Sharp HRO00022 Cellular Transceiver User Manual 00 COV TQ CX1
Sharp Corporation Cellular Transceiver 00 COV TQ CX1
UserManual.wiki
>
Sharp
>
HRO00022 User Manual
Users manual
Navigation menu
Upload a User Manual
Namespaces
Wiki Guide
HTML
PDF
Info
Views
User Manual
Discussion / Help
Navigation

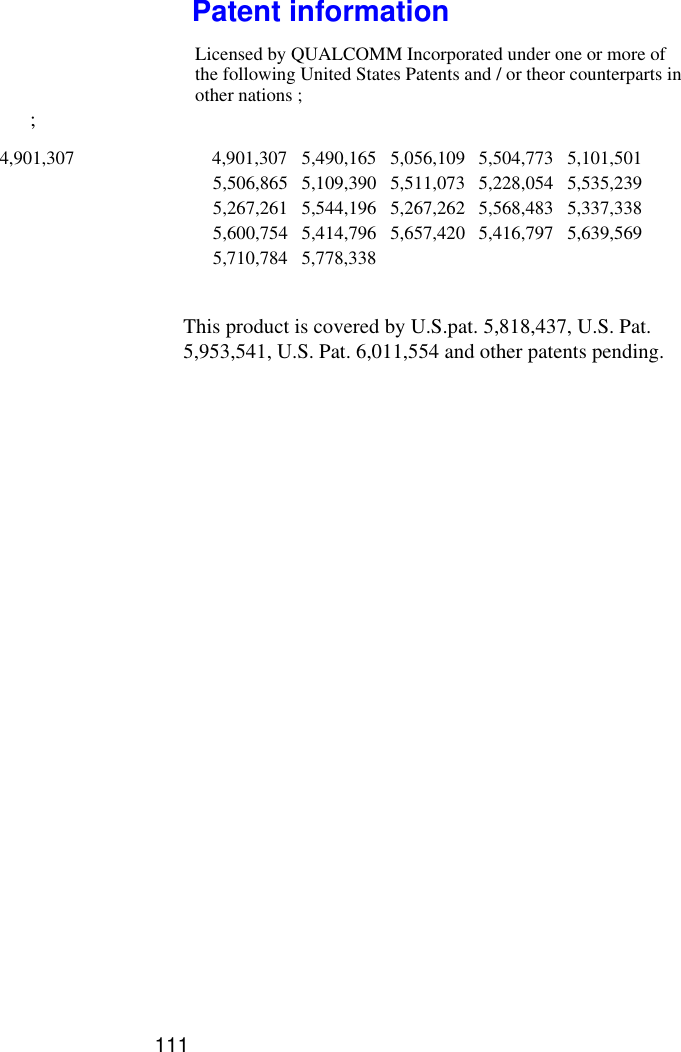
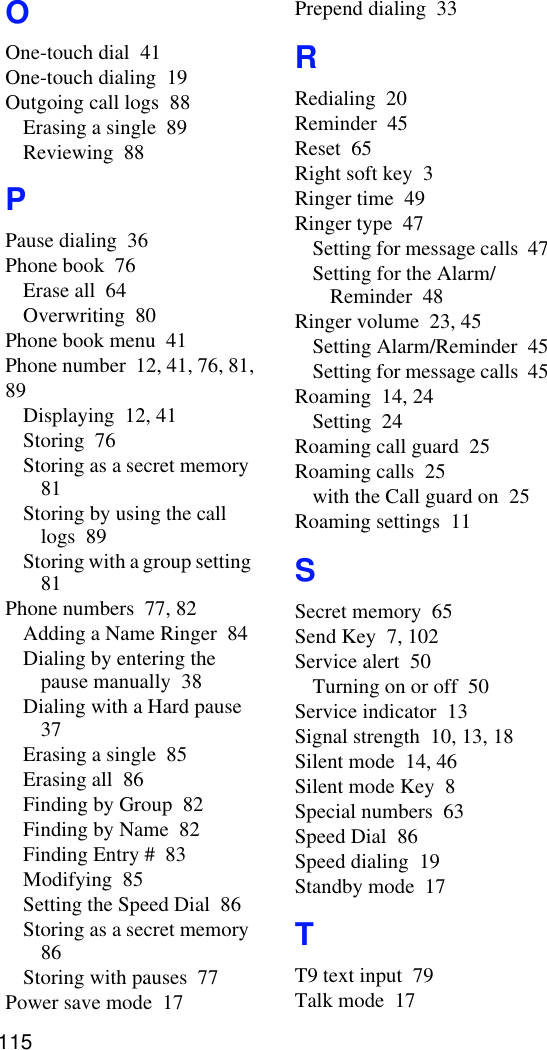
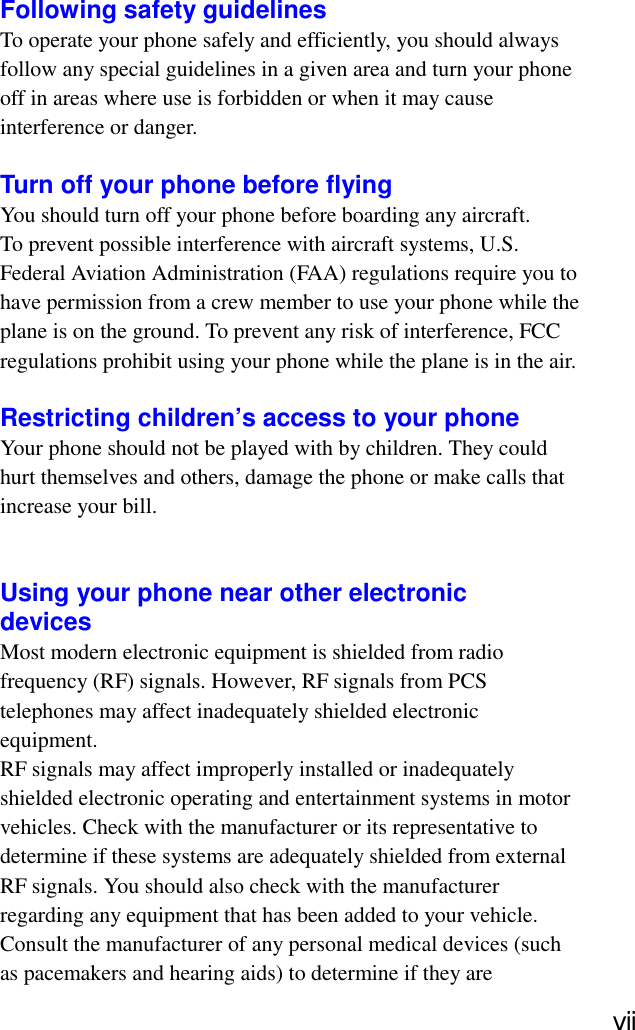
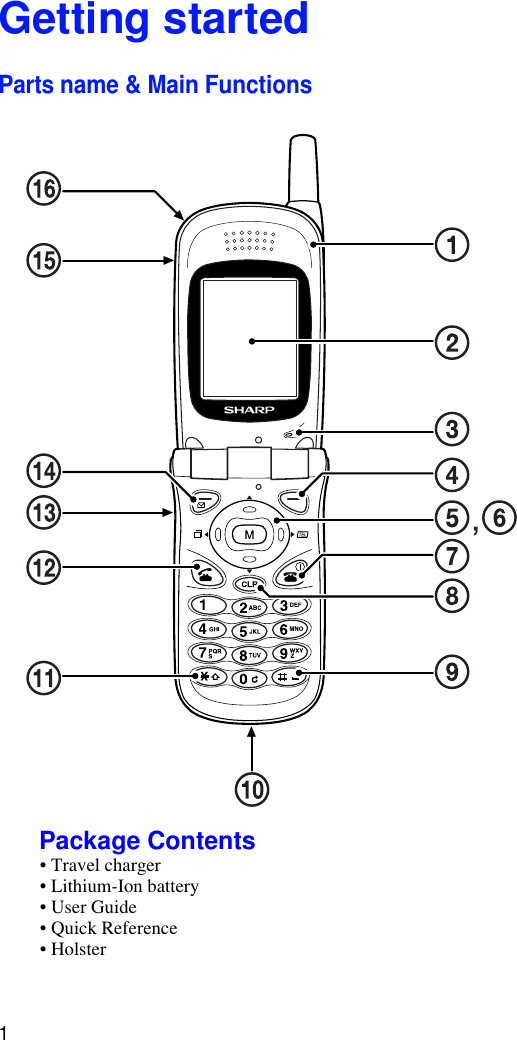
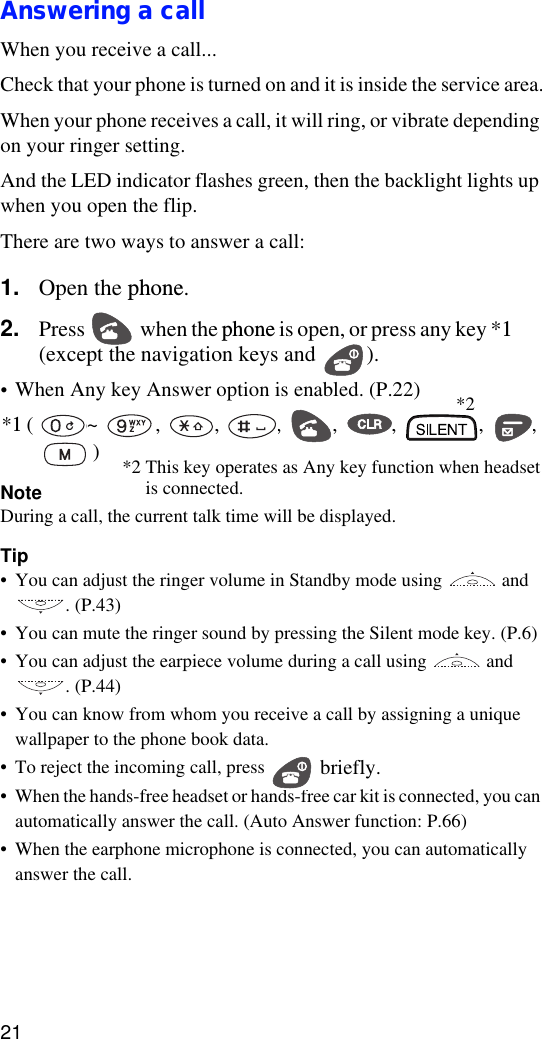
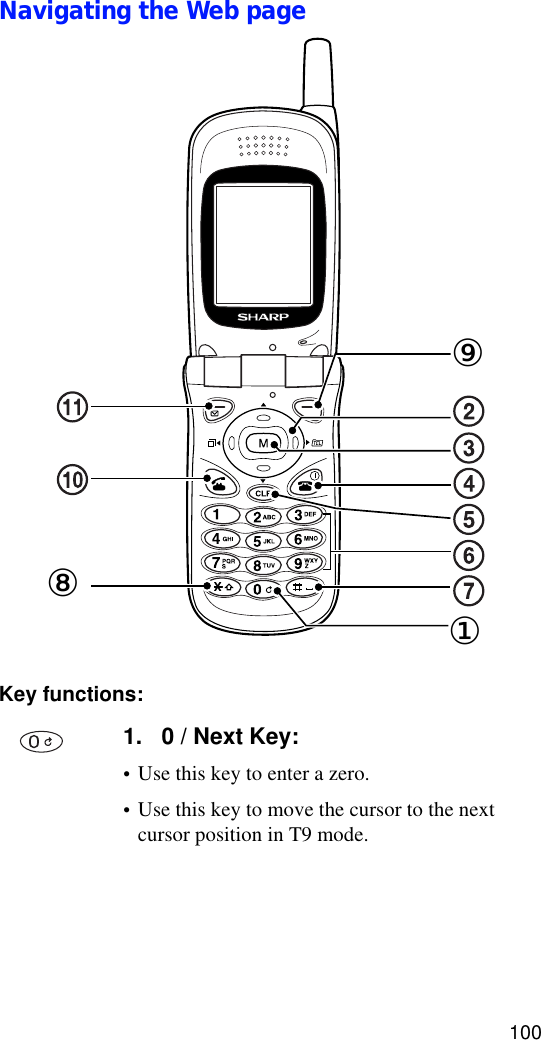
![including both installed or portable wireless equipment, in thearea over the air bag or in the air bag deployment area. If in-vehiclewireless equipment is improperly installed and the air baginflates, serious injury could result.Phone CareYour phone is designed for excellent durability under normal useconditions. Protect your phone from water damage that couldresult from spills or excessive exposure to rain.Never submerge your wireless phone.Cleaning the PhoneCleaning of this product should only be done with a damp cloth.The use of chemical cleaners may harm the finish and integrity ofthe radio housing and is not recommended.All about performance and safetyKeeping tabs on signal strengthIf you’re inside a building, reception may be better near a window.The quality of each call you make or receive depends on the signalstrength in your immediate area. When turned on, your phone willalways give you a visual indication of the signal strength in yourimmediate area. The visual indicator is always in the upper leftcorner of your display and is referred to as the signal strengthindicator: [ ]. More lines indicate more signal strength. Fourlines indicate maximum strength and one line indicates leaststrength.Understanding Power Save modeIf you’re trying to use your Phone in an area where the signal istoo weak, the Power Save feature will be automatically activated toconserve battery power when you’ve been unable to pick up asignal for 15 minutes. If your phone is in Power Save Mode, it willⅳ](https://usermanual.wiki/Sharp/HRO00022/User-Guide-157751-Page-6.png)
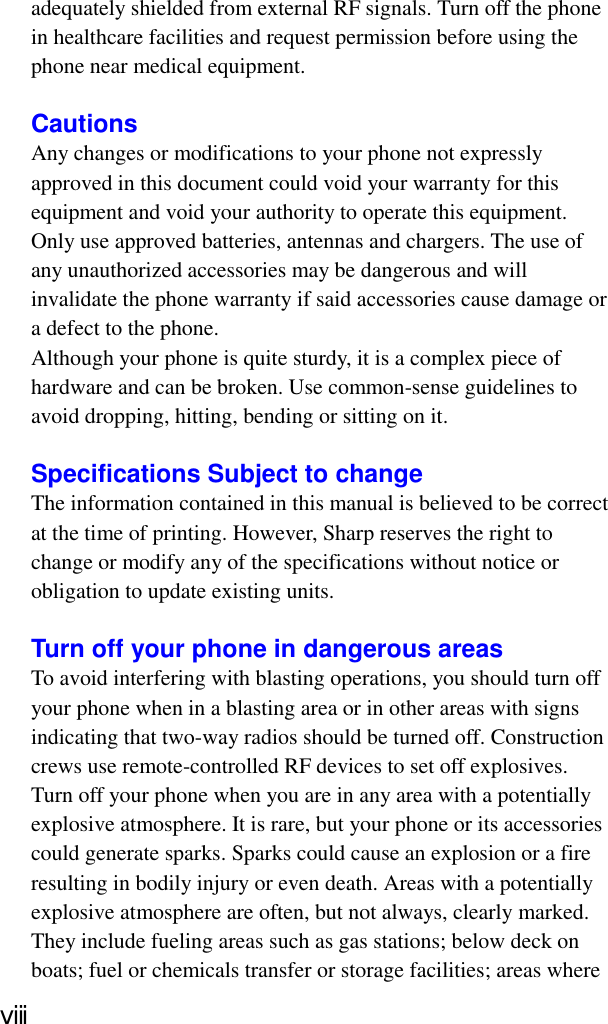


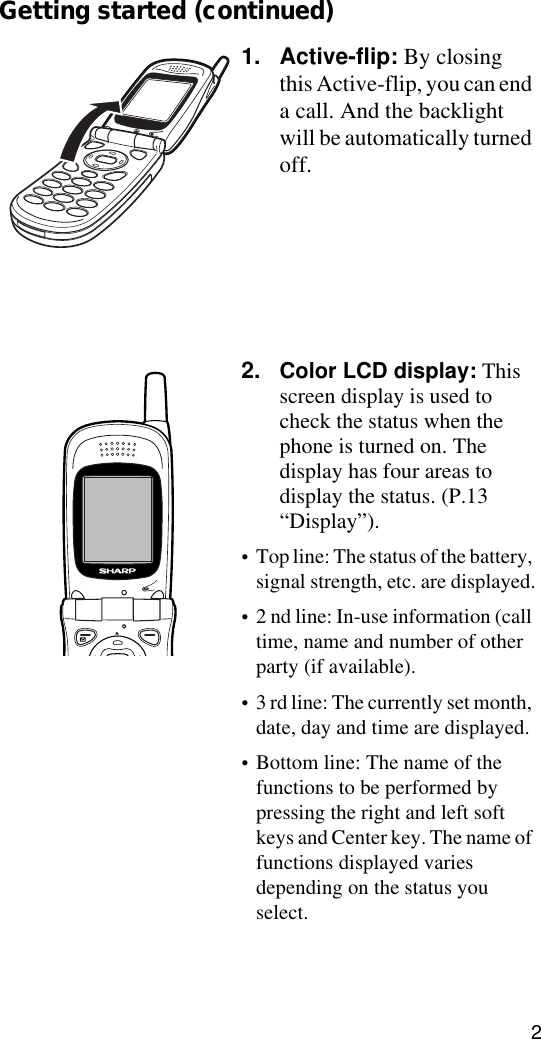
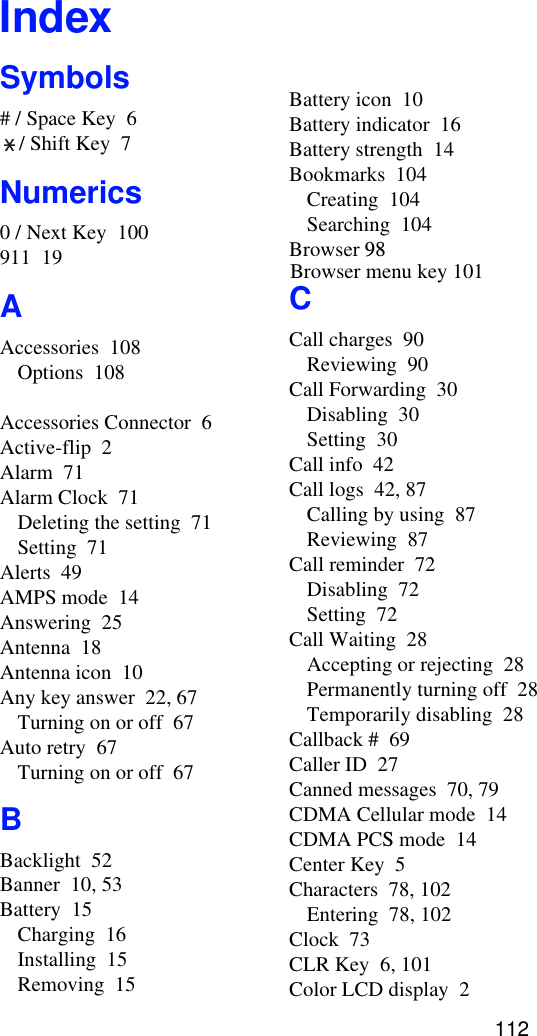
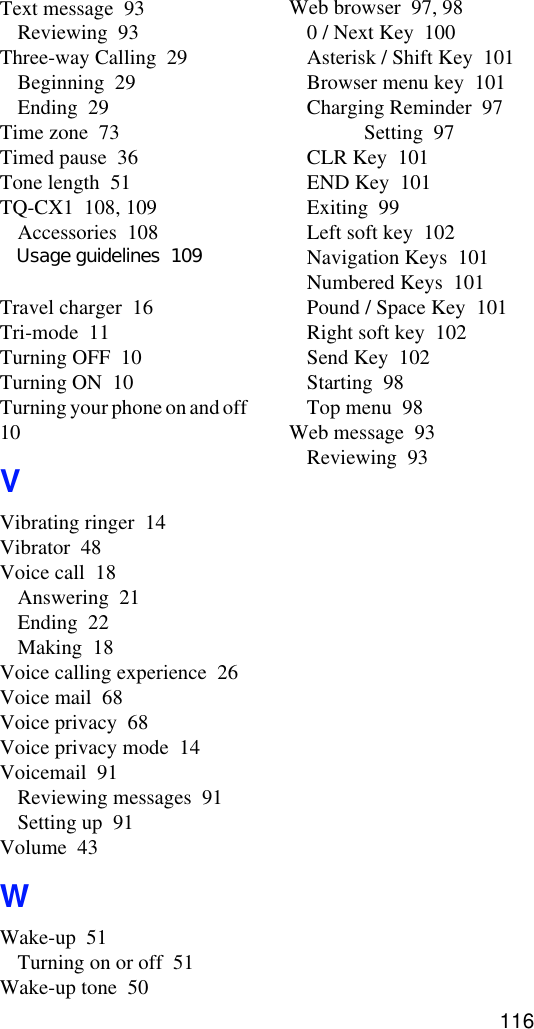
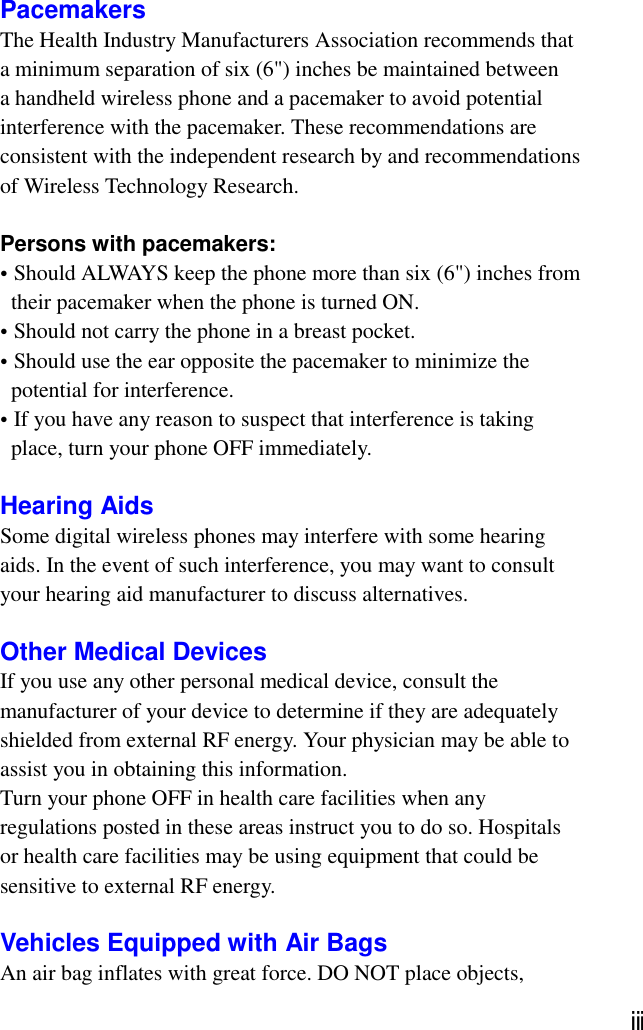
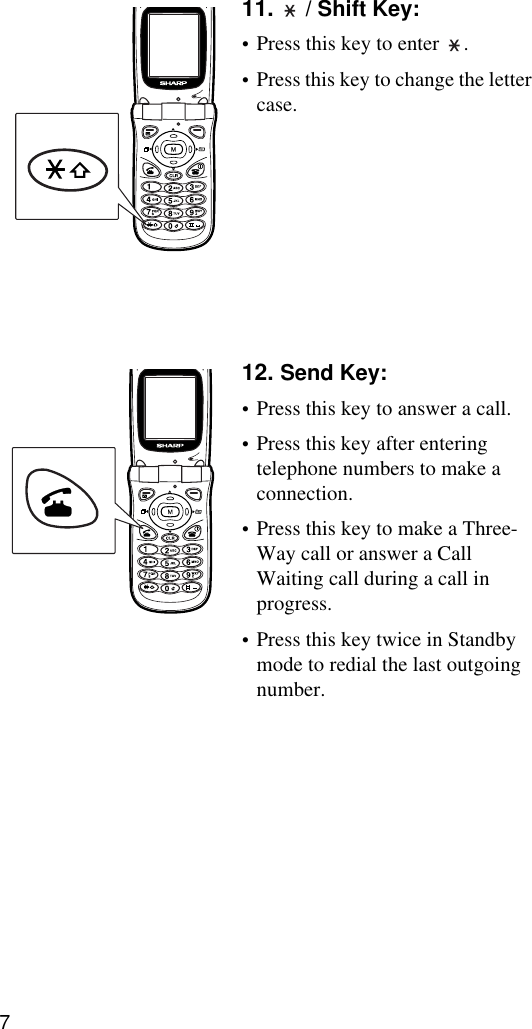
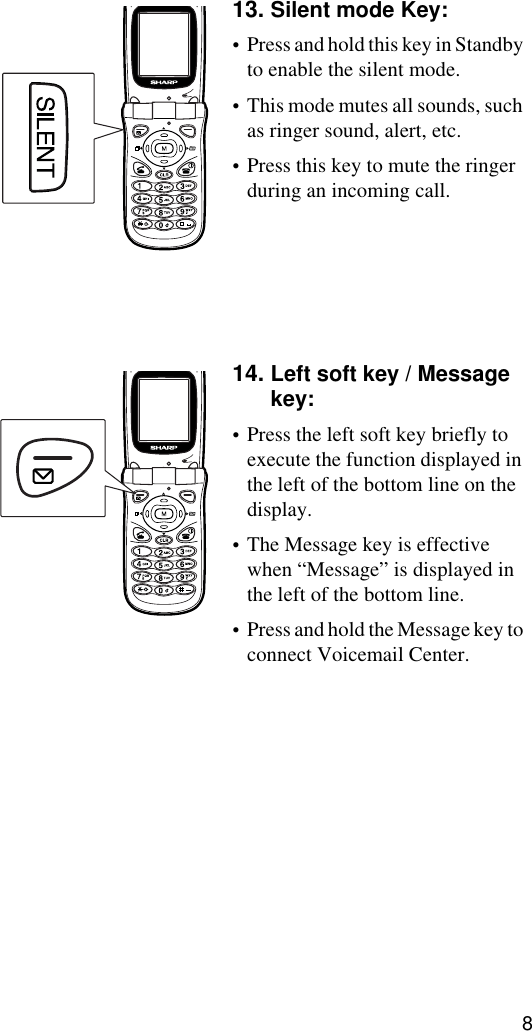
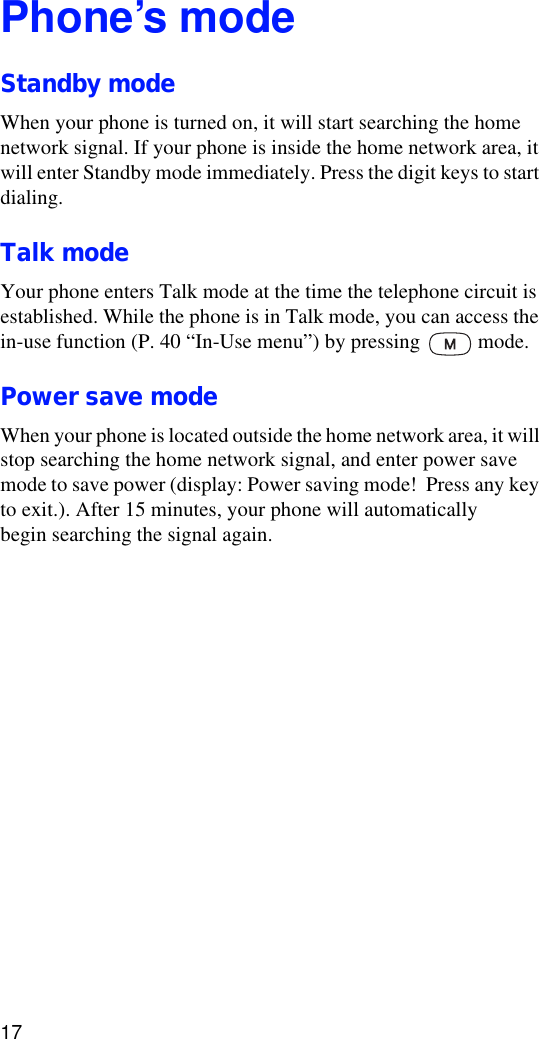
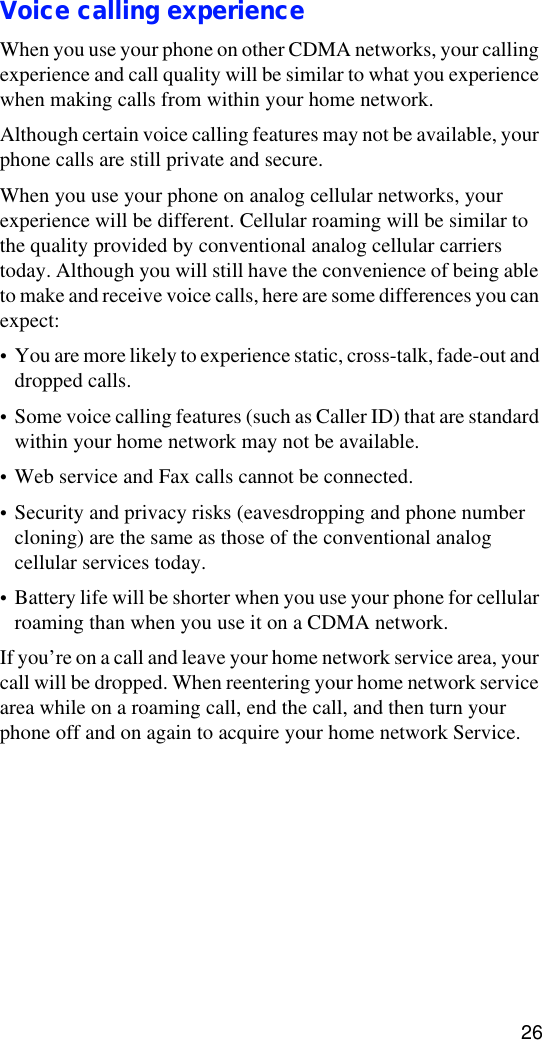
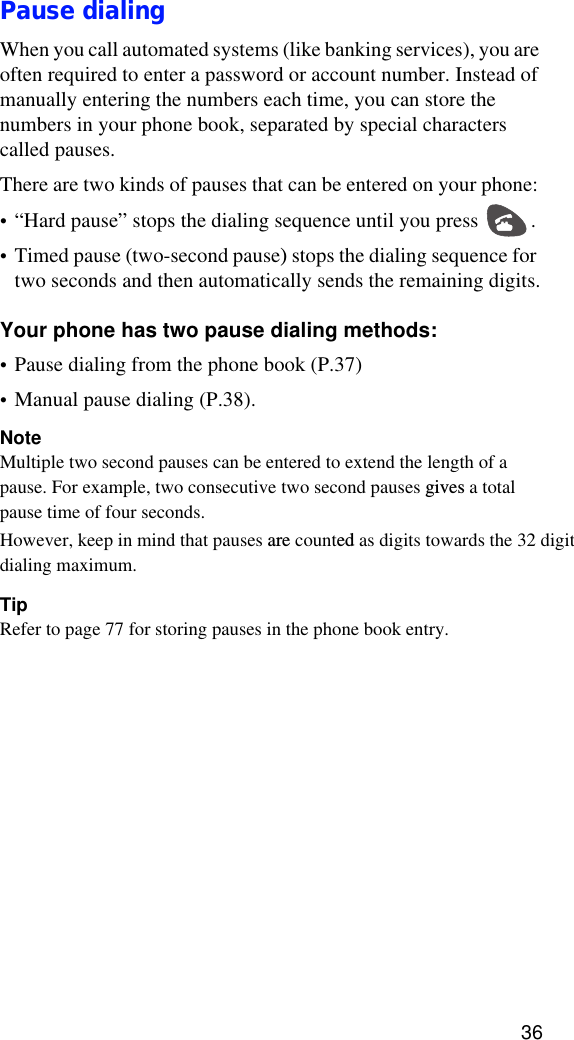
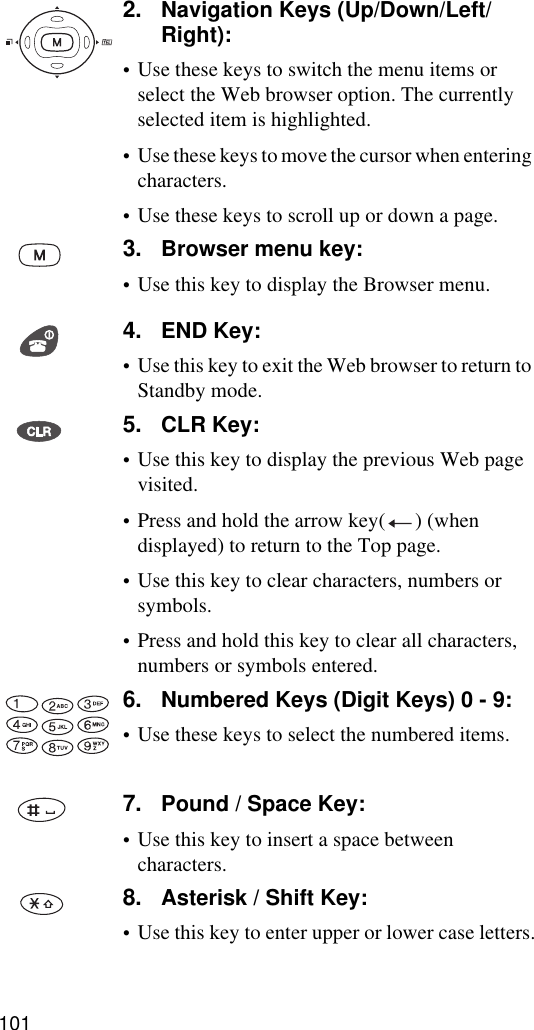
![33. Microphone: Use this microphone to speak to the other party during a call. •Press the right soft key [Mute] during a call to mute the sound from the microphone. Press the right soft key [Unmute] again to cancel the mute setting.4. Right soft key: Press this key briefly to executethe function displayed on the rightcorner of the bottom line on thedisplay. [Browser] is displayed inStandby mode.](https://usermanual.wiki/Sharp/HRO00022/User-Guide-157751-Page-19.png)
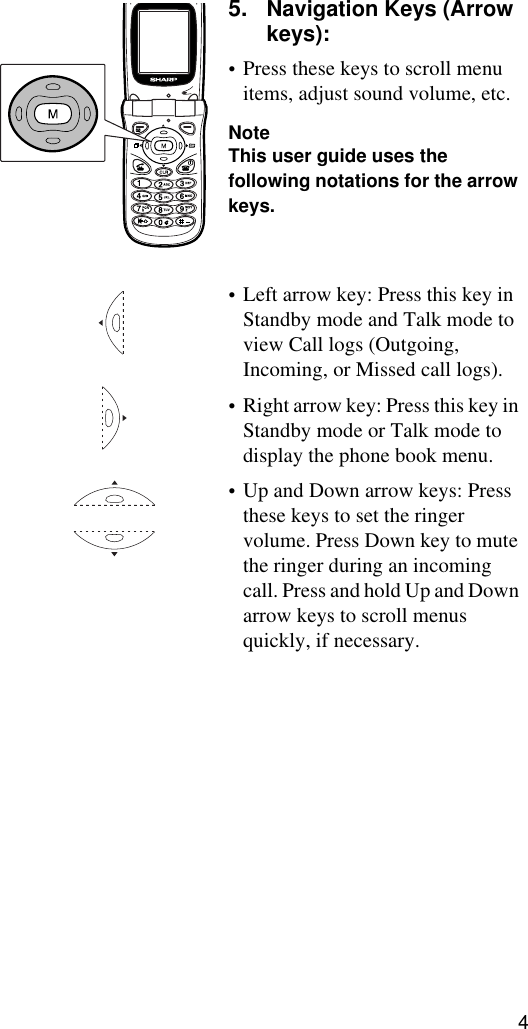
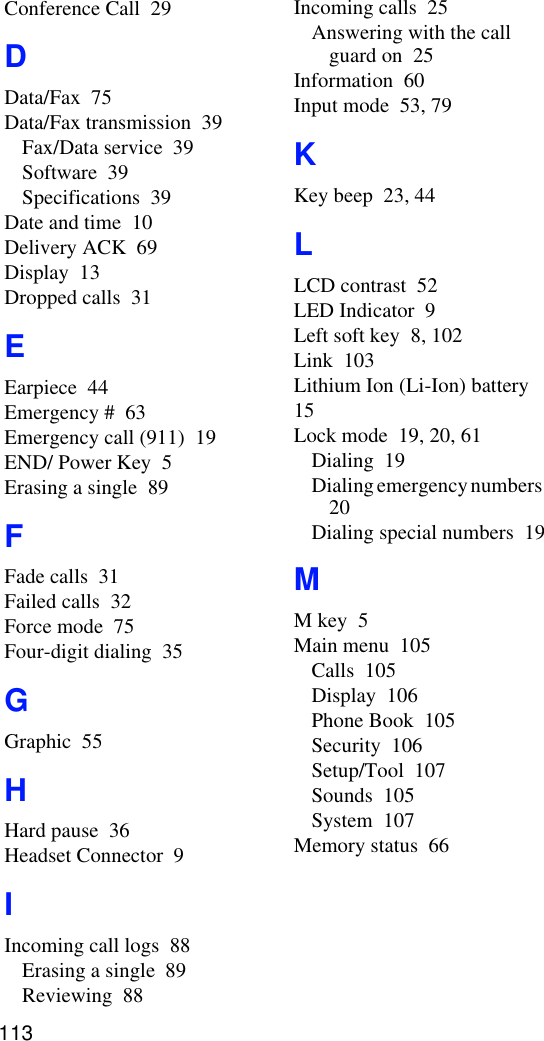
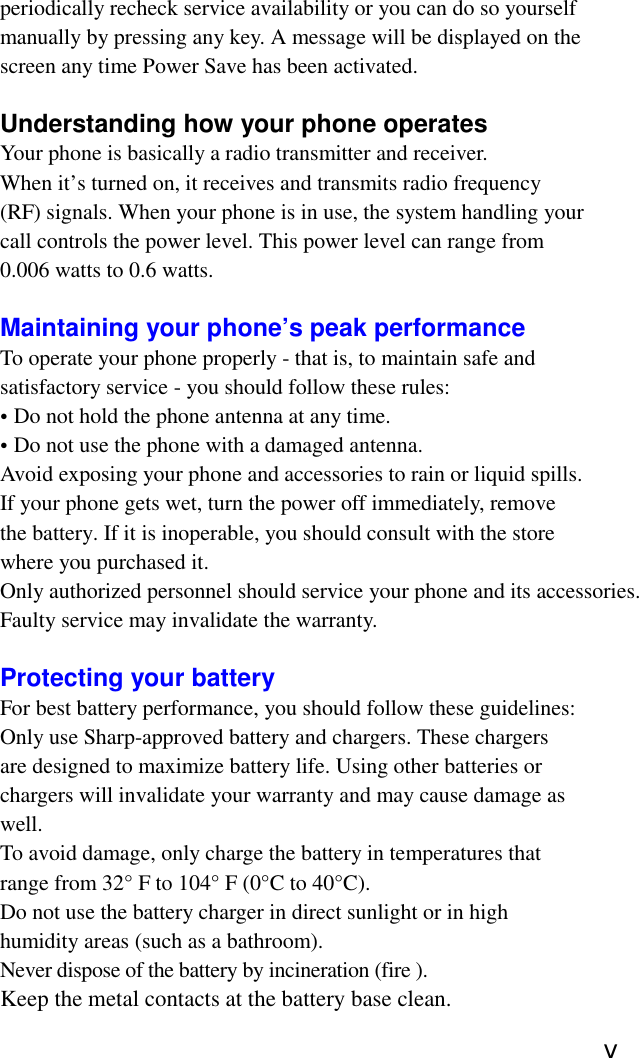
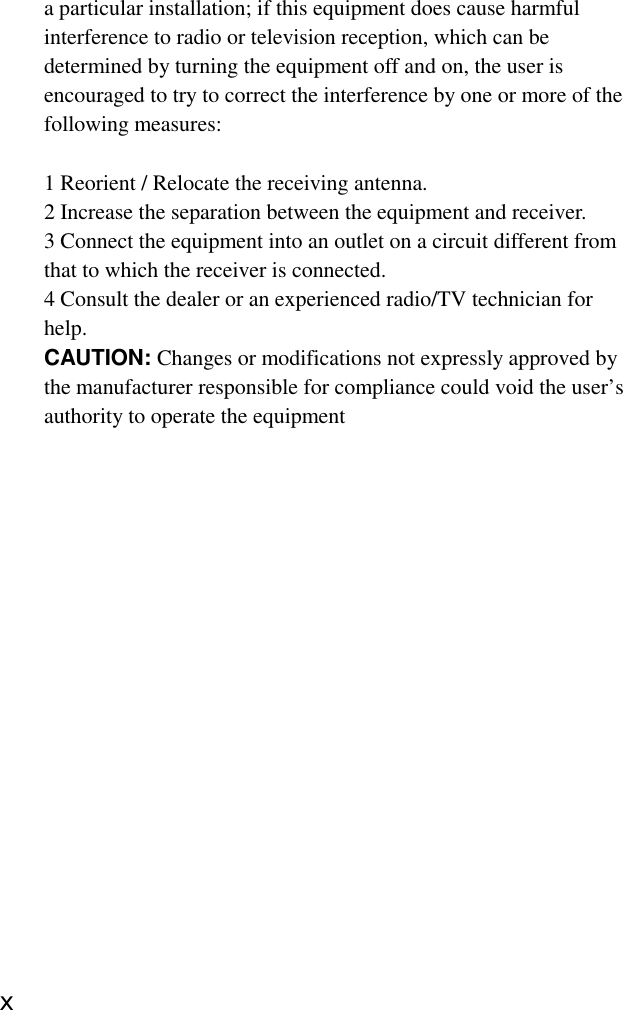
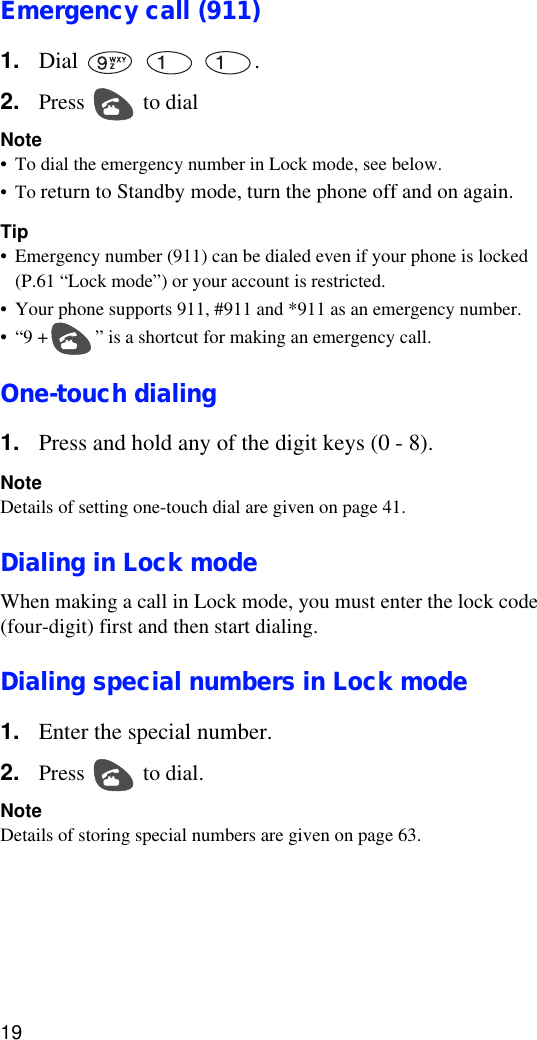
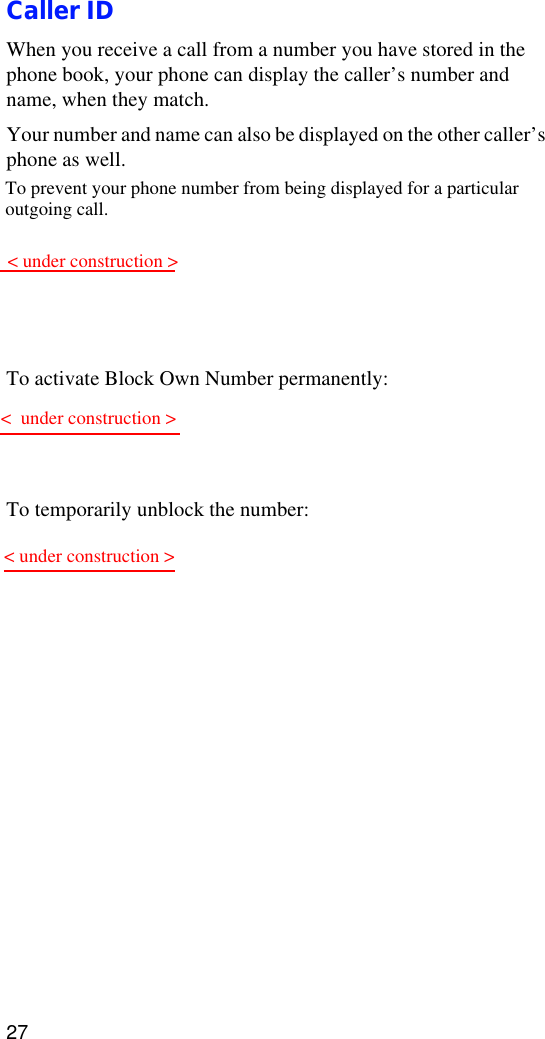
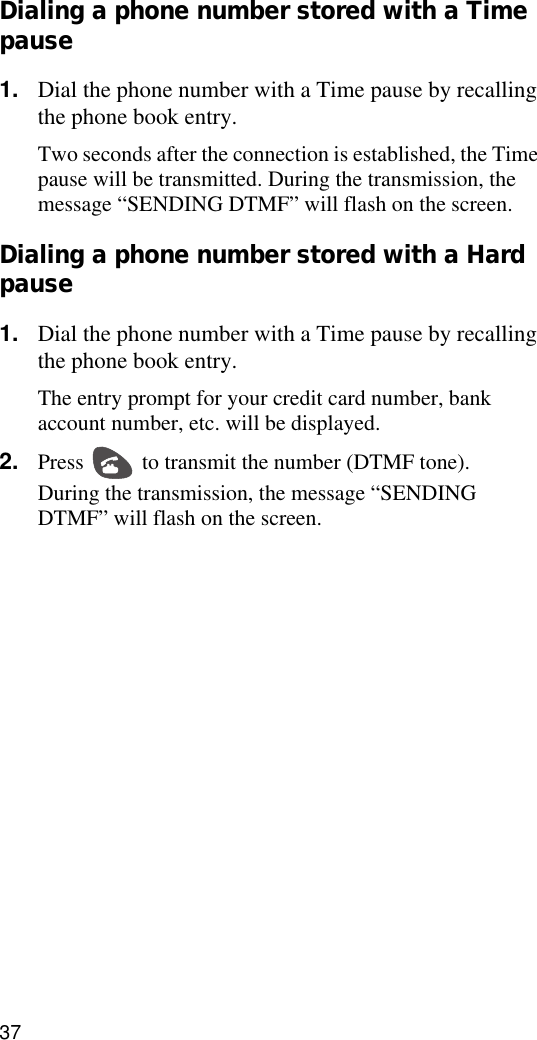
![56. Center Key (M key): •Press this key to display the menu and execute the function displayed in the center of the bottom line on the display. [M MENU] is displayed in the center of the bottom line in Standby and Talk mode. • Press Navigation key to scroll through menus and press this key to decide the desired menu item.7. END/ Power Key: •Press this key to turn the power on and press and hold it to turn it off. •Press this key to disconnect a call or to return to Standby mode, while any menu screen is displayed.](https://usermanual.wiki/Sharp/HRO00022/User-Guide-157751-Page-21.png)
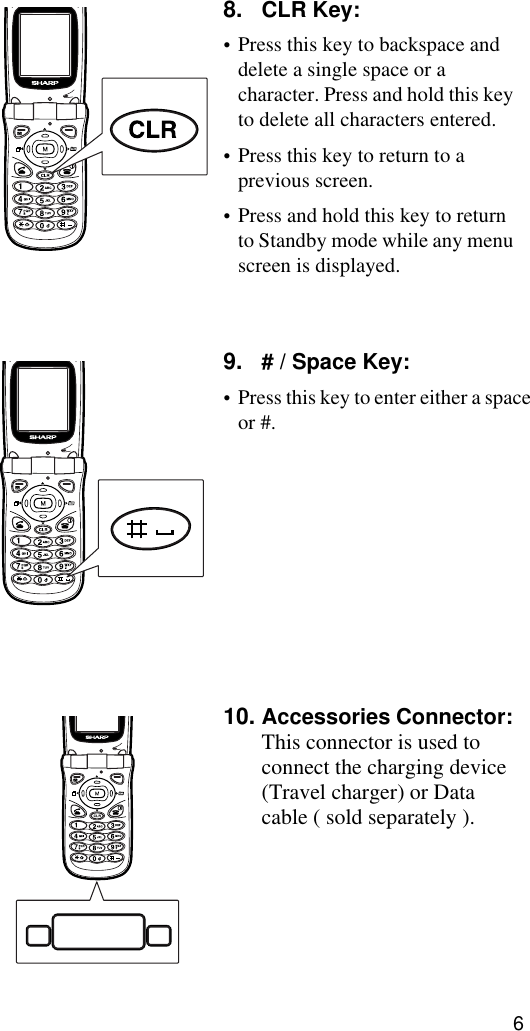
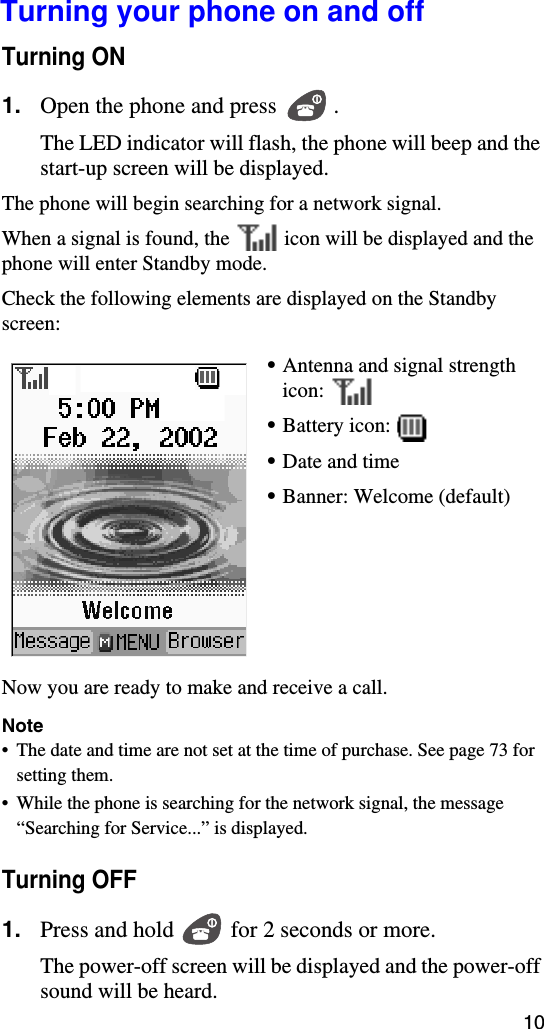

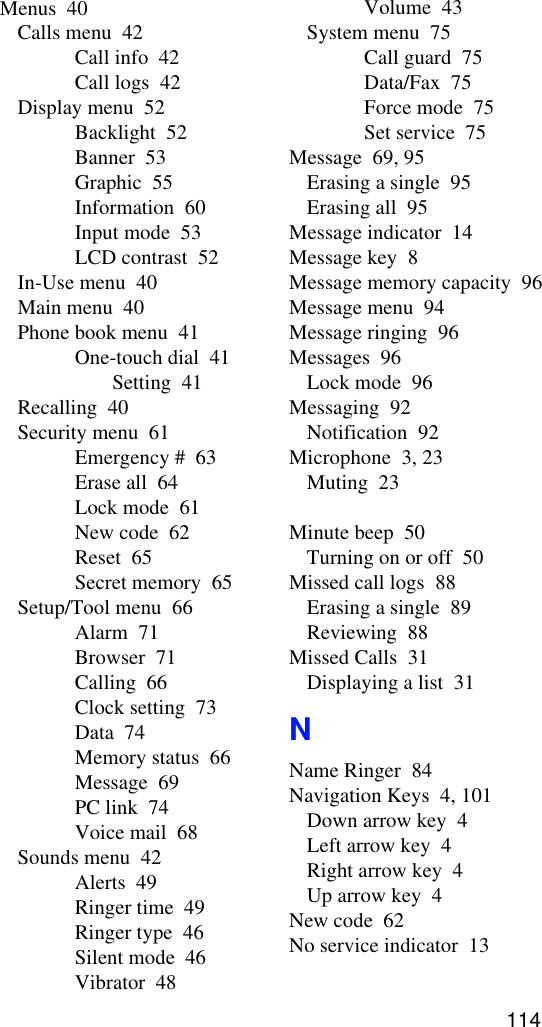
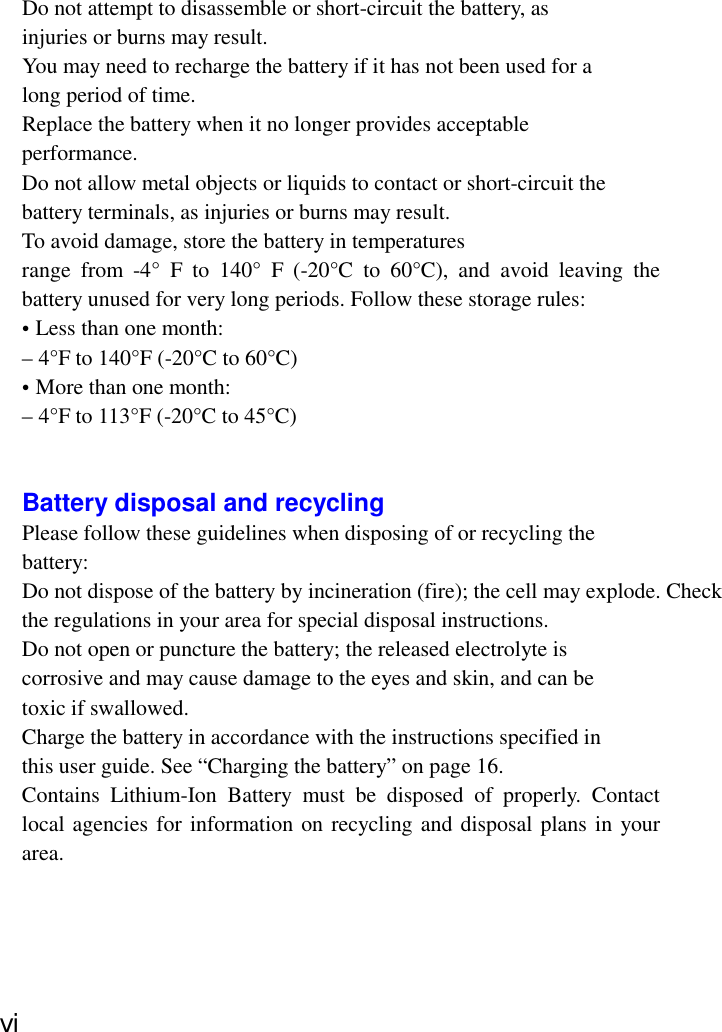
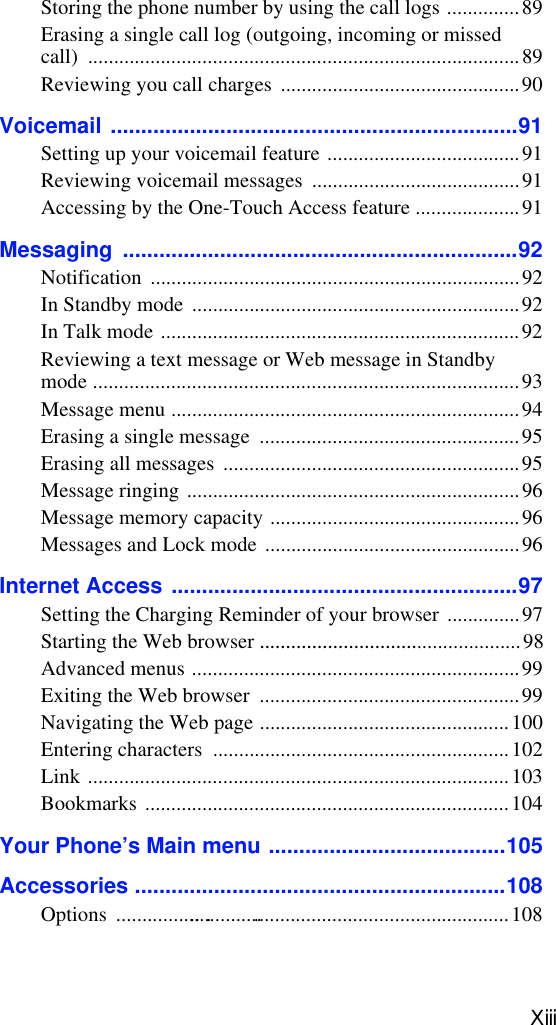
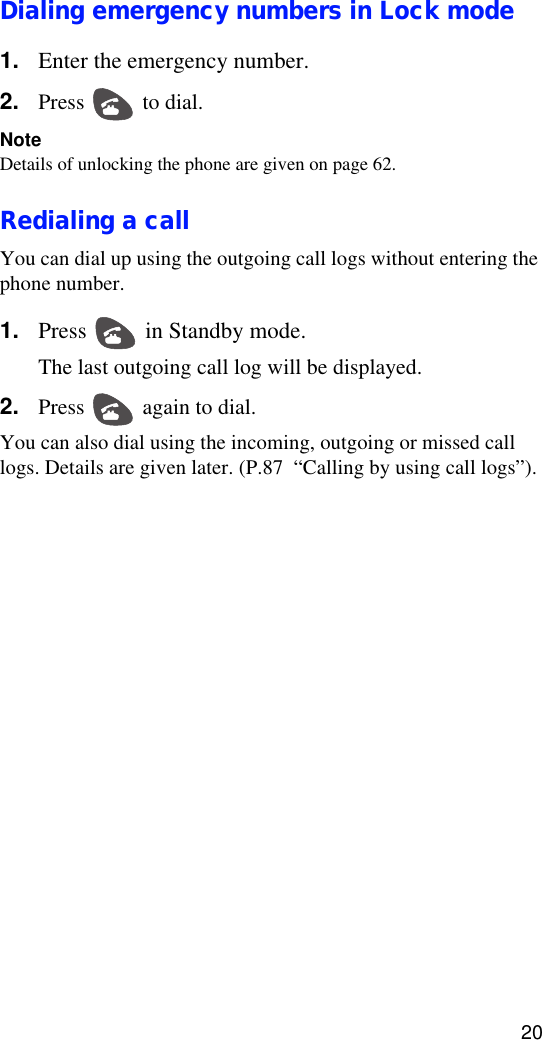
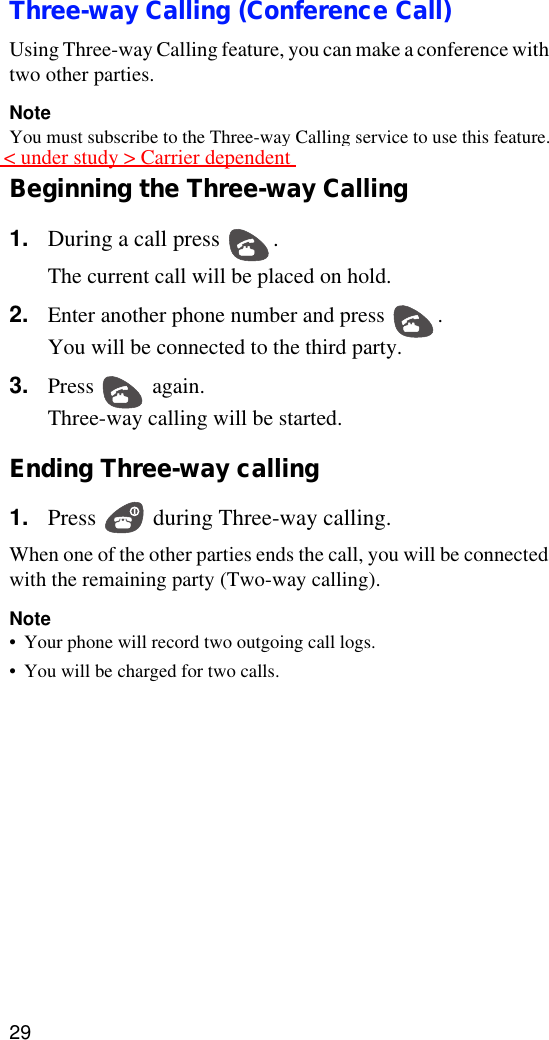
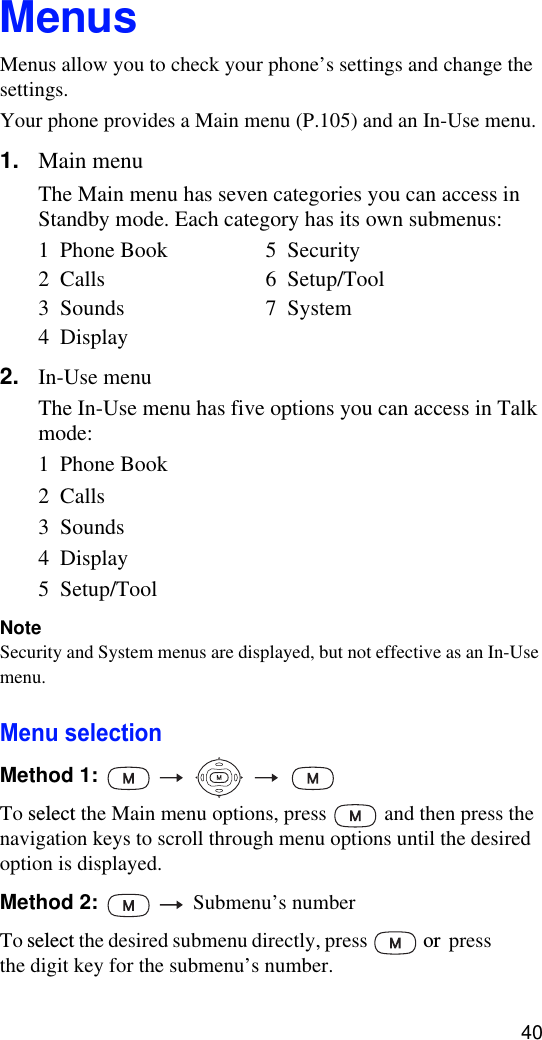
![18Voice callMaking a voice call1. Open the phone and press and hold .The sound is heard and the wake-up screen is displayed.Then, (antenna) and the signal strength level ( ) will be displayed to indicate you are in a service area to make a phone call. 2. Enter the phone number by pressing the digit keys. Up to 32 digits can be entered.3. Press to dial. Note (Advanced ways of calling)There are other ways to make a phone call.1) Using the phone book (P.82)2) Using the call logs (P.87)3) Using the one-touch dialing (speed dialing) (P.19)4) Using the phone number embedded in the received messageTip•When you have made a mistake, press to delete the last digit.•Holding down will delete the entire number.•If you dial the last four digits of a phone number stored in the phone book and press , the matched entry will be recalled and be dialed up. (P.35)•If the phone number you dialed is not stored in the phone book, the number will be kept displayed for 10 seconds on the display. Within the time, you can store the number by pressing [Store].](https://usermanual.wiki/Sharp/HRO00022/User-Guide-157751-Page-34.png)
![22Setting the Any key answer option1. Press [MENU] to display the Main menu.2. Press to select Setup/Tool.3. Press to select Calling.4. Press to select Any Key Answer.5. Press to select ON.The setting will be saved and the display will return to the Calling menu screen.Ending a call1. Close the phone.orPress . The approximate duration of the last call will be displayed.Note• The name and number of the called party will be displayed (10 seconds) if you have stored it in the phone book. (P.76)• You can adjust the voice volume if the headset is connected to the phone. (5 steps/default: 4)•If the number you dialed is not stored in your phone book, your phone prompts you to save the number. Press if needed. If you do nothing, the phone will automatically return to Standby mode after approximately 10 seconds.When the other party ends the callThe Talk time, phone number and name of the called party (if found in the phone book data) will be kept displayed for approximately 10 seconds and the display will return to Standby mode.](https://usermanual.wiki/Sharp/HRO00022/User-Guide-157751-Page-38.png)
![23Key beep volumeThis feature allows you to adjust the volume of beep tone (key tone) you hear when you press a key.1. Press [MENU] to display the Main menu.2. Press to select Sounds.3. Press to select Volume.4. Press to select Key Beep.5. Press or to change and play the options: Silent, level 1, level 2, level 3, and level 4.6. When selecting is complete, press [OK] to save the setting.Adjusting ringer volumeIn Standby mode you can quickly adjust the volume of the ringer.1. Press and . You can also change the settings for your phone’s ringer volume in the Main menu (P.43).Muting the microphone during a callYou can mute the microphone during a call. 1. Press [Mute].The display will change to [Unmute].Your voice will be muted while the voice of the other party reaches you.Ending the call will reset the mute setting to off.To unmute the microphone during a call, press [Unmute].](https://usermanual.wiki/Sharp/HRO00022/User-Guide-157751-Page-39.png)
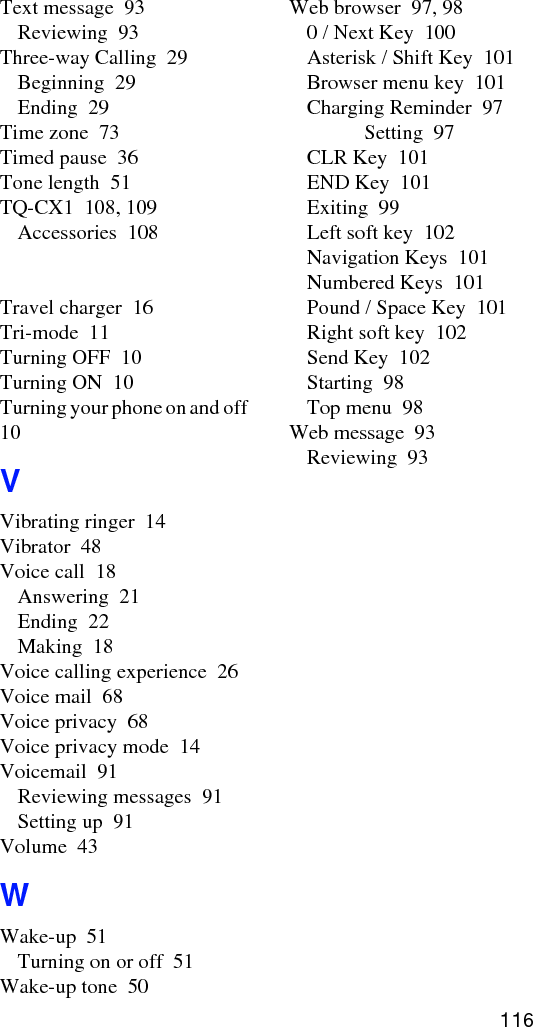
![24RoamingCheck your phone’s display showing the network status when you turn it on.Setting the roaming feature1. Press to display the Main menu.2. Press to select System3. Press to select Set Service4. Press to select Automatic or to select No Roaming.The setting will be saved and the display will return to the System menu screen.Automatic: Your phone will search for your home network service first. When your home network service is not available, it will search for an alternate system automatically.No Roaming: This setting allows you to select only your home network to prevent roaming.5. When the desired service mode is displayed, press [OK] to save the setting.•Press to exit without saving the setting. Display Status and Home networkOther CDMA network and Analog cellular network](https://usermanual.wiki/Sharp/HRO00022/User-Guide-157751-Page-40.png)
![25Roaming call guardThis feature allows you to display a confirmation message asking if you are really ready to use the roaming service or not.If you set this roaming call guard to on, you can avoid being changed for the roaming service.1. Press [MENU] to display the Main menu.2. Press to select System.3. Press to select Call Guard.4. Select to select ON or to select OFF.When you are receiving the roaming service, check the roaming status on the display.The indicator will be displayed.NoteAlways dial 11 digits (1+ area code + number) when calling from outside your home network service area.](https://usermanual.wiki/Sharp/HRO00022/User-Guide-157751-Page-41.png)
![28Call WaitingYour phone supports Call Waiting service. Using this feature, you can receive a second call while holding the current call.When you receive a second call, the incoming call alert is heard and an alert message will be displayed.Accepting or rejecting a second call 1. To accept the call, press . The current call will be placed on hold, while the second call will be answered.• To reject the call, press [CLR].2. Press again to switch between the current and held call.NoteThe call log of a second call will be saved as a missed call log (P.87) if you do not answer the call.Temporarily disabling the Call Waiting feature< under construction > Permanently turning off Call Waiting feature , < under construction >](https://usermanual.wiki/Sharp/HRO00022/User-Guide-157751-Page-44.png)
![30Call ForwardingUsing the Call Forwarding feature, you can forward an incoming call to another phone.When this feature is used, you can still make a call from your phone.NoteYou must subscribe to the Call Forwarding service to use this feature.Setting the call forwarding number1. Press [x ][x ][ x].2. Enter the 11-digit phone number (1+ area code + phone number).3. Press . A confirmation sound will be heard to indicate the setting is enabled.Disabling Call Forwarding feature1. Press [x ][x ][ x] [x ] .A confirmation sound will be heard to indicate the setting is enabled.< under study > Carrier dependent](https://usermanual.wiki/Sharp/HRO00022/User-Guide-157751-Page-46.png)
![31Missed CallsYour phone can record calls you were not able to answer and display a list of missed calls.When the other party has ended a call before you can answer the incoming call, your phone will put an alert message on the display to indicate that you have missed a call.Displaying a list of missed calls1. Press and [Missed].Missed call logs list will be displayed.2. Select a missed call log and press [OK] to display the content.3. Press to dial or press to return to Standby mode.Note•Up to 20 last calls can be stored in the phone memory. If more than 20 missed calls are received, the earliest call log will be automatically replaced with the new one.•Unanswered calls in the Call Waiting service can be recorded in the list of missed calls.•To display a list of your call logs, see “Reviewing your call logs” on page 87.Dropped calls (Fade calls)When your phone leaves your network service area or a signal fade occurs, an alert message (“Signal Faded” ?) appears on the display.When a dropped call occurs, it will be automatically ended and the phone will return to Standby mode.1. Press to clear the alert message.](https://usermanual.wiki/Sharp/HRO00022/User-Guide-157751-Page-47.png)
![32NoteIf the dropped call is your outgoing call, the call log will be recorded in the outgoing call log list, so that you can redial the number by pressing twice.Failed callsWhen your phone is outside the calling range or your service network is temporarily busy, it displays the following alert messages on the display: “Call Failed Out of Range” or “Call Failed Network Busy”.Keep your phone located inside the calling range or make a call later.•Press to cancel the call, or press to clear the alert message.Dialing your home network directory assistance Dial [x] [x] [x] to get the following directory information:•Residential listings•Business listings •Government listings•Local or long-distance call assistance•Leisure listings (Movie, hotel, restaurant and shopping)•Major local event information, etc.Dialing your home network operator services Dial [x] [x] [x] to get the following operator services.•Making collect calls•Making calls billed to a local telephone calling card or a third party.< Carrier dependent >< Carrier dependent >](https://usermanual.wiki/Sharp/HRO00022/User-Guide-157751-Page-48.png)
![33Prepend dialingThe feature allows you to add additional number(s) (e.g. area code, pauses) before the phone number stored in your phone book. 1. Press [MENU] to display the Main menu.2. Press to select Phone Book.3. Search for the desired number to be prepended.Details of searching method are given on page 82.4. Press .5. Press [Func] to display the Function menu.6. Press to select Prepend.7. Enter the prepend digits (area code or feature activation code) by pressing the digit keys. For feature calls, press before dialing the feature code.8. Press to call the prepended number.To prepend a phone number from your call logs:1. Press [MENU] to display the Main menu.2. Press to select Calls.3. Press to select Call Logs (outgoing call logs).•Press [Missed] to display the missed call logs. •Press [Income] to display the incoming call logs.](https://usermanual.wiki/Sharp/HRO00022/User-Guide-157751-Page-49.png)
![344. Select the desired number to be prepended and press .5. Press [Func] to display the Function menu.6. Press to select Prepend.7. Enter the prepend digits (area code or feature activation code) by pressing the digit keys. •For feature calls, press before dialing the feature code.8. Press to dial the prepended number.](https://usermanual.wiki/Sharp/HRO00022/User-Guide-157751-Page-50.png)
![38Dialing the phone number by entering the pause manually1. Enter the phone number of the service you want to call (example: bank’s teleservice phone number (an 800 number)).2. Press [Func] to display the Function menu.3. Press the digit keys to select the option:1To enter a Hard Pause, press .The initial “H” will be displayed. 2Enter the phone number.3Press . 4After the connection is established, press again.The phone number will be sent.1To enter a Timed pause, press . The letter “T” will be displayed at the end of the phone number.2Enter the number followed by the pause (such as your account number).3Press . Two seconds after the connection is established, the number will be sent.NoteWe recommend you to store the frequently used phone numbers including the pause in your phone book.](https://usermanual.wiki/Sharp/HRO00022/User-Guide-157751-Page-54.png)
![39Data/Fax transmissionUsing this feature, you can send and receive faxes and data by connecting your phone with a PC.Details of setting this feature are given on page xx.NoteYou must first activate the Fax/Data service setting depending on your home network and your Internet service provider. Requirements:1. Fax/Data service2. Software for Data/Fax transmission (Optional PC connection kit including cable and CD-ROM)Sending Fax/DataNoteYou can not receive voice mails while your phone is in FAX/Data transmission mode.When the connection between your phone and a PC is established, you can see the following soft key menu(s) on the display.Left soft key: xxxRight soft key: xxx???1. Start the transmission application program.2. Press [xxx] on your phone.Your phone will enter Fax/Data transmission mode.To return to a normal voice call mode, refer to page 75 (7-3. Data/Fax). Transmission specificationsModem: xxxFacsimile: xxx* Model name : XN-CPA10](https://usermanual.wiki/Sharp/HRO00022/User-Guide-157751-Page-55.png)
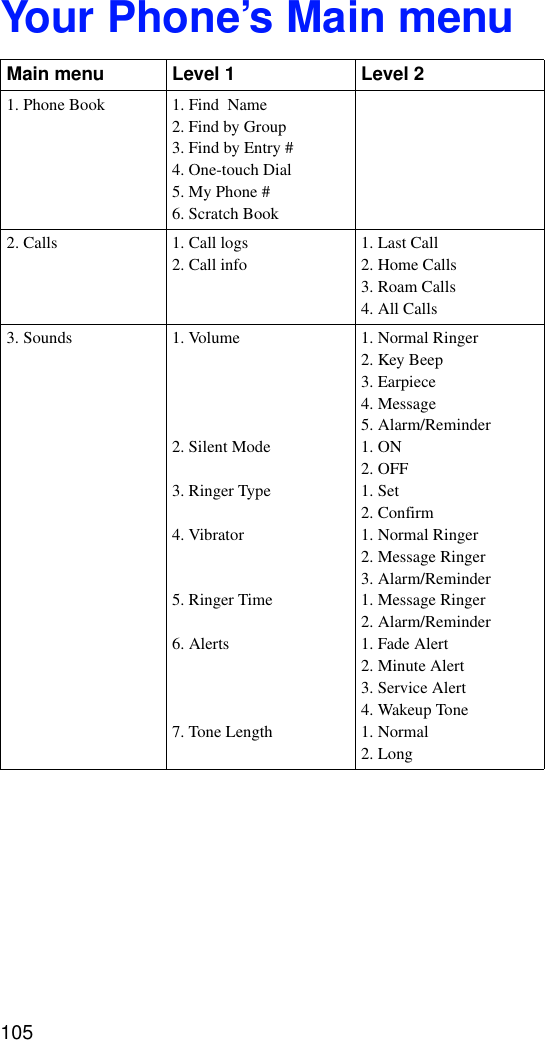
![41NoteWhen you close the active-flip or when none of the keys has been pressed for 60 seconds, the phone will automatically return to Standby mode. 1. Phone Book menu1-1. Find by Name1-2. Find by Group1-3. Find Entry #1-1./1-2./1-3. See page 82 for the details of searching phone books.1-4. Setting one-touch dialYou can set the stored phone book data as a one-touch dial. 1. Press [MEMU] to display the Main menu.2. Press to select Phone Book.3. Press to select One-touch Dial.The names stored in the phone book will be displayed.4. Select the desired blank number and press [Func].The Function menu will be displayed.5. Press to select Set.The phone book menu will be displayed.•To cancel setting, press .6. Search for the desired phone number to be set.Details of searching for the phone number are given on page 82.7. Press [Set]. The selected phone number will be saved.1-5. Displaying my phone number1. Press [MEMU] to display the Main menu.1-4. one-touch dial1-5. My phone #1-6. Scratch book](https://usermanual.wiki/Sharp/HRO00022/User-Guide-157751-Page-57.png)
![422. Press to select Phone Book.3. Press to select My Phone #.4. Press to return to Standby mode.NoteDuring a call, you can also display your phone number in the same manner.1. Press [MEMU] to display the In-Use menu.2. Press to select Phone Book menu.3. Press to select My Phone #.4. Press twice to return to the Calling screen.2. Calls menu2-1. Call logs1. Press [MEMU] to display the Main menu.2. Press to select Calls3. Press to select Call Logs.The outgoing call logs will be displayed.4. To display the missed call logs, press [Missed].5. Then, to display the incoming call logs, press [Incom].6. To display the outgoing call logs again, press [Outgo].The display will switch in this order.2-2. Call infoDetails of displaying call logs and call info (last call, home calls, roam calls and all calls) are given on page 90.3. Sounds menu](https://usermanual.wiki/Sharp/HRO00022/User-Guide-157751-Page-58.png)
![433-1 VolumeThis option allows you to set the ringer volume for voice and fax calls.There are two ways to set the ringer volume: either set in Standby mode or set in the Main menu.In Standby mode1. Press or until the desired volume is selected. Silent, Level 1 through 5, and Escalate.The selected value is effective immediately after you select it.In the Main menu1. Press [MEMU] to display the Main menu.2. Press to select Sounds.3. Press to select Volume.4. Press to select Normal Ringer.5. Select one of the following:Silent, Level 1 through 5 and Escalate.6. When selecting is complete, press [OK] to save the setting.](https://usermanual.wiki/Sharp/HRO00022/User-Guide-157751-Page-59.png)
![44Key beep volumeThis feature allows you to adjust the volume of beep tone (key tone) you hear when you press a key.1. Press [MEMU] to display the Main menu.2. Press to select Sounds.3. Press to select Volume.4. Press to select Key Beep.5. Press the navigation keys to display and play the options: Silent, level 1, level 2, level 3, and level 4.6. When selecting is complete, press [OK] to save the setting.EarpieceThis feature allows you to adjust the volume of earpiece attached to your phone.1. Press [MEMU] to display the Main menu.2. Press to select Sounds.3. Press to select Volume.4. Press to select Earpiece.5. Press the navigation keys to display and play the options: Level 1, level 2, level 3, level 4 and level 5.6. When selecting is complete, press [OK] to save the setting.](https://usermanual.wiki/Sharp/HRO00022/User-Guide-157751-Page-60.png)
![45Setting ringer volume for message callsYou can select a unique ringer volume for incoming message calls. This volume setting applies to incoming voicemail notifications, text messages and numeric pages.1. Press [MEMU] to display the Main menu.2. Press to select Sounds.3. Press to select Volume.4. Press to select Message.5. Select one of the following:Silent, level 1 through 5 and Escalate6. When selecting is complete, press [OK] to save the setting.Setting the ringer volume for Alarm/ReminderThis feature enables you to select a unique ringer volume for your alarm and Reminder.1. Press [MEMU] to display the Main menu.2. Press to select Sounds.3. Press to select Volume.4. Press to select Alarm/Reminder.5. Select one of the following:Level 1 through 5, and Escalate.6. When selecting is complete, press [OK] to save the setting.](https://usermanual.wiki/Sharp/HRO00022/User-Guide-157751-Page-61.png)
![463-2. Silent modeThis feature allows you to silence the ringer tone and incoming message tones. You can also use the Silent key on the left side of the phone while your phone is ringing.1. Press [MEMU] to display the Main menu.2. Press to select Sounds.3. Press to select Silent Mode.4. Press to select ON or to select OFF.5. When selecting is complete, press [OK] to save the setting.3-3. Ringer typeUsing the ringer type option, you can customize your phone book setting by setting a different ringer type for each phone book entry.When the other party has subscribed to Caller ID service, a unique ringer tone can be specified.1. Press [MEMU] to display the Main menu.2. Press to select Sounds.3. Press to select Ringer Type.4. Press to select Set.5. Press .•Use or to choose the desired type among five types of ringer tone and fifteen types of melody. Each time you switch the selection, you hear the demo.6. When selecting is complete, press [OK] to save the setting.](https://usermanual.wiki/Sharp/HRO00022/User-Guide-157751-Page-62.png)
![47Confirming the current setting1. Press Confirm in step 4 above.2. Press to select Normal Ringer.The current setting will be displayed.Setting ringer type for message callsThis option allows you to specify a unique ringer type for an incoming message call: a unique ringer type for voicemail notification, text messages, numeric pages and Web messages.1. Press [MEMU] to display the Main menu.2. Press to select Sounds.3. Press to select Ringer Type.4. Press to set the ringer type.5. Press to select Message Ringer.6. Use or to choose the desired type among five types of ringer tone and fifteen types of melody. Each time you switch the selection, you hear the demo.7. When selecting is complete, press [OK] to save the setting.Confirming the current setting1. Press Confirm in step 4 above.2. Press to select Message Ringer.The current setting will be displayed.1](https://usermanual.wiki/Sharp/HRO00022/User-Guide-157751-Page-63.png)
![48Setting ringer type for the Alarm/Reminder This option enables you to set a unique ringer type for your Alarm and Reminder.1. Press [MEMU] to display the Main menu.2. Press to select Sounds.3. Press to select Ringer Type.4. Press to set the ringer type.5. Press to select Alarm/Reminder.6. Use or to choose the desired type among five types of ringer tone and fifteen types of melody. Each time you switch the selection, you hear the demo.7. When selecting is complete, press [OK] to save the setting.Confirming the current setting1. Press Confirm in step 4 above.2. Press to select Alarm/Reminder.The current setting will be displayed.3-4. VibratorThis option enables you to set a vibrator option for three ringer types: Normal ringer, Message ringer, Alarm/Reminder.1. Press [MEMU] to display the Main menu.2. Press to select Sounds.3. Press to select Vibrator.4. Press to set the Normal Ringer,•Press to select Message Ringer or Press to select Alarm/Reminder.](https://usermanual.wiki/Sharp/HRO00022/User-Guide-157751-Page-64.png)
![495. Press to select ON or to select OFF.6. When setting is complete, press [OK] to save the setting.3-5. Ringer timeThis option enables you to set a ringer time (between 2 and 99 seconds) for Message ringer, Alarm/Reminder.1. Press [MEMU] to display the Main menu.2. Press to select Sounds.3. Press to select Ringer Time.4. Press to select Message Ringer, or Press to select Alarm/Reminder.5. Use or to choose the desired time between 2 and 99 seconds.6. When setting is complete, press [OK] to save the setting.3-6. AlertsFade alertThis option enables you to let the alert tone fade out gradually.1. Press [MEMU] to display the Main menu in Standby mode before making a call.2. Press to select Sounds.3. Press to select Alerts.4. Press to select Fade Alert.5. Press to select ON or to select OFF6. When setting is complete, press [OK] to save the setting.Press numeric keys to choose the desired time between 2 to 99seconds](https://usermanual.wiki/Sharp/HRO00022/User-Guide-157751-Page-65.png)
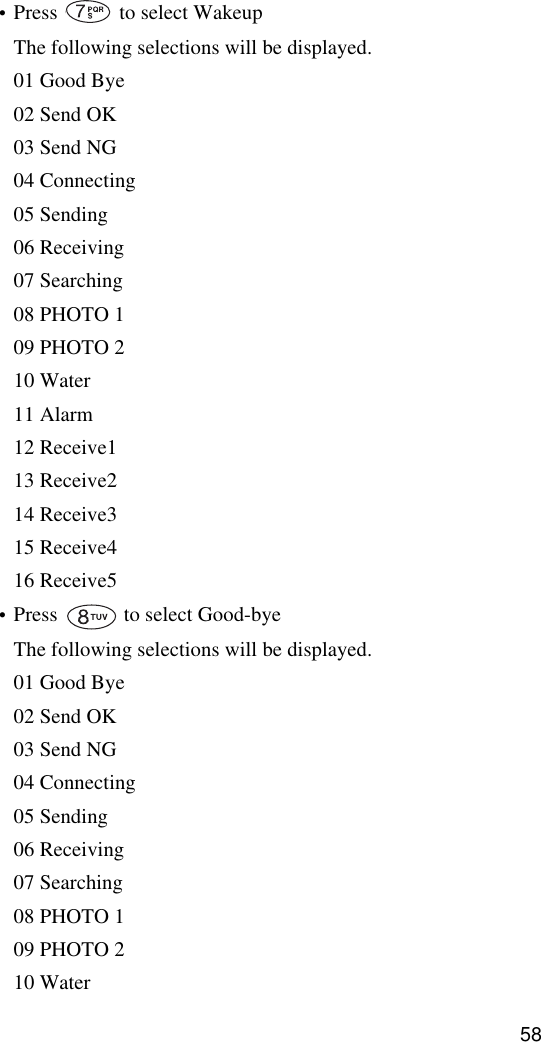
![50Minute alertYou can set the minute beep option to sound an alert 10 seconds before every minute to remind you of the length of the current call.Turning the minute beep on or off1. Press [MEMU] to display the Main menu in Standby mode before placing the call.2. Press to select Sounds.3. Press to select Alerts.4. Press to select Minute Beep.5. Press to select ON or to select OFF6. When setting is complete, press [OK] to save the setting.Service alertYour phone will beep in the following situations:•when a dropped call or a failed call is found, orwhen your phone enters or leaves a service area.Turning the service alert on or off1. Press [MEMU] to display the Main menu.2. Press to select Sounds.3. Press to select Alerts.4. Press to select Service Alert.5. Press to select ON or to select OFF.Wake-up toneWhen you turn on the phone, you hear a tone (wake-up tone) followed by the wakeup screen.](https://usermanual.wiki/Sharp/HRO00022/User-Guide-157751-Page-66.png)
![51Turning the Wake-up tone on or off1. Press [MEMU] to display the Main menu.2. Press to select Sounds.3. Press to select Alerts.4. Press to select Wakeup Tone.5. Press to select ON or to select OFF.3-7. Tone lengthThe tone length setting will be used to change the length (short or long) of the DTMF (dual-tone multi-frequency) tones.The tone length depends in the tele-service system used by the bank or other service (such as a bank account or voicemail system).Consult tele-service center (?) you will use for details of the tone length.1. Press [MEMU] to display the Main menu.2. Press to select Sounds.3. Press to select Tone Length.4. Press to select Normal or to select Long.6](https://usermanual.wiki/Sharp/HRO00022/User-Guide-157751-Page-67.png)
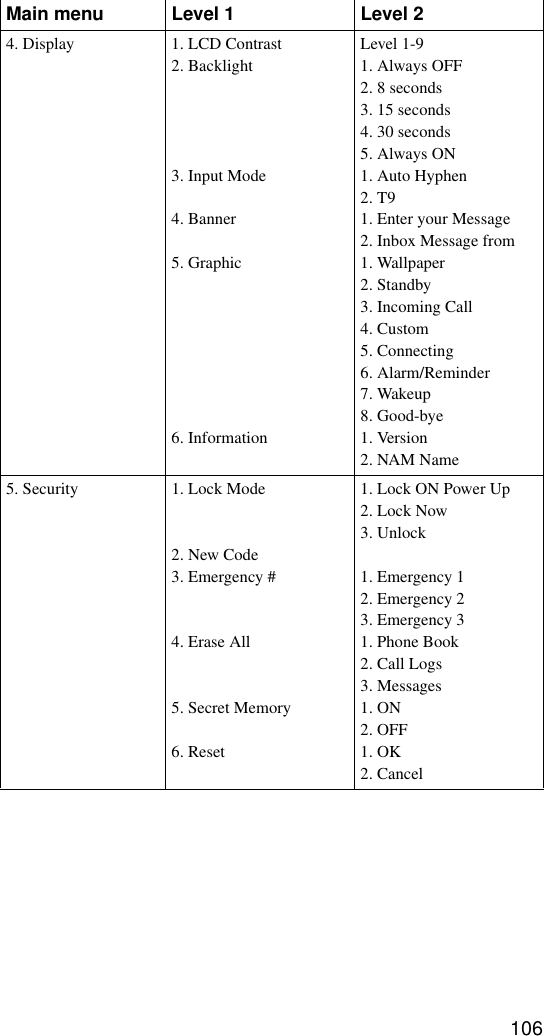
![524. Display menu4-1. LCD contrastYou can adjust the brightness (or contrast) of backlight in 9 steps.1. Press [MEMU] to display the Main menu.2. Press to select Display.3. Press to select LCD Contrast.4. Press (Dark) or (Light).•Up to nine levels are available.5. When the desired contrast is displayed, press [OK] to save the setting.4-2. BacklightYou can turn the backlight on or off, or adjust the length of backlighting. You can save the battery power if you turn the backlight setting off. When you select the length of backlighting, the backlight will goes off after the selected times of interval.1. Press [MEMU] to display the Main menu.2. Press to select Display.3. Press to select Backlight.4. Press one of the following: Always OFF 8 seconds 15 seconds 30 seconds Always ONNoteThis setting is also valid when the phone is attached to the optional hands-free car kit.](https://usermanual.wiki/Sharp/HRO00022/User-Guide-157751-Page-68.png)
![534-3. Input modeThis feature allows you to select input method, automatic hyphenation or T9.Automatic hyphenationAutomatic hyphenation follows the North American Numbering Plan, which hyphenates numbers as follows:800-555-1234A digit following a pause will not be hyphenated. (P.36 “Pause dialing”)Details of T9 input method are given on page 79.1. Press [MEMU] to display the Main menu.2. Press to select Display.3. Press to select Input Mode.4. Press to select Auto Hyphen or to select T9.5. Press to select ON or to select OFF.4-4. BannerYour phone can display a banner up to 100 characters in Standby mode while the phone is on.The default setting (“Welcome”) can be customized within the specified 100 characters.1. Press [MEMU] to display the Main menu.2. Press to select Display.3. Press to select Banner.4. Press to select Enter your Message or to select Inbox Message from.](https://usermanual.wiki/Sharp/HRO00022/User-Guide-157751-Page-69.png)
![54•Enter your MessageThe default setting (“Welcome”) will be displayed. Edit the current message as you desire. Up to 100 characters can be entered.Press [OK] to save the setting.•Inbox Message fromMessage source will be displayed: E-mail address and number.•Enter E-mail AddressPress . The address entry prompt will be displayed.Enter the desired phone address•Enter numberPress . The number entry prompt will be displayed.Enter the desired number.5. Press [OK] to save the setting.6. Press to return to Standby mode.The message will be displayed while your phone is on.](https://usermanual.wiki/Sharp/HRO00022/User-Guide-157751-Page-70.png)
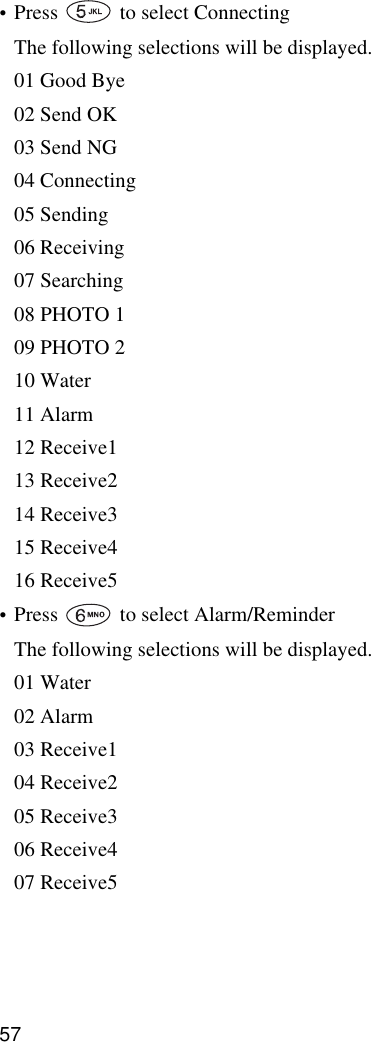
![554-5. GraphicThis feature allows you to select your desired graphic image for the following situations:1. Press [MEMU] to display the Main menu.2. Press to select Display.3. Press to select Graphic.4. Press each key to select the desired graphic image. •Press to select Wallpaper.The following selections will be displayed.01 OFF02 Dolphin03 Flower04 Bee05 Good Bye06 Send OK07 Send NG08 Connecting09 Sending10 Receiving11 Searching12 PHOTO113 PHOTO214 Water15 Alarm16 Receive117 Receive218 Receive319 Receive420 Receive5](https://usermanual.wiki/Sharp/HRO00022/User-Guide-157751-Page-71.png)
![56•Press to select StandbyThe following selections will be displayed.01 Water02 Alarm03 Receive104 Receive205 Receive306 Receive407 Receive5•Press to select Incoming CallThe following selections will be displayed.01 Water02 Alarm03 Receive104 Receive205 Receive306 Receive407 Receive5•Press to select CustomThe following selections will be displayed.[1] ----------[2] ----------[3] ----------[4] ----------[5] ----------](https://usermanual.wiki/Sharp/HRO00022/User-Guide-157751-Page-72.png)
![5911 Alarm12 Receive113 Receive214 Receive315 Receive416 Receive55. Use or to select the desired wallpaper.6. Press [OK].The selected wallpaper will be displayed.7. Press [OK] to save the setting.](https://usermanual.wiki/Sharp/HRO00022/User-Guide-157751-Page-75.png)
![604-6. InformationYou can display your phone’s software version, hardware version, ESN* and PRL*. These items of information are needed for you to call your home network Customer Care.* ESN: Electronic Serial number* PRL: Preferred Roaming List* NAM: Number Assignment Module1. Press [MEMU] to display the Main menu.2. Press to select Display.3. Press to select Information.4. Press to select Version. The hardware, software version, ESN and PRL will be displayed.5. Press to select NAM name.6. Press to return to the Information menu screen.](https://usermanual.wiki/Sharp/HRO00022/User-Guide-157751-Page-76.png)
![615. Security menuTo protect your phone from unauthorized use, you can lock it easily in the Main menu, and unlock it as well.To lock your phone, a 4-digit lock code must be entered. The factory default setting of the lock code is 0000 or last 4 digits of your phone number. Once you have entered the lock number, you must enter it when you want to change the Security menu settings.NoteRegardless of whether the phone is locked or not, you can dial emergency numbers (911, 911 and #911) and three specified numbers (P.63 “special numbers”), and answer incoming calls as well.5-1. Lock mode1. Lock ON power upThis feature allows you to lock the phone every time you turn it on.1. 1.Press [MEMU] to display the Main menu.2. Press to select Security and enter your current lock code .3. Press to select Lock Mode.Press the navigation keys to select an option:• Lock ON Power Up: The phone will be automatically locked when you turn it on.• Lock Now: The phone locks immediately and stays locked until the lock code is entered.• Unlocked: The phone remains unlocked. (See below)4. Press [OK] to save the setting.2. Lock now (see above)](https://usermanual.wiki/Sharp/HRO00022/User-Guide-157751-Page-77.png)
![623. Unlock1. Press [MEMU] to display the Main menu.2. Press to select Security.3. Enter the 4-digit password.When it is matched, the next screen will be displayed.4. Select to select Lock Mode.5. Press to select Unlock.6. Press [OK].The phone will be unlocked immediately.5-2. New codeThe default lock code for your Phone is set to either 0000 or the last four digits of your phone number. You can set a unique lock code and change the lock code if necessary.Entering a new lock code:1. Press [MEMU] to display the Main menu.2. Press to select Security and enter your current lock code.3. Press to select New Code. 4. Enter a new, four-digit lock code by pressing the digit keys.The lock code will be replaced with the * mark preventing your phone from unauthorized use.5. Press [OK] to save the new lock code.•To cancel entering a new code, press or .](https://usermanual.wiki/Sharp/HRO00022/User-Guide-157751-Page-78.png)
![635-3. Emergency # (Special numbers)Special numbers (Emergency #)You can store three phone numbers (Special Numbers) to be dialed up even when the phone is in Lock mode.And once you store these numbers in the phone book, they can be dialed manually. Storing special numbers1. Press [MEMU] to display the Main menu.2. Press to select Security and enter your current lock code.3. Press to select Emergency #.4. To select a location to store the special number:•Press to select Emergency 1,•Press to select Emergency 2,•Press to select Emergency 3.5. Select to select Enter number or to select Search Phone book.[1] Enter NumberEnter the special number by using the digit keys.Press [OK] to save the number in the selected location.[2] Search Phone BookPerform the search procedure explained on page 82.Choose the desired name and press [OK].The contact of the selected name will be displayed.Press [OK] to save the number in the selected location.](https://usermanual.wiki/Sharp/HRO00022/User-Guide-157751-Page-79.png)
![645-4. Erase allYou can erase all numbers stored in your phone book data, messages and call logs.1. Press [MEMU] to display the Main menu.2. Press to select Security and enter your current lock code.3. Press to select Erase All4. Press to select Phone Book.A confirmation message will be displayed to ask if you are sure you want to erase the entire phone book data.•Press to select Call Logs.•Press to select Messages.5. Select to select Phone Book.A confirmation message will be displayed6. Select to select YES.The final confirmation message will be displayed.7. Select . When erasing has been completed, “Erased!” will be displayed and the phone will return to the Erase all menu screen (step 4).](https://usermanual.wiki/Sharp/HRO00022/User-Guide-157751-Page-80.png)
![655-5. Secret memoryDetails of setting secret memory are given on page 81.5-6. ResetIn case of misoperation or failure due to some problem, you need to reset all settings of your phone to the factory defaults.NoteWhen resetting your phone, we recommend you to save or download your important settings (phone book data) to a PC using the optional Phone Book utility software (sold separately) for your safety. (P.39) However, phone book data, messages, and call logs will remain in memory.1. Press [MEMU] to display the Main menu2. Press to select Security and enter your current lock code.3. Press to select Reset. 4. Select to select OK.A confirmation message will be displayed to ask if you are sure you want to reset the phone.5. Select to select YES.6. Press [OK] to execute resetting.After resetting is complete, the phone will be restarted and enter Standby mode. During resetting, “Now Resetting...” will be displayed.•To cancel resetting, press to select Cancel in step 4, or press to select NO in step 5.](https://usermanual.wiki/Sharp/HRO00022/User-Guide-157751-Page-81.png)
![666. Setup/Tool menu6-1. Memory statusThis feature helps you to view the memory status of the following records.1. Press [MEMU] to display the Main menu.2. Press to select Setup/Tool.3. Press to select Memory Status. The following records will be displayed:Phone Book xxx/300 ItemsMessage xxx %Browser data xxx %Download xxx %6-2. CallingTurning the Auto answer option on or off.This option sets your phone to automatically answer a call after one ring.1. Press [MEMU] to display the Main menu.2. Press to select Setup/Tool.3. Press to select Calling.4. Press to select Auto Answer.5. Press to select ON or to select OFF.6. Press [OK] to save the setting.](https://usermanual.wiki/Sharp/HRO00022/User-Guide-157751-Page-82.png)
![67Turning the Any key answer option on or off1. Press [MEMU] to display the Main menu.2. Press to select Setup/Tool.3. Press to select Calling. 4. Press to select Any Key Answer.5. Press to select ON or to select OFF.6. Press [OK] to save the setting.Turning the Auto retry option on or offThis feature helps you let your phone redial automatically up to five times after the specified length of time, until your call will be picked up.1. Press [MEMU] to display the Main menu.2. Press to select Setup/Tool.3. Press to select Calling. 4. Press to select Auto Retry.The options will be displayed.5. Press to select Every 60 sec.•Press to select Every 30 sec.•Press to select OFF.The Auto retry option will be turned off.6. Press [OK] to save the setting.](https://usermanual.wiki/Sharp/HRO00022/User-Guide-157751-Page-83.png)
![68Voice privacy1. Press [MEMU] to display the Main menu.2. Press to select Setup/Tool.3. Press to select Calling. 4. Press to select Voice Privacy.5. Press to select Automatic.•Press to select Enhanced.6. Press [OK] to save the setting.6-3. Voice mail1. Press [MEMU] to display the Main menu.2. Press to select Setup/Tool.3. Press to select Voicemail. 4. xxxxxx5. xxxxxx6. Press [OK] to save the setting.< Network and service dependent feature >](https://usermanual.wiki/Sharp/HRO00022/User-Guide-157751-Page-84.png)
![696-4. Message1. Callback #1. Press [MEMU] to display the Main menu.2. Press to select Setup/Tool.3. Press to select Message.4. Press to select Callback #.5. Enter the desired phone number.6. Press [OK] to save the setting.2. Delivery ACKYou can send the acknowledgement to the sending end when you receive the incoming data successfully.1. Press [MEMU] to display the Main menu.2. Press to select Setup/Tool.3. Press to select Message.4. Press to select Delivery ACK.5. Press to select ON with notification.You can check the notification message on the display that the acknowledgement is sent.•Press to select ON.You can send the acknowledgement without notification message.•Press to select OFF.6. Press [OK] to save the setting.](https://usermanual.wiki/Sharp/HRO00022/User-Guide-157751-Page-85.png)
![703. Canned messagesYou can edit or add the fixed forms used when sending messages.1. Press [MEMU] to display the Main menu.2. Press to select Setup/Tool.3. Press to select Message.4. Press to select Canned Message.The selections will be displayed:[1] Yes[2] No[3] Call me[4] need direction[5] Where are you[6] I’ll call later[7] Busy[8] On my way[9] I’ll arrive soon[10] Thank you[11] Meeting cancel![12] Meet me at[13] Call me at[14] Please help![15] --------------[16] --------------[17] --------------[18] --------------[19] --------------[20] --------------](https://usermanual.wiki/Sharp/HRO00022/User-Guide-157751-Page-86.png)
![716-5. BrowserDetails of setting the charged time display are given on page 97.6-6. AlarmAlarm ClockSetting the daily alarm1. Press [MEMU] to display the Main menu.2. Press to select Setup/Tool.3. Select to select Alarm.4. Press [OK].4. Select to select Daily Alarm.5. Press to select ON.7. Press [OK]. 6. Enter the alarm time.Use the digit keys and press or to set AM or PM.7. Press [OK] to save the setting. Deleting the dairy alarm setting1. Press [MEMU] to display the Main menu.2. Press to select Setup/Tool.3. Select to select Alarm.4. Press to select Dairy Alarm.5. Select to select Alarm.6. Press [OK].5. Press to8.selectPress .The phone will return to Standby mode.1OFF](https://usermanual.wiki/Sharp/HRO00022/User-Guide-157751-Page-87.png)
![72Call ReminderSetting the Call reminder1. Press [MEMU] to display the Main menu.2. Press to select Setup/Tool.3. Press to select Alarm.4. Press to select Call Reminder.5. Press to select ON.Select the search method from one of the following:•[1] to select Search Phone Book•[2] to select Search Call Logs•[3] to select Enter Name6. Press [OK].7. Enter the time for the alarm by using the digits keys.8. Press or key to select AM or PM.9. Press [OK] to save the Call Reminder setting.Disabling the Call reminder setting1. Press [MEMU] to display the Main menu.2. Press to select Setup/Tool.3. Select to select Alarm.4. Press to select Call Reminder.5. Press to select ON.6. Press [Remove].7. Press to select YES.•To cancel removing the setting, press to select NO.](https://usermanual.wiki/Sharp/HRO00022/User-Guide-157751-Page-88.png)
![736-7. Clock setting1. ClockThis feature allows you to set the current date and time. The factory default setting is “January 1. 2001.”Automatic setting provided by the radio network takes priority over the manual setting.1. Press [MEMU] to display the Main menu.2. Press to select Setup/Tool.3. Select to select Clock Setting.4. Select to select Clock.The following clock format will be displayed:Date (M/D/Y)0 0 / 0 0 / 0 0 0 0Time (H:M)12:00 AM (PM)5. Use and to set the current date and time.6. Press [OK] to save the setting.2. Time zoneThis feature allows you to select the time zone you belong to.The selections are:1. Press [MEMU] to display the Main menu.2. Press to select Setup/Tool.3. Select to select Clock Setting.4. Select to select Time Zone.The following options will be displayed:[1] Auto (Your phone will automatically detect the appropriate time zone depending on your location.)[2] AST (Alaska Standard Time)](https://usermanual.wiki/Sharp/HRO00022/User-Guide-157751-Page-89.png)
![74[3] EST (Eastern Standard Time)[4] CST (Central Standard Time)[5] MST (Mountain Standard Time)[6] PST (Pacific Standard Time)[7] AKST (Alaska Standard Time)[8] AIST (Hawaii-Aleutian Standard Time)5. Select Auto or your own and press [OK].6. Press [OK] to save the setting.6-8. DataThis feature allows you to transmit the data.1. Press [MEMU] to display the Main menu.2. Press to select Setup/Tool.3. Select to select Data.4. xxx5. xxx6. xxx6-9. PC linkThis feature allows you to transmit data between your phone and a PC, enabling a PC connection with the specified connection cable.1. Press [MEMU] to display the Main menu.2. Press to select Setup/Tool.3. Press to select PC Link.4. Press [OK].5. Press to enter a PC link mode or press to cancel setting.](https://usermanual.wiki/Sharp/HRO00022/User-Guide-157751-Page-90.png)
![757. System menu7-1. Set serviceDetails of setting Set service are given on page 24.7-2. Force mode1. Press [MEMU] to display the Main menu.2. Press to select System.3. Press to select Force mode.4. Press to select Automatic,•Press to select CDMA only,•Press to select PCS only,•Press to select CELL only.5. Press [OK] to save the setting. 7-3. Data/Fax1. Press [MEMU] to display the Main menu.2. Press to select System.3. Press to select Data/Fax.4. Press to select Automatic,•Press to select CDMA only,•Press to select PCS only,5. Press [OK] to save the setting. 7-4. Call guardDetails of setting Call guard are given on page 25.](https://usermanual.wiki/Sharp/HRO00022/User-Guide-157751-Page-91.png)
![76Phone Book DialingYour phone can store up to 300 phone numbers.Phone book entries: Up to 300Phone number: 32 digits including hard pauses and Timed pausesName: Up to 16 charactersE-mail address: Up to 48 charactersGroup: 10 groups (9 customizable groups + default)*Label: (None), Home, Work, Mobile, Pager, Fax* Group names can not be changed.Tip•You can store the phone number as a hidden number to protect it from unauthorized use. (P.81)• Up to 9 One-touch dialing can be asigned from the phone book data. (P.41 One-touch dialing)Storing a phone number and name1. Press [MENU] to display the Main menu.2. Press to select Phone Book.3. Press [New].The name entry prompt will be displayed. 4. Enter a name and press [OK].See page 78 for details on entering characters.5. Select a desired label for a new entry and press [OK].•[1] None, [2] Home, [3] Work, [4] Mobile, [5] Pager and [6] Fax6. Press the and keys to highlight the number item and press [OK] to enter the phone number.The phone number prompt will be displayed. 7. Press the digit keys to enter the phone number.](https://usermanual.wiki/Sharp/HRO00022/User-Guide-157751-Page-92.png)
![778. If necessary, press to enter a hard pause ([1] key) or a time pause ([2] key).9. Press [OK].The next item (E-mail address) will be highlighted.10. Press [OK].The e-mail address entry prompt will be displayed.11. Enter the e-mail address.•Up to 48 characters can be entered.12. Press [OK].The next item (Memory #) will be highlighted.13. Press [OK].14. Enter the desired number (3-digit) and press [OK] to save the setting.•If a warning message is displayed to indicate you are going to overwrite a location, enter another number and press [OK].Storing phone numbers with pauses1. Enter the phone number you want to store (such as the bank’s teleservice phone number).2. Press [Func] to display Function menu. •Press or to enter the desired pause:–To enter a Hard Pause, press .The letter “H” will be displayed at the end of the number. Then enter the digits followed by the pause (such as your account number), or–To enter a Timed pause, press . The letter “T” will be displayed at the end of the phone number. Then enter the number followed by the pause (such as your account number).3. Store the phone number by pressing [Store].4. Follow the screen prompt.](https://usermanual.wiki/Sharp/HRO00022/User-Guide-157751-Page-93.png)
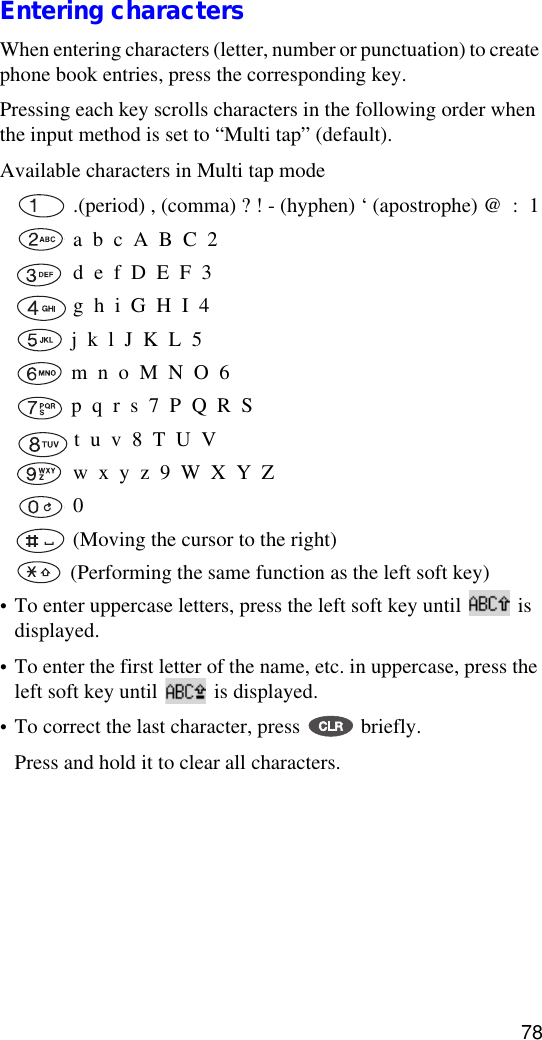
![79Changing the input modesBy choosing the desired input mode and selecting edit options on the entry prompt screen, you can reduce input time. Press on the entry prompt screen.Input mode and edit options will be displayed:[1] T9 (Multi tap), [2] Numeric (Multi tap), [3] Symbol, [4] Canned Message (P.70), [5] Copy, [6] Cut, [7] PasteT9 text inputT9 text input method is a shortcut to enter text easily and quickly.When you enter a letter “how”, you press the corresponding digit keys several times until each letter is displayed.By using T9, you press only . T9 scans and recognizes your keystrokes, and displays the frequently and commonly used letters automatically. (You can change the candidates by pressing until the desired is displayed. T9 will display other candidates by analyzing the combinations of the keys pressed.)For example, this method helps you complete mail messages quickly.•To return to the normal input mode (Multi tap), press [Func] and select [1] (Multi tap).SymbolTo enter symbols, press [Func] and select [3] (Symbol).Select the desired symbol and press [OK].Canned Message To enter fixed text, press [Func] and select [4] (Canned Message).Select the desired text and press [OK].•Canned messages can be edited in the Main menu. (6. Setup/Tool/P.70)](https://usermanual.wiki/Sharp/HRO00022/User-Guide-157751-Page-95.png)
![80Overwriting an existing locationYou can change the existing data with a new phone number or change a part of the stored data.1. Press [MENU] to display the Main menu.2. Press to select Phone Book.3. Perform the search function and select the desired entry.4. Press [OK].The personal contact will be displayed.5. Press [Func] to display the Function menu.6. Press to select EDIT.7. If necessary, change the desired entry.8. Press [Save] to save the setting.9. Enter the memory number and press [OK].NoteIf the desired memory location already contains an entry, the phone displays a message asking if you want to replace the current entry. To replace the entry, press [OK].To return to the previous screen and select another location, press . You can only use each label one time for each stored name (for example, you can only have one name labeled Work for a name entry).If you want to shortcut the way to store a phone number...1. Enter the phone number.2. Press [Store].3. Repeat the steps 5 through 14 for “Storing a phone number and name” (page 76).TipYou can quickly store the phone number using the incoming or outgoing call logs. (P.89)](https://usermanual.wiki/Sharp/HRO00022/User-Guide-157751-Page-96.png)
![81Storing a phone number with a group setting (Property1)1. Repeat the steps of storing a phone number and name step14 on page 76 to 77.2. Press [Func].The Function menu will be displayed.3. Press to select [Property1].4. Press to select [Gr: (current setting)] and press [OK].5. Press the desired number and press [OK].The setting will be displayed.Storing a phone number as a secret memory (Property1)1. Repeat the steps of storing a phone number and name step 14 on page 76 to 77.2. Press [Func].The Function menu will be displayed.3. Press to select [Property1].4. Press to select [Secret] and press [OK].5. Press to select ON or [2] to select OFF and press [OK].The setting will be displayed.Property2 (One-touch dial, Custom tone, Custom graphics)](https://usermanual.wiki/Sharp/HRO00022/User-Guide-157751-Page-97.png)
![82Searching for phone numbersThree methods of searching for phone numbers are available:Finding by Name1. Press [MENU] to display the Main menu.2. Press to select Phone Book.3. Press to select Find by Name.4. Enter up to 16 characters to be found.Matched results will be displayed alphabetically.5. Scroll the list using and , if necessary.6. When the desired entry is found, press [OK].7. Press to dial.Finding by Group1. Press [MENU] to display the Main menu.2. Press to select Phone Book.3. Press to select Find by Group.The group names will be displayed:•[0] Unfiled, [1] Personal 1, [2] Personal 2, [3] Personal 3, [4] Business 1, [5] Business 2, [6] Business 3, [7] Others 1, [8] Others 2, [9] Service4. Press the desired digit keys or use or to locate the entry. 5. When the desired entry is found, press [OK].6. Press to dial.2](https://usermanual.wiki/Sharp/HRO00022/User-Guide-157751-Page-98.png)
![83Finding Entry #1. Press [MENU] to display the Main menu.2. Press to select Phone Book.3. Press to select Find Entry #.4. Press the desired digit keys or use or to locate the entry. 5. When the desired entry is found, press [OK].6. Press to dial.Enter Entry # which you desired, and press [ M ].](https://usermanual.wiki/Sharp/HRO00022/User-Guide-157751-Page-99.png)
![84Adding a Name RingerYou can link your phone book entries with 20 kinds of ringer tones (fifteen melodies and five tones).You can know who is calling identifying the ringer or melody preset to Phone book. 1. Press [MENU] to display the Main menu.2. Press to select Sounds.3. Press to select Ringer Type.4. Press to select Set.5. Choose one of the 5 options ([4] to [8]) and press [OK].The phone number search prompt will be displayed.6. Choose an entry and press [Set].7. Choose the desired melody.8. When selecting is complete, press [OK] to save the setting.Confirming the current setting1. Press Confirm in step 4 above.2. Press to select Normal Ringer.The current setting will be displayed.](https://usermanual.wiki/Sharp/HRO00022/User-Guide-157751-Page-100.png)
![85Modifying Your phone book entriesYou can recall the desired phone book entry and modify it.1. Search for the desired phone book entries in Standby mode.Details of searching for phone book entries are given on page 82.2. Press [Func] to display the Function menu.3. Press to select Edit. 4. Select an entry you want to change and press [OK].5. Edit it as you want to.The overwrite confirmation message will be displayed.6. Press [OK] to save the change.Erasing a single phone book entry1. Search for the desired phone book entries in Standby mode.Details of searching for phone book entries are given on page 82.2. Press [Func] to display the Function menu.3. Press to select Erase.The erase confirmation message will be displayed.4. Press to select YES.When erasing is complete, the message “Memory #xxx Erased!” will be displayed and the display will return to the name list.](https://usermanual.wiki/Sharp/HRO00022/User-Guide-157751-Page-101.png)
![86Erasing all of the phone book entriesDetails of erasing all phone book entries are given on page 64.Setting the Speed DialThis feature allows you to dial quickly by pressing and holding any of the digit keys (0 - 8). To use the speed dial feature, choose the candidate to be set as a speed dial from the stored phone book entries.1. Search for the desired phone book entries in Standby mode.Details of searching for phone book entries are given on page 82.2. Press [OK] to display the entry content.3. Press [Func] to display the Function menu.4. Press to select Edit.5. Press to select Set Speed Dial.6. Press [OK] to save the setting. The message “Speed Dial Saved” will be displayed. •To cancel setting, press to return to the Function menu.Storing your phone book entries as a secret memoryYour phone will protect the specified numbers from unauthorized use by specifying the phone book entries as a secret memory. (P.81)](https://usermanual.wiki/Sharp/HRO00022/User-Guide-157751-Page-102.png)
![87Reviewing your call logsYou can review your call logs (incoming calls, outgoing calls and missed calls) stored.Incoming call logs:Last 20 callsOutgoing calls: Last 20 callsMissed calls: Last 20 callsWhen recalling these call logs, the following data will be displayed:1) Date and time2) Name3) Phone number (if available by the Caller’s ID service)4) Duration ????????Details of reviewing these call logs are given on page 88.NoteIf you have stored the number as an emergency number (“Emergency”), “Emergency” will be displayed instead of the other party’s name. And if you have not stored the name, including “Emergency”, the telephone number will be displayed.Calling by using call logsYou can quickly dial using these call logs.1. Recall and select the desired call log.Details of reviewing these call logs are given on page 88.2. Press [OK].3. Press to dial.](https://usermanual.wiki/Sharp/HRO00022/User-Guide-157751-Page-103.png)
![88Reviewing the outgoing call logs, missed call logs, or incoming call logsRecall the outgoing call logs first and then switch screens to display missed call logs and incoming call logs by pressing the left soft key.1. Press [MENU] to display the Main menu.2. Press to select Calls3. Press to select Call Logs.The outgoing call logs will be displayed.4. To display the missed call logs, press [Missed].5. Then, to display the incoming call logs, press [Income].6. To display the outgoing call logs again, press [Outgo].The display will switch in the this order.(outgoing call logs) (missed call logs) (incoming call logs) (outgoing call logs) ...When you then dial by using these logs ...7. Select the desired log.The selected log will be highlighted in blue.8. Press to select it.9. Press again to dial.TipIf you want to display the content of the selected logs, press [OK].If you want to edit them, press [Func] in step 7 to display the Function menu.Function menu:[1] to store the call logs[2] to erase selected call logs[3] to erase all call logs (See below)](https://usermanual.wiki/Sharp/HRO00022/User-Guide-157751-Page-104.png)
![89Storing the phone number by using the call logs1. Repeat the steps 1 to 7 of reviewing the call logs on page 88.2. Press [Store].The name entry prompt will be displayed.3. Repeat the steps 4 to 14 of storing a phone number and name on page 76 to 77.Erasing a single call log (outgoing, incoming or missed call)1. Perform steps 1 through 7 on page 88.2. Press [Func].3. Press to select Erase.4. Press to select Yes.The message “Outgoing calls XX (No.) Erased!” will be displayed and erasing will be complete.When you erase all the call logs...•Press to select Erase All in step 3 above.The confirmation message “Outgoing calls Erase All?” will be displayed.•Press to select YES.Erasing will be complete.](https://usermanual.wiki/Sharp/HRO00022/User-Guide-157751-Page-105.png)
![90Reviewing your call timeYour phone keeps track of all your call logs and records them by dividing into four categories:1 Last Call: Showing a log of the last call you made inside your home network service area and the time of the last call2 Home Calls: Showing a total log of the calls you made inside your home network service area and the time of the last home call3 Roam Calls: Showing a total log of the calls you made inside your roaming network service area and the time of the last roaming call4 All Calls: Showing a total log of the calls you made inside your home and roaming network service area and the time of the last call1. Press [MENU] to display the Main menu.2. Press to select Calls.3. Press to select Call Info4. Press to select Last Call, to select Home Calls, to select Roam Calls or to select All Calls.](https://usermanual.wiki/Sharp/HRO00022/User-Guide-157751-Page-106.png)
![91VoicemailSetting up your voicemail featurePerform the following steps to set up your voicemail feature:1. Press and hold [Left soft key] for at least two seconds.2. Create your own pass code. 3. Record your name.4. Create a greeting the caller will hear.5. Enable the One-Touch Access feature, if necessary.Reviewing voicemail messagesThere are two ways to review voicemail messages: either to display them in Standby mode or to use the One-Touch Access feature (see below).In Standby mode1. Press [Message] to display the Message menu.2. Press to select Voicemail. The message “Voicemail New” will be displayed.3. Press [Listen] to play a voicemail message.NotePress [Erase] to clear the mail indicator ( ) on the display, if necessary. (The indicator will be also cleared automatically when you have played all the messages received.)One-Touch Access feature1. Press and hold [Message].< Carrier dependemt >](https://usermanual.wiki/Sharp/HRO00022/User-Guide-157751-Page-107.png)
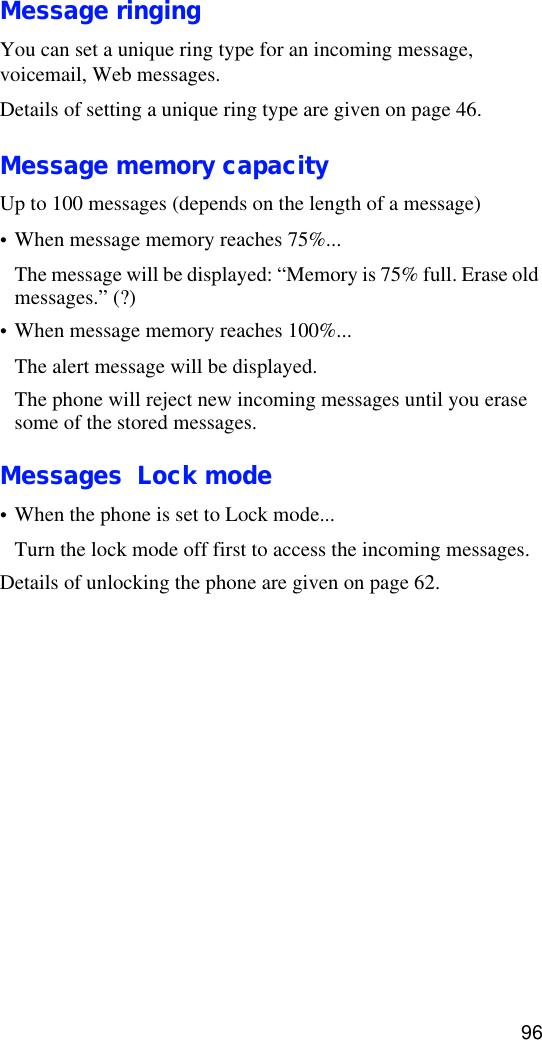
![92MessagingYour phone receives the following messages in Standby mode and Talk mode:•Voicemail message•Text message•Web messageNotificationThe message indicator ( ) will be displayed when your phone receives the messages and remains displayed until you retrieveall the massages.Standby modeWhen you receive a message, you will be notified by the ringer sound (while the phone is on), and the following messages will be displayed:•“New Voicemail” for voicemail message•“New Text” for text message•“New BrowserMsg” for browser messageTalk modeWhen you retrieve a message, the phone’s ringer will be automatically muted, the call waiting tone will be heard and a message header will be displayed. You can retrieve new message while in a call by pressing [OK]. While reviewing the message, you can still be connected with the other party.By using the optional hands-free headset, you can read the message without interrupting the conversation.](https://usermanual.wiki/Sharp/HRO00022/User-Guide-157751-Page-108.png)
![93Reviewing a text message or Web message in Standby mode1. Press [Message] to display the Message menu.2. Press to select Inbox, or Press to select Browser.A list of messages will be displayed. The messages marked with ! : Urgent unread messagesThe messages marked with (Check mark) : Messages read3. Use the navigation keys to select the desired message.4. Press [OK] to review the message. The sender’s name, phone number, time/date stamp and the message will be displayed.NoteUse the Message menu when handling the messages, by pressing [OK]. (P.94)5. When finished, press to return to the previous screen.](https://usermanual.wiki/Sharp/HRO00022/User-Guide-157751-Page-109.png)
![94Message menuThe Messages menu allows you to handle messages while you are reviewing them. •Showing the address of the caller•Erasing a single or all message(s)•Locking or unlocking a message• Redialing the number embedded in the message • Extracting a phone number embedded in the message(?)1. While reviewing a message, press [Func] to display options: .Press to select Address’s Info Press to Erase (P.95)Press to Erase All (P.95)Press to Lock/UnlockNoteIf more than one phone number is included in the message, a list of the phone numbers will be displayed, and you can choose the desired one.2. When handling is complete, press to return to the previous screen.Note (?)If the message you are reviewing contains a phone number that is already stored in your phone book, the Save option does not display, and the available menu options will be: (1) SEND, (2) Erase, (3) Next Msg, (4) Previous Msg.](https://usermanual.wiki/Sharp/HRO00022/User-Guide-157751-Page-110.png)
![95Erasing a single message 1. While reviewing the message, press to display the Message menu.2. Press to select Erase.3. Use the navigation keys to select the message you want to erase.4. Press [OK]. The message header and body will be displayed.5. Press [MENU] to display more options.6. Press to erase the message or to return to the Messages menu.Erasing all messages1. While reviewing the message, press to display the Message menu.2. Press to select Erase All.All messages stored in the memory will be erased.When erasing is complete, the display will return to the previous screen.3. Press to return to the Message menu.[Func] to display the[Func] to display the3](https://usermanual.wiki/Sharp/HRO00022/User-Guide-157751-Page-111.png)
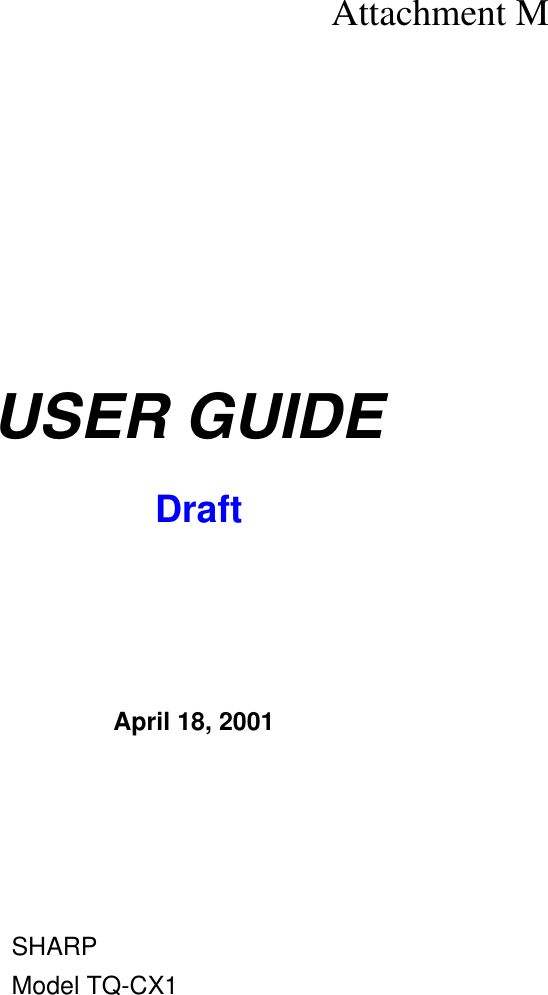
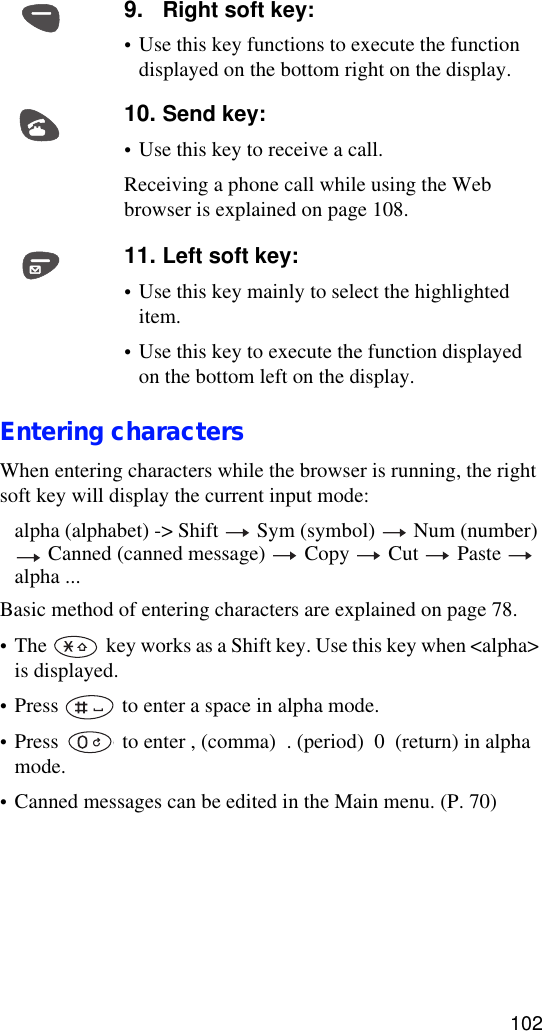
![97Internet AccessUsing the phone’s Internet functions, you can access and obtain the world’s network information, depending on your telecommunications carrier.By starting the Web browser installed in your phone, you will be connected to the Internet through your telecommunications carrier. While you are connecting to the Internet, the service indicator ( ) will be displayed as in the case of a normal phone call.Charges vary, depending on the network service you access and you will be invoiced accordingly. Setting the Charging Reminder of your browserThe Charging Reminder helps you displaying the prompt every time you start the Web browser and tells you when you will be charged for the connection time.1. Press [MENU] to display the Main menu.2. Press to select Setup/Tool3. Press to select Browser.4. Press to select Prompt None.The reminder will not be displayed.•Press to select Prompt to open. •The prompt will be displayed while the browser is running.•Press to select Prompt Both.•The prompt will be displayed when you open or exit the browser.•Press to select Prompt to end.•The prompt will be displayed when you exit the browser.Logo 01.eps Logo 02.eps](https://usermanual.wiki/Sharp/HRO00022/User-Guide-157751-Page-113.png)
![985. Press [OK] to save your setting.•To cancel setting, press to cancel.Starting the Web browserNoteFirst time you start the browser, you will be prompted to finish a security setup taking several minutes. Follow the on-screen messages to complete the setup.Next time you access the Web page, you can omit this setup.1. Press [Browser] in Standby mode.The charging reminder will be displayed, if applicable.2. Press [Yes] to start browsing.•To cancel browsing, press [No].When the connection to the Internet is established, the Top menu will be displayed.3. Press [Brows MENU] to display the browser menu.1 Reload: Downloading the Web page last visited.2 Home: Opening the Web page you registered in the Advanced menu (P.99).3 Bookmarks: Showing the Web sites (frequently visited Web pages) you registered.4 Mark Site: Registering the current Web page displayed.5 About Phone.com: Showing the information of the browser, etc.6 Advanced ...: Showing the advanced menus.1 Email 5 Bookmarks2 Contact 6 Web Sites3 Calendar 7 Settings4To Do’s8Help](https://usermanual.wiki/Sharp/HRO00022/User-Guide-157751-Page-114.png)
![99Advanced menus1 Show URL: Showing the URL of the current Web page displayed.2 Homepage: Registering the URL of the homepage to be displayed when the browser is started.3 Set UP. Link: xxx4 Offline Service: Terminating the connection to the Internet while the browser is kept open.???5 Outbox: xxx6 Restart UP. Browser: Restarting the browser immediately.7 Encryption: (Use this menu only your service provider asks you to access.)Exiting the Web browser1. Press .•If “Prompt to end” or “Prompt both” option has been set in the Web browser menu ( [MENU] ), you will be asked to exit the Web browser.2. Press [Yes] to exit the browser.•To cancel exiting, press [No].](https://usermanual.wiki/Sharp/HRO00022/User-Guide-157751-Page-115.png)
![103LinkThe Link menu helps you to jump to a linked (related) page and get more information concerning the topics you are searching for.Links embedded in the Web page are put in brackets ([ ... ]). Press the left soft key to access the linked page when the link is highlighted. When the Web page includes a telephone number as a link ...If the Web page you visited supports the calling feature from inside the Web page, you may make a call.Press the left soft key ( [Call]) to dial, or press to dial.When you receive a call while the browser is running ...While the Web browser is running, you will send the command and receive the information from the Internet in packet format. This packet transmission method does not always occupy the telephone circuit while the connection to the Internet is made. Your phone can receive a call between the transmission of the packet data. Press .When you end a call, you will automatically return to the page displayed when you pressed .](https://usermanual.wiki/Sharp/HRO00022/User-Guide-157751-Page-119.png)
![104BookmarksThis browser’s menu helps you to store desired (or frequently used) pages (addresses) while visiting Web pages or sites and to access those pages or sites quickly by selecting each bookmark from the Browser menu. It can save you time in accessing Web pages (sites).Creating a bookmark1. Visit the desired page you want to bookmark.2. Press [Brows MENU] once to display the browser menu. 3. Press to select Mark Site.When the page has a title, it will be automatically stored as a bookmark title; you can edit the title by using the browser’s menu.4. Press [Save] to save the title.The page will be saved with its title to the bookmark list and a message will be displayed to indicate that the bookmark was added to the list (at the bottom of the list).5. Select [OK] to return to the page bookmarked.Searching for Bookmark1. Select [Bookmarks] from the browser menu.2. Select the desired bookmark and press [Search] or press and hold the digit key numbered to the bookmark title from the bookmark menu.](https://usermanual.wiki/Sharp/HRO00022/User-Guide-157751-Page-120.png)