Sharp HRO00022 Cellular Transceiver User Manual 00 COV TQ CX1
Sharp Corporation Cellular Transceiver 00 COV TQ CX1
Sharp >
Users manual
USER GUIDE
SHARP
Model TQ-CX1
Draft
April 18, 2001
Attachment M
Safety Information and Usage
Guideline
Exposure to Radio Frequency Signals
Your wireless handheld portable telephone is a low power radio
transmitter and receiver. When it is ON, it receives and also sends
out radio frequency (RF) signals. In August 1996, the Federal
Communications Commissions (FCC) adopted RF exposure
guidelines with safety levels for hand-held wireless phones. Those
guidelines are consistent with the safety standards previously set
by both U.S. and international standards bodies:
• ANSI C95.1 (1992) *1
• NCRP Report 86 (1986) *2
• ICNIRP (1996) *3
Those standards were based on comprehensive and periodic
evaluations of the relevant scientific literature. For example, over
120 scientists, engineers, and physicians from universities,
government health agencies, and industry reviewed the available
body of research to develop the ANSI Standard (C95.1).
The design of your phone complies with the FCC guidelines (and
those standards).
z To maintain compliance with FCC RF exposure guideline, if you
wear a handset on your body use the Sharp supplied or approved
holster. If you do not use a body-worn accessory, ensure the antenna
is at least one inch (2.54 centimeters ) from your body when
transmitting. Use of non-Sharp accessories may violate FCC RF
exposure guidelines.
*1 American National Standards Institute
*2 National Council on Radiation Protection and Measurements
*3 International Commission on Non-Ionizing Radiation Protection
ⅰ
Phone Operation
Normal Position:
Hold the phone as you would any other telephone.
Tips on Efficient Operation:
For your phone to operate most efficiently:
• Do not touch the antenna unnecessarily when the phone is in
use. Contact with the antenna affects call quality and may cause
the phone to operate at a higher power level than otherwise
needed.
Batteries
Caution: All batteries can cause property damage, injury or
burns if a conductive material, such as jewelry, keys or beaded
chains, touches exposed terminals. The material may complete an
electrical circuit and become quite hot. To protect against such
unwanted current drain, exercise care in handling any charged
battery, particularly when placing it inside your pocket, purse or
other container with metal objects. When the battery is detached
from the phone, please use any un-conductive material cover such as
small poly bag : for storing your battery when not in use.
Driving
Check the laws and regulations on the use of wireless telephone
in the areas where you drive. Always obey them. Also, if using
your phone while driving, please:
• Give full attention to driving - driving safely is your first
responsibility.
• Use hands-free operation, if available.
• Pull off the road and park before making or answering a call if
driving conditions so require.
ⅱ
Pacemakers
The Health Industry Manufacturers Association recommends that
a minimum separation of six (6") inches be maintained between
a handheld wireless phone and a pacemaker to avoid potential
interference with the pacemaker. These recommendations are
consistent with the independent research by and recommendations
of Wireless Technology Research.
Persons with pacemakers:
• Should ALWAYS keep the phone more than six (6") inches from
their pacemaker when the phone is turned ON.
• Should not carry the phone in a breast pocket.
• Should use the ear opposite the pacemaker to minimize the
potential for interference.
• If you have any reason to suspect that interference is taking
place, turn your phone OFF immediately.
Hearing Aids
Some digital wireless phones may interfere with some hearing
aids. In the event of such interference, you may want to consult
your hearing aid manufacturer to discuss alternatives.
Other Medical Devices
If you use any other personal medical device, consult the
manufacturer of your device to determine if they are adequately
shielded from external RF energy. Your physician may be able to
assist you in obtaining this information.
Turn your phone OFF in health care facilities when any
regulations posted in these areas instruct you to do so. Hospitals
or health care facilities may be using equipment that could be
sensitive to external RF energy.
Vehicles Equipped with Air Bags
An air bag inflates with great force. DO NOT place objects,
ⅲ

including both installed or portable wireless equipment, in the
area over the air bag or in the air bag deployment area. If in-vehicle
wireless equipment is improperly installed and the air bag
inflates, serious injury could result.
Phone Care
Your phone is designed for excellent durability under normal use
conditions. Protect your phone from water damage that could
result from spills or excessive exposure to rain.
Never submerge your wireless phone.
Cleaning the Phone
Cleaning of this product should only be done with a damp cloth.
The use of chemical cleaners may harm the finish and integrity of
the radio housing and is not recommended.
All about performance and safety
Keeping tabs on signal strength
If you’re inside a building, reception may be better near a window.
The quality of each call you make or receive depends on the signal
strength in your immediate area. When turned on, your phone will
always give you a visual indication of the signal strength in your
immediate area. The visual indicator is always in the upper left
corner of your display and is referred to as the signal strength
indicator: [ ]. More lines indicate more signal strength. Four
lines indicate maximum strength and one line indicates least
strength.
Understanding Power Save mode
If you’re trying to use your Phone in an area where the signal is
too weak, the Power Save feature will be automatically activated to
conserve battery power when you’ve been unable to pick up a
signal for 15 minutes. If your phone is in Power Save Mode, it will
ⅳ
periodically recheck service availability or you can do so yourself
manually by pressing any key. A message will be displayed on the
screen any time Power Save has been activated.
Understanding how your phone operates
Your phone is basically a radio transmitter and receiver.
When it’s turned on, it receives and transmits radio frequency
(RF) signals. When your phone is in use, the system handling your
call controls the power level. This power level can range from
0.006 watts to 0.6 watts.
Maintaining your phone’s peak performance
To operate your phone properly - that is, to maintain safe and
satisfactory service - you should follow these rules:
• Do not hold the phone antenna at any time.
• Do not use the phone with a damaged antenna.
Avoid exposing your phone and accessories to rain or liquid spills.
If your phone gets wet, turn the power off immediately, remove
the battery. If it is inoperable, you should consult with the store
where you purchased it.
Only authorized personnel should service your phone and its accessories.
Faulty service may invalidate the warranty.
Protecting your battery
For best battery performance, you should follow these guidelines:
Only use Sharp-approved battery and chargers. These chargers
are designed to maximize battery life. Using other batteries or
chargers will invalidate your warranty and may cause damage as
well.
To avoid damage, only charge the battery in temperatures that
range from 32° F to 104° F (0°C to 40°C).
Do not use the battery charger in direct sunlight or in high
humidity areas (such as a bathroom).
Never dispose of the battery by incineration (fire ).
ⅴ
Keep the metal contacts at the battery base clean.
Do not attempt to disassemble or short-circuit the battery, as
injuries or burns may result.
You may need to recharge the battery if it has not been used for a
long period of time.
Replace the battery when it no longer provides acceptable
performance.
Do not allow metal objects or liquids to contact or short-circuit the
battery terminals, as injuries or burns may result.
To avoid damage, store the battery in temperatures
range from -4° F to 140° F (-20°C to 60°C), and avoid leaving the
battery unused for very long periods. Follow these storage rules:
• Less than one month:
– 4°F to 140°F (-20°C to 60°C)
• More than one month:
– 4°F to 113°F (-20°C to 45°C)
Battery disposal and recycling
Please follow these guidelines when disposing of or recycling the
battery:
Do not dispose of the battery by incineration (fire); the cell may explode. Check
the regulations in your area for special disposal instructions.
Do not open or puncture the battery; the released electrolyte is
corrosive and may cause damage to the eyes and skin, and can be
toxic if swallowed.
Charge the battery in accordance with the instructions specified in
this user guide. See “Charging the battery” on page 16.
Contains Lithium-Ion Battery must be disposed of properly. Contact
local agencies for information on recycling and disposal plans in your
area.
ⅵ
Following safety guidelines
To operate your phone safely and efficiently, you should always
follow any special guidelines in a given area and turn your phone
off in areas where use is forbidden or when it may cause
interference or danger.
Turn off your phone before flying
You should turn off your phone before boarding any aircraft.
To prevent possible interference with aircraft systems, U.S.
Federal Aviation Administration (FAA) regulations require you to
have permission from a crew member to use your phone while the
plane is on the ground. To prevent any risk of interference, FCC
regulations prohibit using your phone while the plane is in the air.
Restricting children’s access to your phone
Your phone should not be played with by children. They could
hurt themselves and others, damage the phone or make calls that
increase your bill.
Using your phone near other electronic
devices
Most modern electronic equipment is shielded from radio
frequency (RF) signals. However, RF signals from PCS
telephones may affect inadequately shielded electronic
equipment.
RF signals may affect improperly installed or inadequately
shielded electronic operating and entertainment systems in motor
vehicles. Check with the manufacturer or its representative to
determine if these systems are adequately shielded from external
RF signals. You should also check with the manufacturer
regarding any equipment that has been added to your vehicle.
Consult the manufacturer of any personal medical devices (such
as pacemakers and hearing aids) to determine if they are
ⅶ
adequately shielded from external RF signals. Turn off the phone
in healthcare facilities and request permission before using the
phone near medical equipment.
Cautions
Any changes or modifications to your phone not expressly
approved in this document could void your warranty for this
equipment and void your authority to operate this equipment.
Only use approved batteries, antennas and chargers. The use of
any unauthorized accessories may be dangerous and will
invalidate the phone warranty if said accessories cause damage or
a defect to the phone.
Although your phone is quite sturdy, it is a complex piece of
hardware and can be broken. Use common-sense guidelines to
avoid dropping, hitting, bending or sitting on it.
Specifications Subject to change
The information contained in this manual is believed to be correct
at the time of printing. However, Sharp reserves the right to
change or modify any of the specifications without notice or
obligation to update existing units.
Turn off your phone in dangerous areas
To avoid interfering with blasting operations, you should turn off
your phone when in a blasting area or in other areas with signs
indicating that two-way radios should be turned off. Construction
crews use remote-controlled RF devices to set off explosives.
Turn off your phone when you are in any area with a potentially
explosive atmosphere. It is rare, but your phone or its accessories
could generate sparks. Sparks could cause an explosion or a fire
resulting in bodily injury or even death. Areas with a potentially
explosive atmosphere are often, but not always, clearly marked.
They include fueling areas such as gas stations; below deck on
boats; fuel or chemicals transfer or storage facilities; areas where
ⅷ
the air contains chemical or particles such as grain, dust or metal
powders; and any other area where you would normally be
advised to turn off your vehicle engine. Do not transport or store
flammable gas, liquid or explosives in the compartment of any
vehicle that contains your phone or accessories.
FCC notice
The phone may cause TV or radio interference if used in close
proximity to receiving equipment. The FCC can require you to
stop using the telephone if such interference cannot be eliminated.
Liquefied petroleum Gas
Lastly, vehicles using liquefied petroleum gas (such as propane or
butane) must comply with the National Fire Protection Standard
(NFPA-58). For a copy of this standard, contact the National Fire
Protection Association, One Batterymarch Park, Quincy, MA
02269, Attn.: Publication Sales Division.
FCC Compliance
“This device complies with part 15 of the FCC rules. Operation is
subject to the condition that this device does not cause harmful
interference.”
Information To User
This equipment has been tested and found to comply with the
limits of a Class B digital device, pursuant to Part 15 of the FCC
Rules. These limits are designed to provide reasonable protection
against harmful interference in a residential installation. This
equipment generates, uses and can radiate radio frequency energy
and, if not installed and used in accordance with the instructions,
may cause harmful interference to radio communications.
However, there is no guarantee that interference will not occur in
ⅸ
a particular installation; if this equipment does cause harmful
interference to radio or television reception, which can be
determined by turning the equipment off and on, the user is
encouraged to try to correct the interference by one or more of the
following measures:
1 Reorient / Relocate the receiving antenna.
2 Increase the separation between the equipment and receiver.
3 Connect the equipment into an outlet on a circuit different from
that to which the receiver is connected.
4 Consult the dealer or an experienced radio/TV technician for
help.
CAUTION: Changes or modifications not expressly approved by
the manufacturer responsible for compliance could void the user’s
authority to operate the equipment
ⅹ
Table of Contents
Safety Information and Usage Guideline
Getting started ........................................................... 1
Parts name & Main Functions ........................ ............................1
Turning your phone on and off .........................................10
Roaming with your tri-mode telephone ............................11
Roaming settings ...............................................................11
Displaying your phone number .........................................12
Display ..............................................................................13
Battery ...............................................................................15
Phone’s mode .......................................................... 17
Standby mode ....................................................................17
Talk mode .........................................................................17
Power save mode ..............................................................17
Voice call .................................................................. 18
Making a voice call ...........................................................18
Emergency call (911) ........................................................19
One-touch dialing (Speed dialing) ....................................19
Dialing in Lock mode .......................................................19
Dialing special numbers in Lock mode .............................19
Dialing emergency numbers in Lock mode ......................20
Redialing a call ..................................................................20
Answering a call ................................................................21
Ending a call ......................................................................22
Key beep volume ..............................................................23
Adjusting ringer volume ...................................................23
Muting the microphone during a call ................................23
Roaming ............................................................................24
Setting the roaming feature ...............................................24
Voice calling experience ...................................................26
Caller ID ............................................................................27
Call Waiting ......................................................................28
Xi
Three-way Calling (Conference Call) ...............................29
Call Forwarding ................................................................30
Missed Calls ......................................................................31
Dropped calls (Fade calls) .................................................31
Failed calls ........................................................................32
Prepend dialing .................................................................33
Four-digit dialing ..............................................................35
Pause dialing .....................................................................36
Data/Fax transmission ............................................. 39
Sending Fax/Data ..............................................................39
Transmission specifications ..............................................39
Menus ........................................................................ 40
Recalling menus ................................................................40
1. Phone Book menu .........................................................41
2. Calls menu .....................................................................42
3. Sounds menu .................................................................42
4. Display menu ................................................................52
5. Security menu ...............................................................61
6. Setup/Tool menu ...........................................................66
7. System menu .................................................................75
Phone Book Dialing ................................................. 76
Storing a phone number and name ....................................76
Entering characters ............................................................78
Overwriting an existing location .......................................80
Searching for phone numbers ...........................................82
Adding a Name Ringer .....................................................84
Modifying Your phone book entries .................................85
Erasing a single phone book entry ....................................85
Erasing all of the phone book entries ................................86
Setting the Speed Dial .......................................................86
Storing your phone book entries as a secret memory .......86
Reviewing your call logs ...................................................87
Calling by using call logs ..................................................87
Reviewing the outgoing call logs, missed call logs, or
incoming call logs .............................................................88
Xⅱ
Storing the phone number by using the call logs ..............89
Erasing a single call log (outgoing, incoming or missed
call) ...................................................................................89
Reviewing you call charges ..............................................90
Voicemail ...................................................................91
Setting up your voicemail feature .....................................91
Reviewing voicemail messages ........................................91
Accessing by the One-Touch Access feature ....................91
Messaging .................................................................92
Notification .......................................................................92
In Standby mode ...............................................................92
In Talk mode .....................................................................92
Reviewing a text message or Web message in Standby
mode ..................................................................................93
Message menu ...................................................................94
Erasing a single message ..................................................95
Erasing all messages .........................................................95
Message ringing ................................................................96
Message memory capacity ................................................96
Messages and Lock mode .................................................96
Internet Access .........................................................97
Setting the Charging Reminder of your browser ..............97
Starting the Web browser ..................................................98
Advanced menus ...............................................................99
Exiting the Web browser ..................................................99
Navigating the Web page ................................................100
Entering characters .........................................................102
Link .................................................................................103
Bookmarks ......................................................................104
Your Phone’s Main menu .......................................105
Accessories .............................................................108
Options .................................................................................108
Xⅲ
Phone and battery specifications ...................................109
THIS MODEL PHONE MEETS THE GOVERNMENT’S
REQUIREMENTS FOR EXPOSURE TO RADIO
WAVES .........................................................................109
Patent Information ................................................111
Index ......................................................................112
ⅹⅳ
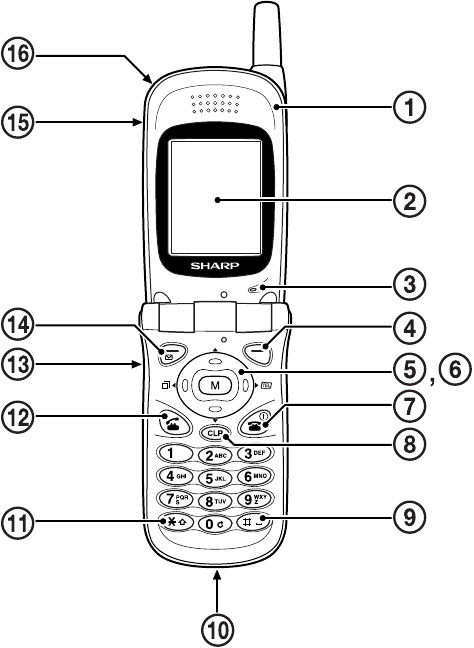
1
Getting started
Parts name & Main Functions
Package Contents
• Travel charger
• Lithium-Ion battery
• User Guide
• Quick Reference
• Holster

2
Getting started (continued)
1. Active-flip: By closing
this Active-flip, you can end
a call. And the backlight
will be automatically turned
off.
2. Color LCD display: This
screen display is used to
check the status when the
phone is turned on. The
display has four areas to
display the status. (P.13
“Display”).
•Top line: The status of the battery,
signal strength, etc. are displayed.
•2 nd line: In-use information (call
time, name and number of other
party (if available).
•3 rd line: The currently set month,
date, day and time are displayed.
•Bottom line: The name of the
functions to be performed by
pressing the right and left soft
keys and Center key. The name of
functions displayed varies
depending on the status you
select.
3
3. Microphone: Use this
microphone to speak to the
other party during a call.
•Press the right soft key
[Mute] during a call to mute the
sound from the microphone.
Press the right soft key
[Unmute] again to cancel the
mute setting.
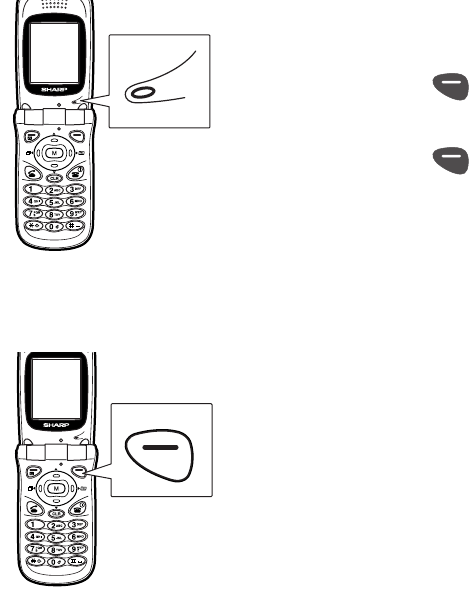
4. Right soft key:
Press this key briefly to execute
the function displayed on the right
corner of the bottom line on the
display. [Browser] is displayed in
Standby mode.
4
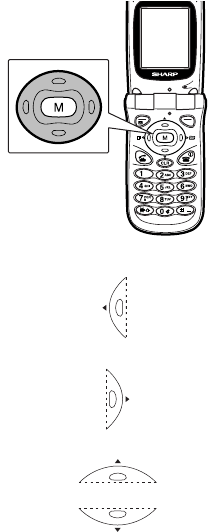
5. Navigation Keys (Arrow
keys):
•Press these keys to scroll menu
items, adjust sound volume, etc.
Note
This user guide uses the
following notations for the arrow
keys.
•Left arrow key: Press this key in
Standby mode and Talk mode to
view Call logs (Outgoing,
Incoming, or Missed call logs).
•Right arrow key: Press this key in
Standby mode or Talk mode to
display the phone book menu.
•Up and Down arrow keys: Press
these keys to set the ringer
volume. Press Down key to mute
the ringer during an incoming
call. Press and hold Up and Down
arrow keys to scroll menus
quickly, if necessary.

5
6. Center Key (M key):
•Press this key to display the menu
and execute the function
displayed in the center of the
bottom line on the display.
[M MENU] is displayed in the
center of the bottom line in
Standby and Talk mode.
•
Press Navigation key to scroll through
menus and press this key to decide the
desired menu item.
7. END/ Power Key:
•Press this key to turn the power on
and press and hold it to turn it off.
•Press this key to disconnect a call
or to return to Standby mode,
while any menu screen is
displayed.
6
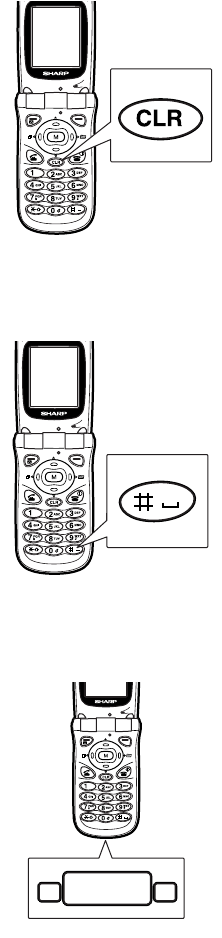
8. CLR Key:
•Press this key to backspace and
delete a single space or a
character. Press and hold this key
to delete all characters entered.
•Press this key to return to a
previous screen.
•Press and hold this key to return
to Standby mode while any menu
screen is displayed.
9. # / Space Key:
•
Press this key to enter either a space
or #.
10. Accessories Connector:
This connector is used to
connect the charging device
(Travel charger) or Data
cable ( sold separately ).
7
11. / Shift Key:
•Press this key to enter .
•Press this key to change the letter
case.
12. Send Key:
•Press this key to answer a call.
•Press this key after entering
telephone numbers to make a
connection.
•Press this key to make a Three-
Way call or answer a Call
Waiting call during a call in
progress.
•Press this key twice in Standby
mode to redial the last outgoing
number.
8
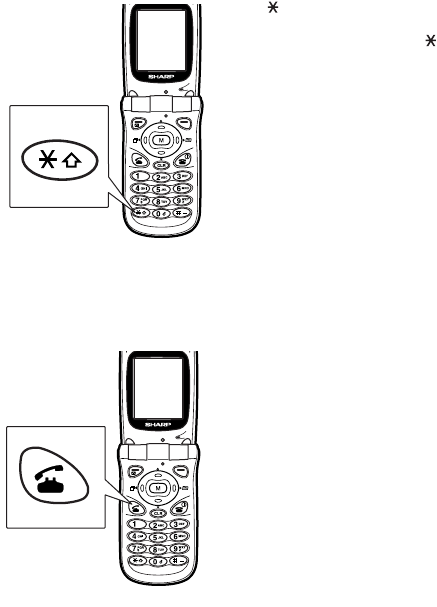
13. Silent mode Key:
•Press and hold this key in Standby
to enable the silent mode.
•This mode mutes all sounds, such
as ringer sound, alert, etc.
•Press this key to mute the ringer
during an incoming call.
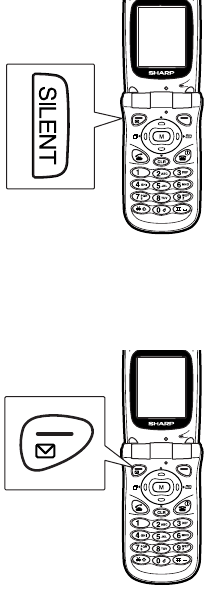
14. Left soft key / Message
key:
•Press the left soft key briefly to
execute the function displayed in
the left of the bottom line on the
display.
•The Message key is effective
when “Message” is displayed in
the left of the bottom line.
•Press and hold the Message key to
connect Voicemail Center.
9
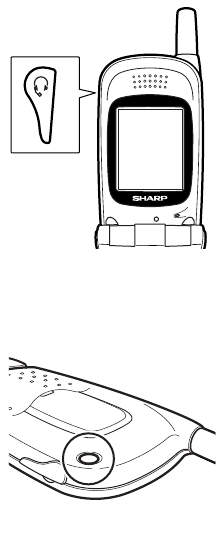
15. Headset Connector: By
connecting the commercial
headset to this connector, you
can talk hands-free. Keep the
connector covered with the
rubber plug when not using
the headset.
16. LED Indicator: This
indicator flashes to indicate
an incoming call or a
message, when you have
closed the Active-flip with
the ringer tone set to off,
•The indicator flashes for a few
seconds when you turn on the
phone.
•The indicator flashes red during
charging, and goes off when the
charging is complete.
When you use headset, please
adjust sound level otherwise you
may cause ear damage.
10
Turning ON
1. Open the phone and press .
The LED indicator will flash, the phone will beep and the
start-up screen will be displayed.
The phone will begin searching for a network signal.
When a signal is found, the icon will be displayed and the
phone will enter Standby mode.
Check the following elements are displayed on the Standby
screen:
Now you are ready to make and receive a call.
Note
•The date and time are not set at the time of purchase. See page 73 for
setting them.
•While the phone is searching for the network signal, the message
“Searching for Service...” is displayed.
Turning OFF
1. Press and hold for 2 seconds or more.
The power-off screen will be displayed and the power-off
sound will be heard.
•Antenna and signal strength
icon:
•Battery icon:
•Date and time
•Banner: Welcome (default)
Turning your phone on and off

11
Note
The phone will not be turned off unless you press and hold .
This feature prevents your phone from being turned off accidentally
Roaming with your tri-mode telephone
Your Phone is Tri-mode, which means you can use it to make and
receive calls in many places.
•In any city where your home network provides service.
•On other CDMA networks and conventional analog cellular
networks where your home network has implemented roaming
agreements.
When you use your phone outside your home network, it’s called
roaming. If you’re roaming in areas where your home network has
agreements in place with digital CDMA or conventional analog
cellular providers, you will pay the roaming rate plus long-
distance charges, where they apply.
Note
In areas where your home network does not have roaming agreements in
place, you will still be able to make (but not receive) calls using a credit
card. This is called manual roaming. Consult your home network
operators for more information.
Roaming settings
For more roaming settings, see the corresponding pages shown
below.
1. Phone’s mode (P.17)
2. Call guard (P.25)
3. Voice calling experience (P.26)

12
Displaying your phone number
There are two ways to display your phone number in Standby
mode:
Using the menu
1. Press to display the Main menu.
2. Press to select Phone Book.
3. Press to select My Phone #.
4. Press to return to the Standby screen.
Using the right arrow key
1. Press to display the phone book menu.
2. Press to select My Phone #.
3. Press to return to the Standby screen.

13
Display
This screen display is used to check the status of your phone when
the phone is turned on.
•Top line: The status of the battery, signal strength, etc. are
displayed. Details are given below.
•Bottom line: The name of the functions to be performed by
pressing the right and left soft keys and center key. The name of
functions displayed varies depending on the status you select.
Signal strength: Indicating the signal strength when
your phone is turned on. The more lines the greater the
signal strength. The strength changes depending on the
location where you are.
Service indicator: Indicating that a call is in progress.
When the signal is not found or lost, the indicator # will be
displayed instead.
No service indicator: Indicating that your phone is
outside the service area. Meaning that you can not make or
receive a call. Move to the area where your phone indicates
more lines for the signal strength.
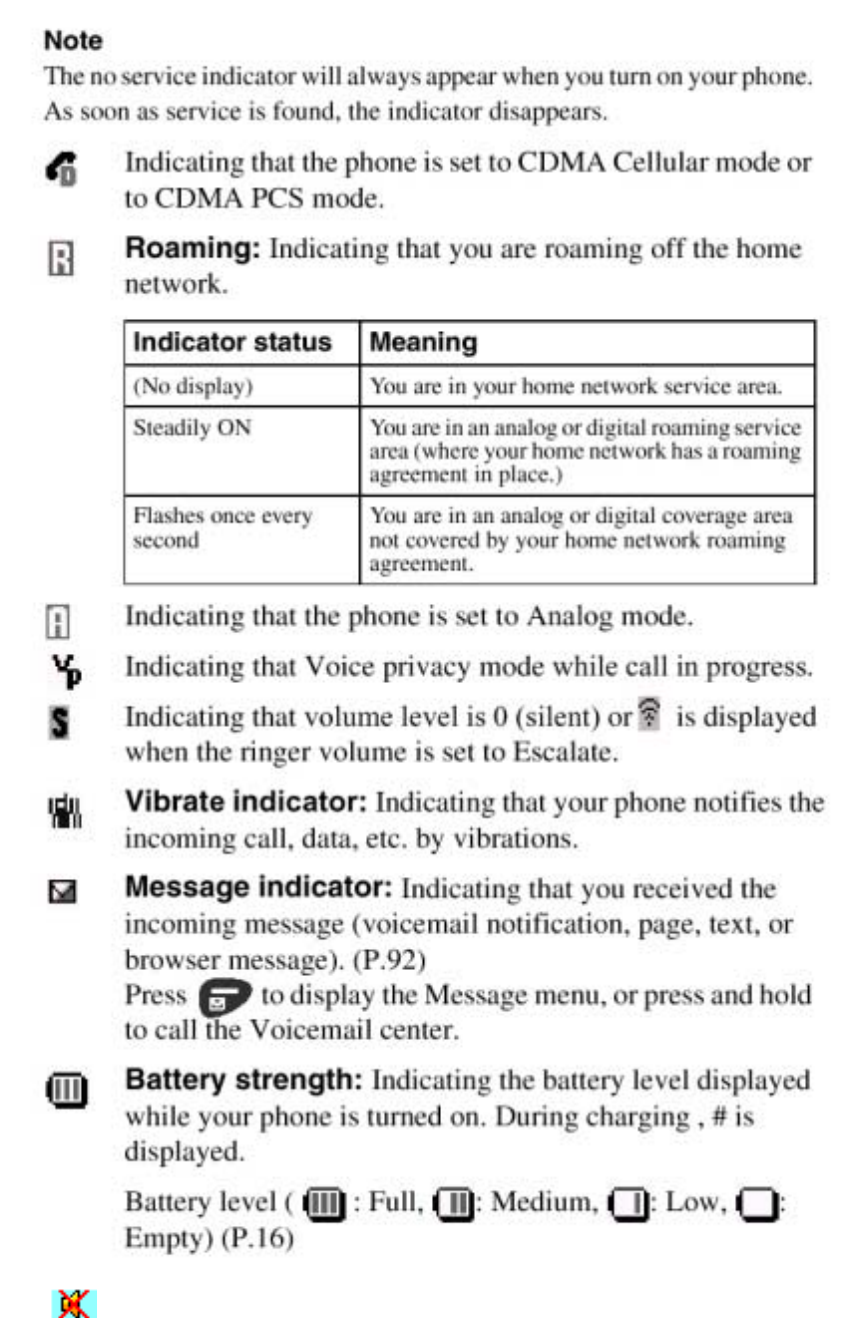
Silent mode
14
14

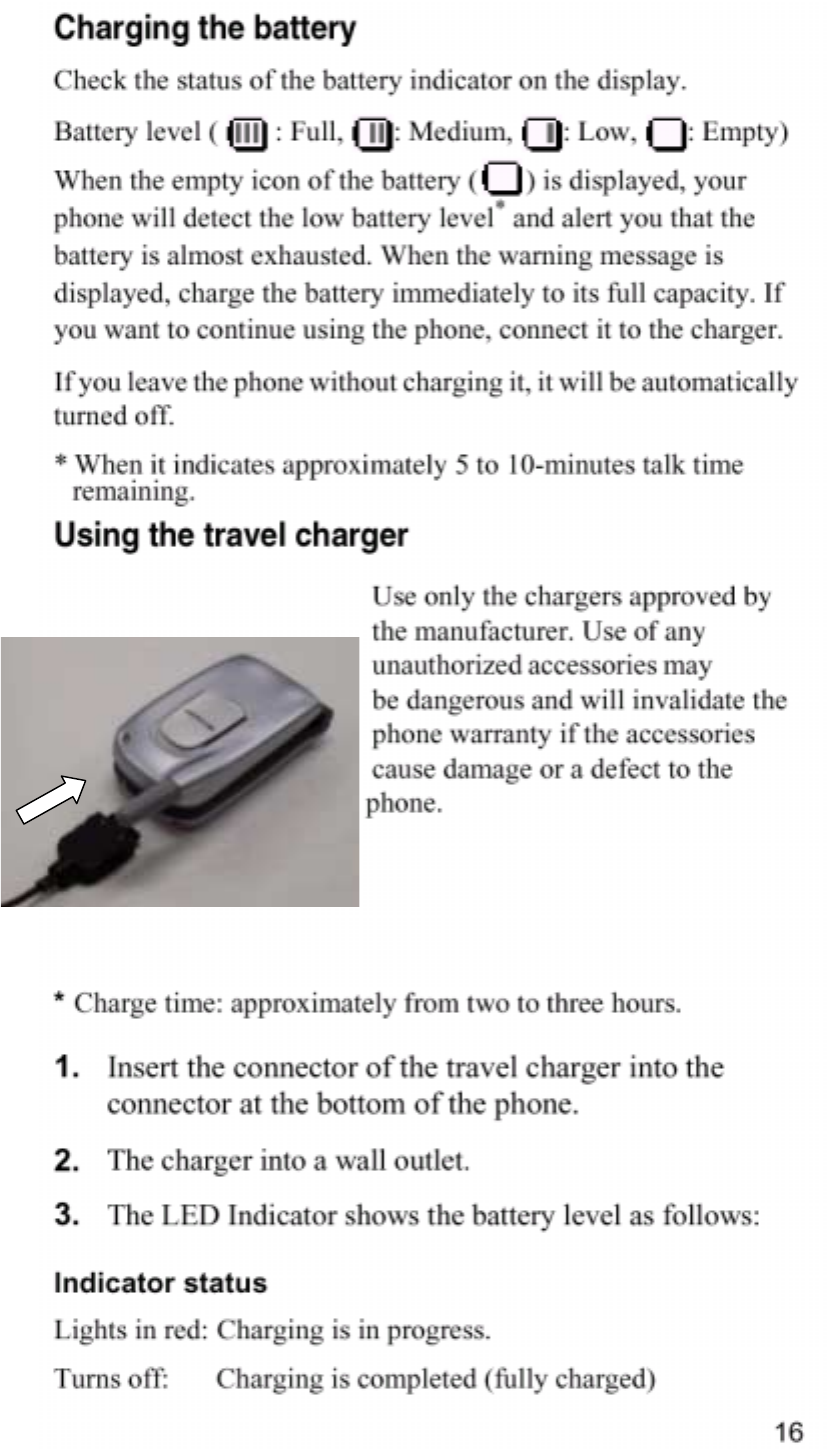
Battery
Your phone comes equipped with a rechargeable lithium Ion (Li-Ion) battery.
This battery has already been partially charged at the factory so that you can
use your phone immediately.
Note : When you use phone first time after install battery, please check battery
Level. Otherwise your call may drop quickly. Depend on how much battery
capacity left.
Installing the battery
1. Remove Cover
Push the release button then slide the battery cover and remove at the following
instruction.
2. Insert battery
Insert the battery that the metal contact side down.
3. Replace cover
Slide into the battery cover until the battery cover is locked.
Removing the battery
1. Turn the phone off.
2. Push the release button then slide the battery cover and remove the cover.
4. Pull out the battery from the phone.
15
2
1
2
1
2
1

17
Phone’s mode
Standby mode
When your phone is turned on, it will start searching the home
network signal. If your phone is inside the home network area, it
will enter Standby mode immediately. Press the digit keys to start
dialing.
Talk mode
Your phone enters Talk mode at the time the telephone circuit is
established. While the phone is in Talk mode, you can access the
in-use function (P. 40 “In-Use menu”) by pressing mode.
Power save mode
When your phone is located outside the home network area, it will
stop searching the home network signal, and enter power save
mode to save power (display: Power saving mode! Press any key
to exit.). After 15 minutes, your phone will automatically
begin searching the signal again.

18
Voice call
Making a voice call
1.
Open the phone and press and hold .
The sound is heard and the wake-up screen is displayed.
Then, (antenna) and the signal strength level ( ) will
be displayed to indicate you are in a service area to make
a phone call.
2. Enter the phone number by pressing the digit keys.
Up to 32 digits can be entered.
3. Press to dial.
Note (Advanced ways of calling)
There are other ways to make a phone call.
1) Using the phone book (P.82)
2) Using the call logs (P.87)
3) Using the one-touch dialing (speed dialing) (P.19)
4) Using the phone number embedded in the received message
Tip
•When you have made a mistake, press to delete the last digit.
•Holding down will delete the entire number.
•If you dial the last four digits of a phone number stored in the phone
book and press , the matched entry will be recalled and be dialed
up. (P.35)
•If the phone number you dialed is not stored in the phone book, the
number will be kept displayed for 10 seconds on the display. Within the
time, you can store the number by pressing [Store].
19
Emergency call (911)
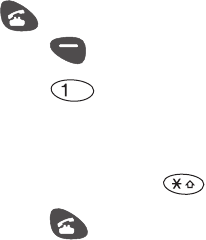
1. Dial .
2. Press to dial
Note
•To dial the emergency number in Lock mode, see below.
•To return to Standby mode, turn the phone off and on again.
Tip
•Emergency number (911) can be dialed even if your phone is locked
(P.61 “Lock mode”) or your account is restricted.
•Your phone supports 911, #911 and *911 as an emergency number.
•“9 + ” is a shortcut for making an emergency call.
One-touch dialing
1. Press and hold any of the digit keys (0 - 8).
Note
Details of setting one-touch dial are given on page 41.
Dialing in Lock mode
When making a call in Lock mode, you must enter the lock code
(four-digit) first and then start dialing.
Dialing special numbers in Lock mode
1. Enter the special number.
2. Press to dial.
Note
Details of storing special numbers are given on page 63.

20
Dialing emergency numbers in Lock mode
1. Enter the emergency number.
2. Press to dial.
Note
Details of unlocking the phone are given on page 62.
Redialing a call
You can dial up using the outgoing call logs without entering the
phone number.
1. Press in Standby mode.
The last outgoing call log will be displayed.
2. Press again to dial.
You can also dial using the incoming, outgoing or missed call
logs. Details are given later. (P.87 “Calling by using call logs”).
21
Answering a call
When you receive a call...
Check that your phone is turned on and it is inside the service area.
When your phone receives a call, it will ring, or vibrate depending
on your ringer setting.
And the LED indicator flashes green, then the backlight lights up
when you open the flip.
There are two ways to answer a call:
1.
Open the phone.
2.
Press when the phone is open, or press any key *1
(except the navigation keys and ).
•When Any key Answer option is enabled. (P.22)
*1 ( ~ , , , , , , ,
)
Note
During a call, the current talk time will be displayed.
Tip
•You can adjust the ringer volume in Standby mode using and
. (P.43)
•You can mute the ringer sound by pressing the Silent mode key. (P.6)
•You can adjust the earpiece volume during a call using and
. (P.44)
•You can know from whom you receive a call by assigning a unique
wallpaper to the phone book data.
•To reject the incoming call, press briefly.
•When the hands-free headset or hands-free car kit is connected, you can
automatically answer the call. (Auto Answer function: P.66)
•When the earphone microphone is connected, you can automatically
answer the call.
*2
*2 This key operates as Any key function when headset
is connected.
22
Setting the Any key answer option
1. Press [MENU] to display the Main menu.
2. Press to select Setup/Tool.
3. Press to select Calling.
4. Press to select Any Key Answer.
5. Press to select ON.
The setting will be saved and the display will return to the
Calling menu screen.
Ending a call
1. Close the phone.
or
Press .
The approximate duration of the last call will be displayed.
Note
• The name and number of the called party will be displayed (10 seconds)
if you have stored it in the phone book. (P.76)
• You can adjust the voice volume if the headset is connected to
the phone. (5 steps/default: 4)
•If the number you dialed is not stored in your phone book, your phone
prompts you to save the number. Press if needed. If you do
nothing, the phone will automatically return to Standby mode after
approximately 10 seconds.
When the other party ends the call
The Talk time, phone number and name of the called party (if
found in the phone book data) will be kept displayed for
approximately 10 seconds and the display will return to
Standby mode.

23
Key beep volume
This feature allows you to adjust the volume of beep tone (key
tone) you hear when you press a key.
1. Press [MENU] to display the Main menu.
2. Press to select Sounds.
3. Press to select Volume.
4. Press to select Key Beep.
5. Press
or to change and play the options:
Silent, level 1, level 2, level 3, and level 4.
6. When selecting is complete, press [OK] to save the
setting.
Adjusting ringer volume
In Standby mode you can quickly adjust the volume of the ringer.
1. Press and .
You can also change the settings for your phone’s ringer volume
in the Main menu (P.43).
Muting the microphone during a call
You can mute the microphone during a call.
1. Press [Mute].
The display will change to [Unmute].
Your voice will be muted while the voice of the other party
reaches you.
Ending the call will reset the mute setting to off.
To unmute the microphone during a call, press [Unmute].
24
Roaming
Check your phone’s display showing the network status when you
turn it on.
Setting the roaming feature
1. Press to display the Main menu.
2. Press to select System
3. Press to select Set Service
4. Press to select Automatic or to select No
Roaming.
The setting will be saved and the display will return to the
System menu screen.
Automatic:
Your phone will search for your home network service first.
When your home network service is not available, it will search
for an alternate system automatically.
No Roaming:
This setting allows you to select only your home network to
prevent roaming.
5. When the desired service mode is displayed, press
[OK] to save the setting.
•Press to exit without saving the setting.
Display Status
and Home network
Other CDMA network
and Analog cellular network
25
Roaming call guard
This feature allows you to display a confirmation message asking
if you are really ready to use the roaming service or not.
If you set this roaming call guard to on, you can avoid being
changed for the roaming service.
1. Press [MENU] to display the Main menu.
2. Press to select System.
3. Press to select Call Guard.
4. Select to select ON or to select OFF.
When you are receiving the roaming service, check the
roaming status on the display.
The indicator will be displayed.
Note
Always dial 11 digits (1+ area code + number) when calling from outside
your home network service area.
26
Voice calling experience
When you use your phone on other CDMA networks, your calling
experience and call quality will be similar to what you experience
when making calls from within your home network.
Although certain voice calling features may not be available, your
phone calls are still private and secure.
When you use your phone on analog cellular networks, your
experience will be different. Cellular roaming will be similar to
the quality provided by conventional analog cellular carriers
today. Although you will still have the convenience of being able
to make and receive voice calls, here are some differences you can
expect:
•You are more likely to experience static, cross-talk, fade-out and
dropped calls.
•Some voice calling features (such as Caller ID) that are standard
within your home network may not be available.
•Web service and Fax calls cannot be connected.
•Security and privacy risks (eavesdropping and phone number
cloning) are the same as those of the conventional analog
cellular services today.
•Battery life will be shorter when you use your phone for cellular
roaming than when you use it on a CDMA network.
If you’re on a call and leave your home network service area, your
call will be dropped. When reentering your home network service
area while on a roaming call, end the call, and then turn your
phone off and on again to acquire your home network Service.
27
Caller ID
When you receive a call from a number you have stored in the
phone book, your phone can display the caller’s number and
name, when they match.
Your number and name can also be displayed on the other caller’s
phone as well.
To activate Block Own Number permanently:
To temporarily unblock the number:
1. Press .
2. Enter the phone number and then press .
< under construction >
To prevent your phone number from being displayed for a particular
outgoing call.
< under construction >
< under construction >

28
Call Waiting
Your phone supports Call Waiting service. Using this feature, you
can receive a second call while holding the current call.
When you receive a second call, the incoming call alert is heard
and an alert message will be displayed.
Accepting or rejecting a second call
1. To accept the call, press .
The current call will be placed on hold, while the second
call will be answered.
•
To reject the call, press [CLR].
2.
Press again to switch between the current and held
call.
Note
The call log of a second call will be saved as a missed call log (P.87) if
you do not answer the call.
Temporarily disabling the Call Waiting feature
< under construction >
Permanently turning off Call Waiting feature
,
< under construction >

29
Three-way Calling (Conference Call)
Using Three-way Calling feature, you can make a conference with
two other parties.
Note
You must subscribe to the Three-way Calling service to use this feature.
Beginning the Three-way Calling
1. During a call press .
The current call will be placed on hold.
2. Enter another phone number and press .
You will be connected to the third party.
3. Press again.
Three-way calling will be started.
Ending Three-way calling
1. Press during Three-way calling.
When one of the other parties ends the call, you will be connected
with the remaining party (Two-way calling).
Note
•Your phone will record two outgoing call logs.
•You will be charged for two calls.
< under study > Carrier dependent

30
Call Forwarding
Using the Call Forwarding feature, you can forward an incoming
call to another phone.
When this feature is used, you can still make a call from your
phone.
Note
You must subscribe to the Call Forwarding service to use this feature.
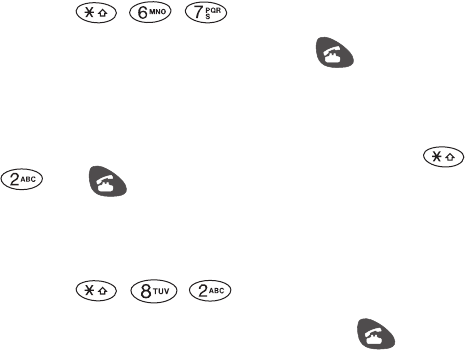
Setting the call forwarding number
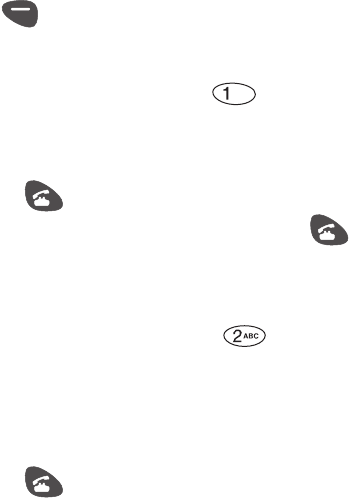
1. Press [x ][x ][ x].
2. Enter the 11-digit phone number (1+ area code + phone
number).
3. Press .
A confirmation sound will be heard to indicate the setting
is enabled.
Disabling Call Forwarding feature
1. Press [x ][x ][ x] [x ] .
A confirmation sound will be heard to indicate the setting
is enabled.
< under study > Carrier dependent

31
Missed Calls
Your phone can record calls you were not able to answer and
display a list of missed calls.
When the other party has ended a call before you can answer the
incoming call, your phone will put an alert message on the display
to indicate that you have missed a call.
Displaying a list of missed calls
1. Press and [Missed].
Missed call logs list will be displayed.
2. Select a missed call log and press [OK] to display
the content.
3. Press to dial or press to return to Standby
mode.
Note
•Up to 20 last calls can be stored in the phone memory. If more than 20
missed calls are received, the earliest call log will be automatically
replaced with the new one.
•Unanswered calls in the Call Waiting service can be recorded in the list
of missed calls.
•To display a list of your call logs, see “Reviewing your call logs” on
page 87.
Dropped calls (Fade calls)
When your phone leaves your network service area or a signal
fade occurs, an alert message (“Signal Faded” ?) appears on the
display.
When a dropped call occurs, it will be automatically ended and the
phone will return to Standby mode.
1. Press to clear the alert message.
32
Note
If the dropped call is your outgoing call, the call log will be recorded in
the outgoing call log list, so that you can redial the number by pressing
twice.
Failed calls
When your phone is outside the calling range or your service
network is temporarily busy, it displays the following alert
messages on the display: “Call Failed Out of Range” or “Call
Failed Network Busy”.
Keep your phone located inside the calling range or make a call
later.
•Press to cancel the call, or press to clear the alert
message.
Dialing your home network directory assistance
Dial [x] [x] [x] to get the following directory information:
•Residential listings
•Business listings
•Government listings
•Local or long-distance call assistance
•Leisure listings (Movie, hotel, restaurant and shopping)
•Major local event information, etc.
Dialing your home network operator services
Dial [x] [x] [x] to get the following operator services.
•Making collect calls
•Making calls billed to a local telephone calling card or a third
party.
< Carrier dependent >
< Carrier dependent >

33
Prepend dialing
The feature allows you to add additional number(s) (e.g. area
code, pauses) before the phone number stored in your phone book.
1. Press [MENU] to display the Main menu.
2. Press to select Phone Book.
3. Search for the desired number to be prepended.
Details of searching method are given on page 82.
4. Press .
5. Press [Func] to display the Function menu.
6. Press to select Prepend.
7. Enter the prepend digits (area code or feature activation
code) by pressing the digit keys. For feature calls,
press before dialing the feature code.
8. Press to call the prepended number.
To prepend a phone number from your call logs:
1. Press [MENU] to display the Main menu.
2. Press to select Calls.
3. Press to select Call Logs (outgoing call logs).
•Press [Missed] to display the missed call logs.
•Press [Income] to display the incoming call logs.
34
4. Select the desired number to be prepended and press
.
5. Press [Func] to display the Function menu.
6. Press to select Prepend.
7. Enter the prepend digits (area code or feature activation
code) by pressing the digit keys.
•For feature calls, press before dialing the feature code.
8. Press to dial the prepended number.

35
Four-digit dialing
When you dial any four continuous digits of a stored phone
number, your phone will redial the matched number on the display
and dial the phone number.
1. Dial any four continuous digits.
The matched phone number(s) will be recalled and dialed
up automatically.
2. Scroll through the displayed phone numbers to highlight
the desired number.
3. Press to dial.
Note
If more than one phone number containing the same four digits are found
in the phone book, those candidates list will be displayed.

36
Pause dialing
When you call automated systems (like banking services), you are
often required to enter a password or account number. Instead of
manually entering the numbers each time, you can store the
numbers in your phone book, separated by special characters
called pauses.
There are two kinds of pauses that can be entered on your phone:
•“Hard pause” stops the dialing sequence until you press .
• Timed pause (two-second pause) stops the dialing sequence for
two seconds and then automatically sends the remaining digits.
Your phone has two pause dialing methods:
•Pause dialing from the phone book (P.37)
•Manual pause dialing (P.38).
Note
Multiple two second pauses can be entered to extend the length of a
pause. For example, two consecutive two second pauses gives a total
pause time of four seconds.
However, keep in mind that pauses are counted as digits towards the 32 digit
dialing maximum.
Tip
Refer to page 77 for storing pauses in the phone book entry.

37
Dialing a phone number stored with a Time
pause
1. Dial the phone number with a Time pause by recalling
the phone book entry.
Two seconds after the connection is established, the Time
pause will be transmitted. During the transmission, the
message “SENDING DTMF” will flash on the screen.
Dialing a phone number stored with a Hard
pause
1. Dial the phone number with a Time pause by recalling
the phone book entry.
The entry prompt for your credit card number, bank
account number, etc. will be displayed.
2. Press to transmit the number (DTMF tone).
During the transmission, the message “SENDING
DTMF” will flash on the screen.
38
Dialing the phone number by entering the
pause manually
1. Enter the phone number of the service you want to call
(example: bank’s teleservice phone number (an 800
number)).
2. Press [Func] to display the Function menu.
3. Press the digit keys to select the option:
1To enter a Hard Pause, press .
The initial “H” will be displayed.
2Enter the phone number.
3Press .
4After the connection is established, press again.
The phone number will be sent.
1To enter a Timed pause, press .
The letter “T” will be displayed at the end of the phone
number.
2Enter the number followed by the pause (such as your
account number).
3Press .
Two seconds after the connection is established, the
number will be sent.
Note
We recommend you to store the frequently used phone numbers
including the pause in your phone book.
39
Data/Fax transmission
Using this feature, you can send and receive faxes and data by
connecting your phone with a PC.
Details of setting this feature are given on page xx.
Note
You must first activate the Fax/Data service setting depending on your
home network and your Internet service provider.
Requirements:
1. Fax/Data service
2. Software for Data/Fax transmission
(Optional PC connection kit including cable and CD-ROM)
Sending Fax/Data
Note
You can not receive voice mails while your phone is in FAX/Data
transmission mode.
When the connection between your phone and a PC is established,
you can see the following soft key menu(s) on the display.
Left soft key: xxx
Right soft key: xxx???
1. Start the transmission application program.
2. Press [xxx] on your phone.
Your phone will enter Fax/Data transmission mode.
To return to a normal voice call mode, refer to page 75 (7-3. Data/
Fax).
Transmission specifications
Modem: xxx
Facsimile: xxx
* Model name : XN-CPA10
40
Menus
Menus allow you to check your phone’s settings and change the
settings.
Your phone provides a Main menu (P.105) and an In-Use menu.
1. Main menu
The Main menu has seven categories you can access in
Standby mode. Each category has its own submenus:
1 Phone Book 5 Security
2 Calls 6 Setup/Tool
3 Sounds 7 System
4 Display
2. In-Use menu
The In-Use menu has five options you can access in Talk
mode:
1 Phone Book
2 Calls
3 Sounds
4 Display
5 Setup/Tool
Note
Security and System menus are displayed, but not effective as an In-Use
menu.
Menu selection
Method 1:
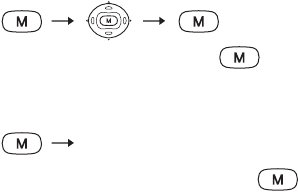
To select the Main menu options, press and then press the
navigation keys to scroll through menu options until the desired
option is displayed.
Method 2: Submenu’s number
To select the desired submenu directly, press or press
the digit key for the submenu’s number.
41
Note
When you close the active-flip or when none of the keys has been pressed
for 60 seconds, the phone will automatically return to Standby mode.
1. Phone Book menu
1-1. Find by Name
1-2. Find by Group
1-3. Find Entry #
1-1./1-2./1-3.
See page 82 for the details of searching phone books.
1-4. Setting one-touch dial
You can set the stored phone book data as a one-touch dial.
1. Press [MEMU] to display the Main menu.
2. Press to select Phone Book.
3. Press to select One-touch Dial.
The names stored in the phone book will be displayed.
4. Select the desired blank number and press [Func].
The Function menu will be displayed.
5. Press to select Set.
The phone book menu will be displayed.
•To cancel setting, press .
6. Search for the desired phone number to be set.
Details of searching for the phone number are given on
page 82.
7. Press [Set].
The selected phone number will be saved.
1-5. Displaying my phone number
1. Press [MEMU] to display the Main menu.
1-4. one-touch dial
1-5. My phone #
1-6. Scratch book
42
2. Press to select Phone Book.
3. Press to select My Phone #.
4. Press to return to Standby mode.
Note
During a call, you can also display your phone number in the same
manner.
1. Press [MEMU] to display the In-Use menu.
2. Press to select Phone Book menu.
3. Press to select My Phone #.
4. Press twice to return to the Calling screen.
2. Calls menu
2-1. Call logs
1. Press [MEMU] to display the Main menu.
2. Press to select Calls
3. Press to select Call Logs.
The outgoing call logs will be displayed.
4. To display the missed call logs, press [Missed].
5. Then, to display the incoming call logs, press
[Incom].
6. To display the outgoing call logs again, press
[Outgo].
The display will switch in this order.
2-2. Call info
Details of displaying call logs and call info (last call, home calls,
roam calls and all calls) are given on page 90.
3. Sounds menu
43
3-1 Volume
This option allows you to set the ringer volume for voice and fax
calls.
There are two ways to set the ringer volume: either set in Standby
mode or set in the Main menu.
In Standby mode
1. Press or until the desired volume is
selected.
Silent, Level 1 through 5, and Escalate.
The selected value is effective immediately after you
select it.
In the Main menu
1. Press [MEMU] to display the Main menu.
2. Press to select Sounds.
3. Press to select Volume.
4. Press to select Normal Ringer.
5. Select one of the following:
Silent, Level 1 through 5 and Escalate.
6. When selecting is complete, press [OK] to save the
setting.

44
Key beep volume
This feature allows you to adjust the volume of beep tone (key
tone) you hear when you press a key.
1. Press [MEMU] to display the Main menu.
2. Press to select Sounds.
3. Press to select Volume.
4. Press to select Key Beep.
5. Press the navigation keys to display and play the options:
Silent, level 1, level 2, level 3, and level 4.
6. When selecting is complete, press [OK] to save the
setting.
Earpiece
This feature allows you to adjust the volume of earpiece attached
to your phone.
1. Press [MEMU] to display the Main menu.
2. Press to select Sounds.
3. Press to select Volume.
4. Press to select Earpiece.
5. Press the navigation keys to display and play the options:
Level 1, level 2, level 3, level 4 and level 5.
6. When selecting is complete, press [OK] to save the
setting.
45
Setting ringer volume for message calls
You can select a unique ringer volume for incoming message
calls.
This volume setting applies to incoming voicemail notifications,
text messages and numeric pages.
1. Press [MEMU] to display the Main menu.
2. Press to select Sounds.
3. Press to select Volume.
4. Press to select Message.
5. Select one of the following:
Silent, level 1 through 5 and Escalate
6. When selecting is complete, press [OK] to save the
setting.
Setting the ringer volume for Alarm/Reminder
This feature enables you to select a unique ringer volume for your
alarm and Reminder.
1. Press [MEMU] to display the Main menu.
2. Press to select Sounds.
3. Press to select Volume.
4. Press to select Alarm/Reminder.
5. Select one of the following:
Level 1 through 5, and Escalate.
6. When selecting is complete, press [OK] to save the
setting.

46
3-2. Silent mode
This feature allows you to silence the ringer tone and incoming
message tones. You can also use the Silent key on the left side of
the phone while your phone is ringing.
1. Press [MEMU] to display the Main menu.
2. Press to select Sounds.
3. Press to select Silent Mode.
4. Press to select ON or to select OFF.
5. When selecting is complete, press [OK] to save the
setting.
3-3. Ringer type
Using the ringer type option, you can customize your phone book
setting by setting a different ringer type for each phone book
entry.
When the other party has subscribed to Caller ID service, a unique
ringer tone can be specified.
1. Press [MEMU] to display the Main menu.
2. Press to select Sounds.
3. Press to select Ringer Type.
4. Press to select Set.
5. Press .
•Use or to choose the desired type among
five types of ringer tone and fifteen types of melody.
Each time you switch the selection, you hear the demo.
6. When selecting is complete, press [OK] to save the
setting.
47
Confirming the current setting
1. Press Confirm in step 4 above.
2. Press to select Normal Ringer.
The current setting will be displayed.
Setting ringer type for message calls
This option allows you to specify a unique ringer type for an
incoming message call: a unique ringer type for voicemail
notification, text messages, numeric pages and Web messages.
1. Press [MEMU] to display the Main menu.
2. Press to select Sounds.
3. Press to select Ringer Type.
4. Press to set the ringer type.
5. Press to select Message Ringer.
6. Use or to choose the desired type among five
types of ringer tone and fifteen types of melody.
Each time you switch the selection, you hear the demo.
7. When selecting is complete, press [OK] to save the
setting.
Confirming the current setting
1. Press Confirm in step 4 above.
2. Press to select Message Ringer.
The current setting will be displayed.
1
48
Setting ringer type for the Alarm/Reminder
This option enables you to set a unique ringer type for your Alarm
and Reminder.
1. Press [MEMU] to display the Main menu.
2. Press to select Sounds.
3. Press to select Ringer Type.
4. Press to set the ringer type.
5. Press to select Alarm/Reminder.
6. Use or to choose the desired type among five
types of ringer tone and fifteen types of melody.
Each time you switch the selection, you hear the demo.
7. When selecting is complete, press [OK] to save the
setting.
Confirming the current setting
1. Press Confirm in step 4 above.
2. Press to select Alarm/Reminder.
The current setting will be displayed.
3-4. Vibrator
This option enables you to set a vibrator option for three ringer
types: Normal ringer, Message ringer, Alarm/Reminder.
1. Press [MEMU] to display the Main menu.
2. Press to select Sounds.
3. Press to select Vibrator.
4. Press to set the Normal Ringer,
•Press to select Message Ringer or
Press to select Alarm/Reminder.
49
5. Press to select ON or to select OFF.
6. When setting is complete, press [OK] to save the
setting.
3-5. Ringer time
This option enables you to set a ringer time (between 2 and 99
seconds) for Message ringer, Alarm/Reminder.
1. Press [MEMU] to display the Main menu.
2. Press to select Sounds.
3. Press to select Ringer Time.
4. Press to select Message Ringer, or
Press to select Alarm/Reminder.
5. Use or to choose the desired time between 2
and 99 seconds.
6. When setting is complete, press [OK] to save the
setting.
3-6. Alerts
Fade alert
This option enables you to let the alert tone fade out gradually.
1. Press [MEMU] to display the Main menu in
Standby mode before making a call.
2. Press to select Sounds.
3. Press to select Alerts.
4. Press to select Fade Alert.
5. Press to select ON or to select OFF
6. When setting is complete, press [OK] to save the
setting.
Press numeric keys to choose the desired time between 2 to 99
seconds
50
Minute alert
You can set the minute beep option to sound an alert 10 seconds
before every minute to remind you of the length of the
current call.
Turning the minute beep on or off
1. Press [MEMU] to display the Main menu in
Standby mode before placing the call.
2. Press to select Sounds.
3. Press to select Alerts.
4. Press to select Minute Beep.
5. Press to select ON or to select OFF
6. When setting is complete, press [OK] to save the
setting.
Service alert
Your phone will beep in the following situations:
•when a dropped call or a failed call is found, or
when your phone enters or leaves a service area.
Turning the service alert on or off
1. Press [MEMU] to display the Main menu.
2. Press to select Sounds.
3. Press to select Alerts.
4. Press to select Service Alert.
5. Press to select ON or to select OFF.
Wake-up tone
When you turn on the phone, you hear a tone (wake-up tone)
followed by the wakeup screen.
51
Turning the Wake-up tone on or off
1. Press [MEMU] to display the Main menu.
2. Press to select Sounds.
3. Press to select Alerts.
4. Press to select Wakeup Tone.
5. Press to select ON or to select OFF.
3-7. Tone length
The tone length setting will be used to change the length (short or
long) of the DTMF (dual-tone multi-frequency) tones.
The tone length depends in the tele-service system used by the
bank or other service (such as a bank account or voicemail
system).
Consult tele-service center (?) you will use for details of the tone
length.
1. Press [MEMU] to display the Main menu.
2. Press to select Sounds.
3. Press to select Tone Length.
4. Press to select Normal or to select Long.
6
52
4. Display menu
4-1. LCD contrast
You can adjust the brightness (or contrast) of backlight in 9 steps.
1. Press [MEMU] to display the Main menu.
2. Press to select Display.
3. Press to select LCD Contrast.
4. Press (Dark) or (Light).
•Up to nine levels are available.
5. When the desired contrast is displayed, press [OK]
to save the setting.
4-2. Backlight
You can turn the backlight on or off, or adjust the length of
backlighting.
You can save the battery power if you turn the backlight setting
off.
When you select the length of backlighting, the backlight will
goes off after the selected times of interval.
1. Press [MEMU] to display the Main menu.
2. Press to select Display.
3. Press to select Backlight.
4. Press one of the following:
Always OFF
8 seconds
15 seconds
30 seconds
Always ON
Note
This setting is also valid when the phone is attached to the optional hands-
free car kit.
53
4-3. Input mode
This feature allows you to select input method, automatic
hyphenation or T9.
Automatic hyphenation
Automatic hyphenation follows the North American Numbering
Plan, which hyphenates numbers as follows:
800-555-1234
A digit following a pause will not be hyphenated. (P.36 “Pause
dialing”)
Details of T9 input method are given on page 79.
1. Press [MEMU] to display the Main menu.
2. Press to select Display.
3. Press to select Input Mode.
4. Press to select Auto Hyphen or to select T9.
5. Press to select ON or to select OFF.
4-4. Banner
Your phone can display a banner up to 100 characters in Standby
mode while the phone is on.
The default setting (“Welcome”) can be customized within the
specified 100 characters.
1. Press [MEMU] to display the Main menu.
2. Press to select Display.
3. Press to select Banner.
4. Press to select Enter your Message or to
select Inbox Message from.

54
•Enter your Message
The default setting (“Welcome”) will be displayed.
Edit the current message as you desire. Up to 100 characters can
be entered.
Press [OK] to save the setting.
•Inbox Message from
Message source will be displayed: E-mail address and number.
•Enter E-mail Address
Press . The address entry prompt will be displayed.
Enter the desired phone address
•Enter number
Press . The number entry prompt will be displayed.
Enter the desired number.
5. Press [OK] to save the setting.
6. Press to return to Standby mode.
The message will be displayed while your phone is on.
55
4-5. Graphic
This feature allows you to select your desired graphic image for
the following situations:
1. Press [MEMU] to display the Main menu.
2. Press to select Display.
3. Press to select Graphic.
4. Press each key to select the desired graphic image.
•Press to select Wallpaper.
The following selections will be displayed.
01 OFF
02 Dolphin
03 Flower
04 Bee
05 Good Bye
06 Send OK
07 Send NG
08 Connecting
09 Sending
10 Receiving
11 Searching
12 PHOTO1
13 PHOTO2
14 Water
15 Alarm
16 Receive1
17 Receive2
18 Receive3
19 Receive4
20 Receive5

56
•Press to select Standby
The following selections will be displayed.
01 Water
02 Alarm
03 Receive1
04 Receive2
05 Receive3
06 Receive4
07 Receive5
•Press to select Incoming Call
The following selections will be displayed.
01 Water
02 Alarm
03 Receive1
04 Receive2
05 Receive3
06 Receive4
07 Receive5
•Press to select Custom
The following selections will be displayed.
[1] ----------
[2] ----------
[3] ----------
[4] ----------
[5] ----------

57
•Press to select Connecting
The following selections will be displayed.
01 Good Bye
02 Send OK
03 Send NG
04 Connecting
05 Sending
06 Receiving
07 Searching
08 PHOTO 1
09 PHOTO 2
10 Water
11 Alarm
12 Receive1
13 Receive2
14 Receive3
15 Receive4
16 Receive5
•Press to select Alarm/Reminder
The following selections will be displayed.
01 Water
02 Alarm
03 Receive1
04 Receive2
05 Receive3
06 Receive4
07 Receive5

58
•Press to select Wakeup
The following selections will be displayed.
01 Good Bye
02 Send OK
03 Send NG
04 Connecting
05 Sending
06 Receiving
07 Searching
08 PHOTO 1
09 PHOTO 2
10 Water
11 Alarm
12 Receive1
13 Receive2
14 Receive3
15 Receive4
16 Receive5
•Press to select Good-bye
The following selections will be displayed.
01 Good Bye
02 Send OK
03 Send NG
04 Connecting
05 Sending
06 Receiving
07 Searching
08 PHOTO 1
09 PHOTO 2
10 Water
59
11 Alarm
12 Receive1
13 Receive2
14 Receive3
15 Receive4
16 Receive5
5. Use or to select the desired wallpaper.
6. Press [OK].
The selected wallpaper will be displayed.
7. Press [OK] to save the setting.

60
4-6. Information
You can display your phone’s software version, hardware version,
ESN* and PRL*. These items of information are needed for you to
call your home network Customer Care.
* ESN: Electronic Serial number
* PRL: Preferred Roaming List
* NAM: Number Assignment Module
1. Press [MEMU] to display the Main menu.
2. Press to select Display.
3. Press to select Information.
4. Press to select Version.
The hardware, software version, ESN and PRL will be
displayed.
5. Press to select NAM name.
6. Press to return to the Information menu screen.

61
5. Security menu
To protect your phone from unauthorized use, you can lock it
easily in the Main menu, and unlock it as well.
To lock your phone, a 4-digit lock code must be entered. The
factory default setting of the lock code is 0000 or last 4 digits of
your phone number.
Once you have entered the lock number, you must enter it when
you want to change the Security menu settings.
Note
Regardless of whether the phone is locked or not, you can dial emergency
numbers (911, 911 and #911) and three specified numbers (P.63
“special numbers”), and answer incoming calls as well.
5-1. Lock mode
1. Lock ON power up
This feature allows you to lock the phone every time you turn it
on.
1. 1.Press [MEMU] to display the Main menu.
2. Press to select Security and enter your current lock
code .
3. Press to select Lock Mode.
Press the navigation keys to select an option:
• Lock ON Power Up: The phone will be
automatically locked when you turn it on.
• Lock Now: The phone locks immediately and
stays locked until the lock code is entered.
• Unlocked: The phone remains unlocked. (See
below)
4. Press [OK] to save the setting.
2. Lock now (see above)

62
3. Unlock
1. Press [MEMU] to display the Main menu.
2. Press to select Security.
3. Enter the 4-digit password.
When it is matched, the next screen will be displayed.
4. Select to select Lock Mode.
5. Press to select Unlock.
6. Press [OK].
The phone will be unlocked immediately.
5-2. New code
The default lock code for your Phone is set to either 0000 or the
last four digits of your phone number. You can set a unique lock
code and change the lock code if necessary.
Entering a new lock code:
1. Press [MEMU] to display the Main menu.
2. Press to select Security and enter your current lock
code.
3. Press to select New Code.
4. Enter a new, four-digit lock code by pressing the digit
keys.
The lock code will be replaced with the * mark preventing
your phone from unauthorized use.
5. Press [OK] to save the new lock code.
•To cancel entering a new code, press or .
63
5-3. Emergency # (Special numbers)
Special numbers (Emergency #)
You can store three phone numbers (Special Numbers) to be
dialed up even when the phone is in Lock mode.
And once you store these numbers in the phone book, they can be
dialed manually.
Storing special numbers
1. Press [MEMU] to display the Main menu.
2. Press to select Security and enter your current lock
code.
3. Press to select Emergency #.
4. To select a location to store the special number:
•Press to select Emergency 1,
•Press to select Emergency 2,
•Press to select Emergency 3.
5. Select to select Enter number or to select
Search Phone book.
[1] Enter Number
Enter the special number by using the digit keys.
Press [OK] to save the number in the selected location.
[2] Search Phone Book
Perform the search procedure explained on page 82.
Choose the desired name and press [OK].
The contact of the selected name will be displayed.
Press [OK] to save the number in the selected location.

64
5-4. Erase all
You can erase all numbers stored in your phone book data,
messages and call logs.
1. Press [MEMU] to display the Main menu.
2. Press to select Security and enter your current lock
code.
3. Press to select Erase All
4. Press to select Phone Book.
A confirmation message will be displayed to ask if you are
sure you want to erase the entire phone book data.
•Press to select Call Logs.
•Press to select Messages.
5. Select to select Phone Book.
A confirmation message will be displayed
6. Select to select YES.
The final confirmation message will be displayed.
7. Select .
When erasing has been completed, “Erased!” will be
displayed and the phone will return to the Erase all
menu screen (step 4).
65
5-5. Secret memory
Details of setting secret memory are given on page 81.
5-6. Reset
In case of misoperation or failure due to some problem, you need
to reset all settings of your phone to the factory defaults.
Note
When resetting your phone, we recommend you to save or download your
important settings (phone book data) to a PC using the optional Phone Book
utility software (sold separately) for your safety. (P.39)
However, phone book data, messages, and call logs will remain in
memory.
1. Press [MEMU] to display the Main menu
2. Press to select Security and enter your current lock
code.
3. Press to select Reset.
4. Select to select OK.
A confirmation message will be displayed to ask if you are
sure you want to reset the phone.
5. Select to select YES.
6. Press [OK] to execute resetting.
After resetting is complete, the phone will be restarted and
enter Standby mode. During resetting, “Now Resetting...”
will be displayed.
•To cancel resetting, press to select Cancel in step 4, or
press to select NO in step 5.
66
6. Setup/Tool menu
6-1. Memory status
This feature helps you to view the memory status of the following
records.
1. Press [MEMU] to display the Main menu.
2. Press to select Setup/Tool.
3. Press to select Memory Status.
The following records will be displayed:
Phone Book xxx/300 Items
Message xxx %
Browser data xxx %
Download xxx %
6-2. Calling
Turning the Auto answer option on or off.
This option sets your phone to automatically answer a call after
one ring.
1. Press [MEMU] to display the Main menu.
2. Press to select Setup/Tool.
3. Press to select Calling.
4. Press to select Auto Answer.
5. Press to select ON or to select OFF.
6. Press [OK] to save the setting.

67
Turning the Any key answer option on or off
1. Press [MEMU] to display the Main menu.
2. Press to select Setup/Tool.
3. Press to select Calling.
4. Press to select Any Key Answer.
5. Press to select ON or to select OFF.
6. Press [OK] to save the setting.
Turning the Auto retry option on or off
This feature helps you let your phone redial automatically up to
five times after the specified length of time, until your call will
be picked up.
1. Press [MEMU] to display the Main menu.
2. Press to select Setup/Tool.
3. Press to select Calling.
4. Press to select Auto Retry.
The options will be displayed.
5. Press to select Every 60 sec.
•Press to select Every 30 sec.
•Press to select OFF.
The Auto retry option will be turned off.
6. Press [OK] to save the setting.

68
Voice privacy
1. Press [MEMU] to display the Main menu.
2. Press to select Setup/Tool.
3. Press to select Calling.
4. Press to select Voice Privacy.
5. Press to select Automatic.
•Press to select Enhanced.
6. Press [OK] to save the setting.
6-3. Voice mail
1. Press [MEMU] to display the Main menu.
2. Press to select Setup/Tool.
3. Press to select Voicemail.
4. xxxxxx
5. xxxxxx
6. Press [OK] to save the setting.
< Network and service dependent feature >

69
6-4. Message
1. Callback #
1. Press [MEMU] to display the Main menu.
2. Press to select Setup/Tool.
3. Press to select Message.
4. Press to select Callback #.
5. Enter the desired phone number.
6. Press [OK] to save the setting.
2. Delivery ACK
You can send the acknowledgement to the sending end when you
receive the incoming data successfully.
1. Press [MEMU] to display the Main menu.
2. Press to select Setup/Tool.
3. Press to select Message.
4. Press to select Delivery ACK.
5. Press to select ON with notification.
You can check the notification message on the display that
the acknowledgement is sent.
•Press to select ON.
You can send the acknowledgement without notification
message.
•Press to select OFF.
6. Press [OK] to save the setting.
70
3. Canned messages
You can edit or add the fixed forms used when sending messages.
1. Press [MEMU] to display the Main menu.
2. Press to select Setup/Tool.
3. Press to select Message.
4. Press to select Canned Message.
The selections will be displayed:
[1] Yes
[2] No
[3] Call me
[4] need direction
[5] Where are you
[6] I’ll call later
[7] Busy
[8] On my way
[9] I’ll arrive soon
[10] Thank you
[11] Meeting cancel!
[12] Meet me at
[13] Call me at
[14] Please help!
[15] --------------
[16] --------------
[17] --------------
[18] --------------
[19] --------------
[20] --------------
71
6-5. Browser
Details of setting the charged time display are given on page 97.
6-6. Alarm
Alarm Clock
Setting the daily alarm
1. Press [MEMU] to display the Main menu.
2. Press to select Setup/Tool.
3. Select to select Alarm.
4. Press [OK].
4.
Select to select Daily Alarm.
5.
Press to select ON.
7. Press [OK].
6.
Enter the alarm time.
Use the digit keys and press or to set AM or
PM.
7.
Press [OK] to save the setting.
Deleting the dairy alarm setting
1. Press [MEMU] to display the Main menu.
2. Press to select Setup/Tool.
3. Select to select Alarm.
4. Press to select Dairy Alarm.
5. Select to select Alarm.
6. Press [OK].
5.
Press to
8.
select
Press .
The phone will return to Standby mode.
1
OFF
72
Call Reminder
Setting the Call reminder
1. Press [MEMU] to display the Main menu.
2. Press to select Setup/Tool.
3. Press to select Alarm.
4. Press to select Call Reminder.
5. Press to select ON.
Select the search method from one of the following:
•[1] to select Search Phone Book
•[2] to select Search Call Logs
•[3] to select Enter Name
6. Press [OK].
7. Enter the time for the alarm by using the digits keys.
8. Press or key to select AM or PM.
9. Press [OK] to save the Call Reminder setting.
Disabling the Call reminder setting
1. Press [MEMU] to display the Main menu.
2. Press to select Setup/Tool.
3. Select to select Alarm.
4. Press to select Call Reminder.
5. Press to select ON.
6. Press [Remove].
7. Press to select YES.
•To cancel removing the setting, press to select NO.
73
6-7. Clock setting
1. Clock
This feature allows you to set the current date and time. The
factory default setting is “January 1. 2001.”
Automatic setting provided by the radio network takes priority
over the manual setting.
1. Press [MEMU] to display the Main menu.
2. Press to select Setup/Tool.
3. Select to select Clock Setting.
4. Select to select Clock.
The following clock format will be displayed:
Date (M/D/Y)
0 0 / 0 0 / 0 0 0 0
Time (H:M)
12:00 AM (PM)
5. Use and to set the current date and time.
6. Press [OK] to save the setting.
2. Time zone
This feature allows you to select the time zone you belong to.
The selections are:
1. Press [MEMU] to display the Main menu.
2. Press to select Setup/Tool.
3. Select to select Clock Setting.
4. Select to select Time Zone.
The following options will be displayed:
[1] Auto (Your phone will automatically detect the appropriate
time zone depending on your location.)
[2] AST (Alaska Standard Time)
74
[3] EST (Eastern Standard Time)
[4] CST (Central Standard Time)
[5] MST (Mountain Standard Time)
[6] PST (Pacific Standard Time)
[7] AKST (Alaska Standard Time)
[8] AIST (Hawaii-Aleutian Standard Time)
5. Select Auto or your own and press [OK].
6. Press [OK] to save the setting.
6-8. Data
This feature allows you to transmit the data.
1. Press [MEMU] to display the Main menu.
2. Press to select Setup/Tool.
3. Select to select Data.
4. xxx
5. xxx
6. xxx
6-9. PC link
This feature allows you to transmit data between your phone and
a PC, enabling a PC connection with the specified connection
cable.
1. Press [MEMU] to display the Main menu.
2. Press to select Setup/Tool.
3. Press to select PC Link.
4. Press [OK].
5. Press to enter a PC link mode or press to
cancel setting.

75
7. System menu
7-1. Set service
Details of setting Set service are given on page 24.
7-2. Force mode
1. Press [MEMU] to display the Main menu.
2. Press to select System.
3. Press to select Force mode.
4. Press to select Automatic,
•Press to select CDMA only,
•Press to select PCS only,
•Press to select CELL only.
5. Press [OK] to save the setting.
7-3. Data/Fax
1. Press [MEMU] to display the Main menu.
2. Press to select System.
3. Press to select Data/Fax.
4. Press to select Automatic,
•Press to select CDMA only,
•Press to select PCS only,
5. Press [OK] to save the setting.
7-4. Call guard
Details of setting Call guard are given on page 25.
76
Phone Book Dialing
Your phone can store up to 300 phone numbers.
Phone book entries: Up to 300
Phone number: 32 digits including hard pauses and Timed pauses
Name: Up to 16 characters
E-mail address: Up to 48 characters
Group: 10 groups (9 customizable groups + default)*
Label: (None), Home, Work, Mobile, Pager, Fax
* Group names can not be changed.
Tip
•You can store the phone number as a hidden number to protect it from
unauthorized use. (P.81)
• Up to 9 One-touch dialing can be asigned from the phone book
data. (P.41 One-touch dialing)
Storing a phone number and name
1. Press [MENU] to display the Main menu.
2. Press to select Phone Book.
3. Press [New].
The name entry prompt will be displayed.
4. Enter a name and press [OK].
See page 78 for details on entering characters.
5. Select a desired label for a new entry and press
[OK].
•[1] None, [2] Home, [3] Work, [4] Mobile, [5] Pager and
[6] Fax
6. Press the and keys to highlight the number
item and press [OK] to enter the phone number.
The phone number prompt will be displayed.
7. Press the digit keys to enter the phone number.
77
8. If necessary, press to enter a hard pause ([1] key) or
a time pause ([2] key).
9. Press [OK].
The next item (E-mail address) will be highlighted.
10. Press [OK].
The e-mail address entry prompt will be displayed.
11. Enter the e-mail address.
•Up to 48 characters can be entered.
12. Press [OK].
The next item (Memory #) will be highlighted.
13. Press [OK].
14. Enter the desired number (3-digit) and press [OK] to
save the setting.
•If a warning message is displayed to indicate you are going to
overwrite a location, enter another number and press
[OK].
Storing phone numbers with pauses
1. Enter the phone number you want to store (such as the
bank’s teleservice phone number).
2. Press [Func] to display Function menu.
•Press or to enter the desired pause:
–To enter a Hard Pause, press .
The letter “H” will be displayed at the end of the number.
Then enter the digits followed by the pause (such as your
account number), or
–To enter a Timed pause, press .
The letter “T” will be displayed at the end of the phone
number.
Then enter the number followed by the pause (such as your
account number).
3. Store the phone number by pressing [Store].
4. Follow the screen prompt.
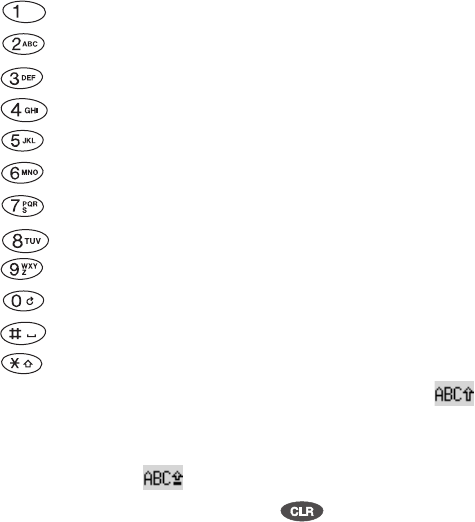
78
Entering characters
When entering characters (letter, number or punctuation) to create
phone book entries, press the corresponding key.
Pressing each key scrolls characters in the following order when
the input method is set to “Multi tap” (default).
Available characters in Multi tap mode
.(period) , (comma) ? ! - (hyphen) ‘ (apostrophe) @ : 1
a b c A B C 2
d e f D E F 3
g h i G H I 4
j k l J K L 5
m n o M N O 6
p q r s 7 P Q R S
t u v 8 T U V
w x y z 9 W X Y Z
0
(Moving the cursor to the right)
(Performing the same function as the left soft key)
•To enter uppercase letters, press the left soft key until is
displayed.
•To enter the first letter of the name, etc. in uppercase, press the
left soft key until is displayed.
•To correct the last character, press briefly.
Press and hold it to clear all characters.

79
Changing the input modes
By choosing the desired input mode and selecting edit options on
the entry prompt screen, you can reduce input time. Press on
the entry prompt screen.
Input mode and edit options will be displayed:
[1] T9 (Multi tap), [2] Numeric (Multi tap), [3] Symbol,
[4] Canned Message (P.70), [5] Copy, [6] Cut, [7] Paste
T9 text input
T9 text input method is a shortcut to enter text easily and quickly.
When you enter a letter “how”, you press the corresponding digit
keys several times until each letter is displayed.
By using T9, you press only . T9 scans and
recognizes your keystrokes, and displays the frequently and
commonly used letters automatically. (You can change the
candidates by pressing until the desired is displayed. T9
will display other candidates by analyzing the combinations of the
keys pressed.)
For example, this method helps you complete mail messages
quickly.
•To return to the normal input mode (Multi tap), press
[Func] and select [1] (Multi tap).
Symbol
To enter symbols, press [Func] and select [3] (Symbol).
Select the desired symbol and press [OK].
Canned Message
To enter fixed text, press [Func] and select [4] (Canned
Message).
Select the desired text and press [OK].
•Canned messages can be edited in the Main menu. (6. Setup/
Tool/P.70)
80
Overwriting an existing location
You can change the existing data with a new phone number or
change a part of the stored data.
1. Press [MENU] to display the Main menu.
2. Press to select Phone Book.
3. Perform the search function and select the desired entry.
4. Press [OK].
The personal contact will be displayed.
5. Press [Func] to display the Function menu.
6. Press to select EDIT.
7. If necessary, change the desired entry.
8. Press [Save] to save the setting.
9. Enter the memory number and press [OK].
Note
If the desired memory location already contains an entry, the phone
displays a message asking if you want to replace the current entry. To
replace the entry, press [OK].
To return to the previous screen and select another location, press .
You can only use each label one time for each stored name (for example,
you can only have one name labeled Work for a name entry).
If you want to shortcut the way to store a phone
number...
1. Enter the phone number.
2. Press [Store].
3. Repeat the steps 5 through 14 for “Storing a phone number
and name” (page 76).
Tip
You can quickly store the phone number using the incoming or outgoing
call logs. (P.89)
81
Storing a phone number with a group setting
(Property1)
1. Repeat the steps of storing a phone number and name step14
on page 76 to 77.
2. Press [Func].
The Function menu will be displayed.
3. Press to select [Property1].
4. Press to select [Gr: (current setting)] and press
[OK].
5. Press the desired number and press [OK].
The setting will be displayed.
Storing a phone number as a secret memory
(Property1)
1. Repeat the steps of storing a phone number and name step 14
on page 76 to 77.
2. Press [Func].
The Function menu will be displayed.
3. Press to select [Property1].
4. Press to select [Secret] and press [OK].
5. Press to select ON or [2] to select OFF and press
[OK].
The setting will be displayed.
Property2 (One-touch dial, Custom tone, Custom graphics)
82
Searching for phone numbers
Three methods of searching for phone numbers are available:
Finding by Name
1. Press [MENU] to display the Main menu.
2. Press to select Phone Book.
3. Press to select Find by Name.
4. Enter up to 16 characters to be found.
Matched results will be displayed alphabetically.
5. Scroll the list using and , if necessary.
6. When the desired entry is found, press [OK].
7. Press to dial.
Finding by Group
1. Press [MENU] to display the Main menu.
2. Press to select Phone Book.
3. Press to select Find by Group.
The group names will be displayed:
•[0] Unfiled, [1] Personal 1, [2] Personal 2, [3] Personal 3, [4]
Business 1, [5] Business 2, [6] Business 3, [7] Others 1, [8]
Others 2, [9] Service
4. Press the desired digit keys or use or to locate
the entry.
5. When the desired entry is found, press [OK].
6. Press to dial.
2
83
Finding Entry #
1. Press [MENU] to display the Main menu.
2. Press to select Phone Book.
3. Press to select Find Entry #.
4. Press the desired digit keys or use or to locate
the entry.
5. When the desired entry is found, press [OK].
6. Press to dial.
Enter Entry # which you desired, and press [ M ].
84
Adding a Name Ringer
You can link your phone book entries with 20 kinds of ringer
tones (fifteen melodies and five tones).
You can know who is calling identifying the ringer or melody
preset to Phone book.
1. Press [MENU] to display the Main menu.
2. Press to select Sounds.
3. Press to select Ringer Type.
4. Press to select Set.
5. Choose one of the 5 options ([4] to [8]) and press
[OK].
The phone number search prompt will be displayed.
6. Choose an entry and press [Set].
7. Choose the desired melody.
8. When selecting is complete, press [OK] to save the
setting.
Confirming the current setting
1. Press Confirm in step 4 above.
2. Press to select Normal Ringer.
The current setting will be displayed.
85
Modifying Your phone book entries
You can recall the desired phone book entry and modify it.
1. Search for the desired phone book entries in Standby
mode.
Details of searching for phone book entries are given on
page 82.
2. Press [Func] to display the Function menu.
3. Press to select Edit.
4. Select an entry you want to change and press [OK].
5. Edit it as you want to.
The overwrite confirmation message will be displayed.
6. Press [OK] to save the change.
Erasing a single phone book entry
1. Search for the desired phone book entries in Standby
mode.
Details of searching for phone book entries are given on page 82.
2. Press [Func] to display the Function menu.
3. Press to select Erase.
The erase confirmation message will be displayed.
4. Press to select YES.
When erasing is complete, the message “Memory #xxx
Erased!” will be displayed and the display will return to
the name list.
86
Erasing all of the phone book entries
Details of erasing all phone book entries are given on page 64.
Setting the Speed Dial
This feature allows you to dial quickly by pressing and holding
any of the digit keys (0 - 8).
To use the speed dial feature, choose the candidate to be set as a
speed dial from the stored phone book entries.
1. Search for the desired phone book entries in Standby
mode.
Details of searching for phone book entries are given on
page 82.
2. Press [OK] to display the entry content.
3. Press [Func] to display the Function menu.
4. Press to select Edit.
5. Press to select Set Speed Dial.
6. Press [OK] to save the setting.
The message “Speed Dial Saved” will be displayed.
•To cancel setting, press to return to the Function menu.
Storing your phone book entries as a secret
memory
Your phone will protect the specified numbers from unauthorized
use by specifying the phone book entries as a secret memory.
(P.81)

87
Reviewing your call logs
You can review your call logs (incoming calls, outgoing calls and
missed calls) stored.
Incoming call logs:Last 20 calls
Outgoing calls: Last 20 calls
Missed calls: Last 20 calls
When recalling these call logs, the following data will be
displayed:
1) Date and time
2) Name
3) Phone number (if available by the Caller’s ID service)
4) Duration ????????
Details of reviewing these call logs are given on page 88.
Note
If you have stored the number as an emergency number (“Emergency”),
“Emergency” will be displayed instead of the other party’s name.
And if you have not stored the name, including “Emergency”, the
telephone number will be displayed.
Calling by using call logs
You can quickly dial using these call logs.
1. Recall and select the desired call log.
Details of reviewing these call logs are given on page 88.
2. Press [OK].
3. Press to dial.
88
Reviewing the outgoing call logs, missed
call logs, or incoming call logs
Recall the outgoing call logs first and then switch screens to
display missed call logs and incoming call logs by pressing the left
soft key.
1. Press [MENU] to display the Main menu.
2. Press to select Calls
3. Press to select Call Logs.
The outgoing call logs will be displayed.
4. To display the missed call logs, press [Missed].
5. Then, to display the incoming call logs, press
[Income].
6. To display the outgoing call logs again, press
[Outgo].
The display will switch in the this order.
(outgoing call logs) (missed call logs) (incoming call
logs) (outgoing call logs) ...
When you then dial by using these logs ...
7. Select the desired log.
The selected log will be highlighted in blue.
8. Press to select it.
9. Press again to dial.
Tip
If you want to display the content of the selected logs, press [OK].
If you want to edit them, press [Func] in step 7 to display the
Function menu.
Function menu:
[1] to store the call logs
[2] to erase selected call logs
[3] to erase all call logs (See below)

89
Storing the phone number by using the call
logs
1. Repeat the steps 1 to 7 of reviewing the call logs on
page 88.
2. Press [Store].
The name entry prompt will be displayed.
3.
Repeat the steps 4 to 14 of storing a phone number and
name on page 76 to 77.
Erasing a single call log (outgoing, incoming
or missed call)
1. Perform steps 1 through 7 on page 88.
2. Press [Func].
3. Press to select Erase.
4. Press to select Yes.
The message “Outgoing calls XX (No.) Erased!” will be
displayed and erasing will be complete.
When you erase all the call logs...
•Press to select Erase All in step 3 above.
The confirmation message “Outgoing calls Erase All?” will be
displayed.
•Press to select YES.
Erasing will be complete.
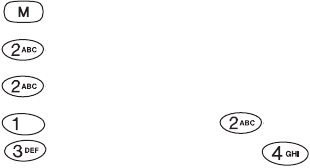
90
Reviewing your call time
Your phone keeps track of all your call logs and records them by
dividing into four categories:
1 Last Call: Showing a log of the last call you made inside your
home network service area and the time of the last call
2 Home Calls: Showing a total log of the calls you made inside
your home network service area and the time of the last home
call
3 Roam Calls: Showing a total log of the calls you made inside
your roaming network service area and the time of the last
roaming call
4 All Calls: Showing a total log of the calls you made inside your
home and roaming network service area and the time of the last
call
1. Press [MENU] to display the Main menu.
2. Press to select Calls.
3. Press to select Call Info
4. Press to select Last Call, to select Home
Calls, to select Roam Calls or to select All
Calls.
91
Voicemail
Setting up your voicemail feature
Perform the following steps to set up your voicemail feature:
1.
Press and hold [Left soft key] for at least two seconds.
2. Create your own pass code.
3. Record your name.
4. Create a greeting the caller will hear.
5. Enable the One-Touch Access feature, if necessary.
Reviewing voicemail messages
There are two ways to review voicemail messages: either to
display them in Standby mode or to use the One-Touch Access
feature (see below).
In Standby mode
1. Press [Message] to display the Message menu.
2. Press to select Voicemail.
The message “Voicemail New” will be displayed.
3. Press [Listen] to play a voicemail message.
Note
Press [Erase] to clear the mail indicator ( ) on the display, if
necessary. (The indicator will be also cleared automatically when you
have played all the messages received.)
One-Touch Access feature
1. Press and hold [Message].
< Carrier dependemt >

92
Messaging
Your phone receives the following messages in Standby mode and
Talk mode:
•Voicemail message
•Text message
•Web message
Notification
The message indicator ( ) will be displayed when your phone
receives the messages and remains displayed until you retrieve
all the massages.
Standby mode
When you receive a message, you will be notified by the ringer
sound (while the phone is on), and the following messages will be
displayed:
•“New Voicemail” for voicemail message
•“New Text” for text message
•“New BrowserMsg” for browser message
Talk mode
When you retrieve a message, the phone’s ringer will be
automatically muted, the call waiting tone will be heard and a
message header will be displayed.
You can retrieve new message while in a call by pressing
[OK].
While reviewing the message, you can still be connected with the
other party.
By using the optional hands-free headset, you can read the
message without interrupting the conversation.
93
Reviewing a text message or Web message
in Standby mode
1. Press [Message] to display the Message menu.
2. Press to select Inbox, or
Press to select Browser.
A list of messages will be displayed.
The messages marked with ! : Urgent unread messages
The messages marked with (Check mark) : Messages read
3. Use the navigation keys to select the desired message.
4. Press [OK] to review the message.
The sender’s name, phone number, time/date stamp and
the message will be displayed.
Note
Use the Message menu when handling the messages, by pressing
[OK]. (P.94)
5.
When finished, press to return to the
previous screen.
94
Message menu
The Messages menu allows you to handle messages while you are
reviewing them.
•Showing the address of the caller
•Erasing a single or all message(s)
•Locking or unlocking a message
•
Redialing the number embedded in the message
•
Extracting a phone number embedded in the message(?)
1. While reviewing a message, press [Func] to
display options: .
Press to select Address’s Info
Press to Erase (P.95)
Press to Erase All (P.95)
Press to Lock/Unlock
Note
If more than one phone number is included in the message, a list of the
phone numbers will be displayed, and you can choose the desired one.
2. When handling is complete, press to return to the
previous screen.
Note (?)
If the message you are reviewing contains a phone number that is already
stored in your phone book, the Save option does not display, and the
available menu options will be: (1) SEND, (2) Erase, (3) Next Msg, (4)
Previous Msg.
95
Erasing a single message
1. While reviewing the message, press to display the
Message menu.
2. Press to select Erase.
3. Use the navigation keys to select the message you want to
erase.
4. Press [OK].
The message header and body will be displayed.
5. Press [MENU] to display more options.
6. Press to erase the message or to return to the
Messages menu.
Erasing all messages
1. While reviewing the message, press to display the
Message menu.
2. Press to select Erase All.
All messages stored in the memory will be erased.
When erasing is complete, the display will return to the
previous screen.
3. Press to return to the Message menu.
[Func] to display the
[Func] to display the
3
96
Message ringing
You can set a unique ring type for an incoming message,
voicemail, Web messages.
Details of setting a unique ring type are given on page 46.
Message memory capacity
Up to 100 messages (depends on the length of a message)
•When message memory reaches 75%...
The message will be displayed: “Memory is 75% full. Erase old
messages.” (?)
•When message memory reaches 100%...
The alert message will be displayed.
The phone will reject new incoming messages until you erase
some of the stored messages.
Messages Lock mode
•When the phone is set to Lock mode...
Turn the lock mode off first to access the incoming messages.
Details of unlocking the phone are given on page 62.

97
Internet Access
Using the phone’s Internet functions, you can access and obtain
the world’s network information, depending on your
telecommunications carrier.
By starting the Web browser installed in your phone, you will be
connected to the Internet through your telecommunications
carrier. While you are connecting to the Internet, the service
indicator ( ) will be displayed as in the case of a normal phone
call.
Charges vary, depending on the network service you access and
you will be invoiced accordingly.
Setting the Charging Reminder of your
browser
The Charging Reminder helps you displaying the prompt every
time you start the Web browser and tells you when you will be
charged for the connection time.
1. Press [MENU] to display the Main menu.
2. Press to select Setup/Tool
3. Press to select Browser.
4. Press to select Prompt None.
The reminder will not be displayed.
•Press to select Prompt to open.
•The prompt will be displayed while the browser is
running.
•Press to select Prompt Both.
•The prompt will be displayed when you open or exit the
browser.
•Press to select Prompt to end.
•The prompt will be displayed when you exit the browser.
Logo 01.eps Logo 02.eps
98
5. Press [OK] to save your setting.
•To cancel setting, press to cancel.
Starting the Web browser
Note
First time you start the browser, you will be prompted to finish a security
setup taking several minutes. Follow the on-screen messages to complete
the setup.
Next time you access the Web page, you can omit this setup.
1. Press [Browser] in Standby mode.
The charging reminder will be displayed, if applicable.
2. Press [Yes] to start browsing.
•To cancel browsing, press [No].
When the connection to the Internet is established, the Top
menu will be displayed.
3. Press [Brows MENU] to display the browser menu.
1 Reload: Downloading the Web page last visited.
2 Home: Opening the Web page you registered in the
Advanced menu (P.99).
3 Bookmarks: Showing the Web sites (frequently visited
Web pages) you registered.
4 Mark Site: Registering the current Web page displayed.
5 About Phone.com: Showing the information of the
browser, etc.
6 Advanced ...: Showing the advanced menus.
1 Email 5 Bookmarks
2 Contact 6 Web Sites
3 Calendar 7 Settings
4To Do’s8Help
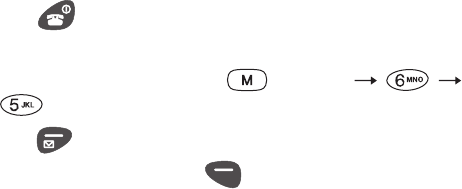
99
Advanced menus
1 Show URL: Showing the URL of the current Web page
displayed.
2 Homepage: Registering the URL of the homepage to be
displayed when the browser is started.
3 Set UP. Link: xxx
4 Offline Service: Terminating the connection to the
Internet while the browser is kept open.???
5 Outbox: xxx
6 Restart UP. Browser: Restarting the browser immediately.
7 Encryption: (Use this menu only your service provider
asks you to access.)
Exiting the Web browser
1. Press .
•If “Prompt to end” or “Prompt both” option has been set
in the Web browser menu ( [MENU]
), you will be asked to exit the Web browser.
2. Press [Yes] to exit the browser.
•To cancel exiting, press [No].

100
Navigating the Web page
Key functions:
1. 0 / Next Key:
•Use this key to enter a zero.
•Use this key to move the cursor to the next
cursor position in T9 mode.
①
⑨
⑧
101
2. Navigation Keys (Up/Down/Left/
Right):
•Use these keys to switch the menu items or
select the Web browser option. The currently
selected item is highlighted.
•Use these keys to move the cursor when entering
characters.
•Use these keys to scroll up or down a page.
3. Browser menu key:
•Use this key to display the Browser menu.
4. END Key:
•Use this key to exit the Web browser to return to
Standby mode.
5. CLR Key:
•Use this key to display the previous Web page
visited.
•Press and hold the arrow key( ) (when
displayed) to return to the Top page.
•Use this key to clear characters, numbers or
symbols.
•Press and hold this key to clear all characters,
numbers or symbols entered.
6. Numbered Keys (Digit Keys) 0 - 9:
•Use these keys to select the numbered items.
7. Pound / Space Key:
•Use this key to insert a space between
characters.
8. Asterisk / Shift Key:
•Use this key to enter upper or lower case letters.
102
Entering characters
When entering characters while the browser is running, the right
soft key will display the current input mode:
alpha (alphabet) -> Shift Sym (symbol) Num (number)
Canned (canned message) Copy Cut Paste
alpha ...
Basic method of entering characters are explained on page 78.
•The key works as a Shift key. Use this key when <alpha>
is displayed.
•Press to enter a space in alpha mode.
•Press to enter , (comma) . (period) 0 (return) in alpha
mode.
•Canned messages can be edited in the Main menu. (P. 70)
9. Right soft key:
•Use this key functions to execute the function
displayed on the bottom right on the display.
10. Send key:
•Use this key to receive a call.
Receiving a phone call while using the Web
browser is explained on page 108.
11. Left soft key:
•Use this key mainly to select the highlighted
item.
•Use this key to execute the function displayed
on the bottom left on the display.

103
Link
The Link menu helps you to jump to a linked (related) page and
get more information concerning the topics you are searching for.
Links embedded in the Web page are put in brackets ([ ... ]). Press
the left soft key to access the linked page when the link is
highlighted.
When the Web page includes a telephone number as a link ...
If the Web page you visited supports the calling feature from
inside the Web page, you may make a call.
Press the left soft key ( [Call]) to dial, or press to dial.
When you receive a call while the browser is running ...
While the Web browser is running, you will send the command
and receive the information from the Internet in packet format.
This packet transmission method does not always occupy the
telephone circuit while the connection to the Internet is made.
Your phone can receive a call between the transmission of the
packet data. Press .
When you end a call, you will automatically return to the page
displayed when you pressed .
104
Bookmarks
This browser’s menu helps you to store desired (or frequently
used) pages (addresses) while visiting Web pages or sites and to
access those pages or sites quickly by selecting each bookmark
from the Browser menu. It can save you time in accessing Web
pages (sites).
Creating a bookmark
1. Visit the desired page you want to bookmark.
2. Press [Brows MENU] once to display the browser
menu.
3. Press to select Mark Site.
When the page has a title, it will be automatically stored as
a bookmark title; you can edit the title by using the
browser’s menu.
4. Press [Save] to save the title.
The page will be saved with its title to the bookmark list
and a message will be displayed to indicate that the
bookmark was added to the list (at the bottom of the list).
5. Select [OK] to return to the page bookmarked.
Searching for Bookmark
1. Select [Bookmarks] from the browser menu.
2. Select the desired bookmark and press [Search] or
press and hold the digit key numbered to the bookmark
title from the bookmark menu.

105
Your Phone’s Main menu
Main menu Level 1 Level 2
1. Phone Book 1. Find Name
2. Find by Group
3. Find by Entry #
4. One-touch Dial
5. My Phone #
6. Scratch Book
2. Calls 1. Call logs
2. Call info
1. Last Call
2. Home Calls
3. Roam Calls
4. All Calls
3. Sounds 1. Volume
2. Silent Mode
3. Ringer Type
4. Vibrator
5. Ringer Time
6. Alerts
7. Tone Length
1. Normal Ringer
2. Key Beep
3. Earpiece
4. Message
5. Alarm/Reminder
1. ON
2. OFF
1. Set
2. Confirm
1. Normal Ringer
2. Message Ringer
3. Alarm/Reminder
1. Message Ringer
2. Alarm/Reminder
1. Fade Alert
2. Minute Alert
3. Service Alert
4. Wakeup Tone
1. Normal
2. Long

106
4. Display 1. LCD Contrast
2. Backlight
3. Input Mode
4. Banner
5. Graphic
6. Information
Level 1-9
1. Always OFF
2. 8 seconds
3. 15 seconds
4. 30 seconds
5. Always ON
1. Auto Hyphen
2. T9
1. Enter your Message
2. Inbox Message from
1. Wallpaper
2. Standby
3. Incoming Call
4. Custom
5. Connecting
6. Alarm/Reminder
7. Wakeup
8. Good-bye
1. Version
2. NAM Name
5. Security 1. Lock Mode
2. New Code
3. Emergency #
4. Erase All
5. Secret Memory
6. Reset
1. Lock ON Power Up
2. Lock Now
3. Unlock
1. Emergency 1
2. Emergency 2
3. Emergency 3
1. Phone Book
2. Call Logs
3. Messages
1. ON
2. OFF
1. OK
2. Cancel
Main menu Level 1 Level 2

107
6. Setup/Tool 1. Memory Status
2. Calling
3. Voicemail
4. Message
5. Browser
6. Alarm
7. Clock Setting
8. Data
9. PC Link
1. Auto Answer
2. Any Key Answer
3. Auto Retry
4. Voice Privacy
1. Callback #
2. Delivery ACK
3. Canned Message
1. Prompt None
2. Prompt to open
3. Prompt Both
4. Prompt to end
1. Daily Alarm
2. Call Reminder
1. Clock
2. Time Zone
1. YES
2. NO
7. System 1. Set Service
2. Force Mode
3. Data/Fax
4. Call Guard
1. Automatic
2. No Roaming
1. Automatic
2. CDMA only
3. PCS only
4. CELL only
1. Voice only
2. Data until power off
3. Fax until power off
1. ON
2. OFF
Main menu Level 1 Level 2
108
Accessories
–
• Lithium-Ion battery
Options
• Cigarette lighter adapter
• Data adapter/PC application (included in a CD-ROM provided)
Phone and battery specifications
Air interface: IS-95B
Display Screen: GF Color LCD
Battery Type : 950 mAh (3.6V) Lithium-Ion
Antenna: Fixed
GOVERNMENT’S REQUIREMENTS FOR
EXPOSURE TO RADIO WAVES.
Your wireless phone is a radio transmitter and receiver. It is
designed and manufactured not to exceed the emission limits for
exposure to radiofrequency (RF) energy set by the Federal
Communications Commission of the U.S. Government. These
limits are part of comprehensive guidelines and establish
permitted levels of RF energy for the general population. The
guidelines are based on standards that were developed by
independent scientific organizations through periodic and
thorough evaluation of scientific studies. The standards include a
substantial safety margin designed to assure the safety of all
persons, regardless of age and health.
The exposure standard for wireless mobile phones employs a unit
of measurement known as the Specific Absorption Rate, or SAR.
The SAR limit set by the FCC is 1.6W/kg. * Tests for SAR are
conducted using standard operating positions specified by the
FCC with the phone transmitting at its highest certified power
level in all tested frequency bands. Although the SAR is
determined at the highest certified power level, the actual SAR
level of the phone while operating can be well below the
109
THIS MODEL PHONE MEETS THE
Phone (including a battery)
Dimensions (H x W x D):3.6 x 2.0 x 1.1 inches (91.5 x 50 x 28 mm)
Weight: less than 4.25 oz. (less than 119 g)
Talk Time : up to 210 minutes (Digital)
Standby Time : up to 150 hours (Digital)
maximum value. This is because the phone is designed to operate
at multiple power levels so as to use only the power required to
reach the network. In general, the closer you are to a wireless base
station antenna, the lower the power output.
Before a phone model is available for sale to the public, it must be
tested and certified to the FCC that it does not exceed the limit
established by the government-adopted requirement for safe
exposure. The tests are performed in positions and locations (e.g.,
at the ear and worn on the body) as required by the FCC for each
model. The highest SAR value for this model phone when tested
for use at the ear is_____and when worn on the body, as described
in this user guide, is____. (Body-worn measurements differ
among phone models, depending upon available accessories and
FCC requirements). SAR value shown is worst case value for a
TQ-CX1. A typical TQ-CX1 is ____ at the ear and ____ when
worn on the body. While there may be differences between the
SAR levels of various phones and at various positions, they all
meet the government requirement for safe exposure.
The FCC has granted an Equipment Authorization for this model
phone with all reported SAR levels evaluated as in compliance
with the FCC RF emission guidelines. SAR information on this
model phone is on file with the FCC and can be found under the
Display Grant section of http://www.fcc.gov/oet/fccid after
searching on FCC ID APYHRO00022.
Additional information on Specific Absorption Rates (SAR) can
be found on the Cellular Telecommunications Industry
Association (CTIA) web-site at http://www.wow-com.com.
* In the United States and Canada, the SAR limit for mobile
phones used by the public is 1.6 watts/kg (W/kg) averaged over
one gram of tissue. The standard incorporates a substantial
margin of safety to give additional protection for the public and
to account for any variations in measurements.
110
;
4,901,307 5,490,165 5,056,109 5,504,773 5,101,501
5,506,865 5,109,390 5,511,073 5,228,054 5,535,239
5,267,261 5,544,196 5,267,262 5,568,483 5,337,338
5,600,754 5,414,796 5,657,420 5,416,797 5,639,569
5,710,784 5,778,338
This product is covered by U.S.pat. 5,818,437, U.S. Pat.
5,953,541, U.S. Pat. 6,011,554 and other patents pending.
Patent information
4,901,307
Licensed by QUALCOMM Incorporated under one or more of
the following United States Patents and / or theor counterparts in
other nations ;
111

Index
Symbols
# / Space Key 6
/ Shift Key 7
Numerics
0 / Next Key 100
911 19
A
Accessories 108
Options 108
Accessories Connector 6
Active-flip 2
Alarm 71
Alarm Clock 71
Deleting the setting 71
Setting 71
Alerts 49
AMPS mode 14
Answering 25
Antenna 18
Antenna icon 10
Any key answer 22, 67
Turning on or off 67
Auto retry 67
Turning on or off 67
B
Backlight 52
Banner 10, 53
Battery 15
Charging 16
Installing 15
Removing 15
Battery icon 10
Battery indicator 16
Battery strength 14
Bookmarks 104
Creating 104
Searching 104
Browser 98
C
Call charges 90
Reviewing 90
Call Forwarding 30
Disabling 30
Setting 30
Call info 42
Call logs 42, 87
Calling by using 87
Reviewing 87
Call reminder 72
Disabling 72
Setting 72
Call Waiting 28
Accepting or rejecting 28
Permanently turning off 28
Temporarily disabling 28
Callback # 69
Caller ID 27
Canned messages 70, 79
CDMA Cellular mode 14
CDMA PCS mode 14
Center Key 5
Characters 78, 102
Entering 78, 102
Clock 73
CLR Key 6, 101
Color LCD display 2
112
Browser menu key 101
Conference Call 29
D
Data/Fax 75
Data/Fax transmission 39
Fax/Data service 39
Software 39
Specifications 39
Date and time 10
Delivery ACK 69
Display 13
Dropped calls 31
E
Earpiece 44
Emergency # 63
Emergency call (911) 19
END/ Power Key 5
Erasing a single 89
F
Fade calls 31
Failed calls 32
Force mode 75
Four-digit dialing 35
G
Graphic 55
H
Hard pause 36
Headset Connector 9
I
Incoming call logs 88
Erasing a single 89
Reviewing 88
Incoming calls 25
Answering with the call
guard on 25
Information 60
Input mode 53, 79
K
Key beep 23, 44
L
LCD contrast 52
LED Indicator 9
Left soft key 8, 102
Link 103
Lithium Ion (Li-Ion) battery
15
Lock mode 19, 20, 61
Dialing 19
Dialing emergency numbers
20
Dialing special numbers 19
M
M key 5
Main menu 105
Calls 105
Display 106
Phone Book 105
Security 106
Setup/Tool 107
Sounds 105
System 107
Memory status 66
113
Menus 40
Calls menu 42
Call info 42
Call logs 42
Display menu 52
Backlight 52
Banner 53
Graphic 55
Information 60
Input mode 53
LCD contrast 52
In-Use menu 40
Main menu 40
Phone book menu 41
One-touch dial 41
Setting 41
Recalling 40
Security menu 61
Emergency # 63
Erase all 64
Lock mode 61
New code 62
Reset 65
Secret memory 65
Setup/Tool menu 66
Alarm 71
Browser 71
Calling 66
Clock setting 73
Data 74
Memory status 66
Message 69
PC link 74
Voice mail 68
Sounds menu 42
Alerts 49
Ringer time 49
Ringer type 46
Silent mode 46
Vibrator 48
Volume 43
System menu 75
Call guard 75
Data/Fax 75
Force mode 75
Set service 75
Message 69, 95
Erasing a single 95
Erasing all 95
Message indicator 14
Message key 8
Message memory capacity 96
Message menu 94
Message ringing 96
Messages 96
Lock mode 96
Messaging 92
Notification 92
Microphone 3, 23
Muting 23
Mini Browser 98
Minute beep 50
Turning on or off 50
Missed call logs 88
Erasing a single 89
Reviewing 88
Missed Calls 31
Displaying a list 31
N
Name Ringer 84
Navigation Keys 4, 101
Down arrow key 4
Left arrow key 4
Right arrow key 4
Up arrow key 4
New code 62
No service indicator 13
114
O
One-touch dial 41
One-touch dialing 19
Outgoing call logs 88
Erasing a single 89
Reviewing 88
P
Pause dialing 36
Phone book 76
Erase all 64
Overwriting 80
Phone book menu 41
Phone number 12, 41, 76, 81,
89Displaying 12, 41
Storing 76
Storing as a secret memory
81
Storing by using the call
logs 89
Storing with a group setting
81
Phone numbers 77, 82
Adding a Name Ringer 84
Dialing by entering the
pause manually 38
Dialing with a Hard pause
37
Erasing a single 85
Erasing all 86
Finding by Group 82
Finding by Name 82
Finding Entry # 83
Modifying 85
Setting the Speed Dial 86
Storing as a secret memory
86
Storing with pauses 77
Power save mode 17
Prepend dialing 33
R
Redialing 20
Reminder 45
Reset 65
Right soft key 3
Ringer time 49
Ringer type 47
Setting for message calls 47
Setting for the Alarm/
Reminder 48
Ringer volume 23, 45
Setting Alarm/Reminder 45
Setting for message calls 45
Roaming 14, 24
Setting 24
Roaming call guard 25
Roaming calls 25
with the Call guard on 25
Roaming settings 11
S
Secret memory 65
Send Key 7, 102
Service alert 50
Turning on or off 50
Service indicator 13
Signal strength 10, 13, 18
Silent mode 14, 46
Silent mode Key 8
Special numbers 63
Speed Dial 86
Speed dialing 19
Standby mode 17
T
T9 text input 79
Talk mode 17
115
Text message 93
Reviewing 93
Three-way Calling 29
Beginning 29
Ending 29
Time zone 73
Timed pause 36
Tone length 51
TQ-CX1 108, 109
Accessories 108
Travel charger 16
Tri-mode 11
Turning OFF 10
Turning ON 10
Turning your phone on and off
10
V
Vibrating ringer 14
Vibrator 48
Voice call 18
Answering 21
Ending 22
Making 18
Voice calling experience 26
Voice mail 68
Voice privacy 68
Voice privacy mode 14
Voicemail 91
Reviewing messages 91
Setting up 91
Volume 43
W
Wake-up 51
Turning on or off 51
Wake-up tone 50
Web browser 97, 98
0 / Next Key 100
Asterisk / Shift Key 101
Browser menu key 101
Charging Reminder 97
Setting 97
CLR Key 101
END Key 101
Exiting 99
Left soft key 102
Navigation Keys 101
Numbered Keys 101
Pound / Space Key 101
Right soft key 102
Send Key 102
Starting 98
Top menu 98
Web message 93
Reviewing 93
116
Usage guidelines 109
©XXXX-00000X
XXX000(XXX01)