Sharp HRO00026 Cordless Phone System User Manual FRONT eps
Sharp Corporation Cordless Phone System FRONT eps
UserManual.wiki
>
Sharp
>
HRO00026 User Manual
>
Users Manual
Contents
1.
Users Manual
2.
Revised User Manual
Users Manual
Navigation menu
Upload a User Manual
Namespaces
Wiki Guide
HTML
PDF
Info
Views
User Manual
Discussion / Help
Navigation


![Using the DIRECT DIAL Key172. Using the Handset6Enter a name by pressing number keys for each letter as shown in the chart below. Up to 15 characters can be entered. (If you do not wish to enter a name, go directly to Step 7.)Example: SHARP = 7777 44 2 777 7♦To enter two letters in succession that require the same key, press after entering the first letter. ♦To clear a mistake, press .♦To change case, press . ♦To enter one of the following symbols, press or repeatedly: . / ! " # $ % & ’ ( ) + + , - : ; < = > ? @ [ ¥ ] ^ _ ' { | } )(7Press .•The display briefly shows STORED.HOLDERASEDIRECTDIALSHIFTENTERA =B =C =D =E =F =G =H =I =J =K =L =M =N =O =P =Q =R =S =T =U =V =W =X =Y =Z =SPACE =WXYZ9WXYZ9WXYZ9WXYZ9WXYZ9WXYZ9WXYZ9WXYZ9WXYZ9WXYZ9TUV8TUV8TUV8TUV8TUV8TUV8PQRS7PQRS7PQRS7PQRS7PQRS7PQRS7PQRS7PQRS7PQRS7PQRS7MNO6MNO6MNO6MNO6MNO6JKL5JKL5JKL5MNO6JKL5JKL5JKL5GHI4GHI4GHI4GHI4GHI4GHI4DEF3DEF3DEF3DEF3DEF3DEF3ABC2ABC2ABC2ABC2ABC2ABC21all.bookPage17Wednesday,April24,20029:49AM](https://usermanual.wiki/Sharp/HRO00026.Users-Manual/User-Guide-242776-Page-19.png)
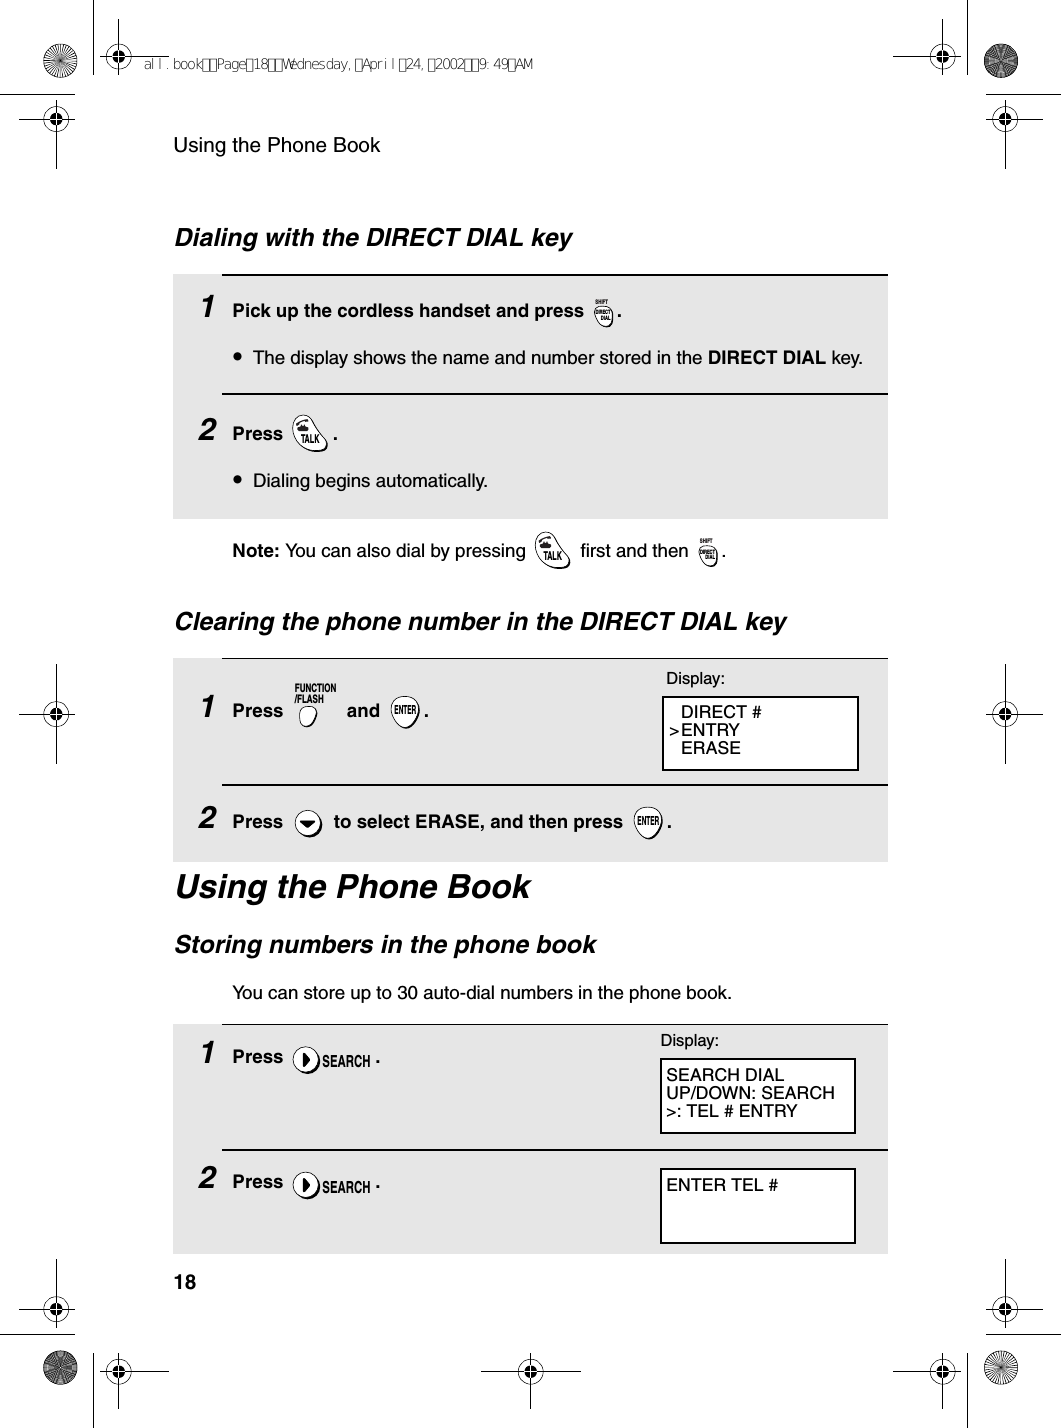
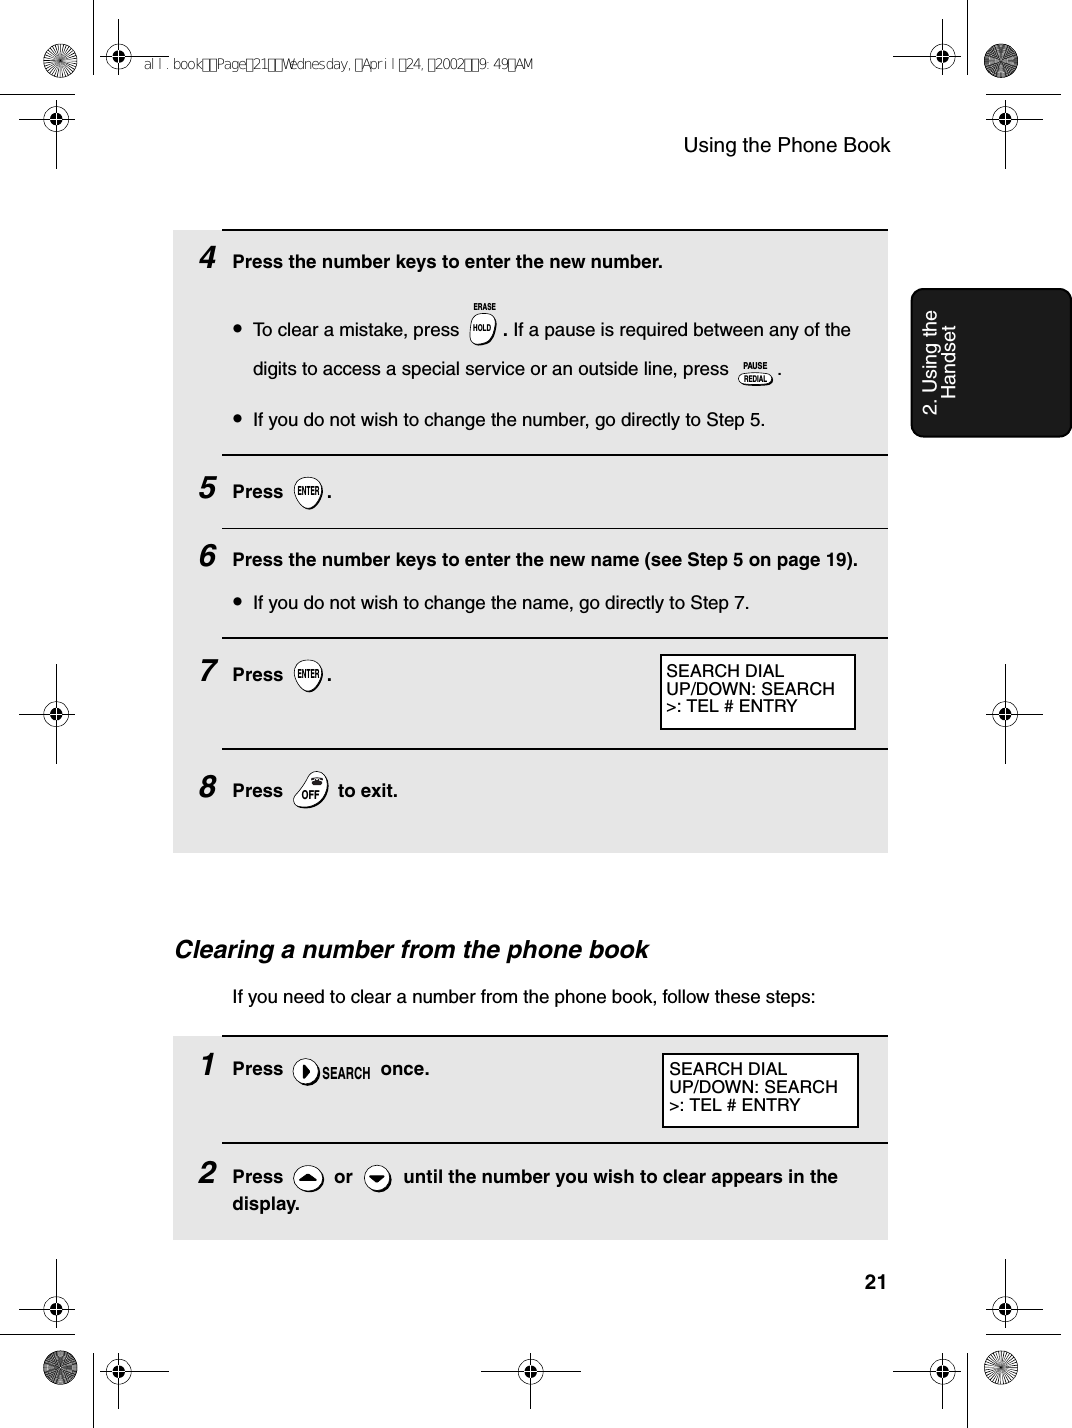
![Using the Phone Book192. Using the Handset3 Enter the number (up to 16 digits) by pressing the number keys. (Note: A space cannot be entered.)•To clear a mistake, press .•If a pause is required between any of the digits to access a special service or an outside line, press . The pause appears as a hyphen (two seconds per pause). Several pauses can be entered in a row.4Press .5Enter a name by pressing number keys for each letter as shown in the chart below. Up to 15 characters can be entered. (If you do not wish to enter a name, go directly to Step 6.)Example: SHARP = 7777 44 2 777 7♦To enter two letters in succession that require the same key, press after entering the first letter. ♦To clear a mistake, press .♦To change case, press . ♦To enter one of the following symbols, press or repeatedly: . / ! " # $ % & ’ ( ) + + , - : ; < = > ? @ [ ¥ ] ^ _ ' { | } )(HOLDERASEREDIALPAUSEENTERHOLDERASEDIRECTDIALSHIFTA =B =C =D =E =F =G =H =I =J =K =L =M =N =O =P =Q =R =S =T =U =V =W =X =Y =Z =SPACE =WXYZ9WXYZ9WXYZ9WXYZ9WXYZ9WXYZ9WXYZ9WXYZ9WXYZ9WXYZ9TUV8TUV8TUV8TUV8TUV8TUV8PQRS7PQRS7PQRS7PQRS7PQRS7PQRS7PQRS7PQRS7PQRS7PQRS7MNO6MNO6MNO6MNO6MNO6JKL5JKL5JKL5MNO6JKL5JKL5JKL5GHI4GHI4GHI4GHI4GHI4GHI4DEF3DEF3DEF3DEF3DEF3DEF3ABC2ABC2ABC2ABC2ABC2ABC21all.bookPage19Wednesday,April24,20029:49AM](https://usermanual.wiki/Sharp/HRO00026.Users-Manual/User-Guide-242776-Page-21.png)