Sharp HRO00163 Cellular Phone with Bluetooth, WLAN and Felica User Manual part1
Sharp Corporation Cellular Phone with Bluetooth, WLAN and Felica part1
UserManual.wiki
>
Sharp
>
HRO00163 User Manual
>
User manual part1
Contents
1.
FCC statements
2.
English version part 1
3.
English version part 2
4.
User manual English part1
5.
User manual English part2
6.
User manual part1
7.
User manual part2
8.
User manual English part1
User manual part1
Navigation menu
Upload a User Manual
Namespaces
Wiki Guide
HTML
PDF
Info
Views
User Manual
Discussion / Help
Navigation
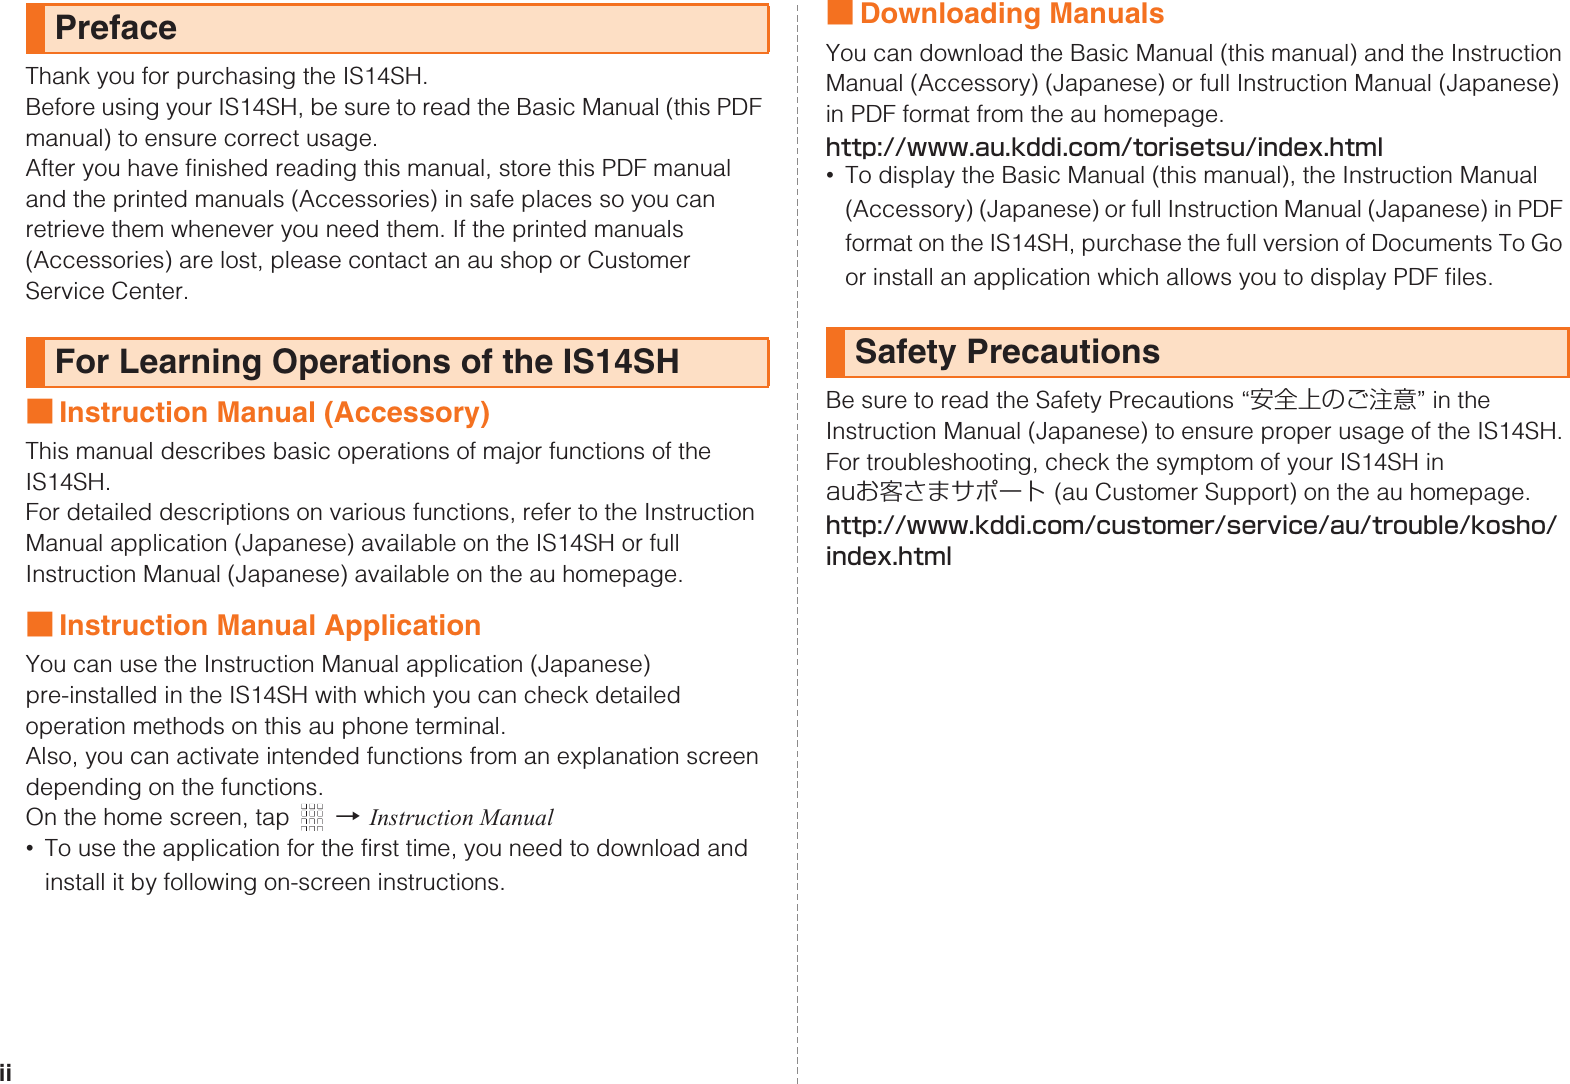
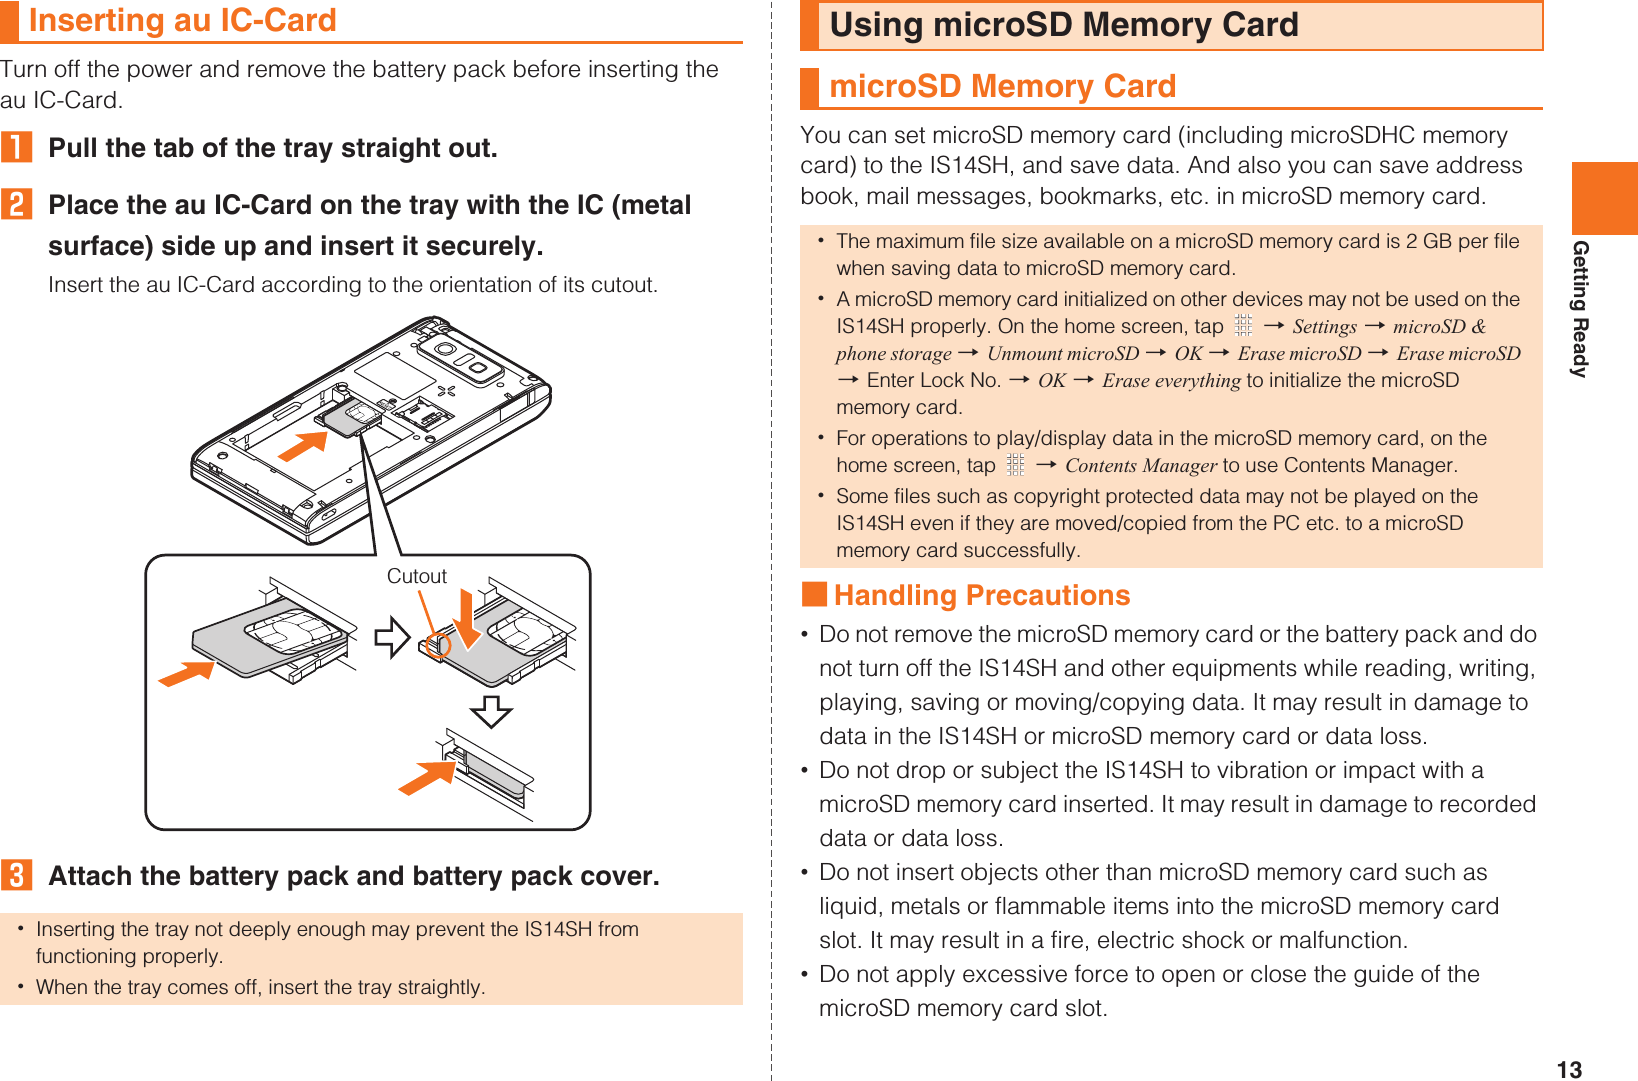
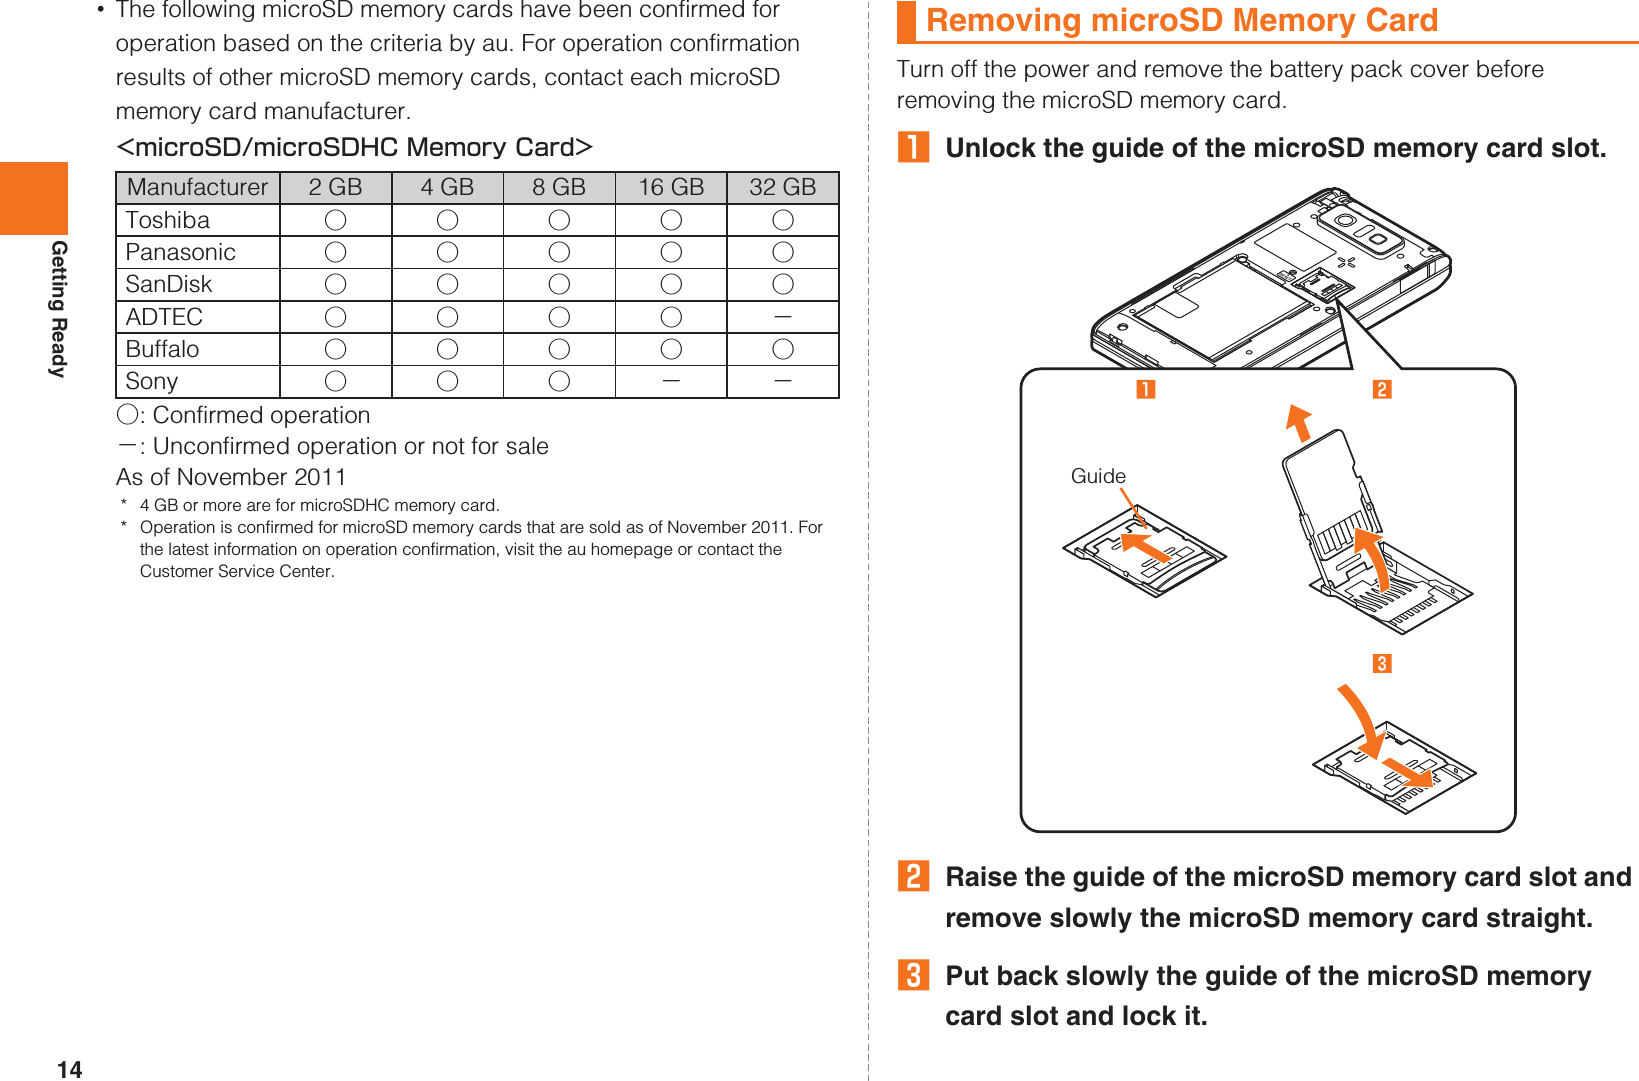
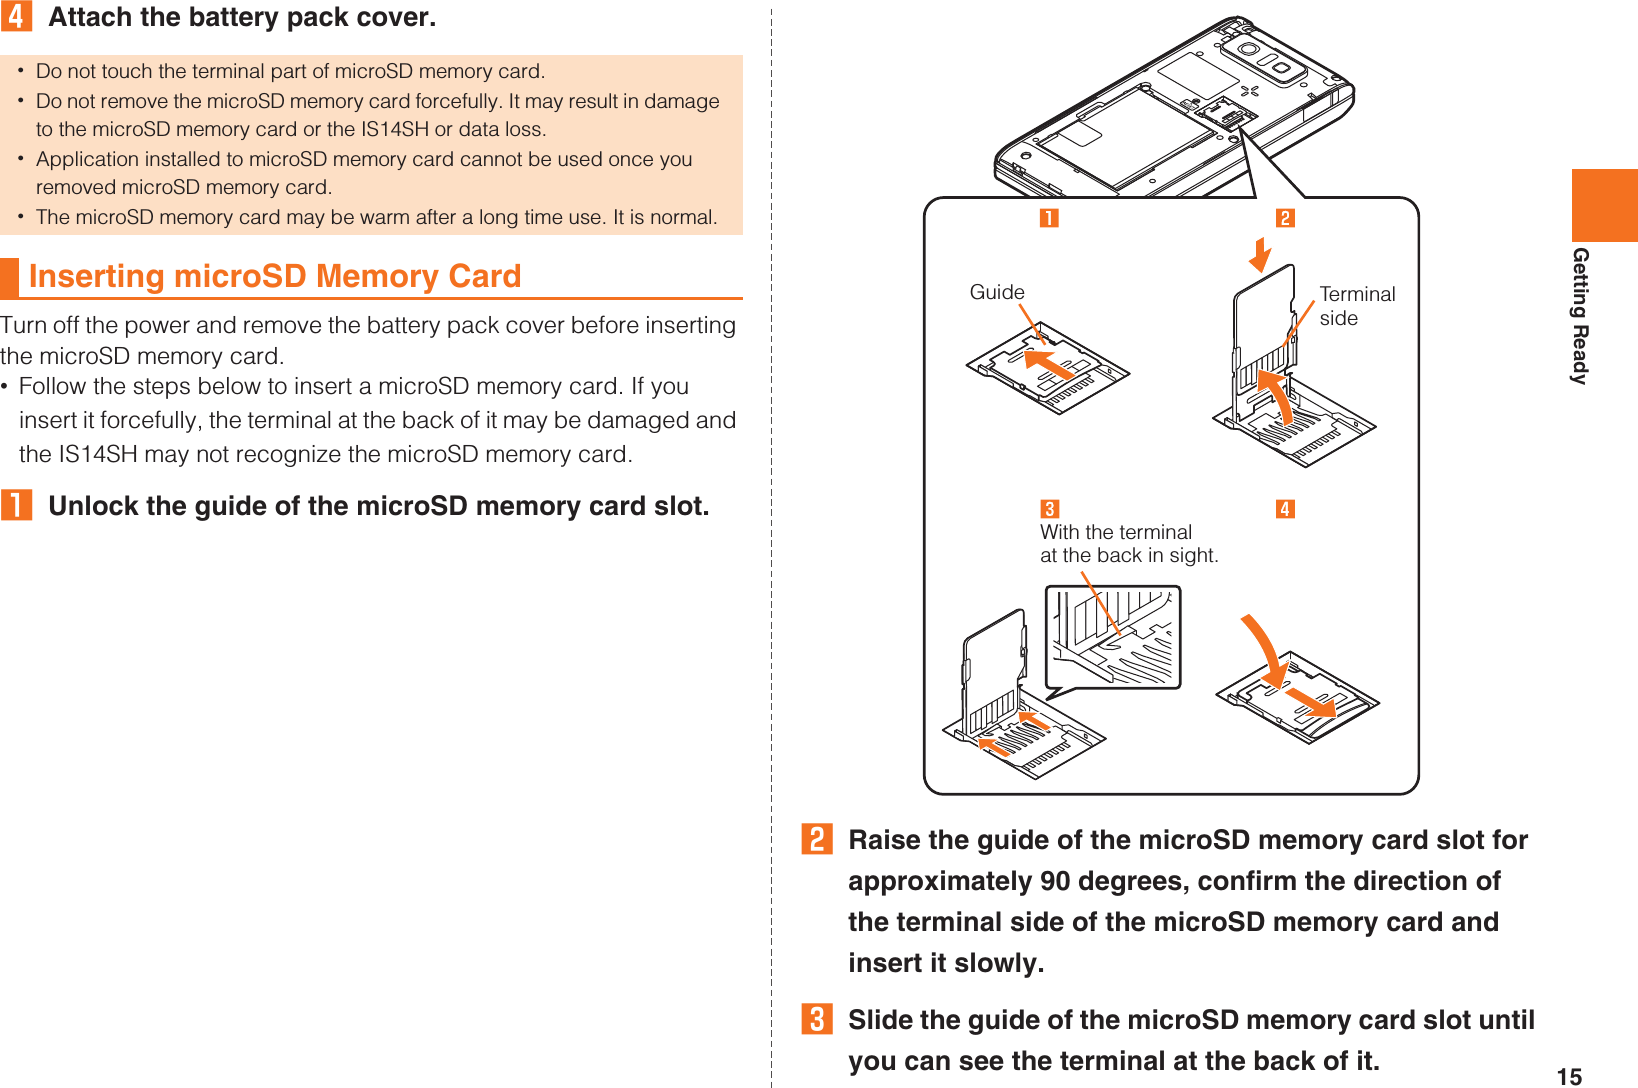
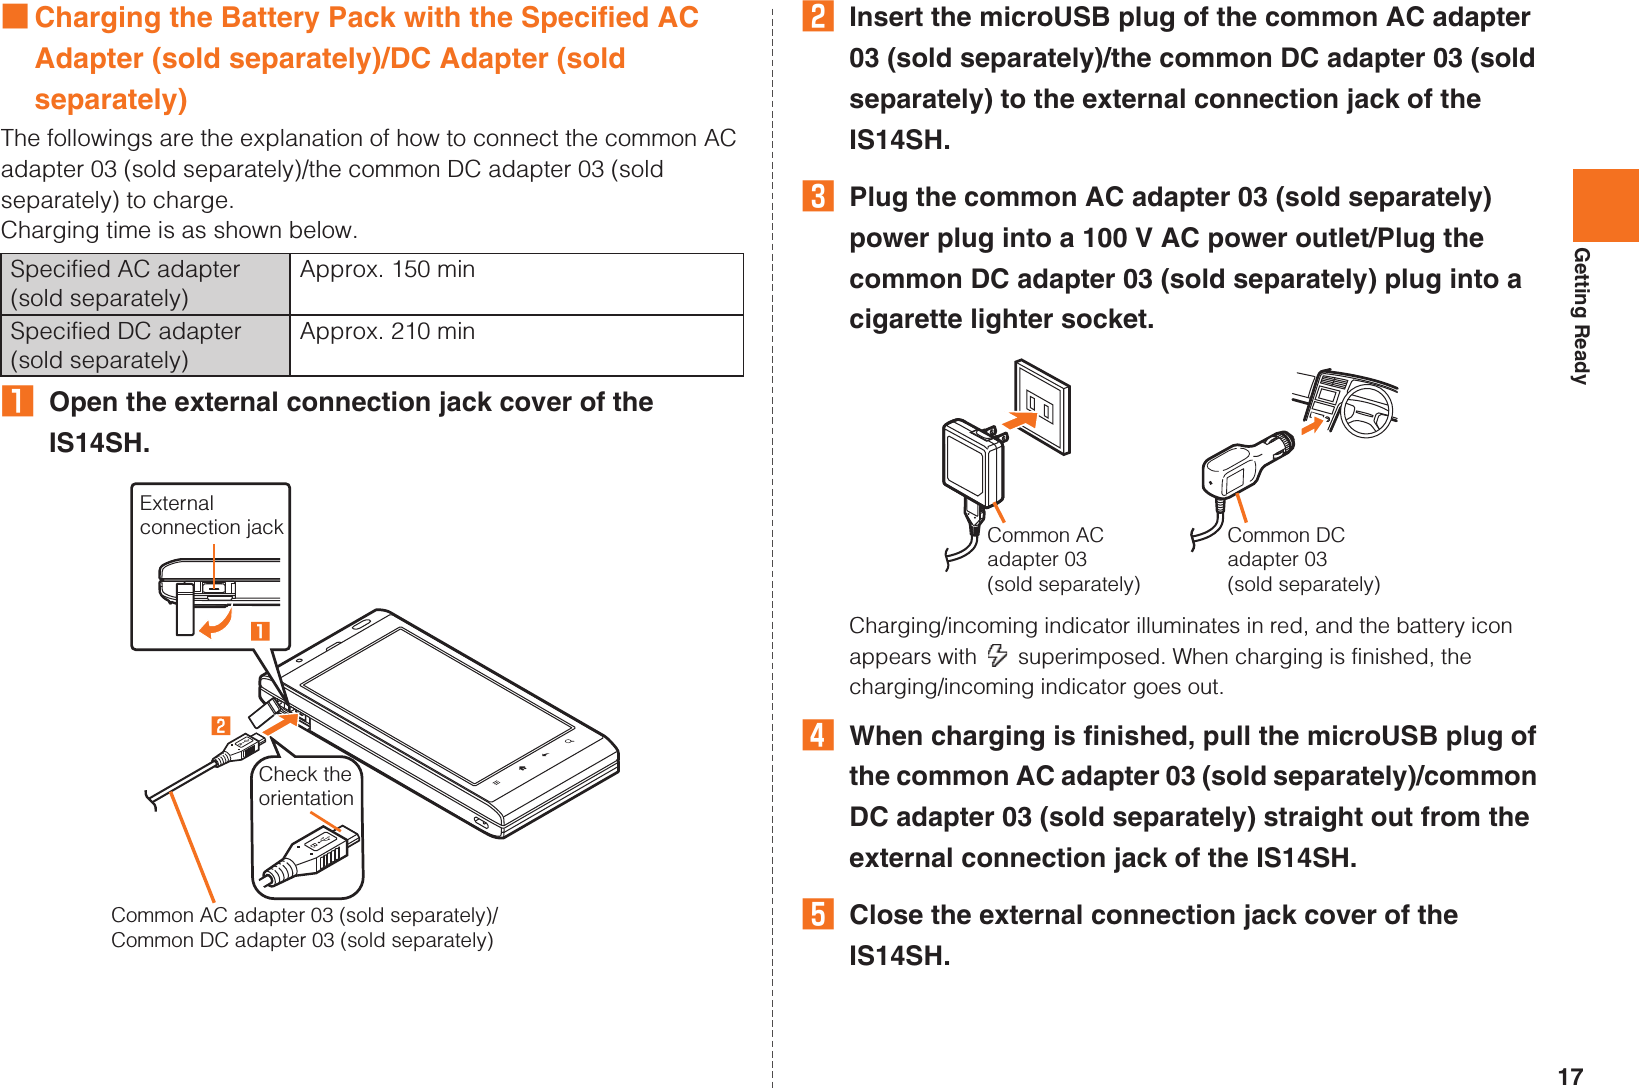
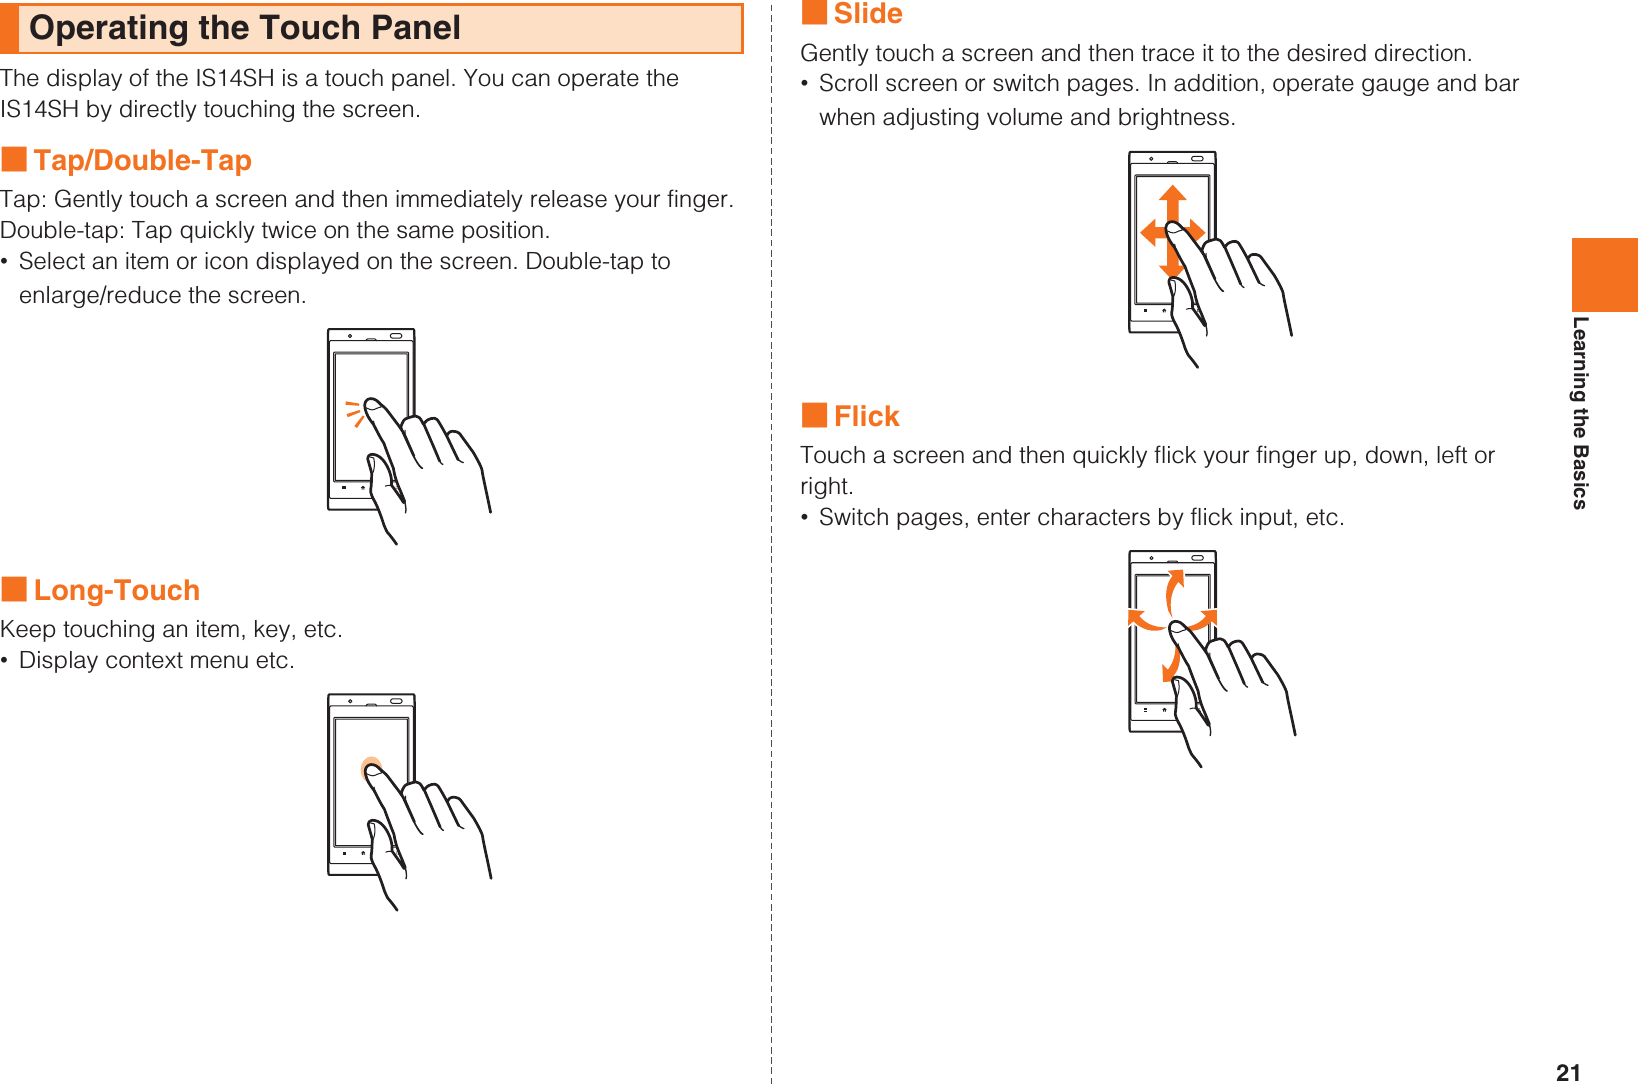
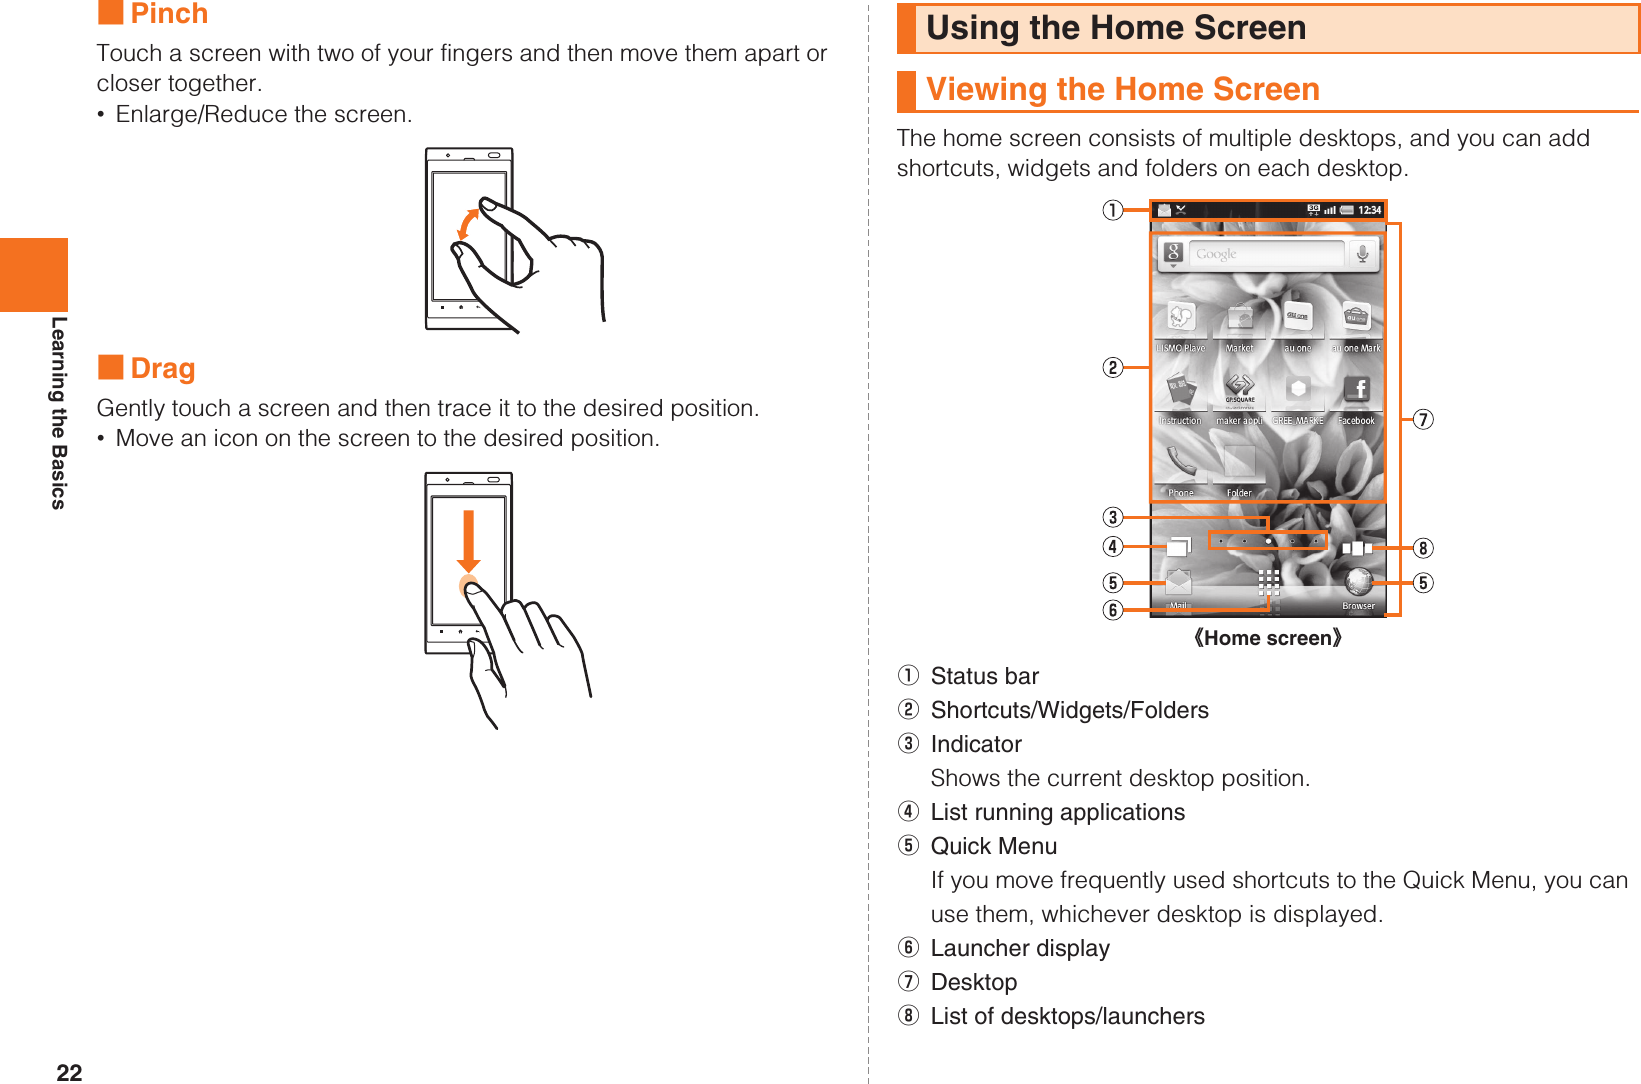
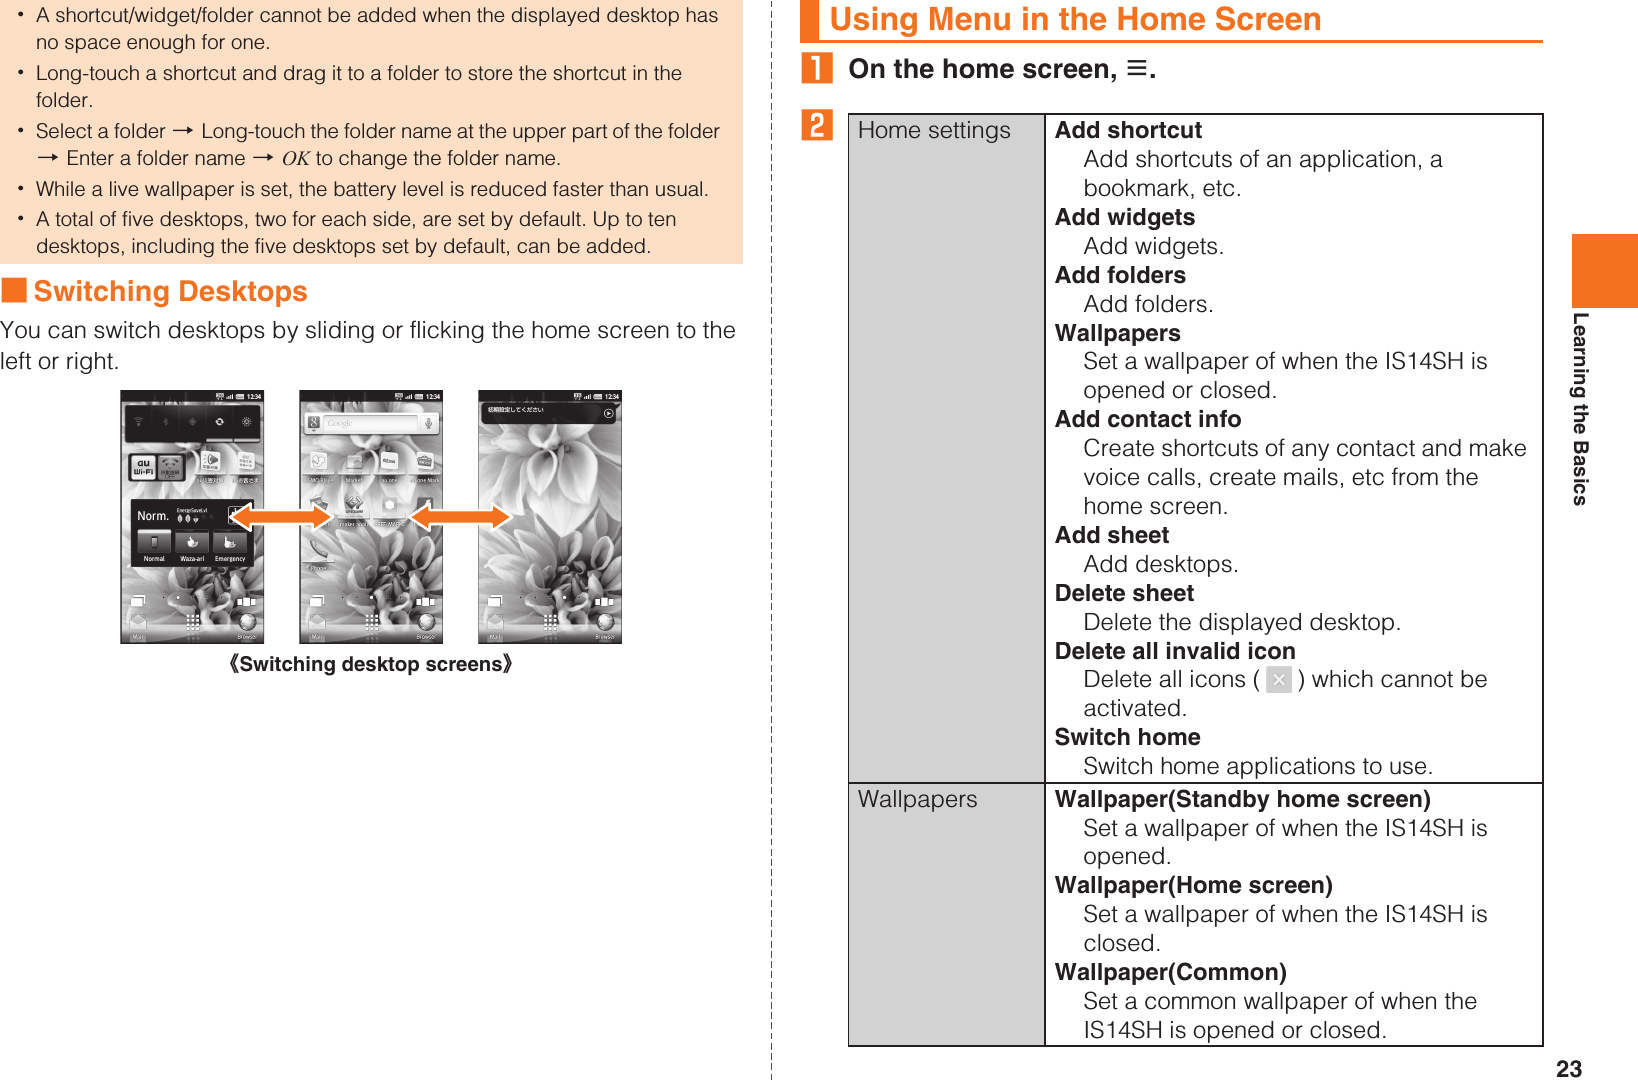
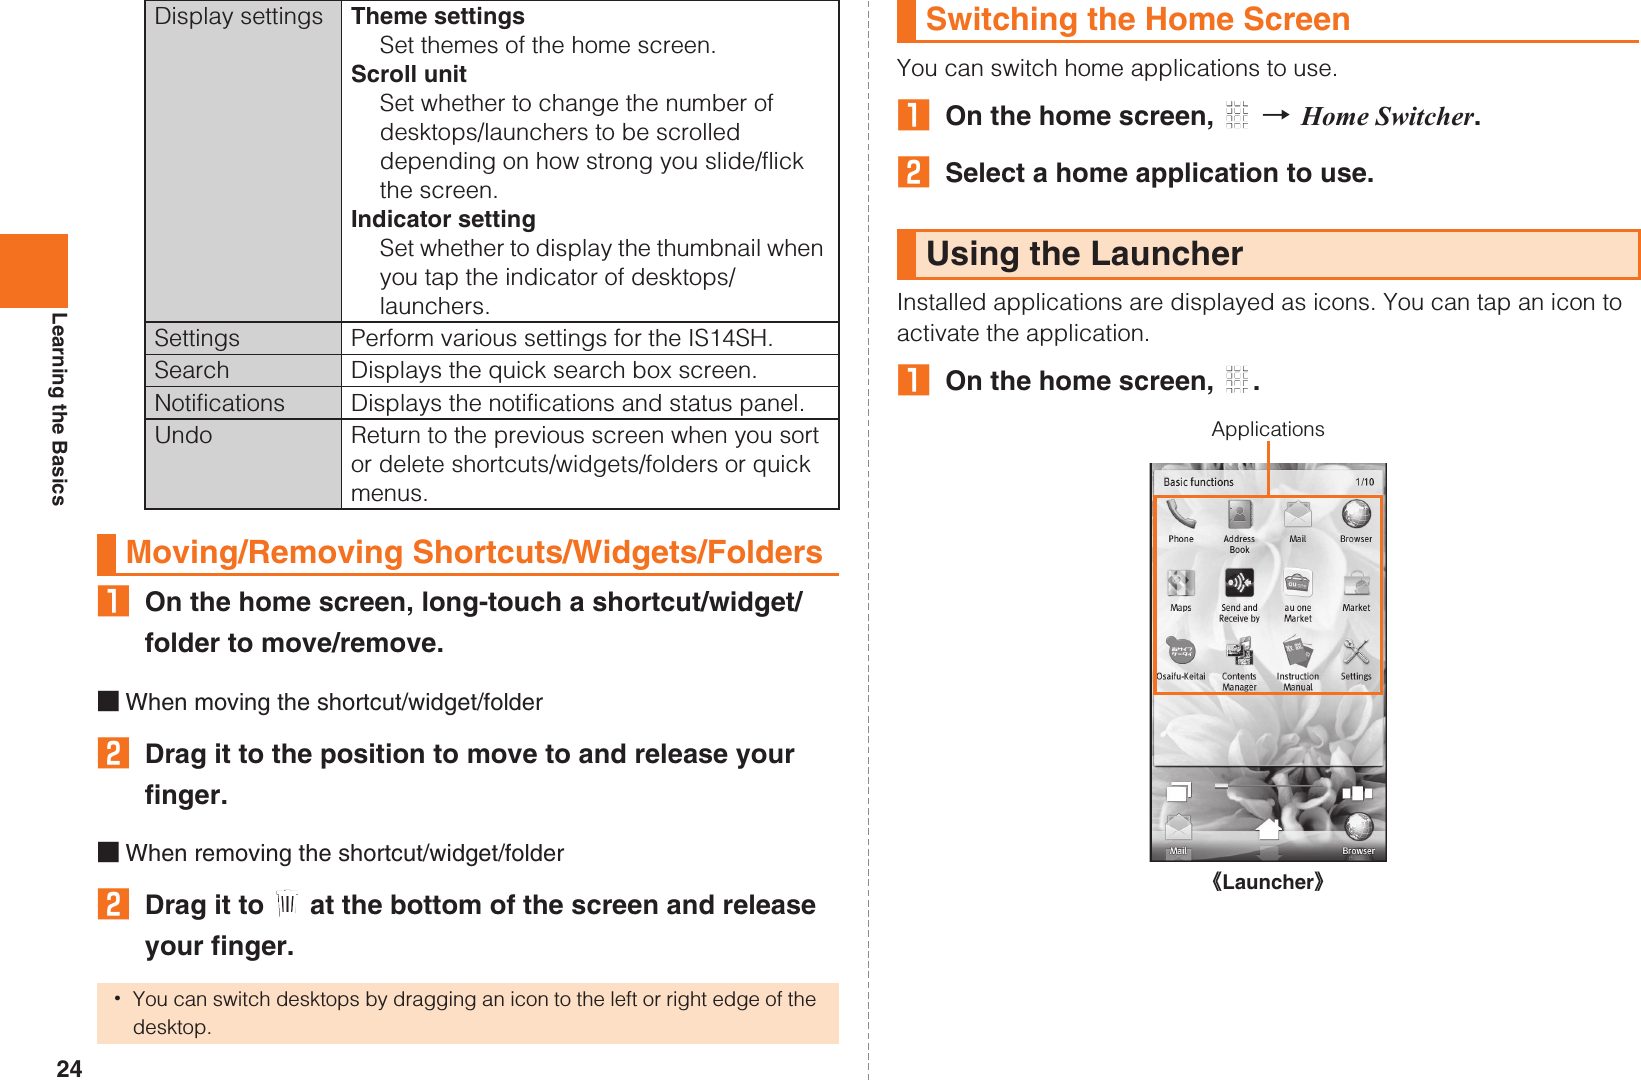
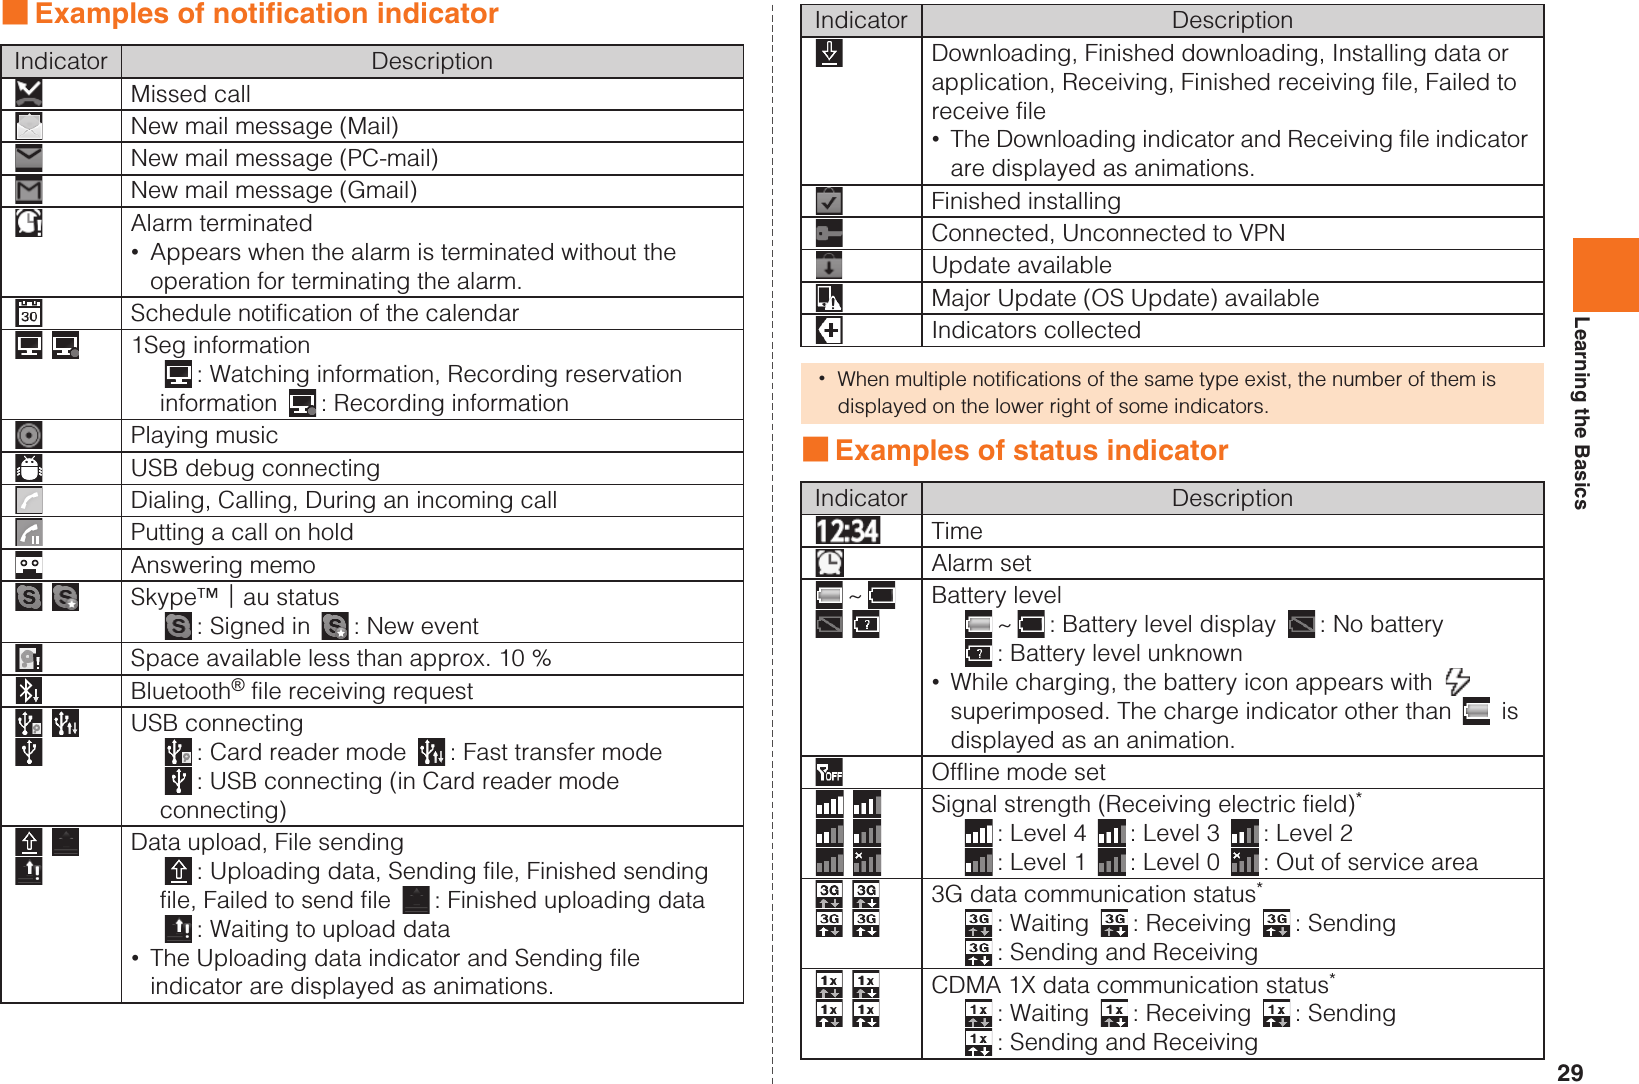

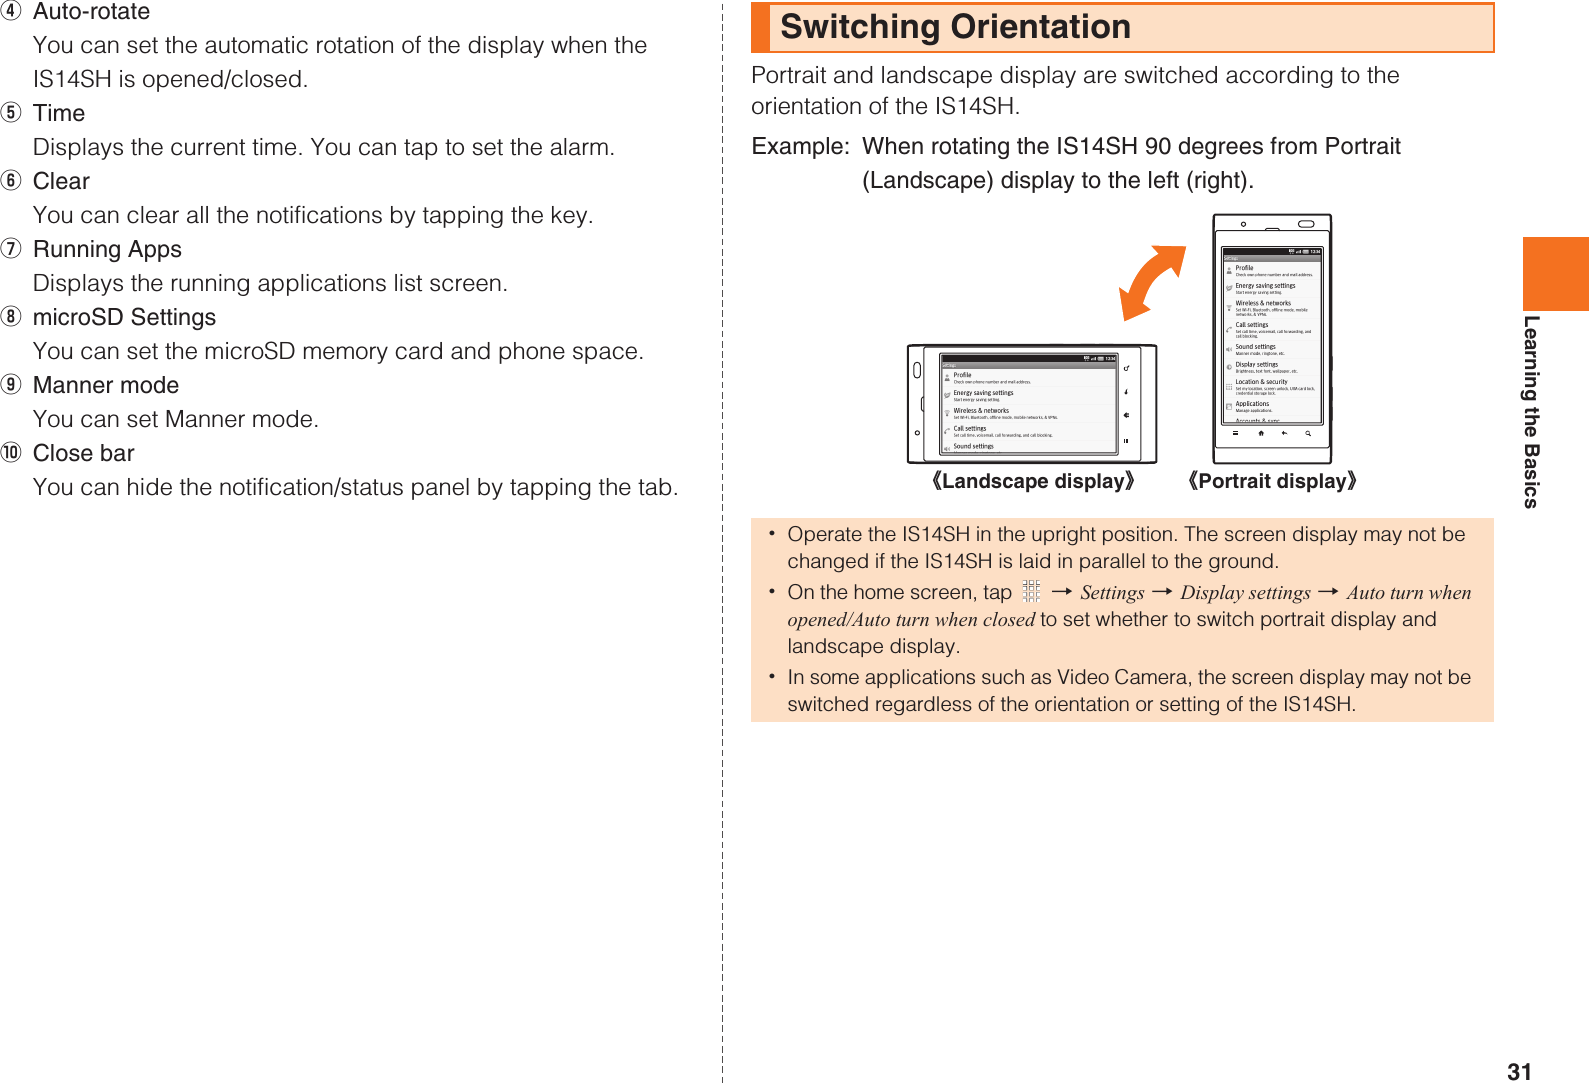
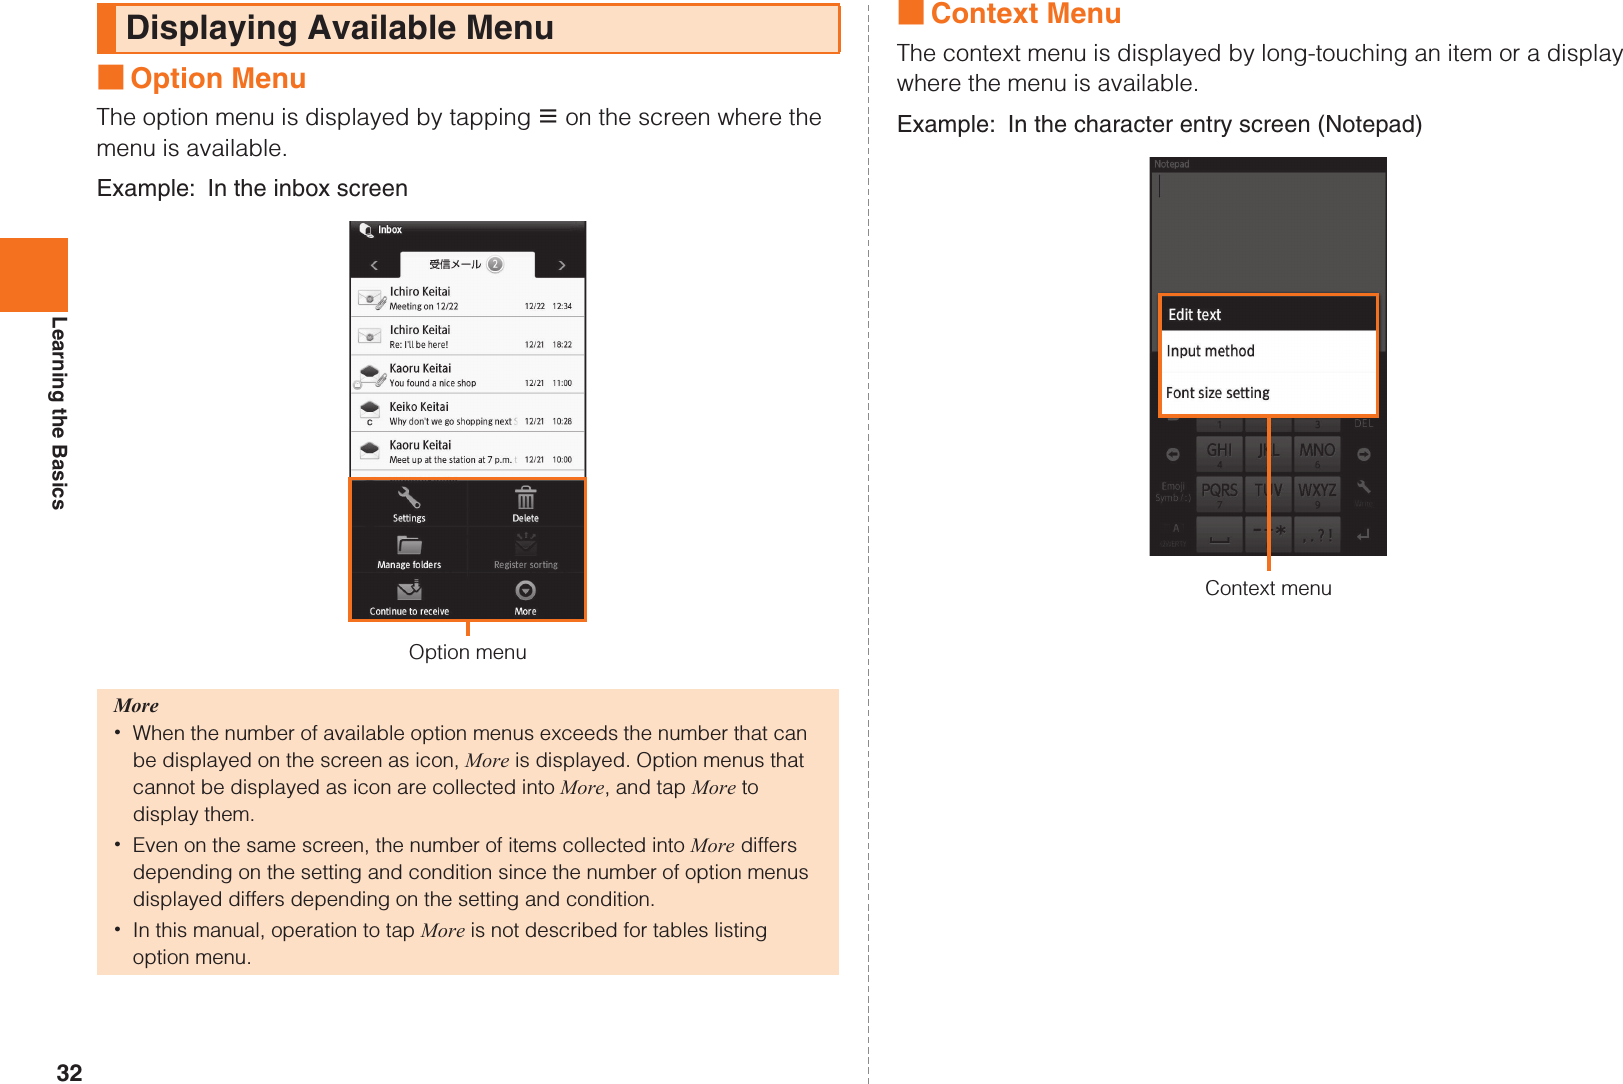
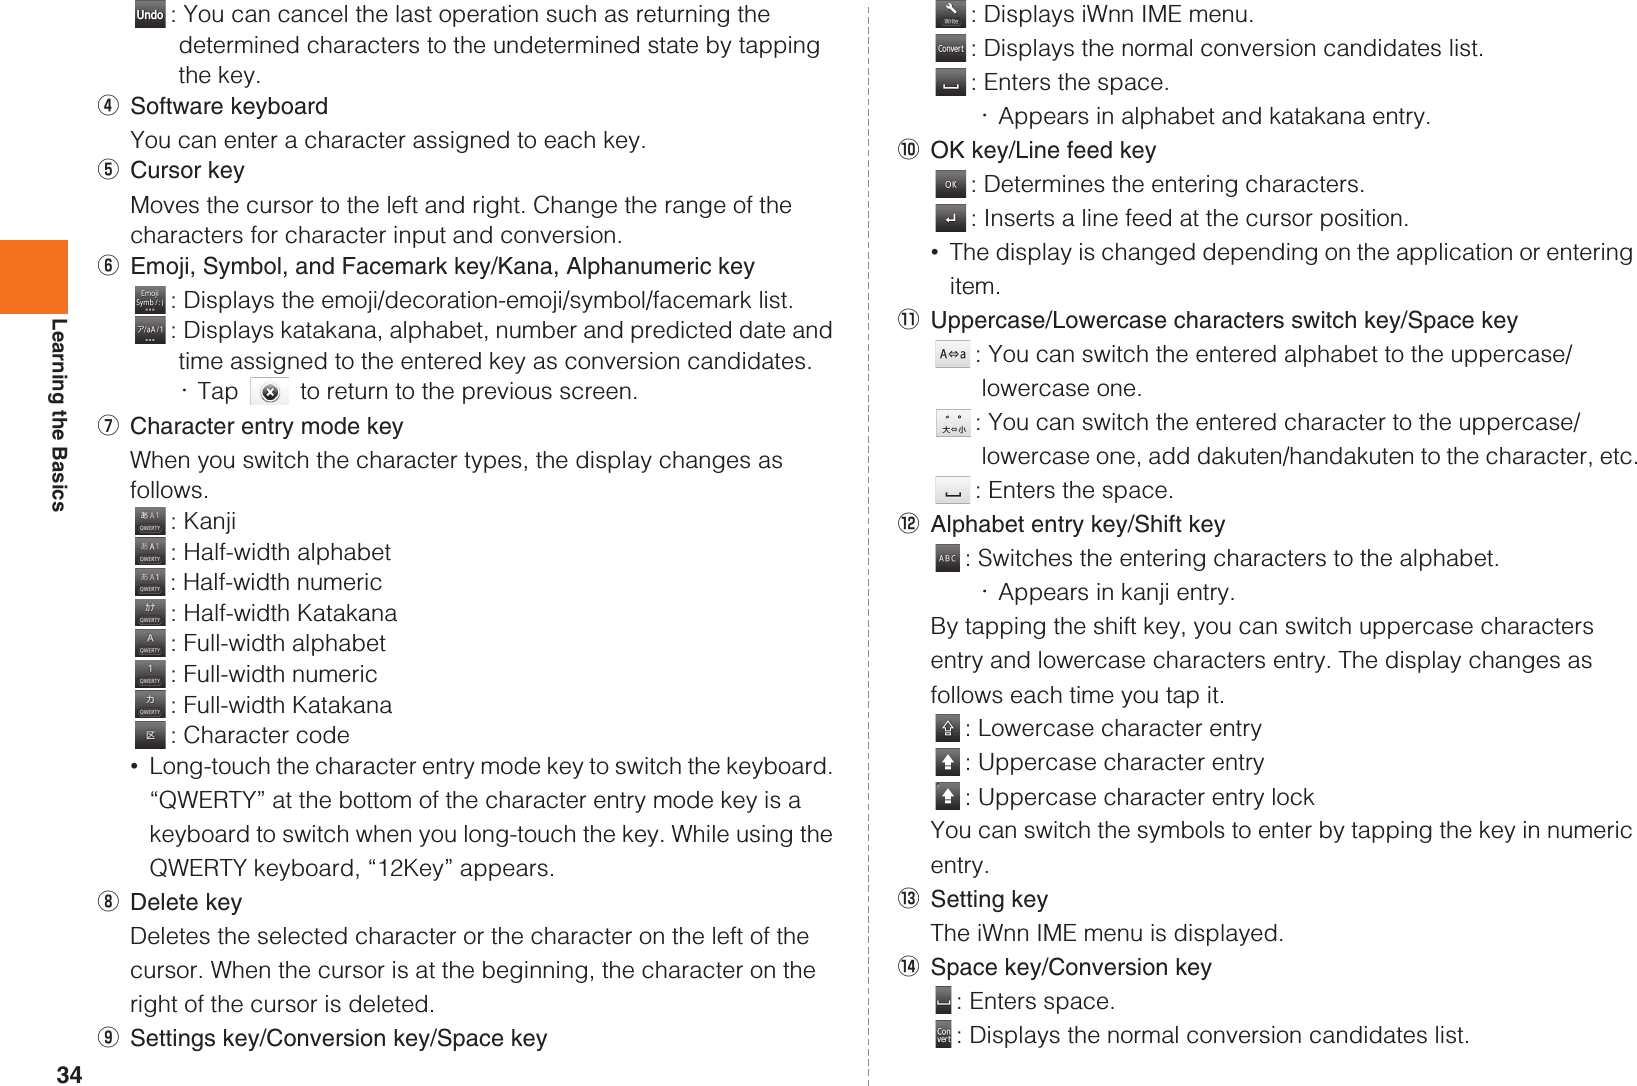
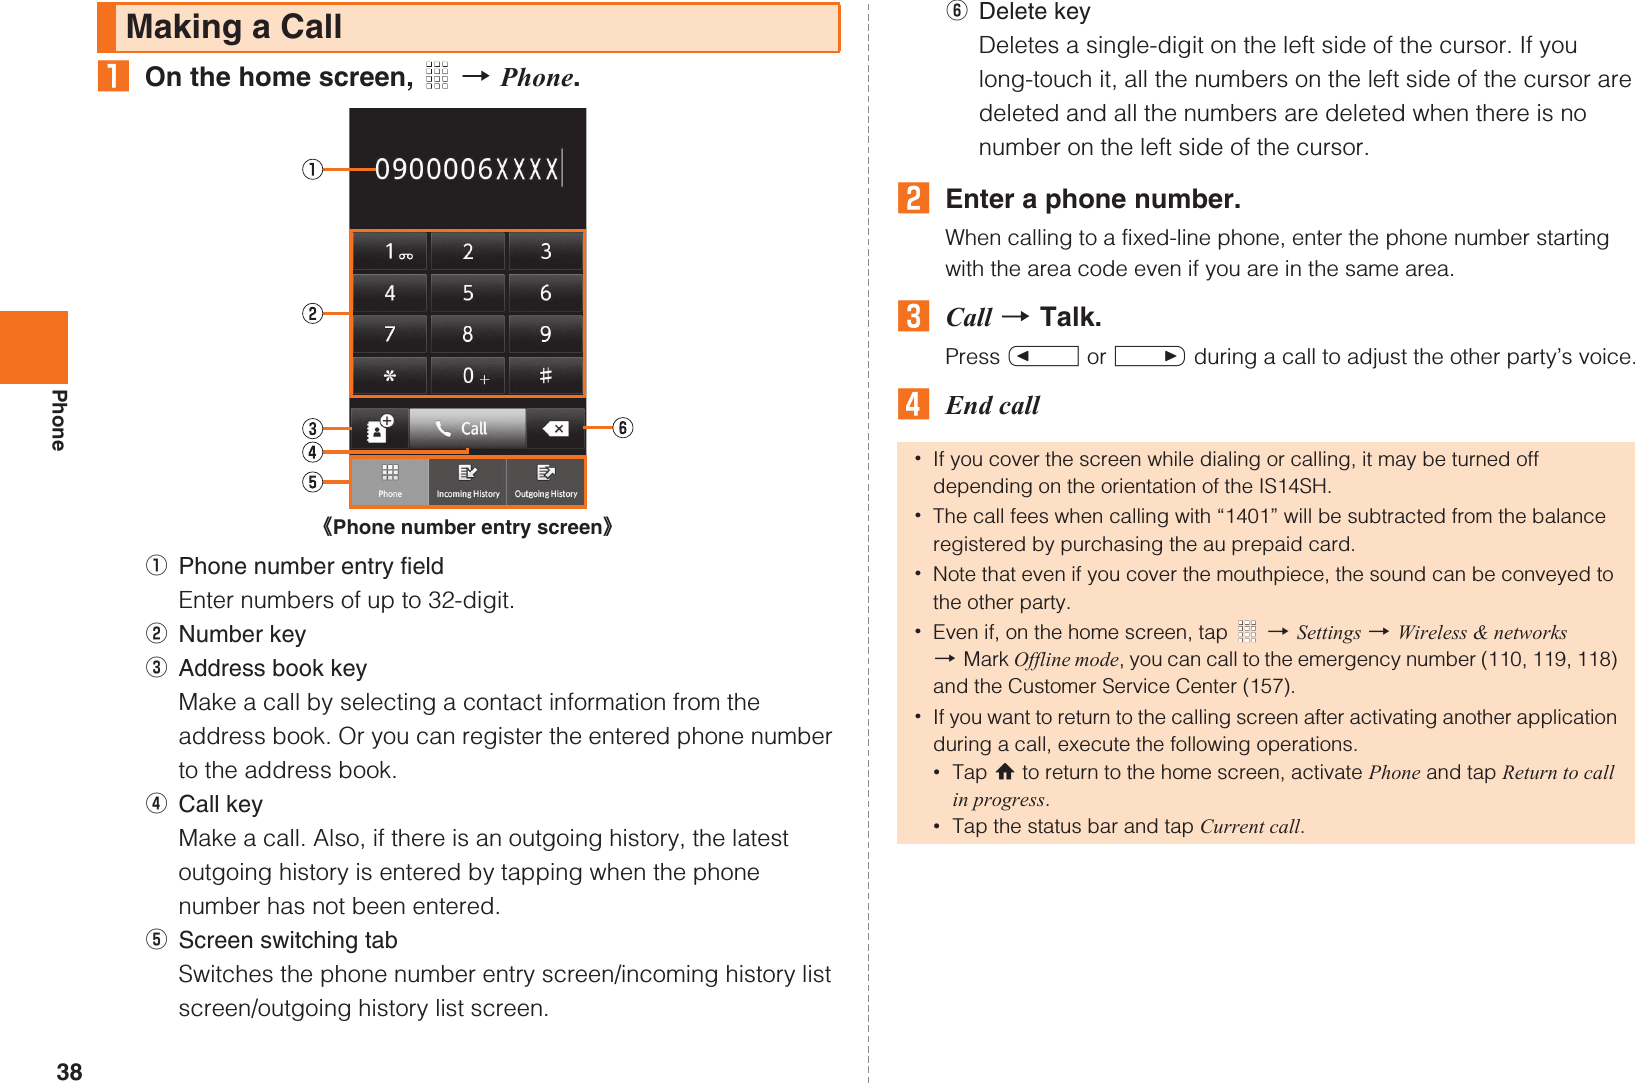
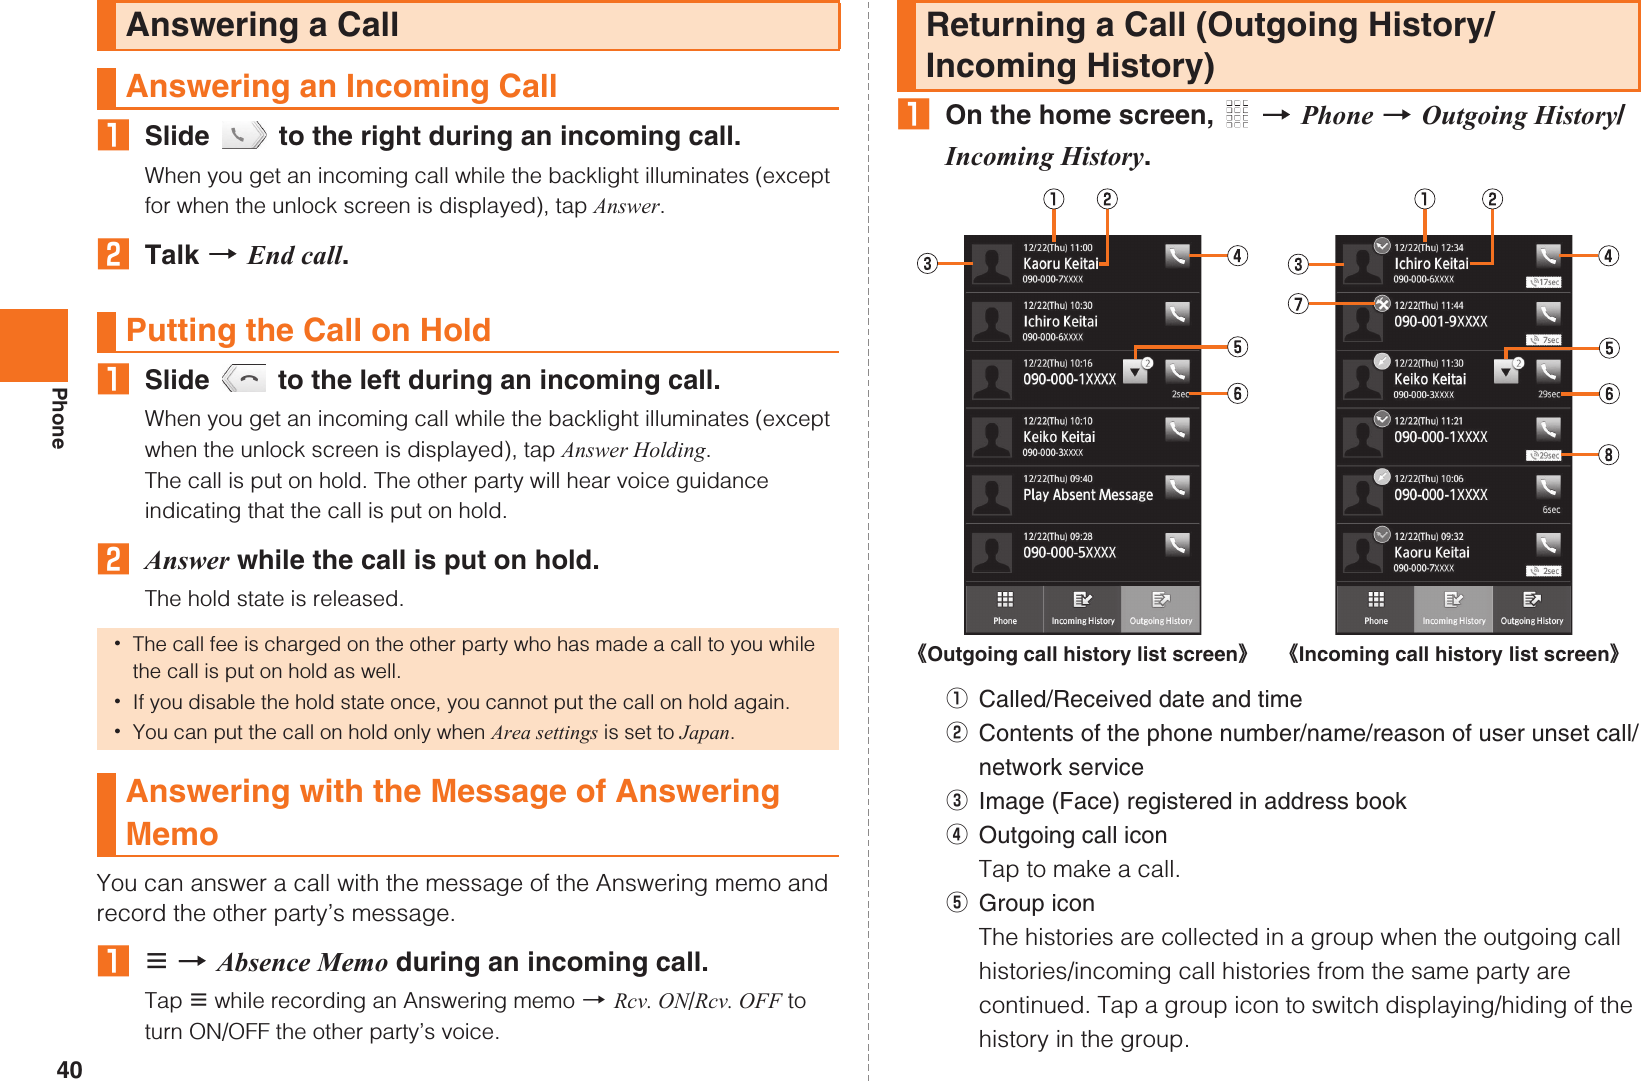
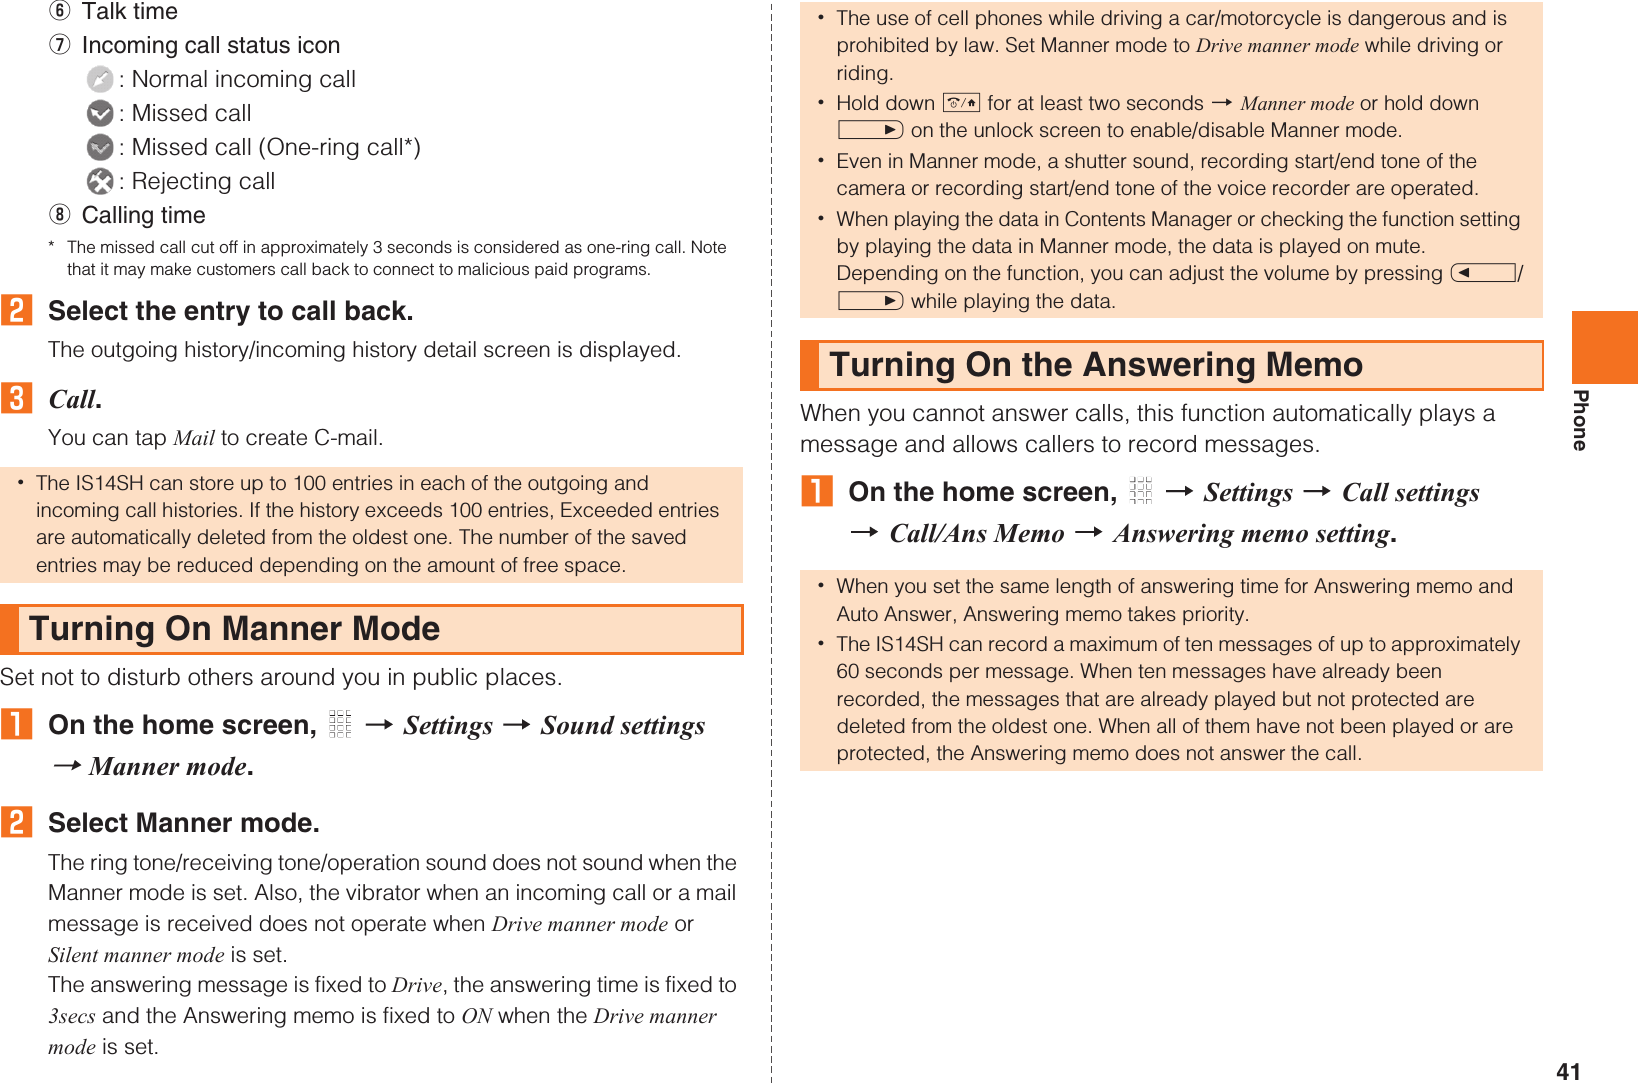
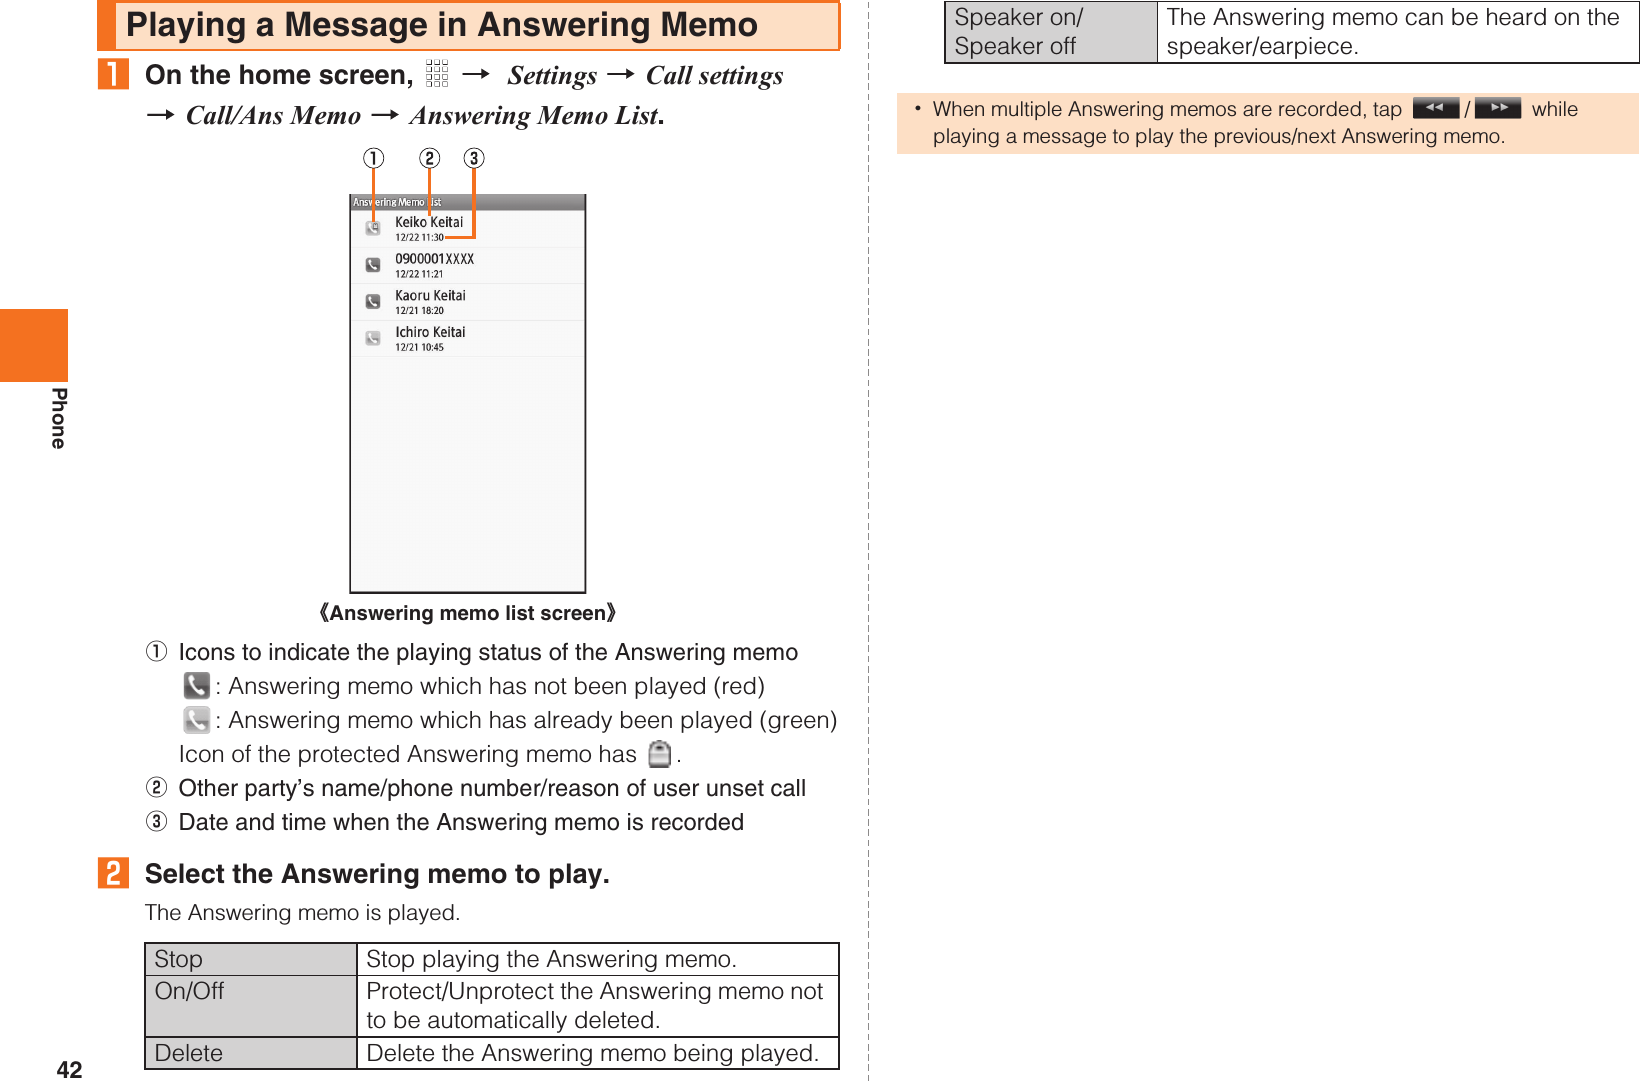
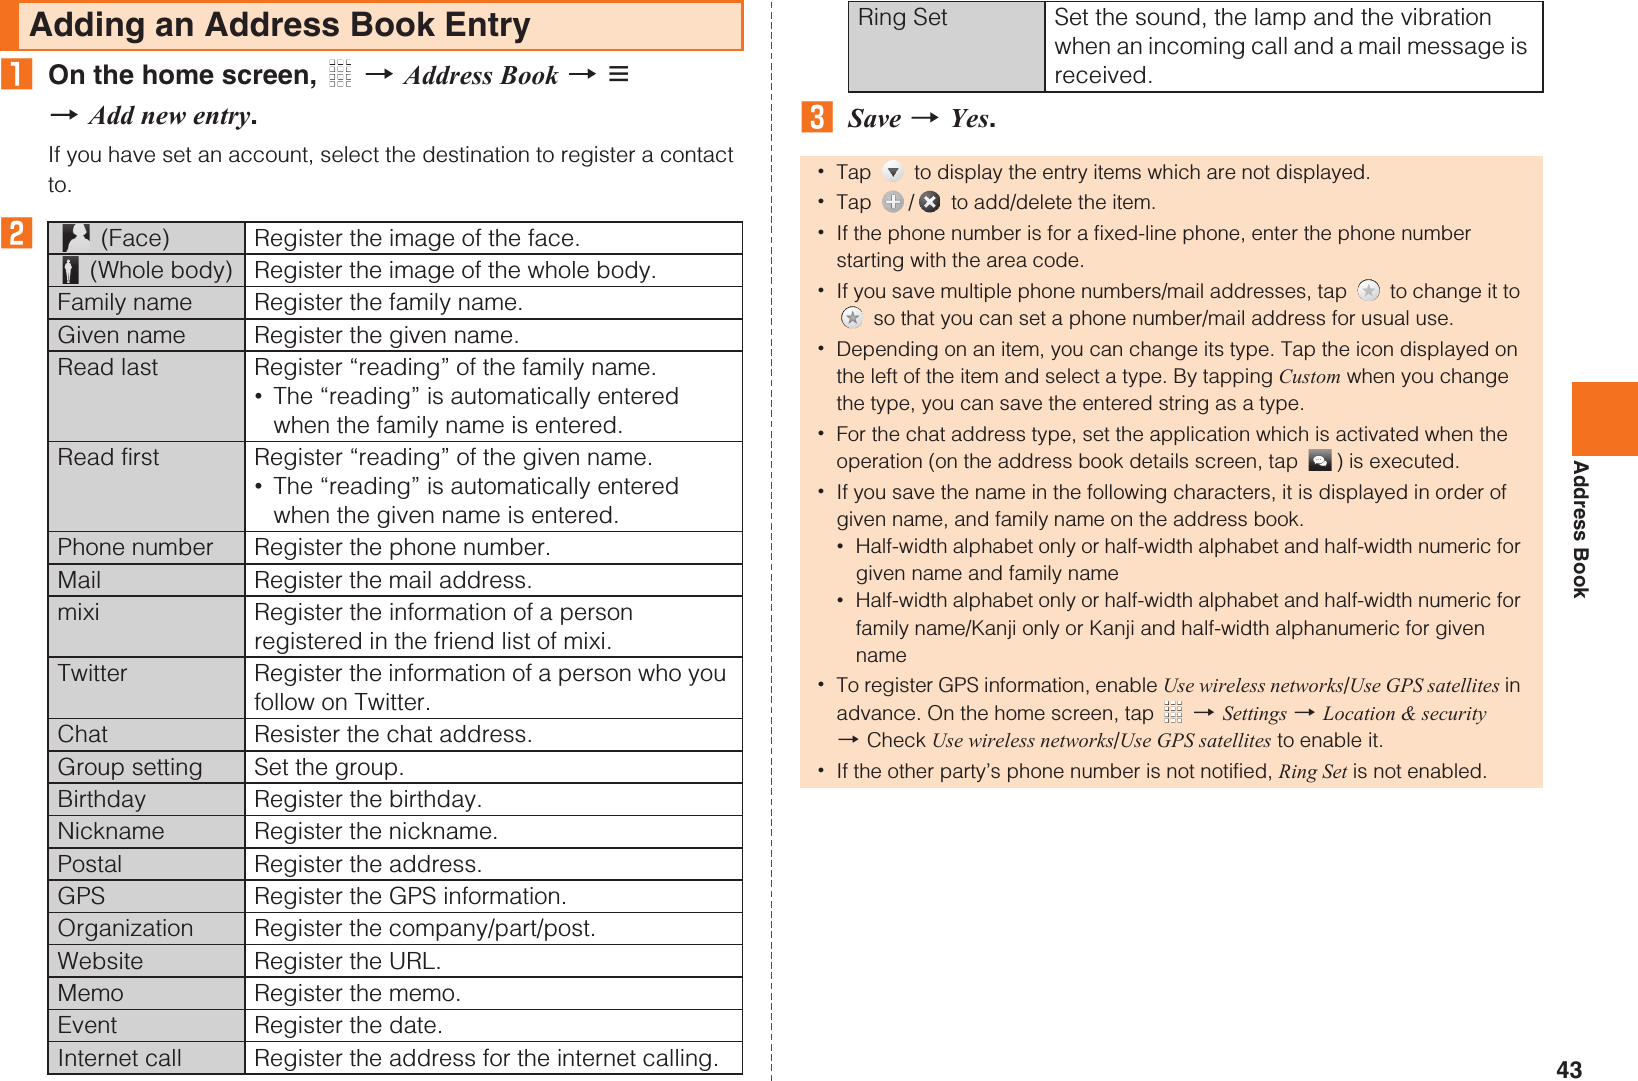
![33Learning the BasicsTap the character entry field while the IS14SH is closed to display software keyboard and enter characters by tapping keys on the screen.The following software keyboards are available for the IS14SH.AOn the character entry screen, [Set QWERTY keyboard[Portrait]/Set 12 keyboard[Portrait] [OK.■Flick inputWhen the software keyboard is “12 Key”, you can enter a desired character by flicking the key up, down, left or right without tapping the key repeatedly.By tapping a key, the candidates that can be entered by flick input are displayed. By flicking the key in the direction of a desired character being displayed, the character is entered in the character entry area. For example, you can enter “A” by only tapping , and you can enter “B” by flicking left.ACharacter entry areaBPrediction candidates list/Relational prediction candidates list/Normal conversion candidates listIf the word prediction function is enabled, the prediction candidates list is displayed when characters are entered. If the relational prediction function is enabled, the relational prediction candidates list is displayed when an entry is selected from the prediction candidates list.Enter characters and tap to display the normal conversion candidates list. •You can enlarge the candidates list area by tapping . Tap to return it to the original display.CReverse toggle key/Undo key: Displays the characters assigned to the same key in the reverse rotation.Character Input (Software Keyboard)Switching Software Keyboards12Key You can enter a character, changing characters by repeatedly tapping the character entry key.QWERTY You can enter a displayed character by tapping the character entry key. Use romaji for entry. Keeptouching Flick leftViewing the Character Entry Screen《Character entry screen (12 Key)》 《Character entry screen (QWERTY)》KUUJAWGDQQMࡍࠫ㧞㧜㧝㧝ᐕ㧝㧞㧝ᣣޓᧁᦐᣣޓඦᓟ㧡ᤨ㧝㧥ಽ](https://usermanual.wiki/Sharp/HRO00163.User-manual-part1/User-Guide-1601707-Page-35.png)