Sharp TCG037 Video Cassette Recorder w/ Remote Locator Transmitter User Manual Ope Manual a
Sharp Corporation Video Cassette Recorder w/ Remote Locator Transmitter Ope Manual a
Sharp >
Contents
- 1. revised manual part 1
- 2. revised manual part 2
revised manual part 1
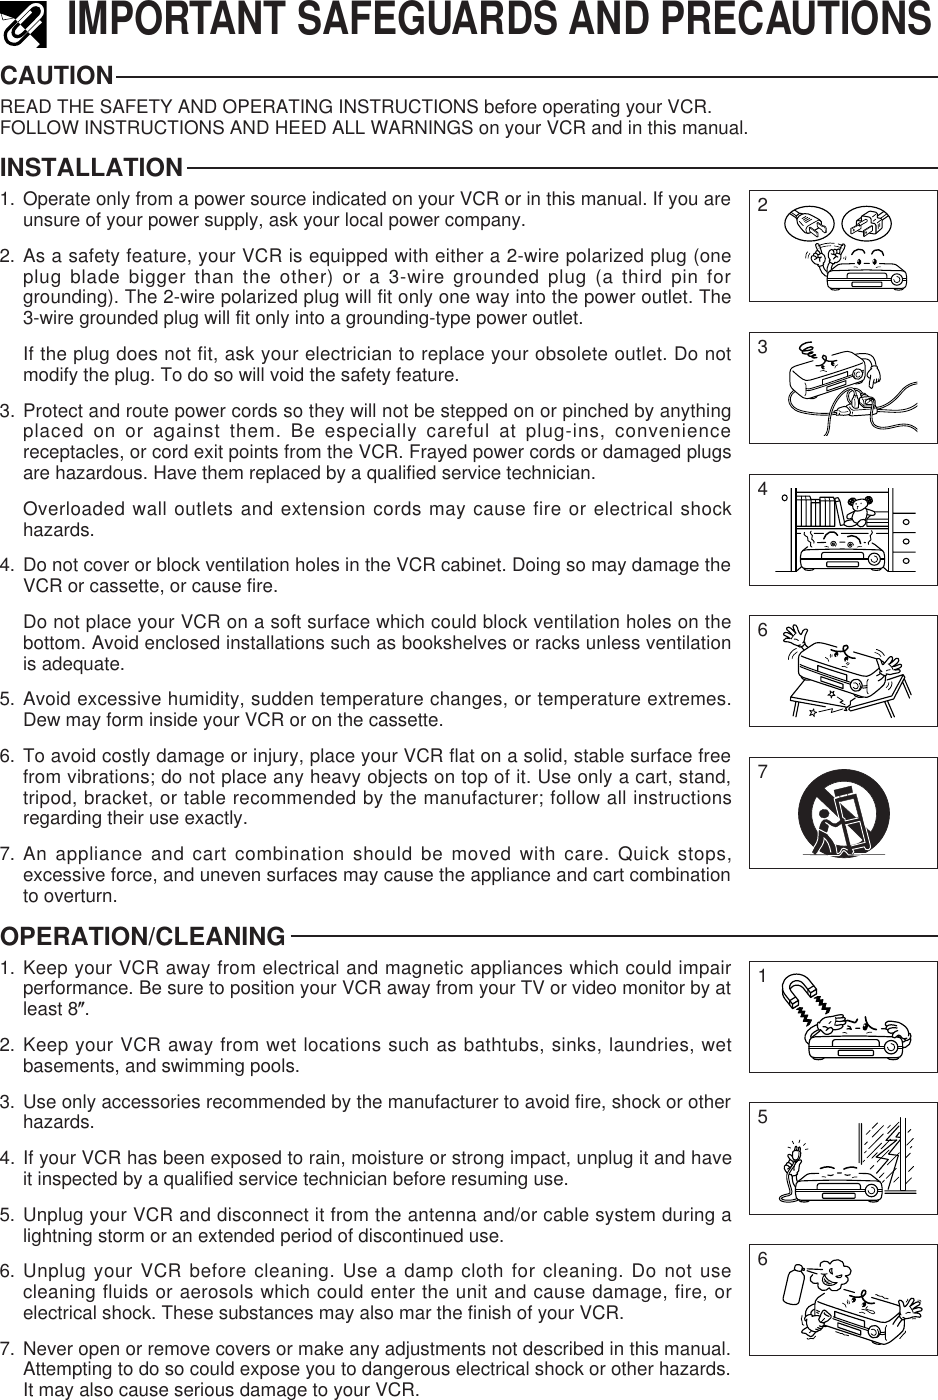
![FeaturesCommon Features• Hi-Fi Stereo Sound• Built-in MTS (Multi-channel TV Sound) Decoder— Lets you record stereo or SAP (Separate AudioProgram) broadcasts.• *The VCR Plus+ Programming System/Cable BoxChannel Control Function/Digital Satellite Re-ceiver Control Function• TURBOWIND — 360 2 Rewind Speed to Fastforward and Rewind.• EZ Set Up — VCR tuner channels and clock areautomatically set for both Air and Cable channels.• Double-Azimuth 4-Heads•19µ Clear Picture System (in EP mode) — Forenhanced picture quality in EP (Extended Play)mode.• Auto VIEWCAM Dubbing function• System for Better Resolution and Color Re-production• Multi-Language (English/Spanish/French) OSD(On Screen Display) with Menu Screen Guidance— On-screen setting and recording instructions.• 181-channel PLL Quartz Synthesized RandomAccess Tuner with Automatic Channel Setting• Quick Start with Full Loading Mechanism• 1-Year, 8-Event Programmable Timer• Simple Recording Timer• Universal Remote Control— Operates the VCR and basic functions of variousTVs, Cable Boxes, and some Digital Satellite Re-ceivers.— Remote Pager function• Sharp Super Picture — Enhances picture qualityduring playback.• Field-Still/Variable Slow/Frame Advance• Real-Time Counter — Displays accurate tape time.• Automatic Daylight Saving–Time (D.S.T.) Ad-justment — Automatically adjusts VCR clock todaylight saving–time.• Blue Screen Noise Elimination• Auto Tracking Control System — Automaticallyadjusts tracking during playback.• Digital Program Search System (DPSS) — Quicklylocates the beginning of a specific recording.• Skip Search — Quickly operates a forward videosearch in 30 second intervals, then resumes play-back.• Instant Replay — Quickly operates a reverse videosearch in 20 second intervals, then resumesplayback.• Auto Zero Back — Quickly finds “0:00.00” pointand stops there.• Recorded Section Auto Repeat — Continuallyplays back a recorded section of the tape.• Full Automatic Playback• Tamper Proof — Prevents accidental change of theoperation mode.• Up to 8 Hours of Recording and Playback (withT-160 cassette)• Built-in Shuttle Control System — Rewind andfast-forward with a single control.• Built-in Front AV Jacks — For easy connection ofaudio/video equipment such as the Sharp Viewcam.• Automatic Head Cleaning System — Cleans the VCRvideo heads each time you insert and eject a tape.* VCR Plus+ C3 and PlusCode are trademarks of Gem-star Development Corporation. The VCR Plus+ systemis manufactured under license from Gemstar Develop-ment Corporation.Be sure that thefollowingaccessories areall included withyour VCR.AccessoriesAA batteries forthe remotecontrol unitRound coaxial cable(75 Ohm, 1 m [3-1/4 ft.])QCNW-0262AJZZorQCNW-0298AJZZRemote control unit](https://usermanual.wiki/Sharp/TCG037.revised-manual-part-1/User-Guide-11814-Page-6.png)
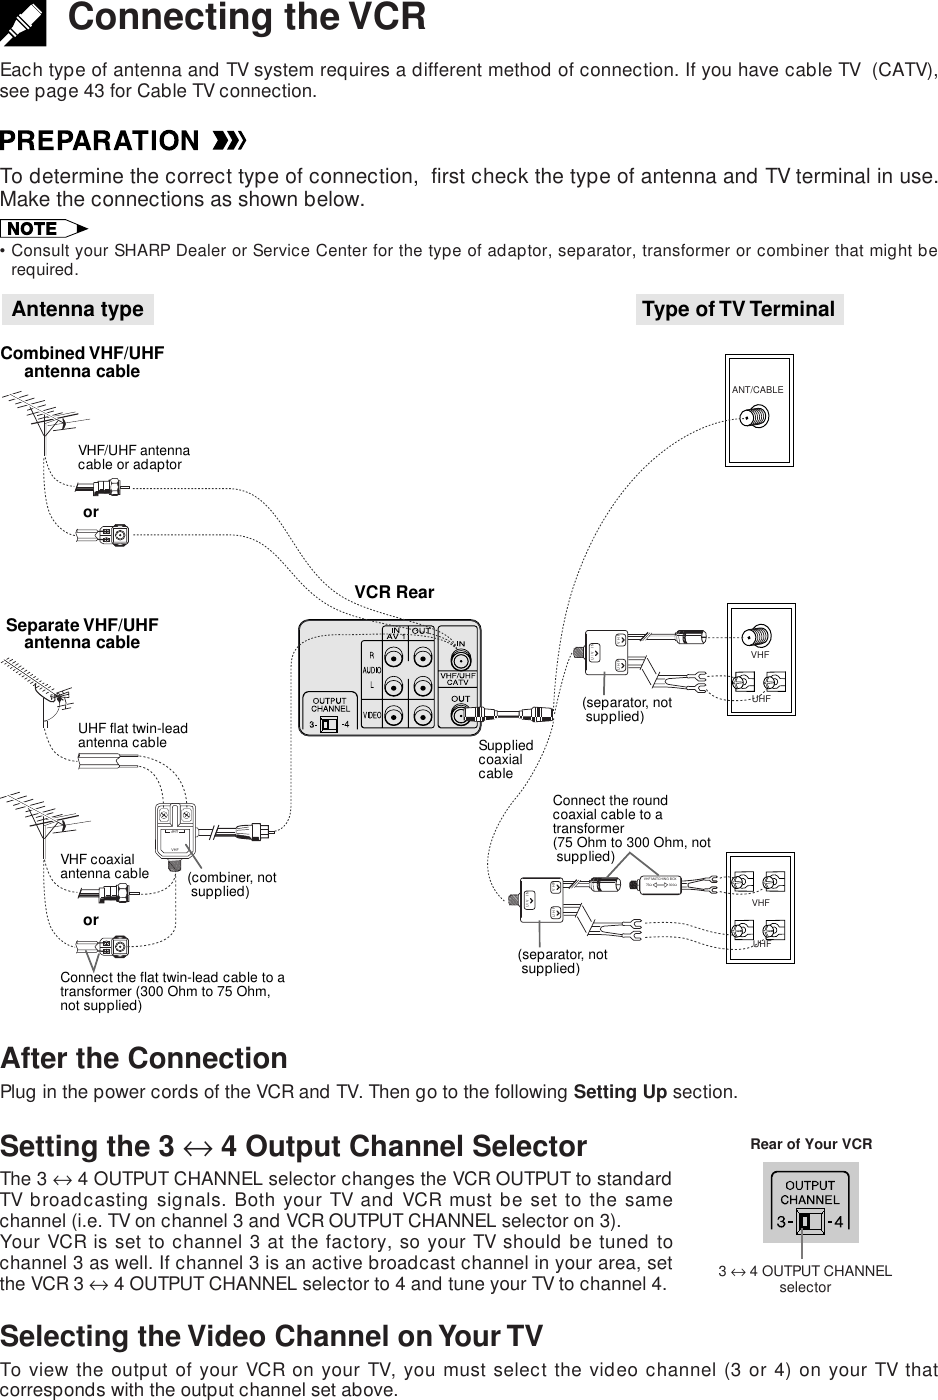
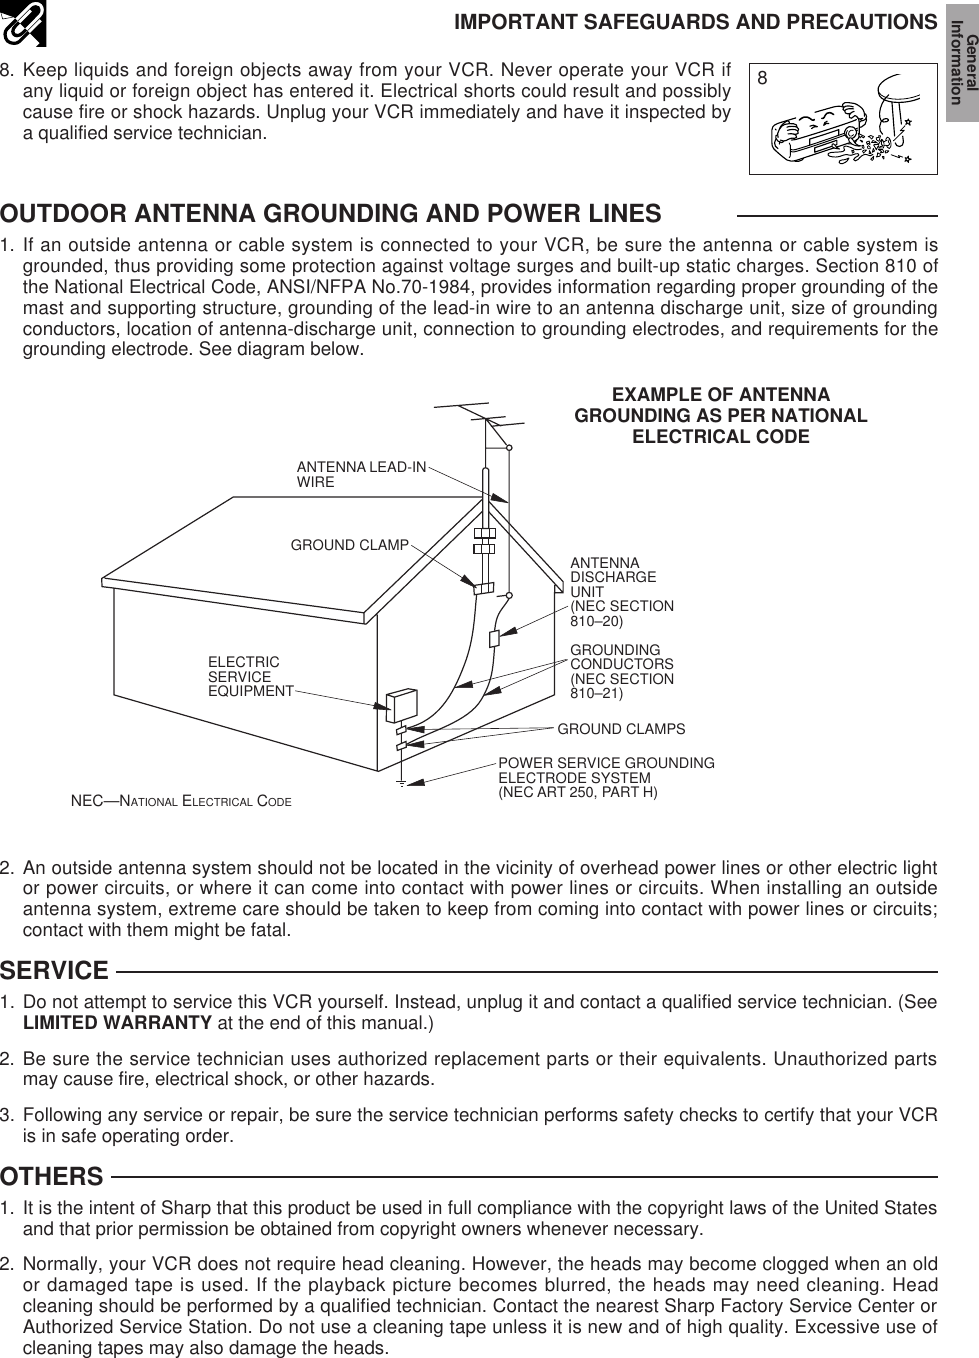
![Major Components of Your VCR[Rear]•The display will return to the original mode (counter or clock display) 3 seconds after theVCR enters the operation mode.3 ↔ 4 OUTPUT CHANNEL selector (see Setting the 3 ↔ 4 Output Channel Selector)Connection terminals (see Tape Dubbing)Connection terminals (see Connecting the VCR and Cable TV Connections)](https://usermanual.wiki/Sharp/TCG037.revised-manual-part-1/User-Guide-11814-Page-7.png)