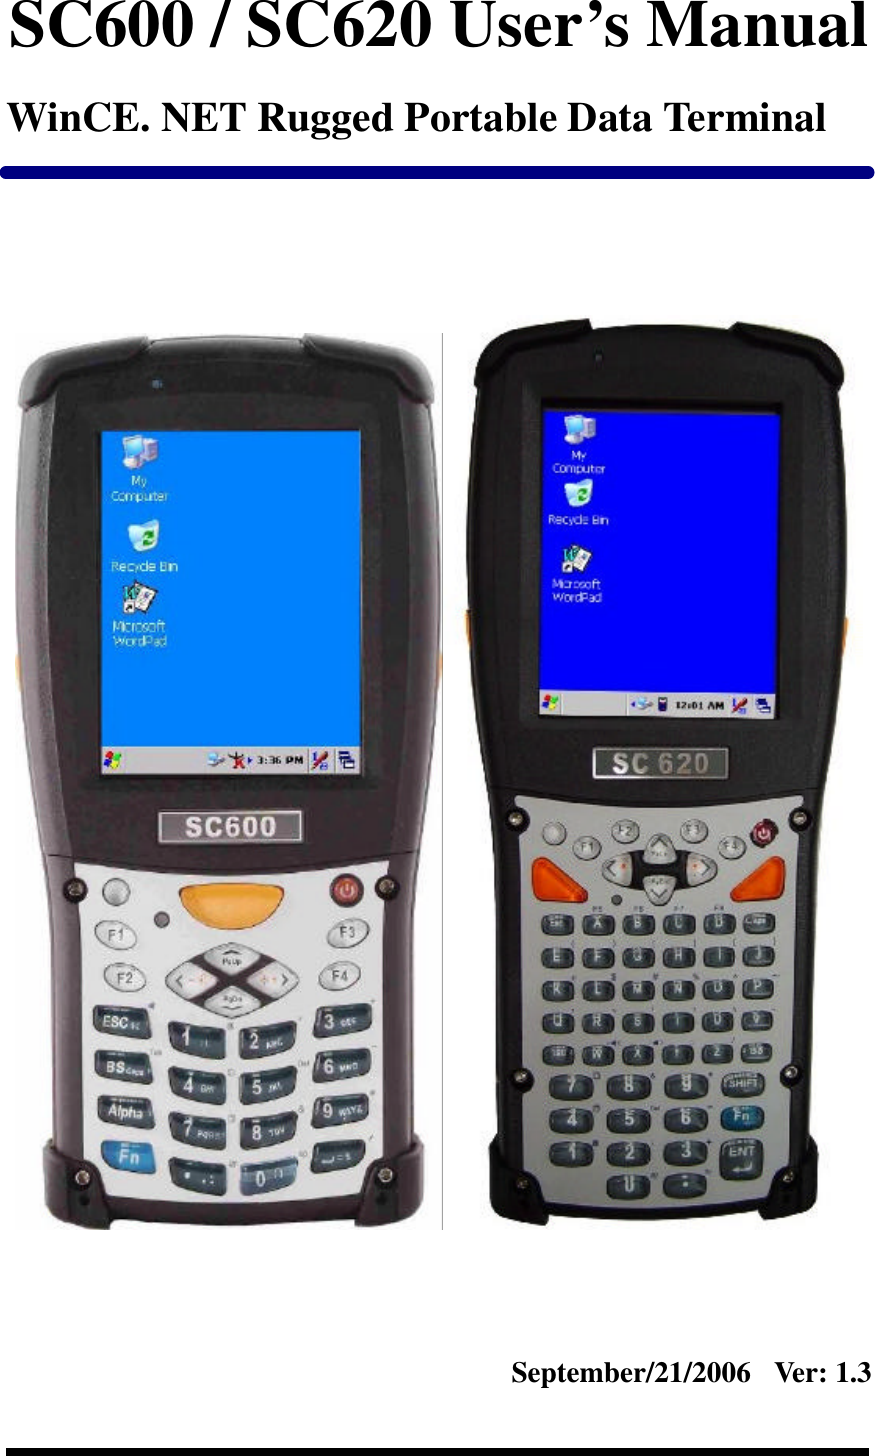
Shin Chuan Computer SC620PDT-BW Portable Data Terminal User Manual SC600 SC620 En 060921 rev by Joy
Shin Chuan Computer Co., Ltd. Portable Data Terminal SC600 SC620 En 060921 rev by Joy
UserManual.wiki
>
Shin Chuan Computer
>
SC620PDT-BW User Manual
>
User manual 1 1 rev2
Contents
1.
User manual 1 1 rev2
2.
User manual 1 2 rev2
3.
User manual 1 3 rev2
4.
User manual 1 4 rev2
5.
User manual 1 5 rev2
6.
User manual 1 6 rev2
7.
User manual 1 7 rev2
8.
User manual 1 8 rev2
9.
User manual 1 9 rev2
10.
User manual 2 rs
User manual 1 1 rev2
Navigation menu
Upload a User Manual
Namespaces
Wiki Guide
HTML
PDF
Info
Views
User Manual
Discussion / Help
Navigation
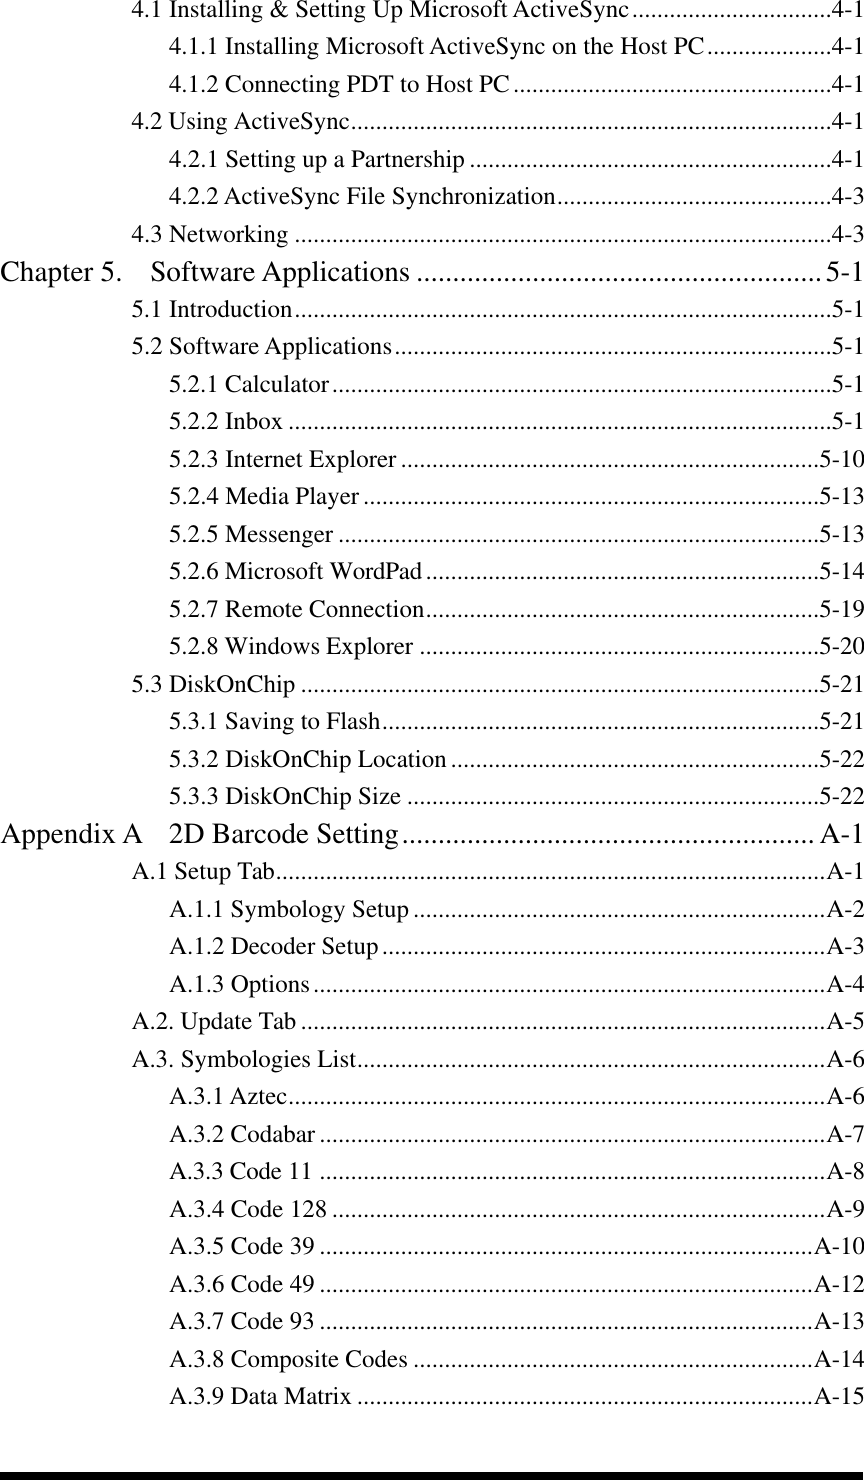


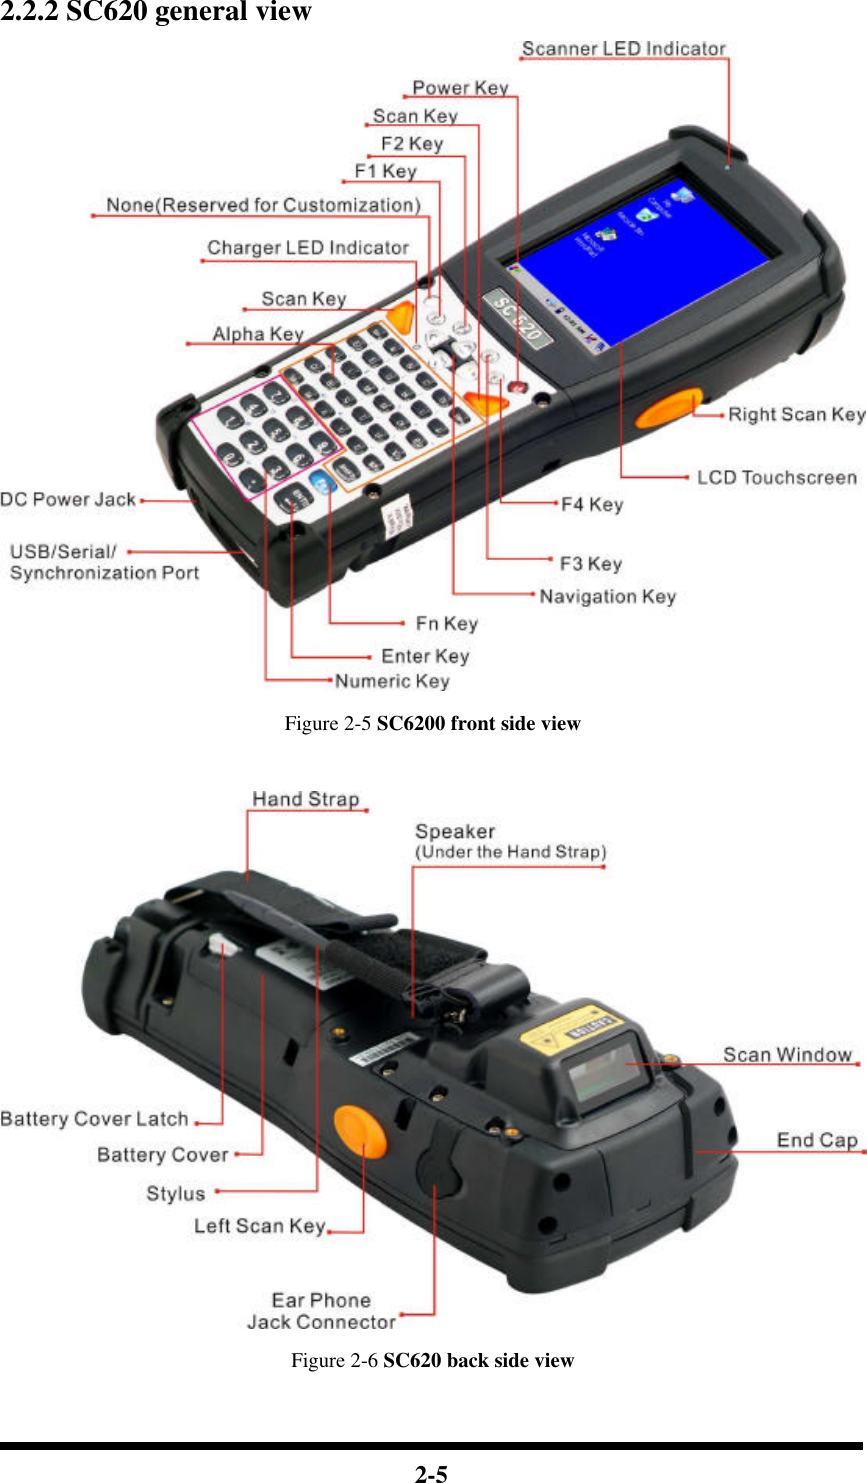
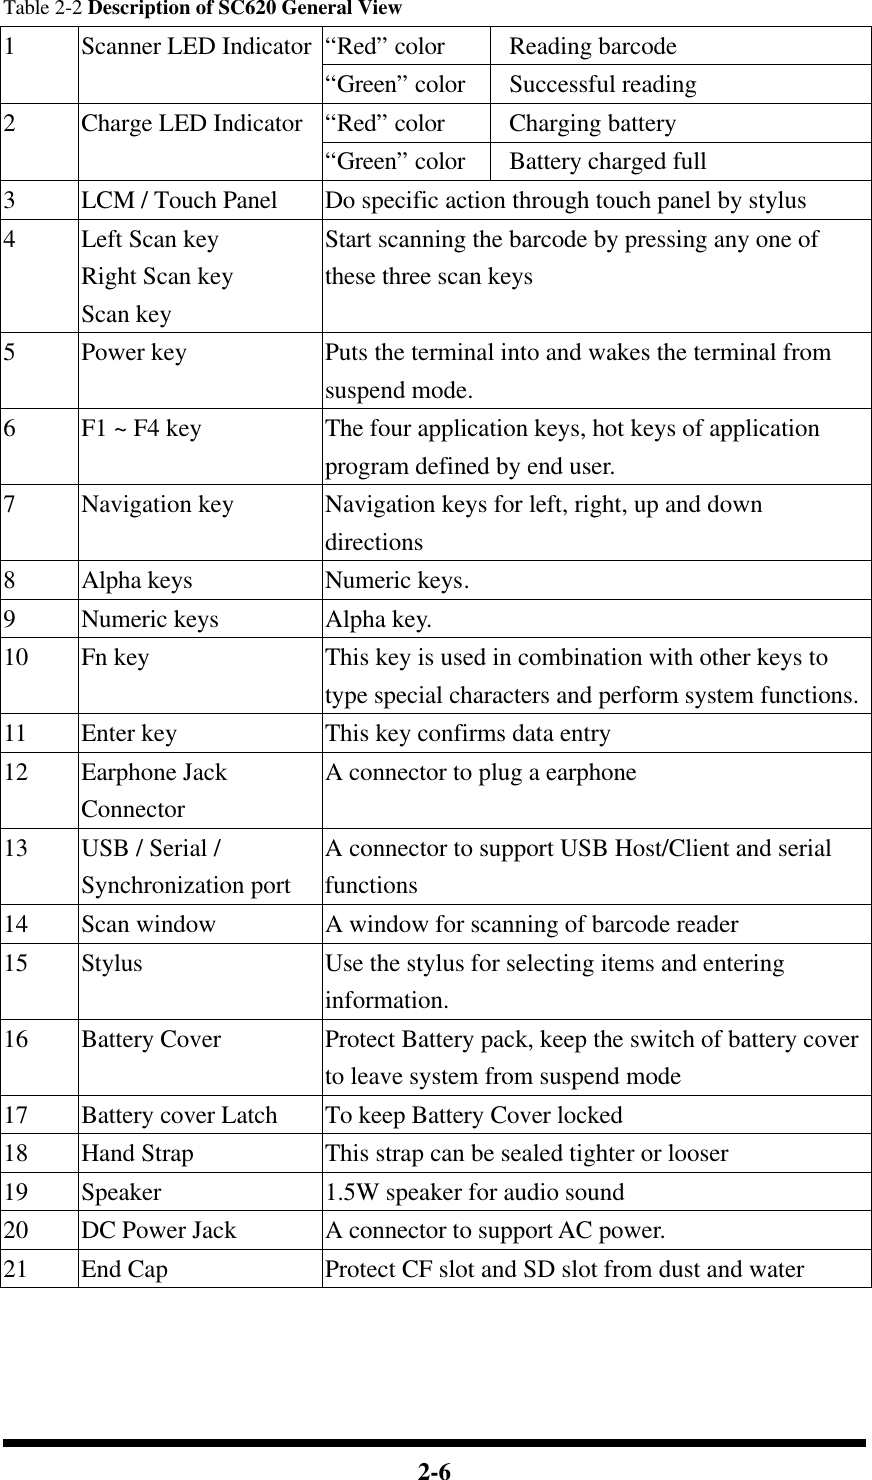


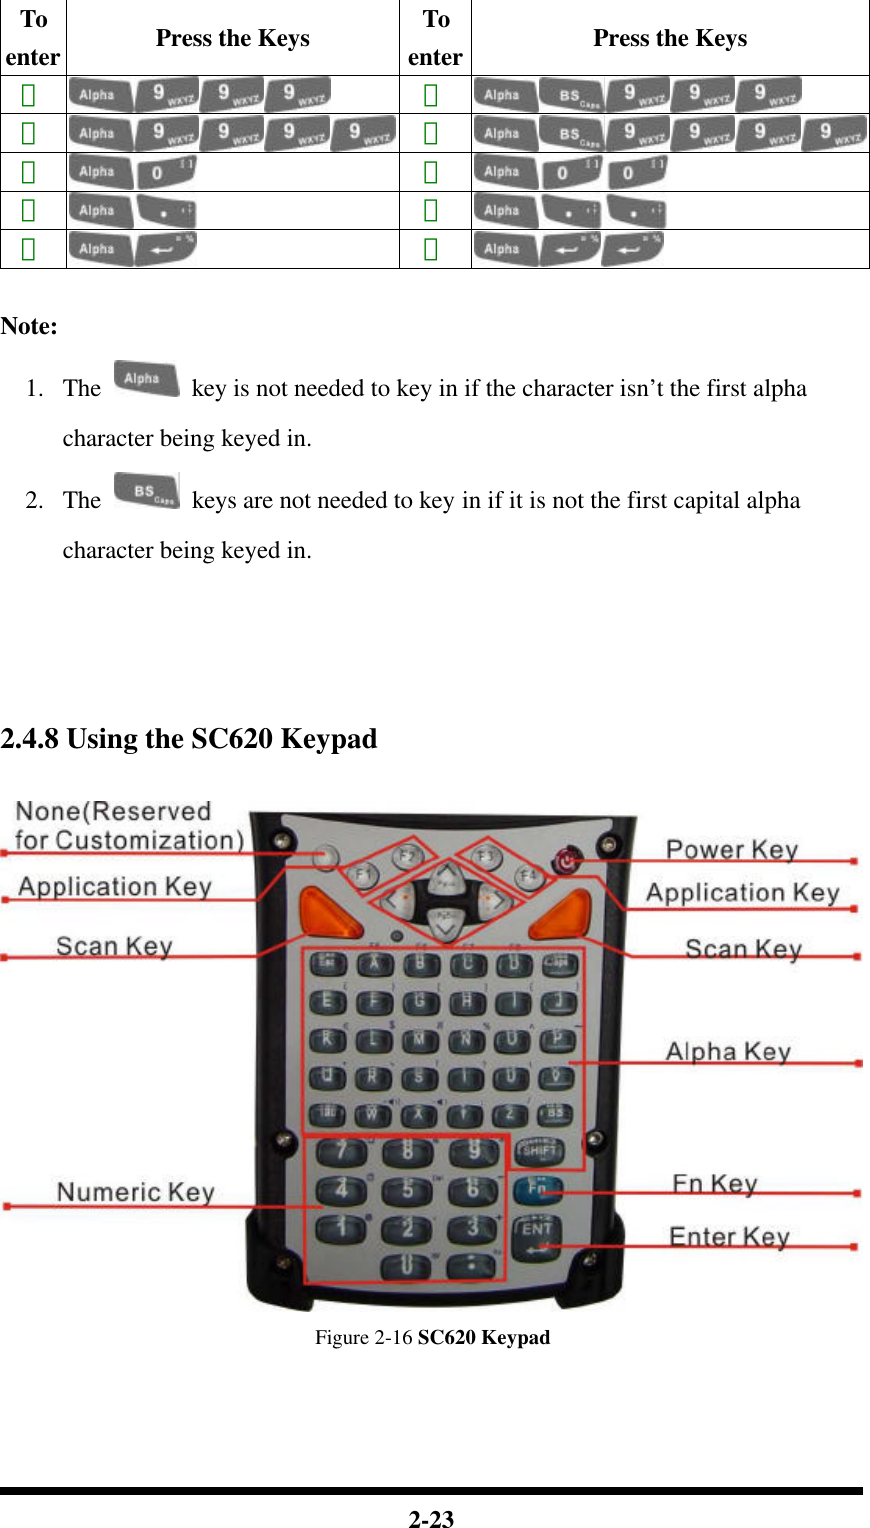
![2-24 Table 2-8 Keypad List Key Main Function Fn + Main Function None Main Barcode Scan Key Power On/Off Internet Explorer Microsoft WordPad Inbox File Explorer Right Increase of Brightness Left Decrease of Brightness Down Page Down Up Page Up Esc Caps Tab Backspace A F5 B F6 C F7 D F8 E ( F ) G [ H ] I { J }](https://usermanual.wiki/Shin-Chuan-Computer/SC620PDT-BW.User-manual-1-1-rev2/User-Guide-731690-Page-41.png)
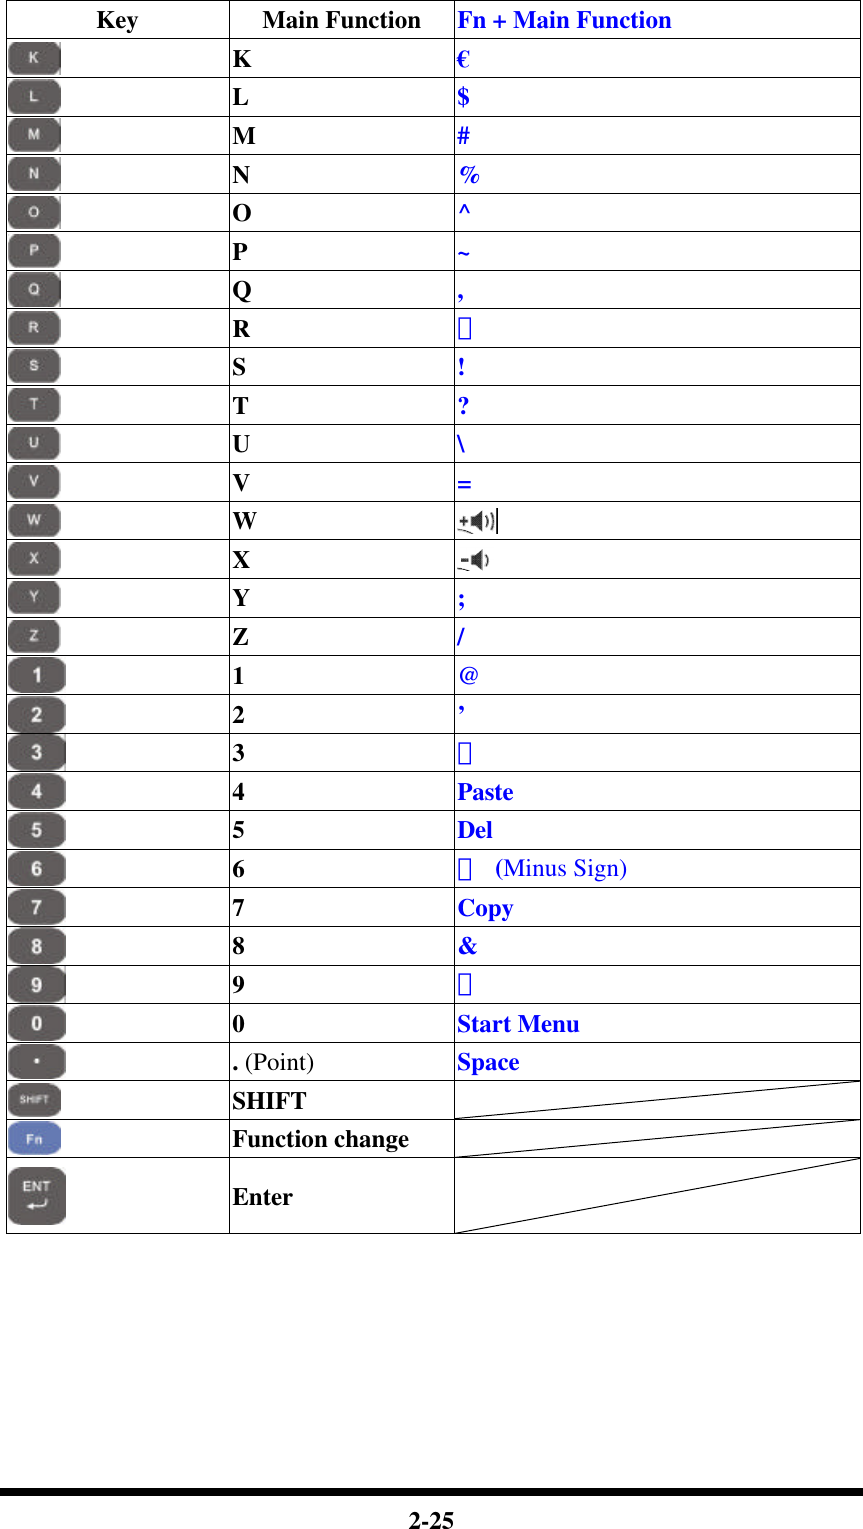
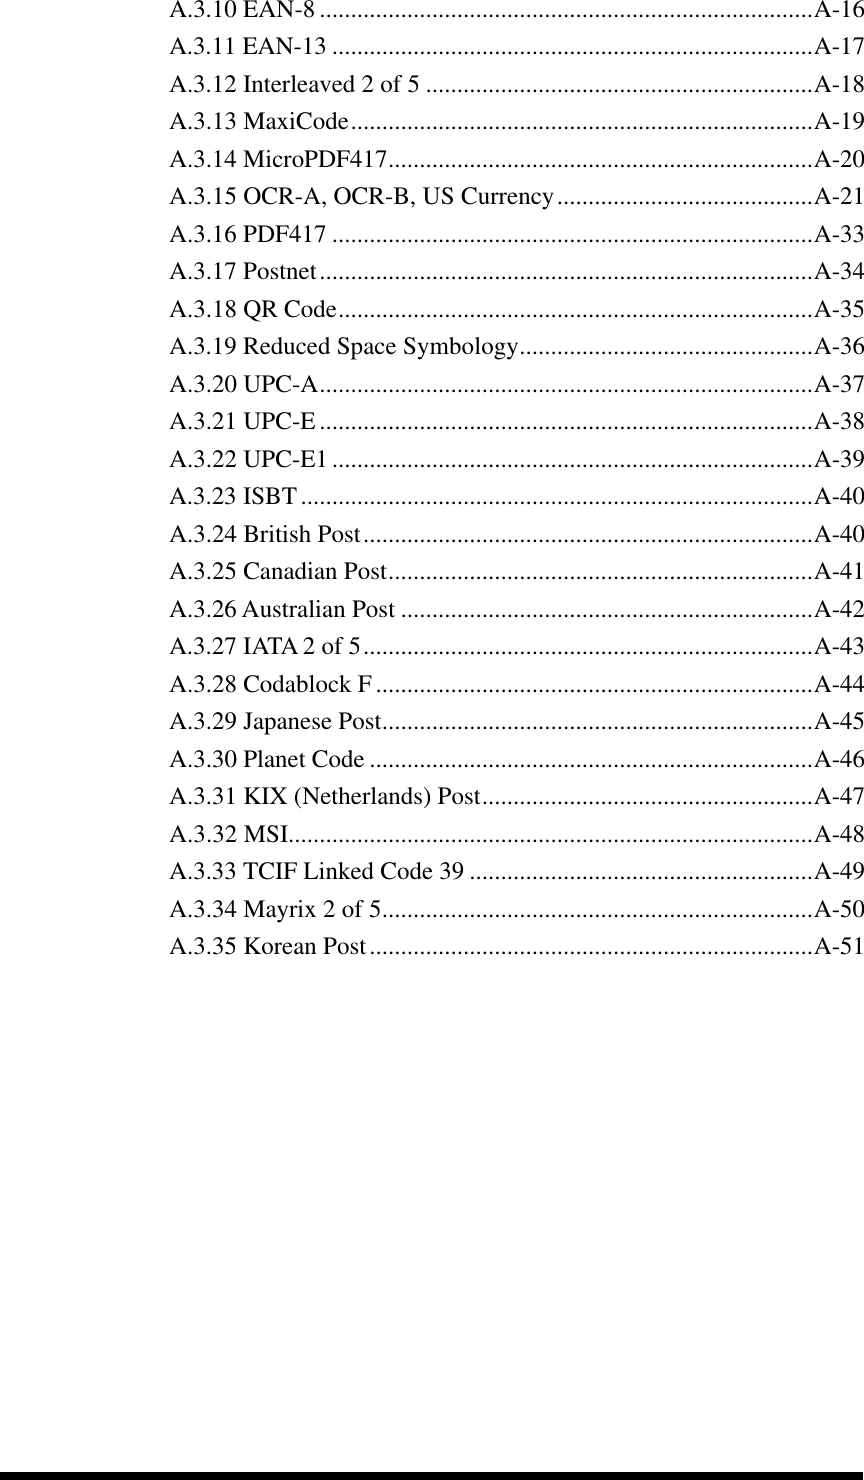
![2-29 Key Sequence Fn + Main Function Definition F8 (Information) Application key 8, User can define F8 function from setting. ( Enter a ( by pressing key, then pressing key. ) Enter a ) by pressing key, then pressing key. [ Enter a [ by pressing key, then pressing key. ] Enter a ] by pressing key, then pressing key. { Enter a { by pressing key, then pressing key. } Enter a } by pressing key, then pressing key. € Enter a € by pressing key, then pressing key. $ Enter a $ by pressing key, then pressing key. # Enter a # by pressing key, then](https://usermanual.wiki/Shin-Chuan-Computer/SC620PDT-BW.User-manual-1-1-rev2/User-Guide-731690-Page-46.png)