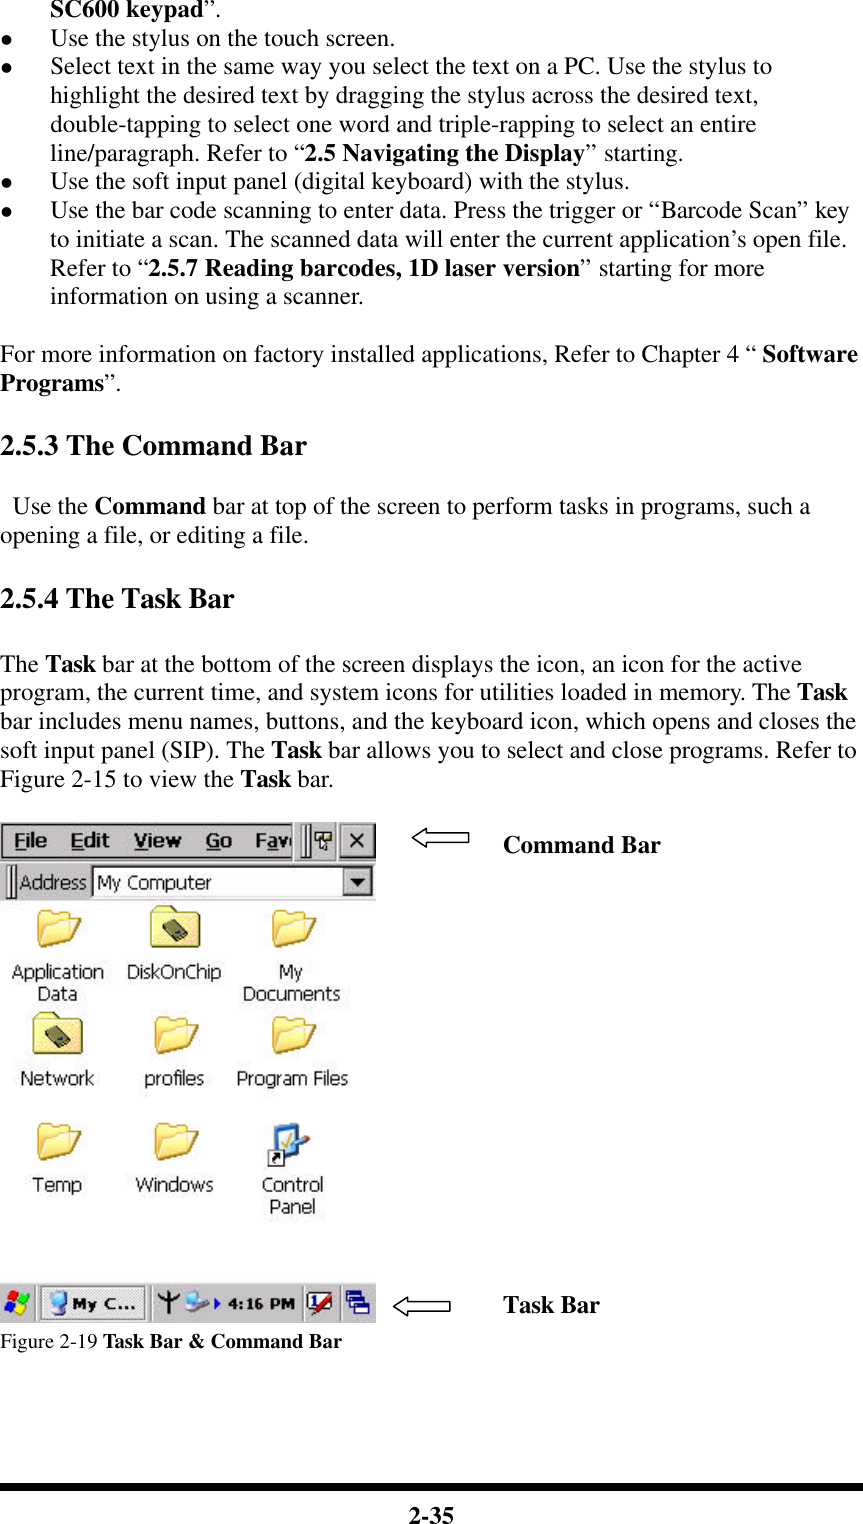
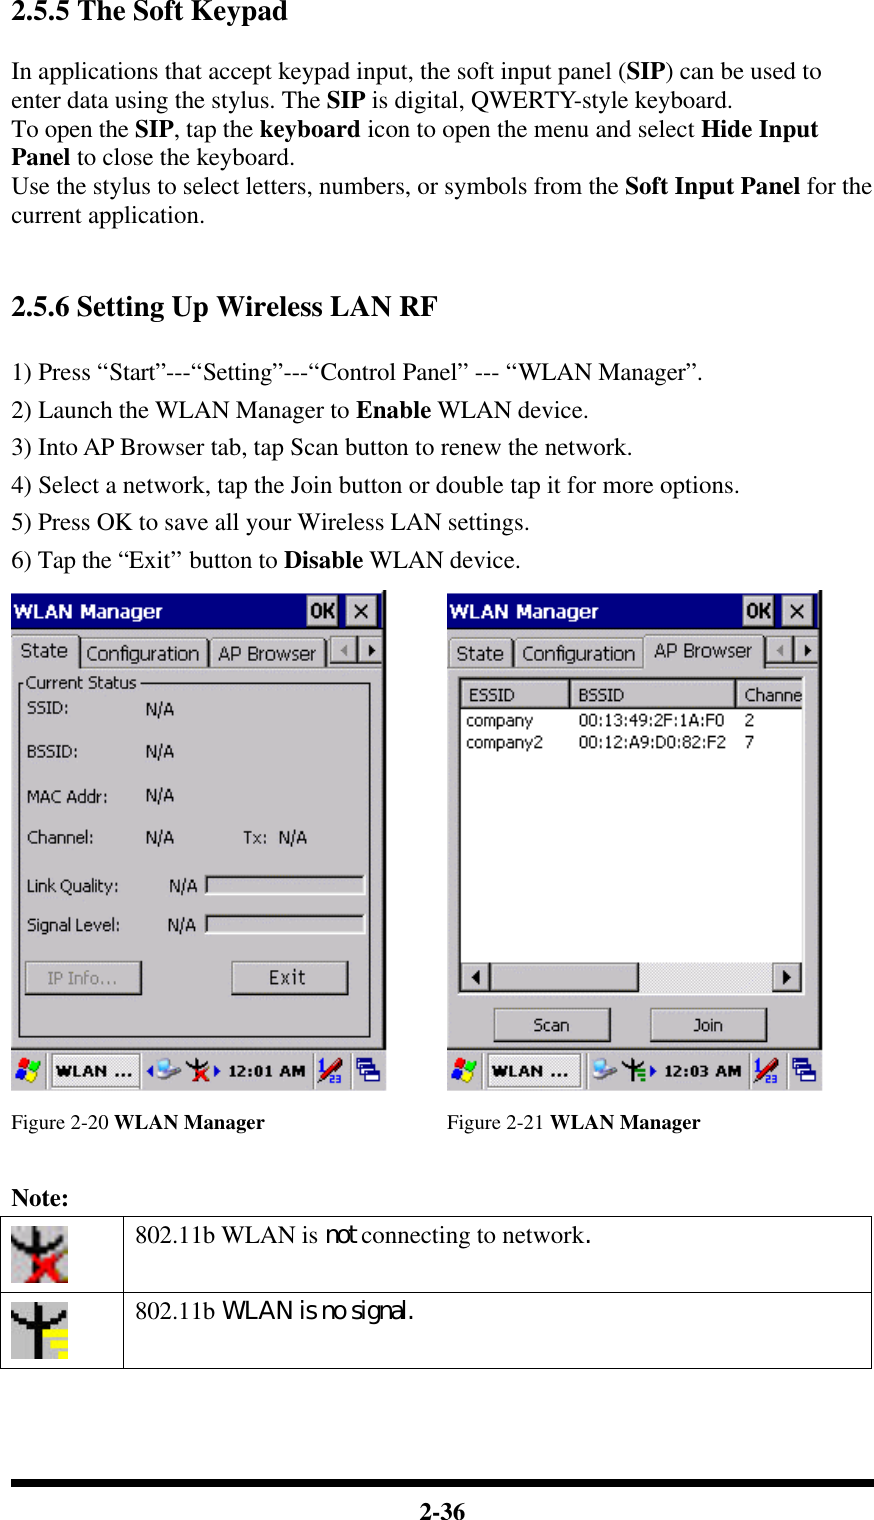
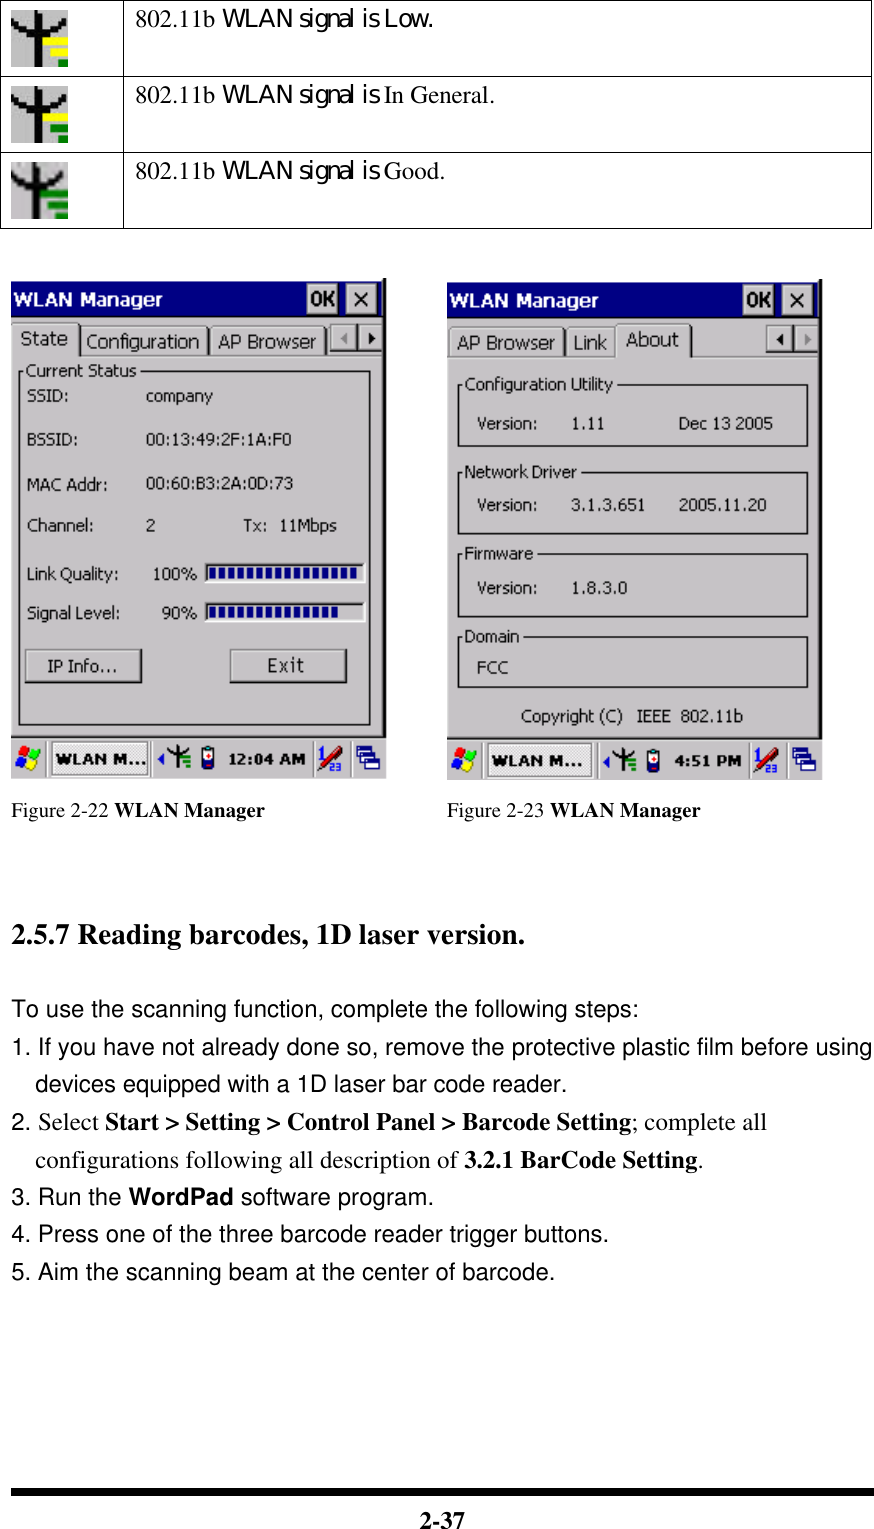
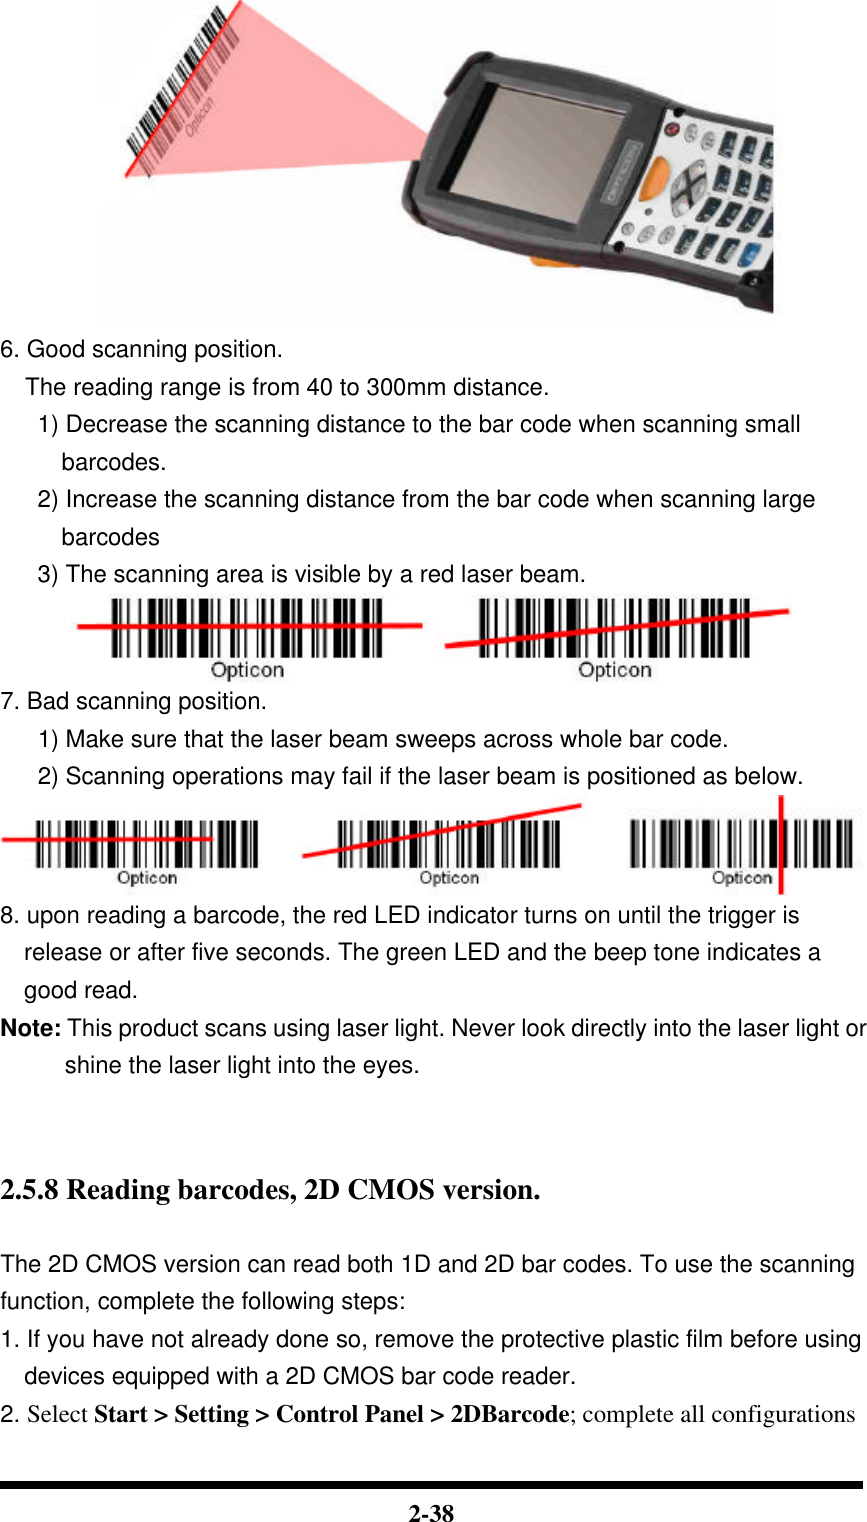
Shin Chuan Computer SC620PDT-BW Portable Data Terminal User Manual SC600 SC620 En 060921 rev by Joy
Shin Chuan Computer Co., Ltd. Portable Data Terminal SC600 SC620 En 060921 rev by Joy
UserManual.wiki
>
Shin Chuan Computer
>
SC620PDT-BW User Manual
>
User manual 1 2 rev2
Contents
1.
User manual 1 1 rev2
2.
User manual 1 2 rev2
3.
User manual 1 3 rev2
4.
User manual 1 4 rev2
5.
User manual 1 5 rev2
6.
User manual 1 6 rev2
7.
User manual 1 7 rev2
8.
User manual 1 8 rev2
9.
User manual 1 9 rev2
10.
User manual 2 rs
User manual 1 2 rev2
Navigation menu
Upload a User Manual
Namespaces
Wiki Guide
HTML
PDF
Info
Views
User Manual
Discussion / Help
Navigation
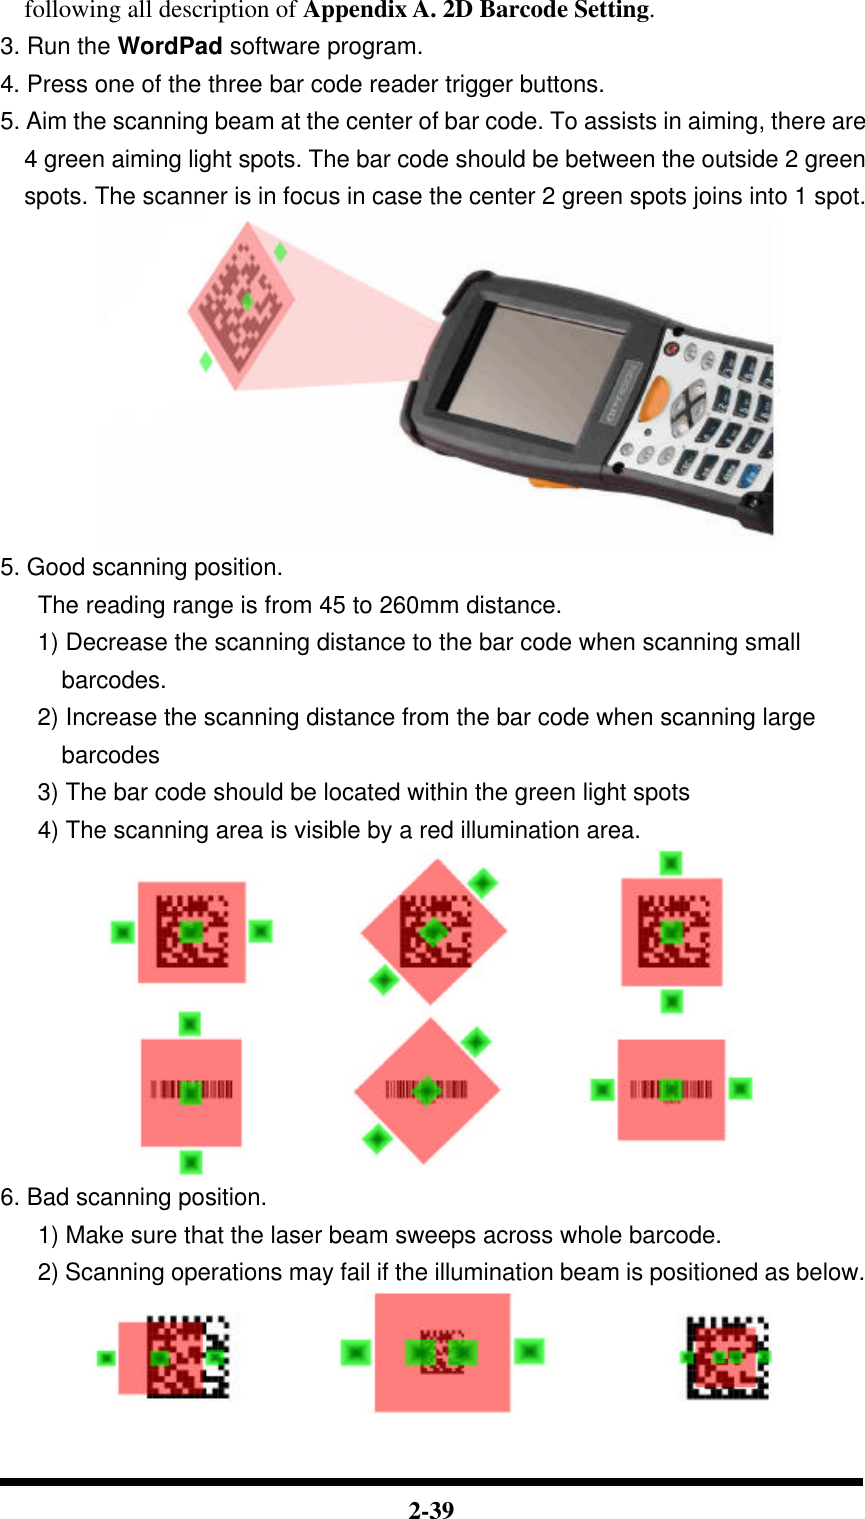
![2-34 2.5 Navigating the Display 2.5.1 Setting Time and Date In the Date/Time options, you can change the year, month, date, time, time zone, or select automatic adjust for Daylight Saving Time. To set or change the date and time: 1. Select Start > Settings > Control Panel > Date/Time 2. To change the year, select the year or open a numeric dial. Select the up arrow to increase the value; select the down arrow to decrease the value. Or you can type a new value in the field. 3. Select the month to open a pull-down list of months or press the arrow buttons to either side of the month to increase or decrease the month. Figure 2-18 Date/Time properties 4. To change the time, select the hour, minute, seconds, or AM/PM and select the up arrow to increase the value; select /tape the down arrow to decrease the value. Or you can type a new value in the field. 5. Select your correct time zone from the pull-down list. 6. To automatically adjust the clock for Daylight Saving Time, enable the checkbox at the bottom of the screen. 7. Select Apply to make save your changes [and make additional modifications] or select OK to exit the Date/Time settings. 2.5.2 Entering the Data To select and open programs, select Start > Programs from the task bar to open a list of available programs. Or if the program has a icon on the desktop, double-tap to open it. There are several ways to enter data on the PDT once in an application: l Use the keypad to enter alpha-numeric characters, Refer to “2.4.7 Using the](https://usermanual.wiki/Shin-Chuan-Computer/SC620PDT-BW.User-manual-1-2-rev2/User-Guide-731691-Page-1.png)