Siemens Information and Communication Mobile BIRD 2.4 GHz DECT Cordless Telephone System User Manual engl
Siemens Information and Communication Mobile LLC 2.4 GHz DECT Cordless Telephone System engl
UserManual.wiki
>
Siemens Information and Communication Mobile
>
BIRD User Manual
Users Manual
Navigation menu
Upload a User Manual
Namespaces
Wiki Guide
HTML
PDF
Info
Views
User Manual
Discussion / Help
Navigation

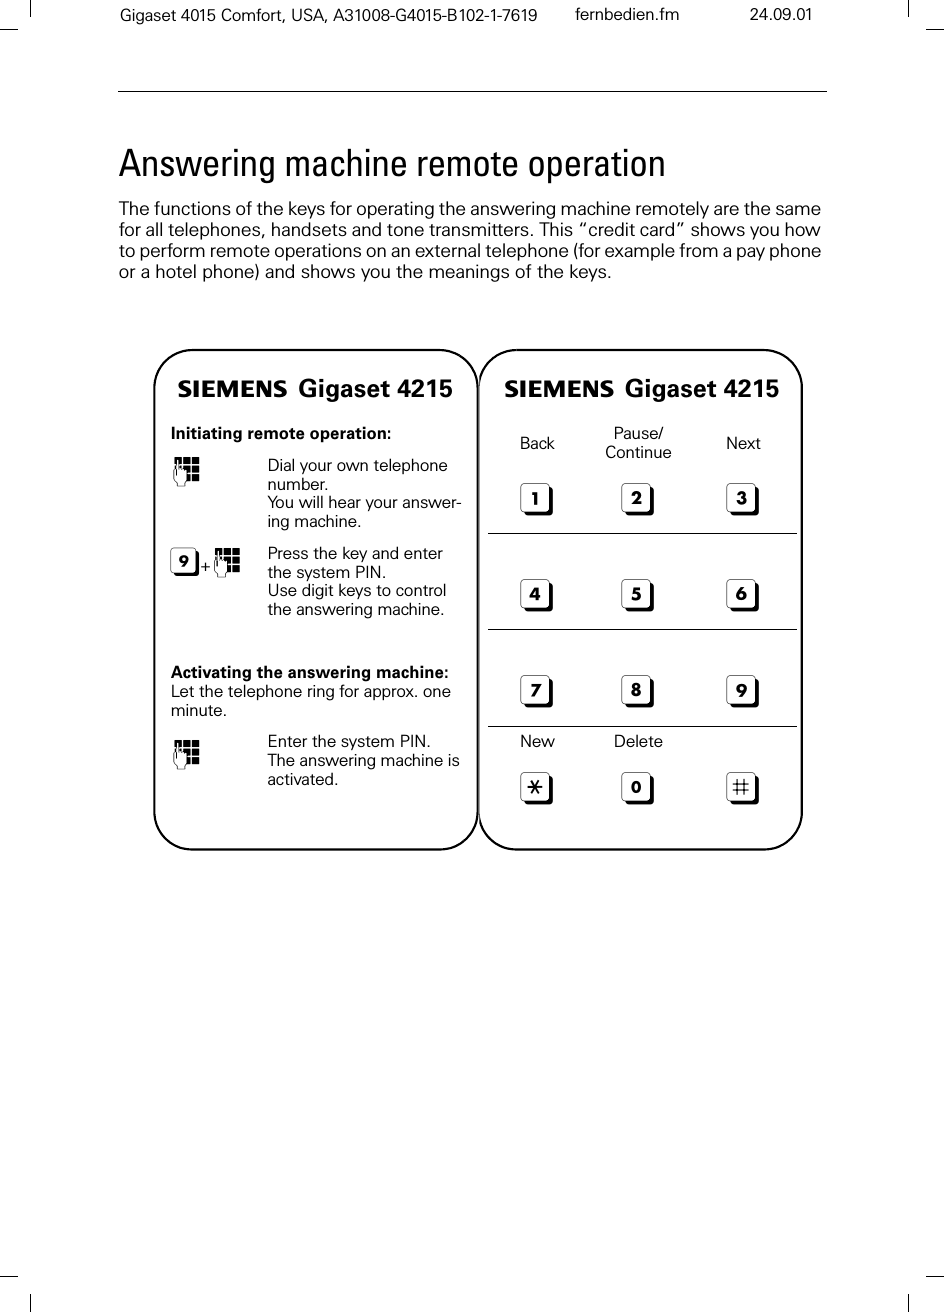
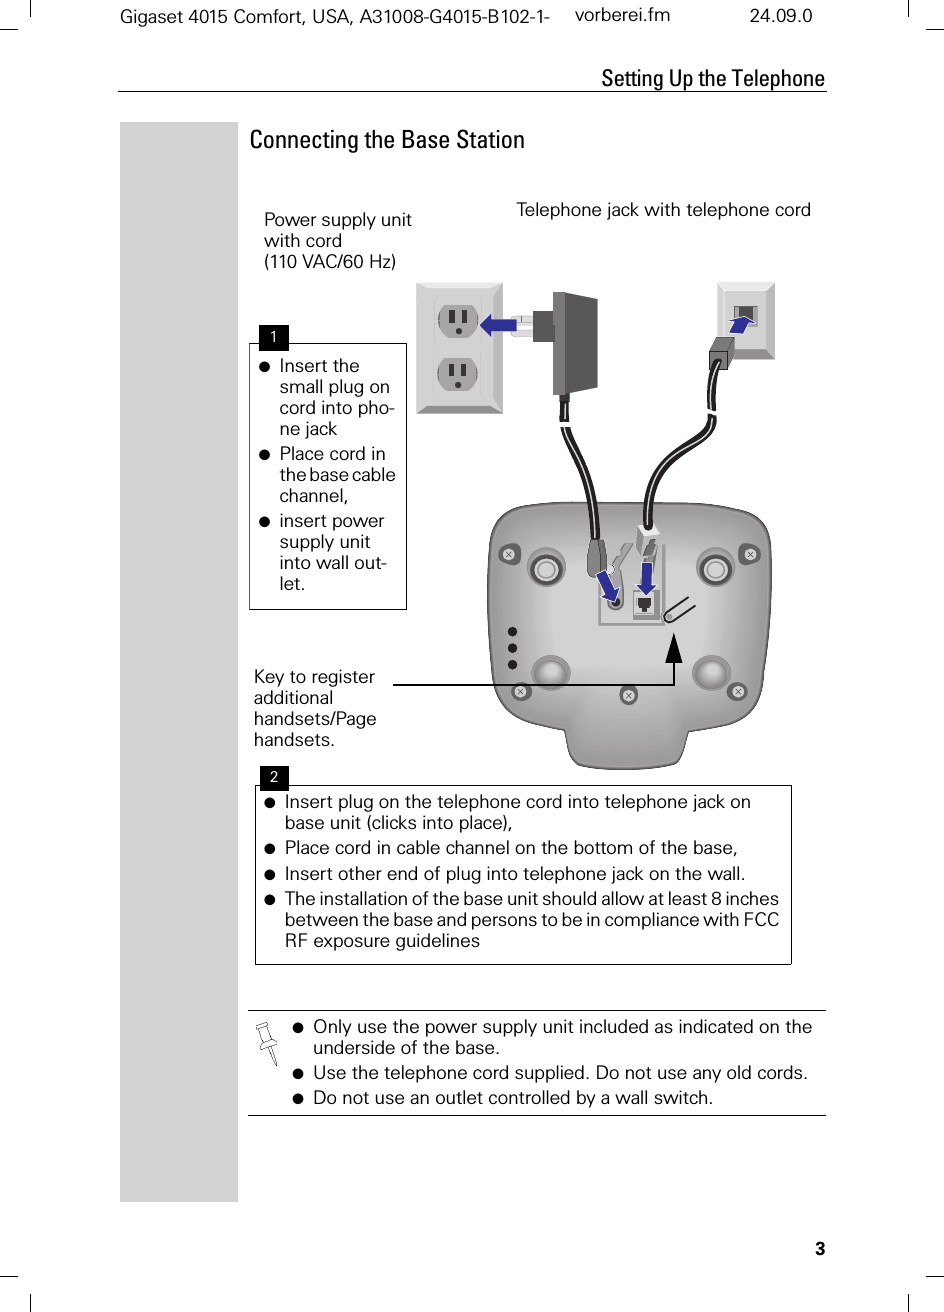
![IIIGeneralGigaset 4015 Comfort, USA, A31008-G4015-U102-1-6019 umschl_v.fm 24.09.0Quick Reference Handset Turning on/off the handset (see page 5) hold downTurning keypad protection on/off (see page 6) hold downBTurning tones on/off (see page 68) hold downCMaking an external call (see page 9) ) !Redialing a number (see page 16) /if necessary select entry !Saving a called number in the directory (see page 22) /0(18 Dialing from the directory (see page 23) )[Name] if necessary ! or !Dialing from the call log (see page 37) if necessary entry !Setting the handset volume (see page 68)0(18 or 6DYHMaking an Internal call to a spe-cific handset and to select internal user!Making an Internal call to a all handsets (see page 9) and !Transferring a call to another handset and to select internal userMaking a consultation call and to select internal user ; end: (QGSetting the date and time (see page 7)0(18 Set date and time 6DYHSetting the alarm clock (see page 18)0(18 Enter settings 6DYHAnswering machine Playing back messages (see page 45) or hold downSkipping to the next message:(see page 46)Repeating the message or or Deleting messages (see page 47) 0(18or press'HOHWHSkipping to the previous mes-sage (see page 46) 2 xSend to DirCall LogSound Settings Handset VolumeIntercom CallAppoint./Clock Date/TimeAppoint./Clock Alarm ClockAns Msg.:Delete Old Msg.](https://usermanual.wiki/Siemens-Information-and-Communication-Mobile/BIRD/User-Guide-285416-Page-3.png)


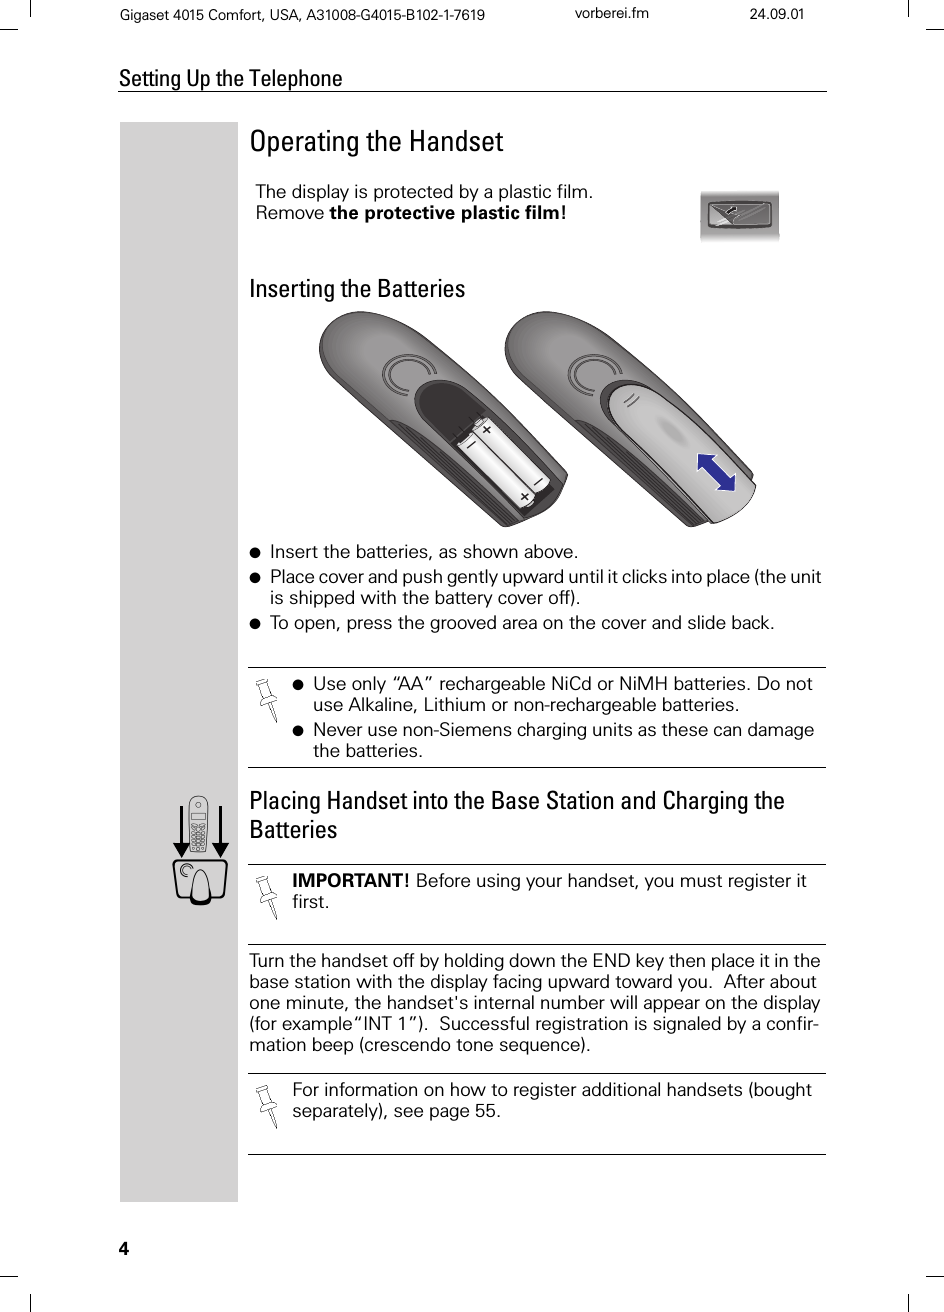
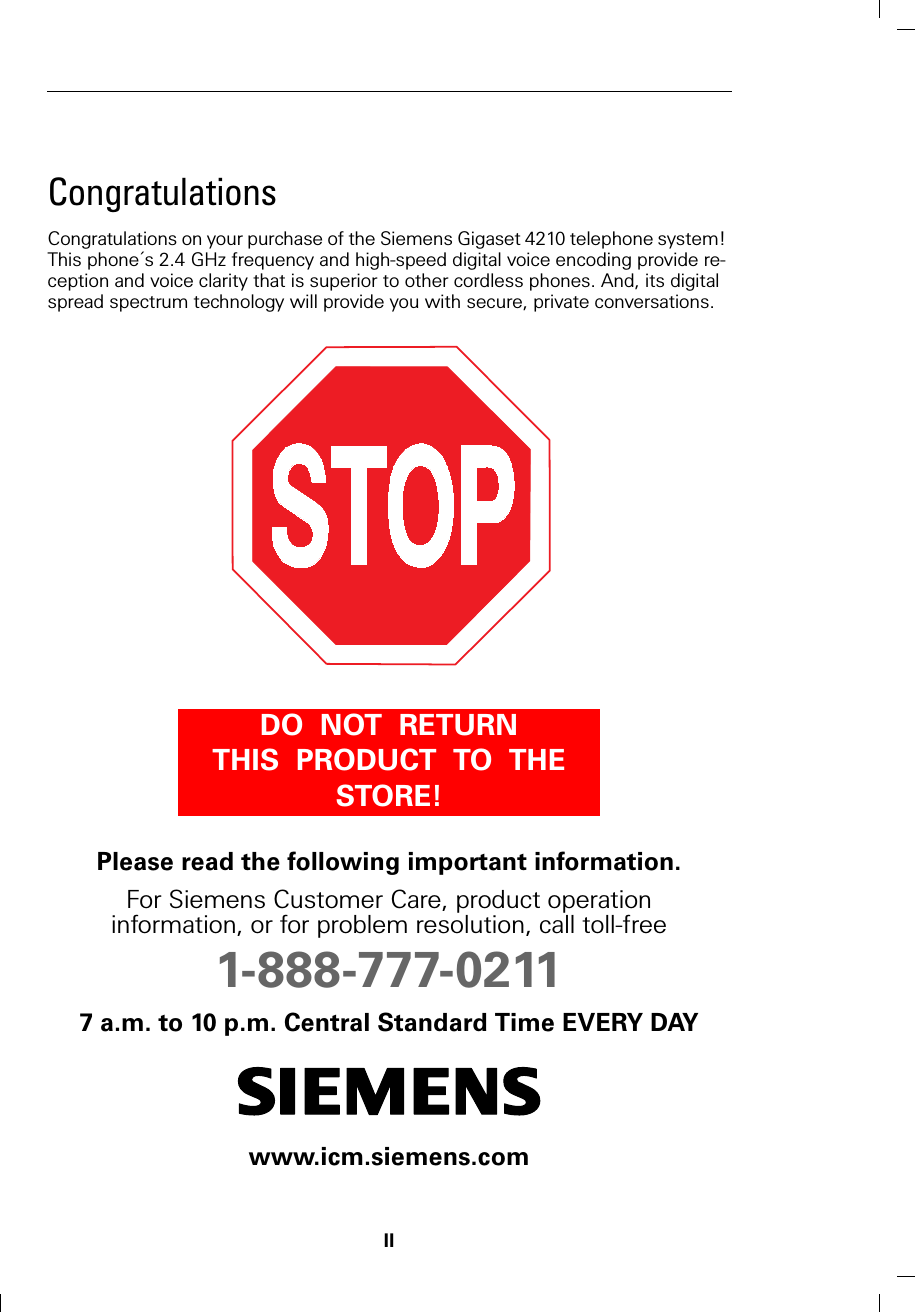
![7Press keys:Date and TimeGigaset 4015 Comfort, USA, A31008-G4015-B102-1-7619 uhrzeit.fm 24.09.01Date and TimeSetting the Date and the TimeThe date and time settings are necessary in order for the date and time of the arriving of messages/incoming calls to be displayed correctly.You can also set the clock mode, to the 12 hour mode (AM and PM) or 24 hour mode. If you subscribe the Caller ID the date and time are automatically set. If you do not subscribe to Caller ID follow the steps below to set the date and time. Date0(18 Press Menu.]]]]]]]]]]]]]]]]]]]]]]]]]]]]]]]]Appoint./Clock Scroll to Appoint/Clock and press OK.]]]]]]]]]]]]]]]]]]]]]]]]]]]]]]]]Date/Time Scroll to Date/Time and press OK.The current setting is displayed in the MM-DD-YY mode. For example:Y<9YY Enter the month/day/year (for example: 05-20-01, as shown).TimeScroll down one line.CY< Enter the hours/minutes (for example: 10.05, as shown).Factory default: 12 hour mode. If am or pm is displayed next to the time, 12 hour mode is activated. If you move the cursor to the time field, you can change from am to pm using the left display key.Clock Mode (12 or 24 Hours)Scroll down one line to set mode. If necessary, select either 24 hour or 12 hour display mode.6DYH Save the settings. •The default setting is 12 hour mode.•If you subscribe to Caller ID, the date and time may be sent from your telephone service and will be automatically set.By default, the clock is set to the 12 hour mode and am or pm is displayed next to the time. If you move the cursor to the time field, you can change from am to pm using the left soft key.](https://usermanual.wiki/Siemens-Information-and-Communication-Mobile/BIRD/User-Guide-285416-Page-13.png)
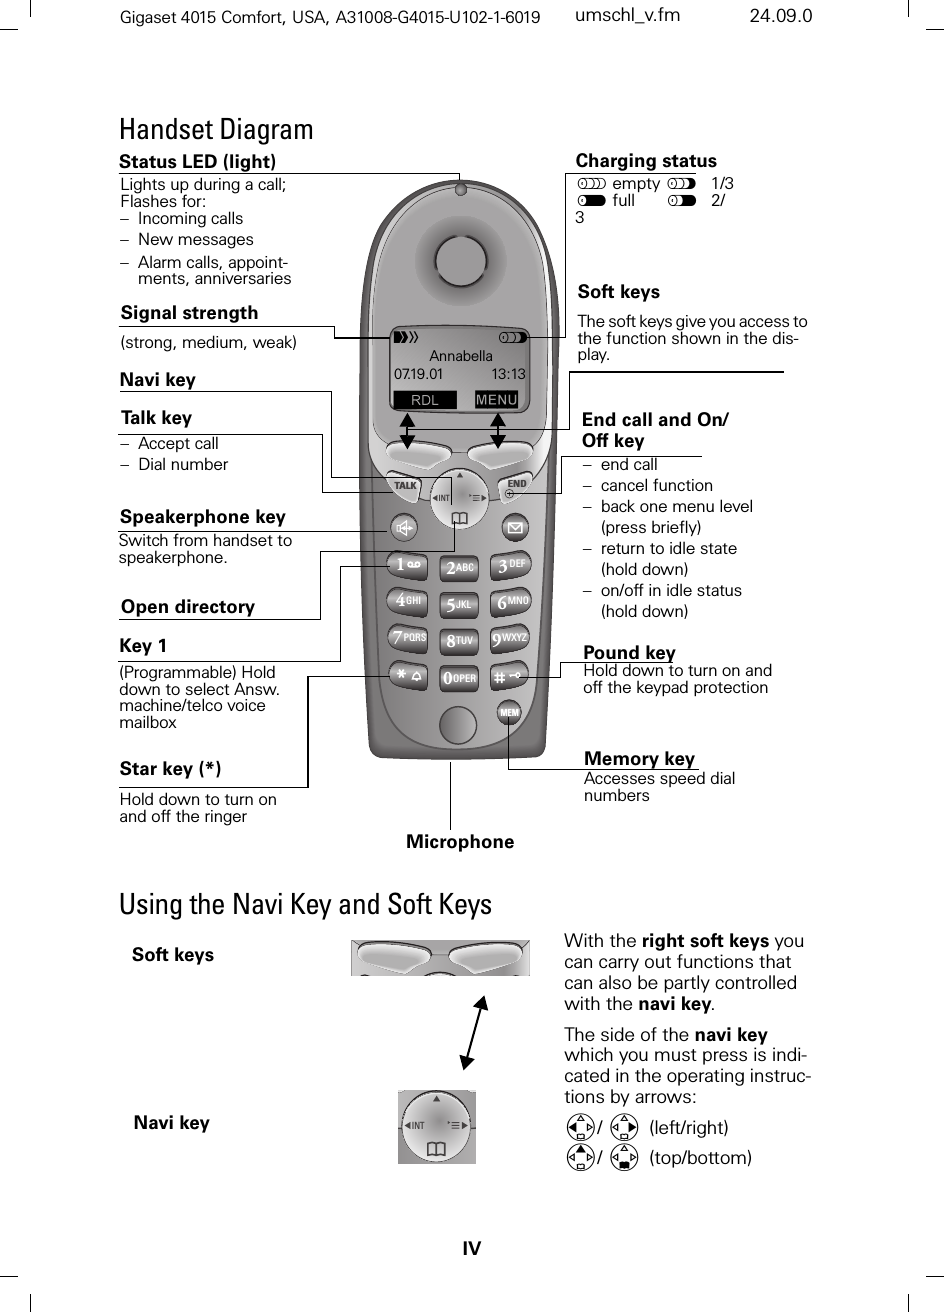
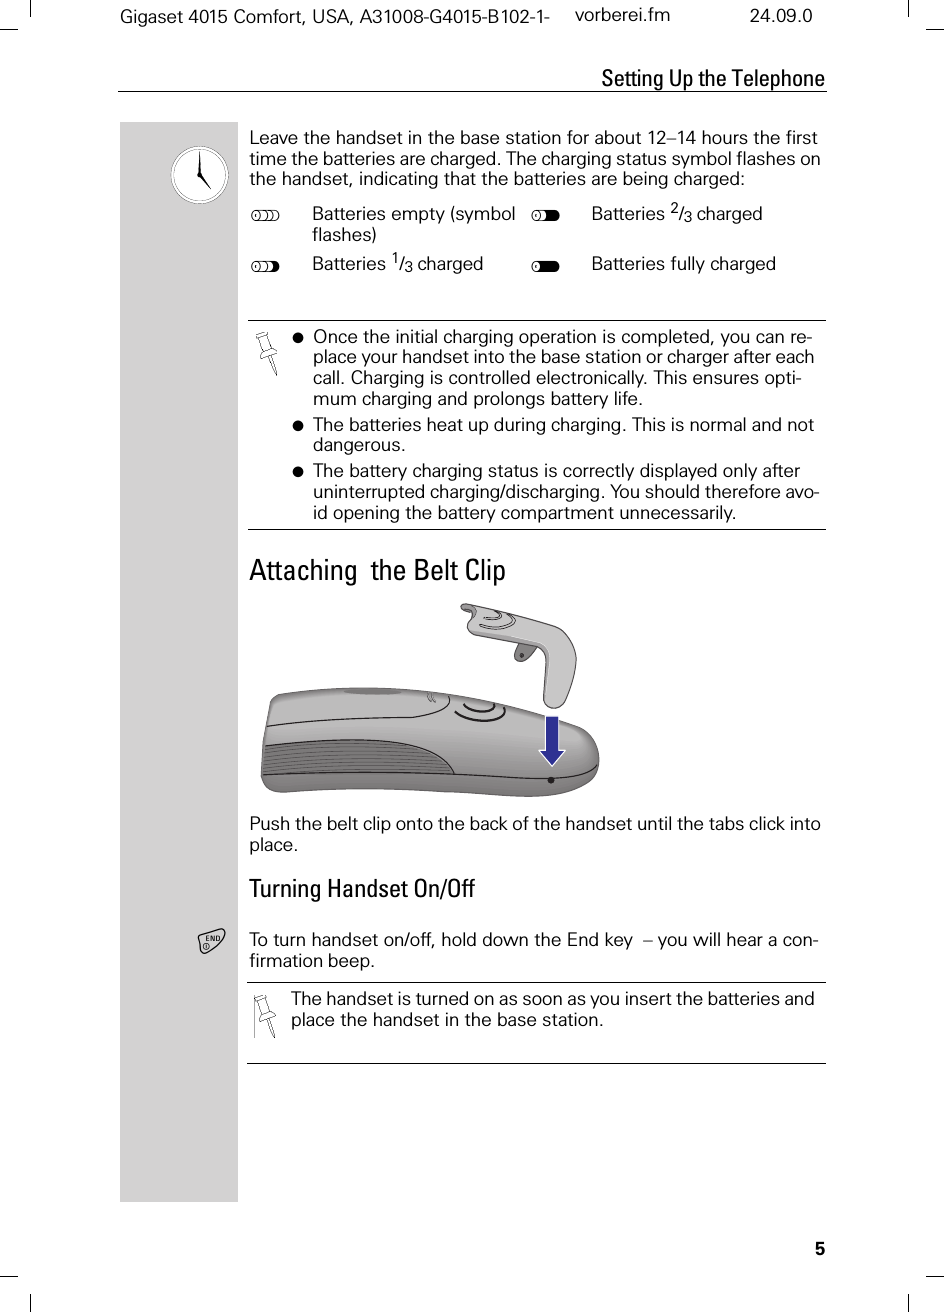
![8Press keys:Date and TimeGigaset 4015 Comfort, USA, A31008-G4015-B102-1-7619 uhrzeit.fm 24.09.01Area CodesTo conveniently call back a user from the call log (see page 37) you will need to key in and store the area code where your telephone is installed (Local Area Code). If it is installed in a Multiple Area Code Area you will also have to key in and store the Extra Codes for that area.Local Area Code0(18 Press Menu.]]]]]]]]]]]]]]]]]]]]]]]]]]]]]]]]Base Settings Scroll to Base Settings and press OK.]]]]]]]]]]]]]]]]]]]]]]]]]]]]]]]]Area Codes Scroll to Area Codes and press OK.]]]]]]]]]]]]]]]]]]]]]]]]]]]]]]]]Local Area Code Scroll to Local Area Code and press OK. Key in your Local Area Code.0(18 Press Menu.]]]]]]]]]]]]]]]]]]]]]]]]]]]]]]]]Save Entry Scroll to Save Entry and press OK.Extra Codes0(18 Press Menu.]]]]]]]]]]]]]]]]]]]]]]]]]]]]]]]]Base Settings Scroll to Base Settings and press OK.]]]]]]]]]]]]]]]]]]]]]]]]]]]]]]]]Area Codes Scroll to Area Codes and press OK.]]]]]]]]]]]]]]]]]]]]]]]]]]]]]]]]Extra Codes Scroll to Extra Codes and press OK. The first entry of list of codes will be displayed.To add or change a code:Scroll down using navi key desired code location.(GLW Press Edit. Key in the Extra Code.0(18 Press Menu.]]]]]]]]]]]]]]]]]]]]]]]]]]]]]]]]Save Entry Scroll to Save Entry and press OK.Repeat the last steps until all the Extra Codes for your area have been keyed in.](https://usermanual.wiki/Siemens-Information-and-Communication-Mobile/BIRD/User-Guide-285416-Page-14.png)
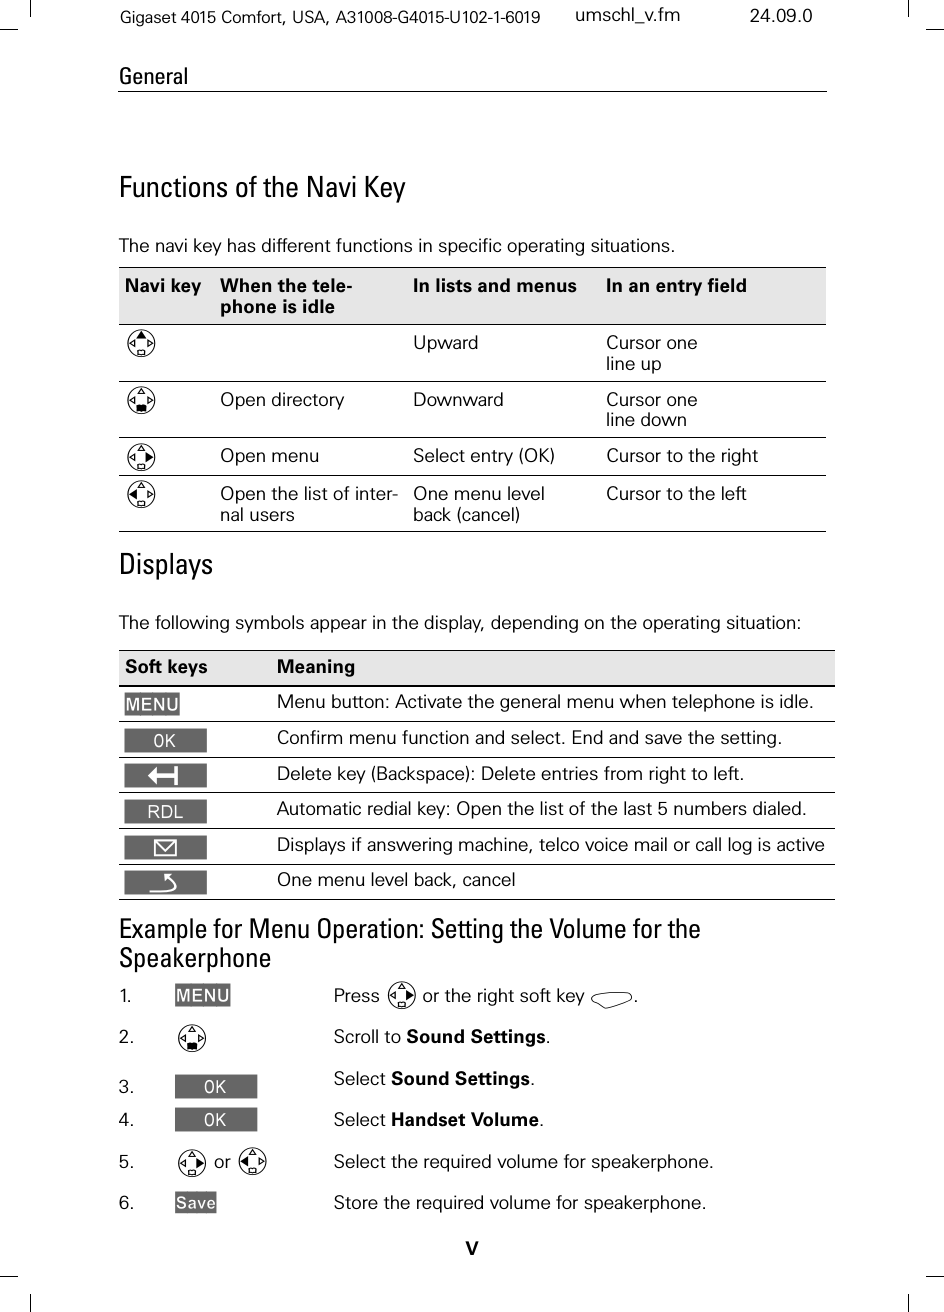
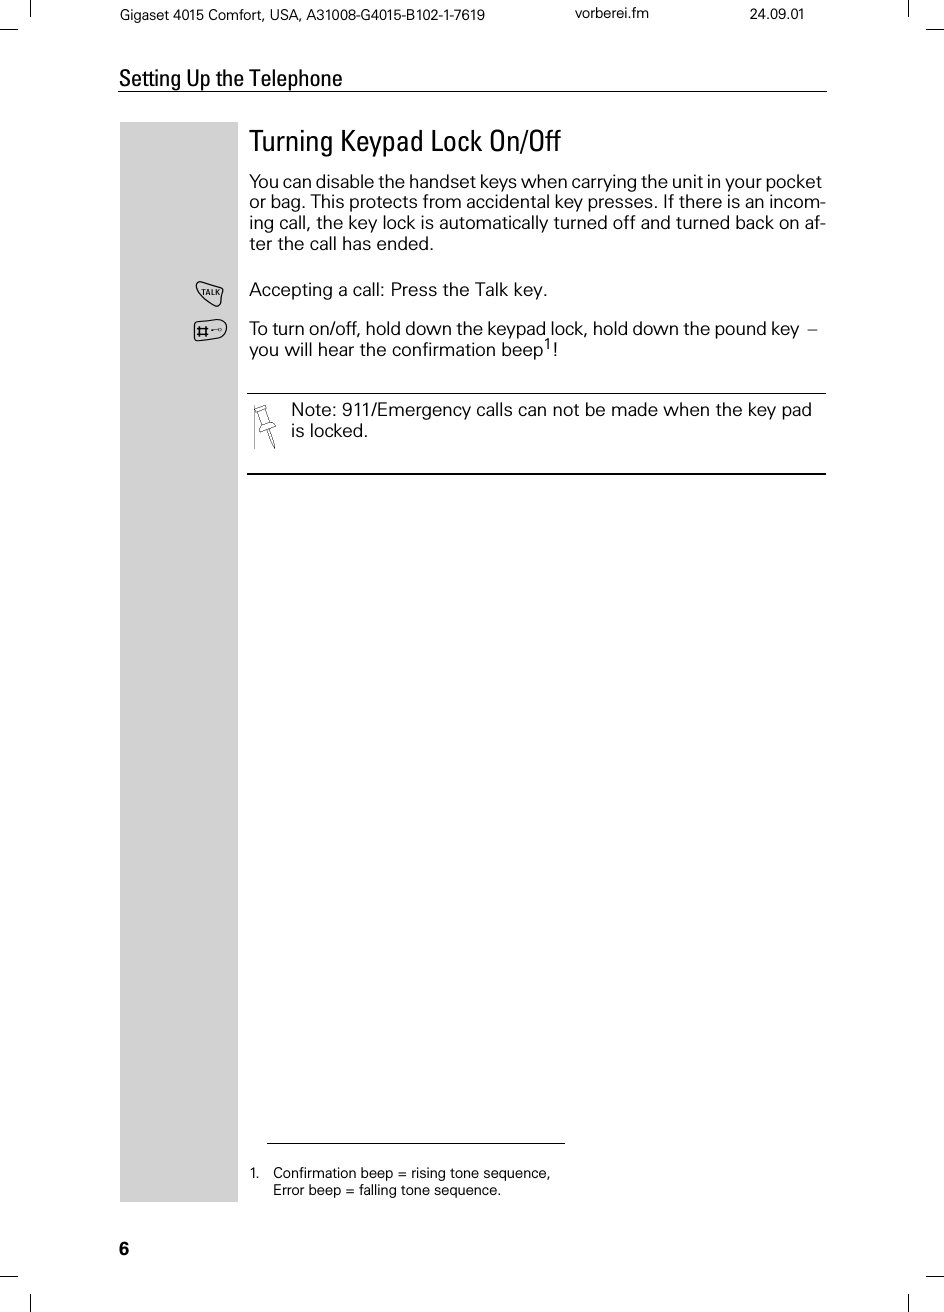
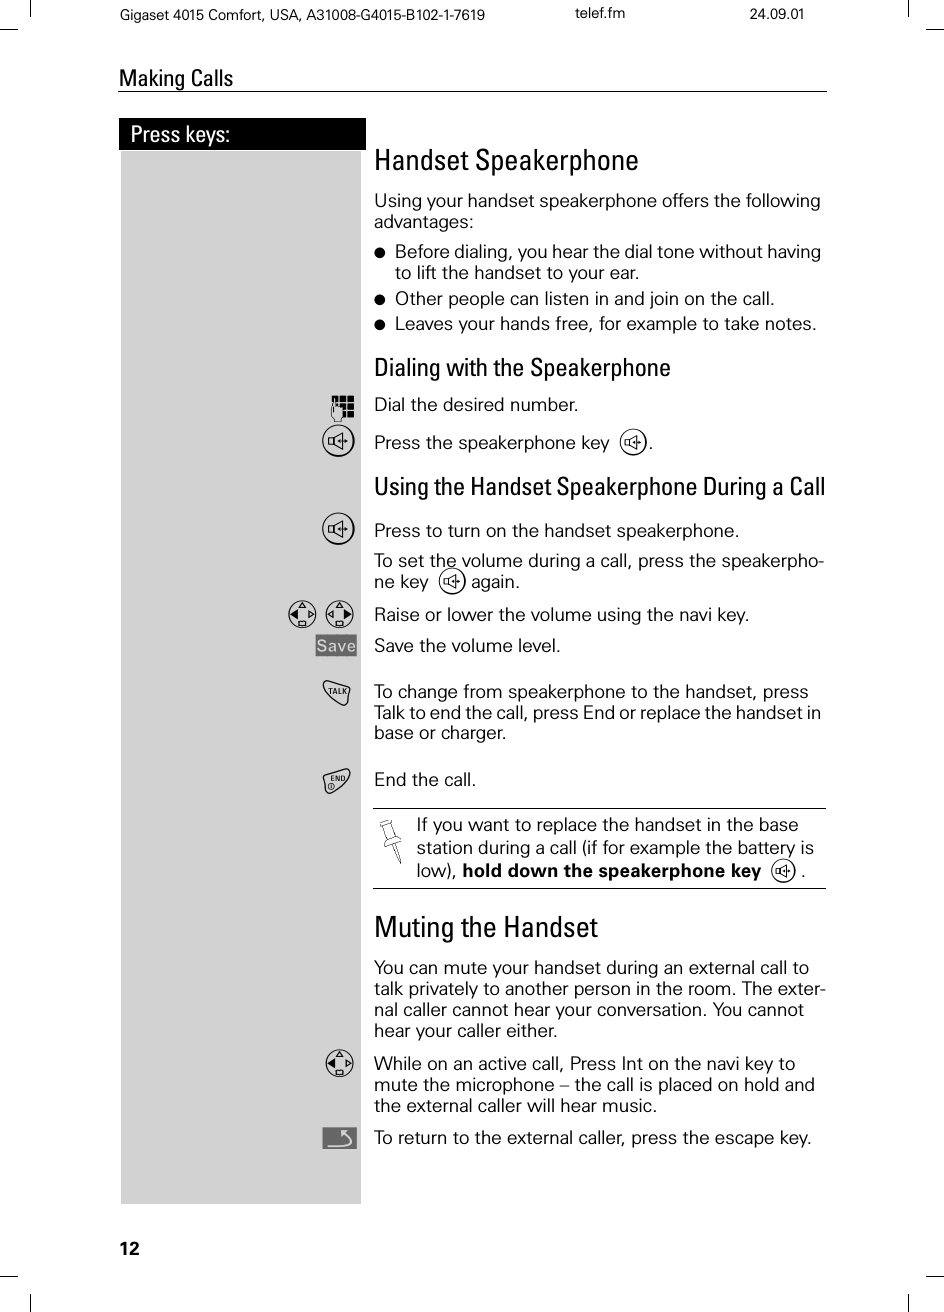
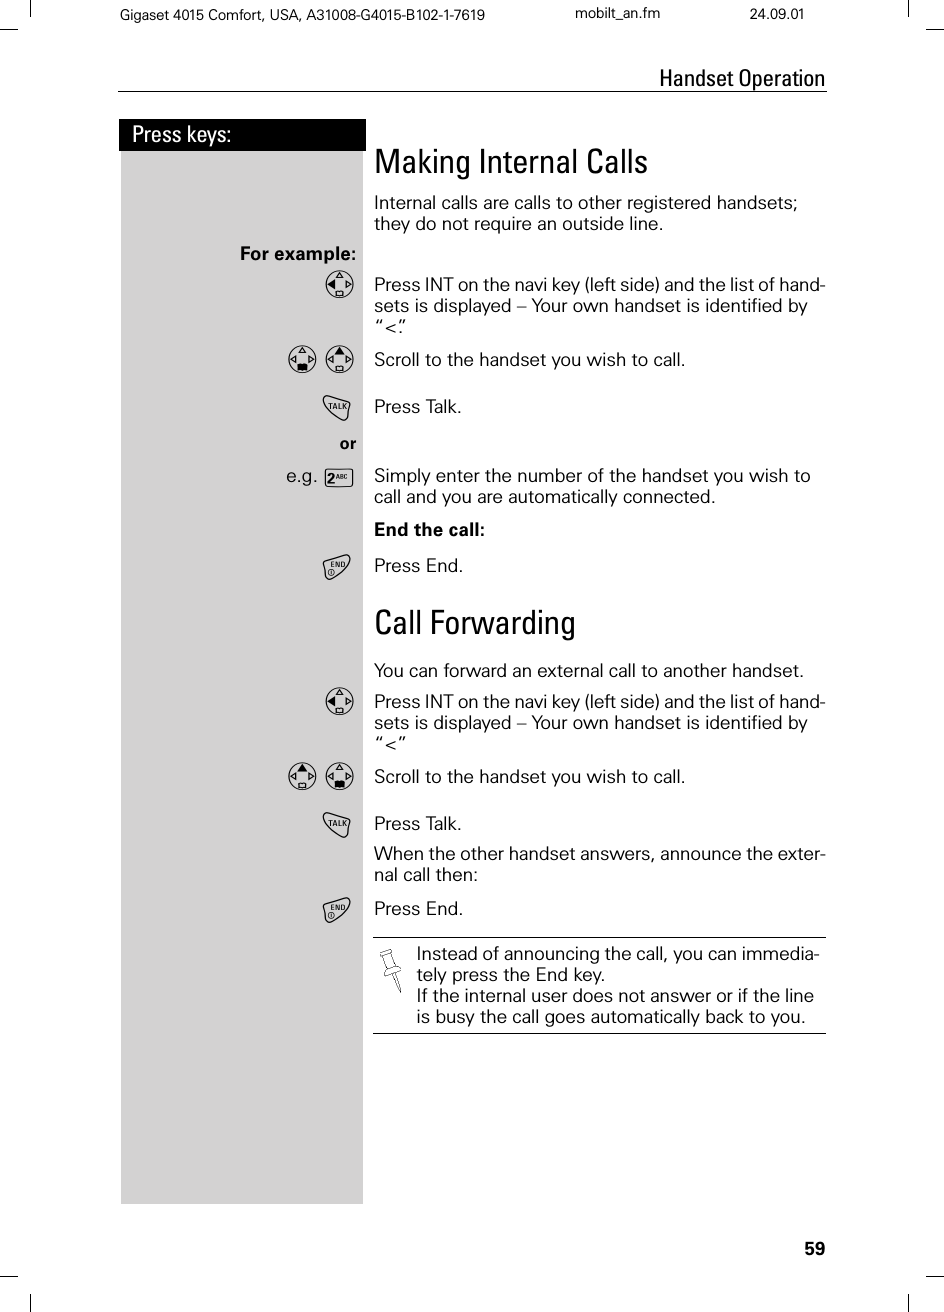
![9Press keys:Making CallsGigaset 4015 Comfort, USA, A31008-G4015-B102-1-7619 telef.fm 24.09.01Making CallsMaking an External CallQDial the telephone number. If necessary use the back-space key to correct mistakes.!Press the Talk key.To end the call, press the End key.To insert a pause when dialing a number:0(18 Press Menu.]]]]]]]]]]]]]]]]]]]]]]]]]]]]]]]]Insert Pause Scroll to Insert Pause and press Ok.Making an Intercom CallIntercom calls are calls to other registered handsets and do not tie up your telephone line (for example, calls within your home from the kitchen to the living room).For example:Press INT on the navi key. Your own handset is identi-fied by “<”.!Scroll to the handset you want to call and press the Talk key.ore.g. 9Simply enter the number of the handset you want to call.Paging All HandsetsPress INT on the navi key.Your own handset is identi-fied by “<”.BPress the C key•You can also press the Talk key firstand then enter the telephone number – each digit is di-aled immediately.•You can cancel the dialing operation with the End key.](https://usermanual.wiki/Siemens-Information-and-Communication-Mobile/BIRD/User-Guide-285416-Page-15.png)

![11Press keys:Making CallsGigaset 4015 Comfort, USA, A31008-G4015-B102-1-7619 telef.fm 24.09.01Answering Caller ID CallsAn incoming call is displayed as follows: ]]]]]]]]]]]]]]]]]]]]]]]]]]]]5125551234 If both number and name were transmitted, then]]]]]]]]]]]]]]]]]]]]]]]]]]]]John Smith both will be shown. If the number is stored in the tele-phone book, only the name stored will appear.]]]]]]]]]]]]]]]]]]]]]]]]]]]]]]]External If you have not applied for Caller ID service.]]]]]]]]]]]]]]]]]]]]]]]]]]]]Private Call The caller has chosen to block his or her number.]]]]]]]]]]]]]]]]]]]]]]]]]]]]Out of Area If the number is not available to your telephone compa-ny, Out of Area will be displayed instead.]]]]]]]]]]]]]]]]]]]]]]]]]]]]Unknown If the caller is unknown or no available Caller ID infor-mation is received by the local telephone company.Caller ID is a service provided by the local tele-phone company which allows your Gigaset to display the name and number of the person who is calling you. Contact your local telephone com-pany to subscribe to Caller ID service.5JU2II $FFHSW0891234567 Telephone numberBell IconIn the first displayline you see a bell:●if you have not applied for Caller ID Service,●if the caller has chosen to block his or her name,●if the name is not available to your telephone com-pany.](https://usermanual.wiki/Siemens-Information-and-Communication-Mobile/BIRD/User-Guide-285416-Page-17.png)
![13Press keys:Making CallsGigaset 4015 Comfort, USA, A31008-G4015-B102-1-7619 telef.fm 24.09.01Picking up a Call from the Answering MachineWhile the answering machine is recording a message (status LED lights up), you can still pick up the call if you want to talk to the caller.!Press the Talk key.The recording will end and you can talk to the caller. Recording a callYou can use the answering machine to record an exter-nal call.To start the recording while you are on an external call:To start the recording0(18 Open the menu.]]]]]]]]]]]]]]]]]]]]]]]]]]]]]]]]Call Record Scroll to Call Record and press OK. The option is marked as active (').The answering machine symbol Hflashes to indicate that call is being recorded.To end the recordingYou are recording a call.0(18 Press Menu.]]]]]]]]]]]]]]]]]]]]]]]]]]]]]]]]Call Record End call recording. The marker (') is deleted.If the handset speakerphone is on, the speaker-phone key ,flashes during recording. You can listen in on the recording on up to four handsets.The recorded call is stored in the message list of the answering machine.In some states it may be illegal to record the per-son on the other end of a phone conversation without their expressed permission. Please obey your local laws and regulations. Always ask the other party whether recording the call is OK.](https://usermanual.wiki/Siemens-Information-and-Communication-Mobile/BIRD/User-Guide-285416-Page-19.png)
![14Press keys:Making CallsGigaset 4015 Comfort, USA, A31008-G4015-B102-1-7619 telef.fm 24.09.01Telco Voice MailIf you subscribe to voice mail from your local telephone company, you may use your Gigaset handset to re-trieve messages. It is recommended you store the ac-cess number in the "1" key.Storing Access Number for Retrieving Voice Mail0(18 Press Menu.]]]]]]]]]]]]]]]]]]]]]]]]]]]]]]]]Answering M. Scroll to Ans Machine and press OK.]]]]]]]]]]]]]]]]]]]]]]]]]]]]]]]]Set Key 1 Select to Set Key 1 and press OK.]]]]]]]]]]]]]]]]]]]]]]]]]]]]]]]]Voice Mail Set the Voice Mail.)Dial the voice mail access number. 0(18 Press Menu.]]]]]]]]]]]]]]]]]]]]]]]]]]]]]]]]Save Entry Scroll to Save Entry and press OK.Once you have entered the voice mail access number, simply hold down the key on the handset and you are directly connected to the Telco voice mail system. Follow the Telco instruc-tions.](https://usermanual.wiki/Siemens-Information-and-Communication-Mobile/BIRD/User-Guide-285416-Page-20.png)
![16Press keys:Enhanced Telephone FeaturesGigaset 4015 Comfort, USA, A31008-G4015-B102-1-7619 komfort.fm 24.09.01Enhanced Telephone FeaturesIn addition to its standard features, your Gigaset offers a number of other fast, convenient, enhanced features.RedialYour handset automatically saves the last five telepho-ne numbers dialed (see page 28). Manual Redial/Press the Redial soft key.Select the desired telephone number/name using the navi key.!Press the Talk or Speakerphone key – the telephone num-ber is dialed.Automatic RedialThe Gigaset can automatically redial a telephone num-ber ten times (with an interval of 20 seconds in each case.) The speakerphone key flashes and the speaker is active during this operation. This function turns itself off after 10 unsuccessful tries.To cancel automatic redial, press or any key.The person you called is not available:/Press the Redial soft key.Scroll to the desired telephone number/name.0(18 Press Menu.]]]]]]]]]]]]]]]]]]]]]]]]]]]]]]]]Auto Redial Scroll to Auto Redial and press OK – After a few mo-ments the phone will start redialing the number.When the user answers:!Press the Talk or Speakerphone key. OffAutomatic redialing is turned off if you subse-quently make a call. You must turn it back on af-terwards.](https://usermanual.wiki/Siemens-Information-and-Communication-Mobile/BIRD/User-Guide-285416-Page-22.png)
![17Press keys:Enhanced Telephone FeaturesGigaset 4015 Comfort, USA, A31008-G4015-B102-1-7619 komfort.fm 24.09.01Delete Entry from Redialing List/Press the Redial soft key.Scroll to desired telephone number.0(18 Press Menu.]]]]]]]]]]]]]]]]]]]]]]]]]]]]]]]]Delete Entry Scroll to Delete Entry and press OK. Copying the Redial Number to the Directory/Press the Redial soft key.Scroll to desired telephone number.0(18 Press Menu.]]]]]]]]]]]]]]]]]]]]]]]]]]]]]]]]Send to Dir Scroll to Send to Dir and press OK.The telephone number is already entered. )If desired, edit the name and number (and, if appropria-te, an anniversary, (see page 27)).0(18 Press Menu. ]]]]]]]]]]]]]]]]]]]]]]]]]]]]]]]]Save Entry Save the entry by pressing OK.For more information about editing letters and characters (see page 77).](https://usermanual.wiki/Siemens-Information-and-Communication-Mobile/BIRD/User-Guide-285416-Page-23.png)
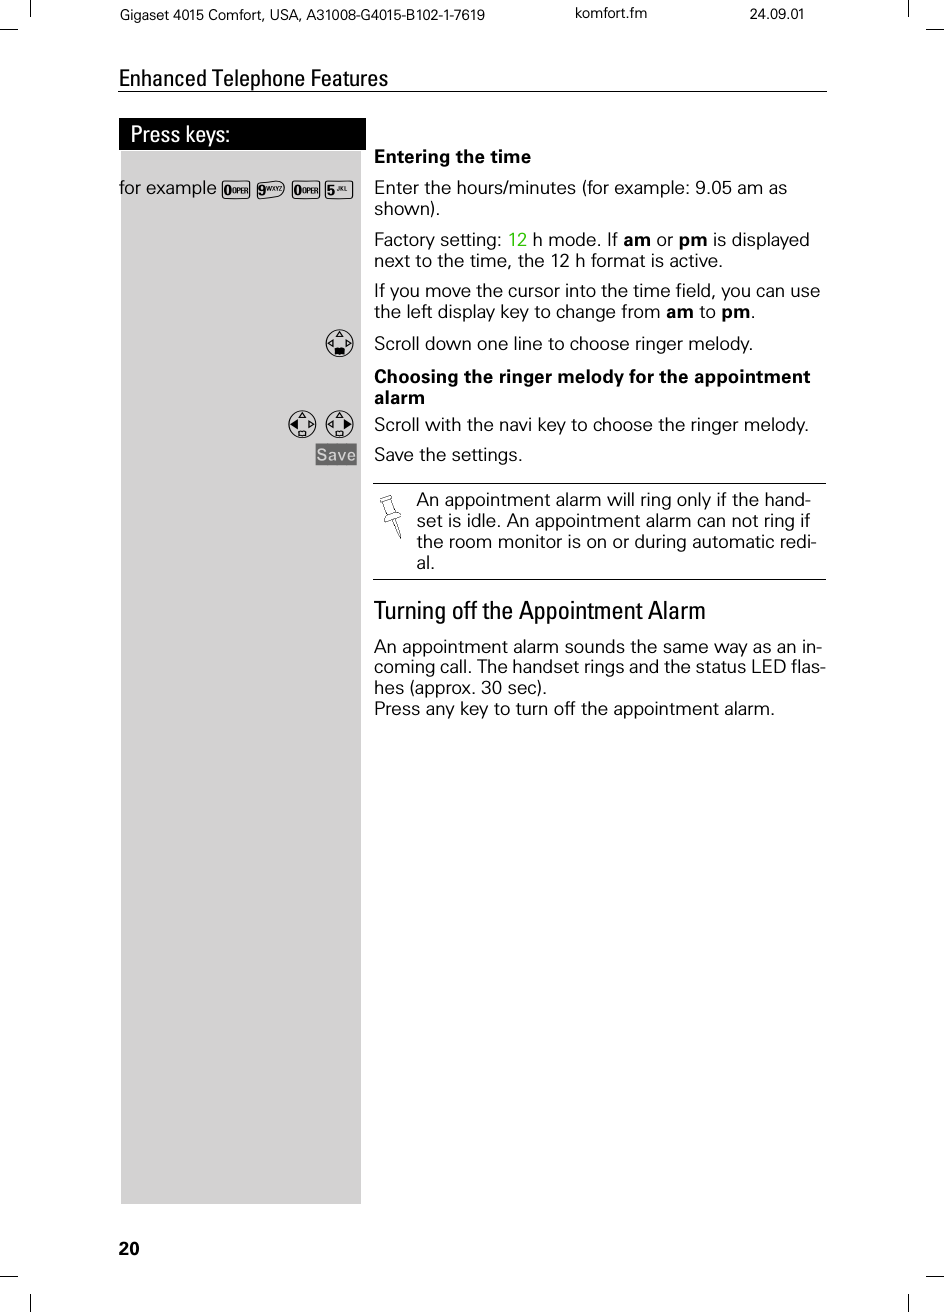
![18Press keys:Enhanced Telephone FeaturesGigaset 4015 Comfort, USA, A31008-G4015-B102-1-7619 komfort.fm 24.09.01Setting the AlarmYour Gigaset has an alarm function to help you keep track of your schedule. You must set the time and date first (see page 8) in order for the alarm to work.Turning the Alarm OnThe active alarm clock rings every day at the set time. If you have set a time for the alarm call, this is indicated by the Hicon in the display.The telephone is idle:0(18 Open the menu.]]]]]]]]]]]]]]]]]]]]]]]]]]]]]]]]Appoint./Clock Scroll to Appoint./Clock and press OK.]]]]]]]]]]]]]]]]]]]]]]]]]]]]]]]]Alarm Clock Scroll to Alarm Clock and press OK.The current setting is displayed. Scroll right (on) or left (off) with the navi key to turn alarm on or off.Scroll down one line to enter time.Entering the time for the alarmfor exampleY=YY Enter the hours/minutes. The example here is 6.00.Scroll down one line.Choosing the ringer melody for the alarm Scroll left or right to choose the ringer melody.6DYH Save the settings. When the handset is idle, a stored time for the alarm call is indicated by the Hicon. Alarm will not sound if the room monitor is on or during automatic redial.](https://usermanual.wiki/Siemens-Information-and-Communication-Mobile/BIRD/User-Guide-285416-Page-24.png)
![19Press keys:Enhanced Telephone FeaturesGigaset 4015 Comfort, USA, A31008-G4015-B102-1-7619 komfort.fm 24.09.01Turning the Alarm OffWhen the alarm rings and the LED flashes (about 30 seconds) press any key on the handset to turn off the alarm sound.0(18 Press Menu.]]]]]]]]]]]]]]]]]]]]]]]]]]]]]]]]Appoint./Clock Scroll to Appoint./Clock and press OK.]]]]]]]]]]]]]]]]]]]]]]]]]]]]]]]]Alarm Clock Scroll to Alarm Clock and press OK. Scroll left with the navi key to turn the alarm off.6DYH Save the settings.Stopping the Alarm SoundAn alarm clock rings and the LED flashes (about 30 seconds). Press any key on the handset to turn off the alarm sound.Schedule Your handset is able to remind you of one appoint-ment. You need to store the date and time of this ap-pointment. You may only set one appointment at a time.If you have set an appointment, this is indicated by the Hiconin the display.Setting an Appointment0(18 Press Menu.]]]]]]]]]]]]]]]]]]]]]]]]]]]]]]]]Appoint./Clock Scroll to Appoint./Clock and press OK.]]]]]]]]]]]]]]]]]]]]]]]]]]]]]]]]Set Appointment Scroll to Set Appointment and press OK.Activating the appointment alarm Scroll right on the navi key to turn on.Scroll down one line to enter date.Entering the datefor exampleY<9Y Enter month/day (for example: 05.20 as shown).Scroll down one line to enter time.There is no snooze setting. The alarm will sound until turned off.The alarm will sound daily at the set time until you turn it off through the menu.](https://usermanual.wiki/Siemens-Information-and-Communication-Mobile/BIRD/User-Guide-285416-Page-25.png)
![21Press keys:Enhanced Telephone FeaturesGigaset 4015 Comfort, USA, A31008-G4015-B102-1-7619 komfort.fm 24.09.01Display Missed Appointments and AnniversariesIf you do not answer an appointment call after nine rings, it will automatically turn off. The calls are then sa-ved in an appointment list.The display will show date in lower right hand corner of the display to show an new, unanswered appointment. Press the right soft key to show the list of events.Then select OK.Proceed as follows to display the appointment:0(18 Press Menu.]]]]]]]]]]]]]]]]]]]]]]]]]]]]]]]]Appoint./Clock Scroll to Appoint./Clock and press OK.]]]]]]]]]]]]]]]]]]]]]]]]]]]]]]]]Dates Scroll to Dates and press OK. Select a missed appointment. The information on the missed appointment is displayed.A missed appointment is identified by H.A missed anniversary (see page 27) is identified by 4. Press 'HOHWH to delete a missed appointment/anni-versary. Go back to the list.Missed Appt. H](https://usermanual.wiki/Siemens-Information-and-Communication-Mobile/BIRD/User-Guide-285416-Page-27.png)
![22Press keys:Enhanced Telephone FeaturesGigaset 4015 Comfort, USA, A31008-G4015-B102-1-7619 komfort.fm 24.09.01DirectoryThe Directory allows you to store up to 200 tele-phone numbers. Storing a Directory EntryOpen the Directory list by pressing the bottom of the navi key.]]]]]]]]]]]]]]]]]]]]]]]]]]]]]]]]New Entry Scroll to New Entry and press OK.QEnter the telephone number (max. 32 digits). QScroll to the name field and enter the name (max. 16 characters) (Optionally you can also enter the anniversary, (see page 27) ).0(18 Press the menu. ]]]]]]]]]]]]]]]]]]]]]]]]]]]]]]]]Save Entry Save the entry by pressing OK.Copying a Telephone Number to the Directory During a CallYou are conducting an external call:0(18 Press Menu]]]]]]]]]]]]]]]]]]]]]]]]]]]]]]]]Send to Dir Scroll to Save to Dir and press OK.A menu opens in which you can enter the telephone number and the name of the caller. If the number has been transmitted it automatically appears in the menu.QEnter the name of the caller if desired.0(18 Press the menu.]]]]]]]]]]]]]]]]]]]]]]]]]]]]]]]]Save Entry Save the entry by pressing OK.Follow all local telephone company dialing re-quirements, such as 7-digit, 10-digit or 11-digit di-aling.●Refer to character map in the Appendix (page 77) for using the keypad to enter names and numbers.●Control the cursor with or . Delete a character with . Characters are always in-serted to the left of the cursor.Voice Dialing”](https://usermanual.wiki/Siemens-Information-and-Communication-Mobile/BIRD/User-Guide-285416-Page-28.png)
![23Press keys:Enhanced Telephone FeaturesGigaset 4015 Comfort, USA, A31008-G4015-B102-1-7619 komfort.fm 24.09.01Dialing a Number from the DirectoryOpen the directory by pressing the bottom of the navi key.The names are listed in alphabetical order.Scroll to the desired name.or You may enter the first letter of the desired name using the keypad to jump ahead in the list.For example:Press the 3 keyonce for David. Press the 3 keytwice for Eric. Press the 3key three times for Frank. !Press the Talk or Speakerphone key. The telephone number is dialed.Displaying and Editing a Directory EntryOpen the Directory list by pressing the bottom of the navi key.Scroll to desired name.'LVSOD\ Press Display.If desired, you can change the telephone number/name:(GLW Press Edit to open the menu for making changes.QIf desired change the telephone number.QScroll to the name field and, if desired, change the name.QScroll to the anniversary field and, if desired, change the date and time of the anniversary (see page 27).0(18 Press the menu. ]]]]]]]]]]]]]]]]]]]]]]]]]]]]]]]]Save Entry Confirm changes by selecting Save Entry and pressing OK.●Refer to character map in the Appendix (page 77) for using the keypad to enter names and numbers.●Control the cursor with or . Delete a character with . Characters are always in-serted to the left of the cursor.](https://usermanual.wiki/Siemens-Information-and-Communication-Mobile/BIRD/User-Guide-285416-Page-29.png)
![24Press keys:Enhanced Telephone FeaturesGigaset 4015 Comfort, USA, A31008-G4015-B102-1-7619 komfort.fm 24.09.01Deleting a Single Entry from the DirectoryOpen the Directory list by pressing the bottom of the navi key.Scroll to desired name.0(18 Press Menu. ]]]]]]]]]]]]]]]]]]]]]]]]]]]]]]]]Delete Entry Scroll to Delete Entry and press OK - A confirmation beep sounds as the entry is deleted.Deleting All Numbers in the Directory Open the Directory list by pressing the bottom of the navi key.Scroll to any name.0(18 Press Menu.]]]]]]]]]]]]]]]]]]]]]]]]]]]]]]]]Delete Log Scroll to Delete Log and press OK.<HV Confirm to delete all entries by pressing Yes - A confir-mation beep sounds as the log is deleted.Copying an Entry to Another HandsetYou can copy an entry to another Gigaset 4200 handset to save yourself time and effort.Open the Directory list by pressing the bottom of the navi key.Scroll to desired name.0(18 Press Menu.]]]]]]]]]]]]]]]]]]]]]]]]]]]]]]]]Send Entry Scroll to Send Entry and press OK.Scroll to handset number where entry is to be sent and press OK - A confirmation beep sounds as the entry is sent.<HV You may copy further entries by pressing Yes and follo-wing the same steps above.or1R Exit by pressing NoYou can not send an entry from a 4200 handset to a 4000 handset.](https://usermanual.wiki/Siemens-Information-and-Communication-Mobile/BIRD/User-Guide-285416-Page-30.png)
![25Press keys:Enhanced Telephone FeaturesGigaset 4015 Comfort, USA, A31008-G4015-B102-1-7619 komfort.fm 24.09.01Copying the Directory You can copy the entire directory to another Gigaset 4200 handset to save yourself time and effort.Open the Directory list by pressing the bottom of the navi key.Scroll to any name.0(18 Press Menu.]]]]]]]]]]]]]]]]]]]]]]]]]]]]]]]]Send Log Scroll to Send Log and press OK.The list of internal users is displayed.Scroll to handset number where log is to be sent and press OK - A confirmation beep sounds as the log is sent.Receiving the Telephone BookOnce a log has been sent the display shows how many entries have been received by the telephone. Entries with identical numbers are not overwritten. For this re-ason the number of stored entries can differ from the number of transmitted entries.The transmission will be interrupted:●if the memory of the receiving handset is full (the last entry is displayed)●if you are calledYou can not send the directory from a 4200 hand-set to a 4000 handset.](https://usermanual.wiki/Siemens-Information-and-Communication-Mobile/BIRD/User-Guide-285416-Page-31.png)
![26Press keys:Enhanced Telephone FeaturesGigaset 4015 Comfort, USA, A31008-G4015-B102-1-7619 komfort.fm 24.09.01Copying a Directory Entry to the “Directory with Voice Dialing”You can copy an entry from the local directory to the voice directory and record a voice pattern (see page 35).Open the Directory list by pressing the bottom of the navi key.Scroll to desired name.0(18 Press Menu.]]]]]]]]]]]]]]]]]]]]]]]]]]]]]]]]Send Voice Ent. Scroll to Send Voice Ent. and press OK.In the directory with voice dialing the fields for phone number and name are already preset with the data from the telephone directory. To record the voice pattern for this entry please refer to "Directory with voice dialing – Recording a new entry and voice pattern" (see page 35).Displaying Available MemoryOpen the Directory list by pressing the bottom of the navi key.Scroll to any name.0(18 Press Menu.]]]]]]]]]]]]]]]]]]]]]]]]]]]]]]]]Available Memory: Scroll to Available Memory and press OK - The memory available is displayed.](https://usermanual.wiki/Siemens-Information-and-Communication-Mobile/BIRD/User-Guide-285416-Page-32.png)
![28Press keys:Enhanced Telephone FeaturesGigaset 4015 Comfort, USA, A31008-G4015-B102-1-7619 komfort.fm 24.09.01Memory Dial ListThe Memory Dial allows you to store up to 9 frequently dialed numbers for quick access using the 1–9 keys. It is recommended that you use the "1" for answering machine or voice mail from the telephone company.Storing a Memory Dial EntryPress the MEM key.]]]]]]]]]]]]]]]]]]]]]]]]]]]]]]]]New Entry Scroll to New Entry and press OK.QEnter the telephone number (max. 32 digits).QScroll to the name field and use the keypad to first sel-ect a quick access key then enter the name.Example: 3 ERIC4x = 3; 2x = E, 3x 2= R, 3x / = I, 3x - = C). (Optionally you can: enter the anniversary, where appli-cable, (see page 27) ).0(18 Press Menu. ]]]]]]]]]]]]]]]]]]]]]]]]]]]]]]]]Save Entry Scroll to Save Entry and press OK.Dialing a Number from the Memory ListLong press will display Eric.!Press Talk to connect.](https://usermanual.wiki/Siemens-Information-and-Communication-Mobile/BIRD/User-Guide-285416-Page-34.png)
![29Press keys:Enhanced Telephone FeaturesGigaset 4015 Comfort, USA, A31008-G4015-B102-1-7619 komfort.fm 24.09.01Displaying and Editing a Memory Dial Number Press the MEM key.Scroll to desired number.'LVSOD\ Press Display to see the number and name.(GLW Press Edit. Scroll to the name or number field and use the keypad to make the desired changes.QIf necessary change the telephone number.QScroll to the name field and, if necessary, change the name.0(18 Press Menu.]]]]]]]]]]]]]]]]]]]]]]]]]]]]]]]]Save Entry Scroll to Save Entry and press OK.Deleting a Single Entry from the Memory Dial ListPress the MEM key.Scroll to desired number. 0(18 Press Menu.]]]]]]]]]]]]]]]]]]]]]]]]]]]]]]]]Delete Entry Scroll to Delete Entry and press OK - A confirmation beep sounds as the entry is deleted.●Refer to character map in the Appendix (page 77) for using the keypad to enter names and numbers.●Controlling the cursor with or . Dele-ting a character with . Characters are al-ways inserted to the left of the cursor.](https://usermanual.wiki/Siemens-Information-and-Communication-Mobile/BIRD/User-Guide-285416-Page-35.png)
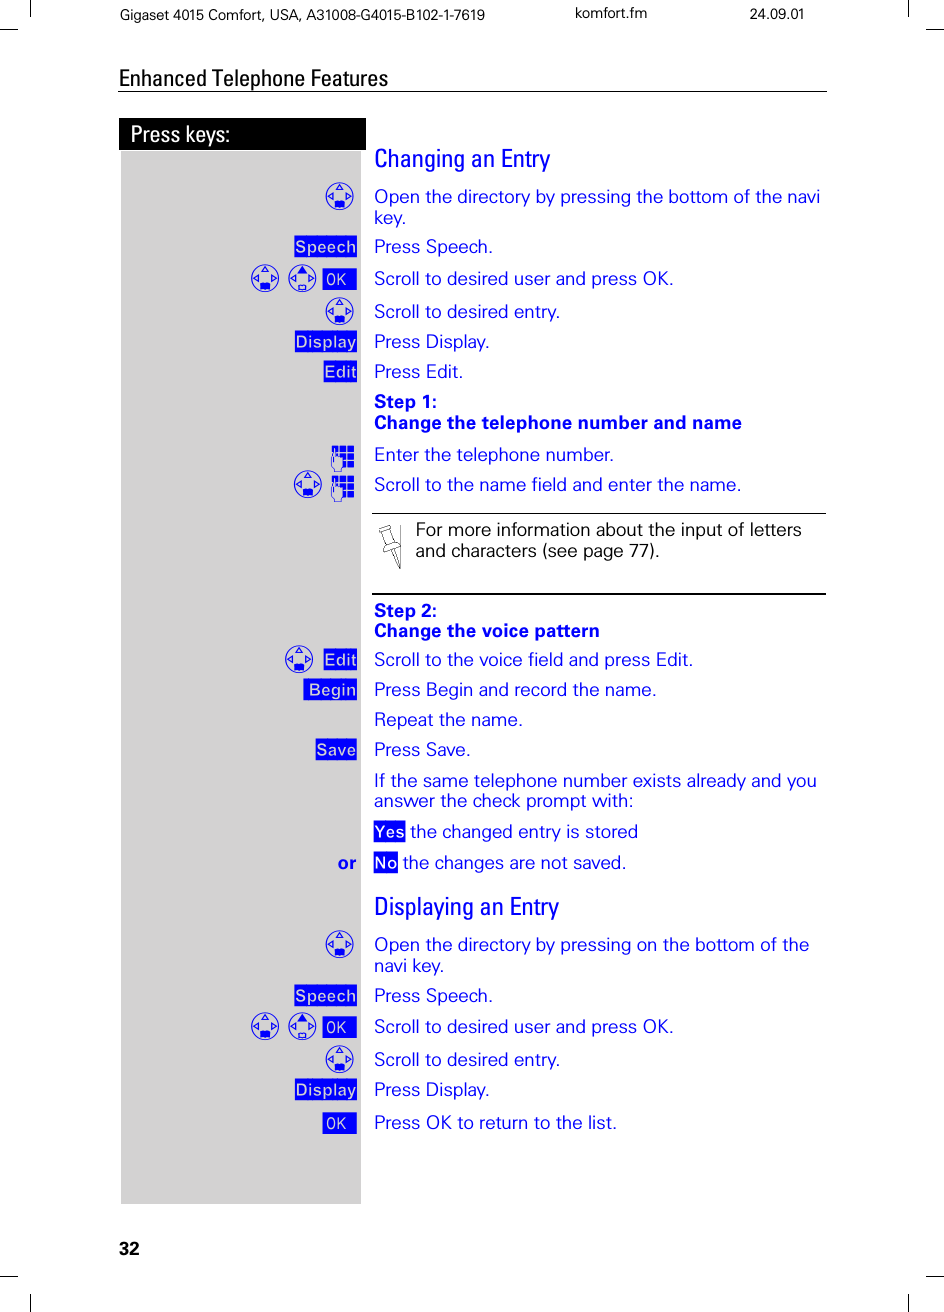
![30Press keys:Enhanced Telephone FeaturesGigaset 4015 Comfort, USA, A31008-G4015-B102-1-7619 komfort.fm 24.09.01Directory with Voice DialingYou can use your voice to dial the telephone numbers of this special directory. Each user must store a voice pattern for each entry of this directory. Up to four users can share this directory. The voice dialing directory can contain a total of 20 voice patterns. Up to four voice patterns can be stored for one entry. Example: There are two users. Each user records a voice pattern for each entry. They can therefore each put 10 entries in the directory.When you open this directory all the entries are display-ed. If a voice pattern for the current user is stored the entry is identified by the Eicon.Recording a New Entry and Voice PatternStep 1:Enter the telephone number and nameOpen the directory by pressing the bottom of the navi key6SHHFK Press Speech. Select user 1-4 and press OK. ]]]]]]]]]]]]]]]]]]]]]]]]]]]]]]]]New Entry Scroll to New Entry and press OK. 2Enter the telephone number.2Scroll to the name field and enter the name.Step 2:Recording a voice pattern5HFRUG Press Record.%HJLQ Press begin to start voice recording and speak the name of the required entry – for example Anne John-son.Repeat the name – for example Anne Johnson.6DYH Press Save.If the directory contains an entry with an identical tele-phone number, a check prompt is displayed. If you ans-wer it with:For more information about the input of letters and characters (see page 77).](https://usermanual.wiki/Siemens-Information-and-Communication-Mobile/BIRD/User-Guide-285416-Page-36.png)
![31Press keys:Enhanced Telephone FeaturesGigaset 4015 Comfort, USA, A31008-G4015-B102-1-7619 komfort.fm 24.09.01<HV the changed number is stored or 1R the changes are not saved.Dialing with your VoiceYou can activate your own voice dialing entry on any handset (Gigaset 4200).Hold down the top of the navi key.You are prompted to speak and the ready tone is gene-rated.Speak the voice pattern you recorded – for example Anne. If your telephone was able to recognize the voice pattern, it is repeated. The number linked to the voice pattern is dialed.Playing Back a Voice PatternOpen the directory by pressing the bottom of the navi key.6SHHFK Press Speech. Scroll to desired user and press OK.Scroll to desired entry.0(18 Press Menu.]]]]]]]]]]]]]]]]]]]]]]]]]]]]]]]]Play Voice Entry Scroll to Play Voice Entry and press OK.When recording a voice pattern it is recommen-ded that you use longer names rather than shor-ter ones. For example, the person’s first and last name. The entire voice pattern can not be longer than 1.5 seconds.You are prompted to repeat the entry if your re-cordings are too different. After four seconds you are returned to the start of the voice recor-ding and can begin once more.If your voice pattern is too similar to another user's voice pattern, you get a message. If you end this message with Qyou return to the start of the voice recording and can begin once more.](https://usermanual.wiki/Siemens-Information-and-Communication-Mobile/BIRD/User-Guide-285416-Page-37.png)
![33Press keys:Enhanced Telephone FeaturesGigaset 4015 Comfort, USA, A31008-G4015-B102-1-7619 komfort.fm 24.09.01Deleting an EntryOpen the directory by pressing on the bottom of the navi key.6SHHFK Press Speech. Scroll to desired user and press OK.Scroll to desired entry.0(18 Press Menu.]]]]]]]]]]]]]]]]]]]]]]]]]]]]]]]]Delete Entry Scroll to Delete Entry and press OK. If you answer the check prompt with: Press <HV to confirm - a confirmation beep is genera-ted.The entry and all its voice patterns are deleted. Deleting a Voice PatternFor an entry you can delete the voice pattern of a spe-cific user. The voice patterns of all other users are not affected.Open the directory by pressing on the bottom of the navi key.6SHHFK Press Speech. Scroll to desired user and press OK.Scroll to desired entry.0(18 Open the menu.]]]]]]]]]]]]]]]]]]]]]]]]]]]]]]]]Del Voice Entry Scroll to Del Voice Entry and press OK - A confirmation beep sounds. The voice pattern is deleted.Delete the last voice pattern (of four possible voice pat-terns) and answer the check prompt with: <HV if the voice pattern and the entry are to be deletedor 1R if the voice pattern and the entry are not to be dele-ted.If you delete the voice pattern of an entry the te-lephone number and the relevant name are not affected. Prerequisite: Voice patterns of other users are still available for this entry.](https://usermanual.wiki/Siemens-Information-and-Communication-Mobile/BIRD/User-Guide-285416-Page-39.png)
![34Press keys:Enhanced Telephone FeaturesGigaset 4015 Comfort, USA, A31008-G4015-B102-1-7619 komfort.fm 24.09.01Copying an Entry to the Local Handset DirectoryYou can copy the telephone number and the name of an entry in the voice directory to the local directory (see page 28).Open the directory by pressing on the bottom of the navi key.6SHHFK Press Speech. Scroll to desired user and press OK.Scroll to desired entry.0(18 Press Menu.]]]]]]]]]]]]]]]]]]]]]]]]]]]]]]]]Transfer Entry Scroll to Transfer Entry and press OK.Changing a User NameTo change a voice pattern, a speaker must be selected (see page 30). There are four speakers. Factory default: user 1 - 4. You can rename these entries. Open the directory by pressing on the bottom of the navi key.6SHHFK Press Speech. Scroll to desired user.(GLW Press Edit.QRename the user (for example user 1 as "Eric").6DYH Press save.Turning On and Off the Playback of a Voice Pattern for an Incoming CallIf the telephone number (Caller ID) transmitted for an incoming call corresponds to an entry with a voice pat-tern this pattern is played back on the loudspeakers of the handset and the base station. 0(18 Press Menu.]]]]]]]]]]]]]]]]]]]]]]]]]]]]]]]]Base Settings Scroll to Base Settings and press OK.]]]]]]]]]]]]]]]]]]]]]]]]]]]]]]]]Spec.Functions Scroll to Spec. Functions and press OK.]]]]]]]]]]]]]]]]]]]]]]]]]]]]]]]]Caller ID Scroll to Caller ID and press OK to switch between on and off – a check indicates the feature is on.](https://usermanual.wiki/Siemens-Information-and-Communication-Mobile/BIRD/User-Guide-285416-Page-40.png)
![35Press keys:Enhanced Telephone FeaturesGigaset 4015 Comfort, USA, A31008-G4015-B102-1-7619 komfort.fm 24.09.01Call Log *The numbers of the last 30 calls are saved in the Call Log.Call Log SettingsYou can set the following options:●only store missed calls●store all incoming callsPress the Mailbox key.]]]]]]]]]]]]]]]]]]]]]]]]]]]]]]]]Calls: Scroll to Calls: and press OK.0(18 Press Menu.]]]]]]]]]]]]]]]]]]]]]]]]]]]]]]]]Call Log Scroll to Call Log and press OK.]]]]]]]]]]]]]]]]]]]]]]]]]]]]]]]]Missed Calls Scroll to Missed calls and press OKor]]]]]]]]]]]]]]]]]]]]]]]]]]]]]]]]All Calls Scroll to All Calls and press OK.* Requires a subscription to Caller ID from your local telephone com-pany•Calls picked up on the first ring will not be saved in the Call Log.•Call Waiting calls are included in the Call Log if you have subscribed to Caller ID with Call Waiting from your local telephone company.•If several calls are received under the same number, only the last call is recorded.•You must subscribe to Caller ID for the Call Log to record numbers.Default setting of Call Log is all incoming calls.](https://usermanual.wiki/Siemens-Information-and-Communication-Mobile/BIRD/User-Guide-285416-Page-41.png)
![37Press keys:Enhanced Telephone FeaturesGigaset 4015 Comfort, USA, A31008-G4015-B102-1-7619 komfort.fm 24.09.01Dialing from the Call LogIf you subscribe to Caller ID and your Local Area Code and any Extra Codes have been stored in your tele-phone, it will behave as described below in the exam-ple of dialing from the call log list:Single Area Code Area (Local Area Code and no Extra Code are stored)If the Area Code of the call log entry is identical to the stored Local Area Code, only the 7digit number will be dialed. Otherwise a "1" will automatically be placed in front of the number.Multiple Area Code Area (Local Area Code and Extra Code(s) are stored)If the Area Code of the call log entry is identical to the stored Local Area Code or one of the Extra Codes, the call log entry will be dialed as displayed. Otherwise a "1" will automatically be placed in front of the number.Press the Mailbox Key.]]]]]]]]]]]]]]]]]]]]]]]]]]]]]]]]Calls: Scroll to Calls: and press OK Scroll to the desired number.!Press Talk to dial the number - The number is copied to the redialing list.Deleting a Number from the Call LogIf there are new calls a prompt appears on the display and the status LED flashes.Press the Mailbox Key.]]]]]]]]]]]]]]]]]]]]]]]]]]]]]]]]Calls: Scroll to Calls: and press OK/Scroll to the desired number. Press 'HOHWH to remove the number from the Call Log. Important: There are certain cases (such as a long distance call within the same Area Code) which are not supported by this feature. In these cases please dial the number manually.](https://usermanual.wiki/Siemens-Information-and-Communication-Mobile/BIRD/User-Guide-285416-Page-43.png)
![38Press keys:Enhanced Telephone FeaturesGigaset 4015 Comfort, USA, A31008-G4015-B102-1-7619 komfort.fm 24.09.01Copying a Call Log Number to the DirectoryPress the Mailbox Key.]]]]]]]]]]]]]]]]]]]]]]]]]]]]]]]]Calls: Scroll to Calls: and press OK. Scroll to the desired number.0(18 Press Menu.]]]]]]]]]]]]]]]]]]]]]]]]]]]]]]]]Send to Dir Scroll to Send to Dir and press OK.QScroll to the name field and enter a name.0(18 Press Menu.]]]]]]]]]]]]]]]]]]]]]]]]]]]]]]]]Save Entry Scroll to Save Entry and press OK.Deleting the Call LogPress the Mailbox Key.]]]]]]]]]]]]]]]]]]]]]]]]]]]]]]]]Calls: Scroll to Calls: and press OK.0(18 Press Menu.]]]]]]]]]]]]]]]]]]]]]]]]]]]]]]]]Delete Log Scroll to Delete Log and press OK.Displaying the Name of the Caller in the Call LogIf your local telephone company transmits the name of the person who called it can be displayed.Press the Mailbox Key.]]]]]]]]]]]]]]]]]]]]]]]]]]]]]]]]Call Log Scroll to Calls: and press OK. Scroll to desired entry.0(18 Press Menu.]]]]]]]]]]]]]]]]]]]]]]]]]]]]]]]]Name/Text Msg. Scroll to Name/Text Msg. and press OK.Q/Press OK to end.●For more information about the input of letters and characters (see page 77).●Please note that numbers copied from the call log list to the telephone book may require ed-iting, for example adding a "1" or removing the Area Code. Depending on your choice of Caller ID Service the name of the caller may be transmitted and dis-played on the handset when the call is received.](https://usermanual.wiki/Siemens-Information-and-Communication-Mobile/BIRD/User-Guide-285416-Page-44.png)
![39Press keys:Gigaset 4015 Comfort, USA, A31008-G4015-B102-1-7619 tnet.fm 24.09.01Using Advanced Caller ID on Call WaitingIn many areas Advanced Caller ID on Call Waiting (Cal-ler ID 2.5) service is available through your local tele-phone provider. The service allows you to select from a series of options if you are on a call and receive another call with Call Waiting ID. The Gigaset 4215 ful-ly supports this convenient telephone company fea-ture. Please contact your local telephone provider for a subscription or more details on this service.While on a call, a second call comes in and the inco-ming number is displayed. For the next 8 seconds you may do one of the following:0(18 Press Menu.]]]]]]]]]]]]]]]]]]]]]]]]]]]]]]]]TAKE MSG Scroll to TAKE MSG and press OK – Forwards second caller to telephone company voice mail.or]]]]]]]]]]]]]]]]]]]]]]]]]]]]]]]]HOLD MSG Scroll to HOLD MSG and press OK – Informs the se-cond caller to hold.or]]]]]]]]]]]]]]]]]]]]]]]]]]]]]]]]CALL BACK Scroll to CALL BACK and press OK – Informs the se-cond caller to call back at a later time.or]]]]]]]]]]]]]]]]]]]]]]]]]]]]]]]]ADD 2ND Scroll to ADD 2ND and press OK – Initiates a 3-way call and adds second caller to current call](https://usermanual.wiki/Siemens-Information-and-Communication-Mobile/BIRD/User-Guide-285416-Page-45.png)
![40Press keys:Operating the Answering MachineGigaset 4015 Comfort, USA, A31008-G4015-B102-1-7619 anrufb_comfort.fm 24.09.01Operating the Answering MachineYour Gigaset 4215 is equipped with an answering ma-chine that will record messages in your absence or al-low you to screen calls and answer them selectively. The answering machine in the Gigaset 4215 is automa-tically turned on when you install your phone and com-pletely operated through any registered 4200 handset.Operating the answering machine is made easier by menus and displays on the handset and by announce-ments that you can hear on the handset.Unless you set the date and time (see page 7), recor-ded messages will not be “time stamped”.In addition to the telephone's answering machine, you can use an “voice mail service” offered by your local network provider (e.g. telco voice). None of the follo-wing functions relates to the network provider's voice mail service. Check with your network provider for the-se services.Turning On and Off the Answering MachineYour answering machine is automatically turned on and ready for operation once your base station has been in-stalled. For recording messages with a time stamp, you need to set the date and time (see page 7). The answering machine is set to use the standard an-nouncement until you record your own announcement of your own.0(18 Press Menu.]]]]]]]]]]]]]]]]]]]]]]]]]]]]]]]]Ans Machine Scroll to Ans Machine and press OK.]]]]]]]]]]]]]]]]]]]]]]]]]]]]]]]]Answering M. Scroll to Answering M. – A check indicates the ans-wering machine is on (no check indicates off).Press OK to add or remove the check – pressing OK will toggle between the on and off settings.(QG Press End or (back arrow) to return to the previous menu. If the answering machine's memory is full it swit-ches itself off. To delete old messages (see page 47).](https://usermanual.wiki/Siemens-Information-and-Communication-Mobile/BIRD/User-Guide-285416-Page-46.png)
![41Press keys:Operating the Answering MachineGigaset 4015 Comfort, USA, A31008-G4015-B102-1-7619 anrufb_comfort.fm 24.09.01Setting a Different LanguageYou may change the language for the voice prompts and for the standard announcement.0(18 Press Menu.36- From the keypad enter 8, 9, 2 then the number of the desired language from the table below.For example to set the language to English you would press Menu then enter 8, 9, 2, 1.Selecting an AnnouncementA standard announcement is already preset: “There is nobody available to take your call right now. Please leave a message after the tone.”This announcement is used until you record your own announcement, or after you have deleted your own an-nouncement.When selecting an announcement you may choose from the following two options:●Announcement – Plays the announcement and re-cords messages●Announcement Only – Plays the announcement but does not record messages You can only select the Announcement Only if you have already recorded an Announcement Only mes-sage (see page 42). 0(18 Press Menu.]]]]]]]]]]]]]]]]]]]]]]]]]]]]]]]]Ans Machine Scroll to Ans Machine and press OK.]]]]]]]]]]]]]]]]]]]]]]]]]]]]]]]]Announcements Scroll to Announcements and press OK.]]]]]]]]]]]]]]]]]]]]]]]]]]]]]]]]Mode Scroll to Mode and press OK.]]]]]]]]]]]]]]]]]]]]]]]]]]]]]]]]Annc Scroll to Annc and press OK to activate the Announce-ment (A check mark indicates option is selected) .An announcement can be recorded.or]]]]]]]]]]]]]]]]]]]]]]]]]]]]]]]]Annc Only Scroll to Annc Only and press OK to activate the An-nouncement Only (A check mark indicates option is selected).The announcement you selected is available even after the answering machine has been switched off.English Spanish-French](https://usermanual.wiki/Siemens-Information-and-Communication-Mobile/BIRD/User-Guide-285416-Page-47.png)
![42Press keys:Operating the Answering MachineGigaset 4015 Comfort, USA, A31008-G4015-B102-1-7619 anrufb_comfort.fm 24.09.01Recording Your Announcement/Announcement Only Greeting0(18 Press Menu.]]]]]]]]]]]]]]]]]]]]]]]]]]]]]]]]Ans Machine Scroll to Ans Machine and press OK.]]]]]]]]]]]]]]]]]]]]]]]]]]]]]]]]Announcements Sroll to Announcements and press OK.]]]]]]]]]]]]]]]]]]]]]]]]]]]]]]]]Record Annc Scroll to Record Annc and press OK.or]]]]]]]]]]]]]]]]]]]]]]]]]]]]]]]]Rec Annc Only Scroll to Rec Annc Only and press OK.Quickly place the handset to your ear and you will hear a notification of the recording and then the ready tone (short beep). After the tone speak your announcement or announcement only greeting clearly into the hand-set.Example of a typical announcement greeting: “I cannot take your call right now. Please leave a mes-sage after the tone.”Example of a typical announcement only greeting: “Our offices are closed. Please call back during busi-ness hours between 9 a.m. and 5 p.m. on weekdays.”(QG Press End to stop the recording.Your greeting is then automatically played back to you.If you press Qor during the recording, the recor-ding will be terminated and the current announcement will be deleted.●If Annc mode is set the standard announcement is used.●If Annc Only mode is set the answering machine is automatically turned off.Recording is automatically terminated:●if you exceed the maximum recording time of 170 seconds●if you pause for more than two secondsIf the memory of the answering machine is full and an announcement only greeting is available the answering machine automatically switches itself to the announcement only setting.](https://usermanual.wiki/Siemens-Information-and-Communication-Mobile/BIRD/User-Guide-285416-Page-48.png)
![43Press keys:Operating the Answering MachineGigaset 4015 Comfort, USA, A31008-G4015-B102-1-7619 anrufb_comfort.fm 24.09.01Checking an Announcement 0(18 Press Menu.]]]]]]]]]]]]]]]]]]]]]]]]]]]]]]]]Ans Machine Scroll to Ans Machine and press OK.]]]]]]]]]]]]]]]]]]]]]]]]]]]]]]]]Announcements Scroll to Announcements and press OK.]]]]]]]]]]]]]]]]]]]]]]]]]]]]]]]]Play Annc Scroll to Play Annc and press OK.or]]]]]]]]]]]]]]]]]]]]]]]]]]]]]]]]Play Annc Only Scroll to Play Annc Only and Press OK.The current announcement or announcement only greeting is played back. Deleting an Announcement 0(18 Press Menu.]]]]]]]]]]]]]]]]]]]]]]]]]]]]]]]]Ans Machine Scroll to Ans Machine and press OK.]]]]]]]]]]]]]]]]]]]]]]]]]]]]]]]]Announcements Scroll to Announcements and press OK.]]]]]]]]]]]]]]]]]]]]]]]]]]]]]]]]Play Annc Scroll to Play Annc and press OK.or]]]]]]]]]]]]]]]]]]]]]]]]]]]]]]]]Play Annc Only Scroll to Play Annc Only and Press OK.The current announcement or announcement only greeting is played back.or]]]]]]]]]]]]]]]]]]]]]]]]]]]]]]]]Delete Annc Scroll to Delete Annc and press OK.After confirmation of the check prompt , the standard announcement is active again.or]]]]]]]]]]]]]]]]]]]]]]]]]]]]]]]]Del Annc Only Scroll to Del Annc Only and Press OK.After confirmation of the check prompt, the current announcement is deleted.<HV Press Yes to confirm.While playing back an announcement or an an-nouncement only greeting you can record a new one by pressing the 5HFRUG soft key.Delete AnncDel Annc Only](https://usermanual.wiki/Siemens-Information-and-Communication-Mobile/BIRD/User-Guide-285416-Page-49.png)
![44Press keys:Operating the Answering MachineGigaset 4015 Comfort, USA, A31008-G4015-B102-1-7619 anrufb_comfort.fm 24.09.01Training voice controlYou can use your voice to assiust in operating the an-swering machine. Four different users can record the commands FORWARD, DELETE and BACK. The an-swering machine will recognizes these commands and acts accordingly.But you have to train the answering machine to recognize your voice first.Storing voice commandsThe telephone is idle:APress menu.]]]]]]]]]]]]]]]]]]]]]]]]]]]]]]]]Answering M. Scroll to Answering M. and press OK.]]]]]]]]]]]]]]]]]]]]]]]]]]]]]]]]Voice Prompts Scroll to Voice Prompts and press OK.]]]]]]]]]]]]]]]]]]]]]]]]]]]]]]]]Rec Prompt Scroll to Rec Prompt and press OK. Select the user and press OK.Put the handset to your ear and follow the commands. You are prompted to record the commands FOR-WARD, DELETE and BACK. For DELETE, for example:●“Please, say the word DELETE”●“Please, repeat the word DELETE”Activating voice controlAPress menu.]]]]]]]]]]]]]]]]]]]]]]]]]]]]]]]]Answering M. Scroll to Answering M. and press OK.]]]]]]]]]]]]]]]]]]]]]]]]]]]]]]]]Voice Prompts Scroll to Voice Prompts and press OK.]]]]]]]]]]]]]]]]]]]]]]]]]]]]]]]]Voice Prompts Scroll to Voice Prompts and press OK (a check mark in-dicates the feature is on).](https://usermanual.wiki/Siemens-Information-and-Communication-Mobile/BIRD/User-Guide-285416-Page-50.png)
![45Press keys:Operating the Answering MachineGigaset 4015 Comfort, USA, A31008-G4015-B102-1-7619 anrufb_comfort.fm 24.09.01Playing Back MessagesWhen new messages have been received a prompt and the icon appear on the display and the status light on the handset flashes. If there are no new mes-sages or calls, you can listen to old messages.Press the Mailbox Key.]]]]]]]]]]]]]]]]]]]]]]]]]]]]]]]]Ans Msg.: Scroll to Ans Msg. and press OK.The playback begins immediately with the first new message. After the last new message, the old messa-ges are played back. After the last message, you hear the end tone.Pause During the PlaybackPress downward on the navi key to pause.Press downward once more on the navi key to conti-nue.If playback is paused for more than a minute the answering machine goes back to idle status.](https://usermanual.wiki/Siemens-Information-and-Communication-Mobile/BIRD/User-Guide-285416-Page-51.png)
![46Press keys:Operating the Answering MachineGigaset 4015 Comfort, USA, A31008-G4015-B102-1-7619 anrufb_comfort.fm 24.09.01Skipping Forward and Back while Playing MessagesYou have two options to jump between messages while playing them back.1st option via keypadPress the left side of the Navi key once to return to the start of the current message2 xPress the left side of the navi key twice to skip back to the previous message.Press the right side of the navi key once to skip forward to the next message.2 xPress the right side of the navi key once to skip forward to the next message.2nd option via voice controlHold down, to interrupt playback of the message for voice control.Speak into the handset: BACK.The AM jumps to the start of the current message.or Speak into the handset: FORWARD.The AM jumps to the next message.Marking an Old Message as “New”New messages are placed at the beginning of the mes-sage list before old messages which have been played back already. You can put an “old message” to the top of this list by marking it as “new” (the light on the handset will start to flash.).1st option via the * keyCPress the star key - The current message is marked as “new” and the AM will skip forward to the next mes-sage.2nd option via the menu0(18 Press Menu.]]]]]]]]]]]]]]]]]]]]]]]]]]]]]]]]Mark As New Scroll to Mark As New and press OK - the current mes-sage is marked as “new” and the AM will skip forward to the next message.](https://usermanual.wiki/Siemens-Information-and-Communication-Mobile/BIRD/User-Guide-285416-Page-52.png)
![47Press keys:Operating the Answering MachineGigaset 4015 Comfort, USA, A31008-G4015-B102-1-7619 anrufb_comfort.fm 24.09.01Deleting MessagesYou can either delete individual messages or all old messages.Deleting Individual MessagesWhile playing back the message to be deleted:1st option via keypad'HOHWH Press Delete.2nd option via voice control Hold down, to interrupt playback of the message for voice control.Speak into the handset: DELETE. The message is deleted.Deleting all Old MessagesDuring playback or a pause:0(18 Press Menu.]]]]]]]]]]]]]]]]]]]]]]]]]]]]]]]]Delete Old Msg. Scroll to Delete Old Msg. and press OK.<HV Press Yes to confirm.Recording MemosMemos are “audible notes” that you can record with the answering machine for members of your family, for example. The memos are played back, stored and de-leted in the same way as announcements. New me-mos are signaled on the handset (light flashes).You can record multiple memos.0(18 Press Menu.]]]]]]]]]]]]]]]]]]]]]]]]]]]]]]]]Ans Machine Scroll to Ans Machine and press OK.]]]]]]]]]]]]]]]]]]]]]]]]]]]]]]]]Record Memo Scroll to Record Memo and press OK - You will hear the notification for recording then the ready toneRecord your memo. (QG Press End when finished.If you press Q or while recording the memo it will stop the recording and nothing will be saved.](https://usermanual.wiki/Siemens-Information-and-Communication-Mobile/BIRD/User-Guide-285416-Page-53.png)
![48Press keys:Operating the Answering MachineGigaset 4015 Comfort, USA, A31008-G4015-B102-1-7619 anrufb_comfort.fm 24.09.01Picking up a Call from the Answering MachineWhile the answering machine is recording a message (status light is on) you can still pick up the call if you want to talk to the caller. !Press Talk – The recording ends and you can talk to the caller.Setting Instant Access to the Answering Machine or Voice Mail*You can set your telephone to instantly access the ans-wering machine or to dial your voice mail0(18 Press Menu.]]]]]]]]]]]]]]]]]]]]]]]]]]]]]]]]Ans Machine Scroll to Ans Machine and press OK.]]]]]]]]]]]]]]]]]]]]]]]]]]]]]]]]Set Key 1 Scroll to Set Key 1 and press OK.]]]]]]]]]]]]]]]]]]]]]]]]]]]]]]]]Answering M. Scroll to Answering M. and press OK - You now have instant access to the answering machine by holding down the 1 keyor]]]]]]]]]]]]]]]]]]]]]]]]]]]]]]]]Voice Mail Scroll to voice mailbox and press OK.)Enter your voice mail number.0(18 Press Menu.]]]]]]]]]]]]]]]]]]]]]]]]]]]]]]]]Save Scroll to Save and press OK – You now have instant ac-cess to your voice mail by holding down the 1 key.*. Voice Mail requires a subscription from you local telephone compa-ny.After you have selected the answering machine, you simply need to hold down the key on the handset. You are then connected directly to the selected answering machine.](https://usermanual.wiki/Siemens-Information-and-Communication-Mobile/BIRD/User-Guide-285416-Page-54.png)
![52Press keys:Customizing the Answering Machine SettingsGigaset 4015 Comfort, USA, A31008-G4015-B102-1-7619 abeinst_comfort.fm 24.09.01Customizing the Answering Machine SettingsThe answering machine has already been preset for you at the factory. However, you may customize the settings using the handset.Setting the Number of Rings and the Toll Saving FunctionFor remote operation you can set how many times the telephone rings before the answering machine picks up the call. You can choose between two to nine rings and an automatic toll saving function. With the automatic toll saving function (factory default) the answering machine picks up after:●2 rings: there are new messages. ●4 rings: no new messages have been received.You then know that if the telephone rings three times there are no new messages – if you end the call now, you will not incur any call charges.0(18 Press Menu.]]]]]]]]]]]]]]]]]]]]]]]]]]]]]]]]Ans Machine Scroll to Ans Machine and press OK.]]]]]]]]]]]]]]]]]]]]]]]]]]]]]]]]No. of Rings Scroll to No. of Rings and press OK. Set the number of rings (or "auto" to set to toll saver) by pressing left or right on the navi key.6DYH Press Save.](https://usermanual.wiki/Siemens-Information-and-Communication-Mobile/BIRD/User-Guide-285416-Page-58.png)
![53Press keys:Customizing the Answering Machine SettingsGigaset 4015 Comfort, USA, A31008-G4015-B102-1-7619 abeinst_comfort.fm 24.09.01Setting Message LengthYou can set the length of message recording time for your answering machine if desired. The factory default setting is 120 seconds. 0(18 Press Menu.]]]]]]]]]]]]]]]]]]]]]]]]]]]]]]]]Ans Machine Scroll to Ans Machine and press OK.]]]]]]]]]]]]]]]]]]]]]]]]]]]]]]]]Msg. Settings Scroll to Msg. Settings and press OK.]]]]]]]]]]]]]]]]]]]]]]]]]]]]]]]]Msg. Length Scroll to Msg. Length and press OK. Select 30, 60, or 120 seconds by pressing left or right on the navi key.6DYH Press Save.Setting Recording QualityYou can set the quality of recorded messages if desi-red. The factory default setting is Long Play (max. re-cording time: 30 min). If you improve the recording quality to High Quality, the recording time will be cut to approx. 15 minutes.0(18 Press Menu.]]]]]]]]]]]]]]]]]]]]]]]]]]]]]]]]Ans Machine Scroll to Ans Machine and press OK.]]]]]]]]]]]]]]]]]]]]]]]]]]]]]]]]Msg. Settings Scroll to Msg. Settings and press OK.]]]]]]]]]]]]]]]]]]]]]]]]]]]]]]]]Msg. Quality Scroll to Msg. Quality and press OK. Select Longplay (approximately 30 minutes) or High-quality (approximately 15 minutes) recording by pres-sing left or right on the navi key.6DYH Press Save.](https://usermanual.wiki/Siemens-Information-and-Communication-Mobile/BIRD/User-Guide-285416-Page-59.png)
![54Press keys:Customizing the Answering Machine SettingsGigaset 4015 Comfort, USA, A31008-G4015-B102-1-7619 abeinst_comfort.fm 24.09.01Call ScreeningWhile a message is being recorded you can listen in and screen calls on the loudspeaker of any handset. Factory default is call screening on.0(18 Press Menu.]]]]]]]]]]]]]]]]]]]]]]]]]]]]]]]]Ans Machine Scroll to Ans Machine and press OK.]]]]]]]]]]]]]]]]]]]]]]]]]]]]]]]]Call Screen Scroll to Call Screen and press OK to switch between on and off – A check mark indicate the feature is on.You can also turn call screening off from on a handset by pressing while the message is recording.](https://usermanual.wiki/Siemens-Information-and-Communication-Mobile/BIRD/User-Guide-285416-Page-60.png)
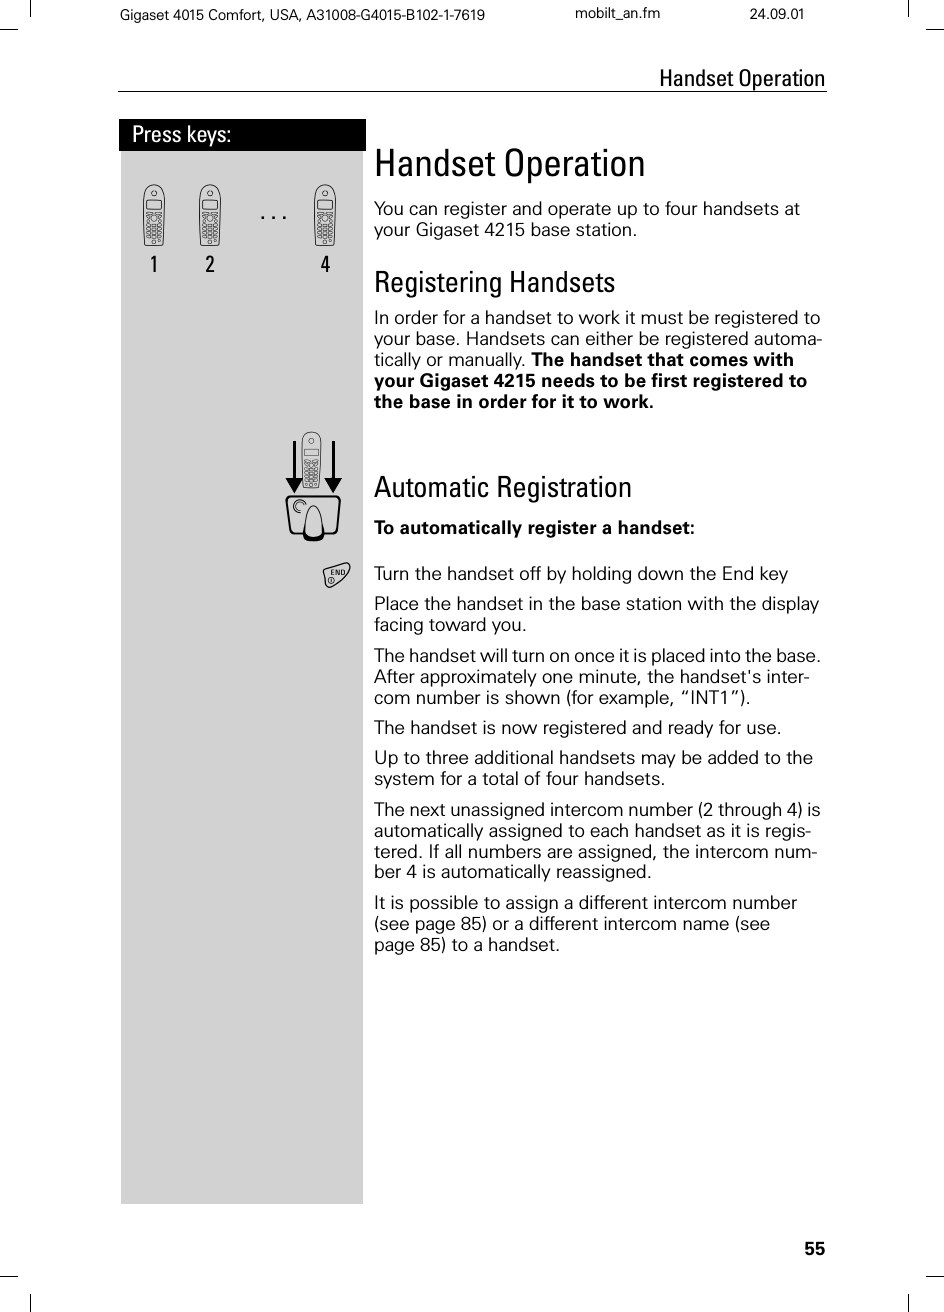
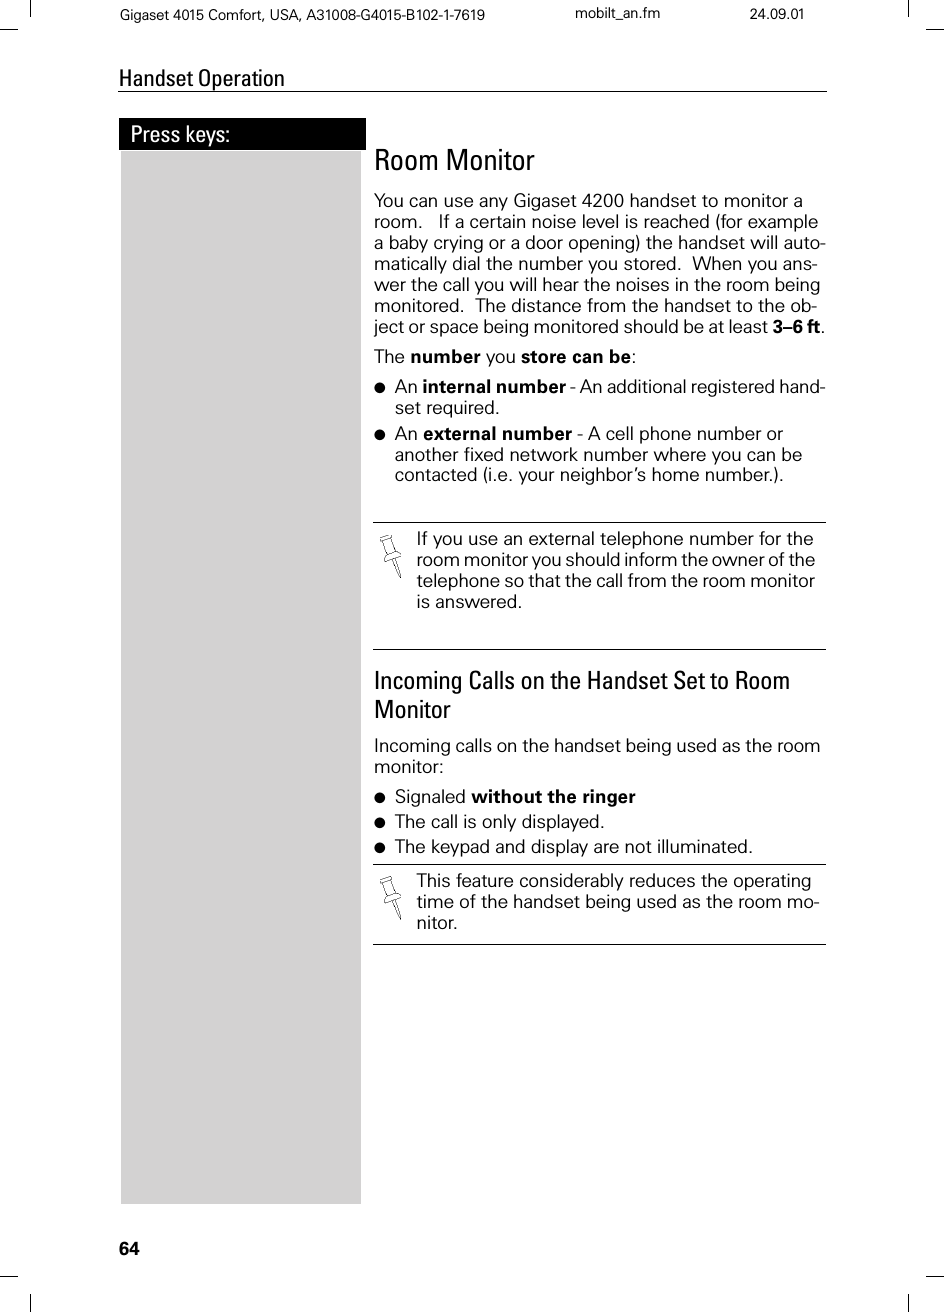
![56Press keys:Handset OperationGigaset 4015 Comfort, USA, A31008-G4015-B102-1-7619 mobilt_an.fm 24.09.01Manual RegistrationIf automatic registration does not work properly, or you wish to register your handset to another base station you may manually register a handset. A handset can only be registered to one Gigaset base station at a time.Step 1: On the Handset0(18 Press Menu.]]]]]]]]]]]]]]]]]]]]]]]]]]]]]]]]H/Set Settings Scroll to H/Set Settings and press OK.]]]]]]]]]]]]]]]]]]]]]]]]]]]]]]]]Reg. Handset Scroll to Reg. Handset and press OK.Select the base station ( is recommended un-less you are registering your handset to an additional base).)Enter the PIN (factory setting: 0000).Step 2: Underside of the base stationHold down the Page/Registration key on the underside of the base station for approximately 10 seconds until a signal tone is heard at the base station.When the handset has been successfully registered, the intercom number is shown (for example, “INT1”). If all internal handset numbers are assigned, the inter-com number 4 is reassigned. The handset that has been registered under number 4 will be deregistered.Base 1](https://usermanual.wiki/Siemens-Information-and-Communication-Mobile/BIRD/User-Guide-285416-Page-62.png)
![57Press keys:Handset OperationGigaset 4015 Comfort, USA, A31008-G4015-B102-1-7619 mobilt_an.fm 24.09.01Deregistering HandsetsPrerequisite:You can only deregister Gigaset 4200 handsets.Press left on the navi key (INT) and the list of handsets is displayed. Scroll to the handset that is to be deregistered.0(18 Press Menu.]]]]]]]]]]]]]]]]]]]]]]]]]]]]]]]]Dereg. Handset Scroll to Dereg. Handset and press OK.PINEnter the PIN (factory setting 0000) and press OK.<HVConfirm by pressing Yes.Switching Base StationsPrerequisite: The handset is registered at more than one base stations.The handset can be ●set to a certain base station (e.g. at home or in the office)or ●set to and it is automatically switched to the base station with the best reception.0(18 Press Menu.]]]]]]]]]]]]]]]]]]]]]]]]]]]]]]]]H/Set Settings Scroll to H/Set Settings and press OK.]]]]]]]]]]]]]]]]]]]]]]]]]]]]]]]]Select Base Scroll to Select Base and press OK.Scroll to the desired base or select Best Base and press OK.You can only deregister handsets with a Gigaset 4200.Best Base](https://usermanual.wiki/Siemens-Information-and-Communication-Mobile/BIRD/User-Guide-285416-Page-63.png)
![58Press keys:Handset OperationGigaset 4015 Comfort, USA, A31008-G4015-B102-1-7619 mobilt_an.fm 24.09.01Changing the Name of a HandsetThe names INT 1, INT 2, and so on are assigned auto-matically. However, you can change these names, for example, to ANNE or OFFICE (10 characters maxi-mum).Press left on the navi key (INT) and the list of handsets is displayed. Scroll to the desired handset (GLW Press Edit.)Enter the new name. 6DYH Press Save.Changing a Handset's Intercom NumberYou can change the number of a handset.Press left on the navi key (INT) and the list of handsets is displayed. 0(18 Press Menu.]]]]]]]]]]]]]]]]]]]]]]]]]]]]]]]]Assign Number Scroll to Assign Number and press OK. All registered handsets are displayed. Select the desired handset)Enter an available intercom number.If necessary:Q Scroll to a different intercom and change it first.Press OK to save changes.Intercom 4Intercom Call INT <EricFour handsets are registered already.“Intercom Call” is only displayed if more than one user is registered. Q0(18If the selected intercom telephone number has already been assigned to a different handset, you will hear an error tone (descending tone se-quence).](https://usermanual.wiki/Siemens-Information-and-Communication-Mobile/BIRD/User-Guide-285416-Page-64.png)
![61Press keys:Handset OperationGigaset 4015 Comfort, USA, A31008-G4015-B102-1-7619 mobilt_an.fm 24.09.01Joining a Call ("Barging In")Under normal circumstances if an internal user is con-ducting an external call a second internal user can join in. However, the Gigaset 4215 allows you to turn this feature off if privacy is desired.Turning this Function On/Off0(18 Press Menu.]]]]]]]]]]]]]]]]]]]]]]]]]]]]]]]]Base Settings Scroll to Base Settings and press OK.]]]]]]]]]]]]]]]]]]]]]]]]]]]]]]]]Spec.Functions Scroll to Spec. Functions and press OK.]]]]]]]]]]]]]]]]]]]]]]]]]]]]]]]]Barge In Scroll to Barge In and press to switch between on and off – A check mark indicate the feature is on.Barging In You want to barge into an active call.Prerequisite: this function has to be activated at the base station previously.You see on the display that the line is in use and want to join the call.!Press Talk. During the call you see this display .Hang up or press End to exit the call.Turning the Ringer OffYou may turn off the ringer on any handset.BHold down the star key until the handset does not ring any more. The ringer is permanently off until until you turn it back on. To turn the ringer back on press the star key.The default is On.Int ConfThe conference cannot be initiated if recording is active during the external call.](https://usermanual.wiki/Siemens-Information-and-Communication-Mobile/BIRD/User-Guide-285416-Page-67.png)
![62Press keys:Handset OperationGigaset 4015 Comfort, USA, A31008-G4015-B102-1-7619 mobilt_an.fm 24.09.01Paging all Handsets from the Base (Locating Handsets)Press the Page/Registration buttons on the bottom side of the base station very briefly. All handsets ring at the same time.To End PagingPress the Page/Registration button again.or!Press the Talk key on a handset.Setting Direct Inward DialingDirect inward dialing allows an external caller to directly call one handset on the system. This feature is especi-ally convenient if the caller is looking for a specific per-son in the home or business.Turning On and Off Direct Inward Dialing0(18 Press Menu.]]]]]]]]]]]]]]]]]]]]]]]]]]]]]]]]Base Settings Scroll to Base Settings and press OK. ]]]]]]]]]]]]]]]]]]]]]]]]]]]]]]]]DID Settings Scroll to DID Settings and press OK. ]]]]]]]]]]]]]]]]]]]]]]]]]]]]]]]]Dir.Inward Dial Scroll to Dir. Inward Dial and press OK to switch bet-ween on and off – A check mark indicates the feature is turned on.](https://usermanual.wiki/Siemens-Information-and-Communication-Mobile/BIRD/User-Guide-285416-Page-68.png)
![63Press keys:Handset OperationGigaset 4015 Comfort, USA, A31008-G4015-B102-1-7619 mobilt_an.fm 24.09.01Recording the Direct Inward Dialing AnnouncementThe key to getting direct inward dialing to work correct-ly is the announcement. It should be simple and clearly direct the caller to the appropriate handset. An examp-le of a good direct inward dialing announcement is:“Hello you have reached the Smith’s. To speak with John press 1, to speak with Mary press 2, to speak with Jimmy press 3.”0(18 Press Menu.]]]]]]]]]]]]]]]]]]]]]]]]]]]]]]]]Base Settings Scroll to Base Settings and press OK. ]]]]]]]]]]]]]]]]]]]]]]]]]]]]]]]]DID Settings Scroll to DID Settings and press OK. ]]]]]]]]]]]]]]]]]]]]]]]]]]]]]]]]Rec.DID Annc Scroll to Rec. DID Annc and press.OK.You hear notification of the recording and then the rea-dy tone. Record your announcement for direct inward dialing. (QG Press End when finished recording - The recorded an-nouncement is repeated for review.The recorded announcement is repeated for review.If you press Qor during recording, the recording will be terminated and the current announcement will be deleted.Recording is automatically terminated:●if you exceed the maximum recording time of 170 seconds●if you pause for longer than 2 secondsPlaying Back or Deleting a Direct Inward Dialing Announcement0(18 Press Menu.]]]]]]]]]]]]]]]]]]]]]]]]]]]]]]]]Base Settings Scroll to Base Settings and press OK. ]]]]]]]]]]]]]]]]]]]]]]]]]]]]]]]]DID Settings Scroll to DID Settings and press OK. ]]]]]]]]]]]]]]]]]]]]]]]]]]]]]]]]Play Annc Scroll to Play Annc and press OK – The direct inward dialing announcement is played back. or]]]]]]]]]]]]]]]]]]]]]]]]]]]]]]]]Delete Annc Scroll to Delete Annc and press OK.<HV Confirm by pressing Yes – The direct inward dialing an-nouncement is deleted. While playing back your announcement you can re-record it by pressing the soft key 5HFRUG.](https://usermanual.wiki/Siemens-Information-and-Communication-Mobile/BIRD/User-Guide-285416-Page-69.png)
![65Press keys:Handset OperationGigaset 4015 Comfort, USA, A31008-G4015-B102-1-7619 mobilt_an.fm 24.09.01Storing the Internal Number for the Room Monitor0(18 Press Menu.]]]]]]]]]]]]]]]]]]]]]]]]]]]]]]]]Room Mon. Scroll to Room Mon. and press OK. ]]]]]]]]]]]]]]]]]]]]]]]]]]]]]]]]Room Monitor. Scroll to Room Monitor and press OK. Press left or right on the navi key to turn On and Off the room monitor feature.(GLW Scroll down one line to Set No. and press Edit.If the Set No. line has an existing external number you can overwrite it with first.You can delete a preset internal telephone number with <HV.Press (GLW and enter the required telephone number.Press INT.>Scroll to desired internal number and press OK.Scroll down one line to Set Level. Press left or right on the navi key to set the sensitivity level to “high” or “low”6DYH Press Save.The room monitor is now on. It can be turned off by pressing the soft key marked Off on the handset set to monitor.](https://usermanual.wiki/Siemens-Information-and-Communication-Mobile/BIRD/User-Guide-285416-Page-71.png)
![66Press keys:Handset OperationGigaset 4015 Comfort, USA, A31008-G4015-B102-1-7619 mobilt_an.fm 24.09.01Storing an External Number for Room Monitoring0(18 Press Menu.]]]]]]]]]]]]]]]]]]]]]]]]]]]]]]]]Room Mon. Scroll to Room Mon. and press OK. ]]]]]]]]]]]]]]]]]]]]]]]]]]]]]]]]Room Monitor. Scroll to Room Monitor and press OK. Press left or right on the navi key to turn On and Off the room monitor feature.Scroll down one line to Set No. and press Edit.(GLW If the Set No. line has an existing external number you can overwrite it with first.You can delete a preset internal number with <HV.Press (GLW and enter the required telephone number.)Enter the desired external phone number.orOpen the directory.>Select the desired number.0(18 Press Menu.]]]]]]]]]]]]]]]]]]]]]]]]]]]]]]]]Save Entry Scroll to Save Entry and press OK.Scroll down one line to Set Level. Press left or right on the navi key to set the sensitivity level to “high” or “low”.6DYH Press Save.The room monitor is now on. It can be turned off by pressing the soft key marked Off on the handset set to monitor.Turning off the room monitor remotelyYou can turn off the room monitor remotely (e.g. from a cell phone) during a room monitor call. Accept the call from the room monitor.CandAEnter 9 and # - The room monitor is now deactivated. A room monitor call will no longer be from the handset set to monitor.](https://usermanual.wiki/Siemens-Information-and-Communication-Mobile/BIRD/User-Guide-285416-Page-72.png)
![67Press keys:Handset OperationGigaset 4015 Comfort, USA, A31008-G4015-B102-1-7619 mobilt_an.fm 24.09.01Resetting the Handset to the Default SettingsAt some point you may want to reset your handset to its factory default settings. The Directory, the Memory Dial list, and the Call Log are not deleted when you re-set the handset. Registration at the base station is not affected either.0(18 Press Menu.]]]]]]]]]]]]]]]]]]]]]]]]]]]]]]]]H/Set Settings Scroll to H/Set Settings and press OK.]]]]]]]]]]]]]]]]]]]]]]]]]]]]]]]]Default Sett. Scroll to Default Sett. and press OK.<HV Press Yes to confirm.'](https://usermanual.wiki/Siemens-Information-and-Communication-Mobile/BIRD/User-Guide-285416-Page-73.png)
![68Press keys:Customizing Handset SettingsGigaset 4015 Comfort, USA, A31008-G4015-B102-1-7619 mobilt.fm 24.09.01Customizing Handset SettingsYou can customize each handset to distinguish it from the other handsets or to best suit your needs.Changing the Display Language of a HandsetThe Gigaset 4215 offers you the choice of 3 different menu languages (English, French, and Spanish).0(18 Press Menu.]]]]]]]]]]]]]]]]]]]]]]]]]]]]]]]]H/Set Settings Scroll to H/Set Settings and press OK.]]]]]]]]]]]]]]]]]]]]]]]]]]]]]]]]Language Scroll to Language and press OK – the current langua-ge is marked with a check '. Scroll to the desired language and press OK.Changing Volumes, Melodies and TonesHandset and Speakerphone Volume You can set the handset volume to one of three levels and you can set the speakerphone to one of five levels.0(18 Press Menu.]]]]]]]]]]]]]]]]]]]]]]]]]]]]]]]]Sound Settings Scroll to Sound Settings and press OK.]]]]]]]]]]]]]]]]]]]]]]]]]]]]]]]]Handset Volume Scroll to Handset Volume and press OK. Press left or right on the navi key to turn the volume of the speakerphone up or down.Scroll down one line.6DYH Press left or right on the navi key to turn the volume of the earpiece up or down and press Save.'English is the factory default setting.](https://usermanual.wiki/Siemens-Information-and-Communication-Mobile/BIRD/User-Guide-285416-Page-74.png)
![69Press keys:Customizing Handset SettingsGigaset 4015 Comfort, USA, A31008-G4015-B102-1-7619 mobilt.fm 24.09.01Ringer Volume and MelodyYou can choose from a number of options: ●Five ringer volumes (the factory setting is volume 2)●“Crescendo” ring (increasing volume)●Ringer off●Any of ten ringer melodies0(18 Press Menu.]]]]]]]]]]]]]]]]]]]]]]]]]]]]]]]]Sound Settings Scroll to Sound Settings and press OK.]]]]]]]]]]]]]]]]]]]]]]]]]]]]]]]]Set Ring Tone Scroll to Set Ring Tone and press OK – You will hear the current ringer volume and its level will be displayed. Press left or right on the navi key to turn the volume of the ringer up or down. Scroll down one line. Press left or right on the navi key to chose the ringer melody.6DYH Press SaveSetting the Time for Ringer VolumeYou can set a different ringer volume for a certain peri-ods of time (e.g. lower volume at night time).0(18 Press Menu.]]]]]]]]]]]]]]]]]]]]]]]]]]]]]]]]Sound Settings Scroll to Sound Settings and press OK.]]]]]]]]]]]]]]]]]]]]]]]]]]]]]]]]Set Ring Tone Scroll to Set Ring Tone and press OK – You will hear the current ringer volume and its level will be displayed.1LWH6Y Press Nite Sv. Press left or right on the navi key to turn the time con-trol on or off.Scroll down one line.----------time control---------Nite Sv Status: <On>From: 06:00 AMUntil: 08:00 AMStatus ON or OFFPeriodRinger volume](https://usermanual.wiki/Siemens-Information-and-Communication-Mobile/BIRD/User-Guide-285416-Page-75.png)
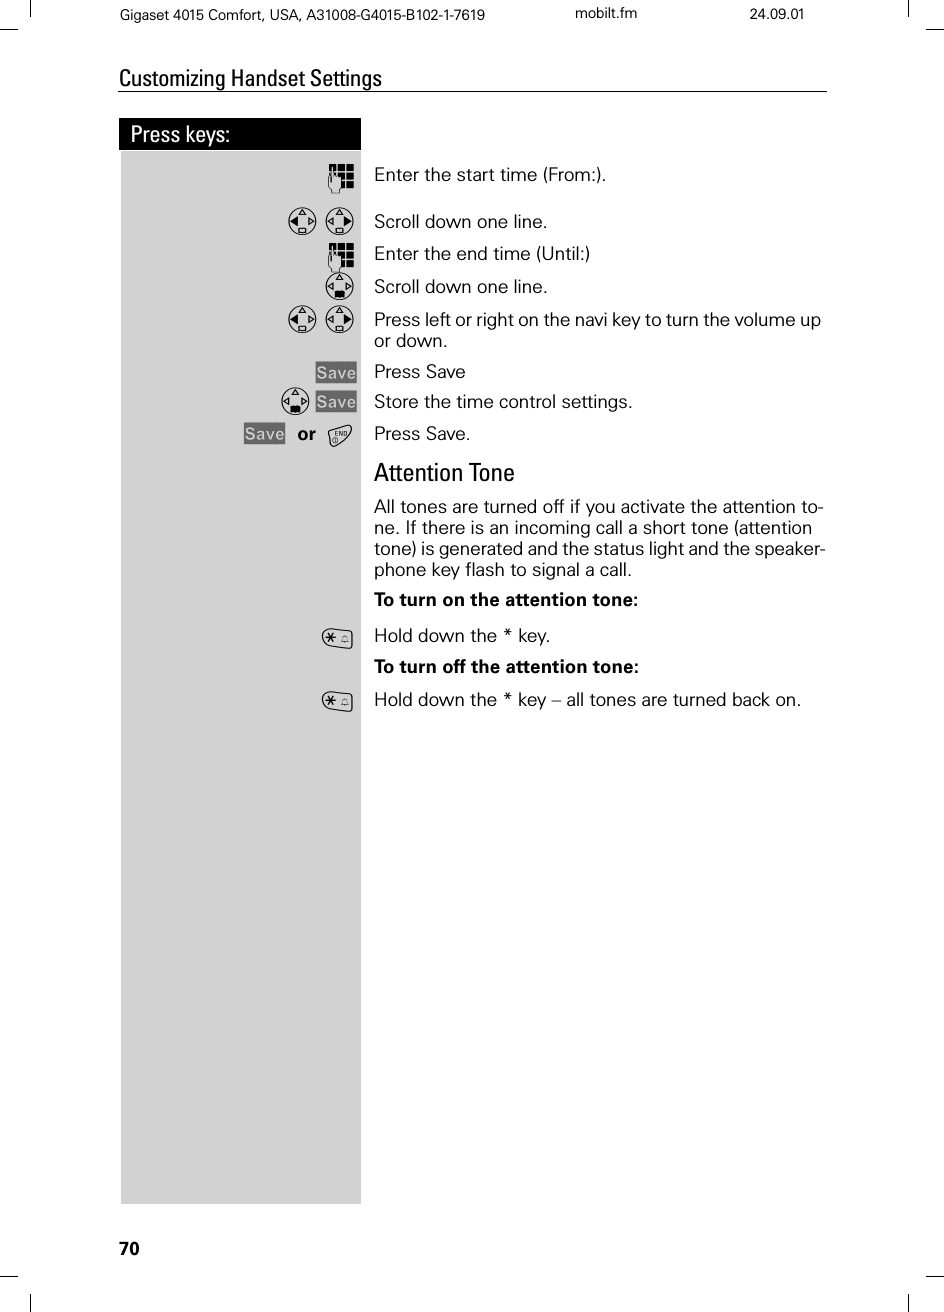
![71Press keys:Customizing Handset SettingsGigaset 4015 Comfort, USA, A31008-G4015-B102-1-7619 mobilt.fm 24.09.01Turning On and Off the Warning and Signal Tones ●Key tones: Every keystroke is confirmed with a click.●Confirm.: Sets confirmation tones (a rising tone se-quence) when you make entries/settings and when you replace the handset in the base station; error tones (a descending tone sequence) when you make an incorrect entry; menu end tone at the end of the menu.●Battery: Low battery tone when battery must be re-charged.0(18 Press Menu.]]]]]]]]]]]]]]]]]]]]]]]]]]]]]]]]Sound Settings Scroll to Sound Settings and press OK.]]]]]]]]]]]]]]]]]]]]]]]]]]]]]]]]Alarm Tones Scroll to Alarm Tones and press OK. Press left or right on the navi key to turn the key tones on or off. Scroll down one line. Press left or right on the navi key to turn the confirma-tion tones on or off.Scroll down one line. Press left or right on the navi key to turn the low battery tone on, off or Dur. Call only. 6DYH Press Save.Turning On and Off Auto AnswerWhen Auto Answer is turned on you can answer a call by simply removing the handset from the base or char-ger. Pressing ! is not necessary.Voice Announced Caller ID calls must always be ans-wered by pressing Talk !. 0(18 Press Menu.]]]]]]]]]]]]]]]]]]]]]]]]]]]]]]]]H/Set Settings Scroll to H/Set Settings and press OK.]]]]]]]]]]]]]]]]]]]]]]]]]]]]]]]]Auto Answer Scroll to Auto Answer and press OK to switch between on and off – A check mark indicates the feature is on.](https://usermanual.wiki/Siemens-Information-and-Communication-Mobile/BIRD/User-Guide-285416-Page-77.png)
![72Press keys:Base Station SettingsGigaset 4015 Comfort, USA, A31008-G4015-B102-1-7619 basisst.fm 24.09.01Base Station Settings All base station settings are conveniently made using the handset!Changing the System PINTo protect the system settings from unauthorized ac-cess you should change the system PIN (default: 0000) to a PIN that only you know. This also enables remote operation (answering machine).0(18 Press Menu.]]]]]]]]]]]]]]]]]]]]]]]]]]]]]]]]Base Settings Scroll to Base Settings and press OK. ]]]]]]]]]]]]]]]]]]]]]]]]]]]]]]]]System-PIN Scroll to System-PIN and press OK. System PINEnter the current system PIN and press OK (default: 0000).QEnter the new system PIN (4 digits).Scroll down one line.QRe-Enter the new system PIN.Press OK to save the new PIN.Resetting the Base Station to the Default SettingsResetting the base station does not affect the system PIN or handset registration. Voice patterns are deleted.0(18 Press Menu.]]]]]]]]]]]]]]]]]]]]]]]]]]]]]]]]Base Settings Scroll to Base Settings and press OK.]]]]]]]]]]]]]]]]]]]]]]]]]]]]]]]]Default Settings Scroll to Default Settings and press OK. PINEnter the system PIN and press OK (default 0000).Press Yes to confirm.Y](https://usermanual.wiki/Siemens-Information-and-Communication-Mobile/BIRD/User-Guide-285416-Page-78.png)
![73Press keys:Base Station SettingsGigaset 4015 Comfort, USA, A31008-G4015-B102-1-7619 basisst.fm 24.09.01Saving and Changing the Emergency NumberEmergency numbers are set to 911 (default). You can save an additional emergency number if desired. The emergency numbers are valid for all handsets.0(18 Press Menu.]]]]]]]]]]]]]]]]]]]]]]]]]]]]]]]]Base Settings Scroll to Base Settings and press OK.]]]]]]]]]]]]]]]]]]]]]]]]]]]]]]]]Spec.Functions Scroll to Spec. Functions and press OK. ]]]]]]]]]]]]]]]]]]]]]]]]]]]]]]]]Emergency No. Scroll to Emergency No and press OK. System PINEnter the system PIN and press OK - If an emergency number is already saved it is displayed and can be changedQEnter desired emergency number.0(18 Press Menu.]]]]]]]]]]]]]]]]]]]]]]]]]]]]]]]]Save Entry Scroll to Save Entry and press OK.Displaying and Dialing the Emergency Number!Press the talk key." Press the display key. Local emergency numbers and the emergency numbers you saved are displayed. Select the emergency number you want.The connection is set up.](https://usermanual.wiki/Siemens-Information-and-Communication-Mobile/BIRD/User-Guide-285416-Page-79.png)
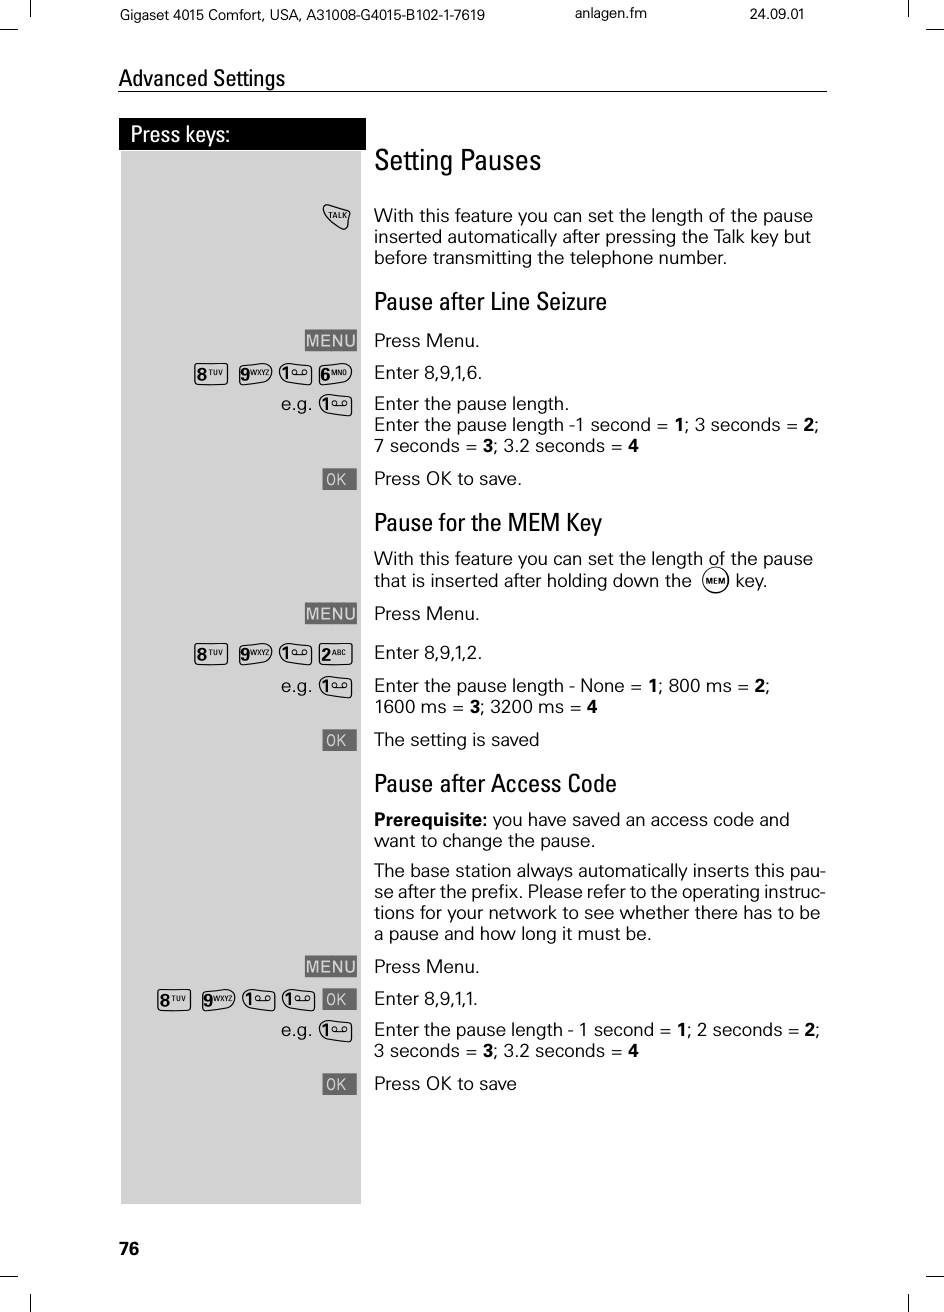
![74Press keys:Advanced SettingsGigaset 4015 Comfort, USA, A31008-G4015-B102-1-7619 anlagen.fm 24.09.01Advanced SettingsIn certain cases you may be required to change some of the advanced settings in order for your phone to work on your particular network. One example is if you connect your Gigaset to a PBX.Changing the Dialing Mode It may be necessary to change the dialing mode if your network does not operate with tone dialing (DTMF)Options:•Tone dialing (DTMF), •Pulse dialing (P).0(18 Press Menu.]]]]]]]]]]]]]]]]]]]]]]]]]]]]]]]]Base Settings Scroll to Base Settings and press OK. ]]]]]]]]]]]]]]]]]]]]]]]]]]]]]]]]Spec.Functions Scroll to Spec. Functions and press OK. ]]]]]]]]]]]]]]]]]]]]]]]]]]]]]]]]Dial Mode Scroll to Dial Mode and press OK. Press up or down on the navi key to select desired mode and press OK – selected mode is marked with a check. Setting the Flash TimeCertain networks may require a flash time different from the factory default setting.0(18 Press Menu.]]]]]]]]]]]]]]]]]]]]]]]]]]]]]]]]Base Settings Scroll to Base Settings and press OK. ]]]]]]]]]]]]]]]]]]]]]]]]]]]]]]]]Spec.Functions Scroll to Spec. Functions and press OK. ]]]]]]]]]]]]]]]]]]]]]]]]]]]]]]]]Flash Time Scroll to Flash Time and press OK. Press up or down on the navi key to select desired flash time and press OK – selected time is marked with a check.](https://usermanual.wiki/Siemens-Information-and-Communication-Mobile/BIRD/User-Guide-285416-Page-80.png)
![75Press keys:Advanced SettingsGigaset 4015 Comfort, USA, A31008-G4015-B102-1-7619 anlagen.fm 24.09.01Saving an Access CodeOn some networks it may be necessary to add a prefix, such as “9”, before the telephone numbers for external calls.0(18 Press Menu.]]]]]]]]]]]]]]]]]]]]]]]]]]]]]]]]Base Settings Scroll to Base Settings and press OK. ]]]]]]]]]]]]]]]]]]]]]]]]]]]]]]]]Spec.Functions Scroll to Spec. Functions and press OK. ]]]]]]]]]]]]]]]]]]]]]]]]]]]]]]]]Access Code Scroll to Access Code and press OK. e.g.YEnter the number (up to 3 digits).0(18 Press Menu.]]]]]]]]]]]]]]]]]]]]]]]]]]]]]]]]Save Entry Scroll to Save Entry and press OK.Switching To Temporary Tone DialingIf your network operates with pulse dialing but tone di-aling (DTMF) is required (for example, to check the mailbox), you must switch to tone dialing (DTMF) dur-ing the call.Prerequisite: You are conducting a call!0(18 Press Menu.]]]]]]]]]]]]]]]]]]]]]]]]]]]]]]]]Tone Dialing Scroll to Tone Dialing and press OK – tone dialing is now on.●When storing numbers in the directory (see page 28) you must enter the prefix. For example: 9 555 2222.●The code that you store here is always inser-ted and dialed automatically before the tele-phone numbers in the caller list and the emer-gency numbers.](https://usermanual.wiki/Siemens-Information-and-Communication-Mobile/BIRD/User-Guide-285416-Page-81.png)
![Menu tableGigaset 4015 Comfort, USA, A31008-G4015-B102-1- menu.fm 24.09.085Menu tableIt is faster to select a menu function by pressing 0(18 than selecting the digit com-binations by scrolling! For example: ;;= 4-4 to set the date.Main menu0(18 when the telephone is idle, press:1Not Available2Not Available3Room Mon. 3-1 Room Monitor. [entry]4Appoint./Clock 4-1 Set Appointment [entry]4-2 Alarm Clock [entry]4-3 Dates [entry]4-4 Date/Time [entry]5Sound Settings 5-1 Handset Volume [entry]5-2 Set Ring Tone [entry]5-3 Alarm Tones [entry]6Not Available7H/Set Settings 7-1 Auto Answer7-2 Language [list]7-3 Reg. Handset [list]7-4 Select Base [list]7-5 Default Sett.8Base Settings 8-2 System-PIN [entry]8-3 Default Settings8-4 Spec.Functions 8-4-1 Dial Mode 8-4-1-1 Tone8-4-1-2 Pulse8-4-1-3 DTMF-Earth8-4-2 Flash Time 8-4-2-1 80 ms8-4-2-[...] [etc. until]8-4-2-8 800 ms8-4-4 Access Code [entry]8-4-5 Emergency No. [entry]8-4-6 Barge In8-4-7 Caller ID8-5 Not Available](https://usermanual.wiki/Siemens-Information-and-Communication-Mobile/BIRD/User-Guide-285416-Page-91.png)
![Menu tableGigaset 4015 Comfort, USA, A31008-G4015-B102-1- menu.fm 24.09.0868-6 DID Settings 8-6-1 Dir.Inward Dial8-6-2 Rec.DID Annc8-6-3 Play Annc8-6-4 Delete Annc9Answering M. 9-1 Set Key 1 9-1-1 Voice Mail9-1-2 Answering M.9-2 Answering M.9-4 Record Memo9-5 Announcements 9-5-1 Record Annc9-5-2 Play Annc9-5-3 Delete Annc9-5-4 Rec Annc Only9-5-5 Play Annc Only9-5-6 Del Annc Only9-5-7 Mode [list]9-6 Msg. Settings 9-6-1 Msg. Length9-6-2 Msg. Quality9-7 Call Screen9-8 No. of Rings9-9 Voice Prompts 9-9-1 Rec Prompt9-9-2 Voice Prompts](https://usermanual.wiki/Siemens-Information-and-Communication-Mobile/BIRD/User-Guide-285416-Page-92.png)