Siemens 277IWLAN-V210 MobilePanel277(F)IWLAN V2 User Manual II
Siemens AG MobilePanel277(F)IWLAN V2 II
Siemens >
Contents
User Manual II
Configuring the HMI device
6.12 Changing Internet settings
Mobile Panel 277F IWLAN V2, Mobile Panel 277F IWLAN (RFID Tag)
180 Operating Instructions, 09/2010, A5E02766325-01
6.12 Changing Internet settings
6.12.1 Changing general settings
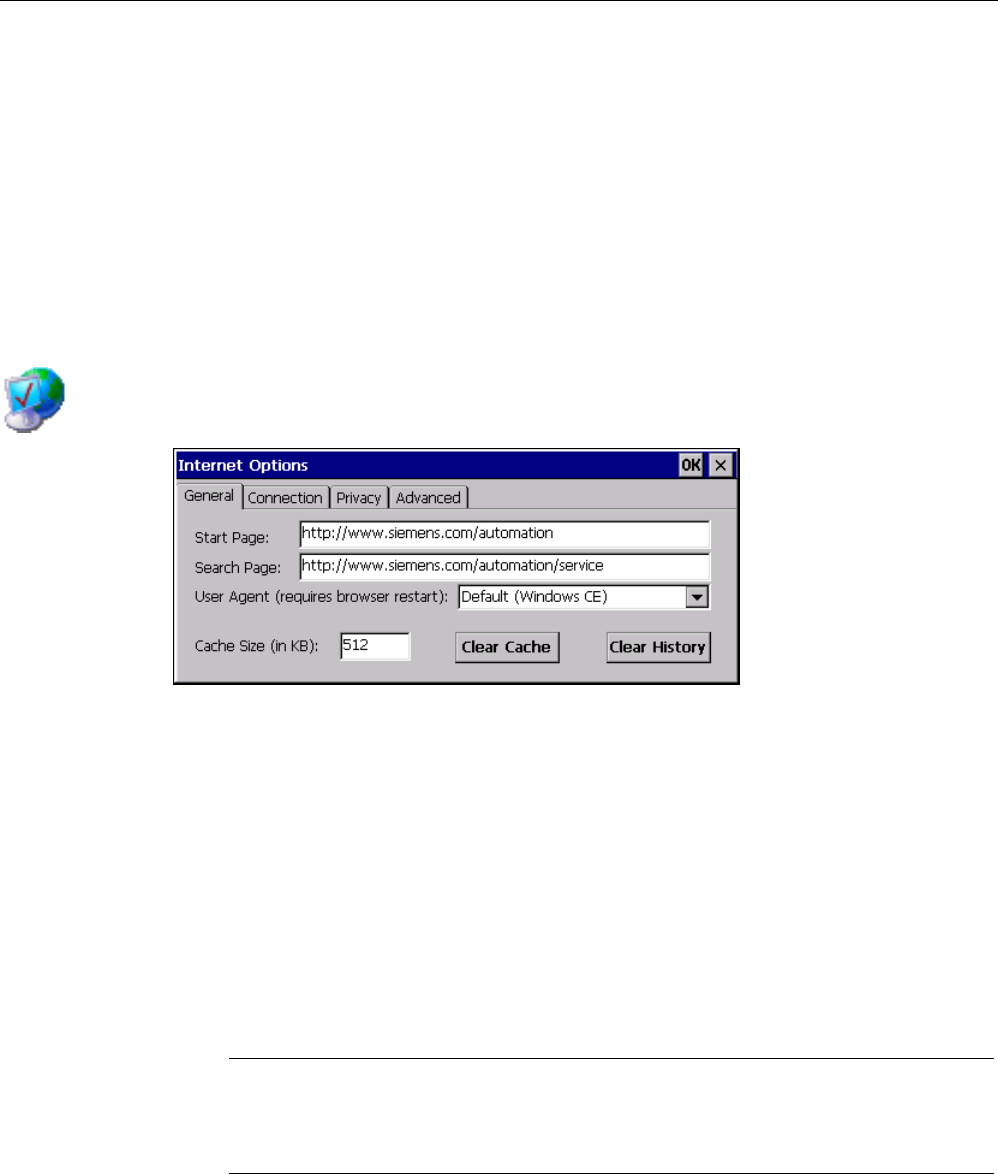
You can use this function to set the homepage and search engine page for an Internet
connection via the Internet Explorer. Ask your network administrator for the required
information.
Requirement
You have opened the "General" tab in the "Internet Options" dialog box using the
"Internet Options" icon.
Procedure
Proceed as follows:
1. Enter the homepage for the Internet browser in the "Start Page" text box.
2. Enter the address of the default search engine in the "Search Page" text box.
3. Enter the display format of the Internet pages in the "User Agent" text box.
The following display formats can be selected:
– Default (Windows CE)
– Same as Pocket PC
– Same as Windows XP
Note
The "Default (Windows CE)" display format is optimized for Internet pages on a HMI
device with the Windows CE operating system. "Default (Windows CE)" is therefore
the most suitable.
4. Enter the required amount of cache in the "Cache" text box.
5. If you want to delete the cache, press the "Clear Cache" button.
REVIEW ENGLISH
27.07.2010
Configuring the HMI device
6.12 Changing Internet settings
Mobile Panel 277F IWLAN V2, Mobile Panel 277F IWLAN (RFID Tag)
Operating Instructions, 09/2010, A5E02766325-01 181
6. If you want to delete the history, press the "Clear History" button.
7. Confirm your entries.
The dialog closes.
Result
The general parameters for the Internet browser have been set. The settings take effect the
next time you start the Internet Explorer.
6.12.2 Setting the proxy server
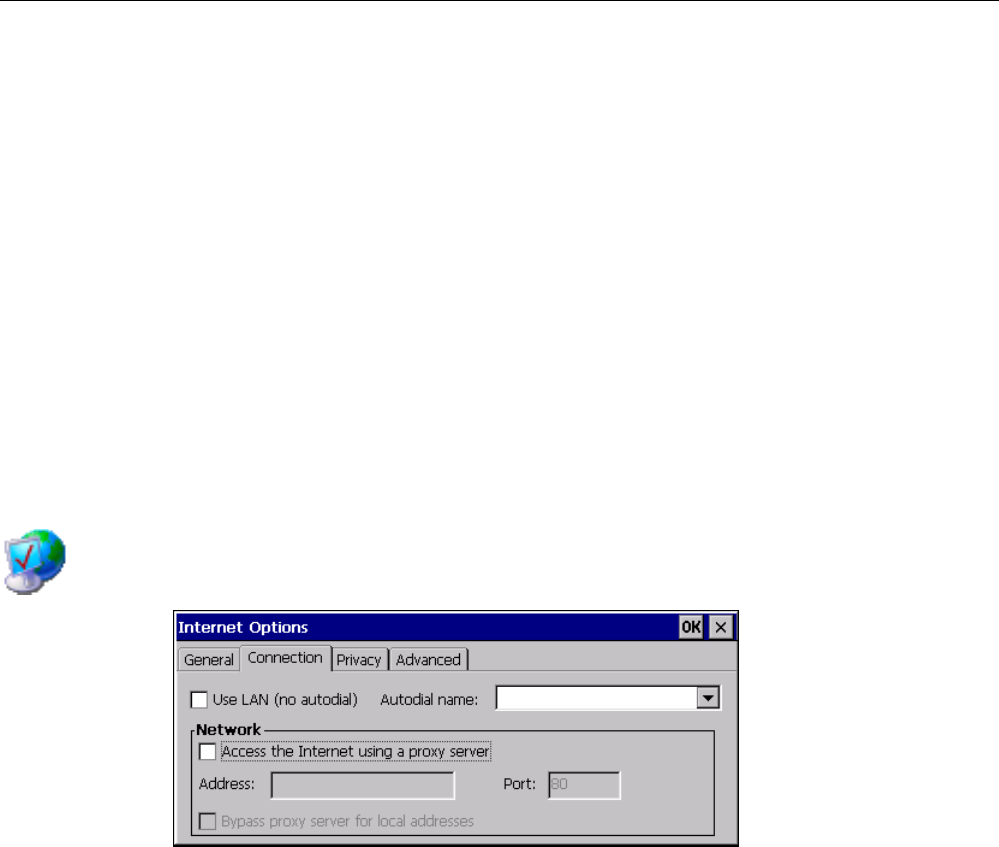
Use this function to configure the type of Internet access. Ask your network administrator for
the required information.
Requirement
You have opened the "Connection" tab in the "Internet Options" dialog box using the
"Internet Options" icon.
Procedure
Proceed as follows:
1. Select the "Use LAN (no autodial)" check box.
2. If you are using a proxy server, in the "Network" group, select the
"Access the Internet using a proxy server" check box.
Specify the address and port of the proxy server.
3. If you want to bypass the proxy server for local addresses, select the
"Bypass proxy server for local addresses" check box.
4. Confirm your entries.
The dialog closes.
Result
The parameters for the LAN connection have been made.
REVIEW ENGLISH
27.07.2010
Configuring the HMI device
6.12 Changing Internet settings
Mobile Panel 277F IWLAN V2, Mobile Panel 277F IWLAN (RFID Tag)
182 Operating Instructions, 09/2010, A5E02766325-01
6.12.3 Changing privacy settings
Cookies contain information sent by a Web server to a browser. The cookie is sent back
when the Web server is accessed at a later time. This step involves sending stored
information for subsequent access.
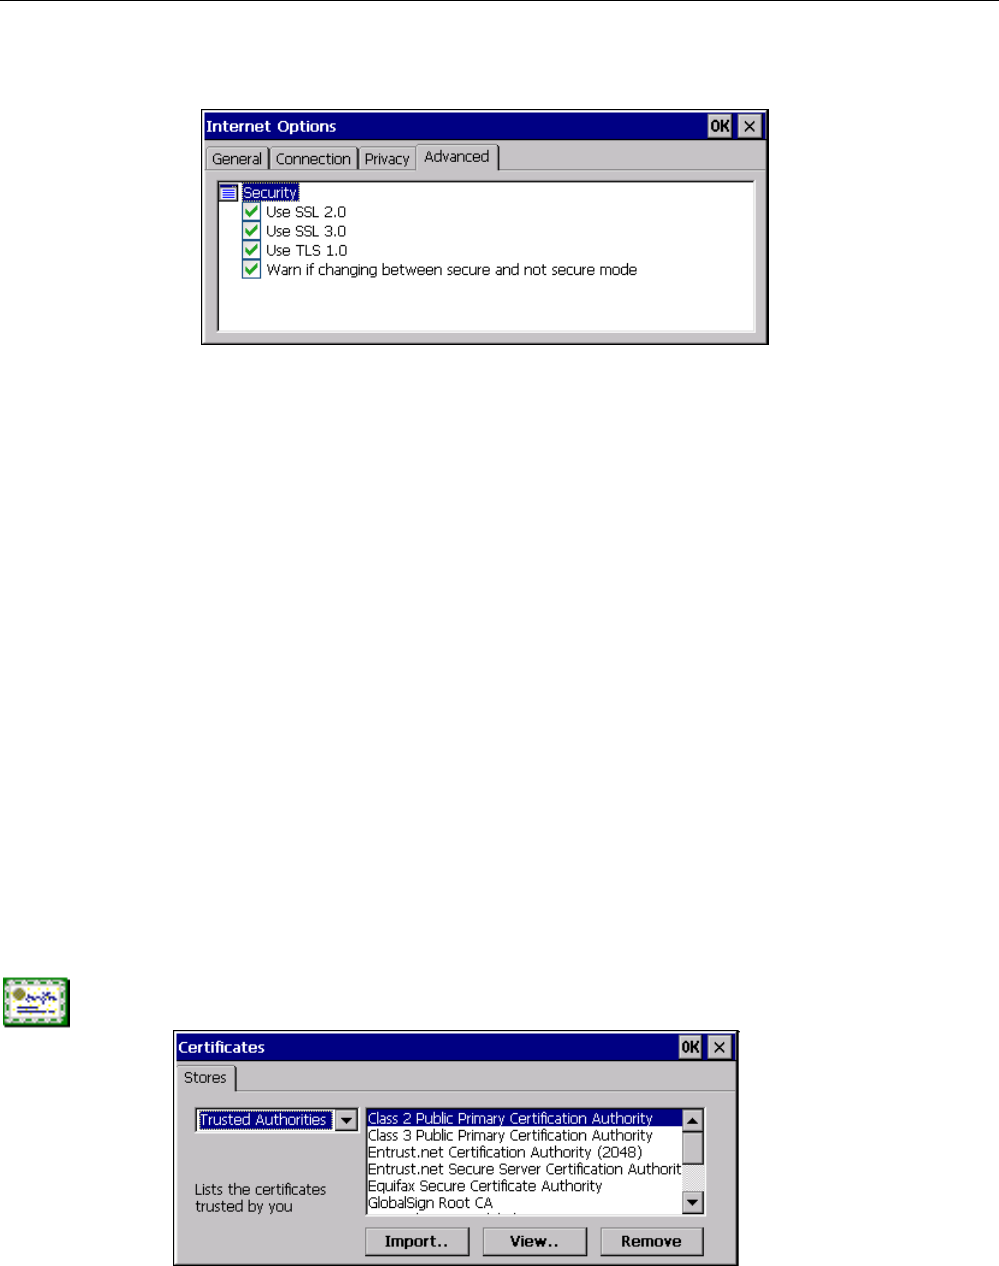
Data can be sent encrypted for greater data security on the Internet. Common encryption
protocols include SSL and TLS. You can activate or deactivate the usage of encryption
protocols.
Ask your network administrator for the required information.
Requirement
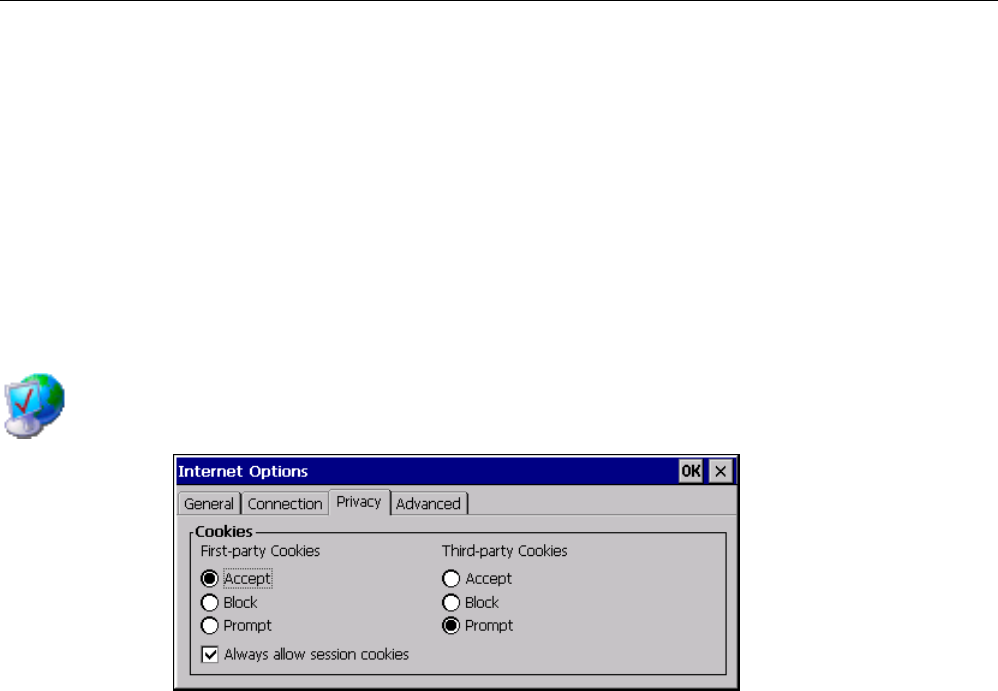
You have opened the "Privacy" tab in the "Internet Options" dialog box using the
"Internet Options" icon.
Procedure
Proceed as follows:
1. Select the required cookie behavior by means of the radio buttons.
– "Accept"
Cookies are stored without request.
– "Block"
Cookies will not be stored.
– "Prompt"
Cookies will be stored on request.
2. If you want allow cookies which are restricted to a single session, select the
"Always allow session cookies" check box.
REVIEW ENGLISH
27.07.2010
Configuring the HMI device
6.12 Changing Internet settings
Mobile Panel 277F IWLAN V2, Mobile Panel 277F IWLAN (RFID Tag)
Operating Instructions, 09/2010, A5E02766325-01 183
3. Change to the "Advanced" tab.
4. Activate the required encryption protocol.
5. Confirm your entries.
The dialog closes.
Result
The accepted cookies and the required encryption protocol are set.
6.12.4 Importing, displaying and deleting certificates
You can use this function to import, display and delete certificates. The certificates differ as
follows:
● Certificates that you trust
● Own certificates
● Other certificates
A digital certificate consists of structured data, which confirms ownership and other
properties of a public key. Ask your network administrator about the certificates required for
your application.
Requirement
You have opened the "Certificates" dialog box with the "Certificates" icon.
REVIEW ENGLISH
27.07.2010
Configuring the HMI device
6.12 Changing Internet settings
Mobile Panel 277F IWLAN V2, Mobile Panel 277F IWLAN (RFID Tag)
184 Operating Instructions, 09/2010, A5E02766325-01
Procedure
Proceed as follows:
1. Select the type of certificate from the selection box:
– "Trusted Authorities" for reliable certificates
– "My Certificates" for your own certificates
– "Other Certificates" for other certificates
2. If you want to import a certificate, press the "Import" button.
A dialog with information about the source opens.
– Select the required source.
– Close the dialog.
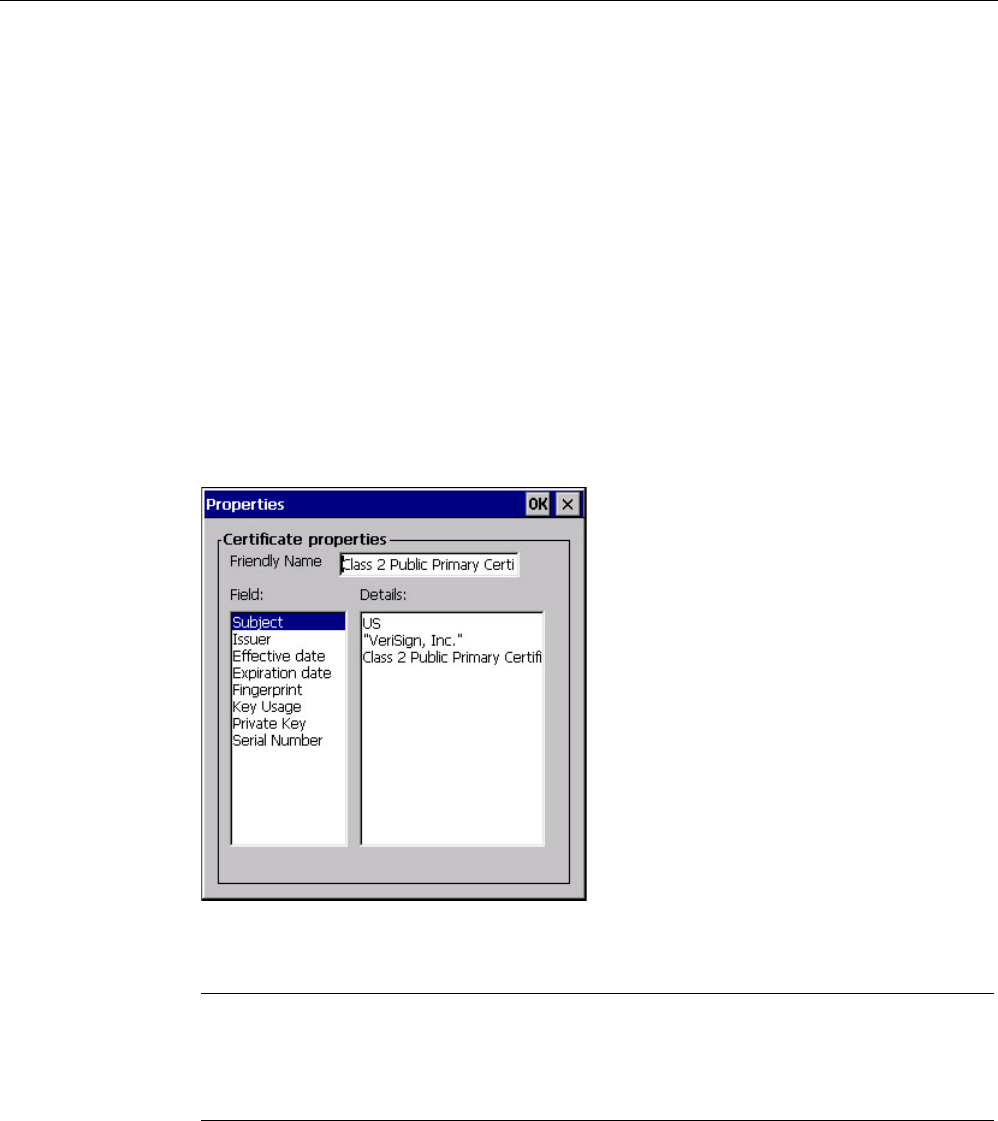
3. If you want to display the properties of the selected certificate, press the "View" button.
The following dialog appears:
4. If you want to delete a certificate, first select it.
5. Confirm by pressing the "Remove" button in the "Certificates" dialog.
Note
The entry is deleted immediately and without further inquiry.
If you want to again use a deleted certificate, you need to import it again from a storage
medium.
6. Confirm your entries.
The dialog closes.
Result
The number of saved certificates has changed.
REVIEW ENGLISH
27.07.2010
Configuring the HMI device
6.13 Saving to external storage medium – backup
Mobile Panel 277F IWLAN V2, Mobile Panel 277F IWLAN (RFID Tag)
Operating Instructions, 09/2010, A5E02766325-01 185
6.13 Saving to external storage medium – backup
You can use this function to back up the operating system, applications and data from the
internal in flash memory of the HMI device to an external storage medium. See section
"Displaying information about the HMI device (Page 158)".
The following external storage media can be used:
● Memory card
● USB memory stick
Requirement
● Storage medium with sufficient free capacity is inserted in the memory card slot.
See section "Inserting a memory card (Page 87)".
● Data that might be overwritten are saved.
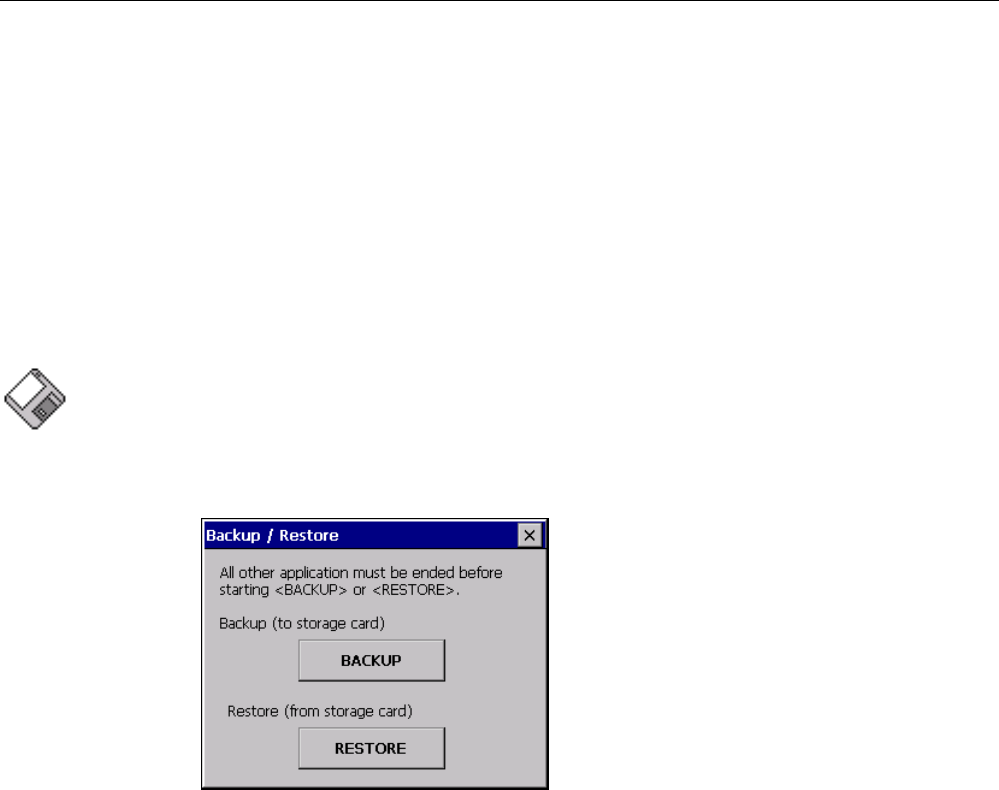
● You have opened the "Backup/Restore" dialog box using the "Backup/Restore" icon.
Procedure
Proceed as follows:
1. Click the "BACKUP" button.
The "Select Storage Card"" dialog box is displayed. The "--- no storage card available ---"
message appears if there is no memory card in the HMI device or it is defective. Insert a
memory card or insert another one.
2. Select the storage medium for backup from the "Please select a Storage Card" list box.
REVIEW ENGLISH
27.07.2010

Configuring the HMI device
6.14 Restoring from external storage medium – Restore
Mobile Panel 277F IWLAN V2, Mobile Panel 277F IWLAN (RFID Tag)
186 Operating Instructions, 09/2010, A5E02766325-01
3. Click the "Start Backup" button.
The HMI device checks the storage medium.
If the "This storage card..." message appears, you need a storage medium of greater
capacity. Acknowledge this message. Backup is aborted at this point. Insert a storage
medium with a greater capacity and restart the backup process.
If the "You may have an old backup on the storage card. Do you want to delete it?"
message appears, there is already a backup on the storage medium. If you do not want
to overwrite the backup, press the ""No"" button. Otherwise, click the "Yes" button.
Several messages are displayed in sequence during the backup process:
– Saving registry data
– Copy files
A progress bar shows the status of the backup process. When the backup process is
completed, the "The operation completed successfully." message is displayed.
4. Acknowledge this message.
The dialog closes.
Result
The HMI device data is now saved on the storage medium.
6.14 Restoring from external storage medium – Restore
Use this function to restore data from a storage medium to the HMI device.
A restore operation deletes the old data from flash memory of the HMI device on
confirmation. The data stored on the storage medium is then copied to the internal flash
memory.
REVIEW ENGLISH
27.07.2010
Configuring the HMI device
6.14 Restoring from external storage medium – Restore
Mobile Panel 277F IWLAN V2, Mobile Panel 277F IWLAN (RFID Tag)
Operating Instructions, 09/2010, A5E02766325-01 187
Requirement
● The storage medium with the backup data is inserted in the HMI device.
See section "Inserting a memory card (Page 87)".
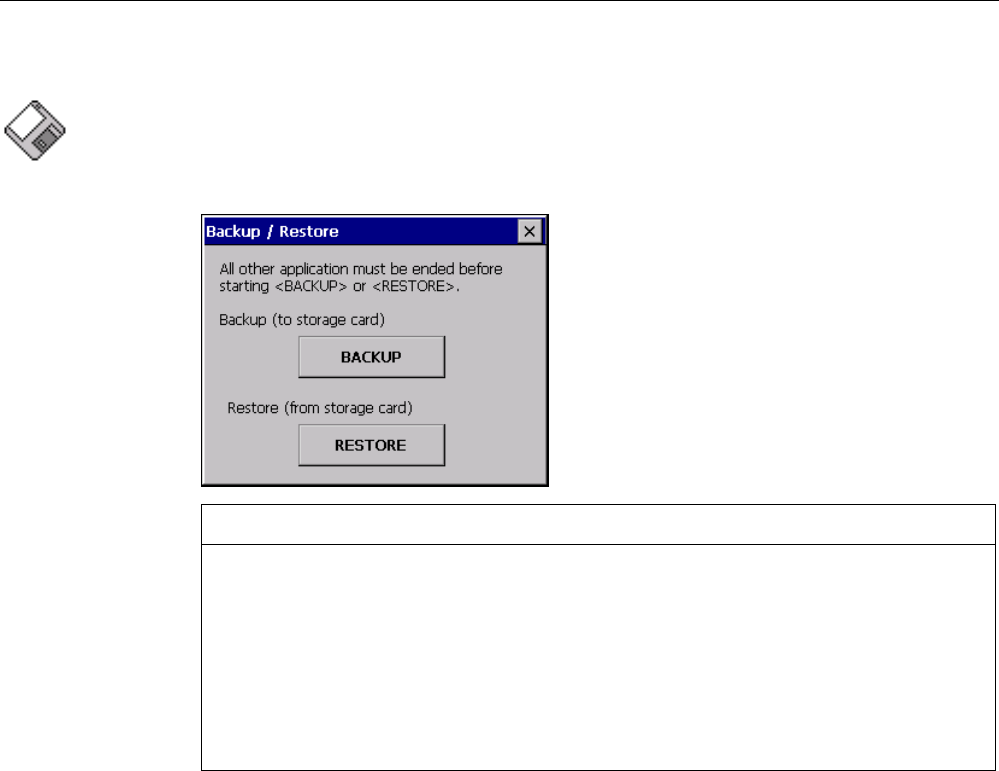
● You have opened the "Backup/Restore" dialog box using the "Backup/Restore" icon.
NOTICE
Data loss
All data on the HMI device will be deleted during a restore operation. License keys will
be deleted after query.
Back up the HMI device's data before restoring if required.
Memory card with data backup
If several storage media with data backups are inserted, the data cannot be restored.
Remove the storage medium with the data backups you do not need.
REVIEW ENGLISH
27.07.2010
Configuring the HMI device
6.14 Restoring from external storage medium – Restore
Mobile Panel 277F IWLAN V2, Mobile Panel 277F IWLAN (RFID Tag)
188 Operating Instructions, 09/2010, A5E02766325-01
Procedure
Proceed as follows:
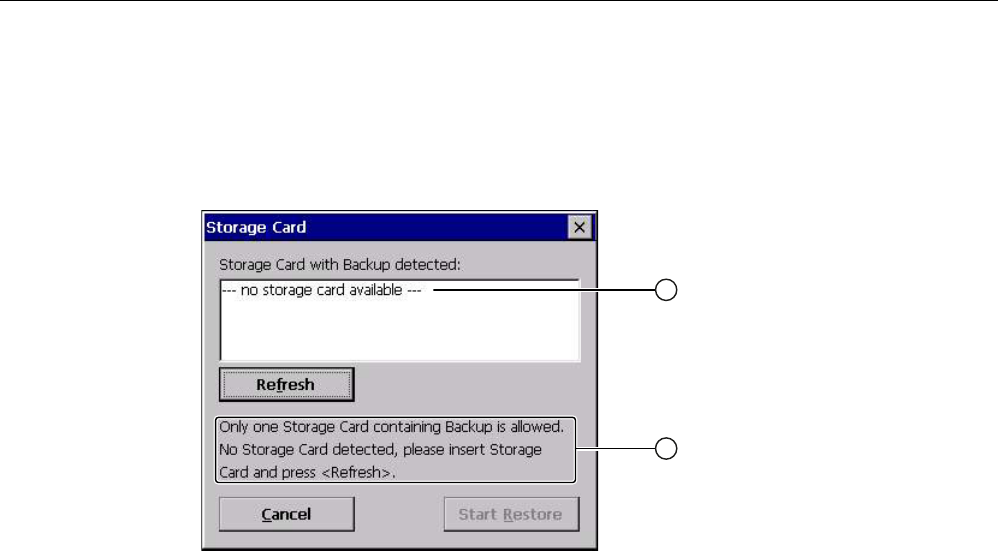
1. Click the "RESTORE" button.
The "Storage Card" dialog box opens.
① No memory card available
② Only one memory card with a backup is permitted. No memory card detected. Insert a
memory card and press the "Refresh" button.
2. Select the storage medium with the backup from the "Storage Card with Backup
detected" selection box.
The "--- no storage card available ---" message appears if there is no storage medium in
the HMI device or it is defective.
3. If the "--- no storage card available ---" message appears, press the "Cancel" button.
Restoring is then aborted.
– Insert a storage medium or another one.
– Click the "Refresh" button.
The content of the selection box changes.
– Select the storage medium with the backup from the "Storage Card with Backup
detected" selection box.
4. Click the "Start Restore" button.
Restoring is started.
5. The data to be restored is checked.
The following messages are displayed in sequence during the check.
– "Starting Restore"
– "Checking data"
When the data has been checked, the following message is displayed:
"You are starting RESTORE now. All files (except files on storage cards) and the registry
will be erased. Are you sure?"
6. If you do not want to permit that data are deleted from the HMI device, abort the restore
process by pressing the "ESC" button.
REVIEW ENGLISH
27.07.2010

Configuring the HMI device
6.15 Activate memory management
Mobile Panel 277F IWLAN V2, Mobile Panel 277F IWLAN (RFID Tag)
Operating Instructions, 09/2010, A5E02766325-01 189
7. Start to restore the data by selecting "Yes".
The following messages are displayed in sequence during the restore:
– "Deleting files on flash"
– "Restore CE Image"
A progress bar shows the status of the restore process.
When restore is completed, the following message is displayed:
"Restore succesfully finished. Press ok, remove your storage card and reboot your
device."
8. Remove the storage medium.
9. Acknowledge this message.
The HMI device starts again.
Result
The data from the storage medium is now on the HMI device.
Note
After the restore, check whether it is necessary to calibrate the touch screen.
6.15 Activate memory management
If memory management is activated, the HMI device will automatically close the project if the
memory needs reorganizing during the active project.
If the project is closed due to this setting, then a message will be displayed on the HMI
device. You have to start the project again.
NOTICE
Memory management
If you do not activate memory management, malfunctions can occur during the runtime of
the project.
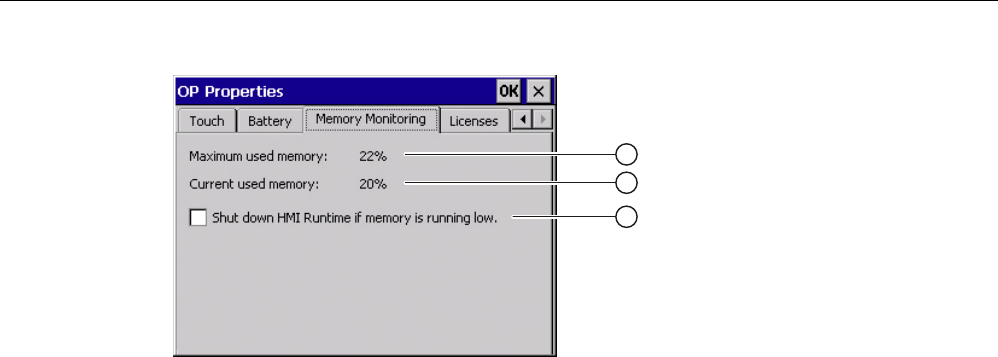
Select memory management in the "OP Properties" dialog.
Requirement
You have opened the "Memory Monitoring" tab in the "OP Properties" dialog using the
"OP" icon.
REVIEW ENGLISH
27.07.2010
Configuring the HMI device
6.15 Activate memory management
Mobile Panel 277F IWLAN V2, Mobile Panel 277F IWLAN (RFID Tag)
190 Operating Instructions, 09/2010, A5E02766325-01
① Percent of maximum memory used since the last startup of the HMI device
② Percentage of memory currently used
③ Check box for selecting memory management
Procedure
Proceed as follows:
1. If you want to enable memory management, then select the check box.
2. Confirm your entries.
The dialog closes.
Result
Memory management is activated.
REVIEW ENGLISH
27.07.2010

Mobile Panel 277F IWLAN V2, Mobile Panel 277F IWLAN (RFID Tag)
Operating Instructions, 09/2010, A5E02766325-01 191
Safety-related configuration 7
7.1 General procedure
Programs for fail-safe operation
For fail-safe operation of the HMI device, the following software is required:
● STEP 7, hardware configuration "HW Config"
● Add-on package "S7 Distributed Safety", V5.4, SP3
● WinCC flexible
See also section "Software requirements (Page 25)".
The software is installed on the configuration computer and is called through the SIMATIC
manager. You can find additional information in the Start menu.
Program Task Start menu
STEP 7, HW Config Creating a project for the
automation system
SIMATIC >
Documentation >
desired language
S7 Distributed Safety Create a safety program SIMATIC >
Documentation >
desired language
WinCC flexible Create a project for the HMI
device
SIMATIC >
WinCC flexible 2007 >
WinCC flexible help system
Procedure
Proceed as follows:
1. Create a STEP 7 project in the SIMATIC Manager.
2. Configure the desired F-CPU and a PROFINET connection in the hardware configuration
"HW Config".
3. Add a mobile HMI device to the configuration from the hardware catalog of HW Config.
4. Set the parameters for the communication with the controller.
See section "Assigning parameters for communication between the HMI device and the
controller (Page 194)".
5. Configure other components in accordance with your plant.
6. Create a safety program for the F-CPU in STEP 7 with S7 Distributed Safety.
7. Insert the F-FBs required for the HMI device in the safety program.
Close these FBs according to the instructions. Follow the checklist for this procedure –
see section "Checklist for EMERGENCY STOP configuration (Page 197)".
REVIEW ENGLISH
27.07.2010

Safety-related configuration
7.2 Checklist for configuration
Mobile Panel 277F IWLAN V2, Mobile Panel 277F IWLAN (RFID Tag)
192 Operating Instructions, 09/2010, A5E02766325-01
8. Open the program, WinCC flexible ES.
9. Create a project for the HMI device.
10. Set "Ethernet/Wireless" in the project view under "Communication".
11. Configure the PROFIsafe address of the HMI device in the project window under "Device
Settings > Device Settings".
12. Configure the effective ranges for your plant under "Device Settings > Effective Ranges".
13. Configure the HMI screens for operator control and monitoring of the plant in fail-safe
mode.
7.2 Checklist for configuration
Perform the following tasks for safety-related configuration. Confirm each task by checking it
off in the following list.
Task Information source Check
STEP 7, HW Config
Add the HMI device to the plant configuration
Set the PROFIsafe parameters
SIMATIC STEP 7 (Page 193)
S7 Distributed Safety
Call the required F-FBs in the safety program
Using F-FBs (Page 198)
WinCC flexible
Configure the unique project identifiers for the
effective ranges and operator controls
Configuration in WinCC flexible
(Page 209)
Configuring the HMI device Configuring the HMI device
(Page 127)
REVIEW ENGLISH
27.07.2010

Safety-related configuration
7.3 SIMATIC STEP 7
Mobile Panel 277F IWLAN V2, Mobile Panel 277F IWLAN (RFID Tag)
Operating Instructions, 09/2010, A5E02766325-01 193
7.3 SIMATIC STEP 7
7.3.1 Configuring in STEP 7
Requirement
● A STEP 7 project has been created in SIMATIC Manager.
Procedure
Proceed as follows:
1. Configure the required F-CPU and a PROFINET connection in the hardware
configuration "HW Config".
2. Add a mobile HMI device to the configuration from the hardware catalog of HW Config.
To do this, drag the HMI device onto the PROFINET connection in the station window.
3. Open the object properties of the HMI device in the shortcut menu and set the
parameters for the communication to the controller.
NOTICE
Response time for the logon sequence a maximum of 2 seconds
The response time for the logon sequence may be a maximum of 2 seconds
Consider this during configuration. The response time is calculated as follows:
2 x PROFINET cycle time + maximum cycle time of the OB.
If the HMI device is not listed in the hardware catalog of HW Config, you need to integrate
the official GSD file (device database) for the HMI device in the STEP 7 database.
You can find the GSDML file on the data medium included in the scope of delivery or by
contacting your Siemens representative in the Internet
(http://support.automation.siemens.com/WW/llisapi.dll?aktprim=99&lang=en&referer=%2f
WW%2f&func=cslib.csinfo2&siteid=csius&extranet=standard&viewreg=WW).
Note
The supplied GSD files have integrated themselves into STEP 7 during installation of
WinCC flexible.
REVIEW ENGLISH
27.07.2010

Safety-related configuration
7.3 SIMATIC STEP 7
Mobile Panel 277F IWLAN V2, Mobile Panel 277F IWLAN (RFID Tag)
194 Operating Instructions, 09/2010, A5E02766325-01
7.3.2 Assigning parameters for communication between the HMI device and the
controller
If you select the HMI device in the HW Config, the following modules are displayed:
● Mobile277fiwlan
● Mobile277Standard_IO
● Mobile277Failsafe_IO
You can find information on configuring the F I/O in STEP 7 in the following manuals:
● Programming and operation manual "S7 Distributed Safety - Configuring and
Programming" (http://support.automation.siemens.com/WW/view/en/22099875)
● "Safety Technology in SIMATIC S7" system manual
(http://support.automation.siemens.com/WW/view/en/12490443)
You can find additional information on working in HW Config in the manual "Configuring
hardware and communication connections with STEP 7"
(http://support.automation.siemens.com/WW/view/en/18652631) and in the HW Config
online help.
Configure the parameters for fail-safe mode in the object properties of the
Mobile277Failsafe_IO. A password is required for the safety program. You can find
additional information about access protection in the "S7 Distributed Safety, Configuring and
Programming" manual (http://support.automation.siemens.com/WW/view/en/22099875).
Procedure
NOTICE
Maximum response time
If an error occurs, the monitoring time will be included in the maximum response time.
Select a monitoring time short enough to ensure that the error tolerance time of the
production process will not be exceeded.
Proceed as follows:
REVIEW ENGLISH
27.07.2010

Safety-related configuration
7.3 SIMATIC STEP 7
Mobile Panel 277F IWLAN V2, Mobile Panel 277F IWLAN (RFID Tag)
Operating Instructions, 09/2010, A5E02766325-01 195
1. Set the address area for the process image in the "Addresses" tab.
The process image is a memory area in the controller which the HMI device and
controller access together. At the beginning of the cyclic control program the signal states
of the inputs of the HMI device are transferred to the controller via the process input
images, PII. At the end of the cyclic program the process image of the outputs, PIQ is
transferred as a signal state to the HMI device.
Parameter Meaning
Input > Address > Start of
Address Area
Start address of the inputs in the process image. The safety-
relevant user data of the HMI device is shown.
The allocation depends on the controller used.
Input > process image Process image to which the address range of the inputs
belongs, PII.
This parameter cannot be changed for SIMATIC CPU 300 type
controllers.
Output > Address > Start of
Address Area
Start address of the outputs in the process image The safety-
relevant user data of the HMI device is shown.
The allocation depends on the controller used.
Output > process image Process image to which the address range of the outputs
belongs, PIQ.
This parameter cannot be changed for SIMATIC CPU 300 type
controllers.
2. In the "PROFIsafe" tab, set the "F_Dest_Add" and "F_WD_Time" parameters.
Parameter Meaning
F_Dest_Add PROFIsafe address used to uniquely identify the destination
throughout the network and station.
The address is assigned automatically. The "F_Dest_Add"
parameter can have a value between 1 and 65534.
F_WD_Time (ms) Monitoring time in the fail-safe IO device.
A valid current safety frame must reach the F-CPU and be
returned to the HMI device within the monitoring time period.
This ensures that failures and errors are detected and
appropriate responses are triggered to keep the fail-safe
system in a safe state or transfer it to a safe state.
You should select a monitoring time long enough for message
frame delays to be tolerated by the communication system, but
short enough for the fault reaction function to respond quickly
enough in the event of a fault (for example interruption of the
communication connection).
You can set the "F_WD_Time" parameter in 1 ms increments.
The monitoring period is set at 500 ms. Calculate the minimum
watchdog time using the table "s7fcotia.xls"
(http://support.automation.siemens.com/WW/view/en/21627074
).
This table is part of the option package S7 Distributed Safety.
You can find the parameters needed to calculate the monitoring
time under "General specifications".
REVIEW ENGLISH
27.07.2010

Safety-related configuration
7.3 SIMATIC STEP 7
Mobile Panel 277F IWLAN V2, Mobile Panel 277F IWLAN (RFID Tag)
196 Operating Instructions, 09/2010, A5E02766325-01
The following parameters are fixed:
Parameter Meaning
F_SIL Safety class of the HMI device
The value of the parameter is set to "SIL 3".
F_Block_ID This parameter must be set to the value "0", because there is
no checksum of the individual device parameters.
F_Par_Version Implemented PROFIsafe version.
The value of the parameter is set to "1". This means
PROFIsafe V2 will be used.
F_Source_Add PROFIsafe address used to uniquely identify the source
throughout the network and station.
The address is assigned automatically. The "F_Source_Add"
parameter can have a value between 1 and 65534.
7.3.3 "SIMATIC S7 Distributed Safety" add-on
During fail-safe operation, a safety program runs in the F-CPU. The HMI device is integrated
into this safety program.
The HMI device and F-CPU communicate via PROFINET IO. PROFIsafe as of V2.0 is
required for safety-related communication.
The HMI device has the following safety features:
● Detects the signal states of the EMERGENCY STOP button and enabling button
● Sends the signal states to the F-CPU in the form of safety message frames
Safety program and fail-safe blocks
For fail-safe operation of the HMI device, you need to configure a safety program in STEP 7
with the "SIMATIC S7 Distributed Safety" add-on package as of V5.4 SP3. To guarantee
availability of the safety functions, the fail-safe function blocks (F-FBs) from the
"MP277F_IWLAN" library must be integrated in the safety program.
If you do not use the F-FBs, the HMI device cannot be integrated in the safety program of
the F-CPU. The project on the HMI device will not start.
You can find the F-FBs on the data medium included in the product package or at the
Internet customer portal
(http://support.automation.siemens.com/WW/llisapi.dll?aktprim=99&lang=en&referer=%2fW
W%2f&func=cslib.csinfo2&siteid=csius&extranet=standard&viewreg=WW).
Additional information
You can find additional information on working with S7 Distributed Safety in the
Programming and operation manual "S7 Distributed Safety - Configuring and Programming"
(http://support.automation.siemens.com/WW/view/en/22099875) as well as in the online help
for S7 Distributed Safety.
REVIEW ENGLISH
27.07.2010

Safety-related configuration
7.3 SIMATIC STEP 7
Mobile Panel 277F IWLAN V2, Mobile Panel 277F IWLAN (RFID Tag)
Operating Instructions, 09/2010, A5E02766325-01 197
7.3.4 Checklist for EMERGENCY STOP configuration
Read all the information provided in Programming and operation manual "S7 Distributed
Safety - Configuring and Programming"
(http://support.automation.siemens.com/WW/view/en/22099875).
Perform the following tasks for configuration:
Task Information source Check
Configure hardware S7 Distributed Safety,
"Overview of configuration" section
Configure F-CPU
Level of protection "CPU contains safety
program"
Password
Set specific safety-related parameters.
Define the call time for the F-runtime group in
which the safety program is to be executed.
S7 Distributed Safety
"Configuring the F-CPU" section
Save, compile and download the hardware
configuration. This step creates the following:
F-shared DB
F-I/O DB for the HMI device
System data
–
Add F-FBs:
FB161, F_FB_MP
FB162, F_FB_RNG_4 or
FB163, F_FB_RNG_16
FC176, F_BO_W
FC177, F_W_BO
FB215, F_ESTOP1
F_DB_STATES or a comparable data area in
an existing F-DB
Using F-FBs (Page 198)
F_FB_MP (Page 201)
F_FB_RNG_4 and F_FB_RNG_16
(Page 204)
Create F-runtime group
Create F-CALL
Assign F-FB and F-FC to F-CALL
Set maximum cycle time for the F-run-time
group in accordance with requirements
S7 Distributed Safety,
"Defining F-run-time groups" section
Call the safety program, for example in OB 35 S7 Distributed Safety,
"Defining F-run-time groups" section
Generate the safety program S7 Distributed Safety, section
"Compiling the safety program"
Test the safety program Online help for the F-FBs
F_FB_MP (Page 201)
F_FB_RNG_4 and F_FB_RNG_16
(Page 204)
Download the safety program to the F-CPU –
Testing and acceptance testing of the safety
program
S7 Distributed Safety,
"Safety program acceptance test"
section
REVIEW ENGLISH
27.07.2010

Safety-related configuration
7.3 SIMATIC STEP 7
Mobile Panel 277F IWLAN V2, Mobile Panel 277F IWLAN (RFID Tag)
198 Operating Instructions, 09/2010, A5E02766325-01
7.3.5 Using F-FBs
You must integrate the following F-blocks into your safety program:
● An F_FB_MP F-block for each HMI device.
The assigned HMI device is monitored by this F-FB.
● One F_FB_RNG_4 or F_FB_RNG_16 for each machine.
The assigned effective range for this machine is managed by this F-FB. Whether
F_FB_RNG_4 or F_FB_RNG_16 is required depends on the maximum number of HMI
devices that are to be logged onto a machine:
– F_FB_RNG_4 For a maximum of 4 HMI devices
– F_FB_RNG_16 For a maximum of 16 HMI devices
NOTICE
Only HMI devices of one model can log on to an F-FB
Only HMI devices with the same distance measurement system can log on to an F-
FB, this means either HMI devices with a transponder system or HMI devices with an
RFID tag system.
Consider this information in the safety program.
● An F_DB_STATES with the WORD data type of a comparable address area in an existing
F-DB.
Using this F-DB, data are exchanged between the F_FB_MP of the HMI device and the
F_FB_RNG_n of the effective range.
● FB215, F_ESTOP1
Use this function block to ensure that the operator must acknowledge an EMERGENCY
STOP before restarting the plant. You can find this block in the "Distributed Safety" F-
library in the "F-Application Blocks" block container.
● FC176, F_BO_W and FC177, F_W_BO
Insert the "FC176, F_BO_W" and "FC177, F_W_BO" blocks into your safety program.
These blocks are used as calls. You can find these blocks in the "F-Application Blocks"
container of the "Distributed Safety" F-library.
WARNING
F-application block
Ensure that the following match when changing the names of an F-application block:
The symbolic name in the symbol table
The name in the object properties of the block (header)
Do not change the number of the F-application block!
REVIEW ENGLISH
27.07.2010

Safety-related configuration
7.3 SIMATIC STEP 7
Mobile Panel 277F IWLAN V2, Mobile Panel 277F IWLAN (RFID Tag)
Operating Instructions, 09/2010, A5E02766325-01 199
Safety program
WARNING
EMERGENCY STOP button
The EMERGENCY STOP button is evaluated when an F_FB_RNG_n is called in the safety
program.
Configure the safety program so that an F_FB_RNG_n is always called. The same applies if
there is no effective range in your plant.
Restarting the plant
Once the EMERGENCY STOP button has been triggered, the plant can only be restarted
after operator acknowledgment.
Use FB215 F_ESTOP1 in the safety program to ensure acknowledgment by the operator.
EMERGENCY STOP button evaluation delayed
If the cycle time for OB35 is set lower than the PNIO update time, the message frame may
be lost and the evaluation of the "E-STOP" output of F_FB_RNG_n may be delayed.
Set the cycle time of OB35 to a value higher than the PNIO update time.
EMERGENCY STOP button not enabled
If a communication error triggers a global rampdown, the EMERGENCY STOP button will
no longer be available on the affected HMI device.
You have the option of interconnecting the "Global Rampdown" signal so that an
EMERGENCY STOP is triggered.
Unintentional restart of the plant
The plant may not be automatically restarted after a communication error on the HMI
device is acknowledged.
Therefore, ensure that your safety program requires an additional operator action before
the plant can be restarted.
CAUTION
Safe operating state
A safe state, such as a global rampdown, can only be evaluated if you call an
F_FB_RNG_n in the safety program.
Call an F_FB_RNG_n in your safety program, even if an effective range is not used in the
plant.
Call sequence for the F_FBs
The F_FBs used are called cyclically in the safety program. Configure the calls of the F_FBs
in the safety program in the following order:
1. All F_FB_MP
2. All F_FB_RNG_n
REVIEW ENGLISH
27.07.2010
Safety-related configuration
7.3 SIMATIC STEP 7
Mobile Panel 277F IWLAN V2, Mobile Panel 277F IWLAN (RFID Tag)
200 Operating Instructions, 09/2010, A5E02766325-01
Interconnecting FBs
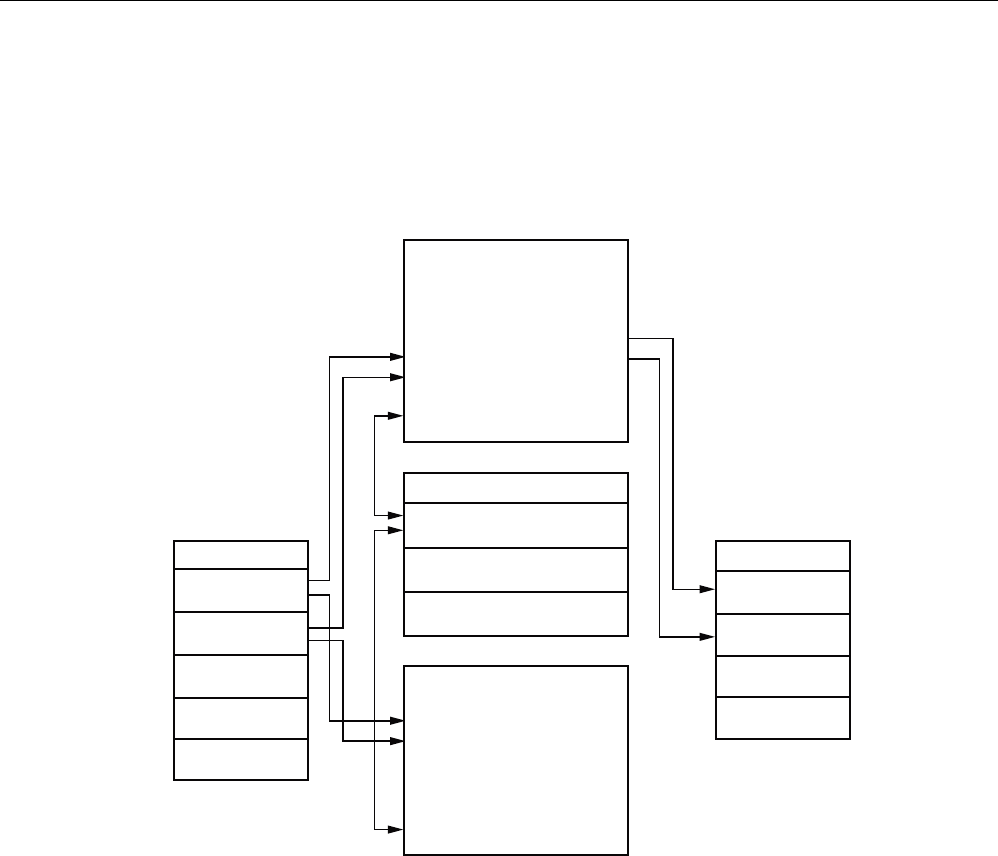
The F-blocks must be interconnected to each other and with the process image of the HMI
device.
The following figure is a schematic representation of the interconnection of F-FBs among
one another and to the PII and PIQ.
03B'$7$ 03B'$7$
03B51* 03B51*
03B)B.(<
)B)%B03
03B'$7$
03B51*
03B'$7$B4
03B51*B4
)B'%B67$7(6
03B,17B67$786
03B,17B67$786
)B)%B51* BQ
03B'$7$
03B51*
03B67$7
03B67$7
5HVHUYHG
3,, 3,4
5HVHUYHG
5HVHUYHG
5HVHUYHG
Example of an application
When using the F_FB_RNG_n, consider the application examples:
● Example of application for transponder system (Page 385)
● Application example RFID tag system (Page 398)
REVIEW ENGLISH
27.07.2010

Safety-related configuration
7.3 SIMATIC STEP 7
Mobile Panel 277F IWLAN V2, Mobile Panel 277F IWLAN (RFID Tag)
Operating Instructions, 09/2010, A5E02766325-01 201
Creating an I/O DB
An F-I/O DB is automatically generated in HW Config for every F-I/O.
WARNING
EMERGENCY STOP button
If you change the parameters for the output PASS_ON = 0, then the EMERGENCY STOP
will not be evaluated.
Keep the parameter for the output PASS_ON = 0 in F-I/O DB of the HMI device.
Access to and working with the F-I/O DB are described in detail in the manual "SIMATIC S7
Distributed Safety – Configuring and Programming", "F-I/O Access" section.
7.3.6 F_FB_MP
This description applies to version 1.0 of F_FB_MP.
Note
Insert the FC176 F_BO_W and FC177 F_W_BO blocks into your safety program because
they are called by F_FB_MP. You can find these blocks in the "F-Application Blocks"
container of the "Distributed Safety" F-library.
Purpose
The assigned HMI device is monitored by F_FB_MP. An F_FB_MP must be used for each
HMI device.
F_FB_MP performs the following tasks:
● The block integrates the HMI device in the safety program of the F-CPU after startup.
● The block removes the HMI device from the safety program after a communication error.
As soon as the communication error has been corrected and the operator has
acknowledged this step, the block will integrate the HMI device back into the safety
program.
● The block passes the states of the HMI device through F_DB_STATES to F_FB_RNG_n.
The following HMI device states are possible:
– Integrated
– Removed
– Communication error
– Acknowledgement required
The QBAD output monitors the F-I/O for integrating and removing the HMI device.
REVIEW ENGLISH
27.07.2010

Safety-related configuration
7.3 SIMATIC STEP 7
Mobile Panel 277F IWLAN V2, Mobile Panel 277F IWLAN (RFID Tag)
202 Operating Instructions, 09/2010, A5E02766325-01
● QBAD = 0
PROFIsafe communication takes place between the HMI device and the F-CPU.
● QBAD = 1
No PROFIsafe communication takes place between the HMI device and the F-CPU.
WARNING
Automatic restart
The security program must ensure that after S7_MP_RES is set, the plant does not
restart automatically.
The operator must explicitly perform an action for the restart.
Configuration
)B)%B03
(1
4%$'
$&.B5(4
6B03B5(6
6B$&.B
(55
03B'$7$
03B51*
03B67$7
$&.B5(,
03B'$7$B4
03B51*B4
',$*
(12
Inputs of F_FB_MP
Parameter Data type Description Interconnection
QBAD Bool QBAD indicates if the F-I/O has been
passivated.
I/O DB:
DBx2.1 = QBAD
ACK_REQ Bool Acknowledgement required
After a communication error, the fail-safe
system sets QBAD = 1 and ACK_REQ = 0.
ACK_REQ = 1 indicates that the PROFIsafe
message frames are being exchanged again.
I/O DB:
DBx2.2 = ACK_REQ
REVIEW ENGLISH
27.07.2010

Safety-related configuration
7.3 SIMATIC STEP 7
Mobile Panel 277F IWLAN V2, Mobile Panel 277F IWLAN (RFID Tag)
Operating Instructions, 09/2010, A5E02766325-01 203
Parameter Data type Description Interconnection
S7_MP_RES Bool This input is set so that the F-CPU resets the
status of F_FB_MP to its "original state", in
other words:
The HMI device has the status "removed"
If a rampdown or shutdown was set, it is
reset.
If the HMI device was logged onto a
machine, the associated effective range
will be enabled once again.
The input is only evaluated if Q_BAD = 1.
The S7_MP_RES input has to be set if the
HMI device cannot return itself to a defined
state, for example when a system error
occurs or the main rechargeable battery is
dead.
Must be specifically
interconnected for
plant.
The security program
must ensure that after
S7_MP_RES is set,
automatic restart of
the plant is not
possible. The operator
must ensure that he
executes a separate
operator action to
begin the restart.
S7_ACK_ERR Bool Communication errors may not be
acknowledged automatically.
This input is set to have the F-CPU to
acknowledge a communication error during
ongoing PROFIsafe communication.
F_FB_MP only reacts to a rising edge.
Must be specifically
interconnected for
plant.
MP_DATA Word User data of the fail-safe process image
inputs
PII:
Word 1 = MP_DATA
MP_RNG Word ID of the effective range in which the HMI is
included.
PII:
Word 2 = MP_RNG
MP_STAT Word Data are exchanged with F_FB_RNG_n
through this input and output via
F_DB_STATES.
F_DB_STATES
Outputs of F_FB_MP
Parameter Data type Description Interconnection
ACK_REI Bool Acknowledgement for reintegration
The automatic reintegration is regulated via
the F-I/O DB through this output.
F-I/O DB:
DBx0.2 = ACK_REI
MP_DATA_Q Word User data of the fail-safe process image
outputs:
PIO:
Word 1 = MP_DATA
MP_RNG_Q Word The effective range ID is transmitted to the
HMI device through this output.
PIO:
Word 2 = MP_RNG
DIAG Word Information about any occurring errors is
provided through this output for servicing
purposes.
Bit 0: HMI device removed
Bit 1: HMI device integrated
Bit 2: Communication error on the HMI device
Bit 3: Communication error must be
acknowledged.
Bit 4 to 15: Reserved
You can evaluate the
DIAG output in your
program.
REVIEW ENGLISH
27.07.2010

Safety-related configuration
7.3 SIMATIC STEP 7
Mobile Panel 277F IWLAN V2, Mobile Panel 277F IWLAN (RFID Tag)
204 Operating Instructions, 09/2010, A5E02766325-01
EN and ENO
When you call an F-FB, the enable input EN and enable output ENO appear automatically.
Note the following for EN and ENO:
● Do not connect them.
● Do not set "0" for them.
● Do not evaluate them.
Addresses of PII and PIQ
You can find the start address of the PII and PIQ in HW Config in the WTPFailsafe_IO
module of the HMI device.
Wiring the inputs and outputs
You have to wire the inputs and outputs of the F-FB manually. No automatic wiring is
performed.
7.3.7 F_FB_RNG_4 and F_FB_RNG_16
The description in this section applies to the following F-FBs:
● F_FB_RNG_4, version 1.0
● F_FB_RNG_16, version 1.0
When the term "F_FB_RNG_n" is used, the information applies to both F-FBs.
Note
Insert the FC176 F_BO_W and FC177 F_W_BO blocks into the safety program because they
are called by F_FB_MP. You can find these blocks in the "F-Application Blocks" container of
the "Distributed Safety" F-library.
Purpose
Depending on the operating status of the HMI device, the F-FBs performs the following:
● Connect the outputs of F_FB_RNG_n
● Prepare the output user data
Each HMI device in the wireless network can assume one of the following operating states:
REVIEW ENGLISH
27.07.2010

Safety-related configuration
7.3 SIMATIC STEP 7
Mobile Panel 277F IWLAN V2, Mobile Panel 277F IWLAN (RFID Tag)
Operating Instructions, 09/2010, A5E02766325-01 205
● Removed without communication error
The HMI device has been successfully removed from the safety program of the F-CPU.
This ends PROFIsafe communication. The HMI device has no influence on the outputs of
F_FB_RNG_n.
● Integrated without communication error
The F_FB_RNG_n reacts as follows:
– The operator can log onto a machine with the HMI device, if no other HMI device is
logged onto this machine.
– The E_STOP output will be set by pressing the EMERGENCY STOP button.
– The ENABLE output of the F_FB_RNG_n is set according to the state of the enabling
button if the HMI device is logged onto a machine.
– The RNG_BUSY output of the F_FB_RNG_n is set to "1" if the HMI device is logged
onto a machine.
– The OVERRIDE input must be set for an RFID logon within five seconds after the
confirmation of logon for the logon to be successfully completed on a machine.
– When the HMI device is logged onto a machine, it can be logged off the machine.
● Removed with communication error
PROFIsafe communication with the HMI device was interrupted without explanation.
The following outputs are set in F_FB_RNG_n:
– GLOB_RD, if the HMI device was not logged onto a machine.
– SHUTDOWN, if the HMI device was logged onto a machine.
The corresponding signal is reset following acknowledgment of the communication
error or the MP status reset is set. The machine is enabled again by F_FB_RNG_n for
logon of an HMI device.
● Integrated with brief communication error
PROFIsafe communication with the HMI device was interrupted after a short disruption
reestablished so that the usage data between the HMI device and F-CPU
can be exchanged. The E_STOP output will be set by pressing the EMERGENCY STOP
button.
, even if the communication error was not yet confirmed.
REVIEW ENGLISH
27.07.2010

Safety-related configuration
7.3 SIMATIC STEP 7
Mobile Panel 277F IWLAN V2, Mobile Panel 277F IWLAN (RFID Tag)
206 Operating Instructions, 09/2010, A5E02766325-01
Configuration
)B)%B 51*BQ
(1
51*B,'
29(55,'(
03B'$7$
03B51*
03B)B.(<
03B'$7$
03B51*
03B)B.(<
03QB'$7$
03QB51*
03QB)B.(<
03B67$7
03B67$7
03QB67$7
(B6723
*/2%B5'
/2&B5'
6+87'2:1
(1$%/(
)B.(<6
51*B%86<
',$*
(12
The follow applies for MPn:
● With F_FB_RNG_4 for up to four HMI devices
● With F_FB_RNG_16 for up to 16 HMI devices
Inputs of F_FB_RNG_n
Parameters Data type Description Interconnection
RNG_ID Integer Click on this input and enter the ID of the
effective range to be monitored by
F_FB_RNG_n. The RNG_ID must be unique
throughout the plant and is set in WinCC
flexible-.
–
OVERRIDE Bool 0 = "Override" mode inactive,
1 = "Override" mode active
Result of connecting
the RNG-BUSY output
to the security system
MPn_DATA Word User data of the fail-safe process image inputs PII:
Word 1 = MP_DATA
MPn_RNG Word ID of the effective range associated with the
machine on which the HMI device is logged on.
PII:
Word 2 = MP_RNG
REVIEW ENGLISH
27.07.2010

Safety-related configuration
7.3 SIMATIC STEP 7
Mobile Panel 277F IWLAN V2, Mobile Panel 277F IWLAN (RFID Tag)
Operating Instructions, 09/2010, A5E02766325-01 207
Parameters Data type Description Interconnection
MPn_F_KEY Word Reserved –
MPn_STAT Word Data are exchanged with F_FB_MP through
this input and output via F_DB_STATES.
F_DB_STATES
NOTICE
Connect OVERRIDE input
The OVERRIDE input should only be enabled as long as the assigned security systems are
enabled. Configure the following connections in the safety program to ensure this reaction:
AND operation of the switch position of the RNG_BUSY output of F_FB_RNG_n and the
signals of the security system.
The result of the AND operation with the OVERRIDE input of F_FB_RNG_n
Outputs of F_FB_RNG_n
Parameters Data type Description Interconnection
E_STOP Bool EMERGENCY STOP
Evaluation of the EMERGENCY STOP button
of all HMI devices connected to F_FB_RNG_n.
0 = At least one EMERGENCY STOP button
pressed
1 = EMERGENCY STOP button not pressed
Output for evaluating
whether an
EMERGENCY STOP
has been triggered.
GLOB_RD Bool Global rampdown Output for evaluating
whether a global
rampdown has been
triggered.
LOC_RD Bool Local rampdown Output for evaluating
whether a local
rampdown has been
triggered.
SHUTDOWN Bool Shutdown Output for evaluating
whether a shutdown
has been triggered.
ENABLE Bool This output passes on the control state of the
enabling button to the logged on HMI device in
the effective range.
0 = enabling button not pressed or enabling
button in the "Panic" switch position
1 = enabling button pressed
Output for evaluating
whether enabling
buttons have been
triggered.
F-KEYS Word Reserved –
REVIEW ENGLISH
27.07.2010

Safety-related configuration
7.3 SIMATIC STEP 7
Mobile Panel 277F IWLAN V2, Mobile Panel 277F IWLAN (RFID Tag)
208 Operating Instructions, 09/2010, A5E02766325-01
Parameters Data type Description Interconnection
RNG_BUSY Bool This output passes on the state of the effective
range associated with a machine.
0 = effective range free,
1 = effective range in use
Output for evaluating
whether the effective
range is free or
allocated.
In an RFID tag system,
this output is evaluated
together with the
signals of the security
system in the form of
an AND operation. The
result of the AND
operation is wired to
the OVERRIDE input of
F_FB_RNG.
You use this output to
control a signal lamp
that indicates if the
machine associated to
the effective range is in
use.
DIAG Word This output indicates which of the HMI devices
with permission to log on in the effective range
are actually logged on.
Bit 0: 1. panel logged on
Bit 1: 2. panel logged on
Bit 2: 3. panel logged on
Bit 3: 4. panel logged on
With F_FB_RNG_16:
Bit 4: 5. panel logged on
...
Bit 14: 15. panel logged on
Bit 15: 16. panel logged on
The "DIAG" output can
be evaluated in the
user program.
EN and ENO
When you call an F-FB, the enable input EN and enable output ENO appear automatically.
Note the following for EN and ENO:
● Do not connect them.
● Do not set "0" for them.
● Do not evaluate them.
Addresses of PII and PIQ
You can find the start addresses of the PII and PIQ in HW Config in the WTPFailsafe_IO
module of the HMI device.
REVIEW ENGLISH
27.07.2010

Safety-related configuration
7.4 Configuration in WinCC flexible
Mobile Panel 277F IWLAN V2, Mobile Panel 277F IWLAN (RFID Tag)
Operating Instructions, 09/2010, A5E02766325-01 209
Wiring the inputs and outputs
You have to wire the inputs and outputs of the F-FB manually. No automatic wiring is
performed.
Override switch
The override switch should only be enabled as long as the assigned security systems are
enabled. Configure the following connections in the safety program to ensure this reaction:
● AND operation of the switch position of the RNG_BUSY output of F_FB_RNG_n and the
signals of the security system.
● The result of the AND operation with the "Override" input of F_FB_RNG_n
7.4 Configuration in WinCC flexible
For fail-safe operation of the HMI you must configure the following areas of WinCC flexible
ES:
● Device settings
Configure the PROFIsafe address of the HMI device in the project window under "Device
Settings > Device Settings".
● Editor "Effective Ranges (RFID)"
Configure the effective ranges specified in the plant design in the project window under
"Device Settings" > "Effective Ranges (RFID)".
● In the project window under "Screens":
– HMI screens
– A display for the project ID
Assign a unique project ID to each project. The project ID is used to check which
project is currently on the HMI.
Update the project ID for each project change.
Configure the display of the project ID at a position in the project that can be displayed
at any time in the active project. A start screen or a service screen is suitable for this
purpose.
– Objects that were especially designed for fail-safe operation of the HMI device.
For more detailed information about configuration, refer to "WinCC flexible Information
System".
REVIEW ENGLISH
27.07.2010

Safety-related configuration
7.4 Configuration in WinCC flexible
Mobile Panel 277F IWLAN V2, Mobile Panel 277F IWLAN (RFID Tag)
210 Operating Instructions, 09/2010, A5E02766325-01
REVIEW ENGLISH
27.07.2010

Mobile Panel 277F IWLAN V2, Mobile Panel 277F IWLAN (RFID Tag)
Operating Instructions, 09/2010, A5E02766325-01 211
Commissioning a project 8
8.1 Using an existing project
You can use a WinCC flexible project for the following HMI devices:
● Mobile Panel 177 PN
● Mobile Panel 177 DP
● Mobile Panel 277
● Mobile Panel 277 IWLAN V1
● Mobile Panel 277F IWLAN V1
Adjusting the project
You have to adjust an existing WinCC flexible project for the HMI device as follows:
NOTICE
Predecessors
The behavior and possible fields of the enabling button and EMERGENCY STOP button on
the Mobile Panel 277F IWLAN are different from those of its predecessors, which do not
have safety integrated functions.
An existing project can be used if the project is configured without a safety integrated
function or was adjusted correspondingly.
● Communication via WLAN
● Perform an HMI device replacement.
● Applies for the transponder system:
– Connection point detection
If you have used point detection with box ID in an existing project, you have the
following option:
In the place of the connection box, set up a zone that consists of at least a
transponder. In the transponder, set the previously used box-ID as ID.
– Recognize configured zones
If you are using zone recognition, you will need one or more transponders for one
zone. In WinCC flexible, you can parameterize zones in "Device settings". In this case,
changes may be required in the control program.
Perform an import of the effective ranges.
● Applies for RFID tag systems:
– Perform an import of the effective ranges.
The IDs of the transponders are converted to RFID tag IDs.
You can find additional information in the WinCC flexible online help or in the
"WinCCF flexible migration" user manual.
REVIEW ENGLISH
27.07.2010

Commissioning a project
8.2 Operating modes
Mobile Panel 277F IWLAN V2, Mobile Panel 277F IWLAN (RFID Tag)
212 Operating Instructions, 09/2010, A5E02766325-01
See also Fail-safe operation (Page 253)
8.2 Operating modes
The HMI device may be in the following operating modes:
● Offline
● Online
● Transfer
Enable the "offline" and "online" modes as follows:
● On the configuration PC
● On the HMI device, when the corresponding operator control is configured.
"Offline" operating mode
In this operating mode, the HMI device and the PLC do not communicate via the connections
configured in the WinCC flexible project. You can operate the active project on the HMI
device. Data of the project will not be transferred.
Note
In "Offline" mode, the EMERGENCY STOP button is active when the following requirements
are met:
The HMI device is in the wireless network.
The HMI device is integrated in the safety program of the CPU.
"Online" operating mode
In this mode, the HMI device and PLC communicate. You can operate the plant on the HMI
device according to your system configuration.
"Transfer" mode
In this mode, you can transfer a project from the configuration PC to the HMI device or
backup and restore HMI device data, for example.
Changing the operating mode
The configuration engineer must have configured an appropriate operator control to allow a
change of the operating mode on the HMI device during ongoing operation.
More detailed information is available in your plant documentation.
REVIEW ENGLISH
27.07.2010

Commissioning a project
8.3 Available data channels
Mobile Panel 277F IWLAN V2, Mobile Panel 277F IWLAN (RFID Tag)
Operating Instructions, 09/2010, A5E02766325-01 213
8.3 Available data channels
The following table shows the possible routes for data communication between the HMI
device and configuration PC.
The Ethernet data channel is used for communication via WLAN and LAN (RJ45).
Type Data channel HMI device
USB Yes Backup
Ethernet Yes
USB Yes Restoring
Ethernet Yes
USB Yes Updating the operating system
Ethernet Yes
USB No Updating the operating system with restore of factory
setting Ethernet via the RJ45
interface
Yes
USB Yes Transferring a project
Ethernet Yes
USB Yes Install or remove WinCC flexible option
Ethernet Yes
USB Yes License key transferring or transferring back
Ethernet Yes
8.4 Preparing and backing up a project
8.4.1 Overview
In order to operate a plant, you need to transfer the corresponding WinCC flexible project to
the HMI device.
Transferring the project to the HMI device
You can transfer a project to an HMI device as follows:
● Transfer from the configuration PC
● Restore from a PC using ProSave
In this case, an archived project is transferred from a PC to the HMI device.
WinCC flexible need not be installed on this PC.
Commissioning and recommissioning
When the HMI device is commissioned there is no project at first. The HMI device is also in
this state after the operating system has been updated.
REVIEW ENGLISH
27.07.2010

Commissioning a project
8.4 Preparing and backing up a project
Mobile Panel 277F IWLAN V2, Mobile Panel 277F IWLAN (RFID Tag)
214 Operating Instructions, 09/2010, A5E02766325-01
When recommissioning, any project already on the HMI device is replaced.
8.4.2 Transfer
8.4.2.1 Overview
The following types of transfer can be performed:
● Transfer
Transfer of a project to the HMI device.
● Backtransfer
Backup of a project from the HMI device to the configuration PC.
Transfer
When the configuration phase is completed, transfer the runtime project from the
configuration PC to the HMI device.
You can start the "Transfer" mode manually on the HMI device.
● When the HMI device starts up
You start the "Transfer" mode with the appropriate button in the loader.
● During ongoing operation
Start the "Transfer" mode manually with a configured operator control.
The transferred project is written directly to the internal flash memory of the HMI device.
Backtransfer
You have the option to transfer the compressed project file together with the runtime project
to the HMI device. If necessary, the compressed project file can be transferred back to the
configuration PC and edited.
The HMI device must be equipped with an external memory to which the compressed project
file can be saved.
NOTICE
Compressed project file and runtime project
If you only transfer the runtime project, there is the risk that the runtime project will not be
identical to an existing compressed project file. WinCC flexible does not check if the two are
identical.
Therefore, always transfer the compressed project file together with the runtime project.
REVIEW ENGLISH
27.07.2010

Commissioning a project
8.4 Preparing and backing up a project
Mobile Panel 277F IWLAN V2, Mobile Panel 277F IWLAN (RFID Tag)
Operating Instructions, 09/2010, A5E02766325-01 215
See also
Operating modes (Page 212)
Programming the data channel (Page 171)
Available data channels (Page 213)
8.4.2.2 Starting manual transfer
You can manually switch the HMI device to "Transfer" mode as follows:
● With a configured operator control during ongoing operation
● In the Loader of the HMI device
Requirement
● The project you want to transfer is open on the configuration PC in WinCC flexible.
● The HMI device is connected to this configuration PC.
● The data channel is configured on the HMI device.
● The HMI device is in "Transfer" mode
Procedure
Proceed as follows:
1. On the configuration PC, select the "Transfer settings" command in the "Project >
Transfer" menu in WinCC flexible.
The "Select devices for transfer" dialog is displayed.
2. Select the HMI device in the left area of the dialog.
3. Select the type of connection between the HMI device and the configuration PC.
4. Configure the connection.
5. Set the transfer parameters in the right area of the dialog.
6. If you wish to transfer the compressed project file together with the executable project to
the HMI device, select the "Enable backtransfer" check box.
7. Start transfer in WinCC flexible with "Transfer".
The configuration PC checks the connection to the HMI device. The project is transferred
to the HMI device. If the connection is not available or is defective, an error message is
displayed on the configuration PC.
When the transfer is completed successfully, the project can be found on the HMI device.
The transferred project is then started automatically.
REVIEW ENGLISH
27.07.2010

Commissioning a project
8.4 Preparing and backing up a project
Mobile Panel 277F IWLAN V2, Mobile Panel 277F IWLAN (RFID Tag)
216 Operating Instructions, 09/2010, A5E02766325-01
8.4.2.3 Starting automatic transfer
If automatic transfer is selected, the HMI device automatically switches to "Transfer" mode
during operation as soon as a transfer is initiated on the connected configuring PC.
Note
The HMI device only switches to "Transfer" mode in the current project.
Automatic transfer is particularly suited for the test phase of a new project since transfer is
completed without interfering with the HMI device.
NOTICE
Undesired system responses
If automatic transfer has been selected on the HMI device and a transfer is then initiated on
the configuring PC, the current project is automatically terminated following a prompt. The
HMI device then automatically switches to "Transfer" mode. The transfer mode can trigger
undesired responses in the system.
After the commissioning phase, deactivate the automatic transfer so that the HMI device
cannot be inadvertently switched to transfer mode.
You can issue a password in the Control Panel to restrict access to the transfer settings
and thus avoid unauthorized modifications.
Requirement
● The project that you want to transfer on the configuration PC is opened in WinCC.
● The HMI device is connected to this configuring PC
● The data channel is programmed on the HMI device
● The automatic transfer is enabled in the data channel.
● The project is started on the HMI device
Procedure
Proceed as follows:
1. On the configuring PC, select the "Transfer settings" command in the menu "Project >
Transfer" in WinCC flexible.
The "Select devices for transfer" dialog opens.
2. Select the HMI device in the left area of the dialog.
3. Select the type of connection between the HMI device and the configuring PC.
4. Configure the connection.
5. Set the transfer parameters in the right area of the dialog.
REVIEW ENGLISH
27.07.2010

Commissioning a project
8.4 Preparing and backing up a project
Mobile Panel 277F IWLAN V2, Mobile Panel 277F IWLAN (RFID Tag)
Operating Instructions, 09/2010, A5E02766325-01 217
6. If you wish to transfer the compressed project file together with the executable project to
the HMI device:
Select the "Enable backtransfer" check box.
7. Start transfer in WinCC flexible with "Transfer".
The configuring PC checks the connection to the HMI device. If the HMI device is
integrated, it displays the "Start removal" dialog box.
8. Confirm the next dialog.
9. Press one of the enabling buttons.
The HMI device is removed. The current project is terminated. The HMI device then
automatically switches to transfer mode. The project is transferred to the HMI device. If
the connection is not available or is defective, an error message is displayed on the
configuring PC.
When the transfer is completed successfully, the project can be found on the HMI device.
The transferred project is then started automatically.
8.4.2.4 Starting backtransfer
Requirement
● No project is open on the configuration PC in WinCC flexible.
● The HMI device is connected to this configuration PC.
● The data channel is configured on the HMI device.
● The HMI device is in "Transfer" mode
● The memory card with the compressed project file is inserted in the HMI device.
Procedure
Proceed as follows:
1. On the configuration PC, select the "Communication settings" command in the "Project >
Transfer" menu in WinCC flexible.
The "Communication Settings" dialog is displayed.
2. Select the type of HMI device.
3. Select the type of connection between the HMI device and the configuration PC.
4. Configure the connection.
5. Close the dialog with "OK".
REVIEW ENGLISH
27.07.2010

Commissioning a project
8.4 Preparing and backing up a project
Mobile Panel 277F IWLAN V2, Mobile Panel 277F IWLAN (RFID Tag)
218 Operating Instructions, 09/2010, A5E02766325-01
6. Select the "Transfer" > "Backtransfer" command in the "Project" menu.
The "Backtransfer" dialog is displayed.
7. Click "OK" to start the backtransfer process.
The configuration PC checks the connection to the HMI device. The compressed project
file is transferred back from the HMI device to the configuration PC. If the connection is
not available or is defective, an error message is displayed on the configuration PC.
After successful backtransfer, the project is opened on the configuration PC in
WinCC flexible.
8.4.3 Testing a project
There are two options to test a project:
● Test the project on the configuring PC
You can test a project at a configuring PC, using a simulator. You can find additional
information in the "WinCC flexible" user manual or in the WinCC flexible online help.
● Offline testing of the project on the HMI device
Offline testing means that communication between the HMI device and PLC connections,
which have been configured in WinCC flexible, is down while the test is being carried out.
The PROFIsafe connection between the HMI device and PLC is also available in "Offline"
mode.
● Online testing of the project on the HMI device
Online testing means that the HMI device and PLC communicate with each other during
testing.
Perform the tests, starting with the "Offline test", followed by the "Online test".
Note
You should always test the project on the HMI device on which the project will be used.
Check the following:
● WLAN
● Zone recognition, if zones have been configured
● Check the hierarchy of the HMI screens.
● Check the correct layout of the HMI screens.
● Check the input objects
● Enter the tag values
REVIEW ENGLISH
27.07.2010

Commissioning a project
8.4 Preparing and backing up a project
Mobile Panel 277F IWLAN V2, Mobile Panel 277F IWLAN (RFID Tag)
Operating Instructions, 09/2010, A5E02766325-01 219
The test increases the certainty that the project will run error-free on the HMI device.
NOTICE
Testing without effective ranges
A plant acceptance test must be performed if you have configured effective ranges in your
project. The effective ranges and assigned transponders will be tested as part of the
acceptance test.
Perform the test without effective ranges.
Procedure – Offline test
● The project has been transferred to the HMI device
● The HMI device is in "Offline" mode.
Procedure
Proceed as follows:
1. In the "Offline" operating mode on the HMI device, test individual project functions that do
not depend on the controller.
PLC tags are not updated in this case.
2. Test the operating elements and visualization of the project as far as possible without
connecting to the PLC.
Procedure – Online test
● The project has been transferred to the HMI device
● The HMI device is in "Online" mode
Procedure
Proceed as follows:
1. In the "Online" operating mode on the HMI device, test individual project functions that
depend on the controller.
PLC tags are updated in this case.
2. Test all functions that depend on communication.
3. Test the operating elements and views of the project.
REVIEW ENGLISH
27.07.2010

Commissioning a project
8.4 Preparing and backing up a project
Mobile Panel 277F IWLAN V2, Mobile Panel 277F IWLAN (RFID Tag)
220 Operating Instructions, 09/2010, A5E02766325-01
8.4.4 Backup and restore
8.4.4.1 Overview
You can back up and restore the following data from the internal flash memory of the HMI
device to a PC:
● Project and HMI device image
● Password list
● Recipe data
● License keys
You have the following possibilities for backing up or restoring data:
● With WinCC flexible
● Alongside with ProSave
● Through the control panel
An external storage medium is required for backup and restore via the Control Panel.
NOTICE
Reset to factory settings required
If a restore operation is interrupted due to power failure on the HMI device, the operating
system of the HMI device may be corrupted!
In this case, you have to restore the factory settings on the HMI device. See section
"Updating the operating system (Page 224)".
Note
If a message appears on the HMI device warning you of a compatibility conflict during the
restore operation, the operating system must be updated.
8.4.4.2 Backing up with WinCC flexible
Requirement
● No project is open on the configuration PC in WinCC flexible.
● The HMI device is connected to this configuration PC.
● The data channel is configured on the HMI device.
REVIEW ENGLISH
27.07.2010

Commissioning a project
8.4 Preparing and backing up a project
Mobile Panel 277F IWLAN V2, Mobile Panel 277F IWLAN (RFID Tag)
Operating Instructions, 09/2010, A5E02766325-01 221
Procedure
Proceed as follows:
1. On the configuration PC, select the "Communication settings" command in the "Project >
Transfer" menu in WinCC flexible.
The "Communication Settings" dialog is displayed.
2. Select the type of HMI device.
3. Select the type of connection between the HMI device and the configuration PC.
4. Configure the connection.
5. Close the dialog with "OK".
6. Select the "Backup" command in the menu "Project > Transfer" in WinCC flexible.
The "Backup Settings" dialog is displayed.
7. Select the data to be backed up.
8. Select a destination folder and a file name for the "filename.psb" backup file.
9. Set "Transfer" mode on the HMI device.
10. Start backup in WinCC flexible with "OK".
11. Follow the instructions in WinCC flexible.
A status view opens to indicate the progress of the operation. The system outputs a
message when the backup is completed.
Result
The relevant data is now backed up on the configuration PC.
8.4.4.3 Backing up with ProSave
Requirement
● The HMI device is connected to a PC on which ProSave is installed.
● The data channel is configured on the HMI device.
Procedure
Proceed as follows:
1. Start ProSave from the Windows start menu.
2. Select the HMI device type in the "General" tab.
3. Select the type of connection between the HMI device and the PC.
4. Configure the connection.
5. Select the data you want to back up in the "Backup" tab.
6. Select a destination folder and a file name for the "filename.psb" backup file.
7. Set "Transfer" mode on the HMI device.
REVIEW ENGLISH
27.07.2010

Commissioning a project
8.4 Preparing and backing up a project
Mobile Panel 277F IWLAN V2, Mobile Panel 277F IWLAN (RFID Tag)
222 Operating Instructions, 09/2010, A5E02766325-01
8. Start the backup in ProSave with "Start Backup".
9. Follow the instructions in ProSave.
A status view opens to indicate the progress of the operation. The system outputs a
message when the backup is completed.
Result
The relevant data is now backed up on the configuration PC.
8.4.4.4 Restoring with WinCC flexible
Requirement
● No project is open on the configuration PC in WinCC flexible.
● The HMI device is connected to this configuration PC.
● The data channel is configured on the HMI device.
Procedure
Proceed as follows:
1. Select the "Communication Settings" command in the menu "Project > Transfer" in
WinCC flexible.
The "Communication Settings" dialog is displayed.
2. Select the type of HMI device.
3. Select the type of connection between the HMI device and the configuration PC.
4. Configure the connection.
5. Close the dialog with "OK".
6. Select the "Restore" command in the menu "Project > Transfer" in WinCC flexible.
The "Restore Settings" dialog is displayed.
7. Select the "filename.psb" backup file to be restored from the "Open" field.
You can see the HMI device for which the backup file was created and the type of backup
data the file contains.
8. Set "Transfer" mode on the HMI device.
9. Start the restore operation in WinCC flexible with "OK" on the configuration PC.
If there are license keys both on the HMI device and in the backup, a dialog box will
appear. Use this dialog to establish whether you want to overwrite the license keys or
abort the restore process.
– If necessary, abort the backup and save the license keys of the HMI device.
– Then start the restore procedure again.
10. Follow the instructions in WinCC flexible.
A status view opens to indicate the progress of the operation.
REVIEW ENGLISH
27.07.2010

Commissioning a project
8.4 Preparing and backing up a project
Mobile Panel 277F IWLAN V2, Mobile Panel 277F IWLAN (RFID Tag)
Operating Instructions, 09/2010, A5E02766325-01 223
Result
When the restore is successfully completed, the data previously backed up on the PC will
now be available on the HMI device.
8.4.4.5 Restoring with ProSave
Requirement
● The HMI device is connected to a PC on which ProSave is installed.
● The data channel is configured on the HMI device.
Procedure
Proceed as follows:
1. Start ProSave from the Windows start menu.
2. Select the HMI device type in the "General" tab.
3. Select the type of connection between the HMI device and the PC.
4. Configure the connection.
5. Select the "filename.psb" backup file you want to restore from the "Restore" tab.
You can see the HMI device for which the backup file was created and the type of backup
data the file contains.
6. Set "Transfer" mode on the HMI device.
7. Start the restore in ProSave with "Start Restore".
If there are license keys both on the HMI device and in the backup, a dialog box will
appear. Use this dialog to establish whether you want to overwrite the license keys or
abort the restore process.
– If necessary, abort the restore process and save the license keys of the HMI device.
– Then start the restore process again.
8. Follow the instructions in ProSave.
A status view opens to indicate the progress of the operation.
Result
When the restore is successfully completed, the data previously backed up on the PC will
now be available on the HMI device.
REVIEW ENGLISH
27.07.2010

Commissioning a project
8.4 Preparing and backing up a project
Mobile Panel 277F IWLAN V2, Mobile Panel 277F IWLAN (RFID Tag)
224 Operating Instructions, 09/2010, A5E02766325-01
8.4.5 Updating the operating system
8.4.5.1 Overview
A compatibility conflict may occur when transferring a project to the HMI device. The reason
for this problem is that there are different versions of the configuration software and the HMI
device image on the HMI device. The transfer is aborted in case of different versions. A
message indicating such a compatibility conflict will be displayed on the configuration PC.
You have the following options to remedy the compatibility problem:
● Update the HMI device image if the project was created with the most recent version of
the configuration software.
● Transfer a version that is compatible with the version of HMI device image if you do not
want to adapt the project to the most recent version of the configuration program.
NOTICE
Data loss
All data on the HMI device, such as the project and passwords, will be deleted when you
update the operating system.
Back up the stored data before you update the operating system.
Data channel
If you do not transfer an image via LAN, malfunctions may occur as a result.
Transfer an image only via LAN.
Note
The license keys on the HMI device will be retained when updating the operating system
without resetting to factory settings.
After the update, you may have to recalibrate the touch screen.
See also
Operating modes (Page 212)
Available data channels (Page 213)
Programming the data channel (Page 171)
8.4.5.2 Updating the operating system using WinCC flexible
Requirement
● No project is open on the configuration PC in WinCC flexible.
● The HMI device is connected to this configuration PC.
● The data channel is configured on the HMI device.
REVIEW ENGLISH
27.07.2010

Commissioning a project
8.4 Preparing and backing up a project
Mobile Panel 277F IWLAN V2, Mobile Panel 277F IWLAN (RFID Tag)
Operating Instructions, 09/2010, A5E02766325-01 225
Procedure
Proceed as follows:
1. Select the "Communication Settings" command in the "Projekt > Transfer" menu in
WinCC flexible.
The "Communication Settings" dialog is displayed.
2. Select the type of HMI device.
3. Select the type of connection between the HMI device and the configuration PC.
4. Configure the connection.
5. Close the dialog with "OK".
6. In WinCC flexible, select the command "OS Update" from the "Projekt > Transfer" menu.
7. Under "Image path", select the HMI device image file "filename.img".
The HMI device image files are available under "WinCC flexible Images" in the
WinCC flexible installation folder or on the WinCC flexible installation CD.
The output area provides you with information on the version of the HMI device image file
once it has been successfully opened.
8. Set "Transfer" mode on the HMI device.
9. In WinCC flexible, select "Update OS" to run the operating system update on the
configuration PC.
10. Follow the instructions in WinCC flexible.
During the operating system update a status view opens to indicate progress. A message
is displayed when the operating system update is successfully completed.
Result
The updated operating system is now on the HMI device.
8.4.5.3 Updating the operating system using ProSave
Requirement
● The HMI device is connected to a PC on which ProSave is installed.
● The data channel is configured on the HMI device.
Procedure
Proceed as follows:
1. Start ProSave from the Windows start menu.
2. Select the HMI device type in the "General" tab.
3. Select the type of connection between the HMI device and the PC.
4. Configure the connection.
5. Select the "OS Update" tab.
REVIEW ENGLISH
27.07.2010

Commissioning a project
8.4 Preparing and backing up a project
Mobile Panel 277F IWLAN V2, Mobile Panel 277F IWLAN (RFID Tag)
226 Operating Instructions, 09/2010, A5E02766325-01
6. Under "Image path", select the HMI device image file "filename.img".
The HMI device image files are available under "WinCC flexible Images" in the
WinCC flexible installation folder or on the WinCC flexible installation CD.
The output area provides you with information on the version of the HMI device image file
once it has been successfully opened.
7. Set "Transfer" mode on the HMI device.
8. Select "Update OS" to run the operating system update on the PC.
9. Follow the instructions in ProSave.
During the operating system update a status view opens to indicate progress. A message
is displayed when the operating system update is successfully completed.
Result
The updated operating system is now on the HMI device.
8.4.6 Restoring factory settings
8.4.6.1 Overview
You have to perform an operating system update with restore of the factory setting if the HMI
device does not yet have an operating system or if the HMI device operating system is
corrupt.
NOTICE
Data loss
The license keys on the HMI device will be deleted when resetting to factory settings.
Back up stored license keys before you restore the factory settings on the HMI device.
Data channel
If you do not transfer an image via LAN, malfunctions may occur as a result.
Transfer an image only via LAN.
Note
The parameters of the data channels are reset when the factory setting is restored.
Configure the data channels again before starting transfer.
REVIEW ENGLISH
27.07.2010

Commissioning a project
8.4 Preparing and backing up a project
Mobile Panel 277F IWLAN V2, Mobile Panel 277F IWLAN (RFID Tag)
Operating Instructions, 09/2010, A5E02766325-01 227
8.4.6.2 Restoring the factory settings using WinCC flexible.
Requirements
● No project is open on the configuring PC in WinCC flexible.
● The HMI device is connected to this configuration PC over the standard Ethernet cable.
● Have the MAC address of the Ethernet interface on your HMI device to hand.
– The MAC address is displayed briefly when the HMI device is turned on.
– The MAC address is displayed in the "PROFINET" dialog in the Control Panel.
Procedure – setting the PC interface
1. Select "Start > Control Panel > Set PG / PC interface" on the configuration PC.
2. Select "S7ONLINE (STEP7) -> TCP / IP" from the "Application access point" area.
3. Select the interface which is connected to the HMI device from the "Interface
parameterization used" area.
4. Confirm your entries.
Procedure – resetting to factory settings
Proceed as follows:
1. On the configuring PC, select the "Communication settings" command in the menu
"Project > Transfer" in WinCC flexible.
The "Communication Settings" dialog opens.
2. Select the HMI device type from the "General" tab, and select "Ethernet" from the
"Connection" area.
3. Enter an IP address.
NOTICE
Possible address conflicts with incorrect IP address
Do not use a dynamic IP configuration for "Reset to factory settings". Specify a unique
IP address in which the configuration PC is located. The HMI device will be assigned to
the specified address for the duration of the update process.
If the HMI device has already been used with WinCC flexible or ProSave you can use
the existing IP address for "Reset to factory settings."
Reserved IP addresses
The following IP addresses are reserved for internal communication with the WLAN
module:
169.254.2.253
169.254.2.254
Do not use these reserved IP addresses.
4. Confirm your entries.
REVIEW ENGLISH
27.07.2010

Commissioning a project
8.4 Preparing and backing up a project
Mobile Panel 277F IWLAN V2, Mobile Panel 277F IWLAN (RFID Tag)
228 Operating Instructions, 09/2010, A5E02766325-01
5. In WinCC flexible, select the command "Update OS" in the "Project > Transfer" menu.
6. Activate the "Reset to factory settings" check box.
A text box opens where you can enter the MAC address.
7. Enter the HMI device's MAC address in the text box.
8. In "Image path", select the HMI device image file "*.img".
The HMI device image files are available under "WinCC flexible Images" in the
WinCC flexible installation folder or on the WinCC flexible installation CD.
In the output area, you are provided information on the version of the HMI device image
file after it is opened.
9. In WinCC flexible, select "Update OS" on the configuring PC to run the operating system
update.
10. In the Control Panel of the HMI device, open the "OP Properties" dialog and select the
"Device" tab.
11. Click on the "Reboot" button.
A query is opened.
12. Click on the "Prepare for Reset" button.
13. On the configuration PC, follow the instructions in WinCC flexible.
During the operating system update a status view opens to indicate progress.
Result
A message is displayed when the operating system update is successfully completed.
This operation has deleted the project data from the HMI device. The factory settings are
reset.
Note
If you can no longer call the Control Panel on the HMI device, as the operating system is
missing, switch off the HMI device. Then reset to factory settings and restart the HMI device.
If the HMI device doesn´t start up, switch it off and then on again.
Note
After the restore, you may have to calibrate the touch screen.
REVIEW ENGLISH
27.07.2010

Commissioning a project
8.4 Preparing and backing up a project
Mobile Panel 277F IWLAN V2, Mobile Panel 277F IWLAN (RFID Tag)
Operating Instructions, 09/2010, A5E02766325-01 229
8.4.6.3 Restoring the factory settings with ProSave
Requirement
● The HMI device is connected over the Ethernet to a PC on which ProSave is installed.
● Have the MAC address of the Ethernet interface on your HMI device to hand.
– The MAC address is displayed briefly when the HMI device is turned on.
– The MAC address is displayed in the "PROFINET" dialog in the Control Panel.
Procedure - Setting the PC interface
1. Select the menu command "Start > Control Panel > Set PG/PC interface" on the
configuration PC.
2. Select "S7ONLINE (STEP7) -> TCP/IP" from the "Application access point" area.
3. Select the interface which is connected to the HMI device from the "Interface
parameterization used" area.
4. Confirm your entries.
REVIEW ENGLISH
27.07.2010
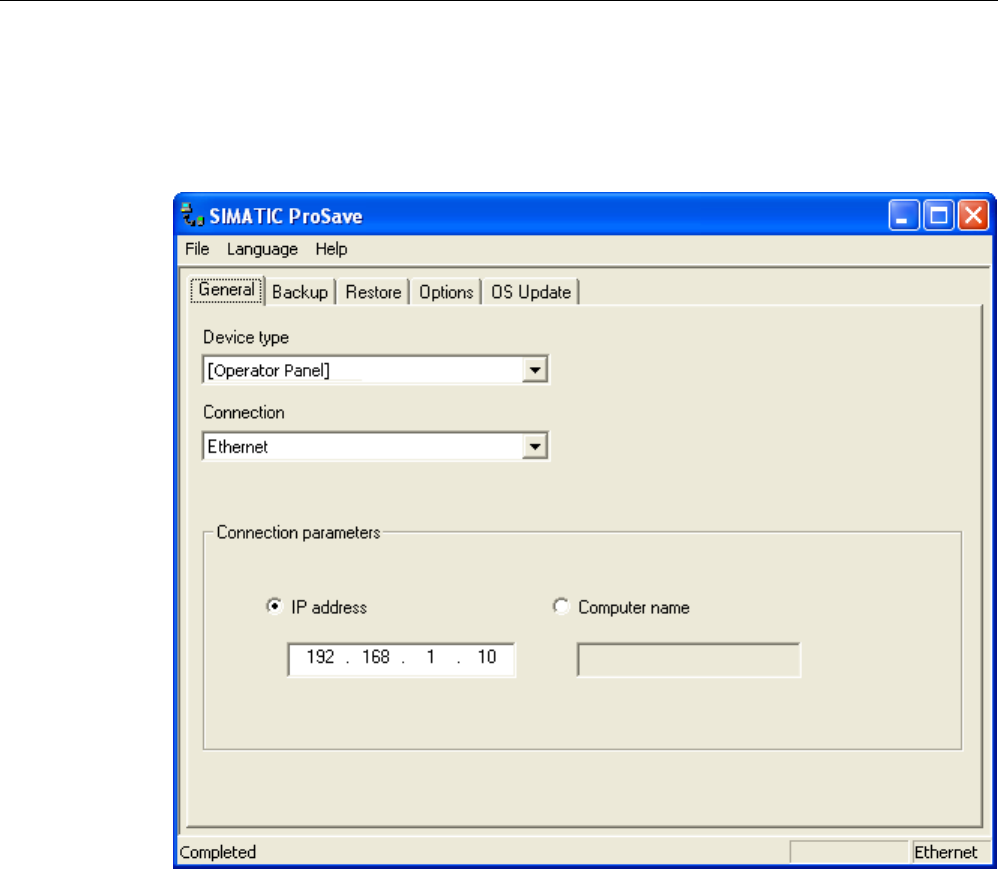
Commissioning a project
8.4 Preparing and backing up a project
Mobile Panel 277F IWLAN V2, Mobile Panel 277F IWLAN (RFID Tag)
230 Operating Instructions, 09/2010, A5E02766325-01
Procedure - Restoring factory settings
Proceed as follows:
1. From the Windows Start menu, start ProSave on the PC.
2. Select the HMI device type from the "General" tab, and select "Ethernet" from the
Connection area.
REVIEW ENGLISH
27.07.2010

Commissioning a project
8.4 Preparing and backing up a project
Mobile Panel 277F IWLAN V2, Mobile Panel 277F IWLAN (RFID Tag)
Operating Instructions, 09/2010, A5E02766325-01 231
3. Enter an IP address.
NOTICE
Possible address conflicts with incorrect IP address
Do not use a dynamic IP configuration for "Reset to factory settings".
Specify a unique IP address of the subnet in which the configuration PC is located. This
subnet has to be a different one than the WLAN subnet. For the duration of the update
process, the HMI device is automatically assigned to the specified address of ProSave.
If the HMI device has already been used with WinCC flexible or ProSave you can use
the existing IP address for "Reset to factory settings."
Reserved IP addresses
The following IP addresses are reserved for internal communication with the WLAN
module:
169.254.2.253
169.254.2.254
Do not use these reserved IP addresses.
4. Change to the "OS Update" tab.
5. Activate the "Reset to factory settings" check box.
A text box opens where you can enter the MAC address.
6. Enter the HMI device's MAC address in the text box.
7. In "Image path", select the HMI device image file "*.img".
The HMI device image files are available under "WinCC flexible Images" in the
WinCC flexible installation folder or on the WinCC flexible installation CD.
The output area provides you with information on the version of the HMI device image file
once it has been successfully opened.
8. Select "Update OS" on the PC to start the "Reset to factory settings" process.
9. In the Control Panel of the HMI device, open the "OP Properties" dialog and select the
"Device" tab.
10. Click on the "Reboot" button.
A query is opened.
11. Click on the "Prepare for Reset" button.
12. Follow the instructions in ProSave.
During the operating system update a status view opens to indicate progress.
Result
A message is displayed when the operating system update is successfully completed.
REVIEW ENGLISH
27.07.2010

Commissioning a project
8.4 Preparing and backing up a project
Mobile Panel 277F IWLAN V2, Mobile Panel 277F IWLAN (RFID Tag)
232 Operating Instructions, 09/2010, A5E02766325-01
There is now no project data on the HMI device. The factory settings are restored.
Note
If you can no longer open the Control Panel on the HMI device because the operating
system is missing, switch off the HMI device. Then restore the factory settings and restart
the HMI device.
If the HMI device does not start up, switch it off and on again.
Note
Calibrating the touch screen
After the reset, you may have to recalibrate the touch screen.
8.4.7 Installing and removing software options
8.4.7.1 Overview
With WinCC flexible-options, you can expand the functional scope of the HMI device.
This chapter describes the installation and deinstallation of WinCC flexible options.
Note
In order to use a WinCC flexible option, a license key may be required. The license key
unlocks the option for use.
8.4.7.2 Installing with WinCC flexible
Requirement
● No project is open on the configuration PC in WinCC flexible.
● The HMI device is connected to this configuration PC.
● The data channel is configured on the HMI device.
Procedure
Proceed as follows:
1. Select the "Communication settings" command in the "Project > Transfer" menu in
WinCC flexible.
The "Communication Settings" dialog is displayed.
2. Select the type of HMI device.
REVIEW ENGLISH
27.07.2010

Commissioning a project
8.4 Preparing and backing up a project
Mobile Panel 277F IWLAN V2, Mobile Panel 277F IWLAN (RFID Tag)
Operating Instructions, 09/2010, A5E02766325-01 233
3. Select the type of connection between the HMI device and the configuration PC.
4. Configure the connection.
5. Close the dialog with "OK".
6. Select the "Options" command in the "Project > Transfer" menu in WinCC flexible.
7. Select the desired option under "Available options".
8. Set "Transfer" mode on the HMI device.
9. Start the installation of the option in WinCC flexible on the configuration PC with the ">>"
button.
10. Follow the instructions in WinCC flexible.
A status display appears indicating the progress of the installation.
Result
The WinCC flexible-option has now been installed on the HMI device.
8.4.7.3 Removing with WinCC flexible
Requirement
● No project is open on the configuration PC in WinCC flexible.
● The HMI device is connected to this configuration PC.
● The data channel is configured on the HMI device.
Procedure
Proceed as follows:
1. Select the "Communication Settings" command in the menu "Project > Transfer" in
WinCC flexible.
The "Communication Settings" dialog is displayed.
2. Select the type of HMI device.
3. Select the type of connection between the HMI device and the configuration PC.
4. Configure the connection.
5. Close the dialog with "OK".
6. Select the "Options" command in the "Project > Transfer" menu in WinCC flexible.
7. Press the "Device status" button to update the display.
8. Select the desired option under "Installed options".
9. Set "Transfer" mode on the HMI device.
REVIEW ENGLISH
27.07.2010

Commissioning a project
8.4 Preparing and backing up a project
Mobile Panel 277F IWLAN V2, Mobile Panel 277F IWLAN (RFID Tag)
234 Operating Instructions, 09/2010, A5E02766325-01
10. Start the removal of the option in WinCC flexible on the configuration PC with the "<<"
button.
11. Follow the instructions in WinCC flexible.
A status display appears indicating the progress of the removal.
Result
The WinCC flexible-option has now been removed from the HMI device.
8.4.7.4 Installing with ProSave
Requirement
● The HMI device is connected to a PC on which ProSave is installed.
● The data channel is configured on the HMI device.
Procedure
Proceed as follows:
1. Start ProSave from the Windows start menu.
2. Select the HMI device type in the "General" tab.
3. Select the type of connection between the HMI device and the PC.
4. Configure the connection.
5. Select the "Options" tab.
6. Select the desired option under "Available options".
7. Set "Transfer" mode on the HMI device.
8. Start the installation of the option in ProSave with the ">>" button.
9. Follow the instructions in ProSave.
A status display appears indicating the progress of the installation.
Result
The WinCC flexible-option has now been installed on the HMI device.
8.4.7.5 Removing with ProSave
Requirement
● The HMI device is connected to a PC on which ProSave is installed.
● The data channel is configured on the HMI device.
REVIEW ENGLISH
27.07.2010

Commissioning a project
8.4 Preparing and backing up a project
Mobile Panel 277F IWLAN V2, Mobile Panel 277F IWLAN (RFID Tag)
Operating Instructions, 09/2010, A5E02766325-01 235
Procedure
Proceed as follows:
1. Start ProSave from the Windows start menu.
2. Select the HMI device type in the "General" tab.
3. Select the type of connection between the HMI device and the PC.
4. Configure the connection.
5. Select the "Options" tab.
6. Press the "Device status" button to update the display.
7. Select the desired option under "Installed options".
8. Set "Transfer" mode on the HMI device.
9. Start the removal of the option in ProSave with the "<<" button.
10. Follow the instructions in ProSave.
A status display appears indicating the progress of the removal.
Result
The WinCC flexible-option has now been removed from the HMI device.
8.4.8 Transferring and transferring back license keys
8.4.8.1 Overview
With the purchase of a WinCC flexible option, you also buy a specific usage license with an
associated license key. Once you have installed an add-on, transfer a license key to the HMI
device. The license key unlocks the option for use. The license key can then be transferred
from the HMI device back to the storage location.
Note
The license key can only be transferred using the Automation License Manager or
WinCC flexible.
8.4.8.2 Transfer license keys
Requirement
● No WinCC flexible project is open on the configuration PC.
● The HMI device is connected to the configuration PC.
● A data channel is configured on the HMI device.
● A storage medium with the license key is available.
REVIEW ENGLISH
27.07.2010

Commissioning a project
8.4 Preparing and backing up a project
Mobile Panel 277F IWLAN V2, Mobile Panel 277F IWLAN (RFID Tag)
236 Operating Instructions, 09/2010, A5E02766325-01
Procedure
Proceed as follows:
1. Switch to "Transfer" mode on the HMI device.
2. When transferring using WinCC flexible:
Select the "Transfer" > "License Keys" command in the "Project > Transfer"" menu. The
Automation License Manager is displayed.
3. For transfers using the Automation License Manager:
Start the Automation License Manager via the Windows Start menu.
4. Select the "Connect HMI device" command in the "Edit > Connect Target System" menu.
The "Connect Target System" dialog is displayed.
5. Under "Device type", select the HMI device type.
6. Select the type of connection from the "Connection" box.
7. Configure the connection.
8. Confirm by clicking "OK".
The connection to the HMI device is established. The connected HMI device is displayed
in the left window of the Automation License Manager.
9. Select the source drive in the left window.
The right window displays the available license keys.
10. Drag and drop the selected license key from the right window to the HMI device in the left
window.
The selected license keys are transferred to the HMI device.
8.4.8.3 Transfer license keys back
Requirement
● No WinCC flexible project is open on the configuration PC.
● The HMI device is connected to the configuration PC.
● A data channel is configured on the HMI device.
● The license key on a storage medium.
Procedure
Proceed as follows:
1. Switch to "Transfer" mode on the HMI device.
2. When transferring back using WinCC flexible:
Select the "License Keys" command in the "Project > Transfer" menu.
The Automation License Manager is displayed.
REVIEW ENGLISH
27.07.2010

Commissioning a project
8.5 Commissioning an RFID tag
Mobile Panel 277F IWLAN V2, Mobile Panel 277F IWLAN (RFID Tag)
Operating Instructions, 09/2010, A5E02766325-01 237
3. When transferring back using the Automation License Manager:
Start the Automation License Manager via the Windows Start menu.
4. Select the "Connect HMI device" command in the "Edit > Connect Target System" menu.
The "Connect Target System" dialog is displayed.
5. Under "Device type", select the HMI device type.
6. Select the type of connection from the "Connection" box.
7. Configure the connection.
8. Confirm by clicking "OK".
The connection to the HMI device is established. The connected HMI device is displayed
in the left window of the Automation License Manager.
9. Select the HMI device in the left window.
The right window displays the available license keys.
10. Drag and drop the selected license key from the right window to the drive in the left
window.
The selected license keys will be transferred back to the storage location.
8.5 Commissioning an RFID tag
Commissioning
If you have transferred a project with configured effective ranges and RFID tags to the HMI
device and start the HMI device for the first time, the HMI device goes into commissioning
mode. In the commissioning mode, you assign a unique ID to each RFID tag in the plant.
Once IDs are assigned to all RFID tags, you can determine the CRC checksum, which must
be entered in the project. Finally, the verified project must then be transferred back to the
HMI device.
Recommissioning
If the mapping between effective ranges and RFID tag changes in the project, you need to
commission the RFID tags again.
NOTICE
Repeated acceptance of the plant
The RFID tags installed in the plant may not be replaced or locally changed without
performing an acceptance procedure.
If a replacement or change is made, the plant needs to once again go through acceptance,
as described in the section "Acceptance of the plant (Page 241)".
REVIEW ENGLISH
27.07.2010
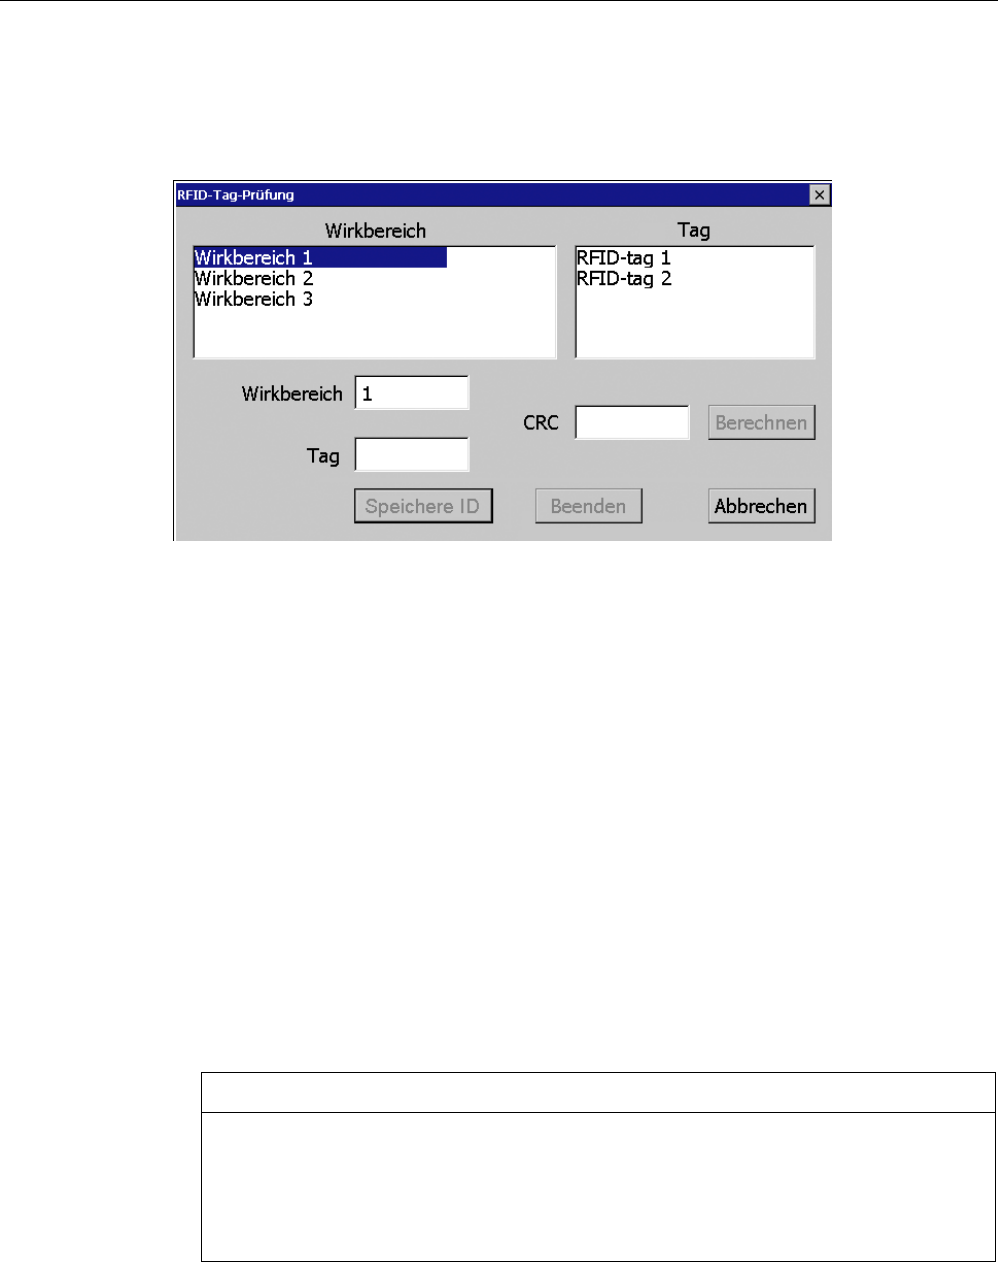
Commissioning a project
8.5 Commissioning an RFID tag
Mobile Panel 277F IWLAN V2, Mobile Panel 277F IWLAN (RFID Tag)
238 Operating Instructions, 09/2010, A5E02766325-01
Requirement
A project with configured effective ranges and RFID tags has been transferred to the HMI
device. The project starts immediately after transfer. The following dialog is displayed.
The dialog shows the configured effective ranges and RFID tags with their assigned IDs in
the project.
Procedure
To recommission the RFID tags, proceed as follows:
1. Select an effective range in the "Effective range" list.
The "Tag" list shows the RFID tags that are assigned to this effective range in the WinCC
flexible project. The "Effective range" box shows the configured ID of the selected
effective range.
2. In the "Tag" list, select the RFID tag to which you want to assign an ID.
The "Tag" box shows the configured ID of the selected RFID tag.
3. Bring the HMI device into the immediate proximity of the RFID tag, in other words, into
the effective range of the RFID tag to which you want to assign the ID shown in the "Tag"
box.
4. Press "Save ID".
The ID is sent to the RFID tag and stored there. A check mark is set in the "Tag" list, if the
configured tag ID is successfully written to the RFID tag.
NOTICE
Recording the ID of the RFID tag
If you replace the RFID tag at a later date due to a defect, for example, you will always
need the ID of the RFID tag.
Therefore, record the ID of the RFID tag so that it is at hand at all times. For example,
write it on the front of the RFID tag using a permanent marker.
REVIEW ENGLISH
27.07.2010
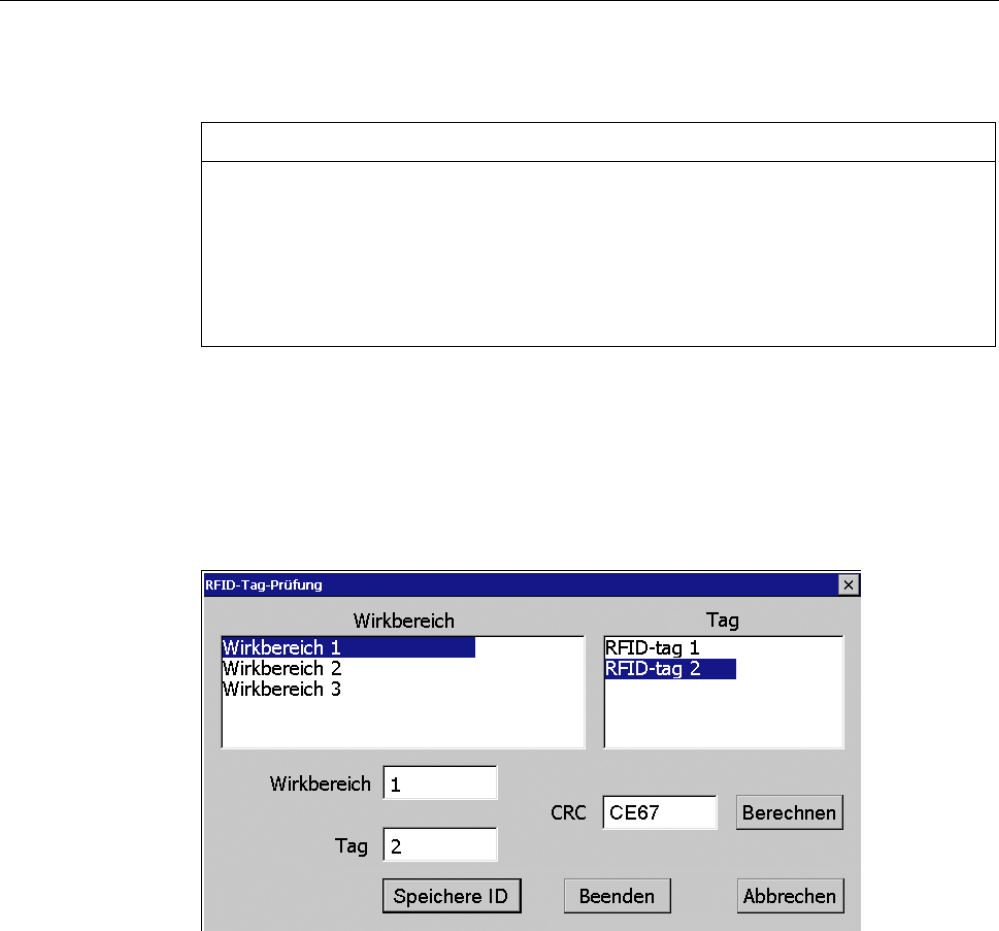
Commissioning a project
8.5 Commissioning an RFID tag
Mobile Panel 277F IWLAN V2, Mobile Panel 277F IWLAN (RFID Tag)
Operating Instructions, 09/2010, A5E02766325-01 239
5. Repeat steps 2 to 4 for all RDIF tags of this effective range.
NOTICE
Only describe RFID-tag once
It is not possible to describe an RFID tag multiple times. No inspection occurs to see if
an RFID tag was already described.
If you accidentally try to describe an RFID multiple times with one ID, then you will not
receive a response from the system and you have to execute the commissioning again.
Make sure that you describe an RFID tag only once with an ID.
When all the RFID tags of an effective range have an ID, the selected effective range has
a check mark in the "Effective range" list.
6. Repeat steps 1 to 5 for all effective ranges.
The "Calculate" button is gray and only becomes black again, and thus enabled, when all
RFID tags have successfully been assigned an ID.
7. Press "Calculate".
The CRC checksum is displayed.
8. Record the checksum or enter it immediately in "Effective ranges (RIFD)" in the
WinCC flexible editor.
9. Click "Exit" to close the dialog.
Result
You have assigned a unique identifier to all RFID tags and determined a checksum.
Transfer the project with the added CRC checksum again to the HMI device. You can log
onto a machine and operate the machine in fail-safe mode.
REVIEW ENGLISH
27.07.2010
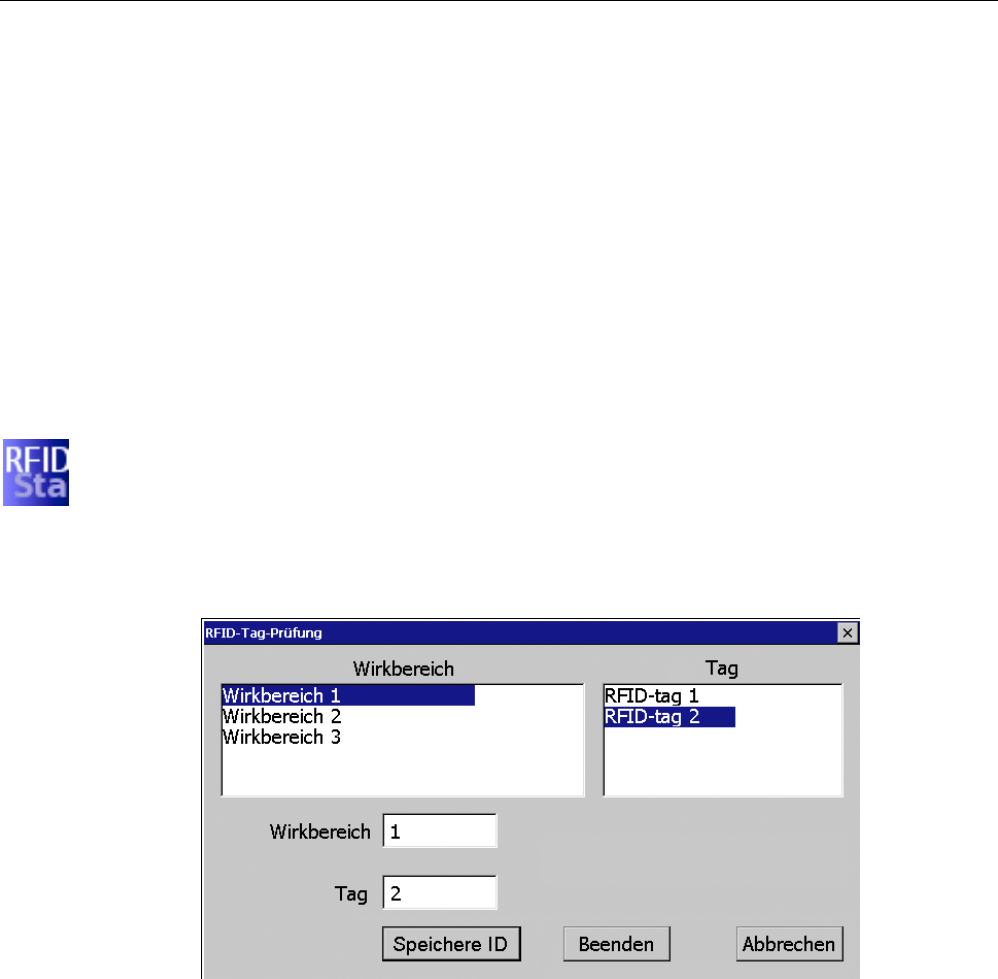
Commissioning a project
8.6 Replacing an RFID tag
Mobile Panel 277F IWLAN V2, Mobile Panel 277F IWLAN (RFID Tag)
240 Operating Instructions, 09/2010, A5E02766325-01
8.6 Replacing an RFID tag
If it is not possible to log onto an effective range, the HMI device or RFID tag may be
defective. This section describes the configuration work carried out after replacement of a
defective RFID tag.
Requirement
● The defective RFID tag has been replaced.
● The ID of the defective RFID tag is available.
● The project, in which the RFID tag has failed, is still on the HMI device.
Procedure
Proceed as follows:
1. Switch on the HMI device.
2. Open the Control Panel.
3. Press the "RFID Config" icon.
The following dialog appears:
4. Select the effective range ID in the "Effective range" selection box and the ID of the
defective RFID tag in the "Tag" selection box.
5. Bring the HMI device into the effective range of the RFID tag.
6. Press "Save ID".
The HMI device transmits the ID to the RFID tag. The new RFID tag has the ID of the
previously used RFID tags.
7. Click "Exit" to close the dialog.
8. Close the Control Panel and start the project.
9. Log the HMI device onto a machine to check the new RFID tag.
– When the logon is successful, you can continue working in the project.
– If logon is not possible close the dialog and repeat steps 2 to 8.
REVIEW ENGLISH
27.07.2010

Mobile Panel 277F IWLAN V2, Mobile Panel 277F IWLAN (RFID Tag)
Operating Instructions, 09/2010, A5E02766325-01 241
Commissioning the plant 9
9.1 Overview
The acceptance of the plant involves the following:
● Safety-related project
● Safety program
● RFID tags with effective ranges
9.2 Acceptance of the plant
All of the relevant application-specific standards and the procedure described in this section
must be observed in the course of final acceptance of the plant.
Note
This section provides a detailed description of the additional tasks required for the fail-safe
operation of the HMI device.
Read the detailed description provided in the "System Acceptance Test" section of the
"S7 Distributed Safety, Configuring and Programming"
(http://support.automation.siemens.com/WW/view/en/22099875) manual when performing
an acceptance procedure for the plant.
The acceptance of the plant involves the following tasks:
● Configure the F-CPU and F-I/O
● Create a safety program
Requirement
● The hardware configuration has been created in HW Config.
● The safety program has been created and generated.
● A backup of the STEP 7 project has been created.
REVIEW ENGLISH
27.07.2010

Commissioning the plant
9.3 Transponder system
Mobile Panel 277F IWLAN V2, Mobile Panel 277F IWLAN (RFID Tag)
242 Operating Instructions, 09/2010, A5E02766325-01
Configuring the F-CPU and F-I/O
● Printing and archiving the hardware configuration.
● Check the following parameters in the hardware configuration:
– Parameters of the F-CPU
– Parameters of the F-I/O
This includes unique PROFIsafe addresses and additional PROFIsafe parameters.
● Save the hardware configuration with the STEP 7 project.
A detailed description is provided in the "Acceptance test for the configuration of the F-CPU
and the F-I/O" section of the "S7 Distributed Safety, Configuring and Programming" manual.
Acceptance of the safety program
● Print and archive the safety program.
● Check the printed copy of the safety program for existence of the criteria specified in the
"S7 Distributed Safety, Configuring and Programming" manual, section "Acceptance of a
safety program."
● Download the entire safety program to the F-CPU.
● Test all functions of the safety program.
A detailed description is provided in the "Acceptance test for the configuration of the F-CPU
and the F-I/O" section of the "S7 Distributed Safety, Configuring and Programming" manual.
9.3 Transponder system
9.3.1 Accepting effective range
For fail-safe operation, the project of the HMI device must precisely match the plant.
For this reason when first starting a project, you must verify all effective ranges with all
transponders. The result of the verification is a CRC checksum that you must enter in the
project. Finally, the verified project must then be transferred back to the HMI device.
Note
Transponders that are exclusively assigned to one zone are not considered in this
verification.
REVIEW ENGLISH
27.07.2010

Commissioning the plant
9.3 Transponder system
Mobile Panel 277F IWLAN V2, Mobile Panel 277F IWLAN (RFID Tag)
Operating Instructions, 09/2010, A5E02766325-01 243
Accepting effective range after changes
If you replace a transponder or change its location or change an effective range in the plant,
the respective project must be adjusted and accepted again.
NOTICE
Repeated acceptance of the plant
The transponder installed in the plant may not be replaced or locally changed without
performing an acceptance procedure.
If a replacement or change is made, the plant needs to once again go through acceptance.
Requirements
● In the project:
– Effective ranges and transponders must be configured in the project.
– The project has been transferred to the HMI device.
● In the plant:
– The transponders must be mounted in the plant in such a manner that the effective
ranges stored in the project are formed.
– Batteries must be inserted in the transponders. The ID must be set on the
transponders that is stored in the project for these transponders.
– The IDs of the effective ranges must be marked in the plant.
– The receipt signal from the WLAN is sufficiently strong.
REVIEW ENGLISH
27.07.2010
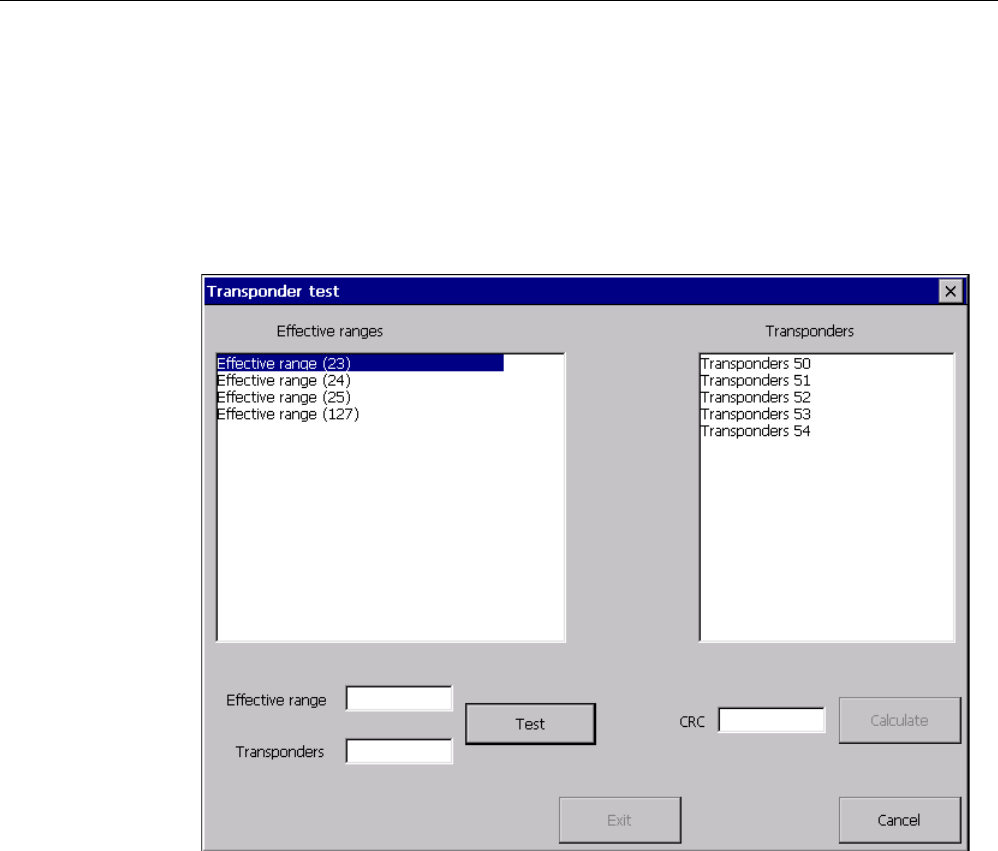
Commissioning the plant
9.3 Transponder system
Mobile Panel 277F IWLAN V2, Mobile Panel 277F IWLAN (RFID Tag)
244 Operating Instructions, 09/2010, A5E02766325-01
Procedure - at HMI device
Proceed as follows:
1. Switch on the HMI device.
The Windows CE desktop with Loader is displayed.
2. Start the project.
The "Transponder test" dialog box opens.
The "effective ranges" list shows the configured effective ranges.
3. In the "Effective ranges" list highlight the first effective range that you want to verify.
In the "Transponder" list, the names of the transponders are displayed that are assigned
to the effective range in the project.
4. Go to the first transponder that you want to verify.
5. Read the ID of the highlighted effective range and enter this ID in the "Effective range"
box.
6. Enter the ID of the transponder where you are located in the "Transponder" box.
7. Verify the entered ID with the "Test" button.
When the HMI device receives the signal of the transponder specified, that transponder is
considered to be checked. The transponder will be marked with a check mark in the list.
8. Repeat steps 4 to 7 for all transponders of this effective range.
If you have successfully checked all transponders of an effective range, that effective
range will be indicated with a check mark in the list.
9. Select the next effective range in the list.
REVIEW ENGLISH
27.07.2010
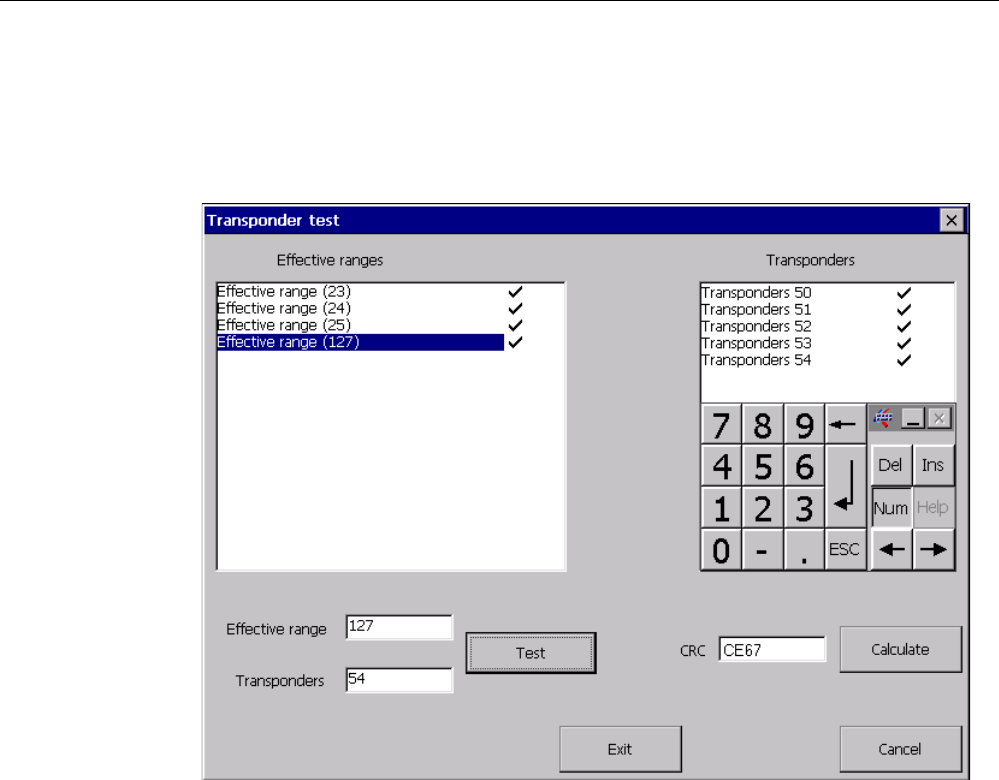
Commissioning the plant
9.3 Transponder system
Mobile Panel 277F IWLAN V2, Mobile Panel 277F IWLAN (RFID Tag)
Operating Instructions, 09/2010, A5E02766325-01 245
10. Repeat steps 4 to 7 for all transponders assigned to this effective range.
11. Verify all other effective ranges.
12. When you have successfully verified all effective ranges, touch the "Calculate" button.
The HMI device calculates the checksum. The checksum is displayed in the "CRC" box.
Procedure - at the configuration computer
Proceed as follows:
1. Open the project in WinCC flexible ES.
2. Enter the checksum in the "Effective ranges" editor.
3. Transfer the amended project to the HMI device again.
Result
You can operate the plant on the HMI device in fail-safe operation.
9.3.2 Test effective range
After successful verification of the effective ranges you must test in the plant whether the
expansion of the configured effective ranges corresponds to the planning. If the operating
elements "Effective range name" and "Effective range quality" are available in the project,
you can check the effective ranges on the HMI device.
In particular, check the following cases:
REVIEW ENGLISH
27.07.2010

Commissioning the plant
9.3 Transponder system
Mobile Panel 277F IWLAN V2, Mobile Panel 277F IWLAN (RFID Tag)
246 Operating Instructions, 09/2010, A5E02766325-01
● Do the limits of the effective range run as planned?
Note particularly that machine operations from excessive distances are not permitted.
● Does the signal light that belongs to the effective range show whether an HMI device is
logged on at the effective range?
● Do the moving parts influence the communication between the transponder - HMI
device?
Investigate all positions of moving parts.
● Is WLAN available throughout the entire effective range?
9.3.3 Testing zones
If zones were configured for a monitored system, test to see if the HMI device recognizes all
zones.
Requirement
● The project is started.
● The transponders have been fitted and the IDs are set
● The operating elements "Zone label" and "Zone quality" are present.
Procedure
Check the following parameters:
● Are the configured zone limits operating as planned?
● Do the moving parts influence the communication between the transponder - HMI
device?
Investigate all positions of moving parts.
● Is WLAN available throughout the entire zone?
REVIEW ENGLISH
27.07.2010
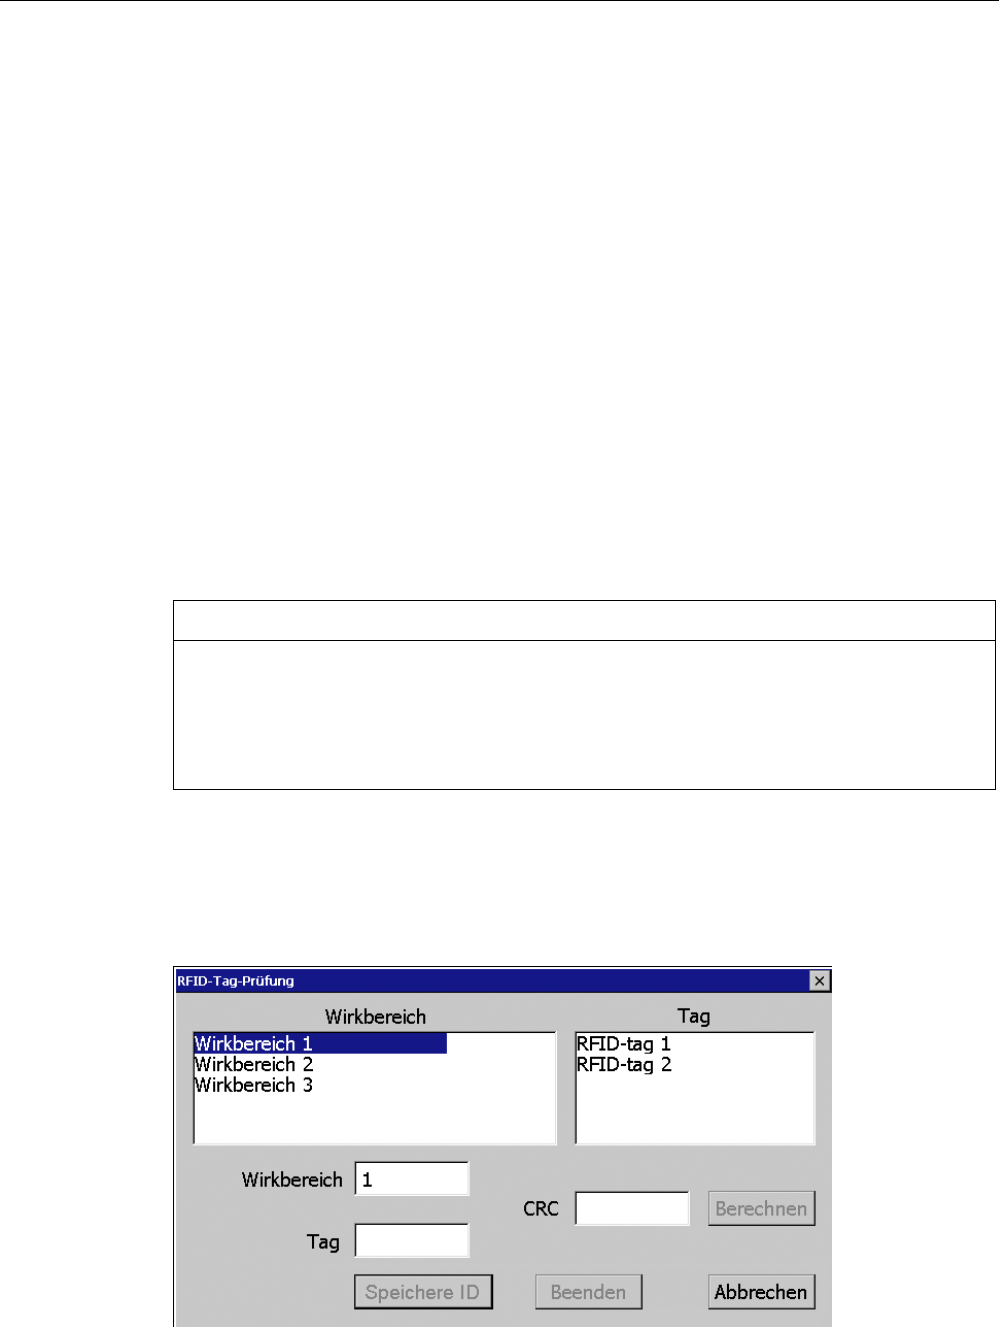
Commissioning the plant
9.4 RFID tag system
Mobile Panel 277F IWLAN V2, Mobile Panel 277F IWLAN (RFID Tag)
Operating Instructions, 09/2010, A5E02766325-01 247
9.4 RFID tag system
9.4.1 Commissioning an RFID tag
Commissioning
If you have transferred a project with configured effective ranges and RFID tags to the HMI
device and start the HMI device for the first time, the HMI device goes into commissioning
mode. In the commissioning mode, you assign a unique ID to each RFID tag in the plant.
Once IDs are assigned to all RFID tags, you can determine the CRC checksum, which must
be entered in the project. Finally, the verified project must then be transferred back to the
HMI device.
Recommissioning
If the mapping between effective ranges and RFID tag changes in the project, you need to
commission the RFID tags again.
NOTICE
Repeated acceptance of the plant
The RFID tags installed in the plant may not be replaced or locally changed without
performing an acceptance procedure.
If a replacement or change is made, the plant needs to once again go through acceptance,
as described in the section "Acceptance of the plant (Page 241)".
Requirement
A project with configured effective ranges and RFID tags has been transferred to the HMI
device. The project starts immediately after transfer. The following dialog is displayed.
REVIEW ENGLISH
27.07.2010

Commissioning the plant
9.4 RFID tag system
Mobile Panel 277F IWLAN V2, Mobile Panel 277F IWLAN (RFID Tag)
248 Operating Instructions, 09/2010, A5E02766325-01
The dialog shows the configured effective ranges and RFID tags with their assigned IDs in
the project.
Procedure
To recommission the RFID tags, proceed as follows:
1. Select an effective range in the "Effective range" list.
The "Tag" list shows the RFID tags that are assigned to this effective range in the WinCC
flexible project. The "Effective range" box shows the configured ID of the selected
effective range.
2. In the "Tag" list, select the RFID tag to which you want to assign an ID.
The "Tag" box shows the configured ID of the selected RFID tag.
3. Bring the HMI device into the immediate proximity of the RFID tag, in other words, into
the effective range of the RFID tag to which you want to assign the ID shown in the "Tag"
box.
4. Press "Save ID".
The ID is sent to the RFID tag and stored there. A check mark is set in the "Tag" list, if the
configured tag ID is successfully written to the RFID tag.
NOTICE
Recording the ID of the RFID tag
If you replace the RFID tag at a later date due to a defect, for example, you will always
need the ID of the RFID tag.
Therefore, record the ID of the RFID tag so that it is at hand at all times. For example,
write it on the front of the RFID tag using a permanent marker.
5. Repeat steps 2 to 4 for all RDIF tags of this effective range.
NOTICE
Only describe RFID-tag once
It is not possible to describe an RFID tag multiple times. No inspection occurs to see if
an RFID tag was already described.
If you accidentally try to describe an RFID multiple times with one ID, then you will not
receive a response from the system and you have to execute the commissioning again.
Make sure that you describe an RFID tag only once with an ID.
When all the RFID tags of an effective range have an ID, the selected effective range has
a check mark in the "Effective range" list.
6. Repeat steps 1 to 5 for all effective ranges.
The "Calculate" button is gray and only becomes black again, and thus enabled, when all
RFID tags have successfully been assigned an ID.
REVIEW ENGLISH
27.07.2010
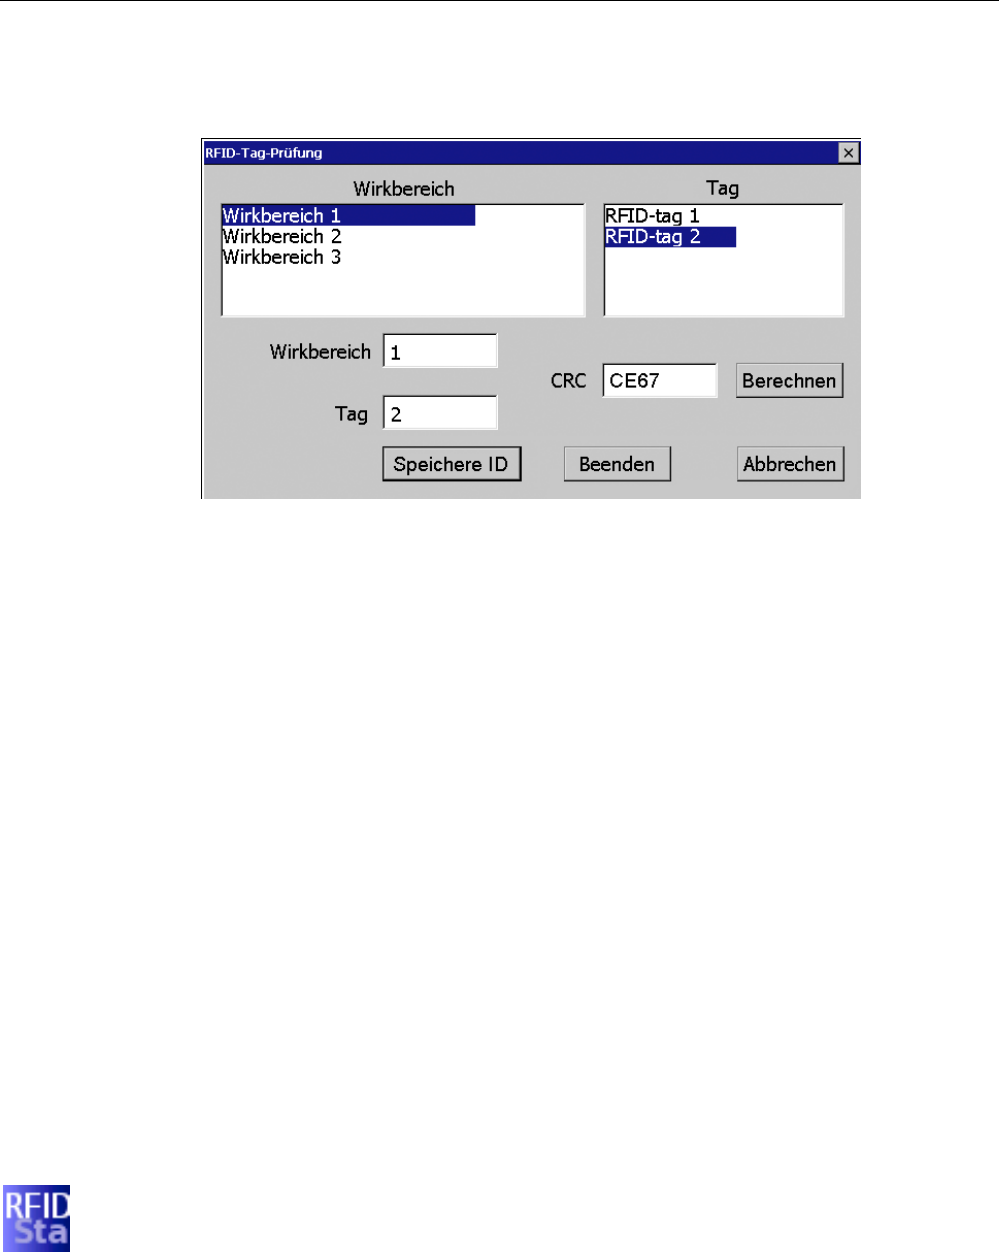
Commissioning the plant
9.4 RFID tag system
Mobile Panel 277F IWLAN V2, Mobile Panel 277F IWLAN (RFID Tag)
Operating Instructions, 09/2010, A5E02766325-01 249
7. Press "Calculate".
The CRC checksum is displayed.
8. Record the checksum or enter it immediately in "Effective ranges (RIFD)" in the
WinCC flexible editor.
9. Click "Exit" to close the dialog.
Result
You have assigned a unique identifier to all RFID tags and determined a checksum.
Transfer the project with the added CRC checksum again to the HMI device. You can log
onto a machine and operate the machine in fail-safe mode.
9.4.2 Replacing an RFID tag
If it is not possible to log onto an effective range, the HMI device or RFID tag may be
defective. This section describes the configuration work carried out after replacement of a
defective RFID tag.
Requirement
● The defective RFID tag has been replaced.
● The ID of the defective RFID tag is available.
● The project, in which the RFID tag has failed, is still on the HMI device.
Procedure
Proceed as follows:
1. Switch on the HMI device.
2. Open the Control Panel.
REVIEW ENGLISH
27.07.2010