Sierra Wireless AC710 PCS GSM Wireless Network Card User Manual Part 1 of 2
Sierra Wireless Inc. PCS GSM Wireless Network Card Users Manual Part 1 of 2
Contents
- 1. Users Manual Part 1 of 2
- 2. Users Manual Part 2 of 2
Users Manual Part 1 of 2
2130135
Rev B
PRE-DRAFT 15/10/01
AirCard® 710
Wireless Network Card
User Guide
Preface
Rev. B Oct. 2001 3
Note: Some airlines may permit the
use of cellular phones while the
aircraft is on the ground and the door
is open. Sierra Wireless network
cards may be used at this time.
AirCard 710 Wireless Network Card - User Guide
42130135
Sales Desk: phone: 1-604-232-1488
hours: 8:00am to 5:00pm Pacific Time
e-mail: sales@sierrawireless.com
Technical Support: phone: 1-604-231-1128
hours: 6:00am to 5:00pm Pacific Time
e-mail: support@sierrawireless.com
address: Sierra Wireless, Inc.
13811 Wireless Way
Richmond, BC
Canada V6V 3A4
fax: 1-604-231-1109
web: www.sierrawireless.com
Rev B Oct. 2001 5
Table of Contents
AirCard 710 Wireless Network Card - User Guide
62130135
Contents
Rev B Oct. 2001 7

AirCard 710 Wireless Network Card - User Guide
82130135
Rev B Oct. 2001 1
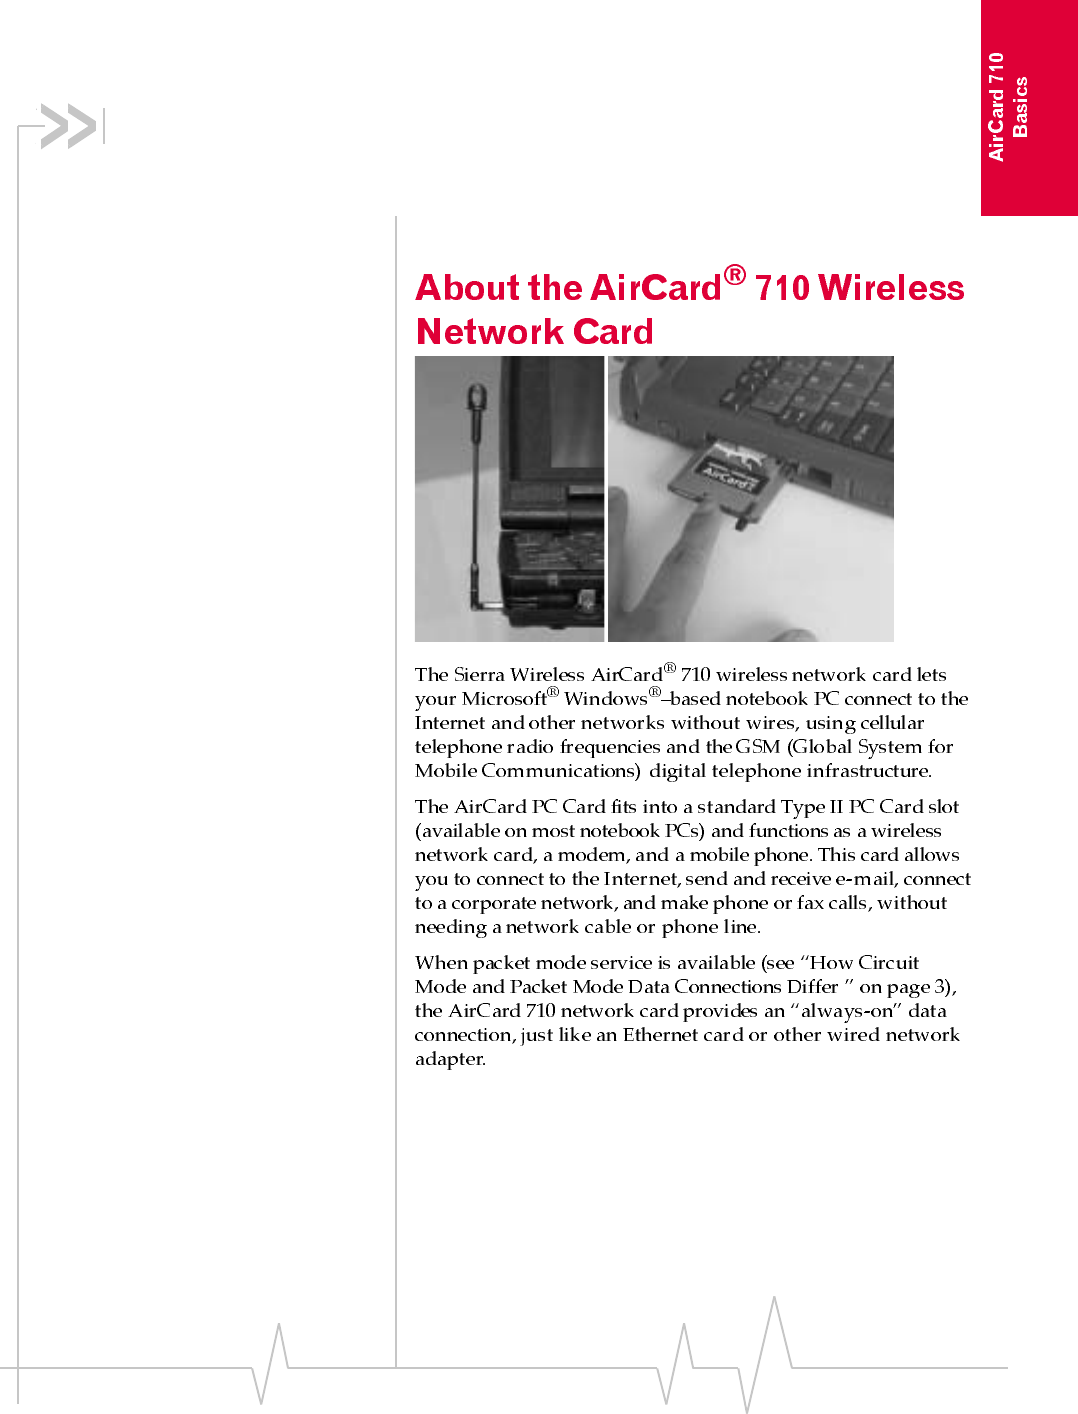
1: Introducing the AirCard® 710
Wireless Network Card
• About the AirCard®
710 Wireless Network
Card
• A Network Card, a
Modem, and a Phone
• Package Contents
• How To Use This
Guide
AirCard 710 Wireless Network Card - User Guide
22130135
Note: Do not insert the AirCard
710 wireless network card into a
PC Card slot until after you have
installed the software from the
AirCard 710 CD-ROM.
Note: If you have more than one
type of supported computer, you
can move the AirCard 710
network card from one notebook
PC to another at any time—as
long as you have installed the
proper software and drivers on
each computer.
Note: Every GSM network worldwide operates on one of three radio
frequency bands. The AirCard 710 network card operates only in the
1900 MHz PCS band used in North America. Sierra Wireless also
manufactures the AirCard 750 wireless network card, which supports
all three bands and works anywhere worldwide with GSM coverage.
Introduction
Rev B Oct. 2001 3
Note: More information about
GSM networks is available on
the GSM Development Group
web site, www.cdg.org.
AirCard 710 Wireless Network Card - User Guide
42130135
Introduction
Rev B Oct. 2001 5
AirCard 710 Wireless Network Card - User Guide
62130135
Rev B Oct. 2001 7
2: Getting Started
• The AirCard® 710
Software
• Account Activation and
Configuration
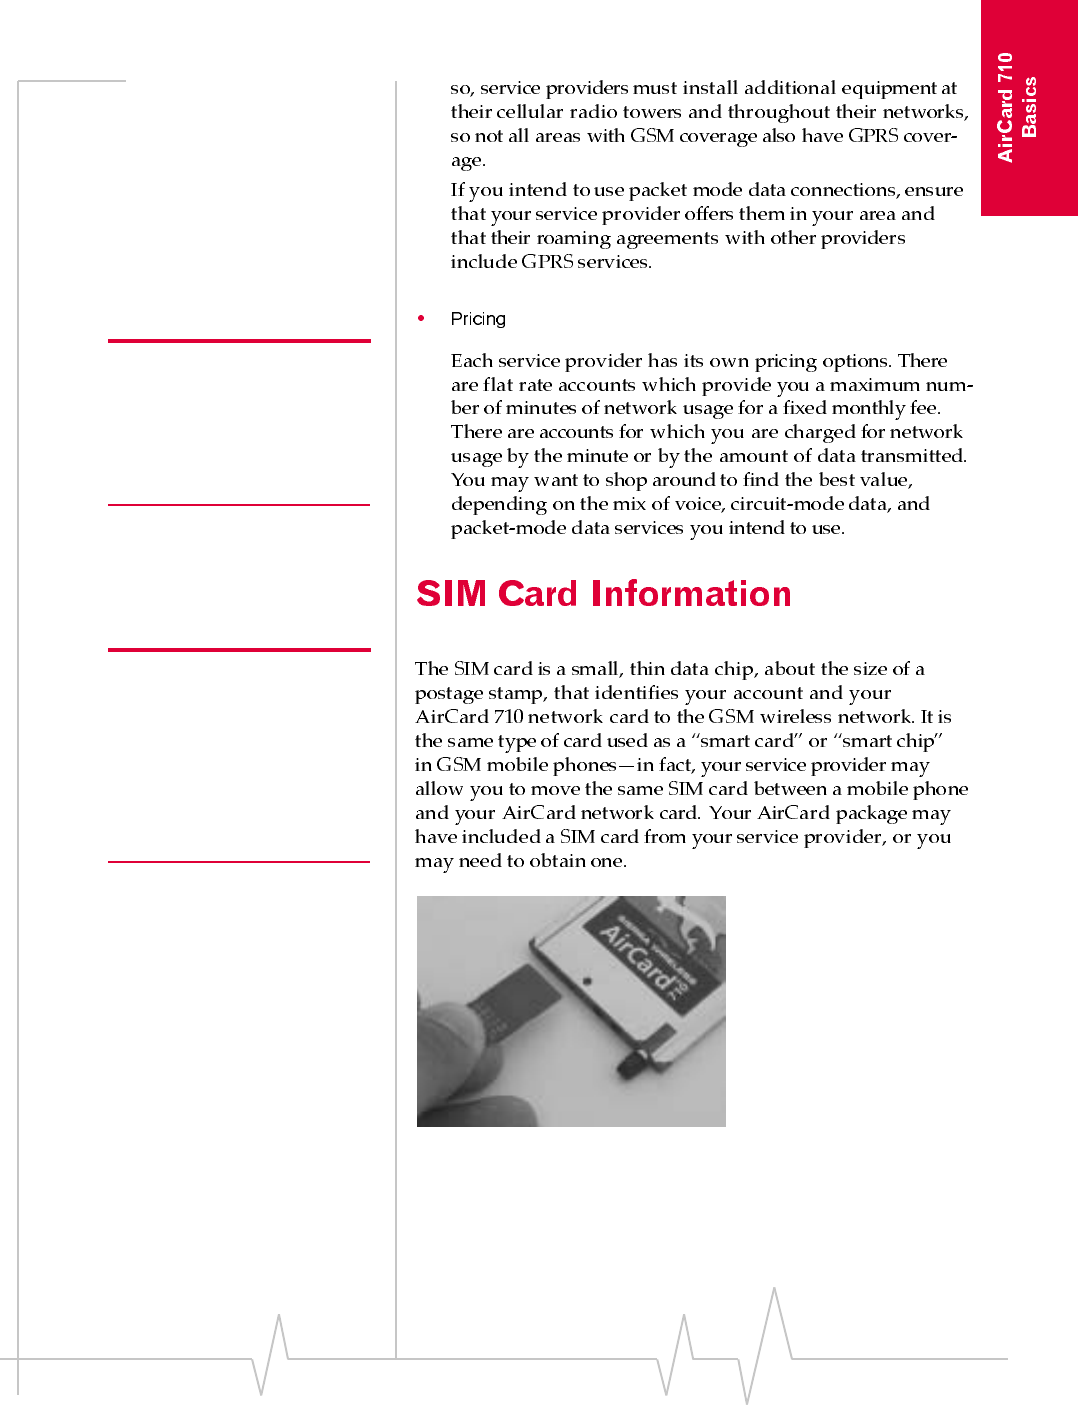
• SIM Card Information
• Care and Maintenance
of Your AirCard 710
Wireless Network Card
Note: You must run Watcher
anytime you use the
AirCard 710 network card.
Note: Install the AirCard
software from the CD before
inserting the AirCard PC Card
into your computer, using the
instructions in the installation
chapter appropriate for your
computer and operating system.
AirCard 710 Wireless Network Card - User Guide
82130135
Note: Most service providers
have coverage maps on their
web sites, and their retailers
usually have printed coverage
maps available.
Getting Started
Rev B Oct. 2001 9
Note: The fee for service is
usually higher when you are
roaming (connecting to a
network other than the one
belonging to your service
provider).
Note: If you change GSM
service providers at any time
(such as if you move to a new
city), you will need a new SIM
card from your new service
provider, and you must
reactivate your AirCard 710
network card in the new location.
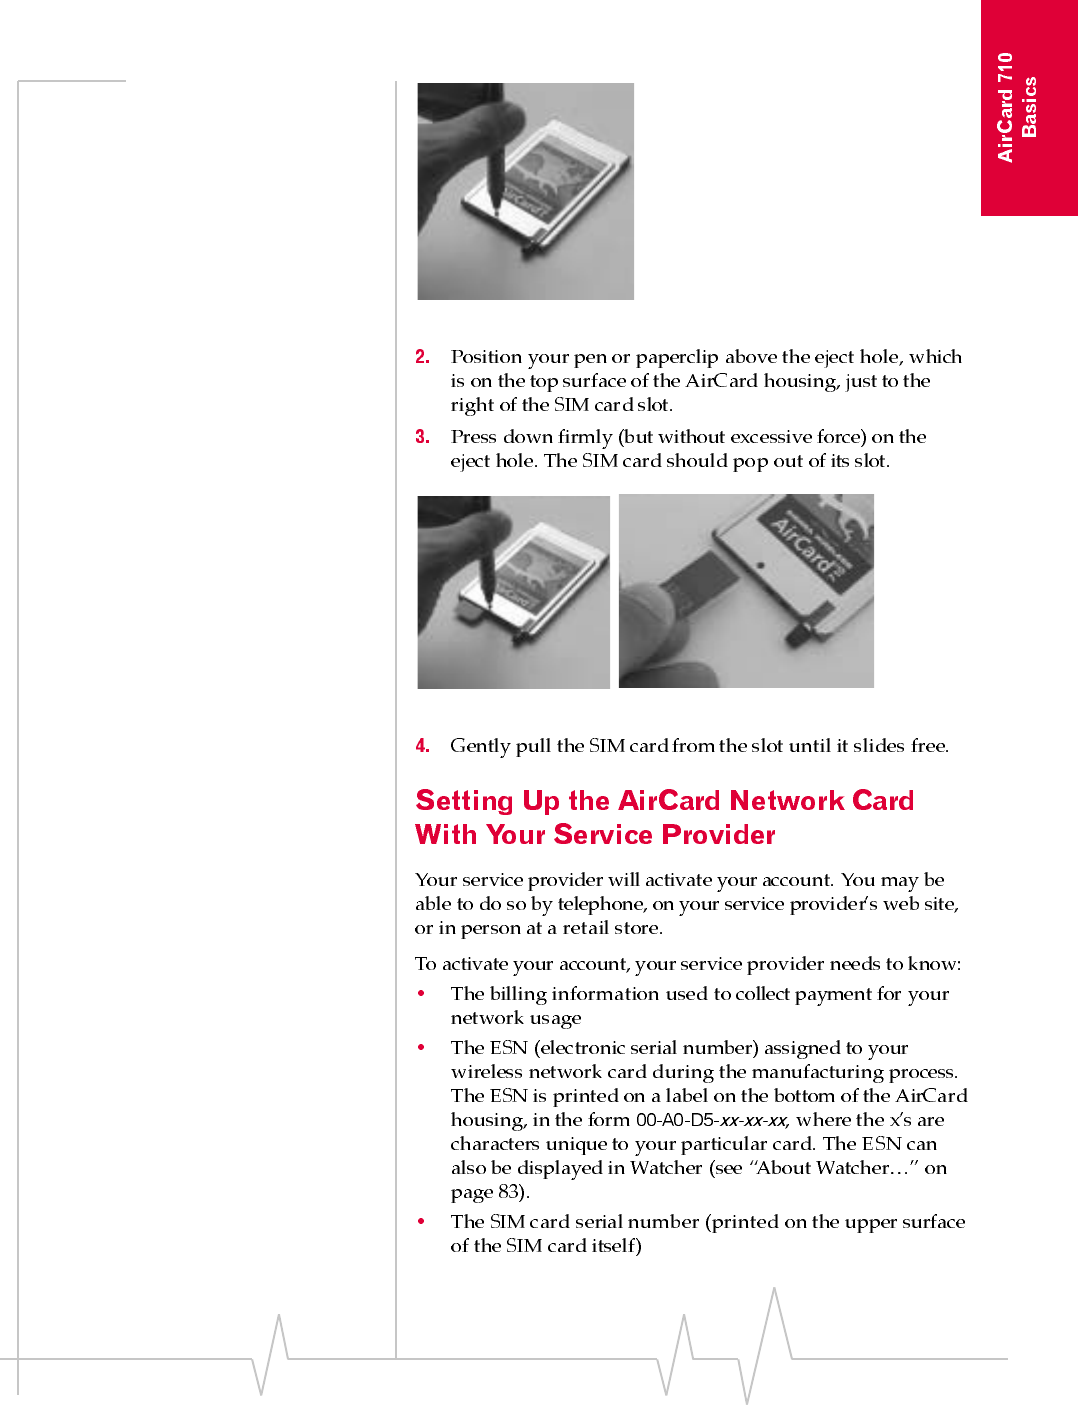
Figure 2-1: A SIM Card (Left)
AirCard 710 Wireless Network Card - User Guide
10 2130135
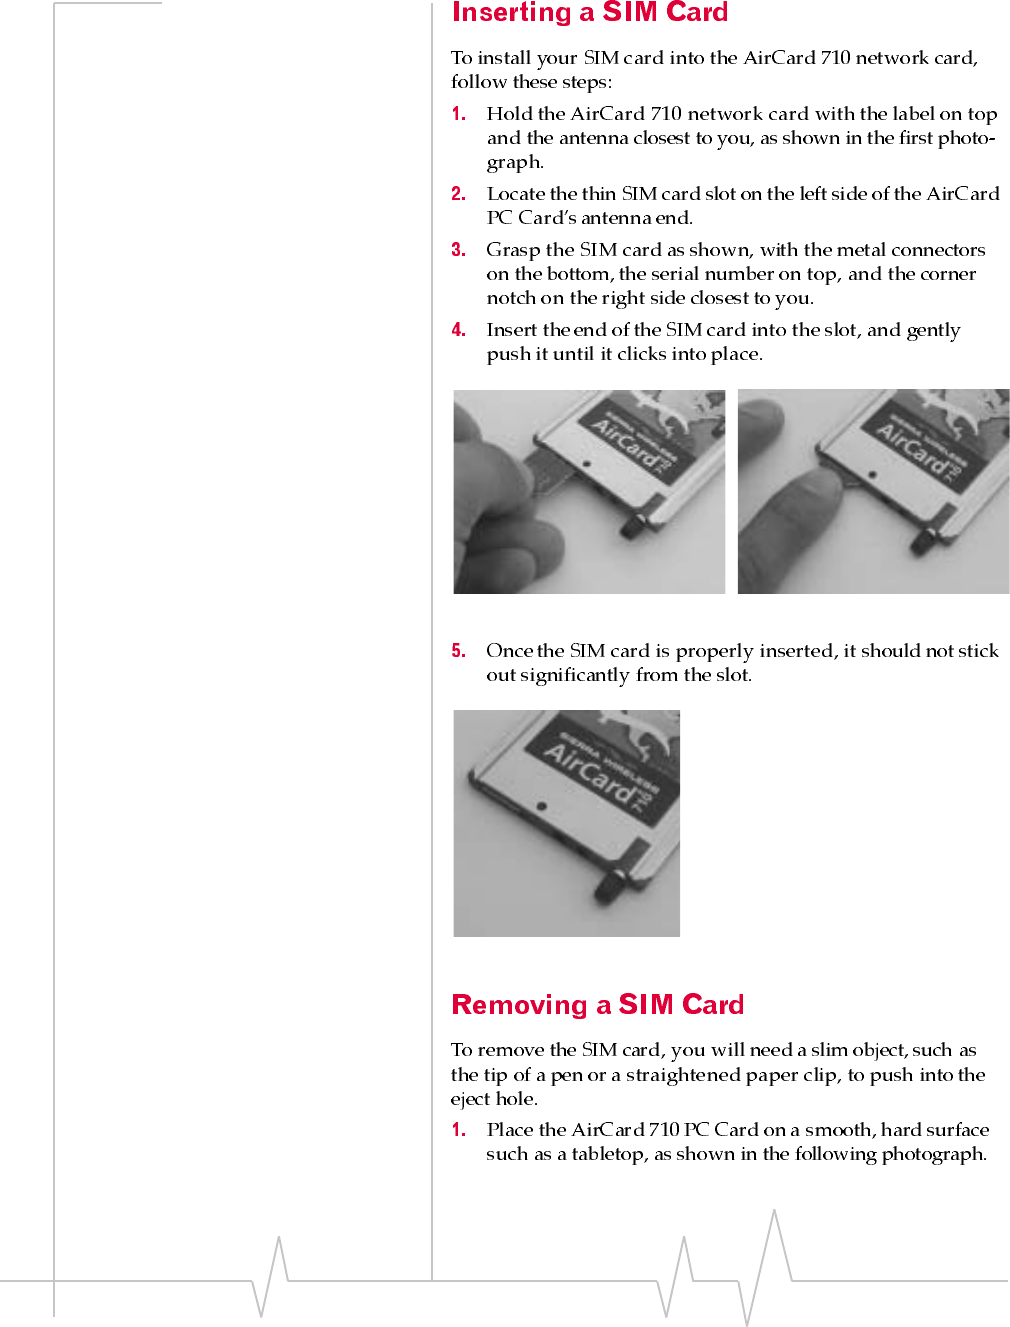
Figure 2-2: Inserting the SIM Card Into the AirCard 710 SIM Card Slot
Figure 2-3: A Properly Inserted SIM Card
Getting Started
Rev B Oct. 2001 11
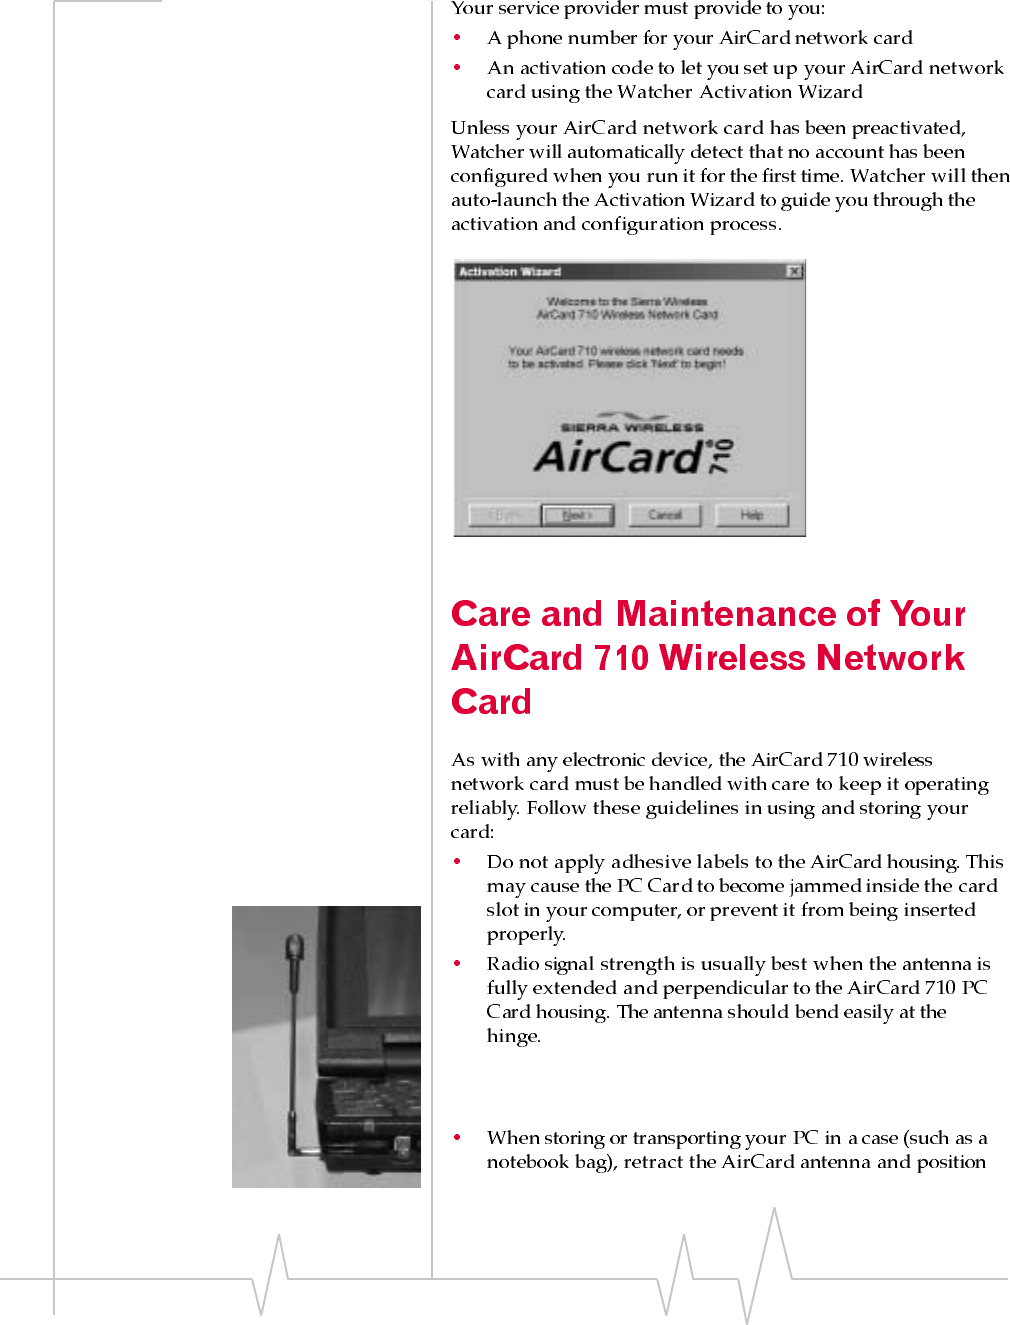
Figure 2-4: Positioning a Pen to Eject the SIM Card
Figure 2-5: Ejecting and Removing the SIM Card
AirCard 710 Wireless Network Card - User Guide
12 2130135
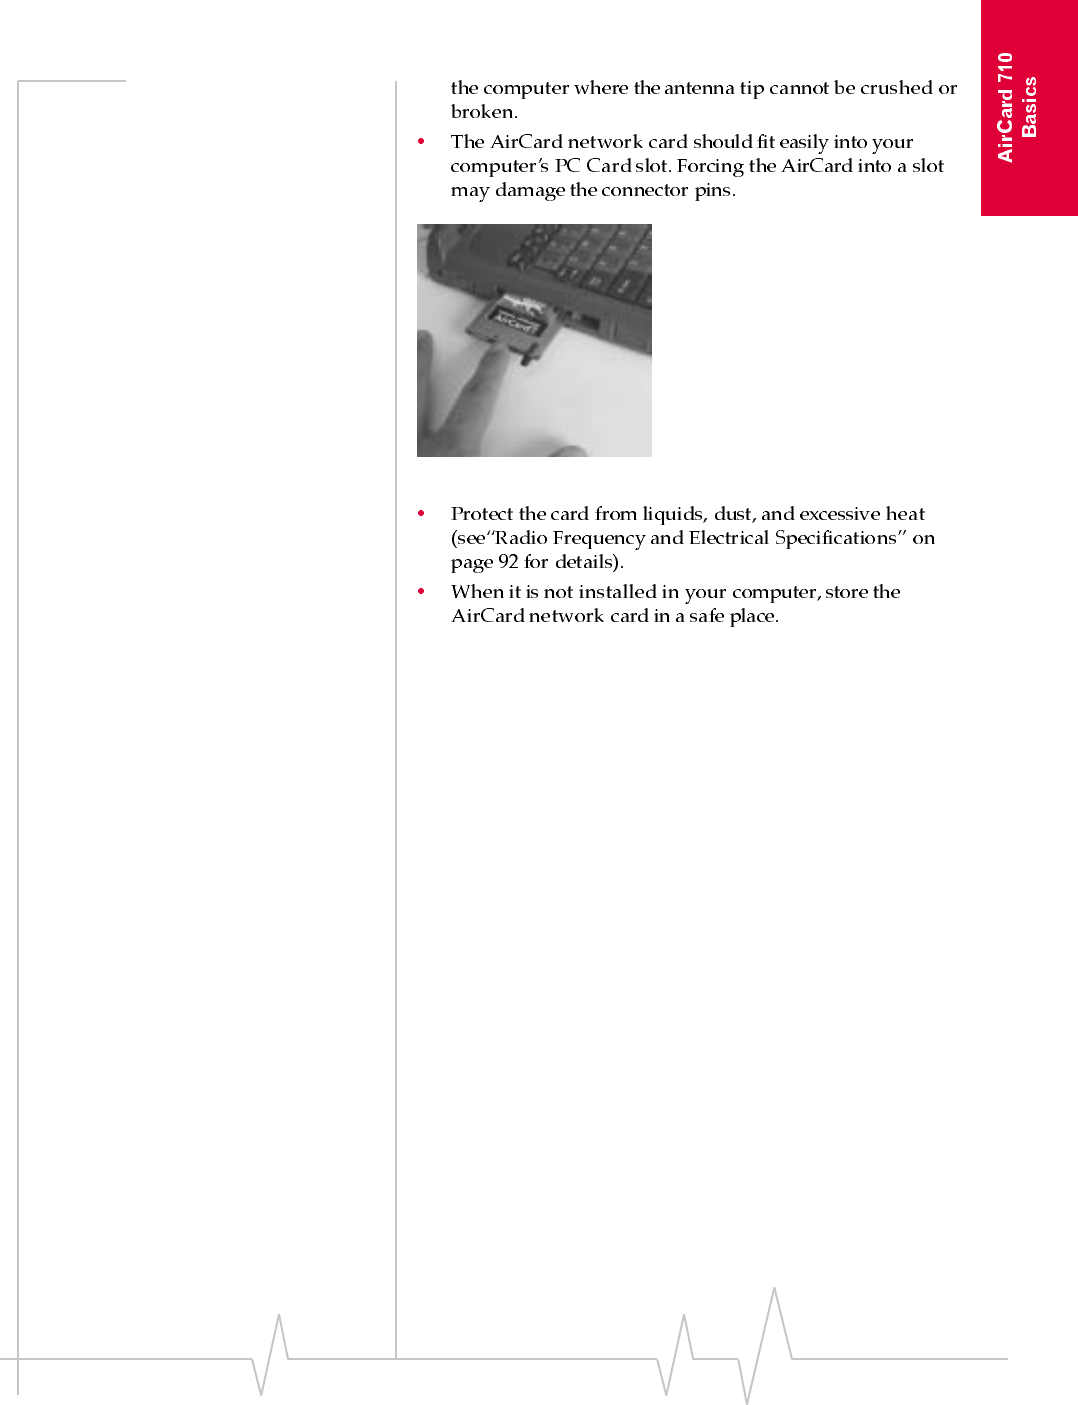
Figure 2-6: The First Screen of the Activation Wizard
Figure 2-7: (Left) Proper Positioning of the AirCard 710 Antenna
Getting Started
Rev B Oct. 2001 13
Figure 2-8: Inserting the AirCard 710 Wireless Network Card

AirCard 710 Wireless Network Card - User Guide
14 2130135
Rev B Oct. 2001 15
3: Installation on Notebook PCs
• Notebook PC System
Requirements
• Software Installation
• Driver Installation
• Account Configuration
• Account Configuration
Note: You must install the
software before inserting the
AirCard network card into your
computer, by following the
detailed software and driver
installation instructions in this
chapter.
1. Non-Intel–compatible processors such as the Compaq Alpha
are not supported, even if they run a supported operating sys-
tem such as Windows NT.
AirCard 710 Wireless Network Card - User Guide
16 2130135
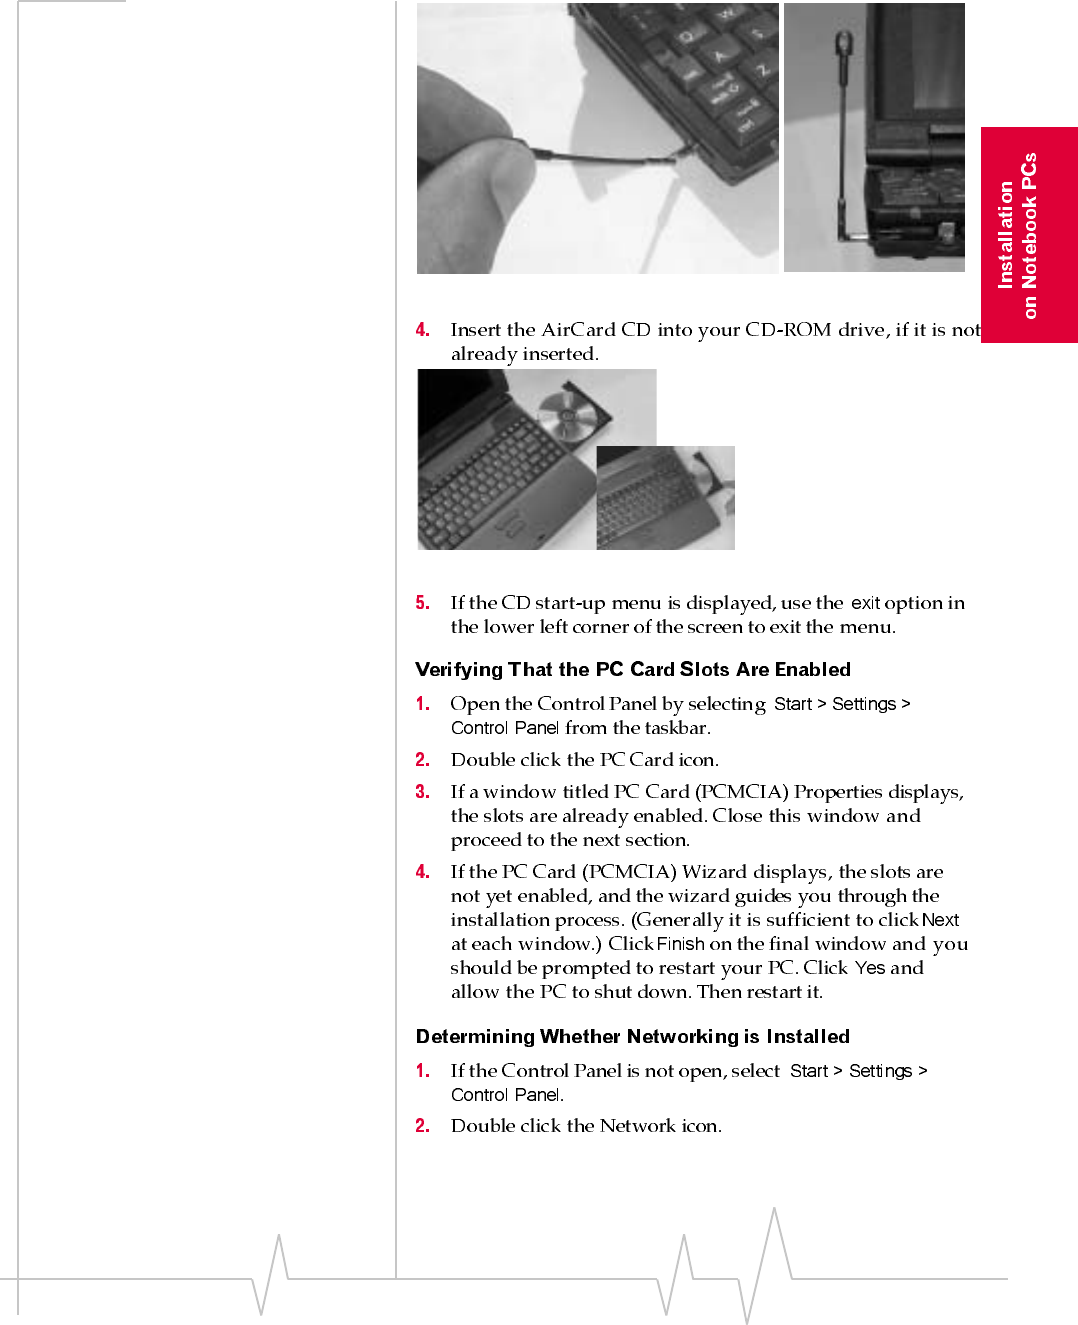
Figure 3-1: Inserting the AirCard 710 CD to Install the Software
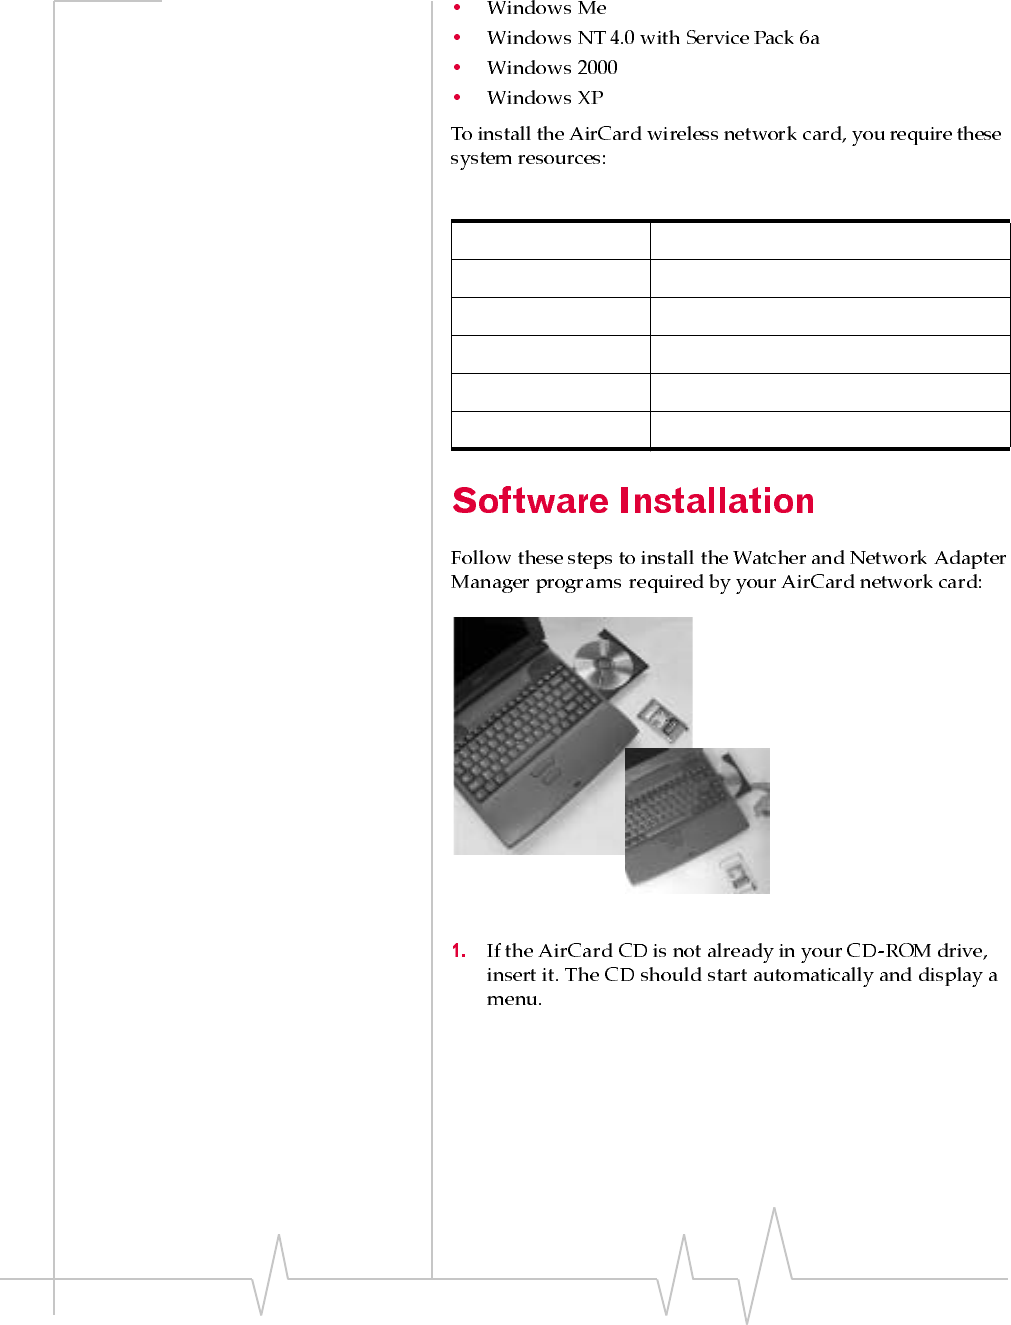
Table 3-1 :System Resource Requirements
Card Slots 1 Type II PCMCIA (PC Card) Slot
Communications Ports 1 Available
Disk Drive CD-ROM
I/O Resources 1 IRQ, 40 bytes I/O Space
Memory 32 MB
Disk Space 7 MB
Install - Notebook PCs
Rev B Oct. 2001 17
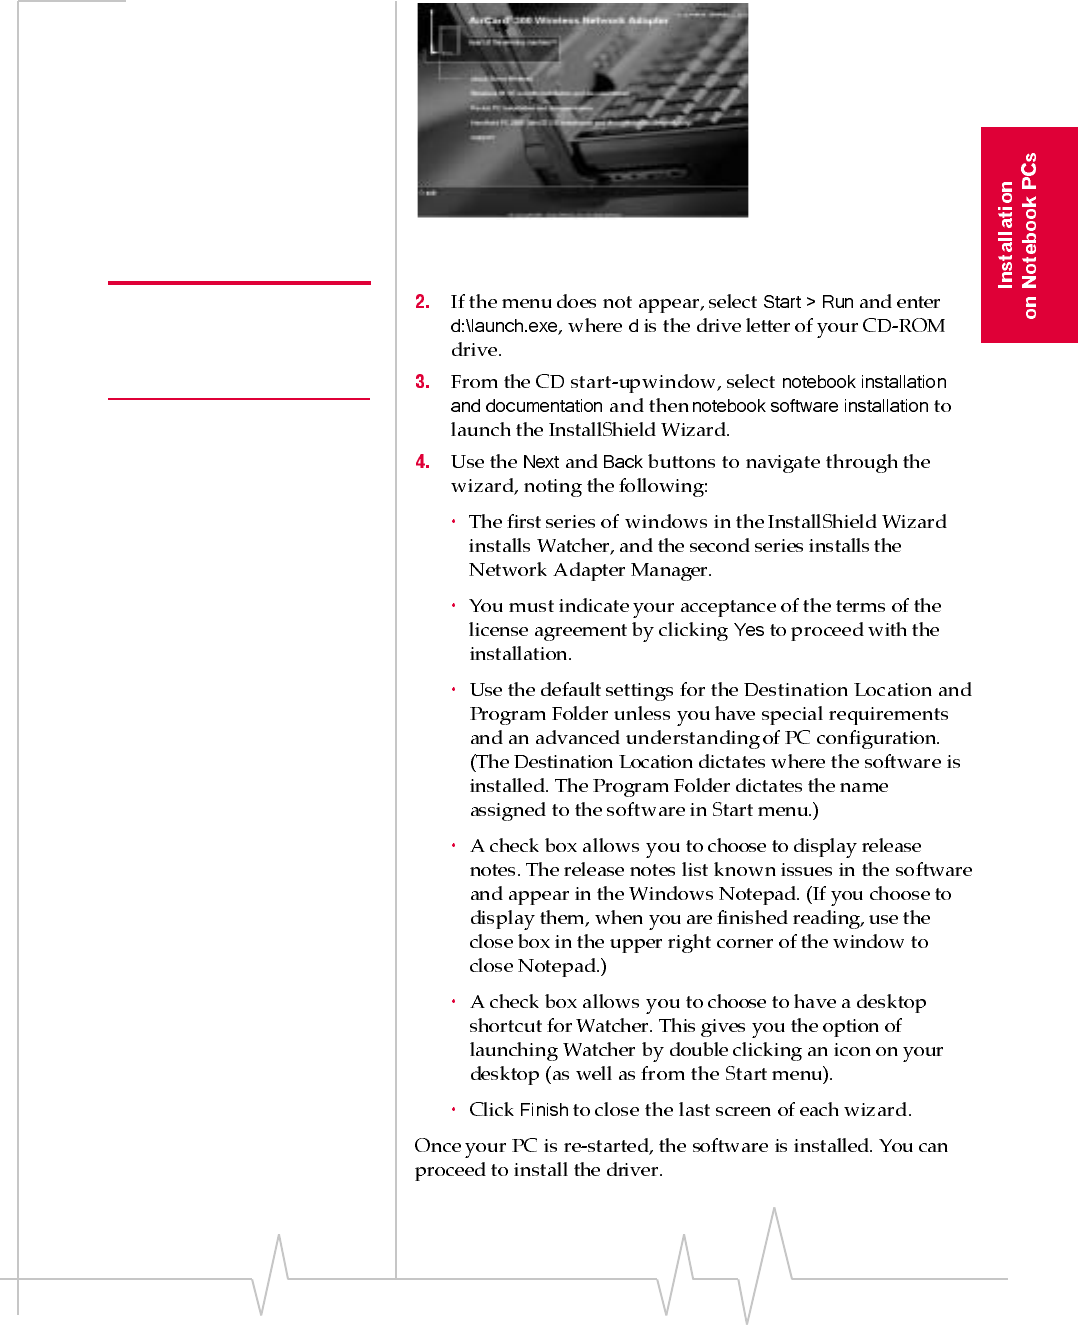
Figure 3-2: The AirCard 710 Installation Menu
Note: Users of Windows 2000,
NT, and XP must be logged in
with administrative privileges to
install the AirCard software.
AirCard 710 Wireless Network Card - User Guide
18 2130135
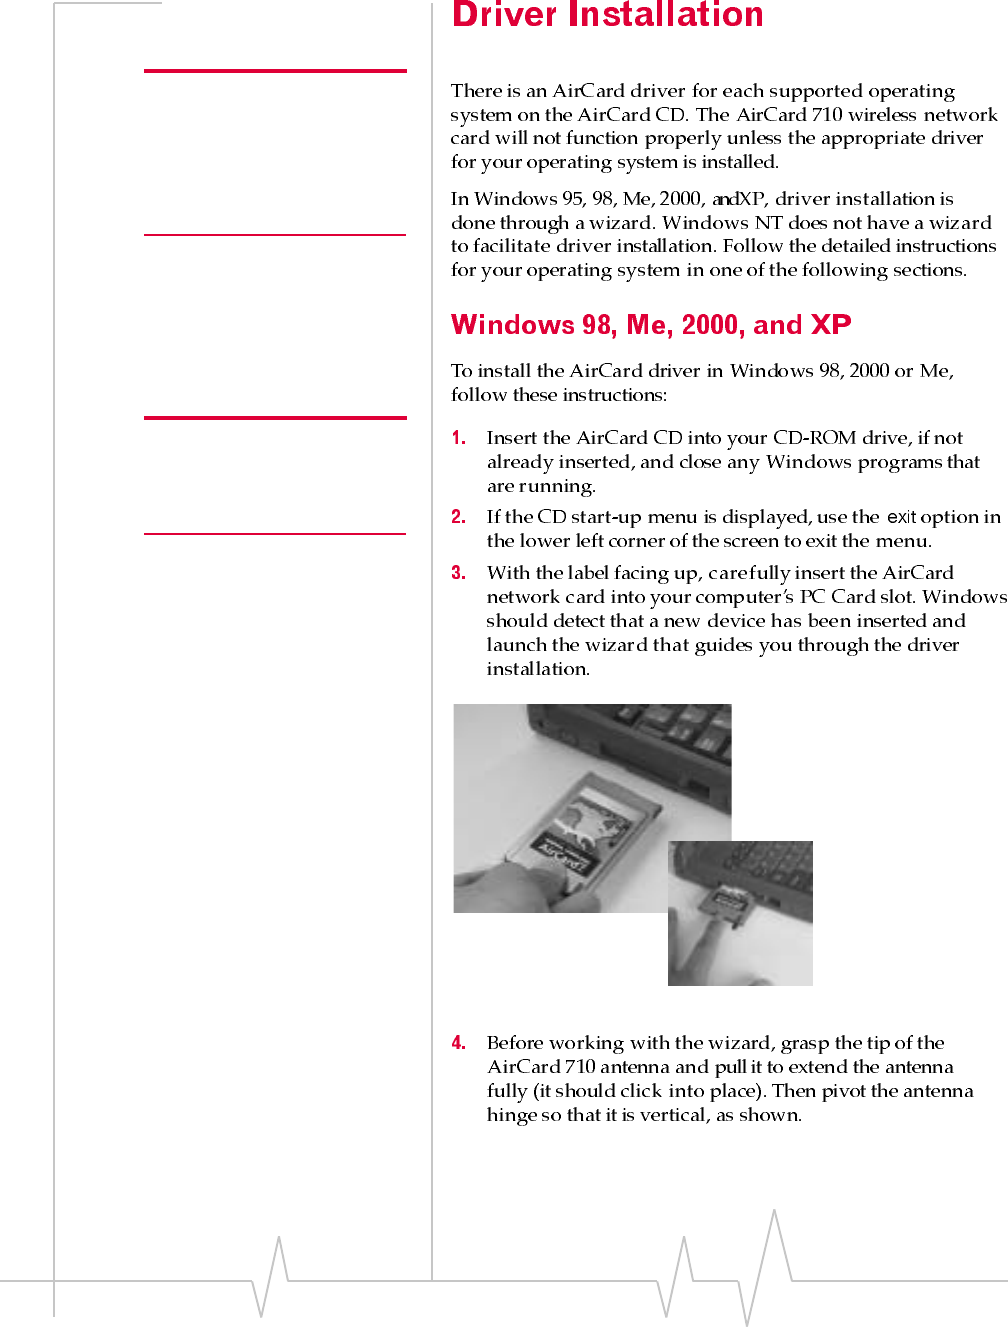
Note: A driver is software that
forms the interface between a
device (such as the AirCard 710
network card) and the operating
system on your PC (such as
Windows 98).
Note: Do not forcefully insert the
AirCard network card into your
computer, or you may damage
the connector pins.
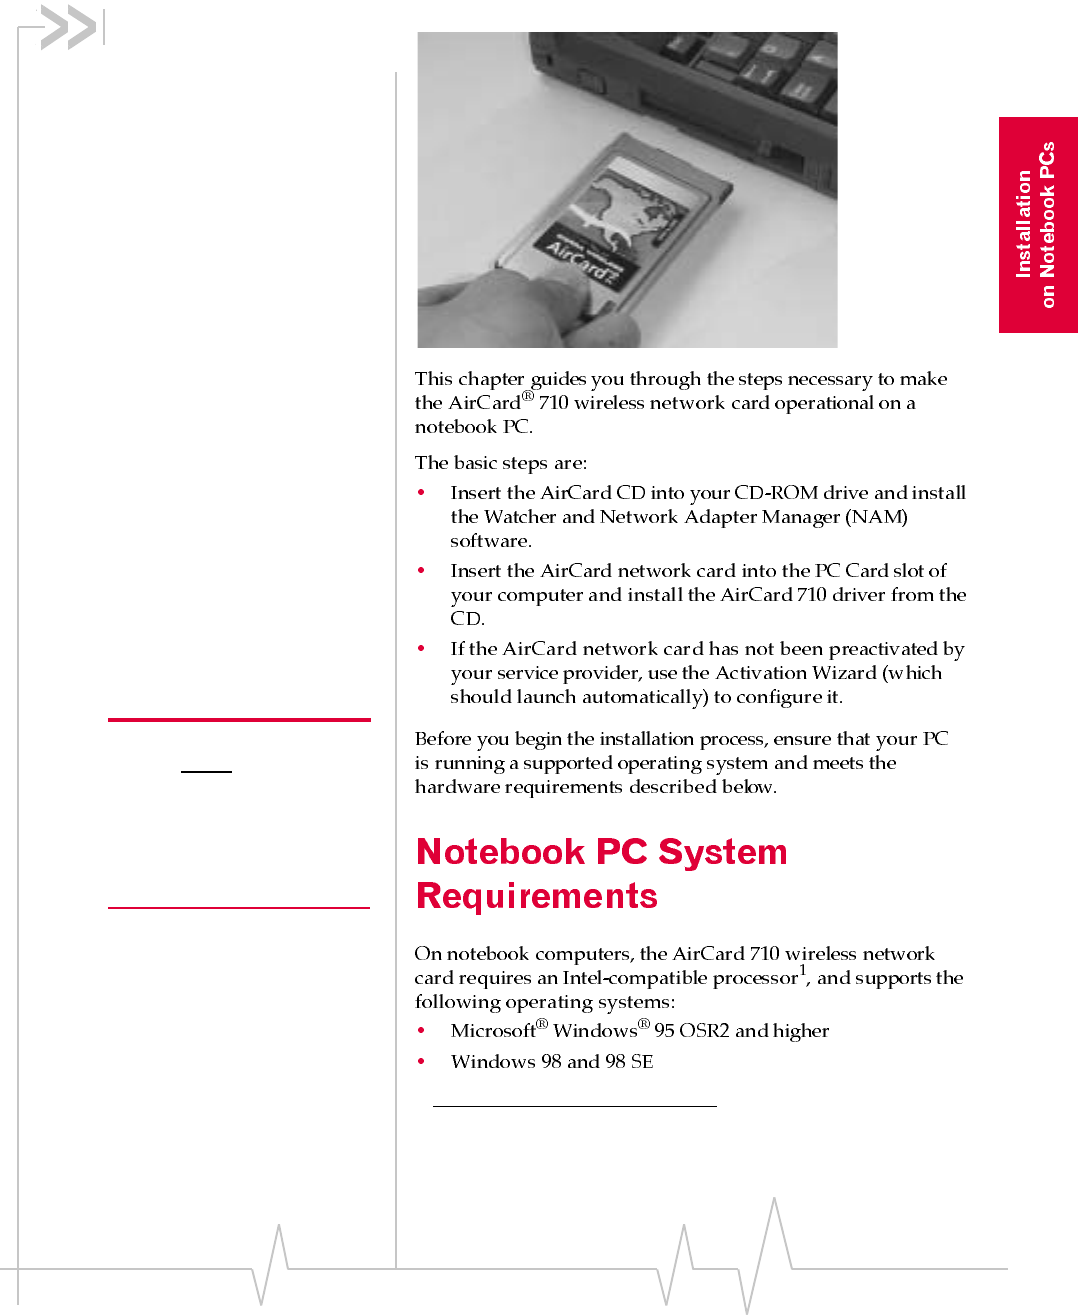
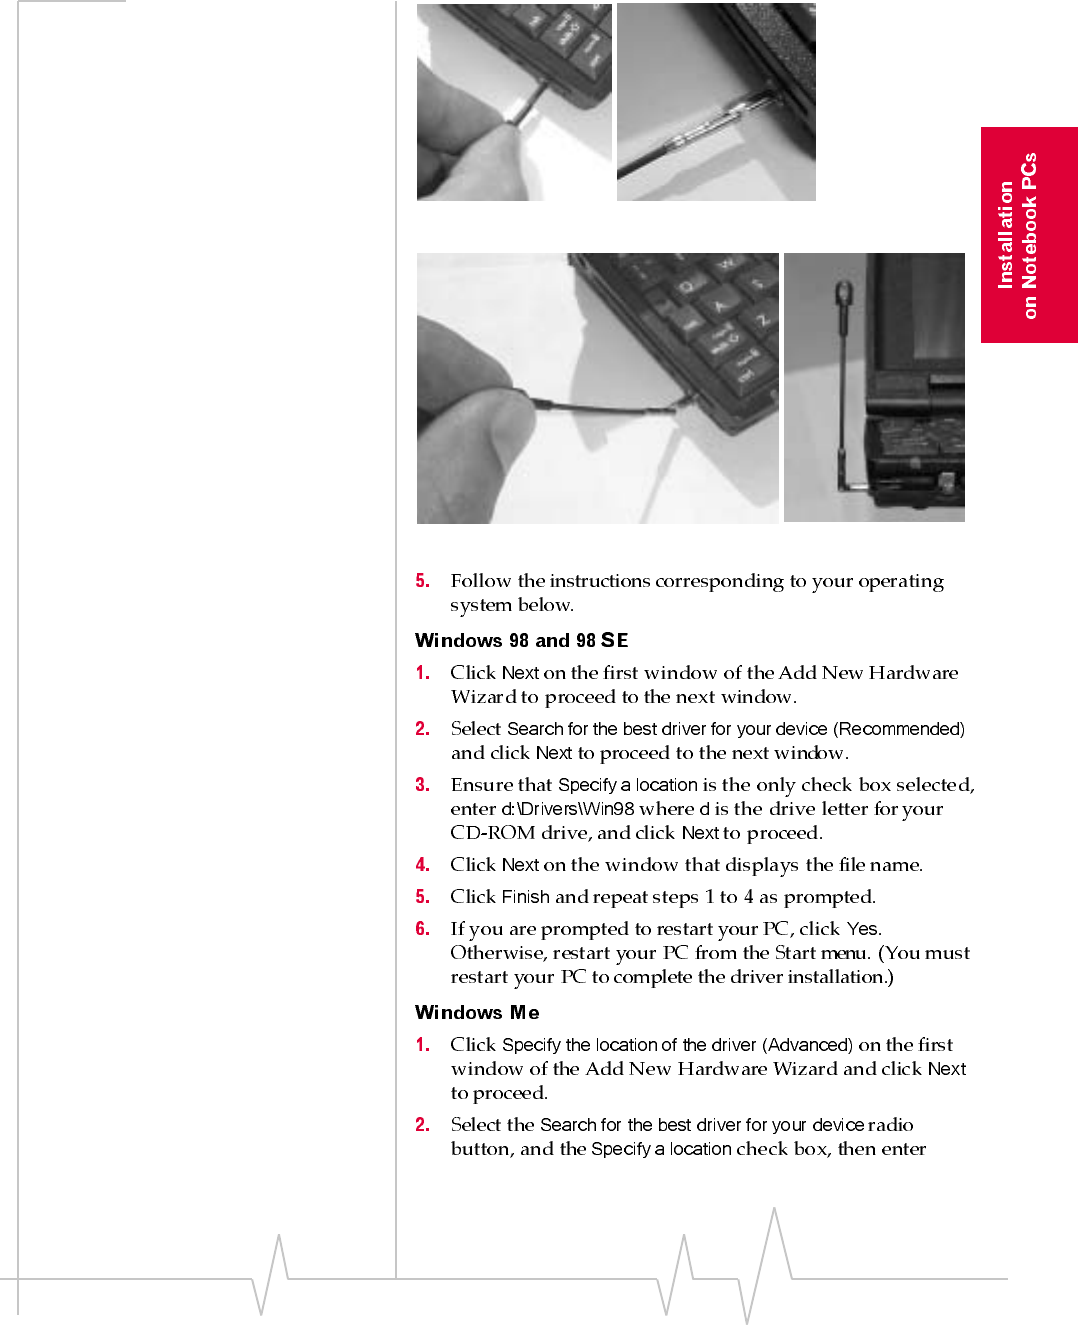
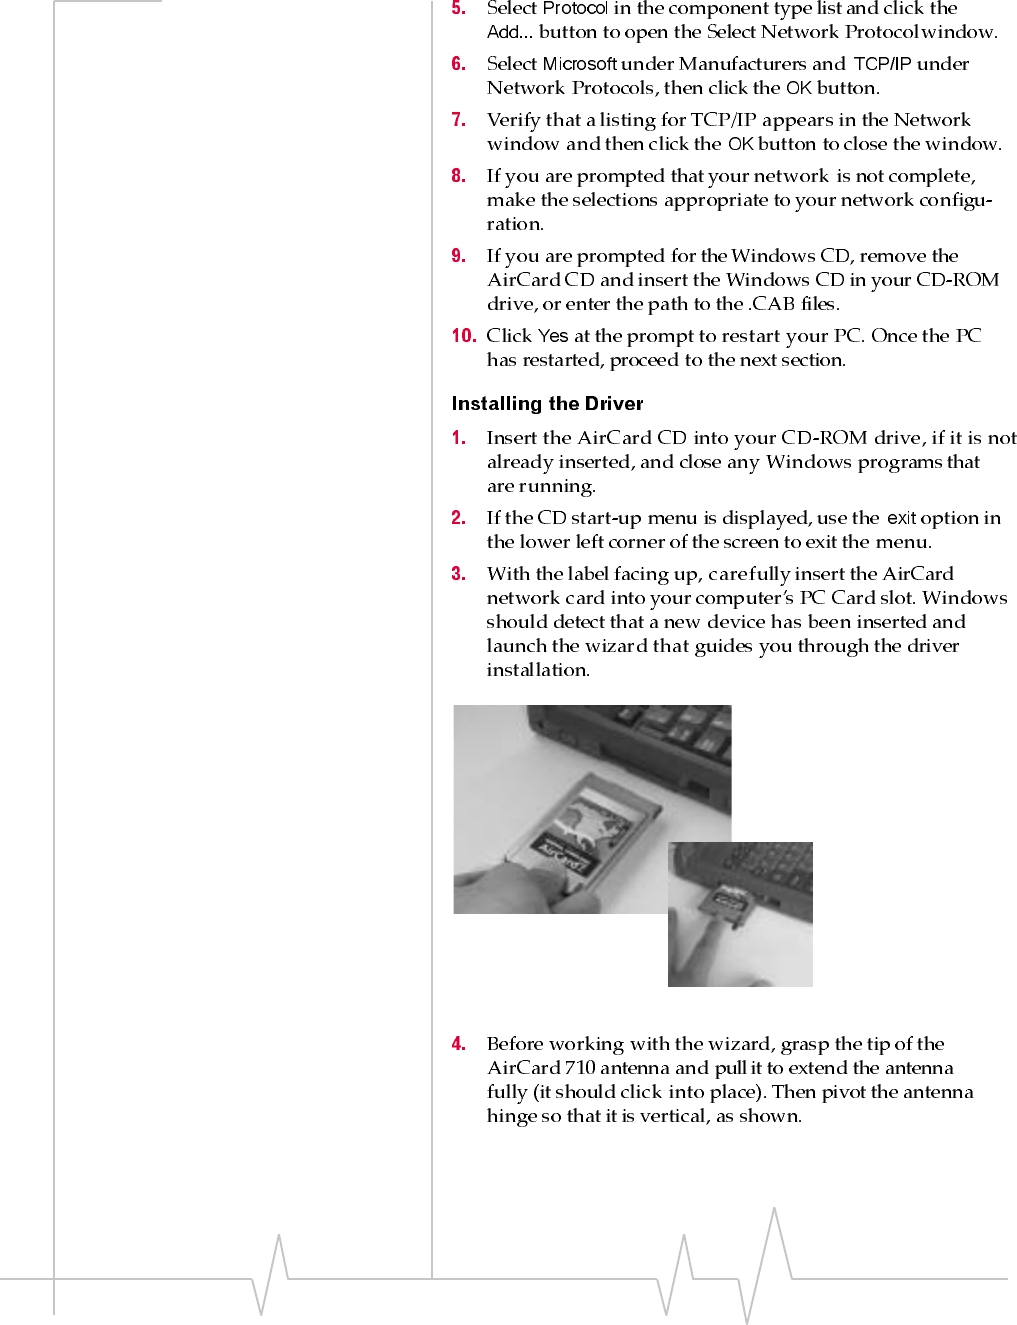
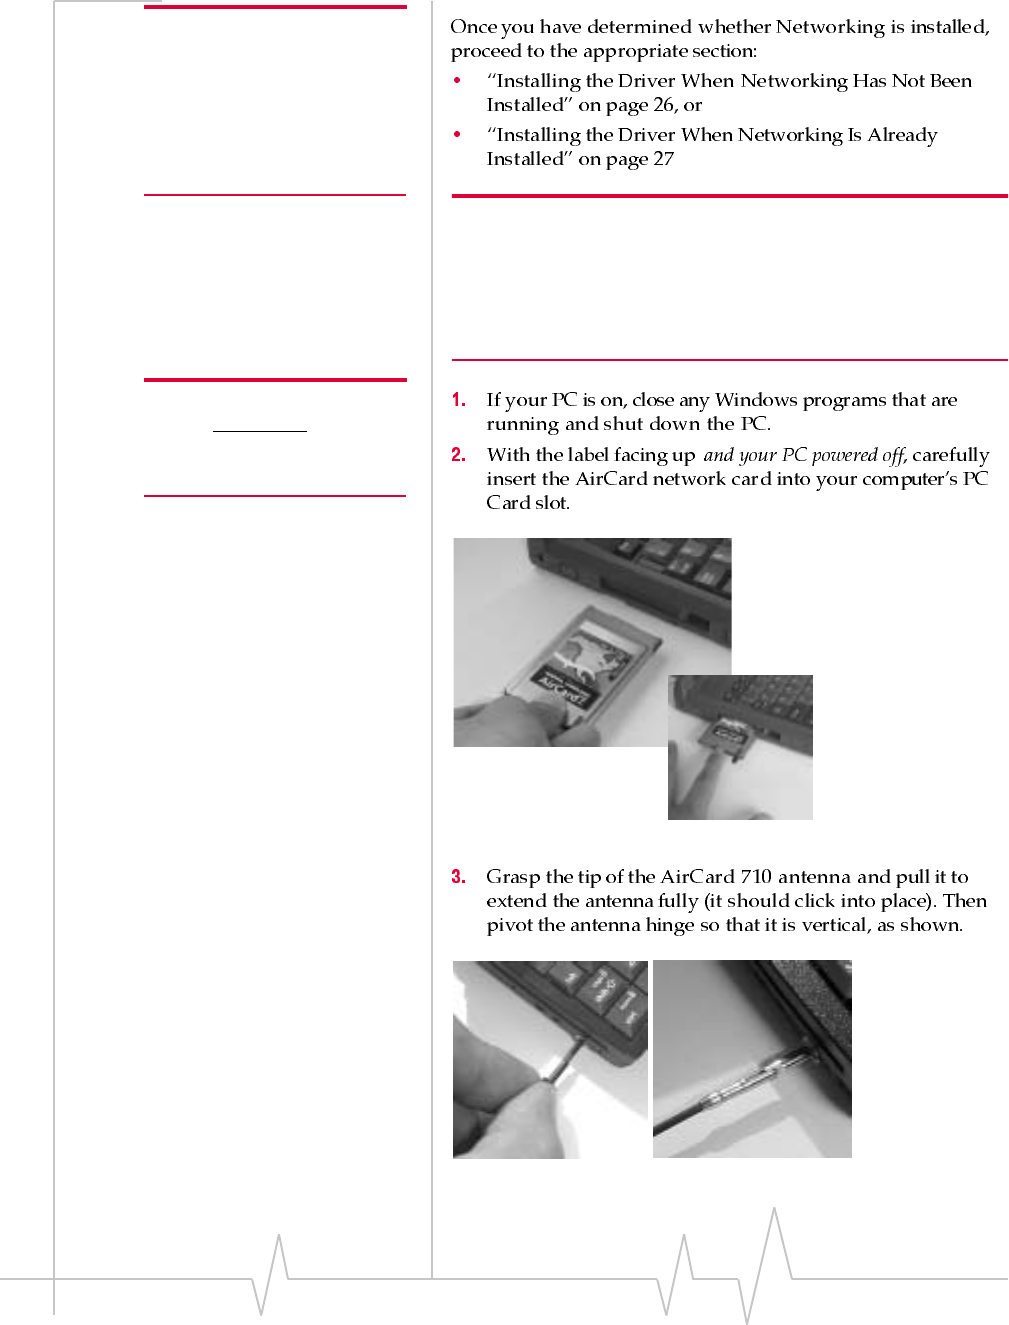
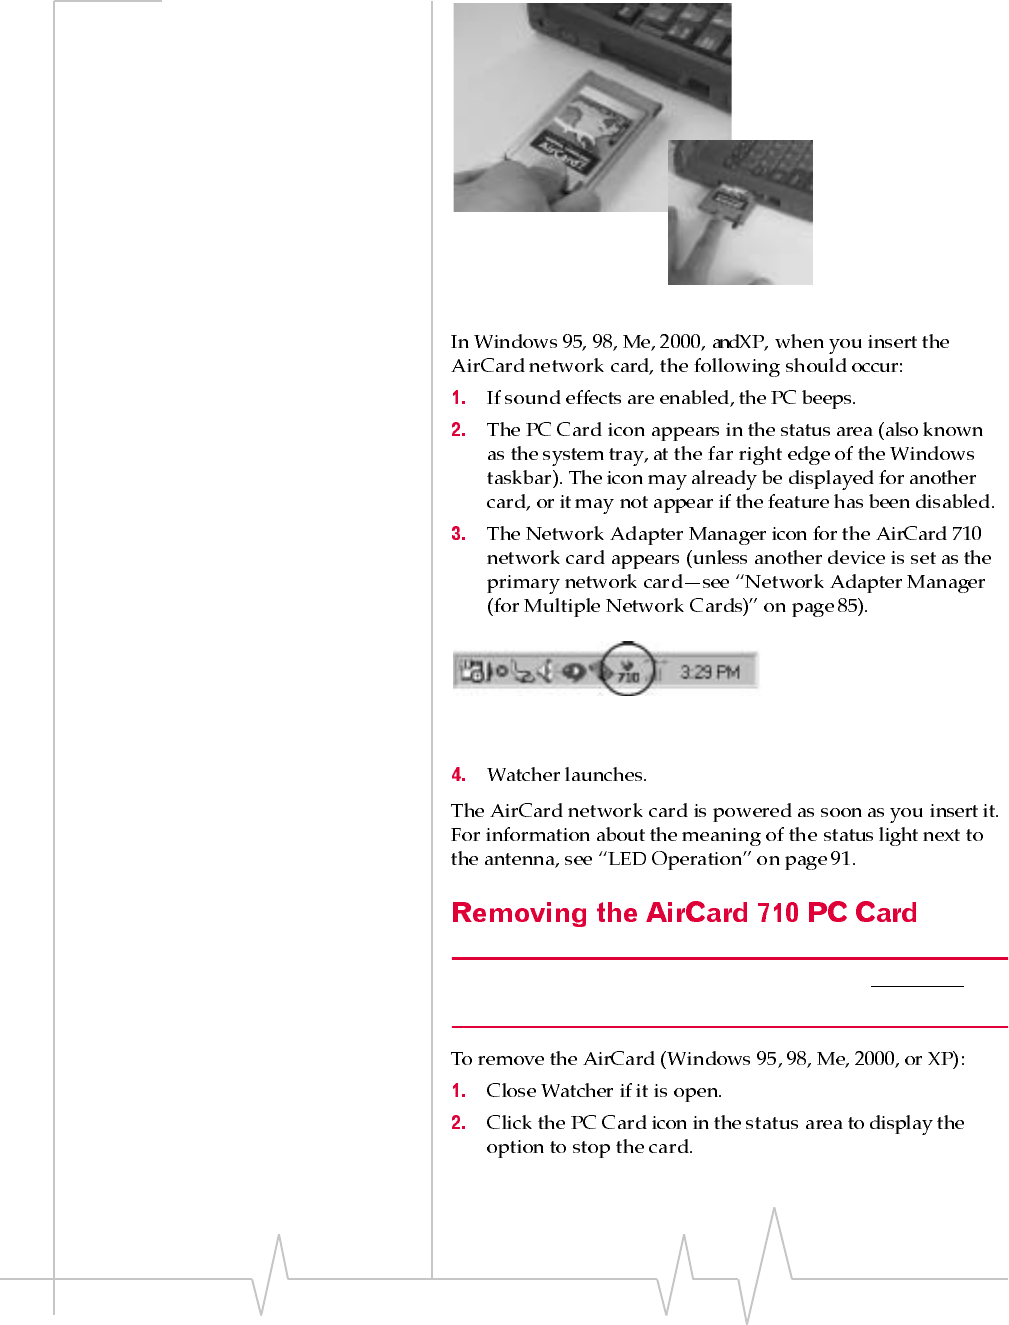
Figure 3-3: Inserting the AirCard 710 Network Card
Install - Notebook PCs
Rev B Oct. 2001 19
Figure 3-4: Extending the AirCard 710 Antenna Until It Clicks Into Place
Figure 3-5: Pivoting the AirCard 710 Antenna at the Hinge
AirCard 710 Wireless Network Card - User Guide
20 2130135
Install - Notebook PCs
Rev B Oct. 2001 21
Note: Windows system files may be required to complete installation
of the AirCard 710 driver. These files are located on the Windows CD
and may be stored on your hard drive in .CAB files. Ensure you have
your Windows CD, or know the location of the .CAB files, before
proceeding.
AirCard 710 Wireless Network Card - User Guide
22 2130135
Figure 3-6: Inserting the AirCard 710 Network Card
Install - Notebook PCs
Rev B Oct. 2001 23
Figure 3-7: Extending the AirCard 710 Antenna Until It Clicks Into Place
Figure 3-8: Pivoting the AirCard 710 Antenna at the Hinge
AirCard 710 Wireless Network Card - User Guide
24 2130135
Note: You must re-install the
Windows NT Service Pack
following installation of the
AirCard driver. Ensure you have
your Service Pack CD before
you begin. (Windows NT 4.0
Service Pack 6a is supported.)
Note: Windows system files may also be required to complete the
installation. These files are located on the Windows NT CD and may
also be stored as .CAB files on your hard drive. If the .CAB files are
not available to you, copy the Windows NT driver from the AirCard CD
to a directory on your hard drive. The Windows NT driver is located on
the CD in the directory \Drivers\WinNT.
Windows NT Users: Your PC
must be powered off whenever
you insert or eject the AirCard
network card.
Figure 3-9: Inserting the AirCard 710 Network Card
Figure 3-10: Extending the AirCard 710 Antenna Until It Clicks Into Place
Install - Notebook PCs
Rev B Oct. 2001 25
Figure 3-11: Pivoting the AirCard 710 Antenna at the Hinge
Figure 3-12: Inserting the AirCard 710 CD to Install the Windows NT Driver
AirCard 710 Wireless Network Card - User Guide
26 2130135

Install - Notebook PCs
Rev B Oct. 2001 27
AirCard 710 Wireless Network Card - User Guide
28 2130135
Note: For information on
obtaining a GSM wireless
account from a service provider,
see “Introducing the AirCard®
710 Wireless Network Card” on
page 1 and “Getting Started” on
page 7. In particular, consult the
section “SIM Card Information”
on page 9.

Install - Notebook PCs
Rev B Oct. 2001 29
Figure 3-13: The AirCard 710 Activation Wizard
Note: If you are using Windows NT, the PC must be powered off
whenever you insert or eject the AirCard network card.
AirCard 710 Wireless Network Card - User Guide
30 2130135
Figure 3-14: Inserting the AirCard 710 Network Card
Figure 3-15: Status Area Icons, With AirCard 710 Icon Circled and PC Card
Icon to Its Left
Note: If you are using Windows NT, the PC must be powered off
whenever you insert or eject the AirCard network card.
Install - Notebook PCs
Rev B Oct. 2001 31
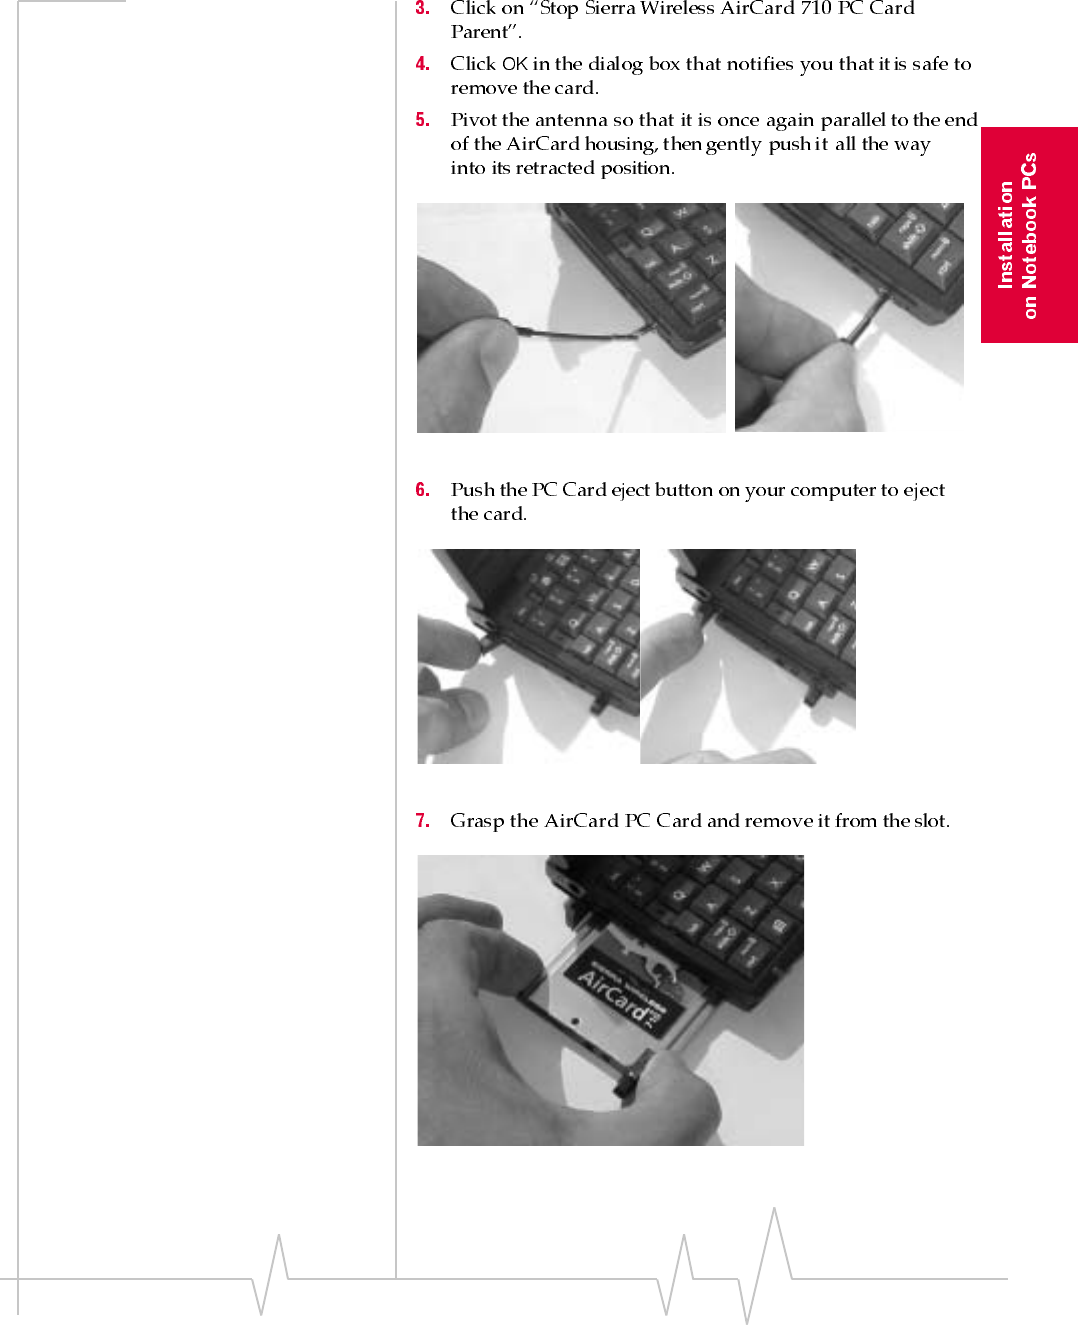
Figure 3-16: Retracting the AirCard 710 Antenna
Figure 3-17: Ejecting the AirCard 710 PC Card From Its Slot
Figure 3-18: Removing the AirCard 710 PC Card From Its Slot

AirCard 710 Wireless Network Card - User Guide
32 2130135
Rev B Oct. 2001 33
4: The Watcher Window and
Indicators
• Launching the
Watcher Program
• Menus and Window
Controls
• Connection Displays
• Taskbar Status Area
Icons
AirCard 710 Wireless Network Card - User Guide
34 2130135
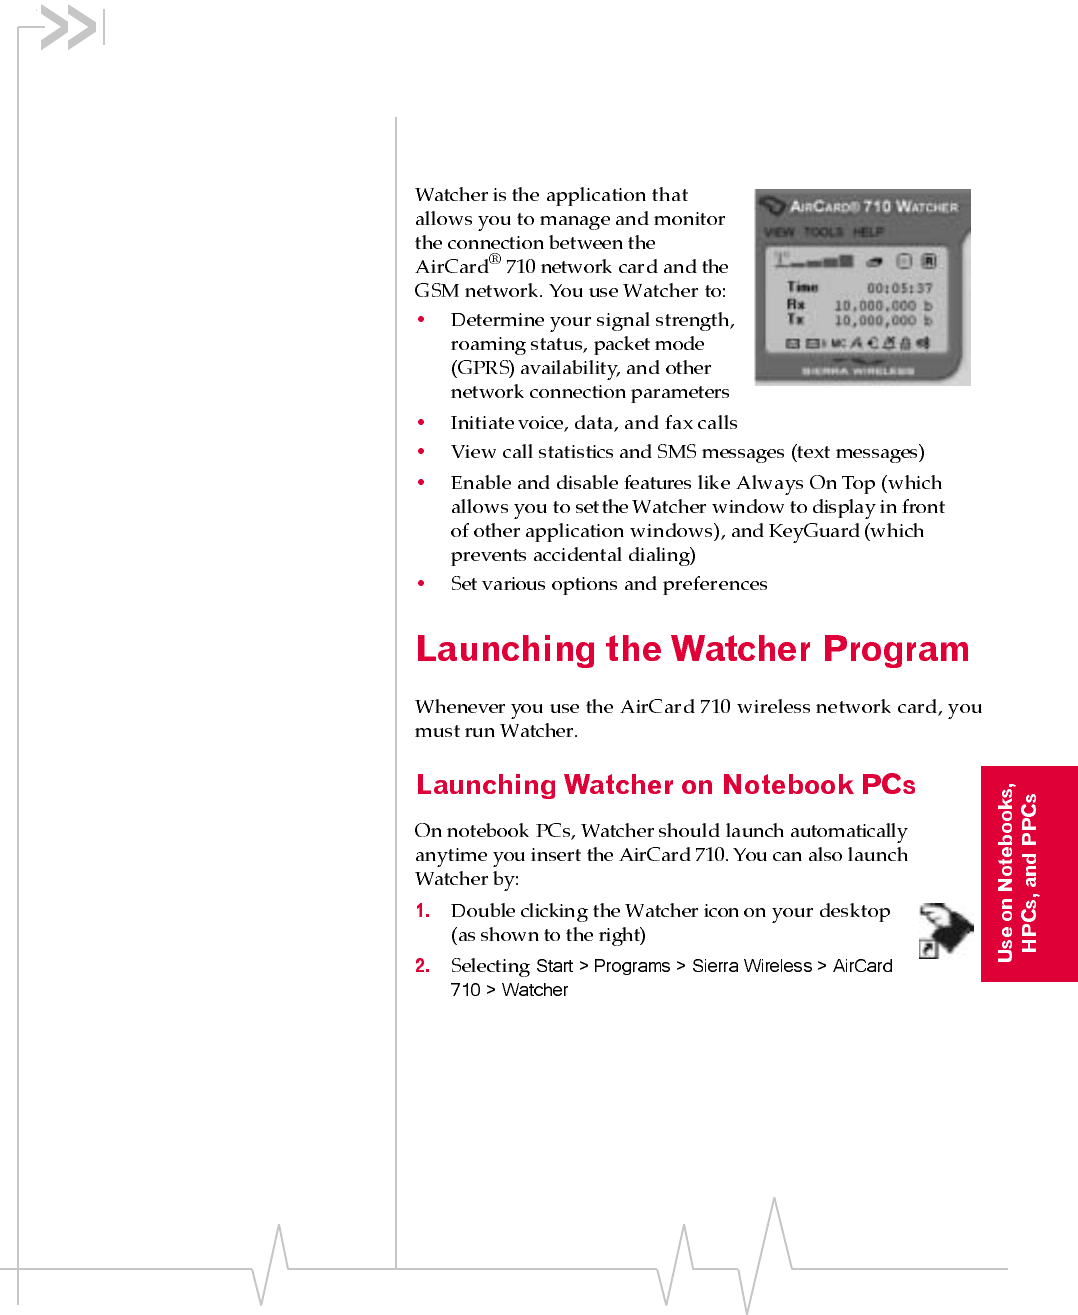
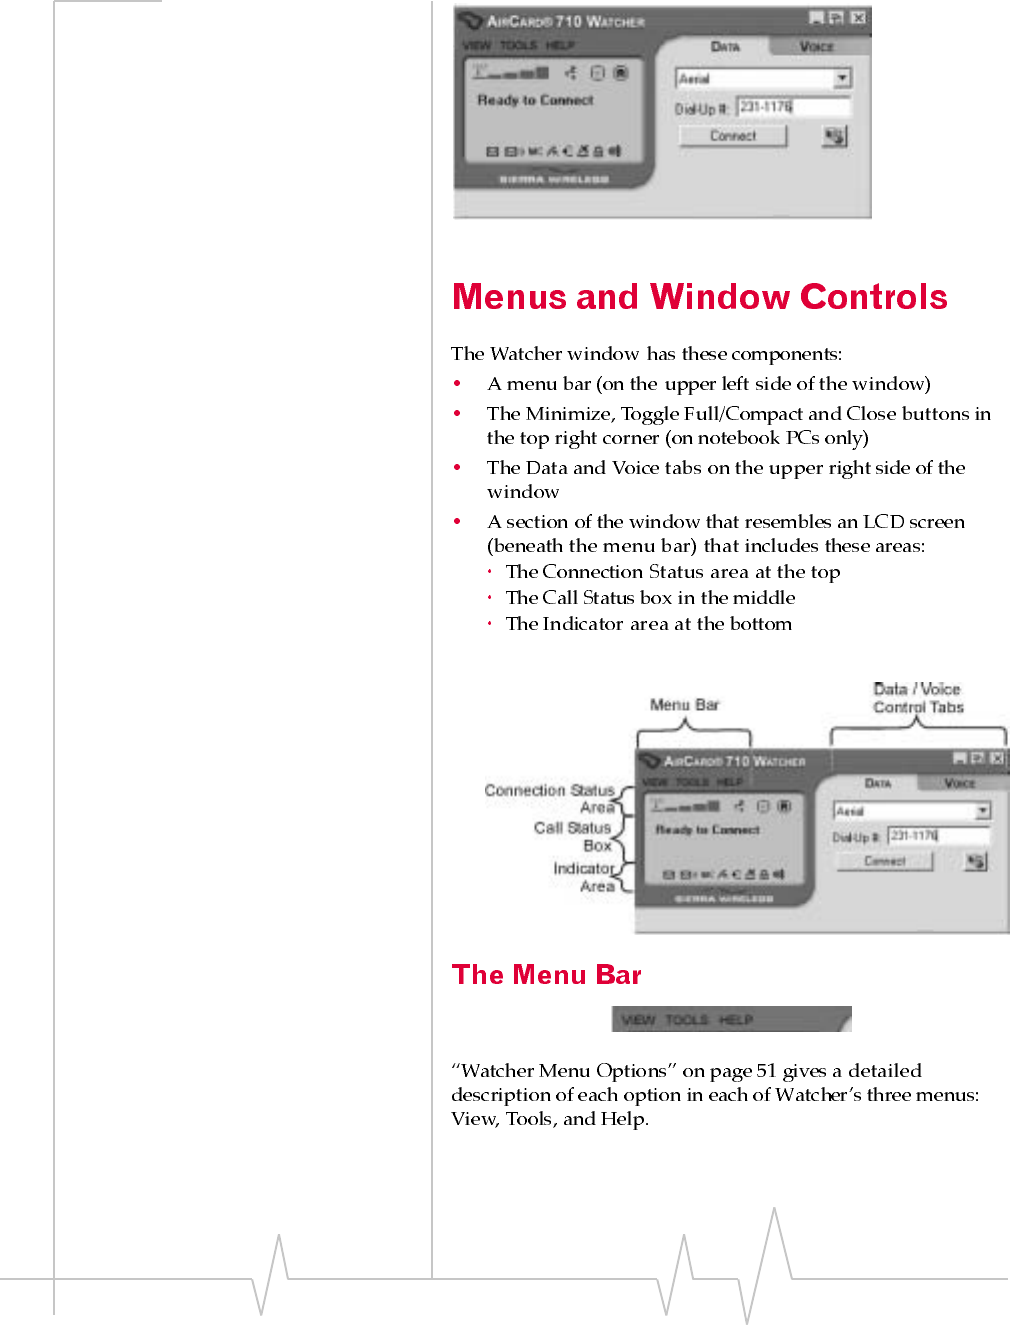
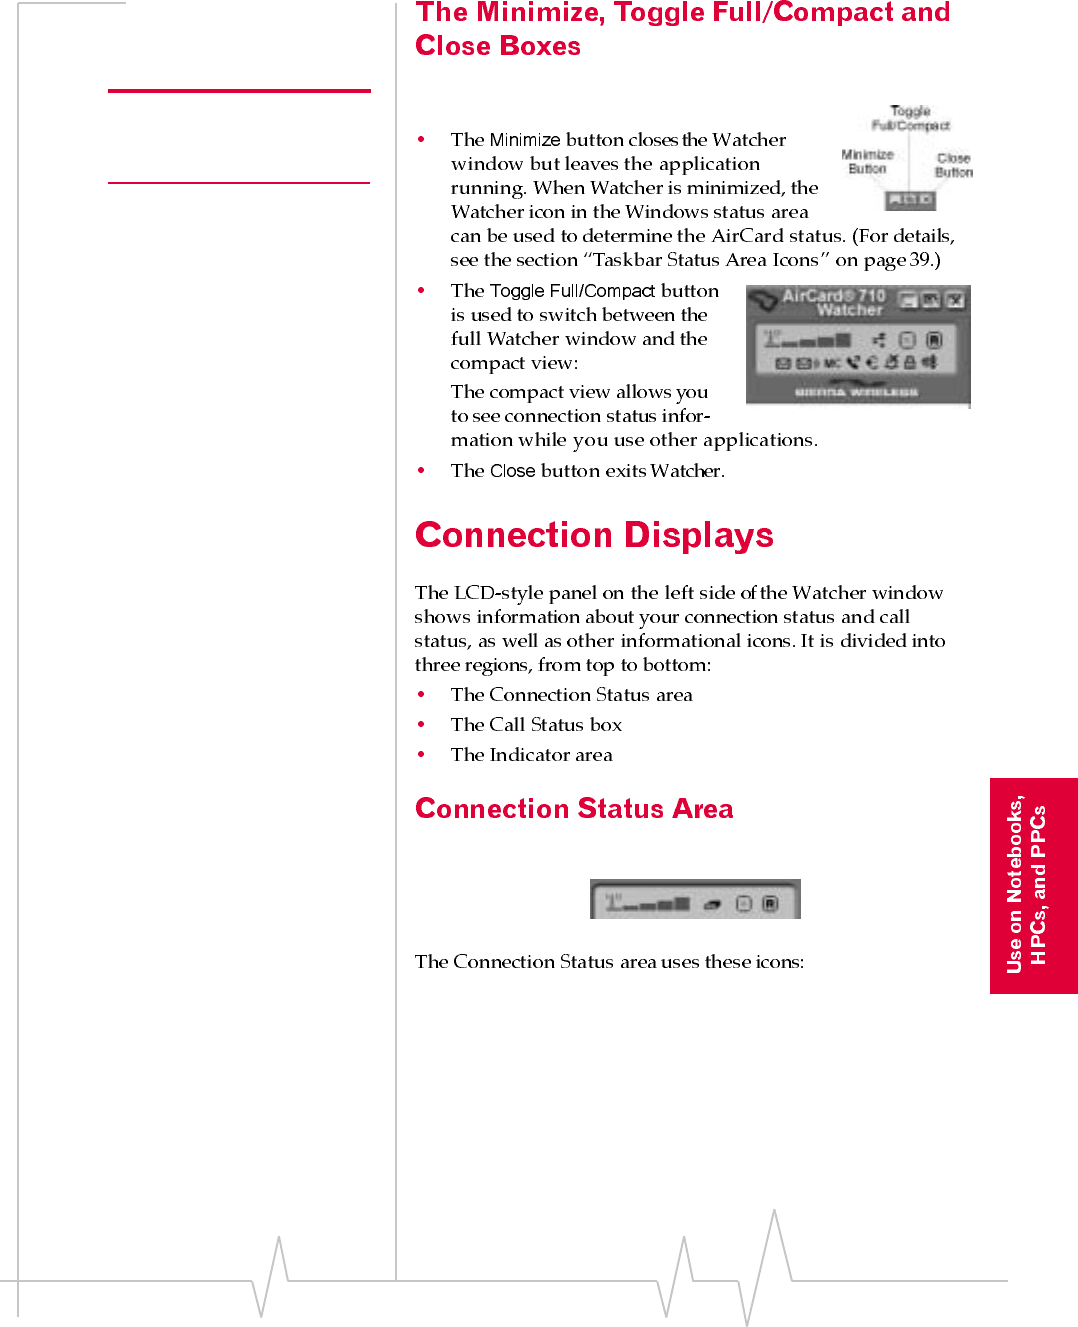
Figure 4-1: The Main Watcher Window
Watcher Window & Indicators
Rev B Oct. 2001 35
Note: These window control
boxes appear only in the
notebook PC version of Watcher.
AirCard 710 Wireless Network Card - User Guide
36 2130135
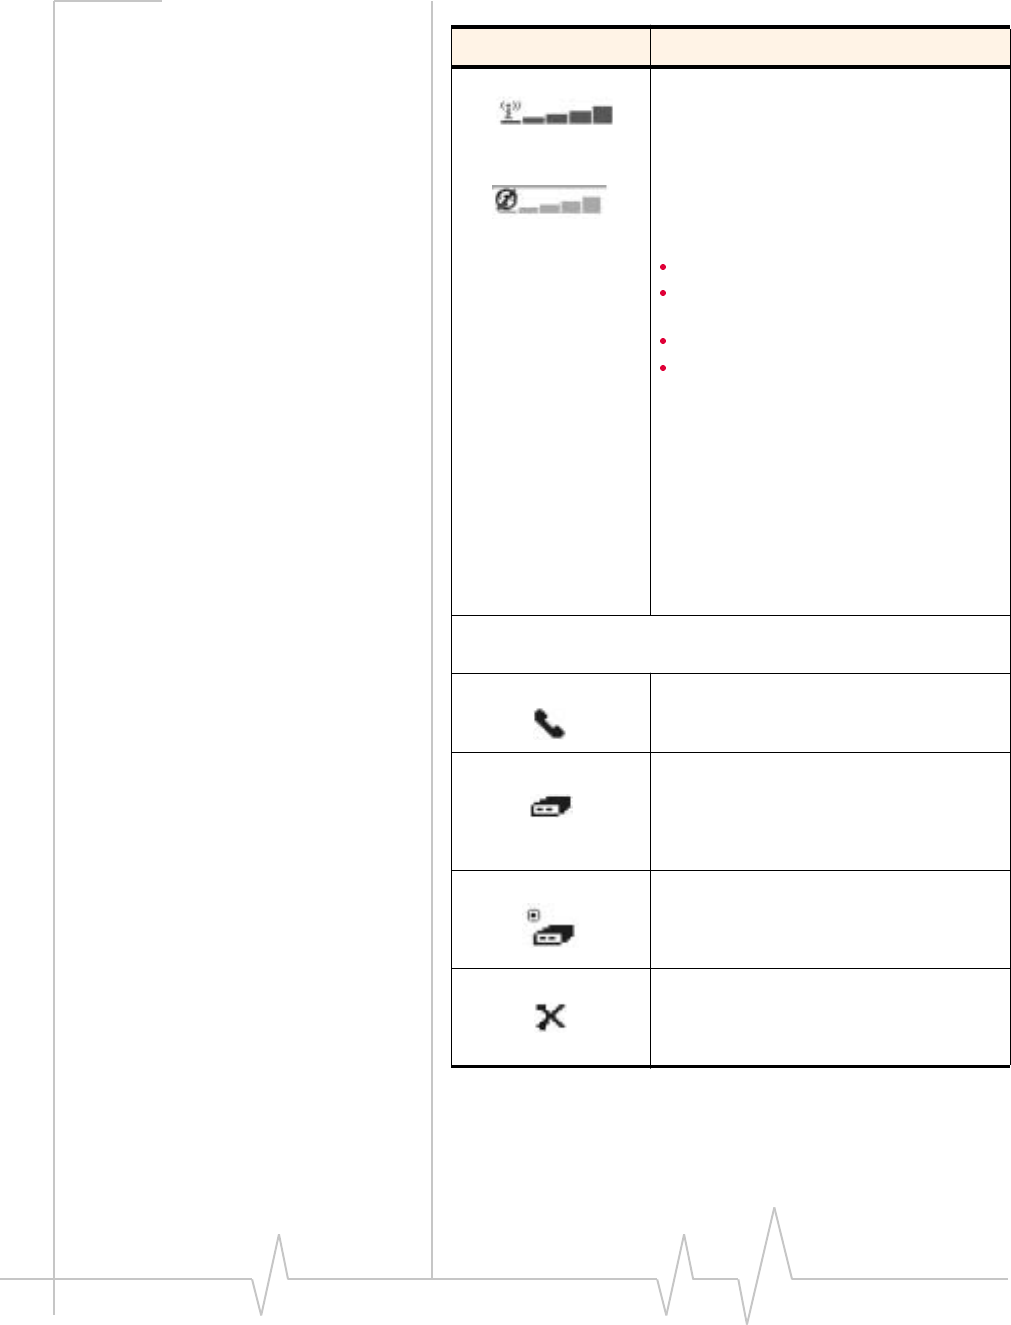
Table 4-1 :Connection Status Area Icons
Icon Meaning
The Signal Strength indicator uses bars to
show the intensity of the radio signal. The
number of bars increases as signal
strength increases to a maximum of five
bars.
When the bars are dimmed and the
antenna icon is crossed out, no connection
is possible for one of these reasons:
the antenna is retracted
you are outside the GSM network
coverage area
the signal strength is too weak
a network or account problem is
preventing the AirCard 710 from
obtaining service
To improve signal strength when you know
there is GSM coverage in your area, try
adjusting the position of the antenna (it
should be vertical), moving near a window,
or otherwise changing the position of your
computer so that the AirCard antenna is
better positioned to receive radio signals
from nearby cellular radio towers.
The In Use indicator shows whether a call is in progress. Depending
on the in-use state, one of these icons is displayed:
When the In Use indicator is a handset, a
voice call is in progress.
When the In Use indicator is a modem, a
circuit mode data (or fax) call is in progress
(see “Dial-Up Circuit Mode Calls” on page
42).
When the In Use indicator is a modem with
packet indicator, a packet mode (GPRS)
data call is in progress. (See “Packet Mode
Connections” on page 43.)
When the In Use indicator is a large “X”,
the AirCard is not functioning properly and
no connection is available. (Try closing
Watcher and restarting your computer.)
Watcher Window & Indicators
Rev B Oct. 2001 37
Note: Watcher begins timing
outgoing calls from the time the
call is initiated—not from the
time the call is answered.
The packet mode indicator shows whether
GPRS packet data coverage is available in
this area. Where GPRS is available, you
can make packet mode (“always on”) data
connections, if your billing plan allows for it.
For more information, see “How Circuit
Mode and Packet Mode Data Connections
Differ” on page 3, and “Packet Mode
Connections” on page 43.
The Roaming Status indicator shows
whether you are roaming onto the network
of a service provider other than your own.
When the indicator is off (gray), you are
within the local coverage area of your
service provider. When the indicator is on
(solid black), you are in a “preferred”
roaming area. When the indicator is
blinking, you are within the coverage area
of a GSM network but not in a “preferred”
roaming area.
Your coverage area and billing charges
depend upon your service provider and the
type of account you have. There may be
surcharges for roaming service that vary
based on whether you are in a preferred
roaming area or a non-preferred roaming
area. If there is no roaming agreement
between your service provider and the local
carrier, you may be unable to complete
calls in non-preferred roaming areas.
Table 4-1 :Connection Status Area Icons
Icon Meaning
AirCard 710 Wireless Network Card - User Guide
38 2130135
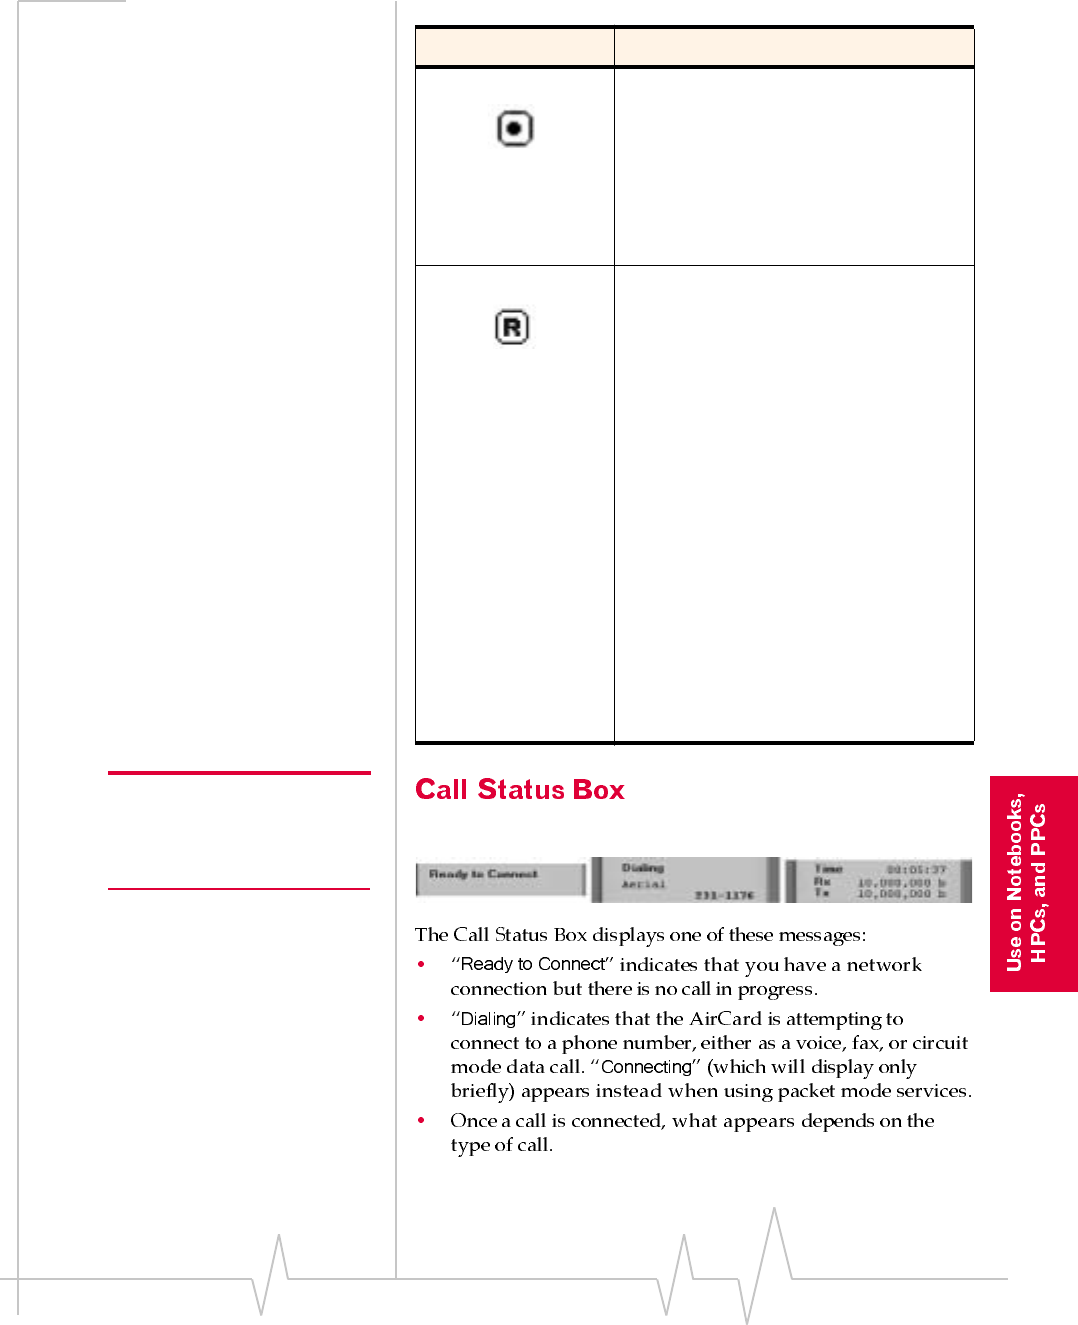
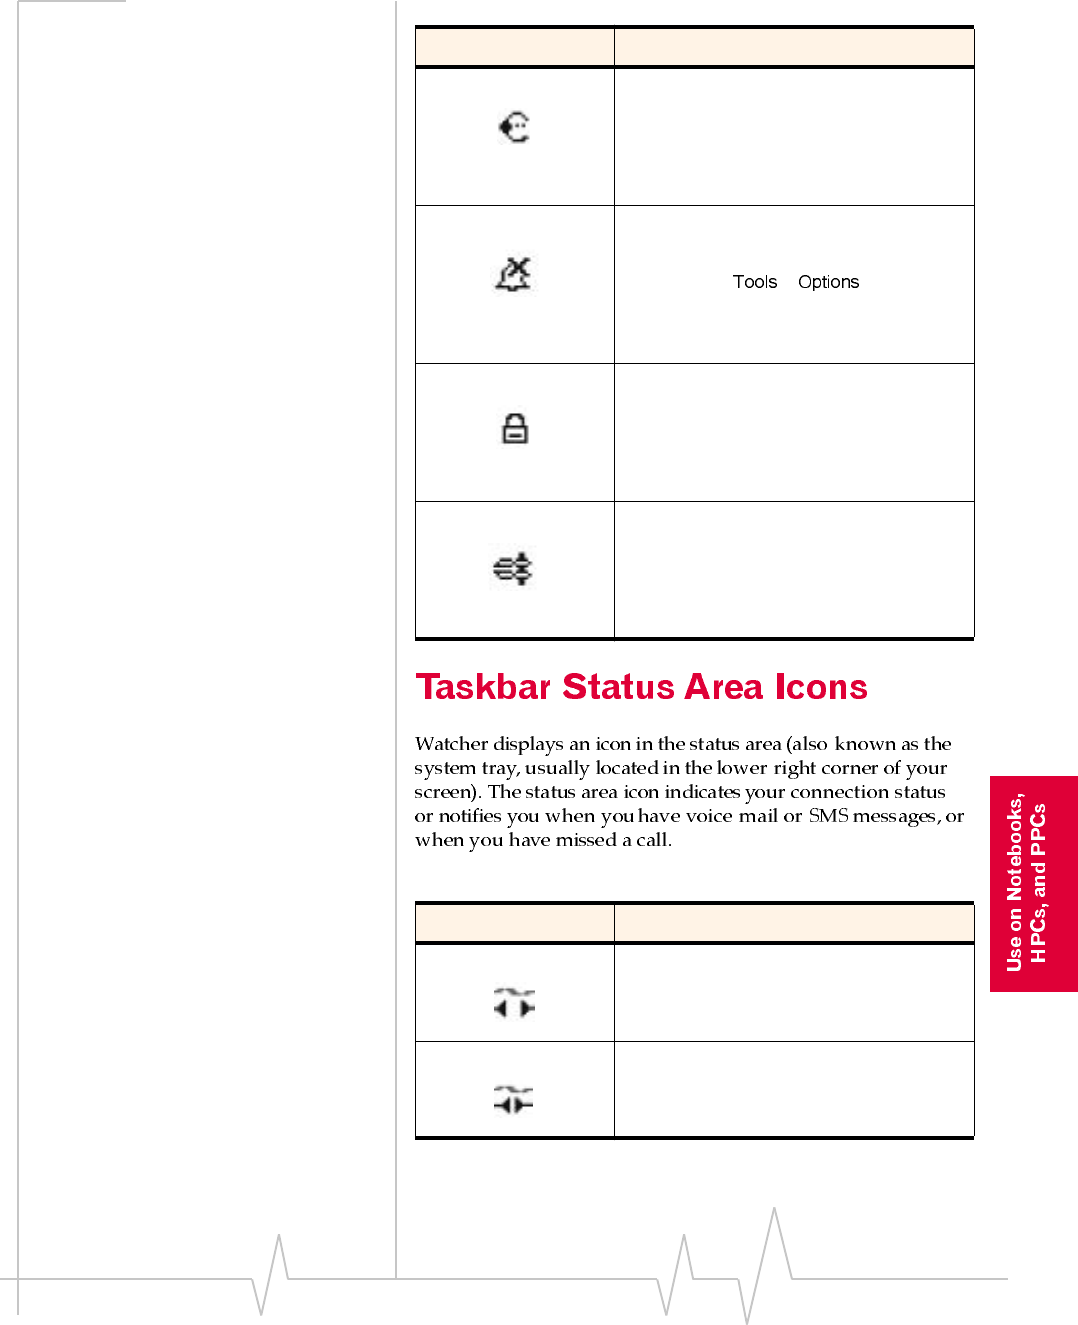
Table 4-2 :Indicator Area Icons
Icon Meaning
The SMS Message indicator shows
whether you have unread text messages. If
it is blinking, at least one of your unread
messages is urgent.
To read and respond to SMS messages,
select > or click the
icon. (For details, see “SMS Manager…” on
page 53.)
The Voice Mail indicator shows whether
you have unheard voice messages. To
hear the messages, you must dial your
wireless service provider’s voice
messaging system. Click the icon to
connect to your voice messaging system.
(For information, see the Options section
“Voice Tab” on page 77.)
The Missed Call indicator displays if you
failed to answer an incoming call. To view
the phone number(s) of any missed calls,
click the icon to display the Call Log (see
“Call Log” on page 59).
The Auto-Answer indicator shows whether
Watcher is set to automatically answer
incoming calls. You can enable and disable
this feature under > (see
“Voice Tab” on page 77).
Watcher Window & Indicators
Rev B Oct. 2001 39
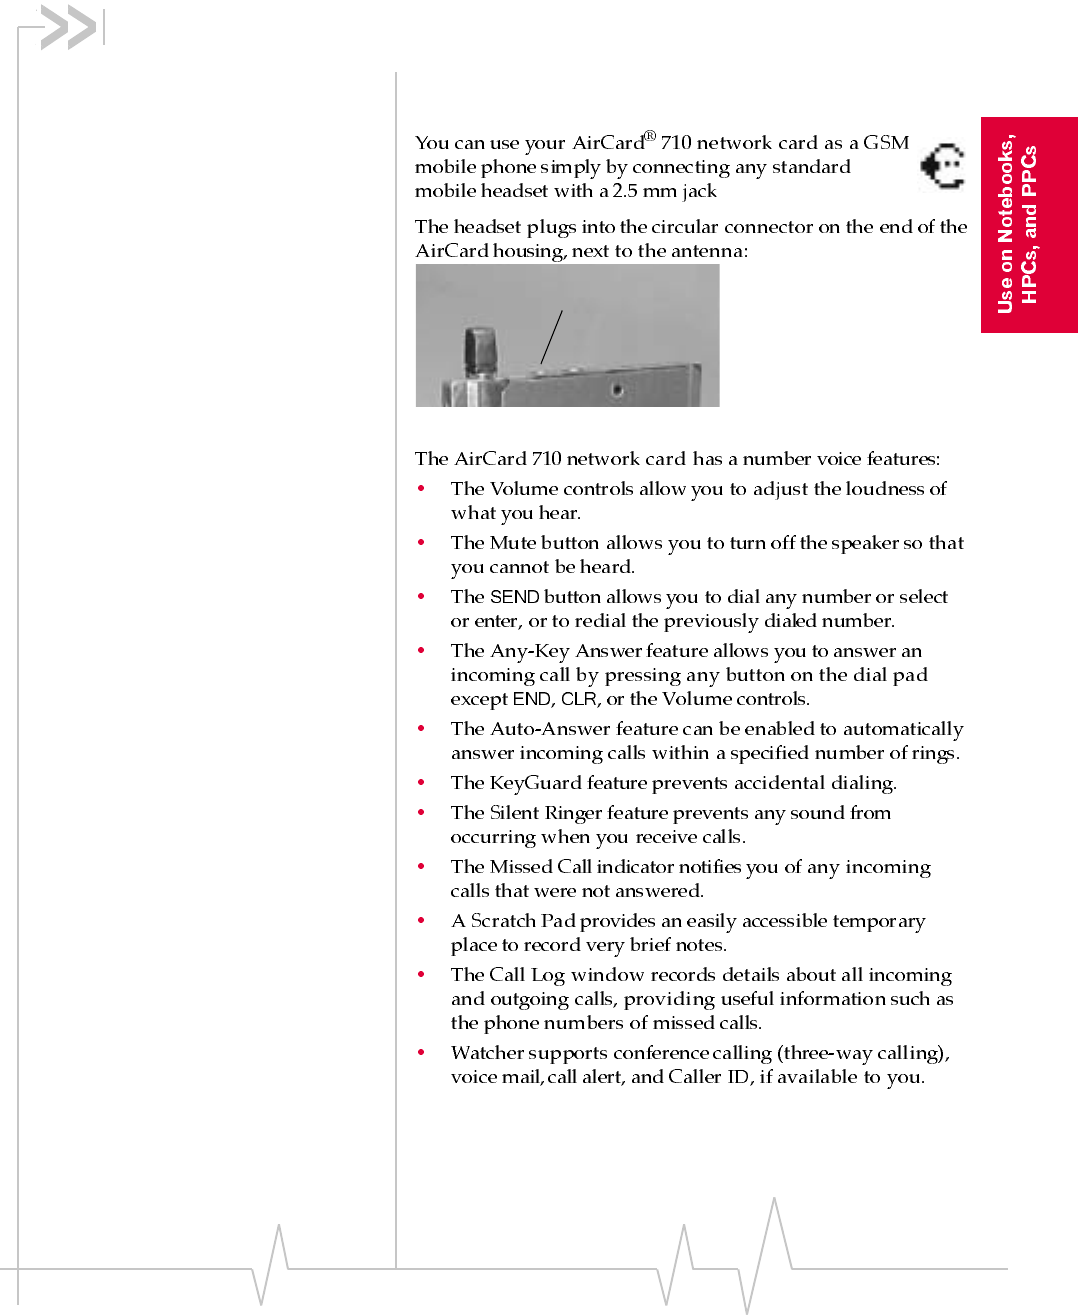
The Headset indicator shows whether a
headset is connected to the AirCard
headset connector, near the antenna at the
end of the AirCard 710 housing. The
connector is designed to use standard
2.5mm mobile voice headsets.
The Silent Ringer indicator means that no
sound is played when an incoming call is
received. You can enable and disable this
feature under > (see “Voice
Tab” on page 77) or with the Mute key
when no call is underway (see “The
Watcher Dial Pad” on page 46).
The Privacy indicator shows whether
encryption is in use on voice calls.
(Encryption prevents your calls from being
monitored.) Your service provider
determines whether encryption is available
its GSM network.
The compression indicator shows whether
data compression is in use. Where
available (which depends on your service
provider), compression can increase
throughput and the effective data
transmission speed.
Table 4-3 :Status Area Icons
Icon Meaning
There is no GSM network connection.
The AirCard 710 wireless network card is
connected to the GSM network.
Table 4-2 :Indicator Area Icons
Icon Meaning
AirCard 710 Wireless Network Card - User Guide
40 2130135
You missed (failed to answer) an incoming
call. You can view the number of the caller
in the Call Log (choose in
Watcher).
You have one or more unread SMS (text)
messages. Choose >
to read them.
You have voice mail. Dial your voice mail
system to retrieve your messages.
Table 4-3 :Status Area Icons
Icon Meaning
Rev B Oct. 2001 41
5: Data Connections Through
GSM and GPRS
• Dial-Up Circuit Mode
Calls
• Packet Mode
Connections
Note: You cannot have a data
and a voice connection at the
same time. If you have a data
connection when an incoming
call occurs, your caller will get a
busy signal or be put through to
your voice mail box.
Note: Depending on your billing
plan, there may be a surcharge
or different billing arrangement
for GPRS packet mode connec-
tions.
Note: Although you may not be
charged extra money while
connected in packet mode, but
not actively moving data, the
AirCard network card continues
to use power in that mode. For
best power conservation from
your computer, shut down any
AirCard wireless connections if
you do not need them.
AirCard 710 Wireless Network Card - User Guide
42 2130135
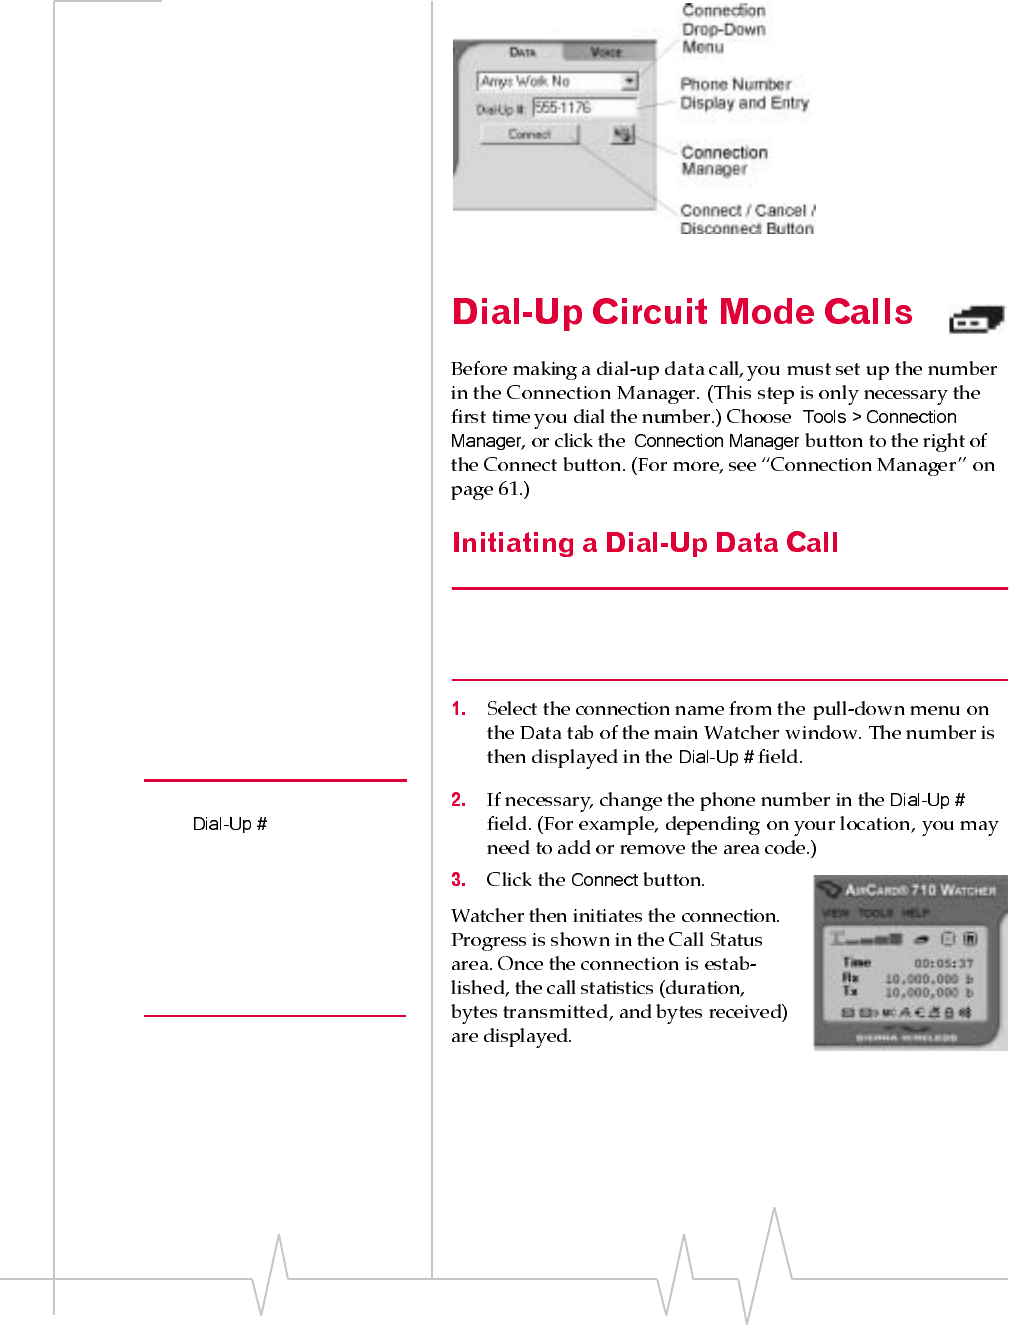
Figure 5-1: The Watcher Data Tab
Note: You can make a dial-up data call anywhere there is GSM voice
coverage, though data speeds may be affected by radio reception and
network congestion.
Note: If you change the number
in the field, the
Connection Manager record is
not changed. The next time you
select the connection, the old
number appears. If you want to
permanently change the record,
you can do so in the Connection
Manager (see page 61).
Figure 5-2: Call Status Area During a Data Connection
Data Connections
Rev B Oct. 2001 43
Note: Packet mode connections are only available where GSM
service providers have installed the appropriate GPRS infrastructure.
Not all GSM coverage areas have GPRS coverage. Contact your
service provider for coverage information in your area.
Note: Depending on your billing
plan, there may be a surcharge
or different billing system for
packet mode service.

AirCard 710 Wireless Network Card - User Guide
44 2130135
Rev B Oct. 2001 45
6: GSM Voice Connections
• The Dial Pad
• The Scratch Pad
• Making a Voice Call
.
Figure 6-1: Location of the AirCard 710 Headset Connector
Headset Connector