Sierra Wireless AC710 PCS GSM Wireless Network Card User Manual Part 2 of 2
Sierra Wireless Inc. PCS GSM Wireless Network Card Users Manual Part 2 of 2
Contents
- 1. Users Manual Part 1 of 2
- 2. Users Manual Part 2 of 2
Users Manual Part 2 of 2
AirCard 710 Wireless Network Card - User Guide
46 2130135
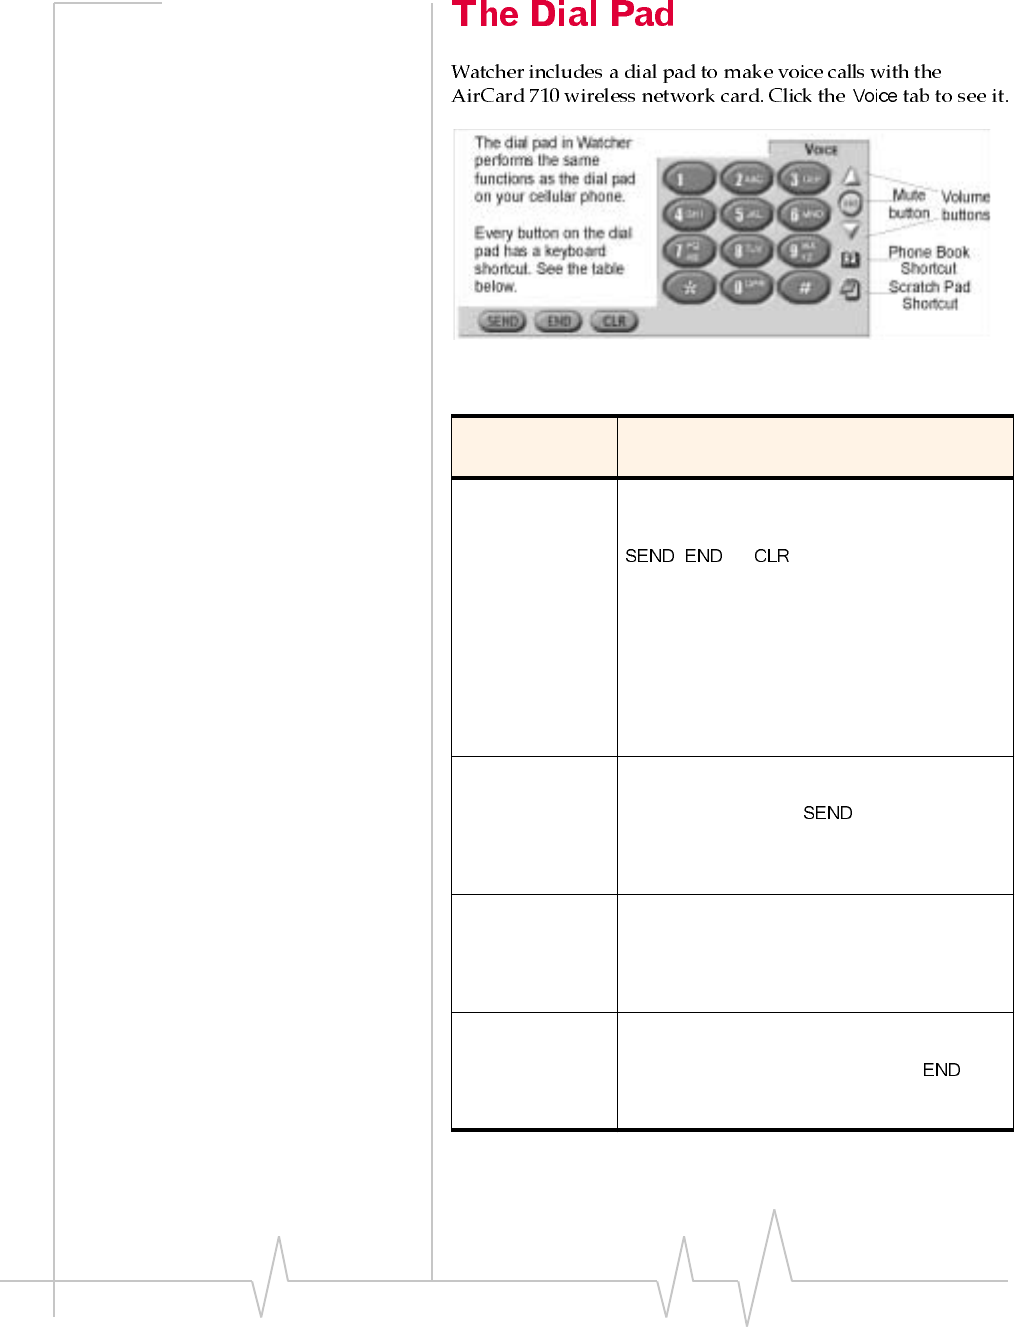
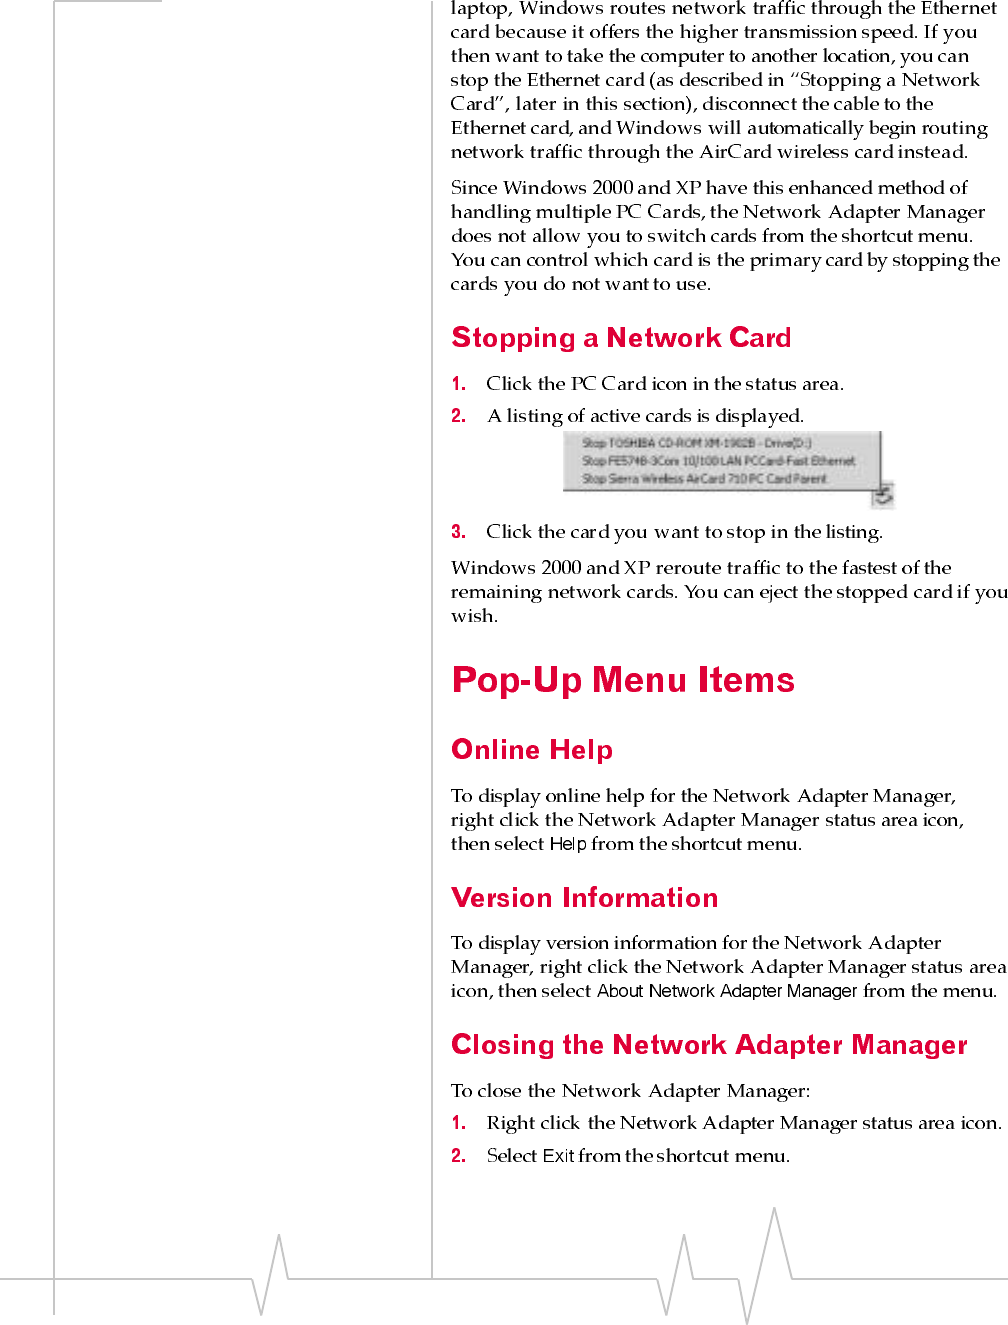
Figure 6-2: The Voice tab in the Watcher Main Window
Table 6-1 :The Watcher Dial Pad
Dial Pad
Buttons Function
0-9, #, *
(or the same
keys on your
keyboard)
Use these buttons to enter the digits (and other
characters) you want to dial. The numbers are
displayed in the call status area until you press
, , or , or you receive an
incoming call.
Any of these buttons can be used to answer an
incoming call if the Any-Key Answer feature is
enabled (see “Voice Tab” on page 77).
If you click these buttons during a call, the
AirCard network card beeps and the characters
are displayed in the Call Status area.
SEND
(ENTER on
your keyboard)
Use this button to dial numbers and to answer
incoming calls. When you are not receiving an
incoming call, clicking dials the numbers
in the call status area. If no numbers are
displayed, Watcher re-dials the last number you
dialed.
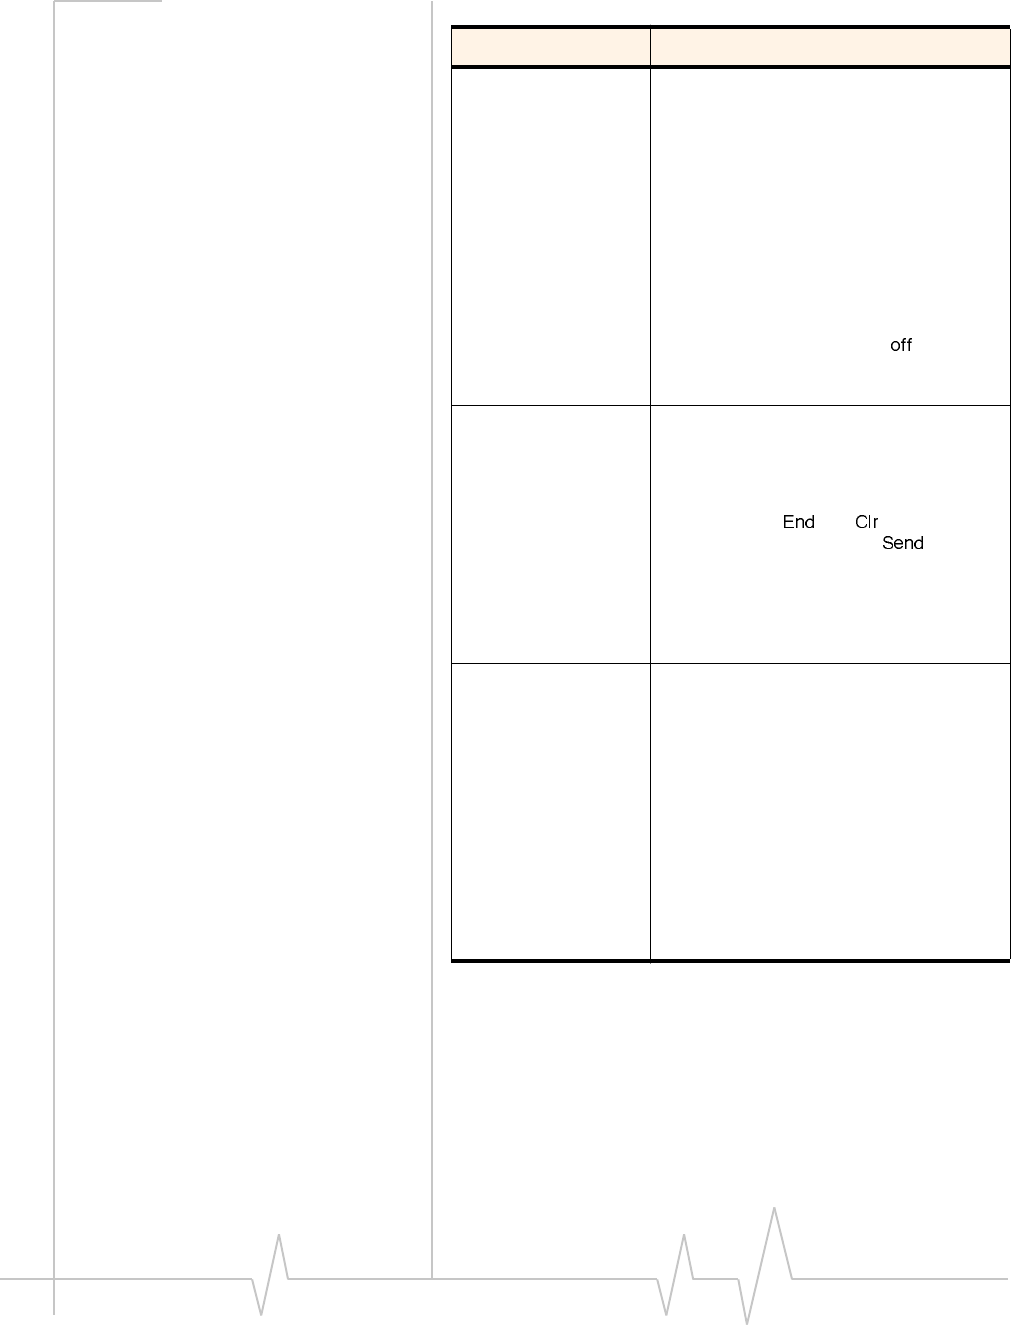
END
(ESC on your
keyboard)
Use this button to hang up or end a call, or to
clear all the digits and characters in the Call
Status area (i.e. to cancel a call that you’ve
started to enter). This button also clears status
messages.
CLR
(BACKSPACE
on your
keyboard)
Use this button to clear the last number you’ve
entered. If you hold this button down for one
second, it has the same effect as the
key—so this button can also be used to hang up
or end a call.
Voice Connections
Rev B Oct. 2001 47
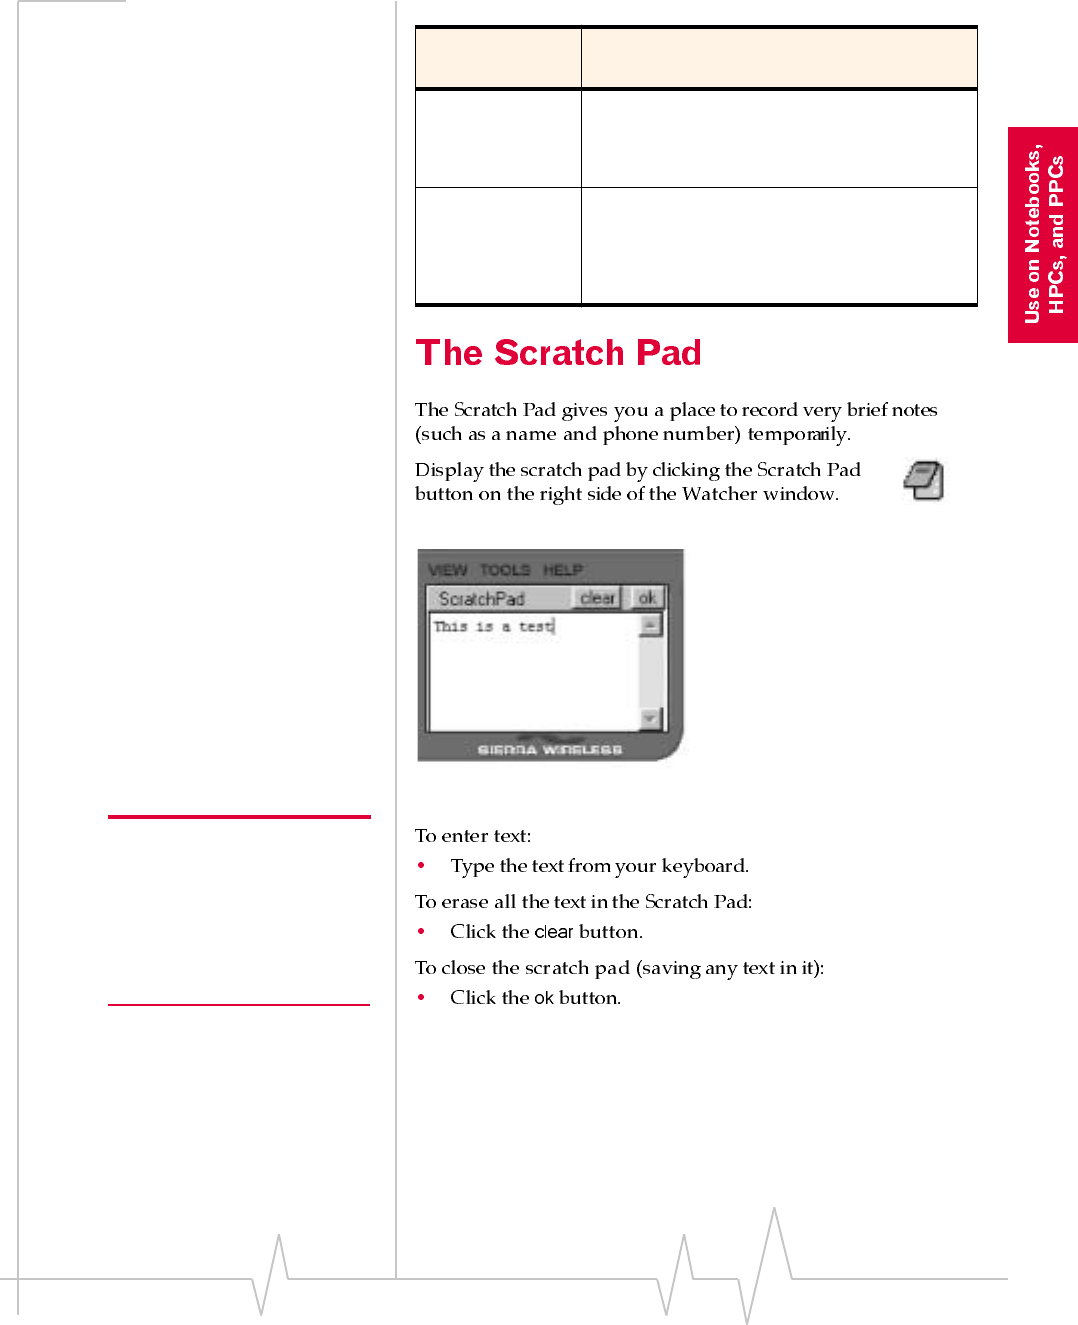
Figure 6-3: The Watcher Scratch Pad
Note: The standard function
keys for copy (CTRL+C), cut
(CTRL+X), and paste (CTRL+V)
can be used to move text from
the Scratch Pad to another appli-
cation (such as the Windows
Notepad or a word processor).
Volume Keys
(Up and Down
arrows on your
keyboard)
Use the Up arrow to increase the volume of
what you hear in the headset. Use the Down
arrow to decrease the volume.
Mute Key Use this key during a call to prevent the caller
from hearing what you say.
When no call is in progress, this key enables
and disables the Silent Ringer feature.
Table 6-1 :The Watcher Dial Pad
Dial Pad
Buttons Function
AirCard 710 Wireless Network Card - User Guide
48 2130135
Note: If you click the
button without entering a
number, Watcher redials the
most recent number you dialed.
Note: The Options window,
displayed when you select Tools
> Options, allows you to
customize the sound played
when you receive an incoming
call and to enable and disable
the Silent Ringer feature. See
“Options…” on page 63.

Voice Connections
Rev B Oct. 2001 49

AirCard 710 Wireless Network Card - User Guide
50 2130135
Rev B Oct. 2001 51
7: Watcher Menu Options
• The View Menu
• The Tools Menu
• The Help Menu
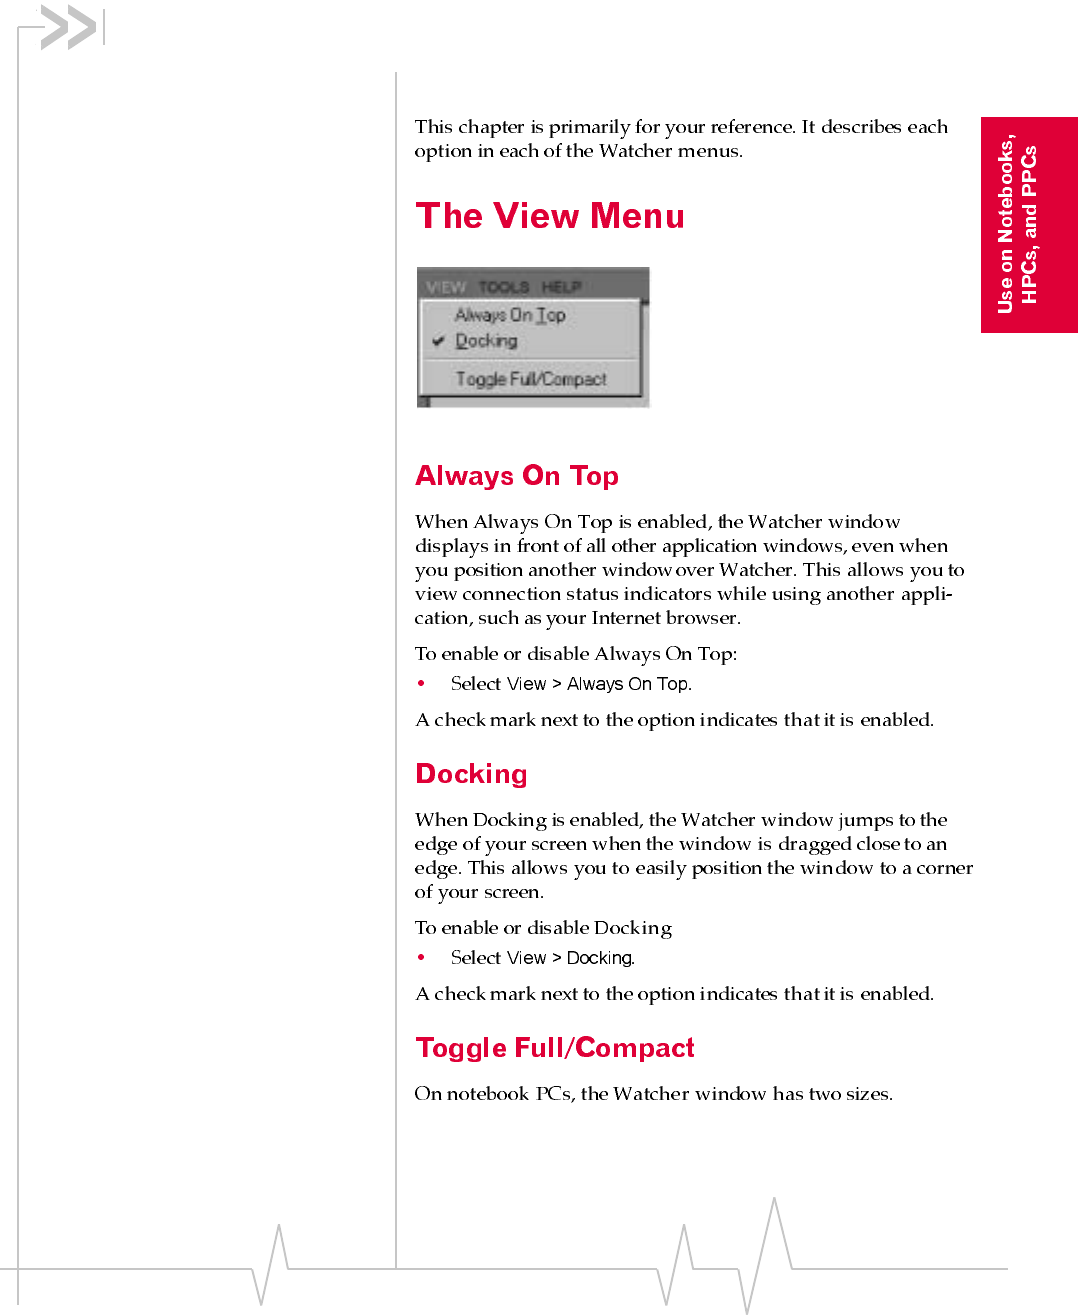
Figure 7-1: The Watcher View Menu
AirCard 710 Wireless Network Card - User Guide
52 2130135
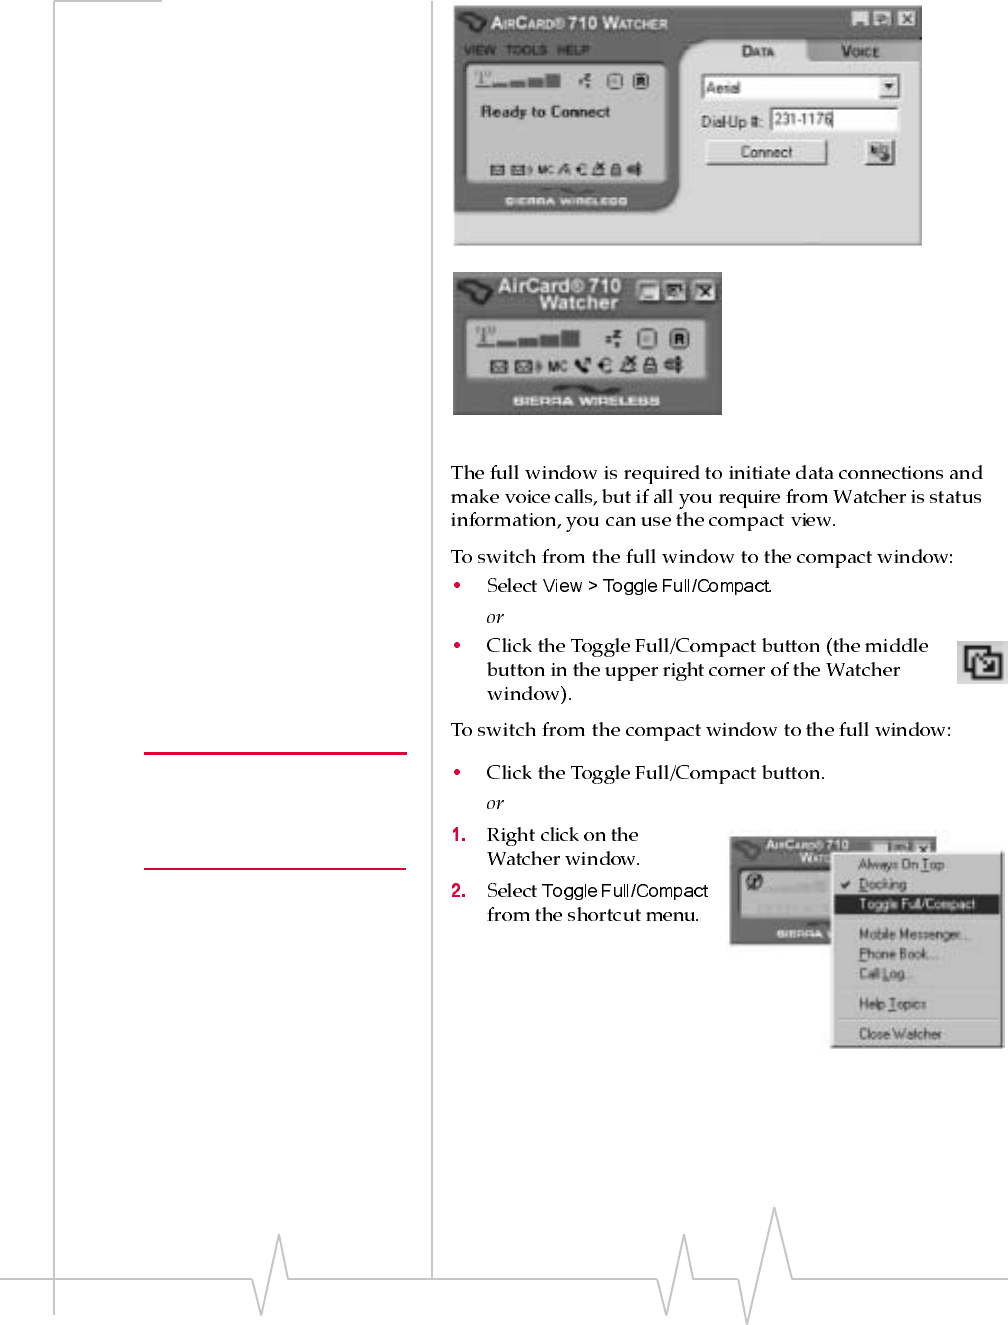
Figure 7-2: Watcher in Full View (Top) and Compact View (Bottom)
Note: The Watcher window
switches to full view automati-
cally when you receive an
incoming call.
Watcher Menus
Rev B Oct. 2001 53
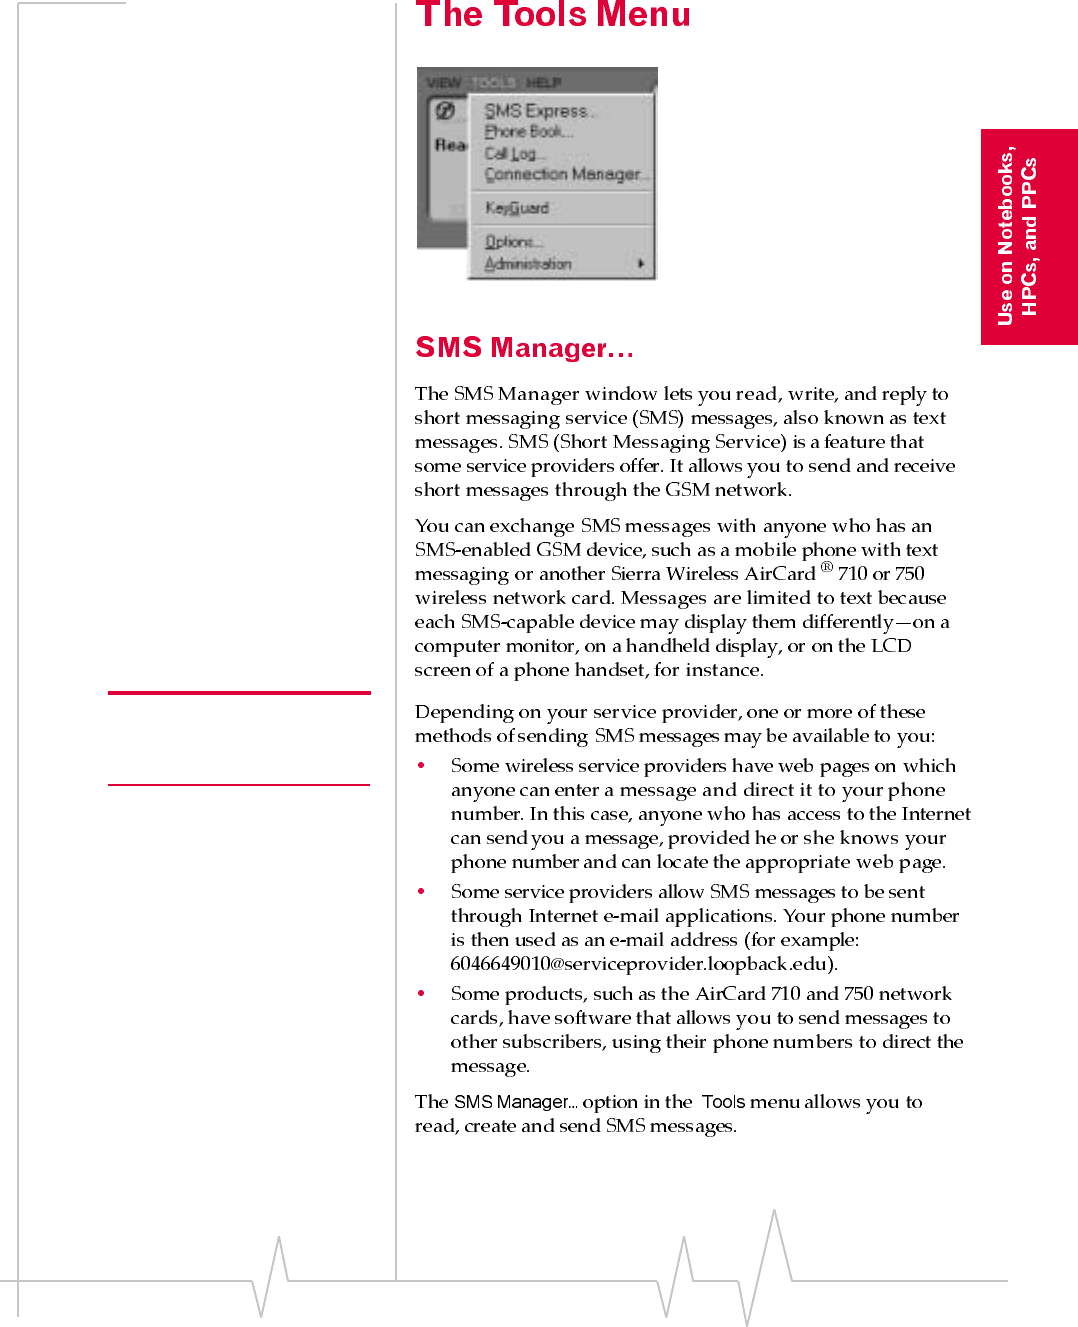
Figure 7-3: The Watcher Tools Menu
Note: Check with your service
provider to see if you have a
subscription to SMS service.

AirCard 710 Wireless Network Card - User Guide
54 2130135
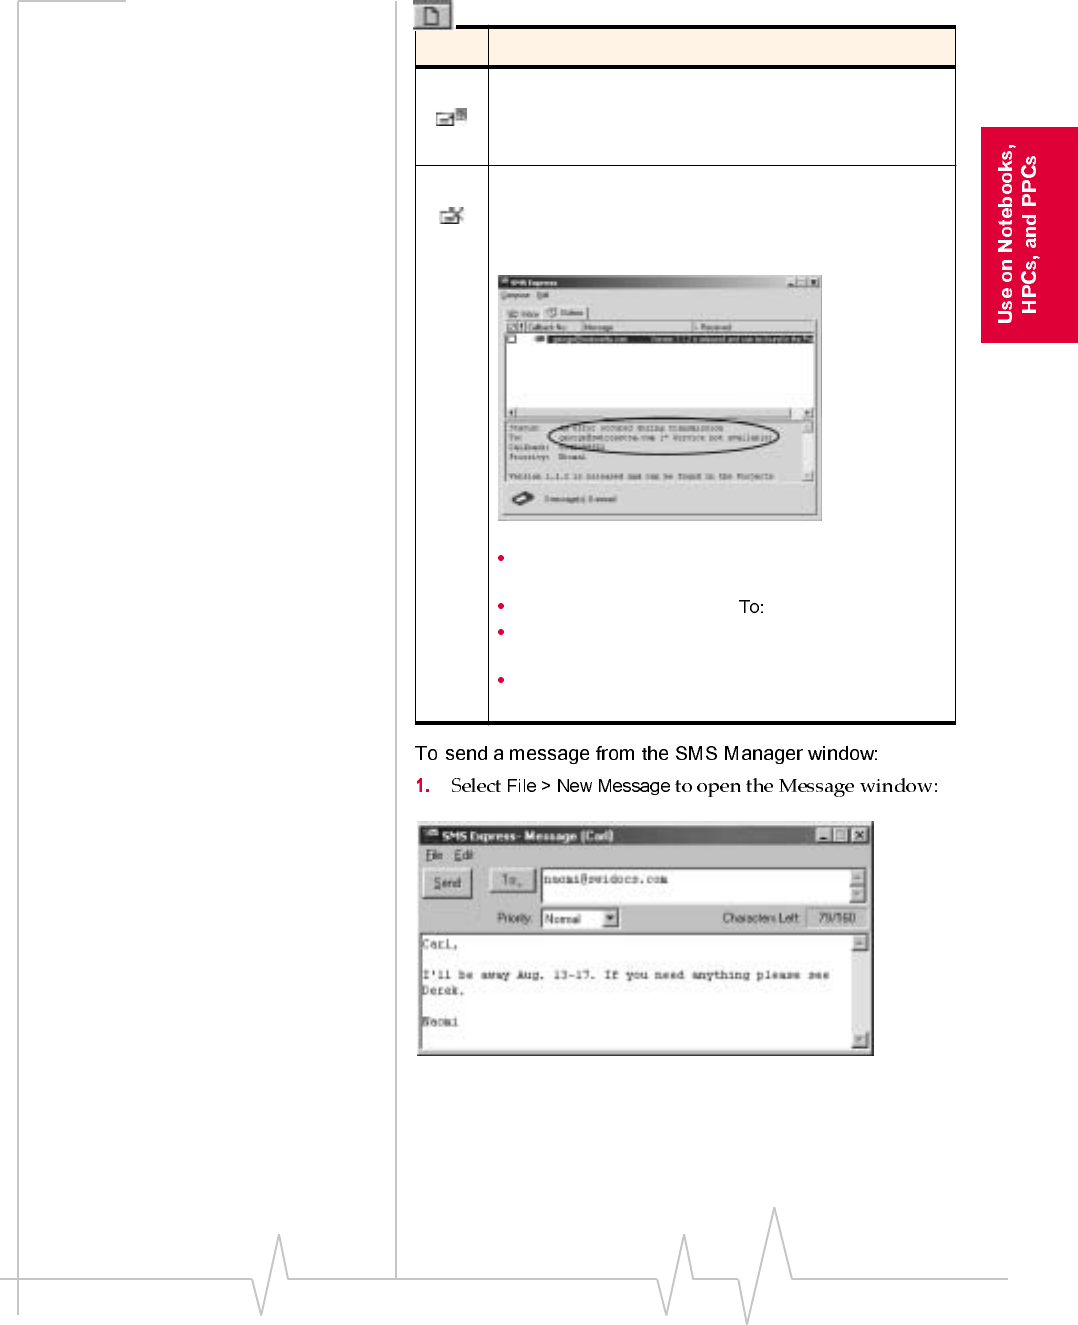
Figure 7-4: The SMS Manager Window, With Inbox Selected
Note: Unread messages are
displayed in bold.
Watcher Menus
Rev B Oct. 2001 55
Note: Both Delete All and the
message expiry features do not
actually delete all available
messages—they only delete
those you have not yet read.
Note: The Reply to Sender
menu option is only available if
the e-mail address of the person
who sent you the message is
included in the message. This
won’t be available if, for
example, the message was sent
from a web site.
Note: The Call Back Sender
menu option is only available if
the message includes a valid
call-back number.
AirCard 710 Wireless Network Card - User Guide
56 2130135
Note: In the Options window
(see “SMS Manager…” on page
53) you can enable and disable
the option to save outgoing
messages to the Outbox.
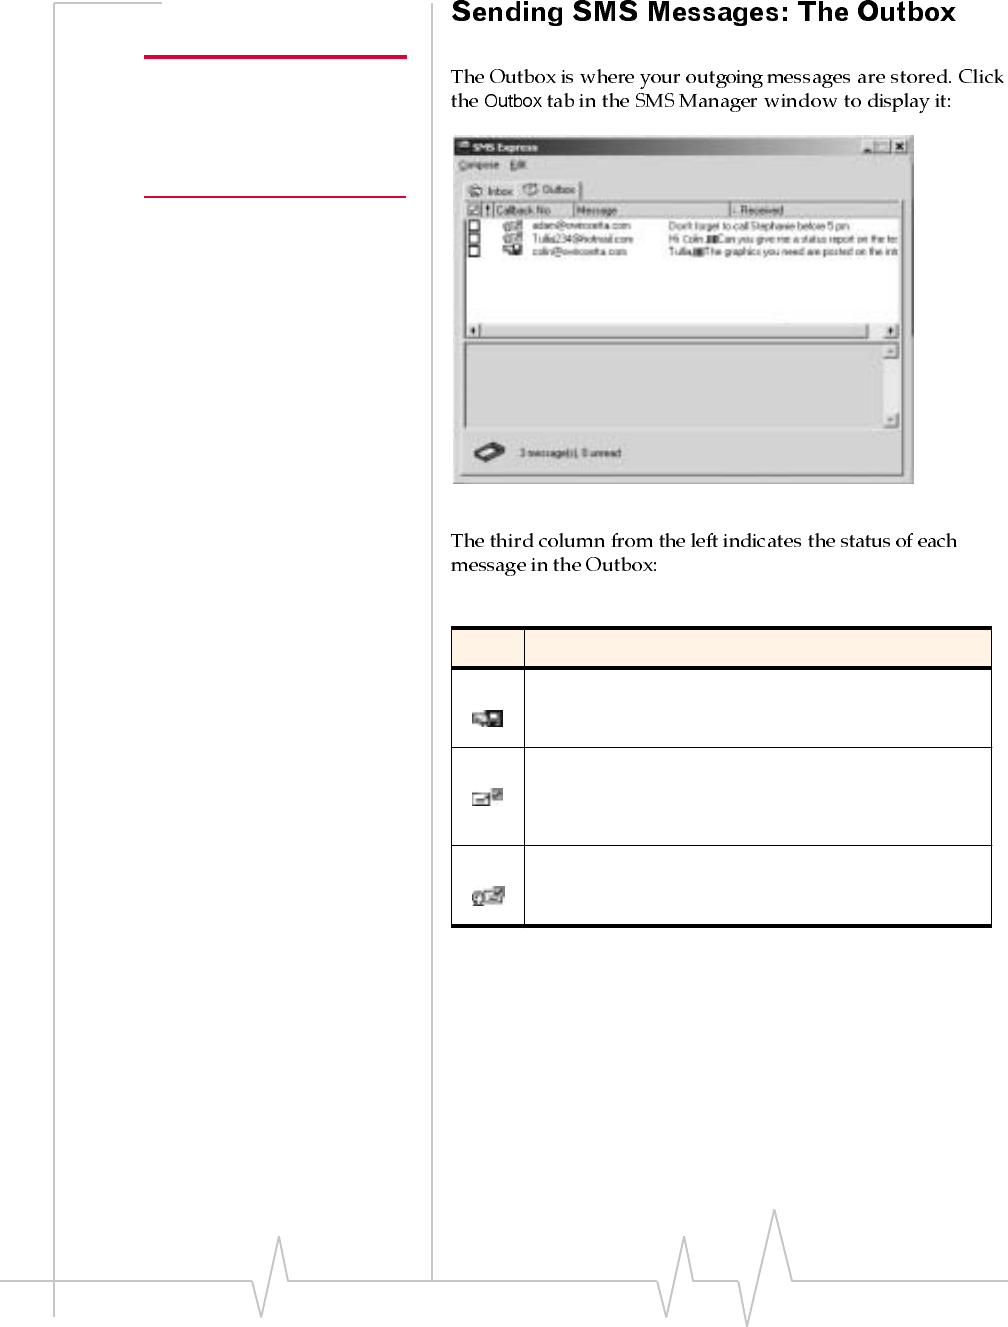
Figure 7-5: The Outbox Tab of the SMS Manager Window
Table 7-1 :Outgoing Message Status Icons
Icon Meaning
Saved
The message has been saved in the Outbox but not yet
sent.
Sent
The message has been sent successfully to the GSM
network but has not yet been delivered to the
recipient(s).
Delivered
The message has been delivered to the recipient(s)’ mail
box(es).
Watcher Menus
Rev B Oct. 2001 57
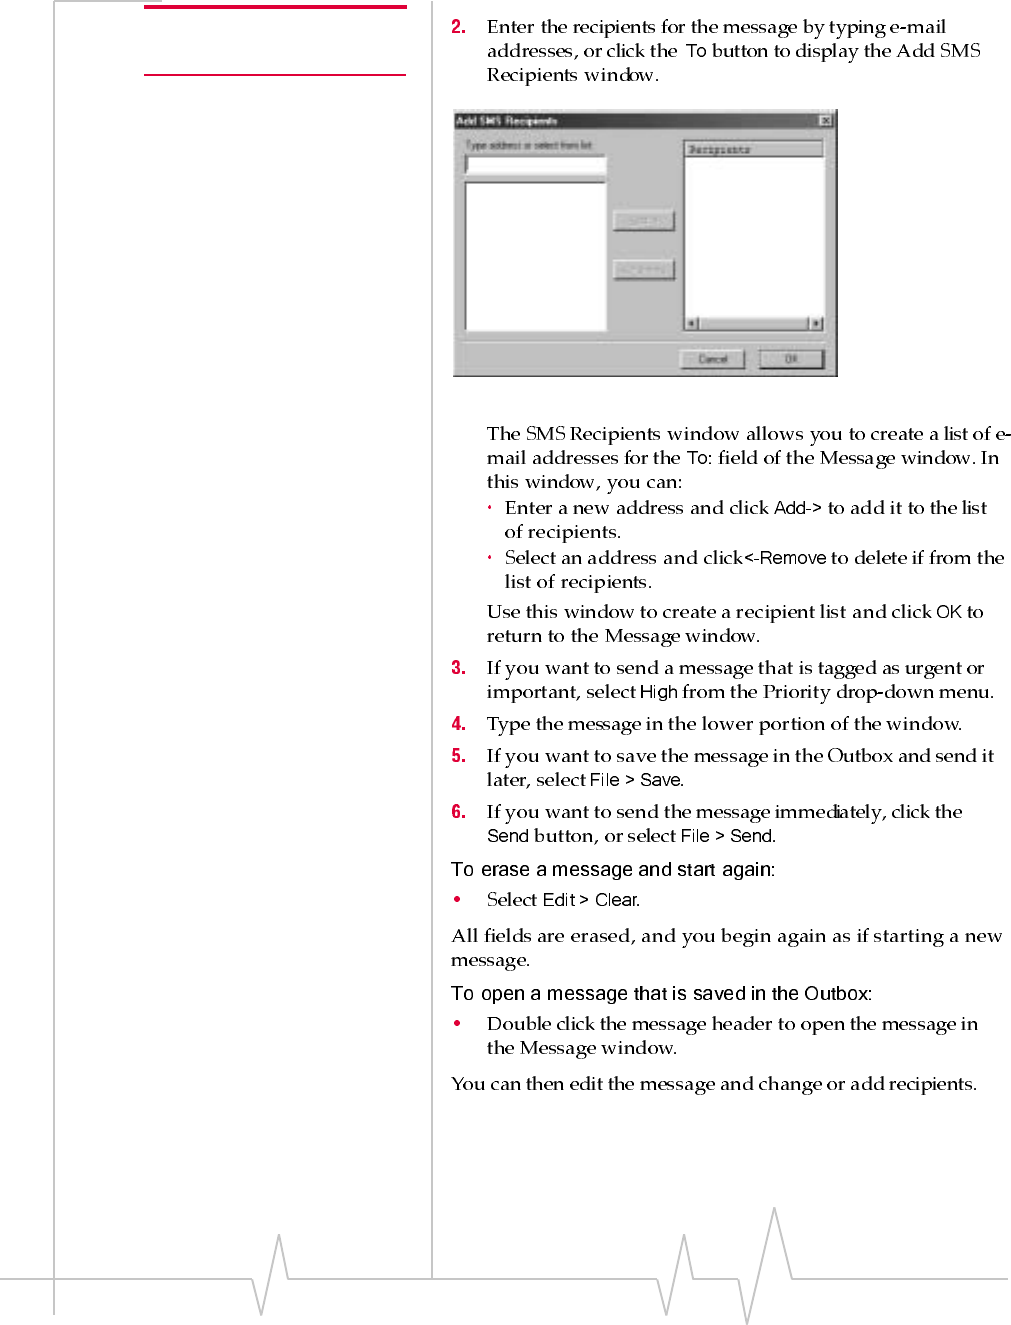
Figure 7-6: The Message Window
Partially Sent
The message has been sent to the network but the
network did not respond. (This may indicate a network
problem.)
Not Sent
The message was sent to the network and the network
responded with an error. The error message is shown in
the Status field when you display the message.
Some possible reasons for a failure to send are:
You do not have a subscription to a service that
allows you to send SMS messages.
The e-mail address in the field is not valid.
The message exceeded the maximum length for
SMS messages.
There is a network problem or a problem with your
account.
Table 7-1 :Outgoing Message Status Icons
Icon Meaning
AirCard 710 Wireless Network Card - User Guide
58 2130135
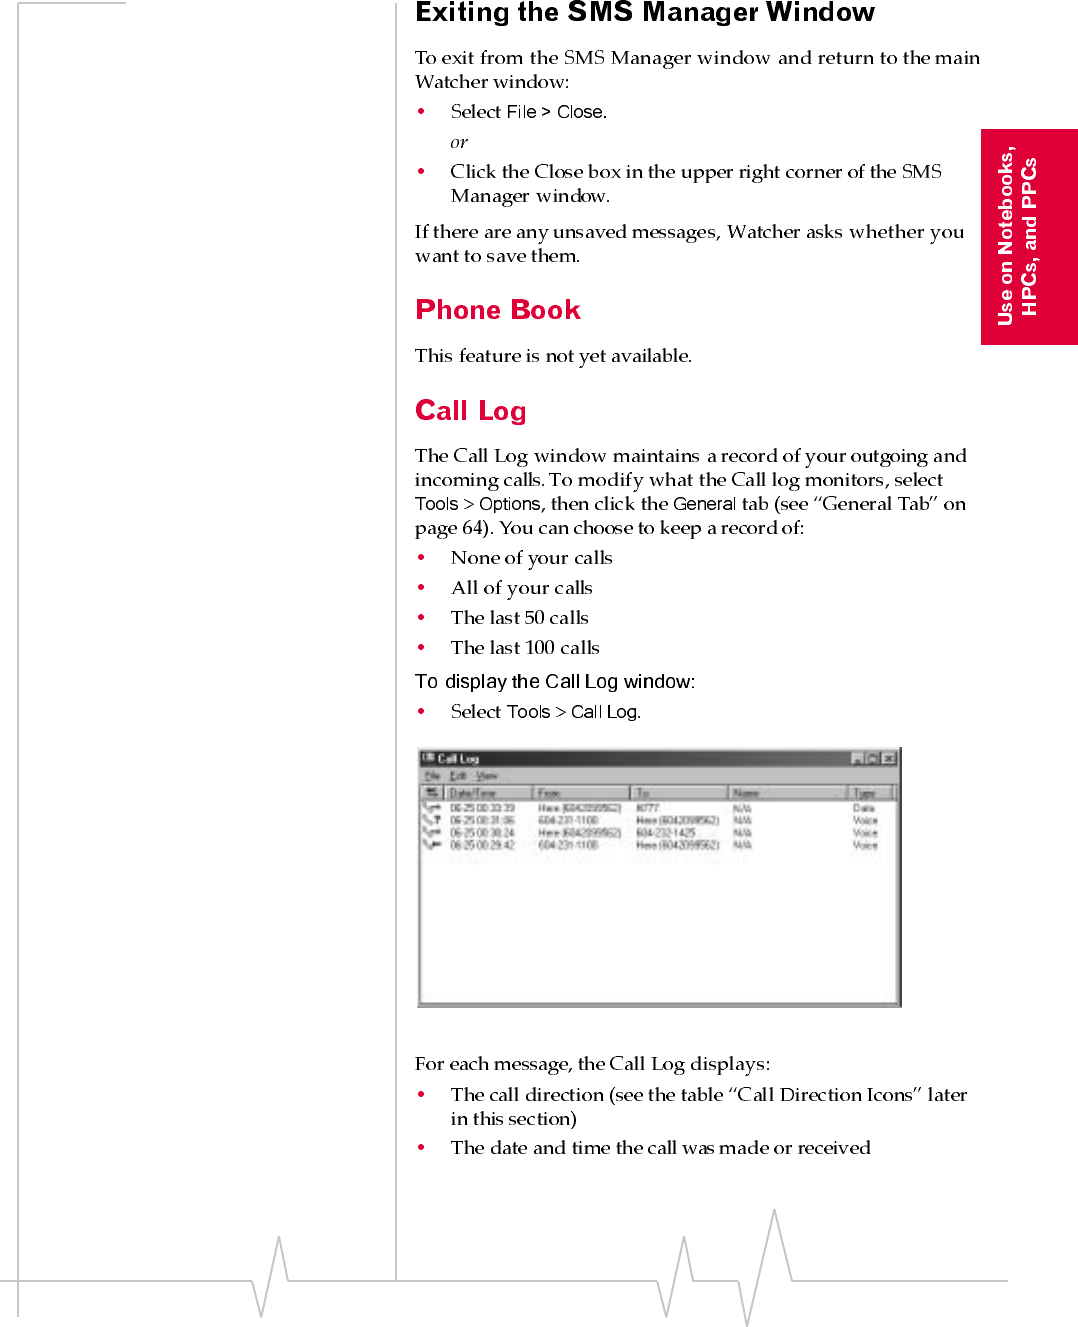
Note: A message can have up
to 16 recipients.
Figure 7-7: The Add SMS Recipients Window
Watcher Menus
Rev B Oct. 2001 59
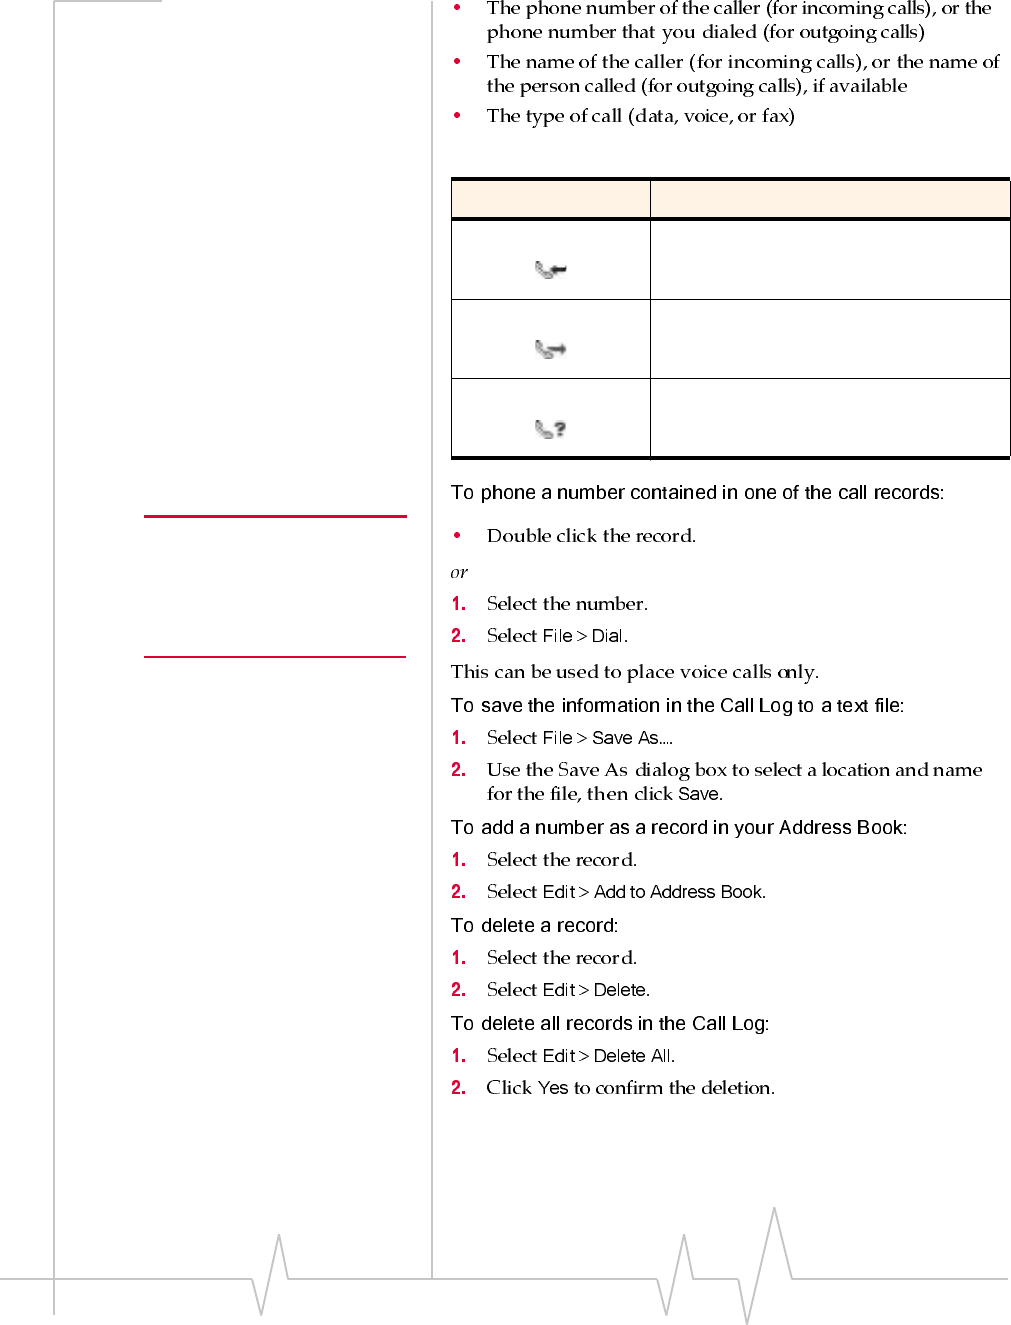
Figure 7-8: The Call Log Window
AirCard 710 Wireless Network Card - User Guide
60 2130135
Note: If you choose File > Dial,
in the Call Log window you can
establish a voice call to any
number in the From or To
column.
Table 7-2 :Call Direction Icons
Icon Meaning
Incoming Call
This is a call that you answered.
Outgoing Call
This is a call that you made.
Missed Call
This is a call you received but did not
answer.
Watcher Menus
Rev B Oct. 2001 61
Note: Choosing View > All
displays all call types in the Call
Log window.
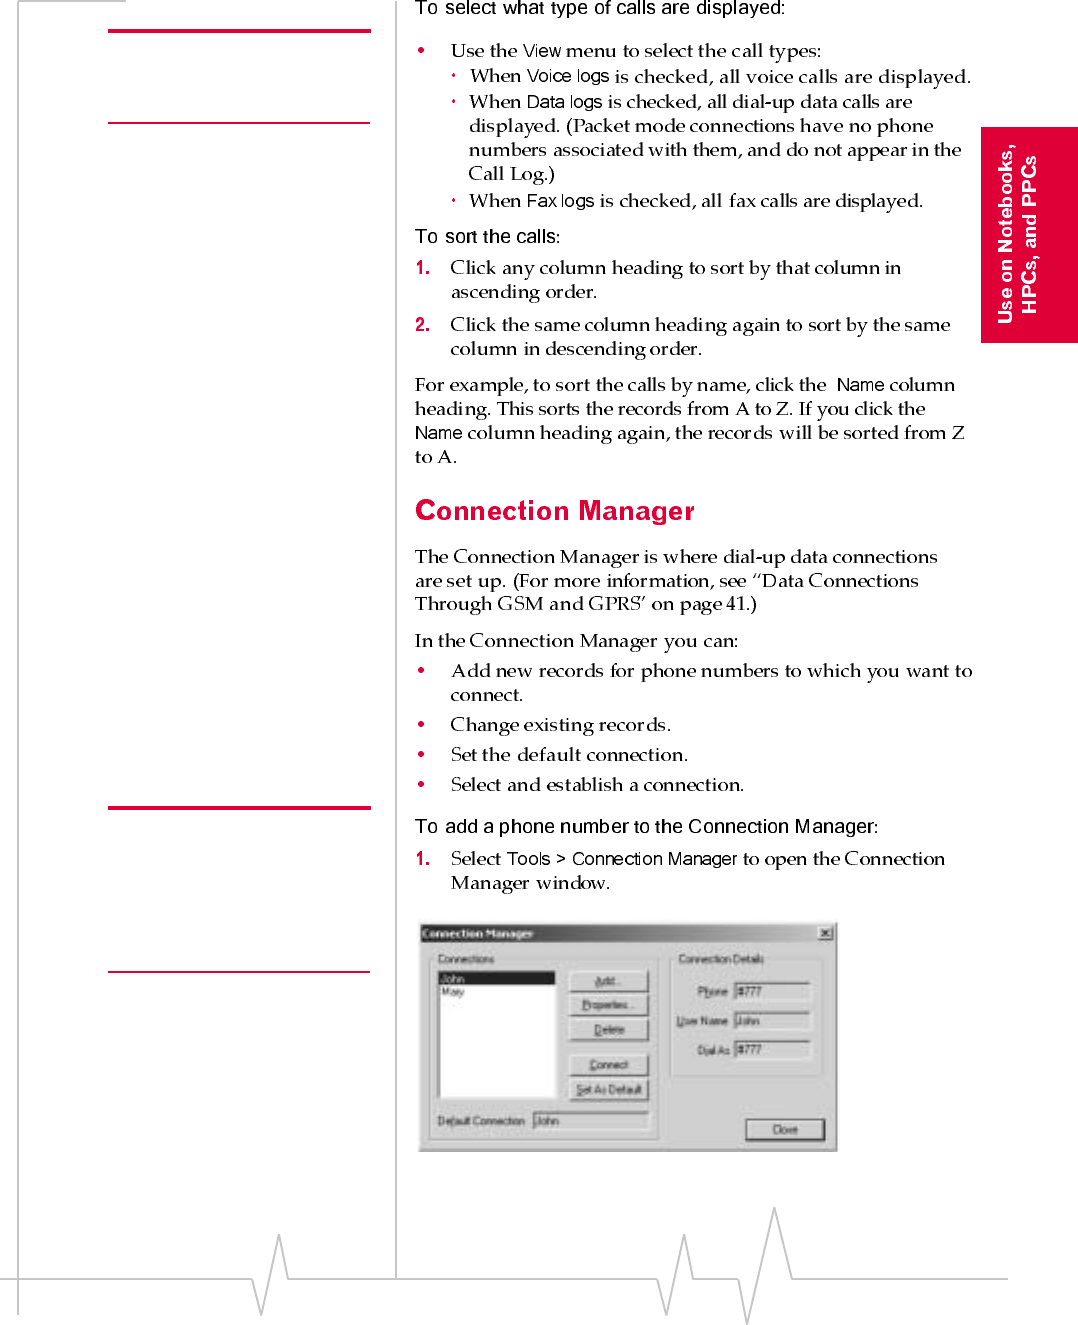
Note: The default connection is
the one established if you click
the Connect button on the main
Watcher window without making
a selection from the drop-down
menu.
Figure 7-9: The Connection Manager Window
AirCard 710 Wireless Network Card - User Guide
62 2130135
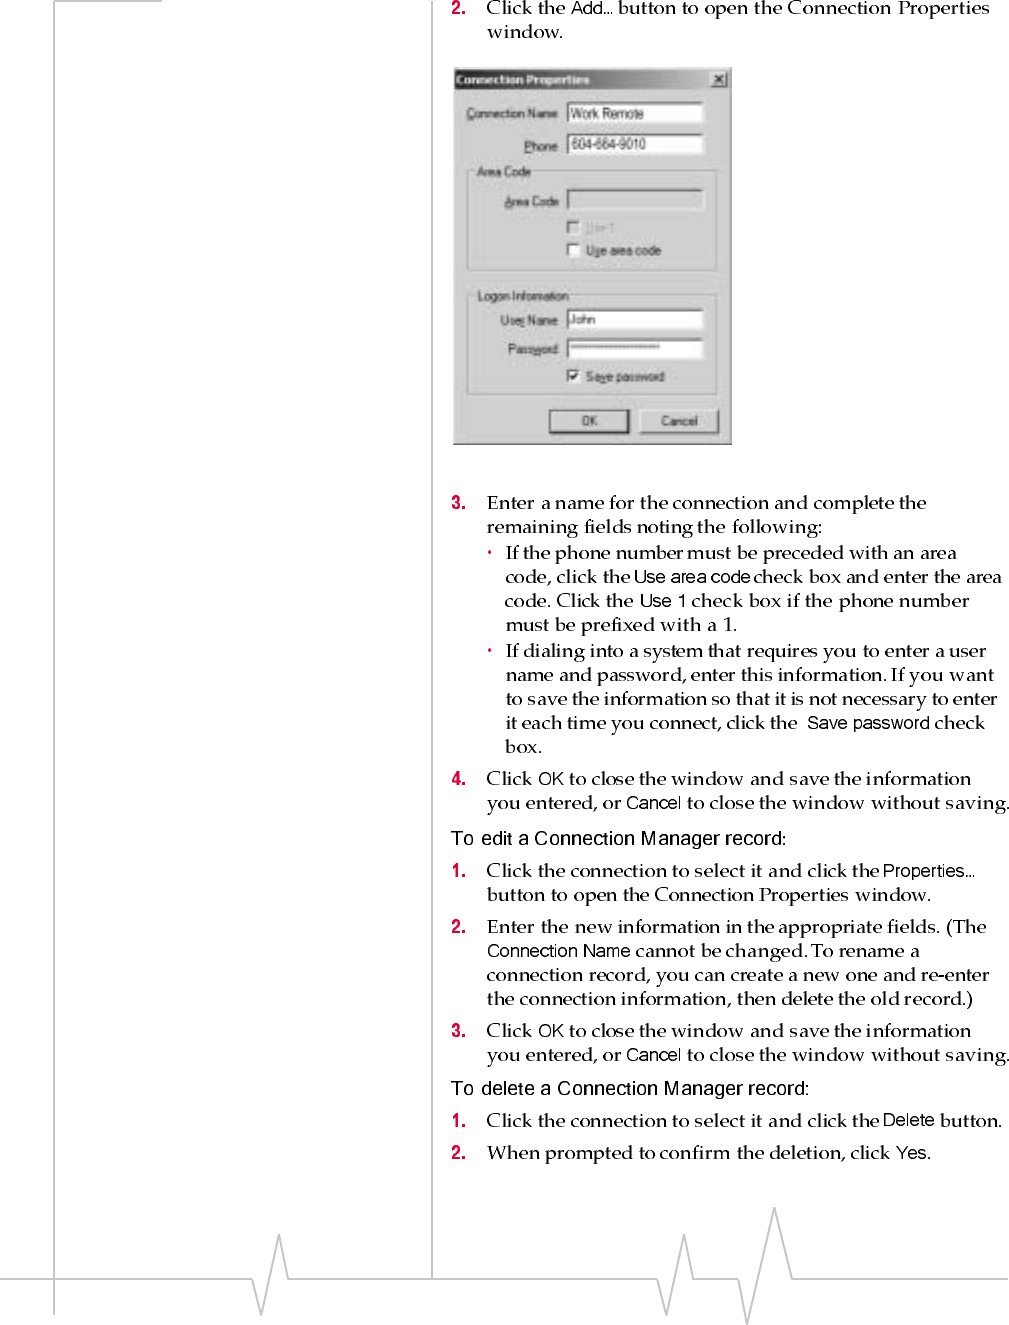
Figure 7-10: The Connection Properties Window
Watcher Menus
Rev B Oct. 2001 63
Note: Use the KeyGuard feature
if you are concerned that you
might inadvertently press SEND
and dial a number.
AirCard 710 Wireless Network Card - User Guide
64 2130135
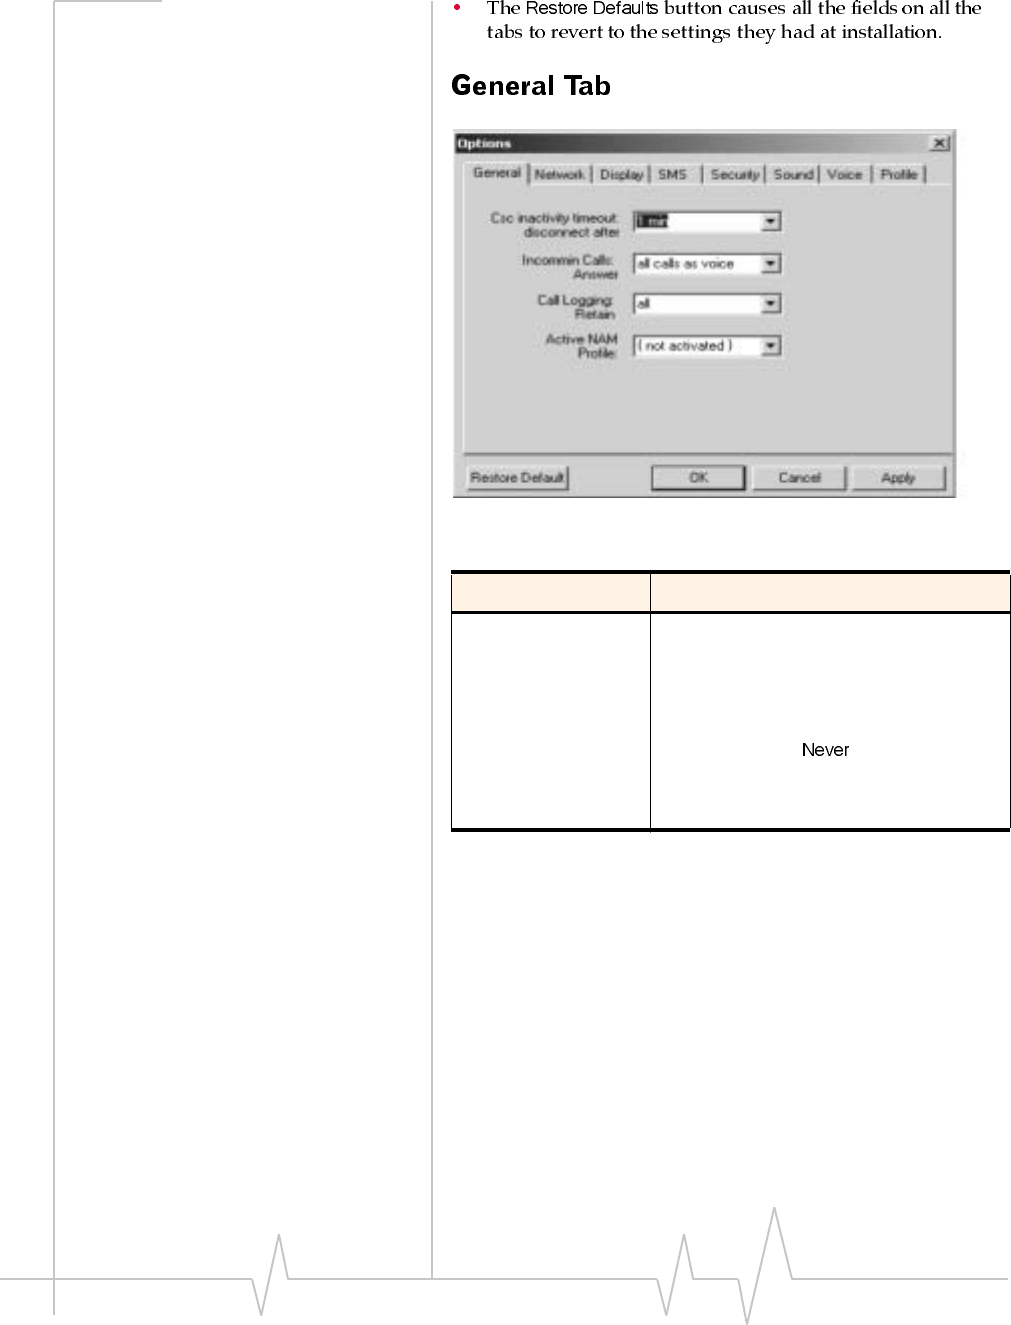
Figure 7-11: The General Tab of the Options Window
Table 7-3 :General Tab Options
Field Description
Data Call
Inactivity
Timeout:
Disconnect
The Inactivity Timeout terminates your
connection to the GSM network
automatically when the AirCard network
card is inactive for the amount of time you
specify here. (The AirCard network card is
inactive when no data transmission is
occurring.) Select to disable the
feature. Otherwise, select the number of
minutes after which you want to
automatically disconnect.
Watcher Menus
Rev B Oct. 2001 65
Incoming Calls
Answer By default the AirCard network card is set
to answer all calls as voice calls. To receive
a fax or data call, you must set this field
appropriately, before the call is answered.
This means that anyone wanting to send a
fax, or establish a data connection with the
AirCard network card, must notify you in
advance so that you can change this field
before the call is made.
This setting reverts to “all calls as Voice”
whenever Watcher is restarted.
If you select “next call as Fax” or “next call
as Data”, the AirCard network card
maintains the setting for one call, or until
Watcher is restarted.
If you select “all calls as Fax” or “all calls as
Data”, the AirCard network card maintains
the setting until you select another option.
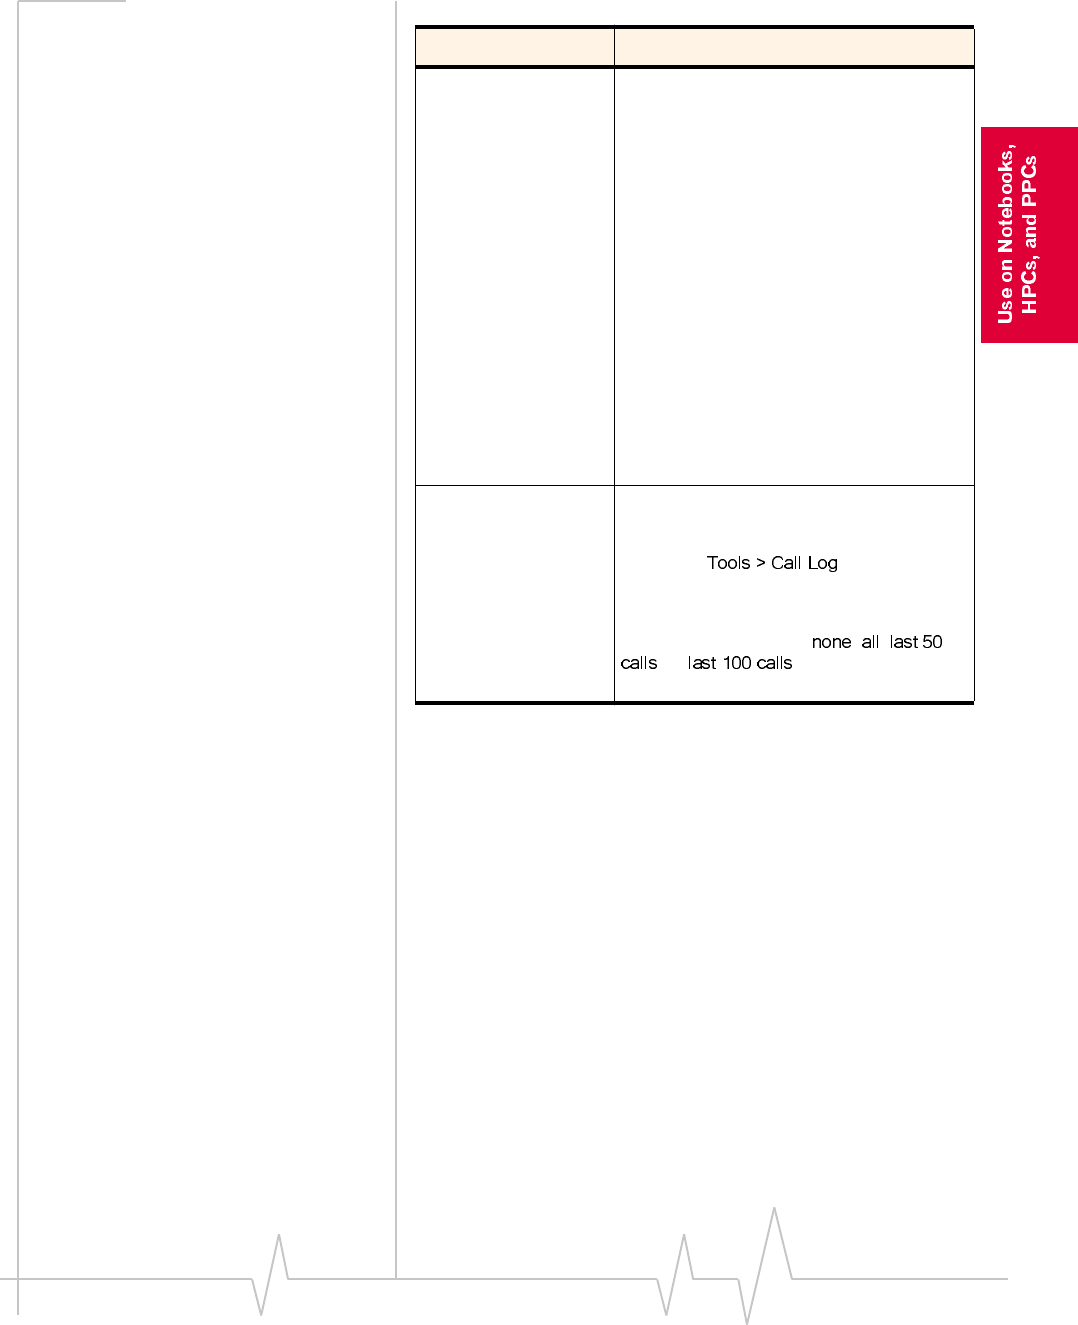
Call Logging
Retain You have the option of maintaining records
of your outgoing and incoming calls in the
Call Log. (The Call Log is displayed when
you select , and is
described above.)
This field allows you to specify the number
of calls retained. Select , ,
, or from the drop-down
menu.
Table 7-3 :General Tab Options
Field Description
AirCard 710 Wireless Network Card - User Guide
66 2130135
*NAM stands for Number Assignment Module and is information stored in
the flash memory of your SIM card. The information includes your phone
number parameters specific to your service provider.
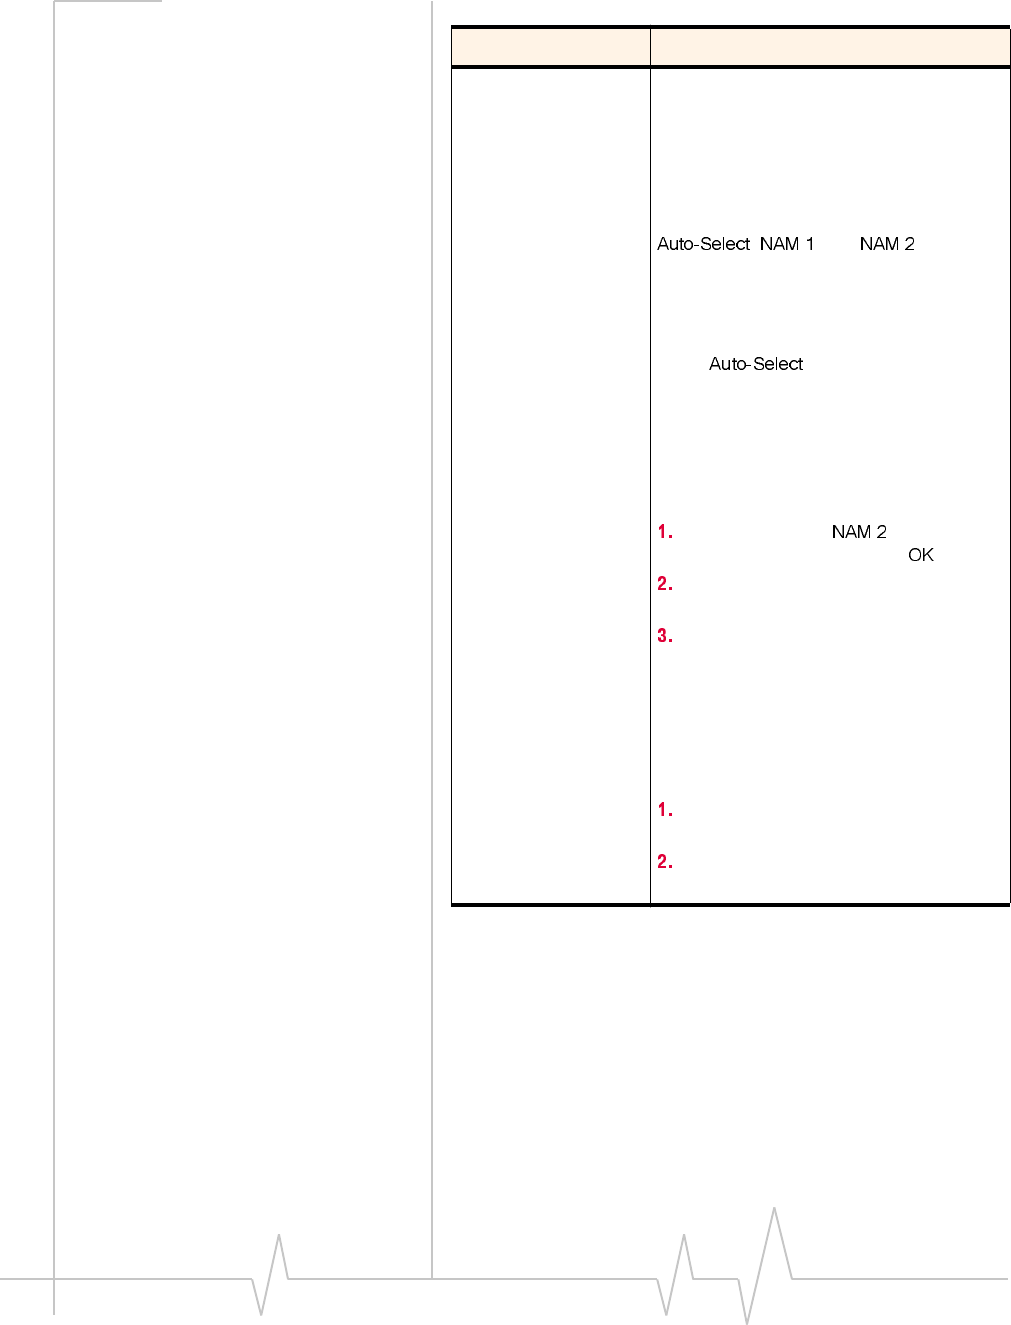
Active NAM*
Profile The AirCard network card allows you to
configure and use up to two accounts (with
two different phone numbers). This may be
useful to users who want, for example, to
have one account for business calls and
one for personal calls.
This drop-down menu lists these items:
, , and . If one
account has been activated, NAM 1 has a
phone number next to it, and if two
accounts have been activated, NAM 1 and
NAM 2 have phone numbers.
When is in effect, the AirCard
network card uses the account most
appropriate to your location, based on the
coverage of your accounts.
To configure a second account (where only
one account has been activated):
Select the option from this
drop-down menu and click .
Stop, eject and re-insert the AirCard
PC Card.
Launch Watcher; the Activation
Wizard should launch. You can then
configure a second account.
If two accounts are configured, both phone
numbers should be displayed in this drop-
down menu. To switch from one account to
the other:
Select the phone number from the
drop-down menu.
Stop, eject and reinsert the AirCard
PC Card.
Table 7-3 :General Tab Options
Field Description
Watcher Menus
Rev B Oct. 2001 67
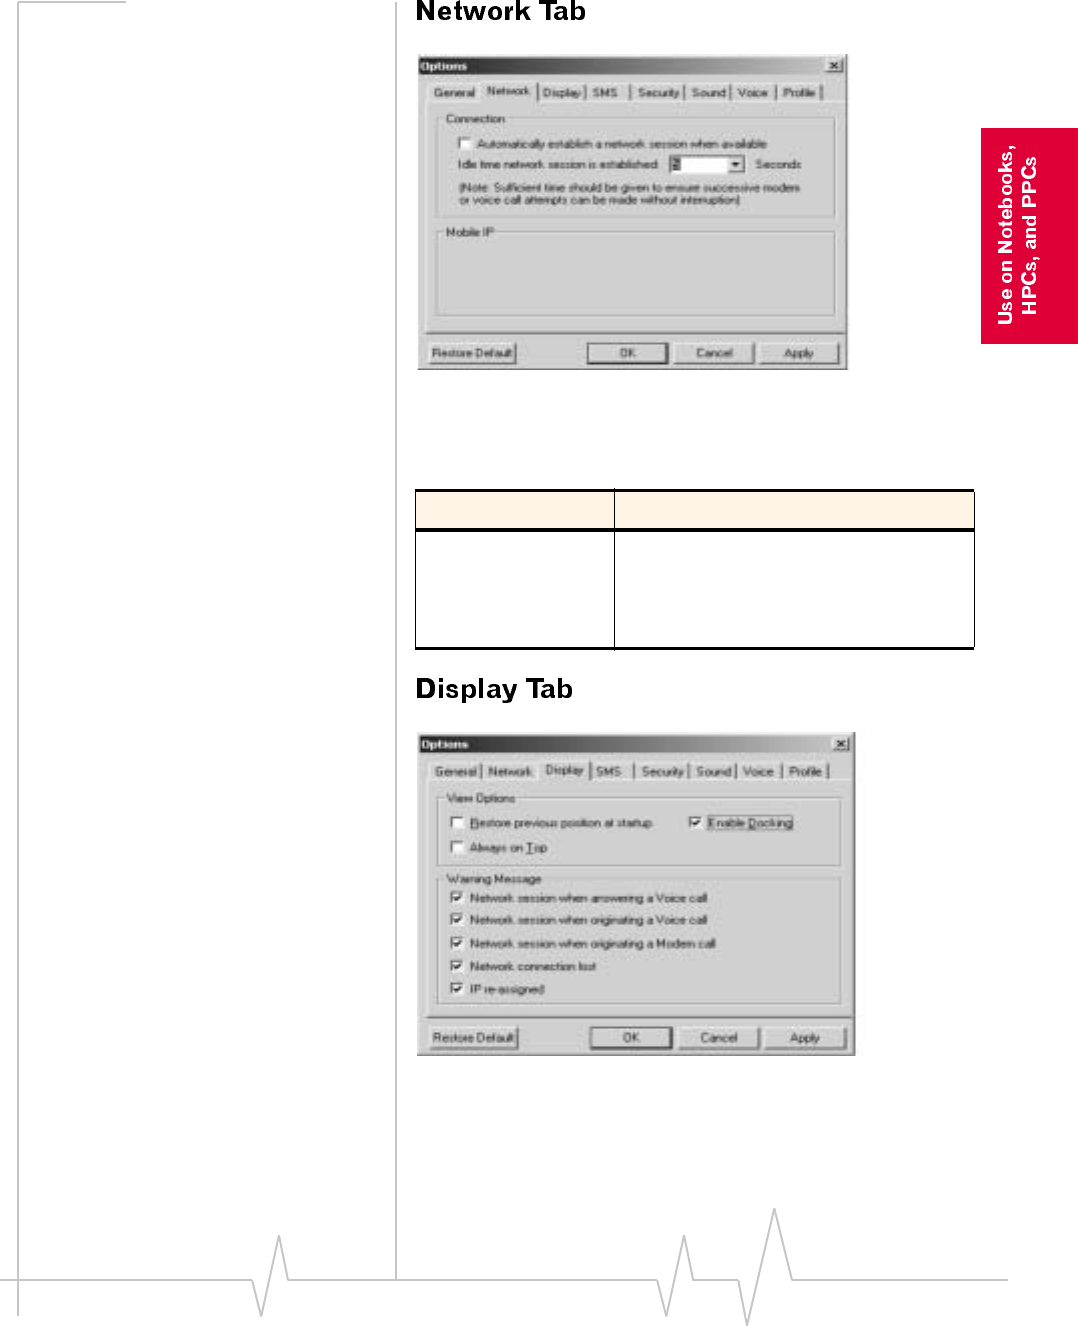
Figure 7-12: The Network Tab of the Options Window
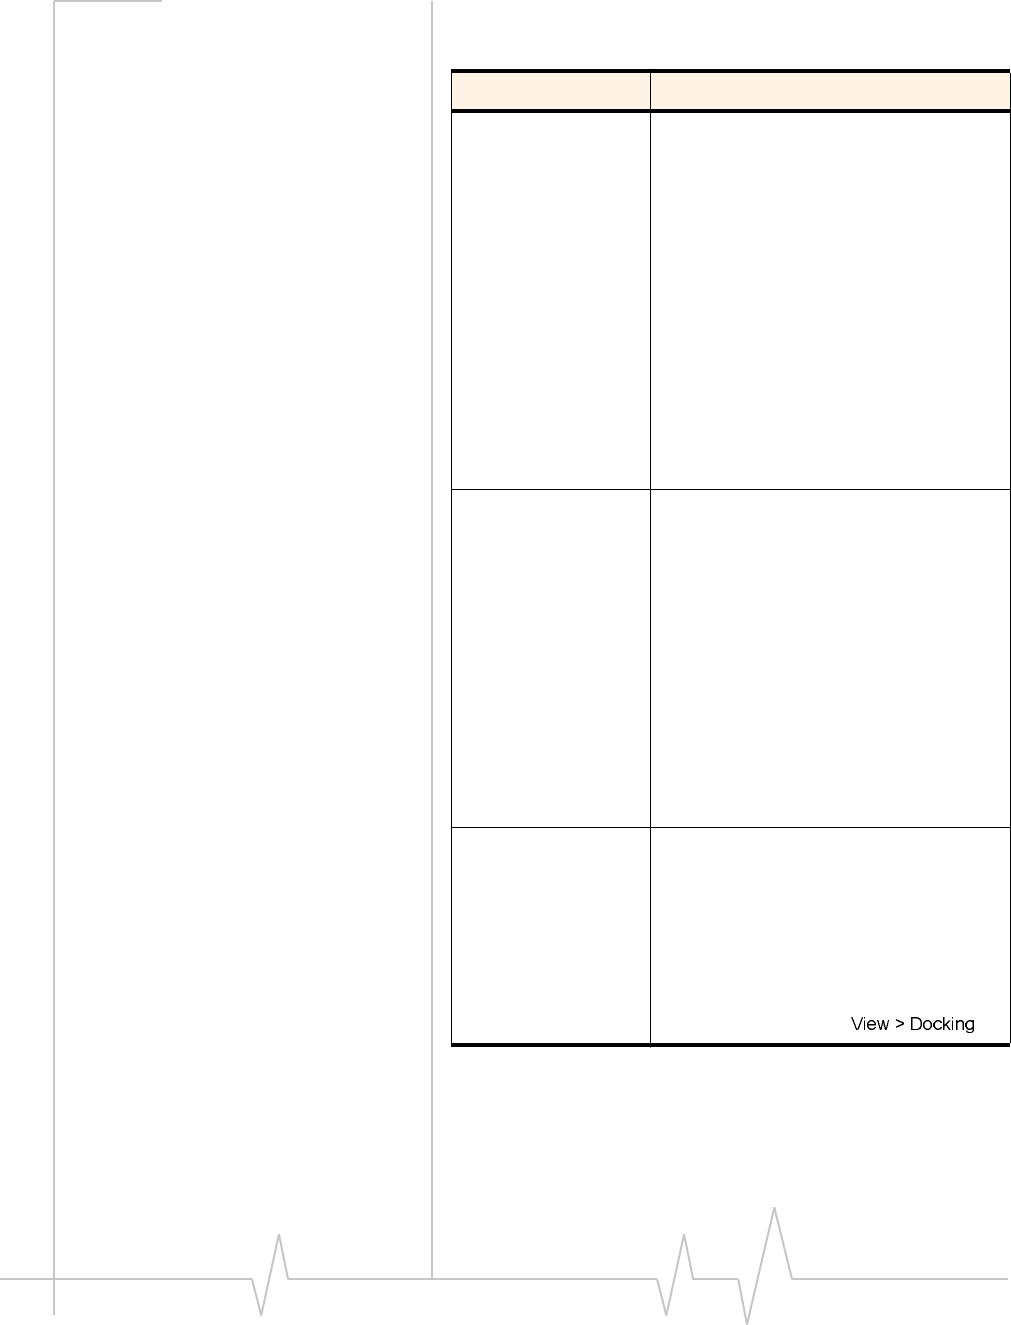
Figure 7-13: The Display Tab of the Options Window
Table 7-4 :Network Tab Options
Field Description
Automatically
establish a
network session
when available
The AirCard network card can try to
establish a packet mode connection
whenever the AirCard PC Card is inserted,
where GPRS service is available. (See
“Packet Mode Connections” on page 43.)
AirCard 710 Wireless Network Card - User Guide
68 2130135
Table 7-5 :Display Tab Options
Field Description
Restore previous
position on
startup
This field determines where the full
Watcher window appears when launched.
(The full and compact views of the Watcher
window are shown under the Toggle Full/
Compact heading above.)
If this feature is disabled, Watcher always
displays in the center of your screen.
If you enable this feature and move the
Watcher window, the window will re-appear
in its new position if you close and re-open
it, or change the view to compact and then
full again.
Use the check box to enable and disable
the feature. (The feature is enabled when
checked.)
Remember
Compact View
position
This field determines where the compact
Watcher window appears.
If this feature is enabled, when you switch
from the full view to the compact view, the
Watcher window remains in the same
place.
If this feature is disabled, when you switch
from the full view to the compact view, the
Watcher window displays in the position it
last occupied.
Use the check box to enable and disable
this feature. (The feature is enabled when
checked.)
Enable Docking When Docking is enabled, the Watcher
window jumps to the edge of your screen
when the window is dragged close to an
edge. This allows you to easily position the
window in a corner of your screen.
Use the check box to enable and disable
this feature. (The feature is enabled when
checked.) You can also enable and disable
this feature by selecting .
Watcher Menus
Rev B Oct. 2001 69
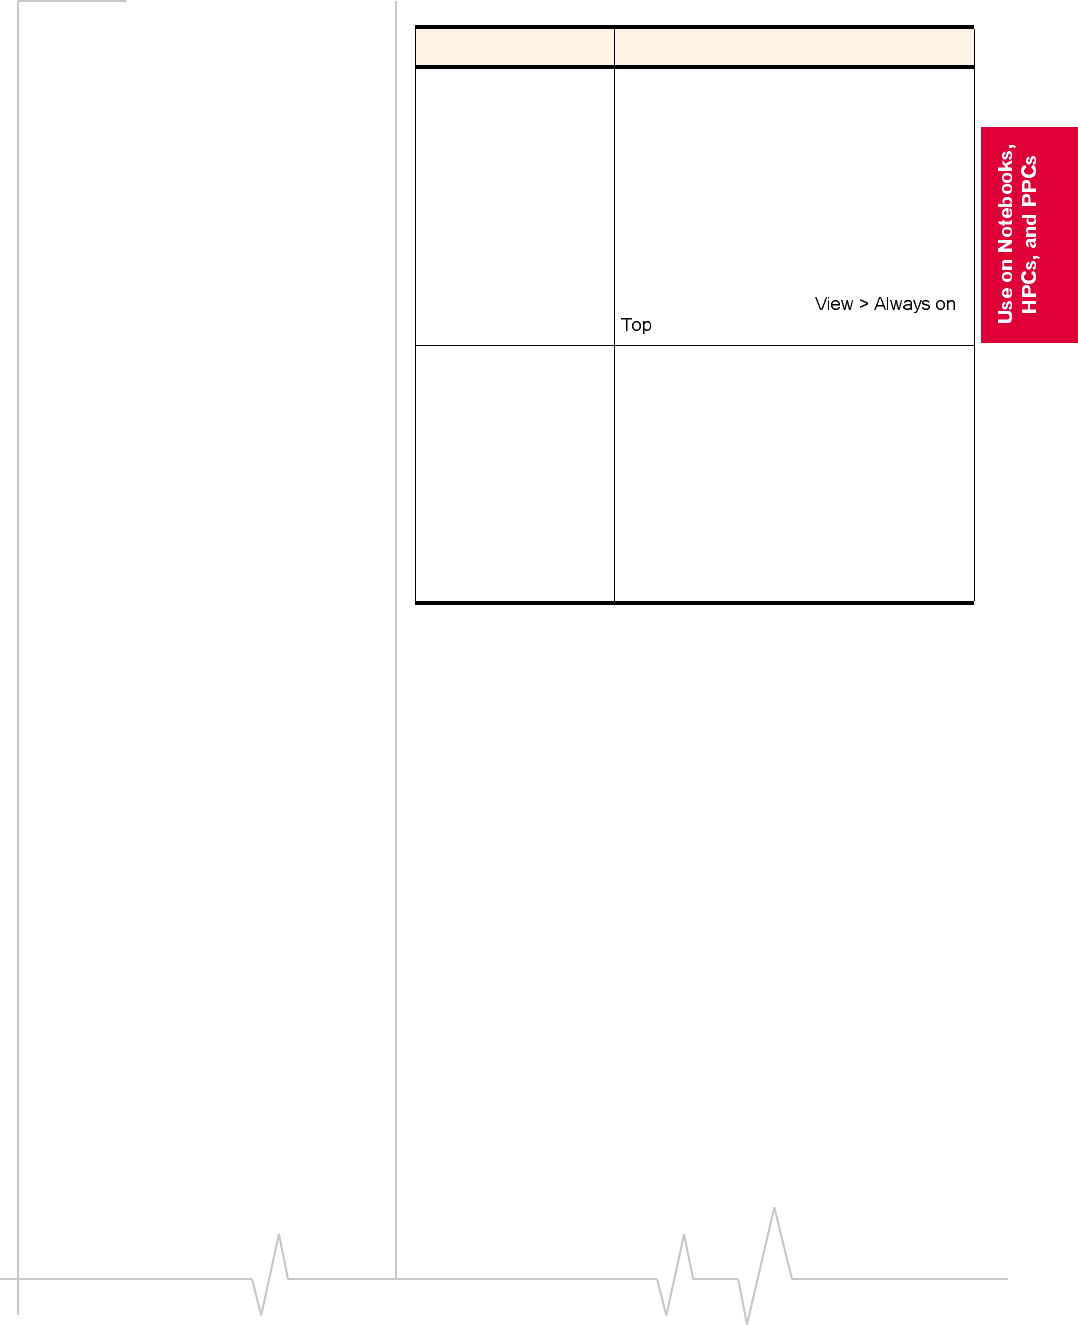
Always on Top When Always On Top is enabled, the
Watcher window displays in front of all
other application windows, even when you
position another window over Watcher.
This allows you to view connection status
indicators while using another application,
such as your Internet browser.
Use the check box to enable and disable
this feature. (The feature is enabled when
checked.) You can also enable and disable
this feature by selecting
.
GPRS premium
service charge
(for non-
subscribers)
When this feature is enabled, a warning
message is displayed any time you select
GPRS from the drop-down menu on the
main Watcher window, to remind you that
you may be charged extra for this service.
(Depending on your billing plan, your
service provider may apply a surcharge to
GPRS service.)
Use the check box to enable and disable
this feature. (The feature is enabled when
checked.)
Table 7-5 :Display Tab Options
Field Description
AirCard 710 Wireless Network Card - User Guide
70 2130135
Data connection
lost When this feature is enabled, a warning
message is displayed any time you lose
your connection to the GSM network.
Use the check box to enable and disable
this feature. (The feature is enabled when
checked.)
IP re-assigned All devices connected to the Internet
require an IP (Internet Protocol) address. In
some technologies, a device is assigned a
permanent IP address and that IP address
can never be used by another device.
Where DHCP (Dynamic Host Configuration
Protocol) is used, the network maintains a
pool of IP addresses and assigns them to
devices as needed. The AirCard 710
network card uses DHCP so that it is
assigned an IP address by the network.
This means that the IP address for your
AirCard network card changes each time
you connect, and sometimes during a
connection.
When this feature is enabled, a warning
message is displayed each time the
network assigns a new IP address to the
AirCard network card.
Use the check box to enable and disable
this feature. (The feature is enabled when
checked.)
Table 7-5 :Display Tab Options
Field Description

Watcher Menus
Rev B Oct. 2001 71
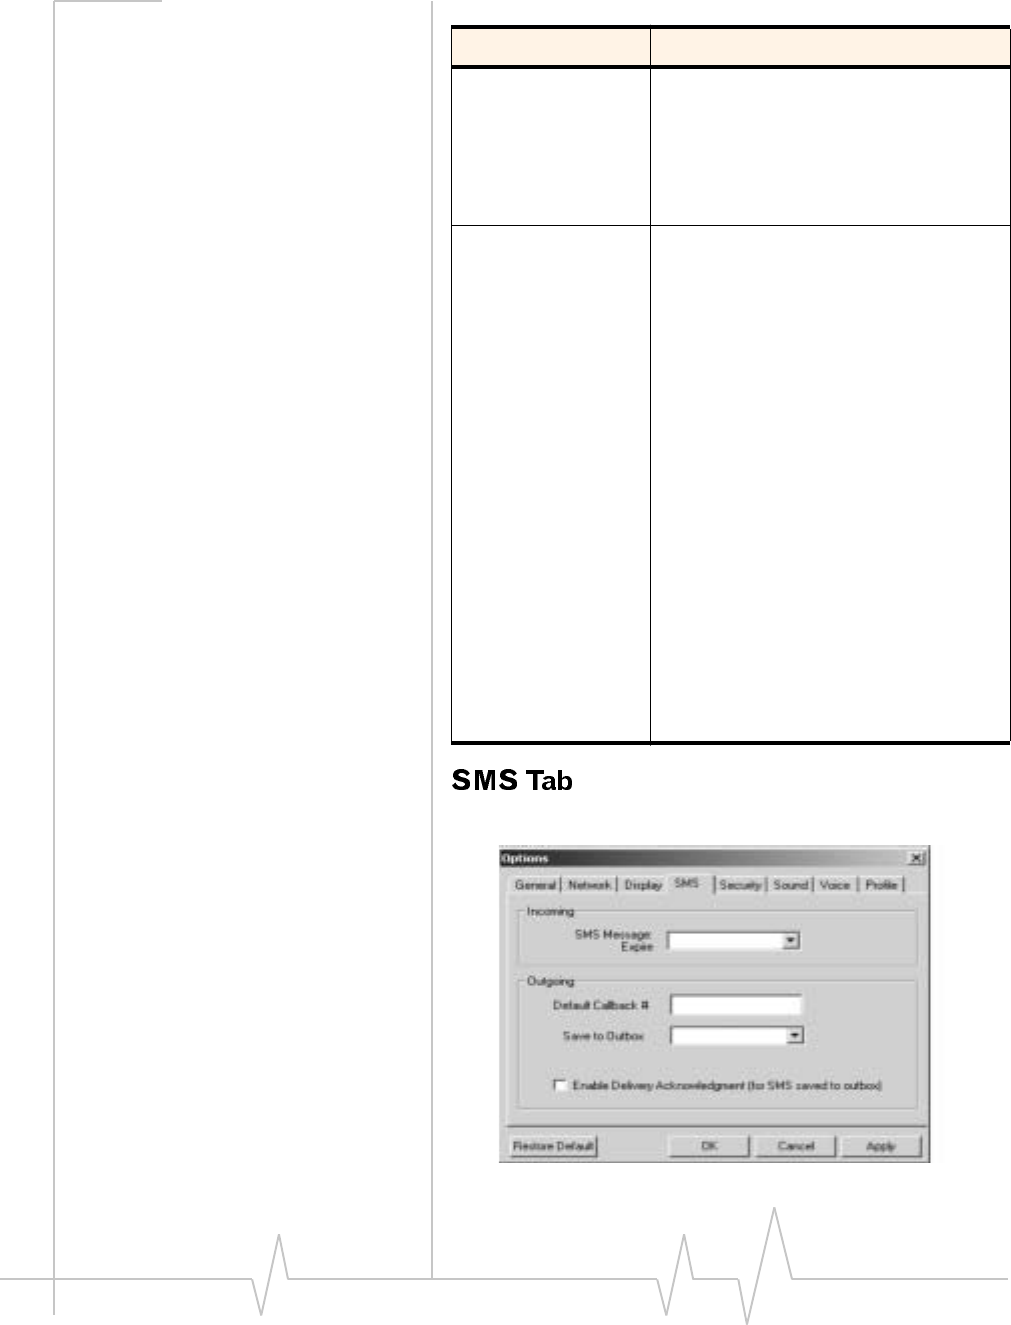
Table 7-6 :SMS Tab Options
Field Description
SMS Messages:
Expire This feature allows for the automatic
deletion of SMS messages that have been
in your Inbox for a specified amount of
time. The SMS messaging feature is
described in detail under the heading
Mobile Messaging… above.
To disable automatic deletion of messages,
select from the drop-down menu.
To enable automatic deletion of messages,
select a number of days from the drop-
down menu.
Only messages that have been “read”
(displayed in the SMS Manager window)
are deleted by this feature. Manual deletion
of messages is covered in the section on
Mobile Messaging… above.
Override
Callback # When you send SMS messages, you have
the option of specifying a call back number
so that the message recipient will know
how to reach you. By default, your call back
number is your AirCard phone number.
This feature allows you to use a different
number than the AirCard phone number.
To set a new call back number, click the
check box to enable the feature and enter a
number in the field. (Leave the field blank if
you prefer to have no call back number on
your messages.)
To disable the feature (and use the AirCard
phone number as your call back number),
click the check box so that it is not
checked.
AirCard 710 Wireless Network Card - User Guide
72 2130135
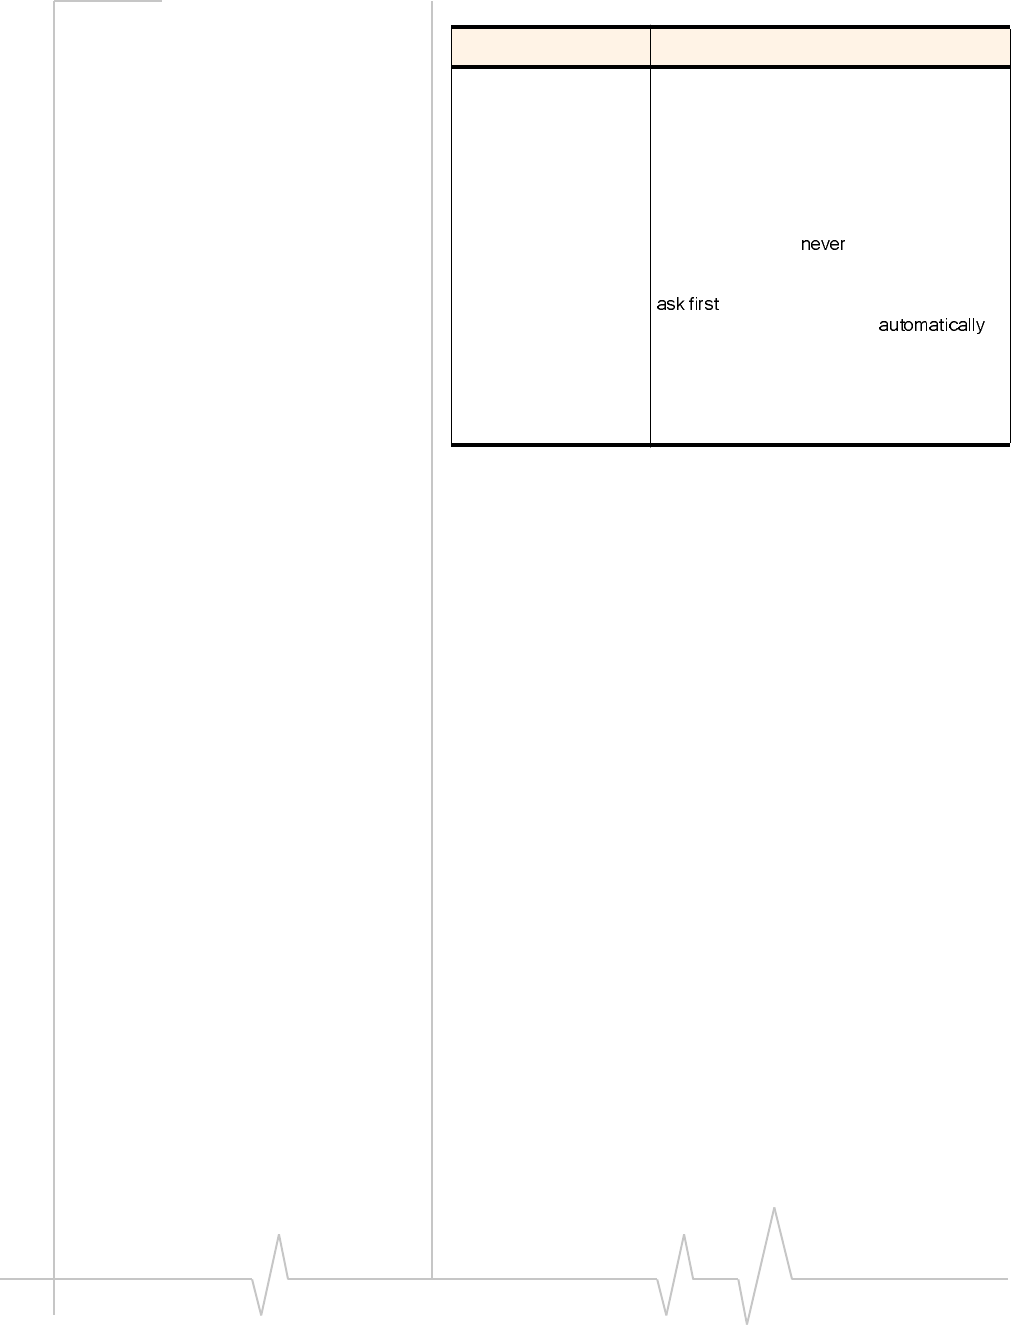
Save to Outbox You have the option of retaining, in the
Outbox, a copy of messages that you send.
See the SMS Manager… section for details
about the Outbox.
This feature allows you to specify whether
outgoing messages are saved in the
Outbox. If you do not want to save any
messages, select . If you want to be
prompted as you send each message, as
to whether you want to retain a copy, select
. If you want to retain a copy of all
messages you send, select .
Note that if you do not save messages to
the outbox you do not receive status
messages, such as the one that notifies
you of a successful delivery.
Table 7-6 :SMS Tab Options
Field Description
Watcher Menus
Rev B Oct. 2001 73
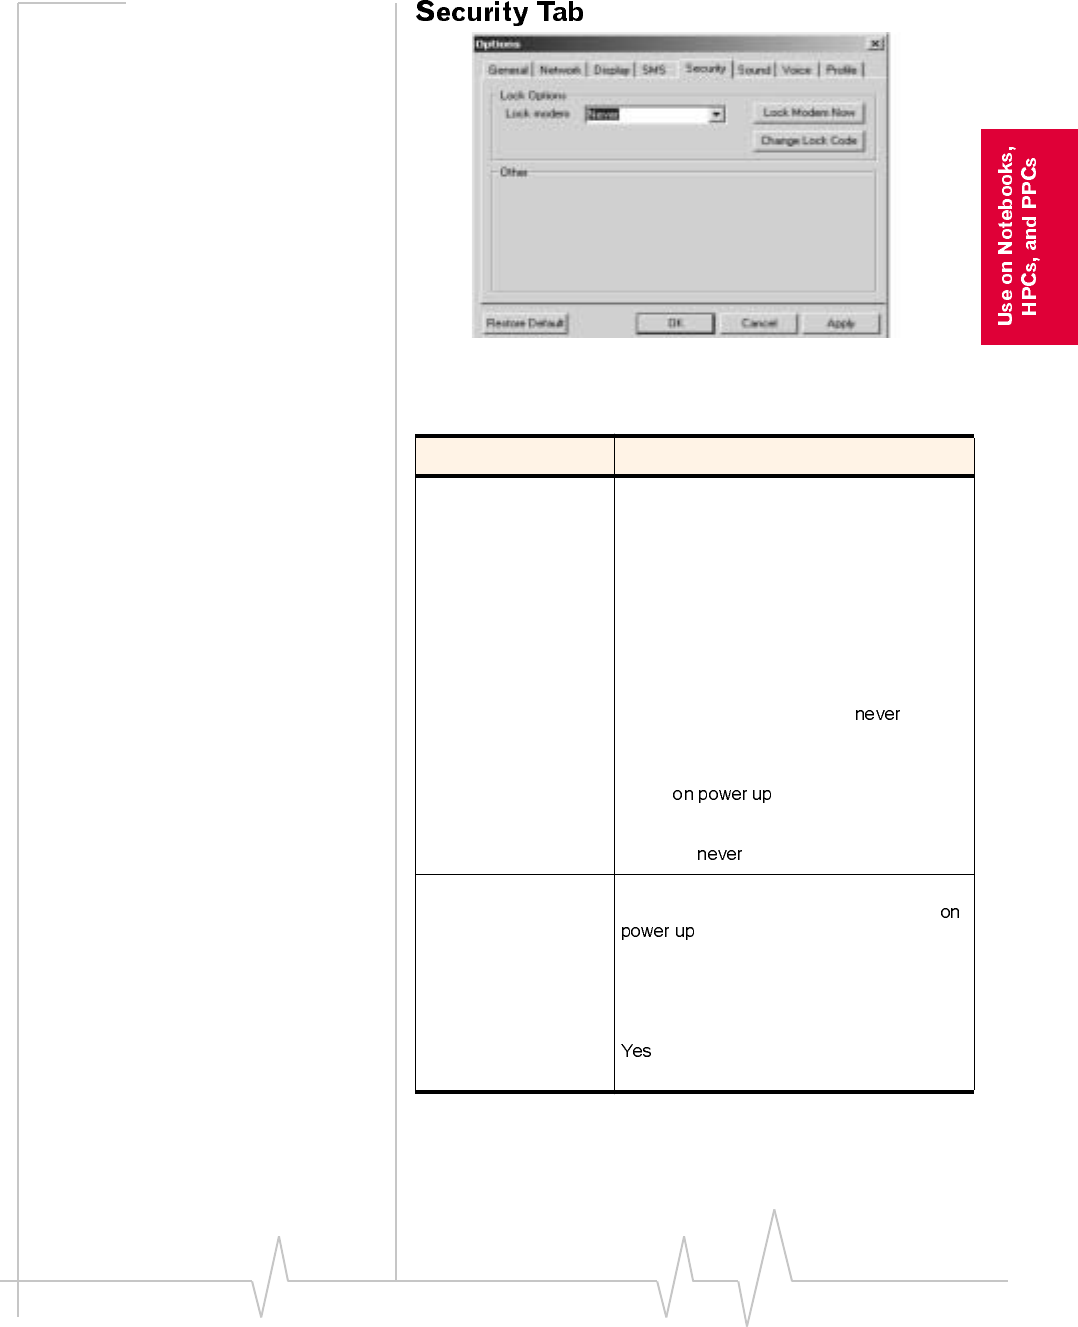
Table 7-7 :Security Tab Options
Field Description
Lock modem The Lock Code feature can be used to
prevent others from using your AirCard
network card and your account. When the
Lock Code is enabled, you are prompted to
enter a code any time Watcher is launched,
and if the wrong code is entered, Watcher
closes. (This makes it impossible to use the
AirCard network card without knowing the
lock code.) By default the lock code is the
last four digits of your phone number.
To disable the feature, select from
the drop-down menu. To enable the
feature, so that you are prompted for a lock
code the next time you launch Watcher,
select from the drop-down
menu. (The Lock Code feature will then
remain enabled until you disable it by
selecting in this field.)
Lock Modem Now This field allows you to enable the Lock
Code feature immediately. (If you select
in the previously described drop-
down menu, you need to close Watcher
before the lock code comes into effect.)
When you click the button, Watcher
prompts, “Lock the modem now?”. Click
at this prompt to lock the AirCard
network card.
AirCard 710 Wireless Network Card - User Guide
74 2130135
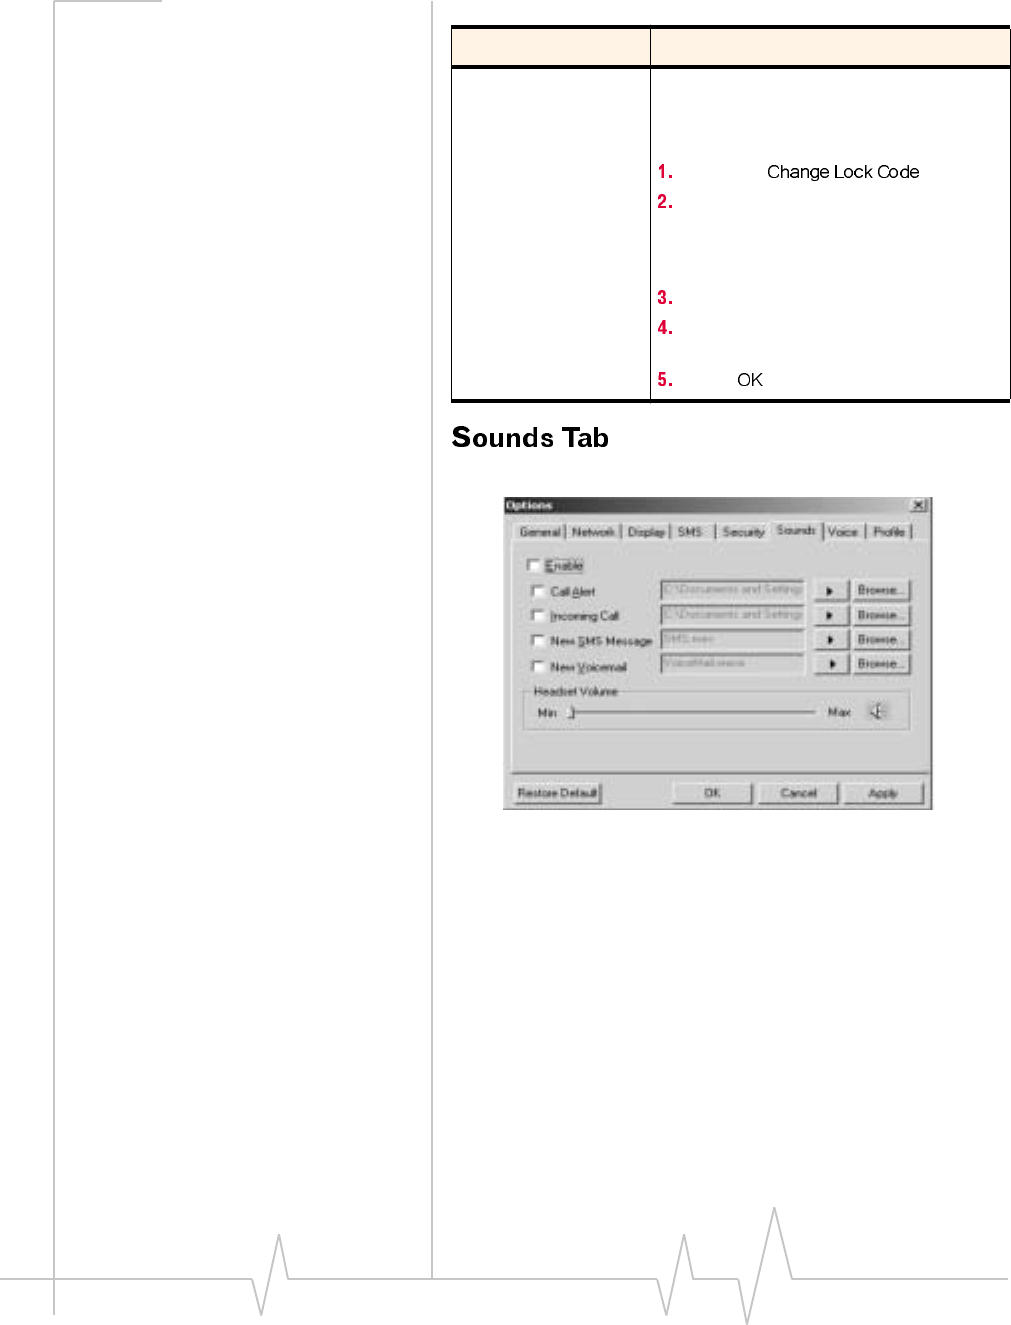
Change Lock
Code This button allows you to set a new lock
code.
To change the lock code:
Click the button.
Enter your existing lock code (the last
four digits of your phone number
unless you have changed it) at the
prompt.
Enter a new lock code.
Enter your new lock code for confir-
mation.
Click .
Table 7-7 :Security Tab Options
Field Description
Watcher Menus
Rev B Oct. 2001 75
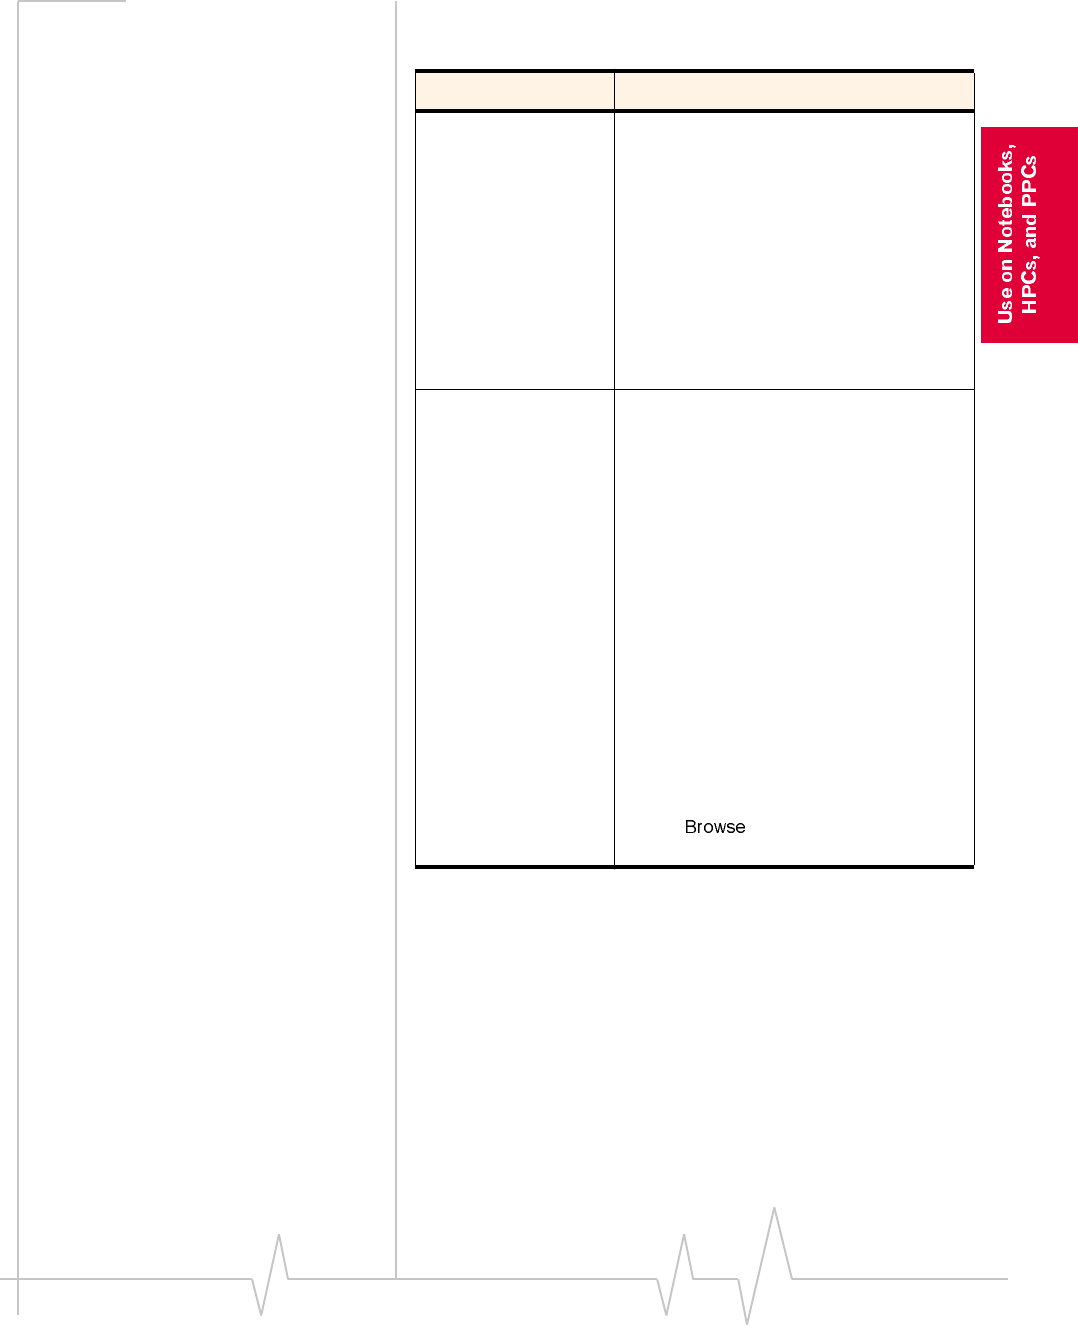
Table 7-8 :Sounds Tab Options
Field Description
Enable This field allows you to enable and disable
all sounds.
When this box is checked, you have the
option of individually enabling and disabling
the Call Alert, Incoming Call, New SMS
Message, and New Voice mail sounds.
When the box is not checked, there are no
sounds to notify you of any of these events.
Use the check box to indicate whether you
want all sounds enabled or disabled.
Call Alert Depending on your billing plan, you may
have a feature called Call Alert. When you
are on a call, this feature notifies you when
you have another incoming call. You can
then ignore the new incoming call or put
your current caller on hold and answer the
new call. (Contact your service provider if
you require more information about Call
Alert.)
If you have Call Alert, you can use this field
to select whether a sound is played to
notify you of another incoming call when
you are already on a voice call.
Use the check box to enable and disable
the sound assigned to Call Alert. The play
button (with the arrow head on it) allows
you to hear the sound assigned to this
feature. If you have another sound file you
would prefer to play for call alerts, you can
use the button to select it. (Any
*.wav file can be used.)
AirCard 710 Wireless Network Card - User Guide
76 2130135
Incoming Call This field allows you to select whether a
sound is played when you receive a call.
When this is disabled, the Silent Ringer
icon is displayed in the indicator area of the
main Watcher window. The only notification
you will then have of an incoming voice call
is the “Voice Call From …” or “Roam Call
From …” message displayed in the call
status area.
Use the check box to enable or disable the
sound. The play button (with the arrow on
it) allows you to hear the sound assigned to
incoming calls. If you have another sound
file you would prefer to use, you can use
the button to select it. (Any *.wav
file can be used.)
New SMS
Message This field allows you to select whether a
sound is played when your receive a new
SMS message.
When this is enabled, a sound is played
each time a message arrives. When
disabled no sound is played.
Use the check box to enable or disable the
sound. The play button (with the arrow on
it) allows you to hear the sound assigned to
new SMS messages. If you have another
sound file you would prefer to use, you can
use the button to select it. (Any
*.wav file can be used.)
New Voicemail This field allows you to select whether a
sound is played when a new voice mail
message arrives.
When this is enabled, a sound is played
when voice mail arrives. When disabled, no
sound is played.
Use the check box to enable or disable the
sound. The play button (with the arrow
head on it) allows you to hear the sound
assigned to new voice mail. If you have
another sound file you would prefer to use,
you can use the button to select it.
(Any *.wav file can be used.)
Table 7-8 :Sounds Tab Options
Field Description
Watcher Menus
Rev B Oct. 2001 77
Headset Volume This slider allows you to adjust the volume
of the ear piece on your headset. This
affects only the volume of what you hear.
(That is, it does not adjust the volume of
the speaker.) This performs the same
function as the volume controls on the main
Watcher window.
To increase the volume, drag the slider to
the right. To decrease the volume, drag the
slider to the left.
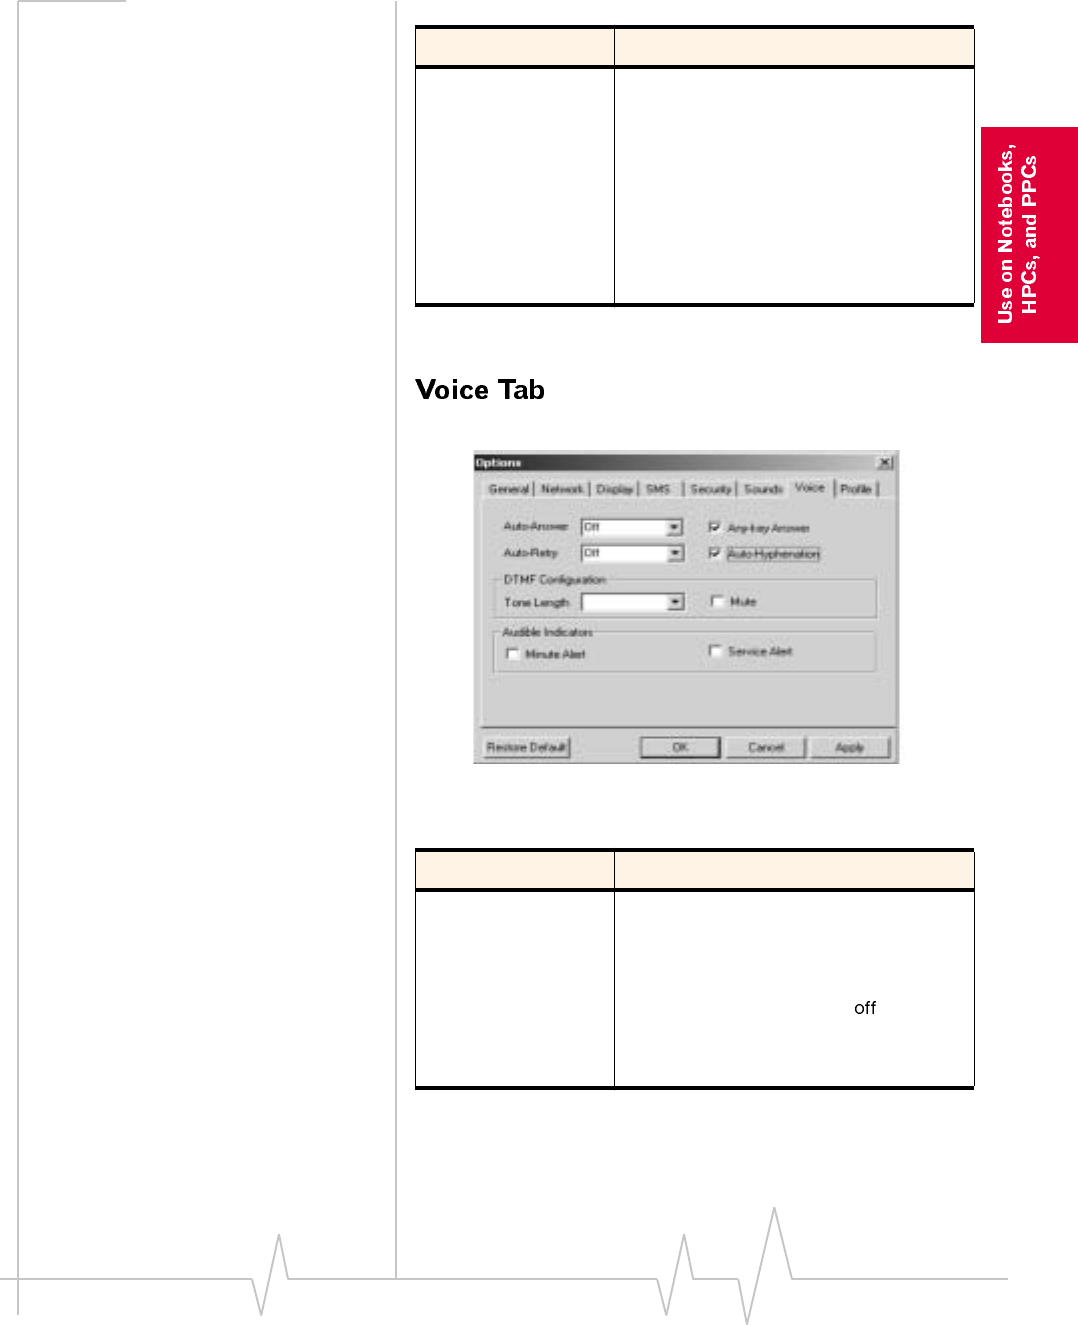
Table 7-9 :Voice Tab Options
Field Description
Auto-Answer
Incoming Calls This field allows you to enable and disable
the Auto-Answer feature, and when
enabled to select the number of rings after
which a voice call is answered.
To disable the feature, select from the
drop-down menu. To enable the feature,
select the number of rings after which
Watcher automatically answers the call.
Table 7-8 :Sounds Tab Options
Field Description
AirCard 710 Wireless Network Card - User Guide
78 2130135
Auto-Retry This field allows you to enable and disable
the Auto-Retry feature, and when enabled
to select the interval between retrys.
At times when a large number of users are
connected to a single base station on the
GSM network, you may be unable to make
a network connection on your first attempt.
When enabled, Auto-Retry attempts the
connection up to five times at the interval
you select. When disabled, the AirCard
network card does not retry automatically.
To disable the feature, select .
Otherwise, select the interval at which you
want automatic retrys to occur.
Any-Key Answer This field allows you to enable and disable
the Any-Key Answer feature.
When enabled, you can answer an
incoming call by clicking any button on the
dial pad except and . When
disabled, you must click the key to
answer incoming calls.
Use the check box to enable and disable
the feature. (The feature is enabled when
checked.)
Auto-
Hyphenation This field allows you to enable and disable
the Auto-Hyphenation feature.
When enabled, a hyphen is automatically
inserted after the area code, and between
the first three and last four digits of a phone
number, as you enter the number. (This
has no effect on what is dialed.) When
disabled, no hyphen is inserted as you
enter a phone number.
Use the check box to enable and disable
the feature. (The feature is enabled when
checked.)
Table 7-9 :Voice Tab Options
Field Description

Watcher Menus
Rev B Oct. 2001 79
Tone Length DTMF (Dual Tone Multi-Frequency) is the
system used by touch tone phones under
which a specific frequency or tone is
assigned to each key. There is a standard
length for these tones. However, some
voice mail systems require a shorter or
longer than normal length tone.
This field allows you to set the AirCard
network card to use a shorter or longer
tone for systems that require it.
The recommendation is to select
unless your service provider indicates that
a different tone is required.
Mute When DTMF mute is enabled, there is no
audible tone while the AirCard network
card dials.
Use the check box to enable and disable
the feature. (The feature is enabled when
checked.)
Minute Alert This field allows you to enable and disable
the Minute Alert feature.
When enabled, the AirCard network card
beeps at one minute intervals while you are
on voice calls. This allows you to keep
track of the duration of your call.
Use the check box to enable and disable
the feature. (The feature is enabled when
checked.)
Service Alert The field allows you to enable and disable
the Service Alert feature.
When enabled, the AirCard network card
emits a tone whenever it goes from being
out of service to being in service, and
whenever it goes from being in service to
being out of service.
Use the check box to enable and disable
the feature. (The feature is enabled when
checked.)
Table 7-9 :Voice Tab Options
Field Description
AirCard 710 Wireless Network Card - User Guide
80 2130135
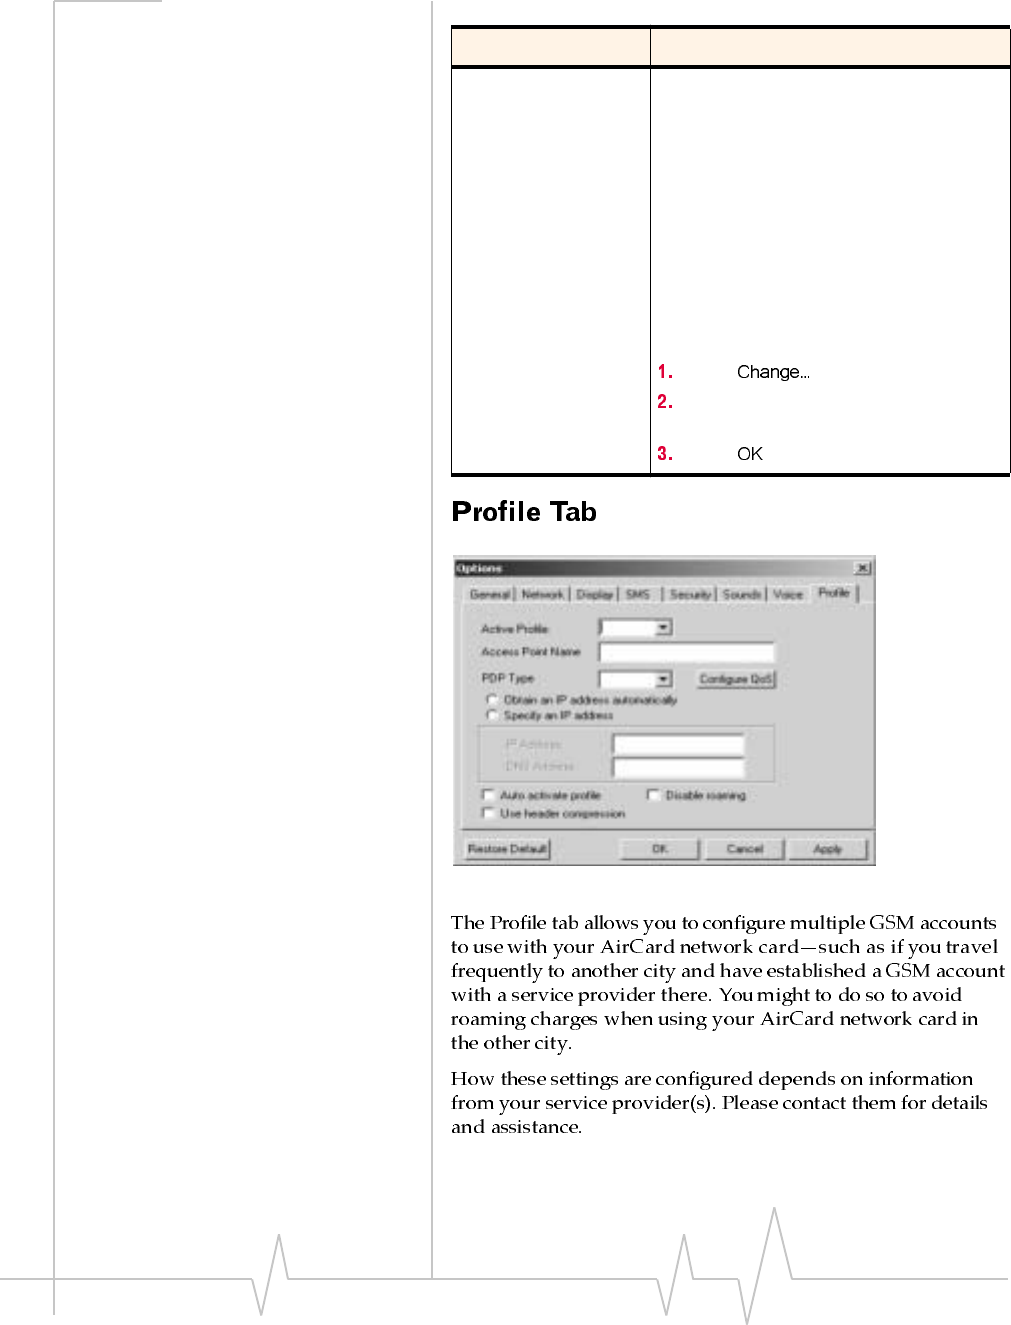
Figure 7-14: The Profile Tab of the Options Window
Voice Mail
Change … Depending on your billing plan, you may
have a Voice Mail feature that allows
callers to leave you a message when you
don’t answer a call. If you have this feature,
then you access your voice messages by
dialing a number specific to your service
provider.
When the AirCard network card is
configured, the phone number your service
provider uses for voice mail is automatically
set up for you. If this number should
change, you can change the number here.
To change the number:
Click
Enter the new phone number in the
window that appears.
Click .
Table 7-9 :Voice Tab Options
Field Description
Watcher Menus
Rev B Oct. 2001 81
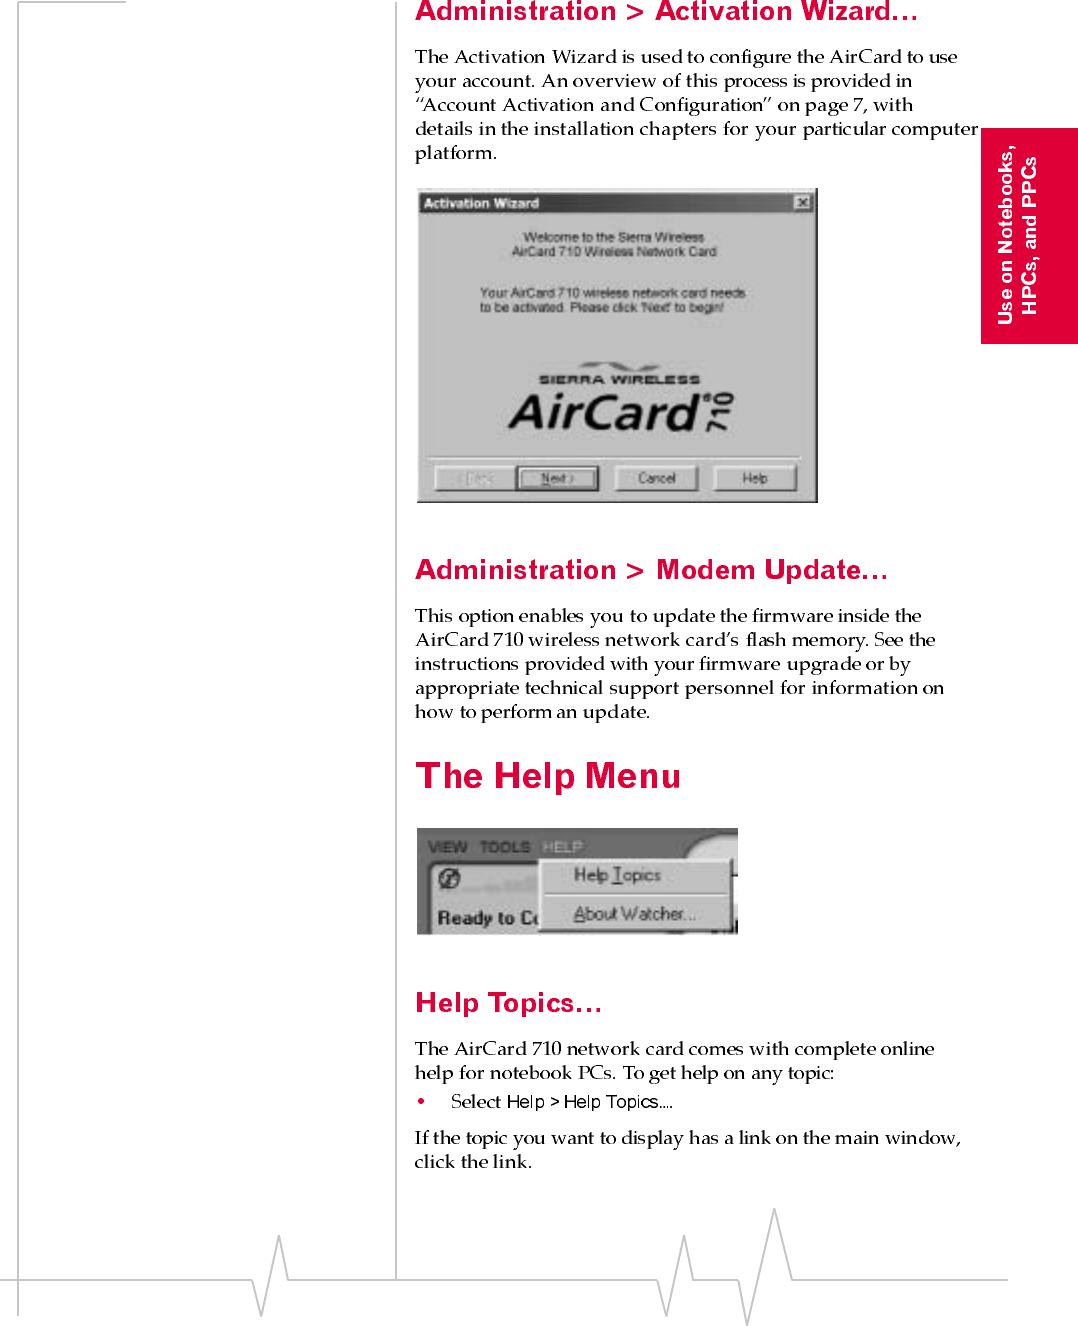
Figure 7-15: The Activation Wizard Window
Figure 7-16: The Help Menu
AirCard 710 Wireless Network Card - User Guide
82 2130135
Note: Help is also available in
most Watcher windows by
clicking the Help button or by
pressing the F1 key on your
keyboard.
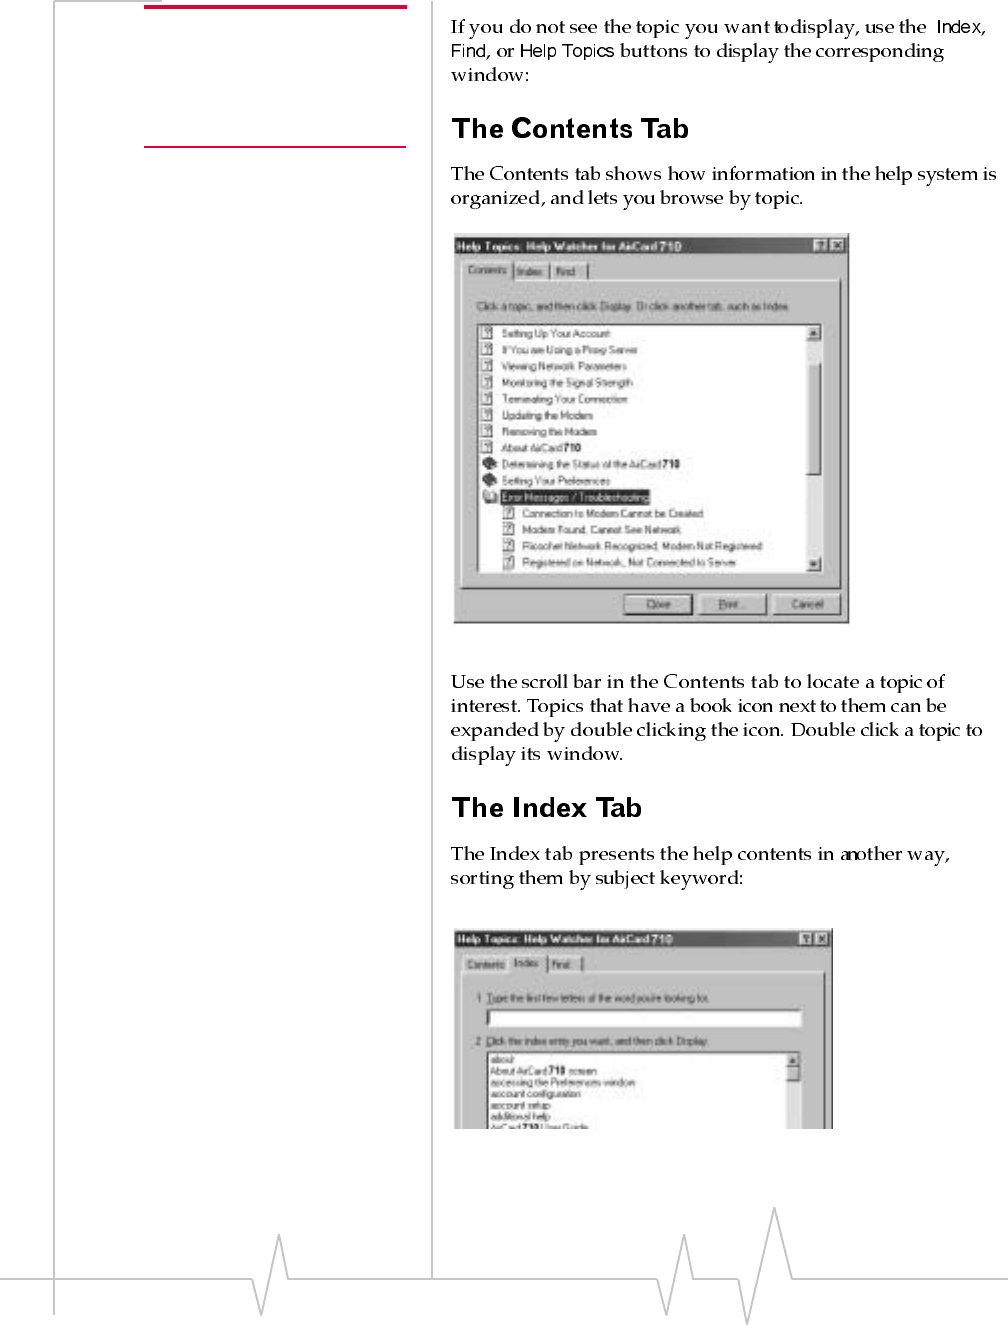
Figure 7-17: The Help Window, With Contents Displayed
Figure 7-18: The Index Tab of the Help Window

Watcher Menus
Rev B Oct. 2001 83
Figure 7-19: The Find Setup Wizard
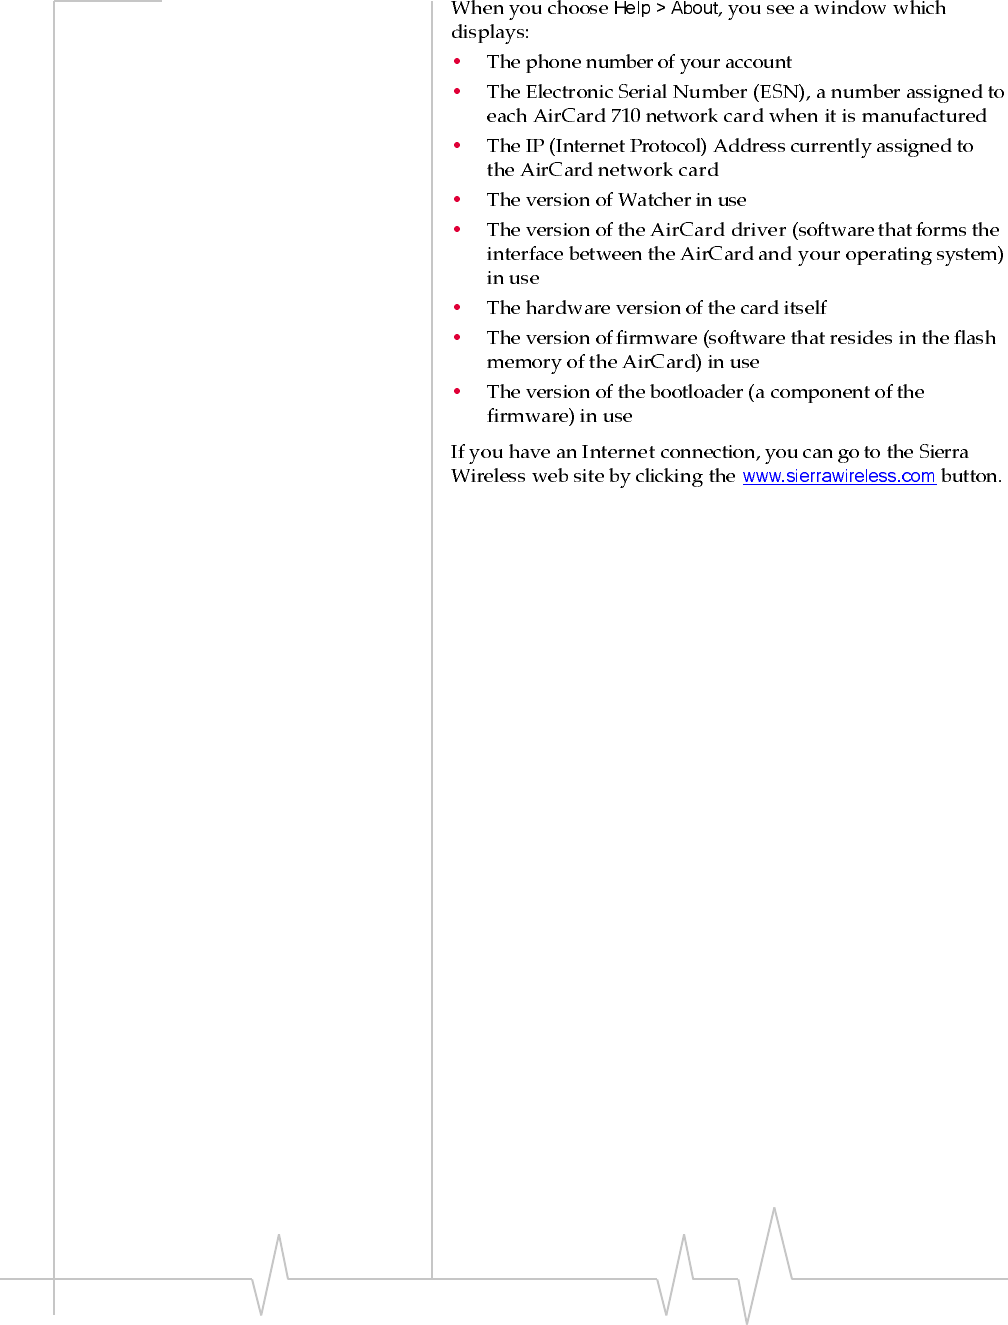
Figure 7-20: The About Watcher Window
AirCard 710 Wireless Network Card - User Guide
84 2130135
Rev B Oct. 2001 85
8: Network Adapter Manager (for
Multiple Network Cards)
• How Windows® Works
With Network Interface
Cards
• Windows 95, 98, NT
and Me
• Windows 2000 and XP
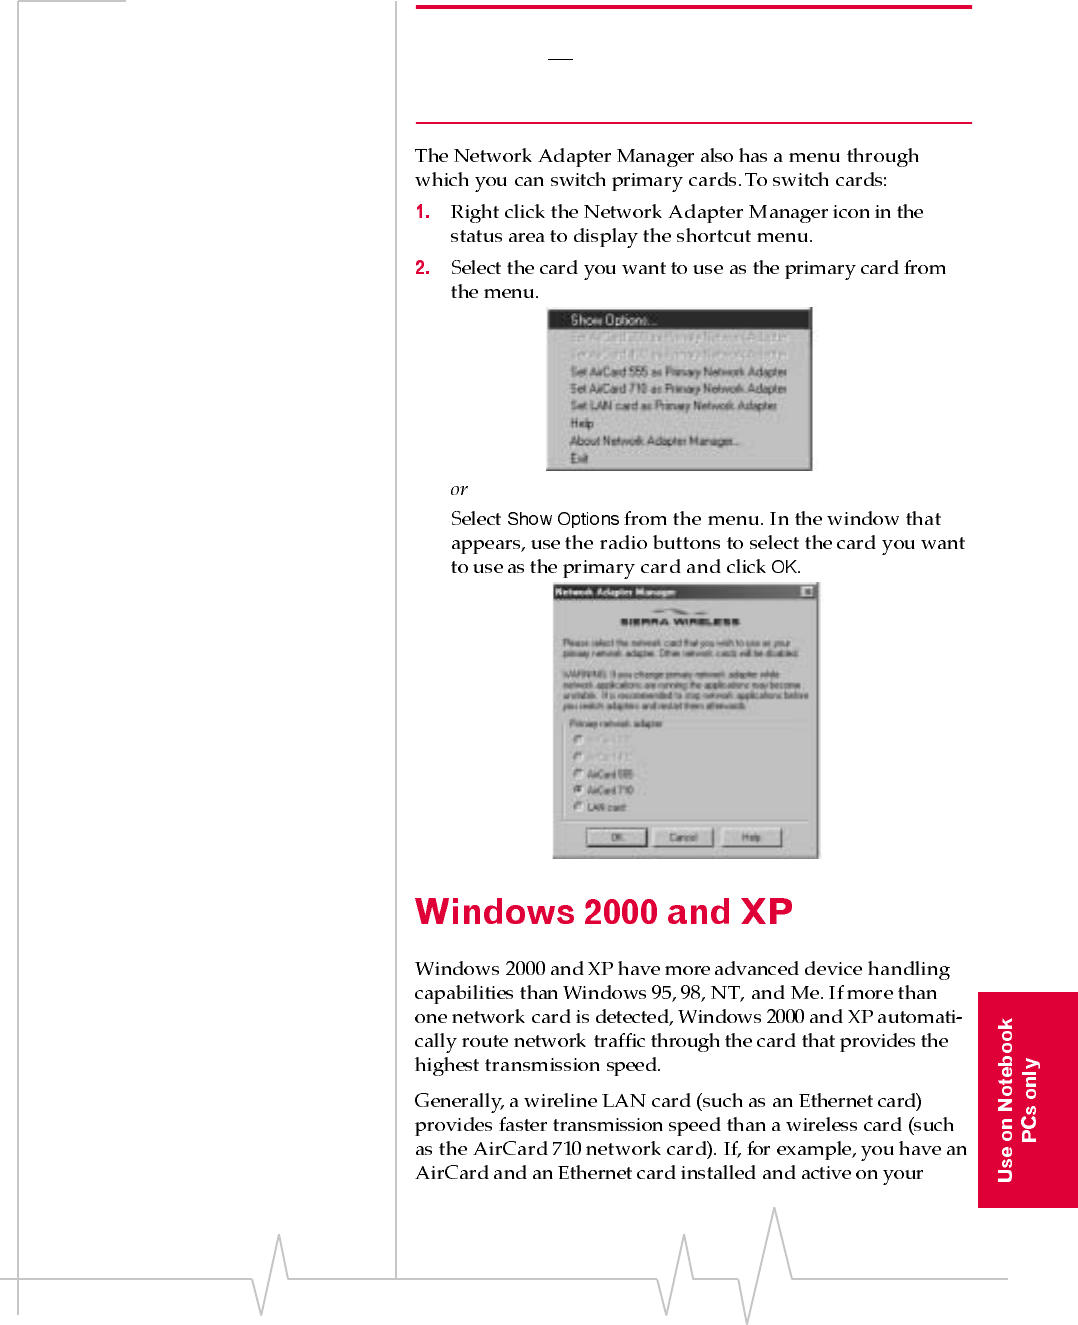
• Pop-Up Menu Items
Note: If you later install software
for another AirCard network
card, such as the AirCard 300,
400, 510, or 555 models, you
should re-install the Network
Adapter Manager from the
AirCard 710 CD. Earlier versions
of the Network Adapter Manager
do not support the AirCard 710
network card.
AirCard 710 Wireless Network Card - User Guide
86 2130135
Figure 8-1: The Network Adapter Manager Icon for the AirCard 710 PC Card
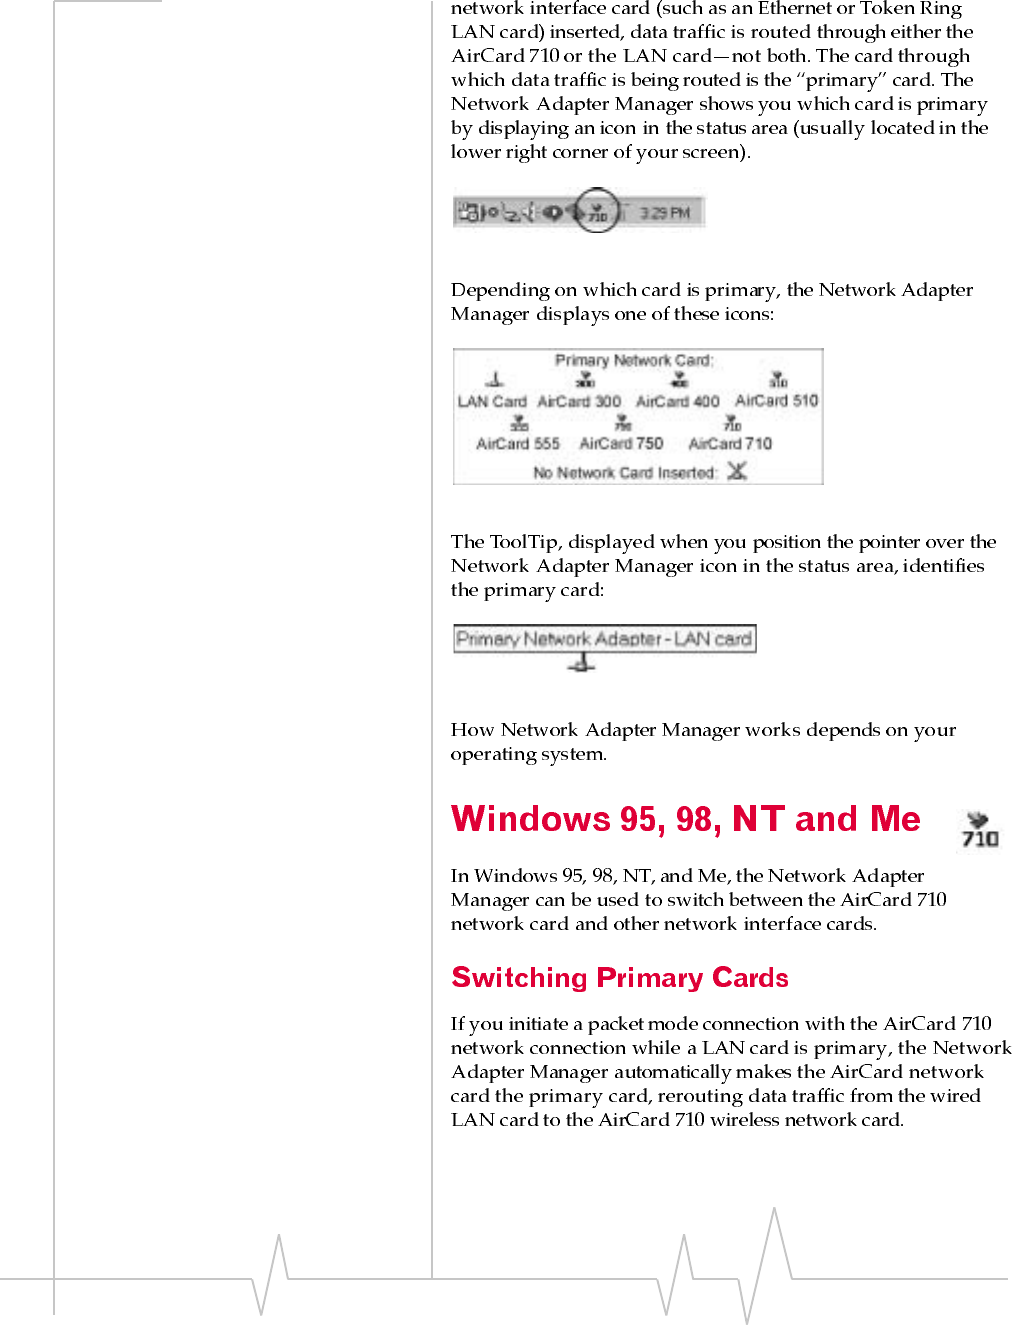
Figure 8-2: Status Area Icons for Network Adapter Manager
Figure 8-3: The Status Area ToolTip Showing a LAN Card as Primary
Network Adapter Manager
Rev B Oct. 2001 87
Note: Switching between cards while using a network program (such
as a browser) is not recommended, since the program may behave
strangely when its network connection changes. Close network appli-
cations, switch cards, then launch the applications again.
AirCard 710 Wireless Network Card - User Guide
88 2130135

Network Adapter Manager
Rev B Oct. 2001 89

AirCard 710 Wireless Network Card - User Guide
90 2130135
Rev B Oct. 2001 91
9: AirCard 710 PC Card:
Technical Specifications
• LED Operation
• Radio Frequency and
Electrical
Specifications
• Environmental
Specifications
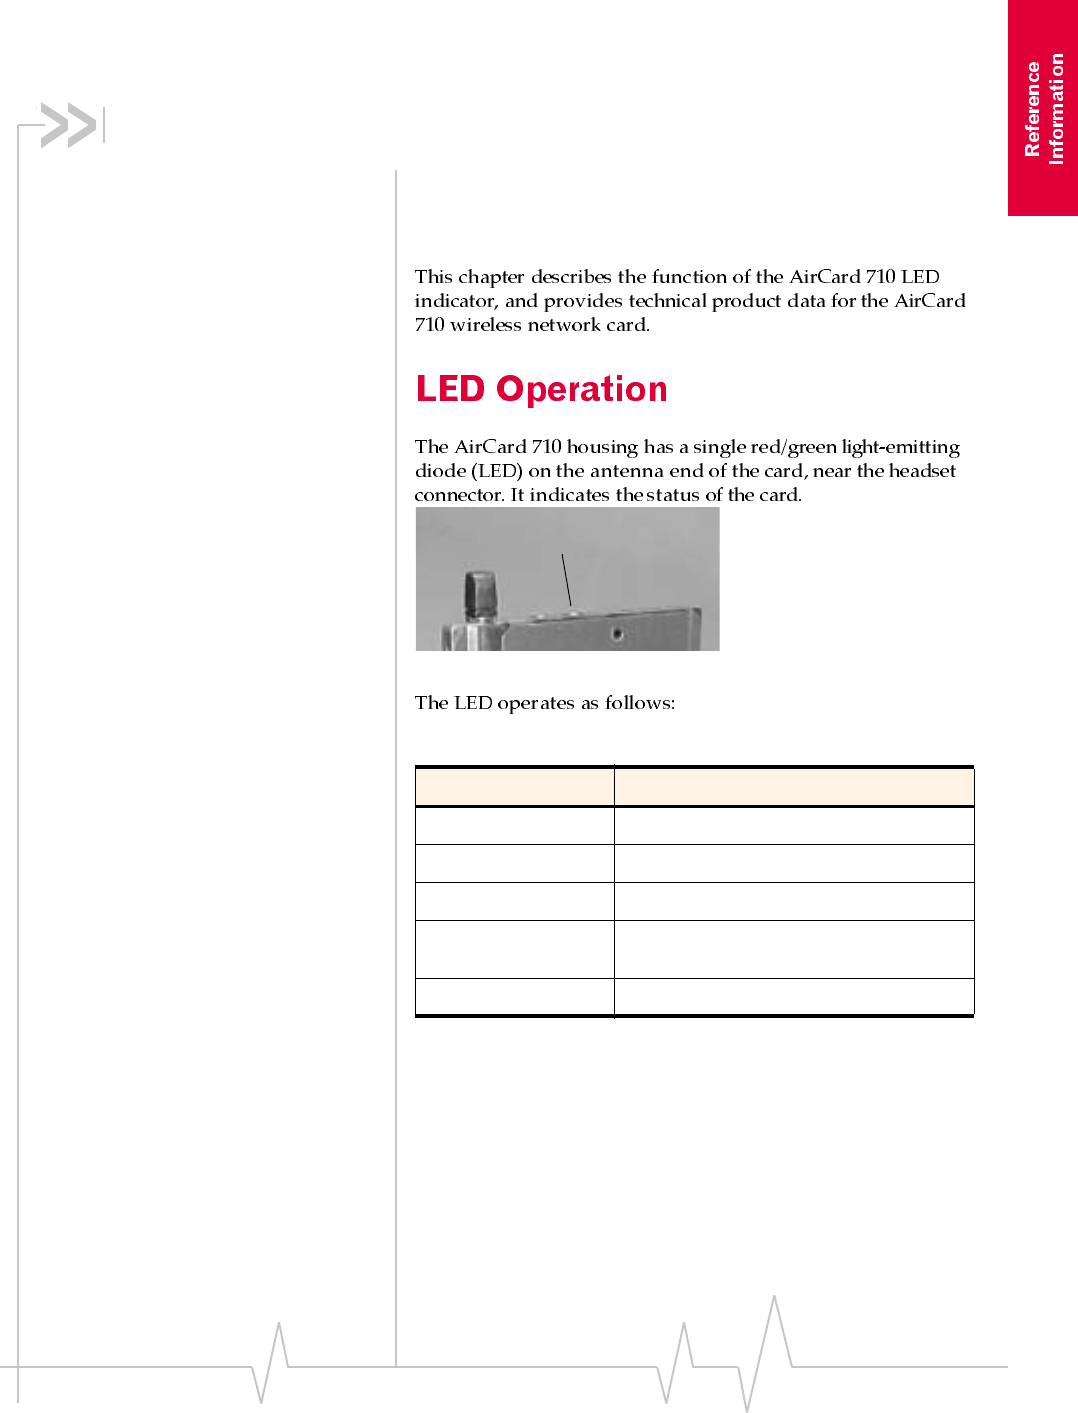
Figure 9-1: Location of the AirCard 710 LED Status Indicator
* Amber is used to describe the color of the LED when both red and
green are lit.
Table 9-1 :LED Operation
LED Behavior Indicates
Solid amber* The AirCard is powering up.
Blinking amber The AirCard is searching for a channel.
Solid green A call is in progress.
Blinking green The AirCard has acquired a channel and is
in idle mode (no call is in progress).
Solid red An error has occurred.
LED Indicator
AirCard 710 Wireless Network Card - User Guide
92 2130135
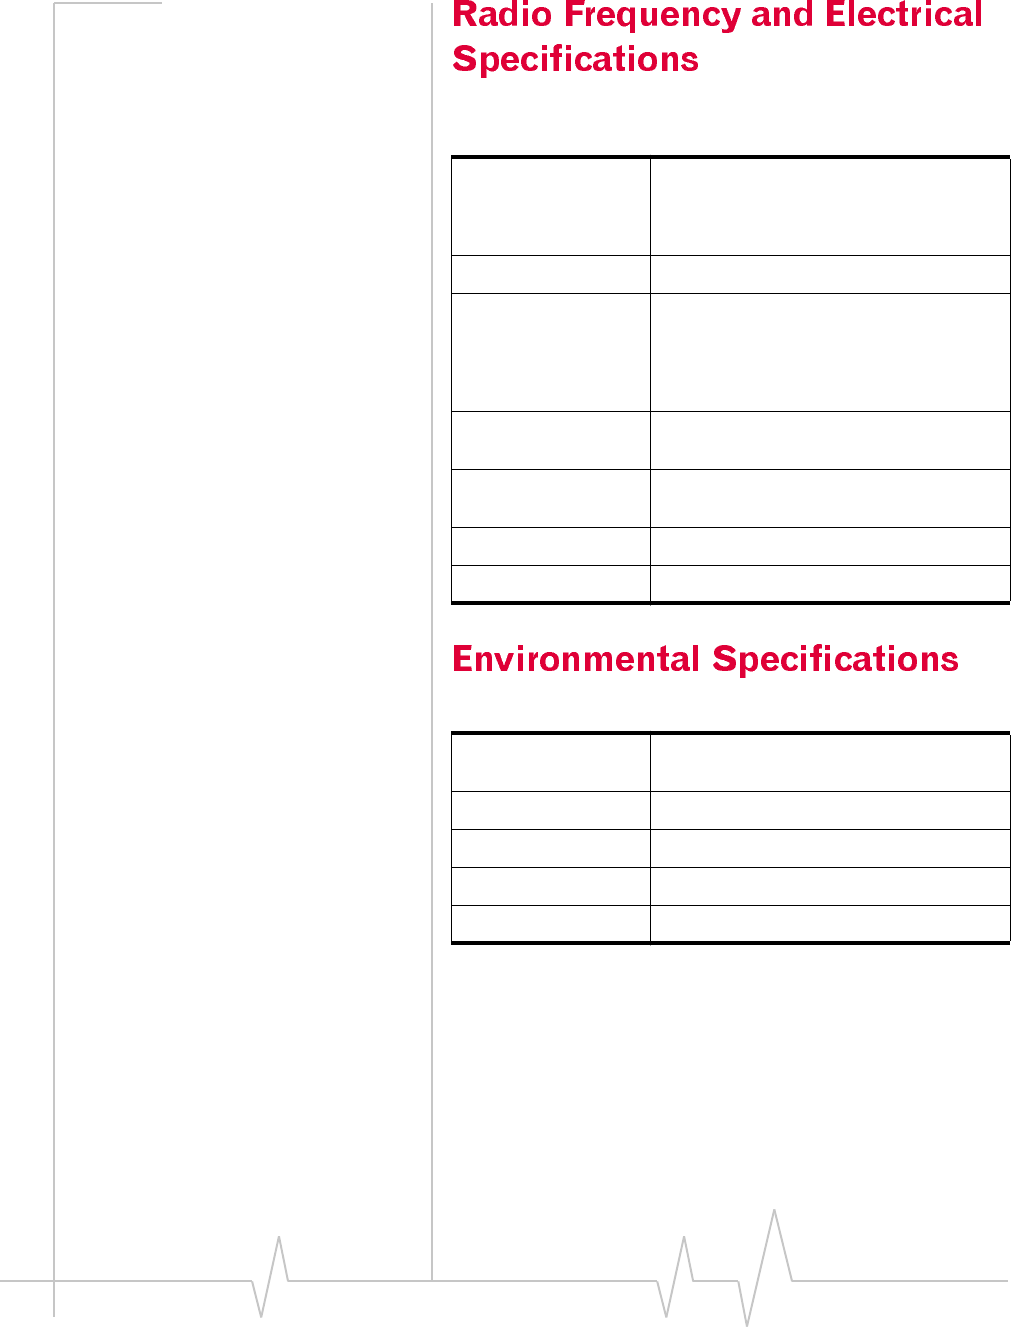
Table 9-2 :Radio Frequency & Electrical
Specifications
Approvals Compliant with:
GPRS GSM Release 97 SMG 31 Phase 2+
FCC Parts 15, and 24
Industry Canada
Voltage +5Vdc from PCMCIA slot
Current Typical requirement:
4 TX slots on 1.20A peak, 0.80A average
2 TX slots on 0.77A peak, 0.40A average
1 TX slots on 0.55A peak, 0.22A average
Standby 15mA
Transmit PCS:
1850 to 1910 MHz
Receive PCS:
1930 to 1990 MHz
Channel Spacing 200kHz
Freq. Stability 0.1ppm
Table 9-3 :Environmental Specifications
Operating Temp. -20 °C to +60 °C (ambient, outside
PCMCIA enclosure)
Storage Temp. -30 °C to +85 °C
Humidity 95% (non-condensing)
Vibration 15 g peak 10 to 2000Hz (non-operating)
Drop 30” (76 cm) onto vinyl covered concrete
Rev B Oct. 2001 93
10: AirCard 710 PC Card:
Regulatory Information
AirCard 710 Wireless Network Card - User Guide
94 2130135

Rev B Oct.01 1
Index

AirCard 710 Wireless Network Card User Guide
22130142
