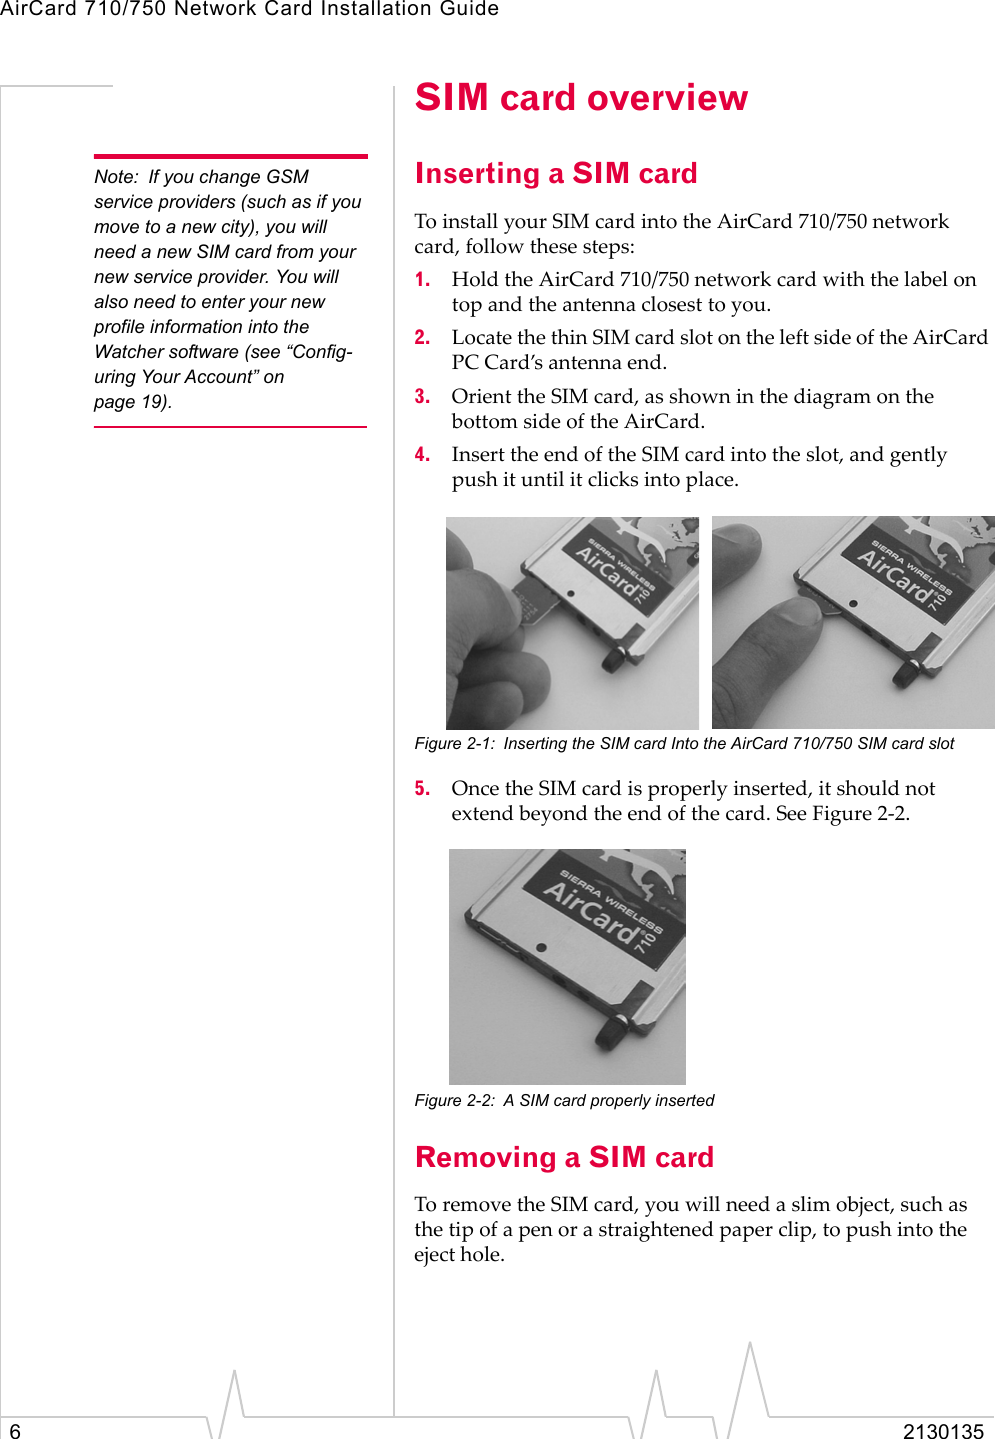
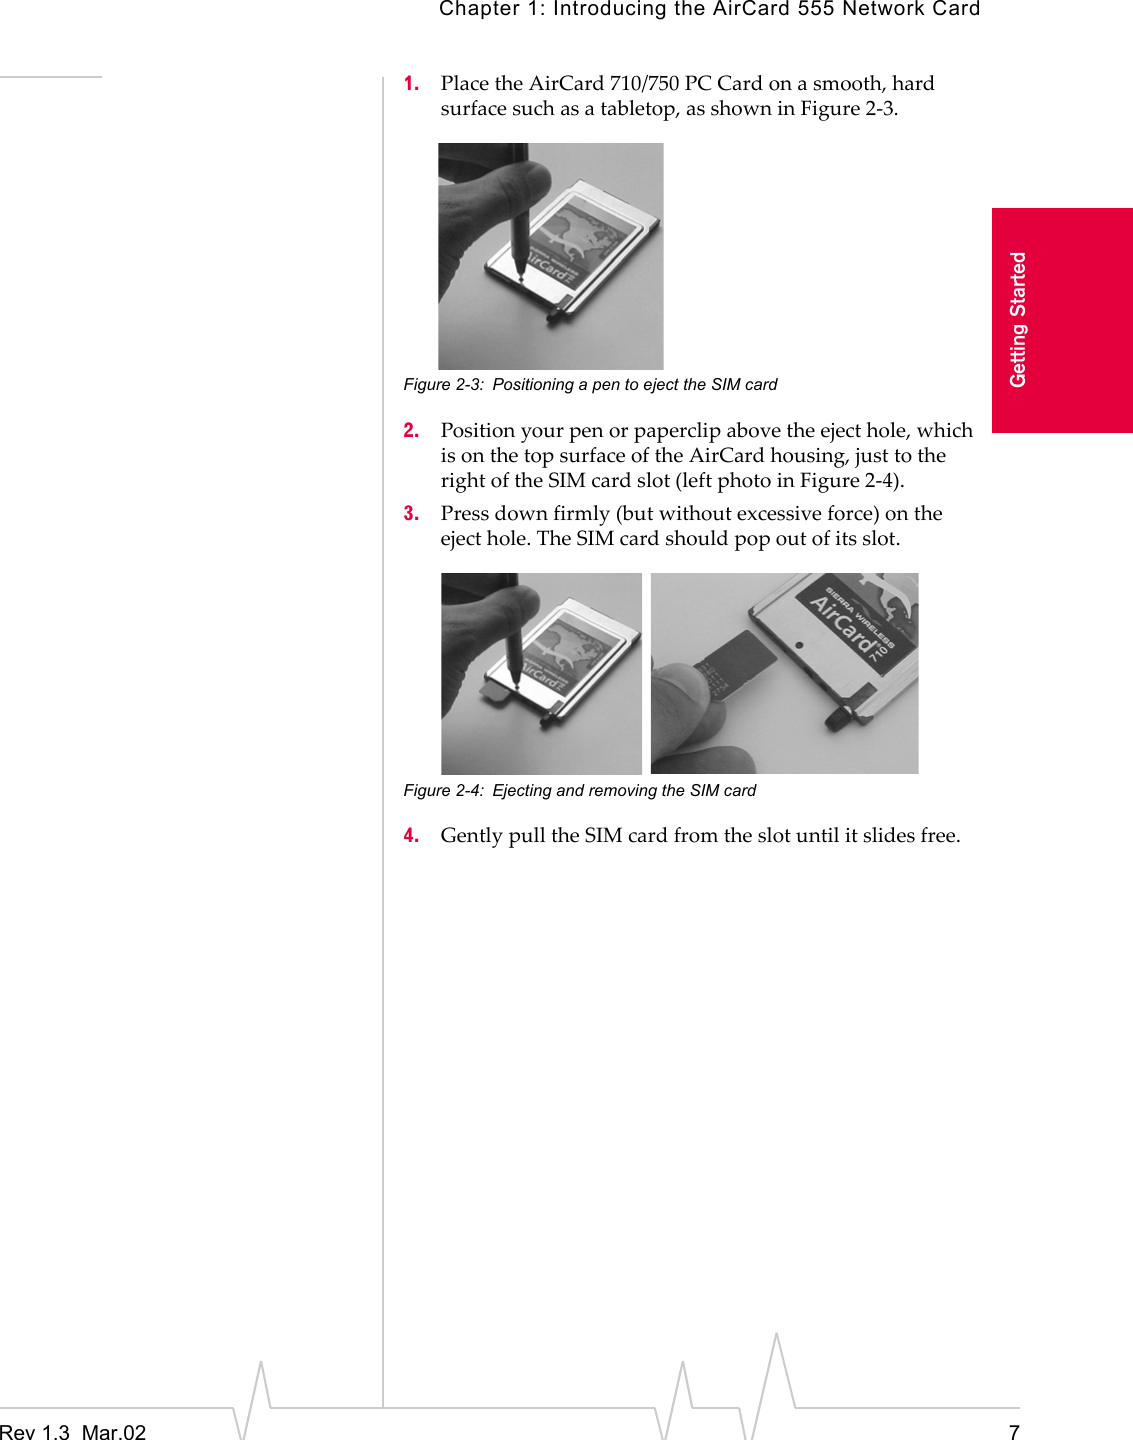
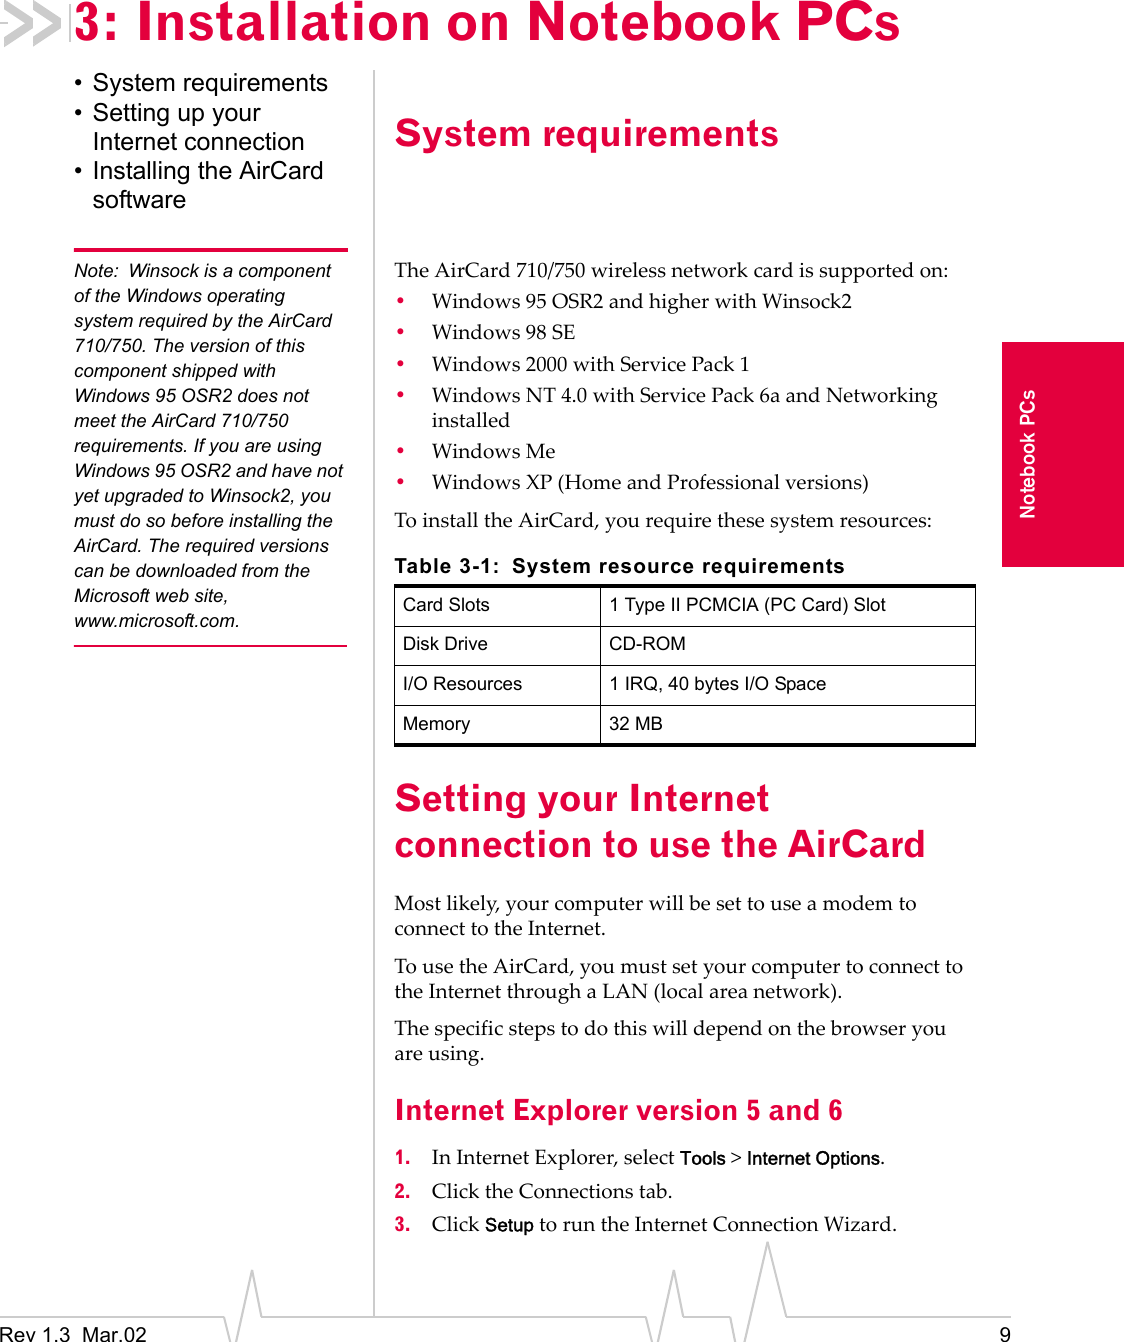
Sierra Wireless AC750 GSM PCS1900 PCMCIA Card User Manual AirCard 710 750 Installation Guide
Sierra Wireless Inc. GSM PCS1900 PCMCIA Card AirCard 710 750 Installation Guide
UserManual.wiki
>
Sierra Wireless
>
AC750 User Manual
>
updated version13
Contents
1.
updated version13
2.
User Manual
3.
Revised Regulatory Info
4.
User Manual Addendum
5.
Revised User Manual
updated version13
Navigation menu
Upload a User Manual
Namespaces
Wiki Guide
HTML
PDF
Info
Views
User Manual
Discussion / Help
Navigation
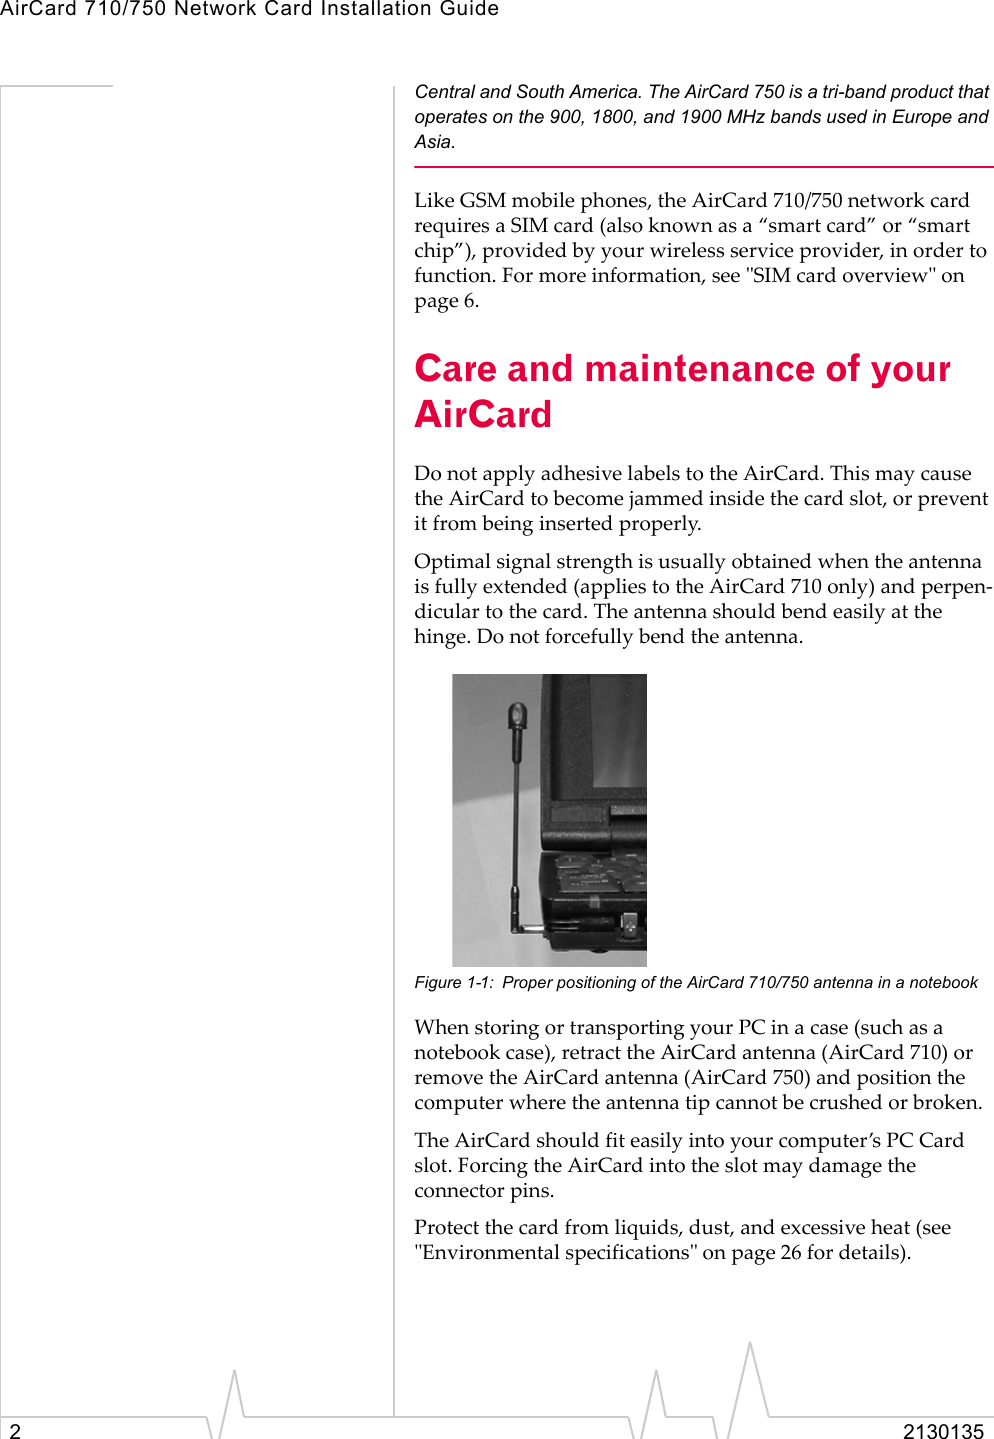


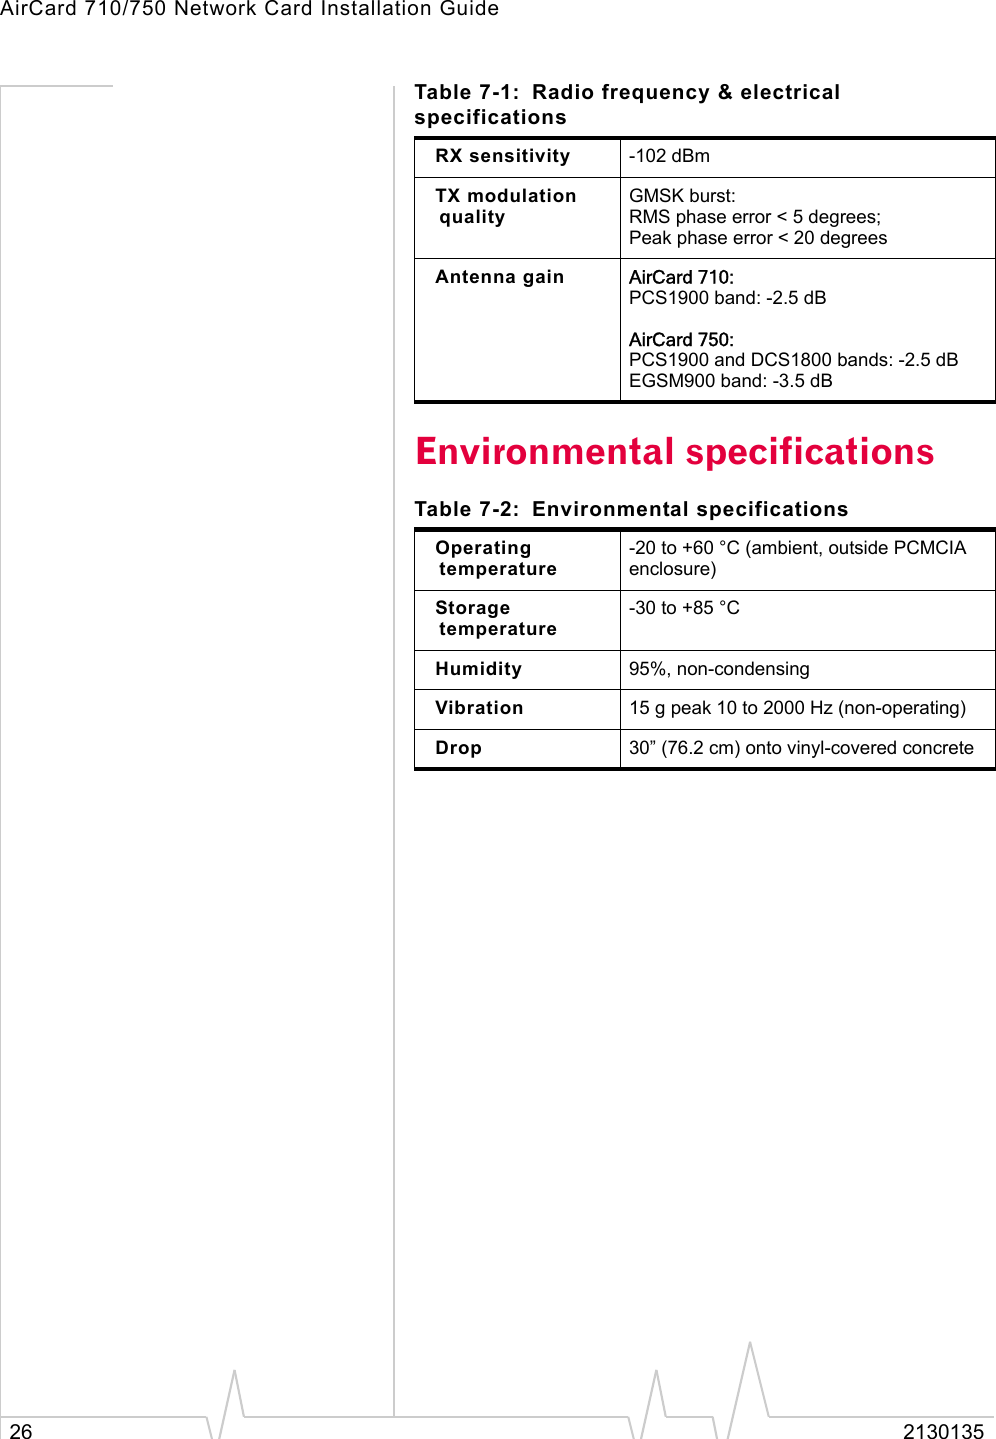
![Rev 1.3 Mar.02 25TechnicalSpecifications7: Technical Specifications• Radio frequence and electrical• Environmental Radio frequency and electrical specificationsTable 7-1: Radio frequency & electrical specificationsApprovals FCC Parts 15, and 24Industry Canada[Pending] CECompliance Compliant with:GPRS GSM Release 97 SMG 31 Phase 2+Voltage +5 VDC from PCMCIA SlotCurrent Typical requirement:4 TX slots on 1.20 A peak, 0.80 A average2 TX slots on 0.77 A peak, 0.40 A average1 TX slots on 0.55 A peak, 0.22 A averageStandby 15 mAMulti-slot class Class 12Transmit AirCard 710:PCS:1850 to 1910 MHzAirCard 750:PCS:1850 to 1910 MHzDCS1800:1710 to 1785 MHzEGSM900:880 to 915 MHzReceive AirCard 710:PCS:1930 to 1990 MHzAirCard 750:PCS:1930 to 1990 MHzDCS1800:1805 to 1880 MHzEGSM900:925 to 960 MHzChannel spacing 200 kHzFrequency stability0.1 ppm](https://usermanual.wiki/Sierra-Wireless/AC750.updated-version13/User-Guide-233377-Page-33.png)
![AirCard 710/750 Network Card Installation Guide28 2130135•Connect the equipment into an outlet on a circuit different from that to which the receiver is connected •Consult the dealer or an experienced radio/TV technician for helpIf you have purchased this product under a United States Government contract, it shall be subject to restrictions as set forth in subparagraph (c)(1)(ii) of Defense Federal Acquisitions Regulations (DFARs) Section 252.227-7013 for Department of Defense contracts, and as set forth in Federal Acquisitions Regulations (FARs) Section 52.227-19 for civilian agency contracts or any successor regulations. If further government regulations apply, it is your responsibility to ensure compliance with such regulations.WARNING (EMI) – Canada – This digital apparatus does not exceed the Class B limits for radio noise emissions from digital apparatus as set out in the interference causing equipment standard entitled “Digital Apparatus”, ICES-003 of the Department of Communications. Cet appareil numérique respecte les limites de bruits radioélec-triques applicables aux appareils numériques de Classe B prescrites dans la norme sur le matériel brouilleur: “Appareils Numériques”, NMB-003 édictée par le ministre des Communi-cations.[Pending] The AirCard 750 is certified to be used in the member states of the EU.](https://usermanual.wiki/Sierra-Wireless/AC750.updated-version13/User-Guide-233377-Page-36.png)
![Chapter 1: Introducing the AirCard 555 Network CardRev 1.3 Mar.02 29Regulatory InformationDeclaration of conformity for CE Marking[Pending]We,Sierra Wireless Inc.13811 Wireless WayRichmond, BCCanada V6V 3A4declare under our sole responsibility that the product AirCard 750, to which this declaration relates, is in conformity with the following standard(s) or other normative document(s):•EN 301 502; V7.0.1 (07-2000)•ETS 300 342-1, November 1997;•EN 301 489-07 (09-2000)•EN 60950, 1992•ICNIRP Guidelines - 1998following the provisions of directive:•R&TTE is 1999/5/EEC.Date [Pending]SignatureName](https://usermanual.wiki/Sierra-Wireless/AC750.updated-version13/User-Guide-233377-Page-37.png)