Sierra Wireless VOQA10 Tri-band Voq Professional Cellular Phone User Manual Voq User Guide
Sierra Wireless Inc. Tri-band Voq Professional Cellular Phone Voq User Guide
UserManual.wiki
>
Sierra Wireless
>
VOQA10 User Manual
User Manual
Navigation menu
Upload a User Manual
Namespaces
Wiki Guide
HTML
PDF
Info
Views
User Manual
Discussion / Help
Navigation


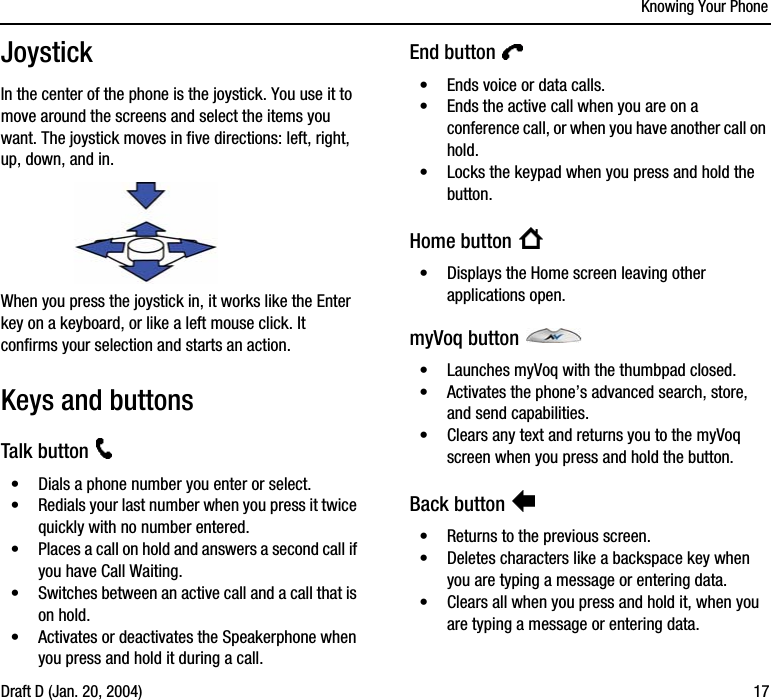


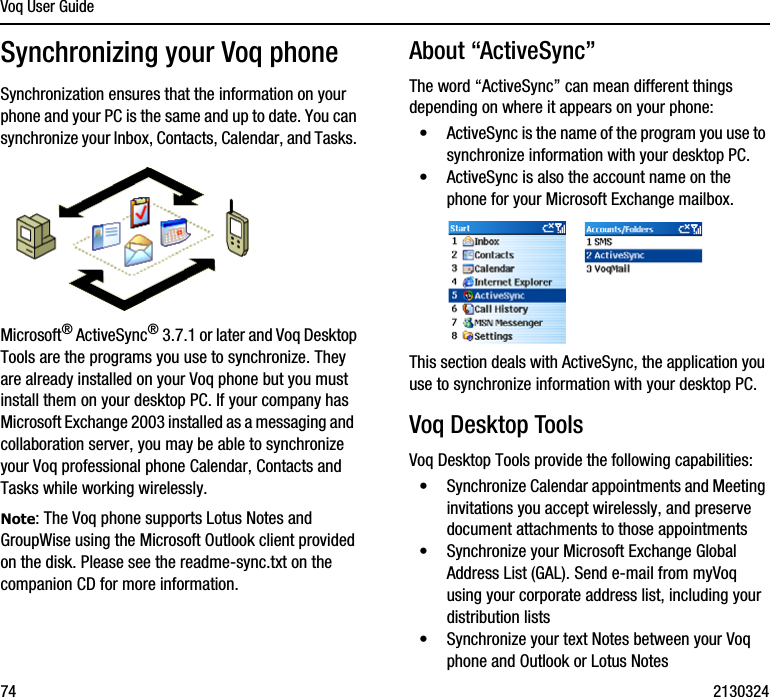

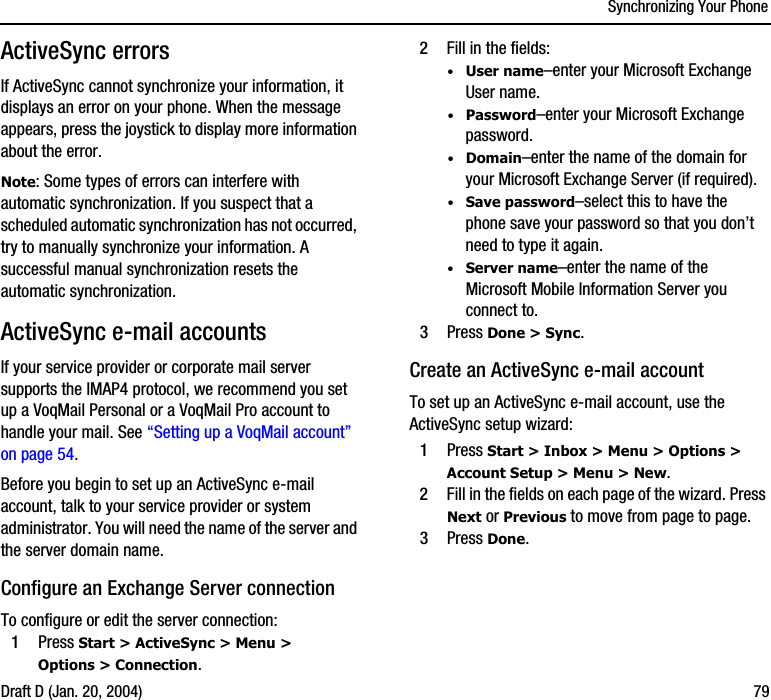


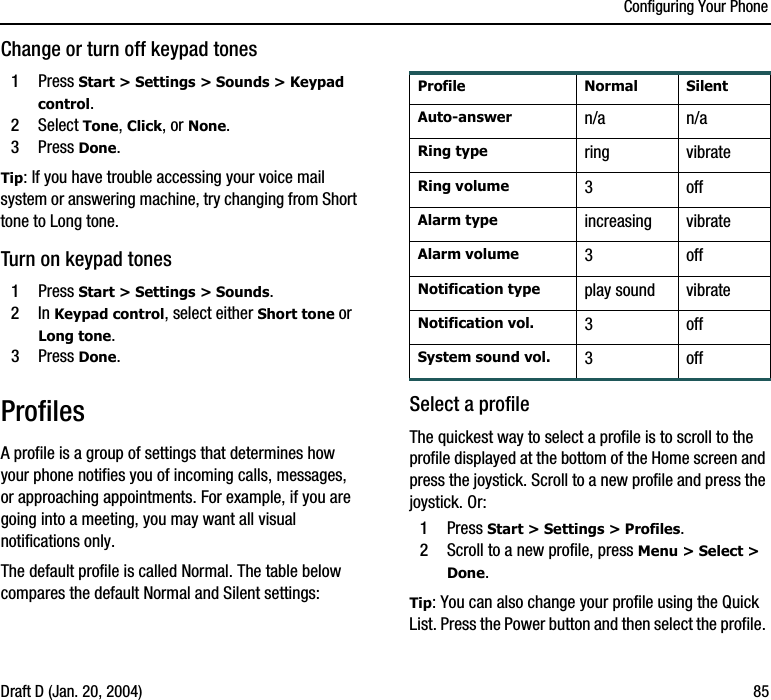


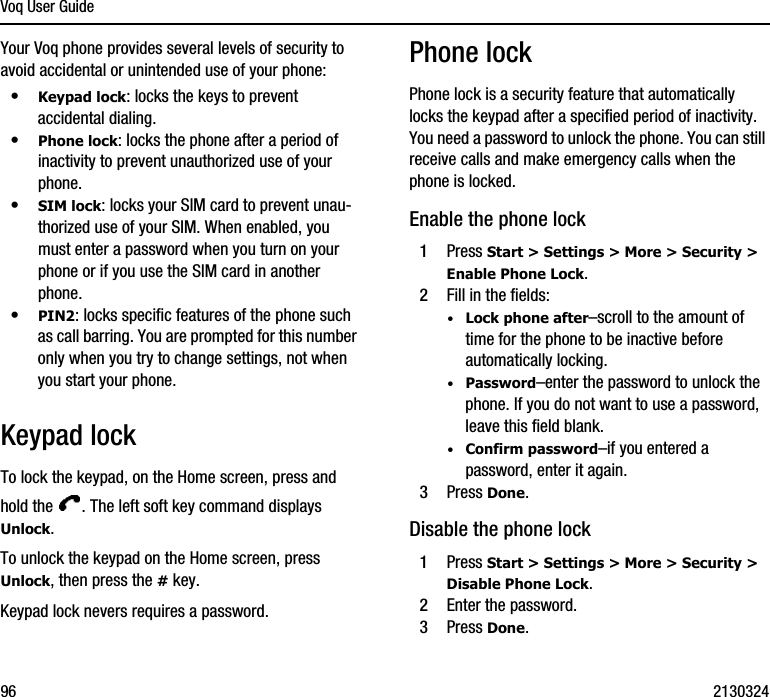


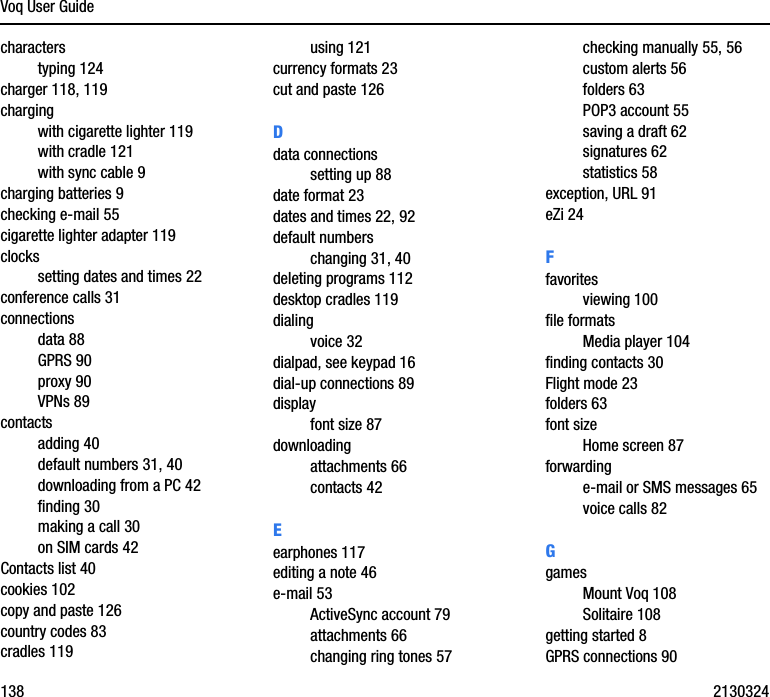
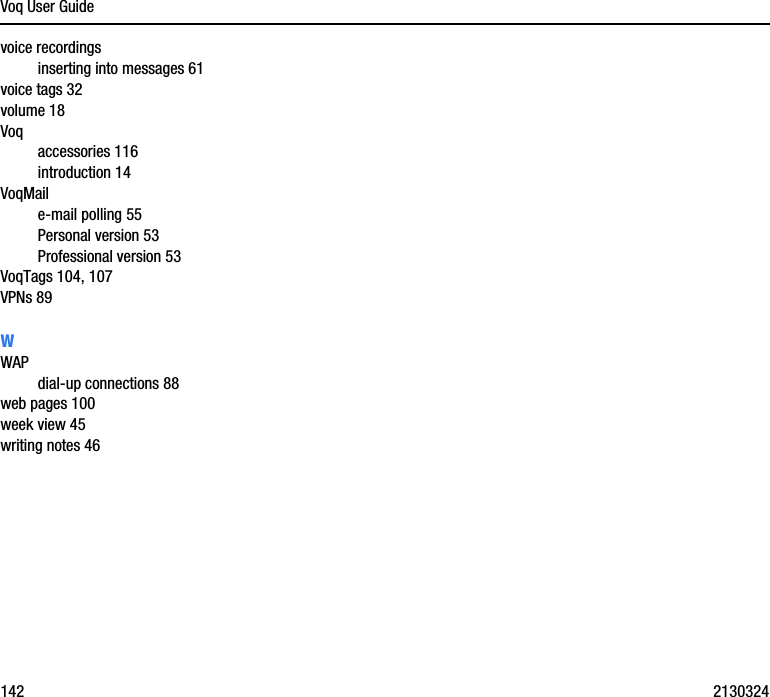
![Voq User Guide110 21303245Press the joystick again to start another calculation.6Divide the total by the number of diners, press [+]-*/ until you display the division symbol. ·On the keypad, you can also press # to scroll through the mathematical symbols. ·On the thumbpad, press Function, then “F”.7Press 5 for the number of people sharing the bill, then press the joystick. Each person pays 17.60.8Now, you decide to spit the bill by 4 instead of 5. To do this, scroll to your last calculation and press the joystick. The calculator displays the calculation.9Press Backspace to remove the 5, press 4, then press the joystick. The new total is 21.995 per paying person or 22.00 rounded off.10 To clear the information on the screen, press Menu > Clear or Menu > Clear Tape.Recording voice notes and memosYou can use your Voq phone to record short voice notes and conversations. The phone stores your recordings under Start > Voice Notes, and names such as Recording 1, Recording 2.Create a voice note1Hold the phone as you would for a voice call.2Press the Record button, located on the right side of your phone, twice to begin recording.3To stop recording, press Stop.](https://usermanual.wiki/Sierra-Wireless/VOQA10/User-Guide-393067-Page-110.png)


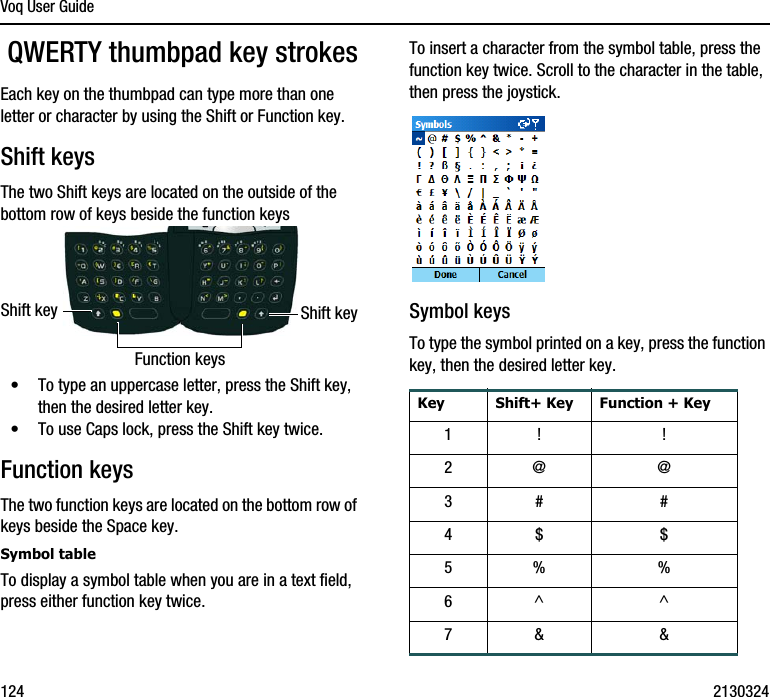
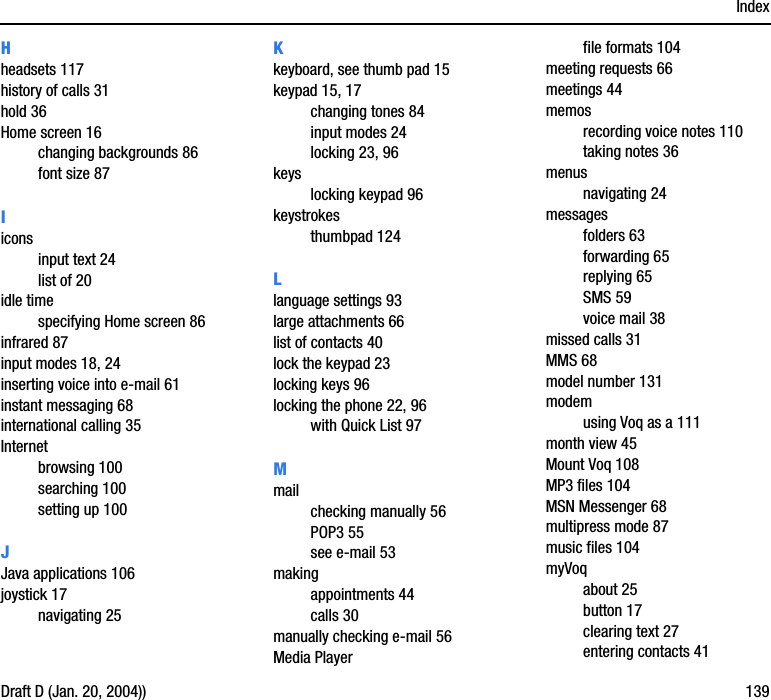
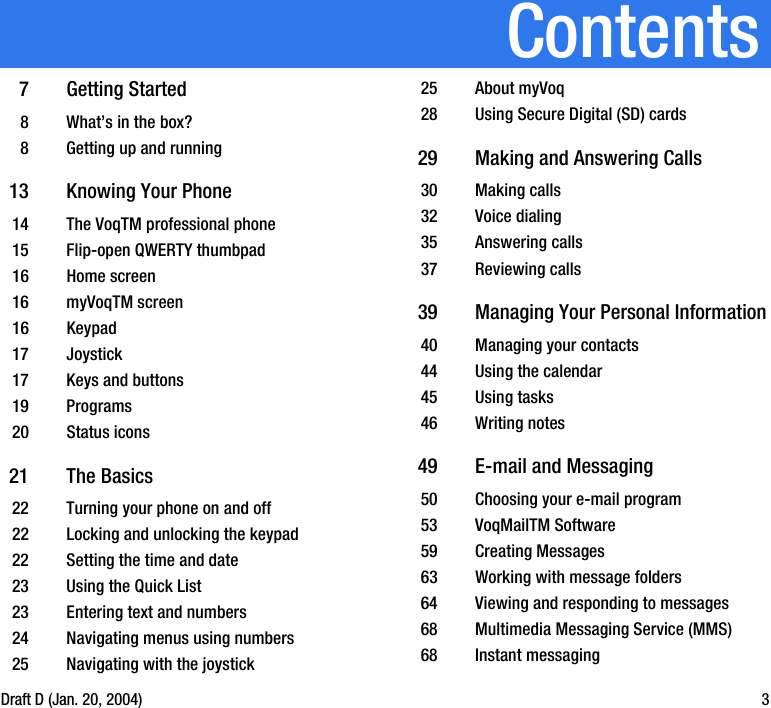
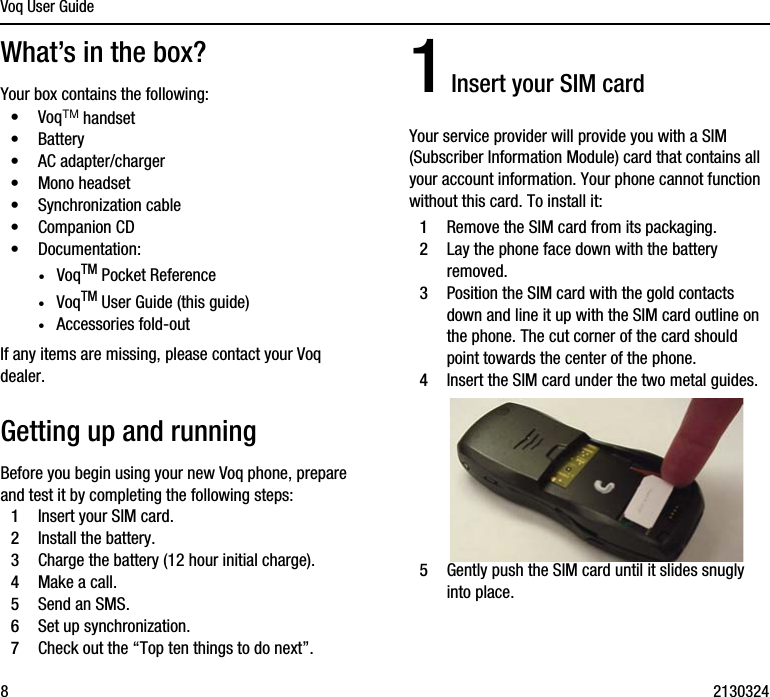
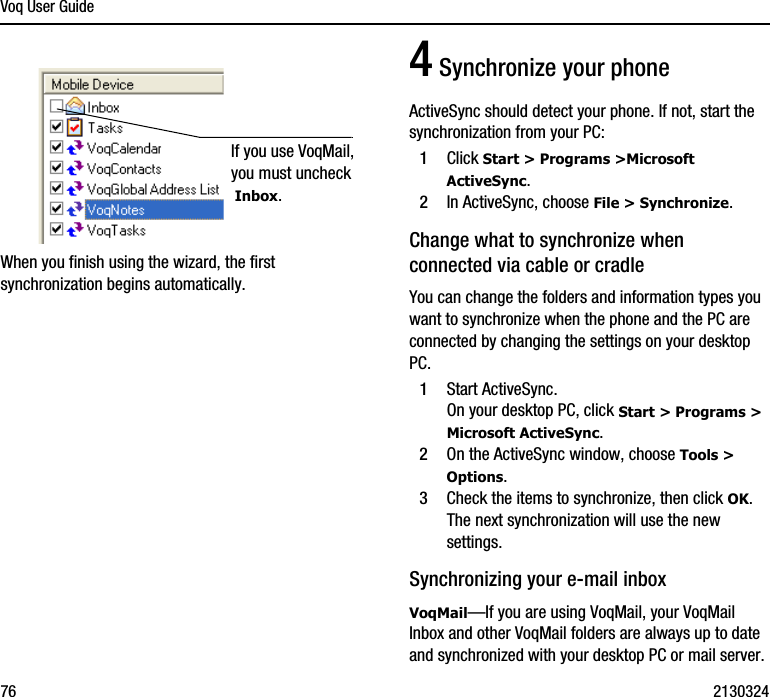
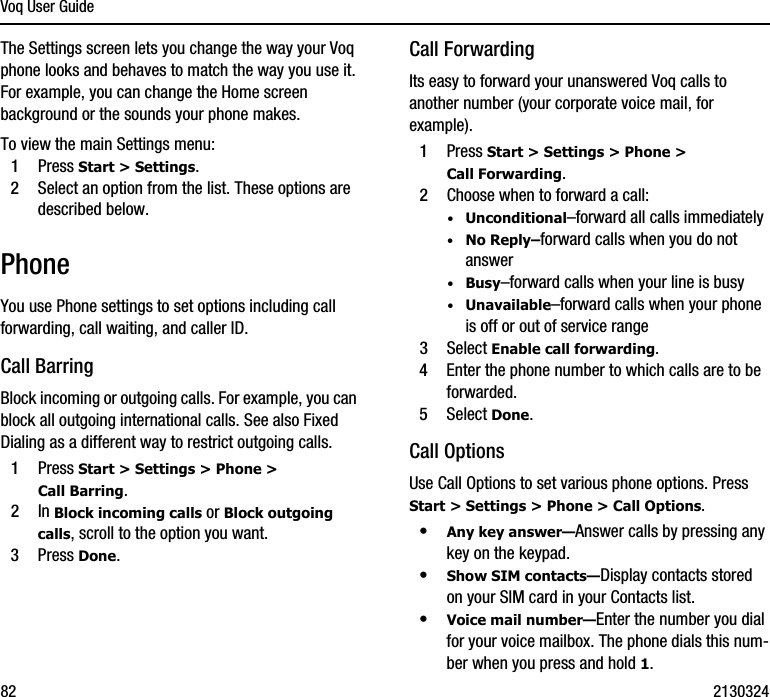
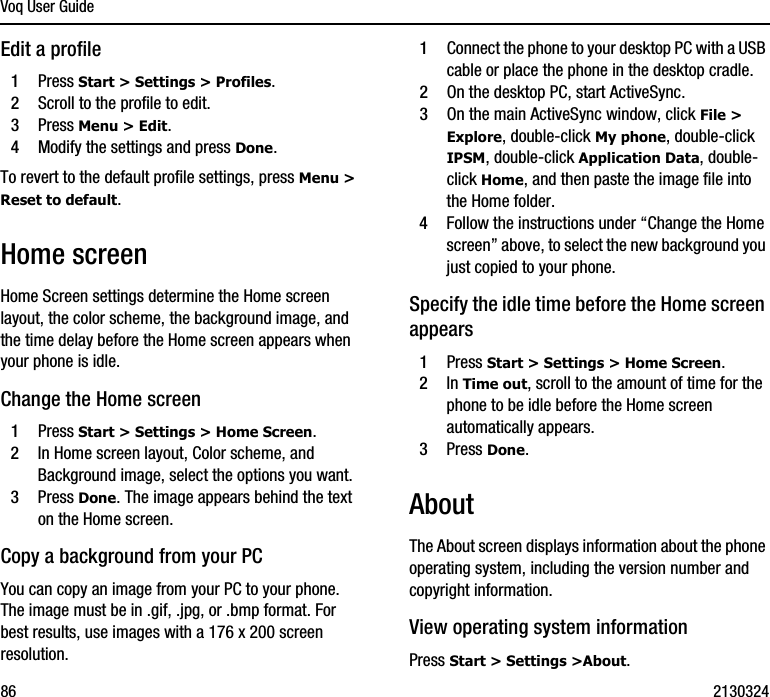
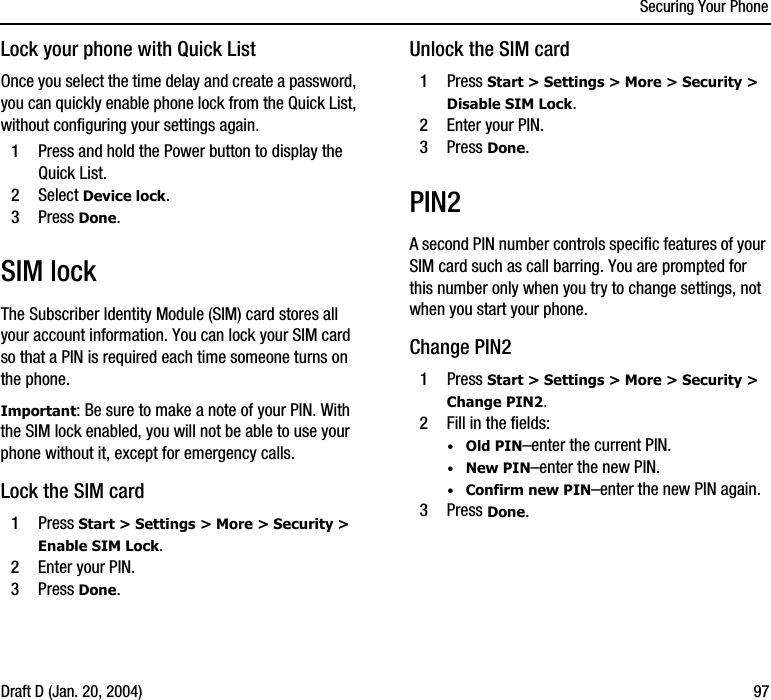
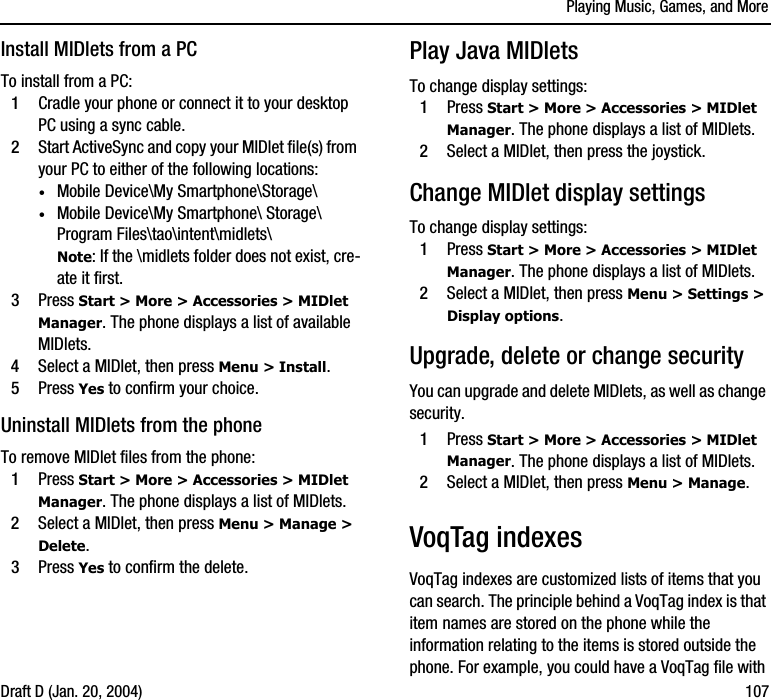
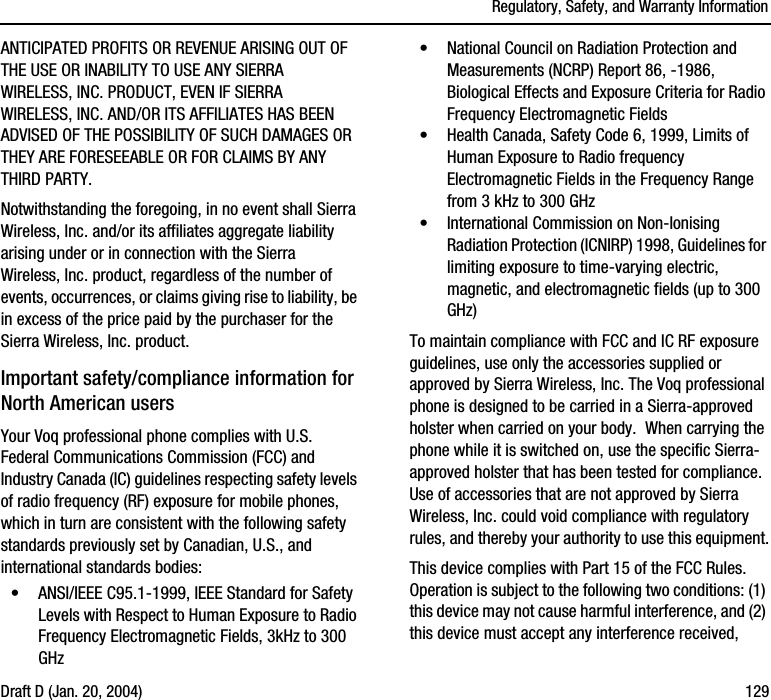
![KeystrokesDraft D (Jan. 20, 2004) 125Key Shift+ Key Function + Key8* *9( (0) )Up Select text UpDown Select text DownLeft Select text LeftRight Select text RightQQ ~WW {EE }RR £TTYY +UU -II ;OO "PP |Key Shift+ Key Function + KeyAA 'SS [DD ]FF /GG \HH =JJ _KK :LL ?ZZ ZX X Cut text to clipboardC C Copy text to clipboardV V Paste text from clipboardBB BNN <MM >](https://usermanual.wiki/Sierra-Wireless/VOQA10/User-Guide-393067-Page-125.png)

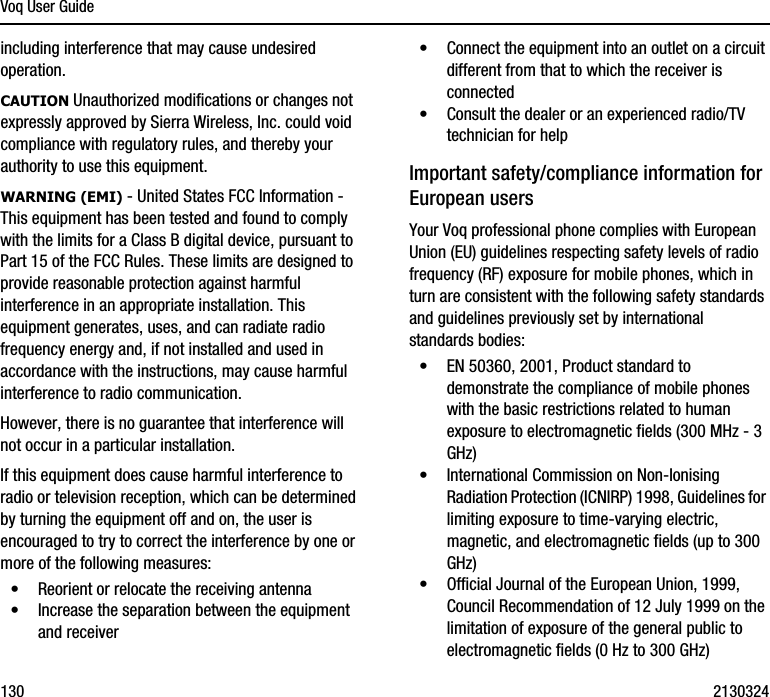
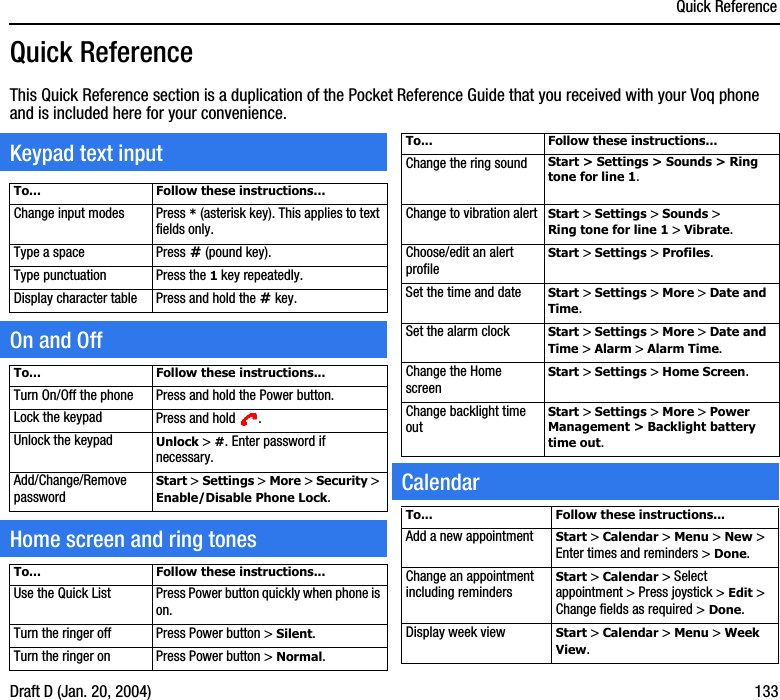
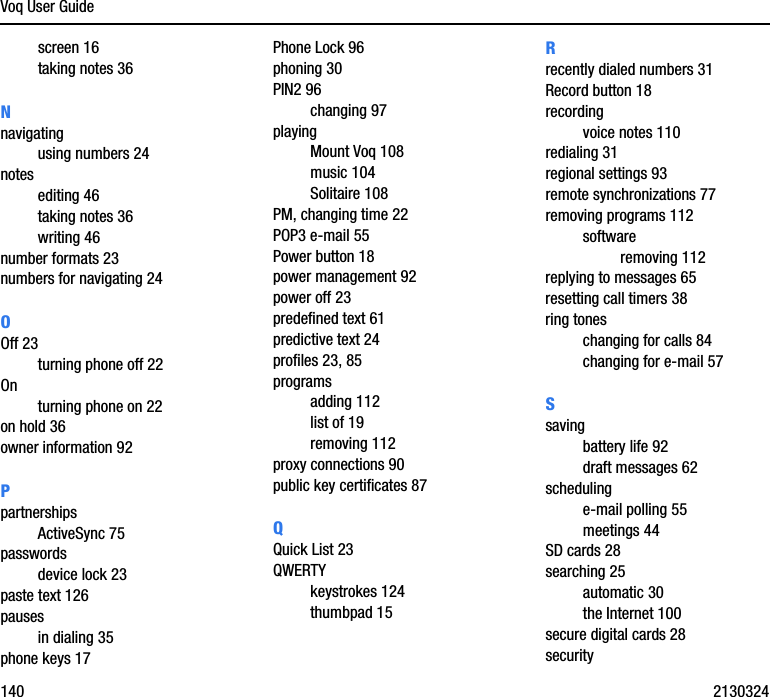
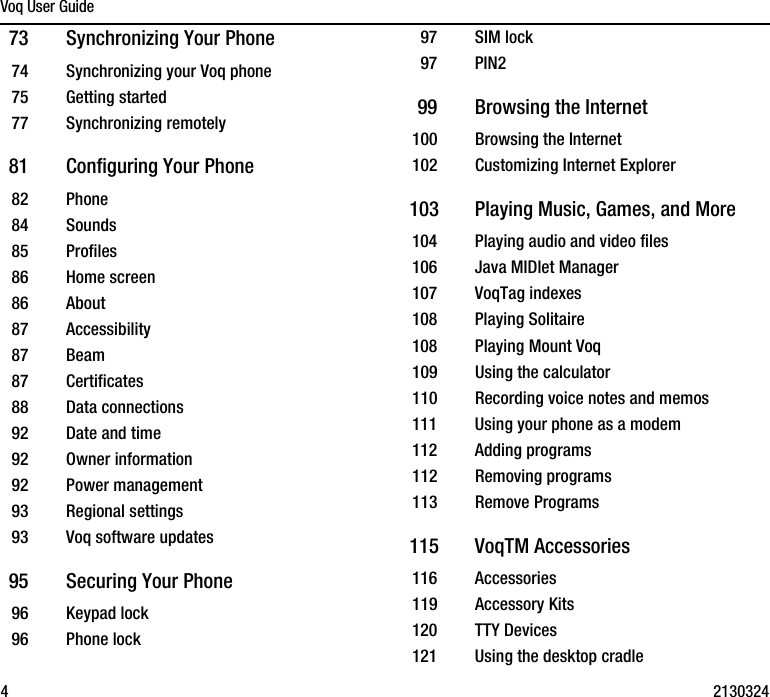
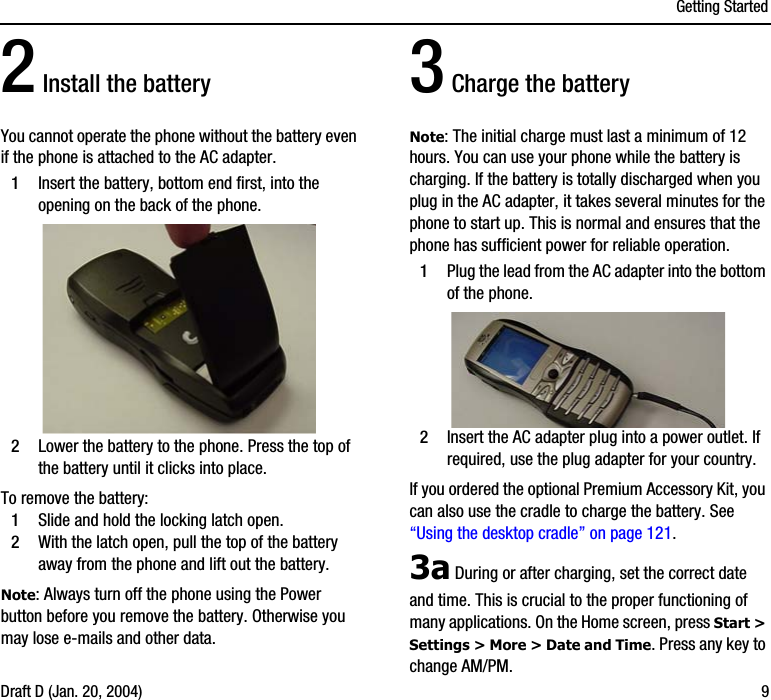
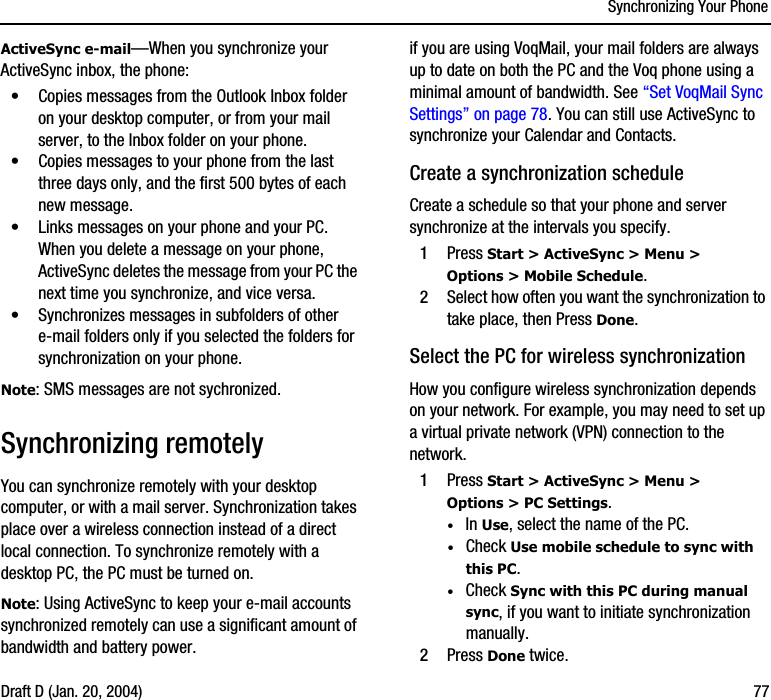
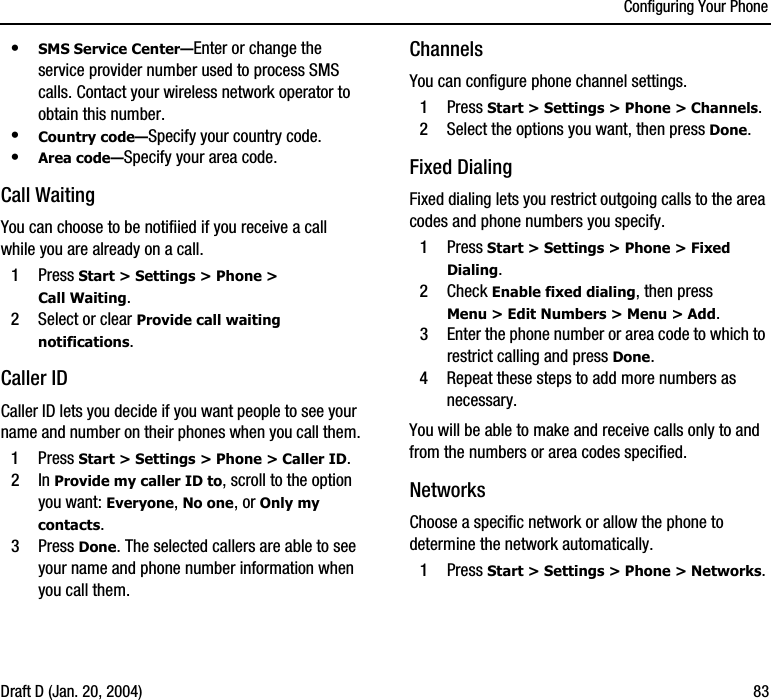
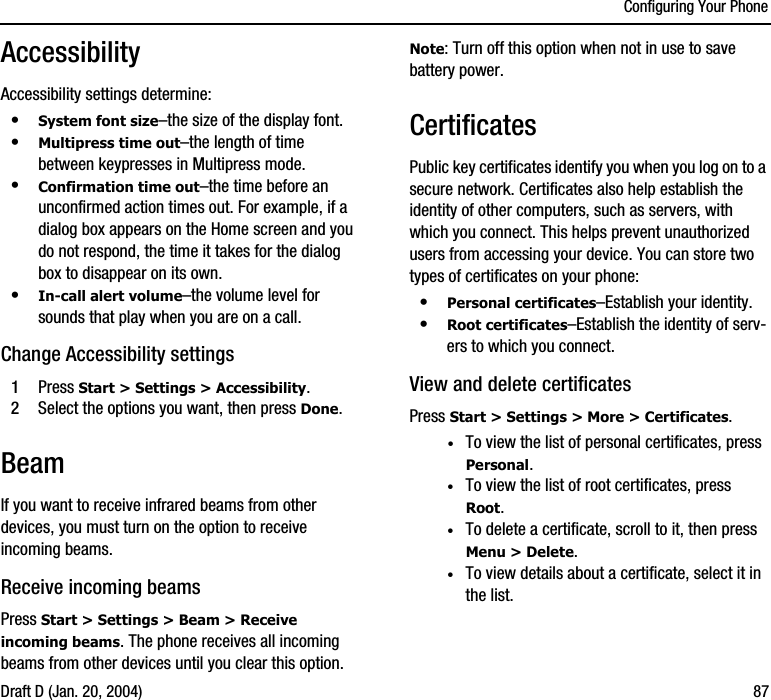
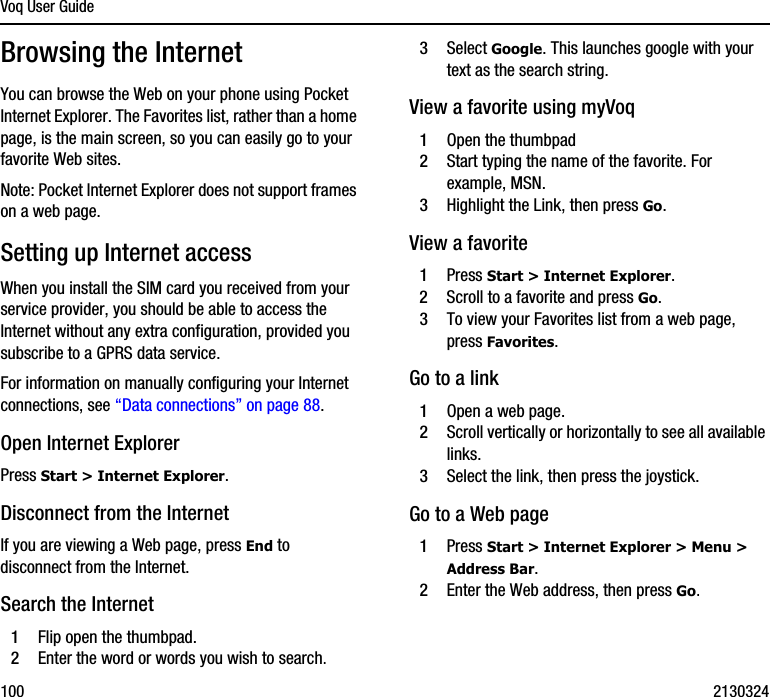
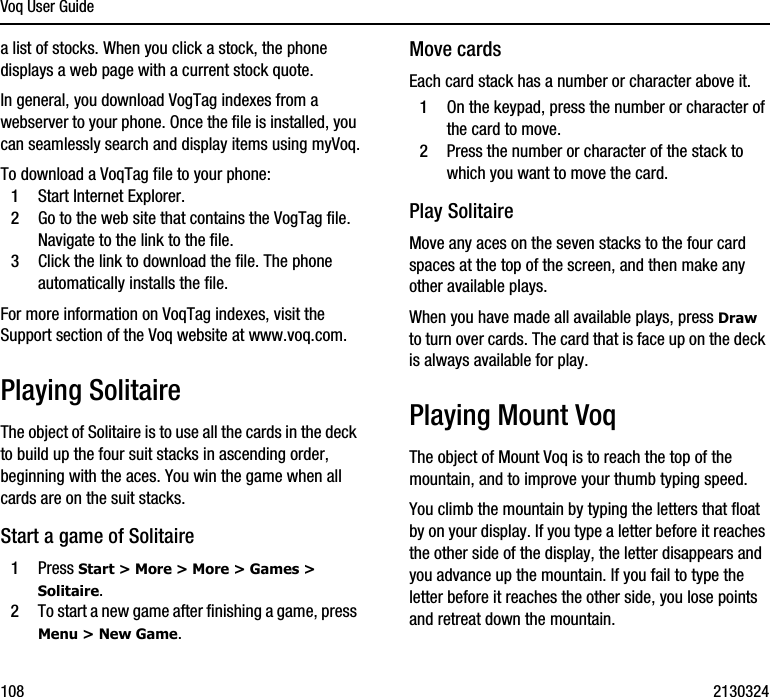
![Voq User Guide134 2130324To... Follow these instructions...Display month view Start > Calendar > Menu > Month View.To... Follow these instructions...Make a call •Dial number > Press .•Open thumbpad or press > Start typing name > Select contact > Press .•Contacts > Select contact > Press .Redial Press twice.Receive a call Press or Accept.End a call Press .Call voice mail Press and hold the 1 key.Call speed dial number Press and hold the speed dial key for the contact.Add a speed dial number(Add person to Contacts list first.)Contacts > Select contact > Press joystick > Menu > Add Speed Dial > Keypad assignment.Add a contact •Open thumbpad or press > Type contact details > Cont l [Save As...].•Contacts > New. Find a contact Open thumbpad or press > Type contact name/info > Select contact > Press joystick to display info.Voice CallsTo... Follow these instructions...Change default number for a contactContacts > Select contact >Move joystick left or right.Assign special ring to a contactContacts > Select contact> Press joystick > Edit > Scroll down to Custom Ring Tone > Done.Put a caller on Hold Menu > Hold.Activate call on Hold Menu > Unhold.View previous calls Start > Call History.Make a conference call 1Call the first person. Press Hold.2Call the second person while first is on hold. 3When the second person answers, the screen displays Conference. Press the joystick.4Repeat steps to add more people.Forward calls Start > Settings > Phone > Call Forwarding > Choose when to forward calls > Check “Enable call forwarding when...” > Enter number > Done.Turn On speakerphone Press and hold for two seconds.Turn Off speakerphone Press and hold for two seconds.To... Follow these instructions...Go to a favorite using myVoq Open the thumbpad or press > Begin typing name > Select favorite > Go.Go to a web page Start > Internet Explorer > Menu > Address Bar > Type URL > Go.Internet browsing](https://usermanual.wiki/Sierra-Wireless/VOQA10/User-Guide-393067-Page-134.png)
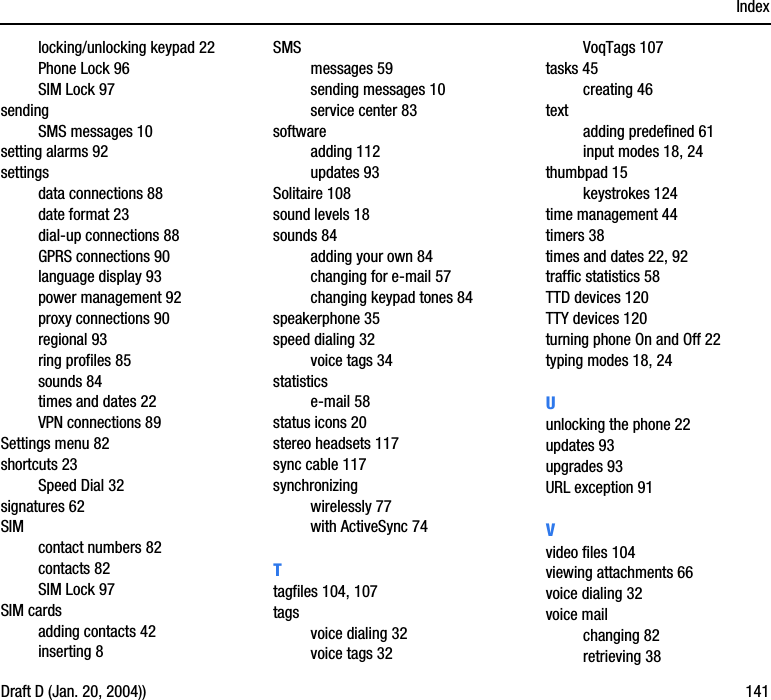
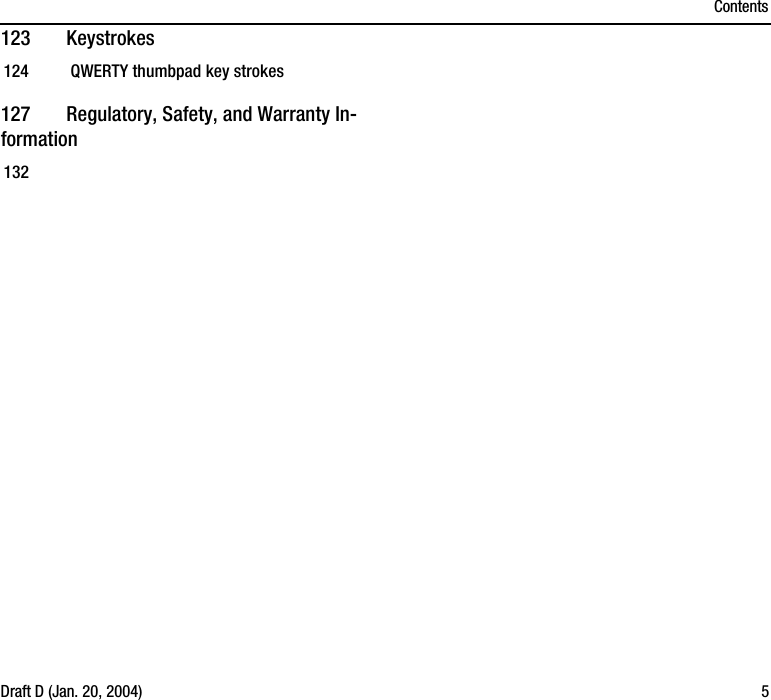
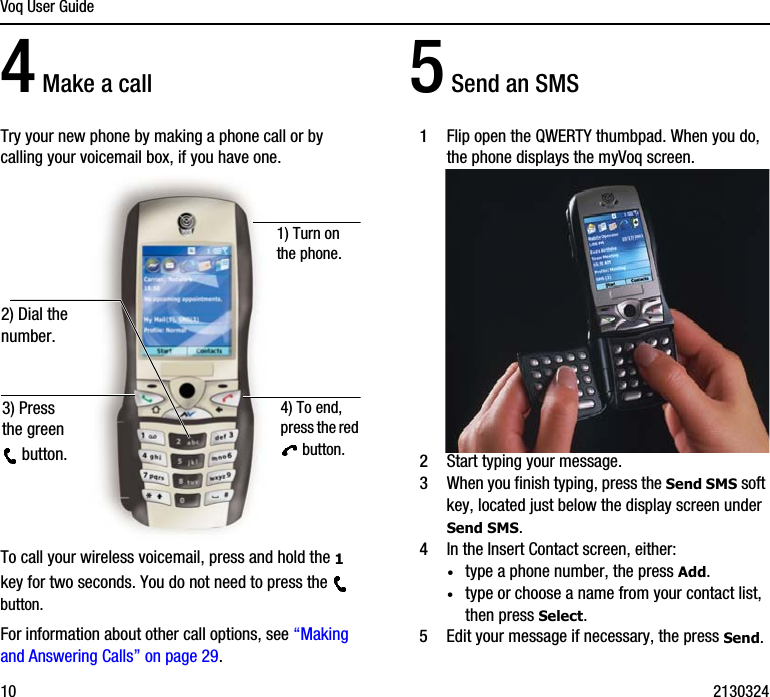
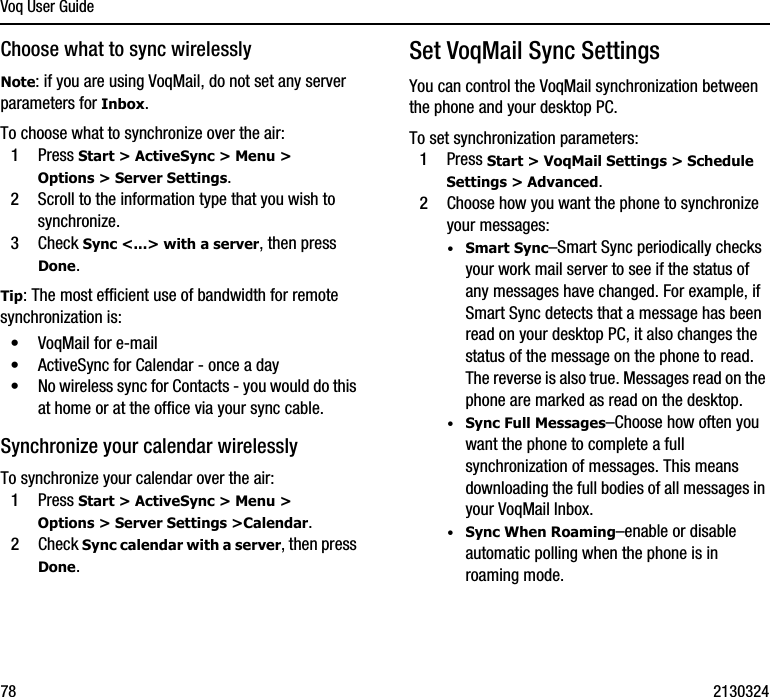
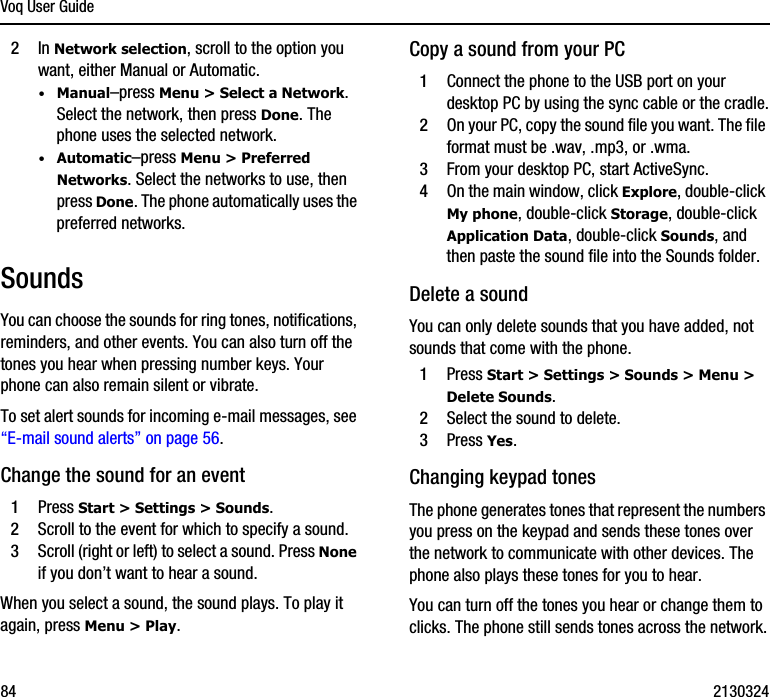
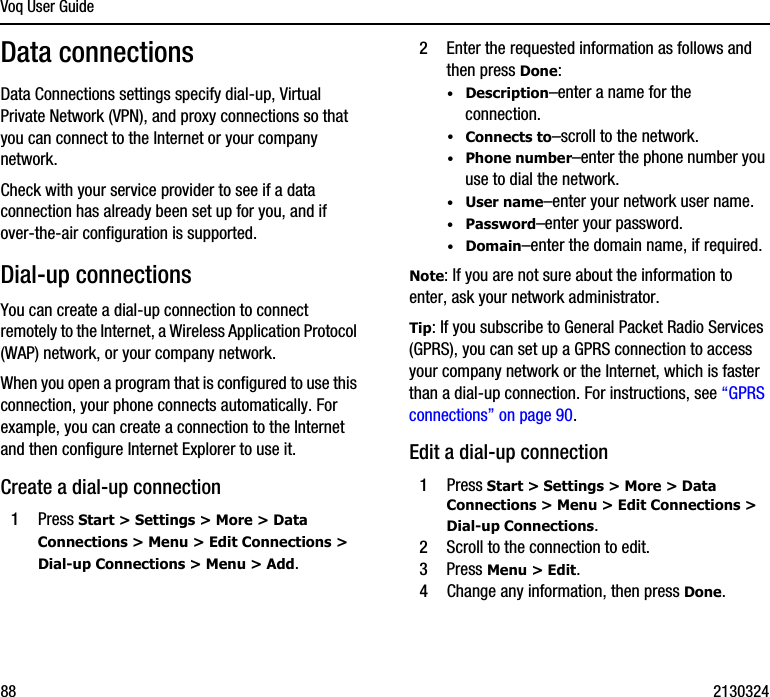
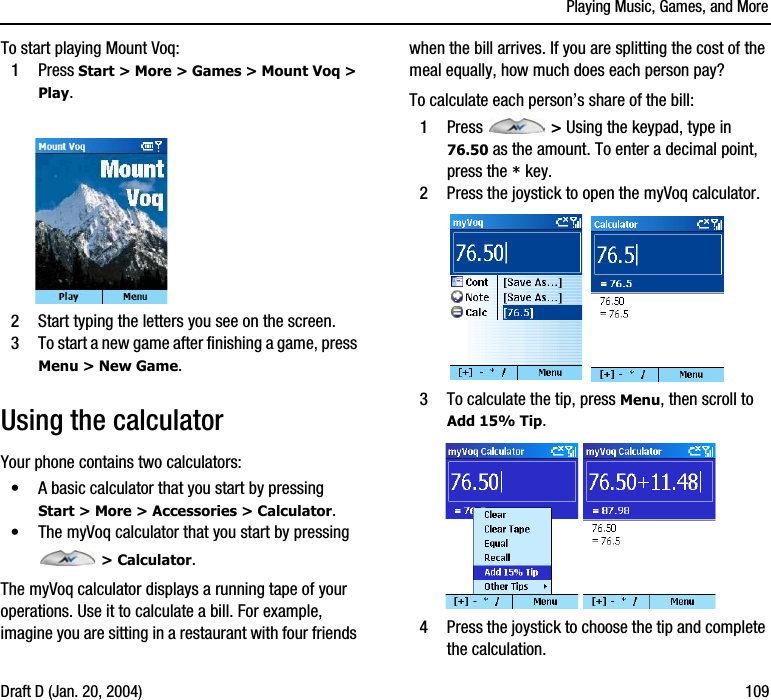
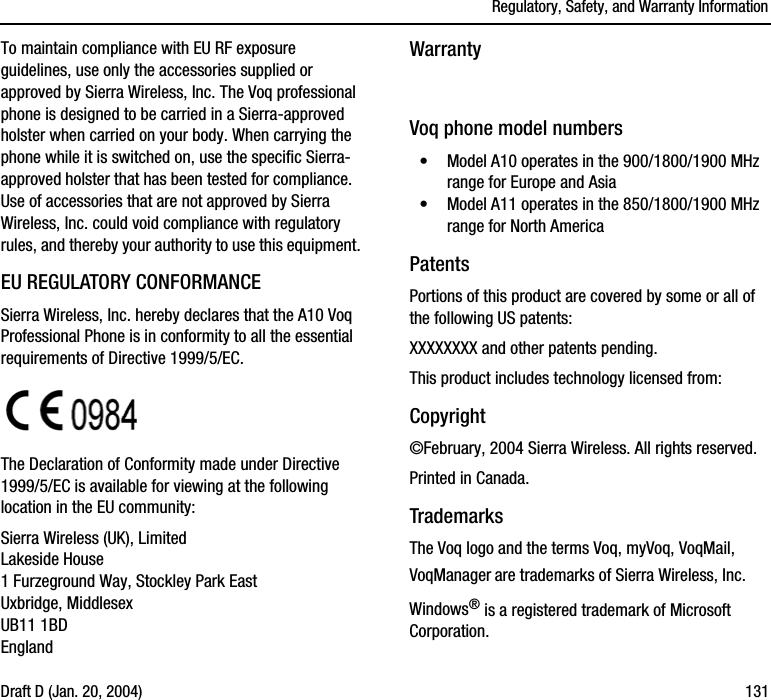
![Quick ReferenceDraft D (Jan. 20, 2004) 135The instructions below assume that the myVoq screen is displayed. To display the myVoq screen, flip open the thumbpad when you are in the Home screen or press .To... Follow these instructions...Configure your e-mail (VoqMail Personal and Pro)Start > More > VoqMail Settings > Setup Wizard > Follow wizard instructions > Press Next or Previous to move from screen to screen > Finish.Read your messages Start > Inbox > Move joystick to select inbox.Configure how often Voq checks server for e-mailStart > More > VoqMail > Schedule Settings > Basic.Manually check for messagesStart > Inbox > Menu > Send/Receive.To... Follow these instructions...Make a call Type phone number > Send.Type Contact recipient’s name > Send.Type GAL recipient’s name > Send.Send an e-mail Type message > Menu > Send E-mail > select Contact > Send.Type Contact recipient’s name > Send E-mail.Type GAL recipient’s name > Send E-mail.E-mailmyVoq (including sending e-mail and SMS)To... Follow these instructions...Send an SMS message Type phone number > Send SMS.Type Contact name > Send SMS.Type GAL recipient’s name > Send SMS.Type message > Send SMS > select Contact > Send.Write a note Type note > Note l [Save As...] > Save.Add text to a note Type text > Highlight Notes > Menu > Append Note.Edit a note Type name of note > Highlight note > Edit.Send a note Type name of note > Highlight note > Menu > Send Email or Send SMS > Enter address/number > Send.Edit Contact notes Type contact name > Menu > Notes.View a file or hear a sound Type file name > Highlight file > Press joystick.Repeat the last action Press the joystick to open History. Press the joystick again to repeat the last action in History.Launch an URL Type URL > Go.Launch a favorite Type favorite name > Favo l [Go...]. Perform a calculation Type number > Type operation (e.g. +) > Type number.](https://usermanual.wiki/Sierra-Wireless/VOQA10/User-Guide-393067-Page-135.png)