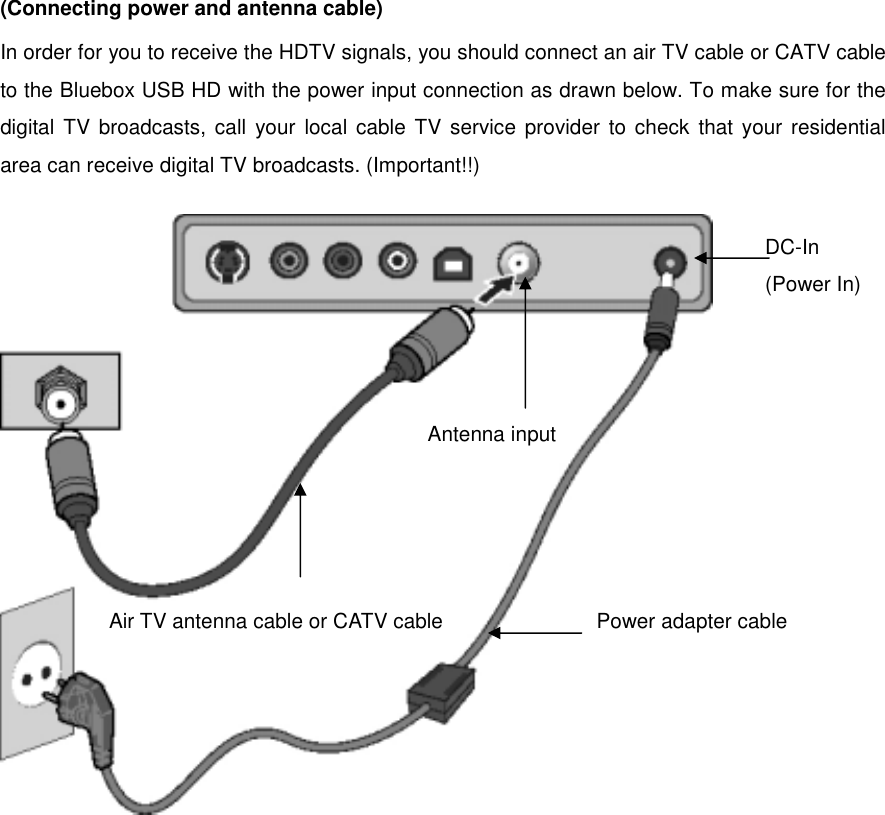
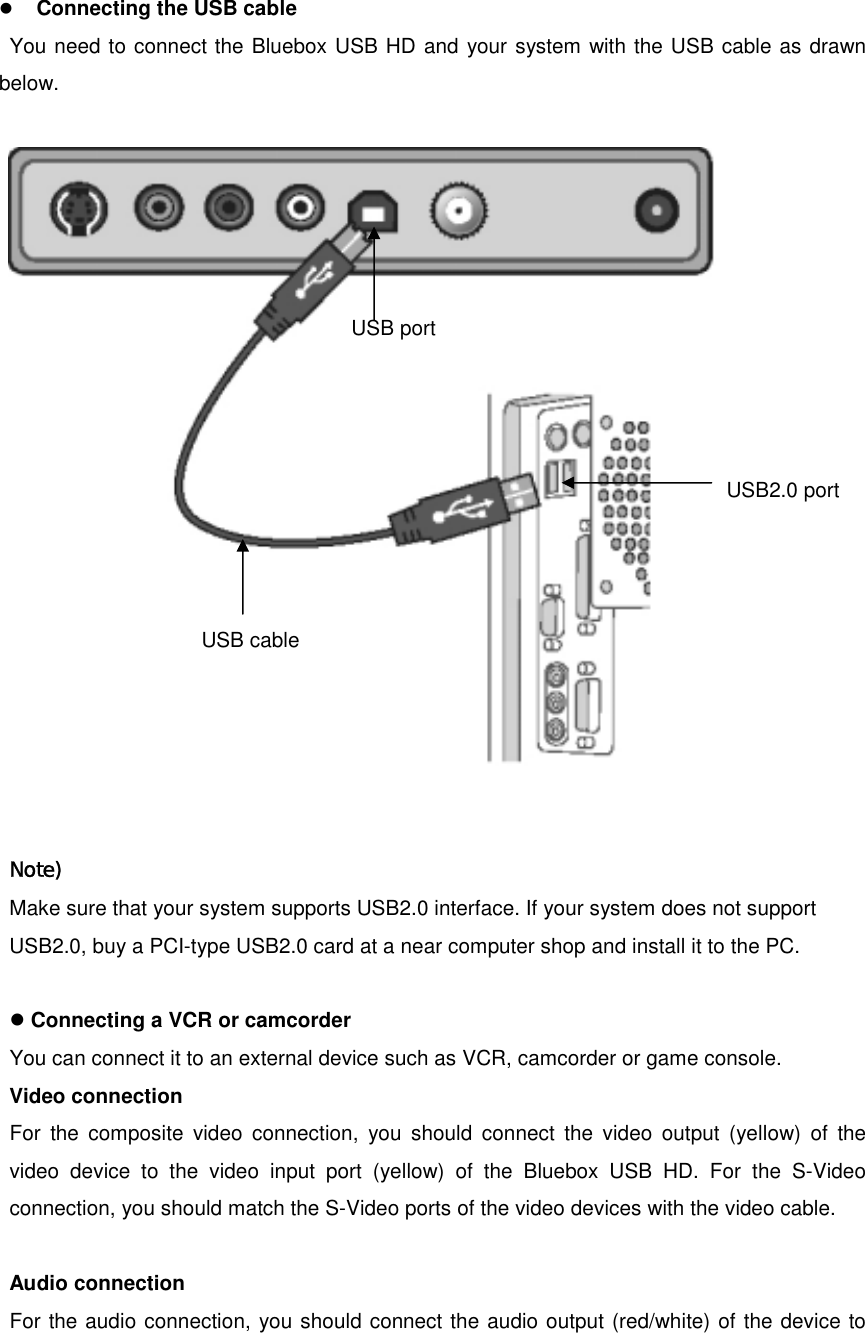
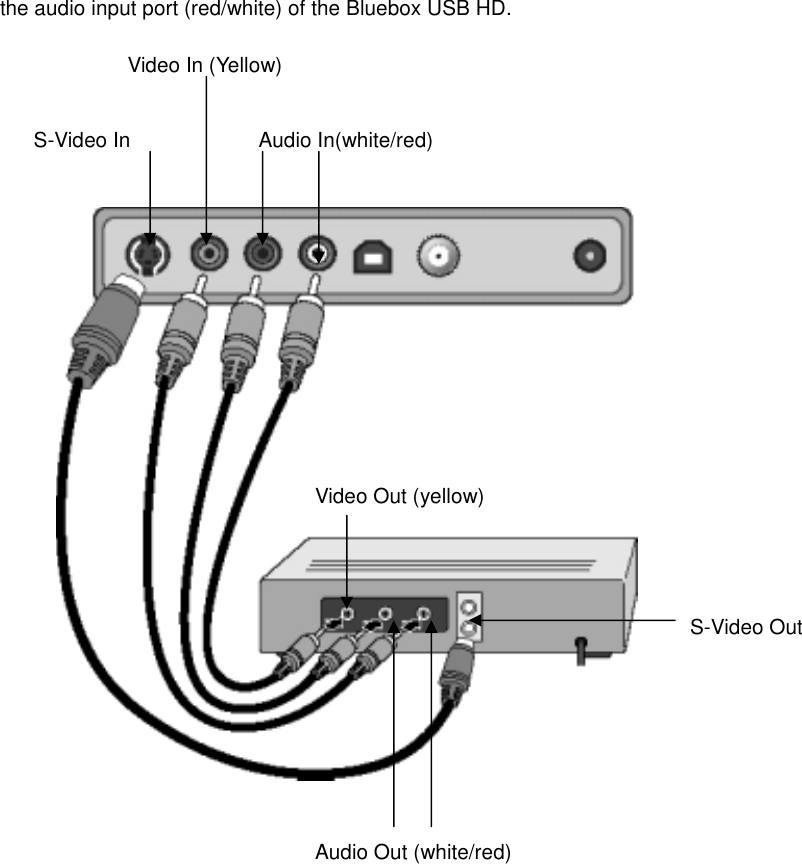
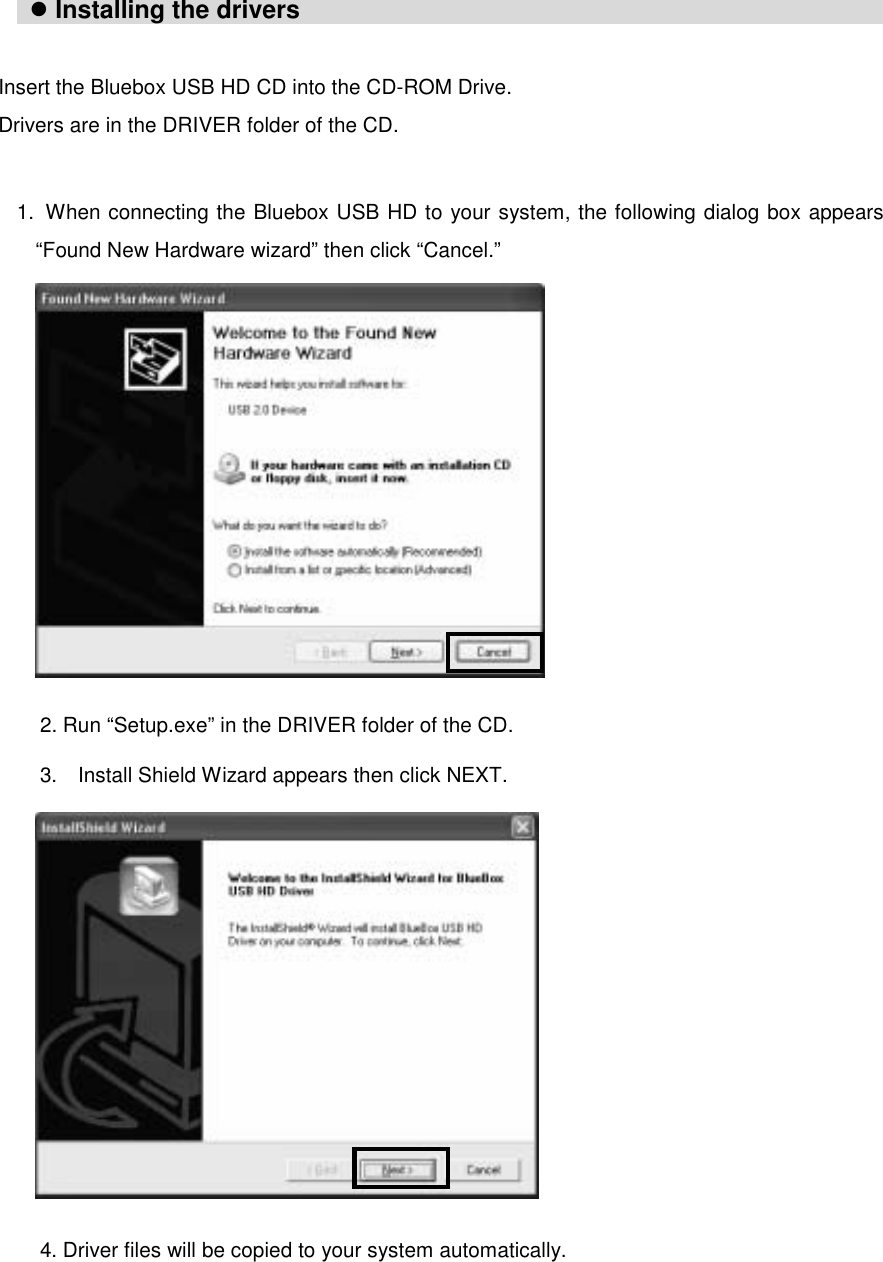
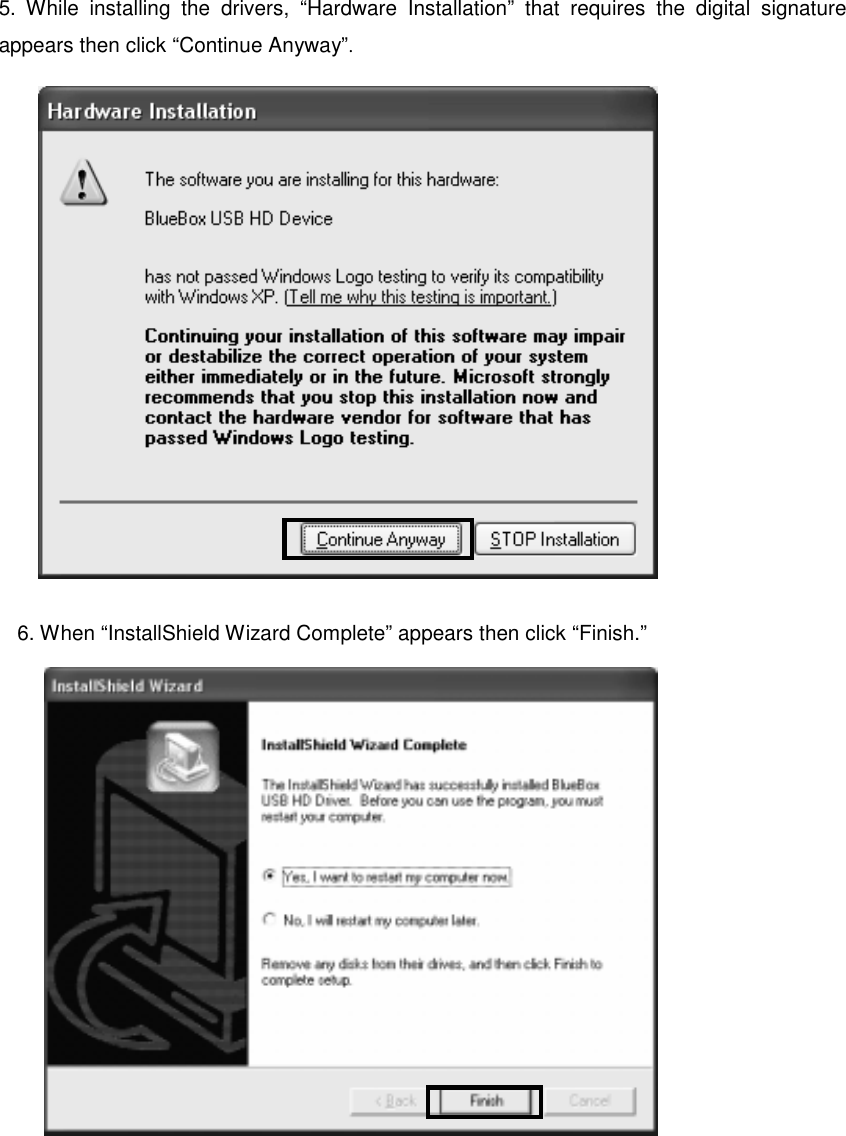
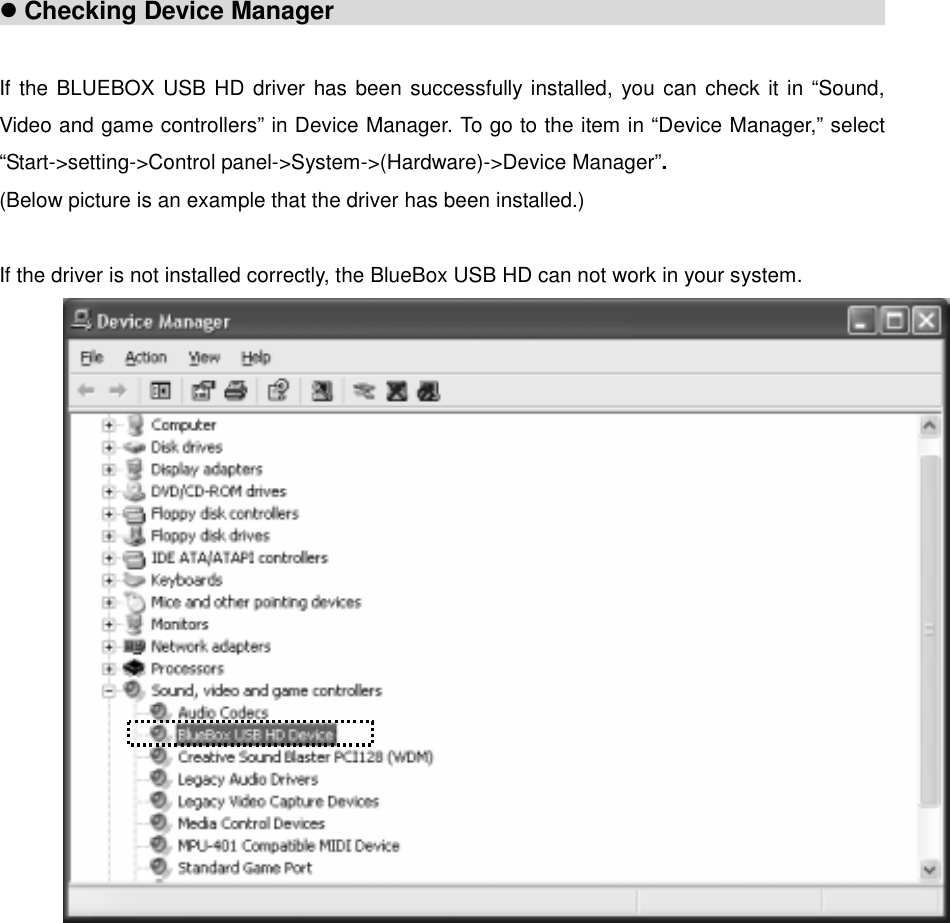
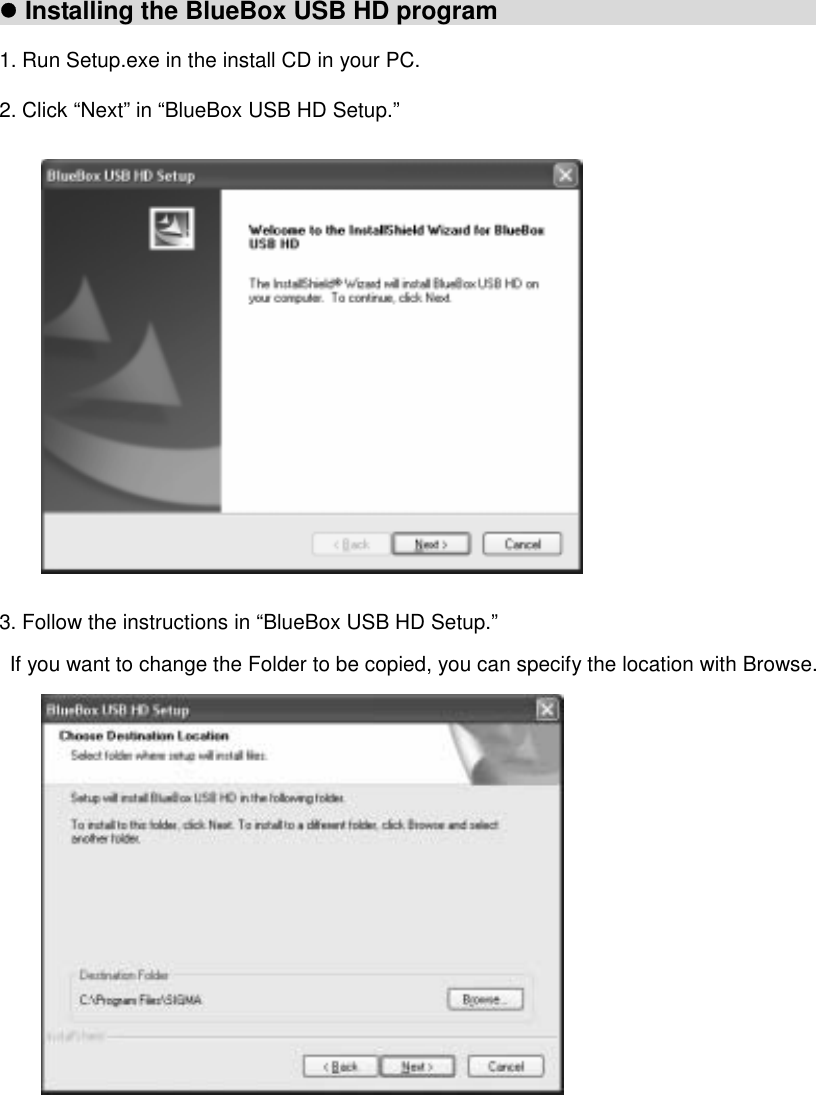
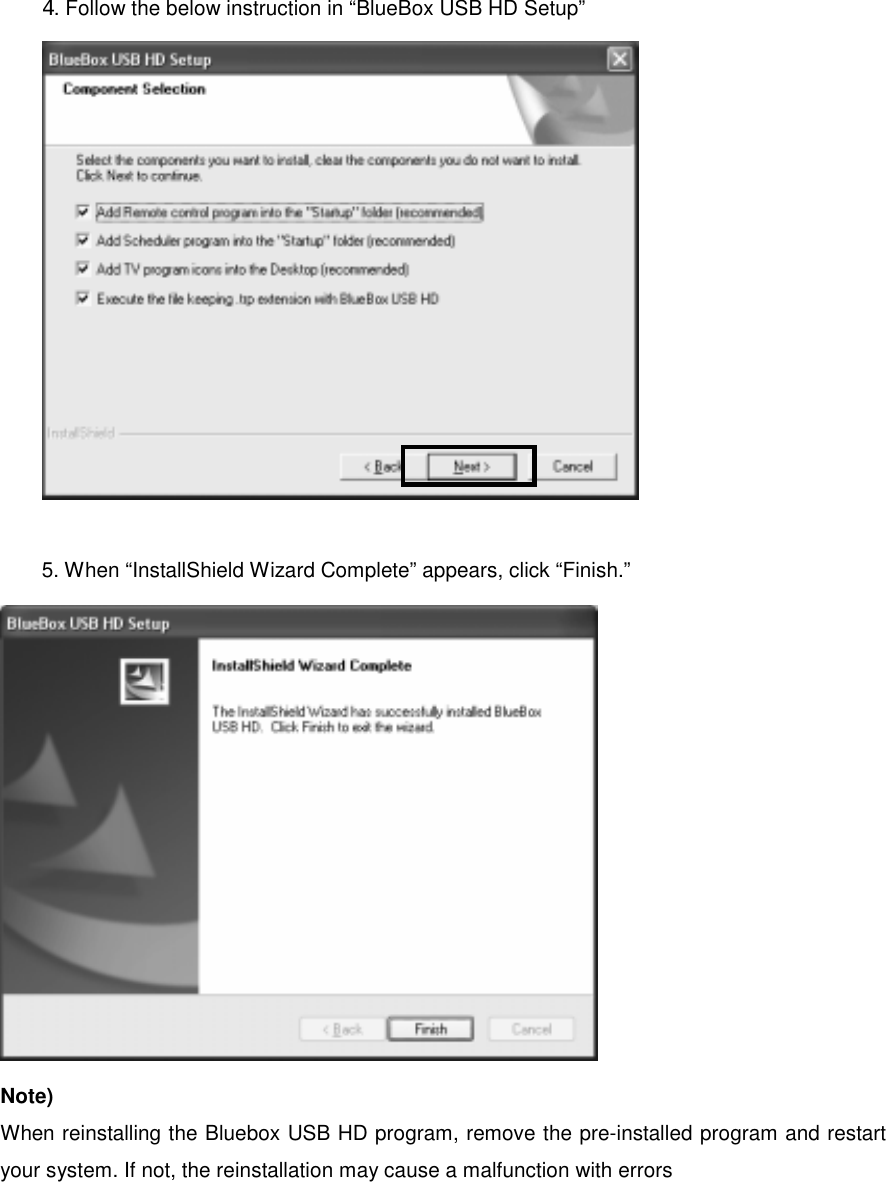
Sigmacom USBHD USB HDTV RECEIVER User Manual USERS MANUAL
Sigmacom Co., Ltd. USB HDTV RECEIVER USERS MANUAL
UserManual.wiki
>
Sigmacom
>
USBHD User Manual
USERS MANUAL
Navigation menu
Upload a User Manual
Namespaces
Wiki Guide
HTML
PDF
Info
Views
User Manual
Discussion / Help
Navigation
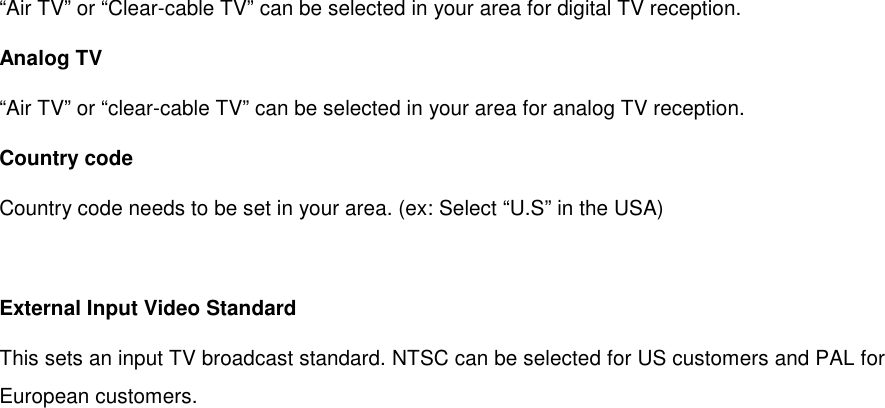
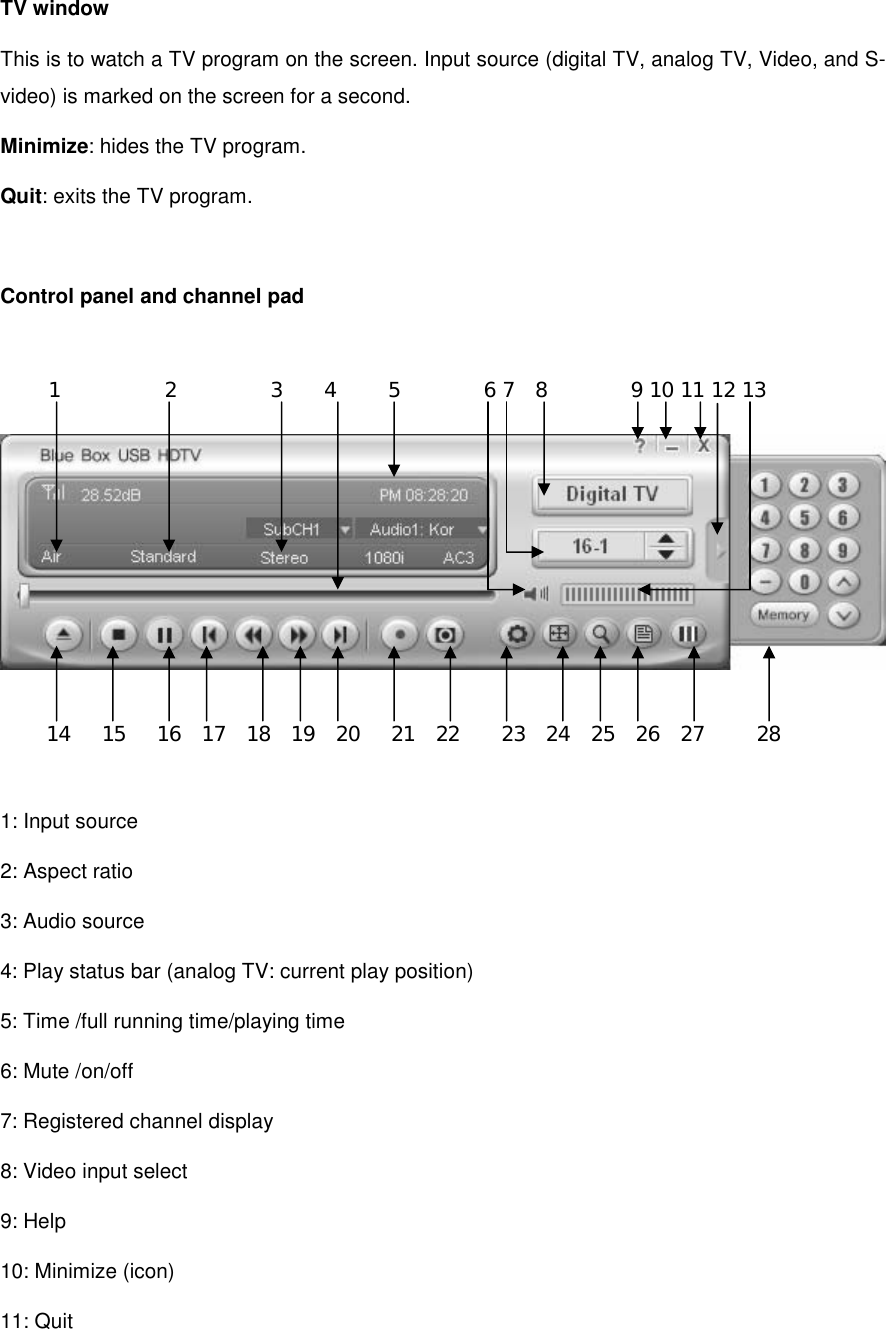
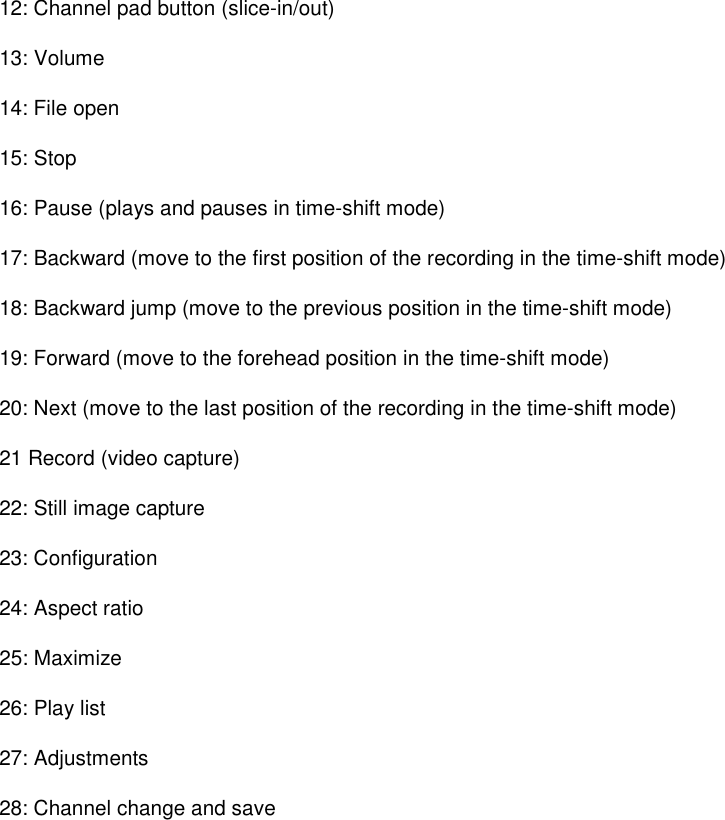
![Chapter 3 Using the program 1. Screen menu [TV window] [Control panel] [Adjustments] [Play list] [Zoom]](https://usermanual.wiki/Sigmacom/USBHD/User-Guide-494794-Page-18.png)
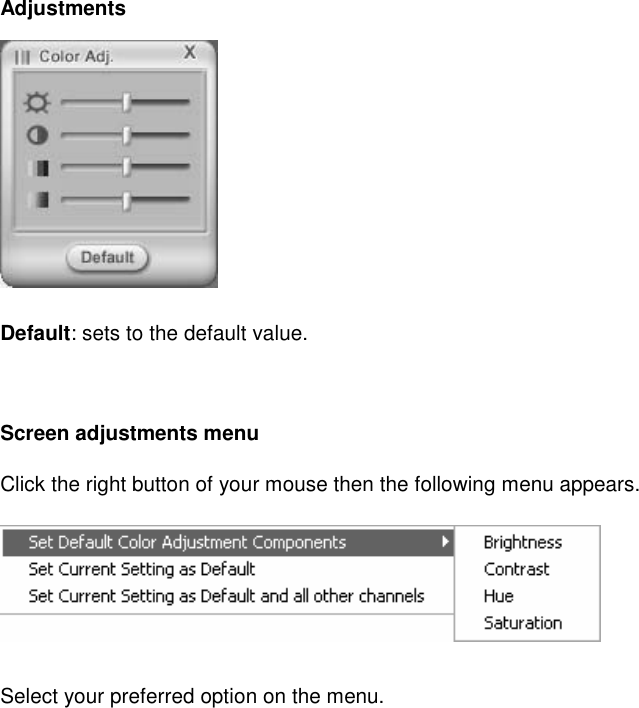
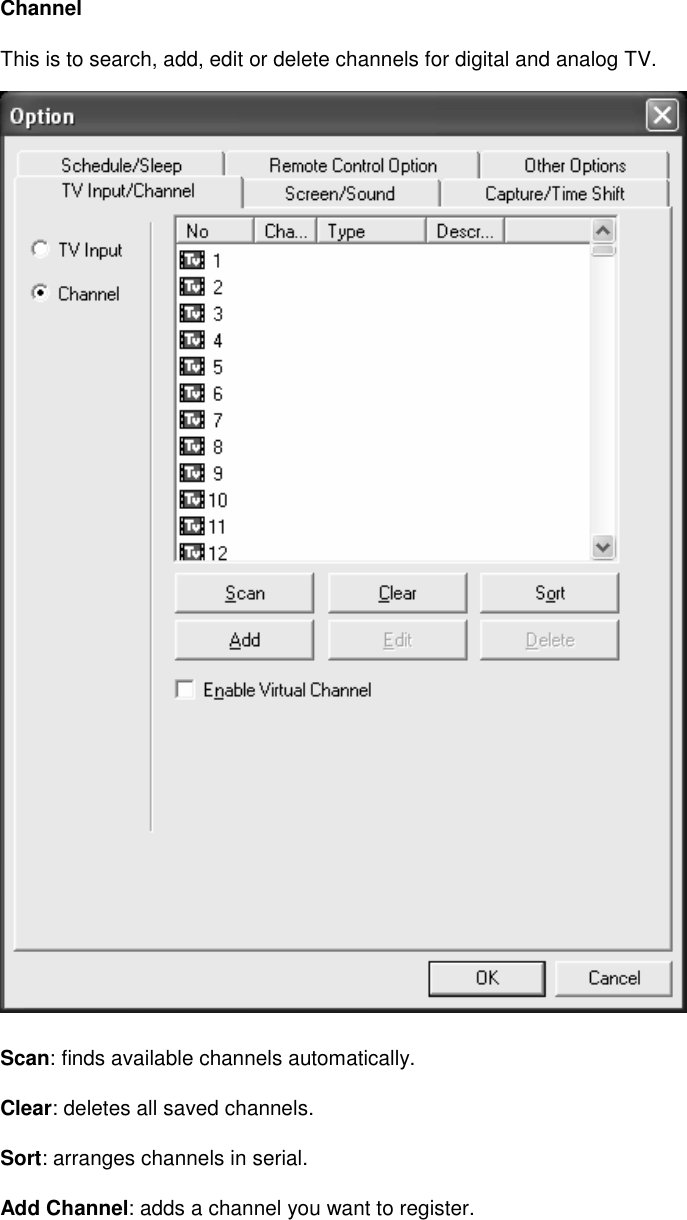
![Play list Add: adds your files in the play list. Del: deletes your files in the play list. Clear: deletes all files in the play list. Zoom This is a function to maximize a point of a viewing picture. 1X to 5X is available in the Zoom and you can control the zoom ratio with the scroll bar. [] A zooming ratio and position Up/down/left/right Zooming ratio with a mouse drag Zoom out (25%) Zoom in (25%)](https://usermanual.wiki/Sigmacom/USBHD/User-Guide-494794-Page-22.png)