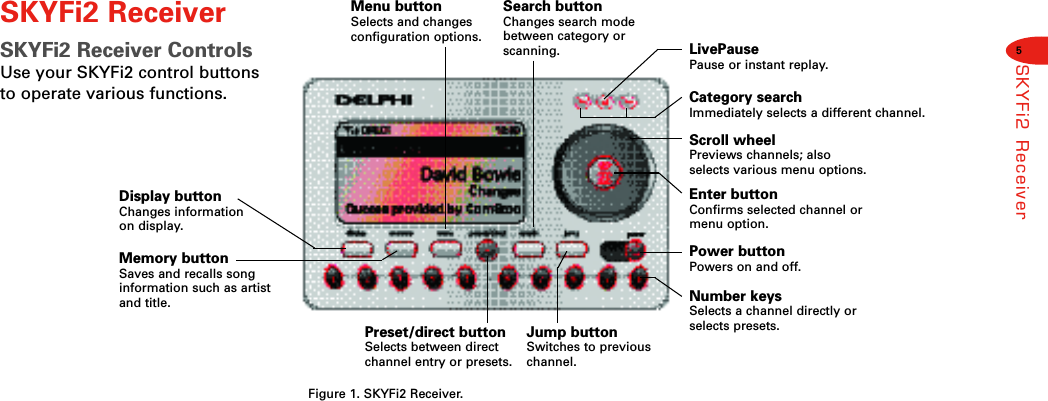
Sirius XM Radio SA10101 LOW POWER TRANSMITTER User Manual SKYFi2 layout 1
Sirius XM Radio Inc. LOW POWER TRANSMITTER SKYFi2 layout 1
UserManual.wiki
>
Sirius XM Radio
>
SA10101 User Manual
USERS MANUAL
Navigation menu
Upload a User Manual
Namespaces
Wiki Guide
HTML
PDF
Info
Views
User Manual
Discussion / Help
Navigation
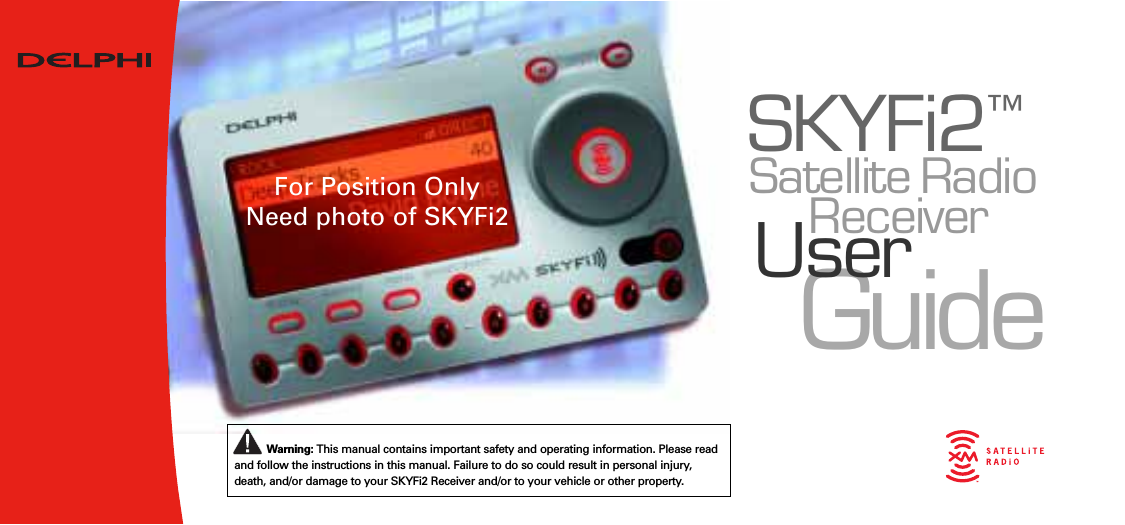
![SKYFi2 improves upon the award-winning SKYFi Satellite Radio Receiverby offering these new features:• Built-in FM wireless modulator.Listen to XM through any nearbyFM radio without using any wires.•LivePause. Hear an instant replay ortake a break (up to 30 minutes)without missing a beat.•TuneSelect. Finds your favoritesongs by artist name or song title ifthey’re playing on any XM channel.• Personal stock and sports tickers.Track your favorite stocks and sportsscores right on SKYFi2’s display.•A brighter, white LED backlit displayfor even better visibility.•More versatile vehicle mountingoptions.To use the SKYFi2 Satellite RadioReceiver, you must have a Vehicle Kit[PART NUMBER], Home Kit [PARTNUMBER], or Marine Kit [PART NUMBER].Caution: Your SKYFi2 must be used with the enclosed connecting devices or other approved acces-sories to ensure maximum performance and safety. Do not modify or alter wires or connections in anyway. Shortening wires or connections may prevent proper functioning of a protection circuit, whichmay damage your receiver and will void your warranty.((Vehicle Kit)) ((Home Kit)) ((Marine Kit))Vehicle Kit [PART NUMBER] Home Kit [PART NUMBER] Marine Kit [PART NUMBER]](https://usermanual.wiki/Sirius-XM-Radio/SA10101/User-Guide-471945-Page-3.png)


![17Advanced FeaturesInfo ExtrasXM may broadcast information such assports scores or horoscopes. To viewthis information, press the “menu”button and select “Info Extras.”LivePauseSKYFi2 allows you to hear an instantreplay of the current song or take abreak (up to 30 minutes) withoutmissing a beat.To Rewind to the Beginning of a Song1. Press the button. SKYFi2rewinds to the beginning of thecurrent song.2. Pressing the button againskips backwards to previoussongs. SKYFi2 can hold about [XX] songs.3. Pressing the button skips forward in the song list.4. To resume normal playback, pressand hold the button untilSKYFi2 beeps and displays[WHAT?]To Pause a Song1. Press the button. The word“Pause” appears in the display.2. To resume playback, press thebutton again.To Replay Last 10 Seconds1. Press the button.2. Press the button. SKYFi2replays the last 10 seconds of the program.3. To resume normal playback, pressthe button.](https://usermanual.wiki/Sirius-XM-Radio/SA10101/User-Guide-471945-Page-19.png)
![18Advanced FeaturesRecall Last ChannelPress the “jump” button to switch tothe channel that was previously beinglistened to.Direct TuneNormally, you can use the scrollwheel to preview the artists and songtitles on other channels. You mustpress the “XM” button to tune toanother channel. To change this sothat you do not have to press the“XM” button, change the “DirectTune” option to “On.”1. Press the “menu” button.2. Use the scroll wheel to select“Direct Tune.” Press the “XM”button to confirm.3. Use the scroll wheel to select“On.” Press the “XM” button toconfirm.4. Press the “menu” button to exit.Search[INFO TO COME]Skipping Channels While TuningYou can choose to skip over certainchannels when using the scroll wheel.1. Press the “menu” button.2. Use the scroll wheel to select“Channel Skip/Add.” Press the“XM” button to confirm.3. SKYFi2 displays a list of channels.In front of each channel is a “+”(meaning the channel is notskipped) or a “-“ (meaning thechannel is skipped).4. To skip a channel, use the scrollwheel to highlight that channel.Press the “XM” button to changethe “+” to a “-”.](https://usermanual.wiki/Sirius-XM-Radio/SA10101/User-Guide-471945-Page-20.png)

![Delphi Corporation1441 West Long Lake RoadTroy, Michigan 48098-5090U.S.A.Customer Service: [1] 877.GO DELPHIwww.delphi.comPrinted on Recycled Paper©2004 Delphi Corporation. All rights reserved.DPSS-04-E-xxxThe SKYFi2 name, XM name, and related logos aretrademarks of XM Satellite Radio Inc.](https://usermanual.wiki/Sirius-XM-Radio/SA10101/User-Guide-471945-Page-28.png)