Skytech II AF-4000PEHH Transmitter User Manual user s manual
Skytech II, Inc. Transmitter user s manual
users manual
Draft
Function Dscription
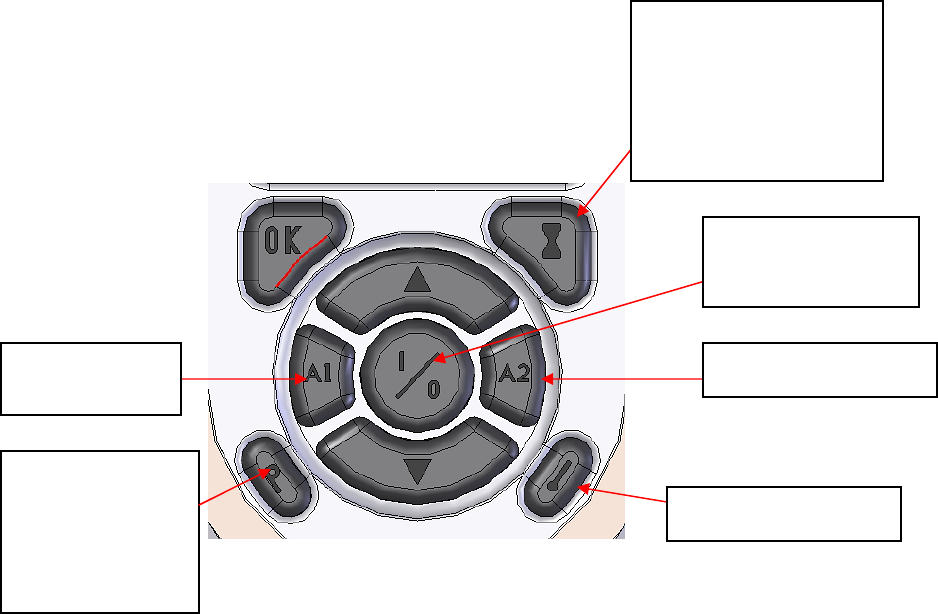
z Button
A long push (5 seconds) of A1 & A2 buttons at the same time will start the Initial Set-up.
At this time, a separate push for A1 &A2 buttons does not light any operations on the
LCD.
A short push of P button will enter into PROGRAM mode.
A long push (5 seconds) of P button will enter into the setting for PROGRAM mode.
*A long push (5 seconds) of TIMER & THERMO mode at the same time will activate or
de-activate the CP feature.
On/Off button for
Manual mode
AUX2 button
AUX1 button
Use this key to
enter into & set
Program mode
Thermo mode
set timer & cancel
timer
function
Draft
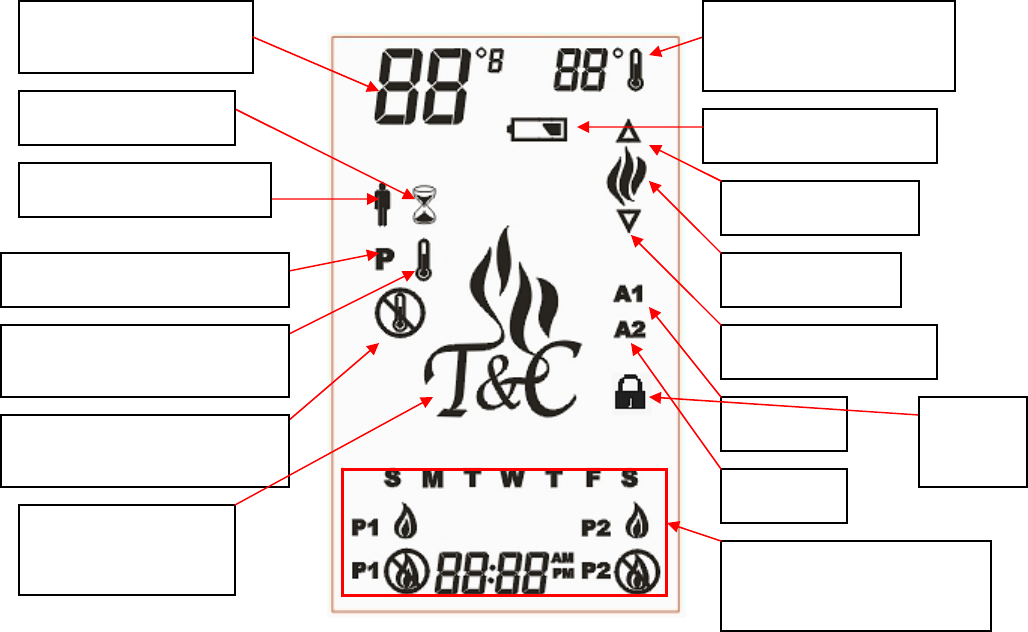
z LCD icon:
Set Temperature: This will ONLY appear when the THERMOSTAT is activated
- Timer: Timer Mode will appear and activate the Timer.
- Manual ON: When manual ON , the MAN Icon will appear and when manual OFF
the MAN icon will be eliminated
- Program Mode: This icon will appear when the program is working
- Thermostat : This icon will appear only when the Thermostatic Function is operating
the fireplace.
- Thermostat NOT : Tthis icon will ONLY appear(for 5 seconds) on the LCD screen
when the Thermostatic function has been de-activated and someone will try to push
the Thermostatic function button of the transmitter. This will show the user the
thermostatic function is de-activated.
Manual ON
Program
Timer
Thermostat
Thermostat NOT
Set temperature thermo
Battery low
Flame UP
Flame down
FLAME
AUX1
AUX2
Pacific energy
company icon Program mode setting
and display area
CP:Chil
d Proof
Draft
Notes:
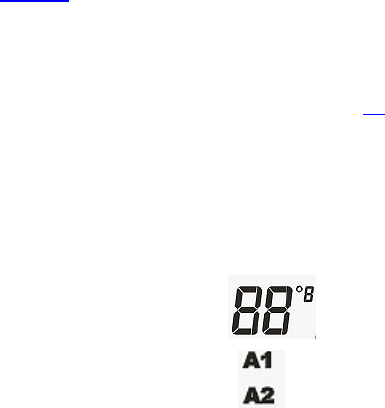
The range for the room temperature readout is 32-99 degree F.
The room temperature always displays on the LCD.
The range for set temperature is 45- 99 90degree F.
The High Limit temperature for PROGRAM mode is 90 degree F.
This High Limit termperature can not be changed by the users and
Will only activate under PROGRAM mode. There is no High
Limit temp for MANUAL & THERMO modes.
The room temperature ( ) always displays on the LCD
The AUX1 and AUX 2 ( ) do not light any operations on the LCD at this time.
NOTE: Very Important to note
Only one function can be going on at one time. You will have only one
operation at a time going on with this system. The pressing of one of the
function buttons will stop the operation that is going on with the fireplace
and start the new function.
Definition of Functions: Timer, Manual ON/OFF, Thermostat, and Program.
Timer” is considered an independent function.
The users are unable to set “Timer” function under Manual & Thermo
modes.
The users can adjust the Flame (operate the motor drive) under Manual ON,
THERMO, TIMER & PROGRAM modes.
SWING:
Pacific Energy after discussion would like to have the following in the swing
without the user having the ability to adjust this swing in any way.
- Above the Room Temperature 1degree F and .5 degree C, 1 degree swing
above
- Below the Room Temperature 2 degree F and 1 degree C, 2 degree swing
down
THESE SETTING CANNOT BE CHANGED, IT IS SET AT THE FACTORY
AND IN THE PROGRAM.
It is not necessary to display SWING on the LCD..

Draft
The FLAME icon will be ON all the time the flame in the fireplace is ON, whether
it is under Manual ON, TIMER, THERMOSTAT or PROGRAM modes.
The UP arrow will appear on the LCD when the motor drive is to be moving into
the higher flame picture. Once the activation of the flame height is stopped, the
UP icon on the LCD will disappear.
The DOWN arrow will appear on the LCD when the motor drive is to be moving into
the Lower flame picture. Once the activation of the flame height is stopped, the
DOWN icon on the LCD will disappear.
Operation Matrix
Initial Set up: Push AUX 1 & AUX 2 buttons together for more than 5
seconds to start the process.
9
C/F conversion: Use UP or DOWN key to choose Celsius or
Fahrenheit, then press OK to enter “TIME”.
Setting.
Use UP or DOWN key to set HOUR, then press OK to
enter “Minute” setting.
Use UP or DOWN key to set “Minute”, then press OK
To enter AM/PM setting.
Use UP or DOWN key to set AM/PM, the press OK to
Enter “DAY” setting.
Use UP or DOWN keys to set correct DAY, then press OK to
finish the initial set up.
The users must use OK button to confirm and enter into next setting.
The icons will keep on flashing even though no button is pushed for more
5 seconds. H’ever, if no buttons is pushed for more than 2 minutes,
the system will automatically confirm the completion of the process and
the LCD will go back to Normal readouts.
Temperature swing:
. This is factory set and can not be changed at all.
Draft
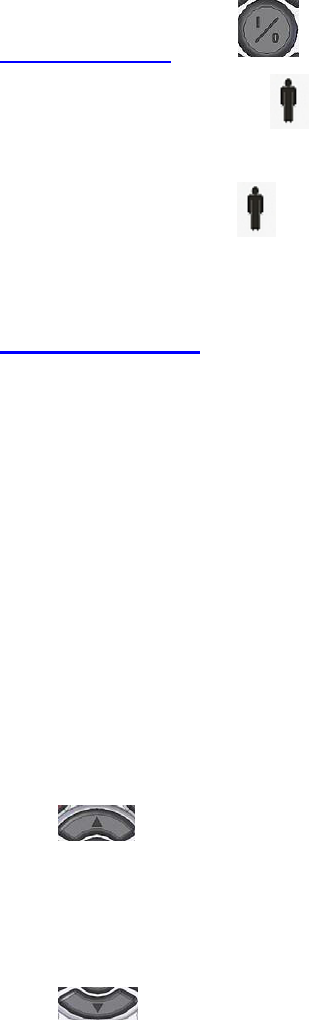
Manual Mode: Push for manual ON, OFF.
ON: The “man"( ) ICON will appear
And the FLAME icon will appear too.
OFF: The man ( ) ICON will disappear and
The FLAME icon will disappear too.
.Flame modulation: The flame can only be modulated when the system is ON. The
flame can be ON from the Manual, Timer, Thermostat and Program modes.
The FLAME icon should be on all the time the flame in the fireplace is ON, whether
It is operated in Manual, Timer, Thermostat or Program modes.
The UP arrow will appear on the LCD when the motor drive is to be moving into
the higher flame picture. Once the activatin of the flame height is stopped, the UP
icon on the LCD will disappear.
The DOWN arrow will appear on the LCD when the motor drive is to be moving into
the Lower flame picture. Once the activation of the flame height is stopped, the
DOWN icon on the LCD will disappear.
Push (UP) button to operate flame motor drive UP. When this key is
pushed, the UP icon will appear. The UP icon will disappear once the activation of the
flame height is stopped (when the button is released.)
Push (DOWN) button to operate flame motor drive DOWN. When this
key is pushed, the DOWN icon will appear .The DOWN icon will disappear once the
activation of the flame height is stopped (when the button is released).

Draft
.Timer function: Once this is selected, the timer ( ) icon will be on the screen and the
clock will flash “30"minutes as the start point. But the users still can go down to
10 minutes and up to 180 minutes. The 10-minute segments remains unchanged.
By pushing (TIMER) button, You can set TIMER or cancel
TIMER function.
You use (DOWN) or (UP) button to set your
desired TIMER.
9 The range of TIMER is from 10 minutes to three hours or 180
minutes, in 10 minute segments.
9 IMPORTANT:Once the timing range is set, the user MUST
push (OK) button to activate the Timer. IF THE
“OK"BUTTON IS NOT PUSHED, THE ORIGINAL FUNCTION
WILL CONTINUE TO OPERATE. In another words, Pacific Energy
would like to have the user too push the OK button to change the function.
The clock will start the countdown right after the completion of the
TIMER setting. At this time, if the (TIMER) button is
pushed again, the TIMER function will be canceled. You'll have
to push the TIMER button again if you want to use the TIMER
function again.
Draft
.Thermo mode:
Selection of (THERMO) button will light the temperature
ICON and will light the smaller set of numbers ( )
The SET area should flash to 5 seconds and during this period of time the UP and Down
arrows will operated the Set Temperature to the correct setting. Once the correct
temperature is obtained, the temperature will continue to flash for 5 seconds and then it
will stop flashing (This means the SET process is completed.) The user will not have to
operate the “OK" button to set the temperature. But if the OK button is pushed, it
also completes the process for setting temperature.
You can use (DOWN) or (UP) buttons to
obtain the desired temperature. Then you can either let the
set area flash for 5 seconds or push the OK button to complete this process.
We should be able to operate the UP and DOWN arrows will direct the motor drive ONLY
after the 5 seconds of flashing.
On the backside of the TX, there is an unmarked recessed button,
you can completely turn off the THERMOSTATIC function of this
remote by pushing this recessed button.
This recessed button has sequence of events to turn on & off
The THERMOSTATIC function.
The “THERMOSTAT NOT" icon on the LCD screen will
appear for 5 seoncs only when the THERMOSTATIC function
is completed turned off.
This “THERMOSTAT NOT icon will light for 5 seoncs if the
THERMO button on the front of the TX is pushed.
In another words, this “THERMOSTAT NOT" icon will
NOT appear all the time.
Draft
.
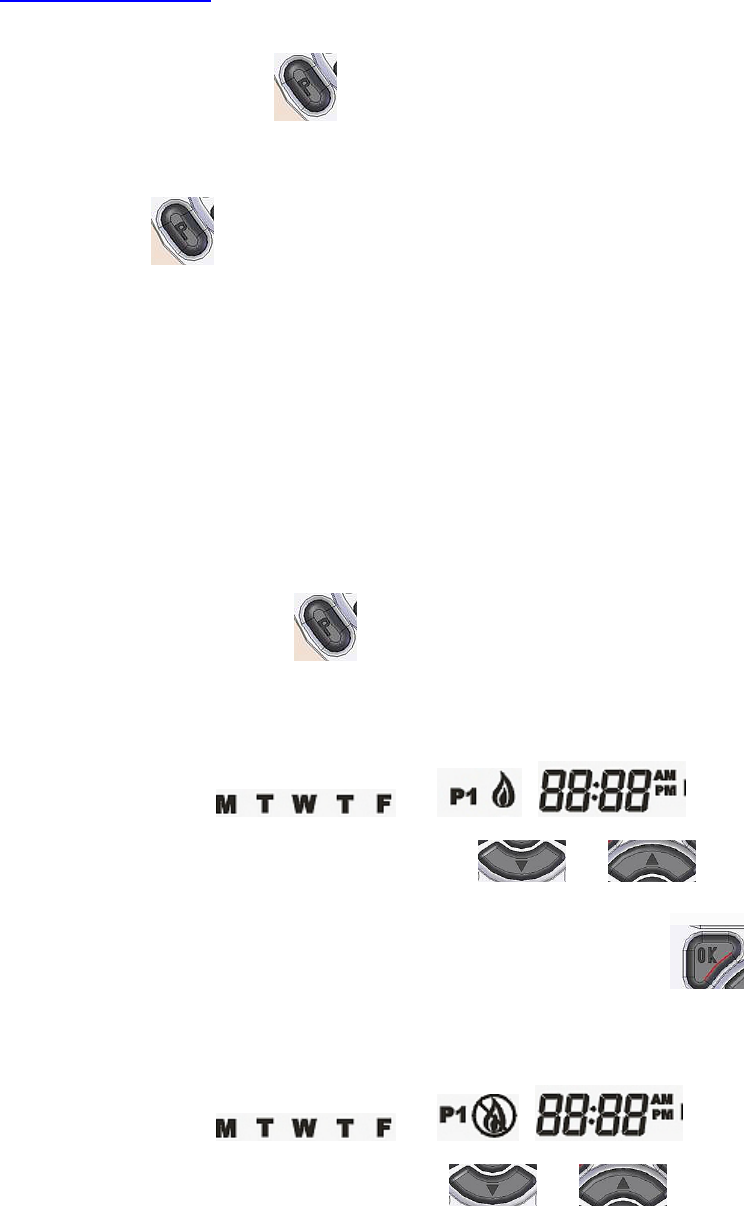
Program mode:
A short push of (PROGRAM) button will select/operate the
PROGRAM mode. A long push (push & hold for more than 5 seconds)
of button will enter into the Setting of PROGRAM mode.
Following are the Factory setting for the PROGRAM mode:
MTWTF Segment 1(P1) On - 7:00am Off 8:00am
Segment 2(P2) On 5:00pm Off 7:00pm
S S Segment 1(P1) On 9:00am Off 10:00am
Segment 2(P2) On 6:00pm Off 9:00pm
Push & hold button for more than 2 seconds to enter the
setting for program mode:
& & on LCD
will flash, then you can use or to change
the setting of “P1 ON". Then you push OK ()
button to enter into next setting.
& &on LCD will
flash, then you can use or to change the
setting of “P1 OFF". Then, push OK button to enter into

Draft
next setting.
& & will flash.
Then use or to change the setting of “P2
ON". Then, use OK button to enter into next setting.
& & will flash.
Then use or to change the setting of
“P2 OFF". Then, push OK button to enter into next setting.
SS & & on the LCD will flash.
You can use or to change the setting of
“P1 OFF". Then, push OK button to enter into next setting.
SS & & on the LCD will flash.
You can use or to change the setting of
“P1 OFF". Then you push OK button to enter into next
setting.
SS & & on the LCD will flash.
You can use or to change the setting of
“P2 ON”. Then, you use OK button to enter next setting.
SS & & on the LCD will flash.
You can use or to change the setting of
“P2 OFF”. Then, you use OK button to finish the setting.
.CP (CHILD PROOF):
Draft
*This feature is to be activated/de-activated by push TIMER/THERMO keys at the
Same time for more than 5 seconds..
*When this feature is activated, the LOCK icon will appear for 5 seconds and then
disappear. This LOCK icon will appear for 5 seconds again and then disappear
if any of the buttons of the TX is pushed. This tells the users that the TX is
LOCKED.
FCC Notice
This device complies with part 15 of the FCC Rules. Operation is subject to the
following two conditions: (1) This device may not cause harmful interference, and (2)
this device must accept any interference received, including interference that may
cause undesired operation.
NOTE: THE MANUFACTURER IS NOT RESPONSIBLE FOR ANY RADIO
OR TV INTERFERENCE CAUSED BY UNAUTHORIZED MODIFICATIONS TO
THIS EQUIPMENT. SUCH MODIFICATIONS COULD VOID THE USER’S
AUTHORITY TO OPERATE THE EQUIPMENT.