Skyworth Digital Technology 081202A Digital Satellite Receiver User Manual
Shenzhen Skyworth Digital Technology Co.,LTD Digital Satellite Receiver Users Manual
UserManual.wiki
>
Skyworth Digital Technology
>
081202A User Manual
Users Manual
Navigation menu
Upload a User Manual
Namespaces
Wiki Guide
HTML
PDF
Info
Views
User Manual
Discussion / Help
Navigation

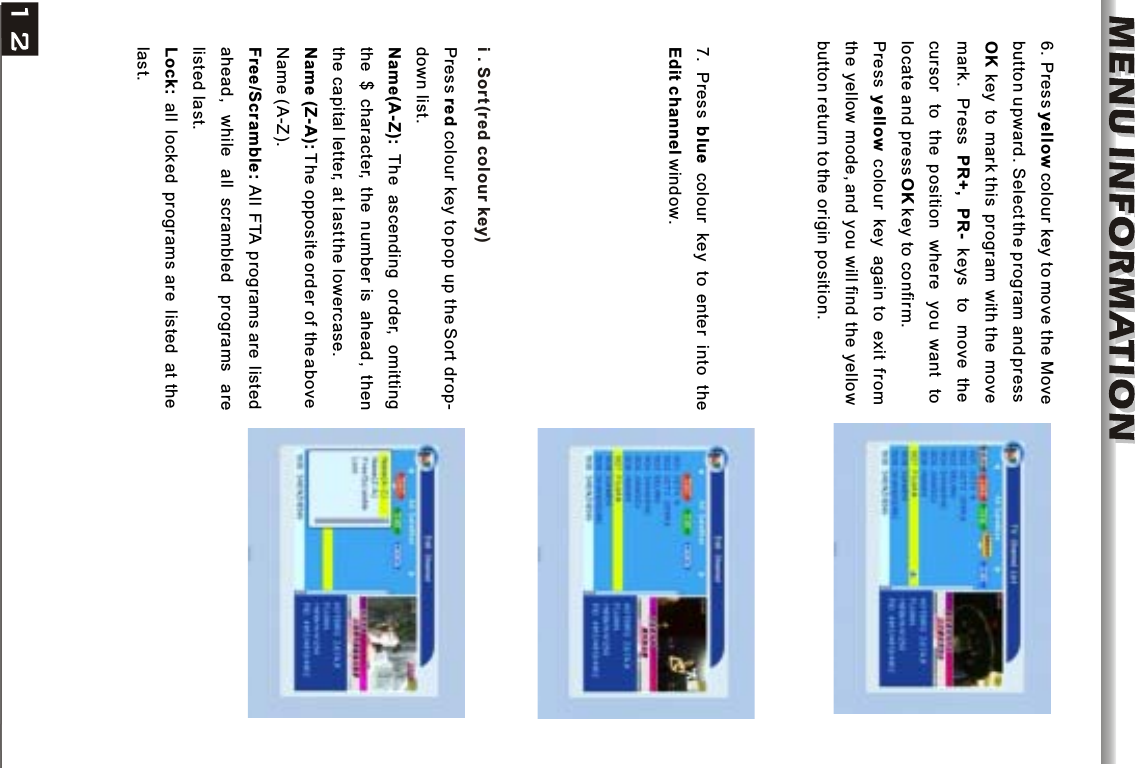
![Numeric keys Press numeric key repeatedly, display in circle1234567890.,*?!@1ABC2DEF3GHI4JKL5MNO6PQRS7TUV8WXYZ9[space]_-0If the name is empty, system will pop up a dialogue informing "Name" once yellowcolour key is pressed. Press OK key to close this dialogue.Press green colour key to move the Edit button upward. Select the program and pressOK key to pop up the Rename window.In Rename window, press red colour key toswitch between capital letter and lower letter; press green colour key to delete the character on the cursor; press keys to move the cursor left or right; press numerickeys (0-9) to input the character, please refer to the down table. Press yellow colourkey to save and exit, or press blue key to cancel and exit.ii. Edit (green colour key)](https://usermanual.wiki/Skyworth-Digital-Technology/081202A/User-Guide-1043285-Page-14.png)