SmartBridges AIRNIC USB LAN Adapter with CD & Cable User Manual
SmartBridges Pte Ltd USB LAN Adapter with CD & Cable
User Manual


Getting Started
Introduction
Thank you for purchasing smartBridges’ airNIC Wireless USB Network Adapter.
airNIC provides instant, high-speed wireless network connectivity. The Adapter
delivers a complete solution to customers who require mobility and freedom in a
Wireless Local Area Network (WLAN).
The external Plug-and-Play Adapter connects directly to the USB port of the PC. The
state of the art hot Plug-and-Play USB technology eliminates IRQ conflicts and
ensures easy installation. The Adapter draws its power from the USB port of the
computer.
The airNIC allows you to:
● Connect your computer to other computers around you
● Connect your computer to a standalone wireless network
● Connect your computer to a wireless LAN connected to a wired LAN infrastructure
Minimum PC Configuration required
● An IBM compatible PC
● Pentium processor (166 MHz or above recommended)
● Microsoft Windows 98 (Second Edition), Windows 2000, Windows ME and
Windows XP
● Memory - Windows 98SE / ME — at least 16 MB RAM
- Windows 2000 / XP — at least 64 MB RAM
● Free space on Hard Disk Drive — 50 MB recommended
● SVGA display (minimum 800 x 600 resolution with 256 colours)
● A CD-ROM drive
● Spare USB port for the airNIC Wireless USB Adapter
"One-Click" simpleConnect™ software
simpleConnect is a proprietary
software, developed by
smartBridges, which simplifies the
airNIC installation
process. The “One-Click
Installation” technology built
into simpleConnect makes it the
simplest solution
available today. The
software automatically installs and
configures the device. This makes
the entire installation
process as simple as 1-2-3.v
Installing airNIC
Follow these easy steps to install airNIC on your desktop or laptop computer
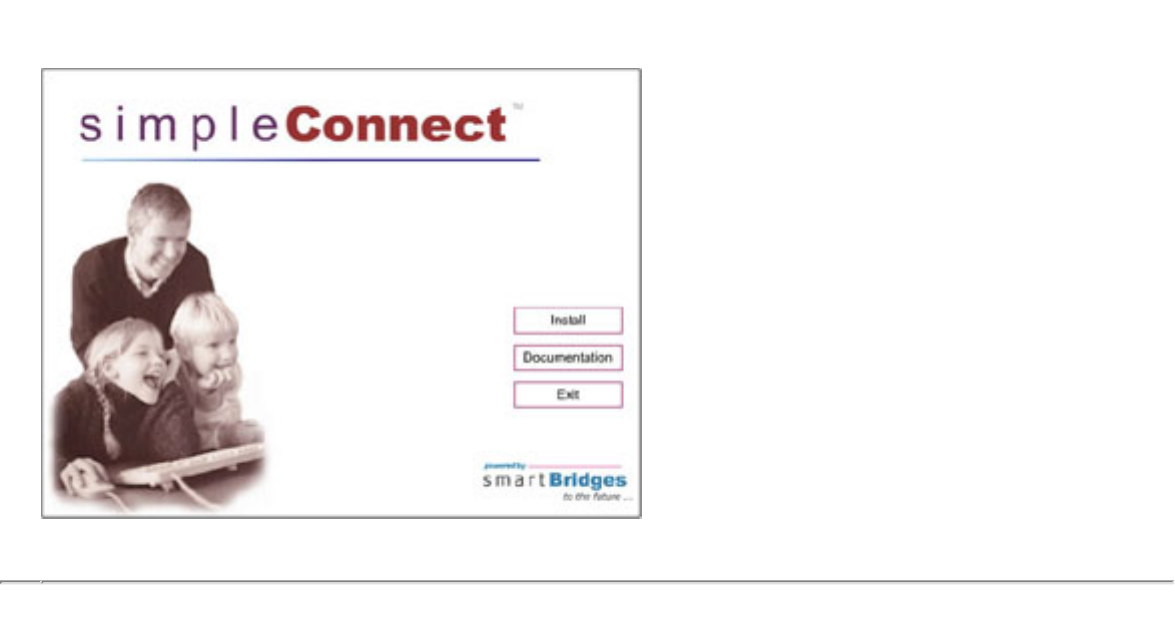
1. Insert the simpleConnect software CD in the CD-ROM drive. The CD will run
automatically and the screen shown below will appear. (In case, the CD drive does not
support auto-run feature, browse the CD and run Install.exe
● Install Button begins the installation process
● Documentation shows the HTML version of User Manual
● Exit allows you to exit the set up process.
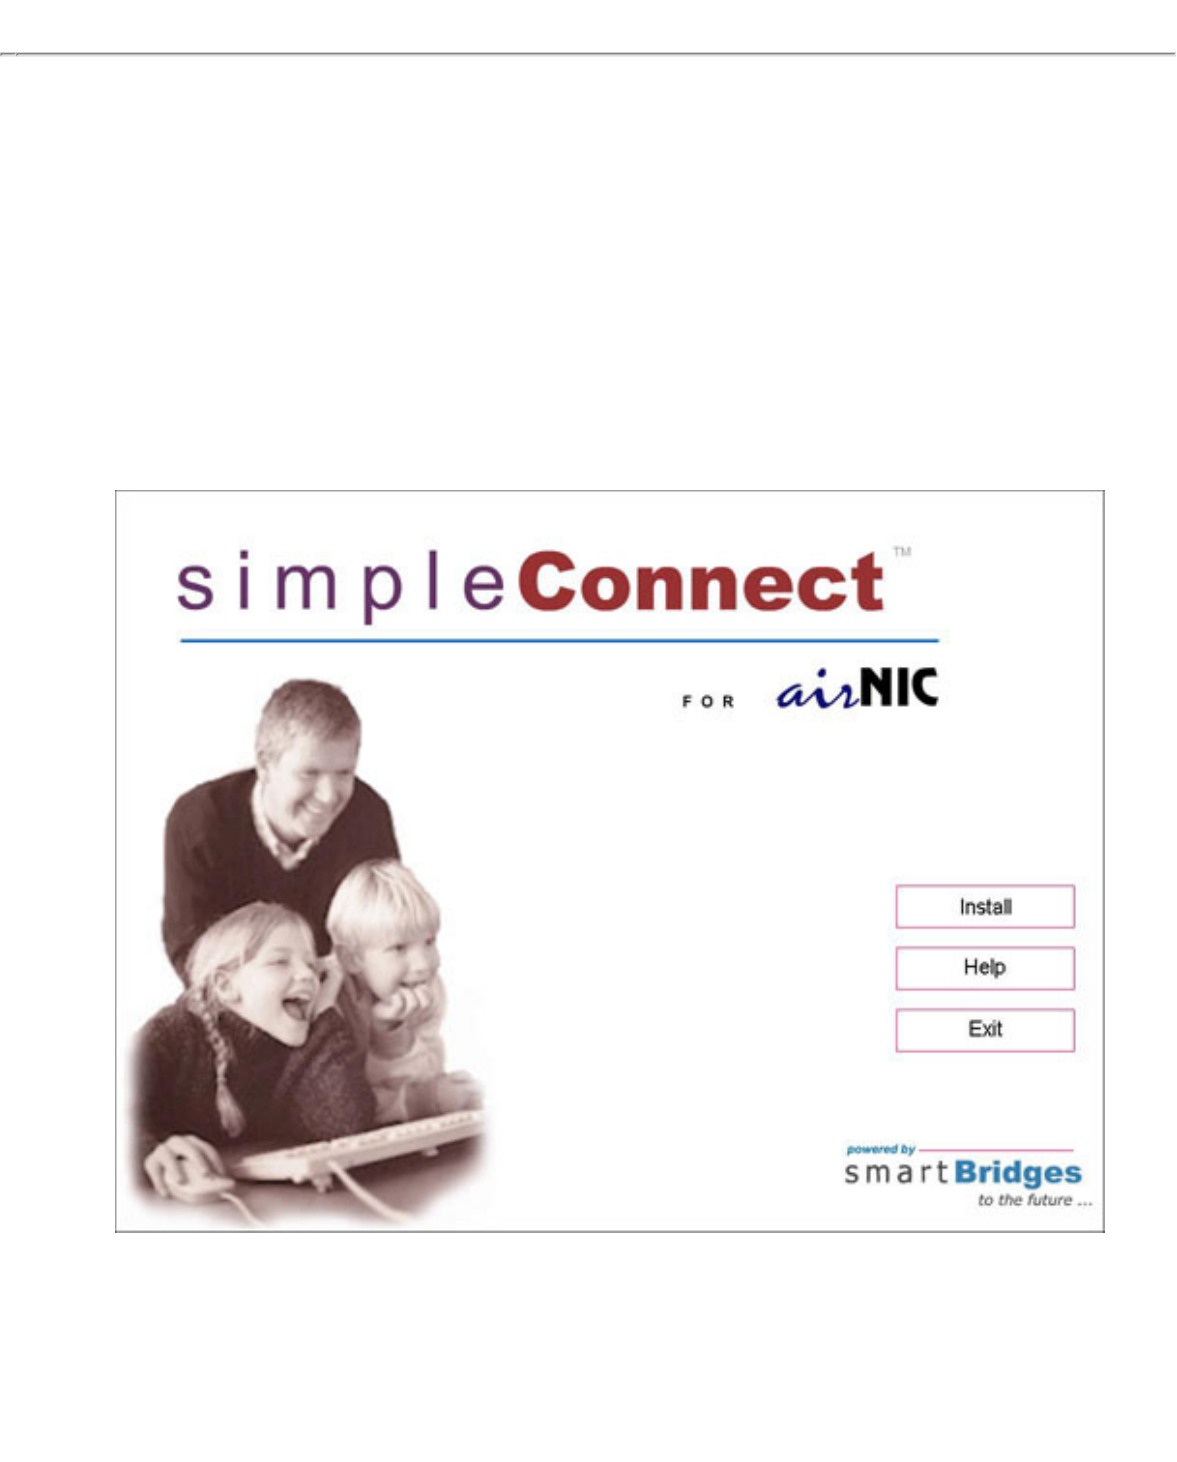
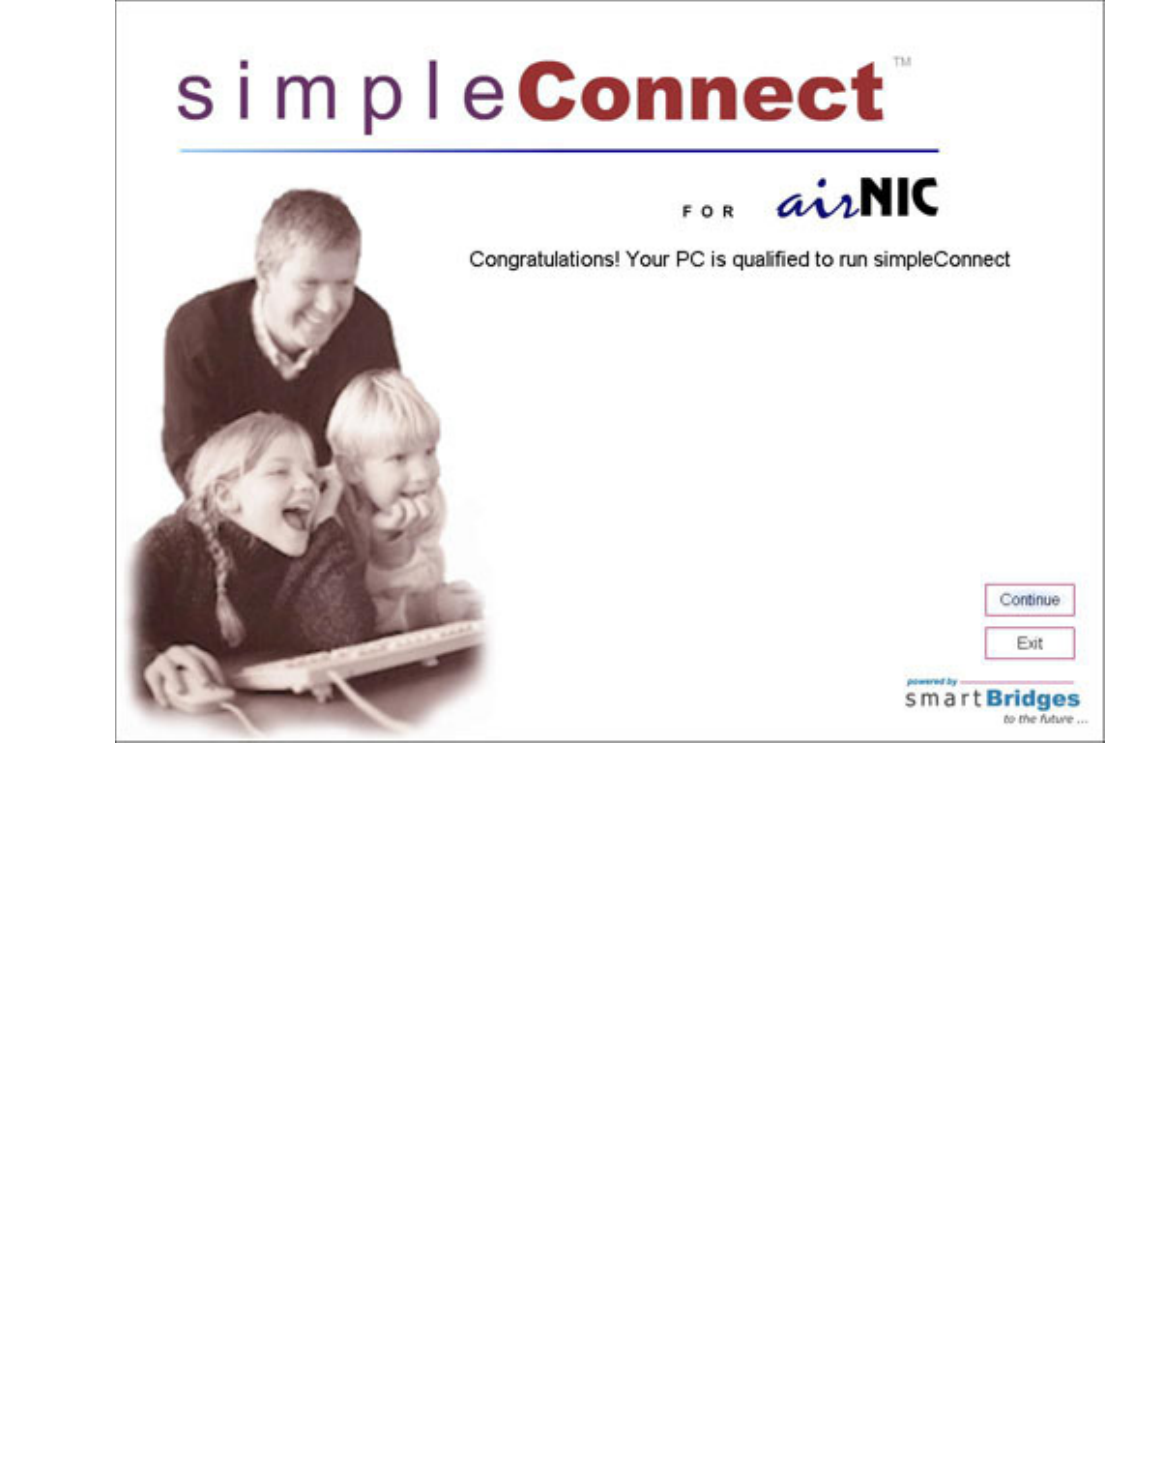
2. Click on the Install button to begin installation. simpleConnect will run a quick check on
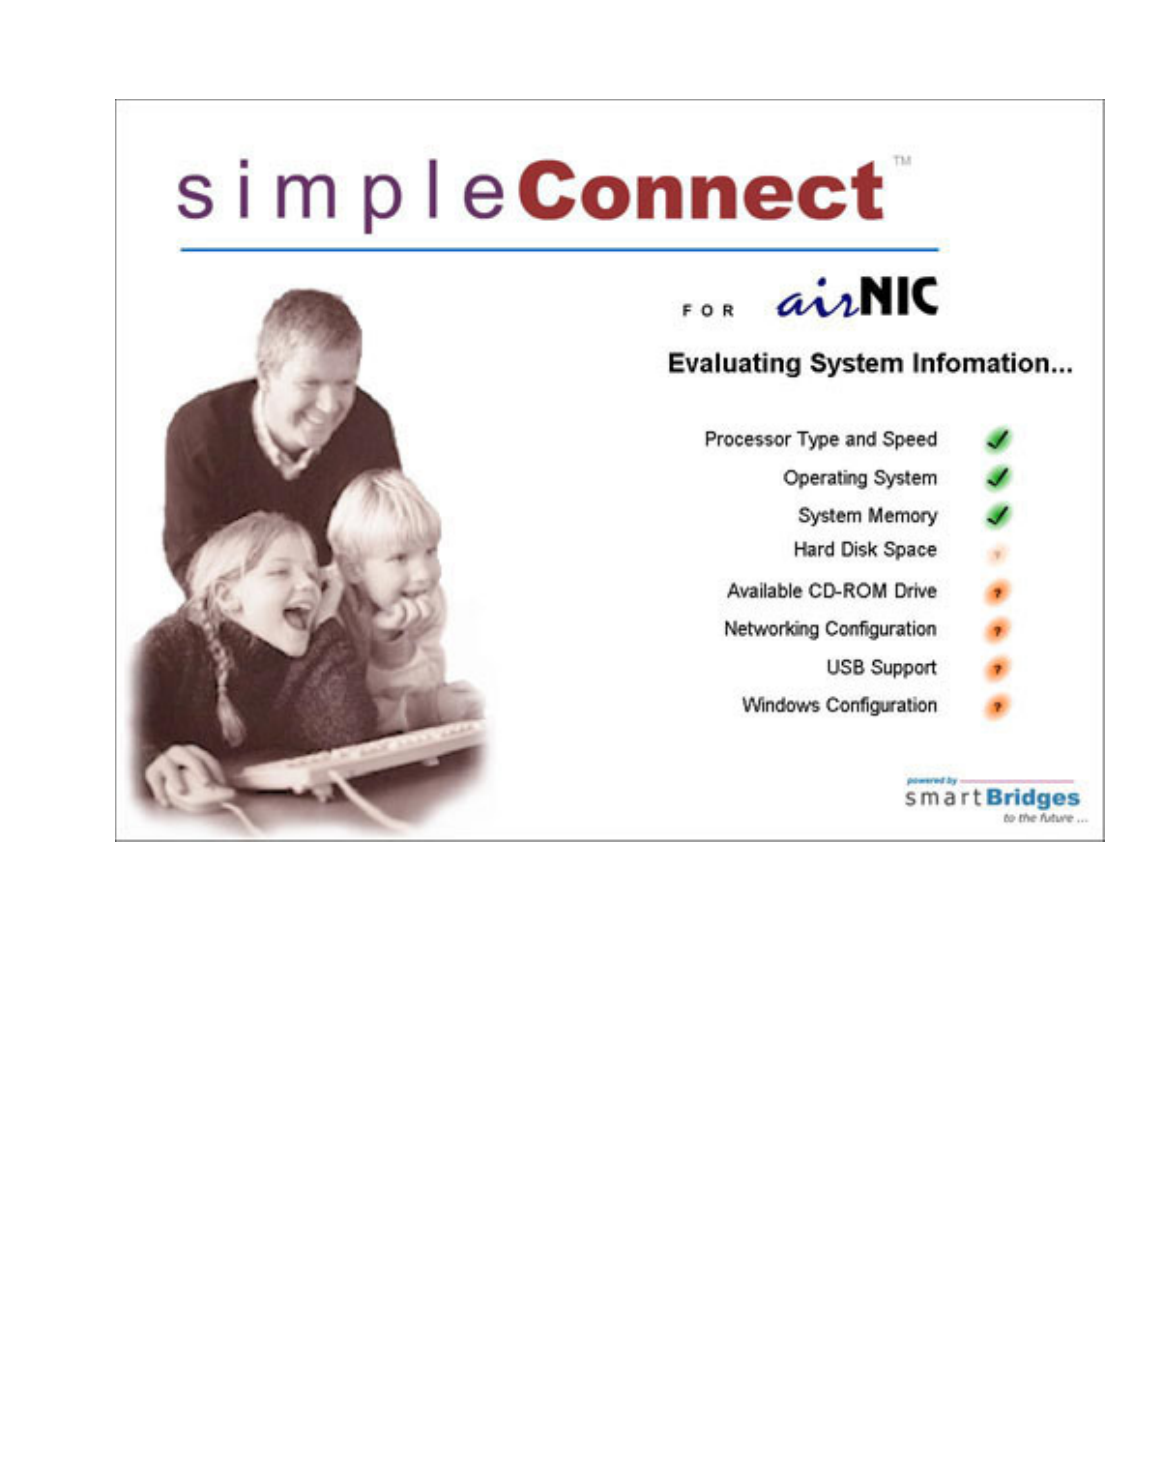
your PC to ensure that it meets all the requirements to install airNIC. The following screen
will be displayed:
The following screen will appear to confirm that your PC is qualified to be used with
airNIC.
3. Click on Continue. simpleConnect will begin to install the drivers, the Client Monitor
Utility and configure the network settings. The following screen will show simpleConnect
installation in progress.

4. Once simpleConnect has installed all the necessary files and configured the network
settings, you will be prompted to connect the airNIC to your computer.
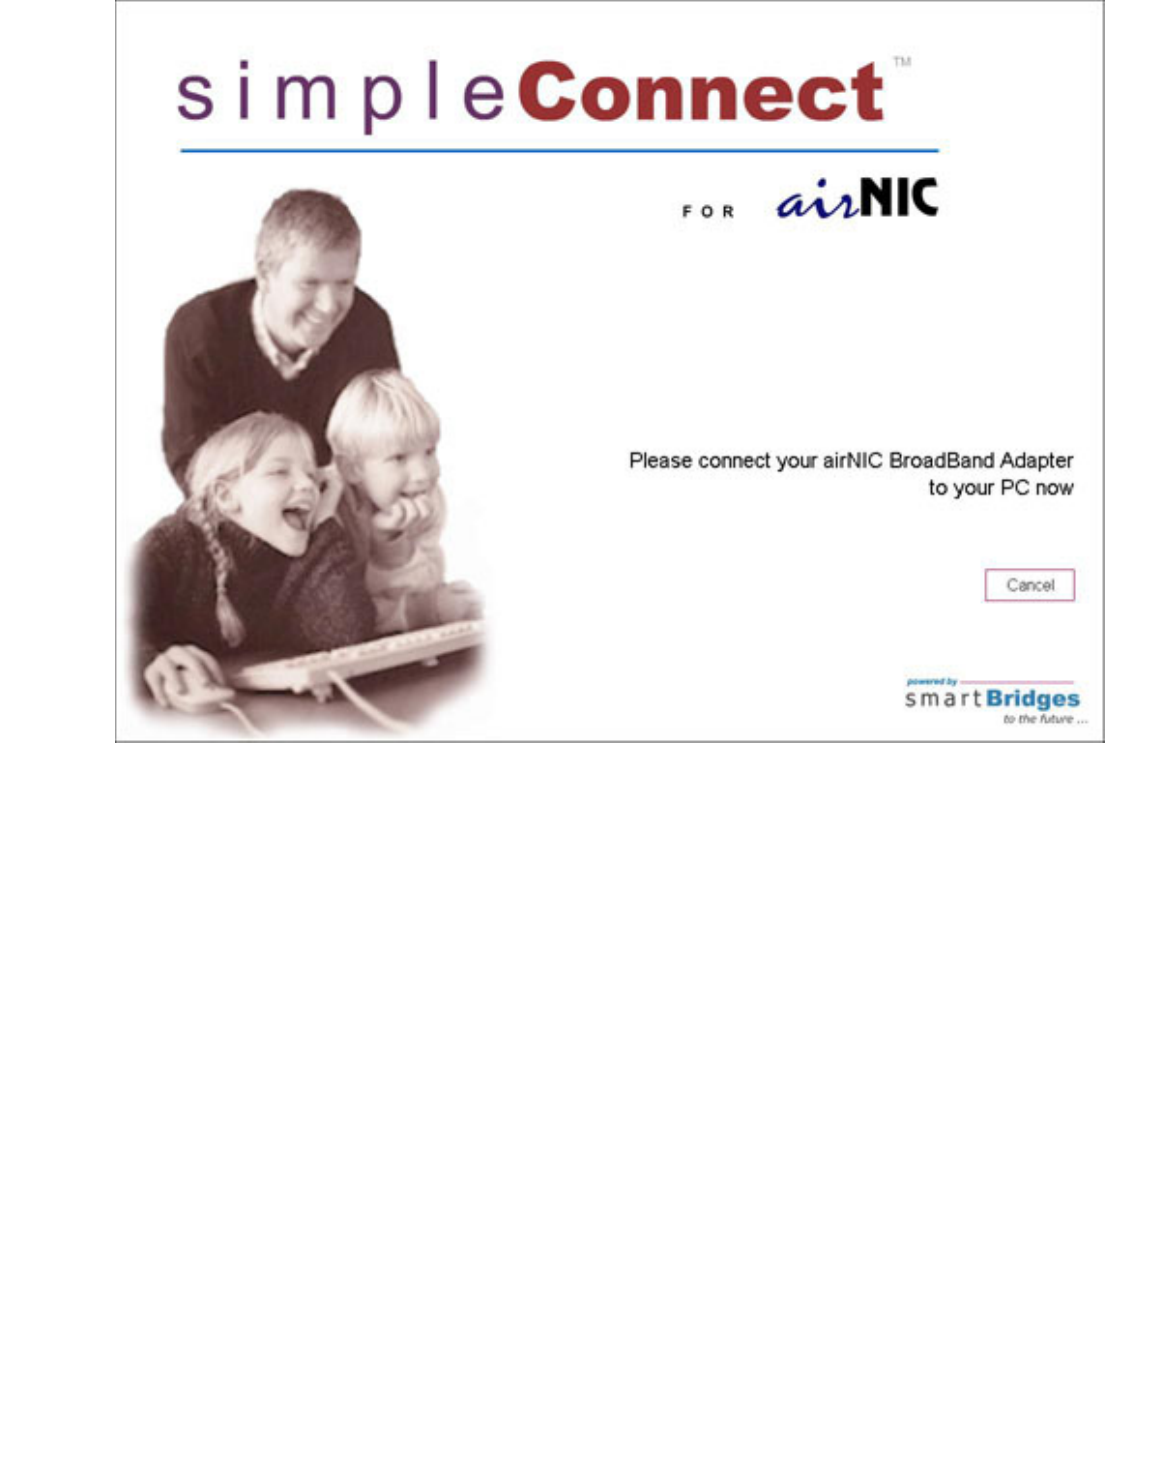
5. Connect the airNIC Wireless USB Adapter to the USB port of your PC or laptop
computer. Windows will automatically detect the airNIC drivers and finish installation of the
device. The following screen will appear to confirm the successful installation of airNIC
Wireless USB Adapter.

Configuring the airNIC Wireless USB
Adapter
When the airNIC is plugged into the USB port of the PC, it is automatically detected
by the Windows Operating System. The Wireless USB Network Adapter
Configuration Utility icon will appear on your system tray.
1. The icon may initially display a red or green monitor. Red monitor indicates that
airNIC is not connected to any Access Point. Green monitor indicates that airNIC is
connected to one of the Access Points.
Double-click on the icon. The screen shown below will appear:
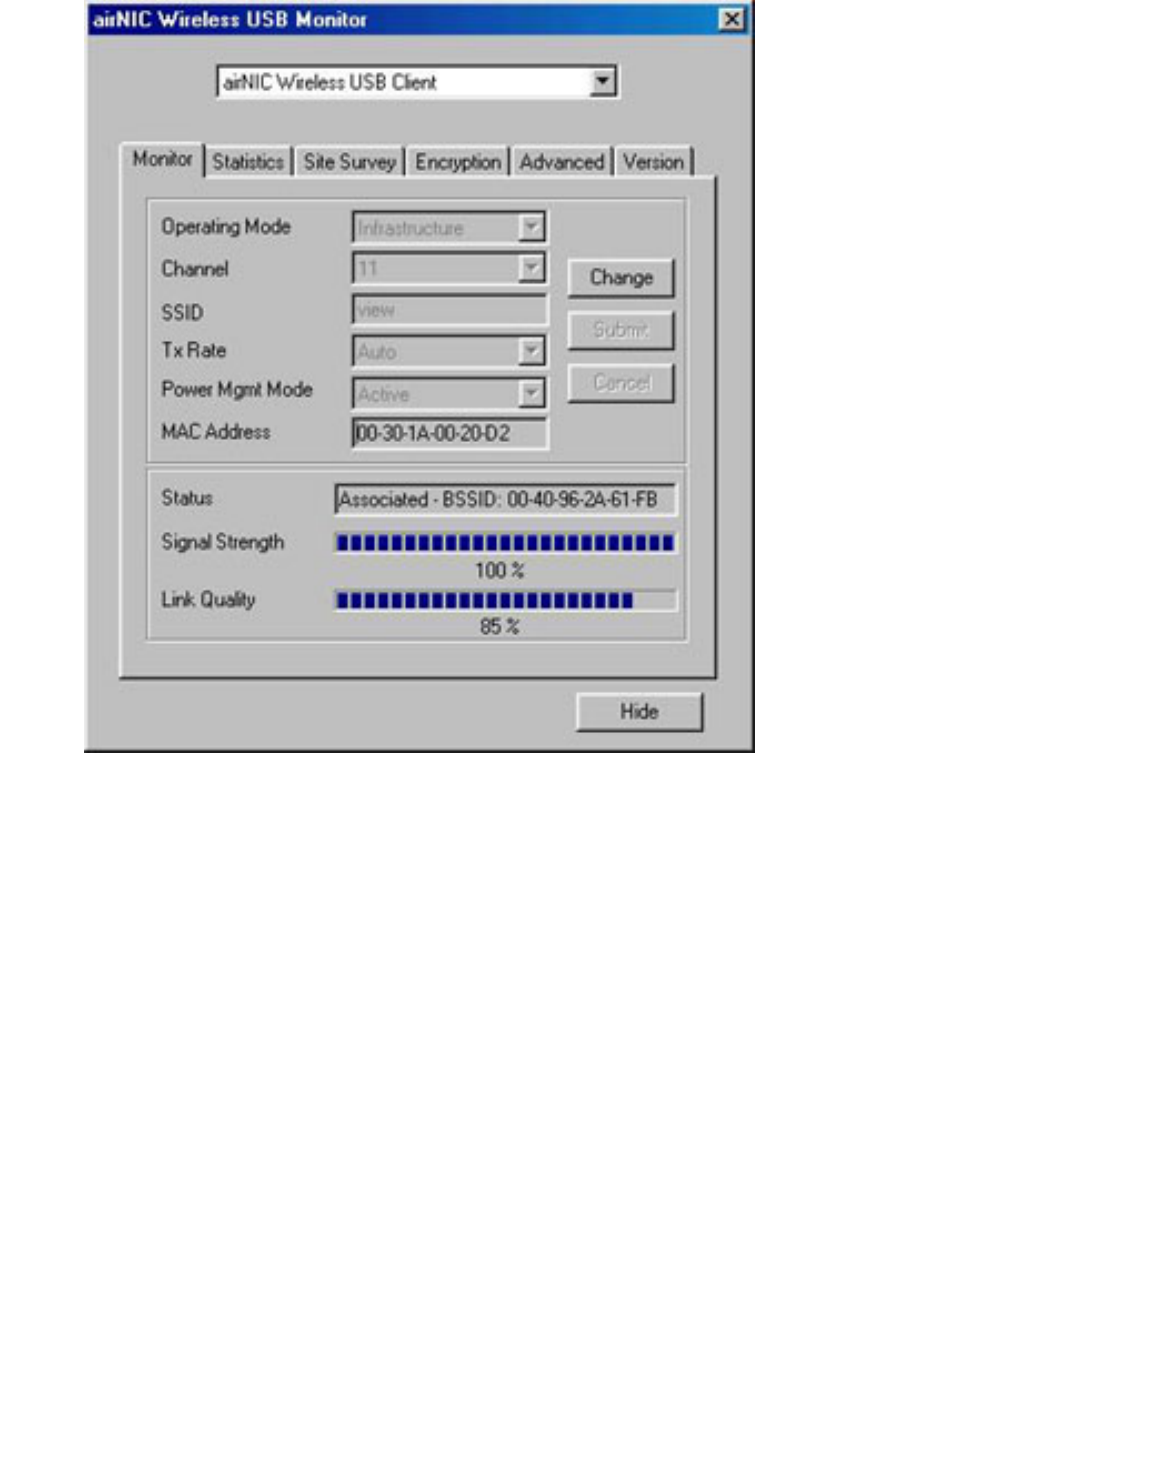
The Monitor utility screen shows the current parameters of operation.
The Status tab displays the following information.
Operating Mode - It indicates whether the airNIC is in Infrastructure mode
(connected to Access Point) or Ad-Hoc mode (peer to peer connection).
Channel - This is automatically selected when the airNIC is connected/associated
to an Access Point in Infrastructure mode. In Ad-Hoc mode, the Channel can be
selected manually. However, you should select the same Channel that is being
used by other client Adapters for peer to peer connection.
SSID - SSID or Service Set Identifier displays the name of the Access Point to
which the airNIC is connected in Infrastructure mode. In Ad-Hoc mode, SSID
indicates the name of the airNIC and can be manually assigned by a user. All client
Adapters should have the same SSID in Ad-Hoc mode.
Tx Rate – This can be set to 1, 2, 5.5, 11Mbps or Auto rate. If a specific rate (1, 2,
5.5 or 11 Mbps) is selected, the airNIC will try to connect only at that rate, even if a

better transfer rate is available. It is, therefore, highly recommended that the user
set this to Auto, so that the highest data rate is selected based on the link signal
quality.
Power Mgmt Mode – The Active mode is used for typical operating condition.
Choosing the Power Save mode allows the unit to enter “sleep” mode. However,
Active mode is recommended for normal operation.
MAC Address – MAC Address (Media Access Controller Address) field indicates
the unique MAC ID assigned to your airNIC Adapter. Status – This field indicates
the current association status of airNIC. In Infrastructure mode, it shows the MAC
ID of the Access Point. In Ad-Hoc mode, it shows the MAC ID of the client Adapter
it is connected to in peer to peer connection.
Signal Strength – This field indicates strength of the signal received from the
Access Point, in the Infrastructure mode. User should position the unit such that this
field displays the maximum signal strength.
Link Quality – This shows the quality of wireless link. The higher is the number in
this field, the better is the signal quality.
When you click on the Change button, you will be able to change the various
parameters. For example, you can change from Infrastructure mode to Ad-Hoc
mode and vice-versa, change the transmission rate, etc. Click on Submit to apply
the new settings.
The Hide button will hide the Monitor utility. Double-click the green icon on your
system tray to display the Monitor utility again.

2. Select the Statistics tab. This
screen shows the data packets
sent and received by the Adapter.
When you click on the Clear
button, all packet counts will be set
to zero
3. The Site Survey displays a list
of available Access Points and
other client Adapters operating in
Ad-Hoc mode. For each of these,
the following features are also
displayed:
● BSSID or Basic Service Set
ID (also called as MAC ID)
● SSID or Service Set Identifier
● Signal strength
● Channel on which the device
is operating
● WEP indicates whether or
not Encryption is enabled on
the device
● TYPE indicates the mode of
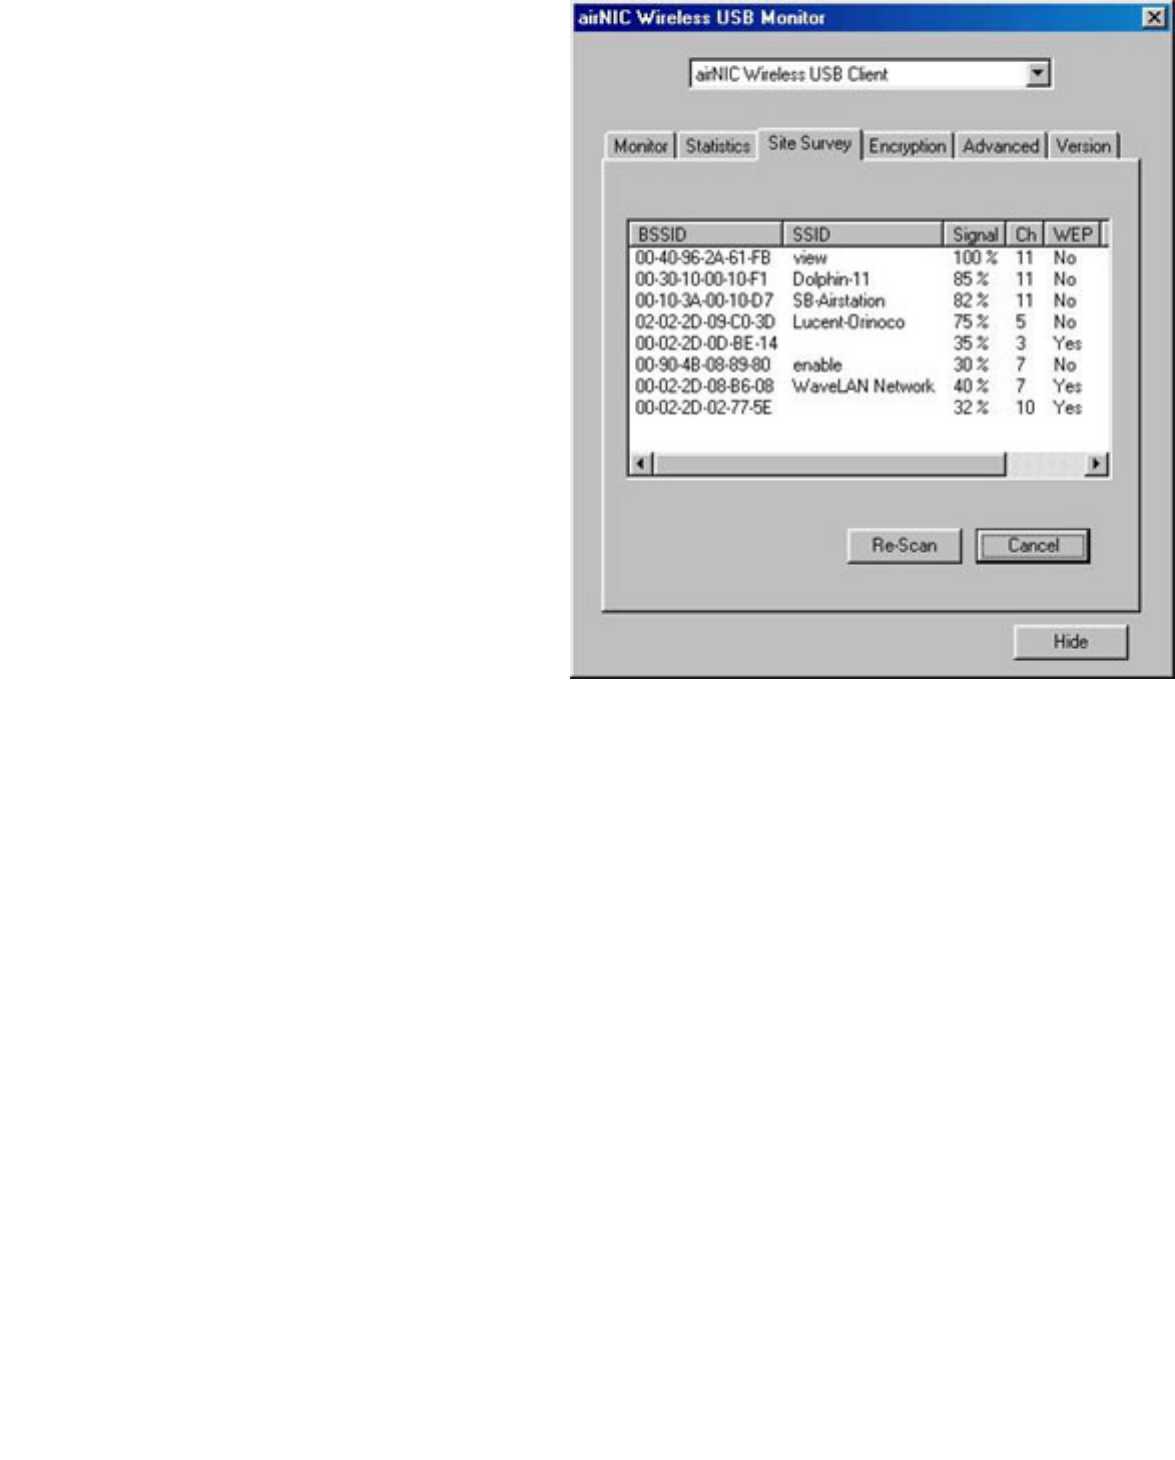
operation. Infrastructure
indicates Access Point while
Ad-Hoc indicates
client Adapter.
When the Re-Scan button is
clicked, the Adapter will scan the
wireless media for available
Access Points & Adapters
operating in Ad-Hoc mode.
You can connect to an Access
Point (or a client Adapter) on the
list by double clicking on its
BSSID (MAC ID).
4. Select the Encryption tab. This
screen lets you enable or disable
WEP encryption on your
airNIC Adapter. Using the drop-
box, you can choose to disable
WEP or choose between 64-bit and
128-bit encryption.
Once you have selected 64-bit or
128-bit encryption, you can enter 4
keys in the Key fields 1-4.
However, you need to ensure that
these keys match the ones set on
the Access Point.
WEP Key to use lets you choose
the key you want to use from
among the 4 keys you entered.
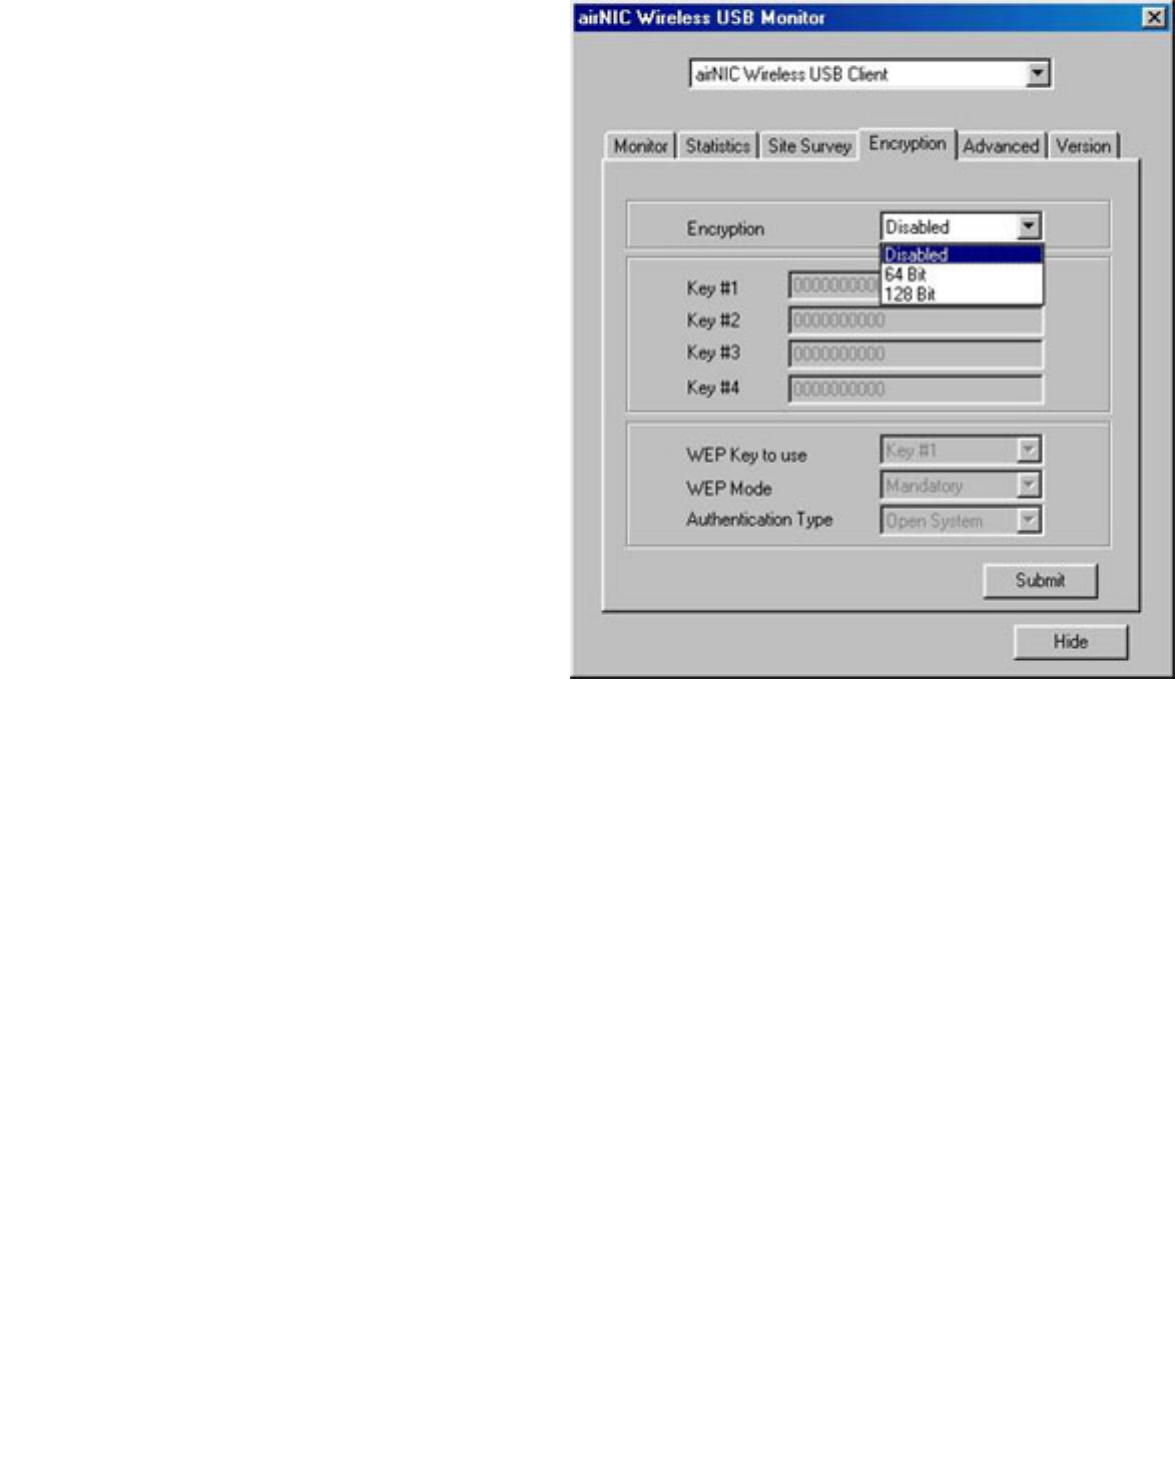
WEP Mode lets you make the use
of keys Optional or Mandatory to
connect to Access Point or other
client Adapter.
Authentication Type lets you
select between Open System and
Shared Key.
Open System Authentication is the
default authentication method of
IEEE 802.11. It is a very simple,
two-step process. First the station
wanting to authenticate with
another station sends an
authentication management frame
containing the sending station’s
identity.The receiving station then
sends back a frame
alerting whether it recognizes the
identity of the authenticating
station.
Shared Key Authentication is a
type of authentication that assumes
each station has received a secret
shared key through a secure
channel independent from an
802.11 network. Stations
authenticate through shared
knowledge of the secret key. Use
of Shared Key authentication
requires implementation of the
802.11 Wireless Equivalent Privacy
algorithm.
Once you have finished setting up
the parameters, click Submit for
the setting to take effect.
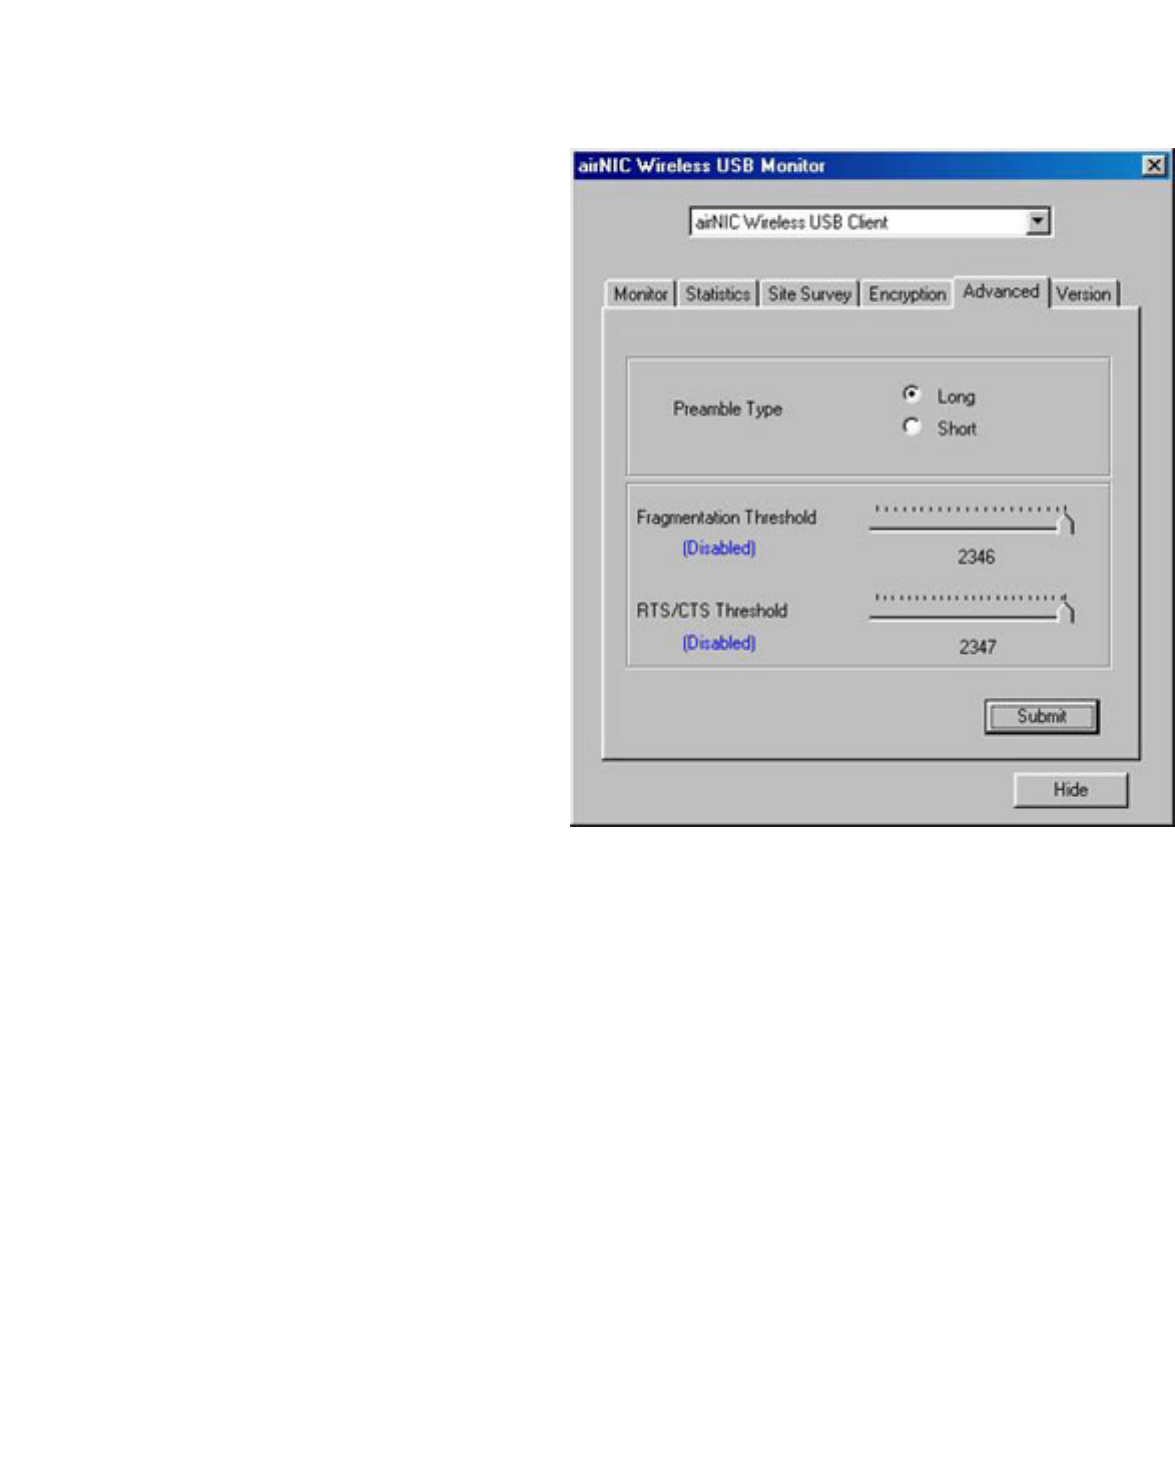
5. Select the Advanced tab. In
normal circumstances, you
wouldn’t need to change the
default parameters on this screen.
The default setting for Preamble
Type is Short.
The default setting for
Fragmentation Threshold is
Disabled (set at the value 2346).
The default setting for RTS/CTS
Threshold is Disabled set at the
value 2347).
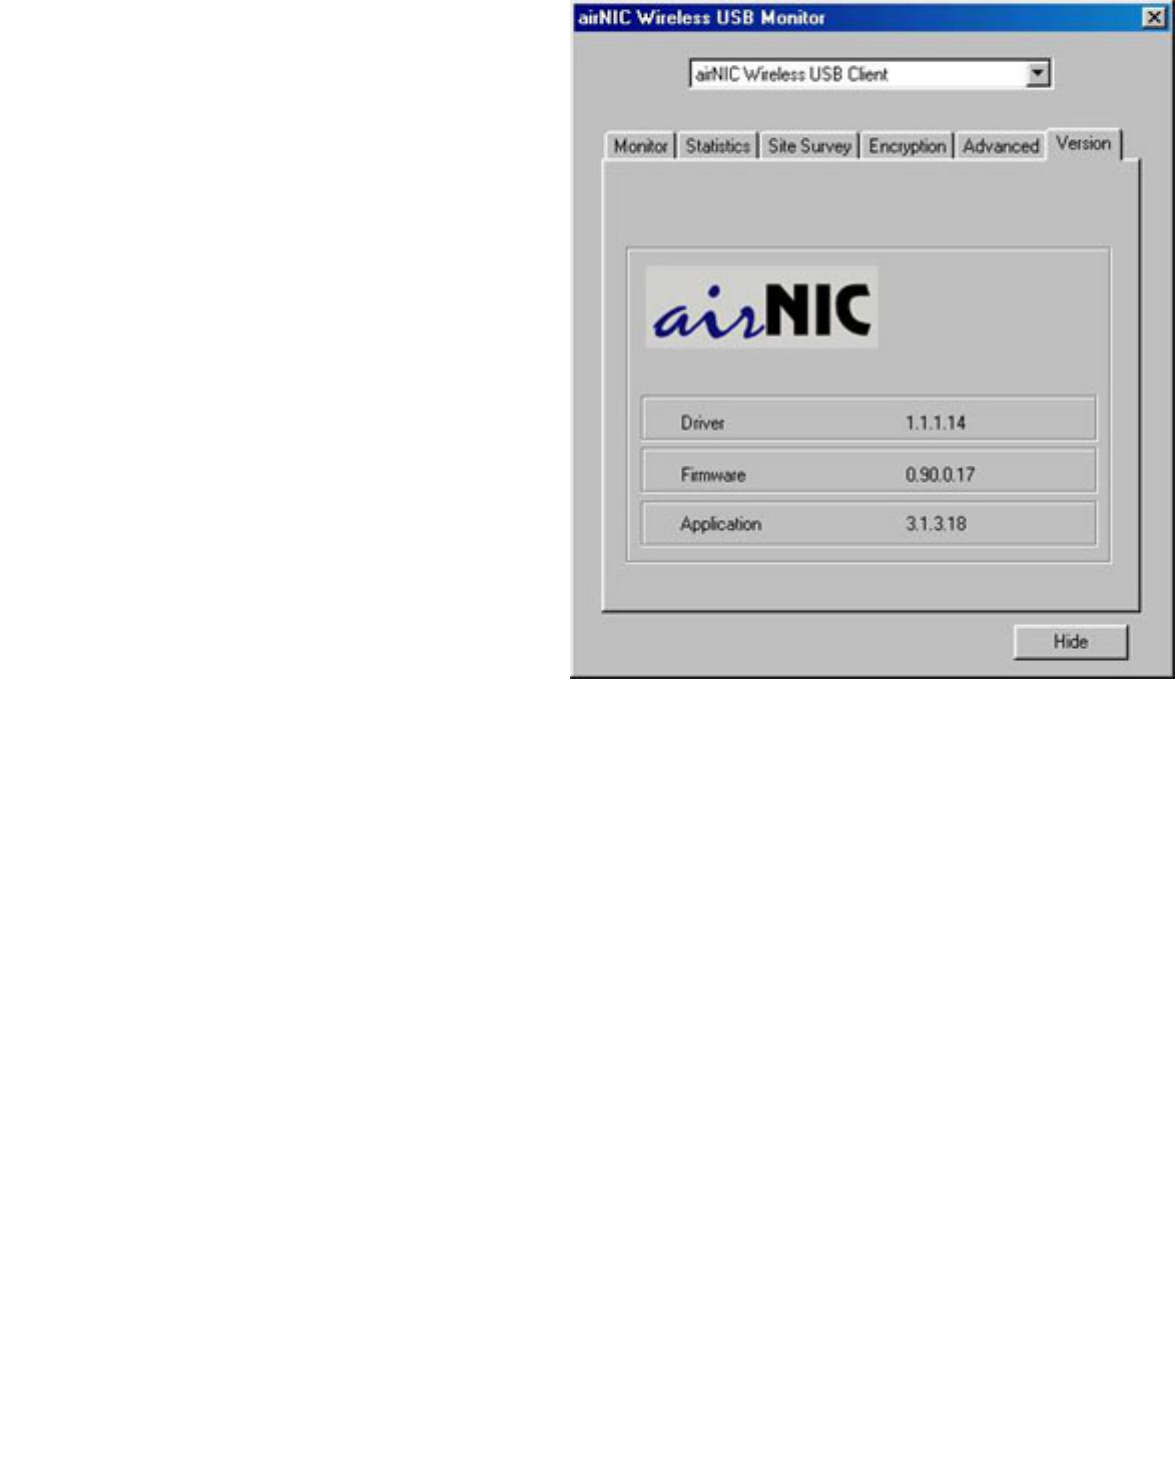
6. Click on Version tab. This
displays the version number of the
Driver, Firmware & Monitor
Application Utility.
Hints for Optimal Performance
● The airNIC Wireless USB Adaptor has a sensitive integrated antenna for
reception & transmission of wireless data. The Adapter allows data transfer
even under sub-optimal conditions by automatically adjusting the data
transfer rate depending upon the prevailing conditions. However, to achieve
the best performance, observe the following precautions:
● Keep the airNIC away from metal structures, such as CPU cabinet, file
cabinet etc.
● Keep the Adapter away from electrical devices that generate RF noise, like
Monitors, CPU, Television sets, Microwave, etc.
● Place the airNIC as high as possible to avoid obstacles in the signal path.
● Make sure that the Antenna is positioned for best reception. This can be done
using the monitor utility software included with the Adaptor. The monitor utility
has an embedded signal strength meter, which helps the user to orient &
place the unit for best signal strength. Optimal speed results when the signal
strength is greater than 50% as displayed on the monitor utility.
● For best signal reception quality and therefore higher speed of operation, it is


Understanding Wireless Networking
Getting familiar with the airNIC Wireless USB Adapter
airNIC conforms to the IEEE standard 802.11b and operates in the 2.4 GHz ISM band. It
has data rate of up to 11Mbps, which makes it one of the fastest Wireless Adapters on the
market today. airNIC can operate in either Ad-Hoc mode (providing Peer-to-Peer network
connection without Access Point) or Infrastructure mode (providing network connection
using Access Point). It can communicate with any Wi-Fi compliant Wireless Access Point,
Wireless Client Adapter and Residential Gateway.
airNIC is capable of 64-bit and 128-bit WEP (Wired Equivalent Privacy) Encryption to
provide secure network connection. It allows secure sharing of data, DVD/CD-ROM drives,
Zip drives, printers and high-speed Internet access over the Wireless Network. The
powerful built-in antenna ensures strong and consistent signals over a long range and
seamless transition from one Access Point to another while roaming around.
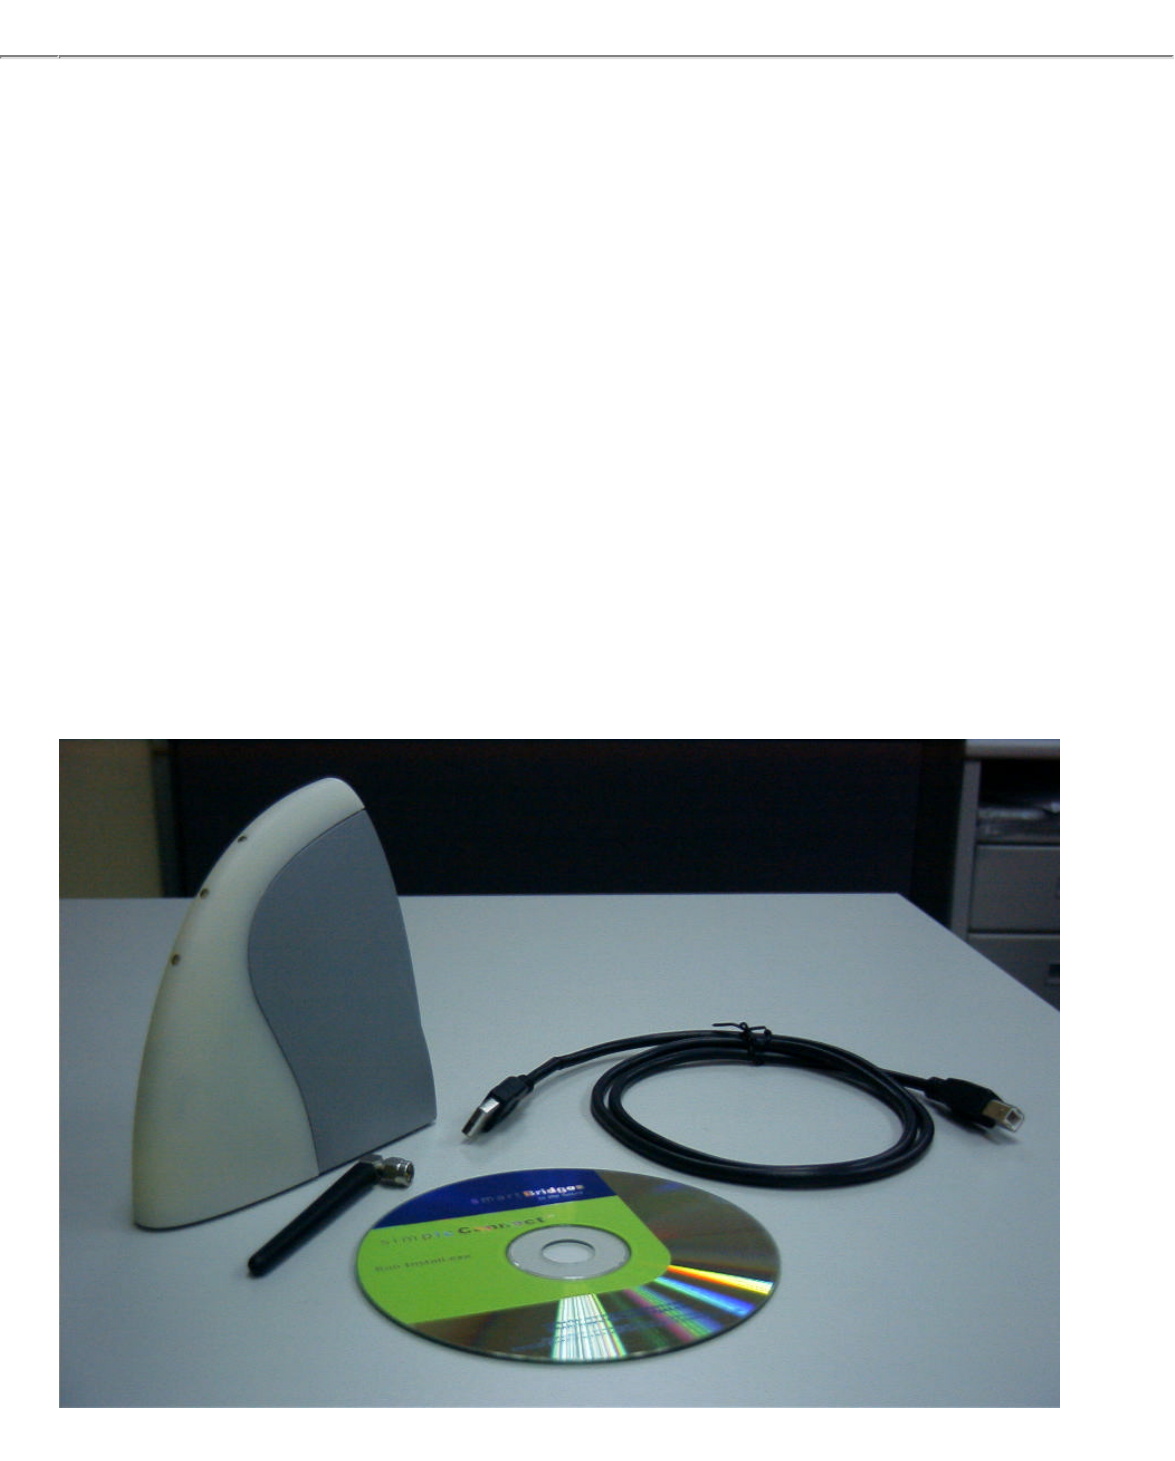
The Wireless USB adapter is equipped with a USB port, an optional external Antenna and
3 LEDs.
airNIC has a high-powered built-in Antenna
which is sufficient for transmission over long
ranges. However, if needed, an external

Antenna can be used to further augment the
range.
There is a USB port at the back of airNIC.
One end of the USB cable is plugged into
this port and the other end is plugged into a
USB-ready PC.
airNIC has 3 LED indicators that indicate the
status of Power, Link & Data Transmission.
Power indicates that the Adapter has been
powered up.
Link indicates that airNIC is properly
installed and ready for use.
Transmission indicates the flow of data
over wireless media.
Getting familiar with Wireless LANs
If you have experience working with wired LAN, you won’t find Wireless LAN (WLAN)
much different from it, except that WLAN offers unmatched flexibility, mobility, scalability
and convenience. WLAN can be easily used to extend your existing wired LAN or to
quickly set up a new LAN environment. Computers in a wireless LAN need to be
configured to share the same radio channel.
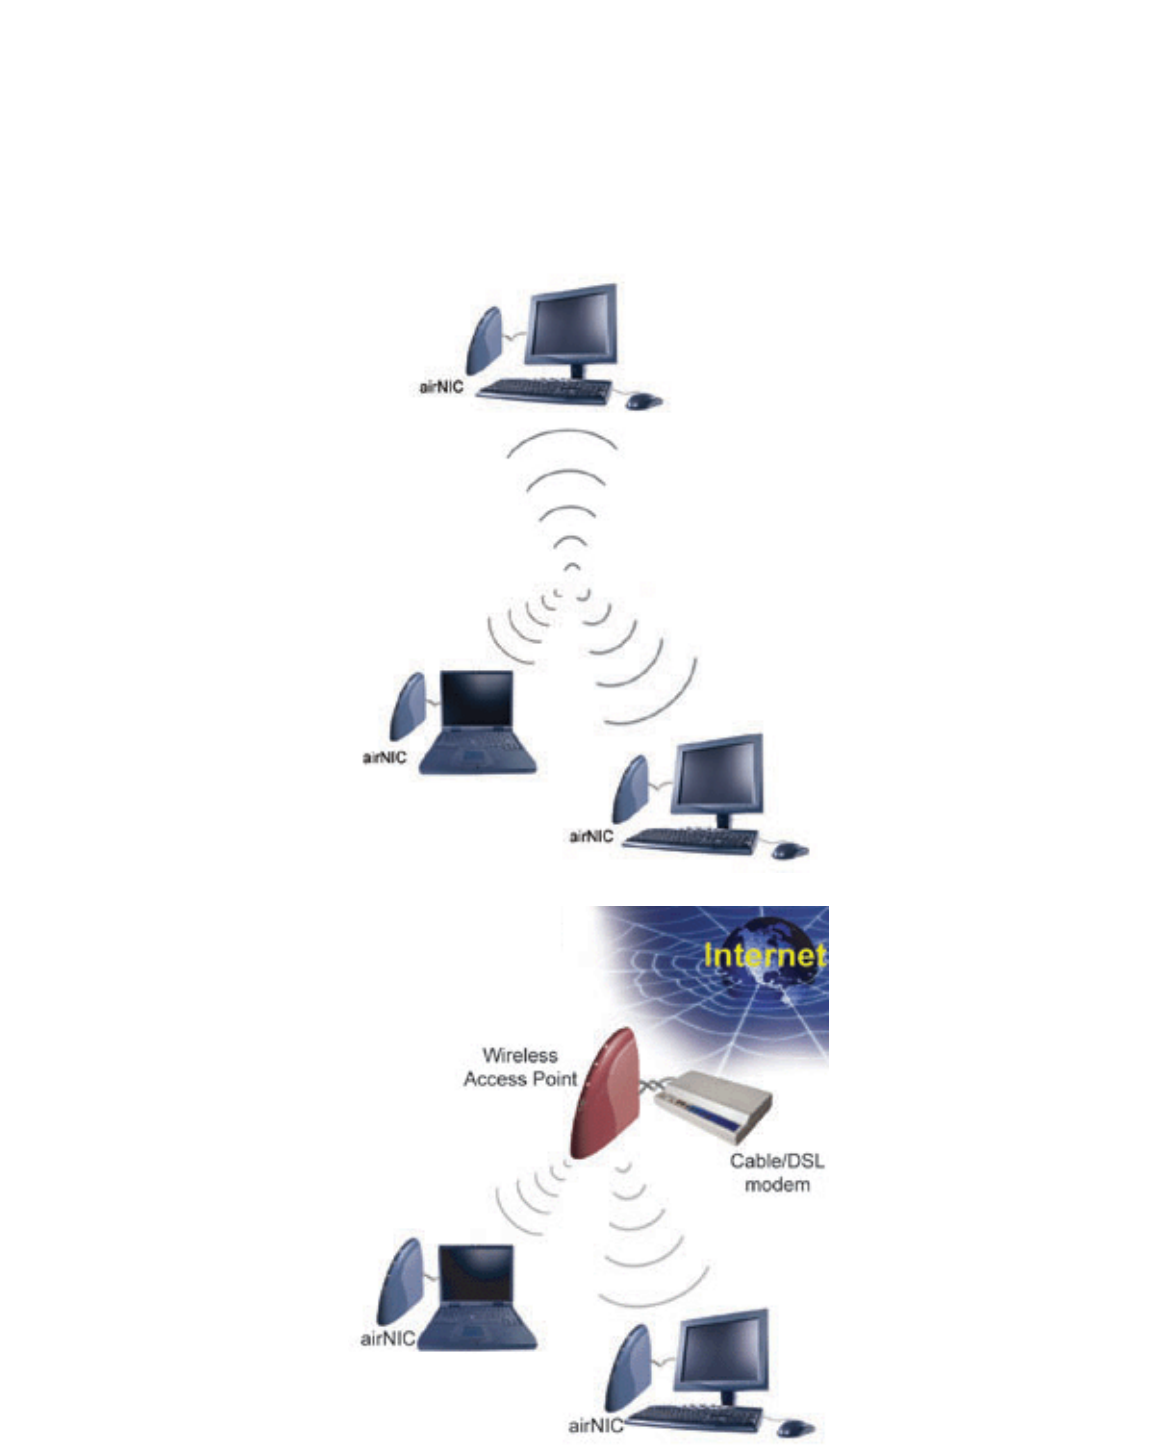
There are two modes of Wireless Network operation:
Ad-hoc mode
In this mode of
operation, peer-to-peer
(or point-to-point)
connectivity is
established between two
PCs for Internet sharing,
file sharing applications
etc. Each PC is equipped
with the Wireless
Adapter and they can
talk to each other without
an Access Point
Infrastructure mode
In this mode of
operation, multiple
wireless network
Adapters can connect to
an Access Point to form
a complete Wireless
network similar to a
Wired LAN. Also, in this
mode, the Access Point
can act as a bridge
between the Wireless
and Wired LAN.


Troubleshooting
Frequently Asked Questions
About airNIC
Q: How fast is airNIC ?
A: airNIC is capable of a data rate of up to 11Mbps.
Q: How do I connect airNIC to my PC ?
It is connected to the USB port of the PC. Please refer the user guide for detailed
installation procedure.
Q: Can I use airNIC with my laptop ?
Yes. airNIC can be used with any USB-ready computer.
Q: What standard does airNIC conform to ?
A: IEEE802.11b for wireless.
Q: Where can I find additional information about airNIC ?
A: You can refer to the manual on the simpleConnect CD, or check out our online
User Guide.
Q: Can it work with any Wireless Access Point ?
A: Yes. It can work with any IEEE802.11b compliant Wireless Access Point.
Q: Would the Internet connection speed be affected if I connect more than
one PC at the same time ?
A: There might be a slight loss in the speed but it will be very insignificant.
Q: What do the different lights (LEDs) on the airNIC case indicate ?
A: Red indicates Device Power On, USB cable connected.
Green indicates Link is OK, Channel is clear for use.
Yellow indicates Device is in Wireless Transmit mode.

Q: What operating systems are supported by airNIC ?
A: Windows 98SE, 2000, ME, XP
Q: Will I be able to see other computers on LAN ?
A: Yes. airNIC allows you to connect to other computers on your network.
Q: Is the Wireless Connection secure ?
A: Yes. airNIC is capable of providing 128-bit WEP encryption.
Q: How can I find out if my PC supports USB?
● Right-click on "My Computer" on your desktop
● Click "Properties"
● Click "Device Manager"
● Click "Universal Serial Bus Controller". If USB is enabled on your PC, you will see
the entry for PCI Universal Open Host Controller.
Q: What are the minimum computer requirements for the proper operation of
airNIC?
● An IBM compatible PC
● Pentium processor (166 MHz or above)
● Microsoft Windows 98SE/2000/Me/XP
● CD-ROM drive
● A Spare USB port
Q: How do I uninstall airNIC from my PC ?
A: In order to uninstall airNIC from your computer, follow the following steps:
● Click on Start -> Programs -> smartBridges
● Select and click on “Uninstall Wireless Tools”. A dialog box will pop up to
confirm that you want to uninstall
simpleConnect. Click "Yes".
General
Q: What is WEP ?
A: Wired Equivalent Privacy (WEP) is an encryption scheme used to protect

wireless data communication. It is part of the system security behind the wireless
IEEE 802.11 protocol, and its goals are to provide confidentiality and data integrity,
and to protect access to the network infrastructure by rejecting all non-WEP
packets.
Q: What is an Access Point ?
A: It is a hardware device that converts a wired LAN port/outlet to a wireless port
typically for Infrastructure mode.
Q: What is AdHoc mode ?
A: Peer-to-Peer networking mode usually used for sharing local resources between
wireless Networked PCs.
Q: What is Infrastructure mode ?
A: Infrastructure Mode allows a wireless network to be integrated into an existing,
wired network through an Access Point, permitting roaming between Access Points
while maintaining a connection to all network resources.
Q: What is IEEE 802.11 standard ?
A: It is a standard set by Institution of Electrical Electronics & Engineers for
standardizing the wireless networking hardware so that they are interoperable.
Q: What is ISM band ?
A: The FCC and their counterparts outside of the U.S. have set aside bandwidth for
unlicensed use in the ISM (Industrial, Scientific and Medical) band. The ISM band
comprises of frequencies in the vicinity of 2.4 GHz.
Q: What is Direct-Sequencing Spread Spectrum (DSSS) ?
A: Wireless LAN products are available in three different technologies – Direct
Sequencing Spread Spectrum (DSSS), Frequency Hopping Spread-Spectrum
(FHSS) and Infrared. DSSS and FHSS are spread-spectrum techniques that
operate over the radio airwaves in the unlicensed ISM band (Industrial, Scientific,
and Medical). DSSS uses radio transmitter to spread data packets over a fixed
range of frequency band.
Q: How does the Wireless LAN connect the PCs ?
A: The Wireless LAN uses Radio Frequency (RF) to transmit data. In this respect, it
is similar to radio stations and cordless phones. Devices "tune in" to different
signals on specific frequency bands and ignore others, allowing the devices to co-
exist and PCs to communicate securely over the Wireless LAN.
Q: Will Wireless LAN interfere with other RF devices like cordless phones?

A: Use of DSSS and FHSS techniques eliminate the interference between different
RF devices.
Common Problems and Solutions
Q: I can’t connect to the Access Point.
● Make sure that the notebook or desktop is powered on and the Wireless USB
Network Adapter is properly connected.
● Make sure that your Network Adapter is configured on the same channel, SSID,
and WEP as the other computers in the Infrastructure configuration.
Q: LEDs are flickering.
● Red should be continuously on. If it flickers, make sure that USB cable is
securely plugged into the USB port.
● Green should be continuously on. If it flickers, the device may not have booted
properly or there may be a strong interfering signal. Disconnect and connect the
device again.
● Yellow should flicker, indicating that the radio is alternating between transmit &
receive modes.
Q: LEDs do not light up at all.
A: Make sure that the USB cable is properly connected and the PC is powered on.
Q: Windows seems to hang when reconnecting airNIC.
A: Windows takes some time to enumerate USB devices when it is connected to the
computer. Wait about 20 seconds between disconnecting and connecting devices
to give Windows time to update the internal registry settings.
Q: All the USB ports on my PC are already connected to other USB devices.
A: Use a self-powered USB hub. It is possible to connect up to 128 USB peripherals
to a PC by using the USB hub.
Q: airNIC does not work when connected through a USB hub.
A: Please ensure that the USB Hub has power connection. airNIC is a USB
powered device. It consumes more than 360mA when in operating mode.
Therefore, it cannot be used downstream of an un-powered hub. airNIC may
enumerate correctly, but the Operating System will prevent it from becoming fully
functional.


Service and Support
This User Manual provides comprehensive information on Installation and
Configuration of airNIC. If, however, you still have problems or need further support,
you can get in touch with us at:
10 Anson Road, #22-14
International Plaza, Singapore 079903
Tel: +65-324 0210
Fax: +65-324 0607
Web: http://www.smartbridges.com
You can also send your queries to support@smartbridges.com

Appendix A
Specifications
General Characteristics
Type Wireless USB LAN Client Adapter
Compatibility • IEEE 802.11b (High Rate)
• Wi-Fi
• USB 1.1
Media Access Protocol CSMA/CA with ACK & RTS/CTS
(Carrier Sense Multiple Access / Collision
Avoidance with Acknowledgment)
Data Rates High Rate: 11Mbps (CCK)
Medium Rate: 5.5Mbps (CCK)
Standard Rate: 2Mbps (DQPSK)
Low Rate: 1Mbps (DBSK)

Network Operating System Microsoft Windows Networking
Novell Client 3.x, 4.x
Host Operating System Windows 98SE, ME, 2000, XP
LEDs Power, Link, Transmission
Radio Characteristics
Frequency Band 2.4 GHz ISM Band (2.4 - 2.4835 GHz)
Number of Selectable
Channels (Overlapping)
North America (FCC) 11
Europe (ETS) 13
France (FR) 4
Japan (JP) 14
Singapore (iDA) 4
Other Countries FCC 11, ETS 13

Modulation Techniques DSSS (Direct Sequence Spread Spectrum):
• CCK (Complimentary Code Keying), for High
and Medium Transmit Rates
• DQPSK (Differential Quadrature Phase Shift
Keying) for Standard Transmit Rate
• DBPSK (Differential Binary Phase Shift
Keying) for Low Transmit Rate
Security 64-bit & 128-bit WEP encryption
Spreading Sequence 11 chip Barker Sequence
Frame Error Rate Better than 8%
Output Power > +12 dBm
Regulations • Europe: ETS 300-328, CE Marked
• USA: FCC 47 CFR Part 15C, Section 15.247
• Canada: RSS 139
• Japan: MPT Radio Regulations
• Singapore: iDA approved
Power Characteristics

Power Consumption 350 mA
Power Supply +5 V DC from USB
Physical Characteristics
Dimensions L 122mm; W 42mm; H 118mm
Weight 120 gms
Operating Temperature 0° to 40° C
Storage Temperature -25° to 60° C
Humidity Operating: 0 to 70% (non-condensing)
Storage: 10 to 90% (non-condensation)
Supported Frequency sub-bands (in MHz)
Channel
number
FCC
countries
ETS
countries
France Japan Singapore
1 2412 2412 Not allocated 2412 Not allocated
2 2417 2417 Not allocated 2417 Not allocated
3 2422 2422 Not allocated 2422 Not allocated
4 2427 2427 Not allocated 2427 Not allocated
5 2432 2432 Not allocated 2432 Not allocated
6 2437 2437 Not allocated 2437 Not allocated

7 2442 2442 Not allocated 2442 Not allocated
8 2447 2447 Not allocated 2447 Not allocated
9 2452 2452 Not allocated 2452 Not allocated
10 2457 2457 2457 2457 2457
11 2462 2462 2462 2462 2462
12 Not allocated 2467 2467 2467 2467
13 Not allocated 2472 2472 2472 2472
14 Not allocated Not allocated Not allocated 2484 Not allocated
NOTE:
• FCC countries adhere to the regulations as defined by the U.S. Federal
Communications Commission (FCC).
• ETS countries adhere to the regulations as defined by the European
Telecommunications Standards Institute (ETSI).
Range
Distance in meters
(feet)
11Mbps 5Mbps 2Mbps 1Mbps

Outdoor Open Space 500 (1640 ft) 700 (2296 ft) 1000 (3280 ft) 1200 (3936 ft)
Semi-Open Office 50 (164 ft) 70 (230 ft) 90 (295 ft) 110 (360 ft)
Closed Office 30 (98 ft) 40 (131 ft) 45 (147 ft) 50 (164 ft)
NOTE:
The range of values listed in the table above are typical distances measured at
smartBridges’ premises. These represent indicative values and may vary according
to actual radio conditions at the location where the airNIC Adapter will be used.
• The range of your wireless devices can be affected when they are placed near
metal surfaces and solid high-density materials like concrete walls, wood
constructions, steel structures etc.
• Range is also affected by “obstacles” in the signal path of radio. These
obstacles may either absorb or reflect the radio signal.
Environments can be described as follows:
– Outdoor Open Space environment: Devices are in Radio Line of Sight
(RLOS) and there is no physical obstruction between them.
– Semi-Open Office environment: Workspace is divided by shoulder-height,
hollow (glass, plastic) wall elements; airNIC is placed at desktop level.
– Closed Office environment: Workspace is divided by high-density solid wall
structures.


Appendix B
Warranty Information
smartBridges warrants product to be free of defects, and agrees to repair or replace
the product that proves defective. airNIC is warranted for one year from date of
purchase. This warranty does not cover accidents, misuse, neglect, unauthorized
product modification, or acts of nature.
Please visit customer support area of smartBridges web site for making warranty
claims. smartBridges may elect to exchange the product or refund the full purchase
price of the unit.
Except as expressly provided above, smartBridges makes no warranties or
conditions, express, implied, or statutory, including without limitation, the implied
warranties of merchantability and fitness for a particular purpose or infringement of
any patent, copyright or other intellectual property right. smartBridges shall not be
liable for damage to other property caused by any defects in this product, damages
based upon inconvenience, loss of use of the product, loss of time or data,
commercial loss, or any other damages, whether special, incidental, consequential,
or otherwise, whether under theory of contract, tort (including negligence),
indemnity, product liability, or otherwise. smartBridges products are not intended for
use in medical, life saving, or life sustaining applications. In no event shall
smartBridges' liability exceed the normal purchase price for this product.
Software License
No license, express or implied, by estoppels or otherwise, to any intellectual
property rights is granted by this document. The simpleConnect software is licensed
for use with the airNIC Wireless USB Network Adapter only. The software may be
copied only for backup purpose.

Copyright & Trademarks
Copyright © 2001 smartBridges. All Rights Reserved. airNIC and simpleConnect
are trademarks of smartBridges. Microsoft Windows 98SE, Windows ME, Windows
2000, and Windows XP are trademarks of Microsoft Corporation. All other
trademarks and brand names mentioned in this Manual are registered trademarks
or trademarks of their respective owners.

Appendix C
Declaration of Conformity and Regulatory Information
DECLARATION OF CONFORMITY TO FCC REGULATIONS, Part 15
smartBridges declares that the equipment described in this document is within the
requirements of the Code of Federal Regulations - Title 47 Part 15, Subpart B,
Class B for a digital device. This declaration is based upon the compliance of the
airNIC plug and play Network Adapter to the above standards. smartBridges has
determined that airNIC has been shown to comply with the applicable technical
standards if no unauthorized changes are made to the equipment and if the
equipment is properly maintained and operated. These units are identical to the
units tested and found acceptable with the applicable standards. Records
maintained by smartBridges continue to reflect that the units being produced under
this Declaration of Conformity, within the variation that can be expected due to
quantity production and tested on a statistical basis, continue to comply with the
applicable technical standards.
FCC Rules and Regulations - Part 15
This device complies with Part 15 of the FCC rules. Operation is subject to the
following two conditions: 1. This device may not cause harmful interference and, 2.
This device must accept any interference received, including interference that may
cause undesired operation. This equipment has been tested and found to comply
with the limits for a Class B digital device pursuant to Part 15 of the FCC rules.
These limits are designed to provide reasonable protection against harmful
interference in a residential installation. This equipment generates, uses, and can
radiate radio frequency energy and, if not installed and used in accordance with the
instructions, may cause harmful interference to radio communications. However,
there is no guarantee that interference will not occur in a particular installation. If
this equipment does cause harmful interference to radio or television reception,

which can be determined by turning the equipment off and on, the user is
encouraged to try to correct the interference by one or more of the following
measures:
● Reorient or relocate the receiving antenna.
● Increase the separation between the equipment and the receiver.
● Connect the equipment into an outlet on a circuit different from that to which the
receiver is connected.
● Consult the dealer or an experienced radio/TV technician for help.
Changes or modifications not expressly approved by the manufacturer or registrant
of this equipment can void your authority to operate this equipment under Federal
Communications Commission rules.
In order to maintain compliance with FCC regulations, standard network cables
must be used with this equipment. Operation with non-approved equipment or non-
standard cables is likely to result in interference to radio and TV reception. This
equipment has been tested and found to comply with the limits for a Class B digital
device, pursuant to Part 15 of the FCC Rules. These limits are designed to provide
reasonable protection against harmful interference in a residential installation.
CANADIAN DEPARTMENT OF COMMUNICATION, INDUSTRY CANADA
STATEMENT
This digital apparatus does not exceed the Class B limits for radio noise emissions
from digital apparatus set out in the Radio Interference Regulations of the Canadian
Department of Communications.
Le présent appareil numérique n'émet pas de bruits radioélectriques dépassant les
limites applicables aux appareils numériques de Classe B prescrites dans le
règlement sur le brouillage radioélectrique édicté par le Ministère des Commu-
nications du Canada.
EUROPEAN COMMUNITY CE MARK, DECLARATION OF CONFORMITY
smartBridges Pte. Ltd. declares that the equipment described in this document is in
conformance with the requirements of the European Council Directives -

73/23/EEC, Low Voltage Directive with Amendment 93/68/EEC and 89/336/EEC,
EMC Directive with Amendments 92/31/EEC and 93/68/EEC. This declaration is
based upon compliance of the product to the following standards: EN 55022
(CISPR 22B), RF Emissions Control and EN 50082-1 (IEC 801-2, 3, 4) Immunity to
Electromagnetic Disturbance.
SAFETY NOTICE
This product is intended for use with UL 1950/EN60950/IEC950 (or other NRTL)
listed ITE computer that contains operator-accessible USB ports.