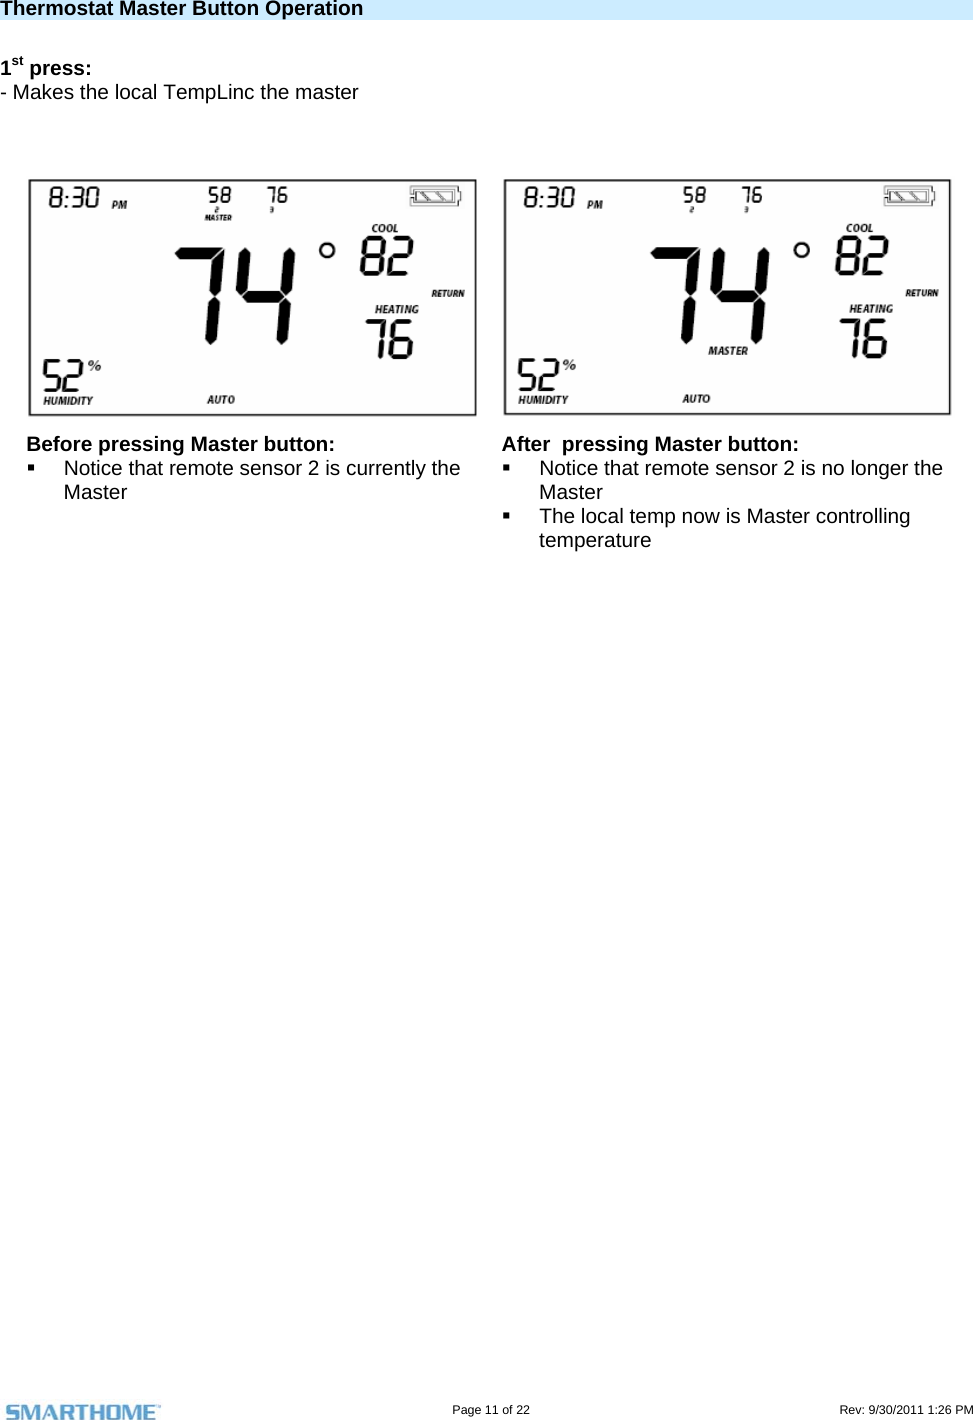
SmartLabs 2441T Wall-Mounted Wireless Thermostat (MN: 2441T) User Manual Owners Manual
SmartLabs, Inc. Wall-Mounted Wireless Thermostat (MN: 2441T) Owners Manual
UserManual.wiki
>
SmartLabs
>
2441T User Manual
Owners Manual
Navigation menu
Upload a User Manual
Namespaces
Wiki Guide
HTML
PDF
Info
Views
User Manual
Discussion / Help
Navigation
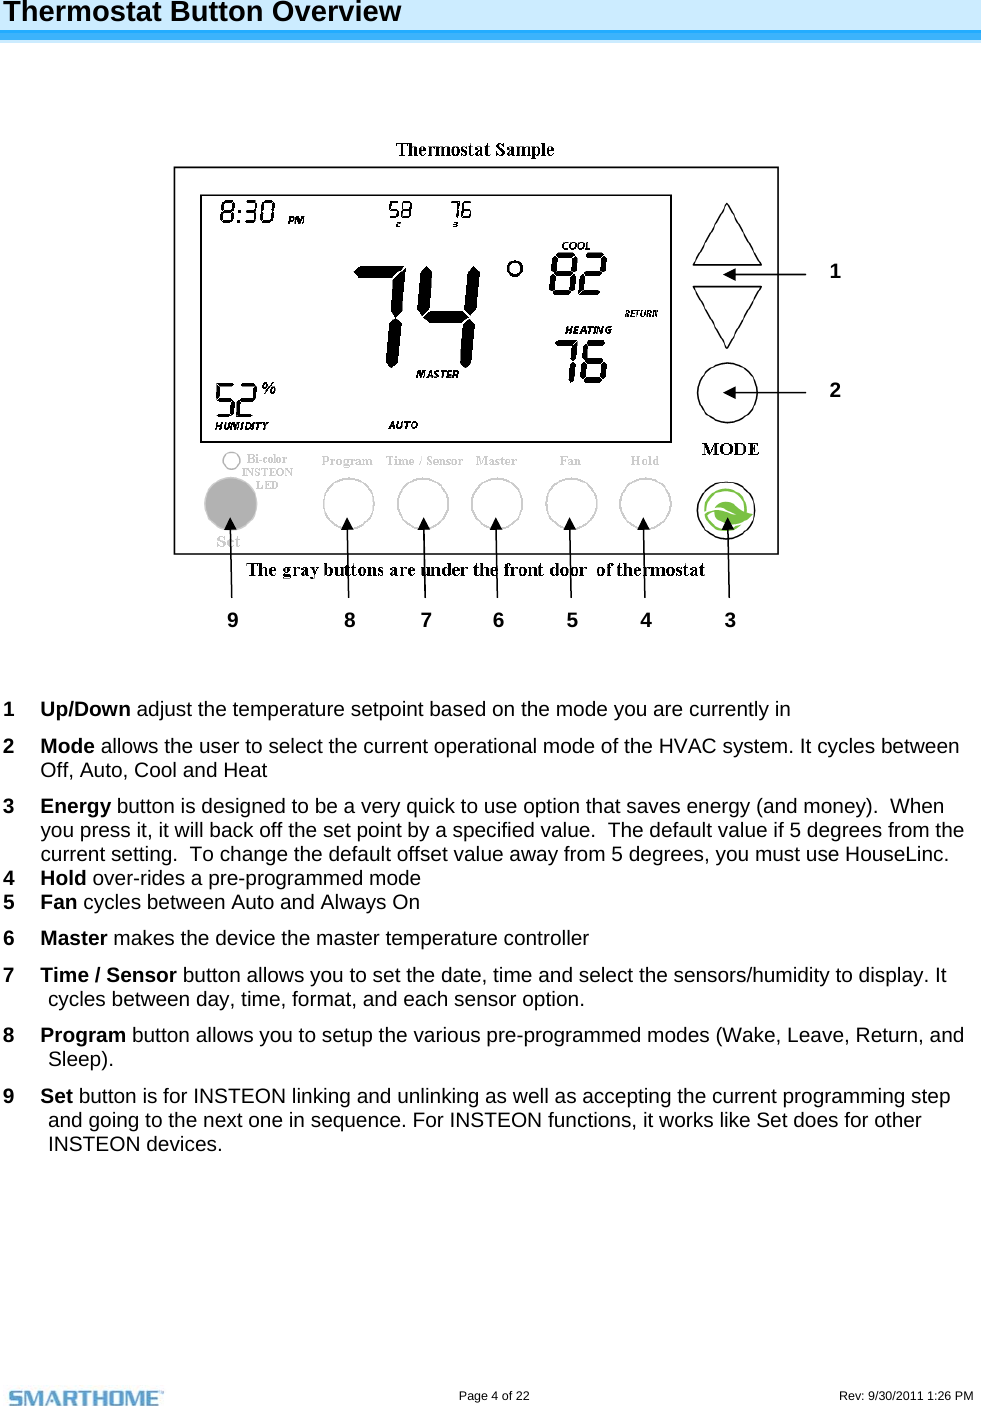
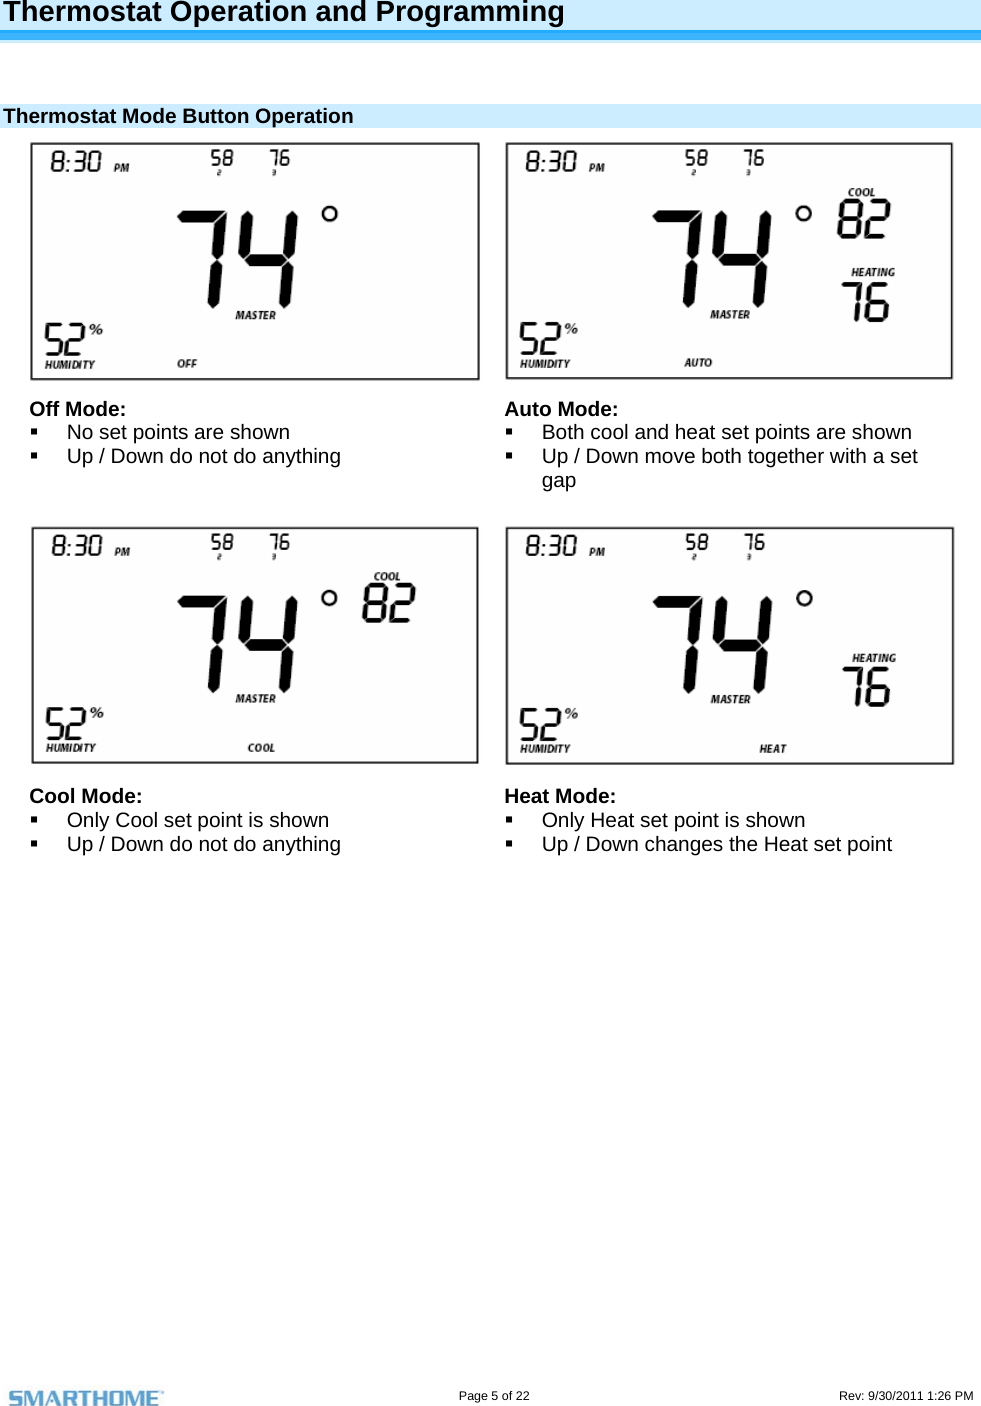
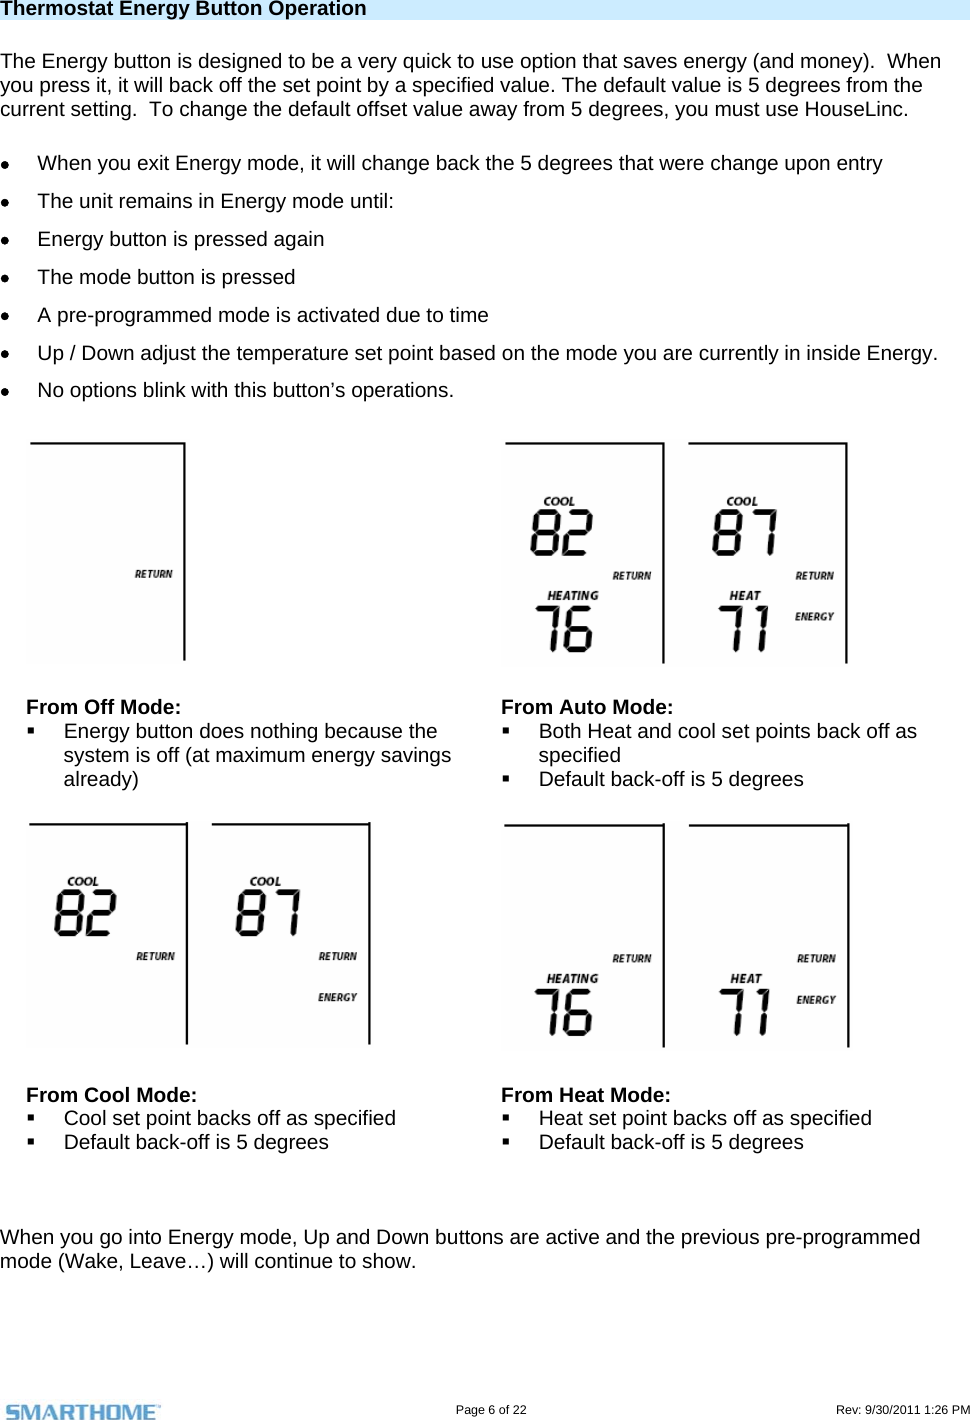
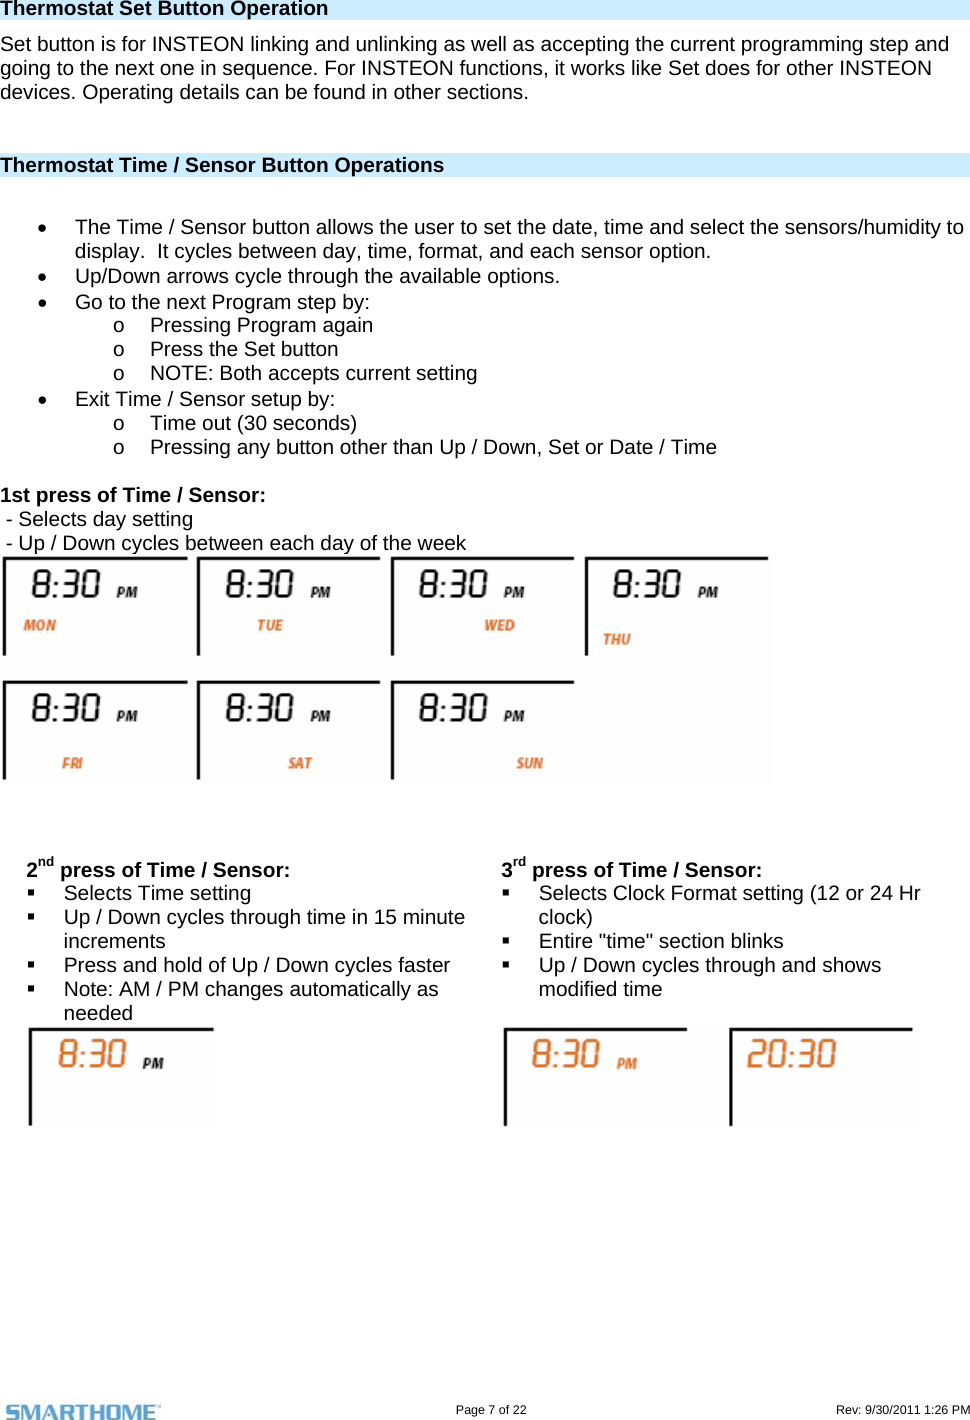
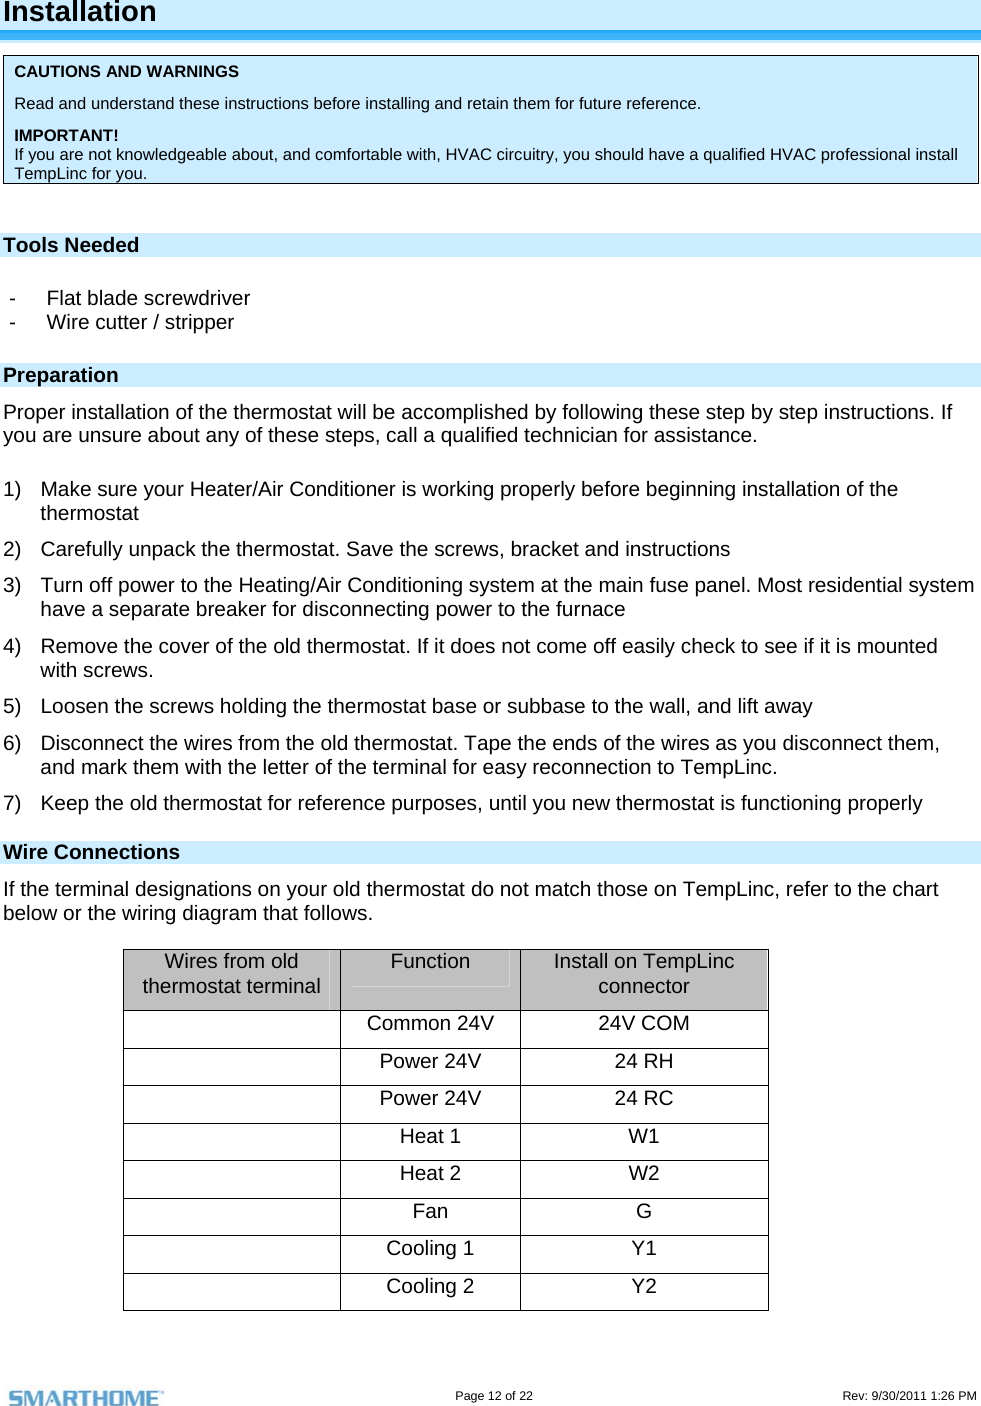
![Page 13 of 22 Rev: 9/30/2011 1:26 PM [Connection diagram] Test Operation 1) Turn the power on to the Heating/Air Conditioning system 2) Press the MODE button repeatedly until the HEAT icon appears in the display. Press the UP or DOWN buttons until the set temperature is 10 degrees above room temperature. The furnace should turn on. 3) Press the MODE button repeatedly until the COOL icon appears on the display. Press the UP or DOWN buttons until the set temperature is 10 degrees below room temperature. The air conditioner should turn on. NOTE: Most equipment has a time delay of 5 minutes between cool cycles. 4) Press the UP button until the setpoint is equal to the room temperature. Press the FAN button to Fan On. The fan should turn on and run continuously. Adding a Wireless Thermostat The TempLinc can be paired with a wireless thermostat (TempLinc Wireless Zone Thermostat) to provide a portable thermostat wherever you want temperature control. You can add up to xx wireless thermostats. 1) Press & hold the Set button on TempLinc Wireless Zone Thermostat TempLinc Wireless Zone Thermostat Set LED goes GREEN for xx seconds 2) Press & hold TempLinc Set button Thermostat will (Beep)](https://usermanual.wiki/SmartLabs/2441T/User-Guide-1583988-Page-14.png)