SofaWare Technologies SBX-166LHGE-5 Safe@Office/VPN-1 Edge User Manual Part 2
SofaWare Technologies Ltd. Safe@Office/VPN-1 Edge Users Manual Part 2
Contents
- 1. Users Manual Part 1
- 2. Users Manual Part 2
- 3. Users Manual Part 3
Users Manual Part 2
Configuring High Availability
Chapter 5: Managing Your Network 135
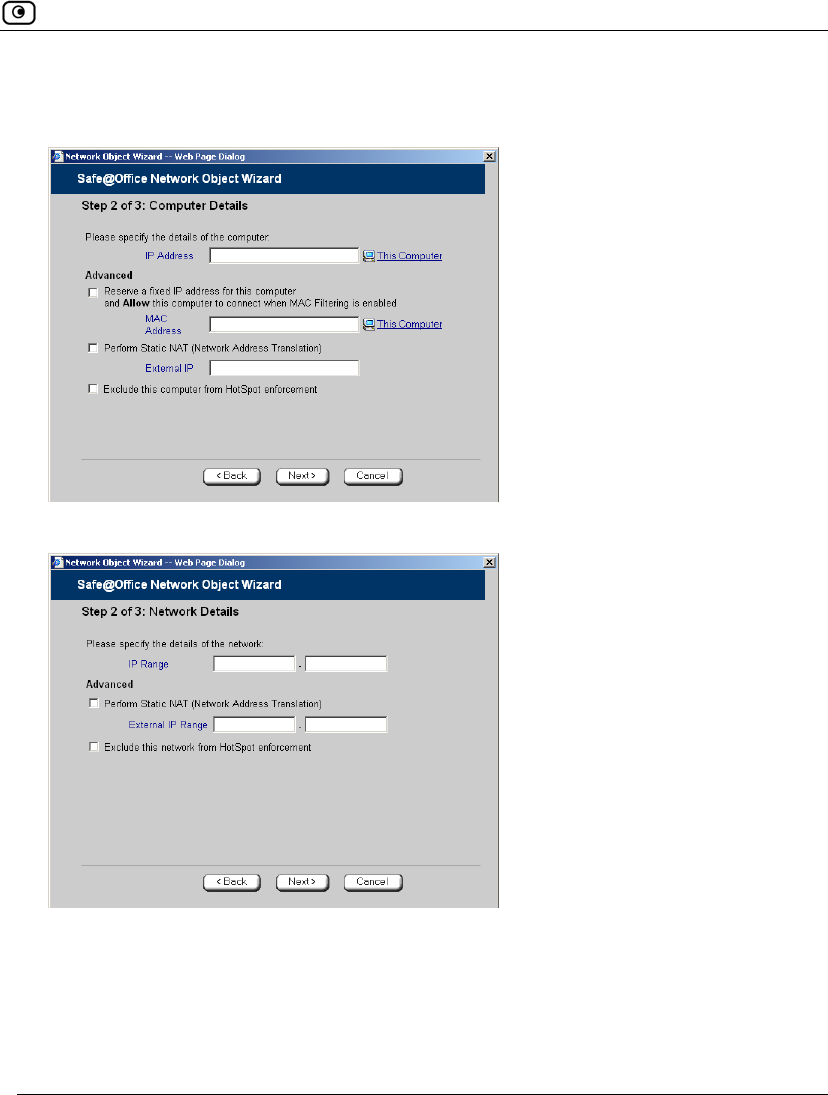
The Step 2: Computer Details dialog box appears. If you chose Single Computer,
the dialog box includes the Perform Static NAT option.
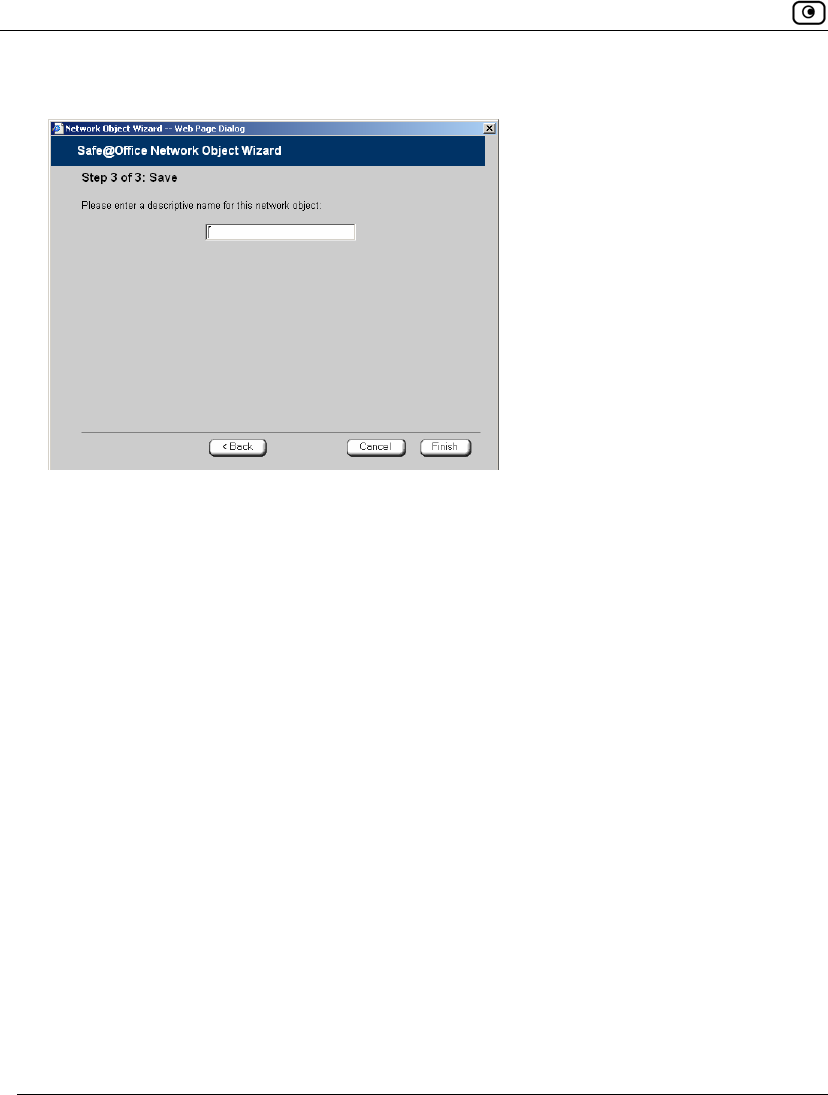
If you chose Network, the dialog box does not include this option.
11. Complete the fields using the information in the tables below.
12. Click Next.
Configuring High Availability
136 Check Point Safe@Office User Guide
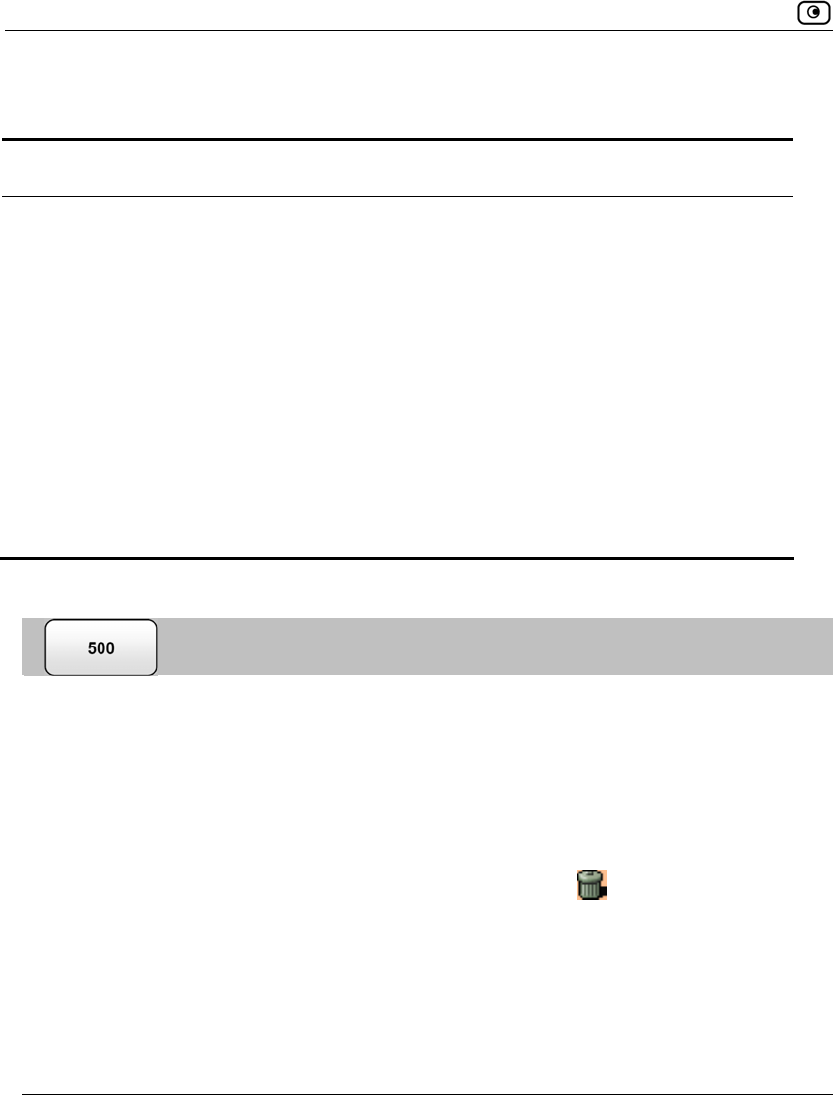
The Step 3: Save dialog box appears.
13. Type a name for the network object in the field.
14. Click Finish.
To add or edit a network object via the Active Computers page
1. Click Reports in the main menu, and click the Active Computers tab.

Configuring High Availability
Chapter 5: Managing Your Network 137
The Active Computers page appears.
If a computer has not yet been added as a network object, the Add button
appears next to it. If a computer has already been added as a network object, the
Edit button appears next to it.
2. Do one of the following:
• To add a network object, click Add next to the desired computer.
• To edit a network object, click Edit next to the desired computer.
The Safe@Office Network Object Wizard opens, with the Step 1: Network Object
Type dialog box displayed.
3. Do one of the following:
• To specify that the network object should represent a single computer or
device, click Single Computer.

Configuring High Availability
138 Check Point Safe@Office User Guide
• To specify that the network object should represent a network, click
Network.
4. Click Next.
The Step 2: Computer Details dialog box appears.
The computer's IP address and MAC address are automatically filled in.
5. Complete the fields using the information in the tables below.
6. Click Next.
The Step 3: Save dialog box appears with the network object's name. If you are
adding a new network object, this name is the computer's name.
7. To change the network object name, type the desired name in the field.
8. Click Finish.
The new object appears in the Network Objects page.

Configuring High Availability
Chapter 5: Managing Your Network 139
Table 16: Network Object Fields for a Single Computer
In this field… Do this…
IP Address Type the IP address of the local computer, or click This Computer to
specify your computer.
Reserve a fixed IP
address for this
computer
Select this option to assign the network object's IP address to a MAC
address, and to allow the network object to connect to the WLAN
when MAC Filtering is used. For information about MAC Filtering, see
Configuring a Wireless Network on page 163.
MAC Address Type the MAC address you want to assign to the network object's IP
address, or click This Computer to specify your computer's MAC
address.
Perform Static NAT
(Network Address
Translation)
Select this option to map the local computer's IP address to an
Internet IP address.
You must then fill in the External IP field.
External IP Type the Internet IP address to which you want to map the local
computer's IP address.
Exclude this computer
from HotSpot
enforcement
Select this option to exclude the network object from HotSpot
enforcement.
Configuring High Availability
140 Check Point Safe@Office User Guide
Table 17: Network Object Fields for a Network
In this field… Do this…
IP Range Type the range of local computer IP addresses in the network.
Perform Static NAT
(Network Address
Translation)
Select this option to map the network's IP address range to a range of
Internet IP addresses of the same size.
You must then fill in the External IP Range field.
External IP Range Type the Internet IP address range to which you want to map the
network's IP address range.
Exclude this network
from HotSpot
enforcement
Select this option to exclude this network from HotSpot enforcement.
Viewing and Deleting Network Objects
To view or delete a network object
1. Click Network in the main menu, and click the Network Objects tab.
The Network Objects page appears with a list of network objects.
2. To delete a network object, do the following:
a. In the desired network object's row, click the Erase icon.
A confirmation message appears.
b. Click OK.
The network object is deleted.
Using Static Routes
Chapter 5: Managing Your Network 141
Using Static Routes
A static route is a setting that explicitly specifies the route for packets originating
in a certain subnet and/or destined for a certain subnet. Packets with a source and
destination that does not match any defined static route will be routed to the default
gateway. To modify the default gateway, see Using a LAN Connection on page
67.
A static route can be based on the packet's destination IP address, or based on the
source IP address, in which case it is a source route.
Source routing can be used, for example, for load balancing between two Internet
connections. For example, if you have an Accounting department and a Marketing
department, and you want each to use a different Internet connection for outgoing
traffic, you can add a static route specifying that traffic originating from the
Accounting department should be sent via WAN1, and another static route
specifying that traffic originating from the Marketing department should be sent via
WAN2.
The Static Routes page lists all existing routes, including the default, and indicates
whether each route is currently "Up" (reachable) or not.
Adding and Editing Static Routes
To add a static route
1. Click Network in the main menu, and click the Routes tab.
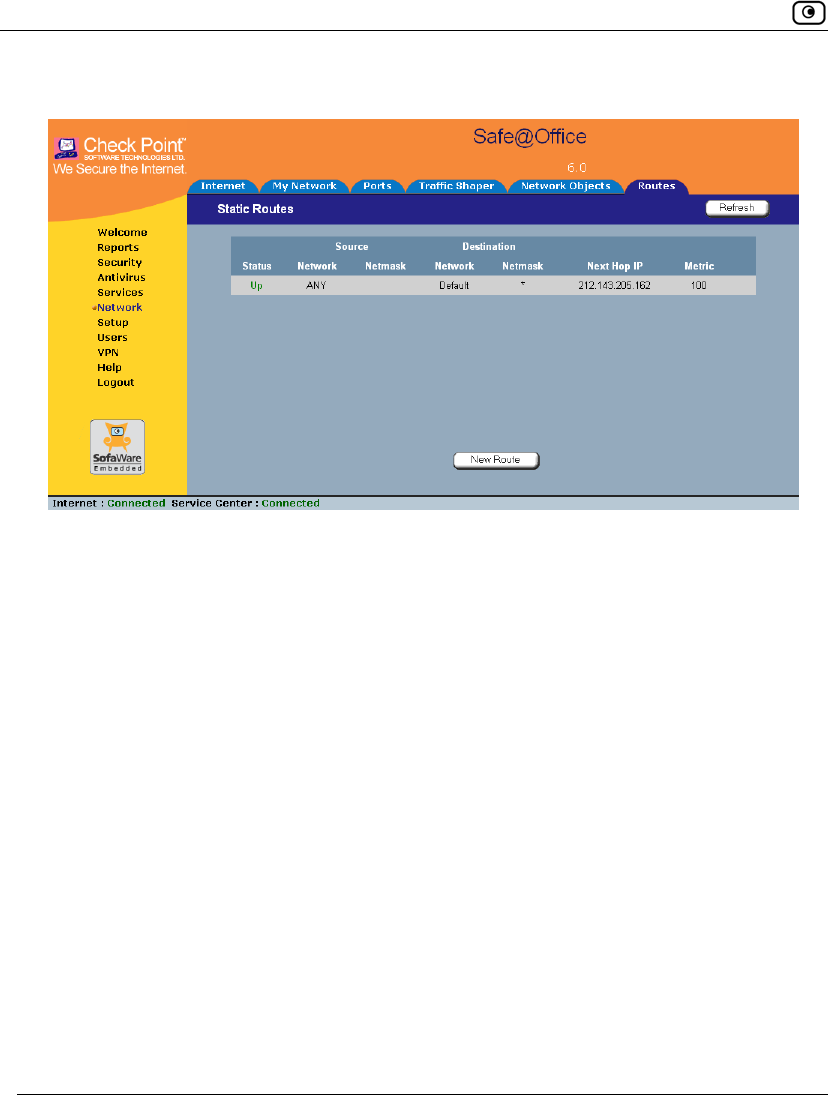
Using Static Routes
142 Check Point Safe@Office User Guide
The Static Routes page appears, with a list of existing static routes.
2. Do one of the following:
• To add a static route, click New Route.
• To edit an existing static route, click Edit next to the desired route in the
list.
Using Static Routes
Chapter 5: Managing Your Network 143
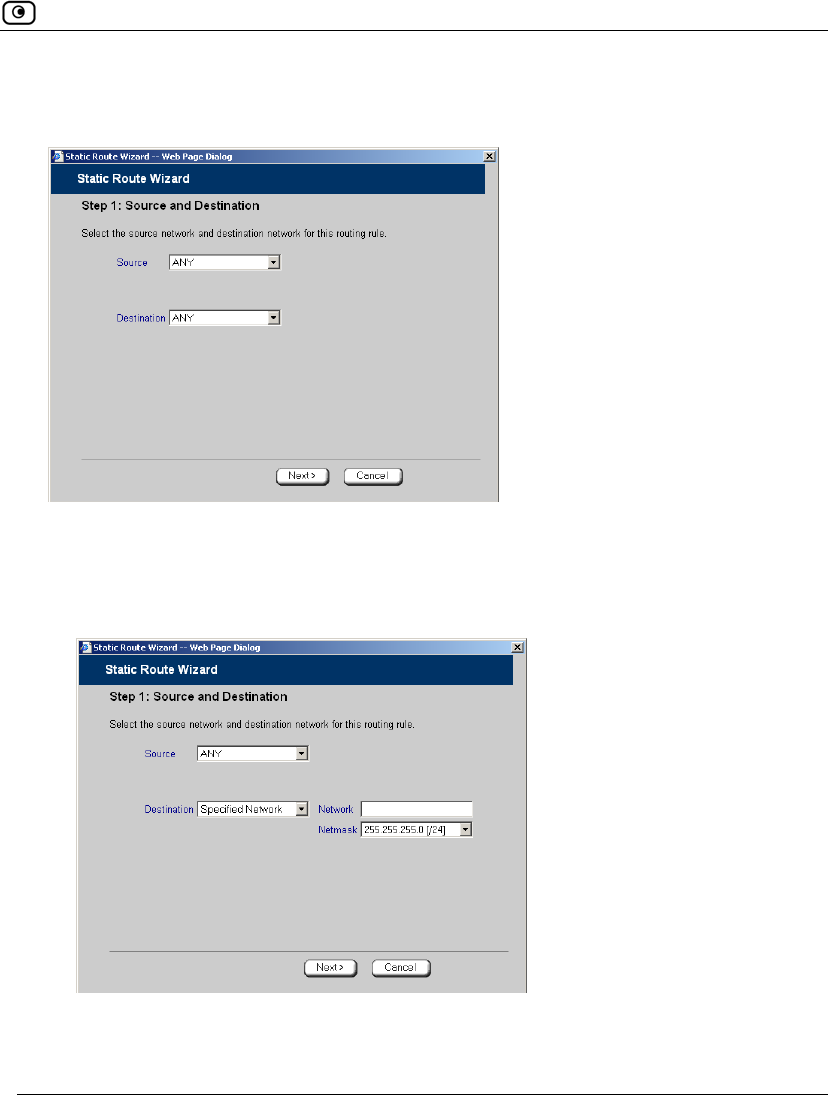
The Static Route Wizard opens displaying the Step 1: Source and Destination
dialog box.
3. To select a specific source network (source routing), do the following:
a) In the Source drop-down list, select Specified Network.
New fields appear.
b) In the Network field, type the IP address of the source network.
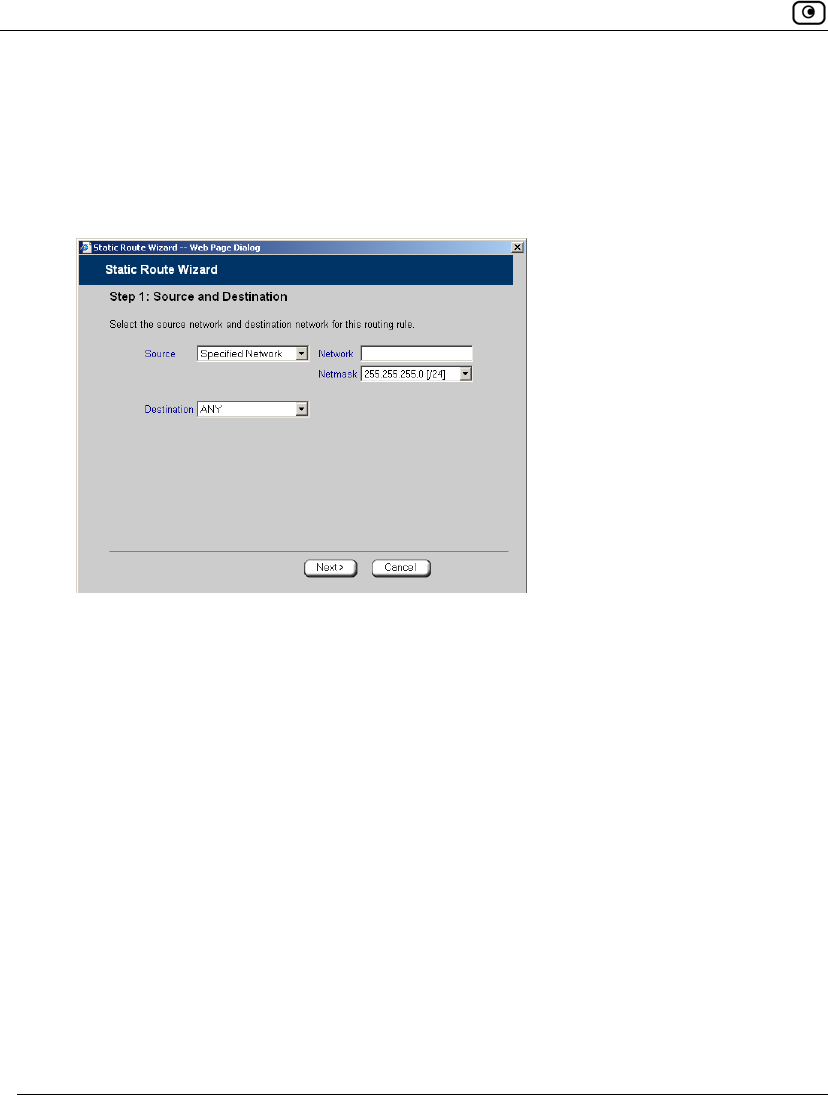
Using Static Routes
144 Check Point Safe@Office User Guide
c) In the Netmask drop-down list, select the subnet mask.
4. To select a specific destination network, do the following:
a) In the Destination drop-down list, select Specified Network.
New fields appear.
b) In the Network field, type the IP address of the destination network.
c) In the Netmask drop-down list, select the subnet mask.
5. Click Next.
Using Static Routes
Chapter 5: Managing Your Network 145
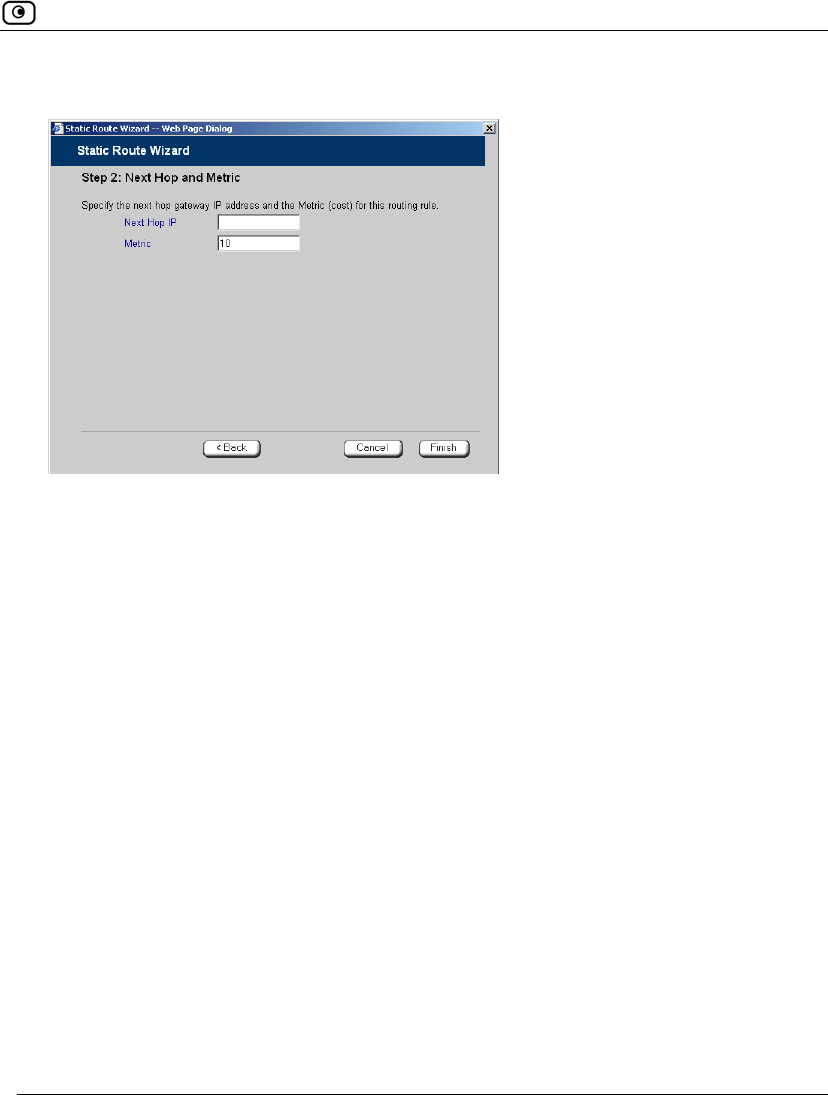
The Step 2: Next Hop and Metric dialog box appears.
6. In the Next Hop IP field, type the IP address of the gateway (next hop router) to
which to route the packets destined for this network.
7. In the Metric field, type the static route's metric.
The gateway sends a packet to the route that matches the packet's destination
and has the lowest metric.
The default value is 10.
8. Click Next.

Using Static Routes
146 Check Point Safe@Office User Guide
The new static route is saved.
Viewing and Deleting Static Routes
Note: The “default” route cannot be deleted.
To delete a static route
1. Click Network in the main menu, and click the Routes tab.
The Static Routes page appears, with a list of existing static routes.
2. In the desired route row, click the Erase icon.
A confirmation message appears.
3. Click OK.
The route is deleted.
Managing Ports
Chapter 5: Managing Your Network 147
Managing Ports
The Safe@Office appliance enables you to quickly and easily assign its ports to
different uses, as shown in the table below. Furthermore, you can restrict each port
to a specific link speed and duplex setting.
Table 18: Ports and Assignments
You can assign this port... To these uses...
LAN LAN network
VLAN network
DMZ/WAN2 DMZ network
Second WAN connection
VLAN trunk
RS232 Dialup modem
Serial console
Managing Ports
148 Check Point Safe@Office User Guide
Viewing Port Statuses
You can view the status of the Safe@Office appliance's ports on the Ports page,
including each Ethernet connection's duplex state. This is useful if you need to
check whether the appliance's physical connections are working, and you can’t see
the LEDs on front of the appliance.
Note: In the Safe@Office 500 model SBX-166LHG-2, status information is only
available for the WAN and DMZ ports, and not for LAN ports 1-4.
To view port statuses
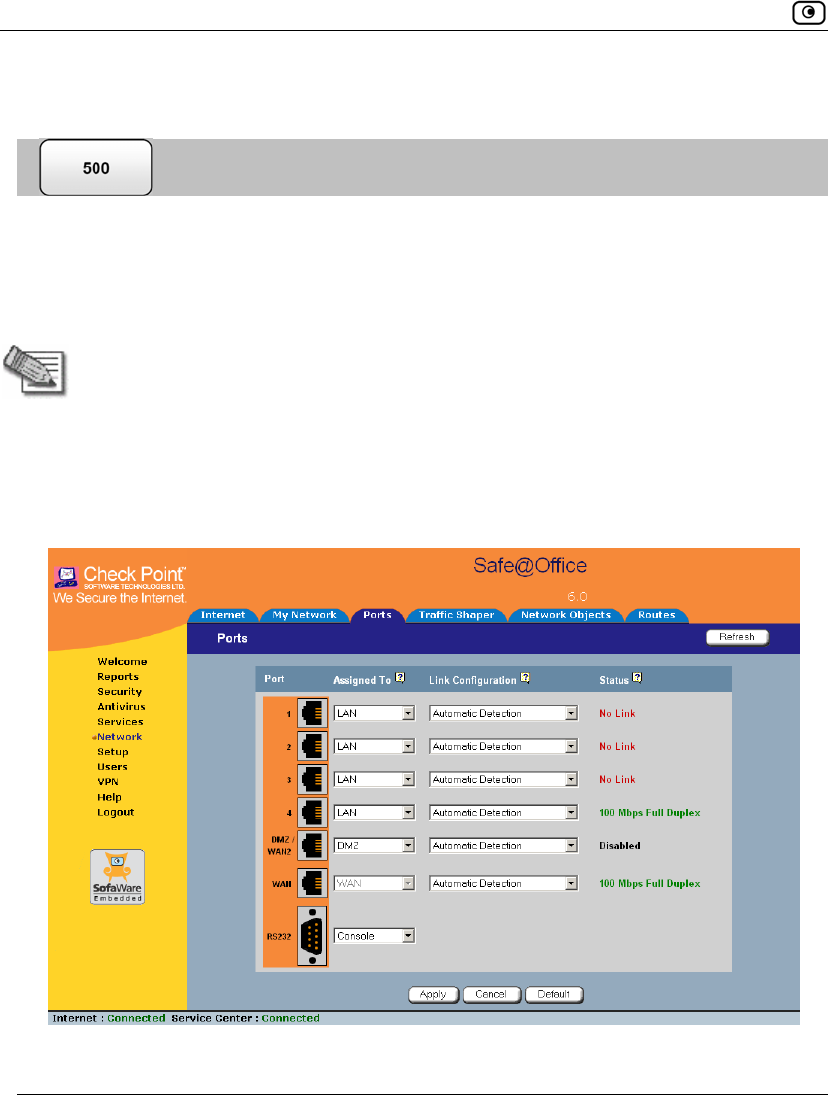
1. Click Network in the main menu, and click the Ports tab.
The Ports page appears.
The following information is displayed for each enabled port:

Managing Ports
Chapter 5: Managing Your Network 149
• Assign To. The port's current assignment. For example, if the
DMZ/WAN2 port is currently used for the DMZ, the drop-down list
displays "DMZ".
• Link Configuration. The configured link speed (10 Mbps or 100 Mbps) and
duplex (Full Duplex or Half Duplex) configured for the port.
Automatic Detection indicates that the port is configured to automatically
detect the link speed and duplex.
• Status. The detected link speed and duplex.
No Link indicates that the appliance does not detect anything connected to the
port.
Disabled indicates that the port is disabled. For example, if the DMZ/WAN2
port is currently assigned to the DMZ, but the DMZ is disabled, the port is
marked as such.
2. To refresh the display, click Refresh.
Modifying Port Assignments
You can assign ports to different networks or purposes. Since modifying port
assignments often requires additional configurations, use the table below to
determine which procedure you should use:
Table 19: Modifying Port Assignments
To assign a port
to...
See...
LAN The procedure below
VLAN or
VLAN Trunk
Configuring VLANs on page 113

Managing Ports
150 Check Point Safe@Office User Guide
To assign a port
to...
See...
WAN2 Setting Up a LAN or Broadband Backup Connection on page 93
DMZ Configuring a DMZ Network
Console Using a Console on page 392
Modem Setting Up a Dialup Modem on page 86
To modify a port assignment
1. Click Network in the main menu, and click the Ports tab.
The Ports page appears.
In the Assigned To drop-down list to the right of the port, select the desired port
assignment.
2. Click Apply.
The port is reassigned to the specified network or purpose.
Managing Ports
Chapter 5: Managing Your Network 151
Modifying Link Configurations
By default, the Safe@Office automatically detects the link speed and duplex. If
desired, you can manually restrict the Safe@Office appliance's ports to a specific
link speed and duplex.
Note: In the Safe@Office 500 model SBX-166LHG-2, restricting the link speed and
duplex is available for the WAN and DMZ ports, and not for LAN ports 1-4.
To modify a port's link configuration
1. Click Network in the main menu, and click the Ports tab.
The Ports page appears.
2. In the Link Configuration drop-down list to the right of the port, do one of the
following:
• Select the desired link speed and duplex.
• Select Automatic Detection to configure the port to automatically detect
the link speed and duplex.
This is the default.
3. Click Apply.
The port uses the specified link speed and duplex.
Managing Ports
152 Check Point Safe@Office User Guide
Resetting Ports to Defaults
You can reset the Safe@Office appliance's ports to their default link configurations
("Automatic Detection") and default assignments (shown in the table below).
Table 20: Default Port Assignments
Port Default Assignment
1-4 LAN
DMZ / WAN2 DMZ
WAN This port is always assigned to the WAN.
RS232 Modem
To reset ports to defaults
1. Click Network in the main menu, and click the Ports tab.
The Ports page appears.
2. Click Default.
A confirmation message appears.
3. Click OK.
The ports are reset to their default assignments and to "Automatic Detection"
link configuration.
All currently-established connections that are not supported by the default
settings may be broken. For example, if you were using the DMZ/WAN2 port as
WAN2, the port reverts to its DMZ assignment, and the secondary Internet
connection moves to the WAN port.

Overview
Chapter 6: Using Traffic Shaper 153
Chapter 6
This chapter describes how to use Traffic Shaper to control the flow of
communication to and from your network.
This chapter includes the following topics:
Overview..................................................................................................153
Setting Up Traffic Shaper.........................................................................155
Predefined QoS Classes............................................................................156
Adding and Editing Classes......................................................................157
Deleting Classes .......................................................................................161
Restoring Traffic Shaper Defaults............................................................162
Overview
Traffic Shaper is a bandwidth management solution that allows you to set
bandwidth policies to control the flow of communication. Traffic Shaper ensures
that important traffic takes precedence over less important traffic, so that your
business can continue to function with minimum disruption, despite network
congestion.
Traffic Shaper uses Stateful Inspection technology to access and analyze data
derived from all communication layers. This data is used to classify traffic in
Quality of Service (QoS) classes. Traffic Shaper divides available bandwidth
among the classes according to weight. For example, suppose Web traffic is
deemed three times as important as FTP traffic, and these services are assigned
weights of 30 and 10 respectively. If the lines are congested, Traffic Shaper will
maintain the ratio of bandwidth allocated to Web traffic and FTP traffic at 3:1.
If a specific class is not using all of its bandwidth, the leftover bandwidth is divided
among the remaining classes, in accordance with their relative weights. In the
example above, if only one Web and one FTP connection are active and they are
competing, the Web connection will receive 75% (30/40) of the leftover
Using Traffic Shaper

Overview
154 Check Point Safe@Office User Guide
bandwidth, and the FTP connection will receive 25% (10/40) of the leftover
bandwidth. If the Web connection closes, the FTP connection will receive 100% of
the bandwidth.
Each class has a bandwidth limit, which is the maximum amount of bandwidth that
connections belonging to that class may use together. Once a class has reached its
bandwidth limit, connections belonging to that class will not be allocated further
bandwidth, even if there is unused bandwidth available. For example, traffic used
by Peer-To-Peer file-sharing applications may be limited to a specific rate, such as
512 kilobit per second. Each class also has a “Delay Sensitivity” value, indicating
whether connections belonging to the class should be given precedence over
connections belonging to other classes.
Your Safe@Office appliance offers different degrees of traffic shaping, depending
on its model:
• Simplified Traffic Shaper. Includes a fixed set of four predefined classes.
You can assign network traffic to each class, but you cannot modify the
classes, delete them, or create new classes. Available in Safe@Office 500.
• Advanced Traffic Shaper. Includes a set of four predefined classes, but
enables you to modify the classes, delete them, and create new classes.
You can define up to eight classes, including weight, bandwidth limits, and
DiffServ (Differentiated Services) Packet Marking parameters. DiffServ
marks packets as belonging to a certain Quality of Service class. These
packets are then granted priority on the public network according to their
class. Available in Safe@Office 500 with Power Pack.
Note: You can prioritize wireless traffic from WMM-compliant multimedia
applications, by enabling Wireless Multimedia (WMM) for the WLAN network. See
Manually Configuring a WLAN on page 167.
Setting Up Traffic Shaper
Chapter 6: Using Traffic Shaper 155
Setting Up Traffic Shaper
To set up Traffic Shaper
1. Enable Traffic Shaper for the Internet connection, using the procedure Using
Internet Setup on page 65.
You can enable Traffic Shaper for incoming or outgoing connections.
• When enabling Traffic Shaper for outgoing traffic:
Specify a rate (in kilobits/second) slightly lower than your Internet
connection's maximum measured upstream speed.
• When enabling Traffic Shaper for incoming traffic:
Specify a rate (in kilobits/second) slightly lower than your Internet
connection's maximum measured downstream speed.
It is recommended to try different rates in order to determine which ones
provide the best results.
Note: Traffic Shaper cannot control the number or type of packets it receives from
the Internet; it can only affect the rate of incoming traffic by dropping received
packets. This makes the shaping of inbound traffic less accurate than the shaping
of outbound traffic. It is therefore recommended to enable traffic shaping for
incoming traffic only if necessary.
2. If you are using Safe@Office 500 with Power Pack, you can add QoS classes
that reflect your communication needs, or modify the four predefined QoS
classes.
See Adding and Editing Classes on page 157.
Note: If you are using Safe@Office 500, you have Simplified Traffic Shaper, and you
cannot add or modify the classes. To add or modify classes, upgrade to
Safe@Office 500 with Power Pack, which supports Advanced Traffic Shaper.
Predefined QoS Classes
156 Check Point Safe@Office User Guide
3. Use Allow or Allow and Forward rules to assign different types of connections
to QoS classes.
For example, if Traffic Shaper is enabled for outgoing traffic, and you create an
Allow rule associating all outgoing VPN traffic with the Urgent QoS class, then
Traffic Shaper will handle outgoing VPN traffic as specified in the bandwidth
policy for the Urgent class.
See Adding and Editing Rules on page 215.
Note: Traffic Shaper must be enabled for the direction of traffic specified in the rule.
Note: If you do not assign a connection type to a class, Traffic Shaper automatically
assigns the connection type to the predefined "Default" class.
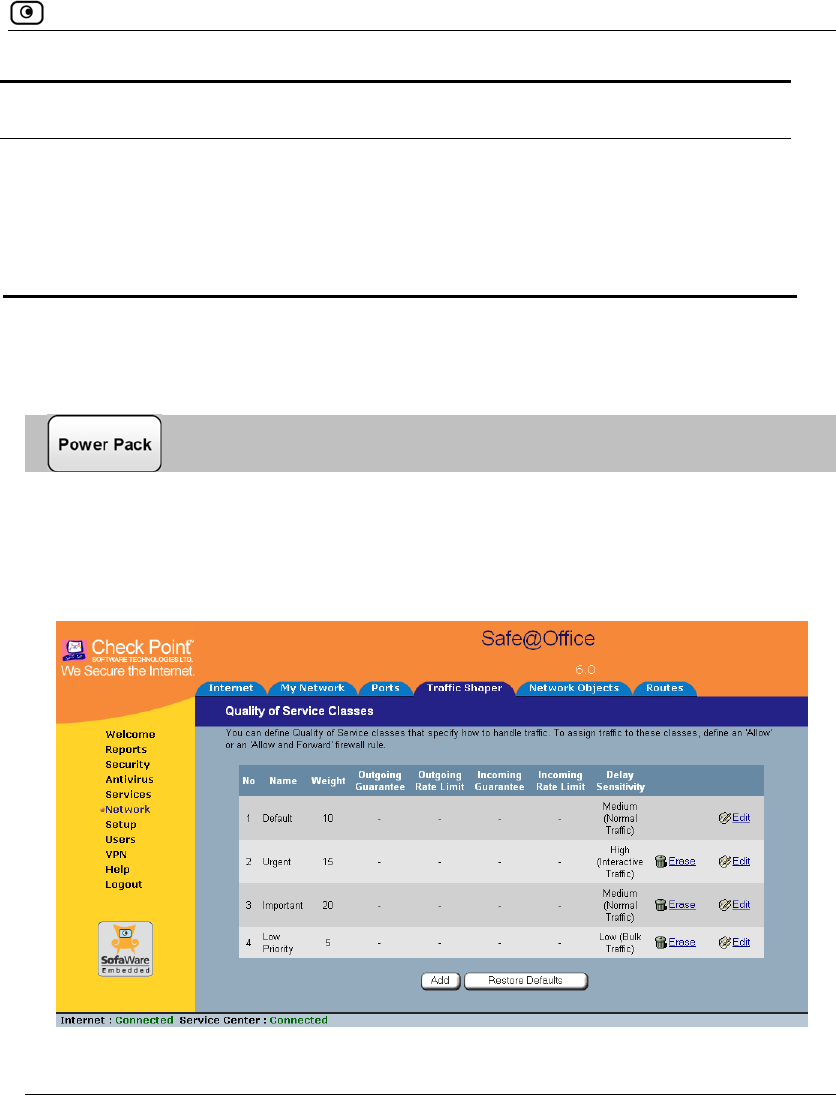
Predefined QoS Classes
Traffic Shaper provides the following predefined QoS classes.
To assign traffic to these classes, define firewall rules as described in Using Rules
on page 211.
Table 21: Predefined QoS Classes
Class Weight Delay Sensitivity Useful for
Default 10 Medium
(Normal Traffic)
Normal traffic.
All traffic is assigned to this class by default.
Urgent 15 High
(Interactive Traffic)
Traffic that is highly sensitive to delay. For
example, IP telephony, videoconferencing,
and interactive protocols that require quick
user response, such as telnet.
Adding and Editing Classes
Chapter 6: Using Traffic Shaper 157
Class Weight Delay Sensitivity Useful for
Important 20 Medium
(Normal Traffic)
Normal traffic
Low Priority 5 Low
(Bulk Traffic)
Traffic that is not sensitive to long delays. For
example, SMTP traffic (outgoing email).
In Simplified Traffic Shaper, these classes cannot be changed.
Adding and Editing Classes
To add or edit a QoS class
1. Click Network in the main menu, and click the Traffic Shaper tab.
The Quality of Service Classes page appears.
2. Click Add.
Adding and Editing Classes
158 Check Point Safe@Office User Guide
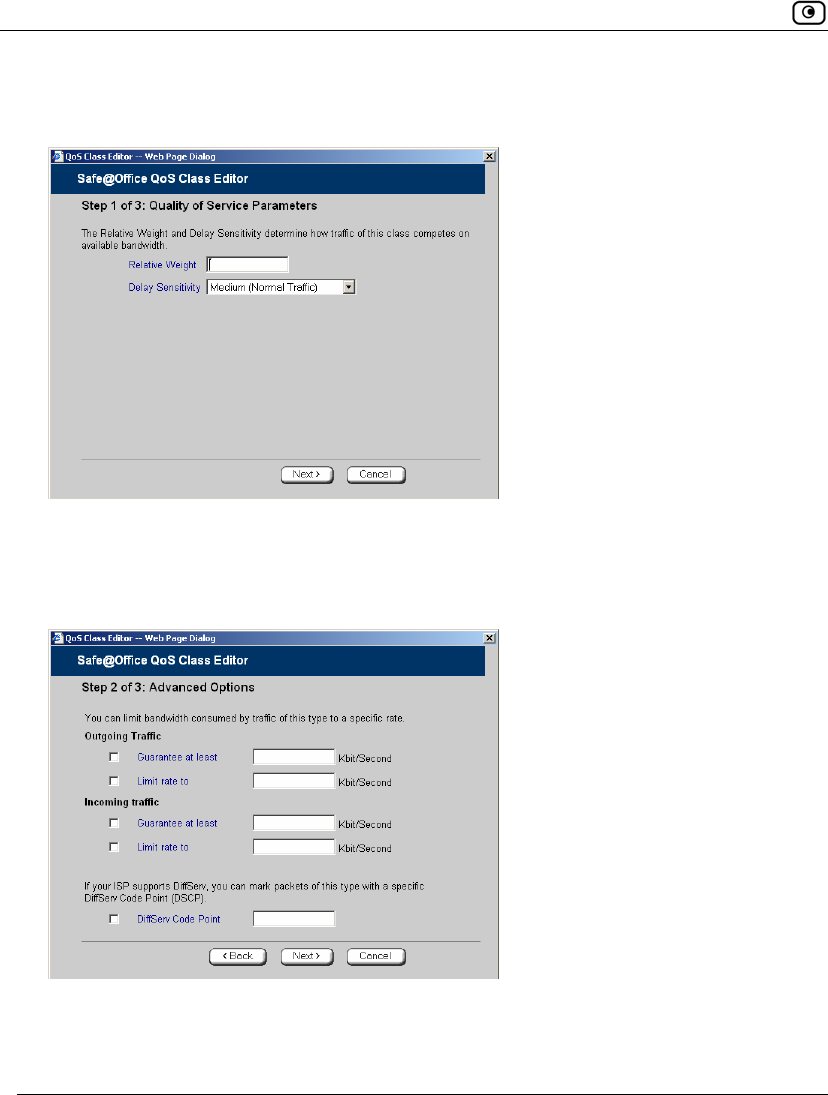
The Safe@Office QoS Class Editor wizard opens, with the Step 1 of 3: Quality of
Service Parameters dialog box displayed.
3. Complete the fields using the relevant information in the table below.
4. Click Next.
The Step 2 of 3: Advanced Options dialog box appears.
5. Complete the fields using the relevant information in the table below.
Adding and Editing Classes
Chapter 6: Using Traffic Shaper 159
Note: Traffic Shaper may not enforce guaranteed rates and relative weights for
incoming traffic as accurately as for outgoing traffic. This is because Traffic Shaper
cannot control the number or type of packets it receives from the Internet; it can
only affect the rate of incoming traffic by dropping received packets. It is therefore
recommended to enable traffic shaping for incoming traffic only if necessary. For
information on enabling Traffic Shaper for incoming and outgoing traffic, see Using
Internet Setup on page 65.
6. Click Next.
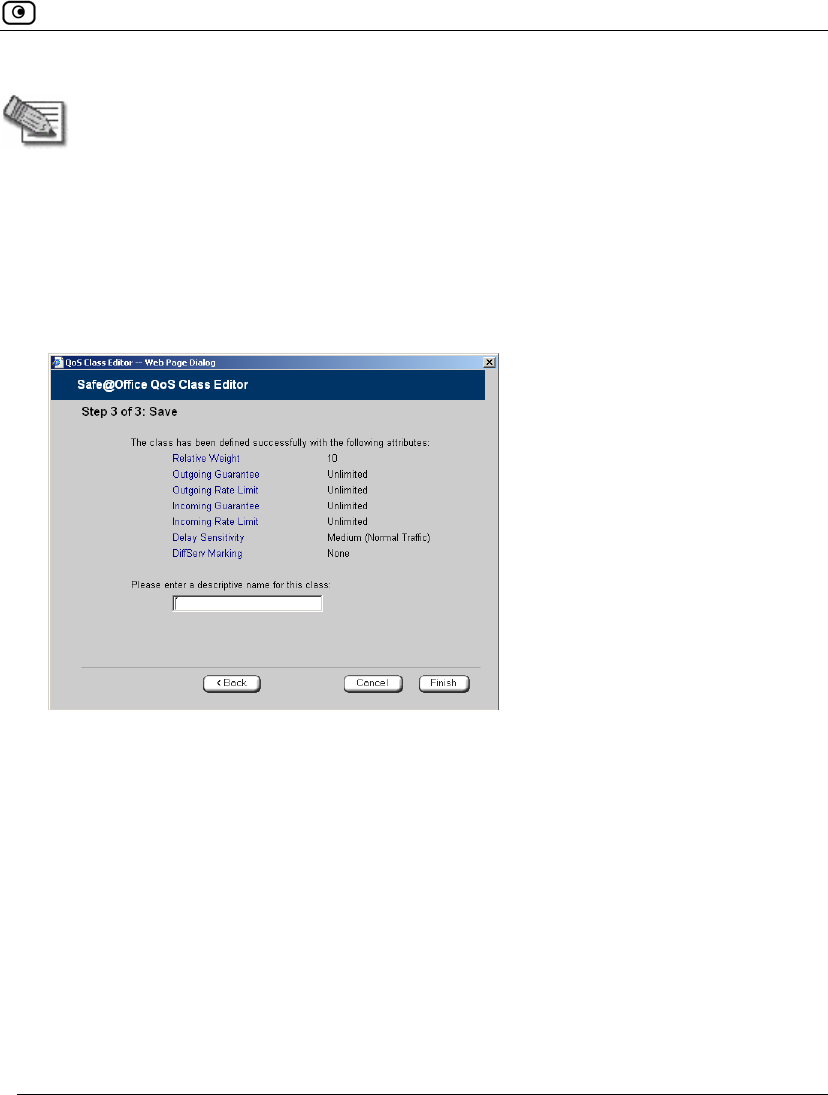
The Step 3 of 3: Save dialog box appears with a summary of the class.
7. Type a name for the class.
For example, if you are creating a class for high priority Web connections, you
can name the class "High Priority Web".
8. Click Finish.
The new class appears in the Quality of Service Classes page.

Adding and Editing Classes
160 Check Point Safe@Office User Guide
Table 22: QoS Class Fields
In this field… Do this…
Relative Weight Type a value indicating the class's importance relative to the other
defined classes.
For example, if you assign one class a weight of 100, and you assign
another class a weight of 50, the first class will be allocated twice the
amount of bandwidth as the second when the lines are congested.
Delay Sensitivity Select the degree of precedence to give this class in the transmission
queue:
• Low (Bulk Traffic) - Traffic that is not sensitive to long delays.
For example, SMTP traffic (outgoing email).
• Medium (Normal Traffic) - Normal traffic
• High (Interactive Traffic) - Traffic that is highly sensitive to delay.
For example, IP telephony, videoconferencing, and interactive
protocols that require quick user response, such as telnet.
Traffic Shaper serves delay-sensitive traffic with a lower latency. That is,
Traffic Shaper attempts to send packets with a "High (Interactive Traffic)"
level before packets with a "Medium (Normal Traffic)" or "Low (Bulk
Traffic)" level.
Outgoing Traffic:
Guarantee At
Least
Select this option to guarantee a minimum bandwidth for outgoing traffic
belonging to this class. Then type the minimum bandwidth (in
kilobits/second) in the field provided.
Outgoing Traffic:
Limit rate to
Select this option to limit the rate of outgoing traffic belonging to this
class. Then type the maximum rate (in kilobits/second) in the field
provided.
Incoming Traffic:
Guarantee At
Least
Select this option to guarantee a minimum bandwidth for incoming traffic
belonging to this class. Then type the minimum bandwidth (in
kilobits/second) in the field provided.
Deleting Classes
Chapter 6: Using Traffic Shaper 161
In this field… Do this…
Incoming Traffic:
Limit rate to
Select this option to limit the rate of incoming traffic belonging to this
class. Then type the maximum rate (in kilobits/second) in the field
provided.
DiffServ Code
Point
Select this option to mark packets belonging to this class with a DiffServ
Code Point (DSCP), which is an integer between 0 and 63. Then type the
DSCP in the field provided.
The marked packets will be given priority on the public network according
to their DSCP.
To use this option, your ISP or private WAN must support DiffServ. You
can obtain the correct DSCP value from your ISP or private WAN
administrator.
Deleting Classes
You cannot delete a class that is currently used by a rule. You can determine
whether a class is in use or not, by viewing the Rules page.
To delete an existing QoS class
1. Click Network in the main menu, and click the Traffic Shaper tab.
The Quality of Service Classes page appears.
2. Click the Erase icon of the class you wish to delete.
A confirmation message appears.
3. Click OK.
The class is deleted.
Restoring Traffic Shaper Defaults
162 Check Point Safe@Office User Guide
Restoring Traffic Shaper Defaults
If desired, you can reset the Traffic Shaper bandwidth policy to use the four
predefined classes, and restore these classes to their default settings. For
information on these classes and their defaults, see Predefined QoS Classes on
page 156.
Note: This will delete any additional classes you defined in Traffic
Shaper and reset all rules to use the Default class.
If one of the additional classes is currently used by a rule, you
cannot reset Traffic Shaper to defaults. You can determine whether
a class is in use or not, by viewing the Rules page.
To restore Traffic Shaper defaults
1. Click Network in the main menu, and click the Traffic Shaper tab.
The Quality of Service Classes page appears.
2. Click Restore Defaults.
A confirmation message appears.
3. Click OK.
Overview
Chapter 7: Configuring a Wireless Network 163
Chapter 7
This chapter describes how to set up a wireless internal network.
This chapter includes the following topics:
Overview..................................................................................................163
About the Wireless Hardware in Your Safe@Office 500W Appliance ...164
Wireless Security Protocols......................................................................165
Manually Configuring a WLAN...............................................................167
Using the Wireless Configuration Wizard................................................178
Preparing the Wireless Stations................................................................184
Troubleshooting Wireless Connectivity...................................................185
Overview
In addition to the LAN and DMZ networks, you can define a wireless internal
network called a WLAN (wireless LAN) network, when using Safe@Office 500W.
For information on default security policy rules controlling traffic to and from the
WLAN, see Default Security Policy on page 205.
You can configure a WLAN network in either of the following ways:
• Wireless Configuration Wizard. Guides you through the WLAN setup step
by step.
See Using the Wireless Configuration Wizard on page 178.
• Manual configuration. Offers advanced setup options.
See Manually Configuring a WLAN on page 167.
Note: It is recommended to configure the WLAN via Ethernet and not via a wireless
connection, because the wireless connection could be broken after making a
change to the configuration.
Configuring a Wireless Network

About the Wireless Hardware in Your Safe@Office 500W Appliance
164 Check Point Safe@Office User Guide
About the Wireless Hardware in Your Safe@Office
500W Appliance
Your Safe@Office 500W appliance features a built-in 802.11b/g access point that
is tightly integrated with the firewall and hardware-accelerated VPN.
Safe@Office 500W supports the latest 802.11g standard (up to 54Mbps) and is
backwards compatible with the older 802.11b standard (up to 11Mbps), so that
both new and old adapters of these standards are interoperable. Safe@Office 500W
also supports a special Super G mode that allows reaching a throughput of up to
108Mbps with Super G compatible stations. For more information on the Super G
mode refer to: http://www.super-ag.com.
Safe@Office 500W transmits in 2.4GHz range, using dual diversity antennas to
increase the range. In addition, the Safe@Office 500W supports a special extended
range (XR) mode that allows up to three times the range of a regular 802.11g
access point. XR dramatically stretches the performance of a wireless LAN, by
enabling long-range connections. The architecture delivers receive sensitivities of
up to 105dBm, over 20 dB more than the 802.11 specification. This allows ranges
of up to 300 meters indoors, and up to 1 km (3200 ft) outdoors, with XR-enabled
wireless stations (actual range depends on environment).
Wireless Security Protocols
Chapter 7: Configuring a Wireless Network 165
Wireless Security Protocols
The Safe@Office wireless security appliance supports the following security
protocols:
Table 23: Wireless Security Protocols
Security
Protocol
Description
None No security method is used. This option is not recommended, because it
allows unauthorized users to access your WLAN network, although you can
still limit access from the WLAN by creating firewall rules. This method is
suitable for creating public access points.
WEP encryption In the WEP (Wired Equivalent Privacy) encryption security method, wireless
stations must use a pre-shared key to connect to your network. This method
is not recommended, due to known security flaws in the WEP protocol. It is
provided for compatibility with existing wireless deployments.
Note: The appliance and the wireless stations must be configured with the
same WEP key.
802.1X: RADIUS
authentication, no
encryption
In the 802.1x security method, wireless stations (supplicants) attempting to
connect to the access point (authenticator) must first be authenticated by a
RADIUS server (authentication server) which supports 802.1x . All messages
are passed in EAP (Extensible Authentication Protocol).
This method is recommended for situations in which you want to authenticate
wireless users, but do not need to encrypt the data.
Note: To use this security method, you must first configure a RADIUS server.
See Using RADIUS Authentication. on page 372

Wireless Security Protocols
166 Check Point Safe@Office User Guide
Security
Protocol
Description
WPA: RADIUS
authentication,
encryption
The WPA (Wi-Fi Protected Access) security method uses MIC (message
integrity check) to ensure the integrity of messages, and TKIP (Temporal Key
Integrity Protocol) to enhance data encryption.
Furthermore, WPA includes 802.1x and EAP authentication, based on a
central RADIUS authentication server. This method is recommended for
situations where you want to authenticate wireless stations using a RADIUS
server, and to encrypt the transmitted data.
Note: To use this security method, you must first configure a RADIUS server
which supports 802.1x. See Using RADIUS Authentication. on page 372
WPA-PSK:
password
authentication,
encryption
The WPA-PSK security method is a variation of WPA that does not require an
authentication server. WPA-PSK periodically changes and authenticates
encryption keys. This is called rekeying.
This option is recommended for small networks, which want to authenticate
and encrypt wireless data, but do not want to install a RADIUS server.
Note: The appliance and the wireless stations must be configured with the
same passphrase.
WPA2 (802.11i) The WPA2 security method uses the more secure Advanced Encryption
Standard (AES) cipher, instead of the RC4 cipher used by WPA and WEP.
When using WPA or WPA-PSK security methods, the Safe@Office enables
you to restrict access to the WLAN network to wireless stations that support
the WPA2 security method. If this setting is not selected, the Safe@Office
appliance allows clients to connect using both WPA and WPA2.
Manually Configuring a WLAN
Chapter 7: Configuring a Wireless Network 167
Note: For increased security, it is recommended to enable the Safe@Office internal
VPN Server for users connecting from your internal networks, and to install
SecuRemote on each computer in the WLAN. This ensures that all connections
from the WLAN to the LAN are encrypted and authenticated. For information, see
Internal VPN Server on page 308 and Setting Up Your Safe@Office Appliance
as a VPN Server on page 309.
Manually Configuring a WLAN
To manually configure a WLAN network
1. Prepare the appliance for a wireless connection as described in Network
Installation on page 37.
2. If you want to use 802.1X or WPA security mode for the WLAN, configure a
RADIUS server.
For information on security modes, see Basic WLAN Settings Fields on page
170.
For information on configuring RADIUS servers, see Using RADIUS
Authentication on page 372.
3. Click Network in the main menu, and click the My Network tab.
The My Network page appears.
4. In the WLAN network's row, click Edit.

Manually Configuring a WLAN
168 Check Point Safe@Office User Guide
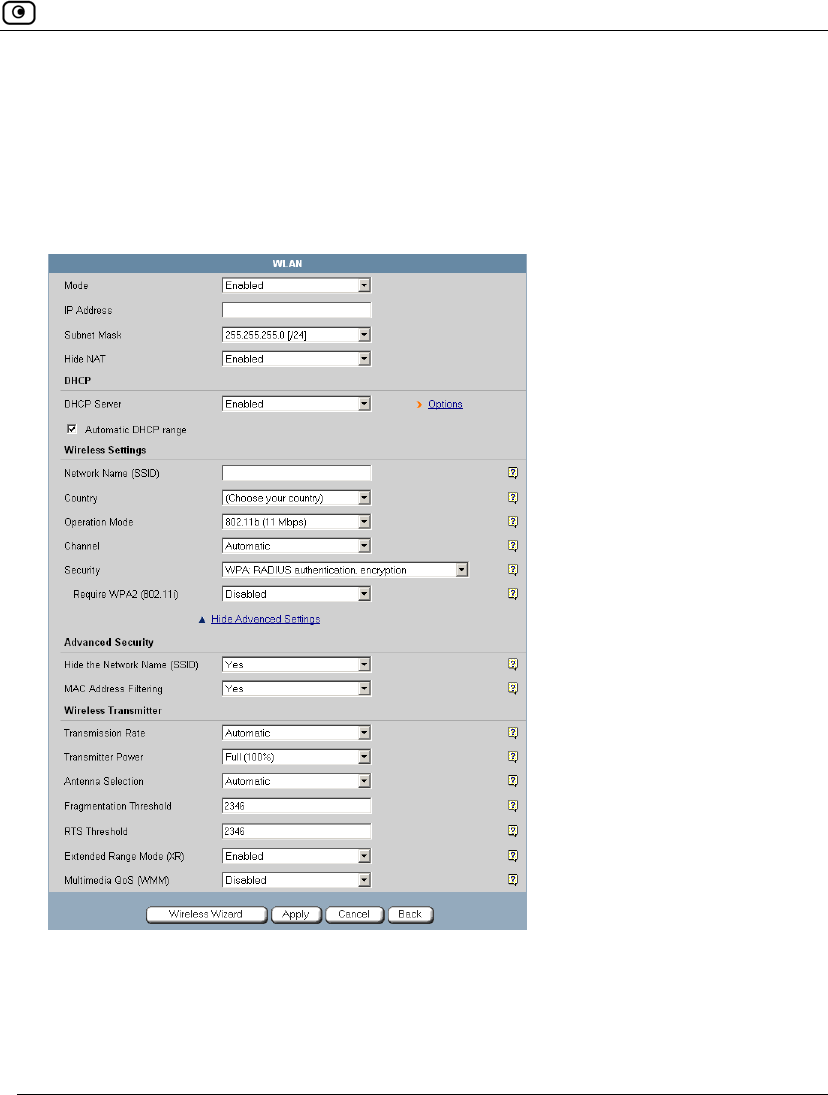
The Edit Network Settings page appears.
5. In the Mode drop-down list, select Enabled.
The fields are enabled.
6. If desired, enable or disable Hide NAT.
See Enabling/Disabling Hide NAT on page 109.
7. If desired, configure a DHCP server.
See Configuring a DHCP Server on page 96.
Manually Configuring a WLAN
Chapter 7: Configuring a Wireless Network 169
8. Complete the fields using the information in Basic WLAN Settings Fields on
page 170.
9. To configure advanced settings, click Show Advanced Settings and complete the
fields using the information in Advanced WLAN Settings Fields on page 174.
New fields appear.
10. Click Apply.
A warning message appears, telling you that you are about to change your
network settings.

Manually Configuring a WLAN
170 Check Point Safe@Office User Guide
11. Click OK.
A success message appears.
12. Prepare the wireless stations.
See Preparing the Wireless Stations on page 184.
Table 24: WLAN Settings Fields
In this field… Do this…
IP Address Type the IP address of the WLAN network's default gateway.
Note: The WLAN network must not overlap other networks.
Subnet Mask Type the WLAN’s internal network range.
Wireless Settings
Network Name
(SSID)
Type the network name (SSID) that identifies your wireless network. This
name will be visible to wireless stations passing near your access point,
unless you enable the Hide the Network Name (SSID) option.
It can be up to 32 alphanumeric characters long and is case-sensitive.
Country Select the country where you are located.
Warning: Choosing an incorrect country may result in the violation of
government regulations.

Manually Configuring a WLAN
Chapter 7: Configuring a Wireless Network 171
In this field… Do this…
Operation Mode Select an operation mode:
• 802.11b (11Mbps). Operates in the 2.4 GHz range and offers a
maximum theoretical rate of 11 Mbps. When using this mode,
only 802.11b stations will be able to connect.
• 802.11g (54 Mbps). Operates in the 2.4 GHz range, and offers a
maximum theoretical rate of 54 Mbps. When using this mode,
only 802.11g stations will be able to connect.
• 802.11b/g (11/54 Mbps). Operates in the 2.4 GHz range, and offers
a maximum theoretical rate of 54 Mbps. When using this mode,
both 802.11b stations and 802.11g stations will be able to
connect.
• 802.11g Super (108 Mbps). Operates in the 2.4 GHz range, and
offers a maximum theoretical rate of 108 Mbps. When using this
mode, only 802.11g Super stations will be able to connect.
• 802.11g Super (11/54/108). Operates in the 2.4 GHz range, and
offers a maximum theoretical rate of 108 Mbps. When using this
mode, 802.11b stations, 802.11g stations, and 802.11g Super
stations will all be able to connect.
Each operation mode indicates a wireless protocol (such as 802.11g
Super), followed by the maximum bandwidth (such as 108 Mbps).
The list of modes is dependent on the selected country.
You can prevent older wireless stations from slowing down your network, by
choosing an operation mode that restricts access to newer wireless
stations.
Note: The actual data transfer speed is usually significantly lower than the
maximum theoretical bandwidth and degrades with distance.
Important: The station wireless cards must support the selected operation
mode. For a list of cards supporting 802.11g Super, refer to
http://www.super-ag.com.

Manually Configuring a WLAN
172 Check Point Safe@Office User Guide
In this field… Do this…
Channel Select the radio frequency to use for the wireless connection:
• Automatic. The Safe@Office appliance automatically selects a
channel. This is the default.
• A specific channel. The list of channels is dependent on the
selected country and operation mode.
Note: If there is another wireless network in the vicinity, the two networks
may interfere with one another. To avoid this problem, the networks should
be assigned channels that are at least 25 MHz (5 channels) apart.
Alternatively, you can reduce the transmission power.
Security Select the security protocol to use. For information on the supported
security protocols, see Wireless Security Protocols on page 165.
If you select WEP encryption, the WEP Keys area opens.
If you select WPA, the Require WPA2 (802.11i) field appears.
If you select WPA-PSK, the Passphrase and Require WPA2 (802.11i) fields
appear.
Passphrase Type the passphrase for accessing the network, or click Random to randomly
generate a passphrase.
This must be between 8 and 63 characters. It can contain spaces and
special characters, and is case-sensitive.
For the highest security, choose a long passphrase that is hard to guess, or
use the Random button.
Note: The wireless stations must be configured with this passphrase as well.

Manually Configuring a WLAN
Chapter 7: Configuring a Wireless Network 173
In this field… Do this…
Require WPA2
(802.11i)
Specify whether you want to require wireless stations to connect using
WPA2, by selecting one of the following:
• Enable. Only wireless stations using WPA2 can access the
WLAN network.
• Disable. Wireless stations using either WPA or WPA2 can access
the WLAN network. This is the default.
WEP Keys If you selected WEP encryption, you must configure at least one WEP key.
The wireless stations must be configured with the same key, as well.
Key 1, 2, 3, 4 radio
button
Click the radio button next to the WEP key that this gateway should use for
transmission.
The selected key must be entered in the same key slot (1-4) on the station
devices, but the key need not be selected as the transmit key on the
stations.
Note: You can use all four keys to receive data.
Key 1, 2, 3, 4
length
Select the WEP key length from the drop-down list.
The possible key lengths are:
• 64 Bits. The key length is 10 characters.
• 128 Bits. The key length is 26 characters.
• 152 Bits. The key length is 32 characters.
Note: Some wireless card vendors call these lengths 40/104/128,
respectively.
Note: WEP is generally considered to be insecure, regardless of the
selected key length.
Manually Configuring a WLAN
174 Check Point Safe@Office User Guide
In this field… Do this…
Key 1, 2, 3, 4 text
box
Type the WEP key, or click Random to randomly generate a key matching
the selected length. The key is composed of hexadecimal characters 0-9
and A-F, and is not case-sensitive.
Table 25: Advanced WLAN Settings Fields
In this field… Do this…
Advanced Security
Hide the Network
Name (SSID)
Specify whether you want to hide your network's SSID, by selecting one of
the following:
• Yes. Hide the SSID.
Only devices to which your SSID is known can connect to your
network.
• No. Do not hide the SSID.
Any device within range can detect your network name using the
wireless network discovery features of some products, such as
Microsoft Windows XP, and attempt to connect to your network.
This is the default.
Note: Hiding the SSID does not provide strong security, because by a
determined attacker can still discover your SSID. Therefore, it is not
recommended to rely on this setting alone for security.

Manually Configuring a WLAN
Chapter 7: Configuring a Wireless Network 175
In this field… Do this…
MAC Address
Filtering
Specify whether you want to enable MAC address filtering, by selecting one
of the following:
• Yes. Enable MAC address filtering.
Only MAC addresses that you added as network objects can
connect to your network.
For information on network objects, see Using Network
Objects on page 131.
• No. Disable MAC address filtering. This is the default.
Note: MAC address filtering does not provide strong security, since MAC
addresses can be spoofed by a determined attacker. Therefore, it is not
recommended to rely on this setting alone for security.
Wireless Transmitter
Transmission Rate Select the transmission rate:
• Automatic. The Safe@Office appliance automatically selects a
rate. This is the default.
• A specific rate
Transmitter Power Select the transmitter power.
Setting a higher transmitter power increases the access point's range. A
lower power reduces interference with other access points in the vicinity.
The default value is Full. It is not necessary to change this value, unless
there are other access points in the vicinity.

Manually Configuring a WLAN
176 Check Point Safe@Office User Guide
In this field… Do this…
Antenna Selection Multipath distortion is caused by the reflection of Radio Frequency (RF)
signals traveling from the transmitter to the receiver along more than one
path. Signals that were reflected by some surface reach the receiver after
non-reflected signals and distort them.
Safe@Office appliances avoid the problems of multipath distortion by using
an antenna diversity system. To provide antenna diversity, each wireless
security appliance has two antennas.
Specify which antenna to use for communicating with wireless stations:
• Automatic. The Safe@Office appliance receives signals through
both antennas and automatically selects the antenna with the
lowest distortion signal to use for communicating. The selection
is made on a per-station basis. This is the default.
• ANT 1. The ANT 1antenna is always used for communicating.
• ANT 2. The ANT 2 antenna is always used for communicating.
Use manual diversity control (ANT 1 or ANT 2), if there is only one antenna
connected to the appliance.
Fragmentation
Threshold
Type the smallest IP packet size (in bytes) that requires that the IP packet
be split into smaller fragments.
If you are experiencing significant radio interference, set the threshold to a
low value (around 1000), to reduce error penalty and increase overall
throughput.
Otherwise, set the threshold to a high value (around 2000), to reduce
overhead.
The default value is 2346.

Manually Configuring a WLAN
Chapter 7: Configuring a Wireless Network 177
In this field… Do this…
RTS Threshold Type the smallest IP packet size for which a station must send an RTS
(Request To Send) before sending the IP packet.
If multiple wireless stations are in range of the access point, but not in range
of each other, they might send data to the access point simultaneously,
thereby causing data collisions and failures. RTS ensures that the channel
is clear before the each packet is sent.
If your network is congested, and the users are distant from one another,
set the RTS threshold to a low value (around 500).
Setting a value equal to the fragmentation threshold effectively disables
RTS.
The default value is 2346.
Extended Range
Mode (XR)
Specify whether to use Extended Range (XR) mode:
• Disabled. XR mode is disabled.
• Enabled. XR mode is enabled. XR will be automatically
negotiated with XR-enabled wireless stations and used as
needed. This is the default.
For more information on XR mode, see About the Wireless Hardware in
Your Safe@Office 500W Appliance on page 164.
Multimedia QoS
(WMM)
Specify whether to use the Wireless Multimedia (WMM) standard to
prioritize traffic from WMM-compliant multimedia applications:
• Disabled. WMM is disabled. This is the default.
• Enabled. WMM is enabled. The Safe@Office appliance will
prioritize multimedia traffic according to four access categories
(Voice, Video, Best Effort, and Background). This allows for
smoother streaming of voice and video when using WMM aware
applications.
Using the Wireless Configuration Wizard
178 Check Point Safe@Office User Guide
Using the Wireless Configuration Wizard
The Wireless Configuration Wizard provides a quick and simple way of setting up
your basic WLAN parameters for the first time.
To configure a WLAN using the Wireless Configuration Wizard
1. Prepare the appliance for a wireless connection as described in Network
Installation on page 37.
2. Click Network in the main menu, and click the My Network tab.
The My Network page appears.
3. In the WLAN network's row, click Edit.
The Edit Network Settings page appears.
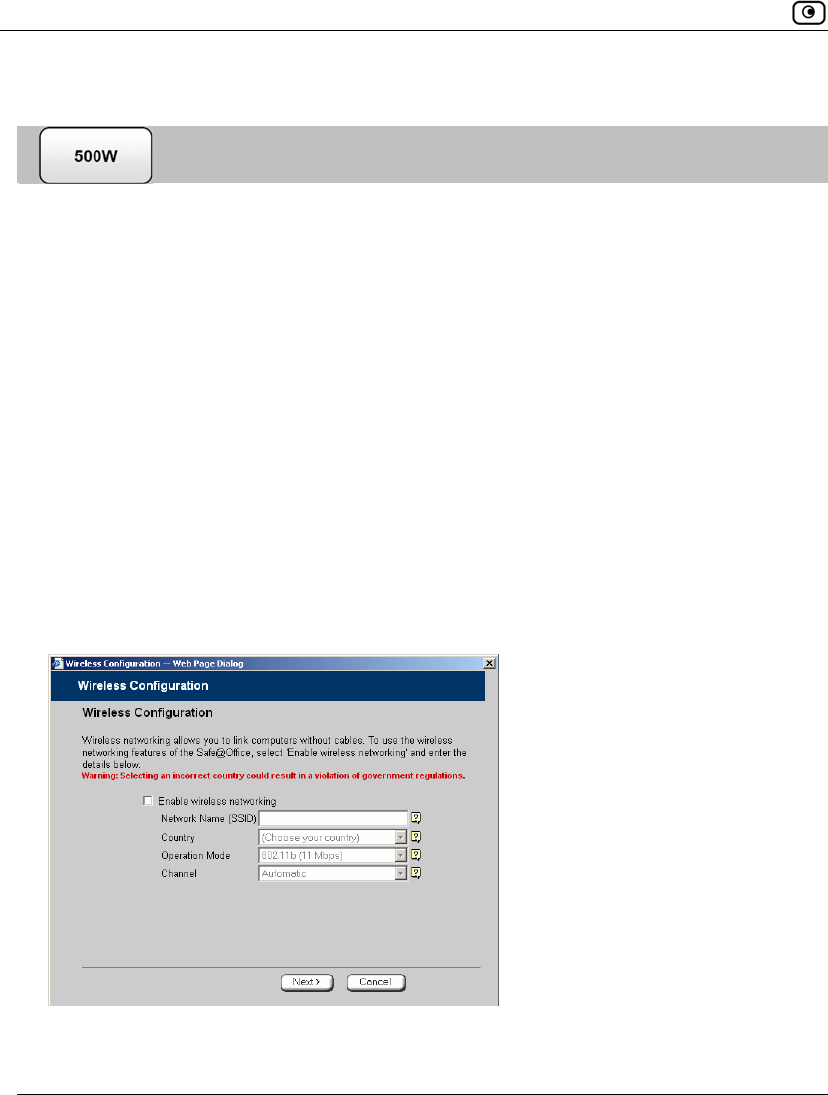
4. Click Wireless Wizard.
The Wireless Configuration Wizard opens, with the Wireless Configuration dialog
box displayed.
5. Select the Enable wireless networking check box to enable the WLAN.
Using the Wireless Configuration Wizard
Chapter 7: Configuring a Wireless Network 179
The fields are enabled.
6. Complete the fields using the information in Basic WLAN Settings Fields on
page 170.
7. Click Next.
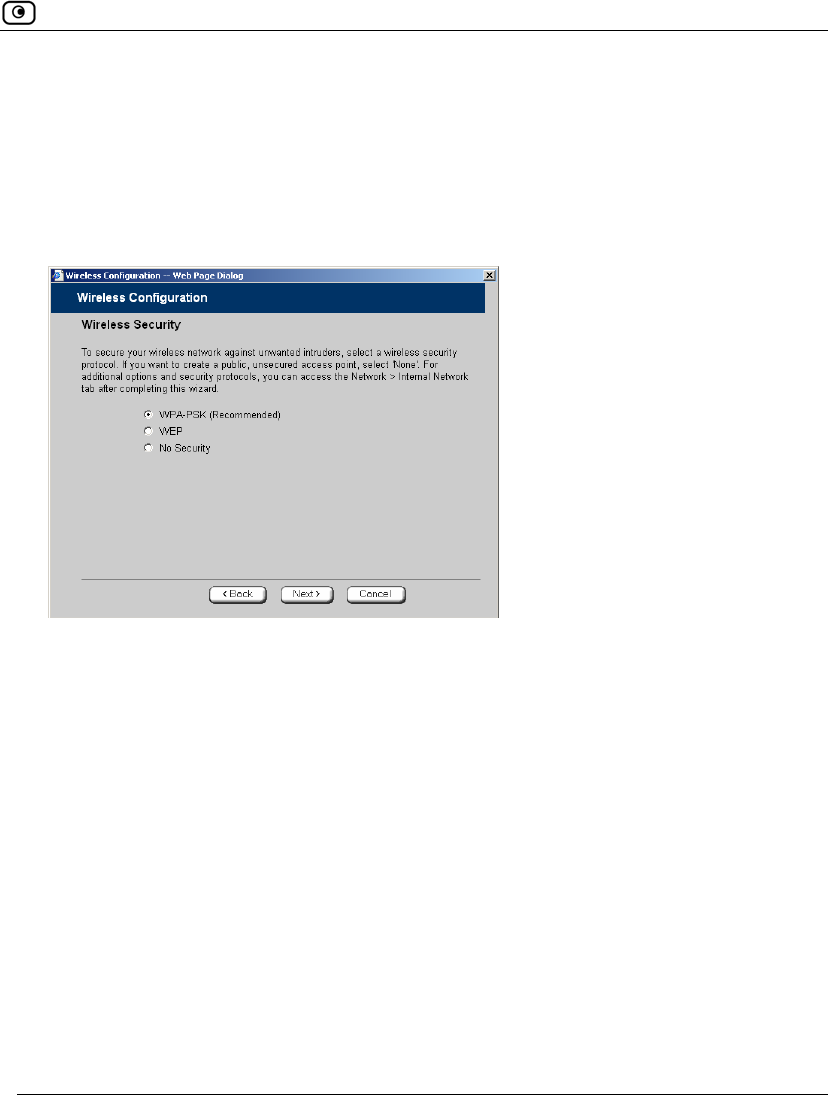
8. The Wireless Security dialog box appears.
9. Do one of the following:
• Click WPA-PSK to use the WPA-PSK security mode.
WPA-PSK periodically changes and authenticates encryption keys. This is a
recommended security mode for small, private wireless networks, which
want to authenticate and encrypt wireless data but do not want to install a
RADIUS server. Both WPA and the newer, more secure WPA2 (802.11i)
will be accepted.
• Click WEP to use the WEP security mode.
Using WEP, wireless stations must use a pre-shared key to connect to your
network. WEP is widely known to be insecure, and is supported mainly for
compatibility with existing networks and stations that do not support other
methods.
Using the Wireless Configuration Wizard
180 Check Point Safe@Office User Guide
• Click No Security to use no security to create a public, unsecured access
point.
Note: You cannot configure WPA and 802.1x using this wizard. For information on
configuring these modes, see Manually Configuring a WLAN on page 167.
10. Click Next.
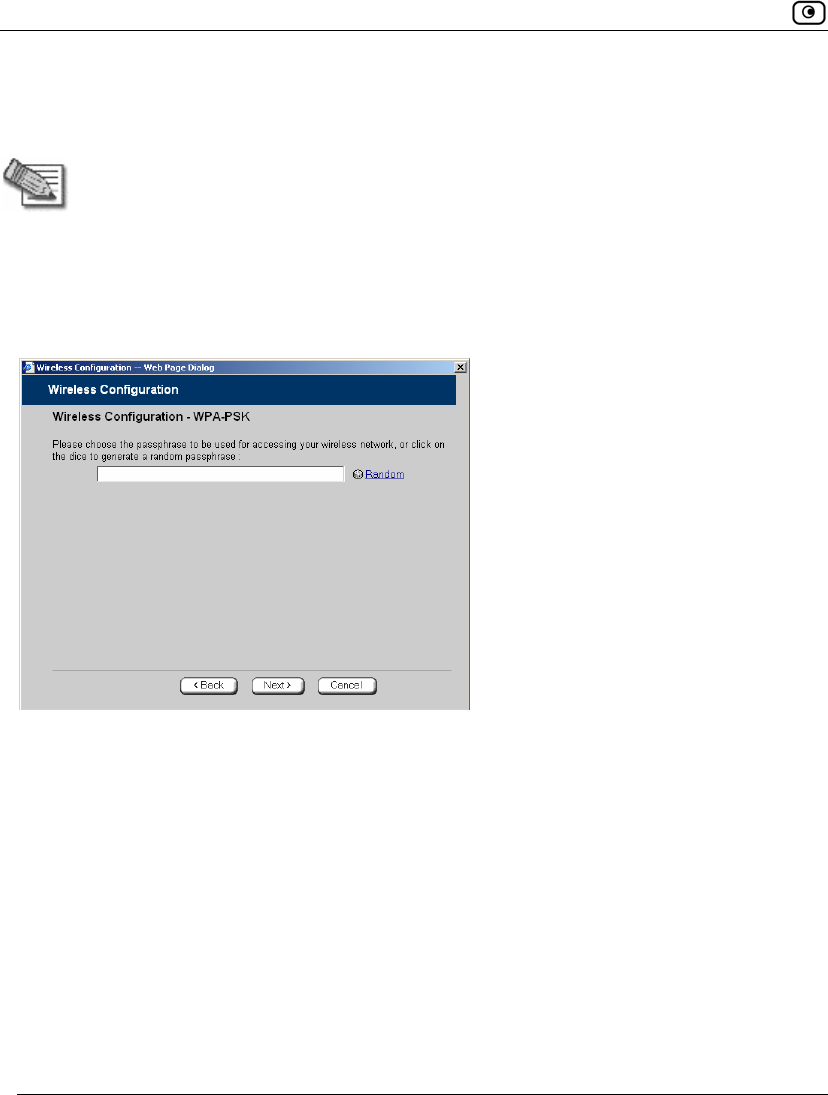
WPA-PSK
If you chose WPA-PSK, the Wireless Configuration-WPA-PSK dialog box appears.
Do the following:
1. In the text box, type the passphrase for accessing the network, or click Random
to randomly generate a passphrase.
This must be between 8 and 63 characters. It can contain spaces and special
characters, and is case-sensitive.
2. Click Next.
Using the Wireless Configuration Wizard
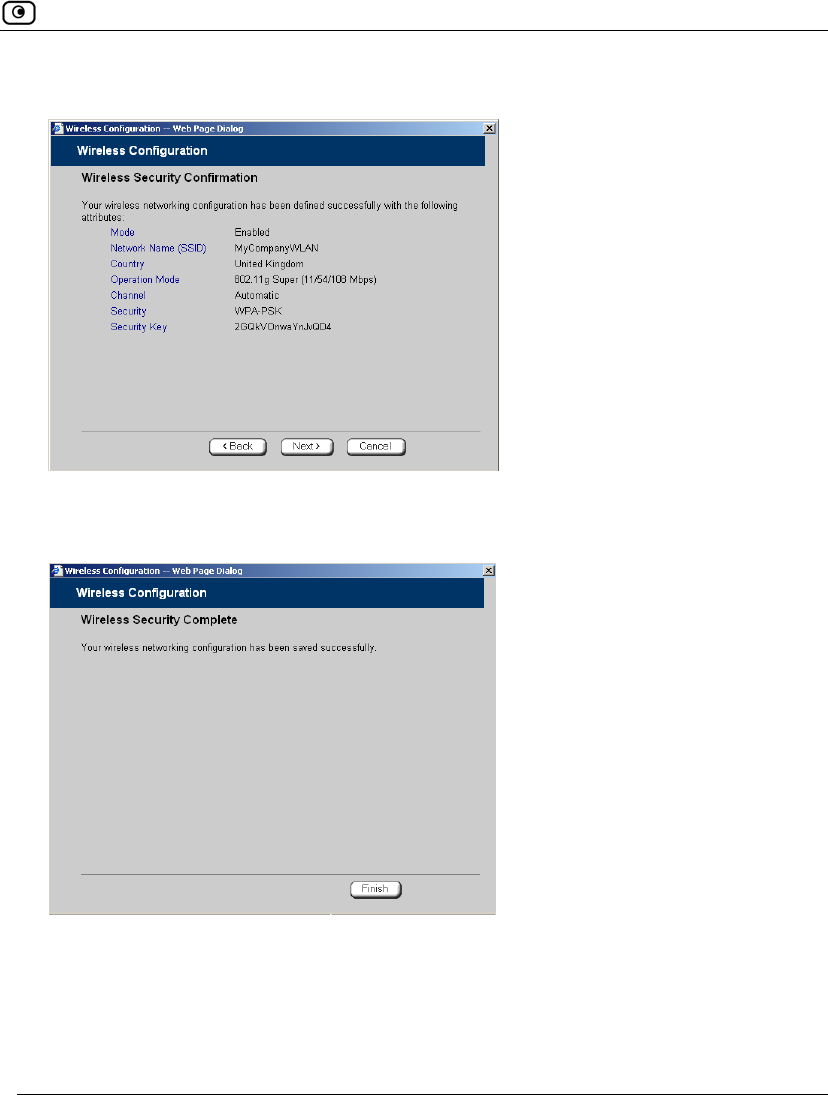
Chapter 7: Configuring a Wireless Network 181
The Wireless Security Confirmation dialog box appears.
3. Click Next.
4. The Wireless Security Complete dialog box appears.
5. Click Finish.
The wizard closes.
6. Prepare the wireless stations.

Using the Wireless Configuration Wizard
182 Check Point Safe@Office User Guide
See Preparing the Wireless Stations on page 184.
WEP
If you chose WEP, the Wireless Configuration-WEP dialog box appears.
Do the following:
1. Choose a WEP key length.
The possible key lengths are:
• 64 Bits - The key length is 10 hexadecimal characters.
• 128 Bits - The key length is 26 hexadecimal characters.
• 152 Bits - The key length is 32 hexadecimal characters.
Some wireless card vendors call these lengths 40/104/128, respectively.
Note that WEP is generally considered to be insecure, regardless of the selected
key length.
2. In the text box, type the WEP key, or click Random to randomly generate a key
matching the selected length.
The key is composed of characters 0-9 and A-F, and is not case-sensitive. The
wireless stations must be configured with this same key.

Using the Wireless Configuration Wizard
Chapter 7: Configuring a Wireless Network 183
3. Click Next.
The Wireless Security Confirmation dialog box appears.
4. Click Next.
The Wireless Security Complete dialog box appears.
5. Click Finish.
The wizard closes.
6. Prepare the wireless stations.
See Preparing the Wireless Stations on page 184.
No Security
The Wireless Security Complete dialog box appears.
• Click Finish.
The wizard closes.
Preparing the Wireless Stations
184 Check Point Safe@Office User Guide
Preparing the Wireless Stations
After you have configured a WLAN, the wireless stations must be prepared for
connection to the WLAN.
To prepare the wireless stations
1. If you selected the WEP security mode, give the WEP key to the wireless
stations' administrators.
2. If you selected the WPA-PSK security mode, give the passphrase to the wireless
stations' administrator.
3. The wireless stations' administrators should configure the wireless stations and
connect them to the WLAN.
Refer to the wireless cards' documentation for details.
Note: Some wireless cards have "Infrastructure" and "Ad-hoc" modes. These modes
are also called "Access Point" and "Peer to Peer". Choose the "Infrastructure" or
"Access Point" mode.
You can set the wireless cards to either "Long Preamble" or "Short Preamble".
Note: The wireless cards' region and the Safe@Office appliance's region must both
match the region of the world where you are located. If you purchased your
Safe@Office appliance in a different region, contact technical support.

Troubleshooting Wireless Connectivity
Chapter 7: Configuring a Wireless Network 185
Troubleshooting Wireless Connectivity
I cannot connect to the WLAN from a wireless station. What should I do?
• Check that the SSID configured on the station matches the Safe@Office
appliance's SSID. The SSID is case-sensitive.
• Check that the encryption settings configured on the station (encryption
mode and keys) match the Safe@Office appliance's encryption settings.
• If MAC filtering is enabled, verify that the MAC address of all stations is
listed in the Network Objects page (see Viewing and Deleting Network
Objects on page 140).
How do I test wireless reception?
• Look at the Wireless page, and check for excessive errors or dropped
packets.
• Look at the Active Computers page, to see information for specific wireless
stations, such as the number of transmission errors, and the current
reception power of each station.
• On the wireless station, open a command window and type ping
my.firewall. If you see a large number of dropped packets, you are
experiencing poor reception.
Wireless reception is poor. What should I do?
• Adjust the angle of the antennas, until the reception improves. The
antennas radiate horizontally in all directions.
• If both antennas are connected to the Safe@Office appliance, check that
the Antenna Selection parameter in the WLAN's advanced settings is set to
Automatic (see Manually Configuring a WLAN on page 167).
• Relocate the Safe@Office appliance to a place with better reception, and
avoid obstructions, such as walls and electrical equipment. For example,
try mounting the appliance in a high place with a direct line of sight to the
wireless stations.
• Check for interference with nearby electrical equipment, such as
microwave ovens and cordless or cellular phones.
Troubleshooting Wireless Connectivity
186 Check Point Safe@Office User Guide
• Check the Transmission Power parameter in the WLAN's advanced settings
(see Manually Configuring a WLAN on page 167).
• Make sure that you are not using two access points in close proximity and
on the same frequency. For minimum interference, channel separation
between nearby access points must be at least 25 MHz (5 channels).
• The Safe@Office appliance supports XR (Extended Range) technology.
For best range, enable XR mode in the WLAN's advanced settings (see
Manually Configuring a WLAN on page 167), and use XR-enabled
stations.
• Range outdoors is normally much higher than indoors, depending on
environmental conditions.
Note: You can observe any changes in the wireless reception in the Active Computers
page. Make sure to refresh the page after making a change.
Note: Professional companies are available for help in setting up reliable wireless
networks, with access to specialized testing equipment and procedures.
There are excessive collisions between wireless stations. What should I do?
If you have many concurrently active wireless stations, there may be collisions
between them. Such collisions may be the result of a "hidden node" problem: not
all of the stations are within range of each other, and therefore are "hidden" from
one another. For example, if station A and station C do not detect each other, but
both stations detect and are detected by station B, then both station A and C may
attempt to send packets to station B simultaneously. In this case, the packets will
collide, and Station B will receive corrupted data.
The solution to this problem lies in the use of the RTS protocol. Before sending a
certain size IP packet, a station sends an RTS (Request To Send) packet. If the
recipient is not currently receiving packets from another source, it sends back a
CTS (Clear To Send) packet, indicating that the station can send the IP packet. Try
setting the RTS Threshold parameter in the WLAN's advanced settings (see
Manually Configuring a WLAN on page 167) to a lower value. This will cause
stations to use RTS for smaller IP packets, thus decreasing the likeliness of
collisions.
Troubleshooting Wireless Connectivity
Chapter 7: Configuring a Wireless Network 187
In addition, try setting the Fragmentation Threshold parameter in the WLAN's
advanced settings (see Manually Configuring a WLAN on page 167) to a lower
value. This will cause stations to fragment IP packets of a certain size into smaller
packets, thereby reducing the likeliness of collisions and increasing network speed.
Note: Reducing the RTS Threshold and the Fragmentation Threshold too much can
have a negative impact on performance.
Note: Setting an RTS Threshold value equal to the Fragmentation Threshold value
effectively disables RTS.
I am not getting the full speed. What should I do?
• The actual speed is always less then the theoretical speed, and degrades
with distance.
• Read the section about reception problems. Better reception means better
speed.
• Check that all your wireless stations support the wireless standard you are
using (802.11g or 802.11g Super), and that this standard is enabled in the
station software. Transmission speed is determined by the slowest station
associated with the access point. For a list of wireless stations that support
802.11g Super, see www.super-ag.com.
Viewing the Event Log
Chapter 8: Viewing Reports 189
Chapter 8
This chapter describes the Safe@Office Portal reports.
This chapter includes the following topics:
Viewing the Event Log.............................................................................189
Using the Traffic Monitor ........................................................................193
Viewing Computers..................................................................................196
Viewing Connections ...............................................................................199
Viewing Wireless Statistics......................................................................200
Viewing the Event Log
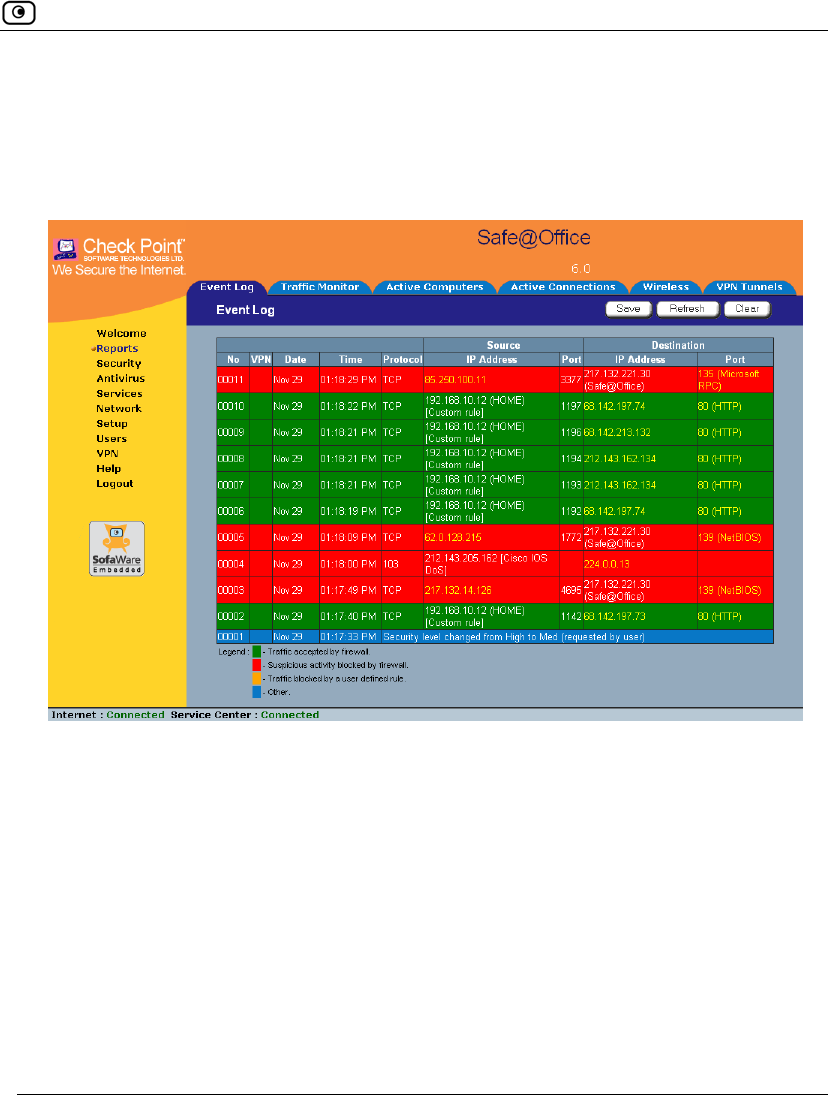
You can track network activity using the Event Log. The Event Log displays the
most recent events and color-codes them.
Table 26: Event Log Color Coding
An event marked in
this color…
Indicates…
Blue Changes in your setup that you have made yourself or as a result of
a security update implemented by your Service Center.
Red Connection attempts that were blocked by your firewall.
Orange Connection attempts that were blocked by your custom security
rules.
Viewing Reports

Viewing the Event Log
190 Check Point Safe@Office User Guide
An event marked in
this color…
Indicates…
Green Traffic accepted by the firewall.
By default, accepted traffic is not logged.
However, such traffic may be logged if specified by a security policy
downloaded from your Service Center, or if specified in user-defined
rules.
You can create firewall rules specifying that certain types of connections should be
logged, whether the connections are incoming or outgoing, blocked or accepted.
For information, see Using Rules on page 211.
The logs detail the date and the time the event occurred, and its type. If the event is
a communication attempt that was rejected by the firewall, the event details include
the source and destination IP address, the destination port, and the protocol used for
the communication attempt (for example, TCP or UDP). If the event is a
connection made or attempted over a VPN tunnel, the event is marked by a lock
icon in the VPN column.
This information is useful for troubleshooting. You can export the logs to an *.xls
(Microsoft Excel) file, and then store it for analysis purposes or send it to technical
support.
Note: You can configure the Safe@Office appliance to send event logs to a Syslog
server. For information, see Configuring Syslog Logging on page 388.
Viewing the Event Log
Chapter 8: Viewing Reports 191
To view the event log
1. Click Reports in the main menu, and click the Event Log tab.
The Event Log page appears.
2. If an event is highlighted in red, indicating a blocked attack on your network,
you can display the attacker’s details, by clicking on the IP address of the
attacking machine.
The Safe@Office appliance queries the Internet WHOIS server, and a window
displays the name of the entity to whom the IP address is registered and their
contact information. This information is useful in tracking down hackers.
3. To refresh the display, click Refresh.
4. To save the displayed events to an *.xls file:
a. Click Save.

Viewing the Event Log
192 Check Point Safe@Office User Guide
A standard File Download dialog box appears.
b. Click Save.
The Save As dialog box appears.
c. Browse to a destination directory of your choice.
d. Type a name for the configuration file and click Save.
The *.xls file is created and saved to the specified directory.
5. To clear all displayed events:
a. Click Clear.
A confirmation message appears.
b. Click OK.
All events are cleared.
Using the Traffic Monitor
Chapter 8: Viewing Reports 193
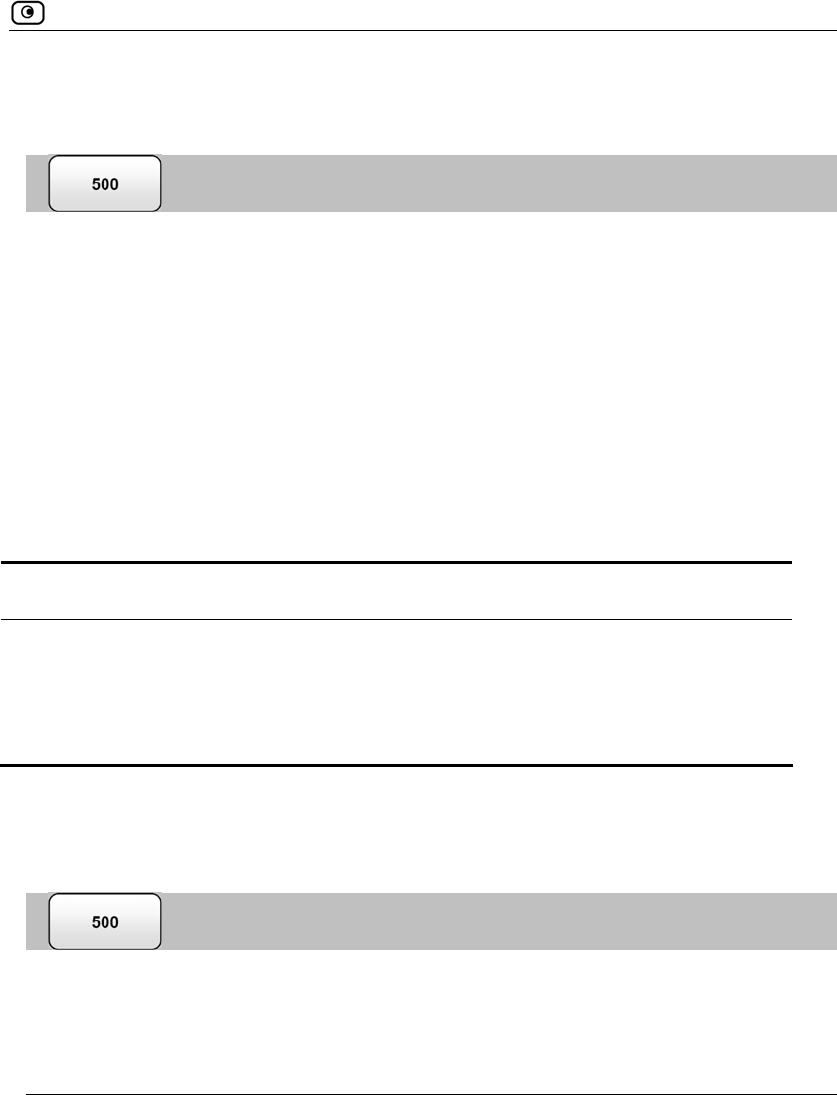
Using the Traffic Monitor
You can view incoming and outgoing traffic for selected network interfaces and
QoS classes using the Traffic Monitor. This enables you to identify network traffic
trends and anomalies, and to fine tune Traffic Shaper QoS class assignments.
The Traffic Monitor displays separate bar charts for incoming traffic and outgoing
traffic, and displays traffic rates in kilobits/second. If desired, you can change the
number of seconds represented by the bars in the charts, using the procedure
Configuring Traffic Monitor Settings on page 195.
In network traffic reports, the traffic is color-coded as described in the table below.
In the All QoS Classes report, the traffic is color-coded by QoS class.
Table 27: Traffic Monitor Color Coding for Networks
Traffic marked in this color… Indicates…
Blue VPN-encrypted traffic
Red Traffic blocked by the firewall
Green Traffic accepted by the firewall
You can export a detailed traffic report for all enabled networks and all defined
QoS classes, using the procedure Exporting General Traffic Reports on page 196.
Viewing Traffic Reports
To view a traffic report
1. Click Reports in the main menu, and click the Traffic Monitor tab.
Using the Traffic Monitor
194 Check Point Safe@Office User Guide
The Traffic Monitor page appears.
2. In the Traffic Monitor Report drop-down list, select the network interface for
which you want to view a report.
The list includes all currently enabled networks. For example, if the DMZ
network is enabled, it will appear in the list.
If Traffic Shaper is enabled, the list also includes the defined QoS classes.
Choose All QoS Classes to display a report including all QoS classes. For
information on enabling Traffic Shaper see Using Internet Setup on page 65.
The selected report appears in the Traffic Monitor page.
3. To refresh all traffic reports, click Refresh.
4. To clear all traffic reports, click Clear.
Note: The firewall blocks broadcast packets used during the normal operation of
your network. This may lead to a certain amount of traffic of the type "Traffic
blocked by firewall" that appears under normal circumstances and usually does not
indicate an attack.
Using the Traffic Monitor
Chapter 8: Viewing Reports 195
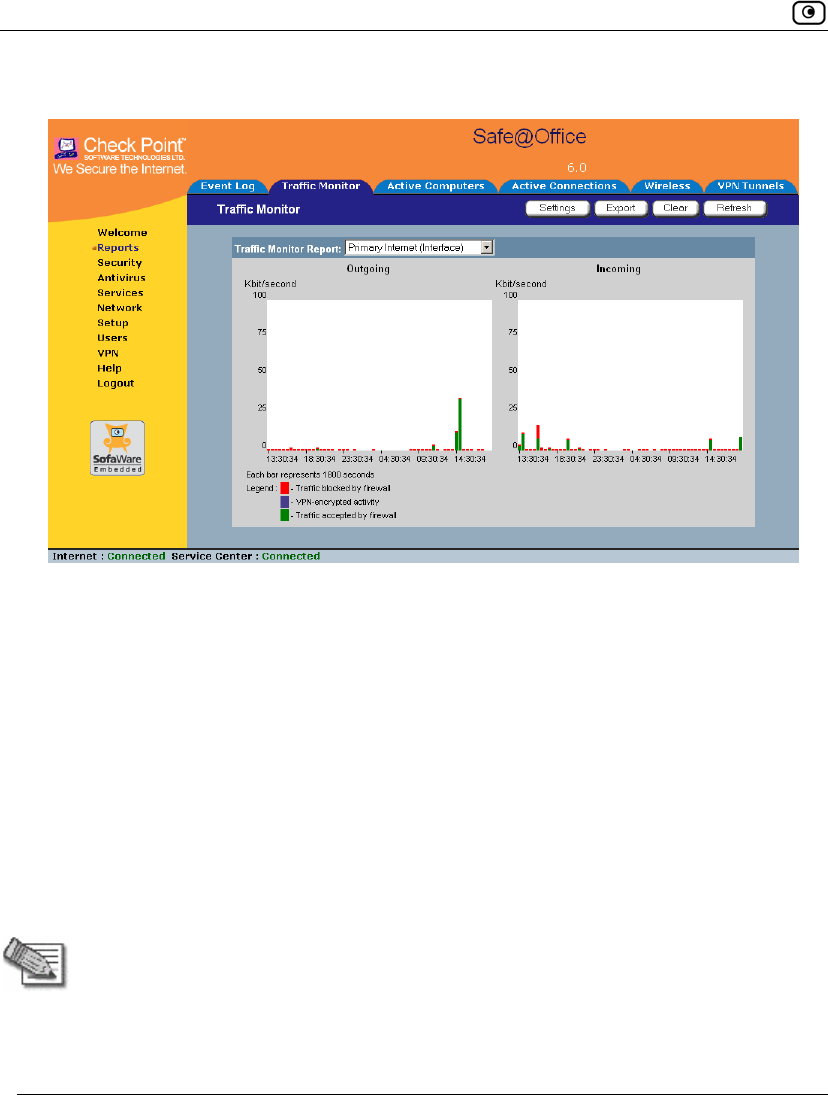
Configuring Traffic Monitor Settings
You can configure the interval at which the Safe@Office appliance should collect
traffic data for network traffic reports.
To configure Traffic Monitor settings
1. Click Reports in the main menu, and click the Traffic Monitor tab.
The Traffic Monitor page appears.
2. Click Settings.
The Traffic Monitor Settings page appears.
3. In the Sample monitoring data every field, type the interval (in seconds) at which
the Safe@Office appliance should collect traffic data.
The default value is one sample every 1800 seconds (30 minutes).
4. Click Apply.
Viewing Computers
196 Check Point Safe@Office User Guide
Exporting General Traffic Reports
You can export a general traffic report that includes information for all enabled
networks and all defined QoS classes to a *.csv (Comma Separated Values) file.
You can open and view the file in Microsoft Excel.
To export a general traffic report
1. Click Reports in the main menu, and click the Traffic Monitor tab.
The Traffic Monitor page appears.
2. Click Export.
A standard File Download dialog box appears.
3. Click Save.
The Save As dialog box appears.
4. Browse to a destination directory of your choice.
5. Type a name for the configuration file and click Save.
A *.csv file is created and saved to the specified directory.
Viewing Computers
This option allows you to view the currently active computers on your network.
The active computers are graphically displayed, each with its name, IP address, and
settings (DHCP, Static, etc.). You can also view node limit information.
To view the active computers
1. Click Reports in the main menu, and click the Active Computers tab.
Viewing Computers
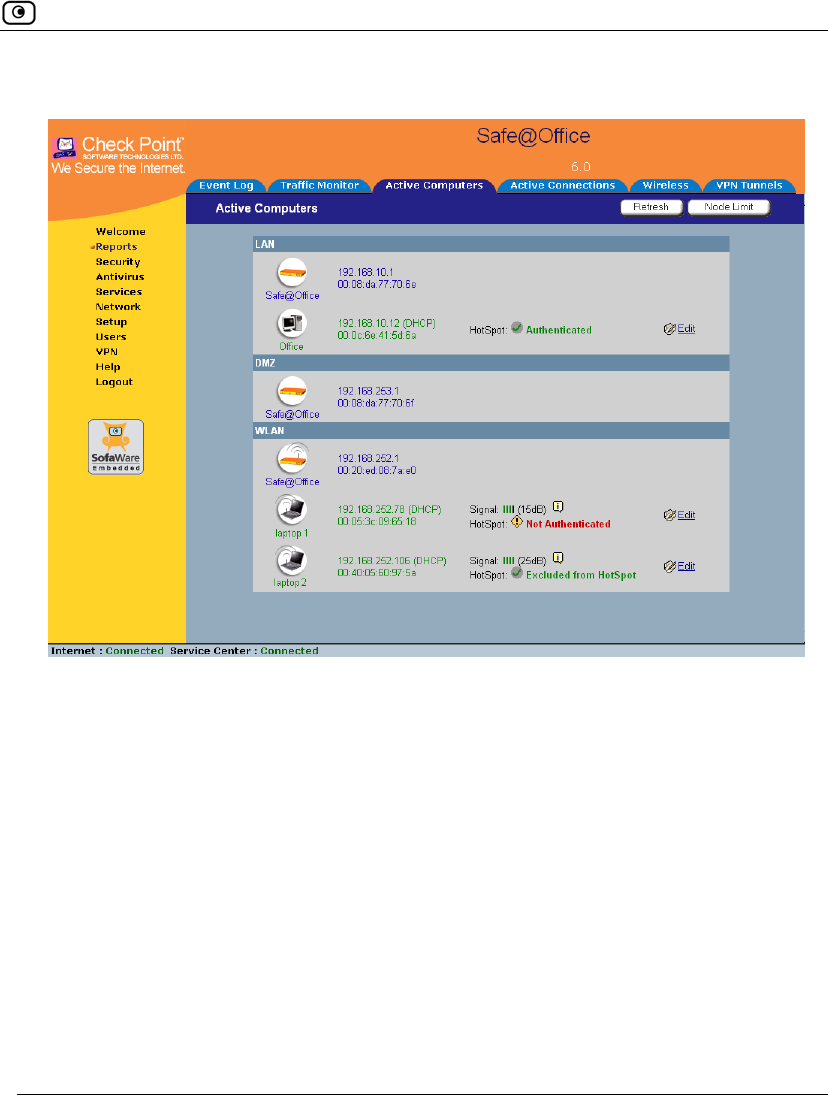
Chapter 8: Viewing Reports 197
The Active Computers page appears.
If you configured High Availability, both the master and backup appliances are
shown. If you configured OfficeMode, the OfficeMode network is shown.
If you are using Safe@Office 500W, the wireless stations are shown. For
information on viewing statistics for these computers, see Viewing Wireless
Statistics on page 200. If a wireless station has been blocked from accessing the
Internet through the Safe@Office appliance, the reason why it was blocked is
shown in red.
If you are exceeding the maximum number of computers allowed by your
license, a warning message appears, and the computers over the node limit are
marked in red. These computers are still protected, but they are blocked from
accessing the Internet through the Safe@Office appliance.
If HotSpot mode is enabled for some networks, each computer's HotSpot status
is displayed next to it. The possible statuses include:
Viewing Computers
198 Check Point Safe@Office User Guide
• Authenticated. The computer is logged on to My HotSpot.
• Not Authenticated. The computer is not logged on to My HotSpot.
• Excluded from HotSpot. The computer is in an IP address range excluded
from HotSpot enforcement. To enforce HotSpot, you must edit the
network object. See Adding and Editing Network Objects on page 132.
Note: Computers that did not communicate through the firewall are not counted for
node limit purposes, even though they are protected by the firewall.
Note: To increase the number of computers allowed by your license, you can
upgrade your product. For further information, see Upgrading Your Software
Product on page 383.
Next to each computer, an Add button enables you to add a network object for
the computer, or an Edit button enables you to edit an existing network object
for the computer. For information on adding and editing network objects, see
Adding and Editing Network Objects on page 132.
2. To refresh the display, click Refresh.
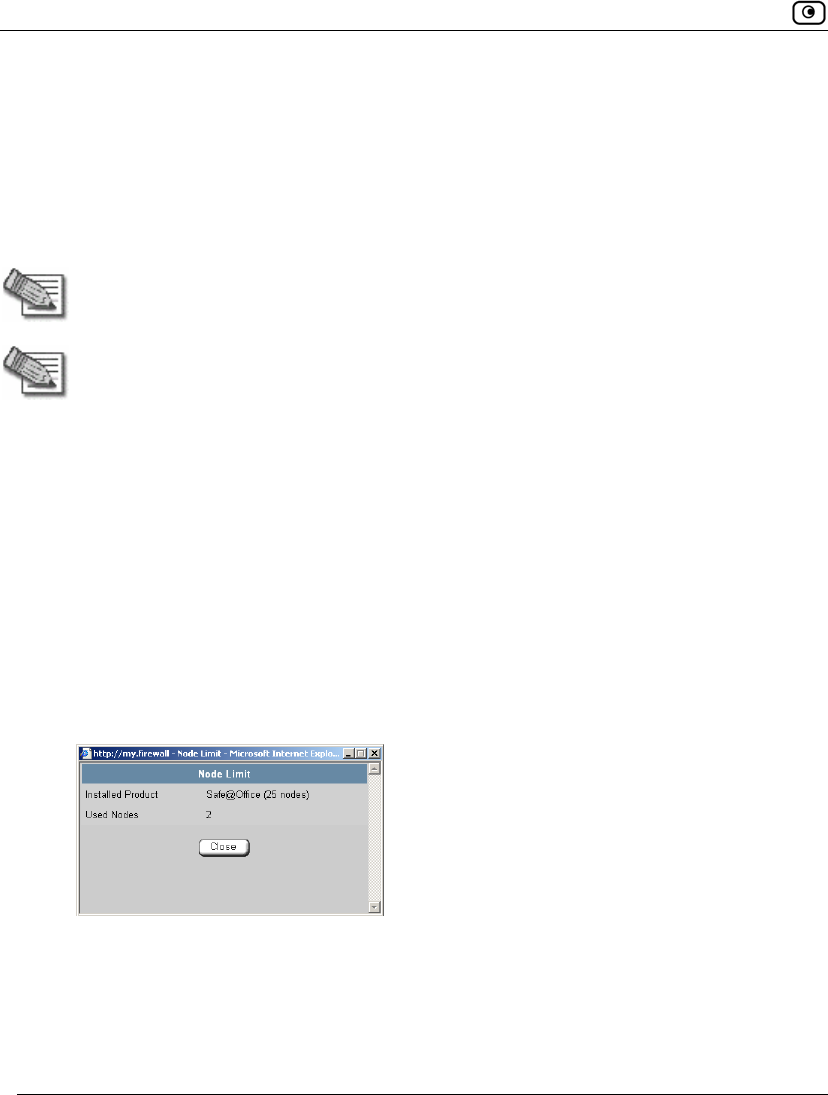
3. To view node limit information, do the following:
a. Click Node Limit.
The Node Limit window appears with installed software product and the
number of nodes used.
b. Click Close to close the window.
Viewing Connections
Chapter 8: Viewing Reports 199
Viewing Connections
This option allows you to view the currently active connections between your
network and the external world.
To view the active connections
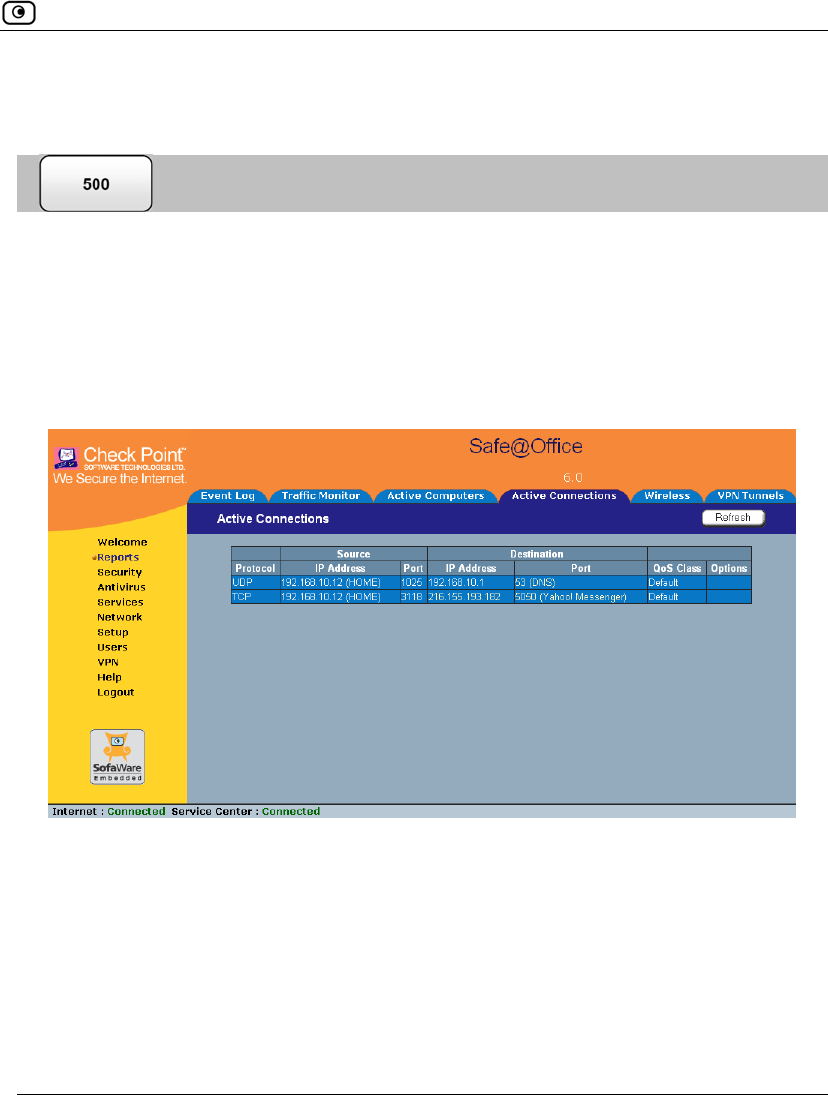
1. Click Reports in the main menu, and click the Active Connections tab.
The Active Connections page appears.
The page displays the information in the table below.
2. To refresh the display, click Refresh.
3. To view information on the destination machine, click its IP address.
The Safe@Office appliance queries the Internet WHOIS server, and a window
displays the name of the entity to which the IP address is registered and their
contact information.
Viewing Wireless Statistics
200 Check Point Safe@Office User Guide
4. To view information about a port, click the port.
A window opens displaying information about the port.
Table 28: Active Connections Fields
This field… Displays…
Protocol The protocol used (TCP, UDP, etc.)
Source - IP Address The source IP address
Source - Port The source port
Destination - IP
Address
The destination IP address
Destination -Port The destination port
QoS Class The QoS class to which the connection belongs
Options An icon indicating further details:
• - The connection is encrypted.
• - The connection is being scanned by VStream Antivirus.
Viewing Wireless Statistics
If your WLAN is enabled, you can view wireless statistics for the WLAN or for
individual wireless stations.
To view statistics for the WLAN
1. Click Reports in the main menu, and click the Wireless tab.
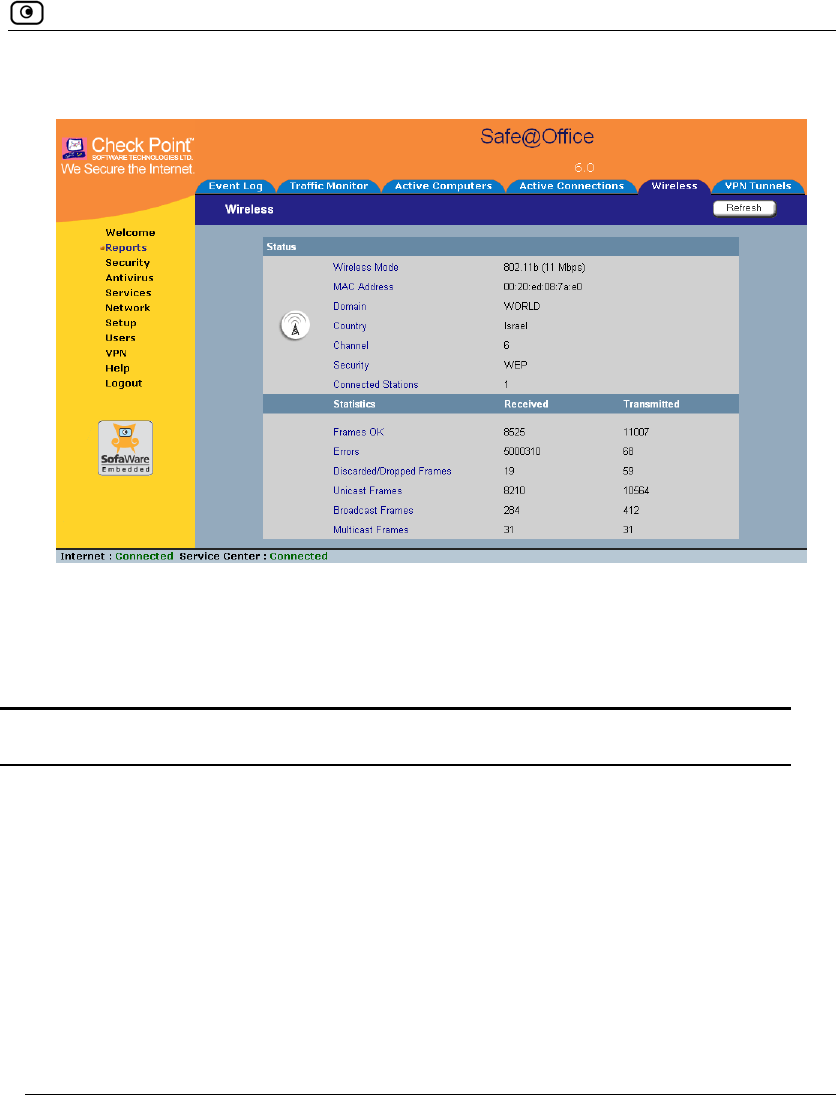
Viewing Wireless Statistics
Chapter 8: Viewing Reports 201
The Wireless page appears.
The page displays the information in the table below.
2. To refresh the display, click Refresh.
Table 29: WLAN Statistics
This field… Displays…
Wireless
Mode
The operation mode used by the WLAN, followed by the transmission rate in
Mbps
MAC Address The MAC address of the Safe@Office appliance's WLAN interface
Domain The Safe@Office access point's region
Country The country configured for the WLAN
Channel The radio frequency used by the WLAN

Viewing Wireless Statistics
202 Check Point Safe@Office User Guide
This field… Displays…
Security The security mode used by the WLAN
Connected
Stations
The number of wireless stations currently connected to the WLAN
Frames OK The total number of frames that were successfully transmitted and received
Errors The total number of transmitted and received frames for which an error
occurred
Discarded/
Dropped
Frames
The total number of discarded or dropped frames transmitted and received
Unicast Frames The number of unicast frames transmitted and received
Broadcast
Frames
The number of broadcast frames transmitted and received
Multicast
Frames
The number of multicast frames transmitted and received
To view statistics for a wireless station
1. Click Reports in the main menu, and click the Active Computers tab.
The Active Computers page appears.
The following information appears next to each wireless station:
• The signal strength in dB
• A bar chart representing the signal strength
2. Mouse-over the information icon next to the wireless station.
A tooltip displays displays statistics for the wireless station, as described in the
table below.

Viewing Wireless Statistics
Chapter 8: Viewing Reports 203
3. To refresh the display, click Refresh.
Table 30: Wireless Station Statistics
This field… Displays…
Current Rate The current reception and transmission rate in Mbps
Frames OK The total number of frames that were successfully transmitted and received
Errors The total number of transmitted and received frames for which an error
occurred
Discarded/
Dropped
Frames
The total number of discarded or dropped frames transmitted and received
Unicast Frames The number of unicast frames transmitted and received
Broadcast
Frames
The number of broadcast frames transmitted and received
Multicast
Frames
The number of multicast frames transmitted and received
WLAN Mode The wireless client's operation mode, indicating the client's maximum speed.
Possible values are B, G, and 108G.
For more information, see Basic WLAN Settings Fields on page 170.
XR Indicates whether the wireless client supports Extended Range (XR) mode.
Possible values are:
• yes. The wireless client supports XR mode.
• no. The wireless client does not support XR mode.

Viewing Wireless Statistics
204 Check Point Safe@Office User Guide
This field… Displays…
Cipher The security protocol used for the connection with the wireless client.
For more information, see Wireless Security Protocols on page 165.

Default Security Policy
Chapter 9: Setting Your Security Policy 205
Chapter 9
This chapter describes how to set up your Safe@Office appliance security policy.
You can enhance your security policy by subscribing to services such as Web
Filtering and Email Filtering. For information on subscribing to services, see Using
Subscription Services on page 283.
This chapter includes the following topics:
Default Security Policy.............................................................................205
Setting the Firewall Security Level ..........................................................206
Configuring Servers..................................................................................209
Using Rules ..............................................................................................211
Using SmartDefense.................................................................................222
Using Secure HotSpot ..............................................................................258
Defining an Exposed Host........................................................................263
Default Security Policy
The Safe@Office default security policy includes the following rules:
Setting Your Security Policy
Setting the Firewall Security Level
206 Check Point Safe@Office User Guide
• Access is blocked from the WAN (Internet) to all internal networks (LAN,
DMZ, WLAN, VLANs, and OfficeMode).
• Access is allowed from the internal networks to the WAN, according to the
firewall security level (Low/Medium/High).
• Access is allowed from the LAN network to the other internal networks
(DMZ, WLAN, VLANs, and OfficeMode).
• Access is blocked from the DMZ, WLAN, VLAN, and OfficeMode
networks to the other internal networks, (including between different
VLANs).
• HTTP access to the Safe@Office Portal (my.firewall and my.vpn) is
allowed from all internal networks except the WLAN. The WLAN can
only access the Safe@Office Portal using HTTPS, unless a specific user-
defined rule allows this.
• When using the print server function (see Using Network Printers on page
427), access from internal networks to connected network printers is
allowed.
• Access from the WAN to network printers is blocked.
These rules are independent of the firewall security level.
You can easily override the default security policy, by creating user-defined
firewall rules. For further information, see Using Rules on page 211.
Setting the Firewall Security Level
The firewall security level can be controlled using a simple lever available on the
Firewall page. You can set the lever to three states.
Setting the Firewall Security Level
Chapter 9: Setting Your Security Policy 207
Table 31: Firewall Security Levels
This
level…
Does this… Further Details
Low Enforces basic control on
incoming connections,
while permitting all
outgoing connections.
All inbound traffic is blocked to the external
Safe@Office appliance IP address, except for
ICMP echoes ("pings").
All outbound connections are allowed.
Medium Enforces strict control on
all incoming connections,
while permitting safe
outgoing connections.
This is the default level
and is recommended for
most cases. Leave it
unchanged unless you
have a specific need for a
higher or lower security
level.
All inbound traffic is blocked.
All outbound traffic is allowed to the Internet
except for Windows file sharing (NBT ports 137,
138, 139 and 445).
High Enforces strict control on
all incoming and outgoing
connections.
All inbound traffic is blocked.
Restricts all outbound traffic except for the
following: Web traffic (HTTP, HTTPS), email
(IMAP, POP3, SMTP), ftp, newsgroups, Telnet,
DNS, IPSEC IKE and VPN traffic.
Note: If the security policy is remotely managed, this lever might be disabled.
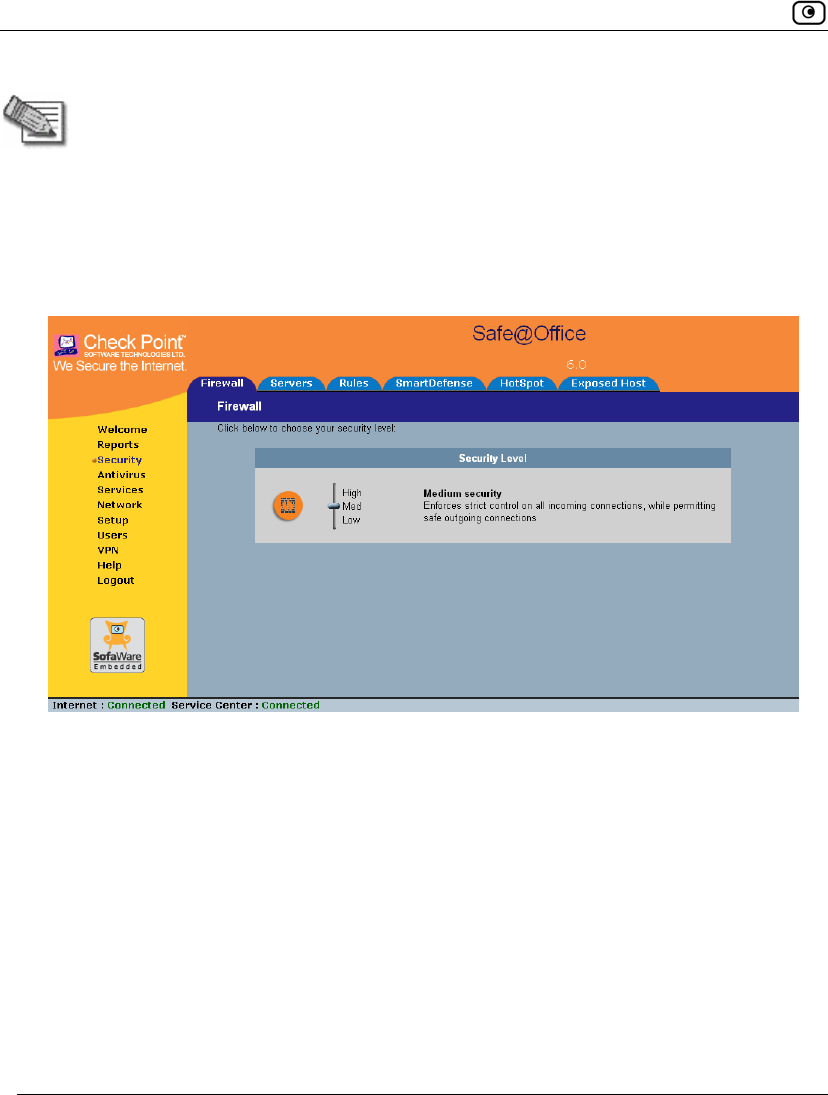
Setting the Firewall Security Level
208 Check Point Safe@Office User Guide
Note: The definitions of firewall security levels provided in this table represent the
Safe@Office appliance’s default security policy. Security updates downloaded from
a Service Center may alter this policy and change these definitions.
To change the firewall security level
1. Click Security in the main menu, and click the Firewall tab.
The Firewall page appears.
2. Drag the security lever to the desired level.
The Safe@Office appliance security level changes accordingly.
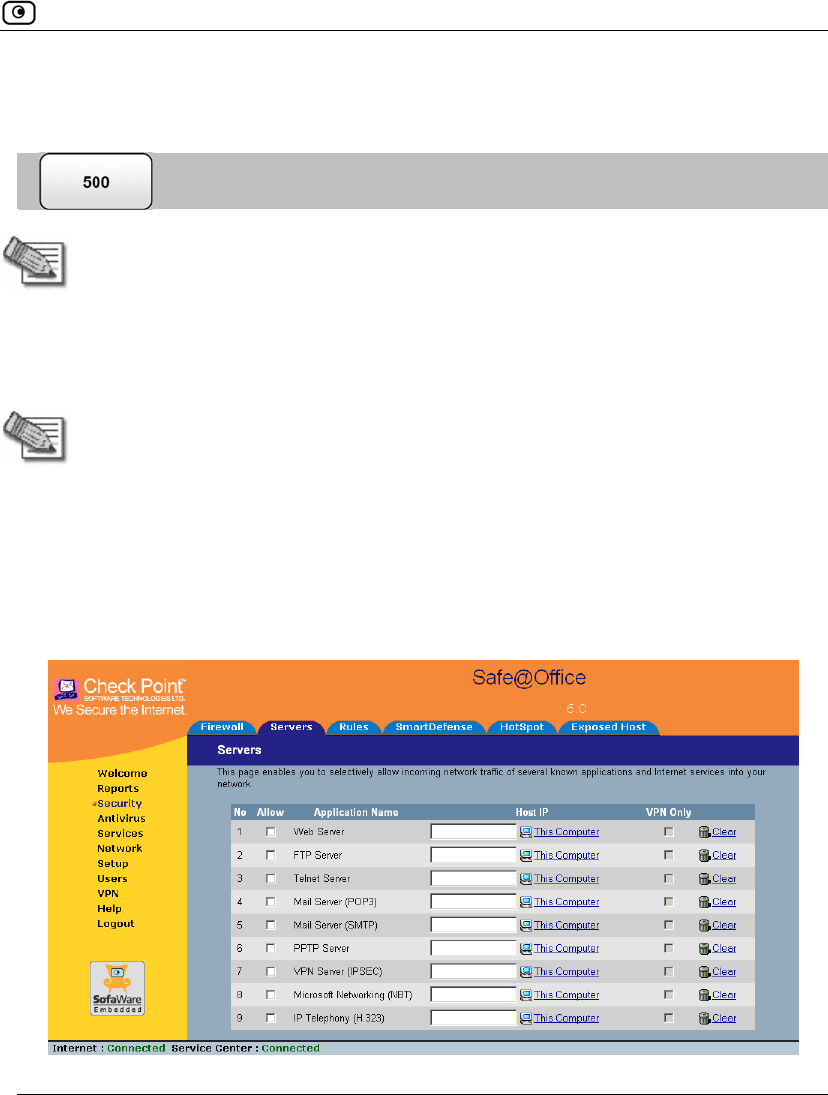
Configuring Servers
Chapter 9: Setting Your Security Policy 209
Configuring Servers
Note: If you do not intend to host any public Internet servers (Web Server, Mail
Server etc.) in your network, you can skip this section.
Using the Safe@Office Portal, you can selectively allow incoming network
connections into your network. For example, you can set up your own Web server,
Mail server or FTP server.
Note: Configuring servers allows you to create simple Allow and Forward rules for
common services, and it is equivalent to creating Allow and Forward rules in the
Rules page. For information on creating rules, see Using Rules on page 211.
To allow a service to be run on a specific host
1. Click Security in the main menu, and click the Servers tab.
The Servers page appears, displaying a list of services and a host IP address for
each allowed service.
Configuring Servers
210 Check Point Safe@Office User Guide
2. Complete the fields using the information in the table below.
3. Click Apply.
A success message appears, and the selected computer is allowed to run the
desired service or application.
Table 32: Servers Page Fields
In this
column…
Do this…
Allow Select the desired service or application.
VPN Only Select this option to allow only connections made through a VPN.
Host IP Type the IP address of the computer that will run the service (one of your
network computers) or click the corresponding This Computer button to
allow your computer to host the service.
To stop the forwarding of a service to a specific host
1. Click Security in the main menu, and click the Servers tab.
The Servers page appears, displaying a list of services and a host IP address for
each allowed service.
2. In the desired service or application’s row, click Clear.
The Host IP field of the desired service is cleared.
3. Click Apply.
The service or application is not allowed on the specific host.

Using Rules
Chapter 9: Setting Your Security Policy 211
Using Rules
The Safe@Office appliance checks the protocol used, the ports range, and the
destination IP address, when deciding whether to allow or block traffic.
User-defined rules have priority over the default security policy rules and provide
you with greater flexibility in defining and customizing your security policy.
For example, if you assign your company’s accounting department to the LAN
network and the rest of the company to the DMZ network, then as a result of the
default security policy rules, the accounting department will be able to connect to
all company computers, while the rest of the employees will not be able to access
any sensitive information on the accounting department computers. You can
override the default security policy rules, by creating firewall rules that allow
specific DMZ computers (such a manager’s computer) to connect to the LAN
network and the accounting department.
The Safe@Office appliance processes user-defined rules in the order they appear in
the Rules table, so that rule 1 is applied before rule 2, and so on. This enables you
to define exceptions to rules, by placing the exceptions higher up in the Rules table.
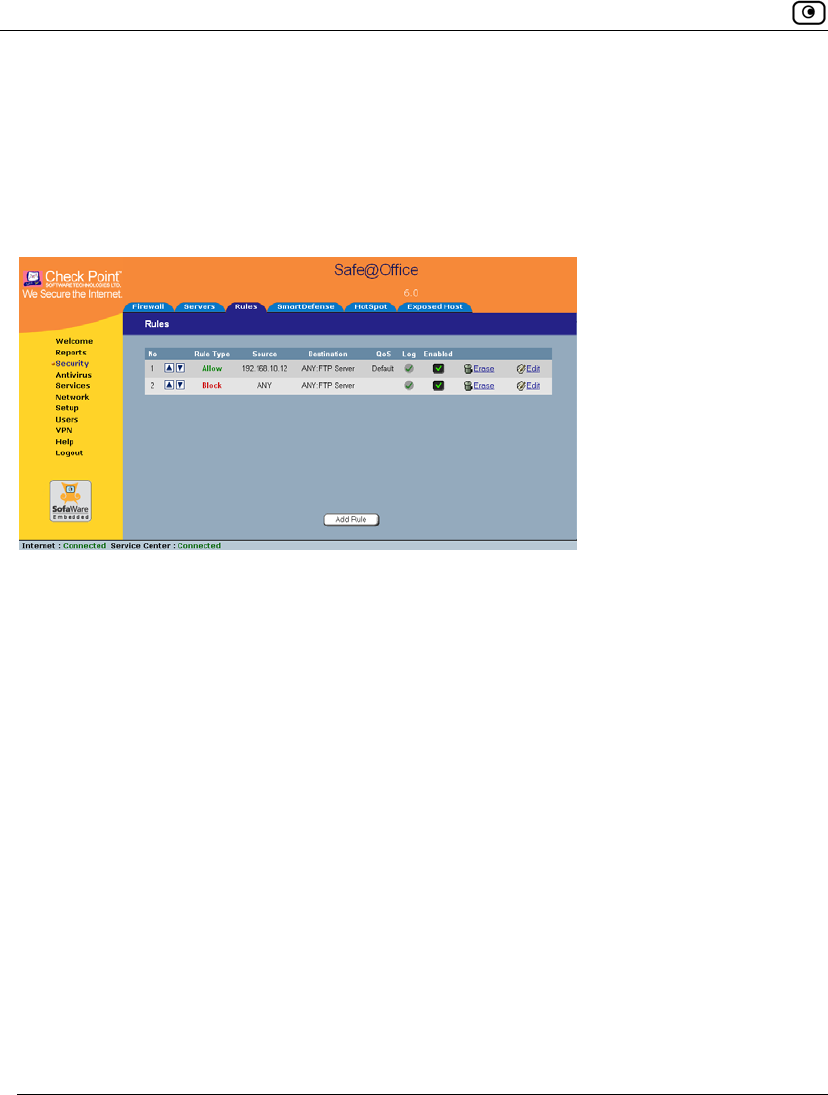
Using Rules
212 Check Point Safe@Office User Guide
For example, if you want to block all outgoing FTP traffic, except traffic from a
specific IP address, you can create a rule blocking all outgoing FTP traffic and
move the rule down in the Rules table. Then create a rule allowing FTP traffic from
the desired IP address and move this rule to a higher location in the Rules table
than the first rule. In the figure below, the general rule is rule number 2, and the
exception is rule number 1.
The Safe@Office appliance will process rule 1 first, allowing outgoing FTP traffic
from the specified IP address, and only then it will process rule 2, blocking all
outgoing FTP traffic.
The following rule types exist:

Using Rules
Chapter 9: Setting Your Security Policy 213
Table 33: Firewall Rule Types
Rule Description
Allow and
Forward
This rule type enables you to do the following:
• Permit incoming access from the Internet to a specific service in
your internal network.
• Forward all such connections to a specific computer in your
network.
• Redirect the specified connections to a specific port. This option is
called Port Address Translation (PAT).
• Assign traffic to a QoS class.
If Traffic Shaper is enabled for incoming traffic, then Traffic Shaper
will handle relevant connections as specified in the bandwidth policy
for the selected QoS class. For example, if Traffic Shaper is enabled
for incoming traffic, and you create an Allow and Forward rule
associating all incoming Web traffic with the Urgent QoS class, then
Traffic Shaper will handle incoming Web traffic as specified in the
bandwidth policy for the Urgent class.
For information on Traffic Shaper and QoS classes, see Using
Traffic Shaper on page 153.
Creating an Allow and Forward rule is equivalent to defining a server in the
Servers page.
Note: You must use this type of rule to allow incoming connections if your
network uses Hide NAT.
Note: You cannot specify two Allow and Forward rules that forward the same
service to two different destinations.
Using Rules
214 Check Point Safe@Office User Guide
Rule Description
Allow This rule type enables you to do the following:
• Permit outgoing access from your internal network to a specific
service on the Internet.
Note: You can allow outgoing connections for services that are not
permitted by the default security policy.
• Permit incoming access from the Internet to a specific service in
your internal network.
• Assign traffic to a QoS class.
If Traffic Shaper is enabled for the direction of traffic specified in the
rule (incoming or outgoing), then Traffic Shaper will handle relevant
connections as specified in the bandwidth policy for the selected
QoS class. For example, if Traffic Shaper is enabled for outgoing
traffic, and you create an Allow rule associating all outgoing Web
traffic with the Urgent QoS class, then Traffic Shaper will handle
outgoing Web traffic as specified in the bandwidth policy for the
Urgent class.
For information on Traffic Shaper and QoS classes, see Using
Traffic Shaper on page 153.
Note: You cannot use an Allow rule to permit incoming traffic, if the network or
VPN uses Hide NAT. However, you can use Allow rules for static NAT IP
addresses.
Block This rule type enables you to do the following:
• Block outgoing access from your internal network to a specific
service on the Internet.
• Block incoming access from the Internet to a specific service in your
internal network.
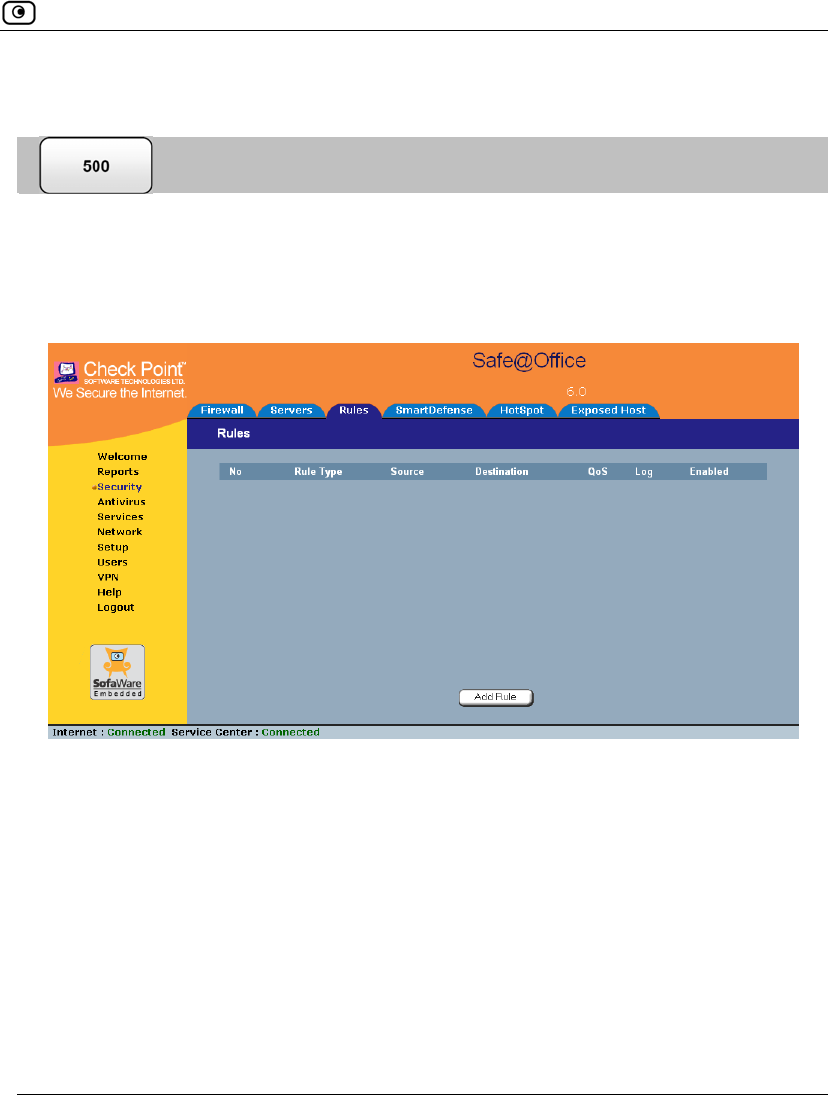
Using Rules
Chapter 9: Setting Your Security Policy 215
Adding and Editing Rules
To add or edit a rule
1. Click Security in the main menu, and click the Rules tab.
The Rules page appears.
2. Do one of the following:
• To add a new rule, click Add Rule.
• To edit an existing rule, click the Edit icon next to the desired rule.
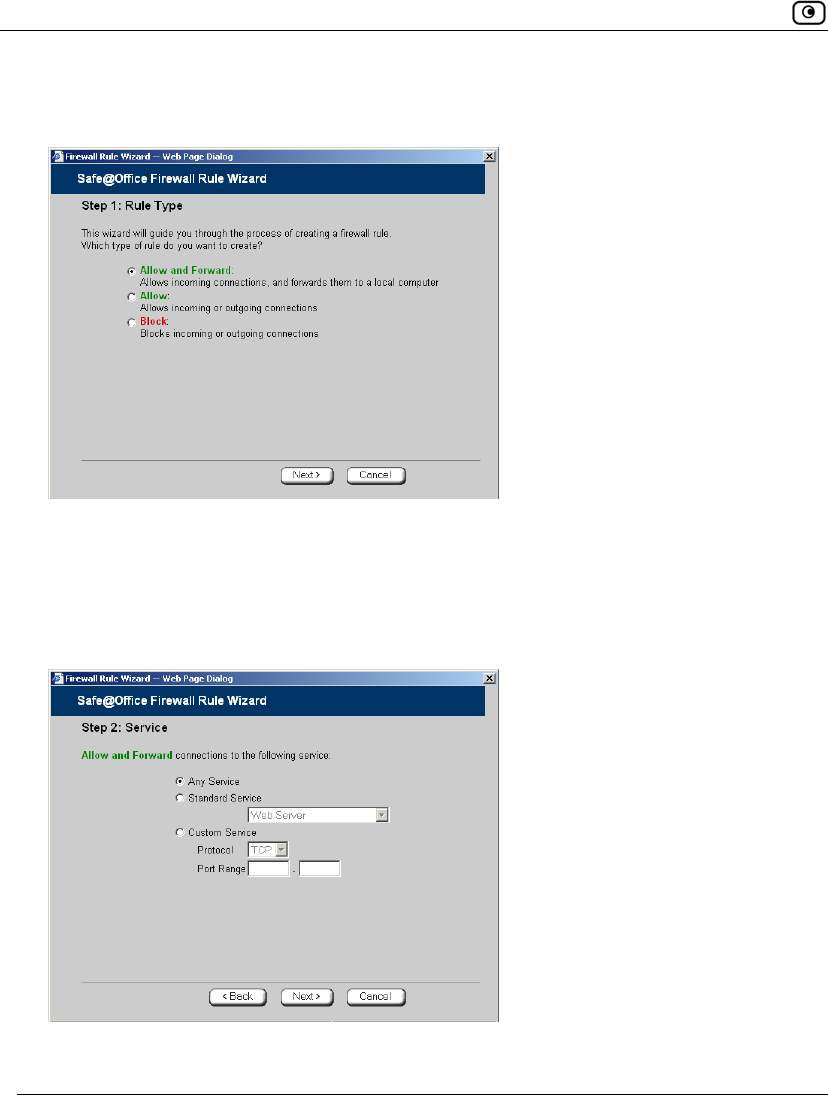
Using Rules
216 Check Point Safe@Office User Guide
The Safe@Office Firewall Rule wizard opens, with the Step 1: Rule Type dialog
box displayed.
3. Select the type of rule you want to create.
4. Click Next.
The Step 2: Service dialog box appears.
The example below shows an Allow rule.
5. Complete the fields using the relevant information in the table below.
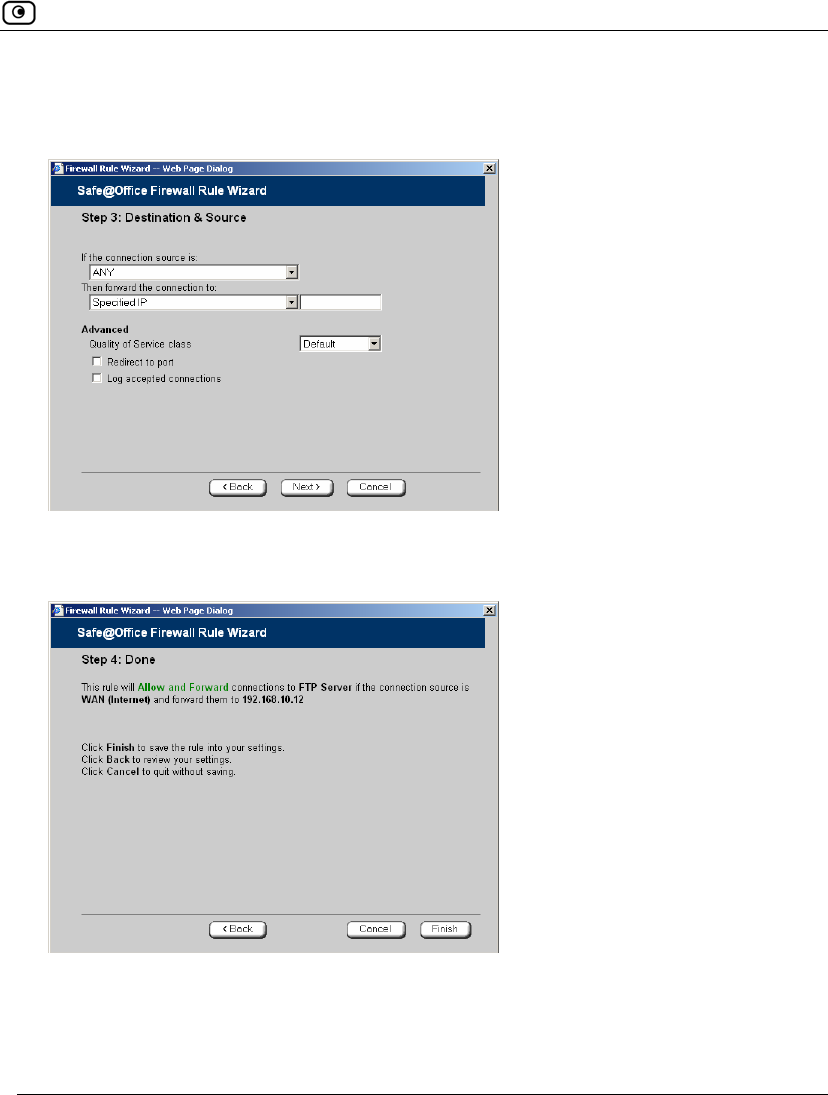
Using Rules
Chapter 9: Setting Your Security Policy 217
6. Click Next.
The Step 3: Destination & Source dialog box appears.
7. Complete the fields using the relevant information in the table below.
The Step 4: Done dialog box appears.
8. Click Finish.
The new rule appears in the Firewall Rules page.

Using Rules
218 Check Point Safe@Office User Guide
Table 34: Firewall Rule Fields
In this field… Do this…
Any Service Click this option to specify that the rule should apply to any service.
Standard
Service
Click this option to specify that the rule should apply to a specific standard
service.
You must then select the desired service from the drop-down list.
Custom Service Click this option to specify that the rule should apply to a specific non-
standard service.
The Protocol and Port Range fields are enabled. You must fill them in.
Protocol Select the protocol (ESP, GRE, TCP, UDP or ANY) for which the rule
should apply.
Ports To specify the port range to which the rule applies, type the start port
number in the left text box, and the end port number in the right text box.
Note: If you do not enter a port range, the rule will apply to all ports. If you
enter only one port number, the range will include only that port.
Source Select the source of the connections you want to allow/block.
To specify an IP address, select Specified IP and type the desired IP address
in the filed provided.
To specify an IP address range, select Specified Range and type the desired
IP address range in the fields provided.

Using Rules
Chapter 9: Setting Your Security Policy 219
In this field… Do this…
Destination Select the destination of the connections you want to allow or block.
To specify an IP address, select Specified IP and type the desired IP address
in the text box.
To specify an IP address range, select Specified Range and type the desired
IP address range in the fields provided. This option is not available in Allow
and Forward rules.
To specify the Safe@Office IP address, select This Gateway. This option is
not available in Allow and Forward rules.
To specify any destination except the Safe@Office Portal and network
printers, select ANY.
Quality of
Service class
Select the QoS class to which you want to assign the specified connections.
If Traffic Shaper is enabled, Traffic Shaper will handle these connections as
specified in the bandwidth policy for the selected QoS class. If Traffic Shaper
is not enabled, this setting is ignored. For information on Traffic Shaper and
QoS classes, see Using Traffic Shaper on page 153.
This drop-down list only appears when defining an Allow rule or an Allow and
Forward rule.
Log accepted
connections /
Log blocked
connections
Select this option to log the specified blocked or allowed connections.
By default, accepted connections are not logged, and blocked connections
are logged. You can modify this behavior by changing the check box's state.
Using Rules
220 Check Point Safe@Office User Guide
In this field… Do this…
Redirect to port Select this option to redirect the connections to a specific port.
You must then type the desired port in the field provided.
This option is called Port Address Translation (PAT), and is only available
when defining an Allow and Forward rule.
Enabling/Disabling Rules
You can temporarily disable a user-defined rule.
To enable/disable a rule
1. Click Security in the main menu, and click the Rules tab.
The Rules page appears.
2. Next to the desired rule, do one of the following:
• To enable the rule, click .
The button changes to and the rule is enabled.
• To disable the rule, click .
The button changes to and the rule is disabled.
Using Rules
Chapter 9: Setting Your Security Policy 221
Changing Rules' Priority
To change a rule's priority
1. Click Security in the main menu, and click the Rules tab.
The Rules page appears.
2. Do one of the following:
• Click next to the desired rule, to move the rule up in the table.
• Click next to the desired rule, to move the rule down in the table.
The rule's priority changes accordingly.
Deleting Rules
To delete an existing rule
1. Click Security in the main menu, and click the Rules tab.
The Rules page appears.
2. Click the Erase icon of the rule you wish to delete.
A confirmation message appears.
3. Click OK.
The rule is deleted.
Using SmartDefense
222 Check Point Safe@Office User Guide
Using SmartDefense
The Safe@Office appliance includes Check Point SmartDefense Services, based on
Check Point Application Intelligence. SmartDefense provides a combination of
attack safeguards and attack-blocking tools that protect your network in the
following ways:
• Validating compliance to standards
• Validating expected usage of protocols (Protocol Anomaly Detection)
• Limiting application ability to carry malicious data
• Controlling application-layer operations
In addition, SmartDefense aids proper usage of Internet resources, such as FTP,
instant messaging, Peer-to-Peer (P2P) file sharing, file-sharing operations, and File
Transfer Protocol (FTP) uploading, among others.
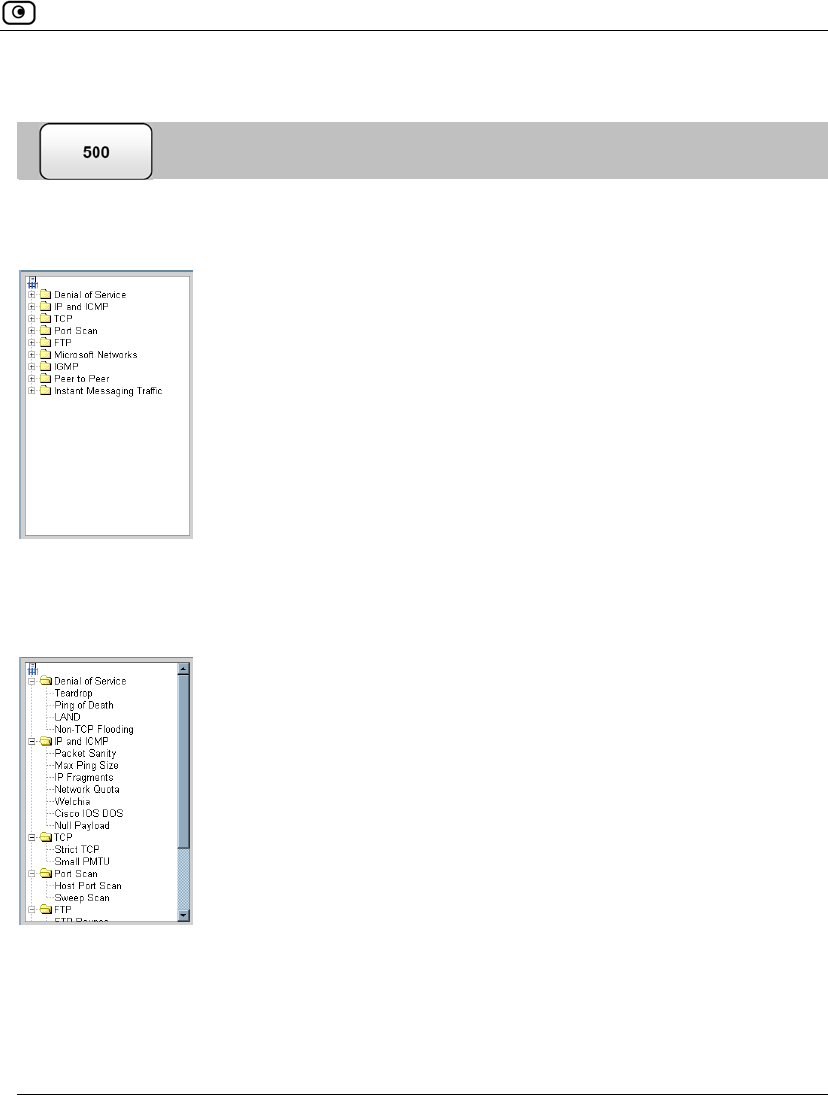
Using SmartDefense
Chapter 9: Setting Your Security Policy 223
Configuring SmartDefense
For convenience, SmartDefense is organized as a tree, in which each branch
represents a category of settings.
When a category is expanded, the settings it contains appear as nodes. For
information on each category and the nodes it contains, see SmartDefense
Categories on page 226.
Each node represents an attack type, a sanity check, or a protocol or service that is
vulnerable to attacks. To control how SmartDefense handles an attack, you must
configure the relevant node's settings.
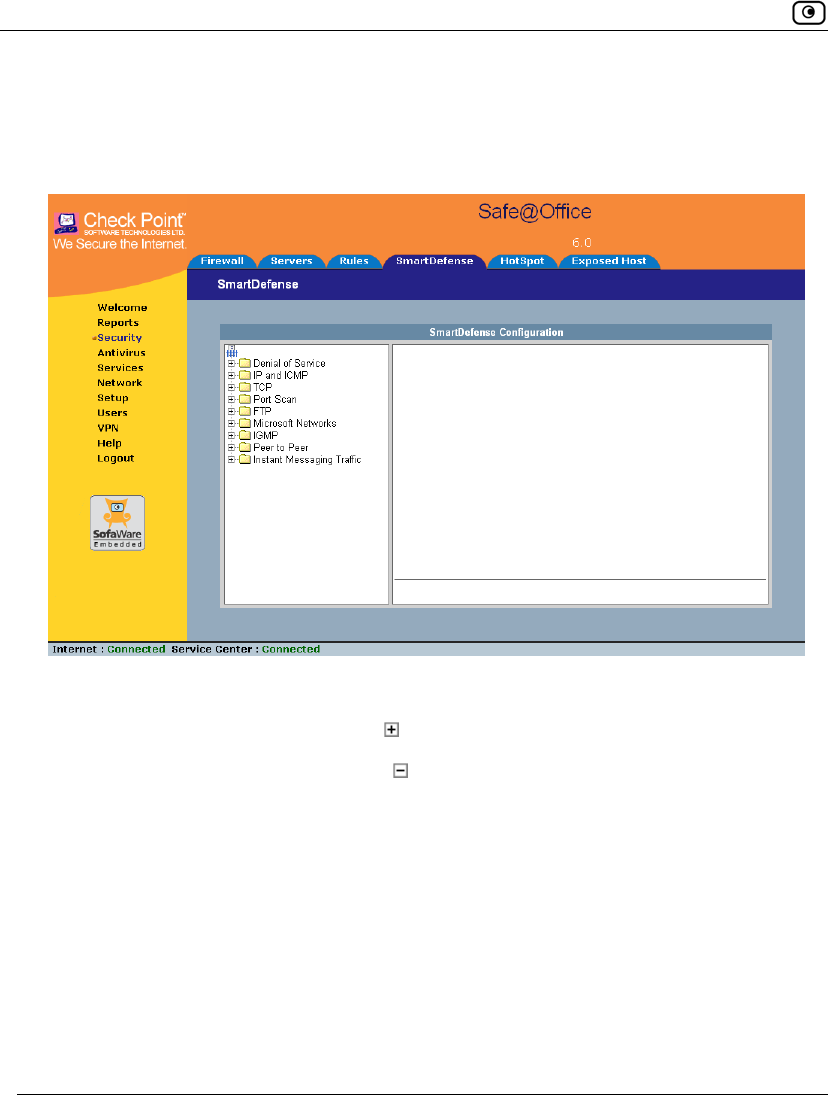
Using SmartDefense
224 Check Point Safe@Office User Guide
To configure a SmartDefense node
1. Click Security in the main menu, and click the SmartDefense tab.
The SmartDefense page appears.
The left pane displays a tree containing SmartDefense categories.
• To expand a category, click the icon next to it.
• To collapse a category, click the icon next to it.
2. Expand the relevant category, and click on the desired node.
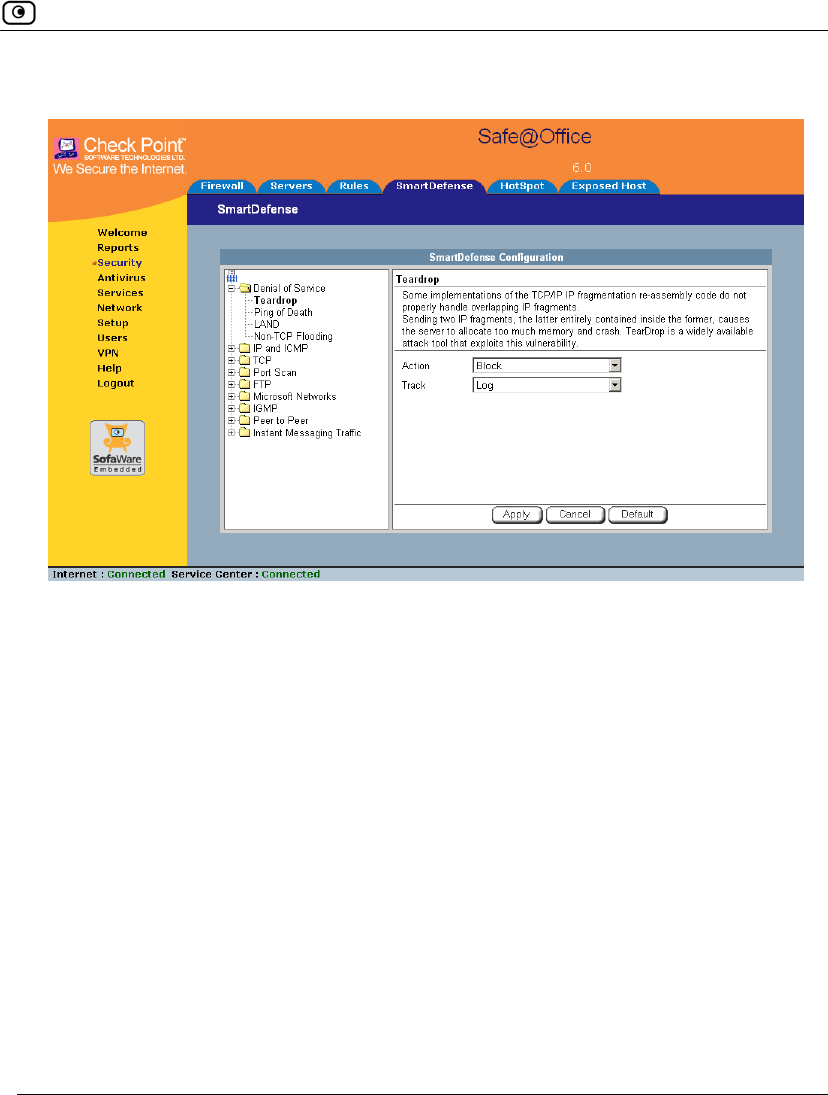
Using SmartDefense
Chapter 9: Setting Your Security Policy 225
The right pane displays a description of the node, followed by fields.
3. To modify the node's current settings, do the following:
a) Complete the fields using the relevant information in SmartDefense
Categories on page 226.
b) Click Apply.
4. To reset the node to its default values:
a) Click Default.
A confirmation message appears.
b) Click OK.
The fields are reset to their default values, and your changes are saved.

Using SmartDefense
226 Check Point Safe@Office User Guide
SmartDefense Categories
SmartDefense includes the following categories:
• Denial of Service on page 226
• IP and ICMP on page 231
• TCP on page 241
• Port Scan on page 244
• FTP on page 247
• Microsoft Networks on page 251
• IGMP on page 253
• Peer to Peer on page 254
• Instant Messengers on page 256
Denial of Service
Denial of Service (DoS) attacks are aimed at overwhelming the target with
spurious data, to the point where it is no longer able to respond to legitimate
service requests.
This category includes the following attacks:
• Teardrop on page 226
• Ping of Death on page 227
• LAND on page 228
• Non-TCP Flooding on page 229
Teardrop
In a Teardrop attack, the attacker sends two IP fragments, the latter entirely
contained within the former. This causes some computers to allocate too much
memory and crash.
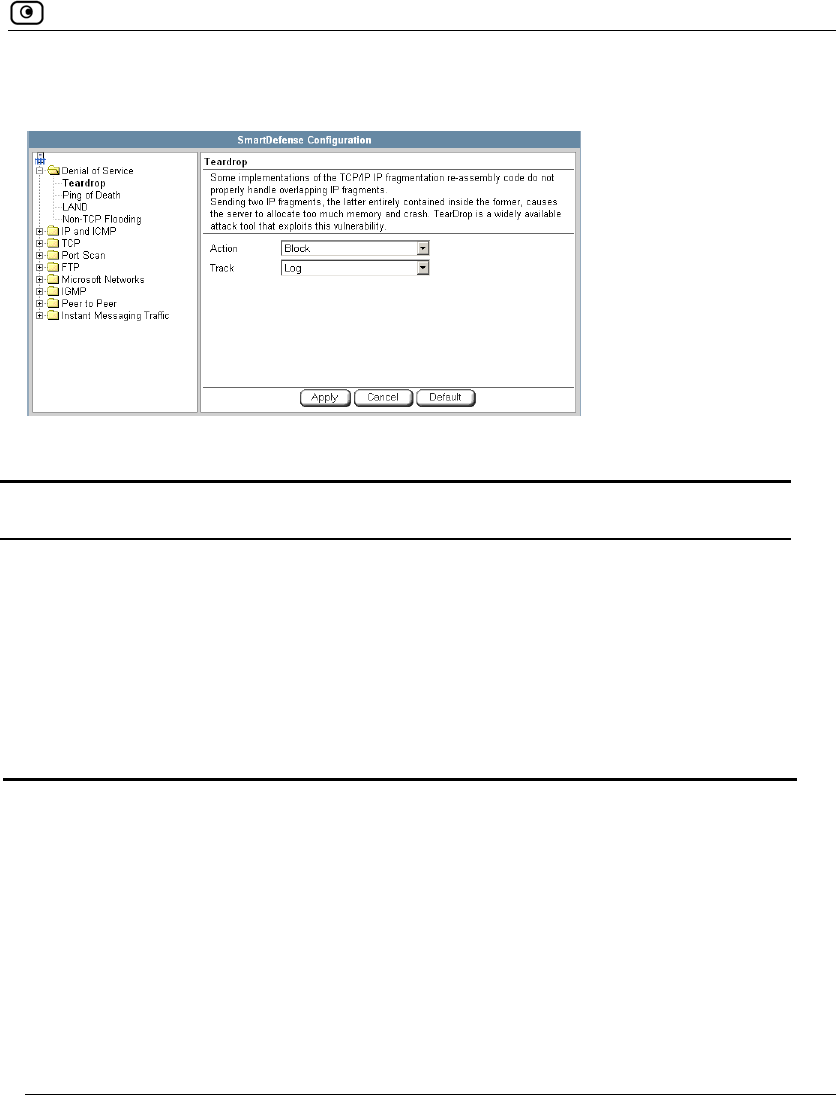
Using SmartDefense
Chapter 9: Setting Your Security Policy 227
You can configure how Teardrop attacks should be handled.
Table 35: Teardrop Fields
In this field… Do this…
Action Specify what action to take when a Teardrop attack occurs, by selecting one
of the following:
• Block. Block the attack. This is the default.
• None. No action.
Track Specify whether to log Teardrop attacks, by selecting one of the following:
• Log. Log the attack. This is the default.
• None. Do not log the attack.
Ping of Death
In a Ping of Death attack, the attacker sends a fragmented PING request that
exceeds the maximum IP packet size (64KB). Some operating systems are unable
to handle such requests and crash.
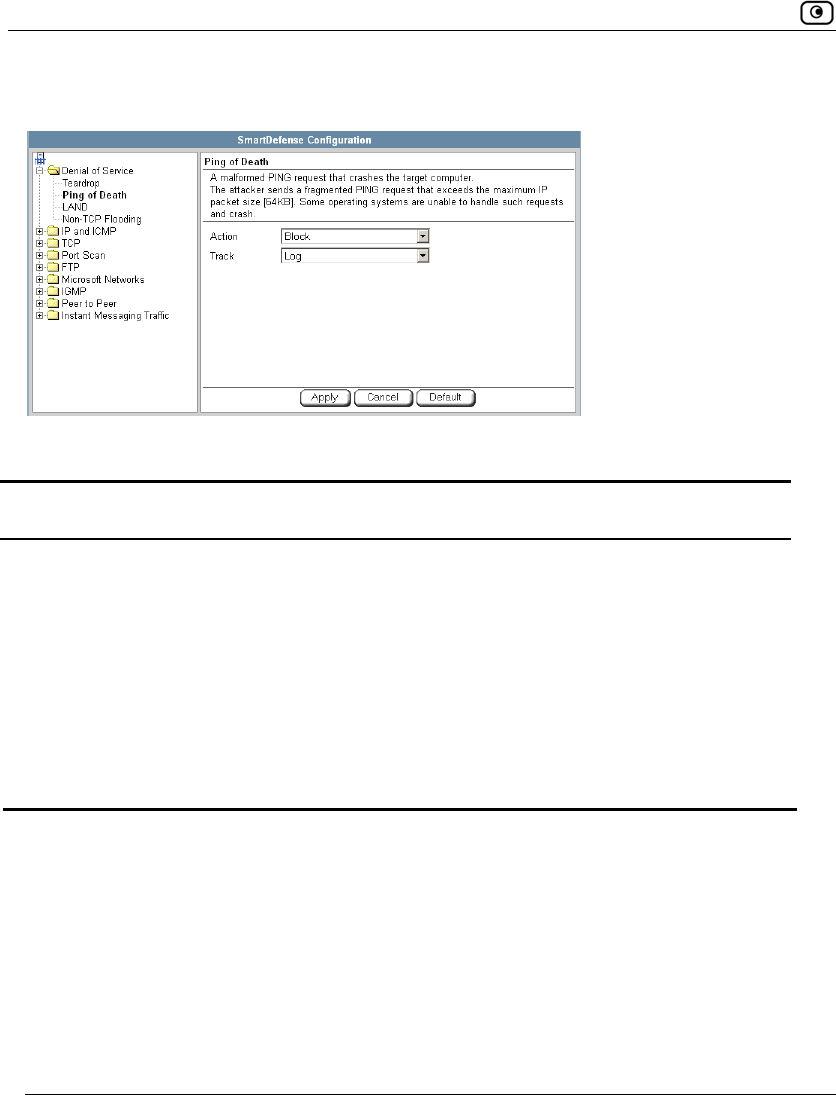
Using SmartDefense
228 Check Point Safe@Office User Guide
You can configure how Ping of Death attacks should be handled.
Table 36: Ping of Death Fields
In this field… Do this…
Action Specify what action to take when a Ping of Death attack occurs, by selecting
one of the following:
• Block. Block the attack. This is the default.
• None. No action.
Track Specify whether to log Ping of Death attacks, by selecting one of the
following:
• Log. Log the attack. This is the default.
• None. Do not log the attack.
LAND
In a LAND attack, the attacker sends a SYN packet, in which the source address
and port are the same as the destination (the victim computer). The victim
computer then tries to reply to itself and either reboots or crashes.
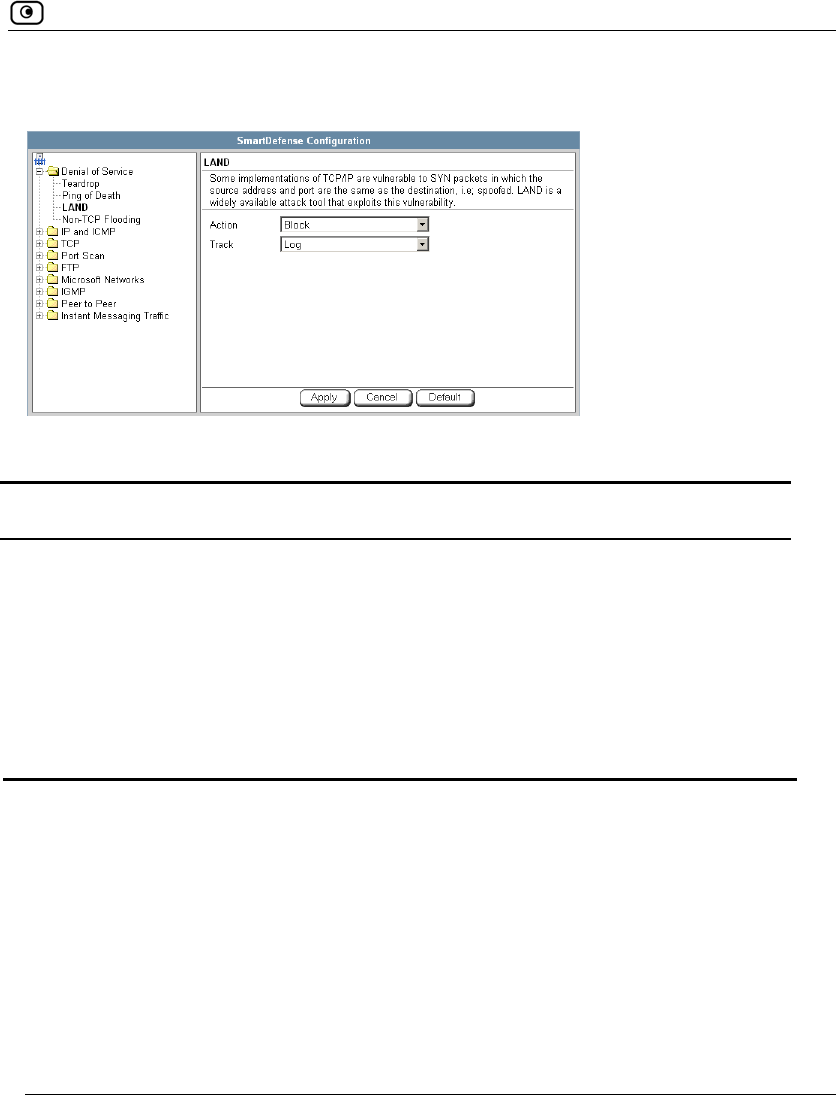
Using SmartDefense
Chapter 9: Setting Your Security Policy 229
You can configure how LAND attacks should be handled.
Table 37: LAND Fields
In this field… Do this…
Action Specify what action to take when a LAND attack occurs, by selecting one of
the following:
• Block. Block the attack. This is the default.
• None. No action.
Track Specify whether to log LAND attacks, by selecting one of the following:
• Log. Log the attack. This is the default.
• None. Do not log the attack.
Non-TCP Flooding
Advanced firewalls maintain state information about connections in a State table.
In non-TCP Flooding attacks, the attacker sends high volumes of non-TCP traffic.
Since such traffic is connectionless, the related state information cannot be cleared
or reset, and the firewall State table is quickly filled up. This prevents the firewall
from accepting new connections and results in a Denial of Service (DoS).
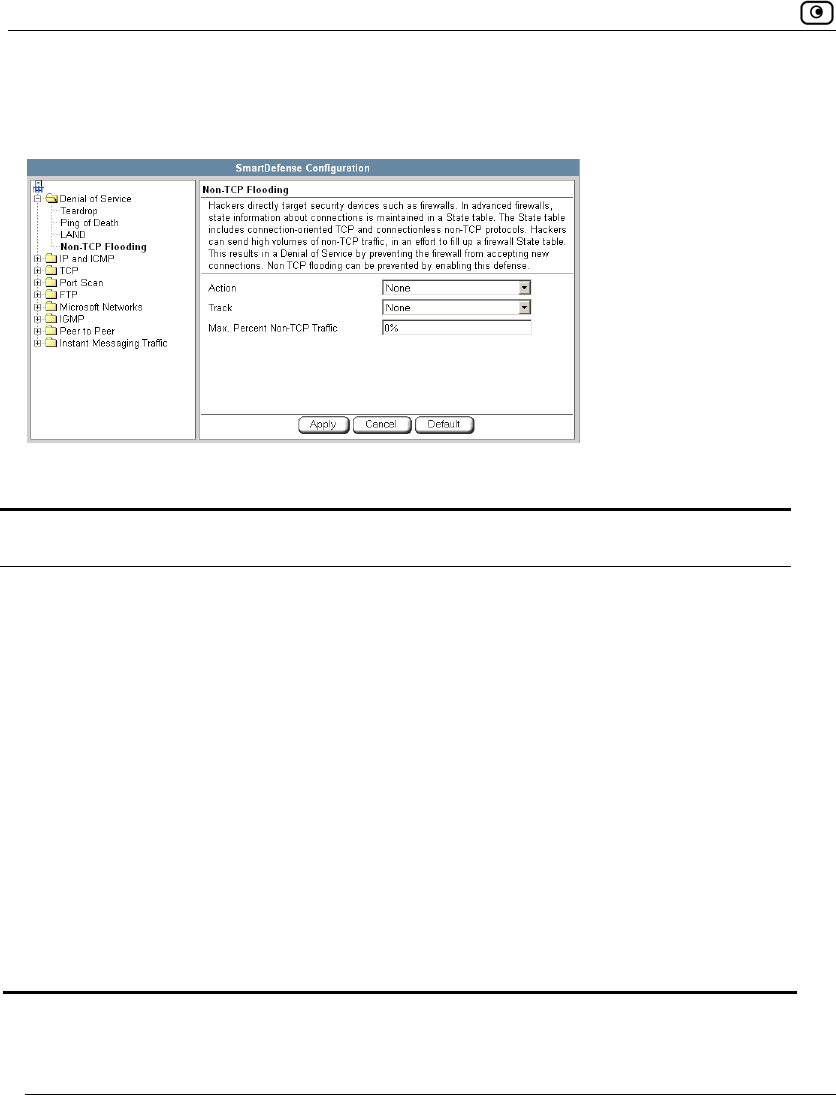
Using SmartDefense
230 Check Point Safe@Office User Guide
You can protect against Non-TCP Flooding attacks by limiting the percentage of
state table capacity used for non-TCP connections.
Table 38: Non-TCP Flooding Fields
In this field… Do this…
Action Specify what action to take when the percentage of state table capacity used
for non-TCP connections reaches the Max. percent non TCP traffic threshold.
Select one of the following:
• Block. Block any additional non-TCP connections.
• None. No action. This is the default.
Track Specify whether to log non-TCP connections that exceed the Max. Percent
Non-TCP Traffic threshold, by selecting one of the following:
• Log. Log the connections.
• None. Do not log the connections. This is the default.
Max. Percent
Non-TCP Traffic
Type the maximum percentage of state table capacity allowed for non-TCP
connections.
The default value is 0%.
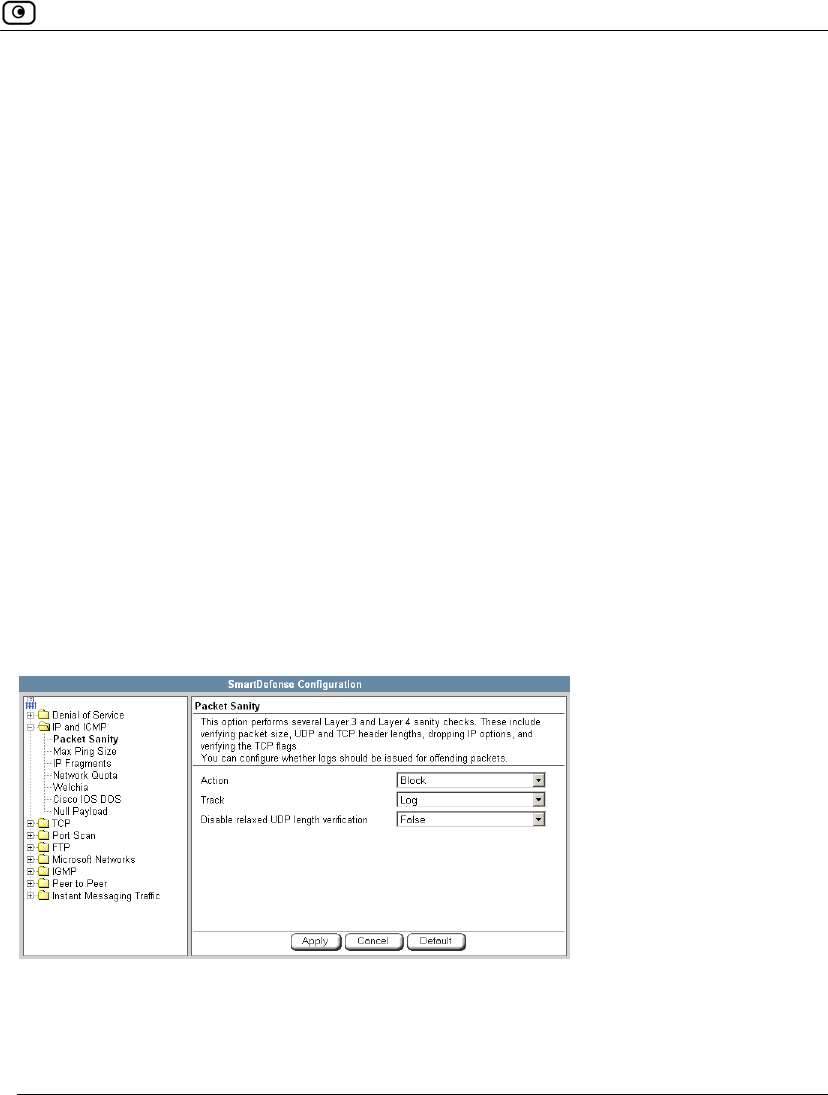
Using SmartDefense
Chapter 9: Setting Your Security Policy 231
IP and ICMP
This category allows you to enable various IP and ICMP protocol tests, and to
configure various protections against IP and ICMP-related attacks. It includes the
following:
• Packet Sanity on page 231
• Max Ping Size on page 233
• IP Fragments on page 234
• Network Quota on page 236
• Welchia on page 237
• Cisco IOS DOS on page 238
• Null Payload on page 240
Packet Sanity
Packet Sanity performs several Layer 3 and Layer 4 sanity checks. These include
verifying packet size, UDP and TCP header lengths, dropping IP options, and
verifying the TCP flags.
You can configure whether logs should be issued for offending packets.

Using SmartDefense
232 Check Point Safe@Office User Guide
Table 39: Packet Sanity Fields
In this field… Do this…
Action Specify what action to take when a packet fails a sanity test, by selecting
one of the following:
• Block. Block the packet. This is the default.
• None. No action.
Track Specify whether to issue logs for packets that fail the packet sanity tests, by
selecting one of the following:
• Log. Issue logs. This is the default.
• None. Do not issue logs.
Disable relaxed
UDP length
verification
The UDP length verification sanity check measures the UDP header length
and compares it to the UDP header length specified in the UDP header. If
the two values differ, the packet may be corrupted.
However, since different applications may measure UDP header length
differently, the Safe@Office appliance relaxes the UDP length verification
sanity check by default, performing the check but not dropping offending
packets. This is called relaxed UDP length verification.
Specify whether the Safe@Office appliance should relax the UDP length
verification sanity check or not, by selecting one of the following:
• True. Disable relaxed UDP length verification. The Safe@Office
appliance will drop packets that fail the UDP length verification
check.
• False. Do not disable relaxed UDP length verification. The
Safe@Office appliance will not drop packets that fail the UDP
length verification check. This is the default.
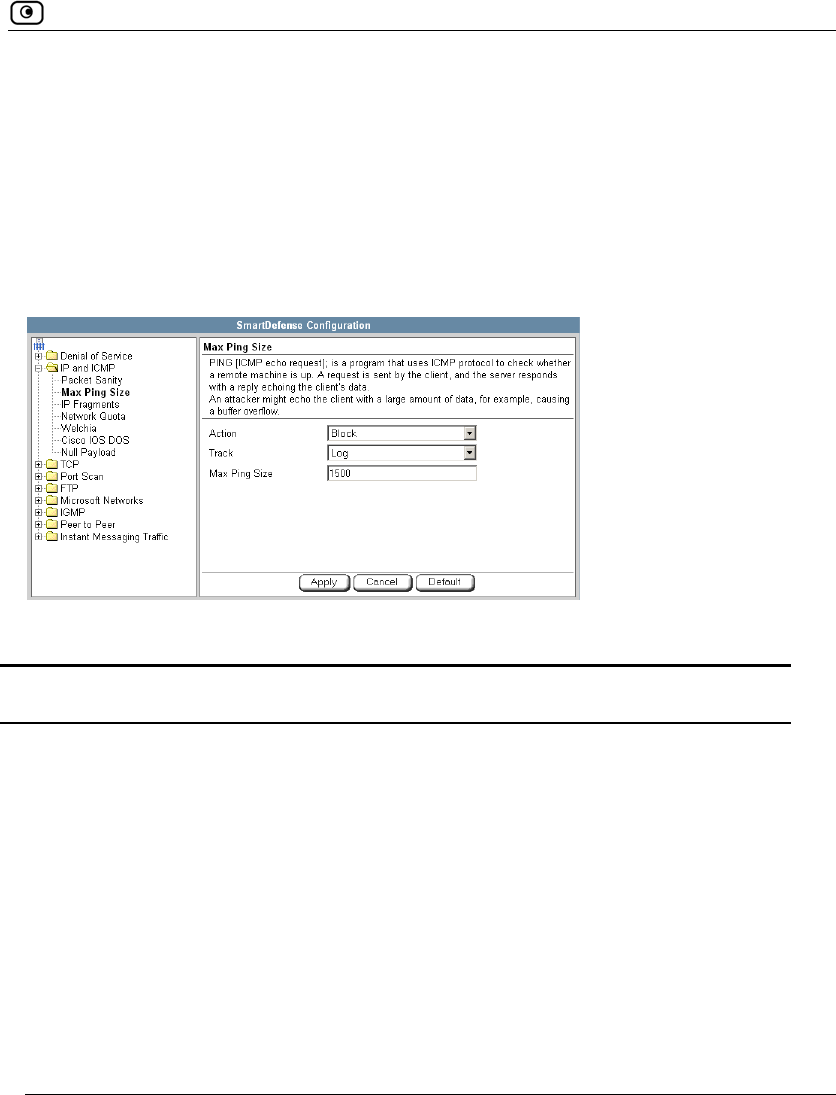
Using SmartDefense
Chapter 9: Setting Your Security Policy 233
Max Ping Size
PING (ICMP echo request) is a program that uses ICMP protocol to check whether
a remote machine is up. A request is sent by the client, and the server responds
with a reply echoing the client's data.
An attacker can echo the client with a large amount of data, causing a buffer
overflow. You can protect against such attacks by limiting the allowed size for
ICMP echo requests.
Table 40: Max Ping Size Fields
In this field… Do this…
Action Specify what action to take when an ICMP echo response exceeds the Max
Ping Size threshold, by selecting one of the following:
• Block. Block the request. This is the default.
• None. No action.
Track Specify whether to log ICMP echo responses that exceed the Max Ping Size
threshold, by selecting one of the following:
• Log. Log the responses. This is the default.
• None. Do not log the responses.
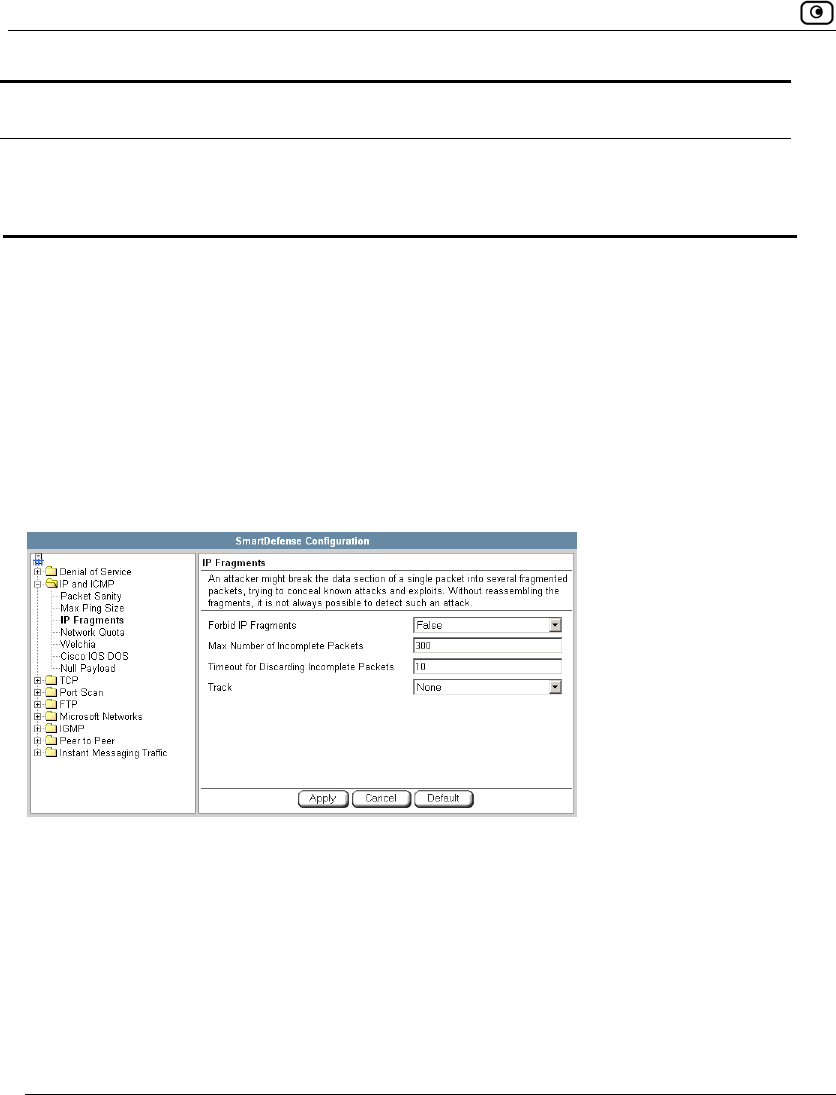
Using SmartDefense
234 Check Point Safe@Office User Guide
In this field… Do this…
Max Ping Size Specify the maximum data size for ICMP echo response.
The default value is 1500.
IP Fragments
When an IP packet is too big to be transported by a network link, it is split into
several smaller IP packets and transmitted in fragments. To conceal a known attack
or exploit, an attacker might imitate this common behavior and break the data
section of a single packet into several fragmented packets. Without reassembling
the fragments, it is not always possible to detect such an attack. Therefore, the
Safe@Office appliance always reassembles all the fragments of a given IP packet,
before inspecting it to make sure there are no attacks or exploits in the packet.
You can configure how fragmented packets should be handled.

Using SmartDefense
Chapter 9: Setting Your Security Policy 235
Table 41: IP Fragments Fields
In this field… Do this…
Forbid IP Fragments Specify whether all fragmented packets should be dropped, by selecting
one of the following:
• True. Drop all fragmented packets.
• False. No action. This is the default.
Under normal circumstances, it is recommended to leave this field set to
False. Setting this field to True may disrupt Internet connectivity, because
it does not allow any fragmented packets.
Max Number of
Incomplete Packets
Type the maximum number of fragmented packets allowed. Packets
exceeding this threshold will be dropped.
The default value is 300.
Timeout for
Discarding
Incomplete Packets
When the Safe@Office appliance receives packet fragments, it waits for
additional fragments to arrive, so that it can reassemble the packet.
Type the number of seconds to wait before discarding incomplete
packets.
The default value is 10.
Track Specify whether to log fragmented packets, by selecting one of the
following:
• Log. Log all fragmented packets.
• None. Do not log the fragmented packets. This is the default.
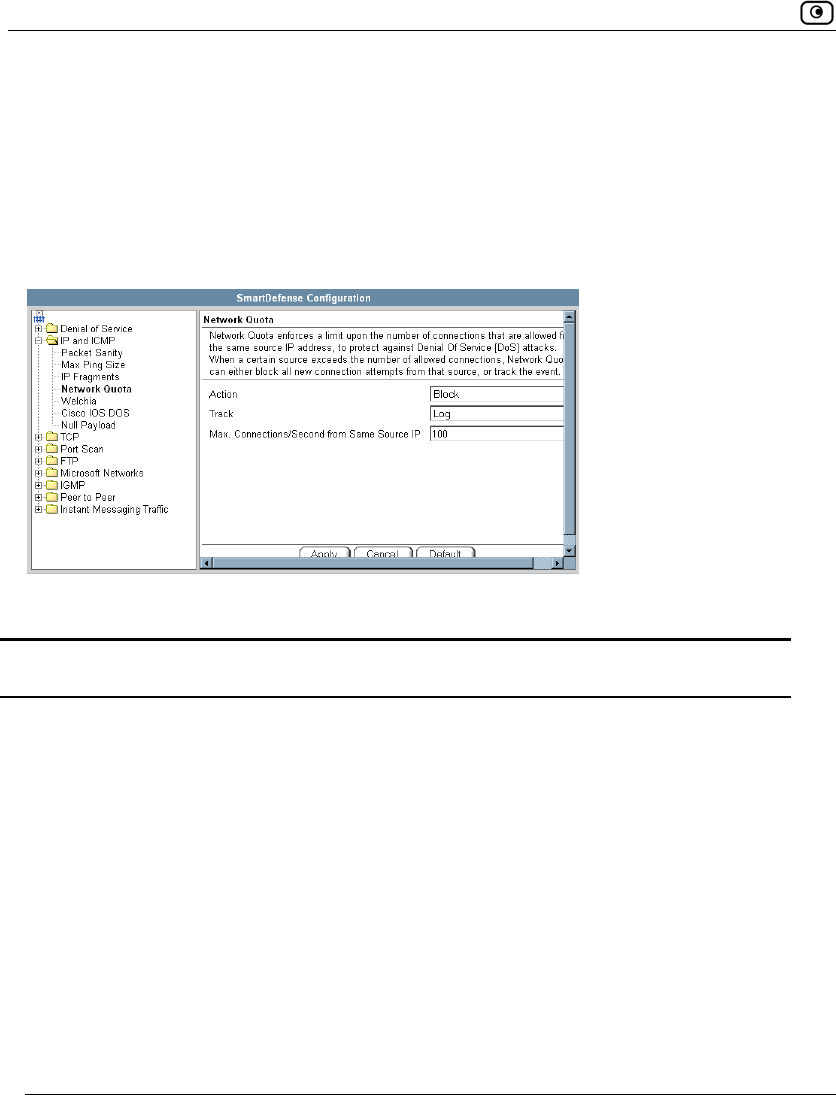
Using SmartDefense
236 Check Point Safe@Office User Guide
Network Quota
An attacker may try to overload a server in your network by establishing a very
large number of connections per second. To protect against Denial Of Service
(DoS) attacks, Network Quota enforces a limit upon the number of connections per
second that are allowed from the same source IP address.
You can configure how connection that exceed that limit should be handled.
Table 42: Network Quota Fields
In this field… Do this…
Action Specify what action to take when the number of network connections
from the same source reaches the Max. Connections/Second per Source IP
threshold. Select one of the following:
• Block. Block all new connections from the source. Existing
connections will not be blocked. This is the default.
• None. No action.
Track Specify whether to log connections from a specific source that exceed
the Max. Connections/Second per Source IP threshold, by selecting one of
the following:
• Log. Log the connections. This is the default.
• None. Do not log the connections.
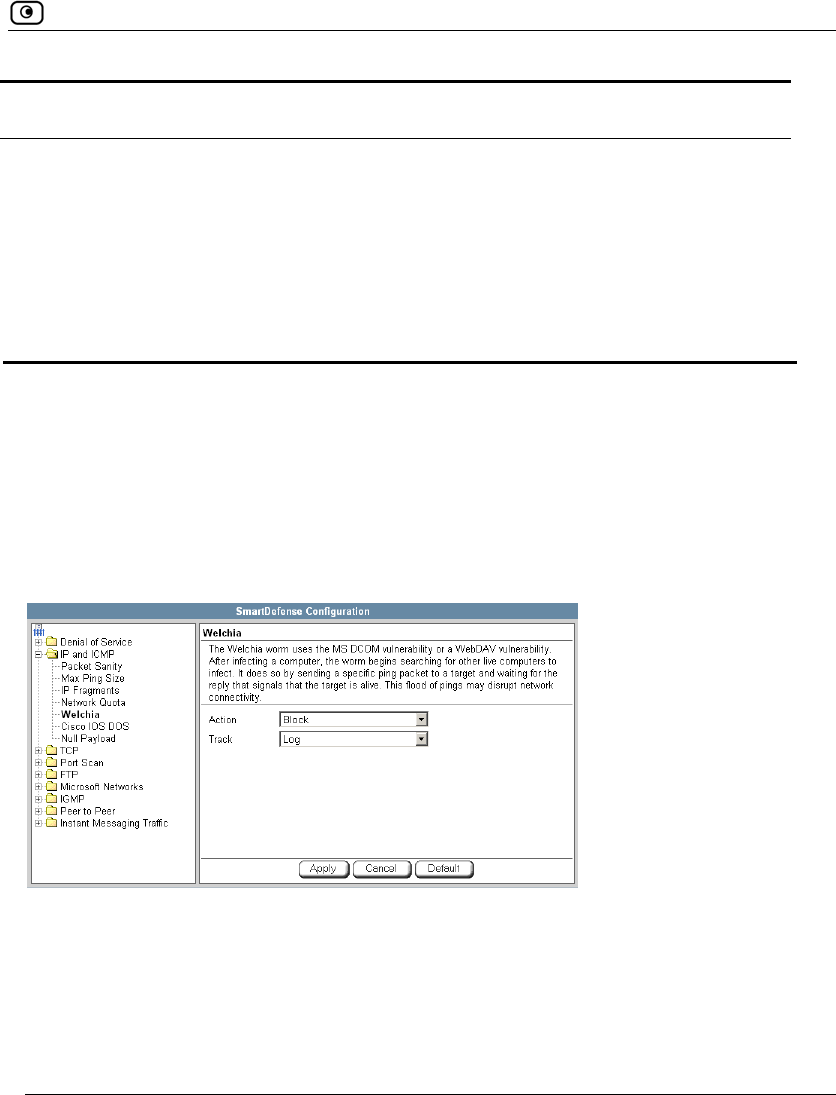
Using SmartDefense
Chapter 9: Setting Your Security Policy 237
In this field… Do this…
Max.
Connections/Second
from Same Source IP
Type the maximum number of network connections allowed per second
from the same source IP address.
The default value is 100.
Set a lower threshold for stronger protection against DoS attacks.
Note: Setting this value too low can lead to false alarms.
Welchia
The Welchia worm uses the MS DCOM vulnerability or a WebDAV vulnerability.
After infecting a computer, the worm begins searching for other live computers to
infect. It does so by sending a specific ping packet to a target and waiting for the
reply that signals that the target is alive. This flood of pings may disrupt network
connectivity.
You can configure how the Welchia worm should be handled.

Using SmartDefense
238 Check Point Safe@Office User Guide
Table 43: Welchia Fields
In this field… Do this…
Action Specify what action to take when the Welchia worm is detected, by selecting
one of the following:
• Block. Block the attack. This is the default.
• None. No action.
Track Specify whether to log Welchia worm attacks, by selecting one of the
following:
• Log. Log the attack. This is the default.
• None. Do not log the attack.
Cisco IOS DOS
Cisco routers are configured to process and accept Internet Protocol version 4
(IPv4) packets by default. When a Cisco IOS device is sent a specially crafted
sequence of IPv4 packets (with protocol type 53 - SWIPE, 55 - IP Mobility, 77 -
Sun ND, or 103 - Protocol Independent Multicast - PIM), the router will stop
processing inbound traffic on that interface.
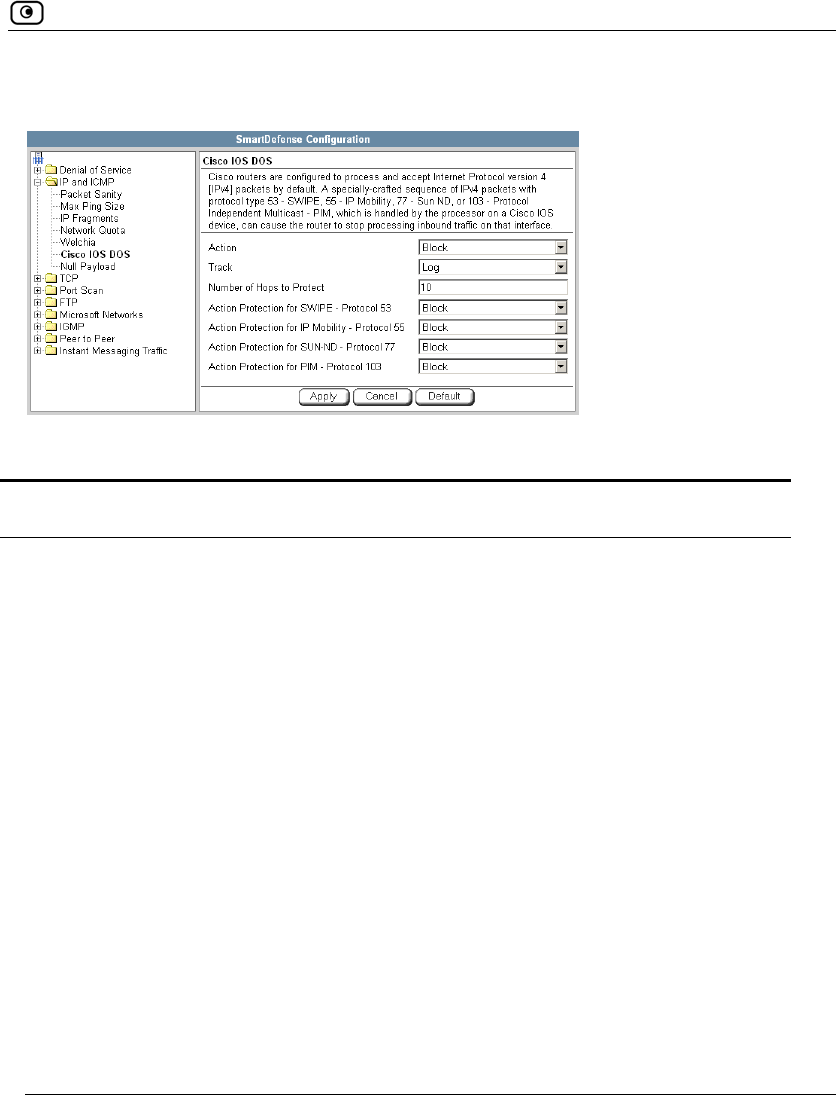
Using SmartDefense
Chapter 9: Setting Your Security Policy 239
You can configure how Cisco IOS DOS attacks should be handled.
Table 44: Cisco IOS DOS
In this field… Do this…
Action Specify what action to take when a Cisco IOS DOS attack occurs,
by selecting one of the following:
• Block. Block the attack. This is the default.
• None. No action.
Track Specify whether to log Cisco IOS DOS attacks, by selecting one of
the following:
• Log. Log the attack. This is the default.
• None. Do not log the attack.
Number of Hops to Protect Type the number of hops from the enforcement module that Cisco
routers should be protected.
The default value is 10.
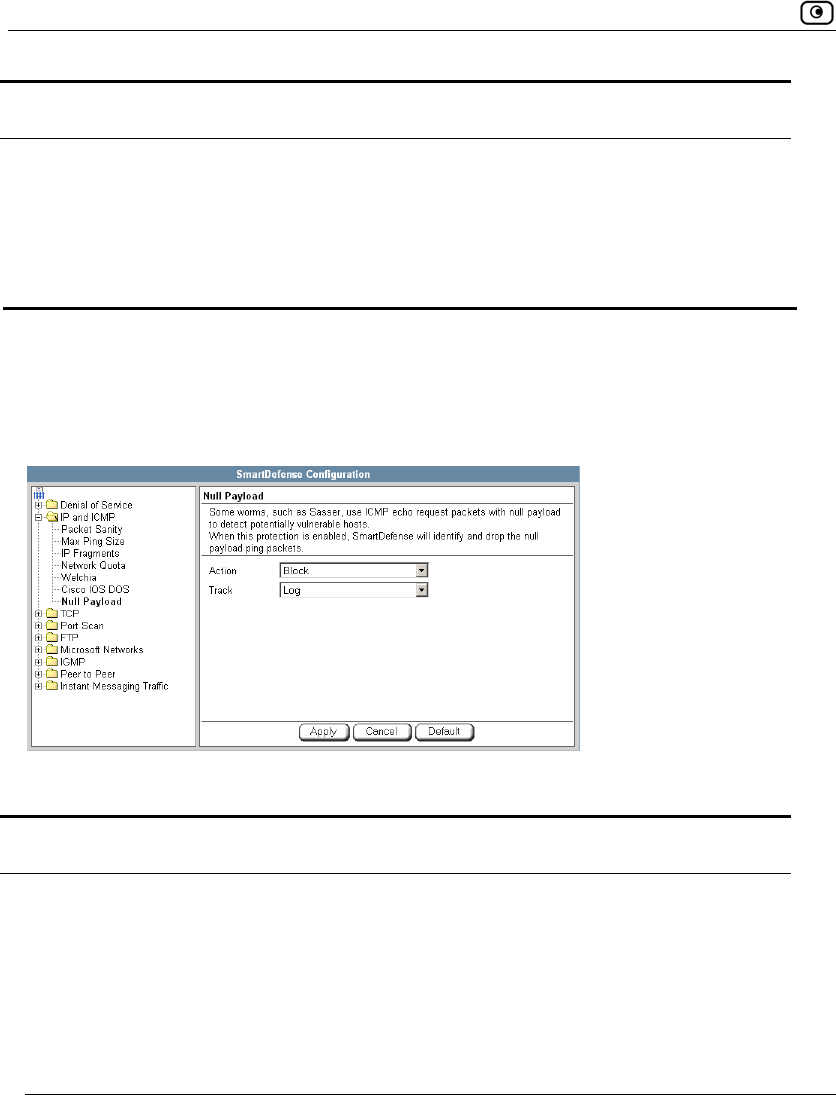
Using SmartDefense
240 Check Point Safe@Office User Guide
In this field… Do this…
Action Protection for
SWIPE - Protocol 53 /
IP Mobility - Protocol 55 /
SUN-ND - Protocol 77 /
PIM - Protocol 103
Specify what action to take when an IPv4 packet of the specific
protocol type is received, by selecting one of the following:
• Block. Drop the packet. This is the default.
• None. No action.
Null Payload
Some worms, such as Sasser, use ICMP echo request packets with null payload to
detect potentially vulnerable hosts.
You can configure how null payload ping packets should be handled.
Table 45: Null Payload Fields
In this field… Do this…
Action Specify what action to take when null payload ping packets are detected, by
selecting one of the following:
• Block. Block the packets. This is the default.
• None. No action.
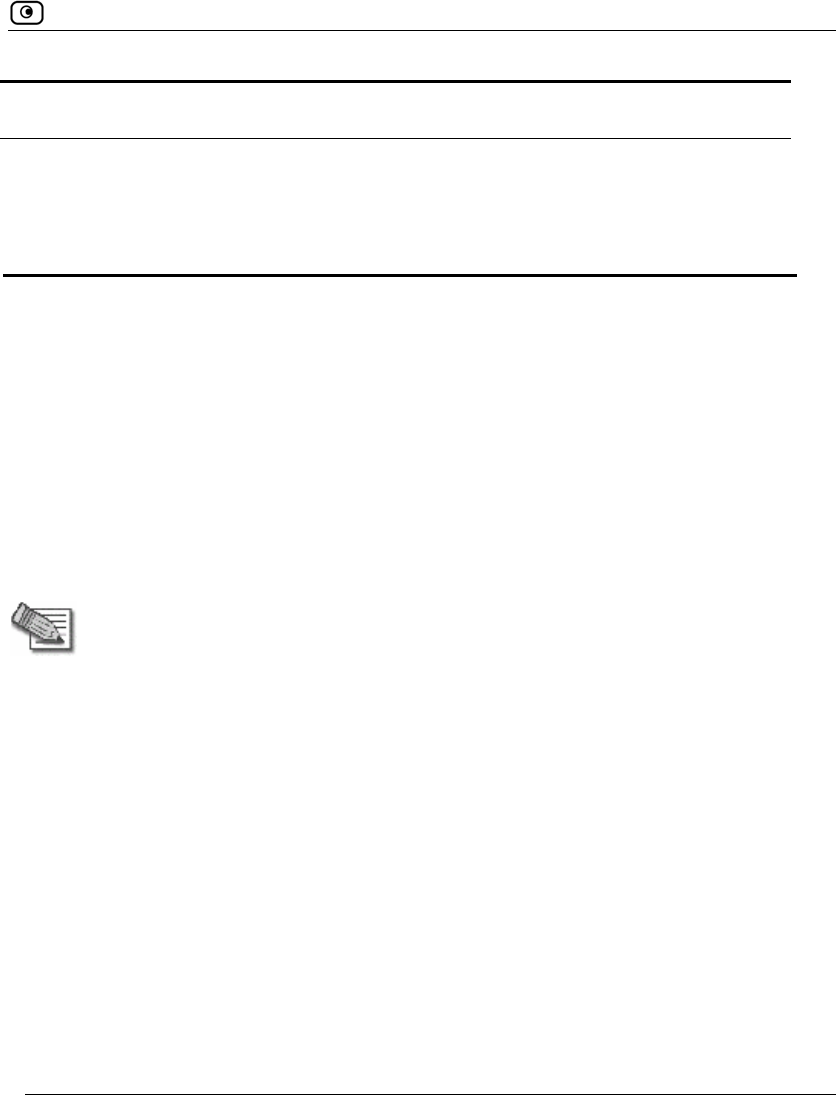
Using SmartDefense
Chapter 9: Setting Your Security Policy 241
In this field… Do this…
Track Specify whether to log null payload ping packets, by selecting one of the
following:
• Log. Log the packets. This is the default.
• None. Do not log the packets.
TCP
This category allows you to configure various protections related to the TCP
protocol. It includes the following:
• Strict TCP on page 241
• Small PMTU on page 243
Strict TCP
Out-of-state TCP packets are SYN-ACK or data packets that arrive out of order,
before the TCP SYN packet.
Note: In normal conditions, out-of-state TCP packets can occur after the
Safe@Office restarts, since connections which were established prior to the reboot
are unknown. This is normal and does not indicate an attack.
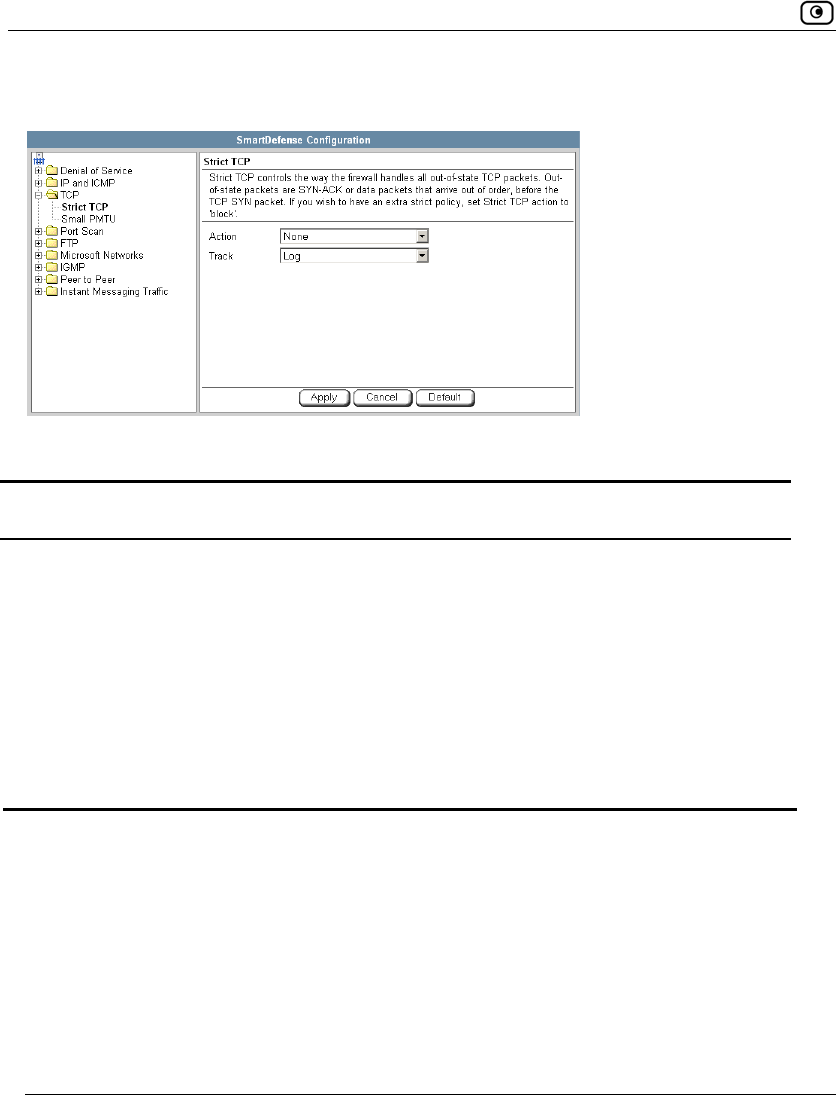
Using SmartDefense
242 Check Point Safe@Office User Guide
You can configure how out-of-state TCP packets should be handled.
Table 46: Strict TCP
In this field… Do this…
Action Specify what action to take when an out-of-state TCP packet arrives, by
selecting one of the following:
• Block. Block the packets.
• None. No action. This is the default.
Track Specify whether to log null payload ping packets, by selecting one of the
following:
• Log. Log the packets. This is the default.
• None. Do not log the packets.
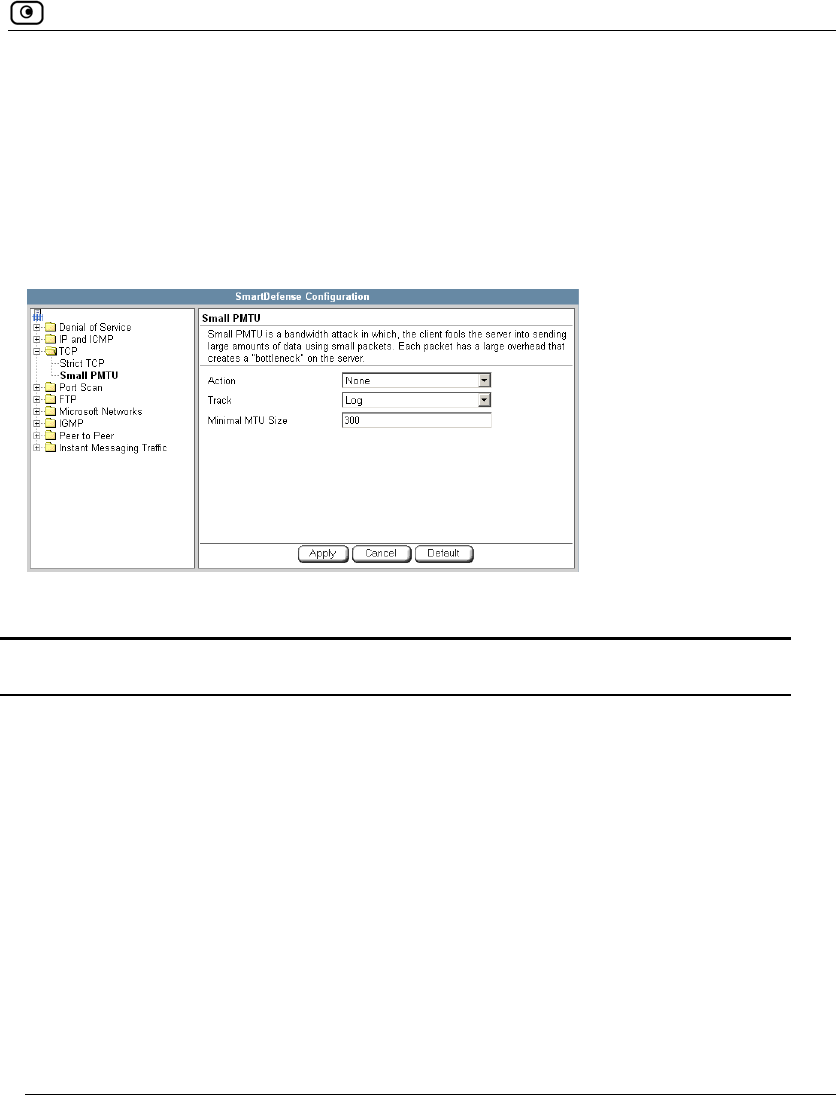
Using SmartDefense
Chapter 9: Setting Your Security Policy 243
Small PMTU
Small PMTU (Packet MTU) is a bandwidth attack in which the client fools the
server into sending large amounts of data using small packets. Each packet has a
large overhead that creates a "bottleneck" on the server.
You can protect against this attack by specifying a minimum packet size for data
sent over the Internet.
Table 47: Small PMTU Fields
In this field… Do this…
Action Specify what action to take when a packet is smaller than the Minimal MTU
Size threshold, by selecting one of the following:
• Block. Block the packet.
• None. No action. This is the default.
Track Specify whether to issue logs for packets are smaller than the Minimal MTU
Size threshold, by selecting one of the following:
• Log. Issue logs. This is the default.
• None. Do not issue logs.
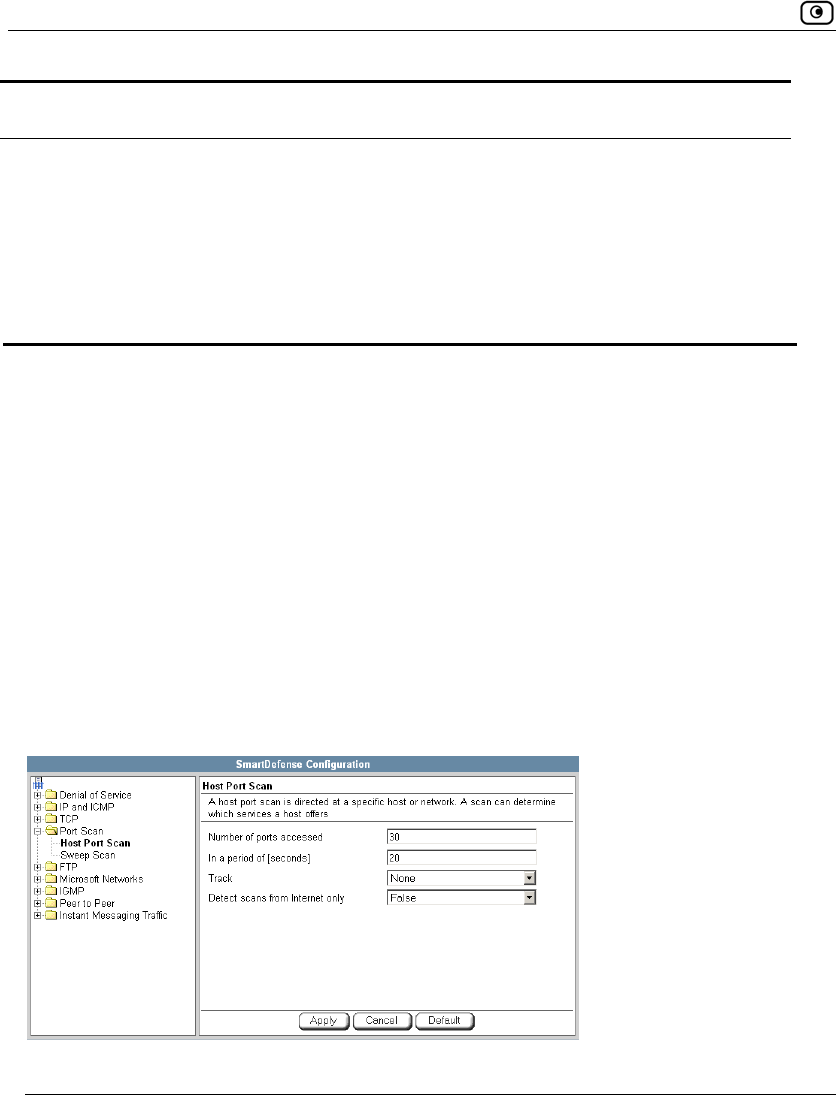
Using SmartDefense
244 Check Point Safe@Office User Guide
In this field… Do this…
Minimal MTU
Size
Type the minimum value allowed for the MTU field in IP packets sent by a
client.
An overly small value will not prevent an attack, while an overly large value
might degrade performance and cause legitimate requests to be dropped.
The default value is 300.
Port Scan
An attacker can perform a port scan to determine whether ports are open and
vulnerable to an attack. This is most commonly done by attempting to access a port
and waiting for a response. The response indicates whether or not the port is open.
This category includes the following types of port scans:
• Host Port Scan. The attacker scans a specific host's ports to determine
which of the ports are open.
• Sweep Scan. The attacker scans various hosts to determine where a specific
port is open.
You can configure how the Safe@Office appliance should react when a port scan is
detected.

Using SmartDefense
Chapter 9: Setting Your Security Policy 245
Table 48: Port Scan Fields
In this field… Do this…
Number of ports
accessed
SmartDefense detects ports scans by measuring the number of ports
accessed over a period of time. The number of ports accessed must exceed
the Number of ports accessed value, within the number of seconds specified by
the In a period of [seconds] value, in order for SmartDefense to consider the
activity a scan.
Type the minimum number of ports that must be accessed within the In a
period of [seconds] period, in order for SmartDefense to detect the activity as
a port scan.
For example, if this value is 30, and 40 ports are accessed within a specified
period of time, SmartDefense will detect the activity as a port scan.
For Host Port Scan, the default value is 30. For Sweep Scan, the default
value is 50.

Using SmartDefense
246 Check Point Safe@Office User Guide
In this field… Do this…
In a period of
[seconds]
SmartDefense detects ports scans by measuring the number of ports
accessed over a period of time. The number of ports accessed must exceed
the Number of ports accessed value, within the number of seconds specified by
the In a period of [seconds] value, in order for SmartDefense to consider the
activity a scan.
Type the maximum number of seconds that can elapse, during which the
Number of ports accessed threshold is exceeded, in order for SmartDefense to
detect the activity as a port scan.
For example, if this value is 20, and the Number of ports accessed threshold is
exceeded for 15 seconds, SmartDefense will detect the activity as a port
scan. If the threshold is exceeded for 30 seconds, SmartDefense will not
detect the activity as a port scan.
The default value is 20 seconds.
Track Specify whether to issue logs for scans, by selecting one of the following:
• Log. Issue logs. This is the default.
• None. Do not issue logs. This is the default.
Detect scans
from Internet only
Specify whether to detect only scans originating from the Internet, by
selecting one of the following:
• False. Do not detect only scans from the Internet. This is the
default.
• True. Detect only scans from the Internet.
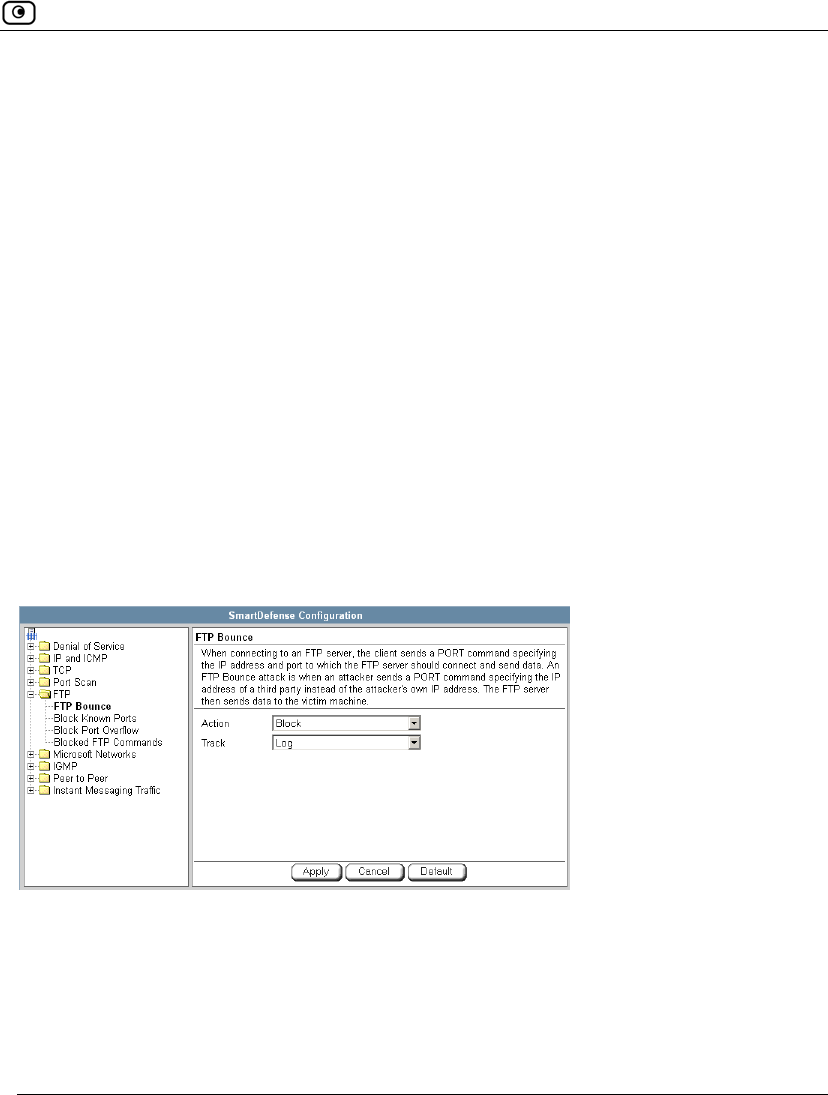
Using SmartDefense
Chapter 9: Setting Your Security Policy 247
FTP
This category allows you to configure various protections related to the FTP
protocol. It includes the following:
• FTP Bounce on page 247
• Block Known Ports on page 248
• Block Port Overflow on page 249
• Blocked FTP Commands on page 250
FTP Bounce
When connecting to an FTP server, the client sends a PORT command specifying
the IP address and port to which the FTP server should connect and send data. An
FTP Bounce attack is when an attacker sends a PORT command specifying the IP
address of a third party instead of the attacker's own IP address. The FTP server
then sends data to the victim machine.
You can configure how FTP bounce attacks should be handled.
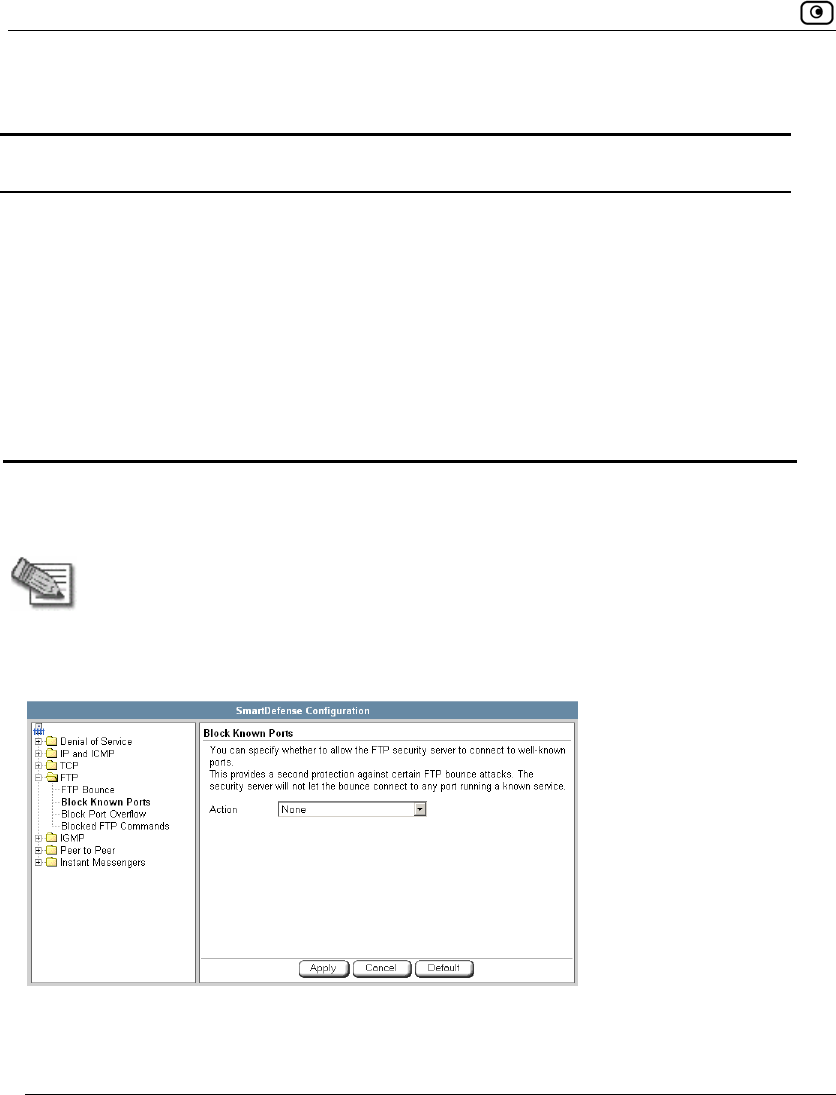
Using SmartDefense
248 Check Point Safe@Office User Guide
Table 49: FTP Bounce Fields
In this field… Do this…
Action Specify what action to take when an FTP Bounce attack occurs, by selecting
one of the following:
• Block. Block the attack. This is the default.
• None. No action.
Track Specify whether to log FTP Bounce attacks, by selecting one of the
following:
• Log. Log the attack. This is the default.
• None. Do not log the attack.
Block Known Ports
You can choose to block the FTP server from connecting to well-known ports.
Note: Known ports are published ports associated with services (for example, SMTP
is port 25).
This provides a second layer of protection against FTP bounce attacks, by
preventing such attacks from reaching well-known ports.
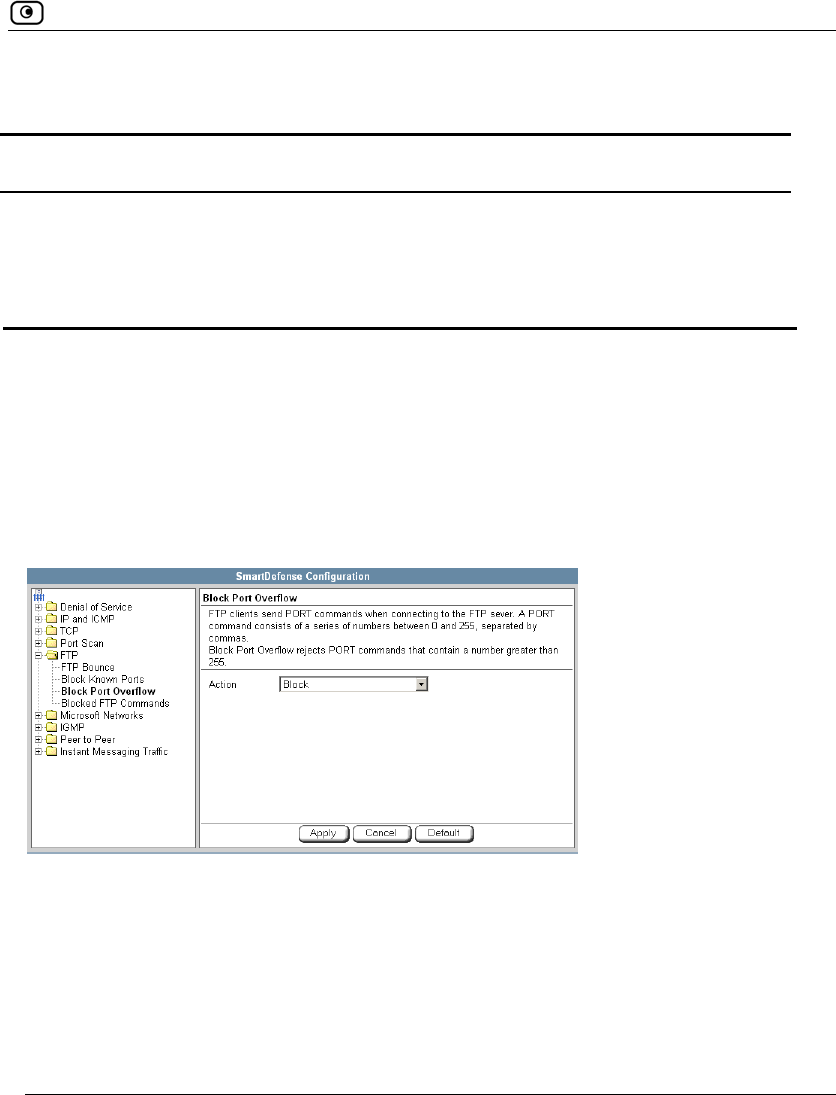
Using SmartDefense
Chapter 9: Setting Your Security Policy 249
Table 50: Block Known Ports Fields
In this field… Do this…
Action Specify what action to take when the FTP server attempts to connect to a
well-known port, by selecting one of the following:
• Block. Block the connection.
• None. No action. This is the default.
Block Port Overflow
FTP clients send PORT commands when connecting to the FTP sever. A PORT
command consists of a series of numbers between 0 and 255, separated by
commas.
To enforce compliance to the FTP standard and prevent potential attacks against
the FTP server, you can block PORT commands that contain a number greater than
255.
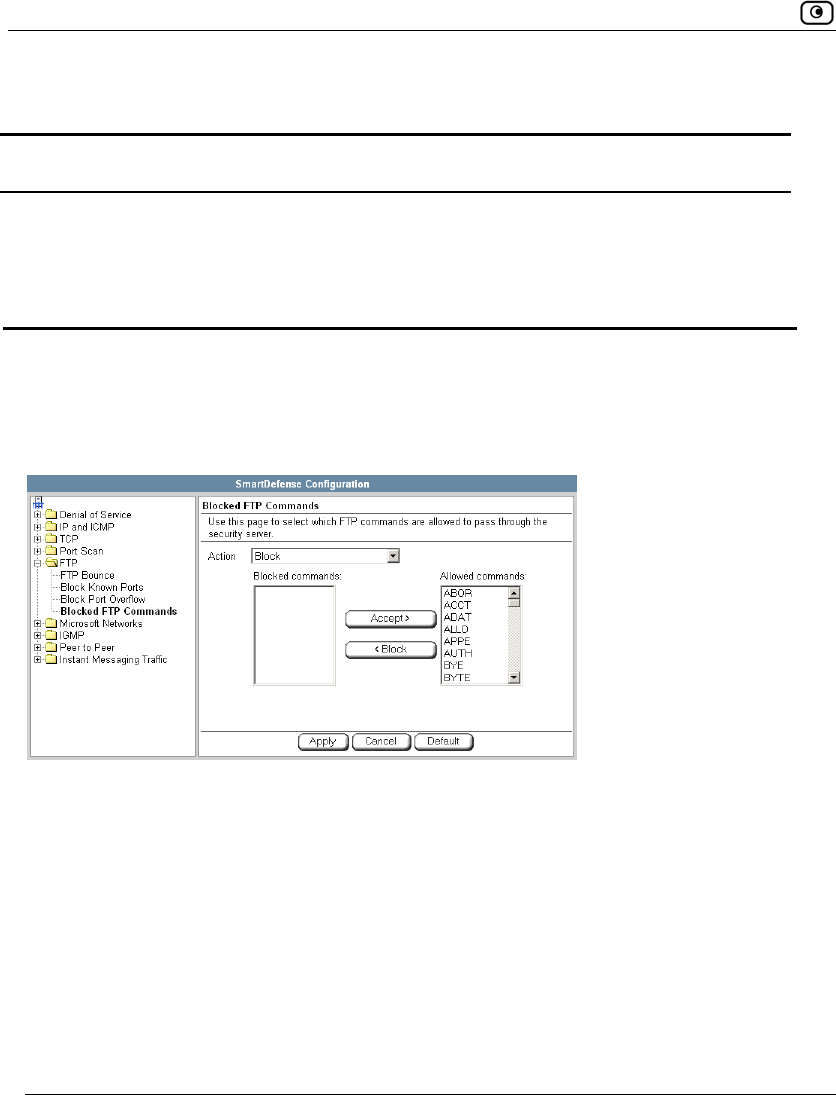
Using SmartDefense
250 Check Point Safe@Office User Guide
Table 51: Block Port Overflow
In this field… Do this…
Action Specify what action to take for PORT commands containing a number
greater than 255, by selecting one of the following:
• Block. Block the PORT command. This is the default.
• None. No action.
Blocked FTP Commands
Some seldom-used FTP commands may compromise FTP server security and
integrity. You can specify which FTP commands should be allowed to pass through
the security server, and which should be blocked.
To enable FTP command blocking
• In the Action drop-down list, select Block.
The FTP commands listed in the Blocked commands box will be blocked.
FTP command blocking is enabled by default.

Using SmartDefense
Chapter 9: Setting Your Security Policy 251
To disable FTP command blocking
• In the Action drop-down list, select None.
All FTP commands are allowed, including those in the Blocked commands box.
To block a specific FTP command
1. In the Allowed commands box, select the desired FTP command.
2. Click Block.
The FTP command appears in the Blocked commands box.
3. Click Apply.
When FTP command blocking is enabled, the FTP command will be blocked.
To allow a specific FTP command
1. In the Blocked commands box, select the desired FTP command.
2. Click Accept.
The FTP command appears in the Allowed commands box.
3. Click Apply.
The FTP command will be allowed, regardless of whether FTP command
blocking is enabled or disabled.
Microsoft Networks
This category includes File and Print Sharing.
Microsoft operating systems and Samba clients rely on Common Internet File
System (CIFS), a protocol for sharing files and printers. However, this protocol is
also widely used by worms as a means of propagation.
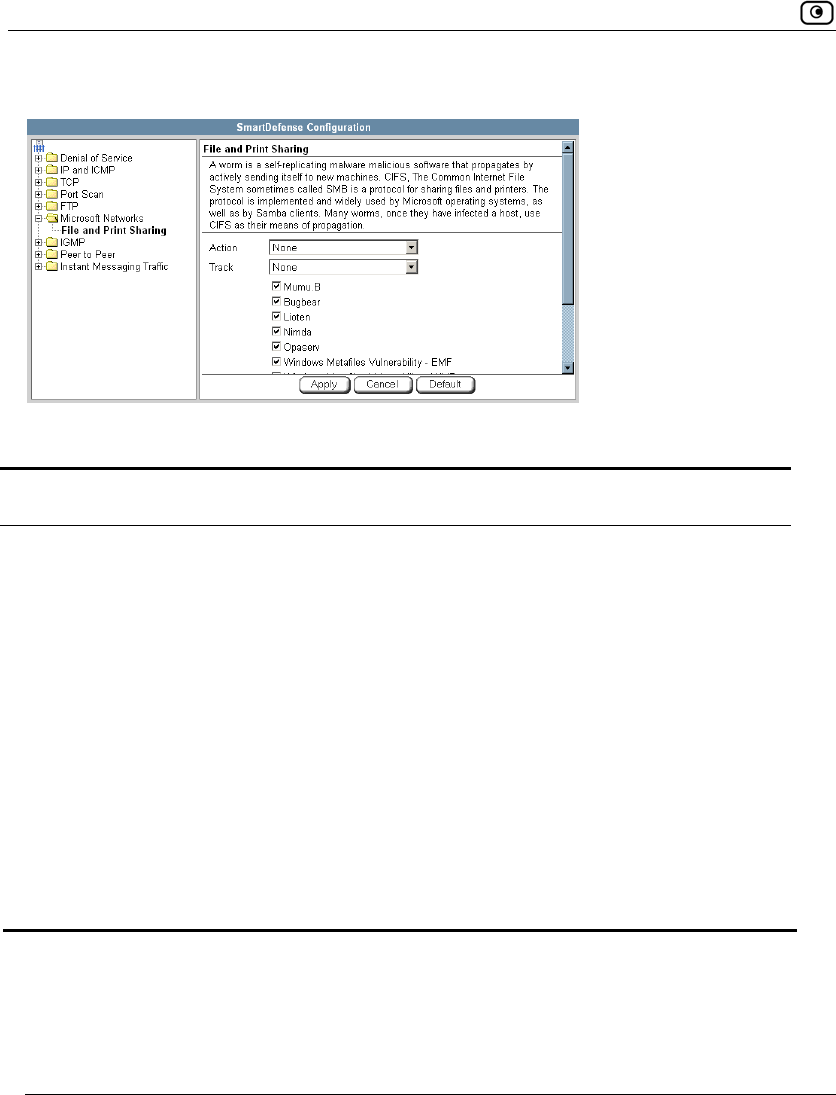
Using SmartDefense
252 Check Point Safe@Office User Guide
You can configure how CIFS worms should be handled.
Table 52: File Print and Sharing Fields
In this field… Do this…
Action Specify what action to take when a CIFS worm attack is detected, by
selecting one of the following:
• Block. Block the attack.
• None. No action. This is the default.
Track Specify whether to log CIFS worm attacks, by selecting one of the
following:
• Log. Log the attack.
• None. Do not log the attack. This is the default.
CIFS worm patterns
list
Select the worm patterns to detect.
Patterns are matched against file names (including file
paths but excluding the disk share name) that the client is
trying to read or write from the server.
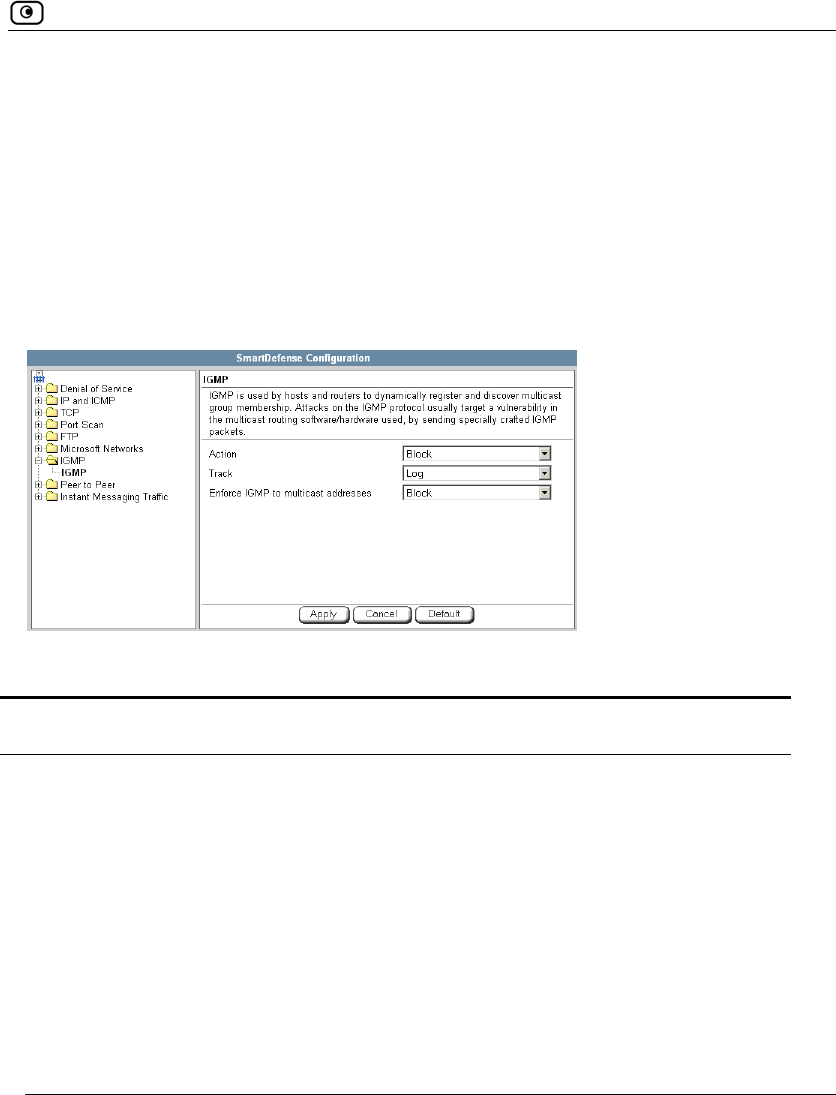
Using SmartDefense
Chapter 9: Setting Your Security Policy 253
IGMP
This category includes the IGMP protocol.
IGMP is used by hosts and routers to dynamically register and discover multicast
group membership. Attacks on the IGMP protocol usually target a vulnerability in
the multicast routing software/hardware used, by sending specially crafted IGMP
packets.
You can configure how IGMP attacks should be handled.
Table 53: IGMP Fields
In this field… Do this…
Action Specify what action to take when an IGMP attack occurs, by selecting
one of the following:
• Block. Block the attack. This is the default.
• None. No action.
Track Specify whether to log IGMP attacks, by selecting one of the following:
• Log. Log the attack. This is the default.
• None. Do not log the attack.
Using SmartDefense
254 Check Point Safe@Office User Guide
In this field… Do this…
Enforce IGMP to
multicast addresses
According to the IGMP specification, IGMP packets must be sent to
multicast addresses. Sending IGMP packets to a unicast or broadcast
address might constitute and attack; therefore the Safe@Office appliance
blocks such packets.
Specify whether to allow or block IGMP packets that are sent to non-
multicast addresses, by selecting one of the following:
• Block. Block IGMP packets that are sent to non-multicast
addresses. This is the default.
• None. No action.
Peer to Peer
SmartDefense can block peer-to-peer traffic, by identifying the proprietary
protocols and preventing the initial connection to the peer-to-peer networks. This
prevents not only downloads, but also search operations.
This category includes the following nodes:
• KaZaA
• Gnutella
• eMule
• BitTorrent
Note: SmartDefense can detect peer-to-peer traffic regardless of the TCP port being
used to initiate the session.
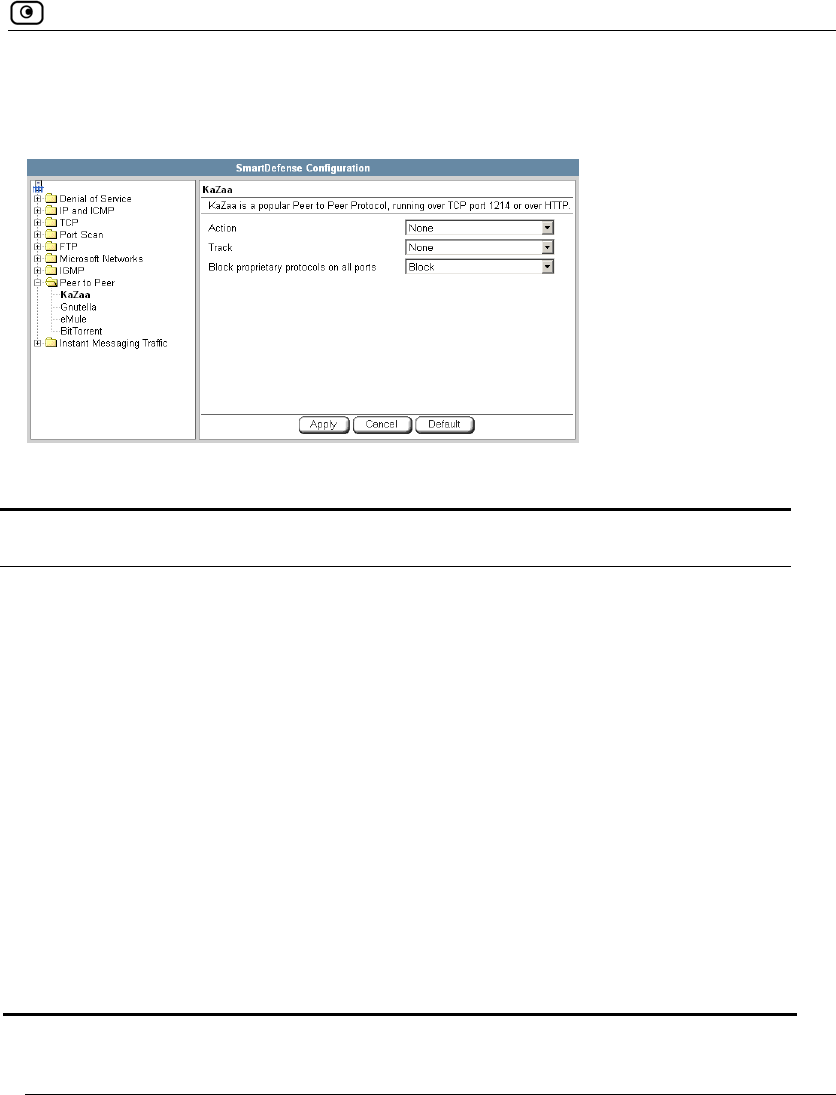
Using SmartDefense
Chapter 9: Setting Your Security Policy 255
In each node, you can configure how peer-to-peer connections of the selected type
should be handled, using the table below.
Table 54: Peer to Peer Fields
In this field… Do this…
Action Specify what action to take when a connection is attempted, by selecting
one of the following:
• Block. Block the connection.
• None. No action. This is the default.
Track Specify whether to log peer-to-peer connections, by selecting one of the
following:
• Log. Log the connection.
• None. Do not log the connection. This is the default.
Block proprietary
protocols on all ports
Specify whether proprietary protocols should be blocked on all ports, by
selecting one of the following:
• Block. Block the proprietary protocol on all ports. This in effect
prevents all communication using this peer-to-peer
application. This is the default.
• None. Do not block the proprietary protocol on all ports.
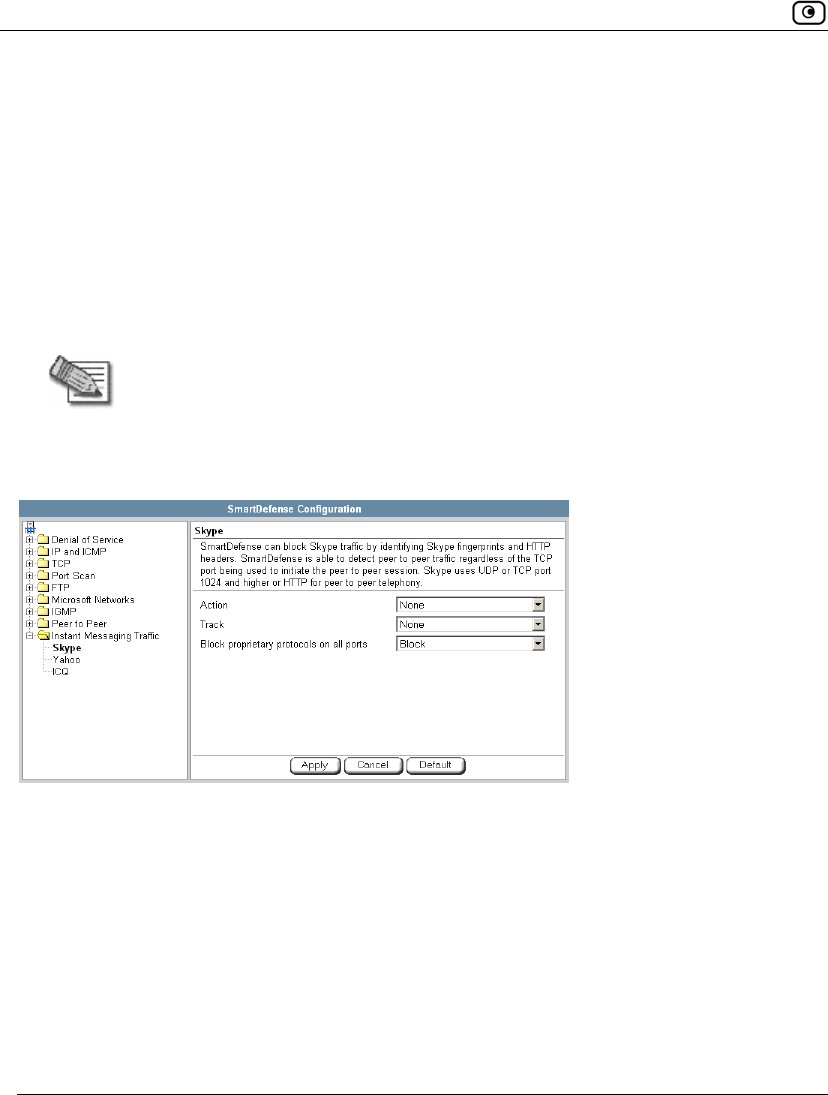
Using SmartDefense
256 Check Point Safe@Office User Guide
Instant Messengers
SmartDefense can block instant messaging applications that use VoIP protocols, by
identifying the messaging application's fingerprints and HTTP headers.
This category includes the following nodes:
• Skype
• Yahoo
• ICQ
Note: SmartDefense can detect instant messaging traffic regardless of the TCP port
being used to initiate the session.
In each node, you can configure how instant messaging connections of the selected
type should be handled, using the table below.

Using SmartDefense
Chapter 9: Setting Your Security Policy 257
Table 55: Instant Messengers Fields
In this field… Do this…
Action Specify what action to take when a connection is attempted, by selecting
one of the following:
• Block. Block the connection.
• None. No action. This is the default.
Track Specify whether to log instant messenger connections, by selecting one
of the following:
• Log. Log the connection.
• None. Do not log the connection. This is the default.
Block proprietary
protocols on all ports
Specify whether proprietary protocols should be blocked on all ports, by
selecting one of the following:
• Block. Block the proprietary protocol on all ports. This in effect
prevents all communication using this instant messenger
application. This is the default.
• None. Do not block the proprietary protocol on all ports.
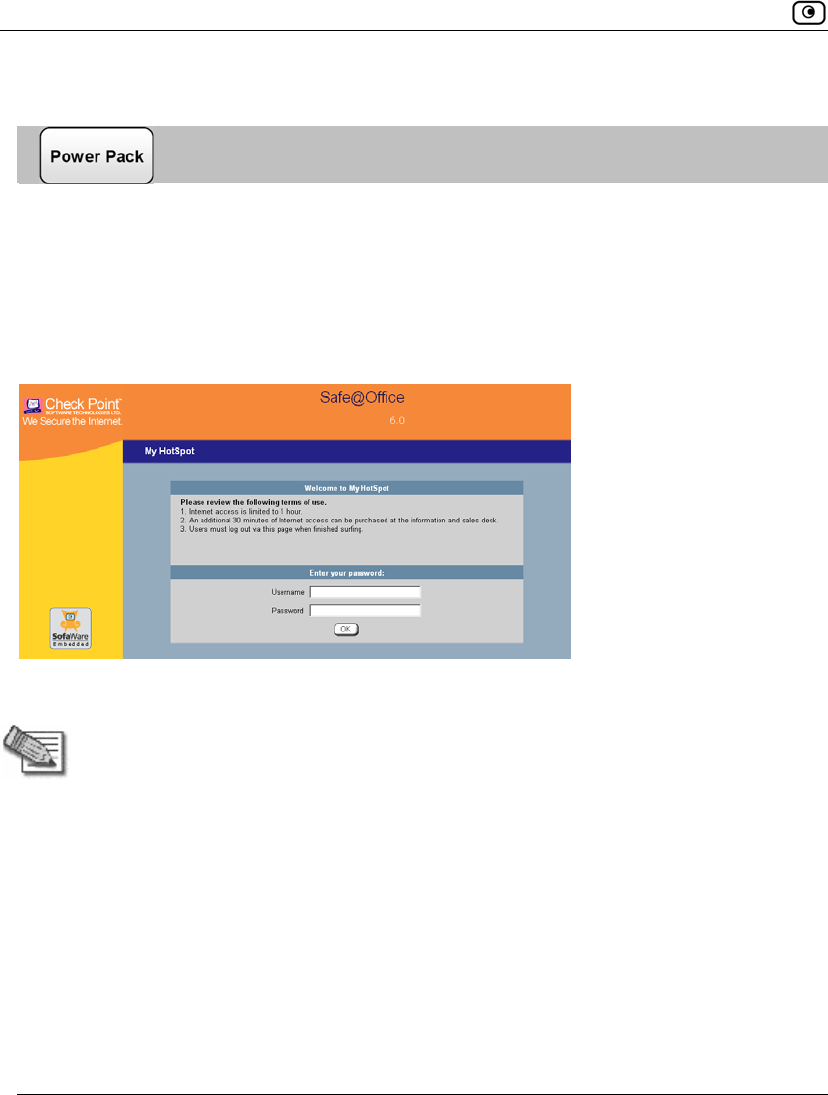
Using Secure HotSpot
258 Check Point Safe@Office User Guide
Using Secure HotSpot
You can enable your Safe@Office appliance as a public Internet access hotspot for
specific networks. When users on those networks attempt to access the Internet,
they are automatically re-directed to the My HotSpot page http://my.hotspot. On
this page, they must read and accept the My HotSpot terms of use, and if My
HotSpot is configured to be password-protected, they must log on using their
Safe@Office username and password. The users may then access the Internet.
Users can also log out in the My HotSpot page.
Note: HotSpot users are automatically logged out after one hour of inactivity.
Safe@Office Secure HotSpot is useful in any wired or wireless environment where
Web-based user authentication or terms-of-use approval is required prior to gaining
access to the network. For example, Secure HotSpot can be used in public
computer labs, educational institutions, libraries, Internet cafés, and so on.
The Safe@Office appliance allows you to add guest users quickly and easily. By
default, guest users are given a username and password that expire in 24 hours and
granted HotSpot Access permissions only. For information on adding quick guest
users, see Adding Quick Guest Users on page 369.
Using Secure HotSpot
Chapter 9: Setting Your Security Policy 259
You can choose to exclude specific network objects from HotSpot enforcement.
For information, see Using Network Objects on page 131.
Important: SecuRemote VPN software users who are authenticated by the Internal
VPN Server are automatically exempt from HotSpot enforcement. This allows, for
example, authenticated employees to gain full access to the corporate LAN, while
guest users are permitted to access the Internet only.
Note: HotSpot enforcement can block traffic passing through the firewall; however, it
does not block local traffic on the same network segment (traffic that does not pass
through the firewall).
Setting Up Secure HotSpot
To set up Secure HotSpot
1. Enable Secure HotSpot for the desired networks.
See Enabling/Disabling Secure HotSpot on page 260.
2. Customize Secure HotSpot as desired.
See Customizing Secure HotSpot on page 261.
3. Grant HotSpot Access permissions to users on the selected networks.
See Adding and Editing Users on page 365.
4. To exclude specific computers from HotSpot enforcement, by adding or editing
their network objects.
See Adding and Editing Network Objects on page 132.
You must select Exclude this computer/network from HotSpot enforcement
option.
5. Add quick guest users as needed.
See Adding Quick Guest Users on page 369.
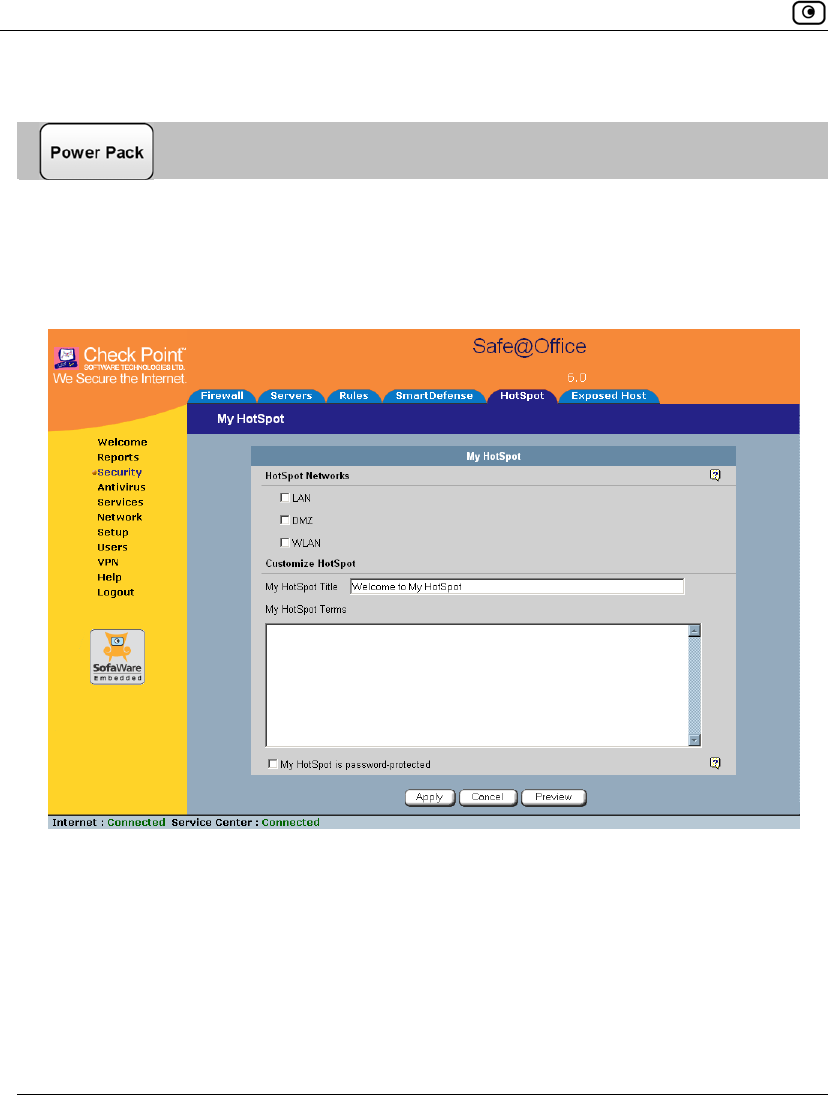
Using Secure HotSpot
260 Check Point Safe@Office User Guide
Enabling/Disabling Secure HotSpot
To enable/disable Secure HotSpot
1. Click Security in the main menu, and click the My HotSpot tab.
The My HotSpot page appears.
2. In the HotSpot Networks area, do one of the following:
• To enable Secure HotSpot for a specific network, select the check box
next to the network.
• To disable Secure HotSpot for a specific network, clear the check box
next to the network.
3. Click Apply.
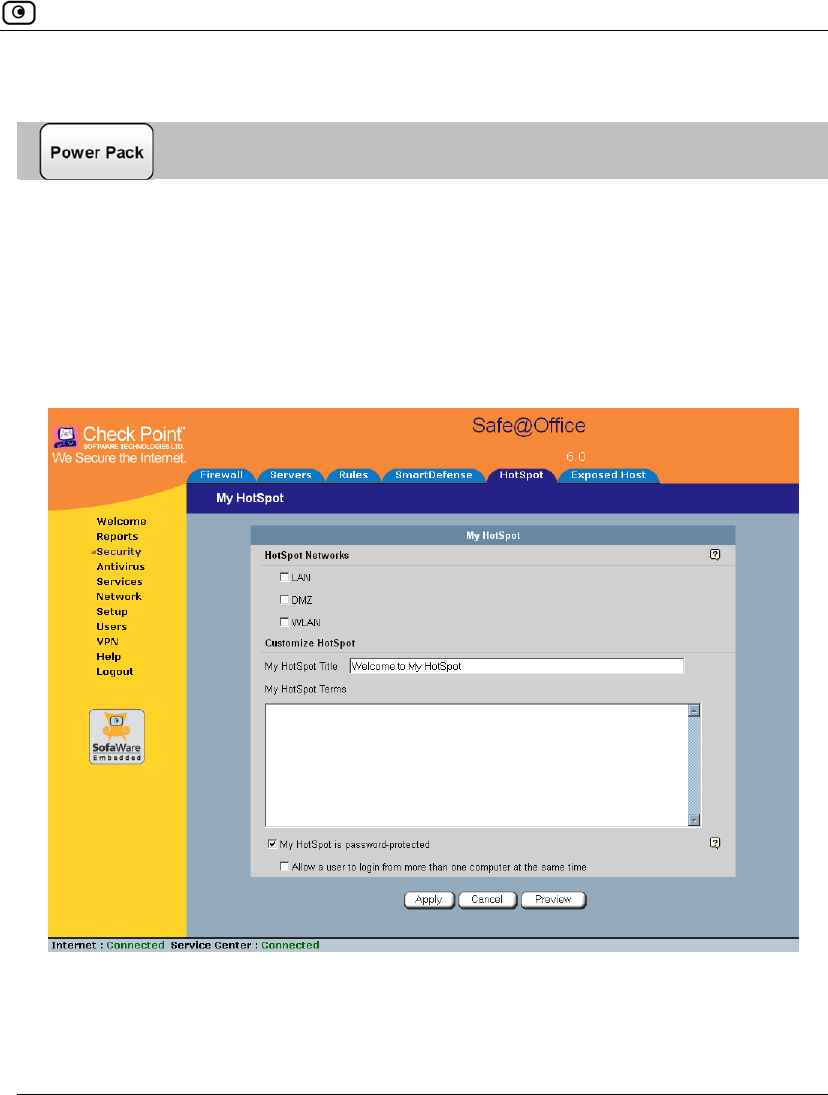
Using Secure HotSpot
Chapter 9: Setting Your Security Policy 261
Customizing Secure HotSpot
To customize Secure HotSpot
1. Click Security in the main menu, and click the My HotSpot tab.
The My HotSpot page appears.
2. Complete the fields using the information in the table below.
Additional fields may appear.
3. To preview the My HotSpot page, click Preview.
A browser window opens displaying the My HotSpot page.

Using Secure HotSpot
262 Check Point Safe@Office User Guide
4. Click Apply.
Your changes are saved.
Table 56: My HotSpot Fields
In this field… Do this…
My HotSpot
Title
Type the title that should appear on the My HotSpot page.
The default title is "Welcome to My HotSpot".
My HotSpot
Terms
Type the terms to which the user must agree before accessing the Internet.
You can use HTML tags as needed.
My HotSpot is
password
protected
Select this option to require users to enter their username and password
before accessing the Internet.
If this option is not selected, users will be required only to accept the terms of
use before accessing the network.
The Allow a user to login from more than one computer at the same time check box
appears.
Allow a user to
login from more
than one
computer at the
same time
Select this option to allow a single user to log on to My HotSpot from multiple
computers at the same time.

Defining an Exposed Host
Chapter 9: Setting Your Security Policy 263
Defining an Exposed Host
The Safe@Office appliance allows you to define an exposed host, which is a
computer that is not protected by the firewall. This is useful for setting up a public
server. It allows unlimited incoming and outgoing connections between the Internet
and the exposed host computer.
The exposed host receives all traffic that was not forwarded to another computer by
use of Allow and Forward rules.
Warning: Entering an IP address may make the designated computer vulnerable to
hacker attacks. Defining an exposed host is not recommended unless you are fully
aware of the security risks.
To define a computer as an exposed host
1. Click Security in the main menu, and click the Exposed Host tab.
The Exposed Host page appears.

Defining an Exposed Host
264 Check Point Safe@Office User Guide
2. In the Exposed Host field, type the IP address of the computer you wish to
define as an exposed host.
Alternatively, you can click This Computer to define your computer as the
exposed host.
3. Click Apply.
The selected computer is now defined as an exposed host.
To clear the exposed host
1. Click Security in the main menu, and click the Exposed Host tab.
The Exposed Host page appears.
2. Click Clear.
3. Click Apply.
No exposed host is defined.

Overview
Chapter 10: Using VStream Antivirus 265
Chapter 10
This chapter explains how to use the VStream Antivirus engine to block security
threats before they reach your network.
This chapter includes the following topics:
Overview..................................................................................................265
Enabling/Disabling VStream Antivirus....................................................267
Viewing VStream Signature Database Information .................................268
Configuring VStream Antivirus ...............................................................269
Updating VStream Antivirus....................................................................281
Overview
The Safe@Office appliance includes VStream Antivirus, an embedded stream-
based antivirus engine based on Check Point Stateful Inspection and Application
Intelligence technologies, that performs virus scanning at the kernel level.
VStream Antivirus scans files for malicious content on the fly, without
downloading the files into intermediate storage. This means minimal added latency
and support for unlimited file sizes; and since VStream Antivirus stores only
minimal state information per connection, it can scan thousands of connections
concurrently. In order to scan archive files on the fly, VStream Antivirus performs
real-time decompression and scanning of ZIP, TAR, and GZ archive files, with
support for nested archive files.
When VStream Antivirus detects malicious content, the action it takes depends on
the protocol in which the virus was found. See the table below. In each case,
VStream Antivirus blocks the file and writes a log to the Event Log.
Using VStream Antivirus

Overview
266 Check Point Safe@Office User Guide
Table 57: VStream Antivirus Actions
If a virus if found in
this protocol...
VStream Antivirus does this... The protocol is detected
on this port...
HTTP • Terminates the
connection All ports on which VStream is
enabled by the policy, not
only port 80
POP3 • Terminates the
connection
• Deletes the virus-
infected email from the
server
The standard TCP port 110.
IMAP • Terminates the
connection
• Replaces the virus-
infected email with a
message notifying the
user that a virus was
found
The standard TCP port 143
SMTP • Rejects the virus-
infected email with error
code 554
• Sends a "Virus
detected" message to
the sender
The standard TCP port 25
FTP • Terminates the data
connection
• Sends a "Virus detected"
message to the FTP
client
The standard TCP port 21
TCP and UDP • Terminates the
connection Generic TCP and UDP ports,
other than those listed above
Note: In protocols that are not listed in this table, VStream Antivirus uses a "best
effort" approach to detect viruses. In such cases, detection of viruses is not
guaranteed and depends on the specific encoding used by the protocol.
Enabling/Disabling VStream Antivirus
Chapter 10: Using VStream Antivirus 267
If you are subscribed to the VStream Antivirus subscription service, VStream
Antivirus virus signatures are automatically updated, so that security is always up-
to-date, and your network is always protected.
Note: VStream Antivirus differs from the Email Antivirus subscription service (part of
the Email Filtering service) in the following ways:
• Email Antivirus is centralized, redirecting traffic through the Service
Center for scanning, while VStream Antivirus scans for viruses in the
Safe@Office gateway itself.
• Email Antivirus is specific to email, scanning incoming POP3 and
outgoing SMTP connections only, while VStream Antivirus supports
additional protocols, including incoming SMTP and outgoing POP3
connections.
You can use either antivirus solution or both in conjunction. For information on
Email Antivirus, see Email Filtering on page 296.
Enabling/Disabling VStream Antivirus
To enable/disable VStream Antivirus
1. Click Antivirus in the main menu, and click the Antivirus tab.
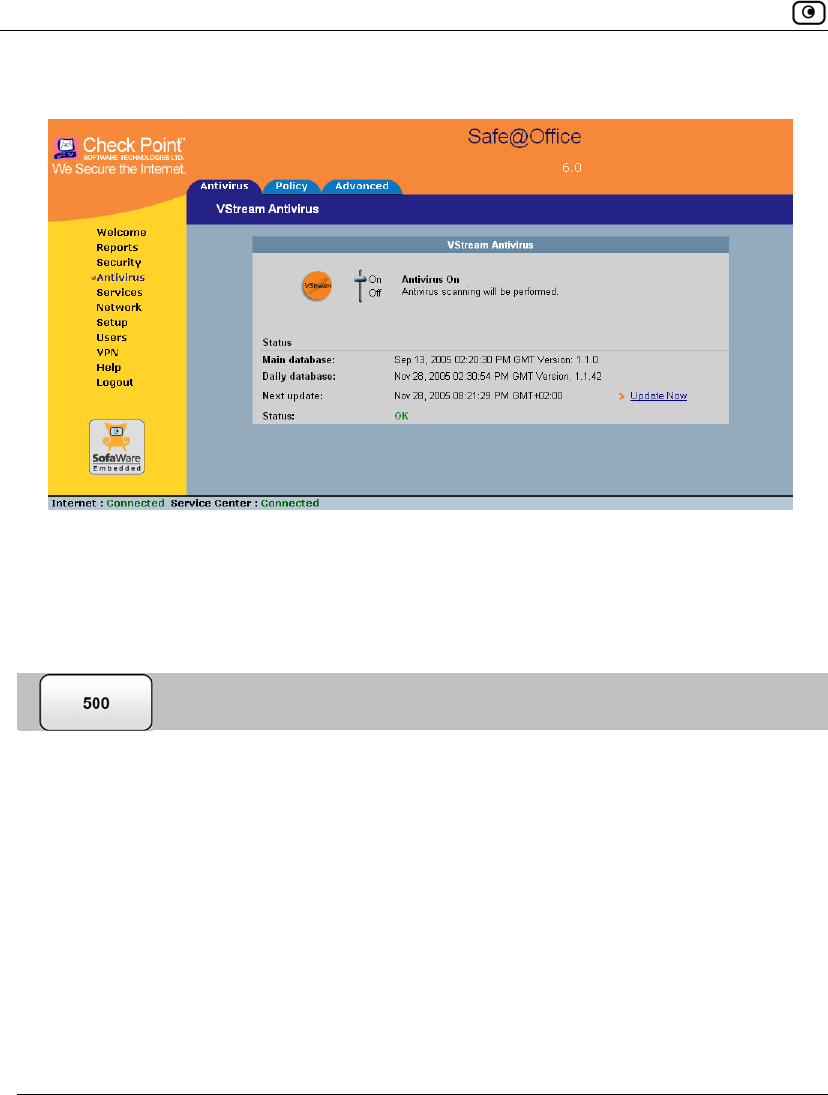
Viewing VStream Signature Database Information
268 Check Point Safe@Office User Guide
The VStream Antivirus page appears.
2. Drag the On/Off lever upwards or downwards.
VStream Antivirus is enabled/disabled for all internal network computers.
Viewing VStream Signature Database Information
VStream Antivirus maintains two databases: a daily database and a main database.
The daily database is updated frequently with the newest virus signatures.
Periodically, the contents of the daily database are moved to the main database,
leaving the daily database empty. This system of incremental updates to the main
database allows for quicker updates and saves on network bandwidth.
You can view information about the VStream signature databases currently in use,
in the VStream Antivirus page.
Configuring VStream Antivirus
Chapter 10: Using VStream Antivirus 269
Table 58: Account Page Fields
This field… Displays…
Main database The date and time at which the main database was last updated,
followed by the version number.
Daily database The date and time at which the daily database was last updated, followed
by the version number.
Next update The next date and time at which the Safe@Office appliance will check for
updates.
Status The current status of the database. This includes the following statuses:
• Database Not Installed
• OK
Configuring VStream Antivirus
You can configure VStream Antivirus in the following ways:
• Configuring the VStream Antivirus Policy on page 269
• Configuring VStream Advanced Settings on page 277
Configuring the VStream Antivirus Policy
VStream Antivirus includes a flexible mechanism that allows the user to define
exactly which traffic should be scanned, by specifying the protocol, ports, and
source and destination IP addresses.
VStream Antivirus processes policy rules in the order they appear in the Antivirus
Policy table, so that rule 1 is applied before rule 2, and so on. This enables you to
define exceptions to rules, by placing the exceptions higher up in the Rules table.
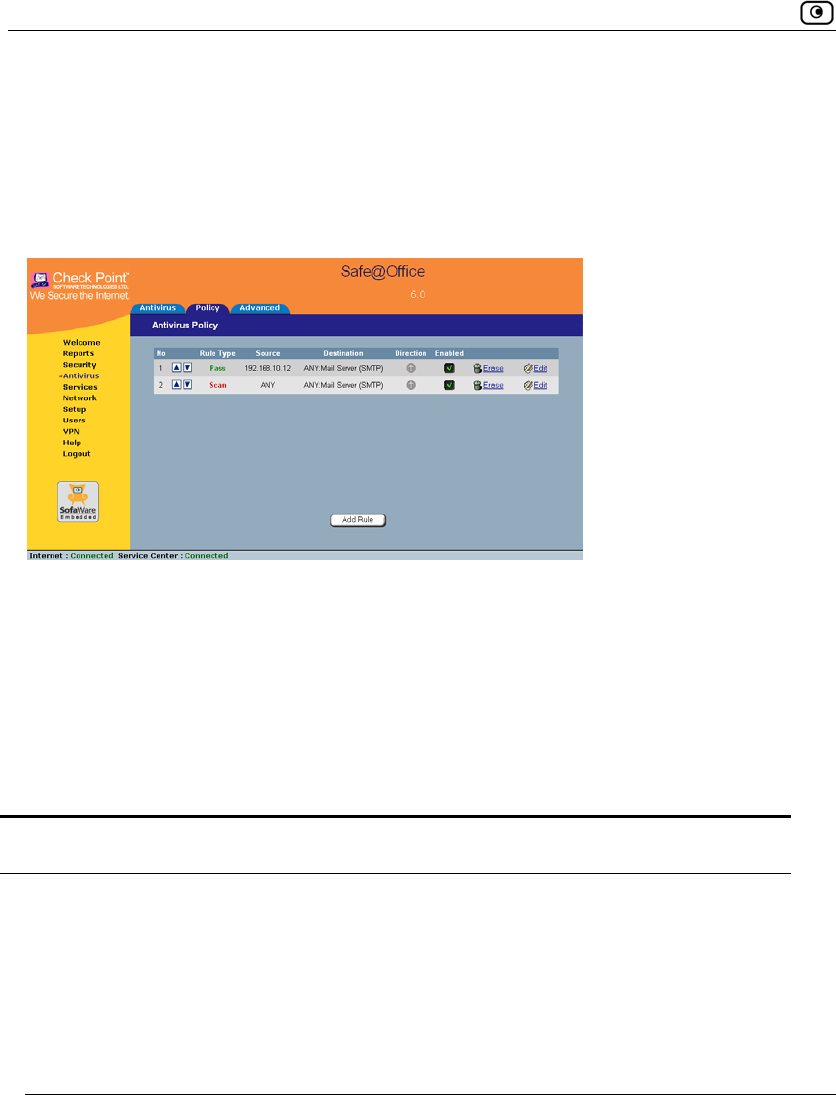
Configuring VStream Antivirus
270 Check Point Safe@Office User Guide
For example, if you want to scan all outgoing SMTP traffic, except traffic from a
specific IP address, you can create a rule scanning all outgoing SMTP traffic and
move the rule down in the Antivirus Policy table. Then create a rule passing SMTP
traffic from the desired IP address and move this rule to a higher location in the
Antivirus Policy table than the first rule. In the figure below, the general rule is rule
number 2, and the exception is rule number 1.
The Safe@Office appliance will process rule 1 first, passing outgoing SMTP traffic
from the specified IP address, and only then it will process rule 2, scanning all
outgoing SMTP traffic.
The following rule types exist:
VStream Antivirus Rule Types
Table 59: VStream Antivirus Rule Types
Rule Description
Pass This rule type enables you to specify that VStream Antivirus should not scan
traffic matching the rule.

Configuring VStream Antivirus
Chapter 10: Using VStream Antivirus 271
Rule Description
Scan This rule type enables you to specify that VStream Antivirus should scan traffic
matching the rule.
If a virus is found, it is blocked and logged.
Adding and Editing Rules
To add or edit a rule
1. Click Antivirus in the main menu, and click the Policy tab.
The Antivirus Policy page appears.
2. Do one of the following:
• To add a new rule, click Add Rule.
• To edit an existing rule, click the Edit icon next to the desired rule.
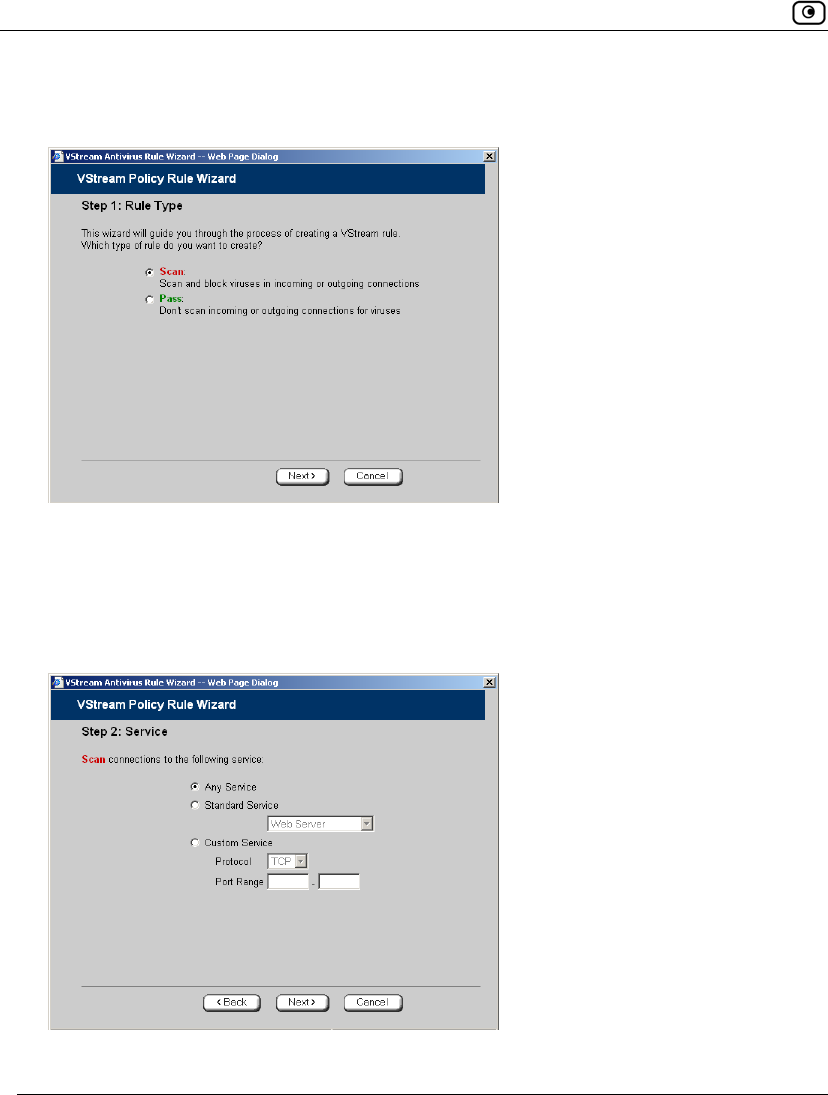
Configuring VStream Antivirus
272 Check Point Safe@Office User Guide
The VStream Policy Rule Wizard opens, with the Step 1: Rule Type dialog box
displayed.
3. Select the type of rule you want to create.
4. Click Next.
The Step 2: Service dialog box appears.
The example below shows a Scan rule.
5. Complete the fields using the relevant information in the table below.
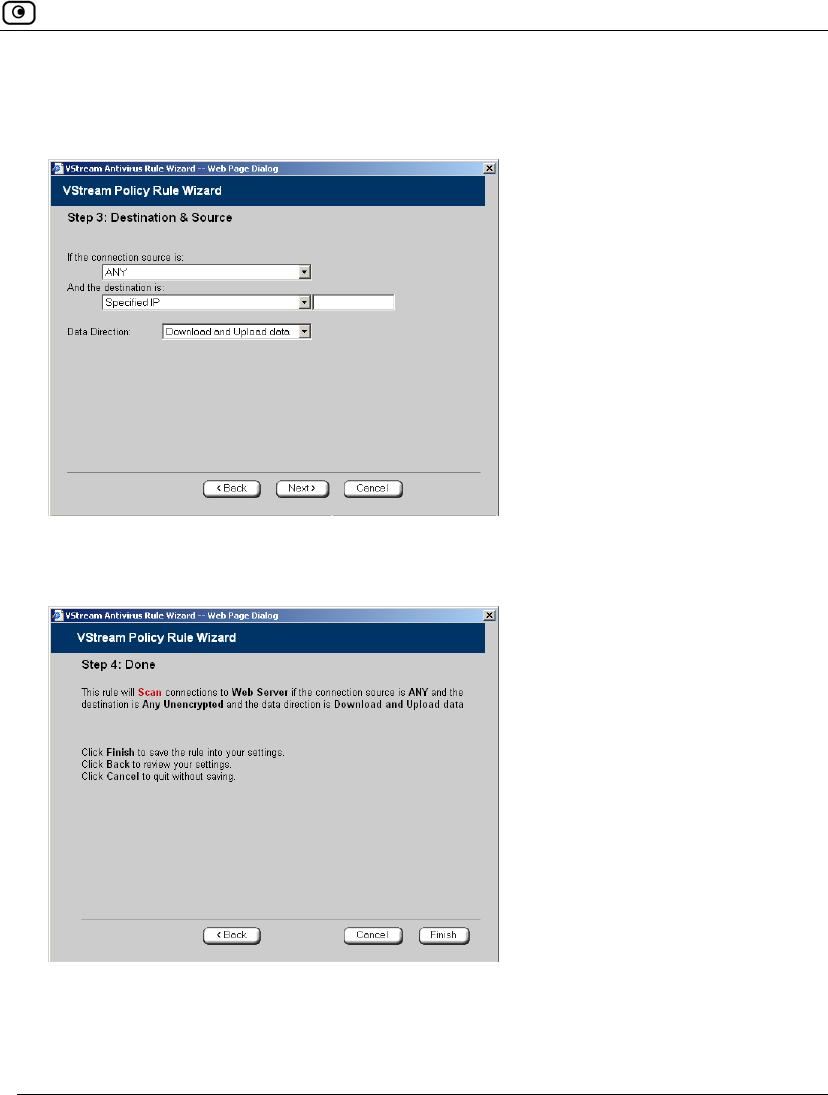
Configuring VStream Antivirus
Chapter 10: Using VStream Antivirus 273
6. Click Next.
The Step 3: Destination & Source dialog box appears.
7. Complete the fields using the relevant information in the table below.
The Step 4: Done dialog box appears.
8. Click Finish.
The new rule appears in the Firewall Rules page.

Configuring VStream Antivirus
274 Check Point Safe@Office User Guide
Table 60: VStream Rule Fields
In this field… Do this…
Any Service Click this option to specify that the rule should apply to any service.
Standard
Service
Click this option to specify that the rule should apply to a specific standard
service.
You must then select the desired service from the drop-down list.
Custom Service Click this option to specify that the rule should apply to a specific non-
standard service.
The Protocol and Port Range fields are enabled. You must fill them in.
Protocol Select the protocol (TCP, UDP, or ANY) for which the rule should apply.
Ports To specify the port range to which the rule applies, type the start port
number in the left text box, and the end port number in the right text box.
Note: If you do not enter a port range, the rule will apply to all ports. If you
enter only one port number, the range will include only that port.
If the
connection
source is
Select the source of the connections you want to allow/block.
To specify an IP address, select Specified IP and type the desired IP address
in the filed provided.
To specify an IP address range, select Specified Range and type the desired
IP address range in the fields provided.
Configuring VStream Antivirus
Chapter 10: Using VStream Antivirus 275
In this field… Do this…
And the
destination is
Select the destination of the connections you want to allow or block.
To specify an IP address, select Specified IP and type the desired IP address
in the text box.
To specify an IP address range, select Specified Range and type the desired
IP address range in the fields provided. This option is not available in Allow
and Forward rules.
To specify the Safe@Office Portal and network printers, select This Gateway.
This option is not available in Allow and Forward rules.
To specify any destination except the Safe@Office Portal and network
printers, select ANY.
Data Direction Select the direction of connections to which the rule should apply:
• Download and Upload data. The rule applies to downloaded and
uploaded data. This is the default.
• Download data. The rule applies to downloaded data, that is, data
flowing from the destination of the connection to the source of the
connection.
• Upload data. The rule applies to uploaded data, that is, data flowing
from the source of the connection to the destination of the
connection.
Enabling/Disabling Rules
You can temporarily disable a VStream Antivirus rule.
To enable/disable a rule
1. Click Antivirus in the main menu, and click the Policy tab.
The Antivirus Policy page appears.
Configuring VStream Antivirus
276 Check Point Safe@Office User Guide
2. Next to the desired rule, do one of the following:
• To enable the rule, click .
The button changes to and the rule is enabled.
• To disable the rule, click .
The button changes to and the rule is disabled.
Changing Rules' Priority
To change a rule's priority
1. Click Antivirus in the main menu, and click the Policy tab.
The Antivirus Policy page appears.
2. Do one of the following:
• Click next to the desired rule, to move the rule up in the table.
• Click next to the desired rule, to move the rule down in the table.
The rule's priority changes accordingly.
Deleting Rules
To delete an existing rule
1. Click Antivirus in the main menu, and click the Policy tab.
The Antivirus Policy page appears.
2. Click the Erase icon of the rule you wish to delete.
A confirmation message appears.
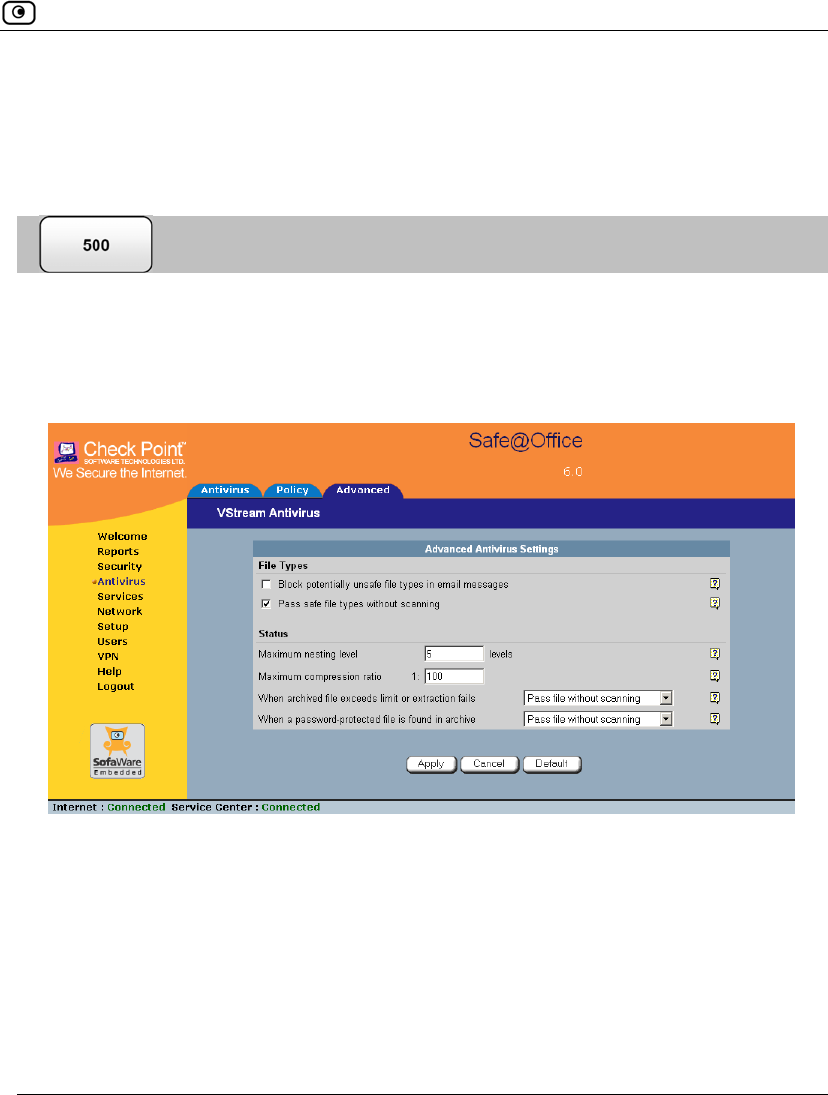
Configuring VStream Antivirus
Chapter 10: Using VStream Antivirus 277
3. Click OK.
The rule is deleted.
Configuring VStream Advanced Settings
To configure VStream Antivirus advanced settings
1. Click Antivirus in the main menu, and click the Advanced tab.
The Advanced Antivirus Settings page appears.
2. Complete the fields using the table below.
3. Click Apply.
4. To restore the default VStream Antivirus settings, do the following:
a) Click Default.
A confirmation message appears.
b) Click OK.

Configuring VStream Antivirus
278 Check Point Safe@Office User Guide
The VStream Antivirus settings are reset to their defaults. For information on
the default values, refer to the table below.
Table 61: Advanced Antivirus Settings Fields
In this field… Do this…
File Types
Block potentially unsafe
file types in email
messages
Select this option to block all emails containing potentially unsafe
attachments.
Unsafe file types are:
• DOS/Windows executables, libraries and drivers
• Compiled HTML Help files
• VBScript files
• Files with {CLSID} in their name
• The following file extensions: ade, adp, bas, bat, chm,
cmd,com, cpl, crt, exe, hlp, hta, inf, ins, isp, js, jse,
lnk, mdb, mde, msc, msi, msp, mst, pcd, pif, reg, scr,
sct, shs,shb, url, vb, vbe, vbs, wsc, wsf, wsh.

Configuring VStream Antivirus
Chapter 10: Using VStream Antivirus 279
In this field… Do this…
Pass safe file types
without scanning
Select this option to accept common file types that are known to
be safe, without scanning them.
Safe files types are:
• MPEG streams
• RIFF Ogg Stream
• MP3
• PDF
• PostScript
• WMA/WMV/ASF
• RealMedia
• JPEG - only the header is scanned, and the rest of
the file is skipped
Selecting this option reduces the load on the gateway by skipping
safe file types. This option is selected by default.
Status
Maximum nesting level Type the maximum number of nested content levels that
VStream Antivirus should scan.
Setting a higher number increases security. Setting a lower
number prevents attackers from overloading the gateway by
sending extremely nested archive files.
The default value is 5 levels.

Configuring VStream Antivirus
280 Check Point Safe@Office User Guide
In this field… Do this…
Maximum compression
ratio 1:x
Fill in the field to complete the maximum compression ratio of
files that VStream Antivirus should scan.
For example, to specify a 1:150 maximum compression ratio,
type 150.
Setting a higher number allows the scanning of highly
compressed files, but creates a potential for highly compressible
files to create a heavy load on the appliance. Setting a lower
number prevents attackers from overloading the gateway by
sending extremely compressible files.
The default value is 100.
When archived file
exceeds limit or extraction
fails
Specify how VStream Antivirus should handle files that exceed
the Maximum nesting level or the Maximum compression ratio, and
files for which scanning fails. Select one of the following:
• Pass file without scanning. Scan only the number of
levels specified, and skip the scanning of more deeply
nested archives. Furthermore, skip scanning highly
compressible files, and skip scanning archives that
cannot be extracted because they are corrupt. This is
the default.
• Block file. Block the file.
When a password-
protected file is found in
archive
VStream Antivirus cannot extract and scan password-protected
files inside archive. Specify how VStream Antivirus should handle
such files, by selecting one of the following:
• Pass file without scanning. Accept the file without
scanning it. This is the default.
• Block file. Block the file.

Updating VStream Antivirus
Chapter 10: Using VStream Antivirus 281
Updating VStream Antivirus
When you are subscribed to the VStream Antivirus updates service, VStream
Antivirus virus signatures are automatically updated, keeping security up-to-date
with no need for user intervention. However, you can still check for updates
manually, if needed.
To update the VStream Antivirus virus signature database
1. Click Antivirus in the main menu, and click the Antivirus tab.
The VStream Antivirus page appears.
2. Click Update Now.
The VStream Antivirus database is updated with the latest virus signatures.
Connecting to a Service Center
Chapter 11: Using Subscription Services 283
Chapter 11
This chapter explains how to start subscription services, and how to use Software
Updates, Web Filtering, and Email Filtering services.
Note: Check with your reseller regarding availability of subscription services, or surf
to www.sofaware.com/servicecenters to locate a Service Center in your area.
This chapter includes the following topics:
Connecting to a Service Center................................................................283
Viewing Services Information..................................................................289
Refreshing Your Service Center Connection............................................290
Configuring Your Account.......................................................................290
Disconnecting from Your Service Center.................................................291
Web Filtering............................................................................................292
Email Filtering..........................................................................................296
Automatic and Manual Updates ...............................................................300
Connecting to a Service Center
To connect to a Service Center
1. Click Services in the main menu, and click the Account tab.
Using Subscription Services
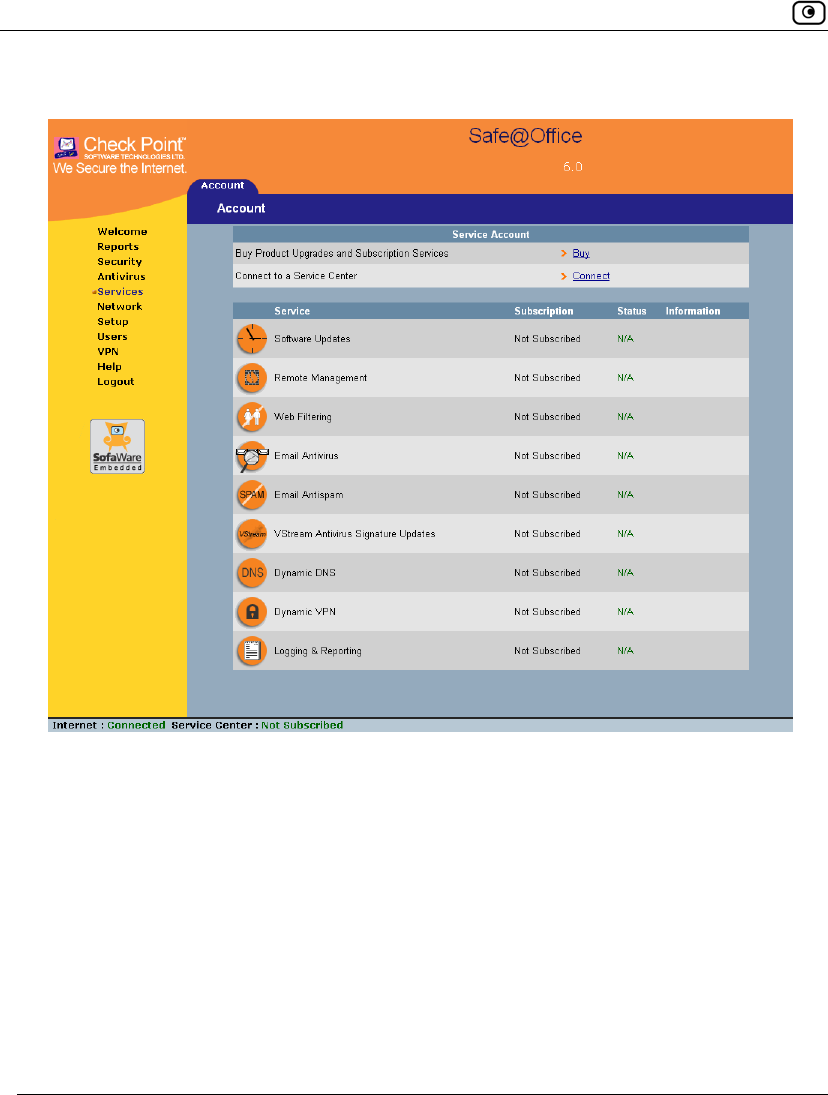
Connecting to a Service Center
284 Check Point Safe@Office User Guide
The Account page appears.
2. In the Service Account area, click Connect.