SofaWare Technologies SBX-166LHGE-5 Safe@Office/VPN-1 Edge User Manual Part 3
SofaWare Technologies Ltd. Safe@Office/VPN-1 Edge Users Manual Part 3
Contents
- 1. Users Manual Part 1
- 2. Users Manual Part 2
- 3. Users Manual Part 3
Users Manual Part 3
Connecting to a Service Center
Chapter 11: Using Subscription Services 285
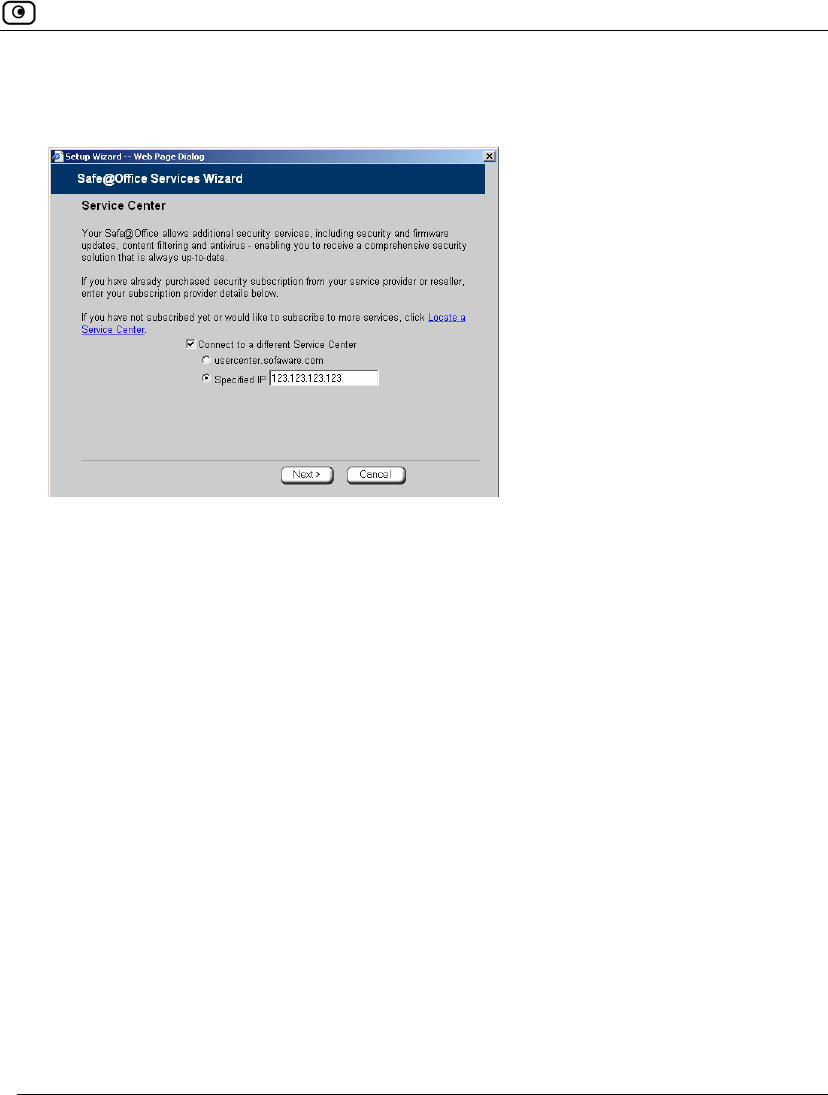
The Safe@Office Services Wizard opens, with the Service Center dialog box
displayed.
3. Make sure the Connect to a different Service Center check box is selected.
4. Do one of the following:
• To connect to the SofaWare Service Center, choose
usercenter.sofaware.com.
• To specify a Service Center, choose Specified IP and then in the Specified
IP field, enter the desired Service Center’s IP address, as given to you by
your system administrator.
5. Click Next.
• The Connecting… screen appears.
Connecting to a Service Center
286 Check Point Safe@Office User Guide
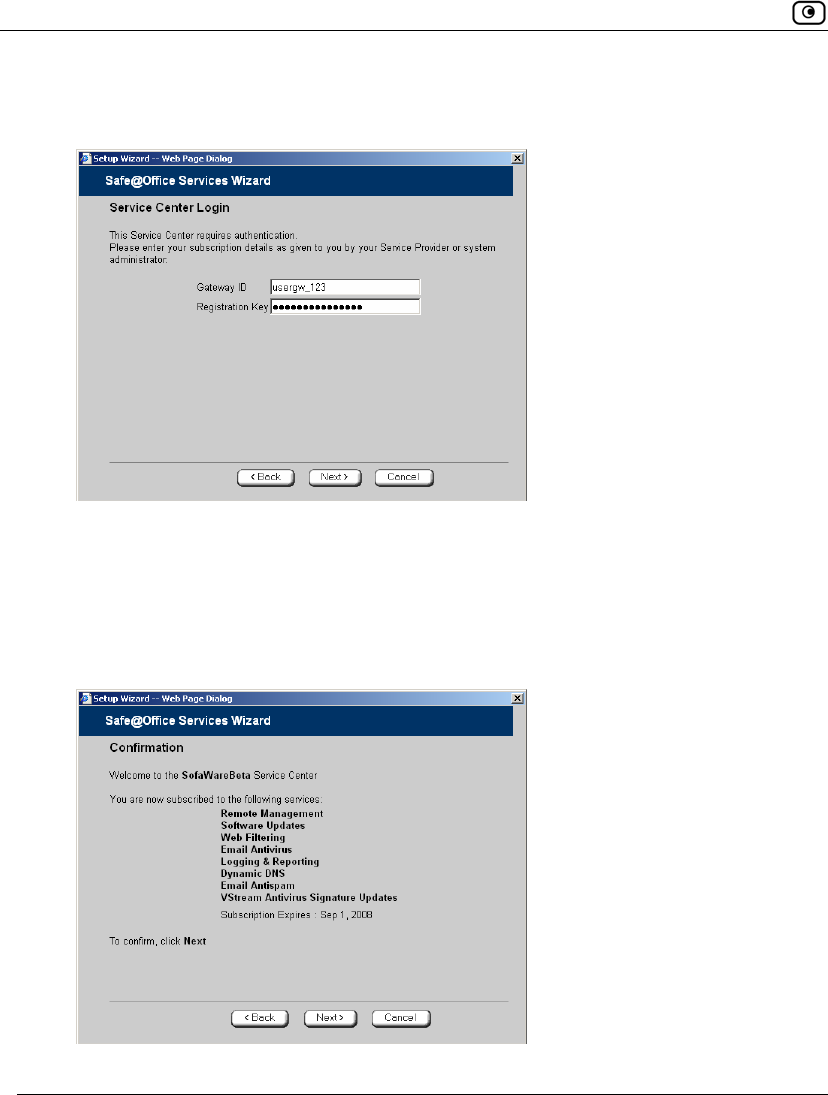
• If the Service Center requires authentication, the Service Center Login
dialog box appears.
Enter your gateway ID and registration key in the appropriate fields, as given
to you by your service provider, then click Next.
• The Connecting… screen appears.
• The Confirmation dialog box appears with a list of services to which you
are subscribed.
Connecting to a Service Center
Chapter 11: Using Subscription Services 287
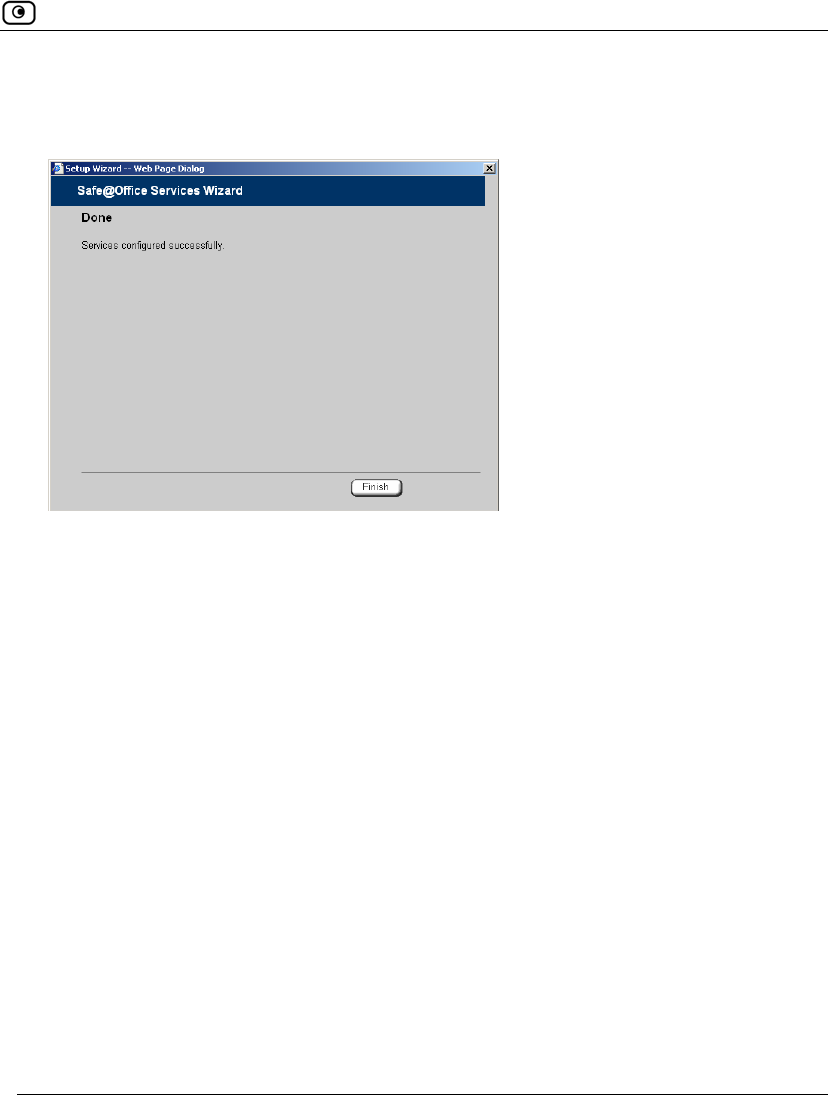
6. Click Next.
The Done screen appears with a success message.
7. Click Finish.
The following things happen:
• If a new firmware is available, the Safe@Office appliance may start
downloading it. This may take several minutes. Once the download is
complete, the Safe@Office appliance restarts using the new firmware.
• The Welcome page appears.
Connecting to a Service Center
288 Check Point Safe@Office User Guide
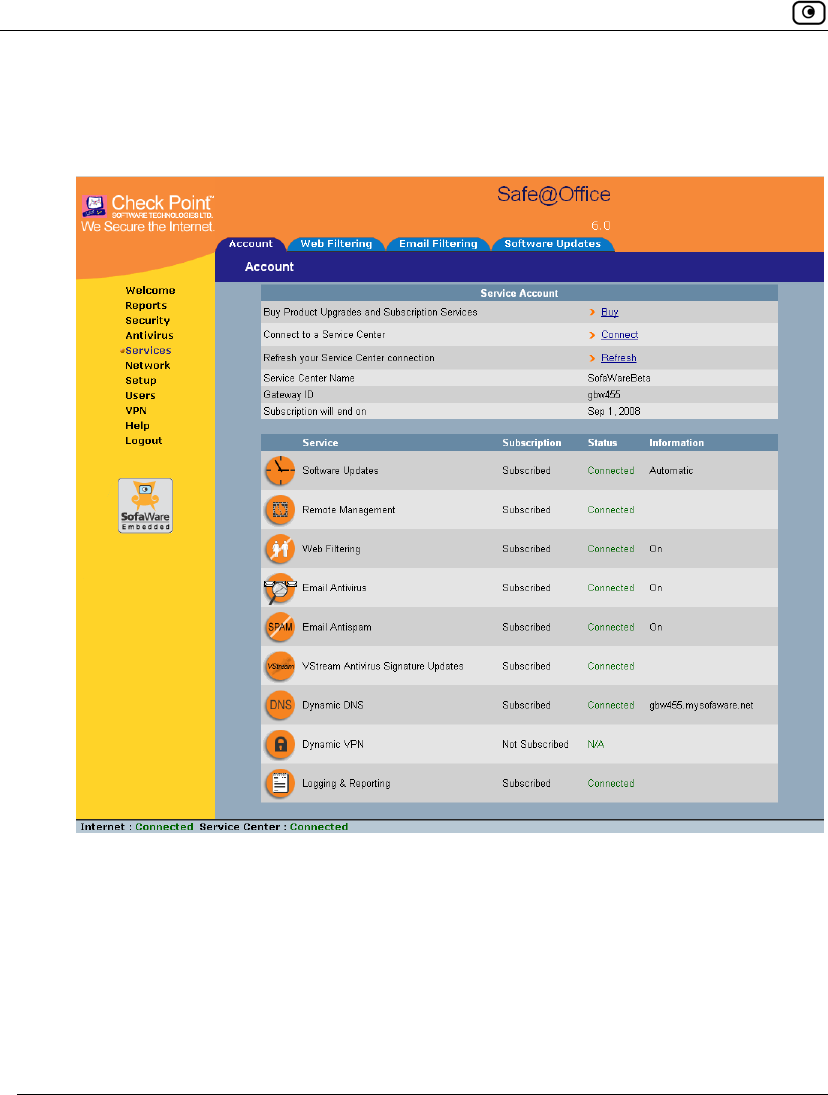
• The services to which you are subscribed are now available on your
Safe@Office appliance and listed as such on the Account page. See
Viewing Services Information on page 289 for further information.
• The Services submenu includes the services to which you are subscribed.
Viewing Services Information
Chapter 11: Using Subscription Services 289
Viewing Services Information
The Account page displays the following information about your subscription.
Table 62: Account Page Fields
This field… Displays…
Service Center
Name
The name of the Service Center to which you are connected (if known).
Gateway ID Your gateway ID.
Subscription will
end on
The date on which your subscription to services will end.
Service The services available in your service plan.
Subscription The status of your subscription to each service:
• Subscribed
• Not Subscribed
Status The status of each service:
• Connected. You are connected to the service through the
Service Center.
• Connecting. Connecting to the Service Center.
• N/A. The service is not available.
Refreshing Your Service Center Connection
290 Check Point Safe@Office User Guide
This field… Displays…
Information The mode to which each service is set.
If you are subscribed to Dynamic DNS, this field displays your gateway's
domain name.
For further information, see Web Filtering on page 292, Virus Scanning
on page 296, and Automatic and Manual Updates on page 300.
Refreshing Your Service Center Connection
This option restarts your Safe@Office appliance’s connection to the Service Center
and refreshes your Safe@Office appliance’s service settings.
To refresh your Service Center connection
1. Click Services in the main menu, and click the Account tab.
The Account page appears.
2. In the Service Account area, click Refresh.
The Safe@Office appliance reconnects to the Service Center.
Your service settings are refreshed.
Configuring Your Account
This option allows you to access your Service Center's Web site, which may offer
additional configuration options for your account. Contact your Service Center for
a user ID and password.
Disconnecting from Your Service Center
Chapter 11: Using Subscription Services 291
To configure your account
1. Click Services in the main menu, and click the Account tab.
The Account page appears.
2. In the Service Account area, click Configure.
Note: If no additional settings are available from your Service Center, this button will
not appear.
Your Service Center's Web site opens.
3. Follow the on-screen instructions.
Disconnecting from Your Service Center
If desired, you can disconnect from your Service Center.
To disconnect from your Service Center
1. Click Services in the main menu, and click the Account tab.
The Account page appears.
2. In the Service Account area, click Connect.
The Safe@Office Services Wizard opens, with the first Subscription Services
dialog box displayed.
3. Clear the Connect to a different Service Center check box.
4. Click Next.
The Done screen appears with a success message.
5. Click Finish.
The following things happen:
• You are disconnected from the Service Center.
Web Filtering
292 Check Point Safe@Office User Guide
• The services to which you were subscribed are no longer available on
your Safe@Office appliance.
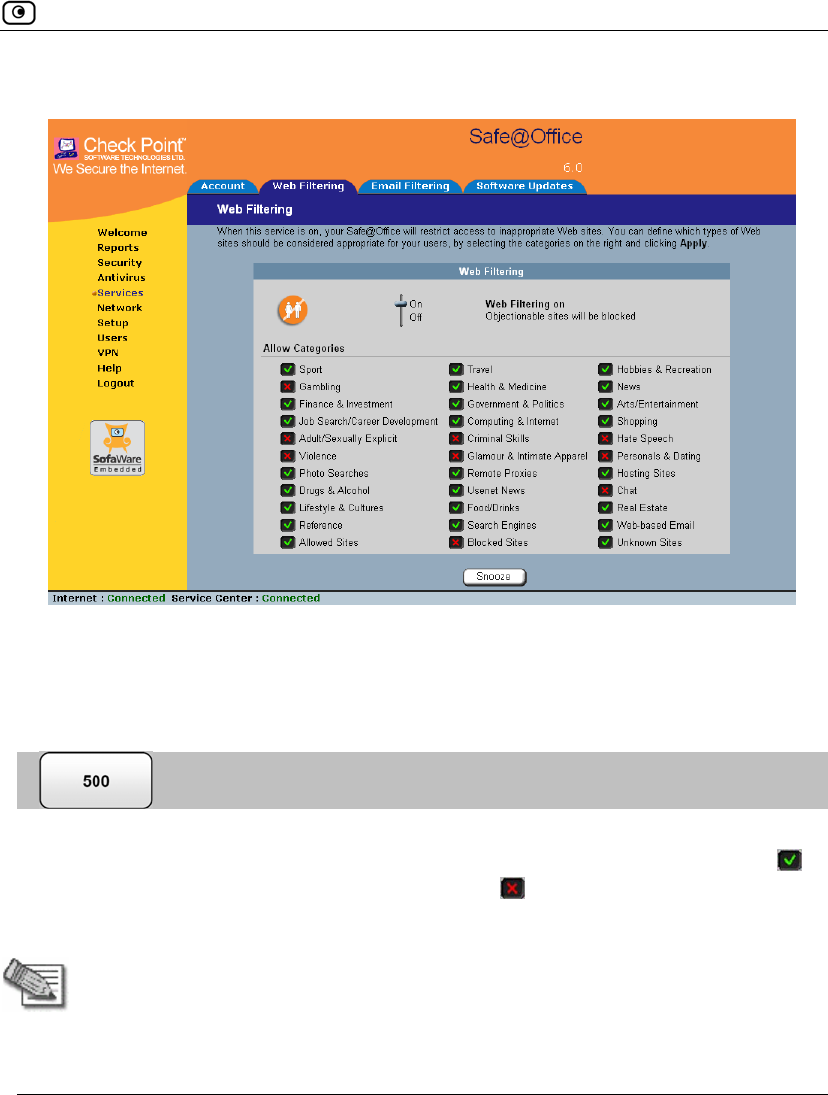
Web Filtering
When the Web Filtering service is enabled, access to Web content is restricted
according to the categories specified under Allow Categories. Authorized users will
be able to view Web pages with no restrictions, only after they have provided the
administrator password via the Web Filtering pop-up window.
Note: Web Filtering is only available if you are connected to a Service Center and
subscribed to this service.
Enabling/Disabling Web Filtering
Note: If you are remotely managed, contact your Service Center to change these
settings.
To enable/disable Web Filtering
1. Click Services in the main menu, and click the Web Filtering tab.
Web Filtering
Chapter 11: Using Subscription Services 293
The Web Filtering page appears.
2. Drag the On/Off lever upwards or downwards.
Web Filtering is enabled/disabled.
Selecting Categories for Blocking
You can define which types of Web sites should be considered appropriate for your
family or office members, by selecting the categories. Categories marked with
will remain visible, while categories marked with will be blocked and will
require the administrator password for viewing.
Note: If you are remotely managed, contact your Service Center to change these
settings.
Web Filtering
294 Check Point Safe@Office User Guide
To allow/block a category
• In the Allow Categories area, click or next to the desired category.
Temporarily Disabling Web Filtering
If desired, you can temporarily disable the Web Filtering service.
To temporarily disable Web Filtering
1. Click Services in the main menu, and click the Web Filtering tab.
The Web Filtering page appears.
2. Click Snooze.
• Web Filtering is temporarily disabled for all internal network computers.
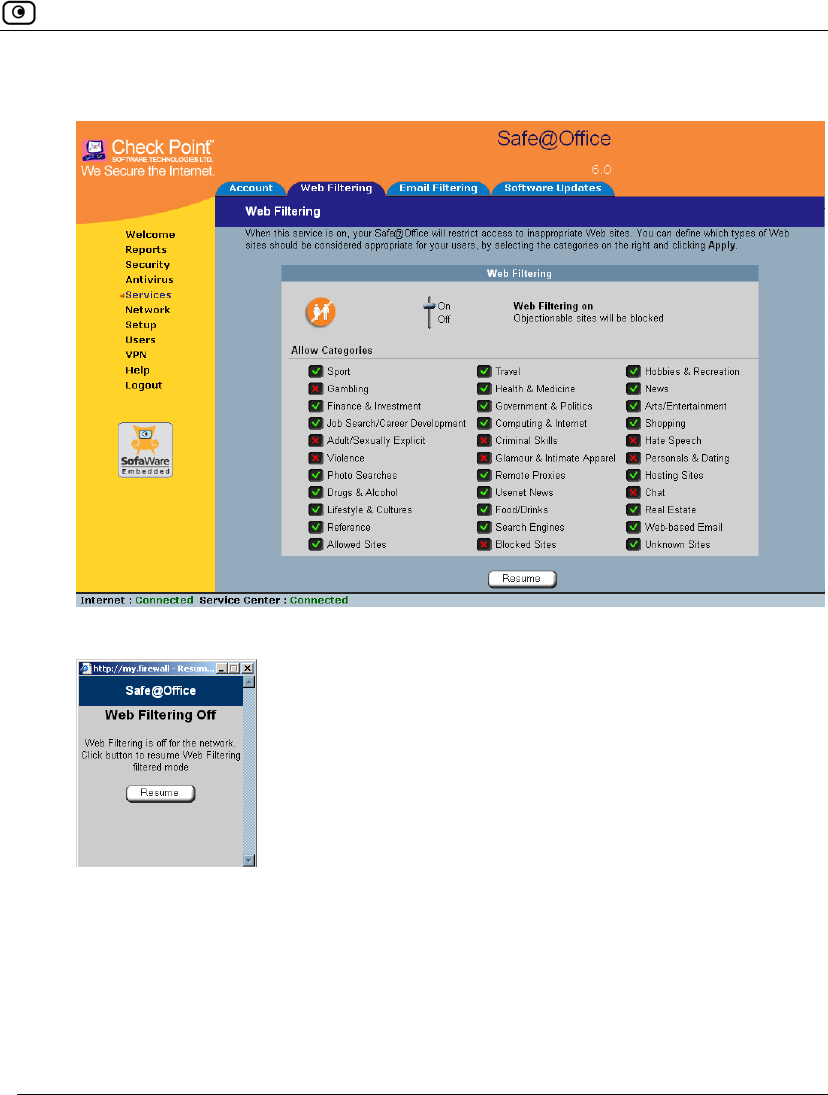
Web Filtering
Chapter 11: Using Subscription Services 295
• The Snooze button changes to Resume.
• The Web Filtering Off popup window opens.
3. To re-enable the service, click Resume, either in the popup window, or on the
Web Filtering page.
• The service is re-enabled for all internal network computers.
• If you clicked Resume in the Web Filtering page, the button changes to
Snooze.
Email Filtering
296 Check Point Safe@Office User Guide
• If you clicked Resume in the Web Filtering Off popup window, the popup
window closes.
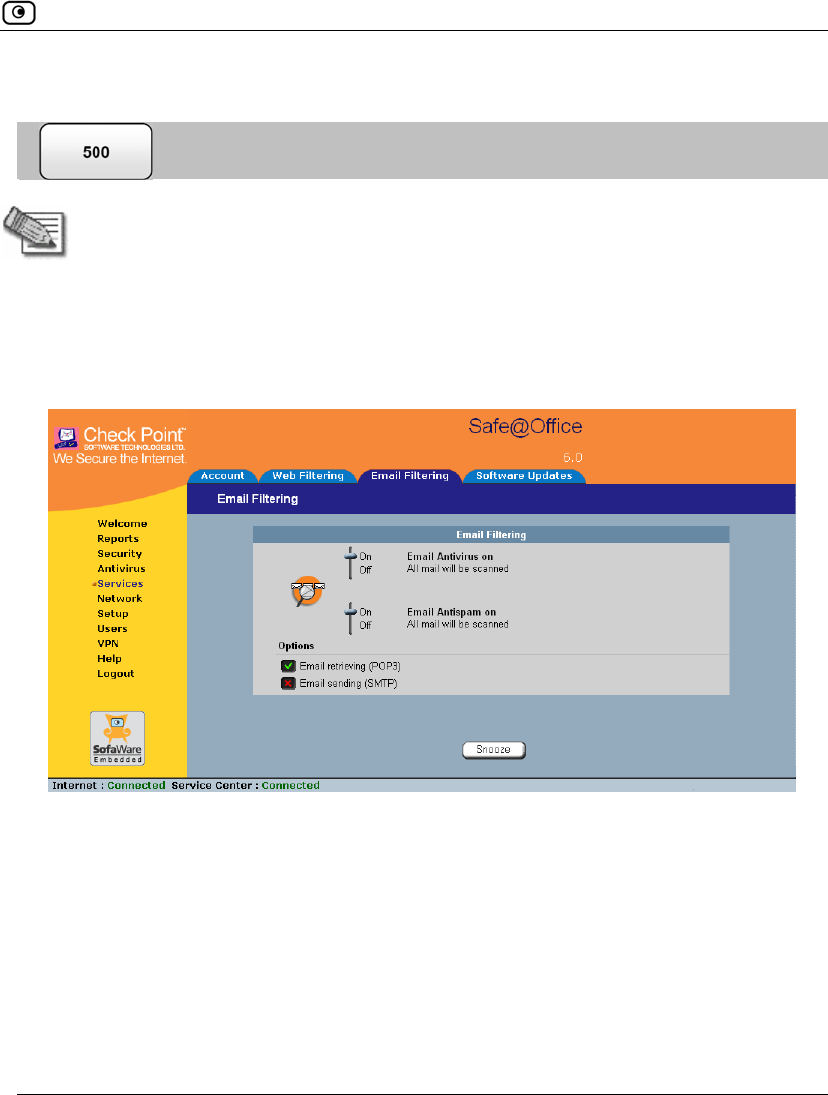
Email Filtering
There are two Email Filtering services:
• Email Antivirus
When the Email Antivirus service is enabled, your email is automatically
scanned for the detection and elimination of all known viruses and vandals. If a
virus is detected, it is removed and replaced with a warning message.
Note: The Email Antivirus subscription service differs from VStream Antivirus in the
following ways:
• Email Antivirus is centralized, redirecting traffic through the Service
Center for scanning, while VStream Antivirus scans for viruses in the
Safe@Office gateway itself.
• Email Antivirus is specific to email, scanning incoming POP3 and
outgoing SMTP connections only, while VStream Antivirus supports
additional protocols, including incoming SMTP and outgoing POP3
connections.
You can use either antivirus solution or both in conjunction. For information on
VStream Antivirus, see Using VStream Antivirus on page 265.
• Email Antispam
When the Email Antispam service is enabled, your email is automatically
scanned for the detection of spam. If spam is detected, the email’s Subject line is
modified to indicate that it is suspected spam. You can create rules to divert
such messages to a special folder.
Note: Email Filtering services are only available if you are connected to a Service
Center and subscribed to the services.
Email Filtering
Chapter 11: Using Subscription Services 297
Enabling/Disabling Email Filtering
Note: If you are remotely managed, contact your Service Center to change these
settings.
To enable/disable Email Filtering
1. Click Services in the main menu, and click the Email Filtering tab.
The Email Filtering page appears.
2. Next to Email Antivirus, drag the On/Off lever upwards or downwards.
Email Antivirus is enabled/disabled.
3. Next to Email Antispam, drag the On/Off lever upwards or downwards.
Email Antispam is enabled/disabled.
Email Filtering
298 Check Point Safe@Office User Guide
Selecting Protocols for Scanning
If you are locally managed, you can define which protocols should be scanned for
viruses and spam:
• Email retrieving (POP3). If enabled, all incoming email in the POP3
protocol will be scanned.
• Email sending (SMTP). If enabled, all outgoing email will be scanned.
Protocols marked with will be scanned, while those marked with will not.
Note: If you are remotely managed, contact your Service Center to change these
settings.
To enable virus and spam scanning for a protocol
• In the Options area, click or next to the desired protocol.
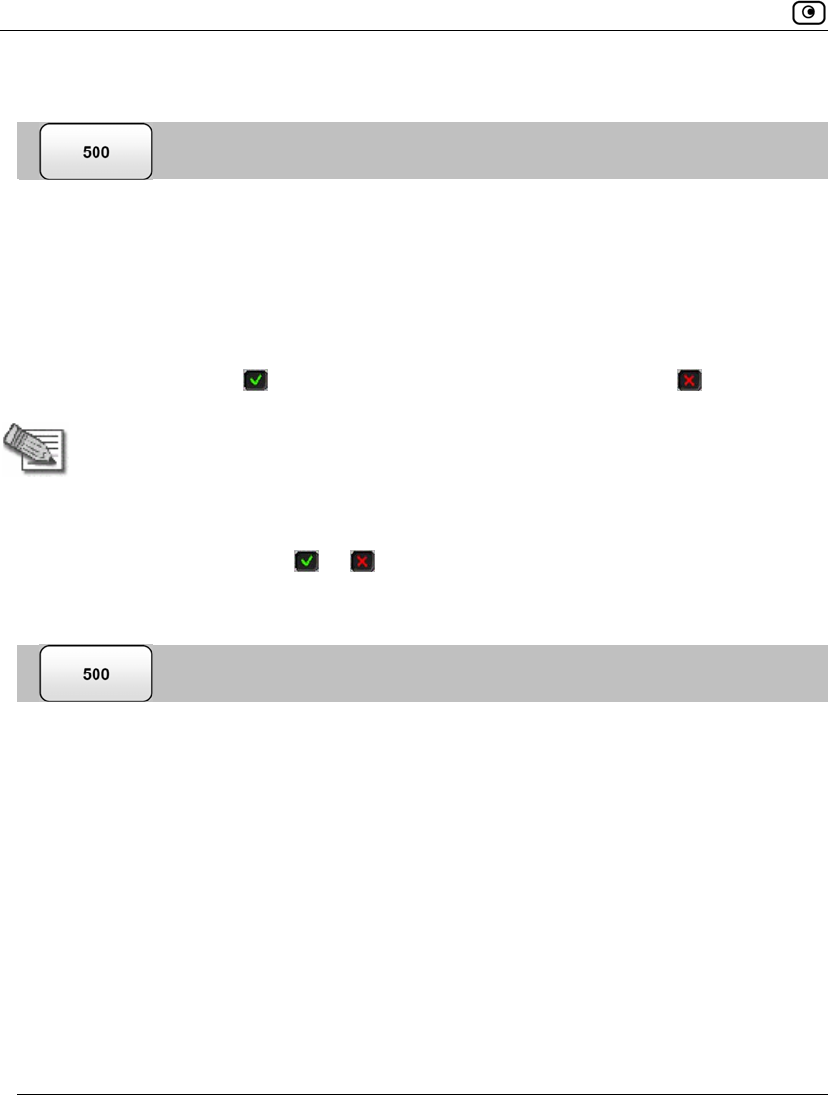
Temporarily Disabling Email Filtering
If you are having problems sending or receiving email you can temporarily disable
the Email Filtering services.
To temporarily disable Email Filtering
1. Click Services in the main menu, and click the Email Filtering tab.
The Email Filtering page appears.
2. Click Snooze.
• Email Antivirus and Email Antispam are temporarily disabled for all
internal network computers.
Email Filtering
Chapter 11: Using Subscription Services 299
• The Snooze button changes to Resume.
• The Email Filtering Off popup window opens.
3. To re-enable Email Antivirus and Email Antispam, click Resume, either in the
popup window, or on the Email Filtering page.
• The services are re-enabled for all internal network computers.
• If you clicked Resume in the Email Filtering page, the button changes to
Snooze.
• If you clicked Resume in the Email Filtering Off popup window, the popup
window closes.
Automatic and Manual Updates
300 Check Point Safe@Office User Guide
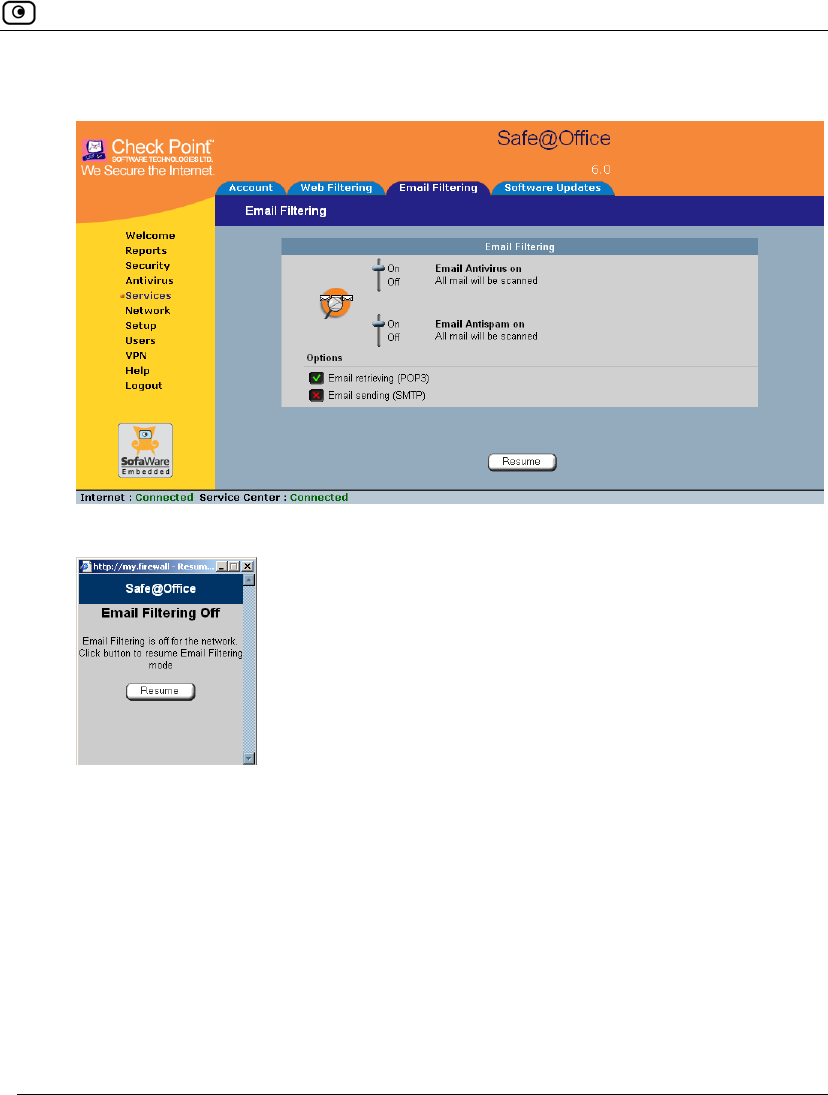
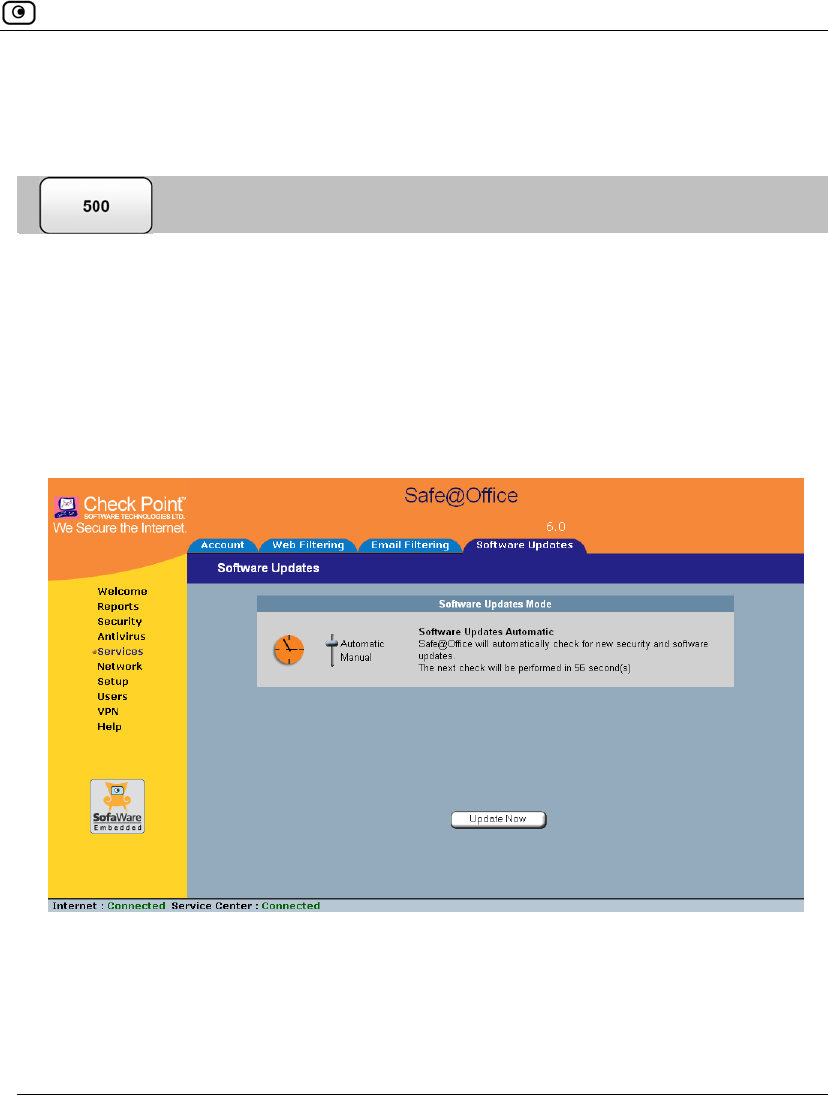
Automatic and Manual Updates
The Software Updates service enables you to check for new security and software
updates.
Note: Software Updates are only available if you are connected to a Service Center
and subscribed to this service.
Checking for Software Updates when Remotely Managed
If your Safe@Office appliance is remotely managed, it automatically checks for
software updates and installs them without user intervention. However, you can
still check for updates manually, if needed.
To manually check for security and software updates
1. Click Services in the main menu, and click the Software Updates tab.
The Software Updates page appears.
2. Click Update Now.
Automatic and Manual Updates
Chapter 11: Using Subscription Services 301
The system checks for new updates and installs them.
Checking for Software Updates when Locally Managed
If your Safe@Office appliance is locally managed, you can set it to automatically
check for software updates, or you can set it so that software updates must be
checked for manually.
To configure software updates when locally managed
1. Click Services in the main menu, and click the Software Updates tab.
The Software Updates page appears.
2. To set the Safe@Office appliance to automatically check for and install new
software updates, drag the Automatic/Manual lever upwards.
The Safe@Office appliance checks for new updates and installs them according
to its schedule.

Automatic and Manual Updates
302 Check Point Safe@Office User Guide
Note: When the Software Updates service is set to Automatic, you can still manually
check for updates.
3. To set the Safe@Office appliance so that software updates must be checked for
manually, drag the Automatic/Manual lever downwards.
The Safe@Office appliance does not check for software updates automatically.
4. To manually check for software updates, click Update Now.
The system checks for new updates and installs them.

Overview
Chapter 12: Working With VPNs 303
Chapter 12
This chapter describes how to use your Safe@Office appliance as a Remote Access
VPN Client, server, or gateway.
This chapter includes the following topics:
Overview..................................................................................................303
Setting Up Your Safe@Office Appliance as a VPN Server.....................309
Adding and Editing VPN Sites ................................................................314
Deleting a VPN Site .................................................................................345
Enabling/Disabling a VPN Site................................................................345
Logging on to a Remote Access VPN Site...............................................346
Logging off a Remote Access VPN Site ..................................................350
Installing a Certificate ..............................................................................350
Uninstalling a Certificate..........................................................................357
Viewing VPN Tunnels .............................................................................358
Viewing IKE Traces for VPN Connections..............................................361
Overview
You can configure your Safe@Office appliance as part of a virtual private network
(VPN). A VPN is a private data network consisting of a group of gateways that can
securely connect to each other. Each member of the VPN is called a VPN site, and
a connection between two VPN sites is called a VPN tunnel. VPN tunnels encrypt
and authenticate all traffic passing through them. Through these tunnels, employees
can safely use their company’s network resources when working at home. For
example, they can securely read email, use the company’s intranet, or access the
company’s database from home.
The are four types of VPN sites:
• Remote Access VPN Server. Makes a network remotely available to
authorized users, who connect to the Remote Access VPN Server using the
Working With VPNs
Overview
304 Check Point Safe@Office User Guide
Check Point SecuRemote VPN Client, provided for free with your
Safe@Office, or from another Safe@Office.
• Internal VPN Server. SecuRemote can also be used from your internal
networks, allowing you to secure your wired or wireless network with
strong encryption and authentication.
• Site-to-Site VPN Gateway. Can connect with another Site-to-Site VPN
Gateway in a permanent, bi-directional relationship.
• Remote Access VPN Client. Can connect to a Remote Access VPN Server,
but other VPN sites cannot initiate a connection to the Remote Access
VPN Client. Defining a Remote Access VPN Client is a hardware
alternative to using SecuRemote software.
Both Safe@Office 500 and 500W provide full VPN functionality. They can act as a
Remote Access VPN Client, a Remote Access VPN Server for multiple users, or a
Site-to-Site VPN Gateway.
A virtual private network (VPN) must include at least one Remote Access VPN
Server or gateway. The type of VPN sites you include in a VPN depends on the
type of VPN you want to create, Site-to-Site or Remote Access.
Note: A locally managed Remote Access VPN Server or gateway must have a static
IP address. If you need a Remote Access VPN Server or gateway with a dynamic
IP address, you must use SofaWare Security Management Portal (SMP)
management.
A SecuRemote or Safe@Office Remote Access VPN Client can have a dynamic IP
address, regardless of whether it is locally or remotely managed.
Note: This chapter explains how to define a VPN locally. However, if your appliance
is centrally managed by a Service Center, then the Service Center can
automatically deploy VPN configuration for your appliance.
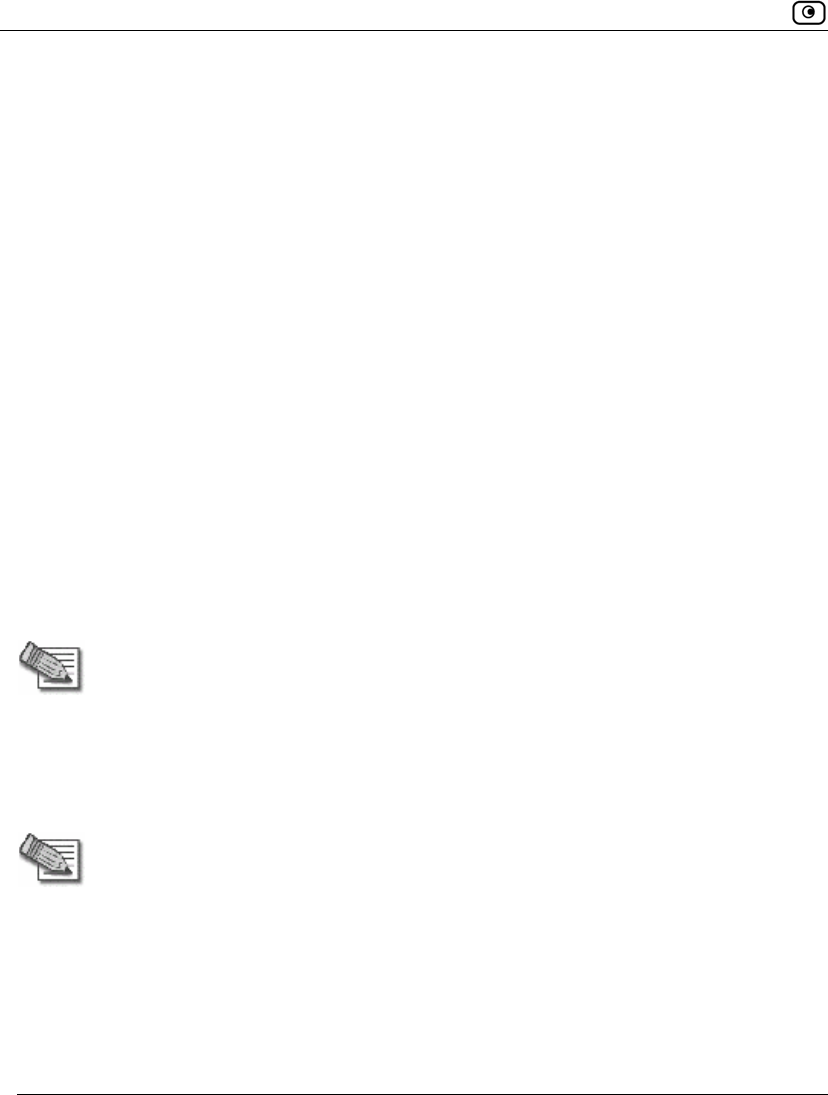
Site-to-Site VPNs
A Site-to-Site VPN consists of two or more Site-to-Site VPN Gateways that can
communicate with each other in a bi-directional relationship. The connected
Overview
Chapter 12: Working With VPNs 305
networks function as a single network. You can use this type of VPN to mesh
office branches into one corporate network.
Figure 12: Site-to-Site VPN

Overview
306 Check Point Safe@Office User Guide
To create a Site-to-Site VPN with two VPN sites
1. On the first VPN site’s Safe@Office appliance, do the following:
a. Define the second VPN site as a Site-to-Site VPN Gateway, or create
a PPPoE tunnel to the second VPN site, using the procedure Adding
and Editing VPN Sites on page 314.
b. Enable the Remote Access VPN Server using the procedure Setting
Up Your Safe@Office Appliance as a Remote Access VPN Server on
page 309.
2. On the second VPN site’s Safe@Office appliance, do the following:
a. Define the first VPN site as a Site-to-Site VPN Gateway, or create a
PPPoE tunnel to the first VPN site, using the procedure Adding and
Editing VPN Sites on page 314.
b. Then enable the Remote Access VPN Server using the procedure
Setting Up Your Safe@Office Appliance as a Remote Access VPN
Server on page 309.
Overview
Chapter 12: Working With VPNs 307
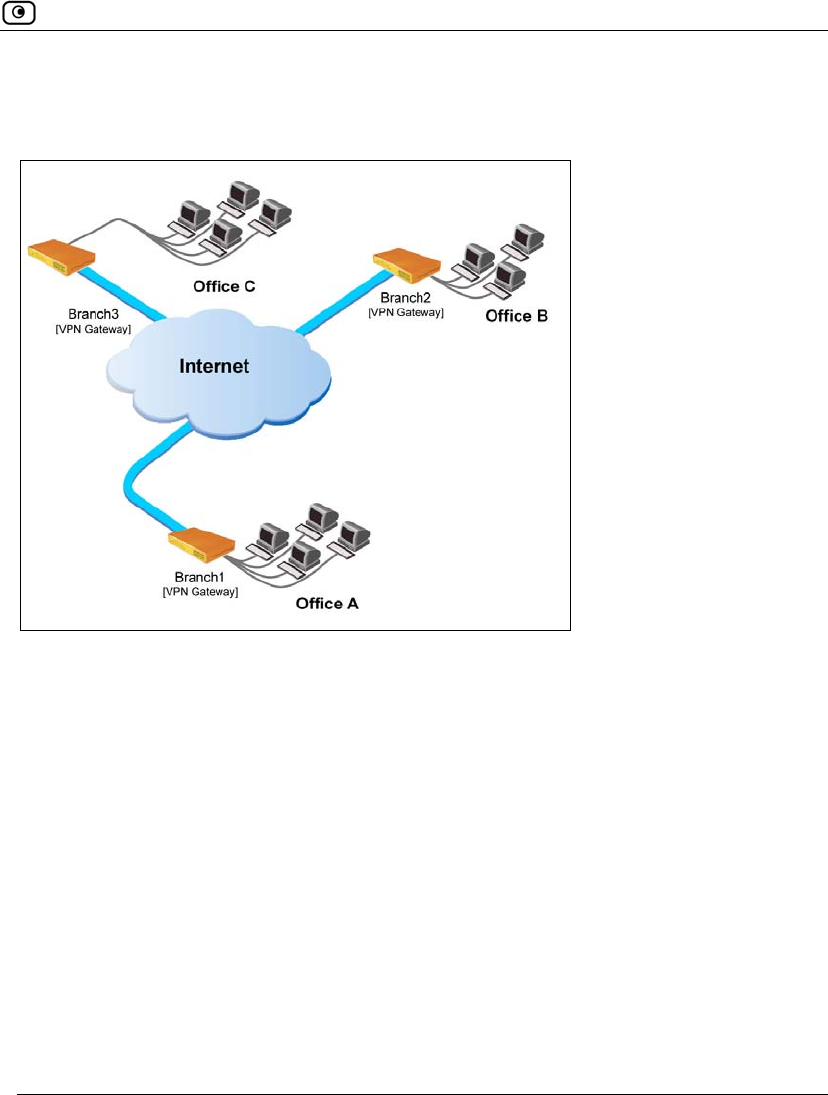
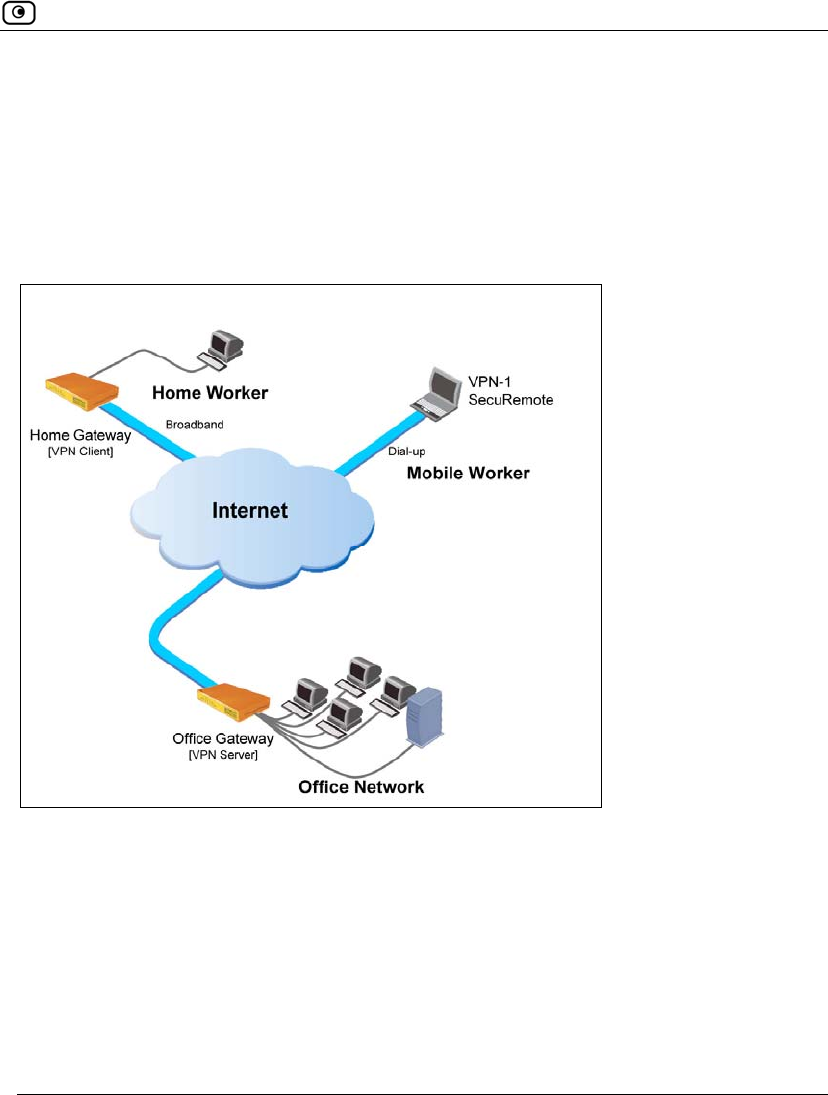
Remote Access VPNs
A Remote Access VPN consists of one Remote Access VPN Server or Site-to-Site
VPN Gateway, and one or more Remote Access VPN Clients. You can use this
type of VPN to make an office network remotely available to authorized users,
such as employees working from home, who connect to the office Remote Access
VPN Server with their Remote Access VPN Clients.
Figure 13: Remote Access VPN

Overview
308 Check Point Safe@Office User Guide
To create a Remote Access VPN with two VPN sites
1. On the remote user VPN site's Safe@Office appliance, add the office Remote
Access VPN Server as a Remote Access VPN site.
See Adding and Editing VPN Sites on page 314.
The remote user's Safe@Office appliance will act as a Remote Access VPN
Client.
2. On the office VPN site's Safe@Office appliance, enable the Remote Access
VPN Server.
See Setting Up Your Safe@Office Appliance as a Remote Access VPN Server
on page 309.
Internal VPN Server
You can use your Safe@Office appliance as an internal VPN Server, for enhanced
wired and wireless security. When the internal VPN Server is enabled, internal
network PCs and PDAs with SecuRemote VPN Client software installed can
establish a Remote Access VPN session to the gateway. This means that
connections from internal network users to the gateway can be encrypted and
authenticated.
The benefits of using the internal VPN Server are two-fold:
• Accessibility
Using SecuRemote, you can enjoy a secure connection from anywhere—in your
wireless network or on the road—without changing any settings. The standard is
completely transparent and allows you to access company resources the same
way, whether you are sitting at your desk or anywhere else.
• Security
Many of today's attacks are increasingly introduced from inside the network.
Internal security threats cause outages, downtime, and lost revenue. Wired
networks that deal with highly sensitive information—especially networks in
public places, such as classrooms—are vulnerable to users trying to hack the
internal network.
Setting Up Your Safe@Office Appliance as a VPN Server
Chapter 12: Working With VPNs 309
Using the internal VPN Server, along with a strict security policy for non-VPN
users, can enhance security both for wired networks and for wireless networks,
which are particularly vulnerable to security breaches.
The internal VPN Server can be used in the Safe@Office 500W wireless appliance,
regardless of the wireless security settings. It also can be used in wired appliances,
both for wired stations and for wireless stations.
Note: You can enable wireless connections to a wired Safe@Office appliance, by
connecting a wireless access point in bridge mode to one of the appliance's internal
interfaces. Do not connect computers to the same interface as a wireless access
point, since allowing direct access from the wireless network may pose a significant
security risk.
For information on setting up your Safe@Office appliance as an internal VPN
Server, see Setting Up Your Safe@Office Appliance as a VPN Server on page
309.
Setting Up Your Safe@Office Appliance as a VPN
Server
You can make your network available to authorized users connecting from the
Internet or from your internal networks, by setting up your Safe@Office appliance
as a VPN Server. Users can connect to the VPN Server via Check Point
SecuRemote or via a Safe@Office appliance in Remote Access VPN mode.
Enabling the VPN Server for users connecting from your internal networks adds a
layer of security to such connections. For example, while you could create a
firewall rule allowing a specific user on the DMZ or WLAN to access the LAN,
enabling VPN access for the user means that such connections can be encrypted
and authenticated. For more information, see Internal VPN Server on page 308.
Setting Up Your Safe@Office Appliance as a VPN Server
310 Check Point Safe@Office User Guide
To set up your Safe@Office appliance as a VPN Server
1. Configure the VPN Server in one or more of the following ways:
• To accept remote access connections from the Internet.
See Configuring the Remote Access VPN Server on page 311.
• To accept connections from your internal networks.
See Configuring the Internal VPN Server on page 312.
2. If you configured the internal VPN Server, install SecuRemote on the desired
internal network computers.
See Installing SecuRemote on page 313.
3. Set up remote VPN access for users.
See Setting Up Remote VPN Access for Users on page 371.
Note: Disabling the VPN Server for a specific type of connection (from the Internet or
from internal networks) will cause all existing VPN tunnels of that type to
disconnect.
Setting Up Your Safe@Office Appliance as a VPN Server
Chapter 12: Working With VPNs 311
Configuring the Remote Access VPN Server
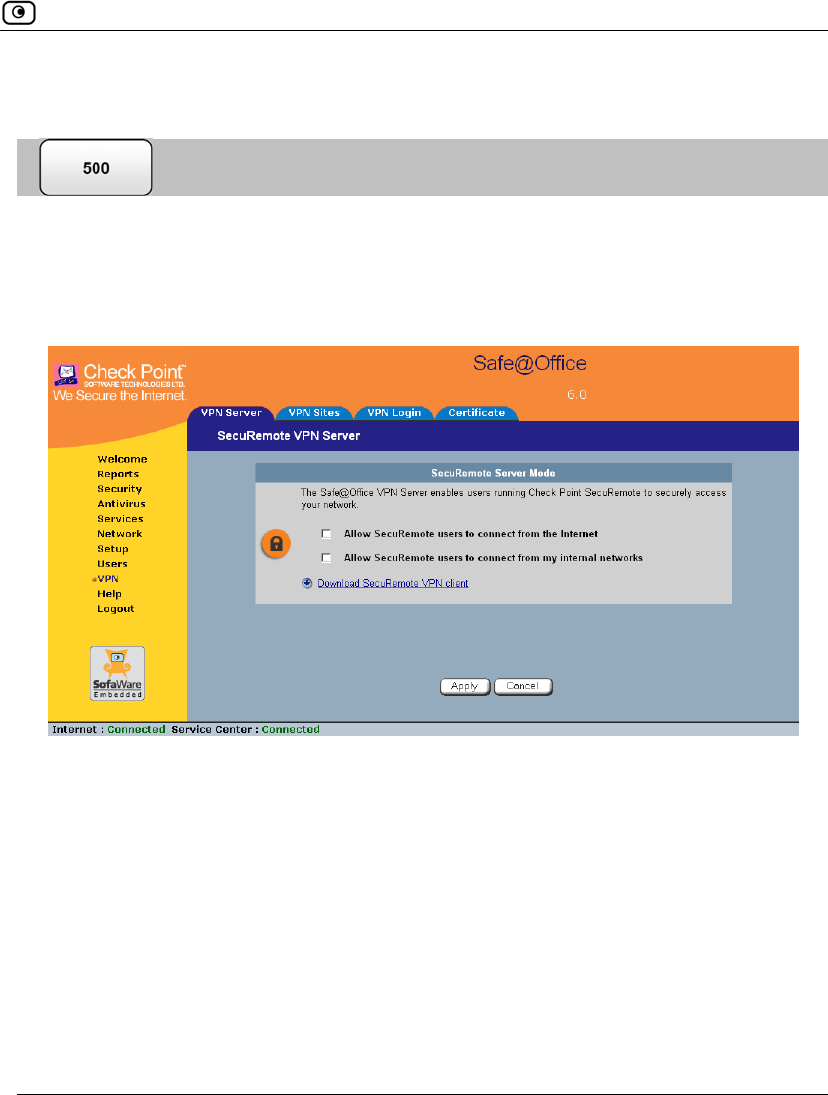
To configure the Remote Access VPN Server
1. Click VPN in the main menu, and click the VPN Server tab.
The SecuRemote VPN Server page appears.
2. Select the Allow SecuRemote users to connect from the Internet check box.
Setting Up Your Safe@Office Appliance as a VPN Server
312 Check Point Safe@Office User Guide
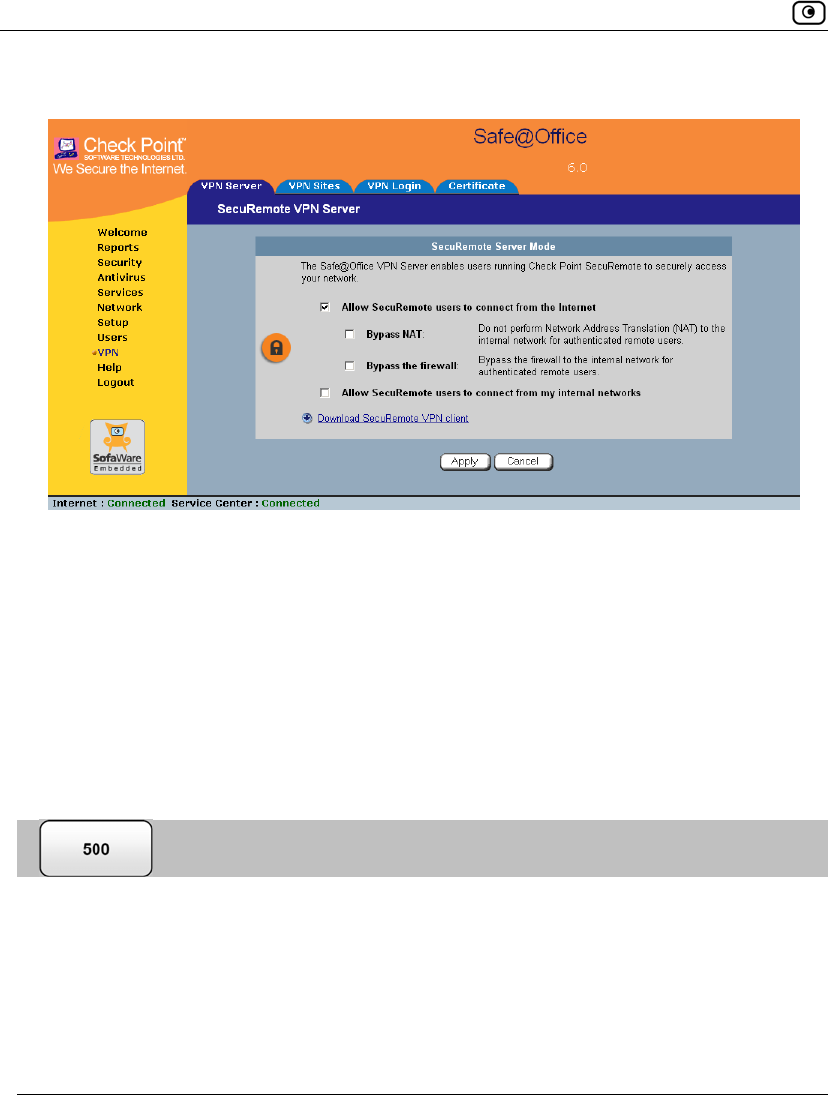
New check boxes appear.
3. To allow authenticated users connecting from the Internet to bypass NAT when
connecting to your internal network, select the Bypass NAT check box.
4. To allow authenticated users connecting from the Internet to bypass the firewall
and access your internal network without restriction, select the Bypass the
firewall check box.
5. Click Apply.
The Remote Access VPN Server is enabled for the specified connection types.
Configuring the Internal VPN Server
To configure the internal VPN Server
1. Click VPN in the main menu, and click the VPN Server tab.
The SecuRemote VPN Server page appears.

Setting Up Your Safe@Office Appliance as a VPN Server
Chapter 12: Working With VPNs 313
2. Select the Allow SecuRemote users to connect from my internal networks check
box.
New check boxes appear.
3. To allow authenticated users connecting from internal networks to bypass the
firewall and access your internal network without restriction, select the Bypass
the firewall check box.
Bypass NAT is always enabled for the internal VPN server, and cannot be
disabled.
4. Click Apply.
The internal VPN Server is enabled for the specified connection types.
Installing SecuRemote
If you configured the Remote Access VPN Server to accept connections from your
internal networks, you must install the SecuRemote VPN Client on internal
network computers that should be allowed to remotely access your network.
Adding and Editing VPN Sites
314 Check Point Safe@Office User Guide
To install SecuRemote
1. Click VPN in the main menu, and click the VPN Server tab.
The SecuRemote VPN Server page appears.
2. Click the Download SecuRemote VPN client link.
The VPN-1 SecuRemote for Safe@Office page opens in a new window.
3. Follow the online instructions to complete installation.
SecuRemote is installed.
For information on using SecuRemote, see the User Help. To access
SecuRemote User Help, right-click on the SecuRemote VPN Client icon in the
taskbar, select Settings, and then click Help.
Adding and Editing VPN Sites
To add or edit VPN sites
1. Click VPN in the main menu, and click the VPN Sites tab.
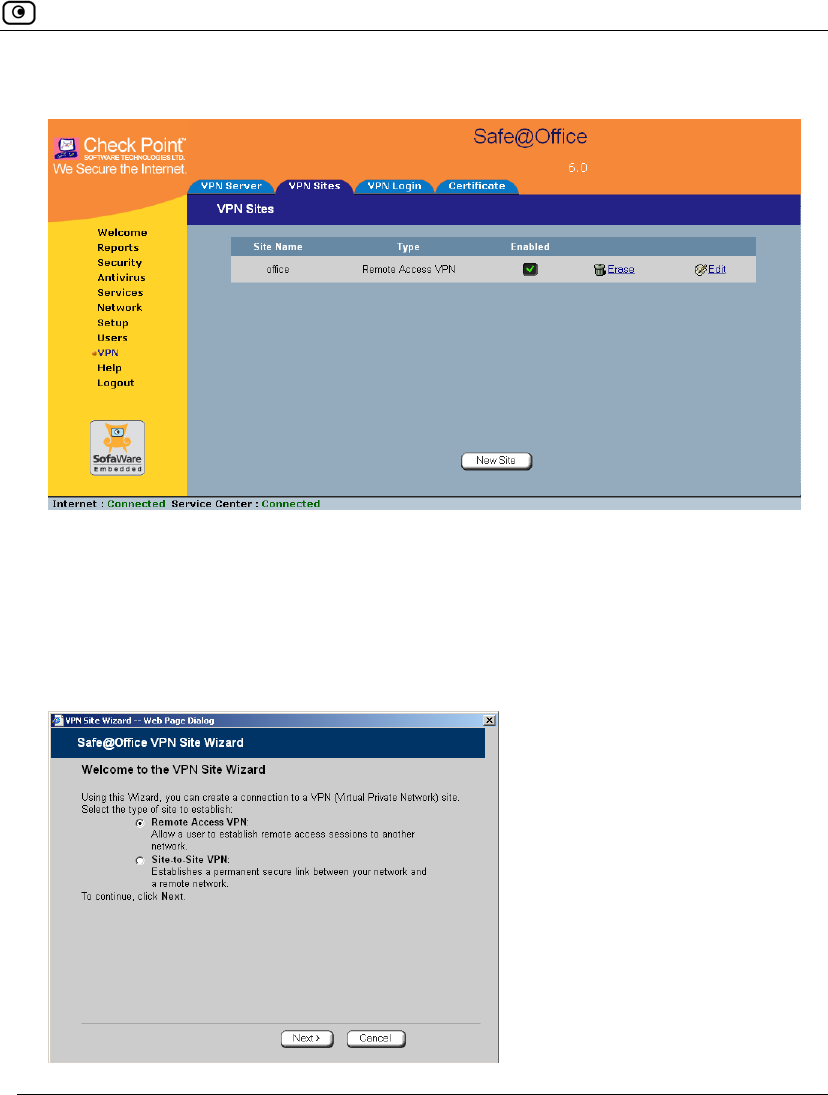
Adding and Editing VPN Sites
Chapter 12: Working With VPNs 315
The VPN Sites page appears with a list of VPN sites.
2. Do one of the following:
• To add a VPN site, click New Site.
• To edit a VPN site, click Edit in the desired VPN site’s row.
The Safe@Office VPN Site Wizard opens, with the Welcome to the VPN Site
Wizard dialog box displayed.
Adding and Editing VPN Sites
316 Check Point Safe@Office User Guide
3. Do one of the following:
• Select Remote Access VPN to establish remote access from your Remote
Access VPN Client to a Remote Access VPN Server.
• Select Site-to-Site VPN to create a permanent bi-directional connection to
another Site-to-Site VPN Gateway.
4. Click Next.
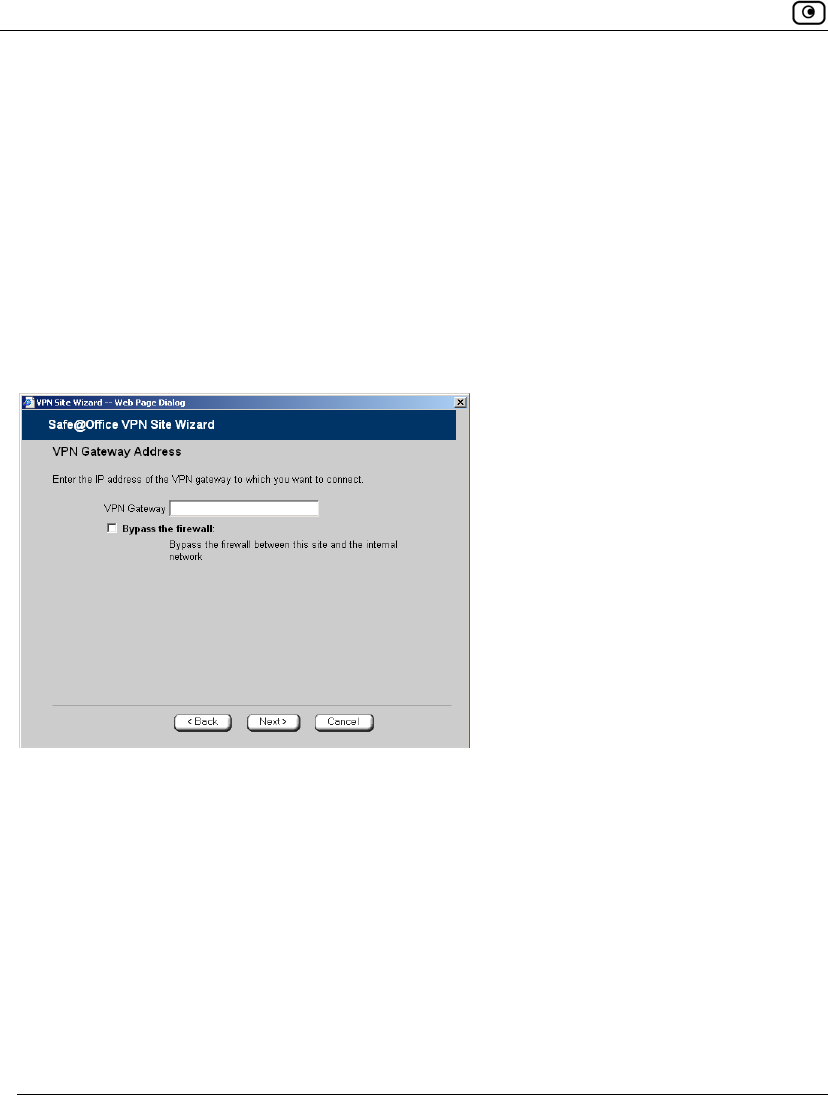
Configuring a Remote Access VPN Site
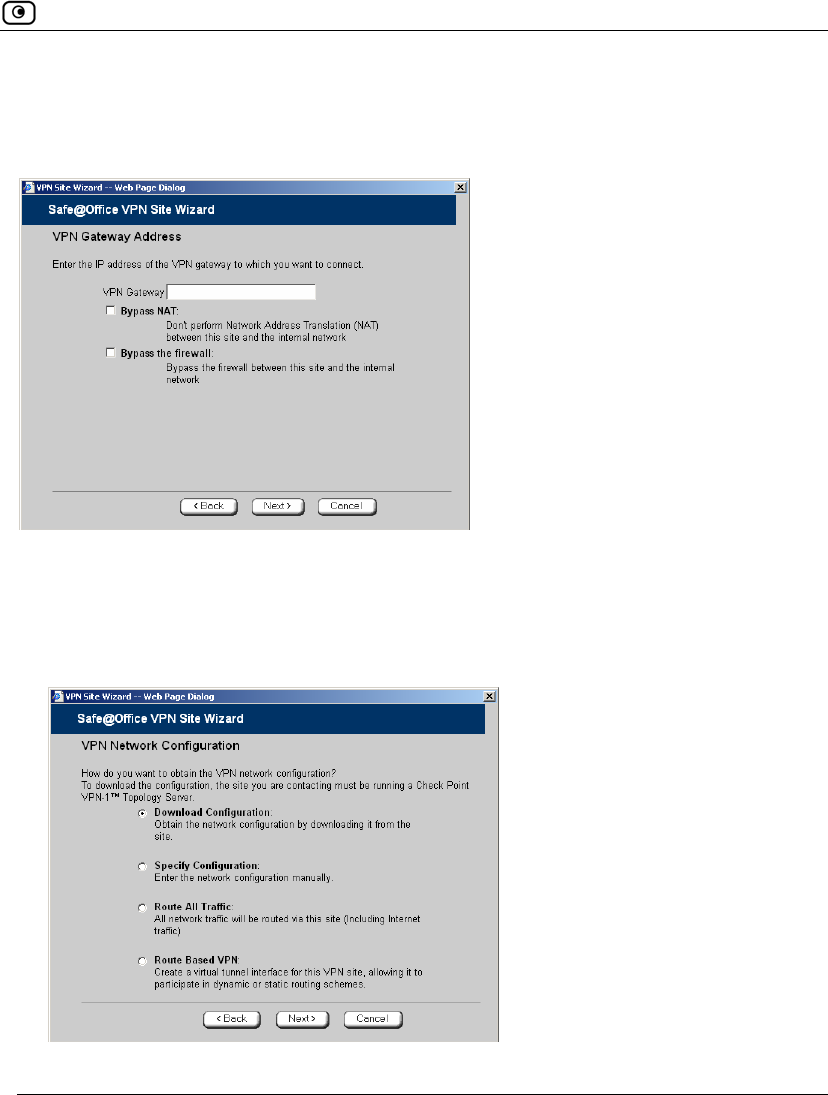
If you selected Remote Access VPN, the VPN Gateway Address dialog box appears.
1. Enter the IP address of the Remote Access VPN Server to which you want to
connect, as given to you by the network administrator.
2. To allow the VPN site to bypass the firewall and access your internal network
without restriction, select the Bypass the firewall check box.
3. Click Next.
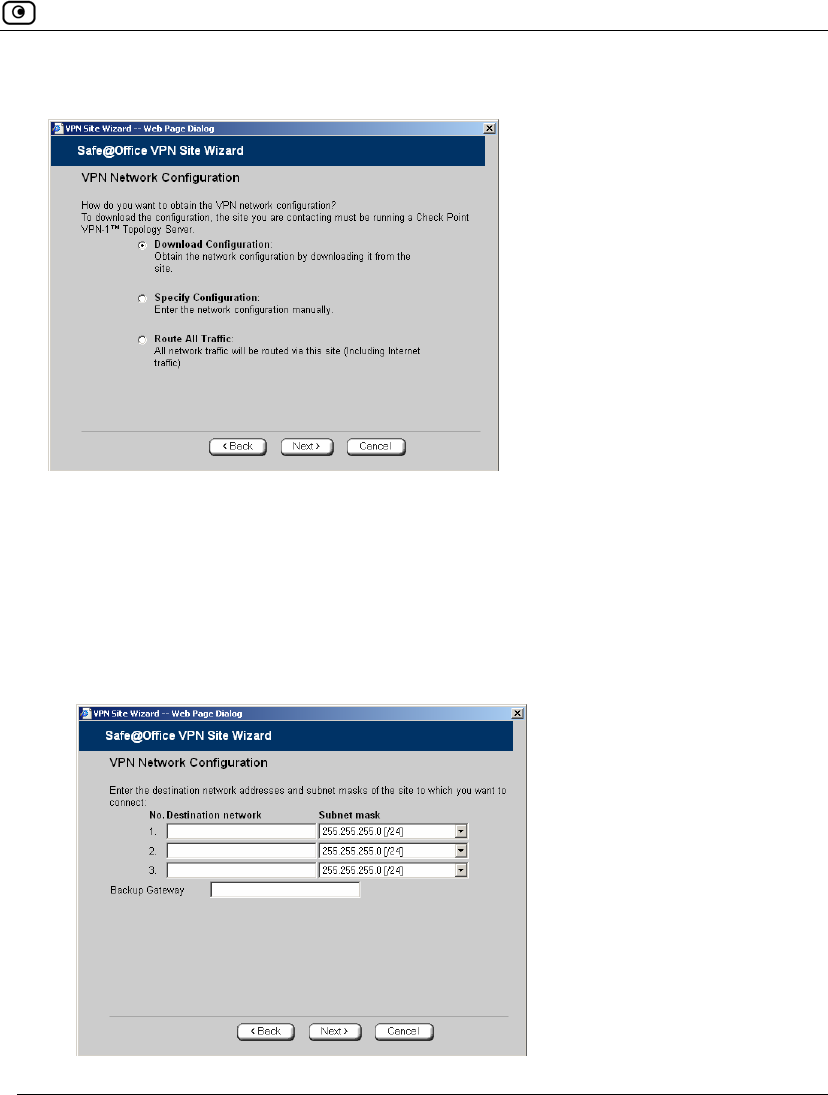
Adding and Editing VPN Sites
Chapter 12: Working With VPNs 317
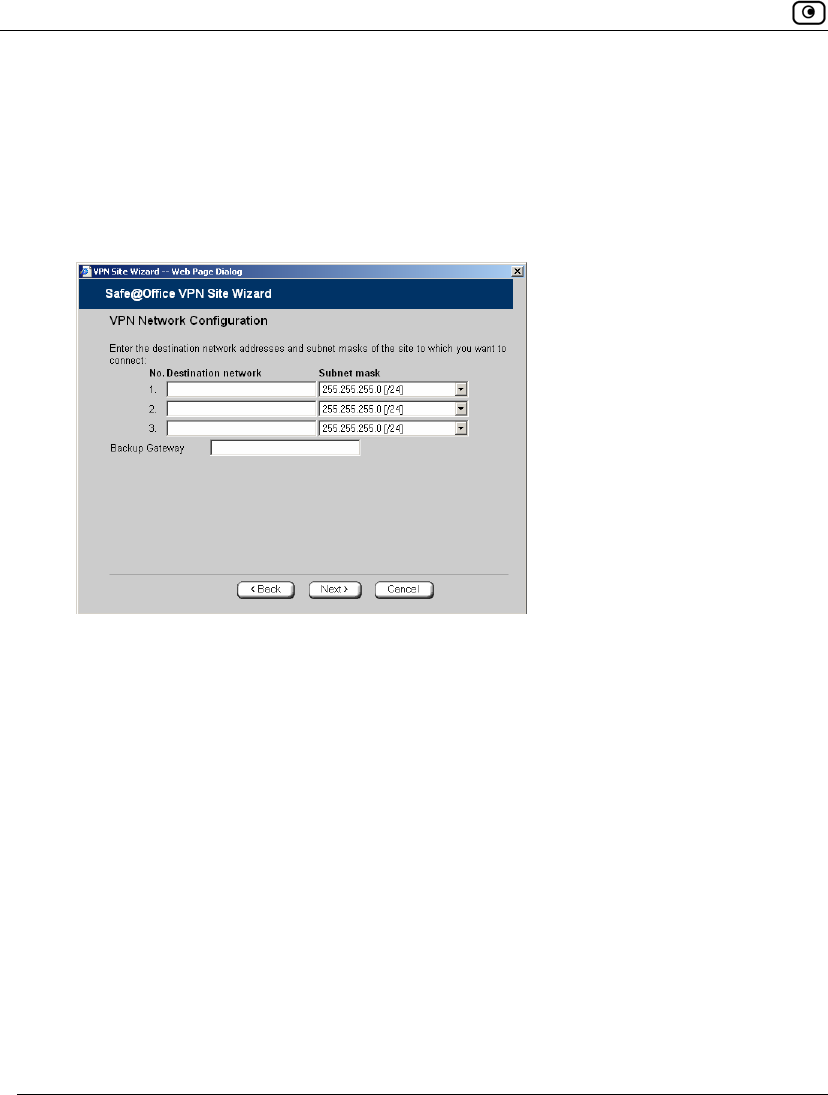
The VPN Network Configuration dialog box appears.
4. Specify how you want to obtain the VPN network configuration. Refer to VPN
Network Configuration Fields on page 325.
5. Click Next.
The following things happen in the order below:
• If you chose Specify Configuration, a second VPN Network Configuration
dialog box appears.
Adding and Editing VPN Sites
318 Check Point Safe@Office User Guide
Complete the fields using the information in VPN Network Configuration
Fields on page 325 and click Next.
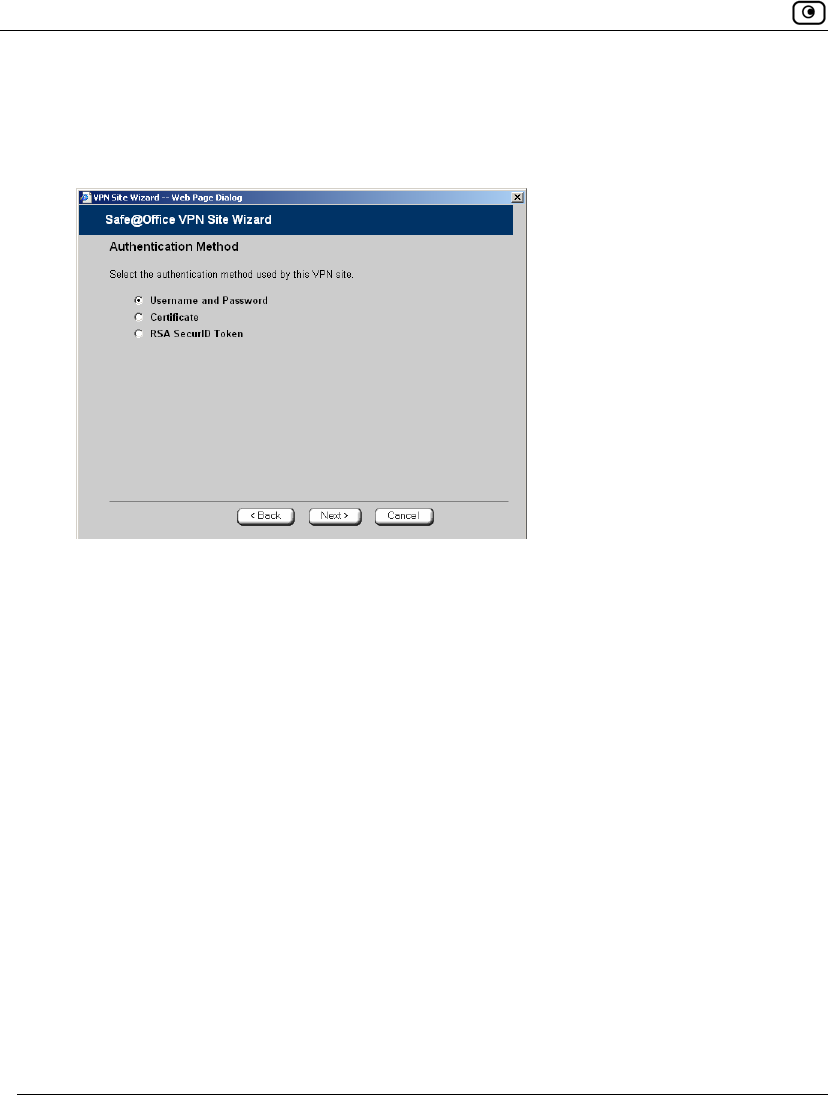
• The Authentication Method dialog box appears.
6. Complete the fields using the information in Authentication Methods Fields on
page 327.
7. Click Next.
Adding and Editing VPN Sites
Chapter 12: Working With VPNs 319
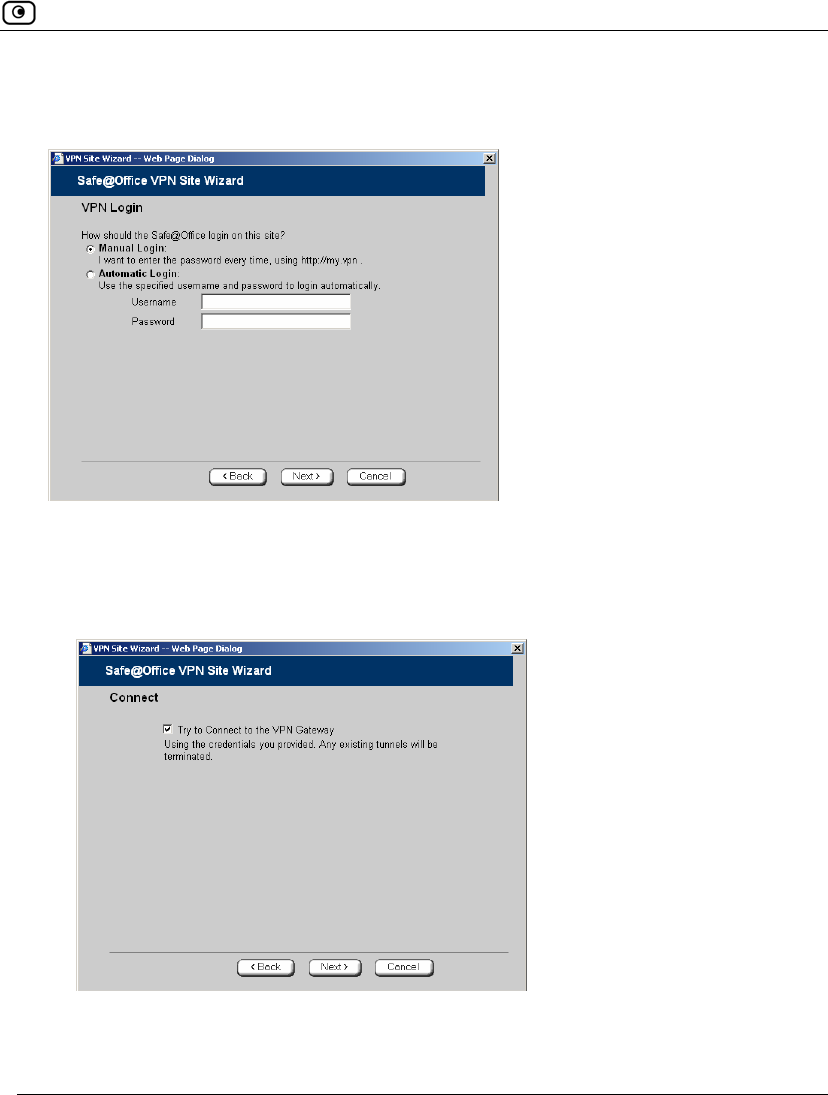
Username and Password Authentication Method
If you selected Username and Password, the VPN Login dialog box appears.
1. Complete the fields using the information in VPN Login Fields on page 327.
2. Click Next.
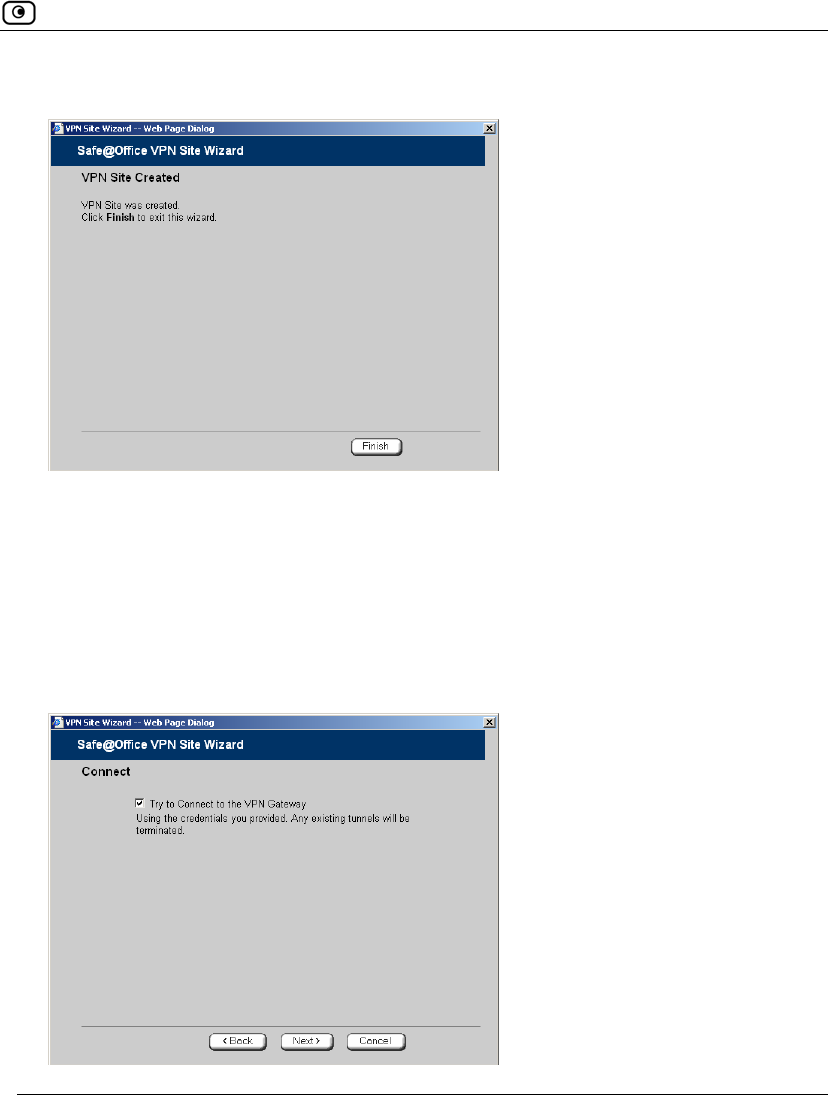
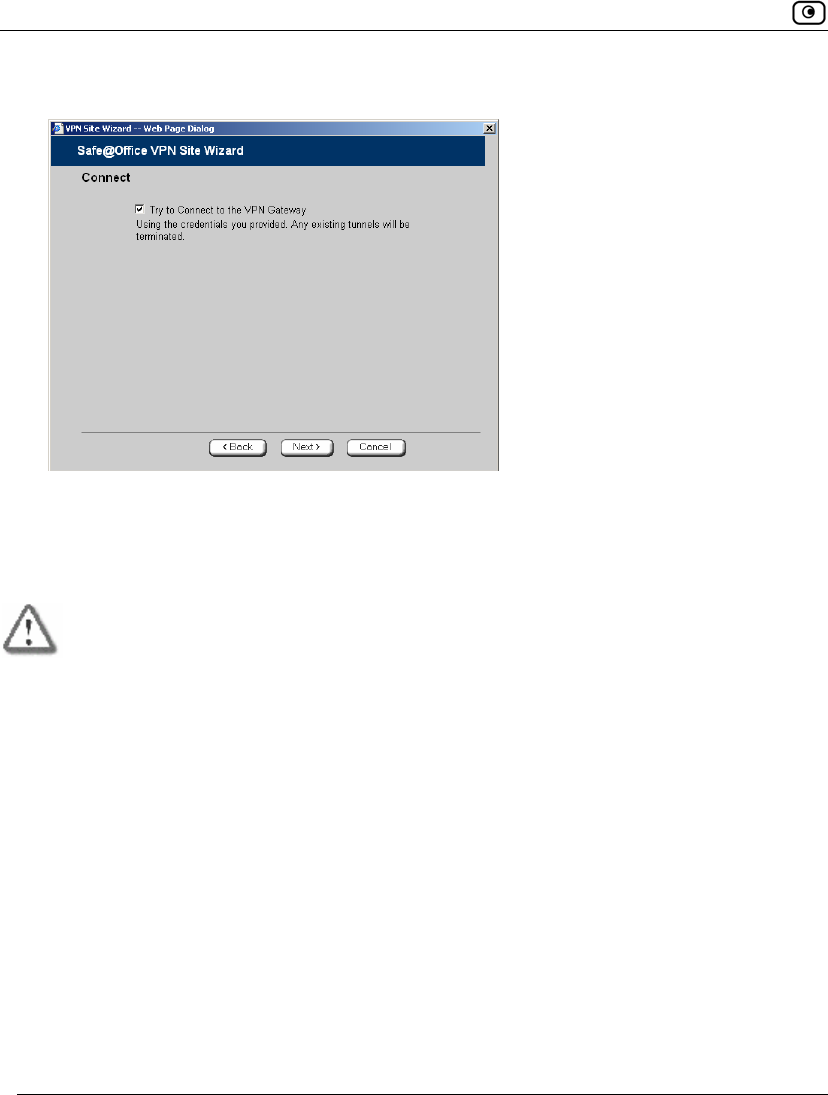
• If you selected Automatic Login, the Connect dialog box appears.
Adding and Editing VPN Sites
320 Check Point Safe@Office User Guide
Do the following:
1) To try to connect to the Remote Access VPN Server, select the Try
to Connect to the VPN Gateway check box.
This allows you to test the VPN connection.
Warning: If you try to connect to the VPN site before completing the wizard, all
existing tunnels will be terminated.
2) Click Next.
If you selected Try to Connect to the VPN Gateway, the Connecting…
screen appears, and then the Contacting VPN Site screen appears.
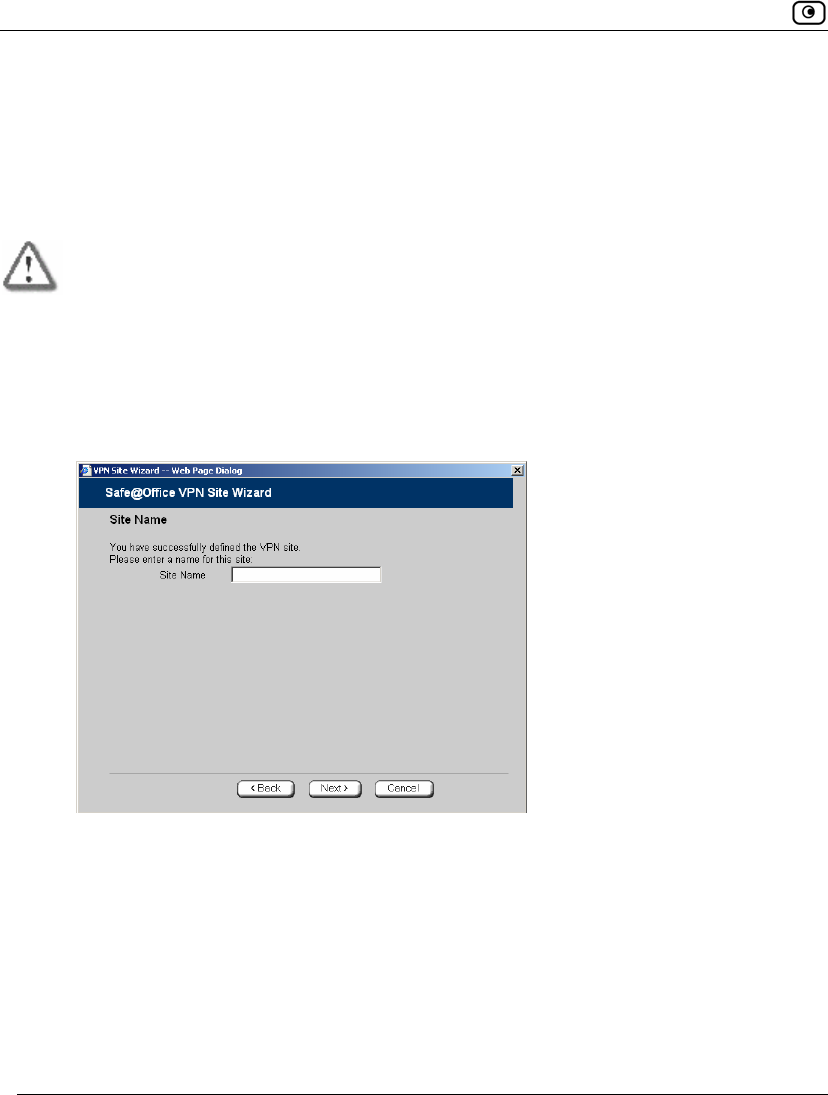
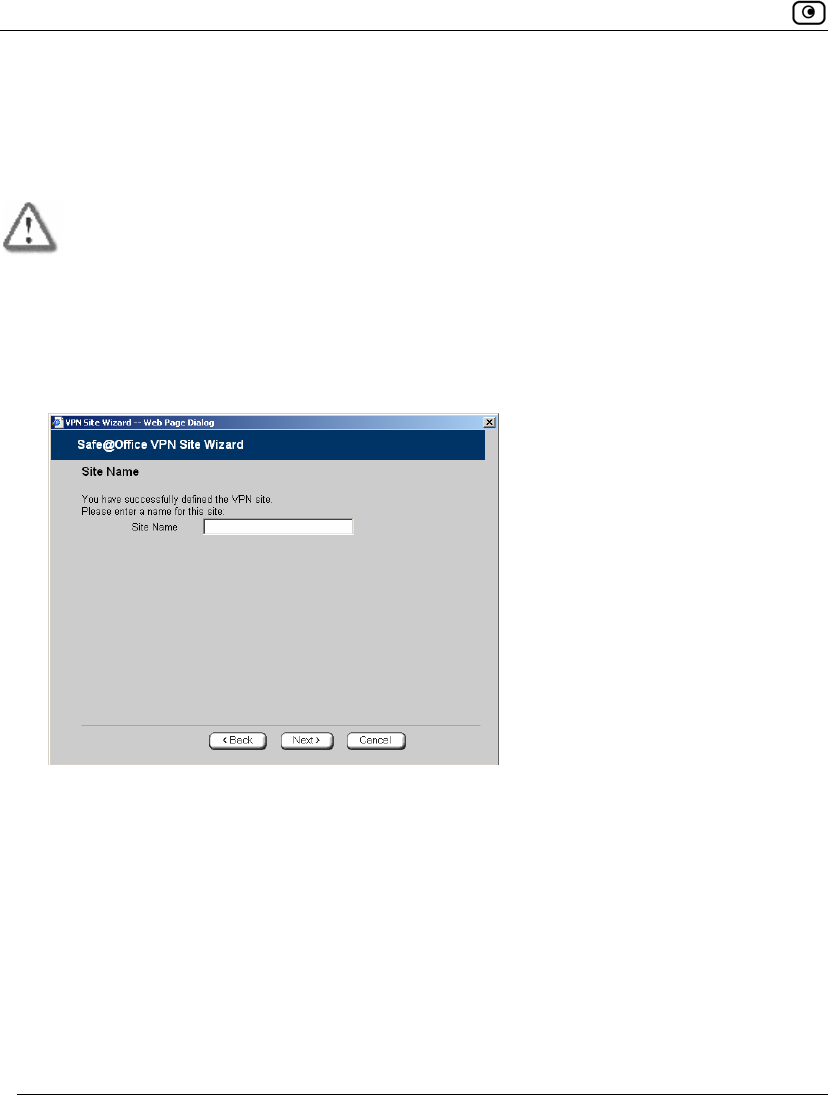
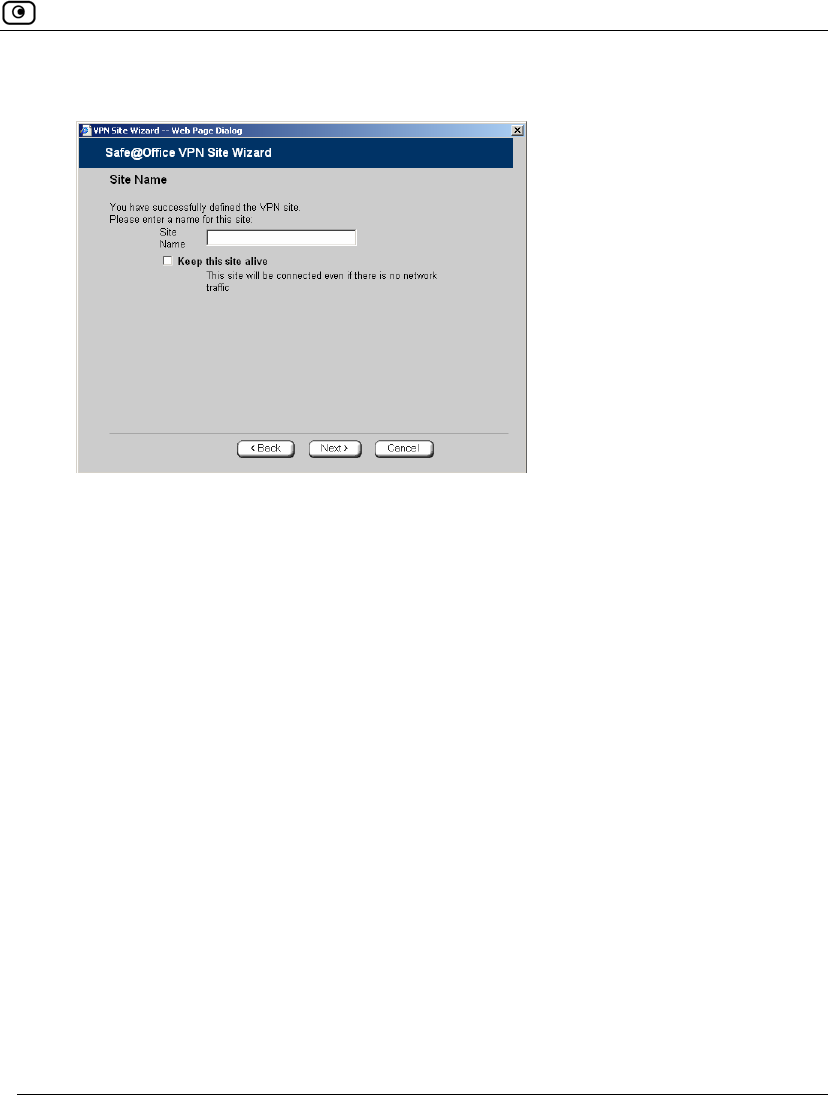
• The Site Name dialog box appears.
3. Enter a name for the VPN site.
You may choose any name.
4. Click Next.
Adding and Editing VPN Sites
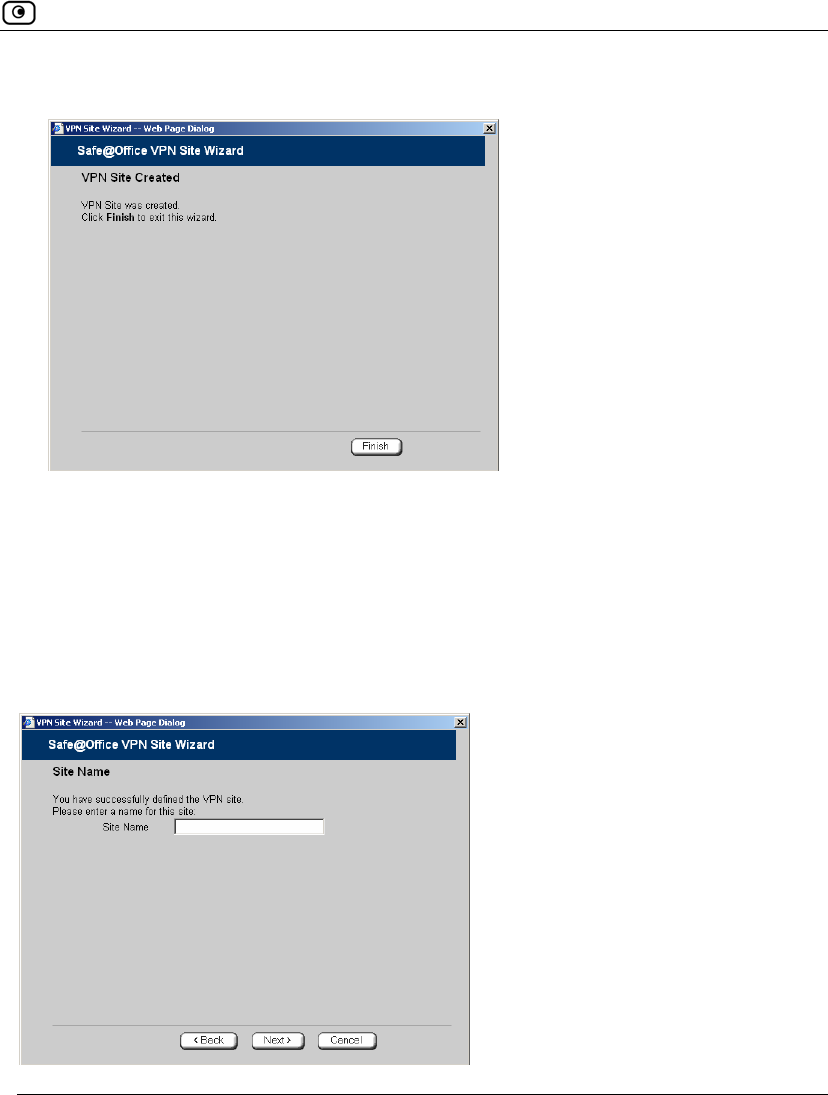
Chapter 12: Working With VPNs 321
The VPN Site Created screen appears.
5. Click Finish.
The VPN Sites page reappears. If you added a VPN site, the new site appears in
the VPN Sites list. If you edited a VPN site, the modifications are reflected in the
VPN Sites list.
Certificate Authentication Method
If you selected Certificate, the Connect dialog box appears.
Adding and Editing VPN Sites
322 Check Point Safe@Office User Guide
1. To try to connect to the Remote Access VPN Server, select the Try to Connect to
the VPN Gateway check box.
This allows you to test the VPN connection.
Warning: If you try to connect to the VPN site before completing the wizard, all
existing tunnels will be terminated.
2. Click Next.
If you selected Try to Connect to the VPN Gateway, the Connecting… screen
appears, and then the Contacting VPN Site screen appears.
The Site Name dialog box appears.
3. Enter a name for the VPN site.
You may choose any name.
4. Click Next.
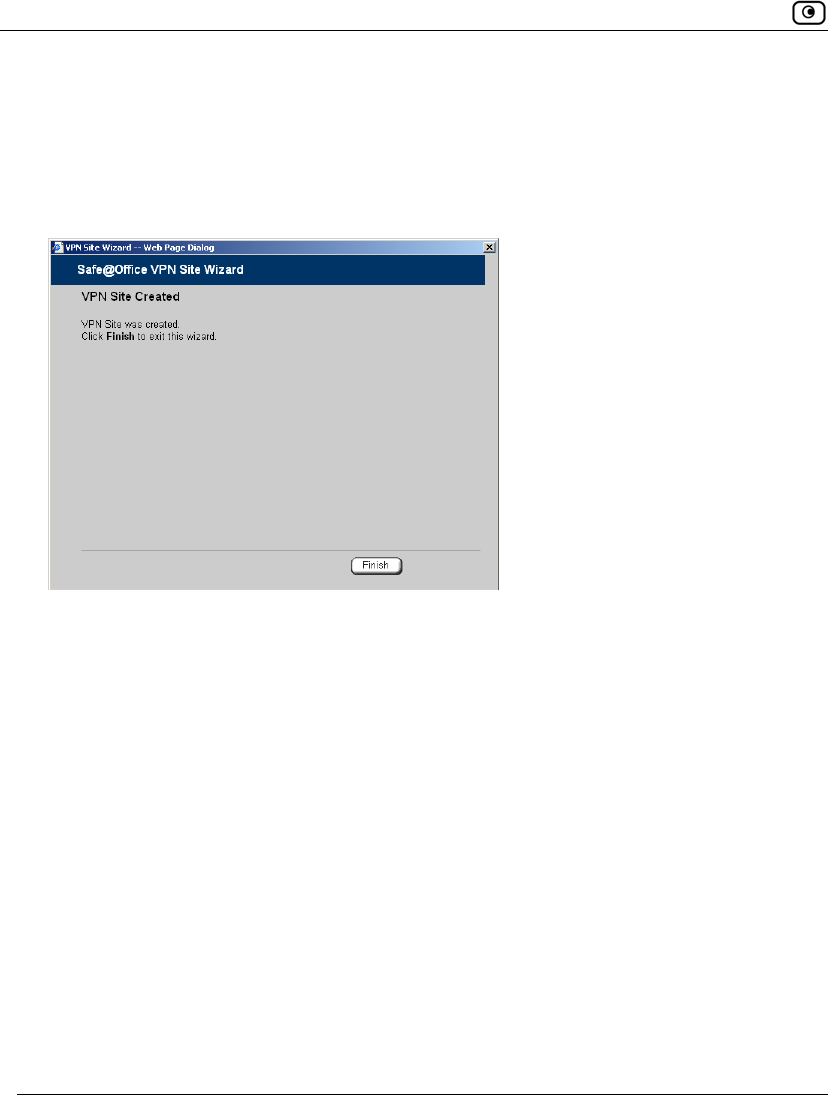
Adding and Editing VPN Sites
Chapter 12: Working With VPNs 323
The VPN Site Created screen appears.
5. Click Finish.
The VPN Sites page reappears. If you added a VPN site, the new site appears in
the VPN Sites list. If you edited a VPN site, the modifications are reflected in the
VPN Sites list.
RSA SecurID Authentication Method
If you selected RSA SecurID, the Site Name dialog box appears.
Adding and Editing VPN Sites
324 Check Point Safe@Office User Guide
1. Enter a name for the VPN site.
You may choose any name.
2. Click Next.
The VPN Site Created screen appears.
3. Click Finish.
The VPN Sites page reappears. If you added a VPN site, the new site appears in
the VPN Sites list. If you edited a VPN site, the modifications are reflected in the
VPN Sites list.

Adding and Editing VPN Sites
Chapter 12: Working With VPNs 325
Table 63: VPN Network Configuration Fields
In this field… Do this…
Download
Configuration
Click this option to obtain the network configuration by downloading it from
the VPN site.
This option will automatically configure your VPN settings, by downloading
the network topology definition from the Remote Access VPN Server.
Note: Downloading the network configuration is only possible if you are
connecting to a Check Point VPN-1 or Safe@Office Site-to-Site VPN
Gateway.
Specify
Configuration
Click this option to provide the network configuration manually.
Route All Traffic Click this option to route all network traffic through the VPN site.
For example, if your VPN consists of a central office and a number of
remote offices, and the remote offices are only allowed to access Internet
resources through the central office, you can choose to route all traffic from
the remote offices through the central office.
Note: You can only configure one VPN site to route all traffic.

Adding and Editing VPN Sites
326 Check Point Safe@Office User Guide
In this field… Do this…
Route Based VPN Click this option to create a virtual tunnel interface (VTI) for this site, so
that it can participate in a route-based VPN.
Route-based VPNs allow routing connections over VPN tunnels, so that
remote VPN sites can participate in dynamic or static routing schemes.
This improves network and VPN management efficiency for large
networks.
For constantly changing networks, it is recommended to use a route-based
VPN combined with OSPF dynamic routing. This enables you to make
frequent changes to the network topology, such as adding an internal
network, without having to reconfigure static routes.
OSPF is enabled using CLI. For information on using CLI, see Controlling
the Appliance via the Command Line on page 390. For information on
the relevant commands for OSPF, refer to the Embedded NGX CLI
Reference Guide.
This option is only available for when configuring a Site-to-Site VPN
gateway.
Destination network Type up to three destination network addresses at the VPN site to which
you want to connect.
Subnet mask Select the subnet masks for the destination network addresses.
Note: Obtain the destination networks and subnet masks from the VPN
site’s system administrator.
Backup Gateway Type the name of the VPN site to use if the primary VPN site fails.

Adding and Editing VPN Sites
Chapter 12: Working With VPNs 327
Table 64: Authentication Methods Fields
In this field… Do this…
Username and
Password
Select this option to use a user name and password for VPN
authentication.
In the next step, you can specify whether you want to log on to the VPN
site automatically or manually.
Certificate Select this option to use a certificate for VPN authentication.
If you select this option, a certificate must have been installed. (Refer to
Installing a Certificate on page 350 for more information about
certificates and instructions on how to install a certificate.)
RSA SecurID
Token
Select this option to use an RSA SecurID token for VPN authentication.
When authenticating to the VPN site, you must enter a four-digit PIN code
and the SecurID passcode shown in your SecurID token's display. The
RSA SecurID token generates a new passcode every minute.
SecurID is only supported in Remote Access manual login mode.

Adding and Editing VPN Sites
328 Check Point Safe@Office User Guide
Table 65: VPN Login Fields
In this field… Do this…
Manual Login Click this option to configure the site for Manual Login.
Manual Login connects only the computer you are currently logged onto to
the VPN site, and only when the appropriate user name and password
have been entered. For further information on Automatic and Manual
Login, see, Logging on to a VPN Site on page 346.
Automatic Login Click this option to enable the Safe@Office appliance to log on to the VPN
site automatically.
You must then fill in the Username and Password fields.
Automatic Login provides all the computers on your internal network with
constant access to the VPN site. For further information on Automatic and
Manual Login, see Logging on to a VPN Site on page 346.
Username Type the user name to be used for logging on to the VPN site.
Password Type the password to be used for logging on to the VPN site.
Adding and Editing VPN Sites
Chapter 12: Working With VPNs 329
Configuring a Site-to-Site VPN Gateway
If you selected Site-to-Site VPN, the VPN Gateway Address dialog box appears.
1. Complete the fields using the information in VPN Gateway Address Fields on
page 340.
2. Click Next.
The VPN Network Configuration dialog box appears.
Adding and Editing VPN Sites
330 Check Point Safe@Office User Guide
3. Specify how you want to obtain the VPN network configuration. Refer to VPN
Network Configuration Fields on page 325.
4. Click Next.
• If you chose Specify Configuration, a second VPN Network Configuration
dialog box appears.
Complete the fields using the information in VPN Network Configuration
Fields on page 325, and then click Next.
Adding and Editing VPN Sites
Chapter 12: Working With VPNs 331
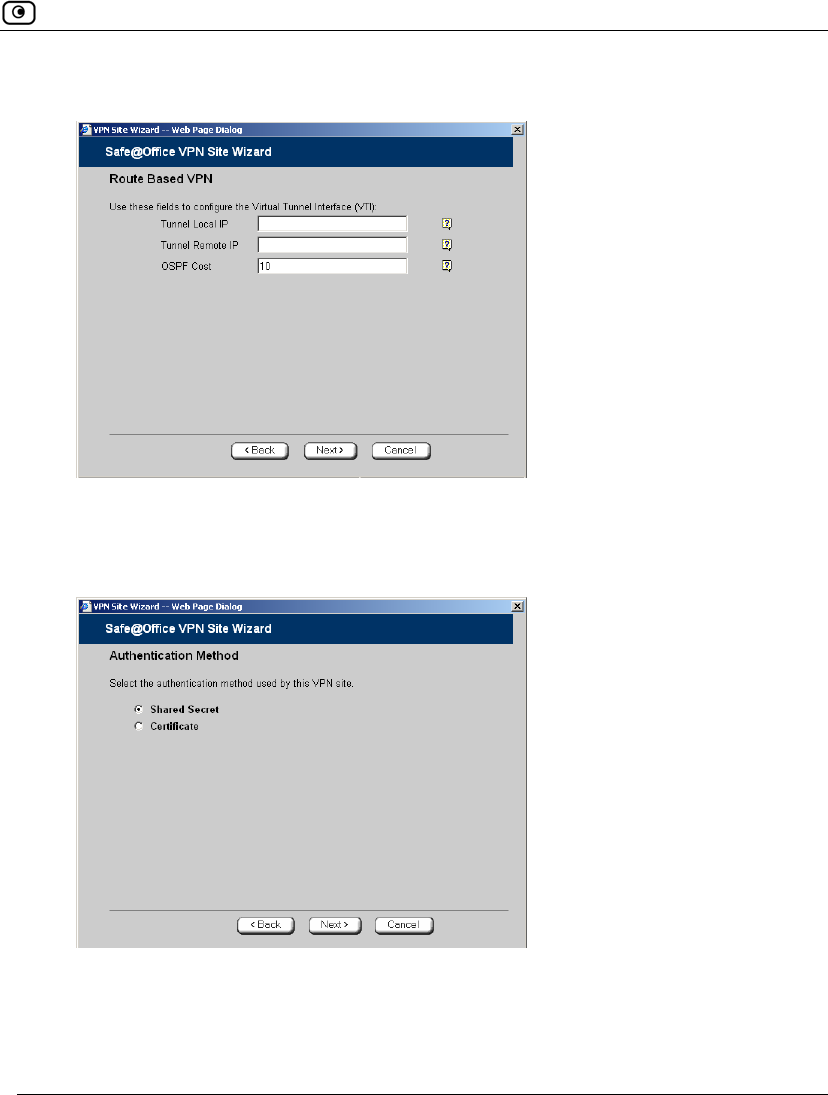
• If you chose Route Based VPN, the Route Based VPN dialog box appears.
Complete the fields using the information in Route Based VPN Fields on
page 341, and then click Next.
• The Authentication Method dialog box appears.
5. Complete the fields using the information in Authentication Methods Fields on
page 342.
6. Click Next.
Adding and Editing VPN Sites
332 Check Point Safe@Office User Guide
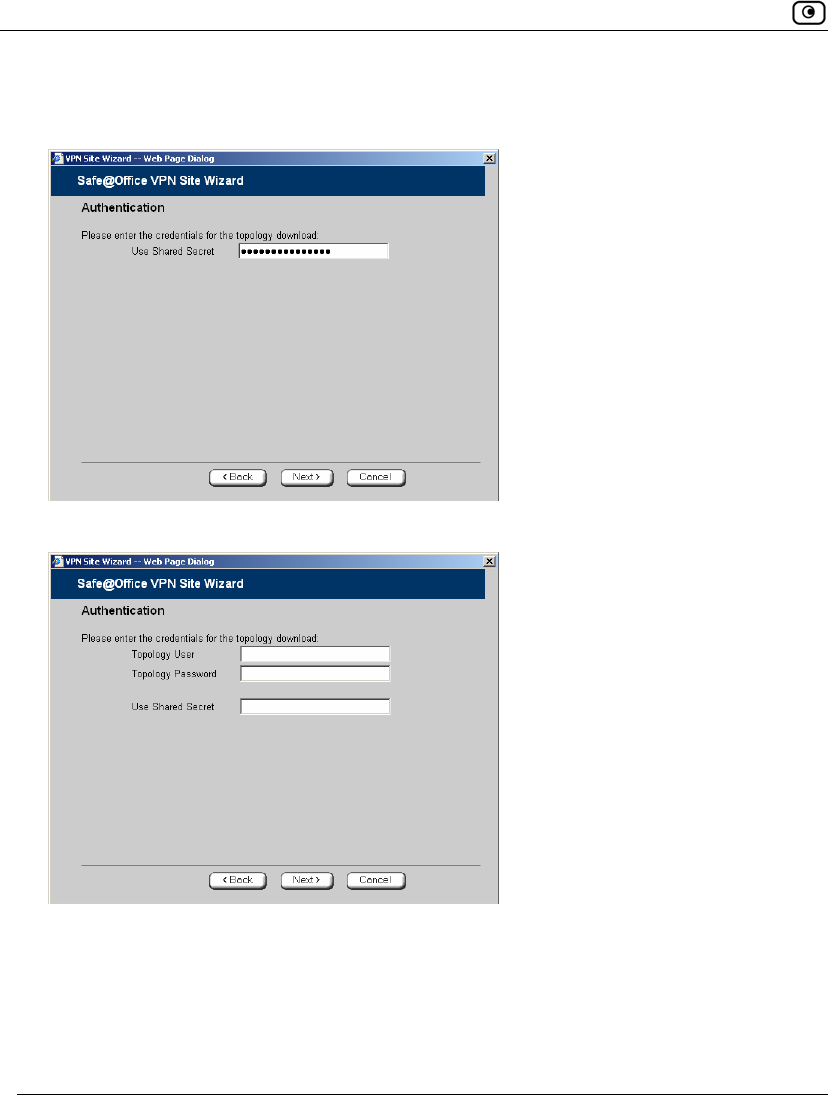
Shared Secret Authentication Method
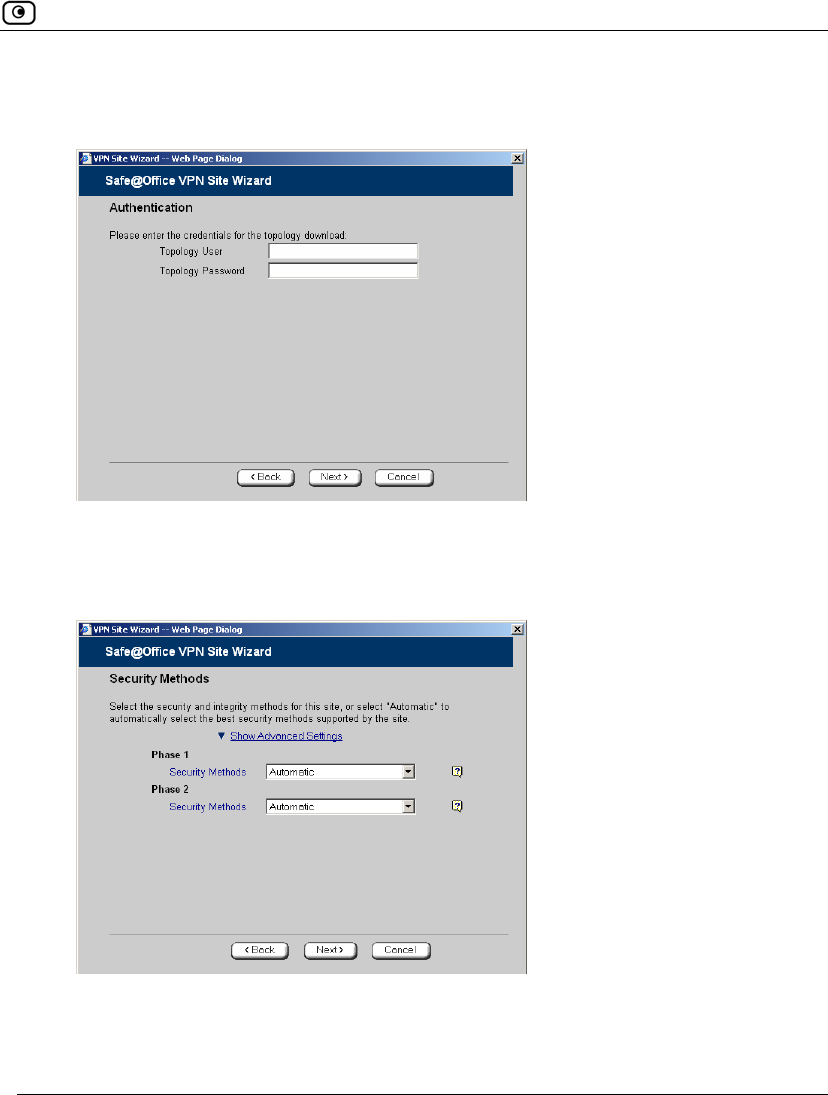
If you selected Shared Secret, the Authentication dialog box appears.
If you chose Download Configuration, the dialog box contains additional fields.
1. Complete the fields using the information in VPN Authentication Fields on
page 342 and click Next.
Adding and Editing VPN Sites
Chapter 12: Working With VPNs 333
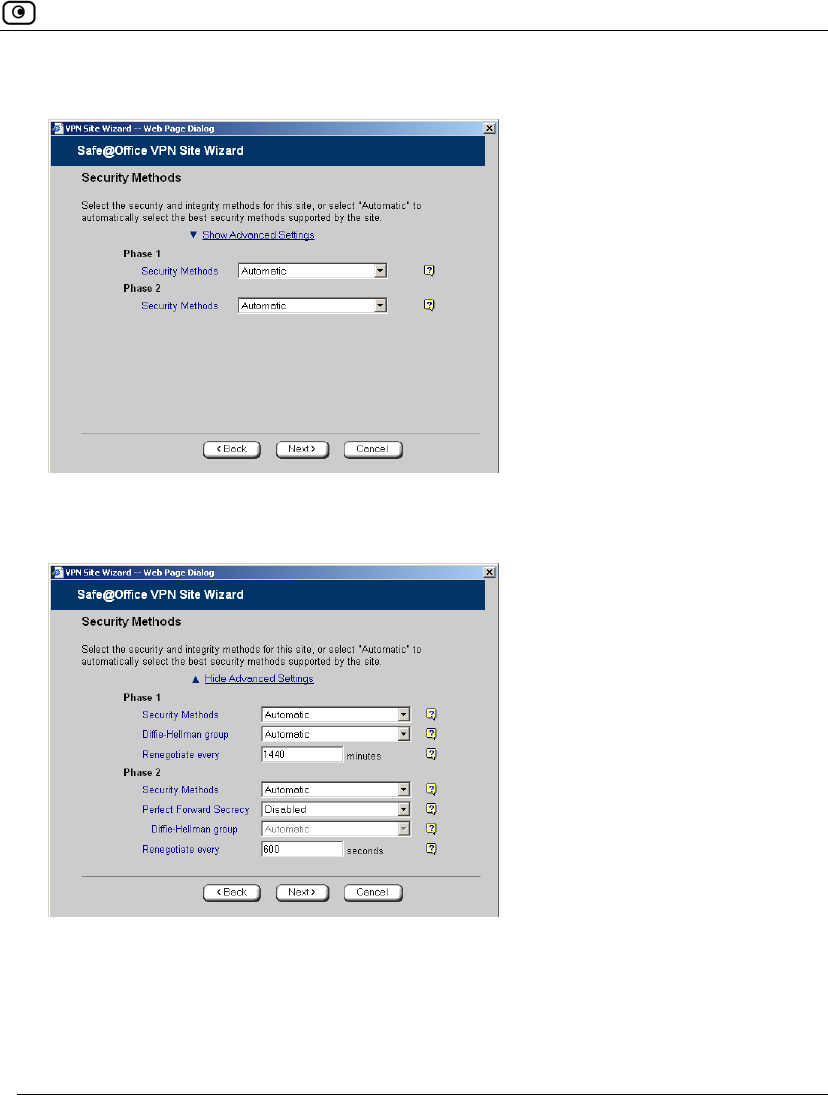
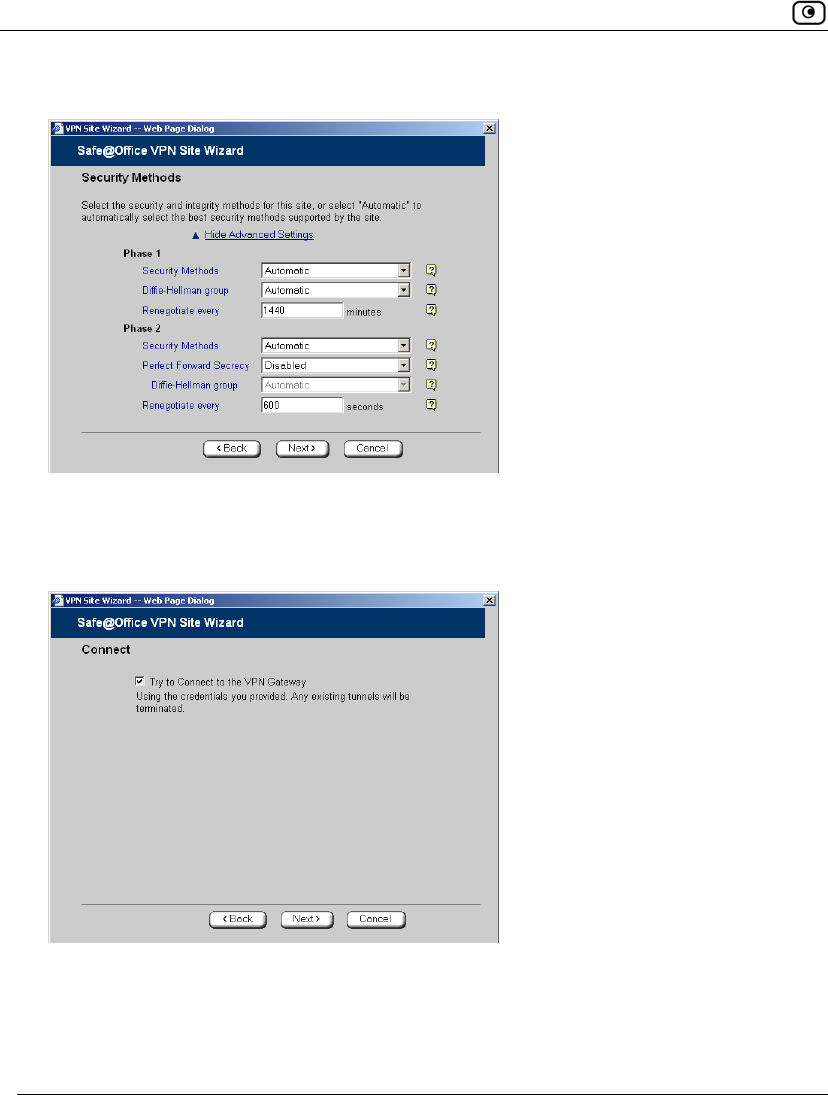
The Security Methods dialog box appears.
2. To configure advanced security settings, click Show Advanced Settings.
New fields appear.
3. Complete the fields using the information in Security Methods Fields on page
342 and click Next.
Adding and Editing VPN Sites
334 Check Point Safe@Office User Guide
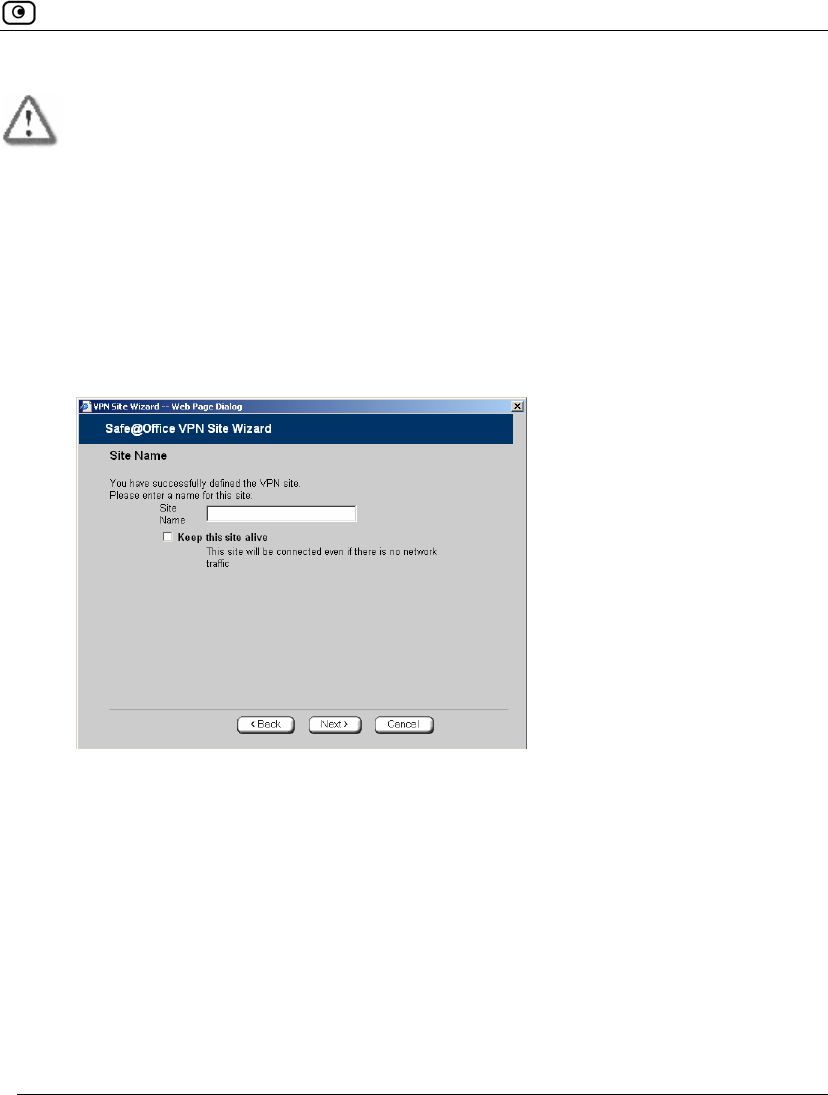
The Connect dialog box appears.
4. To try to connect to the Remote Access VPN Server, select the Try to Connect to
the VPN Gateway check box.
This allows you to test the VPN connection.
Warning: If you try to connect to the VPN site before completing the wizard, all
existing tunnels will be terminated.
5. Click Next.
• If you selected Try to Connect to the VPN Gateway, the Connecting…
screen appears, and then the Contacting VPN Site screen appears.
Adding and Editing VPN Sites
Chapter 12: Working With VPNs 335
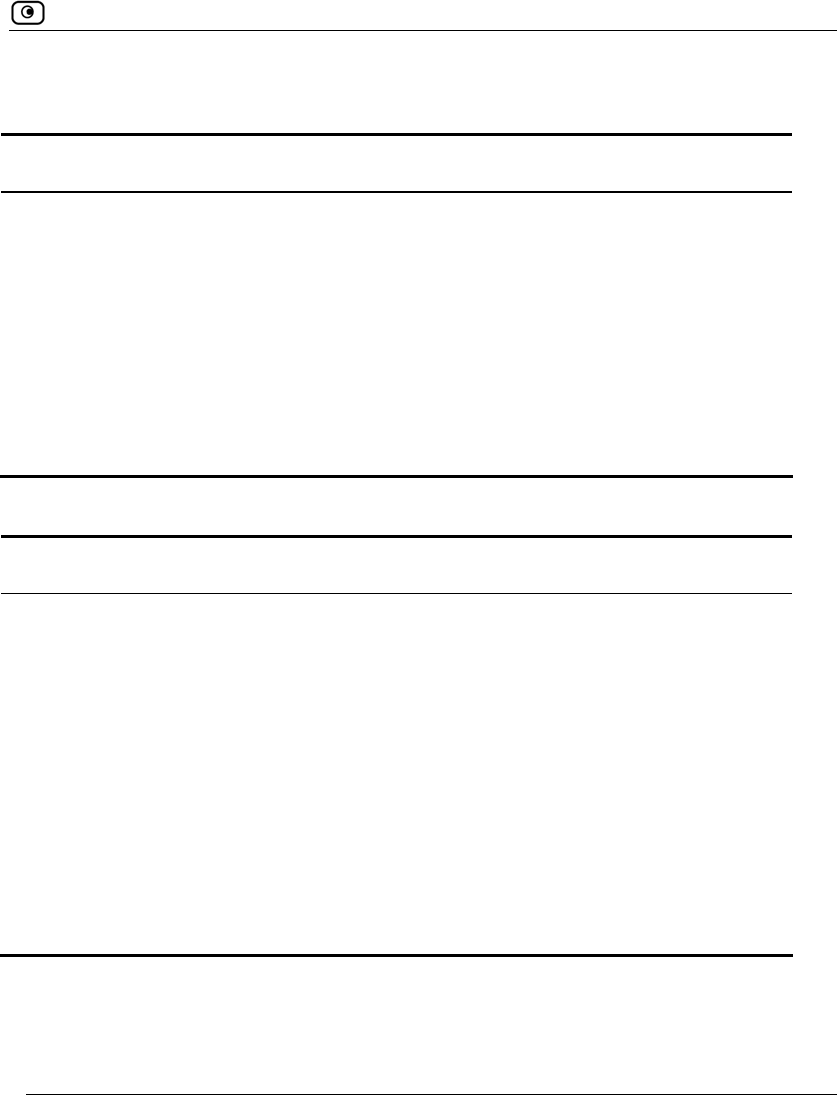
• The Site Name dialog box appears.
6. Enter a name for the VPN site.
You may choose any name.
7. To keep the tunnel to the VPN site alive even if there is no network traffic
between the Safe@Office appliance and the VPN site, select Keep this site alive.
8. Click Next.
Adding and Editing VPN Sites
336 Check Point Safe@Office User Guide
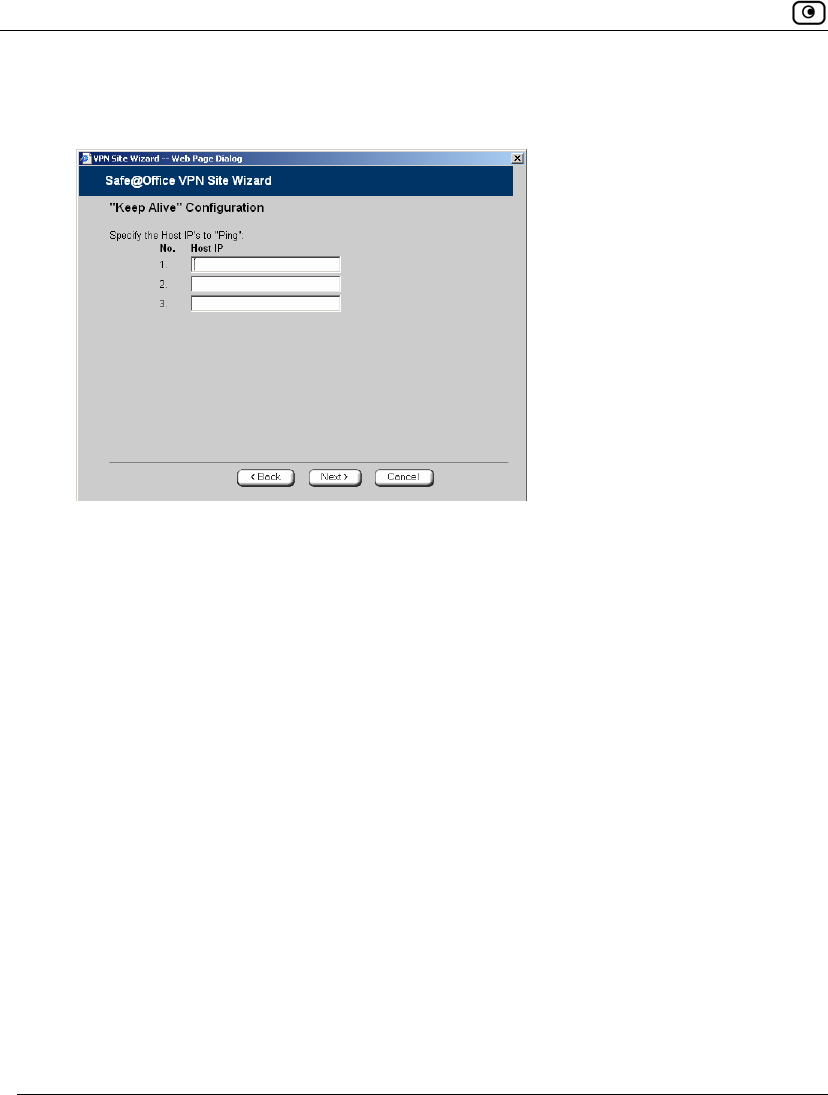
• If you selected Keep this site alive, and previously you chose Download
Configuration, the "Keep Alive" Configuration dialog box appears.
Do the following:
1) Type up to three IP addresses which the Safe@Office appliance
should ping in order to keep the tunnel to the VPN site alive.
2) Click Next.
• The VPN Site Created screen appears.
9. Click Finish.
The VPN Sites page reappears. If you added a VPN site, the new site appears in
the VPN Sites list. If you edited a VPN site, the modifications are reflected in the
VPN Sites list.
Certificate Authentication Method
If you selected Certificate, the following things happen:
Adding and Editing VPN Sites
Chapter 12: Working With VPNs 337
• If you chose Download Configuration, the Authentication dialog box
appears.
Complete the fields using the information in VPN Authentication Fields on
page 342 and click Next.
• The Security Methods dialog box appears.
1. To configure advanced security settings, click Show Advanced Settings.
Adding and Editing VPN Sites
338 Check Point Safe@Office User Guide
New fields appear.
2. Complete the fields using the information in Security Methods Fields on page
342 and click Next.
The Connect dialog box appears.
3. To try to connect to the Remote Access VPN Server, select the Try to Connect to
the VPN Gateway check box.
This allows you to test the VPN connection.
Adding and Editing VPN Sites
Chapter 12: Working With VPNs 339
Warning: If you try to connect to the VPN site before completing the wizard, all
existing tunnels will be terminated.
4. Click Next.
• If you selected Try to Connect to the VPN Gateway, the following things
happen:
The Connecting… screen appears.
• The Contacting VPN Site screen appears.
• The Site Name dialog box appears.
5. Enter a name for the VPN site.
You may choose any name.
6. To keep the tunnel to the VPN site alive even if there is no network traffic
between the Safe@Office appliance and the VPN site, select Keep this site alive.
7. Click Next.

Adding and Editing VPN Sites
340 Check Point Safe@Office User Guide
• If you selected Keep this site alive, and previously you chose Download
Configuration, the "Keep Alive" Configuration dialog box appears.
Do the following:
1) Type up to three IP addresses which the Safe@Office appliance
should ping in order to keep the tunnel to the VPN site alive.
2) Click Next.
• The VPN Site Created screen appears.
8. Click Finish.
The VPN Sites page reappears. If you added a VPN site, the new site appears in
the VPN Sites list. If you edited a VPN site, the modifications are reflected in the
VPN Sites list.
Adding and Editing VPN Sites
Chapter 12: Working With VPNs 341
Table 66: VPN Gateway Address Fields
In this field… Do this…
Gateway Address Type the IP address of the Site-to-Site VPN Gateway to which you want
to connect, as given to you by the network administrator.
Bypass NAT Select this option to allow the VPN site to bypass NAT when connecting
to your internal network.
This option is selected by default.
Bypass the
firewall
Select this option to allow the VPN site to bypass the firewall and access
your internal network without restriction.
Table 67: Route Based VPN Fields
In this field… Do this…
Tunnel Local IP Type a local IP address for this end of the VPN tunnel.
Tunnel Remote IP Type the IP address of the remote end of the VPN tunnel.
OSPF Cost Type the cost of this link for dynamic routing purposes.
The default value is 10.
If OSPF is not enabled, this setting is not used. OSPF is enabled using
the Safe@Office command line interface (CLI). For information on using
CLI, see Controlling the Appliance via the Command Line on page
390. For information on the relevant commands for OSPF, refer to the
Embedded NGX CLI Reference Guide.

Adding and Editing VPN Sites
342 Check Point Safe@Office User Guide
Table 68: Authentication Methods Fields
In this field… Do this…
Shared Secret Select this option to use a shared secret for VPN authentication.
A shared secret is a string used to identify VPN sites to each other.
Certificate Select this option to use a certificate for VPN authentication.
If you select this option, a certificate must have been installed. (Refer to
Installing a Certificate on page 350 for more information about
certificates and instructions on how to install a certificate.)
Table 69: VPN Authentication Fields
In this field… Do this…
Topology User Type the topology user’s user name.
Topology
Password
Type the topology user’s password.
Use Shared
Secret
Type the shared secret to use for secure communications with the VPN
site.
This shared secret is a string used to identify the VPN sites to each other.
The secret can contain spaces and special characters.

Adding and Editing VPN Sites
Chapter 12: Working With VPNs 343
Table 70: Security Methods Fields
In this field… Do this…
Phase 1
Security Methods Select the encryption and integrity algorithm to use for IKE negotiations:
• Automatic. The Safe@Office appliance automatically selects
the best security methods supported by the site. This is the
default.
• A specific algorithm
Diffie-Hellman
group
Select the Diffie-Hellman group to use:
• Automatic. The Safe@Office appliance automatically selects a
group. This is the default.
• A specific group
A group with more bits ensures a stronger key but lowers performance.
Renegotiate every Type the interval in minutes between IKE Phase-1 key negotiations. This
is the IKE Phase-1 SA lifetime.
A shorter interval ensures higher security, but impacts heavily on
performance. Therefore, it is recommended to keep the SA lifetime
around its default value.
The default value is 1440 minutes (one day).
Phase 2
Security Methods Select the encryption and integrity algorithm to use for VPN traffic:
• Automatic. The Safe@Office appliance automatically selects
the best security methods supported by the site. This is the
default.
• A specific algorithm

Adding and Editing VPN Sites
344 Check Point Safe@Office User Guide
In this field… Do this…
Perfect Forward
Secrecy
Specify whether to enable Perfect Forward Secrecy (PFS), by selecting
one of the following:
• Enabled. PFS is enabled. The Diffie-Hellman group field is
enabled.
• Disabled. PFS is disabled. This is the default.
Enabling PFS will generate a new Diffie-Hellman key during IKE Phase 2
and renew the key for each key exchange.
PFS increases security but lowers performance. It is recommended to
enable PFS only in situations where extreme security is required.
Diffie-Hellman
group
Select the Diffie-Hellman group to use:
• Automatic. The Safe@Office appliance automatically selects a
group. This is the default.
• A specific group
A group with more bits ensures a stronger key but lowers performance.
Renegotiate every Type the interval in seconds between IPSec SA key negotiations. This is
the IKE Phase-2 SA lifetime.
A shorter interval ensures higher security.
The default value is 3600 seconds (one hour).
Deleting a VPN Site
Chapter 12: Working With VPNs 345
Deleting a VPN Site
To delete a VPN site
1. Click VPN in the main menu, and click the VPN Sites tab.
The VPN Sites page appears, with a list of VPN sites.
2. In the desired VPN site’s row, click the Erase icon.
A confirmation message appears.
3. Click OK.
The VPN site is deleted.
Enabling/Disabling a VPN Site
You can only connect to VPN sites that are enabled.
To enable/disable a VPN site
1. Click VPN in the main menu, and click the VPN Sites tab.
The VPN Sites page appears, with a list of VPN sites.
2. To enable a VPN site, do the following:
a. Click the icon in the desired VPN site’s row.
A confirmation message appears.
b. Click OK.
The icon changes to , and the VPN site is enabled.
Logging on to a Remote Access VPN Site
346 Check Point Safe@Office User Guide
3. To disable a VPN site, do the following:
Note: Disabling a VPN site eliminates the tunnel and erases the network topology.
a. Click the icon in the desired VPN site’s row.
A confirmation message appears.
b. Click OK.
The icon changes to , and the VPN site is disabled.
Logging on to a Remote Access VPN Site
You need to manually log on to Remote Access VPN Servers configured for
Manual Login. You do not need to manually log on to a Remote Access VPN
Server configured for Automatic Login or a Site-to-Site VPN Gateway: all the
computers on your network have constant access to it.
Manual Login can be done through either the Safe@Office Portal or the my.vpn
page. When you log on and traffic is sent to the VPN site, a VPN tunnel is
established. Only the computer from which you logged on can use the tunnel. To
share the tunnel with other computers in your home network, you must log on to
the VPN site from those computers, using the same user name and password.
Note: You must use a single user name and password for each VPN destination
gateway.
Logging on to a Remote Access VPN Site
Chapter 12: Working With VPNs 347
Logging on through the Safe@Office Portal
Note: You can only login to sites that are configured for Manual Login.
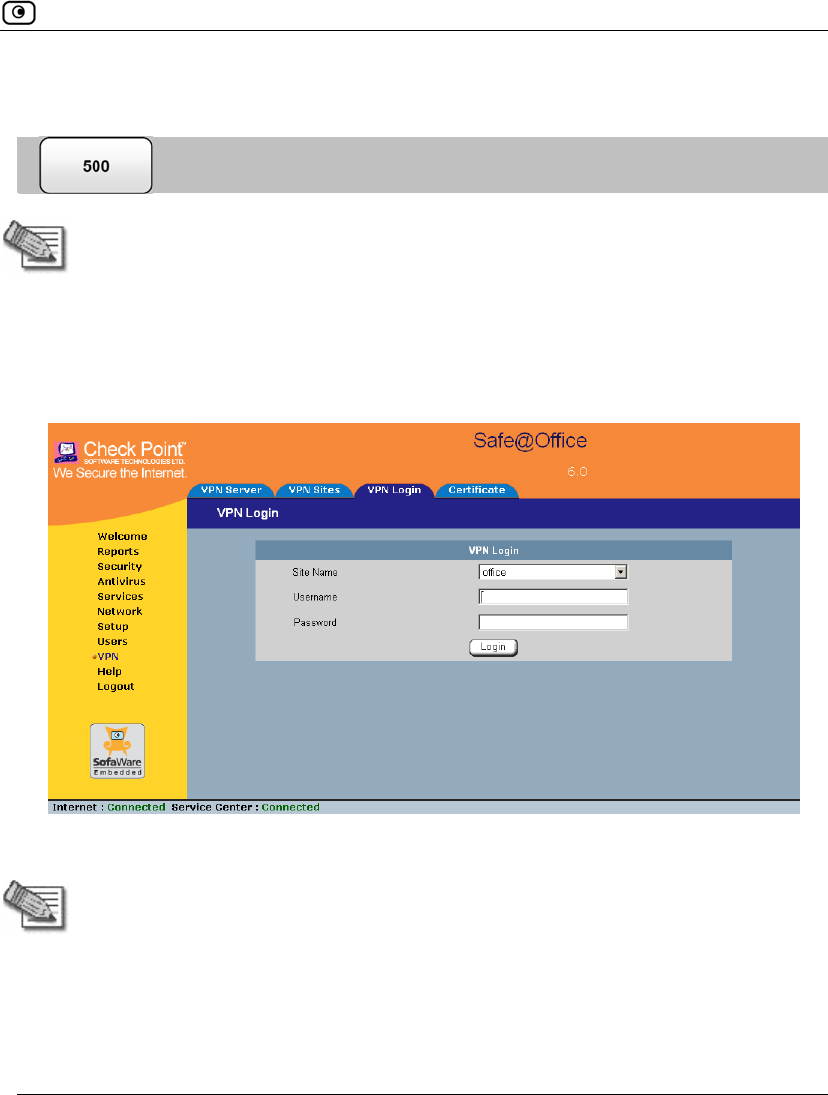
To manually log on to a VPN site through the Safe@Office Portal
1. Click VPN in the main menu, and click the VPN Login tab.
The VPN Login page appears.
2. From the Site Name list, select the site to which you want to log on.
Note: Disabled VPN sites will not appear in the Site Name list.
3. Type your user name and password in the appropriate fields.
4. Click Login.
Logging on to a Remote Access VPN Site
348 Check Point Safe@Office User Guide
• If the Safe@Office appliance is configured to automatically download the
network configuration, the Safe@Office appliance downloads the
network configuration.
• If when adding the VPN site you specified a network configuration, the
Safe@Office appliance attempts to create a tunnel to the VPN site.
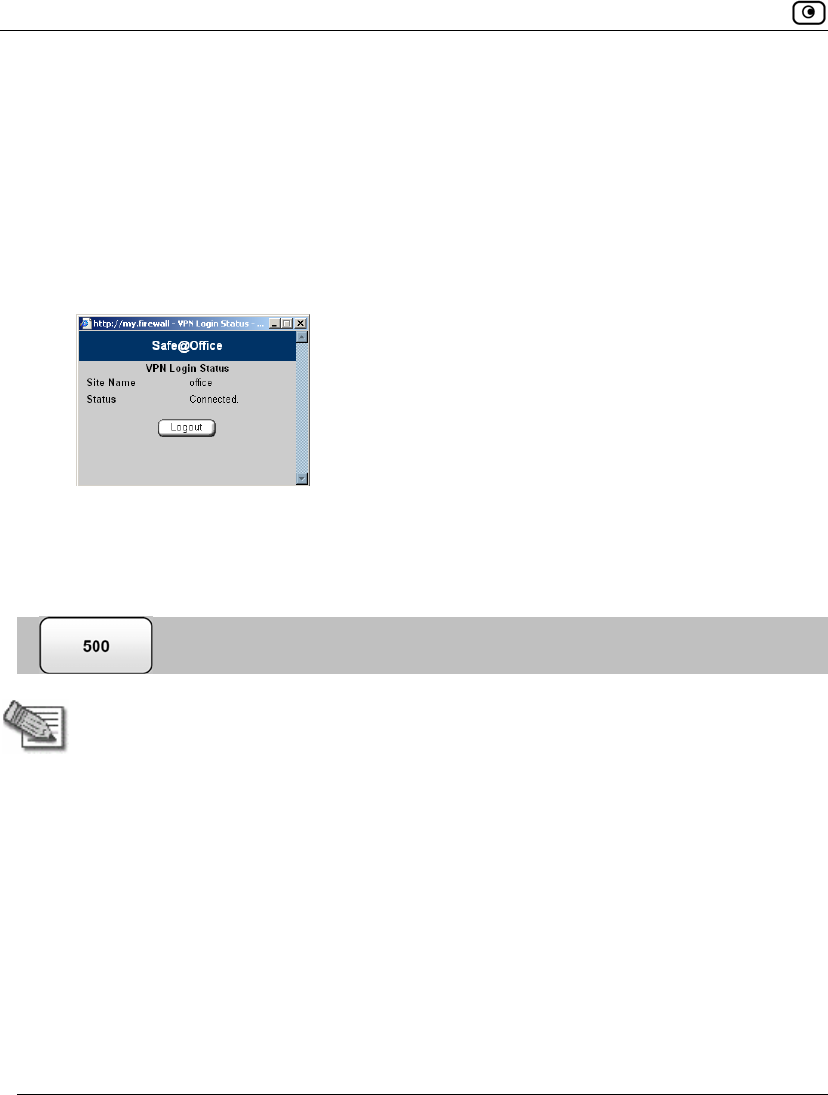
• Once the Safe@Office appliance has finished connecting, the VPN Login
Status box appears. The Status field displays “Connected”.
• The VPN Login Status box remains open until you manually log off the
VPN site.
Logging on through the my.vpn page
Note: You don’t need to know the my.firewall page administrator’s password in order
to use the my.vpn page.
To manually log on to a VPN site through the my.vpn page
1. Direct your Web browser to http://my.vpn
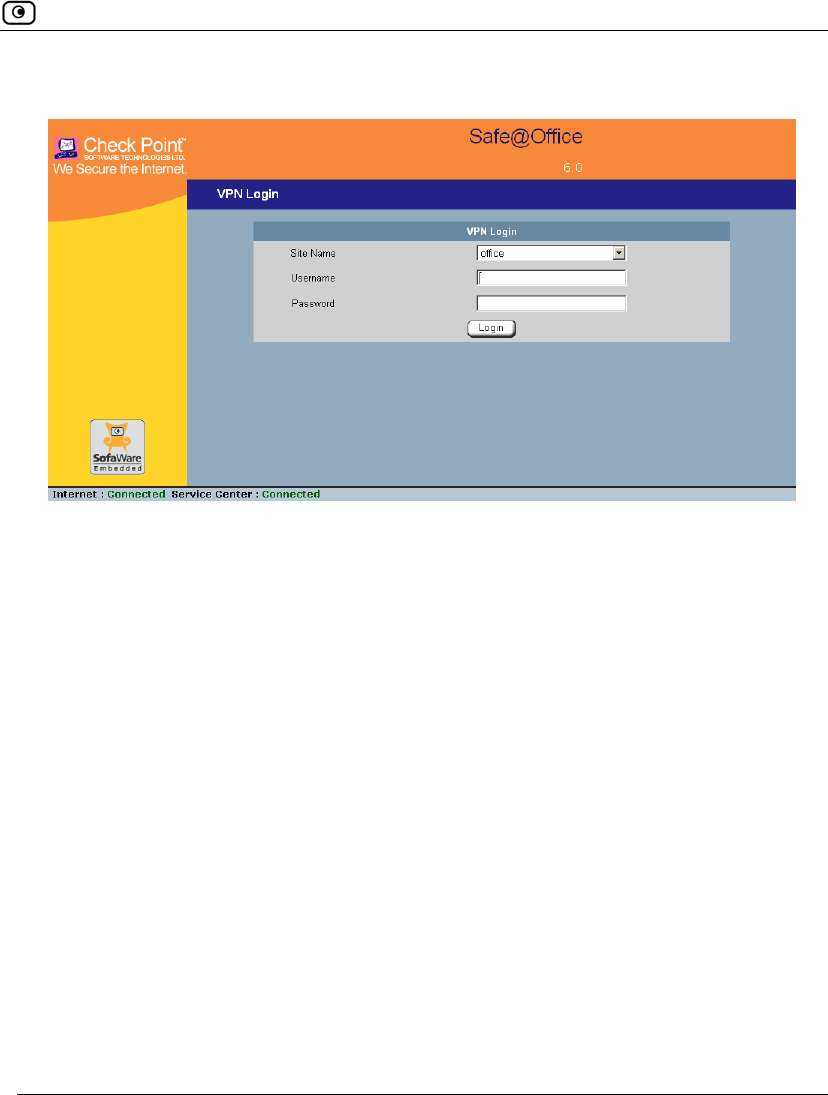
Logging on to a Remote Access VPN Site
Chapter 12: Working With VPNs 349
The VPN Login screen appears.
2. In the Site Name list, select the site to which you want to log on.
3. Enter your user name and password in the appropriate fields.
4. Click Login.
• If the Safe@Office appliance is configured to automatically download the
network configuration, the Safe@Office appliance downloads the
network configuration.
• If when adding the VPN site you specified a network configuration, the
Safe@Office appliance attempts to create a tunnel to the VPN site.
• The VPN Login Status box appears. The Status field tracks the
connection’s progress.
• Once the Safe@Office appliance has finished connecting, the Status field
changes to “Connected”.
• The VPN Login Status box remains open until you manually log off of the
VPN site.
Logging off a Remote Access VPN Site
350 Check Point Safe@Office User Guide
Logging off a Remote Access VPN Site
You need to manually log off a VPN site, if it is a Remote Access VPN site
configured for Manual Login.
To log off a VPN site
• In the VPN Login Status box, click Logout.
All open tunnels from the Safe@Office appliance to the VPN site are closed,
and the VPN Login Status box closes.
Note: Closing the browser or dismissing the VPN Login Status box will also terminate
the VPN session within a short time.
Installing a Certificate
A digital certificate is a secure means of authenticating the Safe@Office appliance
to other Site-to-Site VPN Gateways. The certificate is issued by the Certificate
Authority (CA) to entities such as gateways, users, or computers. The entity then
uses the certificate to identify itself and provide verifiable information.
For instance, the certificate includes the Distinguished Name (DN) (identifying
information) of the entity, as well as the public key (information about itself). After
two entities exchange and validate each other's certificates, they can begin
encrypting information between themselves using the public keys in the
certificates.
The certificate also includes a fingerprint, a unique text used to identify the
certificate. You can email your certificate's fingerprint to the remote user. Upon
connecting to the Safe@Office VPN Server for the first time, the entity should
check that the VPN peer's fingerprint displayed in the SecuRemote VPN Client is
identical to the fingerprint received.
Installing a Certificate
Chapter 12: Working With VPNs 351
The Safe@Office appliance supports certificates encoded in the PKCS#12
(Personal Information Exchange Syntax Standard) format, and enables you to
install such certificates in the following ways:
• By generating a self-signed certificate.
See Generating a Self-Signed Certificate on page 351.
• By importing a certificate.
The PKCS#12 file you import must have a ".p12" file extension. If you do not
have such a PKCS#12 file, obtain one from your network security administrator.
See Importing a Certificate on page 355.
Note: To use certificates authentication, each Safe@Office appliance should have a
unique certificate. Do not use the same certificate for more than one gateway.
Note: If your Safe@Office appliance is centrally managed, a certificate is
automatically generated and downloaded to your appliance. In this case, there is no
need to generate a self-signed certificate.
Generating a Self-Signed Certificate
To generate a self-signed certificate
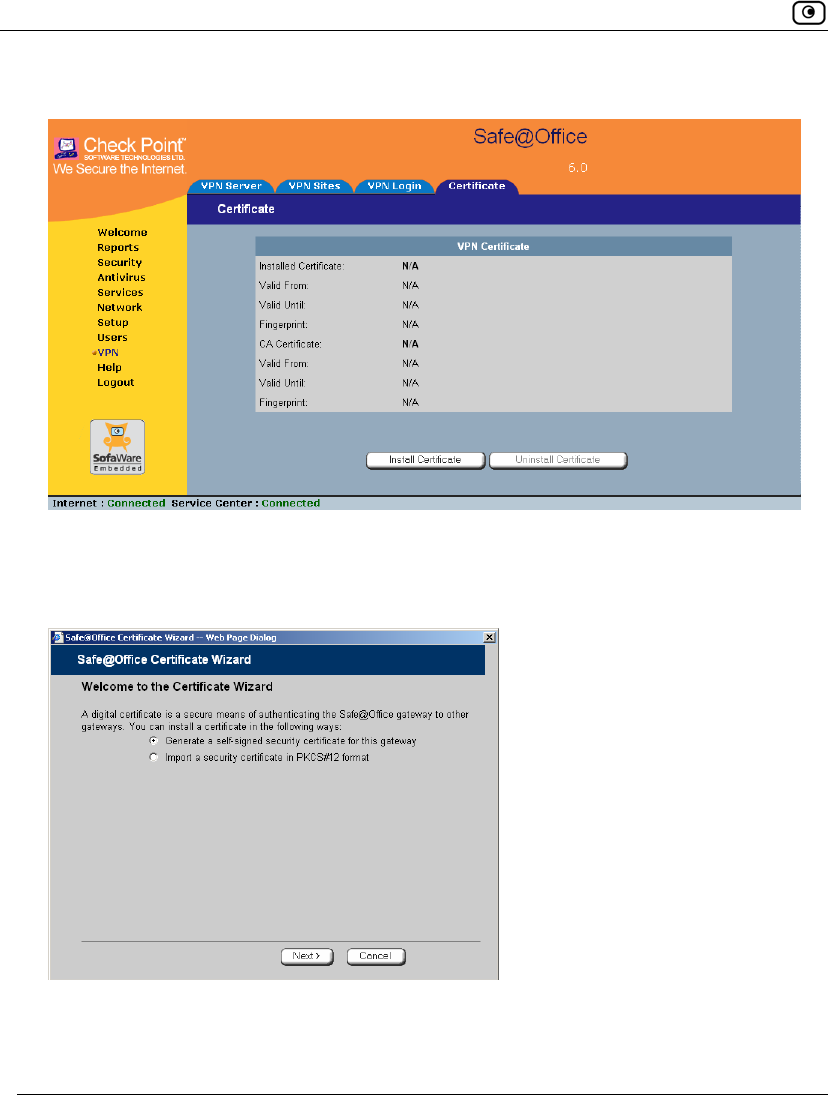
1. Click VPN in the main menu, and click the Certificate tab.
Installing a Certificate
352 Check Point Safe@Office User Guide
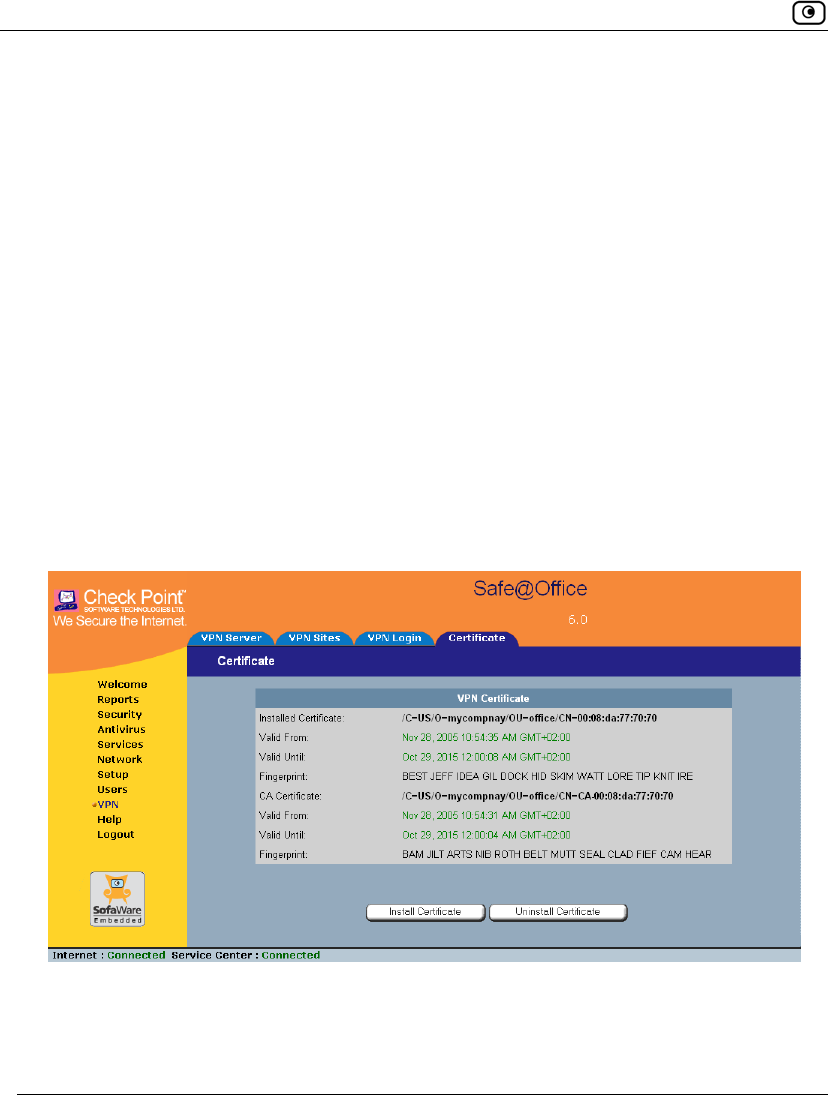
The Certificate page appears.
2. Click Install Certificate.
The Safe@Office Certificate Wizard opens, with the Certificate Wizard dialog box
displayed.
3. Click Generate a self-signed security certificate for this gateway.
Installing a Certificate
Chapter 12: Working With VPNs 353
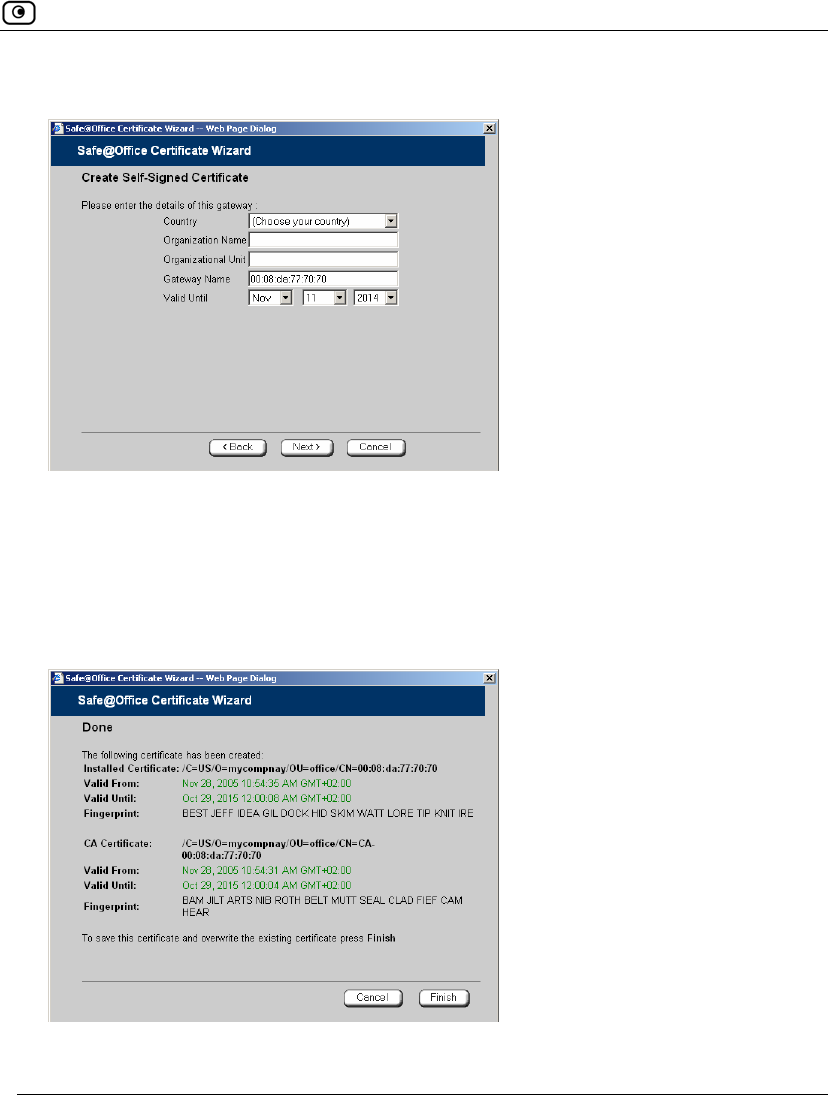
The Create Self-Signed Certificate dialog box appears.
4. Complete the fields using the information in the table below.
5. Click Next.
The Safe@Office appliance generates the certificate. This may take a few
seconds.
The Done dialog box appears, displaying the certificate's details.
6. Click Finish.
Installing a Certificate
354 Check Point Safe@Office User Guide
The Safe@Office appliance installs the certificate. If a certificate is already
installed, it is overwritten.
The Certificate Wizard closes.
The Certificates page displays the following information:
• The gateway's certificate
• The gateway's name
• The gateway certificate's fingerprint
• The CA's certificate
• The name of the CA that issued the certificate (in this case, the
Safe@Office gateway)
• The CA certificate's fingerprint
• The starting and ending dates between which the gateway's certificate and
the CA's certificate are valid
Installing a Certificate
Chapter 12: Working With VPNs 355
Table 71: Certificate Fields
In this field… Do this…
Country Select your country from the drop-down list.
Organization
Name
Type the name of your organization.
Organizational Unit Type the name of your division.
Gateway Name Type the gateway's name. This name will appear on the certificate, and will
be visible to remote users inspecting the certificate.
This field is filled in automatically with the gateway's MAC address. If
desired, you can change this to a more descriptive name.
Valid Until Use the drop-down lists to specify the month, day, and year when this
certificate should expire.
Note: You must renew the certificate when it expires.
Importing a Certificate
To install a certificate
1. Click VPN in the main menu, and click the Certificate tab.
The Certificate page appears.
2. Click Install Certificate.
The Safe@Office Certificate Wizard opens, with the Certificate Wizard dialog box
displayed.
3. Click Import a security certificate in PKCS#12 format.
Installing a Certificate
356 Check Point Safe@Office User Guide
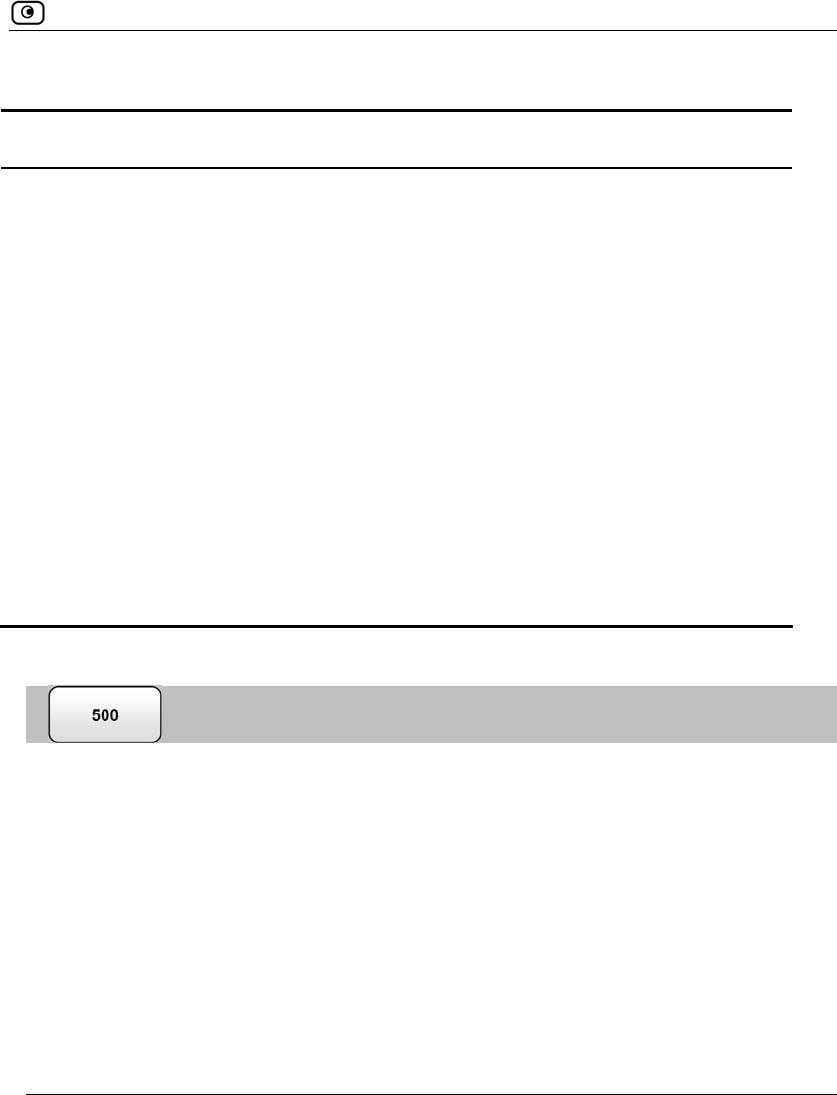
The Import Certificate dialog box appears.
4. Click Browse to open a file browser from which to locate and select the file.
The filename that you selected is displayed.
5. Click Next.
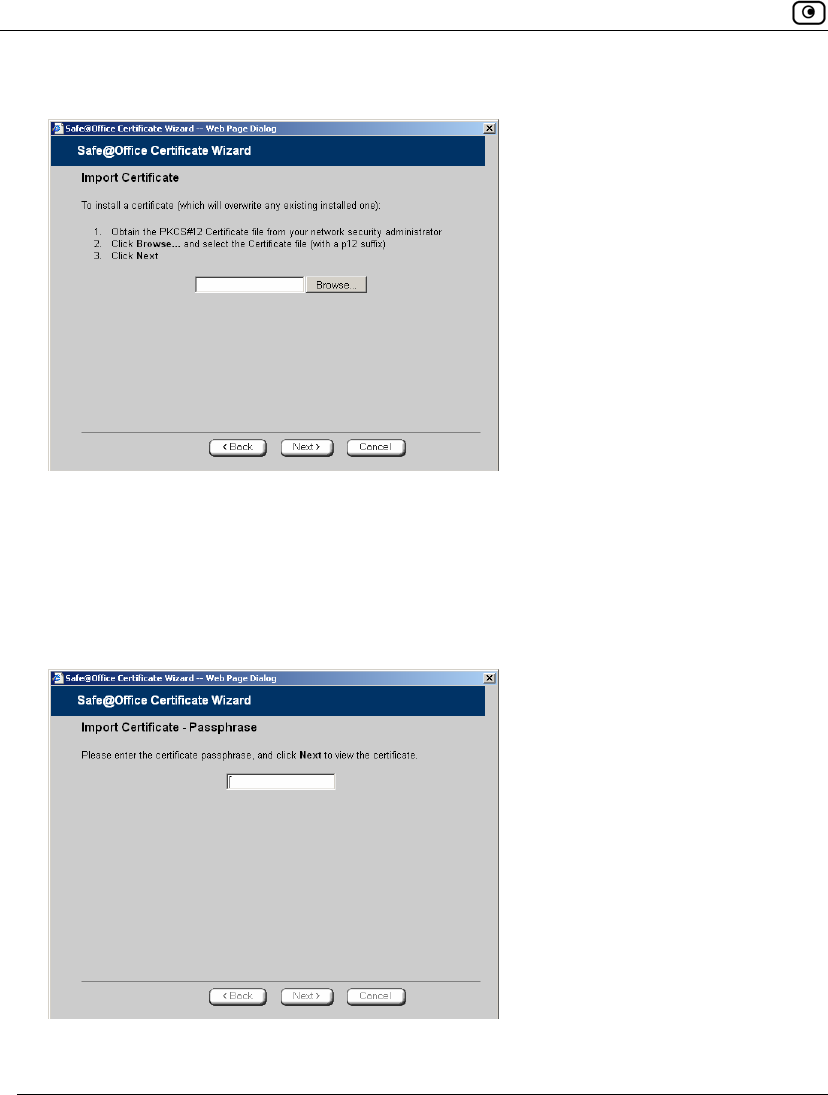
The Import-Certificate Passphrase dialog box appears. This may take a few
moments.
6. Type the pass-phrase you received from the network security administrator.
Uninstalling a Certificate
Chapter 12: Working With VPNs 357
7. Click Next.
The Done dialog box appears, displaying the certificate's details.
8. Click Finish.
The Safe@Office appliance installs the certificate. If a certificate is already
installed, it is overwritten.
The Certificate Wizard closes.
The Certificates page displays the following information:
• The gateway's certificate
• The gateway's name
• The gateway certificate's fingerprint
• The CA's certificate
• The name of the CA that issued the certificate
• The CA certificate's fingerprint
• The starting and ending dates between which the gateway's certificate and
the CA's certificate are valid
Uninstalling a Certificate
If you uninstall the certificate, no certificate will exist on the Safe@Office
appliance, and you will not be able to connect to the VPN if a certificate is
required.
You cannot uninstall the certificate if there is a VPN site currently defined to use
certificate authentication.
Note: If you want to replace a currently-installed certificate, there is no need to
uninstall the certificate first. When you install the new certificate, the old certificate
will be overwritten.
Viewing VPN Tunnels
358 Check Point Safe@Office User Guide
To uninstall a certificate
1. Click VPN in the main menu, and click the Certificate tab.
The Certificate page appears with the name of the currently installed certificate.
2. Click Uninstall.
A confirmation message appears.
3. Click OK.
The certificate is uninstalled.
A success message appears.
4. Click OK.
Viewing VPN Tunnels
You can view a list of currently established VPN tunnels. VPN tunnels are created
and closed as follows:
• Remote Access VPN sites configured for Automatic Login and Site-to-Site
VPN Gateways
A tunnel is created whenever your computer attempts any kind of
communication with a computer at the VPN site. The tunnel is closed when not
in use for a period of time.
Note: Although the VPN tunnel is automatically closed, the site remains open, and if
you attempt to communicate with the site, the tunnel will be reestablished.
• Remote Access VPN sites configured for Manual Login
A tunnel is created whenever your computer attempts any kind of
communication with a computer at the VPN site, after you have manually
logged on to the site. All open tunnels connecting to the site are closed when
you manually log off.
Viewing VPN Tunnels
Chapter 12: Working With VPNs 359
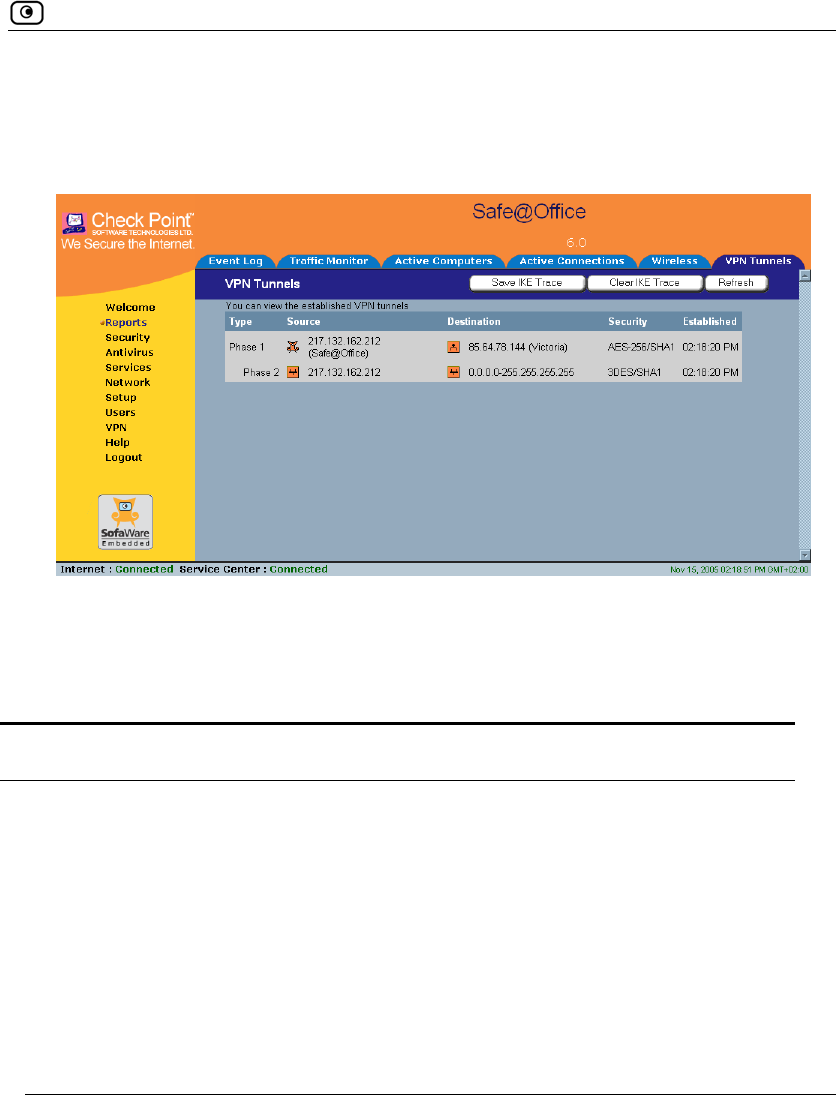
To view VPN tunnels
1. Click Reports in the main menu, and click the VPN Tunnels tab.
The VPN Tunnels page appears with a table of open tunnels to VPN sites.
The VPN Tunnels page includes the information described in the table below.
2. To refresh the table, click Refresh.
Table 72: VPN Tunnels Page Fields
This field… Displays…
Type The currently active security protocol (IPSEC).
Source
The IP address or address range of the entity from which the tunnel
originates.
The entity's type is indicated by an icon. See VPN Tunnel Icons on page
360.
Viewing VPN Tunnels
360 Check Point Safe@Office User Guide
This field… Displays…
Destination The IP address or address range of the entity to which the tunnel is
connected.
The entity's type is indicated by an icon. See VPN Tunnel Icons on page
360.
Security The type of encryption used to secure the connection, and the type of
Message Authentication Code (MAC) used to verify the integrity of the
message. This information is presented in the following format: Encryption
type/Authentication type
Note: All VPN settings are automatically negotiated between the two sites.
The encryption and authentication schemes used for the connection are the
strongest of those used at the two sites.
Your Safe@Office appliance supports AES, 3DES, and DES encryption
schemes, and MD5 and SHA authentication schemes.
Established The time at which the tunnel was established.
This information is presented in the format hh:mm:ss, where:
hh=hours
mm=minutes
ss=seconds
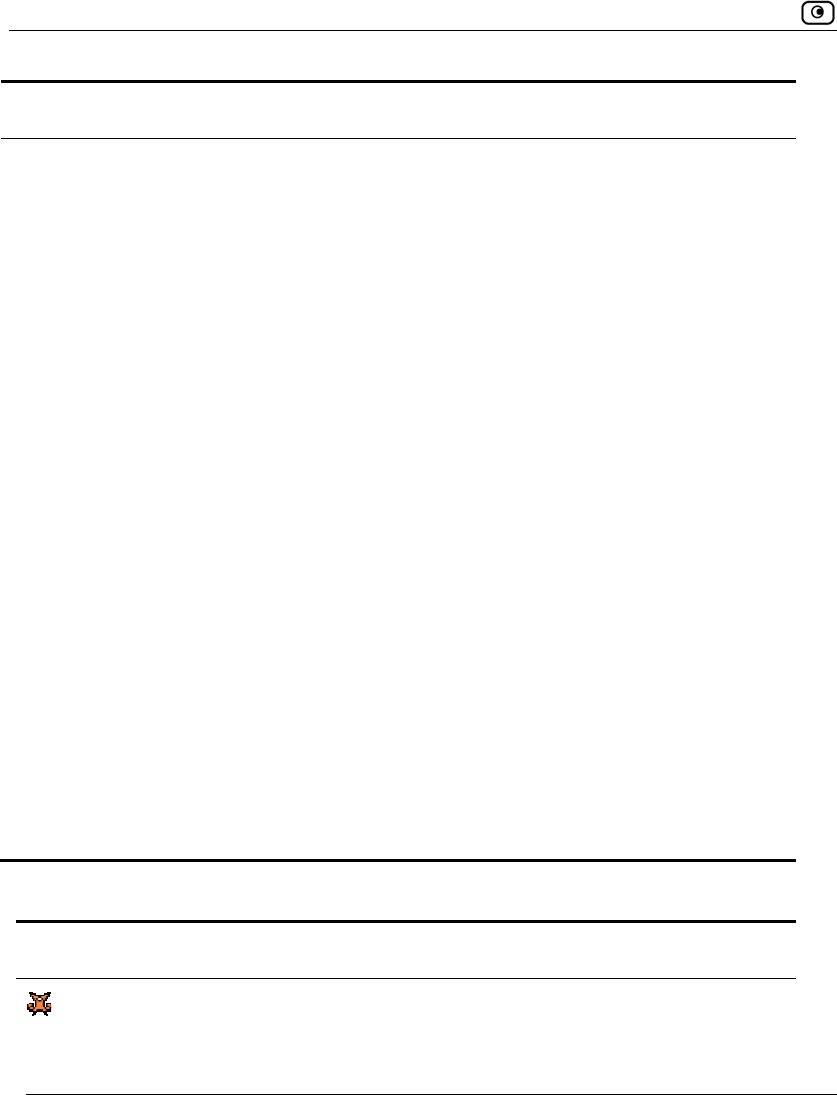
Table 73: VPN Tunnels Icons
This icon… Represents…
This gateway
Viewing IKE Traces for VPN Connections
Chapter 12: Working With VPNs 361
This icon… Represents…
A network for which an IKE Phase-2 tunnel was negotiated
A Remote Access VPN Server
A Site-to-Site VPN Gateway
A remote access VPN user
Viewing IKE Traces for VPN Connections
If you are experiencing VPN connection problems, you can save a trace of IKE
(Internet Key Exchange) negotiations to a file, and then use the free IKE View tool
to view the file.
The IKE View tool is available for the Windows platform.
Note: Before viewing IKE traces, it is recommended to do the following:
• The Safe@Office appliance stores traces for all recent IKE
negotiations. If you want to view only new IKE trace data, clear all IKE
trace data currently stored on the Safe@Office appliance.
• Close all existing VPN tunnels except for the problematic tunnel, so as
to make it easier to locate the problematic tunnel's IKE negotiation
trace in the exported file.
To clear all currently-stored IKE traces
1. Click Reports in the main menu, and click the VPN Tunnels tab.
The VPN Tunnels page appears with a table of open tunnels to VPN sites.
2. Click Clear IKE Trace.
All IKE trace data currently stored on the Safe@Office appliance is cleared.

Viewing IKE Traces for VPN Connections
362 Check Point Safe@Office User Guide
To view the IKE trace for a connection
1. Establish a VPN tunnel to the VPN site with which you are experiencing
connection problems.
For information on when and how VPN tunnels are established, see Viewing
VPN Tunnels on page 358.
2. Click Reports in the main menu, and click the VPN Tunnels tab.
The VPN Tunnels page appears with a table of open tunnels to VPN sites.
3. Click Save IKE Trace.
A standard File Download dialog box appears.
4. Click Save.
The Save As dialog box appears.
5. Browse to a destination directory of your choice.
6. Type a name for the *.elg file and click Save.
The *.elg file is created and saved to the specified directory. This file contains
the IKE traces of all currently-established VPN tunnels.
7. Use the IKE View tool to open and view the *.elg file, or send the file to
technical support.
Changing Your Password
Chapter 13: Managing Users 363
Chapter 13
This chapter describes how to manage Safe@Office appliance users. You can
define multiple users, set their passwords, and assign them various permissions.
This chapter includes the following topics:
Changing Your Password.........................................................................363
Adding and Editing Users ........................................................................365
Adding Quick Guest HotSpot Users.........................................................369
Viewing and Deleting Users.....................................................................371
Setting Up Remote VPN Access for Users...............................................371
Using RADIUS Authentication................................................................372
Configuring the RADIUS Vendor-Specific Attribute ..............................376
Changing Your Password
You can change your password at any time.
To change your password
1. Click Users in the main menu, and click the Internal Users tab.
Managing Users
Changing Your Password
364 Check Point Safe@Office User Guide
The Internal Users page appears.
2. In the row of your username, click Edit.
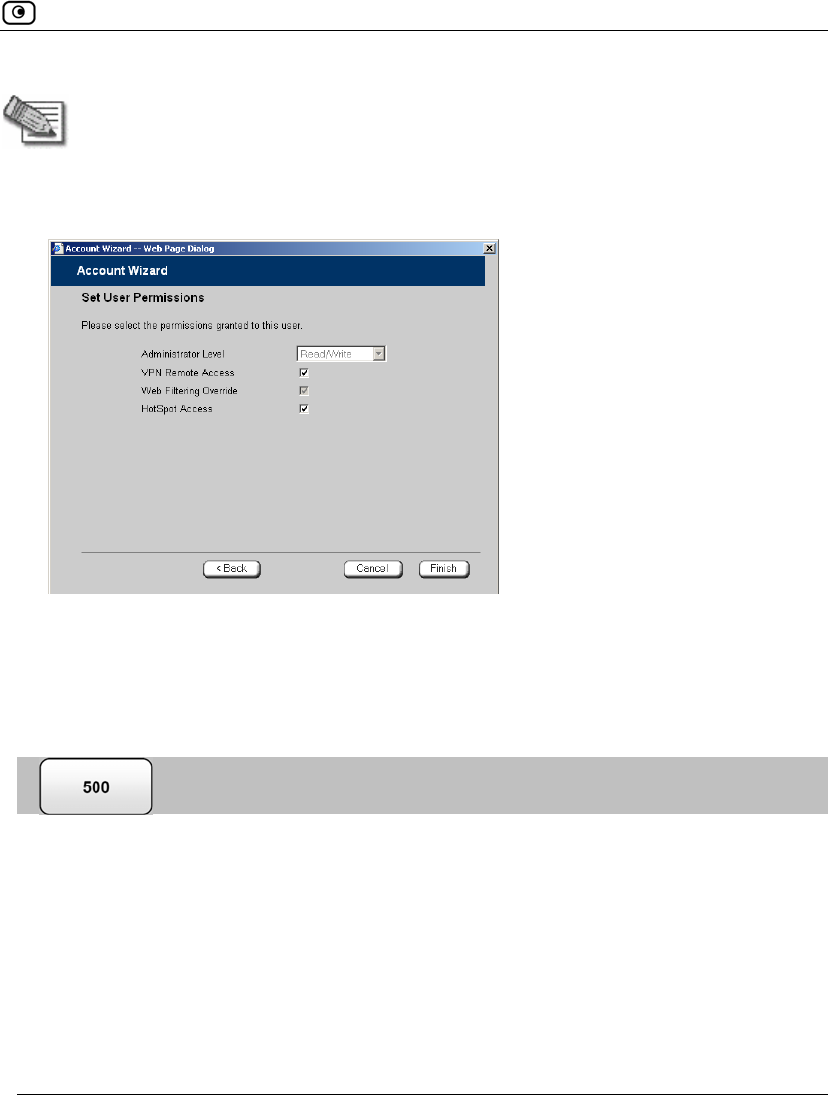
The Account Wizard opens displaying the Set User Details dialog box.
3. Edit the Password and Confirm password fields.
Adding and Editing Users
Chapter 13: Managing Users 365
Note: Use 5 to 25 characters (letters or numbers) for the new password.
4. Click Next.
The Set User Permissions dialog box appears.
5. Click Finish.
Your changes are saved.
Adding and Editing Users
This procedure explains how to add and edit users.
For information on quickly adding guest HotSpot users via a shortcut that the
Safe@Office appliance provides, see Adding Quick Guest HotSpot Users on page
369.
To add or edit a user
1. Click Users in the main menu, and click the Internal Users tab.
Adding and Editing Users
366 Check Point Safe@Office User Guide
The Internal Users page appears.
2. Do one of the following:
• To create a new user, click New User.
• To edit an existing user, click Edit next to the desire user.
The Account Wizard opens displaying the Set User Details dialog box.
3. Complete the fields using the information in Set User Details Fields on page
367.
4. Click Next.
Adding and Editing Users
Chapter 13: Managing Users 367
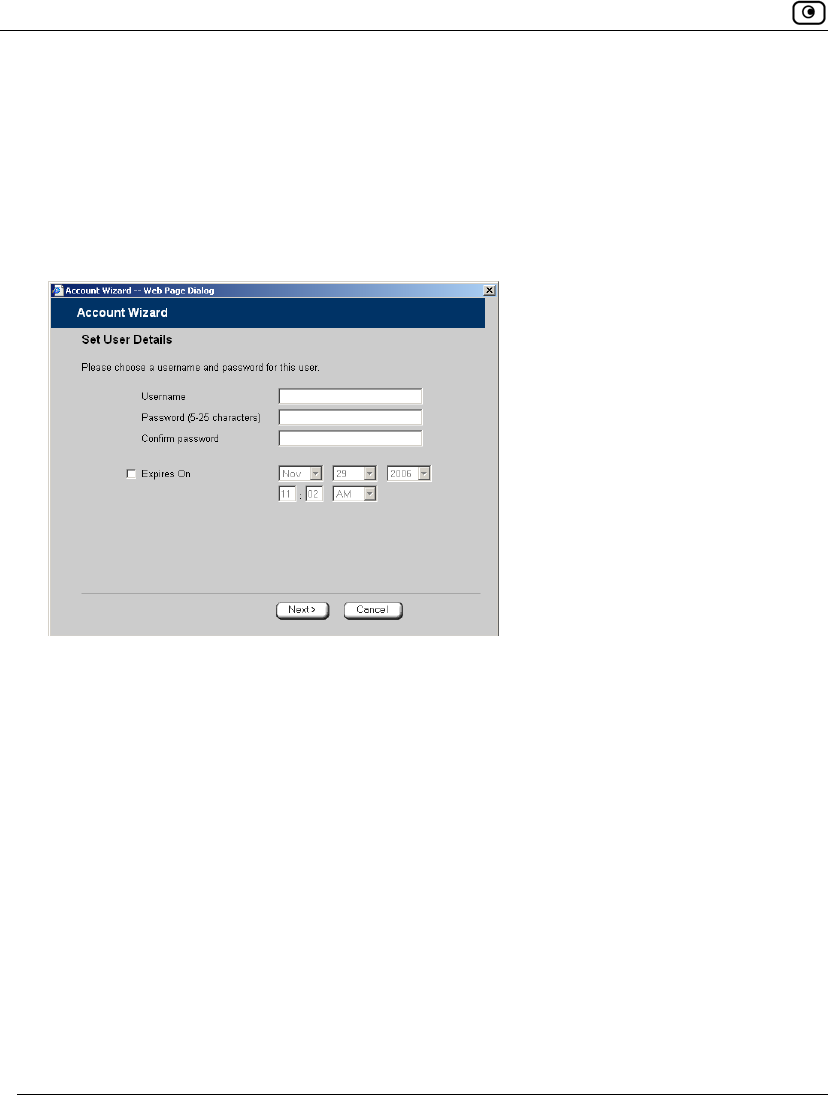
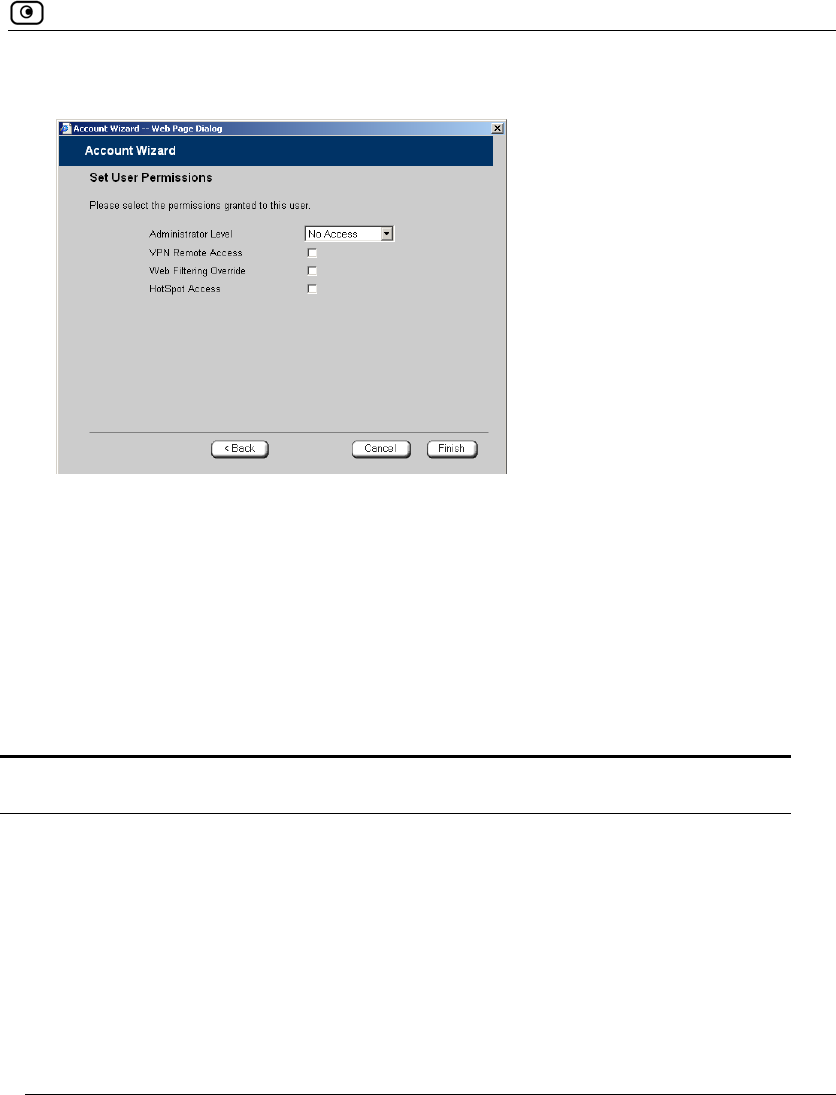
The Set User Permissions dialog box appears.
The options that appear on the page are dependant on the software and services
you are using.
5. Complete the fields using the information in Set User Permissions Fields on
page 368.
6. Click Finish.
The user is saved.
Table 74: Set User Details Fields
In this field… Do this…
Username Enter a username for the user.
Password Enter a password for the user. Use five to 25 characters (letters or
numbers) for the new password.
Confirm Password Re-enter the user’s password.

Adding and Editing Users
368 Check Point Safe@Office User Guide
In this field… Do this…
Expires On To specify an expiration time for the user, select this option and specify
the expiration date and time in the fields provided.
When the user account expires, it is locked, and the user can no longer
log on to the Safe@Office appliance.
If you do not select this option, the user will not expire.
Table 75: Set User Permissions Fields
In this field... Do this...
Administrator Level Select the user’s level of access to the Safe@Office Portal.
The levels are:
• No Access: The user cannot access the Safe@Office Portal.
• Read/Write: The user can log on to the Safe@Office Portal
and modify system settings.
• Read Only: The user can log on to the Safe@Office Portal,
but cannot modify system settings or export the appliance
configuration via the Setup>Tools page. For example, you
could assign this administrator level to technical support
personnel who need to view the Event Log.
The default level is No Access.
The “admin” user’s Administrator Level (Read/Write) cannot be
changed.
VPN Remote
Access
Select this option to allow the user to connect to this Safe@Office
appliance using their VPN client.
For further information on setting up VPN remote access, see Setting
Up Remote VPN Access for Users on page 371.

Adding Quick Guest HotSpot Users
Chapter 13: Managing Users 369
Web Filtering
Override
Select this option to allow the user to override Web Filtering.
This option only appears if the Web Filtering service is defined.
This option cannot be changed for the “admin” user.
HotSpot Access Select this option to allow the user to log on to the My HotSpot page.
For information on Secure HotSpot, see Configuring Secure HotSpot
on page 258.
This option only appears in Safe@Office 500 with Power Pack.
Adding Quick Guest HotSpot Users
The Safe@Office appliance provides a shortcut for quickly adding a guest HotSpot
user. This is useful in situations where you want to grant temporary network access
to guests, for example in an Internet café. The shortcut also enables printing the
guest user's details in one click.
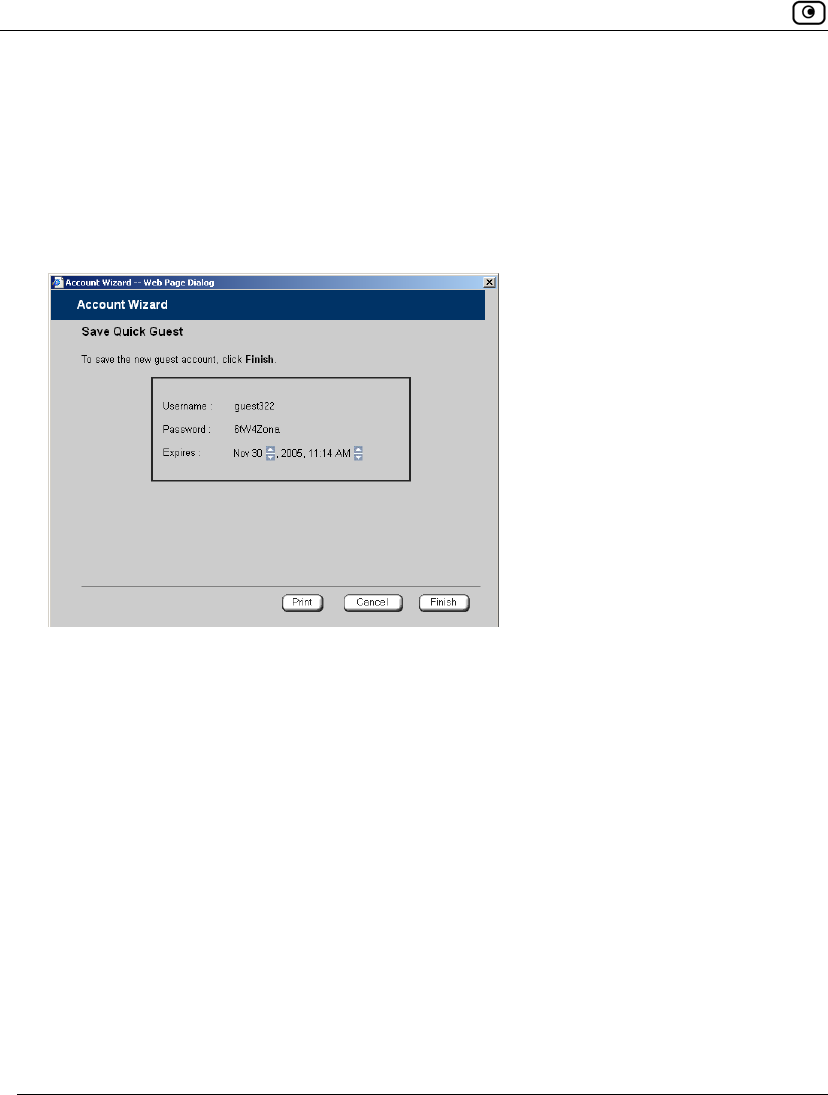
By default, the quick guest user has the following characteristics:
• Username in the format guest<number>, where <number> is a unique
three-digit number.
For example: guest123
• Randomly generated password
• Expires in 24 hours
• Administration Level: No Access
• Permissions: HotSpot Access only
For information on configuring Secure HotSpot, see Using Secure HotSpot on
page 258.
Adding Quick Guest HotSpot Users
370 Check Point Safe@Office User Guide
To quickly create a guest user
1. Click Users in the main menu, and click the Internal Users tab.
The Internal Users page appears.
2. Click Quick Guest.
The Account Wizard opens displaying the Save Quick Guest dialog box.
3. In the Expires field, click on the arrows to specify the expiration date and time.
4. To print the user details, click Print.
5. Click Finish.
The guest user is saved.
You can edit the guest user's details and permissions using the procedure
Adding and Editing Users on page 365.
Viewing and Deleting Users
Chapter 13: Managing Users 371
Viewing and Deleting Users
Note: The “admin” user cannot be deleted.
To view or delete users
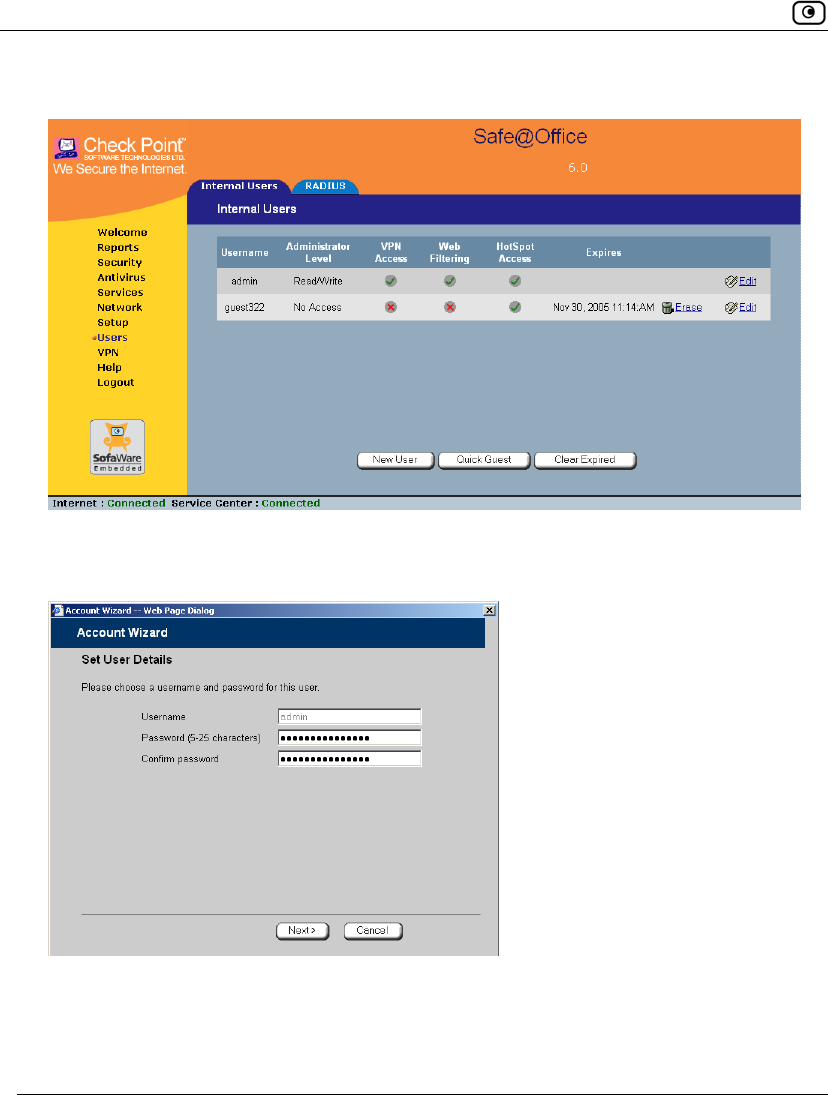
1. Click Users in the main menu, and click the Internal Users tab.
The Internal Users page appears with a list of all users and their permissions.
The expiration time of expired users appears in red.
2. To delete a user, do the following:
a) In the desired user’s row, click the Erase icon.
A confirmation message appears.
b) Click OK.
The user is deleted.
3. To delete all expired users, do the following:
a) Click Clear Expired.
A confirmation message appears.
b) Click OK.
The expired users are deleted.
Setting Up Remote VPN Access for Users
If you are using your Safe@Office appliance as a Remote Access VPN Server or as
an internal VPN Server, you can allow users to access it remotely through their
Using RADIUS Authentication
372 Check Point Safe@Office User Guide
Remote Access VPN Clients (a Check Point SecureClient, Check Point
SecuRemote, or another Embedded NGX appliance).
To set up remote VPN access for a user
1. Enable your VPN Server, using the procedure Setting Up Your Safe@Office
Appliance as a VPN Server on page 309.
2. Add or edit the user, using the procedure Adding and Editing Users on page
365.
You must select the VPN Remote Access option.
Using RADIUS Authentication
You can use Remote Authentication Dial-In User Service (RADIUS) to
authenticate both Safe@Office appliance users and Remote Access VPN Clients
trying to connect to the Safe@Office appliance.
Note: When RADIUS authentication is in use, Remote Access VPN Clients must
have a certificate.
When a user tries to log on to the Safe@Office Portal, the Safe@Office appliance
sends the entered user name and password to the RADIUS server. The server then
checks whether the RADIUS database contains a matching user name and
password pair. If so, then the user is logged on.
By default, all RADIUS-authenticated users are assigned the set of permissions
specified in the Safe@Office Portal's RADIUS page. However, you can configure
the RADIUS server to pass the Safe@Office appliance a specific set of permissions
to grant the authenticated user, instead of these default permissions. This is done by
configuring the RADIUS Vendor-Specific Attribute (VSA) with a set of attributes
containing permission information for specific users. If the VSA is configured for a
user, then the RADIUS server passes the VSA to the Embedded NGX gateway as
part of the response to the authentication request, and the gateway assigns the user
permissions as specified in the VSA. If the VSA is not returned by the RADIUS
Using RADIUS Authentication
Chapter 13: Managing Users 373
server for a specific user, the gateway will use the default permission set for this
user.
To use RADIUS authentication
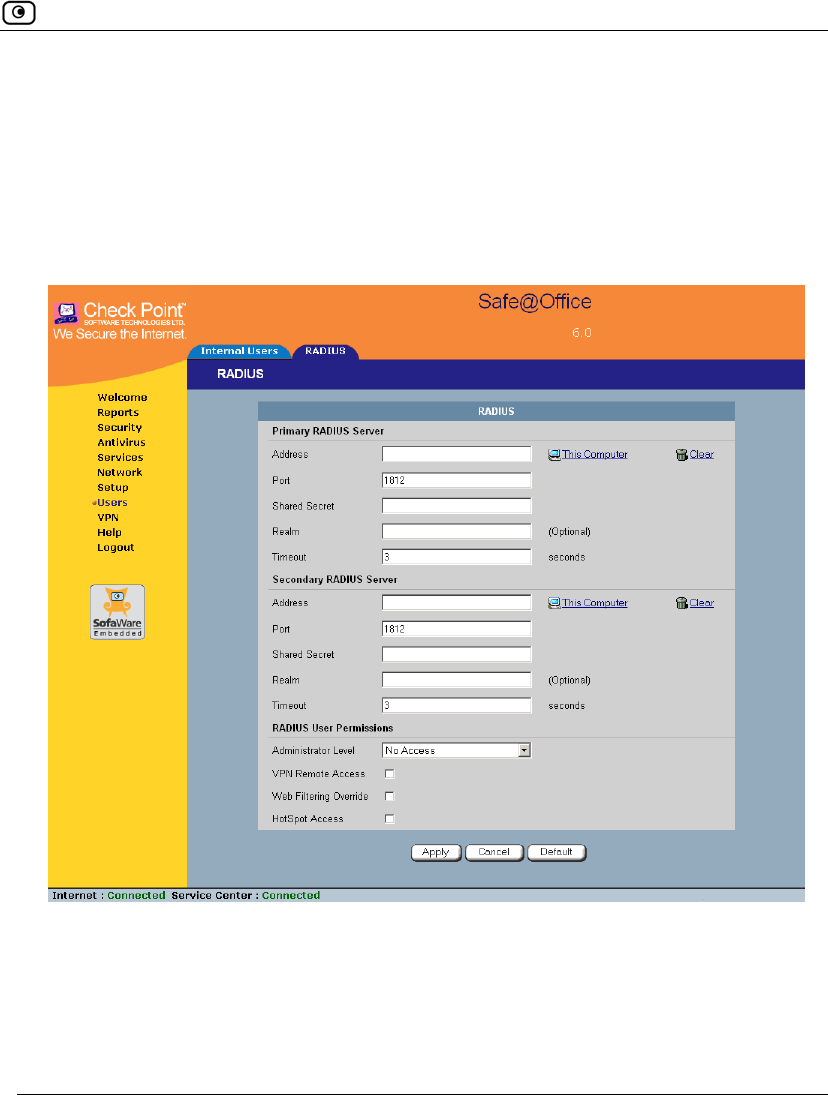
1. Click Users in the main menu, and click the RADIUS tab.
The RADIUS page appears.
2. Complete the fields using the table below.
3. Click Apply.
4. To restore the default RADIUS settings, do the following:
a) Click Default.

Using RADIUS Authentication
374 Check Point Safe@Office User Guide
A confirmation message appears.
b) Click OK.
The RADIUS settings are reset to their defaults. For information on the
default values, refer to the table below.
5. To use the RADIUS VSA to assign permissions to users, configure the VSA.
See Configuring the RADIUS Vendor-Specific Attribute on page 376.
Table 76: RADIUS Page Fields
In this field… Do this…
Primary/Secondary
RADIUS Server
Configure the primary and secondary RADIUS servers.
By default, the Safe@Office appliance sends a request to the primary
RADIUS server first. If the primary RADIUS server does not respond
after three attempts, the Safe@Office appliance will send the request to
the secondary RADIUS server.
Address Type the IP address of the computer that will run the RADIUS service
(one of your network computers) or click the corresponding This
Computer button to allow your computer to host the service.
To clear the text box, click Clear.
Port Type the port number on the RADIUS server’s host computer.
The default port number is 1812.
Shared Secret Type the shared secret to use for secure communication with the
RADIUS server.

Using RADIUS Authentication
Chapter 13: Managing Users 375
In this field… Do this…
Realm If your organization uses RADIUS realms, type the realm to append to
RADIUS requests. The realm will be appended to the username as
follows: <username>@<realm>
For example, if you set the realm to “myrealm”, and the user "JohnS"
attempts to log on to the Safe@Office Portal, the Safe@Office
appliance will send the RADIUS server an authentication request with
the username “JohnS@myrealm”.
This field is optional.
Timeout Type the interval of time in seconds between attempts to communicate
with the RADIUS server.
The default value is 3 seconds.
RADIUS User
Permissions
If the RADIUS VSA (Vendor-Specific Attribute) is configured for a user,
the fields in this area will have no effect, and the user will be granted
the permissions specified in the VSA.
If the VSA is not configured for the user, the permissions configured in
this area will be used.
Administrator Level Select the level of access to the Safe@Office Portal to assign to all
users authenticated by the RADIUS server.
The levels are:
• No Access: The user cannot access the Safe@Office Portal
• Read/Write: The user can log on to the Safe@Office Portal
and modify system settings.
• Read Only: The user can log on to the Safe@Office Portal,
but cannot modify system settings.
The default level is No Access.
Configuring the RADIUS Vendor-Specific Attribute
376 Check Point Safe@Office User Guide
In this field… Do this…
Web Filtering
Override
Select this option to allow all users authenticated by the RADIUS server
to override Web Filtering.
This option only appears if the Web Filtering service is defined.
HotSpot Access Select this option to allow the user to access the My HotSpot page.
This option only appears in Safe@Office 500 with Power Pack.
Configuring the RADIUS Vendor-Specific Attribute
For detailed instructions and examples, refer to the "Configuring the RADIUS
Vendor-Specific Attribute" white paper.
To assign permissions to specific RADIUS-authenticated users
1. Create a remote access policy as follows:
a) Assign the policy’s VSA (attribute 26) the SofaWare vendor code
(6983).
b) For each permission you want to grant, configure the relevant attribute
of the VSA with the desired value, as described in the table below.
For example, to assign the user VPN access permissions, set attribute number 2
to “true”.
2. Assign the policy to the desired user or user group.

Configuring the RADIUS Vendor-Specific Attribute
Chapter 13: Managing Users 377
Table 77: VSA Syntax
Permission Description Attribute
Number Attribute
Format Attribute Values Notes
Admin Indicates the
administrator’s
level of access to
the Embedded
NGX Portal
1 String
none. The user
cannot access the
Safe@Office
Portal.
readonly. The user
can log on to the
Safe@Office
Portal, but cannot
modify system
settings.
readwrite. The user
can log on to the
Safe@Office
Portal and modify
system settings.
VPN Indicates whether
the user can
access the
network from a
Remote Access
VPN Client.
2 String
true. The user can
remotely access
the network via
VPN.
false. The user
cannot remotely
access the
network via VPN.
This permission
is only relevant if
the Safe@Office
Remote Access
VPN Server is
enabled. The
gateway must
have a
certificate.

Configuring the RADIUS Vendor-Specific Attribute
378 Check Point Safe@Office User Guide
Permission Description Attribute
Number Attribute
Format Attribute Values Notes
Hotspot Indicates whether
the user can log
on via the My
HotSpot page.
3 String
true. The user can
access the Internet
via My HotSpot.
false. The user
cannot access the
Internet via My
HotSpot.
This permission
is only relevant if
the Secure
HotSpot feature
is enabled.
UFP Indicates whether
the user can
override Web
Filtering.
4 String
true. The user can
override Web
Filtering.
false. The user
cannot override
Web Filtering.
This permission is
only relevant if
the Web Filtering
service is
enabled.

Viewing Firmware Status
Chapter 14: Maintenance 379
Chapter 14
This chapter describes the tasks required for maintenance and diagnosis of your
Safe@Office appliance.
This chapter includes the following topics:
Viewing Firmware Status.........................................................................379
Updating the Firmware.............................................................................381
Upgrading Your Software Product...........................................................383
Registering Your Safe@Office Appliance ...............................................387
Configuring Syslog Logging....................................................................388
Controlling the Appliance via the Command Line...................................390
Configuring HTTPS .................................................................................394
Configuring SSH......................................................................................396
Configuring SNMP...................................................................................398
Setting the Time on the Appliance ...........................................................401
Using Diagnostic Tools............................................................................405
Backing Up the Safe@Office Appliance Configuration...........................419
Resetting the Safe@Office Appliance to Defaults ...................................422
Running Diagnostics ................................................................................425
Rebooting the Safe@Office Appliance ....................................................426
Viewing Firmware Status
The firmware is the software program embedded in the Safe@Office appliance.
You can view your current firmware version and additional details.
Maintenance
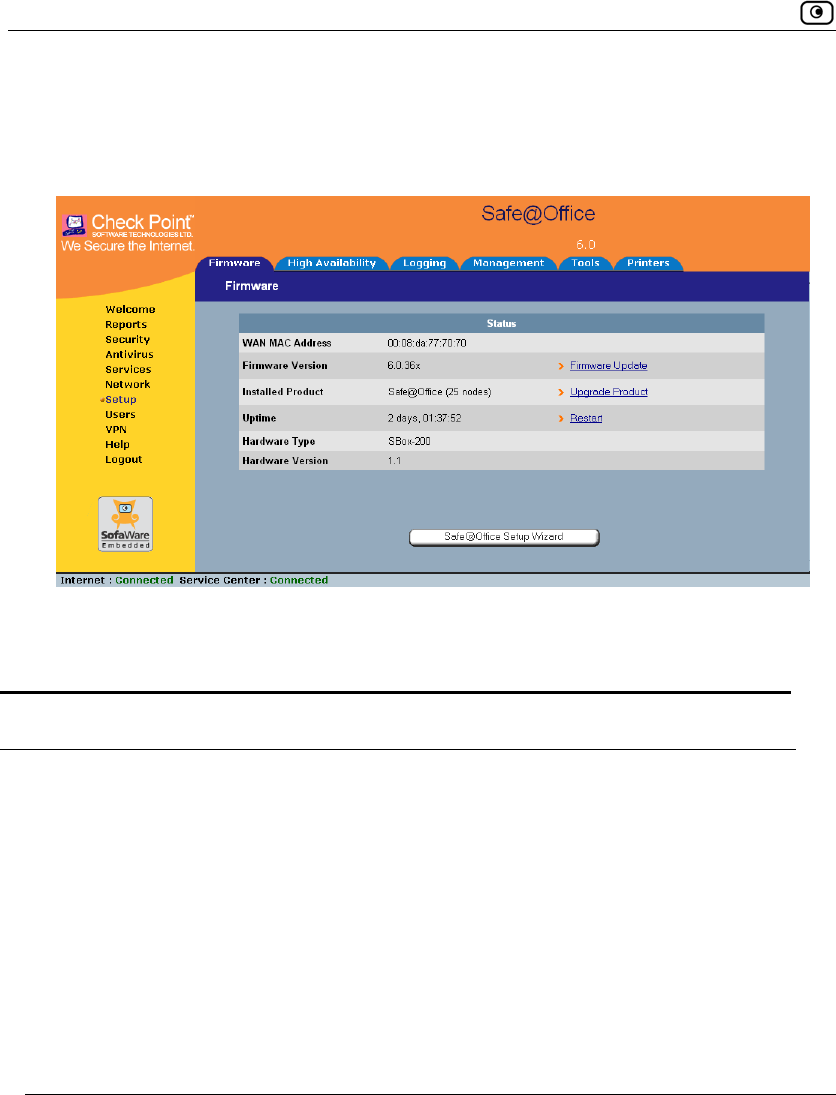
Viewing Firmware Status
380 Check Point Safe@Office User Guide
To view the firmware status
• Click Setup in the main menu, and click the Firmware tab.
The Firmware page appears.
The Firmware page displays the following information:
Table 78: Firmware Status Fields
This field… Displays… For example…
WAN MAC Address The MAC address used for
the Internet connection
00:80:11:22:33:44
Firmware Version The current version of the
firmware
6.0
Installed Product The licensed software and
the number of allowed
nodes
Safe@Office 500 unlimited nodes
Updating the Firmware
Chapter 14: Maintenance 381
This field… Displays… For example…
Uptime The time that elapsed from
the moment the unit was
turned on
01:21:15
Hardware Type The type of the current
Safe@Office appliance
hardware
Sbox-500
Hardware Version The current hardware
version of the Safe@Office
appliance
1.0
Updating the Firmware
If you are subscribed to Software Updates, firmware updates are performed
automatically. These updates include new product features and protection against
new security threats. Check with your reseller for the availability of Software
Updates and other services. For information on subscribing to services, see
Connecting to a Service Center on page 283.
If you are not subscribed to the Software Updates service, you must update your
firmware manually.
To update your Safe@Office firmware manually
1. Click Setup in the main menu, and click the Firmware tab.
The Firmware page appears.
2. Click Firmware Update.

Updating the Firmware
382 Check Point Safe@Office User Guide
The Firmware Update page appears.
3. Click Browse.
A browse window appears.
4. Select the image file and click Open.
The Firmware Update page reappears. The path to the firmware update image file
appears in the Browse text box.
5. Click Upload.
Your Safe@Office appliance firmware is updated.
Updating may take a few minutes, during which time the PWR/SEC LED may
start flashing red or orange. Do not power off the appliance.
At the end of the process the Safe@Office appliance restarts automatically.
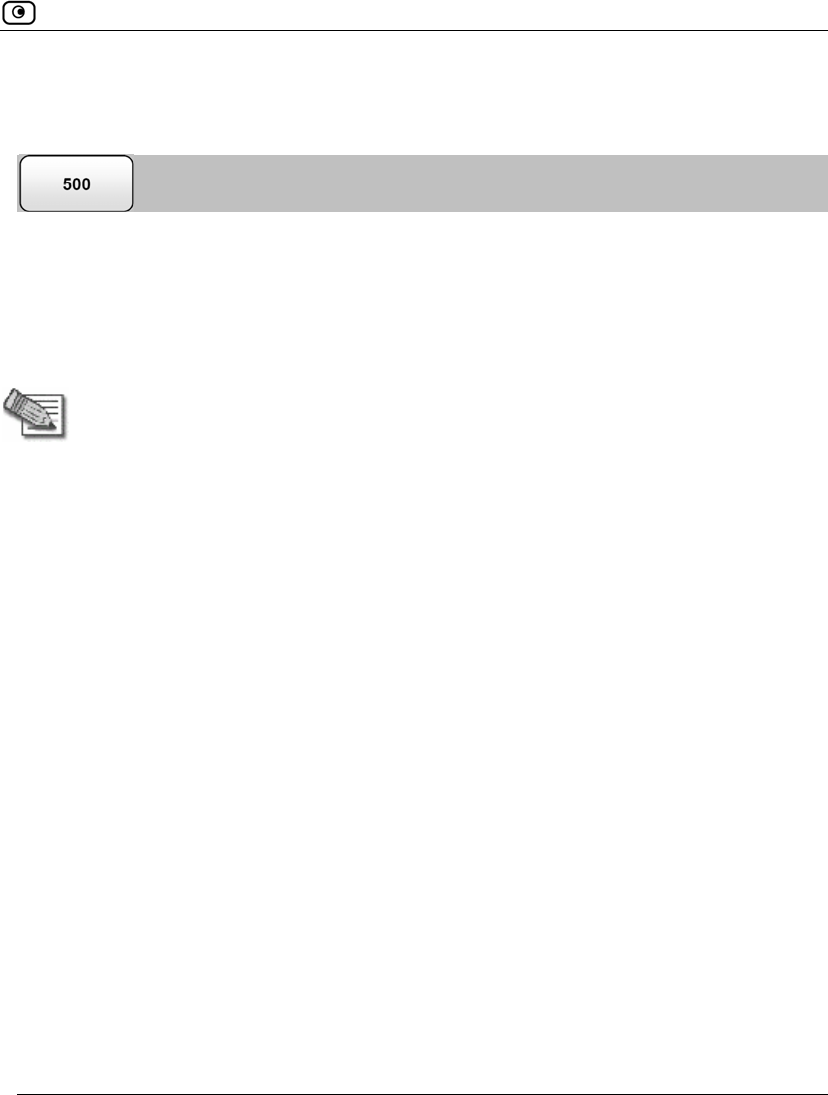
Upgrading Your Software Product
Chapter 14: Maintenance 383
Upgrading Your Software Product
You can upgrade your Safe@Office 500 appliance by adding the Safe@Office 500
Power Pack. After purchasing the Power Pack, you will receive a new Product Key
that enables you to use the Power Pack on the same Safe@Office appliance you
have today. There is no need to replace your hardware. You can also purchase node
upgrades, as needed.
Note: To purchase the Power Pack or node upgrades, contact your Safe@Office
appliance provider.
To upgrade your product, you must install the new Product Key.
To install a Product Key
1. Click Setup in the main menu, and click the Firmware tab.
The Firmware page appears.
2. Click Upgrade Product.
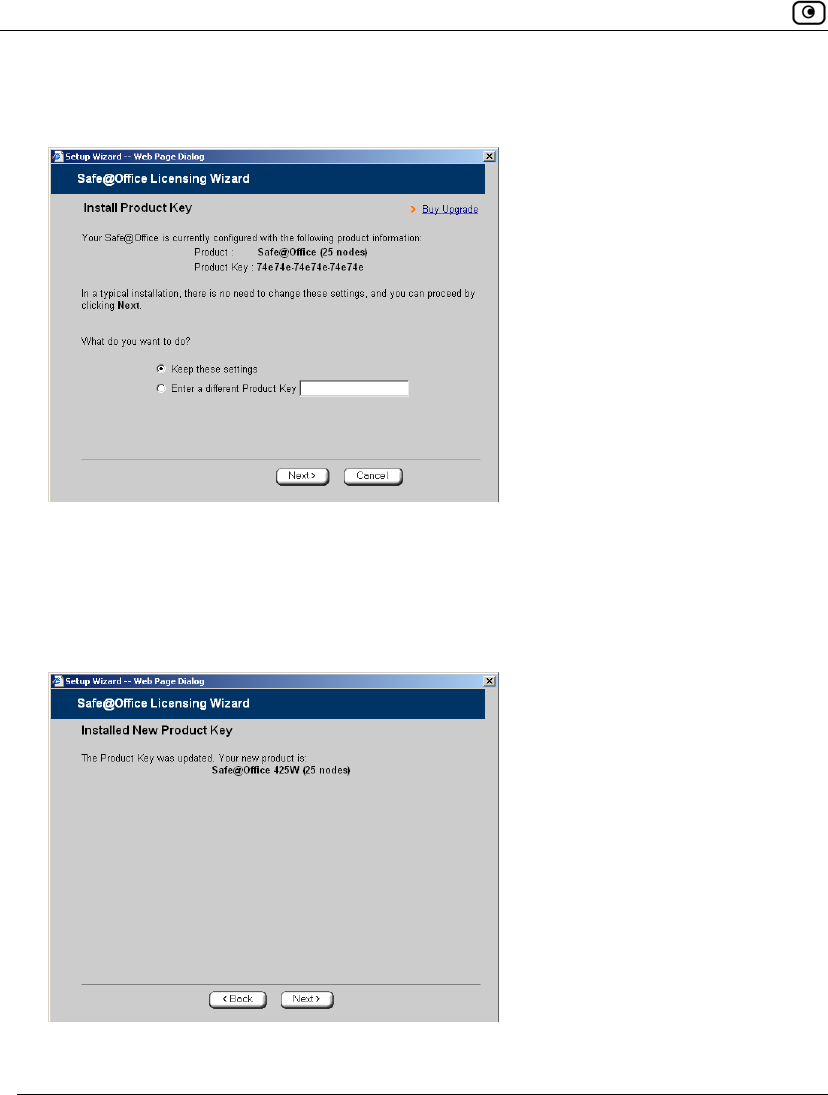
Upgrading Your Software Product
384 Check Point Safe@Office User Guide
The Safe@Office Licensing Wizard opens, with the Install Product Key dialog box
displayed.
3. Click Enter a different Product Key.
4. In the Product Key field, enter the new Product Key.
5. Click Next.
The Installed New Product Key dialog box appears.
6. Click Next.
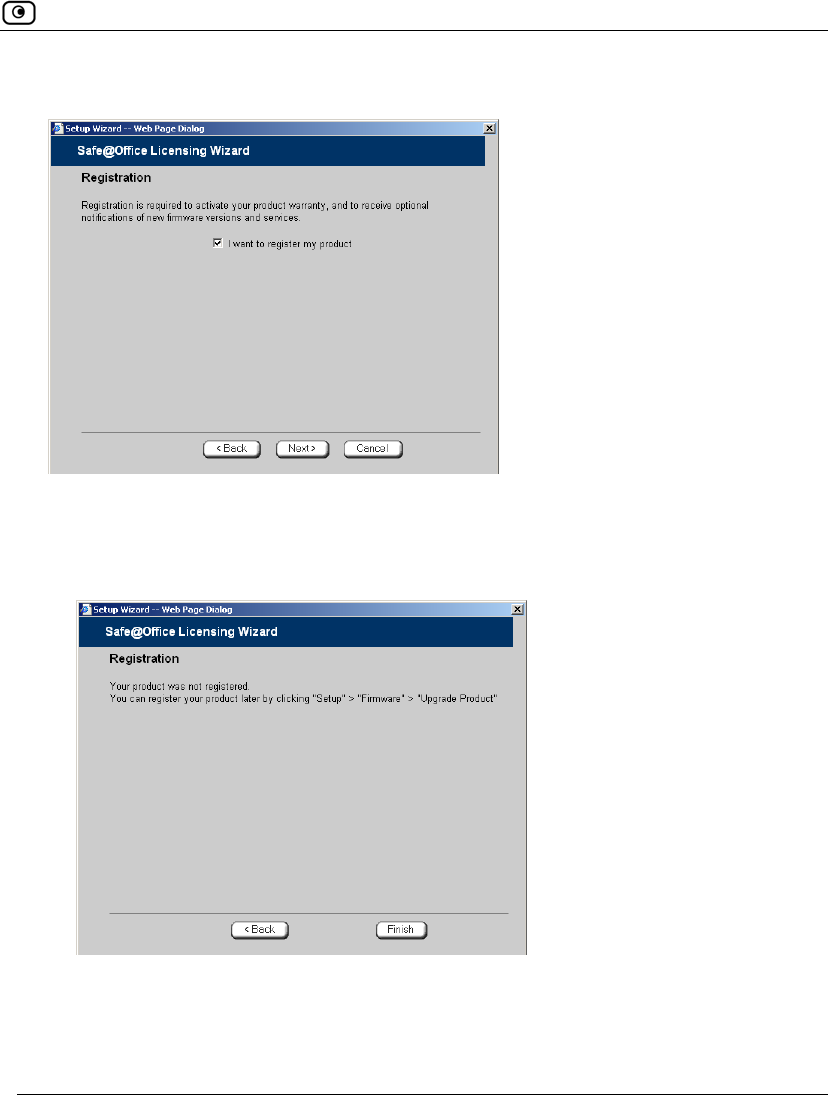
Upgrading Your Software Product
Chapter 14: Maintenance 385
The first Registration dialog box appears.
7. Do one of the following:
• To register your Safe@Office appliance later on, clear the I want to
register my product check box and then click Next.
• To register your Safe@Office appliance now, do the following:
1) Click Next.
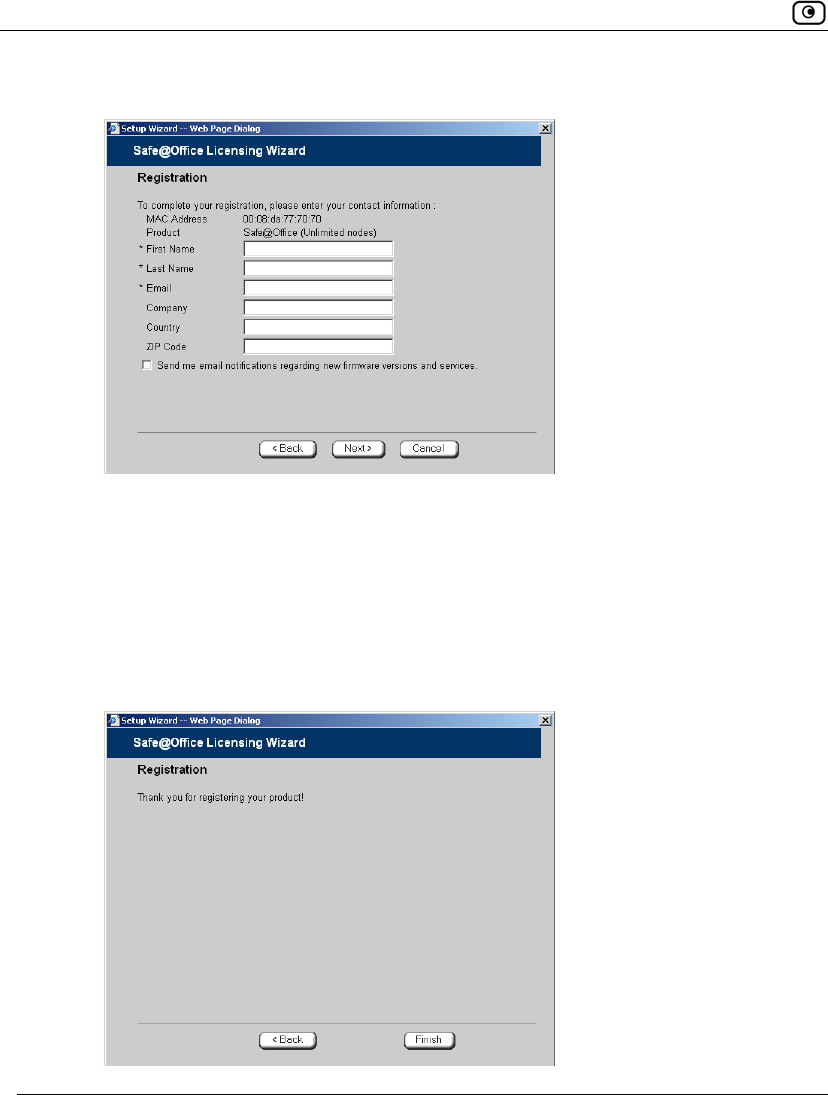
Upgrading Your Software Product
386 Check Point Safe@Office User Guide
A second Registration dialog box appears.
2) Enter your contact information in the appropriate fields.
3) To receive email notifications regarding new firmware versions
and services, select the check box.
4) Click Next.
The Registration… screen appears.
The third Registration dialog box appears.
Registering Your Safe@Office Appliance
Chapter 14: Maintenance 387
8. Click Finish.
Your Safe@Office appliance is restarted and the Welcome page appears.
Registering Your Safe@Office Appliance
If you want to activate your warranty and optionally receive notifications of new
firmware versions and services, you must register your Safe@Office appliance.
Privacy Statement: Check Point is committed to protecting your privacy. We use
the information we collect about you to process orders and to improve our ability to
serve your needs. We will under no circumstances sell, lease, or otherwise disclose
any of your personal or contact details without your explicit permission.
To register your Safe@Office appliance
1. Click Setup in the main menu, and click the Firmware tab.
The Firmware page appears.
2. Click Upgrade Product.
The Safe@Office Licensing Wizard opens, with the Install Product Key dialog box
displayed.
3. Select Keep these settings.
4. Click Next.
The first Registration dialog box appears.
5. Verify that the I want to register my product check box is selected.
6. Click Next.
A second Registration dialog box appears.
7. Enter your contact information in the appropriate fields.
8. To receive email notifications regarding new firmware versions and services,
select the check box.

Configuring Syslog Logging
388 Check Point Safe@Office User Guide
9. Click Next.
The Registration… screen appears.
The third Registration dialog box appears.
10. Click Finish.
Your Safe@Office appliance is restarted and the Welcome page appears.
Configuring Syslog Logging
You can configure the Safe@Office appliance to send event logs to a Syslog server
residing in your internal network or on the Internet. The logs detail the date and the
time each event occurred. If the event is a communication attempt that was rejected
by the firewall, the event details include the source and destination IP address, the
destination port, and the protocol used for the communication attempt (for
example, TCP or UDP).
This same information is also available in the Event Log page (see Viewing the
Event Log on page 189). However, while the Event Log can display hundreds of
logs, a Syslog server can store an unlimited number of logs. Furthermore, Syslog
servers can provide useful tools for managing your logs.
Note: Kiwi Syslog Daemon is freeware and can be downloaded from
http://www.kiwisyslog.com. For technical support, contact Kiwi Enterprises.
To configure Syslog logging
1. Click Setup in the main menu, and click the Logging tab.
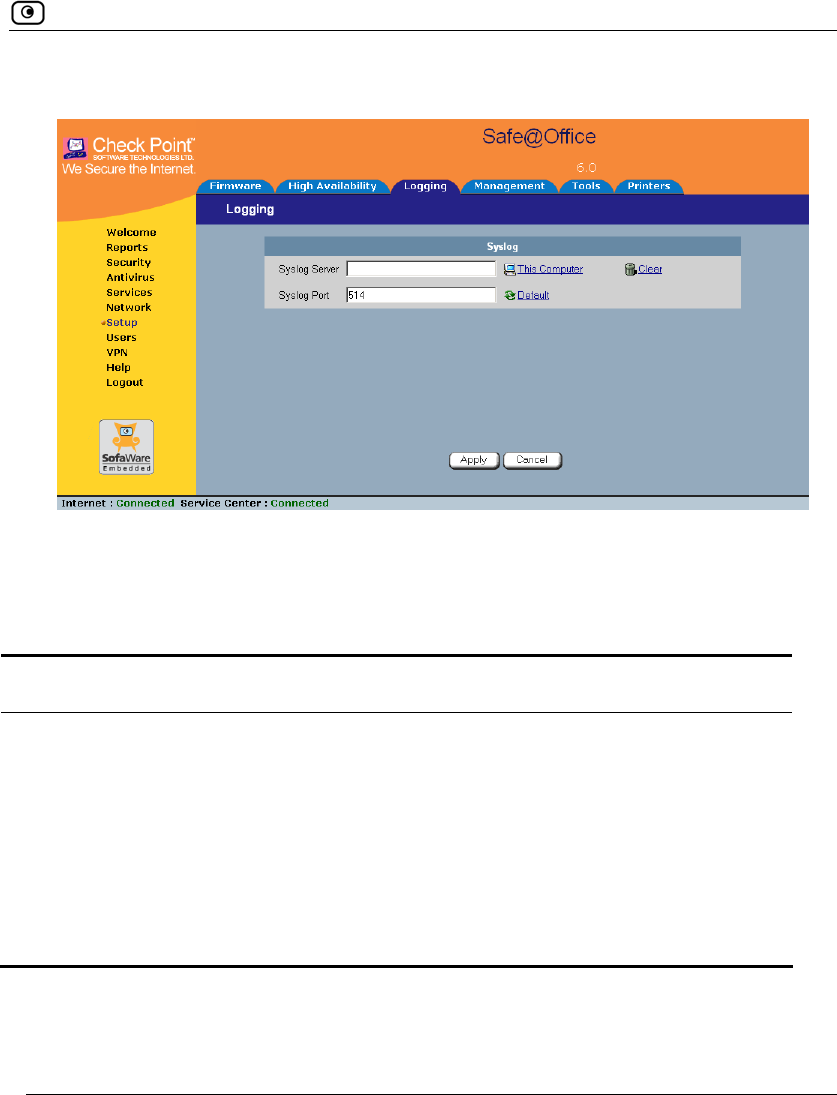
Configuring Syslog Logging
Chapter 14: Maintenance 389
The Logging page appears.
2. Complete the fields using the information in the table below.
3. Click Apply.
Table 79: Logging Page Fields
In this field… Do this…
Syslog Server Type the IP address of the computer that will run the Syslog service
(one of your network computers), or click This Computer to allow your
computer to host the service.
Clear Click to clear the Syslog Server field.
Syslog Port Type the port number of the Syslog server.
Default Click to reset the Syslog Port field to the default (port 514 UDP).

Controlling the Appliance via the Command Line
390 Check Point Safe@Office User Guide
Controlling the Appliance via the Command Line
Depending on your Safe@Office model, you can control your appliance via the
command line in the following ways:
• Using the Safe@Office Portal's command line interface.
See Using the Safe@Office Portal on page 390.
• Using a console connected to the Safe@Office appliance.
For information, see Using the Serial Console on page 392.
• Using an SSH client.
See Configuring SSH on page 396.
Using the Safe@Office Portal
You can control your appliance via the Safe@Office Portal's command line
interface.
To control the appliance via the Safe@Office Portal
1. Click Setup in the main menu, and click the Tools tab.
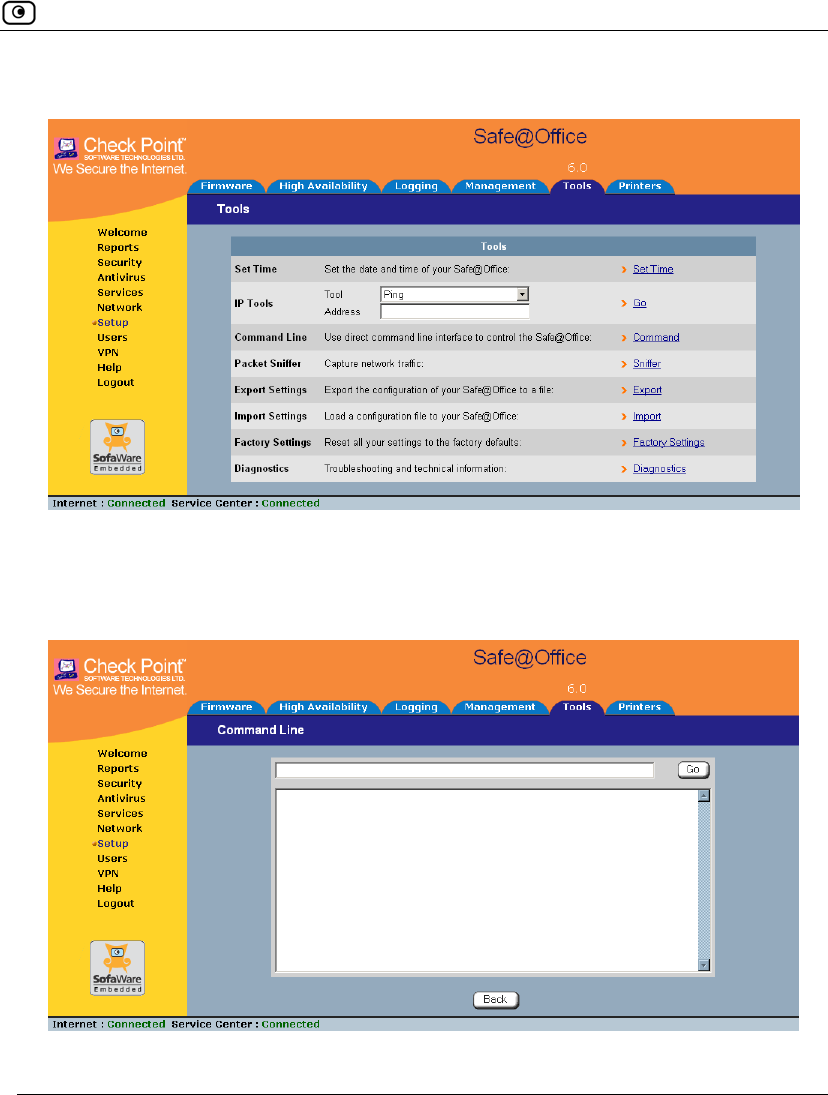
Controlling the Appliance via the Command Line
Chapter 14: Maintenance 391
The Tools page appears.
2. Click Command.
The Command Line page appears.
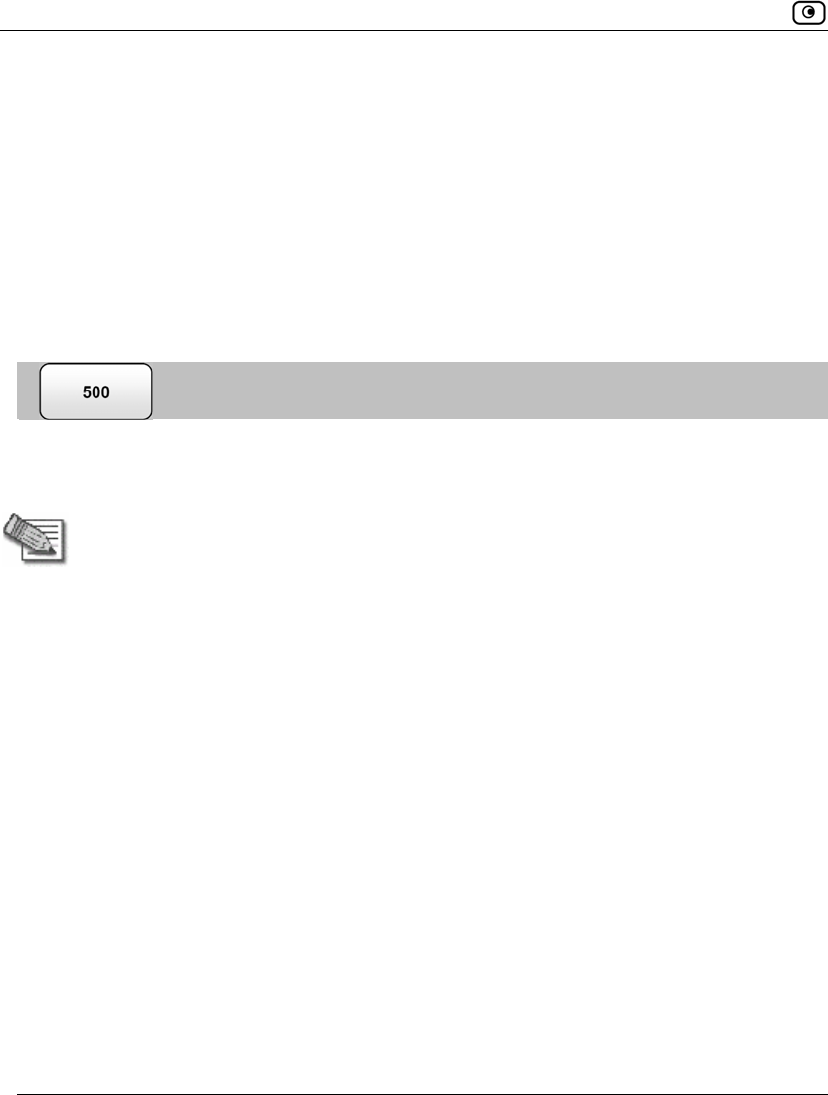
Controlling the Appliance via the Command Line
392 Check Point Safe@Office User Guide
3. In the upper field, type a command.
You can view a list of supported commands using the command help.
For information on all commands, refer to the Embedded NGX CLI Reference
Guide.
4. Click Go.
The command is implemented.
Using the Serial Console
You can connect a console to the Safe@Office appliance, and use the console to
control the appliance via the command line.
Note: Your terminal emulation software must be set to 57600 bps, N-8-1.
To control the appliance via a console
1. Connect the serial console to your Safe@Office appliance's serial port, using an
RS-232 Null modem cable.
For information on locating the serial port, see Rear Panel.
2. Click Network in the main menu, and click the Ports tab.
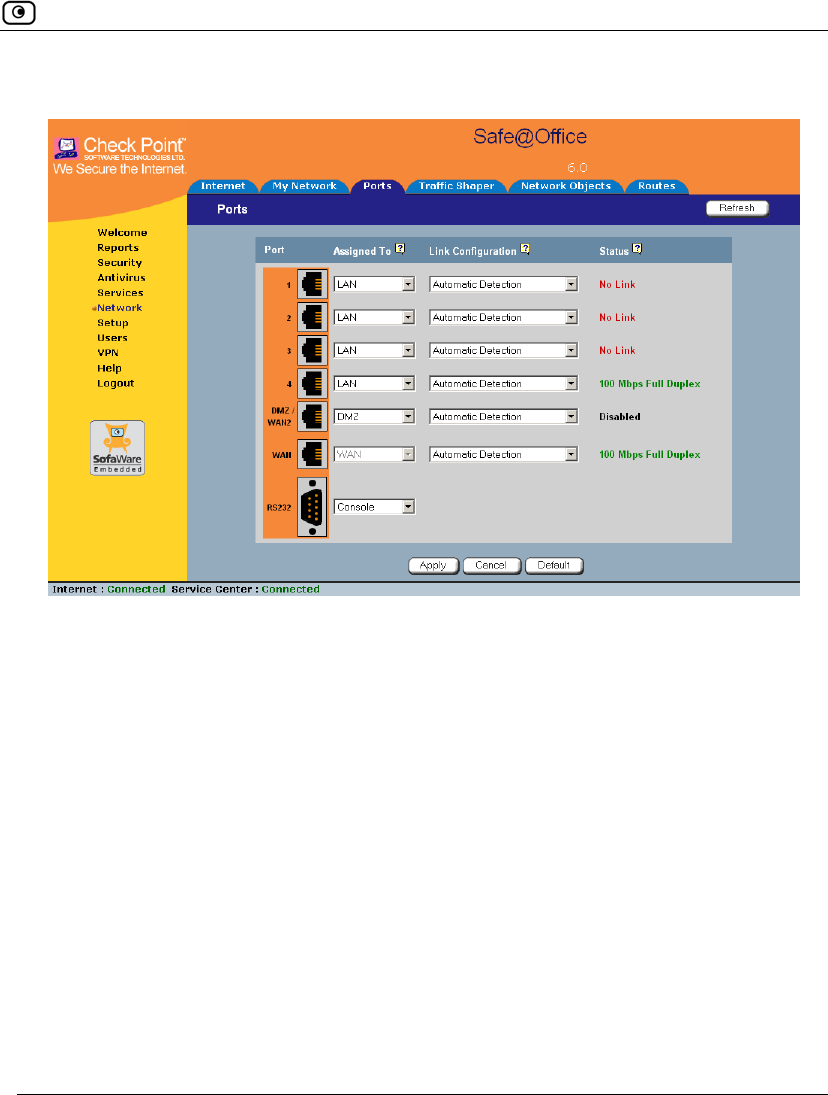
Controlling the Appliance via the Command Line
Chapter 14: Maintenance 393
The Ports page appears.
3. In the RS232 drop-down list, select Console.
4. Click Apply.
You can now control the Safe@Office appliance from the serial console.
For information on all supported commands, refer to the Embedded NGX CLI
Reference Guide.
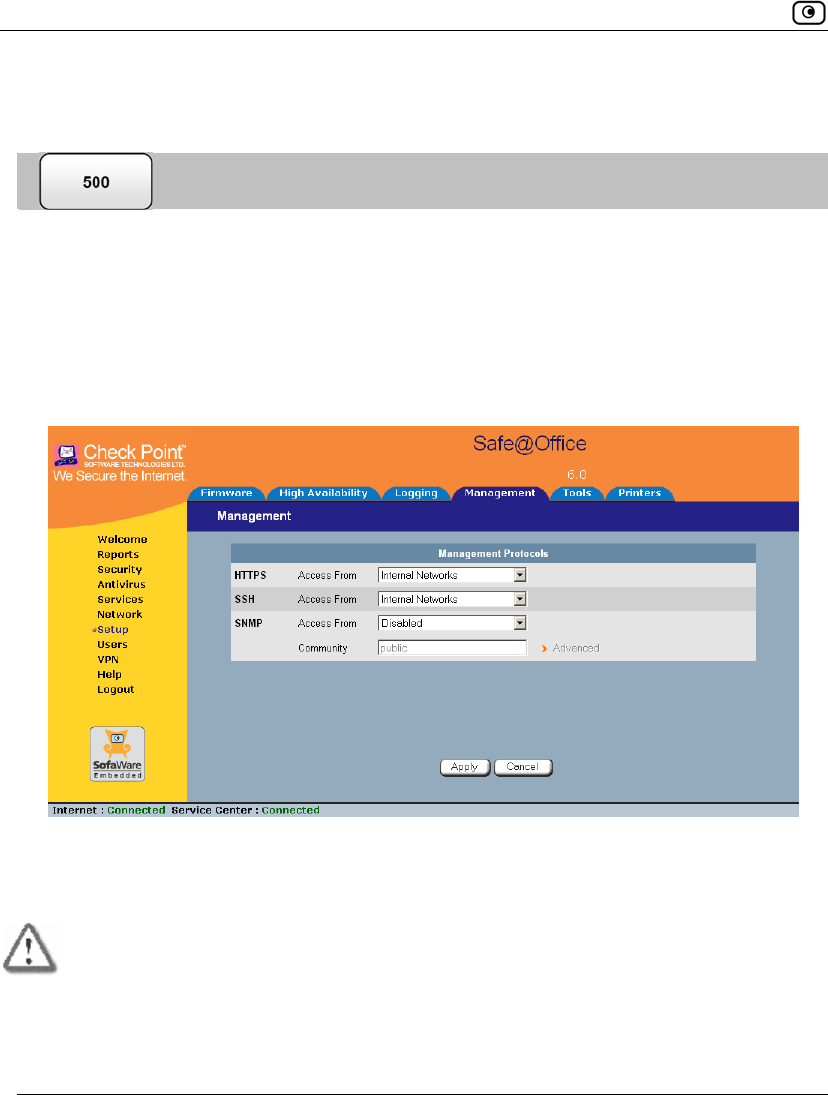
Configuring HTTPS
394 Check Point Safe@Office User Guide
Configuring HTTPS
You can enable Safe@Office appliance users to access the Safe@Office Portal
from the Internet. To do so, you must first configure HTTPS.
To configure HTTPS
1. Click Setup in the main menu, and click the Management tab.
The Management page appears.
2. Specify from where HTTPS access to the Safe@Office Portal should be granted.
See Access Options on page 395 for information.
Warning: If remote HTTPS is enabled, your Safe@Office appliance settings can be
changed remotely, so it is especially important to make sure all Safe@Office
appliance users’ passwords are difficult to guess.
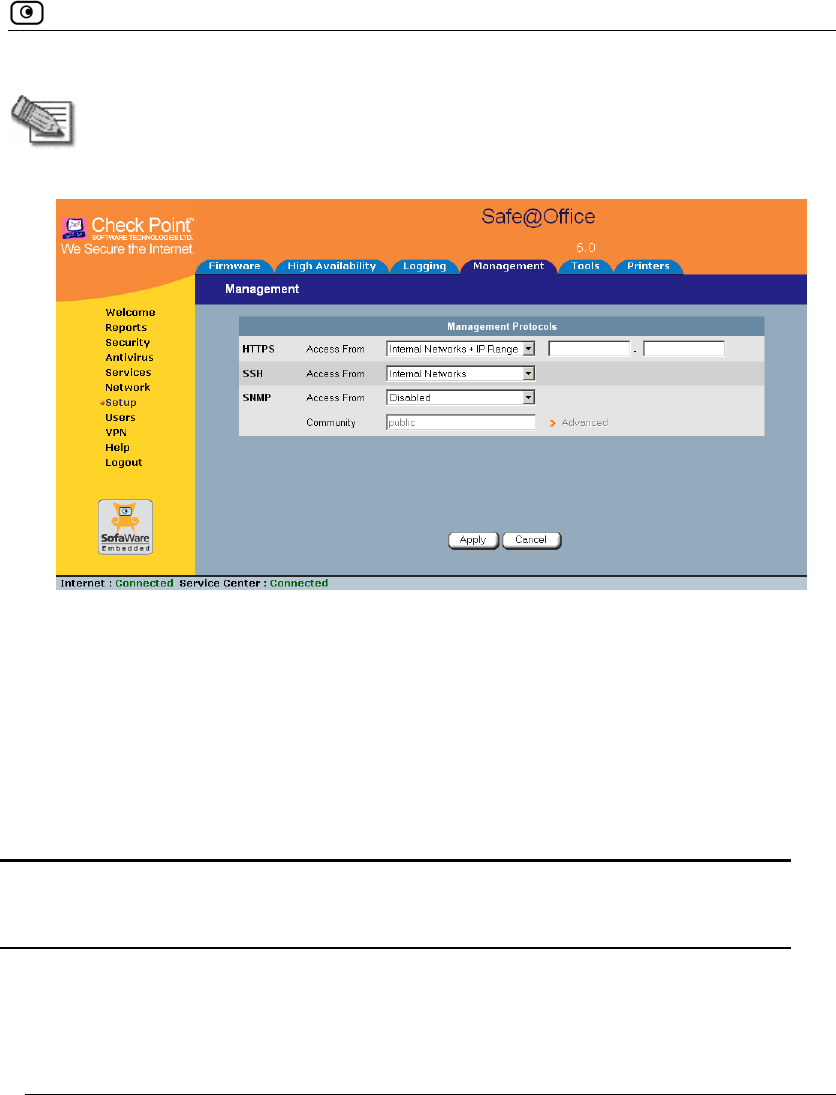
Configuring HTTPS
Chapter 14: Maintenance 395
Note: You can use HTTPS to access the Safe@Office Portal from your internal
network, by surfing to https://my.firewall.
If you selected IP Address Range, additional fields appear.
3. If you selected IP Address Range, enter the desired IP address range in the fields
provided.
4. Click Apply.
The HTTPS configuration is saved. If you configured remote HTTPS, you can
now access the Safe@Office Portal through the Internet, using the procedure
Accessing the Safe@Office Portal Remotely on page 46.
Table 80: Access Options
Select this
option…
To allow access from…
Internal Network The internal network only.
This disables remote access capability.
Configuring SSH
396 Check Point Safe@Office User Guide
Select this
option…
To allow access from…
Internal Network and
VPN
The internal network and your VPN.
IP Address Range A particular range of IP addresses.
Additional fields appear, in which you can enter the desired IP address
range.
ANY Any IP address.
Disabled Nowhere.
This completely disables access. This option is only available for
SNMP.
Configuring SSH
Safe@Office appliance users can control the appliance via the command line, using
the SSH (Secure Shell) management protocol. You can enable users to do so via
the Internet, by configuring remote SSH access. You can also integrate the
Safe@Office appliance with SSH-based management systems.
Note: The Safe@Office appliance supports SSHv2 clients only. The SSHv1 protocol
contains security vulnerabilities and is not supported.
To configure SSH
1. Click Setup in the main menu, and click the Management tab.
The Management page appears.
2. Specify from where SSH access should be granted.
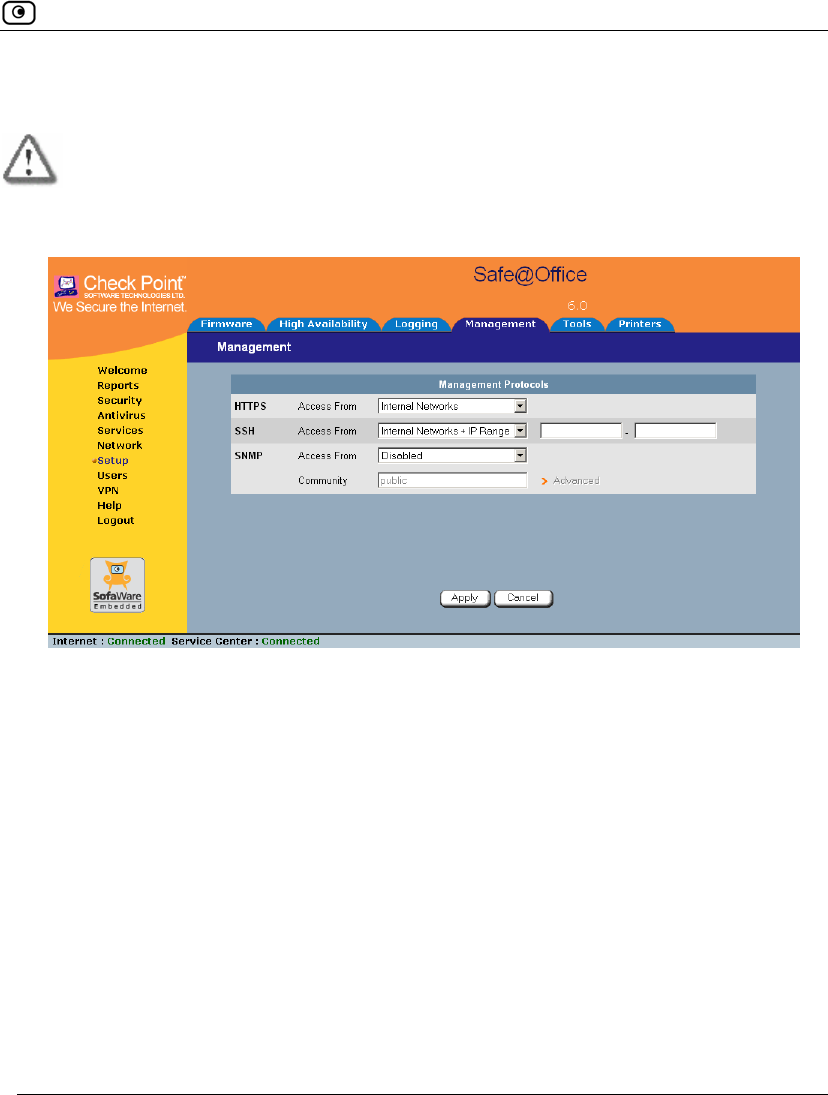
Configuring SSH
Chapter 14: Maintenance 397
See Access Options on page 395 for information.
Warning: If remote SSH is enabled, your Safe@Office appliance settings can be
changed remotely, so it is especially important to make sure all Safe@Office
appliance users’ passwords are difficult to guess.
If you selected IP Address Range, additional fields appear.
3. If you selected IP Address Range, enter the desired IP address range in the fields
provided.
4. Click Apply.
The SSH configuration is saved. If you configured remote SSH access, you can
now control the Safe@Office appliance from the Internet, using an SSHv2
client.
For information on all supported commands, refer to the Embedded NGX CLI
Reference Guide.

Configuring SNMP
398 Check Point Safe@Office User Guide
Configuring SNMP
The Safe@Office appliance users can monitor the Safe@Office appliance, using
tools that support SNMP (Simple Network Management Protocol). You can enable
users can do so via the Internet, by configuring remote SNMP access.
The Safe@Office appliance supports the following SNMP MIBs:
• SNMPv2-MIB
• RFC1213-MIB
• IF-MIB
• IP-MIB
All SNMP access is read-only.
To configure SNMP
1. Click Setup in the main menu, and click the Management tab.
The Management page appears.
2. Specify from where SNMP access should be granted.
See Access Options on page 395 for information.
If you selected IP Address Range, additional fields appear.
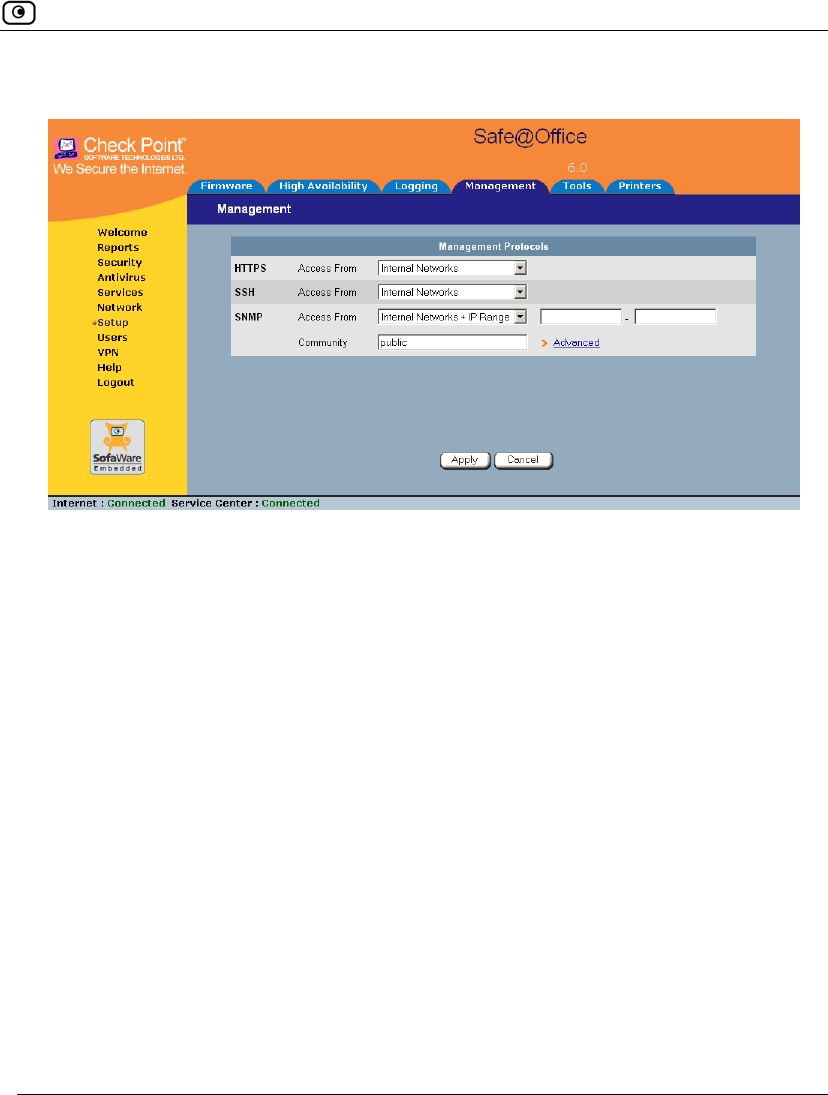
Configuring SNMP
Chapter 14: Maintenance 399
The Community field and the Advanced link are enabled.
3. If you selected IP Address Range, enter the desired IP address range in the fields
provided.
4. In the Community field, type the name of the SNMP community string.
SNMP clients uses the SNMP community string as a password, when
connecting to the Safe@Office appliance.
The default value is "public". It is recommended to change this string.
5. To configure advanced SNMP settings, click Advanced.
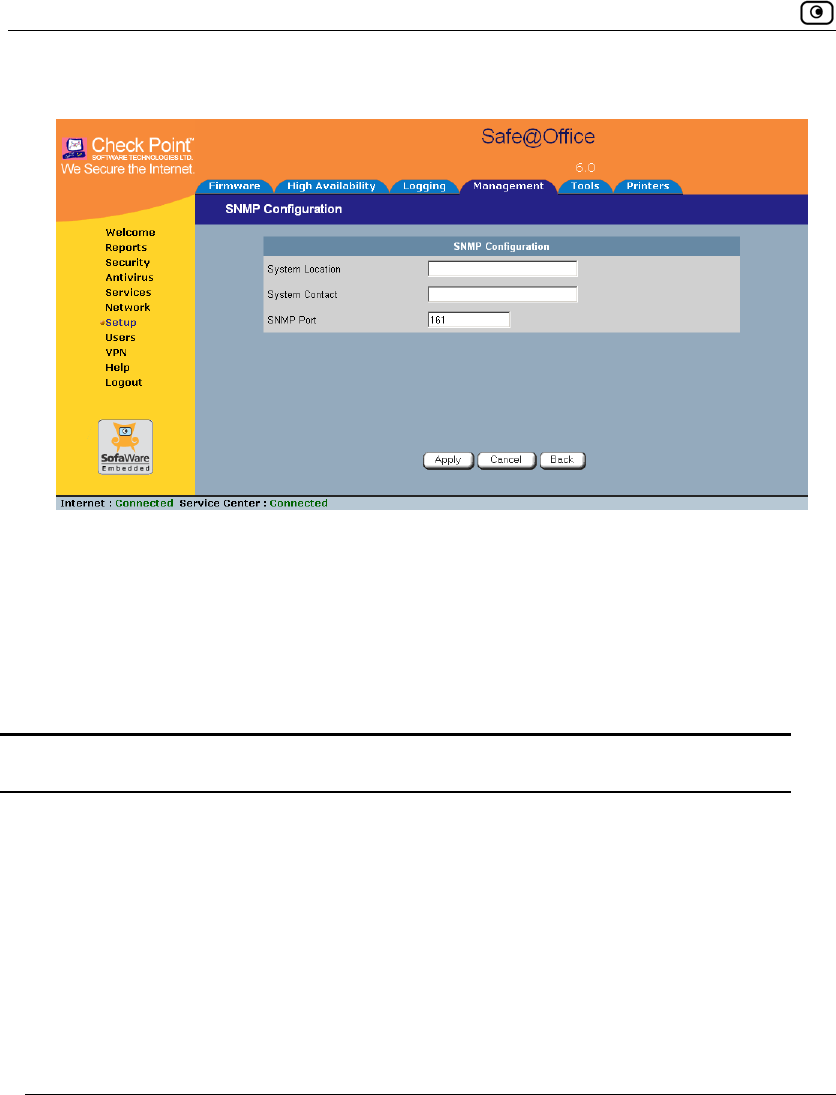
Configuring SNMP
400 Check Point Safe@Office User Guide
The SNMP Configuration page appears.
6. Complete the fields using the table below.
7. Click Apply.
The SNMP configuration is saved.
8. Configure the SNMP clients with the SNMP community string.
Table 81: Advanced SNMP Settings
In this field... Do this…
System Location Type a description of the appliance's location.
This information will be visible to SNMP clients, and is useful for
administrative purposes.
System Contact Type the name of the contact person.
This information will be visible to SNMP clients, and is useful for
administrative purposes.
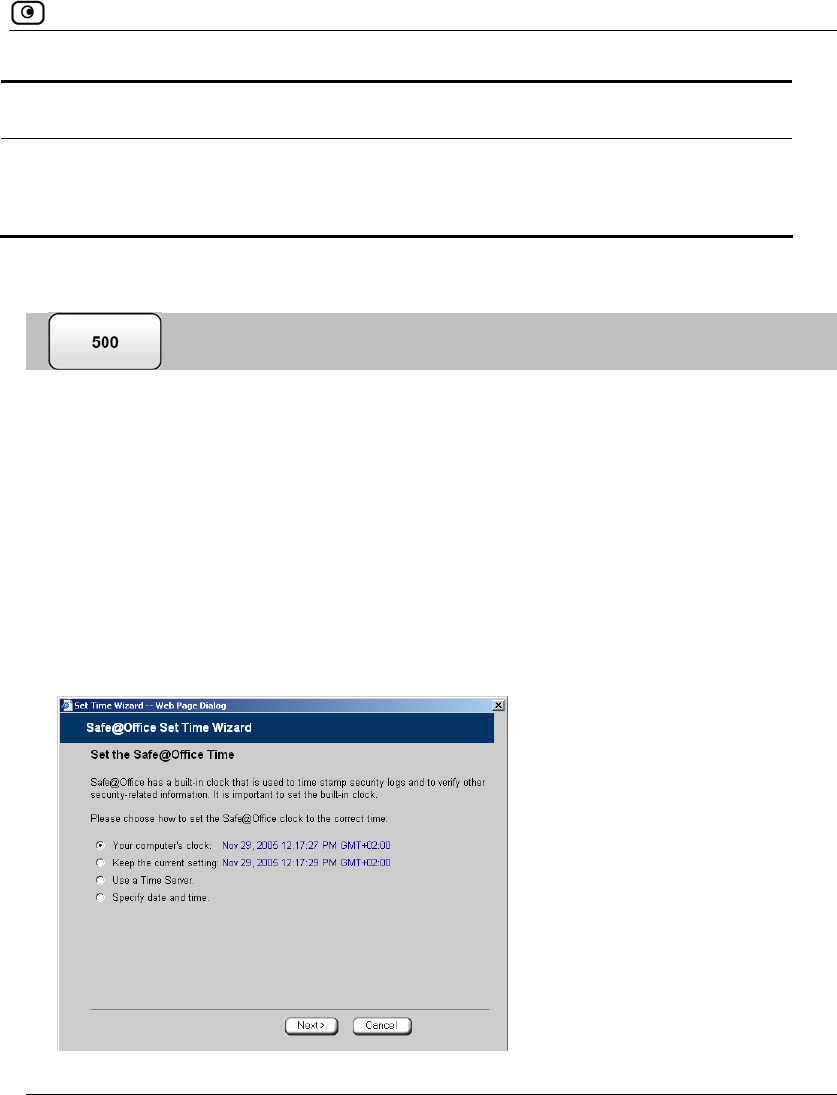
Setting the Time on the Appliance
Chapter 14: Maintenance 401
In this field... Do this…
SNMP Port Type the port to use for SNMP.
The default port is 161.
Setting the Time on the Appliance
You set the time displayed in the Safe@Office Portal during initial appliance setup.
If desired, you can change the date and time using the procedure below.
To set the time
1. Click Setup in the main menu, and click the Tools tab.
The Tools page appears.
2. Click Set Time.
The Safe@Office Set Time Wizard opens displaying the Set the Safe@Office Time
dialog box.
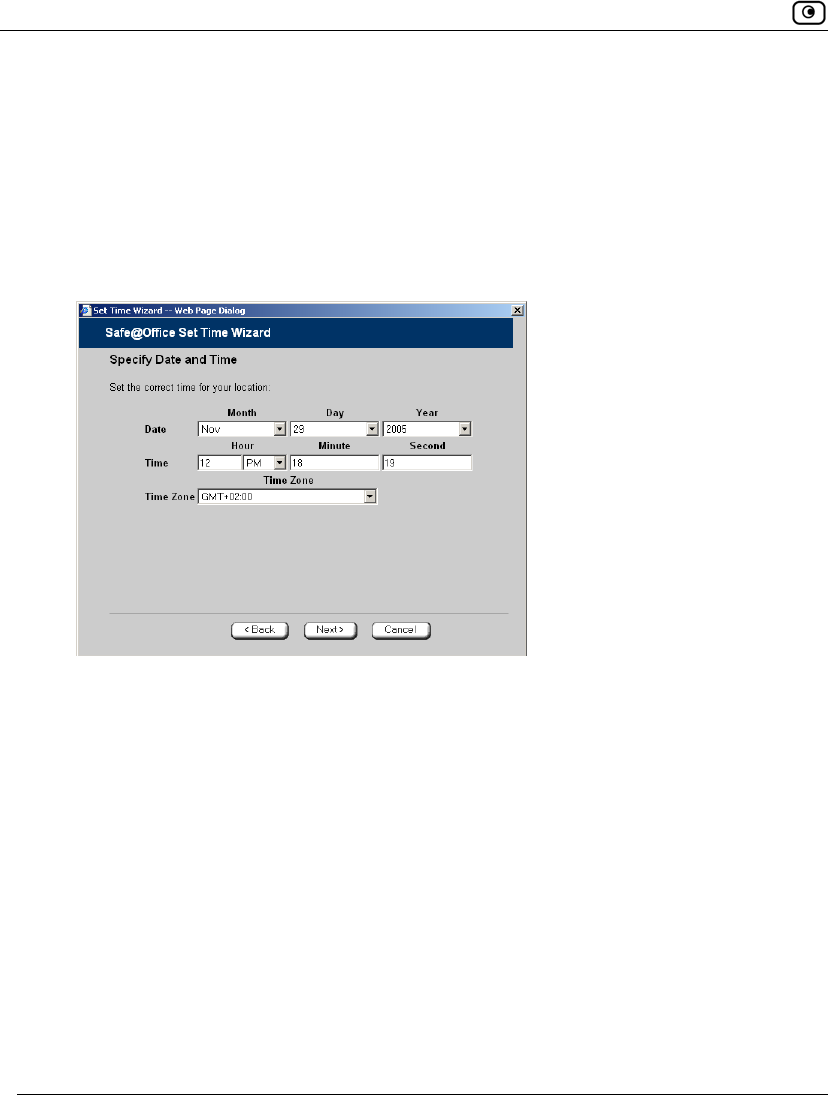
Setting the Time on the Appliance
402 Check Point Safe@Office User Guide
3. Complete the fields using the information in Set Time Wizard Fields on page
404.
4. Click Next.
The following things happen in the order below:
• If you selected Specify date and time, the Specify Date and Time dialog
box appears.
Set the date, time, and time zone in the fields provided, then click Next.
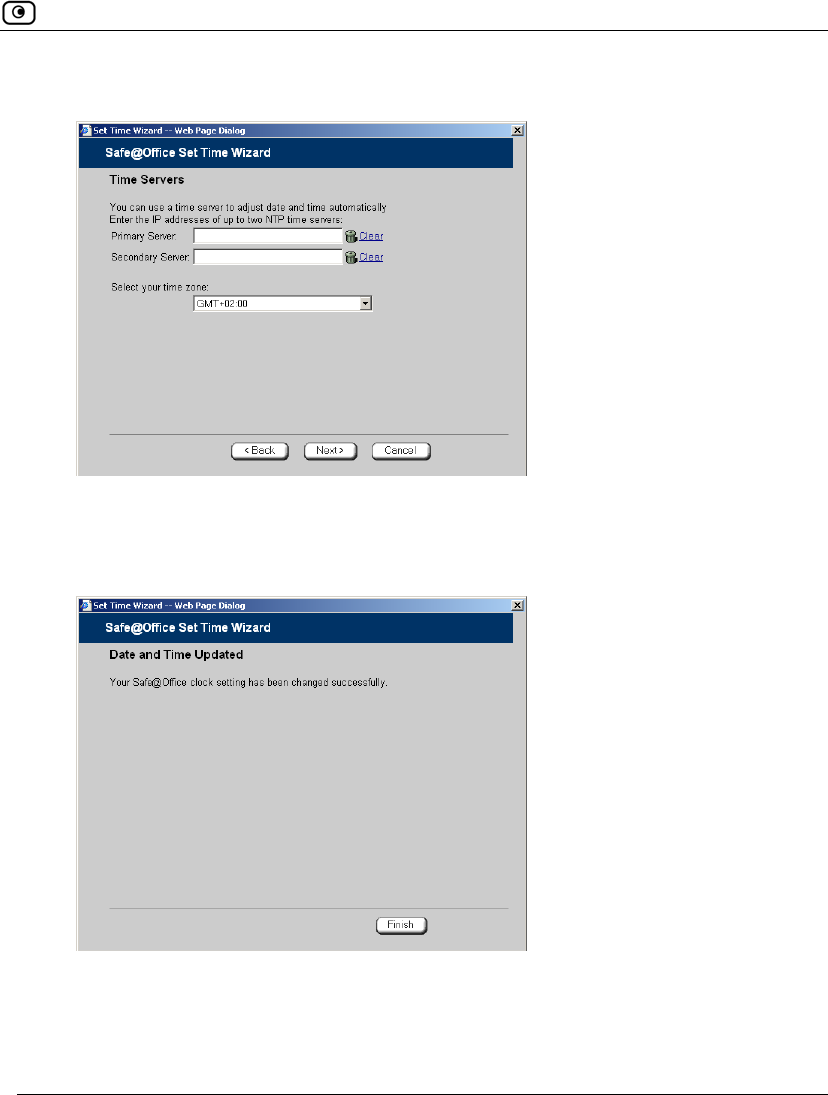
Setting the Time on the Appliance
Chapter 14: Maintenance 403
• If you selected Use a Time Server, the Time Servers dialog box appears.
Complete the fields using the information in Time Servers Fields on page
404, then click Next.
• The Date and Time Updated screen appears.
5. Click Finish.

Setting the Time on the Appliance
404 Check Point Safe@Office User Guide
Table 82: Set Time Wizard Fields
Select this option… To do the following…
Your computer's clock Set the appliance time to your computer’s system time.
Your computer’s system time is displayed to the right of this
option.
Keep the current time Do not change the appliance’s time.
The current appliance time is displayed to the right of this option.
Use a Time Server Synchronize the appliance time with a Network Time Protocol
(NTP) server.
Specify date and time Set the appliance to a specific date and time.
Table 83: Time Servers Fields
In this field… Do this…
Primary Server Type the IP address of the Primary NTP server.
Secondary Server Type the IP address of the Secondary NTP server.
This field is optional.
Clear Clear the field.
Select your time zone Select the time zone in which you are located.
Using Diagnostic Tools
Chapter 14: Maintenance 405
Using Diagnostic Tools
The Safe@Office appliance is equipped with a set of diagnostic tools that are
useful for troubleshooting Internet connectivity.
Table 84: Diagnostic Tools
Use this
tool…
To do this… For information, see...
Ping Check that a specific IP address or DNS
name can be reached via the Internet.
Using IP Tools on page 406
Traceroute Display a list of all routers used to
connect from the Safe@Office appliance
to a specific IP address or DNS name.
Using IP Tools on page 406
WHOIS Display the name and contact information
of the entity to which a specific IP address
or DNS name is registered. This
information is useful in tracking down
hackers.
Using IP Tools on page 406
Packet Sniffer Capture network traffic. This information is
useful troubleshooting network problems. Using Packet Sniffer on page
408
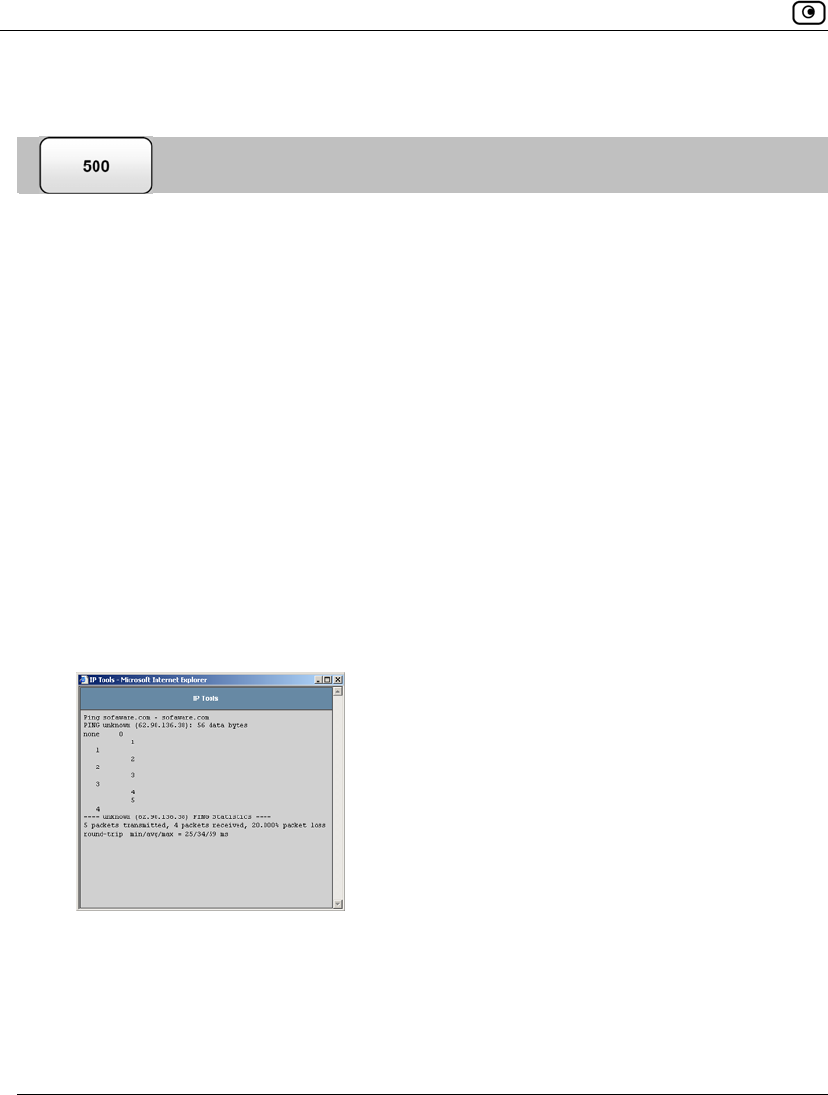
Using Diagnostic Tools
406 Check Point Safe@Office User Guide
Using IP Tools
To use an IP tool
1. Click Setup in the main menu, and click the Tools tab.
The Tools page appears.
2. In the IP Tools drop-down list, select the desired tool.
3. In the Address field, type the IP address or DNS name for which to run the tool.
4. Click Go.
• If you selected Ping, the following things happen:
The Safe@Office appliance sends packets to the specified the IP address or
DNS name.
The IP Tools window opens and displays the percentage of packet loss and
the amount of time it each packet took to reach the specified host and return
(round-trip) in milliseconds.
• If you selected Traceroute, the following things happen:
The Safe@Office appliance connects to the specified IP address or DNS
name.
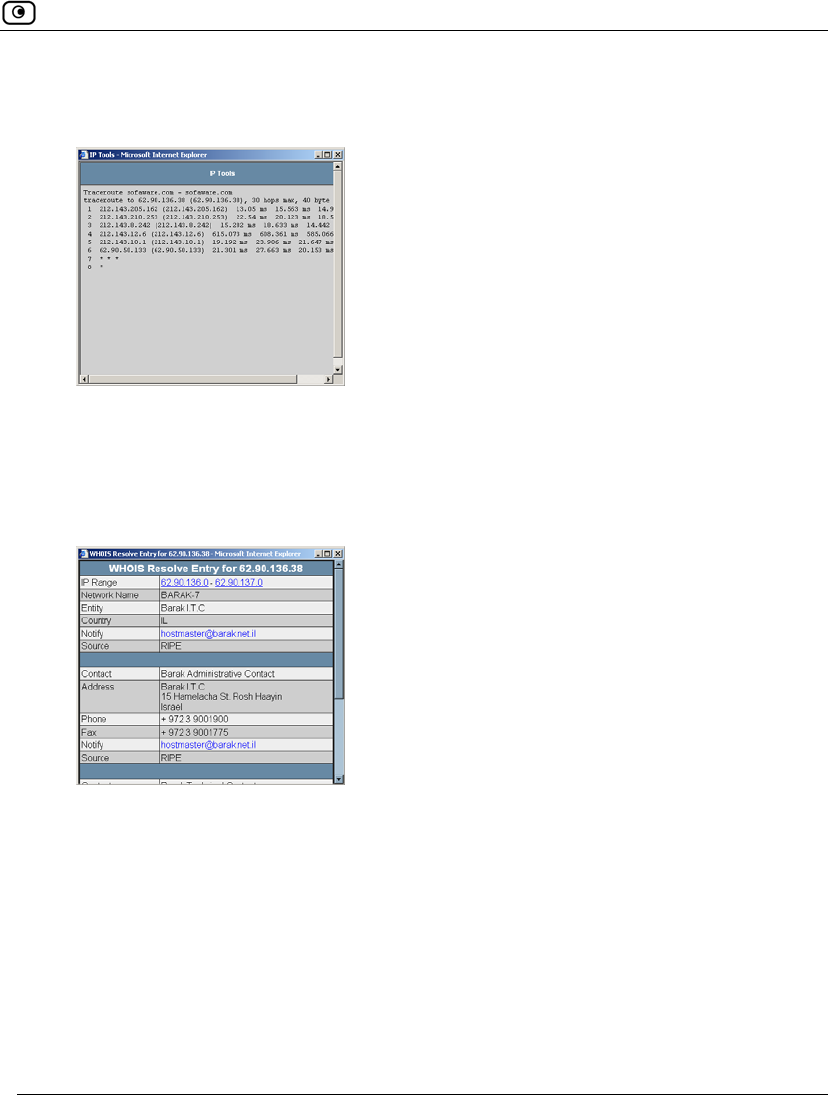
Using Diagnostic Tools
Chapter 14: Maintenance 407
The IP Tools window opens and displays a list of routers used to make the
connection.
• If you selected WHOIS, the following things happen:
The Safe@Office appliance queries the Internet WHOIS server.
A window displays the name of the entity to which the IP address or DNS
name is registered and their contact information.
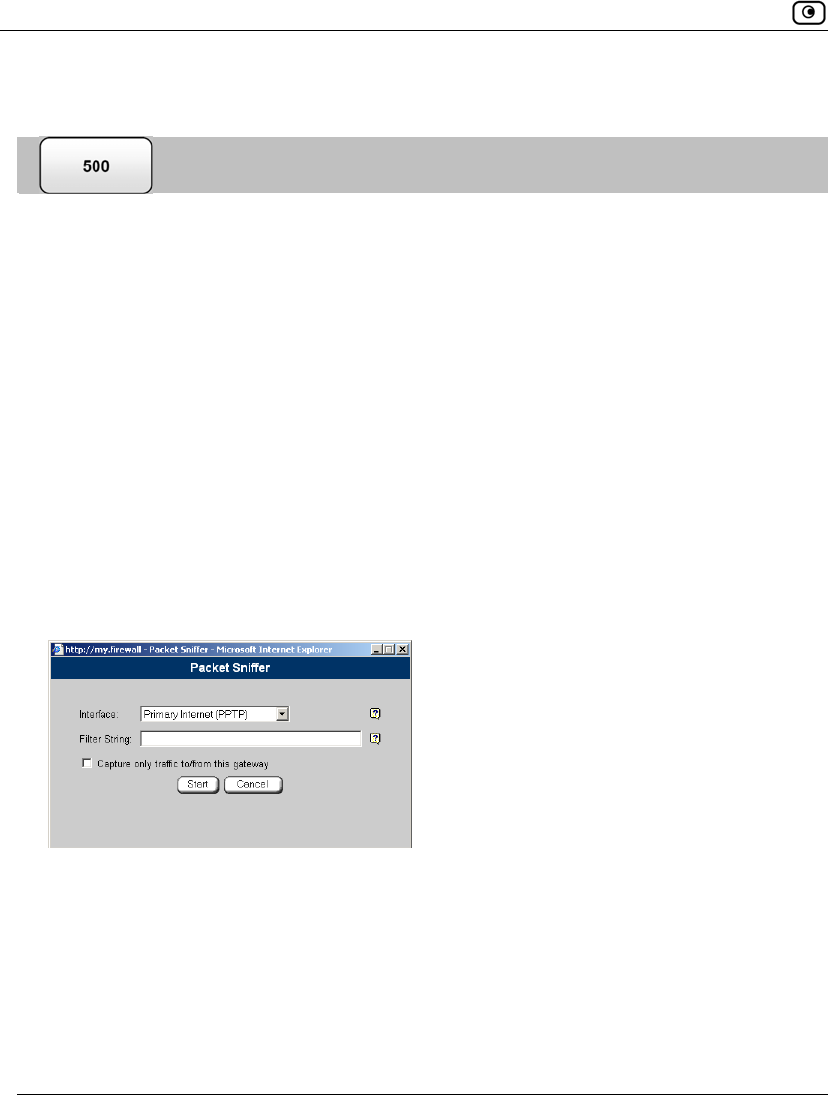
Using Diagnostic Tools
408 Check Point Safe@Office User Guide
Using Packet Sniffer
The Safe@Office appliance includes the Packet Sniffer tool, which enables you to
capture packets from any internal network or Safe@Office port. This is useful for
troubleshooting network problems and for collecting data about network behavior.
The Safe@Office appliance saves the captured packets to a file on your computer.
You can use a free protocol analyzer, such as Ethereal, to analyze the file, or you
can send it to technical support. Ethereal runs on all popular computing platforms
and can be downloaded from http://www.ethereal.com.
To use Packet Sniffer
1. Click Setup in the main menu, and click the Tools tab.
The Tools page appears.
2. Click Sniffer.
The Packet Sniffer window opens.
3. Complete the fields using the information in the table below.
4. Click Start.
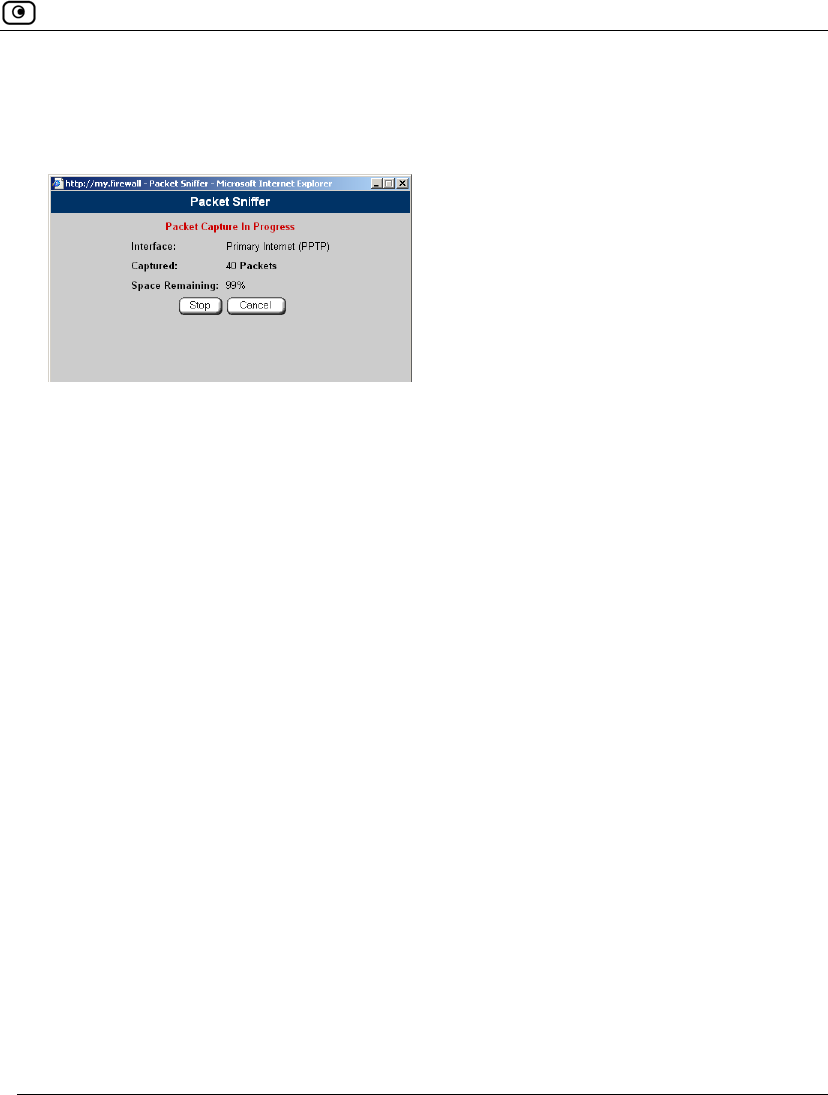
Using Diagnostic Tools
Chapter 14: Maintenance 409
The Packet Sniffer window displays the name of the interface, the number of
packets collected, and the percentage of storage space remaining on the
appliance for storing the packets.
5. Click Stop to stop collecting packets.
A standard File Download dialog box appears.
6. Click Save.
The Save As dialog box appears.
7. Browse to a destination directory of your choice.
8. Type a name for the configuration file and click Save.
The *.cap file is created and saved to the specified directory.
9. Click Cancel to close the Packet Sniffer window.

Using Diagnostic Tools
410 Check Point Safe@Office User Guide
Table 85: Packet Sniffer Fields
In this field… Do this…
Interface Select the interface from which to collect packets.
The list includes the primary Internet connection, the Safe@Office
appliance ports, and all defined networks.
Filter String Type the filter string to use for filtering the captured packets. Only
packets that match the filter condition will be saved.
For a list of basic filter strings elements, see Filter String Syntax on
page 411.
For detailed information on filter syntax, go to
http://www.tcpdump.org/tcpdump_man.html.
Note: Do not enclose the filter string in quotation marks.
If you do not specify a filter string, Packet Sniffer will save all packets on
the selected interface.
Capture only traffic
to/from this gateway
Select this option to capture incoming and outgoing packets for this
gateway only.
If this option is not selected, Packet Sniffer will collect packets for all
traffic on the interface.

Using Diagnostic Tools
Chapter 14: Maintenance 411
Filter String Syntax
The following represents a list of basic filter string elements:
• and on page 411
• dst on page 412
• dst port on page 412
• ether proto on page 413
• host on page 414
• not on page 414
• or on page 415
• port on page 415
• src on page 416
• src port on page 416
• tcp on page 417
• udp on page 418
For detailed information on filter syntax, refer to http://www.tcpdump.org.
and
PURPOSE
The and element is used to concatenate filter string elements. The filtered packets
must match all concatenated filter string elements.
SYNTAX
element and element [and element...]
element && element [&& element...]

Using Diagnostic Tools
412 Check Point Safe@Office User Guide
PARAMETERS
element String. A filter string element.
EXAMPLE
The following filter string saves packets that both originate from IP address is
192.168.10.1 and are destined for port 80:
src 192.168.10.1 and dst port 80
dst
PURPOSE
The dst element captures all packets with a specific destination.
SYNTAX
dst destination
PARAMETERS
destination IP Address or String. The computer to which the packet is
sent. This can be the following:
• An IP address
• A host name
EXAMPLE
The following filter string saves packets that are destined for the IP address
192.168.10.1:
dst 192.168.10.1
dst port
PURPOSE
The dst port element captures all packets destined for a specific port.
SYNTAX
dst port port
Using Diagnostic Tools
Chapter 14: Maintenance 413
Note: This element can be prepended by tcp or udp. For information, see tcp on
page 417 and udp on page 418.
PARAMETERS
port Integer. The port to which the packet is sent.
EXAMPLE
The following filter string saves packets that are destined for port 80:
dst port 80
ether proto
PURPOSE
The ether proto element is used to capture packets of a specific ether protocol
type.
SYNTAX
ether proto \protocol
PARAMETERS
protocol String. The protocol type of the packet.
This can be the following: ip, ip6, arp, rarp,
atalk, aarp, dec net, sca, lat,
mopdl, moprc, iso, stp, ipx, or
netbeui.
EXAMPLE
The following filter string saves ARP packets:
ether proto arp

Using Diagnostic Tools
414 Check Point Safe@Office User Guide
host
PURPOSE
The host element captures all incoming and outgoing packets for a specific
computer.
SYNTAX
host host
PARAMETERS
host IP Address or String. The computer to/from which the packet
is sent. This can be the following:
• An IP address
• A host name
EXAMPLE
The following filter string saves all packets that either originated from IP address
192.168.10.1, or are destined for that same IP address:
host 192.168.10.1
not
PURPOSE
The not element is used to negate filter string elements.
SYNTAX
not element
! element
PARAMETERS
element String. A filter string element.
Using Diagnostic Tools
Chapter 14: Maintenance 415
EXAMPLE
The following filter string saves packets that are not destined for port 80:
not dst port 80
or
PURPOSE
The or element is used to alternate between string elements. The filtered packets
must match at least one of the filter string elements.
SYNTAX
element or element [or element...]
element || element [|| element...]
PARAMETERS
element String. A filter string element.
EXAMPLE
The following filter string saves packets that either originate from IP address
192.168.10.1 or IP address 192.168.10.10:
src 192.168.10.1 or src 192.168.10.10
port
PURPOSE
The port element captures all packets originating from or destined for a specific
port.
SYNTAX
port port
Note: This element can be prepended by tcp or udp. For information, see tcp on
page 417 and udp on page 418.
Using Diagnostic Tools
416 Check Point Safe@Office User Guide
PARAMETERS
port Integer. The port from/to which the packet is sent.
EXAMPLE
The following filter string saves all packets that either originated from port 80, or
are destined for port 80:
port 80
src
PURPOSE
The src element captures all packets with a specific source.
SYNTAX
src source
PARAMETERS
source IP Address or String. The computer from which the packet is
sent. This can be the following:
• An IP address
• A host name
EXAMPLE
The following filter string saves packets that originated from IP address
192.168.10.1:
src 192.168.10.1
src port
PURPOSE
The src port element captures all packets originating from a specific port.
SYNTAX
src port port

Using Diagnostic Tools
Chapter 14: Maintenance 417
Note: This element can be prepended by tcp or udp. For information, see tcp on
page 417 and udp on page 418.
PARAMETERS
port Integer. The port to which the packet is sent.
EXAMPLE
The following filter string saves packets that originated from port 80:
src port 80
tcp
PURPOSE
The tcp element captures all TCP packets. This element can be prepended to port-
related elements.
Note: When not prepended to other elements, the tcp element is the equivalent of
ip proto tcp.
SYNTAX
tcp
tcp element
PARAMETERS
element String. A port-related filter string element that should be
restricted to saving only TCP packets. This can be the
following:
• dst port - Capture all TCP packets destined
for a specific port.
• port - Captures all TCP packets originating
from or destined for a specific port.
• src port - Capture all TCP packets originating
from a specific port.
Using Diagnostic Tools
418 Check Point Safe@Office User Guide
EXAMPLE 1
The following filter string captures all TCP packets:
tcp
EXAMPLE 2
The following filter string captures all TCP packets destined for port 80:
tcp dst port 80
udp
PURPOSE
The udp element captures all UDP packets. This element can be prepended to port-
related elements.
Note: When not prepended to other elements, the udp element is the equivalent of
ip proto udp.
SYNTAX
udp
udp element
PARAMETERS
element String. A port-related filter string element that should be
restricted to saving only UDP packets. This can be the
following:
• dst port - Capture all UDP packets destined
for a specific port.
• port - Captures all UDP packets originating
from or destined for a specific port.
• src port - Capture all UDP packets
originating from a specific port.
EXAMPLE 1
The following filter string captures all UDP packets:
Backing Up the Safe@Office Appliance Configuration
Chapter 14: Maintenance 419
udp
EXAMPLE 2
The following filter string captures all UDP packets destined for port 80:
udp dst port 80
Backing Up the Safe@Office Appliance
Configuration
You can export the Safe@Office appliance configuration to a *.cfg file, and use
this file to backup and restore Safe@Office appliance settings, as needed. The file
includes all your settings.
The configuration file is saved as a textual CLI script. If desired, you can edit the
file. For a full explanation of the CLI script format and the supported CLI
commands, see the Embedded NGX CLI Reference Guide.
Exporting the Safe@Office Appliance Configuration
Exporting the Safe@Office appliance configuration creates a configuration file.
To export the Safe@Office appliance configuration
1. Click Setup in the main menu, and click the Tools tab.
The Tools page appears.
2. Click Export.
A standard File Download dialog box appears.
3. Click Save.
The Save As dialog box appears.
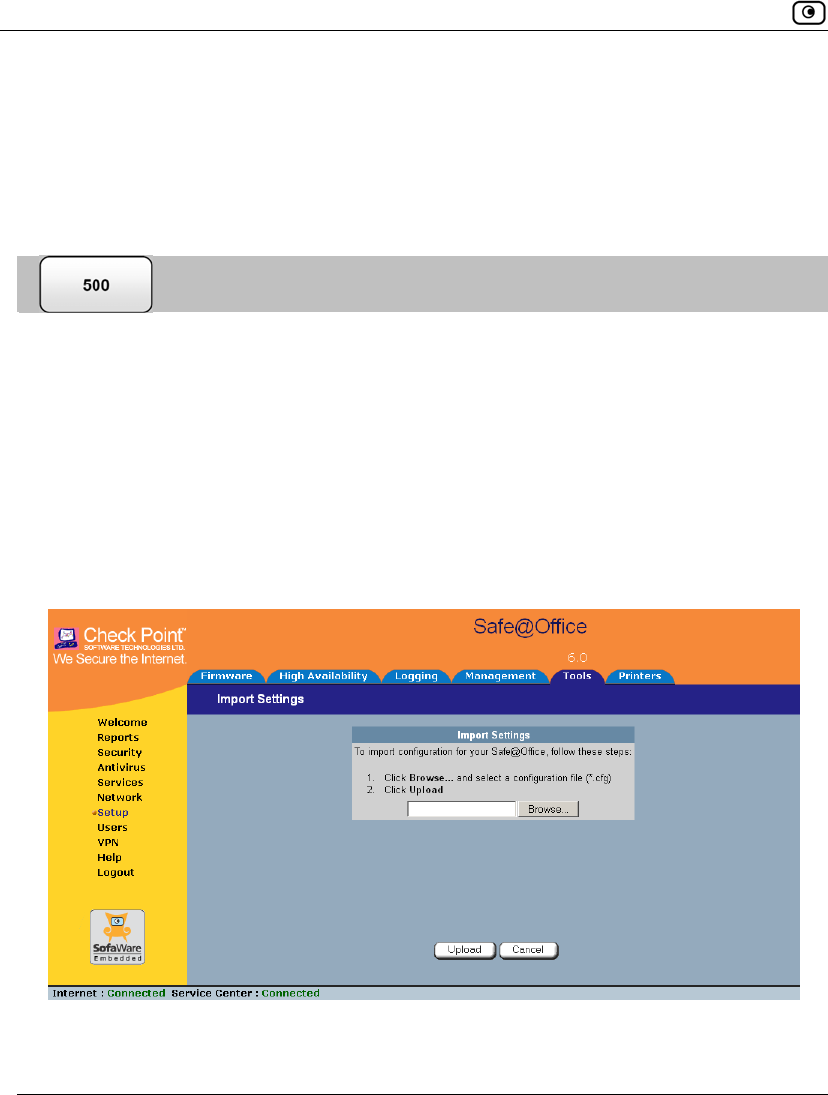
Backing Up the Safe@Office Appliance Configuration
420 Check Point Safe@Office User Guide
4. Browse to a destination directory of your choice.
5. Type a name for the configuration file and click Save.
The *.cfg configuration file is created and saved to the specified directory.
Importing the Safe@Office Appliance Configuration
In order to restore your Safe@Office appliance’s configuration from a
configuration file, you must import the file.
To import the Safe@Office appliance configuration
1. Click Setup in the main menu, and click the Tools tab.
The Tools page appears.
2. Click Import.
The Import Settings page appears.
3. Do one of the following:
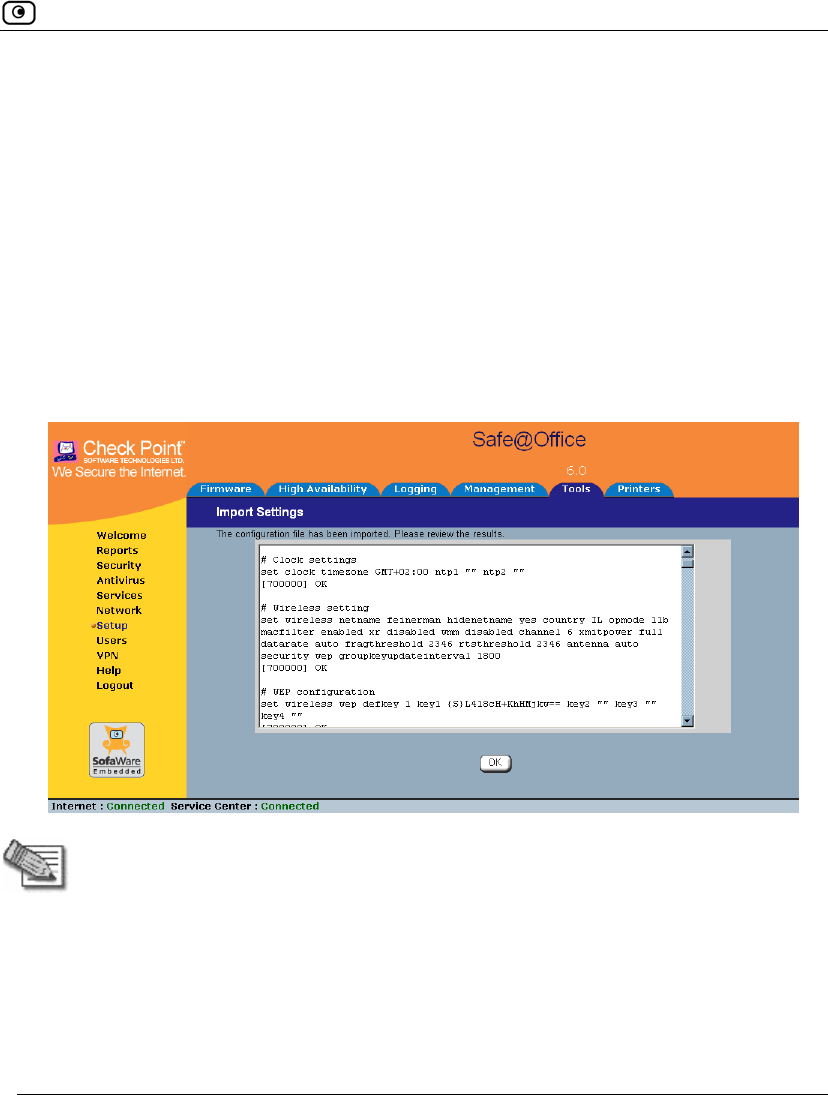
Backing Up the Safe@Office Appliance Configuration
Chapter 14: Maintenance 421
• In the Import Settings field, type the full path to the configuration file.
Or
• Click Browse, and browse to the configuration file.
4. Click Upload.
A confirmation message appears.
5. Click OK.
The Safe@Office appliance settings are imported.
The Import Settings page displays the configuration file's content and the result
of implementing each configuration command.
Note: If the appliance's IP address changed as a result of the configuration import,
your computer may be disconnected from the network; therefore you may not be
able to see the results.
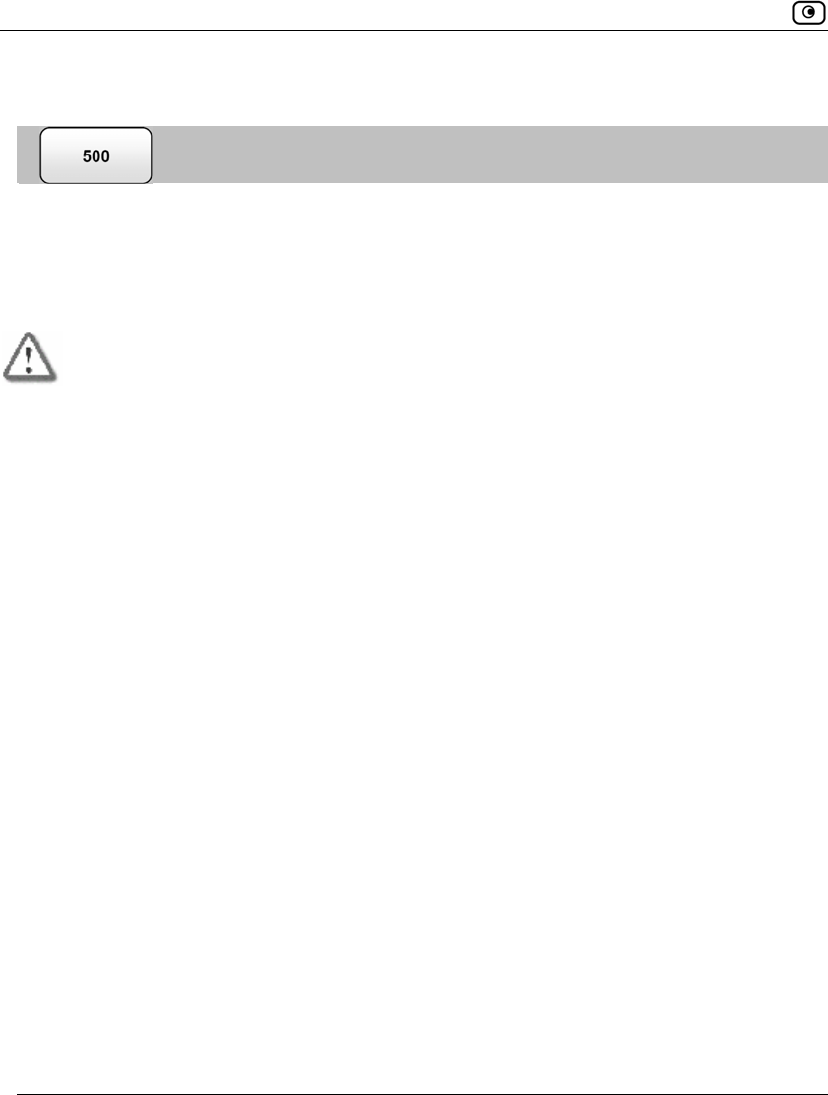
Resetting the Safe@Office Appliance to Defaults
422 Check Point Safe@Office User Guide
Resetting the Safe@Office Appliance to Defaults
You can reset the Safe@Office appliance to its default settings. When you reset
your Safe@Office appliance, it reverts to the state it was originally in when you
purchased it. You can choose to keep the current firmware or to revert to the
firmware version that shipped with the Safe@Office appliance.
Warning: This operation erases all your settings and password information. You will
have to set a new password and reconfigure your Safe@Office appliance for Internet
connection. For information on performing these tasks, see Setting Up the
Safe@Office Appliance.
You can reset the Safe@Office appliance to defaults via the Web management
interface (software) or by manually pressing the Reset button (hardware) located at
the back of the Safe@Office appliance.
To reset the Safe@Office appliance to factory defaults via the Web interface
1. Click Setup in the main menu, and click the Tools tab.
The Tools page appears.
2. Click Factory Settings.
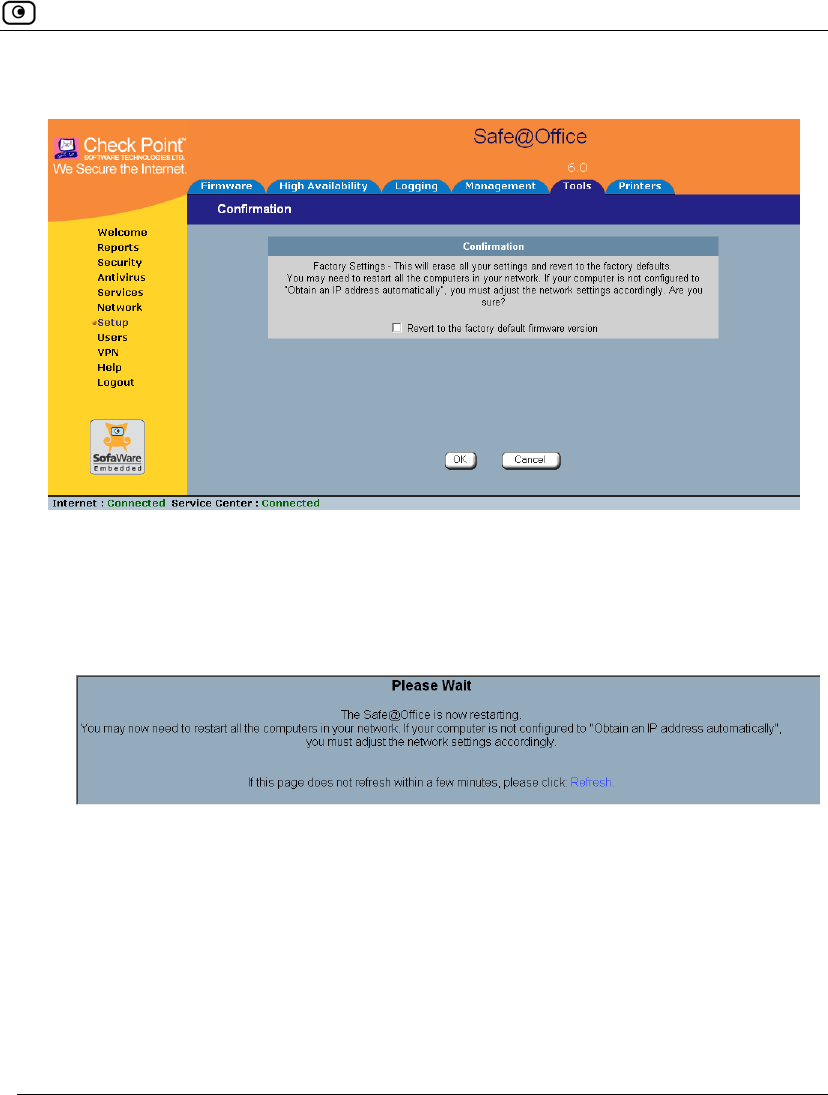
Resetting the Safe@Office Appliance to Defaults
Chapter 14: Maintenance 423
A confirmation message appears.
3. To revert to the firmware version that shipped with the appliance, select the
check box.
4. Click OK.
• The Please Wait screen appears.
• The Safe@Office appliance returns to its factory defaults.
• The Safe@Office appliance is restarted (the PWR/SEC LED flashes
quickly).
This may take a few minutes.
• The Login page appears.
Resetting the Safe@Office Appliance to Defaults
424 Check Point Safe@Office User Guide
To reset the Safe@Office appliance to factory defaults using the Reset button
1. Make sure the Safe@Office appliance is powered on.
2. Using a pointed object, press the RESET button on the back of the Safe@Office
appliance steadily for seven seconds and then release it.
3. Allow the Safe@Office appliance to boot-up until the system is ready
(PWR/SEC LED flashes slowly or illuminates steadily in green light).
For information on the appliance's front and rear panels, see the relevant Getting
to Know Your Appliance section in Introduction on page 1.
Warning: If you choose to reset the Safe@Office appliance by disconnecting the
power cable and then reconnecting it, be sure to leave the Safe@Office appliance
disconnected for at least three seconds, or the Safe@Office appliance might not
function properly until you reboot it as described below.

Running Diagnostics
Chapter 14: Maintenance 425
Running Diagnostics
You can view technical information about your Safe@Office appliance’s hardware,
firmware, license, network status, and Service Center.
This information is useful for troubleshooting. You can export it to an *.html file
and send it to technical support.
To view diagnostic information
1. Click Setup in the main menu, and click the Tools tab.
The Tools page appears.
2. Click Diagnostics.
Technical information about your Safe@Office appliance appears in a new
window.
3. To save the displayed information to an *.html file:
a. Click Save.
A standard File Download dialog box appears.
b. Click Save.
The Save As dialog box appears.
c. Browse to a destination directory of your choice.
d. Type a name for the configuration file and click Save.
The *.html file is created and saved to the specified directory.
4. To refresh the contents of the window, click Refresh.
The contents are refreshed.
5. To close the window, click Close.
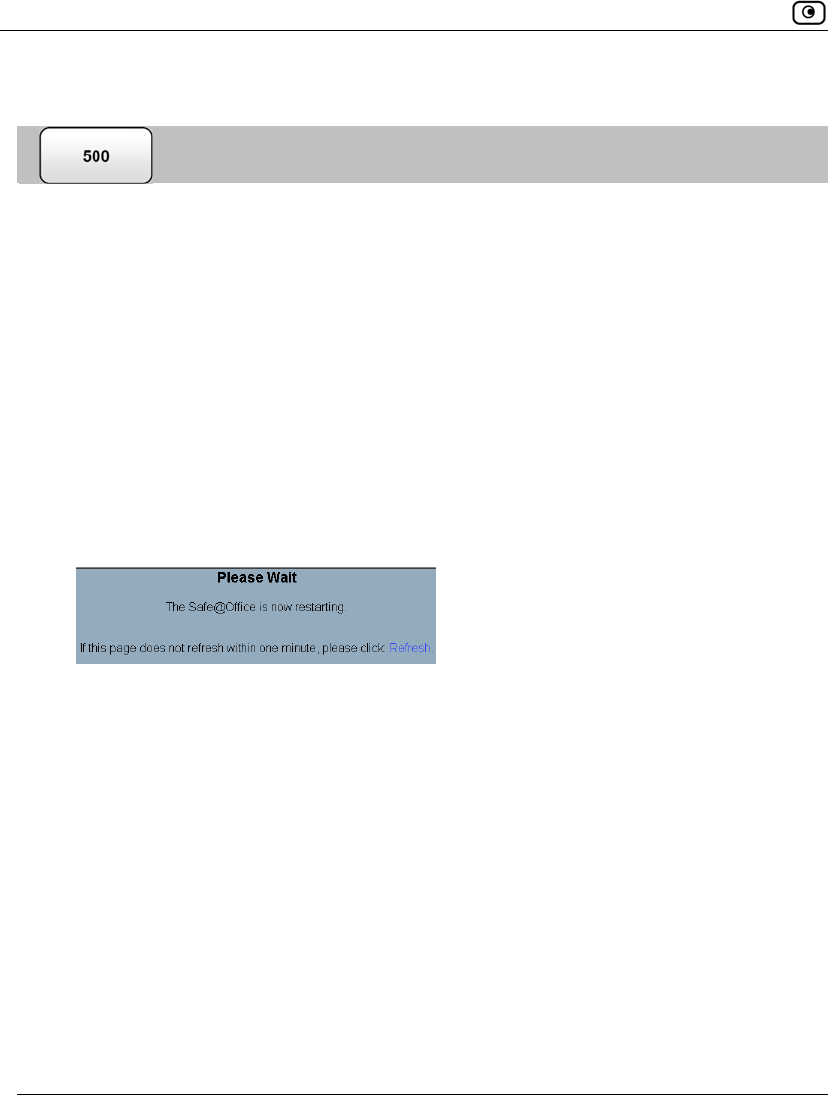
Rebooting the Safe@Office Appliance
426 Check Point Safe@Office User Guide
Rebooting the Safe@Office Appliance
If your Safe@Office appliance is not functioning properly, rebooting it may solve
the problem.
To reboot the Safe@Office appliance
1. Click Setup in the main menu, and click the Firmware tab.
The Firmware page appears.
2. Click Restart.
A confirmation message appears.
3. Click OK.
• The Please Wait screen appears.
• The Safe@Office appliance is restarted (the PWR/SEC LED flashes
quickly).
This may take a few minutes.
• The Login page appears.
Overview
Chapter 15: Using Network Printers 427
Chapter 15
This chapter describes how to set up and use network printers.
This chapter includes the following topics:
Overview..................................................................................................427
Setting Up Network Printers.....................................................................428
Configuring Computers to Use Network Printers.....................................429
Viewing Network Printers........................................................................439
Changing Network Printer Ports...............................................................439
Resetting Network Printers.......................................................................440
Overview
The Safe@Office 500W includes a built-in print server, enabling you to connect
USB-based printers to the appliance and share them across the network.
Note: When using computers with a Windows 2000/XP operating system, the
Safe@Office appliance supports connecting up to four USB-based printers to the
appliance. When using computers with a MAC OS-X operating system, the
Safe@Office appliance supports connecting one printer.
The appliance automatically detects printers as they are plugged in, and they
immediately become available for printing. Usually, no special configuration is
required on the Safe@Office appliance.
Note: The Safe@Office print server supports printing via "all-in-one" printers.
Copying and scanning functions are not supported.
Using Network Printers
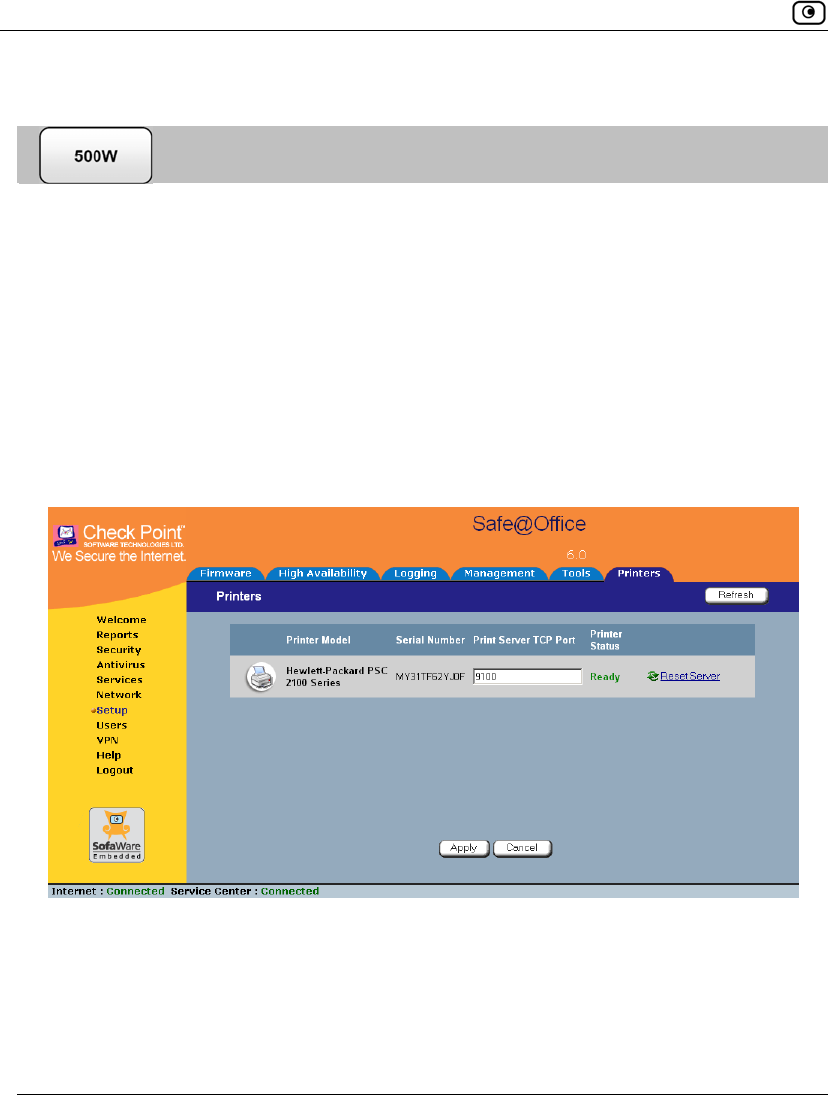
Setting Up Network Printers
428 Check Point Safe@Office User Guide
Setting Up Network Printers
To set up a network printer
1. Connect the network printer to the Safe@Office appliance.
See Network Installation on page 37.
2. Turn the printer on.
3. In the Safe@Office Portal, click Setup in the main menu, and click the Printers
tab.
The Printers page appears. If the Safe@Office appliance detected the printer, the
printer is listed on the page.
4. If the printer is not listed, check that you connected the printer correctly, then
click Refresh to refresh the page.
5. Write down the port number allocated to the printer.
Configuring Computers to Use Network Printers
Chapter 15: Using Network Printers 429
The port number appears in the Printer Server TCP Port field. You will need this
number later, when configuring computers to use the network printer.
6. To change the port number, do the following:
a. Type the desired port number in the Printer Server TCP Port field.
Note: Printer port numbers may not overlap, and must be high ports.
b. Click Apply.
You may want to change the port number if, for example, the printer you are
setting up is intended to replace another printer. In this case, you should change
the replacement printer's port number to the old printer's port number, and you
can skip the next step.
7. Configure each computer from which you want to enable printing to the network
printer.
See Configuring Computers to Use Network Printers on page 429.
Configuring Computers to Use Network Printers
Perform the relevant procedure on each computer from which you want to enable
printing via the Safe@Office print server to a network printer.
Windows 2000/XP
This procedure is relevant for computers with a Windows 2000/XP operating
system.
To configure a computer to use a network printer
1. If the computer for which you want to enable printing is located on the WAN,
create an Allow rule for connections from the computer to This Gateway.
See Adding and Editing Rules on page 215.
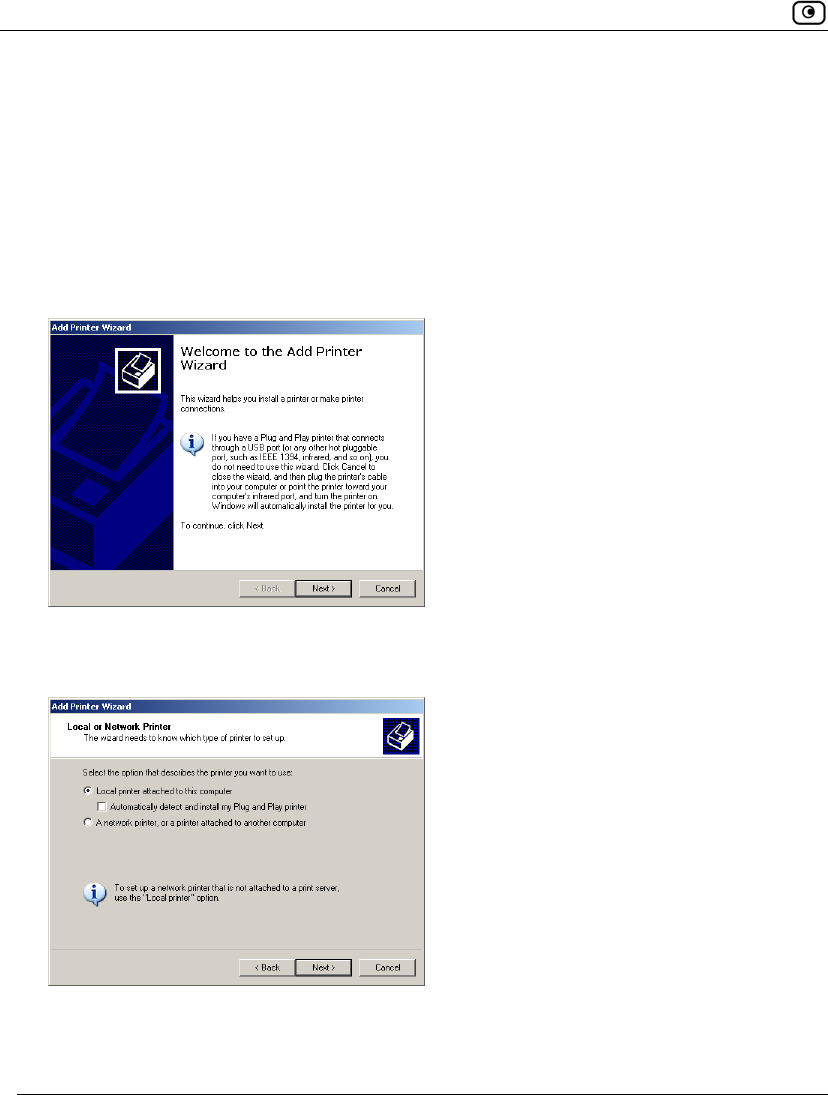
Configuring Computers to Use Network Printers
430 Check Point Safe@Office User Guide
2. Click Start > Settings > Control Panel.
The Control Panel window opens.
3. Click Printers and Faxes.
The Printers and Faxes window opens.
4. Right-click in the window, and click Add Printer in the popup menu.
The Add Printer Wizard opens with the Welcome dialog box displayed.
5. Click Next.
The Local or Network Printer dialog box appears.
6. Click Local printer attached to this computer.
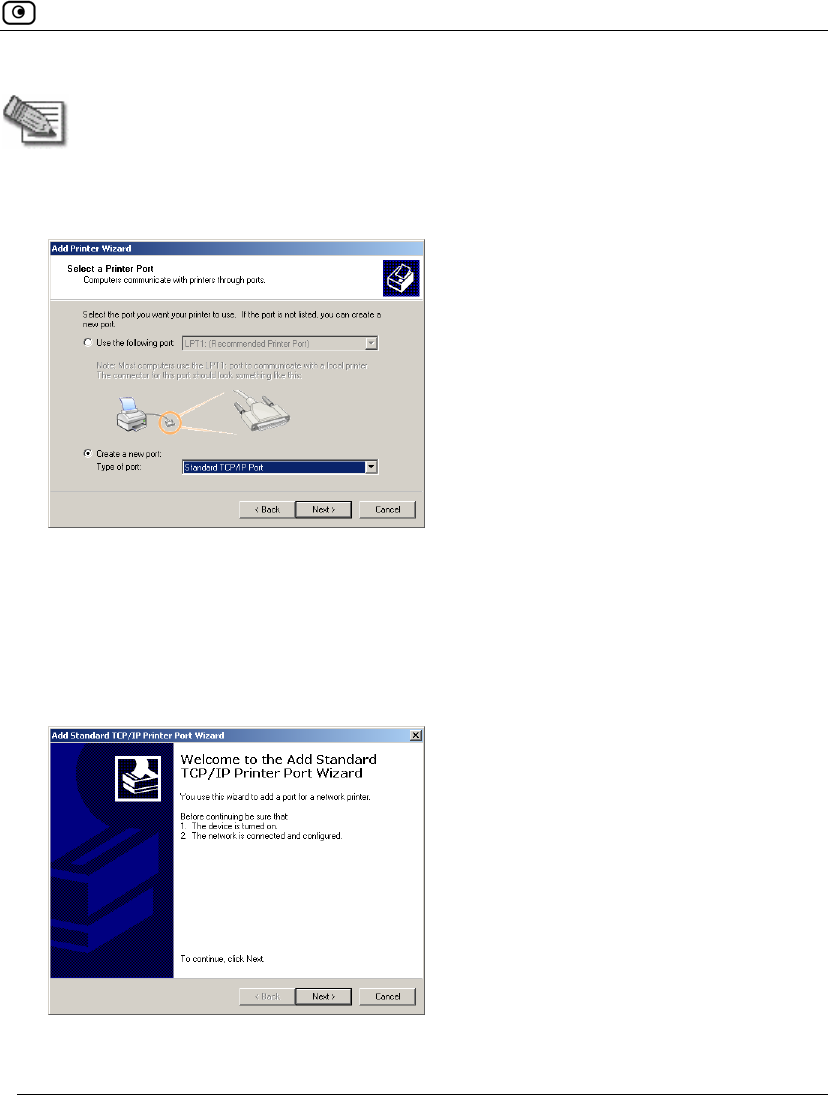
Configuring Computers to Use Network Printers
Chapter 15: Using Network Printers 431
Note: Do not select the Automatically detect and install my Plug and Play printer check
box.
7. Click Next.
The Select a Printer Port dialog box appears.
8. Click Create a new port.
9. In the Type of port drop-down list, select Standard TCP/IP Port.
10. Click Next.
The Add Standard TCP/IP Port Wizard opens with the Welcome dialog box
displayed.
11. Click Next.
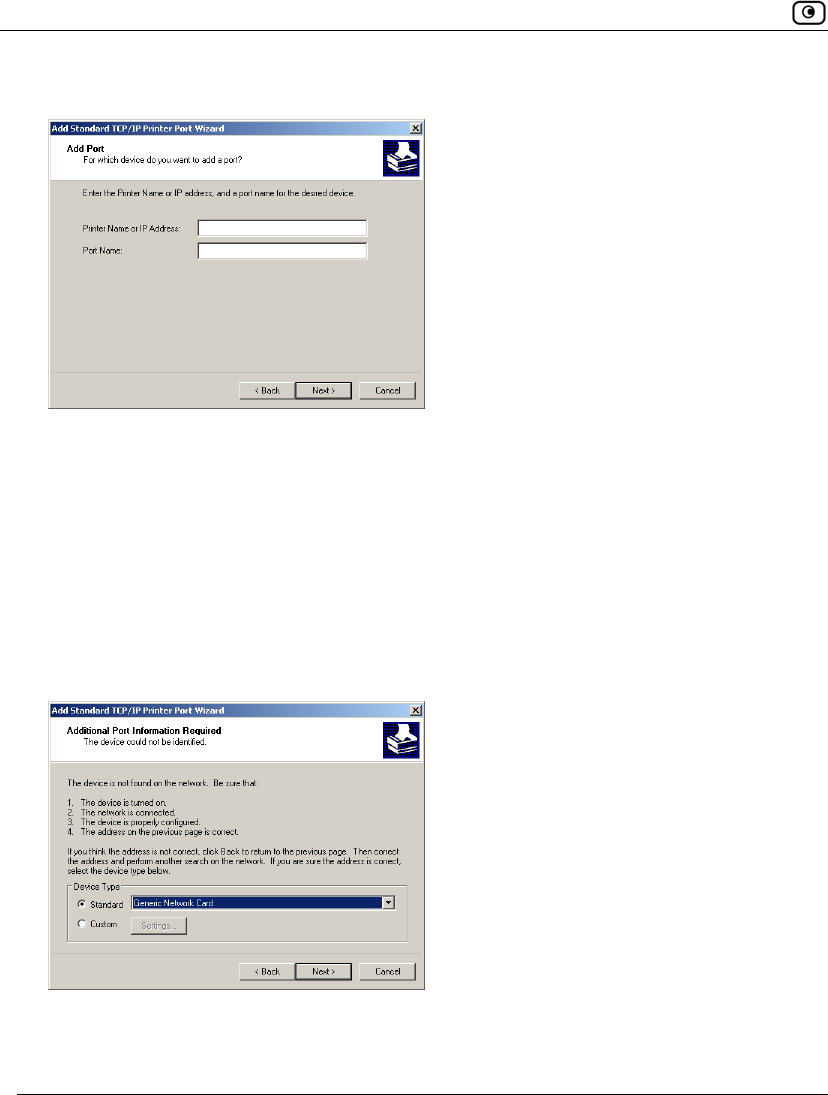
Configuring Computers to Use Network Printers
432 Check Point Safe@Office User Guide
The Add Port dialog box appears.
12. In the Printer Name or IP Address field, type the Safe@Office appliance's
LAN IP address, or "my.firewall".
You can find the LAN IP address in the Safe@Office Portal, under Network >
My Network.
The Port Name field is filled in automatically.
13. Click Next.
The Add Standard TCP/IP Printer Port Wizard opens, with the Additional Port
Information Required dialog box displayed.
14. Click Custom.
15. Click Settings.
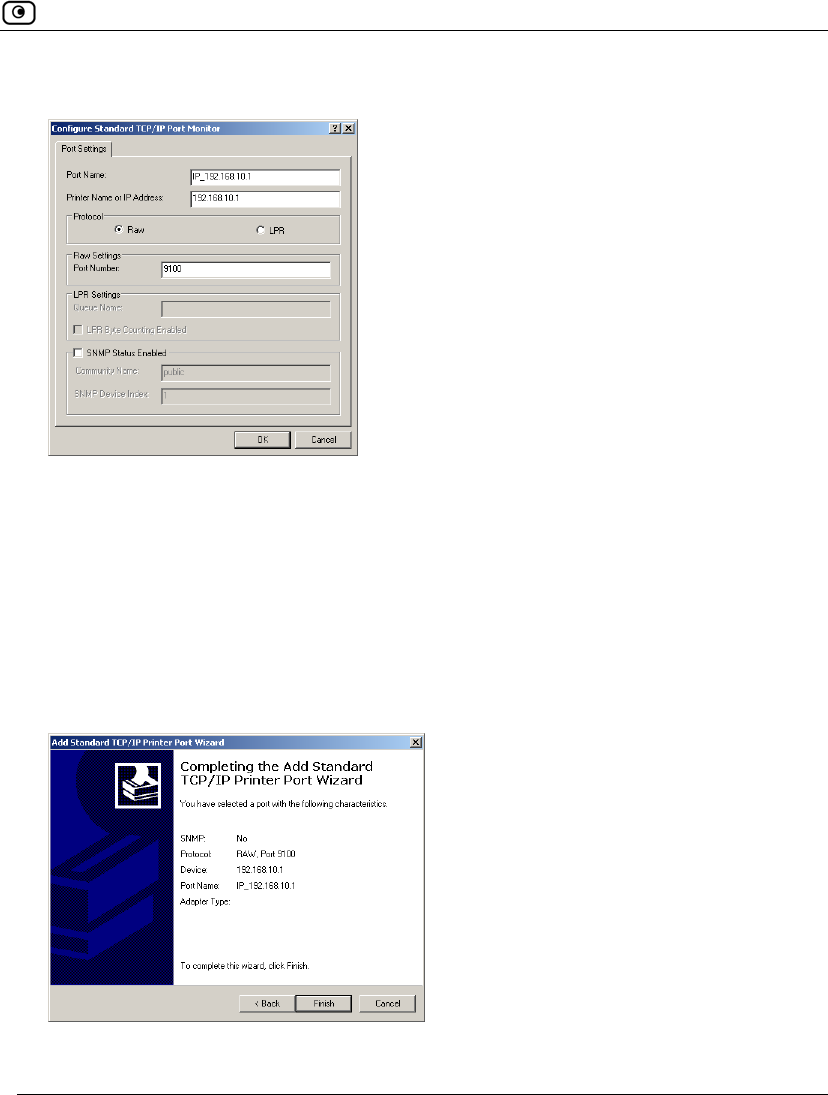
Configuring Computers to Use Network Printers
Chapter 15: Using Network Printers 433
The Configure Standard TCP/IP Port Monitor dialog box opens.
16. In the Port Number field, type the printer's port number, as shown in the
Printers page.
17. In the Protocol area, make sure that Raw is selected.
18. Click OK.
The Add Standard TCP/IP Printer Port Wizard reappears.
19. Click Next.
The Completing the Add Standard TCP/IP Printer Port Wizard dialog box appears.
20. Click Finish.
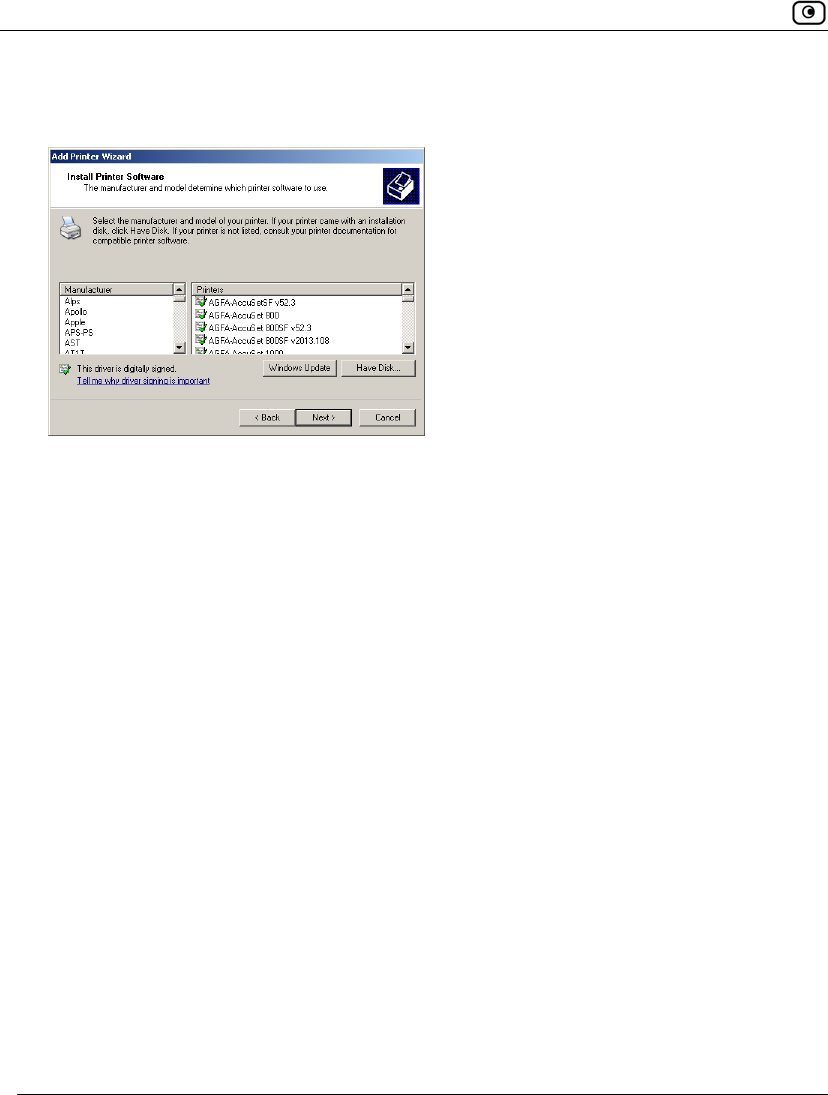
Configuring Computers to Use Network Printers
434 Check Point Safe@Office User Guide
The Add Printer Wizard reappears, with the Install Printer Software dialog box
displayed.
21. Do one of the following:
• Use the lists to select the printer's manufacturer and model.
• If your printer does not appear in the lists, insert the CD that came with
your printer in the computer's CD-ROM drive, and click Have Disk.
22. Click Next.
23. Complete the remaining dialog boxes in the wizard as desired, and click
Finish.
The printer appears in the Printers and Faxes window.
24. Right-click the printer and click Properties in the popup menu.
The printer's Properties dialog box opens.
25. In the Ports tab, in the list box, select the port you added.
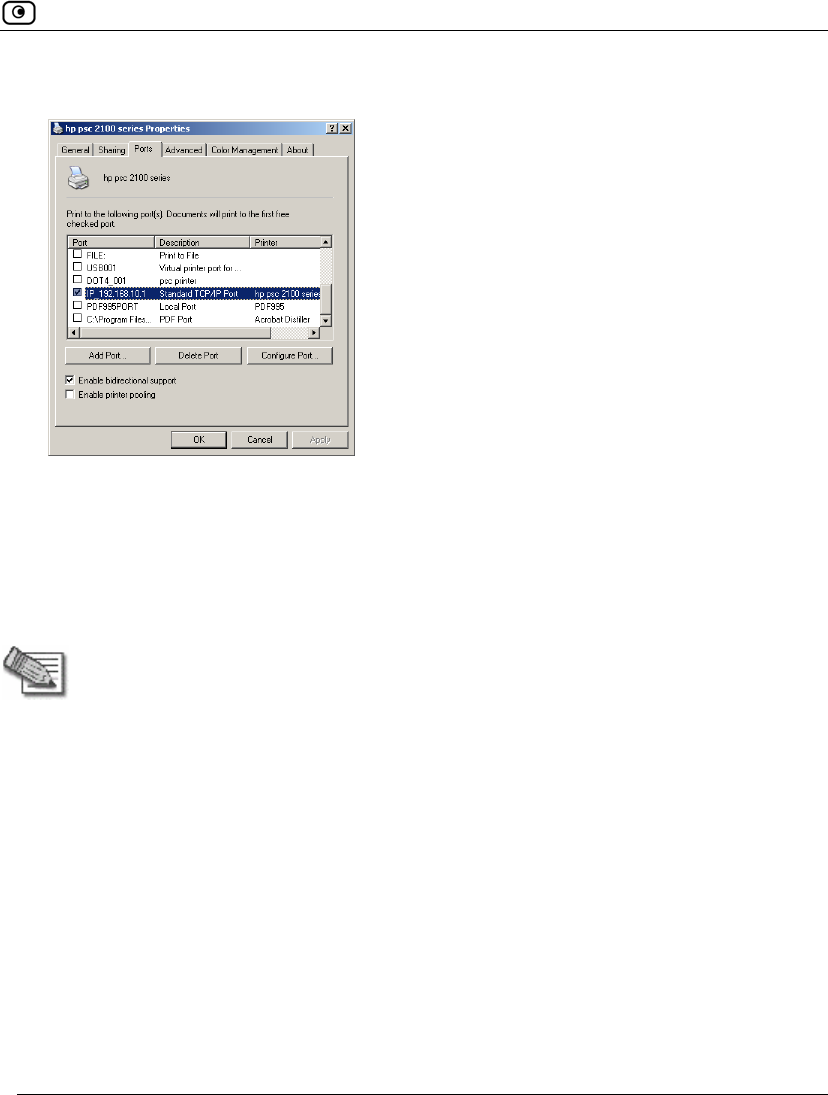
Configuring Computers to Use Network Printers
Chapter 15: Using Network Printers 435
The port's name is IP_<LAN IP address>.
26. Click OK.
MAC OS-X
This procedure is relevant for computers with the latest version of the MAC OS-X
operating system.
Note: This procedure may not apply to earlier MAC OS-X versions.
To configure a computer to use a network printer
1. If the computer for which you want to enable printing is located on the WAN,
create an Allow rule for connections from the computer to This Gateway.
See Adding and Editing Rules on page 215.
2. Choose Apple -> System Preferences.
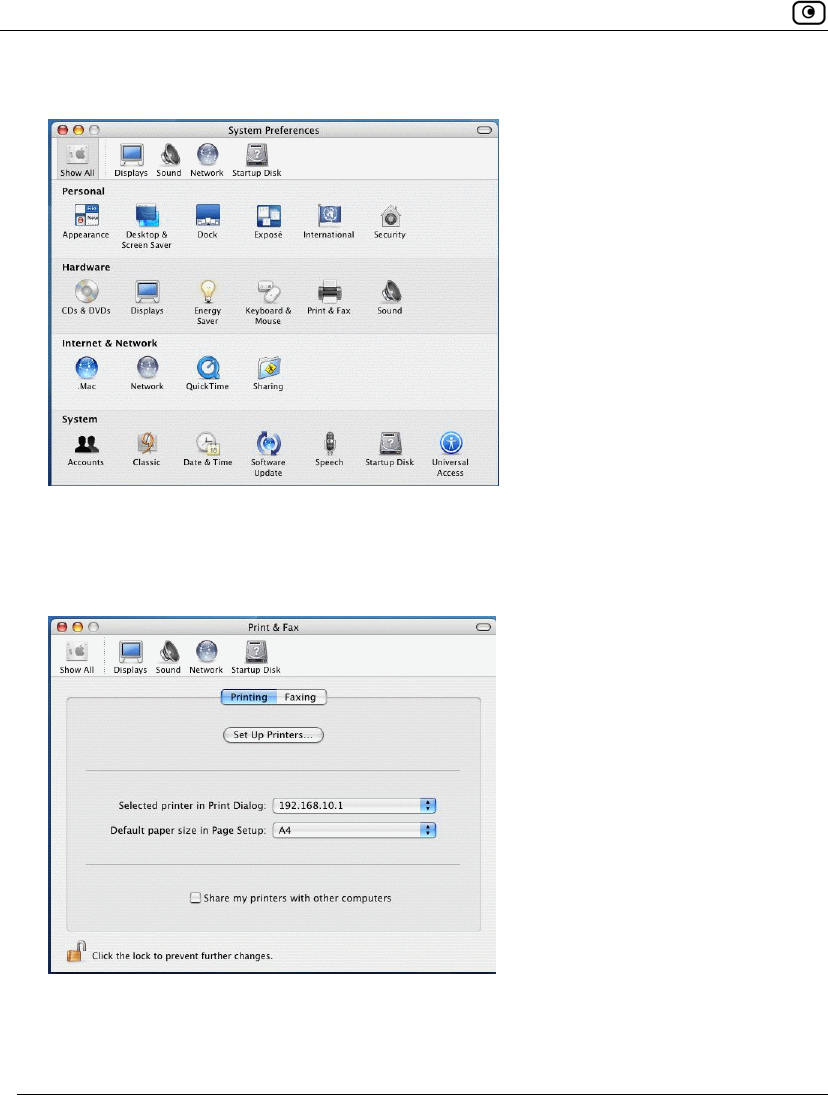
Configuring Computers to Use Network Printers
436 Check Point Safe@Office User Guide
The System Preferences window appears.
3. Click Show All to display all categories.
4. In the Hardware area, click Print & Fax.
The Print & Fax window appears.
5. In the Printing tab, click Set Up Printers.
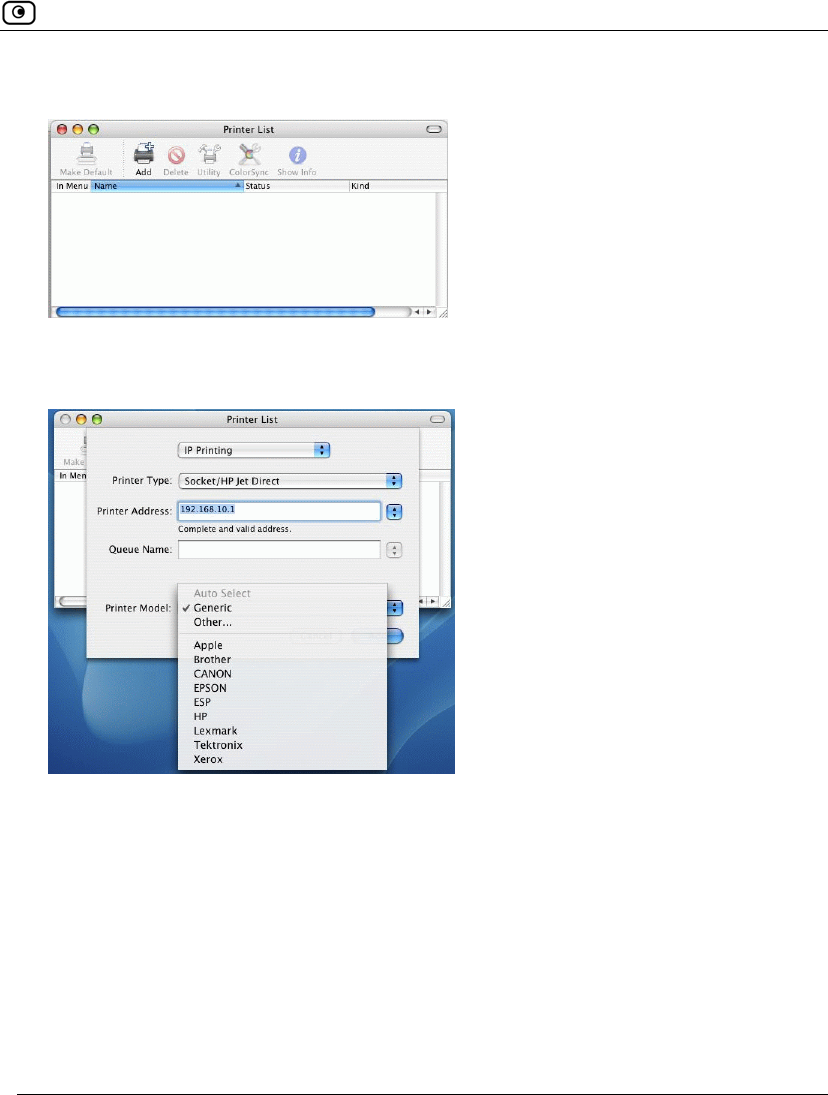
Configuring Computers to Use Network Printers
Chapter 15: Using Network Printers 437
The Printer List window appears.
6. Click Add.
New fields appear.
7. In the first drop-down list, select IP Printing.
8. In the Printer Type drop-down list, select Socket/HP Jet Direct.
9. In the Printer Address field, type the Safe@Office appliance's LAN IP address,
or "my.firewall".
You can find the LAN IP address in the Safe@Office Portal, under Network >
My Network.
10. In the Queue Name field, type the name of the required printer queue.
For example, the printer queue name for HP printers is RAW.
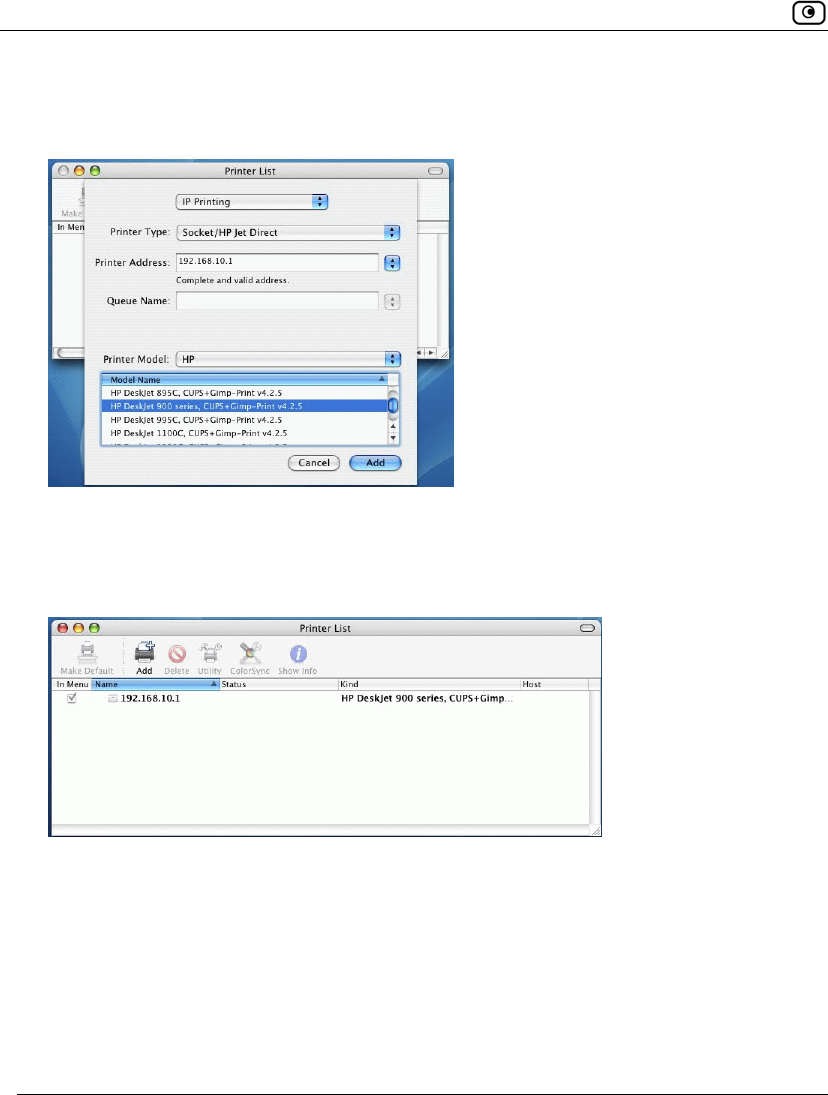
Configuring Computers to Use Network Printers
438 Check Point Safe@Office User Guide
11. In the Printer Model list, select the desired printer type.
A list of models appears.
12. In the Model Name list, select the desired model.
13. Click Add.
The new printer appears in the Printer List window.
14. In the Printer List window, select the newly added printer, and click Make
Default.
Viewing Network Printers
Chapter 15: Using Network Printers 439
Viewing Network Printers
To view network printers
1. Click Setup in the main menu, and click the Printers tab.
The Printers page appears, displaying a list of connected printers.
For each printer, the model, serial number, port, and status is displayed.
A printer can have the following statuses:
• Initialize. The printer is initializing.
• Ready. The printer is ready.
• Not Ready. The printer is not ready. For example, it may be out of paper.
• Printing. The printer is processing a print job.
• Restarting. The printer server is restarting.
• Fail. An error occurred. See the Event Log for details (Viewing the Event
Log on page 189).
2. To refresh the display, click Refresh.
Changing Network Printer Ports
When you set up a new network printer, the Safe@Office appliance automatically
assigns a port number to the printer. If you want to use a different port number, you
can easily change it, as described in Setting up Network Printers on page 428.
However, you may sometimes need to change the port number after completing
printer setup. For example, you may want to replace a malfunctioning network
printer, with another existing network printer, without reconfiguring the client
Resetting Network Printers
440 Check Point Safe@Office User Guide
computers. To do this, you must change the replacement printer's port number to
the malfunctioning printer's port number, as described below.
Note: Each printer port number must be different, and must be a high port.
To change a printer's port
1. Click Setup in the main menu, and click the Printers tab.
The Printers page appears.
2. In the printer's Printer Server TCP Port field, type the desired port number.
3. Click Apply.
Resetting Network Printers
You can cause a network printer to restart the current print job, by resetting the
network printer. You may want to do this if the print job has stalled.
To reset a network printer
1. Click Setup in the main menu, and click the Printers tab.
The Printers page appears.
2. Next to the desired printer, click Reset.
The network printer's current print job is restarted.
Resetting Network Printers
Chapter 16: Troubleshooting 441
Chapter 16
This chapter provides solutions to common problems you may encounter while
using the Safe@Office appliance.
Note: For information on troubleshooting wireless connectivity, see
Troubleshooting Wireless Connectivity on page 185.
This chapter includes the following topics:
Connectivity ............................................................................................ 442
Service Center and Upgrades................................................................... 446
Other Problems........................................................................................ 447
Troubleshooting

Connectivity
442 Check Point Safe@Office User Guide
Connectivity
I cannot access the Internet. What should I do?
• Check if the PWR/SEC LED is green. If not, check the power connection
to the Safe@Office appliance.
• Check if the WAN LINK/ACT LED is green. If not, check the network
cable to the modem and make sure the modem is turned on.
• Check if the LAN LINK/ACT LED for the port used by your computer is
green. If not, check if the network cable linking your computer to the
Safe@Office appliance is connected properly. Try replacing the cable or
connecting it to a different LAN port.
• Using your Web browser, go to http://my.firewall and see whether
"Connected" appears on the Status Bar. Make sure that your Safe@Office
appliance network settings are configured as per your ISP directions.
• Check your TCP/IP configuration according to Installing and Setting up
the Safe@Office Appliance on page 17.
• If Web Filtering or Email Filtering are on, try turning them off.
• Check if you have defined firewall rules which block your Internet
connectivity.
• Check with your ISP for possible service outage.
• Check whether you are exceeding the maximum number of computers
allowed by your license, by viewing the Active Computers page.
I cannot access my DSL broadband connection. What should I do?
DSL equipment comes in two flavors: bridges (commonly known as DSL modems)
and routers. Some DSL equipment can be configured to work both ways.
Connectivity
Chapter 16: Troubleshooting 443
• If you connect to your ISP using a PPPoE or PPTP dialer defined in your
operating system, your equipment is most likely configured as a DSL
bridge. Configure a PPPoE or PPTP type DSL connection.
• If you were not instructed to configure a dialer in your operating system,
your equipment is most likely configured as a DSL router. Configure a
LAN connection, even if you are using a DSL connection.
For instructions, see Configuring the Internet Connection on page 55.
I cannot access my Cable broadband connection. What should I do?
• Some cable ISPs require you to register the MAC address of the device
behind the cable modem. You may need to clone your Ethernet adapter
MAC address onto the Safe@Office appliance. For instructions, see
Configuring the Internet Connection on page 55.
• Some cable ISPs require using a hostname for the connection. Try
reconfiguring your Internet connection and specifying a hostname. For
further information, see Configuring the Internet Connection on page 55.
I cannot access http://my.firewall or http://my.vpn. What should I do?
• Verify that the Safe@Office appliance is operating (PWR/SEC LED is
active)
• Check if the LAN LINK/ACT LED for the port used by your computer is
on. If not, check if the network cable linking your computer to the
Safe@Office appliance is connected properly.
Note: You may need to use a crossed cable when connecting the Safe@Office
appliance to another hub/switch.
• Try surfing to 192.168.10.1 instead of to my.firewall.
Note: 192.168.10 is the default value, and it may vary if you changed it in the My
Network page.

Connectivity
444 Check Point Safe@Office User Guide
• Check your TCP/IP configuration according to Installing and Setting up
the Safe@Office Appliance on page 17.
• Restart your Safe@Office appliance and your broadband modem by
disconnecting the power and reconnecting after 5 seconds.
• If your Web browser is configured to use an HTTP proxy to access the
Internet, add "my.firewall" or "my.vpn" to your proxy exceptions list.
My network seems extremely slow. What should I do?
• The Ethernet cables may be faulty. For proper operation, the Safe@Office
appliance requires STP CAT5 (Shielded Twisted Pair Category 5) Ethernet
cables. Make sure that this specification is printed on your cables.
• Your Ethernet card may be faulty or incorrectly configured. Try replacing
your Ethernet card.
• There may be an IP address conflict in your network. Check that the
TCP/IP settings of all your computers are configured to obtain an IP
address automatically.
I changed the network settings to incorrect values and am unable to correct my error. What
should I do?
Reset the network to its default settings using the button on the back of the
Safe@Office appliance unit. See Resetting the Safe@Office Appliance to Defaults
on page 422.
I am using the Safe@Office appliance behind another NAT device, and I am having problems
with some applications. What should I do?
By default, the Safe@Office appliance performs Network Address Translation
(NAT). It is possible to use the Safe@Office appliance behind another device that
performs NAT, such as a DSL router or Wireless router, but the device will block
all incoming connections from reaching your Safe@Office appliance.
To fix this problem, do ONE of the following. (The solutions are listed in order of
preference.)

Connectivity
Chapter 16: Troubleshooting 445
• Consider whether you really need the router. The Safe@Office appliance
can be used as a replacement for your router, unless you need it for some
additional functionality that it provides, such as Wireless access.
• If possible, disable NAT in the router. Refer to the router’s documentation
for instructions on how to do this.
• If the router has a “DMZ Computer” or “Exposed Host” option, set it to the
Safe@Office appliance’s external IP address.
• Open the following ports in the NAT device:
• UDP 9281/9282
• UDP 500
• TCP 256
• TCP 264
• ESP IP protocol 50
• TCP 981
I cannot receive audio or video calls through the Safe@Office appliance. What should I do?
To enable audio/video, you must configure an IP Telephony (H.323) virtual server.
For instructions, see Configuring Servers on page 209.
I run a public Web server at home but it cannot be accessed from the Internet. What should I
do?
Configure a virtual Web Server. For instructions, see Configuring Servers on page
209.
I cannot connect to the LAN network from the DMZ or WLAN network. What should I do?
By default, connections from the DMZ or WLAN network to the LAN network are
blocked. To allow traffic from the DMZ or WLAN to the LAN, configure
appropriate firewall rules. For instructions, see Using Rules on page 211.

Service Center and Upgrades
446 Check Point Safe@Office User Guide
Service Center and Upgrades
I purchased an advanced Safe@Office model, but I only have the functionality of a simpler
Safe@Office model. What should I do?
Your have not installed your product key. For further information, see Upgrading
Your Software Product on page 383.
I have exceeded my node limit. What does this mean? What should I do?
Your Product Key specifies a maximum number of nodes that you may connect to
the Safe@Office appliance.
The Safe@Office appliance tracks the cumulative number of nodes on the internal
network that have communicated through the firewall. When the Safe@Office
appliance encounters an IP address that exceeds the licensed node limit, the Active
Computers page displays a warning message and marks nodes over the node limit
in red. These nodes will not be able to access the Internet through the Safe@Office
appliance, but will be protected. The Event Log page also warns you that you have
exceeded the node limit.
To upgrade your Safe@Office appliance to support more nodes, purchase a new
Product Key. Contact your reseller for upgrade information.
While trying to connect to a Service Center, I received the message “The Service Center did not
respond”. What should I do?
• If you are using a Service Center other than the Check Point Service
Center, check that the Service Center IP address is typed correctly.
• The Safe@Office appliance connects to the Service Center using UDP
ports 9281/9282. If the Safe@Office appliance is installed behind another
firewall, make sure that these ports are open.

Other Problems
Chapter 16: Troubleshooting 447
Other Problems
I have forgotten my password. What should I do?
Reset your Safe@Office appliance to factory defaults using the Reset button as
detailed in Resetting the Safe@Office Appliance to Defaults on page 422.
Why are the date and time displayed incorrectly?
You can adjust the time on the Setup page's Tools tab. For information, see Setting
the Time on the Appliance on page 401.
I cannot use a certain network application. What should I do?
Look at the Event Log page. If it lists blocked attacks, do the following:
• Set the Safe@Office appliance's firewall level to Low and try again.
• If the application still does not work, set the computer on which you want
to use the application to be the exposed host.
For instructions, see Defining an Exposed Host on page 263.
When you have finished using the application, make sure to clear the exposed host
setting, otherwise your security might be compromised.
Technical Specifications
Chapter 17: Specifications 449
Chapter 17
This chapter includes the following topics:
Technical Specifications.......................................................................... 449
CE Declaration of Conformity................................................................. 458
Federal Communications Commission Radio Frequency Interference
Statement................................................................................................. 460
Technical Specifications
Table 86: Model SBX-166LHGE-2 Appliance Attributes
Attribute Safe@Office 500
SBX-166LHGE-2
General
Dimensions
(width x height x depth)
20.32 x 3.05 x 12.19 cm
(8 x 1.2 x 4.8 inches)
Weight 0.7 kg (1.56 lbs)
Power supply nominal
input voltage, frequency
US Model: 90~132 VAC, 50~60Hz
Japan Model: 100VAC, 50~60Hz
EU Model: 200~265 VAC, 50~60Hz
Power supply nominal
output voltage
All Models: 9VAC, 1.5A
Specifications

Technical Specifications
450 Check Point Safe@Office User Guide
Attribute Safe@Office 500
SBX-166LHGE-2
Max. Power
Consumption
7.5W
Retail box dimensions
(width x height x depth)
31 x 10 x 16 cm
(12.4 x 4 x 6.4 inches)
Retail box weight 1.3 kg (2.9 lbs)
Environmental
Conditions
Temperature:
Storage/Transport
- 20°C to +70°C
Temperature: Operation + 5°C to +45°C
Humidity:
Storage/Operation
5%~90% at 25°C/
None condensed
Applicable Standards
Shock & Vibration ETSI 300 019-2-3 CLASS 3.1 & Bellcore GR 63 (NEBS)
Safety EN60950/
IEC60950/
UL60950
Quality ISO9001
Mean Time Between
Failures (MTBF)
68,000 Hours at 30 ºC
Technical Specifications
Chapter 17: Specifications 451
Table 87: Model SBX-166LHGE-4 Appliance Attributes
Attribute Safe@Office 500
SBX-166LHGE-4 /
Safe@Office 500W
SBXW-166LHGE-4
General
Dimensions
(width x height x depth)
20 x 3.1 x 15.5 cm
(7.9 x 1.2 x 6.1 inches)
Weight 0.69 kg (1.55 lbs)
Power supply nominal
input voltage, frequency
All Models: 100~240VAC, 50~60Hz
Power supply nominal
output voltage
All Models: 5VDC, 3A
Max. Power
Consumption
8W (1.6A w/o external USB devices)
13W (2.6A w USB devices)
Retail box dimensions
(width x height x depth)
29 x 25 x 7.6 cm
(11.4 x 9.8 x 3 inches)
Retail box weight 1.35 kg (3 lbs)
Environmental
Conditions
Temperature:
Storage/Transport
- 5°C to +70°C
Temperature: Operation - 5°C ~ 50°C

Technical Specifications
452 Check Point Safe@Office User Guide
Attribute Safe@Office 500
SBX-166LHGE-4 /
Safe@Office 500W
SBXW-166LHGE-4
Humidity:
Storage/Operation
5%~90% at 25°C/
None condensed
Applicable Standards
Shock & Vibration CNS1219 C6343
Safety EN60950/
IEC60950/
cTUVus 60950
Quality ISO9001:2000
TL9000-HW R3.0
ISO14001
Ohsas18001:
1999
Mean Time Between
Failures (MTBF)
68,000 Hours at 30 ºC
Table 88: Model SBX-166LHGE-5 Appliance Attributes
Standard / Wired DSL / Wired
General

Technical Specifications
Chapter 17: Specifications 453
Model ID VPN-1 Edge X
Safe@Office 500
VPN-1 Edge X ADSL
Safe@Office 500 ADSL
Board's H/W Model SBX-166-LHGE-5
SBXD-166-LHGE-5
Dimensions
(width x height x depth) 200 x 33 x 122mm 200 x 33 x 122mm
Weight
Power Adapter nominal
input voltage, frequency In:
100/110/120/21/2
2/230VAC @ 0.5A
Out: 9VAC @
1.5A
In: 100/110/120/21/22/230VAC @
0.5A
Out: 9VAC @ 1.5A
Power supply nominal
output voltage In: 90~264VAC @
Out: 12VDC @
1.5 A
In: 90~264VAC @
Out: 12VDC @ 1.5 A
Max. Power Consumption 4.5W 8.5W
Retail box dimensions
(width x height x depth)
Retail box weight
Environmental Conditions
Temperature:
Storage/Transport -5ºC ~ 80 ºC -5ºC ~ 80 ºC
Temperature: Operation 0ºC ~ 40 ºC 0ºC ~ 40 ºC
Humidity:
Storage/Operation 10~95% / 10~90%
(none-condensed) 10~95% / 10~90%
(none-condensed)
Applicable Standards
Shock & Vibration MIL-STD-
202F,IEC 68-2-32 MIL-STD-202F,IEC 68-2-32
Safety cULus, CB, LVD cULus, CB, LVD
Quality ISO
9001,ISO 14001,T
L9000
ISO9001,ISO 14001,TL9000
EMC CE . FCC
15B.VCCI CE . FCC 15B.VCCI
ADSL N/A Part 68.CS03.JATE
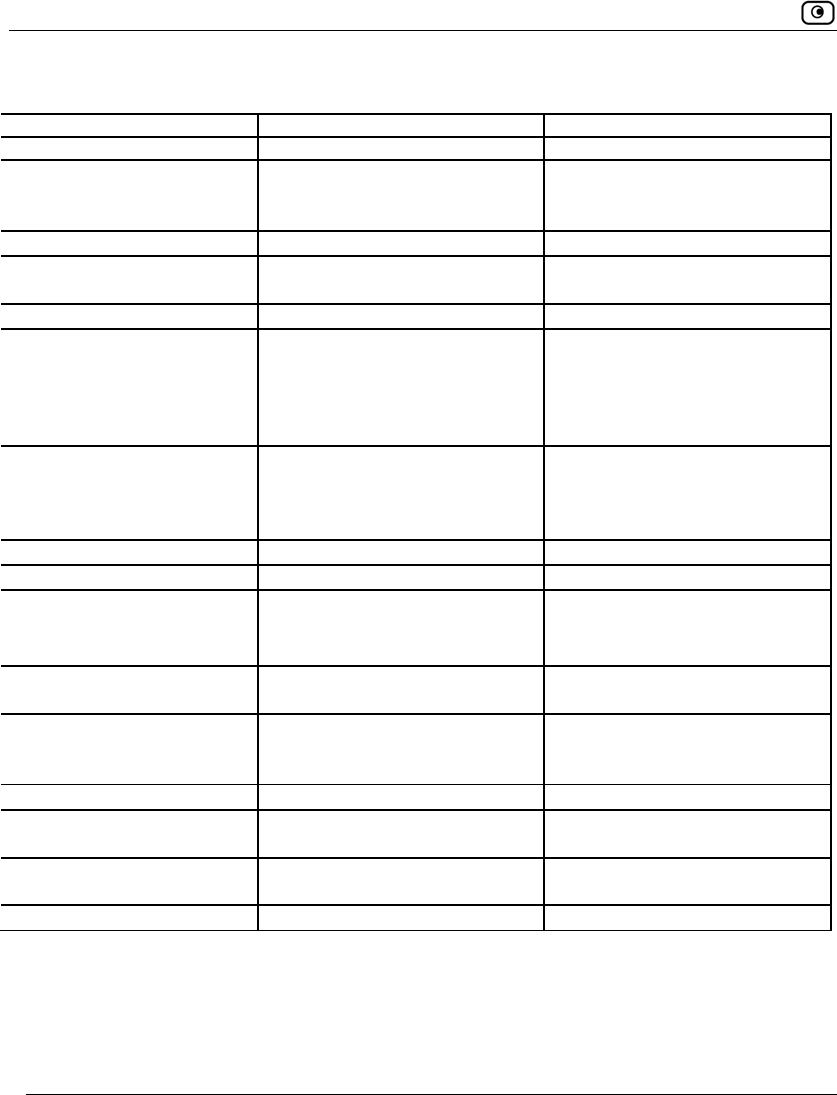
Technical Specifications
454 Check Point Safe@Office User Guide
Standard / Wireless DSL / Wireless
General
Model ID VPN-1 Edge W
Safe@Office 500W
VPN-1 Edge W ADSL
Safe@Office 500W ADSL
Board's H/W Model SBXW-166-LHGE-5 SBXWD-166-LHGE-5
Dimensions
(width x height x depth) 200 x 33 x 130mm
(inc. Antenna's Conn.) 200 x 33 x 130mm
(inc. Antenna's Conn.)
Weight
Power Adapter nominal input
voltage, frequency
In:
100/110/120/21/22/230VAC
@ 0.5A
Out: 9VAC @ 1.5A
In:
100/110/120/21/22/230VAC
@ 0.5A
Out: 9VAC @ 1.5A
Power supply nominal output
voltage
In: 90~264VAC @
Out: 12VDC @ 1.5 A
In: 90~264VAC @
Out: 12VDC @ 1.5 A
Max. Power Consumption 6.5W 10.5W
Environmental Conditions
Temperature:
Storage/Transport
-5ºC ~ 80 ºC
-5ºC ~ 80 ºC
Temperature: Operation 0ºC ~ 40 ºC 0ºC ~ 40 ºC
Humidity: Storage/Operation
10~95% / 10~90%
(none-condensed)
10~95% / 10~90%
(none-condensed)
Applicable Standards
Shock & Vibration
MIL-STD-202F,IEC 68-2-32 MIL-STD-202F,IEC 68-2-32
Quality
ISO9001,ISO 14001,TL9000
ISO9001,ISO 14001,TL9000
RF R&TTE .FCC15C,TELCO R&TTE .FCC15C,TELCO
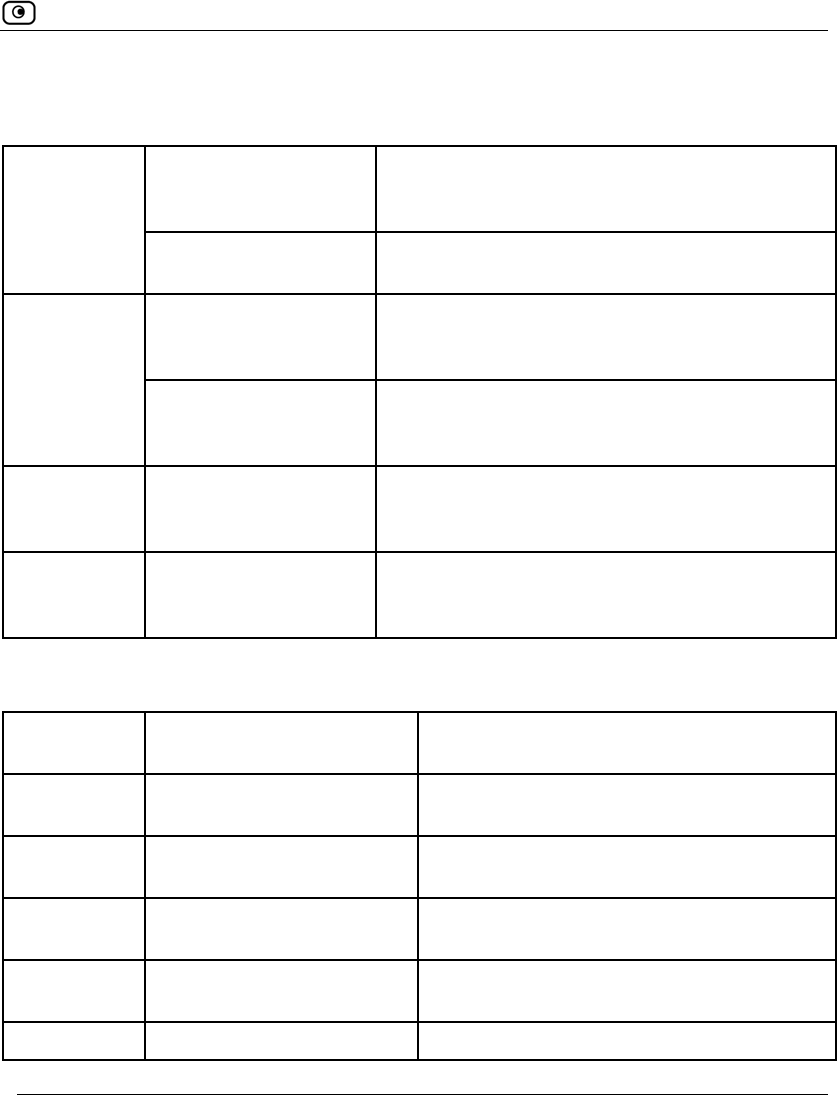
Technical Specifications
Chapter 17: Specifications 455
Model SBX-166LHGE-5 EMC:
FCC Part 15 Class B United States Code of Federal
Regulations, Radio Frequency Devices,
Unintentional Radiators
North
America
USA
Canada ICES-003, Class B Industry Canada Interference-Causing
Equipment Standard, Digital Apparatus
EN 55022:1998,
Class B Information Technology Equipment – Radio
Disturbance Characteristics – Limits and
Methods of Measurement
Europe
EN 55024:1998 Information Technology Equipment – Immunity
Characteristics – Limits and Methods of
Measurement
Worldwide CISPR 22:1997,
Class B Limits and Methods of Measurement of Radio
Disturbance Characteristics of Information
Technology Equipment
AUS / NZ AS/NZS 3548:1997,
Class B Limits and Methods of Measurement of Radio
Disturbance Characteristics of Information
Technology Equipment
Model SBX-166LHGE-5 Safety/Low Voltage:
Worldwide IEC 60950, 3rd ed. +
Amendment 11 Safety of Information Technology
Equipment
Europe EN 60950, 3rd ed. +
Amendment 11 Safety of Information Technology
Equipment
USA UL 60950, 3rd ed. Safety of Information Technology
Equipment
Canada CAN/CSA-C22.2 No.
60950-00, 3rd ed. Safety of Information Technology
Equipment
AUS/NZ AS/NZS 3260:1993 +
Amendments 1..4 Safety of Information Technology
Equipment
AUS/NZ ACA TS 001-1997 Safety of Information Technology

Technical Specifications
456 Check Point Safe@Office User Guide
Equipment
Model SBX-166LHGE-5D Telecom:
FCC Part 68 United States Code of Federal Regulations,
Connection of Terminal Equipment to the
Telephone Network
TIA/EIA/IS 968:2001 Telecommunications Telephone Terminal
Equipment, Technical Requirements for
Connection of Terminal
Equipment to the Telephone Network
USA
TIA/EIA/IS 883:2001 Telecommunications Telephone Terminal
Equipment, Supplemental Technical
Requirements for Connection of
Stutter Dial Tone Detection Devices and
ADSL Modems to the Telephone Network
Canada IC CS-03, March 2001,
Parts I and VIII Harmonized Requirements For Terminal
Equipment, Terminal Systems, and
Registered Protection Circuitry (Part I)
and Requirements and Test Methods for
Digital Subscriber Line (xDSL) Terminal
Equipment (Part VIII)
Europe ITU-T G.992.1,.2,.3,.4,.5
and G. 994.1
ANSI T1.413 issue 2
ETSI TS 101 388
ETR 152, ETR 080, ETR
328
ITU-T G.703, ITU-T
G.704
Asymmetric Digital Subscriber Line
(ADSL/ADSL2) Transceivers
AUS ACA S043

Technical Specifications
Chapter 17: Specifications 457
Table 89: Safe@Office Wireless Attributes
Attribute Safe@Office 500W series
Operation Frequency 2.412-2.484 MHz
Transmission Power 79.4 mW
Modulation OFDM, DSSS, 64QAM, 16QAM, QPSK, BPSK, CCK, DQPSK,
DBPSK
WPA Authentication
Modes
EAP-TLS, EAP-TTLS, PEAP (EAP-GTC), PEAP (EAP-MSCHAP
V2)

CE Declaration of Conformity
458 Check Point Safe@Office User Guide
CE Declaration of Conformity
SofaWare Technologies Ltd., 3 Hilazon St., Ramat-Gan Israel, hereby declares that
this equipment is in conformity with the essential requirements specified in Article
3.1 (a) and 3.1 (b) of:
• Directive 89/336/EEC (EMC Directive)
• Directive 73/23/EEC (Low Voltage Directive – LVD)
• Directive 99/05/EEC (Radio Equipment and Telecommunications
Terminal Equipment Directive)
In accordance with the following standards:
Table 90: Safe@Office Appliance Standards
Attribute Safe@Office 500
SBX-166LHGE-2
Safe@Office 500
SBX-166LHGE-4 /
Safe@Office 500W SBXW-
166LHGE-4
EMC EN 55022:1998
EN 61000-3-2: 1995
EN 61000-3-3: 1995
EN 61000-4-2:1995
EN 61000-4-3:1995
EN 61000-4-4:1995
EN 61000-4-5:1995
EN 61000-4-6:1996
EN 50081-1:1992
EN 50082-1:1997
EN 61000-6-1:2001
EN 61000-6-3:2001
EN 55022:1998
EN 55024:1998
EN 61000-3-2: 1995
EN 61000-3-3: 1995

CE Declaration of Conformity
Chapter 17: Specifications 459
Attribute Safe@Office 500
SBX-166LHGE-2
Safe@Office 500
SBX-166LHGE-4 /
Safe@Office 500W SBXW-
166LHGE-4
EN 61000-4-8:1993
EN 61000-4-11:1994
ENV50204:1995
EN 61000-4-2:1995
EN 61000-4-3:1996/A2:2001
EN 61000-4-4:1995
EN 61000-4-5:1995
EN 61000-4-6:1996
EN 61000-4-7:1993
EN 61000-4-8:1993
EN 61000-4-9:1993
EN 61000-4-10:1993
EN 61000-4-11:1994
EN 61000-4-12:1995
Safety EN 60950: 2000
IEC 60950:1999
EN 60950: 2000
IEC 60950:1999
The "CE" mark is affixed to this product to demonstrate conformance to the
R&TTE Directive 99/05/EEC (Radio Equipment and Telecommunications
Terminal Equipment Directive) and FCC Part 15 Class B.
The product has been tested in a typical configuration. For a copy of the Original
Signed Declaration (in full conformance with EN45014), please contact SofaWare
at the above address.

Federal Communications Commission Radio Frequency Interference Statement
460 Check Point Safe@Office User Guide
Federal Communications Commission Radio
Frequency Interference Statement
This equipment complies with the limits for a Class B digital device, pursuant to
Part 15 of the FCC Rules. These limits are designed to provide reasonable
protection against harmful interference when the equipment is operated in a
commercial environment. This equipment generates, uses, and can radiate radio
frequency energy and, if not installed and used in accordance with the instruction
manual, may cause harmful interference to radio communications.
Shielded cables must be used with this equipment to maintain compliance with
FCC regulations.
Any changes or modifications to this product not explicitly approved by the
manufacturer could void the user’s authority to operate the equipment and any
assurances of Safety or Performance, and could result in violation of Part 15 of the
FCC Rules.
This device complies with Part 15 of the FCC Rules. Operation is subject to the
following two conditions: (1) this device may not cause harmful interference, and
(2) this device must accept any interference received, including interference that
may cause undesired operation.
This Class B digital apparatus complies with Canadian ICES-003.
FCC Radiation Exposure Statement for Wireless Models
This equipment complies with FCC radiation exposure limits set forth for an
uncontrolled environment. The antenna(s) used for this equipment must be installed
to provide a separation distance of at least eight inches (20 cm) from all persons.
This equipment must not be operated in conjunction with any other antenna.

Glossary of Terms
Glossary of Terms 461
A
ADSL Modem
A device connecting a computer to
the Internet via an existing phone
line. ADSL (Asymmetric Digital
Subscriber Line) modems offer a
high-speed 'always-on' connection.
C
CA
The Certificate Authority (CA)
issues certificates to entities such as
gateways, users, or computers. The
entity later uses the certificate to
identify itself and provide verifiable
information. For instance, the
certificate includes the Distinguished
Name (DN) (identifying
information) of the entity, as well as
the public key (information about
itself), and possibly the IP address.
After two entities exchange and
validate each other's certificates,
they can begin encrypting
information between themselves
using the public keys in the
certificates.
Cable Modem
A device connecting a computer to
the Internet via the cable television
network. Cable modems offer a
high-speed 'always-on' connection.
Certificate Authority
The Certificate Authority (CA)
issues certificates to entities such as
gateways, users, or computers. The
entity later uses the certificate to
identify itself and provide verifiable
information. For instance, the
certificate includes the Distinguished
Name (DN) (identifying
information) of the entity, as well as
the public key (information about
itself), and possibly the IP address.
After two entities exchange and
validate each other's certificates,
they can begin encrypting
information between themselves
using the public keys in the
certificates.
Cracking
An activity in which someone breaks
into someone else's computer
system, bypasses passwords or
licenses in computer programs; or in
other ways intentionally breaches
computer security. The end result is
that whatever resides on the
computer can be viewed and
sensitive data can be stolen without
Glossary of Terms

Glossary of Terms
462 Check Point Safe@Office User Guide
anyone knowing about it.
Sometimes, tiny programs are
'planted' on the computer that are
designed to watch out for, seize and
then transmit to another computer,
specific types of data.
D
DHCP
Any machine requires a unique IP
address to connect to the Internet
using Internet Protocol. Dynamic
Host Configuration Protocol
(DHCP) is a communications
protocol that assigns Internet
Protocol (IP) addresses to computers
on the network.
DHCP uses the concept of a "lease"
or amount of time that a given IP
address will be valid for a computer.
DMZ
A DMZ (demilitarized zone) is an
internal network defined in addition
to the LAN network and protected
by the Safe@Office appliance.
DNS
The Domain Name System (DNS)
refers to the Internet domain names,
or easy-to-remember "handles", that
are translated into IP addresses.
An example of a Domain Name is
'www.sofaware.com'.
Domain Name System
Domain Name System. The Domain
Name System (DNS) refers to the
Internet domain names, or easy-to-
remember "handles", that are
translated into IP addresses.
An example of a Domain Name is
'www.sofaware.com'.
E
Exposed Host
An exposed host allows one
computer to be exposed to the
Internet. An example of using an
exposed host would be exposing a
public server, while preventing
outside users from getting direct
access form this server back to the
private network.
F
Firmware
Software embedded in a device.
G
Gateway
A network point that acts as an
entrance to another network.
H
Hacking
An activity in which someone breaks
into someone else's computer
system, bypasses passwords or
licenses in computer programs; or in

Glossary of Terms
Glossary of Terms 463
other ways intentionally breaches
computer security. The end result is
that whatever resides on the
computer can be viewed and
sensitive data can be stolen without
anyone knowing about it.
Sometimes, tiny programs are
'planted' on the computer that are
designed to watch out for, seize and
then transmit to another computer,
specific types of data.
HTTPS
Hypertext Transfer Protocol over
Secure Socket Layer, or HTTP over
SSL.
A protocol for accessing a secure
Web server. It uses SSL as a
sublayer under the regular HTTP
application. This directs messages to
a secure port number rather than the
default Web port number, and uses a
public key to encrypt data
HTTPS is used to transfer
confidential user information.
Hub
A device with multiple ports,
connecting several PCs or network
devices on a network.
I
IP Address
An IP address is a 32-bit number that
identifies each computer sending or
receiving data packets across the
Internet. When you request an
HTML page or send e-mail, the
Internet Protocol part of TCP/IP
includes your IP address in the
message and sends it to the IP
address that is obtained by looking
up the domain name in the Uniform
Resource Locator you requested or
in the e-mail address you're sending
a note to. At the other end, the
recipient can see the IP address of
the Web page requestor or the e-mail
sender and can respond by sending
another message using the IP address
it received.
IP Spoofing
A technique where an attacker
attempts to gain unauthorized access
through a false source address to
make it appear as though
communications have originated in a
part of the network with higher
access privileges. For example, a
packet originating on the Internet
may be masquerading as a local
packet with the source IP address of
an internal host. The firewall can
protect against IP spoofing attacks
by limiting network access based on
the gateway interface from which
data is being received.

Glossary of Terms
464 Check Point Safe@Office User Guide
IPSEC
IPSEC is the leading Virtual Private
Networking (VPN) standard. IPSEC
enables individuals or offices to
establish secure communication
channels ('tunnels') over the Internet.
ISP
An ISP (Internet service provider) is
a company that provides access to
the Internet and other related
services.
L
LAN
A local area network (LAN) is a
group of computers and associated
devices that share a common
communications line and typically
share the resources of a single server
within a small geographic area.
M
MAC Address
The MAC (Media Access Control)
address is a computer's unique
hardware number. When connected
to the Internet from your computer, a
mapping relates your IP address to
your computer's physical (MAC)
address on the LAN.
Mbps
Megabits per second. Measurement
unit for the rate of data transmission.
MTU
The Maximum Transmission Unit
(MTU) is a parameter that
determines the largest datagram than
can be transmitted by an IP interface
(without it needing to be broken
down into smaller units). The MTU
should be larger than the largest
datagram you wish to transmit un-
fragmented. Note: This only
prevents fragmentation locally.
Some other link in the path may
have a smaller MTU - the datagram
will be fragmented at that point.
Typical values are 1500 bytes for an
Ethernet interface or 1452 for a PPP
interface.
N
NAT
Network Address Translation (NAT)
is the translation or mapping of an IP
address to a different IP address.
NAT can be used to map several
internal IP addresses to a single IP
address, thereby sharing a single IP
address assigned by the ISP among
several PCs.
Check Point FireWall-1's Stateful
Inspection Network Address
Translation (NAT) implementation
supports hundreds of pre-defined
applications, services, and protocols,
more than any other firewall vendor.

Glossary of Terms
Glossary of Terms 465
NetBIOS
NetBIOS is the networking protocol
used by DOS and Windows
machines.
P
Packet
A packet is the basic unit of data that
flows from one source on the
Internet to another destination on the
Internet. When any file (e-mail
message, HTML file, GIF file etc.) is
sent from one place to another on the
Internet, the file is divided into
"chunks" of an efficient size for
routing. Each of these packets is
separately numbered and includes
the Internet address of the
destination. The individual packets
for a given file may travel different
routes through the Internet. When
they have all arrived, they are
reassembled into the original file at
the receiving end.
PPPoE
PPPoE (Point-to-Point Protocol over
Ethernet) enables connecting
multiple computer users on an
Ethernet local area network to a
remote site or ISP, through common
customer premises equipment (e.g.
modem).
PPTP
The Point-to-Point Tunneling
Protocol (PPTP) allows extending a
local network by establishing private
“tunnels” over the Internet. This
protocol it is also used by some DSL
providers as an alternative for
PPPoE.
R
RJ-45
The RJ-45 is a connector for digital
transmission over ordinary phone
wire.
Router
A router is a device that determines
the next network point to which a
packet should be forwarded toward
its destination. The router is
connected to at least two networks.
S
Server
A server is a program (or host) that
awaits and requests from client
programs across the network. For
example, a Web server is the
computer program, running on a
specific host, that serves requested
HTML pages or files. Your browser
is the client program, in this case.
Stateful Inspection
Stateful Inspection was invented by
Check Point to provide the highest

Glossary of Terms
466 Check Point Safe@Office User Guide
level of security by examining every
layer within a packet, unlike other
systems of inspection. Stateful
Inspection extracts information
required for security decisions from
all application layers and retains this
information in dynamic state tables
for evaluating subsequent connection
attempts. In other words, it learns!
Subnet Mask
A 32-bit identifier indicating how
the network is split into subnets. The
subnet mask indicates which part of
the IP address is the host ID and
which indicates the subnet.
T
TCP
TCP (Transmission Control
Protocol) is a set of rules (protocol)
used along with the Internet Protocol
(IP) to send data in the form of
message units between computers
over the Internet. While IP takes care
of handling the actual delivery of the
data, TCP takes care of keeping
track of the individual units of data
(called packets) that a message is
divided into for efficient routing
through the Internet.
For example, when an HTML file is
sent to you from a Web server, the
Transmission Control Protocol
(TCP) program layer in that server
divides the file into one or more
packets, numbers the packets, and
then forwards them individually to
the IP program layer. Although each
packet has the same destination IP
address, it may get routed differently
through the network.
At the other end (the client program
in your computer), TCP reassembles
the individual packets and waits until
they have arrived to forward them to
you as a single file.
TCP/IP
TCP/IP (Transmission Control
Protocol/Internet Protocol) is the
underlying communication protocol
of the Internet.
U
UDP
UDP (User Datagram Protocol) is a
communications protocol that offers
a limited amount of service when
messages are exchanged between
computers in a network that uses the
Internet Protocol (IP). UDP is an
alternative to the Transmission
Control Protocol (TCP) and, together
with IP, is sometimes referred to as
UDP/IP. Like the Transmission
Control Protocol, UDP uses the
Internet Protocol to actually get a
data unit (called a datagram) from
one computer to another. Unlike

Glossary of Terms
Glossary of Terms 467
TCP, however, UDP does not
provide the service of dividing a
message into packets (datagrams)
and reassembling it at the other end.
UDP is often used for applications
such as streaming data.
URL
A URL (Uniform Resource Locator)
is the address of a file (resource)
accessible on the Internet. The type
of resource depends on the Internet
application protocol. On the Web
(which uses the Hypertext Transfer
Protocol), an example of a URL is
'http://www.sofaware.com'.
V
VPN
A virtual private network (VPN) is a
private data network that makes use
of the public telecommunication
infrastructure, maintaining privacy
through the use of a tunneling
protocol and security procedures.
VPN tunnel
A secure connection between a
Remote Access VPN Client and a
Remote Access VPN Server.
W
WLAN
A WLAN is a wireless local area
network protected by the
Safe@Office appliance.

Index
Index 469
8
802.1x • 161, 163
A
account, configuring • 288
active computers, viewing • 194
active connections, viewing • 197
Allow and Forward rules, explained • 213
Allow rules, explained • 213
Automatic login • 344
B
backup connection
configuring • 90
dialup • 92
LAN or broadband • 91
Block Known Ports • 246
Block Port Overflow • 247
Block rules, explained • 213
Blocked FTP Commands • 248
C
CA, explained • 348, 455
cable modem
connection • 58, 67
explained • 455
cable type • 35
certificate
explained • 348
generating self-signed • 349
importing • 353
installing • 348
uninstalling • 355
Cisco IOS DOS • 236
command line interface
controlling the appliance via • 388
D
DHCP
configuring • 94
explained • 456
options • 101
DHCP Server
enabling/disabling • 94
explained • 94
diagnostic tools
Packet Sniffer • 406
Ping • 403
Traceroute • 403
using • 403
WHOIS • 403
Index

Index
470 Check Point Safe@Office User Guide
diagnostics • 423
dialup
connection • 75, 92
modem • 84
dialup modem, setting up • 84
DMZ
configuring • 108
configuring High Availability for • 119
explained • 108, 456
DNS • 90, 403, 456
Dynamic DNS • 5, 287
E
Email Antispam, see Email Filtering • 294
Email Antivirus, see Email Filtering • 294
Email Filtering
Email Antispam • 294
Email Antivirus • 294
enabling/disabling • 295
selecting protocols for • 296
snoozing • 296
temporarily disabling • 296
event log, viewing • 187
exposed host
defining a computer as • 261
explained • 261, 456
F
File and Print Sharing • 249
firewall
levels • 204
rule types • 211
setting security level • 204
firmware
explained • 377, 456
updating manually • 379
viewing status • 377
FTP Bounce • 245
G
gateways
backup • 119
default • 108, 119, 139
explained • 456
ID • 287
master • 119
Site-to-Site VPN • 301
H
Hide NAT
enabling/disabling • 107
explained • 107, 458
high availability
configuring • 119
explained • 119

Index
Index 471
Host Port Scan • 242
HTTPS
configuring • 392
explained • 457
using • 44
hub • 35, 90, 119, 440, 457
I
IGMP • 251
IKE traces, viewing • 359
initial login • 39
installation
cable type • 35
network • 35
Instant Messengers • 254
internal VPN Server
configuring • 310
explained • 306
Internet connection
configuring • 53
configuring backup • 90
enabling/disabling • 88
establishing quick • 88
terminating • 90
troubleshooting • 440
viewing information • 87
Internet Setup • 63
Internet Wizard • 54
IP address
changing • 105
explained • 457
hiding • 107
IP Fragments • 232
IPSEC
VPN mode • 457
ISP, explained • 458
L
LAN
cable • 35
configuring High Availability for • 119
connection • 54, 56, 65
explained • 458
ports • 35
LAND • 226
licenses • 194, 377, 423, 440
upgrading • 381
link configurations, modifying • 149
logs
exporting • 187
viewing • 187
M
MAC address • 458
Manual Login • 344
Max Ping Size • 231

Index
472 Check Point Safe@Office User Guide
MTU, explained • 77, 458
N
NetBIOS, explained • 458
network
changing internal range of • 105
configuring • 93
configuring a DMZ • 108
configuring a VLAN • 111
configuring a WLAN • 161
configuring DHCP options • 101
configuring high availability • 119
configuring the OfficeMode network •
110
enabling DHCP Server on • 94
enabling Hide NAT • 107
installation on • 35
managing • 93
objects • 129
network objects
adding and editing • 130
using • 129
viewing and deleting • 138
Network Quota • 234
node limit, viewing • 194
Non-TCP Flooding • 227
Null Payload • 238
O
OfficeMode
about • 110
configuring • 110
P
packet • 87, 139, 403, 457, 459
Packet Sanity • 229
Packet Sniffer
filter string syntax • 409
using • 406
Pass rules, explained • 268
password
changing • 361
setting up • 39
Peer to Peer • 252
Ping • 403
Ping of Death • 225
Port-based VLAN
about • 111
adding and editing • 114
ports
managing • 145
modifying assignments • 147
modifying link configurations • 149
resetting to defaults • 150
viewing statuses • 146
PPTP

Index
Index 473
connection • 61, 71
explained • 459
print server • 425
printers
changing ports • 437
configuring computers to use • 427
resetting • 438
setting up • 426
using • 425
viewing • 437
Q
QoS
classes • 151
explained • 151
QoS classes
adding and editing • 155
assigning services to • 209
built-in • 154, 160
deleting • 159
explained • 151
restoring defaults • 160
R
RADIUS
configuring VSA • 374
explained • 370
using • 370
rebooting • 424
registering • 385
Remote Access VPN Clients, explained •
301
Remote Access VPN Servers
configuring • 307, 309
explained • 301
Remote Access VPN sites • 314
reports
active computers • 194
active connections • 197
event log • 187
node limit • 194
traffic • 191
viewing • 187
wireless statistics • 198
routers • 90, 119, 403, 440, 459
rules
security • 209
VStream Antivirus • 267
S
Safe@Office series
rear panel • 11
Safe@Office 500
front panel • 10
rear panel • 8
Safe@Office 500 series

Index
474 Check Point Safe@Office User Guide
about • 1
features • 2
product family • 2
Safe@Office 500W
front panel • 13
rear panel • 11
Safe@Office appliance
backing up • 417
changing internal IP address of • 105
configuring Internet connection • 53
exporting configuration • 417
importing configuration • 418
installing • 15, 35
maintenance • 377
mounting • 30
rebooting • 424
registering • 385
resetting to factory defaults • 420
setting the time • 399
setting up • 36
Safe@Office Portal
elements • 46
initial login • 39
logging on • 42
remotely accessing • 44
using • 46
Scan rules, explained • 268
Secure HotSpot
customizing • 259
enabling/disabling • 258
quick guest users • 367
setting up • 257
using • 256
SecuRemote
explained • 306
installing • 311
security
configuring servers • 207
creating rules • 209
defining a computer as an exposed host •
261
firewall • 204
Secure HotSpot • 256
SmartDefense • 220
security policy
default • 203
setting up • 203
security rules
adding and editing • 213
changing priority • 219
deleting • 219
enabling/disabling • 218
types • 213
using • 209
serial console • 11

Index
Index 475
controlling appliance via • 390
using • 390
servers
configuring • 207
explained • 459
Remote Access VPN • 301, 307
Web • 129, 207, 440
Service Center
connecting to • 281
disconnecting from • 289
refreshing a connection to • 288
services
Email Filtering • 294
software updates • 298
Web Filtering • 290
Setup Wizard • 39, 54
Site-to-Site VPN gateways • 312
explained • 301
installing a certificate • 348
PPPoE tunnels • 312
Small PMTU • 241
SmartDefense
categories • 224
configuring • 221
using • 220
SNMP
configuring • 396
explained • 396
software updates
checking for manually • 298
explained • 298
source routing, about • 139
SSH
configuring • 394
explained • 394
Stateful Inspection • 458, 459
Static NAT
explained • 129
using • 130
static routes
adding and editing • 139
explained • 139
using • 139
viewing and deleting • 144
Strict TCP • 239
subnet masks, explained • 460
subscription services
explained • 281
starting • 281
viewing information • 287
Sweep Scan • 242
Syslog logging
configuring • 386
explained • 386

Index
476 Check Point Safe@Office User Guide
T
Tag-based VLAN
about • 111
adding and editing • 116
TCP, explained • 460
TCP/IP
explained • 460
setting up for MAC OS • 26
setting up for Windows 95/98 • 21
setting up for Windows XP/2000 • 16
Teardrop • 224
technical support • 14
Telstra • 73
Traceroute • 403
Traffic Monitor
configuring • 193
exporting reports • 194
using • 191
viewing reports • 191
traffic reports
exporting • 194
viewing • 191
Traffic Shaper
advanced • 151
enabling • 63, 151
explained • 151
restoring defaults • 160
setting up • 153
simplified • 151
using • 151
troubleshooting • 439
U
UDP, explained • 460
URL, explained • 461
users
adding and editing • 363
adding quick guest HotSpot • 367
managing • 361
setting up remote VPN access for • 369
viewing and deleting • 369
V
Vendor-Specific Attribute
about • 370
configuring • 267
VLAN
adding and editing • 114, 116
deleting • 118
port-based • 111, 114
tag-based • 111, 116
VPN
explained • 301, 461
Remote Access • 305, 312
sites • 301, 343, 344

Index
Index 477
Site-to-Site • 302, 312
tunnnels • 301, 344, 356
viewing IKE traces • 359
VPN sites
adding and editing using Safe@Office •
312
deleting • 343
enabling/disabling • 343
logging on • 344
VPN tunnels
creation and closing of • 356
establishing • 344
explained • 301, 461
viewing • 356
VStream Antivirus
about • 263
configuring • 267
configuring advanced settings • 275
configuring policy • 267
enabling/disabling • 265
rules • 268
updating • 279
viewing database information • 266
VStream Antivirus rules
adding and editing • 269
changing priority • 274
deleting • 274
enabling/disabling • 273
types • 268
W
WAN
cable • 35
connections • 209
ports • 35, 90
Web Filtering
enabling/disabling • 290
selecting categories for • 291
snoozing • 292
temporarily disabling • 292
Welchia • 235
WEP • 161, 163
WHOIS • 403
wireless hardware • 162
wireless protocols • 163
wireless stations
preparing • 182
viewing • 198
WLAN
configuring • 161
defined • 461
preparing stations for • 182
troubleshooting connectivity • 183
viewing statistics for • 198
WPA • 161, 163
WPA2 • 163

Index
478 Check Point Safe@Office User Guide
WPA-PSK • 161, 163