SofaWare Technologies SBXW-166LHGE-6 Wireless Broadband Router User Manual Check Point Safe Office User Guide
SofaWare Technologies Ltd. Wireless Broadband Router Check Point Safe Office User Guide
UserManual.wiki
>
SofaWare Technologies
>
SBXW-166LHGE-6 User Manual
>
Manual Pt2
Contents
1.
Manual Pt1
2.
Manual Pt2
Manual Pt2
Navigation menu
Upload a User Manual
Namespaces
Wiki Guide
HTML
PDF
Info
Views
User Manual
Discussion / Help
Navigation
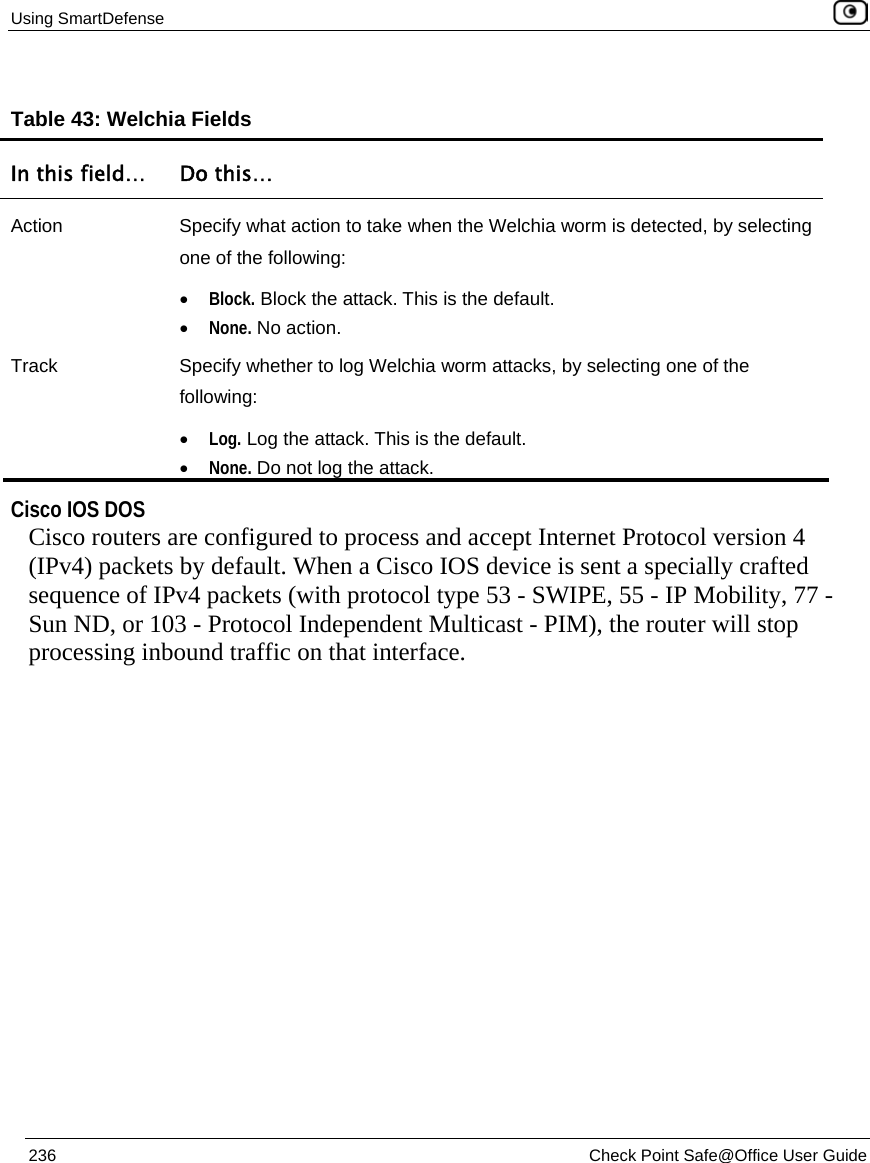
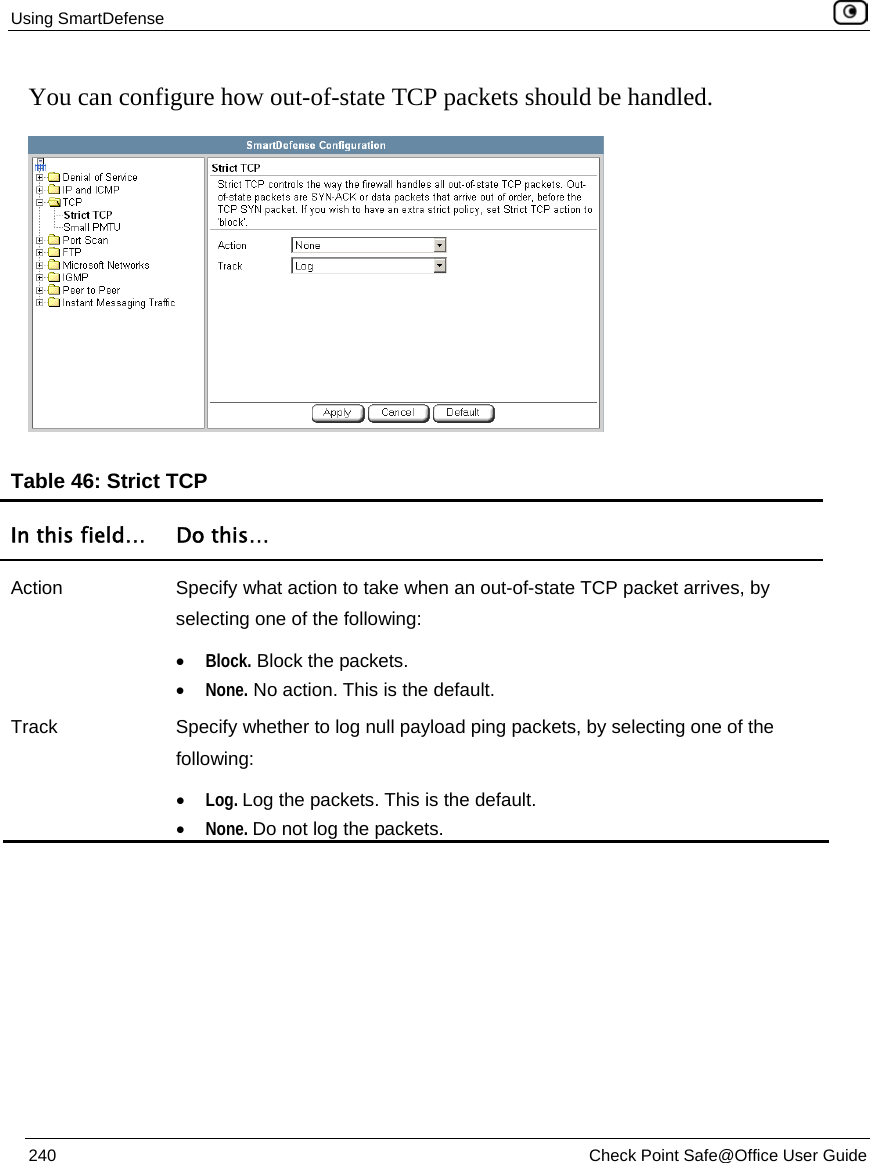
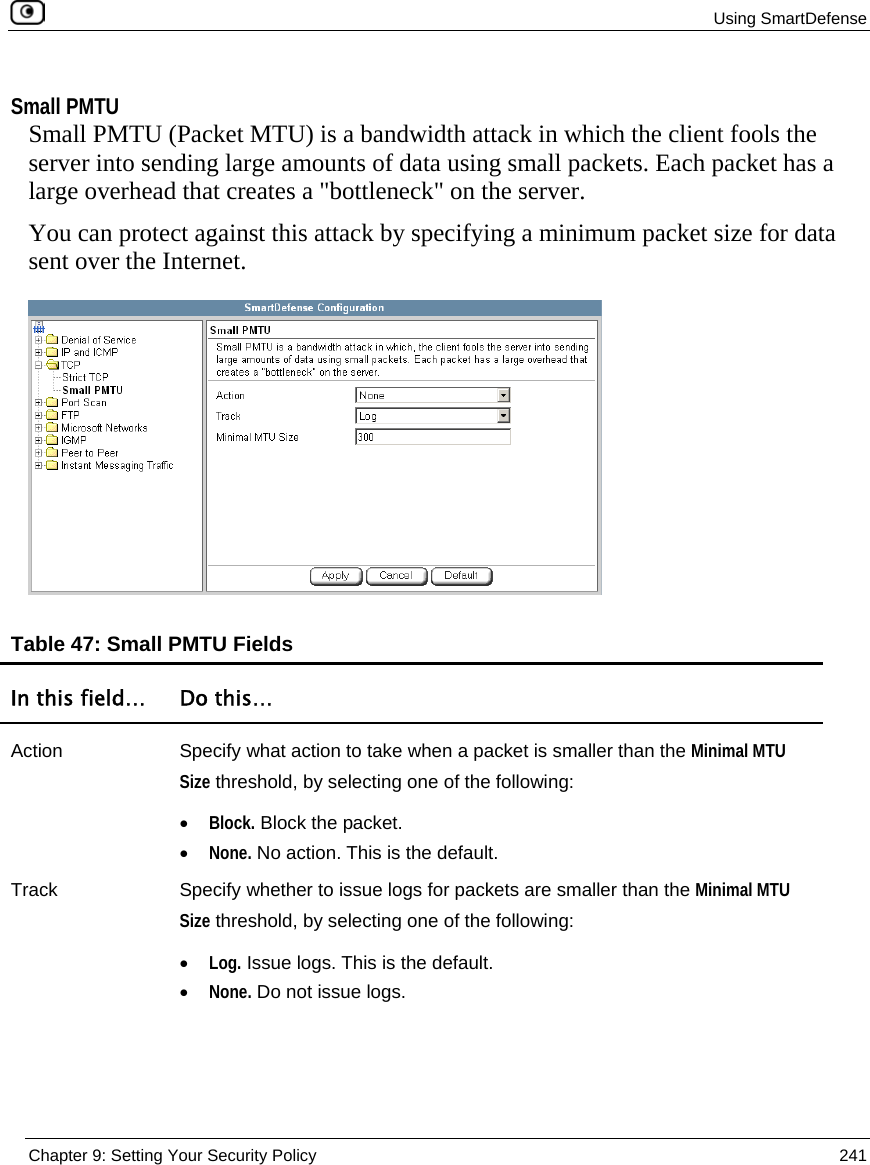
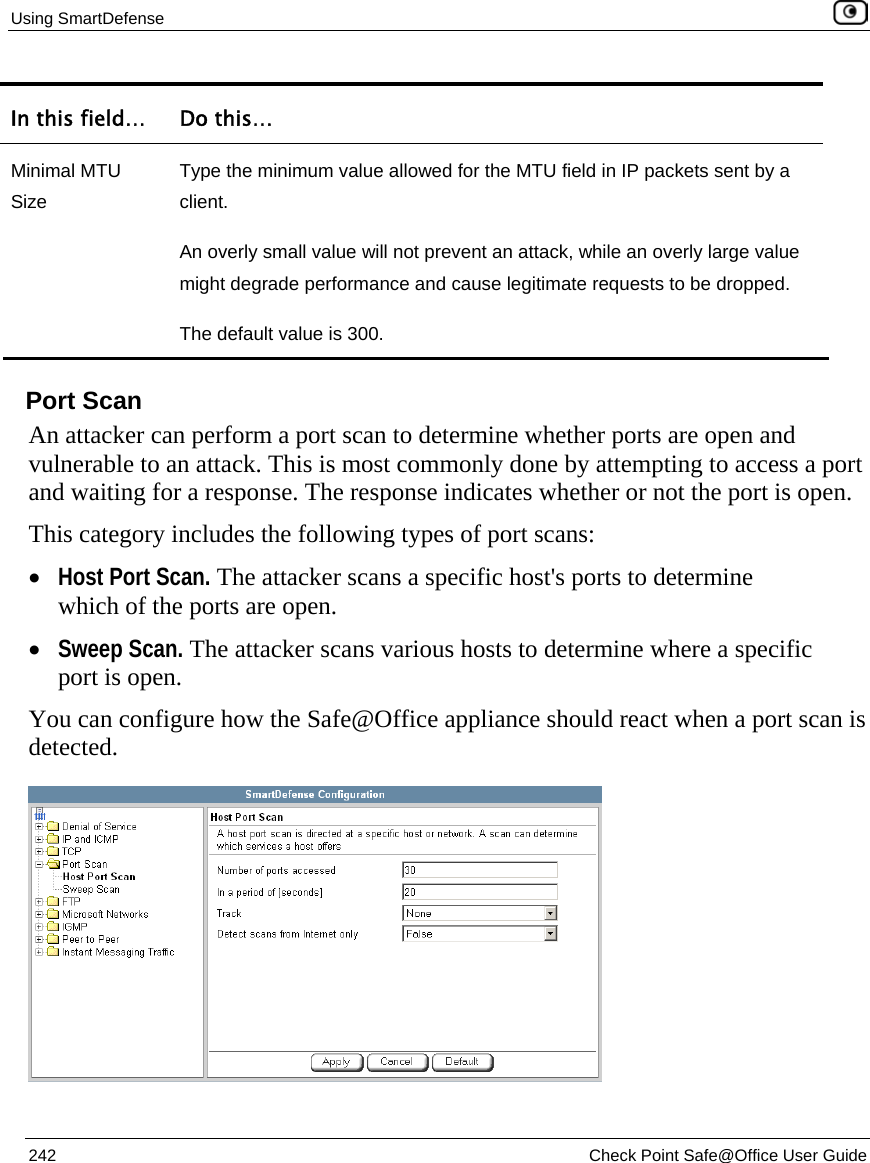
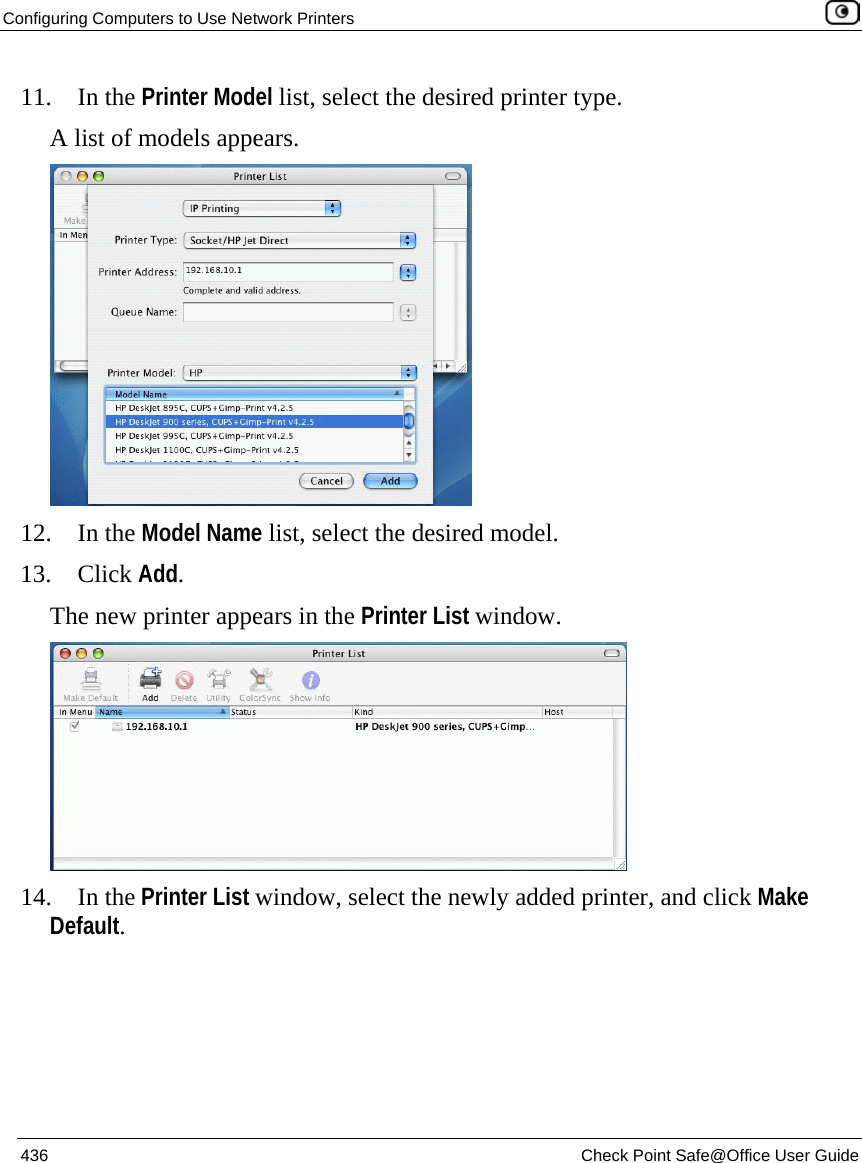
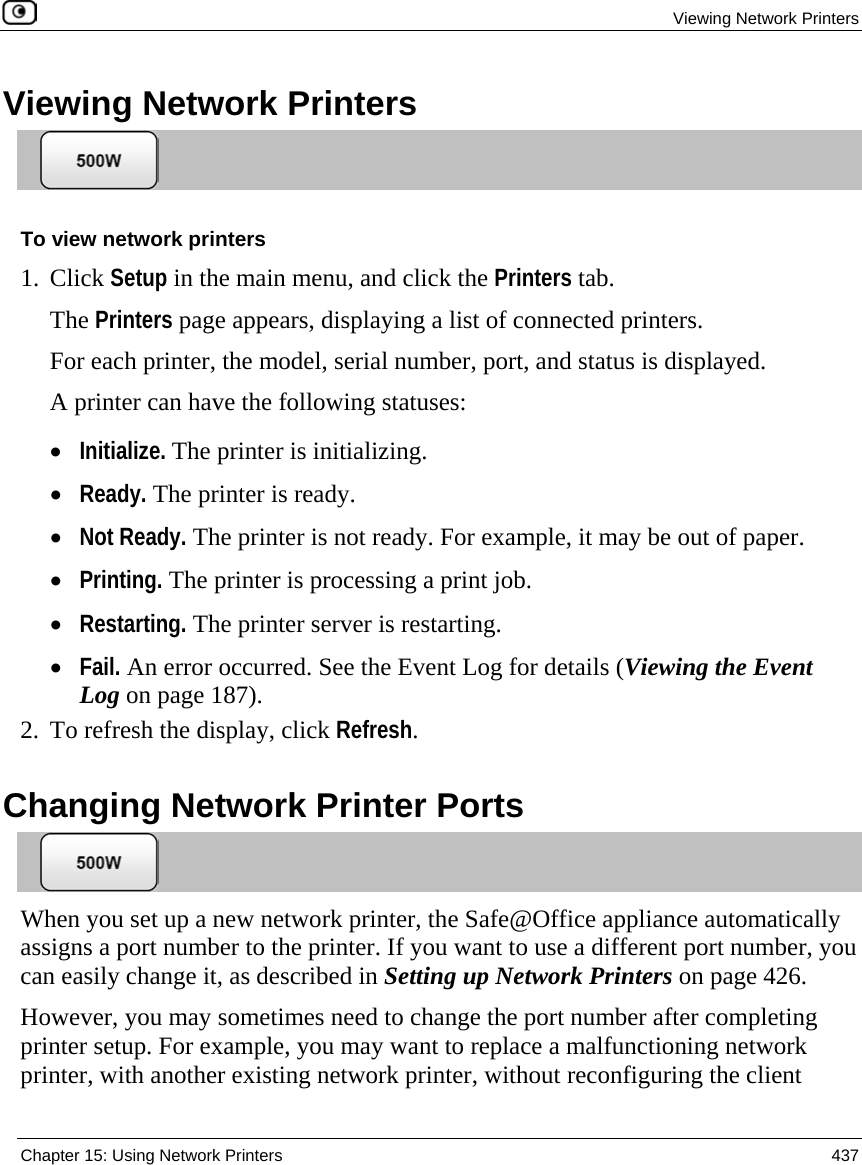
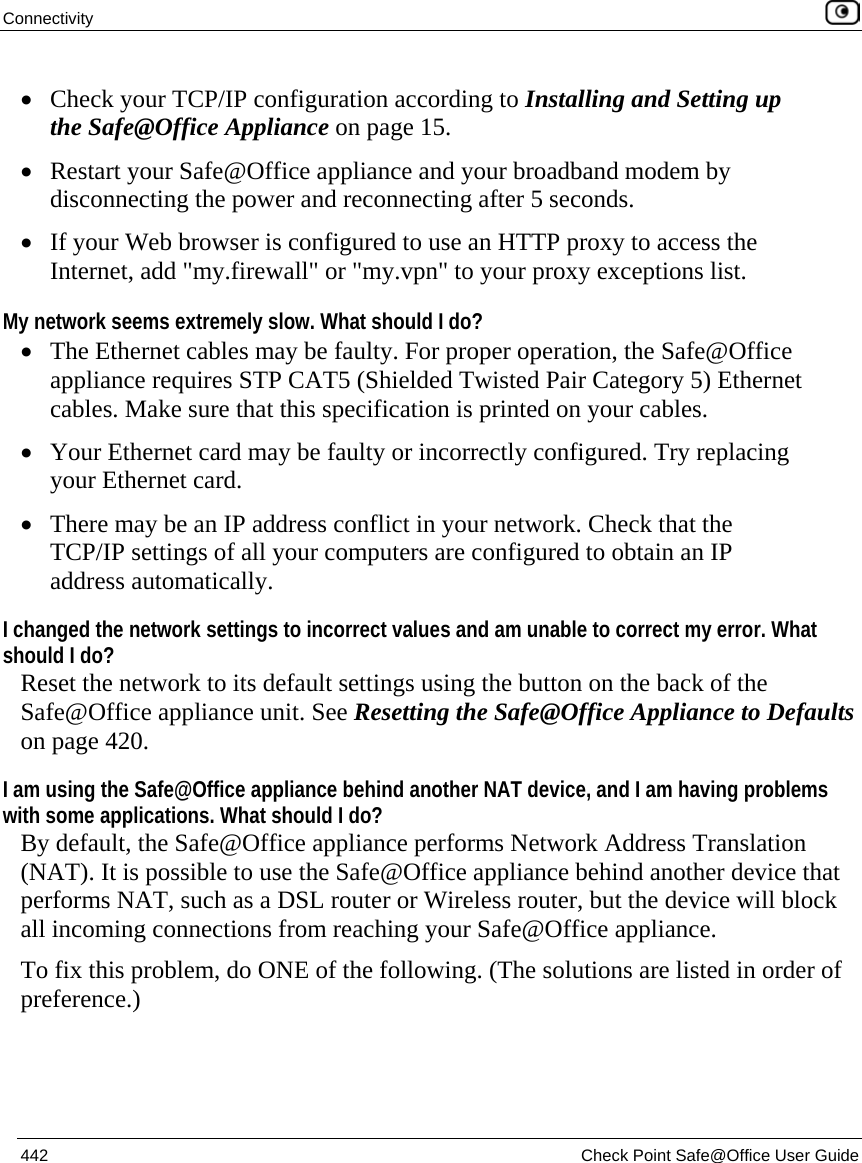
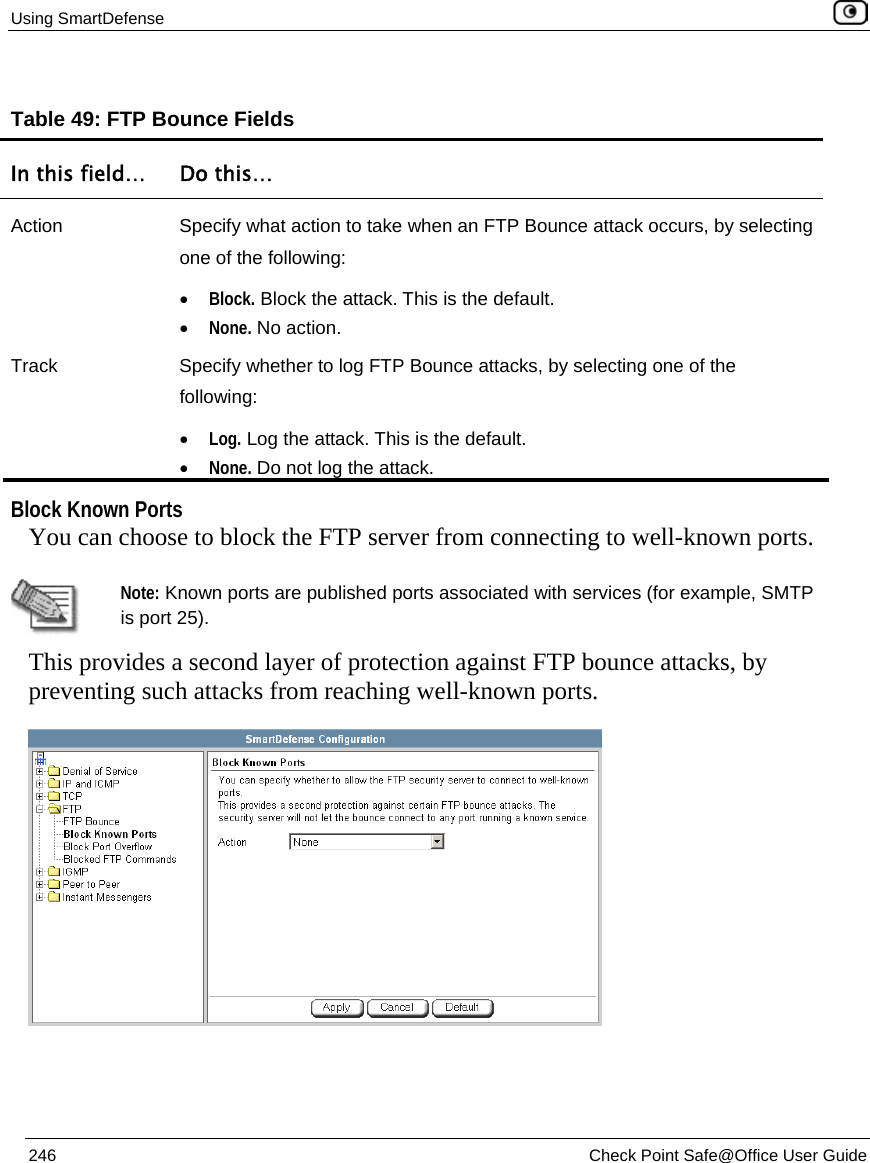
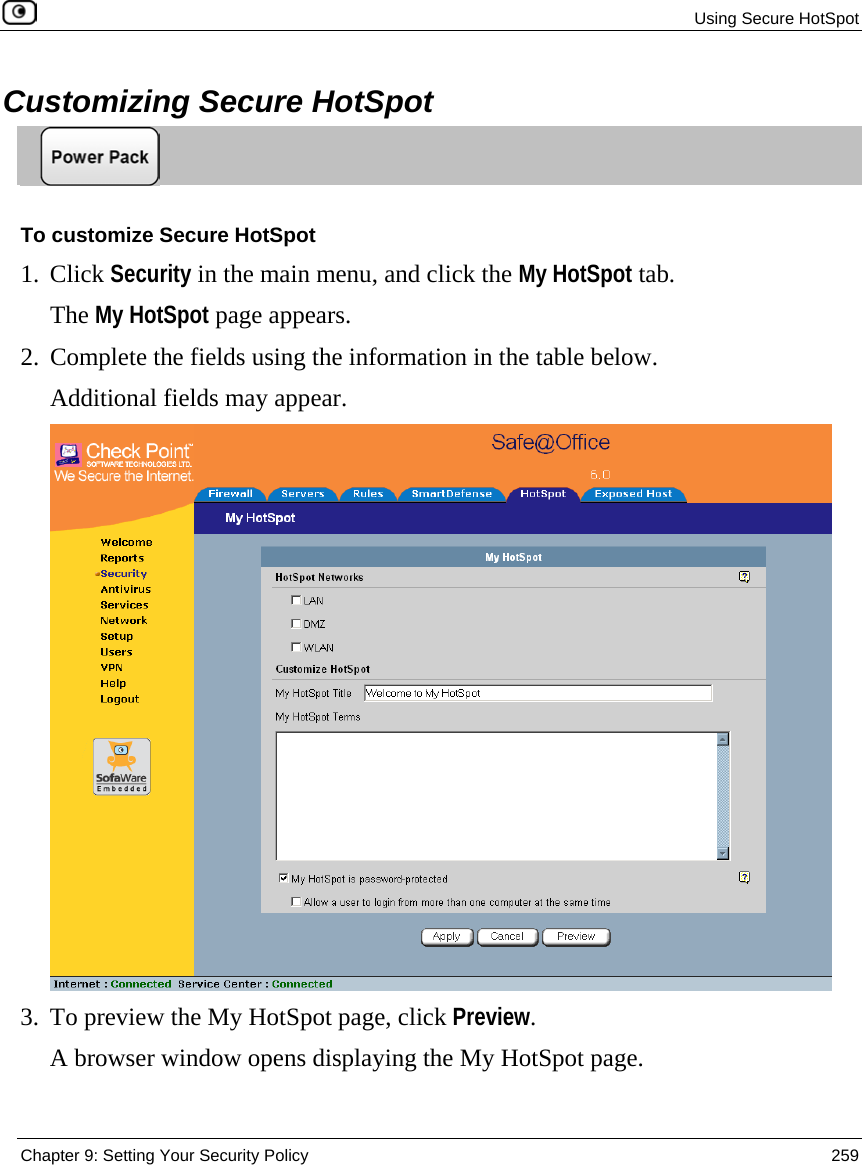
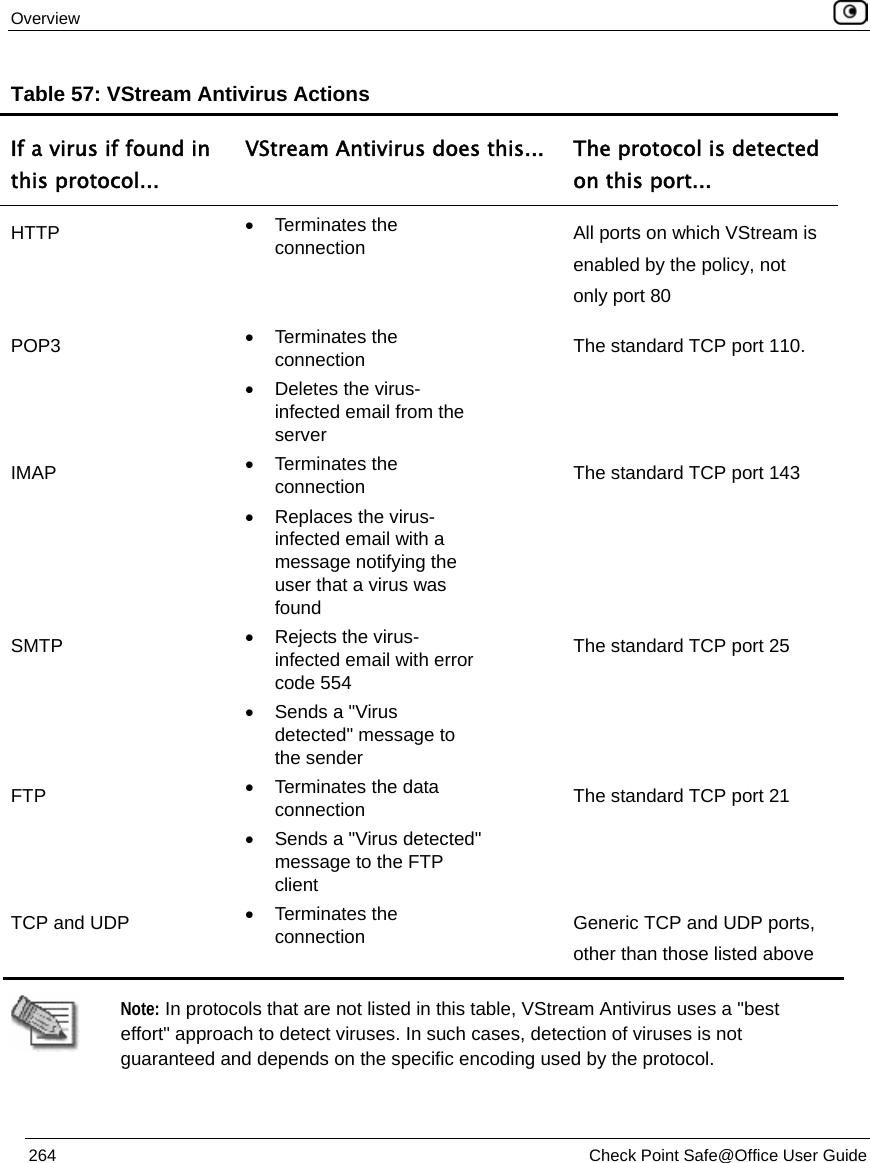
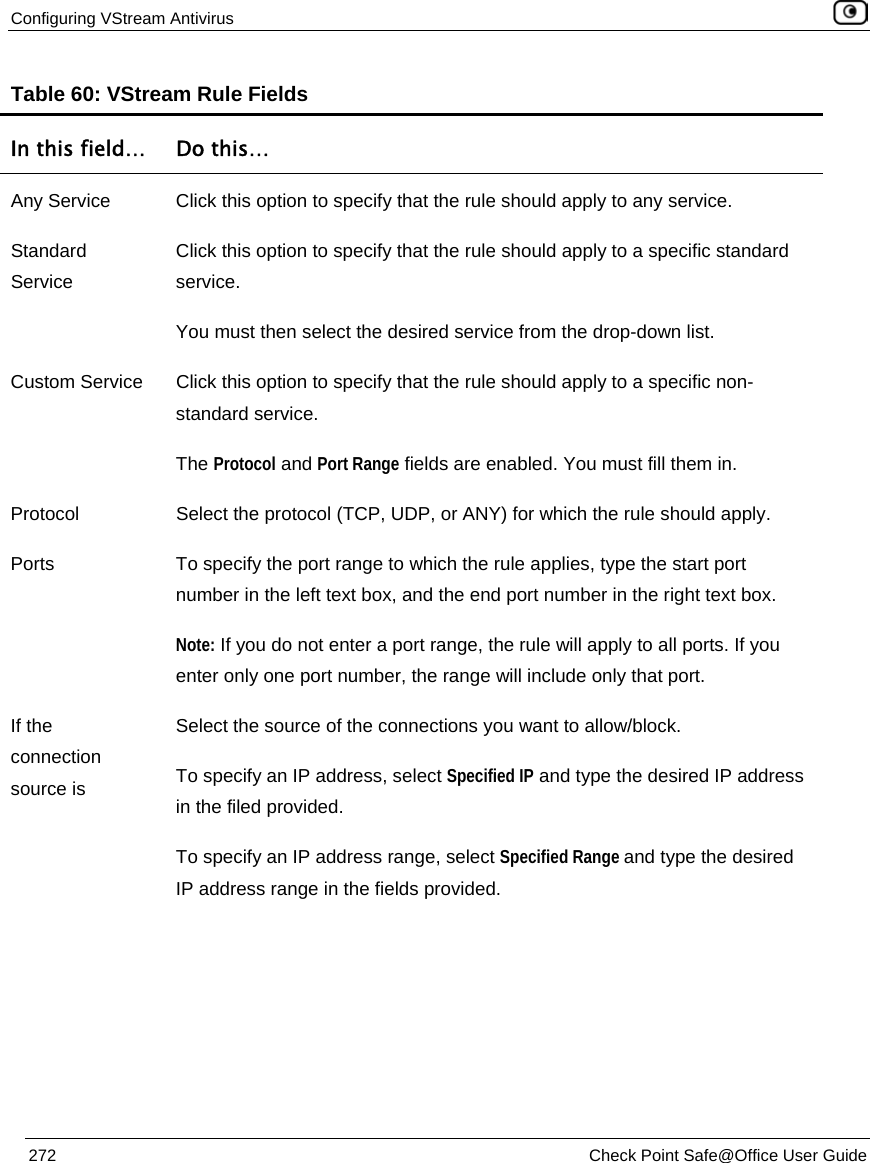
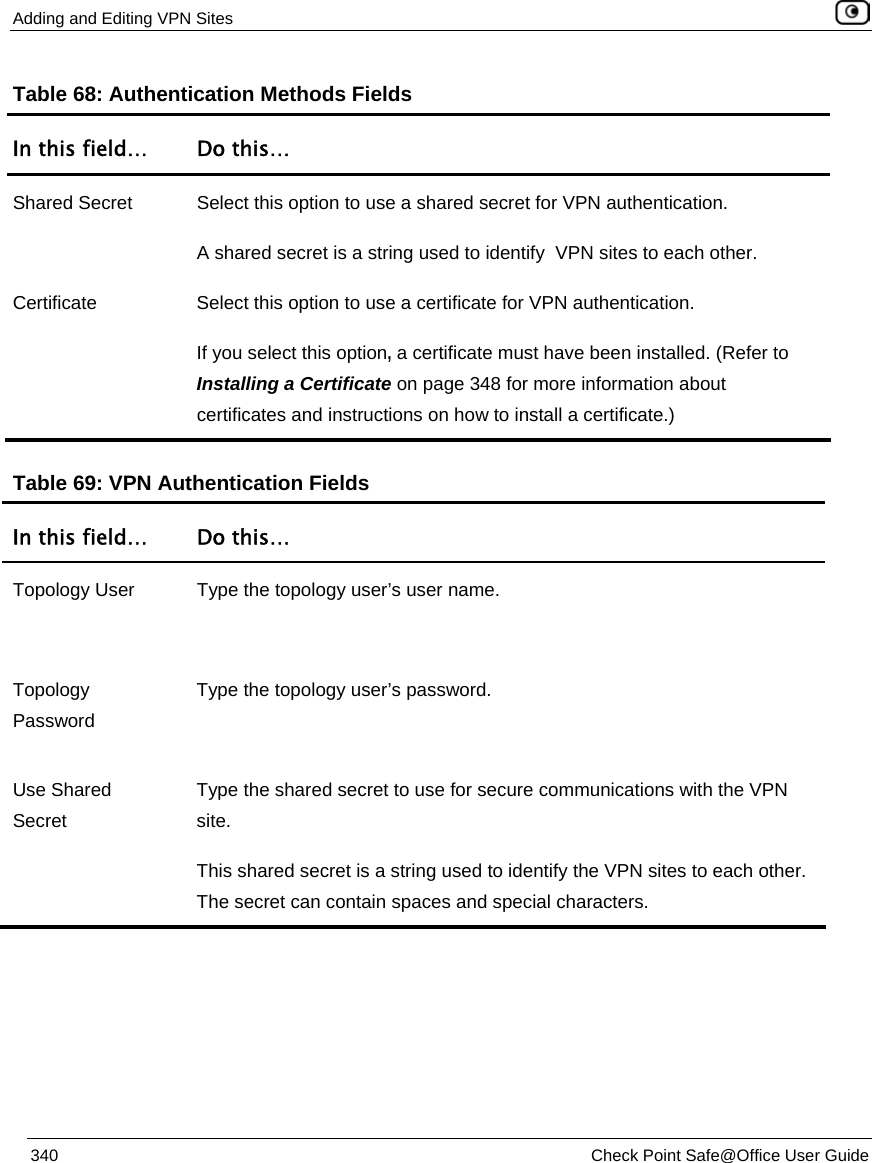
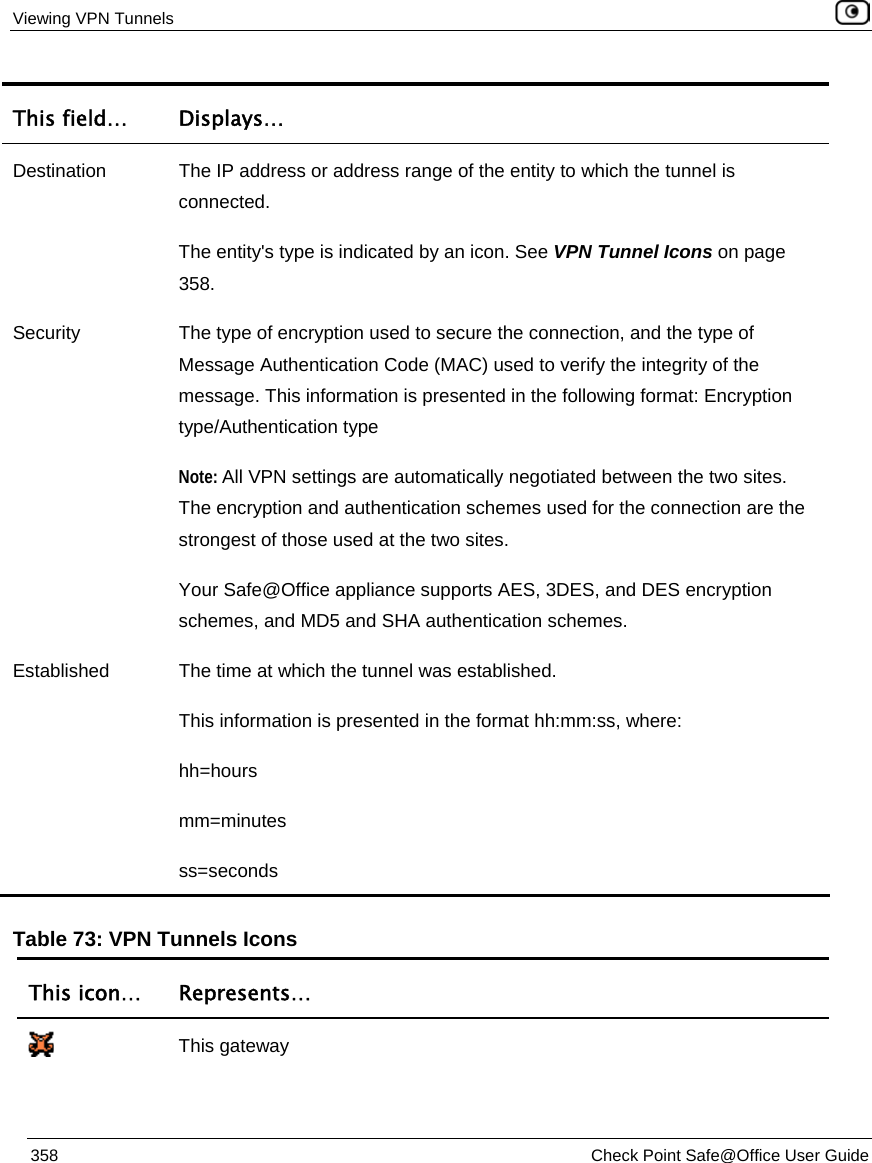
![Using SmartDefense Chapter 9: Setting Your Security Policy 243 Table 48: Port Scan Fields In this field… Do this… Number of ports accessed SmartDefense detects ports scans by measuring the number of ports accessed over a period of time. The number of ports accessed must exceed the Number of ports accessed value, within the number of seconds specified by the In a period of [seconds] value, in order for SmartDefense to consider the activity a scan. Type the minimum number of ports that must be accessed within the In a period of [seconds] period, in order for SmartDefense to detect the activity as a port scan. For example, if this value is 30, and 40 ports are accessed within a specified period of time, SmartDefense will detect the activity as a port scan. For Host Port Scan, the default value is 30. For Sweep Scan, the default value is 50.](https://usermanual.wiki/SofaWare-Technologies/SBXW-166LHGE-6.Manual-Pt2/User-Guide-694887-Page-9.png)
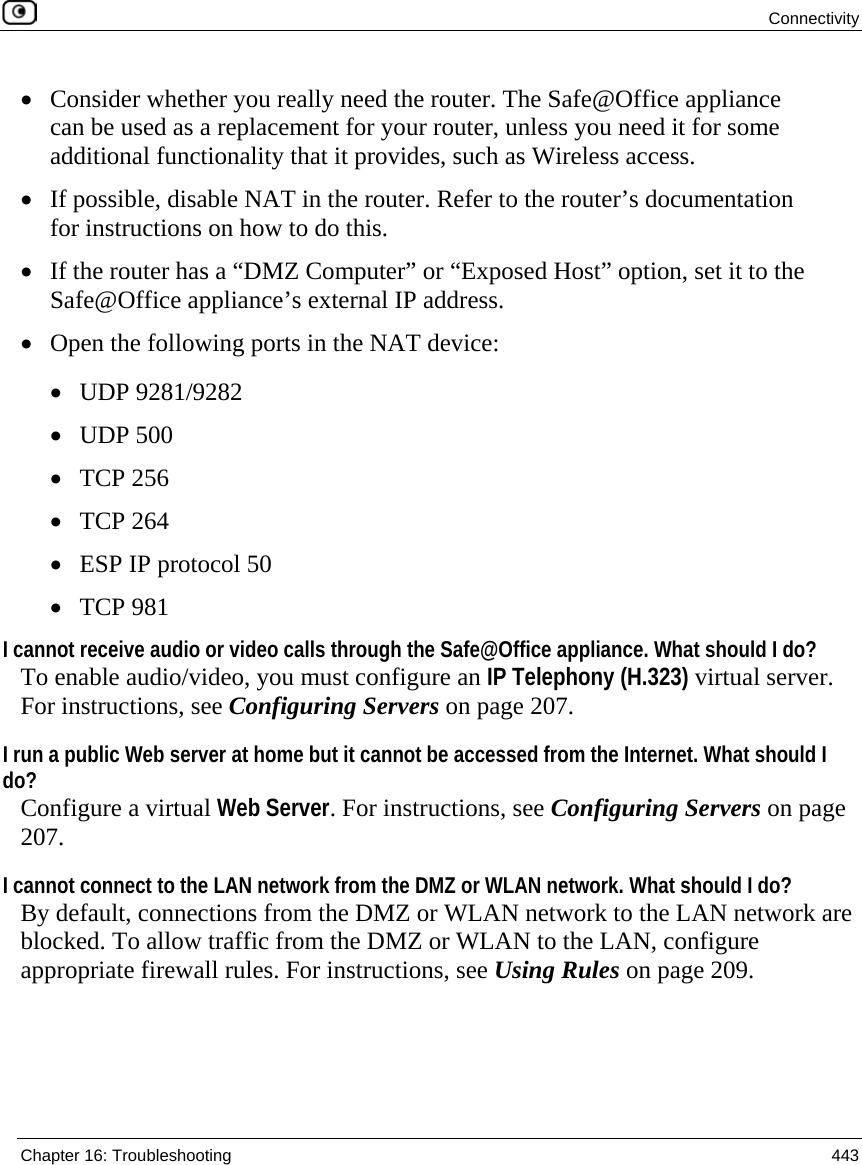
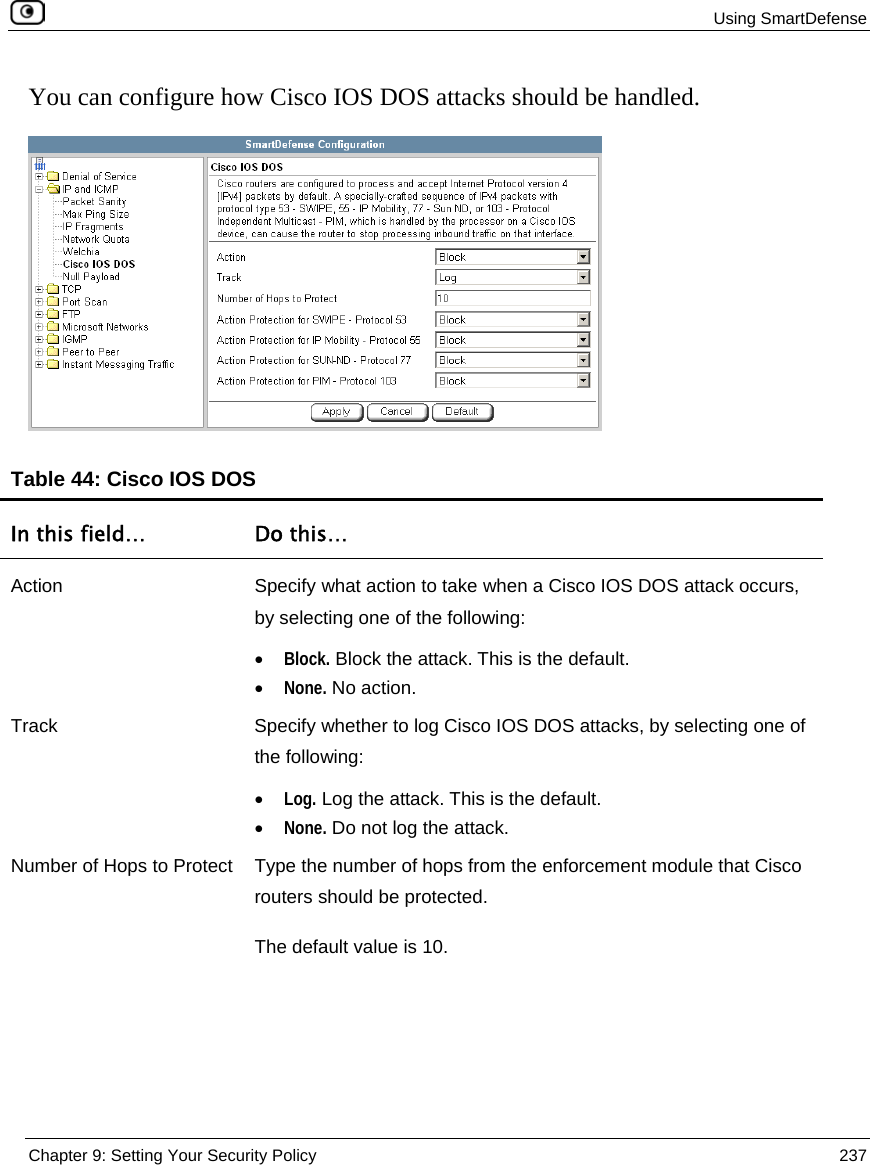
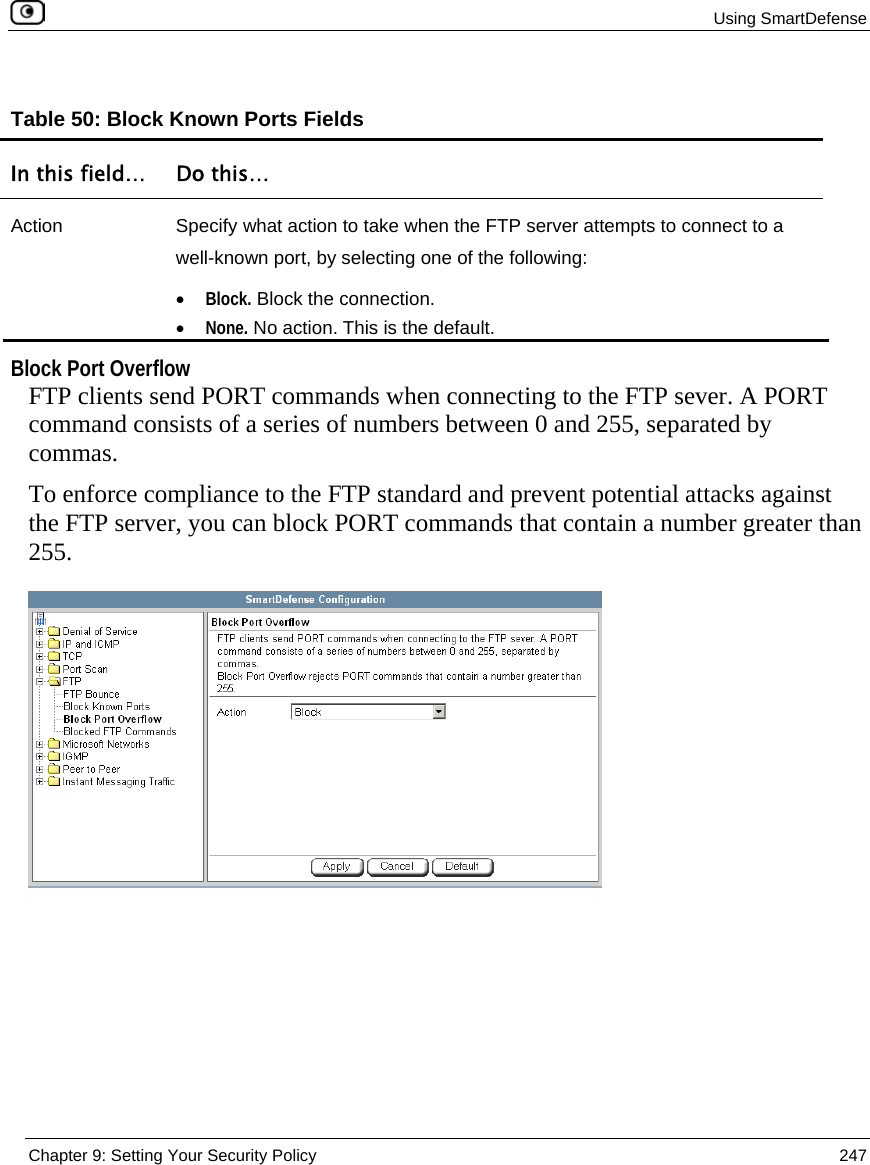
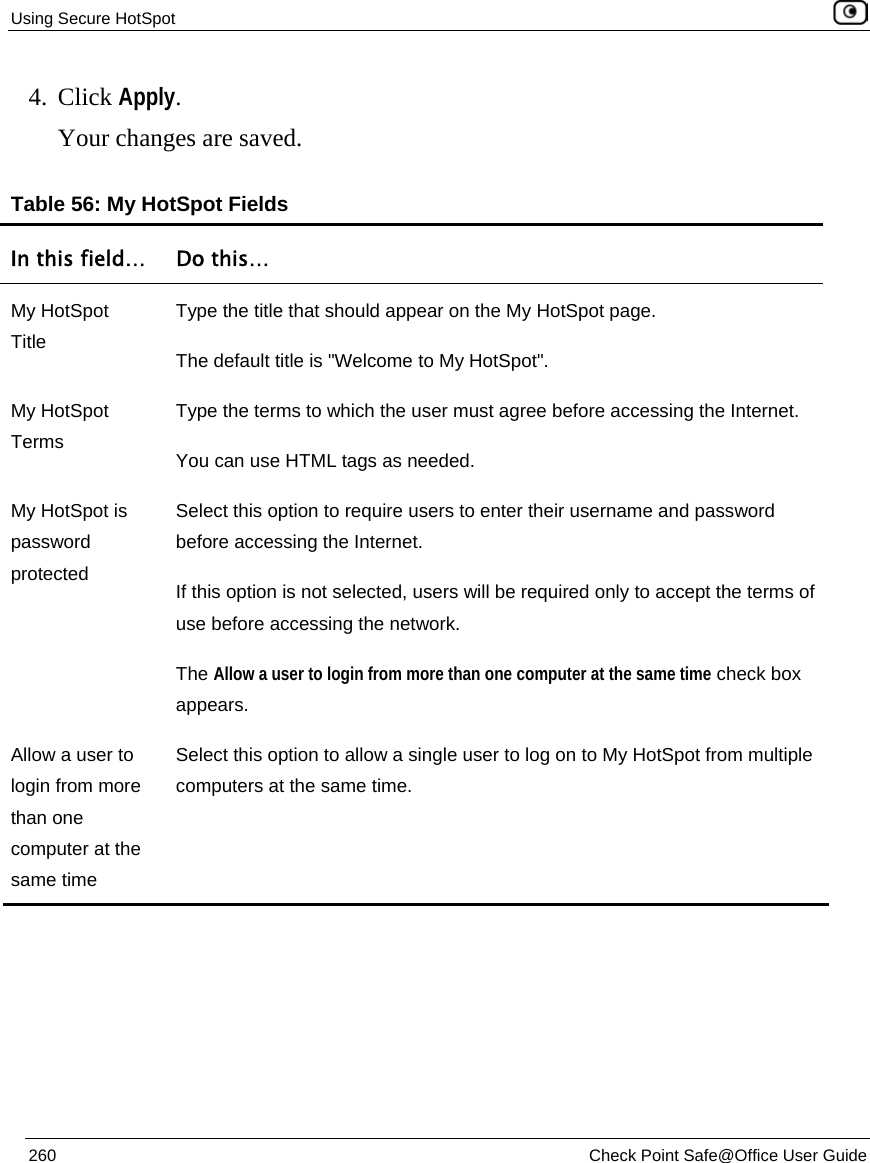
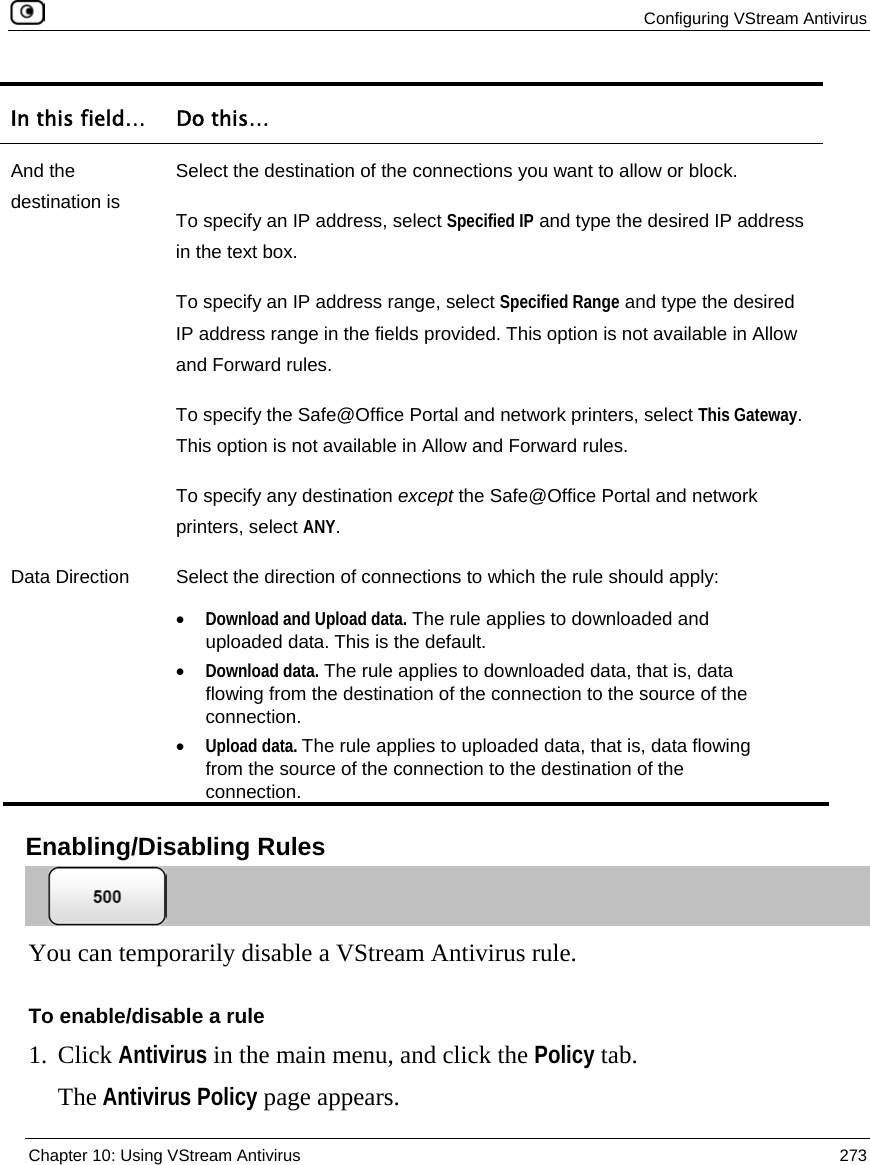
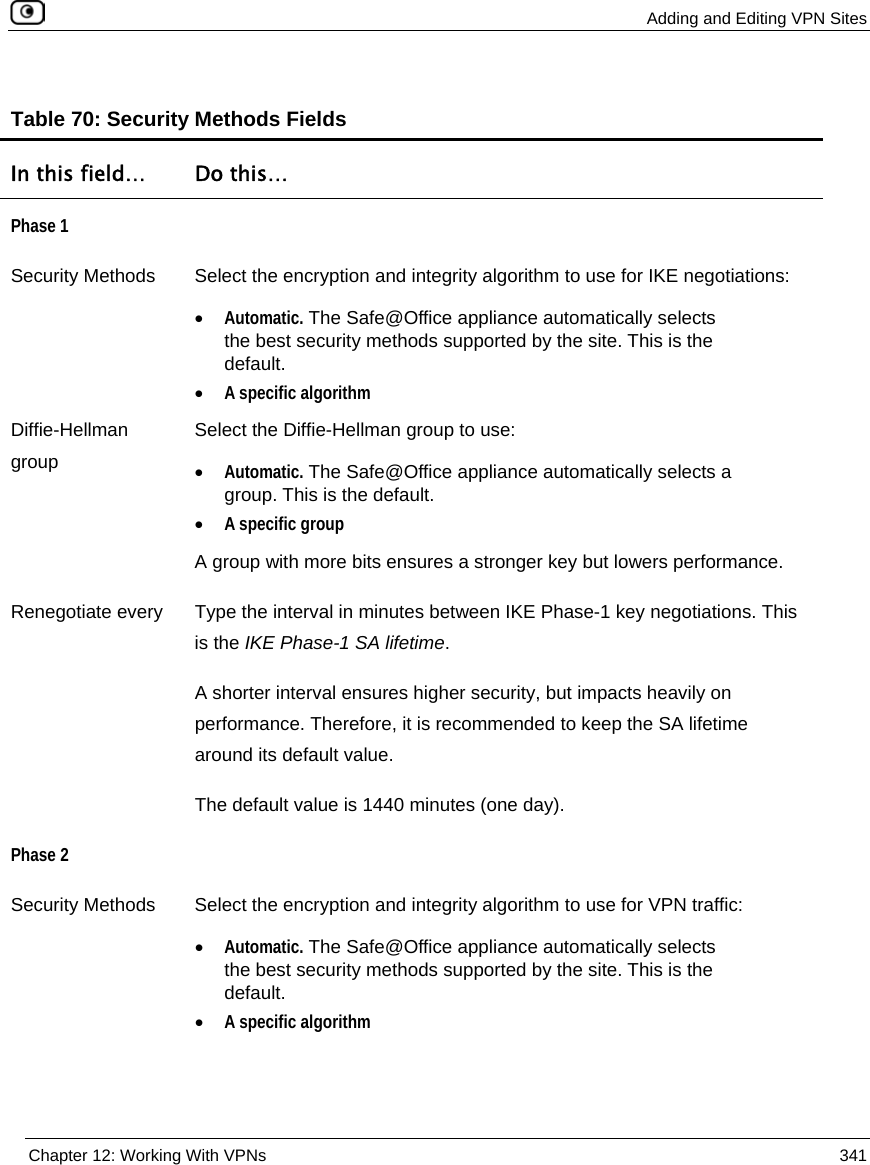
![Using SmartDefense 244 Check Point Safe@Office User Guide In this field… Do this… In a period of [seconds] SmartDefense detects ports scans by measuring the number of ports accessed over a period of time. The number of ports accessed must exceed the Number of ports accessed value, within the number of seconds specified by the In a period of [seconds] value, in order for SmartDefense to consider the activity a scan. Type the maximum number of seconds that can elapse, during which the Number of ports accessed threshold is exceeded, in order for SmartDefense to detect the activity as a port scan. For example, if this value is 20, and the Number of ports accessed threshold is exceeded for 15 seconds, SmartDefense will detect the activity as a port scan. If the threshold is exceeded for 30 seconds, SmartDefense will not detect the activity as a port scan. The default value is 20 seconds. Track Specify whether to issue logs for scans, by selecting one of the following: • Log. Issue logs. This is the default. • None. Do not issue logs. This is the default. Detect scans from Internet only Specify whether to detect only scans originating from the Internet, by selecting one of the following: • False. Do not detect only scans from the Internet. This is the default. • True. Detect only scans from the Internet.](https://usermanual.wiki/SofaWare-Technologies/SBXW-166LHGE-6.Manual-Pt2/User-Guide-694887-Page-10.png)
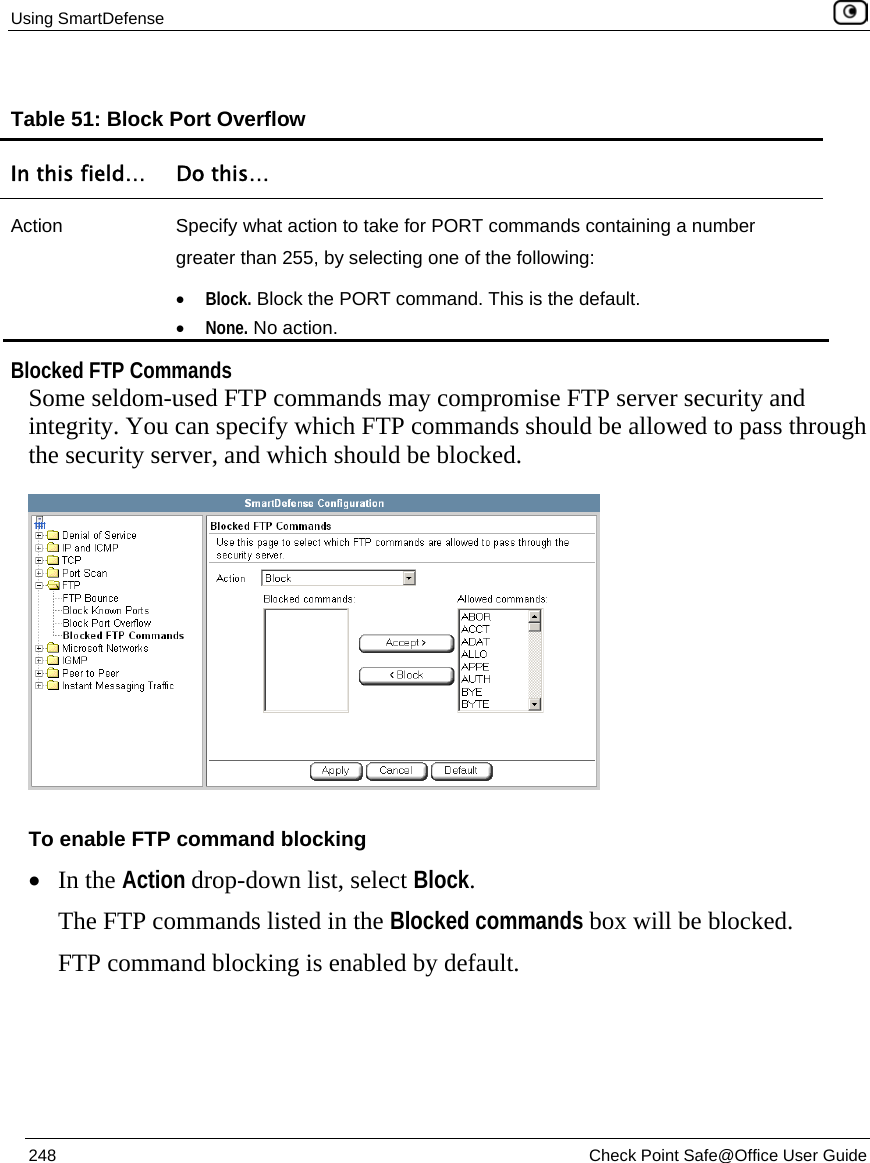

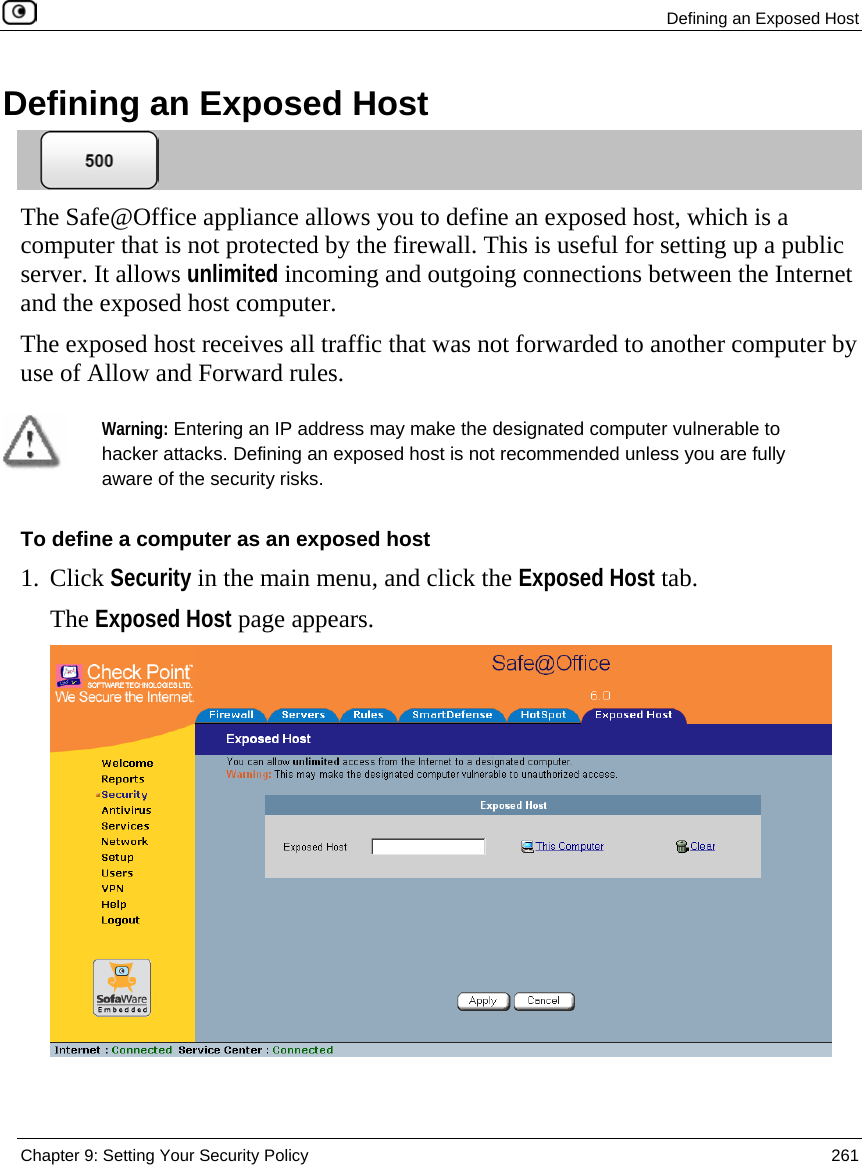


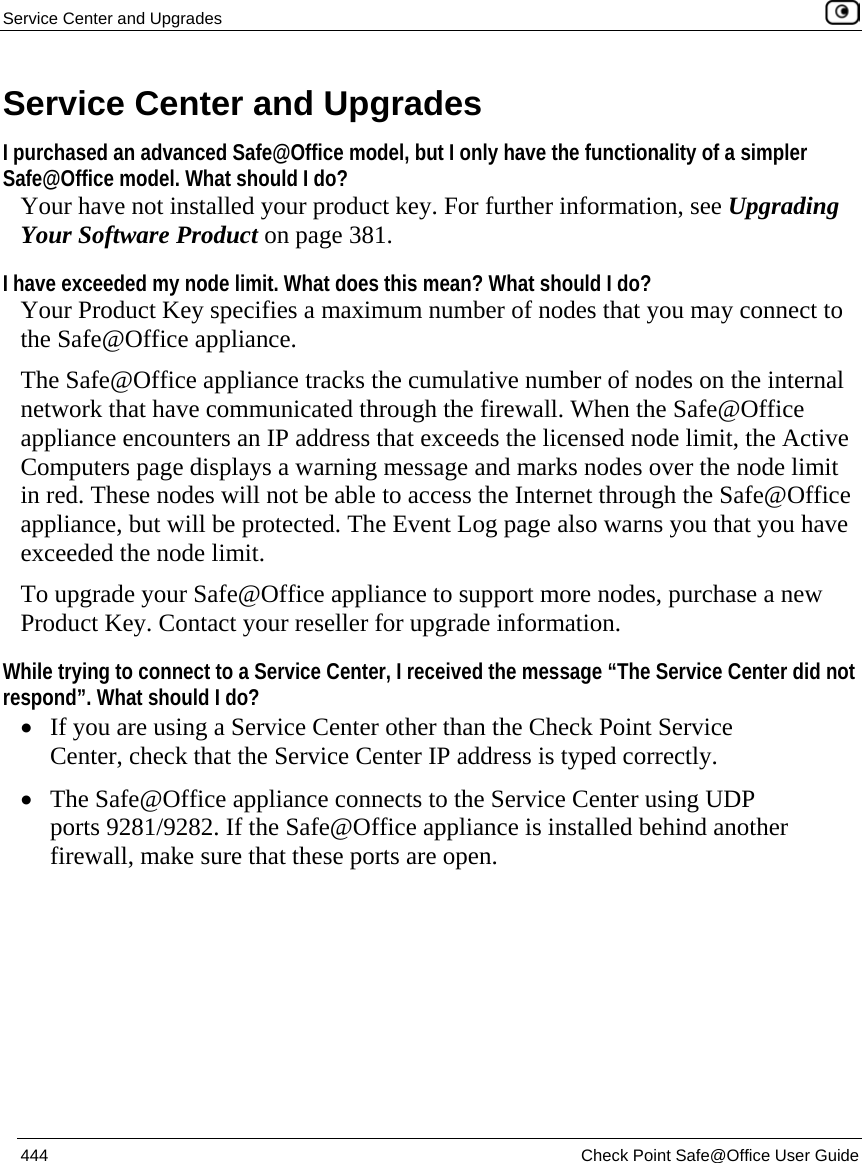
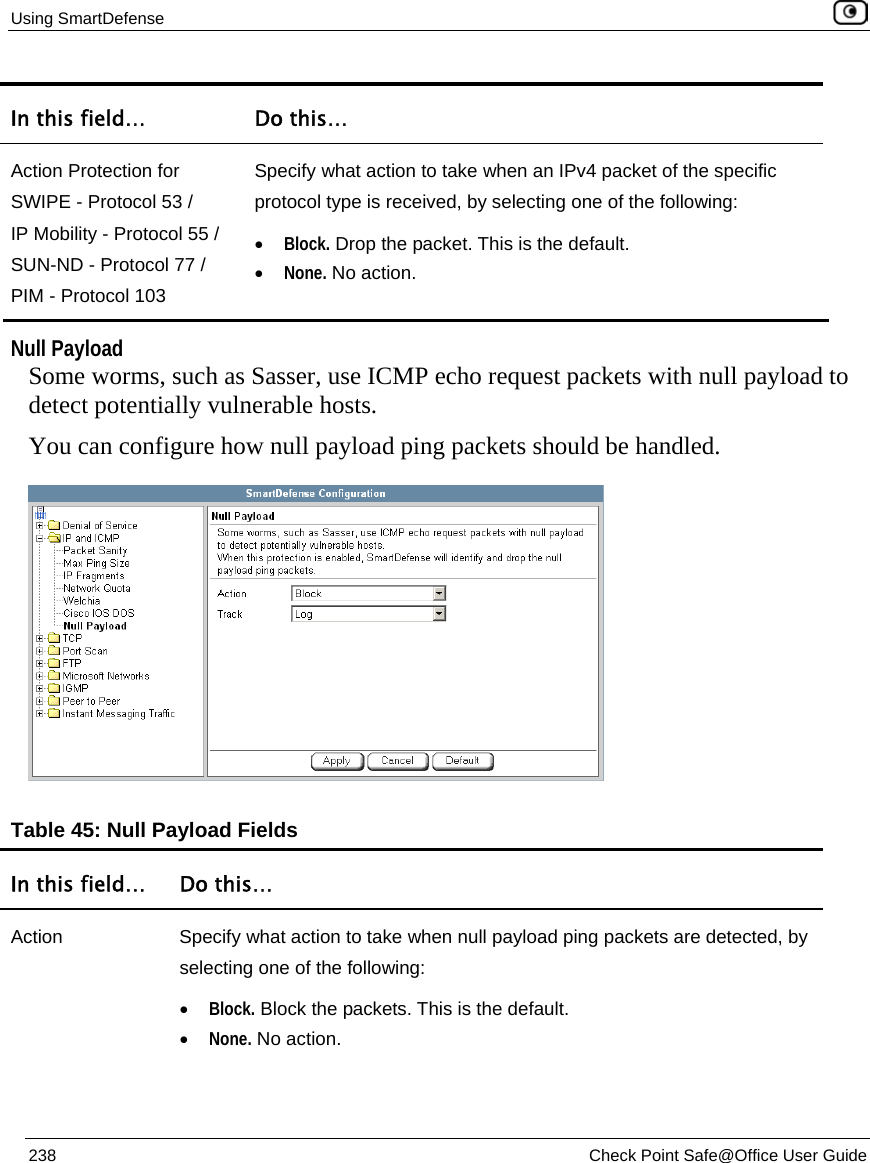
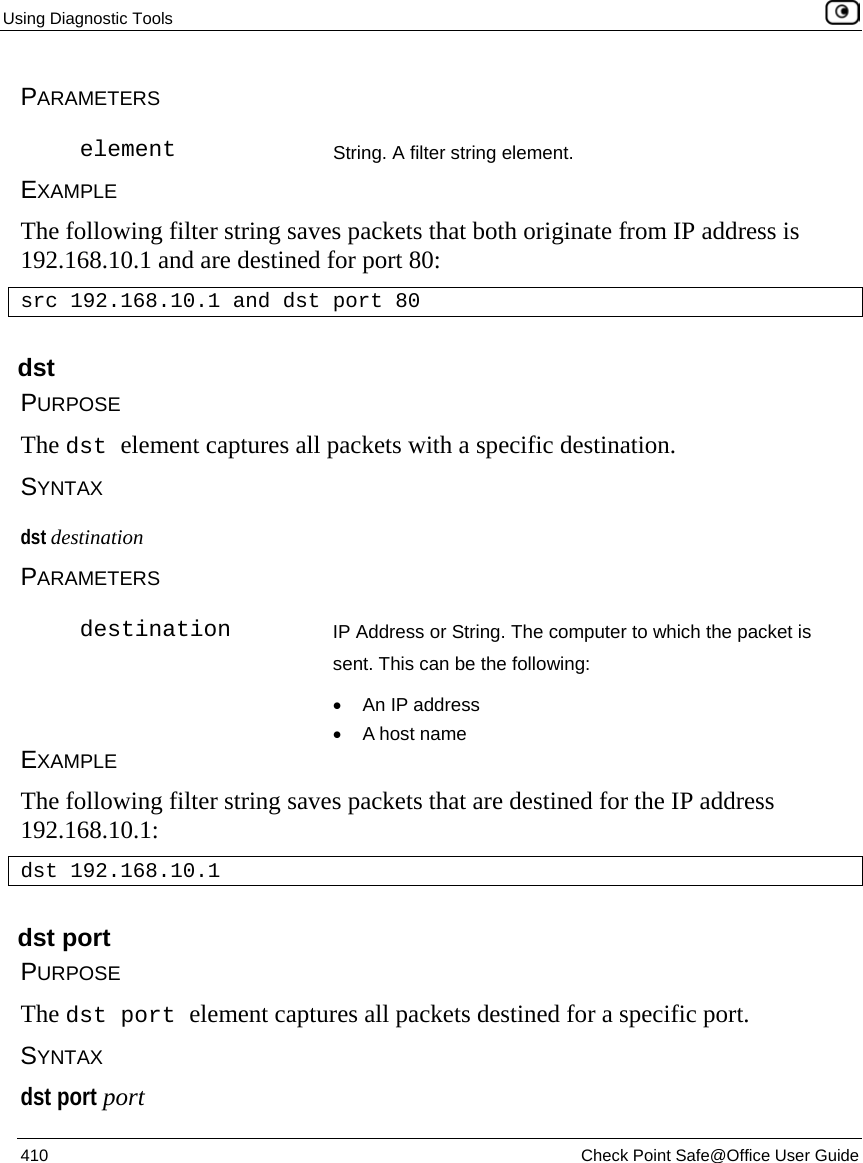
![Using Diagnostic Tools Chapter 14: Maintenance 409 Filter String Syntax The following represents a list of basic filter string elements: • and on page 409 • dst on page 410 • dst port on page 410 • ether proto on page 411 • host on page 412 • not on page 412 • or on page 413 • port on page 413 • src on page 414 • src port on page 414 • tcp on page 415 • udp on page 416 For detailed information on filter syntax, refer to http://www.tcpdump.org. and PURPOSE The and element is used to concatenate filter string elements. The filtered packets must match all concatenated filter string elements. SYNTAX element and element [and element...] element && element [&& element...]](https://usermanual.wiki/SofaWare-Technologies/SBXW-166LHGE-6.Manual-Pt2/User-Guide-694887-Page-175.png)

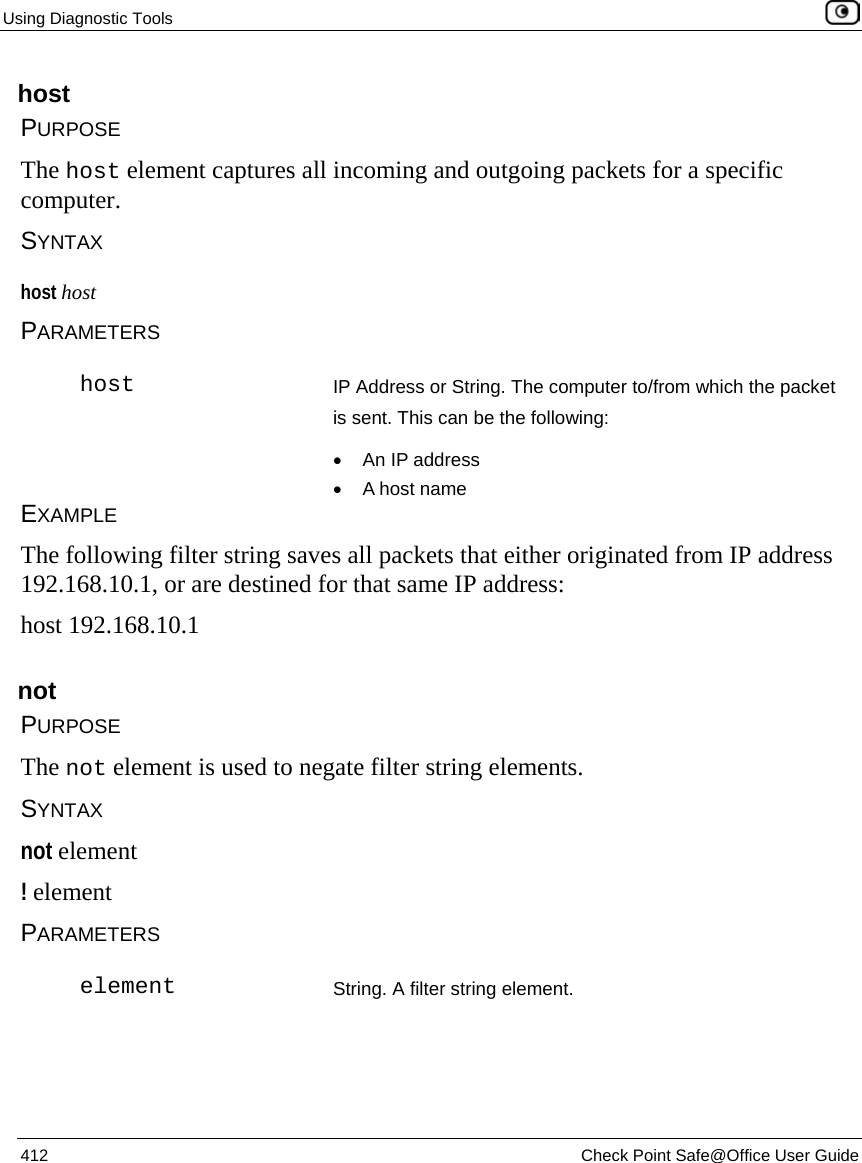
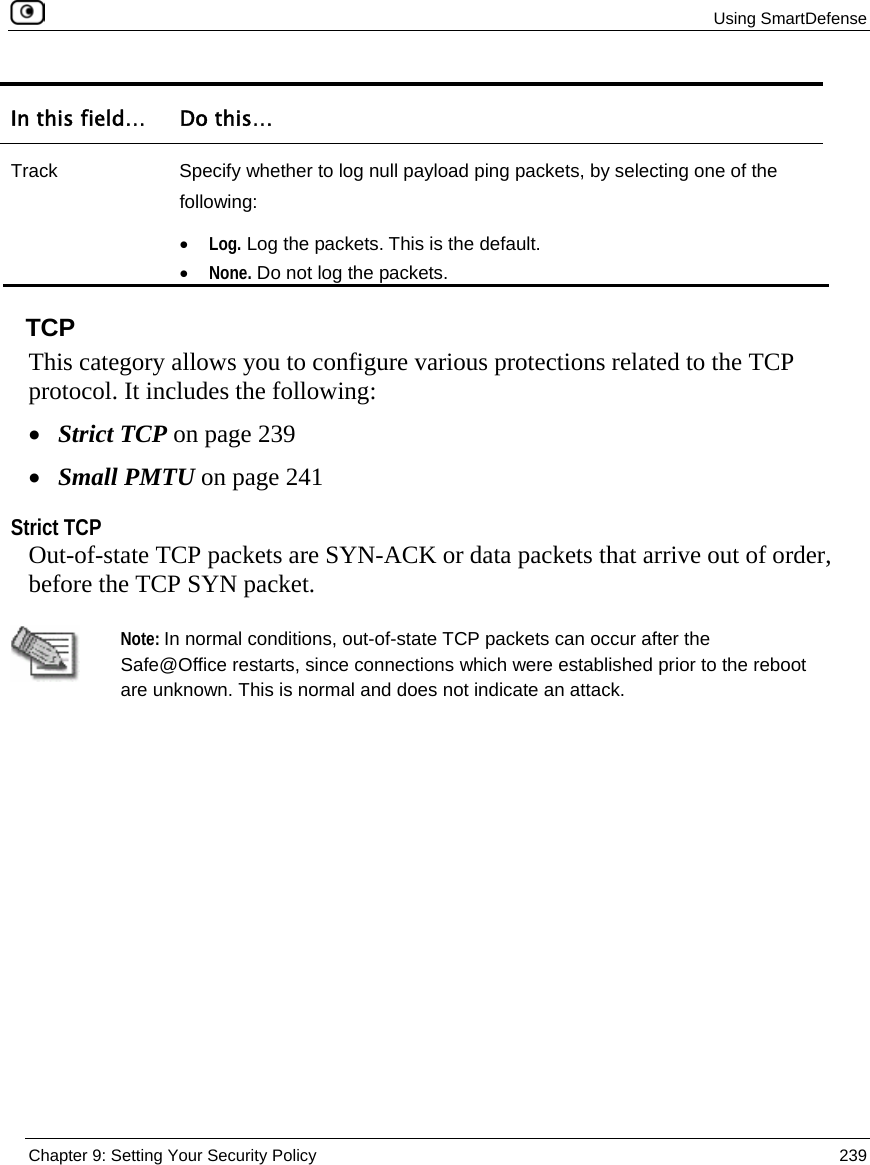
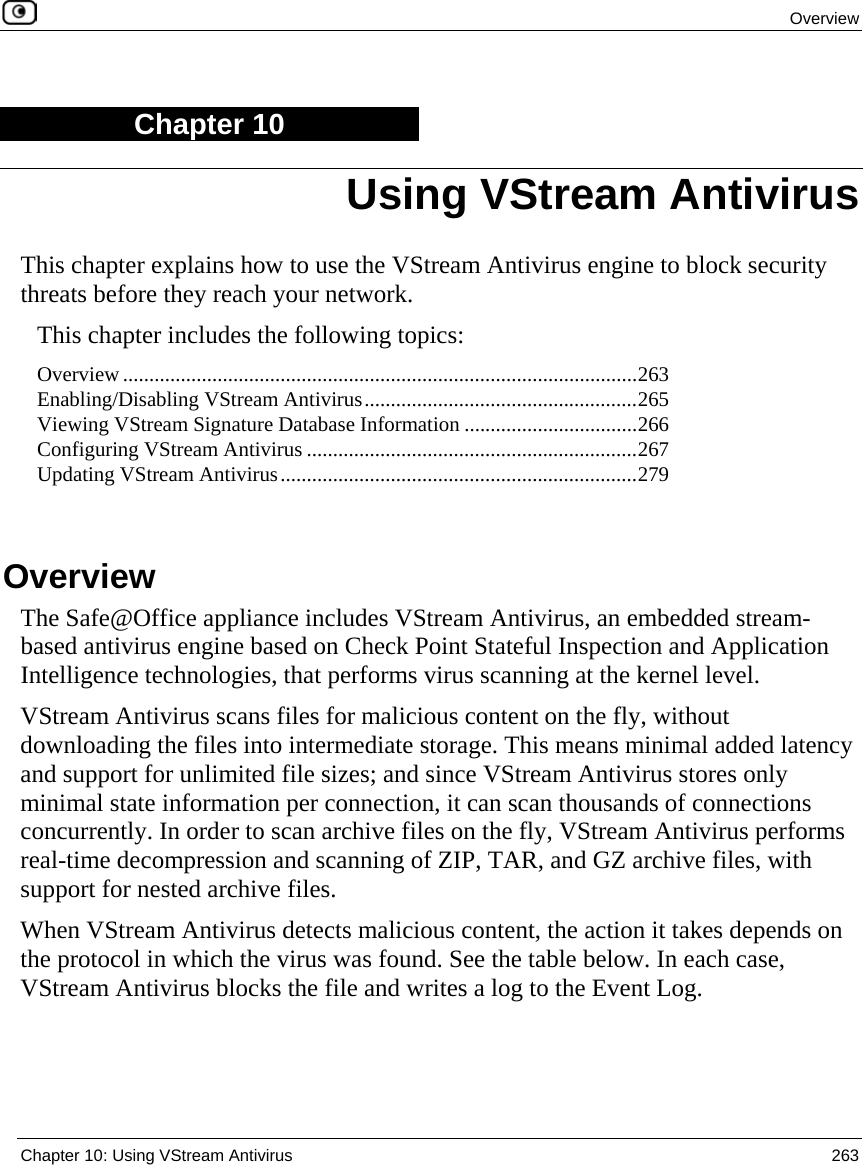
![Using Diagnostic Tools Chapter 14: Maintenance 413 EXAMPLE The following filter string saves packets that are not destined for port 80: not dst port 80 or PURPOSE The or element is used to alternate between string elements. The filtered packets must match at least one of the filter string elements. SYNTAX element or element [or element...] element || element [|| element...] PARAMETERS element String. A filter string element. EXAMPLE The following filter string saves packets that either originate from IP address 192.168.10.1 or IP address 192.168.10.10: src 192.168.10.1 or src 192.168.10.10 port PURPOSE The port element captures all packets originating from or destined for a specific port. SYNTAX port port Note: This element can be prepended by tcp or udp. For information, see tcp on page 415 and udp on page 416.](https://usermanual.wiki/SofaWare-Technologies/SBXW-166LHGE-6.Manual-Pt2/User-Guide-694887-Page-179.png)