Sonicwall 06C 802.11b/g/n Router User Manual SonicWALL TZ 210 Series Getting Started Guide
Sonicwall, Inc. 802.11b/g/n Router SonicWALL TZ 210 Series Getting Started Guide
Contents
- 1. Manual Part 1
- 2. Manual Part 2
- 3. Manual Part 3
- 4. Manual Part 4
Manual Part 3

Page 50 Configuring High Availability
4. Select the Enable Virtual MAC checkbox. Virtual MAC
allows the Primary and Backup appliances to share a
single MAC address. This greatly simplifies the process of
updating network ARP tables and caches when a failover
occurs. Only the switch to which the two appliances are
connected needs to be notified. All outside devices will
continue to route to the single shared MAC address.
5. The Heartbeat Interval controls how often the two units
communicate. The default is 5000 milliseconds; the
minimum supported value is 1000 milliseconds.
6. Set the Failover Trigger Level to the number of
heartbeats that can be missed before failing over. By
default, this is set to 5 missed heartbeats.
7. Set the Probe Interval to the interval in seconds between
probes sent to specified IP addresses to monitor that the
network critical path is still reachable. This is used in logical
monitoring. SonicWALL recommends that you set the
interval for at least 5 seconds. The default is 20 seconds,
and the allowed range is 5 to 255 seconds. You can set the
Probe IP Address(es) on the High Availability >
Monitoring screen.
8. Set the Probe Count to the number of consecutive probes
before SonicOS Enhanced concludes that the network
critical path is unavailable or the probe target is
unreachable. This is used in logical monitoring. The default
is 3, and the allowed range is 3 to 10.
9. The Election Delay Time is the number of seconds
allowed for internal processing between the two units in the
HA pair before one of them takes the primary role. The
default is 3 seconds.
10. Select the Include Certificates/Keys checkbox to have
the appliances synchronize all certificates and keys.
11. You do not need to click Synchronize Settings at this
time, because all settings will be automatically
synchronized to the Idle unit when you click Accept after
completing HA configuration. To synchronize all settings on
the Active unit to the Idle unit immediately, click
Synchronize Settings. The Idle unit will reboot.
12. Click Synchronize Firmware if you previously uploaded
new firmware to your Primary unit while the Backup unit
was offline, and it is now online and ready to upgrade to the
new firmware. Synchronize Firmware is typically used
after taking your Backup appliance offline while you test a
new firmware version on the Primary unit before upgrading
both units to it.
13. When finished with all High Availability configuration, click
Accept. All settings will be synchronized to the Idle unit
automatically.
TZ_210_GSG.book Page 50 Friday, November 14, 2008 10:29 AM
SonicWALL TZ 210 Series Getting Started Guide Page 51
Configuring HA Monitoring
On the High Availability > Monitoring page, you can configure
both physical and logical interface monitoring. By enabling
physical interface monitoring, you enable link detection for the
designated HA interfaces. The link is sensed at the physical
layer to determine link viability.
Logical monitoring involves configuring the SonicWALL to
monitor a reliable device on one or more of the connected
networks. Failure to periodically communicate with the device
by the Active unit in the HA Pair will trigger a failover to the Idle
unit. If neither unit in the HA Pair can connect to the device, no
action will be taken.
The Primary and Backup IP addresses configured on this page
are used for multiple purposes:
• As independent management addresses for each unit (only
on X0 and X1 interfaces)
• To allow synchronization of licenses between the Idle unit
and the SonicWALL licensing server
• As the source IP addresses for the probe pings sent out
during logical monitoring
To set the independent LAN management IP addresses and
configure physical and/or logical interface monitoring, perform
the following steps on the Primary unit:
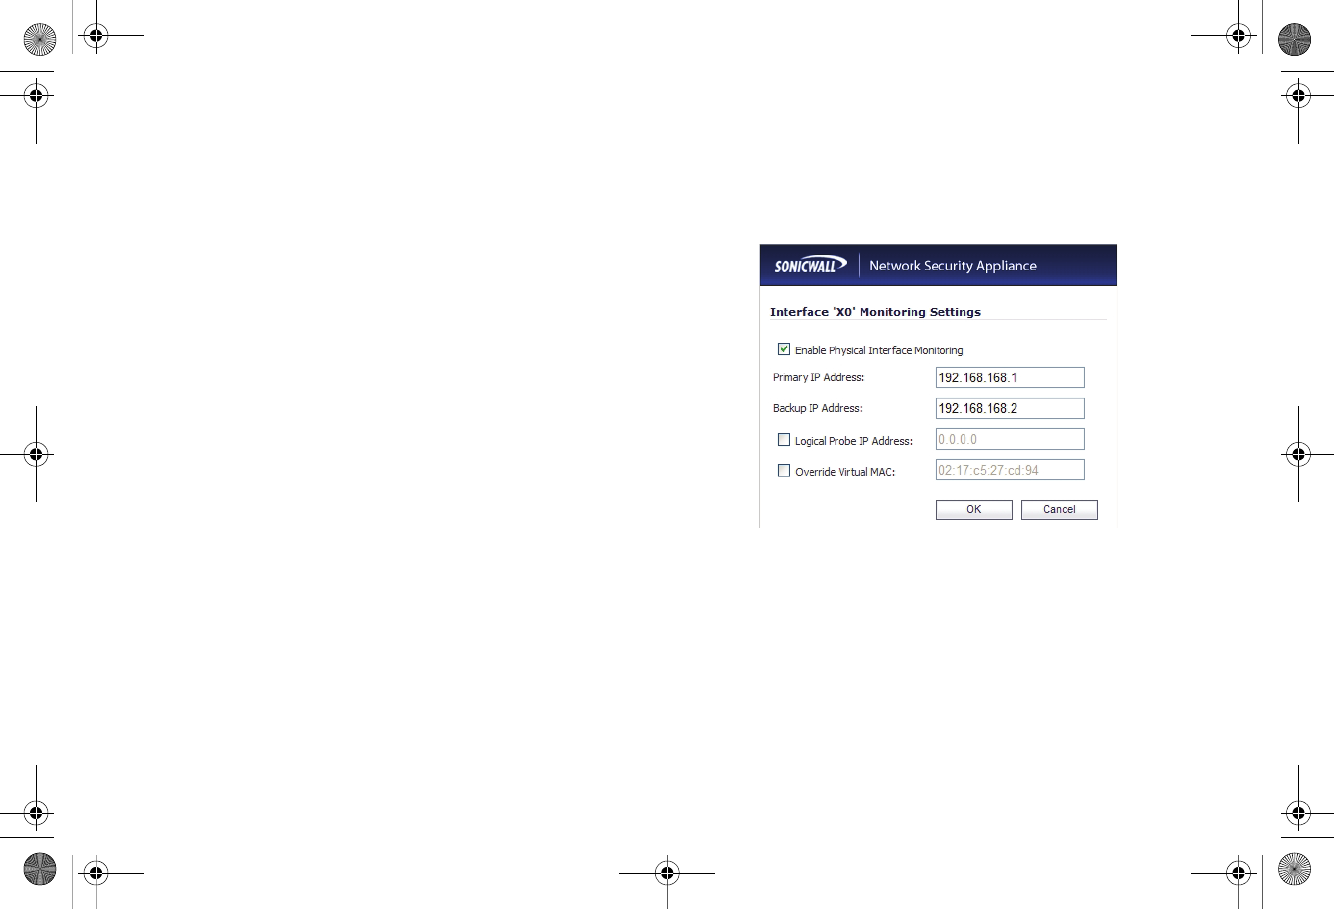
1. Navigate to the High Availability > Monitoring page.
2. Click the Configure icon for the X0 interface.
3. To enable link detection between the designated HA
interfaces on the Primary and Backup units, leave the
Enable Physical Interface Monitoring checkbox
selected.
4. In the Primary IP Address field, enter the unique LAN
management IP address of the Primary unit.
5. In the Backup IP Address field, enter the unique LAN
management IP address of the Backup unit.
TZ_210_GSG.book Page 51 Friday, November 14, 2008 10:29 AM

Page 52 Configuring High Availability
6. In the Logical Probe IP Address field, enter the IP
address of a downstream device on the LAN network that
should be monitored for connectivity. Typically, this should
be a downstream router or server. (If probing is desired on
the WAN side, an upstream device should be used.) The
Primary and Backup appliances will regularly ping this
probe IP address. If both can successfully ping the target,
no failover occurs. If neither can successfully ping the
target, no failover occurs, because it is assumed that the
problem is with the target, and not the SonicWALL
appliances. But, if one appliance can ping the target but the
other appliance cannot, failover will occur to the appliance
that can ping the target.
The Primary IP Address and Backup IP Address fields
must be configured with independent IP addresses on the
X0 interface (X1 for probing on the WAN) to allow logical
probing to function correctly.
7. SonicWALL recommends that you do not select Override
Virtual MAC. When Virtual MAC is enabled, the SonicOS
firmware automatically generates a Virtual MAC address
for all interfaces. Allowing the SonicOS firmware to
generate the Virtual MAC address eliminates the possibility
of configuration errors and ensures the uniqueness of the
Virtual MAC address, which prevents possible conflicts.
8. Click OK.
9. To configure monitoring on any of the other interfaces,
repeat the above steps.
10. When finished with all High Availability configuration, click
Accept. All settings will be synchronized to the Idle unit
automatically.
Synchronizing Settings
Once you have configured the HA settings on the Primary
SonicWALL security appliance, it will automatically synchronize
the settings to the Backup unit, causing the Backup to reboot.
You do not need to click the Synchronize Settings button.
However, if you later choose to do a manual synchronization of
settings, click the Synchronize Settings button. You will see a
HA Peer Firewall has been updated notification at the bottom
of the management interface page. Also note that the
management interface displays Logged Into: Primary
SonicWALL Status: (green ball) Active in the upper-right-
hand corner.
By default, the Include Certificate/Keys setting is enabled.
This specifies that certificates, certificate revocation lists (CRL),
and associated settings are synchronized between the Primary
and Backup units. When local certificates are copied to the
Backup unit, the associated private keys are also copied.
Because the connection between the Primary and Backup units
is typically protected, this is generally not a security concern.
Tip: A compromise between the convenience of
synchronizing certificates and the added security of not
synchronizing certificates is to temporarily enable the
Include Certificate/Keys setting and manually
synchronize the settings, and then disable Include
Certificate/Keys.
TZ_210_GSG.book Page 52 Friday, November 14, 2008 10:29 AM

SonicWALL TZ 210 Series Getting Started Guide Page 53
Verifying HA Functionality
To verify that Primary and Backup SonicWALL security
appliances are functioning correctly, wait a few minutes, then
trigger a test failover by logging into the Primary unit and
powering it off. The Backup SonicWALL security appliance
should quickly take over. After a failover to the Backup
appliance, all the pre-existing network connections must be
re-established, including the VPN tunnels that must be
re-negotiated.
From your management workstation, test connectivity through
the Backup SonicWALL by accessing a site on the public
Internet. Note that unless virtual MAC is enabled, the Backup
SonicWALL will not assume the Ethernet MAC address.
Log into the Backup SonicWALL’s unique LAN IP address. The
management interface should now display Logged Into:
Backup SonicWALL Status: (green ball) Active in the upper-
right-hand corner.
Now, power the Primary SonicWALL back on, wait a few
minutes, then log back into the management interface. If the
Backup SonicWALL is active, you can use the shared IP
address to log into it.
If you are using the Monitor Interfaces feature, experiment with
disconnecting each monitored link to ensure correct
configuration.
Multiple ISP / WAN Failover and Load
Balancing
WAN Failover and Load Balancing allows you to designate an
interface as a Secondary or backup WAN port.
The secondary WAN port can be used as a backup if the
primary WAN port is down and/or unavailable, or it can maintain
a persistent connection for WAN port traffic to divide outbound
traffic flows between the Primary fixed WAN port and the user-
assigned Secondary WAN port.
This section contains the following subsections:
•Configuring Secondary WAN Interface - page 55
•Activating and Configuring WAN Failover - page 55
•Configuring WAN Interface Monitoring - page 56
•WAN Probe Monitoring Overview - page 56
•Configuring WAN Probe Monitoring - page 57
TZ_210_GSG.book Page 53 Friday, November 14, 2008 10:29 AM
Page 54 Multiple ISP / WAN Failover and Load Balancing
X1 WAN
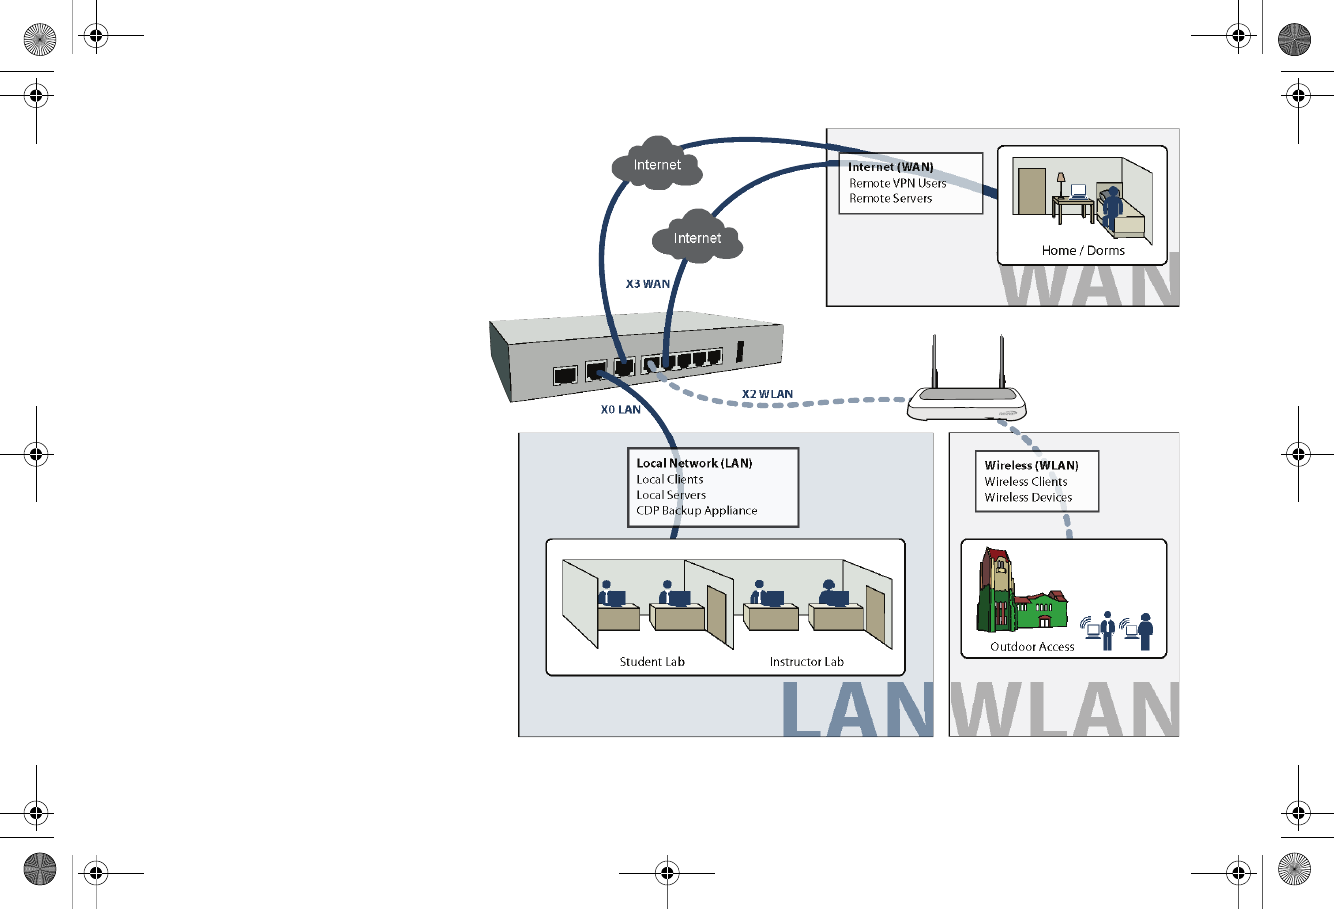
In this scenario, the SonicWALL TZ 210 is
configured in NAT/Route mode to operate
as a network gateway with multiple
Internet Service Providers (ISPs) to allow
load balancing and/or failover. Typical
zone assignments for this scenario are as
follows:
Local Network (LAN) - wired local client
computers and servers
Multiple Internet (WAN) - two Internet
service providers connected through X1
and a second open port (X3 in this case)
DMZ - (optional) wired resources
available to public Internet such as Web
servers and Mail servers
Wireless (WLAN)* - wireless local client
computers and devices
*For the TZ 210 wired appliance, wireless is
achieved by adding a SonicWALL SonicPoint
appliance to any free interface (X4-X5) and
zoning that interface as WLAN.
Multiple ISP / WAN Failover and Load Balancing
Wireless Clients
Wireless Devices
Wireless (WLAN)
Outdoor Access
SonicWALL
SonicPoint
SONICPOINT
TZ_210_GSG.book Page 54 Thursday, November 13, 2008 7:41 PM
SonicWALL TZ 210 Series Getting Started Guide Page 55
Configuring Secondary WAN Interface
Perform the following steps to configure WAN Failover and
Load Balancing on the SonicWALL security appliance:
1. On Network > Interfaces page, configure the chosen port
to be in WAN zone, and enter the correct address settings
provided by the Secondary ISP.
Note: In the example Multiple ISP / WAN Failover and Load
Balancing section, on page 53, the SonicWALL security
appliance is acquiring its secondary WAN address
dynamically from ISP #2, using DHCP. Any interface
added to the WAN zone by default creates a NAT policy
allowing internal LAN subnets to enforce NAT on this
Secondary WAN interface.
Activating and Configuring WAN Failover
To configure the SonicWALL for WAN failover and load
balancing, follow the steps below:
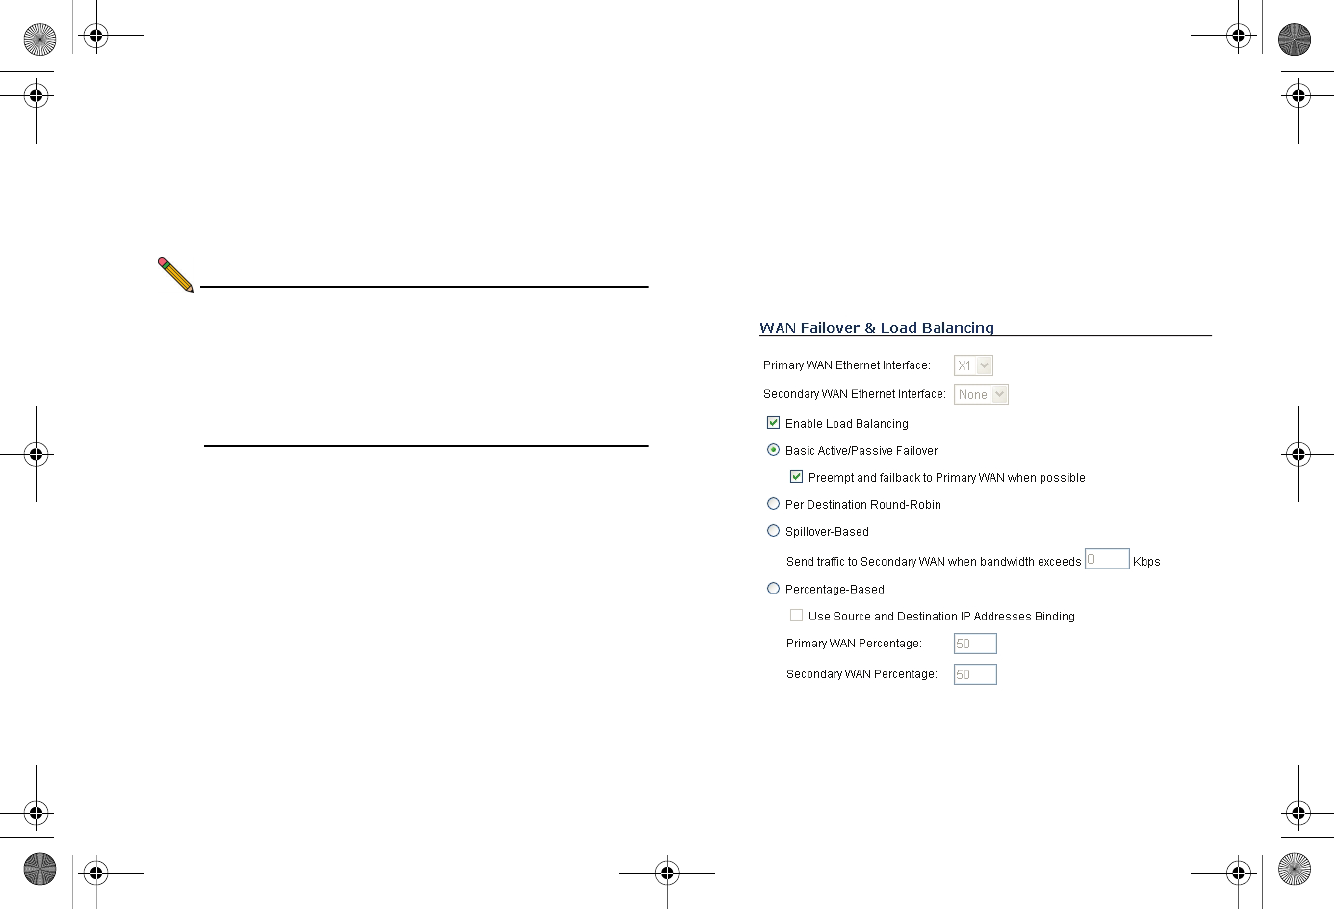
1. On Network > WAN Failover & LB page, select Enable
Load Balancing.
2. If there are multiple possible secondary WAN interfaces,
select an interface from the Secondary WAN Ethernet
Interface.
TZ_210_GSG.book Page 55 Thursday, November 13, 2008 7:41 PM

Page 56 Multiple ISP / WAN Failover and Load Balancing
3. Select a load balancing method. By default, the
SonicWALL will select Basic Active/Passive Failover as
the method, but there are four load balancing methods
available:
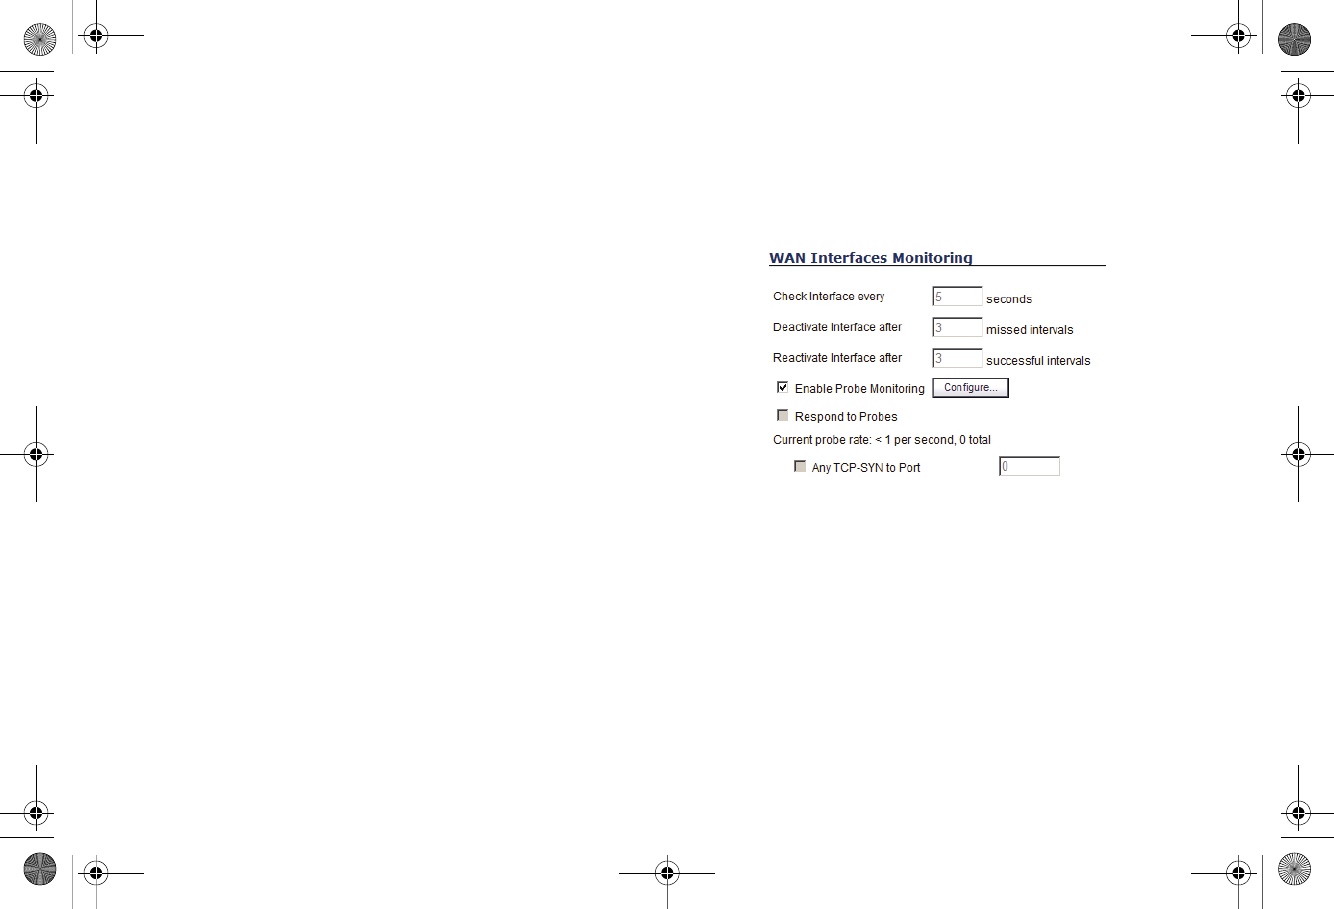
Configuring WAN Interface Monitoring
Under the WAN Interface Monitoring heading, you can
customize how the SonicWALL security appliance monitors the
WAN interface:
1. Enter a number between 5 and 300, in the Check
Interface Every _ Seconds field. The default value is 5
seconds.
2. In the Deactivate Interface after _ missed intervals,
enter a number between 1 and 10. The default value is 3,
which means the interface is considered inactive after 3
consecutive unsuccessful attempts.
3. Enter a number between 1 and 100 in the Reactivate
Interface after _ successful intervals. The default value
is 3, which means the interface is considered active after 3
consecutive successful attempts.
WAN Probe Monitoring Overview
If Probe Monitoring is not activated, the SonicWALL security
appliance performs physical monitoring only on the Primary and
Secondary WAN interfaces, meaning it only marks a WAN
interface as failed if the interface is disconnected or stops
receiving an Ethernet-layer signal. This is not an assured
means of link monitoring, because it does not address most
failure scenarios (for example, routing issues with your ISP or
an upstream router that is no longer passing traffic). If the WAN
interface is connected to a hub or switch, and the router
Basic Active/
Passive Failover
Only sends traffic through the Secondary WAN
interface if the Primary WAN interface has been
marked inactive. If the Primary WAN fails, then the
SonicWALL security appliance reverts to this
method. This mode will automatically return back
to using the Primary WAN interface once it has
been restored (preempt mode).
Per Destination
Round-Robin
Load balances outgoing traffic on a per-
destination basis. This is a simple load balancing
method which allows you to utilize both links in a
basic fashion (instead of the method above, which
does not utilize the capability of the Secondary
WAN until the Primary WAN has failed).
Spillover-Based Allows you to control when and if the Secondary
interface is used. You can specify when the
SonicWALL security appliance starts sending
traffic through the Secondary WAN interface.
Percentage-
Based
Specifies the percentages of traffic sent through
the Primary WAN and Secondary WAN interfaces.
Optionally, enable Source and Destination IP
Address Binding: Enables you to maintain a
consistent mapping of traffic flows with a single
outbound WAN interface, regardless of the
percentage of traffic through that interface.
TZ_210_GSG.book Page 56 Thursday, November 13, 2008 7:41 PM
SonicWALL TZ 210 Series Getting Started Guide Page 57
providing the connection to the ISP (also connected to this hub
or switch) were to fail, the SonicWALL will continue to believe
the WAN link is usable, because the connection to the hub or
switch is good.
Enabling probe monitoring on the Network > WAN Failover &
Load Balancing page instructs the SonicWALL security
appliance to perform logical checks of upstream targets to
ensure that the line is indeed usable.
Under the default probe monitoring configuration, the
SonicWALL performs an ICMP ping probe of both WAN ports’
default gateways. Unfortunately, this is also not an assured
means of link monitoring, because service interruption may be
occurring farther upstream. If your ISP is experiencing problems
in its routing infrastructure, a successful ICMP ping of their
router causes the SonicWALL security appliance to believe the
line is usable, when in fact it may not be able to pass traffic to
and from the public Internet at all.
To perform reliable link monitoring, you can choose ICMP or
TCP as monitoring method, and can specify up to two targets
for each WAN port.
Configuring WAN Probe Monitoring
To configure WAN probe monitoring, follow these steps:
1. On the Network > WAN Failover & Load Balancing page,
under the WAN Interface Monitoring heading, select the
Enable Probe Monitoring checkbox.
2. Select the Respond to Probes checkbox to have the
SonicWALL security appliance respond to SonicwALL TCP
probes received on any of its WAN ports. Do not select this
checkbox if the SonicWALL security appliance should not
respond to TCP probes.
3. Select the Any TCP-SYN to Port checkbox to instruct the
SonicWALL security appliance to respond to TCP probes to
the specified port number without validating them first. The
Any TCP-SYN to Port box should only be selected when
receiving TCP probes from SonicWALL security appliances
running SonicOS Standard or older, legacy SonicWALL
security appliances.
TZ_210_GSG.book Page 57 Thursday, November 13, 2008 7:41 PM
Page 58 Multiple ISP / WAN Failover and Load Balancing
4. If there is a NAT device between the two appliances
sending and receiving TCP probes, the Any TCP-SYN to
Port checkbox must be selected, and the same port
number must be configured here and in the Configure
WAN Probe Monitoring window.
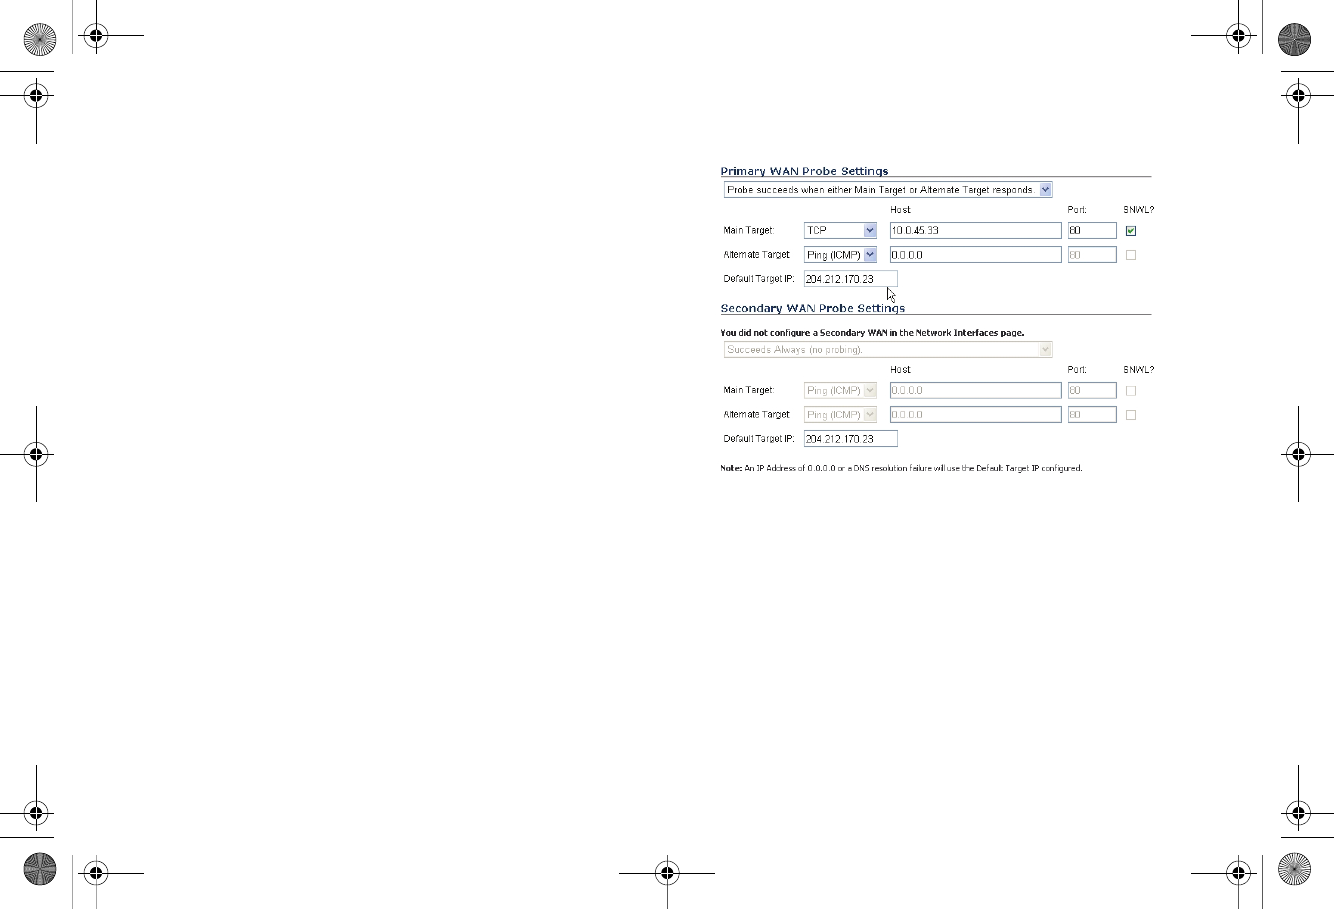
5. Click on the Configure button. The Configure WAN
Probe Monitoring window is displayed.
6. In the Primary WAN Probe Settings menu, select one of
the following options:
• Probe succeeds when either Main Target or Alternate
Target responds
• Probe succeeds when both Main Target and
Alternative Target respond
• Probe succeeds when Main Target responds
• Succeeds Always (no probing)
7. Select Ping (ICMP) or TCP from the Probe Target menu.
8. Enter the host name or IP address of the target device in
the Host field.
9. Enter a port number in the Port field.
10. If there is a NAT device between the two devices sending
and receiving TCP probes, the Any TCP-SYN to Port
checkbox must be selected, and the same port number
must be configured here and in the Configure WAN Probe
Monitoring window.
11. Select the SNWL? checkbox if the target device is a
SonicWALL security appliance. Do not select the SNWL?
box for third-party devices, as the TCP probes may not
work consistently.
12. Optionally, you can enter a default target IP address in the
Default Target IP field. In case of a DNS failure when a
host name is specified, the default target IP address is
used.
13. An IP address of 0.0.0.0 or a DNS resolution failure will use
the Default Target IP configured. If 0.0.0.0 is entered and
no default target IP address is configured, the default
gateway on that interface will be used.
14. Configure the Secondary WAN Probe Settings, which
provide the same options as the Primary WAN Probe
Settings.
15. Click OK.
TZ_210_GSG.book Page 58 Thursday, November 13, 2008 7:41 PM

SonicWALL TZ 210 Series Getting Started Guide Page 59
Support and Training Options
In this Section:
This section provides overviews of customer support and training options for the SonicWALL TZ 210 series appliances.
•Customer Support - page 60
•Knowledge Portal - page 60
•Onboard Help - page 61
•SonicWALL Live Product Demos - page 61
•User Forums - page 62
•Training - page 63
•Related Documentation - page 64
•SonicWALL Secure Wireless Network Integrated Solutions Guide - page 65
6
TZ_210_GSG.book Page 59 Thursday, November 13, 2008 7:41 PM
Page 60 Customer Support
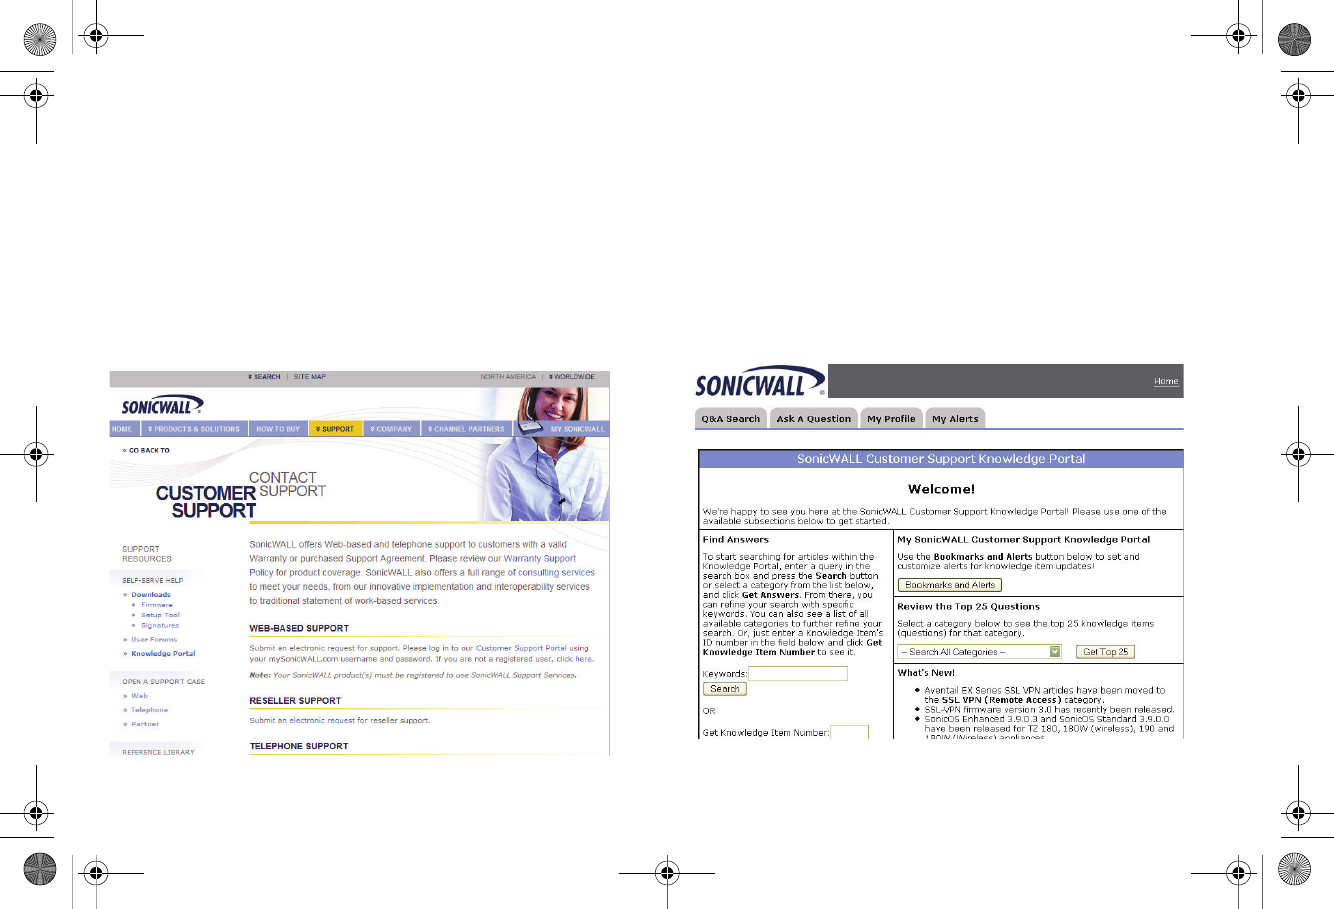
Customer Support
SonicWALL offers Web-based and telephone support to
customers who have a valid Warranty or who purchased a
Support Contract. Please review our Warranty Support Policy
for product coverage. SonicWALL also offers a full range of
consulting services to meet your needs, from our innovative
implementation services to traditional statement of work-based
services.
For further information, visit:
<http://www.sonicwall.com/us/support/contact.html>
Knowledge Portal
The Knowledge Portal allows users to search for SonicWALL
documents based on the following types of search tools:
•Browse
• Search for keywords
• Full-text search
For further information, navigate to the Support > Knowledge
Portal page at:
<http://www.mysonicwall.com/>
TZ_210_GSG.book Page 60 Thursday, November 13, 2008 7:41 PM
SonicWALL TZ 210 Series Getting Started Guide Page 61
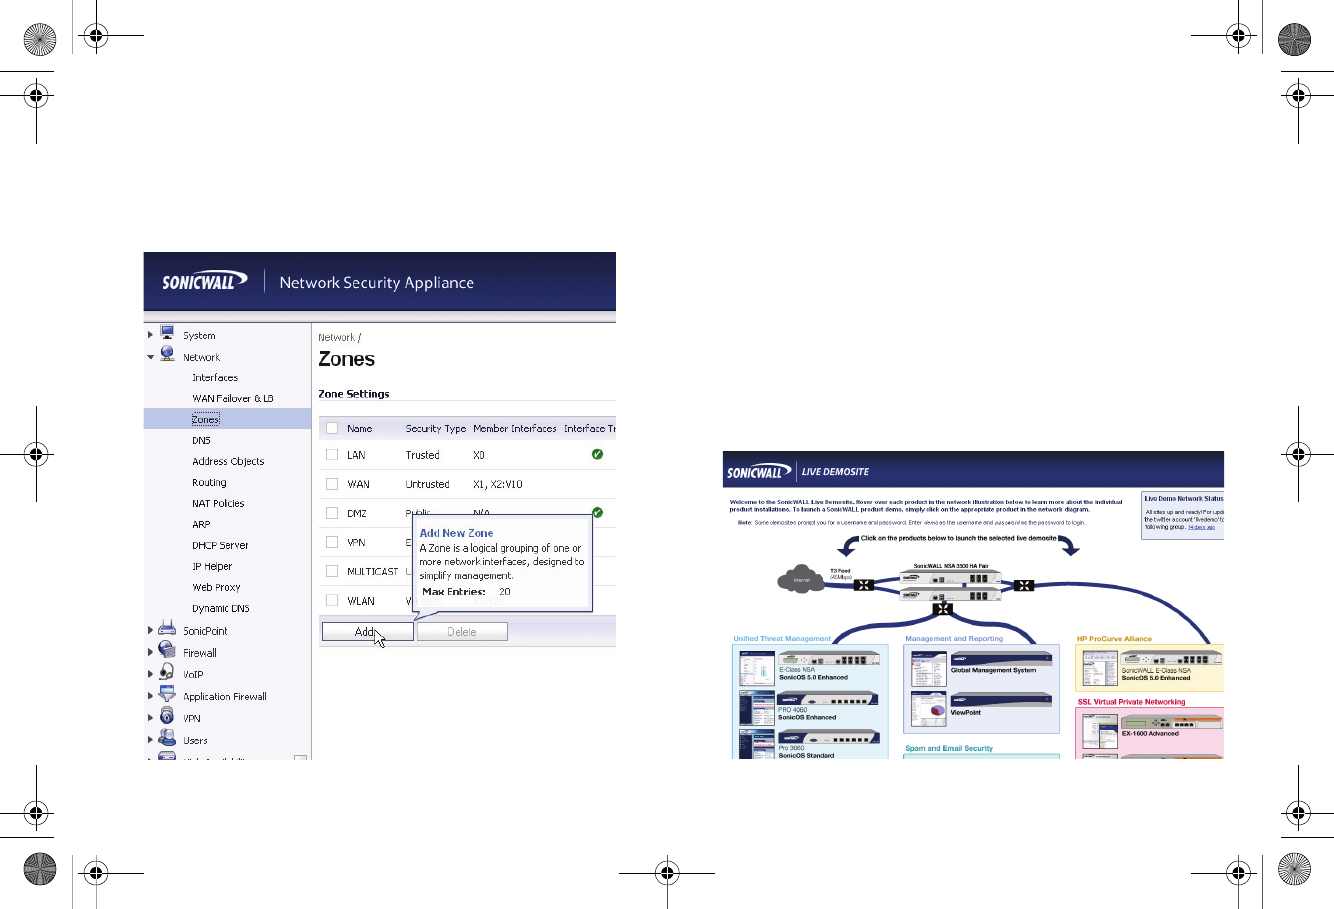
Onboard Help
SonicOS features a dynamic Onboard Help in the form of
helpful tooltips that appear over various elements of the GUI
when the mouse hovers over them. Elements that display these
tooltips include text fields, radio buttons, and checkboxes.
SonicWALL Live Product Demos
The SonicWALL Live Demo Site provides free test drives of
SonicWALL security products and services through interactive
live product installations:
• Unified Threat Management Platform
• Secure Cellular Wireless
• Continuous Data Protection
• SSL VPN Secure Remote Access
• Content Filtering
• Secure Wireless Solutions
• Email Security
• SonicWALL GMS and ViewPoint
For further information, visit:
<http://livedemo.sonicwall.com/>
TZ_210_GSG.book Page 61 Thursday, November 13, 2008 7:41 PM
Page 62 User Forums
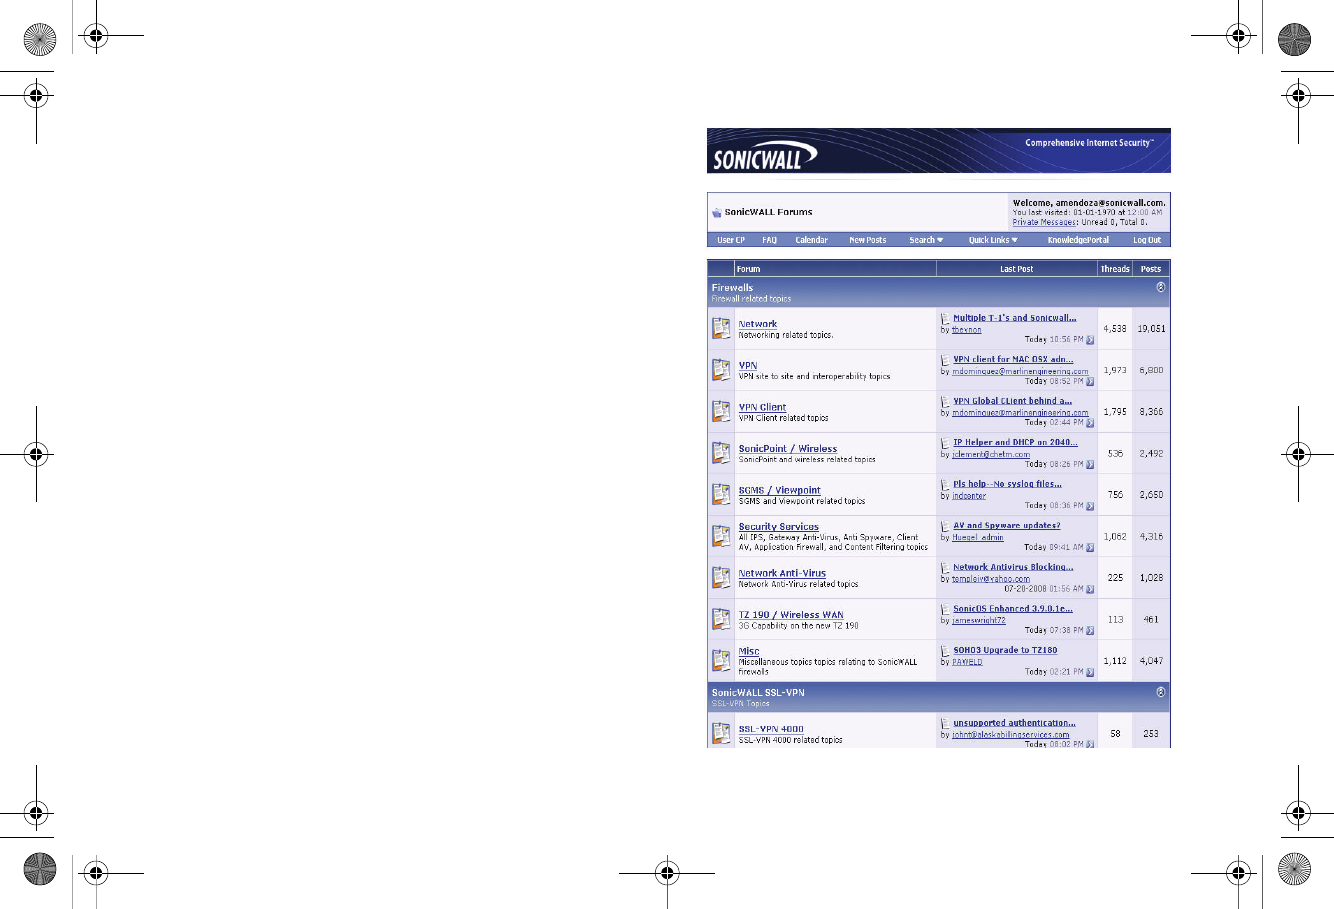
User Forums
The SonicWALL User Forums is a resource that provides users
the ability to communicate and discuss a variety of security and
appliance subject matters. In this forum, the following
categories are available for users:
• Content Security Manager topics
• Continuous Data Protection topics
• Email Security topics
• Firewall topics
• Network Anti-Virus topics
• Security Services and Content Filtering topics
• SonicWALL GMS and Viewpoint topics
• SonicPoint and Wireless topics
• SSL VPN topics
• TZ 210 / Wireless WAN - 3G Capability topics
• VPN Client topics
• VPN site-to-site and interoperability topics
For further information, visit:
<https://forum.sonicwall.com/>
TZ_210_GSG.book Page 62 Thursday, November 13, 2008 7:41 PM
SonicWALL TZ 210 Series Getting Started Guide Page 63
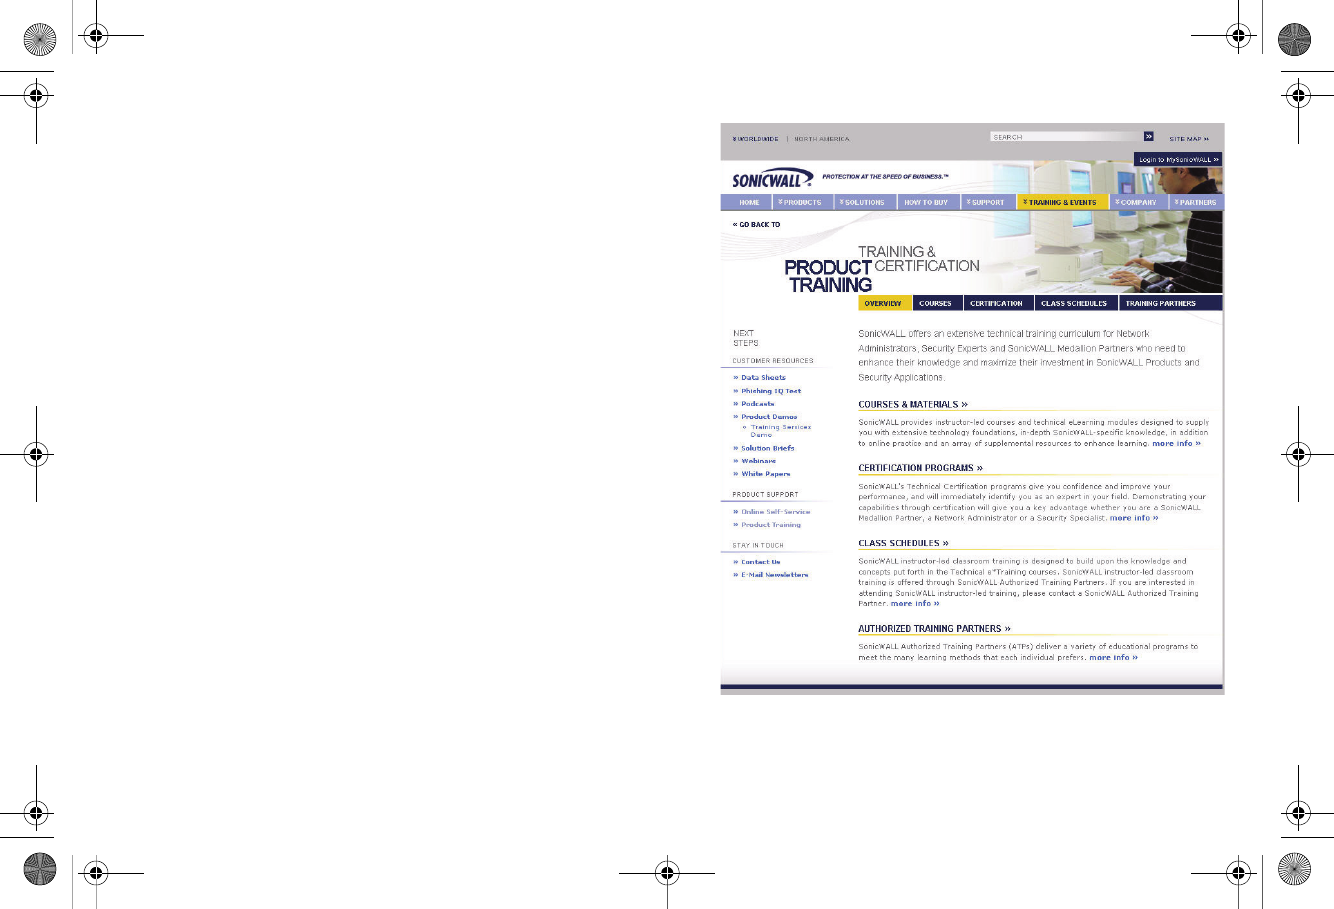
Training
SonicWALL offers an extensive sales and technical training
curriculum for Network Administrators, Security Experts and
SonicWALL Medallion Partners who need to enhance their
knowledge and maximize their investment in SonicWALL
Products and Security Applications. SonicWALL Training
provides the following resources for its customers:
• E-Training
• Instructor-Led Training
• Custom Training
• Technical Certification
• Authorized Training Partners
For further information, visit:
<http://www.sonicwall.com/us/training.html>
TZ_210_GSG.book Page 63 Thursday, November 13, 2008 7:41 PM

Page 64 Related Documentation
Related Documentation
See the following related documents for more information:
• SonicOS Enhanced Administrator’s Guide
• SonicOS Enhanced Release Notes
• SonicOS Enhanced Feature Modules
• Dashboard
• High Availability
• Multiple Admin
• NAT Load Balancing
• Packet Capture
• Radio Frequency Monitoring
• Single Sign-On
• SSL Control
• Virtual Access Points
• SonicWALL GMS 5.0 Administrator’s Guide
• SonicWALL GVC 4.0 Administrator’s Guide
• SonicWALL ViewPoint 5.0 Administrator’s Guide
• SonicWALL GAV 4.0 Administrator’s Guide
• SonicWALL IPS 2.0 Administrator’s Guide
• SonicWALL Anti-Spyware Administrator’s Guide
• SonicWALL CFS Administrator’s Guide
For further information, visit:
<http://www.sonicwall.com/us/support.html>
TZ_210_GSG.book Page 64 Thursday, November 13, 2008 7:41 PM