Sonim Technologies VK01011AA Bluetooth PTT Car Kit User Manual Use Manual
Sonim Technologies, Inc. Bluetooth PTT Car Kit Use Manual
Use Manual.pdf
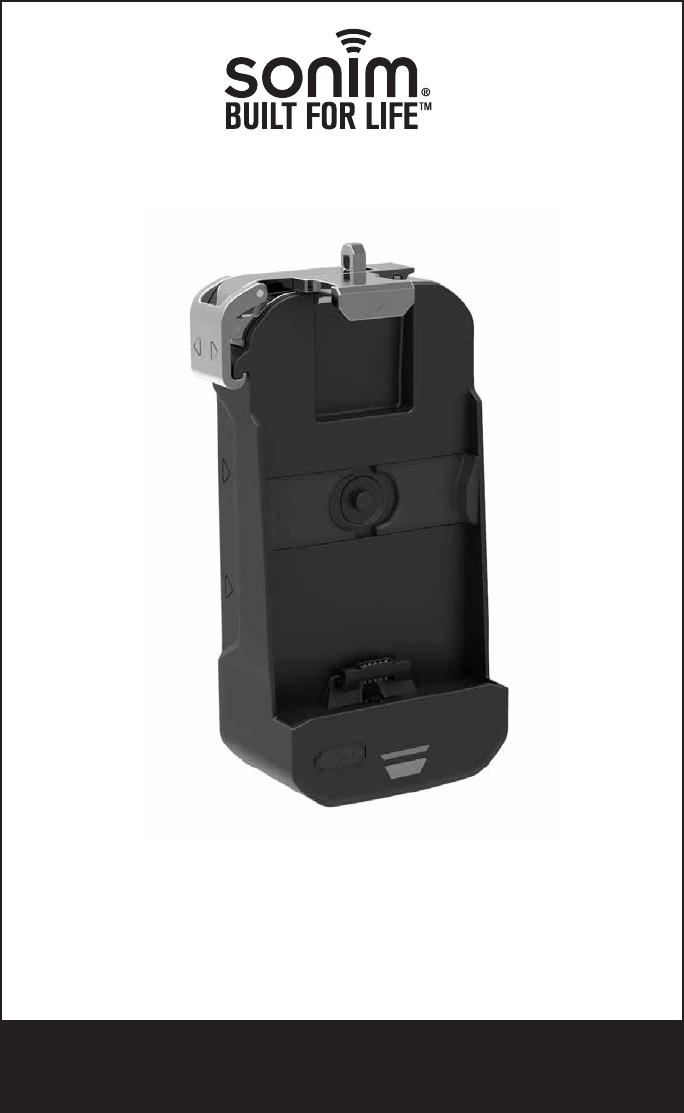
AVK01G
For support, please call (888) 858-9460,
or visit www.sonimtech.com
Bluetooth PTT Car Kit
for XP6® & XP7®
Owner’s / Installation Manual

2
Introduction
Please take the time to read all of the information in this manual. Familiarity
with operation and installation procedures will help you obtain the best possible
performance from your new Bluetooth PTT Car Kit for XP6® & XP7®. This car kit is
intended to be installed by a professional installer
WARNING: Changes or modifications made to this equipment not expressly approved by Sonim
Technologies, Inc. for compliance could void the user’s authority to operate the equipment.
FCC Statement
• This device complies with part 15 of the FCC rules (FCC ID: WYPVK01011AA). Operation is
subject to the following two conditions:
• This device may not cause harmful interference.
• This device must accept any interference received, including interference that may cause
undesired operation.
• This device has been tested and found to comply with the limits for a Class B digital device,
pursuant to Part 15 of the FCC Rules. These limits are designed to provide reasonable
protection against harmful interference in a residential installation. This equipment
generates, uses, and can radiate radio frequency energy, and, if not installed and used in
accordance with the instructions, may cause harmful interference to radio communications.
However, there is no guarantee that interference will not occur in a particular installation
if this equipment does cause harmful interference to radio or television reception, which
can be determined by turning the equipment off and on, the user is encouraged to try to
correct the interference by one or more of the following measures:
• Reorient or relocate the receiving antenna.
• Increase the separation between the equipment and receiver.
• Connect the equipment into an outlet on a circuit different from that to which the receiver
is connected.
• Consult the dealer or an experienced radio/TV technician for help.
FCC Caution
Any changes or modifications not expressly approved by the party responsible for
compliance could void the user’s authority to operate the equipment.
The antenna(s) used for this transmitter must not be co-located or operating in conjunction
with any other antenna or transmitter.
CE Statement
This device complies with the R&TTE directive (1999/5/EC), the EMC Directive (2004/108/
EC), and the Low Voltage Directive (2006/95/EC) issued by the Commision of the European
Community.
IC Statement
Operation is subject to the following two conditions:
1. This device does not cause harmful interference.
2. This device must accept any interference, including interference that may cause undesired
operation of the device.
CE Mark & NB Identification Number
1 7 9 7
This device complies with RSS-310 of Industry Canada (IC:8090A-VK01011AA).
3
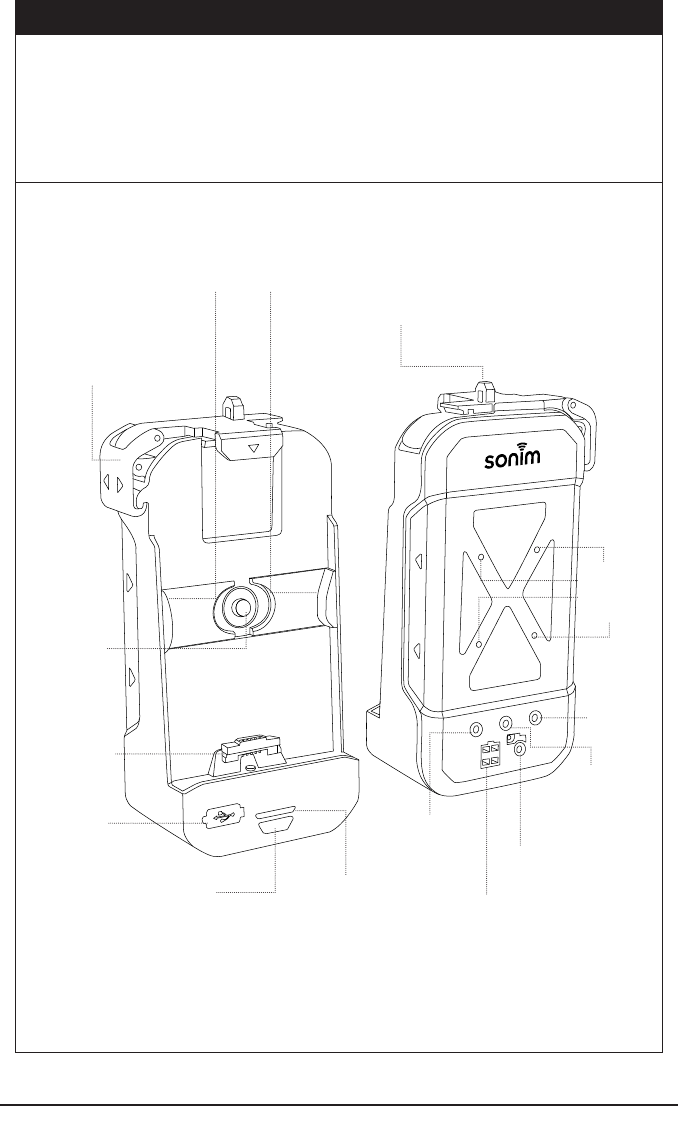
Includes:
1.) Cradle
2.) Speaker with
2m cable
3.) PTT Button with
2m cable
4.) Microphone with
2m cable
5.) 2m Wiring Harness
6.) Mount
7.) Screws:
Speaker (2) -12.5 x 15.0mm
Mounting Bracket (4) - 6.5 x 12.0mm
XP6-XP7
Width Adjustment
Phone Lockdown
Latch
Sonim USB
Connector
USB Port
Bluetooth Pairing
Button
LED Status
Light
Microphone
or Optional
Gooseneck Mic
(sold seperately)
Power
Optional Palm Mic
(sold seperately)
Mount
Holes
Optional Padlock
Location (3mm lock)
Width
Adjustment
Release
Button
LR
Speaker
PTT Button
or Optional
Foot Pedal
(sold seperately)
4
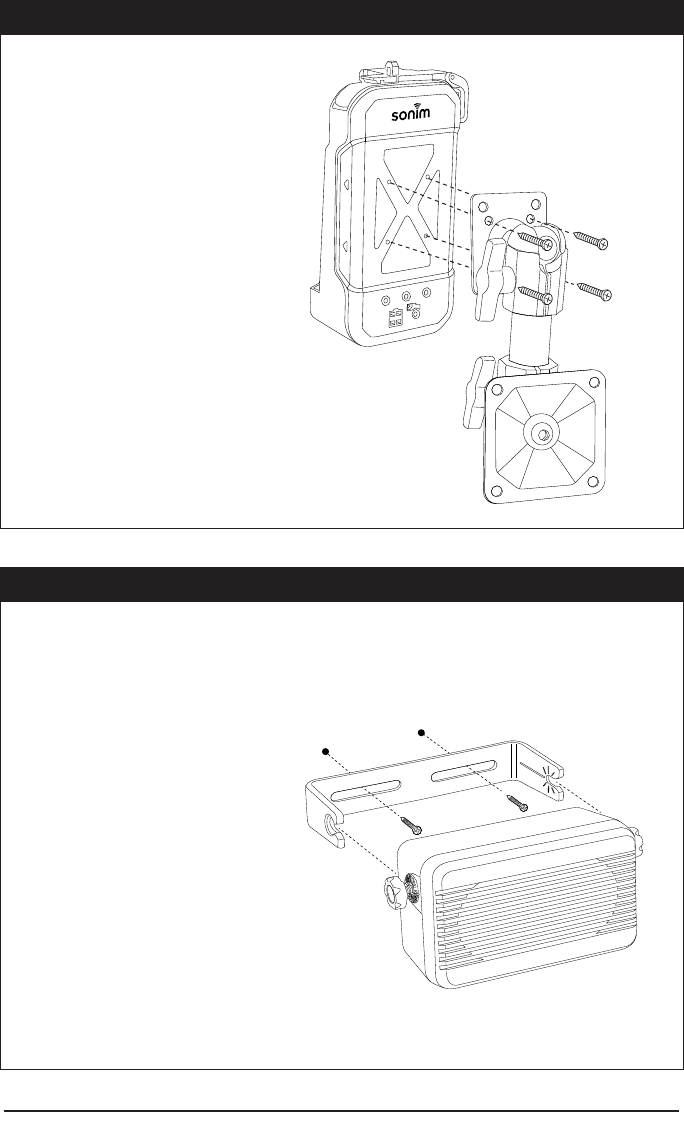
Mounting Bracket
The mounting bracket gives the
convenience and adjustability to
have the car kit installed where the
vehicle operator needs and wants it.
The bracket should be installed in
a location that does not interfere
with the normal operation of the
vehicle or over the vehicles air bag
deployment areas.
The mount attaches to the back of
the car kit with 4 supplied screws.
LR
Speaker Installation
The speaker should be mounted on the passenger side of the vehicle beneath the dashboard at
least 4 feet away from the Car Kit. Do not mount on rear window shelf or on the dashboard.
1. Remove the bracket from the
speaker by loosening the side
thumb screws.
2. Using the mounting bracket as
template, drill the mounting holes
and attach it to your selected
location with the provided self-
tapping screws.
3. Reattach the speaker to the
mounting bracket tightening it
down to your preferred angle.
4. Plug the speakers blue connection
end into the back of the Car Kit’s
corresponding blue socket.
Mount to vehicle screws are not included with
this car kit. Please consult your installer for the
appropriate screws for your installation.
5
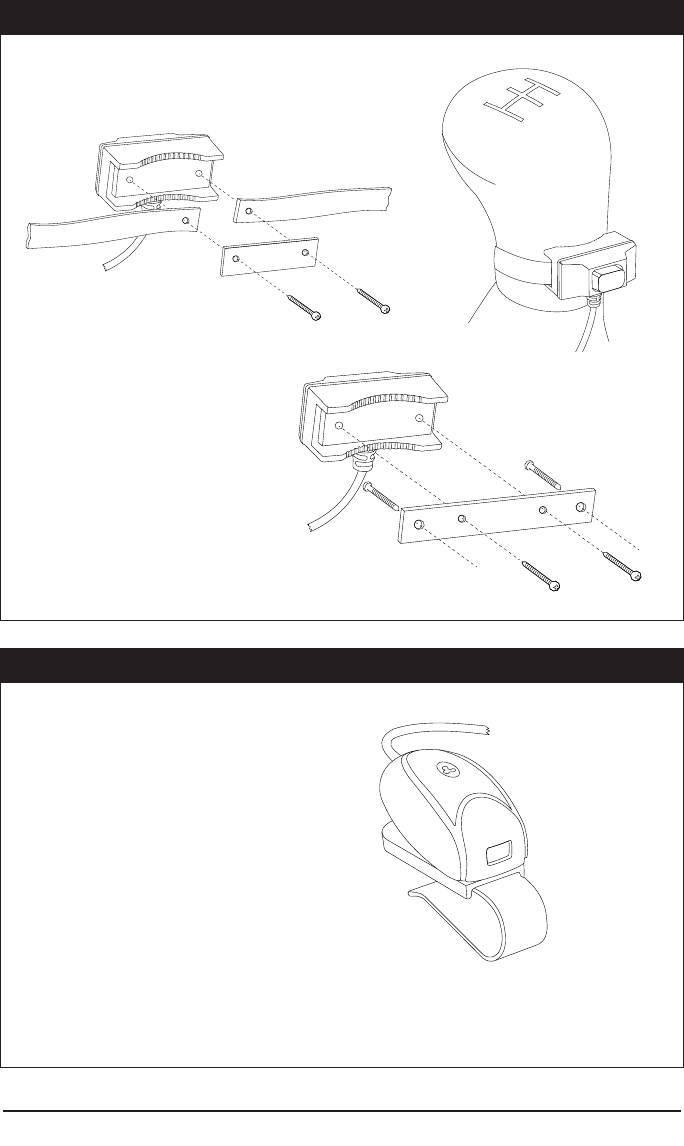
PTT Button
Microphone Placement
1. Facing the microphone directly
at the driver, mount the
microphone on the sun visor
or the headliner above.
2. Plug the microphones green
connection end into the back
of the Car Kit’s corresponding
green socket. Carefully conceal
cables to avoid any visual or
physical hindrances.
1. For gear shift PTT attachment,
install and use the supplied
velcro strip.
2. To place the PTT on a flat
surface in your vehicle, replace
small plastic back with larger
supplied plastic part and screw
mount the PTT into desired
location.
3. Plug the PTT pink connector
end into the back of the Car
Kit’s corresponding pink
socket.
6
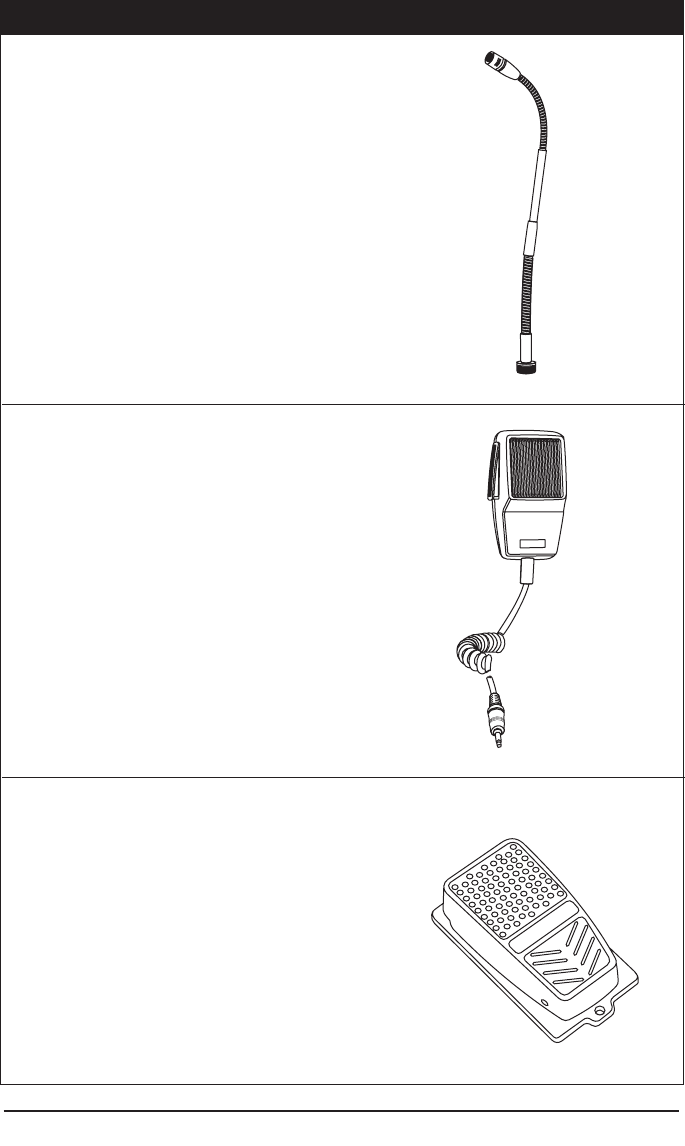
Optional Accessories (sold seperately)
Gooseneck Microphone
1. Mount the microphone in the optimum location
for the drivers use in the vehicle.
(See your Gooseneck Microphone manual for
detailed installation instructions.)
2. Plug the microphones connection end into
microphone socket on the back of the car kit.
(The Gooseneck Microphone optional accessory
replaces the included car kit microphone.)
Carefully conceal cables to avoid any visual or
physical hindrances.
(see pg. 3 for socket location)
Foot Pedal
1. Mount the Foot Pedal in the optimum
location for the drivers use in the vehicle.
(See your Foot Pedal manual for detailed
installation instructions.)
2. Plug the Foot Pedals connection end into
Foot Pedals socket on the back of the car
kit. (The Foot Pedal optional accessory
replaces the car kits PTT button.)
(see pg. 3 for socket location)
Palm Mic
1. Mount the palm mic bracket in the optimum
location for the drivers use in the vehicle.
(See your Palm Mic manual for detailed
installation instructions.)
2. Plug the palm mic connection end into palm
mic socket on the back of the car kit.
(see pg. 3 for socket location)

7
Setup
1. Voltage range: 12-32V
2. Connection Method
Green Cable – 12 VDC Constant - Power
White Cable – Switched +12V DC - Ignition
Black Cable – Ground
Green Cable – Telephone Mute (Optional Install)
3. No Phone Inserted into the Car Kit Cradle
• LED light will be active but will indicate that there is no phone being paired and
connected. The LED will glow Red in this mode.
• If you plug in a another device to the USB port at the front of the car kit, the output
that it will provide is 5V/1A.
• When the ignition is turned to Accessory mode, the car kit will stay active for 30
minutes.
• During voice call if the ignition is turned to Accessory mode the car kit will stay acitve
until the call is disconnected.
4. Bluetooth connection and pairing
AUTO PAIRING
If the handset is pairing for the first time -
1. Enable auto-pairing in the phones Bluetooth settings.
2. Install the handset in the car kit, the handset Bluetooth will turn on automatically.
3. Search “Sonim Car Kit AVK01G” in handset.
4. Press “Sonim Car Kit AVK01G” in handset to pair.
5. After paired successfully, the LED will turn to green.
If the handset had been paired before -
1. Install the handset in the car kit, the handset Bluetooth will turn on automatically.
2. Press front button under LED to pair.
3. After paired successfully, the LED will turn to green.
MANUAL PAIRING
1. Turn on Bluetooth from the phones settings.
2. Install the handset in the car kit.
3. Search “Sonim Car Kit AVK01G” in handset.
4. Press “Sonim Car Kit AVK01G” in handset to pair.
5. After paired successfully, the LED will turn to green.

8
Functions
Voice Call functionalities
Answer call Short press PTT button <400ms
Reject call Press and hold the PTT button for >400ms
End call Short press PTT button
Answer waiting call
a. Short press PTT button. This will put the active call on
hold and accept the waiting call
b. Press and hold the PTT button for >400ms to End the
active call and accept the waiting call
Swapping between the held
and active calls Short press PTT button
Transferring the call audio
Short press the ‘Bluetooth pairing button’ to transfer the
audio from Bluetooth car kit speaker to phone earpiece
and vice versa
End Conference call Press and hold the PTT button for >400ms
PTT Call functionalities
Answer PTT Call Incoming PTT call will be automatically accepted
Initiating PTT Call Short press PTT button (when the contact/group to be
dialed is highlighted)
PTT floor management
On PTT call, press and hold the PTT button to take the
floor and speak, release the held PTT button to release
the floor
End PTT call Please use the phone end button to end the PTT call
Music functionalities
Initiate music play Press the Bluetooth pairing button on the car kit
Play/Pause during
music play Press the Bluetooth pairing button on the car kit
Audio
Pick up sound in small mic Press small PTT button
Pick up sound in palm mic Press PTT button on the palm mic
Audio will always go
through large speaker Regardless if palm mic or small PTT button is used
Phone Inserted into the Car Kit Cradle (In Voice Call Mode Functionality)
End Call Press any button

9
Phone Inserted into the Car Kit Cradle (In PTT Call Mode Functionality)
Generate only ‘button
pressed’ and ‘button
released’ events
Just like pressing the PTT button on the device
Receiving a voice call The receiving “Ring Alert” shall change the mode to voice
call mode
Ending the PTT call Must be performed from the phone not the car kit
Additional functions
Handset manages all call
functions
The car kit with short and long presses activate certain
features in the handset but it is ultimately the handset that
is managing all of these features
Ignition in accessory mode The car kit will stay active for 30 minutes and will then
only power off until there is no active call in progress.

Copyright © 2015 Sonim Technologies, Inc.
SONIM and the Sonim logo are trademarks of Sonim Technologies,
Inc. Other company and product names may be trademarks or
registered trademarks of the respective owners with whom they
are associated. Rev. A 5-20-15
Warranty
Sonim 1-year limited warranty
Sonim provides a limited 1-year warranty for this accessory (hereinafter referred to
as “Product”).
Subject to the conditions of this limited 1-year Warranty Sonim warrants this product to
be free from major defects in design, material and workmanship at the time of its origi-
nal purchase by a consumer, and for a subsequent period of one (1) year.
Conditions
1) This warranty does not cover any failure of the Product due to normal wear and tear,
or due to misuse or abuse, including but not limited to use in other than the normal
and customary manner, in accordance with the Sonim Product specifications and
instructions for use and maintenance of the Product. Nor does this warranty cover
any failure of the Product due to software or hardware modification or adjustment,
acts of God or damage resulting from liquid interacting with the Product beyond
what is described as acceptable in the user guide for the Product.
2) This warranty does not cover Product failures caused by installations, modifications,
or repair or opening of the Product performed by any person other than a Sonim-
authorized person. Tampering with any of the seals on the Product will void the
warranty.
3) The warranty does not cover Product failures, which have been caused by use of
other peripheral devices, which are not Sonim certified and intended for use with
the Product.
4) THERE ARE NO EXPRESS WARRANTIES, WHETHER WRITTEN OR ORAL, OTHER
THAN THIS PRINTED LIMITED WARRANTY. ALL IMPLIED WARRANTIES,
INCLUDING WITHOUT LIMITATION THE IMPLIED WARRANTIES OF
MERCHANTABILITY OR FITNESS FOR A PARTICULAR PURPOSE, ARE LIMITED TO
THE DURATION OF THIS LIMITED WARRANTY. IN NO EVENT SHALL SONIM OR
ITS LICENSORS BE LIABLE FOR INCIDENTAL OR CONSEQUENTIAL DAMAGES OF
ANY NATURE WHATSOEVER, INCLUDING BUT NOT LIMITED TO LOST PROFITS OR
COMMERCIAL LOSS; TO THE FULL EXTENT THOSE DAMAGES CAN BE DISCLAIMED
BY LAW.
For support or questions related to the warranty please visit www.sonimtech.com.