Sonova USA TVLINKII Phonak TVLink II base User Manual
Phonak Inc Phonak TVLink II base Users Manual
UserManual.wiki
>
Sonova USA
>
TVLINKII User Manual
>
Users Manual
Contents
1.
RF_exposure_notice (User Manual)
2.
Users Manual
3.
User manual_exposure_notice
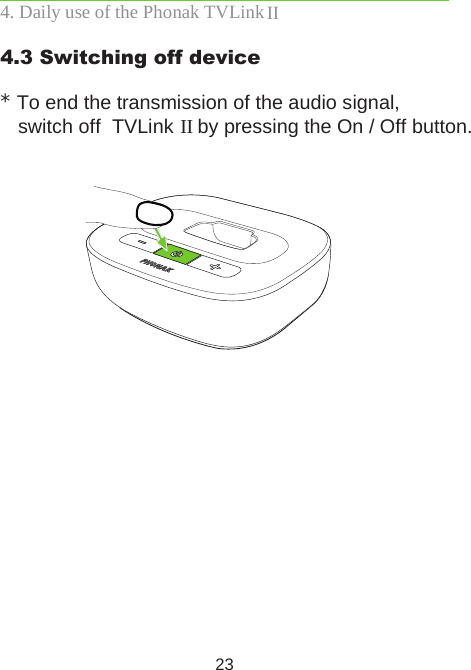
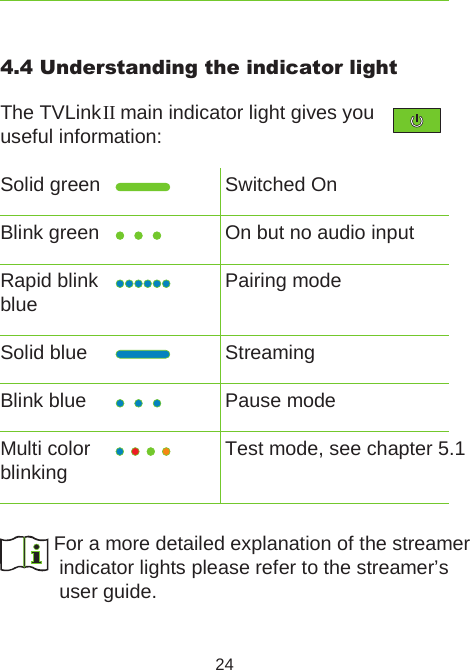
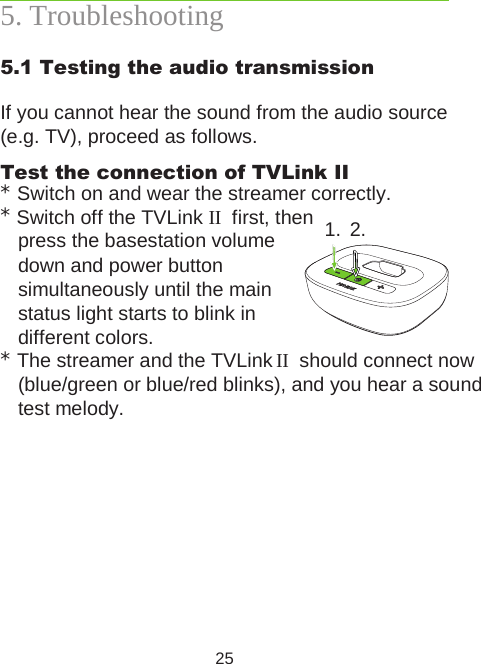
4.
User manual
Users Manual
Navigation menu
Upload a User Manual
Namespaces
Wiki Guide
HTML
PDF
Info
Views
User Manual
Discussion / Help
Navigation