Sony Group MEXBT3900 Bluetooth Audio System User Manual MEX BT39UW
Sony Corporation Bluetooth Audio System MEX BT39UW
UserManual.wiki
>
Sony Group
>
MEXBT3900 User Manual
>
User manual(MEX-BT39UW)
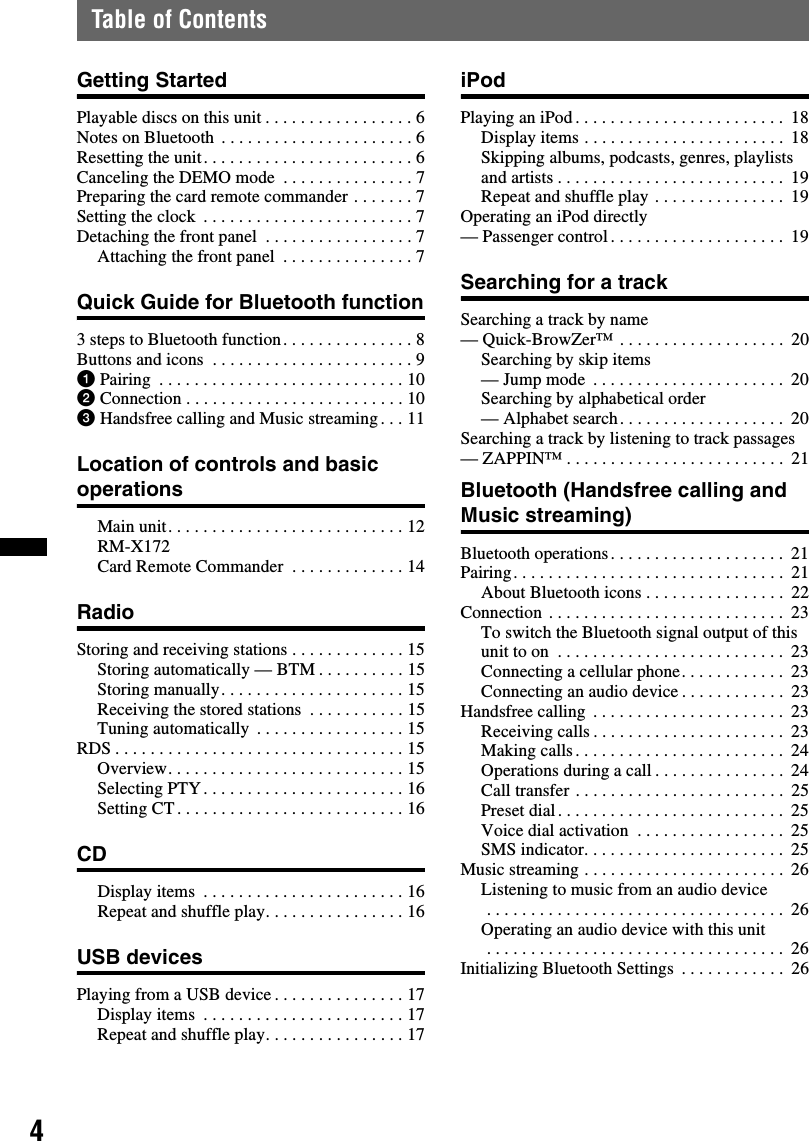
Contents
1.
User manual(MEX-BT39UW)
2.
User manual(MEX-BT3900U)
User manual(MEX-BT39UW)
Navigation menu
Upload a User Manual
Namespaces
Wiki Guide
HTML
PDF
Info
Views
User Manual
Discussion / Help
Navigation

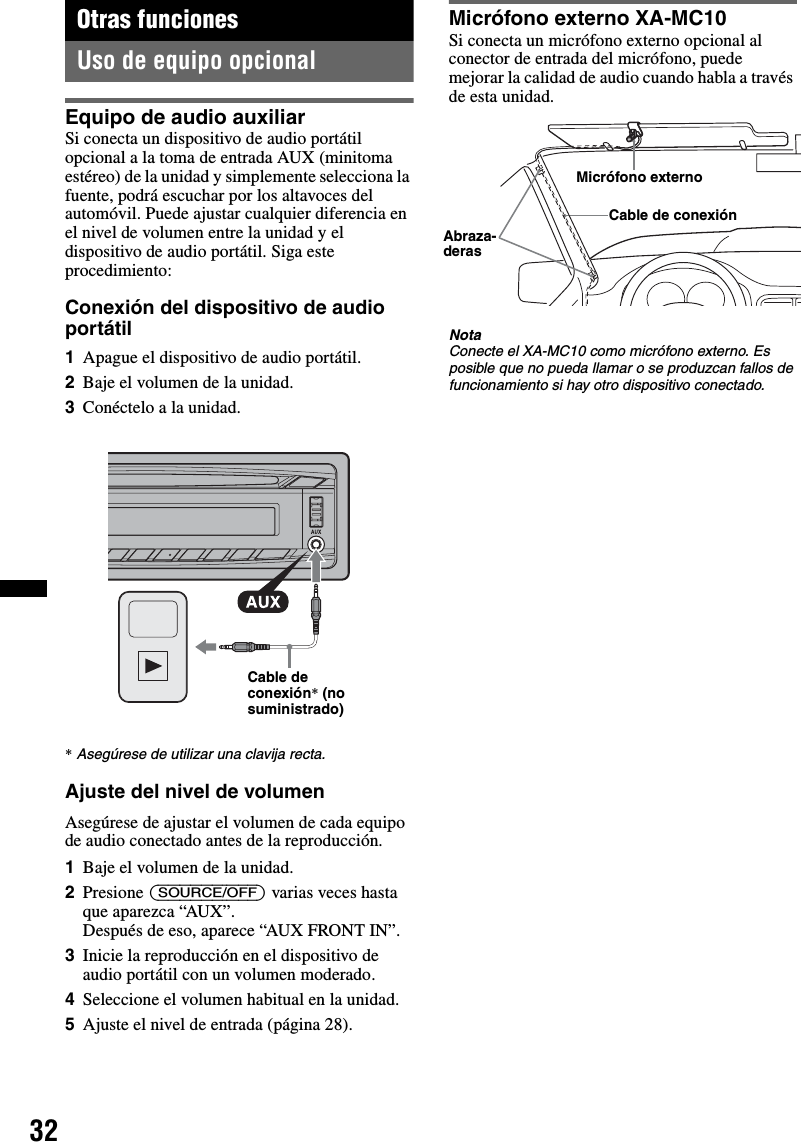
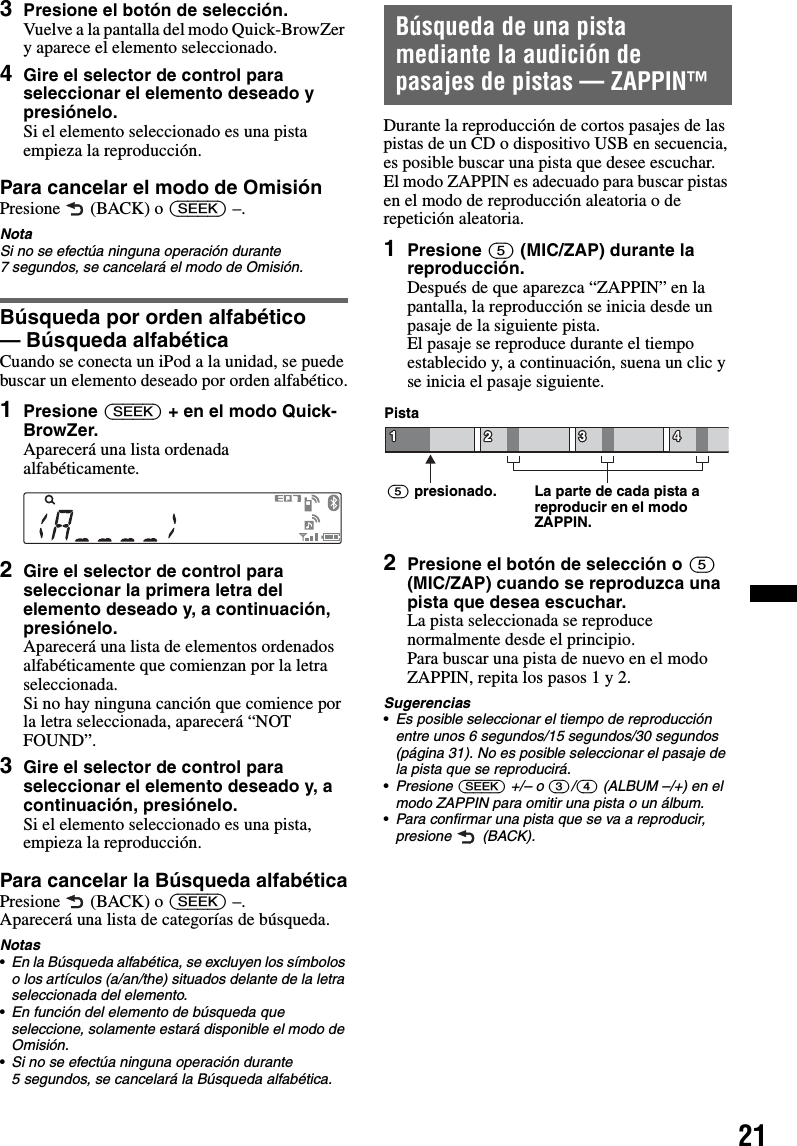
![19Skipping albums, podcasts, genres, playlists and artistsRepeat and shuffle play1During playback, press (1) (REP) or (2) (SHUF) repeatedly until the desired setting appears.After 3 seconds, the setting is complete.To return to normal play mode, select “ OFF” or “SHUF OFF.”Operating an iPod directly— Passenger controlYou can operate an iPod connected to the dock connector directly.1During playback, press and hold (MODE).“MODE IPOD” appears and you will be able to operate the iPod directly.To change the display itemPress (DSPL).The display items change as follows:Track name t Artist name t Album name t MODE IPOD t ClockTo exit the passenger controlPress and hold (MODE).Then “MODE AUDIO” will appear and the play mode will change to resuming mode.Notes•The volume can be adjusted only by the unit.•If this mode is canceled, the repeat setting will be turned off.To Do thisSkip Press (3)/(4) (ALBUM –/+) [press once for each]Skip continuously Press and hold (3)/(4) (ALBUM –/+) [hold to desired point]Select To play TRACK track repeatedly. ALBUM album repeatedly. PODCAST podcast repeatedly. ARTIST artist repeatedly. PLAYLIST playlist repeatedly. GENRE genre repeatedly.SHUF ALBUM album in random order.SHUF PODCAST podcast in random order.SHUF ARTIST artist in random order.SHUF PLAYLIST playlist in random order.SHUF GENRE genre in random order.SHUF DEVICE device in random order.](https://usermanual.wiki/Sony-Group/MEXBT3900.User-manual-MEX-BT39UW/User-Guide-1367384-Page-19.png)
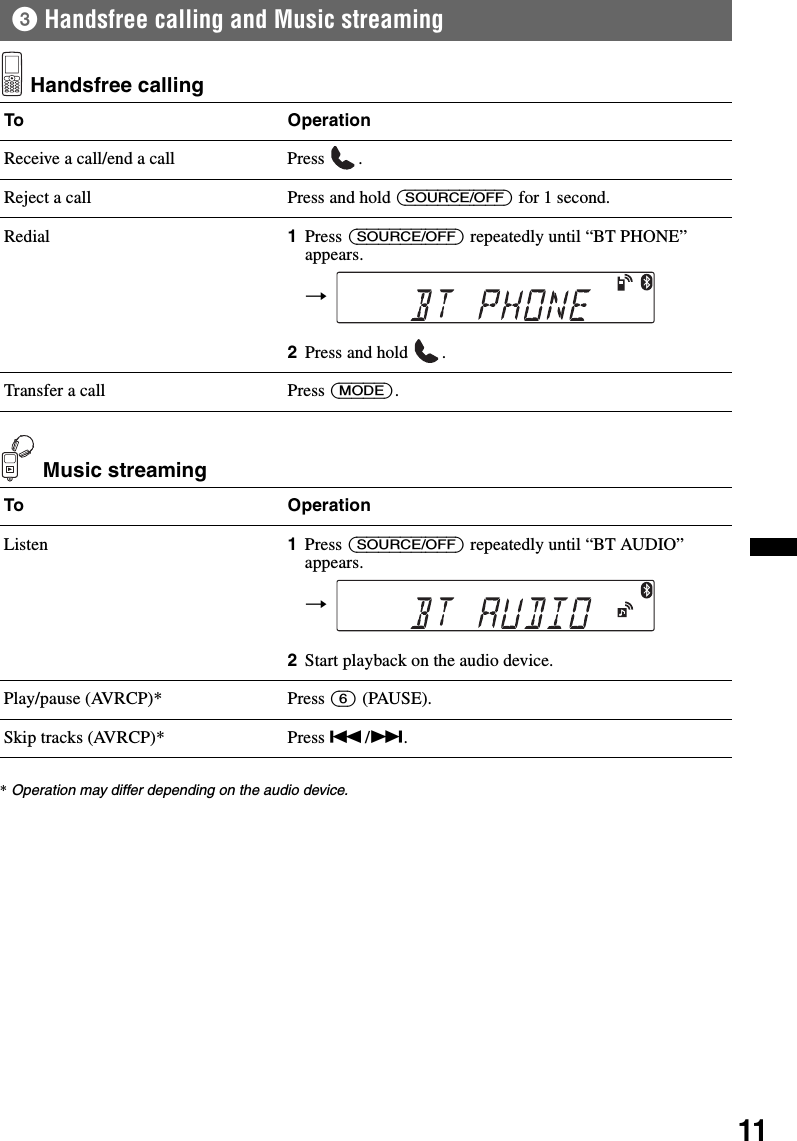
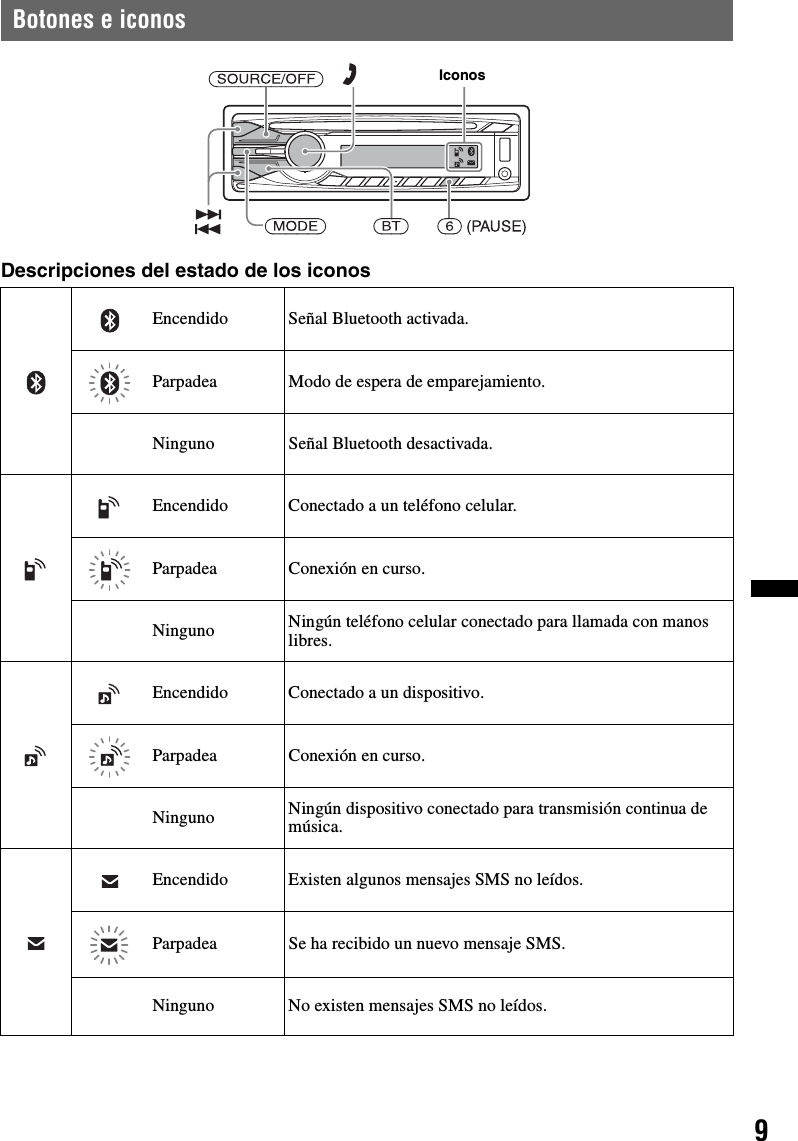
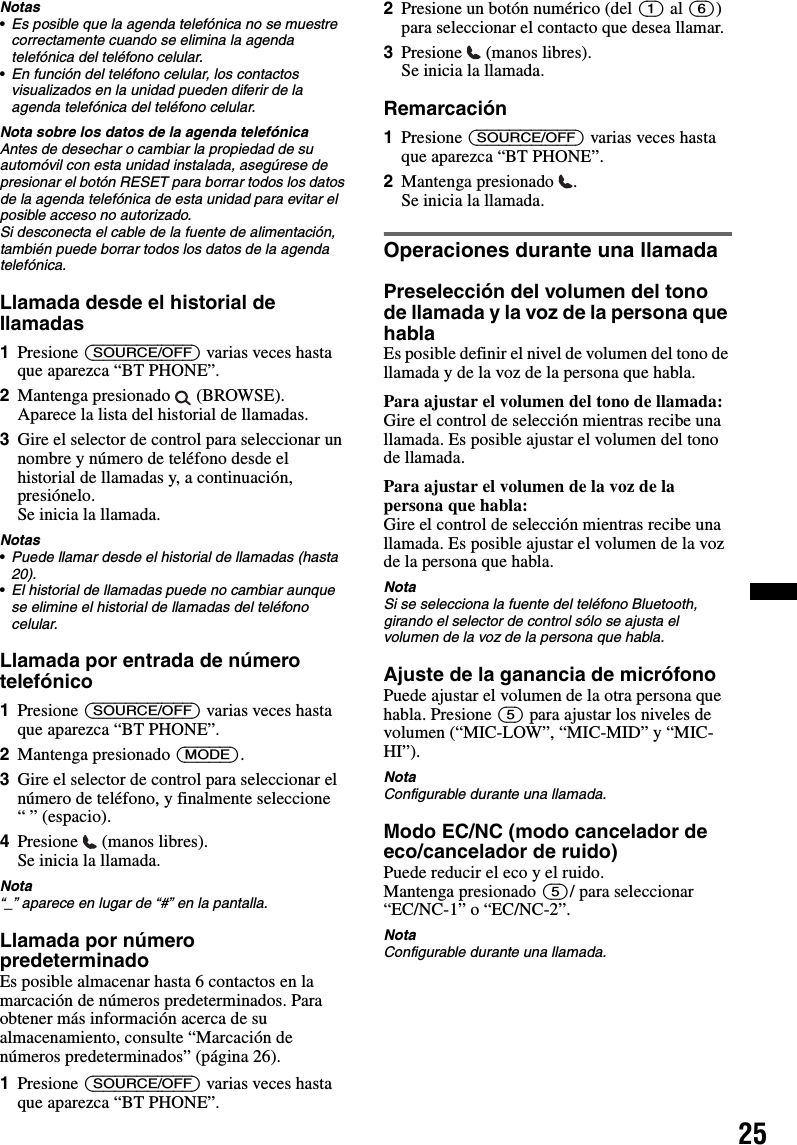
![26Music streamingListening to music from an audio deviceYou can listen to music of an audio device on this unit if the audio device supports A2DP (Advanced Audio Distribution Profile) of Bluetooth technology.1Turn down the volume on this unit.2Press (SOURCE/OFF) repeatedly until “BT AUDIO” appears.3Operate the audio device to start playback.4Adjust the volume on this unit.Adjusting the volume levelThe volume level is adjustable for any difference between the unit and the Bluetooth audio device.1Start playback of the Bluetooth audio device at a moderate volume.2Set your usual listening volume on the unit.3Press the select button.4Rotate the control dial until “BTA VOL” appears, and rotate the volume control dial to adjust the input level (“+18dB” – “0dB” – “– 8dB”).Operating an audio device with this unitYou can perform the following operations on this unit if the audio device supports AVRCP (Audio Video Remote Control Profile) of Bluetooth technology. (The operation differs depending on the audio device.)*1 Press repeatedly until the desired setting appears.*2 Depending on the device, it may be necessary to press twice.Operations other than the above should be performed on the audio device.Notes•Depending on the audio device, information, such as title, track number/time, playback status, etc., may not be displayed on this unit. The information is displayed during Bluetooth Audio playback only.•Even if the source is changed on this unit, playback of the audio device does not stop.TipYou can connect a cellular phone that supports A2DP (Advanced Audio Distribution Profile) as an audio device and listen to music.Initializing Bluetooth SettingsYou can initialize all the Bluetooth-related settings from this unit.1Press and hold (SOURCE/OFF) for 1 second to turn off the power.2Press and hold the select button.The menu list appears.3Rotate the control dial to select “BT INIT,” then press it.The confirmation appears.4Rotate the control dial to select “INIT-YES,” then press it.“INITIAL” flashes while initializing the Bluetooth settings.“COMPLETE” appears when initializing has finished.NoteWhen disposing of this unit, preset numbers should be deleted with “BT INIT.”To Do thisRepeat play Press (1) (REP)*1Shuffle play Press (2) (SHUF)*1Skip albums Press (3)/(4) (ALBUM –/+)[press once for each album]Play Press (6) (PAUSE)*2 on this unit.Pause Press (6) (PAUSE)*2 on this unit.Skip tracks Press SEEK –/+ (./>) [press once for each track]Reverse/Fast-forward Press and hold SEEK –/+ (./>) [hold to desired point]](https://usermanual.wiki/Sony-Group/MEXBT3900.User-manual-MEX-BT39UW/User-Guide-1367384-Page-26.png)


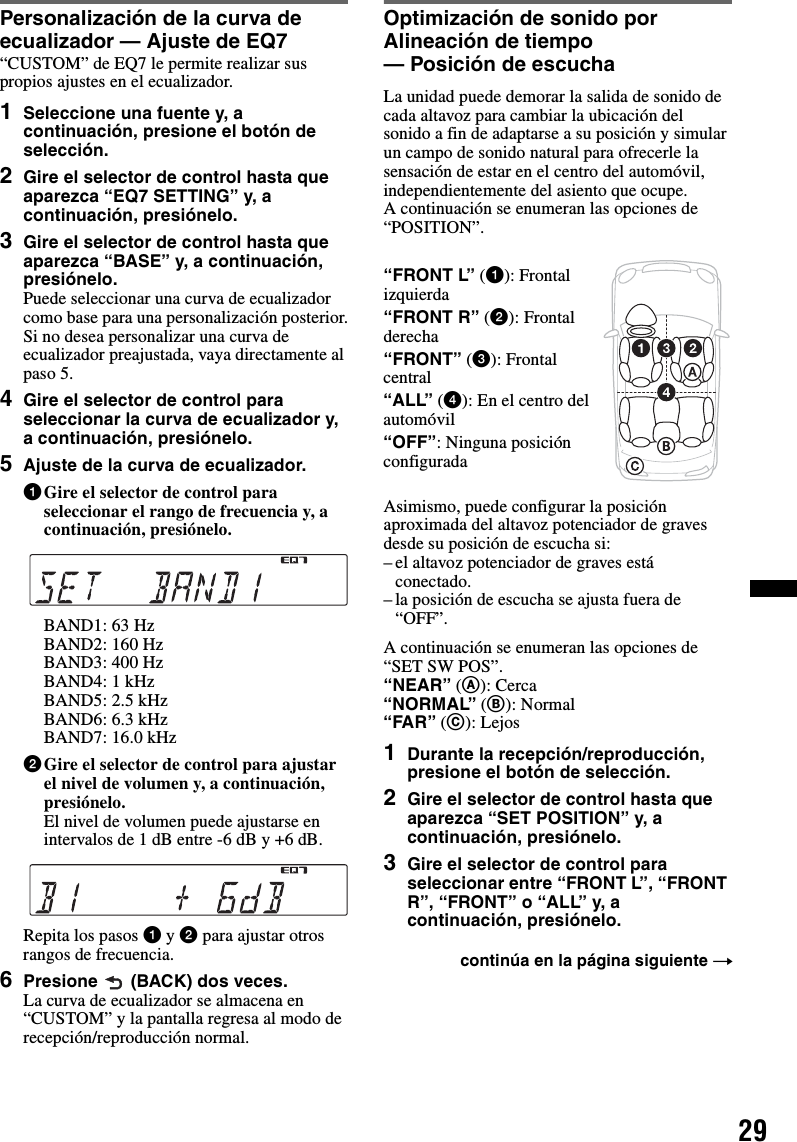
![19*En caso de que se conecte un iPod touch o un iPhone, o si la última vez se realizó la reproducción en el iPod en el modo de control de pasajero, el logotipo no aparecerá en la pantalla.2Ajuste el volumen.Mantenga presionado (SOURCE/OFF) 1 segundo para detener la reproducción.Extracción del iPod1Detenga la reproducción del iPod.2Extraiga el iPod.Precaución para iPhoneAl conectar un iPhone mediante USB, el volumen del teléfono se controla a través del iPhone. Para que el volumen del dispositivo no sea extremadamente alto tras una llamada, durante las llamadas, no lo aumente en la unidad.Notas•No extraiga el panel frontal durante la reproducción del iPod, ya que podrá dañar los datos.•Esta unidad no puede reconocer el iPod a través de un concentrador USB.Sugerencias•Si se coloca la llave de encendido en la posición ACC, o si la unidad está encendida, el iPod se recarga.•Si el iPod se desconecta durante la reproducción, aparecerá “NO DEV” en la pantalla de la unidad.Modo de reanudaciónCuando el iPod se conecta al conector de base, el modo de esta unidad cambia al modo de reanudación y se inicia la reproducción en el modo ajustado por el iPod.En el modo de reanudación, no es posible utilizar los botones siguientes.– (1) (REP)– (2) (SHUF) Elementos de la pantallaAIndicación de la fuente (iPod)BNombre de la pista, Nombre del artista, Nombre del álbum, Número de pista/Tiempo de reproducción transcurrido, RelojPara cambiar los elementos de la pantalla B, presione (DSPL).SugerenciaSi se modifica álbum/podcast/género/artista/lista de reproducción, el número de elemento aparece durante unos instantes.NotaEs posible que algunos caracteres almacenados en el iPod no se visualicen correctamente.Omitir álbumes, podcasts, géneros, listas de reproducción y artistasReproducción repetida y aleatoria1Durante la reproducción, presione (1) (REP) o (2) (SHUF) varias veces hasta que aparezca el ajuste deseado.Después de 3 segundos, se completa el ajuste.Para volver al modo de reproducción normal, seleccione “ OFF” o “SHUF OFF”.Para Realice esta acciónOmitir Presione (3)/(4) (ALBUM –/+) [presionar una vez para cada opción]Omitir en forma continua Mantenga presionado (3)/(4) (ALBUM –/+) [mantener presionado hasta llegar al punto deseado]Seleccione Para reproducir TRACK pistas en forma repetida. ALBUM álbumes en forma repetida. PODCAST podcast en forma repetida. ARTIST artistas en forma repetida. PLAYLIST listas de reproducción en forma repetida. GENRE género en forma repetida.SHUF ALBUM álbumes en orden aleatorio.SHUF PODCAST podcast en orden aleatorio.SHUF ARTIST artistas en orden aleatorio.SHUF PLAYLIST listas de reproducción en orden aleatorio.SHUF GENRE género en orden aleatorio.SHUF DEVICE dispositivos en orden aleatorio.](https://usermanual.wiki/Sony-Group/MEXBT3900.User-manual-MEX-BT39UW/User-Guide-1367384-Page-57.png)

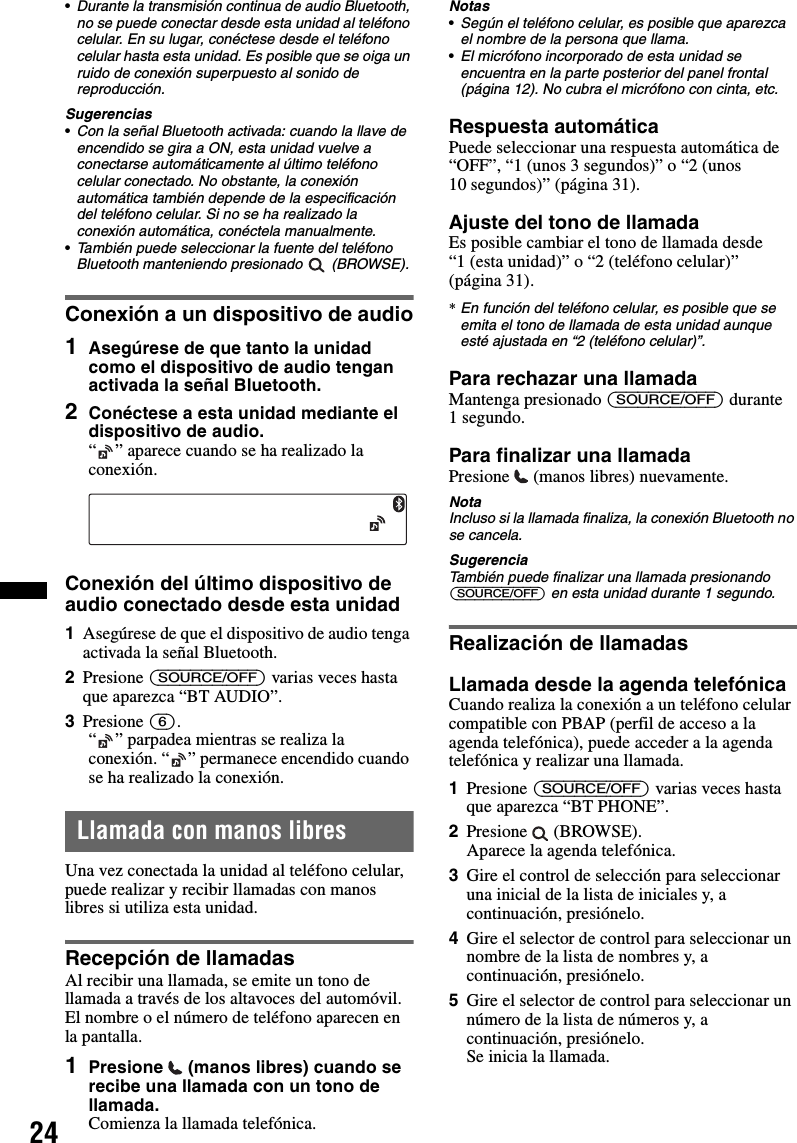
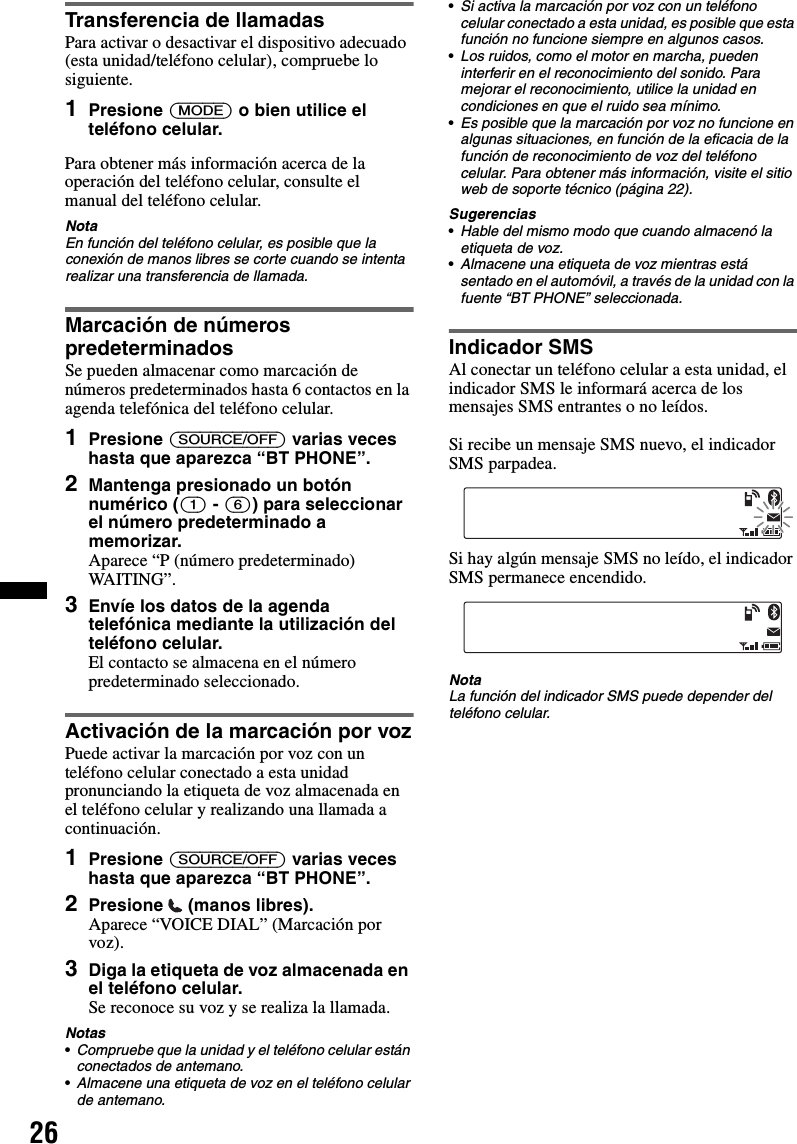
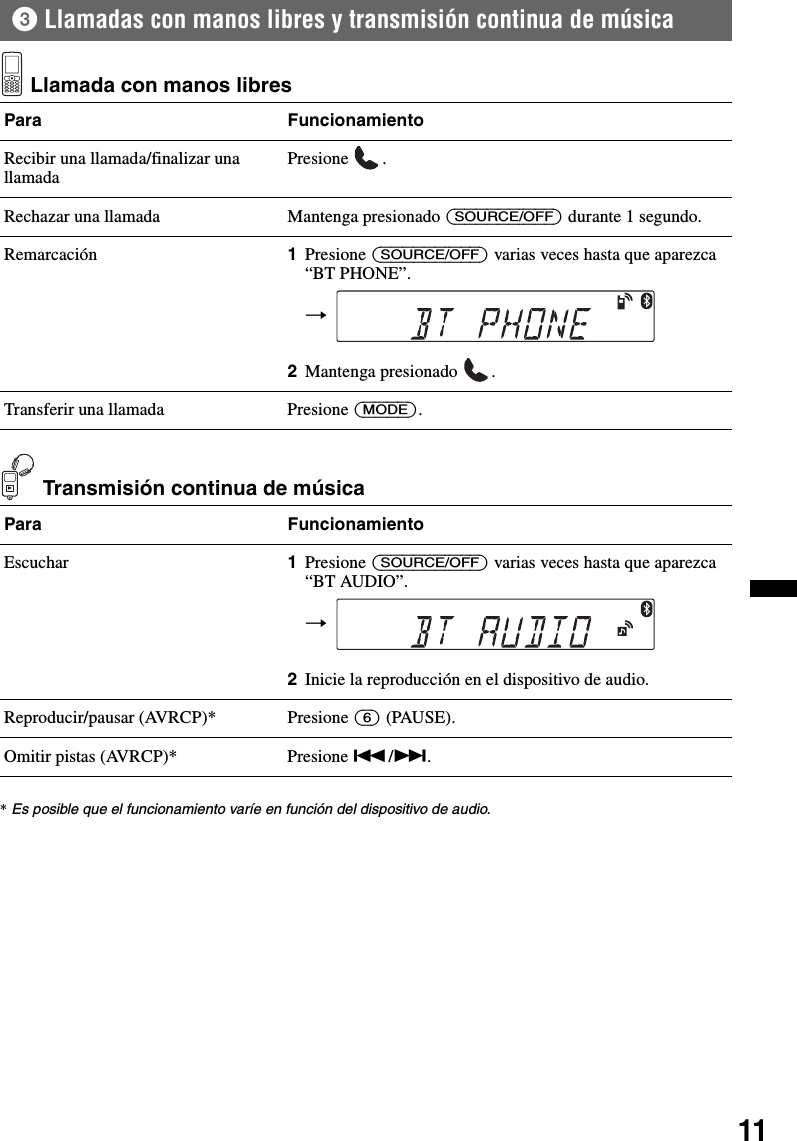
![27Transmisión continua de músicaEscuchar música desde un dispositivo de audioPuede escuchar música de un dispositivo de audio en esta unidad si el dispositivo de audio es compatible con A2DP (perfil de distribución avanzada de audio) de la tecnología Bluetooth.1Baje el volumen de esta unidad.2Presione (SOURCE/OFF) varias veces hasta que aparezca “BT AUDIO”.3Utilice el dispositivo de audio para iniciar la reproducción.4Ajuste el volumen en esta unidad.Ajuste del nivel de volumenPuede ajustar cualquier diferencia en el nivel de volumen entre la unidad y el dispositivo de audio Bluetooth.1Inicie la reproducción en el dispositivo de audio Bluetooth con un volumen moderado.2Seleccione el volumen habitual en la unidad.3Presione el botón de selección.4Gire el selector de control hasta que aparezca “BTA VOL” y gire el selector de control de volumen para ajustar el nivel de entrada (“+18dB” – “0dB” – “– 8dB”).Operación de un dispositivo de audio con esta unidadPuede realizar las siguientes operaciones en esta unidad si el dispositivo de audio es compatible con AVRCP (perfil de control remoto de audio y vídeo) de la tecnología Bluetooth. (La operación varía en función del dispositivo de audio.)*1 Presione varias veces hasta que aparezca la configuración deseada.*2 En función del dispositivo, es posible que sea necesario presionar dos veces.Otras operaciones que no sean las mencionadas anteriormente deben realizarse en el dispositivo de audio.Notas•En función del dispositivo de audio, la información como título, número de pista/tiempo, estado de reproducción, etc., puede no aparecer en esta unidad. La información se muestra durante la reproducción de audio Bluetooth únicamente.•Incluso si se cambia la fuente en esta unidad, la reproducción del dispositivo de audio no se detiene.SugerenciaPuede conectar un teléfono celular compatible con A2DP (perfil de distribución avanzada de audio) como un dispositivo de audio y escuchar música.Inicialización de los ajustes de BluetoothPuede inicializar todos los ajustes relacionados con Bluetooth desde esta unidad.1Mantenga presionado (SOURCE/OFF) durante 1 segundo para apagar.2Mantenga presionado el botón de selección.Aparece la lista de menú.3Gire el selector de control hasta que aparezca “BT INIT” y, a continuación, presiónelo.Aparece la confirmación.4Gire el selector de control hasta que aparezca “INIT-YES” y, a continuación, presiónelo.“INITIAL” parpadea durante la inicialización de los ajustes de Bluetooth.Aparece el mensaje “COMPLETE” al terminar la inicialización.NotaCuando vaya a deshacerse de esta unidad, los números predeterminados deben eliminarse con “BT INIT”.Para Realice esta acciónReproducción repetida Presione (1) (REP)*1Reproducción aleatoria Presione (2) (SHUF)*1Omitir álbumes Presione (3)/(4) (ALBUM –/+)[presionar una vez para cada álbum]Reproducir Presione (6) (PAUSA)*2 en esta unidad.Pausar Presione (6) (PAUSE)*2 en esta unidad.Para Realice esta acciónOmitir pistas Presione SEEK –/+ (./>) [presionar una vez para cada pista]Retroceder/avanzar rápidamenteMantenga presionado SEEK –/+ (./>) [mantener presionado hasta el punto deseado].](https://usermanual.wiki/Sony-Group/MEXBT3900.User-manual-MEX-BT39UW/User-Guide-1367384-Page-65.png)