Sony Group MLU200 Handy Reader Writer User Manual 04 01 06 GB
Sony Corporation Handy Reader Writer 04 01 06 GB
Manual
HANDY READER/WRITER
MLU-200
電気製品は、安全のための注意事項を守らないと、火災
や人身事故になることがあります。
このオペレーションマニュアルには、事故を防ぐための重要な注意事項と製
品の取り扱いかたを示してあります。このオペレーションマニュアルをよく
お読みのうえ、製品を安全にお使いください。お読みになったあとは、いつ
でも見られるところに必ず保管してください。
OPERATION MANUAL
1st Edition(Revised 1)
Serial No. 10001 and Higher(SYV)
Japanese/English
For the customers in U.S.A.
This equipment has been tested and found to comply with
the limits for a Class B digital device, pursuant to Part 15 of
the FCC Rules. These limits are designed to provide
reasonable protection against harmful interference in a
residential installation. This equipment generates, uses, and
can radiate radio frequency energy and, if not installed and
used in accordance with the instructions, may cause harmful
interference to radio communications. However, there is no
guarantee that interference will not occur in a particular
installation. If this equipment does not harmful interference
to radio or television reception, which can be determined by
turning the equipment off and on, the user is encouraged to
try correct the interference by one or more of the following
measures:
- Reorient or relocate the receiving antenna.
- Increase the separation between the equipment and
receiver.
- Connect the equipment into an outlet on a circuit different
from that to which the receiver is connected.
- Consult the dealer or an experienced radio/TV technician
for help.
You are cautioned that any changes or modifications not
expressly approved in this manual could void your authority
to operate this equipment.
If you have any questions about this product, you may call
: Sony’s Business Information Center (BIC) at 1-800-686-
SONY(7669) or write to : Sony Customer Information
Services Center 6900-29 Daniels Parkway, PMB 330 Fort
Myers, Florida 33912
Declaration of Conformity
Trade Name : SONY
Model : MLU-200
Responsible Party : Sony Electronics Inc.
Address : 680 Kinderkamack Road,
Oradell NJ 07649 U.S.A.
Telephone Number : 201-930-6972
This device complies with part 15 of the FCC Rules. Operation is
subject to the following two conditions: (1) This device may not
cause harmful interference, and (2) this device must accept any
interference received, including interference that may cause
undesired operation.
For the customers in Canada
This device complies with RSS-210 of Industry Canada.
Operation is subject to the following two conditions: (1) this
device may not cause interference, and (2) this device must
accept any interference, including interference that may
cause undesired operation of the device.
Pour les clients au Canada
Cet appareil satisfait á la norme CNR-210 de l’Industrie
Canada.
Son utilisation est soumise aux deux conditions suivantes:
(1) cet appareil ne peut provoquer d’interférences et (2) cet
appareil doit accepter toutes les interférences, y compris les
interférences qui peuvent provoquer un fonctionnement
indésirable de l’appareil.
0682
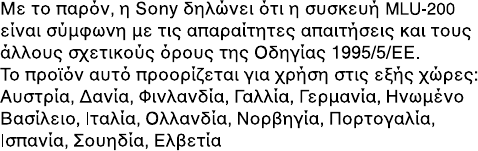
Hereby, Sony, declares that this MLU-200 is in compliance
with the essential requirements and other relevant provisions
of Directive 1995/5/EC.
This product is intended to be used in the following
countries.: Austria, Denmark, Finland, France, Germany, UK,
Italy, Netherlands, Norway, Portugal, Spain, Sweden,
Switzerland
Sony erklärt hiermit, dass diese MLU-200 den wesentlichen
Anforderungen und sonstigen Voraussetzungen der Direktive
1995/5/EC erfüllt.
Dieses Produkt ist für den Gebrauch in den folgenden
Ländern bestimmt: Dänemark, Deutschland, Finnland,
Frankreich, Großbritannien, Holland, Italien, Norwegen,
Österreich, Portugal, Schweden, Schweiz und Spanien.
Sony déclare par la présente que ce MLU-200 est en
conformité avec les exigences essentielles et les autres
stipulations pertinentes de la Directive 1995/5/CE.
Ce produit est destiné à être utilisé dans les pays suivants:
Autriche, Danemark, Finlande, France, Allemagne,
Royaume-Uni, Italie, Pays-Bas, Norvège, Portugal, Espagne,
Suède et Suisse.
Por la presente Sony declara que este MLU-200 cumple con
los requisitos esenciales y otras cláusulas relevantes de la
Directiva 1995/5/EC.
Este producto fue diseñado para ser utilizado en los
siguientes países: Austria, Dinamarca, Finlandia, Francia,
Alemania, Reino Unido, Italia, Holanda, Noruega, Portugal,
España, Suecia, Suiza (Continued)
English
Con ciï, Sony dichiara che questo MLU-200 ä conforme ai
requisiti essenziali e alle altre pertinenti disposizioni della
direttiva 1995/5/CE.
Questo prodotto è destinato ad essere usato nei seguenti
paesi: Austria, Danimarca, Finlandia, Francia, Germania,
Regno Unito, Italia, Paesi Bassi, Norvegia, Portogallo,
Spagna, Svezia, Svizzera
A Sony declara que o modelo MLU-200 está em
conformidade com as exigências essenciais e outras
providências pertinentes da Directiva 1995/5/EC.
Este produto foi projectado para uso nos seguintes países:
Áustria, Dinamarca, Finlândia, França, Alemanha, Reino
Unido, Itália, Holanda, Noruega, Portugal, Espanha,
Suécia e Suíça.
Sony verklaart hierbij dat de MLU-200 voldoet aan de
hoofdvereisten en andere relevante bepalingen van de
Richtlijn 1995/5/EC.
Dit product is bedoeld voor gebruik in de volgende landen:
Denemarken, Duitsland, Groot-Brittannië, Finland,
Frankrijk, Italië, Nederland, Noorwegen, Oostenrijk,
Portugal, Spanje, Zweden en Zwitserland
Sony erklærer herved, at denne MLU-200 er i
overensstemmelse med de grundlæggende krav og andre
relevante bestemmelser i Direktiv 1995/5/EC.
Dette produkt er beregnet til anvendelse i følgende lande:
Østrig, Danmark, Finland, Frankrig, Tyskland,
Storbritannien, Italien, Holland, Norge, Portugal, Spanien,
Sverige, Schweiz.
Sony betygar härmed att denna MLU-200 uppfyller de
väsentliga kraven och andra tillhörande villkor för EG-
direktiv 1995/5/EC.
Denna apparat är avsedd att användas i följande länder:
Österrike, Danmark, Finland, Frankrike, Tyskland,
Storbritannien, Italien, Holland, Norge, Portugal, Spanien,
Sverige och Schweiz.
Sony ilmoittaa täten, että tämä MLU-200 vastaa ohjeen
1995/5/EC olennaisia vaatimuksia ja muita vastaavia
säädöksiä.
Tämä laite on tarkoitettu käytettäväksi seuraavissa maissa:
Itävalta, Tanska, Suomi, Ranska, Saksa, Iso-Britannia,
Italia, Alankomaat, Norja, Portugali, Espanja, Ruotsi,
Sveitsi.

1(GB)
Table of Contents
Overview............................................................................................ 2(GB)
Location and Function of Parts ....................................................... 3(GB)
Front Panel .................................................................................. 3(GB)
Rear panel.................................................................................... 4(GB)
Connection......................................................................................... 6(GB)
RS-232C Communication ........................................................... 6(GB)
Infrared data trafsfer .................................................................... 6(GB)
Start-up.............................................................................................. 7(GB)
HEADER DISPLAY menu ......................................................... 8(GB)
MAIN MENU .................................................................................... 8(GB)
LOCATION DISPLAY menu ..................................................... 8(GB)
CUE DATA DISPLAY menu ................................................... 10(GB)
SEARCH menu ......................................................................... 12(GB)
Specifications................................................................................... 13(GB)
English

2(GB)
Overview
The MLU-200 is a handy reader/writer specifically
designed for use with the Tele-File1) system.
Features of MLU-200
No contact communication
It is possible to read and write data of the optional
device for the Tele-File system (MLB-1M-100/1TS-
100 etc.) without contact. Thanks to no contact
communication, there is no soiling or wearing down of
physical components. High reliability is thus
maintained even after repeated operations.
Compact and lightweight
Thanks to compact and lightweight, high movability is
realized.
Low power consumption and long continuous
operation
Low power consumption is realized. It is possible to
operate for 8 hours or more continuously under the
normal operation.
Mass data storage
MLU-200 has a memory of 512K bytes.
Thanks to adoption of the memory stick2), mass data
storage is realized.
Infrared communication
Data can be transferred between MLU-200 and an
external personal computer with infrared
communication.
Communication with personal computer
Data can be transferred with RS-232C or USB
communication between MLU-200 and an external
personal computer through an optional MLT-200
terminal.
Self-diagnostics
MLU-200 has self-diagnostics.
1) Tele-File
Tele-File is a trademark of Sony Corporation.
2) Memory stick
Memory stick is a trademark of Sony Corporation.
..........................................................................................................................................................................................................
3(GB)
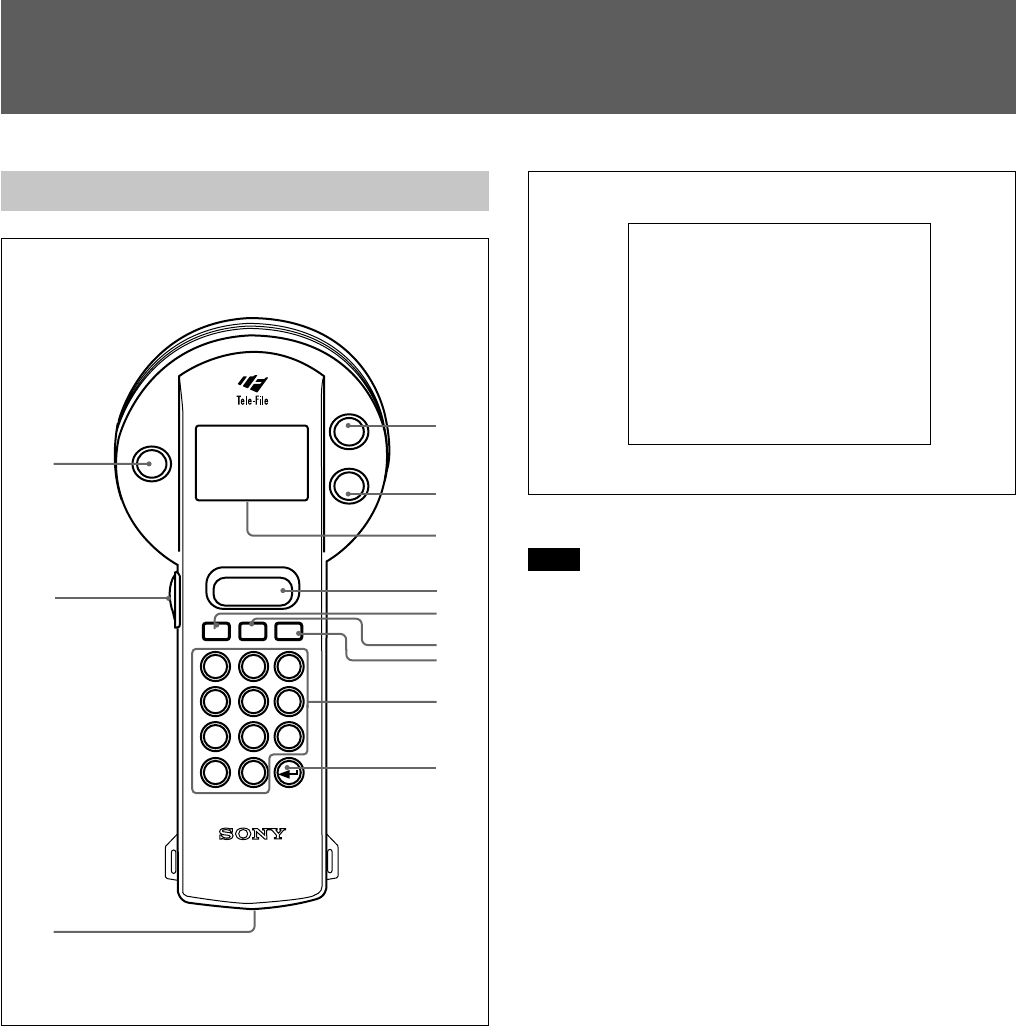
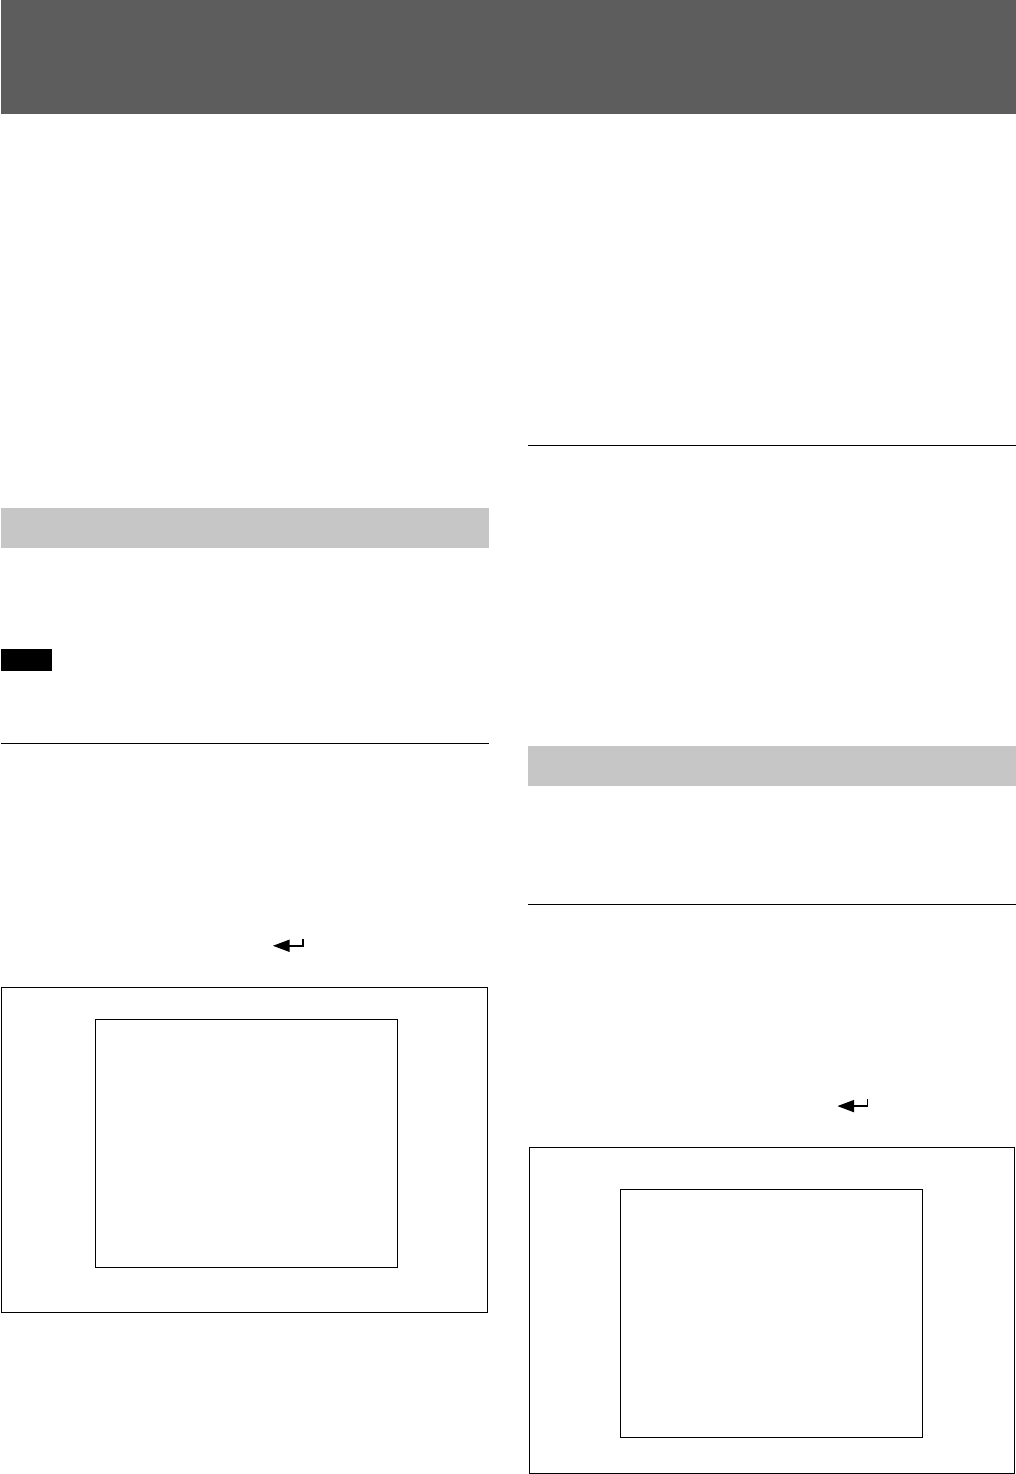
Location and Function of Parts
Front Panel
1 POWER key
Press this key to turn on and off the power.
When a battery pack is attached, a press of this key
turns on the power, then <MAIN MENU> is
displayed. When the <MAIN MENU> is displayed, a
press of this key turns off the power.
When a MLU-200 is in the sleep mode, a press of this
key releases the sleep mode.
<MAIN MENU>
Note
Even when the power is turned off, the electric current
is consumed. If you will not use a MLU-200 for a
long time, be sure to remove the battery pack.
2 Jog dial
Turn and click this dial to select the item in the menu
and to fix data when editing.
With turning this dial
• Selects the item.
• Select the item to be edited when editing the data.
• Move the cursor when editing the data.
With clicking this dial
• Fix the item to be selected.
• Fix the item to be edited when editing the data.
• Fix the contents to be edited when editing the data.
3 IrDA
Window for infrared transfers with a personal
computer and an optional MLT-200 terminal.
4 F1 key
Press this key to scroll the display in the left direction.
5 F2 key
Press this key to scroll the display in the right
direction.
6 Display
Menu and data are displayed.
POWER
ACCESS
HANDY READER/WRITER
MLU-200
F1
F2
ABC
CL BS SF
7DEF
8GHI
9
JKL
4MNO
5PQR
6
STU
1VWX
2YZ-
3
0•
1
2
3
4
5
6
7
8
9
q;
qs
qa
<MAIN MENU> HH:MM
1.HEADER DISPLAY
2.LOCATION DISPLAY
3.CUE DATA DISPLAY
4.SEARCH
5.REMOTE
6.SYSTEM MENU
4(GB)
RESET
EJECT
A
N
T
E
N
A
A
R
E
A
Location and Function of Parts
7 ACCESS key
Press this key to read and write data. Press this key
while positioning the data transfer area over an
optional memory label.
8 CL(CLear) key
Press this key to clear the input data when editing data.
With pressing this key together with the SF key, the
input data reverts.
This key is also pressed to return to the upper menu.
9 BS(Back Space) key
Press this key to delete a character on the cursor when
editing data.
!º SF(ShiFt) key
Press this key to input a character of an alphabet when
editing data. In the upper left side of the display,
[ABC] blinks. To release, press this key again. With
pressing this key together with the CL key, the edited
data reverts.
!¡ Alphabetical and numerical keys (A to Z, 0 to 9,
hyphen(-), space and period(.))
Press these keys to input characters when editing data.
These keys are also pressed to select the menu to be
displayed. To select the menu, press the numerical key
of the menu number in <MAIN MENU>.
!™ (Return) key
Press this key to fix the selection of item. The display
proceeds to the next stage.
This key is also pressed to fix the selection of item to
be edited and the contents to be edited when editing
data.
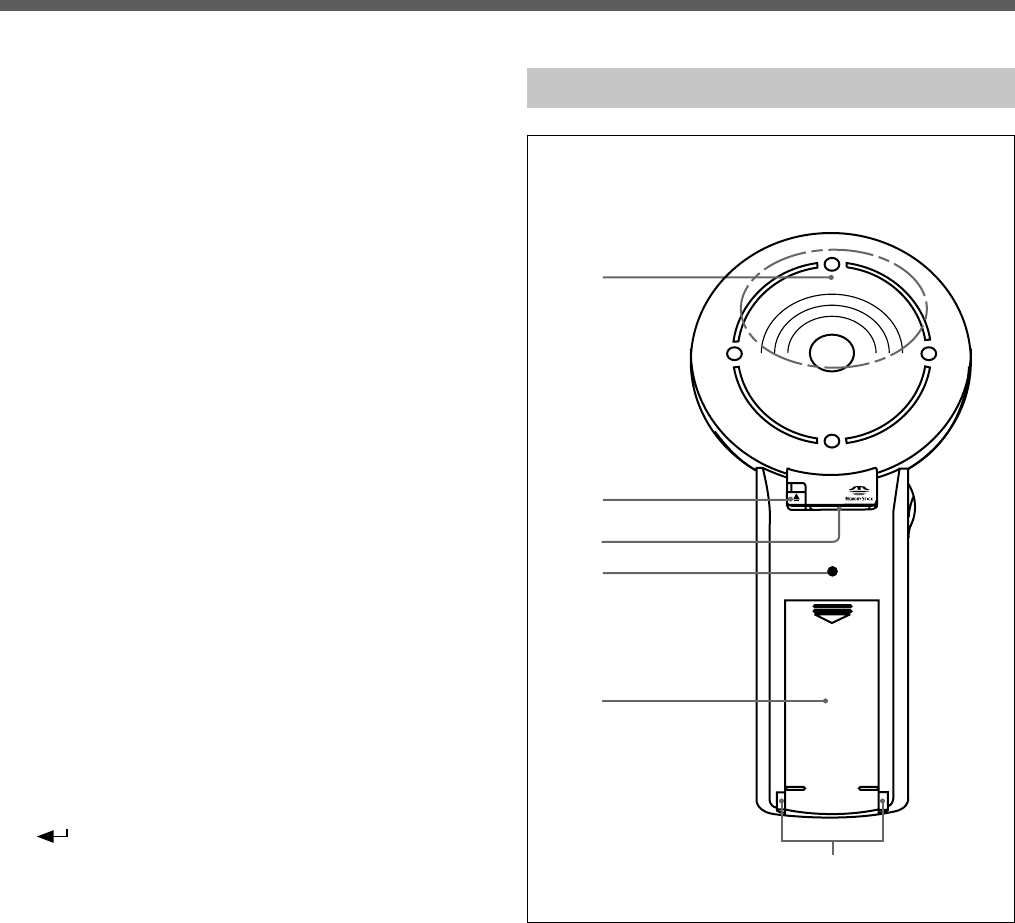
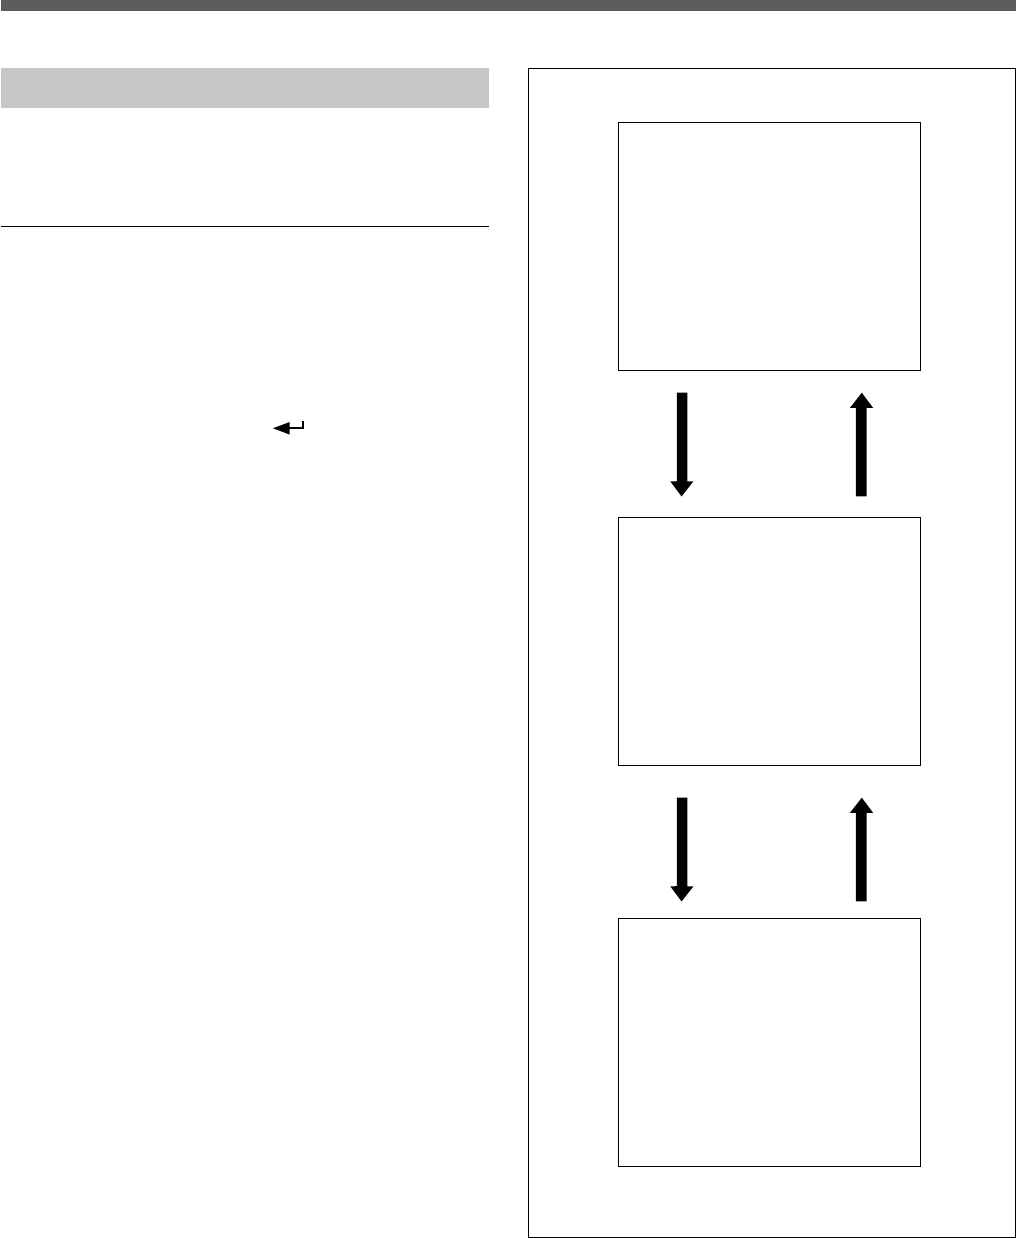
Rear panel
1 Data transfer area
Position this area over an optional memory label for
data transfer.
2 EJECT lever
Push this lever in the direction of v to eject a memory
stick.
3 Slit for the memory stick
Insert a memory stick into this slit.
4 RESET switch
Push this switch to reset a MLU-200.
1
2
3
4
6
5
5(GB)
5 Battery cover
Pull this cover in the direction of V to attach and
detach a battery pack. When the battery pack is
attached, the start-up display appears, then after
approx. 5 seconds <MAIN MENU> appears.
Start-up display
Note
Be sure to turn off the power when attaching and
detaching a battery pack to remain the stored data.
6 Charging terminals
These are charging terminals. When a MLU-200 is
put on a MLT-200 terminal with these terminals
connected with ones of the MLT-200, charging starts.
When the battery voltage of the battery pack is 0, to
charge the battery fully, it takes approx. 2 hours.
Note
While charging, the battery icon appears on the
display.
When charging with an optional MLT-200 terminal, be
sure to put a MLU-200 on the MLT-200 securely and
confirm that the battery icon flashes.
MLU-200 Version x.xx
yy-mm-dd HH:MM:SS
<MAIN MENU>
1.HEADER DISPLAY
2.LOCATION DISPLAY
3.CUE DATA DISPLAY
6(GB)
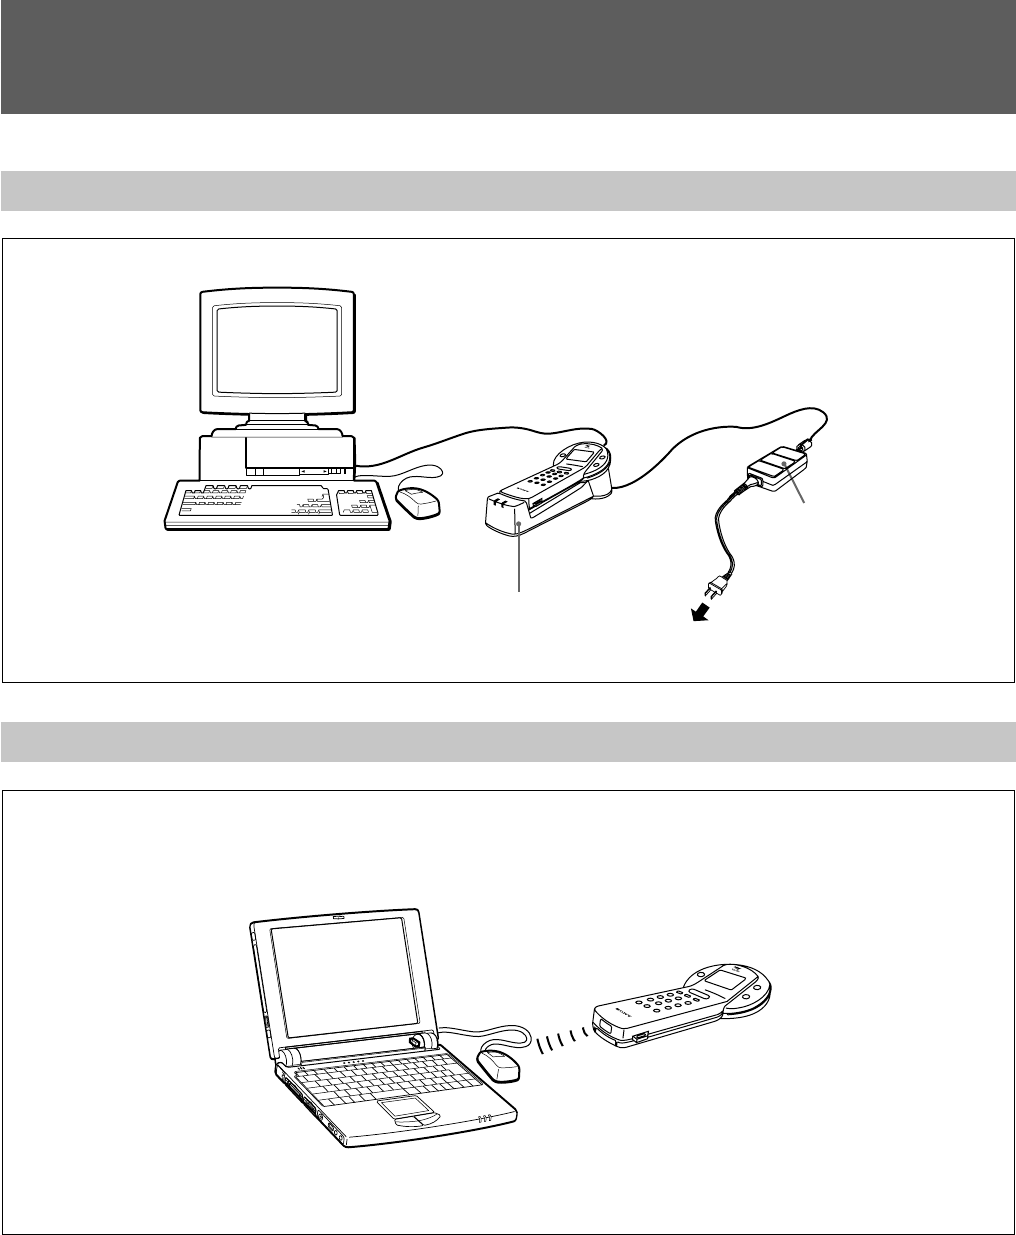
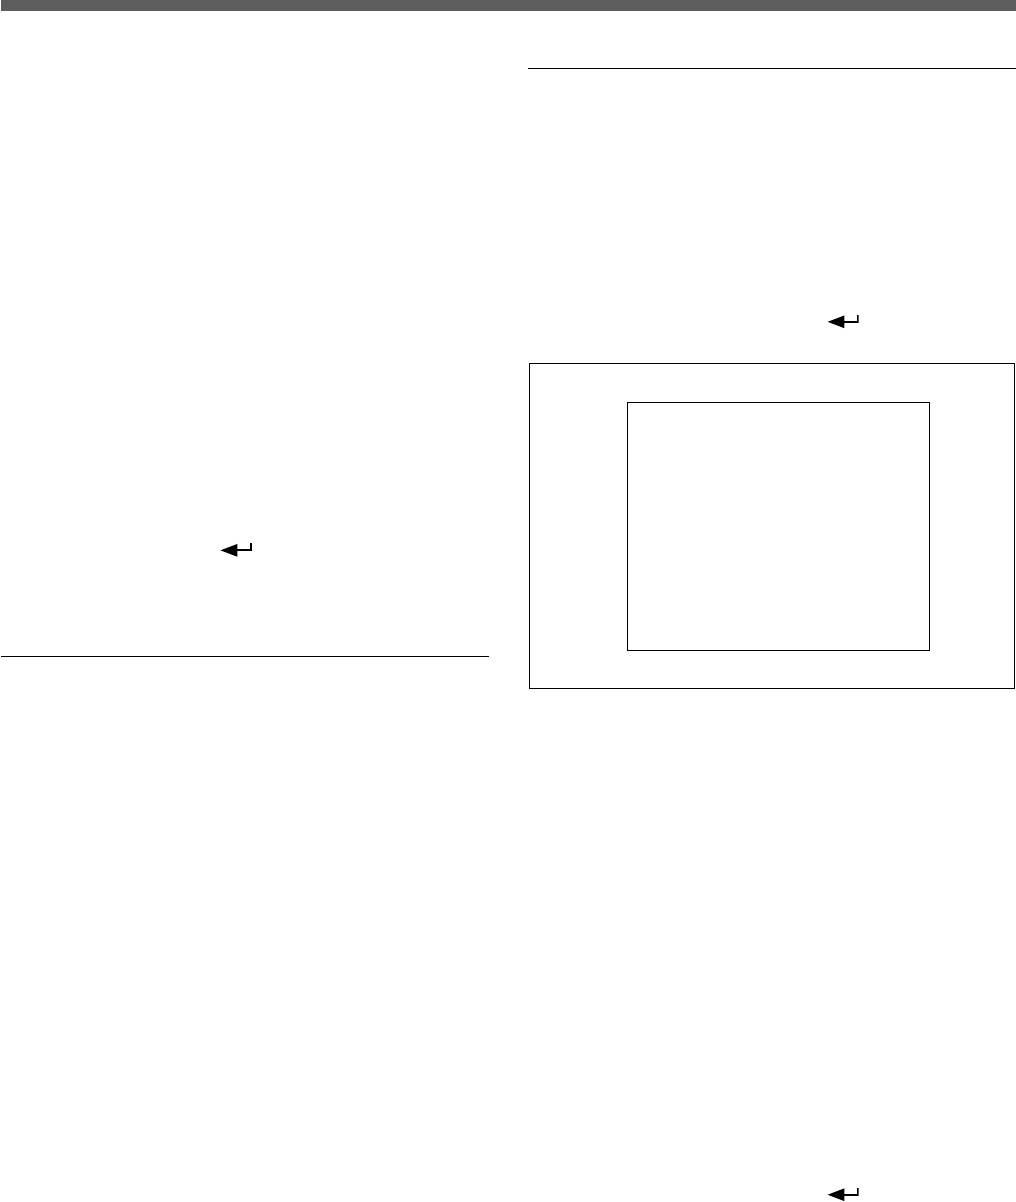
RS-232C/USB Communication
Infrared communication
Personal computer
RS-232C cable
or
USB cable
MLT-200 terminal
To AC power supply
AC adapter
Personal computer with infrared
Connection
7(GB)
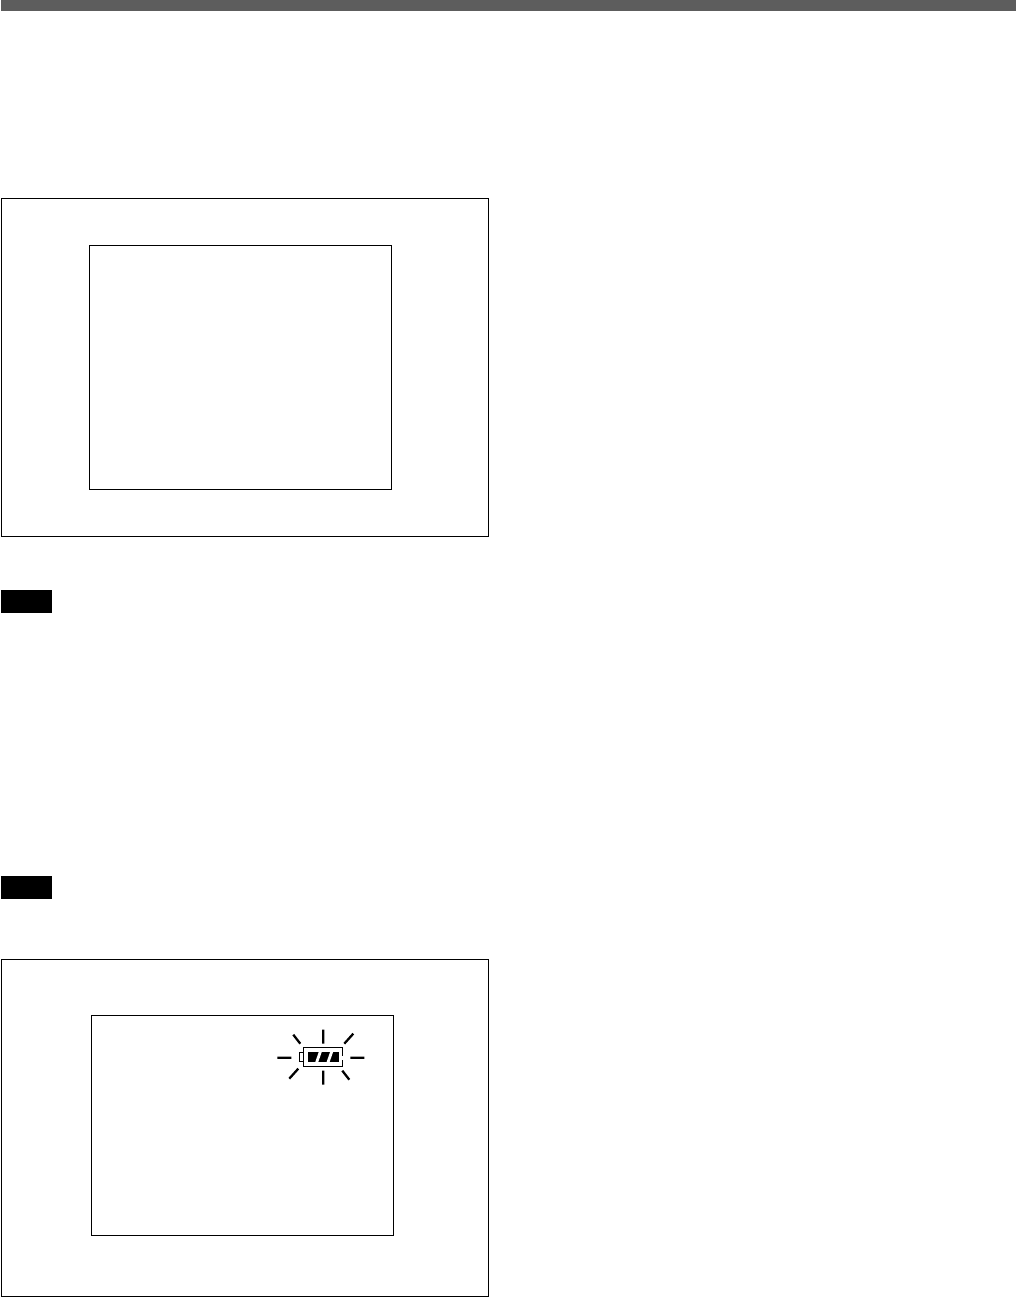
To start up a MLU-200 Handy Reader Writer, attach a
battery pack to the MLU-200. The start-up display
appears, then after 5 minutes the <MAIN MENU>
appears.
Start-up display
Note
Confirm that time is correct.
<MAIN MENU>
Turning off MLU-200
To turn off a MLU-200, push the POWER button
when the <MAIN MENU> is displayed.
Turning on MLU-200 with a battery pack
already attached
To turn on a MLU-200, push the POWER key.
<MAIN MENU> is displayed immediately.
MLU-200 Version x.xx
yy-mm-dd HH:MM:SS
<MAIN MENU> HH:MM
1.HEADER DISPLAY
2.LOCATION DISPLAY
3.CUE DATA DISPLAY
4.SEARCH
5.REMOTE
6.SYSTEM MENU
Start-up
8(GB)
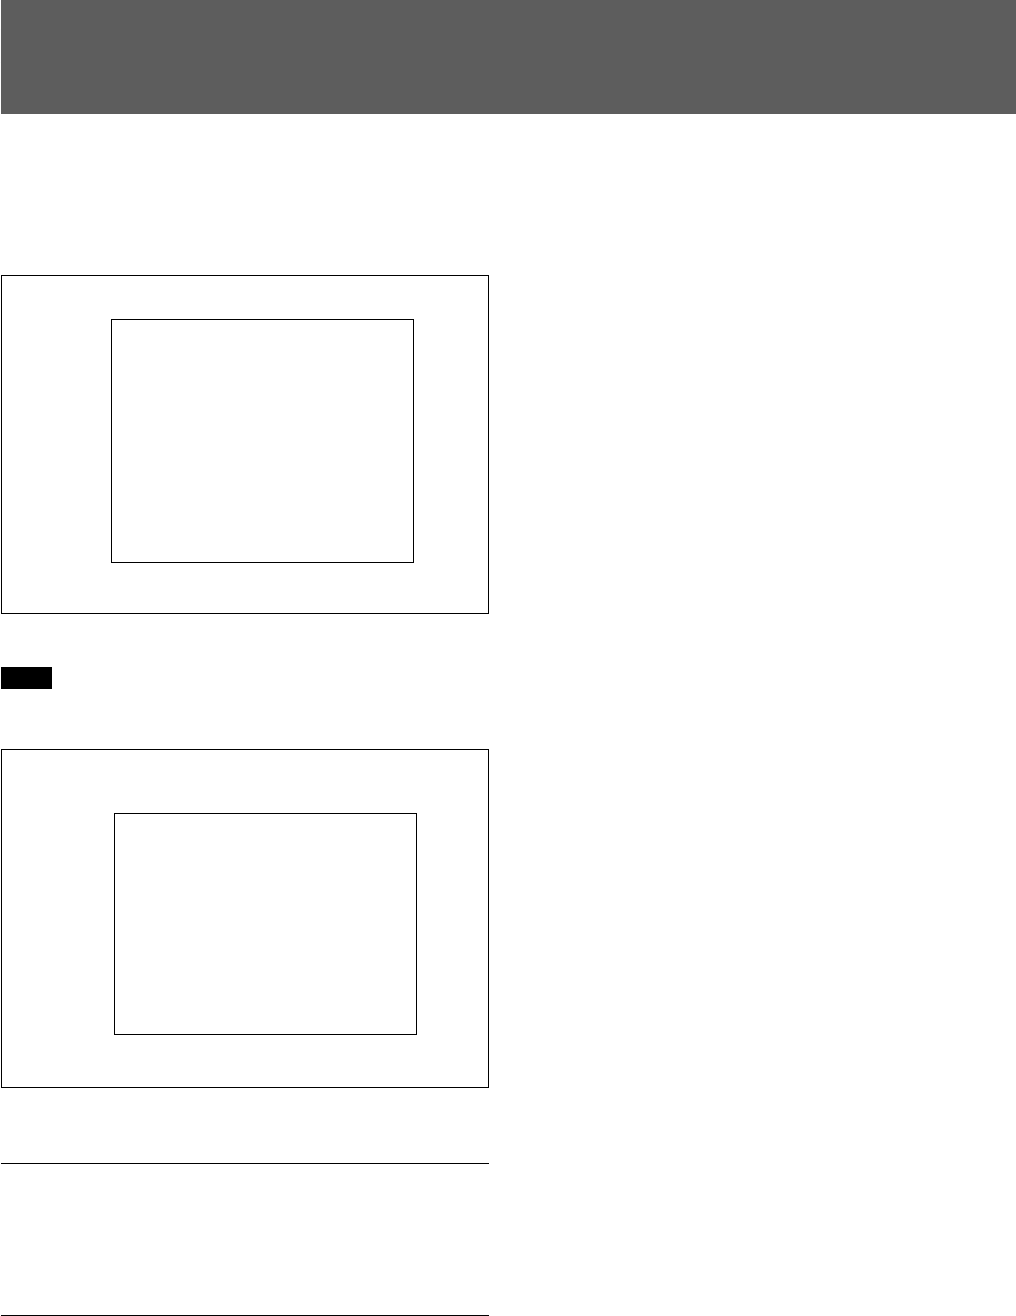
MAIN MENU consists of the following menus.
1. HEADER DISPLAY
2. LOCATION DISPLAY
3. CUE DATA DISPLAY
4. SEARCH
5. REMOTE (Not available now)
6. SYSTEM MENU (Not available now)
Details for each menu are as follows.
HEADER DISPLAY menu
In this menu, it is possible to read the header data of a
memory label.
Note
With this menu, the only header information is read.
Displaying the HEADER DISPLAY menu
The “HEADER DISPLAY” menu is displayed with
either of the following procedures.
• In the <MAIN MENU>, move the cursor to
“HEADER DISPLAY” with turning the jog dial, and
click the jog dial or press the key.
• In the <MAIN MENU>, press the numerical key “1.”
HEADER DISPLAY menu
ID (cassette ID) : 20 characters of ASCII
DBK (Data Base Key) : 20 characters of ASCII
TTL (TiTLe) : 24 characters of ASCII
ADM (ADMinistrator) : 16 characters of ASCII
UPD (UPDated date) : yyyy(year)/mm(month)/
dd(data)
SNO (Serial NO.) : 7 digits
MDL (MoDeL name) : 12 characters of ASCII
THR (number of THReading) : 0 to 32767
Reading the header data of a memory
label
1Display the HEADER DISPLAY menu.
2Position the data transfer area of the MLU-200
over a memory label.
3Press the ACCESS key.
LOCATION DISPLAY menu
In this menu, it is possible to read the location data of a
memory label.
Displaying the LOCATION DISPLAY menu
The “LOCATION DISPLAY” menu is displayed with
either of the following procedures.
• In the <MAIN MENU>, move the cursor to
“LOCATION DISPLAY” with turning the jog dial,
and click the jog dial or press the key.
• In the <MAIN MENU>, press the numerical key “2.”
LOCATION DISPLAY menu
ID:Cassette ID
DBK:Data base key
TTL:Title
ADM:Administrator
UPD:yyyy/mm/dd
SNO:1234567
MDL:Model name
THR:Thread
MAIN MENU
FLOOR NO.: 123
SHELF NO.: 785156
STEP NO.: 456
POSITION: 7890

9(GB)
FLOOR NO. : 3 characters of ASCII to identify No.
of the floor where the cassette tape with the
memory label is stocked
SHELF NO. : 6 characters of ASCII to identify No.
of the shelf where the cassette tape with the
memory label is stocked.
STEP NO. : 3 characters of ASCII to identify No. of
the step where the cassette tape with the memory
label is stocked.
POSITION: 4 characters of ASCII to identify the
position where the cassette tape with the memory
label is stocked.
Reading the location data of a memory
label
1Display the LOCATION DISPLAY menu.
2Position the data transfer area of the MLU-200
over a memory label.
3Press the ACCESS key.
Editing the location data
To edit the location data which is read in the
LOCATION DISPLAY menu, follow the procedure
below.
1Press the BS key.
The cursor appears.
2Turn the jog dial to move the cursor to the item to
be edited.
3Click the jog dial or press the key.
4Change the data.
To change the data
Press the numerical keys.
To input the alphabet
Press the SF key, then press the alphabetical keys.
To delete the character
Press the BS key. The character on the cursor is
deleted.
To restore the data
Press the CL key.
5Click the jog dial or press the key.
6Press the CL key.
The cursor disappears.
7Press the ACCESS key with positioning the data
transfer area of the MLU-200 over a memory label.
The edited data is written.
Displaying the contents of the HEADER
DISPLAY menu
To display the contents of the HEADER DISPLAY
menu, press the BS key.
10(GB)
MAIN MENU
CUE DATA DISPLAY menu
In this menu, it is possible to read the CUE data of a
memory label and edit it.
Displaying the CUE DATA DISPLAY menu
The “CUE DATA DISPLAY” menu is displayed with
either of the following procedures.
• In the <MAIN MENU>, move the cursor to “CUE
DATA DISPLAY” with turning the jog dial, and
click the jog dial or press the key.
• In the <MAIN MENU>, press the numerical key “3.”
CUE DATA DISPLAY menu
Scroll in the left
direction
Scroll in the left
direction
Scroll in the right
direction
Scroll in the right
direction
No. SCN CUT TAK
000: A01 ABC1 001
001: A01 ABC1 002
002: A01 ABC1 003
nnn: n01 zzz1 000
ST CUE POINT IN POINT
NG 00:00:00:00 --:--:--:--
KP 00:01:53:12 --:--:--:--
OK 00:05:20:20 --:--:--:--
00:20:17:09 --:--:--:--
OUT POINT COMMENT
--:--:--:-- ABCDEFGH
--:--:--:-- IJKLMNOP
--:--:--:-- 12345678
--:--:--:-- END
11(GB)
No. : 3 digits (continuous number)
SCN : 3 characters of ASCII to identify the scene
CUT : 4 characters of ASCII to identify the cut
TAK : 3 characters of ASCII for the take number
ST : Status code
• NG : No Good
• KP : KeeP
• OK : Good
COMMENT : 24 characters of ASCII for the
comment
With this menu, key function is as follows;
To scroll in the left direction : Press the F1 key.
To scroll in the right direction : Press the F2 key.
To move to the right end : Press the SF and F1 key.
To move to the left end : Press the SF and F2 key.
To confirm the details of the CUE data : Click the
jog dial or press the key.
To display the “HEADER DISPLAY” menu :
Press the BS key.
Reading the CUE data of the memory label
1Display the CUE DATA DISPLAY menu.
2Position the data transfer area of the MLU-200
over a memory label.
3Press the ACCESS key.
nnn:comment
scn CUE 00:00:00:00
cut IN --:--:--:--
taks OUT --:--:--:--
Editing the CUE data
To edit the CUE data which is read in the CUE DATA
DISPLAY menu, follow the procedure below.
1Turn the jog dial to move the cursor to the CUE
data to be edited in the CUE DATA DISPLAY
menu.
2Click the jog dial or press the key.
nnn : 3 digits (continuous number)
comment : 80 characters of ASCII for the comment
scn : 3 characters of ASCII to identify the scene
cut : 4 characters of ASCII to identify the cut
tak : 3 characters of ASCII for the take number
s : Status code
• N : No good
• K : Keep
• O : Good
3Press the BS key.
The cursor appears.
4Turn the jog dial to move the cursor to the item to
be edited.
5Click the jog dial or press the key.
6Change the data.
To change the data
Press the numerical keys. (Continued)
12(GB)
To input the alphabet
Press the SF key, then press the alphabetical keys.
To delete the character
Press the BS key. The character on the cursor is
deleted.
To restore the data
Press the CL key.
7Click the jog dial or press the key.
8Press the CL key.
The cursor disappears.
9Press the CL key.
The CUE DATA DISPLAY menu is displayed.
10
Press the ACCESS key with positioning the data
transfer area of the MLU-200 over a memory label.
The edited data is written.
Displaying the contents of the HEADER
DISPLAY menu
To display the contents of the HEADER DISPLAY
menu, press the BS key.
SEARCH menu
In this menu, it is possible to search a memory label.
Displaying the SEARCH menu
The “SEARCH” menu is displayed with either of the
following procedures.
• In the <MAIN MENU>, move the cursor to
“SEARCH” with turning the jog dial, and click the
jog dial or press the key.
• In the <MAIN MENU>, press the numerical key “4.”
<SEARCH>
START:nn COUNT:nn
DATA:abcdefghijklmn
SEARCH menu
START : Number of the sector where the detection is
started
COUNT : Number of sectors to be searched
DATA : Data to be searched
Searching the data
1Display the SEARCH menu.
2Turn the jog dial to move the cursor to the item to
be input.
3Click the jog dial or press the key.
4Input the key data.
To input the data
Press the numerical keys.
To input the alphabet
Press the SF key, then press the alphabetical keys.
To delete the character
Press the BS key. The character on the cursor is
deleted.
To restore the data
Press the CL key.
5Position the data transfer area of the MLU-200
over a memory labels while pressing the ACCESS
key.
When the memory label which matches the key
data for searching is found, the buzzer sounds.
MAIN MENU
13(GB)
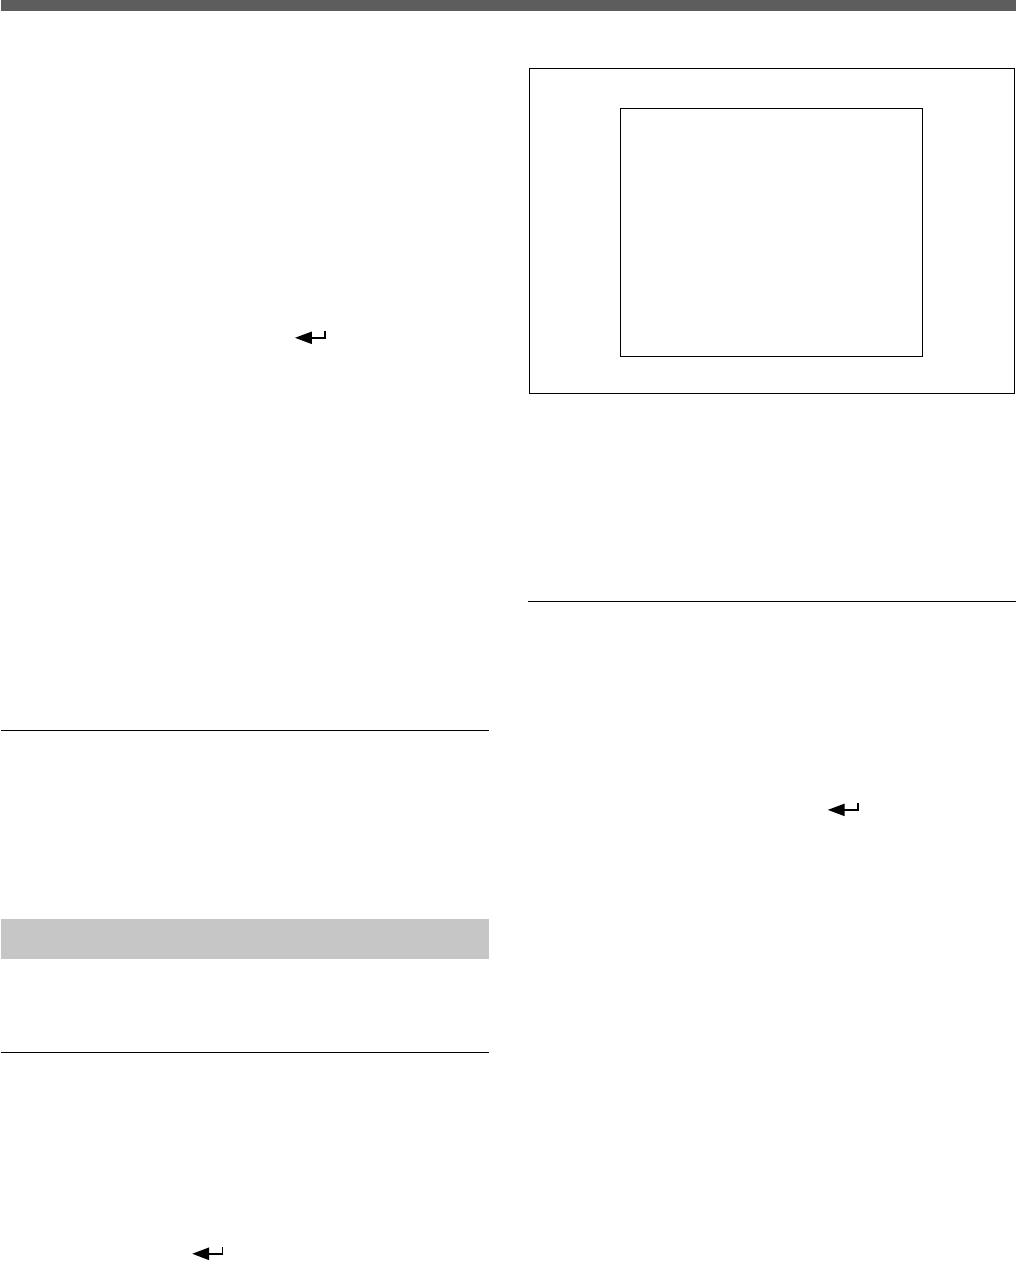
Specifications
General
Transmission rate 105.9 kbps
Transmission frequency
13.56 MHz
Transmission range0 to 20 mm
Power supply voltage
DC 3.6V ±10%
Mass 230 g
Current 500 mA max.
Operating temperature
5 °C to 40 °C (41°F to 104°F)
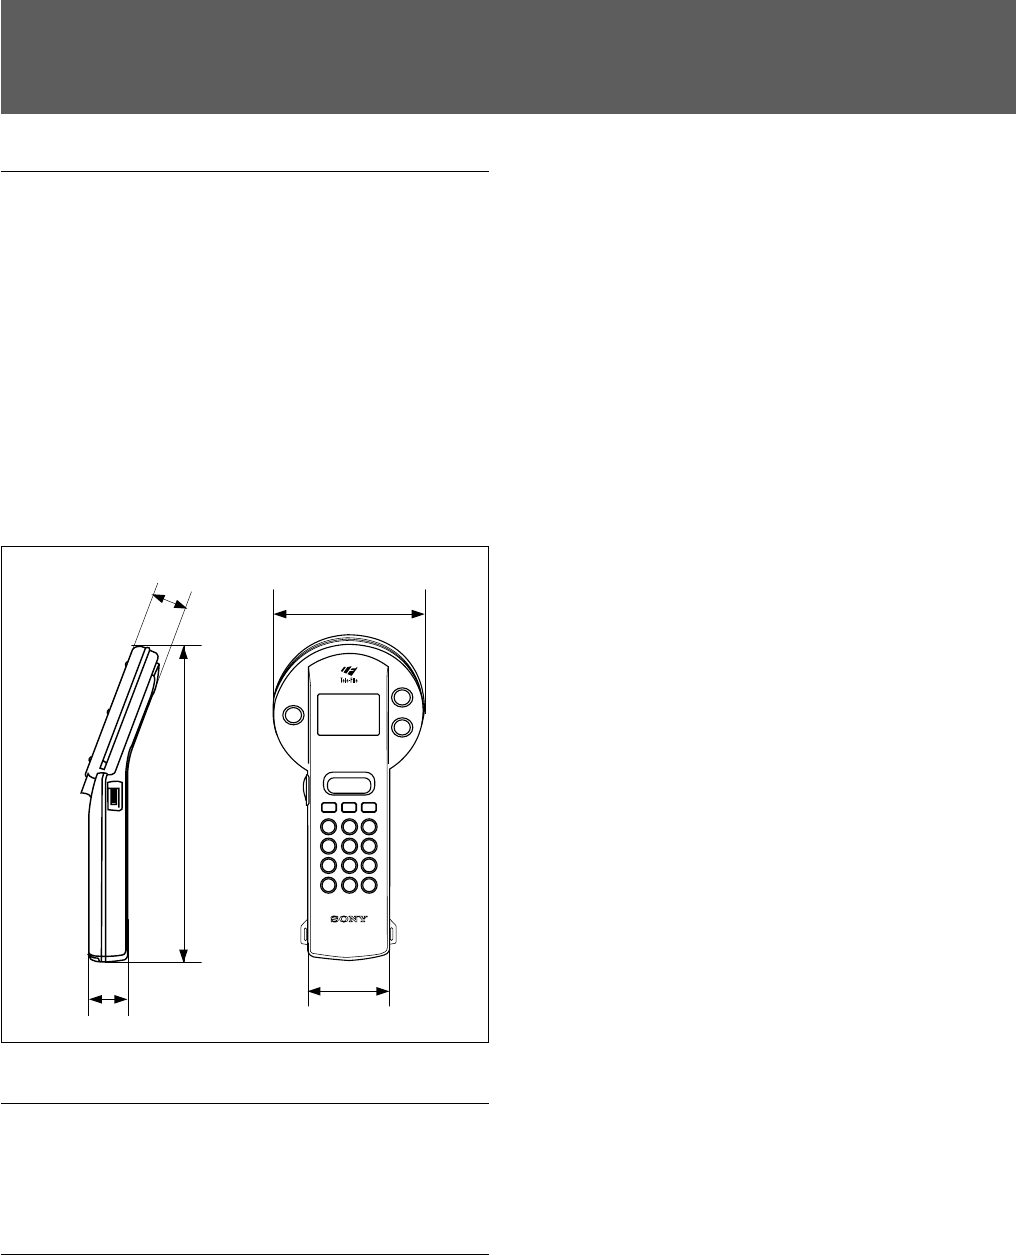
External dimensions
External dimensions (Unit : inch)
Supplied accessories
Operation Manual (1)
Shoulder strap(1)
Optional accessories
MSA-4A/8A/16A/32A Memory stick
NP-FS11 Rechargable battery pack
Design and specifications are subject to change
without notice.
Printed on recycled paper
..........................................................................................................................................................................................................
POWER
ACCESS
HANDY READER/WRITER
MLU-200
F1
F2
ABC
CL BS SF
7DEF
8GHI
9
JKL
4MNO
5PQR
6
STU
1VWX
2YZ-
3
0•
9 1/8
1 1/8
4 1/8
1
1/4
The material contained in this manual consists of
information that is the property of Sony Corporation and is
intended solely for use by the purchasers of the equipment
described in this manual.
Sony Corporation expressly prohibits the duplication of any
portion of this manual or the use thereof for any purpose
other than the operation or maintenance of the equipment
described in this manual without the express written
permission of Sony Corporation.
Le matériel contenu dans ce manuel consiste en
informations qui sont la propriété de Sony Corporation et
sont destinées exclusivement à l’usage des acquéreurs de
l’équipement décrit dans ce manuel.
Sony Corporation interdit formellement la copie de quelque
partie que ce soit de ce manuel ou son emploi pour tout
autre but que des opérations ou entretiens de l’équipement
à moins d’une permission écrite de Sony Corporation.
Das in dieser Anleitung enthaltene Material besteht aus
Informationen, die Eigentum der Sony Corporation sind,
und ausschließlich zum Gebrauch durch den Käufer der in
dieser Anleitung beschriebenen Ausrüstung bestimmt sind.
Die Sony Corporation untersagt ausdrücklich die
Vervielfältigung jeglicher Teile dieser Anleitung oder den
Gebrauch derselben für irgendeinen anderen Zweck als die
Bedienung oder Wartung der in dieser Anleitung
beschriebenen Ausrüstung ohne ausdrückliche schriftliche
Erlaubnis der Sony Corporation.
本機を使用したことによる、お客様の損害、または第3者か
らのいかなる請求についても、当社は一切その責任を負い
兼ねます。
IN NO EVENT SHALL SONY CORPORATION BE
LIALBLE FOR ANY INCIDENTAL, CONSEQUENTIAL,
OR SPECIAL DAMAGES, WHETHER BASED ON TORT,
CONTRACT, OR OTHERWISE ARISING OUT OF OR IN
CONNECTION WITH USE OF THIS PRODUCT.

Printed in Japan
2000. 12. 00
©1999
MLU-200 (J, SYV, , )
3-203-401-02 (1)
Sony Corporation
Communication System Solutions Network Company