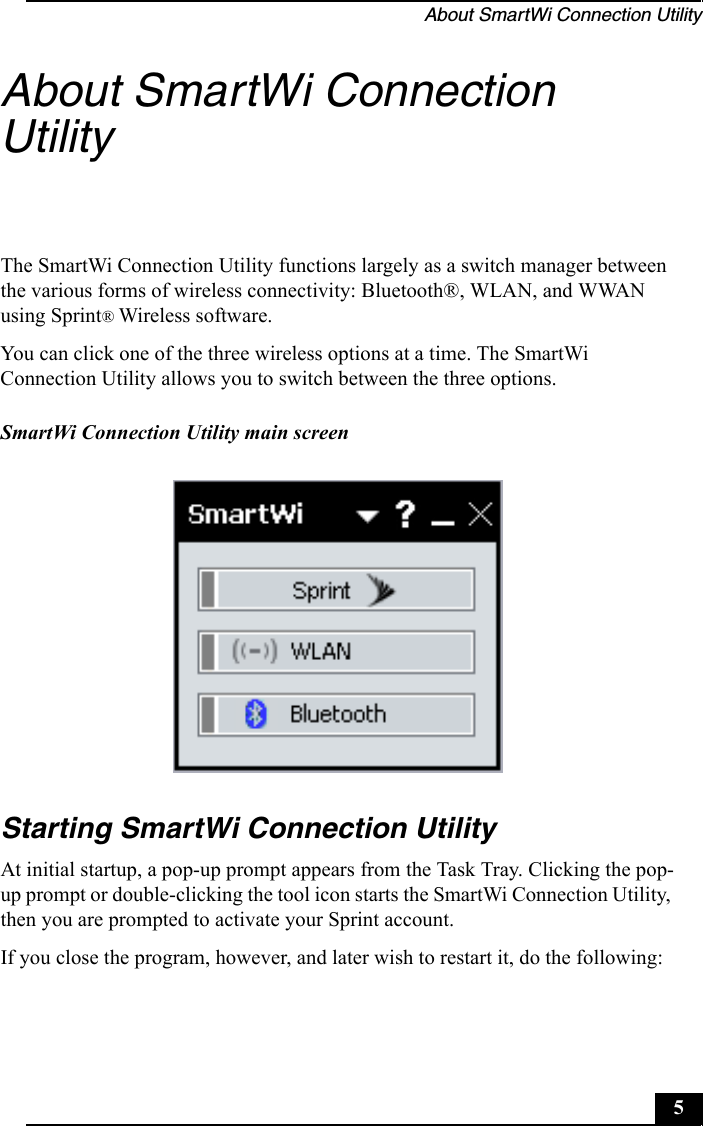
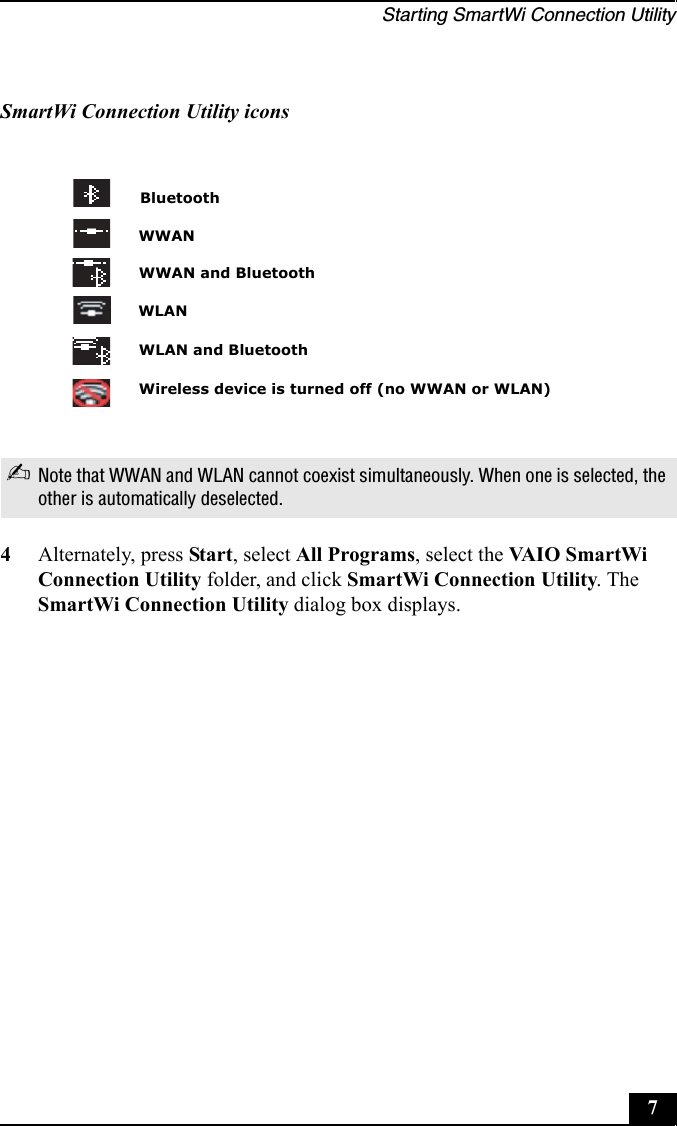
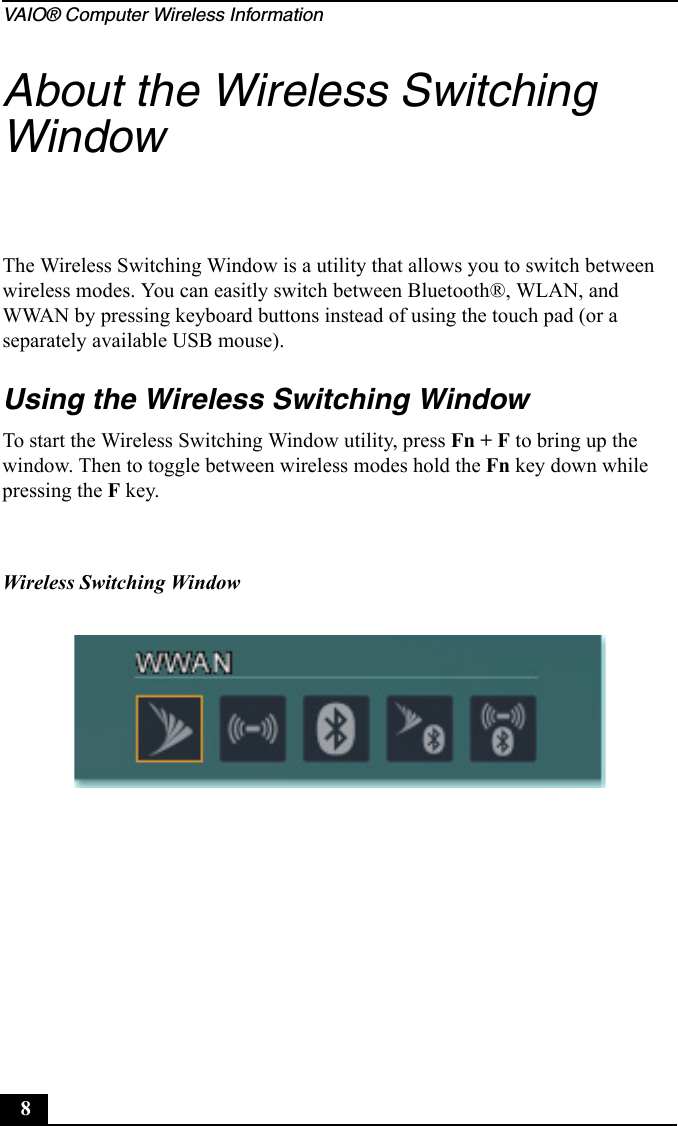
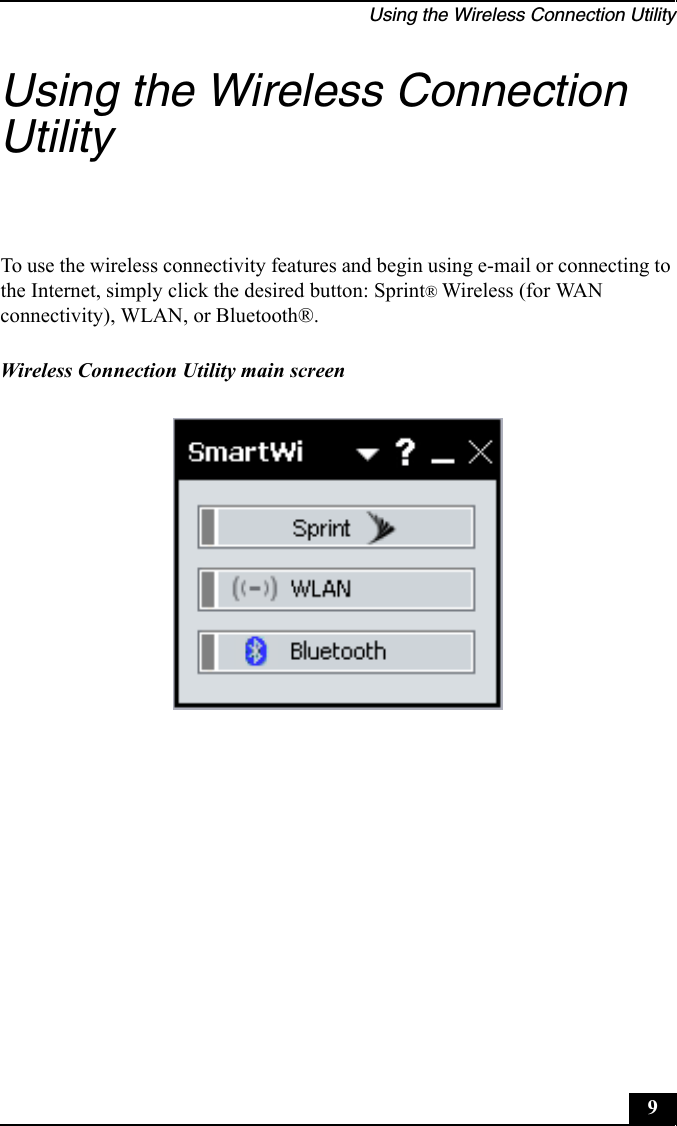
Sony Group PCG4J3L Laptop with several wireless radios User Manual InazmaN3 SmartWi Connection Utility Guide
Sony Corporation Laptop with several wireless radios InazmaN3 SmartWi Connection Utility Guide
UserManual.wiki
>
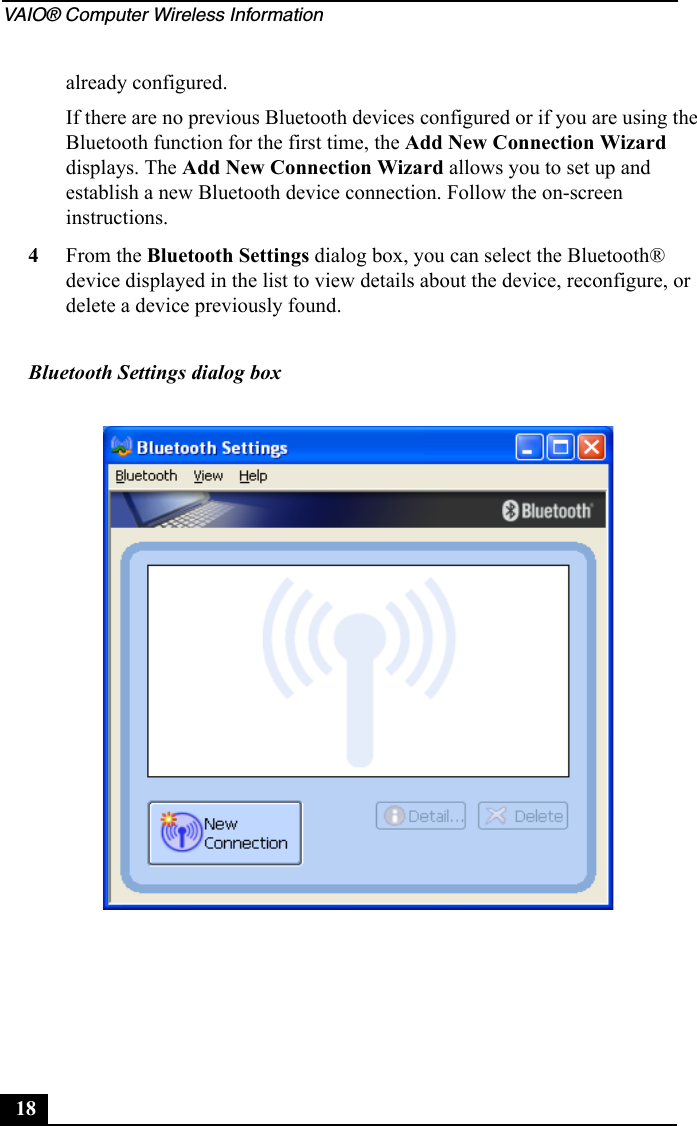
Sony Group
>
PCG4J3L User Manual
>
Users Manual Connectivity
Contents
1.
Laptop User Manual
2.
Laptop Connectivity Guide
3.
Users Guide Safety Regs
4.
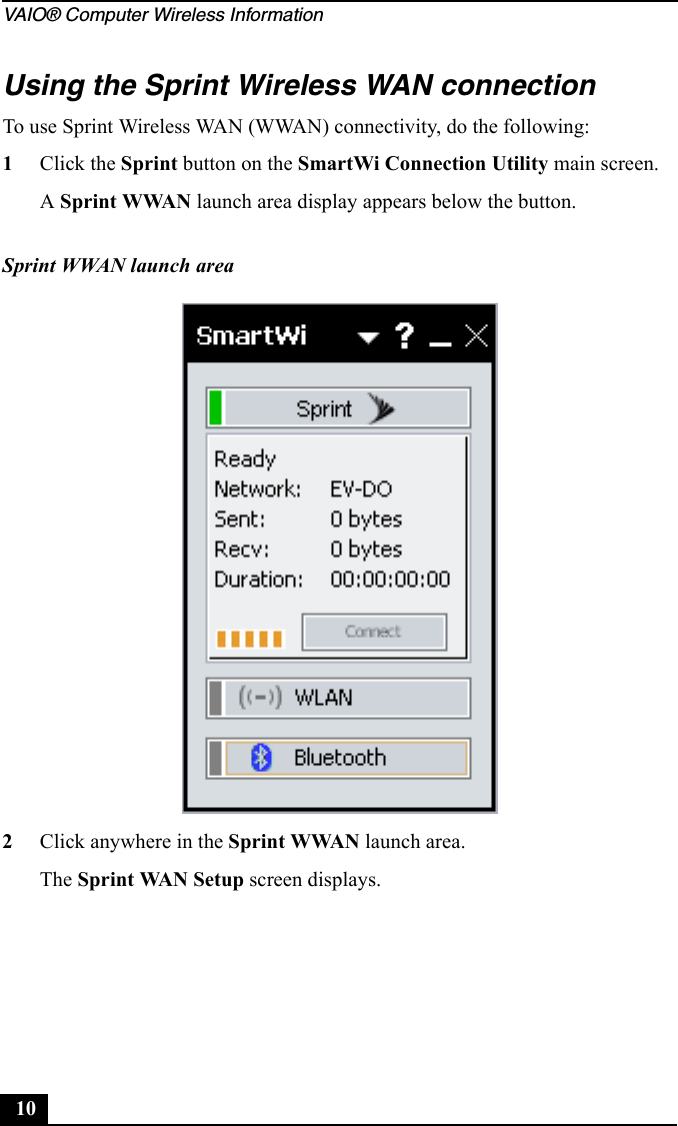
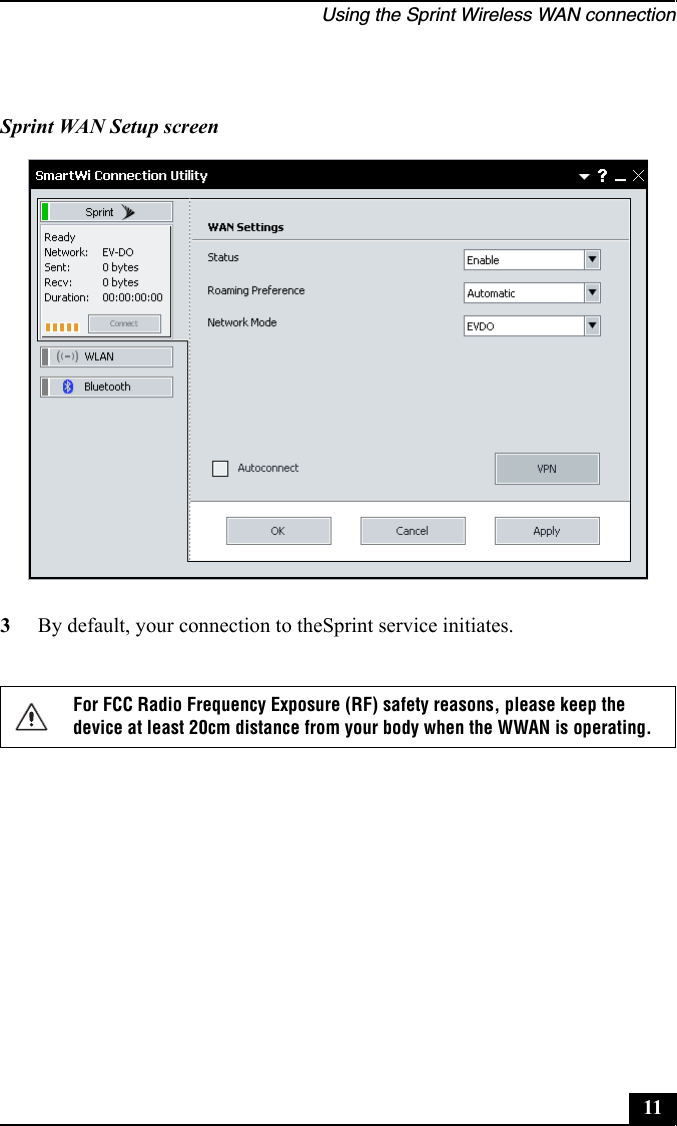
Connectivity
5.
Users Manual Connectivity
6.
Users Guide
7.
Users Guide Safety
8.
Users Manual Safety
9.
Laptop Cennectivity Guide new REV
10.
Users Guide Full
Users Manual Connectivity
Navigation menu
Upload a User Manual
Namespaces
Wiki Guide
HTML
PDF
Info
Views
User Manual
Discussion / Help
Navigation