Sony Group PCG57AL Notebook Personal Computer with WLAN User Manual Ventana QuickStart
Sony Corporation Notebook Personal Computer with WLAN Ventana QuickStart
UserManual.wiki
>
Sony Group
>
PCG57AL User Manual
User manual
Navigation menu
Upload a User Manual
Namespaces
Wiki Guide
HTML
PDF
Info
Views
User Manual
Discussion / Help
Navigation


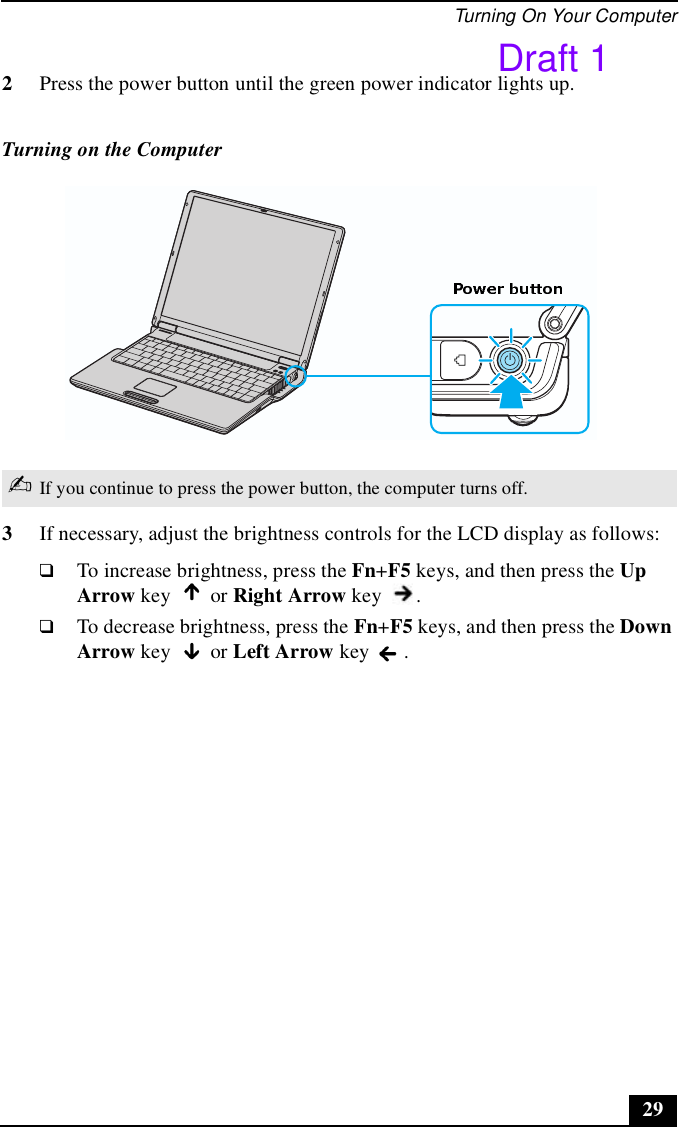
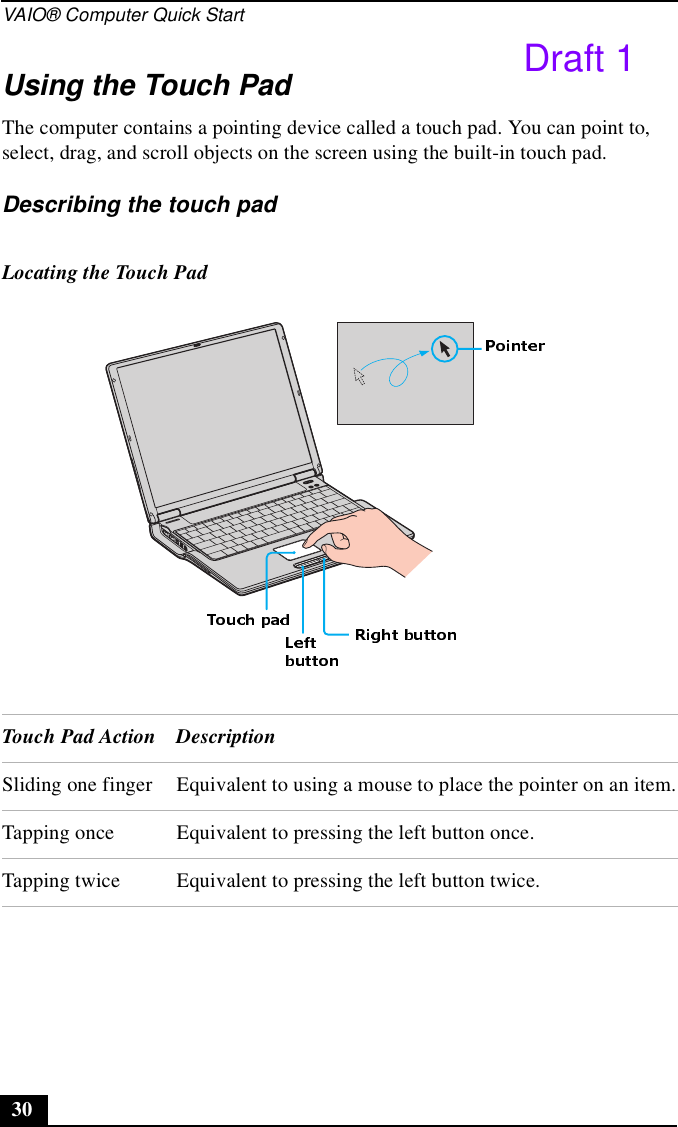
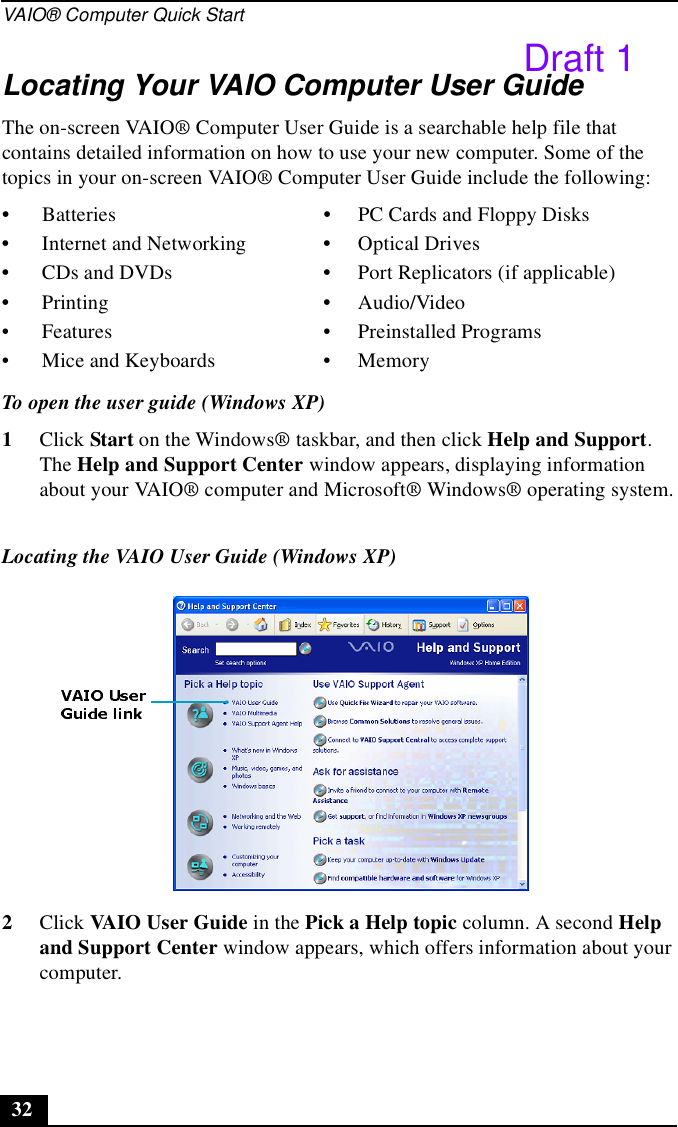
![d’homologation/enregistrement signifie seulement que les spécifications techniques d’Industrie Canada ont été respectées. The installer of this radio equipment must ensure that the antenna is located or pointed such that it does not emit RF field in excess of Health Canada limits for the general population; consult Safety Code 6, obtainable from Health Canada’s website www.hc-sc.gc.ca/rpb** Telephone Consumer Protection Act of 1991 (United States) The Telephone Consumer Protection Act of 1991 makes it unlawful for any person to use a computer or other electronic device, including FAX machines, to send any message unless such message clearly contains in a margin at the top or bottom of each transmitted page or on the first page of the transmission, the date and time it is sent and an identification of the business or *[ product name (model name) ], [ value ], [ position ] will be replaced. **Above Gray lines will be translated to French.](https://usermanual.wiki/Sony-Group/PCG57AL/User-Guide-307566-Page-12.png)