Sony Group PCG6J1L Laptop with wireless radios User Manual VGN SZ100 Series
Sony Corporation Laptop with wireless radios VGN SZ100 Series
UserManual.wiki
>
Sony Group
>
PCG6J1L User Manual
>
Users Guide
Contents
1.
Users Guide
2.
WLAN
3.
Smart WI Connection Utility
4.
SmartWi Connection Utility Guide
5.
Smart Wi Connection Utility
6.
SmartWi Connection Utility
7.
Laptop Users Guide
Users Guide
Navigation menu
Upload a User Manual
Namespaces
Wiki Guide
HTML
PDF
Info
Views
User Manual
Discussion / Help
Navigation

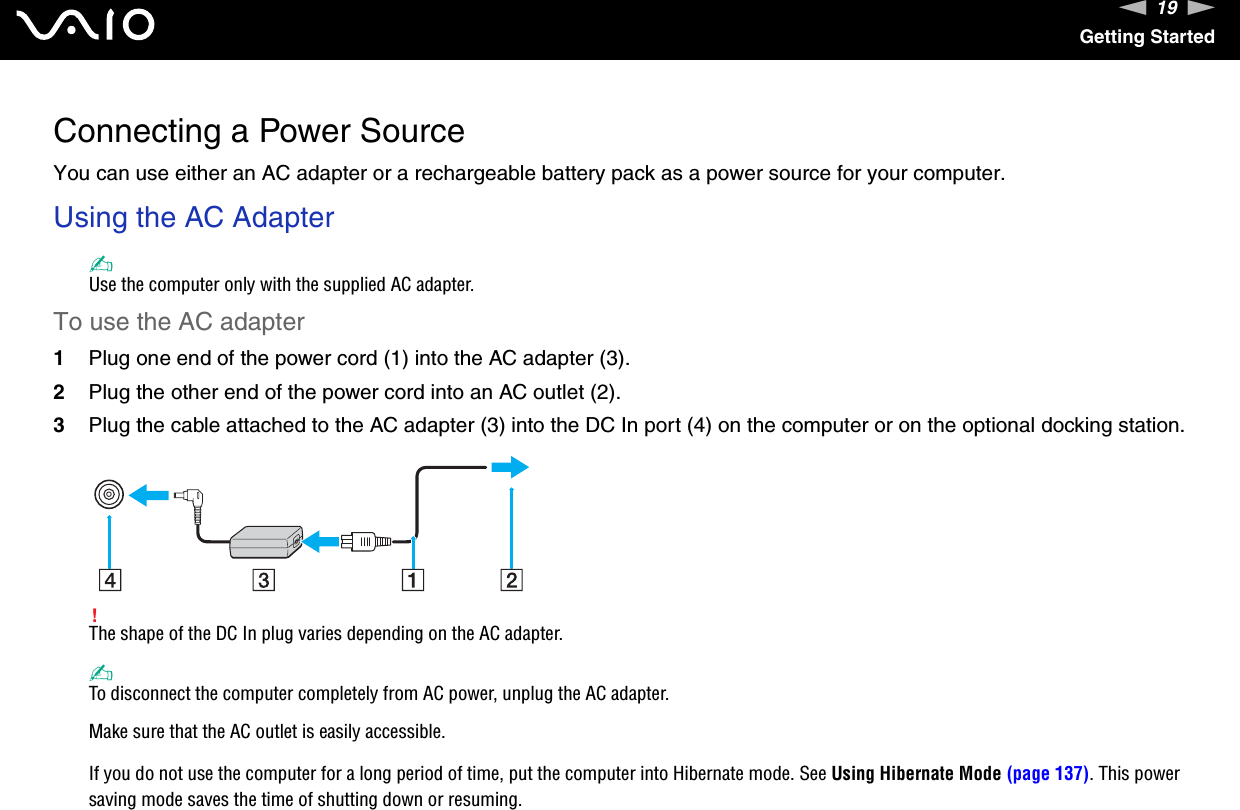
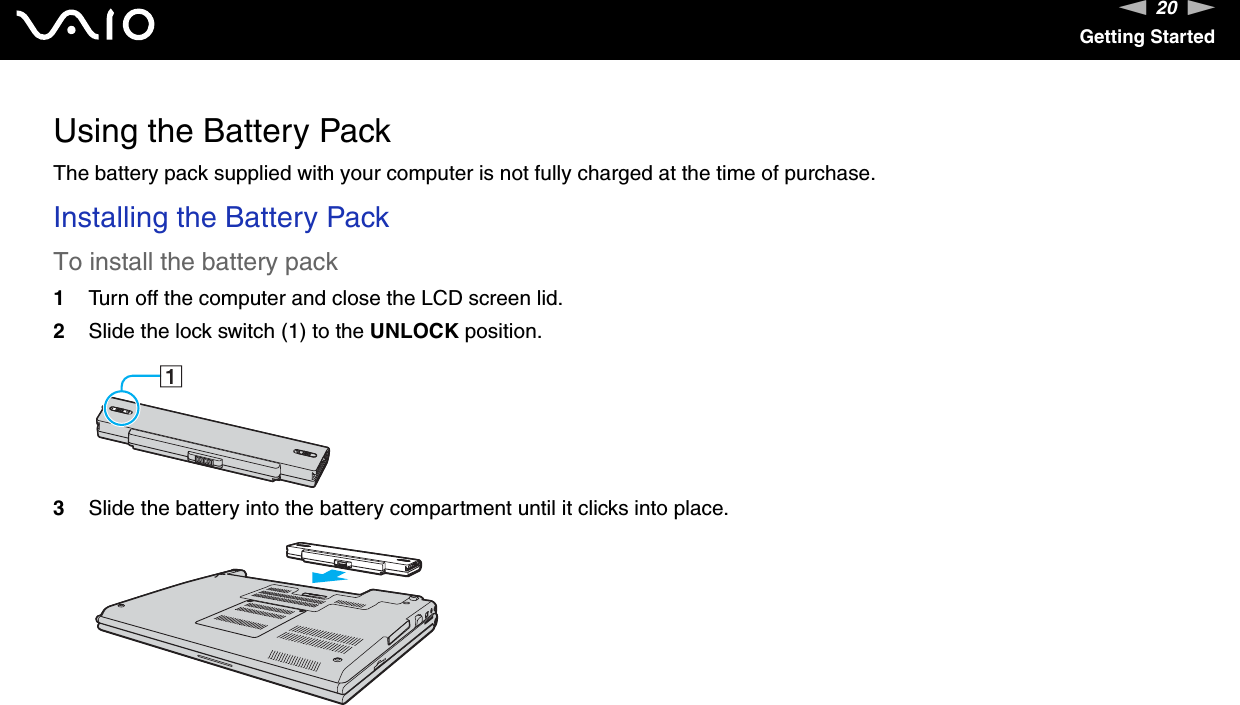
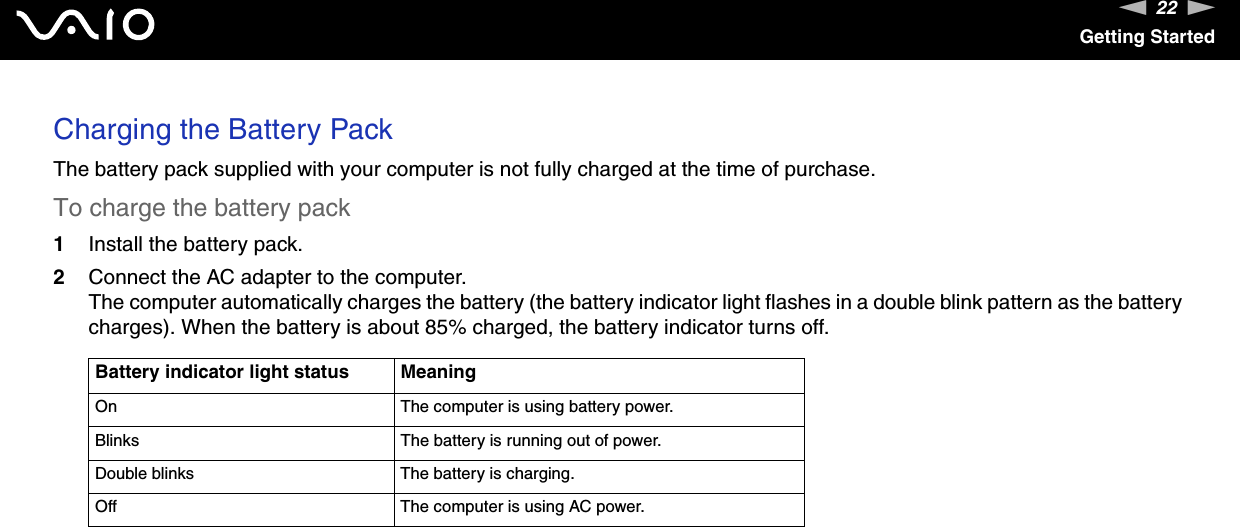
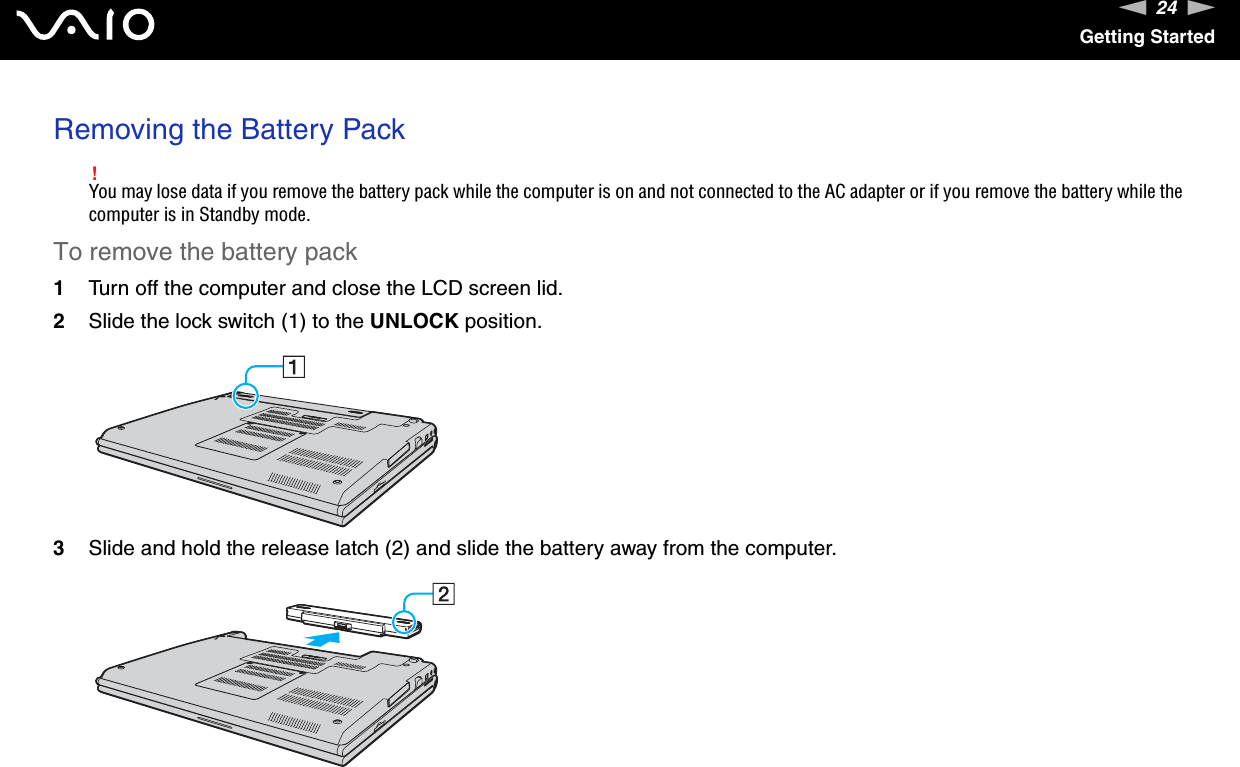

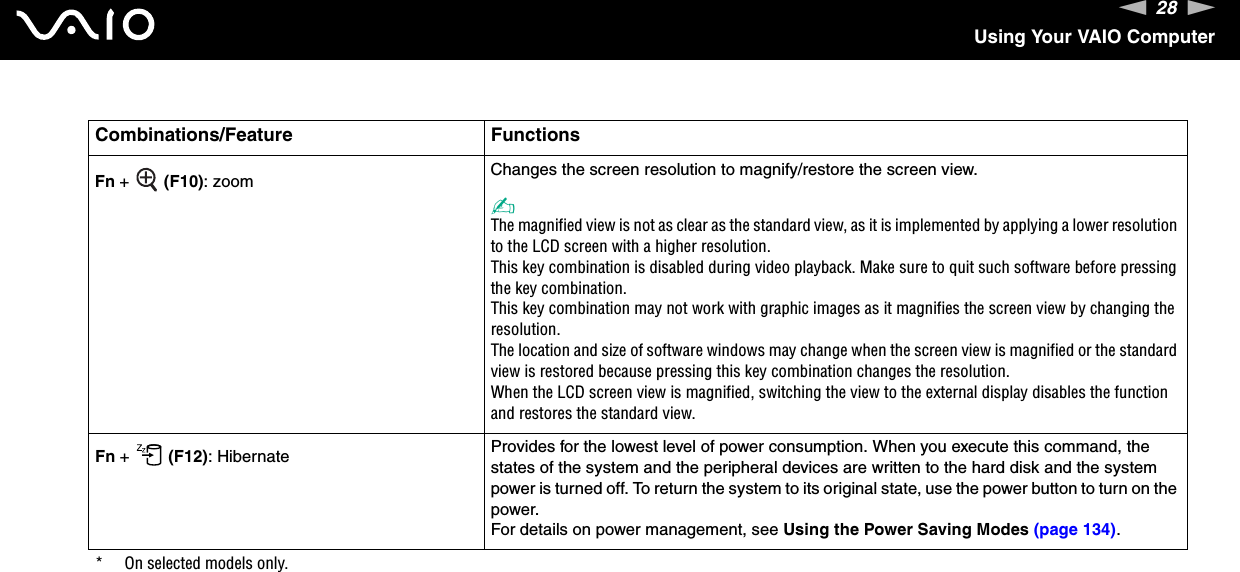
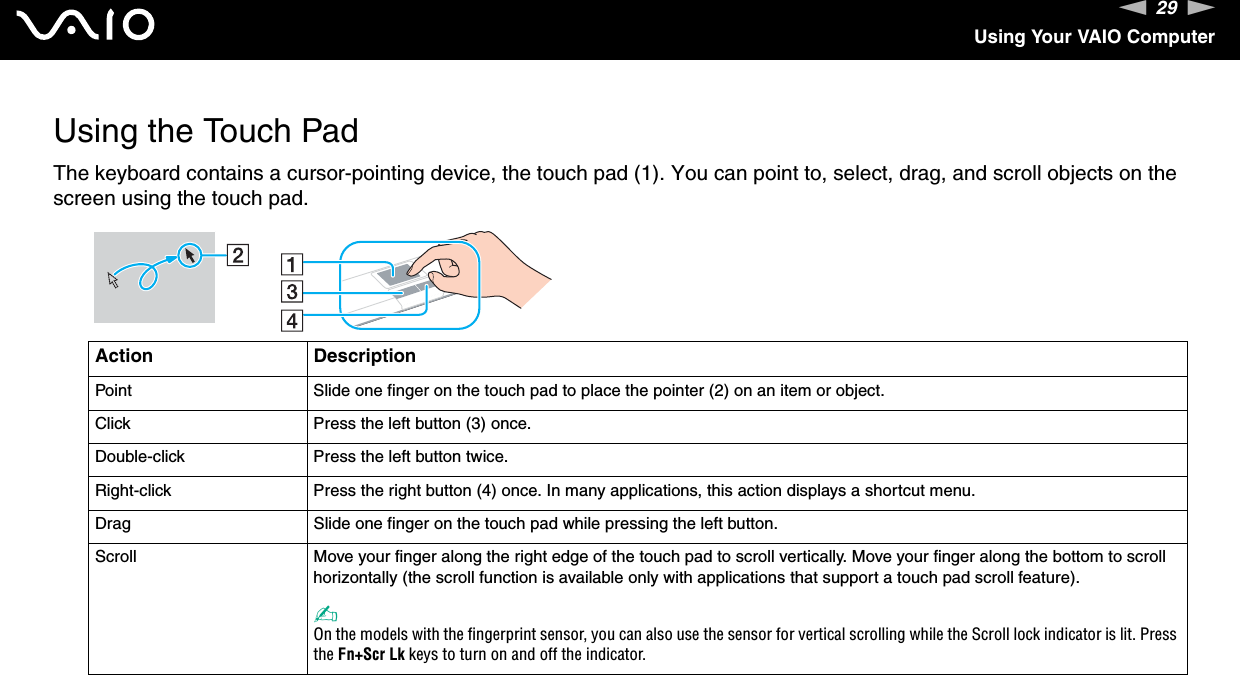
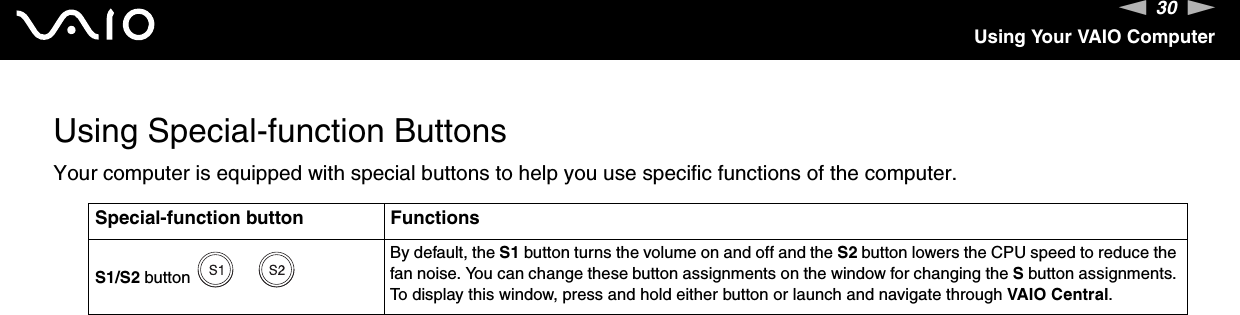
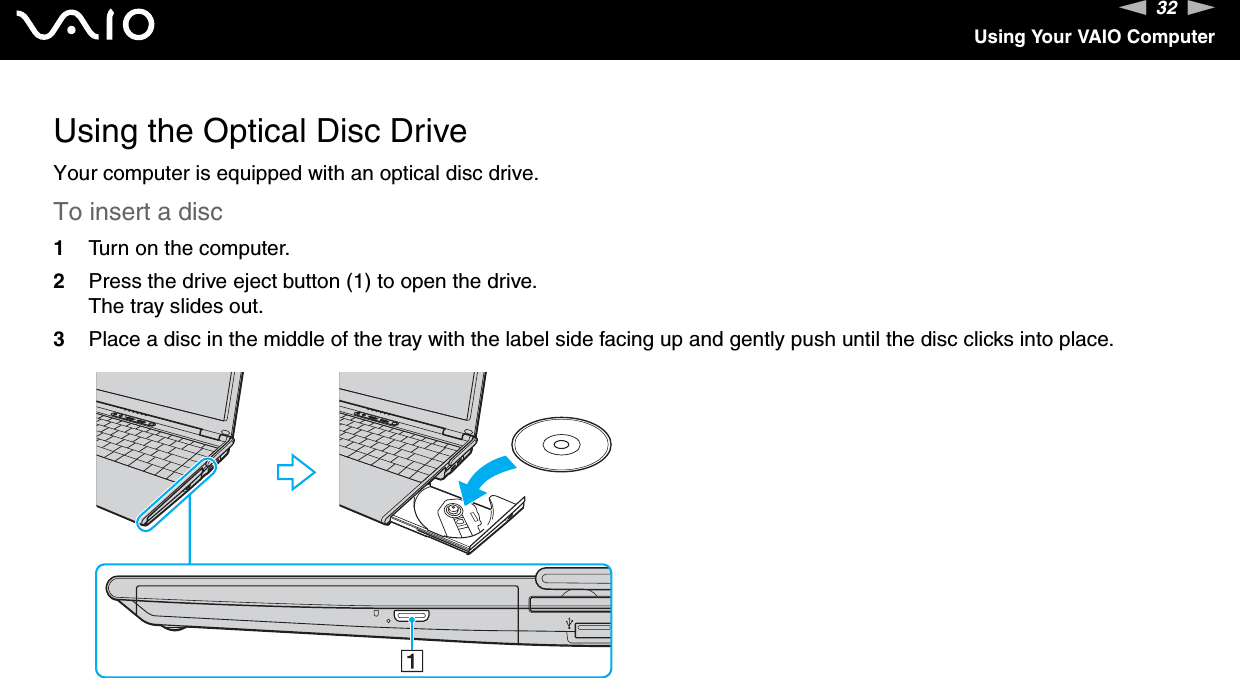

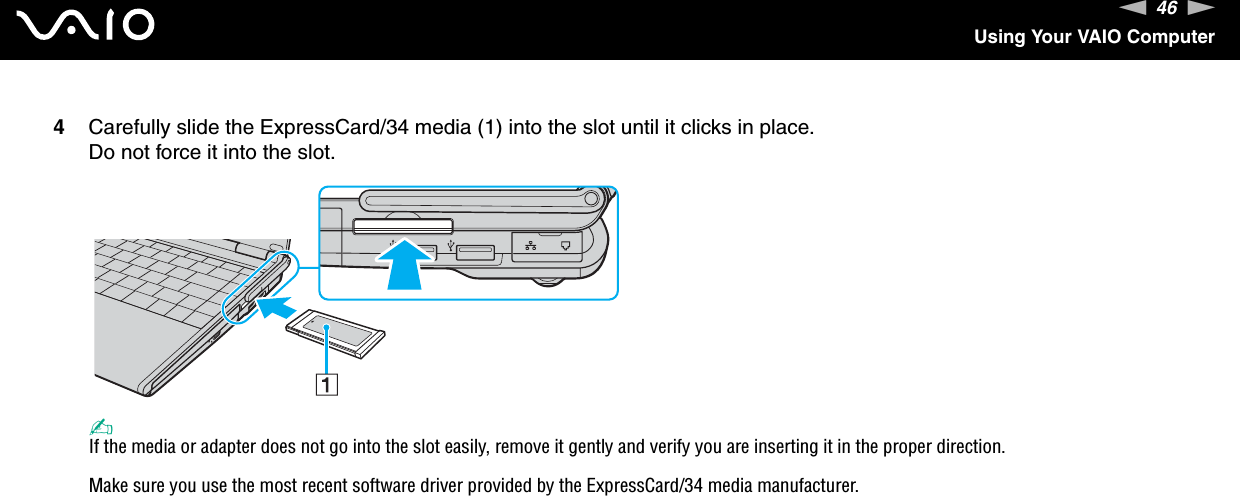

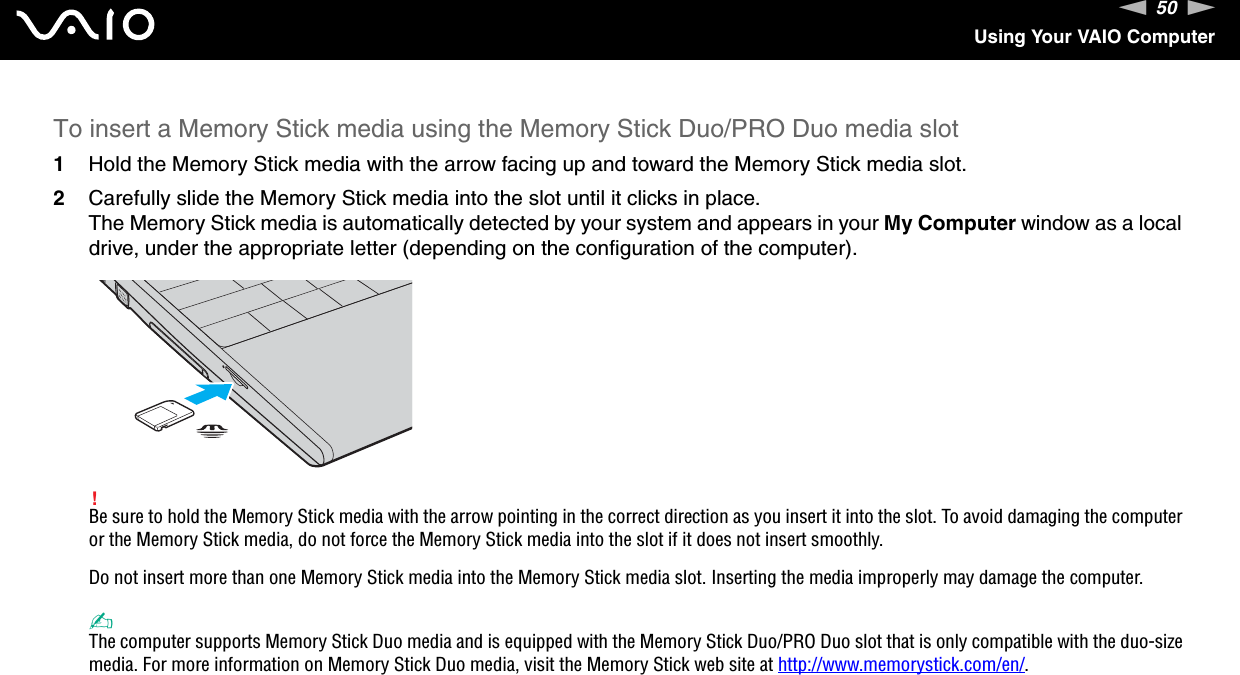
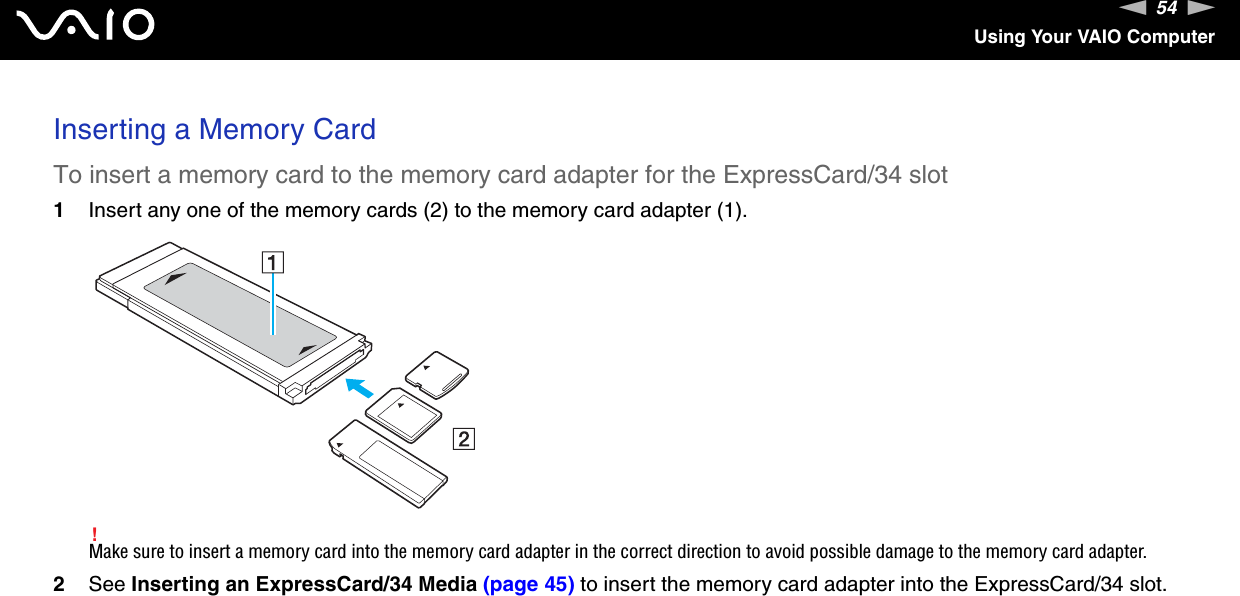
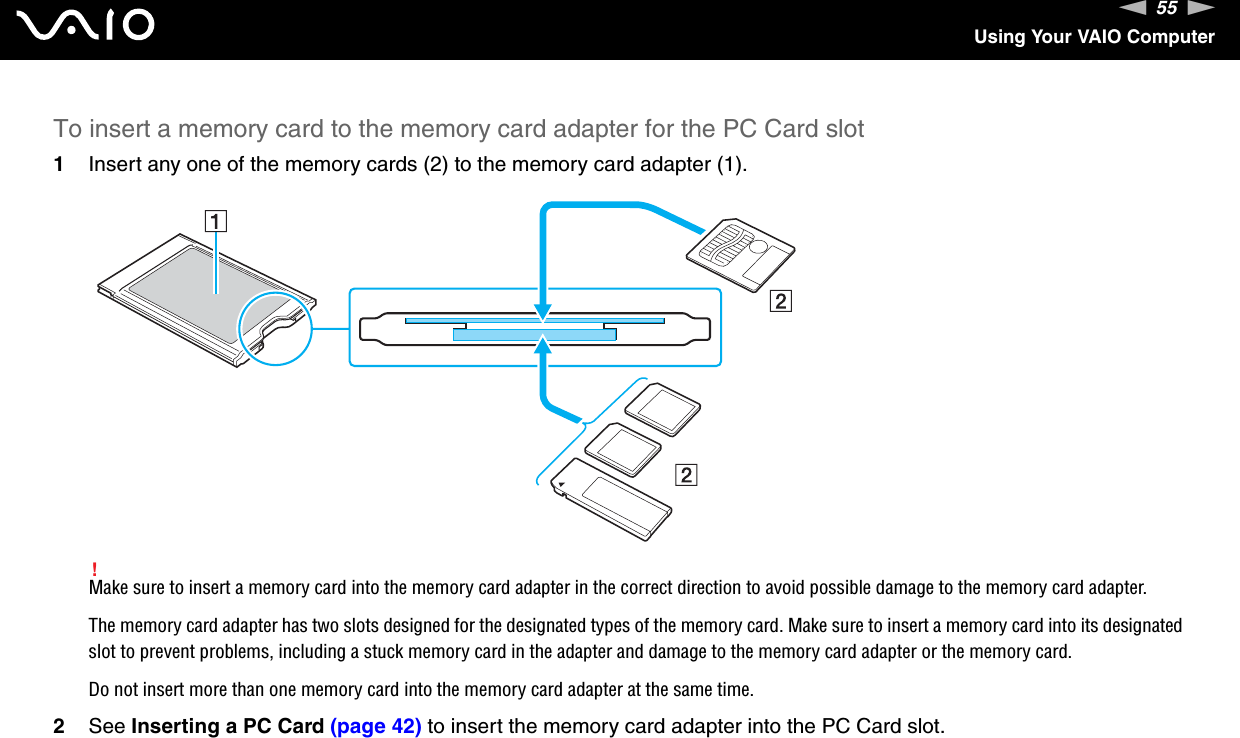

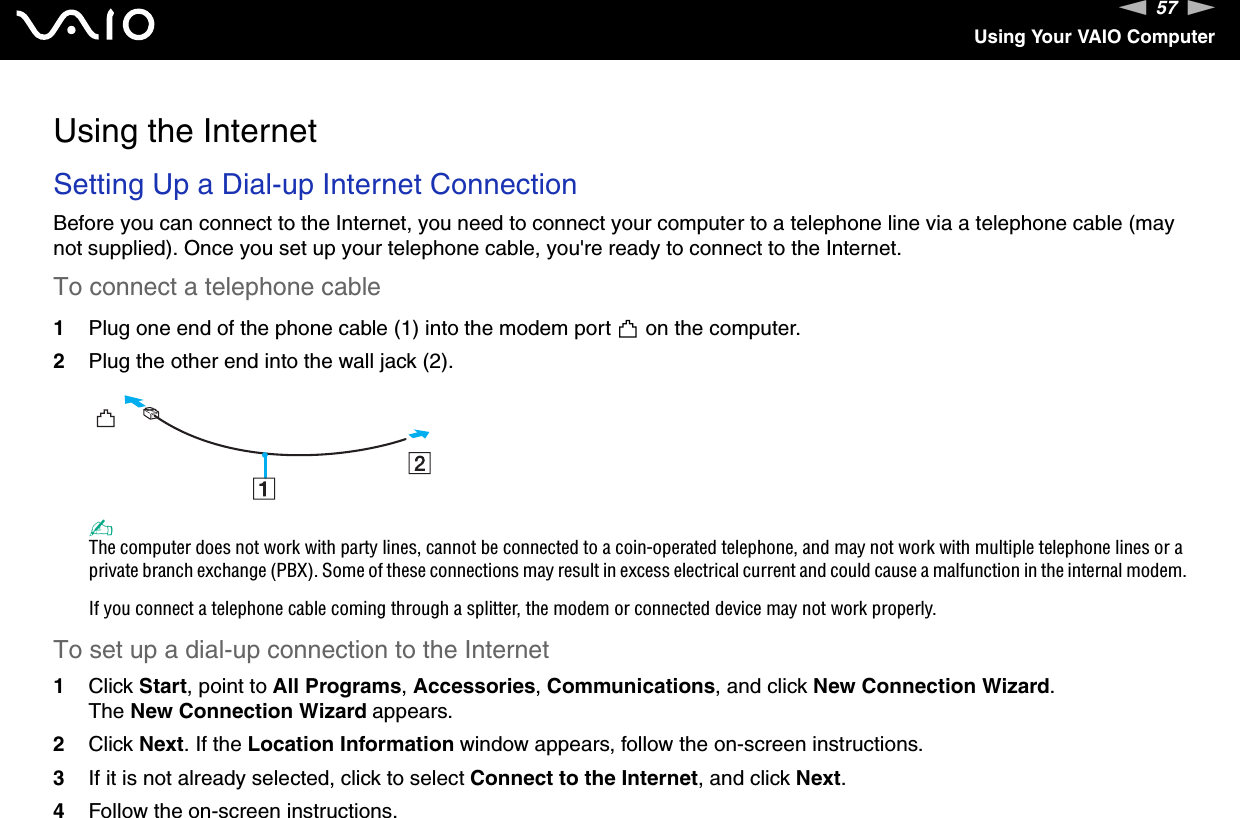


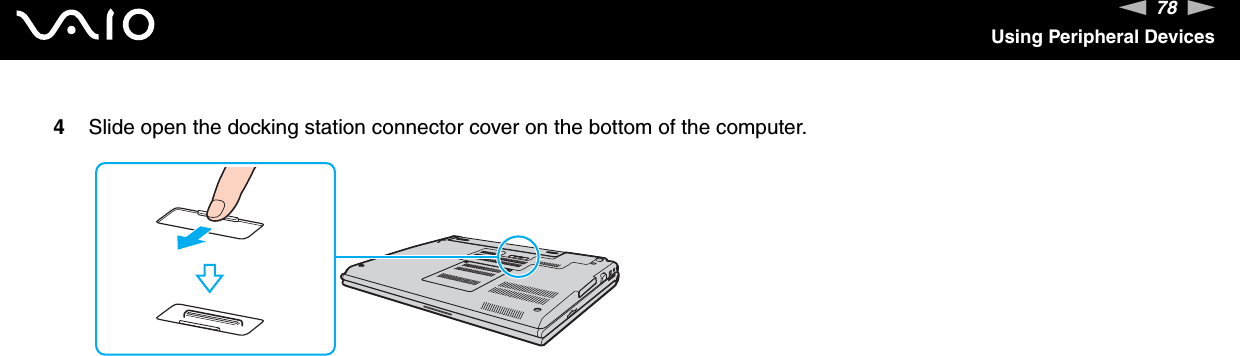
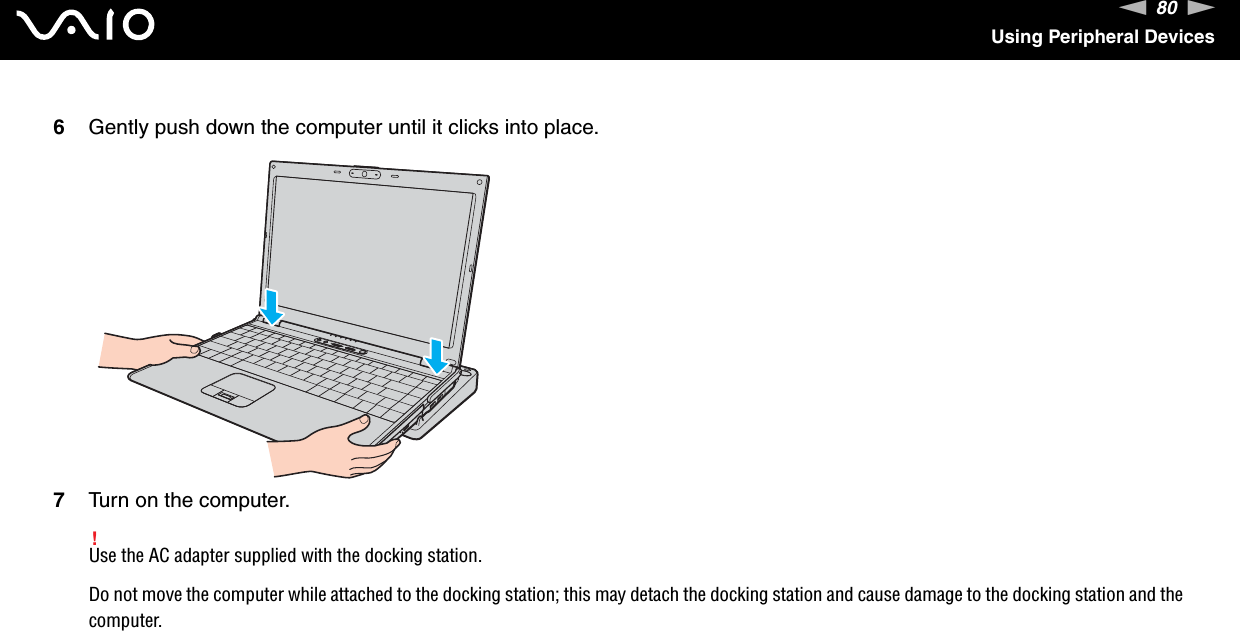
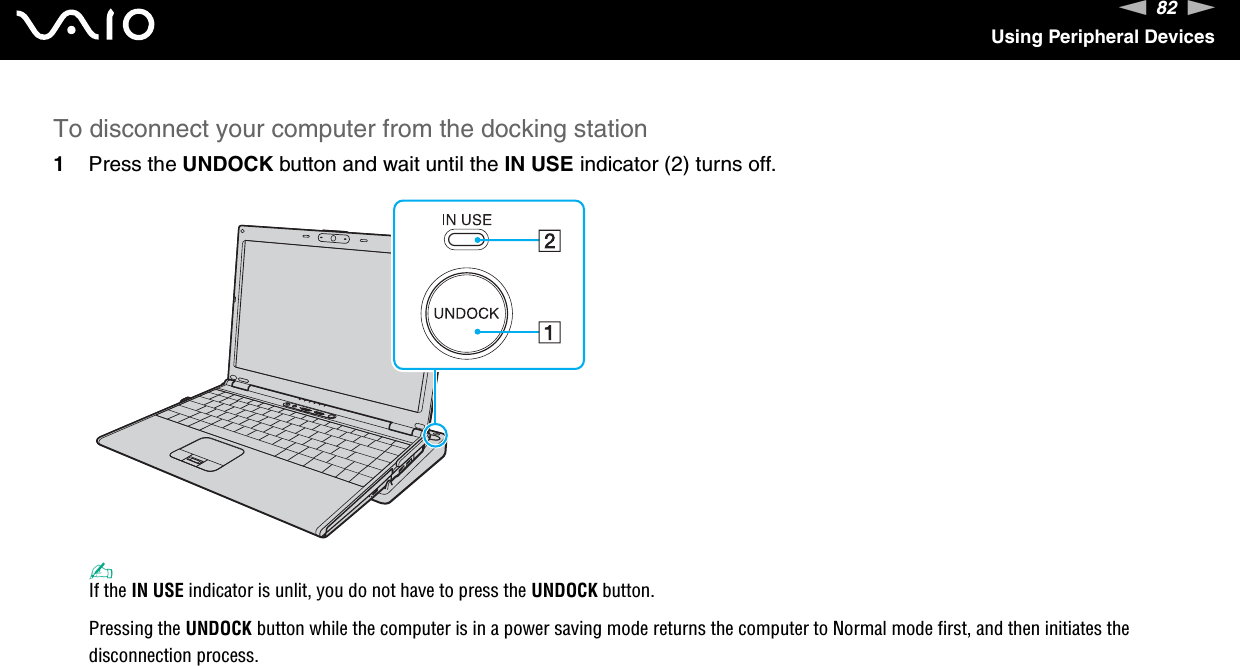
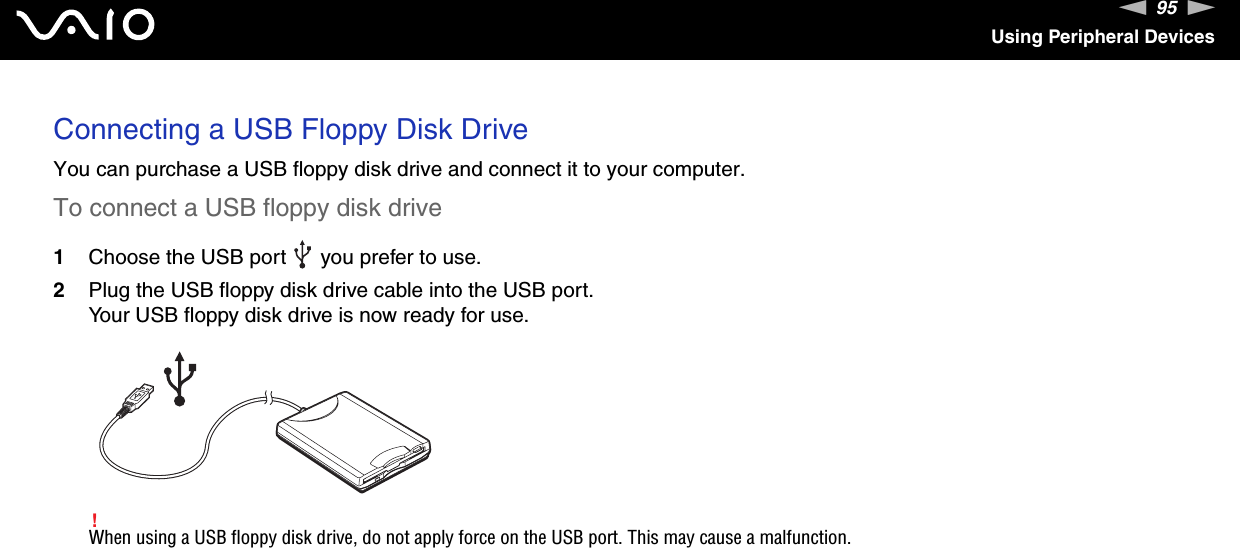
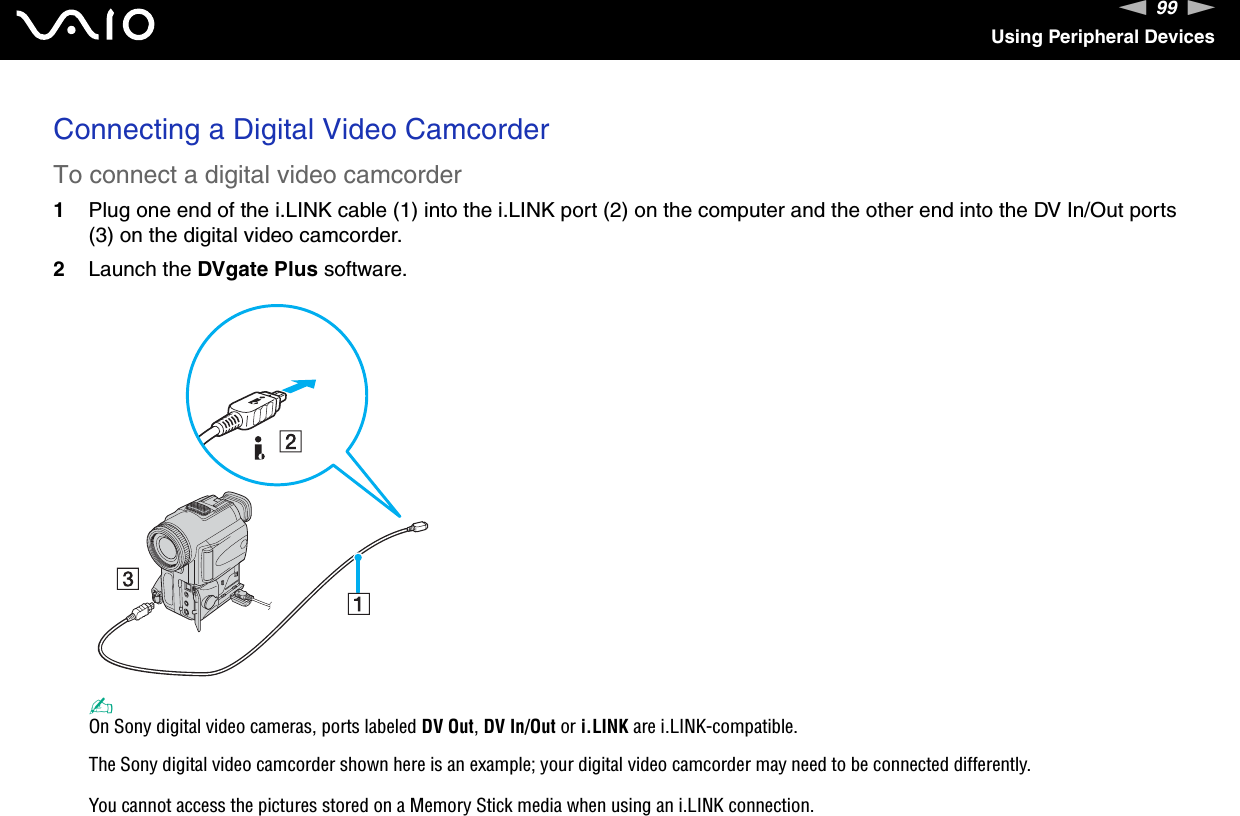
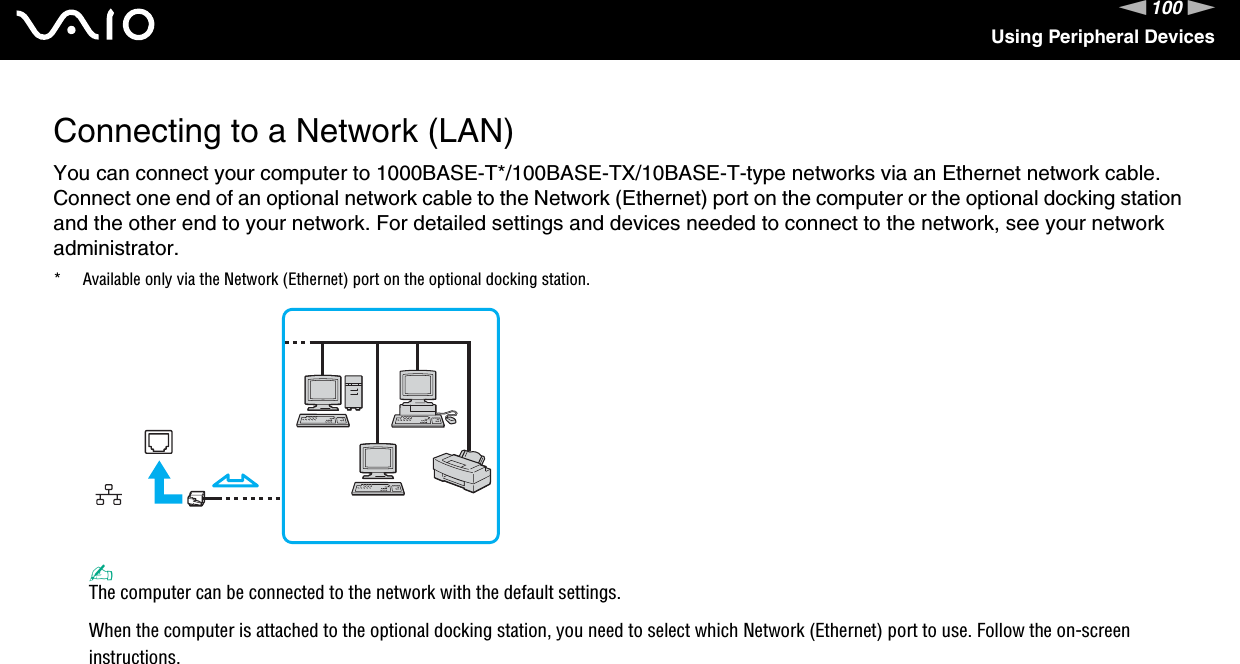
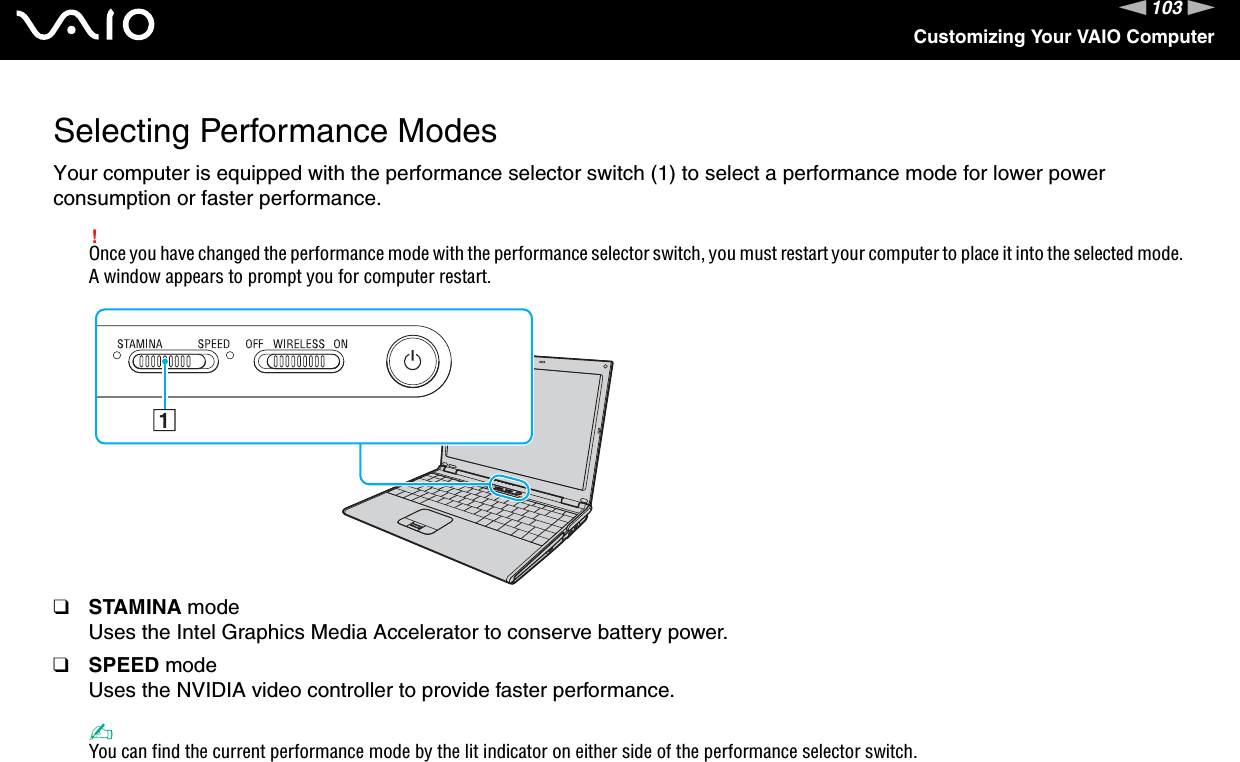
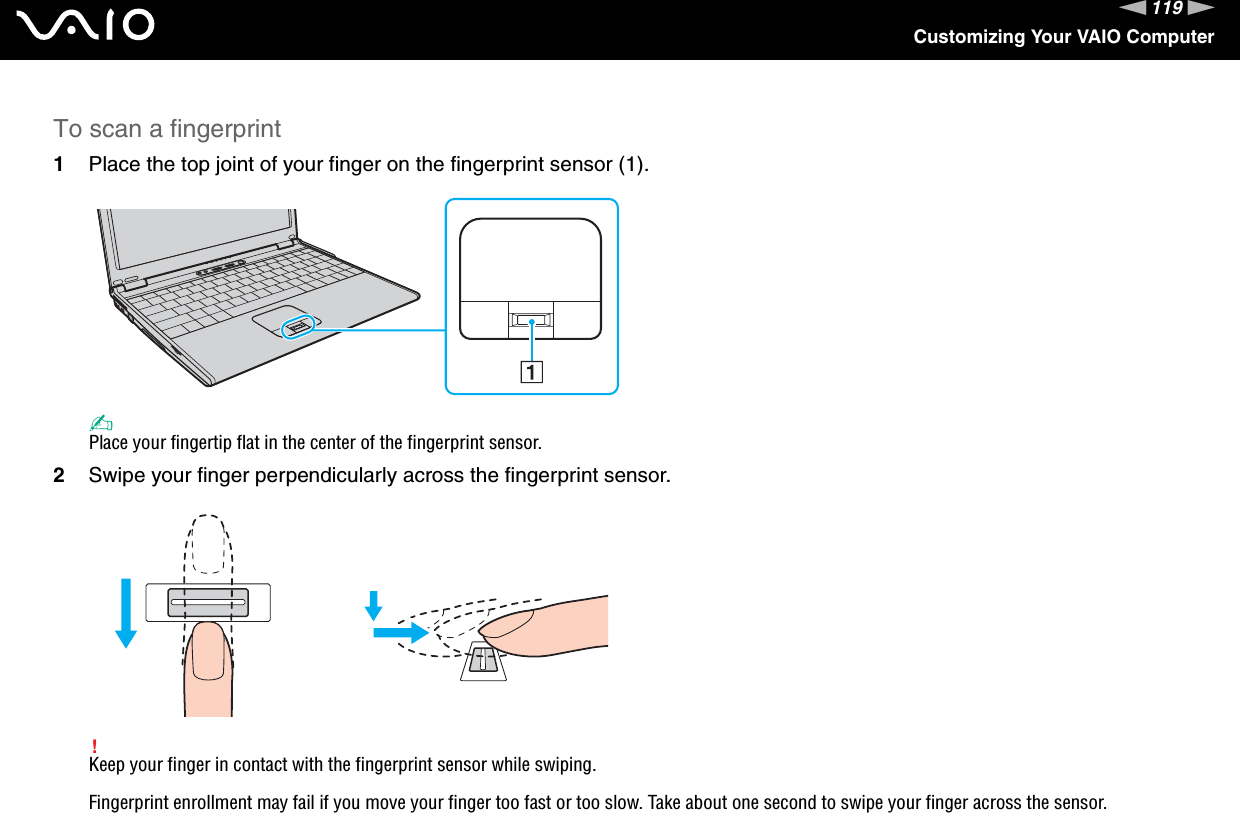
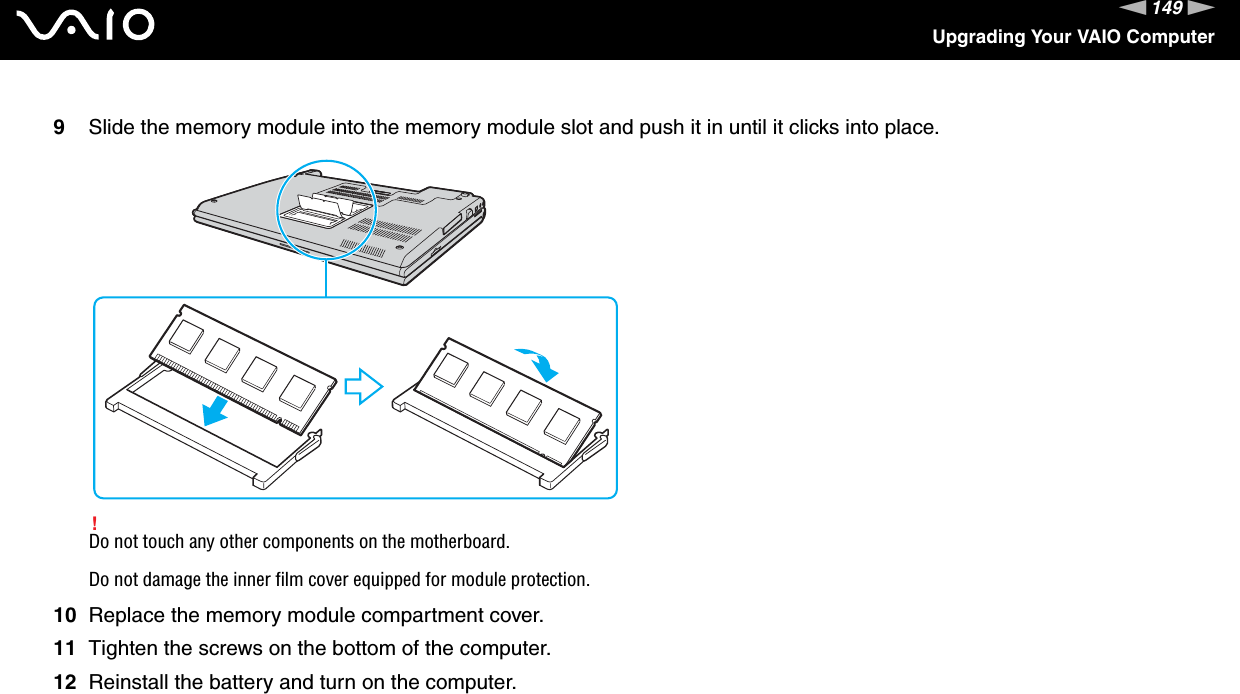
![73nNUsing Your VAIO ComputerUsing the Bluetooth HeadsetThe Bluetooth headset is available as an optional accessory. It will come in handy during a video conference over the Internet using instant messaging software, for example Windows Messenger. For details on using the Bluetooth headset, see the manual that came with the Bluetooth headset.To connect the headset with a computer1Press and hold the headset power button for at least five seconds to turn on the Bluetooth headset.2Press and hold the volume buttons until the indicator light blinks in red.3Right-click the Bluetooth icon on the taskbar and select Bluetooth Settings from the menu.The Bluetooth Settings window appears and Add New Connection Wizard automatically starts.4If the Add New Connection Wizard window does not appear, click New Connection.The Add New Connection Wizard window appears.5Select Express Mode [Recommended] and then click Next.The wizard searches for Bluetooth devices in range and lists available devices, if any.6Select HBH-608 and then click Next.The Bluetooth Manager-Bluetooth Security window appears when a connection is established.7Enter "0000" for Bluetooth Passkey (PIN) and then click OK.8Press the headset power button.9Click Finish.The headset icon appears in the Bluetooth Settings window.10 Click the headset icon and then press the headset power button.The computer should now be ready to communicate with the Bluetooth headset.](https://usermanual.wiki/Sony-Group/PCG6J1L.Users-Guide/User-Guide-625689-Page-73.png)