Sony Group PEGUX50 Personal Entertainment Organizer User Manual 1
Sony Corporation Personal Entertainment Organizer Users Manual 1
Contents
- 1. Users Manual 1
- 2. Users Manual 2
- 3. Users Manual 3
Users Manual 1
X-XXX-XXX-11 (1)
Sony Personal Entertainment Organizer PEG-UX50/UX00 X-XXX-XXX-11 (1)
Printed in Japan
For the latest information on support
and accessories,
check our official Sony CLIÉ website
For customers in the U.S.A. and Canada
http://www.sony.com/clie/
For customers in Australia, Hong Kong, Malaysia,
Mexico, New Zealand, Singapore, Taiwan and Thailand
http://vaio-online.sony.com/clie/
Printed using VOC (Volatile Organic Compound)-free
vegetable oil based ink.
Read
This
First
Setting up your
CLIÉ™ handheld
Basic operations of your
CLIÉ™ handheld
Have a try
Taking pictures / Recording
movies
Recording a voice memo
Listening to music
Managing schedule events /
addresses
Viewing computer documents
Using the Bluetooth™
function
1
2
4
CLIÉ™ handheld
components
Personal Entertainment Organizer
PEG-UX50
PEG-UX00
Operating Instructions
© 2003 Sony Corporation
Connecting to the
Internet
3
01US01COV for print.fm Page 1 Friday, June 20, 2003 6:39 AM
Sony Personal Entertainment Organizer PEG-UX50/UX00 X-XXX-XXX-11 (1)
X-XXX-XXX-11 (1)
Personal Entertainment Organizer
PEG-UX50
PEG-UX00
© 2003 Sony Corporation
Read
This
First
Operating Instructions
Setting up your
CLIÉ™ handheld
Basic operations of your
CLIÉ™ handheld
Have a try
Taking pictures / Recording
movies
Recording a voice memo
Listening to music
Managing schedule events /
addresses
Viewing computer documents
Using the Bluetooth
®
function
1
2
4
CLIÉ™ handheld
components
Connecting to the
Internet
3
01US01COV.fm Page 1 Friday, June 20, 2003 12:20 PM
2
Sony Personal Entertainment Organizer PEG-UX50/UX00 X-XXX-XXX-11 (1)
The following manuals are included with your CLIÉ handheld.
Refer to the following together with this manual.
Before you start using your CLIÉ handheld (This manual)
When you want to become more familiar with the basic operations
of your CLIÉ handheld
When you want to change the settings of your CLIÉ handheld
When you want to become more familiar with using the supplied applications
When you want to install additional applications
When you have problems
Read This First (Operating Instructions)
Explains the following:
• Setting up your CLIÉ handheld and computer
• Basic operations
• What you can do with the applications
For safety use, be sure to read the supplied “Safety & Regulations
Guide”.
Handbook
Using CLIÉ handheld for the first time
The basic features and operations are explained in detail.
CLIÉ handheld advanced operations
Useful and advanced features of your CLIÉ handheld are
explained in detail.
CLIÉ Application Manual (HTML format: Read via a
computer screen)
Explains how to use the supplied applications in detail.
This manual will be automatically installed on your computer when you
install Palm™ Desktop for CLIÉ.
For details on using the manual, refer to “Using the CLIÉ Application Manual” on
page 72 of this manual.
Troubleshooting Q&A
Helps in solving common problems that you may have while using your CLIÉ
handheld.
01US01COV.book Page 2 Friday, June 20, 2003 6:29 AM
3
Sony Personal Entertainment Organizer PEG-UX50/UX00 X-XXX-XXX-11 (1)
Before use
Caution
IN NO EVENT SHALL SONY BE LIABLE FOR
ANY INCIDENTAL, INDIRECT OR
CONSEQUENTIAL DAMAGES OR OTHER
DAMAGES INCLUDING WITHOUT
LIMITATION LOSS OF PROFITS, LOSS OF
REVENUE, LOSS OF DATA, LOSS OF USE
OF THE PRODUCT OR ANY ASSOCIATED
EQUIPMENT, DOWNTIME, AND
PURCHASER’S TIME RELATED TO OR
ARISING OUT OF THE USE OF THIS
PRODUCT, ITS HARDWARE AND/OR ITS
SOFTWARE.
On the supplied software
• Copyright laws prohibit reproducing the
software or the software manual in whole or
in part or renting the software without the
permission of the copyright holder.
• In no event will SONY be liable for any
financial damage or loss of profits, including
claims made by third parties, arising out of
the use of the software supplied with this
product.
• In the event a problem occurs with this
software as a result of defective
manufacturing, SONY will replace it at
SONY’s option or issue a refund. However,
SONY bears no other responsibility.
• The software provided with this product
cannot be used with equipment other than
that which it is designated for use with.
• Please note that, due to continued efforts to
improve quality, the software specifications
may be changed without notice.
• The software library incorporated in the
CLIÉ handheld is based in part on the work of
the Independent JPEG Group.
NOTES
• Sony does not support third party add-on
applications. If you have a problem with a
third party application, please contact the
developer or publisher of that software.
• The illustrations in this manual may differ
from the actual software.
• Explanations in this manual assume that you
are familiar with basic operations of
Windows®. For how to use your computer
and operating system, please refer to their
respective manuals.
Program © 2003 Sony Corporation, © 2003 Palm,
Inc., or its subsidiaries. All rights reserved.
Documentation © 2003 Sony Corporation
CAUTION
Please contact your nearest Sony dealer regarding
any problems you have with your Sony product.
01US01COV.book Page 3 Friday, June 20, 2003 6:29 AM
4
Sony Personal Entertainment Organizer PEG-UX50/UX00 X-XXX-XXX-11 (1)
Table of Contents
Setting up your CLIÉ™ handheld
Confirming the package
contents . . . . . . . . . . . . . . . . 6
Setting up your CLIÉ™
handheld . . . . . . . . . . . . . . . . 8
Charging your CLIÉ handheld. . . . . . . . . . . . . 8
Performing the initial setup after turning on
your CLIÉ handheld for the first time. . . . . 9
Using your CLIÉ™ handheld with
your computer . . . . . . . . . . . .16
Installing the software on your computer. . . 16
Connecting your CLIÉ handheld and computer
via the USB cable. . . . . . . . . . . . . . . . . . . 19
Entering a user name for your
CLIÉ handheld . . . . . . . . . . . . . . . . . . . . . 20
Synchronizing data between your CLIÉ
handheld and computer (the HotSync®
operation) . . . . . . . . . . . . . . . . . . . . . . . . 21
Basic operations of your CLIÉ™
handheld
Turning on/off your CLIÉ
handheld . . . . . . . . . . . . . . . .24
Turning on your CLIÉ handheld . . . . . . . . . . 24
Starting an application . . . . . . .25
Using the Jog Dial™ navigator and the BACK
button . . . . . . . . . . . . . . . . . . . . . . . . . . . 25
Other ways to start an application . . . . . . . . 27
About Internal Media . . . . . . . . .28
Entering text. . . . . . . . . . . . . . .29
Turning off your CLIÉ handheld in Power
Saving mode . . . . . . . . . . . . . . . . . . . . . . 30
Turning off your CLIÉ handheld using
Power Saving mode. . . . . . . . .30
Restarting your CLIÉ handheld . .32
Connecting to the Internet
Preparing for the wireless LAN
function . . . . . . . . . . . . . . . .35
Step 1: Verifying the value settings for the
wireless LAN access point. . . . . . . . . . . . 36
Step 2: Using the check sheet . . . . . . . . . . . 37
Step 3: Setting up the wireless
LAN function . . . . . . . . . . . . . . . . . . . . . . 38
Browsing websites. . . . . . . . . . .40
Setting up NetFront v3.0 for CLIE . . . . . . . . 40
Browsing websites by connecting to
the Internet via the wireless LAN access
point.. . . . . . . . . . . . . . . . . . . . . . . . . . . . 42
Sending/Receiving e-mails . . . . .43
Setting up CLIE Mail . . . . . . . . . . . . . . . . . . 43
Sending e-mails. . . . . . . . . . . . . . . . . . . . . . 45
Receiving e-mails . . . . . . . . . . . . . . . . . . . . 46
Have a try
Enjoying image files. . . . . . . . . . . . . . . . . . . 47
Enjoying movies . . . . . . . . . . . . . . . . . . . . . 50
Recording a voice memo
(Voice Recorder) . . . . . . . . . . . . . . . . . . . 53
Viewing handwritten memos and image files,
and playing back voice memos . . . . . . . . 55
Listening to music . . . . . . . . . . . . . . . . . . . . 57
Managing schedules (Date Book) . . . . . . . . 59
Managing addresses and telephone numbers
(Address Book) . . . . . . . . . . . . . . . . . . . . 61
Exchanging Date Book and Address Book
data between your CLIÉ handheld and
computer. . . . . . . . . . . . . . . . . . . . . . . . . 63
Viewing computer documents on your CLIÉ
handheld (Picsel Viewer for CLIE) . . . . . . 64
Using the Bluetooth® function. . . . . . . . . . . 66
Using applications. . . . . . . . . . .72
Using the CLIÉ Application Manual . . . . . . . 72
Introducing add-on applications . . . . . . . . . 74
Additional information . . . . . . . .85
01US01COV.book Page 4 Friday, June 20, 2003 6:29 AM
5
Sony Personal Entertainment Organizer PEG-UX50/UX00 X-XXX-XXX-11 (1)
Making a backup of the data or applications on
your CLIÉ handheld . . . . . . . . . . . . . . . . . 85
Resetting your CLIÉ handheld to the
factory setting . . . . . . . . . . . . . . . . . . . . . 86
Troubleshooting . . . . . . . . . . . . . . . . . . . . . . 87
Customer Support and Customer
Registration . . . . . . . . . . . . . . . . . . . . . . . 88
Notes on use. . . . . . . . . . . . . . . . . . . . . . . . . 89
Specifications . . . . . . . . . . . . . . . . . . . . . . . . 93
CLIÉ™ handheld components
Front panel . . . . . . . . . . . . . . . . . . . . . . . . . . 98
Back panel . . . . . . . . . . . . . . . . . . . . . . . . . 100
Locating the components of the initial screen .
106
Locating Charger Cradle components . . . . 111
INDEX. . . . . . . . . . . . . . . . . . .112
Notes on this manual
• This manual supports PEG-UX50 and PEG-UX00.
– The illustrations in this manual are for PEG-UX50, unless specified otherwise.
– Differences between PEG-UX50 and PEG-UX00 are specified in each
corresponding section.
• Screen shots in this manual may be different from the actual displays in the supplied
software.
• The contents of this manual are written for users with a working knowledge of
Windows®. For details about computer operations, refer to your computer manual.
LCD display and camera lens
The LCD of your CLIÉ handheld is designed with precision technology. However, in
some cases, individual pixels may remain lit or may not light at all. Also, the brightness
of the display may appear inconsistent, depending on the angle of view. Such anomalies
are caused by the nature of the LCD and do not indicate a malfunction.
Please note that Sony does not guarantee a replacement or refund for such cases.
Do not expose the LCD or camera lens to direct sunlight for prolonged periods of time. It
may result in a malfunction. Do not store in areas subject to sunlight, such as near
windows, and be careful when using outdoors.
Before taking pictures (CLIE Camera),
recording movies (Movie Recorder) or
recording sounds (Voice Recorder)
SONY recommends taking a test picture to confirm settings, etc., before actual shooting.
Take a test shot, save it, and view it to check the result. Likewise, perform tests before
actual movie and sound clip recording.
No guarantee for lost or damaged data
Sony does not provide any guarantee for lost or damaged data.
Copyrights
Television programs, films, video tapes, and other materials may be copyrighted.
Unauthorized recording of such materials may violate copyright laws.
01US01COV.book Page 5 Friday, June 20, 2003 6:29 AM
6
Sony Personal Entertainment Organizer PEG-UX50/UX00 X-XXX-XXX-11 (1)
Setting up your
CLIÉ™ handheld
This chapter explains how to charge your CLIÉ handheld and use it with your computer.
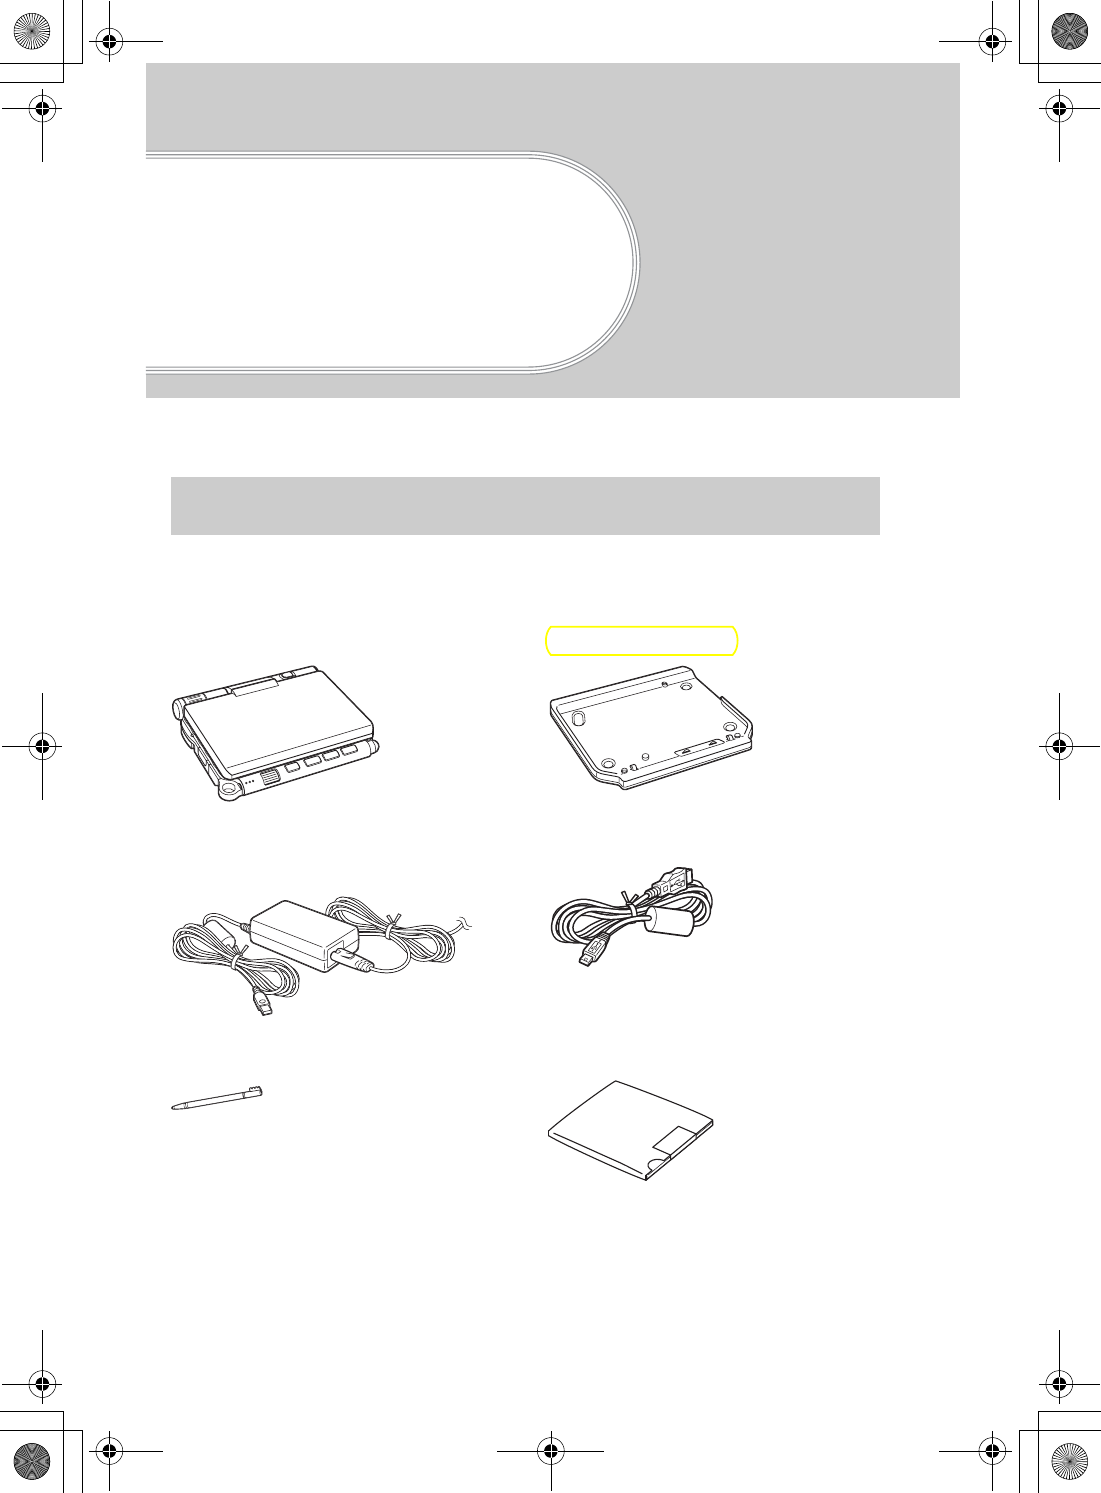
Please confirm that all the following accessories are included in the package before
setting up your CLIÉ handheld.
Confirming the package contents
CLIÉ handheld (1) Charger Cradle (1)
AC power adapter (1)
(including AC cord)
USB cable (1)
Stylus (1)
The stylus is inserted into your CLIÉ
handheld at the factory.
Installation CD-ROM (1)
01US01COV.book Page 6 Friday, June 20, 2003 6:29 AM
7
Sony Personal Entertainment Organizer PEG-UX50/UX00 X-XXX-XXX-11 (1)
Setting up your CLIÉ™ handheld
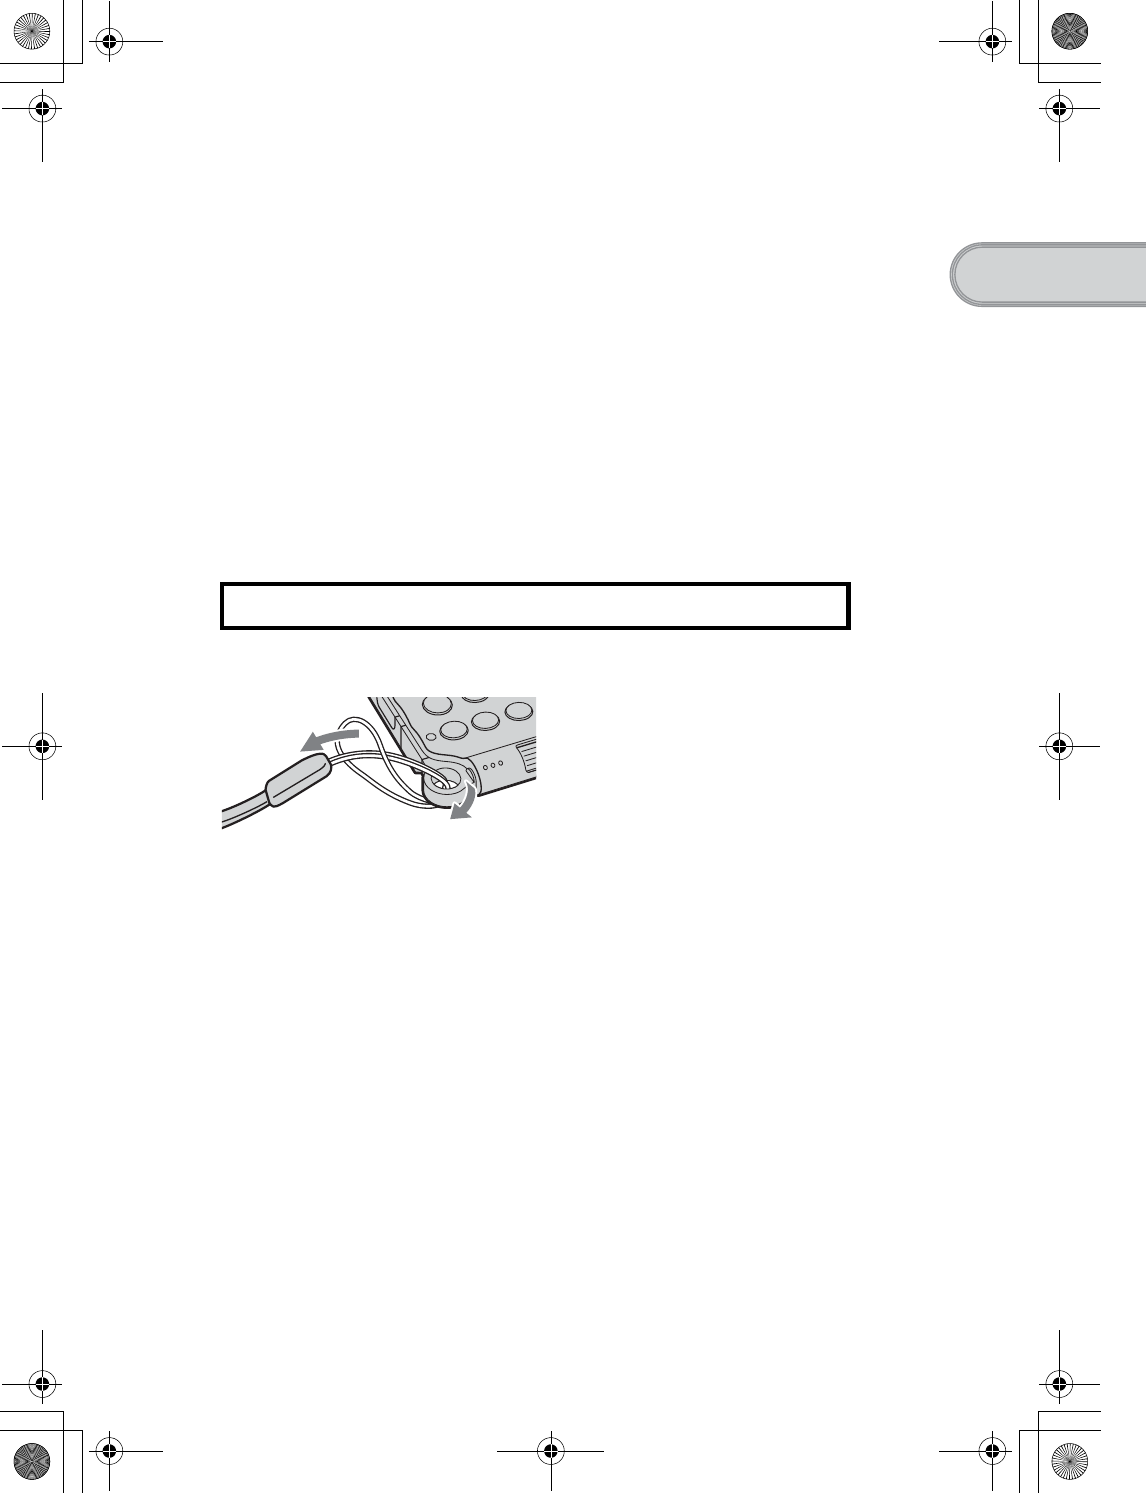
Strap (1)
Refer to the illustration below to attach the strap.
Read This First - Operating Instructions (1, this manual)
Safety & Regulations Guide (1)
Troubleshooting Q&A (1)
Software license agreement (1)
Other printed materials
Make sure that the package contains all of the above contents. If any item is missing,
contact the Sony Customer Information Service Center or a Sony dealer.
Attaching the strap
Use the strap to avoid dropping your CLIÉ handheld
01US01COV.book Page 7 Friday, June 20, 2003 6:29 AM
8
Sony Personal Entertainment Organizer PEG-UX50/UX00 X-XXX-XXX-11 (1)
Perform the following before setting up your CLIÉ handheld.
Step 1: Charging your CLIÉ handheld
Setting up your CLIÉ™ handheld
Step 1: Charging your CLIÉ handheld
Step 2: Performing the initial setup after turning on your
CLIÉ handheld for the first time
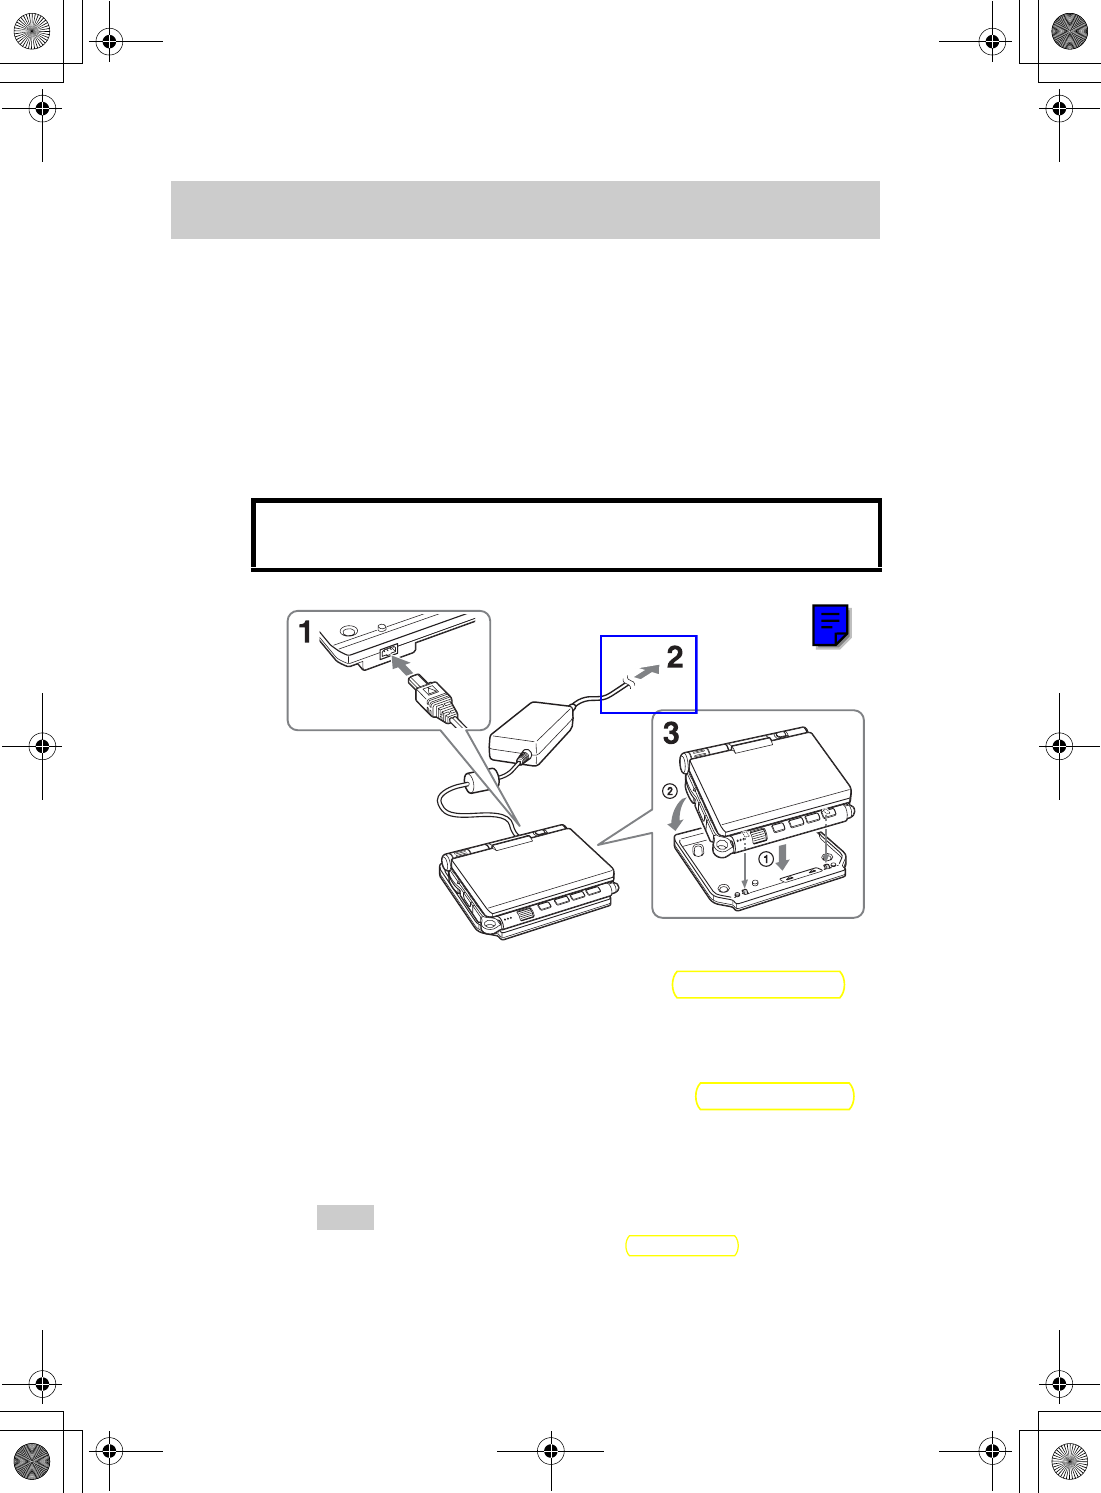
Before using your CLIÉ handheld for the first time, be
sure to fully charge the battery.
1Connect the AC power adapter to the charger cradle’s AC
power adapter connector.
2Connect the AC power adapter to a wall outlet.
3Align and attach the front clasps of the charger cradle
with the holes on the back of your CLIÉ handheld (1),
then gently lay it down (2).
The POWER LED of your CLIÉ handheld turns on when charging starts.
Tips
• To remove your CLIÉ handheld from the charger cradle, lift up from the rear
(camera lens side).
• Clean the connectors if they get dirty.
To a wall
outlet
01US01COV.book Page 8 Friday, June 20, 2003 6:29 AM
9
Sony Personal Entertainment Organizer PEG-UX50/UX00 X-XXX-XXX-11 (1)
Setting up your CLIÉ™ handheld
It takes about four hours to fully charge your CLIÉ handheld for the first time.
The POWER LED turns off when charging is complete.
Tip
Subsequent charges will require less time if you charge your CLIÉ handheld
frequently.
Step 2: Performing the initial setup after
turning on your CLIÉ handheld for
the first time
The first time you turn on your CLIÉ handheld, you need to make some initial
settings. Follow the on-screen instructions to complete the initial setup and to
become familiar with operating your CLIÉ handheld.
Changing the operating style
You can use your CLIÉ handheld with the display panel set in three different styles.
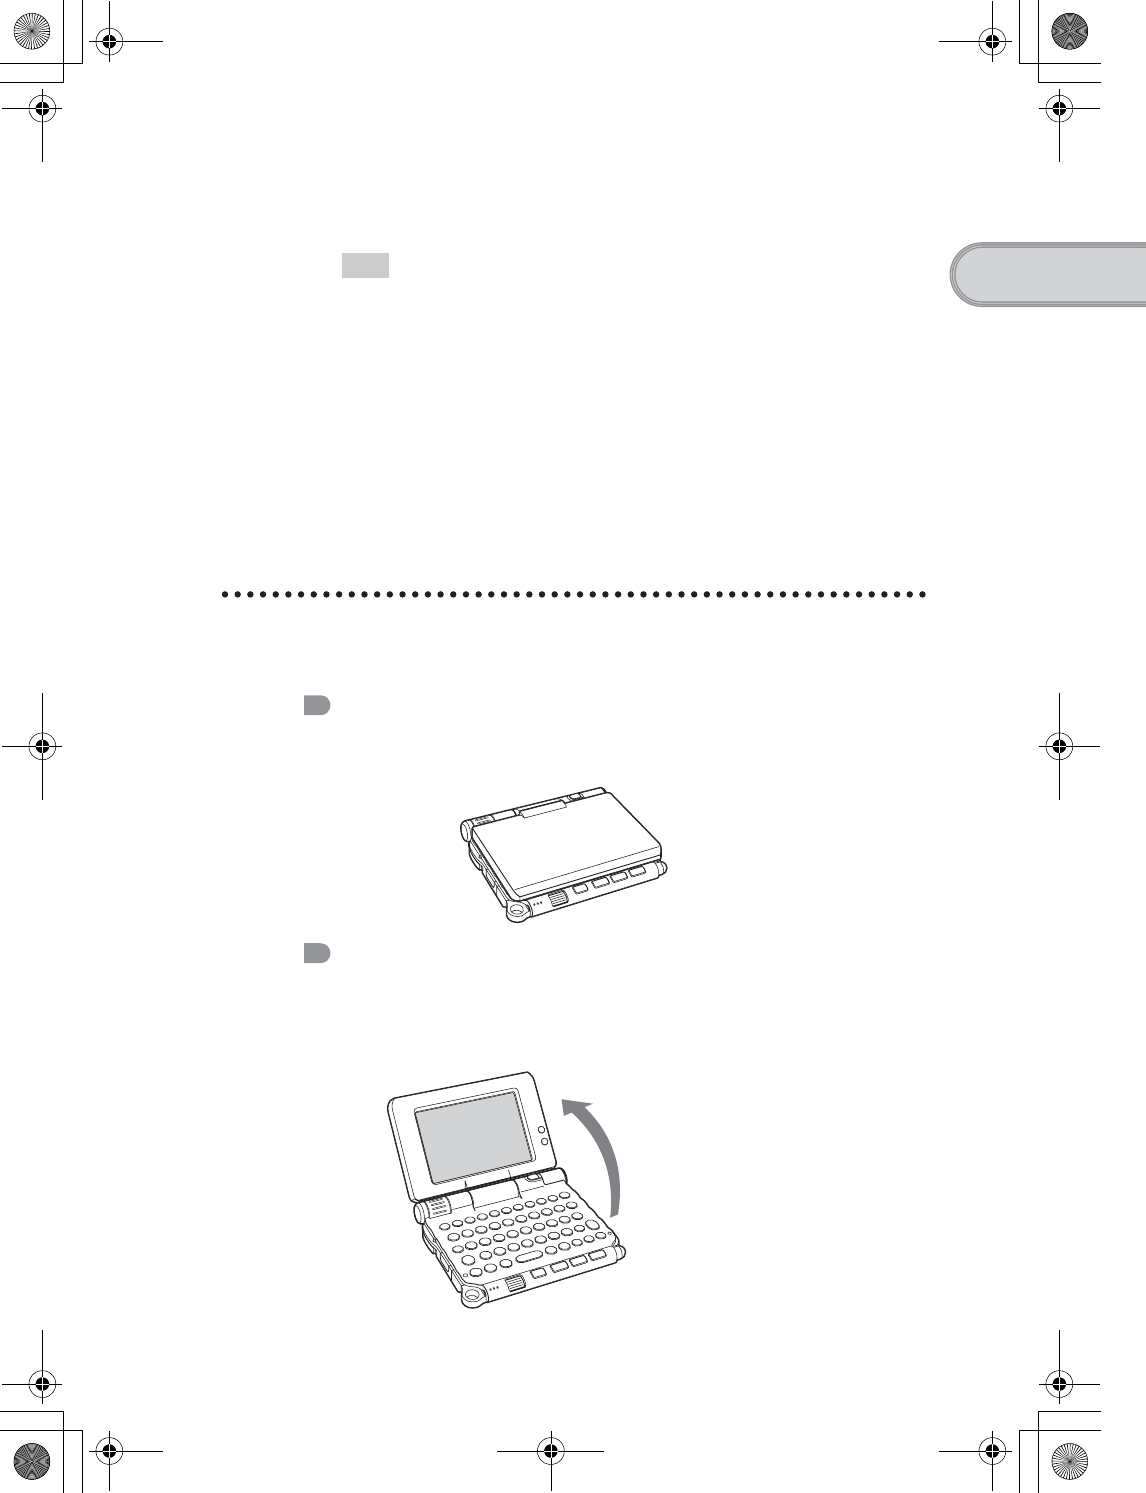
Carrying style
Put your CLIÉ handheld in the “carrying style” when carrying it in your
bag or pocket to prevent the screen from damage.
Opened style
Put your CLIÉ handheld in the “opened style” when you enter data with
the hardware keyboard.
Open the display
panel
Continued on next page
• • • • • • • • • • • • • • • • • • • • •
01US01COV.book Page 9 Friday, June 20, 2003 6:29 AM
10
Sony Personal Entertainment Organizer PEG-UX50/UX00 X-XXX-XXX-11 (1)
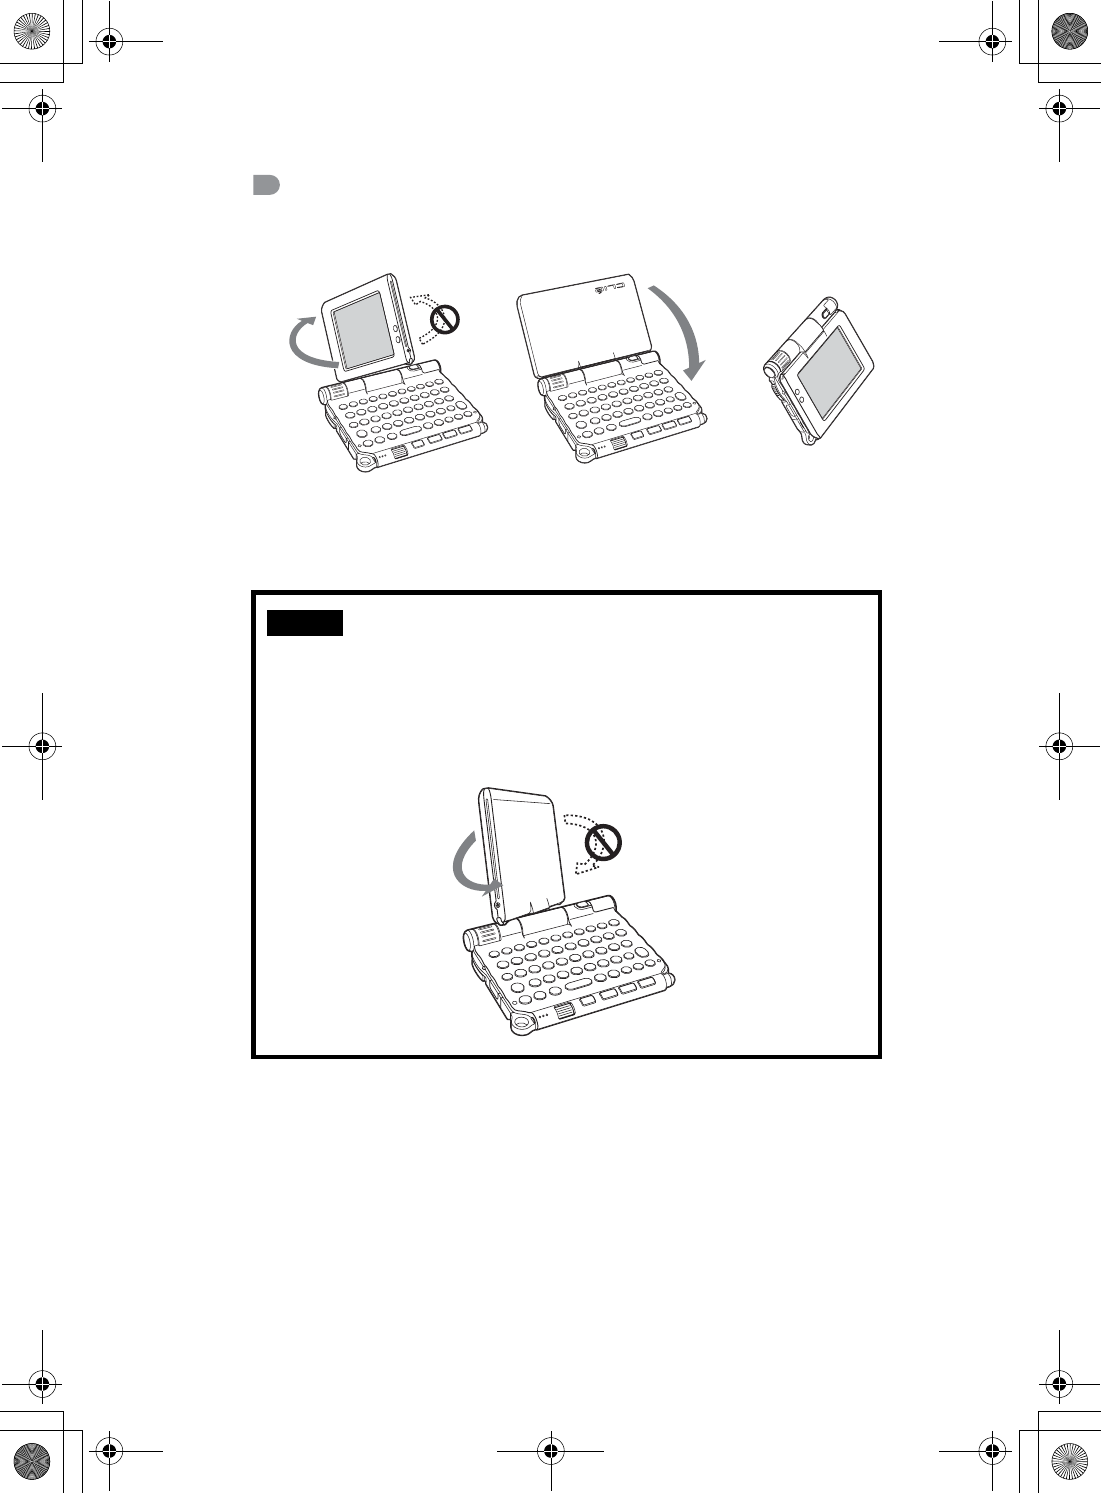
Turned style
Put your CLIÉ handheld in the “turned style” to make it compact when
you operate it with the stylus or use it in camera mode.
Note
Do not apply too much force or rotate the display panel in the wrong direction.
Closing the display panel
Close the display panel by rotating it counterclockwise until it clicks into
place.
Open the display and rotate
it clockwise until it clicks into
place
Fold the display over the
keyboard
bb
01US01COV.book Page 10 Friday, June 20, 2003 6:29 AM
11
Sony Personal Entertainment Organizer PEG-UX50/UX00 X-XXX-XXX-11 (1)
Setting up your CLIÉ™ handheld
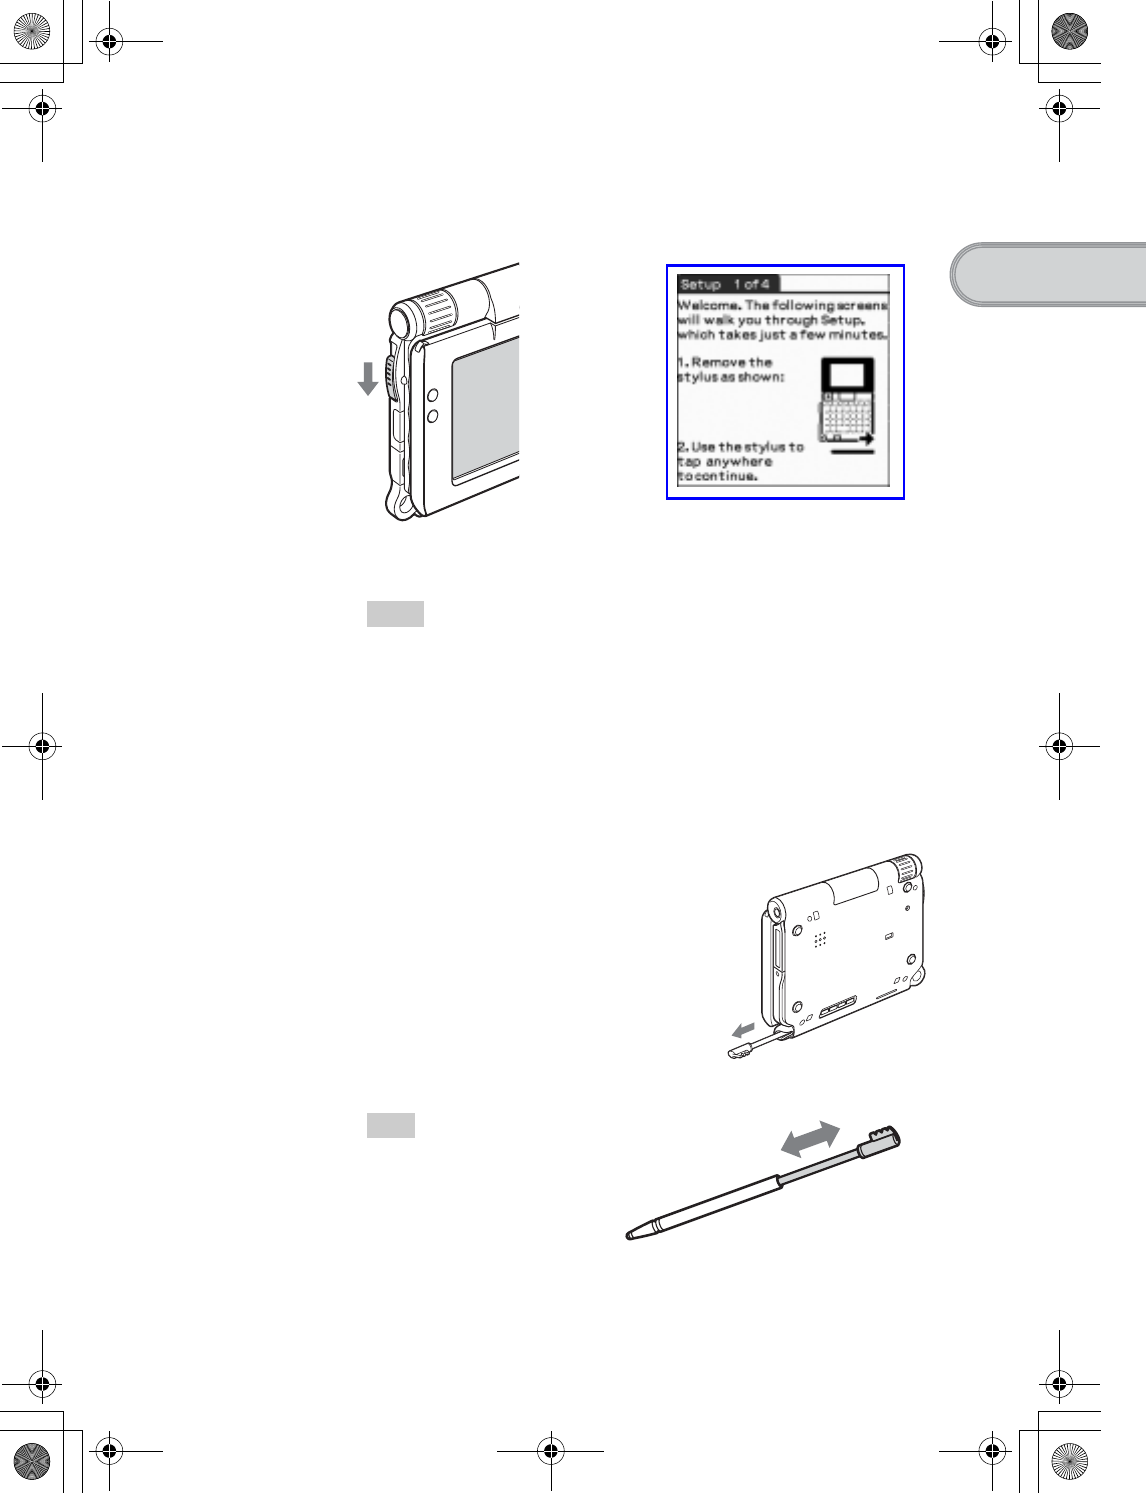
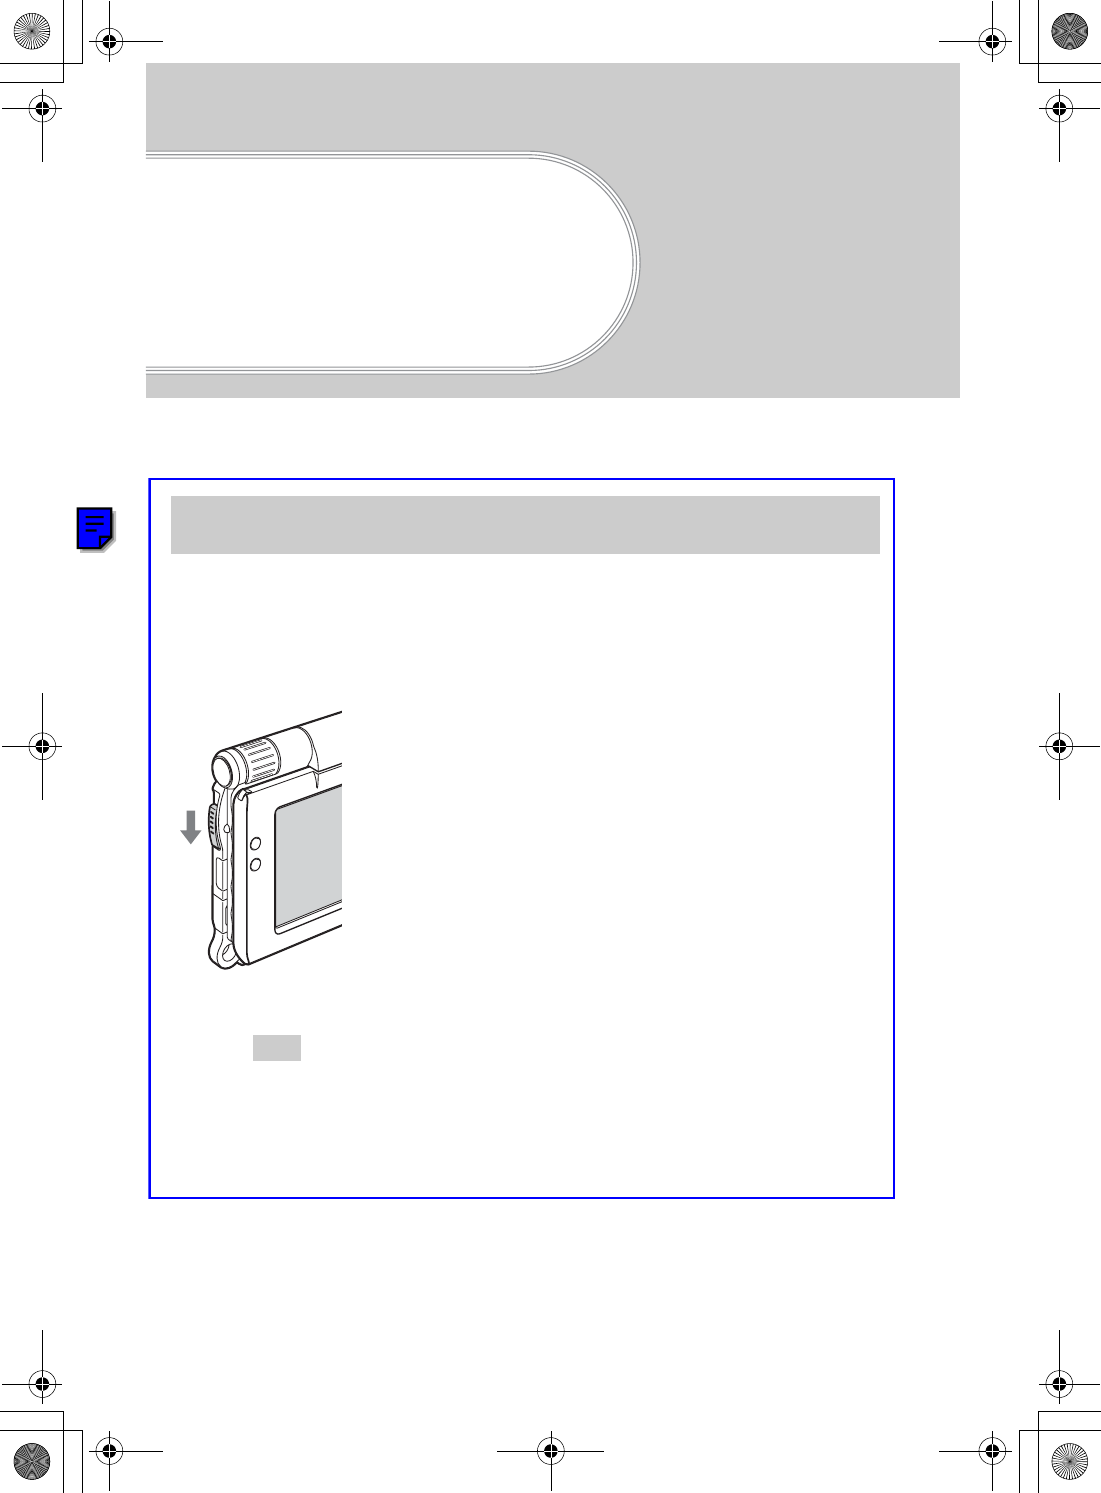
1Slide down the POWER/HOLD switch.
Your CLIÉ handheld turns on, and the Setup screen is displayed.
Tips
If you cannot turn on your CLIÉ handheld
• Did you charge your CLIÉ handheld as described on page 8?
bFor details, refer to the supplied “Troubleshooting Q&A”.
• Perform a soft reset if you cannot turn on your CLIÉ handheld even after
charging it (page 32).
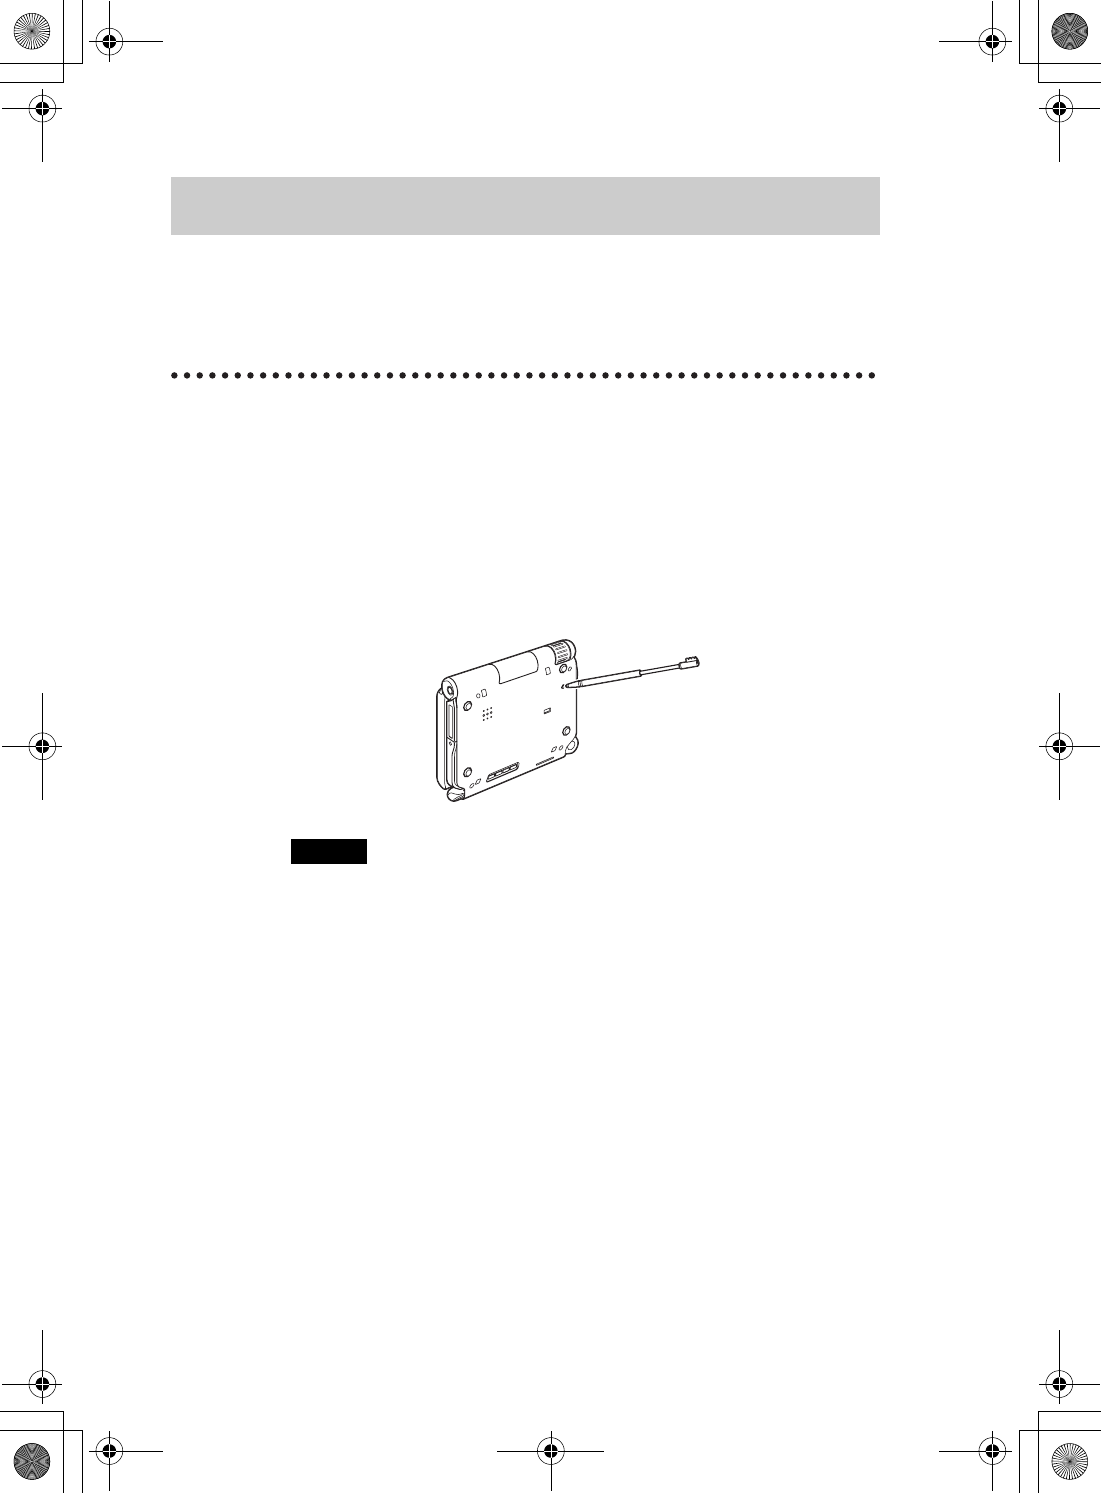
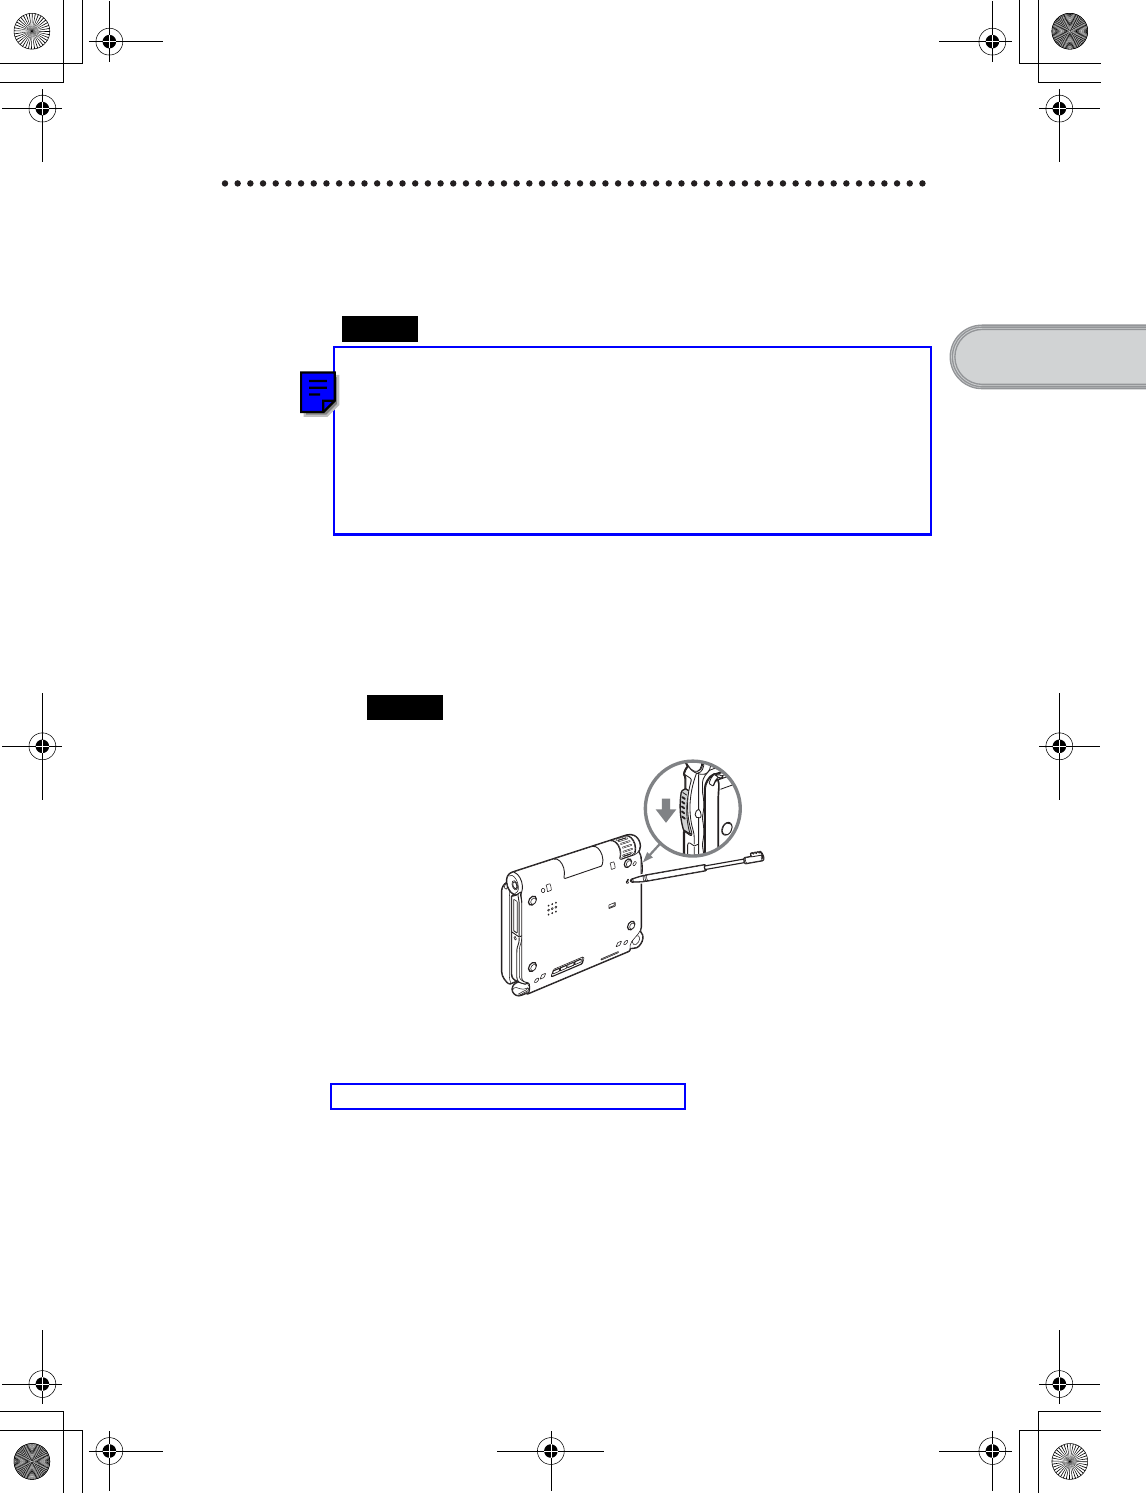
2Take out the stylus.
You can use the stylus to enter text or to select applications.
Tip
You can extend or shorten the
stylus, as shown in the
illustration.
Slide down the POWER/HOLD switch
b
Take out the stylus
Continued on next page
• • • • • • • • • • • • • • • • • • • • •
01US01COV.book Page 11 Friday, June 20, 2003 6:29 AM
12
Sony Personal Entertainment Organizer PEG-UX50/UX00 X-XXX-XXX-11 (1)
Notes
• Never use a writing pen, pencil, or other sharp object instead of the stylus to
write on your CLIÉ handheld, as the screen may get scratched.
• When you put the stylus back in its holder, push it in until it clicks into place.
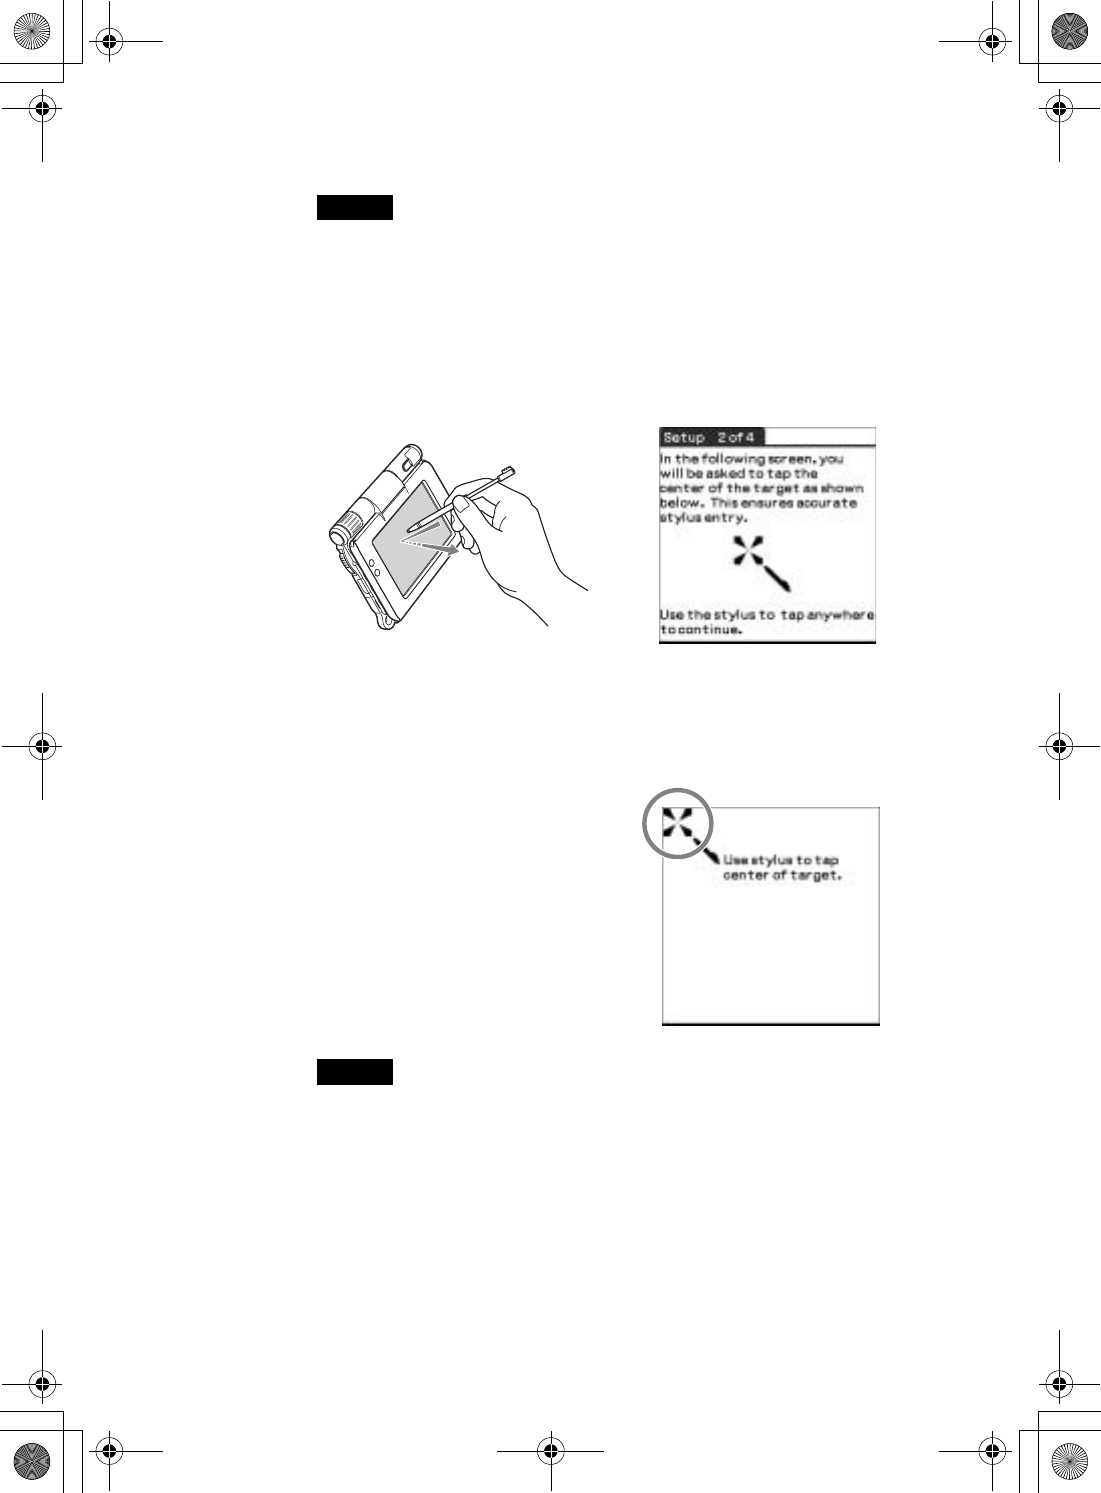
3Press lightly on the screen with the stylus.
This action is called “tapping”.
The Setup screen for stylus digitizer is displayed.
4Following the on-screen instructions, tap exactly in the
center of the displayed mark.
Tap the next targets, which are displayed at the bottom right and then in the
center of the screen.
Note
If the stylus digitizer is not configured correctly, the scroll bar may not operate
properly, “tapping” may not work as expected, or other problems may occur.
bFor details on reconfiguring the stylus digitizer, refer to “Customizing your
CLIÉ™ handheld (Preferences): Adjusting the Digitizer” in the supplied
“Handbook”.
After the stylus adjustment is complete, a screen for setting the time and
date is displayed.
Press lightly on the screen (Tap)
b
01US01COV.book Page 12 Friday, June 20, 2003 6:29 AM
13
Sony Personal Entertainment Organizer PEG-UX50/UX00 X-XXX-XXX-11 (1)
Setting up your CLIÉ™ handheld
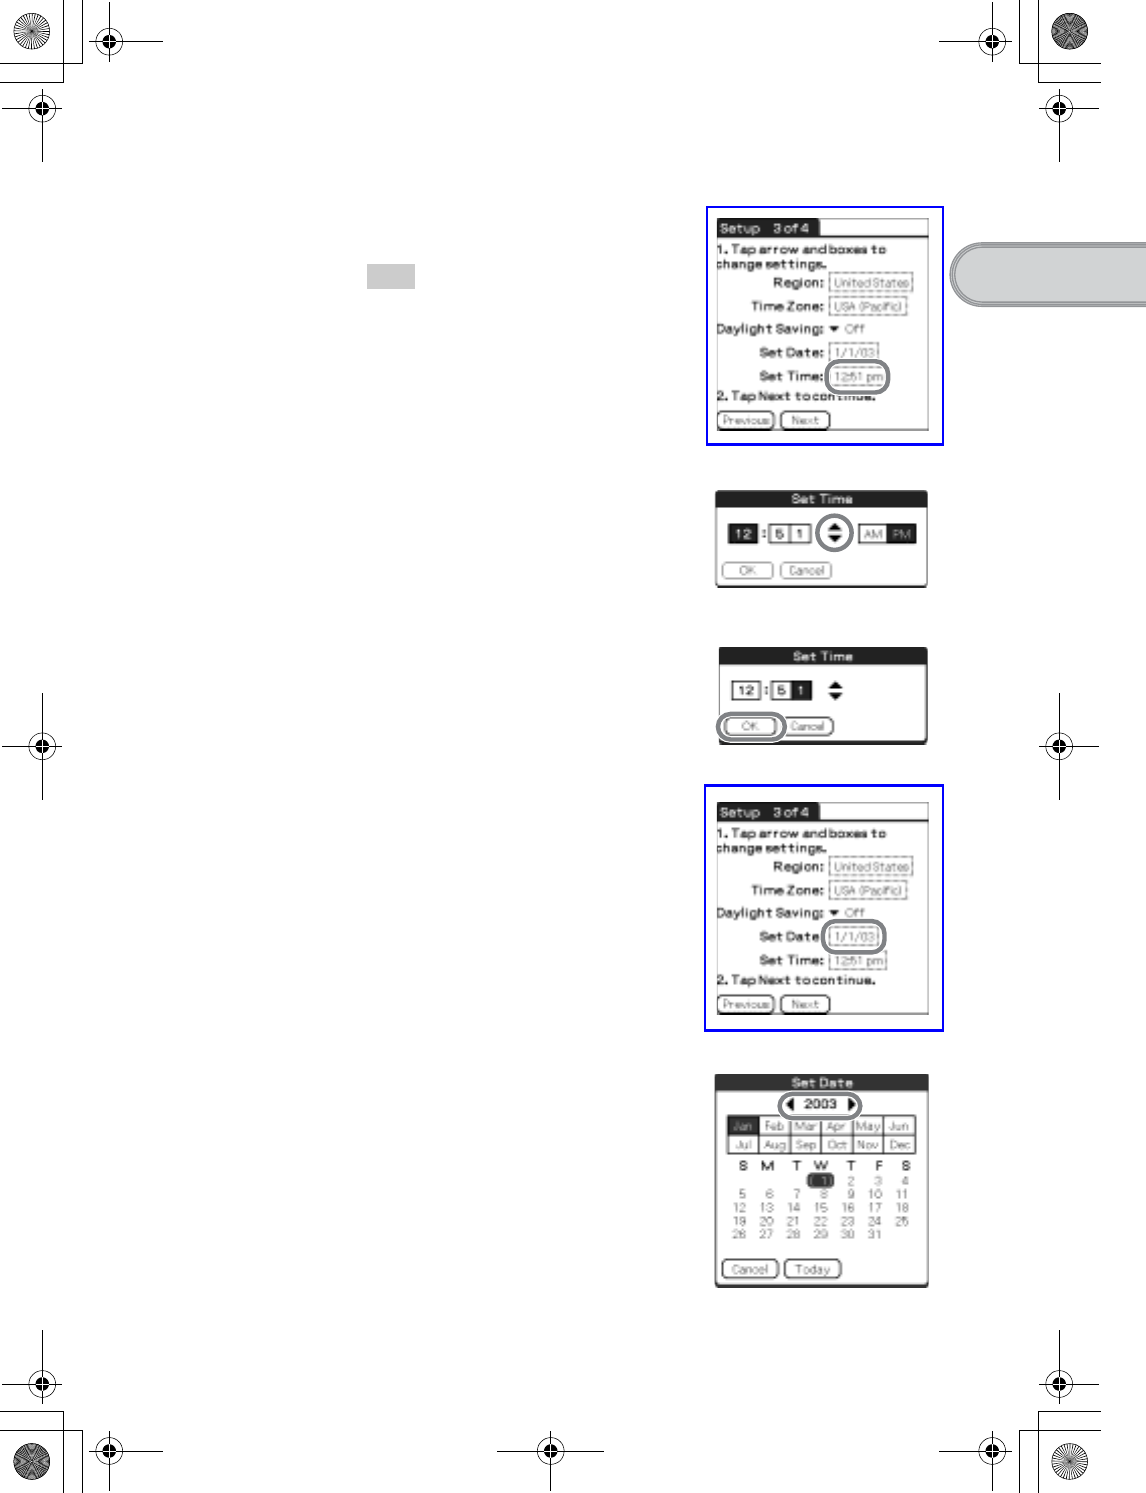
5Tap the box next to [Set Time].
The Set Time dialog box is displayed.
Tip
You can reconfigure the date and time
settings in the Preferences screen.
bFor details, refer to “Customizing your
CLIÉ™ handheld (Preferences): Setting
up the Date & Time preferences” in the
supplied “Handbook”.
6Tap v or V to set the current time.
Tap each box to set the hour and
minute.
7Tap [OK].
The current time is set and the
Setup screen is displayed.
8Tap the box next to [Set Date].
The Set Date screen is displayed.
9Tap b or B to select the current year.
Continued on next page
• • • • • • • • • • • • • • • • • • • • •
01US05SET.fm Page 13 Friday, June 20, 2003 1:27 PM
14
Sony Personal Entertainment Organizer PEG-UX50/UX00 X-XXX-XXX-11 (1)
10 Tap the current month, then tap the current date.
The Set Date screen closes.
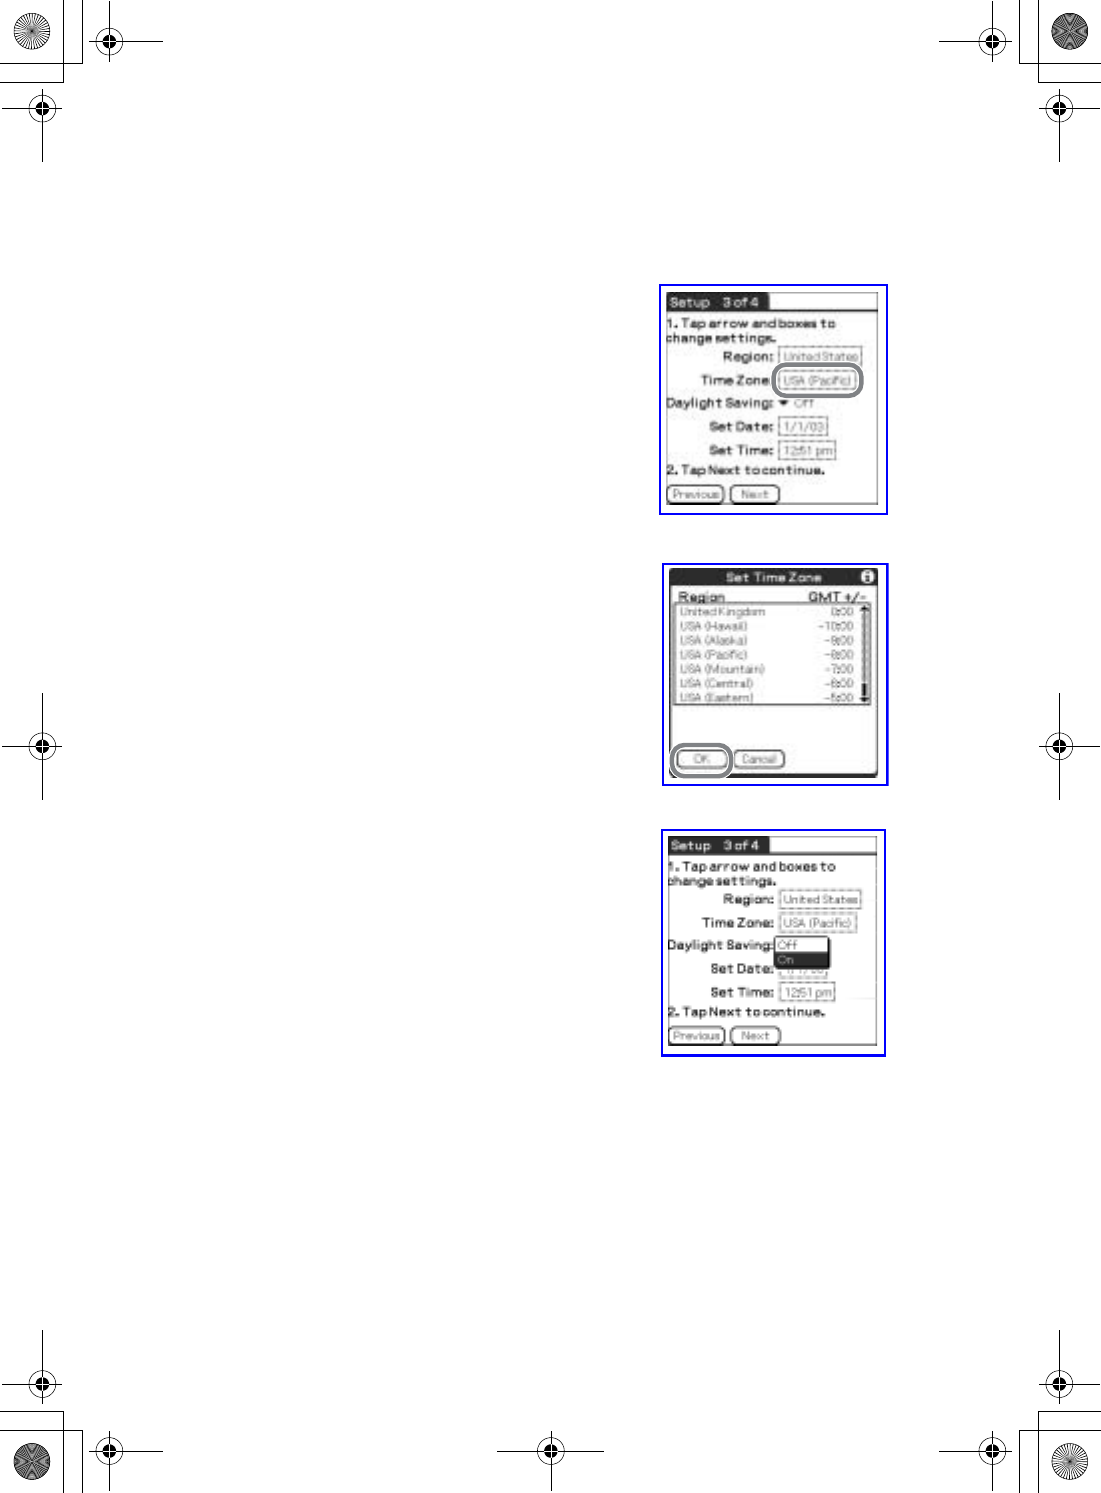
11 Tap the box next to [Time Zone].
The Set Time Zone screen is displayed.
12 Tap the region to set the time zone, then tap [OK].
13 Tap V next to [Daylight Saving] and select [On] or [Off].
01US01COV.book Page 14 Friday, June 20, 2003 6:29 AM
15
Sony Personal Entertainment Organizer PEG-UX50/UX00 X-XXX-XXX-11 (1)
Setting up your CLIÉ™ handheld
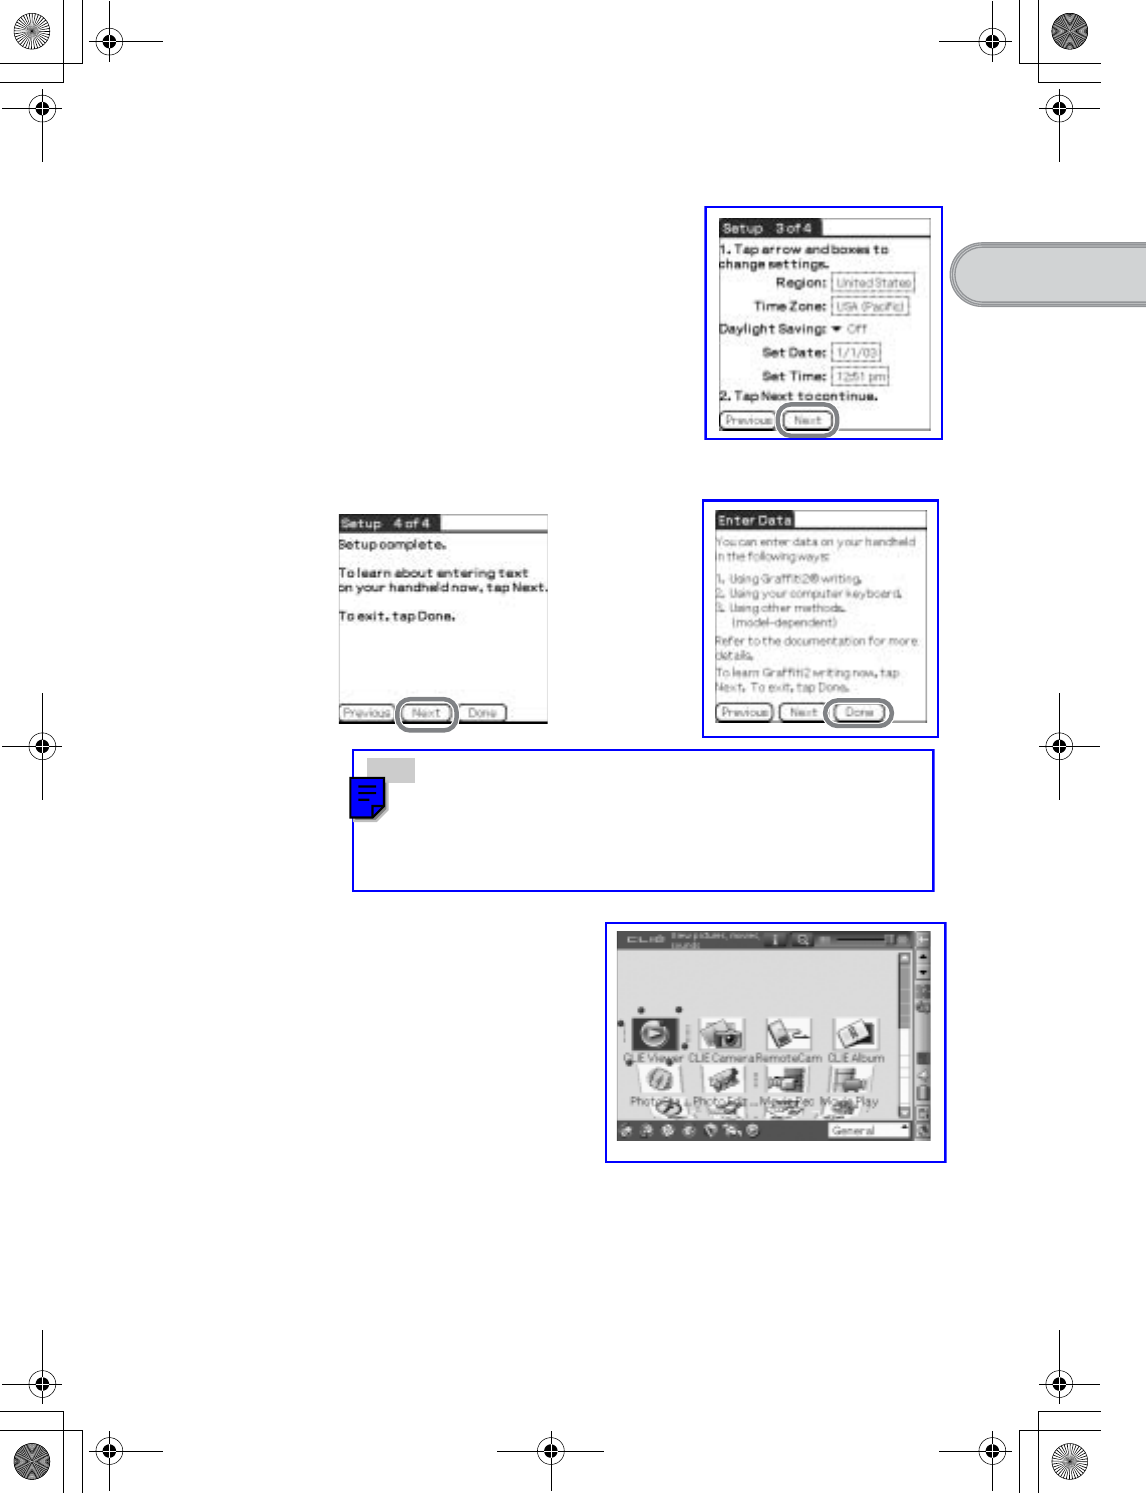
The initial setup is complete.
14 Tap [Next].
15 Tap [Next] and [Done].
Tip
When you tap [Next] in the Enter Data screen, you can proceed to Graffiti 2
Demo.
bFor details on Graffiti 2 Demo, refer to "Entering text on your CLIÉ™
handheld: Using Graffiti® 2 to enter text" in the supplied "Handbook".
The CLIE 3D Launcher is displayed.
b
01US01COV.book Page 15 Friday, June 20, 2003 6:29 AM
16
Sony Personal Entertainment Organizer PEG-UX50/UX00 X-XXX-XXX-11 (1)
You can perform the following if you use your CLIÉ handheld with your computer.
• Synchronize the latest schedules and addresses between your CLIÉ handheld
and your computer.
• Save a backup of your CLIÉ handheld data on your computer.
• Transfer images and music files from your computer to your CLIÉ handheld.
• Read the supplied “CLIÉ Application Manual” installed on your computer
and learn how to use add-on applications in detail.
Follow the procedure below before using your CLIÉ handheld with your
computer.
Step 1: Installing the software on your
computer
Palm™ Desktop for CLIÉ stored on the supplied Installation CD-ROM
must be installed on your computer. The software is used for data transfer
between your CLIÉ handheld and computer, and handling data on your
computer such as Address Book.
bFor details on the system requirements of computer, refer to “System requirements”
on page 97.
Using your CLIÉ™ handheld with your computer
Step 1: Installing the software on your computer
Step 2: Connecting your CLIÉ handheld and computer via
the USB cable
Step 3: Entering a user name for your CLIÉ handheld
Do not connect your CLIÉ handheld to your computer
before installing the software. Otherwise, the
software may not be installed properly.
01US01COV.book Page 16 Friday, June 20, 2003 6:29 AM
17
Sony Personal Entertainment Organizer PEG-UX50/UX00 X-XXX-XXX-11 (1)
Setting up your CLIÉ™ handheld
Notes
• Do not simply copy the Palm™ Desktop for CLIÉ folder from the supplied
Installation CD-ROM to your computer. To install the software properly, follow
the installation procedure described below.
• If you use Windows 2000 Professional or Windows XP, log on with a User Name
in the Administrators group before installing the software.
• If you have more than one CLIÉ handheld and the old version of Palm™
Desktop for CLIÉ has already been installed on your computer, follow the
installation procedure below to overwrite the old version.
* If you are using PEG-N710C Series or PEG-S300 Series, refer to your CLIÉ
handheld support website. (Refer to the URL shown on the back cover of this
manual.)
bFor details, refer to “Transferring data from another CLIÉ™ handheld” in the
supplied “Handbook”.
1Quit all applications running on Windows®.
2Insert the supplied Installation CD-ROM into the CD-ROM
drive of your computer.
The Installation Launcher window is displayed.
3Click [Install] for Palm™ Desktop for CLIÉ.
The setup program starts and the InstallShield Wizard window is
displayed.
4Click [Next].
The Select Synchronization Application window is displayed.
5Select the software you will use to synchronize your CLIÉ
handheld with your computer.
If you select [Synchronize with Palm Desktop for CLIÉ], Intellisync Lite
will not be installed. If you select [Synchronize with Microsoft Outlook or
Lotus Organizer], both Palm™ Desktop for CLIÉ and Intellisync Lite
will be installed.
6Click [Next].
The Setup Type window is displayed.
7Select the setup type [Complete] or [Custom] and the
destination folder if you select [Custom].
8Click [Next].
The Select User window is displayed.
Continued on next page
• • • • • • • • • • • • • • • • • • • • •
01US01COV.book Page 17 Friday, June 20, 2003 6:29 AM
18
Sony Personal Entertainment Organizer PEG-UX50/UX00 X-XXX-XXX-11 (1)
Installation of Palm™ Desktop for CLIÉ on your computer
is complete.
9Enter a user name in the Select User window.
You can enter any user name you prefer.
Note
If you have more than one CLIÉ handheld
Enter a user name that is different from the one you use for another CLIÉ
handheld.
If you set an identical user name to multiple CLIÉ handhelds, errors may occur.
Tip
If you want to transfer data between CLIÉ handhelds
Refer to “Transferring data from another CLIÉ™ handheld” in the supplied
“Handbook”.
10 Click [Next].
The Connections window is displayed.
11 Select [USB] or [Serial Port], depending on how you want
to connect your CLIÉ handheld to your computer.
12 Click [Next].
The Ready to Install the Program window is displayed.
13 Click [Install].
Palm™ Desktop for CLIÉ installation starts.
14 Click [Finish].
01US01COV.book Page 18 Friday, June 20, 2003 6:29 AM
19
Sony Personal Entertainment Organizer PEG-UX50/UX00 X-XXX-XXX-11 (1)
Setting up your CLIÉ™ handheld
Step 2: Connecting your CLIÉ handheld and
computer via the USB cable
You can synchronize data between your CLIÉ handheld and computer via the
supplied USB cable after installing Palm™ Desktop for CLIÉ.
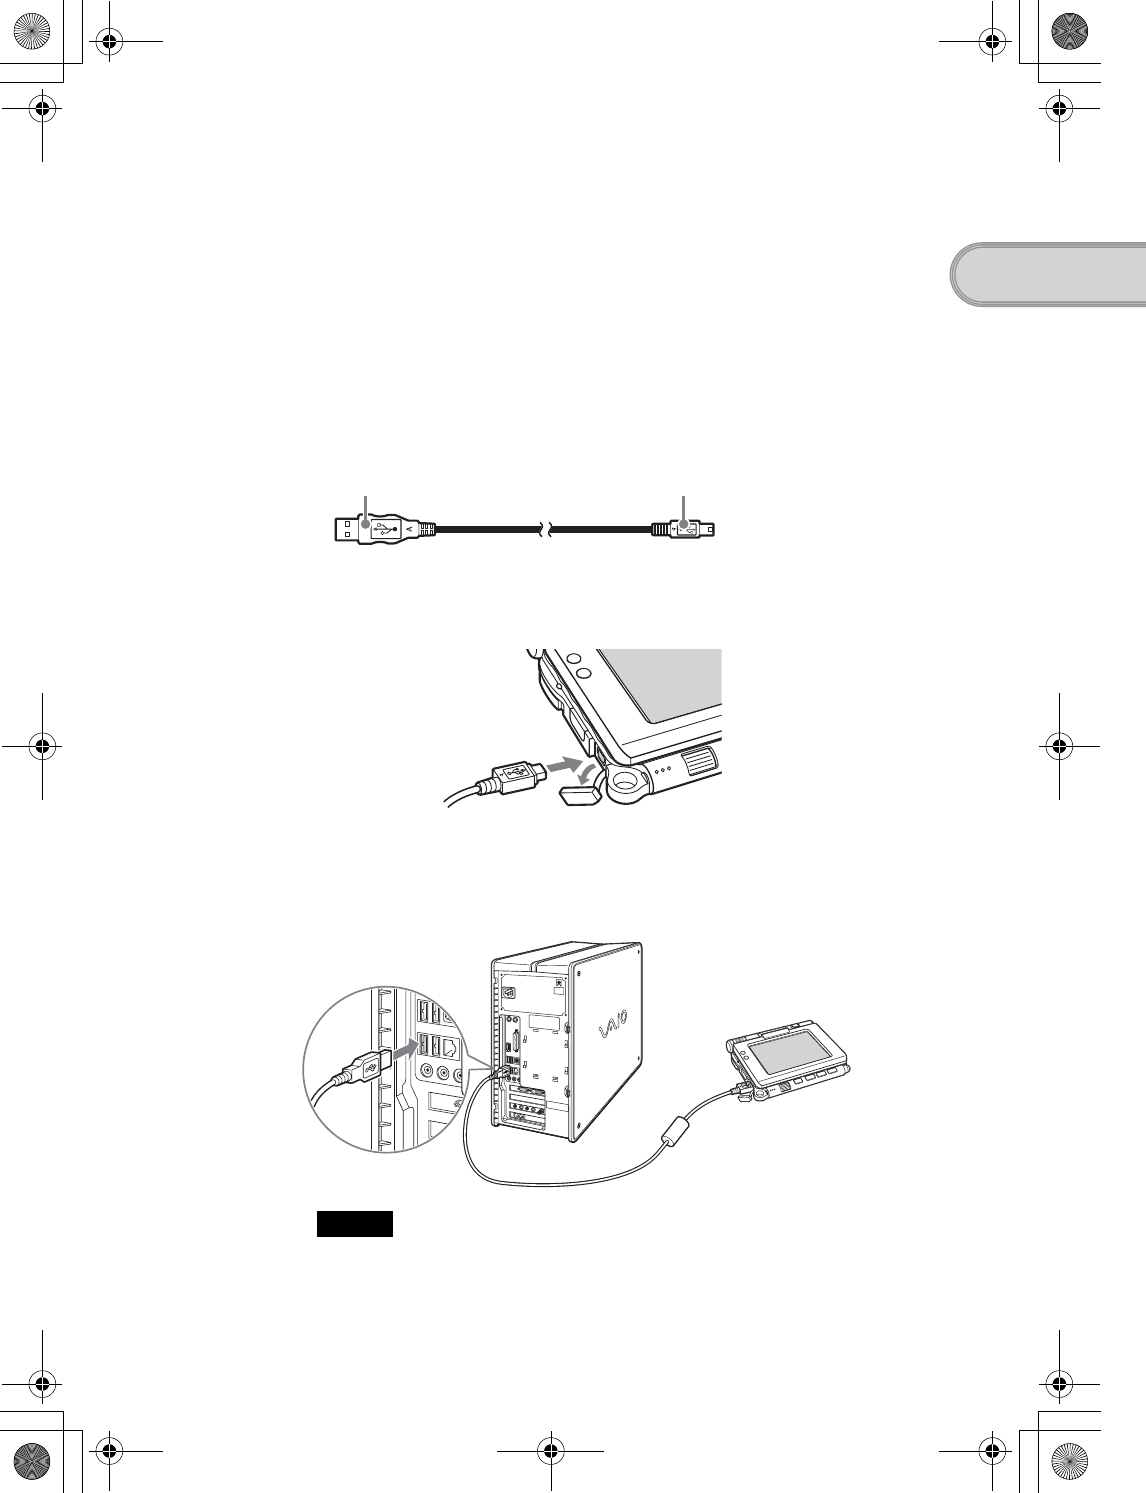
About the USB cable
The supplied USB cable has two connectors. Connect the “A” plug to the USB
port of your computer and the mini “B” plug to the USB connector of your
CLIÉ handheld.
1Connect the mini “B” plug of the USB cable to the USB
connector of your CLIÉ handheld.
2Connect the “A” plug of the USB cable to the USB port of
your computer.
Note
Be sure to connect the USB cable directly to a USB port of your computer. If
the USB cable is connected to a computer via another device, such as a USB
hub, the HotSync® operation may not work properly.
“A” plug mini “B” plug
Open the USB connector cover
To the USB port of
your computer
01US01COV.book Page 19 Friday, June 20, 2003 6:29 AM
20
Sony Personal Entertainment Organizer PEG-UX50/UX00 X-XXX-XXX-11 (1)
Step 3: Entering a user name for your CLIÉ
handheld
Setup is complete.
1Rotate the Jog Dial™ navigator to select (HotSync) on
the CLIE 3D Launcher and press the Jog Dial™ navigator.
The HotSync screen is displayed.
Tip
You can also tap (HotSync) to display the HotSync screen.
2Tap (HotSync) in the HotSync screen.
The HotSync® operation starts and the installation for the required
software starts automatically.
3Click [OK] in the Users window of your computer.
A beep sounds and the HotSync® operation starts.
Your user name entered for Palm™ Desktop for CLIÉ is also registered
in your CLIÉ handheld.
When the setup is complete, “HotSync operation complete.” will be
displayed on your CLIÉ handheld.
4Click [OK] on the computer window.
01US01COV.book Page 20 Friday, June 20, 2003 6:29 AM
21
Sony Personal Entertainment Organizer PEG-UX50/UX00 X-XXX-XXX-11 (1)
Setting up your CLIÉ™ handheld
Synchronizing data between your CLIÉ handheld
and computer (the HotSync®operation)
What is the HotSync® operation?
The HotSync® operation is a one-step operation that allows you to synchronize
data between your CLIÉ handheld and your computer, back up the data of your
CLIÉ handheld to your computer, and install add-on applications.
bFor details, refer to “Exchanging and updating files/data using the HotSync®
operation (Other HotSync® operations)” in the supplied “Handbook”.
Performing the HotSync® operation
The following procedure explains how to synchronize data between your CLIÉ
handheld and computer, using Date Book as an example.
1Turn on your computer.
2Follow the procedure on page 59 and enter new schedule
event in Date Book.
3Connect your CLIÉ handheld and computer via the
supplied USB cable.
4Rotate the Jog Dial™ navigator to select (HotSync) on
the CLIE 3D Launcher and press the Jog Dial™ navigator.
The HotSync screen is displayed.
Tip
You can also tap (HotSync) to display the HotSync screen.
Continued on next page
• • • • • • • • • • • • • • • • • • • • •
01US01COV.book Page 21 Friday, June 20, 2003 6:29 AM
22
Sony Personal Entertainment Organizer PEG-UX50/UX00 X-XXX-XXX-11 (1)
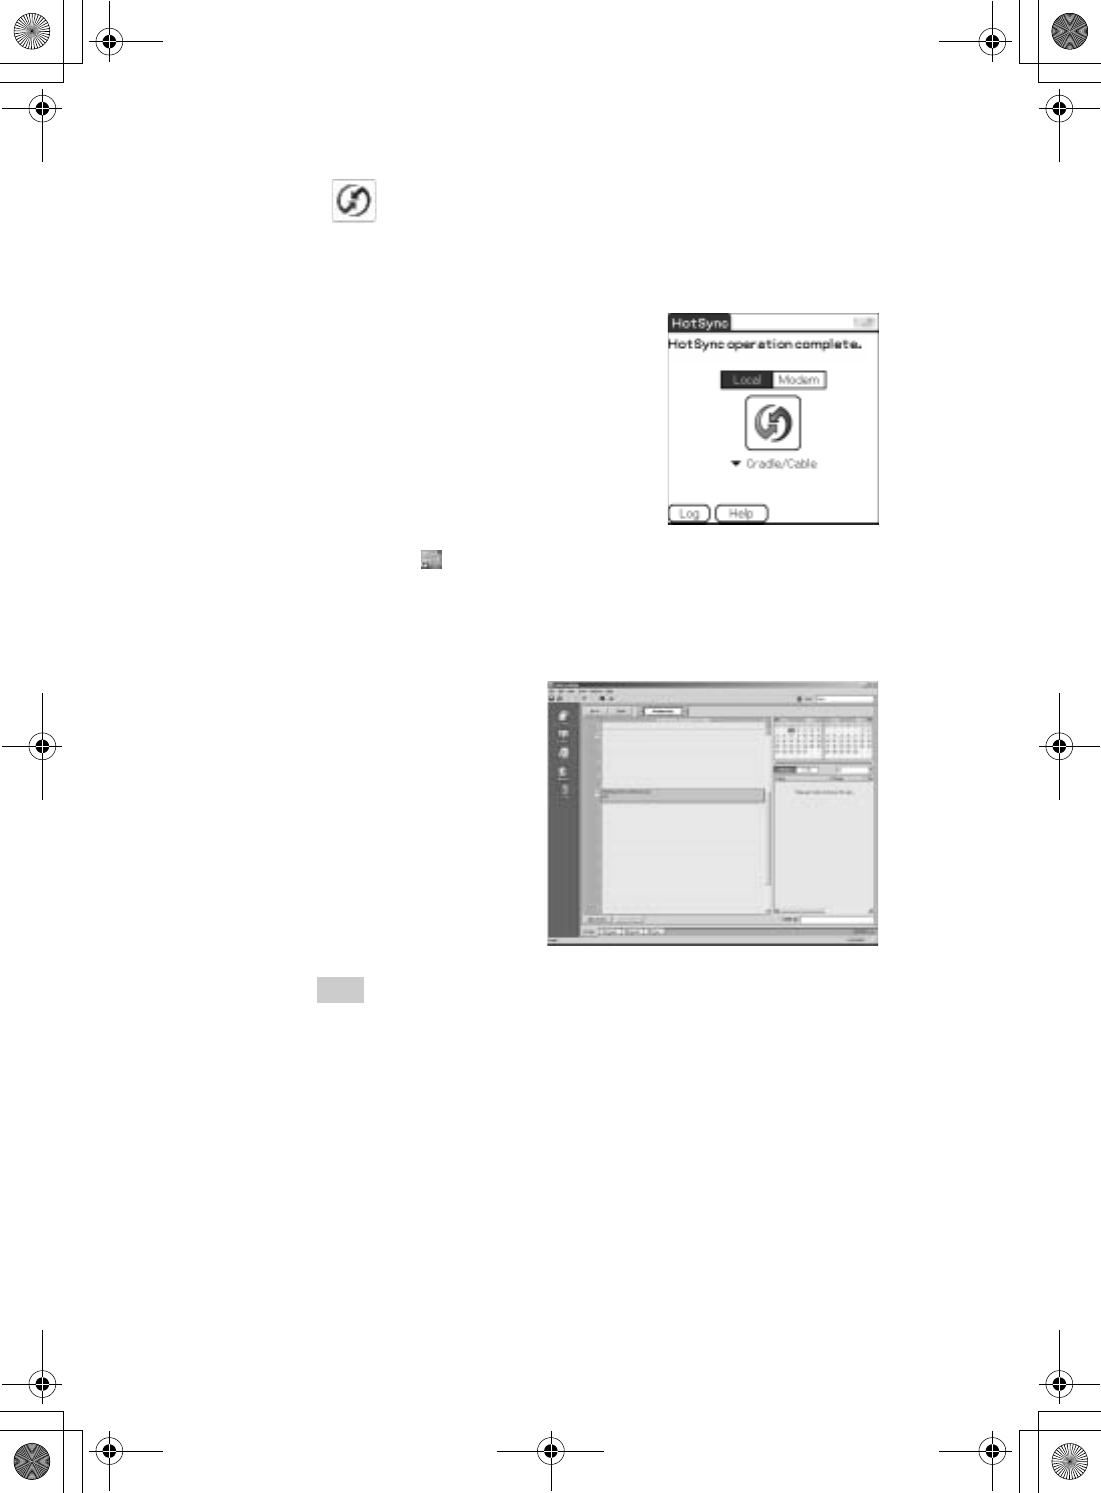
5Tap (HotSync) in the HotSync screen.
The HotSync® operation starts.
When the HotSync® operation is complete, the following screen is
displayed.
6Double-click (Palm Desktop for CLIÉ) on the Windows
desktop.
Palm™ Desktop for CLIÉ starts and the Date Book window is
displayed. If you select the same date you entered in Step 2, you will see
that schedule.
Tip
You can also click [Start], select [Programs] (for Windows XP, select [All
Programs])-[Sony handheld], and click [Palm Desktop for CLIÉ] to start the
software.
01US01COV.book Page 22 Friday, June 20, 2003 6:29 AM

23
Sony Personal Entertainment Organizer PEG-UX50/UX00 X-XXX-XXX-11 (1)
Setting up your CLIÉ™ handheld
To display other application windows (Address
Book, To Do List, and Memo Pad)
Performing the HotSync®operation using the
wireless LAN function
You can also synchronize data between your CLIÉ handheld and computer
using the wireless LAN function.
bFor details, refer to “Exchanging and updating files/data using the HotSync®
operation (Other HotSync® operations): Performing the HotSync® operation via a
wireless LAN network” in the supplied “Handbook”.
Making a backup is recommended
If problems occur, even those requiring a hard reset, you can restore your CLIÉ
handheld to the same state as it was at the last HotSync® operation.
You may not be able to back up certain add-on applications installed after the
initial setup or the data created with such add-on applications.
bFor backup details, refer to “Making a backup of the data or applications on your CLIÉ
handheld” on page 85.
Click any icon on the left side of the window.
01US01COV.book Page 23 Friday, June 20, 2003 6:29 AM
24
Sony Personal Entertainment Organizer PEG-UX50/UX00 X-XXX-XXX-11 (1)
Basic operations of
your CLIÉ™
handheld
This chapter explains how to turn on/off your CLIÉ handheld, start an application, enter text,
turn it off using Power Saving mode and perform a reset.
Turning on your CLIÉ handheld
Slide down the POWER/HOLD switch.
Your CLIÉ handheld turns on, and the last screen you viewed is displayed.
Slide down the POWER/HOLD switch
Tip
If you cannot turn on your CLIÉ handheld
Did you fully charge your CLIÉ handheld?
b For details, refer to the supplied “Troubleshooting Q&A”.
Turning on/off your CLIÉ handheld
01US01COV.book Page 24 Friday, June 20, 2003 6:29 AM
25
Sony Personal Entertainment Organizer PEG-UX50/UX00 X-XXX-XXX-11 (1)
Basic operations of your CLIÉ™ handheld
Turning off your CLIÉ handheld
Slide down the POWER/HOLD switch again.
Tip
If you do not use your CLIÉ handheld for long periods of time, you can save
the battery power using Power Saving mode.
bFor details on Power Saving mode, refer to “Turning off your CLIÉ handheld using
Power Saving mode” on page 30.
To work with your CLIÉ handheld, you need to start an application.
The following explains how to start an application.
The following shows how to start applications from the CLIE 3D Launcher
using the Jog Dial™ navigator.
Using the Jog Dial™ navigator and the BACK
button
1Displaying the CLIE 3D Launcher
Starting an application
1Displaying the CLIE 3D Launcher
2Selecting an application
3Quitting the application
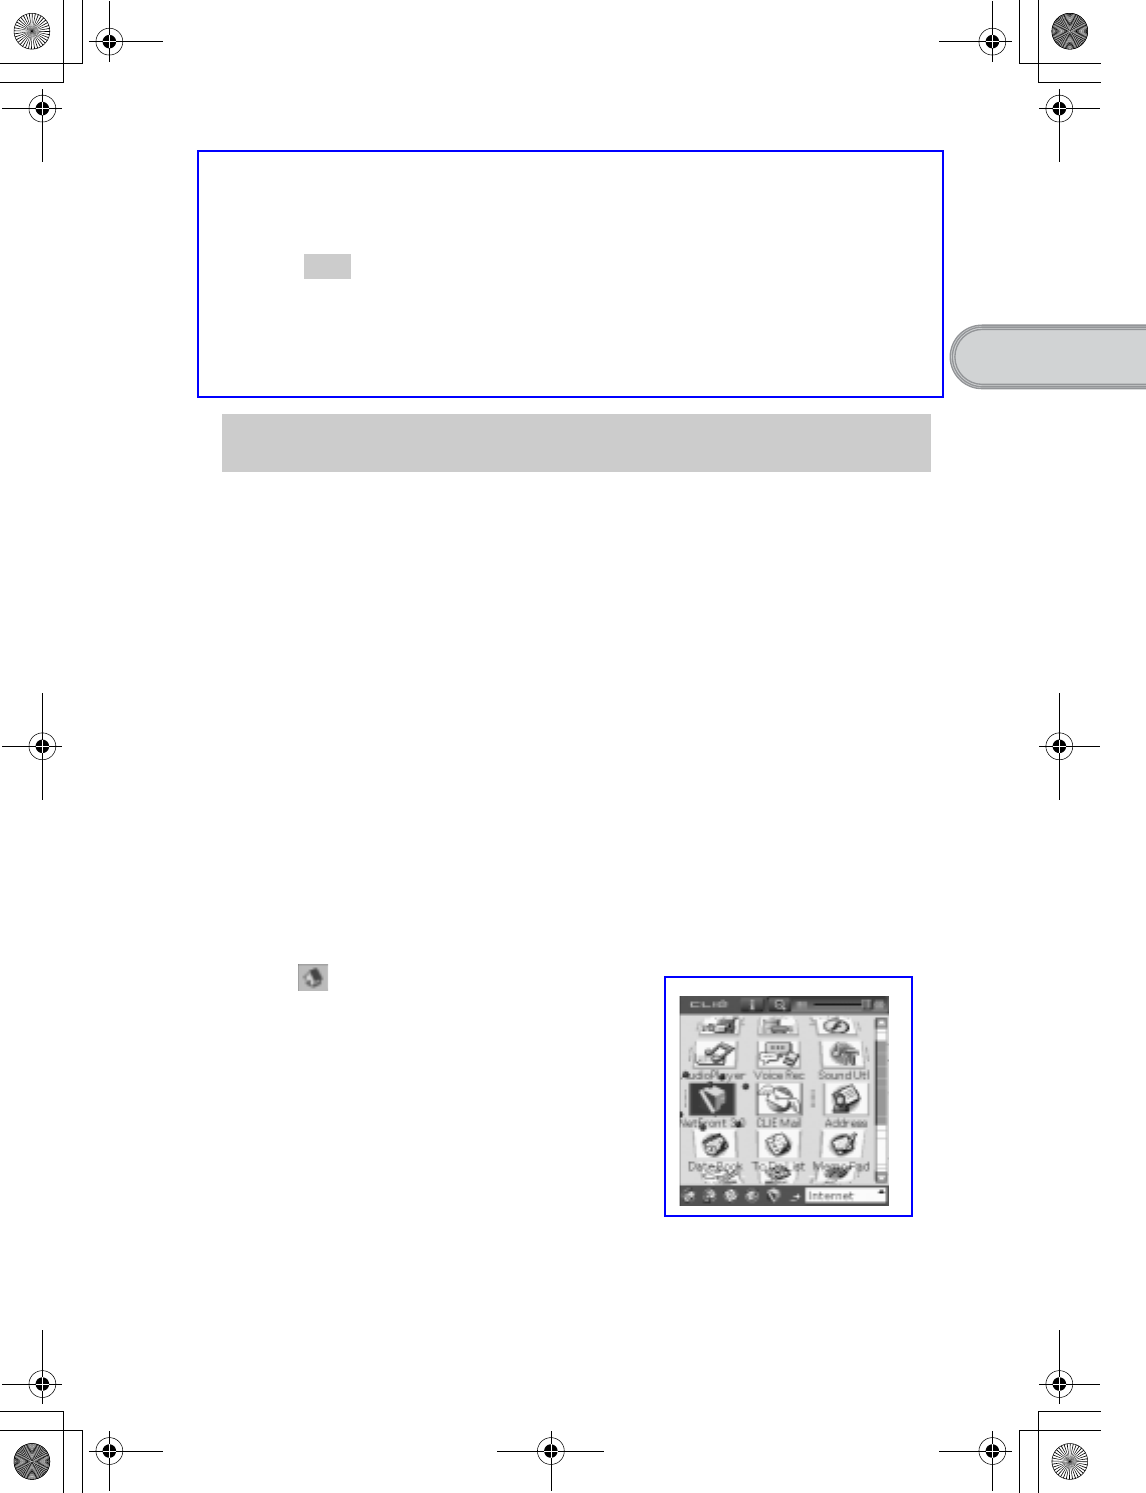
1Tap (Home).
The CLIE 3D Launcher is displayed.
Continued on next page
• • • • • • • • • • • • • • • • • • • • •
01US01COV.book Page 25 Friday, June 20, 2003 6:29 AM
26
Sony Personal Entertainment Organizer PEG-UX50/UX00 X-XXX-XXX-11 (1)
2Selecting an application
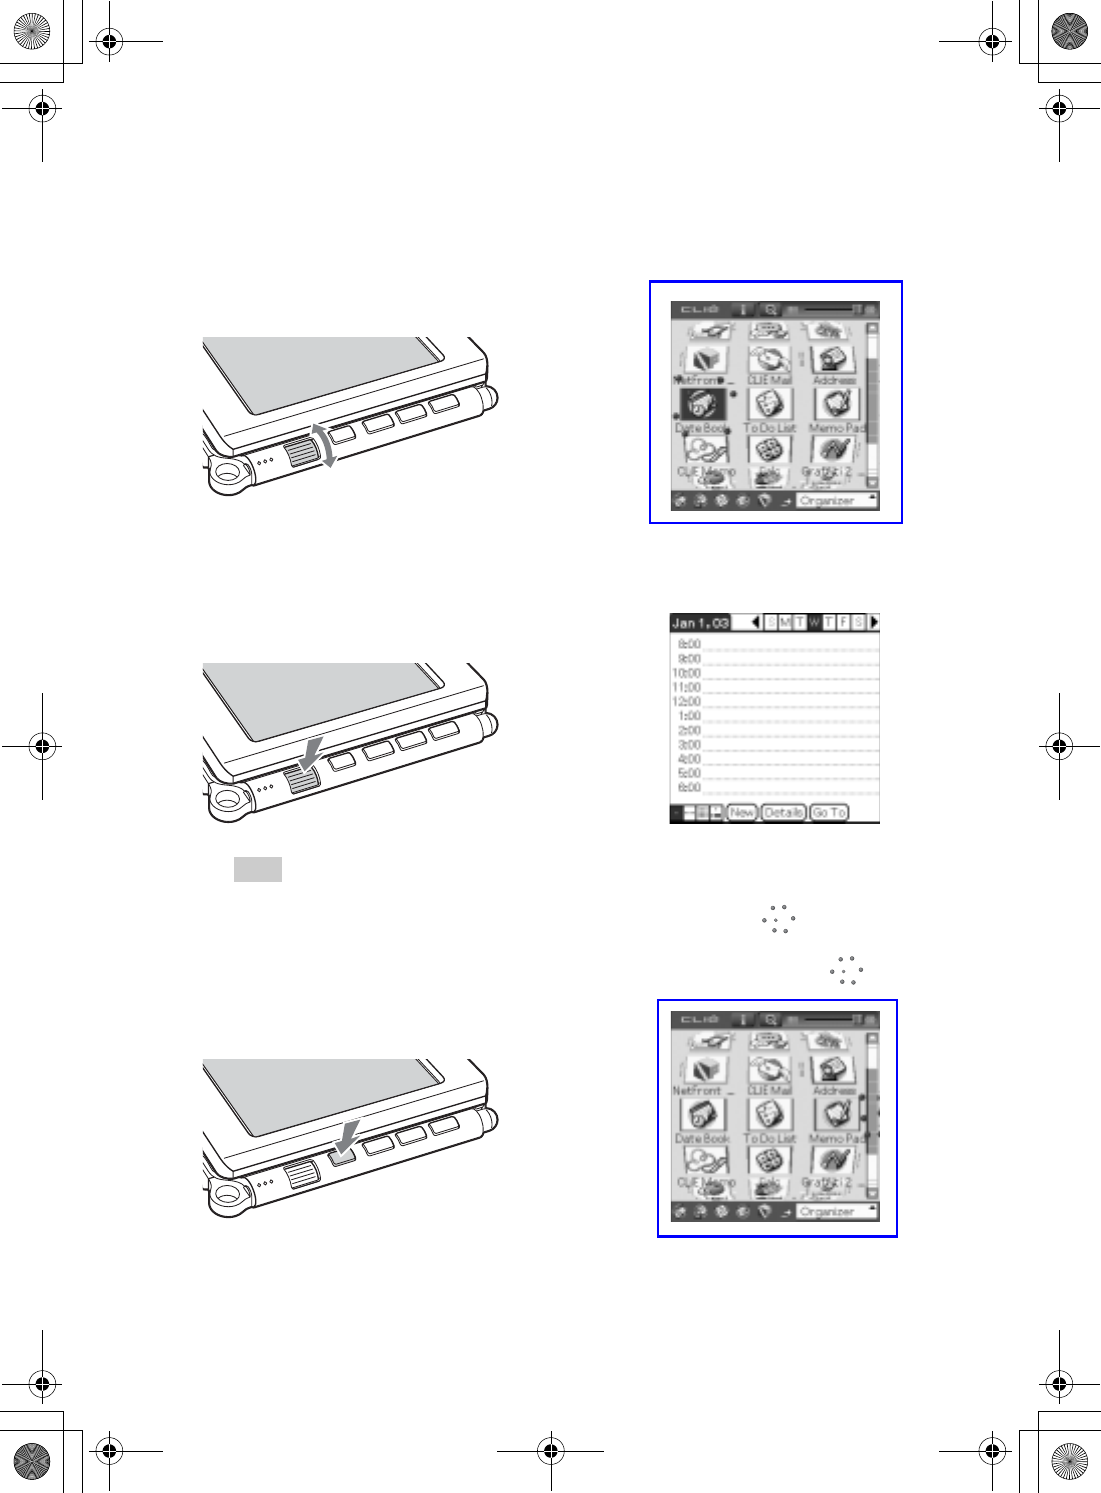
1Rotate the Jog Dial™ navigator to select an application to start.
An application is selected.
2Press the Jog Dial™ navigator.
The selected application starts.
Tip
To select an application easily
If you press the BACK button while the CLIE 3D Launcher is displayed, (Selector)
moves to the scroll bar on the right. You can then scroll to the row of the application icons
by rotating the Jog Dial™ navigator. Press the Jog Dial™ navigator again to move
(Selector) back to the desired application icon.
b
Rotate up and down
Press
b
Press
b
01US01COV.book Page 26 Friday, June 20, 2003 6:29 AM
27
Sony Personal Entertainment Organizer PEG-UX50/UX00 X-XXX-XXX-11 (1)
Basic operations of your CLIÉ™ handheld
3Quitting the application
You do not need to save data manually on your CLIÉ handheld as you do on a
computer, although some applications need to be saved.
bFor details, refer to the “CLIÉ Application Manual” installed on your computer.
To switch from one application to another, you need to display the CLIE 3D
Launcher again. You can use either of the following methods to display the
CLIE 3D Launcher.
Tip
You can also switch from one to another application by pressing the Application
buttons (page 29).
Other ways to start an application
You can also start an application using the stylus or application buttons.
Using the stylus
Start the application by pressing the screen directly with the supplied stylus.
Return to the CLIE 3D Launcher by tapping
(Home).
Return to the CLIE 3D Launcher by pressing and
holding the BACK button.
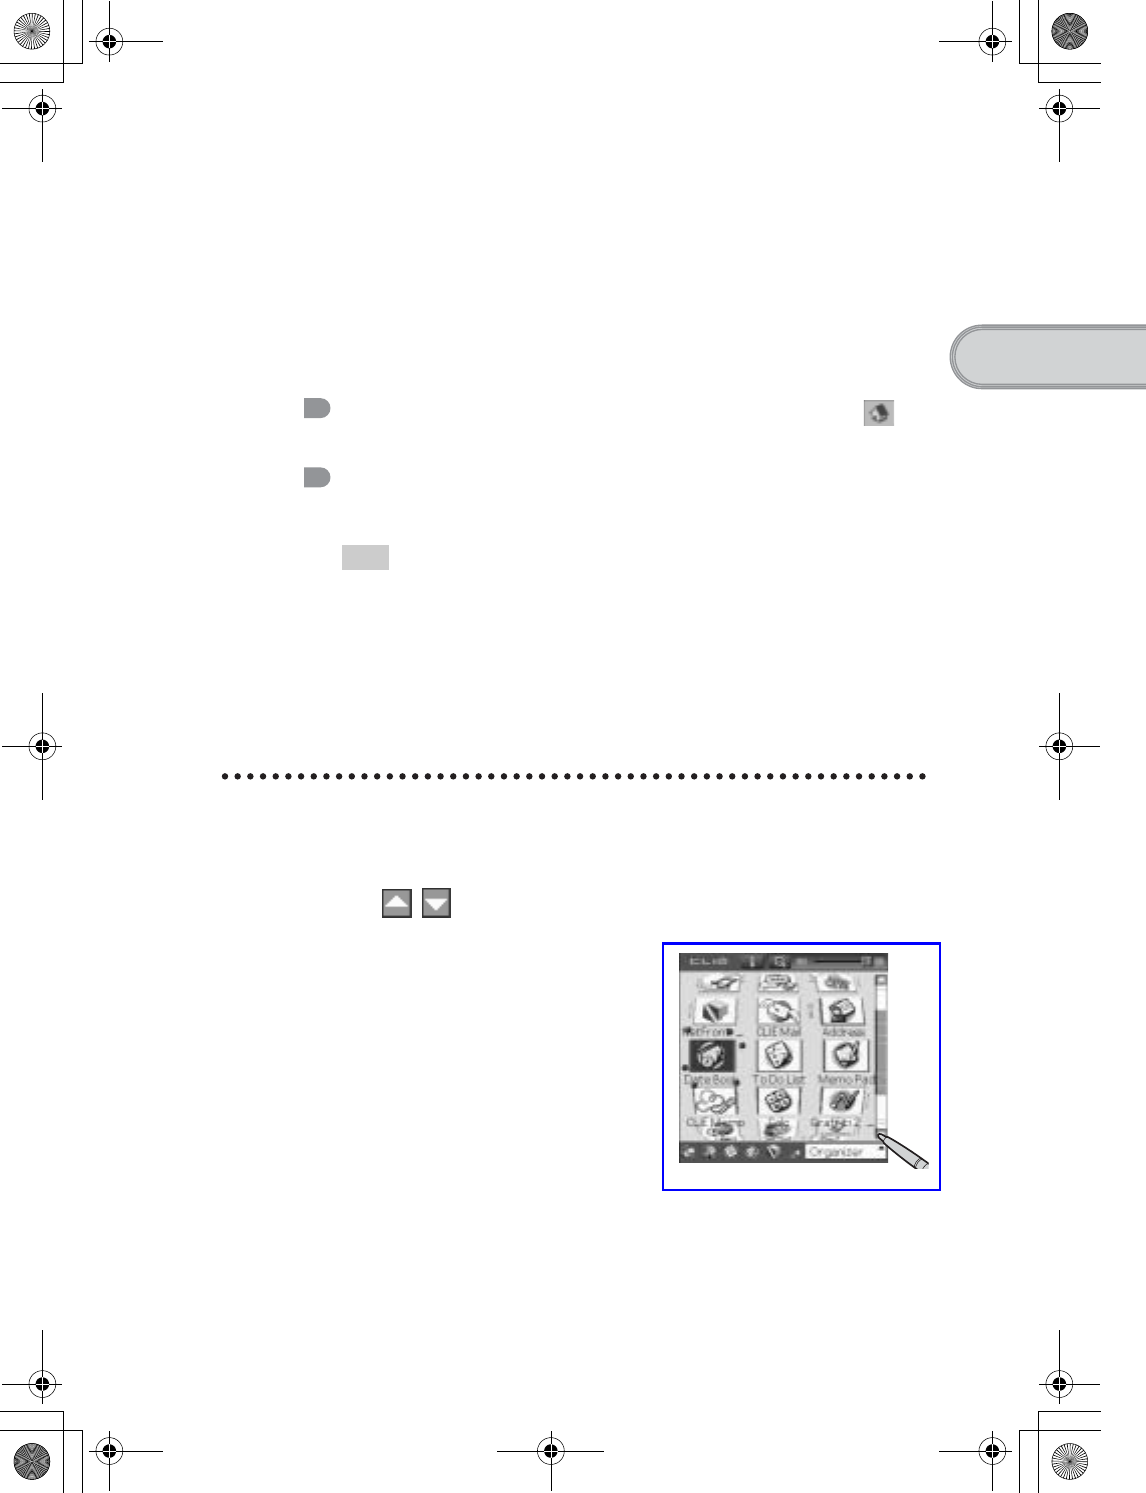
1Tap on the CLIE 3D Launcher to display the
application you want to start.
Continued on next page
• • • • • • • • • • • • • • • • • • • • •
01US01COV.book Page 27 Friday, June 20, 2003 6:29 AM
28
Sony Personal Entertainment Organizer PEG-UX50/UX00 X-XXX-XXX-11 (1)
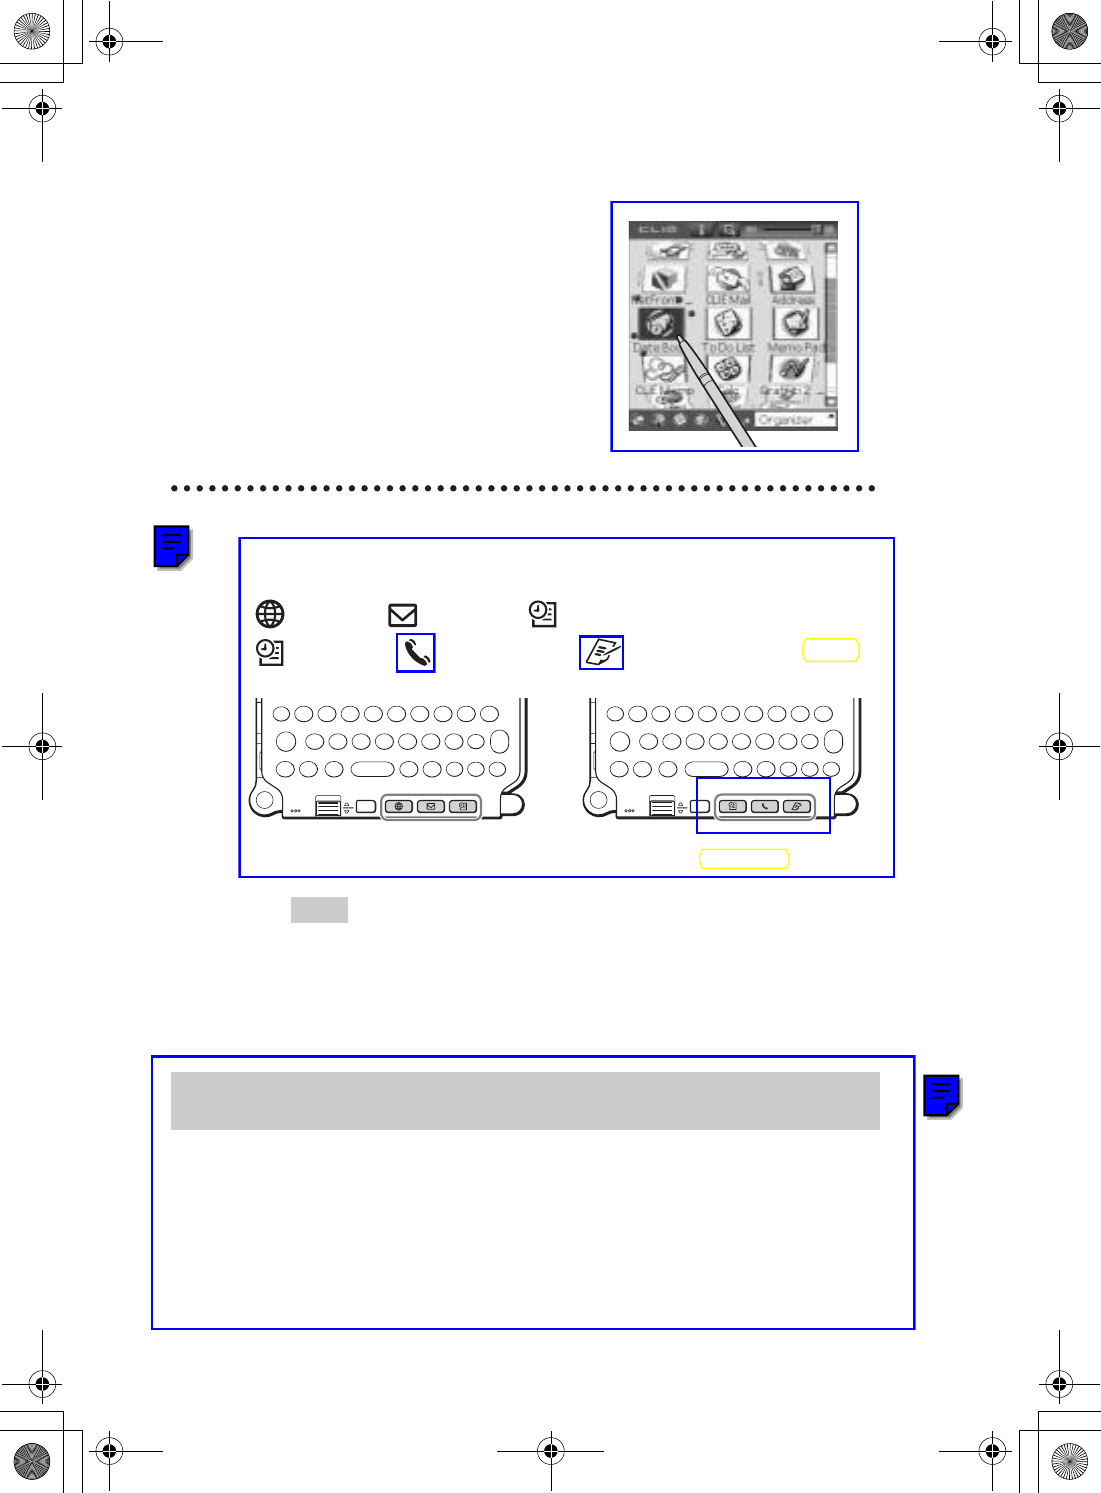
Pressing the application buttons
You can also start the applications by pressing the application buttons.
The default setting of the application buttons are:
NetFront,CLIE Mail,Date Book for PEG-UX50
Date Book,Address Book,Memo pad for PEG-UX00
Tips
• Even when your CLIÉ handheld is off, you can start an application by pressing
one of the application buttons.
• You can assign your favorite applications to the application buttons.
bFor details, refer to “Customizing your CLIÉ™ handheld (Preferences):
Assigning applications to application buttons” in the supplied “Handbook”.
Your CLIÉ handheld is built with a storage area of memory, called “Internal Media”.
Internal media is an extended storage area which is different from the main storage area
of your CLIÉ handheld and data stored on Internal media will not be deleted even if the
battery power is gone.
bFor details on Internal media, refer to “Using storage media such as “Memory Stick™” media” in
the supplied “Handbook”.
2Tap the application icon.
The selected application starts.
About Internal Media
for PEG-UX50 for PEG-UX00
01US01COV.book Page 28 Friday, June 20, 2003 6:29 AM
29
Sony Personal Entertainment Organizer PEG-UX50/UX00 X-XXX-XXX-11 (1)
Basic operations of your CLIÉ™ handheld
There are five ways to enter text into your CLIÉ handheld. You can use whichever is the
most comfortable for you.
zHardware keyboard (page 103)
You can enter text using the hardware keyboard in the same way as your
computer’s keyboard. This is useful when you want to enter lots of text.
zHandwriting system
There are two ways of using the handwriting system.
bFor details, refer to “Entering text on your CLIÉ™ handheld” in the supplid
“Handbook”.
Graffiti® 2
You can enter text using a stroke recognition program, Graffiti® 2.
Decuma Input
You can enter text using Decuma Input, which converts your handwriting
into typed text as you write.
zOn-screen keyboard
You can enter text by tapping the on-screen keyboard.
bFor details, refer to “Entering text on your CLIÉ™ handheld: Using the on-screen
keyboard to enter text” in the supplied “Handbook”.
zThe HotSync® operation with a computer
You can enter text using your computer keyboard and then performing the
HotSync® operation. The text data is transferred from your computer to your
CLIÉ handheld using Palm™ Desktop for CLIÉ.
bFor details, refer to [Help] in Palm™ Desktop for CLIÉ.
Entering text
01US01COV.book Page 29 Friday, June 20, 2003 6:29 AM
30
Sony Personal Entertainment Organizer PEG-UX50/UX00 X-XXX-XXX-11 (1)
To use your CLIÉ handheld over an extended period of time, you can save the battery
power of your CLIÉ handheld by using Power Saving mode when turning off your CLIÉ
handheld. Normally, the battery power is consumed even when your CLIÉ handheld is
turned off so that data will not be lost. However, in Power Saving mode, data is stored on
a storage area that requires no power, thus prolonging battery life.
Notes
• Turning on/off your CLIÉ handheld in Power Saving mode requires a bit more time
than usual.
• Never press the RESET button while Power Saving mode is saving or restoring data.
Turning off your CLIÉ handheld (Power Saving
mode)
Turning off your CLIÉ handheld using Power
Saving mode
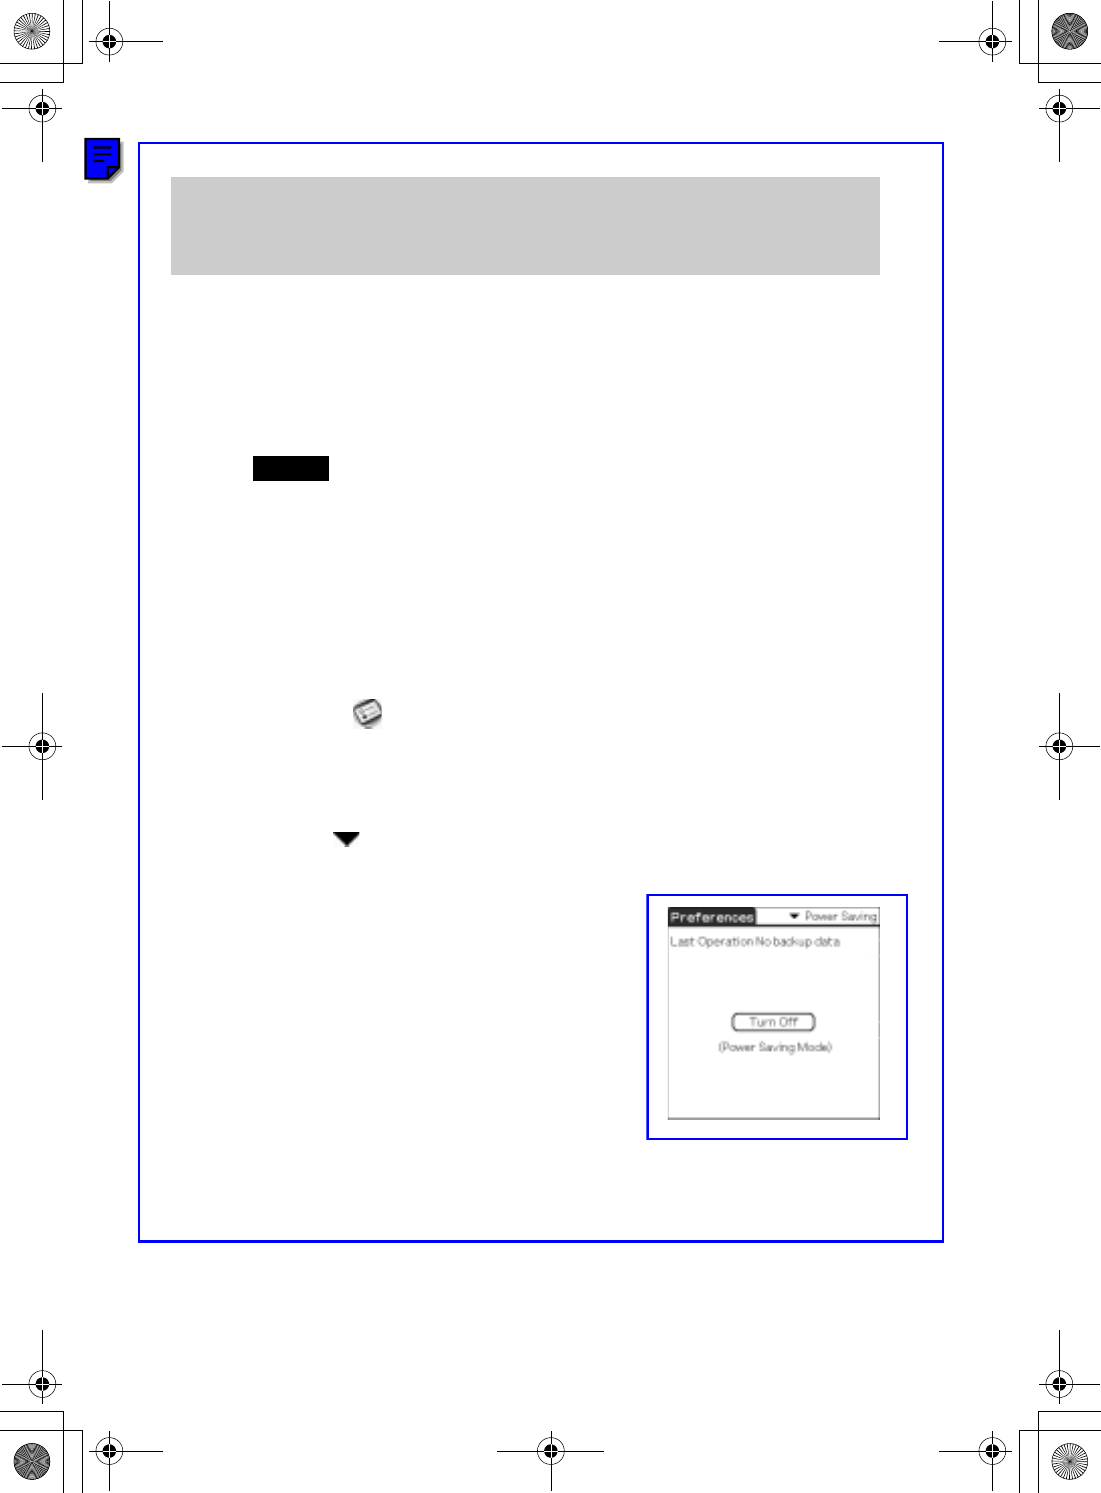
1Select (Prefs) in the CLIE 3D Launcher to start
Preferences.
The Preferences screen is displayed.
2Tap at the top right of the screen and select [Power
Saving].
The Power Saving screen is displayed.
3Tap [Turn Off].
The Turn off dialog box is displayed.
Continued on next page
• • • • • • • • • • • • • • • • • • • • •
01US01COV.book Page 30 Friday, June 20, 2003 6:29 AM
31
Sony Personal Entertainment Organizer PEG-UX50/UX00 X-XXX-XXX-11 (1)
Basic operations of your CLIÉ™ handheld
To erase the saved data
4Tap [Yes].
The data of your CLIÉ handheld is saved in Power Saving mode.
The data will be automatically restored next time you turn on your CLIÉ
handheld.
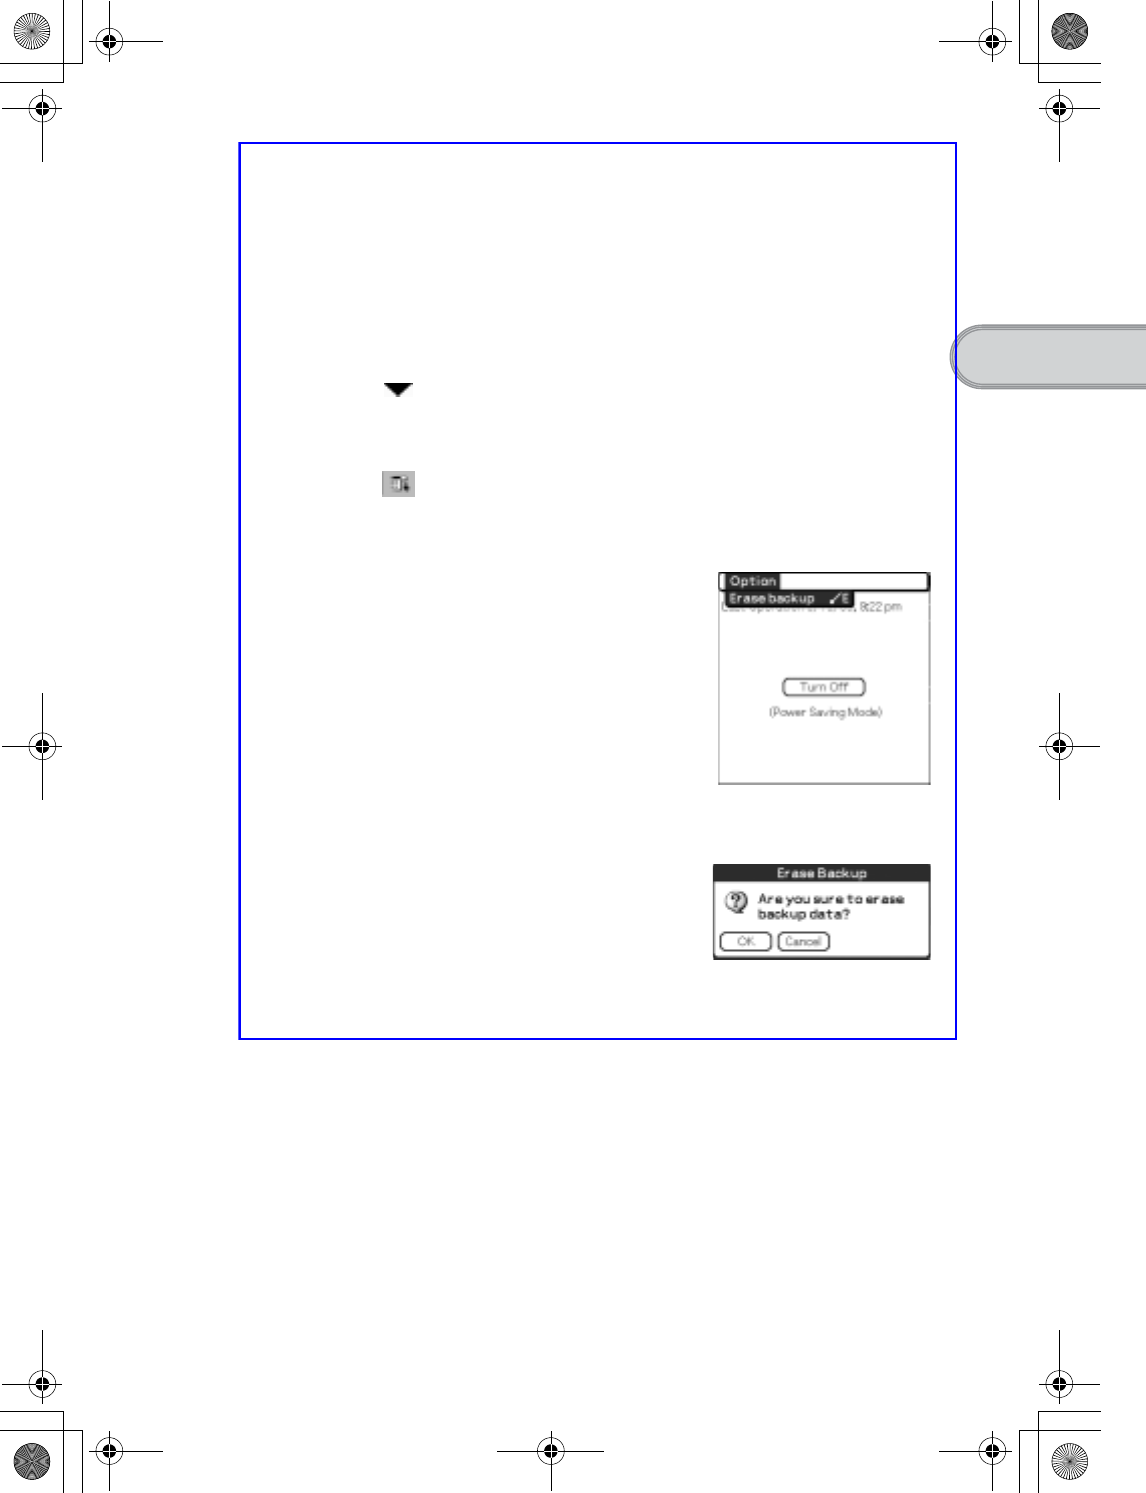
1Tap at the top right of the Preferences screen and
select [Power Saving].
The Power Saving screen is displayed.
2Tap (Menu).
The menu is displayed.
3Select [Erase backup] from [Option].
The Erase Backup dialog box is displayed.
4Tap [Yes].
The saved data is erased.
01US01COV.book Page 31 Friday, June 20, 2003 6:29 AM
32
Sony Personal Entertainment Organizer PEG-UX50/UX00 X-XXX-XXX-11 (1)
Normally, you do not need to reset your CLIÉ handheld. However, if your CLIÉ handheld
does not turn on or respond, performing a soft reset may solve the problem.
To reset your CLIÉ handheld, follow the procedure below.
Performing a soft reset
All records and add-on applications stored on your CLIÉ handheld are retained
even after performing a soft reset.
Notes
• After the RESET button is pressed, it takes a while before the Preferences
screen is displayed. Do not press the RESET button again while resetting.
• Do not press the RESET button with anything other than the stylus. It may cause
a malfunction.
Restarting your CLIÉ handheld
Gently press the RESET button with the stylus.
The system shuts down and your CLIÉ handheld restarts.
After restarting, it displays “palm POWERED”, “SONY” and “CLIÉ”,
followed by the Preferences screen for setting up the time and date.
01US01COV.book Page 32 Friday, June 20, 2003 6:29 AM
33
Sony Personal Entertainment Organizer PEG-UX50/UX00 X-XXX-XXX-11 (1)
Basic operations of your CLIÉ™ handheld
Performing a hard reset
If the soft reset does not solve the problem, you will need to perform a hard
reset to restart your CLIÉ handheld.
Notes
•All records and add-on applications stored on your CLIÉ
handheld will be erased by performing a hard reset. (All records
and add-on applications stored on Internal media will be retained.)
• Perform a hard reset only if a soft reset does not solve the problem.
However, you can restore your CLIÉ handheld data if it was saved in Power
Saving mode (page 30).
You can also restore it if you have made a backup on your computer via the
HotSync® operation.
1Slide down and hold the POWER/HOLD switch.
2Press the RESET button gently with the stylus, and then
release the stylus.
Note
Keep the POWER/HOLD switch held down.
3Wait more than three seconds after the palm POWERED
screen is displayed, and release the POWER/HOLD switch.
A message, “Erase all data?” is displayed.
Continued on next page
• • • • • • • • • • • • • • • • • • • • •
01US01COV.book Page 33 Friday, June 20, 2003 6:29 AM
34
Sony Personal Entertainment Organizer PEG-UX50/UX00 X-XXX-XXX-11 (1)
After restarting, your CLIÉ handheld displays “palm POWERED”, “SONY”
and “CLIÉ”, followed by the SETUP screen. Refer to “Step 2: Performing the
initial setup after turning on your CLIÉ handheld for the first time” on page 9
for the initial setup.
After a hard reset, only the current date and time are retained. Formats,
Preferences, and other controls revert to the factory settings.
Notes
• After the RESET button is pressed, it takes a while before the Setup screen is
displayed. Do not press the RESET button again while resetting.
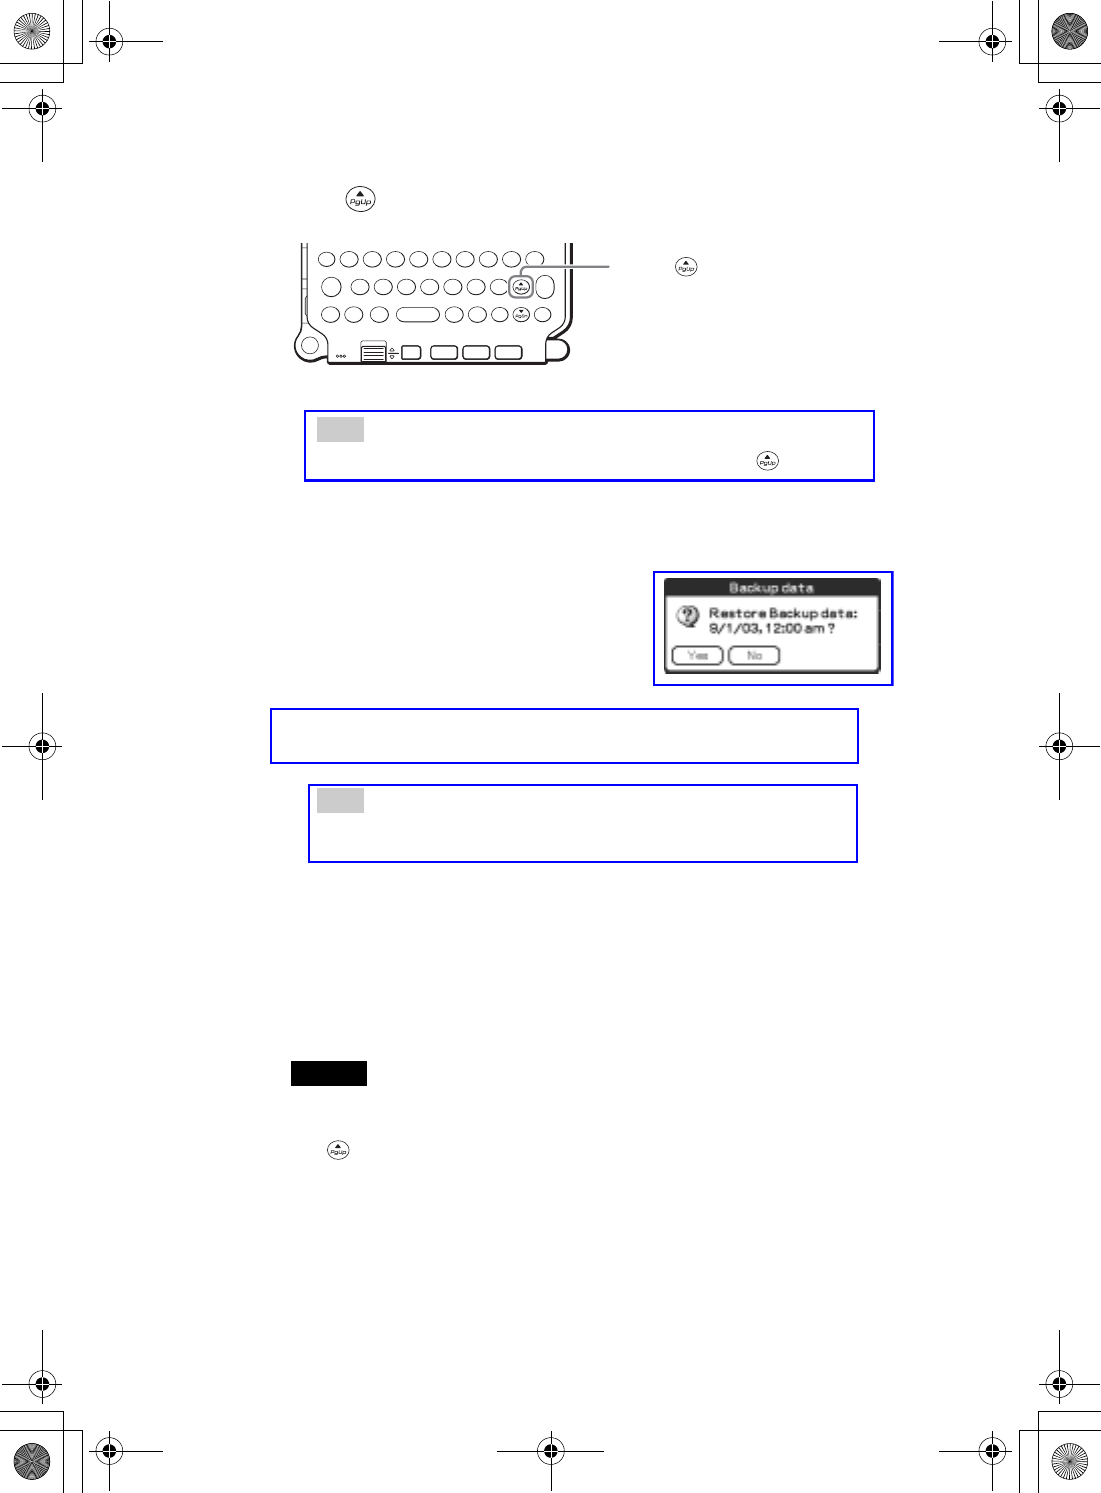
• If (Page Up) is not pressed long enough, the hard reset may not be
performed.
4Press (Page Up) on the hardware keybord.
Tip
If you want to cancel the hard reset, press any key other than (Page Up).
The Backup data dialog box is displayed.
5Tap [No] after verifying the backup data.
The hard reset is performed.
(All records and add-on applications stored on Internal media will be
retained.)
Tip
When you tap [Yes], the last data you saved will be restored on your CLIÉ
handheld.
Press (Page Up)
01US01COV.book Page 34 Friday, June 20, 2003 6:29 AM
35
Sony Personal Entertainment Organizer PEG-UX50/UX00 X-XXX-XXX-11 (1)
Connecting to the Internet
Connecting to the
Internet
This chapter explains how to connect to the Internet using the wireless LAN function.
Note
The wireless LAN function is only available for PEG-UX50.
You can also access the Internet using the Bluetooth® function.
bFor details on using the Bluetooth® function, refer to “Using the Bluetooth® function:
Connecting to the Internet by communicating with a Bluetooth compatible mobile
phone” in the supplied “Handbook”.
Your CLIÉ handheld is built with a wireless LAN function that complies with
IEEE802.11b. You can access the Internet via a wireless LAN access point using the
wireless LAN function.
Note
To connect to the Internet via a wireless LAN access point, you need to be a subscriber
to a telecommunications company and an Internet Service Provider (ISP) in advance.
You need to prepare for the wireless LAN function in order to connect to the Internet.
Follow the procedure on the following pages to use the wireless LAN function.
Preparing for the wireless LAN function
Continued on next page
• • • • • • • • • • • • • • • • • • • • •
01US01COV.book Page 35 Friday, June 20, 2003 6:29 AM
36
Sony Personal Entertainment Organizer PEG-UX50/UX00 X-XXX-XXX-11 (1)
Step 1: Verifying the value settings for the
wireless LAN access point
To connect to the Internet using the wireless LAN function of your CLIÉ
handheld, you need the value settings below for the wireless LAN access point.
• SSID (also called ESSID or Network Name.)
• WEP key (also called Encryption.)
You may need a user ID or password depending on your wireless LAN access
point.
For details, ask the System Administrator of your wireless LAN network.
Tip
WEP key is a security function that encrypts transferred data.
Note
Your CLIÉ handheld uses the channels 1-11 (2.4GHz band of frequencies). If the
wireless LAN access point uses channels 12-14, you cannot communicate using the
wireless LAN function of your CLIÉ handheld.
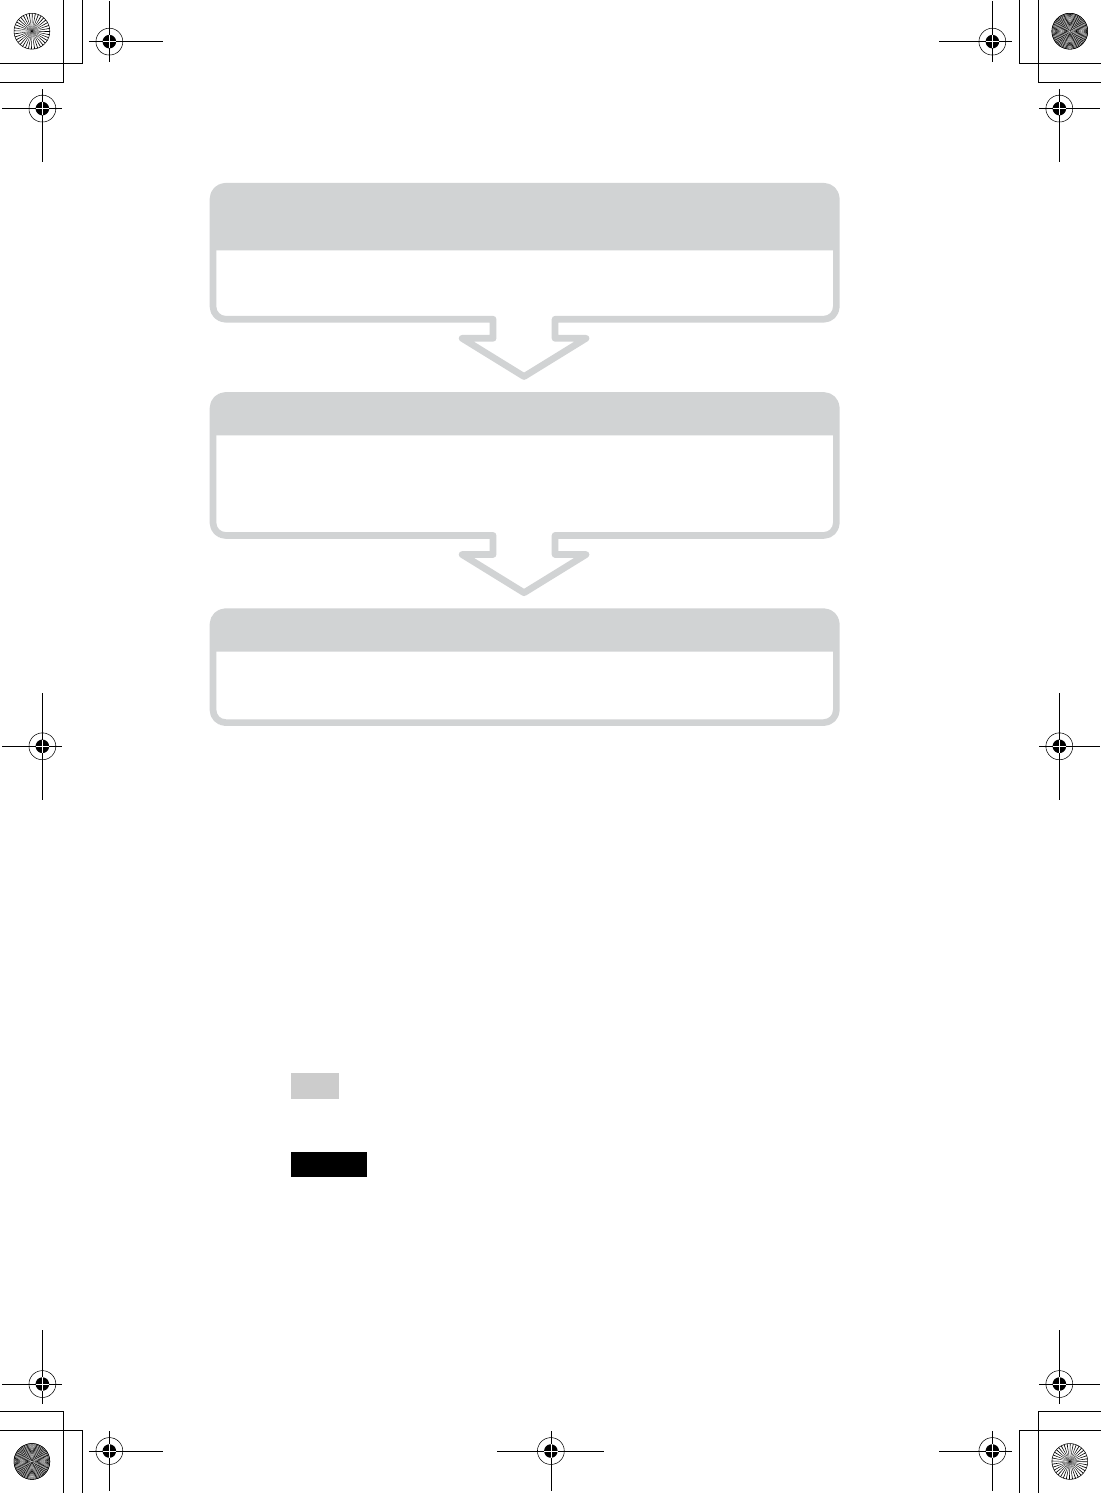
Step 1: Verifying the value settings for the wireless
LAN access point (Page 36)
To connect to the Internet using the wireless LAN function, verify the value
settings for the wireless LAN access point.
Step 2: Using the check sheet (Page 37)
Use the check sheet to record the value settings provided by your System
Administrator and Internet Service Provider (ISP). For more information
you need, ask your System Administrator or Internet Service Provider.
Step 3: Setting up the wireless LAN function (Page 38)
You need to set up the wireless LAN function of you CLIÉ handheld,
referring to the check sheet with the value settings.
01US01COV.book Page 36 Friday, June 20, 2003 6:29 AM
37
Sony Personal Entertainment Organizer PEG-UX50/UX00 X-XXX-XXX-11 (1)
Connecting to the Internet
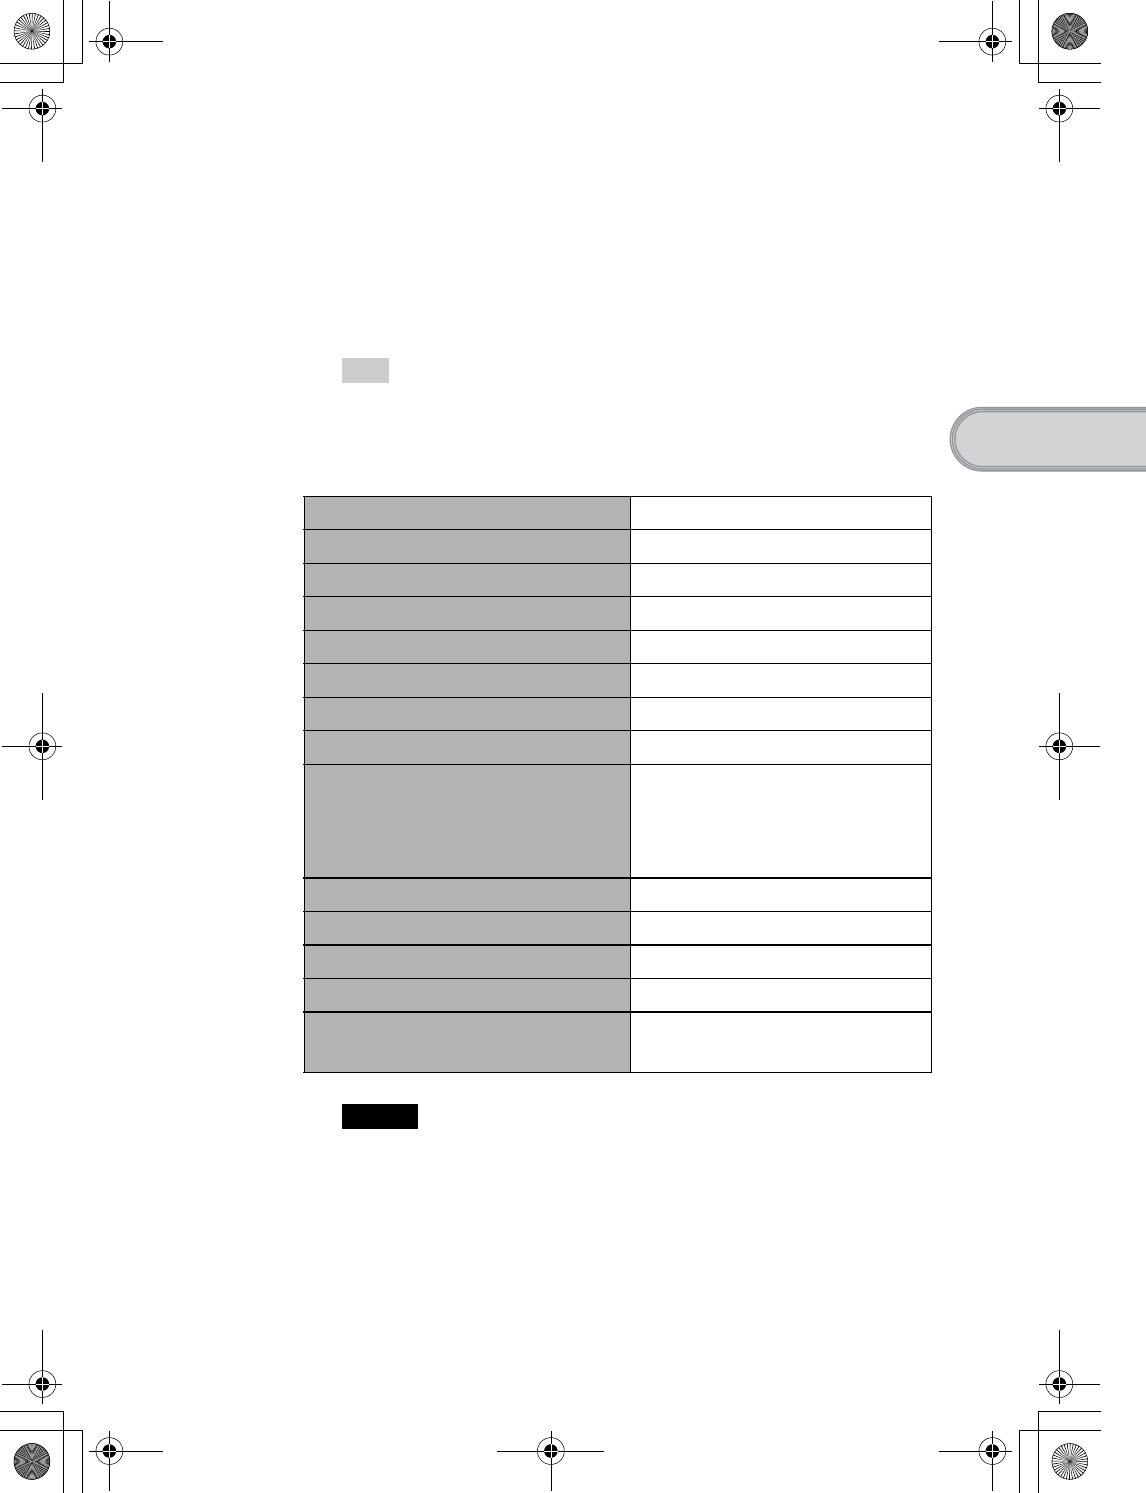
Step 2: Using the check sheet
You can enter the value settings for the wireless LAN access point in this check
sheet. The value settings you enter will be needed in “Setting up the wireless
LAN function” (Page 38), “Setting up NetFront v3.0 for CLIE” (Page 40), and
“Setting up CLIE Mail” (Page 43).
Tip
When you select [DHCP], you do not need the value settings for 3 Primary DNS,
4 Secondary DNS, 5 IP address, 6 Netmask, and 7 Router.
Check Sheet
Note
Ask the System Administrator of your wireless LAN network for value settings to
connect to the wireless LAN access point, and ask your Internet Service Provider
(ISP) for value settings to connect to the Internet.
Requirement setting Your value setting
1SSID
2WEP Key
3Primary DNS · · ·
4Secondary DNS · · ·
5IP Address · · ·
6Netmask · · ·
7Router · · ·
When using proxy server
8Address for proxy server
(or Host name)
Proxy port number
9Mail address @
0Incoming mail server (POP3)
qa Outgoing mail server (SMTP)
qs Mail account name
qd Mail password
(POP account password)
01US01COV.book Page 37 Friday, June 20, 2003 6:29 AM
38
Sony Personal Entertainment Organizer PEG-UX50/UX00 X-XXX-XXX-11 (1)
Step 3: Setting up the wireless LAN function
You need to set up the wireless LAN function, referring to the value settings you recorded
on the check sheet.
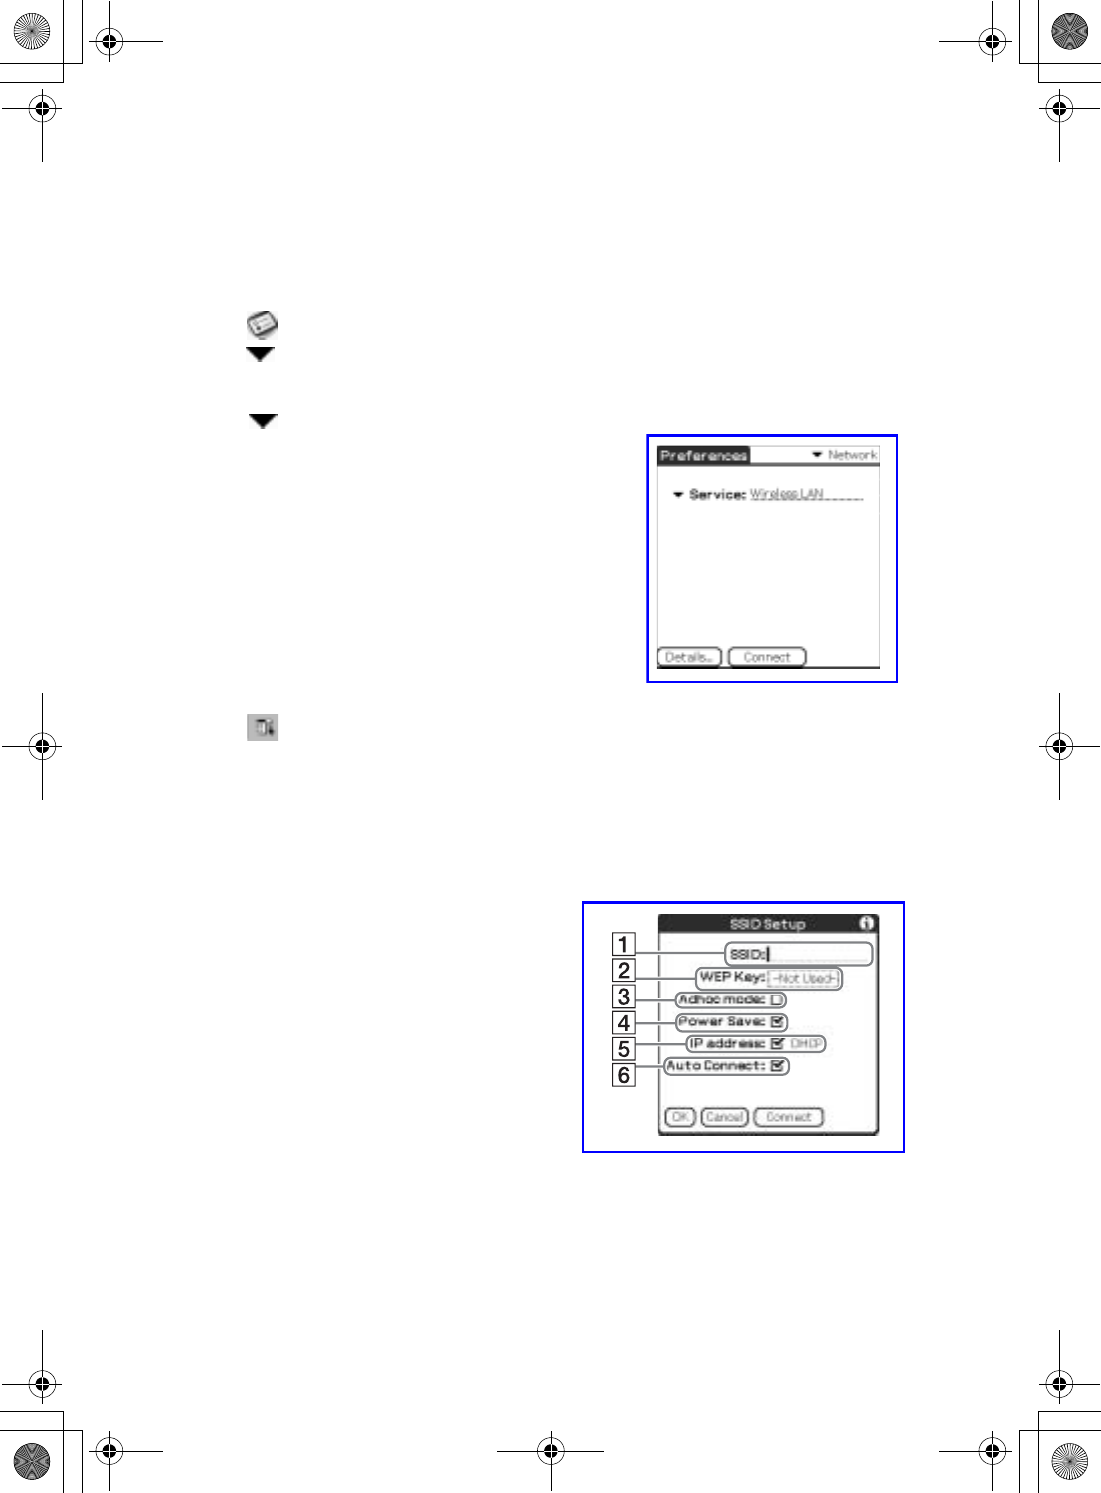
1Tap (Prefs) in the CLIE 3D Launcher to start Preferences, then
tap at the top right of the screen and [Network].
The Network screen is displayed.
2Tap next to [Service], then tap [Wireless LAN] and [Details...].
The Wireless LAN Setup screen is displayed.
3Tap (Menu).
The menu is displayed.
4Tap [New...] from [SSID].
The SSID Setup screen is displayed.
5Enter the value settings for the wireless LAN access point,
referring to the check sheet.
01US01COV.book Page 38 Friday, June 20, 2003 6:29 AM

39
Sony Personal Entertainment Organizer PEG-UX50/UX00 X-XXX-XXX-11 (1)
Connecting to the Internet
ASSID
Enter the value setting for 1 SSID on the check sheet.
Note
Alphabet input is case sensitive.
BWEP Key
Enter the value setting for 2 WEP Key on the check sheet.
CAdhoc mode
You can communicate with other wireless LAN compatible devices without
connecting to the wireless LAN access point when [Adhoc mode] is selected.
DPower Save
You can enable the power saving function when [Power Save] is selected.
Note
You cannot select [Power Save], when [Adhoc mode] is selected.
Tip
You can disable the power saving function for the maximum battery power when the
communication reception of the wireless LAN is low. However, the battery power
is quickly consumed.
Select [Power Save] for normal use.
EIP address
Tap next to [IP address] to disable [DHCP], and you can enter the value
settings for 3 Primary DNS, 4 Secondary DNS, 5 IP Address, 6 Netmask,
and 7 Router in the following IP Address screen.
FAuto Connect
When [Auto Connect] is selected, your CLIÉ handheld automatically connects to
the wireless LAN access point when you access it.
6Tap [OK].
The Wireless LAN Setup screen is displayed.
7Tap [OK].
The Preferences screen is displayed.
01US01COV.book Page 39 Friday, June 20, 2003 6:29 AM
40
Sony Personal Entertainment Organizer PEG-UX50/UX00 X-XXX-XXX-11 (1)
You can access the Internet via the wireless LAN access point using NetFront v3.0 for
CLIE.
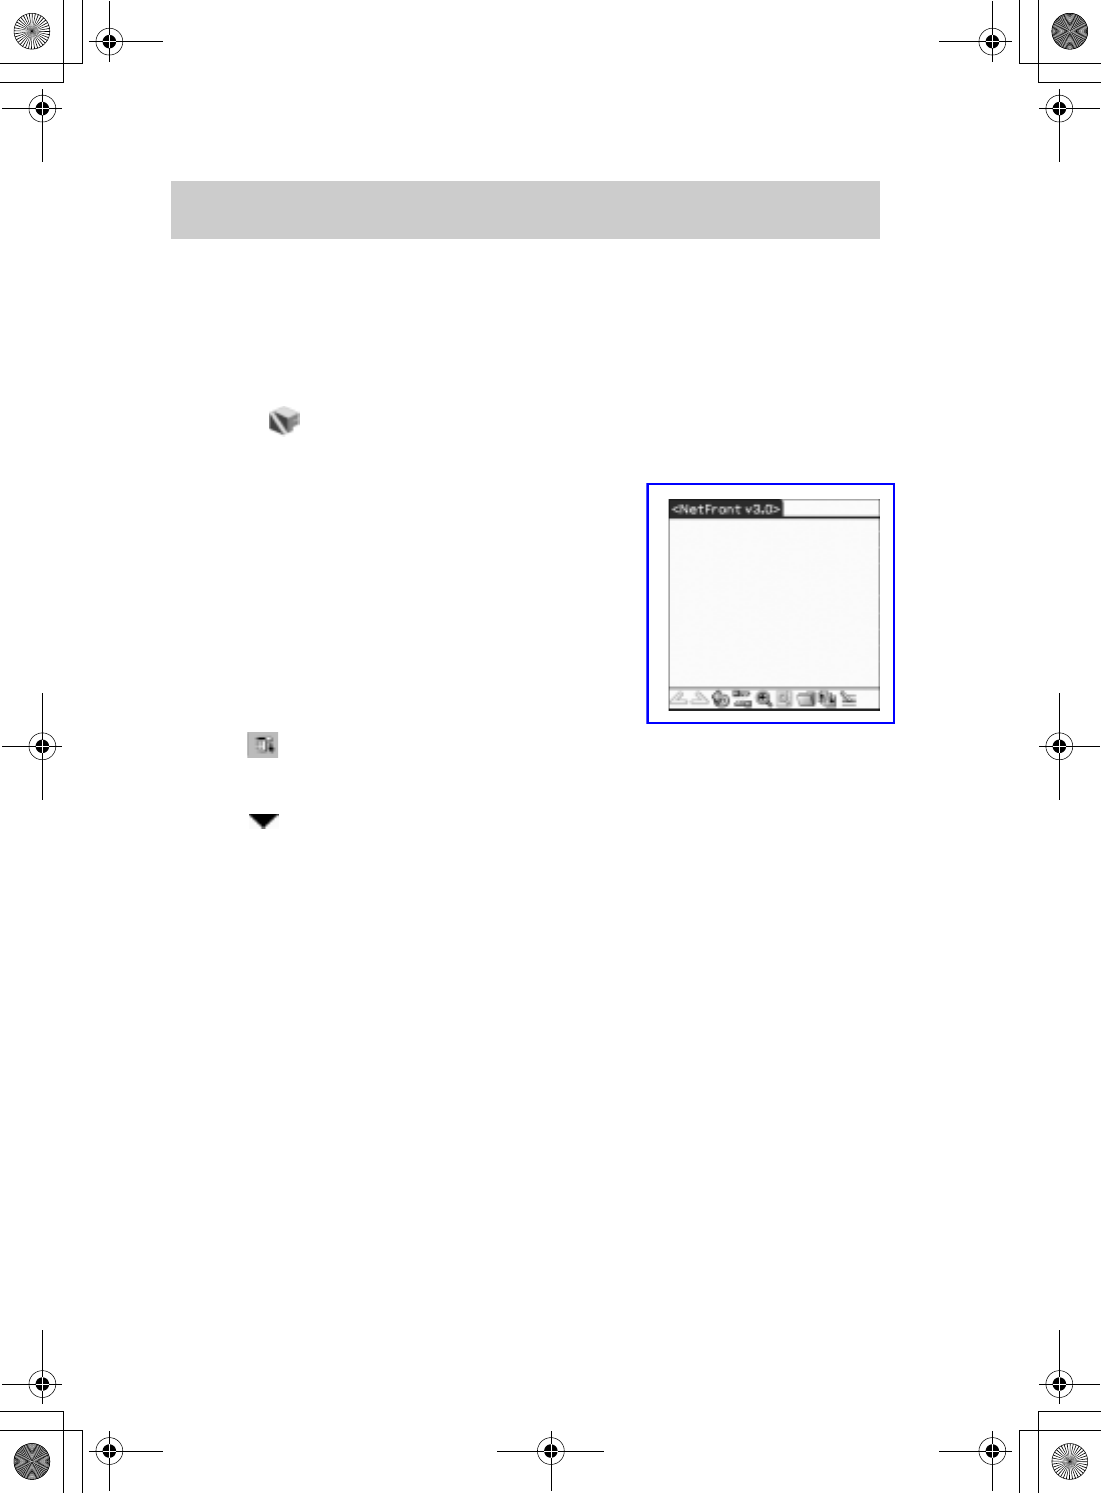
Setting up NetFront v3.0 for CLIE
Browsing websites
1Select (NetFront 3.0) in the CLIE 3D Launcher to start NetFront
v3.0 for CLIE.
The browser screen is displayed.
2Tap (Menu) and [NetFront Settings] from [Options].
The first page of the NetFront Settings screen is displayed.
3Tap at the bottom right of the screen to display the second
page of the NetFront Settings screen.
The NetFront Settings screen for [Connections] is displayed.
01US01COV.book Page 40 Friday, June 20, 2003 6:29 AM
41
Sony Personal Entertainment Organizer PEG-UX50/UX00 X-XXX-XXX-11 (1)
Connecting to the Internet
Setting up NetFront v3.0 for CLIE is complete.
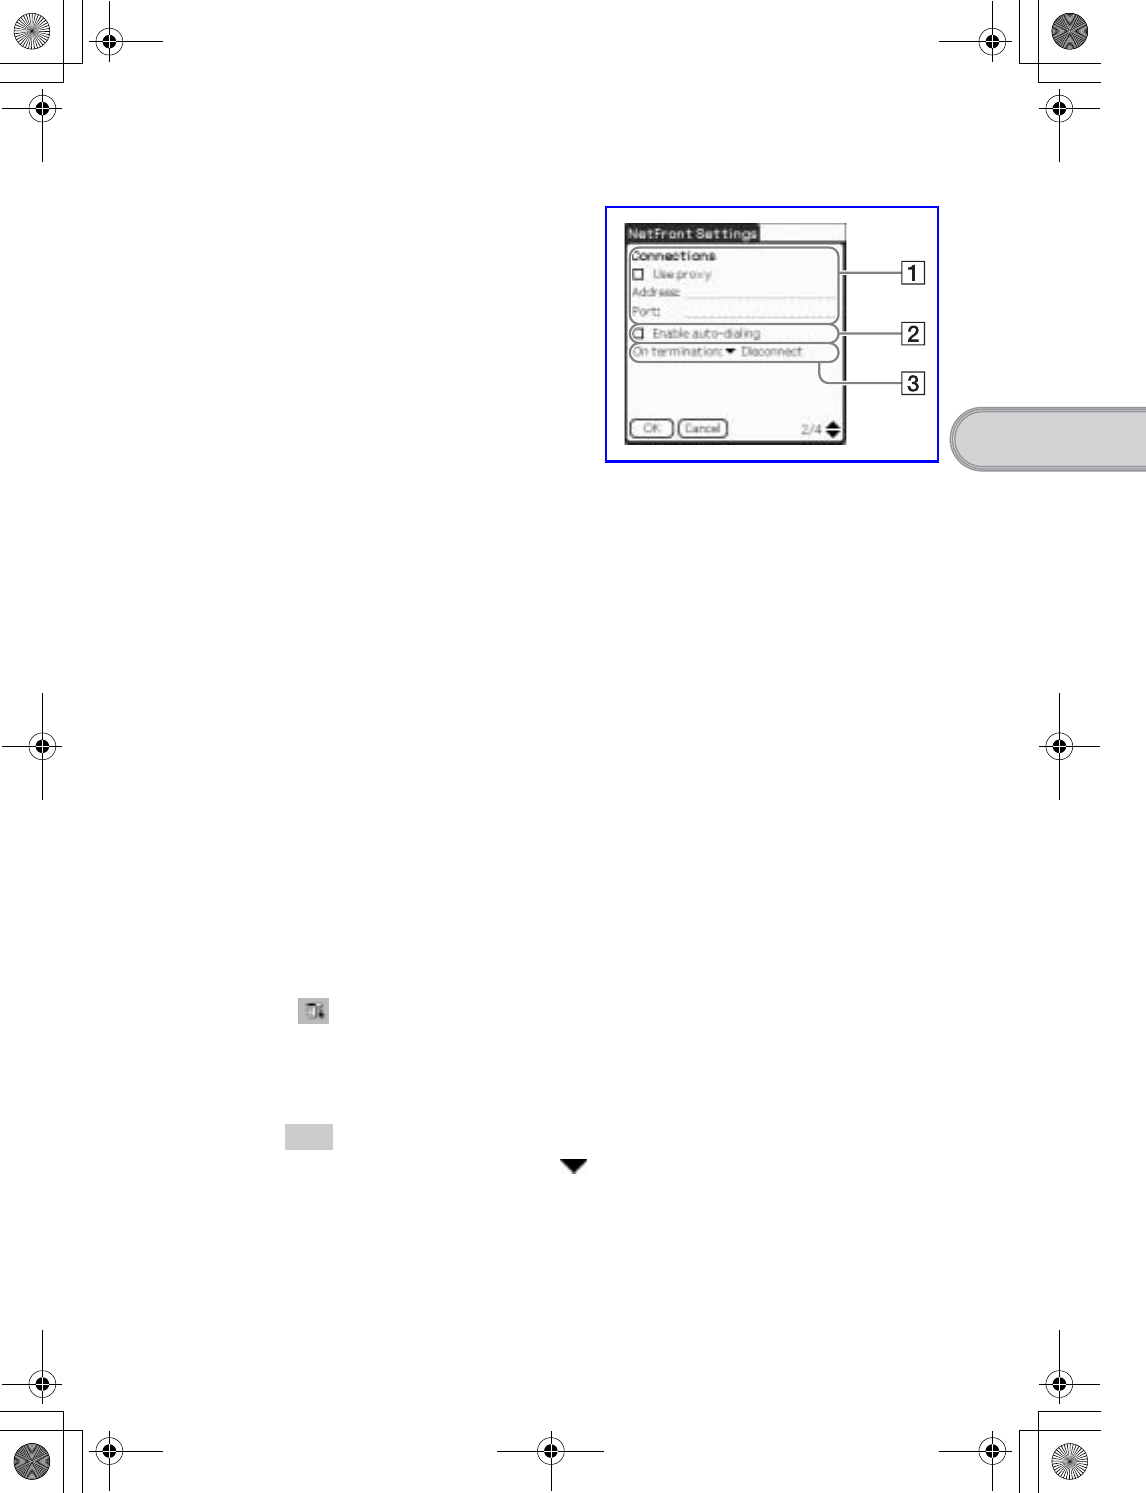
4Set up the connection method.
AUse proxy
This setting is not needed for normal use.
If your Internet Service Provider (ISP) provides you with proxy server address,
select [Use proxy] and enter the proxy server address (or host name) and proxy
port number.
BEnable auto-dialing
You can access the Internet automatically without displaying the Prompt dialog
box when [Enable auto-dialing] is selected.
COn termination
You can select how NetFront v3.0 for CLIE closes.
[Never Disconnect]: keeps your connection to the Internet open for use with
other applications.
[Disconnect]: disconnects from the Internet when NetFront closes or
another application is started.
[Prompt]: displays the Prompt dialog box, whether you want to
disconnect or stay connected.
5Tap [OK].
The browser screen is displayed.
6Tap (Menu) and [Preferences] from [Options].
The Network screen of Preferences is displayed.
7Verify that [Wireless LAN] is selected next to [Service].
Tip
If [Wireless LAN] is not selected, tap next to [Service] to select it.
8Tap [Done].
The browser screen is displayed.
01US01COV.book Page 41 Friday, June 20, 2003 6:29 AM
42
Sony Personal Entertainment Organizer PEG-UX50/UX00 X-XXX-XXX-11 (1)
Browsing websites by connecting to the Internet
via the wireless LAN access point.
Browsing a website
1Select (NetFront 3.0) in the CLIE 3D Launcher to start NetFront
v3.0 for CLIE.
The browser screen is displayed.
2Tap (Off line) .
The Prompt dialog box is displayed.
Tip
When [Enable auto-dialing] is selected in the second page of the NetFront Settings
screen, the connection automatically starts.
3Tap [OK].
When your CLIÉ handheld is connected to the Internet, (On line) is displayed.
Tips
• The Wireless LAN LED of your CLIÉ handheld lights.
• You can check the reception level for the wireless LAN on the status bar (Page 109).
1On the browser screen, tap (Menu) and [Enter Address] from
[Open].
The Enter Address screen is displayed.
2Enter the URL for the website you want to view.
Tip
You can use shortcut entries by tapping next to [Assistant].
3Tap [OK].
The website page you entered is displayed.
01US07INT.fm Page 42 Friday, June 20, 2003 1:21 PM
43
Sony Personal Entertainment Organizer PEG-UX50/UX00 X-XXX-XXX-11 (1)
Connecting to the Internet
Disconnecting the connection
Tap (On line) in the browser screen to disconnect the connection.
(Off line) is displayed when your CLIÉ handheld is disconnected from the Internet.
bFor details on the Internet connection, refer to “Internet/E-mail” in the “CLIÉ Application
Manual” installed on your computer.
You can send/receive e-mails using CLIE Mail.
Setting up CLIE Mail
Sending/Receiving e-mails
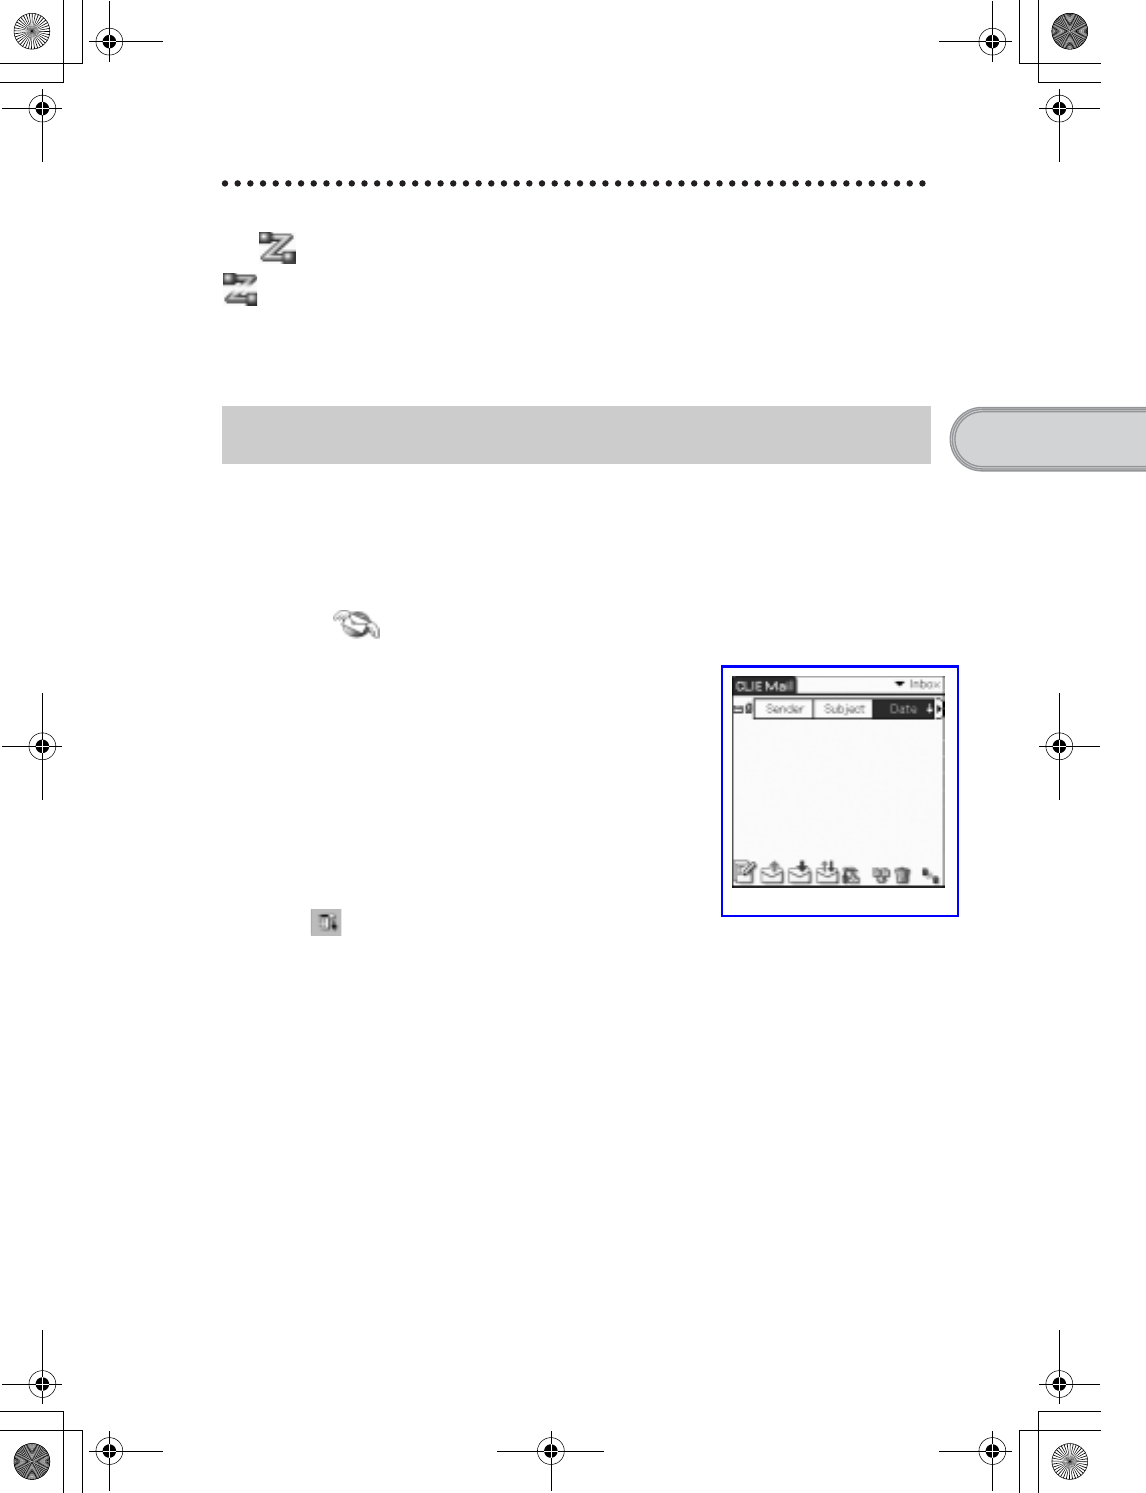
1Select (CLIE Mail) in the CLIE 3D Launcher to start CLIE Mail.
The CLIE Mail screen is displayed.
2Tap (Menu) and [Accounts] from [Options].
The Accounts screen is displayed.
3Tap [New].
The New Account screen for [Name] is displayed.
4Enter your display name when you send e-mails and tap [Next].
The New Account screen for [E-mail address] is displayed.
01US01COV.book Page 43 Friday, June 20, 2003 6:29 AM

44
Sony Personal Entertainment Organizer PEG-UX50/UX00 X-XXX-XXX-11 (1)
Setting up CLIE Mail is complete.
5Enter 9 Mail address on the check sheet, then tap [Next].
The New Account screen for [E-mail Server Names] is displayed.
6Enter 0 Incoming mail server (POP3) and qa Outgoing mail server
(SMTP) on the check sheet, then tap [Next].
The New Account screen for [Internet Mail Logon] is displayed.
7Enter qs Mail account name and qd Mail password, and tap [Next].
The New Account screen for [Congratulations] is displayed.
8Tap [Finish].
The Accounts screen is displayed.
9Tap [OK].
The CLIE Mail screen is displayed.
10 Tap (Menu) and [Networks] from [Options].
The Network screen of Preferences is displayed.
11 Verify that [Wireless LAN] is selected next to [Service].
Tip
If [Wireless LAN] is not selected, tap next to [Service] to select it.
12 Tap [Done].
The CLIE Mail screen is displayed.
01US01COV.book Page 44 Friday, June 20, 2003 6:29 AM
45
Sony Personal Entertainment Organizer PEG-UX50/UX00 X-XXX-XXX-11 (1)
Connecting to the Internet
Sending e-mails
You can send e-mails with CLIE Mail.
1Select (CLIE Mail) in the CLIE 3D Launcher to start CLIE Mail.
The CLIE Mail screen is displayed.
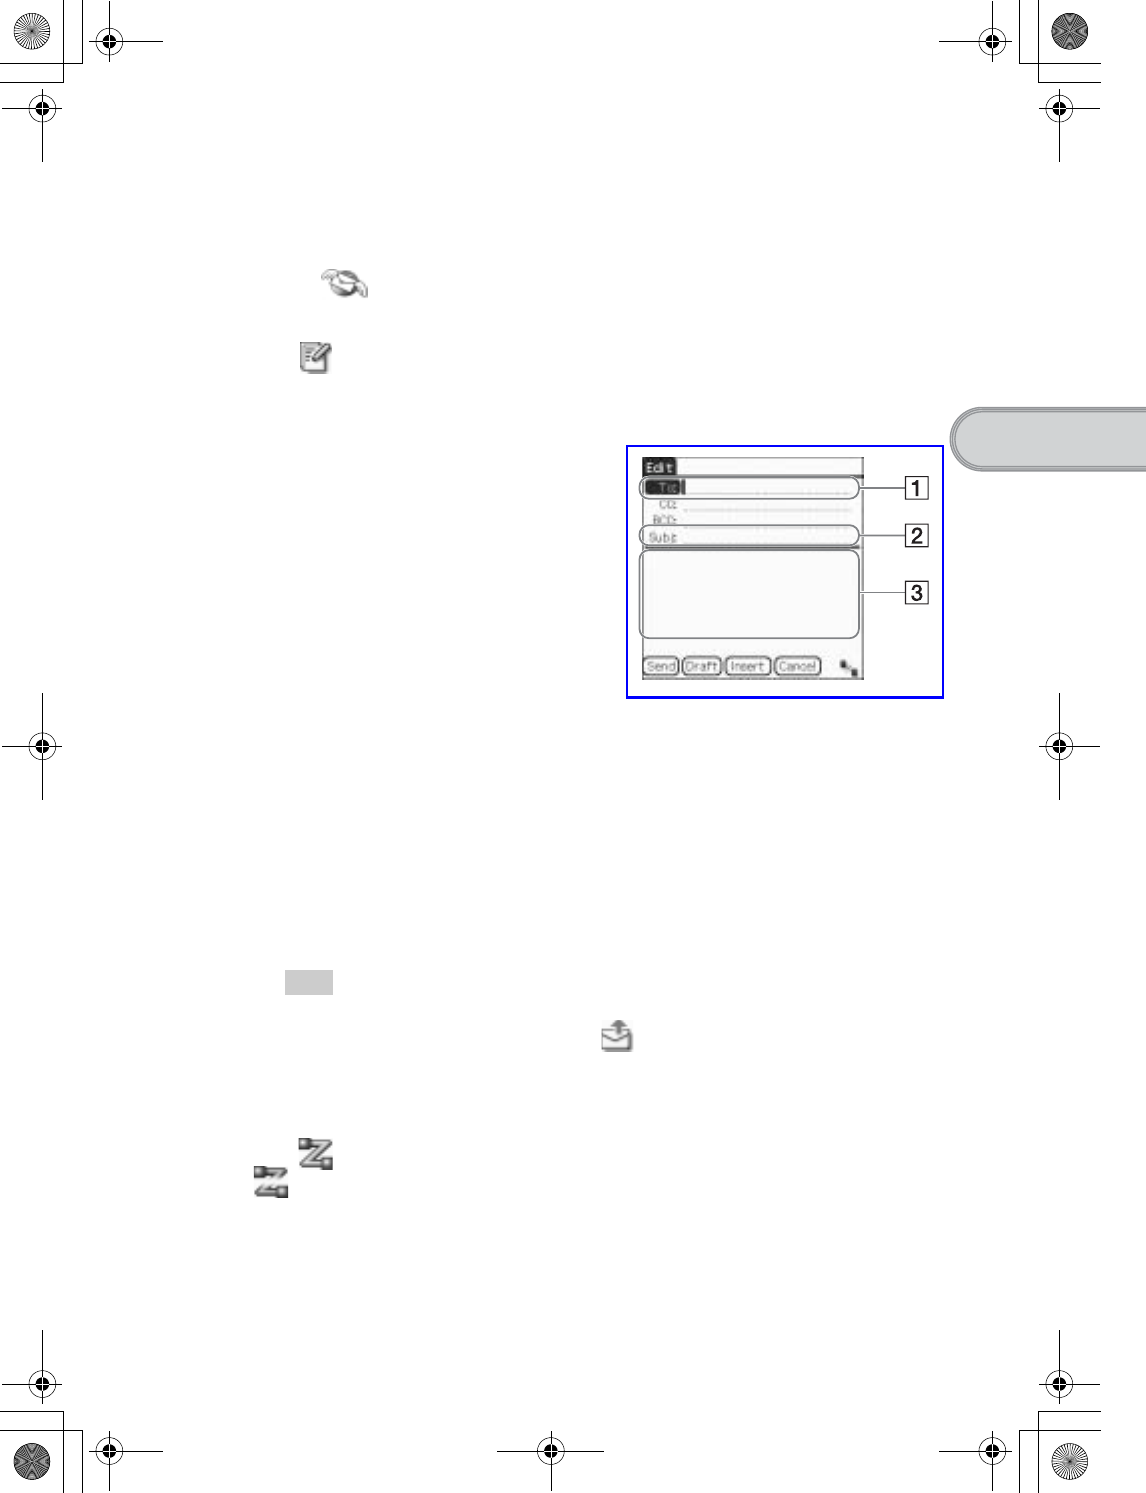
2Tap (New).
The Edit screen is displayed.
3Enter the e-mail address of receiver, a subject, and text.
A[To:]
Enter the mail address of the receiver.
B[Subj:]
Enter a subject for the e-mail.
CEnter the e-mail text.
4Tap [Send] and [Send Now].
After connecting to the Internet, the Communication Status screen is displayed
and the e-mail is sent.
Tip
When you tap [Send Later], the e-mail is temporarily saved in [Outbox].
The saved e-mail will be sent when you tap (Send).
5Tap [OK].
The CLIE Mail screen is displayed.
6Tap (On line).
(Off line) is displayed when disconnected.
01US01COV.book Page 45 Friday, June 20, 2003 6:29 AM