Sony A3724011 GSM900/1800/1900 UMTS mobile phone with RFID User Manual
Sony Mobile Communications Inc GSM900/1800/1900 UMTS mobile phone with RFID
Sony >
Contents
- 1. 08 user guide part 1
- 2. 08 user guide part 2
08 user guide part 1

INSTRUCTION MANUAL
FOMA® SO906i
Easy Search/Contents/Precautions
Before Using the Handset
Voice/Videophone Calls
PushTalk
Phonebook
Sound/Display/Light Settings
Security Settings
Camera
i-mode/i-motion/i-Channel
Mail
i-αppli
GPS Function
1Seg
Osaifu-Keitai/ToruCa
Data Display/Edit/Management
Full Browser/PC Movie
Convenient Functions
Network Services
PC Connection
Overseas Use
Appendix/External Devices
Troubleshooting
Music&Video Channel
Music Playback
Index/Quick Manual
Character Entry
ISSUE DATE:
NAME:
PHONE NUMBER:
MAIL ADDRESS:
‘08.5

NTT DoCoMo W-CDMA/GSM/GPRS System Mobile Phone
Thank you for your purchase of the new “FOMA SO906i” mobile phone.
For proper use of the FOMA SO906i, read this manual and each manual attached to other optional
devices carefully before and while you use the FOMA SO906i. For more information on manuals,
contact the inquiries on the backcover of this manual.
The FOMA SO906i is the efficient partner of yours. Please handle the FOMA SO906i with care and
use it regularly for a long time.
Before using the FOMA terminal
● Because a FOMA terminal operates using radio frequencies, it cannot be used inside a tunnel, underground,
in a building or other locations where radio waves do not reach the FOMA terminal, in locations with weak radio
wave condition, or outside of the FOMA’s service area. The FOMA services may not be available on high upper
floors of high-rise apartments or buildings, even if you can see no obstructions around you. On occasion, your
calls may become disconnected even in areas with strong radio wave condition, even if you are not moving, or
even if there are 3-antenna marks in the FOMA terminal’s display.
● Please use discretion and mind your manners when using the FOMA terminal in public areas or crowded/quiet
places to keep from bothering others.
● Note that because the FOMA terminal operates on radio frequencies, your calls are at risk of being intercepted
by the third party. However, the W-CDMA/GSM/GPRS system automatically scrambles all calls through a
private call feature. Therefore, even if the third party successfully intercepts your call, they will only hear noise.
● The FOMA terminal operates on radio frequencies by converting voice into digital signals. If the caller moves
into an area of adverse radio wave condition, the digital signal may not be restored accurately, and the voice
received in the call may differ slightly from the actual voice.
● The user hereby agrees that the user shall be solely responsible for the result of the use of SSL. Neither
DoCoMo nor the certifiers as listed herein make any representation and warranty as for the security in the use
of SSL. In the event that the user shall sustain damage or loss due to the use of SSL, neither DoCoMo nor the
certifiers shall be responsible for any such damage or loss.
Certifiers: VeriSign Japan K.K., Cybertrust, Inc., GlobalSign K.K., RSA Security Inc., and SECOM Trust Systems
Co., Ltd.
● The FOMA terminal has FOMA Plus-Area and FOMA HIGH-SPEED Area support.
● The FOMA terminal can be used only via the FOMA network provided by DoCoMo and DoCoMo’s roaming
area.
● Always keep the information you save in the FOMA terminal (e.g. phonebook entries, schedules, text memos,
record messages, voice memos, videophone messages) in a separate note. Even if the data may be lost as a
result of malfunction, repair, change, or other handling of the FOMA terminal, under no condition will DoCoMo
be held liable for any lost data saved in the FOMA terminal.
● It is strongly recommended to save important data in the microSD memory card. Also, if you have a PC,
you can transfer/save data such as phonebook entries, mail, schedules in your PC using the DoCoMo keitai
datalink.
● Before using this manual
The FOMA terminal supports the Kisekae tool (P.110). When you use the Kisekae tool to change the design of
the menu display, some menu types may change the menu structure depending on the frequency in use. The
digits assigned to menu items may not be applied.
In this case, you cannot operate the FOMA terminal as explained in this manual, so please change the menu to
the Standard menu or reset the menu settings (P.35, 111).
The latest information on this manual is ready for download at the NTT DoCoMo’s website.
“User’s Manual Download”
(http://www.nttdocomo.co.jp/english/support/manual/index.html)
※ The URL and contents of the website are subject to change without notice.

1
Information on Using the Manual and How to Look up in the Manual
This manual guides you through the operating instructions with step-by-step screen
examples for each operating procedure to ensure that you operate the FOMA terminal
properly.
■ How to Look up in the Manual
This manual employs several search methods so that it can provide the most appropriate way
to find a page relating to your desired function or service flexibly according to your need or
situation.
For details, see the next page.
◆ Index (P.478)
Search by a function or service name known to you or a function name to be displayed on
the FOMA terminal’s display.
◆ Easy Search (P.4)
Search a function that you want to know or you consider useful to know from a listing
sorted by purpose or by a function name.
◆ Headings on the cover (Cover page)
Search the description page of a desired function in the order of “Cover page” → “Chapter
opening page (the first page of a chapter)” → “Description page”. The opening page of
each chapter contains detailed contents of the chapter.
◆ Contents (P.6)
Search by purpose or a function name starting from chapters that are categorized by
functions.
◆ Main functions (P.8)
Search for main functions of SO906i, such as new and useful functions.
◆ List of menus (P.420)
The menu items, which appear on the display of the FOMA SO906i, and default settings at
the time of purchase are listed.
◆ Quick Manual (P.490)
The basic operations of the FOMA terminal are explained briefly. Cut and fold these pages
into a booklet and take it with you for convenient reference. The Quick Manual for “Overseas
Use” is also included for convenient reference when the FOMA terminal is used abroad.
● Please note that “FOMA SO906i” is called the “FOMA terminal” in this “Manual for FOMA
SO906i”.
● This manual describes the functions that can be performed using the microSD memory card.
To use these functions, you need the optional microSD memory card.
About the microSD memory card (P.306)
● Reproduction or reprint of all or part of this manual without prior permission is forbidden.
● The contents of this manual are subject to change without notice.
2
A function, referred to as “Notify caller ID” here, can be searched in diverse ways as
follows.
Index (P.478)
Search by a function or service name known to you or a function name to be displayed on
the FOMA terminal’s display.
MENU
Notify Caller ID
Select
Set Notification
Check setting
nloading a program
... 339
folder ..................... 319
d
er info .................... 322
v
e program .............. 341
y
...................... 340, 342
program ................. 339
............................... 321
a ............................... 45
c
ument .................... 333
ch to mail ............... 212
kmark ..................... 336
p
ture screen ............ 336
e
te ........................... 321
My Selection ..................... 368
N
Name ................................ 121
Network search mode ....... 415
Network security code ...... 130
Network service ................ 391
Notification display .............. 32
Notify caller ID .................... 45
Nuisance Call Blocking
Service ......................... 394
P.45
To the descr-
iption page
of the “Notify
caller ID”.
Easy Search (P.4)
Search a function that you want to know or you consider useful to know from a listing sorted
by purpose or by a function name.
Useful Functions for a Call
Sending your phone number or keeping it anonymous
...Notify caller ID (P.45)
Switching to videophone during a voice call ...............Chg. to videophone (P.54)
Putting a current call on hold ............................................Holding (P.68)
Adjusting the volume of a caller’s voice ......................Volume (P.112)
P.45
To the descr-
iption page
of the “Notify
caller ID”.
Headings on the cover (Cover page)
Search the description page of a desired function in the order of “Cover page” → “Chapter
opening page (the first page of a chapter)” → “Description page”. The opening page of
each chapter contains detailed contents of the chapter.
Easy Search/Contents/
Precautions
Before Using the
Handset
Voice/
Videophone Calls
PushTalk
Phonebook
Before Using the
Handset
Part Names and Functions ................................
Opening/Closing the FOMA Terminal ................
About the Style ..................................................
Using the Displays .............................................
Selecting the Menu ............................................
Using the UIM ....................................................
Attaching and Removing the Battery Pack ........
Charging the FOMA Terminal ............................
Checking the Battery Level ................................
Powering On/Off ................................................
Setting the Basic Functions ...............................
Setting the Date and Time .................................
Notifying the Recipient of Your Phone Number ..
Checking Your Own Phone Number ..................
......................... 26
......................... 29
......................... 29
......................... 30
......................... 33
......................... 36
......................... 39
......................... 40
.... <Battery level> 42
.... <Power on/off> 43
.... <Initial setting> 43
........ <Date/time> 44
.<Notify caller ID> 45
....<Own number> 45
P.45
To the descr-
iption page
of the “Notify
caller ID”.
3
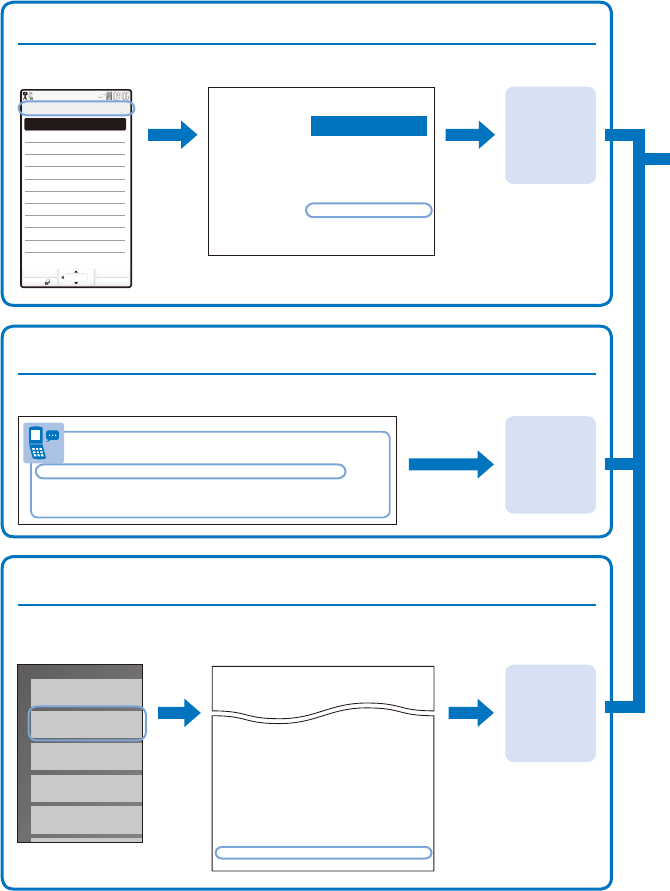
■ Typical layout of the operating instructions page
45
Before Using the Handset
Notifying the Recipient of Your Phone Number <Notify caller ID>
When placing a call, your phone number can be shown in the display of the
recipient’s phone you are calling.
The caller ID is important personal information. Carefully decide whether you want to notify a
recipient of your caller ID.
1
From the Menu, select [Settings] → [Management] → [NW Services] → [Notify
Caller ID] → [Set Notification] and press .
The network security code screen appears.
2
Select [Notify]/[Not notify] and press .
Select Caller ID
notification
setting
Notify
Not notify
[Notify] : Your phone number (caller ID) is notified to the recipient.
[Not notify] : Your phone number (caller ID) is not notified to the recipient.
The Notify caller ID is set.
To check the setting
From the Menu, select [Settings] → [Management] → [NW Services]
→ [Notify Caller ID] → [Check setting].
● If you hear a guidance asking to send the caller ID when you place a call, call again after
setting the Set Notification to [Notify] or by adding “186” before the recipient’s phone
number.
Useful information,
additional information,
and points of caution
Index
A display sample if
important for proper
operation
Operation procedure
described step by
step
Page number
Function name
Chapter title
An outline and objectives of
the function
Additional information relating
to the procedure
Section title
Options listed in the display
and their descriptions
Additional notes and
restrictions of the function
※
Please note that the above page is only for explanation purpose and is partly different from the actual page.
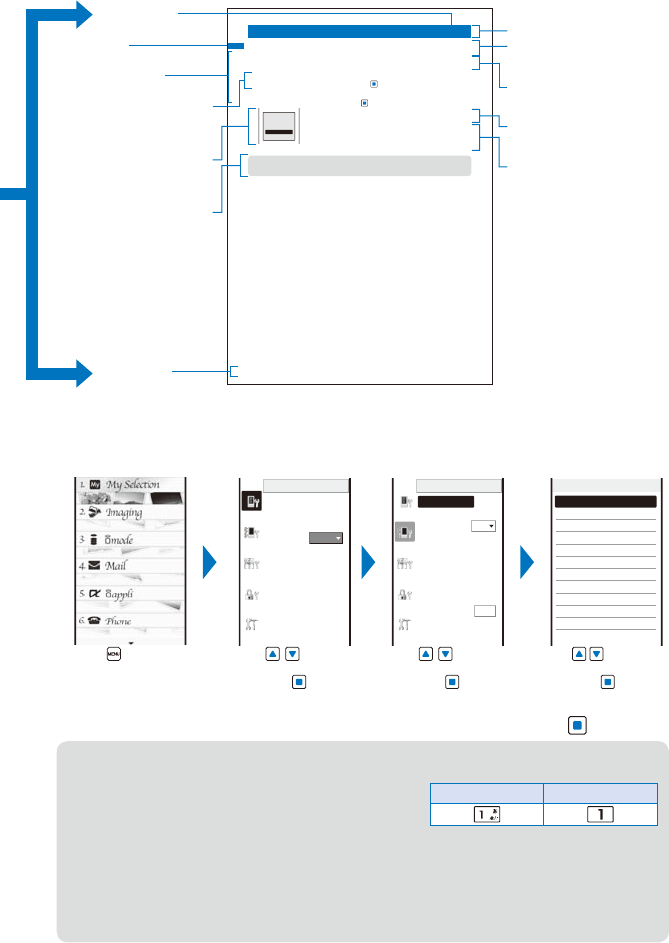
■ About the menu operation
Throughout this manual the operations for selecting from the menu are described as follows.
Actual operations
Press (MENU).
Display
Stand−by display
Backlight
Power saver
1min
Menu setting
Kisekae setting
Animation
Font size
Use to move
the cursor to [Settings]
and press (Select).
Call
Incoming set
Missed call
ON
Videophone
Call display
Call assist
Call setting
Call quality
Headset setting
Self mode
OFF
Melody Call
Use to move
the cursor to [Call]
and press (Select).
Incoming set
Incoming call
Incoming V.phone
PushTalk
Mail
MessageR
MessageF
Use to move the
cursor to [Incoming set]
and press (Select).
Typical description of the operations
From the Menu, select [Settings] → [Call] → [Incoming set] and press .
● Display examples and illustrations used in this manual are just images for explanations and
may be different from actual ones.
Actual key
Illustration in this manual
● Some parts of the keys are deformed or omitted in
the illustration in this manual.
● Display examples in this manual show the conditions based on the Kisekae menu (White
Scrapbook) of the main body color: WHITE, the Color theme setting (White & Gold), and
Clock set to [Digital clock5]. The position of the clock in the display in this manual is different
from the default position.
● The shorter form “Osaifu-Keitai-compatible i-αppli” is used for “Osaifu-Keitai-compatible
i-αppli software supporting IC card function” in this manual.
Easy Search/Contents/Precautions
4
Easy Search
You can search the function that you want to know with simple words.
Useful Functions for a Call
Sending your phone number or keeping it anonymous
...Notify caller ID (P.45)
Switching to videophone during a voice call ...............Chg. to videophone (P.54)
Putting a current call on hold ............................................Holding (P.68)
Adjusting the volume of a caller’s voice ......................Volume (P.112)
When Being Unable to Answer a Call
Putting an incoming call on hold .......................................On hold (P.68)
Informing of inability to talking on the phone ................Public mode (Drive mode) (P.69)
Public mode (Power off) (P.70)
Recording a message ......................................................Record message/
Videophone message
(P.72)
How to Customize the Melody and Indicator
Using a ring tone, etc. specific to individual callers ...........Des phone/mail tone/
Select phone/mail Illum. (P.97)
Changing a ring tone .........................................................Ring tone (P.109)
Adjusting the volume of the ring tone ...........................Ring volume (P.109)
Setting the vibrator to notify incoming calls and mail .........Vibrator (P.110)
Changing the color of the indicator ...............................Color (P.110)
Muting the keypad sound .................................................Keypad sound (P.111)
Muting the sound when canceling the Lock key ......Keyguard release tone (P.111)
Setting the Manner mode .................................................Manner mode (P.115)
How to Customize the Display
Learning what the icons in the display represent ...............Use display (P.30)
Switching the menu display ...........................................Menu setting (P.35)
Changing the stand-by display .......................................Stand-by display (P.117)
Displaying the calendar in the stand-by display .................Stand-by display (P.118)
Changing the font size ......................................................Font size (P.127)
Easy Search/Contents/Precautions
5
Useful Functions for Mail
Sending Deco-mail ...........................................................
Compose and send Deco-mail
(P.208)
Sending an image ..............................................................File attachment (P.212)
Sorting received mail automatically .............................Sort inbox/Sort outbox (P.226)
Useful Functions for the Camera
Changing the recording size ...........................................Select size (P.159)
Performing the Panorama shoot .....................................Panorama (P.165)
Turning on/emitting the photo light/flash ........................Photo light (P.174)
Flash
(P.174)
Saving an image directly to the microSD memory card
...Select save to (P.177)
Displaying a recorded image .........................................My picture (P.290)
For Secure Operations of the FOMA Terminal
Locking the FOMA terminal from a remote
location in case you misplace it ............................................Omakase Lock※ (P.136)
Displaying saved secret contents .......................................Secret display (P.141)
Rejecting a call if no caller’s phone number is presented
...Denied no ID (P.144)
Rejecting a call from a caller who is not saved in the Phonebook
...Reject unknown (P.146)
Storing the Phonebook data and
other information to prevent data loss ...........................Data Security Service※ (P.147)
※
Omakase Lock is a paid service and Data Security Service is a paid service that requires a subscription.
Other Useful Functions
Suppressing the consumption of the battery ............Power saver (P.122)
Reading the QR and bar codes ......................................Bar code reader (P.183)
Using the GPS function ....................................................GPS function (P.264)
Using the microSD memory card .................................microSD memory card (P.306)
Exchanging information using infrared communication
...Infrared communication (P.327)
Listening to music ..............................................................MUSIC Player (P.342)
Using the FOMA terminal as an alarm clock ....................Alarm (P.360)
Using the FOMA terminal as a calculator .........................Calculator (P.372)
Using the FOMA terminal overseas ..................................Int’l roaming (P.410)
Upgrading to the latest software .......................................Software update (P.456)
Updating security to the latest safeguards ........................Scan function (P.462)
For information on how to search the other operations than described above, see “Information
on Using the Manual and How to Look up in the Manual” (P.1).
The Quick Manual is included for convenient reference, in which operating instructions on the
most commonly used functions are summarized (P.490).
6
Easy Search/Contents/Precautions
Before using the FOMA terminal
Information on Using the Manual and How to Look up
in the Manual ............................................................. 1
Easy Search ............................................................... 4
Main Functions of the FOMA SO906i ......................... 8
Making Full Use of SO906i ! ..................................... 10
Safety Precautions (Observe Strictly) ....................... 12
Handling Precautions ............................................... 19
Intellectual Property Right ........................................ 22
Supplied and Optional Accessories .......................... 24
Before Using the Handset 25
Part names and functions, Open/close the FOMA terminal, Style, Use display, Select menu,
UIM, Attach and remove battery pack, Charge the FOMA terminal, Battery level, Power on/
off, Initial setting, Date/time, Notify caller ID, Own number
Voice/Videophone Calls 49
Place voice/videophone call, Change to videophone/voice call, Redial/Received record,
Chaku-moji, WORLD CALL, Receive voice/videophone call, Any key answer, Setting when
folded, Public mode, Record message/Videophone message, Call Chara-den, Videophone
setting, and so on...
PushTalk 79
What is PushTalk?, Originate PushTalk call, Receive PushTalk call, Add to PushTalk
phonebook, Originate from the PushTalk phonebook, Delete a PushTalk phonebook entry,
PushTalk setting, and so on...
Phonebook 93
About phonebooks, Add to FOMA terminal phonebook, Add to UIM phonebook, Group
setting, Display phonebook, Search phonebook, Phonebook setting, Edit phonebook,
Delete phonebook, Memory status, 2-touch dial, Data Security Service, and so on...
Sound/Display/Light Settings 107
Incoming set, Set basic tone, Volume, Manner mode, Stand-by display, Animation, Call
display, Backlight, Menu setting, Kisekae setting, Kisekae menu, Font size, Select language,
and so on...
Security Settings 129
About security codes, Change code, UIM setting, Cancel the PIN lock, Lock all, Omakase
Lock, Self mode, Personal data lock, Key dial lock, Lock key, Record display, Secret display,
Mail security, Data security, Accept/Reject call, Denied no ID, Set ring start time, Reject
unknown, Data Security Service, and so on...
Camera 149
Record still images, Camera’s standard functions, Shoot mode, Record movies, Change the
camera settings, Adjust the camera, Set the camera operation, Bar code reader, and so on...
i-mode/i-motion/i-Channel 185
What is i-mode?, i-mode menu, Display sites, Change i-mode password, Internet
connection, Bookmark, Screen Memo, Acquire image, Download, i-mode setting, SSL
certificate, User certificate, What is i-motion?, Download i-motion, What is i-Channel?,
Display i-Channel, i-Channel setting, and so on...
Mail 205
What is i-mode mail?, Mail menu, Compose and send mail, Compose and send Deco-mail,
Template, File attachment, Save mail, Receive option, Check new message, Received/sent/
saved mail, Mail setting, MessageR/MessageF, What is Early Warning “Area Mail”?, Area
Mail setting, Compose and send SMS, and so on...
Contents
7
Easy Search/Contents/Precautions
i-αppli 209
What is i-αppli?, Download, Run i-αppli, Auto-start, i-αppli stand-by, Manage i-αppli, and
so on...
Osaifu-Keitai/ToruCa 225
What is Osaifu-Keitai?, Start an Osaifu-Keitai-compatible i-αppli, What is ToruCa?, Obtain a
ToruCa card, Display ToruCa, Manage ToruCa cards, ToruCa setting, IC act. notice, IC card
lock, and so on...
GPS Function 235
Position location, Location provision, Location notice, Location history, and so on…
1Seg 251
About One Seg, Before using One Seg, Set channel list, Activate 1Seg, Program guide,
Booking list, Data broadcasting, TVlink, Record 1Seg, Time shift, 1Seg setting, and so on…
Full Browser/PC Movie 279
Display website, Key operations, Manage bookmark, Full Browser setting
Data Display/Edit/Management 289
My picture, Music slide show, Edit photo, i-motion, Edit movie, Chara-den, Music, Melody,
Kisekae Tool, microSD memory card, Data Box, Infrared communication, iC communication,
My document, and so on...
Music&Video Channel/Music Playback 337
What is Music&Video Channel?, What is MUSIC Player?, Transfer music data, Download
Chaku-Uta Full®, Play back music data, Manage playlist, MUSIC Player setting, and so on...
“Chaku-Uta Full” is a registered trademark of Sony Music Entertainment Corporation.
Other Convenient Functions 351
Multiaccess, Multitask, Edit slide setting, Lifetime Calendar, easy BlogUp, Alarm, Schedule,
My Selection, Voice memo, Call duration/cost, Calculator, Text Memo, Jog setting, Reset
settings, Reset all data&set, and so on...
Character Entry 381
Enter text, Enter common phrases, Pictographs/symbols, Cut/Copy/Paste, Reset data,
Download dictionary, and so on...
Network Services 391
Voice Mail Service, Call Waiting Service, Call Forwarding Service, Nuisance Call Blocking
Service, Caller ID Display Request Service, Dual Network Service, English Guidance Service,
Service Numbers, Arrival Call Act, Remote Control, Multi Number Service, 2in1, and so on...
PC Connection 403
About data communication, Before using data communication, Preparations and flow of
data transfer (OBEX™ communication), Preparations and flow of data communication, AT
commands, About the supplied CD-ROM, Introduction of DoCoMo keitai datalink
Overseas Use 409
Overview of international roaming, Available services, Place call, Receive call, Network search
mode, PLMN setting, Operator name display, Roaming Guidance, Oversea service, and so on…
Appendix/External Devices/Troubleshooting 419
List of menus, Enjoy with Picture Motion Browser, Troubleshooting, Software update, Scan
function, Specifications, and so on...
Index/Quick Manual 477
Index, Quick Manual, Quick Manual for “Overseas Use”
Easy Search/Contents/Precautions
8
Main Functions of the FOMA SO906i
“FOMA” is the name of NTT DoCoMo’s mobile service based on the W-CDMA
(Wideband Code Division Multiple Access) system, which has been approved as a
global standard of third generation (3G) wireless communication systems (IMT-2000
or International Mobile Telecommunications-2000).
It’s amazing because it’s i-mode
i-mode is an online service that enables you to take advantage of valuable
information from i-mode Menu sites (Program) and i-mode compatible sites.
This service also enables you to exchange e-mail with great ease.
Deco-mail/Deco mail pict.
The FOMA terminal supports Deco-mail and
Deco-mail pictographs, allowing you to use fonts
in different color and size, change a background
color, and paste moving pictographs as well as
images in the mail main body (P.208).
Mega i-αppli/Virtual game
By downloading i-αppli from a relevant site, you
can enjoy games or obtain automatically updated
information, such as about market shares and
weather.
Mega i-αppli is supported, enabling you to enjoy
games that require large amounts of memory, such
as high resolution 3D games and full-featured role
playing games.
Additionally, the virtual games which are operated
by sensuously such as “tilting” the mobile phone
are also supported (P.238).
Compatible with High-Speed Communication
The FOMA HIGH-SPEED Area is supported a high-
speed communication of the maximum reception
speed 3.6Mbps and maximum transmission speed
384kbps can be achieved (P.404).
International Roaming
You can use the same FOMA terminal, phone
number, and mail address as used in Japan when
you are overseas (supported GSM/3G areas). A
voice/videophone call, i-mode, i-mode mail, SMS,
and network services are available (P.410).
GPS
You can use various services using the location
information you obtain by GPS, such as viewing
the map of your location, searching for information
on your neighborhood, notifying your location
information by attaching it to mail, letting the
FOMA terminal to navigate you to the destination.
The Map appli is preinstalled and allows you to
use the high-definition map easily (P.264).
Chaku-Uta Full®/Uta-hodai/
Music&Video Channel※/Video clip
※ Music&Video Channel is a paid service that
requires a subscription.
Chaku-Uta Full® that allows you to download a
whole track of music and Uta-hodai that allows you
to enjoy favorite music as much as you want by
the fixed fee are supported.
Also, Music&Video Channel is supported to
download a music program during the night only
by setting it in advance and enjoy it. You can enjoy
program with video by the SO906i. Moreover,
because i-motion up to 10MB is supported, video
clip which allows you to enjoy a music clip of a
whole track of music is supported (P.338, 344).
Osaifu-Keitai/ToruCa
Once you download the Osaifu-Keitai-compatible
i-αppli, you can use the FOMA terminal to
deposit e-money to the IC card incorporated
in the terminal as well as to check your credit
balance and purchase history on a relevant site.
Furthermore, the i-αppli for “DCMX” credit service
provided by DoCoMo is preinstalled (P.244). The
“iC transfer service” is also supported, which
allows you to easily transfer data stored on the IC
card to another one in a case such when replacing
a FOMA terminal with a new model.
ToruCa is an e-card which you can obtain from
a reading device (reader/writer) or site and
exchanges with others easily using e-mail or
infrared communication (P.256).
Kisekae Tool
You can download data such as a display of your
favorite character from i-mode and change the
stand-by display and menu display to the data at
once. For SO906i, you can also change the orders
of the menu items based on your usage and
customize the menu display to your taste (P.123,
125).
Easy Search/Contents/Precautions
9
Stand-by books
There are eight unique preinstalled Flash contents
which display various information such as bits of
knowledge, general knowledge, and picture books
wave after wave every time when the stand-by
display appears.
You can set your favorite content selecting from
the [Preinstalled] folder in My picture of the Data
Box and enjoy it (P.118).
Quick deco. Mail Function
Fun Deco-mail is available with simple steps (P.210).
“POBox Pro 2.0” and Convenient Text Input
The FOMA terminal is provided with the prediction
conversion function “POBox Pro 2.0” (Predictive
Operation Based On eXample Pro 2.0). Pressing
allows you to move vertically and
horizontally in the “POBox Pro 2.0”, enabling
to select the target word. Also, switching tabs
allows you to enable the speedy selection of the
matching words list (P.383).
Multiaccess
You can use voice call and packet communication
simultaneously. You can receive i-mode mail even
when you are in a call and you can also make a
call while you are using i-mode (P.352).
High-Definition Wide VGA Liquid-Crystal Screen Display
A 2.7-inch high-resolution full wide liquid-crystal
screen display is employed. Not only you can
enjoy viewing websites, but also perform mail and
i-mode operations in the large screen comfortably.
Lifetime Calendar
The Lifetime Calendar allows you to display an
image, mail, Schedule, and Phonebook (birthday)
data directly from the Calendar and provides
you with more pleasant way of retrieving your
memories saved in the FOMA terminal (P.355).
Infrared Communication/Infrared Remote Control
You can exchange data with other FOMA terminals
using the infrared communication function. You can
also use the FOMA terminal to operate equipment such
as a TV that is provided with infrared remote control.
Moreover, the FOMA terminal supports the high-speed
infrared communication standard IrSimple™ function,
allowing you to transfer high-quality images to
compatible devices at a high speed (P.327, 331).
Security Settings (P.129)
Omakase Lock
If you misplace the FOMA terminal, it can be
locked by your request. You can cancel the lock
as well. See the contact address at the backcover
of this manual for inquiries (P.136). Please note
that Omakase Lock is a paid service*.
* When you subscribe to this service together
with your request to suspend the FOMA terminal
or while the FOMA terminal is suspended, the
service charge is not required.
Omakase Lock allows the FOMA terminal to be
locked by a request from a subscriber of the
UIM inserted in the FOMA terminal. Note that
if the UIM subscriber and user of the FOMA
terminal are different, the FOMA terminal may
be locked without knowledge of the user by
request of the subscriber.
Data Security Service
You can save the Phonebook, images, and mail
of the FOMA terminal at the Data Security Service
Center, and restore the data stored at the Center
in case you lose any of it. You can also use a PC
to edit/manage the data stored at the Center and
update the FOMA terminal with newly edited data.
See the “Mobile Phone User’s Guide
【i-mode】
FOMA version” to learn about the precautions and
details on how to use the Data Security Service
when you use this service. See the contact
address at the backcover of this manual for
inquiries. Data Security Service is a paid service
that requires a subscription (P.147).
Comprehensive Line-up of Network Services
Voice Mail Service (Paid) (P.392) Call Waiting Service (Paid) (P.393)
Call Forwarding Service (Free) (P.393) Nuisance Call Blocking Service (Free) (P.394)
Caller ID Display Request Service (Free) (P.395) Dual Network Service (Paid) (P.395)
English Guidance Service (Free) (P.395) Multi Number Service (Paid) (P.397)
2in1 (Paid) (P.398)
Easy Search/Contents/Precautions
10
Making Full Use of SO906i !
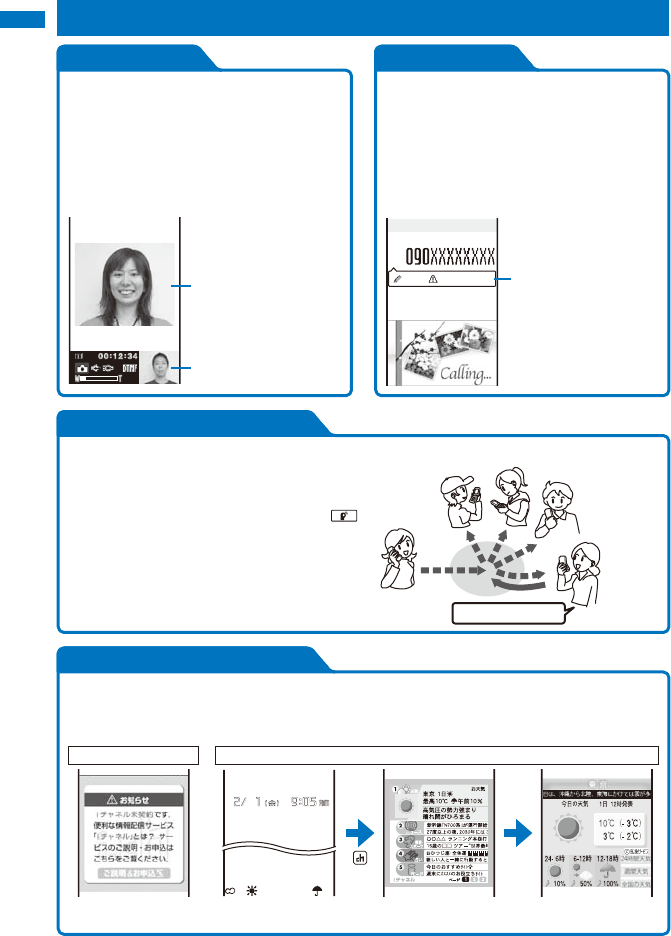
Videophone
You can have a face-to-face conversation
with a person in the distance. You can hear
the person’s voice from the speaker without
changing any settings, so you can start a
conversation soon. You can switch a call
to a videophone call during a voice call
without hanging up as well (P.50).
Image of a person
you are talking to
Your image
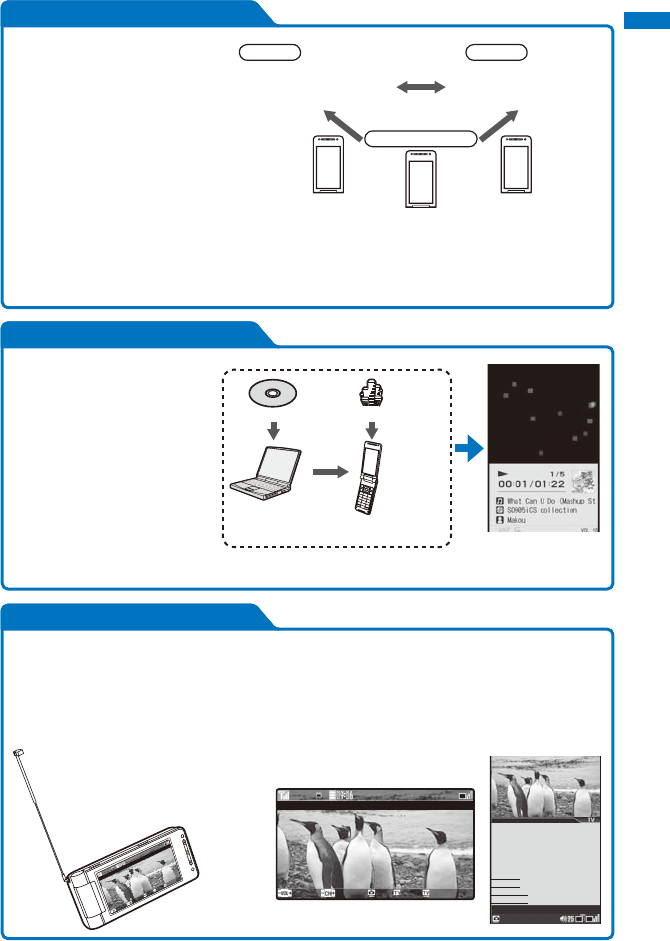
Chaku-moji
You can send a message that is displayed
in the recipient’s Incoming call display
while calling the recipient. The recipient
can know the purpose of the call or feelings
of the caller from a message even before
the recipient answers (P.58).
Chaku-moji
Urgent
Incoming call
PushTalk
Caller
Originating
a call
Recipient Recipient
Recipient
Recipient
(Speaker)
I’ll arrive soon.
You can communicate among several persons
(up to five persons including yourself) with a
simple operation of selecting recipients from
the PushTalk phonebook and pressing
(P.80).
i-Channel
You can receive graphical information such as News or weather.
You can also get rich and detailed information that is created with Flash (P.189) by selecting
your favorite channel from a list of available channels (P.202).
Unsubscribed Subscribed
→
最高
10
℃
10
Connect
(i.ch)
※ i-Channel is a paid service that requires a subscription.
Easy Search/Contents/Precautions
11
2in1
A mode
Phone No. : 090-AAAA-AAAA
Address : XXA@docomo.ne.jp
Phonebook : For A mode
Phone/mail
by A mode
B mode
Phone No. : 090-BBBB-BBBB
Address : XXB@docomo.ne.jp
Phonebook : For B mode
Phone/mail
by B mode
Dual mode
Phonebook A/B
Mail box A/B
Records A/B
Voice mail A/B
・・
Phonebook B
Mail box B
Records B
Voice mail B
・・
Phonebook A
Mail box A
Records A
Voice mail A
・・
2in1 is a service that allows you
to use two phone numbers, two
mail addresses, and special mode
functions to make one mobile
phone work like using two mobile
phones separately. Phonebooks,
mail boxes, redial/received
records, stand-by displays, etc.
can be managed by the “A mode”
and “B mode” separately and also
you can use the “Dual mode” to
manage both the A and B modes
at the same time (P.398).
※ 2in1 is a paid service that requires a subscription.
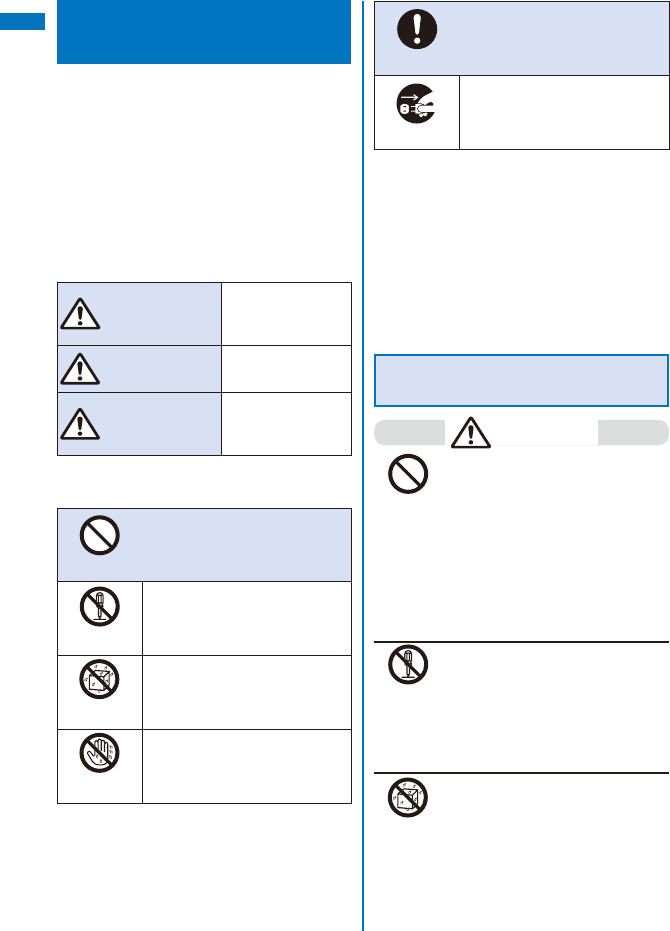
MUSIC Player
Music CD
PC
Chaku-Uta Full
®
distribution site
FOMA terminal
(microSD memory card)
You can use the MUSIC Player
to play back Chaku-Uta Full
®
downloaded from a music
distribution site or music data that
was saved in the microSD memory
card using Windows Media
Player or Napster
®
. Also, a music
program of up to one hour that
is reserved for the Music&Video
Channel and automatically
distributed during the night can
be played back (P.338, 342).
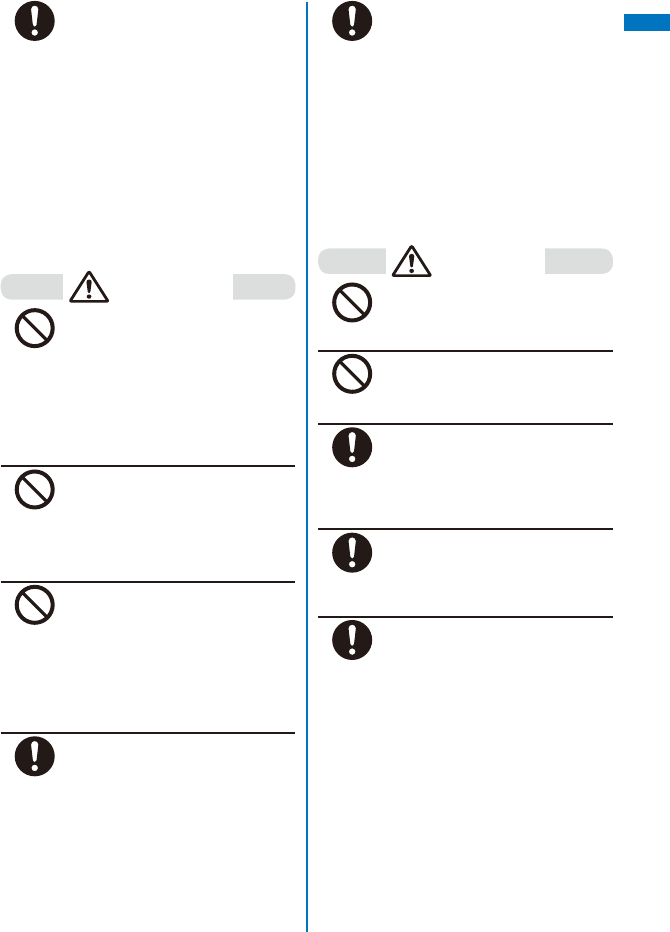
1Seg
You can watch One Seg that is the Terrestrial digital TV broadcasting designed for mobile devices.
You can record a One Seg program while watching it or set a timer for watching/recording a One
Seg program as well. Also, you can use convenient functions such as Time shift that allows you to
pause a One Seg program temporarily and start watching it again from the point you paused and
Rapid play with sound that allows you to play back a recorded video at about 1.3x speed (P.240).
Volume
Channel
Rec
Func
Quit
○
△
の不思議
○
×
ch
TV style
○
△
の不思議
録画
○
△
の不思議
毎週木曜よる
10
時∼
第
225
回
ペンギンの一生
■豆知識
■クイズ
■撮影裏話
■次回予告
○
×
ch
Normal style
Volume
Channel
Rec
Func
Quit
○
△
の不思 議
○
×
ch
When you watch One Seg in the TV style,
using the 3 Step 1Seg Stand allows you
to place the FOMA terminal on the flat
surface in the horizontal orientation and
watch One Seg with full-wide horizontal
screen display.
12
Easy Search/Contents/Precautions
Safety Precautions
(Observe Strictly)
For safe and proper use of the FOMA terminal,
please read the “Safety Precautions” prior to
use. Keep the Manual in a safe place for future
reference.
ALWAYS observe the safety precautions
since they intend to prevent personal injury or
property damage.
■ The following symbols indicate the different
levels of injury or damage that may result
if the guidelines are not observed and the
FOMA terminal is used improperly.
DANGER
Failure to observe
these guidelines may
immediately result in
death or serious injury.
WARNING Failure to observe these
guidelines may result in
death or serious injury.
CAUTION
Failure to observe these
guidelines may result
in injury and property
damage.
■ The following symbols indicate specific
directions.
Don’t
Indicates prohibited actions.
No
Disassembly
Indicates not to disassemble.
No
liquids
Indicates not to use where it could
get wet.
No wet
hands
Indicates not to handle with wet
hands.
Do
Indicates compulsory actions in
accordance with instructions.
Unplug
Indicates to remove the power plug
from the outlet.
■ “Safety Precautions” are described in the
following categories:
Handling the FOMA Terminal, Battery Pack,
Adapter (including the charger), and UIM ... 12
Handling the FOMA Terminal .....................................14
Handling the Battery Pack..........................................16
Handling the Adapter (including the charger) ........... 17
Handling the UIM ....................................................... 19
Handling the FOMA Terminal Near
Electronic Medical Equipment ...................... 19
Handling the FOMA Terminal, Battery Pack,
Adapter (including the charger), and UIM
DANGER
Don’t
Do not use, store, or leave the FOMA
terminal, battery pack, adapter, or UIM
in a place subject to high temperature
such as close to fire, under direct
sunlight, or in a car on an extremely hot
day.
Doing so may cause the device to be
deformed or damaged, or the battery
pack to leak, overheat, explode, catch
fire, or deteriorate in performance and
longevity. Also, part of the case may heat
up and cause burns.
No
Disassembly
Do not disassemble or modify the
FOMA terminal, battery pack, or
adapter and do not directly solder the
battery pack to the FOMA terminal.
Doing so may cause accident such as fire,
injury or electric shock, or malfunction.
Also, it may cause the battery pack to
leak, overheat, explode, or catch fire.
No
liquids
Do not get the FOMA terminal, battery
pack, or adapter wet.
If liquids such as water or pet urine get
into the device, it may cause overheating,
electric shock, fire, malfunction, or injury.
Be careful where and how you use the
device.
13
Easy Search/Contents/Precautions
Do
Use the battery packs and adapters
(including chargers) specified for the
FOMA terminal by DoCoMo.
The use of products that are not specified
may cause the FOMA terminal, battery
pack, or other device to leak, overheat,
explode, catch fire, or malfunction.
Battery Pack SO02, Desktop Holder SO10,
FOMA AC Adapter 01/02, FOMA DC
Adapter 01/02, FOMA Portable Charging
Adapter 01, FOMA Dry Battery Adapter
01, FOMA AC Adapter 01 for Global use,
FOMA USB Cable with Charge Function
01/02
※ Contact our service counter (DoCoMo
shop, etc.) for information on other
compatible products.
WARNING
Don’t
Do not place the FOMA terminal,
battery pack, adapter (including
the charger), or UIM inside cooking
appliance such as a microwave oven or
high-pressure containers.
Doing so may cause the battery pack to
leak, overheat, explode, or catch fire, or
the FOMA terminal and adapter (including
the charger) to overheat, smoke, catch
fire, or damage the circuit parts.
Don’t
Do not subject the FOMA terminal,
battery pack, or adapter to excessive
force or throw it.
Doing so may cause the battery pack to
leak, overheat, explode, or catch fire, or
cause the device to malfunction or catch
fire.
Don’t
Do not allow the charge and external
connection terminals to come in contact
with conducting foreign substances
(a piece of metal, pencil lead, etc.).
Never allow these objects to get into
the FOMA terminal, battery pack, or
adapter.
Doing so may cause fire or malfunction
due to short circuits.
Do
Power off the mobile phone before you
step into a place where flammable gas
can leak, such as gas stations.
Do not charge the battery as well
because it may cause gas to ignite.
Keep the mobile phone powered off even
when you use the Osaifu-Keitai in gas
station premises or other similar place.
(When the IC card lock is set, cancel
the lock and then power off the mobile
phone.)
Do
If you notice anything unusual about
the FOMA terminal, battery pack,
or adapter such as an unusual
odor, overheating, discoloration or
deformation during operation, charging
or storage, immediately perform the
following measures.
1. Remove the power plug from the power
outlet or cigarette lighter socket.
2. Power off the FOMA terminal.
3. Remove the battery pack from the
FOMA terminal.
Failure to do so may cause the device to
overheat, explode, or catch fire, or the
battery pack to leak.
CAUTION
Don’t
Do not place on an unstable or inclined
platform.
Doing so may cause the device to fall and
cause injury or malfunction.
Don’t
Do not keep in a place that is very
humid, dusty, or subject to high
temperature.
Doing so may cause malfunction.
Do
If children use the FOMA terminal,
parents or guardians should give them
the proper instructions for use. Make
sure that they use the FOMA terminal
as instructed.
Failure to do so may cause injury.
Do
Keep the FOMA terminal, battery pack,
adapter, and UIM out of the reach of
babies and infants.
Failure to do so may cause accidental
swallowing or injury.
Do
Be careful especially when you use
the FOMA terminal while it has been
continuously connected to the adapter
(including the charger) for a long period
of time.
If you continue using i-αppli or talking
on the videophone for a long period of
time with the battery being charged, the
temperature of the FOMA terminal, battery
pack, and adapter (including the charger)
may rise.
If you are directly in contact with hot parts
for a long period of time, it may cause your
skin to become red, itch, or develop a rash
depending on your physical condition and
also it may cause low-temperature burn.
Continued
14
Easy Search/Contents/Precautions
Handling the FOMA Terminal
WARNING
Don’t
Do not aim the infrared data port
towards eyes when using the infrared
communication.
Doing so may affect your eyes. Also,
aiming it towards other infrared devices
may interfere with the operation of these
devices.
Don’t
Do not turn on the photo light with the
lighting luminescence part close to the
eyes.
Doing so may cause vision impairment or
accident by dazzling eyes or surprising.
Don’t
Do not leave the FOMA terminal in a
place such as the dashboard near the
automobile air bag, which can have an
adverse effect on the phone when it
inflates.
Doing so may cause accidents such as
an injury, malfunction, or breakage, in
case the air bag inflates.
Don’t
Do not put the FOMA terminal in your
breast pocket or inside pocket if you
are wearing any electronic medical
equipment.
If the FOMA terminal is used close to
electronic medical equipment, it may
cause malfunction.
Don’t
Do not allow a foreign substance such
as water and other liquids, metal parts,
or flammables to get in the UIM or
microSD memory card insertion slot on
the FOMA terminal.
Doing so may cause fire, electric shock,
or malfunction.
Don’t
Do not turn on the light toward a driver
such as of a car.
Doing so may disturb driving and cause
an accident.
Do
Power off the FOMA terminal in a place
where the use is prohibited such as in
airplane or hospital.
Failure to do so may affect electronic
equipment and electronic medical
equipment. If you set the automatic power-
on function, cancel it before powering off
the FOMA terminal.
Follow the instructions of each medical
facility for the use of mobile phones on
their premises.
Prohibited acts such as mobile phone
usage on board an airplane may be
punished by law.
Do
Always keep the FOMA terminal away
from your ear when you talk setting
the hands-free function. Also, when
you play game or play back music
connecting the Earphone/Microphone
to the FOMA terminal, adjust the
volume adequately.
If the volume is too loud, it may cause
difficulty in hearing.
Moreover, if you barely hear the
surrounding sounds, it may cause an
accident.
Do
If you have a weak heart, set the
vibrator or ring volume carefully.
Failure to do so may affect your heart.
Do
If you hear thunder while using the
FOMA terminal outdoors, power off
immediately, and take shelter in a safe
place.
Failure to do so may cause injury or
electric shock from the lightning.
Do
Power off the FOMA terminal near
electronic devices or equipment
operating on high precision control or
weak signals.
Failure to do so may interfere with
the operation of electronic devices or
equipment.
※ The followings are some electronic
devices or equipment that you should
be careful of:
Hearing aids, implantable cardiac
pacemaker, implantable cardioverter
defibrillator, other electronic medical
equipment, fire detector, automatic
door, and other automatically controlled
devices or equipment.
If you use an implantable cardiac
pacemaker, implantable cardioverter
defibrillator, or other electronic
medical equipment, check with the
relevant medical electronic equipment
manufacturer or vendor whether the
operation can be affected by radio
waves.
Do
Be careful about broken glasses or
exposed internal from the FOMA
terminal if the display or the camera
lens is broken.
The display and the camera lens are
designed not to be shattered when broken
using the plastic panel. But they may
cause injury if you touch a cut surface or
exposed portion mistakenly.
15
Easy Search/Contents/Precautions
CAUTION
Don’t
Do not swing the FOMA terminal
around by holding the strap.
The FOMA terminal may hit you or others
and doing so may cause accident such
as injury or damage to the FOMA terminal
or other property.
Don’t
To use the Motion tracking functions,
make sure that your surroundings are
safe to play, grip the FOMA terminal
firmly, and do not shake it around
unnecessarily.
Motion tracking is a function to operate
the FOMA terminal by titling or shaking.
If you shake it too much and it hits a
person or objects, it may cause a serious
accident or damage.
Don’t
Do not hit a person or objects by the
strap while using the Motion tracking
functions when you attach the strap
made of metal to the FOMA terminal.
Doing so may cause accidents such as
malfunction or damage.
Don’t
Do not place a magnetic card, etc. near
the FOMA terminal or let it caught by
the closed FOMA terminal.
Magnetic data on bankcards, credit
cards, telephone cards, floppy disks, etc.
may be erased.
Don’t
Do not place magnetized devices near
the FOMA terminal.
The strong magnetism may interfere with
the operation.
Don’t
If the display is mistakenly damaged
and when the liquid crystal is broken,
do not drink, absorb, or get it on your
skin.
If the liquid crystal gets on your eye or
mouth, rinse with clean running water,
and get medical treatment immediately.
Also, if it gets on your skin or clothes,
use something such as alcohol to wipe
off and wash it with soap in clear water.
Failure to do so may cause blindness or
injury on your skin.
Don’t
Do not bring your ear closer to the
speaker when the ring tone sounds or
melody is played back on the FOMA
terminal.
Doing so may cause difficulty in hearing.
Do
In rare cases, using the FOMA terminal
may interfere with the operation of
electronic devices in some types of
vehicle.
If there is any interference, do not use the
FOMA terminal when driving for safety
reasons.
Do
The use of the FOMA terminal may
cause itching, rashes, eczema, or other
symptoms depending on the user’s
physical condition. Immediately stop
using and get medical treatment in
such a case.
Metals are used as listed below:
Where it is
used Material Surface
treatment
One Seg
Antenna pipe
Stainless
steel
Tin-cobalt alloy
plating finishing
One Seg Antenna
hinge (top)
Stainless
steel
Tin-cobalt alloy
plating finishing
One Seg Antenna
hinge (bottom)
Brass
Tin-cobalt alloy
plating finishing
Back panel
Aluminum
Anodized
aluminum finishing
UIM tray
Stainless
steel
−
Do
Be careful not to get your finger, palm,
or the strap caught in the closed FOMA
terminal when you close and open it.
Failure to do so may cause injury or
damage.
Handling the Battery Pack
■ Check the type of the battery by the label on
the battery pack.
Display Type of Battery
Li-ion Lithium Ion Battery
DANGER
Don’t
Do not touch the battery pack terminal
with a metal object such as a wire.
Also, do not carry or keep the battery
pack together with metal objects such
as a necklace.
Doing so may cause the battery pack to
leak, overheat, explode, or catch fire.
Don’t
Do not forcibly attach the battery pack
to the FOMA terminal. Also, make sure
to attach the battery pack in the correct
direction.
Doing so may cause the battery pack to
leak, overheat, explode, or catch fire.
Continued
16
Easy Search/Contents/Precautions
Don’t
Do not throw the battery pack into fire.
Doing so may cause the battery pack to
leak, overheat, explode, or catch fire.
Don’t
Do not stick a nail into the battery pack,
hit it with a hammer, or step on it.
Doing so may cause the battery pack to
leak, overheat, explode, or catch fire.
Do
If the battery fluid gets into your eyes,
do not rub, rinse with clean running
water, and get medical treatment
immediately.
Failure to do so may cause blindness.
WARNING
Don’t
If any abnormality caused by an
external shock, such as deformation
or damages by falling is found in the
battery pack, stop using the battery
pack immediately.
Failure to do so may cause the battery
pack to leak, overheat, explode, or catch
fire, or cause the device to malfunction or
catch fire.
Do
Stop charging if the FOMA terminal
is not charged within the specified
charging time.
Failure to do so may cause the battery
pack to leak, overheat, explode, or catch
fire.
Do
If the battery pack leaks or hears an
unusual odor, immediately stop using
and move it away from fire.
The leaking liquid may ignite fire, catch
fire, or explode.
Do
Be careful about your pet not to bite the
battery pack.
Failure to do so may cause the battery
pack to leak, overheat, explode, or catch
fire, or cause the device to malfunction or
catch fire.
CAUTION
Don’t
Do not dispose of the battery pack
together with other garbage.
The battery pack may become the source
of fire or environmental destruction. Take
the used battery pack to our service
counter (DoCoMo shop, etc.) after
insulating it by affixing an adhesive
tape on the terminal of it or follow the
instructions of the local authorities in
charge of collecting used battery packs.
Don’t
Do not charge the wet battery pack.
Doing so may cause the battery pack to
overheat, catch fire, or explode.
Do
If the battery fluid gets on your skin
or clothes, immediately stop using
the battery pack and rinse with clean
running water thoroughly.
Failure to do so may cause injury on your skin.
Handling the Adapter (including
the charger)
WARNING
Don’t
Do not use the adapter (including the
charger) if the cord of the adapter or
the power cord is damaged.
Doing so may cause electric shock,
overheating, or fire.
Don’t
Do not use the AC adapter or desktop
holder in a very humid or steamy place
such as bathroom.
Doing so may cause electric shock.
Don’t
The DC adapter is for use in vehicles
with a negative ground. Do not use it in
vehicles with a positive ground.
Doing so may cause fire.
Don’t
Do not touch the FOMA terminal and
adapter (including the charger) if you
hear thunder.
Doing so may cause injury or electric
shock from the lightning.
Don’t
Do not short-circuit the charge terminal
of the charger while the power plug
is connected to the power outlet or
cigarette lighter socket. Do not touch
the charge terminal with your hands,
fingers, or any part of your body.
Doing so may cause fire, malfunction,
electric shock, or injury.
Don’t
Place the charger or the desktop holder
on a stable platform while charging. Do
not cover or wrap the charger or the
desktop holder with a cloth or bedding.
The FOMA terminal may fall off the
charger or heat up and cause fire or
malfunction.
Don’t
Do not place any heavy objects on
the cord of the adapter (including the
charger) or the power cord.
Doing so may cause electric shock or fire.
17
Easy Search/Contents/Precautions
No wet
hands
Do not touch the cord of the adapter
(including the charger) or the power
outlet with wet hands.
Doing so may cause electric shock.
Do
Use the adapter only on the specified
power supply and voltage.
Failure to do so may cause fire or
malfunction. Use the AC adapter available
overseas when you use the phone
overseas.
AC adapter: AC 100 V
DC adapter: DC 12 V/24 V
(exclusively used for vehicles with a
negative ground)
AC adapter available overseas:
AC 100 to 240 V
(Make sure to connect the adapter to a
household AC power outlet.)
Do
If the fuse of the DC adapter is blown,
replace it with the specified fuse.
The use of a fuse other than specified one
may cause fire or malfunction. See the
user’s manual supplied with the adapter
for the specified fuse.
Do
Clean dust from the power plug.
Failure to do so may cause fire.
Do
When you connect the AC adapter
to the power outlet, make sure that it
does not come in contact with a metal
object such as a metal strap and insert
it firmly.
Failure to do so may cause electric shock,
short circuit, or fire.
Do
Hold the power plug, not the cord of
the adapter (including the charger) or
the power cord, when you remove the
adapter (including the charger) from the
power outlet or cigarette lighter socket.
Pulling the cord may damage it and cause
electric shock or fire.
Unplug
Remove the power plug from the power
outlet when not used for a long period
of time.
Failure to do so may cause electric shock,
fire, or malfunction.
Unplug
If liquid such as water gets into the
adapter, immediately remove it from the
power outlet or cigarette lighter socket.
Failure to do so may cause electric shock,
smoking, or fire.
Unplug
Before cleaning, remove the power
plug from the power outlet or cigarette
lighter socket.
Failure to do so may cause electric shock.
Handling the UIM
CAUTION
Do
Please be careful not to touch a cut
surface when you remove the UIM (IC
portion).
Failure to do so may damage your hand
or fingers.
Handling the FOMA Terminal Near
Electronic Medical Equipment
■ The following instructions observe
the guidelines of the Electromagnetic
Compatibility Conference, Japan to protect
electronic medical equipment from radio
waves from mobile phones.
WARNING
Do
Please observe the following guidelines
in medical facilities.
Do not take the FOMA terminal into the
operating rooms, ICU (Intensive Care
Unit), or CCU (Coronary Care Unit).
Power off the FOMA terminal inside
hospital wards.
Power off the FOMA terminal in the
lobby and other places if there are any
electronic medical equipment operating
in the vicinity.
Follow the instructions of each medical
facility when they specify areas
forbidding to use and carrying a mobile
phone.
If you set the automatic power-on
function, cancel it before powering off
the FOMA terminal.
Do
Power off the FOMA terminal in crowded
places such as rush-hour trains. There
may be a person with an implantable
cardiac pacemaker or implantable
cardioverter defibrillator near you.
The radio waves from the FOMA terminal
may affect the operation of implantable
cardiac pacemaker or implantable
cardioverter defibrillator.
Do
If you use an implantable cardiac
pacemaker or implantable cardioverter
defibrillator, keep the FOMA terminal
more than 22 cm away from the implant
at all times.
The radio waves from the FOMA terminal
may affect the operation of implantable
cardiac pacemaker or implantable
cardioverter defibrillator.
Continued

18
Easy Search/Contents/Precautions
Do
If you need to use electronic medical
equipment other than implantable
cardiac pacemaker or implantable
cardioverter defibrillator outside
medical facilities such as treating at
home, check with the relevant medical
electronic equipment manufacturer or
vendor whether the operation may be
affected by radio waves.
The radio waves from the FOMA terminal
may affect the operation of electronic
medical equipment.
Handling Precautions
◆ Common Precautions
● Do not expose to water.
The FOMA terminal, battery pack, adapter
(including the charger), and UIM are not
waterproof. Do not use them in a humid place
such as bathroom or in the rain. If you carry the
FOMA terminal on your body, perspiration may
corrode the internal parts of the FOMA terminal
and cause malfunction. Note that if a trouble is
diagnosed as exposure to water or other liquid,
repairs of the FOMA terminal may not be covered
by the Warranty or it may not be possible to
repair such phones. In that case, even if the
FOMA terminal can be repaired, it is repaired at
the owner’s expense.
● Clean the FOMA terminal with a dry soft
cloth (such as used for cleaning eyeglasses).
The color liquid crystal display of the FOMA
terminal has a special coating on it for better
visibility. Do not use unnecessary force to wipe the
display when you are cleaning it with a dry cloth.
The display and its coating may be damaged.
Handle the display with care and use a dry soft
cloth (such as used for cleaning eyeglasses)
to clean it. If the display is left with water drops
or stains, stains may become permanent or the
display coating may be peeled off.
Do not use alcohol, thinner, benzene, cleaning
detergent, etc. to clean the FOMA terminal.
These chemicals may erase the printing on the
FOMA terminal or cause discoloration.
● Clean the terminals occasionally with a dry
cotton swab.
Soiled terminals may cause poor connection and
loss of power. If the terminals are dirty, use a dry
cloth or cotton swab to wipe them clean.
● Do not leave the FOMA terminal near the air
conditioning vent.
Extreme temperature changes may produce
condensation and corrode the internal parts of
the FOMA terminal, causing it to malfunction.
● Make sure to use the FOMA terminal or
battery pack without excessive force.
If you put the FOMA terminal in a bag full of items
or sit down with the FOMA terminal in the pocket
of your clothe, it may damage the display, and
internal circuit board, and the battery pack and
cause the FOMA terminal to malfunction.
Also, while the external device is connected to
the External connection terminal or Earphone/
Microphone jack, it may damage the connector
and cause malfunction.
● Make sure to see the user’s manuals
supplied with the FOMA terminal, adapter
(including the charger), and desktop holder.
● Do not rob or scratch the display with metal.
The display may get scratched and it may cause
malfunction or damage.
◆ FOMA Terminal Precautions
● Do not use the FOMA terminal in extremely
hot or cold places.
Use the FOMA terminal within a temperature
range of 5°C to 35°C and a humidity range of
45% to 85%.
● Using the FOMA terminal near ordinary
phone, television or radio may cause
interference in these electric appliances.
Make sure to move far away from them when
using the FOMA terminal.
● Note down the information saved in the
FOMA terminal in a separate note and keep
it safely.
Under no condition will DoCoMo be held liable
for any damaged or lost data saved in the FOMA
terminal.
● Do not plug the connector of the external
device into the External connection terminal
or Earphone/Microphone jack at the slant
and pull it while connecting.
Doing so may cause malfunction or damage to
the FOMA terminal.
● Do not close the FOMA terminal with an
object including the strap left inside.
Doing so may cause malfunction or damage to
the FOMA terminal.
● The FOMA terminal could become warm
while in use and charging. This condition is
not abnormal. You can continue using the
FOMA terminal.
● Do not leave the camera under direct
sunlight.
If you do so, some of the phone parts may melt
or become faded.

19
Easy Search/Contents/Precautions
● Use the FOMA terminal with the covers of
the Earphone/Microphone jack, External
connection terminal, and microSD memory
card slot closed.
Failure to do so may get dust or water inside and
cause malfunction.
● Do not use the FOMA terminal without the
back cover.
Doing so may cause the battery pack fall,
malfunction, and damage.
● Do not stick a label or sticker on the back of
the display of the FOMA terminal.
When opening/closing the FOMA terminal, it
may get stuck on a label or sticker and doing so
may cause malfunction or damage to the FOMA
terminal.
● Do not remove the microSD memory card or
power off the FOMA terminal while using the
microSD memory card.
Doing so may cause data loss or malfunction.
◆ Battery Pack Precautions
● The battery pack is a consumable accessory.
Even if the operating time of the FOMA terminal
varies depending on the operating conditions
and other factors, when the length of time you
can use the FOMA terminal with a fully charged
battery becomes unusually short, it is time to
replace the battery pack. Purchase the battery
pack specified in this manual.
● Charge the battery pack in an environment
with the proper ambient temperature (5°C to
35°C).
● Make sure to charge the battery pack before
you use the FOMA terminal for the first time
or when you have not been using it for a long
period of time.
● The operating time of the battery pack varies
depending on the operating environment and
the secular degradation of the battery pack.
● Depending on the use condition, the battery
pack may be inflated as it comes to the end
of its life. This is not a malfunction.
● Do not store or leave the battery pack with
the condition of which the battery level is 0.
Doing so may decrement the performance or
shorten the life of the battery pack.
◆ Adapter (including the charger) Precautions
● Charge the battery pack in an environment
with the proper ambient temperature (5°C to
35°C).
● Do not charge in the following places.
Places that are very humid, dusty or exposed to
strong vibrations.
Near ordinary phone or TV/radio.
● The adapter (including the charger) could
become warm while charging. This condition
is not abnormal. You can continue charging
the battery.
● When you charge the battery pack using the
DC adapter, keep the car engine running.
Charging the battery with the engine turned off
may drain your car battery.
● When you use the power outlet with a
mechanism to prevent the plug from being
removed, follow the instructions on the
outlet’s user’s manual.
● Do not give a strong impact to the adapter.
Also, do not bend or deform the charging
pins on the adapter.
If you do so, the adapter may not work properly.
◆ UIM Precautions
● Do not use unnecessary force to insert/
remove the UIM.
● The UIM could become warm while it is in
use. This condition is not abnormal. You can
continue using the card.
● Do not insert and use the UIM with another
IC card reader/writer. Please note that
you are wholly liable for any damage or
malfunction as a result of such action.
● Always keep the IC portion clean when you
use the card.
● Use a dry soft cloth (such as used for
cleaning eyeglasses) for cleaning and
maintenance of the UIM.
● Note down the information saved in the UIM
in a separate note and keep it safely.
Under no condition will DoCoMo be held liable
for any damaged or lost data saved in the UIM.
● Take an expended UIM to our service
counter (DoCoMo shop, etc.) for proper
disposal in order to protect the environment.
● Do not use the UIM in extremely high or low
temperature.
● Do not carelessly damage, contact, or short
circuit an IC.
Doing so may cause data loss or malfunction.
● Do not drop a UIM or subject it to impact.
Doing so may cause malfunction.
Continued
20
Easy Search/Contents/Precautions
●
Do not bend a UIM or place a heavy object on it.
Doing so may cause malfunction.
● Do not insert the UIM on which any label or
seal is stuck into the FOMA terminal.
Doing so may cause malfunction.
◆ FeliCa Reader/Writer
● The FeliCa reader/writer function of the
FOMA terminal uses extremely weak radio
waves, so that no license is required for use
as a radio station.
● The FeliCa reader/writer function of the
FOMA terminal uses frequencies in the
13.56MHz range. If there is another reader/
writer used in the neighborhood, keep
enough distance from it. Attention should be
also paid to assure that no other radio station
which uses the same frequency range exists
near the FOMA terminal.
◆ Caution
● Never use the modified FOMA terminal.
Using the modified equipment is against the
Radio Law.
The FOMA terminal satisfies certificates such as
the technology standard agreement of the specific
wireless equipment based on the Radio Law. The
model plate of the FOMA terminal shows “技適マー
ク” as the proof of it.
If you modify the inside of the FOMA terminal by
taking screws off, the certificates such as the
technology standard agreement, are counted as
invalid.
Using the FOMA terminal, while the certificates
such as the technology standard agreement are
invalid, is against the Radio Law, so that never use
it under those conditions.
● Be careful using the FOMA terminal while
driving a vehicle.
Holding the mobile phone with a hand while
driving applies the penal regulations.
When you are compelled to receive a call, tell
“Call you back” to the caller using the hands-free
funcion and park the vehicle in a safe place to
place a call.
● Use the FeliCa reader/writer function only in
Japan.
The FeliCa reader/writer function of the FOMA
terminal is designed to conform to the Japanese
radio standard. Overseas use of this function
may be subject to punishment.
● Use the IC card authentication function only
in Japan.
The IC card authentication function of the FOMA
terminal is designed to conform to the Japanese
radio standard. Overseas use of this function
may be subject to punishment.
Intellectual Property Right
◆ Copyright and Right of Portrait
Copyrighted contents you recorded or obtained from
sites or Internet home pages using this product by
downloading or other means, such as documents,
images, music data, software, are prohibited from
reproduction, transformation and transmission over
public lines without consent of the copyright holders,
unless intended for personal use or any other purpose
permitted by law.
Note that some performances, shows, and exhibitions
may not allow photography, movie shooting, or sound
recording even for personal use.
You should also refrain from taking a picture of other
people and disclosing it by such means as posting it
on a site on the Internet without their consent because
of possible infringement of their right of portrait.
◆ Trademarks
“FOMA”, “mova”, “i-mode”, “i-Channel”, “PushTalk”,
“PushTalkPlus”, “ToruCa”, “i-αppli”, “i-αppliDX”,
“i-motion”, “i-area”, “Deco-mail”, “Chara-den”,
“mopera U”, “mopera”, “DoPa”, “WORLD CALL”,
“WORLD WING”, “Chaku-motion”, “FirstPass”,
“Dual Network”, “DCMX”, “iD”, “Public mode”,
“Security Scan”, “2in1”, “sigmarion”, “musea”,
“V-live”, “visualnet”, “IMCS”, “OFFICEED”, “Chokkan
Game”, “FOMA” logo, “i-mode” logo, “i-αppli” logo,
“DCMX” logo, “iD” logo, and “HIGH SPEED” logo
are trademarks or registered trademarks of NTT
DoCoMo.
“Catch Phone (Call waiting service)” is a registered
trademark of Nippon Telegraph and Telephone
Corporation.
Free Dial logo mark is a registered trademark of NTT
Communications Corporation.
McAfee® is a registered trademark or trademark of
McAfee, Inc. and/or its affiliates in the U.S. and/or
other countries.
G-GUIDE, G-GUIDE MOBILE,
and their logos are registered
trademarks in Japan of U.S.
Gemstar-TV Guide International,
Inc. and/or its affiliates.
QuickTime is a registered trademark of Apple Inc.,
in the U.S. and other countries.
Powered by JBlend™ Copyright 2002-2008
Aplix Corporation. All rights reserved.
JBlend and JBlend-related trademarks
are trademarks or registered trademarks
of Aplix Corporation in Japan and other
countries.
“ ” is a registered trademark of FeliCa Networks,
Inc.
microSD logo is a trademark.
“Multitask” is a registered trademark of NEC
Corporation.
Microsoft®, Windows®, and Windows Vista®
are trademarks or registered trademarks of the
U.S. Microsoft Corporation in the U.S. and other
countries.
21
Easy Search/Contents/Precautions
Windows Media® is either a registered trademark
or trademark of Microsoft Corporation in the United
States and/or other countries.
Napster is a registered trademark of Napster, LLC.
and/or its affiliates in the US and/or other countries.
Mascot Capsule® is a trademark of the HI
Corporation.
“PostPet” is a registered trademark of So-net
Entertainment Corporation.
“POBox”, “POBox Pro”, “Cyber-shot”, and “Cyber-
shot” logo are trademarks or registered trademarks
of Sony Corporation.
“Smile Shutter” is a trademark of Sony Marketing Inc.
“BestPic” is a registered trademark of Sony Ericsson
Mobile Communications AB.
“deco-e maker”, “+JOG”, “Ericle”, and “Stand-by
books” are trademarks or registered trademarks of
Sony Ericsson Mobile Communications Japan, Inc.
Java and Java-related trademarks are trademarks or
registered trademarks of the U.S. Sun Microsystems,
Inc. in the U.S. and other countries.
ImageStar is a registered trademark of Ainix
Corporation.
QR code is a registered trademark of Denso Wave Inc.
IrSimple™, IrSS™, and IrSimpleShot™ are
trademarks of Infrared Data Association®.
Other system names and/or product names
mentioned in this manual are generally trademarks
or registered trademarks of their respective owners.
The trademark symbol ™ and registered trademark
symbol ® are omitted hereafter in this manual.
◆ Others
Contains Flash
®
Lite™ and
Adobe
®
Reader
®
technology by
Adobe Systems Incorporated
Flash Lite copyright © 1995-2007
Adobe Macromedia Software
LLC. All rights reserved.
Adobe Reader copyright © 1984-2007 Adobe
Systems Incorporated. All rights reserved.
Adobe, Flash, Flash Lite and Reader are either
registered trademarks or trademarks of Adobe
Systems Incorporated in the United States and/or
other countries.
GestureTek technology is installed in this product.
Copyright © 2007, Gesture Tek, Inc. All rights reserved.
Content owners use Windows Media digital rights
management technology (WMDRM) to protect their
intellectual property, including copyrights. This
device uses WMDRM software to access WMDRM-
protected content.
If the WMDRM software fails to protect the content,
content owners may ask Microsoft to revoke the
software’s ability to use WMDRM to play or copy
protected content.
Revocation does not affect unprotected content.
When you download licenses for protected content,
you agree that Microsoft may include a revocation
list with the licenses. Content owners may require
you to upgrade WMDRM to access their content.
If you decline an upgrade, you will not be able to
access content that requires the upgrade.
This product contains
NetFront Browser and
NetFront Sync Client of
ACCESS CO., LTD.
ACCESS and NetFront are
trademarks or registered
trademarks of ACCESS CO., LTD. in Japan and
other countries.
Copyright © 2007 ACCESS CO., LTD. All rights
reserved.
This product incorporates a program module
developed by Independent JPEG Group.
FeliCa is a contactless IC card technology
developed by Sony Corporation. FeliCa is a
registered trademark of Sony Corporation.
Powered by Mascot Capsule®
Built with Linter Database.
Copyright © 2006-2007 Brycen Corp., Ltd.
Copyright © 1990-2003 Relex, Inc., All rights
reserved.
POBox technology has been developed by Sony
Computer Science Laboratories, Inc. and Sony
Ericsson Mobile Communications Japan, Inc.
This product is under the licensing agreement of
the MPEG-4 Visual Patent Portfolio License, and is
approved for private and non-profit uses, such as
those indicated below.
- For recording MPEG-4 Visual standards-compliant
movie (hereinafter referred to as MPEG-4 Movie).
- For playing back MPEG-4 Movie recorded by a
consumer who uses the product for private and
non-profit activities.
- For playing back MPEG-4 Movie recorded by a
provider who owns an MPEG-4 license.
To use this product for other applications, such
as promotional activities, company use, or profit-
making endeavor, contact U.S. MPEG LA, LLC.
This product includes software
licensed from Symbian Software Ltd.
Symbian, Symbian OS, and all Symbian-related
trademarks and logos are trademarks or registered
trademarks of Symbian Software Ltd.
© 1998-2007 Symbian Software Ltd. All rights
reserved.
◆ Windows Title Conventions
Windows 2000 is an abbreviation of the Microsoft®
Windows® 2000 Professional operating system.
Windows XP is an abbreviation of the Microsoft®
Windows® XP Professional operating system or
Microsoft® Windows® XP Home Edition operating
system.
Windows Vista is an abbreviation of the Windows
Vista® (Home Basic, Home Premium, Business,
Enterprise, Ultimate).
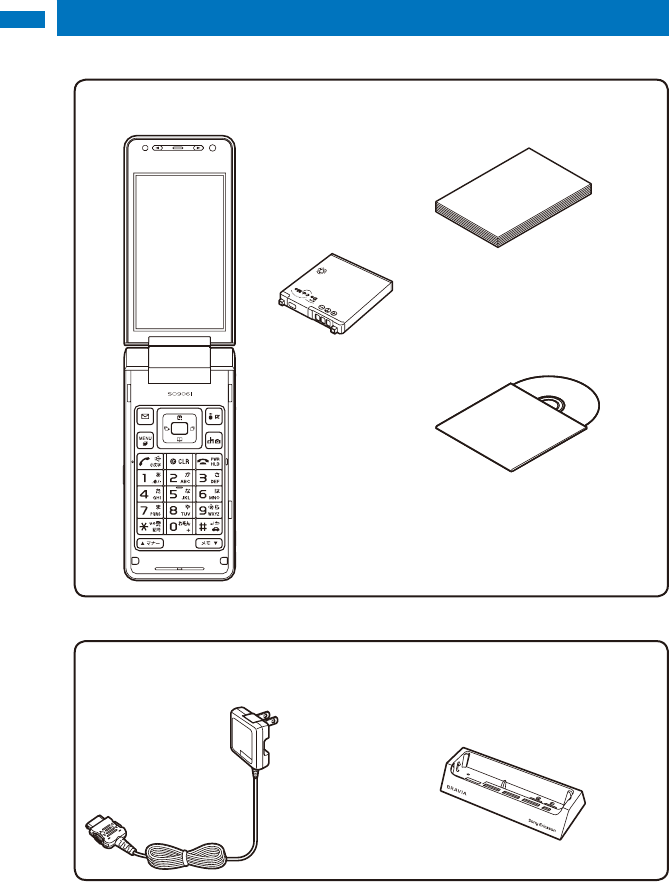
Easy Search/Contents/Precautions
22
Supplied and Optional Accessories
■ Supplied accessor ies
FOMA SO906i
(w/warranty and back cover SO11)
Manual for FOMA SO906i
(this manual)
(w/Quick Manual P.478)
FOMA SO906i CD-ROM
(“Manual for PC connection
setting” (PDF format) and “Kuten
Code List” (PDF format) are
included)
Battery Pack SO02
Li-ion
■ Optional accessor ies
FOMA AC Adapter 01/02
(w/warranty and user’s manual)
Desktop Holder SO10
(w/user’s manual)
Other optional accessories (P.431)

23
Before Using the
Handset
Part Names and Functions ........................................................................................ 26
About the Style .......................................................................................................... 29
Using the Displays ..................................................................................................... 30
Selecting the Menu .................................................................................................... 33
Using the UIM ............................................................................................................ 36
Attaching and Removing the Battery Pack ................................................................ 39
Charging the FOMA Terminal .................................................................................... 40
Checking the Battery Level ................................................................... <Battery level> 42
Powering On/Off ................................................................................... <Power on/off> 43
Setting the Basic Functions .................................................................. <Initial setting> 43
Setting the Date and Time ........................................................................ <Date/time> 44
Notifying the Recipient of Your Phone Number .................................. <Notify caller ID> 45
Checking Your Own Phone Number .....................................................<Own number> 45
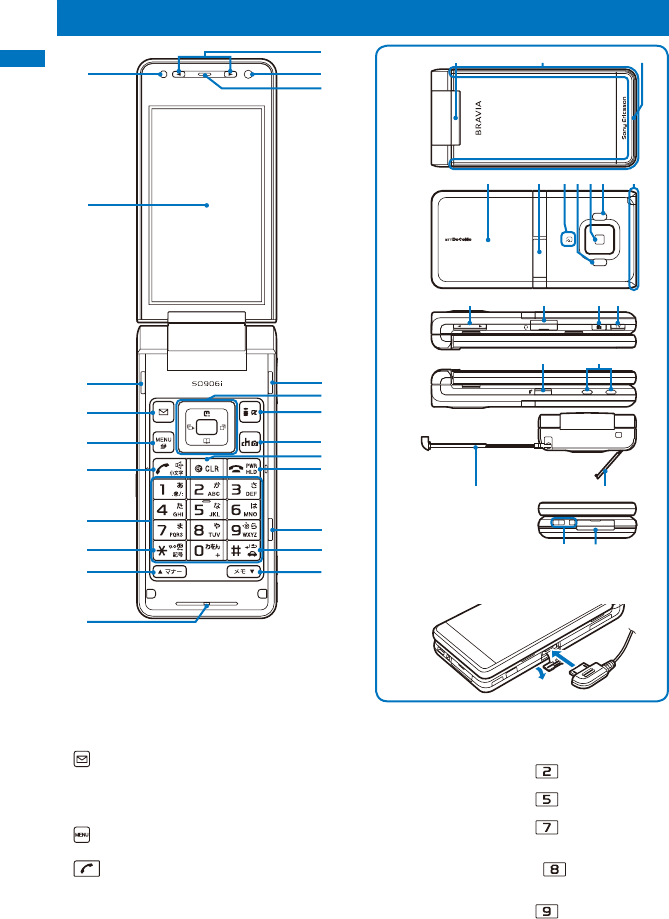
Before Using the Handset
24
Part Names and Functions
Brightness Sensor
Adjust the display light brightness and set ON/OFF
of the keypad light automatically to adapt for the
surrounding brightness (P.121).
Display (P.30)
3 Units Front Speaker
Sounds including the ring tone are heard from here.
Mail Key
In the stand-by display, press to display the Mail menu
(P.206) and press for over a second to perform the
Check new message (P.216, 231).
Press to select an item in the guide display (P.33).
MENU Key
Press to display the menu (P.33, 353).
Call/Hands-free Switch Key
Press to place a voice call or start talking on the phone
of a voice, videophone, or PushTalk call.
Press during a call to switch ON/OFF of the hands-free
function (P.53).
Keypad
Enter phone numbers or text (P.430).
In the stand-by display, press for over a second to
switch ON/OFF of the Shield view (P.115).
In the stand-by display, press for over a second to
display the Reset display (P.376).
In the stand-by display, press for over a second to
switch [Display]/[Undisplay] of the Secret data display.
To set [Display], enter the Security code (P.115).
In the stand-by display, press for over a second
and enter the Security code to display the 2in1 setting
display or Mode switching display (P.399).
In the stand-by display, press for over a second to
check your current location (P.264).
Connecting the Flat-plug Earphone/
Microphone with Switch (optional)
Before Using the Handset
25
/IC Card Lock Key
In the stand-by display, press for over a second to lock
the IC card function or cancel the lock. To cancel the
lock, enter the Security code (P.262).
Manner/ Key
In the stand-by display, press to display the Manner
mode display (P.116) and press for over a second to
set/cancel the Manner mode (P.115).
Press to scroll a page to the previous display.
Microphone
Picks up the sound of your voice. Do not cover it with
your hand.
/ Volume Up Key/Volume Down Key
Operates One Seg, Camera, Full Browser, or Media
Launcher when the FOMA terminal is in the TV style.
Press to select an item of the Guide display (P.23).
In-Camera
Use to record a still image or movie (P.155, 170) or
send the image at your side during a videophone call
(P.50).
Earpiece
The caller’s voice is heard from here.
Four-way Keys and Enter Key (P.28)
i-mode/i-αppli Key
In the stand-by display, press to display the i-mode
menu (P.186) and press for over a second to display
the i-αppli folder list display (P.239).
Press to select an item in the guide display (P.33).
i-Channel Key
Press to place or receive a videophone call (P.52, 66).
In the stand-by display, press to display the Channel
list display (P.202) and press for over a second to
activate the Camera mode (P.129).
Press to select an item in the guide display (P.33).
Clear Key
Press to cancel the current operation.
In the i-αppli stand-by display, press to operate the
software (P.247).
In the stand-by display, press for over a second to turn
off the notification icon (P.32).
Power/End/Hold Key
Press to power on/off the FOMA terminal (P.43).
Press to hang up or end the multitask functions.
Press while receiving a voice or videophone call to put
a call on hold (P.68).
Press to turn on/off the display while the Calendar,
Lifetime calendar (P.97), or i-Channel Telop text (P.157)
is displayed in the stand-by display.
#/Public Mode (Drive Mode) Key
In the stand-by display, press for over a second to set/
cancel the Public mode (Drive mode) (P.69).
Memo/ Key
In the stand-by display, press to display the Record
message display (P.73) and press for over a second to
set/cancel the Record message (P.72).
Press to scroll a page to the next display.
FeliCa Sign
Lights in green during iC communication or when the
FOMA terminal comes within the communication range
with the reading device (P.255, 332).
Illumination Indicator (P.23)
Incoming Indicator/Charge Indicator
Flashes when receiving a call/mail. It flashes when
there is a missed call or new mail/unread message
(P.126).
Flashes while obtaining the location information using
the GPS function (P.264).
Lights in red while charging the battery (P.41).
Back Cover (P.39)
The microSD memory card slot is located at the
position visible when removing the back cover and
battery pack (P.285).
3 Step Stand
Places the FOMA terminal in the horizontal orientation
and allows you to watch One Seg in the TV style (P.23).
FeliCa Mark
Indication for a built-in IC card.
Hold this mark to the reading device to use the Osaifu-
Keitai. You can send and receive data by placing the
FeliCa mark of the FOMA terminal over that of another
FOMA terminal provided with the iC communication
function. You cannot remove the IC card (P.255, 331).
Photo Light/Auto Timer Indicator
Turn this light on when recording (P.129).
Lights during the Camera mode. Flashes while
recording or activating the Auto timer (P.150, 173).
Out-Camera
Use to record a still image or movie (P.155, 170) or
send the surrounding image during a videophone call
(P.50).
Infrared Data Port
When you perform infrared communication (P.327) or
use the FOMA terminal as a remote control (P.331),
point this port to the target device or equipment.
FOMA Antenna
The antenna is incorporated in the main body. To talk
on the phone with better condition, do not cover the
antenna with your hands.
Channel Select Up Key/Channel Select
Down Key
Operates One Seg, Camera, Full Browser, or Media
Launcher when the FOMA terminal is in the TV style.
Press to select an item of the Guide display (P.23).
Press to adjust the volume while playing back music
data on the MUSIC Player with the FOMA terminal
folded (P.331).
Earphone/Microphone Jack
Connect the Flat-plug Earphone/Microphone with
Switch (optional), etc. Other traditional Earphone/
Microphone with Switch (optional) is also available
by connecting it through the Earphone Plug Adapter
(optional). Do not pull the cover forcibly (P.374).
Continued
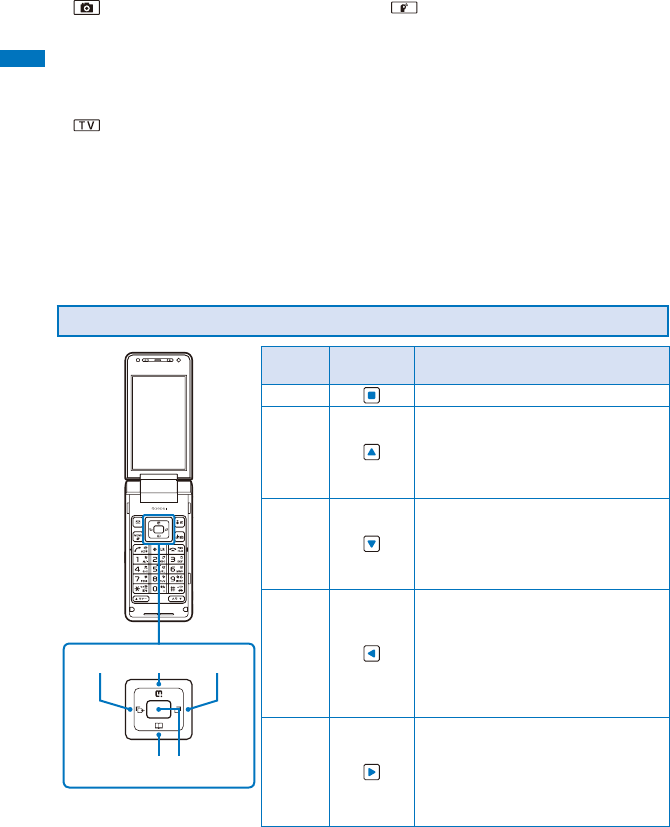
Before Using the Handset
26
Four-way Keys and Enter Key
Left
arrow key
Up
arrow key
Right
arrow key
Down arrow
key
Enter key
Operation Symbols in
this manual Description
Enter key Set a selected item.
Up arrow
key
Move the cursor upward. Press for
over a second to move the cursor
continuously.
Press in the stand-by display to display
the Data Box.
Down
arrow key
Move the cursor downward. Press
for over a second to move the cursor
continuously.
Press in the stand-by display to display
the Phonebook.
Left arrow
key
Move the cursor to the left. Press for
over a second to move the cursor
continuously.
Or, press to return to the previous
display.
Press in the stand-by display to display
the Received record.
Right arrow
key
Move the cursor to the right. Press
for over a second to move the cursor
continuously.
Or, press to go to the next display.
Press in the stand-by display to display
the Redial record.
Shutter Key
In the stand-by display, press for over a second to
activate the Camera mode (P.150).
Press to record using the camera (P.155, 170).
Press halfway down to perform the Auto Focus when
you are recording a still image (P.155).
Press to select an item of the Guide display in the TV
style.
TV Key
In the stand-by display, press for over a second to
activate One Seg (P.251).
Press for over a second while the stand-by display
appears with the FOMA terminal folded to light the
illumination indicator.
Press to select an item of the Guide display in the TV
style.
PushTalk Key
Press to originate or receive a PushTalk call (P.82, 84).
In the stand-by display, press for over a second to
display the PushTalk phonebook (P.85).
Press for over a second while the stand-by display
appears with the FOMA terminal folded to light the
Photo light as a flash light (P.345).
Press to select an item of the Guide display in the TV
style.
Charge Terminal Pins (P.41)
One Seg Antenna
Use when using the One Seg function (P.251).
Strap Attachment
Attach the strap here.
External Connection Terminal
Connect the AC adapter (optional), FOMA USB Cable
with Charge Function 01/02 (optional), etc. (P.41, 315).
Do not pull the cover forcibly.
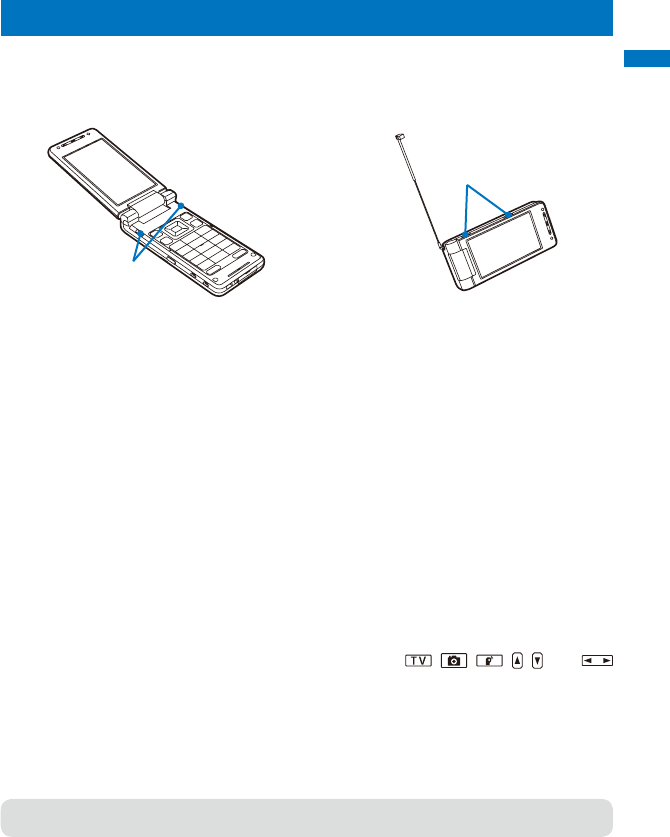
Before Using the Handset
27
About the Style
You can use the FOMA terminal in the Normal style and TV style in which the terminal
is placed horizontally.
■ Normal style ■ TV style
Speaker
Speaker
You hear sounds from speakers of the
both side in the Normal style.
When you watch One Seg in the TV style,
using the 3 Step 1Seg Stand allows you to
place the FOMA terminal on the flat surface
in the horizontal orientation and watch One
Seg with full-wide horizontal screen display.
In the TV style, you hear sounds from two
speakers placed in the upper side.
The available functions when the TV style
is used are as follows.
- Watch/record a One Seg program
(P.243, 252)
- Shoot by photo (P.142)
- Movie shoot (P.146)
- Display an image (P.285)
- Play back a movie (P.285)
- Music slide show (P.285)
- Full Browser (P.259)
When the TV style is used, you can only
use the , , , , , and
keys.
When you answer a phone call while
watching One Seg with antenna
extended, be very careful with the point
of the antenna not to harm people around
you or get into your eyes.
● You can set functions to be activated when switching to the TV style in the stand-by display
(P.328).
Continued
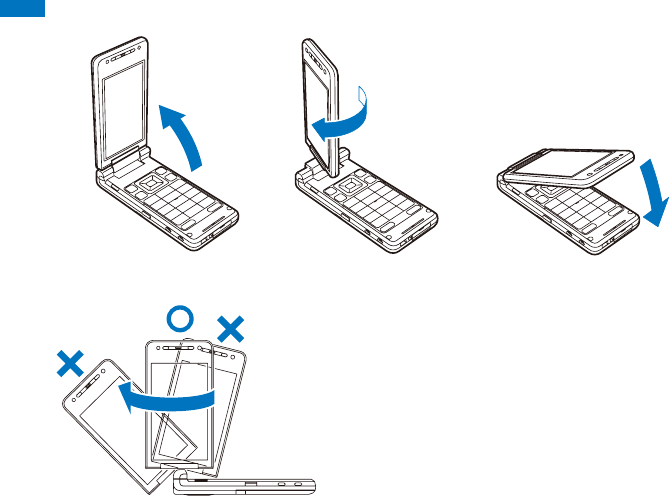
Before Using the Handset
28
Cautions when rotating the display
When you rotate the display, be careful not to touch the corner of the display to the keys or
body. Moreover, you cannot rotate the display counterclockwise or over 180 degrees. Forcing
to rotate the display may cause damage or malfunction.
■ Switching to TV style
1 Hold the FOMA terminal
and open the display
straight.
2 Rotate the display 180
degrees clockwise.
3 Fold the FOMA terminal.
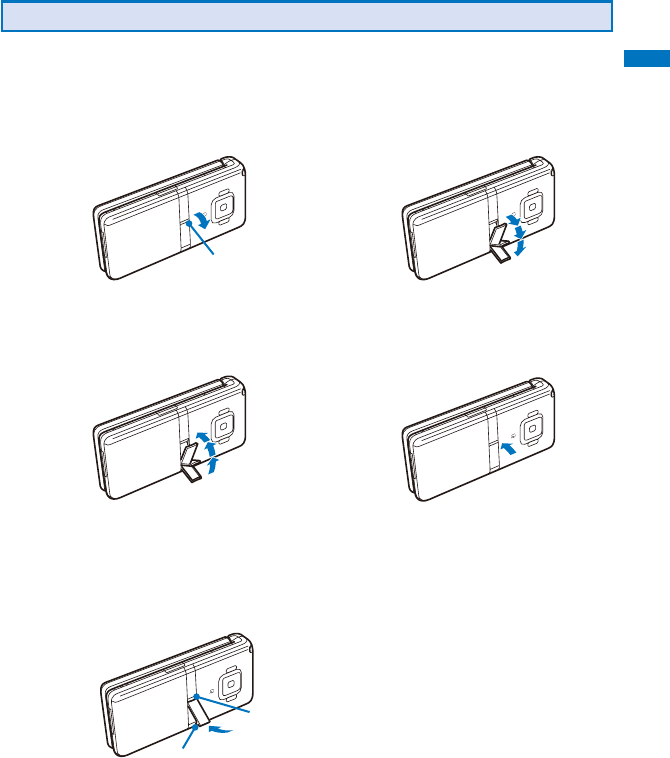
Before Using the Handset
29
■ When the 3 Step 1Seg Stand comes off
1 Insert the other side of the raised portion of the back of the 3 Step 1Seg Stand while
aligning it with the dint portion of the FOMA terminal.
2 Push the raised portion of the back of the 3 Step 1Seg Stand until it clicks into the
FOMA terminal.
Dint portion
Raised portion
■ Usage precaution
When you place/place back the 3 Step 1Seg Stand, do not force to do so. It may cause
accident such as injury or malfunction.
How to Use the 3 Step 1Seg Stand
You can enjoy One Seg with three angles by placing the FOMA terminal horizontally
in the TV style.
■ How to place the 3 Step 1Seg Stand
1 Catch the dint portion with your finger
and lift it forward.
Dint portion
2 Lift it until it stops.
There are three stopping positions.
■ How to place the 3 Step 1Seg Stand back
1 Press the 3 Step 1Seg Stand toward the
FOMA terminal.
2 Push it until it clicks into place.
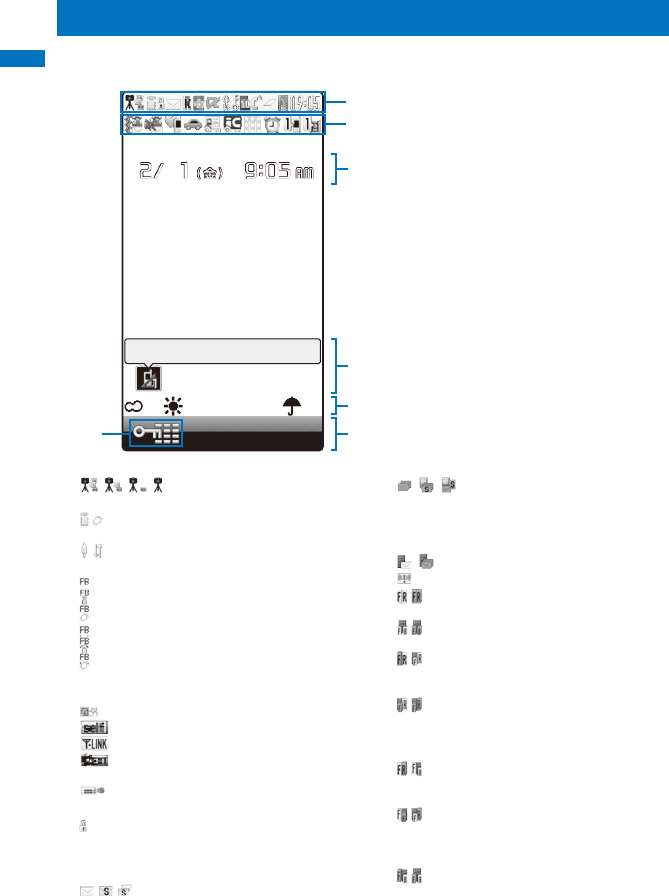
Before Using the Handset
30
Using the Displays
For details on the icons in the Camera mode, see P.154.
The position of the clock in the display can be changed (P.118).
→
最高
10
℃
10
Missed call
1
∼
∼
Clock (P.44, 118)
Notification display (P.32)
i-Channel Telop text (P.203)
Guide display (P.33)
/ / / Radio wave condition
(Strong Weak)
/ During i-mode (P.187)/During i-mode
communication
/
During packet communication/While sending/
receiving packet communication data
Full Browser activating
During Full Browser (P.280)
During Full Browser communication
Full Browser activating (PC mode)
During Full Browser (PC mode)
During Full Browser communication (PC mode)
(During Full Browser communication, the icon
becomes animation.)
Outside of the service area
Self mode is set (P.137)
A card other than the UIM is inserted
While using the infrared communication function
(P.329)/During iC communication (P.332)
While the infrared remote control is
being used (P.331)
While an SSL site is displayed (P.187)/While
i-αppli software downloaded from an SSL
site is running (P.240)/While the software
update is using SSL communication (P.459)
/ /
Unread i-mode mail (P.214)/Unread SMS
(P.235)/Unread i-mode mail and unread SMS
/ /
The FOMA terminal is full of received i-mode
mail and SMS/The UIM is full of SMS/The
FOMA terminal is full of received i-mode
mail and SMS and the UIM is full of SMS
/
Mail at the i-mode center/The i-mode center is full
Unread Area Mail (P.233)
/ Unread Message R/F (P.230)/The
FOMA terminal is full of Message R/F.
/ Message R/F at the i-mode center/
The i-mode center is full
/
Unread Message R (P.230), the FOMA
terminal is full of Message F/Unread
Message R, Message F at the i-mode center
/
Unread Message R (P.230), the
i-mode center is full of Message F/The
FOMA terminal is full of Message R,
the i-mode center is full of Message F
/
Unread Message F (P.230), the FOMA
terminal is full of Message R/Unread
Message F, Message R at the i-mode center
/ Unread Message F (P.230), the
i-mode center is full of Message R/
The FOMA terminal is full of Message
R, Message F at the i-mode center
/ Message R at the i-mode center, the
FOMA terminal is full of Message F/
Message R at the i-mode center, the
i-mode center is full of Message F
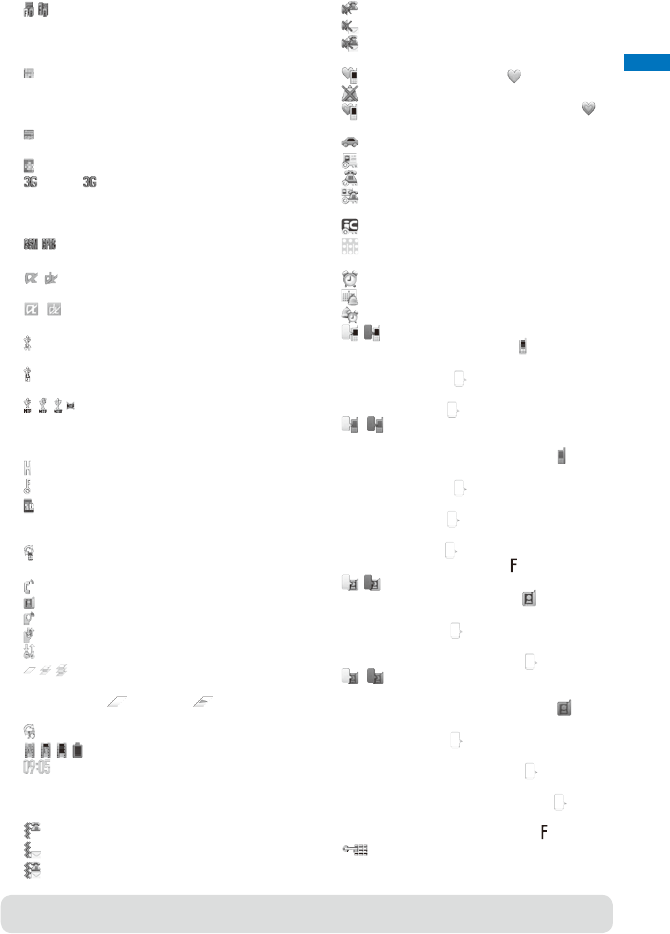
Before Using the Handset
31
/
The i-mode center is full of Message R,
Message F at the i-mode center/The
i-mode center is full of Message R, the
FOMA terminal is full of Message F
While providing location information
by GPS/While accepting to provide
location information during the period
of accepting the location request
While rejecting to provide location information
during the period of accepting the location request
During GPS positioning
(Blue)/ (Red)
While connecting to the 3G network (Packet
communication: able)/While connecting to the
3G network (Packet communication: disable)
/
While connecting to the GSM network/
While connecting to the GPRS network
/
While running i-αppli (i-αppli stand-by
display)/While running i-αppli DX
/
i-αppli stand-by display is set/i-αppli
DX stand-by display is set (P.247)
The USB mode setting is set to
Communication mode (P.315)
The USB mode setting is set to
microSD mode (P.315)
///
The USB mode setting is set to MTP
mode: Connecting/Transferring/
Transfer completed/Error (P.315)
While using a hands-free device (P.65)
Secret display is [ON] (P.141)
While the microSD memory card is inserted (P.307)
(Flashes during preparation for access after
insertion of the microSD memory card)
While the microSD memory card management
information is being updated (P.314)
During a voice call
During a videophone call (P.50)
During PushTalk communication (P.80)
While using PushTalkPlus (P.89)
During 64K data communication
/ /
1/2/3 or more tasks are being executed
(P.353) ( changes to while playback
is in progress on the MUSIC Player)
While data in the MUSIC Player is being updated
/ / / Battery level (P.42)
Current time (Displayed in 24-hour
format in other than the stand-by display)
When the Clock is set to [Pict clock], the clock
is displayed in the stand-by display (P.118).
The vibrator is set for incoming calls (P.110)
The vibrator is set for incoming mail (P.110)
The vibrator is set for incoming calls
and mail (P.110)
Incoming call ring volume is OFF (P.109)
Incoming mail ring volume is OFF (P.109)
Incoming call and mail ring volumes
are OFF (P.109)
Manner mode is set ( is pink) (P.115)
Silent mode is set (P.115)
Original manner mode is set ( is
blue) (P.115)
Public mode (Drive mode) is set (P.69)
Personal data lock is set (P.138)
Key dial lock is set (P.139)
Personal data lock and Key dial lock
are set (P.138, 139)
IC card lock is set (P.262)
During Music&Video Channel
reservation (P.339)
Alarm is set (P.362)
Schedule alarm is set (P.364)
Alarm and Schedule alarm are set (P.362, 364)
/
Record message is set ( is white) (P.72)
There are non-played back record
messages ( is light blue)
There is no non-played back record
message ( is blue)
/
Record message is OFF
(There are record messages) ( is gray)
There are non-played back record
messages ( is light blue)
There is no non-played back record
message ( is blue)
The number of recorded messages is
displayed at . When the number of recorded
messages becomes full, “ ” appears.
/
Videophone message is set ( is green) (P.72)
There are non-played back videophone
messages ( is light blue)
There is no non-played back
videophone message ( is blue)
/
Videophone message is OFF
(There are videophone messages) ( is gray)
There are non-played back videophone
messages ( is light blue)
There is no non-played back
videophone message ( is blue)
The number of recorded videophone
messages is displayed at . When
the number of recorded videophone
messages becomes full, “ ” appears.
Lock key is set (P.140)
● The FOMA terminal’s display is manufactured based on the leading edge technologies, and
some pixels unlit or lit may appear constantly in the display. This is not a malfunction.
Continued
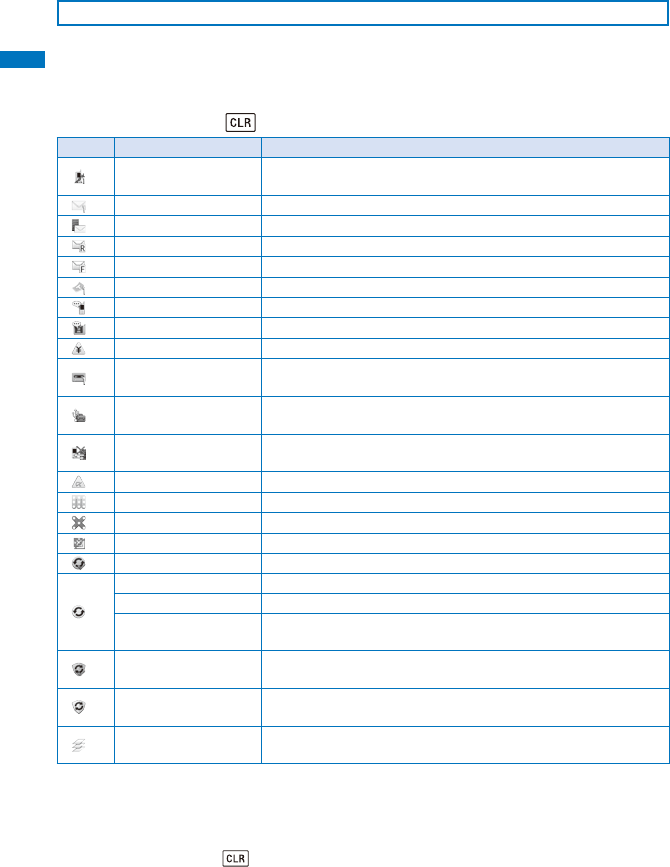
Before Using the Handset
32
Notification Display
An icon is displayed in the notification display to alert you, for example, when you
cannot answer a call. The icon is displayed from the left in the order of the latest event.
Move the cursor to the icon to display the text information and select the icon to
check the notification information. The icon is turned off by checking the notification
information or pressing for over a second.
Icon Text information Description
Missed call X※1There is a missed call of a voice, videophone, or PushTalk call,
or 64K data communication (P.71).
New mail X※2i-mode mail/SMS is received (P.214, 235).
Mail at center Mail is held at the i-mode center (P.215).
New MessageR X Message R is received (P.230).
New MessageF X Message F is received (P.230).
New ToruCa X A ToruCa card is obtained from a reading device (P.256).
New Record msg A record message is recorded (P.72).
New V.phone msg A videophone message is recorded (P.72).
※3Exceed cost limit The total cost has exceeded the upper limit (P.371).
Voice Mail X※1A record message is saved at the Voice Mail Service Center
(P.392).
USB cable cncted The FOMA USB Cable with Charge Function 01/02 (optional),
etc. is being connected (P.315).
PB update failed The Phonebook auto-update at the Data Security Service Center
has failed (P.105).
Stand-by SW error i-αppli stand-by display security error has occurred (P.247).
Download completed Downloading the Music&Video Channel is completed (P.339).
Download failed Downloading the Music&Video Channel is failed (P.339).
Answer X Location information is requested (P.270).
Update complete The software update is completed (P.460).
※4
Check for update There is confirmation of a software update (P.460).
Update notification The software update is necessary (P.458).
Update schedule Downloading the software is complete. Overwrite the software
with new one (P.458).
※3Update completed The pattern definition auto-update was completed successfully
(P.464).
※3Update definitions The pattern definition auto-update was failed. The update is still
required (P.464).
※3SW not terminated There is an active function (excluding the i-αppli stand-by
display) (P.353).
※1 When 2in1 is set to the Dual mode, the number of data is displayed separately for Number
A/Number B.
※2 When 2in1 is set to the Dual mode, the total number of mail sent to Address A and Address B
is displayed.
※3 Even when you press for over a second, the icon is not turned off.
※4 If there are more than two notifications, either “Update notification” or “Update schedule”
appears when you check “Check for update”.
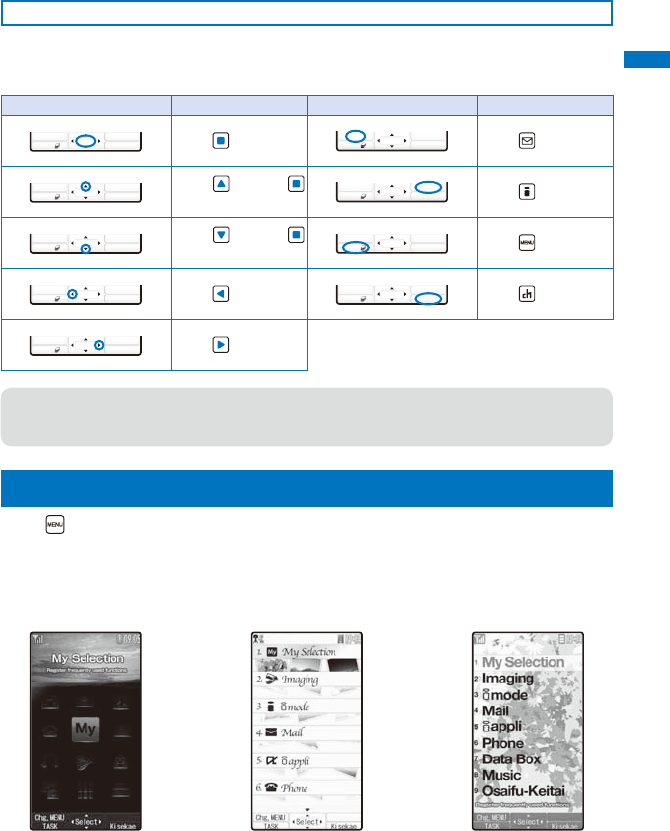
Before Using the Handset
33
Guide Display
To utilize the FOMA terminal’s functions, use the 4-way keys (Up/Down/Left/Right
arrow keys), the JOG, the Mail key, the i-mode/i-αppli key, the MENU key, and the
i-Channel key according to the instructions shown in the guide display.
Display Operation Display Operation
MENU
Link i.ch
i−modeMail
Press .
MENU
Link i.ch
i−modeMail
Press .
MENU
Link i.ch
i−modeMail
Press or scroll
up.
MENU
Link i.ch
i−modeMail
Press .
MENU
Link i.ch
i−modeMail
Press or scroll
down.
MENU
Link i.ch
i−modeMail
Press .
MENU
Link i.ch
i−modeMail
Press .
MENU
Link i.ch
i−modeMail
Press .
MENU
Link i.ch
i−modeMail
Press .
● The guide display does not appear in the stand-by display at the time of purchase. To
display it, set the Soft key to [ON] (P.117).
● The display may differ from the above depending on websites and i-αppli software.
Selecting the Menu
Press (MENU) to display the Menu display. You can select the menu display from
[Kisekae menu]/[Standard menu]/[My Selection].
The Kisekae menu is displayed at the time of purchase.
You can change the menu when you start or settings of icons for the Standard menu, and you
can switch the Kisekae menus (P.122, 125).
Main body color: SILVER Main body color: WHITE Main body color: PINK
Continued
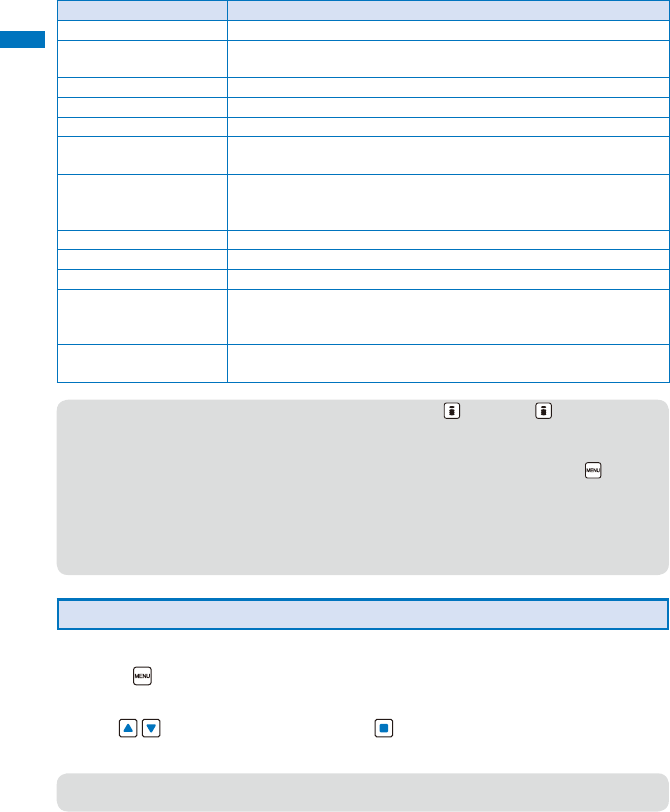
Before Using the Handset
34
Kisekae menu
Menu name Description
My Selection Used to access My Selection.
Imaging Used to access Camera, Movie, easy BlogUp, Music slide show, and
Stand-by pictures.
i mode Used to access an i-mode and Full Browser functions.
Mail Used to access an i-mode mail and SMS functions.
i appli Used to access an i-αppli function.
Phone Used to access mainly related to Phone such as Phonebook, Call
record, PushTalk phonebook, and Record message.
Data Box Used to access data such as those saved in My picture, MUSIC,
Music&Video Channel, i-motion, Melody, My document, Kisekae Tool,
and Chara-den.
Music Used to access MUSIC player and Music&Video Channel functions.
Osaifu-Keitai Used to access IC card content, DCMX, and ToruCa functions.
Own number Used to display the own phone number.
LifeKit Used to access functions such as Bar code reader, Receive Ir data,
microSD, Camera, Movie, Lifetime Calendar, Alarm, Schedule, Text
Memo, Calculator, Data Security Service, and GPS.
Settings Used to set items such as Display, Call, Application, Lock/Security,
and Management.
● You can turn on/off the Standard menu guide by pressing (Help ON)/ (Help OFF).
● Functions displayed in gray are not available.
● When another function is activated or the FOMA terminal is connected to a PC while the USB
mode setting is set to [MTP mode], the Standard menu is displayed by pressing .
● The Kisekae menu at the time of purchase varies depending on the color of the FOMA
terminal and the displayed menu changes based on the Kisekae Tool. The descriptions of
this manual are written based on the Kisekae menu (White Scrapbook) of the main body
color: WHITE and the Color theme setting (White & Gold).
● For the list of menus in the Standard menu, see P.420.
Selecting a Function from the Menu Display
A function can be executed easily by going through the menus.
1
Press (MENU).
The menu display appears.
2
Use to select a menu and press .
The function associated to the menu is selected.
● You can execute a function in the menu display by pressing a key on the keypad. For the
functions that can be executed using a number key, see the list of menus (P.420).
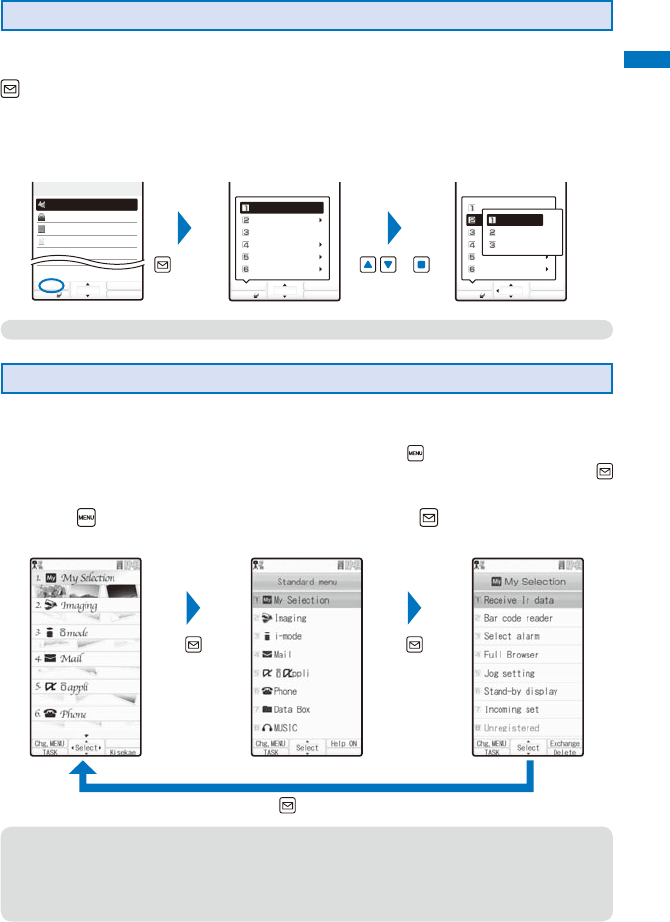
Before Using the Handset
35
Selecting a Function from the Function Menu
The Function menu is a menu that plays an auxiliary role for each function.
Whenever the Function menu is available, [Func] appears in the guide display. Press
to display a list of available Function menus.
The contents of the Function menu vary depending on the functions and displays. For details,
see the description of operation for the individual option.
When the numbers and symbols are displayed in the Function menu, press a key on the
keypad to activate a function.
MENU
Func Create
Select
Text Memo list
1/4
Book airline ticket
Milk and sugar
090XXXXXXXX
12345
Close Select
MENU
Edit
Delete
Copy Text memo
Save to microSD
Send Ir data
iC transmission
Close Select
MENU
Edit
Delete
Copy Text memo
Save to microSD
Send Ir data
iC transmission
Delete one
Select&delete
Delete all
(Func) +
● Function menus displayed in gray are not available.
Switching the Menu Display
You can switch the menu (Kisekae menu, Standard menu, and My Selection) to be
displayed temporarily.
At the time of purchase, the activated menu when you press in the stand-by display is the
Kisekae menu. To change the activated menu, display the menu to be changed and press
(Chg.MENU) for over a second.
1
Press (MENU) in the stand-by display and press (Chg.MENU).
Kisekae menu Standard menu My Selection
(Chg.MENU) (Chg.MENU)
(Chg.MENU)
● When you use the Kisekae tool to change the design of the menu display, some menu types
may change the menu structure depending on the frequency in use. The digits assigned to
menu items may not be applied.
In this case, you cannot operate the FOMA terminal as explained in this manual, so please
change the menu to the Standard menu or reset the menu settings (P.124).
Before Using the Handset
36
Using the UIM
The UIM (FOMA card) records user information such as your phone number. Insert a
UIM in the FOMA terminal to use it.
Inserting/Removing the UIM
When inserting/removing the UIM (FOMA card), make sure to power off and close the
FOMA terminal, remove the battery pack, and perform the operation with the FOMA
terminal held with your hand.
If you insert the UIM forcibly, it may be damaged.
■ Inserting the UIM
1 Pull the tab and then pull
out the tray.
Pull out the tray until it stops.
Tab
2 Place the UIM on the tray
with the IC side facing
up.
Align the notches of the tray
and UIM.
Notch
3 Push the tray until it
stops.
■ Removing the UIM
1
Pull the tab and then pull out the tray.
2
Lift up the UIM with your finger to take it out.
● When you remove the UIM from the tray, be careful not to damage the terminal of the battery
pack.
● Make sure to keep a removed UIM safely.
About the UIM Security Code
You can set two Security codes, namely “PIN1” and “PIN2”, for the UIM (FOMA card).
These codes are set to “0000” at the time of subscription. You can change them to
any 4- to 8-digit number you want (P.118).
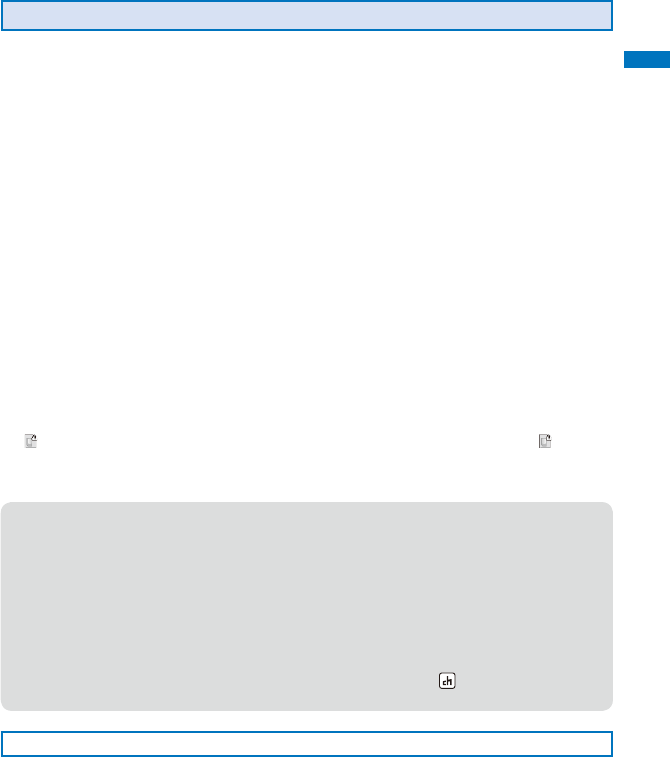
Before Using the Handset
37
About the Function for Restricting UIM Operation
The FOMA terminal provides a function for restricting UIM (FOMA card) operation in
order to protect your data and files. If you record a videophone message or download
files or data from sites or mail while the UIM is inserted in the FOMA terminal, the UIM
operation restriction function is automatically set for these data and files.
When you replace the UIM with another one or if you do not have a UIM inserted in the FOMA
terminal, you are unable to display or play back the data or files for which the UIM operation
restriction function is set or if they are sent using the infrared or iC communication or attached
to mail.
The target data for operation restriction is as follows:
- Image (including GIF animation, Flash, and Stamp&Frame) - Deco-mail pictograph
- Image downloaded from the Data Security Service Center - Movie/i-motion
- Downloaded Kisekae tool - Chara-den
- Chaku-Uta®/Chaku-Uta Full® -
Image inserted in a ToruCa(detail) card
- File attached to i-mode mail (excluding a ToruCa card) - Melody
- Message R/F attached file (melody/image) - PDF data
- Mail template (including target data for restriction) - Videophone message
- Image inserted in Deco-mail or a signature -
Movable contents-compatible data
- i-αppli (including i-αppli stand-by display) - Downloaded dictionary
- Screen Memo (including target data for restriction)
- Downloaded easy BlogUp service information file
- Image trimmed from PDF data (downloaded PDF data only)
“ ” appears for the data with UIM operation restriction. Depending on the data, “ ” may not
appear and a message may appear instead when you select the data.
“Chaku-Uta” is a registered trademark of Sony Music Entertainment Corporation.
● If you replace the UIM with another one or use the FOMA terminal without inserting a UIM
when data targeted by the UIM operation restriction function is set for the stand-by display,
call image, and ring tone, then the sound and image settings are reset to the default
settings. In this case, the sound and image you have set and the actual sound and image
may be different.
● You cannot set the UIM operation restriction function for data received using the infrared or
iC communication, the microSD memory card, or data transfer (OBEX™ communication)
function such as DoCoMo keitai datalink or images recorded with the built-in camera.
● If you use the UIM on another i-Channel-compatible terminal, the Telop text does not appear.
When the information is automatically updated or if you press (i.ch) to receive latest
information, the Telop text starts running automatically.
Settings Saved in the UIM
The following settings are saved in the UIM (FOMA card). If you replace the UIM with
another one, the settings in the new UIM come into effect.
- Select language - SSL certificate - SMS setting - UIM setting
Continued
Before Using the Handset
38
About the Differences in UIM Functions
A UIM (FOMA card) (blue) has the following functional differences from a UIM (green/
white).
Item UIM (blue) UIM (green/
white) Page
Number of digits that can be saved for a phone
number in the UIM phonebook
Maximum
20 digits
Maximum
26 digits
P.98
User certificate operation for using FirstPass Unavailable Available P.199
Use of WORLD WING service Unavailable Available P.38
Service Numbers (Use of [ドコモ故障問合せ]
(Contact for Repairs) and [ドコモ総合案内・受 付 ]
(General Inquiries))
Unavailable Available P.396
WORLD WING
WORLD WING is the DoCoMo’s FOMA international roaming service that enables you to place
or receive a call using the same mobile phone number even if you are overseas, just by using
the UIM (green/white) and a WORLD WING service-compatible FOMA terminal.
※ If you subscribed to the FOMA services after September 1, 2005, you already have WORLD
WING and no application is required. If you declined to use WORLD WING when you
subscribed to the FOMA services or cancel the WORLD WING service halfway, you need to
make an application again to use WORLD WING.
※ If you subscribed to the FOMA services before August 31, 2005 and did not make an
application to “WORLD WING”, you need to make a separate application.
This service is not available in some service charge plans.
If you should lose your UIM (green/white) or have it stolen abroad, please report it to
DoCoMo and take steps to cancel the use of the UIM as soon as possible. For information
on where to call, see “General Contact” on the backcover of this manual. Note that you are
still liable for the call and communication charge incurred after the loss or theft occurred.
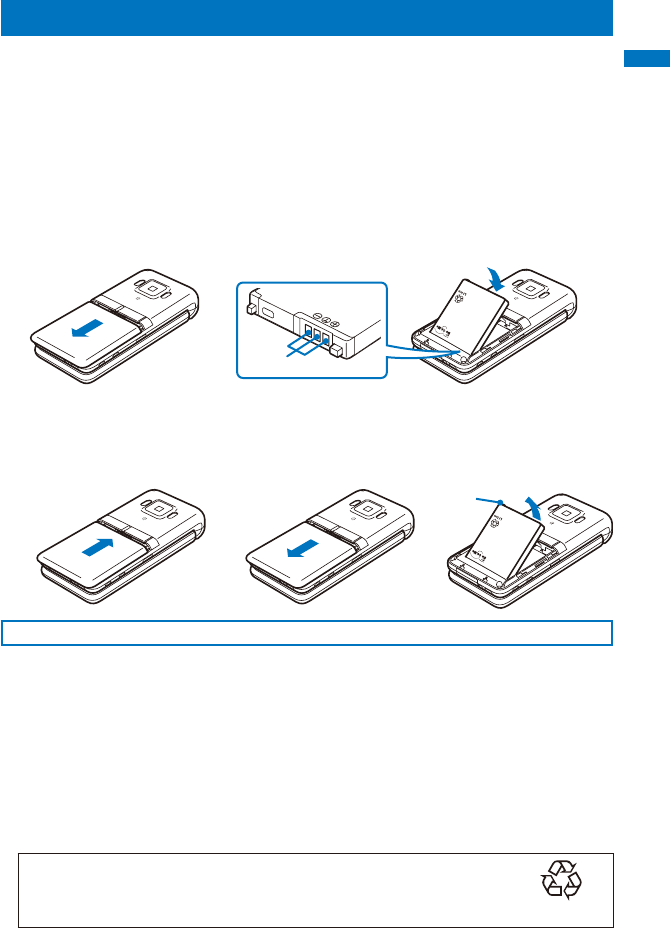
Before Using the Handset
39
Attaching and Removing the Battery Pack
When attaching/removing the battery pack, make sure to power off and close the
FOMA terminal.
If you attach the battery pack forcibly, the terminal on the FOMA terminal may be damaged.
Holding too hard or attaching/removing the back cover in a manner other than described below
may damage it.
■ Attaching the battery pack
1 Slide to remove the back
cover in the direction of
the arrow.
2
Hold the battery pack with the
recycle-mark side up, align the
terminal of the battery pack
with that of the FOMA terminal,
and push it into place.
Terminal
3
Align the back cover with the
grooves on the FOMA terminal
while holding it almost closed
(about 3 mm clearance) and slide
it in the direction of the arrow.
■ Removing the battery pack
1 Slide to remove the back
cover in the direction of
the arrow.
2 Raise to remove the
battery pack in the
direction of the arrow by
holding it by the tab.
Tab
Battery Pack
To make full use of the FOMA terminal, make sure to use the Battery Pack SO02.
■ Life of the battery pack
The battery pack is a consumable part. The usage duration of the battery per one charge
decreases gradually each time the battery is recharged. When the usage duration per one
charge becomes about half that of a new battery pack, the life of the battery pack is assumed
to be almost over. It is recommended that you replace the battery pack ahead of time.
Depending on the usage condition, the battery pack may be inflated as it comes to the end of
its life. This is not a malfunction.
If you continue using i-αppli or talking on the videophone for a long period of time with the
battery being charged, the life of the battery pack may become shorter.
Return all spent battery packs to NTT DoCoMo or a dealer, or a recycling
shop to protect the environment. Li-ion
Before Using the Handset
40
Charging the FOMA Terminal
At the time of purchase, the battery pack is not fully charged. Make sure to fully
charge the battery pack before using the FOMA terminal for the first time.
About Charging the FOMA Terminal
For details, see the user’s manual of the FOMA AC Adapter 01/02 (optional), FOMA AC Adapter
01 for Global use (optional), or FOMA DC Adapter 01/02 (optional).
The FOMA AC Adapter 01 is only compatible with AC 100 V. The FOMA AC Adapter 02 and
FOMA AC Adapter 01 for Global use are compatible with AC 100 V to AC 240 V.
The shape of the AC adapter’s power plug is only for use with AC 100 V (domestic
specification). For using the AC adapter which is compatible with AC 100 V to AC 240 V
overseas, a plug adapter that fits the electrical outlets in the country you stay is needed. Do not
use an electrical transformer for overseas use to charge the FOMA terminal.
Make sure to attach the battery pack in the FOMA terminal before connecting it to the optional AC Adapter,
Desktop Holder, or DC Adapter. If the battery pack is not attached, the FOMA terminal cannot be charged.
If you use a function such as videophone, data communication, and i-αppli while charging the battery, the
charging may stop because of high temperature of the FOMA terminal. The charging may not even start if the
FOMA terminal is in high temperature. Wait until the temperature of the FOMA terminal falls and restart charging.
If the charge indicator of the FOMA terminal flashes in red, wait until the temperature of the
FOMA terminal falls or remove the battery pack and attach it back again.
If it continues to flash in red, the battery pack may be defective. Stop charging immediately
and contact our service counter (DoCoMo shop, etc.).
Do not charge the battery pack for a long period of time (more than 24 hours) with the FOMA
terminal powered on. If the FOMA terminal is powered on when charging is completed, the
battery level decreases. This causes the FOMA terminal to restart charging. If you remove the
FOMA terminal while it is recharging, the following conditions may occur.
- The battery level is low. - The battery alarm sounds. - The operation time is short.
■ Estimated charging time/Battery time (ab.: about, h: hour, m: minute)
Charging time
(AC adapter) Network 3G/GSM
setting Continuous stand-by time Continuous call time
ab. 140m FOMA/3G 3G Moving state : ab. 380h Voice call : ab. 220m
Videophone call : ab. 120m
Auto Moving state : ab. 360h
Stationary state : ab. 520h
GSM Auto Stationary state : ab. 290h Voice call : ab. 230m
The charging time is an estimated time for charging when the battery pack is empty and the FOMA terminal
is powered off. When charging with the FOMA terminal powered on, the charging time becomes longer.
The continuous call time is an estimated time for a call when the FOMA terminal can send/receive radio waves properly.
The continuous stand-by time is an estimated battery time available on the FOMA terminal when
it is closed and can receive radio waves properly. The continuous stand-by time during the
stationary state indicates the average battery time available on the FOMA terminal that is placed
stationary when it is closed and can receive radio waves properly. The continuous stand-by time
during the moving state indicates the average battery time available on the FOMA terminal that
is placed in mixture of the following states: “stationary”, “moving”, and “outside of the service
area” when it is closed and within an area where it can receive radio waves properly.
Note that the call (communication) time and stand-by time may be reduced to about half of the time indicated
above depending on the operating environment such as the charge level of the battery, how functions are set,
and temperature, and radio wave condition in the area where a call is placed (outside of the service area or area
with weak radio wave condition). Similarly, the call (communication) time and stand-by time become shorter than
the above when you use i-mode communication. Besides calls and i-mode communication, the battery time is
also reduced when you are composing i-mode mail, starting a downloaded i-αppli or i-αppli stand-by display,
performing data communication, executing multiaccess, using the camera, and using the MUSIC Player.
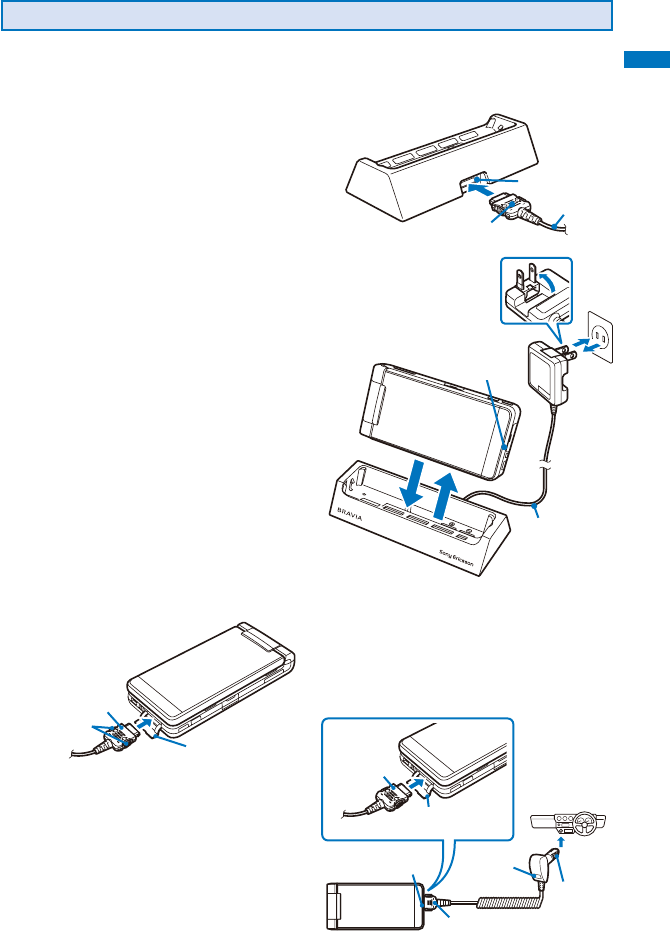
Before Using the Handset
41
How to Charge the FOMA Terminal
Charge the battery pack using the optional Desktop Holder SO10 with the FOMA AC
Adapter 01/02 connected. Make sure to see the user’s manuals of the Desktop Holder
and AC Adapter. The battery pack cannot be charged alone.
1
5
2
3
4
Insert the connector
horizontally with
the engraved side
facing outside.
AC adapter
AC adapter
Terminal
Charge indicator
1 Insert the connector of the AC adapter
horizontally with the engraved side facing
outside into the terminal (the side labeled
“ACアダプタ”) of the desktop holder.
2 Lift the power plug of the AC adapter and
plug it into an AC 100 V outlet.
3 Insert the FOMA terminal, which has the
battery pack attached, to the desktop
holder and push it into place.
Charging starts and the red charge indicator is
turned on. The indicator is turned off when charging
is completed.
When you charge while the FOMA terminal is
powered on
The battery level icon flashes and the Charge
sound is heard. When charging is completed,
the icon changes from flashing to lighting and
the Charge sound is heard.
You can set to mute the Charge sound with the
Set basic tone (P.100).
4
When the charging is completed, lift to
remove the FOMA terminal while holding
the desktop holder.
5 Remove the power plug of the AC adapter
from the AC 100 V outlet.
■ Charging with the AC adapter only
Insert the connector
horizontally with the
engraved side facing up.
Open the
terminal cover.
Release buttons
To remove the AC adapter, make sure to
pull it horizontally while holding the release
buttons pressed. Pulling it forcibly may cause
malfunction.
■ Charging with the DC adapter
With the optional FOMA DC Adapter 01/02,
you can charge the battery pack by using
the cigarette lighter socket of a vehicle
(12 V/24 V). For details, see the user’s
manual of the DC adapter.
Power
indicator
Connector
Charge indicator
Plug
Insert the connector
horizontally with
the engraved
side facing up.
Open the
terminal cover.
Continued
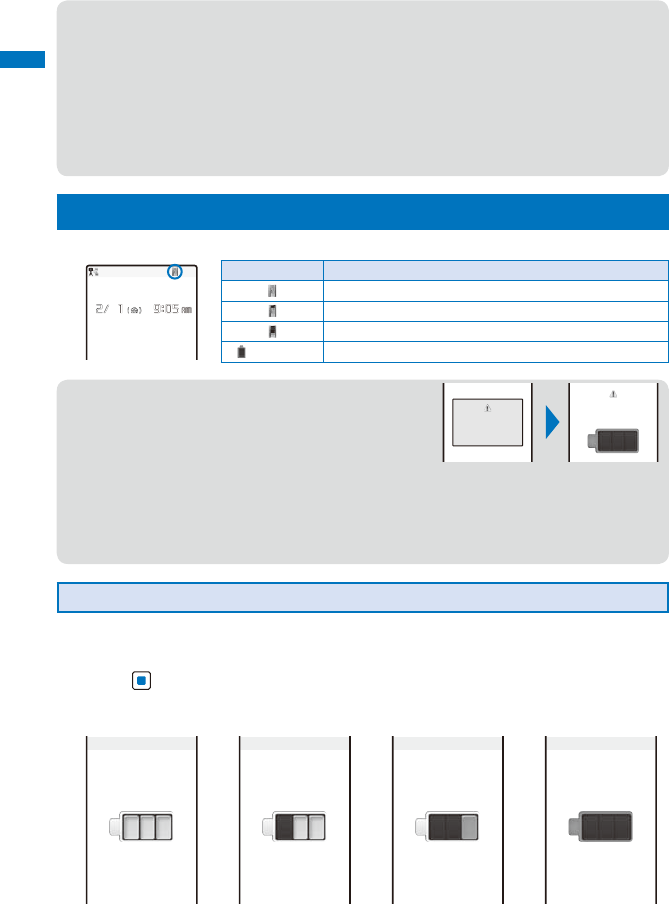
Before Using the Handset
42
● During iC communication or when the FOMA terminal comes within the communication
range with the reading device while charging the battery, the Charge indicator and FeliCa
Sign light at the same time.
● When not using the AC adapter for a long period of time, remove its power plug from the AC
outlet.
● Make sure that the phone strap, etc. does not get caught in between the FOMA terminal and
the desktop holder.
● The fuse (2.0 A) of the DC adapter is a consumable part. Purchase an equivalent fuse from
an automobile parts store when it is necessary to replace the fuse.
Checking the Battery Level <Battery level>
The estimated battery level is indicated in the display.
Display Charge level
Sufficiently charged.
Slightly low.
Very low. Charge.
(Flashes) The battery level is 0. Charge.
Finish operation
and charge
battery
Charge battery
● When the battery level becomes nearly 0, the screen
shown to the right appears and warning sound is heard.
The sound may be suppressed by other sound, etc.
in operation. It is heard again when the battery level is
0 and the function you are performing is terminated.
During a call, the warning sound is heard from the
earpiece and the call is terminated when another
warning sound is heard after about 20 seconds. If
you do not charge the battery, the FOMA terminal is
automatically powered off after about 60 seconds.
Checking the Battery Level with the Sound and Display
The confirmation beep does not sound when the volume of the keypad sound is [OFF] (P.111).
1
From the Menu, select [Settings] → [Management] → [Battery level] and
press .
The current battery level is displayed using bars in the display and the confirmation beep
sounds according to the remaining battery level.
Battery level
Battery level
Battery level
Battery level
Sufficiently charged. Slightly low. Very low. Battery level 0.
(three beeps) (two beeps) Charge. (one beep) Charge. (no beeps)

Before Using the Handset
43
Powering On/Off <Power on/off>
When you power on the FOMA terminal, the screen informing to execute the software update
automatically may appear (P.456).
1
Press (PWR) for over two seconds.
The FOMA terminal is powered on, the display and the keypad lights
are turned on, and an animation is displayed. After a while, the stand-by
display appears.
If you have set the PIN1 code setting to [ON], the PIN1 code input
screen appears. Enter the PIN1 code and press (OK) (P.131).
To power off
Press (PWR) for over two seconds.
● If you replace the UIM with another one (except when the Omakase Lock is set), you need to
enter a 4- to 8-digit Security code when the FOMA terminal is powered on. When the entered
code is correct, the stand-by display appears. If you enter a wrong Security code five times
consecutively, the FOMA terminal is powered off. (You can still power on the FOMA terminal,
however.)
Setting the Basic Functions <Initial setting>
The Initial setting can be used to make basic settings such as the Date/time and
Security code. See the respective pages for details about the settings.
■ Available setting items
Item Description
Date/time Set the date and time of the FOMA terminal (P.44).
Change code Change the Security code (P.132).
Keypad sound Set the volume of the tone to sound when you press the key (P.111).
Location request Set whether to provide positioning information (P.271).
All font size setting Set the size of fonts to be used for displaying the Phonebook, Call record,
Mail, i-mode sites, and Input text display (P.127).
1
From the Menu, select [Settings] → [Management] → [Initial setting] and
press .
Date/time
Change code
Yet
Keypad sound
1
Location request
Yet
All font size setting
Yet
Initial setting
2
Set each item.
● If you perform the Reset all data&set or do not change the Security code of the FOMA
terminal or settings of the Location request or All font size setting, the message “Initial
setting is incomplete. Execute?” appears when you power on the FOMA terminal. When you
select [Yes], the display in step 1 appears and you can perform the initial setting.
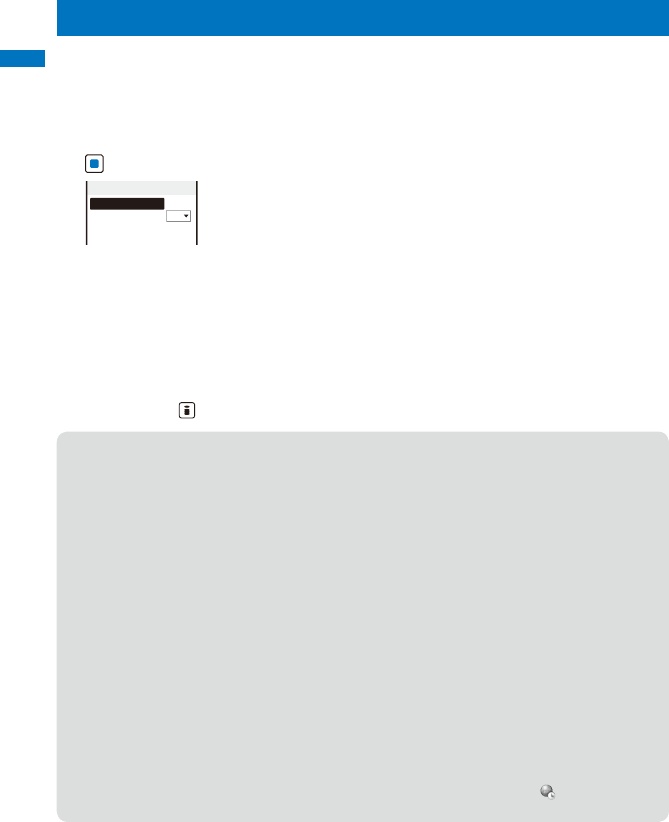
Before Using the Handset
44
Setting the Date and Time <Date/time>
You can set the date and time either by automatically correcting the time based on
the time information obtained from the DoCoMo network or by manually setting the
time.
Example: Correcting the time automatically
1
From the Menu, select [Settings] → [Management] → [Date/time] and press
.
Auto time adjust
ON
Manual clock set
Date/time
[Auto time adjust] : Set the time automatically.
[Manual clock set] : Enter the time manually. When you set the time
using the Manual clock set, the Auto time adjust is
set to [OFF].
2
Select [ON] at [Auto time adjust].
[ON] : Correct the date and time automatically.
[OFF] : Do not correct the date and time automatically. Set the time using the Manual clock
set.
To set the time manually
Select [Manual clock set] → [Yes] and enter the year and date within the range from
2000/01/01 to 2050/12/31, the time in 24-hour format (00:00 to 23:59), and select time
zone. Press (Complete).
● When you set the Auto time adjust to [ON], the date and time are corrected automatically
when the FOMA terminal is powered on with a UIM installed. Note, however, that there may
be an error lasting several seconds. The time cannot be automatically corrected in the
following cases.
- Outside of the service area (The time may not be corrected automatically even inside the
service area depending on the radio wave condition.)
- While i-αppli is running
● The date and time settings are retained even when you replace the battery pack. However,
if you leave the FOMA terminal without a battery pack or with a fully expended battery pack,
the date and time may be reset to “----/--/-- --- --:--”. In this case, set the date and time once
again.
● If the date and time are not set, functions that use the clock, such as the current time icon,
Schedule, Alarm, i-αppli Auto-start, and calendar/clock display cannot be used. The date
and time for the Redial/Received record and the date and time on images shot with the
camera are also not recorded.
● When you receive time correction information from the network of the carrier to which the
FOMA terminal is connected during international roaming, the time is automatically corrected
when the Auto time adjust is set to [ON].
When the time is corrected to the local time, the date and time used for the Redial/Received
record and sent/received mail also are corrected to the local time and “ ” appears. Note,
however, that some overseas networks may not perform time correction.
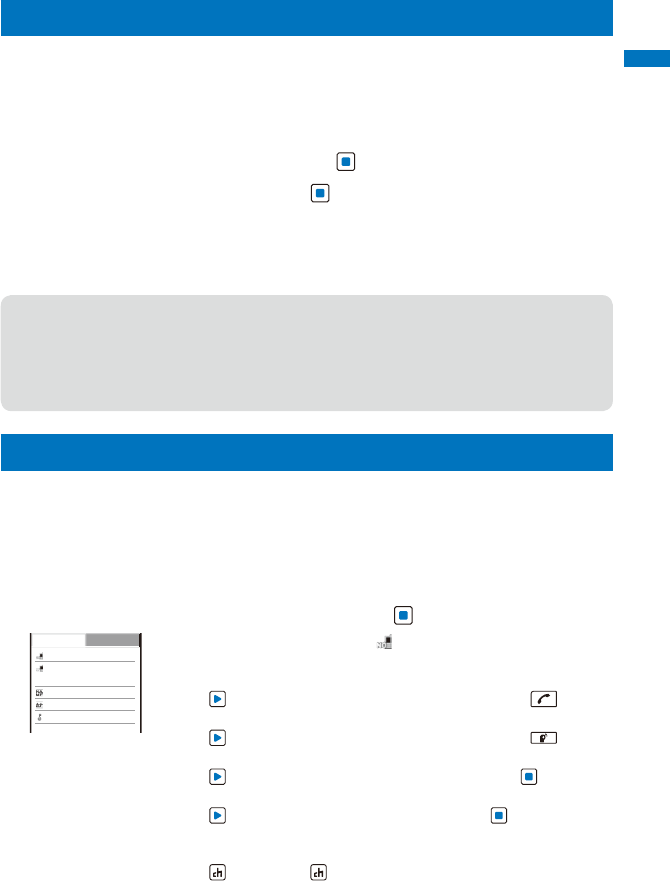
Before Using the Handset
45
Notifying the Recipient of Your Phone Number <Notify caller ID>
When placing a call, your phone number can be shown in the display of the
recipient’s phone you are calling.
The caller ID is important personal information. Carefully decide whether you notify a recipient
of your caller ID.
1
From the Menu, select [Settings] → [Management] → [NW Services] → [Notify
Caller ID] → [Set Notification] and press .
2
Select [Notify]/[Not notify] and press .
The Notify caller ID is set.
To check the setting
From the Menu, select [Settings] → [Management] → [NW Services] → [Notify Caller ID]
→ [Check setting].
● The setting, whether to originate a PushTalk call with/without the caller ID, follows this setting.
● If you hear a guidance asking to send the caller ID when you place a call, call again after
setting the Set Notification to [Notify] or by adding “186” before the recipient’s phone
number. The caller ID is not displayed even if you add “186” when you originate a PushTalk
call.
● You cannot set the Notify Caller ID when the FOMA terminal is outside of the service area.
Checking Your Own Phone Number <Own number>
Your phone number can be checked. You can also save your name, mail address,
etc.
If the Own number is saved as Secret, the data other than your phone number is not displayed.
Set the Secret display to [ON] to display all data.
Number B does not appear on the Own number display of the B mode at the time of purchase.
To display Number B, perform the Check service (P.47).
1
From the Menu, select [Own number] and press .
090XXXXXXXX
docomo.taro.
△△
@docom
o.ne.jp
ドコモ太郎
ト゛コモタロウ
OFF
Basic
Detail
Your phone number appears at [ ]. If the data other than a phone
number is saved, that data also appears.
To place a call
Press , move the cursor to a phone number, and press .
To originate a PushTalk call
Press , move the cursor to a phone number, and press .
To send i-mode mail
Press , move the cursor to a mail address, and press (Mail).
To check the image
Press , move the cursor to the image, and press (Play).
To switch the Own number display between the A and B modes when 2in1
is set to the Dual mode
Press (Number A)/ (Number B).
Continued
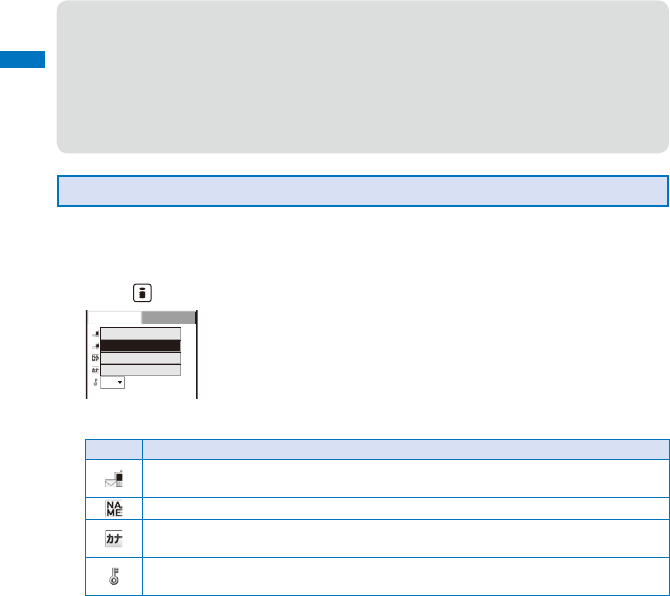
Before Using the Handset
46
● You cannot originate a PushTalk call from the Own number display of the B mode.
● When you replace the UIM (From 2in1 subscriber to 2in1 subscriber) while 2in1 is used, to
obtain a correct Number B, you need to perform the 2in1 function OFF (P.400) first, and then
set the 2in1 to ON again.
When you replace the UIM (From 2in1 subscriber to 2in1 non-subscriber), perform the 2in1
function OFF.
● When you replace the UIM while 2in1 is used, you need to reset all the items of the personal
data at the B mode (P.47).
Saving Your Personal Data
You can save your personal data such as your name, postal address, and mail
address, and check saved data in the Own number display and quote this data in the
text input display.
1
Press (Edit) in the Own number display.
090XXXXXXXX
OFF
Basic
Detail
2
Save each item at the Basic display.
Icon Settings
Enter your mail address within 50 half-width alphanumeric characters and
symbols.
Enter your name within 16 full-width or 32 half-width characters.
When entering your name, the reading is automatically entered.
To edit the reading, enter a reading within 32 half-width characters.
Select [ON]/[OFF] of the Secret.
To display the entry saved as Secret, set the Secret display to [ON].
Before Using the Handset
47
3
Press and save each item at the Detail display.
Icon Settings
Select an image from My picture/i-motion of the Data Box or record one.
You can set the following files.
Category File format File size Image size
My picture GIF/JPEG Max. 100K bytes Max. [QVGA(240×320)]
i-motion※MP4 Max. 10M bytes Max. [VGA(640×480)]
※ Some i-motion may not be set.
It may take time to display a large-sized image.
To use an image after recording it by the camera, select [Camera]/[Movie] (P.155,
170).
You can record an image in the following sizes.
Still image Max. [QVGA(240×320)]
Movie Max. [VGA(640×480)]
To specify no image, select [None].
To check the image, move the cursor to the image and press (Play).
Enter the postal code of your home address within seven half-width digits.
Enter the postal address of your home within 64 full-width or 128 half-width
characters.
Enter your home phone number within 26 digits.
Enter your home mail address within 50 half-width alphanumeric characters and
symbols.
Enter the name of your office within 64 full-width or 128 half-width characters.
Enter the postal code of your office address within seven half-width digits.
Enter the postal address of your office within 64 full-width or 128 half-width
characters.
Enter your office phone number within 26 digits.
Enter your office mail address within 50 half-width alphanumeric characters and
symbols.
Enter your birthday within the range from 1900/01/01 to 2050/12/31.
4
Press (Complete).
Your personal data is saved.
To reset to the default settings
From the Function menu in the Own number display, select [Reset all] → [Yes].
To register Number B at the Own number display of the B mode
In the Own number display of the B mode, from the Function menu, select [Check service].
● At [ ] your phone number is displayed and at [ ] and [ ] Additional Nos. set for the Multi
Number Service are displayed. These numbers cannot be edited or deleted.
● At the time of purchase, your mail address does not appear. Check your mail address by
selecting (i-mode) → [i Menu] → [English iMenu] → [Options] → [Mail Settings] →
[Confirm Mail Address]. When you change your mail address, edit the Own number display
accordingly.
● When you replace the UIM while 2in1 is used, you need to reset all the items of the personal
data at the B mode (P.46).


49
Voice/Videophone Calls
■ Placing Voice/Videophone Calls
What is Videophone?.................................................................................................. 50
Placing a Voice/Videophone Call ................................................................................ 51
Switching to/from Voice/Videophone Call ............<Chg. to videophone/Chg. to voice call> 54
Using the Redial/Received Record ............................... <Redial record/Received record> 55
Setting the Chaku-moji ............................................................................<Chaku-moji> 58
Changing the Caller ID Setting ON/OFF for an Individual Call .................... <186/184> 60
Placing a Call by Specifying a Condition ................................................................... 60
Setting a Prefix ..................................................................................... <Prefix setting> 61
Placing an International Call ............................................................... <WORLD CALL> 61
Placing a Call by Specifying a Sub-address ..........................................<Sub-address> 63
Setting the Alarm When Reconnecting a Dropped Call ...................<Reconnect alarm> 64
Improving Voice Clarity by Suppressing Background Noise ................ <Reduce noise> 64
Talking Hands-free While Driving ................................................... <Hands-free mode> 64
■ Receiving Voice/Videophone Calls
Receiving a Voice/Videophone Call ............................................................................ 65
Receiving a Call by Switching to/from Voice/Videophone Call ................................... 66
Pressing a Key on the Keypad to Receive a Call ..............................<Any key answer> 67
Setting the Operation for the FOMA Terminal Being Closed during a Call
........
<Setting when folded>
67
Using the Low Voice Feature .............................................................. <Whisper mode> 68
Putting a Call on Hold during a Call..............................................................<Holding> 68
■ When You Are/Were Unable to Answer a Voice/Videophone Call
Putting a Call on Hold .................................................................................. <On hold> 68
Using the Public Mode (Drive Mode) .................................. <Public mode (Drive mode)> 69
Using the Public Mode (Power off) ........................................ <Public mode (Power off)> 70
Checking the Missed Calls ......................................................................<Missed call> 71
Recording Caller’s Messages When Unable to Answer Calls
........
<Record message/Videophone message>
72
Recording a Caller’s Message When Unable to Answer a Call Just Receiving
.....
<Quick record message>
74
Playing Back/Deleting a Record Message/Videophone Message/Voice Memo ........ 74
Using Chara-den ....................................................................................................... 75
Setting the Videophone Operation ...............................................<Videophone setting> 76
Setting Notice for Switching between Voice and Videophone Calls
.......
<Videophone switch notice>
78
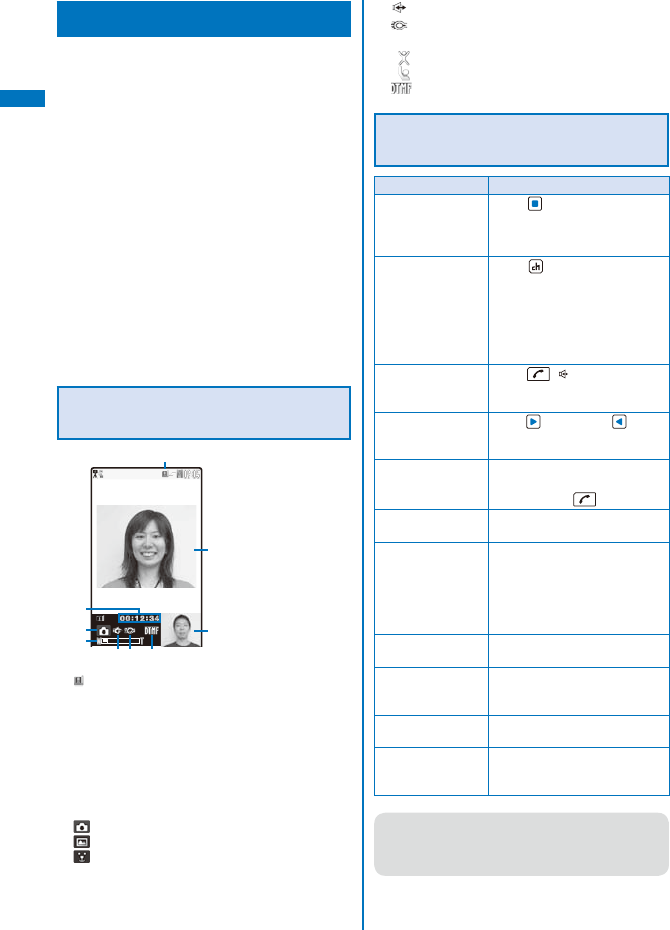
50
Voice/Videophone Calls
What is Videophone?
You can use the videophone function between
DoCoMo videophone compatible terminals.
You can use videophone to talk to the recipient/
caller while looking at each other’s image. You
can send a still image, substitute image, or
Chara-den character instead of your own.
DoCoMo’s videophone complies with
“3G-324M※1 standardized by 3GPP※2 for
global standard”. The FOMA terminal cannot
be connected to a videophone that uses a
different system.
※1 3G-324M
Global standard for third-generation mobile
videophones.
※2 3GPP (3rd Generation Partnership Project)
Local standardization committee set up for
development of common technology specifications
related to third-generation mobile wireless
communication systems (IMT-2000).
Using the Display during a
Videophone Call
: During videophone call
Videophone image (Large)
Display an image of a person you are talking to
(default setting).
Videophone image (Small)
Display your image (default setting).
Call duration
Display the call duration in the hh:mm:ss format.
Outgoing image status
: Camera image is being sent.
: A still image is being sent.
: A Chara-den character is being sent.
Zoom magnification
Display the zoom magnification bar.
: Hands-free ON
: Photo light ON
Mode
: Mode for operating full-body actions
: Mode for operating parts actions
: Mode for sending touch-tones (DTMF)
Operations during a Videophone
Call
Operation Key operation
Switch between
camera image/
substitute image
Press (MySide/Sub). Every
time you press the key, the
display is switched between
camera image/substitute image.
Switch cameras Press (In/Out). Every time
you press the key, the camera is
switched between the In-/Out-
camera.
You can also switch between
the In-/Out-camera by opening/
closing the lens cover.
Switch ON/OFF
of the hands-free
operation
Press ( ). Every time you
press the key, the ON/OFF
setting is switched.
Zoom-in/-out image Press (Zoom in) / (Zoom
out) when recording with the
Out-camera.
Put a call on hold F r o m the Function menu,
select [Holding]. To cancel this
function, press .
Switch the display From the Function menu, select
[Display setting].
Switch the quality of
the outgoing image
From the Function menu, select
[Visual preference]. When you
finish a call, the image quality
set for the Visual preference
of the Videophone setting is
restored.
Select a substitute
image
From the Function menu, select
[Select sub image].
Switch ON/OFF of
the photo light
From the Function menu, select
[Photo light] (when using the
Out-camera only).
Display your phone
number
From the Function menu, select
[Own number].
Switch to a voice
call
From the Function menu, select
[Chg. to voice call] (when
placing a videophone call only).
● When you switch to the Out-camera with the lens
cover closed, the message “Please open the
lens cover” appears and your own image is sent
instead of switching to the Out-camera.
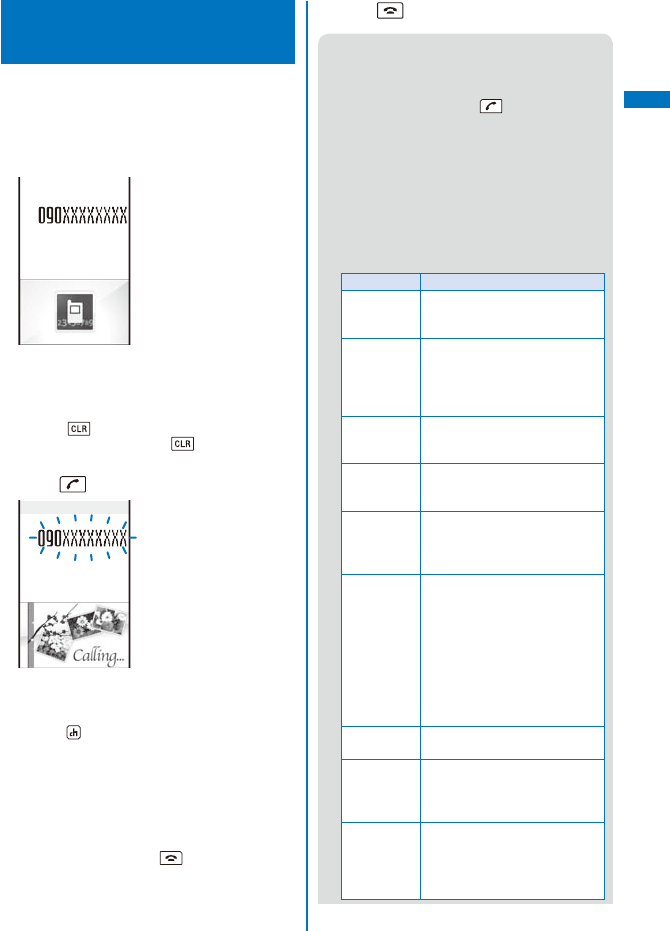
51
Voice/Videophone Calls
Placing a Voice/
Videophone Call
Check the radio wave condition and enter a
phone number.
Example: Placing a voice call
1 Enter a phone number in the stand-by
display.
You can enter a phone number of up to 80 digits.
Make sure to include the area code, even for a
local call.
When you press the wrong number
Press to delete the entered digits one by
one from the right. Press for over a second
to delete all digits.
2 Press .
Calling
A ringing sound is heard when the call is
connected.
To place a videophone call
Press (V.phone). When the call is answered,
your image is sent to the recipient and the call
is switched to the hands-free operation that
allows you to hear the recipient’s voice from the
speaker.
When 2in1 is set to the Dual mode
Select [Number A]/[Number B] (P.398).
When a busy tone sounds
The line is busy. Press to hang up and call
again after a while.
When you hear a guidance
Call again according to the guidance.
3 Press to hang up.
● See P.59 for sending the Chaku-moji and P.60 for
placing a voice or videophone call by specifying
the condition.
● For a voice call, you can also place it in the order
of step 2 → step 1. Press and enter a phone
number, and the call is dialed automatically after
about five seconds.
● You are charged for digital communication even
if you send a substitute image during a call.
● If the videophone call is not connected, the
following messages appear in the display. The
displayed message may not correctly represent
the status of the recipient depending on the
type of the phone of the recipient or whether the
recipient has subscribed to any network service.
Message Description
Check
number, then
redial
The phone number is no longer
in use.
Busy The recipient is talking on the
phone.
(This message may appear also
during packet communication on
some recipient’s terminals.)
Busy with
packet
transmission
The recipient is using packet
communication.
Outside of
service area/
power off
The recipient is in a place where
radio waves do not reach or the
phone is powered off.
Set Caller ID
to ON
This message appears when the
call was connected without a
Caller ID (when a call is placed
to Visual Net or other sites).
Please try
voice call
This message appears when the
Call Forwarding Service is set
on the recipient’s phone and the
terminal to which the call was
forwarded is not equipped with
the videophone function.
(As of December 2007, this
message may appear also when
the Voice Mail Service is set on
the recipient’s phone.)
Connection
failed
This message appears when
none of the above reasons apply.
Please make
your call from
the i-mode
web page
To view V-Live contents, visit and
view an official i-mode site once,
and then place a videophone
call.
Upper limit
has been
exceeded.
Connection
failed
The upper limit set to the plan
with a Limit (Type Limit or Family
Wide Limit) has been exceeded.
Continued
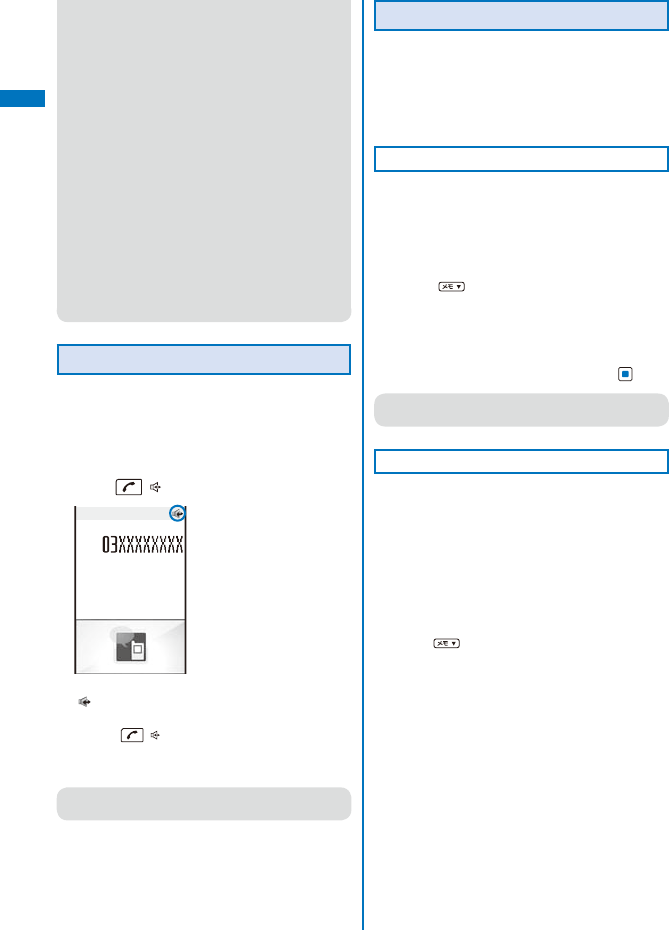
52
Voice/Videophone Calls
● If you use the FOMA terminal to place a
videophone call to emergency numbers (110,
119, and 118), it automatically switches to voice
call dialing.
● When you place a videophone call to a terminal
that is not equipped with a videophone function,
or when a recipient is outside of the service area
or the phone is powered off (even if the FOMA
terminal has the videophone function), your call
is not connected. When you place a videophone
call to a terminal that is not equipped with a
videophone function and the Auto redial(voice) is
set to [ON], the recipient’s terminal disconnects
your videophone call before it is connected, and
the FOMA terminal redials the call as a voice call.
If, however, you dial a wrong number such as
an ISDN synchronous 64kbps or PIAFS access
points, or ISDN videophone that is not 3G-324M
(as of December 2007) compatible, the above
operations may not take place. Note also that
you may be charged for the call.
Using the Hands-free Function
When you switch to the hands-free operation
during a call, you can hear the caller’s voice
from the speaker and talk hands-free.
Example: Switching to the hands-free operation during
a voice call
1 Press ( ) during a call.
Talking
Call duration
0:03
The call is switched to the hands-free operation and
“ ” appears.
To cancel the hands-free function
Press ( ) again.
When you finish the call, the hands-free operation
is automatically canceled.
● Talk into the FOMA terminal from a distance of
30 cm or less.
Entering a Pause, Timer, or +
You can include a pause, timer, or + in a phone
number (within 80 digits in all) to place a call.
The phone number and pause, timer, or + can
be saved together in the Phonebook.
Pause and timer are valid only for a voice call.
Entering a pause “P”
If you enter “P (pause)” between the phone
number and touch-tones when you book a
ticket or play back your home answering
machine, the touch-tones are sent by
separating the numbers at the pause (P).
1 Press in the phone number input
display.
“P” is entered.
To send touch-tones saved in the Phonebook
When the touch-tones are displayed after you
place a call from the Phonebook, press (Call).
● Some receiver devices may not be able to
accept touch-tones.
Entering a timer “T”
To dial an inside line number following an
outside line number, enter “T (timer)” between
the outside and inside line numbers. After
a preset interval in seconds, the inside line
number is dialed following the outside line
number. An interval of about one second is
added for every timer (T) entry. You can enter
“T” consecutively to make the interval longer.
1 Press for over a second in the phone
number input display.
“T” is entered.
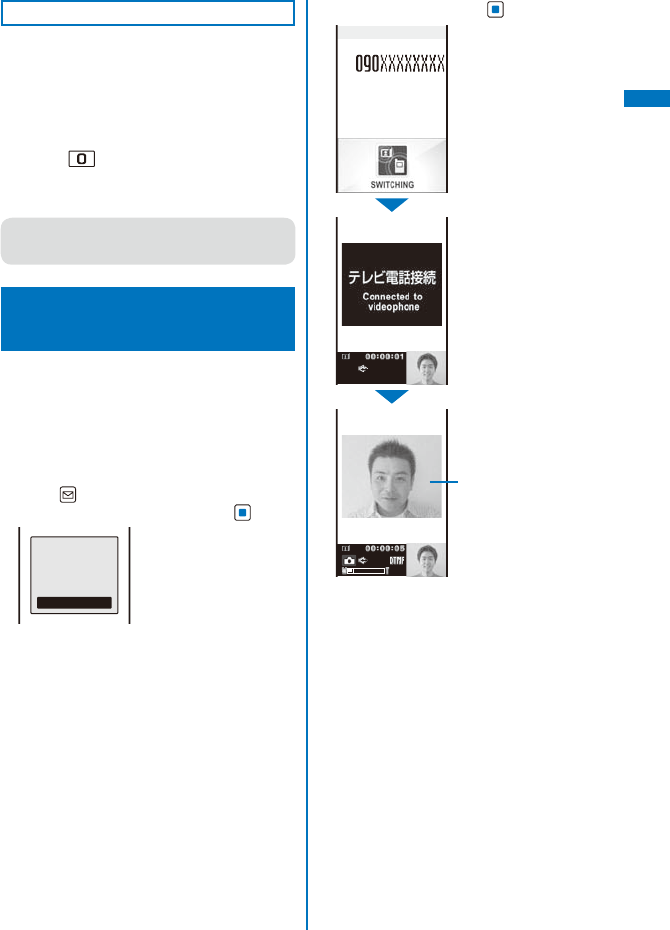
53
Voice/Videophone Calls
Entering a “+”
If you enter “+” at the beginning of a phone
number when the Auto conversion of the Int’l
dial assist setting is set to [ON], a call is dialed
by automatically adding the set international
access number (set to “009130010” at the time
of purchase).
1 Press for over a second in the
stand-by display.
“+” is entered.
● You may not be able to place the call if you enter
other than a phone number after “+” or enter only
“+”.
Switching to/from Voice/Videophone
Call
<Chg. to videophone/Chg. to voice call>
A caller can switch to/from voice/videophone
call during a call.
This function can be used only between terminals
that can switch between voice and videophone
calls. A recipient must preset the V.ph switch notice
to [Indication ON] (P.78).
Example: Switching from voice call to videophone call
1 Press (Func) during a voice call, select
[Chg. to videophone], and press .
Change to
videophone?
Yes
No
[Yes]:
Switch the call from voice call to videophone call.
[No]:
Return to the voice call without switching the call.
To switch from videophone call to voice call
From the Function menu, select [Chg. to voice
call] → [Yes]. When the call is switched to the
voice call, the hands-free operation is canceled.
2 Select [Yes] and press .
Chg.to videophone
The recipient’s image
A substitute image may appear
according to the setting on the
recipient’s terminal.
While the call is switched, an animation is displayed
and you hear a guidance notifying you that a call is
switched.
When the call is switched to the videophone call,
your image is sent to the recipient and the call is
switched to the hands-free operation that allows
you to hear the recipient’s voice from the speaker.
Continued
54
Voice/Videophone Calls
● If packet communication is in progress, it is
disconnected and the FOMA terminal is switched
to videophone.
● When the call is put on hold on the recipient
or while the recipient is performing packet
communication, you cannot switch to
videophone.
● The switching operation takes about five
seconds. It may take time depending on the
radio wave condition.
● Switching to/from voice/videophone call may not
be performed in some radio wave condition, and
the phone may be disconnected.
● You are not charged while “Chg. to videophone”/
“Chg. to voice call” is displayed.
● Every time you switch, the call duration starts
from 0 seconds. When you finish the call, the
total call duration is displayed for each of the
voice and videophone calls.
Using the Redial/Received
Record <Redial record/Received record>
Up to 30 previously placed/received calls are
saved as call records with their dates/times,
phone numbers, and names. The phone
numbers or names appear in descending
order from the most recent call. For a PushTalk
call, the group name or the first member’s
name appears.
When 2in1 is used, up to 30 redial/received records
of Number A and Number B can be saved for each
separately. When 2in1 is set to the Dual mode
or OFF, up to 30 redial/received records of both
numbers appear in descending order from the most
recent call at once.
The call records of Number A and Number B are
defined by different colors for each. The displayed
color varies depending on the Color theme setting
of the Kisekae setting (P.124).
Also, you can set the color for Number B from
[dark]/[light] at the Disp. call/rcv. No. of 2in1 (P.400).
Redial record Dial frequency record
2/13 10:32
ドコモ二郎
2/12 10:30
090XXXXXXXX
2/12 9:35
ドコモ一郎
2/11 10:32
携帯はる子
2/10 22:15
○○○同好会
2/10 10:28
携帯あき子
Recv Freq Redial
ドコモ一郎
ドコモ二郎
ドコモ二郎
携帯あき子
携帯はる子
○○○同好会
090XXXXXXXX
携帯あき子
△△△クラブ
03XXXXXXXX
080XXXXXXXX
携帯なつ子
Recv Redl DialFreq
Received record
2/13 10:32
ドコモ二郎
2/12 10:30
090XXXXXXXX
2/12 9:35
ドコモ一郎
2/11 10:32
携帯はる子
2/10 22:15
○○○同好会
2/10 10:28
携帯あき子
Freq Redl Received
Call type
/※
Placed/received voice call / Missed voice
call (“ ” appears in case of the Dial
frequency record)
/※
Placed/received videophone call /
Missed videophone call
(“ ” appears in case of the Dial
frequency record)
/Received 64K data communication /
Missed 64K data communication
/Originated/received PushTalk call /
Missed PushTalk call
/ / PushTalk type (to one person)/(to multiple
persons)/(PushTalkPlus)
With Chaku-moji (Displayed only in the
Received record)
※ “ ” appears when the Record message/
Videophone message is recorded.
Phone type
Mobile1
Mobile2
Public phone
Videophone
Home phone
Office phone
Home FAX
Office FAX
QUICKCAST
The phone type icons do not appear when the
Personal data lock is set.
55
Voice/Videophone Calls
Example: Displaying the Redial record
1 Press ( ) in the stand-by display.
The Redial record display appears.
To display the Received record
Press ( ) in the stand-by display.
To display the Dial frequency record
Press in the Redial record display.
To display phone numbers
When saved in the Phonebook, the name and
phone type of a recipient are displayed instead
of the phone number. Press to switch the
display temporarily between names and phone
numbers. The display is not switched when a
group name for a PushTalk call is displayed.
To place a voice call
Move the cursor to a call record and press .
To place a videophone call
Move the cursor to a call record and press
(V.phone).
To originate a PushTalk call
Move the cursor to a call record and press .
To send mail
You can send mail to a person whose phone
number and mail address are saved in the
Phonebook. Move the cursor to a call record and
from the Function menu, select [Reply by mail]
→ a mail address. Compose mail and send it.
To save in a group of the PushTalk phonebook
When you perform PushTalk communication
among several persons saved in the PushTalk
phonebook, move the cursor to a received
record of the PushTalk call ( ), press (Save),
select a group, and press (Complete).
● If the same phone number has been repeatedly
called, only the most recent call is saved in the
Redial record. Note, however, that when you
originate a PushTalk call, individual PushTalk
communication among several persons are
recorded.
● If you switch the call between voice and
videophone during a call, the call you placed/
received first is saved in the Redial/Received
record.
● When a caller uses a “Dial-in” phone number, the
phone number displayed may be different from
the caller’s dial-in number.
● When you place a voice or videophone call from
the Received record, a Chaku-moji recorded in
the Received record is not sent.
● When the date and time are corrected to the
local time during international roaming, “ ”
appears next to the name/phone number (P.44).
Displaying the Detailed Information
of the Redial/Received Record
1 From the call record display, select a call
record and press (Detail).
Redial record
Redial
UsrSet
2/10 Sun
10:05
ドコモ太郎
090XXXXXXXX
付加番号
1
090XXXXXXXX
Multi Number type
Call type
Phone type
Received record
2/10 Sun
10:05
ドコモ太郎
090XXXXXXXX
12sec
付加番号
1
090XXXXXXXX
Urgent
Received
Multi Number type
Call type
Phone type
Ring time for a missed call
Chaku-moji message
The following icons show the Multi Number type.
基本契約番号 (Basic Number)
付加番号1 (Additional No.1)
付加番号2 (Additional No.2)
● When you select a call record of a PushTalk call,
[] group name, [ ] caller name (Received
record only), and all members are displayed.
Continued
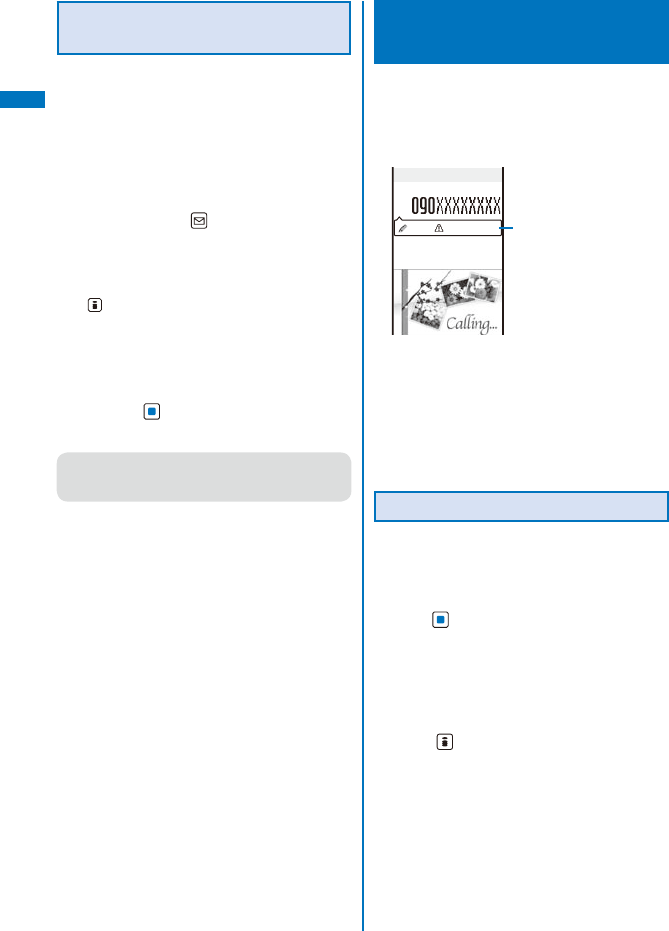
56
Voice/Videophone Calls
Deleting the Redial/Received
Record
The call records are retained even if the FOMA
terminal is powered off. If you do not wish
others to know the previously dialed records,
delete one or all of the call records.
If you delete either a redial record or a dial
frequency record, both records are deleted.
Example: Deleting a call record
1 From the call record display, select a call
record and press (Func).
The Function menu appears.
To delete several call records
From the Function menu, select [Delete] →
[Select&delete], select call records, press
(Complete), and select [Yes].
To delete all call records
From the Function menu, select [Delete] →
[Delete all], enter the Security code, and select
[Yes].
2 Select [Delete] → [Delete one] → [Yes]
and press .
The selected call record is deleted.
● If you perform the Delete all when 2in1 is used,
all the Call records of Number A and Number B
are deleted, regardless of the 2in1 mode.
Setting the Chaku-moji
<Chaku-moji>
When you place a voice or videophone call,
you can send a message (Chaku-moji) that
is displayed in the recipient’s Incoming call
display in order to notify the purpose of the call
even before this recipient answers.
Urgent
Incoming call
Chaku-moji
Chaku-moji disappears when
you start talking on the phone.
Chaku-moji can be checked in
the detailed information display
of the Received Record (P.57).
For more details about the Chaku-moji or compatible
models, see the DoCoMo’s website or “Mobile
Phone User’s Guide
【Network services】
”.
Charge is required for the Chaku-moji sender, but
no charge for a recipient.
Chaku-moji cannot be used for PushTalk calls.
When you use the FOMA terminal overseas, you
cannot send or receive a Chaku-moji message.
Editing Chaku-moji Messages
You can save up to 10 Chaku-moji messages.
1 From the Menu, select [Settings] →
[Management] → [NW Services] →
[Chaku-moji] → [Create message] and
press .
To delete a Chaku-moji message
Move the cursor to a Chaku-moji message and
from the Function menu, select [Delete one] →
[Yes]. To delete all Chaku-moji messages, from
the Function menu, select [Delete all], enter the
Security code, and select [Yes].
2 Press (Edit) and enter a Chaku-moji
message.
Enter a message within 10 characters regardless of
pictographs, symbols, full-width, or half-width.
The Chaku-moji message is saved.
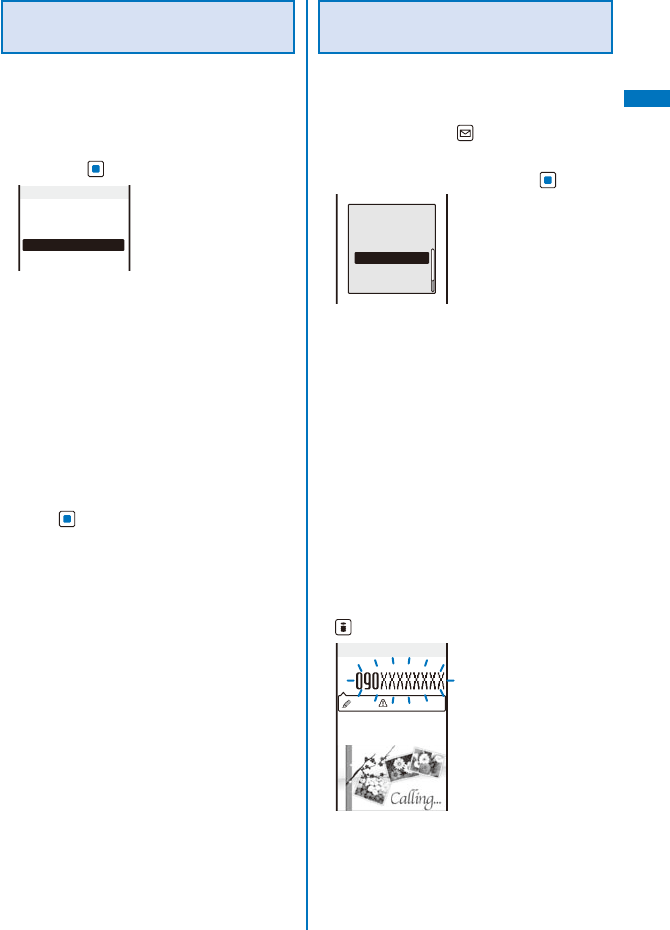
57
Voice/Videophone Calls
Setting the Display for Chaku-
moji Being Received
You can set the display style to be used when
you receive a Chaku-moji message.
1 From the Menu, select [Settings] →
[Management] → [NW Services] →
[Chaku-moji] → [Set Message display]
and press .
Set Message display
Display all Msgs
Only numbers in PB
Only calls w/ID
Hide all messages
[Display all Msgs]:
Receive and display all Chaku-moji.
[Only numbers in PB]:
Receive and display Chaku-moji sent only from
callers who are saved in the Phonebook. You
cannot receive Chaku-moji from a caller who is
saved in the Phonebook as Secret unless the
Secret display is set to [ON].
[Only calls w/ID]:
Receive and display Chaku-moji sent only from
callers who notify their caller IDs.
[Hide all messages]:
Do not receive or display any Chaku-moji.
2 Select the Chaku-moji display style and
press .
The display style for Chaku-moji is set.
Placing a Call with a Chaku-moji
Message
You can place a voice or videophone call
together with a Chaku-moji message.
1 Enter a phone number in the stand-by
display and press (Option).
The Option call display appears.
2 Select [Chaku-moji] and press .
Select the way
to input
chaku−moji
None specified
Create message
Select message
[None specified]:
Place a call without a Chaku-moji message.
[Create message]:
Create a Chaku-moji message and place a call.
Enter a message within 10 characters regardless
of pictographs, symbols, full-width, or half-width.
[Select message]:
Select a saved Chaku-moji message and place
a call. (This menu appears only when the Chaku-
moji message is saved.)
[Sent messages]:
Select a sent Chaku-moji message and place
a call. Up to 10 Chaku-moji messages can be
saved. (This menu appears only when there is a
sent Chaku-moji message.)
3 Compose/Select a Chaku-moji message.
The Chaku-moji message is composed/selected.
4 Select another call condition and press
(Call).
Calling
Urgent
The call is dialed according to the selected Chaku-
moji message and call condition.
Continued
58
Voice/Videophone Calls
● When a Chaku-moji is received by the recipient,
“” appears in the sender’s terminal display and
charge is required.
● If the recipient does not receive the Chaku-moji,
“” appears. In this case, there is no charge.
(For example, when the recipient’s terminal does
not have Chaku-moji support or if the Chaku-moji
was received in a condition other than that set
using the Set Message display menu.)
● If the recipient’s terminal has the following
settings or conditions, Chaku-moji cannot be
delivered to this recipient and the call is not
saved in the Received record of the recipient’s
terminal. “ ” or “ ” is not displayed on the
sender’s terminal and there is no charge for this
transmission.
- When the recipient’s terminal is outside of the
service area
- When the recipient’s terminal is powered off
- When the Public mode (Drive mode) is set
- When the To answer the Record message is
set to 0 seconds, etc.
● Even if a Chaku-moji was delivered successfully
to the recipient, “ ” or “ ” may not be
displayed in the sender’s terminal display
depending on the radio wave condition. In this
case, charge is required.
● If you place a videophone call with a Chaku-moji
while the Auto redial(voice) is set to [ON], the
Chaku-moji is sent even when this call is redialed
as a voice call.
Changing the Caller ID Setting ON/
OFF for an Individual Call
<186/184>
You can choose whether to notify a recipient of
your phone number (caller ID) every time you
place a call.
The caller ID is important personal information.
Carefully decide whether you want to notify a
recipient of your caller ID.
You can use the following methods to notify or
not notify your caller ID.
Presetting
for all calls
Use the Set Notification to set [Notify]/
[Not notify] (P.45).
Setting
in the
Phonebook
Add “186/184” to the recipient’s
phone number when you save it in the
Phonebook (P.95).
Setting
when you
place a call
Set [Call with ID]/[Call without ID] at the
Caller ID of the Option call display after
dialing a recipient’s phone number (P.60).
Enter “186/184” before dialing a
recipient’s phone number (P.51).
To notify the caller ID
Press 186 + Phone number + .
Not to notify the caller ID
Press 184 + Phone number + .
● When you place a call by pressing after
dialing a phone number with “186/184”, the
phone number is saved in the Redial record with
“186/184”.
● You cannot set whether to notify the caller ID
when you originate a PushTalk call even when
you add “186/184”.
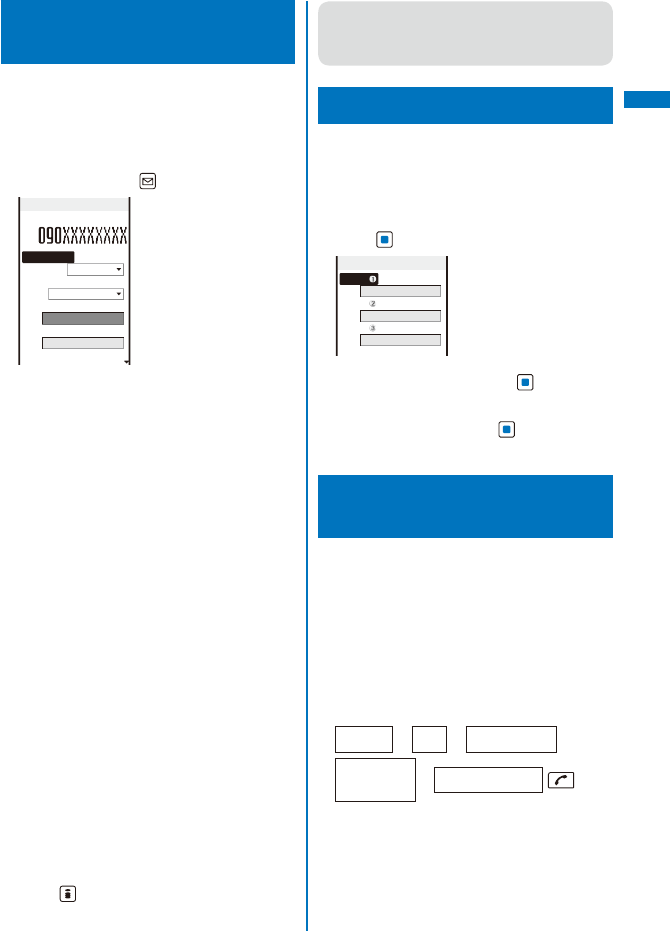
59
Voice/Videophone Calls
Placing a Call by
Specifying a Condition
When you place a call, you can set a call
condition at the Option call display such as
selecting a call type or whether to notify a
recipient of your phone number for each call.
1 Enter a phone number in the stand-by
display and press (Option).
Option call
Phone number
Call method
Voice call
Caller ID
None specified
V.phone outgoing img
My side
Chaku−moji
None specified
Prefix
[Call method]:
Select [Voice call]/[Videophone]/[PushTalk]/
[SMS].
[Caller ID]:
Select whether to notify your phone number to
the recipient. When you select [None specified],
follow the setting of the Set Notification.
[V.phone outgoing img]:
Select an image to be sent when placing a
videophone call.
[Chaku-moji]:
Compose/select a Chaku-moji message (P.59).
[Prefix]:
Place a voice or videophone call by selecting a
saved prefix (P.61). (This item appears only when
a prefix is saved.)
[Int’l prefix]:
Place a voice or videophone call by selecting
a saved international access number (P.63).
(This item appears only when you enter a phone
number with a preceding “+”.)
[Country code]:
Place a voice or videophone call by selecting a
saved country code (P.63).
[2in1 call number]:
Select a Caller ID when 2in1 is set to the Dual
mode.
[Multi Number]:
Select a Caller ID when the Multi Number call is
set to [ON].
2 Set each item.
3 Press (Call).
The call is dialed according to the set call condition.
● You cannot place a call even if you set [Prefix],
[Int’l prefix], or [Country code] from the Call
condition if a phone number you dialed exceeds
81 digits when the call condition is added.
Setting a Prefix <Prefix setting>
You can save up to three specific numbers
(prefixes) to be added at the beginning of a
phone number when you place a call.
1 From the Menu, select [Settings] → [Call]
→ [Call assist] → [Prefix setting] and
press .
Prefix setting
Number
Number
Number
2 Select a number and press .
The number input display appears.
3 Enter a prefix and press (OK).
Enter a prefix within 26 digits.
Placing an International
Call <WORLD CALL>
With WORLD CALL, you can place an
international call from a DoCoMo mobile
phone.
The users who subscribe to the FOMA services
are automatically signed up for the “WORLD
CALL” service when the agreement is concluded.
(Excluding users who choose to refuse the WORLD
CALL service.)
■ Placing an international call by entering a
phone number
009130 −010 −Country code −
Area code
(City code) −Phone number
You can save the above procedure in the
Phonebook of the FOMA terminal.
If an area code begins with “0”, omit the “0”
when dialing (except when calling ordinary
phones, etc. in Italy).
Continued
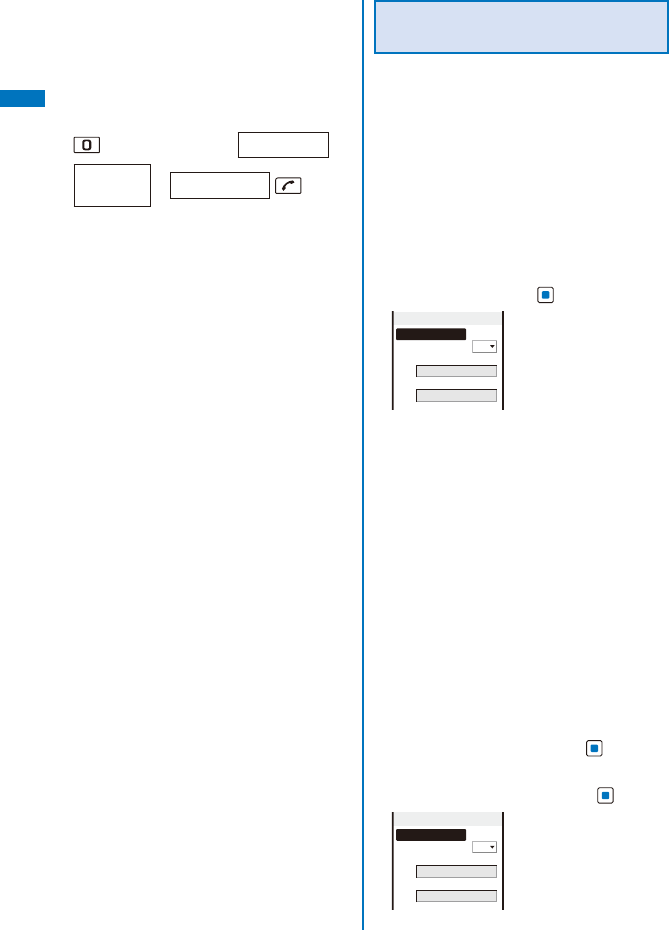
60
Voice/Videophone Calls
■ Placing an international call by using “+”
When you enter “+” at the beginning of a phone
number, you can place an international call without
entering an international access number such as
“009130010” (P.54).
The Auto conversion of the Int’l dial assist is set
to [ON] at the time of purchase. An international
access number is entered automatically.
(for over a second) −Country code −
Area code
(City code) −Phone number
You can save the above procedure in the
Phonebook of the FOMA terminal.
If an area code begins with “0”, omit the “0”
when dialing (except when calling ordinary
phones, etc. in Italy).
You can place calls to about 240 countries and
regions in the world.
Charges for this service are billed together with the
monthly call charges.
No application fees or monthly basic charges are
required.
This service is not available in some service charge
plans.
Change in the dial procedure for international calls.
Since mobile communication such as mobile phones
is beyond the scope of the “MYLINE” service,
“MYLINE” service is not available also for WORLD
CALL. With the introduction of “MYLINE” service,
however, the dial procedure for international calls
on mobile phones has been changed. Note that the
old dial procedure (excluding “010” from the above
mentioned dial procedure) is not available.
For the WORLD CALL details, call the “General
Contact” on the backcover of this manual.
To use an international call service company other
than DoCoMo, contact them directly.
If you have an overseas specific 3G mobile phone,
you can connect to an international videophone
by selecting videophone after the above dialing
method.
※ See the NTT DoCoMo’s website for information
about countries to which a videophone call
can be connected and telecommunication
companies.
※ A recipient’s image displayed on the FOMA
terminal may be fuzzy or a call may not be
connected successfully depending on the
terminal to which the international videophone is
connected.
Setting a Number Other Than
WORLD CALL
You can save up to three international access
numbers and up to 30 country codes to be
added at the beginning of a phone number in
order to place an international call from Japan.
You can automatically add the international
access number by entering “+” when you
place a call. You can automatically convert
the first digit “0” of the phone number to a
country code when you place a call from the
Phonebook, etc.
1 From the Menu, select [Settings] →
[Management] → [NW Services] → [Int’l
dial assist] and press .
Int’l dial assist
Auto conversion
ON
Int’l prefix
World Call
Country code
日本
[Auto conversion]:
Set whether an international access number is
automatically added.
[Int’l prefix]:
Save an international access number and set
the Auto assist number. You can also add an
international access number by selecting [Int’l
prefix] at the Option call display when you place
a call.
[Country code]:
Save a country code. You can add a country
code by selecting [Country code] at the Option
call display when you place a call.
2 Select [ON]/[OFF] at [Auto conversion].
[ON]:
Automatically add the additional number you set
for the Int’l prefix.
[OFF]:
Do not automatically add the additional number.
3 Select [Int’l prefix] and press .
The Int’l prefix setting display appears.
4 Select an input field and press .
Int’l dial assist
Auto conversion
ON
Int’l prefix
World Call
Country code
日本
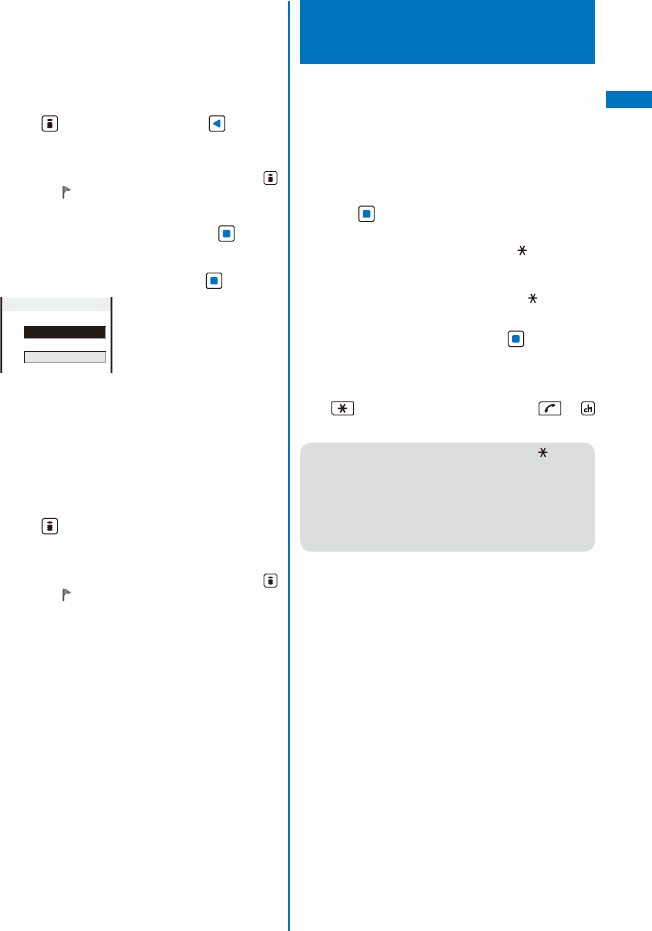
61
Voice/Videophone Calls
5 Enter a name in the name field and
an international access number in the
international access number field.
Enter a name within 10 full-width characters or 20
half-width characters and an international access
number within 10 digits.
6 Press (Complete) and press .
The international access number is saved.
To set the Auto assist number
Move the cursor to the input field and press
(Auto). “ ” appears to the left of the Auto assist
number.
7 Select [Country code] and press .
The Set country code display appears.
8 Select an input field and press .
Country code23
Country Name
Country code
9 Enter a country name in the country
name field and a country code in the
country code field.
Enter a country name within seven full-width
characters or 14 half-width characters and a
country code within five digits.
“+” is already entered in the country code field.
10
Press (Complete).
The country code is saved.
To set the Auto assist number
Move the cursor to the input field and press
(Auto). “ ” appears to the left of the Auto assist
number.
Placing a Call by Specifying
a Sub-address
<Sub-address>
You can set to place a call to a specific phone
or communication device by specifying a sub-
address.
The sub-address is also used when you select a
content in V-Live.
1 From the Menu, select [Settings] → [Call]
→ [Call assist] → [Sub-address] and
press .
[ON]:
Recognize the numbers after “ ” as a sub-
address.
[OFF]:
Do not recognize the numbers after “ ” as a sub-
address.
2 Select [ON]/[OFF] and press .
The Sub-address is set.
To place a call by specifying a sub-address
In the stand-by display, enter a phone number +
+ sub-address and press either or
(V.phone).
● Even if the Sub-address is set to ON, “ ” is not
recognized as the sub-address separator but as
part of a phone number in the following cases:
where it is at the beginning of a phone number
and immediately after a number entered using
Prefix/Int’l prefix/Country code of the Option call
display for placing a call.
62
Voice/Videophone Calls
Setting the Alarm When Reconnecting
a Dropped Call
<Reconnect alarm>
This function automatically reconnects the call
interrupted during a voice, videophone, or
PushTalk call due to the radio wave condition,
such as in a tunnel or between buildings, right
after the radio wave condition is recovered.
You can set an alarm tone when a call is
reconnected.
1 From the Menu, select [Settings] → [Call]
→ [Call setting] → [Recnct ALM] and
press .
[High]:
Sound the high alarm tone.
[Low]:
Sound the low alarm tone.
[OFF]:
Do not sound the alarm tone.
2 Select the type of the alarm tone and
press .
The alarm tone during reconnection is set.
● The recipient does not hear any sound while the
radio wave is interrupted.
● The time required for reconnection depends
on the usage and radio wave condition. The
average reconnection time is about 10 seconds
and the caller is charged for the time spent for
reconnection.
Improving Voice Clarity by Suppressing
Background Noise
<Reduce noise>
You can suppress background noise during
a voice or videophone call or during playing
back an answering message set for the record
message.
1 From the Menu, select [Settings] → [Call]
→ [Call quality] → [Reduce noise] and
press .
[ON]:
Suppress background noise.
[OFF]:
Do not suppress background noise.
2 Select [ON]/[OFF] and press .
The Reduce noise is set.
Talking Hands-free While
Driving <Hands-free mode>
You can place or receive a voice call using a
hands-free device by connecting the FOMA
terminal to a device such as the In-Car Hands-
Free Kit 01 (optional) or car navigation system.
For details about the operation of the hands-
free device, see the user’s manual of the
device. When you use the In-car Hands-free
Kit, you need the FOMA In-Car Hands-Free
Cable 01 (optional).
● The incoming call display and ring tone operation
follow the FOMA terminal settings.
● When a setting is made for hearing sound from
the hands-free device, a ring tone sounds from
the hands-free device even if the FOMA terminal
is set to the Manner mode or its Ring volume is
set to [OFF].
● Even if you connect the FOMA terminal to a
hands-free device, the Public mode (Drive mode)
and Record message function operate normally.
● When a setting is made for hearing sound from
the FOMA terminal, the operation when the
FOMA terminal is closed during a call follows
the Setting when folded. When a setting is made
for hearing sound from the hands-free device,
the call continues even if the FOMA terminal is
closed regardless of the setting of the Setting
when folded.
● When you use the In-Car Hands-Free Kit 01,
“” appears. If you use any other commercially
available car adapter, “ ” may appear.
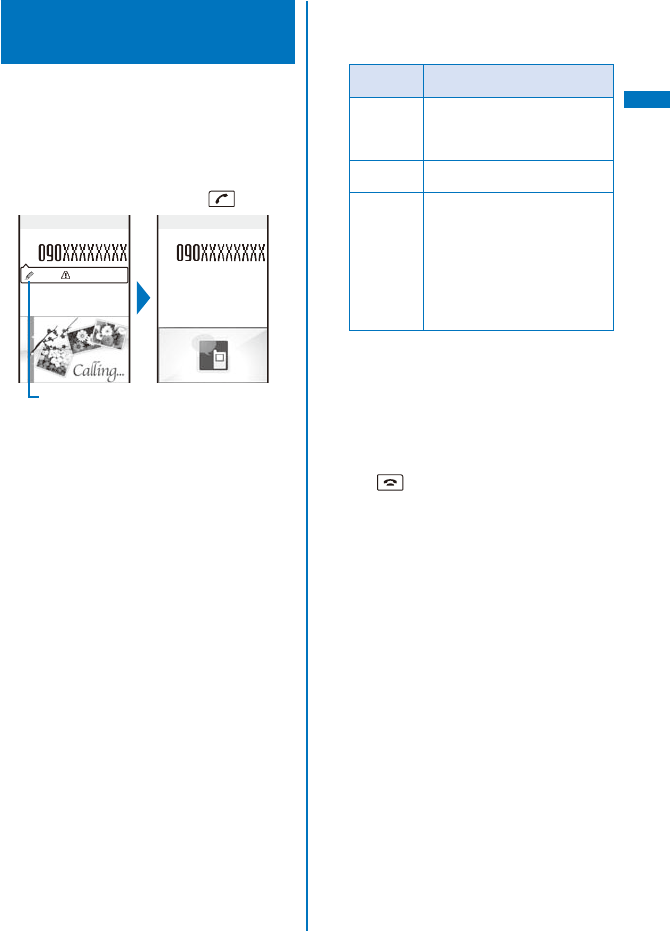
63
Voice/Videophone Calls
Receiving a Voice/
Videophone Call
When you receive a voice or videophone call,
you are notified by flashing indicator, ring tone,
vibrator, etc. The operation for an incoming
call varies depending on the settings of the
Incoming set, Manner mode, etc.
Example: Receiving a voice call
1 When receiving a call, press .
Urgent
Incoming call Talking
Call duration
0:03
Chaku-moji (P.58)
A phone number appears in the display when a
caller sends it.
When you receive a videophone call
Your image is sent to the caller and the call is
switched to the hands-free operation that allows
you to hear the caller’s voice from the speaker.
When the caller notifies you of the phone number
When saved in the Phonebook, the name and
phone number of a caller are displayed. If you
saved the same phone number for several
names in the Phonebook, the name stored using
the smallest memory number is displayed. The
Des phone tone, Des call display, and Select
phone Illum. saved in the Phonebook are used.
When the caller does not notify you of the phone
number
The reason why the phone number is not
displayed appears.
Non-display
reason Description
User Unset When a call is received from
a caller who does not notify
the caller’s phone number
intentionally.
PublicPhone When a call is received from a
public phone, etc.
Unavailable When a call is received from
a caller who cannot notify the
caller’s phone number, such
as from overseas and from an
ordinary phone through call
forwarding services (however,
the caller’s phone number may
be displayed depending on the
intermediary telephone company).
To connect a call to the Voice Mail Service Center
From the Function menu, select [FWD to Voice
Mail].
To forward a call to a forwarding number
From the Function menu, select [Call
Forwarding].
To reject a call
From the Function menu, select [Call Rejection].
2 Press to hang up.
Continued
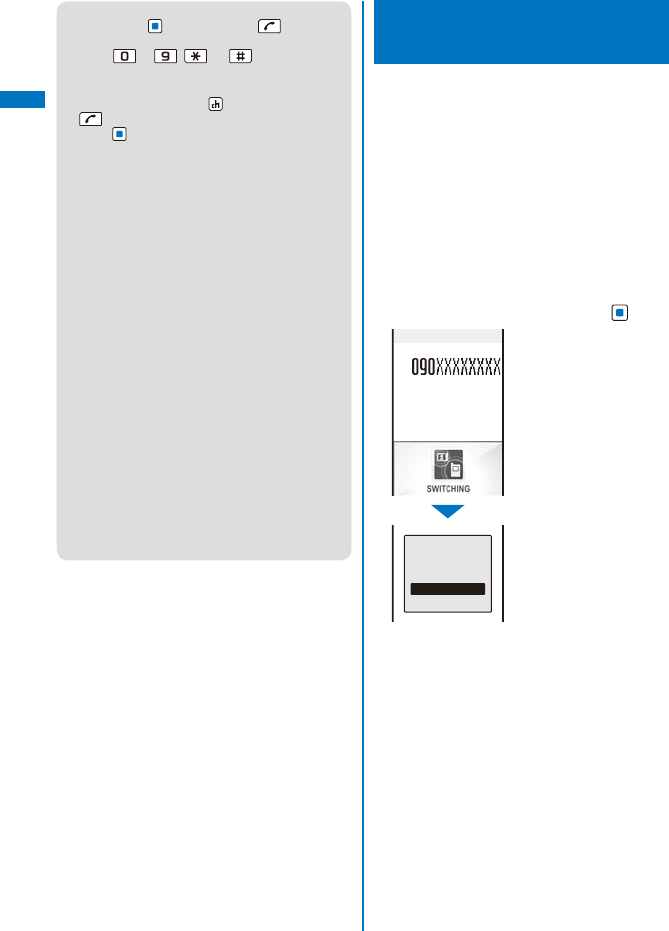
64
Voice/Videophone Calls
● When you receive a voice call, you can answer it
by pressing (Call) instead of . When you
set the Any key answer to [ON], you can also
press to , , or to answer a call
(P.67).
● When you receive a videophone call, you can
answer it by pressing (V.phone) instead of
. To answer a call with a substitute image,
press (Sub) (P.76).
● When the Slide open setting is set to [Answer],
you can answer a voice/videophone call just by
opening the FOMA terminal (P.67).
● If you receive a videophone call while the Manner
mode is set, the screen for confirming whether
the hands-free operation is set to ON appears. If
you do not want to use the hands-free operation,
select [No].
● You can preset the hands-free function of a
videophone call to [OFF] (P.77).
● You may hear beeps (ring tone during a call)
while talking on the FOMA terminal.
If [Answer] is set for the Arrival Call Act with the
Voice Mail Service, the Call Forwarding Service,
or the Call Waiting Service subscribed, the
beeps (the ring tone during a call) sound and the
following operations are available when there is
another incoming call during a call:
<Contents of subscription>
- The Voice Mail Service
Forward a call to the Voice Mail Service
Center.
- The Call Forwarding Service
Forward a call to a forwarding number.
- The Call Waiting Service
Put the active call on hold and answer the
incoming call.
Receiving a Call by Switching
to/from Voice/Videophone Call
A caller can switch between voice and
videophone calls during a call. When the caller
switches the voice call to the videophone
call, a recipient can select whether to send a
camera image.
This function can be used only between terminals
that can switch between voice and videophone
calls. Preset the V.ph switch notice to [Indication
ON] (P.78).
Example: When the voice call is switched to the
videophone call
1 When the screen for confirming whether
to send your own image appears during a
voice call, select [Yes] and press .
Chg.to videophone
Send
camera image
Yes
No
While the call is switched,
an animation is displayed
and you hear a guidance
notifying you that a call is
switched.
[Yes]:
Send a camera image to
the caller’s phone display.
[No]:
Send a preinstalled image
to the caller.
When the videophone call is switched to the voice
call
The call is automatically switched to the voice
call. When the call is switched to the voice call,
the hands-free operation is canceled.
When the call is switched to the videophone call,
your image is sent to the caller and the call is
switched to the hands-free operation that allows
you to hear the caller’s voice from the speaker.
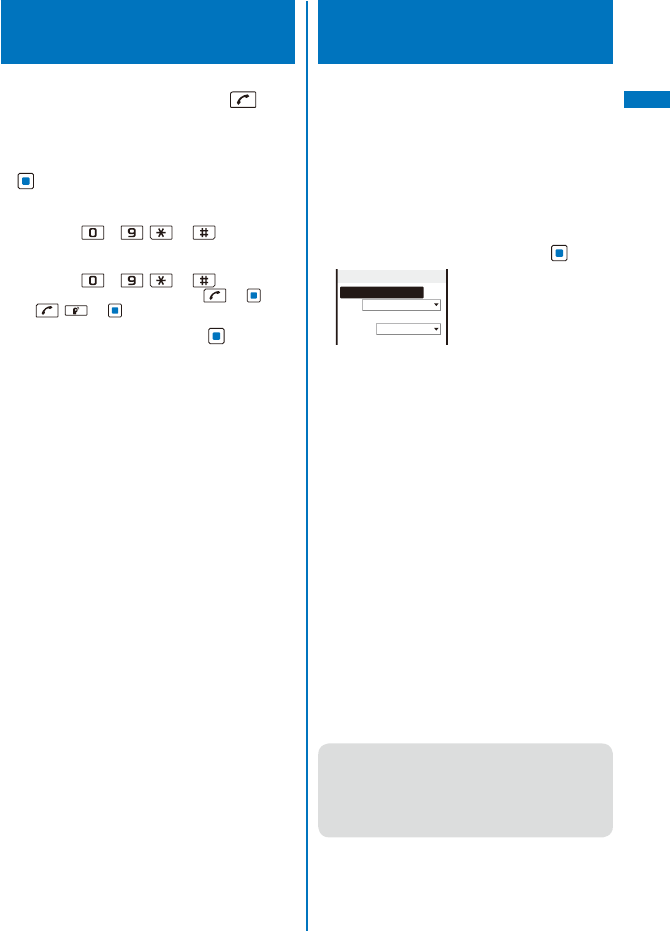
65
Voice/Videophone Calls
Pressing a Key on the Keypad
to Receive a Call
<Any key answer>
You can set to answer a call by pressing a key
on the keypad instead of pressing when
you receive a voice or PushTalk call.
1 From the Menu, select [Settings] → [Call]
→ [Call assist] → [Any key ans] and press
.
[ON]:
Enable to answer a voice or PushTalk call also by
pressing to , , or .
[OFF]:
Disable to answer a voice or PushTalk call by
pressing to , , or .
To answer a voice call, press or (Call)
(, , or (Answer) for a PushTalk call).
2 Select [ON]/[OFF] and press .
The Any key ans is set.
Setting the Operation for the FOMA Terminal
Being Closed during a Call
<Setting when folded>
You can end a call, put a call on hold, or
continue the conversation just by closing the
FOMA terminal during a voice/videophone
call. You can also end or continue a call, or
switch a call to the hands-free operation by
closing the FOMA terminal during PushTalk
communication.
1 From the Menu, select [Settings] →
[Management] → [Slide setting] →
[Setting when folded] and press .
Setting when folded
Voice call/V.phone
Continuous call
PushTalk
Speaker call
[Voice call/V.phone]:
Set the operation for the FOMA terminal being
closed during a voice/videophone call.
[PushTalk]:
Set the operation for the FOMA terminal being
closed during PushTalk communication (P.91).
2 Select the Setting when folded at [Voice
call/V.phone].
[Holding]:
Put the call on hold. Both you and the recipient
hear the melody “Hamabe no uta”. During a
videophone call, the preinstalled image is sent to
the recipient.
[Mute]:
Put the call on hold with the voice muted. During
a videophone call, a substitute image is sent to
the recipient (P.76).
[Disconnect]:
Hang up the call.
[Continuous call]:
Continue a conversation.
The Seting when folded during a voice or
videophone call is set.
● When the Flat-plug Earphone/Microphone with
Switch (optional) is connected, the Setting when
folded is disabled and the call continues even
if you close the FOMA terminal. If it is during
a videophone call that you close the FOMA
terminal, a substitute image is sent.
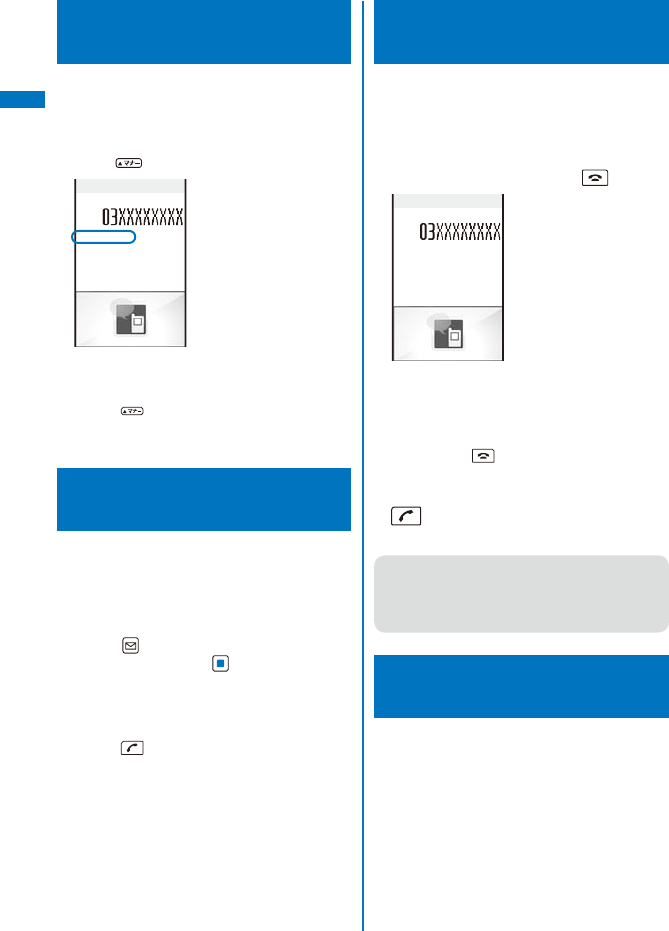
66
Voice/Videophone Calls
Using the Low Voice
Feature <Whisper mode>
You can set the FOMA terminal so that the
recipient can hear your voice at a normal
volume level even if you speak in low voice
during a voice call.
1 Press during a call.
Whisper mode
12:34
Talking
The call is switched to the Whisper mode and the
message “Whisper mode” is displayed.
To cancel the Whisper mode
Press again.
When you finish a call, the Whisper mode is
canceled automatically.
Putting a Call on Hold
during a Call <Holding>
The call can be put on hold during a voice or
videophone call so that your voice cannot be
heard by the recipient.
Even if the call is put on hold, the caller is charged
for the call.
1 Press (Func) during a call, select
[Holding], and press .
Both you and the recipient hear the melody
“Hamabe no uta”. During a videophone call, a
preinstalled image is sent to the recipient.
To cancel the Holding
Press .
Putting a Call on Hold
<On hold>
If you cannot answer a voice or videophone
call immediately, you can put the call on hold.
Even if the answer is put on hold, the caller is
charged for the calling charge.
Example: Putting a voice call on hold
1 When receiving a call, press (HLD).
Call duration
0:03
On hold
The answer is put on hold.
The guidance to inform the caller that you are
currently unable to answer the call is played back.
During a videophone call, a preinstalled image is
sent to the recipient.
If you press while the call is put on hold, the
call on hold is disconnected.
2 When ready to answer the call, press
.
The On hold is canceled and you can talk.
● If you have signed up for the Voice Mail or Call
Forwarding Service, you can select [FWD to
Voice Mail] or [Call Forwarding] from the Function
menu while you are receiving a call, in order to
use those services.
Using the Public Mode (Drive
Mode)
<Public mode (Drive mode)>
The Public mode is an automated answering
service which takes into account the manners
in highly public places. When the Public mode
is set, the guidance is played back to inform
the caller that you are unable to answer the call
because you are driving or in a place where
talking on a mobile phone should be avoided
(trains, buses, or movie theaters), and then the
call is disconnected.
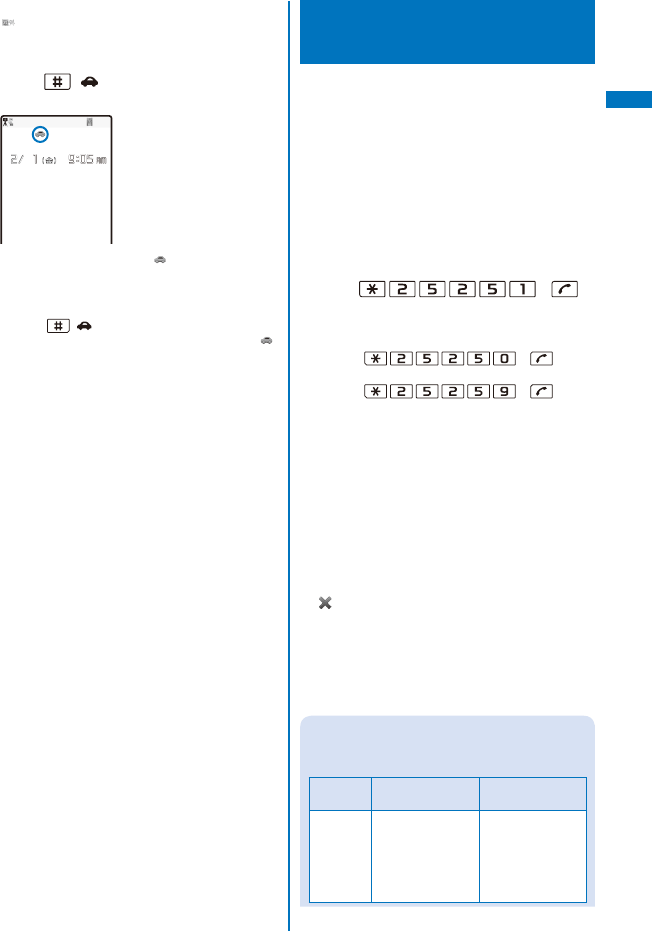
67
Voice/Videophone Calls
The Public mode can be set or canceled even if
“” is displayed.
The Public mode cannot be used during data
communication.
1 Press ( ) for over a second in the
stand-by display.
The Public mode is set and “ ” appears.
When the Manner mode and the Public mode are
set simultaneously, the Public mode has priority.
To cancel the Public mode
Press ( ) for over a second in the stand-by
display. The Public mode is canceled and “ ”
disappears.
■ When the Public mode (Drive mode) is set
Even if there is an incoming call, the ring tone does
not sound and you cannot answer it. The notification
icon of missed call appears and the call is saved in
the Received record. The guidance for the Public
mode is played back to inform the caller that you are
unable to answer the call because you are driving or
in a place where talking on a mobile phone should
be avoided, and then the call is disconnected.
Even if there is an incoming PushTalk call, you
cannot answer it. The notification icon of missed
call appears and the call is saved in the Received
record. If the received call is for the PushTalk
communication among several persons, the
message “Driving” appears in the On PushTalk
display of the members.
The call can be placed normally.
The following tones do not sound and the vibrator,
etc. does not operate.
- Ring tone - Alarm tone
- Schedule alarm - Battery alarm
- Alarm for the Call cost limit
- i-αppli software sound - Charge sound
- ToruCa receive completion tone
- Position location sound
- Location notice sound
- Loc. provide/accept tone
- Loc. provide/check tone
For operation for an incoming call when the Public
mode (Drive mode) and each network service are
set simultaneously, see “Operation for an incoming
call when network services and the Public mode
(Drive mode/Power OFF) are set” (P.70).
Using the Public Mode
(Power off) <Public mode (Power off)>
The Public mode (Power off) is an automated
answering service which takes into account
the manners in highly public places. When the
Public mode (Power off) is set, the guidance
is played back to inform the caller that you are
unable to answer the call because you are in a
place where it is required to power off a mobile
phone (such as in hospitals, airplanes, and
near priority seats in trains), provided that there
is an incoming call when the FOMA terminal is
powered off, and then the call is disconnected.
1 Press + .
The Public mode (Power off) is set. (No change
appears on the stand-by display.)
To cancel the Public mode (Power off)
Press + .
To check the setting
Press + .
■ When the Public mode (Power off) is set
If there is an incoming call when the FOMA terminal
is powered off or you are outside of the service area
or in a location without the radio wave, the guidance
for the Public mode (Power off) is played back to
inform the caller that you are unable to answer the
call because you are in a place where it is required
to power off a mobile phone, and then the call is
disconnected.
You cannot answer an incoming PushTalk call. If
the received call is for the PushTalk communication
among several persons, the message
“ Disconnect” appears in the On PushTalk display
of the members.
For operation for an incoming call when the Public
mode (Power OFF) and each network service are
set simultaneously, see “Operation for an incoming
call when network services and the Public mode
(Drive mode/Power OFF) are set” (P.70).
Operation for an incoming call when network
services and the Public mode (Drive mode/
Power OFF) are set
Service When a voice call
is received
When a videophone
call is received
The Voice
Mail
Service
※1
After the guidance
for the Public mode
is played back, the
call is connected
to the Voice Mail
Service Center.
The video guidance
for the Public mode is
not played back and
the call is connected
to the Voice Mail
Service Center.
Continued
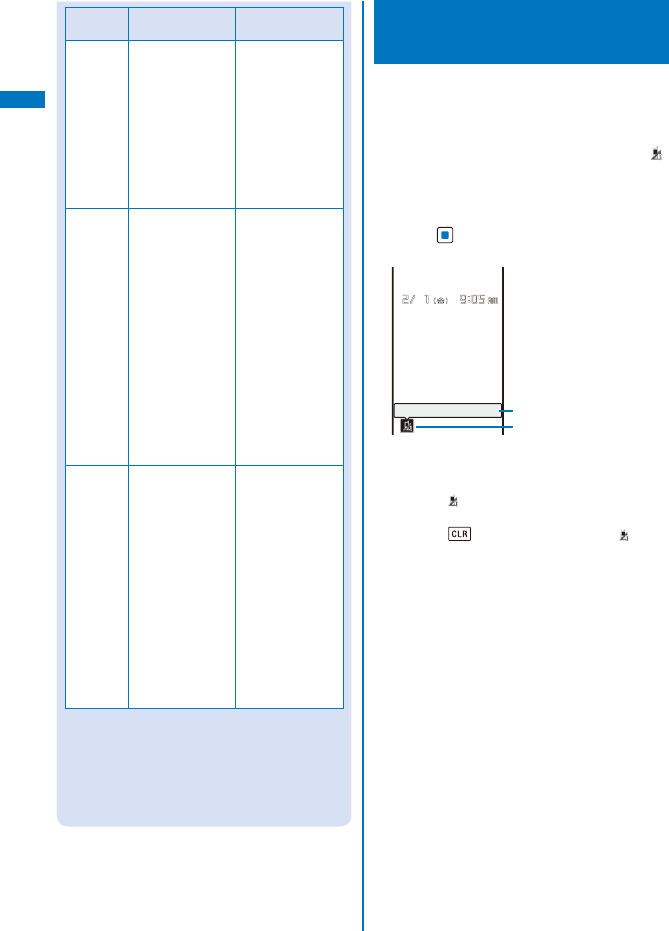
68
Voice/Videophone Calls
Service When a voice call
is received
When a videophone
call is received
The Call
Forwarding
Service
※1※2
After the guidance
for the Public mode
is played back, the
call is forwarded
to a forwarding
number.
The video guidance
for the Public mode is
not played back and
the call is forwarded to
a forwarding number.
If the forwarding
number of the phone
which is not compliant
with 3G-324M
videophone call, the
call is disconnected.
The
Nuisance
Call
Blocking
Service
After the guidance
is played back to
inform the caller
that the call is
not able to be
connected, the call
is disconnected if
the caller is saved
as a nuisance
caller.
After the guidance
for the Public mode
is played back, the
call is disconnected
if the caller is
not saved as a
nuisance caller.
After the video
guidance is played
back to inform the
caller that the call
is not able to be
connected, the call
is disconnected if
the caller is saved
as a nuisance caller.
After the video
guidance for the
Public mode is
played back, the
call is disconnected
if the caller is
not saved as a
nuisance caller.
The Caller
ID Display
Request
Service
After the caller ID
request guidance
is played back,
the call is
disconnected if
the caller does
not notify the
phone number.
After the guidance
for the Public
mode is played
back, the call is
disconnected
if the caller
notifies the phone
number.
After the video
guidance for the
caller ID request is
played back to the
caller, the call is
disconnected if the
caller does not notify
the phone number.
After the video
guidance for the
Public mode is
played back to
the caller, the call
is disconnected if
the caller notifies
the phone number.
※1 If you set the ring time of the Voice Mail or Call
Forwarding Service to 0 seconds, the guidance
for the Public mode is not played back and a
call is not saved in the Received record, either.
※2 You can set whether the guidance is played
back to a caller with the “1429” setting of the
Call Forwarding Service.
Checking the Missed Calls
<Missed call>
When you are unable to answer an incoming
call or receive new mail, the notification icon
(P.32) appears in the stand-by display.
If a voice, videophone, or PushTalk call or 64K
data communication is not answered, “ ”
appears in the stand-by display. The received
record shows the date/time and the person
who called (P.55).
1 Press (Link) in the stand-by display
and select the notification icon.
Missed call
1
Text information
Notification icon
The text information for the notification icon
appears.
To check the Received record
Select “ ” (Missed call).
To delete the notification icon
Press for over a second. “ ” also
disappears when the Received record is
displayed.
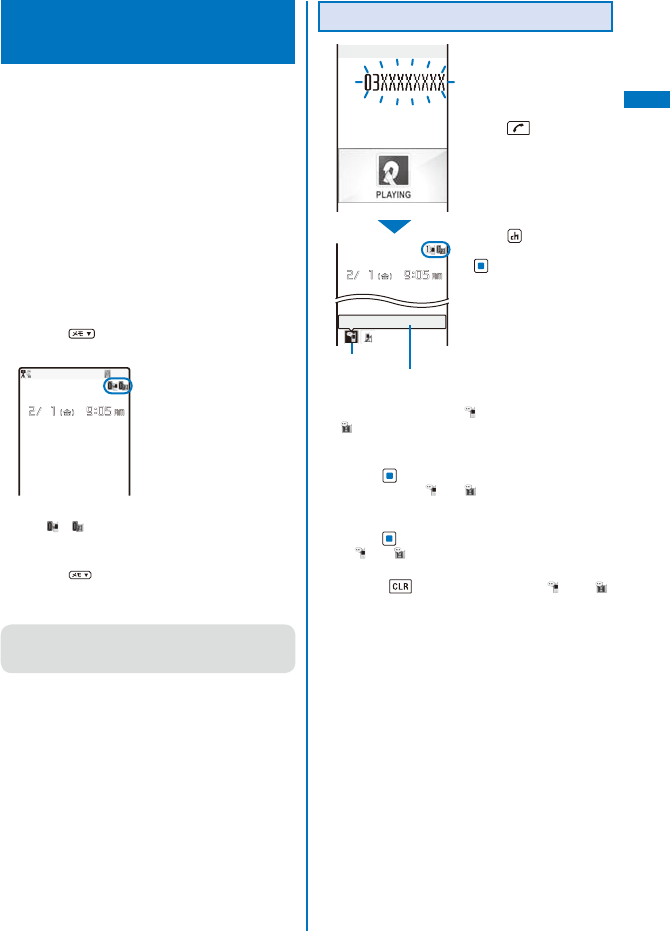
69
Voice/Videophone Calls
Recording Caller’s Messages When Unable
to Answer Calls <Record message/Videophone message>
When the Record message/Videophone
message is set, the FOMA terminal can record
a caller’s message when you are unable to
answer a call.
The FOMA terminal can record up to three record
messages and videophone messages, each for
up to about 15 seconds. If three record messages
have been recorded, the Record message does
not function. Similarly, when three videophone
messages have been recorded, the Videophone
message does not function. Delete unnecessary
record messages or videophone messages.
When the Public mode (Drive mode) is set, the
Record message/Videophone message dose not
operate.
1 Press for over a second in the
stand-by display.
The Record message/Videophone message is set
and “ ”/“ ” appears.
To cancel the Record message/Videophone
message
Press for over a second in the stand-by
display. The Record message/Videophone
message is canceled.
● When you are outside of the service area, the
Record message does not function. Use the
Voice Mail Service (Paid).
When Receiving a Call
ドコモ一郎
Play answer message
New Record msg
Notification
icon Text
information
The answering message is
played back to the caller
after the ring tone sounds
for the set duration.
To talk to the caller
Press .
When you receive a
videophone call
The answering message
is played back and the
answering image is
displayed to the caller.
Press (V.phone) to talk
to the caller. If you press
(Sub), you can answer
the call with a substitute
image.
The notification icon “ ” (New Record msg) or
“” (New V.phone msg) appears in the stand-by
display.
To display the text information
Press (Link) in the stand-by display and move
the cursor to “ ” or “ ”.
To play back a record message/videophone
message
Press (Link) in the stand-by display and select
“ ” or “ ”.
To delete the notification icon
Press for over a second. “ ” or “ ”
also disappears when the record message/
videophone message is played back.
Continued
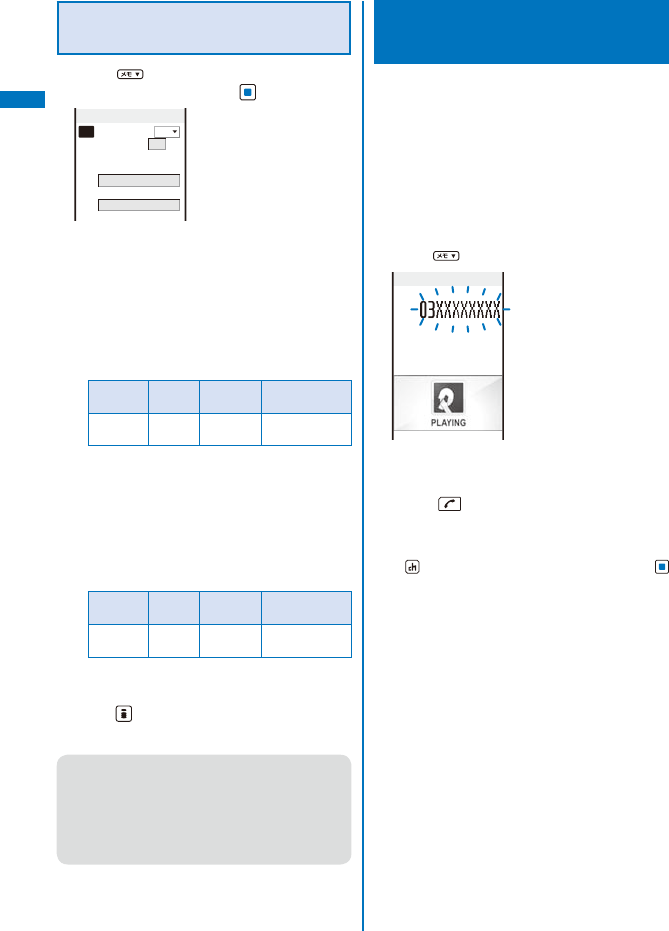
70
Voice/Videophone Calls
Setting the Operation of the
Record Message
1 Press in the stand-by display, select
[Set rec msg], and press .
Set record message
Set
OFF
To answer
013
sec
(000−120)
Answer img(V.phone)
テレヒ゛
電話動作中
Record img(V.phone)
テレヒ゛
電話動作中
2 Enter the time before starting the
answering message at [To answer].
Enter from 000 to 120 seconds.
3 Select an image to be sent when
answering a call from My picture of the
Data Box at [Answer img(V.phone)].
You can set the following files.
Category File
format File size Image size
My picture
GIF/
JPEG
Max. 50K
bytes
Max. [QCIF
(W176×H144)]
※ You cannot set an image with file restrictions
or a frame image.
4 Select an image to be sent when
recording the caller’s image from My
picture of the Data Box at [Record img(V.
phone)].
You can set the following files.
Category File
format File size Image size
My picture
GIF/
JPEG
Max. 50K
bytes
Max. [QCIF
(W176×H144)]
※ You cannot set an image with file restrictions
or a frame image.
5 Press (Complete).
The operation of the Record message is set.
● When the Voice Mail or Call Forwarding Service
and the Record message are set simultaneously,
and if you want to give priority to the Record
message, set the time before starting the
answering message for the Record message
shorter than the ring time for the Voice Mail or
Call Forwarding Service.
Recording a Caller’s Message When Unable
to Answer a Call Just Receiving <Quick record message>
You can start the Record message for
temporary use when you receive a voice or
videophone call even if the Record message is
[OFF].
If three record messages are recorded when the
FOMA terminal receives a voice call, the Quick
record message function cannot be operated.
Similarly, if three videophone messages are
recorded when it receives a videophone call, the
Quick record message function cannot be operated.
1 Press while receiving a call.
ドコモ一郎
Play answer message
The answering message is played back to the
caller.
To talk to a caller
Press .
When you receive a videophone call
The answering message is played back and the
answering image is displayed to the caller. Press
(V.phone) to talk to the caller. If you press
(Sub), you can answer the call with a substitute
image.
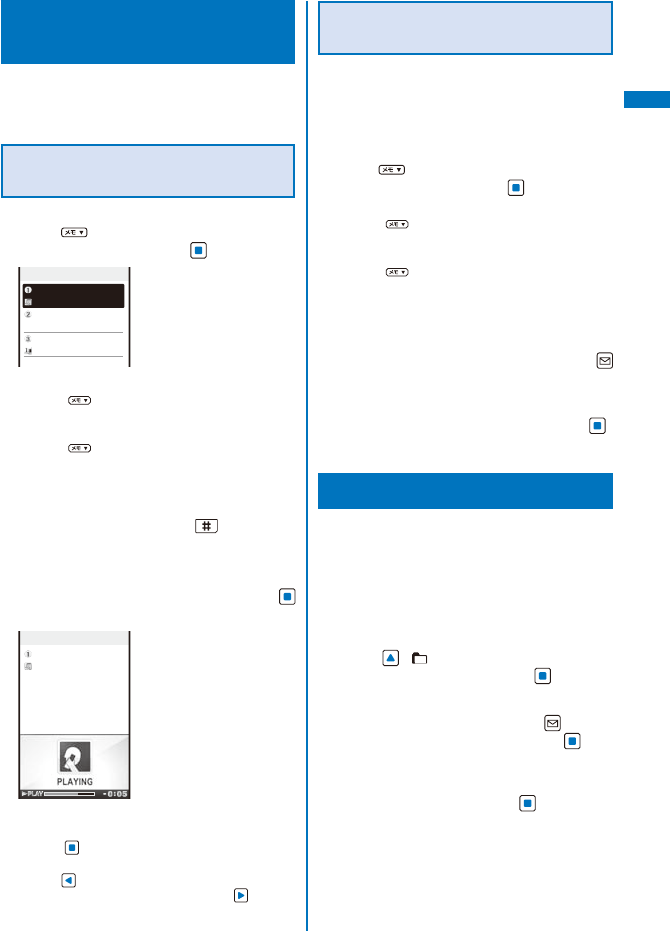
71
Voice/Videophone Calls
Playing Back/Deleting a Record Message/
Videophone Message/Voice Memo
You can play back or delete a recorded record
message/videophone message and voice
memo (P.369).
Playing Back a Record Message/
Videophone Message/Voice Memo
Example: Playing back a record message
1 Press in the stand-by display, select
[Play rec msg], and press .
Play record message
2/12 9:35
ドコモ一郎
2/ 5 22:00
User Unset
2/ 5 7:50
携帯あき子
To play back a videophone message
Press in the stand-by display and select
[Play Vphone msg].
To play back a voice memo
Press in the stand-by display and select
[Play voice memo].
To display phone numbers
When saved in the Phonebook, the name and
phone type of a caller are displayed instead
of the phone number. Press to switch the
display temporarily between names and phone
numbers. The display is not switched when a
voice memo is displayed.
2 Select a record message and press
(Play).
Play record message
2/12 9:35
ドコモ一郎
The record message is played back.
To stop the playback
Press (Stop).
To play back the previous/next record message
Use during playback to play back the
previous record message and during
playback to play back the next record message.
Deleting a Record Message/
Videophone Message/Voice Memo
You can record up to three record messages,
three videophone messages, and three
voice memos. Delete unnecessary record/
videophone messages or voice memos.
Example: Deleting a record message
1 Press in the stand-by display, select
[Play rec msg], and press .
To delete a videophone message
Press in the stand-by display and select
[Play Vphone msg].
To delete a voice memo
Press in the stand-by display and select
[Play voice memo].
To delete all record messages
From the Function menu, select [Delete all], enter
the Security code, and select [Yes].
2 Select a record message and press
(Func).
The Function menu appears.
3 Select [Delete one] → [Yes] and press .
The selected record message is deleted.
Using Chara-den
When you place a videophone call, you can
send a character instead of a camera image.
You can press keys on the keypad to move
a character or some character’s mouth to
correspond to the voice on the microphone.
For details about the action lists of the preinstalled
Chara-den characters, see P.302.
1 Press ( ) in the stand-by display,
select [Chara-den], and press .
The Chara-den list appears.
2 Select a Chara-den file, press (Func),
select [Call Chara-den], and press .
The screen for selecting the method of entering the
phone number appears.
3 Select the method, press , and enter
the phone number.
Continued
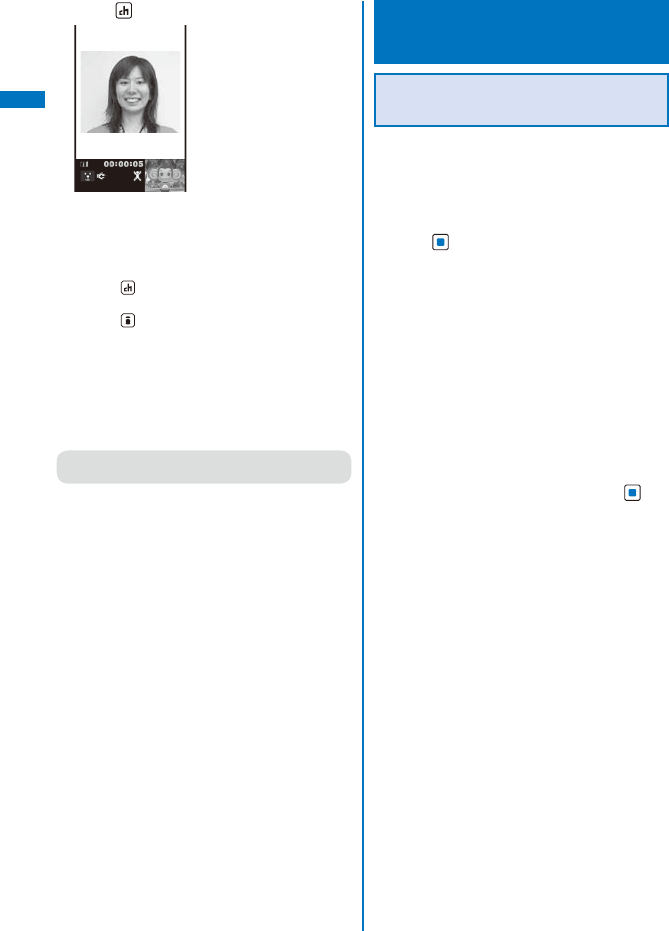
72
Voice/Videophone Calls
4 Press (V.phone).
©SEGA
The videophone call is dialed with a Chara-den
character set as the substitute image.
To switch between the full-body action and parts
action modes
Press (Change).
To display the action list
Press (List).
To switch to the mode for sending touch-tones
(DTMF)
From the Function menu, select [DTMF send
mode].
To switch to the Chara-den action operating mode
From the Function menu, select [Action input
mode].
● When the mode for sending touch-tones (DTMF)
is set, the Chara-den action cannot be operated.
Setting the Videophone
Operation <Videophone setting>
Setting the Display to Be Used
in a Videophone Call
You can set the image to be displayed on the
videophone images (Large) and (Small) during
a videophone call.
1 From the Menu, select [Settings] → [Call]
→ [Videophone] → [Display setting] and
press .
[Main-Other side]:
Display the recipient’s/caller’s image on the
videophone image (Large) and your image on
the videophone image (Small).
[Main-My side]:
Display your image on the videophone image
(Large) and the recipient’s/caller’s image on the
videophone image (Small).
[Other side only]:
Display the recipient’s/caller’s image only on the
videophone image (Large).
[My side only]:
Display your image only on the videophone
image (Large).
2 Select a display method and press .
The Display setting is set.
73
Voice/Videophone Calls
Setting a Video to Be Sent to the
Recipient/Caller
You can set whether to send a camera image
to the recipient when you place a videophone
call. You can also set an image from either My
picture or Chara-den as a substitute image if
you do not want to send a camera image.
1 From the Menu, select [Settings] → [Call]
→ [Videophone] → [Set outgoing image]
and press .
Set outgoing image
Camera image
ON
Substitute image
アイアイ
2 Select [ON]/[OFF] at [Camera image].
[ON]:
Send a camera image to the recipient when you
place a videophone call.
[OFF]:
Send a substitute image to the recipient when
you place a videophone call.
3 Select a substitute image from My
picture/Chara-den of the Data Box at
[Substitute image].
You can set the following files.
Category File
format File size Image size
My picture
GIF/
JPEG
Max. 50K
bytes
Max. [QCIF
(W176×H144)]
Chara-den
−Max. 100K
bytes −
※ You cannot set an image with file restrictions
or a frame image.
The Set outgoing image is set.
Setting the Videophone Image
Quality
You can set the quality of an image to be sent
to the recipient.
1 From the Menu, select [Settings] → [Call]
→ [Videophone] → [Visual preference]
and press .
[Prefer img qual]:
Send an image with priority on image quality.
[Normal]:
Send an image by keeping a balance between
image quality and movement.
[Prefer motion]:
Send an image with priority on movement.
2 Select the quality of an image to be sent
and press .
The Visual preference is set.
Redialing by Voice Call When the
Videophone Is Not Connected
When the videophone call is not connected,
the FOMA terminal automatically redials
by voice call. When the videophone call is
connected successfully, the FOMA terminal
does not redial by voice call.
1 From the Menu, select [Settings] → [Call]
→ [Videophone] → [Auto redial(voice)]
and press .
[ON]:
Redial by voice call.
[OFF]:
Do not redial by voice call.
2 Select [ON]/[OFF] and press .
The Auto redial(voice) is set.
● You are charged for a call instead of digital
communication when you redial by voice call.
Continued
74
Voice/Videophone Calls
Using the Hands-free Function
You can set whether to use the hands-free
function during a videophone call.
1 From the Menu, select [Settings] → [Call]
→ [Videophone] → [Hands-free] and
press .
[ON]:
You hear the recipient’s/caller’s voice from the
speaker during a videophone call.
[OFF]:
You hear the recipient’s/caller’s voice from the
earpiece during a videophone call.
2 Select [ON]/[OFF] and press .
The Hands-free is set.
● When the Flat-plug Earphone/Microphone with
Switch (optional) is connected to the FOMA
terminal, you hear a recipient’s voice from the
Earphone/Microphone, regardless of the Hands-
free setting.
Setting How to Answer a
Videophone Call during i-mode
You can set how to answer a videophone
call received during i-mode or packet
communication, for example, sending or
receiving mail.
1 From the Menu, select [Settings] → [Call]
→ [Videophone] → [V.ph while packet]
and press .
[Prefer V.phone]:
Receive a videophone call. When you answer the
videophone call, the packet communication in
progress is disconnected.
[Prefer packet]:
Continue the packet communication without
receiving a videophone call. The received call is
saved in the Received record.
[V.ph voicemail]:
Connect a received videophone call to the Voice
Mail Service Center.
[Call forwarding]:
Connect a received videophone call to a
forwarding phone number.
2 Select the operation to be performed
when you receive a videophone call
during i-mode communication and press
.
The V.ph while packet is set.
Setting Notice for Switching between Voice
and Videophone Calls <Videophone switch notice>
You can set whether to notify the recipient/
caller that the FOMA terminal is capable of
switching between voice and videophone calls.
You cannot perform this setting when you are
outside of the service area or in a place where
radio waves do not reach, or during a voice or
videophone call.
1 From the Menu, select [Settings] →
[Management] → [NW Services] → [V.ph
switch notice] and press .
V.ph switch notice
Indication ON
Indication OFF
Check setting
2 Select [Indication ON] → [Yes] and press
.
When you do not want to notify
Select [Indication OFF] → [Yes].
To check the setting
Select [Check setting].

75
PushTalk
What is PushTalk? ..................................................................................................... 80
Originating a PushTalk Call ....................................................................................... 82
Adding a Member during PushTalk Communication .................................................. 83
Receiving a PushTalk Call ......................................................................................... 84
Saving Data in the PushTalk Phonebook .................................................................. 85
Originating a PushTalk Call Using the PushTalk Phonebook .................................... 87
Deleting a PushTalk Phonebook Entry ...................................................................... 88
Using the PushTalk Phonebook ...........................................................<PushTalkPlus> 89
Setting the PushTalk Operation .......................................................<PushTalk setting> 89
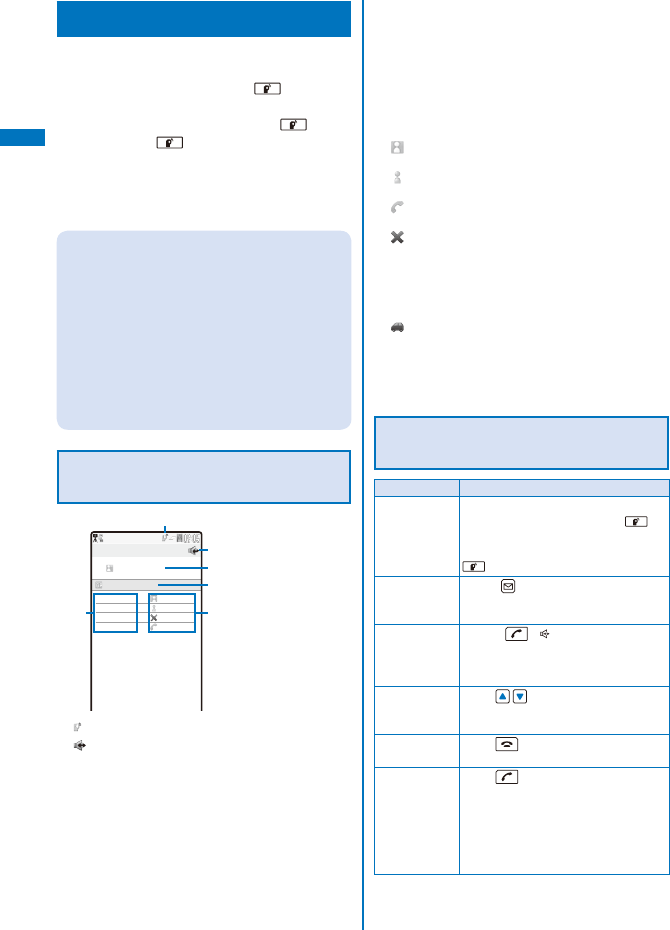
76
PushTalk
What is PushTalk?
You can communicate among several persons
(up to five persons including yourself) with a
simple operation of pressing for over a
second to display the PushTalk phonebook,
selecting recipients, and pressing . Every
time you press (speak), you are charged
for PushTalk communication.
For more details on PushTalk or compatible models,
see the DoCoMo’s website or “Mobile Phone User’s
Guide
【Network services】
”.
PushTalkPlus
The PushTalkPlus is a service that allows you to
communicate simultaneously with up to 20 persons
(including yourself). It also allows you to use
PushTalk more conveniently by using the shared
phonebook on the network or checking the status of
members.
※ For details about operations, see the general
information which you are handed when you
subscribe to the service.
※ You need to subscribe to PushTalkPlus
separately.
Using the Display during
PushTalk Communication
ドコモ一郎
○○○同好会
On PushTalk
ドコモ一郎
Connected
ドコモ三郎
Connected
ドコモ二郎
Disconnect
090XXXXXXXX
Calling
: During PushTalk communication
: Hands-free ON
Active speaker
The phone number (or the member name when the
speaker is saved in the Phonebook) appears
[Myself] : You are currently the active
speaker (you can speak)
[User Unset] : The Caller ID of the caller is set to
[OFF]
[?] : The active speaker is not
identified
(No indication) : There is no active speaker (open
status)
Group name
Displayed only in the display of the caller who
originated a call using a group
Members
The phone number (or the member name when the
member is saved in the Phonebook) appears
[User Unset] : The Caller ID of the caller is set to
[OFF]
Communication status
Connected : The caller who originated a
PushTalk call
Connected : Currently participating in the
PushTalk communication
Calling※ : The recipient’s terminal is
ringing
Disconnect※ : The recipient ended the
PushTalk session, does not
answer the call, or is outside of
the service area. Otherwise the
recipient’s terminal is powered
off
Driving※ : Public mode (Drive mode) is
set
※ These icons appear only when PushTalk
communication is performed among several
persons.
Operations during PushTalk
Communication
Operation Key operation
Speak When the floor is open, you can speak
only while you press and hold .
While another member has the floor,
you cannot get it even if you press
.
Add a member Press (Add). This operation is
enabled only when you originate a
PushTalk call.
Switch ON/
OFF of the
hands-free
operation
Press ( ). Every time you
press the key, the ON/OFF setting is
switched.
Adjust the
volume of the
caller’s voice
Press .
Terminate a
PushTalk call
Press .
Receive a
voice call
Press (P.65).
If you receive a voice call, the
PushTalk communication is
terminated.
The operation for an incoming voice
call while using PushTalk can be
customized (P.90).
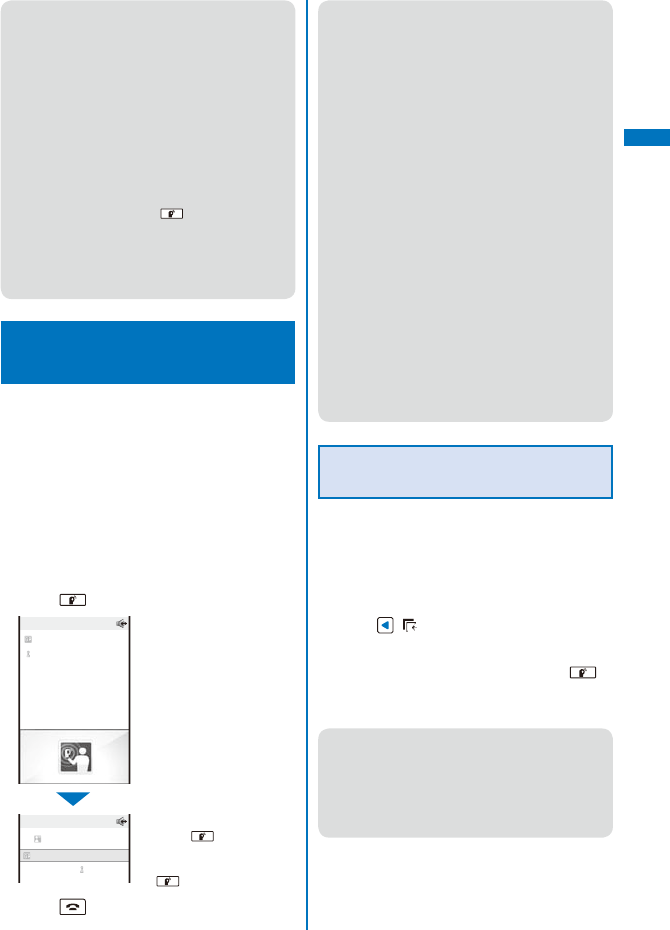
77
PushTalk
● Each speech session granted by obtaining the
floor is time limited. The obtained floor is released
after the time limit. The PushTalk communication
is terminated if no member takes over the floor
within a certain interval.
● When there is any change in PushTalk
communication status or a member takes over
the floor, the signal tone sounds.
● You cannot use i-mode during PushTalk
communication.
● When other functions are activated, you cannot
obtain the floor. However, when you activate a
function while you have the floor, you can speak
while you press and hold .
● When you receive a videophone call, data
communication, or a PushTalk call during
PushTalk communication, a new call is saved in
the Received record and the current PushTalk
call is continued.
Originating a PushTalk
Call
You cannot originate a PushTalk call during a voice
call, a videophone call, or data communication, or
while the B mode is set in 2in1.
If you originate a PushTalk call during i-mode
communication, the i-mode communication is
terminated. Originating a PushTalk call while running
i-αppli also stops the i-αppli.
Number B of 2in1 cannot be used for PushTalk and
PushTalkPlus services.
1 Enter a phone number in the stand-by
display.
2 Press .
Myself
090XXXXXXXX
Connected
On PushTalk
090XXXXXXXX
Dialing PushTalk
When you originate a
PushTalk call, it is switched
to the hands-free operation
that allows you to hear the
signal tone from the speaker.
To speak
Press while the floor
is open. You can speak
while you press and hold
.
3 Press to end the communication.
● You cannot use PushTalk to place a call to
emergency numbers (110, 119, and 118).
● You cannot set whether to notify the caller ID
when you originate a PushTalk call even if you
add “186/184”.
● The setting whether to originate a PushTalk call
with/without the caller ID follows the setting of the
Set Notification (P.45).
● When you set the Set Notification to [Notify], all
members including added members are notified
the phone numbers of the person who originates
and all members. When you set it to [Not notify],
[User Unset] is displayed in the fields of the
speaker and all members including added
members.
● If you set [Call with ID]/[Call without ID] of the
caller ID at the Option call display when you
originate a PushTalk call, the phone numbers of
yours and all members are/are not notified to all
members based on the selected call condition.
● When you originate a PushTalk call, if the Set
Notification is set as well as the Call condition
is set at the Option call display, the following
priority is applied.
1. Call condition selected at the Option call
display when originating a PushTalk call
2. Set Notification
Originating a PushTalk Call from
the Call Record
You can originate a PushTalk call using the
Redial and Received records.
You cannot originate a PushTalk call using the call
records of Number B when 2in1 is used.
Example: Originating a PushTalk call from the Received
record
1 Press ( ) in the stand-by display.
The Received record display appears.
2 Select a received record and press .
When a PushTalk call is originated, the signal tone
sounds.
● If a member is disconnected during PushTalk
communication among several persons, the
disconnected member can come back to the
session using the Redial/Received record as
long as the other members continue it. When the
PushTalk communication is already ended, the
call is going to be a new one.
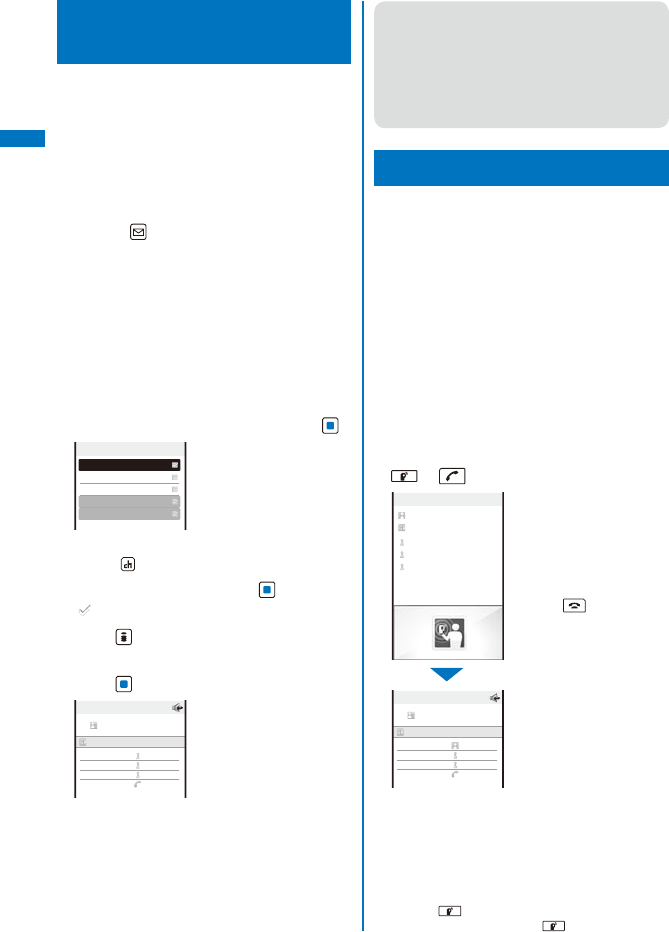
78
PushTalk
Adding a Member during
PushTalk Communication
If you originate a PushTalk call, you can add a
member during PushTalk communication.You
can add members up to the maximum number
allowed for communication (up to five persons
including yourself) and also place a second
call to a non-participating member.
Example: Selecting a member from the PushTalk
phonebook
1 Press (Add) during PushTalk
communication.
The screen for selecting the method of adding a
member appears.
[View PushTalk PB]:
Select a member from the PushTalk phonebook.
[View phonebook]:
Select a member from the FOMA terminal
phonebook.
[Direct input]:
Enter a phone number directly.
2 Select [View PushTalk PB] and press .
携帯あき子
携帯なつ子
携帯はる子
ドコモ一郎
ドコモ二郎
Member
To select a member from a group
Press (Group) and select a group.
3 Select a member and press .
“” appears for the selected member.
4 Press (Complete).
The Members to add display appears.
5 Press (Call).
Myself
携帯あき子
Connected
ドコモ一郎
Connected
ドコモ二郎
Connected
携帯はる子
Calling
On PushTalk
The FOMA terminal starts calling the selected
member.
● Members added during PushTalk communication
are not displayed in the detailed information of
the Redial/Received record.
● You can add a party who uses a PushTalk-
compatible model, as a PushTalk group member.
However, this added member is not displayed on
the displays of non-compatible models and the
signal tone does not sound either.
Receiving a PushTalk Call
When you receive a PushTalk call, you are
notified by flashing indicator, ring tone, vibrator,
etc. The operation for an incoming PushTalk
call varies depending on the settings of the
Incoming set, Manner mode, etc.
If you receive a PushTalk call during a voice call,
the PushTalk call is not connected. The notification
icon of missed call appears and the call is saved
in the Received record. A PushTalk call received
during a videophone call or data communication is
not connected, either. The call is not saved in the
Received record.
When receiving a PushTalk call during i-mode
communication, the setting for the i-mode arrival act
is applied.
1 When you receive a PushTalk call, press
or .
ドコモ一郎
ドコモ三郎
ドコモ二郎
090XXXXXXXX
PushTalk Gr call
ドコモ二郎
ドコモ一郎
Connected
ドコモ三郎
Connected
ドコモ二郎
Connected
090XXXXXXXX
Calling
On PushTalk
When the call is answered,
it is switched to the hands-
free operation that allows
you to hear the recipient’s
voice from the speaker.
When you do not want to
answer the call
Press .
The names of the members
appear. If the member is not
saved in the Phonebook, this
member’s phone number
appears instead.
When the person who originates a PushTalk call
sets the Set Notification to [Notify], all members
including added members are notified the phone
numbers of the person who originates and all
members. When the person sets it to [Not notify],
all members are displayed as [User Unset].
To speak
Press while the floor is open. You can speak
while you press and hold .
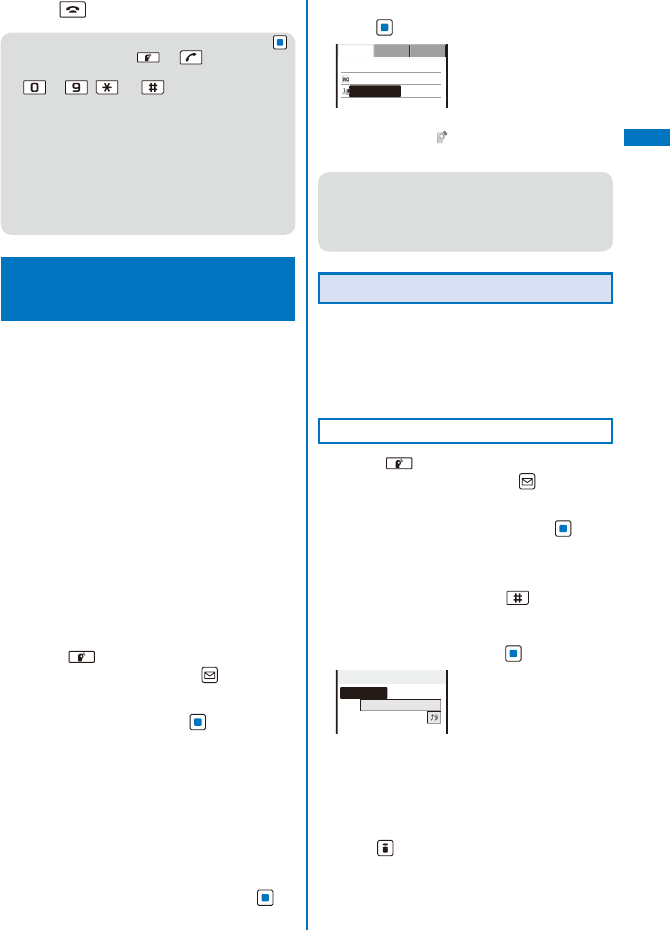
79
PushTalk
2 Press to end the communication.
● You can answer a PushTalk call by pressing
(Answer) instead of or . When you set
the Any key answer to [ON], you can also press
to , , or to answer a PushTalk
call (P.67). When the Slide open setting is set to
[Answer], you can answer a PushTalk call just by
opening the FOMA terminal (P.67).
● A PushTalk call cannot be put on hold.
● When you receive a PushTalk call originated
from a caller who is saved as a nuisance caller,
the call is rejected. The notification icon of
missed call appears and the call is saved in the
Received record.
Saving Data in the
PushTalk Phonebook
You can save up to 1,000 members in the
PushTalk phonebook.
Members you want to save in the PushTalk
phonebook must be also saved in the FOMA
terminal phonebook. You can save only one
phone number in the PushTalk phonebook for
each FOMA terminal phonebook entry. The
name of a member displayed in the PushTalk
phonebook is diverted from that saved in the
FOMA terminal phonebook.
When 2in1 is set to the B mode, you cannot save
data in the PushTalk phonebook.
When 2in1 is set to the Dual mode, you cannot save
the phonebook data for which the Phonebook 2in1
setting is set to [B] in the PushTalk phonebook.
When 2in1 is set to the A mode, the member for
which the Phonebook 2in1 setting is set to [B] is not
displayed.
1 Press for over a second in the
stand-by display and press (Func).
The Function menu appears.
2 Select [Create] and press .
The screen for selecting the saving method
appears.
[View phonebook]:
Select from the FOMA terminal phonebook.
[Direct input]:
Save new data in the FOMA terminal phonebook
and then save it in the PushTalk phonebook.
Follow the same steps as in “Add to FOMA
terminal phonebook” (P.95, step 3 to 6).
3 Select [View phonebook] and press .
The FOMA terminal phonebook appears.
4 Select an entry → a phone number and
press .
Detail Setting
Basic
ドコモ太郎
015
090XXXXXXXX
The phone number is saved in the PushTalk
phonebook and “ ” appears in the entry in the
FOMA terminal phonebook.
● When you save a person saved as Secret in
the FOMA terminal phonebook in the PushTalk
phonebook, the entry is not displayed in the
PushTalk phonebook. To display the name, set
the Secret display to [ON] (P.141).
Setting a Group
You can originate a PushTalk call to several
recipients by saving them in a group as
members beforehand.
You can save up to 20 groups in the PushTalk
phonebook, 19 members for each group.
Saving a Group
1 Press for over a second in the
stand-by display and press (Func).
The Function menu appears.
2 Select [Group setting] and press .
The Group setting display appears.
To display group numbers
When saved, group icons are displayed instead
of group numbers. Press to switch the
display temporarily between group icons and
group numbers.
3 Select a group and press .
Edit group 3
Group name
グループ
3
Icon
4 Enter a group name at [Group name].
Enter a group name within 10 full-width or 21 half-
width characters.
5 Select a group icon at [Icon].
6 Press (Complete).
The group is saved in the PushTalk phonebook.
Continued
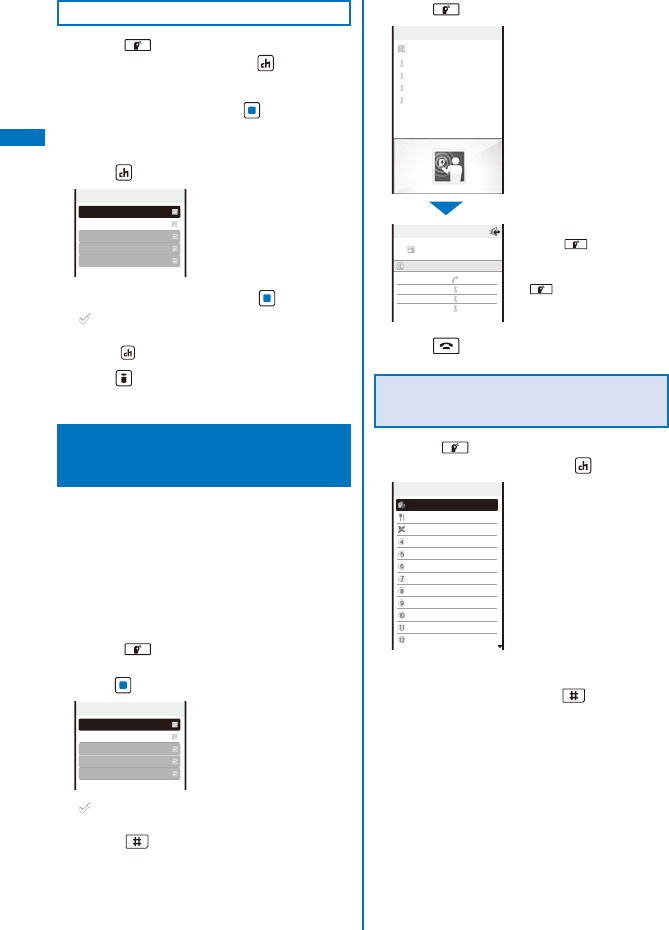
80
PushTalk
Saving a Member to a Group
1 Press for over a second in the
stand-by display and press (Group).
The Group list display appears.
2 Select a group and press .
The Member list display of the selected group
appears.
3 Press (Edit).
携帯あき子
携帯なつ子
携帯はる子
ドコモ一郎
ドコモ二郎
Select member
4/19
4 Select a member and press .
“” appears on the selected member.
To cancel all selections
Press (Rel all).
5 Press (Complete).
The selected member is saved in the group.
Originating a PushTalk Call
Using the PushTalk Phonebook
If you save persons as members in the
PushTalk phonebook, you can originate a
PushTalk call to several persons.
When 2in1 is set to the B mode, you cannot use the
PushTalk phonebook.
When 2in1 is set to the Dual mode, you cannot use
members for which the Phonebook 2in1 setting is
set to [B].
1 Press for over a second in the
stand-by display, select a member, and
press .
Member
携帯あき子
携帯なつ子
携帯はる子
ドコモ一郎
ドコモ二郎
“ ” appears for the selected member.
To display phone numbers
Press to switch the display temporarily
between names and phone numbers.
2 Press .
携帯あき子
携帯はる子
ドコモ一郎
ドコモ二郎
Dialing PT group
Myself
携帯あき子
Calling
携帯はる子
Connected
ドコモ一郎
Connected
ドコモ二郎
Connected
On PushTalk
When a PushTalk call is
originated, the signal tone
sounds.
To speak
Press while the floor
is open. You can speak
while you press and hold
.
3 Press to end the communication.
Originating a PushTalk Call from
the Group
1 Press for over a second in the
stand-by display and press (Group).
Group
○○○同好会
△△△クラブ
○△○愛好会
グループ
4
グループ
5
グループ
6
グループ
7
グループ
8
グループ
9
グループ
10
グループ
11
グループ
12
To display group numbers
When saved, group icons are displayed instead
of group numbers. Press to switch the
display temporarily between group icons and
group numbers.
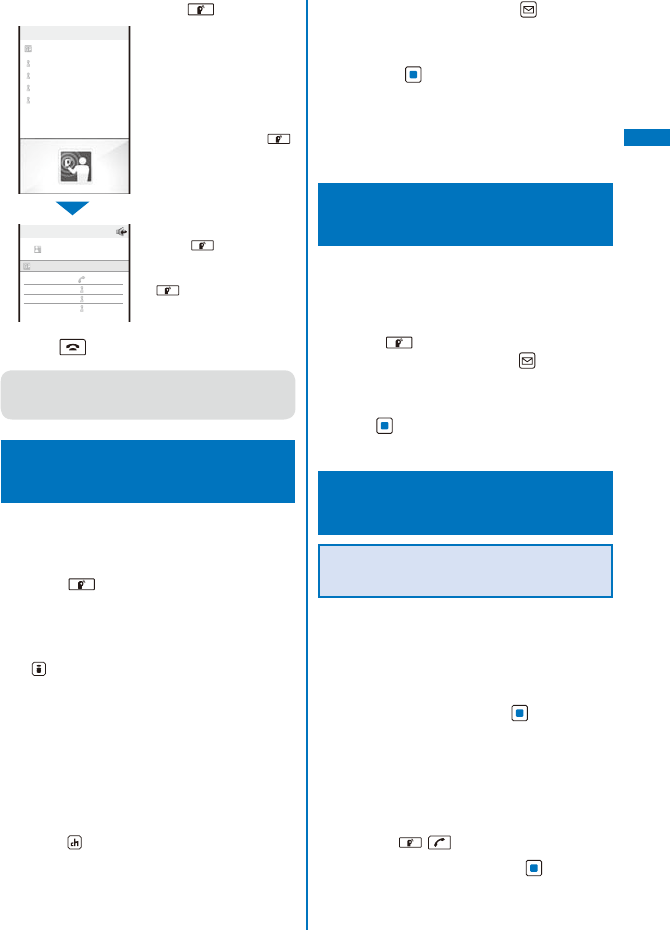
81
PushTalk
2 Select a group and press .
○○○同好会
携帯あき子
携帯はる子
ドコモ一郎
ドコモ二郎
Dialing PT group
Myself
○○○同好会
携帯あき子
Calling
携帯はる子
Connected
ドコモ一郎
Connected
ドコモ二郎
Connected
On PushTalk
When a PushTalk call is
originated, the signal tone
sounds.
To originate a call to specific
members by selecting them
from a group
Select a group →
members and press .
To speak
Press while the floor
is open. You can speak
while you press and hold
.
3 Press to end the communication.
● When originating a PushTalk call to a group, you
can originate a call to up to four members even if
more than five members are saved in the group.
Deleting a PushTalk
Phonebook Entry
You can delete members saved in the PushTalk
phonebook using three methods.
Example: Deleting a member
1 Press for over a second in the
stand-by display.
To delete several members
From the Function menu, select [Delete]
→ [Select&delete], select members, press
(Delete), and select [Yes]/[Delete from main].
To delete all members
From the Function menu, select [Delete] →
[Delete all], enter the Security code, and select
[Yes]/[Delete from main].
When 2in1 is used, the screen informing
to delete members of all modes of the
Phonebook 2in1 setting appears. If you
select [Yes], the members of all modes of the
Phonebook 2in1 setting are deleted.
To reset a group to the default setting
Press (Group), move the cursor to a group
and from the Function menu, select [Reset
group] → [Yes].
2 Select a member and press (Func).
The Function menu appears.
3 Select [Delete] → [Delete one] → [Yes]
and press .
The selected member is deleted.
To delete the selected member from the FOMA
terminal phonebook
Select [Delete] → [Delete one] → [Delete from
main].
Using the PushTalk
Phonebook <PushTalkPlus>
You can connect to the network and use the
PushTalkPlus service (P.80).
To use the PushTalkPlus service, you must subscribe
to this service.
1 Press for over a second in the
stand-by display and press (Func).
The Function menu appears.
2 Select [NW connection] → [Yes] and
press .
The call is connected to the network.
Setting the PushTalk
Operation <PushTalk setting>
Setting Whether to Answer a
Call Automatically
You can set whether to answer an incoming
PushTalk call automatically using the hands-
free function.
1 From the Menu, select [Settings] →
[Application] → [PushTalk] → [Auto
answer setting] and press .
[ON]:
A PushTalk call you receive is answered
automatically using the hands-free function.
When the Manner mode is set, the call is not
answered automatically.
[OFF]:
A PushTalk call you receive is answered by
pressing , , etc.
2 Select [ON]/[OFF] and press .
The Auto answer setting is set.
Continued
82
PushTalk
Setting the Ring Time
If you select [OFF] for the Auto answer setting,
set the ring time of the PushTalk call.
1 From the Menu, select [Settings] →
[Application] → [PushTalk] → [Set ring
time] and press .
Enter the ring time within 01 to 60 seconds.
2 Enter the Push Talk ring time.
The Set ring time is set.
Setting How to Answer a Voice Call
during PushTalk Communication
You can set how to answer a voice call when
you receive it during PushTalk communication.
1 From the Menu, select [Settings] →
[Application] → [PushTalk] → [P-Talk
arrival act] and press .
[Answer]:
Receive a voice call and you can answer it.
[Call Rejection]:
Reject an incoming voice call. The missed call
notification icon appears and the call is saved in
the Received record.
[Voice Mail]:
Connect an incoming voice call to the Voice Mail
Service Center.
[Call Forwarding]:
Connect an incoming voice call to a forwarding
number.
2 Select the operation to be performed
when you receive a voice call during
PushTalk communication and press .
The P-Talk arrival act is set.
Setting Whether to Receive a
PushTalk Call during i-mode
You can set whether to receive a PushTalk
call by disconnecting i-mode if there is any
incoming PushTalk call during i-mode or
i-mode communication.
1 From the Menu, select [Settings] →
[Application] → [PushTalk] → [i-mode
arrival act] and press .
[Prefer PushTalk]:
Receive the PushTalk call and disconnect
i-mode. After the PushTalk call is finished, the
previous display reappears.
[Prefer i-mode]:
Continue i-mode without receiving a PushTalk
call. The missed PushTalk call is not saved in the
Received record.
2 Select the preferred function and press
.
The i-mode arrival act is set.
Using the Hands-free Function
You can set whether to use the hands-free
function during PushTalk communication.
1 From the Menu, select [Settings] →
[Application] → [PushTalk] → [Hands-
free] and press .
[ON]:
You hear a member’s voice from the speaker
during PushTalk communication.
[OFF]:
You hear a member’s voice from the earpiece
during PushTalk communication.
2 Select [ON]/[OFF] and press .
The Hands-free is set.
● When the Flat-plug Earphone/Microphone with
Switch (optional) is connected to the FOMA
terminal, you hear a member’s voice from the
Earphone/Microphone, regardless of the Hands-
free setting.
● When the FOMA terminal is opened while the
Manner mode is set, you cannot answer a call
using the hands-free function regardless of the
Hands-free setting.
83
PushTalk
Setting the Operation for the FOMA Terminal
Being Closed during PushTalk Communication
You can end a call or switch a call to the
hands-free operation by closing the FOMA
terminal during PushTalk communication. You
can also continue the communication.
1 From the Menu, select [Settings] →
[Management] → [Slide setting] →
[Setting when folded] → [PushTalk] and
press .
[Continuous call]:
Continue the PushTalk communication.
[Speaker call]:
You hear a member’s voice from the speaker
during PushTalk communication.
[Finish]:
Hang up the PushTalk call.
2 Select an operation when the
FOMA terminal is closed during the
communication and press .
The Setting when folded is set.
● The Setting when folded is disabled when the
Flat-plug Earphone/Microphone with Switch
(optional) is connected to the FOMA terminal
and the call remains connected through the
Earphone/Microphone even if you close the
FOMA terminal.


85
Phonebook
Phonebooks the FOMA Terminal Can Use ................................................................ 94
Saving an Entry in the FOMA Terminal Phonebook
...
<Add to FOMA terminal phonebook>
95
Saving an Entry in the UIM Phonebook ................................. <Add to UIM phonebook> 98
Saving the Redial/Received Record in the Phonebook ............................................. 99
Saving a Group ..................................................................................<Group setting> 100
Displaying the Phonebook ....................................................................................... 101
Searching the Phonebook ......................................................... <Search phonebook> 102
Setting the Display of the Phonebook ....................................... <Phonebook setting> 102
Editing a Phonebook Entry .............................................................<Edit phonebook> 103
Deleting a Phonebook Entry .......................................................<Delete phonebook> 103
Checking the Number of Entries Saved ...........................................<Memory status> 104
Dialing Quickly to Frequently Called Numbers .................................... <2-touch dial> 104
Storing (Restoring/Updating) the Phonebook at the Data Security Service Center
...
<Data Security Service>
105
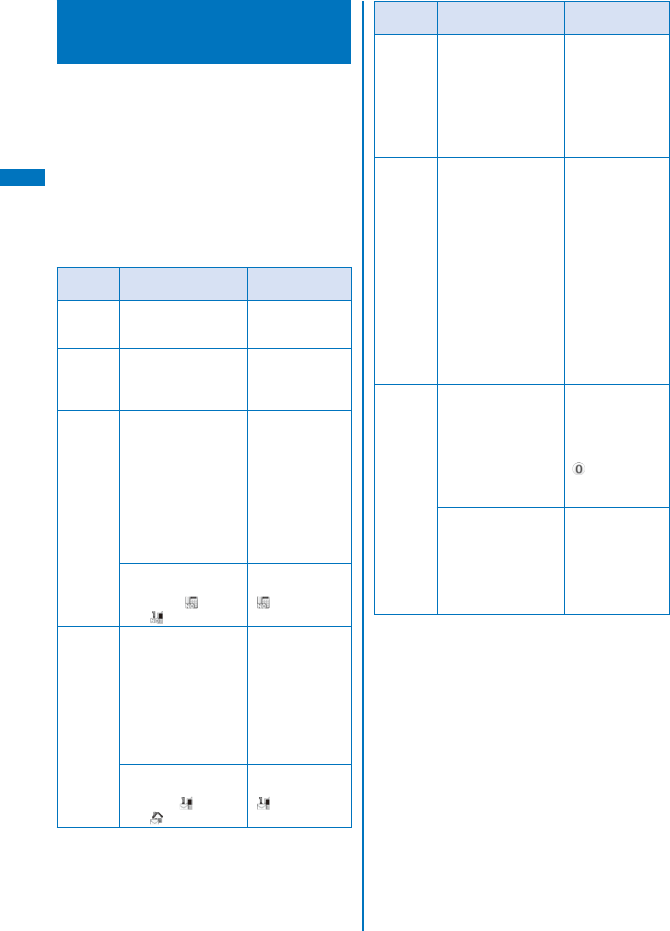
86
Phonebook
Phonebooks the FOMA
Terminal Can Use
The FOMA terminal is equipped with two types
of phonebooks, the FOMA terminal phonebook,
which you can set up with various functions,
and the UIM (FOMA card) phonebook, which
can be used with other FOMA terminals. Use
either phonebook to your convenience.
You can also use the PushTalk phonebook
dedicated for PushTalk that can be created using
data saved in the FOMA terminal phonebook (P.85).
The table below shows the data you can save
in each phonebook.
Data to be
saved
FOMA terminal
phonebook UIM phonebook
Number
of data
entries
You can save up to
1,000 entries.
You can save up
to 50 entries.
Group You can sort entries in
groups from Group 0
to 19.
You can sort
entries in groups
from Group 0 to
10.
Phone
number to
be saved
You can save up to
three numbers for
each phonebook entry
and a total of up to
3,000 numbers in the
Phonebook.
You can save one
number for each
phonebook entry in the
PushTalk phonebook.
You can save one
number for each
phonebook entry.
You can select from
nine types of icons,
such as [ Public]
and [ Mobile1].
You cannot
select icons.
“” is saved
automatically.
Mail
address to
be saved
You can save up to
three addresses for
each phonebook entry
and a total of up to
3,000 addresses in the
Phonebook.
You can also save one
Secret code for each
address.
You can save one
address for each
phonebook entry.
You can select from
five types of icons,
such as [ Mobile1]
and [ Home].
You cannot
select icons.
“” is saved
automatically.
Data to be
saved
FOMA terminal
phonebook UIM phonebook
Image to
be saved
You can save one Des
call display and one
Des substitute image
for each phonebook
entry. You can save up
to 1,000 each of still
image and Chara-den
files in the Phonebook.
You cannot save
images.
Other
data to be
saved
You can save one
name, reading,
memory number,
location information,
postal code, postal
address, and birthday
for each phonebook
entry.
You can also set one
type of Des phone
tone, Des mail tone,
Select phone Illum.,
Select mail Illum.,
and Secret for each
phonebook entry.
You can save
one name and
reading for each
phonebook entry.
Group to
be saved
You can save one
group name and
group icon for each
group.
You can save one
group name for
each group. You
cannot change a
group name with
[グループなし].
You cannot select
icons.
You can also set
one type of Des call
display, Des phone
tone, Des mail tone,
Select phone Illum.,
and Select mail Illum.
for each group.
Unavailable
You can use phonebook data saved in your
UIM when this UIM is used on another FOMA
terminal.
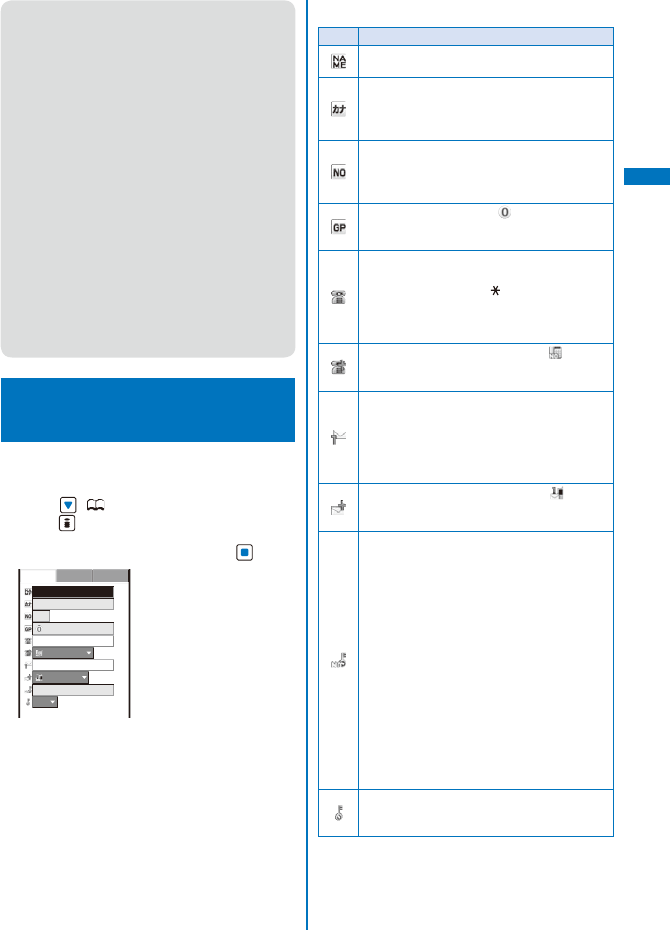
87
Phonebook
● For the order of priority between call image, ring
tone, and incoming indicator color, see P.111.
● When you receive a call or mail from a person
saved as Secret, the regular ring tone, incoming
image and incoming indicator color are used,
and a name of the caller/sender is not displayed.
To enable the settings of a person saved as
Secret or a group that includes a person saved
as Secret, set the Secret display to [ON].
● When 2in1 is used, the phonebook is
automatically switched to the available one
according to the 2in1 modes. When you save
data in the phonebook, the Phonebook 2in1
setting is automatically set according to a
compatible 2in1 mode. You can also change the
Phonebook 2in1 setting by each data or group
(P.399).
● Please note that when you change models and
attempt to transfer the saved data to a new
mobile phone at our service counter (DoCoMo
shop, etc.), you may not be able to copy it to the
FOMA terminal depending on the specifications
of your new phone.
Saving an Entry in the FOMA Terminal
Phonebook
<Add to FOMA terminal phonebook>
Up to 1,000 entries can be saved in the FOMA
terminal phonebook.
1 Press ( ) in the stand-by display and
press (Create).
2 Select [Main memory] and press .
000
グループなし
Public
Mobile1
OFF
Detail
Basic Setting
To save an entry in the UIM phonebook
Select [UIM] (P.98).
3 Save each item at the Basic display.
Icon Settings
Enter a name within 16 full-width or 32 half-
width characters.
When entering a name, the reading is
automatically entered.
To edit the reading, enter the reading within
32 half-width characters.
Enter a memory number from 000 to 999.
The smallest available memory number is
automatically entered. Enter a name/phone
number/mail address to change it.
Select a group. [ グループなし] is
automatically entered. Enter a name/phone
number/mail address to change it.
Enter within 26 digits per phone number. You
can save the pause (P), timer (T), “+”, “#”, and
sub-address separator ( ).
If a phone number is saved with the “184”
or “186”, SMS cannot be sent to this phone
number even if you select it.
Select a phone number type icon. [ Public] is
automatically entered. Enter a phone number
to change it.
Enter within 50 half-width alphanumeric
characters and symbols per mail address.
When sending mail to an i-mode terminal
(including a Mova terminal), you need to
specify only the mail address portion before
the @ mark.
Select a mail address type icon. [ Mobile1]
is automatically entered. Enter a mail address
to change it.
When the recipient saves a Secret code in a
mail address (phone number@docomo.ne.jp),
enter the Secret code. When sending mail, the
Secret code is automatically added.
When you save a mail address as “phone
number + Secret code@docomo.ne.jp” in
the Phonebook, if you save a Secret code,
you cannot send mail or reply mail to this
address. To avoid this problem, change the
mail address to “phone number@docomo.
ne.jp” and save a Secret code.
The Secret code is masked by “
****
”.
Only when the Secret display is set to [ON],
it is displayed in numbers.
To save your Secret code, see the “Mobile
Phone User’s Guide
【i-mode】
FOMA
version”.
Select [ON]/[OFF] of the Secret.
To display the entry saved as Secret, set
the Secret display to [ON].
Continued
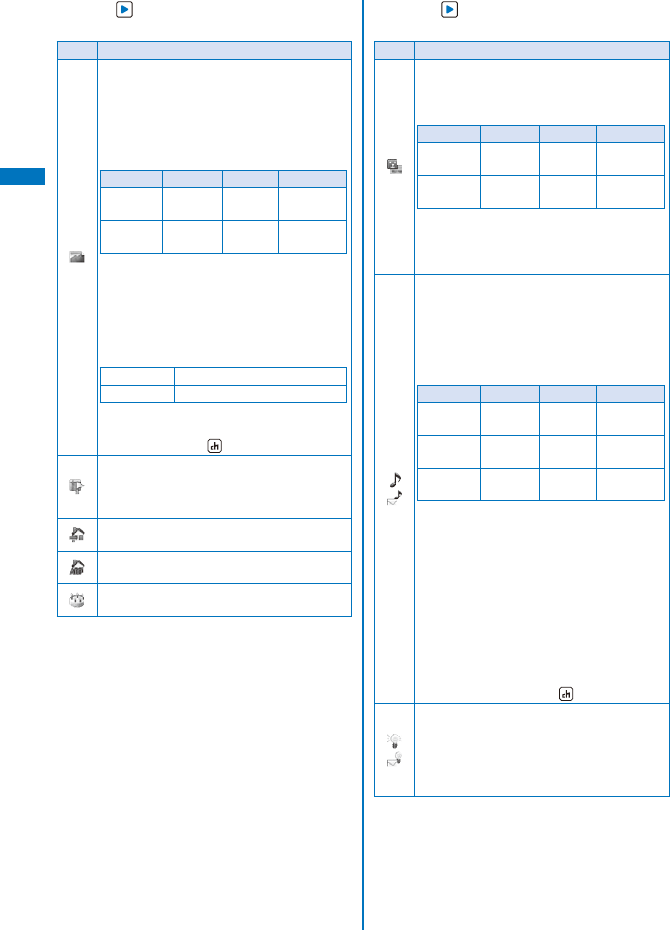
88
Phonebook
4 Press and save each item at the Detail
display.
Icon Settings
Select an image from My Picture/i-motion of
the Data Box or record a new one to be used
as the Des call display that is displayed when
placing/receiving a voice or videophone call,
right after receiving mail, or when displaying
the individual Phonebook entry.
You can set the following files.
Category
File format
File size Image size
My picture GIF/JPEG
Max. 100K
bytes
Max. [QVGA
(240×320)]
i-motion※MP4
Max. 10M
bytes
Max. [VGA
(640×480)]
※ Some i-motion may not be set.
It may take time to display a large-sized
image.
To use an image after recording it by the
camera, select [Camera]/[Movie] (P.155,
170). You can record an image in the
following sizes.
Still image Max. [QVGA(240×320)]
Movie Max. [VGA(640×480)]
To specify no image, select [None].
To check the image, move the cursor to an
image and press (Play).
Add the location information from the Position
location, Location history, or image (P.277).
When the location information is saved, the
message “Has loc. info” appears.
Enter a postal code within seven half-width
digits.
Enter a postal address within 64 full-width or
128 half-width characters.
Enter a birthday within the range from
1900/01/01 to 2050/12/31.
5 Press and save each item at the
Setting display.
Icon Settings
Select the Des substitute image to be sent
during a videophone call from My picture/
Chara-den of the Data Box.
You can set the following files.
Category
File format
File size Image size
My picture GIF/JPEG Max. 50K
bytes
Max. [QCIF
(176×144)]
Chara-den
−
Max. 100K
bytes
−
To specify no substitute image, select
[None]. A substitute image or your own
image set in the Set outgoing image (P.76)
is sent.
Select a ring tone from MUSIC/i-motion/
Melody of the Data Box to be used as the Des
phone tone/Des mail tone that sounds when
receiving a voice or videophone call and right
after receiving mail.
You can set the following files. You can
select a Chaku-Uta® from [i-motion].
Category
File format
File size Image size
MUSIC※AAC-LC/
HE-AAC
Max. 5M
bytes −
i-motion※MP4
Max. 10M
bytes
Max. [VGA
(640×480)]
Melody SMF/MFi
Max. 350K
bytes
−
※ Some files may not be set.
When you select a Chaku-Uta Full® that has
a choice of specified playback ranges from
[MUSIC], the screen for selecting a type of
setting appears. If you select [Full song], the
entire track of Chaku-Uta Full® is set for the
ring tone. If you select [Point], the specified
playback range of Chaku-Uta Full® is set for
the ring tone.
To specify no ring tone, select [None].
To mute the ring tone, select [Silent].
To check the ring tone, move the cursor to
the ring tone and press (Play).
Select a color for the Select phone/mail
Illum. that flashes when receiving a voice or
videophone call and right after receiving mail.
When you move the cursor to a color, the
incoming indicator flashes accordingly.
To specify no color, select [None].
89
Phonebook
6 Press (Complete).
The entered data is saved in the FOMA terminal
phonebook.
● If you set [None] for the Des call display, Des
phone/mail tone, or Select phone/mail Illum.,
then the call image, ring tone, and indicator color
saved for the Group setting are automatically
used for the respective function. If these settings
are not saved in the Group setting, the Incoming
set (P.108) or Animation (P.120) is used.
● If you set an i-motion with video and sound
tracks for the Des mail tone, the i-motion image
appears when mail reception is completed.
● If you set an i-motion for the Des call display, the
image set for the Animation is displayed when
you place a voice or videophone call.
● If you set an i-motion or Chaku-Uta Full® for the
Des phone/mail tone or set an i-motion for the
Des call display, the settings may be changed in
some cases.
Saving an Entry in the UIM
Phonebook <Add to UIM phonebook>
Up to 50 entries can be saved in the UIM
(FOMA card) phonebook.
1 Press ( ) in the stand-by display and
press (Create).
2 Select [UIM] and press .
グループなし
Basic
To save an entry in the FOMA terminal phonebook
Select [Main memory] (P.95).
3 Save each item.
Icon Settings
Enter a name within 10 full-width or 21 half-
width characters. If you use a mixture of full-
width and half-width characters or half-width
katakana characters for the name, the number
of characters that you can save is limited to 10
characters.
When entering a name, the reading is
automatically entered.
To edit the reading, enter the reading within
12 full-width katakana characters or 25
half-width alphanumeric characters. If you
use a mixture of full-width and half-width
characters for the reading, the number of
characters that you can save is limited to
12 characters.
Select a group. When entering a name/phone
number/mail address, group [ グループなし]
is automatically entered.
Enter a phone number within 26 digits (20
digits for some types of UIM).
Enter a mail address within 50 half-width
alphanumeric characters and symbols. If you
use symbols for the mail address, you may not
be able to save up to the maximum allowable
number of characters.
When sending mail to an i-mode terminal
(including a Mova terminal), you need to
specify only the mail address portion before
the @ mark.
4 Press (Complete).
The entered data is saved in the UIM phonebook.
● Data copied from the FOMA terminal phonebook
or received using a function such as the infrared
or iC communication may not be saved correctly.
90
Phonebook
Saving the Redial/Received
Record in the Phonebook
A phone number saved in the record can be
directly added to the Phonebook.
Example: Saving a received record in the FOMA
terminal phonebook as a new entry
1 Press ( ) in the stand-by display.
To save a number from the redial record
Press ( ) in the stand-by display.
2 Select a received record and press
(Save).
The screen for selecting where to save appears.
3 Select [Ordinary PB] and press .
The screen for selecting how to save to the
Phonebook appears.
To save data in the PushTalk phonebook
Select [PushTalk PB] → a PushTalk phone
number.
4 Select [New] and press .
The screen for selecting where to save appears.
When you select [Add]
Select an entry to which you want to add from
the Phonebook.
5 Select [Main memory] and press .
The Edit phonebook display appears.
To save to the UIM phonebook
Select [UIM].
6 Save other items.
Follow the same steps as in “Add to FOMA
terminal phonebook” (P.95, step 3 to 5) or in “Add
to UIM phonebook” (P.98, step 3).
7 Press (Complete).
The entry is saved in the FOMA terminal
phonebook.
Saving a Group <Group setting>
Up to 20 groups can be saved in the FOMA
terminal phonebook, and up to 10 groups can
be saved in the UIM (FOMA card) phonebook.
You cannot change [ グループなし] in the UIM
phonebook.
Example: Saving a group in the FOMA terminal
phonebook
1 Press (Func) in the Phonebook.
The Function menu appears.
2 Select [Group setting] and press .
Group setting
グループなし
Friends
Office
グループ
3
グループ
4
グループ
5
グループ
6
グループ
7
グループ
8
グループ
9
グループ
10
グループ
11
To display group numbers
When saved, group icons are displayed instead
of group numbers. Press to switch the
display temporarily between group icons and
group numbers.
To reorder a group
Press (Reorder), select a group, move the
cursor to the place to move to, press (Move),
and press (Complete).
3 Select a group and press .
グループなし
Basic
Setting
4 Enter a group name at [ ].
Enter a group name within 10 full-width or 21 half-
width characters. For data in the UIM phonebook,
if you use a mixture of full-width and half-width
characters or half-width katakana characters for the
group name, the number of characters that you can
save is limited to 10 characters.
For data in the UIM phonebook, go to step 7.
5 Select a group icon at [ ].

91
Phonebook
6 Press and save the Des call display,
Des phone tone, and Select phone Illum.
Follow the same steps as those for the Des
call display, Des phone/mail tone, and Select
phone/mail Illum. described in the Add to FOMA
terminal phonebook (P.95, step 3 to 5).
7 Press (Complete).
The group is set.
● When the Des call display, Des phone/mail tone,
or Select phone/mail Illum. is set for both the
Phonebook and Group setting, the setting for the
Phonebook has higher priority.
Displaying the Phonebook
You can use the Phonebook to perform various
operations.
Example: Displaying the FOMA terminal phonebook
1 Press ( ) in the stand-by display.
かさ なはまやらた
ドコモ一郎
ドコモ三郎
ドコモ二郎
ドコモ太郎
When 2in1 is set to the Dual mode, the
Phonebook 2in1 setting is confirmed by the
following icons.
A mode
B mode
Common
To change the phonebook being displayed
From the Function menu, select [Change to
UIM]/[Change to Main]. “ ” appears in the UIM
phonebook.
To switch the display style
Press (Display), select [Alphabet]/[Group]/
[Number]/[Phone number].
To attach a Phonebook entry to mail
Move the cursor to data and from the Function
menu, select [Attach to mail].
To place a voice call
Move the cursor to data and press .
2 Select an entry and press .
ト゛コモタロウ
015
Friends
090XXXXXXXX
docomo.taro.
△△
@doco
mo.ne.jp
OFF
ドコモ太郎
Detail Setting
Basic
To place a videophone call
Move the cursor to a phone number and press
(V.phone).
To originate a PushTalk call
Move the cursor to a phone number and press
.
To send mail
Move the cursor to a mail address and press
(Mail).
To check the call image
Press , move the cursor to a call image and
press (Play).
To use the location information
Press , move the cursor to [ Has loc. info],
and press .
To display the detailed location information
Press , move the cursor to [ Has loc. info],
and press (Detail).
To check the Des substitute image
Press and move the cursor to the Des
substitute image and press (Play).
To check a ring tone
Press and move the cursor to a ring tone and
press (Play).
To check an incoming indicator
Press and move the cursor to an incoming
indicator and press (Check).
To turn on/off the image display
Press to temporarily turn on/off an image.
● When 2in1 is set to the Dual mode, you can
select a caller ID at the Option call display before
placing a call (P.60).
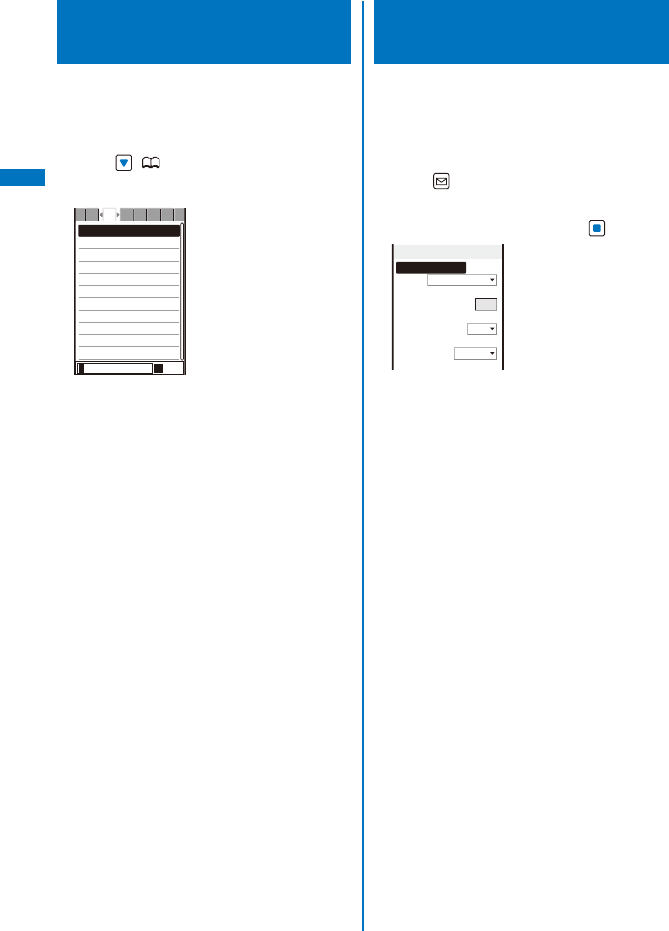
92
Phonebook
Searching the Phonebook
<Search phonebook>
You can search the desired data of the
Phonebook by entering a reading, memory
number, and phone number.
Example: Phonebook is ordered alphabetically
1 Press ( ) in the stand-by display.
2 Enter a reading.
ドコモ一郎
ドコモ三郎
ドコモ二郎
ドコモ太郎
タ
カナAa12
かさ なはまやらた
Every time you enter a letter, the cursor moves to
the data which is the closest one to the entered
reading.
When the Phonebook is ordered by the group
Enter a reading. Every time you enter a letter, the
cursor moves to the data which is the closest
one to the entered reading within the group.
When the Phonebook is ordered by the memory
number
Enter a memory number. Every time you enter a
digit, the cursor moves to the data which is the
closest one to the entered memory number.
When the Phonebook is ordered by the phone
number
Enter a phone number. Every time you enter a
digit, the cursor moves to the data which is the
closest one to the entered phone number.
Setting the Display of the
Phonebook <Phonebook setting>
You can set the type of a phonebook to be
displayed and font size to be used for the
Phonebook when you display it and whether
to display an image when you display a single
entry of the Phonebook.
1 Press (Func) in the Phonebook.
The Function menu appears.
2 Select [PB setting] and press .
Phonebook setting
Which PB to use
Phonebook
Font size
M
Set image display
ON
Save/attach image
Valid
[Which PB to use]:
Select a phonebook to be displayed when you
display the Phonebook.
[Font size]:
Select the font size of the Phonebook from [Extra
extra large], [Extra large], [Large], or [Medium].
[Set image display]:
Select whether to display the Des call display
that was saved when a single entry of the
Phonebook is displayed.
[Save/attach image]:
Select whether to save an image that is set for
the Des call display to the microSD memory card
when you save Phonebook data or attach to mail.
3 Select [Phonebook]/[UIM phonebook] at
[Which PB to use].
4 Select [ON]/[OFF] at [Set image display].
5 Select [Valid]/[Invalid] at [Save/attach
image].
[Valid]:
Save an image.
[Invalid]:
Do not save an image.
The Phonebook setting is set.
93
Phonebook
Editing a Phonebook Entry
<Edit phonebook>
1 From the Phonebook, select an entry and
press .
2 Press (Edit).
The Edit phonebook display appears.
3 Edit each item.
Follow the same steps as in “Add to FOMA
terminal phonebook” (P.95, step 3 to 5) or in “Add
to UIM phonebook” (P.98, step 3).
4 Press (Complete).
The edited data is saved in the Phonebook.
Deleting a Phonebook Entry
<Delete phonebook>
You can delete Phonebook entries using three
methods.
When the Phonebook is ordered by the phone
number, [Delete one] and [Select&delete] cannot be
selected.
Example: Deleting an entry
1 Press ( ) in the stand-by display.
ドコモ一郎
ドコモ三郎
ドコモ二郎
ドコモ太郎
かさ なはまやらた
To delete several entries
From the Function menu, select [Delete]
→ [Select&delete], select entries, press
(Complete), and select [Yes].
Every time you enter a letter or digit in the
Data selection display, the cursor moves to the
data which is the closest one to the entered
reading or memory number.
To delete all Phonebook entries
From the Function menu, select [Delete] →
[Delete all], enter the Security code, and select
[Yes].
2 Select an entry and press (Func).
The Function menu appears.
3 Select [Delete] → [Delete one] → [Yes]
and press .
The selected entry is deleted.
● When an entry to be deleted is also saved in the
PushTalk phonebook, it is automatically deleted
from the PushTalk phonebook. When you delete
all data of the FOMA terminal phonebook, the
Group setting of the PushTalk phonebook is reset
to the default setting.
Checking the Number of
Entries Saved <Memory status>
You can check the number of entries saved in
the FOMA terminal phonebook and UIM (FOMA
card) phonebook and entries saved as Secret.
1 Press (Func) in the Phonebook.
The Function menu appears.
2 Select [Memory status] and press .
Memory status
Used
450
Secret
5
Used(UIM)
20
[Used]:
Display the number of entries saved in the FOMA
terminal phonebook (including entries saved as
Secret).
[Secret]:
Display the number of entries saved as Secret
in the FOMA terminal phonebook (this data is
displayed only when the Secret display is set to
[ON]).
[Used(UIM)]:
Display the number of entries saved in the UIM
phonebook.
94
Phonebook
Dialing Quickly to Frequently
Called Numbers
<2-touch dial>
A call can be placed easily to the recipients
saved in memory numbers from 000 to 009 by
using a shortcut.
It is useful to save frequently used phone
numbers in memory numbers from 000 to 009.
When the Secret display is set to [OFF], the 2-touch
dial cannot be used to place a call to a phone
number saved as Secret.
Example: Placing a call to the recipient saved in the
memory number 001
1 Enter the last one digit of the memory
number (0 to 9) in the stand-by display.
To check a recipient’s data saved in a memory
number
Enter the memory number (one or two digits) and
press or . A list of used memory numbers
and their associated entries appears with the
entered memory number highlighted.
2 Press .
After about five seconds, the call is connected to
the first phone number of the recipient saved in
memory number 001.
To place a videophone call
Press (V.phone).
To send mail
Press (Mail).
To send SMS
Press (Mail) for over a second.
● The call can be placed or SMS can be sent to
the recipients saved in memory numbers from
010 to 099 by entering the last two digits (10 to
99) of the memory numbers.
Storing (Restoring/Updating) the Phonebook at the
Data Security Service Center
<Data Security Service>
You can use the Data Security Service to store
the FOMA terminal phonebook at the Data
Security Service Center. You can update or
restore the stored Phonebook by connecting to
the Data Security Service Center.
Data Security Service is a paid service that requires
a subscription. For details on this service, see
the “Mobile Phone User’s Guide
【i-mode】
FOMA
version”.
You cannot save the UIM phonebook at the Center.
Storing/Updating/Restoring the
Phonebook
1 From the Menu, select [LifeKit] → [Data
Security Service] → [Connect to Center]
and press .
The Security code screen appears.
To connect to the Data Security Service Center from
the Phonebook
From the Function menu in the Phonebook,
select [Cnct to Center].
2 Enter the Security code and press
(OK).
The screen for confirming whether to connect to the
Data Security Service Center appears.
3 Select [Yes] and press .
The call is connected to the Data Security Service
Center and the data is updated. When the update
is completed, the update result screen appears.
● The automatic update of the Phonebook may fail
when another function is executed. In this case,
“” (PB update failed) appears in the stand-by
display.
95
Phonebook
Setting Whether to Send Images
of the Phonebook
You can set whether to send a Des call display
(JPEG/GIF image) saved in the Phonebook to
the Data Security Service Center.
1 From the Menu, select [LifeKit] → [Data
Security Service] → [Service setting] and
press .
The Service setting display appears.
2 Select [Send]/[Unsend] at [Send
phonebook img].
The Send phonebook img is set.
Displaying the Communication
History
You can save up to 30 history records of
communication with the Data Security Service
Center.
When the number of communication history records
exceeds 30, the records with the oldest date/time
are overwritten, in that order.
1 From the Menu, select [LifeKit] → [Data
Security Service] → [Exchanging history]
and press .
The Exchanging history display appears.
2 Select a record and press .
The update result screen appears.


97
Sound/Display/
Light Settings
Setting the Ring Tone/Image/Indicator Color for Incoming Call and Mail
....<Incoming set> 108
■ Setting the Ringer
Setting the Sounds of the FOMA Terminal .......................................<Set basic tone> 111
Adjusting the Volume of Caller’s Voice ....................................................... <Volume> 112
Adjusting the Volume While Playing Flash Movie ...............................<Sound effect> 112
Adjusting the Volume While Running i-αppli Software ................... <Volume setting> 112
Setting Whether to Prioritize the i-αppli Sound ......................... <Pref. i αppli sound> 113
Setting the Sound/Indicator While Using the GPS Function ...................................... 113
Setting the Poor Signal Quality Alert .................................................<Quality alarm> 114
Setting Earphone Only for the Ring Tone ............................. <Headset usage setting> 114
Changing the Ringing Sound ................................................................ <Melody Call> 115
Muting the Ring Tone ........................................................................ <Manner mode> 115
Changing the Manner Mode Settings ..................................... <Manner mode setting> 116
■ Setting the Display/Display Light
Setting the Stand-by Display ........................................................ <Stand-by display> 117
Setting Images for Placing a Call/Sending Mail ......................................<Animation> 120
Setting the Display for Incoming and Outgoing Calls ...........................<Call display> 121
Setting the Display and Keypad Illumination ...........................................<Backlight> 121
Saving Power for the Display .............................................................. <Power saver> 122
Changing the Appearance of the Menu ..............................................<Menu setting> 122
Using the Kisekae Tool .................................................................... <Kisekae setting> 123
Customizing the Kisekae Menu .........................................................<Kisekae menu> 125
Informing Missed Call/New Mail with Indicator ..................................... <Missed call> 126
Setting the Font Size ...............................................................................<Font size> 127
Changing the Screen Display to English .......................................<Select language> 128
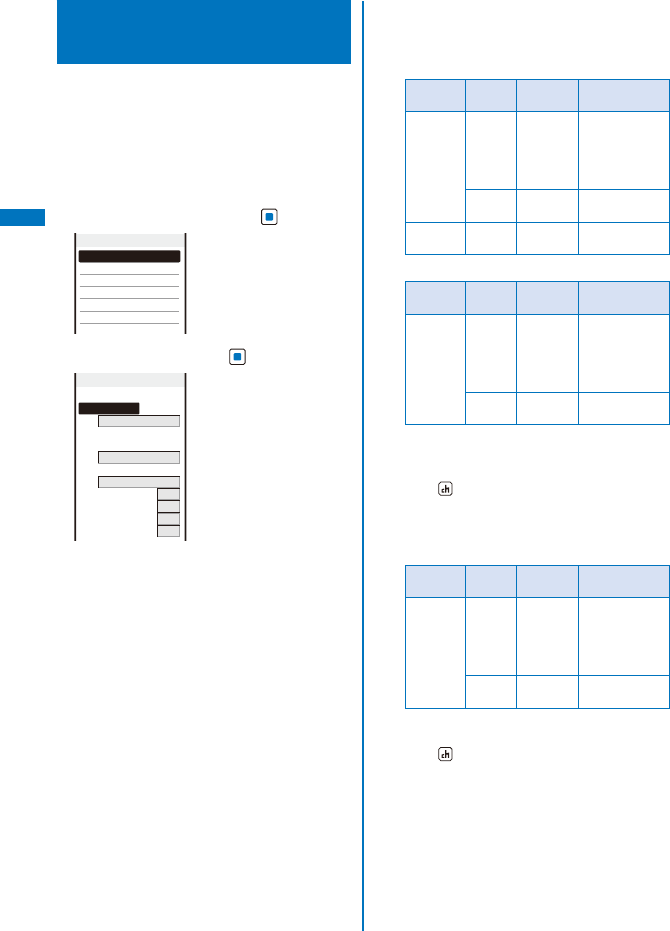
98
Sound/Display/Light Settings
Setting the Ring Tone/Image/Indicator Color
for Incoming Call and Mail
<Incoming set>
You can set a ring tone, ring volume, incoming
image, vibration pattern, and incoming
indicator color for each type of incoming
transmission (voice, videophone, or PushTalk
call, or mail, etc.).
Example: Performing incoming mail settings
1 From the Menu, select [Settings] → [Call]
→ [Incoming set] and press .
Incoming set
Incoming call
Incoming V.phone
PushTalk
Mail
MessageR
MessageF
2 Select [Mail] and press .
Mail
<Receiving setting>
Receiving img
White Scrapbook
<Complete setting>
Received image
White Scrapbook
Ring tone
着信音
1
Ring volume
4
Vibrator
OFF
Color
C9
Ring time
04s
To perform the settings for an incoming videophone
call
If you set [Link incoming call] to [ON], the
settings for the incoming call are applied.
To perform the settings for an incoming Message
R/Message F
If you set [Link receive mail] to [ON], the settings
for the incoming mail are applied.
3 Select an image from the Data Box at
[Receiving img].
You can set the following files.
Incoming call/Incoming V.phone
Category File
format File size Image size
My picture
GIF/
JPEG
Max. 250K
bytes
Max. [Stand-by
(480×864)],
Max. W480×
H288 for GIF
animation
SWF Max. 100K
bytes −
i-motion
※MP4 Max. 10M
bytes
Max. [VGA(640
×480)]
Mail/MessageR/MessageF
Category File
format File size Image size
My picture
GIF/
JPEG
Max. 250K
bytes
Max. [Stand-by
(480×864)],
Max. W480×
H288 for GIF
animation
SWF Max. 100K
bytes −
※ Some i-motion may not be set.
To check the incoming image
Move the cursor to the incoming image and
press (Play).
4 Select an image from the Data Box at
[Received image].
You can set the following files.
Category File
format File size Image size
My picture
GIF/
JPEG
Max. 250K
bytes
Max. [Stand-by
(480×864)],
Max. W480×
H288 for GIF
animation
SWF Max. 100K
bytes −
To check the Received image
Move the cursor to the Received image and
press (Play).
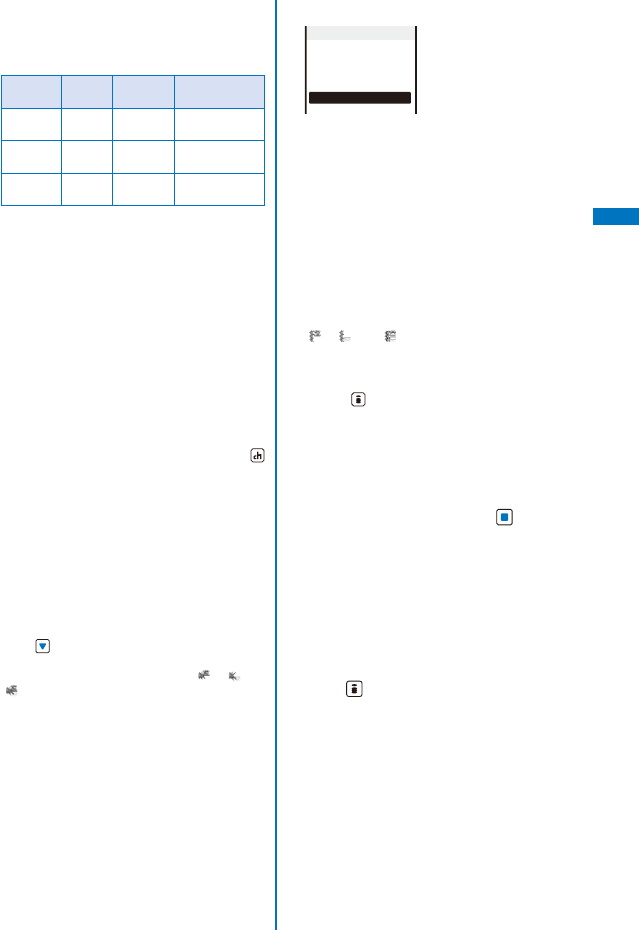
99
Sound/Display/Light Settings
5 Select a ring tone from MUSIC/i-motion/
Melody of the Data Box at [Ring tone].
You can set the following files. You can select a
Chaku-Uta® from [i-motion].
Category File
format File size Image size
MUSIC※
AAC-LC/
HE-AAC
Max. 5M
bytes −
i-motion
※MP4 Max. 10M
bytes
Max. [VGA(640
×480)]
Melody SMF/
MFi
Max. 350K
bytes −
※ Some files may not be set. You cannot set an
i-motion with video track only. You can set only
an i-motion with sound track only (i-motion
without video track, such as singer’s voice) for
incoming PushTalk calls.
When you select a Chaku-Uta Full® that has a
choice of specified playback ranges from [MUSIC]
The screen for selecting a type of setting
appears. If you select [Full song], the entire track
of Chaku-Uta Full® is set for the ring tone. If you
select [Point], the specified playback range of
Chaku-Uta Full® is set for the ring tone.
To mute the ring tone
Select [Silent].
To check the ring tone
Move the cursor to the ring tone and press
(Play).
6 Set the volume of the ring tone at [Ring
volume].
Select from [OFF] and [1 to 6].
For an incoming voice, videophone, or PushTalk
call, you can set [STEP DOWN] and [STEP UP].
[STEP DOWN] turns down the volume every six
seconds and [STEP UP] turns up the volume
every six seconds.
To set the ring tone volume to [OFF]
Press at level 1. When you set the ring tone
volume for incoming calls, incoming mail, or both
incoming calls and mail to [OFF], “ ”, “ ”, or
“” appears in the stand-by display respectively.
7 Set a vibration pattern at [Vibrator].
Select vibrator
Pattern1
Pattern2
Link melody
OFF
[Pattern1]:
Set a short intermittent vibration.
[Pattern2]:
Set a long intermittent vibration.
[Link melody]:
Set vibration to be synchronized with the
vibration pattern of the melody. When you set the
ring tone to [Silent] or the melody is not specified
with a vibration pattern, [Pattern1] is used.
[OFF]:
Do not set the vibrator.
When you set the vibrator for incoming calls,
incoming mail, or both incoming calls and mail,
“”, “ ”, or “ ” appears in the stand-by display
respectively.
To check the vibration
Move the cursor to the vibration pattern and
press (Confirm).
8 Select an indicator color at [Color].
Select from 12 colors plus [C13:ALL] (in which the
12 colors flash in turn).
When you move the cursor through the colors, the
incoming indicator flashes accordingly.
9 Select [Ring time] and press .
You can set the ring time for incoming mail,
Message R, and Message F.
10
Select [ON]/[OFF] of the ring tone at [Set].
11
Enter the duration for sounding the ring
tone at [Ring time].
Enter the duration within the range from 01 to 30
seconds.
12
Press (Complete).
The Ring time is set.
Continued
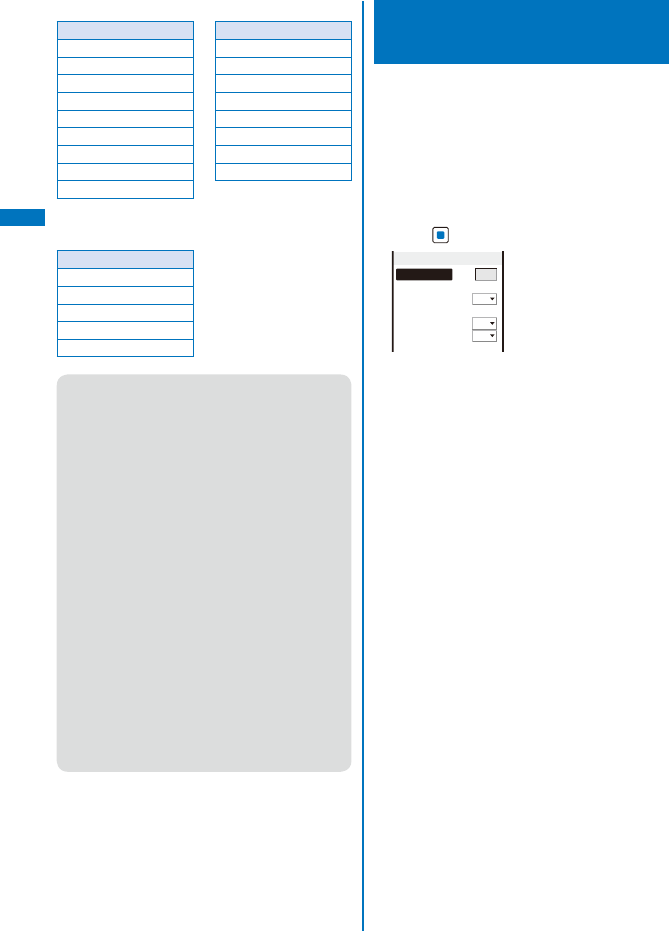
100
Sound/Display/Light Settings
■ Preinstalled melodies
Title Title
着信音1∼5 Elevator
Symphony ※Giant Gong
Tsuki ※Whistle ※
Pavane Pilsner
Raindrop ※Brilliance ※
Forest ※Typewriter ※
Cuckoo Clock ※Vibe x Vibe
School Chime Get Many Bananas!
Ecosound ※
※ 3D sound support (P.111)
■ Preinstalled music
Title
Active
Cat
Natural Life
Stylish
What Can U Do
● If several ring tones, call images, and incoming
indicator colors are set for voice/videophone call/
mail, the following priority is applied.
1. Ring tone of Number Setting (When you
receive a call to an Additional No. for the Multi
Number)
2. Des phone tone, Des call display, and Select
phone/mail Illum. of an entry saved in the
Phonebook
3. Des phone tone, Des call display, and Select
phone/mail Illum. of the Group setting
4. Ring tone of the Ringtone for Number B of
2in1
5. Ring tone, incoming image, and indicator
color of the Incoming set
However, when you set an i-motion or Chaku-
Uta Full® for the ring tone or an i-motion for the
incoming image, the order of priority may vary.
● You can adjust the ring volume while receiving
a call. The volume last set is applied regardless
of whether you adjust the volume in advance or
while receiving a call.
● When you set an i-motion or Chaku-Uta Full® for
the ring tone or set an i-motion for the incoming
image, the settings may be changed in some
cases.
Setting the Sounds of the
FOMA Terminal <Set basic tone>
You can set to turn on/off the sound effect that
can be used when canceling the Lock key or
charging starts and is completed. You can
also set whether the 3D sound is played back
through the stereo speaker and set the keypad
sound volume.
1 From the Menu, select [Settings] →
[Management] → [Set basic tone] and
press .
Set basic tone
Keypad sound
1
Keyguard release tone
ON
Stereo&3D
ON
Charge sound
ON
[Keypad sound]:
Set the volume of the keypad sound to be heard
when you press a key.
[Keyguard release tone]:
Set whether the sound effect is heard when
canceling the Lock key.
[Stereo&3D]:
Set whether to play back 3D sound with
3-dimensional stereophonic reproduction through
the stereo speaker.
[Charge sound]:
Set whether the sound effect is heard when
charging starts and is completed.
2 Set the volume of the keypad sound at
[Keypad sound].
Select from [OFF] and [1 to 2].
3 Select [ON]/[OFF] at [Keyguard release
tone].
4 Select [ON]/[OFF] at [Stereo&3D].
5 Select [ON]/[OFF] at [Charge sound].
The sounds of the FOMA terminal are set.
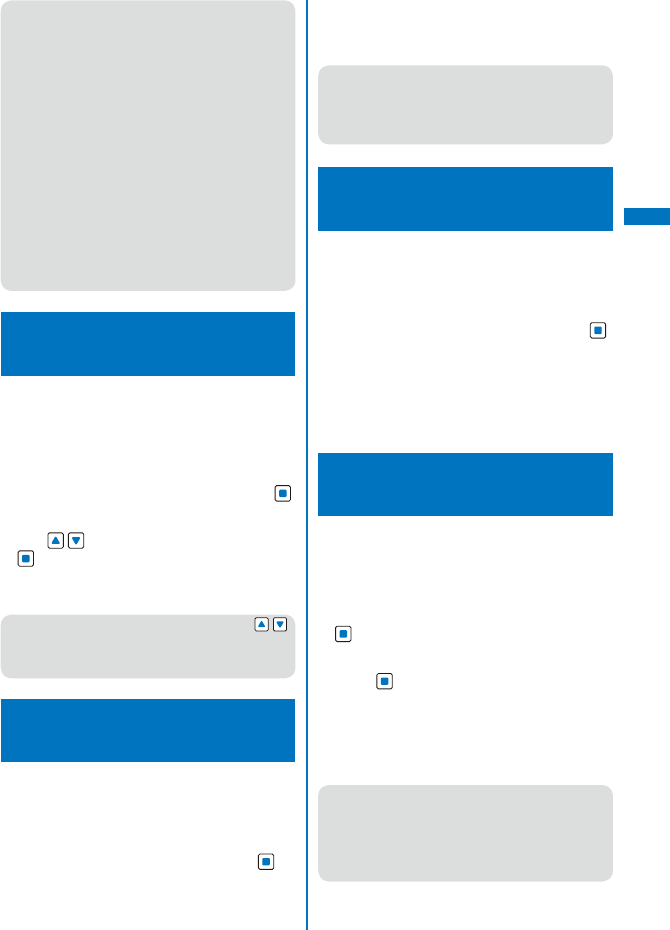
101
Sound/Display/Light Settings
● The Keyguard release tone and Charge sound
may not be heard under some conditions, such
as when another sound is active.
● The 3D sound function reproduces a
3-dimensional stereophonic sound or space-
wise moving sound, over the stereo speaker (or
the Flat-Plug Stereo Earphone Set (optional)).
This function lets you enjoy 3D sound i-αppli
games and ring tones with realistic sound. You
can feel the effect of this function when you hold
the FOMA terminal about 40 cm (this distance
depends on the sense of an individual) away and
facing toward you. Note that if the FOMA terminal
is moved left or right or the distance between the
terminal and you is not suitable, you cannot enjoy
the effect. The perception of this 3D effect varies
depending on the senses of an individual. If you
feel uncomfortable in any way, set the Stereo&3D
to [OFF].
Adjusting the Volume of
Caller’s Voice <Volume>
The volume of caller’s voice during a voice,
videophone, or PushTalk call can be adjusted
in six levels from level 1 (smallest) to level 6
(largest).
1 From the Menu, select [Settings] → [Call]
→ [Call setting] → [Volume] and press .
The Volume display appears.
2 Use to adjust the volume and press
(OK).
Select from [1 to 6].
The volume of caller’s voice is set.
● The volume can be adjusted by pressing
during a call. Whichever way you may take, the
most recently adjusted volume is used until it is
adjusted next time.
Adjusting the Volume While
Playing Flash Movie
<Sound effect>
The sound volume while playing Flash movie
can be adjusted in seven levels: OFF (silent),
level 1 (smallest) to level 6 (largest).
1 From the i-mode menu, select [i-mode
setting] → [Sound effect] and press .
2 Set the sound effect volume.
Select from [OFF] and [1 to 6].
The sound volume while playing Flash movie is set.
● You can also adjust the volume by selecting
[Sound effect] from the Function menu while
playing Flash movie (P.189).
● The sound effect may not be heard depending
on Flash movie.
Adjusting the Volume While Running
i-αppli Software
<Volume setting>
The sound volume while running i-αppli
software can be adjusted in seven levels: OFF
(silent), level 1 (lowest) to level 6 (highest).
1 From the Menu, select [i appli] → [i αppli
setting] → [Volume setting] and press .
The Volume setting display appears.
2 Set the software volume.
Select from [OFF] and [1 to 6].
The sound volume while running i-αppli software is
set.
Setting Whether to Prioritize the
i-αppli Sound
<Pref. i αppli sound>
You can set whether to prioritize the i-αppli
sound when the MUSIC Player and i-αppli are
activated simultaneously.
1 From the Menu, select [i appli] → [i αppli
setting] → [Pref. i αppli sound] and press
.
2 Select [preference]/[unpreference] and
press .
[preference]:
You hear the i-αppli sound.
[unpreference]:
You hear the sound of the MUSIC Player or
Music&Video Channel.
● Even if the Perf. i αppli sound is set to
[preference], you may not hear the i-αppli
sound.
● Even if you select [unpreference], you hear the
i-αppli sound when the sound of the MUSIC
Player or Music&Video Channel is muted.
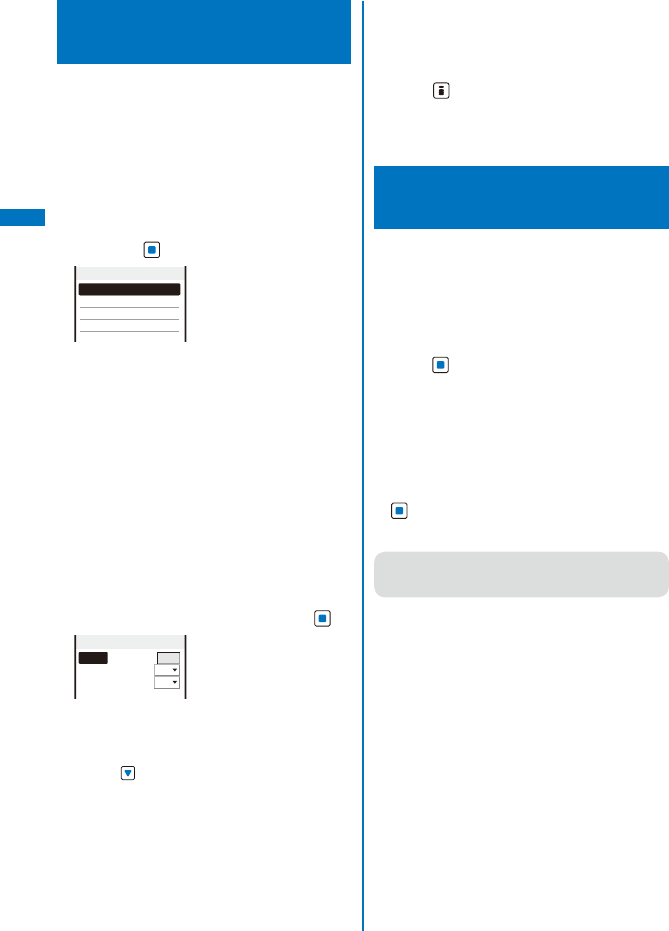
102
Sound/Display/Light Settings
Setting the Sound/Indicator
While Using the GPS Function
You can set the sound volume to be used and
the vibrator and incoming indicator operations
to be performed when you position and
notify your current location and when you are
requested to provide your location information.
Example: Setting the sound/indicator of the Position
location
1 From the Menu, select [LifeKit] → [GPS]
→ [GPS settings] → [Sound/Color setting]
and press .
Sound/Color setting
Position location
Location notice
Loc. provide/accept
Loc. provide/check
[Position location]:
Set the operation to be performed when the
current location is determined.
[Location notice]:
Set the operation to be performed when the
current location is notified.
[Loc. provide/accept]:
Set the operation to be performed when you are
requested to provide location information when
the settings for using each service is set to “許可”
(accept).
[Loc. provide/check]:
Set the operation to be performed when you are
requested to provide location information when
the settings for using each service is set to “毎回
確認” (Check every time).
2 Select [Position location] and press .
Position location
Volume
OFF
Vibrator
OFF
Color
ON
3 Select the sound volume at [Volume].
Select from [OFF] and [1 to 6].
To set the volume to [OFF]
Press at level 1.
4 Select [ON]/[OFF] of the vibrator at
[Vibrator].
5 Select [ON]/[OFF] of the incoming
indicator at [Color].
You can set the incoming indicator to the Position
location and Location notice functions.
6 Press (Complete).
The sound volume level and incoming indicator ON/
OFF settings to be applied when you use the GPS
function are set.
Setting the Poor Signal
Quality Alert <Quality alarm>
You can set to inform you with alarm of the
possibility of the call being disconnected
during a voice call due to the radio wave
condition.
1 From the Menu, select [Settings] → [Call]
→ [Call quality] → [Quality alarm] and
press .
[High]:
Sound a high alarm tone.
[Low]:
Sound a low alarm tone.
[OFF]:
Do not sound an alarm tone.
2 Select the type of alarm tones and press
.
The Quality alarm is set.
● If the radio wave condition becomes weak
suddenly, the call may be disconnected with no
alarm.
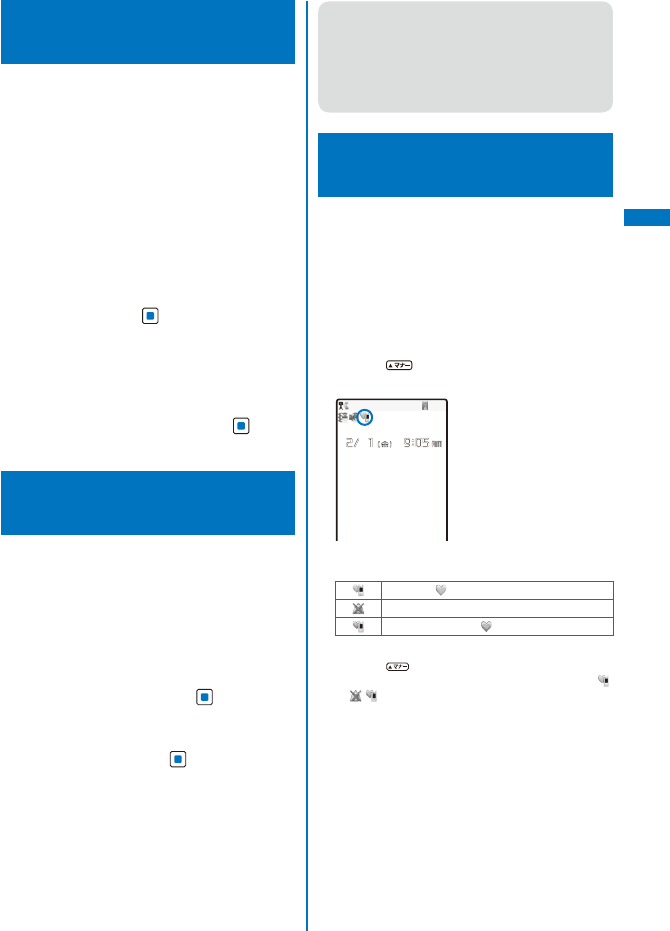
103
Sound/Display/Light Settings
Setting Earphone Only for
the Ring Tone
<Headset usage setting>
You can set the position where the ring
tone sounds when the Flat-plug Earphone/
Microphone with Switch (optional) is connected
to the FOMA terminal. The other tones, such
as the Alarm and Schedule alarm tones also
sound from the position you set for the ring
tone.
Even if [Headset only] is set, the ring tone of a voice,
videophone, or PushTalk call sounds from both the
earphone and speaker about 20 seconds later after
it starts sounding.
1 From the Menu, select [Settings] → [Call]
→ [Headset setting] → [Headset usage
setting] and press .
[Headset only]:
The tone sounds only from the earphone.
[Headset+speaker]:
The tone sounds from both the earphone and the
speaker.
2 Select [Headset only] and press .
The tone sounds only from the earphone.
Changing the Ringing
Sound <Melody Call>
You can change the ringing sound which a
caller hears to a melody with sense of the
season or popular music, etc.
This service is a paid service that requires a
subscription. For more details about this service,
see the “Mobile Phone User’s Guide
【Network
services】
”.
1 From the Menu, select [Settings] → [Call]
→ [Melody Call] and press .
The screen for confirming whether to connect a site
appears.
2 Select [Yes] and press .
The Melody Call site is connected.
3 Set each item.
For details how to set, see the “Mobile Phone
User’s Guide
【Network services】
”.
● When a call is a videophone or PushTalk call, the
Melody call does not sound.
● When you select the Melody Call, the FOMA
terminal is connected to the i-mode site and
packet communication charge is required.
However, the packet communication of the
setting site is free of charge.
Muting the Ring Tone
<Manner mode>
All sounds from the FOMA terminal can be
disabled to avoid disturbing others by using
the Manner mode.
There are three types of the Manner mode. Set
the mode by using the Manner mode setting
(P.116).
Even if the Manner mode is set, the shutter sound of
the camera can be heard.
1 Press for over a second in the
stand-by display.
The Manner mode is set and the icon for the current
type appears.
Manner ( is pink)
Silent
Original manner ( is blue)
To cancel the Manner mode
Press for over a second in the stand-by
display. The Manner mode is canceled and “ /
/ ” disappears.
Continued
104
Sound/Display/Light Settings
■ Functions of each mode
Manner Silent
Original manner
Initial
setting
Setting
range
Vibrator
(P.110)※1
Follow each
setting
(Vibrates
in Pattern1
when [OFF]
is set.)
OFF OFF Pattern1/
Pattern2/
Link melody/
Follow each
setting/OFF
Phone
volume
(P.109)※2
OFF OFF
SD (STEP
DOWN)
SU (STEP
UP)/
SD (STEP
DOWN)/
6 to 1/OFF
Mail
volume
(P.109)※3
OFF OFF 4 6 to 1/OFF
Alarm
volume
(P.361,
365)
OFF OFF 4 6 to 1/OFF
Keypad
sound
(P.111)※4
OFF OFF 1 2 to 1/OFF
Keyguard
release
tone
(P.111)
OFF OFF ON ON/OFF
Charge
sound
(P.111)
OFF OFF ON ON/OFF
Battery
ALM
(P.42)※5
OFF +
Vibrator
OFF ON※6 ON/OFF※6
Whisper
mode
(P.68)
ON OFF OFF ON/OFF
※1 Vibrator setting common to voice, videophone,
and PushTalk calls, mail, Message R/F, Alarm, and
Schedule alarm.
※2 Setting common to the ring volume for voice,
videophone, and PushTalk calls and the alarm for
the Call cost limit.
※3 Setting common to the ring volume for mail and
Message R/F.
※4 Setting common to the battery level confirmation
beep.
※5 During a call, the battery alarm is heared from the
earpiece regardless of the setting. When a call is
put on hold, however, only the display is provided
and the battery alarm does not sound.
※6 When the Battery ALM is set to [ON], the vibrator
operates regardless of the Vibrator setting.
● Press during a voice call to set the Whisper
mode and press it again to cancel the Whisper
mode.
Changing the Manner Mode
Settings
<Manner mode setting>
The Manner mode can be selected from
three types: “Manner”, “Silent”, and “Original
manner”.
1 Press in the stand-by display.
Manner mode
Set
OFF
Mode
Manner
Original manner
2 Select the type of the Manner mode at
[Mode].
3 Press (Complete).
The type of the Manner mode is changed.
Changing the Original Manner
The operations of the Original manner can be
customized. For the items you can set, see
“Functions of each mode” (P.116).
Example: Setting the battery alarm
1 Press in the stand-by display, select
[Original manner], and press .
Original manner
Vibrator
OFF
Phone volume
SD
Mail volume
4
Alarm volume
4
Keypad sound
1
Keyguard release tone
ON
Charge sound
ON
Battery ALM
ON
Whisper mode
OFF
2 Select [ON]/[OFF] at [Battery ALM].
The battery alarm setting is changed.
105
Sound/Display/Light Settings
Setting the Stand-by
Display <Stand-by display>
You can set the image for the stand-by display,
image quality, Calendar/Clock display, and
whether to show or hide the guide display.
1 From the Menu, select [Settings] →
[Display] → [Stand-by display] and press
.
Stand−by display
Stand−by
White Scrapbook
Image quality
Sharp
Calendar/Clock
Soft key
OFF
Camera in key locking
Not activate
[Stand-by]:
Set an image or i-αppli software to be displayed
in the stand-by display.
[Image quality]:
Set an image quality of an image to be displayed
in the stand-by display.
[Calendar/Clock]:
Set the type of calendar and clock to be
displayed in the stand-by display and also set
the font color, display style, and position of the
clock.
[Soft key]:
Set whether to display the guide display in the
stand-by display.
[Camera in key locking]:
Set whether to activate the camera by sliding the
lens cover while the Lock key is set.
2 Select an image from My picture/i-motion
of the Data Box at [Stand-by].
You can set the following files.
Category File
format File size Image size
My picture
GIF/
JPEG
Max. 500K
bytes
Max. [1M(1280
×960)]
SWF Max. 100K
bytes −
i-motion
※MP4 Max. 10M
bytes
Max. [VGA(640
×480)]
※ Some i-motion may not be set.
When you select a JPEG image
The screen for selecting a display pattern
appears. Select [V]/[H] at [Direction] and [True
img]/[Screen size]/[Twice the size] at [Size] and
press (Complete).
When you select a GIF image
The screen for selecting a display pattern
appears. Select [True img]/[Screen size]/[Twice
the size] at [Size] and press (Complete).
To set the i-αppli stand-by display
Select [i αppli list] and a software supporting
i-αppli stand-by display from the list of i-αppli
software.
To set the Stand-by pictures
Select [Stand-by pictures] (P.119).
To set Stand-by books
Select from [世界遺産1], [世界遺産2], [四字熟語],
[魚へんの漢字], [日本の首相], [日本の温泉], [歴史
上の名言], or [恋の格言] in the [Preinstall] folder
of My picture.
To display no image
Select [None specified].
To check the image
Move the cursor to the image and press (Play).
3 Select an image quality at [Image quality].
[Sharp]:
Sharply edged image quality.
[Normal]:
The standard image quality emphasized
naturalness.
[Dynamic]:
The clear image quality in which an edge and
contrast of an image is emphasized.
4 Select [Calendar/Clock] and press .
Calendar/Clock
Calendar
OFF
Cal. font color
Blk
Clock
Digital clock5
Clock style
12h
Arrangement setting
Continued
106
Sound/Display/Light Settings
5 Select the type of calendar at [Calendar].
[LTC 1Week]:
Display the one-week Lifetime Calendar.
[LTC 1Month]:
Display the one-month Lifetime Calendar.
[Cal. 1Month(S)]:
Display the one-month calendar (small).
[Cal. 1Month(L)]:
Display the one-month calendar (large).
[Cal. 2Months]:
Display the two-month calendar.
[OFF]:
Do not display the calendar.
6 Select the font color of the calendar at
[Cal. font color].
You cannot change the font color of Saturdays
and holidays.
7 Select a clock type at [Clock].
Select from [Digital clock1 to 5], [Analog clock], [Pict
clock], or [OFF].
8 Select the format to display the clock in
the display at [Clock style].
[12h]:
Display in 12-hour format.
[24h]:
Display in 24-hour format.
9 Select [Arrangement setting] and press
.
The screen for selecting a position appears.
Press (Change) to switch between calendar
and clock, and then press to select a
position to be displayed.
10
Press (Complete).
The position of calendar/clock is set.
11
Press and select [ON]/[OFF] at [Soft
key].
The Soft key is set.
12
Select [Not activate]/[Activate] at [Camera
in key locking].
[Not activate]:
You cannot activate the camera by sliding the
lens cover while the Lock key is set.
[Activate]:
You can activate the camera by sliding the lens
cover while the Lock key is set.
● If you change the setting so that the i-Channel
Telop text is displayed when an i-motion or
i-αppli is set for the stand-by display, the
screen for confirming whether to cancel the
setting for the stand-by display appears. If you
select [Yes], the i-motion or i-αppli set for the
stand-by display is canceled and the image for
the stand-by display is changed to that of the
Kisekae menu.
● If you set an i-motion or i-αppli for the stand-by
display when the i-Channel Telop text is
displayed, the screen for confirming whether
to cancel the display of the Telop text appears.
If you select [Yes], the Telop text is turned off.
When you change the setting for the stand-by
display to other than an i-motion or i-αppli, the
display of the Telop text is automatically restored.
● If you set an i-motion for the stand-by display, the
playback starts in the case, such as when you
open the FOMA terminal, return to the stand-by
display, or press in the stand-by display, and
the first frame of it is displayed as the stand-by
display image. While the i-motion is played back,
the setting of the Calendar is not displayed.
● If you set a Flash movie, GIF animation, or
Stand-by pictures for the stand-by display, the
playback starts in the case, such as when you
open the FOMA terminal, return to the stand-by
display, or press in the stand-by display.
The playback stops after a certain period of time.
A frame displayed at the time of the playback
being stopped is used as the stand-by display
image. To restart the playback, press
(however, while displaying the i-Channel Telop
text, the playback does not start even if you
press ). The sound effect of the Flash movie
set for the stand-by display is not heard.
● The displayed contents of Stand-by books are
employed using part of examples/explanations.
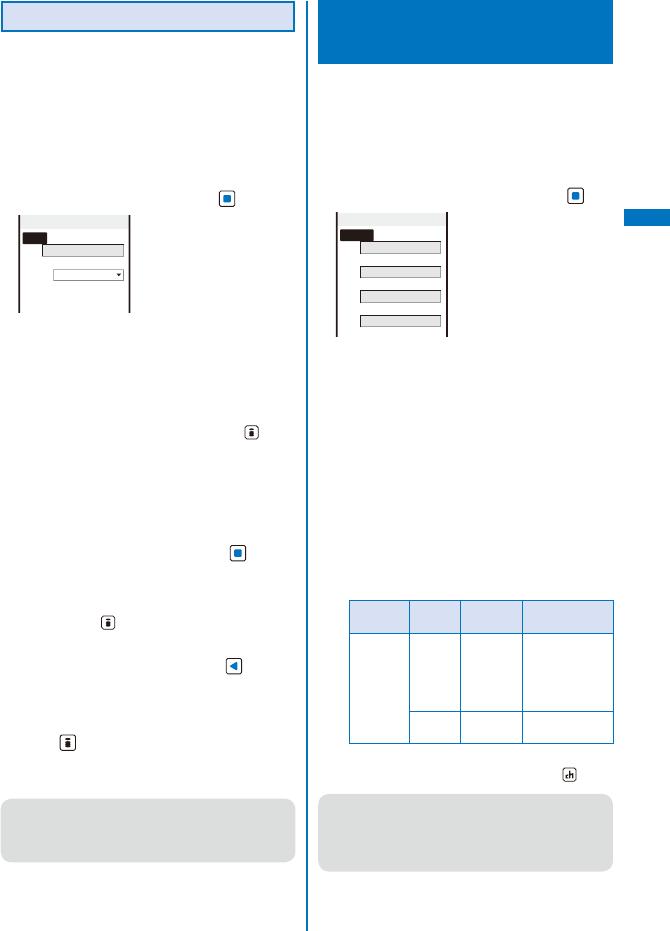
107
Sound/Display/Light Settings
Setting the Stand-by Pictures
Several images in the specified folder can be
displayed in the stand-by display automatically,
decorated with a frame. The images are
rotated in the specified interval or when the
FOMA terminal is powered on.
JPEG images saved in My picture of the Data Box
can be used as Stand-by pictures.
1 From the Menu, select [Imaging] →
[Stand-by pictures] and press .
Stand−by pictures
Frame
Bulletin Board(
↑
Screen update
Every 1hours
Select folder
Update image
2 Select a frame to be used at [Frame].
Select from [Bulletin Board(↑)], [Sweet(↑)],
[Balloon(↑)], [Museum(↑)], [Tile(↑)], [Simple(↑)],
[Single(↑)], [Window(→)], [Magazine(→)], or
[Random display].
To check a frame
Move the cursor to the frame and press (Play).
3 Select an interval to change images at
[Screen update].
Select from [Every 30min], [Every 1hours], [Every
3hours], [Every 6hours], [Every 12hours], or [Every
days].
4 Select [Select folder] and press .
The screen for selecting a folder appears.
To set the specified folder to “OFF”
Move the cursor to a field for specifying the
folder, press (Reset), and select [Yes].
5 Select a folder from My picture of the
Data Box at the field and press .
Up to five folders can be specified.
6 Select [Yes]/[No] at [Update image].
7 Press (Activate).
The Stand-by pictures is set for the Stand-by
display.
● Updating images is performed in the interval
based on the time set in the FOMA terminal
rather than the time past from when the Stand-by
pictures is set for the Stand-by display.
Setting Images for Placing
a Call/Sending Mail <Animation>
You can set an image that appears when you
place a voice or videophone call, send mail,
and perform other events.
Example: Setting an image to be used when you place
a call
1 From the Menu, select [Settings] →
[Display] → [Animation] and press .
Animation setting
Calling
White Scrapbook
V.phone calling img
White Scrapbook
Mail sending img
White Scrapbook
Check new message
White Scrapbook
[Calling]:
Set an image that appears when you place a
voice call.
[V.phone calling img]:
Set an image that appears when you place a
videophone call.
[Mail sending img]:
Set an image that appears when you send
i-mode mail or SMS.
[Check new message]:
Set an image that appears when you check new
messages or SMS.
2 Select an image from My picture of the
Data Box at [Calling].
You can set the following files.
Category File
format File size Image size
My picture
GIF/
JPEG
Max. 250K
bytes
Max. [Stand-by
(480×864)],
Max. W480×
H288 for GIF
animation
SWF Max. 100K
bytes −
To check the image
Move the cursor to the image and press (Play).
● If you set the Phonebook image of the Set call
display to [ON], the Des call display set in the
Phonebook is displayed when you place a voice
or videophone call regardless of the above
setting.
108
Sound/Display/Light Settings
Setting the Display for Incoming
and Outgoing Calls
<Call display>
You can set whether the Des call display or the
name saved in the Phonebook is displayed.
1 From the Menu, select [Settings] → [Call]
→ [Call display] and press .
Set call display
Phonebook image
ON
Name
ON
Disp. call/rcv. No.
None specified
[Phonebook image]:
Set whether to display the Des call display set
for a specific individual/group saved in the
Phonebook.
[Name]:
Set whether to display the name of a caller/
recipient saved in the Phonebook.
[Disp. call/rcv. No.]:
Set the display or call record display when
placing/receiving a voice or videophone call, or
the color of the font for the received/sent mail
lists.
2 Select [ON]/[OFF] at [Phonebook image].
[ON]:
Display the image set for the Des call display in
the Phonebook when placing/receiving a voice
or videophone call.
[OFF]:
Display the image set in the Animation or
Incoming set when placing/receiving a voice or
videophone call.
3 Select [ON]/[OFF] at [Name].
[ON]:
Display the name saved in the Phonebook when
placing/receiving a voice or videophone call, or
originating/receiving a PushTalk call, or right after
receiving mail or SMS.
[OFF]:
Do not display the name saved in the Phonebook
when placing/receiving a voice or videophone
call, or originating/receiving a PushTalk call, or
right after receiving mail or SMS.
4 Select a color of the font to be displayed
at [Disp. call/rcv. No.].
[dark]:
Set the darker color for the display or call record
display when placing/receiving a voice or
videophone call, or the font for the received/sent
mail lists.
[light]:
Set the lighter color for the display or call record
display when placing/receiving a voice or
videophone call, or the font for the received/sent
mail lists.
[None specified]:
Do not specify the color of the font.
When 2in1 is set to ON, the information of
Number A/Address A is displayed in the font
color which is set at the Disp. call/rcv. No. To
display the information of Number B/Address B
in the different color, you can set at the Set call/
receive No. of the 2in1 setting (P.400).
Setting the Display and
Keypad Illumination <Backlight>
You can set the display light brightness, ON/
OFF of the keypad light, and whether to turn on
the light of the display.
1 From the Menu, select [Settings] →
[Display] → [Backlight] and press .
Backlight
Auto setting
ON
Adjust light
3
Keypad light
ON
Backlight always on
[Auto setting]:
Set whether to adjust the display light brightness
and set ON/OFF of the keypad light automatically
by the Brightness Sensor to adapt for the
surrounding brightness.
[Adjust light]:
Set the display light brightness.
[Keypad light]:
Set whether to turn on the keypad light.
[Backlight always on]:
Set whether to keep the display light on all
the time including at the time of charging or
recording.
2 Select [ON]/[OFF] of adjusting
automatically at [Auto setting].
109
Sound/Display/Light Settings
3 Set the display light brightness at [Adjust
light].
Select from [1 to 5].
To reset to the default brightness
Press (Reset).
4 Select [ON]/[OFF] of the Keypad light at
[Keypad light].
5 Select [Backlight always on] and press
.
Backlight always on
Charging
OFF
Videophone
ON
Internet
OFF
Pict. shoot
ON
Movie shoot
ON
Movie play
ON
[Charging]:
Set whether to keep the light on during charging.
[Videophone]:
Set whether to keep the light on during a
videophone call.
[Internet]:
Set whether to keep the light on while displaying
sites or Internet home pages.
[Pict. shoot]:
Set whether to keep the light on while recording
a still image.
[Movie shoot]:
Set whether to keep the light on while recording
a movie.
[Movie play]:
Set whether to keep the light on while playing
back a movie.
6 Select [ON]/[OFF] of the Backlight always
on for each item and press .
● It may take time to complete charging when
[Charging] of the Backlight always on is [ON].
● When the Auto setting is set to [ON], the
brightness is automatically adjusted based on
the value set at the Adjust light.
Saving Power for the
Display <Power saver>
The display is automatically turned off to save
battery power when no operations are made
for a specific period. You can set the time
before turning off the display.
1 From the Menu, select [Settings] →
[Display] → [Power saver] and press .
2 Select a time before starting the Power
saver mode and press .
Select from [1min], [3min], [5min], [10min], [15min],
and [30min].
● When the Lock key is set, the Power saver is
activated after about 15 seconds if no operations
are made, regardless of the setting of the Power
saver mode.
● When the Music slide show is running, the
software update (rewrite) is in progress, or the
Camera mode is being activated while a function
for which the Backlight always on is set to [ON]
is in use, the Power saver mode does not work.
● The Power saver mode may be canceled if there
is an incoming call, an activation of the Alarm or
Schedule alarm, etc.
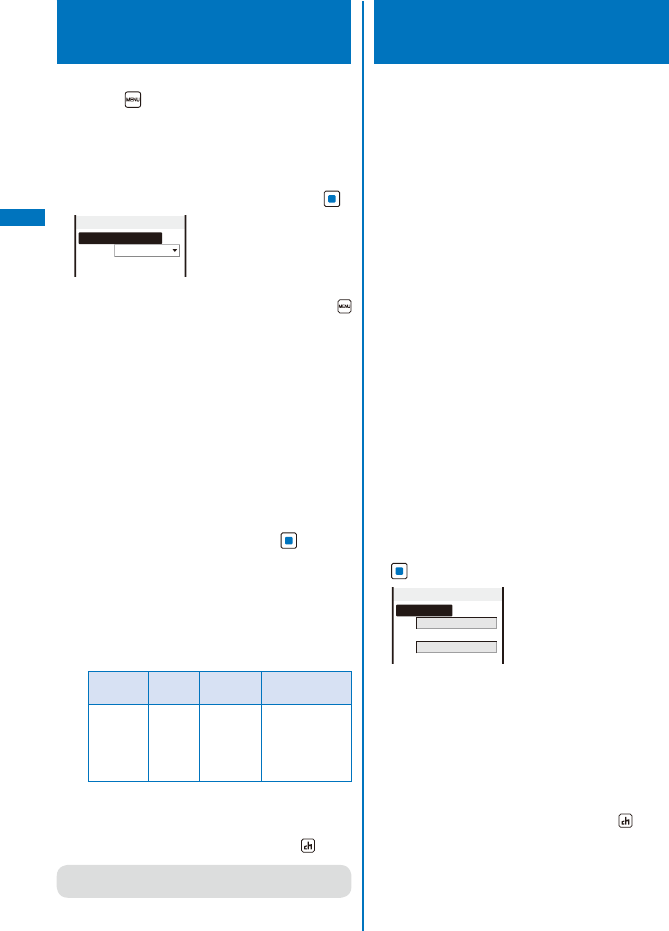
110
Sound/Display/Light Settings
Changing the Appearance
of the Menu <Menu setting>
You can switch the menu to be displayed when
you press (MENU) in the stand-by display,
and also set images to customize 12 icons
displayed in the Standard menu.
Example: Setting an image as the icon for i-mode
1 From the Menu, select [Settings] →
[Display] → [Menu setting] and press .
Menu setting
Start menu setting
Kisekae menu
Icon setting
[Start menu setting]:
Set the menu to be displayed when you press
(MENU) in the stand-by display.
[Icon setting]:
Set the icons to be displayed in the Standard
menu display (P.33).
2 Select a display menu at [Start menu
setting].
[Kisekae menu]:
Display the Kisekae menu.
[Standard menu]:
Display the Standard menu.
[My Selection]:
Display the menu of My Selection.
3 Select [Icon setting] and press .
The Icon setting display appears.
You can only set it when [Standard menu] is set
at the Start menu setting.
4 Select an image from My picture of the
Data Box at [i-mode].
You can set the following files.
Category File
format File size Image size
My picture
GIF/
JPEG
Max. 250K
bytes
Max. [Stand-by
(480×864)],
Max. W480×
H288 for GIF
animation
An image exceeding 60×80 dots in image size
is displayed in reduced size.
To check the image
Move the cursor to the image and press (Play).
● If you set a GIF animation as an icon, the image
in the first frame is displayed.
Using the Kisekae Tool
<Kisekae setting>
Using the Kisekae Tool allows you to change
settings such as the Kisekae menu, ring tone,
stand-by display, icon, and coloration pattern
at once. You can also use the Kisekae tools
downloaded from i-mode sites, “PlayNow by
SO”, etc. (P.305).
The following items can be set by the Kisekae Tool.
Display
- Stand-by display -
Voice call Calling image
-
V.phone Calling image
- Mail Sending image
- Check new message -
Voice call Incoming image
-
V.phone Incoming image
- Mail Receiving image
- Mail Complete image -
MessageR Receiving image
-
MessageR Complete image
-
MessageF Receiving image
-
MessageF Complete image
- Battery level icon
- Radio wave level icon - Menu icon
- Color theme - Kisekae menu
Sound
- Voice call Ring tone - V.phone Ring tone
- PushTalk Ring tone - Mail Ring tone
- MessageR Ring tone - MessageF Ring tone
- Alarm tone - Schedule alarm tone
Some displays or sounds of Kisekae Tool may not
be set.
Example: Setting a Kisekae tool
1 From the Menu, select [Settings] →
[Display] → [Kisekae setting] and press
.
Kisekae setting
Kisekae Tool
White Scrapbook
Color theme setting
White&Gold
[Kisekae Tool]:
Set the Kisekae tool.
[Color theme setting]:
Set the colors such as background color or
coloration pattern at once.
2 Select data from Kisekae Tool of the Data
Box at [Kisekae Tool].
To check an image
Move the cursor to the image and press (Play).
To set the Color theme setting
Select a color theme at [Color theme setting].

111
Sound/Display/Light Settings
● When 2in1 is used, the following items are not
changed even if the Kisekae Tool is set.
- Stand-by display of the Dual and B modes
- Voice call Ring tone, Voice call Calling image,
Voice call Incoming image, V.phone Ring tone,
V.phone Incoming image, and V.phone Calling
image for Number B
- Mail Ring tone, Mail Receiving image, Mail
Complete image, and Mail Sending image for
Address B
● If you have deleted the preinstalled Kisekae tool,
you can download it from “PlayNow by SO”.
[i Menu] → [メニュー/検索] (Menu/Search)
→ [ケータイ電話メーカー] (Mobile Phone
Manufacturers) → [PlayNow by SO] (Japanese
only)
● When you use the Kisekae tool to change the
design of the menu display, some menu types
may change the menu structure depending on
the frequency in use. The digits assigned to
menu items may not be applied.
In this case, you cannot operate the FOMA
terminal as explained in this manual, so please
change the menu to the Standard menu or reset
the menu settings (P.35, 124).
● When the Kisekae Tool is set to [ドコモダケ],
if you select [基本メニュー呼び出し] (loading
the basic menu), the menu structure can be
changed to normal temporarily.
● Some menus are displayed in Japanese even if
the Select language is set to English depending
on the Kisekae Tool.
Resetting the Menu Display
You can reset the display of the Kisekae menu
to the default setting.
1 From the Menu, select [Settings] →
[Management] → [Reset] → [Reset menu
screen] and press .
The Security code screen appears.
The Reset display also appears by pressing
for over a second in the stand-by display. Select
[Reset menu screen] and press .
2 Enter the Security code and press
(OK).
The screen for confirming whether to perform the
Reset menu screen appears.
3 Select [Yes] and press .
The default setting is restored.
Resetting the Settings of the
Display and Sound
You can reset the settings of the display and
sound set by the Kisekae Tool to the default
settings.
1 From the Menu, select [Settings] →
[Management] → [Reset] → [Reset
display/sound] and press .
The Security code screen appears.
The Reset display also appears by pressing
for over a second in the stand-by display. Select
[Reset display/sound] and press .
2 Enter the Security code and press
(OK).
The screen for confirming whether to perform the
Reset display/sound appears.
3 Select [Yes] and press .
The default settings are restored.
Customizing the Kisekae
Menu <Kisekae menu>
Changing the Menu Items
You can change the items of the saved Kisekae
menu with other menu items.
You may not be able to change menu items
depending on the Kisekae menus.
Menu items which can be changed vary depending
on a Kisekae menu you use. You may not be able to
change some menu items.
Some Kisekae menus change the menu items
automatically based on the operation history.
You need to set the Start menu setting to [Kisekae
menu] in advance (P.122).
1 Select a menu item in the Kisekae menu
display and press (Exchange).
Replacement
My Selection
Imaging
i−mode
Mail
ppli
Phone
Data Box
MUSIC
Osaifu−Keitai
Own number
LifeKit
Settings
※ The display shown is
when the Kisekae Tool is
set to [Manual Custom].
Continued
112
Sound/Display/Light Settings
2 Select a menu item to be saved newly and
press (Save).
The screen for confirming whether to change a
menu item with the selected item appears.
3 Select [Yes] and press .
The selected menu item is saved.
Resetting the Operation History
of the Kisekae Menu
Some Kisekae menus save the frequencies
in use of menu items as an operation history
and change the menu items automatically. The
Operation history can be deleted.
1 From the Menu, select [Settings] →
[Management] → [Reset] → [Reset menu
log] and press .
The Security code screen appears.
The Reset display also appears by pressing
for over a second in the stand-by display. Select
[Reset menu log] and press .
2 Enter the Security code and press
(OK).
The screen for confirming whether to reset the
operation history appears.
3 Select [Yes] and press .
The operation history of the menu is reset.
● To restore the default settings for the Kisekae
menu display, see P.124.
Informing Missed Call/New
Mail with Indicator <Missed call>
The incoming indicator can be set to flash about
every five seconds to notify you that there is a
missed call or unread mail/SMS/message. The
indicator is turned off by checking the missed
call or displaying mail/SMS/message.
1 From the Menu, select [Settings] → [Call]
→ [Missed call] and press .
2 Select [ON]/[OFF] and press .
The Missed call is set.
● The indicator color for a missed call follows that
set in the Incoming set.
● The indicator flashes in the following order of
priority when there are mix of missed calls and
unread mail/messages.
1. Voice call indicator color
2. Videophone call indicator color
3. PushTalk call indicator color
4. Mail indicator color
5. Message R indicator color
6. Message F indicator color
7. Location provision indicator color
If there are several calls, mails, messages, etc. of
the same priority, the indicator color of the latest
one has priority.
Setting the Font Size
<Font size>
Setting the Font Size At Once
You can set the size of fonts to be used for
displaying the Kisekae menu, Phonebook, Call
record, mail/SMS, and sites or for entering a
word at once.
1 From the Menu, select [Settings] →
[Display] → [Font size] → [All font size
setting] and press .
[Standard disp.]:
Set the standard font size (40 dots) at once.
[Large disp.(XL)]:
Set the extra large font size (60 dots) at once.
[Large disp.(XXL)]:
Set the extra-extra large font size (80 dots) at
once.
When the font size of the Kisekae menu is
changed between [Standard disp.] and [Large
disp.(XL)]/[Large disp.(XXL)], the menu display
is changed from the one which is used before
the setting is changed.
2 Select a font size to be set at once and
press .
The All font size setting is set.
● Even if the Select language is set to English,
when you set the font size to [Large disp.(XL)] or
[Large disp.(XXL)], the menus are displayed in
Japanese.
113
Sound/Display/Light Settings
Setting the Font Size Individually
You can set the size of fonts to be used
individually for displaying the Phonebook, Own
number Call record, mail/SMS, and sites or for
entering a word.
Example: Setting the font size of the Phonebook
1 From the Menu, select [Settings] →
[Display] → [Font size] → [Individual font
size] and press .
Individual font size
Phonebook
M
Call record
M
Mail
M
Internet
M
Input text
M
[Phonebook]:
Select a font size for the Phonebook and Own
number from [Extra extra large], [Extra large],
[Large], and [Medium].
[Call record]:
Select a font size for the Call record from [Extra
extra large], [Extra large], [Large], and [Medium].
[Mail]:
Select a font size for the contents display of an
i-mode mail, SMS, or Message R/F from [Extra
extra large], [Extra large], [Large], [Medium],
and [Small].
[Internet]:
Select a font size for the contents display of a
site, Full Browser, or screen memo from [Extra
extra large], [Extra large], [Large], [Medium],
and [Small].
[Input text]:
Select a font size when entering a word from
[Extra extra large], [Extra large], [Large],
[Medium], and [Small].
2 Select a font size at [Phonebook].
The Phonebook font size is set.
● Even if you change the mail font size, the size of
Deco mail pict. does not change.
● The font size of the Mail list is displayed in [Extra
large] when [Extra extra large] or [Extra large] is
selected at [Mail] of the Individual font size, or in
[Medium] when [Large], [Medium], or [Small] is
selected.
● The font size in the Input text display (address,
subject, and main body) of mail/SMS is displayed
in [Extra large] when [Extra extra large] or [Extra
large] is selected at [Input text] of the Individual
font size, in [Large] when [Large] is selected,
or in [Medium] when [Medium] or [Small] is
selected. When the [Small] is selected, only the
font size in the matching word list is displayed in
[Small].
Changing the Screen Display
to English
<Select language>
Menus, messages, and other displays can be
displayed in either Japanese or English.
1 From the Menu, select [設定] → [管理] →
[バイリンガル] and press .
バイリンガル
Japanese
English
[Japanese]:
Set the display language to Japanese.
[English]:
Set the display language to English.
When the display language is set to English
Select [Settings] → [Management] → [Select
language].
2 Select [English] and press .
The display language is set to English.
● When you set the display language with the UIM
inserted, the setting is recorded to the UIM.


115
Security Settings
■ About Security Codes
Security Codes Used on the FOMA Terminal .......................................................... 130
Changing the Security Code ..............................................................<Change code> 132
Setting the PIN Code .............................................................................<UIM setting> 132
Canceling the PIN Lock ............................................................................................ 133
■ Restricting Operations and Functions Available on the Mobile Phone
Various Locking Functions ....................................................................................... 134
Locking the Keypad to Prevent Unauthorized Use ....................................<Lock all> 135
Restricting Placing/Receiving Calls ....................................................... <Self mode> 137
Protecting Your Personal Data in the Phonebook, Schedule, etc.
<Personal data lock> 137
Restricting Dialing from the Keypad ................................................... <Key dial lock> 139
■ Restricting Callers and Senders
Setting the Display of the Redial/Received Record .........................<Record display> 141
Displaying the Data Saved as Secret ...............................................<Secret display> 141
Protecting Mail from Unauthorized Access .........................................<Mail security> 142
Protecting Data from Unauthorized Access ........................................ <Data security> 142
Specifying Phone Numbers to Accept/Reject Calls .....................<Accept/Reject call> 143
Rejecting Calls with No Caller ID ....................................................... <Denied no ID> 144
Muting the Ring Tone for Calls with No Phonebook Entry ...........<Set ring start time> 145
Rejecting Calls from Callers with No Phonebook Entry ................ <Reject unknown> 146
■ Other Measures “For Safety Operation”
Using the Data Security Service ............................................. <Data Security Service> 147
Other Measures “For Safety Operation” .................................................................. 148
116
Security Settings
Security Codes Used on
the FOMA Terminal
Some functions provided for convenient use
of the FOMA terminal require the security
code to use them. Besides the Security code
for operating the mobile phone, the network
security code necessary for the network
services, i-mode password, etc. are available.
Make use of the FOMA terminal using an
appropriate security code according to the
purpose.
Notes on the security codes
● Avoid using a number that is easy to guess, such
as “birth date”, “part of your phone number”,
“street address number or room number”, “1111”,
and “1234”. Make sure to make a note of the
security code you set lest you should forget it.
● Be very careful not to let others know your
security code. If your security code is known by
anyone else, DoCoMo shall have no liability for
any loss due to any unauthorized use of it.
● DoCoMo by no means inquires your security
code.
● If you forget any of your security codes, you must
bring your official identification (such as driver’s
license), the FOMA terminal, and UIM with you to
the nearest DoCoMo shop.
For details, call the “General Contact” on the
backcover of this manual.
Security Code
The Security code is set to “0000” at the time
of purchase. It can be changed by yourself
(P.132).
Input
security code
When the Security code screen appears, enter the 4-
to 8-digit Security code and press (OK).
The entered Security code is displayed as asterisks
(
*
).
When you enter the wrong Security code
The message “Invalid security code” appears. Enter
the correct Security code.
Network Security Code
The network security code, a 4-digit number
necessary for performing procedures on ド
コモeサイト (DoCoMo e-site) and using the
DoCoMo Network Services, can be set to any
number at the time of subscription. It can be
also changed later by yourself.
You can change your network security code
to the new one using the PC if you have
the “DoCoMo ID”/“Password” for the “My
DoCoMo” General support site for PC. You can
also change it by yourself using i-mode, from
“各種手続き” (Applications and Procedures)
available on ドコモeサイト (DoCoMo e-site).
※ For information on “My DoCoMo” or “DoCoMo
e-site”, see the backcover of this manual.
i-mode Password
The 4-digit “i-mode password” is required
when saving/deleting My Menu or subscribing/
canceling message service or i-mode charged
service, etc.
(There may be other passwords for the i-mode
used by IP (information service providers).)
The i-mode password is set to “0000” at the
time of subscription. It can be changed by
yourself.
You can change the i-mode password using
i-mode, by selecting [i Menu] → [English
iMenu] → [Options] → [Change i-mode
Password].
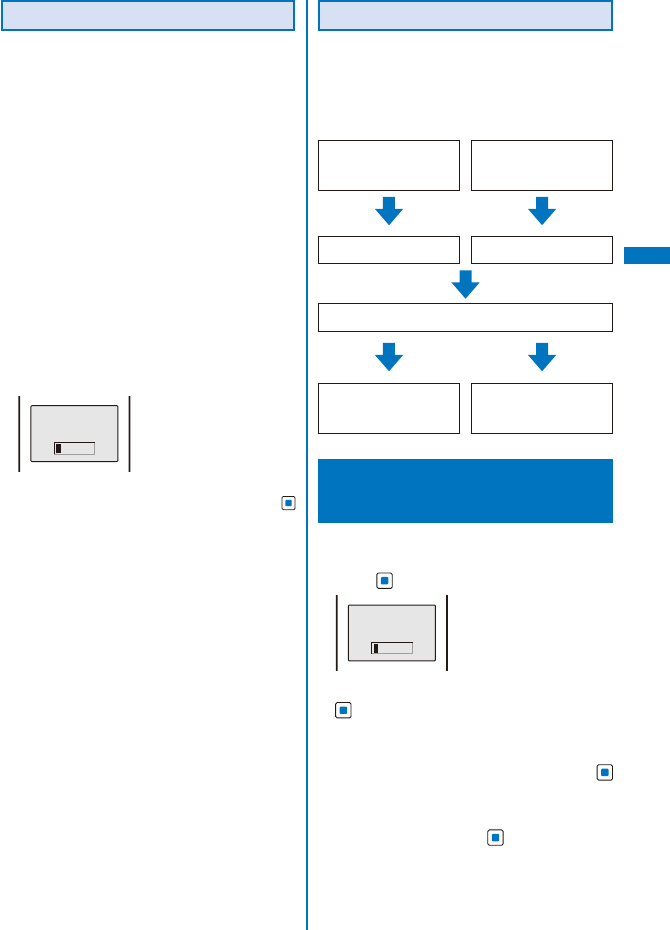
117
Security Settings
PIN1 Code and PIN2 Code
You can set two Security codes, namely
PIN1 and PIN2, for the UIM (FOMA card).
These codes are set to “0000” at the time of
subscription. They can be changed by yourself
(P.133).
PIN1 is a 4- to 8-digit number (code) that must
be entered for user confirmation to prevent
unauthorized use by a third party every time
you insert the UIM into the FOMA terminal or
when the FOMA terminal is powered on. Only
after you enter the PIN1 code, you can use the
FOMA terminal for placing/receiving a call and
other operation.
PIN2 is a 4- to 8-digit number (code) that must
be entered in order to reset the total call cost,
use a user certificate, or request the issue of a
user certificate.
If you continue to use the current UIM with a newly
purchased FOMA terminal, use the previous PIN1
and PIN2 codes you set for the UIM.
Input PIN1 code.
3times left
When the PIN1 or PIN2 code input screen appears,
enter the 4- to 8-digit PIN1/PIN2 code and press
(OK).
The entered PIN1/PIN2 code is displayed as
asterisks (
*
).
If you enter a wrong PIN1/PIN2 code three times
consecutively, the PIN1/PIN2 code is locked and
cannot be used anymore. (“X times left” appears
on the screen, indicating the remaining number
of times for retry operation.)
When you enter the correct PIN1/PIN2 code, the
number of times left is reset to 3.
PUK Code
The PUK code is a 8-digit number for
canceling the locked PIN1/PIN2 code. The
PUK code cannot be changed by yourself.
If you enter a wrong PUK code 10 times
consecutively, the UIM is locked.
Security provided
when you power on the
FOMA terminal
Enter the PIN1 code
User certificate operation
Connection to a
FirstPass-compatible site
Enter the PIN2 code
Enter the PUK code
Consecutive three
times incorrect input
Correct
input
Contact the nearest
DoCoMo shop
Enter a new
PIN1/PIN2 code
Consecutive
10 times
incorrect input
Changing the Security
Code <Change code>
1 From the Menu, select [Settings] →
[Management] → [Change code] and
press .
Input
security code
2 Enter the current Security code and press
(OK).
The entered Security code is displayed as asterisks
(
*
).
3 Enter the new Security code and press
(OK).
Enter a 4- to 8-digit code.
4 Select [Yes] and press .
The Security code is changed.
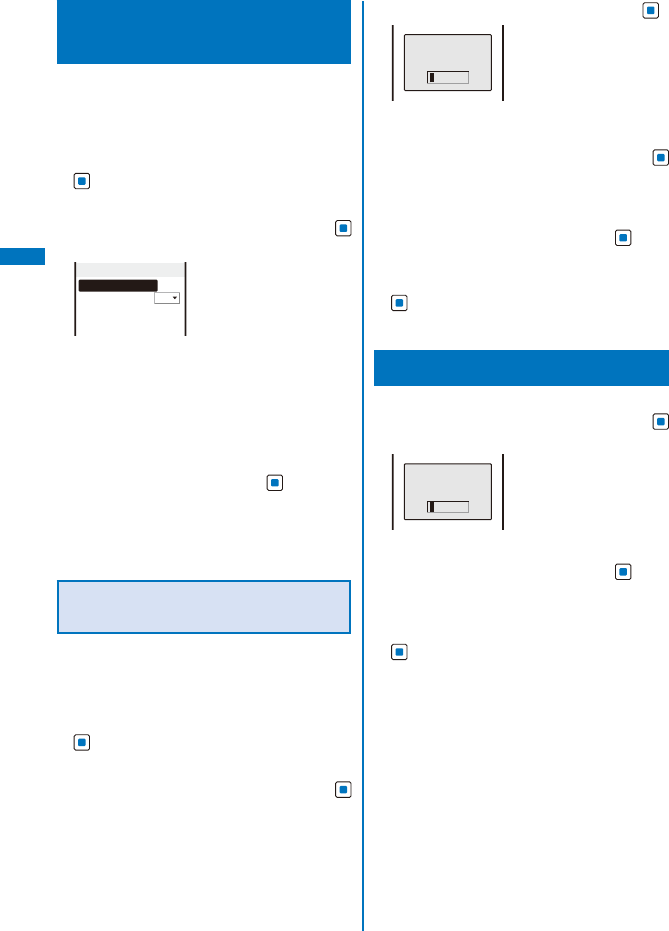
118
Security Settings
Setting the PIN Code
<UIM setting>
You can set the FOMA terminal to require the
PIN1 code input when powered on. You can
change the PIN1 and PIN2 codes.
1 From the Menu, select [Settings] →
[Management] → [UIM setting] and press
.
The Security code screen appears.
2 Enter the Security code and press
(OK).
UIM setting
PIN1 code setting
OFF
Change PIN1 code
Change PIN2 code
3 Select [ON]/[OFF] at [PIN1 code setting].
[ON]:
You need to enter the PIN1 code when the FOMA
terminal is powered on.
[OFF]:
Do not need to enter the PIN1 code when the
FOMA terminal is powered on.
4 Enter a PIN1 code and press (OK).
The entered PIN1 code is displayed as asterisks (
*
).
The PIN1 code is set to “0000” at the time of
subscription.
The PIN1 code setting is set.
Changing the PIN1 Code/PIN2
Code
To change the PIN1 code, set the PIN1 code setting
to [ON].
Example: Changing the PIN1 code
1 From the Menu, select [Settings] →
[Management] → [UIM setting] and press
.
The Security code screen appears.
2 Enter the Security code and press
(OK).
The UIM setting display appears.
3 Select [Change PIN1 code] and press .
Input PIN1 code.
3times left
To change the PIN2 code
Select [Change PIN2 code].
4 Enter the current PIN1 code and press
(OK).
The entered PIN1/PIN2 code is displayed as
asterisks (
*
).
5 Enter a new PIN1 code and press (OK).
Enter a 4- to 8-digit code.
6 Enter the new PIN1 code again and press
(OK).
The new PIN1 code is set.
Canceling the PIN Lock
Example: Canceling the PIN1 code lock
1 Enter the 8-digit PUK code and press
(OK).
Input PUK code.
10times left
The entered PUK code is displayed as asterisks (
*
).
2 Enter a new PIN1 code and press (OK).
Enter a 4- to 8-digit code.
The entered PIN1 code is displayed as asterisks (
*
).
3 Enter the new PIN1 code again and press
(OK).
The PIN lock is canceled and the PIN1 code is
changed to the new one.
119
Security Settings
Various Locking Functions
The FOMA terminal offers many lock functions
to assure safety operation, such as preventing
unauthorized use of the FOMA terminal,
protecting the Phonebook from being seen by
others. You can use any mix of these functions
depending on the purpose.
Functions Description
Lock all Prevent others from using the FOMA
terminal (P.135).
Omakase
Lock
Lock the FOMA terminal to prevent
others from using it. For example, this
service is useful when you lose or
misplace the FOMA terminal (P.136).
Self mode Disable all functions that involve calls
and communication, such as placing/
receiving a voice or videophone
call, originating/receiving a PushTalk
call, sending/receiving mail, infrared
communication, or the infrared remote
control (P.137).
Personal data
lock
Disable some functions to prevent
others from viewing/editing your
personal information such as the
Phonebook and Schedule data
(P.137).
Key dial lock Disable the dial keys to prevent
placing a voice/videophone call or
originating a PushTalk call (P.139).
Lock key Pr event the keypad from being
accidentally pressed while carrying
around the FOMA terminal with the
power on (P.140).
Record
display
Set the Redial, Dial frequency, and
Received records not to be displayed
(P.141).
Secret display Display/not display phonebook entries
(PushTalk phonebook)/Own number/
schedules saved as Secret (P.141).
Mail security Set the FOMA terminal not to display
the saved mail, Receive ranking, etc.
(P.142).
Data security Set the FOMA terminal not to display
data in My picture or i-motion of the
Data Box (P.142).
Accept/Reject
call
Accept/reject a voice, videophone, or
PushTalk call from a specific phone
number/group when it is received
(P.143).
Denied no ID Set not to accept a voice, videophone,
or PushTalk call without the caller’s
phone number (P.144).
Functions Description
Set ring start
time
Set a time interval before performing
the receiving operation for a voice,
videophone, or PushTalk call from
a caller who is not saved in the
Phonebook (P.145).
Reject unknown
Reject a voice, videophone, or
PushTalk call from a caller who is not
saved in the Phonebook (P.146).
IC card lock Lock the IC card to prevent others
from using the IC card function
(P.262).
Locking the Keypad to Prevent
Unauthorized Use
<Lock all>
You can set the Lock all to prevent others from
using the FOMA terminal. When the Lock all is
set, you cannot perform any operation other
than powering on/off the FOMA terminal and
answering a voice or videophone call.
1 From the Menu, select [Settings] → [Lock/
Security] → [Lock all] and press .
The Security code screen appears.
2 Enter the Security code and press
(OK).
The screen for confirming whether to set the Lock
all appears.
3 Select [Yes] and press .
The Lock all is set and the message “Lock all”
appears in the stand-by display.
To cancel the Lock all
Enter the Security code and press (OK).
Continued
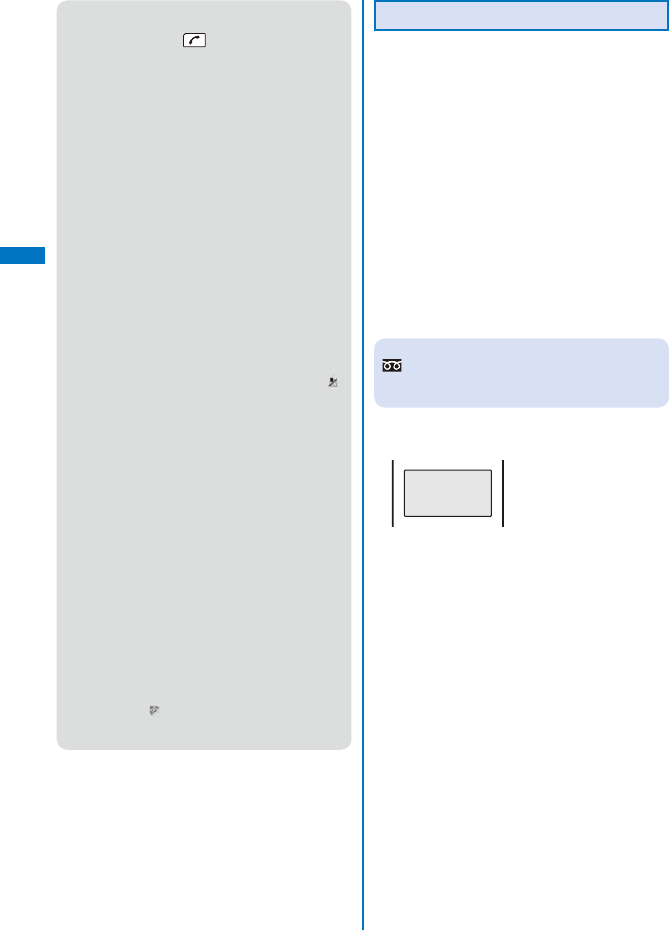
120
Security Settings
● To call emergency numbers (110, 119, and 118)
when the Lock all is set, enter the emergency
number and press . The emergency number
is displayed as asterisks (
*
) in the security code
input field of the Security code screen.
● The FOMA terminal is powered off after five
unsuccessful attempts to cancel the Lock all.
● When the Lock all is set, the default ring tone is
used for an incoming voice or videophone call.
One of the images from the [Preinstall] folder
in My picture of the Data Box is used for the
incoming image. In this case, not the caller’s
name but the caller’s phone number is displayed.
Chaku-moji, if received, is not displayed, but
when you cancel the Lock all, Chaku-moji can be
checked in the Received record (P.57).
● When the Lock all is set, you cannot send a
substitute image to answer a videophone call.
You can only adjust the volume of the caller’s
voice or switch the camera during a call.
● If there is an incoming PushTalk call when the
Lock all is set, the FOMA terminal does not
receive the call and the caller hears a busy tone.
The call is saved in the Received record. When
you cancel the Lock all, the notification icon “ ”
(Missed call) appears.
● If you receive a request for your location
information while the Lock all is set, the FOMA
terminal answers the request. In this case, not
the caller’s name but the caller’s phone number
is displayed.
● When the Lock all is set, i-mode mail, Message
R/F, and SMS are still received automatically,
however, the receiving operations, such as
displaying the incoming mail display or the
received mail display or the sounding of the ring
tone, are not performed and you are not notified
of the reception.
● When you set the Lock all, the Alarm and
Schedule alarm do not operate.
● When you set the Lock all, the image set for the
stand-by display is changed to the preinstalled
[Cyber-shot Logo] image. The i-Channel Telop
text is not displayed.
● When you set the Lock all, the notification icons
other than “ ” (Answer X) are not displayed.
When you cancel the Lock all, the icons are
displayed again.
Using the Omakase Lock
Omakase Lock is a service that allows you to
lock the FOMA terminal remotely if you lose
the FOMA terminal by requesting DoCoMo
or using a procedure available on the My
DoCoMo website. Use this service to protect
your important private information and Osaifu-
Keitai.
You can also request DoCoMo by a call, etc. to
unlock the FOMA terminal.
※ Omakase Lock is a paid service. However, when
you subscribe to this service together with your
request to suspend the FOMA terminal or while the
FOMA terminal is suspended, the service charge is
not required.
※ If the Location request is set to ON while the
Omakase Lock is set, the FOMA terminal answers a
request of location information of the GPS function.
Setting/Canceling the Omakase Lock
0120-524-360 Service hours: 24 hours
※ You can also use your PC to set/cancel the lock
from the My DoCoMo website.
For details on how to use/charges, etc. of the
Omakase Lock, see the “Mobile Phone User’s Guide
【Procedures and After-Sales Services】
”.
Omakase Lock
activated
The message “Omakase Lock activated” appears
and the Omakase Lock is set.
The Omakase Lock service locks a FOMA
terminal if it has an installed UIM card you are
currently subscribing to.
When the Omakase Lock is set, the user can
answer a voice or videophone call and power on/
off the FOMA terminal, but all keypad operation
is locked and all functions (including the IC card
function) are disabled.
When the Omakase Lock is set, the received mail
is stored at the Mail Center.
Although the user can power on/off the FOMA
terminal, powering off does not cancel the lock.
Note, however, that the UIM and microSD
memory card are not locked.
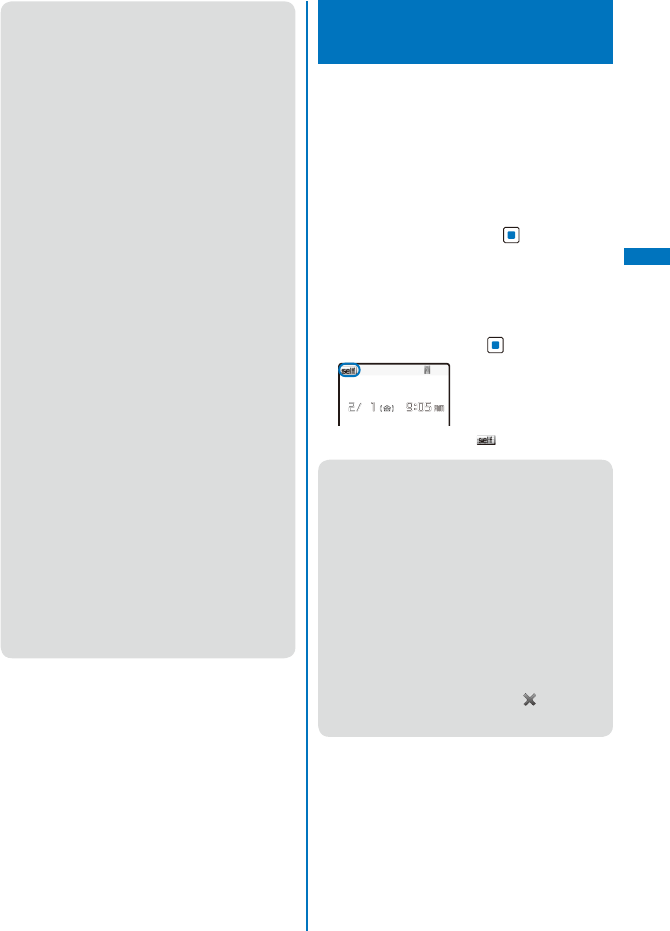
121
Security Settings
● Any other active function is terminated when the
Omakase Lock is set.
● The Omakase Lock can be used even when
another lock function is set. If you set the
Omakase Lock while the Public mode (Drive
mode) is set, you cannot receive a voice or
videophone call.
● The Omakase Lock cannot be set if the FOMA
terminal is outside of the service area, in the Self
mode, or powered off.
● The Omakase Lock cannot be set if you
subscribe to the Dual Network Service and use
the Mova service.
● The Omakase Lock service locks the FOMA
terminal upon request from a subscriber of the
UIM inserted in the FOMA terminal. Even if this
UIM subscriber and user of the FOMA terminal
are different, the FOMA terminal is locked if
requested by the subscriber.
● You can cancel the Omakase Lock only when
the UIM the phone number of which is the same
as of the one inserted when you set the lock is
inserted in the FOMA terminal. If the lock cannot
be canceled, call the “General Contact” on the
backcover of this manual.
● When the Omakase Lock is set, the default ring
tone is used for an incoming voice or videophone
call. One of the images from the [Preinstall]
folder in My picture of the Data Box is used for
the incoming image. In this case, not the caller’s
name but the caller’s phone number is displayed.
Chaku-moji, if received, is not displayed, but
when you cancel the Omakase Lock, Chaku-moji
can be checked in the Received record (P.57).
● When the Omakase Lock is set, you cannot send
a substitute image to answer a videophone call.
You can only adjust the volume of the caller’s
voice and switch the camera during a call.
● When you set the Omakase Lock, the image
set for the stand-by display is changed to the
preinstalled [Cyber-shot Logo] image. The
i-Channel Telop text is not displayed.
Restricting Placing/
Receiving Calls <Self mode>
You can disable all functions that involve calls
or communication, such as placing/receiving a
voice or videophone call, originating/receiving
a PushTalk call, and sending/receiving mail.
You cannot use infrared communication,
infrared remote control, and iC communication,
either.
1 From the Menu, select [Settings] → [Call]
→ [Self mode] and press .
The screen for confirming whether to set the Self
mode appears.
To cancel the Self mode
Select [Yes] on the screen for confirming whether
to cancel the Self mode.
2 Select [Yes] and press .
The Self mode is set and “ ” appears.
● Even if the Self mode is set, you can call
emergency numbers (110, 119, and 118).
The Self mode is canceled after you call an
emergency number.
● If there is an incoming voice call when the
Self mode is set, the caller hears a guidance
informing that the FOMA terminal is outside of the
service area or the FOMA terminal is powered
off. When using the DoCoMo Voice Mail Service
or Call Forwarding Service, these services can
be used in the same manner as when the FOMA
terminal is powered off.
● If you receive a PushTalk call when the Self mode
is set, the call is disconnected. If the received
call is for the PushTalk communication among
several persons, the message “ Disconnect”
appears in the On PushTalk display of the
members.
122
Security Settings
Protecting Your Personal Data in the
Phonebook, Schedule, etc.
<Personal data lock>
You can disable the following functions to
prevent others from viewing/editing your
personal information such as the Phonebook
and Schedule data.
- MUSIC Player -
Music&Video Channel
- Lifetime Calendar - Camera
- Full Browser - microSD
- Mail - i-mode
- i-Channel - i-αppli
- DCMX - Own number
- Phonebook - PushTalk phonebook
- Data Security Service - Record message
- Voice memo - Bar code reader
-
Infrared/iC communication
- ToruCa
- IC card content - GPS
- Alarm - Schedule
- Text memo - Data Box
- Stand-by display - Kisekae tool
- Icon settings - Animation
- Ring tone - Incoming image
- Substitute image - Reset
- Chaku-moji - Melody Call
- easy BlogUp - Music slide show
- Stand-by pictures
When the Reject unknown is set, you cannot set the
Personal data lock.
1 From the Menu, select [Settings] → [Lock/
Security] → [Pers. data lock] and press
.
The Security code screen appears.
2 Enter the Security code and press
(OK).
3 Select [ON] and press .
The Personal data lock is set and “ ” appears.
To cancel the Personal data lock
Select [OFF]. The Personal data lock is canceled
and “ ” disappears.
● When the Personal data lock and Key dial lock
are set simultaneously, “ ” is displayed instead
of “ ”.
● If you set the Personal data lock when data other
than that of the Kisekae menu or that preinstalled
in the [Preinstall] folder of the Data Box is set for
the image, substitute image, or ring tone in the
stand-by or other display, the setting is reset to
the default setting. If you cancel the Personal
data lock, the image or ring tone you set is
restored.
● When the Personal data lock is set, the regular
ring tone, incoming image (excluding PushTalk),
and indicator color are used for an incoming
voice, videophone, or PushTalk call. In this case,
not the caller’s name but the caller’s phone
number is displayed. Chaku-moji, if received, is
not displayed, but when you cancel the Personal
data lock, Chaku-moji can be checked in the
Received record (P.57).
● If you receive a request for your location
information while the Personal data lock is set,
the FOMA terminal answers the request. In this
case, not the caller’s name but the caller’s phone
number is displayed.
● When the Personal data lock is set, i-mode
mail, Message R/F, and SMS are still received
automatically, however, the receiving operations,
such as displaying the incoming mail display
or the received mail display or the sounding of
the ring tone, are not performed and you are not
notified of the reception.
● When you set the Personal data lock, the
name, phone type icon, and Chaku-moji are not
displayed in the Redial/Received record.
● When you set the Personal data lock, the Alarm
and Schedule alarm do not operate.
● When you set the Personal data lock, all
incoming call is accepted regardless of the
Accept/Reject call setting.
● When you set the Personal data lock, the
i-Channel Telop text is not displayed.
● When you set the Personal data lock, the FOMA
terminal does not display the following icons. If
you cancel the lock, they appear.
- “ ” (New mail)
- “ ” (Mail at center)
- “ ” (New MessageR)
- “ ” (New MessageF)
- “ ” (New ToruCa)
- “ ” (New Record msg)
- “ ” (New V.phone msg)
- “ ” (Voice Mail)
- “ ” (Download completed)
- “ ” (Download failed)
- “ ” (PB update failed)
- “ ” (Stand-by SW error)
- “ ” (Update completed)
- “ ” (Update definitions)
123
Security Settings
Restricting Dialing from
the Keypad <Key dial lock>
The keypad is locked to restrict placing a voice
or videophone call or originating a PushTalk
call. To cancel the Key dial lock temporarily,
enter the Security code.
When you set the Key dial lock, you cannot perform
the following functions.
- Place a call using the keys on the keypad
(excluding calls made by the 2-touch dial or
using the Flat-plug Earphone/Microphone with
Switch) or [Call back] from i-mode mail
- Add a member during PushTalk communication
using the keys on the keypad
- Place a call to a recipient who is not saved in
the Phonebook using the Redial/Dial frequency/
Received record
- Send i-mode mail or SMS to a recipient who is not
saved in the Phonebook
- Phone To (AV Phone To) or Mail To
- Save new data or edit/delete data in the
Phonebook
- Operate the Phonebook stored in the microSD
memory card
- Select the Phonebook attached to i-mode mail
- Save/edit/delete the Location notice or information
of a party
- Send the Phonebook data using the infrared
communication
1 From the Menu, select [Settings] → [Lock/
Security] → [Key dial lock] and press .
The Security code screen appears.
2 Enter the Security code and press
(OK).
3 Select [ON] and press .
The Key dial lock is set and “ ” appears.
To cancel the Key dial lock
Select [OFF]. The Key dial lock is canceled and
“” disappears.
● When the Key dial lock and Personal data lock
are set simultaneously, “ ” is displayed instead
of “ ”.
● Even if the Key dial lock is set, you can call
emergency numbers (110, 119, and 118).
Setting the Display of the Redial/
Received Record
<Record display>
The Redial, Dial frequency, and Received
record can be set not to be displayed.
Playback of the Record message is also
disabled. To cancel the Record display
temporarily, enter the Security code.
1 Press ( ) in the stand-by display and
press (Func).
The Function menu appears.
2 Select [Set call record] → [Record
display] and press .
The Security code screen appears.
3 Enter the Security code and press
(OK).
The Record display appears.
4 Select [ON]/[OFF] and press .
The Record display is set.
● The call is saved in the Redial/Received record
even if the Record display is [OFF].
Displaying the Data Saved
as Secret <Secret display>
The Phonebook (PushTalk phonebook), Own
number, and Schedule saved as Secret are not
displayed unless the Secret display is set to
[ON]. Make sure to save the Phonebook, Own
number, and Schedule as Secret if you do not
want others to see them.
Even if the Secret display is set to [ON], it is
changed to [OFF] when you power off the FOMA
terminal.
1 From the Menu, select [Settings] → [Lock/
Security] → [Secret display] and press
.
The Security code screen appears.
2 Enter the Security code and press
(OK).
3 Select [ON]/[OFF] and press .
The Secret display is set.
When set to [ON], “ ” appears.
Continued
124
Security Settings
● When a caller or recipient is saved as Secret in
the Phonebook, the name and phone type are
not displayed in the Redial/Received record.
Once you cancel the Secret, they are displayed.
Protecting Mail from
Unauthorized Access
<Mail security>
You can set the FOMA terminal not to display
the received/sent/saved mail by folder. You
can also use this function not to display the
Receive/Send ranking and Sort inbox/outbox.
To cancel this function temporarily, enter the
Security code.
1 From the Mail menu, select [Inbox]/
[Outbox]/[Draft] and press .
2 Press (Func).
The Function menu appears.
3 Select [Mail security] and press .
The Security code screen appears.
4 Enter the Security code and press
(OK).
The Mail security set display appears.
5 Select a folder to be locked and press .
“” appears.
To lock all folders
Press (Sel. all).
To unlock the selected folder
Press (Rel.).
6 Press (Complete).
The Mail security is set and “ ” (yellow)/“ ” (blue)/
“ ” appears (P.219).
Protecting Data from
Unauthorized Access
<Data security>
You can set the FOMA terminal not to display
data in My picture or i-motion of the Data Box.
You can select data not to display by folder.
To cancel this function temporarily, enter the
Security code.
Even if the Data security is set for a folder, images
in the folder are displayed without entering the
Security code in cases such as when the folder is
set for the Stand-by pictures.
The Data security can be set for the following
folders.
Category Folder
My picture i-mode, Camera, Data exchange,
and User-created folder
i-motion i-mode, Camera, Data exchange,
and User-created folder
1 From the Data Box, select a category and
press .
The folder list appears.
2 Press (Func).
The Function menu appears.
3 Select [Data security] and press .
The Security code screen appears.
4 Enter the Security code and press
(OK).
The screen for selecting a security folder appears.
5 Select a folder to be locked and press .
To lock all folders
Press (Sel. all).
To unlock the selected folder
Press (Rel.).
6 Press (Complete).
The screen for confirming the change of the
security setting appears.
7 Select [Yes] and press .
The Data security is set.
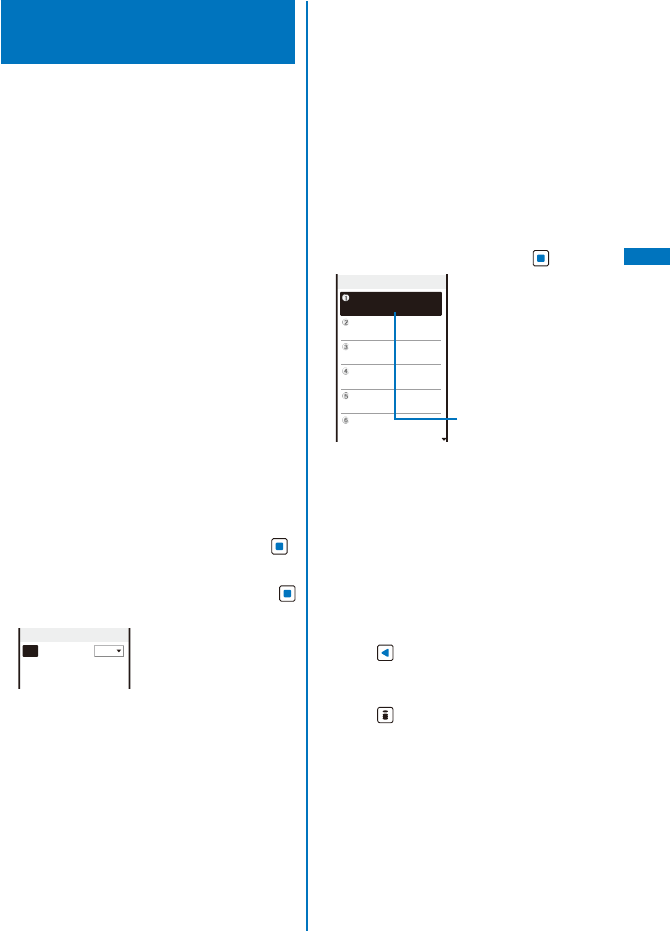
125
Security Settings
Specifying Phone Numbers to
Accept/Reject Calls
<Accept/Reject call>
You can set to accept/reject voice, videophone,
or PushTalk calls only from specific phone
numbers. For the Accept/Reject calls, up to 20
phone numbers can be saved (Phone No.).
You can also set to accept/reject calls only
from specific groups in the FOMA terminal
phonebook. For the Accept/Reject calls, up to
three groups can be saved (Group list).
This function is valid only when a caller sends
the phone number. It is recommended to set
the Caller ID Display Request Service and the
Denied no ID together with this function.
SMS and i-mode mail can be received regardless of
this function.
For an incoming PushTalk call, it is only to the
caller’s phone number that the Accept/Reject call
setting is valid. The Accept/Reject setting does not
work even if you set it to a member other than the
caller. When you make the Accept/Reject setting
through the Group list, a call is accepted/rejected if
the caller of it belongs to the specified group in the
FOMA terminal phonebook.
When the Personal data lock is set, you cannot set
the Accept/Reject calls.
Example: Setting [Accept]/[Reject] for calls from
specified phone numbers
1 From the Menu, select [Settings] → [Lock/
Security] → [Acpt/Rjct call] and press .
The Security code screen appears.
2 Enter the Security code and press
(OK).
Accept/Reject call
Set
OFF
Phone No.
0/20
Group list
0/3
3 Select [Accept]/[Reject] at [Set].
[Accept]:
Set to accept a call. When you receive a call
from a phone number/group other than specified,
the call is not connected. The missed call
notification icon appears and the call is saved in
the Received record.
[Reject]:
Set to reject a call. When you receive a call from
a specified phone number/group, the call is not
connected. The missed call notification icon
appears and the call is saved in the Received
record.
[OFF]:
Cancel the Accept/Reject call setting.
4 Select [Phone No.] and press .
Phone No. list
Number field
To specify a group
Select [Group list] and select a group at the
group field.
To delete a phone number or group
Move the cursor to the number or group field
and from the Function menu, select [Delete] →
[Delete one] → [Yes]. To delete all numbers or
groups, from the Function menu, select [Delete]
→ [Delete all] → [Yes].
5 Enter a phone number at the number
field.
6 Press .
The list is saved and the Accept/Reject call display
is restored.
7 Press (Complete).
The Accept/Reject call from specified phone
numbers is set.

126
Security Settings
Rejecting Calls with No
Caller ID <Denied no ID>
When receiving a voice, videophone, or
PushTalk call without the caller’s phone number
displayed, the reason for not displaying it is
shown. You can decide whether to accept a
call based on the reason.
SMS and i-mode mail can be received regardless of
this function.
If you receive a call with no caller ID when the
Denied no ID is [ON], the call is not connected. The
missed call notification icon appears and the call is
saved in the Received record.
1 From the Menu, select [Settings] → [Lock/
Security] → [Denied no ID] and press .
The Security code screen appears.
2 Enter the Security code and press
(OK).
Denied no ID
User Unset
OFF
PublicPhone
OFF
Not supported
OFF
3 Select [ON]/[OFF] of the Denied no ID for
each non-display reason.
The Denied no ID is set.
Muting the Ring Tone for Calls with
No Phonebook Entry
<Set ring start time>
You can set a time interval before starting
operation of the ring tone, incoming indicator,
and vibrator when you receive a voice,
videophone, or PushTalk call from a person/
group who is not saved in the Phonebook. This
function is also useful for blocking a nuisance
call such as from a malicious caller.
When the Reject unknown is set, you cannot set the
Set ring start time.
1 From the Menu, select [Settings] → [Call]
→ [Call assist] → [Set ring start time] and
press .
Set ring start time
Set
OFF
Start time
04
sec
(01−99)
Missed call display
OFF
2 Select [ON]/[OFF] for the Set ring start
time at [Set].
3 Enter the time before starting the ring
tone for an incoming call at [Start time].
Enter from 01 to 99 seconds.
4 Select [ON]/[OFF] at [Missed call display].
[ON]:
Display all calls in the Received record.
[OFF]:
For a call the start time of which is shorter than
the set time, neither the missed call notification
icon nor the received record is displayed. The
call is saved in the Received record. When the
operation of the record message or videophone
message is started, the notification icon of
missed call appears and the received record is
displayed.
5 Press (Complete).
The Set ring start time is set.
● In the following cases, the Set ring start time
setting works to a call even if you receive it from
a person saved in the Phonebook.
- A call from a person saved as Secret in the
Phonebook (when the Secret display is set to
[OFF])
- A call with no caller ID
- When the Personal data lock is set
● To display all received records when the Missed
call display is [OFF], from the Function menu in
the Received record display, select [Display all].
● If the time set for the Start time is same as that for
the answer or ring times for the Record message,
Auto answer setting, Voice Mail Service, and Call
Forwarding Service, the ring tone may sound.
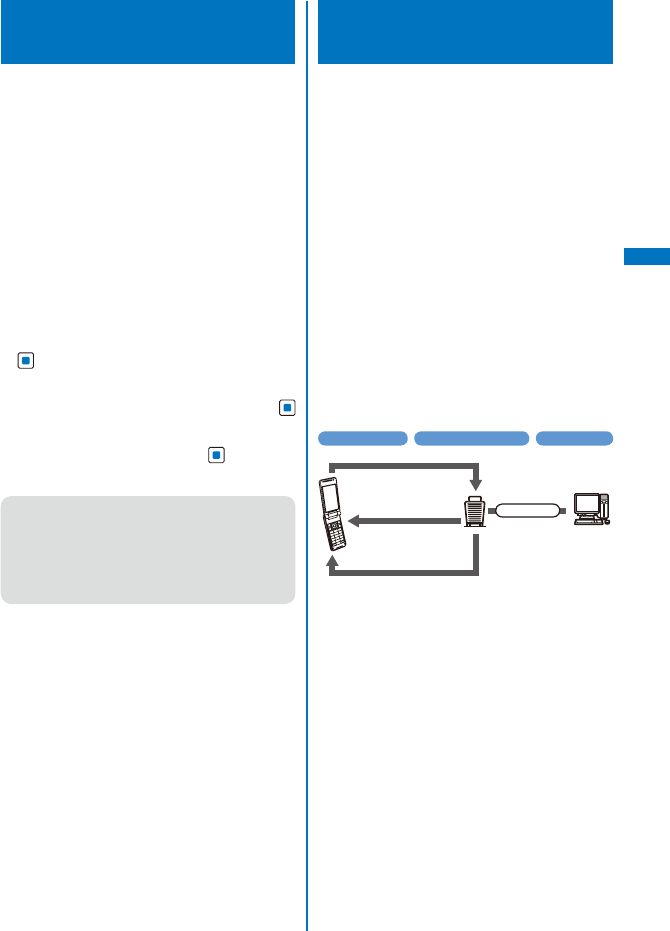
127
Security Settings
Rejecting Calls from Callers with
No Phonebook Entry
<Reject unknown>
You can set to reject voice, videophone, or
PushTalk calls from callers not saved in the
Phonebook. It is recommended that you set
the Caller ID Display Request Service together
with this function.
SMS and i-mode mail can be received regardless of
this function.
If you receive a call from a caller who is not saved
in the Phonebook when the Reject unknown is
[ON], the call is not connected. The missed call
notification icon appears and the call is saved in the
Received record.
When the Set ring start time or Personal data lock is
set, you cannot set the Reject unknown.
1 From the Menu, select [Settings] → [Lock/
Security] → [Reject unknown] and press
.
The Security code screen appears.
2 Enter the Security code and press
(OK).
3 Select [ON]/[OFF] and press .
The Reject unknown is set.
● In the following cases, the Reject unknown
setting works to a call even if you receive it from
a person saved in the Phonebook.
- A call from a person saved as Secret in the
Phonebook (when the Secret display is set to
[OFF])
- A call with no caller ID
Using the Data Security
Service <Data Security Service>
The Data Security Service is a service that
allows you to store the Phonebook, images,
and mail (hereinafter referred to as “stored
data”) saved in your FOMA terminal at the Data
Security Service Center.
Even if you lose the stored data, for example,
if you accidentally lost the FOMA terminal or
it had a water-related trouble, you can restore
the stored data at the Center into a new
FOMA terminal. Also, the phonebook data
saved in both the FOMA terminal and Data
Security Service Center can be kept it latest
automatically on a regular basis. Furthermore,
you can easily edit the stored data at the Data
Security Service Center by accessing the My
DoCoMo website on your PC, and save the
edited stored data in the FOMA terminal.
※ For details on the Data Security Service, see the
“Mobile Phone User’s Guide
【i-mode】
FOMA
version”.
Store the Phonebook, images, and mail.
FOMA terminal
Data Security Service Center
PC, etc.
Internet
View and edit
the stored data.
Update the FOMA
terminal after editing
the data on a PC.
Easily restore data when
the FOMA terminal is lost or
has a water-related trouble.
※ Data Security Service is a paid service that requires
a subscription. (To apply for this service, you need
an i-mode subscription.)
Saving the Phonebook (P.105)
Saving the mail (P.221)
Saving the images (P.295)
128
Security Settings
Other Measures “For
Safety Operation”
The following functions and services are also
available for safety operation besides those
described in this chapter.
Purpose
Function name/
Service name
Page
Prevent others from
using the IC card
function without
consent.
IC card lock P.262
Do not receive a
“nuisance call” such
as a prank call and
malicious sales call.
Nuisance
Call Blocking
Service
P. 3 9 4
Do not receive a call
without a caller ID.
Caller ID
Display
Request
Service
P. 3 9 5
Use the electronic
authentication
service to perform
secure and reliable
data communication
(available only when
accessing FirstPass-
compatible sites).
FirstPass P.199
Update of the FOMA
terminal software when
it is necessary.
SW Update P.456
Protect the FOMA
terminal from data that
could cause trouble.
Scan function P.462
Choose to receive only
necessary mail when
receiving i-mode mail.
Recv option
setting
P.215, 227
Purpose
Function name/
Service name
Page
Register or check
information about your
or someone’s condition
using i-mode in the
event of a disaster.
“i-mode
Disaster
Message
Board”
service
See the
“Mobile Phone
User’s Guide
【i-mode】
FOMA
version”.
Change the mail
address.
Change Mail
Address
Reject mail that contains
URLs.
Spam Mail
Prevention
(Reject Mail
with URL)
Receive/reject mail from
specific domains.
Spam Mail
Prevention
(Reject/
Receive Mail
Settings)
Receive/reject mail only
from i-mode users.
Receive/reject mail from
specific addresses.
Set the recommended
settings for Spam Mail
Prevention easily.
Spam Mail
Prevention
(かんたん
メール設定
(Easy Setting
for Mail))
Do not receive mail from
an i-mode compatible
mobile phone if the
number of mail sent
from it reaches 500 a
day.
Spam Mail
Prevention
(Reject Mass
i-mode Mail
Senders)
Do not receive SMS
messages.
Spam Mail
Prevention
(SMS
Rejection
Settings)
Do not receive
advertising mail sent
without prior agreement.
Spam Mail
Prevention
(Reject
Unsolicited
Ad Mail)
Limit the size of
received mail.
Limiting mail
size
Confirm the current
settings of the mail
function.
Confirm Mail
Settings
Disable the mail function
temporarily.
Suspend Mail
Check the rough
present location of the
lost FOMA terminal.
Keitai-
Osagashi
Service
129
Camera
Before Using the Camera ........................................................................................ 150
Recording Still Images .................................................................... <Shoot by photo> 155
Using the Basic Functions of the Camera ................................................................ 157
Enjoying Various Recording Modes ......................................................<Shoot mode> 163
Recording Movies ................................................................................<Movie shoot> 170
Changing the Camera Settings ............................................................................... 171
Adjusting the Camera during Recording .................................................................. 175
Setting the Camera Operation ................................................................................. 177
Using the Bar Code Reader .......................................................... <Bar code reader> 183
About the Copyright
Objects, such as movies, still images, and sounds, recorded using the FOMA terminal and
productions on a site (program) or Internet site are prohibited by the copyright law from
reproduction, transformation, and compilation without consent of the copyright holders,
unless intended for personal use or any other purpose permitted by law. Also, using or
transformation of other person’s portrait or name without his or her permission may violate
the right of portrait. When you present recorded images or sounds in a public place such
as on an Internet home page, make sure to be aware of the copyright and right of portrait.
Note that some performances, shows, and exhibitions may not allow photography, movie
shooting, or sound recording even for personal use.
Please be considerate of the privacy of individuals around you when taking and sending
photos using camera-equipped mobile phones.
130
Camera
Before Using the Camera
You can record images using the built-in
camera, and you can send them by attaching
to i-mode mail, posting on a blog, setting for
the stand-by display, and so on.
When you save an image to the microSD
memory card, you can also select a mode to
save a replicated image of smaller size in the
FOMA terminal at the same time (P.178, 319).
To use the microSD memory card, you need to
obtain a microSD memory card separately. If
you do not have a microSD memory card, you
can purchase one at a home electric appliance
store or other similar store (P.306).
The image recorded by the camera may differ from
actual color or brightness of object.
About Using the Camera
Notes Before Using the Camera
Clear images cannot be obtained if the camera
lens is stained with fingerprints or grease. Wipe the
camera with a soft clean cloth before recording an
image.
Leaving the FOMA terminal in a place exposed to
direct sunlight or high temperature for a long period
of time may deteriorate the image quality.
You cannot start the Camera mode when the battery
level is very low. To use the camera, charge the
battery sufficiently.
The Camera mode may not be activated when the
FOMA terminal is charged electrostatically.
When you post or send an image recorded by the
camera, it is at your own risk to decide whether
or not to share your location information attached
to the image. If you do not want to send location
information, set the Auto attach loc. info to [OFF]
(P.171).
Notes on Using the Camera
To prevent shaking, hold the FOMA terminal firmly
or place it on a stable place and use the Auto timer
when recording.
When you try to record a strong light source directly,
such as the sun or a lamp, the screen may black out
or the image on the screen may be distorted.
The camera is manufactured based on the leading
edge technologies. Nevertheless, black and bright
points or lines may appear constantly in the display.
Additionally, increased noise may appear as white
lines when recording in a low-light environment.
These are not malfunctions.
When the battery level becomes very low in the
Camera mode, the Camera mode is terminated.
About the Camera Mode
To use the camera, slide the lens cover to
open in the stand-by display or menu display.
The camera activation sound is heard, the
Camera mode is activated, an image through
the camera lens appears in the display, and
the Auto timer indicator is turned on.
To terminate the Camera mode, close the lens
cover.
You can also activate the Camera mode by pressing
for over a second in the stand-by display.
● The Camera mode is terminated automatically if
the keypad is not pressed for about two minutes.
● Depending of the functions you are using, the
Camera mode may not be terminated even if you
close the lens cover. Press (Stop) or to
terminate it.
● When the camera is activated or swiched to
the Out-camera with the lens cover closed, the
message “Open the lens cover” appears.

131
Camera
About Still Image/Movie
Item Still image Movie
File
format
JPEG (Exif format) MP4 (MobileMP4)
File
name
When saved to [Data
Box]
YYYYMMDDhhmmss
The recorded year,
month, date, hour,
minute, second
is displayed. For
example, when
a still image
is recorded at
February 1,
2008, 18:02:10, it
appears as “2008
0201180210”.
When using the
Continuous mode,
00 to 03 is added
after the year,
month, date, hour,
minute, second,
resulting in a format
like “2008020118
0210_00”.
When saved to
[microSD]
DSC0nnnn
When saved to [Data
Box]
YYYYMMDDhhmmss
The recorded year,
month, date, hour,
minute, second
is displayed. For
example, when a
movie is recorded
at February 1,
2008, 18:02:10, it
appears as “2008
0201180210”.
When saved to
[microSD]
MOLnnn
File
number
NNN-nnnn
The file number is
displayed when
saved to [microSD].
You can reset the
file number (P.181).
−
A number “100 to 999” is assigned to “NNN”, “001
to FFF” is assigned to “nnn”, and “0001 to 9999” is
assigned to “nnnn” in the order of recorded time.
If you have not set the date/time, the file name is
displayed as “--------------”.
About the Orientation of Still Images
Being Saved
Images recorded with the camera are saved
in landscape or portrait orientation depending
on the image size to be recorded. An image
of a size of [QCIF(176×144)], [VGA(640×
480)], [1M(1280×960)], [2M(1632×1224)],
[2M Wide(1920×1080)], or [3M(2048×1536)]
is saved in landscape orientation and of a size
of [QVGA(240×320)] or [Stby(480×864)]※ is
saved in portrait orientation.
※ When the Shoot mode is set to [BestPic™], the
orientation of a saved image is landscape even if
you set the image size to [Stby(480×864)].
Continued
Camera
132
Number of Still Images You Can Save
The number of still images that can be saved in the Data Box or microSD memory card varies
depending on the image quality and size, recording conditions, and object of shooting.
■ Estimated number of still images you can record and save in the Data Box
Image size
Image quality
QCIF
(176×144)
QVGA
(240×320)
VGA
(640×480)
Stby
(480×864)
1M
(1280×960)
2M
(1632×1224)
2M Wide
(1920×1080)
3M
(2048×1536)
Fine
About 2,500 About 2,500 About 2,500 About 1,989
About 716 About 448 About 448 About 285
Standard
About 2,500 About 2,500 About 2,500 About 2,500 About 1,119
About 689 About 689 About 442
Economy
About 2,500 About 2,500 About 2,500 About 2,500 About 1,705 About 1,053 About 1,053
About 689
■ Estimated number of still images you can record and save in the microSD memory card (64MB)
Image size
Image quality
QCIF
(176×144)
QVGA
(240×320)
VGA
(640×480)
Stby
(480×864)
1M
(1280×960)
2M
(1632×1224)
2M Wide
(1920×1080)
3M
(2048×1536)
Fine
About 1,883 About 1,259
About 541 About 421 About 151 About 94 About 94 About 60
Standard
About 1,883 About 1,883
About 757 About 631 About 237 About 145 About 145 About 92
Economy
About 3,738 About 1,883 About 1,259
About 945 About 344 About 223 About 223 About 145
About Recording Time of Movie
The recording time of movie that can be saved in the Data Box or microSD memory card varies
depending on the recorded image quality, Shoot mode, image size, file size restriction settings as
well as the recording conditions and object of shooting.
■ Estimated recording time of movie you can record and save in the Data Box
(m: minute, s: second)
File size
restriction
Image size Shoot
mode
Recording time available for each movie
Total recording time available
Image quality Image quality
Super fine
Fine
Standard
Economy
Super fine
Fine
Standard
Economy
Attach(S)
−
Sound only
About 304s About 2,933m
VGA
(640×480)
Image only
−−−−−−−−
Image+Sound
−−−−−−−−
QVGA
(320×240)
Image only
About 10s
−−−
About 96m
−−−
Image+Sound
About 10s
−−−
About 96m
−−−
QCIF
(176×144)
Image only
About 20s About 31s About 77s
About 168s
About 193m About 299m About 743m
About 1,621m
Image+Sound
About 19s About 28s About 68s
About 130s
About 183m About 270m About 656m
About 1,254m
sQCIF
(128×96)
Image only
−
About 61s
About 130s About 214s
−
About 588m
About 1,254m About 2,065m
Image+Sound
−
About 51s
About 105s About 155s
−
About 492m
About 1,013m About 1,495m
Attach(L)
−
Sound only
About 20m About 2,829m
VGA
(640×480)
Image only
About 10s
−−−
About 23m
−−−
Image+Sound
About 10s
−−−
About 23m
−−−
QVGA
(320×240)
Image only
About 42s
−−−
About 98m
−−−
Image+Sound
About 41s
−−−
About 96m
−−−
QCIF
(176×144)
Image only
About 85s
About 127s About 317s
About 11m
About 199m About 298m About 744m
About 1,628m
Image+Sound
About 79s
About 116s About 279s About 534s
About 185m About 272m About 655m
About 1,254m
sQCIF
(128×96)
Image only
−
About 253s About 534s
About 14m
−
About 594m
About 1,254m About 2,065m
Image+Sound
−
About 212s About 434s
About 10m
−
About 498m
About 1,019m About 1,499m

Camera
133
■ Estimated recording time of movie you can record and save in the microSD memory card (64MB)
(m: minute, s: second)
File size
restriction
Image size Shoot
mode
Recording time available for each movie
Total recording time available
Image quality Image quality
Super fine
Fine
Standard
Economy
Super fine
Fine
Standard
Economy
Attach(S)
−
Sound only
About 304s About 663m
VGA
(640×480)
Image only
−−−−−−−−
Image+Sound
−−−−−−−−
QVGA
(320×240)
Image only
About 10s
−−−
About 21m
−−−
Image+Sound
About 10s
−−−
About 21m
−−−
QCIF
(176×144)
Image only
About 20s About 31s About 77s
About 168s
About 43m About 67m
About 168m About 366m
Image+Sound
About 19s About 28s About 68s
About 130s
About 41m About 61m
About 148m About 283m
sQCIF
(128×96)
Image only
−
About 61s
About 130s About 214s
−
About 133m About 283m About 467m
Image+Sound
−
About 51s
About 105s About 155s
−
About 111m About 229m About 338m
Attach(L)
−
Sound only
About 20m About 622m
VGA
(640×480)
Image only
About 10s
−−−
About 434s
−−−
Image+Sound
About 10s
−−−
About 434s
−−−
QVGA
(320×240)
Image only
About 42s
−−−
About 21m
−−−
Image+Sound
About 41s
−−−
About 21m
−−−
QCIF
(176×144)
Image only
About 85s
About 127s About 317s
About 11m About 43m About 65m
About 163m About 358m
Image+Sound
About 79s
About 116s About 279s About 534s
About 40m About 59m
About 144m About 275m
sQCIF
(128×96)
Image only
−
About 253s About 534s
About 14m
−
About 130m About 275m About 454m
Image+Sound
−
About 212s About 434s
About 10m
−
About 109m About 224m About 329m
No limit −
Sound only
About 60m About 665m
VGA
(640×480)
Image only
About 465s
−−−
About 465s
−−−
Image+Sound
About 460s
−−−
About 460s
−−−
QVGA
(320×240)
Image only
About 22m
−−−
About 22m
−−−
Image+Sound
About 22m
−−−
About 22m
−−−
QCIF
(176×144)
Image only
About 45m About 60m About 60m About 60m About 45m About 67m
About 169m About 369m
Image+Sound
About 42m About 60m About 60m About 60m About 42m About 61m
About 148m About 285m
sQCIF
(128×96)
Image only
−
About 60m About 60m About 60m
−
About 135m About 285m About 469m
Image+Sound
−
About 60m About 60m About 60m
−
About 113m About 232m About 340m
Continued
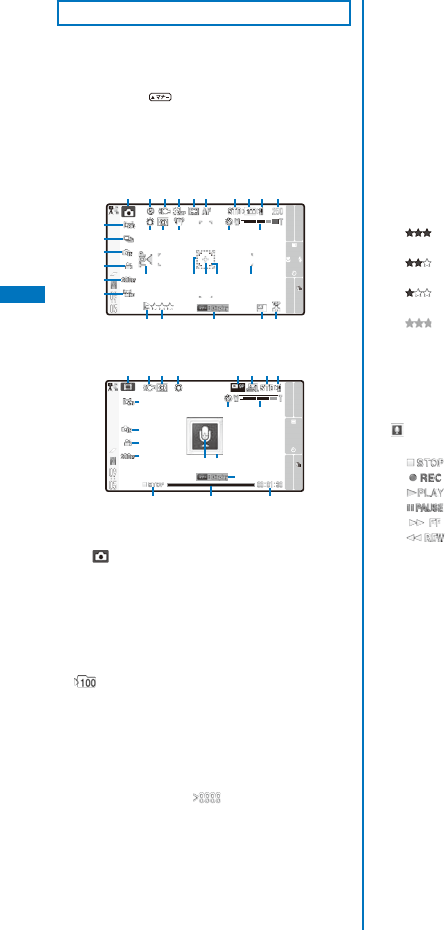
134
Camera
Icons in the Camera Mode
In the Camera mode display, the following
icons appear according to the settings and
functions selected.
You can use to switch display of the icons
and guide display (Standard, Key operation guide
display, or Display off). Even if you select “Display
off”, related icons are displayed when you perform
any operations.
When recording a still image
MENU
Shoot
Func
Zoom(T)
Zoom(W)
When recording a movie
MENU
Shoot
Func
Zoom(T)
Zoom(W)
Shoot mode (P.182)
“ ” appears when recording a still image.
Flash (P.174)
Photo light ON (P.174)
Auto Focus (P.173)
Multi focus (P.172)
During the Auto Focus operation
Image quality (P.178)
The number of a folder to save to
Appears when saving data to/playing data from
the microSD memory card (does not appear
when no microSD memory card is inserted).
Save to (P.177)
Estimated number of images that can be recorded
If the number of images that can be recorded is
higher than 9,999, “ ” appears.
Image size (P.159)
Shoot mode (P.163)
Switch camera (Out-camera/In-camera)
Select scene (P.160)
EV (P.162)
Face detection OFF (P.162)
White balance (P.175)
Photometry (P.176)
Image stabilize (P.180)
Auto timer ON (P.173)
Zoom (P.161)
Does not appear when the Zoom cannot be
used.
Saved with this side up indication (P.159, 179)
Focus frame when the digital zoom is used
Spot photometry (P.176)
Spot Focus frame
Multi focus frame
Set attach loc. info ON (P.171)
GPS positioning accuracy (P.265)
: Nearly accurate location information (with
an error less than approximately 50 m)
: Relatively accurate location information
(with an error less than approximately 300 m)
: Approximate location information (with an
error more than approximately 300 m)
Positioning failed
Guide for using the key operation guide display
Mini-Photo creator set to [Replicate] (P.178)
Auto orientation ON (P.179)
Common replay mode (P.175)
File size (P.181)
Recording sound only
Recording status
Stopped
During image recording
During image playing
During pausing
During image fast-forwarding
During image fast-reversing
Progress bar
Estimated recordable time
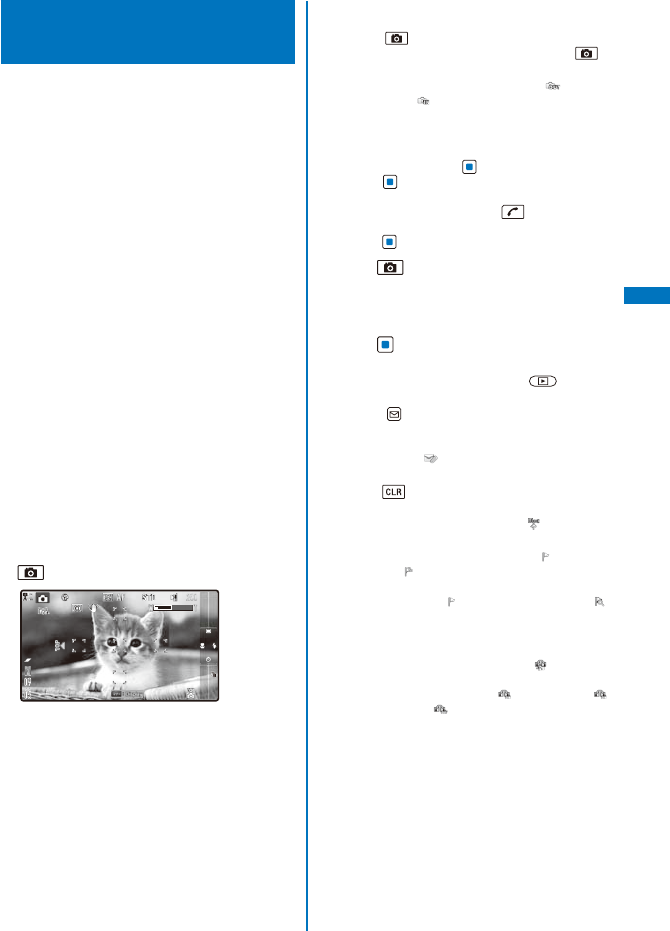
135
Camera
Recording Still Images
<Shoot by photo>
When recording with the Out-camera, you
can record still images by focusing on five
spots in the display when the Multi focus is
set to [Multi AF] or a spot at the center of the
display when set to [Spot AF]. When the Auto
orientation is set to [ON], the orientation of
the FOMA terminal is automatically detected
while recording and orientation information is
recorded in the image file.
The allowable distance for the Auto focus between
the camera and an object is about 30 cm or more
using [Macro OFF], about 10 cm or more using
[Macro], and about 3 cm to 18 cm using [S-macro].
When the zoom magnification is increased into the
digital zoom range, the Multi focus function does
not operate even if the Multi focus is set to [Multi
AF]. An auto-focus function that finds a focus in the
central area of the display is used instead.
You cannot use the Auto Focus when you set
the Select scene to [Night scene]/[Low Light] for
recording still images.
1 Slide the lens cover to open in the
stand-by display.
The Camera mode is activated.
You can also activate the Camera mode by
sliding the lens cover to open in the menu
display.
2 Point the camera at the object and press
halfway down to focus on it.
MENU
Shoot
Func
When the Multi focus is set to [Multi AF], objects
are brought to focus at up to five spots within the
white Multi focus frame. When set to [Spot AF], the
focus is adjusted using the white Spot focus frame
at the center of the display. When the image comes
into focus, the confirmation sound is heard, and the
focus frame/frames turn green.
While recording a still image, the Auto timer
indicator flashes.
When failed to adjust the focus, the white focus
frame/frames turn red.
To focus on an area other than the center of the
display when the Multi focus is set to [Spot AF]
Press halfway to focus, point the camera
where you want to record, and then press .
To switch to the In-camera
From the Function menu, select [ ] (Switch
camera) → [ ] (In camera).
When using the In-camera, the white focus
frame/frames do not appear, indicating that
the Auto Focus function is disabled.
To record images using (Shoot)
Press (Shoot). To focus on an area other than
the center of the display when the Multi focus
is set to [Spot AF], press to focus, point
the camera where you want to record, and then
press (Shoot).
3 Press .
A still image is recorded with the shutter sound and
the screen for confirming whether to save the image
appears.
4 Press (Save).
The still image is saved. You can display the saved
still image for checking by pressing .
To attach to mail
Press (Func) for over a second. The still
image is saved and the Edit mail display
appears. You can also attach an image to mail
by selecting [ ] from the Function menu.
To cancel a recorded image
Press and select [Yes].
To post on a blog
From the Function menu, select [ ] (P.358).
To add location information
From the Function menu, select [ ] (Location
info) → [ ] (Rcv location info). To display the
obtained detailed information, from the Function
menu, select [ ] (Location info) → [ ]
(Location detail) (P.277).
To save as a mirror image when recording with the
In-camera
From the Function menu, select [ ]. To switch
between Normal image and Mirror image, from
the Function menu, select [ ] (Display) → [ ]
(Mirror image)/[ ] (Normal image).
When you switch an image between Normal
image and Mirror image, the image is reversed
horizontally, seen in the orientation in which
it is saved. Depending on the orientation of a
saved image, the image may be displayed as
if it is reversed vertically.
Continued
136
Camera
● When there is not enough memory or the number
of saved images exceeds the maximum number,
the message appears. Change the place to save
the image or delete unnecessary images.
● When you switch to the Shoot by photo mode
from the Movie shoot mode, the following items
are reset.
Item Default setting
Switch camera Out camera
Select scene AUTO
Zoom magnification ×1.0
EV ±0.0EV
Auto timer OFF
Photo light OFF
Grid Line OFF
White balance AUTO
Photometry Center
Picture effect OFF
● The image may not be saved when you receive a
call before the shutter sound ends.
● Depending on the object of shooting and the
recording conditions, you may not be able to
adjust focus or an unexpected portion may be
brought into focus.
● When you record an object under the following
conditions, the Auto Focus may not be able to
adjust the focus of the object.
- The object does not have color contrast.
- The object is moving.
- You are recording in a dark place.
- You are recording while moving the FOMA
terminal.
- There is a light within range of the camera
view.
● When you record an image while the Auto
orientation is set to [ON], the image may be
displayed in an orientation different from that
seen in the FOMA terminal in the following cases.
- When attaching an image to mail or posting it
on a blog
- When transferring an image to a PC, etc. using
USB
Using the Basic Functions
of the Camera
Graphical Menu
Main settings of the camera can be changed
from the Graphical menu.
In this manual, the icons displayed defaultly at
the time of purchase are used for describing
operations available from the Graphical menu,
regardless of them being changed because of
change in the settings.
Because the icons of the Graphical menu vary
depending on the settings at the time, icons used in
this manual may differ from the actual ones.
1 Press (Func) in the Camera mode
display.
Photograph image to fit the
size of stand−by display
Select size
Stby(480
×
864)
Submenu of the selected menu item
Name of the selected item
Guide of the selected item
Menu item
The icon for the currently set item appears.
2 Set each item.
Use to select a menu item to be set and
to select an item on the submenu, and press .
● For the operations in the horizontal orientation,
the 4-way keys are described differently
according to the key positions seen in the
horizontal orientation of the FOMA terminal.
represent and represent
for normal operations respectively. Also,
the scrolling directions of the JOG upward and
downward in the normal operations become to
the left and right.

137
Camera
Direct Key Operation
Frequently used functions are assigned a
Direct key. You can use Direct keys to change
settings with a simple key operation instead of
selecting from the Menu. Every time you press
the Direct key, the settings are changed.
For functions for which the Direct key operation
is available, the assigned Direct keys are also
mentioned in this manual.
Functions are assigned to the Direct keys as follows.
Operation Key operation Page
Select size Press or . P.159
Switch the Auto timer Press . P.173
Switch the Flash Press . P.174
Auto Focus setting Press . P.173
Decrease the EV value Scroll the Jog to left. P.162
Increase the EV value Scroll the Jog to right. P.162
Switch camera Press . P.159
Select scene setting Press . P.160
White balance setting Press . P.175
Photometry setting Press . P.176
Switch ON/OFF of the
Grid Line
Press . P.174
Picture effect setting Press . P.176
Position the current
location
Press for over a
second.
P. 1 7 2
Reset all setting Press . P.177
Switch ON/OFF of the
Photo light
Press . P.174
Switch the Shoot by
photo/Movie shoot
Press . P.170
You may not be able to operate some functions
depending on the Shoot mode.
Example: Setting the Auto timer
1 Press in the Camera mode display.
Auto timer:10sec
Photograph 10 seconds after
pressing shutter
Every time you press , the time is changed
among [OFF], [10sec], [5sec], and [2sec]. After
about 2 seconds without any operations, the
display restores and the Auto timer is set to the last
selected setting.
2 Press until the time you want or [OFF]
appears.
The Auto timer is set.
● The Direct keys and functions assigned to them
can be checked on the Key operation guide
display that appears by pressing or sliding
the FOMA terminal to open.
Selecting an Image Size
You can select the size of a still image and
movie to be recorded from nine and four types,
respectively.
When the Shoot mode of the still image is set to
[Panorama], [Continuous mode], or [Shoot with
frame], you cannot select the image size.
When the size of a movie is set to [QVGA(320×
240)] or [VGA(640×480)], the image quality of the
movie is changed to [Super fine]. When the size of
a movie whose image quality is [Super fine] is set to
[sQCIF(128×96)], the image quality of the movie is
changed to [Standard].
1 Press (Func) in the Camera mode
display, select [ ] (Select size) → an
image size, and press .
You can also set an image size by pressing
or in the Camera mode display.
The image size is set and the icon for the current
image size appears.
When the image size is set to [QVGA(240×320)]
or [Stby(480×864)], the saved with this side up
indication “ ” appears. The image is saved with
the indicated side up.
Still image (Out-camera)
QCIF(176×144)
QVGA(240×320)
VGA(640×480)
Stby(480×864)
1M(1280×960)
2M(1632×1224)
2M Wide(1920×1080)
3M(2048×1536)
The image size which can be recorded with the
In-camera is [QCIF(176×144)], [QVGA(240×
320)], or [VGA(640×480)].
Movie (Out-/In-camera)
sQCIF(128×96)
QCIF(176×144)
QVGA(320×240)
VGA(640×480)
Continued
138
Camera
Switching the Camera Used for
Recording
You can switch between the Out- and In-
cameras for recording.
When the Shoot mode of the still image is set to
[Smile shutter], [Panorama], [High sensitivity],
[BestPic™], or [Continuous mode], you cannot
switch the camera.
When the Shoot mode of the still image is set to
[Shoot with frame] while the image size is set to
[Stby(480×864)], you cannot switch the camera
from the Out-camera to In-camera.
When the camera is switched from the Out-camera
to In-camera, the following items are changed. The
Select scene, Face detection, Auto Focus, Flash,
Digital Zooming, and Image stabilize restore the
previous settings when switching the camera to the
Out-camera.
Item Setting
Image size VGA(640×480)※1
Select scene AUTO
EV ±0.0EV※1※2
Face detection OFF
Auto Focus OFF
Flash OFF
White balance AUTO※2
Photometry Center※2
Picture effect OFF※2※3
Digital Zooming OFF
Image stabilize OFF
※1 The setting of the Image size or EV is changed
to the listed one when it cannot be set for the In-
camera.
※2 The setting of the EV, White balance, Photometry,
or Picture effect is changed to the listed one when
the Select scene is set to other than [AUTO] for the
Out-camera.
※3 The Picture effect is changed to [OFF] when it is
set to [Solarization].
1 Press (Func) in the Camera mode
display, select [ ] (Switch camera) →
[] (Out camera)/[ ] (In camera), and
press .
You can also switch the camera by pressing
in the Camera mode display.
The camera is switched.
● While switching the camera from Out-camera
to In-camera and if the lens cover is closed, the
message “Open the lens cover” appears. Once
you open the lens cover, the Camera mode is
activated.
Switching the Recording Scene
When you record an image with the Out-
camera, you can automatically adjust the
camera settings in accordance with a scene.
When you change a scene, the White balance,
Photometry, EV, and Picture effect settings are
reset.
When the Shoot mode is set to [BestPic™] or
[Continuous mode] or while recording a movie, you
cannot select [Night scene] and [Low Light].
When the Face detection is set to [ON],
[Landscape], [Night scene], [Low Light], [Sports],
or [Beach/snow] cannot be selected.
When the Shoot mode is set to [High sensitivity] or
[Smile shutter], the Select scene changes to [AUTO].
You cannot change the Select scene.
When the Shoot mode of movie is set to [Sound
only], you cannot set the Select scene.
1 Press (Func) in the Camera mode
display, select [ ] (Select scene) → a
scene, and press .
You can also set the Select scene by pressing
in the Camera mode display.
[] (AUTO):
Record an image by automatically adjusting the
color and brightness.
[] (People):
Make a clear recording of a person’s skin in
bright and warm tones of color.
[] (Landscape):
Make a clear recording of an outdoor scene with
a vivid expression of the color of ocean, sky, and
trees.
[] (Night scene):
Record night scenes without compromising the
atmosphere of darkness.
[] (Low Light):
Increase the film speed in a dark place to record
the scene as brightly as possible.
[] (Sports):
Record an object that is moving in a brightly lit
place such as the outdoors.
[] (Beach/snow):
Record the bright colors of the ocean, lake, and
snow scene even more vividly.
[] (Party):
Make a clear recording of a party scene by
enhancing the mood of the illumination in a room.
The Select scene is set and the icon for the current
scene appears.
If you set to [AUTO], no icon appears.
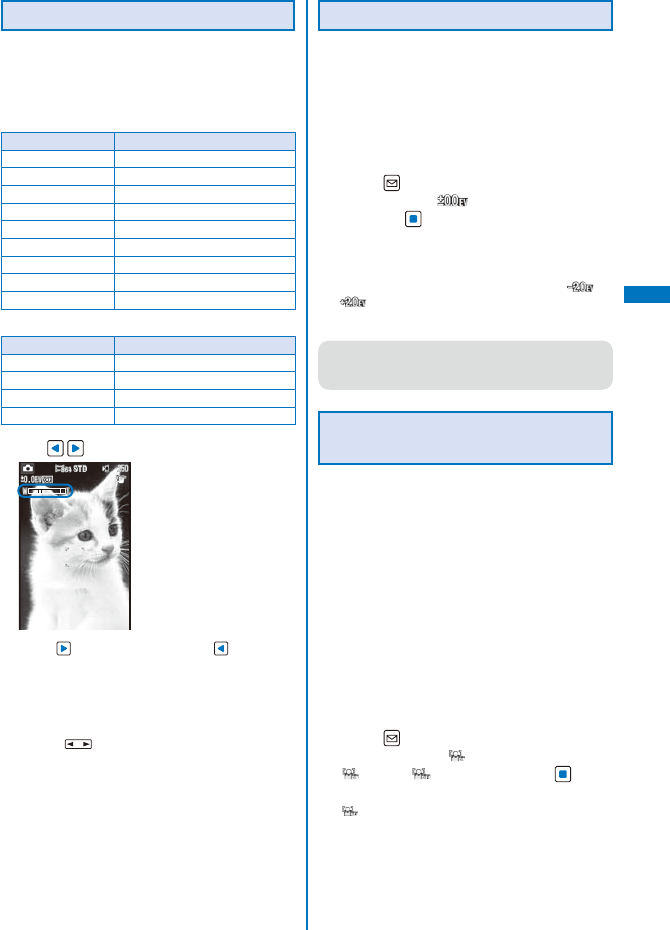
139
Camera
Continued
Adjusting Zoom
You can adjust the zoom of an image when
you record using the Out-camera. The zoom
magnifications that can be adjusted for each
image size are as follows.
When recording a still image
Image size Maximum magnification display
[sQCIF(128×96)] About ×16 (33 levels)
[QCIF(176×144)] About ×10.6 (31 levels)
[QVGA(240×320)] About ×6.4 (27 levels)
[CIF(352×288)] About ×6.4 (27 levels)
[VGA(640×480)] About ×6.4 (27 levels)
[Stby(480×864)] About ×6.4 (27 levels)
[1M(1280×960)] About ×6.4 (27 levels)
[2M(1632×1224)] About ×6.4 (27 levels)
[3M(2048×1536)] About ×6.4 (27 levels)
When recording a movie
Image size Maximum magnification display
[sQCIF(128×96)] About ×16 (33 levels)
[QCIF(176×144)] About ×10.6 (31 levels)
[QVGA(320×240)] About ×6.4 (27 levels)
[VGA(640×480)] About ×6.4 (27 levels)
1 Use in the Camera mode display.
Use to increase the zoom and to decrease
it. When you press these keys for over a second,
an image is zoomed in/out continuously.
The zoom is adjusted and the current magnification
is indicated on the zoom bar.
For the TV style
Press in the Camera mode display.
Adjusting Brightness
The image brightness (EV: Exposure Value)
can be adjusted according to the ambient
condition. The exposure can be adjusted in
13 levels from -2.0EV to +2.0EV for recording
with the Out-camera and in seven levels from
-1.0EV to +1.0EV for recording with the In-
camera.
1 Press (Func) in the Camera mode
display, select [ ] (EV) → the EV value,
and press .
When you scroll the JOG to the left in the Camera
mode display, the EV value decreases, to the
right, the EV value increases.
The brightness is adjusted and the icon “ ” to
“” for the current EV value appears.
When the EV is set to ±0.0EV, no icon appears.
● When the place is extremely bright or dark, the
brightness may not be changed even after being
adjusted.
Adjusting the Focus
Automatically by Detecting Faces
You can detect up to three persons’ faces at
a time. The Face detection frame chases the
faces and adjusts the focus and brightness to
the one best suited for the scene automatically
even if they move.
When you set the Face detection to [ON] while the
Select scene is set to [Landscape], [Night scene],
[Low Light], [Sports], or [Beach/snow], the Select
scene is changed to [AUTO].
When you set the Face detection to [ON], the Picture
effect is changed to [OFF]. The Digital Zooming is
also changed to [OFF] temporarily.
When the Auto Focus is set to other than [Macro
OFF], the Face detection is temporarily set to [OFF]
and the setting cannot be changed.
1 Press (Func) in the Camera mode
display, select [ ] (Face detection) →
[ ] (ON)/[ ] (OFF), and press .
The Face detection is set. When you select [OFF],
“” appears.
When you set [ON], no icon appears.
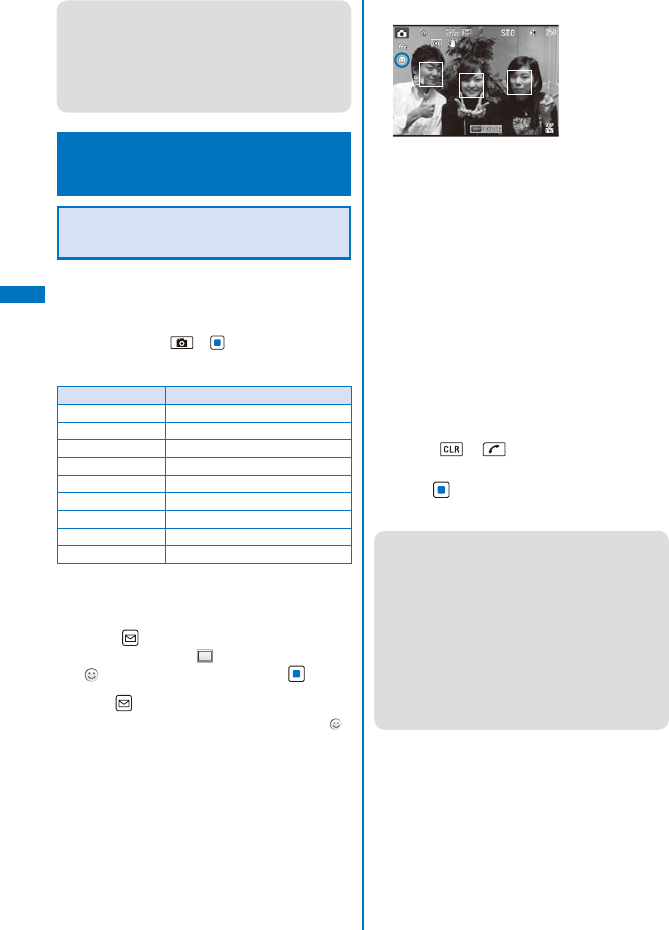
140
Camera
3 Point the camera at the object.
The white Face detection frame appears and the
Face detection operation begins. When the person
targeted for the smile detection comes into focus,
the confirmation sound is heard and the Face
detection frame turns green.
When the smiling face of the object is detected, the
shutter is released automatically and an image is
recorded.
Up to three persons’ faces can be detected.
When several faces are detected, the camera
selects a person who is closer to the center
of the display and focuses on the face of the
person.
It is only the smiling face of a person for whom
the green Face detection frame is displayed that
can be detected.
If you fail to adjust the focus, the white Face
detection frame turns red.
When failed to adjust the focus
Press or and retry the Face detection
again.
4 Press (Save).
The image is saved.
● Depending on the recording conditions, the
Face detection operation may fail and the shutter
cannot be released.
● In the following cases, a smile may not be
detected.
- When the light is too dark or too bright on a
face
- When the distance between the camera and
objects are too far and faces are too small
- When the part of the face is covered with
sunglasses, a mask, hat, etc.
- When the face turns away from the camera or
is tilted
● The Face detection operation may fail when a
face is tilted, part of a face is covered, a targeted
face is of other than a person such as of any pet
animal, or recording in a dark place.
● Even if you record in a scene where no face is
found, the Face detection frame may appear if
there found any object that looks like a face.
Enjoying Various
Recording Modes <Shoot mode>
Recording a Smiling Face Using
the Smile Shutter
The camera detects a smile and automatically
releases the shutter.
The Zoom cannot be used during the Smile shutter
mode. Also, you cannot release the shutter manually,
either by pressing or (Shoot).
When the Shoot mode is set to [Smile shutter], the
following items are changed temporarily.
Item Setting
Switch camera Out camera
Select scene AUTO
Face detection ON
Auto Focus OFF(before detecting faces)※
Auto timer OFF
White balance AUTO
Photometry Center
Picture effect OFF
Digital Zooming OFF
※ After detecting faces, the effective range is set to
the same level as [Macro OFF].
The items above cannot be changed.
1 Press (Func) in the Camera mode
display, select [ ] (Shoot mode) →
[ ] (Smile shutter), and press .
2 Press (Close).
The Shoot mode is set to [Smile shutter] and “ ”
appears.
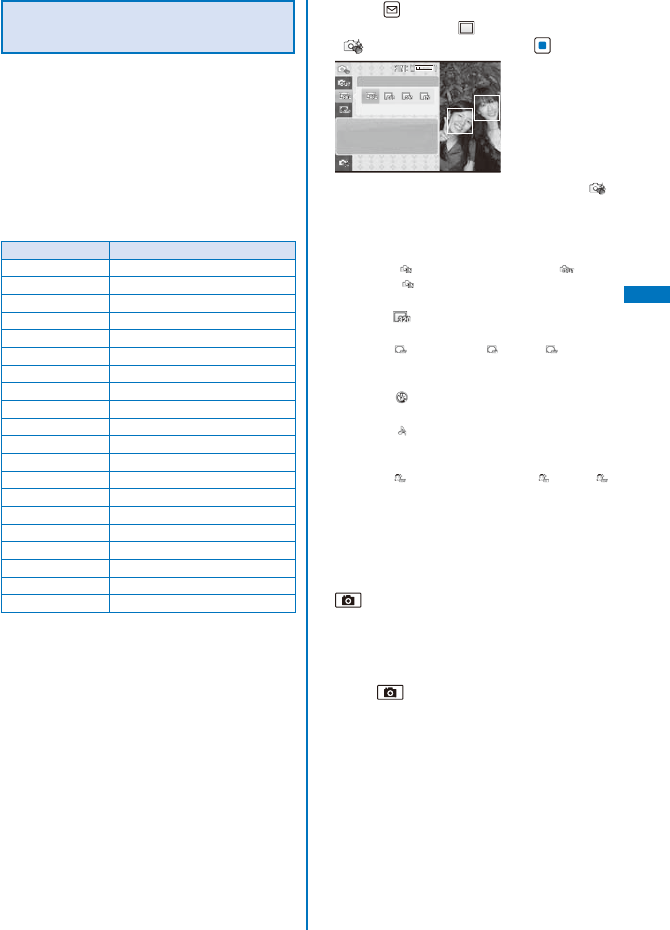
141
Camera
Decorating Images Fashionably
Using the Deco-Snap Mode
Using frames and stamps, you can decorate
images in fashionable way.
For Out-camera recording, you can select an image
size of [QCIF(144×176)], [QVGA(240×320)],
[VGA(480×640)], and [Stby(480×864)]. For In-
camera recording, you can select the image size of
[QCIF(144×176)] and [QVGA(240×320)].
When the Shoot mode is set to [Deco-Snap], the
following items are changed temporarily. The items
other than Select size, Switch camera, EV(Whitening
mode), and Flash cannot be changed.
Item Setting
Select size QVGA(240×320)
Switch camera In camera
Select scene AUTO
EV Whitening mode [OFF] : ±0.0EV
Face detection ON※1
Set attach loc. info OFF
Auto Focus Macro OFF※1
Multi focus Spot AF※1
Auto timer※2 5sec
Photo light OFF
Flash OFF
Grid Line OFF
White balance AUTO
Photometry Average
Picture effect OFF
Auto save OFF
Image quality Fine
Digital Zooming OFF
Image stabilize AUTO
Auto orientation OFF
※1 The listed settings for the Face detection, Auto
Focus, and Multi focus are those assumed for use
of the Out-camera. These functions do not operate
when recording with the In-camera.
※2 The previous setting of the Auto timer is not
restored even if the Shoot mode is changed.
Once you set the Shoot mode to [Deco-Snap], the
zoom magnification is set default to [×1.0] even if
the Shoot mode is changed to other setting.
1 Press (Func) in the Camera mode
display, select [ ] (Shoot mode) →
[ ] (Deco-Snap), and press .
Select size
Stby(480
×
864)
Photograph image to
fit the size of
stand−by display
The Shoot mode is set to [Deco-Snap] and “ ”
appears.
When recording with the In-camera, point the
camera at the object and go to step 3.
To switch the camera
Select [ ] (Switch camera) → [ ] (Out
camera)/[ ] (In camera).
To set the Select size
Select [ ] → a size.
To record an image with a frame
Select [ ] (Frame) → [ ] (ON)/[ ] (OFF). If
you select [ON], select a frame.
To emit the flash light (Out-camera only)
Select [ ] (Flash) → a type of flash light.
To change the sound for Deco-Snap
Select [ ] (Deco-Snap beep) → a sound for
Deco-Snap.
To set the Whitening mode
Select [ ] (Whitening mode) → [ ] (ON)/[ ]
(OFF).
When the Whitening mode is set to [ON], the
EV is set to +1.0EV for the Out-camera and
+0.3EV for the In-camera. When set to [OFF],
the EV is set to ±0.0EV.
2 Point the camera at the object and press
halfway.
The Face detection function is activated and the
focus is adjusted based on a face. When the face
comes into focus, the confirmation sound is heard
and the Face detection frame turns green.
3 Press .
The Auto timer is activated and the Deco-Snap
beep is heard. An image is recorded with the
shutter sound, and the menu before saving images
appears.
Continued
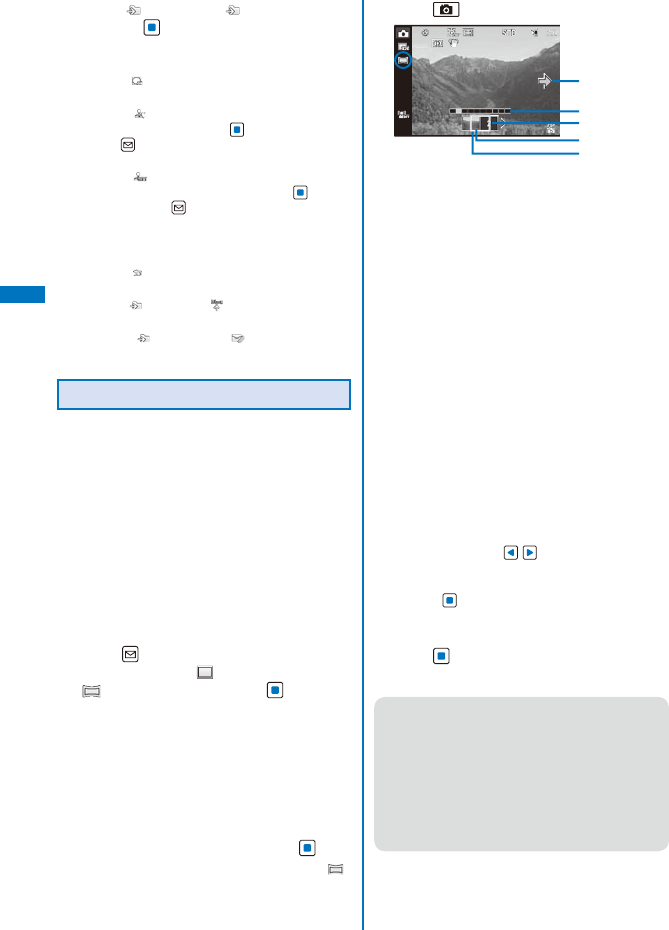
142
Camera
4 Select [ ] (Save) → [ ] (Save) → [Yes]
and press .
The image is saved.
To paste a frame
Select [ ] → a frame.
To paste an image stamp
Select [ ] → a stamp, adjust the position to
paste the stamp, press (Paste), and then
press (Cancel).
To paste text
Select [ ], compose a text stamp, adjust the
position to paste the text stamp, press (Paste),
and then press (Cancel).
Follow the same steps as in “Pasting Text”
(P.293, step 2 to 3).
To undo all editing
Select [ ].
To post on a blog
Select [ ] (Save) → [ ] (easy BlogUp) (P.358).
To attach to mail
Select [ ] (Save) → [ ] (Attach to mail)
(P.212).
Recording a Panorama Image
You can record several images sequentially
and compose them into one panorama
image just by pressing the shutter key once
and moving the FOMA terminal horizontally.
You can also record a 360-degree view of
panorama image.
When the Shoot mode is set to [Panorama], the
Picture effect is changed to [OFF]. Also, the Face
detection, Auto Focus, Auto timer, Auto save, and
Digital Zooming are temporarily changed to [OFF]
and the Flash is changed to [OFF].
The zoom cannot be used during the Panorama
mode.
1 Press (Func) in the Camera mode
display, select [ ] (Shoot mode) →
[ ] (Panorama), and press .
The display for selecting the Panorama mode (size
×number) appears.
[NormalPanorama(VGA×4)]:
Up to four images are recorded to create one
panorama image.
[360°Panorama(QVGA×10)]:
Up to 10 images are recorded to create a
360-degree panorama image that surrounds you.
2 Select a recording size and press .
The Shoot mode is set to [Panorama] and “ ”
appears.
3 Press .
Guide to show the recording direction
Move the camera in the direction of the arrow.
Number of recordable images
The frame of the image to be recorded next
turns green.
Number of the image to be recorded next
counted from the beginning
Thumbnail of the image recorded previously
Camera orientation guide
When you move the camera according to the
guide, the green frame also moves along with
the movement of the camera. The frame turns
red when the camera reaches the spot for
recording the next image.
The first image is recorded with the shutter sound.
Keep the FOMA terminal horizontally and slowly
move it in either direction left or right. When you
move the camera with the help of the green-framed
camera orientation guide and once bring it to the
spot for recording the next image, the frame turns
red and the next image is recorded automatically
with the shutter sound.
After recording the last image, all images are
composed into one image and the entire image
is displayed. Press to scroll the display to
check the hidden portions of the image.
To stop recording
Press (Stop). If the screen for confirming
whether to compose the images appears, select
[Activate]/[Erase photo].
4 Press (Save).
The composed panorama image is saved.
● After the shutter sound is heard, do not move
the camera while the message “Photographing.
Please keep for a while” remains displayed.
Failure not to do so may cause the composed
image to be extremely compressed vertically or
failure in composition.
● Once you press the shutter key to start recording
a panorama image, the Shoot mode is not
terminated even if no operation is made for over
two minutes.
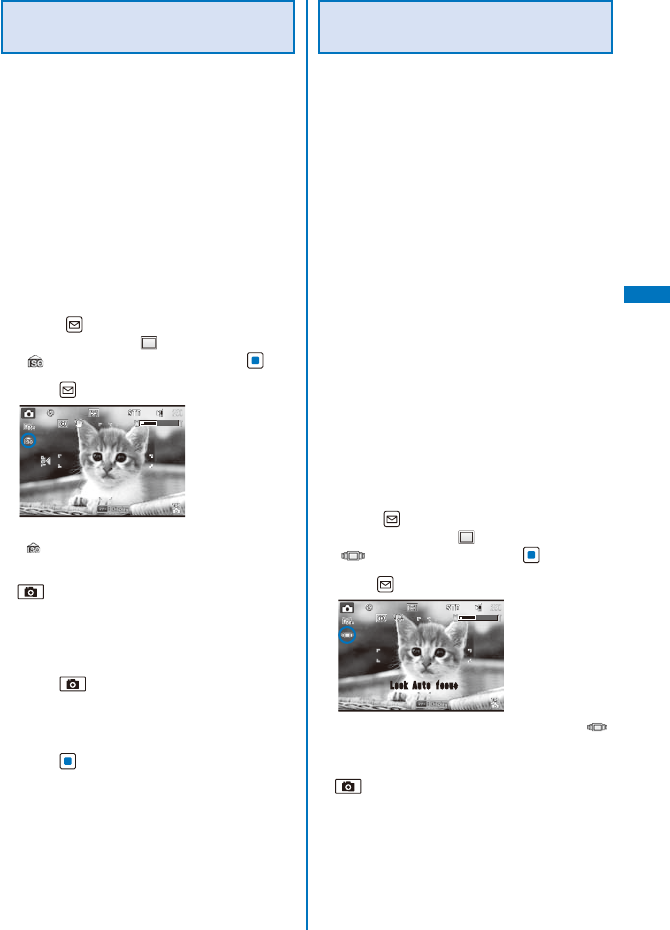
143
Camera
Recording an Image Using the
High Sensitivity Mode
You can record an image beautifully by
reducing the blurring of an object under low-
light condition or in a dark room without using
the flash.
The image size which can be recorded using the
High sensitivity is [QCIF(176×144)], [QVGA(240
×320)], [VGA(640×480)], [Stby(480×864)], or
[1M(1280×960)].
When you set the Shoot mode to [High sensitivity]
while the image size is [2M(1632×1224)] or more,
the image size is changed to [1M(1280×960)].
When you set the Shoot mode to [High sensitivity],
the Flash is temporarily set to [OFF] and the Select
scene is set to [AUTO]. The setting of the Select
scene cannot be changed.
1 Press (Func) in the Camera mode
display, select [ ] (Shoot mode) →
[ ] (High sensitivity), and press .
2 Press (Close).
The Shoot mode is set to [High sensitivity] and
“” appears.
3 Point the camera at the object and press
halfway.
The white focus frame/frames are used to adjust
the focus. When the image comes into focus, the
confirmation sound is heard, and the focus frame/
frames turn green.
4 Press .
An Image is recorded with the shutter sound and
the screen for confirming whether to save the image
appears.
5 Press (Save).
The image is saved.
Recording a Still Image Using
the BestPic™ Mode
Just by bringing an object into focus using the
Auto Focus function and pressing the shutter
key, you can record a total of nine continuous
still images in a moment before and after you
press the shutter key, from which you can
select the best shot.
The image size of BestPic™ is [VGA(640×480)],
[Stby(480×864)], [1M(1280×960)], [2M(1632×
1224)], [2M Wide(1920×1080)], or [3M(2048×
1536)].
When you set the Shoot mode to [BestPic™] while
the image size is [QCIF(176×144)] or [QVGA(240
×320)], the image size is temporarily changed to
[Stby(480×864)].
When you set the Shoot mode to [BestPic™] while
the Auto Focus is set to [OFF], the Auto Focus is
changed to [Macro OFF].
When the Shoot mode is set to [BestPic™], the
Image stabilize and Auto save are temporarily set
to [OFF] and the Image quality is set to [Standard].
The image quality cannot be changed.
If you use the flash when recording images using
BestPic™, the light intensity of the flash drops to the
photo light level.
When you set the Shoot mode to [BestPic™] while
the Select scene is set to [Night scene] or [Low
Light], the Select scene is changed to [AUTO].
1 Press (Func) in the Camera mode
display, select [ ] (Shoot mode) →
[ ] (BestPic™) and press .
2 Press (Close).
Lock Auto focus
Lock Auto focus
The Shoot mode is set to [BestPic™] and “ ”
appears.
3 Point the camera at the object and press
halfway.
The white focus frame/frames are used to adjust
the focus. When the image comes into focus, the
confirmation sound is heard, and the focus frame/
frames turn green.
Continued
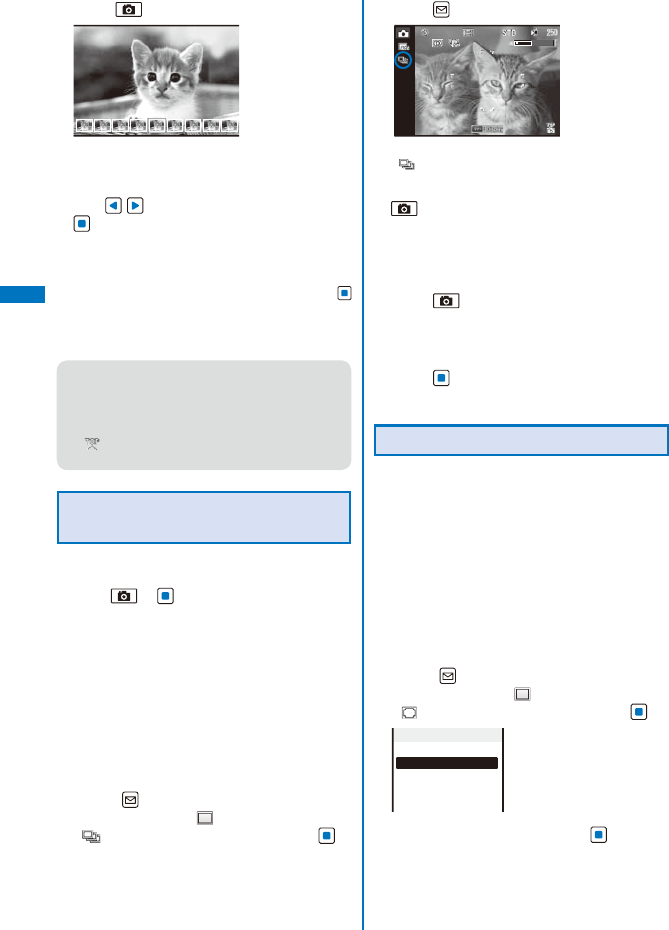
144
Camera
4 Press .
Images are recorded continuously with the shutter
sound, and the screen for confirming whether to
save the images appears.
5 Use to select an image and press
(Save).
The selected image is saved and the screen for
confirming whether to save another image appears.
To save another image
Select [Yes], select an image, and press
(Save).
To return to the Camera mode display
Select [No].
● When you set the image size to [Stby(480×864)]
while the Shoot mode is set to [BestPic™], an
image is saved in landscape orientation even
if you record it with the FOMA terminal held
vertically. The Saved with this side up indication
“” does not appear in the Camera mode
display.
Recording Still Images in the
Continuous Mode
You can record four still images continuously at
an interval of about 0.2 seconds with a single
press of or (Shoot).
The image size in the Continuous mode is [VGA(640
×480)]. You cannot change the image size.
When you set the Shoot mode to [Continuous mode]
while the Select scene is set to [Night scene] or [Low
Light], the Select scene is changed to [AUTO].
When the Shoot mode is set to [Continuous mode],
the Image stabilize function is temporarily set to
[OFF].
If you use the flash when recording images using
the Continuous mode, the light intensity of the flash
drops to the photo light level.
1 Press (Func) in the Camera mode
display, select [ ] (Shoot mode) →
[ ] (Continuous mode), and press .
2 Press (Close).
The Shoot mode is set to [Continuous mode] and
“” appears.
3 Point the camera at the object and press
halfway.
The white focus frame/frames are used to adjust
the focus. When the image comes into focus, the
confirmation sound is heard, and the focus frame/
frames turn green.
4 Press .
Images are recorded continuously with the burst
sound, and the screen for confirming whether to
save the images appears.
5 Press (Save).
Four continuous images are saved.
Recording Images with Frames
You can record an image with a frame, which
can be selected from the preinstalled frames
or downloaded frames.
For Out-camera recording, you can select a frame
size of [QCIF(176×144)], [QVGA(240×320)],
[VGA(640×480)], and [Stand-by(480×864)]. For
In-camera recording, you can select the frame
size of [QCIF(176×144)], [QVGA(240×320)], and
[VGA(640×480)].
The size of images recorded with a frame is
determined according to the frame you selected
and cannot be changed.
1 Press (Func) in the Camera mode
display, select [ ] (Shoot mode) →
[] (Shoot with frame), and press .
Select frame size
QCIF(176
×
144)
QVGA(240
×
320)
VGA(640
×
480)
Stand−by(480
×
864)
2 Select a frame size and press .
The Frame display appears.
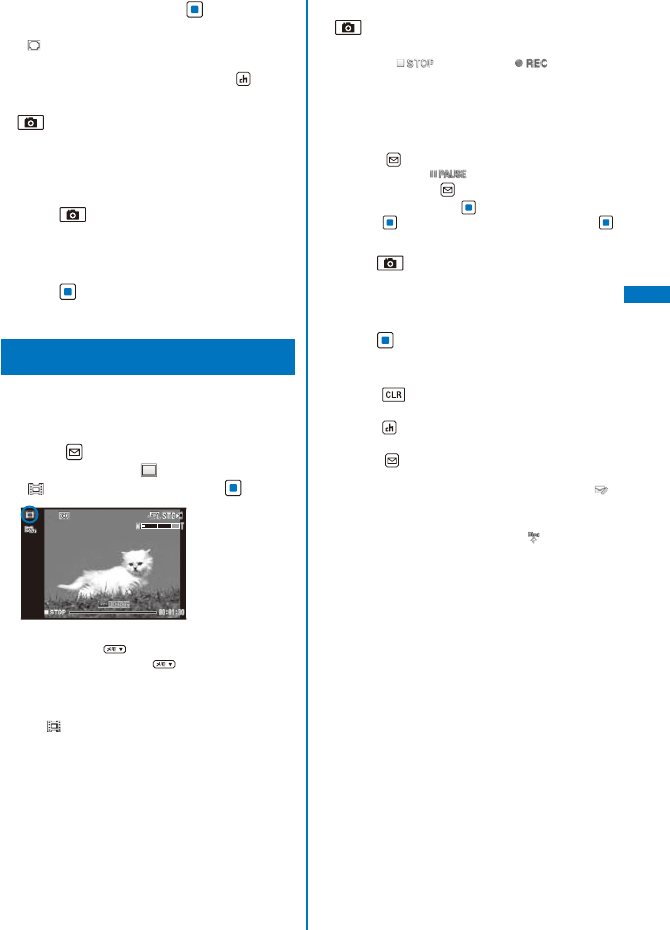
145
Camera
3 Select a frame and press .
The Shoot mode is set to [Shoot with frame] and
“” and the selected frame appear.
To check a frame
Move the cursor to a frame and press (Play).
4 Point the camera at the object and press
halfway.
The white focus frame/frames are used to adjust
the focus. When the image comes into focus, the
confirmation sound is heard, and the focus frame/
frames turn green.
5 Press .
An image is recorded with the shutter sound and
the screen for confirming whether to save the image
appears.
6 Press (Save).
The image is saved.
Recording Movies <Movie shoot>
You can record a movie with the camera.
The movie recording time varies depending on
where to save a movie (P.152, 153).
1 Press (Func) in the Camera mode
display, select [ ] (Shoot mode) →
[ ] (Movie shoot), and press .
You can also switch to the Movie shoot display
by pressing in the Camera mode display.
Every time you press , the display switches
between the Shoot by photo display and Movie
shoot display.
The display switches to the Movie shoot display
and “ ” appears.
2 Point the camera at the object and press
.
The recording start tone is heard and the movie is
recorded. “ ” changes to “ ”.
While you record a movie, the estimated
recordable time is displayed by both a bar and
numbers under the image and the Auto timer
indicator flashes.
To pause recording
Press (Pause). The recording pause tone
sounds and “ ” appears. To restart the
recording, press (Record).
To record movies using (Shoot)
Press (Shoot). To end the recording, press
(Stop).
3 Press to end recording.
The recording end tone is heard, the recording is
stopped, and the screen for confirming whether to
save the movie appears.
4 Press (Save).
The movie is saved.
To cancel movie recording
Press and select [Yes].
To check before saving
Press (Play).
To attach to mail
Press (Func) for over a second. The movie
is saved and the Edit mail display appears. You
can also attach a movie to mail by selecting [ ]
from the Function menu.
To post on a blog
From the Function menu, select [ ] (P.358).
Continued
146
Camera
● When there is not enough memory or the number
of recorded time of saved movies exceeds
the maximum number, the message appears.
Change the place to save the movie or delete
unnecessary movies. Even if recording is
possible, the maximum recording time may not
be achieved.
● When you switch to movie recording from still
image recording, the following items are reset.
Item Default setting
Switch camera Out camera
Select scene AUTO
Zoom magnification ×1.0
EV ±0.0EV
Shoot mode Regular
Auto Focus Macro OFF
Auto timer OFF
Photo light OFF
Grid Line OFF
White balance AUTO
Photometry Center
Picture effect OFF
● Noise in the form of a mosaic may appear in an
image or the image or sound may be interrupted
while you are recording a movie. Note that this is
not malfunction.
● The movie sound is recorded via the microphone
of the FOMA terminal. If you operate the keys
or block the microphone during recording, the
recording may be affected by the sound of the
keys and other noise.
● The motion of the recorded movie may be rough
depending on the object you are shooting and
the recording conditions.
Changing the Camera
Settings
Setting Whether to Add Location
Information to an Image When Saving
You can add location information automatically
to a recorded still image using the GPS
function.
When an image recorded with the Auto attach
loc. info of the Set attach loc. info set to [ON] is
posted on a blog, sent with mail, etc., the location
information is at risk of being known by other
persons.
1 Press (Func) in the Camera mode
display, select [ ], and press .
Set attach loc. info
Auto Focus
Multi focus
Auto timer
Photo light
Flash
Grid Line
OFF
Macro OFF
Multi AF
OFF
OFF
OFF
OFF
Shoot
Adjust
Set
2 Select [Shoot] → [Set attach loc. info] and
press .
Set attach loc. info
Auto attach loc. info
OFF
Attach loc. info meth.
From act. camera
Location info
[Auto attach loc. info]:
Select whether to add location information
automatically when saving an image.
[Attach loc. info meth.]:
Select an obtaining method of location
information to be added automatically.
[Location info]:
Save location information to be added to an
image.
3 Select [ON]/[OFF] of whether to add
location information automatically at
[Auto attach loc. info].
147
Camera
4 Select [From saved info]/[From act.
camera] at [Attach loc. info meth.].
[From saved info]:
Add the location information saved in the
Location info.
[From act. camera]:
Obtain location information when activating the
camera and add it automatically.
5 Save location information at [Location
info].
Follow the same steps as in “Adding the Location
Information” (P.277, step 2 to 3).
When the location information is already saved
The Has loc. info display appears. To check the
location information, select [Check]. To change
the location information, select [Change] and
obtain location information. To delete the location
information, select [Delete].
6 Press (Complete).
The Set attach loc. info is set.
When the Auto attach loc. info is set to [ON], the
Set attach loc. info is set and “ ” appears.
● When the Auto attach loc. info is set to [ON], it
may take time to start next recording.
● When the Auto attach loc. info is set to [ON] and
the Attach loc. info meth. is set to [From act.
camera], the icons which show the accuracy
appear in the Camera mode display (P.154).
● If the positioning is failed when activating the
camera, you can do it manually by pressing
for over a second in the Camera mode display.
● The location information may not be added to
an image properly if you record it right after the
camera is activated or in a place where it is
difficult to obtain location information.
Using the Auto Focus Functions
Properly
When recording a still image with the Out-
camera, you can select the Auto Focus setting
properly according to the shooting conditions,
such as when two persons are standing
alongside, to record a beautiful image surely
and easily.
You can bring an object into focus with the Spot
focus frame or Multi focus frame so long as the
zoom magnification is within the optical zoom range.
When the zoom magnification is increased into the
digital zoom range, the focus frame is changed to
that for the digital zoom and the focus is adjusted
on an object around the focus frame.
When the Auto Focus is set to [OFF], the focus
frame does not appear.
1 Press (Func) in the Camera mode
display, select [ ], and press .
2 Select [Shoot] → [Multi focus] and press
.
[Multi AF]:
The Multi focus frame appears and searches
objects to be focused at multiple spots in the
display. When the focus is set, up to five focus
frames are displayed. It is very useful to use in a
case such as when recording two persons stand
alongside.
[Spot AF]:
The Spot focus frame is displayed in the center
of the display and you use it to focus on an
object. It is recommended to use when you want
to focus exactly on the spot that you want.
3 Select [Multi AF]/[Spot AF] and press .
The Multi focus is set and the icon for the current
Multi focus type appears.
Multi AF
Spot AF
Setting the Effective Distance of
the Auto Focus
You can set the effective distance of the Auto
Focus function when you record still images
with the Out-camera.
When the Select scene is set to [Night scene] or
[Low Light], the Auto Focus is temporarily changed
to [OFF]. The setting of the Auto Focus cannot be
changed.
1 Press (Func) in the Camera mode
display, select [ ], and press .
2 Select [Shoot] → [Auto Focus] and press
.
You can also set the Auto Focus by pressing
in the Camera mode display.
The menu for selecting the Auto Focus type
appears.
[Macro OFF]:
Record an image by focusing the object. The
minimum focusing distance is about 30 cm.
[Macro]:
Record an image by focusing a close object. The
minimum focusing distance is about 10 cm.
[S-macro]:
Record an image by focusing a very close
object. The focusing distance is between about
3 cm to 18 cm.
[OFF]:
Record an image without using the Auto Focus.
Continued
148
Camera
3 Select the Auto Focus type and press .
The Auto Focus is set and the icon for the current
Auto Focus type appears.
No icon appears for [Macro OFF].
OFF
Macro
S-macro
Using the Auto Timer
The Auto timer allows you to record yourself
or others without holding the FOMA terminal.
You can also set the interval until recording is
started after you press the shutter key.
1 Press (Func) in the Camera mode
display, select [ ], and press .
2 Select [Shoot] → [Auto timer] and press
.
You can also set the Auto timer by pressing in
the Camera mode display.
The menu for selecting a time for the Auto timer
appears.
3 Select a time until recording is started
after you press the shutter key and press
.
Select from [OFF], [10sec], [5sec], and [2sec].
The Auto timer is set and “ ” appears.
● If there is an incoming call when you are
recording with the Auto timer, the recording
stops.
● After recording, the Auto timer is automatically
reset to [OFF].
Turning on the Photo Light
The FOMA terminal’s built-in photo light can be
used when recording with the Out-camera in a
dark place, etc.
1 Press in the Camera mode display.
Every time you press , the photo light is
switched to [ON]/[OFF].
When switched to [ON], the photo light is turned on
and “ ” appears.
● The photo light is for helping you record in a dark
place. You cannot expect as much amount of
light from the photo light as from the electric flash
of a normal camera.
Emitting the Flash
You can use the flash when recording with the
Out-camera in a dark place.
When the Shoot mode is set to [BestPic™] or
[Continuous mode], if you use the flash when
recording images, the light intensity of the flash
drops to the photo light level.
When the Shoot mode is set to [Panorama], the
Flash is set to [OFF] temporarily.
1 Press (Func) in the Camera mode
display, select [ ], and press .
2 Select [Shoot] → [Flash] and press .
You can also set the Flash by pressing in the
Camera mode display.
[AUTO]:
The flash is emitted depending on the brightness
of surroundings.
[Forced ON]:
The flash is always emitted.
[OFF]:
The flash is not emitted.
3 Select a flash type and press .
The Flash is set and the icon for the current Flash
setting appears.
No icon appears for [AUTO].
Forced ON
OFF
Using the Grid Line
The Grid Line which divides the display into 3
×3 panes helps you, as auxiliary lines, position
objects on the display. Using the Grid Line, you
can record an image in which all objects are
arranged well-balanced.
When the Shoot mode is set to [Deco-Snap], the
Grip Line does not appear.
When the Shoot mode of movie is set to [Sound
only], the Grid Line does not appear.
1 Press (Func) in the Camera mode
display, select [ ], and press .
2 Select [Shoot] → [Grid Line] and press
.
You can also set the Grid Line by pressing
in the Camera mode display.
3 Select [ON]/[OFF] and press .
When you select [ON], the Grid Line appears.
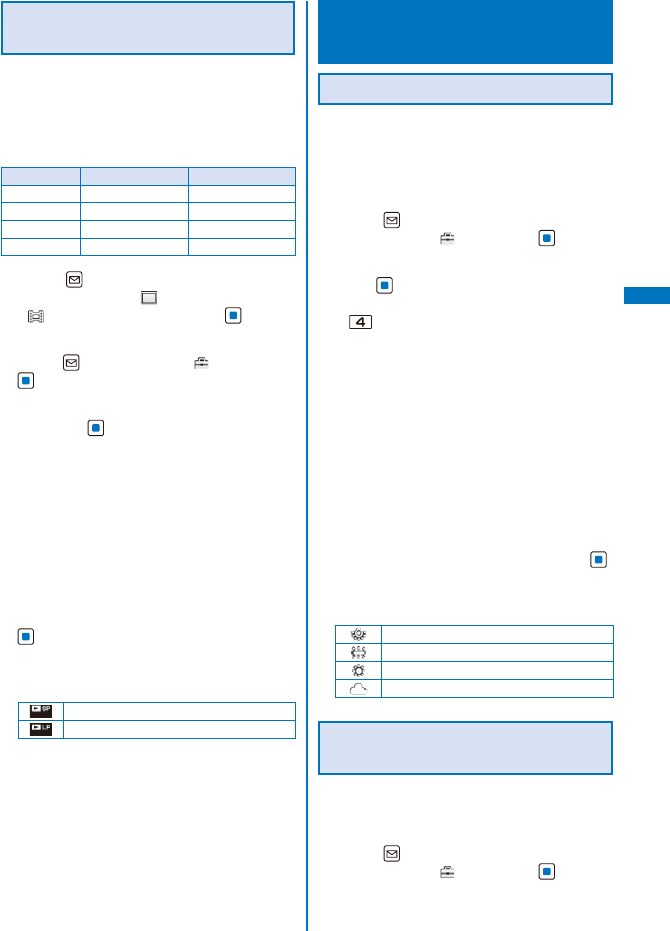
149
Camera
Setting Movies to Enable
Playback on Other FOMA Terminal
You can change a set of settings necessary for
a recorded movie to be played back on other
FOMA terminal with a single operation.
When the Common replay mode is set to either [High
quality] or [Long play], the settings of the camera
are changed, as follows.
Item High quality Long play
Image size [QCIF(176×144)] [sQCIF(128×96)]
Image quality Super fine Fine
File size Attach(S) Attach(S)
Shoot mode Image+Sound Image+Sound
1 Press (Func) in the Camera mode
display, select [ ] (Shoot mode) →
[ ] (Movie shoot), and press .
The display switches to the Movie shoot display.
2 Press (Func), select [ ], and press
.
3 Select [Shoot] → [Common replay mode]
and press .
The screen for selecting the Common replay mode
appears.
[OFF]:
Record a movie regularly.
[High quality]:
Record a movie focused on the image quality to
be clearer.
[Long play]:
Record a movie focused on the recording time to
be longer.
4 Select a common replay mode and press
.
The Common replay mode is set and the icon for
the current Common replay mode appears.
No icon appears for [OFF].
High quality
Long play
Adjusting the Camera
during Recording
Adjusting White Balance
The color balance of the image can be
adjusted depending on the lighting condition. If
a recording image appears in unnatural colors,
set the white balance in accordance with the
recording environment.
1 Press (Func) in the Camera mode
display, select [ ], and press .
2 Select [Adjust] → [White balance] and
press .
You can also set the White balance by pressing
in the Camera mode display.
The menu for selecting a white balance appears.
[AUTO]:
Adjust the color balance automatically.
[Bulb]:
Set when recording under bulbs or incandescent
lamps.
[Fluorescent]:
Set when recording under fluorescent lamps.
[Fine]:
Set when recording outdoors on a clear day.
[Cloudy]:
Set when recording outdoors on a cloudy day or
in the shade.
3 Select a white balance type and press .
The White balance is set and the icon for the
current white balance type appears.
No icon appears for [AUTO].
Bulb
Fluorescent
Fine
Cloudy
Setting a Position for Automatic
Adjustment of the Exposure
You can set what position on the screen to use
as a reference for the image brightness (EV)
adjustment.
1 Press (Func) in the Camera mode
display, select [ ], and press .
Continued
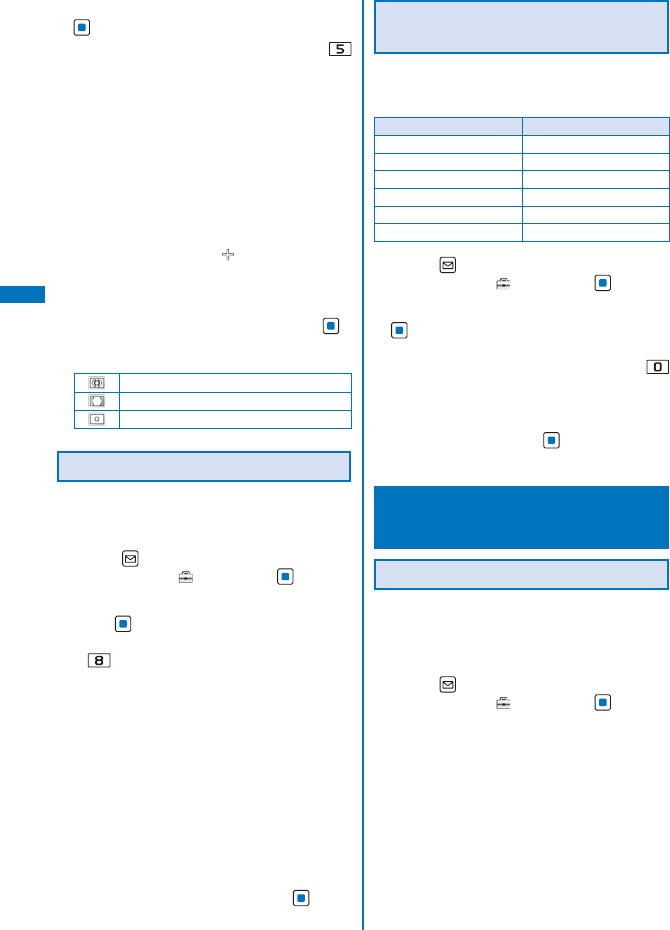
150
Camera
2 Select [Adjust] → [Photometry] and press
.
You can also set the Photometry by pressing
in the Camera mode display.
The menu for selecting a photometry mode
appears.
[Center]:
Photometry mode for centerweighted metering of
the display, including the periphery.
[Average]:
Photometry mode for average metering of the
whole display.
[Spot]:
Photometry mode for metering only a part in
the center of the display. Aim the object at the
Spot photometry point “ ” in the center of the
display. You can use this mode effectively when
recording an object against light or an object
with the strong contrast to the background.
3 Select a photometry mode and press .
The Photometry mode is set and the icon for the
current photometry mode appears.
Center
Average
Spot
Adding a Picture Effect
The images can be recorded with a special effect.
When you record an image using the In-camera,
you cannot select the [Solarization].
1 Press (Func) in the Camera mode
display, select [ ], and press .
2 Select [Adjust] → [Picture effect] and
press .
You can also set the Picture effect by pressing
in the Camera mode display.
The menu for selecting a picture effect appears.
[OFF]:
Cancel the picture effect.
[Negative art]:
Set the color and brightness of the image as in a
negative.
[Solarization]:
Set the image as an illustration with sharp tones.
[Sepia]:
Set the image sepia-toned like an old
photograph.
[Black&White]:
Set the image monochrome (black and white).
3 Select a special effect and press .
The Picture effect is set.
Restoring the Default Camera
Settings
You can reset the camera settings to the
default settings. The camera settings listed
below can be reset.
Item Default setting
Select scene AUTO
Zoom magnification ×1.0
EV ±0.0EV
White balance AUTO
Photometry Center
Picture effect OFF
1 Press (Func) in the Camera mode
display, select [ ], and press .
2 Select [Adjust] → [Reset all] and press
.
You can also display the screen for confirming
whether to perform the Reset all by pressing
in the Camera mode display.
The screen for confirming whether to perform the
Reset all appears.
3 Select [Yes] and press .
The default settings are restored.
Setting the Camera
Operation
Selecting Where to Save Images
You can set the place to save recorded
images.
Example: Selecting the microSD memory card to save
the recorded still images
1 Press (Func) in the Camera mode
display, select [ ], and press .
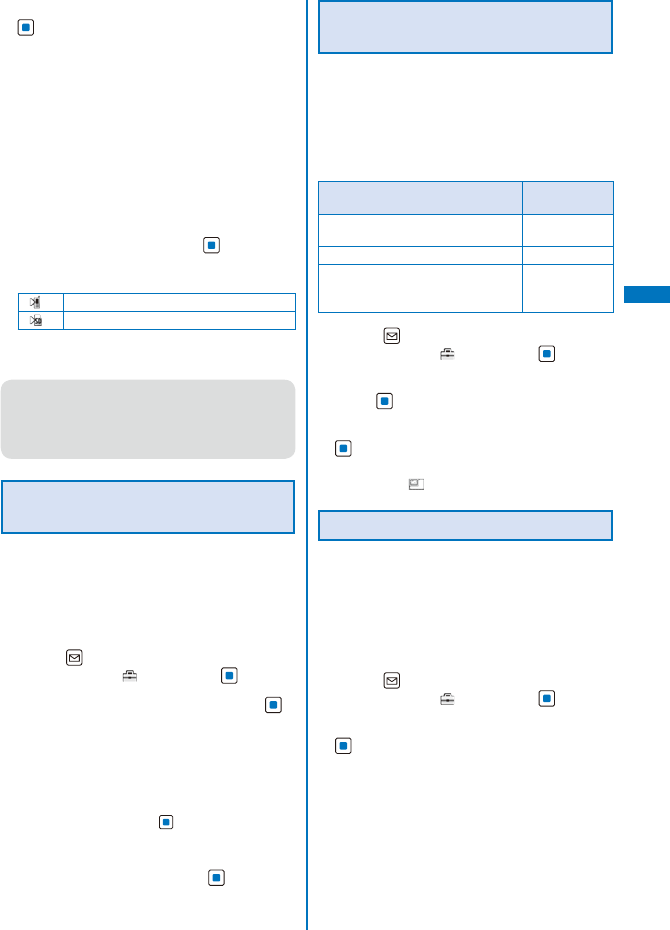
151
Camera
2 Select [Set] → [Select save to] and press
.
The menu for selecting a place to save to appears.
[Data Box]:
Save images in the Data Box. Select a folder for
saving still images and movies from My picture
and i-motion, respectively.
[microSD]:
Save images in the microSD memory card. Still
images are saved in the [Camera] folder in My
picture, movies with video and sound tracks and
with video track only in the [Distribute contents]
folder in i-motion, and movies with sound track
only in the MM file, respectively.
3 Select [microSD] and press .
The place to save images is set and the icon for the
selected place appears.
Data Box
※microSD memory card
※ Does not appear when no microSD memory card
is inserted.
● When you set the Mini-Photo creator to [Not
replic.] while the Select save to is set to
[microSD], the message “Activate Mini-Photo
creator?” appears. To create and save a
replicated image, select [Replicate] (P.178, 319).
Setting Whether Recorded
Images Are Automatically Saved
You can set the save method of an image
recorded.
When the Shoot mode is set to [Deco-Snap],
[Panorama], or [BestPic™], the Auto save is
temporarily changed to [OFF] and the setting cannot
be changed.
1 Press (Func) in the Camera mode
display, select [ ], and press .
2 Select [Set] → [Auto save] and press .
The menu for selecting whether to automatically
save the recorded images appears.
[ON]:
After recording, the image is automatically
saved.
[OFF]:
After recording, press (Save) on the screen
for confirming whether to save the image if you
want to save it.
3 Select [ON]/[OFF] and press .
The image save method is set.
Setting Whether Replicated
Images Are Saved Automatically
When a recorded image is saved to the
microSD memory card, you can set to create
and save the replicated image automatically.
A replicated image is created in the following size
according to the size of the original image and
saved in the [Camera] folder in My picture of the
Data Box.
Image size when recorded Replicated
image size
1M(1280×960), 2M(1632×1224),
3M(2048×1536)
VGA(640×480)
2M Wide(1920×1080) 852×480
QCIF(176×144), QVGA(240×320),
VGA(640×480), Stby(480×864),
Panorama image, Deco-Snap image
Original image
size
1 Press (Func) in the Camera mode
display, select [ ], and press .
2 Select [Set] → [Mini-Photo creator] and
press .
3 Select [Replicate]/[Not replic.] and press
.
The Mini-Photo creator is set. When it is set to
[Replicate], “ ” appears.
Selecting the Image Quality
You can select the image quality for recording
images.
When the size of a movie is set to [QVGA(320×
240)] or [VGA(640×480)], you can only select
[Super fine] for the image quality. When the size of a
movie is set to [sQCIF(128×96)], you cannot select
[Super fine] for the image quality.
1 Press (Func) in the Camera mode
display, select [ ], and press .
2 Select [Set] → [Image quality] and press
.
The menu for selecting an image quality appears.
Still image
[Fine]:
Higher image quality mode. The file size is
larger.
[Standard]:
Standard image quality mode.
[Economy]:
Lowest image quality mode. The file size is
smaller.
Continued
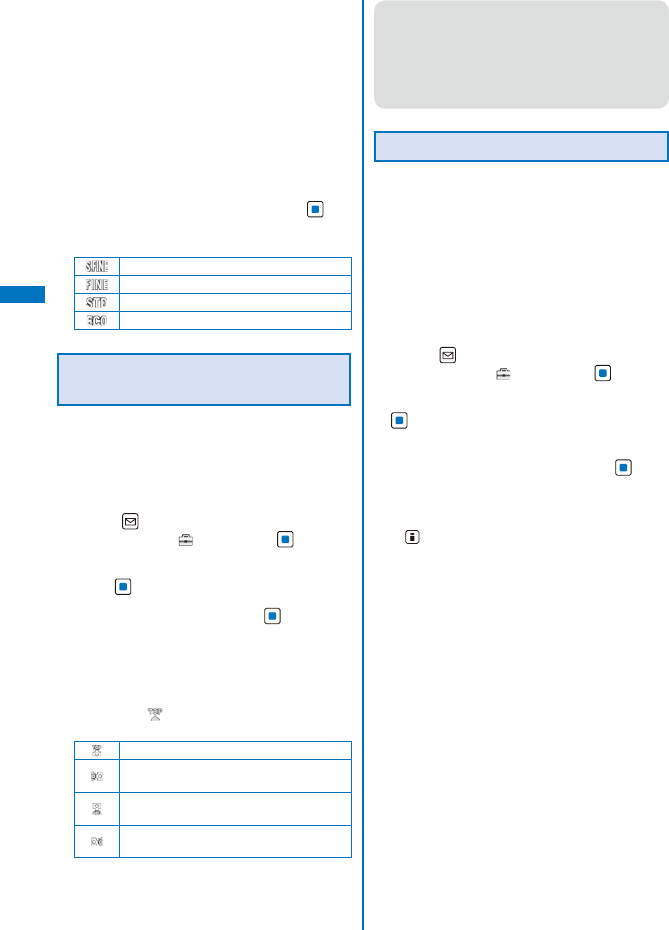
152
Camera
Movie
[Super fine]:
Higher image quality mode. The file size is
larger and the recording time is shortest.
[Fine]:
Image quality mode for smoother movement in
movies.
[Standard]:
Standard image quality mode.
[Economy]:
Lowest image quality mode. The file size is
smaller and the recording time is longest.
3 Select the image quality and press .
The image quality is set and the icon for the current
image quality appears.
Super fine (Movie only)
Fine
Standard
Economy
Rotating the Direction of a Recorded
Image to Align to the FOMA Terminal
You can set a recorded image to be displayed
in the same orientation as that of the
FOMA terminal by obtaining the orientation
information of the FOMA terminal and adding it
to the image when it is recorded.
1 Press (Func) in the Camera mode
display, select [ ], and press .
2 Select [Set] → [Auto orientation] and
press .
3 Select [ON]/[OFF] and press .
The Auto orientation is set. When it is set to [ON],
the icon which shows the orientation of the FOMA
terminal appears.
When the image size is set to [QVGA(240×320)]
or [Stby(480×864)], the saved with this side up
indication “ ” appears. The image is saved with
the indicated side up.
The FOMA terminal is held normally
The FOMA terminal is rotated to the right
by 90 degrees
The FOMA terminal is rotated by 180
degrees
The FOMA terminal is rotated to the left by
90 degrees
● An image recorded with the Auto orientation
set to [ON] is displayed rotated accordingly
depending on which orientation the FOMA
terminal is in when the image is recorded.
Therefore, the orientation of an image may differ
between when it is displayed and when it is
saved (P.151).
Changing the Shutter Sound
The shutter sound can be selected from three
types when the Shoot mode for still images is
[Regular], [Smile shutter], [Panorama], [High
sensitivity], [BestPic™], or [Shoot with frame].
The shutter sound volume is fixed and cannot be
adjusted or muted. The shutter sound is heard even
if the Manner mode is set.
When the Shoot mode is set to [Deco-Snap], the
current shutter sound is heard when recording. You
cannot set the shutter sound.
1 Press (Func) in the Camera mode
display, select [ ], and press .
2 Select [Set] → [Shutter sound] and press
.
The menu for selecting a shutter sound appears.
3 Select a shutter sound and press .
The Shutter sound is set.
To check the shutter sound
Move the cursor to the shutter sound and press
(Play).
153
Camera
Correcting Camera Shake
You can set whether to use the Image stabilize
when you record still images with the Out-
camera.
1 Press (Func) in the Camera mode
display, select [ ], and press .
2 Select [Set] → [Image stabilize] and press
.
The menu for selecting whether to correct camera
shake appears.
3 Select [AUTO]/[OFF] and press .
The Image stabilize is set and the icon for the
current Image stabilize setting appears.
AUTO
OFF
● While recording movies, the Image stabilize is set
to [AUTO] if you use the Out-camera and [OFF] if
you use the In-camera.
● The Image stabilize function is to reduce camera
shake. Its effect may differ depending on the
object of shooting and recording conditions.
● In the following cases, the effect of the Image
stabilize may be small.
- When camera shake is too strong
- When using the zoom function
- When [Night scene] or [Low Light] is set for
the Select scene
● When recording a moving object, an afterimage
may remain in the image. In this case, set the
Image stabilize to [OFF].
Resetting File Numbers
When a still image with the file number (P.151)
“999-9999” is saved in the microSD memory
card, no more still images can be saved even
if there is a vacant space in these memories.
The Reset file No. allows you to reset the file
numbers up to the largest file number saved
in the microSD memory card. To reset the file
numbers, delete still images that have file
numbers larger than that you want to reset
beforehand.
The images cannot be saved even if the file
numbers are reset when the microSD memory card
has no free space. In this case, change the microSD
memory card or delete data saved in the microSD
memory card.
1 Press (Func) in the Camera mode
display, select [ ], and press .
2 Select [Set] → [Reset file No] and press
.
The screen for confirming whether to perform the
Reset file No. appears.
3 Select [Yes] and press .
The file numbers are reset.
Restricting the Size of a File
Used for Movie Recording
You can restrict the size of a movie file to a file
size that can be attached to i-mode mail.
1 Press (Func) in the Camera mode
display, select [ ] (Shoot mode) →
[ ] (Movie shoot), and press .
The display switches to the Movie shoot display.
2 Press (Func), select [ ], and press
.
3 Select [Set] → [File size] and press .
The menu for selecting a file size restriction
appears.
[Attach(S)]:
You can record up to about 500K bytes.
[Attach(L)]:
You can record up to about 2M bytes.
[No limit]:
No file size restriction. You can record up to
about one hour. Selectable when [microSD] is set
as the place to save to.
4 Select a file size restriction type and
press .
The file size restriction for movie is set and the icon
for the current file size restriction type appears.
Attach(S)
Attach(L)
No limit
● Depending on the recording conditions and
object of shooting, the recording may be stopped
before the maximum file size set in the file size
restriction is reached.
Continued
154
Camera
Selecting the Shoot Mode of
Movie
You can select the shoot mode of movie from
three types.
1 Press (Func) in the Camera mode
display, select [ ] (Shoot mode) →
[ ] (Movie shoot), and press .
The display switches to the Movie shoot display.
2 Press (Func), select [ ], and press
.
3 Select [Set] → [Shoot mode] and press
.
The menu for selecting a shoot mode appears.
[Image+Sound]:
Record a movie with video and sound tracks.
[Image only]:
Record a movie with video track only. No sound
is recorded.
[Sound only]:
Record a movie with sound track only. No video
is recorded.
4 Select a shoot mode and press .
The Shoot mode is set and the icon for the current
shoot mode appears.
Image+Sound
Image only
Sound only
Using the Bar Code
Reader <Bar code reader>
You can use the Out-camera to scan JAN or
QR code. The scanned text data can be used
for Phone To (AV Phone To), Mail To, Web
To and i-αppli To functions, Bookmark and
Phonebook entries, and also for displaying and
copying/pasting text. You can also obtain a
ToruCa card, and play and save the scanned
images and melodies.
To scan the JAN/QR code, hold the Out-camera
more than about 30 cm in [Macro OFF] and 10 cm in
[Macro] away from the code to be scanned. When
the code cannot be scanned, change the distance
between the code and the Out-camera, angle, or
direction.
The FOMA terminal may not be able to scan JAN or
QR code if it is scratched, smudged, damaged, of
poor print quality, too small in size, or in certain light
reflection conditions. It also may not be able to scan
some QR code versions.
The FOMA terminal cannot scan a bar code/2-
dimensional code other than JAN and QR codes.
■ What is JAN code?
“Example: 4942857133110”
A bar code that represents
numbers using vertical lines
(bars) of different widths.
The FOMA terminal can scan
13-digit and 8-digit JAN
codes.
■ What is QR code?
“Example: FOMA SO906i”
One of the 2-dimensional
codes that represent data
in the vertical and horizontal
directions. This data includes
alphanumeric characters,
character strings (kanji, kana,
pictographs), melodies, still
images, and ToruCa cards.
Up to 16 QR codes can be scanned serially so that
they connect to each other and saved as a single
data set. When scanning multiple segmented QR
codes, the message prompting you to scan the next
QR code appears after you scan the first one. Scan
the QR code in response to the message.
Scanning JAN/QR Code
You can scan JAN or QR code and save the
maintained data for later use. Specifically, you
can use text data from the scanned JAN or QR
code to enter information in a textbox while
entering text (P.387).
1 From the Menu, select [LifeKit] → [Bar
code reader] → [Scan code] and press .
The bar code reader is activated and “ ” appears.
To change the effective distance of the Auto Focus
Press (Normal/Closeup). Every time you press
this key, the mode is switched between [Normal]
and [Closeup].
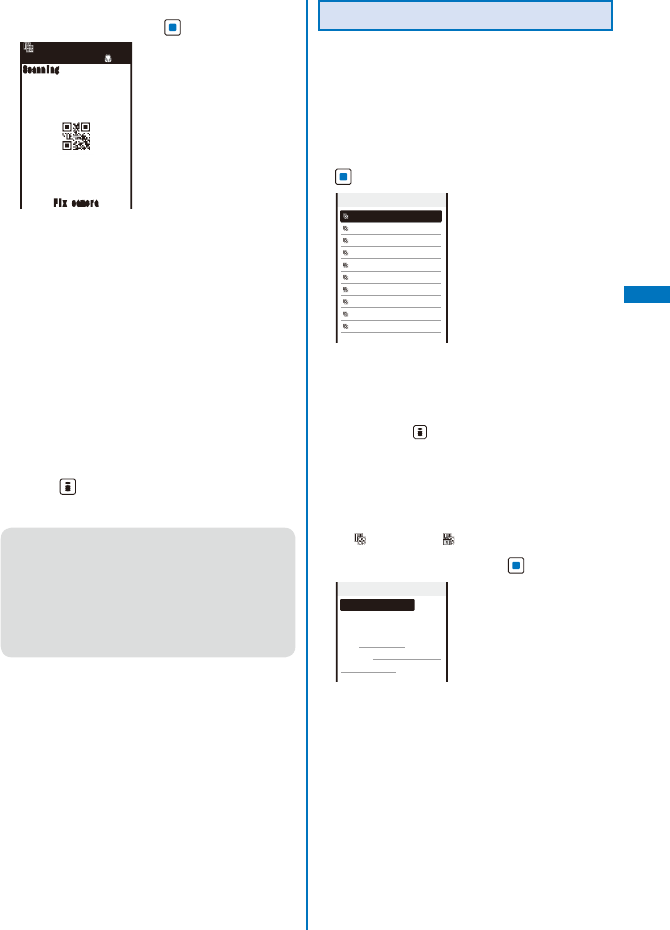
155
Camera
2 Locate the JAN/QR code at the center of
the display and press (Scan).
ScanningScanning
Fix camera
Fix camera
The scanning of the JAN/QR code starts.
When the scanning is completed, the end sound
is heard and the data that has been scanned is
displayed in the normal display.
To save a scanned URL as a bookmark
Move the cursor to the URL and from the
Function menu, select [Add bookmark] → [Yes]
→ a folder.
To save scanned data such as a phone number
Move the cursor to data such as a phone number
and from the Function menu, select [Add to
phonebook] → [Yes] and save the scanned data
in the Phonebook.
Follow the same steps as in “Add to FOMA
terminal phonebook” (P.95, step 3 to 6) or “Add
to UIM phonebook” (P.98, step 3 to 4).
3 Press (Save).
The data from the scanned JAN/QR code is saved.
● Some QR codes allow you to save data such as
a name, phone number, and mail address all at
once in the Phonebook just by scanning them.
● When scanned characters cannot be entered in
the text editing display, they are replaced with as
many spaces (blanks).
● A scanned image may not be saved depending
on its image or file size.
Displaying the Saved Data
You can save up to 10 data entries for JAN or
QR codes that are scanned.
When a total of 10 data entries is saved and a new
JAN/QR code is scanned, unprotected data is
overwritten from the oldest.
1 From the Menu, select [LifeKit] → [Bar
code reader] → [Saved data] and press
.
Data list
2008/02/14 13:56
2008/02/07 23:13
2008/01/28 14:25
2008/01/28 10:42
2008/01/23 16:21
2008/01/12 13:29
2008/01/03 19:28
2008/01/03 09:47
2007/12/30 14:05
2007/12/30 13:50
To delete data
Move the cursor to the data and from the
Function menu, select [Delete] → [Delete one] →
[Yes]. To delete several data, from the Function
menu, select [Delete] → [Select&delete], select
data, press (Complete), and then select [Yes].
To delete all data, from the Function menu, select
[Delete] → [Delete all], enter the Security code,
and select [Yes].
To protect data
Move the cursor to the data and from the
Function menu, select [Protect ON/OFF] → [Yes].
“” changes to “ ”.
2 Select the data and press .
2008/02/14 13:56
Add to phonebook
Name:
ドコモ太郎
Reading:ト゛コモタロウ
TEL:03XXXXXXXX
E−mail:docomo.taro.
△△
@
docomo.ne.jp


157
i-mode/i-motion/
i-Channel
※ i-mode is a paid service that requires a subscription.
What is i-mode? ....................................................................................................... 186
Displaying the i-mode Menu .............................................................. <i-mode menu> 186
■ Displaying a Site
Displaying Sites ....................................................................................................... 187
Using Sites .............................................................................................................. 188
Saving a Site in My Menu ........................................................................<My Menu> 190
Changing the i-mode Password ........................................<Change i-mode password> 190
Displaying Internet Sites ............................................................<Internet connection> 191
Saving a Site to Display It Quickly ......................................................... <Bookmark> 191
Saving a Site in the Screen Memo ...................................................<Screen Memo> 193
■ Downloading Graphics, Melodies or Other Data from Sites
Obtaining Graphics from a Site/Message ........................................ <Acquire image> 194
Downloading Data from Sites .................................................................<Download> 195
■ Useful Functions for Using i-mode
Using the Phone To/Mail To/Web To/i-αppli To ........................................................ 196
■ Make Settings for i-mode
Setting i-mode ..................................................................................<i-mode setting> 197
■ Using Cer tificates
Operating the SSL List .................................................................... <SSL certificate> 198
Setting the FirstPass ....................................................................... <User certificate> 199
Changing the Host for Certificate Issue ................................................<Select host> 200
■ Using i-motion
What is i-motion? ..................................................................................................... 200
Downloading an i-motion from Sites ...........................................<Download i-motion> 201
Setting Whether to Play Back i-motion Automatically ............... <i-motion auto replay> 201
■ Using i-Channel
What is i-Channel? .................................................................................................. 202
Displaying the i-Channel .......................................................................................... 202
Changing the i-Channel Settings ............................................................................. 203
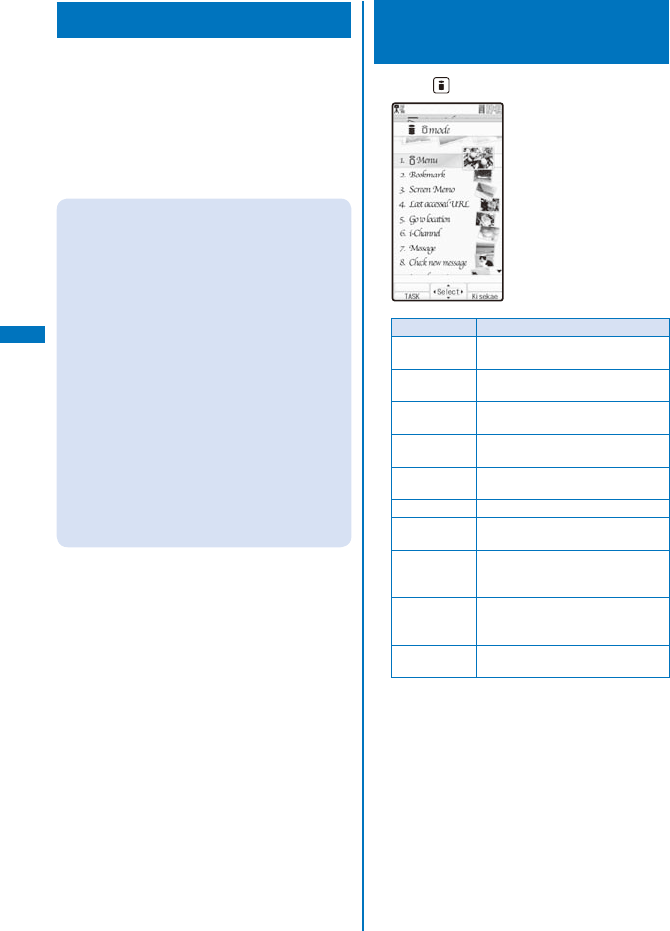
158
i-mode/i-motion/i-Channel
What is i-mode?
i-mode allows you to use the i-mode
compatible FOMA terminal (hereinafter referred
to as i-mode terminal) to access various online
services such as site (program) connection,
Internet connection, and i-mode mail.
i-mode is a paid service that requires a subscription.
For details on i-mode, see the “Mobile Phone User’s
Guide
【i-mode】
FOMA version”.
Important information about using i-mode
● The data on sites (programs) or Internet sites is
generally protected by the copyright laws. Part or
all of the data such as documents and graphics
obtained to the i-mode terminal from these sites
(programs) or Internet sites cannot be sold or
redistributed, whether they are changed or not,
without consent of the copyright holders except
for personal use.
● When the UIM is switched to another card, or the
i-mode terminal is powered on without inserting
the UIM, some of the terminal models may not
be able to display/play back still images/movies/
melodies downloaded from sites, attached files
(still images/movies/melodies, etc.) sent/received
by mail, screen memos, and Message R/F.
● If you set a file whose display/playback is
restricted by the UIM for the stand-by display,
ring tone, and/or other applications, those
settings are reset to the initial settings if the UIM
is switched to another card or the FOMA terminal
is powered on without inserting a UIM.
Displaying the i-mode
Menu <i-mode menu>
1 Press (i-mode) in the stand-by display.
Menu name Function
i Menu Connect the FOMA terminal to the
i-mode center (P.187).
Bookmark Display favorite sites and Internet
sites (P.191).
Screen Memo Display sites saved in the FOMA
terminal (P.193).
Last accessed
URL
Display sites and Internet sites
displayed last (P.187).
Go to location Connect the FOMA terminal to the
Internet (P.191).
i-Channel Display the channel menu (P.202).
Message Display the list of Message R/
Message F received (P.231).
Check new
message
Check if the i-mode center holds
mail, Message R, and Message F
(P.216, 231).
i-mode setting Set the i-mode settings on the
FOMA terminal (P.112, 127, 197,
etc.).
Full Browser Display the Full Browser menu
(P.280).
To display i Menu while displaying a site
From the Function menu, select [i Menu].
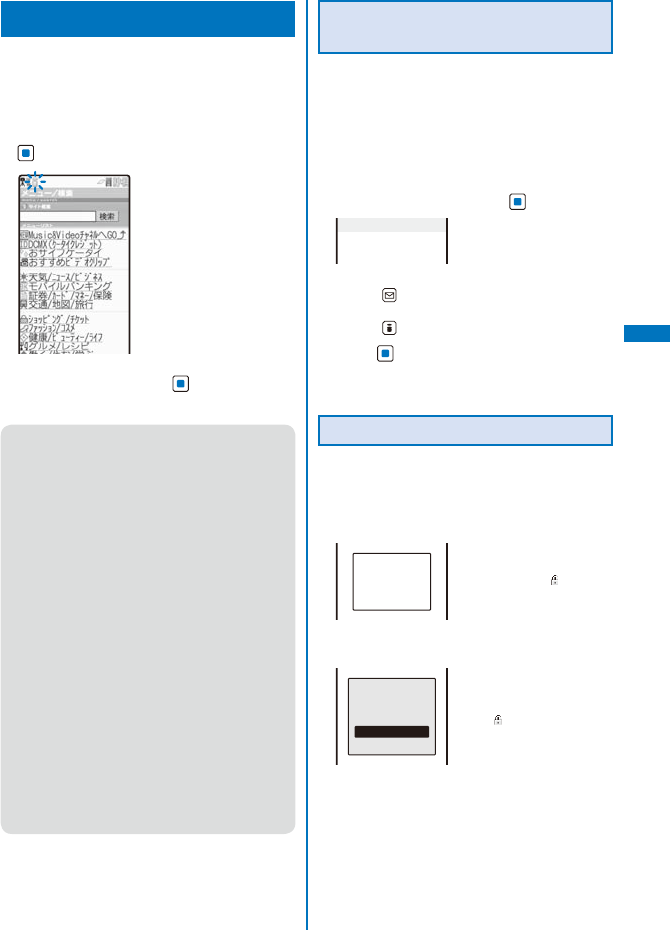
159
i-mode/i-motion/i-Channel
Displaying Sites
Various sites offered by IP (information service
providers) can be displayed (the subscription
is necessary for some sites).
1 From the i-mode menu, select [i Menu] →
[メニュー/検索] (Menu/Search) and press
.
2 Select a site and press .
The FOMA terminal is connected to the site.
● Some of the connected sites may request you
to send the “manufacturer’s serial number of
the mobile phone/UIM (FOMA card)” before you
access the site.
The “manufacturer’s serial number of the mobile
phone/UIM (FOMA card)” that you send is used
by IP (information service providers) to identify
you in order to provide information customized
for you and to determine whether the content
provided by IP is compatible with your FOMA
terminal.
Since the “manufacturer’s serial number of the
mobile phone/UIM (FOMA card)” is sent to IP
via the Internet, it might be accessed by a third
party. Note, however, that IP is not notified of
your phone number, address, age, and sex by
this operation.
● When you receive a request from a site about
information of music you play back on your
FOMA terminal, the screen for confirming
whether to send the music information appears.
If you select [Yes], the music information (names
of title and artist and date of playing back)
played back on your FOMA terminal is sent.
The sent music information is used by IP
(information service providers) to provide a
customer with the customized information.
Reconnecting to the Web Page
Displayed Last
The site displayed when you last connected to
i-mode is recorded as the Last accessed URL.
You can directly connect to this site from the
Last accessed URL.
Some web pages cannot be recorded as Last
accessed URL.
1 From the i-mode menu, select [Last
accessed URL] and press .
Last accessed URL
http://www.
△△△△
.□□.jp
To delete the Last accessed URL
Press (Delete) and select [Yes].
To copy the Last accessed URL
Press (Copy).
2 Press (Cnct).
The FOMA terminal is connected to the site
displayed last.
Displaying SSL Site
You can display SSL-compatible sites (SSL
page) using an operation similar to that for
general sites.
To display an SSL site, make sure to set the date
and time with the Date/time setting beforehand.
Establishing
SSL session
(Authenti−
cating)
The message on the left
appears when connecting
to an SSL site. “ ” appears
when displaying an SSL site.
To display the certificate
From the Function menu,
select [Certificates].
SSL session
is released
Yes
No
The message on the left
appears when moving from
an SSL site to a non-SSL
site. “ ” disappears when
displaying a non-SSL site.
Continued
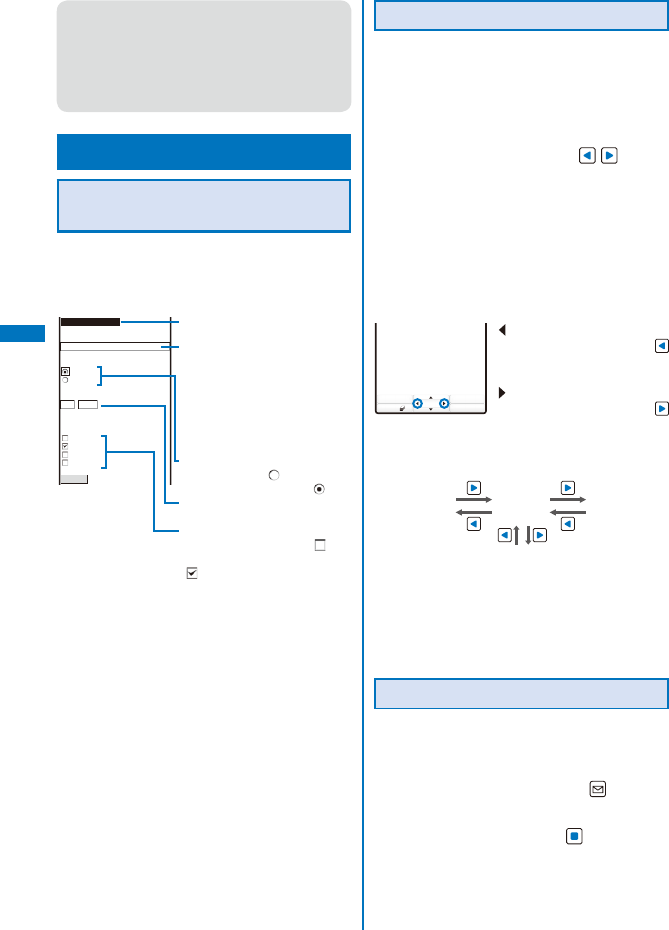
160
i-mode/i-motion/i-Channel
● The confirmation message may appear when
the connected site may not be secure. Select
[Yes] to connect to the SSL site, or select [No] to
cancel connecting to the SSL site.
● If there are any problems such as an invalid
certificate of the server, the SSL site may not be
displayed.
Using Sites
Selecting Links or Other Items
of Choice
When using a site, you may display a linked
site, enter texts (textbox) or select an item from
multiple options (radio button, check box, and
pull-down menu).
For more info
Your mail address:
Sex:
Male
Female
Month/Year of Birth:
Feb 2008
Select your favorite
programs:
Drama
Film
Variety
Sports
Send
Link
Go to the related web page.
Textbox
Enter a text.
The mode and number of
characters you can use depend
on the textbox.
When you enter a code such as
the i-mode password, it may be
masked by “
*
”.
Radio button
Select one item. “ ” of the
selected item changes to “ ”.
Pull-down menu
Select an item from the item list.
Check box
Select one or more items. “ ”
of the selected items changes to
“ ”.
To cancel the selection, select
the check box again.
Displaying the Previous/Next Page
The FOMA terminal stores up to 20 most
recently displayed site pages in its cache.
The stored site pages are deleted when i-mode
is terminated.
When the left or right arrow is displayed in the
guide display, the pages stored in the cache
can be used for display using without
accessing the site. Note, however, that if the
recorded site pages exceed the cache size
or when a site page is programmed always
to download the latest information, network
communication is performed.
The text or setting you entered in a site is not stored
in the cache.
The cache is a place in the terminal used for
temporarily storing the displayed screen data.
Func Select
MENU
: Indicates that the previous
page is recorded. Use
to display the previous
page.
: Indicates that the next
page is recorded. Use
to display the next page.
Example: When viewing site pages in the order of →
→→→
Assuming that you view site pages in the order of →
→ and go to a new site page after going back
to as shown in the above illustration, the history for
→ is cleared and starts afresh for → at the
time you go to a new site page .
Reloading a Page
The page, which is displayed incorrectly or
updated frequently, can be reloaded so that
the latest data is displayed.
1 While displaying a site, press (Func).
The Function menu appears.
2 Select [Reload] and press .
The display of the page is updated.
161
i-mode/i-motion/i-Channel
Displaying a Site URL
The URL of the currently displayed site can be
displayed.
1 While displaying a site, press (Func).
The Function menu appears.
2 Select [URL] and press .
The URL of the site is displayed.
To copy the URL
Press (Copy).
Sending a URL by Mail
The URL of the currently displayed site can be
sent by mail.
1 While displaying a site, press (Func).
The Function menu appears.
2 Select [Compose message] and press .
The Edit mail display appears.
The site URL is already entered in the main body.
3 Compose mail and send it.
Follow the same steps as in “Compose and send
mail” (P.207, step 2 to 5).
Displaying a Site Correctly
If the display of the text is incorrect on a site,
you can reload the page after changing the
character code.
1 While displaying a site, press (Func).
The Function menu appears.
2 Select [Word translate] → [Convert]/[Auto
select] and press .
[Convert]:
Sequentially convert the character codes
and display the page again. If the text is still
incorrectly displayed, repeat this operation. The
original display reappears when you repeat [Word
translate] → [Convert] several times.
[Auto select]:
Automatically select and convert the character
code and display the page.
The character code is converted and the page is
displayed again.
● The page may not be displayed correctly even
if the character code is changed. Note that
changing the character code when the page is
displayed correctly may cause the page to be
displayed incorrectly.
Changing the Display to Full
Browser
You can change the current site display to Full
Browser.
1 While displaying a site, press (Func).
The Function menu appears.
2 Select [To Full Browser] → [OK] and
press .
The display is switched to Full Browser.
For information on the operations of Full Browser,
see P.280.
What is Flash?
Flash is an animation technology that uses
animation and sound. Flash movies enhance
site content for richer expression. You can set
a Flash movie for the stand-by display and
other applications.
● When a Flash movie is displayed, the action may
differ from other sites.
● Even if (Select) is displayed, you may not be
able to use the Select function.
● Some Flash movies may be accompanied by a
sound effect. To mute the sound effect, set the
Sound effect to [OFF].
● If you do not operate the FOMA terminal for more
than about 30 seconds while the Flash movie is
played back, the playback pauses. To operate
a Flash movie again, from the Function menu,
select [Retry]. If the playback is not started,
either display the Flash movie entirely or adjust
the display position until it can be played back.
● Even if a Flash movie is displayed, it may not
operate properly in some cases.
● When you save a Flash movie using the Save
image function or save it in Screen Memo, a
portion of it may not be saved or it may appear
differently from the one you viewed on the site.
● When you play back a Flash movie saved in the
Data Box, Screen Memo, or microSD memory
card, the image may be displayed differently
depending on the saved places.
Continued
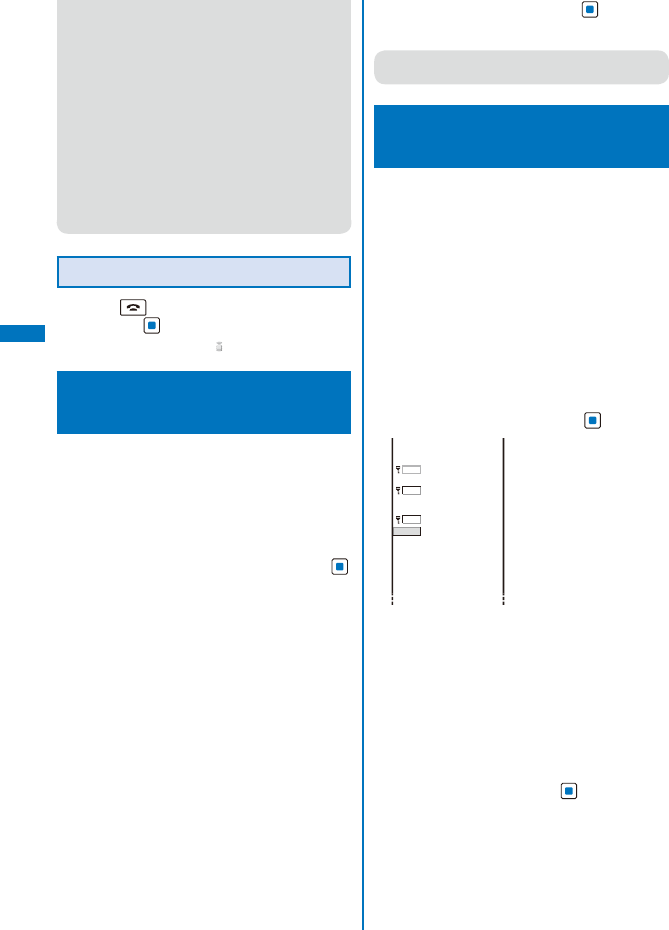
162
i-mode/i-motion/i-Channel
● If an error occurs during a Flash movie playback,
this Flash movie cannot be saved.
● Some of the Flash movies vibrate the FOMA
terminal during playback. Note that this could
happen even if the vibrator is set to [OFF].
● Some Flash movies may have to use data saved
in the i-mode terminal. To allow such a Flash
movie to use saved data, set the Use phone info
of the i-mode setting to [Yes] (P.198). This item is
set to [Yes] at the time of purchase. Saved data
that may be used by a Flash movie is as follows.
- Battery level - Reception level
- Clock information - Sound effect setting
- Language setting - Terminal type
- Model information
Terminating i-mode
1 Press during i-mode, select [Yes],
and press .
i-mode is terminated and “ ” disappears.
Saving a Site in My Menu
<My Menu>
If you save the frequently used sites in My
Menu, you can access them easily from next
time. Up to 45 sites can be saved in My Menu.
Only i-mode sites can be saved in My Menu. To
save Internet sites, use the Bookmark.
1 While displaying a site, select [マイメ
ニュー登録] (Save My Menu) and press .
The location of [マイメニュー登録] (Save
My Menu) and the menu structure may vary
depending on each site.
2 Enter the i-mode password at [iモードパ
スワード] (i-mode Password).
The password is masked by “
****
”.
3 Select [決定] (OK) and press .
The site is saved in My Menu.
● The site is saved automatically in My Menu when
you subscribe to a paid site.
Changing the i-mode
Password <Change i-mode password>
The “i-mode password” is used for saving/
deleting My Menu and changing i-mode mail
settings, etc. The i-mode password is set to
“0000” at the time of subscription. Change it to
your own i-mode password.
Make sure to keep the i-mode password
confidential.
If you forget the i-mode password, you must bring
your official identification (such as driver’s license),
the FOMA terminal, and UIM with you to the nearest
DoCoMo shop.
1 From the i-mode menu, select [i Menu] →
[English iMenu] → [Options] → [Change
i-mode Password] and press .
Change i−mode
Password
Current Password
New Password
New Password
(Confirmation)
Select
※
You will use
your i−mode
password to
subscribe and
unsubscribe
sites and set
to your
options.
2 Enter the current i-mode password at
[Current Password].
The password is masked by “
****
”.
3 Enter the new password at [New
Password].
4 Enter the new password at [New
Password (Confirmation)].
5 Select [Select] and press .
The i-mode password is changed.
163
i-mode/i-motion/i-Channel
Displaying Internet Sites
<Internet connection>
i-mode compatible Internet site can be
displayed from the i-mode terminal.
Sites that are not compatible with i-mode may not
be displayed correctly.
1 From the i-mode menu, select [Go to
location] → [Enter URL] and press .
The Enter URL display appears.
When the URL has been entered before, the URL
entered previously is displayed.
The beginning of the URL “http://” is entered
beforehand.
2 Press (Edit) and enter the URL.
Enter the URL including “http://” within 256 half-
width alphanumeric characters and symbols.
3 Press (Cnct).
The FOMA terminal is connected to the site.
Operations while displaying Internet sites are the
same as while displaying the i-mode sites.
Displaying Using the URL History
Up to 50 sites that have been displayed by
entering their URLs are saved in the URL
history. The sites can be directly accessed
from the URL history.
If a total of 50 URLs is saved in the URL history, the
URL is overwritten from the oldest.
1 From the i-mode menu, select [Go to
location] → [URL history] and press .
The URL history display appears.
To delete a URL
Move the cursor to the URL and from the
Function menu, select [Delete one] → [Yes]. To
delete several URLs, from the Function menu,
select [Select&delete], select URLs, press
(Complete), and select [Yes]. To delete all URLs,
from the Function menu, select [Delete all], enter
the Security code, and select [Yes].
2 Select a URL and press .
The URL history display appears.
To copy a URL
Press (Copy).
3 Press (Cnct).
The FOMA terminal is connected to the site of the
selected URL.
Saving a Site to Display It
Quickly <Bookmark>
Up to 200 URLs of the sites you display
frequently can be saved in the Bookmark.
The sites can be directly accessed from the
Bookmark.
Both i-mode and Internet sites can be saved as
bookmarks, but with some exceptions.
The text or setting you entered on the site, etc. is not
saved in the Bookmark.
Saving a Site in the Bookmark
A URL including “http://” of up to 256 half-width
alphanumeric characters and symbols can be
saved as a bookmark.
1 While displaying a site, press (Func).
The Function menu appears.
2 Select [Add bookmark] → a folder and
press .
The bookmark is saved in the selected folder.
When the maximum number of bookmarks has been
reached
The screen for confirming whether to overwrite
a bookmark appears. To overwrite a bookmark,
select [Yes] and select a bookmark to overwrite.
● A title of up to 12 full-width or 24 half-width
characters can be saved in the Bookmark. If
the length of the title exceeds the limit, extra
characters are deleted. If there is no title on the
bookmark, the URL appears instead.
Continued
164
i-mode/i-motion/i-Channel
Displaying a Site
A site can be displayed using a bookmark.
1 From the i-mode menu, select [Bookmark]
and press .
A list of bookmark folders appears.
The following icons show the type of folder.
(Yellow) Preset folder
(Blue) User-created folder
2 Select a folder and press .
A list of bookmarks appears.
3 Select a bookmark and press (Cnct).
The FOMA terminal is connected to the site of the
selected bookmark.
To check the URL
Move the cursor to the bookmark and press
(Check).
To copy a bookmark URL
Move the cursor to the bookmark and press
(Check) and (Copy).
To change the title
Move the cursor to the bookmark and from the
Function menu, select [Edit title]. Enter the title
within 12 full-width or 24 half-width characters.
To display other site while displaying a site
From the Function menu, select [Bookmark] → a
folder → a bookmark.
● “ ” for the i-mode bookmark and “ ” for the
Full Browser bookmark appear on the list of
bookmarks of the microSD memory card
Adding/Deleting Folders
Folders in which bookmarks are saved can
be added or deleted. Up to 10 folders can be
used to manage bookmarks and folder names
can also be changed.
You cannot delete the preset folders.
Example: Adding a folder
1 From the i-mode menu, select [Bookmark]
and press , then press (Func).
The Function menu appears.
2 Select [Edit folder] → [Create folder] and
press , then enter a folder name.
Enter a name within 10 full-width or 20 half-width
characters.
The folder is added.
To change a folder name
Move the cursor to a folder and from the Function
menu, select [Edit folder] → [Edit folder name].
Enter a name within 10 full-width or 20 half-width
characters.
To delete a folder
Move the cursor to a folder and from the Function
menu, select [Edit folder] → [Delete folder]. Enter
the Security code and select [Yes].
Moving a Bookmark to a
Different Folder
Bookmarks can be moved to a different folder
using three methods.
Example: Moving a bookmark
1 From the i-mode menu, select [Bookmark]
→ a folder and press .
To move all bookmarks in the folder
From the Function menu, select [Move] → [Move
all] → [Yes] → a folder.
To move several bookmarks
From the Function menu, select [Move] →
[Select&move], select bookmarks, and press
(Complete). Select [Yes] → a folder.
2 Select a bookmark and press (Func).
The Function menu appears.
165
i-mode/i-motion/i-Channel
3 Select [Move] → [Move one] → [Yes] and
press .
The Select move to display appears.
4 Select a folder and press .
The selected bookmark is moved to the different
folder.
Deleting a Bookmark
You can delete bookmarks using four methods.
Example: Deleting a bookmark
1 From the i-mode menu, select [Bookmark]
and press .
To delete all bookmarks
From the Function menu, select [Delete all], enter
the Security code, and select [Yes].
2 Select a folder and press .
To delete all bookmarks in the folder
From the Function menu, select [Delete] →
[Delete all], enter the Security code, and select
[Yes].
To delete several bookmarks
From the Function menu, select [Delete] →
[Select&delete], select bookmarks, press
(Complete), and select [Yes].
3 Select a bookmark and press (Func).
The Function menu appears.
4 Select [Delete] → [Delete one] → [Yes]
and press .
The selected bookmark is deleted.
Saving a Site in the Screen
Memo <Screen Memo>
You can save sites as your favorite ones in the
Screen Memo. You can also instantaneously
call up a saved screen memo.
You can save up to 100 screen memos, each up to
100K bytes. The number of screen memos that can
be saved may decrease depending on the data to
be saved.
The text or setting you entered on the site, etc. is not
saved in the Screen Memo.
Saving a Screen Memo
1 While displaying a site, press (Func).
The Function menu appears.
2 Select [Add screen memo] and press .
The screen memo is saved.
When there is not enough memory
The screen for confirming whether to overwrite a
screen memo appears. To overwrite, select [Yes],
select unnecessary screen memos, press
(Complete), and select [Yes].
When the maximum number of screen memos has
been reached
The screen for confirming whether to overwrite a
screen memo appears. To overwrite, select [Yes]
and select a screen memo to overwrite.
Displaying a Screen Memo
Saved screen memos can be displayed. The
following icons show the status of the screen
memo.
Normal screen memo
Protected screen memo
1 From the i-mode menu, select [Screen
Memo] and press .
A list of screen memos appears.
2 Select a screen memo and press .
The screen memo is displayed.
To check the URL
Move the cursor to the screen memo and from
the Function menu, select [URL].
To change the title
Move the cursor to the screen memo and from
the Function menu, select [Edit title]. Enter
the title within 10 full-width or 20 half-width
characters.
● To operate the Flash movie or GIF animation
again, from the Function menu, select [Retry].
If the playback is not started, either display the
Flash movie entirely or adjust the display position
until it can be played back.
Continued
166
i-mode/i-motion/i-Channel
Protecting a Screen Memo
You can protect screen memos from being
overwritten. You can protect up to 50 screen
memos.
1 Select a screen memo from the screen
memo list and press (Func).
The Function menu appears.
To cancel the protection
Move the cursor to the protected screen memo
and press (Func).
2 Select [Protect ON/OFF] → [Yes] and
press .
The screen memo is protected and “ ” changes to
“”.
Deleting a Screen Memo
You can delete screen memos using three
methods.
Example: Deleting a screen memo
1 From the i-mode menu, select [Screen
Memo] and press .
To delete all screen memos
From the Function menu, select [Delete] →
[Delete all], enter the Security code, and select
[Yes].
To delete several screen memos
From the Function menu, select [Delete] →
[Select&delete], select screen memos, press
(Complete), and select [Yes].
2 Select a screen memo and press
(Func).
The Function menu appears.
3 Select [Delete] → [Delete one] → [Yes]
and press .
The selected screen memo is deleted.
Obtaining Graphics from a
Site/Message <Acquire image>
You can obtain images and frames from sites
and screen memos, and save them in My
picture.
You can save up to 100K bytes for each image
entry. The number of images that you can save
varies depending on the free memory space on the
place to save to and data size.
Example: Saving a graphic displayed in a site
1 While displaying a site, press (Func).
The Function menu appears.
2 Select [Acquire image] and press .
To save the background image
Select [Acquire BG image].
3 Select [Save] → a graphic and press .
The selected image is displayed in a frame and the
screen for selecting the place to save to appears.
[Data Box]:
Save an image in the Data Box. Select a folder to
save to.
[microSD]:
Save an image in the microSD memory card.
To perform the Display setting after saving an image
Select [Save&setting] → an image → a place to
save to → the Display setting.
To save the frame/stamp/Deco-mail pictograph
Select [Save] → an image. The image is saved
in an appropriate folder in My picture of the Data
Box.
4 Select a place to save to and press .
The graphic is saved in the selected place to save
to.
When there is not enough memory or the maximum
number of graphics has been reached
The screen informing insufficient memory or
that the maximum number has been reached
appears. To save the new graphic, select
[Sel. delete file] → a folder → a file, press
(Complete), and select [Yes].
● You cannot save a GIF image exceeding
[UXGA(1600×1200)] and a GIF animation
exceeding [Stby(480×864)] in the Data Box. You
may also not be able to save some JPEG images
in the Data Box.

167
i-mode/i-motion/i-Channel
Downloading Data from
Sites <Download>
You can download melodies, PDF data, Chara-
den, ToruCa cards, Deco-mail templates,
dictionaries, Kisekae Tool, mail (vMessage
format), and easy BlogUp service information
file from related sites.
■ Files that can be downloaded
Type Maximum downloadable size
Melody (SMF/MFi)※100K bytes
PDF data※2M bytes
Chara-den 100K bytes
ToruCa※1K bytes
ToruCa(detail)※100K bytes
Deco-mail template 200K bytes
Dictionary data 100K bytes
Kisekae Tool 2M bytes
Mail (vMessage)※200K bytes
easy BlogUp service
information file
100K bytes
※ The number of files that you can save varies
depending on the free memory space on the place
to save to and data size.
Example: Downloading a melody from a related site
1 While displaying a site, select a melody
and press .
Download
completed
Play
Save
Back
The melody is downloaded and the screen for
confirming whether to save the melody appears.
To check the melody before saving
Select [Play].
To cancel the saving
Select [Back] → [Yes].
2 Select [Save] and press .
The screen for selecting where to save appears.
[Data Box]:
Save melodies in the Data Box of the FOMA
terminal. Select a folder for saving melodies.
[microSD]:
Save melodies in the microSD memory card.
3 Select a place to save to and press .
The melody is saved.
To download Chara-den/Deco-mail template/
dictionary data
While displaying the site, select data and select
[Save].
To download a Kisekae tool
While displaying the site, select a Kisekae
tool and select [Save]/[Save temporary]/
[Save&setting].
To download PDF data
While displaying the site, select PDF data and
select [Data Box]/[microSD].
To download a ToruCa card
While displaying the site, select a ToruCa card
and select [Yes] → a folder.
To download mail
While displaying the site, select mail and select
[Save] /[Save in mail box].
When you select [Save in mail box], the mail
is saved in the Mail box. If the data contains
several mails, only the first mail is saved.
To download an easy BlogUp service information file
While displaying the site, select an easy BlogUp
service information file and select [Save] → [Yes].
When there is not enough memory
The screen for confirming whether to overwrite
the data appears. To overwrite, select
unnecessary data (P.326).
Continued
168
i-mode/i-motion/i-Channel
● Downloaded melodies may not be played back
properly.
● PDF data whose size is unknown is downloaded
until the downloaded size of it reaches 2M bytes.
● You may be able to display the PDF data you
failed to download by downloading it again.
However, some PDF data may be disabled for
display.
● If you have deleted preinstalled
Chara-den files or PDF data, you
can download them from “PlayNow
by SO”.
[i Menu] → [メニュー/検索] (Menu/
Search) → [ケータイ電話メーカー]
(Mobile Phone Manufacturers) →
[PlayNow by SO] (Japanese only)
Using the Phone To/Mail To/
Web To/i-αppli To
You can use highlighted information in a site,
message, mail main body, i-αppli, ToruCa
card, PDF data, and i-Channel channel list to
place a call, compose mail, display an Internet
website, and start i-αppli.
Sometimes, you may not be able to select an
item for establishing a link to the displayed phone
number/mail address/URL/i-αppli. Whether you can
use the function depends on sites, mail, messages,
software, ToruCa cards, and i-Channel contents.
Placing a Call from the Current
Display
You can place a voice or videophone call,
originate a PushTalk call, or send SMS from
a phone number currently displayed in the
display (Phone To, AV Phone To).
When 2in1 is set to the B mode, you cannot originate
a PushTalk call.
You cannot send SMS from i-αppli.
1 Select a phone number in the display and
press .
The screen for confirming whether to place a call
appears.
2 Select [Yes] → [Voice call]/[Videophone]/
[PushTalk]/[SMS] and press .
Follow the same steps as in “Placing a call by
specifying a condition” (P.60, step 1 to 3).
Composing/Sending Mail from
the Current Display
You can compose/send mail to a mail address
currently displayed in the display (Mail To).
When 2in1 is set to the B mode, you cannot use the
Mail To function.
1 Select a mail address in the display and
press .
The Edit mail display appears.
The selected mail address is entered as the
address.
2 Compose mail and send it.
Follow the same steps as in “Compose and send
mail” (P.207, step 3 to 5).
Accessing a Site from the
Current Display
You can connect to a site by i-mode of Full
Browser from a URL currently displayed in the
display (Web To).
1 Select a link (URL) in the display and
press .
The FOMA terminal is connected to the linked site.
Running i-αppli from the
Current Display
You can start i-αppli software from a link
currently displayed in the display. The
software can also be started using the infrared
communication (i-αppli To).
Download software that can be started by the
i-αppli To beforehand.
i-αppli cannot be started to run when the i-αppli To
is set to [No] (P.241).
1 Select i-αppli link in the display and
press .
The screen for confirming whether to start i-αppli
appears.
2 Select [Yes] and press .
The software is started to run.
169
i-mode/i-motion/i-Channel
Setting i-mode <i-mode setting>
Setting the Connection Timeout
The duration before disconnecting the FOMA
terminal automatically can be set when you
cannot send or receive data due to heavy
traffic at the i-mode center.
1 From the i-mode menu, select [i-mode
setting] → [Common setting] →
[Connection timeout] and press .
[60sec]:
Disconnect automatically when unable to send/
receive data for 60 seconds.
[90sec]:
Disconnect automatically when unable to send/
receive data for 90 seconds.
[Unlimited]:
Do not set the connection timeout (however, the
connection can be disconnected due to the radio
wave condition or other reasons).
2 Select the waiting duration and press .
The Connection timeout is set.
Changing the i-mode Host (ISP
Connection Communication)
※ You do not need to change the Host setting
when using the i-mode service of DoCoMo.
You can set up to 10 hosts for receiving
services other than the services provided by
i-mode (DoCoMo). When you change a host
to other than [i-mode(UIM)], you cannot use
i-mode.
You must always enter [Host name], [Host number],
and [Host address].
1 From the i-mode menu, select [i-mode
setting] → [Common setting] → [Host
selection] and press .
Host selection
i−mode(UIM)
To edit the settings of the set host
Move the cursor to the set host and from the
Function menu, select [Edit], and enter the
Security code. Edit each item.
To delete the set host
Move the cursor to the set host and from the
Function menu, select [Delete one], enter the
Security code, and select [Yes].
2 Press (Create).
The Security code screen appears.
3 Enter the Security code and press
(OK).
Host setting
Host name
Host number
Host address
Host address2
[Host name]:
Enter a host name within eight full-width or 16
half-width characters.
[Host number]:
Enter a host number within 99 half-width
alphanumeric characters and symbols.
[Host address]/[Host address2]:
Enter a host address within 30 half-width
alphanumeric characters and symbols.
4 Enter each item.
5 Press (Complete).
The entered host is saved.
6 Select the host and press .
The host is changed.
● Note that packet communication is not covered
by the Pake-Houdai/Pake-Houdai Full service if a
host of the packet communication is set to other
than [i-mode(UIM)].
Continued
170
i-mode/i-motion/i-Channel
Setting Whether to Use the
Saved Data for Flash Movies
You can set whether to use the saved data
(P.190) when you play back a Flash movie
displayed on a site or saved in the Screen
Memo.
1 From the i-mode menu, select [i-mode
setting] → [Use phone info] and press .
2 Select [Yes]/[No] and press .
The Use phone info is set.
Disabling the Display of Graphics
You can set whether to display graphics when
displaying sites or screen memos.
1 From the i-mode menu, select [i-mode
setting] → [Display img] and press .
2 Select [ON]/[OFF] and press .
The Display img is set.
When set to [OFF], “ ” is displayed instead of a
graphic.
● Some graphics may not be displayed correctly
even if the Display img is [ON].
Displaying a Site Automatically
with the Correct Character Code
You can set to identify the character code of a
site automatically.
1 From the i-mode menu, select [i-mode
setting] → [Auto detect.] and press .
2 Select [ON]/[OFF] and press .
The Auto detect. is set.
● Even if the Auto detect. is [ON], some sites may
not be displayed correctly.
Operating the SSL List
<SSL certificate>
You can set to validate/invalidate the certificate
that is required to connect to an SSL site.
1 From the i-mode menu, select [i-mode
setting] → [SSL list] and press .
SSL list
13
CA cert. 1
CA cert. 2
CA cert. 3
CA cert. 4
CA cert. 5
CA cert. 6
CA cert. 7
CA cert. 8
CA cert. 9
CA cert.10
CA cert.11
DoCoMo cert.1
[CA cert.]:
An authentication company issues these
certificates. They are saved in the FOMA terminal
at the time of purchase.
[DoCoMo cert.]:
This certificate is required for connecting to the
FirstPass Center and FirstPass-compatible sites
and is saved on the UIM (green/white).
[User cert.]:
This certificate is downloaded from the FirstPass
Center by [User certificate] and is saved in the
UIM (green/white).
To check the certificate
Move the cursor to the certificate and press .
2 Select an SSL certificate and press
(Set).
The Security code screen appears.
3 Enter the Security code and press
(OK).
The Valid/Invalid display appears.
4 Select [Valid]/[Invalid] and press .
The SSL certificate is set.
When set to [Invalid], “ ” changes to “ ”. The SSL
communication is canceled when connecting to an
SSL site that requires a certificate.
171
i-mode/i-motion/i-Channel
Setting the FirstPass
<User certificate>
You can issue and download the user
certificate from the FirstPass Center.
The user certificate certifies that you are a
FOMA subscriber. The downloaded user
certificate is saved on the green/white UIM
(FOMA card) and enables you to use FirstPass-
compatible sites.
You cannot use the user certificate using the blue
UIM.
To connect to the FirstPass Center, set the date and
time (P.44).
The screens and operation methods displayed by
the FirstPass Center may change.
While the FOMA terminal is connected to the
FirstPass Center, you cannot send/receive mail or
receive Message R/F.
The User certificate is not available overseas.
1 From the i-mode menu, select [i-mode
setting] → [User certificate] and press .
FirstPass
・
FirstPass
をご利用いた
だくためには、
ユーサ゛
証明書
の発行申請、
タ゛ウンロート゛
が必
要です。
・「次へ」を選択して、
ユーサ゛
証明書の発行申請、
タ゛ウンロー
ト゛
を行ってください。
・当
サイト
の閲覧
/
ご利用にあ
たっての
ハ゜ケット
通信料は無
料です。
次へ
/English
2 Select [English] and press .
FirstPass
Request your certifica
te
Download your certific
ate
Other settings
The usage regulation (
Japanese only)
3 Select [Request your certificate] →
[Continue] and press .
The PIN2 code input screen appears.
To void the issued certificate
Select [Other settings] → [Revoke your
certificate] → [Yes], enter the PIN2 code, and
select [Continue] → [Continue] → [Continue].
4 Enter the PIN2 code and press (OK).
If you do not enter the PIN2 code within 15
seconds, the request for issuing your certificate
is canceled.
5 Select [Download] → [Continue] and
press .
FirstPass
Requesting a certificate
is completed.
Download the certificate
.
Download/Menu
The user certificate is downloaded and added to
the list of SSL certificates (P.198).
Precautions on the use of FirstPass
● The packet communication charge is free when
you connect to the FirstPass Center.
● The packet communication performed when
connecting to a FirstPass-compatible site is
covered by the Pake-Houdai/Pake-Houdai Full
service. However, data communication with a PC
connected is not covered by the Pake-Houdai/
Pake-Houdai Full service.
● FirstPass is an electronic authentication service
provided by DoCoMo. Using FirstPass enables
client authentication, which is performed between
the site and FOMA terminal user by exchanging
certificates and verifying the received certificate
of the other side for mutual authentication.
● FirstPass can be used for Internet communication
from the FOMA terminal as well as for Internet
communication by connecting the FOMA
terminal to a PC. To use on a PC, you must install
the FirstPass PC software on the supplied CD-
ROM.
● When you request the user certificate to be
issued, carefully read the displayed “FirstPass
Agreement” and then make the request if you
accept the terms.
● You need to enter the PIN2 code in order to use
the user certificate (P.131).
You are liable for all operations performed after
you enter the PIN2 code. Therefore, exercise
care to prevent the use of your UIM or PIN2 code
by others.
● If you have lost or stolen your UIM, you can
invalidate your user certificate at the “General
Contact” numbers provided on the backcover of
this manual.
● DoCoMo shall have no liability for any content
and information provided by FirstPass-
compatible sites. Any problem must be resolved
between you and the FirstPass-compatible site.
● DoCoMo and the authentication company do not
guarantee the security for using FirstPass and
SSL. Therefore, you must use them at your own
discretion and responsibility.
172
i-mode/i-motion/i-Channel
Changing the Host for
Certificate Issue <Select host>
※ Normally, you do not need to change the
setting.
When you want a service other than FirstPass
services, you can set one host. Note that if you
change the setting, you cannot connect to the
FirstPass Center.
You cannot set this function during i-mode
connection.
1 From the i-mode menu, select [i-mode
setting] → [Select host] and press .
Select host
ドコモ
To edit the set host
Move the cursor to the set host and from the
Function menu, select [Edit] and enter the
Security code. Edit each item.
To restore the default host setting
From the Function menu, select [Reset], enter
the Security code, and select [Yes].
2 Press (Create).
The Security code screen appears.
3 Enter the Security code and press
(OK).
Host setting
Host name
Host address
[Host name]:
Enter a host name within 99 half-width
alphanumeric characters and symbols.
[Host address]:
Enter a host address within 100 half-width
alphanumeric characters and symbols.
4 Enter each item.
5 Press (Complete).
The entered host is saved.
6 Select a host and press .
The host is changed.
What is i-motion?
i-motion is movie data that contains both
video and sound tracks. You can play back an
i-motion on the FOMA terminal and set a saved
i-motion for the stand-by display.
The i-motion can be of the following types. The
type of i-motion varies depending on a site and
cannot be selected.
Category Description
Type Playback method
Standard
type
(Allowed to
be saved※)
Playback is
performed while
loading data
(10M bytes
maximum)
Playback starts after
halfway downloading
i-motion data and
proceeds while
downloading the rest
of the data.
Playback is
performed after
loading data
(10M bytes
maximum)
Playback starts after
all i-motion data is
downloaded.
Streaming
type
(Not allowed
to be saved)
Playback is
performed while
loading data
(10M bytes
maximum)
Playback starts after
halfway downloading
i-motion data and
proceeds while
downloading the
rest of the data.
The i-motion data
is deleted once it is
played back.
※ Some i-motion cannot be saved.
173
i-mode/i-motion/i-Channel
Downloading an i-motion
from Sites <Download i-motion>
You can download i-motion from a site and
save it to the FOMA terminal.
You can save up to 150 i-motion, each up to 10M
bytes. The number of i-motion that can be saved
may decrease depending on the data to be saved.
1 While displaying a site, select an i-motion
and press .
i−motion
Play
Save
File property
Back
The i-motion is downloaded to the FOMA terminal.
When the i-motion auto replay is set to [ON],
playback of the i-motion starts automatically after
the downloading is completed. (For i-motion that
can be played back while being downloaded,
playback starts after halfway downloading data.)
The operations during playback is the same as
those described for i-motion in the Data Box
(P.295).
Even if you stop playback while the downloading
is in progress, the downloading continues.
2 Select [Save]/[Save temporary] and press
.
The screen for selecting where to save appears.
[Data Box]:
Save the i-motion in i-motion of the Data Box of
the FOMA terminal. Select a folder for saving
data.
[microSD]:
Save the i-motion in the microSD memory card.
To play back data
Select [Play].
To display detailed information
Select [File property].
3 Select a place to save to and press .
The i-motion is saved.
● Some i-motion may not be played back/saved
properly even if its data is downloaded
successfully.
● The playback may be stopped or the image
may be distorted when you play back i-motion
while downloading data depending on the radio
wave condition, communication line conditions,
or the communication speed. A standard type
i-motion allows you to play back as many times
as you want after downloading (using the saved
data). However, a streaming type i-motion does
not allow further playback once it is played back
(unless you download it again).
● If you close the FOMA terminal or execute
another function while downloading/playing back
an i-motion, the downloading/playing back may
be stopped depending on some i-motion.
● You cannot download or play back an i-motion in
the ASF format.
Setting Whether to Play Back
i-motion Automatically
<i-motion auto replay>
You can set whether to automatically play back
standard type i-motion.
1 From the i-mode menu, select [i-mode
setting] → [i-motion auto replay] and
press .
2 Select [ON]/[OFF] and press .
[ON]:
Automatically play back the i-motion during or
after downloading.
[OFF]:
Do not automatically play back the i-motion
during or after downloading and display the
download completion screen.

174
i-mode/i-motion/i-Channel
What is i-Channel?
The i-Channel service provided by DoCoMo
or another IP (information service providers)
distributes news, weather, etc. as graphics-
based information to i-Channel-compatible
terminals.
You can run the latest information updates
in the stand-by display as Telop text by
automatically getting this information on a
regular basis. You can also display a list of
channels and view the channel you want by
pressing (P.202). The channel you select
from the channel list gives you access to rich
and detailed information.
i-Channel is a paid service that requires a
subscription. (To apply for the i-Channel
service, the subscription to i-mode is required.)
There are two types of channels: “Basic
channel” and “Favorite channel”. “Basic
channel” is provided by DoCoMo and is pre-
registered, and therefore you can use it from
the moment you start using the i-Channel
service. The packet communication charge
required for automatic updates of information
distributed for the “Basic channel” is free of
charge. IP (information service providers) other
than DoCoMo offers “Favorite channel” that you
can register and use according to your needs.
The packet communication charge required for
automatic updates of information distributed
for “Favorite channel” is not included in the
i-Channel service charge.
However, the packet communication charge
is required in addition to the i-Channel service
charge when you view detailed information of
“Basic channel” and “Favorite channel” from
the channel list.
Also, note that the packet communication
charge is required for automatic updates of
information distributed for “Basic channel”
during international roaming is not included in
the i-Channel service charge.
i-Channel is available only in Japanese.
For details on i-Channel, see the “Mobile Phone
User’s Guide
【i-mode】
FOMA version”.
● You can set the display speed of the Telop text
and also turn off the Telop text (P.203).
Displaying the i-Channel
1 Press (i.ch) in the stand-by display.
The channel list appears.
2 Select a channel and press .
● You may receive specific information when the
channel list is displayed, depending on the terms
of use.
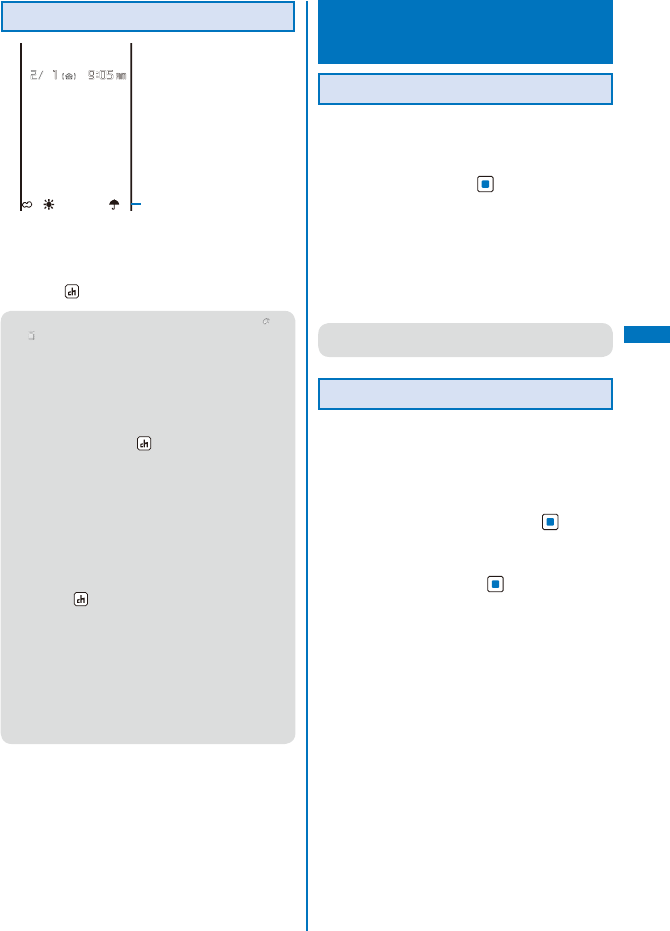
175
i-mode/i-motion/i-Channel
When You Receive i-Channel
→
最高
10
℃
10
Tel o p
When you receive information, the information is
automatically run as Telop text on the stand-by
display.
To display the channel list
Press (i.ch).
● When you receive i-Channel information, “ ”→
“” flashes. Even if you receive information, the
FOMA terminal does not sound the ring tone
or vibrate, and the incoming indicator does not
operate, either.
● If you change the host, the Telop text may
be turned off and information may not be
automatically updated. To receive latest
information, press (i.ch) and display the
channel list. The Telop text starts running
automatically.
● You can change the i-Channel host using the
Host selection (P.197). Normally, you do not need
to change the host.
● When the FOMA terminal is powered off,
outside of the service area, or in poor radio
wave condition, you may not be able to receive
information. When you receive information by
pressing (i.ch), the Telop text is automatically
displayed in the stand-by display.
● Telop text is not displayed in the following cases.
- When the Lock all is set
- When the Personal data lock is set
- When the Omakase Lock is set
- When the Public mode (Drive mode) is set
- When the UIM is not inserted
- When the i-Channel or i-mode service is
canceled
Changing the i-Channel
Settings
Setting the Telop Text
You can set the display speed of the Telop text
and also turn off the Telop text.
1 From the i-mode menu, select [i-Channel]
→ [Ticker] and press .
The Ticker display appears.
2 Set the speed for displaying the Telop text
at [Stand-by].
Select from [Fast], [Std], and [Slow].
To turn off the Telop text
Select [OFF].
● When 2in1 is used, you can set the Ticker for
each 2in1 mode.
Restoring the Default Settings
You can delete saved i-Channel data and reset
the Ticker settings to the default settings.
If an i-motion or i-αppli is set for the stand-by
display, the Ticker settings are not reset.
1 From the i-mode menu, select [i-Channel]
→ [Reset i-Channel] and press .
The screen for confirming whether to reset the
i-Channel data appears.
2 Select [Yes] and press .
The i-Channel is reset.


177
Mail
What is i-mode Mail? ............................................................................................... 206
Displaying the Mail Menu ....................................................................... <Mail menu> 206
■ Composing i-mode Mail/Deco-mail
Composing and Sending i-mode Mail .................................<Compose and send mail> 207
Composing and Sending Deco-mail .......................... <Compose and send Deco-mail> 208
Using a Template to Send Mail ................................................................................ 211
File Attachment ............................................................................... <File attachment> 212
Saving i-mode Mail to Send Later ..........................................................<Save mail> 213
■ Receiving/Manipulating i-mode Mail
Receiving i-mode Mail ........................................................................ <Auto receive> 214
Selecting to Receive i-mode Mail ....................................................<Receive option> 215
Checking New i-mode Mail ..................................................... <Check new message> 216
Replying to i-mode Mail ..................................................................... <Reply to mail> 216
Forwarding i-mode Mail ..................................................................... <Forward mail> 216
Saving the Mail Address/Phone Number in the Phonebook .................................... 217
Playing Back/Saving a File Attachment Received in i-mode Mail ............................ 218
■ Manipulating the Mail Box
Displaying Received/Sent/Saved Mail ..................................................................... 219
■ Setting Mail
Setting the Mail Function of the FOMA Terminal ..................................<Mail setting> 225
■ Using the Message Service
Receiving a Message ..................................................................<Receive message> 230
Checking a New Message ...................................................... <Check new message> 231
Displaying a Message ......................................................... <Message R/Message F> 231
■ Using Early Warning “Area Mail”
What is Early Warning “Area Mail”? .......................................................................... 233
Receiving Early Warning “Area Mail” ........................................... <Receive Area Mail> 233
Setting Early Warning “Area Mail” .................................................. <Area Mail setting> 233
■ Using SMS
Composing and Sending SMS ..........................................<Compose and send SMS> 234
Receiving SMS ..................................................................................<Receive SMS> 235
Checking New SMS ...................................................................... <Check new SMS> 236
Setting SMS .........................................................................................<SMS setting> 236
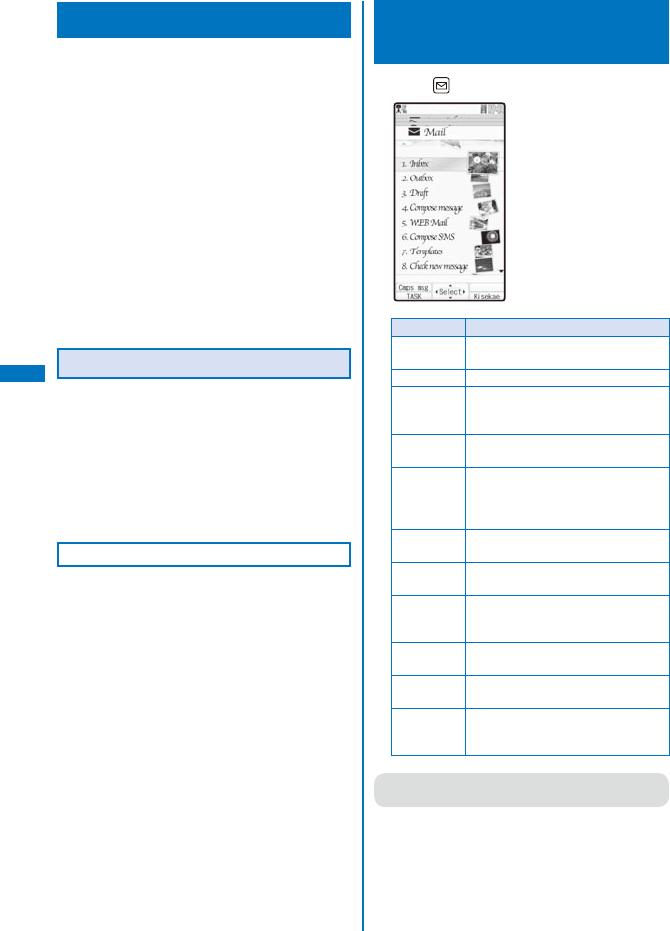
178
Mail
What is i-mode Mail?
When subscribing to the i-mode service, mail
can be exchanged with i-mode terminals as
well as e-mail over the Internet.
In addition to the main body of text, you can
attach up to 10 files (JPEG, ToruCa, PDF data,
etc.) of up to 2M bytes in total. The i-mode
mail function also provides Deco-mail support,
and you can change the font color/size and
background color of the mail main body text.
Since there are many preinstalled Deco-mail
pictographs that can be inserted in an i-mode
mail message in the same manner as other
pictographs, you can easily compose and
send expressive mail.
For details on the i-mode mail, see the “Mobile
Phone User’s Guide
【i-mode】
FOMA version”.
About SMS
You can exchange messages between FOMA
terminals without subscribing to i-mode.
Sending SMS (P.234)
Receiving SMS (P.235)
Checking new SMS (P.236)
See DoCoMo’s website to send/receive SMS to/from
an overseas telecommunication company other than
DoCoMo.
If Unable to Receive SMS
The SMS received at the SMS center is
immediately sent to your FOMA terminal. When
your FOMA terminal is powered off or cannot
receive radio waves because it is outside of the
i-mode service area or due to other reasons,
the SMS is held at the SMS center.
Displaying the Mail Menu
<Mail menu>
1 Press (Mail) in the stand-by display.
Menu name Function
Inbox Display, reply to or forward received
mail (P.216, 219).
Outbox Display or edit sent mail (P.219).
Draft Display mail that was saved without
being sent and sent unsuccessfully
(P.219).
Compose
message
Compose and send new i-mode mail
(P.207).
WEB Mail Connect to the WEB mail site to
display mail addressed to Address
B and compose/send mail from
Address B at the site (P.398).
Compose
SMS
Compose and send new SMS
(P.234).
Templates D isplay the list of Deco-mail
templates (P.211).
Check new
message
Obtain mail, Message R, and
Message F held at the i-mode center
(P.216, 231).
Check new
SMS
Obtain SMS held at the SMS center
(P.236).
Receive
option
Select and receive mail held at the
i-mode center (P.215).
Mail setting Set items relating to i-mode mail,
SMS, and Area Mail on the FOMA
terminal (P.127, 225, 236, etc.).
● For details on the WEB mail, see the “Mobile
Phone User’s Guide
【2in1】
”.
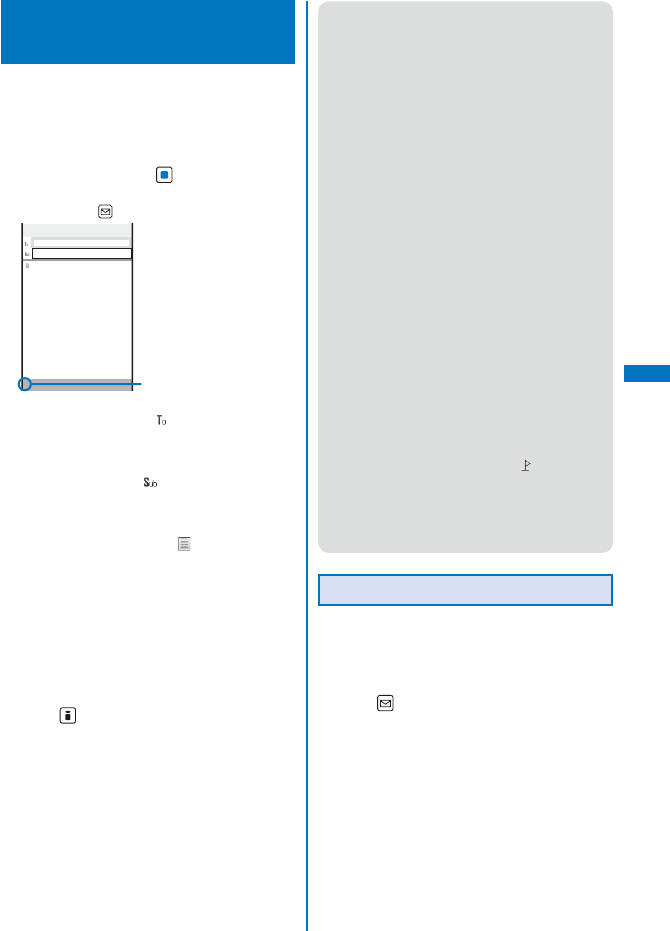
179
Mail
Continued
Composing and Sending
i-mode Mail <Compose and send mail>
Sent mail is saved in [Outbox].
Mail may not be displayed correctly on the
recipient’s phone depending on the radio wave
condition.
1 From the Mail menu, select [Compose
message] and press .
You can also display the mail compose display
by pressing (Cmps msg) in the Mail menu.
0
Edit mail
Number of entered bytes
2 Enter an address at [ ].
Enter an address within 50 half-width alphanumeric
characters and symbols.
3 Enter a subject at [ ].
Enter a subject within 100 full-width or 200 half-
width characters.
4 Enter the main body at [ ].
Enter the main body within 5,000 full-width or
10,000 half-width characters.
You can enter a Deco mail pict. to compose Deco-
mail (P.208).
To obtain the location information
From the Function menu, select [Rcv loc. info]
(P.277).
To display the preview image
From the Function menu, select [Preview].
5 Press (Send).
The mail is sent.
To save the main body of text as signature
From the Function menu, select [Save signature].
● When you change the font size, from the
Function menu, from [Input method] → [Font
size], in the Edit mail or Edit address display,
the setting is only applied for the font size in the
matching word list. The setting for the font size
of an address, subject, and main body text is
changed from the next time when you compose
mail (P.127).
● When the number of saved draft mail has
reached 50 or there is not enough memory left
for draft mail, you cannot compose new mail nor
edit draft mail.
● If new mail is sent when the number of saved
sent mail has reached 500 or there is not
enough free space, the unprotected sent mail is
overwritten from the oldest.
● If mail you send to several addresses is sent
successfully to some and unsuccessfully to other
addresses, the same mail is saved in [Outbox]
as sent mail and in [Draft] as unsent mail/mail
sent unsuccessfully.
● Even if the mail is sent successfully, you may
receive the error message “Transmission failed”
depending on the radio wave condition and the
mail is saved in [Draft].
● When 2in1 is set to the B mode, you cannot
compose any i-mode mail.
● You cannot send i-mode mail using Address B.
● When you obtain location information and attach
the location information URL, “ ” appears in
front of the location information URL in the main
body. Attached location information URL is
counted as the characters in the mail main body.
● All the part of a title may not be received
depending on the recipient’s terminal model.
Adding an Address
You can send i-mode mail containing the same
information up to five addresses all at once by
adding these addresses. You can select the
type of address from To, Cc, and Bcc.
1 Press (Func) in the Edit mail display.
The Function menu appears.
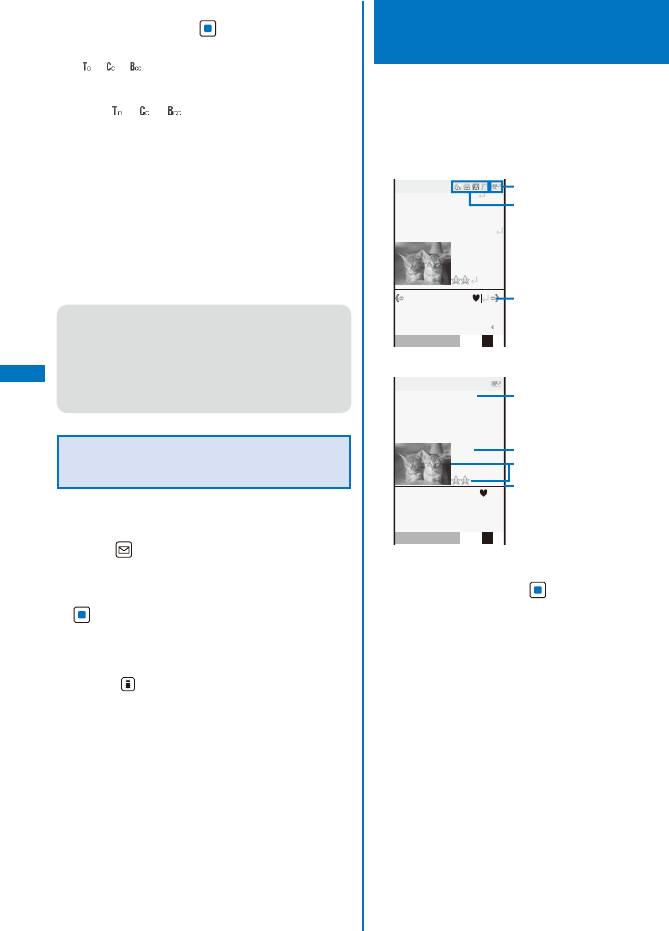
180
Mail
2 Select [Add receiver] → address type (To/
Cc/Bcc) and press .
The address field of the selected address type
([ ]/[ ]/[ ]) is added.
3 Enter an address in the added address
field [ ]/[ ]/[ ].
To delete an address
Move the cursor to an address and from the
Function menu, select [Delete receiver] → [Yes].
To change the address type
Move the cursor to an address and from the
Function menu, select [Change addr type] → an
address type (To/Cc/Bcc).
4 Compose mail and send it.
Follow the same steps as in “Compose and send
mail” (P.207, step 3 to 5).
● The mail addresses entered in To and Cc are
displayed in the recipient’s terminal display.
Note, however, that they may not be displayed
depending on the terminal, device, or mail
software of the recipient. The mail addresses
entered in Bcc are not displayed in the recipient’s
terminal display.
Entering an Address from the
Mail List
You can send mail to several recipients saved
in the mail list.
1 Press (Func) in the Edit mail display.
The Function menu appears.
2 Select [Mail list] → a mail list and press
.
All the members in the list are entered in the
address box.
To select a specific address from the mail list
Press (Each) in the Mail list display and select
a member.
3 Compose mail and send it.
Follow the same steps as in “Compose and send
mail” (P.207, step 3 to 5).
Composing and Sending
Deco-mail
<Compose and send Deco-mail>
You can compose and send Deco-mail, i-mode
mail that has a decorated main body.
Deco-mail may not be received or displayed
correctly depending on the recipient’s terminal
model.
Main body input display
Input
R.ab4061
漢
カナAa12
Sasha and Beckie are ver
y cute and so frisky. Th
ey are running throughou
t the house tirelessly.
Why not see ’em
If you miss this chance,
you will never see such
cute little kittens.
Newcommers
Deco-mail
Icons for the specified
decoration items
Blink/Move
Preview display
Preview
R.4061
漢
カナAa12
Sasha and Beckie are ver
y cute and so frisky. Th
ey are running throughou
t the house tirelessly.
Why not see ’em
If you miss this chance,
you will never see such
cute little kittens.
Newcommers
Color/Size/Align
Background color
Insert image
Insert line
1 From the Mail menu, select [Compose
message] and press .
The Edit mail display appears.
2 Enter an address and subject.
Follow the same steps as in “Compose and send
mail” (P.207, step 2 to 3).
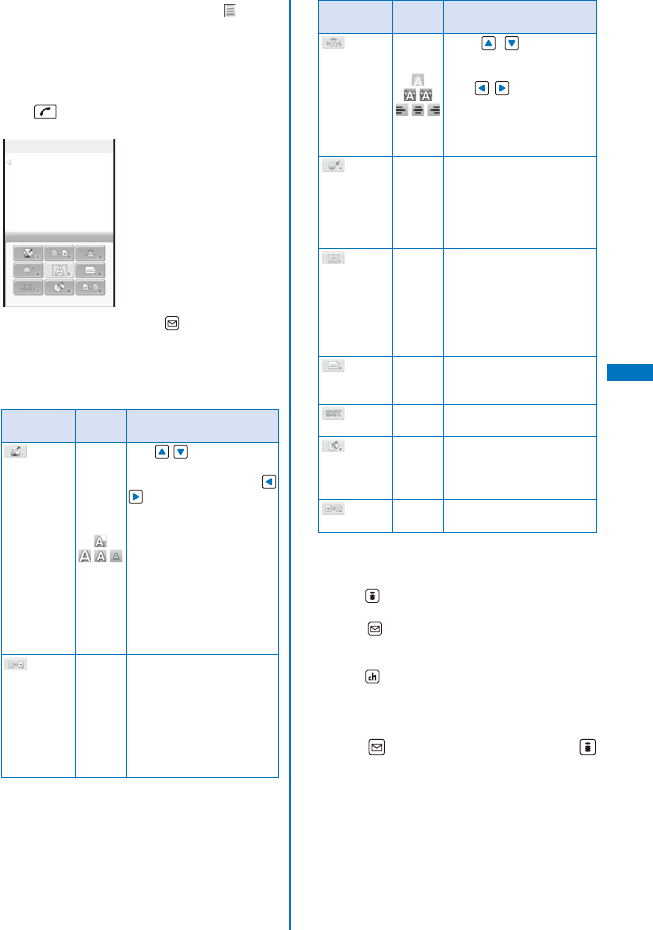
181
Mail
3 Enter/decorate the main body at [ ].
Enter the main body within 5,000 full-width or
10,000 half-width characters.
Number of characters permitted in the main
body may be reduced depending on the type
and volume of decoration you use.
Press in the Main body input display to display
the decoration menu.
Decorate the selected text
Input
Deco. slcted txt
Set the decorations and press (Close) to end the
decoration menu.
The following table indicates the decoration items,
buttons displayed in the decoration menu, and
icons which appear in the title field of the Main
body input display after decoration.
Decoration
menu Icon Description
[1]:
Color/Size
Use to select a font
size from three types,
large/medium/small and
to select font and line
colors from 20 colors.
When you select a
font color, the color of
a pictograph is also
changed. To reset to the
normal pictograph color,
select [None].
You cannot change the
size of the Deco-mail
pictograph.
[2]:
Quick deco.
Mail −
You can specify the
background and font
colors of Deco-mail all
at once and also insert a
decoration line above and
below the text by selecting
a pattern image and its
color scheme (P.210).
Decoration
menu Icon Description
[3]:
Blink/Move/
Align
Use to select
whether or not to allow
the text to blink (ON/OFF)
and to select the
alignment (left justified/
centered/right justified)
or move (none/Telop text/
swing).
[4]:
Insert image −
You can insert up to 20
types of images (90K
bytes) from My picture
of the Data Box. You can
also select a Deco-mail
pictograph.
[5]:
Deco. slcted
txt −
After specifying the range
of the main body, you
can decorate it. You can
decorate the mail using
[Color/Size] and [Blink/
Move/Align], one after the
other (P.210).
[6]:Insert
line
−
The line in the color set in
[Color/Size] is inserted.
[7]:Close −You can quit the decoration
menu.
[8]:
Background
color
−
You can select the
background color from 80
colors.
[9]:Reset all −You can cancel the all
decorations.
You can set a decoration by entering a digit in
front of the name of the decoration menu.
To undo the last decoration setting
Press (Undo).
To check the decoration settings
Press (Close) and from the Function menu,
select [Preview].
To enter Deco mail pict.
Press (Pict/Sym) to select Deco mail pict.
Deco mail pict. is a Deco-mail pictograph
that can be entered only in the Edit mail, Edit
template, and Edit signature displays.
4 Press (Close) and then press
(Send).
To save the composed Deco-mail as a template
From the Function menu, select [Save template]
→ [Yes]. The Deco-mail is saved in Templates.
Continued
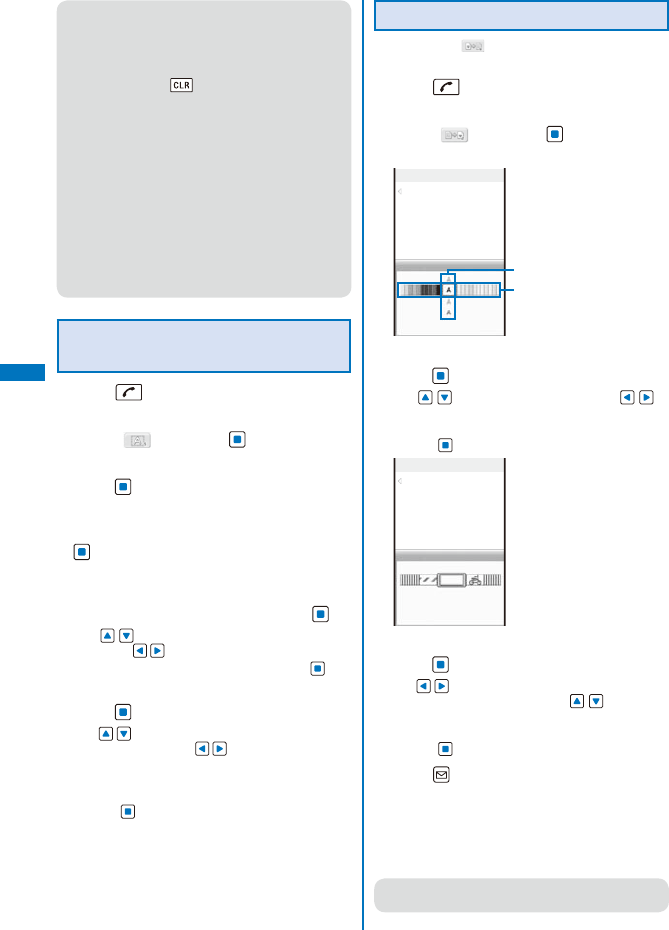
182
Mail
● Even if you delete a decorated character, the
data used for decoration may not be erased
and the number of characters in the mail main
body that you can enter could be reduced. After
canceling the decoration, delete the character.
When you press for over a second, both the
character and the decoration data are deleted.
● Blinking, motion, and animation stop
automatically after a certain period of time.
● When Deco-mail exceeding 10,000 bytes is sent
to a terminal of other than the following models
※, it is received as ordinary mail in which a URL
for viewing the Deco-mail is included. However,
some terminals may receive mail only of the main
body in which no URL for viewing the Deco-mail
is included.
※
903i series, 904i series, 905i series, 703i
series (excluding P703iµ), 704i series
(excluding P704iµ), 705i series, and F801i
Specifying Decoration After
Entering the Main Body
1 Press in the main body input display.
The decoration menu appears.
2 Select [ ] and press .
3 Select the decoration start point and
press .
The first character to be decorated is set.
4 Select the decoration end point and press
.
The range of the text to be decorated is set and the
Cross Deco-palette appears.
5 Select the font size/color and press .
Use to select the font size (large/medium/
small) and to select the font color.
If you do not set the font size/color, press .
6 Select the text blink/move/alignment and
press .
Use to select whether or not to allow the text
to blink (ON/OFF) and to select the alignment
(left justified/centered/right justified) or move (none/
Telop text/swing).
If you do not set the text blink/move/alignment,
press .
Specifying Decoration All at Once
If you select “ ” from the decoration menu, all the
specified decorations are canceled.
1 Press in the main body input display.
The decoration menu appears.
2 Select [ ] and press .
The Cross Deco-palette appears.
Input
Sample
Quick deco. Mail
Font color
Background color
3 Select the font/background color and
press .
Use to select the font color and to
select the background color.
If you do not set the font/background color,
press .
Input
Quick deco. Mail
4 Select a pattern image/color scheme and
press .
Use to select a pattern image to be inserted
above and below the text and to select a
pattern image/color scheme.
If you do not set a pattern image/color scheme,
press .
5 Press (Close) and enter the main body.
Enter text within 5,000 full-width or 10,000 half-width
characters.
Number of characters permitted in the main
body may be reduced depending on the type
and volume of decoration you use.
● You can also select the Quick deco. Mail after
entering the main body.
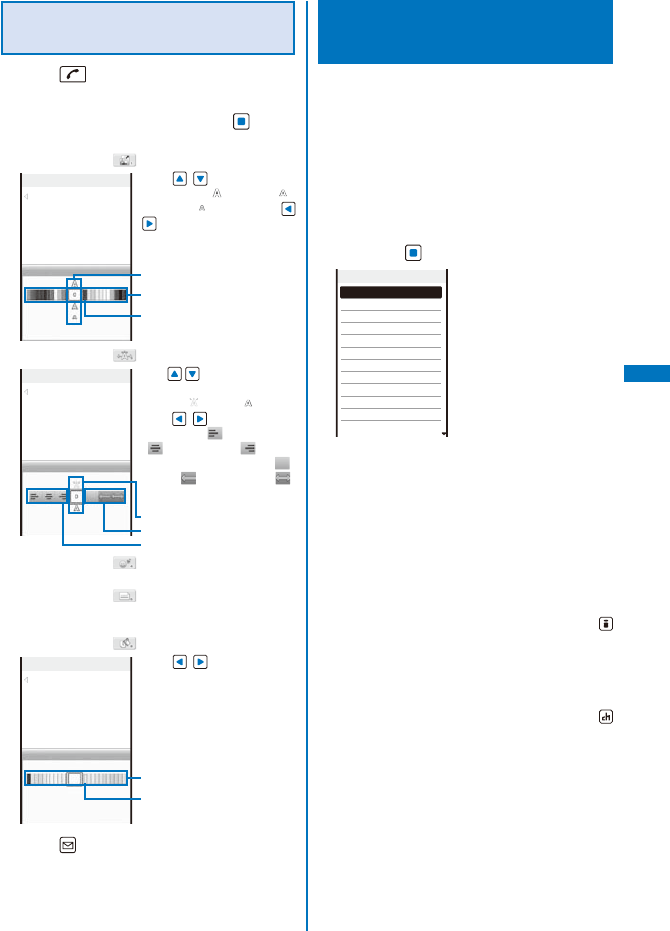
183
Mail
Entering the Main Body After
Specifying Decoration
1 Press in the main body input display.
The decoration menu appears.
2 Select the decoration and press .
The Cross Deco-palette appears.
When you select “ ”
Input
Sample
Color/Size
Use to select the
font size (“ ” large/“ ”
medium/“ ” small) and
to select the font color.
Font size
Font color
Font color [none]
When you select “ ”
Input
Sample
Blink/Move/Align
Use to select whether
or not to allow the text to
blink (“ ” ON/“ ” OFF)
and to select the
alignment (“ ” left justified/
“” centered/“ ” right
justified) or move (“ ”
none/“ ” Telop text/“ ”
swing).
Blink
Move
Align
When you select “ ”
Select an image from My picture of the Data Box.
When you select “ ”
Insert a line at the line where the cursor is
displayed.
When you select “ ”
Input
Sample
Background color
Use to select the
background color.
Background color
Background color [none]
3 Press (Close) and enter the main body.
Enter text within 5,000 full-width or 10,000 half-width
characters.
Number of characters permitted in the main
body may be reduced depending on the type
and volume of decoration you use.
Using a Template to Send
Mail
A template is a model used for Deco-mail,
which is preset with decorations for the
main body. You can use templates to easily
compose/send Deco-mail.
You can download a template from a site and
also save up to 50 composed/received/sent
Deco-mails as templates (P.209).
You cannot edit or delete a preinstalled template.
1 From the Mail menu, select [Templates]
and press .
Templates
モモ
:
Happy Birthday
!
モモ
:遊びに行こうよ
モモ
:ありがとう!
モモ
:旅行に行ってきたよ
モモ
:探検中
浜でお散歩
海でぷかぷか
らぶらぶ
男の子
お化け
きのこ
きらり
To check a template
Select a template.
To change the title
Move the cursor to a template and from the
Function menu, select [Edit title]. Enter the title
within 10 full-width or 20 half-width characters.
To delete a template
Move the cursor to a template and from the
Function menu, select [Delete] → [Delete
one] → [Yes]. To delete several templates,
from the Function menu, select [Delete] →
[Select&delete], select templates, press
(Complete), and select [Yes]. To delete all
templates, from the Function menu, select
[Delete] → [Delete all], enter the Security code,
and select [Yes].
To edit a template
Move the cursor to a template and press
(Edit).
Continued
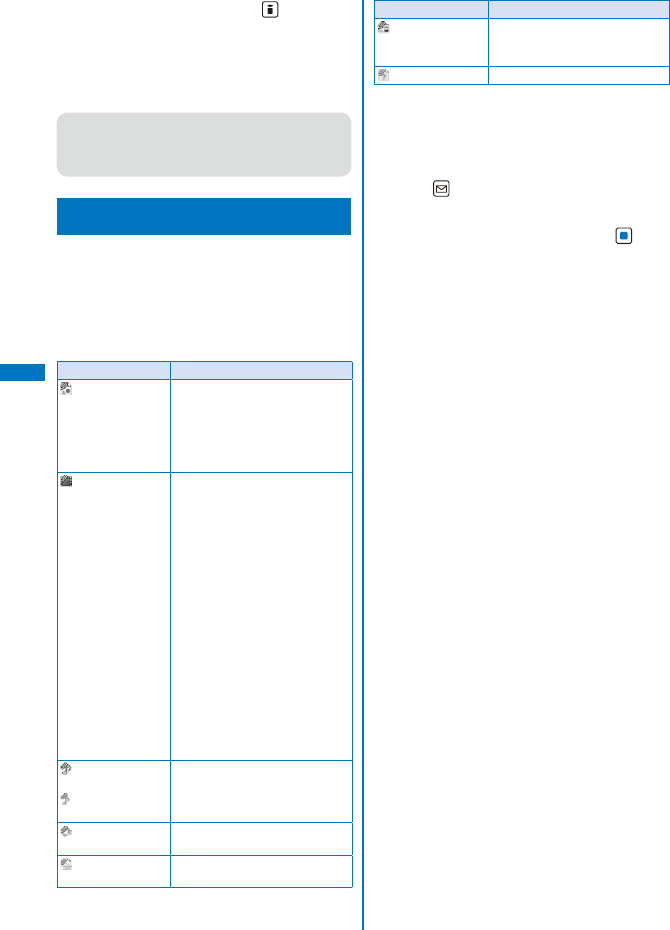
184
Mail
2 Select a template and press (Mail).
The Edit mail display appears.
3 Compose mail and send it.
Follow the same steps as in “Compose and send
Deco-mail” (P.208, step 2 to 4).
● When you save Deco-mail containing an image
that cannot be sent as a mail attachment or
Deco-mail with a file attachment as a template,
the image or file attachment is not saved.
File Attachment <File attachment>
You can send i-mode mail with up to 10 file
attachments, 2M bytes in total, including still
images, movies/i-motion, melodies, ToruCa
cards, PDF data, Phonebook, Schedule,
Bookmark, My data, and other files.
■ Files that can be attached
Type Restrictions, etc.
Image (GIF/
JPEG/SWF)
A JPEG image exceeding
2M bytes is automatically
converted to a file of 2M bytes
or less. (It is only the first
file attachment that can be
selected for conversion.)
Movie/i-motion
(MP4)
A movie/i-motion file
exceeding 2M bytes is
automatically clipped from the
beginning within 2M bytes. (It
is only the first file attachment
that can be selected for
conversion.)
A movie/i-motion whose image
size is set to [VGA(640×480)]
or less can be attached.
An attached movie may
appear grainy or may
be displayed after being
converted into several
continuous still images
depending on the recipient’s
terminal model.
Some i-motion files may not
be attached.
(Green) Melody
(SMF)
(Orange) Melody
(MFi)
A melody may not be sent
properly to mobile phones
other than SO906i.
ToruCa You may not be able to send
some ToruCa cards.
PDF data (PDF) PDF data that you obtained
by page cannot be attached.
Type Restrictions, etc.
Tool data The Phonebook, My data,
Schedule, and Bookmark data
can be attached.
Other files −
Files that cannot be attached to mail and files
prohibited from being retrieved out of the FOMA
terminal cannot be attached.
When you reply to mail saved in the microSD
memory card, you cannot attach a file (P.311).
1 Press (Func) in the Edit mail display.
The Function menu appears.
2 Select [Add attach file] and press .
The Select attach file display appears.
[Image]:
Select an image from My picture of the Main
memory/microSD.
[i-motion]:
Select a movie/i-motion from i-motion of the Main
memory/microSD.
[Melody]:
Select a melody from Melody of the Main
memory/microSD.
[ToruCa]:
Select data from ToruCa of the Main memory/
microSD.
[PDF]:
Select PDF data from My document of the Main
memory/microSD.
[Phonebook]:
Select data from Phonebook of the Main memory/
microSD. However, when the Save/attach image
of the Phonebook is set to [Invalid], the image is
not attached.
[My data]:
Attach My data.
[Schedule]:
Select data from Schedule of the Main memory/
microSD.
[Bookmark]:
Select data from Bookmark of the Main memory/
microSD.
[Others]:
Select data from Others of the microSD.
[Activate camera]:
Select [Camera]/[Movie] and record images/
movies using the camera (P.155, 170).
185
Mail
3 Select a file type and press .
To check the contents of a file
Move the cursor to a file and press (Play).
4 Select a folder → a file and press .
0
20080214183006. 11.4KB
Edit mail
The file is attached and “ ”, “ ”, “ ”(Green), “ ”
(Orange), “ ”, “ ”, “ ”, or “ ” appears.
When you select the image that is added the
location information
The screen for confirming whether to attach
the location information URL to the main body
appears. If you select [Yes], “ Location
information URL” is entered at the end of the
main body.
5 Compose mail and send it.
Follow the same steps as in “Compose and send
mail” (P.207, step 2 to 5).
● It may take time to send mail depending on the
size of a file attachment.
● When you send mail with a still image attached,
the sent image may be displayed in an
orientation different from that seen in the FOMA
terminal.
● When you send mail to an i-mode terminal which
does not support 2M-byte file transmission, you
can only attach files of the supported types and
size within the capacity of the recipient’s terminal.
If you attach files of unsupported types or size
exceeding the capacity, the file attachments are
deleted and only the mail main body is sent to
the recipient.
When you send a movie as a file attachment
to i-mode terminals of other than the following
models※, a movie that is recorded with [High
quality] or [Long play] set at the Common replay
mode is recommended.
※
903i series, 904i series, 905i series, 703i
series (excluding P703iµ), 704i series
(excluding P704iµ), 705i series, and F801i
● When you attach an image using [File attach]
for easy BlogUp, a location information URL is
not entered in the mail main body in spite of the
location information being added to the image.
● When you send mail to an i-mode terminal for
the Mova service, file attachment is restricted
to one JPEG image, melody of the MFi format,
or i-motion file. The recipient receives it as mail
with a URL linked to the file. If you attach multiple
files or an unsupported file, the attached files are
deleted and only the mail main body is sent to
the recipient.
Deleting a File Attachment
1 Select a file in the Edit mail display and
press (Func).
The Function menu appears.
2 Select [Del attach file] → [Yes] and
press .
The file attachment is deleted.
Saving i-mode Mail to
Send Later <Save mail>
If you do not want to send composed mail
immediately, you can save it in [Draft].
1 Press (Func) in the Edit mail display.
The Function menu appears.
2 Select [Save] and press .
The composed mail is saved as unsent mail in
[Draft].
To edit saved mail
From the Mail menu, select [Draft] → [Draft] →
mail.
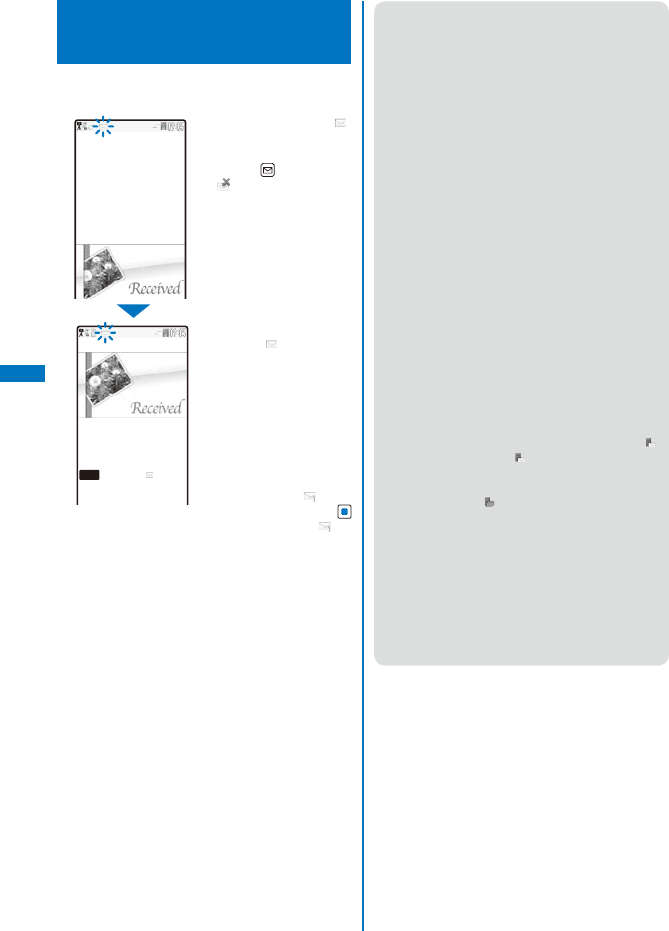
186
Mail
Receiving i-mode Mail
<Auto receive>
When mail is sent to the i-mode center, the
FOMA terminal automatically receives them.
Receiving mail
Unread mail/message
Mail
MessageR
MessageF
1
0
0
While receiving mail, “ ”
flashes.
To cancel receiving mail
Press (Cancel).
“” appears in the next
display informing the
completion of reception.
Receiving may be
completed depending on
the timing of cancellation.
When receiving is
completed, “ ” is displayed,
the indicator flashes, the
ring tone sounds, and the
number of received mail is
displayed.
The display before receiving
reappears after about 15
seconds.
When returning to the
stand-by display, the
notification icon “ ” (New
mail) appears. Press
(Link) and select “ ” to
display the Inbox display.
● You can automatically receive up to 100K
bytes of data in each mail, including the file
attachment. You have to manually obtain a file
attachment exceeding 100K bytes from the
i-mode center (P.219).
● If new mail is received when the number of saved
received mail has reached 1,000 or there is not
enough free space, the unprotected read mail is
overwritten from the oldest.
● When you receive multiple mail at the same time,
the ring tone, call picture, and indicator color of
the last received mail have priority.
● Mail that has been sent to you in the following
situations is held at the i-mode center.
- During a videophone call
- When the FOMA terminal is powered off
- When the FOMA terminal is outside of the
i-mode service area
- During PushTalk communication
- While receiving SMS
- While the Self mode is set
- While the Omakase Lock is set
- During the infrared communication
- During the iC communication
- While updating the software
- While connected to the FirstPass Center
- While connected to the Data Security Service
Center
● Some mail is held at the i-mode center when “ ”
appears (sometimes “ ” does not appear even if
mail is held at the i-mode center).
If the maximum number of mail is held at the
i-mode center, “ ” appears. In this case, check
the contents of unread mail, delete unnecessary
received mail, or cancel protection of received
mail before performing the Check new message.
● When the size of received mail (number of
characters and file attachment size) has
exceeded the number of characters (data size)
specified at Limit Mail Size accessible through
[i Menu] → [English iMenu] → [Options] → [Mail
Settings], the file attachment cannot be received
automatically.
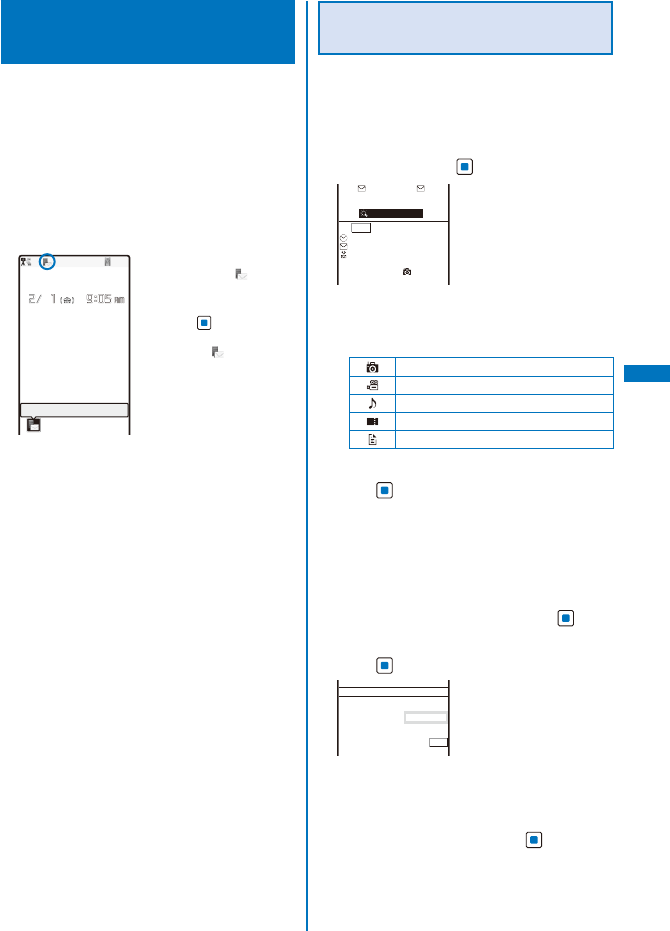
187
Mail
Selecting to Receive
i-mode Mail <Receive option>
You can check through mail held at the i-mode
center, where you can select mail to receive
and delete mail without receiving it based on
the information such as mail subject. To use
this function, set the Recv option setting to
[ON]. When the Recv option setting is set to
[ON], i-mode mail is not received automatically.
When the Recv option setting is set to [ON], the Mail
tone does not sound and when the Manner mode or
Vibrator is set, the vibrator does not operate.
Mail at center
When receiving mail, the
notification icon “ ” (Mail at
center) appears.
To check mail
Press (Link) in the
stand-by display and
select “ ” → [Yes].
The FOMA terminal is
connected to the i-mode
center.
Receiving i-mode Mail after
Selecting
Connect to the i-mode center and select mail
to receive.
When 2in1 is set to the B mode, the Receive option
cannot be performed.
1 From the Mail menu, select [Receive
option] and press .
メール選択受信
(1/2
ページ
)
−−−−−−−−
選択受信説明
[
1
]保留
08/02/12 17:54
Sorry for delay
docomotaro@
△△
.□□□.co.j
p
サイス゛:1.3Kハ゛イト
The call is connected to the i-mode center and the
list of i-mode mail saved at the center appears.
When the mail contains a file attachment, the
following icons appear.
Still image file attachment
i-motion attachment
Melody attachment
ToruCa card attachment
Other file attachment
2 Select [保留] (Holding) for the mail and
press .
[受信] (Receive):
Receive a selected i-mode mail.
[削除] (Delete):
Delete a selected i-mode mail.
[保留] (Holding):
Hold a selected i-mode mail at the i-mode center.
3 Select [受信] (Receive) and press .
4 Select [受信/削除] (Receive/Delete) and
press .
1/2
ページまで選択したメール
を
受信
/
削除
−−−−−−−−
i
モードセンターから全てのメールを
削除
To delete all mail
Select [削除] (Delete) below [iモードセンター
から全てのメールを] (All mail from the i-mode
center).
5 Select [決定] (OK) and press .
The selected mail is received.
188
Mail
Checking New i-mode Mail
<Check new message>
New mail held at the i-mode center while the
FOMA terminal is powered off or outside of the
i-mode service area can be checked.
Depending on the radio wave condition, you may
not be able to check new mail.
1 Press (Mail) for over a second in the
stand-by display.
The FOMA terminal is connected to the i-mode
center, and an inquiry result is displayed.
To check mail
Select [Mail].
Replying to i-mode Mail
<Reply to mail>
You can compose and send replies to the
received mail.
You may not be able to reply to some received mail.
1 From the received mail list, select mail
and press (Quote).
The Edit mail display appears.
The mail address as address, “Re: title of the
received mail” as subject, and “>main body of
the received mail” as main body are entered
beforehand.
When the subject including “Re:” exceeds 100
full-width or 200 half-width characters, the extra
characters are automatically deleted.
When the subject of the received mail includes
more than one “Re:”, some “Re:” are brought
together in one automatically.
To reply to mail without the sender’s message
Move the cursor to mail and press (Reply).
To reply to broadcast mail
Select mail, press (Quote) or (Reply), and
select [Reply to sender]/[Reply all].
2 Compose mail and send it.
Follow the same steps as in “Compose and send
mail” (P.207, step 3 to 5).
The reply mail is sent and “ ” appears.
● No quote is used for a file attachment, a melody
or i-αppli To link that is inserted in the mail main
body, and an image in Deco-mail that cannot be
redistributed.
● You cannot reply to the i-mode mail sent to
Address B of 2in1.
● When you set [Quote reply]/[Reply] at [Inbox(List/
Detail)] of the Edit slide setting, you can reply
to a received mail just by opening the FOMA
terminal in the received mail list or while
displaying the contents of the mail (P.354).
Forwarding i-mode Mail
<Forward mail>
You can forward received mail to another
person. A file attachment is also forwarded.
1 From the received mail list, select mail
and press (Func).
The Function menu appears.
2 Select [Forward] and press .
The Edit mail display appears.
“Fw: title of the received mail” as subject and
“main body of the received mail” as main body are
entered beforehand.
When the subject including “Fw:” exceeds 100
full-width or 200 half-width characters, the extra
characters are automatically deleted.
When the subject of the received mail includes
more than one “Fw:”, some “Fw:” are brought
together in one automatically.
3 Compose mail and send it.
Follow the same steps as in “Compose and send
mail” (P.207, step 2 to 5).
The mail is forwarded and “ ” appears.
● A melody or i-αppli To link inserted in the mail
main body, an image in Deco-mail that cannot be
redistributed, and a file not yet downloaded are
not forwarded.
189
Mail
Saving the Mail Address/Phone
Number in the Phonebook
Saving the Sender’s/Recipient’s
Mail Address in the Phonebook
You can save the mail address of a received
mail sender and recipient or sent/saved mail
recipient in the Phonebook.
Example: Saving the mail address of a received mail
sender to the FOMA terminal phonebook as
a new entry
1 From the received mail list, select mail,
press , and press (Func).
The Function menu appears.
2 Select [Save address] and press .
The screen for selecting how to save to the
Phonebook appears.
3 Select [New] and press .
The screen for selecting where to save appears.
When you select [Add]
Select an entry to which you want to add the mail
address from the Phonebook.
When there are multiple mail addresses
Select mail addresses → [New]/[Add].
4 Select [Main memory] and press .
The Edit phonebook display appears.
To save to the UIM phonebook
Select [UIM].
5 Save other items.
Follow the same steps as in “Add to FOMA
terminal phonebook” (P.95, step 3 to 5) or in “Add
to UIM phonebook” (P.98, step 3).
6 Press (Complete).
The entry is saved in the FOMA terminal
phonebook.
Saving the Phone Number/Mail
Address in Display in the Phonebook
The mail addresses or phone numbers
currently displayed in the site, received mail/
sent mail, or ToruCa card can be saved in the
Phonebook.
Depending on the site, the displayed phone number
or mail address may not be saved.
Example: Saving the phone number contained in the
main body of the received mail to the FOMA
terminal phonebook as a new entry
1 From the received mail list, select mail
and press , and then select the phone
number and press (Func).
The Function menu appears.
2 Select [Add to phonebook] and press .
The screen for selecting how to save to the
Phonebook appears.
3 Select [New] and press .
The screen for selecting where to save appears.
When you select [Add]
Select an entry to which you want to add the
phone number from the Phonebook.
4 Select [Main memory] and press .
The Edit phonebook display appears.
To save to the UIM phonebook
Select [UIM].
5 Save other items.
Follow the same steps as in “Add to FOMA
terminal phonebook” (P.95, step 3 to 5) or in “Add
to UIM phonebook” (P.98, step 3).
6 Press (Complete).
The entry is saved in the FOMA terminal
phonebook.
190
Mail
Playing Back/Saving a File
Attachment Received in i-mode Mail
You can display/play back/save/delete a file
that is attached or pasted in i-mode mail or a
message including an image, movie/i-motion,
melody, ToruCa card, PDF data, Phonebook,
Schedule, Bookmark, and My data.
■ File attachments that can be played back
and saved
Format Restrictions
Image (JPEG/
GIF/SWF)
You can save a Deco-mail
pictograph and stamp/frame in
the Data Box only.
You cannot play back a Flash
movie of 100K bytes or more. You
can save a Flash movie of 100K
bytes or more in the microSD
memory card only.
Movie/i-motion
(MP4) −
Melody (SMF/
MFi)
You cannot play back a melody of
100K bytes or more. You can save
a melody of 100K bytes or more in
the microSD memory card only.
You may not be able to play back
correctly a melody sent from a
mobile phone other than SO906i.
ToruCa card You cannot play back a ToruCa
card of 1K bytes or more and a
ToruCa(detail) card of 100K bytes
or more.
PDF data (PDF) −
Tool data You can save the Phonebook,
Schedule, and Bookmark data.
When you save a file using [Save
attached], you cannot select the
Main memory.
Other files You can save other files in the
microSD memory card only.
The number of files that you can save varies
depending on the free memory space on the place
to save to and data size.
Example: Saving a file attachment received in mail
1 From the received mail list, select mail
and press .
2 Select a file attachment and press
(Func).
The Function menu appears.
To display/play back a file attachment
Move the cursor to the file attachment and
press .
3 Select [Save attached] and press .
The Save to display appears.
[Data Box]:
Save a file attachment in the Data Box. Select a
folder to save to.
[microSD]:
Save a file attachment in the microSD memory
card.
To play back a melody pasted in a message
Select [Play melody].
To save a melody pasted in a message
Select [Save melody] → a place to save to.
To check a melody title
Select [Confirm title].
To display details about an inserted image
Select [Insert img info] → an image. The detailed
information appears.
To save an inserted image
Select [Save insert img] → an image → a place
to save to.
4 Select a place to save to and press .
The file is saved.
To display Tool data
Move the cursor to the file attachment, press ,
and select [Confirm].
To save Tool data in the FOMA terminal
Move the cursor to the file attachment, press ,
select [Register], enter the Security code, and
select [Add]/[Overwrite].
When there is not enough memory
The screen for confirming whether to overwrite
the data appears. To overwrite, select
unnecessary data (P.326).
● Some of the received image and movie/i-motion
may not be played back correctly.
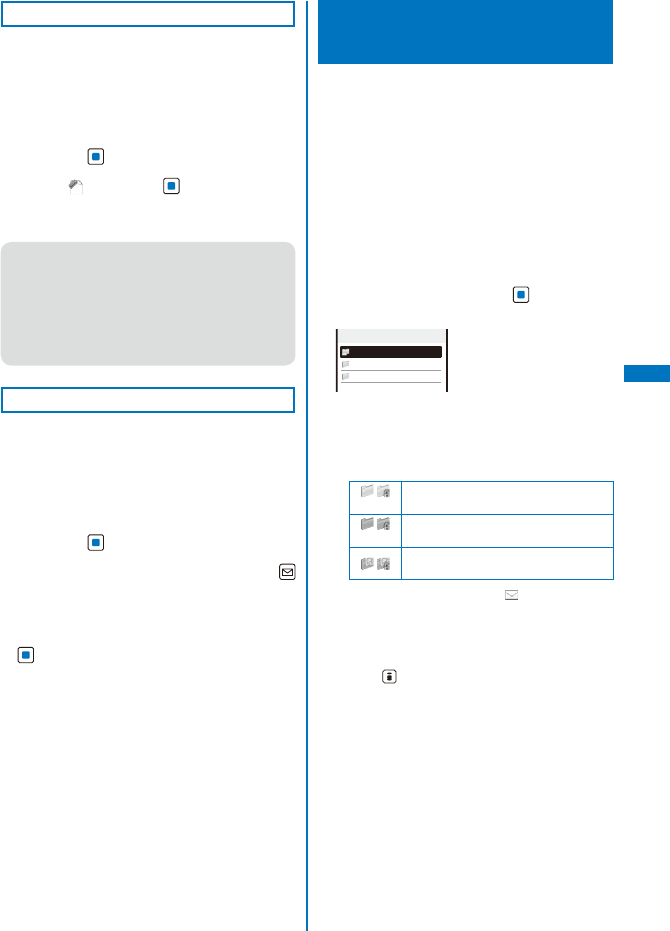
191
Mail
Receiving a File Attachment Selectively
You can obtain a file attachment exceeding
100K bytes and one for which the Attached file
pref. is set to [Invalid].
You cannot obtain a file attachment whose retention
period is expired.
1 From the received mail list, select mail
and press .
2 Select “ ” and press .
The obtaining operation starts and the file
attachment is obtained.
● If you obtain a file attachment not yet existing
when there exist already 1,000 received mails
or there is no more free memory space in the
FOMA terminal, the obtained data overwrites
the unprotected read mail from the oldest one.
Depending on the size of the file attachment to
be obtained, multiple mails may be overwritten
by it.
Deleting a File Attachment
You can delete a file that is attached to i-mode
mail.
You cannot delete an i-αppli To link that is displayed
in the mail main body.
Example: Deleting a file attached to the received mail
1 From the received mail list, select mail
and press .
2 Select a file attachment and press
(Func).
The Function menu appears.
3 Select [Del attach file] → [Yes] and press
.
The file attachment is deleted.
Displaying Received/Sent/
Saved Mail
You can display received/sent/saved mail any
time you want to. Received and sent mail can
be saved in [Inbox] and [Outbox], respectively.
Mail that was saved without being sent or sent
unsuccessfully, is saved in [Draft].
You can save up to 1,000 received mails, up to 500
sent mails, up to 50 saved mails, and up to 30 Area
Mail. The number of files that can be saved may
decrease depending on the data to be saved.
For SMS saved in the UIM, some function menu
items are not available.
1 From the Mail menu, select [Inbox]/
[Outbox]/[Draft] and press .
Received mail
Inbox
25/66
Inbox
MessageR
MessageF
The number of saved mail in the folder at the
cursor/the total number of mail is displayed at
the right end of the title line.
The following icons show the status of the folder.
Next to the icon, the folder name is displayed.
/
(Yellow)
Preset folder/Mail security is set
/
(Blue)
User-created folder/Mail security is set
/Folder created by i-αppli with mail/
Mail security is set
If there is unread mail, “ ” appears at the
lower left of the icon.
When 2in1 is set to Address B, sent and saved
mail cannot be displayed.
To display the SMS list in the UIM
Press (UIM).
When 2in1 is set to the B mode, the SMS list
cannot be displayed.
Continued
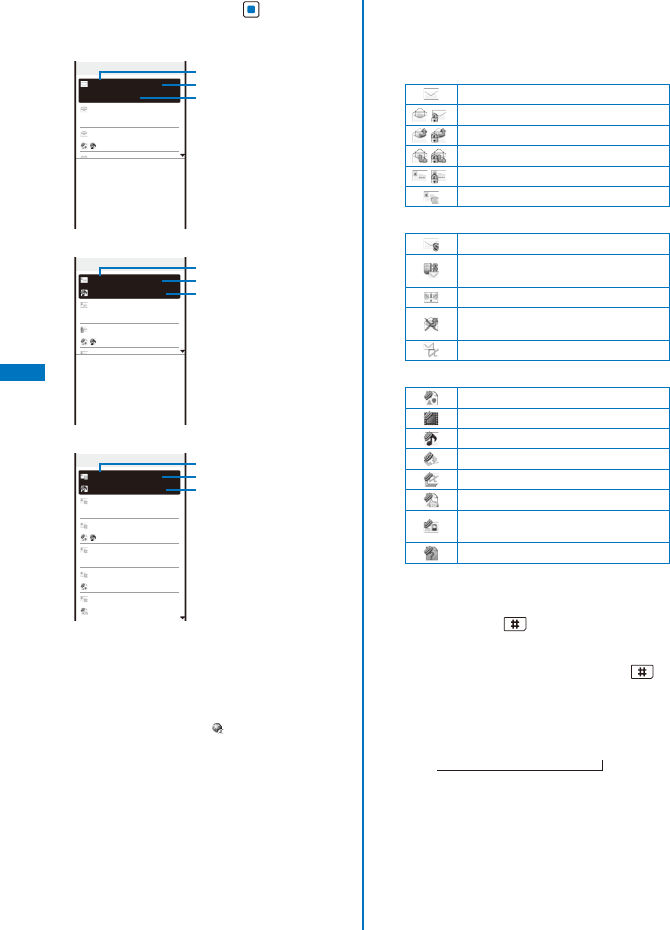
192
Mail
2 Select a folder and press .
The received/sent/saved mail list appears.
Received mail
Inbox
1/25
15:51
ドコモ一郎
Photo contest
12:34
ドコモ二郎
Concert ticket next mo
02/13
携帯なつ子
Yesterday’s subjec
02/12
携帯なつ子
Happy Birthday
02/11 docomo.taro
Place set for meetin
02/10
携帯はる子
Sorry, 20 minutes l wi
The application deadline
of the next photo conte
st is the day after tomo
rrow. To apply, either r
eply to this mail or cal
l us. We hope to hear fr
om you.
Received date/time
Sender
Subject
Sent mail
Outbox
1/25
20:12
携帯はる子
Departure date an
10:24 docomo.taro
It’s a long time since
02/13
ドコモ一郎
Present
02/12
携帯はる子
New melody
02/11
ドコモ二郎
Snapshots during the
02/11
携帯なつ子
Schedule for tomorrow
Long desired XXX! The lo
ng awaited departure is
close at hand.
Let’s meet together at X
XX on 16th at 5:45 pm.
− END −
Sent date/time
Recipient
Subject
Saved mail
Draft
1/25
15:51
ドコモ二郎
I’ve got the tick
02/13 docomo.taro
Give me a call
02/13
携帯はる子
How about skiing
02/12
ドコモ二郎
Sorry!
02/12
ドコモ一郎
Souvenir for you
02/11
携帯はる子
Map to the event
Saved date/time
Recipient
Subject
You can change the display style of the mail list
(P.225).
The received/sent/saved date/time field indicates
the time when the mail is received/sent/saved
today, and otherwise the date. When the
date/time is corrected to the local time during
international roaming, “ ” appears (P.44).
For SMS, the beginning of the mail main body is
displayed instead of the subject.
For Area Mail, “エリアメール” and the beginning
of the mail main body are displayed instead of
the sender and the subject, respectively.
All the part of a title may not be displayed.
When 2in1 is used, mails for each Address A and
Address B are colored differently.
The following icons show the status and type of
the mail and the type of the file attachment.
Mail status
Unread mail
( ) Read mail (Protect ON)
( ) Replied mail (Protect ON)
( ) Forwarded mail (Protect ON)
( ) Sent mail (Protect ON)
Unsent mail/mail sent unsuccessfully
Mail type
SMS
SMS in the UIM (Received/sent mail
only)
Area Mail (Received mail only)
Unable to reply mail (Received mail
only)
Mail used by i-αppli with mail
File attachment type
With image attachment
With movie attachment
With melody attachment
With ToruCa card attachment
With i-αppli To
With PDF data attachment
With Tool data attachment (Phonebook,
Schedule, Bookmark)
With other file attachment
To display mail addresses or phone numbers
When saved in the Phonebook, the name is
displayed instead of the mail address/phone
number. Press to switch the display
temporarily between the names and mail
addresses/phone numbers.
While displaying the mail list, press to
change the display.
For 2lines
Name of sender ←→ Mail address/phone number
For 1line
Subject → Name of sender → Mail address/phone number
↑
When the Secret display is set to [ON], the
name is displayed even if a caller or recipient
is saved as Secret in the Phonebook.
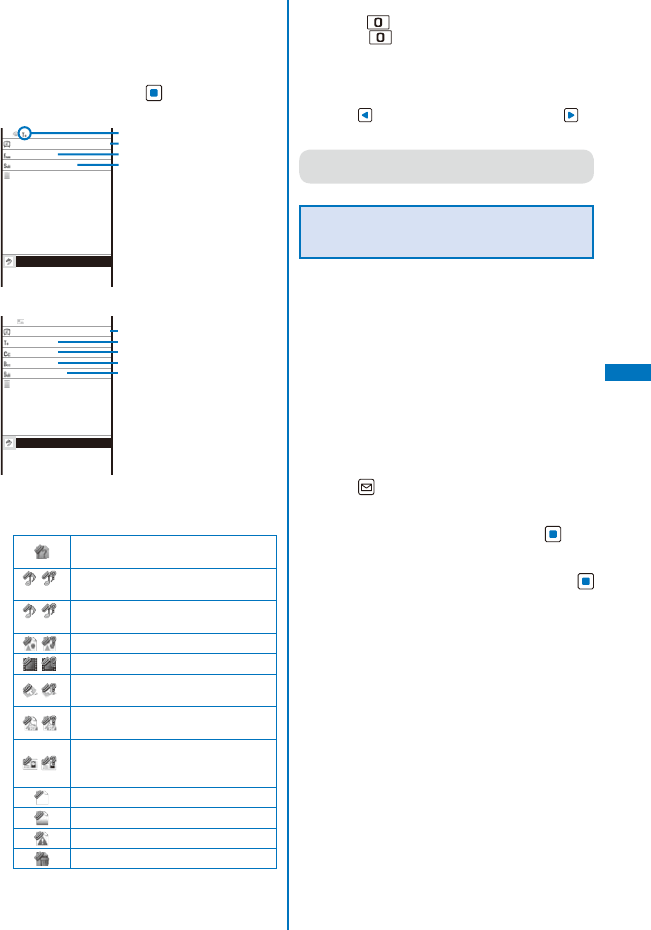
193
Mail
To place a call
When a mail address and phone number is
saved in the Phonebook, you can place a call
to this number. Move the cursor to the mail and
from the Function menu, select [Call back].
3 Select mail and press .
Received mail
In
4
2008/02/12
11:54
携帯なつ子
Happy Birthday
080212.mid
0.9KB
Happy birthday! It’s alr
eady one year since you
left. You surely familia
rize yourself with the l
ocal culture. I hope you
enjoy your coming year.
Attached is our memorial
song.
− END −
Address type
Received date/time
Sender
Subject
Sent mail
Out
1
2008/02/14
20:12
携帯はる子
携帯なつ子
ドコモ一郎
Departure date and ti
Long desired XXX! The lo
ng awaited departure is
close at hand.
Let’s meet together at X
XX on 16th at 5:45 pm.
− END −
080214.mid
0.9KB
Sent date/time
Recipient
Recipient (Cc)
Recipient (Bcc)
Subject
The following icons show the details of mail.
Other icons are the same as in step 2.
File attachment type
Invalid pasted data (when several
data is pasted)
( )
(Green)
With SMF-format melody attachment
(Invalid data)
( )
(Orange)
With MFi-format melody attachment
(Invalid data)
( ) With image attachment (Invalid data)
( ) With movie attachment (Invalid data)
( ) With ToruCa card attachment (Invalid
data)
( ) With PDF data attachment (Invalid
data)
( )
With Tool data attachment
(Phonebook, Schedule, Bookmark)
(Invalid data)
Not loaded file attachment
File attachment loading in progress
File attachment loading error
File attachment already deleted
To change the font size
Press for over a second. Every time you
press for over a second, the font size
changes to one level bigger than it. When the
font size is [Extra extra large], the font size
changes to [Small].
To display the previous or next mail
Use to display the previous mail or to
display the next mail.
● You can set the received/sent/saved mail not to
be displayed by folder (Mail security) (P.142).
Storing the Mail at the Data
Security Service Center
You can use the Data Security Service to store
up to 10 i-mode mails, SMS messages, or Area
Mail at one time at the Data Security Service
Center.
Data Security Service is a paid service that requires
a subscription. For details on this service, see
the “Mobile Phone User’s Guide
【i-mode】
FOMA
version”.
You can also store an image inserted in Deco-mail.
You cannot store a file attachment and also a mail
file exceeding 100K bytes.
Example: Storing received mail
1 Press (Func) in the received mail list.
The Function menu appears.
2 Select [Store in Center] and press .
The Security code screen appears.
3 Enter the Security code and press
(OK).
The Select mail display appears.
Continued
194
Mail
4 Select mail and press .
To store several mails, repeat step 4.
5 Press (Complete).
The screen for confirming whether to store the mail
appears.
6 Select [Yes] and press .
The call is connected to the Data Security Service
Center and mail is stored. When the storing is
completed, the storing result display appears.
● You cannot store SMS report.
Adding/Deleting Folders
In addition to [Inbox]/[Outbox], you can create
up to 20 folders each to manage received and
sent mail. Besides these folders, additional
five folders are reserved for i-αppli with mail
each in [Inbox]/[Outbox]/[Draft]. You can also
change a folder name or sort the folders.
You cannot delete the preset folders, folders
including protected mail, mail folders supported
by i-αppli with mail software, and [MessageR]/
[MessageF]. Folders of i-αppli with mail can be
deleted if there is no supporting software for that
i-αppli with mail. In this case, the other folders of
that i-αppli with mail in the received, sent, or saved
mail list are also deleted.
You cannot change the names of the preset folders,
folders of i-αppli with mail, and [MessageR]/
[MessageF].
Example: Adding a folder for received mail
1 From the Mail menu, select [Inbox], press
, and press (Func).
The Function menu appears.
2 Select [Edit folder] → [Create folder],
press , and enter a folder name.
Enter a name within 10 full-width or 20 half-width
characters.
The folder is added.
To change a folder name
Move the cursor to a folder and from the Function
menu, select [Edit folder] → [Edit folder name].
Enter a name within 10 full-width or 20 half-width
characters.
To reorder folders
From the Function menu, select [Edit folder] →
[Reorder folders] → a folder. Move the cursor
to a position to move to, press (Move), and
press (Complete).
To delete a folder
Move the cursor to a folder and from the Function
menu, select [Edit folder] → [Delete folder]. Enter
the Security code and select [Yes].
● After downloading i-αppli with mail, the folders
of i-αppli with mail are automatically created in
[Inbox], [Outbox], and [Draft].
● When you delete a folder, all mail for both
Address A and Address B and SMS for both
Number A and Number B within the folder are
deleted, regardless of the 2in1 mode.
Moving Mail to a Different Folder
You can move received/sent mail to another
folder using three methods.
You cannot move messages in the [MessageR]/
[MessageF] folder to another folder or mail from
another folder to the [MessageR]/[MessageF] folder.
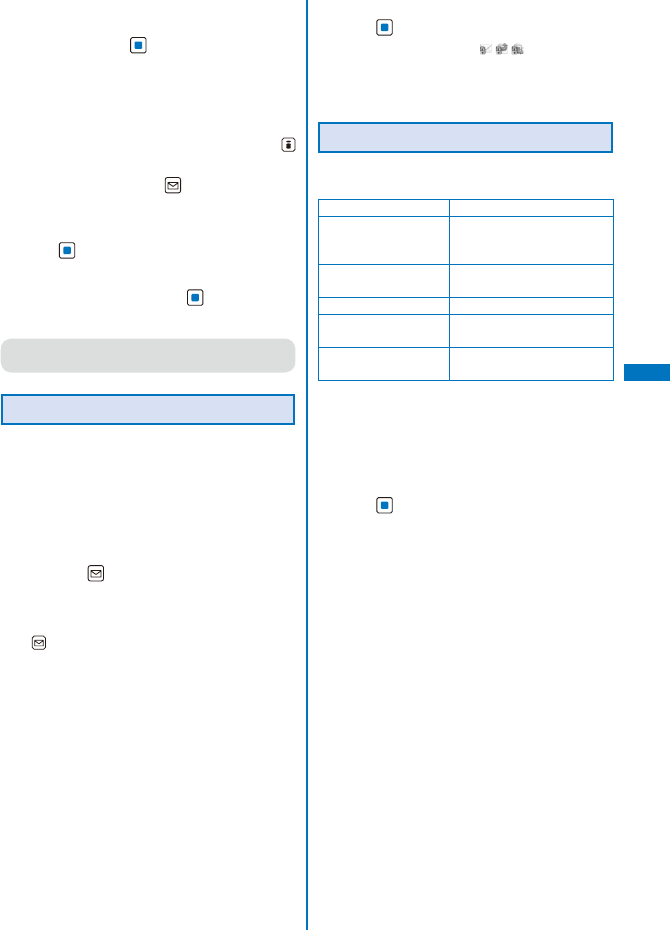
195
Mail
Example: Moving received mail
1 From the Mail menu, select [Inbox] → a
folder and press .
To move all mail in a folder
From the Function menu, select [Move] → [Move
all] → [Yes] → a folder.
To move several mails
From the Function menu, select [Move] →
[Select&move], select mails, and press
(Complete). Select [Yes] → a folder.
2 Select mail and press (Func).
The Function menu appears.
3 Select [Move] → [Move one] → [Yes] and
press .
The Select move to display appears.
4 Select a folder and press .
The selected mail is moved to the different folder.
● When you perform the Move all, only the
displayed mail of each 2in1 mode are moved.
Protecting Mail
Received or sent mail can be protected from
being overwritten. Up to 500 received mails
and 250 sent mails can be protected.
You cannot set protection for unread mail, unsent
mail/mail, and Area Mail sent unsuccessfully.
Example: Protecting received mail
1 From the received mail list, select mail
and press (Func).
The Function menu appears.
To cancel the protection
Move the cursor to the protected mail and press
(Func).
2 Select [Protect ON/OFF] → [Yes] and
press .
The mail is protected and “ / / ” appears.
To cancel the protection of all mail
From the Function menu, select [Unprotect all] →
[Yes].
Deleting Mail
You can delete the received or sent mail using
the following six methods.
Delete one※1 Delete a mail in the folder.
Select&delete※1 Delete several mails in a
folder. Up to 30 mails can be
selected at a time.
Delete read msg (for
received mail only)※1
Delete all read mail.
Delete all※1 Delete all mail in the folder.
Delete read msg (for
received mail only)※1
Delete all read mail in the
folder.
Delete all※2 Delete all received or sent
mail.
※1 Deleting only displayed mail at each 2in1 mode.
※2 Deleting all mail for both Address A and Address
B and SMS for both Number A and Number B
within the folder, regardless of the 2in1 mode.
Example: Deleting received mail
1 From the Mail menu, select [Inbox] and
press .
To delete all received mail
From the Function menu, select [Delete] →
[Delete all], enter the Security code, and select
[Yes].
To delete all read mail
From the Function menu, select [Delete] →
[Delete read msg], enter the Security code, and
select [Yes].
Continued
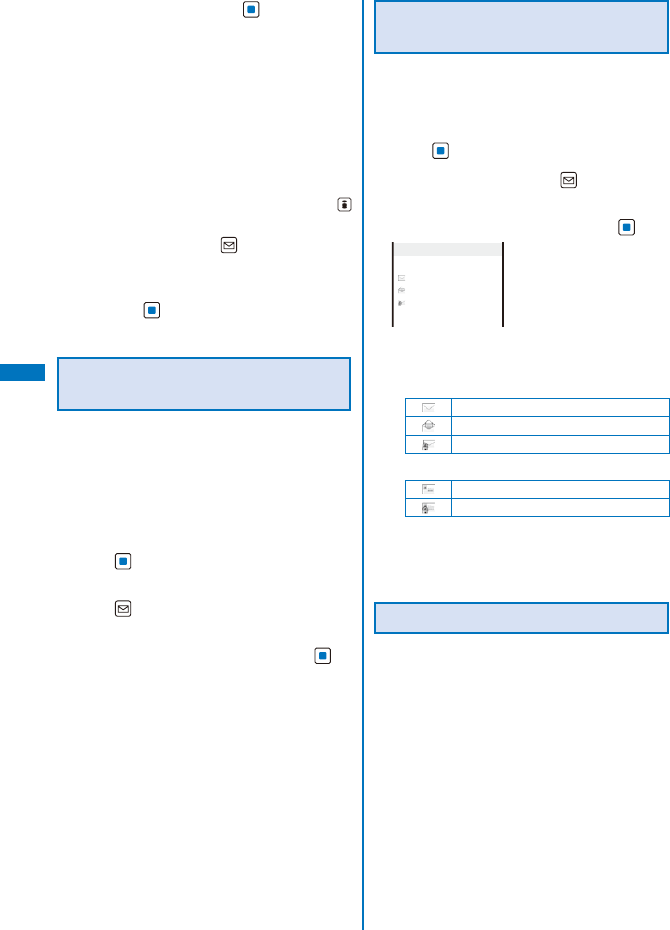
196
Mail
2 Select a folder and press .
The received mail list appears.
To delete all read mail in the folder
From the Function menu, select [Delete] →
[Delete read msg], enter the Security code, and
select [Yes].
To delete all mail in the folder
From the Function menu, select [Delete] →
[Delete all], enter the Security code, and select
[Yes].
To delete several mails
From the Function menu, select [Delete]
→ [Select&delete], select mails, press
(Complete), and select [Yes].
3 Select mail and press (Func).
The Function menu appears.
4 Select [Delete] → [Delete one] → [Yes]
and press .
The selected mail is deleted.
Displaying i-αppli Mail as
Regular Mail
i-αppli mail can be displayed as regular mail.
If after the i-αppli with mail software is deleted,
mail saved in the folder of the i-αppli with mail
can be displayed in the same way as regular
mail.
Example: Displaying received i-αppli mail
1 From the Mail menu, select [Inbox] and
press .
2 Select the folder of i-αppli with mail and
press (Func).
The Function menu appears.
3 Select [i-mode mail form] and press .
The i-αppli mail can be displayed as regular mail.
Checking the Number of Mail
Saved
The number of mail saved can be checked for
each folder.
Example: Checking the number of received mail saved
1 From the Mail menu, select [Inbox] and
press .
2 Select a folder and press (Func).
The Function menu appears.
3 Select [Memory status] and press .
Memory status
All
1
55
10
Ttl
66
Folder
1
22
2
25
The number of received mail saved in the selected
folder and the total number of received mail saved
are displayed.
Received mail
Number of unread mail
Number of read mail
Number of protected read mail
Sent mail
Number of sent mail
Number of protected sent mail
Saved mail
The number of saved mail in the selected
folders and the total number of saved mail are
displayed.
Sorting Mail
Received or sent mail in a folder can be sorted
for display temporarily.
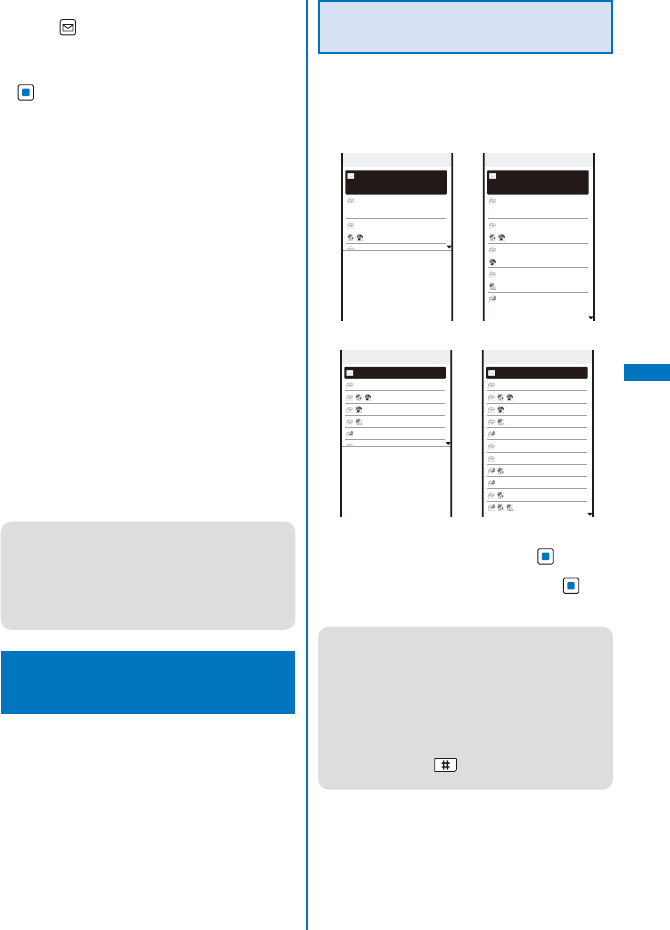
197
Mail
Example: Sorting received mail
1 Press (Func) in the received mail list.
The Function menu appears.
2 Select [Sort] → a sorting order and press
.
Received mail
[Date]:
Sort mail from newest to oldest received date.
[From address]:
Sort mail by the sender’s mail address in
alphabetical order.
[Subject]:
Sort mail by the subject in Japanese
alphabetical order.
[Size]:
Sort mail by the mail file size from the largest
(including an obtained file attachment).
Sent mail
[Date]:
Sort mail from newest to oldest sent date.
[To address]:
Sort mail by the recipient’s mail address in
alphabetical order.
[Subject]:
Sort mail by the subject in Japanese
alphabetical order.
[Size]:
Sort mail by the mail file size from the largest
(including a converted file attachment).
The mail is listed in the selected order.
● When you select [Subject], sorting may not be
performed exactly in Japanese alphabetical
order if, for example, some subjects contain a
mixture of full-width and half-width characters.
For SMS, sorting may not be performed exactly
in Japanese alphabetical order because it is
treated as mail without the subject.
Setting the Mail Function of
the FOMA Terminal
<Mail setting>
When 2in1 is set to the B mode, the following
functions are not available.
- Sort outbox - Edit signature
- Signature - Recv option setting
- Mail list - Attached file pref.
- Clear Send/Recv ranking
Setting How to Display a List of
Mails
You can select the display style of Inbox,
Outbox, and Draft lists using the following four
methods. The set display style is applies to all
folders.
2lines+body 2lines
Inbox
1/25
15:51
ドコモ一郎
Photo contest
12:34
ドコモ二郎
Concert ticket next mo
02/13
携帯なつ子
Yesterday’s subjec
02/12
携帯なつ子
Happy Birthday
02/11 docomo.taro
Place set for meetin
02/10
携帯はる子
Sorry, 20 minutes l wi
The application deadline
of the next photo conte
st is the day after tomo
rrow. To apply, either r
eply to this mail or cal
l us. We hope to hear fr
om you.
Inbox
1/25
15:51
ドコモ一郎
Photo contest
12:34
ドコモ二郎
Concert ticket next mo
02/13
携帯なつ子
Yesterday’s subjec
02/12
携帯なつ子
Happy Birthday
02/11 docomo.taro
Place set for meetin
02/10
携帯はる子
Sorry, 20 minutes l wi
1line+body 1line
Inbox
1/25
Photo contest
Concert ticket next
Yesterday’s subj
Happy Birthday
Place set for meet
Sorry, 20 minutes I
Plan for next week
Long time no see you
Place changed
Check attendees
Contest result
Info on class re
The application deadline
of the next photo conte
st is the day after tomo
rrow. To apply, either r
eply to this mail or cal
l us. We hope to hear fr
om you.
Inbox
1/25
Photo contest
Concert ticket next
Yesterday’s subj
Happy Birthday
Place set for meet
Sorry, 20 minutes I
Plan for next week
Long time no see you
Place changed
Check attendees
Contest result
Info on class re
1 From the Mail menu, select [Mail setting]
→ [Mail list setting] and press .
2 Select the display style and press .
The display style of a mail list is set.
● When [2lines+body] or [1line+body] is set, the
beginning of the mail at the cursor is displayed.
Even if the mail is previewed, the status is still to
be read.
● For the Draft list, the preview display does not
appear.
● The preview display may not appear depending
on the character string (URL, etc.) in mail.
● When you press in the Mail list display, the
display can be changed (P.220).
Continued
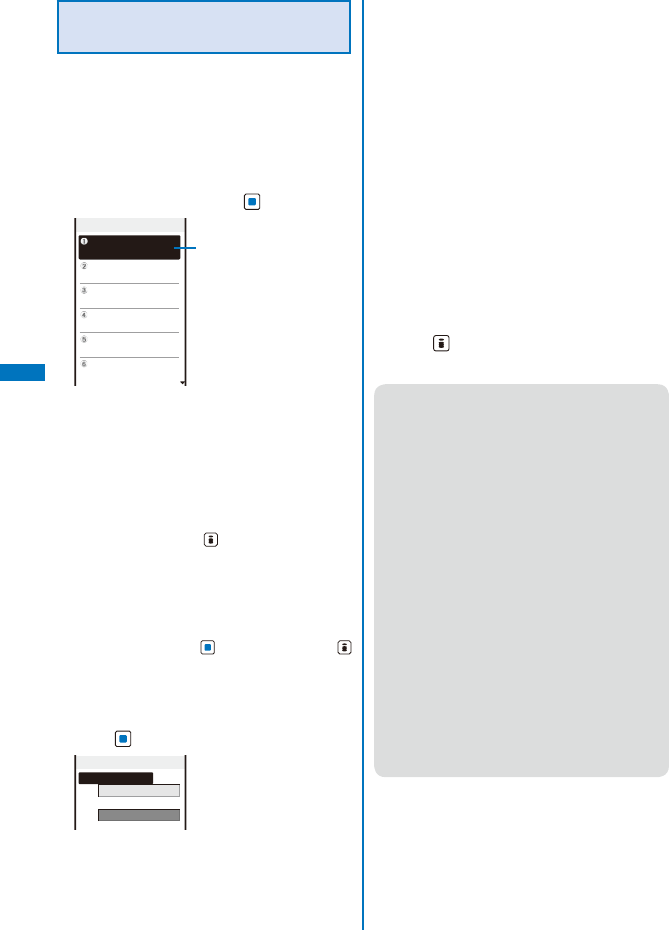
198
Mail
Assigning Separate Folders for
Mail
You can save requirements to sort received
or sent mail so that they can be automatically
assigned to folders. Up to 30 sorting
requirements can be saved.
Example: Setting a sorting requirement for received
mail
1 From the Mail menu, select [Mail setting]
→ [Sort inbox] and press .
Sort inbox
Sorting requirement field
To set a sorting requirement for sent mail
From the Mail menu, select [Mail setting] → [Sort
outbox].
To delete a sorting requirement
Move the cursor to the sorting requirement field
and from the Function menu, select [Delete] →
[Delete one] → [Yes]. To delete several sorting
requirements, from the Function menu, select
[Delete] → [Select&delete], select sorting
requirements, press (Complete), and select
[Yes]. To delete all sorting requirements, from the
Function menu, select [Delete] → [Delete all],
enter the Security code, and select [Yes].
To reorder the sorting requirements
From the Function menu, select [Reorder] → a
sorting requirement, move the cursor to a folder
to move to, press (Move), and press
(Complete).
To cancel editing
From the Function menu, select [Cancel].
2 Select the sorting requirement field and
press .
Sort rule1
Sorting criteria
Folder to sort into
3 Select the sorting method at [Sorting
criteria].
[Address]:
Specify a mail address. The mail address portion
after the @ mark is required. However, when
you set the mail address to “phone number@
docomo.ne.jp”, enter the phone number only.
[Group]:
Specify a group.
[Subject]:
Enter a subject or a part of it within 100 full-width
or 200 half-width characters.
[None]:
Sort mail that does not meet any specified
sorting requirement.
4 Select a folder to be used for sorted mail
at [Folder to sort into].
When no folder is specified
Mail is sorted to [Inbox]/[Outbox].
5 Press (Complete).
The sorting requirement is saved.
● If mail satisfies several sorting requirements,
the sorting requirement with a lower number in
the list has higher priority. If you set [None] for
sorting requirement, the sorting requirements
lower than the number you set become invalid,
and mail is sorted to the folder for which [None]
is set.
● If you delete a folder for which the sorting
requirement was set, [Inbox]/[Outbox] is used as
a sort destination folder.
● If data saved as Secret is contained in a group
that has been set as a sorting requirement, and
if you receive mail from a sender or send mail
to a recipient who is relevant to the data, it is
saved in [Inbox]/[Outbox]. To enable the sorting
requirement, set the Secret display to [ON].
● An i-αppli with mail is automatically sorted to the
corresponding i-αppli with mail folder regardless
of the sorting requirement.
● Mail received before the sorting requirement is
set is not sorted automatically.
● When 2in1 is set to ON, the sorting requirement
of the Group may become invalid.
You need to set the sorting requirement from the
Address, Subject, or None.