Sony A3724011 GSM900/1800/1900 UMTS mobile phone with RFID User Manual
Sony Mobile Communications Inc GSM900/1800/1900 UMTS mobile phone with RFID
Sony >
Contents
- 1. 08 user guide part 1
- 2. 08 user guide part 2
08 user guide part 2
199
Mail
Adding a Signature to Mail
When saved beforehand, your signature can
be attached at the end of the main body of
mail.
Saving a Signature
The signature attached to mail can be created
and saved.
1 From the Mail menu, select [Mail setting]
→ [Edit signature] and press .
The Edit signature display appears.
ˎ If you have saved a signature before, it is
displayed.
2 Press (Edit) and enter a signature.
Enter a signature within 5,000 full-width or 10,000
half-width characters.
You can enter a Deco mail pict. to compose Deco-
mail.
3 Press (Complete).
The signature is saved.
● You can also decorate a signature (P.208).
Adding a Signature Automatically
The saved signature can be automatically
attached to the main body when you compose
mail.
1 From the Mail menu, select [Mail setting]
→ [Signature] and press .
2 Select [Auto]/[No] and press .
The Signature is set.
● Even if the Signature is set to [No], you can
attach the signature manually. From the Function
menu in the Input text display, select [Add
signature].
● Even if the Signature is set to [Auto], you cannot
attach a signature to a reply mail using the Quote
function or a forwarded mail.
Setting the Type of Mail/Message
to be Checked
You can set whether to receive mail, Message
R, and Message F when making inquiries to
the i-mode center.
Example: Setting the i-mode inquiry set for mail
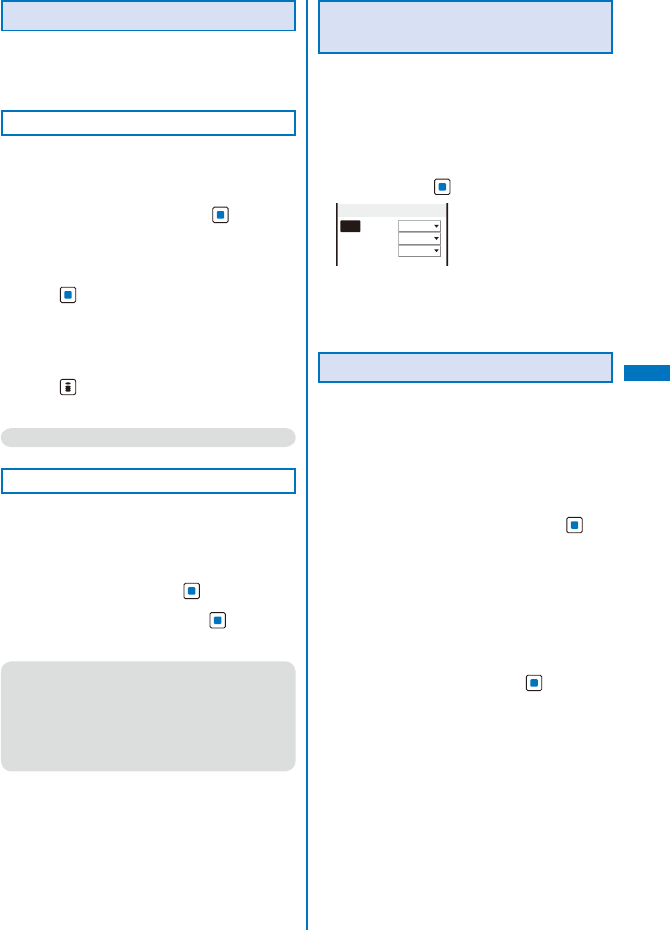
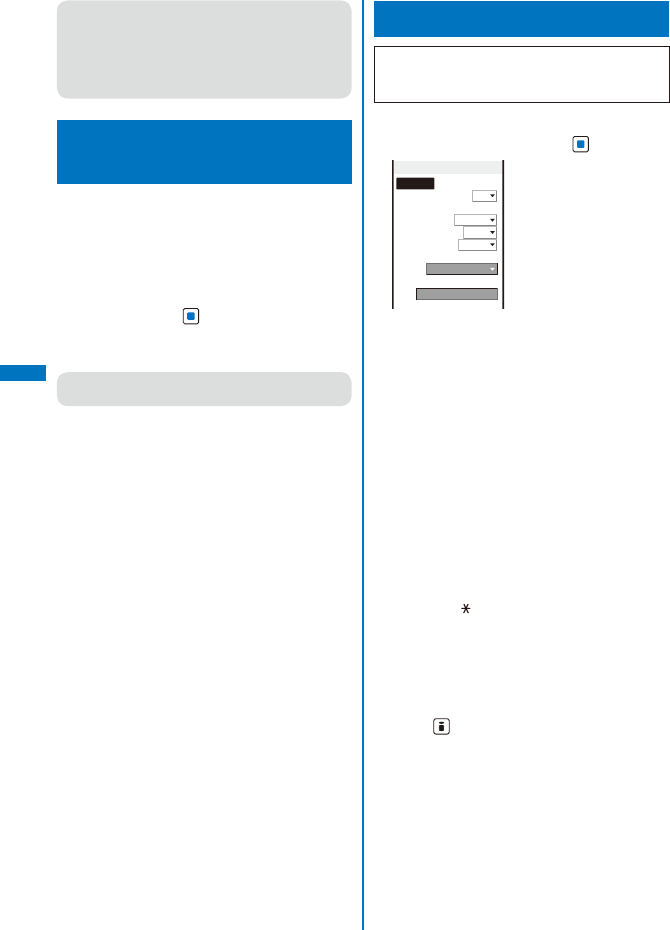
1 From the Mail menu, select [Mail setting]
→ [Common setting] → [i-mode inquiry
set] and press .
i−mode inquiry set
Mail
Valid
MessageR
Valid
MessageF
Valid
2 Select [Mail] → [Valid]/[Invalid] of the
i-mode inquiry set.
The i-mode inquiry set is set.
Setting to Select and Receive Mail
You can set whether to selectively receive
i-mode mail.
ˎ Even if the Recv option setting is [ON], all mail is
received if you use the Check new message. If you
do not want to receive mail, set [Mail] to [Invalid] in
the i-mode inquiry set (P.227).
1 From the Mail menu, select [Mail setting]
→ [Recv option setting] and press .
The Recv option setting display appears.
[ON]:
Sent mail is held at the i-mode center and not
received by the FOMA terminal. To receive, use
the Receive option (P.215).
[OFF]:
Sent mail is received automatically by the FOMA
terminal.
2 Select [ON]/[OFF] and press .
The Recv option setting is set.
Continued
200
Mail
Setting a Mail List
By saving mail addresses in a mail list, you can
send mail to all members in the list at the same
time.
Up to 10 mail lists can be saved. Up to five
mail addresses can be saved in each mail list.
1 From the Mail menu, select [Mail setting]
→ [Mail list] → a mail list and press .
List setting
List
リスト
5
Member list
0/5
2 Enter a list name at [List].
Enter a list name within eight full-width or 16 half-
width characters.
3 Select [Member list] and press .
Friend
Member field
To delete a member
Move the cursor to the member field and from
the Function menu, select [Delete] → [Delete
one] → [Yes]. To delete all members, from the
Function menu, select [Delete] → [Delete all],
enter the Security code, and select [Yes].
4 Enter the mail address or the phone
number in the member field.
Enter a mail address or phone number within 50
half-width alphanumeric characters and symbols.
5 Press (Complete).
The member list is set.
6 Press (Complete).
The mail list is set.
To delete a mail list
Move the cursor to a mail list in the Mail list
display and from the Function menu, select
[Delete one] → [Yes]. To delete several mail lists,
from the Function menu, select [Select&delete],
select mail lists, press (Complete), and select
[Yes]. To delete all mail lists, from the Function
menu, select [Delete all], enter the Security code,
and select [Yes].
● Even if you change the contents of the
Phonebook after saving a member to the mail
list, the saved contents on the mail list do not
change.
Playing a Melody Automatically
from Mail
The melody can be set to be played back
automatically when displaying mail or
message.
1 From the Mail menu, select [Mail setting]
→ [Common setting] → [Melody auto
play] and press .
2 Select [ON]/[OFF] and press .
The Melody auto play is set.
● When mail has several melody attachments, the
melodies are played back in the order they were
attached to the mail. Melodies in the MFi format
has lower priority than those in the SMF format.
● When the Manner mode is set or when the
message is displayed automatically, the Melody
auto play is disabled.
201
Mail
Setting the Receiving Operation
during Multitasking
You can set whether the incoming mail or
received mail display should appear when you
receive mail, SMS, or Message R/F while you
are using the FOMA terminal for other tasks.
1 From the Mail menu, select [Mail setting]
→ [Common setting] → [Dur multi task
disp] and press .
[Prefer alarm]:
Display the incoming mail or received mail
display.
[Prefer operat.]:
Do not display the incoming mail or received mail
display. “ ”, “ ”, or “ ” flashes while you are
receiving mail/message and “ ”, “ ”, “ ”, or “ ”
appears after reception.
2 Select [Prefer alarm]/[Prefer operat.] and
press .
The receiving operation during multitasking is set.
● Regardless of the setting, SMS is received
with [Prefer operat.] while placing (originating)/
receiving a voice, videophone, or PushTalk call,
during a voice call, videophone call, or PushTalk
communication, while recording a still image/
movie, running i-αppli, or receiving mail.
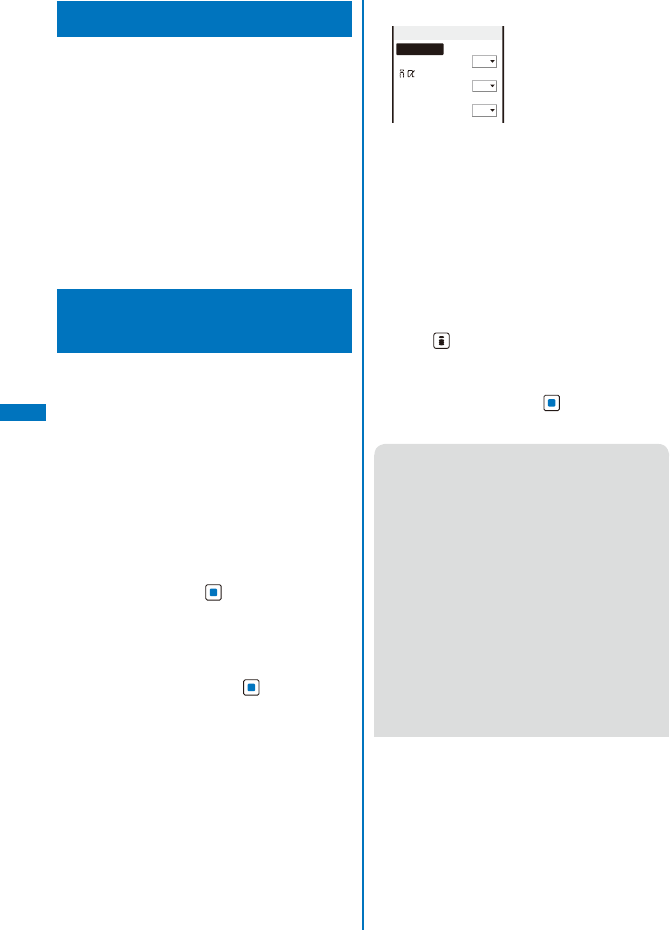
Enabling the Receiving of a File
Attachment
You can set whether to automatically receive
the file attached to i-mode mail.
1 From the Mail menu, select [Mail setting]
→ [Attached file pref.] and press .
Attached file pref.
Image
Valid
Melody
Valid
i−motion
Valid
ToruCa
Valid
PDF
Valid
Tool data
Valid
Others
Valid
2 Select [Valid]/[Invalid] for each item.
[Valid]:
Automatically receive a file attachment.
[Invalid]:
Do not automatically receive a file attachment. To
obtain a file attachment, from the Inbox display,
select “ ” (P.219).
The Attached file pref. is set.
● Even if you set the Attached file pref. to [Valid],
a file attachment exceeding 100K bytes is not
received automatically.
Deleting the Send/Receive
Ranking List
Up to 20 each of most frequent senders and
recipients are automatically saved in the Send
and Receive ranking lists. You can select a
recipient from this list when you compose mail.
The Send and Receive ranking lists can be
cleared at once.
Example: Deleting the Receive ranking list
1 From the Mail menu, select [Mail setting]
→ [Clear Recv ranking] and press .
To delete the Send ranking list
From the Mail menu, select [Mail setting] → [Clear
Send ranking].
2 Select [Clear all] and press .
All Receive ranking list data is deleted.
202
Mail
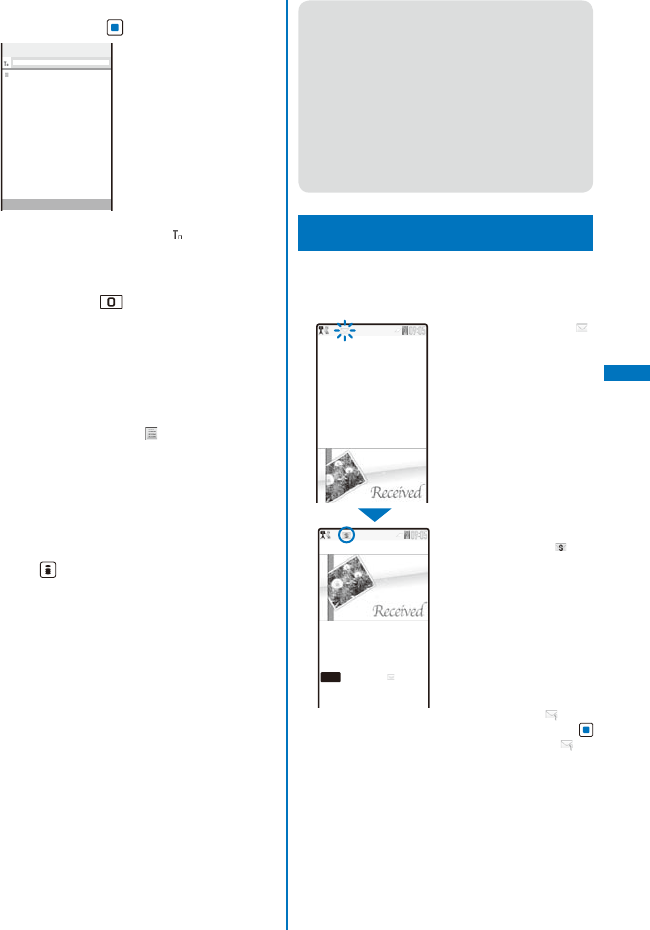
Receiving a Message
<Receive message>
When a message is received while in the
stand-by display, the contents of the message
are automatically displayed. Up to 20 Message
R and Message F each can be saved in the
FOMA terminal.
Receiving
MessageR
When receiving a message,
“”/“ ”/“ ” flashes.
When receiving is completed, “ ”/“ ”/“ ” is
displayed, the indicator flashes, the ring tone
sounds, and the number of received messages is
displayed.
The contents of the message appear automatically
after about 15 seconds. The display before
receiving reappears after about 15 seconds when
no operations are made.
ˎ Messages that are automatically displayed are
saved as unread.
● When the number of saved received messages
has reached 20 and a new message is received,
the unprotected message is overwritten from the
oldest.
● You can also disable Auto-display of messages
(P.230).
● Messages are held at the i-mode center when “ ”,
“”, “ ”, “ ”, “ ”, “ ”, “ ”, “ ”, or “ ” appears
(sometimes “ ”, “ ”, “ ”, “ ”, “ ”, “ ”, “ ”, “ ”, or
“” do not appear even if messages are held at
the i-mode center).
If the maximum number of messages is held
at the i-mode center, “ ”, “ ”, “ ”, “ ”, “ ”, “ ”,
“”, “ ”, “ ” appears. In this case, perform the
Check new message after checking contents
of the unread messages, delete unnecessary
messages, and cancel protection of the
messages.
● Message R/F that has been sent to you in the
following situations is held at the i-mode center.
- During a videophone call
- When the FOMA terminal is powered off
- When the FOMA terminal is outside of the
i-mode service area
- During PushTalk communication
- While receiving SMS
- While the Self mode is set
- While the Omakase Lock is set
- During the infrared communication
- During the iC communication
- While updating the software
- While connected to the FirstPass Center
- While connected to the Data Security Service
Center
Setting Auto-display
You can set to display the contents of the
message automatically when it is received
while in the stand-by display. You can also
select which message should be displayed
first when receiving both Message R and
Message F at the same time.
1 From the Mail menu, select [Mail setting]
→ [Common setting] → [Auto-display]
and press .
[Prefer msgR]:
Display automatically Message R first when
receiving Message R and Message F at the
same time.
[MessageR only]:
Display automatically Message R only.
[Prefer msgF]:
Display automatically Message F first when
receiving Message R and Message F at the
same time.
[MessageF only]:
Display automatically Message F only.
[Display off]:
Do not display automatically.
To set from the i-mode menu
From the i-mode menu, select [i-mode setting] →
[Common setting] → [Auto-display].
2 Select a display method and press .
The Auto-display is set.
203
Mail
Checking a New Message
<Check new message>
New messages held at the i-mode center while
the FOMA terminal is powered off or outside of
the i-mode service area can be checked.
ˎ Depending on the radio wave condition, you may
not be able to check new messages.
1 Press (Mail) for over a second in the
stand-by display.
The FOMA terminal is connected to the i-mode
center, and an inquiry result is displayed.
To check messages
Select [MessageR] or [MessageF].
● You can select an inquiry item (P.227).
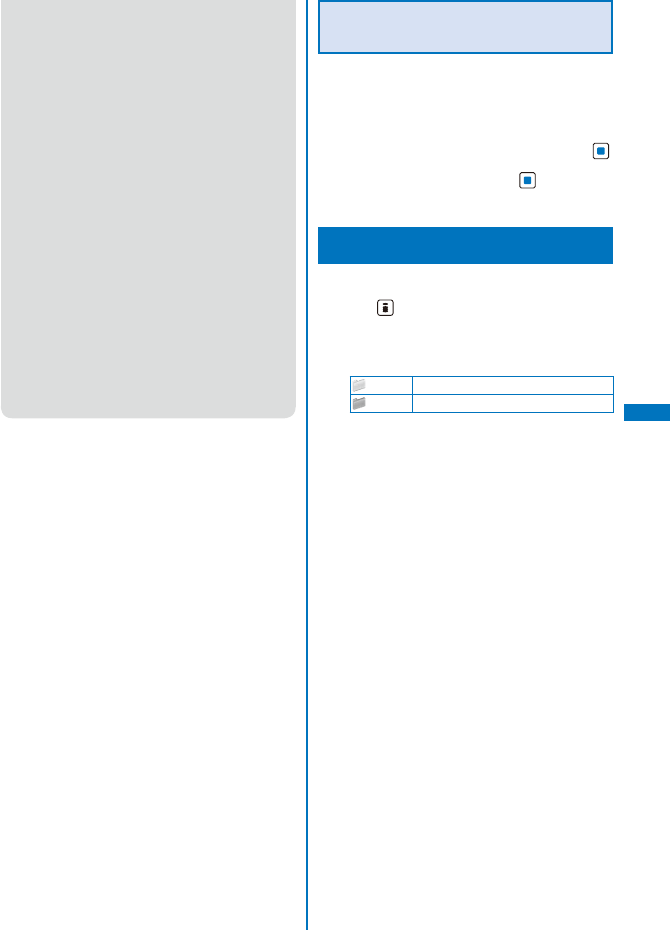
Displaying a Message
<Message R/Message F>
The list of received messages can be
displayed.
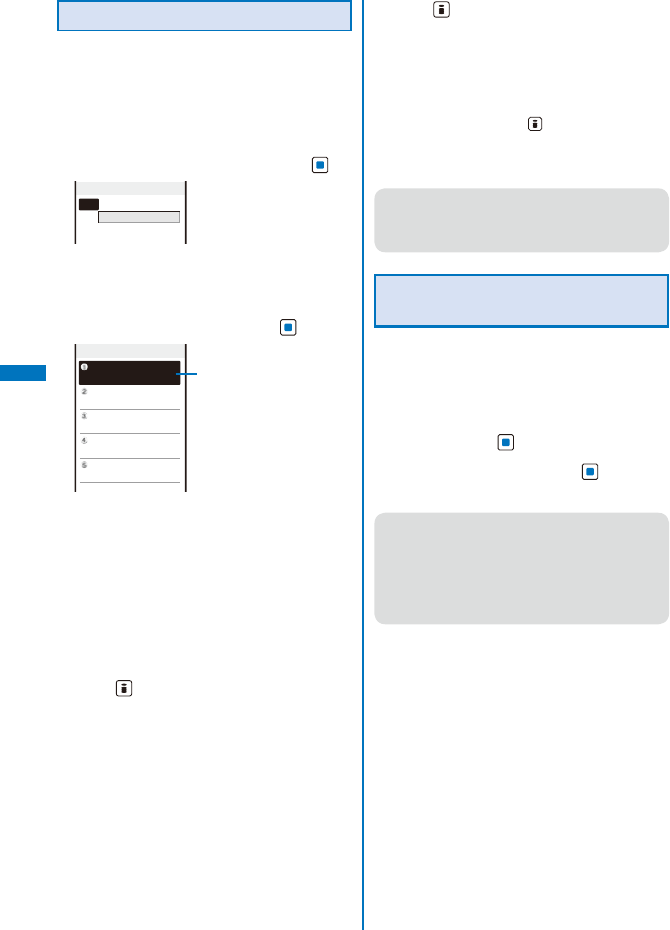
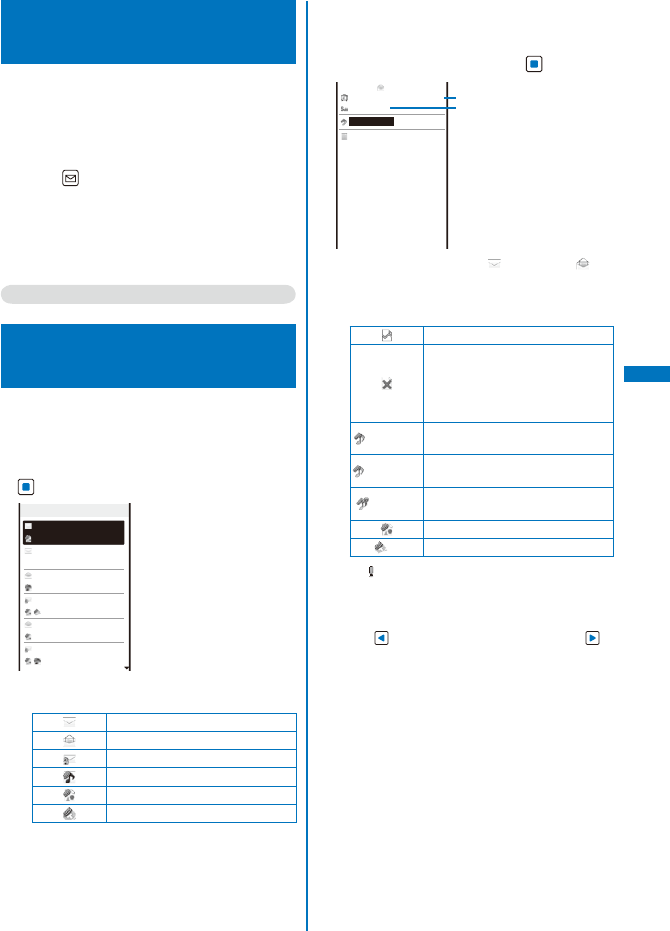
1 From the Mail menu, select [Inbox] → the
[MessageR]/[MessageF] folder and press
.
MessageR
1/8
2008/02/28 10:50
News
2008/02/28 10:00
Weather Forecast
2008/02/27 09:52
Horoscope
2008/02/26 10:00
Best choice for
2008/02/25 11:45
Salt and Pepper
2008/02/25 09:48
Recommended sto
ˎ The following icons show the status and type of
the message.
Unread message
Read message
Protected read message
With melody attachment
With still image attachment
With ToruCa card attachment
To display from the i-mode menu
From the i-mode menu, select [Message] → the
[MessageR]/[MessageF] folder.
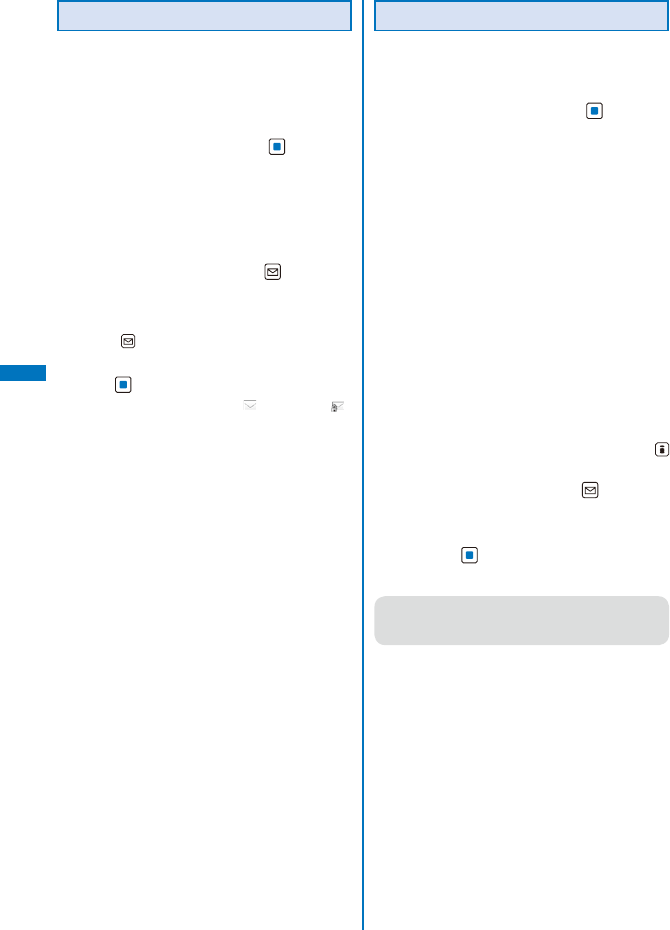
2 Select a message and press .
MessageR
3
2008/02/27
09:52
Horoscope
080227.mid 0.9KB
Sagittarius
Money
☆☆
Love
☆☆☆☆
Job
☆☆
Health
☆☆☆
Some overtime is unavoid
able because of overlapp
ing jobs. However, if it
triggers a chance to me
et a dream partner, it w
ill be lucky.
Received date/time
Subject
The message appears and “ ” changes to “ ”.
ˎ The following icons show the details of a
message. Other icons are the same as in step 1.
File attachment type
Failed to obtain the image
With invalid image attachment
With image attachment (When the
UIM is not inserted or other than
that used when the message was
received)
(Green)※With SMF-format melody
attachment
(Orange)
※With MFi-format melody
attachment
(Orange) With invalid MFi-format melody
attachment
With image attachment
※With ToruCa card attachment
※ “ ” appears when the UIM is not inserted.
ˎ For details about the operation of the file
attachment, see P.218.
To display the previous or next message
Use to display the previous message or to
display the next message.
Continued
204
Mail
Protecting a Message
Message R or Message F can be protected
from being overwritten.
ˎ An unread message cannot be protected.
Example: Protecting Message R
1 From the Mail menu, select [Inbox] → the
[MessageR] folder and press .
To protect Message F
From the Mail menu, select [Inbox] → the
[MessageF] folder.
To set from the i-mode menu
From the i-mode menu, select [Message] → the
[MessageR]/[MessageF] folder.
2 Select a message and press (Func).
The Function menu appears.
To cancel the protection
Move the cursor to the protected message and
press (Func).
3 Select [Protect ON/OFF] → [Yes] and
press .
The message is protected and “ ” changes to “ ”.
Deleting a Message
You can delete messages using four methods.
Example: Deleting Message R
1 From the Mail menu, select [Inbox] → the
[MessageR] folder and press .
To delete Message F
From the Mail menu, select [Inbox] → the
[MessageF] folder.
To delete from the i-mode menu
From the i-mode menu, select [Message] → the
[MessageR]/[MessageF] folder.
To delete all messages
From the Function menu, select [Delete] →
[Delete all], enter the Security code, and select
[Yes].
ˎ In the received mail list, from the Function
menu, select [Delete] to delete a message.
To delete all read messages
From the Function menu, select [Delete] →
[Delete read msg], enter the Security code, and
select [Yes].
ˎ In the received mail list, from the Function
menu, select [Delete] to delete a message.
To delete several messages
From the Function menu, select [Delete] →
[Select&delete], select messages, press
(Complete), and select [Yes].
2 Select a message and press (Func).
The Function menu appears.
3 Select [Delete] → [Delete one] → [Yes]
and press .
The selected message is deleted.
● You can delete all messages or read messages
by selecting [Delete] from the Function menu at
the folder list display of received mail.
205
Mail
What is Early Warning
“Area Mail”?
Area Mail is a service that allows you to receive
mail such as the urgent earthquake news flash
delivered by the Japan Meteorological Agency.
ˎ You can receive Area Mail without subscribing to the
i-mode service.
<Usage precautions>
ˎ To receive Area Mail, you need to set the Receive
setting.
※ To set the Receive setting of Area Mail, see
P.233.
ˎ You may not be able to receive Area Mail in the
following cases.
- During a call (voice/videophone call)
- During the packet communication (i-mode,
data, or PushTalk communication)
- While updating the software
In the following cases, you cannot receive Area
Mail at all.
- While the Omakase Lock is set
- While the international roaming service is used
- While the Self mode is set
※ The message which cannot be received
because of the reasons such as above ones,
you cannot receive it again.
Receiving Early Warning
“Area Mail” <Receive Area Mail>
The FOMA terminal automatically receives
Area Mail when it is sent. You can save up to
30 received Area Mail in [Inbox] separated
from up to 1,000 mails of the normal received
mail. When there are already 30 received Area
Mail, the unprotected read mail from the oldest
one is deleted.
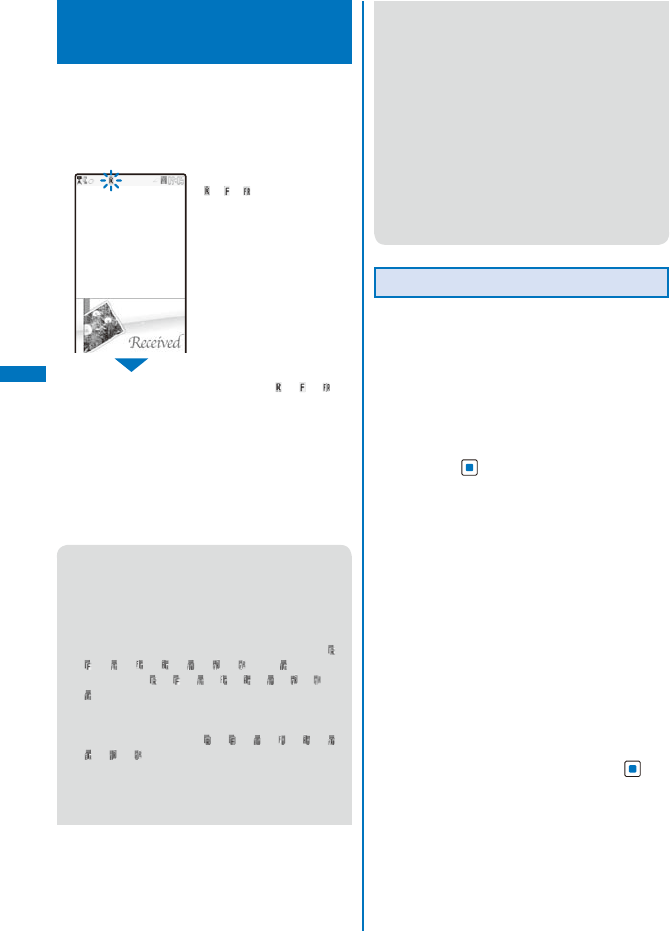
Received
Area Mail
When Area Mail is received, “ ” appears, the
incoming indicator flashes, the beep or ring tone of
Area Mail sounds, and then the screen informing
the Area Mail reception appears.
After about 15 seconds, the display prior to the
Area Mail reception reappears.
ˎ Some Area Mail may activate the vibrator after
the reception is completed.
ˎ Some Area Mail may show the Area Mail main
body after the reception is completed. Confirm
the contents and press (OK), , or .
● You cannot adjust the volume of the beep of
Area Mail of the urgent earthquake news flash.
[Pattern1] is used for the vibrator (P.110). The
vibration pattern cannot be changed. But the
Beep and Beep time can be set (P.234). While
the Manner mode is set, the setting follows that
set in the Manner mode (P.115).
● When you receive Area Mail except Area Mail of
the urgent earthquake news flash, the ring tone
volume of the incoming Area Mail follows the
setting of the Mail volume.
Setting Early Warning “Area
Mail”
<Area Mail setting>
Setting Whether to Receive Area
Mail
The default setting of the Receive setting is
[OFF].
1 From the Mail menu, select [Mail setting]
→ [Area Mail setting] → [Receive setting]
and press .
Area Mail enables you
to receive area
information, such as
Earthquake Early
Warning, based on your
location
Notice
(Read these
directions)
DoCoMo will provide
Receive setting
2 Confirm the contents, select [Yes]/[No],
and press .
The Receive setting is set.
ˎ You may receive messages from different areas
other than your current area.
Continued
206
Mail
Setting to Save Receiving Entry
of Area Mail
You need to save a name and Message ID of
Area Mail including information you want to
receive rather than Area Mail of the emergency
information. To receive emergency information,
you do not need to save receiving entry.
1 From the Mail menu, select [Mail setting]
→ [Area Mail setting] → [Receive entry]
and press .
Receive entry
Emergency information
To edit the settings of the set entry
Move the cursor to the set entry, press (Edit),
and enter the Security code. Edit each item.
To delete the set entry
Move the cursor to the set entry, press
(Delete), enter the Security code, and select
[Yes].
2 Press (Create).
The Security code screen appears.
3 Enter the Security code and press
(OK).
Edit Area Mail name
Area Mail name
Message ID
(A400−A7FF)
[Area Mail name]:
Enter the Area Mail name within 15 full-width or
30 half-width characters.
[Message ID]:
Enter the Message ID from A400 to A7FF (in
hexadecimal).
4 Enter each item.
5 Press (Complete).
The entered entry is saved.
● You cannot edit/delete the pre-saved [Emergency
information].
Setting the Operation While
Receiving Area Mail
You can set whether to sound the beep and
activate the vibrator when you receive Area
Mail of the urgent earthquake news flash, and
the ring time of the beep. The Beep setting is
set to [Permission] and the Beep time is set to
[10sec] at the time of purchase.
1 From the Mail menu, select [Mail setting]
→ [Area Mail setting] and press .
Area Mail setting
Receive setting
ON
Receive entry
Beep setting
Permission
Beep time
10
sec
(01−30)
2 Select [Permission]/[Non-permission] at
[Beep setting].
[Permission]:
The beep sounds and the vibrator is active.
[Non-permission]:
Neither the beep nor the vibrator activates.
3 Enter the ring time of the beep at [Beep
time].
Enter the ring time within 01 to 30 seconds.
Composing and Sending
SMS <Compose and send SMS>
Regardless of whether you subscribe to
i-mode, you can send/receive text messages
between FOMA terminals.
ˎ You can exchange SMS with recipients/senders
who subscribe to an overseas telecommunication
company other than DoCoMo. See the NTT DoCoMo
website for information about countries and
overseas telecommunication companies you can
use for sending/receiving SMS.
ˎ Even if the Notify caller ID is set to [Not notify], an
SMS recipient is notified of the sender’s phone
number.
ˎ The text of sent message may not be displayed
correctly on the recipient’s terminal depending on
the radio wave condition or the type of characters to
be sent.
207
Mail
1 From the Mail menu, select [Compose
SMS] and press .
R.70char
Edit SMS
2 Enter a phone number at [ ].
Enter a phone number within 21 digits.
When a recipient subscribes to an overseas
telecommunication company other than DoCoMo
Enter “+” (press for over a second), “Country
code”, and “recipient’s mobile phone number”,
in this order. When the mobile phone number
starts with “0”, enter the number without “0”. You
can also send SMS by entering “010”, “Country
code”, and “recipient’s mobile phone number”,
in this order. (To reply to SMS received from
overseas, use the latter method using “010”.)
3 Enter a main body at [ ].
When you set [Language] to [JPN] for the SMS
setting, enter the SMS main body within 70
characters regardless of full-width or half-width.
When you set it to [ENG], enter the main body
within 160 half-width characters (excluding `, 。
,
「,」
,、
,
・
, ”, and ゜). Use of the symbols (|^{}[]~¥)
reduces the number of characters that can be sent.
4 Press (Send).
The SMS is sent.
To save SMS without sending it
From the Function menu, select [Save]. The SMS
is saved in [Draft].
● When you change the font size, from the Function
menu, from [Input method] → [Font size], in the
Edit SMS display, the setting is only applied for
the font size in the matching word list. The setting
for the font size of an address and main body
text is changed from the next time when you edit
mail/SMS (P.127).
● When you subscribe to the Multi Number Service,
set [Basic Number] for the Set Multi Number.
● When 2in1 is set to the B mode, you cannot
compose SMS.
● You cannot send SMS from Number B.
Receiving SMS <Receive SMS>
The FOMA terminal automatically receives
SMS. You can save up to 1,000 received SMS
including i-mode mail in [Inbox].
Receiving SMS
Unread mail/message
Mail
MessageR
MessageF
1
0
0
While receiving SMS, “ ”
flashes.
When SMS reception
is completed, “ ” is
displayed, the incoming
indicator flashes, the ring
tone sounds, and the
number of received SMS
appears.
After about 15 seconds,
the display prior to the SMS
reception reappears.
ˎ When returning to the
stand-by display, the
notification icon “ ” (New
mail) appears. Press
(Link) and select “ ” to
display the Inbox display.
Continued
208
Mail
● You can compose and send a reply to the
received SMS and forward it (P.216).
● Some characters in a received SMS message
are replaced with as many spaces (blanks).
● You cannot reply to SMS sent to Number B of
2in1.
Checking New SMS
<Check new SMS>
New SMS held at the SMS center while the
FOMA terminal is powered off or outside of the
service area can be checked.
ˎ Depending on the radio wave condition, you may
not be able to check new SMS.
1 From the Mail menu, select [Check new
SMS] and press .
The FOMA terminal is connected to the SMS center
and receives SMS if some are held at the center.
● Even if you check new SMS, it may take time to
receive SMS.
Setting SMS <SMS setting>
※ Normally, you do not need to change the
SMSC, Type of Number, and address
settings.
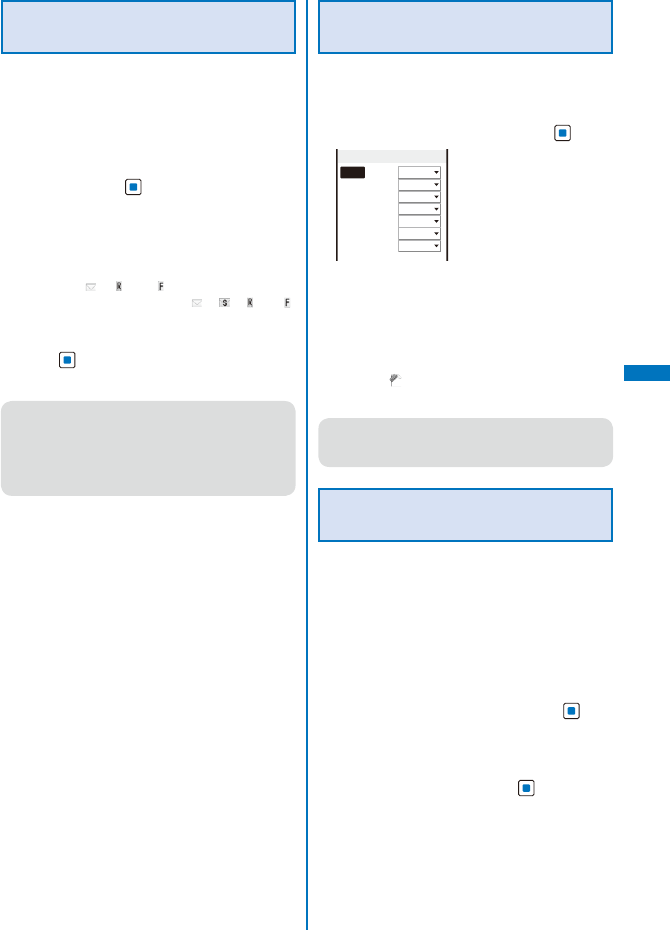
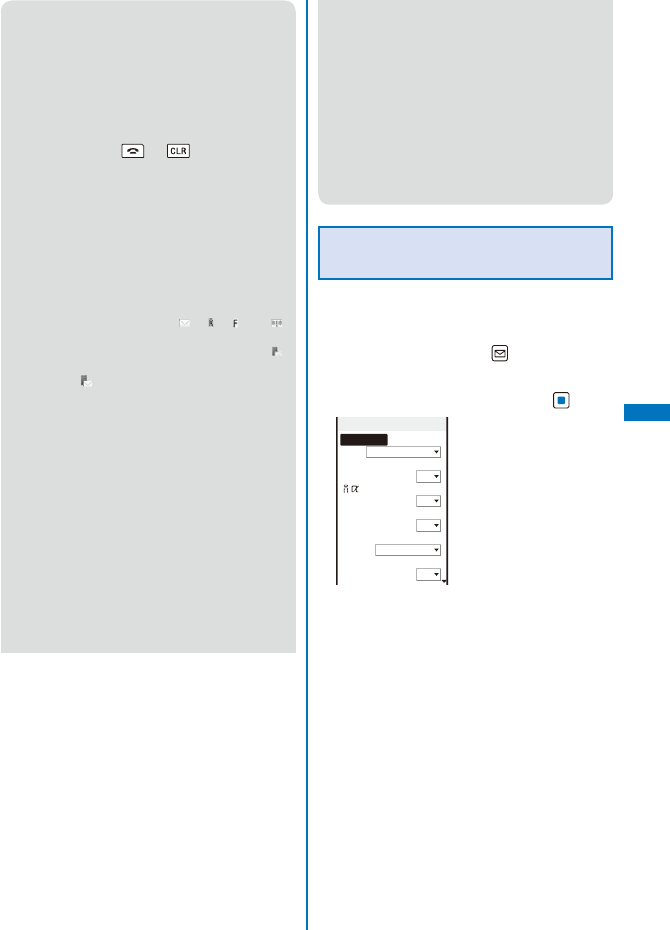
1 From the Mail menu, select [Mail setting]
→ [SMS setting] and press .
SMS setting
Language
JPN
SMS report
Invalid
Validity
3days
SMSC
DoCoMo
Type of Number
International
Address
81903101652
[Language]:
Select whether a message to be sent is going
to be displayed in Japanese or English. The
number of characters that can be sent varies
depending on the type of characters.
[SMS report]:
Set whether you require a delivery report when
SMS is sent.
[Validity]:
Select the period for holding your SMS at the
SMS center when a recipient is unable to receive
the SMS you sent.
[SMSC]:
Set when you receive SMS services provided by
companies other than DoCoMo.
[Type of Number]:
When you select [Others] at [SMSC], select
[International]/[Unknown].
ˎ When “ ” or “#” is included in the address
entered at [Address], select [Unknown].
[Address]:
When you select [Others] at [SMSC], enter an
address. You can enter up to 20 half-width digits.
2 Set each item.
3 Press (Complete).
The SMS setting is set.

209
i-αppli
What is i-αppli? ...................................................................................................... 238
Downloading i-αppli from a Site ............................................................................. 238
Running i-αppli ................................................................................... <Run i-αppli> 239
Running i-αppli Automatically ................................................................<Auto-start> 246
Setting i-αppli for the Stand-by Display ........................................<i-αppli stand-by> 247
Managing i-αppli ..................................................................................................... 247
Displaying i-αppli Data in microSD memory card ........................<i-αppli(microSD)> 250
Using Various i-αppli Functions .............................................................................. 251
210
i-αppli
What is i-αppli?
By downloading i-αppli from its site, the
i-mode terminal can be made much more
useful in many ways. For example, you can
enjoy many kinds of games by downloading
them to it. There are also i-αppli from which
you can directly save data to the Phonebook
and Schedule, as well as i-αppli that can
be linked with Data Box for saving/loading
images.
ˎ For details on i-αppli, see the “Mobile Phone User’s
Guide
【i-mode】
FOMA version”.
ˎ Some i-αppli cannot be used when 2in1 is set to
either the B or Dual mode.
Downloading i-αppli from
a Site
You can download i-αppli software from sites
and save it.
ˎ You can save up to 100 i-αppli software, each
software maximum 1M bytes. The number of
i-αppli software that can be saved may decrease
depending on the data to be saved.
ˎ When downloading ends in failure due to the radio
wave condition, the software is not saved.
ˎ When downloading i-αppli with mail, software
cannot be downloaded if there are already five mail
folders for i-αppli with mail or if software using the
same mail folder already exists.
1 While displaying the site, select the
software and press .
The software is downloaded.
When the screen for confirming whether to
download the software appears
Select [Yes] or [Download].
2 Select a folder and press .
The downloaded software is saved in the selected
folder.
3 Perform the Software setting.
SW init. Setting
NW setting
Yes
ppli stand−by
No
Use location info
Yes
ˎ There are items that cannot be changed
depending on the software.
To connect to the network automatically when the
software is started
Select [NW setting] → [Yes].
ˎ Settings you made are applied to the NW
setting and Stand-by NW setting of the
Individual set (P.241).
To set the software for the i-αppli stand-by display
Select [i αppli stand-by] → [Yes].
To use the location information
Select [Use location info] → [Yes].
4 Press (Complete).
The screen for confirming whether to run the
software appears.
5 Select [Yes] and press .
The downloaded software is started.
● If you have deleted preinstalled software, you
can download it from “PlayNow by SO”.
[i Menu] → [メニュー/検索] (Menu/Search)
→ [ケータイ電話メーカー] (Mobile Phone
Manufacturers) → [PlayNow by SO] (Japanese
only)
● The message “Terminal and UIM ID will be
sent” may appear when downloading. Select
[Download] to download. Since the “serial
number of your mobile phone/UIM (FOMA card)”
is sent to IP (information service providers) via
the Internet, it might be accessed by a third
party.
● The message “This software uses saved data”
may appear when downloading. Information on
the saved data to be used can be confirmed
by pressing [Description]. Select [Download]
to download the software. The i-αppli uses the
saved data in this case.
211
i-αppli
Continued
● If you lock the IC card function while
downloading an Osaifu-Keitai-compatible
i-αppli, the downloading is stopped.
● After downloading i-αppli with mail, i-αppli with
mail folder is automatically created in Inbox,
Outbox, and Draft. The folder is named based on
the downloaded i-αppli with mail and cannot be
changed.
● If only the mail folder to be used remains when
downloading i-αppli with mail, that folder can
be used. If a folder name is different from the
name of a downloaded i-αppli, this folder name
is changed to the downloaded i-αppli name.
If the i-αppli with mail does not use that folder,
it can be deleted and a new folder can be
created. Note that the i-αppli with mail cannot
be downloaded without creating a new folder.
● Even if there is enough memory, you may not be
able to download an Osaifu-Keitai-compatible
i-αppli depending on the volume of data
saved on your IC card. If you cannot perform a
download, delete unnecessary software data in
accordance with the confirmation screen and
download the i-αppli again. (You may not be
able to delete some software data.) In some
cases, you may need to start up the software
before deleting related data on the IC card.
Checking i-αppli Information
When Downloading
The software information can be displayed
when i-αppli software is downloaded from a
site.
1 From the Menu, select [i appli] → [i αppli
setting] → [SW description] and press .
2 Select [Yes]/[No] and press .
The SW description is set.
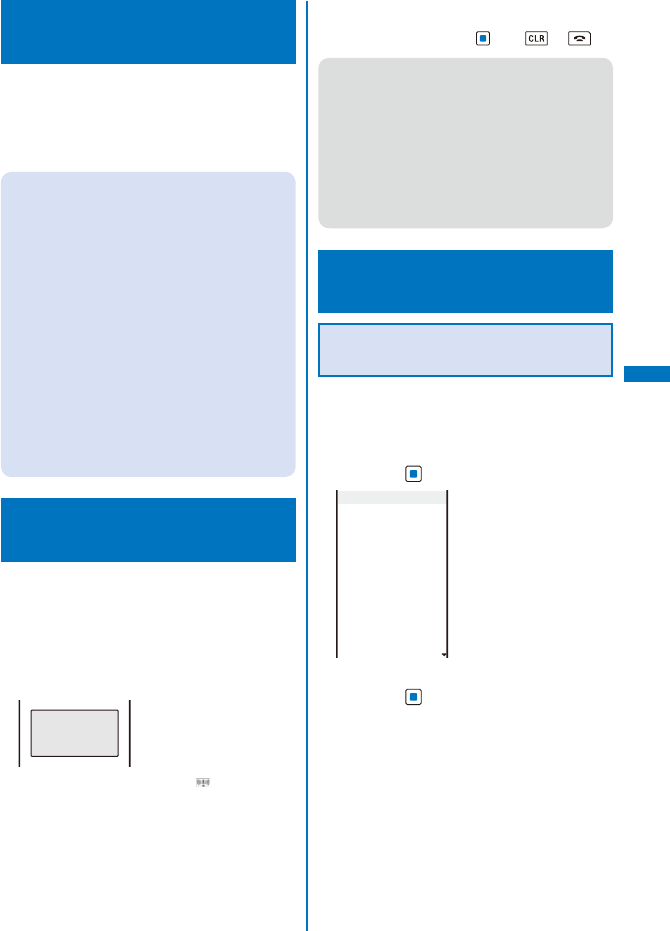
Running i-αppli <Run i-αppli>
i-αppli software can be set to run manually.
1 Press (i-mode) for over a second in the
stand-by display.
The i-αppli folder list appears.
ˎ The following icons show the type of folder.
(Yellow) Preset folder
(Blue) User-created folder
212
i-αppli
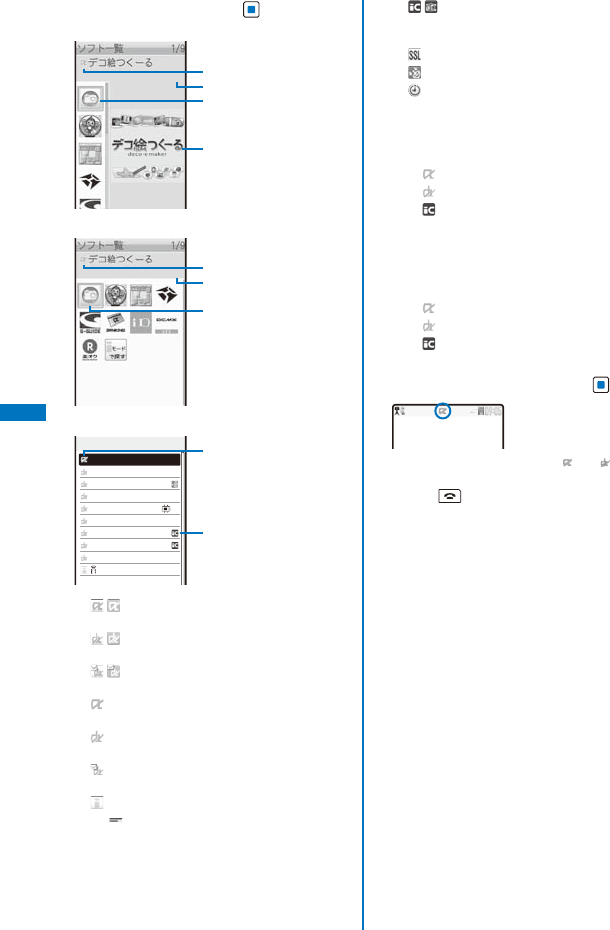
2 Select a folder and press .
Icon(L)
ͦ
ͨ
ͩ
ͧ
Icon(S)
ͨ
ͦ
ͧ
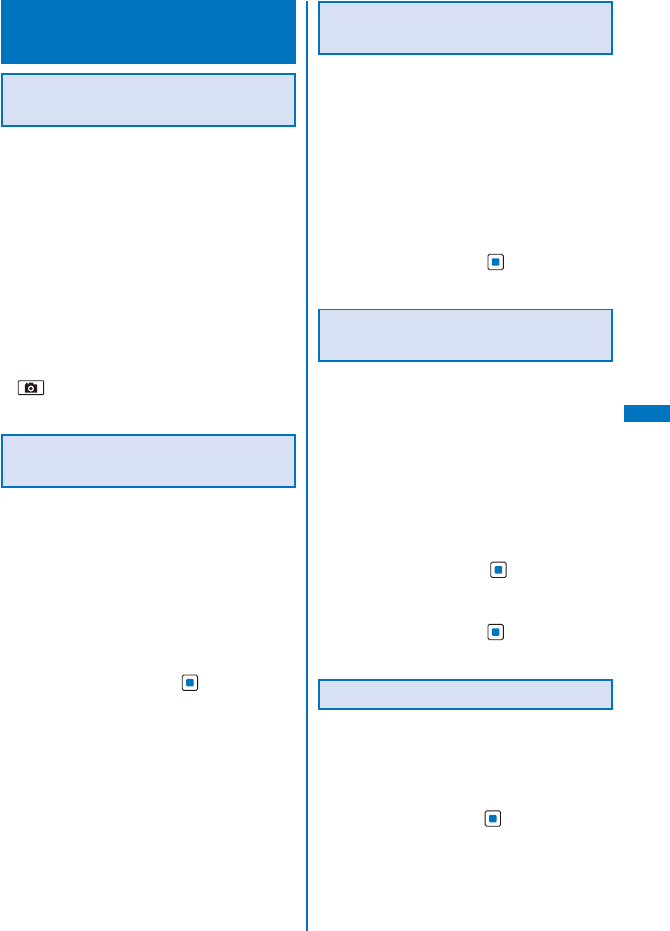
List
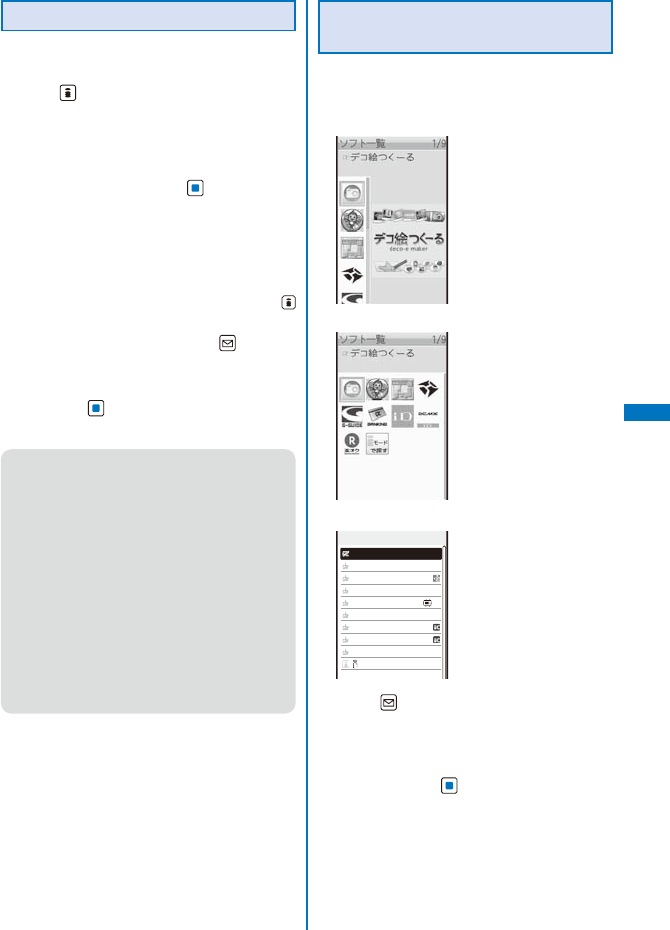
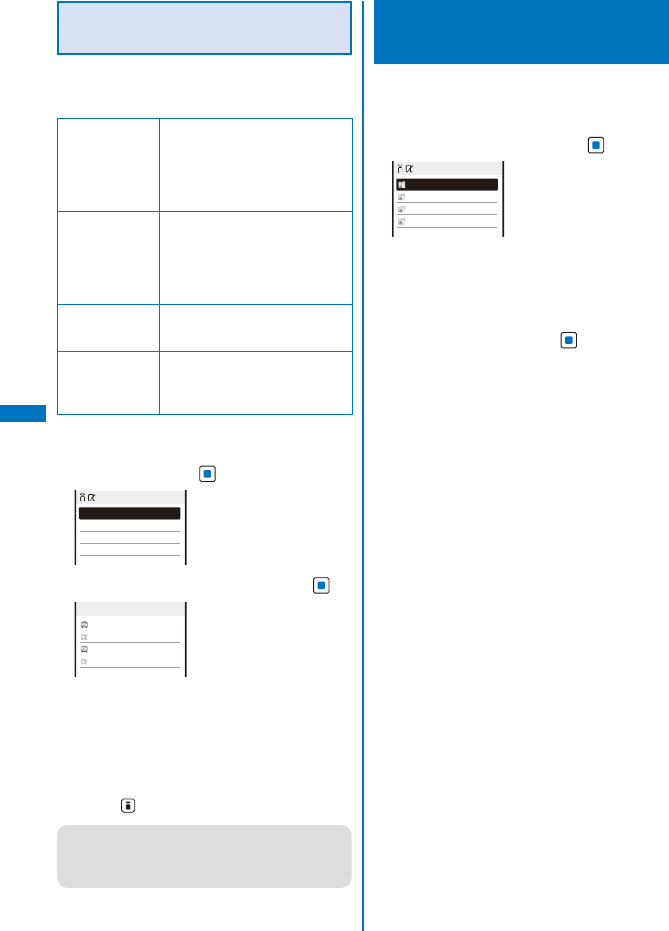
ソフト一覧
1/9
デコ絵つくーる
スーハ゜ーモンキーホ゛ール for SO
地図アプリ
FOMA
通信環境確認
アフ゜リ
Gカ゛イト゛
番組表
リモコン
iアフ゜リハ゛ンキンク゛
iD
設定アプリ
DCMXクレシ゛ットアフ゜リ
楽オク出品アプリ
2
Search by i−mode
ͦ
ͧ
ͦ( )※ : Software supporting i-αppli stand-by
display (While setting)
( )※ : Software supporting i-αppli DX
stand-by display (While setting)
( )※ : Software supporting i-αppli with
mail stand-by display (While setting)
※ : Software not supporting i-αppli
stand-by display
※ : Software not supporting i-αppli DX
stand-by display
※ : Software not supporting i-αppli with
mail stand-by display
: Search by i-mode
※ “ ” appears to the lower right of the icon for
the software while downloading in progress.
ͧ() : Osaifu-Keitai-compatible i-αppli
software (While the service is
unavailable)
: Software downloaded from an SSL site
: GPS-compatible i-αppli software
: Software set for automatic startup
ͨ Software icon
ˎ An icon assigned to each software appears.
If there is no icon assigned to software, the
following icons appear.
: i-αppli software
: i-αppli DX software
: Osaifu-Keitai-compatible i-αppli
software
ͩ Title image of selected software
ˎ A title image assigned to each software
appears. If there is no title image assigned to
software, the following icons appear.
: i-αppli software
: i-αppli DX software
: Osaifu-Keitai-compatible i-αppli
software
3 Select the software and press .
The software is started up and “ ” or “ ” appears.
To quit i-αppli software
Press and select [Yes].
To check the detailed information
Move the cursor to the software and from the
Function menu, select [Soft description].
ˎ Displayed items may vary depending on the
software.
ˎ The name of the software listed in the Soft
description display cannot be changed.
To display the certificate
Move the cursor to the software and from the
Function menu, select [Certificates].
213
i-αppli
● Some software applications start up immediately
from the site. This means that the software has
been downloaded, but not saved. Also note that
you cannot save some downloaded software.
● Some software applications that start up
immediately from the site may require NW setting
while it is running.
● The software is interrupted when the Alarm or
Schedule alarm time comes while running the
software. Press or to return to the
previous display.
● The software can be interrupted and the phone
can be answered when you receive a voice,
videophone, or PushTalk call while running the
software. The previous display returns when a
call is finished. When receiving a videophone or
PushTalk call while i-αppli communication is in
progress, the setting for the V.ph while packet or
the i-mode arrival act is applied, respectively.
● When you receive mail/message/Area Mail
while running the software, “ ”, “ ”, “ ”, or “ ”
appears.
When the Receive option setting is [ON], “ ”
appears if you receive mail while running the
software. “ ” (Mail at center) appears when you
display the stand-by display. To check mail, use
the Receive option (P.215).
● Images used by i-αppli software※ and some of
the data you entered may be automatically sent
to a server via the Internet.
※ Images used by i-αppli software include
those recorded by the camera activated from
within i-αppli software with camera interface,
obtained using the infrared communication
function of i-αppli software, obtained from
sites or Internet home pages using i-αppli
software, and obtained from the Data Box by
i-αppli software.
● You can save data of some software applications
in a microSD memory card. The data saved in a
microSD memory card may not be used by other
terminal models.
● There is i-αppli software that starts the specified
software so that you can enjoy the software
without returning to the software list. If software
to start is not specified, you need to select it.
Even if software to start is specified, however,
you need to download it if it is not included in the
software list.
● Some software cannot start with the MUSIC
Player or Music&Video Channel simultaneously.
● Some software may be displayed in the full-
screen display. While displaying in the full-
screen, the icons other than the communication
icon are not displayed.
Setting i-αppli Operating
Conditions
ˎ It may not be possible to change some items of the
saved software.
1 From the list of i-αppli software, select
the software and press (Func).
The Function menu appears.
2 Select [Individual set] and press .
Individual setting
NW setting
Yes
Stand−by NW setting
Yes
ppli To
Yes
Use icons
Yes
Cng. ring tone/img.
Yes
Phonebook/Records
Yes
[NW setting]:
Set whether to permit the software that uses
network communication to connect to the
network or alternatively set it to ask confirmation
every time you start it.
[Stand-by NW setting]:
Set whether the FOMA terminal should connect
to the network when you set an i-αppli software
that uses network communication as the stand-by
display.
[i αppli To]:
Set whether to start the software from the
currently displayed i-αppli link.
[Use icons]:
Set whether to use icon information (mail,
message, radio wave condition, battery level,
and Manner mode).
Continued
214
i-αppli
[Cng. ring tone/img.]:
Set whether to permit the software to change the
ring tone or image. Otherwise, set the software
to ask for your permission every time before
changing it.
[Phonebook/Records]:
Set whether to permit the software to look up
the Phonebook, Redial/Received record, unread
mail, or ToruCa cards.
[Use location info]:
Set whether to use location information.
3 Set each item.
● If you set the NW setting or Stand-by NW setting
to [No], the software may not be started and
information may not be provided in a timely
manner.
● If you set the NW setting or Stand-by NW setting
to [Yes], i-αppli automatically connects to the
network. When the FOMA terminal is connected
to the network, the packet communication charge
is required.
● When you set [Yes] for the Use icons, icon
information might be accessed by a third
party since it is sent to IP (information service
providers) via the Internet just as it is the case
with the “serial number of your mobile phone/UIM
(FOMA card)”.
● Depending on the settings of the Individual
set, the network connection and use of icon
information (such as unread mail and battery
level) from i-αppli software may not be available.
Preinstalled Software
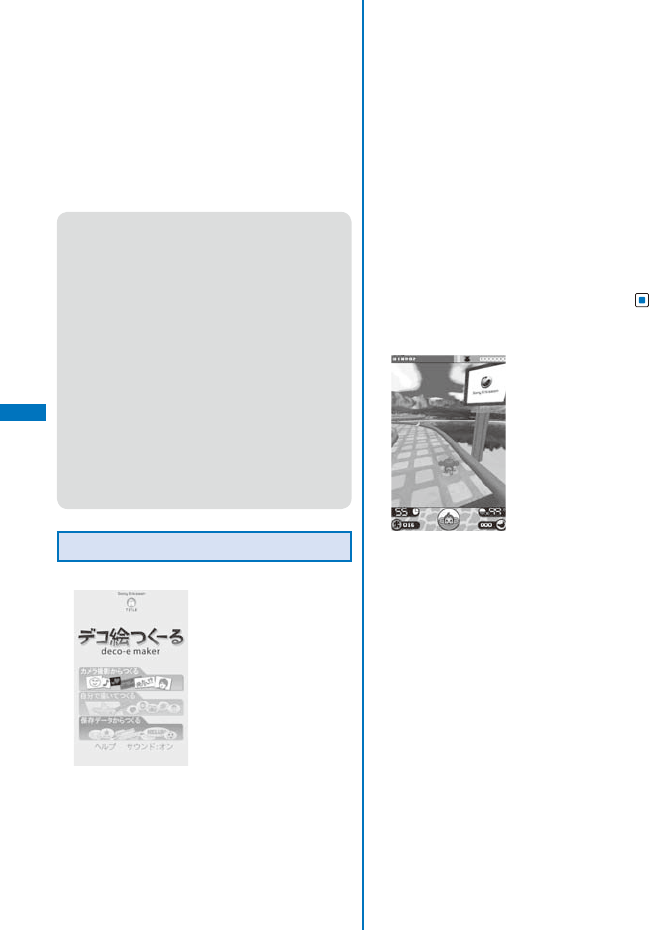
● デコ絵つくーる™ (deco-e maker)
You can create materials for decorating mail by
converting/editing a part of a still image recorded by
the camera, drawing a picture by yourself, or other
means. The created image is saved in the Data Box
and you can use it when you compose mail.
Creating from the camera shoot
You can create a Deco mail image or Deco mail
pictograph by converting/editing a part of a still image
recorded by the camera. To edit an image nicely, it is
recommended to record an image in a mono-(even)
color background where pictures or characters are
separated clearly in brightness from the background.
Creating by drawing a picture by yourself
Using various lines, colors, and functions such as
daubing and background transmission functions,
you can create a Deco mail pictograph. You can also
create an animation pictograph.
Creating from saved data
You can create a Deco mail image or Deco mail
pictograph by converting/editing data saved in the
Data Box.
ˎ For information on the operations, see “ヘルプ”
(Help).
To display it, select [ヘルプ] (Help) and press .
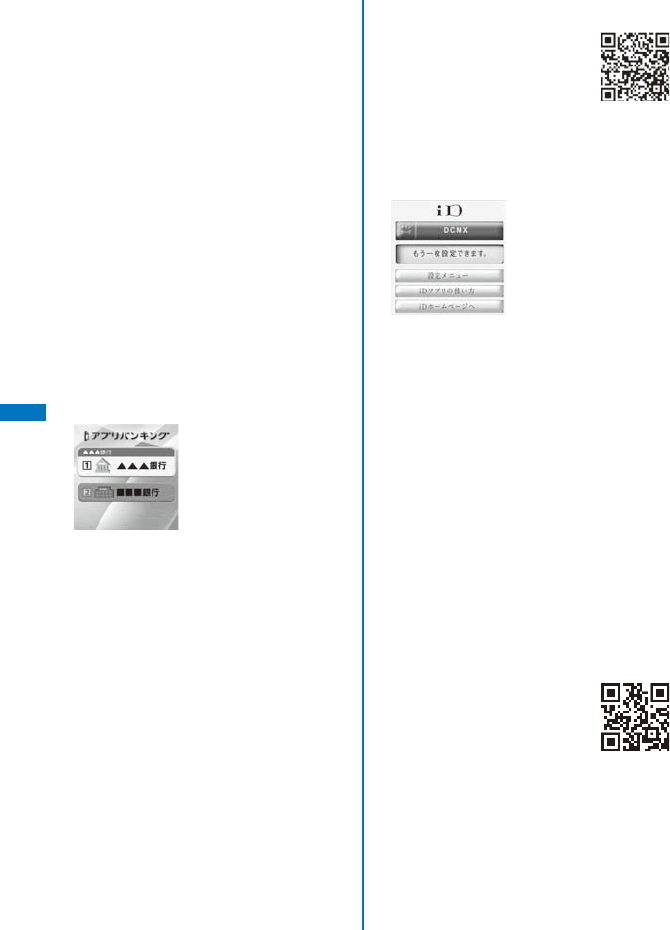
● スーパーモンキーボールモバイル for SO
(Super Monkey Ball Mobile for SO)
©SEGA
This is the mobile phone appli that is the very famous
home action game called “スーパーモンキーボール”
(Super Monkey Ball).
This is the action game to roll a ball where a monkey
character stays for the goal.
Clear various worlds (scenes) and daedal stages for
the goal.
To operate by moving SO906i
Moving the FOMA terminal up, down, and to the left
and right allows you to operate it as using the 4-way
keys of the FOMA terminal.
The ball where the monkey stays is rolled to the
direction where the FOMA terminal is moved.

215
i-αppli
To operate by a player’s movement
Check the player location by the In-camera and the
ball is rolled to the direction where the player moves.
ˎ For more details about operations, see the “スー
パーモンキーボールの遊び方” (How to play Super
Monkey Ball).
From the Menu, select [Data Box] → [My document]
→ [Preinstall] → [スーパーモンキーボールの遊び方]
and press . The appli appears.
■ Warning
This appli is the game played by titling or shaking
the FOMA terminal. It may injure or damage by
hitting a person or object due to some reasons
such as shaking too hard.
When you play it, hold the FOMA terminal tightly
and do not shake or move the FOMA terminal
too much or too hard. Make sure to secure the
surroundings to be safe as to play.
● 地図アプリ (Map appli)
You can check your current location, search a map
by addresses or phone numbers, or use the FOMA
terminal to navigate you to the destination. The i-αppli
allows you to use GPS functions (P.264).
ˎ When you use a GPS-compatible i-αppli, the
location information is sent to IP (information service
providers) of the i-αppli being used.
ˎ When you use the GPS function with a GPS-
compatible i-αppli, set the Use location info of the
i-αppli being used to [Yes].
● FOMA通信環境確認アプリ (FOMA
communication environment check i-appli)
※ The display shown is an
image for explanatory
purpose and may be
different from the actual
display.
FOMA通信環境確認アプリ (FOMA communication
environment check i-appli) is an appli to check whether
the FOMA terminal can be used the FOMA HIGH-
SPEED Area.
ˎ To use FOMA 通信環境確認アプリ (FOMA
communication environment check i-appli),
you need to accept “ご利用上の注意” (Usage
Precautions).
ˎ When the communication environment is checked,
different confirmation results or the result informing
that it is outside of the service area may appear
depending on the communication environment
(such as weather, radio wave condition, or network
congested) even if you use it in the same place and
same time.
ˎ When you use another function while using this
appli, it may not be checked correctly.
● G ガイド番組表リモコン (G-GUIDE TV
Program List Remote Control)
※ The display shown is an
image for explanatory
purpose and may be
different from the actual
display. The TV program
list is displayed according
to your location.
This convenient i-αppli is a TV program list integrated
with an audiovisual remote control function and it is
free.
It enables you to get terrestrial digital/analog or BS
digital TV program information for your preferred hour
from anywhere, any time. The information includes a
TV program title, details of the program, start/end time,
etc.
If you find any program interesting, you can let the
DVD hard disk recorder to schedule recording of it
remotely via the Internet. (A DVD hard disk recorder
that features a remote scheduling function is required.
Before using this function, the initial setting for this
appli is also required.)
You can also search for program information by
entering a keyword such as a TV program category or
your favorite TV personality. Furthermore, you can also
perform remote control operation of a TV/video player/
DVD player. (Some models are not compatible with this
function.)
ˎ When you use the “G-GUIDE TV Program List
Remote Control” for the first time, you need to
perform initial registration and accept the Terms of
Use.
ˎ An additional packet communication charge is
required for using this function.
ˎ When you use this appli overseas, you need to set
the time of the FOMA terminal to Japan time.
ˎ For details on Gガイド番組表リモコン (G-GUIDE
TV Program List Remote Control), see the “Mobile
Phone User’s Guide
【i-mode】
FOMA version”.
ˎ You cannot use this appli when 2in1 is set to the B
mode because it uses mail.
Continued
216
i-αppli
About the remote timer recording function
If you have a DVD hard disk recorder that supports
a remote timer recording function, you can book
recording of a program from the program list provided
by this appli.
To use this function, the initial setting for this appli is
required.
ˎ Making initial setting
1. Set the DVD hard disk recorder to connect to the
Internet.
(For more information, see the user’s manual
supplied with your DVD hard disk recorder.)
2. Start this appli, select “リモート録画予約”
(Remote timer recording) from the menu, and
continue the initial setting as instructed by the
displayed guidance.
ˎ Booking recording of a program
Once you complete the initial setting, by selecting
a desired program and selecting “リモート録画
予約” from the menu, you can connect to the DVD
hard disk recorder that has an entry in this appli via
the Internet and let it to schedule recording of the
program.
ˎ An additional packet communication charge is
required for using this function.
● iアプリバンキング (i-appli Banking)
※ The display shown is an
image for explanatory
purpose and may be
different from the actual
display.
This i-αppli is for using the mobile banking service
conveniently. Mobile banking is a service that allows
you to check the balance and usage details of deposit
or withdrawal, transfer between accounts, and make a
transfer, from anywhere and at anytime. By entering the
password which you set when you start this i-αppli,
you can use up to two mobile banking services
provided by financial institutions.
ˎ To use a mobile banking service by iアプリバンキ
ング (i-appli Banking), you need to open an account
at a financial institution which provides the mobile
banking service and subscribe to a mobile banking
service of each financial institution.
ˎ An additional packet communication charge is
required for using this function.
ˎ For details, see the “Mobile Phone User’s Guide
【i-mode】
FOMA version”.
ˎ For information on iアプリバンキン
グ (i-appli Banking), see the i-mode
site.
i-mode site :
[iMenu] → [メニュー/検索]
(Menu/Search)→[モバイルバ
ンキング] (Mobile banking) →
[iアプリバンキング](i-appli
Banking)
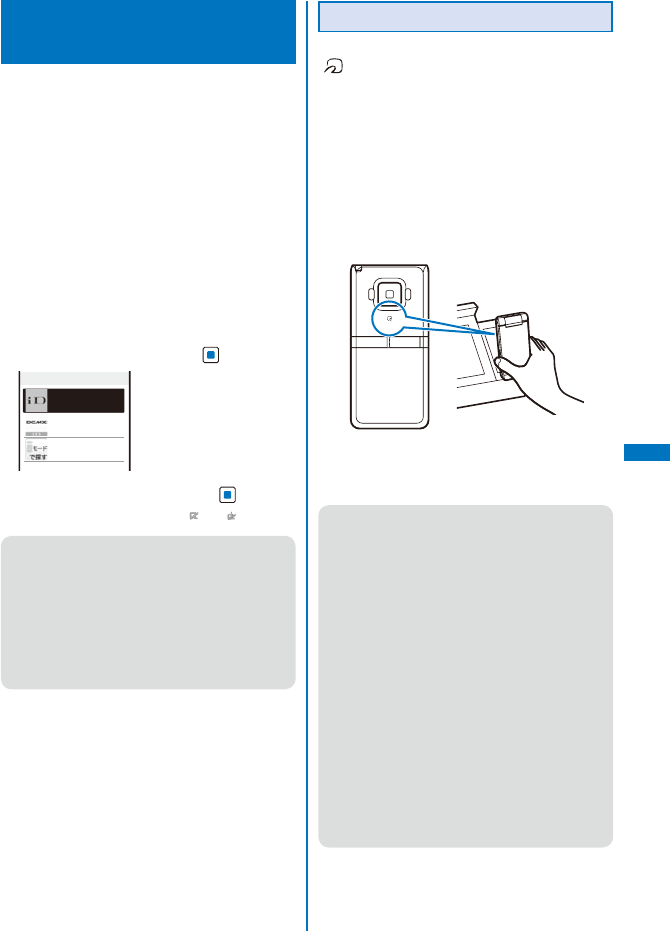
● iD 設定アプリ (iD Setting appli)
※ The display shown is an
image for explanatory
purpose and may be
different from the actual
display.
The chargeless e-cash “iD” is a service that enables
you to make payments for shopping by simply holding
up the Osaifu-Keitai or a credit card that is employed
“iD” to a reader. It provides you with a convenient way
of shopping because you do not need to give your
signature as you did before. Some credit card issuing
companies support cash withdrawals as well.
ˎ To use “iD”, a subscription to each credit card
issuing company that adopts the iD brand and the
Osaifu-Keitai whose settings are completed by the
iD appli and Card appli of a credit card issuing
company or a credit card that is employed “iD” are
needed.
ˎ For using “iD” by the Osaifu-Keitai, you start the
iD appli, agree with “ご利用上の注意” (Usage
precautions), complete the settings for the iD appli,
download or start a Card appli, and then perform
the settings for the Card appli.
ˎ A fee for using a service that adopts the iD brand
(annual membership fee, etc.) varies depending on
each credit card issuing company.
ˎ The packet communication charge is required for
downloading the iD appli and a Card appli.
ˎ For information on “iD”, see the
i-mode site for “iD”.
i-mode site :
[i Menu] → [メニュー/検索]
(Menu/Search) → [iD]
217
i-αppli
● DCMXクレジットアプリ(DCMX credit appli)
※ The display shown is an
image for explanatory
purpose and may be
different from the actual
display.
“DCMX” is an “iD” compatible credit service provided
by NTT DoCoMo group. Two types of services are
available in DCMX: DCMX mini in which the total
amount of credit is limited to ¥10,000 per month and
DCMX which allows you to use more amount than
DCMX mini as well as get DoCoMo points.
DCMX mini provides immediate use of a mobile credit
service with an easy subscription that can be made
from within this software.
What you can do on this software
Subscription and Examination ※1
Setting card information
Using
No need for troublesome charging!
You can enjoy shopping simply by holding the mobile
phone that has been configured for the service close
to a reading device without signature ※3.
Checking ※2
You can check the available balance of the credit
and the usage details for this month from within the
software!
Changing
You can also make necessary settings from within
the software when you get the card updated or the
FOMA terminal changed!
※1 We make an online examination for your
qualification when we receive your subscription
to DCMX mini. If your subscription is to other than
DCMX mini, the connection is redirected to the
i-mode site for subscription information.
※2 A function, such as for checking the usage status
is available only when you are a member of DCMX
mini.
※3 You may be asked to enter a security code at a
given condition.
ˎ For information on the contents of
the service and on how to subscribe
to the service, see the i-mode site
for DCMX.
i-mode site : [i Menu] → [DCMX iD]
● When you start this software for the first time, you
are asked to agree with “ご利用上の注意” (Note
on using the program). Agree with it to continue.
● Packet communication charge is required for
settings and operations on this software.
Precaution on the Osaifu-Keitai-compatible
i-αppli software
● Under no condition will DoCoMo be held liable
for any information set in the IC card.
● 楽オク出品アプリ2 (Appli for selling items at
Rakuten)
※ The display shown is an
image for explanatory
purpose and may be
different from the actual
display.
“楽オク出品アプリ2” (Appli for selling items at
Rakuten) is a convenient appli for selling items at 楽
オク (Rakuten Auction) from anywhere and at anytime
easily.
The appli helps you sell an item with the guide display,
making it easy even for first-time users. Also, there are
functions such as shooting a photo, editing a photo,
and saving a history to sell an item faster than doing it
from the site.
ˎ When you use the “Appli for selling items at
Rakuten” for the first time, you need to accept “利用
規約” (Terms of use).
ˎ An additional packet communication charge is
required for using this function.
ˎ For details on 楽オク (Rakuten Auction), see the
“Mobile Phone User’s Guide
【i-mode】
FOMA
version”.
ˎ To sell items at 楽オク (Rakuten Auction), you need
to sign up for the Rakuten Membership and register
as an auctioneer.
ˎ For information on 楽オク (Rakuten
Auction), see the i-mode site.
i-mode site : [i Menu] → [楽オク -
オークション-]
218
i-αppli
Running i-αppli
Automatically <Auto-start>
Enabling/Disabling Auto-Start
You can set whether to start i-αppli software
automatically on the FOMA terminal.
1 From the Menu, select [i appli] → [i αppli
setting] → [Auto-start] and press .
2 Select [Yes]/[No] and press .
Whether to enable the Auto-start is set.
Setting the Start Date and Time
The i-αppli software can be started
automatically. You can set the starting date/
time and day of the week and whether to use
the software’s automatic start for each i-αppli
software.
1 From the list of i-αppli software, select
the software and press (Func).
The Function menu appears.
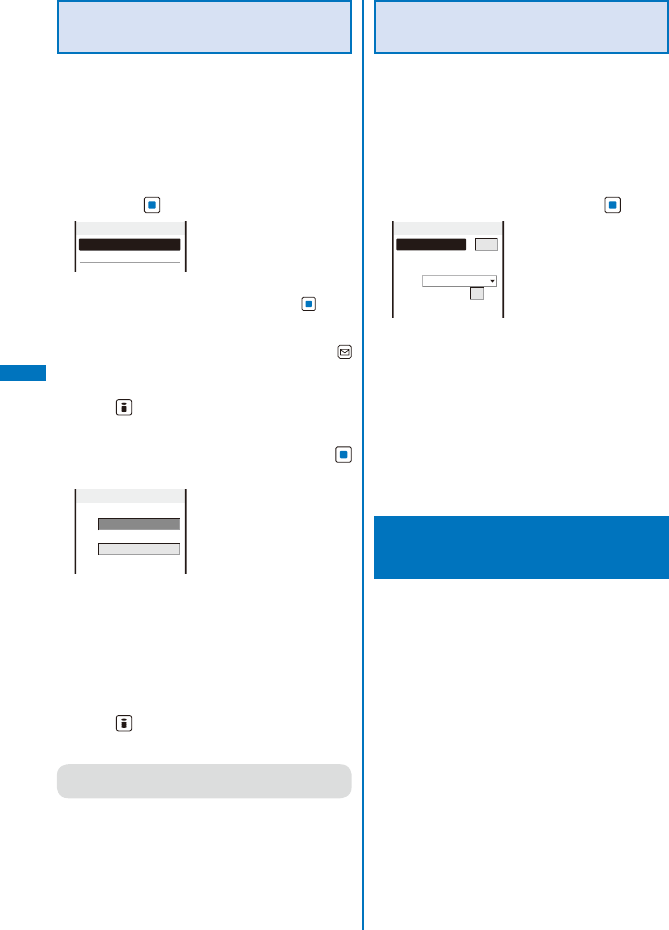
2 Select [Auto-start] and press .
Auto−start
User set
OFF
SW set
Inva
[User set]:
Set the staring date/time and day of the week for
each software.
[SW set]:
Set whether to start the software using the
software’s auto-start function.
3 Select [User set] and press .
User setting
Style
OFF
Date
2008/02/01 Fri
Time
09:05
Day
Mon
4 Select a style of the Auto-start time at
[Style].
[OFF]:
Do not set the start time.
[D/T]:
Start the software automatically at the specified
date and time.
[Eyd]:
Start the software automatically at the specified
time everyday.
[Week]:
Start the software automatically at the specified
time on every specified day of the week.
5 Enter the date/time/day of the week.
ˎ Enter the date/time/day of the week according to
the style of the auto-start time selected in step 4.
6 Press (Complete).
7 Select [SW set] and press .
The SW set display appears.
8 Select [Valid]/[Invalid] of the Auto-start
function of the software at [Set].
The Auto-start is set.
● The Auto-start does not operate in the following
cases.
- When the FOMA terminal is powered off
- During a call/communication
- When the date/time is not set
- When another function is executed
- When the Alarm/Schedule alarm is set to start
at the same time as the Auto-start
- When the Lock all/Personal data lock is set
- When the Lock key is set
- When the Omakase Lock is set
- When 2in1 is set to the B mode (when i-αppli
with mail software is used or i-αppli uses
mail)
219
i-αppli
Setting i-αppli for the
Stand-by Display
<i-αppli stand-by>
Only one supporting software can be set for
the i-αppli stand-by display. The software
that supports the i-αppli stand-by display is
identified by “ / / ”.
ˎ When the software using network transmission is set
for the i-αppli stand-by display, it may not operate
properly depending on the radio wave condition.
ˎ When you set the i-αppli stand-by display from
the i-αppli software list display, the image set for
the stand-by display in the Stand-by display is also
changed.
1 From the list of i-αppli software, select
the software and press (Func).
The Function menu appears.
2 Select [Stand-by display] → [Yes] and
press .
The i-αppli stand-by display is set and the icon
(P.240) changes to indicate that the software is set
for the stand-by display.
To operate the software set for the i-αppli stand-by
display
Press ( ) in the i-αppli stand-by display.
● The message confirming whether to start the
i-αppli stand-by display appears when the
FOMA terminal is powered on if the i-αppli
stand-by display is set. Select [No] not to start
it. Select [Yes] or leave it for a while to start the
i-αppli stand-by display.
● If the Lock all or Personal data lock is set or 2in1
is set to the Dual or B mode while you set the
i-αppli stand-by display, the i-αppli stand-by
display is temporarily terminated. When you
cancel the Lock all or Personal data lock, the
i-αppli stand-by display reappears.
● The Web To cannot be used from the i-αppli
stand-by display.
● If an error which could terminate the i-αppli
stand-by display occurs, the time of error
occurrence can be checked in the stand-by error
history.
● If a security error occurs in the i-αppli stand-by
display, “ ” (Stand-by SW error) appears in the
stand-by display.
Terminating the i-αppli Stand-by
Display
The i-αppli stand-by display is terminated and
the normal stand-by display is set.
1 From the list of i-αppli software, select
the software and press (Func).
The Function menu appears.
2 Select [Stand-by display] → [Cancel] and
press .
[End]:
End the i-αppli stand-by display once and
redisplay without terminating it.
[Cancel]:
Terminate the i-αppli stand-by display.
The i-αppli stand-by display is terminated.
Managing i-αppli
ˎ For some software, IP (information service providers)
may access the software saved in the mobile phone
and directly stop the use of it. In this case, most
operations including starting the software, setting
the software for the stand-by display, and upgrading
the software are disabled and only deleting the
software and displaying the software information
are available. To use the software again, you need
to request IP to resume the use of the software. For
more details, contact IP.
ˎ For some software, IP (information service providers)
may send data to the software saved in the mobile
phone.
ˎ When IP (information service providers) sends a
stop/resume request or data to the software, the
mobile phone starts to communicate with IP and
“” flashes. No packet communication charge is
required.
Continued
220
i-αppli
Upgrading i-αppli
The software saved in the FOMA terminal
can be upgraded if a newer version of the
downloaded software is available on a site.
1 From the list of i-αppli software, select
the software and press (Func).
The Function menu appears.
2 Select [Upgrade] → [Yes] and press .
Download of the new version of the software starts.
● Some software can be upgraded automatically
when it is started.
● When the FOMA terminal is connected to the
network for software upgrade, the packet
communication charge is required.
Adding/Deleting Folders
Folders in which software are saved can be
added or deleted. Up to 10 folders can be
used to manage software and folder names
can also be changed.
ˎ You cannot delete the preset folders.
Example: Adding a folder
1 Press (i-mode) for over a second in the
stand-by display and press (Func).
The Function menu appears.
2 Select [Edit folder] → [Create folder],
press , and enter a folder name.
Enter a name within 10 full-width or 20 half-width
characters.
The folder is added.
To change a folder name
Move the cursor to a folder and from the Function
menu, select [Edit folder] → [Edit folder name].
Enter a name within 10 full-width or 20 half-width
characters.
To delete a folder
Move the cursor to a folder and from the Function
menu, select [Edit folder] → [Delete folder]. Enter
the Security code and select [Yes].
Moving i-αppli to a Different
Folder
You can move software to a different folder
using three methods.
Example: Moving a software
1 Press (i-mode) for over a second in
the stand-by display, select a folder, and
press .
To move all software in the folder
From the Function menu, select [Move] → [Move
all] → [Yes] → a folder.
To move several software
From the Function menu, select [Move] →
[Select&move]. Select software and press
(Complete). Select [Yes] → a folder.
2 Select the software and press (Func).
The Function menu appears.
3 Select [Move] → [Move one] → [Yes] and
press .
The Select move to display appears.
4 Select a folder and press .
The selected software is moved to the different
folder.
221
i-αppli
Deleting i-αppli
You can delete software using four methods.
Example: Deleting a software
1 Press (i-mode) for over a second in the
stand-by display.
To delete all software
From the Function menu, select [Delete all], enter
the Security code, and select [Yes].
2 Select a folder and press .
To delete all software in the folder
From the Function menu, select [Delete] →
[Delete all], enter the Security code, and select
[Yes].
To delete several software
From the Function menu, select [Delete] →
[Select&delete] and select software. Press
(Complete) and select [Yes].
3 Select the software and press (Func).
The Function menu appears.
4 Select [Delete] → [Delete one] → [Yes]
and press .
The selected software is deleted.
● When deleting i-αppli with mail or deleting
all software including i-αppli with mail, you
can select whether to delete the automatically
created mail folder at the same time. However,
if the i-αppli with mail folder contains protected
mail at the time you select to delete both of
them, neither the software nor the folder can
be deleted. When you select to delete only
the software and keep the folder intact, you
can display only the mail main body from the
Function menu (P.224).
● Some Osaifu-Keitai-compatible i-αppli software
may not be deleted. Some software requires to
run i-αppli software and delete data stored in
the IC card before you can delete the software.
● When the IC card lock is set, you cannot delete
an Osaifu-Keitai-compatible i-αppli.
Setting How to Display a List of
Software
You can select the display style of a software
list using the following three methods. The set
display style is applied to all folders.
Icon(L)
Icon(S)
List
ソフト一覧
1/9
デコ絵つくーる
スーハ゜ーモンキーホ゛ール for SO
地図アプリ
FOMA
通信環境確認
アフ゜リ
Gカ゛イト゛
番組表
リモコン
iアフ゜リハ゛ンキンク゛
iD
設定アプリ
DCMXクレシ゛ットアフ゜リ
楽オク出品アプリ
2
Search by i−mode
1 Press (Func) in the i-αppli software
list display.
The Function menu appears.
2 Select [Change display] → the display
style and press .
The display style of an i-αppli software list is set.
Continued
222
i-αppli
Checking Error History and
Trace Result
The error histories for the i-αppli stand-by
display and the results output by the i-αppli
trace feature can be displayed.
Stand-by err hist When an i-αppli stand-by
display is terminated by an
error, such as being unable to
continue operation, up to 10
records including the time of error
occurrence, etc. are displayed.
Security err. hist. When i-αppli software is
terminated by an error, such as
being unable to use the saved
data, up to 10 records including
the time of error occurrence, etc.
are displayed.
Trace result When i-αppli software supporting
the trace feature is terminated, up
to 16 trace results are displayed.
Auto-start err hist When i-αppli software fails to
operate the Auto-start, up to 10
records including the time of error
occurrence, etc. are displayed.
Example: Displaying the stand-by error history
1 From the Menu, select [i appli] → [i αppli
history] and press .
ppli history
Stand−by err hist
Security err. hist.
Trace result
Auto−start err hist
2 Select [Stand-by err hist] and press .
Stby err hist
2008/02/14
15:11
XXXgame
2008/02/13
12:34
XXXhoroscope
To display the security error history
Select [Security err. hist.].
To display the trace result
Select [Trace result].
To display the auto-start error history
Select [Auto-start err hist].
To delete the error history or trace result
Press (Delete) and select [Yes].
● To i-αppli authors
If the software does not operate properly during
its programming, the trace result may be useful
as a reference.
Displaying i-αppli Data in microSD
memory card
<i-αppli(microSD)>
You can display i-αppli data saved in the
microSD memory card, using a folder name.
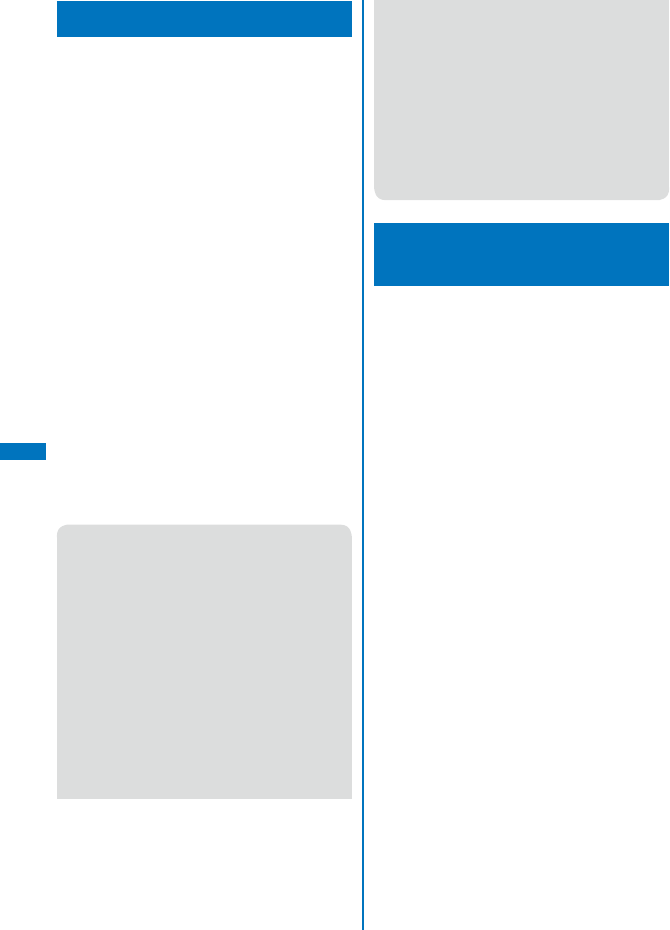
1 From the Menu, select [i appli] →
[i αppli(microSD)] and press .
ppli data
Folder1
Folder2
Folder3
Folder4
The i-αppli(microSD) folder list display appears.
To delete a folder
Move the cursor to a folder and from the Function
menu, select [Delete folder]. Enter the Security
code and select [Yes].
2 Select a folder and press .
The SW description display appears.
223
i-αppli
Using Various i-αppli
Functions
Using the Camera Function from
i-αppli
You can use the camera function (P.155) from
the software running on the FOMA terminal.
ˎ When you use the camera, open the lens cover.
ˎ Images are used and saved in the software.
ˎ Items that can be set and the startup procedure of
the camera vary depending on the software.
ˎ When you activate the camera from the software
that is specified the setting of the Closeup mode,
the Auto focus becomes [Macro].
1 While running the software, start the
camera function.
The Camera mode display appears.
2 Point the camera at the object and press
.
The image is recorded.
Using the Bar Code Reader from
i-αppli
You can use the bar code reader (P.183) from
the software running on the FOMA terminal.
ˎ The startup procedure of the bar code reader varies
depending on the software.
ˎ The scanned data may be used in the software.
1 While running the software, start the bar
code reader.
The Bar code reader display appears.
2 Locate at the JAN/QR code at the center
of the display and press .
The JAN/QR code is scanned.
Using Infrared Communication
from i-αppli
You can use the infrared communication
(P.327) from the software running on the FOMA
terminal.
ˎ There are some data that cannot be exchanged
even if the other device is equipped with the infrared
communication function.
ˎ The startup procedure of the infrared communication
varies depending on the software.
1 While running the software, start the
infrared communication.
2 Select [Yes] and press .
The infrared communication is started.
Obtaining a ToruCa Card from
i-αppli
You can obtain ToruCa cards from the software
running on the FOMA terminal (P.256) and
save them.
ˎ You can obtain up to 100 ToruCa or ToruCa(detail)
cards each up to 1K bytes for a ToruCa card or
100K bytes for a ToruCa(detail) card. The number
of cards that can be obtained may decrease
depending on the data to be obtained.
ˎ The obtaining method of ToruCa cards varies
depending on the software.
1 While running the software, select a
ToruCa card and press .
The screen for confirming whether to save data
appears.
2 Select [Yes] and press .
The ToruCa card is obtained.
Saving the Alarm from i-αppli
You can save the Alarm from the software
running on the FOMA terminal (P.360).
1 While running the software, perform the
settings of the Alarm.
2 Select [OK] and press .
The Alarm is saved.


225
Osaifu-Keitai/ToruCa
What is Osaifu-Keitai? ............................................................................................. 254
What is the iC transfer service? ................................................................................ 254
Starting an Osaifu-Keitai-compatible i-αppli ........................................................... 255
What is ToruCa? ...................................................................................................... 256
Obtaining a ToruCa Card ........................................................<Obtain a ToruCa card> 256
Displaying a ToruCa Card ............................................................... <Display ToruCa> 257
Managing ToruCa Cards .......................................................................................... 258
Setting the ToruCa Details ............................................................... <ToruCa setting> 259
Setting Whether to Notify That within the Communication Range ..... <IC act. notice> 261
Locking the IC Card Function .............................................................. <IC card lock> 262
226
Osaifu-Keitai/ToruCa
What is Osaifu-Keitai?
“Osaifu-Keitai” provides convenient i-mode
functions (i-mode FeliCa) that can be
performed using the IC card inserted in an
i-mode terminal.
FeliCa adopts a contactless IC card technology
that enables data to be read/written just by
scanning.
You can simply hold up your Osaifu-Keitai to a
reading device in stores that provide the FeliCa
service to pay using e-money, or use it as an
airplane ticket or point card. With features like
Osaifu-Keitai, your mobile phone becomes an
increasingly handy tool.
This latest FeliCa is even more convenient to
use compared with previous versions of the
FeliCa-compatible contactless IC card. For
example, you can deposit e-money in Osaifu-
Keitai on the IC card, and check the balance
and purchase history using communications.
※ To use Osaifu-Keitai-compatible services, you
need to make the necessary settings using i-αppli
software (IC appli) supporting IC card function
(check with IP (information service providers) for
more details).
※ For precautions on the use of each Osaifu-Keitai-
compatible service, see the “Mobile Phone User’s
Guide
【i-mode】
FOMA version”.
● The data on the IC card could be lost/changed
due to an Osaifu-Keitai trouble (Note that, as
a rule, when your Osaifu-Keitai is left with us
such as for repairs, we can take it only when all
data is deleted. Therefore, you are requested
to delete the data yourself). You are requested
to use the backup services provided by IP
(information service providers) to support for
reissuing, restoring, holding temporarily, or
transferring data except transferring data by the
iC transfer service. Check with IP (information
service providers) whether the backup service
is provided, for the usage conditions (such as
necessary prior procedures or fees), or whether
the iC transfer service is supported beforehand
because those vary from one service to another.
Please make sure to use the services supporting
the backup services for important data.
● DoCoMo shall not be liable for any data loss/
change of the information saved on the IC card
or any damage occurred relating to using Osaifu-
Keitai-compatible services regardless of any
reasons such as trouble or changing to another
FOMA terminal.
● If you should lose the Osaifu-Keitai or have
it stolen, immediately contact the Osaifu-
Keitai-compatible service provider you use
for operations which have to be done in this
situation. For this FOMA terminal, both the
Omakase Lock (P.136) and IC card lock (P.262)
can be used.
What is the iC transfer
service?
The iC transfer service※1 is a service
provided for transferring all data stored on
the IC card at once※2 to a new Osaifu-Keitai
※3 when the Osaifu-Keitai is replaced such
as for changing to another FOMA terminal or
trouble repair. Once the data stored in the IC
card is transferred to the new Osaifu-Keitai,
you can use Osaifu-Keitai-compatible services
by simply downloading the Osaifu-Keitai-
compatible i-αppli.
You can use the iC transfer service at our
service counter of your local DoCoMo shop,
etc.
For details, see the “Mobile Phone User’s
Guide
【i-mode】
FOMA version”.
※1 There is a processing charge for the use of the iC
transfer service. (There are some cases where no
charges apply.) Packet communication charges
apply for IC appli downloads and various settings.
※2 There are some Osaifu-Keitai-compatible services
that do not support the all data transfer function.
Unsupported services are deleted when you
use the iC transfer service. Therefore, utilize the
backup service of each Osaifu-Keitai-compatible
service or delete them before you use the iC
transfer service.
※3 The iC transfer service can be used only the
Osaifu-Keitai where the data is transferred to has
to be the compatible model with the iC transfer
service.
227
Osaifu-Keitai/ToruCa
Starting an Osaifu-Keitai-
compatible i-αppli
You have access to useful functions, for
example, reading/writing data on the IC card
using an Osaifu-Keitai-compatible i-αppli in
order to deposit e-money (such as train ticket
deposit) or look up the balance or purchase
history from the mobile phone.
ˎ When you start an Osaifu-Keitai-compatible i-αppli
software for the first time or download one, the
message “Current UIM necessary to use IC card?”
appears. If you select [Yes], you cannot use the IC
card function without inserting the associated UIM.
When you use the FOMA terminal with another UIM,
you once need to delete all Osaifu-Keitai-compatible
i-αppli software with the associated UIM inserted in
the FOMA terminal to use the IC card function.
1 From the Menu, select [Osaifu-Keitai] →
[IC card content] and press .
IC card content
1/2
iD
設定
アフ゜リ
DCMXクレシ゛ットアフ゜リ
Search by i−mode
2 Select the software and press .
The software is started up and “ ” or “ ” appears.
● Reading/writing of data on the IC card from the
software is interrupted in the following cases.
Partially read/written data may be discarded.
- When the time preset for the Schedule alarm
or Alarm occurs
- When receiving a voice, videophone, or
PushTalk call (The operation that takes place
after you hang up the call may be different
depending on the service you use.)
- When the battery runs out
Using the Osaifu-Keitai
When you hold up and show the FeliCa mark
“” side of the FOMA terminal to a reading
device, you can use the FOMA terminal for
payment as e-money or use it in place of a
train ticket. You can use this function without
starting up the associated software.
ˎ You can use Osaifu-Keitai by holding up and
showing the FeliCa mark to a reading device during
a call or i-mode connection. You cannot start the
software.
ˎ Holding up and showing the FeliCa mark to a
reading device may cause the associated software
to be executed.
When the FOMA terminal comes within the
communication range with the reading device, the
FeliCa Sign lights in green. The vibrator vibrates
when the communication starts.
● If the FeliCa mark on the FOMA terminal is not
recognized by a reading device, move the
terminal back and forth and side to side as you
hold it up to the device.
● Even if the FOMA terminal is powered off, you
can use the Osaifu-Keitai by holding up and
showing the FeliCa mark to a reading device. You
cannot use it if the battery pack is not attached.
You may not be able to use Osaifu-Keitai if the
attached battery pack has not been used for a
long period of time or has not been charged after
the battery alarm was sounded. In this case,
charge the battery pack and power on the FOMA
terminal. When the FOMA terminal is powered
off, you cannot start an Osaifu-Keitai-compatible
i-αppli to read/write data on the IC card.
● Note that if you leave the FeliCa Sign lighting, the
battery drains faster.
● When the FOMA terminal comes within the
communication range with the reading device
while charging the battery, the Charge indicator
and FeliCa Sign light at the same time.
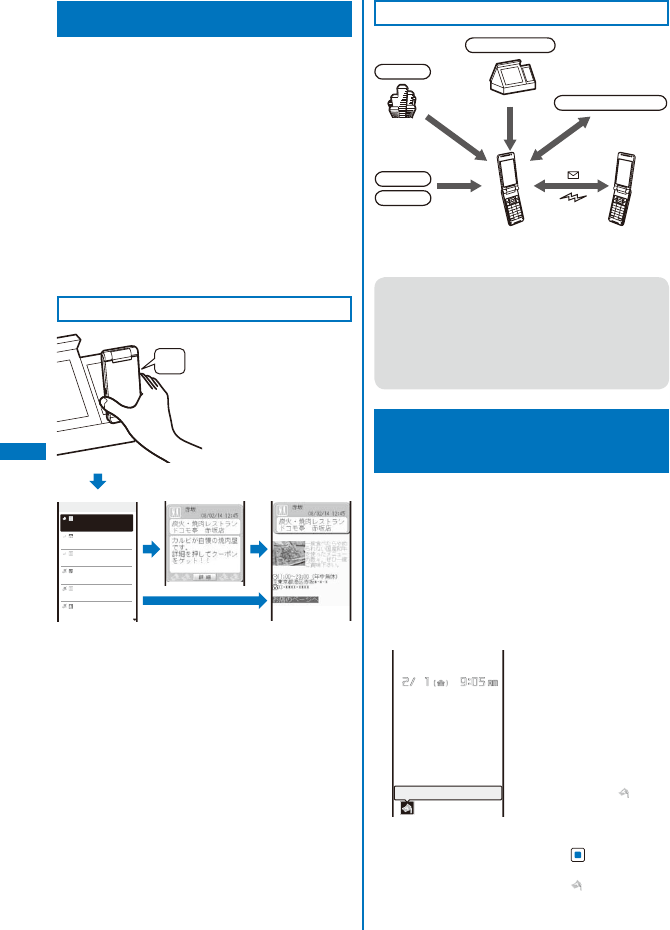
228
Osaifu-Keitai/ToruCa
What is ToruCa?
ToruCa is an e-card that can be obtained using
Osaifu-Keitai. This convenient e-card can be
used for applications such as flier, restaurant
card, or coupon.
You can obtain ToruCa cards from a reading
device or site. These e-cards can be easily
exchanged by way of e-mail, infrared
communication, or the microSD memory card.
The ToruCa card you obtained is saved in
[ToruCa] of the [Osaifu-Keitai] menu.
You need a ToruCa-compatible terminal to use
ToruCa. For details, see the “Mobile Phone
User’s Guide
【i-mode】
FOMA version”.
Flow of ToruCa Operation
ToruCa
1/8
12:45
赤坂
炭火・焼肉レストラン
02/13
築地
江戸前 ○○○
02/08
銀座
とんかつ △△△
02/08
六本木
サロン △□△
02/07
赤坂
フレンチ ○□○
02/05
品川
割烹 ○△○
Hold up and show the Osaifu-
Keitai to a reading device in
order to obtain a ToruCa card.
When the FOMA terminal
comes within the
communication range with
the reading device, the
FeliCa Sign lights in green.
The vibrator vibrates and the
FeliCa Sign flashes when the
communication starts.
Beep!
Select an obtained ToruCa card from the ToruCa list.
Methods for Obtaining a ToruCa Card
Exchange a ToruCa card between
i-mode terminals
Mail
Infrared/
iC communication
Site
microSD memory card
QR code
i-αppli
Reading device
● When you exchange a ToruCa card using
i-mode communication, the regular packet
communication charge is required.
● Some ToruCa cards may not allow you to
update or redistribute using mail or infrared
communication, etc. depending on the settings
by IP (information service providers).
Obtaining a ToruCa Card
<Obtain a ToruCa card>
You can hold up and show the FOMA terminal
to a reading device to obtain a ToruCa or
ToruCa(detail) card.
ˎ You can obtain up to 100 ToruCa cards, each up to
1K bytes for a ToruCa card and up to 100K bytes for
a ToruCa(detail) card. The number of ToruCa cards
that can be obtained may decrease depending on
the data to be obtained.
ˎ While the IC card lock is set, you cannot obtain a
ToruCa card from a reading device.
New ToruCa
1
When you obtain a ToruCa
card from a reading device,
the FeliCa Sign flashes in
green, a beep sounds to
notify you that the card has
been obtained, the ToruCa
card is displayed, and the
previous display reappears
after about 15 seconds. The
notification icon “ ” (New
ToruCa) appears in the
stand-by display.
To display the ToruCa card
Press (Link) in the
stand-by display and
select “ ”.
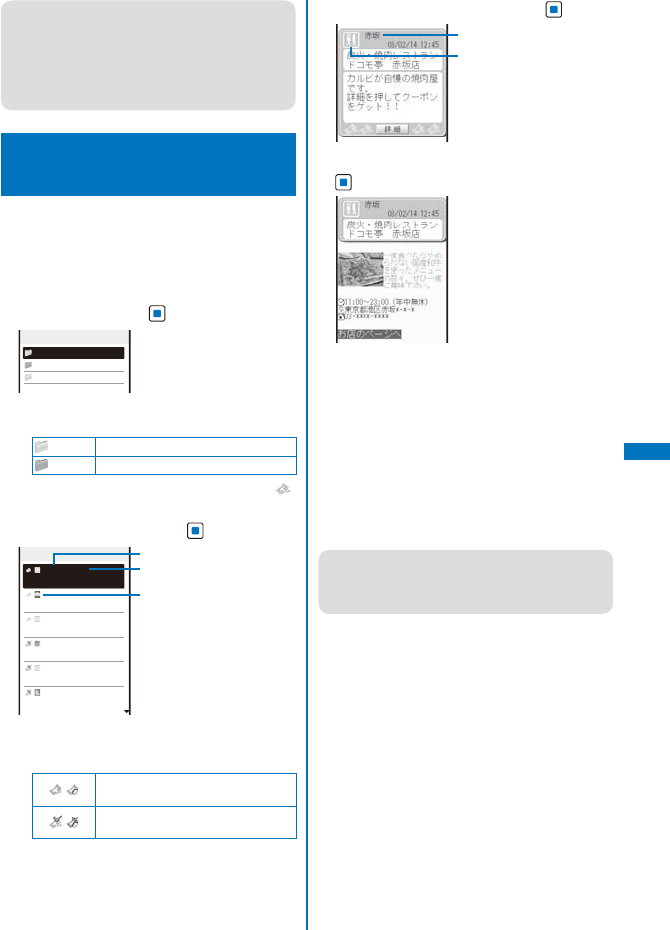
229
Osaifu-Keitai/ToruCa
● Some ToruCa cards may not allow you to send
mail with ToruCa cards attached, send data
using iC or infrared communication, or copy
them to the microSD memory card.
● When the Lock key is set, a beep for notifying
you that the card has been obtained does not
sound.
Displaying a ToruCa Card
<Display ToruCa>
You can display a saved ToruCa or
ToruCa(detail) card any time. You can also
obtain a ToruCa(detail) card from the ToruCa
card.
1 From the Menu, select [Osaifu-Keitai] →
[ToruCa] and press .
ToruCa
8/12
ToruCa
Folder1
Used
The ToruCa folder list appears.
ˎ The following icons show the status of the folder.
(Yellow) Preset folder
(Blue) User-created folder
ˎ If there is an unread ToruCa card, “ ”
appears at the lower right of the icon.
2 Select a folder and press .
ToruCa
1/8
12:45
赤坂
炭火・焼肉レストラン
02/13
築地
江戸前 ○○○
02/08
銀座
とんかつ △△△
02/08
六本木
サロン △□△
02/07
赤坂
フレンチ ○□○
02/05
品川
割烹 ○△○
Obtained date/time
Index
Category icon
The ToruCa list appears.
ˎ The following icons show the status of the ToruCa
card.
/Unread ToruCa card/Expired unread
ToruCa card
/Read ToruCa card/Expired read
ToruCa card
3 Select a ToruCa card and press .
Index
Category icon
4 Select [詳細] (Detail) → [Yes] and press
.
You obtain a ToruCa(detail) card.
To update a ToruCa(detail) card to the latest status
From the Function menu, select [Updated
ToruCa] → [Yes].
To save data such as a phone number in the
Phonebook
Move the cursor to the phone number, etc.
and from the Function menu, select [Add to
phonebook].
ˎ Follow the same steps as in “Saving the
Redial/Received Record in the Phonebook”
(P.99, step 4 to 7).
● When you obtain a ToruCa card from a reading
device while displaying a list such as the ToruCa
list, the ToruCa folder list appears. Select [ToruCa]
once again to display the obtained ToruCa card.
230
Osaifu-Keitai/ToruCa
Managing ToruCa Cards
ˎ You cannot move, sort, or search a ToruCa card in
the [Used] folder.
Adding/Deleting Folders
You can create and delete a folder for saving a
ToruCa card. You can manage up to 22 folders.
You can also change the name of a folder or
sort folders in the list.
ˎ You cannot delete or change the names of the
preset folders.
Example: Adding a folder
1 Press (Func) in the ToruCa folder list.
The Function menu appears.
2 Select [Edit folder] → [Create folder],
press , and enter a folder name.
Enter a folder name within 10 full-width or 20 half-
width characters.
The folder is added.
To change a folder name
Move the cursor to the folder and from the
Function menu, select [Edit folder] → [Edit folder
name]. Enter a folder name within 10 full-width or
20 half-width characters.
To reorder the folders
From the Function menu, select [Edit folder] →
[Reorder folders] → a folder. Move the cursor
to a position to move to, press (Move), and
press (Complete).
To delete a folder
Move the cursor to the folder and from the
Function menu, select [Edit folder] → [Delete
folder], enter the Security code, and select [Yes].
Moving a ToruCa Card to
Another Folder
You can move ToruCa cards to another folder
using three methods.
ˎ You cannot move a ToruCa card to [Used].
Example: Moving a ToruCa card
1 From the ToruCa folder list, select a folder
and press .
To move all ToruCa cards in the folder
From the Function menu, select [Move] → [Move
all] → [Yes] → a folder.
To move several ToruCa cards
From the Function menu, select [Move] →
[Select&move], select ToruCa cards, and press
(Complete). Select [Yes] → a folder.
2 Select a ToruCa card and press (Func).
The Function menu appears.
3 Select [Move] → [Move one] → [Yes] and
press .
The Select move to display appears.
4 Select a folder and press .
The selected ToruCa card is moved to another
folder.
Deleting a ToruCa Card
You can delete ToruCa cards using four
methods.
Example: Deleting a ToruCa card
1 From the Menu, select [Osaifu-Keitai] →
[ToruCa] and press .
To delete all ToruCa cards
From the Function menu, select [Delete all], enter
the Security code, and select [Yes].
2 Select a folder and press .
To delete all ToruCa cards in the folder
From the Function menu, select [Delete] →
[Delete all], enter the Security code, and select
[Yes].
To delete several ToruCa cards
From the Function menu, select [Delete] →
[Select&delete], select ToruCa cards, press
(Complete), and select [Yes].
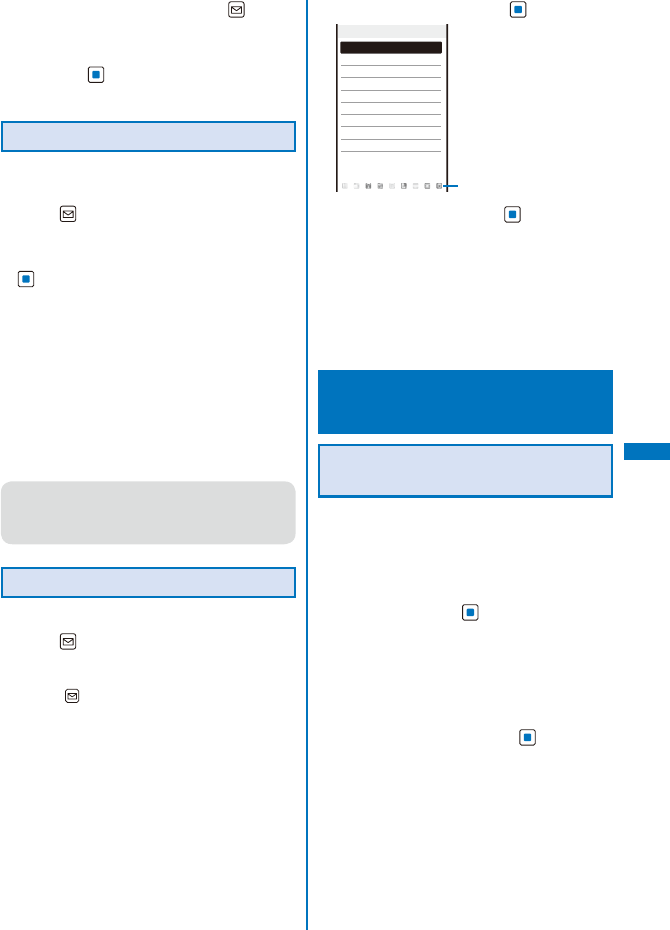
231
Osaifu-Keitai/ToruCa
3 Select a ToruCa card and press (Func).
The Function menu appears.
4 Select [Delete] → [Delete one] → [Yes]
and press .
The selected ToruCa card is deleted.
Sorting the List
You can temporarily sort the ToruCa cards in a
folder and display them.
1 Press (Func) in the ToruCa list.
The Function menu appears.
2 Select [Sort] → a sorting order and press
.
[Date]:
Sort by obtained date/time from newest to oldest.
[Genre]:
Sort by genre that identifies the type of ToruCa.
[Index]:
Sort by index in Japanese alphabetical order.
[By kana]:
Sort by “kana” in the data saved on a ToruCa
card.
The ToruCa cards are displayed in accordance with
the selected sort method.
● When you sort ToruCa cards using [Index], the
order of sorting may not follow the Japanese
alphabetical order if both full-width and half-
width characters are used.
Searching a ToruCa Card
You can search for ToruCa cards by genre.
1 Press (Func) in the ToruCa folder list.
The Function menu appears.
To search for ToruCa cards in the folder
Press (Func) in the ToruCa list.
2 Select [Search] and press .
Select category
Restaurant
Town info
Supermarket
travel/recreation
fashion/accessory
beauty/relaxation
game/horoscope
hobby/entertainment
Education
Others
Category icons
3 Select a genre and press .
The search result appears.
To delete all searched ToruCa cards
From the Function menu, select [Delete] →
[Delete all item], enter the Security code, and
select [Yes].
To move all searched ToruCa cards
From the Function menu, select [Move] → [Move
all item] → [Yes] → a folder.
Setting the ToruCa Details
<ToruCa setting>
Setting Whether to Obtain a
ToruCa Card
You can set whether to obtain ToruCa
cards from a reading device or using the iC
communication.
1 From the Menu, select [Osaifu-Keitai] →
[Settings] → [ToruCa setting] → [ToruCa
receive] and press .
[Yes]:
Obtain a ToruCa card from a reading device or
using the iC communication.
[No]:
Do not obtain a ToruCa card from a reading
device or using the iC communication.
2 Select [Yes]/[No] and press .
The ToruCa receive is set.
Continued
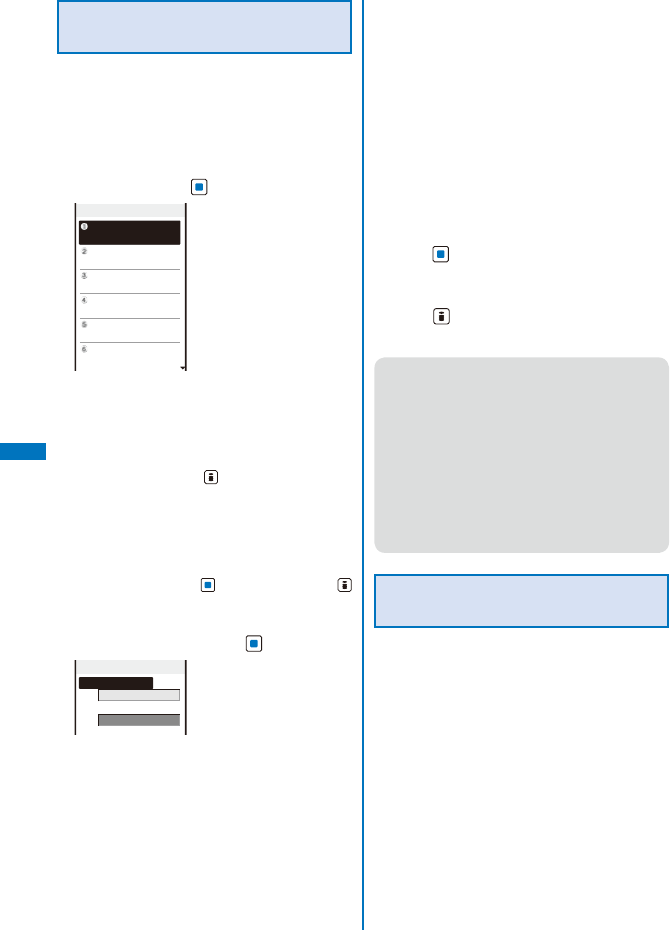
232
Osaifu-Keitai/ToruCa
Assigning Separate Folders for
ToruCa Cards
You can save requirements to sort ToruCa
cards obtained from a reading device so that
they can be automatically assigned to folders.
Up to 20 sorting requirements can be saved.
1 From the Menu, select [Osaifu-Keitai] →
[Settings] → [ToruCa setting] → [Sort
folder] and press .
Sort folder
To delete a sorting requirement
Move the cursor to the sorting requirement
and from the Function menu, select [Delete] →
[Delete one] → [Yes]. To delete several sorting
requirements, from the Function menu, select
[Delete] → [Select&delete], select sorting
requirements, press (Complete), and select
[Yes]. To delete all sorting requirements, from the
Function menu, select [Delete] → [Delete all],
enter the Security code, and select [Yes].
To reorder the sorting requirements
From the Function menu, select [Reorder] → a
sorting requirement, move the cursor to a folder
to move to, press (Move), and press
(Complete).
2 Select a place to save the sorting
requirement to and press .
Sort rule1
Sorting criteria
Folder to sort into
3 Select the sorting method at [Sorting
criteria].
[Genre]:
Specify a genre of ToruCa cards.
[Title]:
Specify a part of a title within 10 full-width or 20
half-width characters.
[Index]:
Specify a part of an index within 10 full-width or
20 half-width characters.
[None]:
Do not specify any sorting method.
4 Select a folder to be used for sorted
ToruCa cards at [Folder to sort into] and
press .
When no folder is specified
ToruCa cards are sorted to [ToruCa].
5 Press (Complete).
The sorting requirement is saved.
● If a ToruCa card satisfies several sorting
requirements, the sorting requirement with a
lower number in the list has higher priority.
● If you delete a folder for which the sorting
requirement is set, [ToruCa] is used as a sort
destination folder.
● ToruCa cards received before the sorting
requirement is set are not sorted automatically.
● You cannot set [Used] as a sort destination
folder.
● Only ToruCa cards obtained from the reading
device are sorted automatically.
Setting Whether to Automatically
Recognize a ToruCa(Detail) Card
You can set whether to let a reading device
recognize available ToruCa cards automatically
when you hold up and show the FOMA terminal
to it in order to use ToruCa.
ˎ Up to 20 ToruCa cards are saved in [Used]. When
the number of saved cards exceeds 20, the cards
with the oldest date/time are deleted, in that order.
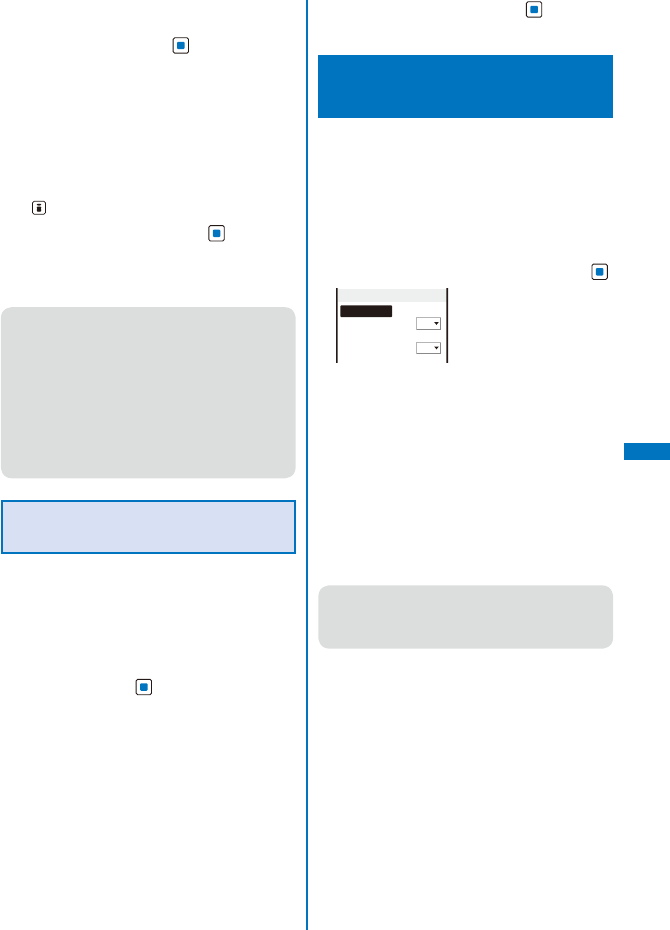
233
Osaifu-Keitai/ToruCa
1 From the Menu, select [Osaifu-Keitai]
→ [Settings] → [ToruCa] → [Auto
recognition] and press .
[ON]:
Available ToruCa cards are automatically
recognized by the reading device and saved in
[Used].
[OFF]:
Available ToruCa cards are not recognized by
the reading device.
To display the explanation about the Auto recognition
Move the cursor to [Auto recognition] and press
(Help).
2 Select [ON]/[OFF] and press .
The Auto recognition is set.
When you select [ON]
Select [Yes].
● When the Lock all or Personal data lock is set, a
ToruCa card does not move to [Used] even if it is
to be deleted regardless of the Auto recognition
being set to [ON].
● If you hold up and show the FOMA terminal to
a reading device with the Auto recognition set
to [OFF], a message confirming whether to use
the Automatic reading function or stating that the
Automatic reading function is OFF may appear.
To use the Automatic reading function, select
[Yes] to set the Auto recognition to [ON].
Setting Whether to Check the
Duplication of a ToruCa(Detail) Card
You can set the FOMA terminal to check if the
ToruCa(detail) card you are trying to obtain has
been obtained already when you obtain the
card from a reading device.
1 From the Menu, select [Osaifu-Keitai] →
[Settings] → [ToruCa] → [Duplication
check] and press .
[ON]:
Check if a target ToruCa(detail) card is already
obtained. Do not obtain a ToruCa card that you
have obtained already. Obtain a ToruCa card
only when you have not obtained it yet.
[OFF]:
Do not check if a target ToruCa(detail) card is
already obtained.
2 Select [ON]/[OFF] and press .
The Duplication check is set.
Setting Whether to Notify That within
the Communication Range
<IC act. notice>
You can set the FOMA terminal whether to notify
you of being within the FeliCa communication
range or the FeliCa communication being
started by vibration or the FeliCa Sign when
you are close to a reading device with the
FOMA terminal powered on.
1 From the Menu, select [Osaifu-Keitai] →
[Settings] → [IC act. notice] and press .
IC act. notice
By vibrator
ON
By LED
ON
[By vibrator]:
Set whether to activate the vibrator when the
communication starts.
[By LED]:
Set whether to turn on the FeliCa Sign when
you enter the range in which communication is
enabled or when the communication starts.
2 Select [ON]/[OFF] of the vibrator at [By
vibrator].
3 Select [ON]/[OFF] of the FeliCa Sign at [By
LED].
● When the Public mode (Drive mode) is set, the
FeliCa Sign does not light and the vibrator does
not operate even if the By vibrator and By LED
are set to [ON].
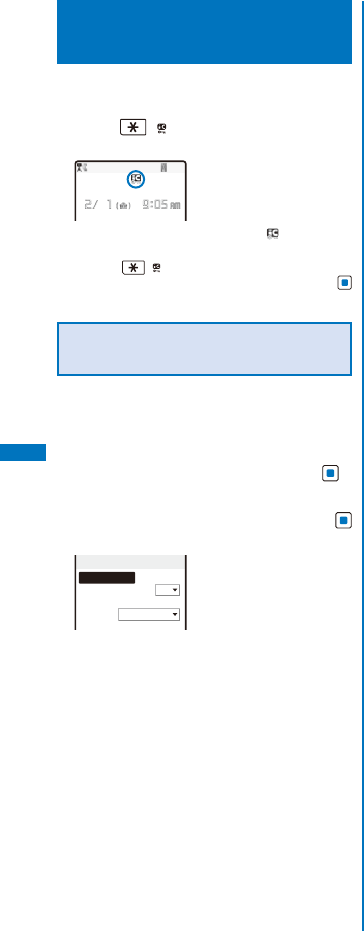
234
Osaifu-Keitai/ToruCa
Locking the IC Card
Function <IC card lock>
You can lock the IC card function to prevent
others from using it.
1 Press ( ) for over a second in the
stand-by display.
The IC card function is locked and “ ” appears.
To cancel the IC card lock
Press ( ) for over a second in the stand-by
display, enter the Security code, and press
(OK).
Locking the IC Card Function When
the FOMA Terminal Is Powered Off
You can set to automatically lock the IC card
function when the FOMA terminal is powered
off.
1 From the Menu, select [Osaifu-Keitai] →
[Settings] → [IC card lock] and press .
The Security code screen appears.
2 Enter the Security code and press
(OK).
IC card lock
IC card lock
OFF
IC lock(power−off)
Last status
[IC card lock]:
Set whether to lock the IC card function.
[IC lock(power-off)]:
Set whether to automatically lock the IC card
function when the FOMA terminal is powered off.
3 Select [Last status]/[Locked] at [IC
lock(power-off)].
[Last status]:
Keep the current status even after the FOMA
terminal is powered off.
[Locked]:
Lock the IC card function when the FOMA
terminal is powered off.

235
GPS Function
Precautions on the Use of GPS Functions .............................................................. 264
Checking Your Location .................................................................<Position location> 264
Using the GPS-compatible i-αppli .............................................................. <i appli> 265
Providing Your Current Location Information upon Request ....... <Location provision> 270
Notifying Your Current Location Information ................................... <Location notice> 274
Displaying the History of Location Positioning ............................... <Location history> 276
Using the Location Information from Each Function ................................................ 277
Setting the GPS Functions ................................................................. <GPS settings> 278

236
GPS Function
Precautions on the Use of
GPS Functions
ˎ You may need i-mode subscription for the use of the
GPS function.
ˎ GPS is operated by the U.S. Department of
Defense. Therefore, GPS radio wave condition may
be controlled (degradation of accuracy, suspension
of radio wave transmission, etc.) at the discretion of
the U.S. Department of Defense.
ˎ Note that radio waves may not be received or it may
be difficult to receive radio waves in the following
conditions, since GPS uses radio waves from a
satellite.
- Inside or immediately under a building
- Inside a basement or tunnel, and below the
ground or water
- Inside a bag or box
- High-rise building district or densely populated
residential area
- Inside or under a thick covering of trees
- Near a high-voltage cable
- In a car, inside a train compartment
- Bad weather such as heavy rain or snow
- When there are obstructions (people or objects)
near a mobile phone
- When you are covering the display or earpiece of
your mobile phone with your hand.
The obtained location information may deviate by
300 m or more under the above conditions.
ˎ When the FOMA terminal is outside of the service
area (or it is overseas), the GPS function is not
available.
ˎ There are about 24 GPS satellites in orbit at an
altitude of about 20,000 km, and each satellite takes
about 12 hours to travel around the earth. Therefore,
radio wave reception condition may vary depending
on the date/time even if the operating environment is
the same. For example, a significant deviation could
occur to the location information or it may not be
possible to identify a location.
ˎ Please note that DoCoMo shall have no liabilities
for any purely economic loss including those due
to missing a chance to check the measurement
(communication) results because of external factors
(including the running out of the battery), such as
a failure, malfunction, or any other problems of the
FOMA terminal or the power failure.
ˎ You cannot use the FOMA terminal as a navigation
device for an aircraft, vehicle, and person.
Please note that DoCoMo shall have no liabilities
whatsoever even if you suffer damage or loss
while performing a navigation using the location
information.
ˎ You cannot use the FOMA terminal as a high-
accuracy measurement GPS. Please note that
DoCoMo shall have no liabilities whatsoever even if
you suffer damage or loss due to a deviation of the
location information.
ˎ The Position location, Location notice, and Location
provision cannot be used in the following cases.
- While the Lock all is set※1
- While the Omakase Lock is set※1
- While the Personal data lock is set※1
- While the Lock key is set※1
- While the Self mode is set
- When the UIM is not inserted
- While updating the software
- While the Key dial lock is set※2
※1 The Location provision is available.
※2 The Position location, Location provision, and
Location notice from the Loc. service client list
are available.
Checking Your Location
<Position location>
You can measure your current location to
determine where you are. You can display a
map based on the location information you
obtain, mail the location information, or save
the location information in the Phonebook.
ˎ No communication charge is required for confirming
your current location. Note, however, that there is an
extra packet communication charge for displaying a
map based on your current location information.
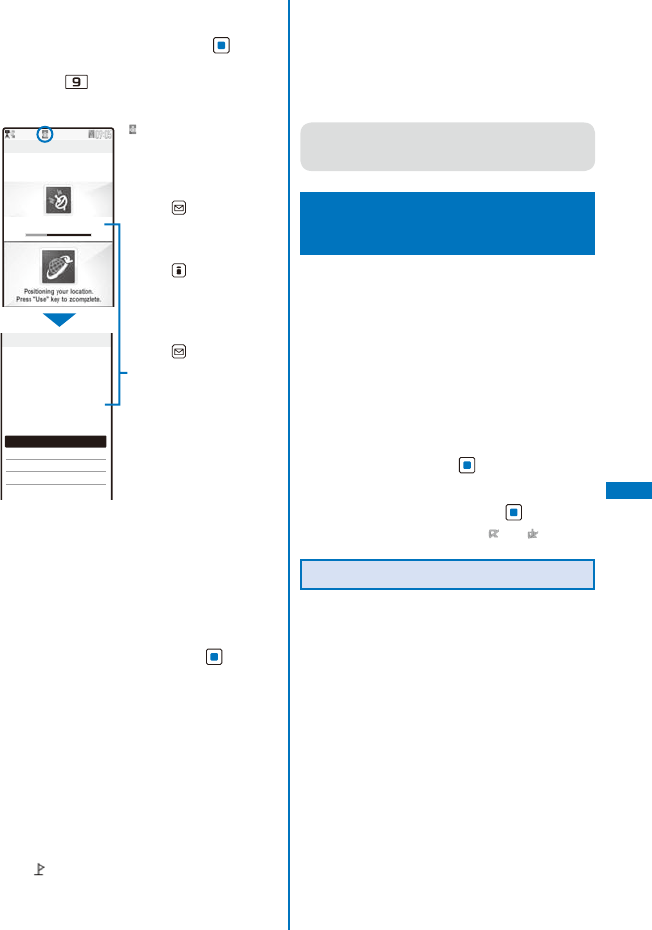
237
GPS Function
Continued
Example: Displaying a map of your current location
1 From the Menu, select [LifeKit] → [GPS]
→ [Position location] and press .
ˎ You can also check your current location by
pressing for over a second in the stand-by
display. After positioning, the operations follow
the settings of the GPS button setting (P.278).
Positioning loc.
Accuracy:
★
☆
☆
Position location
Read a Map
Run i appli
Paste to mail
Add to phonebook
Attach to image
Positioning
completed.
Accuracy
★
★
★
“” flashes and the incoming
indicator flashes.
The progress of accuracy is
indicated by the bar.
To quit the Position location
Press (Cancel).
To display the result for
identifying a location right
away
Press (Use).
To retry the operation
Press (Retry).
Accuracy
★ ★ ★: Nearly accurate
location information
(with an error less
than approximately
50 m)
★ ★ ☆: Relatively accurate
location information
(with an error less
than approximately
300 m)
★ ☆ ☆: Approximate
location information
(with an error more
than approximately
300 m)
ˎ Use the positioning accuracy as a guide. The
accuracy may vary depending on the radio wave
condition of the vicinity.
2 Select [Read a Map] and press .
The map of determined current location is
displayed.
ˎ After displaying the map, you can search for the
neighborhood information using “iエリア−周
辺情報−” (i-mode area –Neighbor info–). For
details about “iエリア−周辺情報−”, see the
DoCoMo’s website.
To use the location information with GPS-compatible
i-αppli software
Select [Run i appli] → software to be used.
To paste the location information to mail
Select [Paste to mail] → [Yes].
ˎ “ location URL” that has a link to the location
information is entered in the mail main body.
ˎ The location information URL being sent is
only displayed on the i-mode compatible
terminals.
To save the location information in the Phonebook
Select [Add to phonebook] → [New]/[Add].
ˎ Follow the same steps as in the Add to FOMA
terminal phonebook (P.95, step 3 to 6).
To add location information on an image
Select [Attach to image] → an image from My
picture of the Data Box.
● You can add location information using the GPS
function on an image recorded by the camera
automatically (P.171).
Using the GPS-compatible
i-αppli <i appli>
You can use the location information with GPS-
compatible i-αppli software.
ˎ When you use a GPS-compatible i-αppli, the
location information is sent to the information
provider of the software being used.
ˎ When you use the GPS function with a GPS-
compatible i-αppli, set the Use location info of the
software being used to [Yes].
ˎ The method of using the location information varies
depending on the software.
1 From the Menu, select [LifeKit] → [GPS]
→ [i appli] and press .
The GPS software list display appears.
2 Select a software and press .
The software is started up and “ ” or “ ” appears.
Using 地図アプリ(Map appli)
The preinstalled “地図アプリ(Map appli)”
uses the GPS function and a map to display
your current location or specified location, to
search the information on neighborhood, and
to navigate you to the destination by public
transportation, walk, or car.
ˎ An additional packet communication charge is
required for using this function. It is recommended
to use the Pake-Houdai/Pake-Houdai Full for this
software.
ˎ When you have deleted the software but you want to
restore it, download it from “iエリア−周辺情報−”
(i-mode area-Neighbor info-).
ˎ You cannot use this software when 2in1 is set to the
B mode because it uses mail.
ˎ Please note that DoCoMo will not guarantee any
result such as of the accuracy and immediacy of
information such as map or route.
ˎ While driving a car, please let a person other than
the driver operate it.
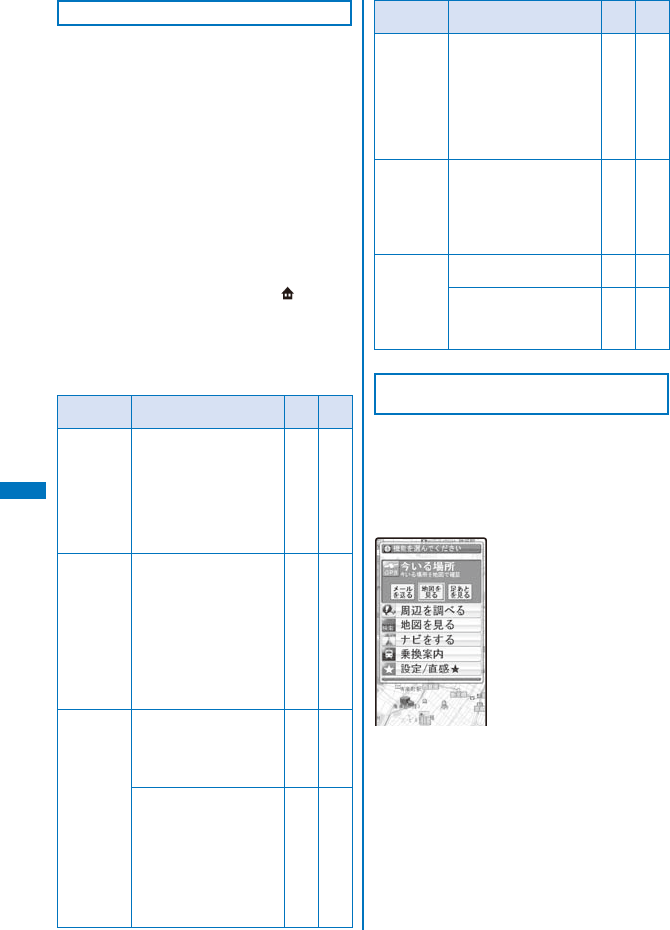
238
GPS Function
Basic Service and Additional Service
There are the basic services and additional
services for this software.
Basic service : Services provided by
DoCoMo for free of
charge.
Additional service : Services provided by
ZENRIN DataCom that
require an additional
charge.
You can use the additional services except
the traffic information up to 90 days after you
activate the software for the first time.
After 90 days, if you wish to keep using the
additional services, you need to apply for a
membership (paid) to “ゼンリン 地図+ナ
ビ” (ZENRIN Maps+Navi) provided by ZENRIN
DataCom.
If you apply for a membership while still using
it, you do not need to download the software
again. You can keep using the software.
Menu Contents
Up to
90 days
After 90
days
今いる場所
(Current
location)
ˎ Use the GPS function to
show the map of your
current location or send
a map attached to mail.
ˎ Leave your footmark of
your current location,
follow the track, and
check others’ footmarks.
Free Free
周辺を調べる
(Search
neighborhood)
ˎ Search information such
as shops, facilities, iD-
available stores around
your current location or
specified location and
obtain a coupon from
gourmet information.
ˎ Check weather or
availabilities of parking
lot near the location.
Free Free
地図を見る
(View a map)
ˎ Search a map by
entering information
such as keywords, a
genre, address, and
phone number.
Free Free
ˎ Check a map of the
location saved in the
software, server, or
Phonebook or searched
before.
ˎ Save a map of a location
in a server to use the
information on a PC as
well.
Free Paid
Menu Contents
Up to
90 days
After 90
days
ナビをする
(Navigation)
ˎ Navigate the route to the
destination by public
transportation, walk, or
car.
ˎ Navigate the route
to your house whose
information is saved
before.
Free Paid
乗換案内
(Transfer
information)
ˎ Check transfer
information and time
table of trains.
ˎ Check the train route on
a map and set an alarm
before departure.
Free Paid
設定/直感★
(Settings/
Intuition)
ˎ Tilt the FOMA terminal to
move a 3D map or map.
Free Free
ˎ Check how to set or
operate the software
regarding display of a
map, navigation, etc.
Free Free
Menus and Operations of the Top Display
of “地図アプリ” (Map appli)
ˎ When you use “地図アプリ” (Map appli) for the
first time, the Terms of Use and precautions are
displayed.
ˎ The display shown is an image for explanatory
purpose and may be different from the actual
display.
Top display
Each menu is displayed in the Top display. When you
close the menu, the last searched map appears.
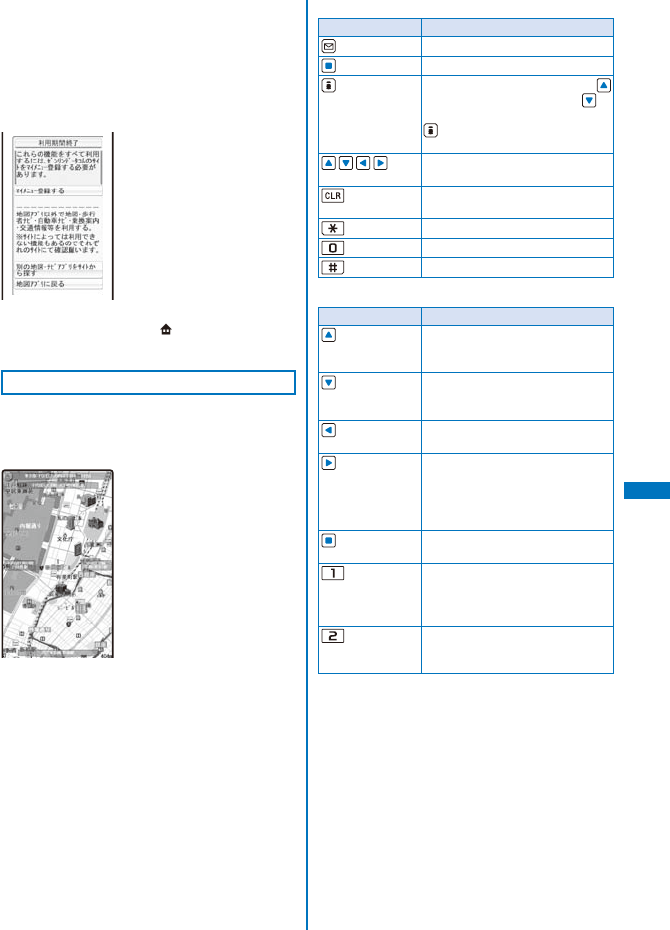
239
GPS Function
■ After 90 days without a subscription for a
membership
When you use the software for the first time after
90 days, the message informing that available
functions are limited and the message inquiring for a
subscription for a membership appear.
When you select an additional service, those
messages appear as well.
You can subscribe for a membership from the software
accessed to the “ゼンリン 地図+ナビ” (ZENRIN
Maps+Navi) site.
Display and Operations of a Map
ˎ The display shown is an image for explanatory
purpose and may be different from the actual
display.
Map display
©ZENRIN DataCom CO.,LTD. 2007
Key operations while displaying a map
Key operation Action
メニュー(Menu)
Display the menu.
Display the quick access menu.
拡縮 (Zoom) Display the zoom bar. Press
to display a wider range, or to
display the detailed area. Press
(閉じる) (Exit) to determine the
zoom and the bar disappears.
Move the map horizontally or
vertically.
Close the menu or send you back
to the first searched result position.
Rotate the map counterclockwise.
Rotate the map faced to north.
Rotate the map clockwise.
Key operations while displaying the quick access menu
Key operation Action
周辺を調べる
(Search neighbor)
Search the neighboring information
based on the center of the
displayed map.
ココへナビ
(Navi here)
Search the route from the set
departure point to the center of the
displayed map.
ココを送信
(Send here)
Send mail with the URL of the
displayed map.
ココを登録
(Save here)
Save the location information
on the center of the map in the
software, server, or Phonebook.
When you save it in the server, you
can access it from a PC as well.
地図へ
(To Map)
Close the quick access menu.
3D
・パノラマ
(3D/Panorama)
Display the points where you
can display a 3D intersection or
panorama image. Select the point
to view them.
ビル テナ
ント
(Building
Tenant)
Display a building existed around
and if there is a tenant, you can
click to check it.
Continued
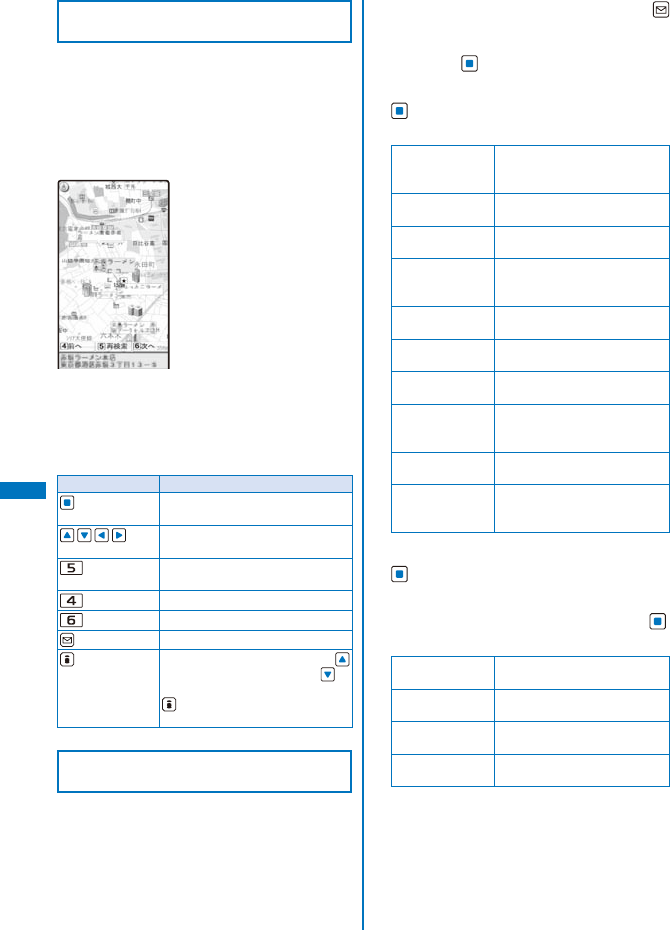
240
GPS Function
Display and Operations of the Search
Result of Neighboring Information
ˎ It explains only for the display and operations of the
search result displayed on the map, and it does not
apply for the display and operations selected from
the list.
ˎ The display shown is an image for explanatory
purpose and may be different from the actual
display.
Search result display of neighboring information
©ZENRIN DataCom CO.,LTD. 2007
Key operations while displaying the search result
display of neighboring information
ˎ When the cursor does not point at searched
information such as a store, the quick menu is
displayed.
Key operation Action
Check the detailed information on
the search result.
Move the map horizontally or
vertically.
Search again based on the
displayed map to be center.
Show the previous search result.
Show the next search result.
メニュー (Menu)
Display the menu.
拡縮 (Zoom) Display the zoom bar. Press
to display a wider range, or to
display the detailed area. Press
(閉じる) (Exit) to determine the
zoom and the bar disappears.
Navigating the Searched Route with
Sound and Display to the Destination
You can set the departure point and the
destination to search the route. The route
is displayed traveling by walk, public
transportation, or car. After the route is
searched, you can be navigated to the
destination with sound and display.
1 While activating the software, press
(メニュー) (Menu), select [ナビをする]
(Navigation) → [ナビをする] (Navigation),
and press .
2 Select [出発地] (Departure point), press
, and set the departure point by the
items below.
現在地(GPS)
(Current location
(GPS))
Position the current location
and set it.
フリーワード検索
(By keyword)
Search by keyword.
地図上で指定
(Specif
y on map)
Set the departure point on the
map.
TEL/〒検索
(By phone
number/code)
Search by phone number/
postal code.
住所一覧から
(From address list)
Select an address to set.
ジャンルから
(From genre)
Select a genre to set.
履歴から
(From history)
Set from the previously
displayed map.
登録地点から
(From saved
location)
Set from the location information
saved in the software, server, or
Phonebook.
自宅 (Home) Set the location information on
your home.
出発地の確認
(Check departure
point)
Check information on the
departure point.
3 Select [目的地] (Destination), press
, and set the destination following the
similar steps at Step 2.
4 Select [時間指定] (Specify time), press ,
and select an item below.
現時刻で指定
(Current time)
Check the route using the
current time.
出発時刻指定
(Start time)
Set the start time and check the
route.
到着時刻指定
(Arrival time)
Set the arrival time and check
the route.
終電を利用
(Last train)
Check the route with the last
train of the day.
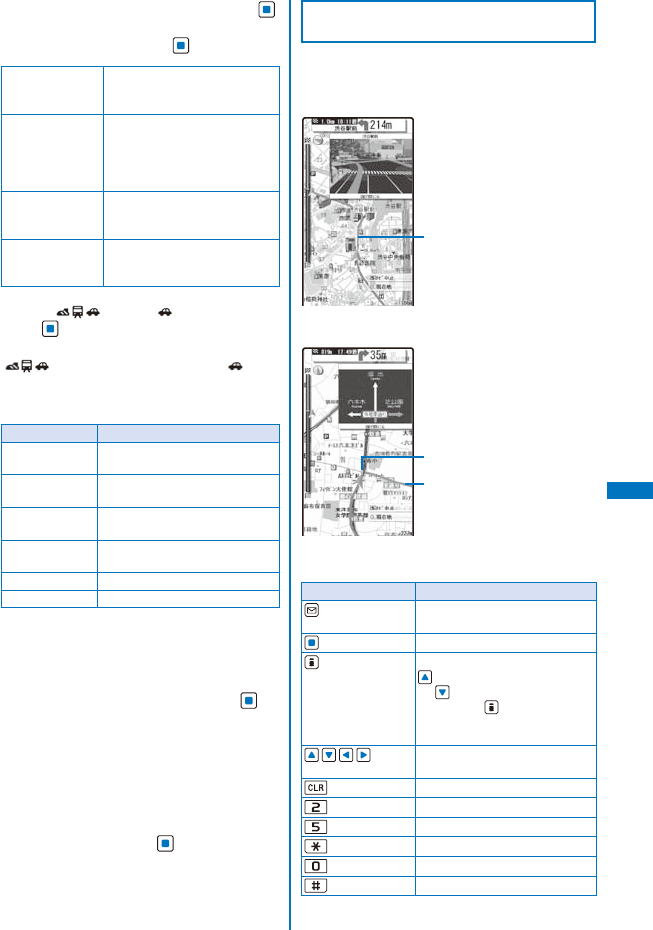
241
GPS Function
5 Select [条件設定] (Condition), press ,
select an item below, select [上記で設定]
(Set as above), and press .
乗換条件
(Transfer)
Select from [早い] (Fast), [安い]
(Budget), or [楽々] (Easy) for
transfer selection criteria.
徒歩ルート
(Walking route)
Select from [おまかせ]
(Recommended), [屋根多い]
(Many roofs), or [階段少ない]
(Less up-and-down) for route
selection criteria.
特急利用
(Express)
Select whether to use express
even if the total route distance
is within 100 km.
通常利用車種
(Type of car in
regular use)
Select a type of car in regular
use.
6 Select [ で検索]/[ のみで検索] and
press .
You can search a route by using the total navigation:
[で検索] and the car navigation: [ のみで
検索]. Routes (up to six routes) are displayed as a
search result. If there is another transfer route, an
icon shows the characteristics of the route.
Icon Meaning
早 (Fast) Fastest route to reach the
destination.
安 (Budget) Most budget route to reach the
destination.
楽 (Easy)
Route with less numbers of
transfers to reach the destination.
オススメ
(Recommended)
Meet the above three conditions.
有料 (Toll) Car route taking toll roads.
一般 (Local) Car route taking local roads.
To save the route
Select [ルートを登録] (Save route).
7 Select a route, select [ナビ・ルート確認]
(Check Navi/route) → [ナビ]/[ナビ(省電力)]
(Navi/Navi(power saver)), and press .
The “ご利用上の注意” (Usage precautions)
appears.
To check a route
Select a route and select [ルート確認] (Check
route).
To check the time table
Select a route and select [時刻表] (Time table).
8 Select [はい] and press .
The navigation to the destination starts.
Display and operations of route (car)/
navigation (car)
ˎ The display shown is an image for explanatory
purpose and may be different from the actual
display.
Route (car) display
Route to the destination
©ZENRIN DataCom CO.,LTD. 2007
Navigation (car) display
Route to the destination
Current location/traveling direction
©ZENRIN DataCom CO.,LTD. 2007
Key operations while using the navigation
Key operation Action
メニュー(Menu) End the navigation and display
the Top menu.
Display the quick access menu.
拡縮 (Zoom) Display the zoom bar. Press
to display a wider range,
or to display the detailed
area. Press (閉じる) (Exit) to
determine the zoom and the bar
disappears.
Move the map horizontally or
vertically.
Go back to the current location.
Switch to the intersection mode.
End/start the navigation.
Rotate the map counterclockwise.
Rotate the map faced to north.
Rotate the map clockwise.
Continued

242
GPS Function
Key operations while displaying the quick access menu
Key operation Action
結果&設定
(Result&Settings)
Display the search result
of a route (time, fee, etc.)
and perform settings for the
navigation.
経由地の決定
(Decide the passing
point)
Search the route adding up to
three passing points toward the
destination.
リルート
(Search the route
again)
Search the route from the
departure to the destination
again.
ルート消去
(Delete route)
Delete the displayed route.
モード切替
(Switch mode)
Switch to the intersection mode.
渋滞情報
(Traffic information)
※ Only for the car
route
Display the traffic information
linked to the displayed map.
Using the Setting/Help
1 From the menu of the Top display, select
[設定/直感★]→ [設定・ヘルプ], press ,
and select items from the followings.
会員情報確認
(Check membership)
Check whether you sign up
for [ゼンリン 地図+ナ
ビ] (ZENRIN Maps+Navi).
基本設定
(Basic settings of appli)
Set the settings related
to the software itself such
as the display color of the
map and font size.
ナビ設定
(Navi setting)
Set the setting related to
the navigation function
such as リルート (Re-
route) and volume of audio
guidance.
自宅設定
(Set your home)
Save your home location.
履歴系クリア
(Delete history)
Delete the usage history of
maps and navigations.
使い方の説明/よく
ある質問/利用規約
(Explanation of usage/
FAQ/Agreement for use)
Check the explanation
of usage, FAQ, and
agreement for use.
Providing Your Current Location
Information upon Request
<Location provision>
You can provide your current location
information when there is a request from
another party.
ˎ Before using the Location provision, set the Location
request to [ON] or [Permission sched]. The default
setting is set to [OFF]. You may also need to perform
the usage settings for each service (P.271). (When
you use “imadoco-search”, you need to set “位置情
報利用設定” (Settings to use location information)
(settings for imadoco-search) in i Menu (“オプショ
ン設定” (Options) of “料金&お申込・設 定 ” (Charge &
Subscription/Settings)).)
ˎ To use the Location provision, you may need to
subscribe to a service provider that supports this
function. There may be a charge for the use of the
service.
ˎ To use the Location provision, follow the information
provided by the service provider and DoCoMo’s
website.
ˎ When the Location request is set to [ON] or
[Permission sched], the location information may
be sent to a searcher without operating the FOMA
terminal.
When Your Location Information
Is Requested
When the provision of the location information
is requested by the preset GPS host, the
Location provision is started.
ˎ During a voice call or PushTalk communication, the
vibrator does not operate.
When the settings for using each service is set to “許可”
(accept)
イマドコサーチ
090XXXXXXXX
ドコモ一郎
Providing location
Accuracy:
★
☆
☆
“” flashes, the Loc.
provide/accept tone sounds,
and the incoming indicator
flashes.
To quit the Location provision
Press (Cancel), ,
or .
When the Lock key is set,
(Cancel) becomes
invalid.
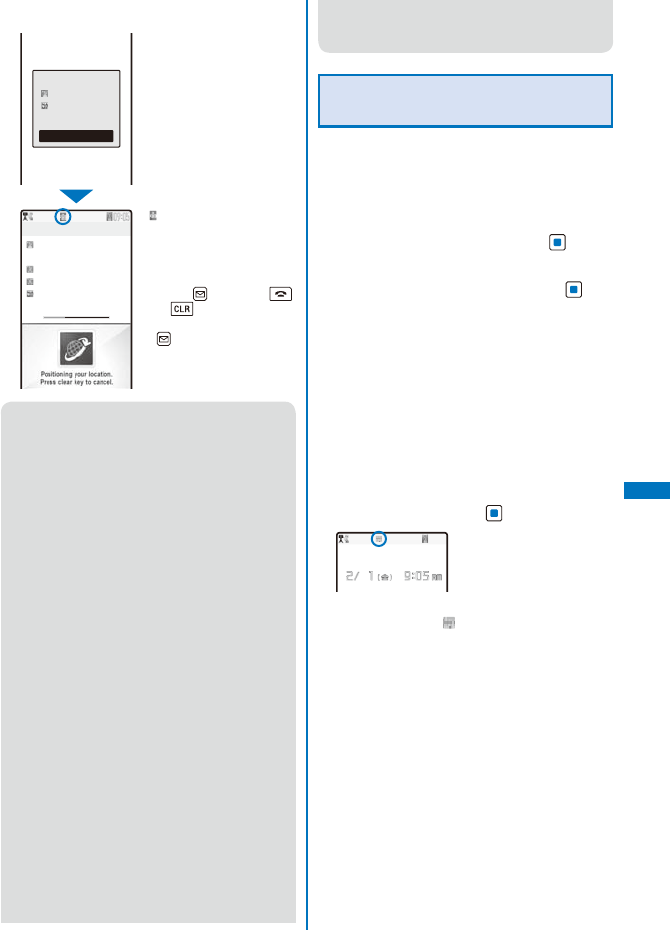
243
GPS Function
When the settings for using each service is set to “毎回
確認” (Check every time)
イマドコサーチ
090XXXXXXXX
ドコモ一郎
Providing location
Accuracy:
★
☆
☆
Loc.Req.from
:
イマドコサーチ
ドコモ一郎
Send Loc.
Not Send Loc.
Select [Send Loc.].
“” flashes, the Loc.
provide/check tone sounds,
and the incoming indicator
flashes.
To quit the Location provision
Press (Cancel), ,
or .
When the Lock key is set,
(Cancel) becomes
invalid.
● If there is a request for your location information
when the Public mode (Drive mode) is set, the
FOMA terminal operates as follows.
- When the settings for using each service
is set to “許可” (accept), it is indicated only
in the display and the location information
is provided. The Loc. provide/accept tone,
vibrator, and incoming indicator do not
operate.
- When the settings for using each service is set
to “毎回確認” (Check every time), the location
information is not provided.
● When the location information is requested from
a person who uses “imadocokantan search”, the
FOMA terminal operates as follows.
- The confirmation screen appears every time
you are requested. If you select [Send Loc.],
the rough positioning result is immediately
notified to the person who requests it. After
you select [Send Loc.], the GPS positioning
display appears. The high-detailed positioning
result is notified after the GPS positioning.
- After you select [Send Loc.] and you cancel
providing the location, the rough positioning
result is notified to the person who requests it.
In this case, the Location history is saved but
location information is not displayed.
● The location information may be sent depending
on the timing of cancellation.
● Even if the location information may have
been sent, the service provider that supports
the Location provision function may not have
received it depending on the radio wave
condition.
● When 2in1 is used, the location information is
provided, regardless of the 2in1 mode.
● Some Service client IDs may not be displayed.
Setting Whether to Provide Your
Location Information
You can set whether to accept or reject the
request to provide your current location
information.
1 From the Menu, select [LifeKit] → [GPS]
→ [GPS settings] → [Loc. request menu]
→ [Location request] and press .
The Security code screen appears.
2 Enter the Security code and press .
The Location request display appears.
[ON]:
Provide the location information to requesting
party. The location information may be sent to a
searcher without operating the FOMA terminal.
[OFF]:
Do not provide location information to requesting
party.
[Permission schedule]:
Provide the location information to requesting
party during the permitted period.
3 Select a way to provide the location
information and press .
The Location request is set. If you set [ON] or
[Permission sche], “ ” appears.
When you select [Permission schedule]
Set a period to permit for providing location
information. Enter the time both at [Start time]
and [End time] in 24-hour format and select the
repeat type at [Repeat]. If you set [Eyd] or [Day],
enter dates both at [Start day] and [End day].
To perform the setting via the Initial setting
From the Menu, select [Settings] →
[Management] → [Initial setting] → [Location
request], enter the Security code, and select
[Yes]/[No].
Continued

244
GPS Function
Operations When the Period to Permit for
Providing Location Information is Set
Example: When the current date and time is “2008/2/23
14:00”
Starting time: 15:00 Ending time: 22:00
Settings Period for providing location
information
Repeat
type Valid period
None
specified −From 2008/2/23 15:00 to
2008/2/23 22:00
Everyday Start date
2008/2/28
End date
2008/3/28
From 2008/2/28 15:00 to
2008/3/28 22:00
Everyday (from 15:00 to
22:00)
Start date
2008/2/23
End date
2008/3/28
From 2008/2/23 15:00 to
2008/3/28 22:00
Everyday (from 15:00 to
22:00)
Start date
2008/2/23
End date None
specified
After 2008/2/23 15:00
Everyday (from 15:00 to
22:00)
Specified
day
Start date
2008/2/28
End date
2008/3/28
Specified day from
2008/2/28 15:00 to
2008/3/28 22:00 (from
15:00 to 22:00)
Start date
2008/2/23
End date
2008/3/28
Specified day from
2008/2/23 15:00 to
2008/3/28 22:00 (from
15:00 to 22:00)
Start date
2008/2/23
End date None
specified
Specified day after
2008/2/23 15:00 (from
15:00 to 22:00)
Starting time: 09:00 Ending time: 22:00
Settings Period for providing location
information
Repeat
type Valid period
None
specified −From 2008/2/23 14:00 to
2008/2/23 22:00
Everyday Start date
2008/2/28
End date
2008/3/28
From 2008/2/28 09:00 to
2008/3/28 22:00
Everyday (from 09:00 to
22:00)
Start date
2008/2/23
End date
2008/3/28
From 2008/2/23 14:00 to
2008/3/28 22:00
Everyday (from 09:00 to
22:00)
Start date
2008/2/23
End date None
specified
After 2008/2/23 14:00
Everyday (from 09:00 to
22:00)
Specified
day
Start date
2008/2/28
End date
2008/3/28
Specified day from
2008/2/28 09:00 to
2008/3/28 22:00 (from
09:00 to 22:00)
Start date
2008/2/23
End date
2008/3/28
Specified day from
2008/2/23 14:00 to
2008/3/28 22:00 (from
09:00 to 22:00)
Start date
2008/2/23
End date None
specified
Specified day after
2008/2/23 14:00 (from
09:00 to 22:00)
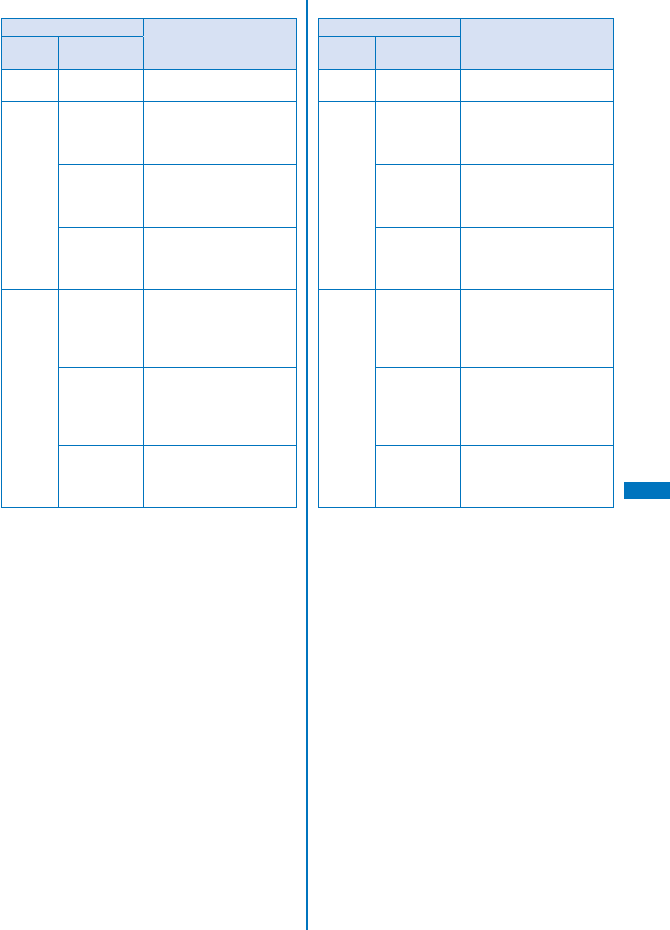
245
GPS Function
Starting time: 15:00 Ending time: 10:00
Settings Period for providing location
information
Repeat
type Valid period
None
specified −From 2008/2/23 15:00 to
2008/2/24 10:00
Everyday Start date
2008/2/28
End date
2008/3/28
From 2008/2/28 15:00 to
2008/3/29 10:00
Everyday (from 15:00 to
10:00 at the next day)
Start date
2008/2/23
End date
2008/3/28
From 2008/2/23 15:00 to
2008/3/29 10:00
Everyday (from 15:00 to
10:00 at the next day)
Start date
2008/2/23
End date None
specified
After 2008/2/23 15:00
Everyday (from 15:00 to
10:00 at the next day)
Specified
day
Start date
2008/2/28
End date
2008/3/28
Specified day from
2008/2/28 15:00 to
2008/3/29 10:00 (from
15:00 to 10:00 at the next
day)
Start date
2008/2/23
End date
2008/3/28
Specified day from
2008/2/23 15:00 to
2008/3/29 10:00 (from
15:00 to 10:00 at the next
day)
Start date
2008/2/23
End date None
specified
Specified day after
2008/2/23 15:00 (from
15:00 to 10:00 at the next
day)
Starting time: 09:00 Ending time: 09:00
Settings Period for providing location
information
Repeat
type Valid period
None
specified −From 2008/2/23 14:00 to
2008/2/24 09:00
Everyday Start date
2008/2/28
End date
2008/3/28
From 2008/2/28 09:00 to
2008/3/29 09:00
Everyday (from 09:00 to
09:00 at the next day)
Start date
2008/2/23
End date
2008/3/28
From 2008/2/23 14:00 to
2008/3/29 09:00
Everyday (from 09:00 to
09:00 at the next day)
Start date
2008/2/23
End date None
specified
After 2008/2/23 14:00
Everyday (from 09:00 to
09:00 at the next day)
Specified
day
Start date
2008/2/28
End date
2008/3/28
Specified day from
2008/2/28 09:00 to
2008/3/29 09:00 (from
09:00 to 09:00 at the next
day)
Start date
2008/2/23
End date
2008/3/28
Specified day from
2008/2/23 14:00 to
2008/3/29 09:00 (from
09:00 to 09:00 at the next
day)
Start date
2008/2/23
End date None
specified
Specified day after
2008/2/23 14:00 (from
09:00 to 09:00 at the next
day)
Continued
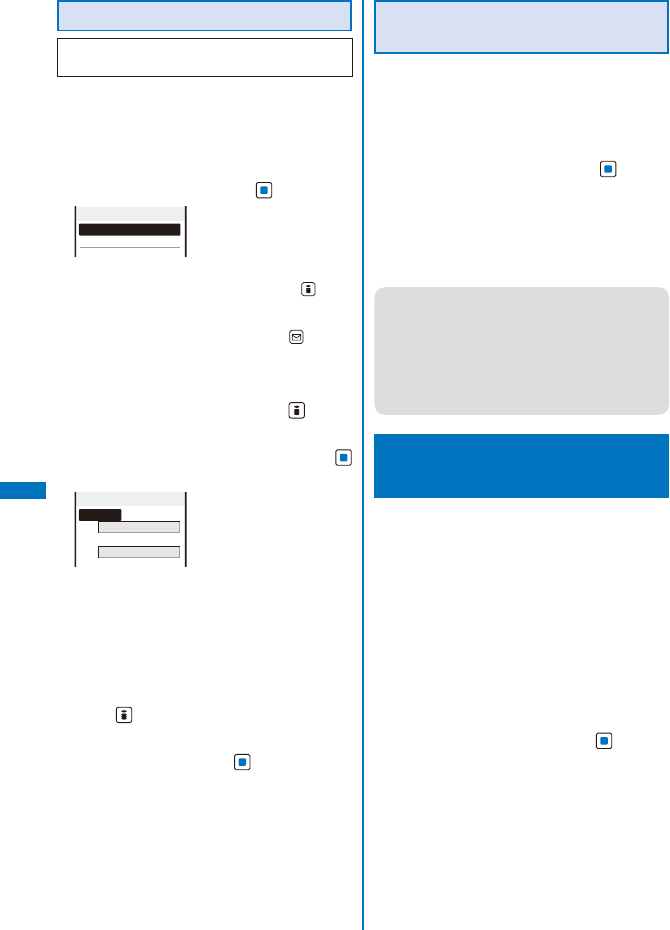
246
GPS Function
Setting the User-defined Host
※ Normally, you do not need to change this
setting.
You can set one host for using the GPS service
besides the Initial host set at the time of
subscription.
1 From the Menu, select [LifeKit] → [GPS]
→ [GPS settings] → [Loc. request menu]
→ [Host setting] and press .
Host setting
Initial host
Unregistered
To edit the set host
Move the cursor to the set host, press (Edit),
and enter the Security code. Edit each item.
To delete the set host
Move the cursor to the set host, press (Delete),
enter the Security code, and select [Yes].
To reset the host to the default setting
Select [Initial host].
2 Select [Unregistered] and press (Edit).
The Security code screen appears.
3 Enter the Security code and press
(OK).
Register host
Host name
Host address
[Host name]:
Enter a host name within 99 half-width
alphanumeric characters and symbols.
[Host address]:
Enter a host address within 100 half-width
alphanumeric characters and symbols.
4 Enter each item.
5 Press (Complete).
The entered host is saved.
6 Select a host and press .
The user-defined host is changed.
Performing Settings for Using
the GPS Service
You can connect to the GPS service settings
site and perform setting necessary for
providing the location information.
1 From the Menu, select [LifeKit] → [GPS]
→ [GPS settings] → [Loc. request menu]
→ [Service settings] and press .
The FOMA terminal is connected to the GPS service
settings site.
2 Set each item.
ˎ For details about how to set the services, contact
your service provider.
● While you are connecting to the GPS service
settings site, available Function menus are
different from the ones displayed during i-mode.
The URL history is also not recorded.
● If you connect to the GPS service settings site
during international roaming, an error message
appears on the display and a communication
charge is required.
Notifying Your Current Location
Information
<Location notice>
You can notify a specific party (a service
provider that supports the Location notice
function) of the location information of your
current location.
ˎ To use the Location notice, you may need to
subscribe to a service provider that supports this
function. There may be a charge for the use of the
service.
ˎ To use the Location notice, follow the instructions
provided by the service provider or on the DoCoMo’s
website. There is a charge for the use of the Location
notice function.
1 From the Menu, select [LifeKit] → [GPS]
→ [Location notice] and press .
The screen for selecting the method for activating
the Location notice appears.
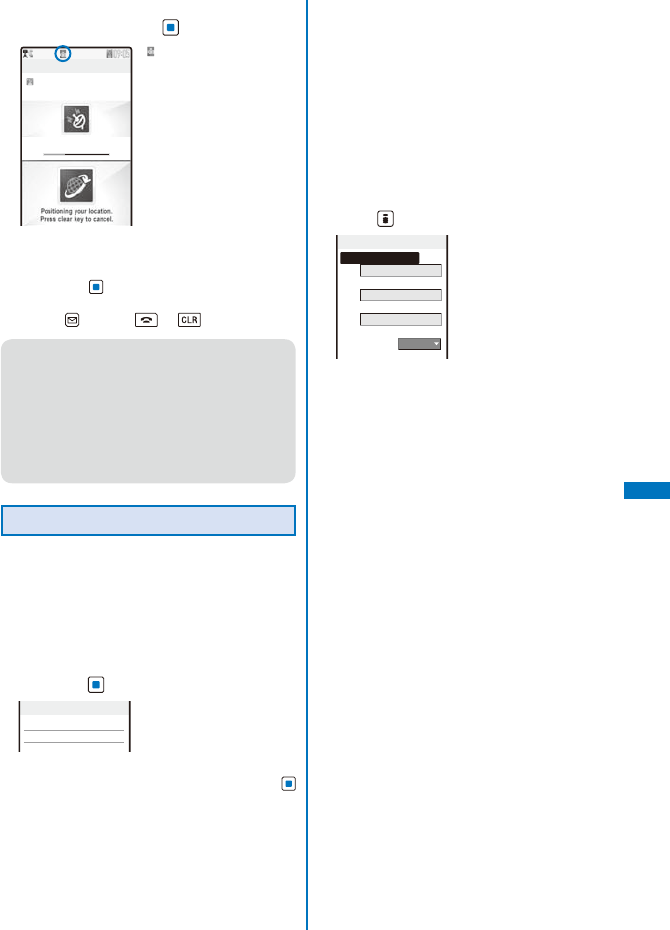
247
GPS Function
2 Select [Loc. service client] → a party to
be notified and press .
○○サービス
Notifying location
Accuracy:
★
☆
☆
“” flashes and the incoming
indicator flashes.
When the current location
is notified, the location
notice tone sounds and
the location information is
notified to a recipient.
To enter a party to be notified and notify location
information
Select [Direct input], enter the service client ID,
and press (OK).
To quit the Location notice
Press (Cancel), , or .
● When 2in1 is used, the location information is
notified by Number A, regardless of the 2in1
mode.
● The location information may be sent depending
on the timing of cancellation.
● Even if the location information may have been
sent, the service provider that supports the
Location notice function may not have received it
depending on the radio wave condition.
Saving a Party to Be Notified
You can save a party to be notified of your
current location information as a location
service client. Up to five parties can be saved.
ˎ Make sure to enter [Loc. serv. client] and [Service
client ID].
1 From the Menu, select [LifeKit] → [GPS]
→ [GPS settings] → [Reg. service client]
and press .
Loc. service client
To display the details of a party
Move the cursor to the party and press
(Detail).
To edit the information of a party
Move the cursor to the party and from the
Function menu, select [Edit]. Edit each item.
To delete a party
Move the cursor to the party and from the
Function menu, select [Delete] → [Delete one]
→ [Yes]. To delete all parties, from the Function
menu, select [Delete] → [Delete all], enter the
Security code, and select [Yes].
To save a party in the Phonebook
Move the cursor to the party and from the
Function menu, select [Add to phonebook] →
[Main memory]/ [UIM].
ˎ Follow the same steps as in the Add to FOMA
terminal phonebook (P.95, step 3 to 6) or in
the Add to UIM phonebook (P.98, step 3 to 4).
2 Press (Create).
Reg. service client
Loc. serv. client
Service client ID
Phone number
Auto Notice setting
Confirm
[Loc. serv. client]:
Enter a name of the party to be notified.
[Service client ID]:
Enter a notified party ID specified by the service
provider.
[Phone number]:
Enter a phone number.
[Auto Notice setting]:
Set whether to notify your current location
automatically when you place a voice/
videophone call to the number set at [Phone
number].
3 Enter a name of a party to be notified at
[Loc. serv. client].
Enter the name within 16 full-width or 32 half-width
characters.
4 Enter a notified party ID specified by the
service provider at [Service client ID].
Enter the ID within 12 half-width numeric characters
including “
*
” or “#”.
Continued
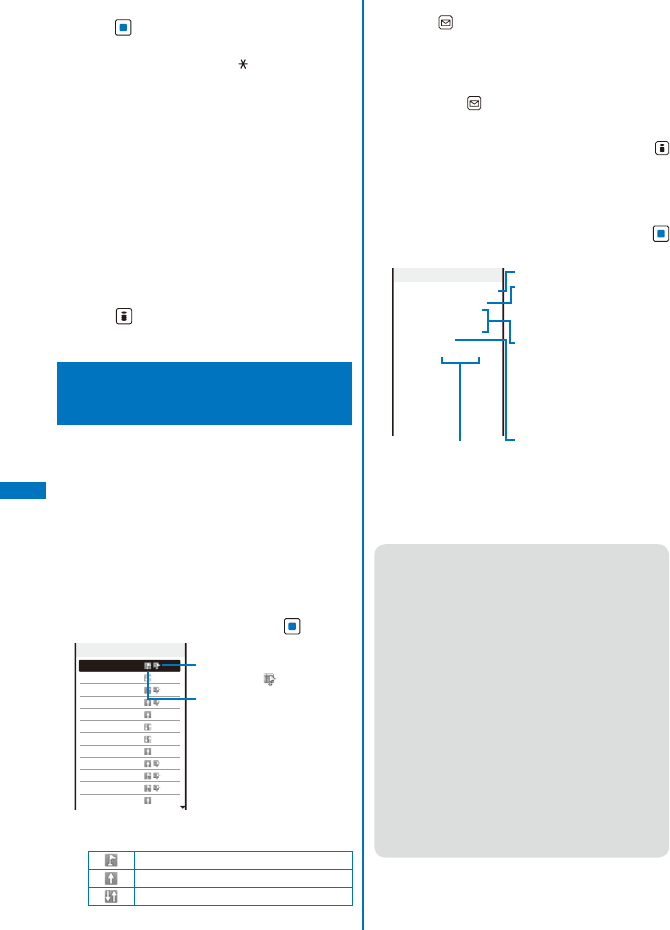
248
GPS Function
5 Select [Phone number] → [Direct input],
press , and enter a phone number.
Enter the phone number within 26 half-width
numeric characters including “ ”, “#”, “+”, or “P”.
ˎ The phone number which is already saved as a
location service client cannot be saved again.
To quote from the Phonebook
Select [Phonebook].
6 Select the notification method at [Auto
Notice setting].
[Yes]:
Notify your current location automatically.
[No]:
Do not notify your current location automatically.
[Confirm]:
When you place a voice/videophone call, confirm
whether to notify your current location.
7 Press (Complete).
The party is set as a location service client.
Displaying the History of
Location Positioning
<Location history>
Up to 50 results of location information
positioned by the Position location, Location
provision, and Location notice are recorded
as history. You can perform various operations
from the location information recorded in the
history.
ˎ When the number of location information records
exceeds 50, the records are deleted starting from
the location information with the oldest date/time.
1 From the Menu, select [LifeKit] → [GPS]
→ [Location history] and press .
Loc. history
1/25
02/14 10:20:10
02/12 10:00:08
02/12 9:32:00
02/11 21:28:37
02/11 21:22:15
02/11 15:43:10
02/11 15:09:51
02/11 14:49:33
02/11 14:40:39
02/10 22:54:22
02/10 22:34:08
02/10 10:55:17
When the location information
is available, “ ” appears.
Type of positioning
ˎ The following icons show the type of positioning
used.
Position location
Location notice
Location provision
To use the location information
Press (Use).
ˎ For details about how to use the location
information, see P.277.
To delete a location history record
Move the cursor to the location history record
and press (Use), select [Delete] → [Delete
one] → [Yes]. To delete several location history
records, from the Function menu, select [Delete]
→ [Select&delete], select records, press
(Complete), and select [Yes]. To delete all
location history records, from the Function menu,
select [Delete] → [Delete all], enter the Security
code, and select [Yes].
2 Select a location history and press
(Detail).
Loc. history
2008/02/14 10:20:10
Position location
NXX
°
XX’ XX.XXX”
EXXX
°
XX’ XX.XXX”
Datum:WGS84
Accuracy:
★
★
☆
Accuracy
Positioning date/time
Type:
Either Position location,
Location notice, or Location
provision is displayed.
Location information:
Latitude (degree, minute,
second), Longitude
(degree, minute, second)
“N” and “E” indicate
northern latitude and eastern
longitude, respectively.
Datum:
WGS84 (World Geodetic
System)
The geodetic system is the
standard used for indicating
a location on earth by its
longitude/latitude.
● When the Location notice or Location provision is
performed, it is recorded in the Location history
even if the Position location fails or is canceled.
However, note that some items are not displayed.
● A location history record for which location
information is not obtained cannot be used by
any function.
● Even if the result of the Location provision or
Location notice is left in the history, the service
provider may not have received the location
information.
● When you provide your location information while
2in1 is used, the name of the party who requests
the location information is displayed by each
2in1 mode following the Phonebook 2in1 setting.
● The location information and accuracy saved in
the Location history may differ from those sent
to the Location provision destination/Location
service client depending on some reasons such
as radio wave condition.
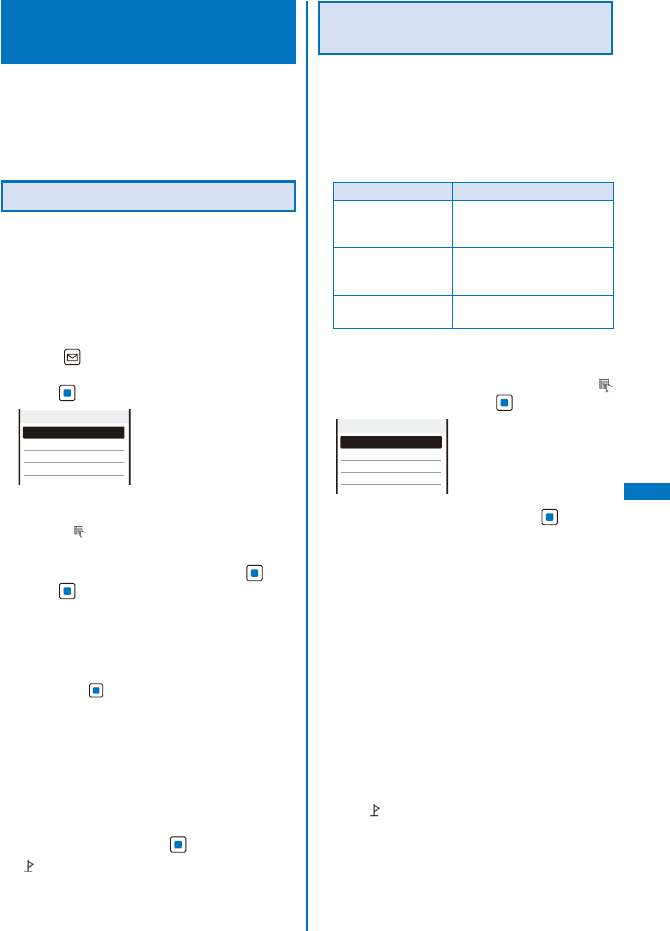
249
GPS Function
Using the Location Information
from Each Function
You can display a map based on the location
information added to the Phonebook, sites,
screen memos, ToruCa cards, Message R/F,
or images. You can also paste the location
information URL to mail.
Adding the Location Information
You can add the location information to an
image or the FOMA terminal phonebook or
paste the location information URL in the main
body of mail.
Example: Adding the location information to the mail
main body by obtaining it by the Position
location
1 Press (Func) in the mail main body
input display, select [Rcv loc. info], and
press .
Rcv location info
From position loc.
From loc. history
From phonebook
Attach from image
To add the location information to the FOMA
terminal phonebook
Select “ ” in the Edit FOMA terminal phonebook
display.
2 Select [From position loc.], press , and
press (OK).
The screen for confirming whether to paste the
location URL appears.
To add the location information by selecting from the
Location history
Select [From loc. history] → a location history
and press (OK).
To add the location information by selecting from the
Phonebook
Select [From phonebook] → a phonebook.
To add the location information from an image
Select [Attach from image] → an image from My
picture of the Data Box.
ˎ You cannot select it when you add the location
information on an image.
3 Select [Yes] and press .
“ location URL” that has a link to the location
information is entered in the mail main body.
Using the Added Location
Information
You can use the location information added to
the image, FOMA terminal phonebook, sites,
screen memos, ToruCa cards, or Message R/F.
ˎ Items you can use vary depending on the type of
data which is attached location information. The
available items depending on the type of data are
followings.
Type of data Available item
Image Read a Map, Paste to mail,
Run i appli, and Add to
phonebook
Phonebook Read a Map, Paste to mail,
Run i appli, and Attach to
image
Site, Screen memo,
ToruCa, or MessageR/F
Read a Map, Paste to mail,
and Run i appli
Example: Displaying a map of the location information
added to the Phonebook
1 From the Phonebook, select data → [
Has loc. info] and press .
Use location info
Read a Map
Run i appli
Paste to mail
Attach to image
2 Select [Read a Map] and press .
The map of the location information appears.
ˎ After displaying the map, you can search for the
neighborhood information using “iエリア−周
辺情報−” (i-mode area –Neighbor info–). For
details about “iエリア−周辺情報−”, see the
DoCoMo’s website.
To add the location information on an image
Select [Attach to image] → an image from My
picture of the Data Box.
To delete the location information added on the
image
Select [Delete loc. info] → [Yes].
To use the location information with GPS-compatible
i-αppli software
Select [Run i appli] → software to be used.
To paste the location information to mail
Select [Paste to mail] → [Yes].
ˎ “ location URL” that has a link to the location
information is entered in the mail main body.
Continued
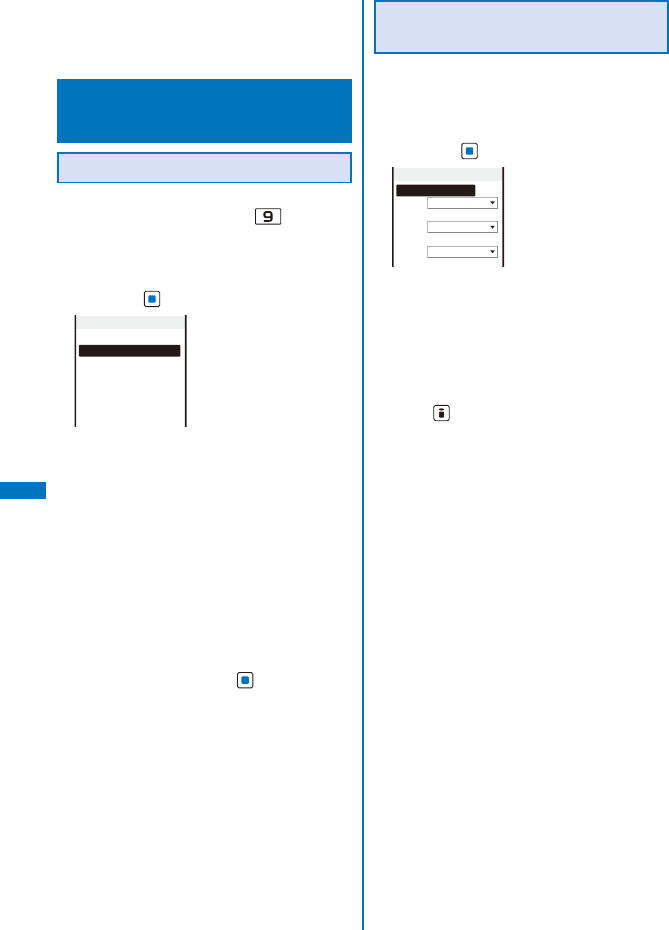
250
GPS Function
To save the location information in the Phonebook
Select [Add to phonebook] → [New]/[Add].
ˎ Follow the same steps as in the Add to FOMA
terminal phonebook (P.95, step 3 to 6).
Setting the GPS Functions
<GPS settings>
Setting the GPS Keys
You can set the actions when performing the
Position location by pressing for over a
second in the stand-by display.
1 From the Menu, select [LifeKit] → [GPS]
→ [GPS settings] → [GPS button setting]
and press .
GPS button setting
Read a Map
Run i appli
Paste to mail
Add to phonebook
Attach to image
Confirm
[Read a Map]:
Display the map showing your current location
that is positioned.
[Run i appli]:
Use the GPS-compatible i-αppli.
[Paste to mail]:
Attach the location information into mail.
[Add to phonebook]:
Save the location information in the Phonebook.
[Attach to image]:
Attach the location information to an image.
[Confirm]:
Select a function every time you use.
2 Select a function to be performed
automatically and press .
The GPS button setting is set.
Setting the Positioning
Accuracy
You can set to prioritize either the speed or
accuracy of positioning.
1 From the Menu, select [LifeKit] → [GPS]
→ [GPS settings] → [Positioning mode]
and press .
Positioning mode
Position location
Standard mode
Location notice
Standard mode
Location provision
Standard mode
2 Select a positioning mode at each item.
[Standard mode]:
Perform positioning in preference to the speed.
[Quality mode]:
Perform positioning in preference to the
accuracy. It may take time longer than [Standard
mode] to perform positioning.
3 Press (Complete).
The Positioning mode is set.

251
1Seg
About One Seg ........................................................................................................ 240
Before Using One Seg ............................................................................................. 241
Setting Channels ............................................................................ <Set channel list> 242
Watching One Seg ........................................................................... <Activate 1Seg> 243
Using the Program Guide i-αppli .................................................... <Program guide> 247
Setting a Timer for Watching/Recording a One Seg Program ............. <Booking list> 247
Using Data Broadcasting ......................................................................................... 251
Using TVlink .................................................................................................<TVlink> 252
Recording One Seg While Watching ............................................ <Record One Seg> 252
Starting Time Shift Play While Watching .................................................<Time shift> 253
Receiving Mail While Watching One Seg ................................................................. 254
Various Settings for One Seg ............................................................. <1Seg setting> 255
252
1Seg
About One Seg
What is One Seg?
One Seg is a digital terrestrial broadcasting
for mobile devices and provides data
broadcasting as well as video and sound
broadcasting. You can also receive more
detailed program information, join panel shows,
enjoy TV shopping, and more using i-mode.
ˎ For details on the “One Seg” service, see the
website below.
The Association for Promotion of Digital
Broadcasting
PC : http://www.dpa.or.jp/
i-mode : http://www.dpa.or.jp/1seg/k/
About Using One Seg
ˎ One Seg is a service provided by TV broadcasters
(broadcast stations).
ˎ You can receive video, sound, and data
broadcasting of One Seg that is broadcasted
without any subscription and free of charge.
ˎ The two types of information are available in the
area of the data broadcasting: “data broadcasting”
and “data broadcasting site”. “Data broadcasting”
is carried in airwave with video and sound, and “data
broadcasting site” is available by accessing sites
provided by TV broadcasters (broadcast stations).
Also, “i-mode site” can be accessed with this
service. To access sites, you need to subscribe to
services such as i-mode.
ˎ The packet communication charge is required to
access a site such as “data broadcasting site” or
“i-mode site”.
Depending on a site, an additional information
charge may be required for using sites (i-mode paid
sites).
About Radio Wave
One Seg is one of the broadcasting services
and uses the different radio wave (airwave)
from the FOMA service. Therefore, regardless
of whether you are outside/inside of the FOMA
service area, you cannot receive One Seg
broadcasting in a place where the airwave
does not reach or in a time zone when it is out
of service.
Even if you are in the digital terrestrial
broadcasting service area, the receiving
condition may become worse or you cannot
receive anything in the following places.
- Places where are far away from the radio wave
tower which send airwaves
- Places such as interfered by mountains, covered
with a building where the radio wave is interrupted
by features or buildings
- Places such as in the tunnel, basement, or building
where the radio wave is weak or does not reach at all
To make the radio wave condition better,
extend the One Seg Antenna fully. Changing
the orientation of the antenna, placing the
FOMA terminal closer or further to the body, or
moving to another location may make the radio
wave condition better.
Display When Using One Seg for the First
Time
After the purchase, when you use One Seg
for the first time, the display for confirming the
notabilia of the service appears. Check the
contents and press (OK).
● When you insert another UIM or perform the
Reset all data&set, the display for confirming the
notabilia of the service appears again.
What is Broadcast Storage Area?
The broadcast storage area is a storage area
inside the terminal that is exclusive for One
Seg. The information you input according
to the instructions provided by the data
broadcast program you are watching is saved
in the broadcast storage area as specified by
the settings of TV broadcasters (broadcast
stations). The information to be saved may
contain answers for quiz, as well as personal
information such as membership number,
gender, age, or occupation.
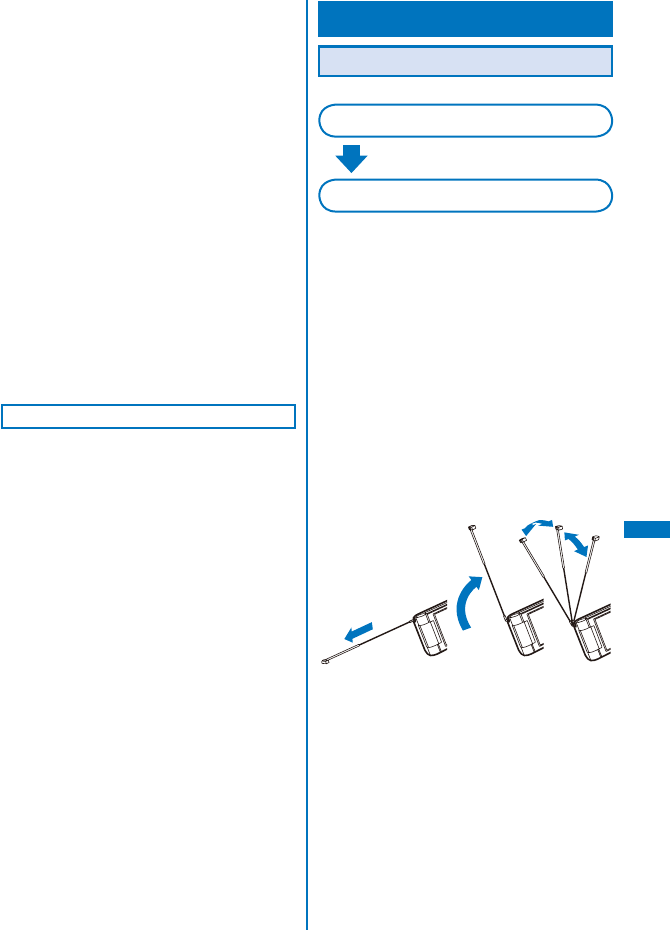
253
1Seg
Continued
The saved information may be displayed, or be
sent to TV broadcasters (broadcast stations)
without another input of information when you
browse to the data broadcasting site.
To delete information in the broadcast storage
area, see P.255.
When you replace the UIM with another one,
the screen for confirming whether to reset the
broadcast storage area appears. Select [Yes]
to reset it.
■ Using information in the broadcast storage
area
When information in the broadcast storage area
is used while you are watching a program, the
message “Use saved info? It may include info
used by the same broadcasting gr.” appears.
When you select [Yes], the confirmation screen
does not appear as long as you watch the
same program. If you select [Yes,from then
on], the confirmation screen no longer appears
even if the program is changed.
Other Features
● One-touch channel selection by the remote-
control numbers (P.244)
● Switching between the main sound and sub
sound (P.246)
● Using the program guide i-αppli (P.247)
● Setting a timer for watching (P.247)
● Setting a timer for recording (P.247)
● Displaying and using the data broadcasting
(P.251)
● Using TVlink (P.252)
● Recording a video and still image (P.252)
● Time shift play while watching (P.253)
● Rapid play with sound at about 1.3x speed
(P.277)
Before Using One Seg
Step to Watch One Seg
Example: When you watch One Seg for the first time
Save a channel list suitable for the
area you use.
Step 1 Set channel list (P.242)
Step 2 Activate One Seg (P.243)
Extend the One Seg Antenna and
activate One Seg.
■ One Seg Antenna
When you use the One Seg function, extend
the One Seg Antenna as illustrated below.
When the One Seg reception is poor, change
the direction of the One Seg Antenna or the
location of the FOMA terminal.
ˎ Do not use force to change the direction of the One
Seg Antenna.
Using the One Seg Antenna
1 Pull out the One Seg Antenna.
2 Raise the One Seg Antenna.
3 Change the direction.
1
33
2
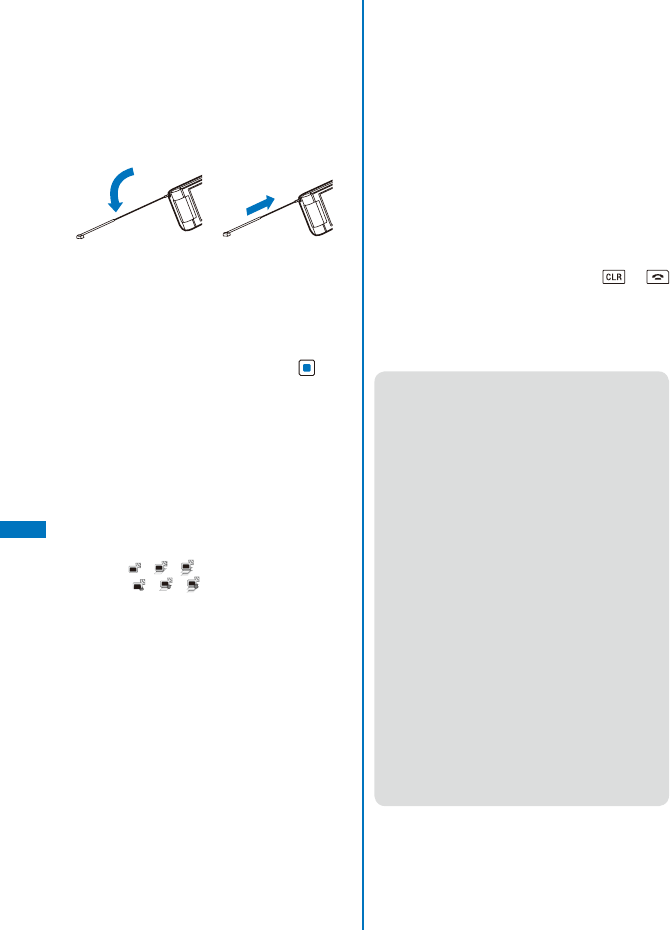
254
1Seg
Putting the One Seg Antenna back
1 Change the direction back.
2 Push the One Seg Antenna back while
aligning the top of the One Seg Antenna
with the counter part until it stops.
ˎ If you use force to put the antenna back without
confirming the correct orientation, it may cause
malfunction.
1
2
■ The display that appears when One Seg is
used for the first time
When One Seg is activated for the first time,
the display for confirming the notabilia of the
service appears. When the FOMA terminal is
in the TV style, switch to the Normal style, and
then check the contents and press (OK)
(P.240).
■ Battery level
ˎ If you try to activate One Seg with the battery level
low, the screen for confirming whether to activate
One Seg appears. If you select [Yes], One Seg
is activated. When the battery level becomes low
while watching One Seg, the screen for confirming
whether to quit One Seg appears. When you select
[Yes], One Seg is terminated.
ˎ When the battery level becomes low, the screen
informing that the battery level becomes low
appears, “ ”/“ ”/“ ” flashes while watching One
Seg, and “ ”/“ ”/“ ” flashes while recording a
One Seg program.
ˎ When the battery level becomes extremely low while
watching or recording a One Seg program, One
Seg is terminated. When you are recording a One
Seg program, the video recorded up to this point is
saved automatically.
■ When there is an incoming call, etc. while
watching One Seg
ˎ When receiving a voice, videophone, or PushTalk
call while watching One Seg, you can answer the
call by pausing video and sound. After the call is
terminated, the screen for confirming whether to
use Time shift play appears. When you select [Yes],
Time shift play is started.
ˎ When receiving i-mode mail, SMS, Message R/F
while watching One Seg, the incoming mail display
appears. The display restores when mail reception
is completed. (When the Mail telop disp set is set
to [OFF] and Dur multi task disp is set to [Prefer
operat.])
ˎ When the Alarm, Schedule alarm, or Booking alarm
time comes while watching One Seg, the alarm is
displayed. The display restores when you stop the
Alarm or Schedule alarm and press or
in the display informing the release of the alarm.
When you stop the Booking alarm, the screen for
confirming whether to activate One Seg appears
depending on the setting of the Cfm. activation
(P.248) and you can activate it.
● When the UIM is not inserted, you cancel the
subscription to DoCoMo, or you temporarily
suspend using the FOMA service, you cannot
watch One Seg.
● Even when you insert the UIM for which you
subscribe to DoCoMo, you may not be able to
activate One Seg if you repeatedly watch One
Seg in the condition the FOMA terminal cannot
communicate such as when the FOMA terminal
is outside of the service area or in the Self mode.
In that case, try to activate One Seg in the
condition the FOMA terminal can communicate
by moving into the FOMA service area.
● When you activate One Seg for the first time,
activate it within the FOMA service area.
● Even if the data may be lost or changed as a
result of malfunction, repair, or other handling
of the FOMA terminal, under no condition will
DoCoMo be held liable for any damaged or lost
data saved in the FOMA terminal. Furthermore,
note that the saved information (such as One
Seg recorded videos or still images, TV links, or
information saved in the broadcast storage area)
cannot be moved when you change your FOMA
terminal or have it repaired.
● If you continue watching One Seg for a long
period of time with the battery being charged,
the life of the battery pack may become shorter.
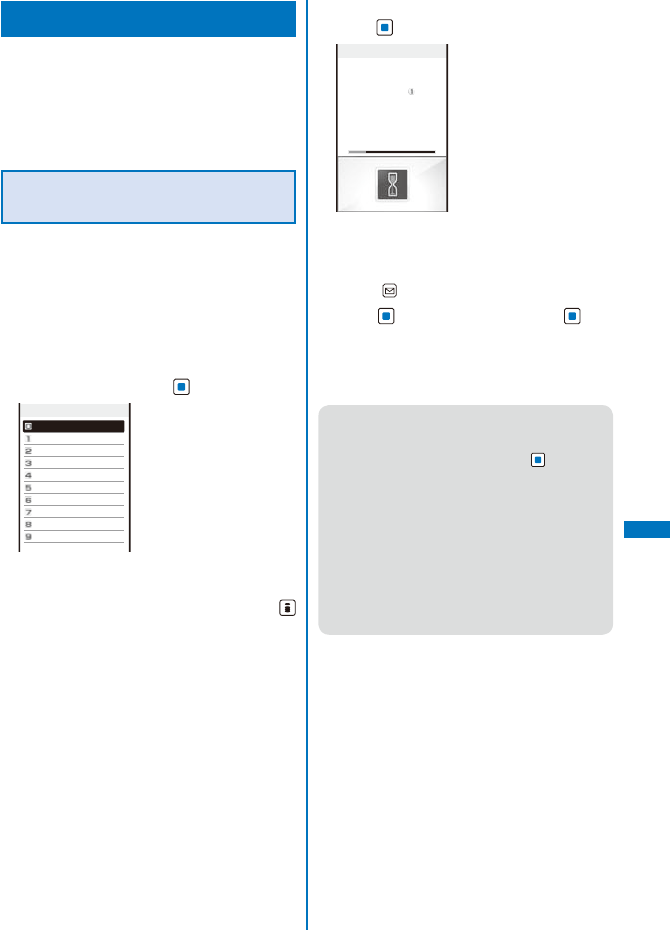
255
1Seg
Setting Channels
<Set channel list>
To use One Seg, you need to perform the
channel setting and save the channel list
beforehand. When you watch One Seg, select
a channel list suitable for the current location.
You can save up to 10 channel lists, 62
broadcast stations for each list.
Saving a Broadcast Station to the Channel
List Automatically
<Auto channel set>
Broadcast stations that can be received are
automatically searched and saved to a channel
list.
ˎ You need to set it within the Terrestrial digital TV
broadcasting service area.
ˎ When you perform the Auto channel set, extend the
One Seg Antenna fully.
1 From the Menu, select [1 Seg] → [Set
channel list] and press .
Set channel list
チャンネルリスト1
東京
大阪
神奈川
When no channel list is saved
Follow step 3 to 4.
2 Select a place to save to and press
(Create).
The screen for creating a channel list appears.
3 Select [Auto channel set] → [Yes] and
press .
Channel scanning
Receive ch.
Physical ch. 27ch
○○テレビ
Searching broadcast stations starts. The Channel
scan result display appears when the search is
completed.
To cancel searching broadcast stations
Press (Cancel) and select [Yes].
4 Press (OK), select [Yes], press , and
enter a name of a channel list.
Enter a name within 10 full-width or 20 half-width
characters.
The channel list is saved.
● When the multiple broadcast stations which have
the same remote-control number are retrieved,
the message to the effect that the remote-control
number is doubled appears. Press and select
the current location you are in from the Select
service area display. The channels in the area
you select are preferentially assigned to remote-
control numbers 1 to 12, and channels in the
area you do not select are assigned to remote-
control numbers 13 to 62 onward.
● It takes about 40 to 60 seconds to complete
searching broadcast stations. However, the
searching time varies and it may exceed 60
seconds depending on the number of broadcast
stations or the condition of airwave.
Continued
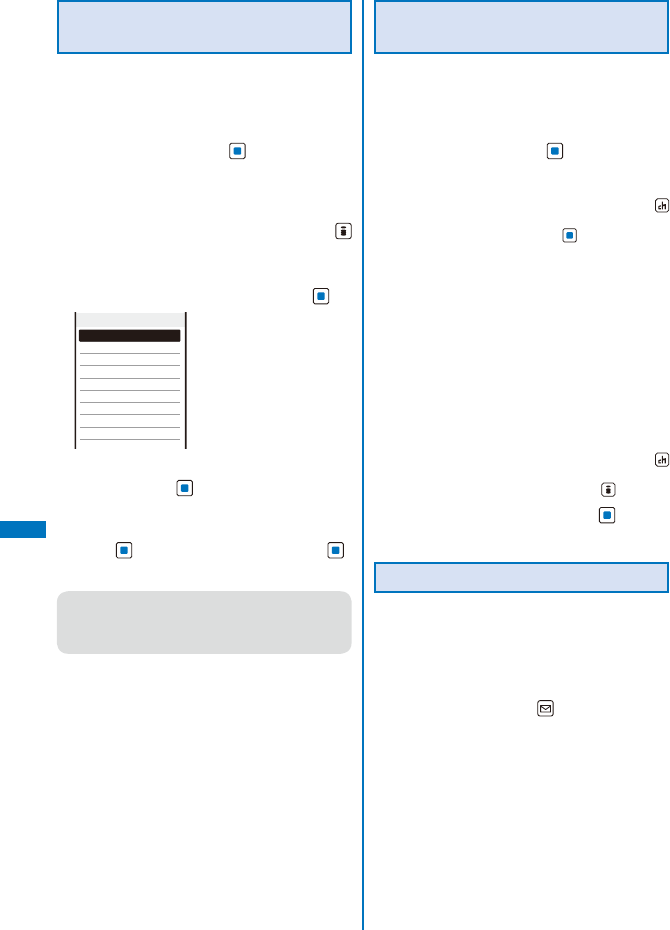
256
1Seg
Saving a Broadcast Station into
the Channel List Manually
You can save broadcast stations to a channel
list by selecting a service area, prefecture, and
area.
1 From the Menu, select [1 Seg] → [Set
channel list] and press .
The Set channel list display appears.
When no channel list is saved
Follow step 3 to 5.
2 Select a place to save to and press
(Create).
The screen for creating a channel list appears.
3 Select [Select Serv Area] and press .
Select service area
Hokkaido
Tohoku
Kanto
Koshinetsu/Hokuriku
Tokai
Kinki
Chugoku
Shikoku
Kyusyu/Okinawa
4 Select a service area → a prefecture → an
area and press .
The screen for confirming the channel information
of the selected service area appears.
5 Press (OK), select [Yes], and press .
The channel list is saved.
● Depending on the area you use, you may not be
able to save a broadcast station correctly even
if you set the Select Serv Area. In this case, use
the Auto channel set.
Selecting a Channel List to be
Used
You can select a channel list suitable for your
current location. Also, you can edit the saved
channel lists.
1 From the Menu, select [1 Seg] → [Set
channel list] and press .
The Set channel list display appears.
To activate One Seg from the channel list
Move the cursor to a channel list, press
(Ch. list), move the cursor to a broadcast station
in the channel list, and press (Watch).
To change the name of a channel list
Move the cursor to a channel list and from the
Function menu, select [Edit title]. Enter a name
within 10 full-width or 20 half-width characters.
To delete a channel list
Move the cursor to a channel list and from the
Function menu, select [Delete one] → [Yes].
ˎ The currently used channel list cannot be
deleted.
To reset the channel list
From the Function menu, select [Reset], enter
the Security code, and select [Yes].
To display detailed information of a broadcast station
Move the cursor to a channel list, press
(Ch. list), move to the cursor to a broadcast
station in the channel list, and press (Detail).
2 Select a channel list and press .
The channel list to be used is set.
Editing Remote-control Numbers
A remote-control number which can be used
for selecting a station is already assigned
to each broadcast station. Remote-control
numbers can be changed.
1 Select a channel list in the Set channel
list display and press (Func).
The Function menu appears.
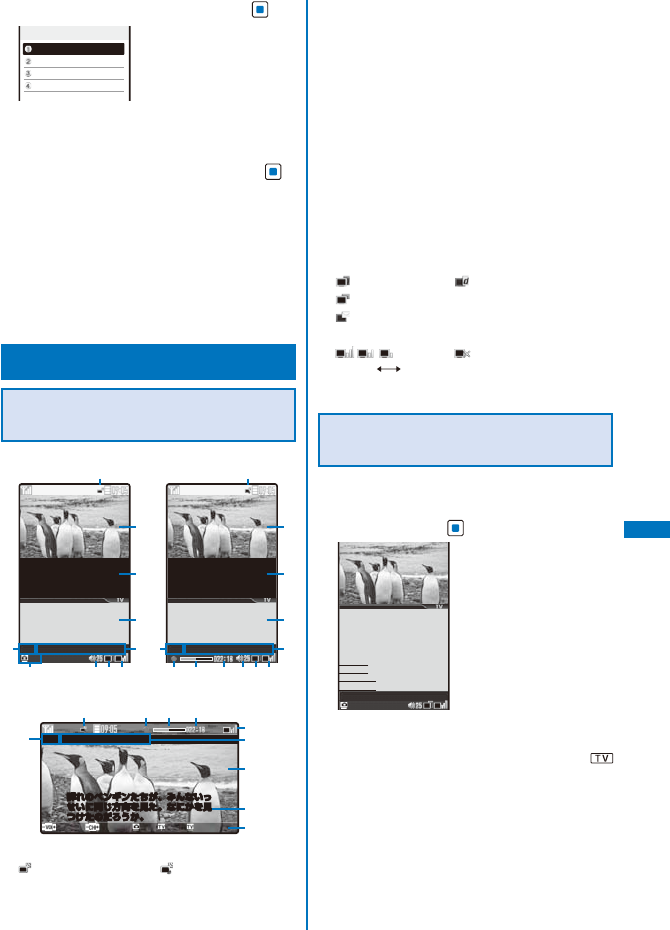
257
1Seg
2 Select [Edit RC number] and press .
Edit RC number
○○テレビ
△△
テレビ
○
△
テレビ
□□テレビ
To delete a broadcast station
Move the cursor to a broadcast station and from
the Function menu, select [Delete one] → [Yes].
3 Select a broadcast station and press .
The remote-control number input screen appears.
4 Enter a remote-control number.
Enter a number within 01 to 62.
The remote-control number is changed.
When the remote-control number is already
assigned to another broadcast station
Select [Yes]. The saved broadcast station is
replaced with the new one.
Watching One Seg
<Activate 1Seg>
Using the Display for Watching
One Seg
Normal style (Watching) Normal style (Recording)
○○テレビ ○
△
の不思議
Rec
○
×
ch
群れのペンギンたちが、み
んないっせいに同じ方向を
見た。なにかを見つけたの
だろうか。
○
△
の不思議
毎週木曜よる
10
時∼
第
225
回
ペンギンの
一
生
ͧ
ͫͪ
ͯͰͱͲ
ͦ
ͨ
ͩ
群れのペンギンたちが、み
んないっせいに同じ方向を
見た。なにかを見つけたの
だろうか。
○○テレビ ○
△
の不思議
○
×
ch
○
△
の不思議
毎週木曜よる
10
時∼
第
225
回
ペンギンの
一
生
ͧ
ͨ
ͩ
ͫͪ
ͯͰͱͬ ͭ ͮ
ͦ
TV style
群れのペンギンたちが、みんないっ
せいに同じ方向を見た。なにかを見
つけたのだろうか。
Volume
Channel
Rec
Func
Quit
○○テレビ ○
△
の不思議
○
×
ch
群れのペンギンたちが、みんないっ
せいに同じ方向を見た。なにかを見
つけたのだろうか。
ͧ
ͱ
ͨ
Ͳ
ͬͭ ͮ
ͪͫ
ͦ
ͦ Display status
Watching One Seg Recording One Seg
ͧ Video
ͨ Subtitle
ͩ Data broadcasting/displaying mail
ˎ The display varies depending on the Mail disp
set (P.256).
※ It is not displayed in the TV style.
ͪ Remote-control number
ͫ Name of the channel/program
ͬ Recording status
ͭ Recording progress bar
ͮ Estimated recordable time
※ The recordable time changes according to
the progress of recording. It may increase or
suddenly decrease while recording, depending
on the contents of the program to be recorded.
ͯ Volume
Ͱ Operating mode
Video mode Data broadcasting mode
Video mode while displaying mail
Mail mode
ͱ Airwave reception level
Outside of the broadcast
(strong weak) service area
Ͳ Guide display
Watching One Seg in the Normal
Style
You can watch One Seg in the Normal style.
1 From the Menu, select [1 Seg] → [Activate
1Seg] and press .
○
△
の不思議
○
△
の不思議
毎週木曜よる
10
時∼
第
225
回
ペンギンの一生
■豆知識
■クイズ
■撮影裏話
■次回予告
○
×
ch
Rec
The channel which you watched previously is
displayed.
ˎ You can also activate One Seg by pressing
for over a second in the stand-by display.
Continued
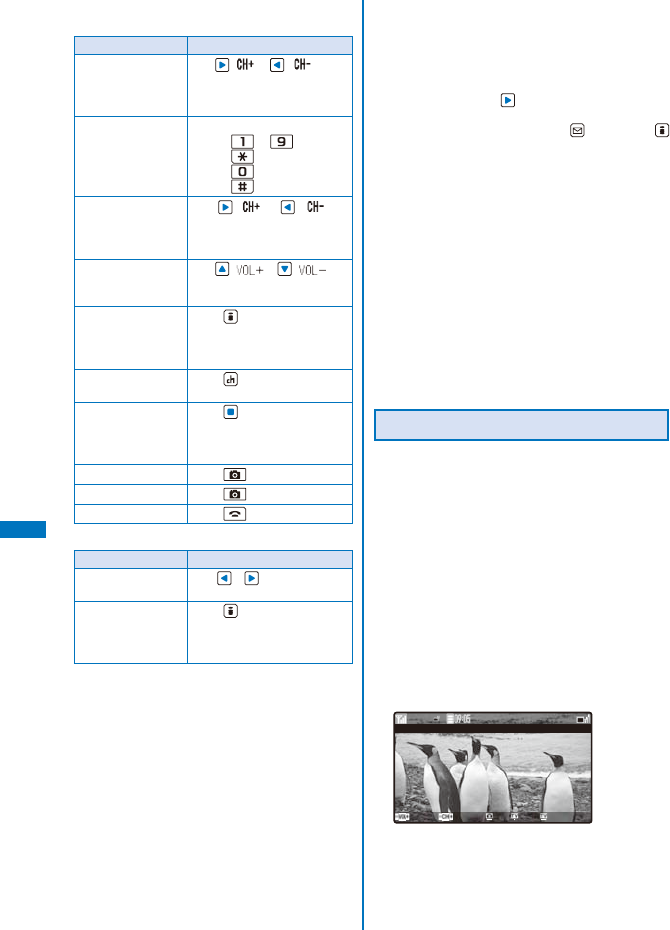
258
1Seg
Operating method
Video mode
Operation Key operation
UP/DOWN channel
select
Use ( ) / ( ).
Select a station in order/
reverse order of the remote-
control numbers.
One-touch channel
select
Remote-control number
1 to 9 : to
10 :
11 :
12 :
Channel search Use ( ) / ( ) for
over a second.
Search broadcast stations
which can be received.
Volume adjustment Use ( ) / ( ).
The volume can be adjusted
in 32 levels: 0 to 31.
Switch between
video and data
broadcasting
modes
Press (TV/DATA) (P.251).
Start the program
guide i-αppli
Press (EPG).
Time shift Press (T.shft).
Pause watching a program
and play it back in time-shift
mode (P.253).
Record a still image Press .
Record a video Press for over a second.
Quit 1Seg Press and select [Yes].
Data broadcasting mode
Operation Key operation
Display the previous/
next page
Use / while using the
data broadcasting site.
Switch the data
broadcasting
screen between half
and full screens
Press (TV/DATA) for over a
second.
When no channel list is saved
The screen informing that no channel list is saved
appears. Select how to save a channel and save
one (P.242).
To display the program information
From the Function menu, select [Program info.].
When you press , the details of the program
is displayed. To display the information of the
previous/next program, press (Previous) /
(Next).
To set the 1Seg setting
From the Function menu, select [1Seg setting].
To compose mail containing program information
From the Function menu, select [Prog info mail].
ˎ When you send the program information to the
FOMA terminal which is compatible with the
Media To function, the recipient can select it to
activate One Seg.
To select a program when multiple services
(programs) are broadcasted on the same channel
From the Function menu, select [Select service]
→ a program.
To save the broadcast station into a channel list
while watching it
From the Function menu, select [Add channel].
Watching One Seg in the TV Style
When you switch the FOMA terminal to the TV
style, you can watch One Seg in the horizontal
orientation.
ˎ See “About the Style” (P.27) to switch the FOMA
terminal to the TV style.
ˎ The data broadcasting cannot be displayed in the
TV style.
1 Switch to the TV style in stand-by status.
The Viewing Touch Key lights and it can be
operated.
ˎ You can set functions to be activated when
switching to the TV style (P.328).
When you set other functions to be activated,
activate One Seg in the stand-by status and then
switch to the TV style.
○
△
の不思議
○
×
ch
Volume
Channel
Rec
Func
Quit
The channel which you watched previously is
displayed.
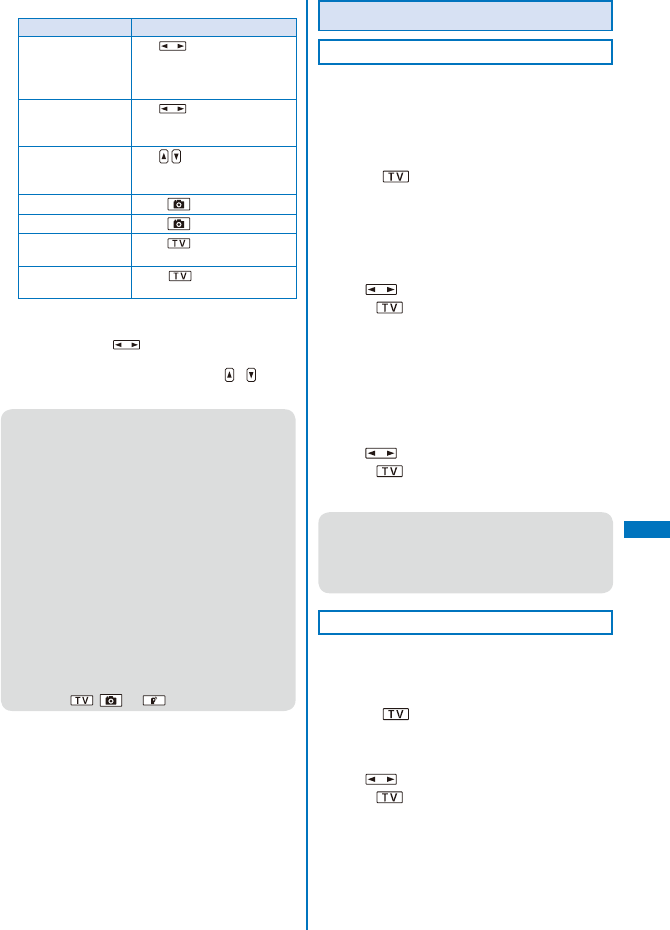
259
1Seg
Operating method
Operation Key operation
UP/DOWN channel
select
Use .
Select a station in order/
reverse order of the remote-
control numbers.
Channel search Use for over a second.
Search broadcast stations
which can be received.
Volume adjustment Use .
The volume can be adjusted
in 32 levels: 0 to 31.
Record a still image Press .
Record a video Press for over a second.
Display the Function
menu
Press .
Quit 1Seg Press for over a second
and select [Yes].
To display the program information
From the Function menu, select [Program info.].
When you use (Chg.Info), the details of the
program is displayed. To display the information
of the previous/next program, use / (Back/
Next).
● Depending on the receiving condition of
airwave, sound interruption or video pause may
occur, black-shaped noise may appear on the
picture, or a dark display without video or data
broadcasting may appear.
● Depending on the radio wave condition, videos
and data broadcasting may not be displayed
even if the status of the airwave reception level
is other than the outside of the broadcast service
area.
● When you activate One Seg while the Manner
mode is set, the screen for confirming whether
to output sound appears. When you select [Yes],
you hear the sound.
● Colors of the guide display, etc. may change
slightly while watching One Seg.
● The Viewing Touch Key is turned off about 15
seconds after it lights. Pat the Viewing Touch Key
or press , , or to light it again.
Setting While Watching One Seg
Watching One Seg with Subtitles
You can display subtitles while watching a
program.
ˎ You can set it either in the Normal style or in the TV
style.
Example: For the TV style
1 Press (Func) while watching One
Seg.
The Function menu appears.
For the Normal style
From the Function menu, select [Caption disp
set] → a type of subtitles.
2 Use to select [Caption disp set] and
press .
The Caption disp set menu appears.
[Language1]:
The subtitle of Language 1 is displayed.
[Language2]:
The subtitle of Language 2 is displayed.
[OFF]:
The subtitle is not displayed.
3 Use to select a type of subtitles and
press .
The subtitle is set.
● Whether subtitles are provided or not depends
on the program.
● When no subtitle is provided on a program,
the subtitle is not displayed regardless of the
Caption disp set.
Displaying the Guide Display All the Time
You can set whether to display the guide
display, icon, etc. all the time in the TV style.
ˎ You can set it only in the TV style.
1 Press (Func) while watching One
Seg.
The Function menu appears.
2 Use to select [Guide always on] and
press .
The Guide always on setting menu appears.
Continued
260
1Seg
3 Use to select [ON]/[OFF] and press
.
The Guide always on is set.
● When the guide display, icon, etc. are displayed,
part of video may not be seen.
Adjusting the Image Quality
You can set the image quality of the video
portion.
ˎ You can set it either in the Normal style or in the TV
style.
Example: For the TV style
1 Press (Func) while watching One
Seg.
The Function menu appears.
For the Normal style
From the Function menu, select [Image quality]
→ an image quality.
2 Use to select [Image quality] and
press .
The Image quality menu appears.
[Normal]:
The standard image quality emphasized
naturalness.
[Sharp]:
Sharply edged image quality.
[Dynam.]:
The clear image quality in which an edge and
contrast of an image is emphasized.
3 Use to select an image quality and
press .
The image quality is set.
Setting to Adjust the Light Automatically
You can set whether to adjust automatically
the display light brightness by the Brightness
Sensor to adapt for the surrounding brightness
while watching One Seg.
ˎ You can set it either in the Normal style or in the TV
style.
Example: For the TV style
1 Press (Func) while watching One
Seg.
The Function menu appears.
For the Normal style
From the Function menu, select [Auto Disp light]
→ [ON]/[OFF].
2 Use to select [Auto Disp light] and
press .
The Auto Disp light display appears.
[ON]:
Adjust the light automatically.
[OFF]:
Do not adjust the light automatically.
3 Use to select [ON]/[OFF] and press
.
The Auto Disp light is set.
Adjusting the Brightness of the Display
You can set the display light brightness when
you watch One Seg.
ˎ You can set it either in the Normal style or in the TV
style.
Example: For the TV style
1 Press (Func) while watching One
Seg.
The Function menu appears.
For the Normal style
From the Function menu, select [Display light] →
brightness.
2 Use to select [Display light] and
press .
The Display light menu appears.
3 Use to select brightness and press
.
Select brightness from [1 to 5].
261
1Seg
Switching between the Primary/Secondary
Sounds
You can switch the sound between the primary
and secondary sounds.
ˎ You can switch the sound only in the Normal style.
1 Press (Func) while watching One Seg.
The Function menu appears.
2 Select [Switch sound] and press .
The screen for selecting the Switch sound appears.
[Primary sound]:
The primary sound is played back.
[Secondary sound]:
The secondary sound is played back.
3 Select a sound and press .
The Switch sound is set.
● Even if the Switch sound is set to [Secondary
sound], the primary sound is played back when
there is no secondary sound for the program
which you are watching.
Switching between the Main/Sub Sounds
You can switch the sound between the main
and sub sounds.
ˎ You can switch the sound only in the Normal style.
1 Press (Func) while watching One Seg.
The Function menu appears.
2 Select [Main/Sub] and press .
The screen for selecting the Main/Sub appears.
[Main sound]:
The main sound is played back.
[Sub sound]:
The sub sound is played back.
[Main+Sub sound]:
The main sound is played back from the left
speaker and the sub sound is played back from
the right speaker.
3 Select a sound and press .
The Main/Sub is set.
● Even if the Main/Sub is set to [Sub sound]/
[Main+Sub sound], the main sound is played
back when there is no sub sound for the program
which you are watching.
Using the Sleep Timer
You can set to terminate One Seg automatically
after the certain period of time.
ˎ You can set it either in the Normal style or in the TV
style.
Example: For the TV style
1 Press (Func) while watching One
Seg.
The Function menu appears.
For the Normal style
From the Function menu, select [Sleep] → a time
before terminating One Seg automatically.
2 Use to select [Sleep] and press .
The Sleep setting menu appears.
3 Use to select a time before
terminating One Seg automatically and
press .
Select from [OFF], [30min], [60min], [90min], and
[120min].
Using the Program Guide
i-αppli <Program guide>
Using the program guide i-αppli, you can
activate One Seg by selecting a program from
within the program guide and set a timer for
watching or recording a program.
ˎ “Gガイド番組表リモコン” (G-GUIDE TV Program
List Remote Control) is preinstalled as the program
guide i-αppli (P.211). For details, see the “Mobile
Phone User’s Guide
【i-mode】
FOMA version”.
Continued
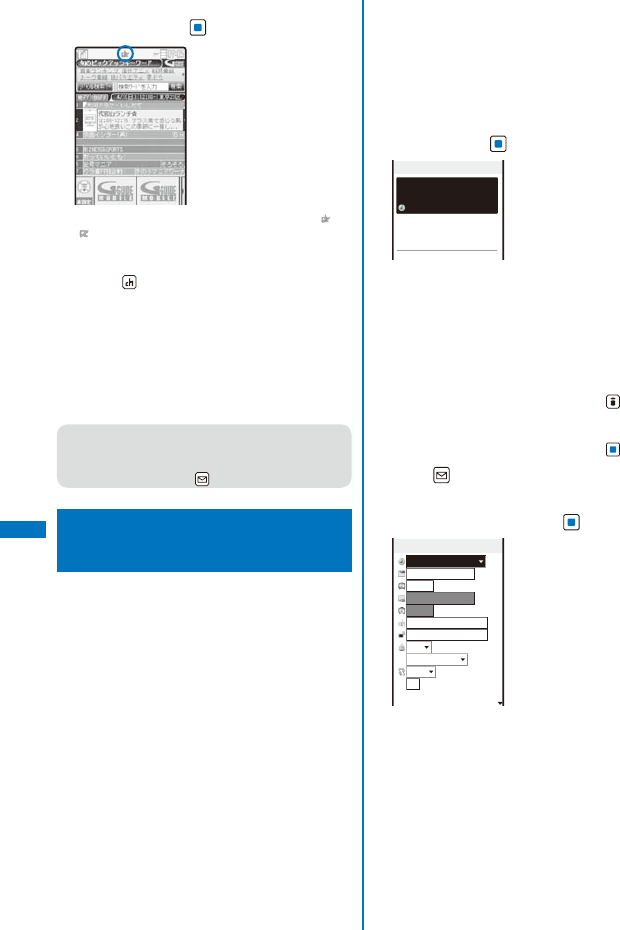
262
1Seg
1 From the Menu, select [1 Seg] → [Program
guide] and press .
※ The display shown is an
image for explanatory
purpose and may be
different from the actual
display. The TV program
list is displayed according
to your location.
The program guide i-αppli is started and “ ” or
“” appears.
To start the program guide i-αppli while watching in
the Normal style
Press (EPG). You can also start the program
guide i-αppli when, from the Function menu,
select [Program guide].
To change the software to be activated by the
Program guide key
Move the cursor to the software in the list of
i-αppli software and from the Function menu,
select [Individual set] → [Program guide key] →
[Yes]/[No] (P.209).
● When you select a program in the “Gガイド番組
表リモコン” (G-GUIDE TV Program List Remote
Control) display, you can watch the selected
program by pressing (TV起動).
Setting a Timer for Watching/Recording
a One Seg Program
<Booking list>
You can set a timer for watching or recording
a One Seg program. When you set a timer for
watching a program, the alarm sounds to notify
you of the start of the program at the specified
date/time. You can save up to 50 timer settings
for watching and recording programs.
ˎ When the channel list is not set, you cannot set a
timer for watching or recording a program.
ˎ The copy control signal (indicating that “the program
cannot be recorded (Copy Never)”, “the program
can be recorded only once (Copy Once)”, or “the
program can be recorded without restrictions (Copy
Free)”) is placed in One Seg. They are set by each
broadcast station.
ˎ If the copy control signal of a program is one of
“the program can be recorded only once (Copy
Once)” and “the program can be recorded without
restrictions (Copy Free)”, the program can be
recorded.
ˎ When the copy control signal changes to “the
program cannot be recorded (Copy Never)” while
recording a program, the recording stops. Video
data recorded up to that point is saved.
ˎ When you set a microSD memory card as a place
to save a recorded video, insert a microSD memory
card beforehand.
1 From the Menu, select [1 Seg] → [Booking
list] and press .
Rsrv data list
1/1
2007/11/28 Wed18:00
○○テレビ
明日の天気
The Res. data list display appears.
To delete a timer for watching/recording a program
Move the cursor to a timer and from the Function
menu, select [Delete] → [Delete one] → [Yes]. To
delete all timers, from the Function menu, select
[Delete] → [Delete all], enter the Security code,
and select [Yes].
To edit a timer for watching/recording a program
Move the cursor to a timer and press (Edit).
To display the detailed information of a timer for
watching/recording a program
Move the cursor to a timer and press .
2 Press (Func).
The Function menu appears.
3 Select [Create] and press .
Edit Reservation
Booking program
2007/11/28 Wed
18:00
2007/11/28 Wed
20:00
○○テレビ
明日の天気
ON
30sec.before
Eyd
10
Count
To 2007/12/07
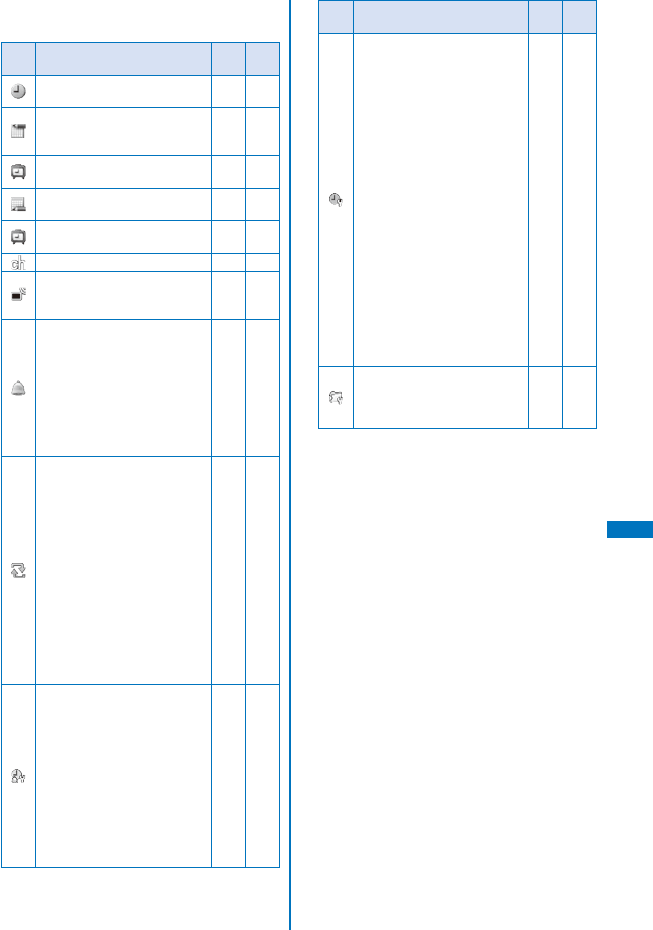
263
1Seg
4 Save each item.
○:
Allowed to be saved
−:
Not allowed to be saved
Icon Setting data
Booking
program
Timer
recording
Select [Booking program]
(Blue)/ [Timer recording] (Pink). ○○
Enter a starting date within
the range from 2000/01/01 to
2050/12/31.
○○
Enter a starting time in 24-hour
format. ○○
Enter an ending date from the
starting date to 2050/12/31. −○
Enter an ending time in 24-hour
format. −○
Select a channel. ○○
Enter a program name within
48 full-width or 96 half-width
characters.
○○
Select [ON]/[OFF] of the alarm.
ˎ When you set to [ON],
you can select how many
minutes before the starting
time of timer the alarm
should sound. If you want to
sound the alarm at the same
time as the starting time,
select [00sec.before].
○−
Select the repeat type.
[OFF]:
Do not repeat the timer.
[Eyd]:
Repeat the timer every day.
[Day]:
Repeat the timer on the
same day of the week.
[Month]:
Repeat the timer every
month on the same day.
ˎ When the repeat type is set
to other than [OFF], enter the
repeat count within 01 to 99
times.
○○
Cfm. activation
Select whether to display the
Cfm. activation display when
the Booking alarm is activated.
[ON]:
Display the Cfm. activation
display.
[OFF]:
Do not display the Cfm.
activation display.
ˎ When the alarm is set to
[OFF], it cannot be set.
○−
Icon Setting data
Booking
program
Timer
recording
Dur multitask Rec
Select whether to display the
screen for confirming to start
recording when the time to
start recording comes while
another function which cannot
be activated at the same time
is running.
[Pref. recording]:
Terminate the executed
function automatically and
start recording.
[Prefer operat.]:
Display the screen for
confirming whether to
terminate the executed
function. When you select
[Yes], terminate the
executed function and start
recording. When you select
[No], a timer for recording a
program is canceled.
−○
Output of Rec
Select [Data Box]/[microSD]
as a place to save a recorded
video.
−○
Continued

264
1Seg
5 Press (Complete).
A timer for watching/recording a program is saved.
ˎ To play back a recorded video, see “Displaying/
Playing Back One Seg” (P.277).
To set a timer for recording a program
The display for confirming the notabilia of the
service appears. To save a timer for recording a
program, confirm the contents and select [Yes].
If you do not want to display the confirmation
display next time, select [Yes,from then on]. The
confirmation display no longer appears.
ˎ To restore the display for confirming the
notabilia of the service, perform the Rset
permission set (P.256).
● You can also set a timer for watching/recording
a program using a program information provided
by the program guide i-αppli, site, mail, etc.
● If the Alarm, Schedule alarm, and Booking alarm
are set to start at the same time, the following
priority is applied.
1. Schedule alarm
2. Booking alarm
3. Alarm
● If there is a timer that is set to start at the same
time as the new timer for recording a program,
the confirmation screen appears. If you select
[Yes], the previously saved timer for recording a
program is overwritten by the new one.
● When the ending or starting date and time set
for the previously saved timer for recording a
program is the same as the starting or ending
date and time set for the newly saved one
respectively, the confirmation screen appears. If
you select [Yes], the preceding timer terminates
slightly earlier than the specified time.
● If the Booking list is updated because of the
saved reservation being started while editing a
reservation or other reason, the reservation may
not be saved successfully.
● If the repeat type of the schedule set for the 31st
is set to [Month], the schedule is set for the last
day of the month for months with less than 31
days.
At the Booking Alarm Time
The alarm tone sounds for about 30 seconds
with the indicator flashing.
Booking alarm
18:00
○○テレビ
明日の天気
ON
30sec.before
Eyd
10 Count
To stop the alarm tone
Press any key. When you stop the alarm tone,
the display informing the release of the alarm
appears. To turn off the display, press (OK) or
.
When you do not stop the alarm tone
The display informing the release of the alarm
appears. To turn off the display, press (OK) or
.
When the Cfm. activation is set to [ON]
After you turn off the display informing the
release of the alarm, the Cfm. activation display
appears. Select [Yes] to activate One Seg.
When the Cfm. activation is set to [OFF]
Press for over a second to activate One
Seg.
● If you set an i-motion with video and sound
tracks to the alarm tone, a movie in the i-motion
is displayed.
● If the alarm time comes during a voice/
videophone call or PushTalk communication,
the default alarm tone sounds and default
alarm image is displayed. The vibrator does not
operate.
● The Booking alarm does not operate in the
following cases.
- When the FOMA terminal is powered off
- While the Lock all is set
- While the Personal data lock is set
- While the Omakase Lock is set
- While updating the software
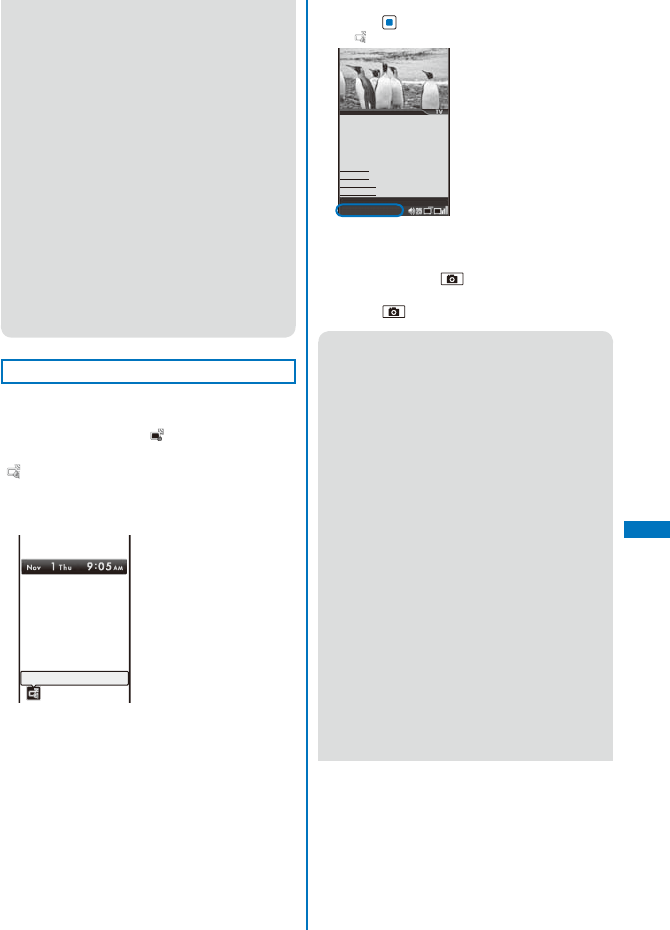
265
1Seg
● If the alarm time comes in the following cases,
the alarm may operate when the status changes
to during a call or stand-by.
- While placing/receiving a voice/videophone
call or originating/receiving a PushTalk call
- During packet communication
- During the infrared communication/while the
infrared remote control is being used
- During the iC communication
- During data communication or while reading/
writing data from/into a microSD memory card
on a PC with the FOMA terminal connected
using the USB cable
- While recording a still image/movie
- While the Schedule alarm is sounding
- Beep while receiving Area Mail, while
sounding Area Mail ring tone, or displaying
Area Mail
● If you leave the FOMA terminal with the battery
pack removed or fully expended for a long
period of time, the date and time is reset, and the
Booking alarm may not operate correctly.
At the Timer Recording Starting Time
A recording is automatically started. When the
timer for recording a program starts while One
Seg is not activated, “ ” appears. After the
recording is completed, the notification icon
“” (Timer Rec result) appears in the stand-by
display.
ˎ Extend the One Seg Antenna fully while recording a
program.
Timer Rec result
1
To check the reservation result
Press (Link) in the stand-by display and select
“ ”.
Preparing to Rec
○
△
の不思議
○
△
の不思議
毎週木曜よる
10
時∼
第
225
回
ペンギンの一生
■豆知識
■クイズ
■撮影裏話
■次回予告
○
×
ch
When the timer recording starting time comes while
watching One Seg
The Preparing to Rec display appears. To cancel
recording, press and select [Yes].
To cancel the recording during timer recording
Press while recording and select [Yes].
● Even if the Dur multitask Rec is set to [Prefer
recording], the timer for recording a program
may be canceled in a case such as when there
are too many active functions or there is not
enough memory. Also, while transferring data to
the microSD memory card, the recording does
not start.
● If the Dur multitask Rec is set to [Prefer
operat.] and when functions that cannot be
run simultaneously are active, the screen for
confirming whether to start the timer recording
appears. When you select [Yes], the timer
recording starts.
However, regardless of selecting [Yes] on the
confirmation screen, the timer for recording a
program may not start in a case such as when
there are too many active functions or there is not
enough memory.
● Even if the FOMA terminal is outside of the
broadcast service area when the timer recording
starting time comes, the timer recording works
effectively.
However, the timer recording fails if the FOMA
terminal is outside of the broadcast service area
all the time from the beginning to the end of the
scheduled recording time. The message “Could
not receive broadcast wave” appears in the
Result detail display (P.251).
Continued
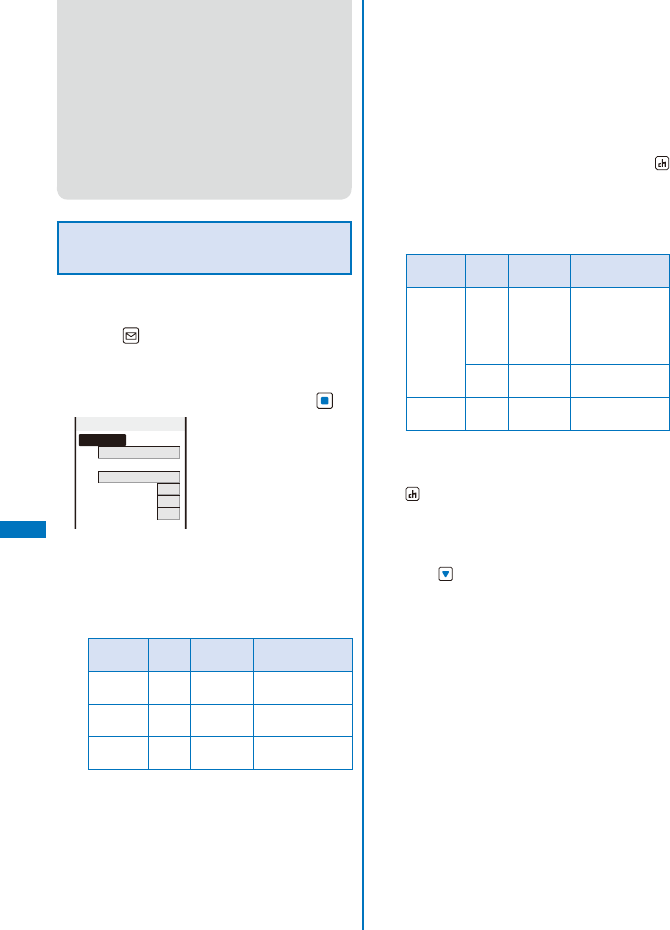
266
1Seg
● Timer recording does not start in the following
cases.
- When the FOMA terminal is powered off
- When the UIM is not inserted
- While the Lock all is set
- While the Personal data lock is set
- While the Omakase Lock is set
- During packet communication
- During 64K data communication
- During the infrared communication
- During the iC communication
- While using the Data Security Service
- While updating the software
Setting the Operation for the
Booking Alarm
You can set the detailed operation for the
Booking alarm.
1 Press (Func) in the Res. data list
display.
The Function menu appears.
2 Select [Booking ALM set] and press .
Alarm setting
Alarm tone
Alarm(std)
Alarm image
視聴予約
アラーム
鳴動
Alarm volume
4
Vibrator
OFF
Color
C5
3 Select an alarm tone from MUSIC/
i-motion/Melody of the Data Box at [Alarm
tone].
ˎ You can set the following files. You can select a
Chaku-Uta® from [i-motion].
Category File
format File size Image size
MUSIC※
AAC-LC/
HE-AAC
Max. 5M
bytes −
i-motion
※MP4 Max. 10M
bytes
Max. [VGA(640×
480)]
Melody SMF/
MFi
Max. 350K
bytes −
※ Some files may not be set.
When you select a Chaku-Uta Full® that has a
choice of specified playback ranges from [MUSIC]
The screen for selecting a type of setting
appears. If you select [Full song], the whole track
of Chaku-Uta Full® is set for the alarm tone. If you
select [Point], the specified playback range of
Chaku-Uta Full® is set for the alarm tone.
To mute the alarm tone
Select [Silent].
To check the alarm tone
Move the cursor to the alarm tone and press
(Play).
4 Select an image from My picture/i-motion
of the Data Box at [Alarm image].
ˎ You can set the following files.
Category File
format File size Image size
My picture
GIF/
JPEG
Max. 250K
bytes
Max. [Stand-by
(480×864)],
Max. W480×
H288 for GIF
animation
SWF Max. 100K
bytes −
i-motion
※MP4 Max. 10M
bytes
Max. [VGA(640×
480)]
※ Some i-motion may not be set.
To check the alarm image
Move the cursor to the alarm image and press
(Play).
5 Set the volume at [Alarm volume].
Select from [OFF] and [1 to 6].
To set the volume to [OFF]
Press at level 1.
6 Select a vibration type at [Vibrator].
[Pattern1]:
Set short intermittent vibration.
[Pattern2]:
Set long intermittent vibration.
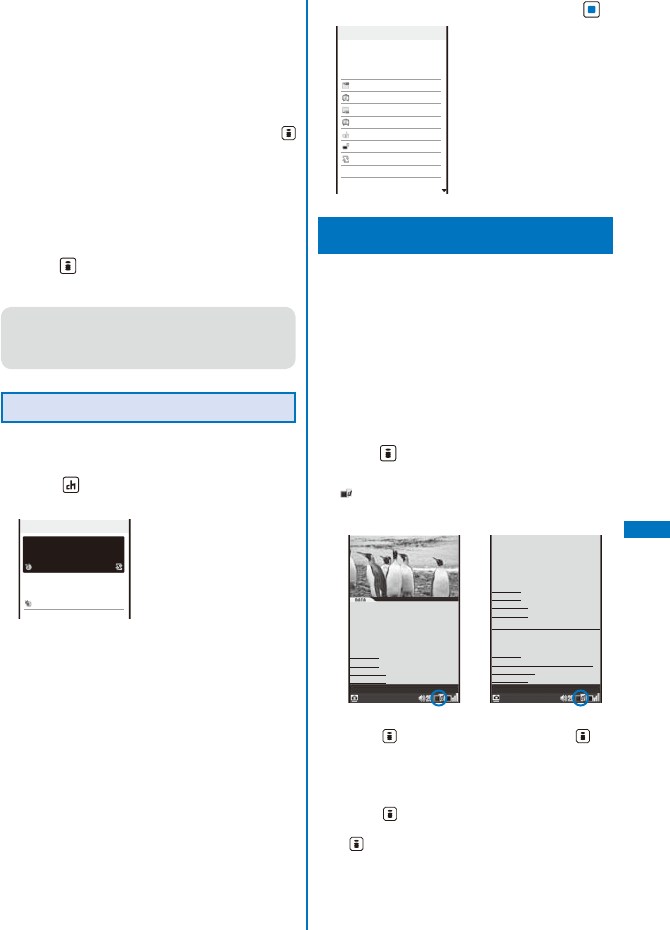
267
1Seg
[Link melody]:
Vibrates in accordance with the alarm tone. If you
have set the alarm tone to [Silent] or to a melody
that cannot be synchronized with the vibrator
operation, the vibrator vibrates using [Pattern1].
[OFF]:
Do not set the vibrator.
To check the vibration
Move the cursor to the pattern and press
(Confirm).
7 Select an indicator color at [Color].
Select from 12 indicator colors or [C13:ALL]
(indicator flashes in 12 colors in sequence).
When you move the cursor, the indicator flashes
accordingly.
8 Press (Complete).
The operation for the Booking alarm is set.
● When you set an i-motion or Chaku-Uta Full® for
the alarm tone or set an i-motion for the alarm
image, the settings may be changed in some
cases.
Checking the Reservation Result
Up to 30 results of Timer recording can be
saved.
1 Press (Res.Rslt) in the Res. data list
display.
Rsrv rslt list
1/2
2007/11/28 Wed18:00
○○テレビ
明日の天気
2007/11/29 Thu21:00
△△
テレビ
今日のニュース
To delete a reservation result
Move the cursor to a reservation result and from
the Function menu, select [Delete one] → [Yes].
To delete all reservation results, from the Function
menu, select [Delete all], enter the Security code,
and select [Yes].
2 Select a reservation result and press .
Result detail
[Result]
Timer recording
finished completely
2007/11/28 Wed
18:00
2007/11/28 Wed
20:00
○○テレビ
明日の天気
Eyd
10 Count
To 2007/12/07
Using Data Broadcasting
One Seg allows you to use the data
broadcasting in addition to the video and
sound broadcasting. Various kinds of
information including still images and movies,
such as sites linked with programs are
available.
ˎ You cannot display the data broadcasting in the TV
style.
ˎ During the data broadcasting mode, you cannot
select a broadcast station.
1 Press (TV/DATA) while watching One
Seg.
“” appears and the mode is switched to the data
broadcasting mode.
Half-screen display Full-screen display
○
△
の不思議
○
△
の不思議
毎週木曜よる
10
時∼
第
225
回
ペンギンの一生
■豆知識
■クイズ
■撮影裏話
■次回予告
○
×
ch
Rec
○
△
の不思議
毎週木曜よる
10
時∼
第
225
回
ペンギンの一生
■豆知識
■クイズ
■撮影裏話
■次回予告
最新情報
●ドラマ
●ニュース・ドキュメンタリー
●バラエティ
●スポーツ
○
△
の不思議
○
×
ch
Rec
To go back to the video mode
Press (TV/DATA). Every time you press , the
mode is switched between the video and data
broadcasting modes.
To switch the data broadcasting screen between half
and full screens
Press (TV/DATA) for over a second during the
data broadcasting mode. Every time you press
for over a second, the screen is switched
between half and full screens.
To display the certificate
From the Function menu, select [Certificates].
Continued
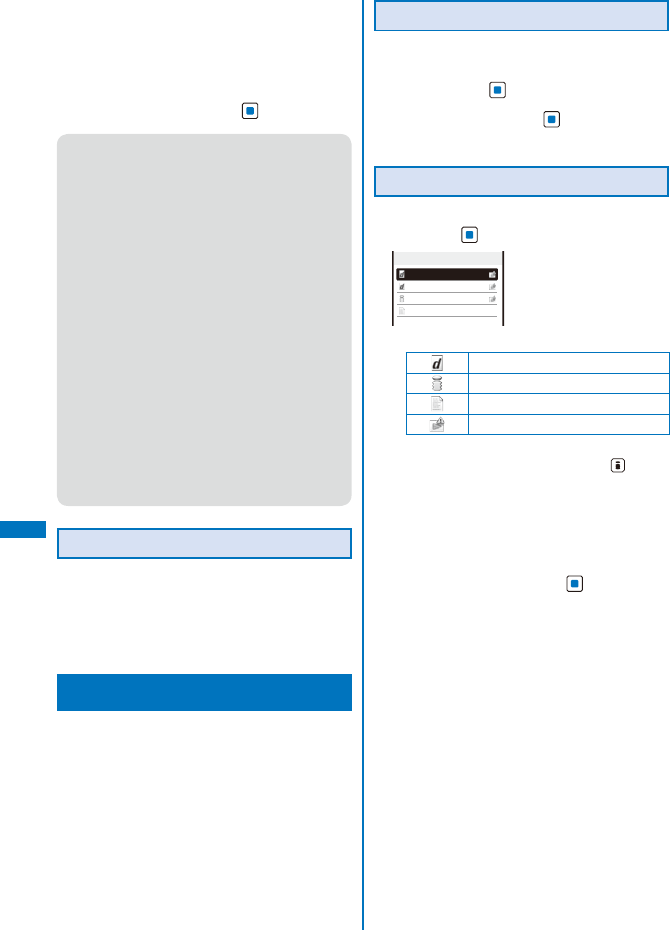
268
1Seg
To reload the data broadcasting site
From the Function menu, select [Reload].
To go back to the data broadcasting from the data
broadcasting site
From the Function menu, select [Back to data
BC.].
2 Select an item and press .
● When you access an i-mode site from the data
broadcasting, the site is displayed in full-screen
and the video and sound of One Seg are not
output.
● If you select [Yes] on the screen for confirming
whether to connect to i-mode that appears while
using data broadcasting or data broadcasting
site, the FOMA terminal connects to i-mode. If
you select [Yes,from then on], the confirmation
screen no longer appears. The packet
communication charge may be required because
of contents of data broadcasting or data
broadcasting site being updated automatically.
To display the confirmation screen again,
perform the Rset permission set (P.256).
● The packet communication performed when
connecting to a data broadcasting site is
covered by the Pake-Houdai/Pake-Houdai Full
service.
● For the operation while the site is displayed,
follow the same steps as in “Using Sites”
(P.162). You cannot enter pictographs in the
text box while in a data broadcasting or data
broadcasting site.
Using Displayed Information
Some data broadcasting or data broadcasting
sites allow you to use displayed information
to activate Phone To, Mail To, or i-αppli To
function, download ToruCa cards, and save
entries in the Phonebook or Schedule.
Using TVlink <TVlink>
Depending on the data broadcasting or data
broadcasting sites, you can save a URL or
memo information as a TV link. Once the
frequently used site or memo information is
saved as a TV link, you can display a desired
site or memo information directly.
Saving as a TV link
ˎ You can save up to 50 TV links.
1 Select an item that can be saved as a TV
link and press .
2 Select [Yes] and press .
The TV link is saved.
Displaying the Saved TV link
1 From the Menu, select [1 Seg] → [TVlink]
and press .
○○番組
□
△
ズーム
○
△
入門
△△
発見
TVlink list
1/4
ˎ The following icons show the type of TV link
Data broadcasting site
i-mode site
Memo information
TV link with expiration date set
To display the detailed information of a TV link
Move the cursor to a TV link and press (Detail).
To delete a TV link
Move the cursor to a TV link and from the
Function menu, select [Delete one] → [Yes].
To delete all TV links, from the Function menu,
select [Delete all], enter the Security code, and
select [Yes].
2 Select a TV link and press .
The selected TV link is displayed.
When the screen for confirming whether to connect
to the i-mode appears
Select [Yes].
269
1Seg
Recording One Seg While
Watching <Record One Seg>
You can save a program as a video and a
scene of a program as a still image while
watching One Seg.
ˎ The copy control signal (indicating that “the program
cannot be recorded (Copy Never)”, “the program
can be recorded only once (Copy Once)”, or “the
program can be recorded without restrictions (Copy
Free)”) is placed in One Seg. They are set by each
broadcast station.
ˎ If the copy control signal of a program is one of
“the program can be recorded only once (Copy
Once)” and “the program can be recorded without
restrictions (Copy Free)”, the program can be
recorded.
ˎ When the copy control signal changes to “the
program cannot be recorded (Copy Never)” while
recording a program, the recording stops. Video
data recorded up to that point is saved.
Recording a Video
A recorded video is saved in either the [Video]
folder in 1Seg of the Data Box or in 1Seg of a
microSD memory card.
■ Estimated number and recording time of
videos you can record
Place to save to Estimated max.
number*1
Estimated max.
recording time*2
Data Box 99 items About 30 minutes
microSD memory
card (2GB)
99 items About 10 hours
43 minutes
*1 Depending on the data size, the number of
videos you can save may decrease.
*2 The recording times are estimated values. They
vary depending on the contents of a program
to be recorded.
ˎ To set a place to save a recording video, see
“Setting a Place to Save a Recorded Video to”
(P.255).
1 Press for over a second while
watching One Seg.
The display is switched to the Preparing to Rec
display. After time for preparation, recording starts
and “ ” appears.
2 To stop recording, press , select [Yes],
and press .
The recording is stopped and a video is saved.
ˎ To play back a saved video, see “Displaying/
Playing Back One Seg” (P.277).
For the TV style
Press , select [Yes], and press .
● A file name of a recorded video appears in
the format of the recorded year, month, date,
hour, and minute. For example, when a video is
recorded at November 1, 2007, 9:05, it appears
as “200711010905NNN”. A number “000 to 999”
is assigned to “NNN”.
● You cannot set a recorded video for the stand-by
display, ring tone, incoming image, etc.
● When the Rec T.shift now/Play T.shift now is
activated, you cannot start recording a program.
● You cannot start recording a video while the
FOMA terminal is outside of the broadcast
service area.
● Recorded video can only be moved from the
Data Box to the microSD memory card. A video
cannot be moved/copied from the microSD
memory card to the Data Box.
● If the free space of the storage area is being
decreased during recording, the message
informing that there is not enough space appears
and the recording ends. The video recorded up
to this point is saved.
Recording a Still Image
You can save up to 50 recorded still images.
1 Press while watching One Seg.
A still image is recorded and saved automatically.
ˎ A One Seg recorded still image cannot be saved
in the microSD memory card.
ˎ To play back a saved still image, see “Displaying/
Playing Back One Seg” (P.277).
Continued
270
1Seg
● Subtitles and data broadcasting cannot be
recorded as a still image.
● A file name of a recorded still image appears
in the format of the recorded year, month, date,
hour, and minute. For example, when a still
image is recorded at November 1, 2007, 9:05, it
appears as “200711010905NNN”. A number “000
to 999” is assigned to “NNN”.
● You cannot set a recorded still image for the
stand-by display, incoming image, etc.
● You cannot record a still image while the Rec
T.shift is in progress, the FOMA terminal is
outside of the broadcast service area, or video
playback is in progress.
● The number of images that can be saved may
decrease depending on the size of still images.
Starting Time Shift Play
While Watching <Time shift>
You can play back a time-delayed copy of a
program after pausing watching One Seg.
ˎ While playing back, a video and sound are played
back at about 1.3× speed. When the time shift
play is ended, the original broadcasting program is
returned.
ˎ When you start the Time shift recording while you
are talking on the phone, extend the One Seg
Antenna fully.
ˎ You can set it either in the Normal style or in the TV
style.
Example: For the TV style
1 Press (Func) while watching One
Seg.
The Function menu appears.
For the Normal style
Press (T.shft) and select [Yes]. To play back,
press (Play).
2 Use to select [Time shift] and press
.
3 Use to select [Start] and press .
4 Use to select [Yes] and press .
The Time shift recording is started and the Rec
T.shift now display appears.
To cancel the Time shift recording
From the Function menu, select [Time shift] →
[Quit] → [Yes].
To cancel the Time shift recording in the Normal
style
Press and select [Yes].
5 Press (Func) to play back.
The Function menu appears.
6 Use to select [Time shift] and press
.
7 Use to select [Play] and press .
The Time shift play is started.
To quit the Time shift play
From the Function menu, select [Time shift] →
[Quit] → [Yes].
To quit the Time shift play in the Normal style
Press (Quit) and select [Yes].
● When there is an incoming voice/videophone or
PushTalk call while watching One Seg, the Time
shift recording is automatically started. After the
call is disconnected, the screen for confirming
whether to play back a program appears. Select
[Yes] to start the Time shift play.
● The recording time of video you can record
using the Time shift recording is up to about 90
seconds. When 90 seconds are past, the older
part of the video is overwritten by the newer one.
Every latest 90 seconds of video is maintained.
● When the Time shift recording is too short, the
Time shift play may not start, or it may stop
immediately to return to the original broadcasting
program.
● You cannot start the Time shift recording when
the FOMA terminal is outside of the broadcast
service area. However, if the FOMA terminal
becomes outside of the broadcast service area
while the Time shift recording is in progress, the
recording continues.
● Regardless of whether the data broadcasting
is displayed in half-/full-screen, you cannot
start the Time shift recording during the data
broadcasting mode.

271
1Seg
Receiving Mail While
Watching One Seg
While watching One Seg, you can read
received mail or reply to the mail. The display
style of the received mail varies depending on
the Mail disp set. The default setting is set to
[OFF] (P.256).
■ When the Mail disp set is set to [Display
mail]
In
携帯なつ子
Happy Birthday
Happy birthday! It’s alr
eady one year since you
left. You surely familia
rize yourself with the l
ocal culture. I hope you
enjoy your coming year
“” appears in the Video
mode and “ ” appears in the
Mail mode.
Multi-window
When you receive mail in the Normal style, the screen
for confirming whether to display received mail
appears. Select [Yes] to display the contents of the
mail and “ ” appears.
To reply mail/SMS using the Quote function
Press (Quote). The Edit mail display or Edit SMS
display appears.
ˎ Follow the same steps as in “Compose and send
mail” (P.179, step 3 to 5) or “Compose and send
SMS” (P.202, step 3 to 4).
To switch to the Video mode
Press (TV/Mail). Every time you press (TV/
Mail), the mode is changed between Video and Mail
modes.
To end the mail display
Press (QuitMail).
● Mail cannot be displayed in the TV style but the
Telop text is displayed.
● Mail cannot be displayed when you receive
it from the sender who is saved as Secret. To
display mail, set the Secret display to [ON].
● Mail cannot be displayed when it is sent from a
sender who is not saved in the Phonebook.
● If you receive several mails continuously, the last
received mail is displayed.
● When a message appears in the Mail mode, the
message is not displayed completely and you
may not be able to perform an operation. Press
(TV/Mail) to switch to the Video mode, the
message appears correctly, and then you can
perform the operation.
■ When the Mail disp set is set to [Display
telop]
When you receive mail, the Telop text is displayed.
When you receive i-mode mail from the sender who is
saved in the Phonebook, the name of the sender and
subject are added to the Telop text. When SMS is sent
from the sender who is saved in the Phonebook, the
name of the sender and “SMS” are added.
For the Normal style
Received mail
携帯なつ子
○
△
の不思議
○
△
の不思議
毎週木曜よる
10
時∼
第
225
回
ペンギンの一生
■豆知識
■クイズ
■撮影裏話
■次回予告
○
×
ch
Telop
For the TV style
○
△
の不思議
○
×
ch
Received mail
携帯なつ子
Volume
Channel
Rec
Func
Quit
Telo p
Continued
272
1Seg
● When you receive mail from a sender who is
saved as Secret, the name of the sender is not
displayed. To display a name, set the Secret
display to [ON].
● When the mail is being saved in the folder for
which the Mail security is set, the name and
subject are not displayed.
● When the Public mode (Drive mode) is set, the
Telop text is not displayed.
● Mail ring tone, vibrator, and incoming indicator
are not operated.
● If you receive several mails or messages
continuously, the information of the last received
mail or message is displayed in the Telop text.
Various Settings for One
Seg <1Seg setting>
You can set functions regarding One Seg, reset
the settings, etc.
Deleting the Broadcast Storage
Area <Delete storage area>
You can delete information stored in the
broadcast storage area.
1 From the Menu, select [1 Seg] → [1Seg
setting] → [Delete storage area] and
press .
The BC group list display appears.
To delete data by each affiliated channel group
Move the cursor to an affiliated channel group
and from the Function menu, select [Delete aff.
Data] → [Yes]. To delete data of all affiliated
channel groups, from the Function menu, select
[Del all aff.data], enter the Security code, and
select [Yes].
2 Select an affiliated channel group and
press .
The list of the broadcast stations in the affiliated
channel group is displayed.
3 Select a broadcast station and press
(Delete).
4 Select [Yes] and press .
Data of the selected broadcast station is deleted.
Setting Not to Display Images of
Data Broadcasting Site <Display img>
You can set whether to display images
provided by data broadcasting sites.
ˎ This setting is synchronized with that of the Display
img of i-mode (P.170).
1 From the Menu, select [1 Seg] → [1Seg
setting] → [Display img] and press .
2 Select [ON]/[OFF].
The Display img is set.
When set to [OFF], “ ” is displayed instead of
images.
● Even if the Display img is set to [ON], some
images may not be displayed correctly.
Setting Not to Hear Sound Effect of
Data Broadcasting Site
<Sound effect>
You can set whether to hear sound effect
provided by data broadcasting/data
broadcasting sites.
1 From the Menu, select [1 Seg] → [1Seg
setting] → [Sound effect] and press .
2 Select [ON]/[OFF].
The Sound effect is set.
● The volume of the Sound effect follows that set
for watching One Seg.
273
1Seg
Setting a Place to Save a
Recorded Video to <Output of Rec>
You can set a place to save a recorded video.
1 From the Menu, select [1 Seg] → [1Seg
setting] → [Output of Rec] and press .
The Save to display appears.
[Data Box]:
A video is saved in the [Video] folder of 1Seg of
the Data Box.
[microSD]:
A video is saved in 1Seg of the microSD memory
card.
2 Select a place to save to and press .
The Output of Rec is set.
● When you set the Output of Rec while recording
a video, the setting is effective from the next
recording.
Setting the Operation for Incoming Mail
While Watching One Seg
<Mail disp set>
You can set whether to display contents of the
received mail or telop when you receive mail
while watching One Seg.
1 From the Menu, select [1 Seg] → [1Seg
setting] → [Mail disp set] and press .
[Display mail]:
Display the screen for confirming whether to
display the contents of mail when you receive
mail.
[Display telop]:
Display the Telop text.
[OFF]:
Do not display anything.
When you watch in the TV style
In the watching display, from the Function menu,
select [Mail disp set] → [Mail]/[Telop]/[OFF].
2 Select an operation which is performed
when you receive mail while watching.
The Mail disp set is set.
● Even if the Mail disp set is set to [Display mail],
while watching One Seg in the TV style or when
receiving mail from the sender who is not saved
in the Phonebook, the mail is not displayed but
the Telop text is displayed.
Displaying a User’s Confirmation Screen for
Data Broadcasting Site
<Rset permission set>
If you select [Yes,from then on] on the screen
for confirming whether to connect to i-mode,
which appears when using data broadcasting
or data broadcasting sites, the confirmation
screen no longer appears. To display the
confirmation screen again, perform the Rset
permission set.
1 From the Menu, select [1 Seg] → [1Seg
setting] → [Rset permission set] and
press .
The Security code screen appears.
2 Enter the Security code and press
(OK).
The screen for confirming whether to perform the
Rset permission set appears.
3 Select [Yes] and press .
The Rset permission set is reset.
Continued
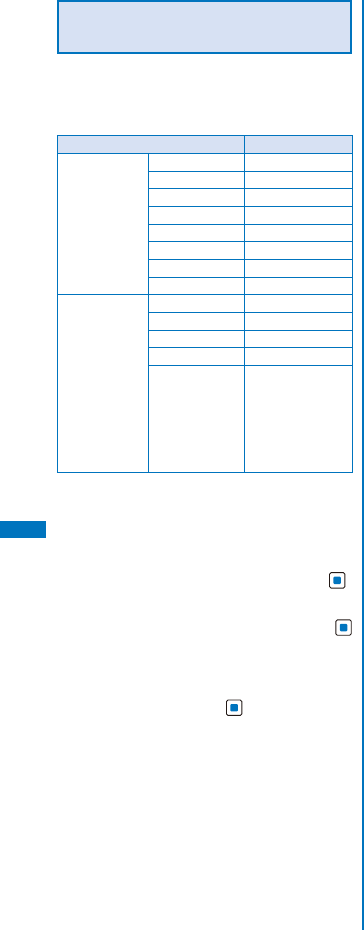
274
1Seg
Resetting the One Seg Settings to
the Default Settings
<Reset 1Seg set>
You can reset the settings of the functions
regarding the One Seg video and sound to the
default settings. The items that can be reset
are as follows.
Item Default setting
Items set from
the Function
menu while
watching/
playing back a
program
Caption disp set OFF
Guide always on ON
Image quality Normal
Display light 3
Auto Disp light ON
Switch sound Primary sound
Main/Sub Main sound
Auto off setting OFF
Items set from
the 1Seg menu
Display img ON
Sound effect ON
Output of Rec Data Box
Mail disp set OFF
Booking ALM set A l a r m tone:
Alarm(std), Alarm
image:視聴予約
アラーム鳴動中,
Alarm volume:
4, Vibrator: OFF,
Color: C5:Color5
ˎ The broadcast storage area and channel list are not
reset.
ˎ By performing the Reset 1Seg set, the Rset
permission set is also performed simultaneously.
1 From the Menu, select [1 Seg] → [1Seg
setting] → [Reset 1Seg set] and press .
The Security code screen appears.
2 Enter the Security code and press
(OK).
The screen for confirming whether to reset the One
Seg settings appears.
3 Select [Yes] and press .
The One Seg settings are reset.

275
Full Browser
Displaying a Website Designed for PC ..................................................................... 280
Key Operations While Viewing a Website ................................................................. 280
Managing a Bookmark.............................................................................................. 285
Setting the Full Browser Functions ........................................................................... 286
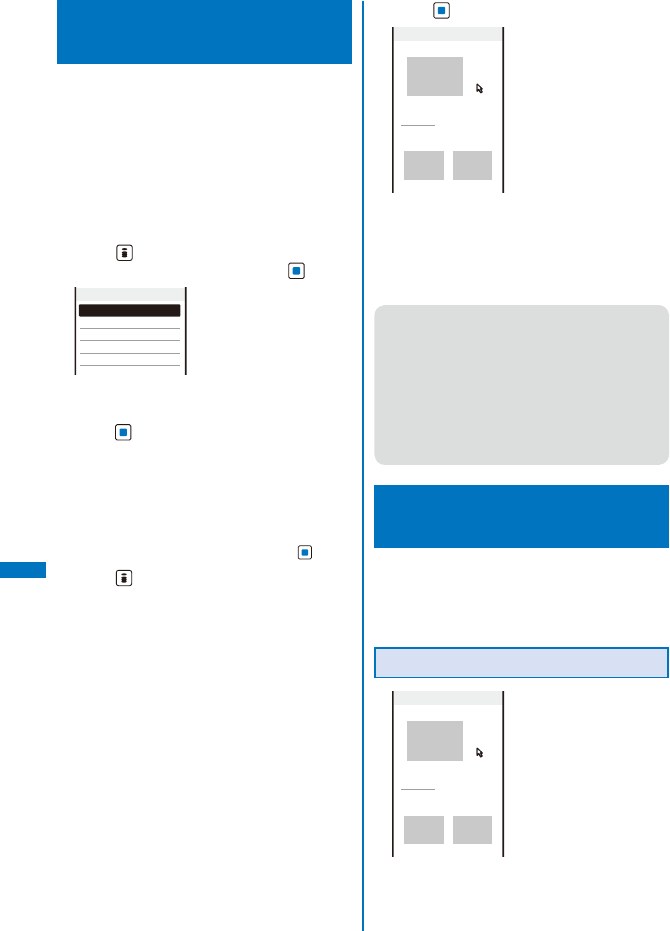
276
Full Browser
Displaying a Website
Designed for PC
You can view websites designed for PC on the
FOMA terminal using Full Browser.
ˎ Some websites may not be displayed at all or
displayed incorrectly.
ˎ Note that the communication charge could be
expensive if you exchange large volumes of data
such as viewing websites that contain a lot of
images or downloading files. For details on the
packet communication charge, see the “Mobile
Phone User’s Guide
【i-mode】
FOMA version”.
1 Press (i-mode) in the stand-by display,
select [Full Browser], and press .
Full Browser
Home
Bookmark
Go to location
Last accessed URL
Full Browser setting
The Full Browser menu appears.
2 Select [Go to location] → [Enter URL] and
press .
The Enter URL display appears.
To view the website saved as the Home page
Select [Home].
To view a website from a bookmark
Select [Bookmark] → a folder → a bookmark.
To view the website accessed last
Select [Last accessed URL] and press (Cnct).
3 Press (Edit) and enter the URL.
Enter the URL including “http://” within 512 half-
width alphanumeric characters and symbols.
4 Press (Cnct).
○○○
△△△
□□□ □□□
××××××××××
×××××
The website is displayed.
ˎ When the Access setting is set to [No], the
screen for confirming whether to use Full
Browser appears. If you select [Yes] and [OK],
the Access setting is changed and the website is
displayed (P.288).
● It may take time to display a website depending
on a website.
● Full Browser does not support the following
functions.
- Displaying a Flash movie
- Plug-in
- Playing back a melody or music data
- Phone To
- Displaying PDF data
● Some websites may communicate automatically.
Key Operations While
Viewing a Website
You can operate Full Browser both in vertical
and horizontal views.
The following key operations can be performed
while viewing a website.
Operating in Vertical View
○○○
△△△
□□□ □□□
××××××××××
×××××
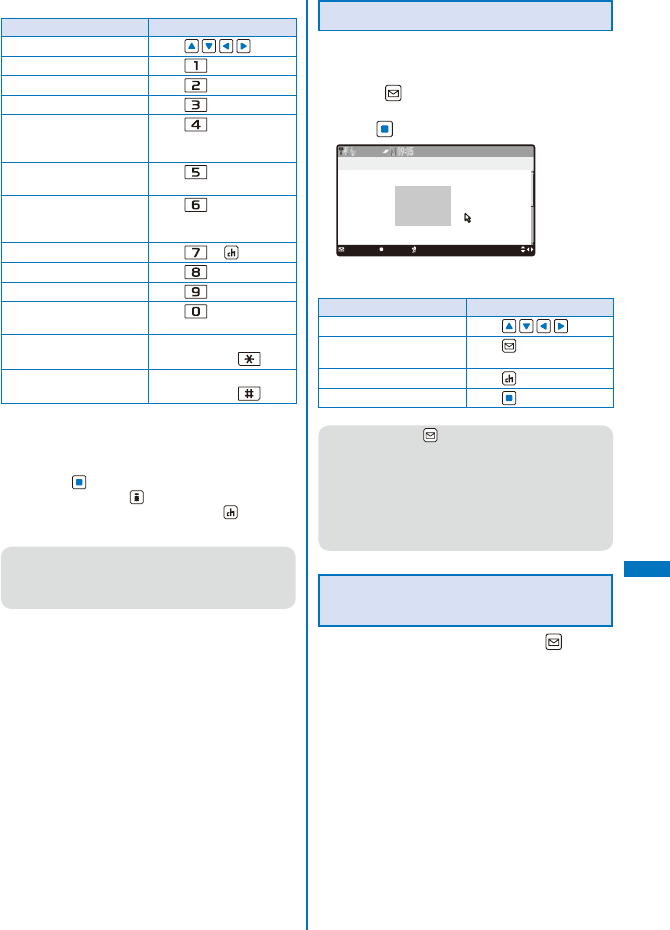
277
Full Browser
Continued
Operating method
Operation Key operation
Move the pointer※Press .
Zoom out Press .
Scroll to the upper page Press .
Zoom in Press .
Scroll to the left page Press .
It can be operated only in
the PC mode.
Display the PagePilot
display (Full page display)
Press .
Scroll to the right page Press .
It can be operated only in
the PC mode.
Display the previous page Press or (History).
Scroll to the lower page Press .
Display the next page Press .
Display the list of
bookmarks
Press .
Switch to the left window While displaying multiple
windows, press .
Switch to the right window While displaying multiple
windows, press .
※ The movement speed of the pointer can be changed
(P.287).
To change the function assigned to a key
From the Function menu, select [Short cut], select a
key, press (Edit), select a function to be assigned
to the key, and press (Complete).
To restore the default settings, press (Reset) in
the Short cut list display and select [Yes].
● You can scroll pages using the JOG but you
cannot use the JOG to operate the pointer in a
page such as selecting items. To operate the
pointer, use the 4-way keys.
Operating in Horizontal View
You can operate the FOMA terminal held
horizontally, tilted 90 degrees from vertical.
1 Press (Func) in the Full Browser
display, select [Horizontal mode], and
press .
△△△
××××××××××
Vertical
Select
History
○○○
A website is displayed in horizontal view.
Operating method
Operation Key operation
Move the pointer Press .
Switch the display to the
vertical view
Press (Vertical).
View the previous page Press (History).
OK Press .
● If you press (Vertical) while viewing a
website in horizontal view, the display may not
be switched to the vertical view immediately in
a case such as when the PagePilot display is
active. To switch to the vertical view, return to the
normal page viewing display.
● Setting/canceling the full-screen display can be
performed only in vertical view (P.284).
Function Menus While Viewing a
Website
While viewing a website, press (Func)
to display the Function menu, and from the
Function menu, the following operations can
be performed.
ˎ Operations from the Function menu are not available
in horizontal view. Switch to the vertical view before
using the Function menu.
ˎ Some functions cannot be activated while loading a
page.
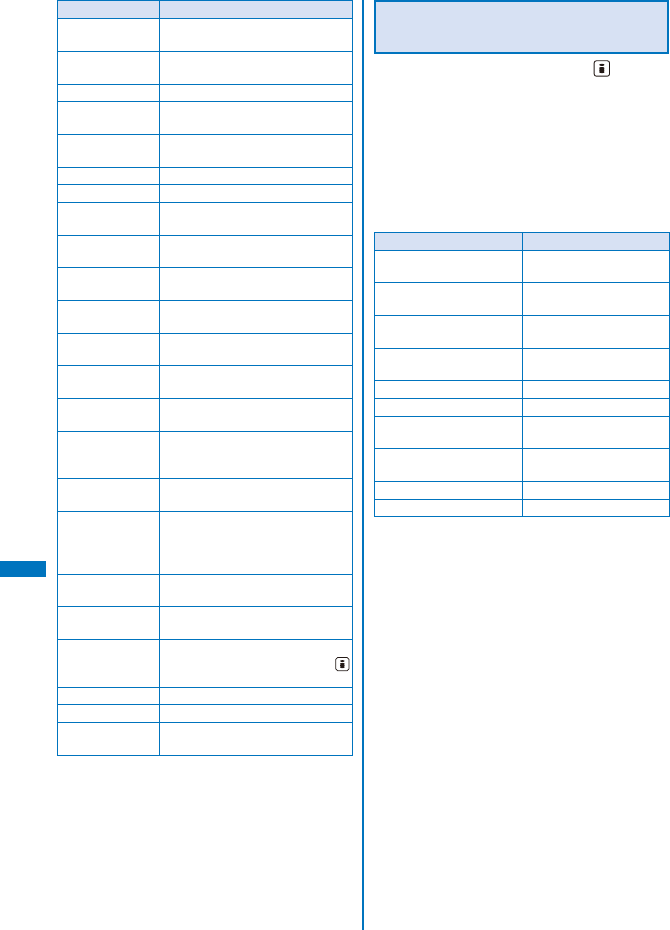
278
Full Browser
Item Operation
Display the
previous page
Select [Previous page].
Display the next
page
Select [Next page].
Reload a website Select [Reload].
Save a website in
the Bookmark
Select [Add bookmark] →
[Complete] → a folder.
Connect to
another site
Select [Bookmark] → a folder → a
bookmark.
Use a history※Select [History].
Display a website
Select [Go to location] (P.280, 283).
Save a website as
the Home page
Select [Set as Home URL] → [Yes].
Display the website
saved as Home
Select [Home].
Display in
horizontal view
Select [Horizontal mode].
Display in full-
screen view
Select [Full scrn/normal].
Save an image Select [Acquire image] → [Save]/
[Save&Setting] → an image.
Display multiple
windows
Select [Window] (P.283).
Display the Flame
selection display
Select [All frames] (P.283).
Search a
character string
in a page
Select [Search] (P.285).
Send a URL by mail
Select [Compose message]
(P.207).
Display a website
correctly
Select [Word translate].
ˎ Sequentially convert the
character codes and display
the site again.
Retry to play back
an animation
Select [Retry].
Display a title of a
website
Select [Title].
Display a website
URL
Select [URL].
ˎ To copy the URL, press
(Copy).
Display a certificate
Select [Certificates] (P.284).
Set Full Browser Select [Full browser set] (P.286).
Display a function
assigned to a key
Select [Short cut] (P.281).
※ If there is not enough memory, the image which is
different from the one displayed in the shrinking
display may appear.
Action Menu While Viewing a
Website
While viewing a website, press (Action)
to display the Action menu, and from the
Action menu, the following operations can be
performed.
ˎ Operations from the Action menu are not available
in horizontal view. Switch to the vertical view before
using the Action menu.
ˎ The Action menu which can be actually performed
varies depending on a displayed website or position
of the pointer.
Item Operating method
Display a link in a new
window
Select [Open New
Window] (P.283).
Display a linked URL Select [Display Link URL]
(P.283).
Download and save an
image
Select [Save image]
(P.285).
Save an image and set it
as the stand-by display
Select [Save image&set].
Zoom in Select [Zoom in].
Zoom out Select [Zoom out].
Select a portion of an
entire page to display
Select [PagePilot] (P.284).
Select an area or grab a
display to move
Select [Drag] (P.284).
Copy a text Select [Text copy] (P.284).
Paste a text Select [Text paste] (P.284).
279
Full Browser
Displaying Using the URL
History
Up to 50 websites that have been displayed
by entering their URLs are saved in the URL
history. The sites can be directly accessed
from the URL history.
ˎ If a total of 50 URLs is saved in the URL history, the
URL is overwritten from the oldest.
1 From the Full Browser menu, select [Go
to location] → [URL history] and press
.
The URL history display appears.
To display a URL
Move the cursor to a URL history and from the
Function menu, select [URL]. When you press
(Cnct), it is connected to its website.
To send a URL history by mail
Move the cursor to a URL history and from the
Function menu, select [Compose message].
ˎ Follow the same steps as in “Compose and
send mail” (P.207, step 2 to 5).
To delete a URL history
Move the cursor to a URL history and from the
Function menu, select [Delete] → [Delete one] →
[Yes]. To delete several URLs, from the Function
menu, select [Delete] → [Select&delete], select
URLs, press (Complete), and select [Yes]. To
delete all URLs, from the Function menu, select
[Delete] → [Delete all], enter the Security code,
and select [Yes].
2 Select a URL history and press (Cnct).
The website of the selected URL history is
connected.
Displaying Websites in the
Multiple Windows
You can view several websites by switching
windows.
ˎ Up to five windows can be displayed. However, you
may not be able to display the maximum number of
windows depending on displaying websites.
Example: Displaying the Home page in the new
window
1 Press (Func) in the Full Browser
display, select [Window], and press .
To display a link in the new window
Move the cursor to a link in the Full Browser
display, press (Action), and select [Open New
Window].
To display a URL of a link
Move the cursor to a link in the Full Browser
display, press (Action), and select [Display
Link URL].
2 Select [Open New Window] and press .
To display a website in the back window
Select [Open Back Window].
To close the window
Select [Close Window] → [OK].
To change the window
Select [Change Window] → a window being
switched.
3 Select [Home].
The Home is displayed in the new window.
To display a website from a bookmark
Select [Bookmark] → a folder → a bookmark.
To display a website by entering a URL
Select [Go to location] → [Enter URL], press
(Edit), enter a URL, and press (Cnct).
To display a website from a URL history
Select [Go to location] → [URL history] → a URL.
Displaying a Frame Page
You can display a website consisted of multiple
frames. Select a frame from the frame selection
display to display a page.
1 Use to select a frame in the frame
selection display and press .
The selected frame is displayed.
To go back to the frame selection display
From the Function menu, select [All frames].
Continued
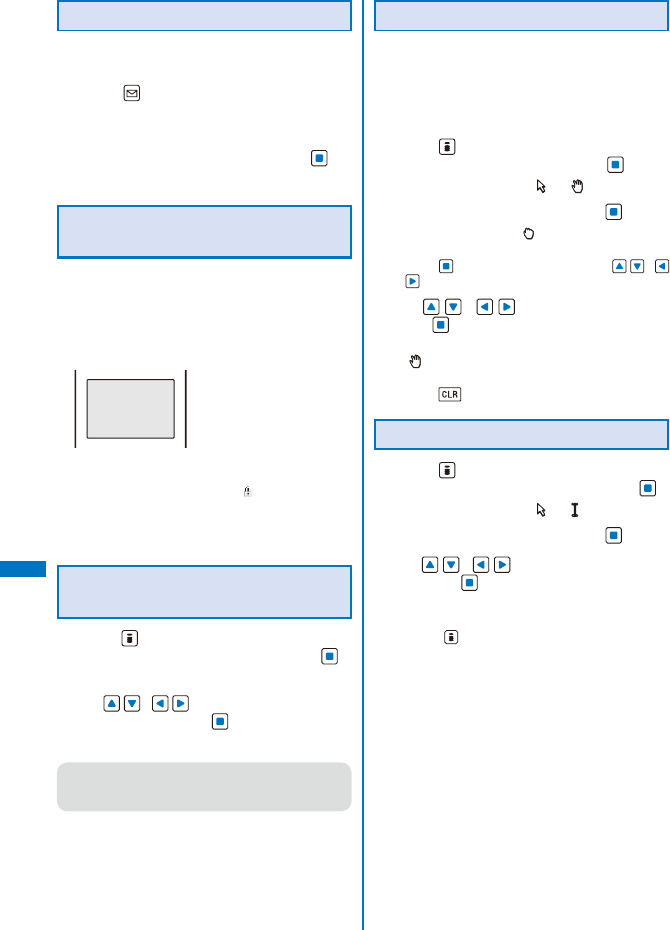
280
Full Browser
Changing the Display
You can set whether to display the guide
display in the display.
1 Press (Func) in the Full Browser
display.
The Function menu appears.
2 Select [Full scrn/normal] and press .
The Full scrn/normal is set.
Displaying a SSL-/TLS-
Compatible Page
You can display a SSL-/TLS-compatible page
whose URL begins with “https://” using Full
Browser.
ˎ SSL/TLS is a method to perform data communication
safely using the authentication/cryptograph
technology.
Establishing
SSL/TLS session
(Authenti−
cating)
When you display a SSL-/TLS-compatible page,
the screen above appears. Once the SSL-/TLS-
compatible page is displayed, “ ” appears.
To display a certificate
From the Function menu, select [Certificates] →
a certificate.
Selecting a Portion to be
Displayed from the Entire Page
1 Press (Action) in the Full Browser
display, select [PagePilot], and press .
The entire page is displayed.
2 Use / to select a portion to be
displayed and press .
The selected portion is displayed.
● If there is not enough memory, the image which is
different from the one displayed in the shrinking
display may appear.
Dragging
You can select an area or move a display using
the dragging operation in the Full Browser
display.
ˎ Some sites may not allow you to drag.
Example: Selecting an area
1 Press (Action) in the Full Browser
display, select [Drag], and press .
The pointer changes from “ ” to “ ”.
2 Select the Start point and press .
The pointer changes to “ ”.
To move a display by dragging
Press at the point to grab and use /
to move the display.
3 Use / to select an area and
press .
The area is selected and the pointer changes
to “ ”.
To quit the Drag
Press .
Copying Text
1 Press (Action) in the Full Browser
display, select [Text copy], and press .
The pointer changes from “ ” to “ ”.
2 Select the Start point and press .
3 Use / to select the End point
and press .
The text is copied.
To paste text
Press (Action) in the textbox of the Full
Browser display and select [Text paste].
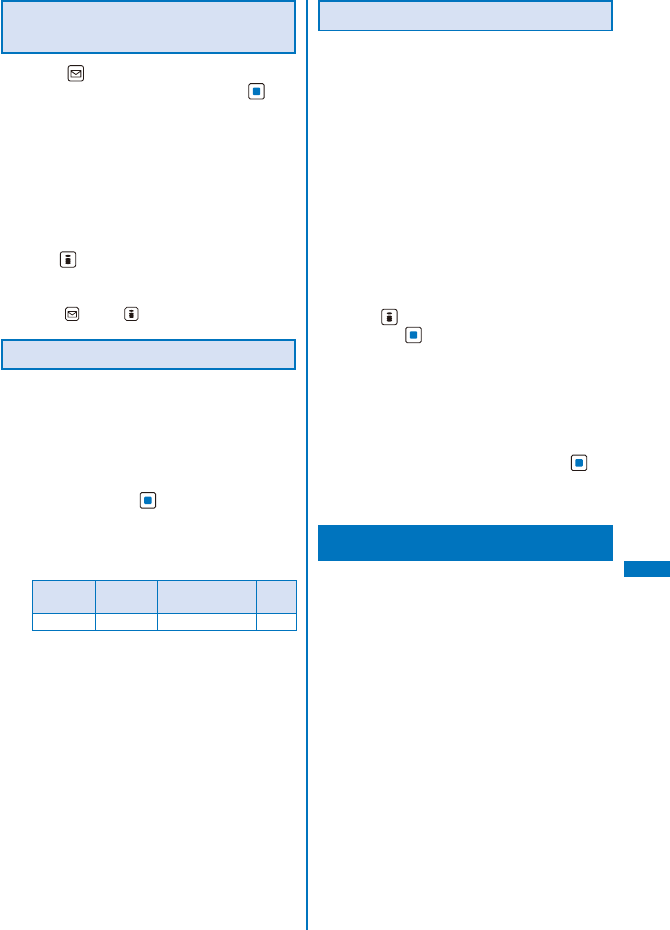
281
Full Browser
Searching a Character String in
a Page
1 Press (Func) in the Full Browser
display, select [Search], and press .
2 Enter a keyword to be searched at [Search
text].
Enter a keyword within 25 full-width or 50 half-width
characters.
3 Select [ON]/[OFF] at [Match full].
4 Select [ON]/[OFF] at [Case sensitivity].
5 Press (OK).
The searched word is displayed in reverse video.
To display the previous/next search result
Press (Back)/ (Next).
Uploading an Image
You can upload an image saved in the Data
Box or microSD memory card to a website
which allows you to upload an image.
ˎ The way of uploading an image varies depending
on a website.
1 Select the “select” key in the Full Browser
display and press .
2 Select an image in My picture of the Data
Box or microSD memory card.
ˎ The following image can be uploaded.
Category File format File size Image
size
My picture GIF/JPEG
Max. 80K bytes※
−
※ It is the size for one file. When containing
several images or character strings, the
maximum size of the total amount is 100K
bytes.
Saving an Image
You can save images downloaded from a
website in the Data Box or microSD memory
card.
ˎ A GIF image, JPEG image, PNG image, or BMP
image can be saved and the image size must be
less than 1M bytes. PNG and BMP images can be
saved in the microSD memory card only.
ˎ You cannot save a GIF image exceeding
[UXGA(1600×1200)] and a GIF animation
exceeding [Stby(480×864)] in the Data Box. You
may not be able to save some JPEG images in the
Data Box as well.
1 In the Full Browser display, move the
pointer to an image which you want to
save.
2 Press (Action), select [Save image],
and press .
The screen for selecting where to save appears.
[Data Box]:
Save an image in the Data Box. Select a folder to
save to.
[microSD]:
Save an image in the microSD memory card.
3 Select a place to save to and press .
The image is saved in the selected place to save
to.
Managing a Bookmark
Up to 200 URLs can be saved as bookmarks
of Full Browser.
ˎ For information on functions operated at the folder
list display or bookmark list display of Bookmark,
see P.191 (a URL can be changed in Full Browser).
ˎ A URL including “http://” of up to 512 half-width
alphanumeric characters and symbols can be
saved as a bookmark.
ˎ Bookmarks can be managed by up to 16 folders.
ˎ A folder neme of a bookmark can be entered within
16 full-width or 32 half-width characters.
ˎ If there is not enough memory, the image which is
different from the one displayed in the shrinking
display may appear.
Continued
282
Full Browser
Editing a Bookmark
You can change the title of a bookmark or URL.
1 From the Full Browser menu, select
[Bookmark] → a folder, press , select a
bookmark, and press (Func).
The Function menu appears.
2 Select [Edit] and press .
The display for editing a bookmark appears.
3 Select [Title], press , and enter a title.
Enter a title within 12 full-width or 24 half-width
characters.
4 Select [URL], press , and enter a URL.
Enter the URL including “http://” within 512 half-
width alphanumeric characters and symbols.
5 Press (Complete).
The edited contents are saved.
Setting the Full Browser
Functions
You can set the functions used for Full Browser.
ˎ You can operate Full Browser from the Function
menu while viewing a website, but some functions
cannot be performed.
Saving a Website as the Home
Page
You can save a website as the Home page.
“http://www.google.co.jp” is set as the Home
URL at the time of purchase.
1 From the Full Browser menu, select [Full
Browser setting] → [Home URL] and
press .
2 Press (Edit), enter a URL, and press
(OK).
Enter the URL including “http://” within 512 half-
width alphanumeric characters and symbols.
Setting Cookie
Cookie is the mechanism for temporarily saving
information such as the user name, date and
time you accessed the website, and number
of accesses in the FOMA terminal when you
accessed a website. When you access the
same website next time, the information is
used.
You can set whether to send/receive Cookie
when connecting to a website.
ˎ Under no condition will DoCoMo be held liable
for any reveal of your information to third parties
because of sending Cookie.
ˎ Some websites may not be displayed correctly or
may be unable to use when Cookie is not set.
1 From the Full Browser menu, select [Full
Browser setting] → [Cookie setting] and
press .
[Valid]:
Cookie is always valid.
[Notify-sending]:
Select whether to send Cookie.
[Notify-receiving]:
Select whether to receive Cookie.
[Notify-send/recv]:
Select whether to send/receive Cookie.
[Invalid]:
Cookie is always invalid.
To delete all Cookie
Select [Delete Cookie], enter the Security code,
and select [Yes].
2 Select whether to set Cookie valid and
press .
The Cookie setting is set.
● When you insert another UIM, the Cookie setting
becomes [Invalid].
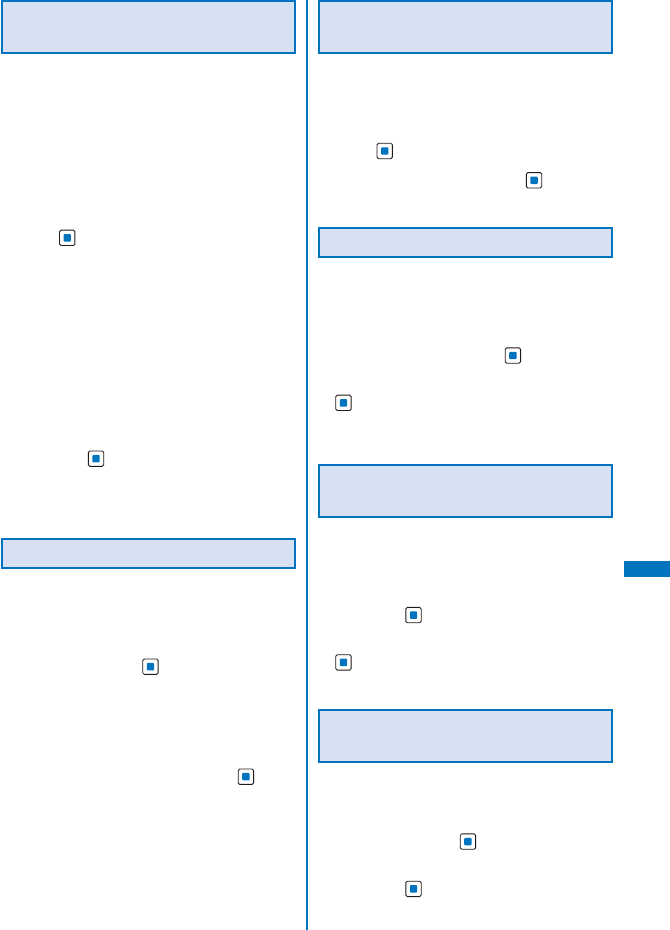
283
Full Browser
Setting JavaScript to Be Valid/
Invalid
JavaScript is a programming language
used on a website to create a website with
movement.
When JavaScript is used at the website, you
can set whether to execute the program.
ˎ Some websites may not be displayed correctly
when you set JavaScript to be invalid.
1 From the Full Browser menu, select [Full
Browser setting] → [Script setting] and
press .
[Valid(Auto)]:
Activate a program automatically during
communication.
[Valid(Confirm)]:
Confirm whether to activate a program during
communication. If you select [Yes,from then on]
at the confirmation screen during communication,
the setting is changed to [Valid(Auto)]
automatically.
[Invalid]:
Do not activate a program.
2 Select a method to activate a program
and press .
The Script setting is set.
When [Valid(Auto)] is selected
Select [Yes].
Setting the Display Mode
You can set the display mode when activating
Full Browser.
1 From the Full Browser menu, select
[Full Browser setting] → [Display mode
setting] and press .
[PC mode]:
Display the website with the screen size for PC.
[Mobile mode]:
Reduce the display size of a website to fit in the
width of the FOMA terminal.
2 Select a display mode and press .
The Display mode setting is set.
Disabling the Display of
Graphics
You can set whether to display graphics when
displaying a website.
1 From the Full Browser menu, select [Full
Browser setting] → [Display img] and
press .
2 Select [ON]/[OFF] and press .
The Display img is set.
Setting the Display Magnification
You can set the display magnification for the
Full Browser display.
1 From the Full Browser menu, select
[Full Browser setting] → [Display
magnification] and press .
2 Select a display magnification and press
.
Select from [75%], [100%], [125%], [150%], [175%],
and [200%].
Displaying the Entire Page While
Scrolling
You can set whether to display the entire page
automatically while scrolling.
1 From the Full Browser menu, select [Full
Browser setting] → [PagePilot setting]
and press .
2 Select [Valid in scrl]/[Invalid] and press
.
The PagePilot setting is set.
Setting the Movement Speed of
the Pointer
You can set a speed to move the pointer.
1 From the Full Browser menu, select
[Full Browser setting] → [Pointer speed
setting] and press .
2 Select a movement speed of the pointer
and press .
Select from [1(Slow)], [2 to 4], or [5(Fast)].
Continued
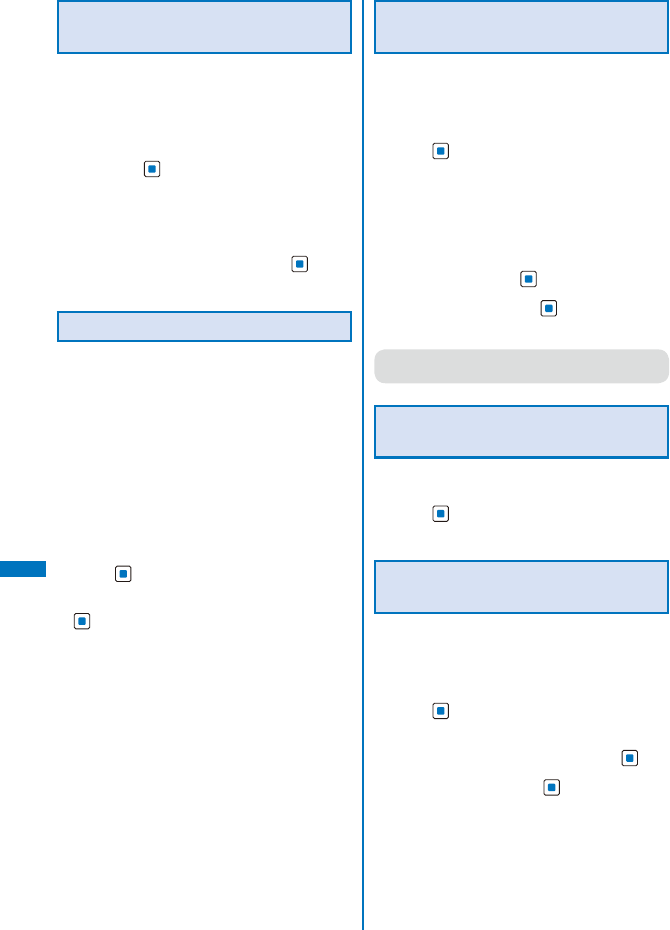
284
Full Browser
Setting Whether to Open a New
Window Automatically
You can set whether to open a website in a
new window automatically when JavaScript of
a website requests to open a new window.
1 From the Full Browser menu, select [Full
Browser setting] → [Window Open Guard]
and press .
[Valid]:
Do not open a website in a new window.
[Invalid]:
Open a website in a new window.
2 Select [Valid]/[Invalid] and press .
The Window Open Guard is set.
Setting Whether to Send Referer
Referer is the information of a link origin. If you
send Referer, the access information of which
page is used to connect is sent to a site.
You can set whether to send Referer when you
select the link while viewing a website.
ˎ Under no condition will DoCoMo be held liable
for any reveal of your information to third parties
because of using Referer.
ˎ Some websites may not be displayed correctly
when Referer is not sent.
1 From the Full Browser menu, select [Full
Browser setting] → [Referer setting] and
press .
2 Select [Send]/[Unsend]/[Notify] and press
.
The Referer setting is set.
Setting Whether to Use the Full
Browser Function
You can set whether to use the Full Browser
function.
1 From the Full Browser menu, select [Full
Browser setting] → [Access setting] and
press .
[Yes]:
Full Browser can be used.
[No]:
The Access setting display appears when you
activate Full Browser.
2 Select whether to use the Full Browser
function and press .
3 Select [OK] and press .
The Access setting is set.
● When you change the UIM to another UIM, the
Access setting changes to [No].
Checking the Settings of Full
Browser
1 From the Full Browser menu, select [Full
Browser setting] → [Check settings] and
press .
The contents of the settings appear.
Restoring the Default Settings
of Full Browser
You can restore the default settings of Full
Browser.
1 From the Full Browser menu, select [Full
Browser setting] → [Reset settings] and
press .
The Security code screen appears.
2 Enter the Security code and press .
3 Select [Yes] and press .
The default settings of Full Browser are restored.

285
Data Display/Edit/
Management
■ Using Still Image
Displaying the Saved Image ..................................................................<My picture> 290
Display Images Using the Music Slide Show............................................................. 291
Editing Still Images ................................................................................ <Edit photo> 292
■ Using Movie
Playing Back Movie/i-motion ..................................................................... <i-motion> 295
Editing Movies .......................................................................................<Edit movie> 298
■ Using Chara-den
What is Chara-den? ...............................................................................<Chara-den> 302
■ Using Music
Playing Back Music Data ............................................................................. <Music> 303
■ Using the Melody
Playing Back a Melody .............................................................................. <Melody> 304
■ Using Kisekae Tool
Displaying/Playing Back Kisekae Tool .................................................<Kisekae Tool> 305
■ Using the microSD memory card
microSD memory card ............................................................................................. 306
Displaying Data on the microSD memory card ........................................................ 308
Folder Setup of the microSD memory card ............................................................. 309
Data That Can Be Written/Read to and from the microSD memory card ................ 311
Saving Data from the FOMA Terminal to the microSD memory card ...................... 312
Saving Data from the microSD memory card to the FOMA Terminal ...................... 312
Managing the microSD memory card ...................................................................... 313
Using the FOMA Terminal with a PC .......................................... <USB mode setting> 314
■ Using the UIM
Copying Data from the FOMA Terminal to the UIM ................................................. 316
Copying Data from the UIM to the FOMA Terminal ................................................. 317
■ Using Data Box
Managing Data Box .................................................................................<Data Box> 317
Checking the Memory of the FOMA Terminal ........................... <Storage information> 326
■ Using Infrared Communication
What is the Infrared Communication? .................................<Infrared communication> 327
Data That Can Be Sent/Received via Infrared Communication ............................... 328
Receiving Data Using the Infrared Communication ........................ <Receive Ir data> 329
Sending Data Using the Infrared Communication .............................. <Send Ir data> 329
Using the Infrared Remote Control .......................................................................... 331
■ Using iC Communication Function
What is iC Communication Function? ..................................................................... 331
Receiving Data Using iC Communication ................................................................ 332
Sending Data Using iC Communication .................................................................. 332
■ Using PDF-compatible Viewer
Displaying PDF Data .........................................................................<My document> 333
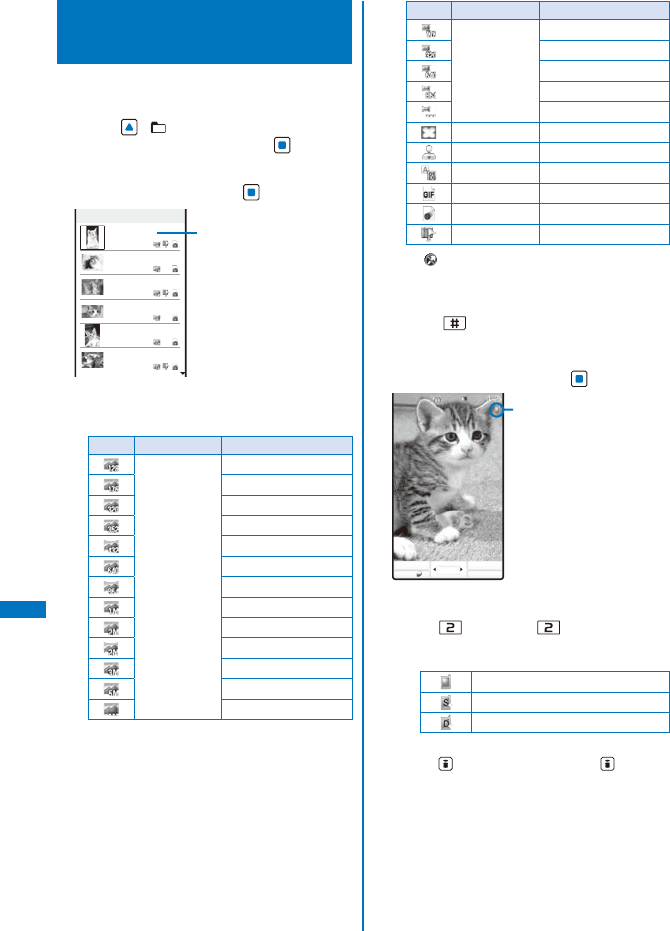
286
Data Display/Edit/Management
Displaying the Saved
Image <My picture>
You can display images saved in My picture of
the Data Box or microSD memory card.
1 Press ( ) in the stand-by display,
select [My picture], and press .
My picture folder list appears.
2 Select a folder and press .
Camera
1/25
My favorite
Your cat
Memorial shot
Sasha of the nex
A friend of Sash
A stage face
Management title
My picture file list appears.
ˎ The following icons show the type/size of an
image.
Icon Type Size
JPEG image sQCIF(128×96)
QCIF(176×144)
QVGA(240×320)
CIF(352×288)
WQVGA(240×432)
VGA(640×480)
Stby(480×864)
1M(1280×960)
2M(1632×1224)
2M Wide(1920×1080)
3M(2048×1536)
5M(2592×1944)
Others
Icon Type Size
Mini-Photo
image
QCIF(176×144)
QVGA(240×320)
VGA(640×480)
Stby(480×864)
Others
Frame image −
Stamp image −
Deco mail pict. −
GIF image −
Flash movie −
Has loc. info −
ˎ “ ” appears on the upper right of the icon for
images prohibited from being retrieved out of
the FOMA terminal.
To display the saved date/time
Press to switch the display temporarily
between the management title and saved date/
time.
3 Select an image and press .
MENU
Enlarge
Func Display
Display quality
The selected image appears.
To change the display quality
Press . By pressing , you can switch the
display quality between Normal/Sharp/Dynamic.
ˎ The following icons show the display quality.
Normal
Sharp
Dynamic
To hide the icons and guide display
Press (Display). When you press (Display),
you can switch the display between standard
and simple or turn off the display.
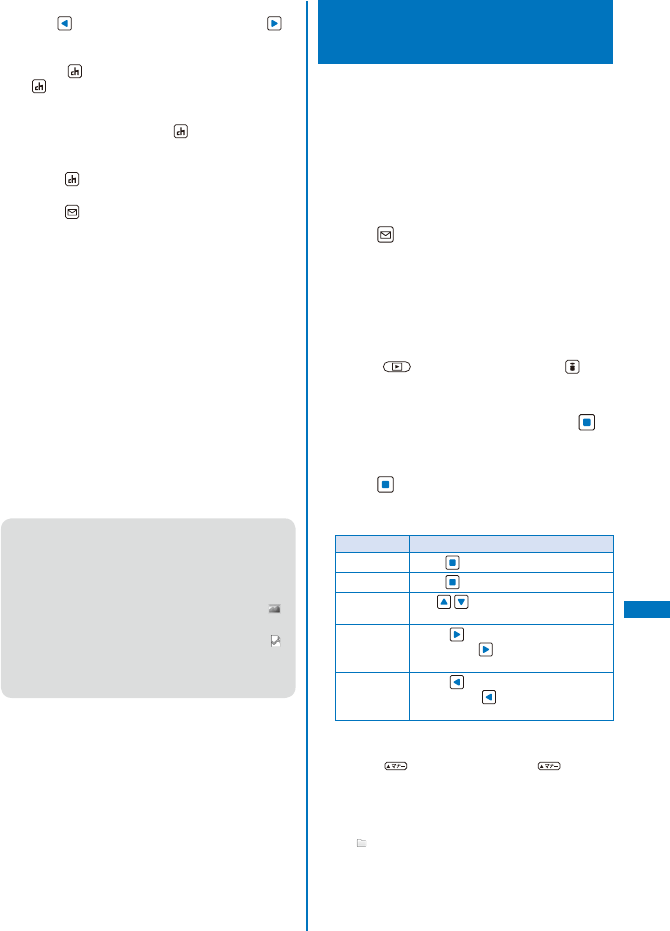
287
Data Display/Edit/Management
Continued
To display the previous/next image
Use to display the previous image and to
display the next image.
To change the display size of a JPEG or GIF image
Press (True img/Std./Enlarge/Shrink). Press
(True img) to display the image in the true
size. However, when the image size is set
to [sQCIF(128×96)], [QCIF(176×144)], or
[QVGA(240×320)], press (Std.) to display the
image in the doubled size.
To display a Flash movie again
Press (Retry).
To attach to i-mode mail
Press (Func) for over a second (P.212).
To post on a blog
From the Function menu, select [easy BlogUp]
→ a service provided a blog (P.358).
To set an image for stand-by or other displays
From the Function menu, select [Display setting]
→ a type of display.
To add the location information
From the Function menu, select [Location info] →
[Rcv loc. info] → [Yes] (P.277).
To use the added location information
From the Function menu, select [Location info] →
[Use loc. info] (P.277).
To display the attached detailed location information
From the Function menu, select [Location info] →
[Location detail].
To delete the added location information
From the Function menu, select [Location info] →
[Delete loc. info] → [Yes].
● When the file list of images in the microSD
memory card is displayed, you cannot perform
the Rcv loc. info or Delete loc. info.
● It may take time to display a file list or images
saved in the microSD memory card.
● If you edit a recorded image on a PC, etc., “ ”
may be displayed instead of the thumbnail.
● When the image cannot be displayed, “ ”
appears.
● You can send a still image using the high-speed
infrared communication (P.330).
Displaying Images Using
the Music Slide Show
JPEG images saved in My picture of the
Data Box or microSD memory card can be
displayed with a BGM and effect, while being
switched automatically.
ˎ The Music slide show is played back in the
horizontal orientation.
Example: Playing back the Music slide show from My
picture of the Data Box
1 Press (Func) in the My picture file list.
The Function menu appears.
To play back the Music slide show from the Menu
display
From the Menu, select [Imaging] → [Music slide
show].
To play back the Music slide show while the camera
is activated
Press in the Camera mode, press (List),
and from the Function menu, select [Music slide
show].
2 Select [Music slide show] and press .
The display indicating stand-by for playing back
the Music slide show appears.
3 Press (Play).
The Music slide show is started.
Operating method
Operation Key operation
Play Press (Play).
Pause Press (Pause).
Volume
adjustment
Use .
Fast-forward
an image
Press while pausing. Pressing
and holding keeps fast-forwarding
images continuously.
Fast-reverse
an image
Press while pausing. Pressing
and holding keeps fast-reversing
images continuously.
To display the icon or guide display while playing
back
Press . Every time you press , you can
switch between turning on/off the display.
To specify the folder to be played back as the Music
slide show
While pausing, from the Function menu, select
[]→ a folder.
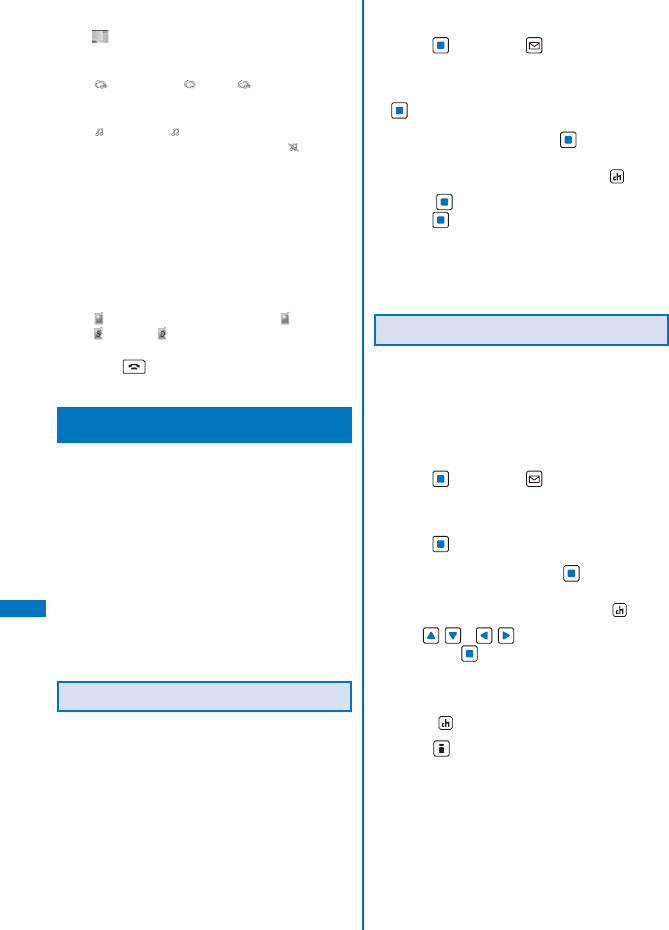
288
Data Display/Edit/Management
To change the Effect
While pausing, from the Function menu, select
[](Effect) → a type of effects.
To set the repeat on the Effect
While pausing, from the Function menu, select
[](Repeat) → [ ](ON)/[ ](OFF).
To change the BGM
While pausing, from the Function menu, select
[](BGM) → [ ](Data Box) → [Music]/[i-motion]
→ a BGM. To mute the BGM, select [ ](Silent).
ˎ When you select a Chaku-Uta Full® that has
a choice of specified playback ranges from
[MUSIC], the screen for selecting a type of
setting appears. If you select [Full song],
the entire track of Chaku-Uta Full® is set for
the BGM. If you select [Point], the specified
playback range of Chaku-Uta Full® is set for
the BGM.
To set the display quality
While pausing, from the Function menu, select
[](Change image quality) → [ ](Normal)/
[ ](Sharp)/[ ](Dynamic).
To end the Music slide show
Press to end the Music slide show and go
back to the stand-by display.
Editing Still Images <Edit photo>
You can edit a JPEG image saved in My
picture by pasting a stamp, a frame, etc.
ˎ You cannot edit preinstalled images, images
prohibited from being retrieved out of the FOMA
terminal, or images recorded with [Panorama] set at
the Shoot mode.
ˎ Some images may not be edited.
ˎ Once you start editing an image of a type displayed
after being rotated, the rotation is canceled and the
image is displayed in the orientation in which the
image is saved. Also after saving the image, it is
displayed in the orientation without rotation.
ˎ Images may become inferior by editing repeatedly.
Pasting a Frame
A frame can be pasted to an image of
[sQCIF(128×96)], [QCIF(176×144)],
[QVGA(240×320)], [CIF(352×288)],
[VGA(640×480)], and [Stby(480×864)].
Example: Pasting a frame and saving by overwriting
1 From My picture file list, select an image,
press , and press (Func).
The Function menu appears.
2 Select [Edit photo] → [Frame] and press
.
3 Select a frame and press .
To check a frame
Move the cursor to a frame and press (Play).
4 Press (Save), select [Overwrite], and
press .
The image with the frame is saved by overwriting
the original image.
To save as a new image
Select [Save new] → a place to save to.
Pasting a Stamp
A stamp can be pasted to an image of
[sQCIF(128×96)], [QCIF(176×144)],
[QVGA(240×320)], [CIF(352×288)],
[VGA(640×480)], and [Stby(480×864)].
Example: Pasting a stamp and saving by overwriting
1 From My picture file list, select an image,
press , and press (Func).
The Function menu appears.
2 Select [Edit photo] → [Image stamp] and
press .
3 Select a stamp and press .
To check a stamp
Move the cursor to a stamp and press (Play).
4 Use / to adjust the position
and press (Paste).
To add the same stamp
Repeat step 4.
To paste another stamp
Press (Retry) and perform step 3 to 4 again.
5 Press (OK).
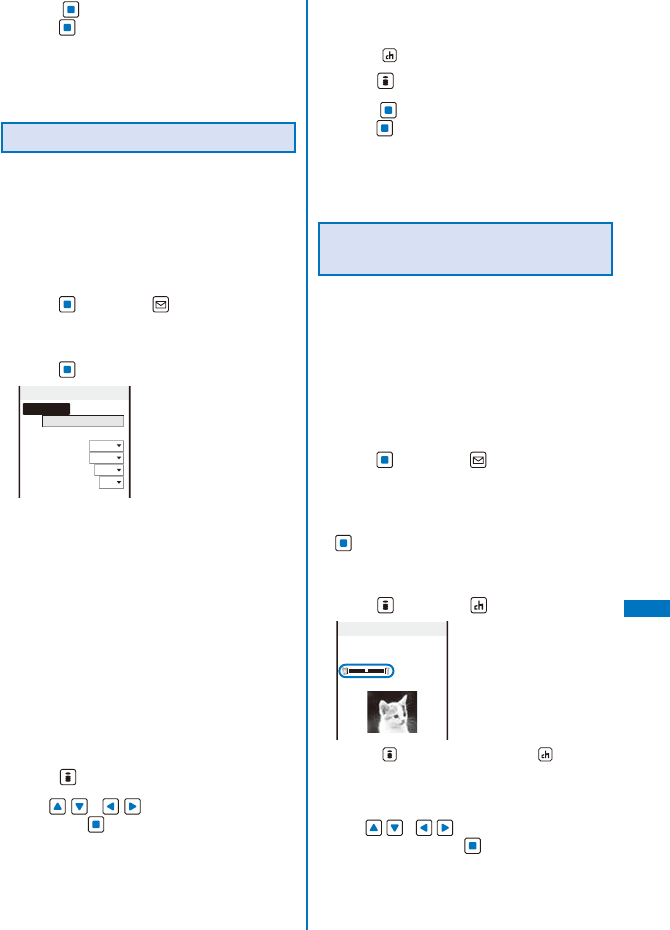
289
Data Display/Edit/Management
6 Press (Save), select [Overwrite], and
press .
The image with the stamp is saved by overwriting
the original image.
To save as a new image
Select [Save new] → a place to save to.
Pasting Text
Text can be pasted to an image of [sQCIF(128
×96)], [QCIF(176×144)], [QVGA(240×
320)], [CIF(352×288)], [VGA(640×480)], and
[Stby(480×864)]. The style and color of the
text can also be specified.
Example: Pasting text and saving by overwriting
1 From My picture file list, select an image,
press , and press (Func).
The Function menu appears.
2 Select [Edit photo] → [Text stamp] and
press .
Text stamp
Input text
Font color
□
Font size
Std
Font type
Std
Thickness
Std
Underline
No
[Input text]:
Enter a text to be pasted within 10 full-width or
20 half-width characters.
[Font color]:
Select the color of a font to be pasted.
[Font size]:
Select the size of a font to be pasted.
[Font type]:
Select the type of a font to be pasted.
[Thickness]:
Select the thickness of a font to be pasted.
[Underline]:
Select whether to display a line under a font to
be pasted.
3 Set each item.
4 Press (OK).
5 Use / to adjust the position
and press (Paste).
To add the same text stamp
Repeat step 5.
To paste another text stamp
Press (Retry) and perform step 2 to 5 again.
6 Press (OK).
7 Press (Save), select [Overwrite], and
press .
The image with the text is saved by overwriting the
original image.
To save as a new image
Select [Save new] → a place to save to.
Trimming Part of an Image After
Zoom In
You can specify a part of an image after
zooming in on it and trim it into a size of
[sQCIF(128×96)], [QCIF(176×144)],
[QVGA(240×320)], [CIF(352×288)],
[VGA(640×480)], and [Stand-by(480×864)].
ˎ When the image size is [sQCIF(128×96)], you
cannot trim this image.
Example: Trimming an image and saving by overwriting
1 From My picture file list, select an image,
press , and press (Func).
The Function menu appears.
2 Select [Edit photo] → [Zoom&trim] → a
size of an image to be trimmed and press
.
ˎ The image size displayed in gray is not available
for trimming.
3 Press (Zoom(T))/ (Zoom(W)).
QCIF(176
×
144)
ˎ Press (Zoom(T)) to enlarge and (Zoom(W))
to reduce an image.
The zoom is adjusted and the bar is displayed for
the zoom magnification you have set.
4 Use / to select the area to be
trimmed and press (OK).
The image is trimmed to the selected size.
Continued
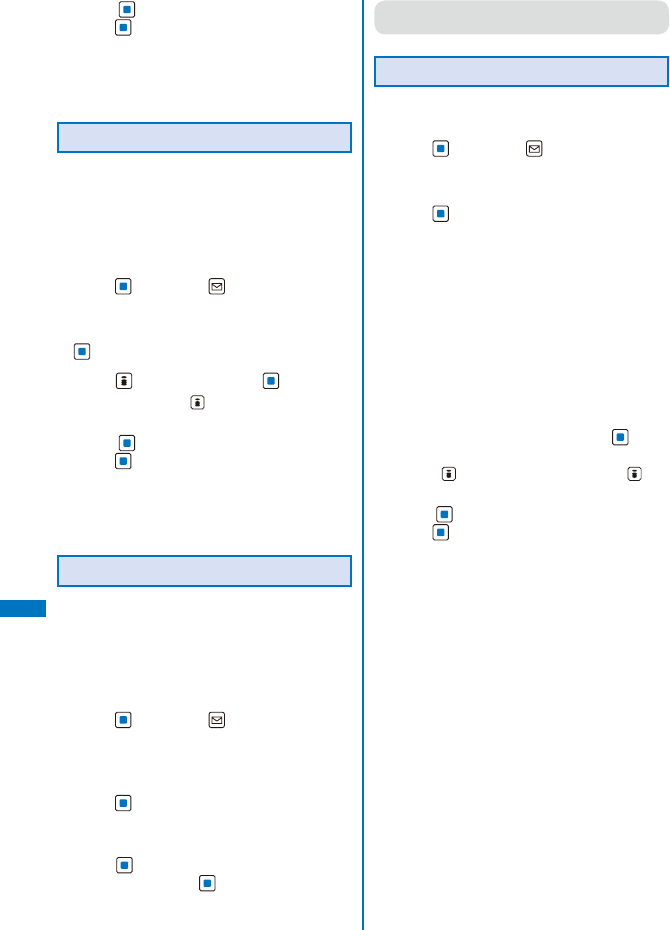
290
Data Display/Edit/Management
5 Press (Save), select [Overwrite], and
press .
The trimmed image is saved by overwriting the
original image.
To save as a new image
Select [Save new] → a place to save to.
Rotating an Image
An image of [sQCIF(128×96)], [QCIF(176×
144)], [QVGA(240×320)], [CIF(352×288)],
[VGA(640×480)], and [Stby(480×864)] can
be rotated.
Example: Rotating an image and saving by overwriting
1 From My picture file list, select an image,
press , and press (Func).
The Function menu appears.
2 Select [Edit photo] → [Rotate] and press
.
3 Press (Rotate) and press (OK).
Every time you press (Rotate), the image rotates
clockwise by 90 degrees.
4 Press (Save), select [Overwrite], and
press .
The rotated image is saved by overwriting the
original image.
To save as a new image
Select [Save new] → a place to save to.
Converting the Image Size
You can convert an image size into [sQCIF(128
×96)], [QCIF(176×144)], [QVGA(240×
320)], [CIF(352×288)], [VGA(640×480)], and
[Stand-by(480×864)].
Example: Converting an image size and saving
1 From My picture file list, select an image,
press , and press (Func).
The Function menu appears.
2 Select [Edit photo] → [Select size] → a
size of an image to be converted and
press .
ˎ The image size displayed in gray is not available
for size conversion.
3 Press (Save), select [Yes] → a place to
save to, and press .
The size-converted image is saved.
● Some of the image size cannot be converted into
the selected size.
Adding the Effect on an Image
You can add special effects on an image.
1 From My picture file list, select an image,
press , and press (Func).
The Function menu appears.
2 Select [Edit photo] → [Image effect] and
press .
[Photo fix]:
Adjust the color and brightness of an image
automatically.
[Comical]:
Make an image cartoonish.
[Gray scale]:
Set an image in black and white.
[Antique]:
Set an image antique-toned like an old
photograph. It is brighter than Sepia.
[Sketch]:
Make an image like in colored line drawing.
3 Select an image effect and press .
To display an image without an image effect
Press (Eff. OFF). To undo it, press (Eff.
ON).
4 Press (Save), select [Overwrite], and
press .
The image added the effect is overwritten.
To save as a new image
Select [Save new] → a place to save to.
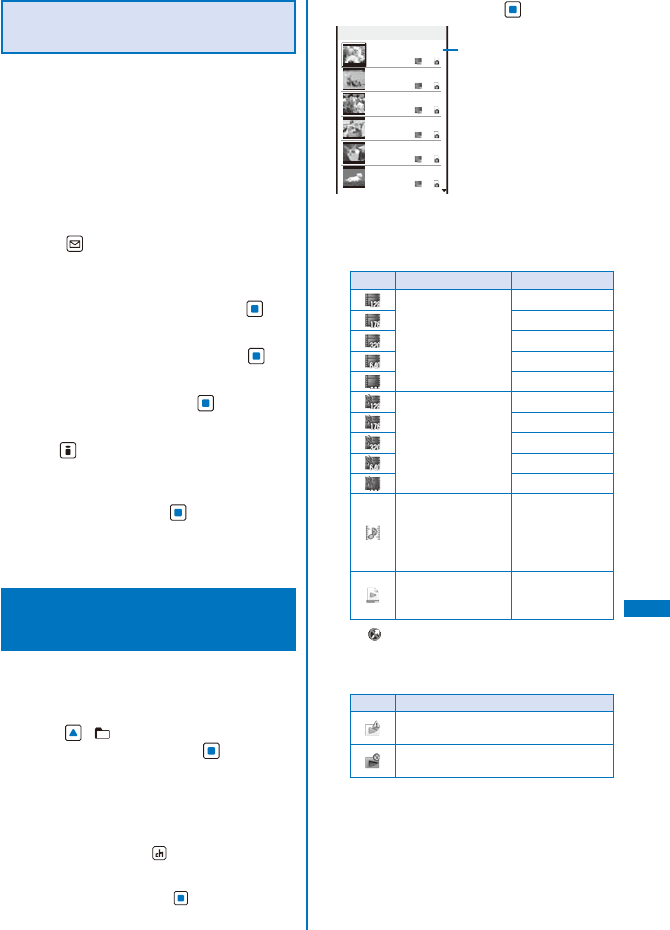
291
Data Display/Edit/Management
Storing an Image at the Data
Security Service Center
You can use the Data Security Service to store
up to 10 GIF/JPEG images at one time at the
Data Security Service Center.
ˎ Data Security Service is a paid service that requires
a subscription. For details on this service, see
the “Mobile Phone User’s Guide
【i-mode】
FOMA
version”.
ˎ You cannot store a file that contains an image larger
than 100K bytes and an image that is prohibited
from being retrieved out of the FOMA terminal.
1 Press (Func) in the file list of My
picture.
The Function menu appears.
2 Select [Store in Center] and press .
The Security code screen appears.
3 Enter the Security code and press .
The Select&save display appears.
4 Select an image and press .
ˎ To store several images, repeat step 4.
5 Press (Complete).
The screen for confirming whether to store the
image appears.
6 Select [Yes] and press .
The call is connected to the Data Security Service
Center and the image is stored. When the storing is
completed, the storing result display appears.
Playing Back Movie/
i-motion <i-motion>
You can play back movie/i-motion that is saved
in i-motion of the Data Box or microSD memory
card.
1 Press ( ) in the stand-by display,
select [i-motion], and press .
The i-motion folder list appears.
To play back data from the last stopped position
Select [Resume play].
To play back a playlist
Select the [Playlist] folder, move the cursor to
a playlist, and press (Play). When you play
back a movie/i-motion in the playlist, select the
[Playlist] folder → a playlist, move the cursor to a
movie/i-motion, and press (Play).
2 Select a folder and press .
Camera
1/8
Flowers and cats
One early aftern
Chummy two
It looks big
Farewell, My fri
Roaming at night
Management title
The i-motion file list appears.
ˎ The following icons show the type/size of a
movie/i-motion and playback restrictions.
Type and size
Icon Type Size
Movie/i-motion with
video and sound
tracks
sQCIF(128×96)
QCIF(176×144)
QVGA(320×240)
VGA(640×480)
Others
Movie/i-motion with
video track only
sQCIF(128×96)
QCIF(176×144)
QVGA(320×240)
VGA(640×480)
Others
Movie/i-motion with
sound track only
(i-motion without
video track, such as
singer’s voice)
−
Movie/i-motion
downloaded
partway
−
ˎ “ ” appears on the upper right of the icon for
movie/i-motion prohibited from being retrieved
out of the FOMA terminal.
Playback restrictions
Icon Playback restrictions
Movie/i-motion with playback
restrictions
Movie/i-motion whose time limit on
playback has expired
Continued
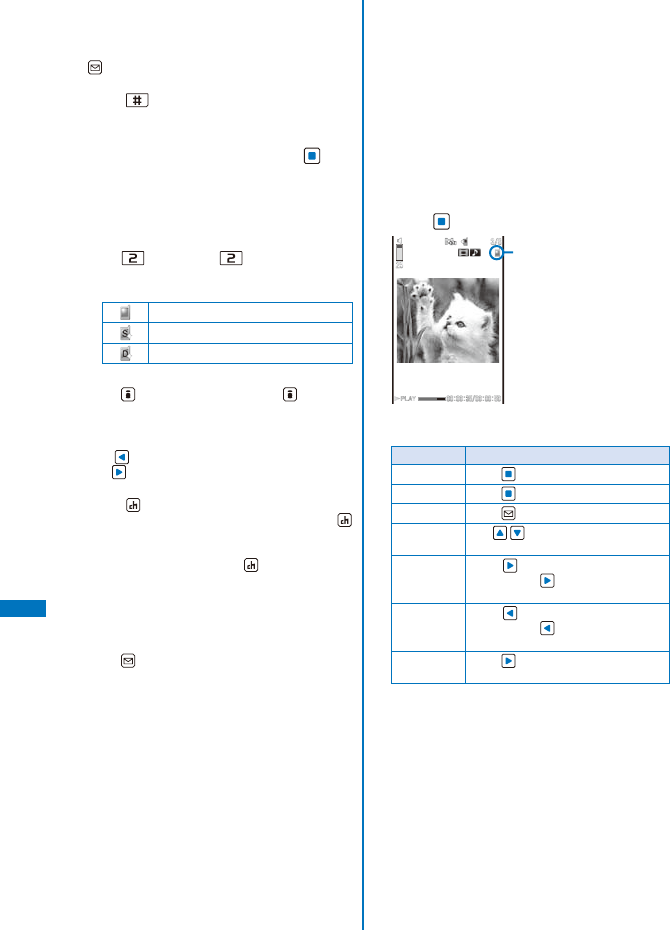
292
Data Display/Edit/Management
To play back movie in a folder repeatedly
From the Function menu, select [Continuous
play]. The files displayed in the list are played
back sequentially. To stop the playback, press
(Stop).
To display the saved date/time
Press to switch the display temporarily
between the management title and saved date/
time.
3 Select a movie/i-motion and press .
The selected movie/i-motion appears.
When the screen informing to make enough space
appears
Select [Yes].
To change the display quality
Press . By pressing , you can switch the
display quality between Normal/Sharp/Dynamic.
ˎ The following icons show the display quality.
Normal
Sharp
Dynamic
To hide the icons and guide display
Press (Display). When you press (Display),
you can switch the display between standard/
simple or turn it off.
To display the previous/next movie/i-motion
Use to display the previous movie/i-motion
and to display the next movie/i-motion.
To change the display size
Press (True img/Std./Enlarge). When the
image size is set to [QVGA(320×240)], press
(True img) to display the image in the true size.
When the image size is set to [sQCIF(128×96)]
or [QCIF(176×144)], press (Std.) to display
the image in the doubled size.
ˎ When the image size is set to [VGA(640×
480)], the image is always displayed in the
true size and cannot change the display size.
To attach to i-mode mail
Press (Func) for over a second (P.212).
To post on a blog
From the Function menu, select [easy BlogUp]
→ a service provided a blog (P.358).
To set a movie/i-motion for the stand-by display or
other settings
From the Function menu, select [Display setting]
→ a type of a display.
To set a movie/i-motion for the ring tone or other
tones
From the Function menu, select [Sound setting]
→ a type of a ring tone.
To change the display style of an image temporarily
From the Function menu, select [Change scr. set]
→ a display style of an image.
ˎ When the image size is [QVGA(320×240)],
you can select [Hor. wide(zoom)]/[Hor.
wide(full)].
To set the display style of an image
From the Function menu, select [Screen setting]
→ a display style of an image.
4 Press (Play).
Display quality
The selected movie/i-motion is played back.
Operating method
Operation Key operation
Play Press (Play).
Pause Press (Pause).
Stop Press (Stop).
Volume
adjustment
Use .
Fast-forward Press during playback. Pressing
and holding also provides Fast-
forward.
Fast-reverse Press during playback. Pressing
and holding also provides Fast-
reverse.
Frame
advance
Press during pause.
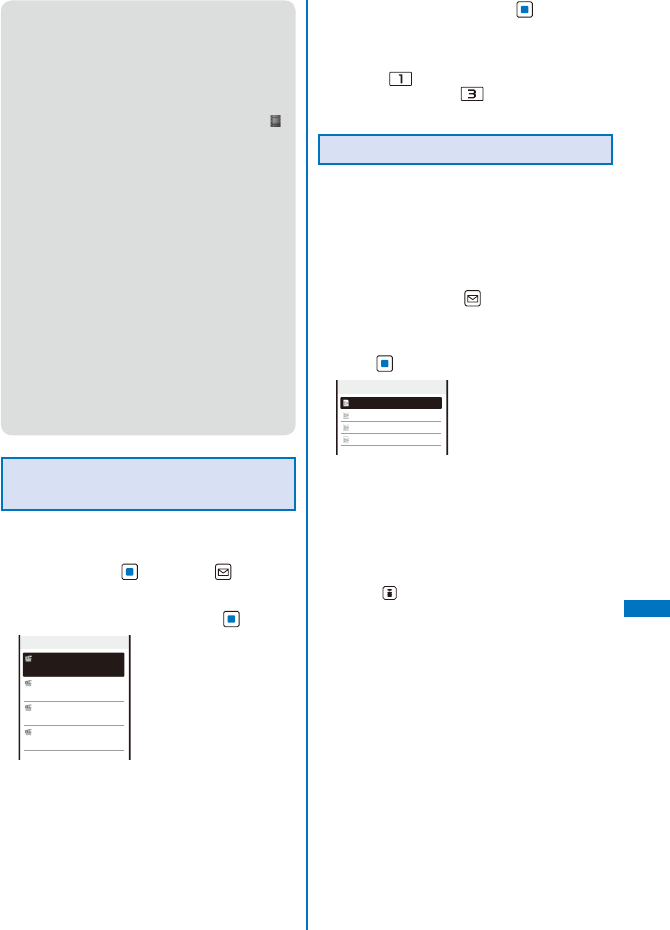
293
Data Display/Edit/Management
● When you play back a movie/i-motion for the first
time, the screen for confirming whether to play it
back in the horizontal orientation appears. If you
select [Yes], the movie/i-motion is played back in
the horizontal orientation.
● It may take time to display a file list or movie/
i-motion saved in the microSD memory card.
● If you edit a recorded movie on a PC, etc., “ ”
may be displayed instead of the thumbnail.
● If you leave the FOMA terminal without a battery
pack or with a fully expended battery pack for a
long period of time, the date and time is reset,
and a movie/i-motion that has a time limit on
playback may not be played back.
● A movie/i-motion can be set for the ring tone
and/or incoming image when [Ring tone] and/or
[Receive display] is set to “Not restricted” as can
be checked in the Detail info display. However,
the following are the exceptions.
- A movie/i-motion restored from a PC or another
FOMA terminal, which was once transferred
to it using the infrared or iC communication or
DoCoMo keitai datalink
- A movie/i-motion saved from the microSD
memory card to the FOMA terminal (including
the one that is restored to the FOMA terminal
after once copied/moved from there, except
for the movable contents-compatible one)
Playing Back i-motion by Each
Chapter
You can play back i-motion by each chapter.
1 From the i-motion file list, select a movie/
i-motion, press , and press (Func).
The Function menu appears.
2 Select [Chapter list] and press .
Chapter list
1/4
Chapter1
00:00:00
Chapter2
00:01:20
Chapter3
00:06:30
Chapter4
00:09:00
3 Select a chapter and press .
The movie/i-motion is played back from the selected
position.
To play back from the previous/next chapter
Press to play back from the previous
chapter and press to play back from the
next chapter.
Creating a Playlist
You can save your favorite movies/i-motion in a
playlist. Up to five playlists can be saved and
up to 25 movies/i-motion can be saved in each
playlist.
Example: Adding and saving one movie/i-motion
1 From the i-motion file list, select a movie/
i-motion and press (Func).
The Function menu appears.
2 Select [Add to playlist] → [Save one] and
press .
Select add to
1/4
Playlist1
Playlist2
Playlist3
Playlist4
To create a new playlist
From the i-motion folder list, select [Playlist] and
from the Function menu, select [Create playlist].
Enter a playlist name within 10 full-width or 20
half-width characters.
To save several movies/i-motion
From the Function menu, select [Add to playlist]
→ [Select&save], select movies/i-motion, and
press (Complete).
Continued
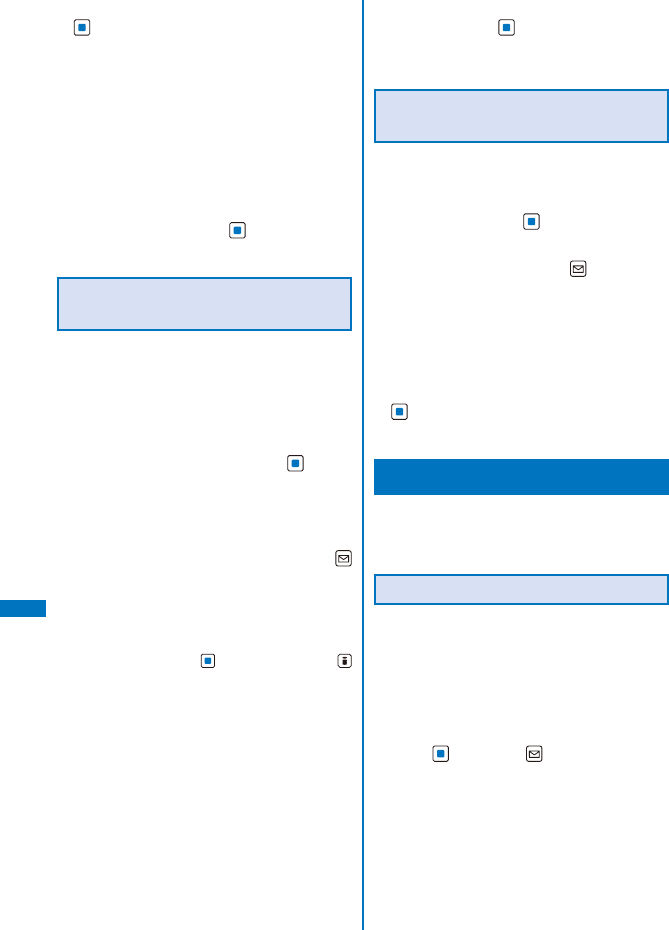
294
Data Display/Edit/Management
3 Select a playlist to be saved and press
.
The screen for selecting the saving method
appears.
[Add]:
The selected movie/i-motion is newly added in a
playlist.
[Overwrite]:
The screen for confirming whether to overwrite all
movies/i-motion saved in a playlist with selected
movies/i-motion appears. Note that all data
existing in the playlist is deleted when you select
[Yes].
4 Select [Add] and press .
The selected movie/i-motion is saved in the playlist.
Deleting/Reordering Movies/
i-motion of the Playlist
You can delete movies/i-motion from a playlist
or reorder them within a playlist. Even if you
delete movies/i-motion from a playlist, the files
of the movies/i-motion are not deleted.
Example: Deleting one movie/i-motion
1 From the i-motion folder list, select
[Playlist] → a playlist and press .
The movie/i-motion list of the playlist appears.
To delete all movies/i-motion
From the Function menu, select [Delete from list]
→ [Delete all] → [Yes].
2 Select a movie/i-motion and press
(Func).
The Function menu appears.
To reorder movies/i-motion
From the Function menu, select [Reorder] →
a movie/i-motion. Move the cursor to the place
to move to, press (Move), and press
(Complete).
3 Select [Delete from list] → [Delete one] →
[Yes] and press .
The selected movie/i-motion is deleted from the
playlist.
Deleting/Editing the Name of the
Playlist
You can delete a playlist or edit its name.
Example: Deleting one playlist
1 From the i-motion folder list, select
[Playlist] and press .
A list of all playlists appears.
2 Select a playlist and press (Func).
The Function menu appears.
To edit the name of a playlist
Move the cursor to the playlist and from the
Function menu, select [Edit name]. Enter a
new name within 10 full-width or 20 half-width
characters.
3 Select [Delete playlist] → [Yes] and press
.
The selected playlist is deleted.
Editing Movies <Edit movie>
You can edit a movie recorded with the FOMA
terminal.
ˎ Some movies may not be edited.
Clipping a Movie
You can clip a portion of a movie of [sQCIF(128
×96)], [QCIF(176×144)], [QVGA(320×240)],
and [VGA(640×480)] image size by specifying
the range or size to be clipped.
Example: Trimming a movie image by specifying size
and saving by overwriting
1 From the i-motion file list, select a movie,
press , and press (Func).
The Function menu appears.
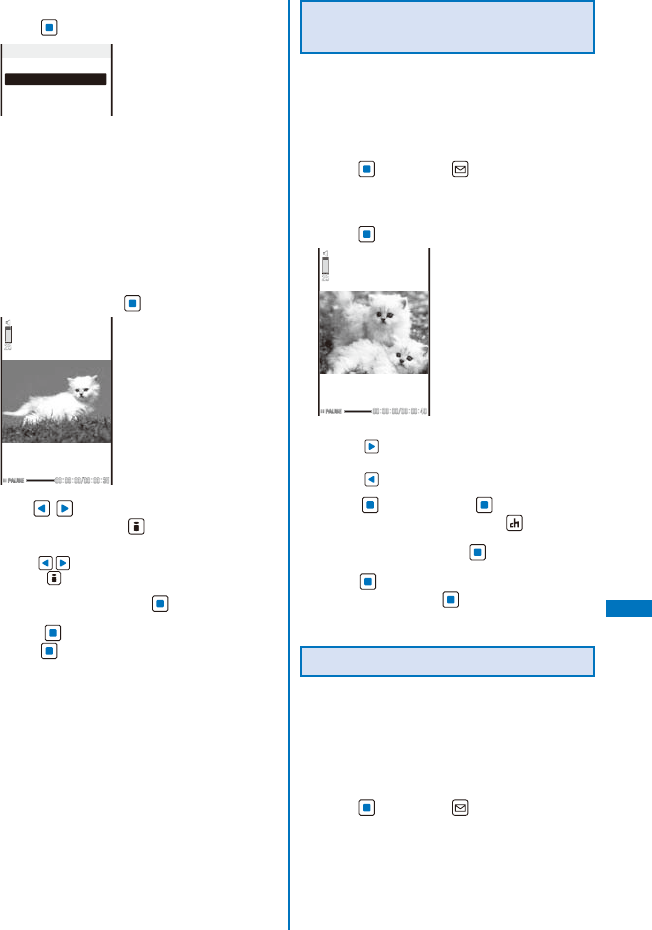
295
Data Display/Edit/Management
2 Select [Edit movie] → [Clip movie] and
press .
Clip movie
Any size
Attach to mail(S)
Attach to mail(L)
[Any size]:
Clip a movie by specifying the start and end
positions.
[Attach to mail(S)]:
Automatically clip a movie to up to 500K-byte
length from the specified start position.
[Attach to mail(L)]:
Automatically clip a movie to up to 2M-byte
length from the specified start position.
3 Select [Attach to mail(S)]/[Attach to
mail(L)] and press .
4 Use to select the clipping start
position and press (Start).
When you select [Any size]
Use to select the clipping end position and
press (End).
5 Select [Yes] and press .
6 Press (Save), select [Overwrite], and
press .
The movie clip is saved by overwriting the original
movie.
To save as a new movie
Select [Save new] → a place to save to.
Clipping a Still Image from a
Movie
You can specify any portion of a movie and
clip it as a still image of [sQCIF(128×96)],
[QCIF(176×144)], [QVGA(320×240)], and
[VGA(640×480)] image size.
1 From the i-motion file list, select a movie,
press , and press (Func).
The Function menu appears.
2 Select [Edit movie] → [Clip picture] and
press .
To move forward frame-by-frame
Press .
To move backward frame-by-frame
Press .
3 Press (Play), press (Pause) at the
clipping position, and press (Clip).
4 Select [Yes] and press .
5 Press (Save), select [Yes] → a place to
save to, and press .
The still image clip is saved in My picture.
Converting the Image Size
You can convert a [QVGA(320×240)] image
size movie into the [QCIF(176×144)] image
size.
Example: Converting the image size and saving by
overwriting
1 From the i-motion file list, select a movie,
press , and press (Func).
The Function menu appears.
Continued
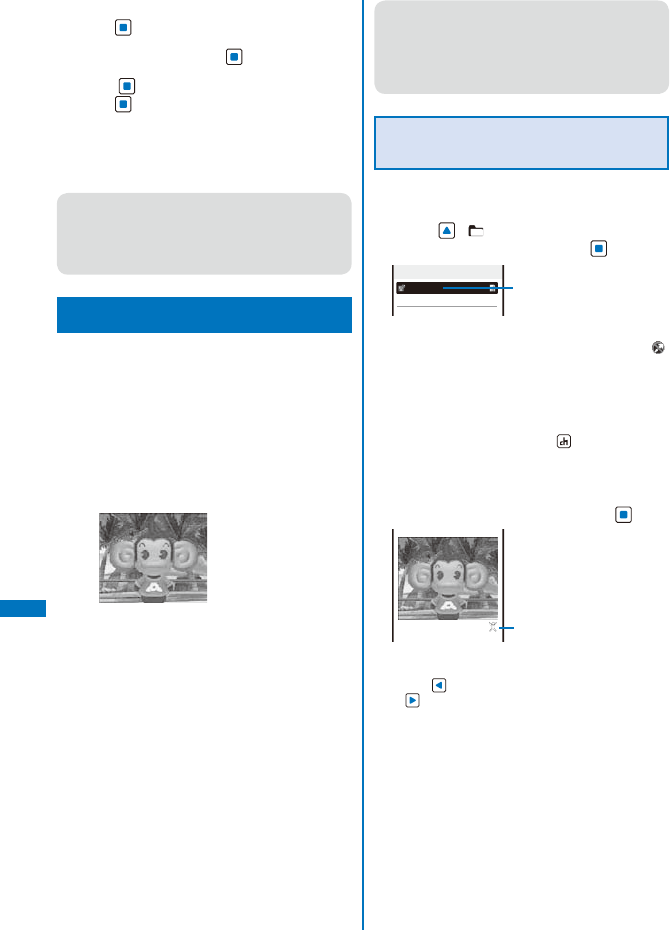
296
Data Display/Edit/Management
2 Select [Edit movie] → [Select size] and
press .
3 Select [Yes] and press .
4 Press (Save), select [Overwrite], and
press .
The converted movie is saved by overwriting the
original movie.
To save as a new movie
Select [Save new] → a place to save to.
● It may take time to convert a large movie/i-motion
file.
● When the size of a file after conversion is too
large, movie images may be partially clipped into
a file of 500K bytes or less.
What is Chara-den?
<Chara-den>
You can send an avatar of your choice
instead of your own image when you use the
videophone function. You can make this avatar
move by pressing the keys on the keypad. The
mouth part of some avatars can be moved
in response to the sound heard from the
microphone.
■ Preinstalled Chara-den characters
アイアイ
©SEGA
■ Action lists of the preinstalled Chara-den
characters
アイアイ
Full-body action
1: アレレ? 2:
イェーイ!
3: エーンエーン 4:
アハハッ
5: もうっ! 6:
ねむいよ∼
7: がっかり・・・
8:
ごめんなさーい
9: なんだってー!
● If you have deleted a preinstalled Chara-den fille,
you can download it from “PlayNow by SO”.
[i Menu] → [メニュー/検索] (Menu/Search)
→ [ケータイ電話メーカー] (Mobile Phone
Manufacturers) → [PlayNow by SO] (Japanese
only)
Displaying and Operating Chara-
den
You can display Chara-den characters saved
in the Chara-den folder of the Data Box.
1 Press ( ) in the stand-by display,
select [Chara-den], and press .
Chara−den
1/1
アイアイ
Management title
The Chara-den file list appears.
ˎ File restriction is set for Chara-den files and “ ”
appears on the upper right of the Chara-den
icon.
To place a videophone call
Move the cursor to the Chara-den file and from
the Function menu, select [Call Chara-den], enter
a phone number, and press (V.phone).
To set a substitute image of videophone
Move the cursor to the Chara-den file and from
the Function menu, select [Set sub image].
2 Select a Chara-den file and press .
Action mode icon
©SEGA
To display the previous/next Chara-den
Use to display the previous Chara-den and
to display the next Chara-den.
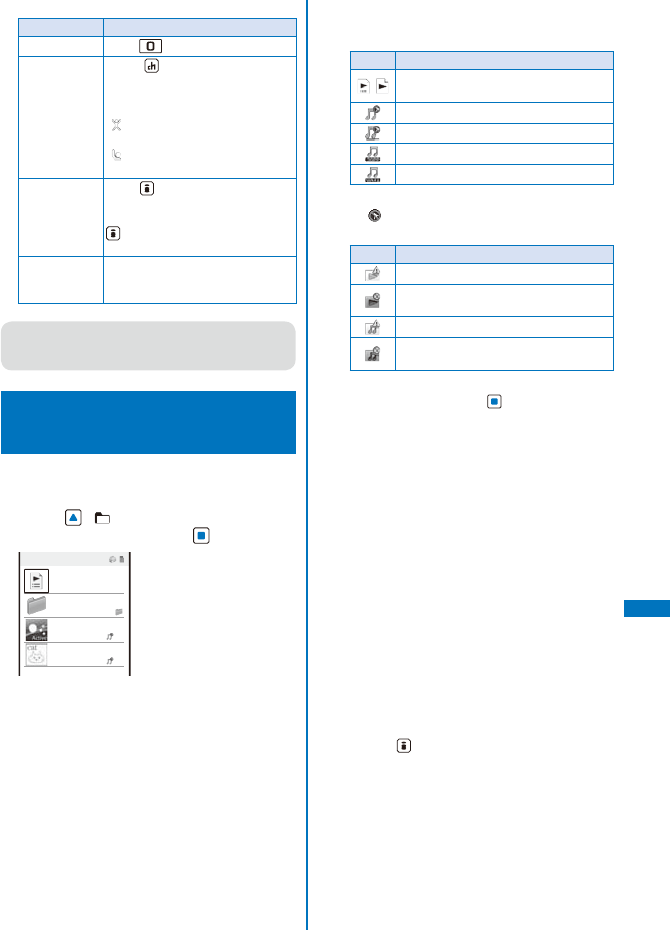
297
Data Display/Edit/Management
Operating method
Operation Key operation
Stop action Press while in action.
Switch the
action mode
Press (Change). Every time
you press this key, the operation is
switched between full-body action
and parts action.
(Full-body action) :
The entire body is moved.
(Parts action) :
A part of the body is moved.
Display the
action list
Press (List). Select an action to
check the movement of it. Move
the cursor to an action and press
(Detail) to display the action
name.
Display other
Chara-den file
From the Function menu, select
[Set Chara-den] → [Change
Chara-den] → a Chara-den file.
● The action that you can perform varies
depending on a Chara-den file. Some Chara-den
files have no action to be performed.
Playing Back Music Data
<Music>
You can play back music data saved in MUSIC
of the Data Box and microSD memory card.
1 Press ( ) in the stand-by display,
select [MUSIC], and press .
Music
Orig. playlis
folder 1
Active−OKINO, SH
Cat−Masato Kouya
The list of music folders and files appears.
ˎ The following icons show the type of music data
and playback restrictions.
Ty p e
Icon Type
/Original playlist, WMA playlist, and
imported playlist
Chaku-Uta Full®
Chaku-Uta Full® downloaded partway
3GPP
WMA
ˎ File restriction is set for Chaku-Uta Full® and
“” appears on the upper right of the icon.
Playback restrictions
Icon Playback restrictions
Music data with playback restrictions
Music data whose time limit on
playback has expired
Uta-hodai
Uta-hodai whose time limit on playback
has expired
To play back music data in a folder
Select a folder and press .
To switch between the jacket display and list display
From the Function menu, select [Change
jackets].
To switch to the MUSIC Player
From the Function menu, select [Player mode].
To set a Chaku-Uta Full® for the ring tone
Move the cursor to a Chaku-Uta Full® from the
Function menu, select [Sound setting] → a type
of incoming.
ˎ When you select a Chaku-Uta Full® that has
a choice of specified playback ranges from
[MUSIC], the screen for selecting a type of
setting appears. If you select [Full song], the
entire track of Chaku-Uta Full® is set for the
ring tone. If you select [Point], the specified
playback range of Chaku-Uta Full® is set for
the ring tone.
ˎ When you select a Chaku-Uta Full® saved in
the microSD memory card, select [Yes] at the
screen for confirming whether to save to the
FOMA terminal, select a folder to move to, and
press (Save).
Continued
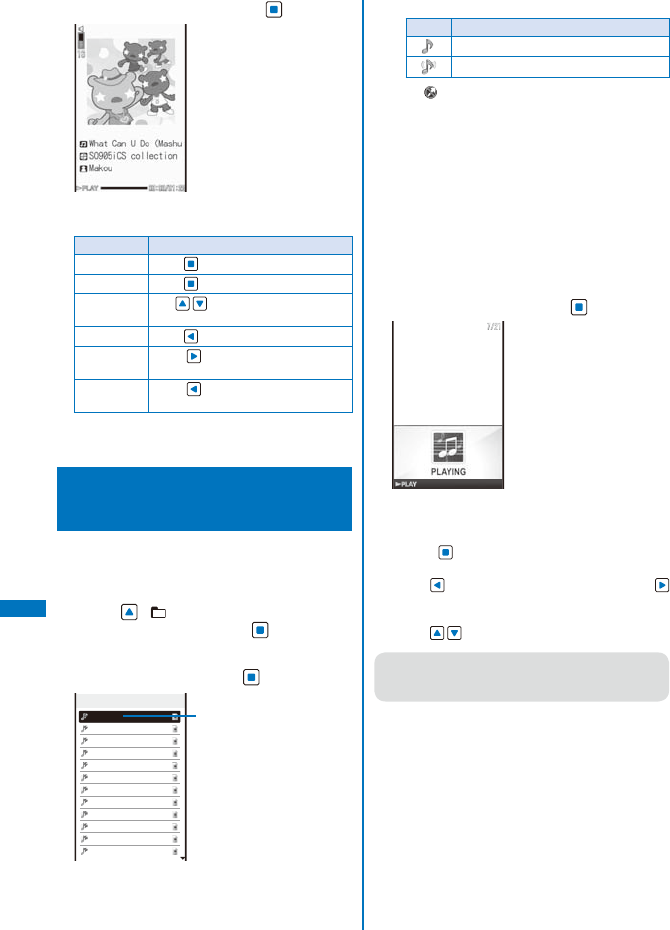
298
Data Display/Edit/Management
2 Select music data and press .
The selected music data is played back.
Operating method
Operation Key operation
Play Press (Play).
Stop Press (Stop).
Volume
adjustment
Use .
Rewinding Press .
Fast-forward Press for over a second during
playback.
Fast-reverse Press for over a second during
playback.
When you select a playlist
It is switched to the MUSIC Player.
Playing Back a Melody
<Melody>
You can play back an SMF/MFi-format melody
that is saved in Melody of the Data Box or
microSD memory card.
1 Press ( ) in the stand-by display,
select [Melody], and press .
The melody folder list appears.
2 Select a folder and press .
Preinstall
1/21
着信音
1
着信音
2
着信音
3
着信音
4
着信音
5
Symphony
Tsuki
Pavane
Raindrop
Forest
Cuckoo Clock
School Chime
Management title
The melody file list appears.
ˎ The following icons show the type of the melody.
Icon Type
Melody
3D sound-compatible melody
ˎ “ ” appears on the upper right of the icon for
melodies prohibited from being retrieved out
of the FOMA terminal.
To play a melody that has specified playback range
Move the cursor to the melody and from the
Function menu, select [Play portion].
To attach to i-mode mail
Move the cursor to the melody and from the
Function menu, select [Attach to mail] (P.212).
To set a melody for the phone tone or other settings
Move the cursor to a melody and from the
Function menu, select [Sound setting] → a ring
tone.
3 Select a melody and press .
Tsuki
The selected melody is played and the indicator
flashes.
To stop playback
Press (Stop).
To play back the previous/next melody
Use to play back the previous melody and
to play back the next melody.
To adjust the volume
Use .
● When you play back a melody, the FOMA
terminal may start vibrating in concert with the
melody, regardless of the Vibrator setting (P.110).
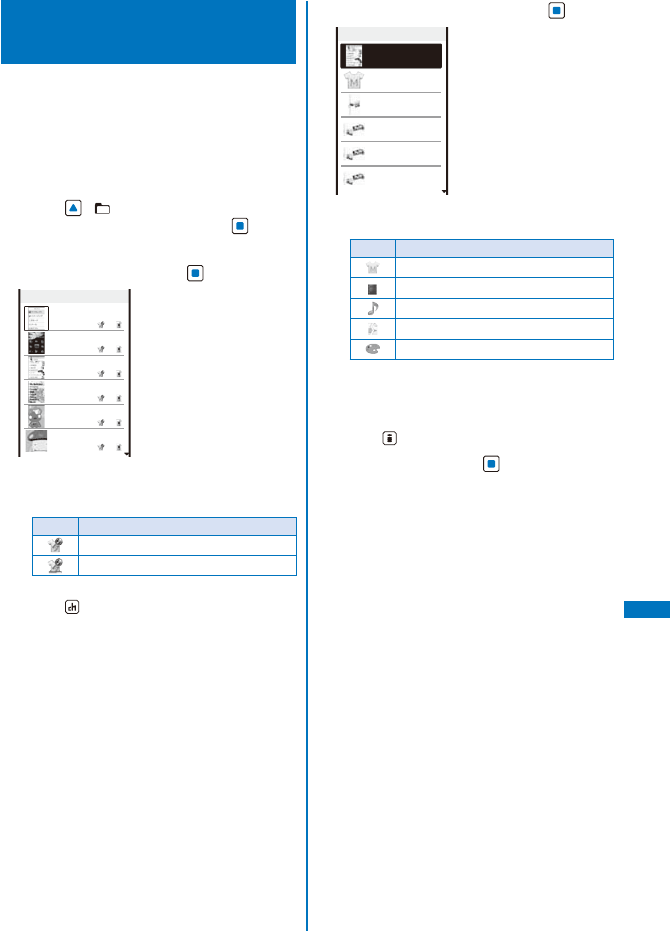
299
Data Display/Edit/Management
Displaying/Playing Back
Kisekae Tool <Kisekae Tool>
You can display/play back data selected from
the list of contents of the Kisekae tool saved in
the Data Box.
ˎ You can display the list of contents of the Kisekae
tool but cannot select data to display/play back it
if the Kisekae tool is saved in the microSD memory
card.
1 Press ( ) in the stand-by display,
select [Kisekae Tool], and press .
The Kisekae Tool folder list appears.
2 Select a folder and press .
Preinstall
1/7
Manual Custom
Reflective Black
White Scrapbook
Relief Pink
Ericle’s Travel
ドコモダケ
The Kisekae Tool list appears.
ˎ The following icons show the type of the Kisekae
tool.
Icon Type
Kisekae tool
Kisekae tool downloaded partway
To display an image of the Kisekae tool
Press (Play).
To set the Kisekae tool
Move the cursor to a Kisekae tool and from the
Function menu, select [Kisekae setting].
3 Select a Kisekae tool and press .
White Scrapbook
1/18
Preview
Kisekae menu
Stand−by
Voice call
Calling image
Voice call
Incoming image
V.phone
Calling image
The data list display of the Kisekae tool appears.
ˎ The following icons show the type of the file.
Icon Type
Kisekae menu
Movie/i-motion
Image or melody
File that cannot be played back
Color theme
When the screen informing to make enough space
appears
Select [Yes].
To set the currently displayed Kisekae tool
Press (Kisekae).
4 Select data and press .
The selected data is displayed/played back.
300
Data Display/Edit/Management
microSD memory card
You can save Phonebook, mail, Bookmark,
and other data in the FOMA terminal to the
microSD memory card, as well as copy data
in the microSD memory card to the FOMA
terminal. In addition, you cannot only view data
in the microSD memory card on the FOMA
terminal, but also use the FOMA terminal as
a reader/writer of a microSD memory card by
connecting it to a PC (P.314).
To use the microSD memory card, you are
required to obtain a microSD memory card
separately. If you have no microSD memory
card, you can purchase it at a home electric
appliance store or other similar store.
ˎ Data saved in the microSD memory card from other
devices may not be displayed/played back on the
FOMA terminal. Similarly, data saved in the microSD
memory card from the FOMA terminal may not be
displayed/played back on other devices.
ˎ SO906i supports the commercially available
microSD memory card of up to 2G bytes (as of
December 2007).
For the latest information for which normal operation
of the microSD memory card is confirmed, such as
information about the manufactures and capacities
of the microSD memory card, see the following
websites. Note that a microSD memory card other
than listed in the websites may not operate normally
on SO906i.
i-mode site :
[PlayNow by SO] (as of December
2007)
[i Menu] → [メニュー/検索]
(Menu/Search) → [ケータイ
電話メーカー] (Mobile Phone
Manufacturers) → [PlayNow by
SO] (Japanese only)
Website :
Website of Sony Ericsson Mobile Communications
Japan, Inc.
http://www.SonyEricsson.co.jp/memorycard/
Please note that the information listed represents
only the result of the operation checks and by no
means provides guarantee for all operations of the
microSD memory card.
ˎ Do not remove the microSD memory card during
data access (reading of data, saving data, etc.).
Doing so may cause malfunction, etc.
ˎ During preparation for access after insertion of the
microSD memory card (the time before the first
reading/writing operation is ready), “ ” flashes. If
“” keeps flashing, remove the microSD memory
card and then insert it again. If the icon still keeps
flashing, please check conditions of the microSD
memory card.
ˎ Do not stick a label, etc. on the microSD memory
card. It may be removed when inserting/removing
the microSD memory card, resulting in malfunction,
etc. of the FOMA terminal.
ˎ When you save data in a microSD memory card, it is
recommended to make a backup copy of the saved
data and keep it separately in a safe place. Under
no condition will DoCoMo be held liable for any loss
or modification of the data.
The microSD memory card formatted on a PC or other
devices cannot be used on the FOMA terminal. Be
sure to use the microSD memory card after formatting
it using the FOMA terminal (P.313).
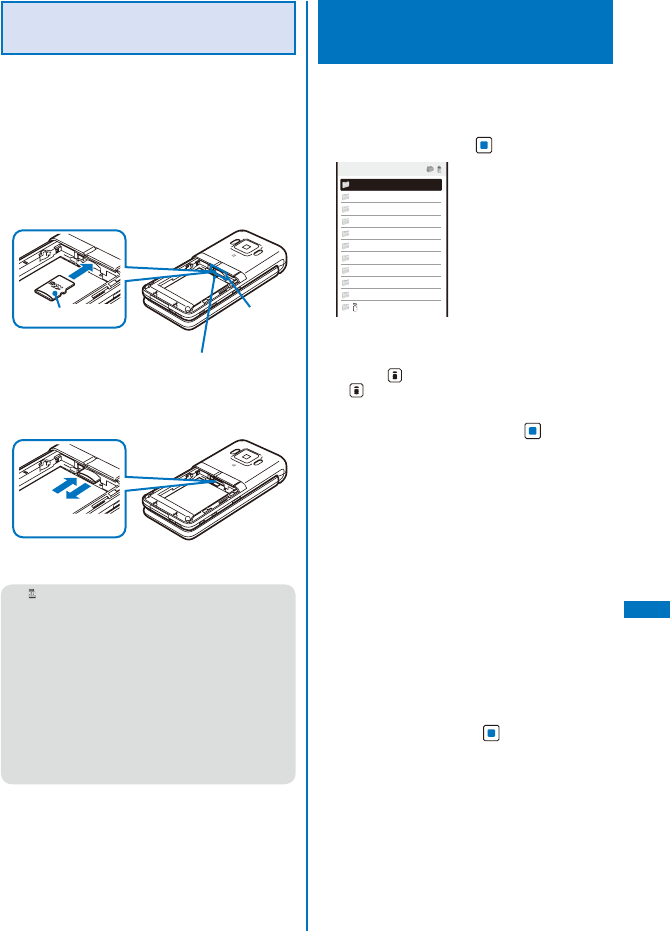
301
Data Display/Edit/Management
Inserting and Removing the
microSD memory card
■ Inserting the microSD memory card
ˎ When inserting the microSD memory card, make
sure to insert it in the correct orientation with the
printed side facing up as illustrated below. Any
insertion in an orientation other than illustrated
below may cause malfunction, etc.
1 Insert the microSD memory card into the
slot.
ˎ Insert until it clicks into place.
1
Printed side microSD
memory
card slot
UIM tray
■ Removing the microSD memory card
1 Press the microSD memory card lightly.
It is ejected slightly.
12
2 Remove the microSD memory card.
● “ ” appears in the display while inserting the
microSD memory card. When it does not appear,
the following reasons about the microSD memory
card may be considered. Please check them.
- Dust or something gets on the metallic
terminal portion
- Insertion is not completed
- Damaged
- Using an external memory other than
recommended ones (For information on
recommended external memories, scan the
QR code in P.306 and access to “PlayNow by
SO”.)
Displaying Data on the
microSD memory card
Data saved in the microSD memory card can
be displayed and checked.
1 From the Menu, select [LifeKit] →
[microSD] and press .
microSD
My picture
MUSIC
i−motion
Melody
My document
Kisekae Tool
SD_PIM
ToruCa
MM File
Others
αppli data
The category list of the microSD appears.
To switch the contents of a memory to be displayed
Press (Chg.Mmry). Each time you press
, the contents to be displayed are switched
between the Data Box/microSD memory card.
2 Select a category and press .
ˎ To perform an operation while category/data
is displayed, see the description about each
function. You may not be able to perform some of
the operations using the microSD memory card.
- My picture (P.290)
- MUSIC (P.303)
- i-motion (P.295)
- Melody (P.304)
- My document (P.333)
- Kisekae Tool (P.305)
- Phonebook (P.101)
- Text Memo (P.372)
- Schedule (P.363)
- Inbox/Outbox/Draft (P.219)
- Bookmark (P.191)
- ToruCa (P.257)
- MM File (P.295, 309)
- i
αppli data (P.250)
3 Select data and press .
The contents of the selected data are displayed.

Data Display/Edit/Management
302
Folder Setup of the microSD memory card
When Displaying the Folders on the FOMA Terminal
○: Allowed to be saved ×: Not allowed to be saved △: Only allowed to be moved
Category
Data you can/cannot save
in the FOMA terminal
Contents of data
One file
Selected
files
All files
My picture Camera ○○○
Image recorded with the camera of the FOMA
terminal and GIF image
Deco mail pict. ○○○
Deco-mail pictograph
Other images ○○○
JPEG image and GIF animation
Movable contents △××
Movable contents-compatible still image
MUSIC Distrib. contents ×××
Music data (3GPP)
Movable contents △××
Movable contents-compatible music data (Chaku-Uta Full
®
)
WMA ×××
WMA file
i-motion Distrib. contents ○○○
Movie/i-motion
Movable contents △××
Movable contents-compatible movie/i-motion
Melody Distrib. contents ○○○
Melody
Movable contents △××
Movable contents-compatible melody
My document Distrib. contents ○○○
PDF data
Movable contents △××
Movable contents-compatible PDF data
Kisekae Tool Movable contents △××
Movable contents-compatible Kisekae tool
SD_PIM Phonebook ○※1××
Phonebook data
Text Memo ○※1××
Text memo
Schedule ○※1××
Schedule
Inbox ○※1××
Received mail
Outbox ○※1××
Sent mail
Draft ○※1××
Saved mail
Bookmark ○※1××
Bookmark
ToruCa ○※1××
ToruCa card, ToruCa(detail) card
MM File ○○○
i-motion with sound track only (i-motion without video
track, such as singer’s voice)※2
Others ×××
Other files
iαppli data ×××
Saved i-αppli data
※1 When you save a Phonebook entry, text memo, schedule, mail, bookmark, and a ToruCa card from the
microSD memory card to the FOMA terminal, they are saved as a file formatted for the microSD memory card.
Multiple data records of above categories may be contained in a file of the microSD memory card.
※2 AAC-format music data is included.
■ Data that cannot be moved/saved in the FOMA terminal
Phonebook ˎ You cannot save a movie/i-motion set for the Des call display and also a GIF/JPEG image set for
the Des call display if it exceeds 100K bytes or [QVGA(240×320)].
ToruCa ˎ
You cannot save a ToruCa and ToruCa(detail) card exceeding 1K bytes and 100K bytes respectively.
Melody ˎ You cannot save a melody exceeding 200K bytes.
My picture ˎ You cannot save a GIF image exceeding 2M bytes.
ˎ You cannot save a GIF image and a GIF animation exceeding [UXGA(1600×1200)] and
[Stby(480×864)] respectively, and some JPEG images.
ˎ You cannot save a JPEG image exceeding 2M bytes or [5M(2592×1944)].
MUSIC ˎ You cannot save music data from the microSD memory card to the Data Box (except for the
movable contents-compatible Chaku-Uta Full®).
i-motion ˎ You cannot save a movie/i-motion exceeding 10M bytes.
My document ˎ You cannot save PDF data exceeding 2M bytes.
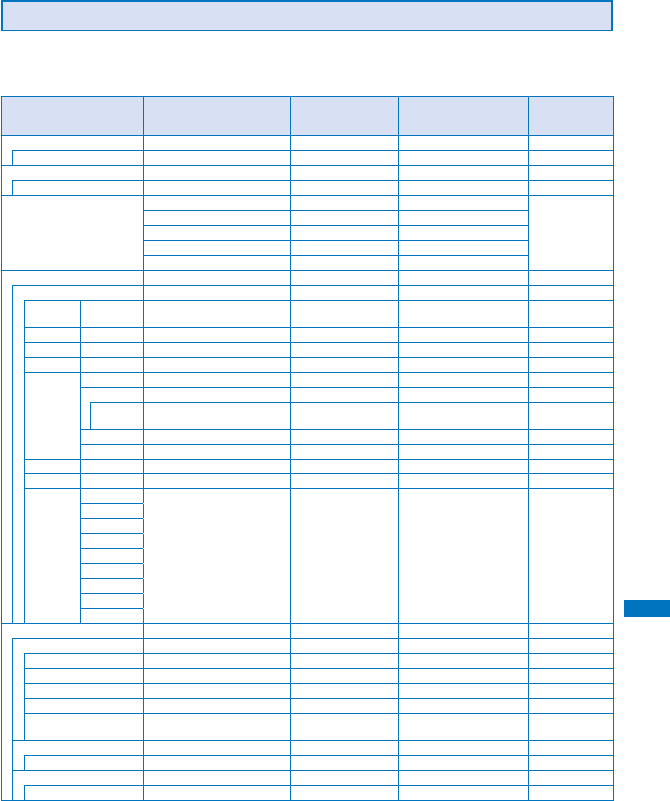
Data Display/Edit/Management
303
When Displaying the Folders on a PC
When you save data of the FOMA terminal to the microSD memory card, a corresponding folder is
created automatically.
ˎ The maximum number of files that can be saved is an estimated number, assuming the blank memory is used.
Category FOMA terminal folder File format FOMA terminal filename
Estimated max.
number of files to
be saved (64MB)
DCIM −−−−
100SODCF∼999SODCF My picture/Camera JPEG(Exif), GIF DSC0nnnn.JPG/.GIF P.152
SD_VIDEO −−−−
PRLxxx i-motion/Distrib. contents MP4 MOLxxx.MP4/.3GP P.152, 153
SD_PIM Phonebook vCard PIM*****.VCF 3,877
Mail (Outbox/Inbox/Draft) vMessage PIM*****.VMG
Schedule vCalendar PIM*****.VCS
Bookmark vBookmark PIM*****.VBM※1
Text Memo vNote PIM*****.VNT
PRIVATE −−−−
DOCOMO −−−−
STILL SUDnnn My picture/Other images
JPEG (excluding Exif),
GIF animation, SWF
STILnnnn.JPG/.GIF/.SWF 3,875
RINGER RUDnnn Melody/Distrib. contents MFi, SMF
RINGnnnn.MID/.MLD/.SMF
3,875
DOCUMENT
PUDnnn
My document/Distrib. contents
PDF PDFDCnnn.PDF/.$DF※2 3,875
TORUCA TRCnnn ToruCa vNote TORUCnnn.TRC 3,875
MMFILE MUDnnn MM File/Distrib. contents MP4 MMFnnnn.MP4/.3GP P.152, 153
MUSIC MUSIC/Distrib. contents 3GPP, WMA Filename.3gp/.wma P.343
Playlist MUSIC/Distrib. contents/Imp.
playlist
M3U Filename.m3u P.348
WM Music/WMA WMA Filename.wma P.343
WM_SYSTEM
−− P. 3 4 3
DECOIMG
DUDnnn My picture/Deco mail pict. JPEG, GIF DIMGnnnn.JPG/.GIF 3,875
OTHER OUDnnn Others −OTHERnnn 3,875
TABLE DCIM
Additional information
management files of each
folder
−−−
STILL
SD_VIDEO
MMFILE
RINGER
DOCUMENT
TORUCA
DECOIMG
OTHER
SD_BIND −−−−
SVC***** −−−−
******** My picture/Movable contents JPEG, GIF, SWF ********.SB1 3,875
******** i-motion/Movable contents MP4 ********.SB1 3,875
******** Melody/Movable contents MFi, SMF ********.SB1 3,875
********
My document/Movable contents
PDF ********.SB1 3,875
********
Kisekae tool/Movable contents
UI Meta-data file, UI
Content-Package file
********.SB1 32
SVC***** −−−−
******** i αppli data i αppli data 3,875
SVC***** −−−−
******** MUSIC/Movable contents Chaku-Uta Full®********.SB2 P.343
※1 A “*.url” file received via data communication is also processed as a bookmark file.
※2 If there is a file with the same name, a serial number is added to the end of the file name.
ˎ The numbers “001” to “999” and “0001” to “9999” are assigned to “nnn” and “nnnn” respectively from the smallest
available number in the order of their creation. Note that the number of files which can be saved per folder is up to 500
files.
ˎ The hexadecimal digits “001” to “FFF” are assigned to “xxx” in the order of their creation.
ˎ The numbers “00001” to “65535” and “00000001” to “00065535” are assigned to “*****” and “********” respectively from
the smallest available number in the order of their creation.
ˎ A file name that can be identified by the microSD memory card is up to 255 bytes including a drive name and path.
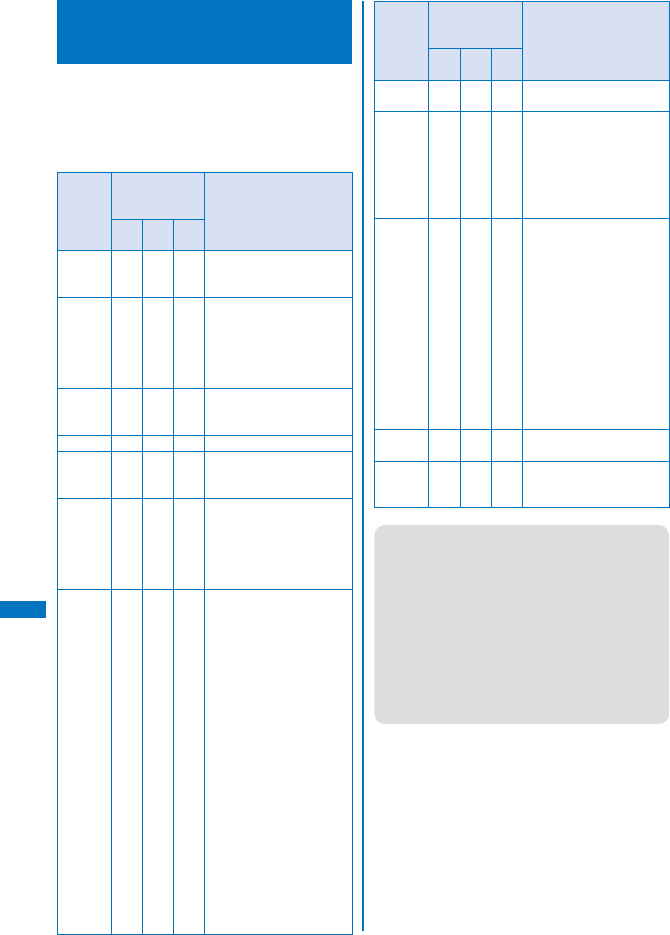
304
Data Display/Edit/Management
Data That Can Be Written/Read to
and from the microSD memory card
ˎ It may take time to save data depending on the data
size.
ˎ Data saved from the microSD memory card may not
be displayed/played back properly.
ˎ You cannot copy/move a file prohibited from being
retrieved out of the FOMA terminal.
Category
Data you can/cannot
save from the FOMA
terminal
Data you cannot save from
the FOMA terminal and
other information
One
file
Selected
files
All
files
My
picture ○○○
ˎ You cannot save a
frame image and stamp
image.
MUSIC
×××
ˎ
You can only move data
from the Data Box to the
microSD memory card
(except for the movable
contents-compatible
Chaku-Uta Full
®
).
i-motion
○○○
ˎ You cannot save a
movie/i-motion with
playback restriction.
Melody ○○○ −
My
document
○○○
ˎ The document definition
file is saved together
with PDF data.
Kisekae
Tool
×××
ˎ
You cannot save data
from the Data Box to the
microSD memory card
(except for the movable
contents-compatible
Kisekae tool).
Phonebook
○×○
ˎ
You cannot save the Des
substitute image, Des
phone tone, Des mail
tone, Select phone Illum.,
and Select mail Illum.
ˎ When you use Save
one, you cannot save
a Group number and
Group name. To save
data using Save one,
set the Secret to [OFF].
ˎ You cannot save a
movie/i-motion set for
the Des call display.
ˎ
When you use Save all,
the data of the PushTalk
phonebook is also saved.
ˎ You cannot save the
Des call display if the
Save/attach image is
set to [Invalid].
ˎ You cannot copy the
UIM phonebook.
Category
Data you can/cannot
save from the FOMA
terminal
Data you cannot save from
the FOMA terminal and
other information
One
file
Selected
files
All
files
Text
Memo ○×○ −
Schedule
○×○
ˎ You cannot save
ON/OFF of the holiday
setting for a repeated
schedule.
ˎ To save data using
Save one, set the
Secret to [OFF].
Inbox/
Outbox/
Draft
○×○
ˎ You cannot save a
folder name, i-αppli To
link, and file attachment
not yet obtained.
ˎ Mail exceeding 100K
bytes is saved after
being resized to 100K
bytes by deleting a file
attachment, etc.
ˎ Protected mail and
i-αppli mail are saved
as regular mail.
ˎ You cannot save the
SMS report.
Bookmark
○×○
ˎ You cannot save a
folder name.
ToruCa
○×○
ˎ You may not be able
to save some ToruCa
cards.
● If you edit, add, or delete data stored in the
microSD memory card on a device such as a PC,
it may not be displayed correctly on the FOMA
terminal. If this happens, update the information
of the management file in the microSD memory
card (P.314).
● When you reply to mail saved in the microSD
memory card, you cannot attach a file. If you
want to reply to the mail with file attachment,
you need to save the mail in the FOMA terminal
first, select the mail from the Draft, attach a file
to the mail, and then you can send it with file
attachment.
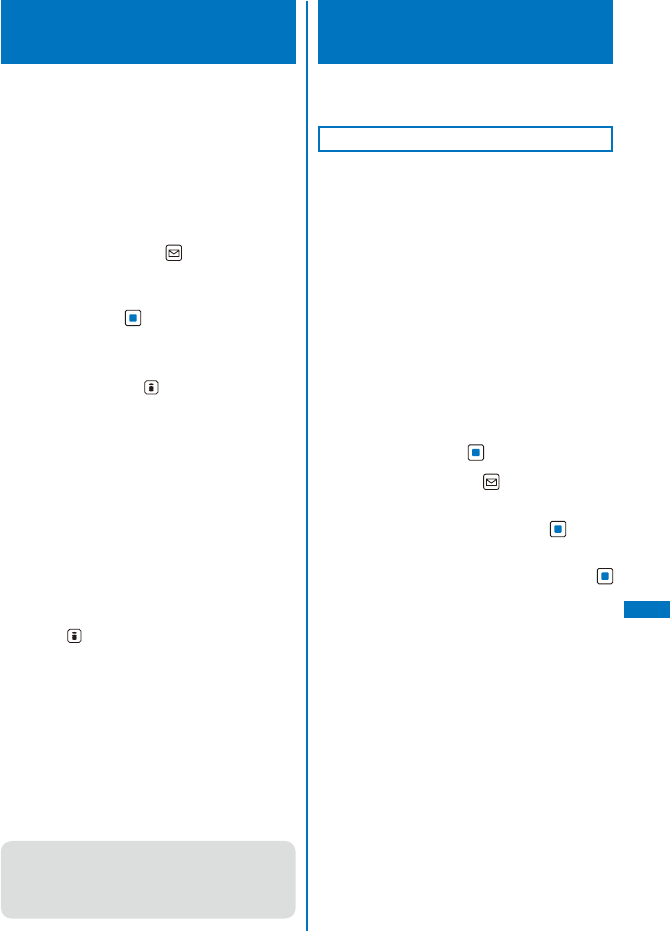
305
Data Display/Edit/Management
Saving Data from the FOMA Terminal
to the microSD memory card
You can copy data from the FOMA terminal to
the microSD memory card.
ˎ While you save the Phonebook, Text memo,
Schedule, mail, Bookmark, and ToruCa card data,
the status of the FOMA terminal is the same as the
outside of the service area status. Therefore, you
cannot use call or communication functions, such as
placing/receiving a call and using i-mode and data
communication.
Example: Saving data
1 Select data and press (Func).
The Function menu appears.
2 Select [Save to microSD] → [Save one] →
[Yes] and press .
The selected data is saved.
To save several data
Select [Save to microSD] → [Select&save] and
select data. Press (Complete) and select
[Yes].
To save all data in My picture/i-motion/Melody/My
document
Select [Save to microSD] → [Save all], enter the
Security code, and select [Yes].
To save all Phonebook entries
Select [Save to microSD] → [Save all] → [Yes]/
[No] and enter the Security code.
To save a file of the still image/movie file list
displayed in the Camera mode
In the file list, move the cursor to a file and from
the Function menu, select [Save to microSD] →
[Save one] → [Yes]. To save several files, in the
file list, from the Function menu, select [Save
to microSD] → [Select&save] and select files.
Press (Complete) and select [Yes]. To save
all files, in the file list, from the Function menu,
select [Save to microSD] → [Save all], enter the
Security code, and select [Yes].
To save all text memos
Select [Save to microSD] → [Save all] → [Yes]/
[No] and enter the Security code.
To save mail/Schedule/Bookmark/ToruCa card
In the data list, from the Function menu, select
[Save to microSD] → [Yes]. To save all data, in
the folder list or the calendar, from the Function
menu, select [Save to microSD] and enter the
Security code.
● When you save an image recorded with the
camera from the FOMA terminal to the microSD
memory card, the orientation of the displayed
image may differ from when it is saved in the
Data Box.
Saving Data from the microSD
memory card to the FOMA Terminal
You can copy data from the microSD memory
card to the FOMA terminal.
Saving the Phonebook and Mail
You can save the Phonebook, Text memo,
Schedule, mail, Bookmark, and ToruCa card
data to the FOMA terminal.
ˎ While you save the Phonebook, Text memo,
Schedule, mail, Bookmark, and ToruCa card data,
you cannot use call or communication functions,
such as placing/receiving a call and using i-mode
and data communication, because the FOMA
terminal is placed in the same condition as outside
of the service area.
ˎ While another function is activated, you cannot
save the Phonebook, Text memo, Schedule, mail,
Bookmark, and ToruCa card data to the FOMA
terminal.
Example: Saving the data by adding to the existing
data
1 From the microSD category list, select a
category and press .
2 Select data and press (Func).
The Function menu appears.
3 Select [Save to main] and press .
The Security code screen appears.
4 Enter the Security code and press
(OK).
The screen for confirming whether to save data
appears.
[Add]:
Save the data by adding to the existing data.
[Overwrite]:
Save the data by overwriting the existing data.
The screen for confirming whether to delete the
existing data appears.
Continued

306
Data Display/Edit/Management
5 Select [Add] and press .
The selected data is saved.
Saving a Melody and Image
You can save My picture, i-motion, Melody,
My document, and MM File data to the FOMA
terminal.
Example: Saving one data item
1 From the microSD category list, select a
category and press .
2 Select data and press (Func).
The Function menu appears.
3 Select [Save to main] → [Save one] →
[Yes] and press .
The selected data is saved in the [Data exchange]
folder.
To save several data
Select [Save to main] → [Select&save] and
select data. Press (Complete) and select
[Yes].
To save all data
Select [Save to main] → [Save all], enter the
Security code, and select [Yes].
To save a file of the still image/movie file list
displayed in the Camera mode
In the file list, move the cursor to a file and from
the Function menu, select [Save to main] → [Save
one] → [Yes]. The selected file is saved in the
[Data exchange] folder. To save several files, in
the file list, from the Function menu, select [Save
to main] → [Select&save] and select files. Press
(Complete) and select [Yes]. To save all files,
in the file list, from the Function menu, select
[Save to main] → [Save all], enter the Security
code, and select [Yes].
● Data created on a microSD memory card
compatible device other than SO906i may not be
saved correctly.
Managing the microSD
memory card
Formatting
You can format the microSD memory card to
be used with the FOMA terminal.
ˎ If you format the microSD memory card that
contains data, the data is deleted. Be careful not to
delete important data unintentionally when you start
formatting.
1 Press (Func) in the microSD category
list.
The Function menu appears.
2 Select [Format] and press .
The Security code screen appears.
3 Enter the Security code and press
(OK).
4 Select [Yes] and press .
The microSD memory card is formatted.
● Do not format the microSD memory card using
a PC, etc. Make sure to format it on the FOMA
terminal.
Checking the Usage Information
You can check the usage information of the
microSD memory card.
ˎ The displayed data amount and total capacity of
the microSD memory card are estimated values that
may not be accurate.
1 Press (Func) in the microSD category
list.
The Function menu appears.
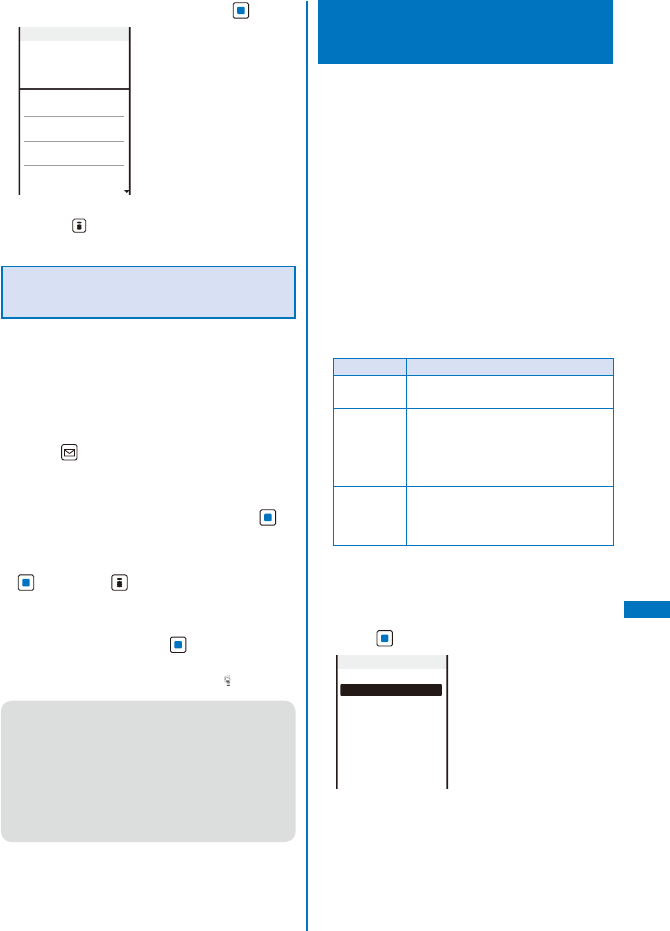
307
Data Display/Edit/Management
2 Select [microSD info] and press .
microSD info
My picture
3.2MB
MUSIC
12.1MB
i−motion
5.6MB
Melody
0.5MB
Full cap.
60.5MB
Using
22.1MB
To change the unit
Press (Unit chg) to switch temporarily
between the MB and KB displays.
Updating the Management Information
of the microSD memory card
If you edit, add, or delete data stored in
the microSD memory card on a device
other than the FOMA terminal, it may not be
displayed correctly on the FOMA terminal. If
this happens, update the information of the
management file in the microSD memory card.
1 Press (Func) in the microSD category
list.
The Function menu appears.
2 Select [Update mng. info] and press .
The Update mng. info display appears.
3 Select a category to be updated, press
, and press (Complete).
The screen for confirming whether to update the
management information appears.
4 Select [Yes] and press .
The management information is updated. While the
management information is updated, “ ” appears.
● If any data in the microSD memory card has a
file name that is not supported by the FOMA
terminal, the file name is changed when you
update the management information.
● If you update the management information while
the screen for confirming whether to save the
recorded images is displayed, the image that is
being confirmed is discarded when the microSD
memory card is set as the place to save to.
Using the FOMA Terminal
with a PC <USB mode setting>
When you connect the FOMA terminal to a
PC using the FOMA USB Cable with Charge
Function 01/02 (optional), you can use it as
an external drive to read/write data on the
microSD memory card.
ˎ You can change the USB mode setting before
connecting the FOMA terminal to a PC.
ˎ If the FOMA terminal is not connected to a PC
correctly or the battery level is very low or 0, not only
data cannot be sent/received, but also it may be lost
in some cases.
ˎ Do not unplug the FOMA USB Cable with Charge
Function 01/02 (optional) during reading/writing
data. If you do so, not only data cannot be sent/
received, but also it may be lost in some cases.
ˎ The operating environment for using the FOMA
terminal connected to a PC is as follows.
Item Required environment
Connection
cable
FOMA USB Cable with Charge
Function 01/02 (optional)
PC main unit PC with a USB port (Universal Serial
Bus Specification 1.1 compliant) that
can be used to connect the FOMA
USB Cable with Charge Function
01/02 (optional)
OS Windows 2000 Professional (SP3 or
later)※,
Windows XP,
Windows Vista (Japanese version)
※ [Communication mode] and [microSD mode] are
supported.
1 From the Menu, select [Settings] →
[Management] → [USB mode setting] and
press .
USB mode setting
Communication mode
microSD mode
MTP mode
Uses USB Hands−free/
data transmission/
data transfer
[Communication mode]:
Perform packet and 64K data communication,
and send/receive data (OBEX™ communication).
Continued
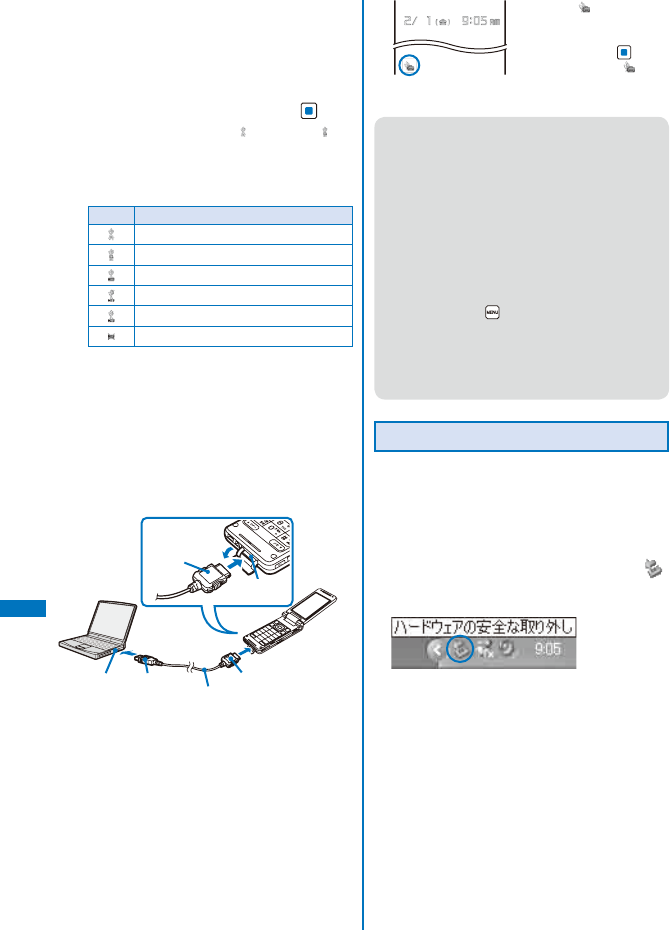
308
Data Display/Edit/Management
[microSD mode]:
Read and write data from/to the microSD memory
card.
[MTP mode]:
Transfer music data (WMA file) from a PC to the
microSD memory card.
2 Select [microSD mode] and press .
The microSD mode is set and “ ” changes to “ ”.
On the PC, “リムーバブル ディスク” is displayed
for the microSD memory card.
ˎ You can check the current USB mode and
connection status by the following icons.
Icon Mode/Connection status
Communication mode
microSD mode
MTP mode (Connected)
MTP mode (Transferring)
MTP mode (Completed)
MTP mode (Error)※
※ It appears when the FOMA terminal is
connected to a PC by the MTP mode and
cannot start the connection because there
is not enough memory. End the unused
applications, increase memory space, and
then retry the operation again.
3 Connect the FOMA terminal and PC
using the FOMA USB Cable with Charge
Function 01/02 (optional).
3
2
1
USB
connector
Insert the connec-
tor horizontally
with the label side
facing up.
External connection
connector
FOMA USB Cable with Charge
Function 01/02 (optional)
USB terminal
External
connection terminal
The icon “ ” (USB cable
cncted) appears in the
stand-by display.
When you press (Link)
and then select “ ”, the
USB mode setting display
appears.
● Do not format the microSD memory card using
a PC, etc. Make sure to format it on the FOMA
terminal.
● Even if you set the USB mode setting to
[MTP mode] or [microSD mode] and connect
the FOMA terminal to a PC, the PC may not
recognize the FOMA terminal while the FOMA
terminal is accessing to the microSD memory
card (reading/saving data, etc.) or the microSD
memory card is not inserted.
● While the USB mode setting is set to [MTP mode]
and the FOMA terminal is connected to a PC,
when you press , the Standard menu appears.
The Kisekae menu is not displayed. Also, some
functions may be limited.
● For more details about the USB mode setting,
see the website below.
http://www.SonyEricsson.co.jp/so906i/faq.html
Terminating the microSD Mode
To remove the FOMA terminal from a PC,
perform the procedure to safely remove the
hardware on the PC in advance, which is
slightly different for each OS.
Example: When using Windows XP
1 Double-click the task tray icon [ ]
(ハードウェアの安全な取り外し)
on the
Windows desktop.
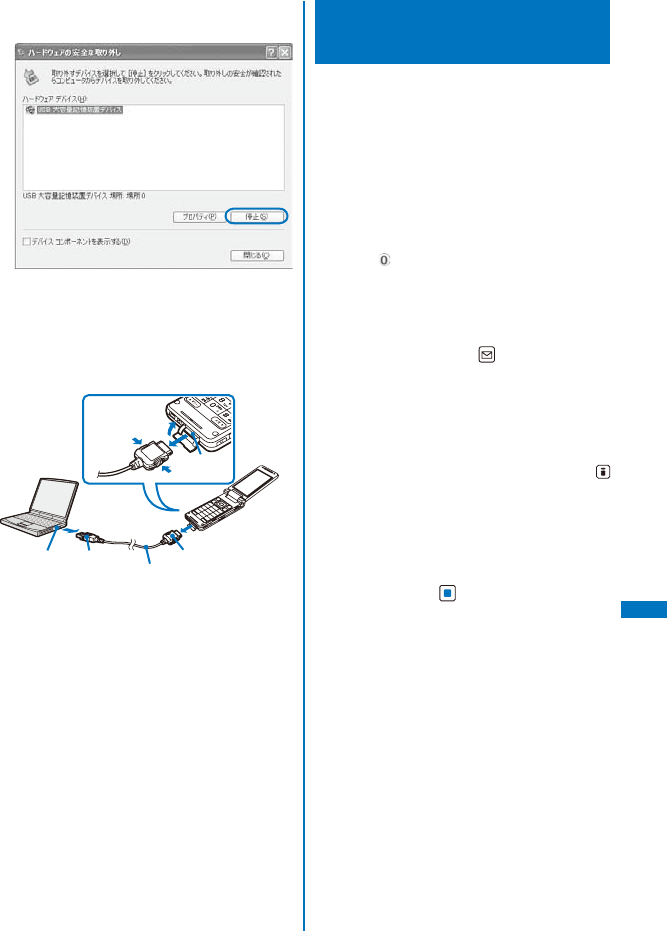
309
Data Display/Edit/Management
2 Move the pointer to [USB大容量記憶装置
デバイス] and click [停止].
3 Click [OK] and confirm that the hardware
is unmounted successfully.
4 Remove the FOMA USB Cable with
Charge Function 01/02 (optional) from the
FOMA terminal and PC.
1
3
2
USB
connector
Pull out the cable
while holding the
release buttons
pressed.
External connection
connector
FOMA USB Cable with Charge
Function 01/02 (optional)
USB terminal
External
connection
terminal
Copying Data from the
FOMA Terminal to the UIM
You can copy up to 50 FOMA terminal
phonebook entries and up to 20 SMS from the
FOMA terminal to the UIM (FOMA card).
ˎ Only the “name”, “reading”, “first phone number”,
and “first mail address” can be copied from the
FOMA terminal phonebook to the UIM phonebook.
The reading is converted from half-width katakana
characters to full-width katakana characters. If “+” is
included in a phone number, it is deleted.
ˎ If a group with the same name exists in the UIM
phonebook, data is saved in it and if not, data is
saved in グループなし.
ˎ You cannot copy the SMS report.
Example: Copying the FOMA terminal phonebook
entries
1 From the FOMA terminal phonebook,
select data and press (Func).
The Function menu appears.
To copy all data
From the Function menu, select [Copy to UIM] →
[Copy all] → [Yes] and enter the Security code.
To copy several data
From the Function menu, select [Copy to UIM]
→ [Select©] and select data. Press
(Complete) and select [Yes].
To copy SMS
Move the cursor to the mail in the mail list and
from the Function menu, select [Copy to UIM] →
[Yes].
2 Select [Copy to UIM] → [Copy one] →
[Yes] and press .
The selected data is copied.
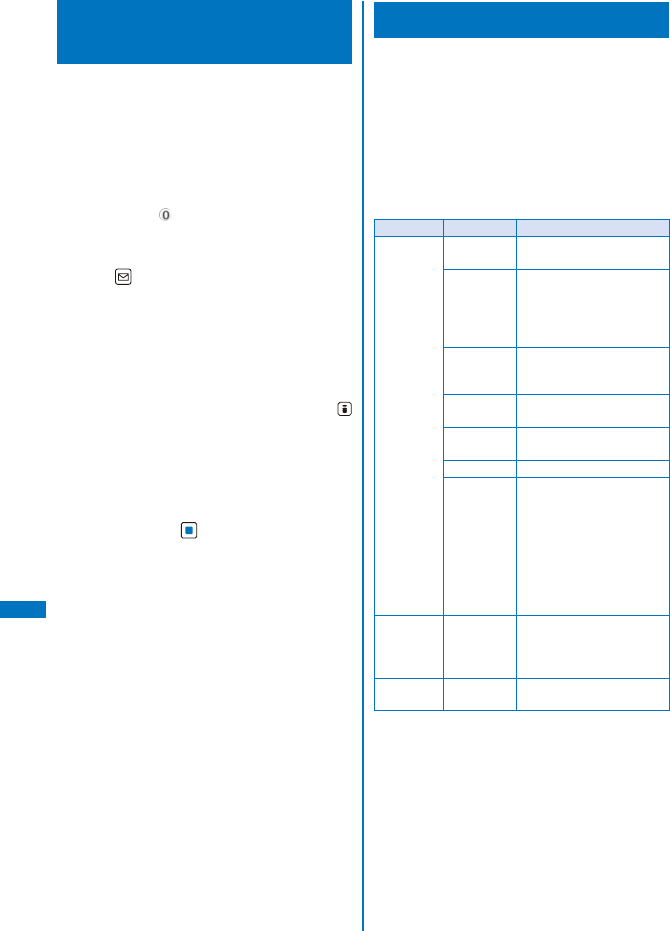
310
Data Display/Edit/Management
Copying Data from the
UIM to the FOMA Terminal
You can copy UIM (FOMA card) phonebook
data and SMS from the UIM to the FOMA
terminal.
ˎ The reading of the UIM phonebook is converted
from full-width katakana characters to half-width
katakana characters.
ˎ If a group with the same name exists in the FOMA
terminal phonebook, data is saved in it and if not,
data is saved in グループなし.
Example: Copying the UIM phonebook entries
1 From the UIM phonebook, select data and
press (Func).
The Function menu appears.
To copy all data
From the Function menu, select [Copy to Main]
→ [Copy all] → [Yes] and enter the Security
code.
To copy several data
From the Function menu, select [Copy to Main]
→ [Select©] and select data. Press
(Complete) and select [Yes].
To copy SMS
Move the cursor to the mail in the mail list and
from the Function menu, select [Copy to Main] →
[Yes] → a folder.
2 Select [Copy to Main] → [Copy one] →
[Yes] and press .
The selected data is copied.
Managing Data Box <Data Box>
Data handled by the FOMA terminal, such as
downloaded data and data recorded using
the camera, are saved in the categories of the
Data Box: My picture, MUSIC, Music&Video
Channel, i-motion, Melody, My document,
Kisekae Tool, and Chara-den. You can display/
play back saved data any time.
ˎ You may not be able to operate some categories.
■ Data saved in the Data Box
Category Folder name Contents of data
My picture i-mode Images obtained from a
site, i-mode mail, or i-αppli
Camera Images recorded using
the camera of the FOMA
terminal and images
replicated as the Mini-
Photo images
Deco mail
image
Images that can be used
when you compose Deco-
mail
Deco mail
pict.※
Deco-mail pictograph
Stamp&Frame
Images used for stamps/
frames
Preinstall Preinstalled images
Data
exchange
Images scanned by the
bar code reader, images
moved/copied from the
microSD memory card,
images received using
infrared/iC communication,
images clipped from the
PDF data, and images
retrieved from a PC, etc.
MUSIC
−
User-created original
playlist, preinstalled Chaku-
Uta Full®, or Chaku-Uta
Full® obtained from a site
Music&Video
Channel
Distrib.
program
Program obtained from a
site
※ Only Deco mail pict. can be saved.
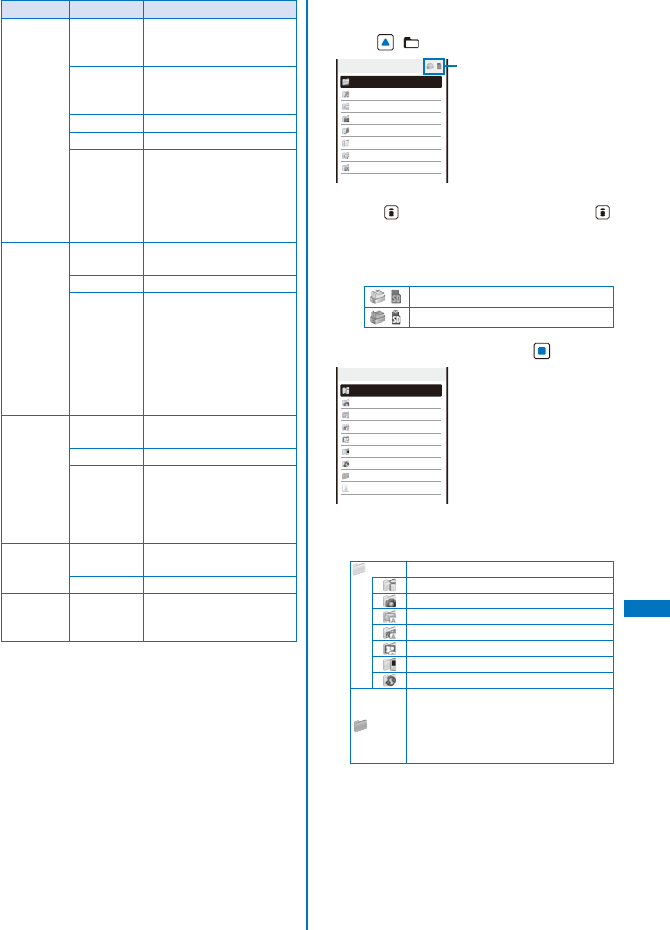
311
Data Display/Edit/Management
Category Folder name Contents of data
i-motion i-mode Movie obtained from
a site, i-mode mail, or
i-αppli
Camera Movie recorded using
the camera of the FOMA
terminal
Preinstall Preinstalled movie
Playlist User-created playlist
Data
exchange
Movie moved/copied from
the microSD memory card,
movie received using
infrared/iC communication,
and movie retrieved from a
PC, etc.
Melody i-mode Melodies obtained from a
site, i-mode mail, or i-αppli
Preinstall Preinstalled melodies
Data
exchange
Melodies scanned by the
bar code reader, melodies
moved/copied from the
microSD memory card,
melodies received using
infrared/iC communication,
and melodies retrieved
from a PC, etc.
My
document
i-mode PDF data obtained from a
site or i-mode mail
Preinstall Preinstalled PDF data
Data
exchange
PDF data moved/copied
from the microSD memory
card and PDF data
received using infrared/iC
communication
Kisekae Tool
i-mode Kisekae tool obtained from
a site
Preinstall Preinstalled Kisekae tool
Chara-den
−
Preinstalled Chara-den
files, Chara-den files
downloaded from a site
Example: Displaying the file list in the [Preinstall] folder
in My picture
1 Press ( ) in the stand-by display.
Data Box
My picture
MUSIC
Music&Video Channel
i−motion
Melody
My document
Kisekae Tool
Chara−den
Type of memory being
displayed
To switch the memory contents to be displayed
Press (Chg.Mmry). Each time you press ,
the displayed contents are switched between the
microSD memory card/Data Box.
ˎ The following icons show the type of memory
being displayed.
Data Box (currently used)
microSD memory card (currently used)
2 Select [My picture] and press .
My picture
i−mode
Camera
Deco mail image
Deco mail pict.
Stamp&Frame
Preinstall
Data exchange
スーハ゜ーモンキーホ゛ール
Search by i−mode
My picture folder list appears.
ˎ The following icons show the status of a folder.
The folder name is displayed next to the icon.
(Yellow)
Preset folder
i-mode
Camera
Deco mail image
Deco mail pict.
Stamp&Frame
Preinstall
Data exchange
(Blue)
User-created folder
ˎ
At the time of purchase, the [スーパー
モンキーボール] folder is created in
My picture, in which images used by
i-αppli are contained.
Continued
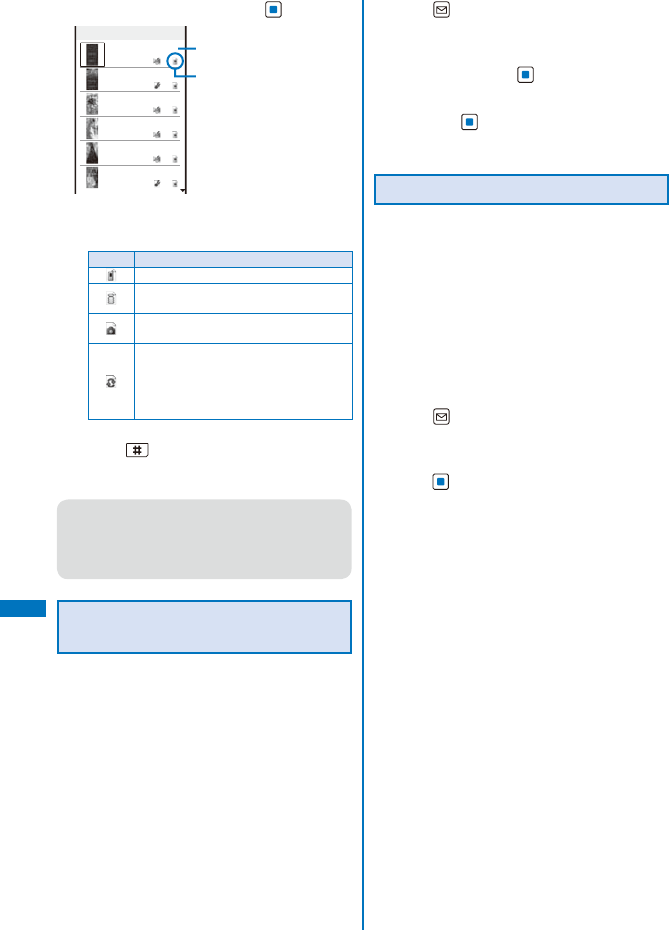
312
Data Display/Edit/Management
3 Select [Preinstall] and press .
Preinstall
1/26
Cyber−shot Logo
Cyber−shot Logo
(Flash)
Fruits
Town
Great Wood
Cozy Village
Management title
Source
The file list appears.
ˎ The following icons show the source from where
the file was obtained.
Icon Source
Preinstalled data
Data obtained from sites, i-mode mail,
or i-αppli
Data recorded using the camera of the
FOMA terminal
Data scanned by a bar code reader,
data moved/copied from the microSD
memory card, data received using
infrared/iC communication, and data
retrieved from a PC, etc.
To display the saved date/time
Press to switch the display temporarily
between the management title and saved date/
time.
● When you select [Search by i-mode] on the folder
or file lists, the screen for confirming whether to
connect to i-mode appears. If you select [Yes],
the FOMA terminal connects to an i-mode site
and you can search data.
Setting Whether to Replicate an
Image Automatically
When you move an image from the [Camera]
folder in My picture of the Data Box to the
microSD memory card, you can set whether to
save the replicated image automatically in the
Data Box (P.178).
1 Press (Func) in My picture folder list.
The Function menu appears.
2 Select [Mini-Photo] → [Mini-Photo
creator] and press .
3 Select [Replicate to main]/[Not replicate]
and press .
The Mini-Photo creator is set.
Creating/Deleting Folders
You can create or delete a folder for saving
data. Regarding the user-created folder, you
can manage files by allocating them in 10
folders per category. You can also change the
name of a folder.
ˎ For MUSIC, 10 folders can be created under each
folder in MUSIC.
ˎ You can neither delete the preset folders nor change
the name of them. However, the [スーパーモンキー
ボール] folder that is preset in My picture can be
deleted and renamed.
1 Press (Func) in the category folder list.
The Function menu appears.
2 Select [Edit folder] → [Create folder],
press , and enter a folder name.
Enter a name within 10 full-width or 20 half-width
characters (seven full-width or 15 half-width
characters in case of MUSIC).
The folder is added.
To change a folder name
Move the cursor to the folder and from the
Function menu, select [Edit folder] → [Edit folder
name]. Enter a name within 10 full-width or 20
half-width characters (seven full-width or 15 half-
width characters in case of MUSIC).
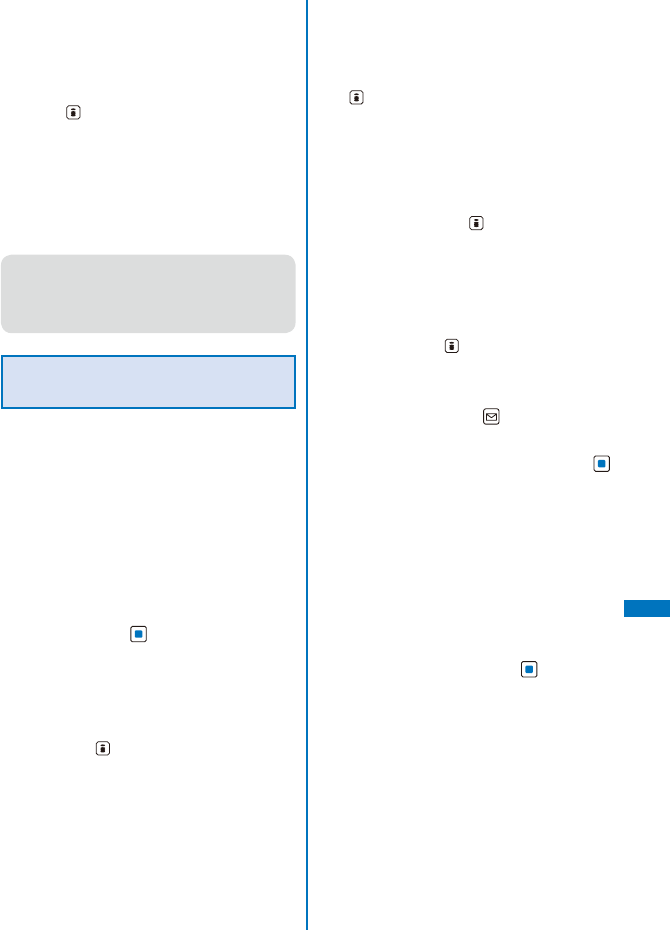
313
Data Display/Edit/Management
To delete a folder
Move the cursor to the folder and from the
Function menu, select [Edit folder] → [Delete
folder], enter the Security code, and select [Yes].
To delete several folders, from the Function
menu, select [Edit folder] → [Select&delete],
enter the Security code, and select folders.
Press (Complete) and select [Yes]. To delete
all folders, from the Function menu, select [Edit
folder] → [Delete all], enter the Security code,
and select [Yes].
To delete all data in the [WMA] folder in the microSD
memory card
From the Function menu in the folder list, select
[Delete all WMA], enter the Security code, and
select [Yes].
● When you perform the Delete all WMA, the
[WM] and [WM_SYSTEM] folders of the microSD
memory card and all data in the folders are
deleted. Note that data which is not used for the
MUSIC Player may be deleted as well.
Moving Data to a Different
Folder
You can use three methods to move data to
another folder or the microSD memory card.
ˎ You cannot move the Chara-den and data saved in
the [Preinstall] folder.
ˎ You cannot move copyrighted data if it is not
permitted by the provider of this data.
ˎ You cannot move data such as an i-motion or
Kisekae tool downloaded partway to the microSD
memory card.
Example: Moving data from the Data Box to the
microSD memory card
1 From the Data Box, select a category → a
folder and press .
To move all data in the folder
From the Function menu, select [Move] → [Move
all] → a place to move to.
To move several data
From the Function menu, select [Move] →
[Select&move] → a place to move to and select
data. Press (Complete) and select [Yes].
To move data from the microSD memory card to the
FOMA terminal
Move the cursor to the data and from the
Function menu, select [Move to main] → [Move
one]. To move several data, select [Move to
main] → [Select&move] and select data. Press
(Complete) and select [Yes]. To move all data,
select [Move to main] → [Move all].
ˎ You cannot perform the Select&move and
Move all to move copyrighted data.
To move a Chaku-Uta Full® from the microSD
memory card to the FOMA terminal
Move the cursor to a Chaku-Uta Full®, from the
Function menu, select [Move to main] → a place
to move to, and press (Complete).
To move a file of the still image/movie file list
displayed in the Camera mode
In the file list, move the cursor to a file and from
the Function menu, select [Move] → [Move one]
→ a place to move to. To move several files, in
the file list, from the Function menu, select [Move]
→ [Select&move] → a place to move to and
select files. Press (Complete) and select [Yes].
To move all files, in the file list, from the Function
menu, select [Move] → [Move all] → a place to
move to.
2 Select data and press (Func).
The Function menu appears.
3 Select [Move] → [Move one] and press .
The screen for selecting where to move appears.
[Data Box]:
Move data to a folder in the Data Box. To move a
folder within the Data Box, select a place to save
to → a folder.
[microSD]:
Move data to a folder in the microSD memory
card. Copyrighted data is moved to [SO906i] of
[Movable contents].
[Back to origin]:
Restore data to its original folder.
4 Select [microSD] and press .
The selected data is moved to the microSD memory
card.
Continued
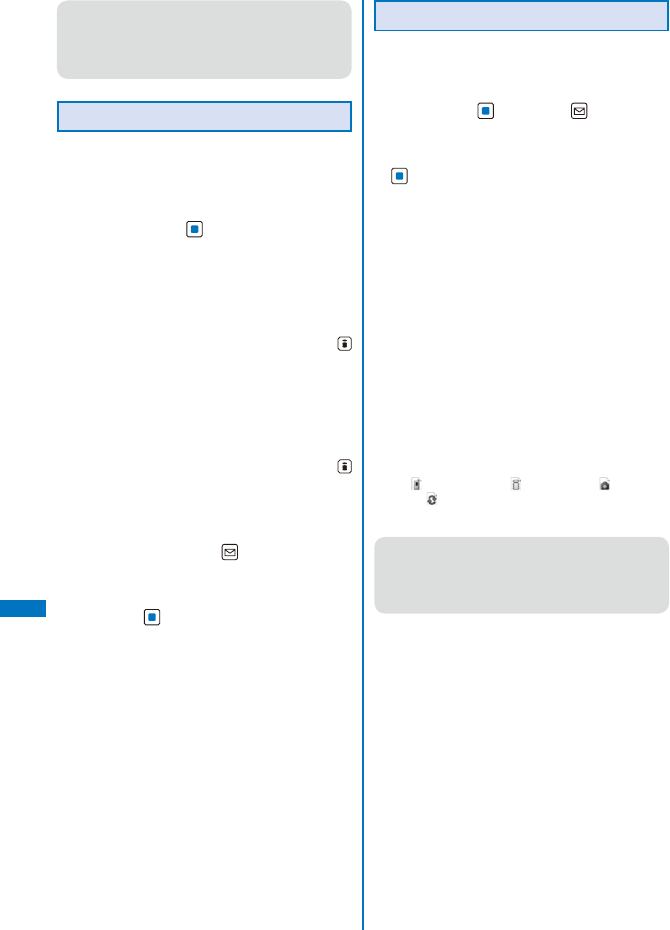
314
Data Display/Edit/Management
● When you move an image saved in My picture of
the Data Box to the microSD memory card, if the
Mini-Photo creator is set to [Not replicate], the
replicated image is automatically saved in the
Data Box (P.319).
Deleting Data
You can delete data using three methods.
ˎ You cannot delete some preinstalled data.
Example: Deleting one data item
1 From the Data Box, select a category → a
folder and press .
To delete all data in the folder
From the Function menu, select [Delete] →
[Delete all], enter the Security code, and select
[Yes].
To delete several data
From the Function menu, select [Delete] →
[Select&delete] and select data. Press
(Complete) and select [Yes].
To delete a file of the still image/movie file list
displayed in the Camera mode
In the file list, move the cursor to a file and from
the Function menu, select [Delete] → [Delete
one] → [Yes]. To delete several files, in the file
list, from the Function menu, select [Delete]
→ [Select&delete] and select files. Press
(Complete) and select [Yes]. To delete all files,
in the file list, from the Function menu, select
[Delete] → [Delete all], enter the Security code,
and select [Yes].
2 Select data and press (Func).
The Function menu appears.
3 Select [Delete] → [Delete one] → [Yes]
and press .
The selected data is deleted.
Sorting Data
Data in a folder can be sorted for display.
ˎ You cannot sort data in MUSIC.
1 From the Data Box, select a category → a
folder, press , and press (Func).
The Function menu appears.
2 Select [Sort] → a sorting order and press
.
[Title(up)]:
Sort data by the management title in Japanese
alphabetical ascending order.
[Title(down)]:
Sort data by the management title in Japanese
alphabetical descending order.
[Date(new → old)]:
Sort data from newest to oldest saved date.
[Date(old → new)]:
Sort data from oldest to newest saved date.
[Size(big → small)]:
Sort data in decreasing order of file size, the
largest file first.
[Size(small → big)]:
Sort data in increasing order of file size, the
smallest file first.
[Originated(icon)]:
Sort data by the icon of the source in the order of
“” (Preinstall) → “ ” (i-mode) → “ ” (Camera)
→ “ ” (Data exchange).
The data is listed in the selected order.
● When you sort data by titles, sorting may not
be performed exactly in Japanese alphabetical
order for reasons such as because some titles
contain a mixture of full-width and half-width
characters.
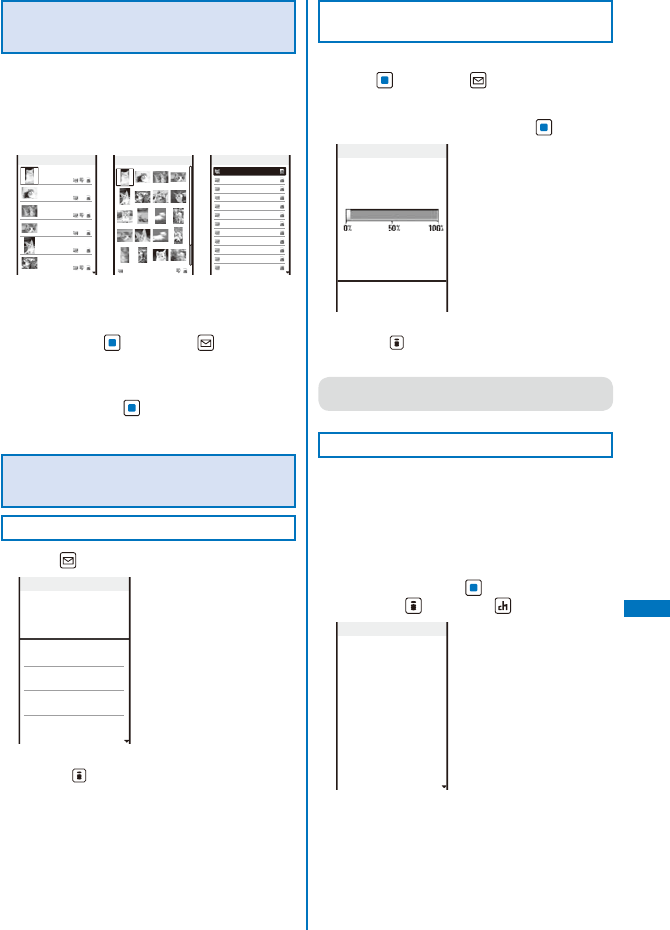
315
Data Display/Edit/Management
Setting How to Display a List of
Images
You can select the display style of My picture,
i-motion, Music&Video Channel, and Kisekae
Tool file lists using the following three methods.
The set display style is applied to all folders.
6 images 20 images List only
Camera
1/25
My favorite cat
Your cat
Memorial shot
Sasha of the nex
A friend of Sash
A stage face
Display by
6 images
Camera
1/25
My favorite cat
Display by
20 images
Camera
1/25
My favorite cat
Your cat
Memorial shot
Sasha of the next
A friend of Sasha
A stage face
A cat I met on
Night walking
Snapshot
Something ennu
Time to say go
It’s unlucky today
Display in the
list form
1 From the Data Box, select a category → a
folder, press , and press (Func).
The Function menu appears.
2 Select [Change display] → the display
style and press .
The display style of a file list is set.
Displaying the Data Box/Data
Information
Displaying the Data Box Information
1 Press (Property) in the Data Box.
Data Box info
My picture
2.8MB
MUSIC
2.6MB
Music&Video channel
0.0MB
i−motion
4.2MB
Full cap.
316.1MB
Using
13.2MB
To change the unit
Press (Unit chg) to switch temporarily
between the MB and KB displays.
Displaying Information of Folders in Data
Box
1 From the Data Box, select a category,
press , and press (Func).
The Function menu appears.
2 Select [Folder info] and press .
My picture info
Max
2500
Registered
533
Remaining
279.7MB
Using
2.8MB
To change the unit
Press (Unit chg) to switch temporarily
between the MB and KB displays.
● Data in the [Distrib. program] folder of
Music&Video Channel are not counted.
Displaying/Editing Data Information
You can change the data management title
and file name, and set file restrictions. The
management title is displayed in the file list.
ˎ You may not be able to edit the detailed information
of some preinstalled data.
1 From the Data Box, select a category →
a folder and press . Select a data item
and press (Detail) or (Detail).
Detail info
[Management title]
Your cat
[File name]
20080212091836
[File format]
JPEG
[Restriction]
Not restricted
[Size]
W 352
×
H 288
[File size]
35KB
The detailed information of data appears.
Continued
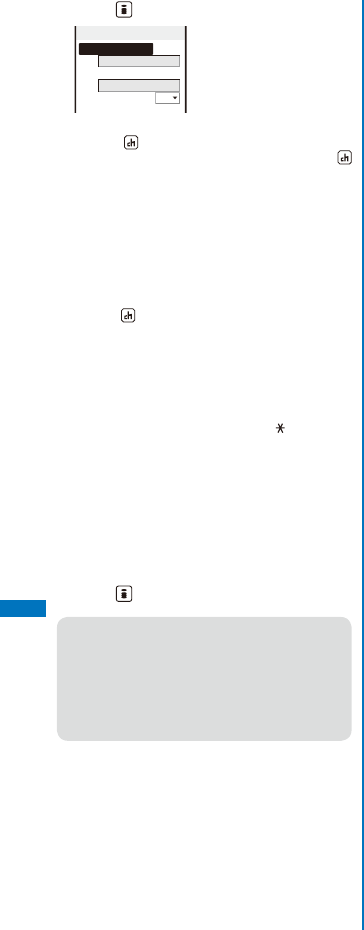
316
Data Display/Edit/Management
2 Press (Edit).
Edit file info
Management title
Your cat
File name
20080212091836
Restriction
No
For Chaku-Uta Full®
Press (Edit). Edit each item. To reset each
item, move the cursor to an item, and press
(Reset).
ˎ You can enter a management title at
[Management title] within 25 full-width or 50
half-width characters.
3 Enter a title at [Management title].
Enter a title within 18 full-width or 36 half-width
characters.
To reset the management title
Press (Rset Ttl).
ˎ You can reset the management title only of the
data that has an original title to be displayed.
4 Enter a file name at [File name].
Enter a file name within 36 half-width alphanumeric
characters and symbols.
ˎ You cannot use half-width symbols “ / : < > ? ¥|.
You cannot enter “.” at the beginning of a file name.
5 Select [Yes]/[No] at [Restriction].
[Yes]:
Set file restriction. Once you send the file as a
mail attachment, it cannot be sent or forwarded
from the recipient’s FOMA terminal.
[No]:
Do not set file restriction.
6 Press (Complete).
● The image size expressed in width×height at
[Size] in the Detail info display is based on the
orientation of an image in which it is saved. Since
an image recorded while the Auto orientation is
set to [ON] is displayed rotated according to the
orientation of the FOMA terminal held when it is
recorded, the orientation of the displayed image
may differ from expressed at [Size] (P.151, 179).

Data Display/Edit/Management
317
■ List of display items and items that can be edited
◎: Can be edited ○: Display only −: Not displayed
Display item
My picture
Chaku-
Uta
Full®
Music&Video Channel
Movie/
i-motion
Melody
My
document
Chara-
den
Kisekae
Tool
Description
JPEG
GIF SWF
Program
Chapter
(Chaku-
Uta Full®)
Chapter
(Movie/
i-motion)
Management
title ◎◎◎◎◎−−◎◎◎◎◎
Title to be displayed on the FOMA terminal
File name ◎◎○○−−−◎◎○○○
Name of file to be displayed when the mail
has a data attachment.
Original title −−−−−○○○○−○○
Original title
File format ○○−○○−−○○○−−
File type
Restriction
◎◎◎○○−−◎◎○○○
Whether the file can be sent or forwarded
from the recipient’s FOMA terminal when it is
sent as a mail attachment
ˎ You may not be able to change the
restriction for an i-motion and melody
obtained from a site, etc.
ˎ You cannot change the restriction for a
frame image and stamp image.
Size
○○−−−−−○−−○−
Data display size
ˎ This item is not displayed for i-motion
with sound track only (i-motion without
video track, such as singer’s voice).
File size ○○○○○○○○○○○○
Data file size
Mail attach
size ○−−−−−−−−−−−
File size of an Exif-format file excluding the
size of its thumbnail
Replay
restriction −−−○○−−○−−−−
Playback restriction
Ring tone −−−−−−−○−−−−
Whether setting as the ring tone is permitted
Receive
display −−−−−−−○−−−−
Whether setting as the receive display is
permitted
Full song ring
tone −−−○−−−−−−−−
Whether setting as the Full song ring tone is
permitted※1
Point ring
tone −−−○−−−−−−−−
Whether setting as the Point ring tone is
permitted※1
Savable
Jacket image −−−○−−−−−−−−
With/without a CD jacket image that can be
saved※1
Savable
Image −−−○−−−−−−−−
With/without a stand-by display image that
can be saved※1
Savable Lyric −−−○−−−−−−−−
With/without a song image that can be
saved※1
Title −−−◎−−−−−−−−
Track title
Artist −−−◎−○−−−−−−
Name of artist
Album −−−◎−−−−−−−−
Name of album
Year −−−◎−−−−−−−−
Year composed (Christian calendar)
Genre −−−◎−−−−−−−−
Genre
Comment −−−◎○○−−−−−−
Comment
Track number −−−◎−−−−−−−−
Track number in the album and the total
number of tracks
Music by −−−○−○−−−−−−
Name of composer
Lyric by −−−○−○−−−−−−
Name of lyricist
Rights holder −−−○−○−−−−−−
Copyright holder
Selling agency
−−−○−○−−−−−−
Distributor
Rights
information −−−○○−−−−−−−
Copyright information
Label −−−○−○−−−−−−
Album label
URL※2−−−○○−−−−−−−
URL information
Creator −−−−○−○○−−−−
Author information of a file
Copyright −−−−−−○○−−−−
Copyright information of a file
Description −−−−−−○○−−−−
Description of a file
Video −−−−−−−○−−−−
Yes/No (with/without video track)/Not
supported※1
Audio
−−−○−−−○−−−−
Format and bit rate for Chaku-Uta Full®,
Audio format/No (without sound track)/Not
supported for movies※1
Tex t −−−−−−−○−−−−
Yes/No (with/without text track)
Play time −−−○○○○−−−−−
Estimated playback time
Originated ○○○○○−−○○○○○
Source from where the file is obtained
Download date
○○○○○−−○○○○○
Date on which the file was saved
Create date ○○−−−−−−○○○○
Date on which the file was created
Continued
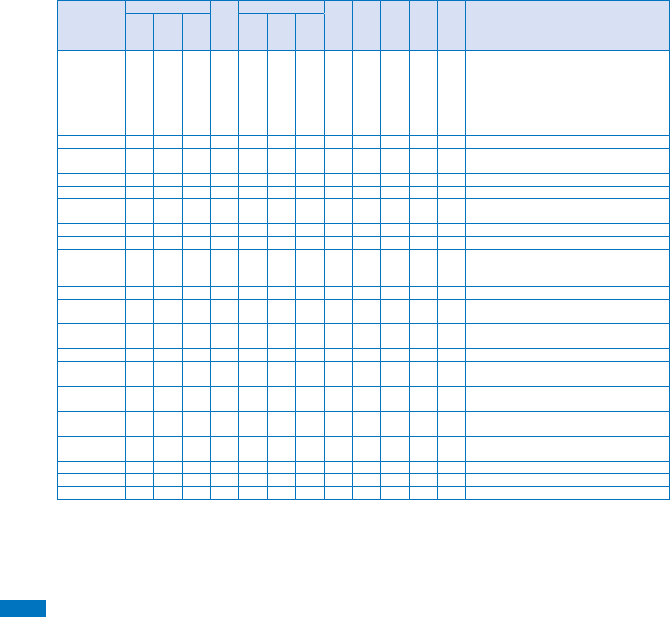
Data Display/Edit/Management
318
Display item
My picture
Chaku-
Uta
Full®
Music&Video Channel
Movie/
i-motion
Melody
My
document
Chara-
den
Kisekae
Tool
Description
JPEG
GIF SWF
Program
Chapter
(Chaku-
Uta Full®)
Chapter
(Movie/
i-motion)
Move to
microSD
○○○○○−−○○○○○
Yes/Yes(Same model only)/No/Unknown for
transferring data to the microSD memory
card※1
ˎ [Yes(Same model only)] indicates that
the data can be moved only when the
same model as used for obtaining the
data is used.
Record time −−−−−−−○−−−−
Recording time
Setting ○○○○−−−○○−○○
Type of stand-by display or ring tone
currently set
Shooting date ○−−−−−−−−−−−
Date on which the image was recorded
Digitized date ○−−−−−−−−−−−
Date on which the image was edited
AE ○−−−−−−−−−−−
The value that indicates the amount of light
passing through a lens (F4/F2.8).
Shutter speed ○−−−−−−−−−−−
Period during which light is stored in CMOS
EV ○−−−−−−−−−−−
EV correction
ISO
○−−−−−−−−−−−
The value that indicates the level of
sensitivity to light (equivalent to the ISO
sensitivity of a film).
Photometry ○−−−−−−−−−−−
Photometry mode
Time link
distribution −−−−○−−−−−−−
Set or not the playback starting time,
Program repeat interval
Move
restriction −−−−○−−−−−−−
Whether saving again is permitted
FF restriction −−−−○−−−−−−−
With/without a fast-forward restriction
Rew
restriction −−−−○−−−−−−−
With/without a rewined restriction
Chapter skip
restriction −−−−○−−−−−−−
With/without a chapter skip restriction
Chapter back
restriction
−−−−○−−−−−−−
With/without a chapter back restriction
Program
image −−−−○−−−−−−−
Program image
Program title −−−−○−−−−−−−
Program title
Distributor −−−−○−−−−−−−
Distributor
Program size −−−−○−−−−−−−
Memory space saved for the delivery area
※1 Depending on the data, the displayed contents may not represent exact information about it.
※2 For the Chaku-Uta Full®, it is displayed as “URL info”.
ˎ When there is no information for the displayed item, “unknown” or a blank is indicated.
ˎ Even if “◎: Can be edited” is indicated for an item in the above table, you may not be able to change some of
the data.
ˎ Detailed information of data saved in the microSD memory card may be different from the information displayed
on the FOMA terminal.
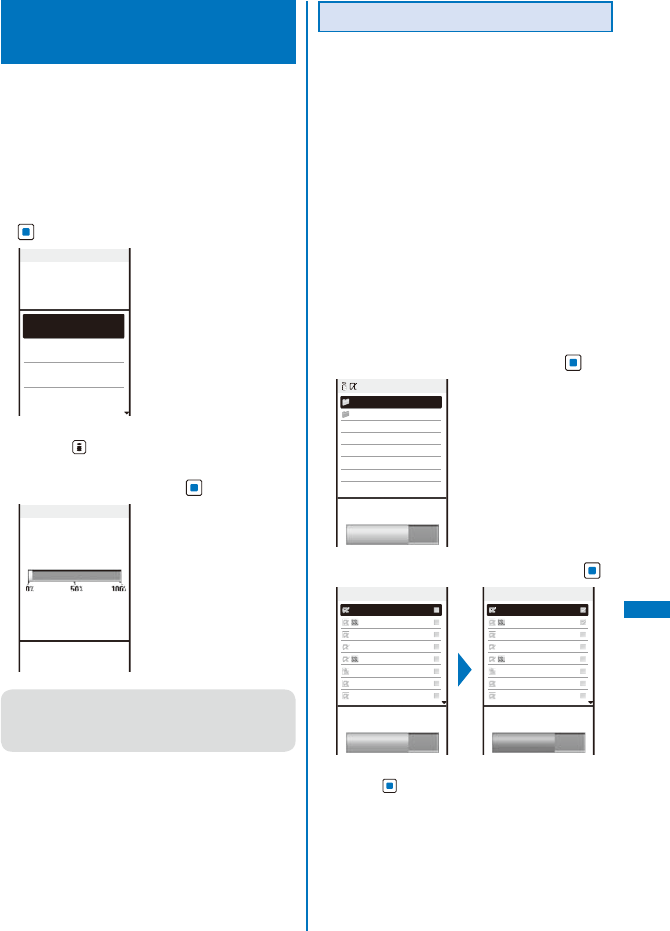
319
Data Display/Edit/Management
Checking the Memory of the
FOMA Terminal
<Storage information>
You can display the memory use status of the
FOMA terminal. You can also check the volume
used up by the category-specific Data Box
and i-αppli memories.
ˎ The displayed data amount is an estimated value
and not accurate.
1 From the Menu, select [Settings] →
[Management] → [Storage info] and press
.
Storage information
My picture
2.8MB
MUSIC
2.6MB
Music&Video Channel
0.0MB
i−motion
4.2MB
Full cap.
321.8MB
Using
19.0MB
To change the unit
Press (Unit chg) to switch temporarily
between the MB and KB displays.
2 Select an item and press .
My picture info
Max
2500
Registered
533
Remaining
279.7MB
Using
2.8MB
● Preinstalled i-αppli, [Deco mail pict.] and [スー
パーモンキーボール] folders in My picture, and
data of MUSIC and My document are included in
the data amount.
In Case of Insufficient Memory
If there is not enough memory when you save
or download data or software in My picture,
MUSIC, i-motion, melody, My document,
Chara-den, and Kisekae Tool of the Data
Box, or i-αppli, select and delete data that is
no longer required from the same category,
allocate the save area, and then save the new
data/software.
Example: When there is not enough memory while
downloading software
1 Download the software.
The screen informing memory shortage appears.
[Sel. delete data]:
Delete unnecessary software and continue to
download the software.
[Cancel]:
Cancel downloading.
2 Select [Sel. delete data] and press .
Used(Folder)
320KB
Shortage
64KB
ppli
12/24
ソフト一覧
Downloaded software
3 Select a folder → software and press .
Used(Data)
64KB
Shortage
64KB
ソフト一覧
1/12
XXX game
XXX quiz
Aqua XXX friend
XXX Sanguozhi
Future of You
Adventure XXX
Warring States
Survival XXX st
Used(Data)
64KB
Saving available
ソフト一覧
1/12
XXX game
XXX quiz
Aqua XXX friend
XXX Sanguozhi
Future of You
Adventure XXX
Warring States
Survival XXX st
To cancel the selection
Press (Rel.).
Continued
320
Data Display/Edit/Management
4 Press (Delete), select [Yes], and press
.
The selected software is deleted and then
downloading starts.
● If you delete preinstalled Chara-den files, it does
not help you increase the save area.
What is the Infrared
Communication?
<Infrared communication>
You can send and receive the Phonebook,
Schedule, Text memo, Bookmark, mail, image,
movie, melody, PDF data, and ToruCa card to/
from a mobile phone equipped with the infrared
communication function. To send/receive
all entries, you need a 4-digit authentication
password preset with a communication target
recipient/sender.
The FOMA terminal can also do much more in
conjunction with other devices equipped with
the infrared communication function by using
the infrared communication feature of i-αppli.
ˎ There are some data that cannot be exchanged
even if the other device is equipped with the infrared
communication function.
ˎ The infrared communication of the FOMA terminal
follows IrMC™ version 1.1. Even if the other device
follows IrMC™ version 1.1, there may be data that
cannot be exchanged properly depending on the
software.
ˎ You cannot perform infrared communication during
a call or i-mode/packet/64K data communication,
or when the Lock all, Omakase Lock, Personal data
lock, Lock key, or Self mode is set.
ˎ During the infrared communication, the status of
the FOMA terminal is the same as the outside of the
service area status. Therefore, you cannot place a
call or perform i-mode and data communication.
ˎ When the other device does not support IrSimple™
function, the communication speed slows.
ˎ The infrared receiving function of the FOMA terminal
and infrared sending function of contents of the
Data Box support IrSimple™ function.
ˎ JPEG images saved in My picture of the Data
Box can be sent by using the high-speed infrared
communication (IrSimpleShot™ function※) (P.330).
※ IrSimpleShot™ function is the one-way
communication function (Home Appliance Profile)
that is compliant with IrSimple™ function.
Using the Infrared
Communication
ˎ The FOMA terminal and the other device can be
used within about 20 cm apart. The infrared data
port must be kept pointed at the other device until
the data exchange ends.
ˎ If used under direct sunlight, fluorescent lamp
or near other infrared devices, the infrared data
exchange may not function properly.
Reception angle:
±
15 degrees off
axis
Infrared data
port
Within about
20 cm
Infrared data
port
Data Display/Edit/Management
321
Data That Can Be Sent/Received via Infrared Communication
You can send and receive your Own number, Phonebook, Schedule, Text memo, Bookmark, mail,
image, movie, melody, PDF data, and ToruCa card between mobile phones and other devices
equipped with the infrared communication function.
ˎ It may take time to exchange or save data depending on the data size.
ˎ Data received using the infrared communication may not be displayed/played back properly.
Type of data
Reception
Transmission
Storage for received
data Items that cannot be sent/received, etc.
One
item
All
items
One
item
All
items
Own number ×−○−
FOMA terminal
phonebook※1
ˎ You cannot send Additional No.1 and No.2 and images.
ˎ Data is sent by setting the Secret to [OFF].
FOMA terminal
phonebook
○○○○
FOMA terminal
phonebook※1
ˎ You cannot send Des call display, Des substitute image,
Des phone tone, Des mail tone, Select phone Illum., and
Select mail Illum.
ˎ
When you send one data item, the group number, group
name, memory number, and data of the PushTalk phonebook
are not sent. Data is sent by setting the Secret to [OFF].
ˎ When all data is sent/received, the data of the PushTalk
phonebook is also sent/received.
ˎ When all data is sent/received, the first Phonebook entry
is sent/received as the Own number.
UIM phonebook ○○××
FOMA terminal
phonebook※1
ˎ When you receive one data item, the group name is not
transmitted.
Schedule
○○○○
Schedule※2ˎ You cannot send ON/OFF of the holiday setting for a
repeated schedule.
ˎ When you send one data item, the data is sent by setting
the Secret to [OFF].
Text memo ○○○○
Text Memo※3−
Bookmark ○○○○
Bookmark※4ˎ You cannot send/receive a folder name.
Mail
Received
○○○○
[Inbox]※5ˎ You cannot send a folder name, i-αppli To link, and file
attachment not yet obtained.
ˎ
Mail exceeding 100K bytes is sent until the size being sent
reaches 100K bytes after deleting a file attachment, etc.
ˎ Protected mail and i-αppli mail are sent as regular mail.
ˎ You cannot send the SMS report .
Sent [Outbox]※5
Saved [Draft]※5
JPEG/GIF
image/Flash
movie ○×○×
[Data exchange]
folder in My picture
※4
ˎ You cannot receive an image exceeding 2M bytes.
ˎ You cannot receive a GIF image and a GIF animation
exceeding [UXGA(1600×1200)] and [Stby(480×864)]
respectively, and some JPEG images.
ˎ You cannot send a frame image, stamp image.
Movie/i-motion ○×○×
[Data exchange]
folder in i-motion※4
ˎ You cannot receive a movie/i-motion exceeding 10M bytes
and that with playback restriction.
Melody ○×○×
[Data exchange]
folder in Melody※4
ˎ You cannot receive a melody exceeding 200K bytes.
PDF data
○×○×
[Data exchange]
folder in My
document※4
ˎ You cannot receive PDF data exceeding 2M bytes.
ˎ You cannot send PDF data that you downloaded by page
or failed to download.
ˎ
The document definition file is sent together with PDF data.
Toru C a
○○○○
[ToruCa] folder in
Toru C a※4
ˎ You cannot receive a ToruCa and ToruCa(detail) card
exceeding 1K bytes and 100K bytes respectively.
ˎ You may not be able to send some ToruCa cards.
ˎ When you send/receive bookmark or mail data, the folder allocation setting may not be applied depending on the terminal
model of a caller/recipient.
ˎ When you send mail data, all of the title may not be displayed depending on the recipient’s terminal.
ˎ You cannot send data saved in the microSD memory card except JPEG images. To send JPEG images, you can use the
infrared communication or high-speed infrared communication (IrSimpleShot™ function).
ˎ You cannot send/receive a file prohibited from being retrieved out of the FOMA terminal.
※1 Saved in a memory space with the smallest vacant memory number.
※2 Saved in the order of date and time when they start.
※3 Saved in the order of date and time when they were created.
※4 Saved at the top of the list.
※5 Saved in the order of date and time when they were received/sent/saved.
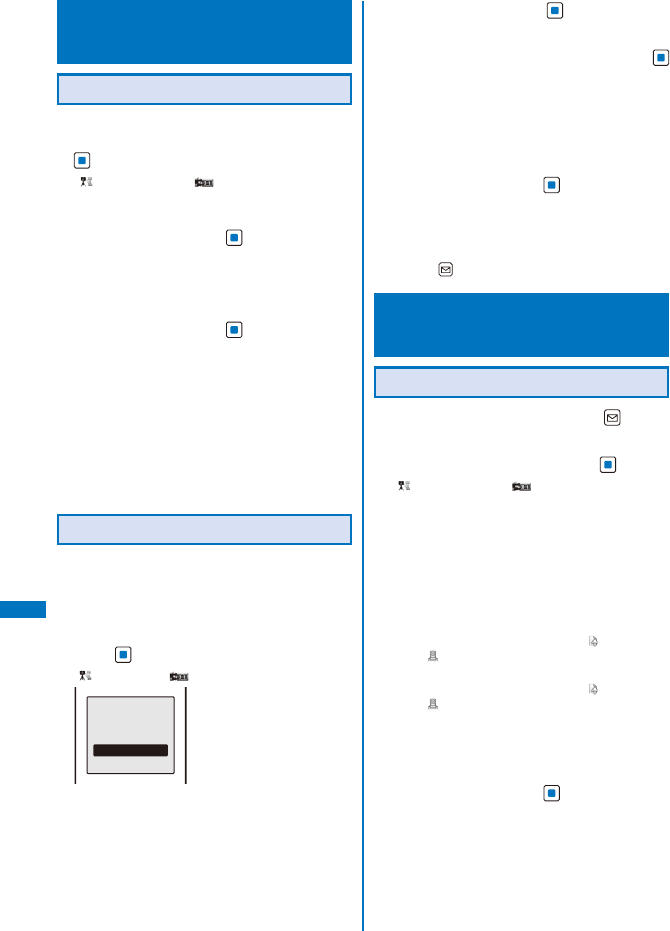
322
Data Display/Edit/Management
Receiving Data Using the Infrared
Communication
<Receive Ir data>
Receiving Data
1 From the Menu, select [LifeKit] →
[Receive Ir data] → [Receive] and press
.
“” changes to “ ” and the screen for
confirming whether to begin the infrared
communication appears.
2 Select [Yes] and press .
The infrared communication is started and data
exchange is started.
The screen for confirming whether to save data
appears.
3 Select [Yes] and press .
The received data is saved.
When you receive Phonebook data
The screen for confirming whether to save data
in the PushTalk phonebook appears. If you select
[Yes], the data is saved in both the PushTalk
and FOMA terminal phonebooks. If you select
[No], the data is saved in the FOMA terminal
phonebook only. When there are several phone
numbers, select the phone number to be saved
in the PushTalk phonebook.
Receiving All Data
ˎ It is necessary that you and the sender determine
the 4-digit authentication password beforehand.
Example: Adding received data
1 From the Menu, select [LifeKit] →
[Receive Ir data] → [Receive all] and
press .
“” changes to “ ”.
Select the way
to save
Add
Overwrite
[Add]:
Save received data by adding to the existing
data.
[Overwrite]:
The screen for confirming whether to delete the
existing data appears. Note that all existing data
is deleted if you select [Yes].
2 Select [Add] and press .
The Security code screen appears.
3 Enter the Security code and press
(OK).
The Authentication password screen appears.
4 Enter the authentication password.
The screen for confirming whether to begin the
infrared communication appears.
5 Select [Yes] and press .
The infrared communication is started. Data
exchange is started and the data is added to the
existing data.
To cancel receiving
Press (Cancel).
Sending Data Using the Infrared
Communication
<Send Ir data>
Sending Data
1 Select data to be sent and press (Func).
The Function menu appears.
2 Select [Send Ir data] and press .
“” changes to “ ” and the screen for
confirming whether to begin the infrared
communication appears.
To send data from the still image file list in My
picture of the Data Box or displayed in the Camera
mode
Move the cursor to the data and from the
Function menu, select [Send Ir data] → [Send Ir
data].
To send a still image displayed in the Camera mode
From the Function menu, select [ ](Send data)
→ [ ](Send Ir data).
To send a movie displayed in the Camera mode
From the Function menu, select [ ](Send data)
→ [ ](Send Ir data).
To send one entry in the Phonebook/Text Memo
Move the cursor to the data and from the
Function menu, select [Send Ir data] → [Send Ir
data].
3 Select [Yes] and press .
The infrared communication is started and data
exchange is started.
323
Data Display/Edit/Management
Sending All Data
ˎ It is necessary that you and the receiver determine
the 4-digit authentication password beforehand.
1 Press (Func) in the folder list of data
to be sent.
The Function menu appears.
2 Select [Send all Ir data] and press .
“” changes to “ ” and the Security code
screen appears.
To send all entries in the Phonebook/Text Memo
From the Function menu in the list of data, select
[Send Ir data] → [Send all Ir data].
To send all entries in the Schedule
From the Function menu in the calendar display,
select [Send all Ir data].
To send all ToruCa cards
From the Function menu in the folder list, select
[Send all Ir data] → [Yes] → [Yes].
3 Enter the Security code and press
(OK).
The Authentication password screen appears.
4 Enter the authentication password.
The screen for confirming whether to begin the
infrared communication appears.
5 Select [Yes] and press .
The infrared communication is started and data
exchange is started.
To cancel sending
Press (Cancel).
Sending a Still Image Using the
High-Speed Infrared Communication
You can send a JPEG image saved in My
picture of the Data Box or microSD memory
card to the IrSimpleShot™ function-compatible
devices using the high-speed infrared
communication.
ˎ IrSimpleShot™ function is the one-way
communication, so send data without checking the
answer from the receiver. Therefore, the sender side
is completed normally even if the receiver cannot
receive data.
Example: Sending an image in My picture of the Data
Box
1 From My picture file list, select an image
and press (Func).
The Function menu appears.
2 Select [Send Ir data] → [Send IrSS] and
press .
“” changes to “ ” and the screen for
confirming whether to begin the IrSimpleShot™
communication appears.
To send a still image displayed in the Camera mode
From the Function menu, select [ ](Send data)
→ [ ](Send IrSS).
To send an image in the microSD memory card
Select [Send IrSS].
3 Select [Yes] and press .
The high-speed infrared communication is started
and data transfer begins.
After completing to send data, the screen informing
the completion appears.
4 Select [End] and press .
The high-speed infrared communication ends.
To send the same data again
Select [Retry].
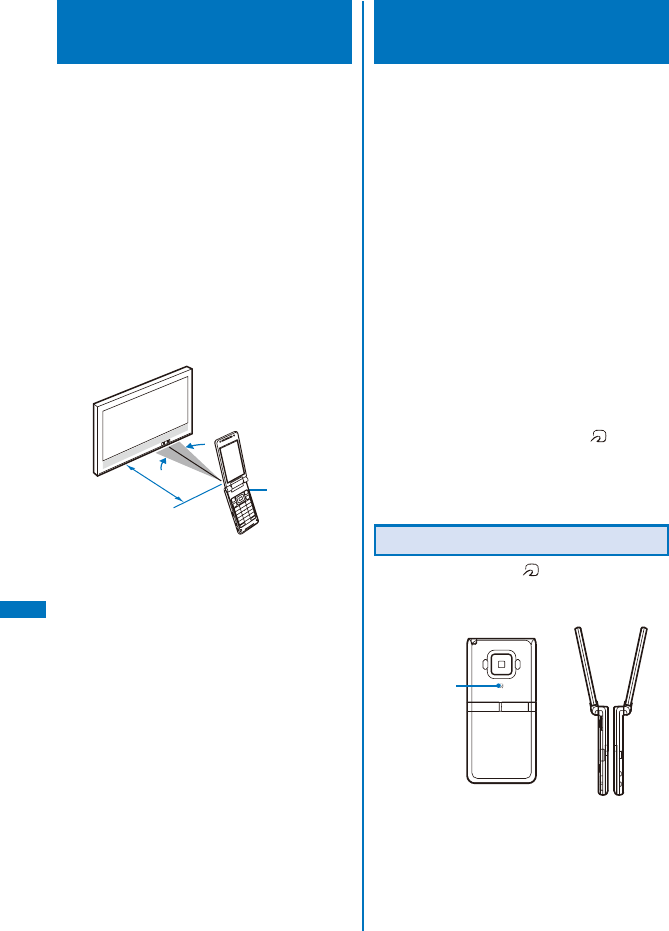
324
Data Display/Edit/Management
Using the Infrared Remote
Control
Once infrared remote control software is
downloaded from a site and saved in the
FOMA terminal, the FOMA terminal can be
used as the TV or DVD player remote control.
ˎ To use the infrared remote control, it is necessary to
download the software corresponding to the target
equipment. Even if the corresponding software is
used, some equipment may not be operated.
ˎ The infrared remote control key operations vary
depending on the software.
■ Remote control operation
When using this function, point the FOMA terminal’s
infrared data port at the remote control receiver
of the TV or DVD player and operate the FOMA
terminal within about 4 m remote control range. Note
that communication may be affected by the target
equipment or ambient brightness.
Within
about 4 m
Reception angle:
±15 degrees
off axis
Infrared
data port
What is iC Communication
Function?
You can send and receive data by placing
the FOMA terminal provided with the iC
communication function over the FeliCa mark
of another FOMA terminal.
ˎ Data that can be sent and received by iC
communication is the same as the data exchanged
using infrared communication (P.328).
ˎ You cannot perform the iC communication
during a call, i-mode/packet/64K data/infrared
communication, or when the Lock all, Omakase
Lock, Personal data lock, Lock key, Self mode, or IC
card lock is set.
ˎ To receive data using iC communication, make
sure that the FOMA terminal is in stand-by status.
You cannot receive data when operation of another
function is in progress.
ˎ During the iC communication, the status of the
FOMA terminal is the same as the outside of the
service area status. Therefore, you cannot place a
call or perform i-mode and data communication.
ˎ Data may not be sent/received depending on the
recipients’ terminals. In this case, move the FOMA
terminals so that both FeliCa marks “ ” are closer
or farther together, or move the FOMA terminals ups
and downs or back and forth.
ˎ When you send mail data, all of the title may not be
received depending on the recipient’s terminal.
Performing iC Communication
ˎ Place the FeliCa mark “ ” of the FOMA terminal
over that of the other terminal. Do not move either
of the FOMA terminals until the data exchange is
completed.
FeliCa mark
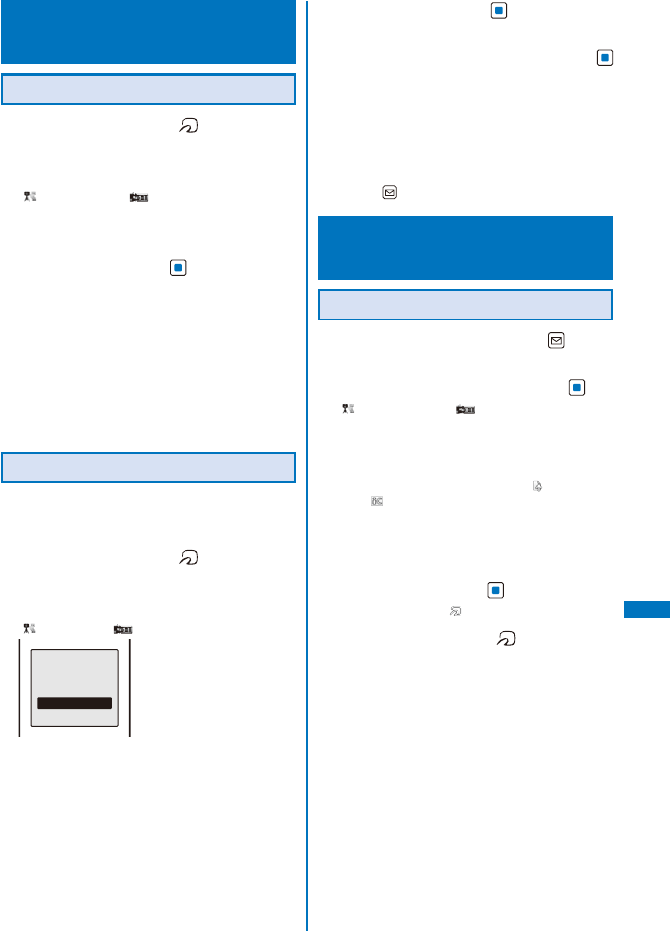
325
Data Display/Edit/Management
Receiving Data Using iC
Communication
Receiving Data
1 Place the FeliCa mark “ ” of the FOMA
terminal over that of the other terminal in
the stand-by display on both terminals.
The vibrator vibrates and the FeliCa Sign lights.
“” changes to “ ” and data exchange is
started.
The screen for confirming whether to save data
appears.
2 Select [Yes] and press .
The received data is saved.
When you receive Phonebook data
The screen for confirming whether to save data
in the PushTalk phonebook appears. If you select
[Yes], the data is saved in both the PushTalk
and FOMA terminal phonebooks. If you select
[No], the data is saved in the FOMA terminal
phonebook only. When there are several phone
numbers, select the phone number to be saved
in the PushTalk phonebook.
Receiving All Data
ˎ It is necessary that you and the sender determine
the 4-digit authentication password beforehand.
Example: Adding received data
1 Place the FeliCa mark “ ” of the FOMA
terminal over that of the other terminal in
the stand-by display on both terminals.
The vibrator vibrates and the FeliCa Sign lights.
“” changes to “ ”.
Select the way
to save
Add
Overwrite
[Add]:
Save received data by adding to the existing
data.
[Overwrite]:
The screen for confirming whether to overwrite
the existing data with the received data appears.
Note that all existing data is deleted if you select
[Yes].
2 Select [Add] and press .
The Security code screen appears.
3 Enter the Security code and press
(OK).
The Authentication password screen appears.
4 Enter the authentication password.
Data exchange is started and the data is added to
the existing data.
To cancel receiving
Press (Cancel).
Sending Data Using iC
Communication
Sending Data
1 Select data to be sent and press (Func).
The Function menu appears.
2 Select [iC transmission] and press .
“” changes to “ ” and the screen for
confirming whether to begin data exchange
appears.
To send a still image/movie displayed in the Camera
mode
From the Function menu, select [ ](Send data)
→ [ ](iC transmission).
To send one entry in the Phonebook/Text Memo
Move the cursor to the data and from the
Function menu, select [iC transmission] → [iC
transmission].
3 Select [Yes] and press .
The message “Place over another one” appears.
4 Place the FeliCa mark “ ” of the FOMA
terminal over that of the other terminal.
The FeliCa Sign lights.
Data exchange is started.
Continued

326
Data Display/Edit/Management
Sending All Data
ˎ It is necessary that you and the receiver determine
the 4-digit authentication password beforehand.
1 Press (Func) in the folder list of data
to be sent.
The Function menu appears.
2 Select [iC trans.(all)] and press .
“” changes to “ ” and the Security code
screen appears.
To send all entries in the Phonebook/Text Memo
From the Function menu in the list of data, select
[iC transmission] → [iC trans.(all)].
To send all entries in the Schedule
From the Function menu in the calendar display,
select [iC trans.(all)].
3 Enter the Security code and press
(OK).
The Authentication password screen appears.
4 Enter the authentication password.
The screen for confirming whether to begin data
exchange appears.
5 Select [Yes] and press .
The message “Crossover the with counterpart”
appears.
6 Place the FeliCa mark “ ” of the FOMA
terminal over that of the other terminal.
The FeliCa Sign lights.
Data exchange is started.
To cancel sending
Press (Cancel).
Displaying PDF Data
<My document>
You can display PDF data saved in My
document of the Data Box or microSD memory
card. You can also download PDF-compatible
data from a site to the FOMA terminal and
display/save it.
ˎ It may take time to display some PDF data. Note
also that PDF data written in a format incompatible
with the PDF-compatible viewer or containing a
complicated design may not be displayed correctly.
ˎ To display PDF data protected with a password, you
need to enter the password.
1 Press ( ) in the stand-by display,
select [My document], and press .
My document folder list appears.
2 Select a folder and press .
Preinstall
1/1
スーハ゜ーモンキーホ゛ール
の遊 Management title
My document file list appears.
ˎ The following icons show the type of PDF data.
Icon Type
PDF data retrieved all pages
(White) PDF data retrieved in pages
(Gray) PDF data that you canceled
retrieving or could not retrieve
ˎ “ ” appears on the upper right of the icon for
PDF data prohibited from being retrieved out
of the FOMA terminal.
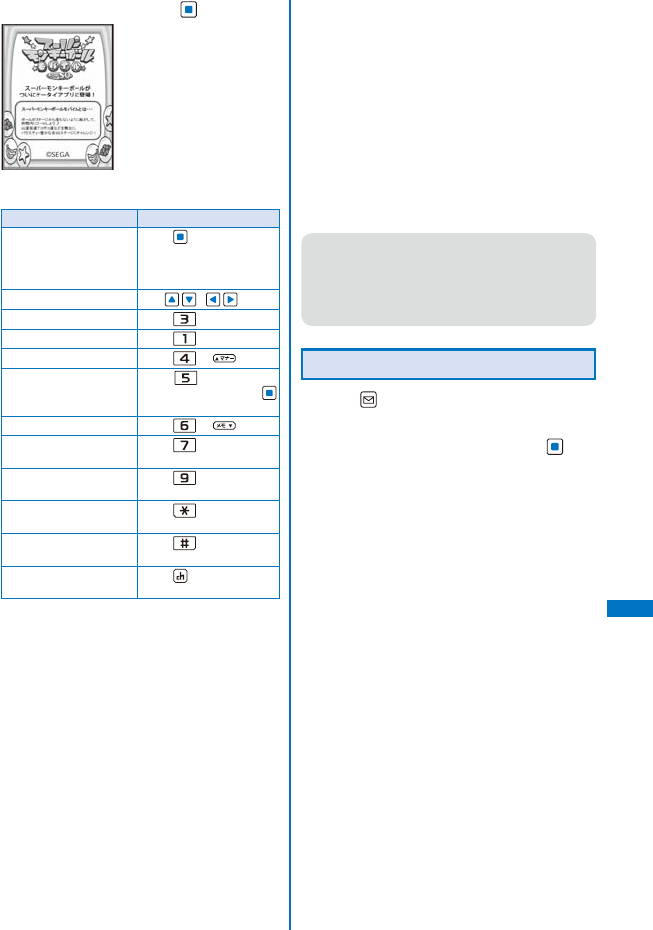
327
Data Display/Edit/Management
3 Select PDF data and press .
©SEGA
Operating method
Operation Key operation
Display the data in
original size or by
adjusting the page
width to the display size
Press (Fit/Tr img).
Scroll Use / .
Zoom in Press .
Zoom out Press .
Move to previous page Press or .
Move to the specified
page
Press , enter a page
number, and press
(OK).
Move to next page Press or .
Rotate counterclockwise
by 90 degrees
Press .
Rotate clockwise by 90
degrees
Press .
Turn on/off the Ratio/
Page No.
Press .
Turn on/off the scrollbar
display
Press .
Display the list of key
operations
Press (Help).
To change the page layout
From the Function menu, select [Page layout] →
[Single page]/[Continuous]/[Continuous-facing].
To move to the first/last page
From the Function menu, select [Move page] →
[First page]/[Last page].
To use a link
From the Function menu, select [Display link].
ˎ You can use a link set in PDF data to use the
Phone To, Mail To, and Web To functions and
move to another page within the PDF data.
To display the detailed information
From the Function menu, select [Property].
To save PDF data
From the Function menu, select [Save] → a
place to save to.
To download all PDF data that you downloaded by
page
From the Function menu, select [Download all]
→ [Yes].
● If you have deleted preinstalled PDF data, you
can download it from “PlayNow by SO”.
[i Menu] → [メニュー/検索] (Menu/Search)
→ [ケータイ電話メーカー] (Mobile Phone
Manufacturers) → [PlayNow by SO] (Japanese
only)
Setting How to Display PDF Data
1 Press (Func) in the PDF data display.
The Function menu appears.
2 Select [Detail info disp] and press .
The Disp detail info display appears.
[Ratio/Page No.]:
Set whether to display the ratio and page no.
[Scroll bar]:
Set whether to display the scroll bar.
3 Select [ON]/[OFF] at [Ratio/Page No.].
4 Select [ON]/[OFF] at [Scroll bar].
The Detail info disp is set.
Continued
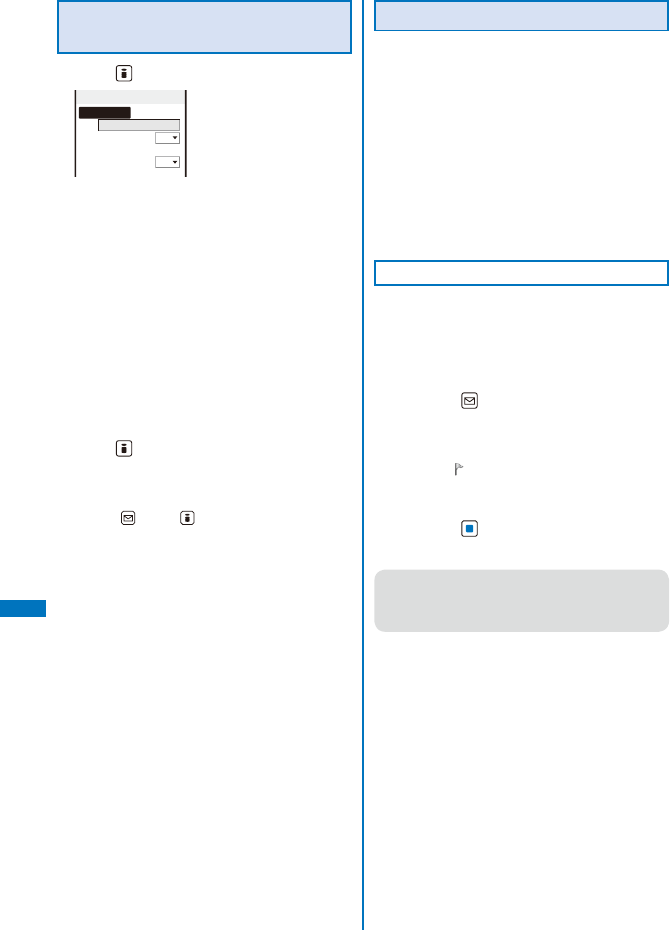
328
Data Display/Edit/Management
Searching a Character String of
PDF Data
1 Press (Search) in the PDF data display.
Search criteria
Search text
Match full
OFF
Case sensitivity
OFF
[Search text]:
Enter a character string you want to search for.
[Match full]:
Set whether to search for an exact character
string match.
[Case sensitivity]:
Set whether to distinguish uppercase and
lowercase characters.
2 Enter a character string at [Search text].
Enter a character string within eight full-width or 16
half-width characters.
3 Select [ON]/[OFF] at [Match full].
4 Select [ON]/[OFF] at [Case sensitivity].
5 Press (OK).
The searched character string is displayed in
reverse video.
To display the previous/next search result
Press (Back)/ (Next).
Using a Bookmark/Mark
Once you save a bookmark or mark in pages
that you use frequently, you can display the
linked page by simply selecting the bookmark
or mark. You can save a mark for the number
of the currently displayed page and location
in the page. Some PDF data is preset with
bookmarks or marks.
ˎ The two types of bookmarks that you can use are as
follows.
- Bookmark: Saved in PDF data in advance. You
cannot change it.
- i bookmark: You can add/delete this bookmark.
Adding an i Bookmark/Mark
You can add up to 10 i bookmarks and marks
each.
Example: Adding an i bookmark
1 In the PDF data display, display the page
for which you want to add an i bookmark
and press (Func).
The Function menu appears.
To add a mark
From the Function menu, select [Mark] → [Add
mark]. “ ” appears at the location where the
mark is added.
2 Select [Bookmark] → [Add i bookmark]
and press .
The i bookmark is added.
● The i bookmarks/marks that you have added
may be deleted if you attempt to copy them to
a PC or other FOMA terminals using infrared/iC
communication or the microSD memory card.
329
Data Display/Edit/Management
Displaying the i Bookmark/Mark List
Example: Displaying the i bookmark list
1 Press (Func) in the PDF data display.
The Function menu appears.
2 Select [Bookmark] → [i bookmark list]
and press .
The list of i bookmarks is displayed.
To display the list of marks
Select [Mark] → [Mark list].
To check the details of a bookmark/i bookmark
Press (Confirm).
To change the title of an i bookmark
Move the cursor to the i bookmark and from the
Function menu, select [Edit title]. Enter a new title
within 64 full-width or 128 half-width characters.
To delete an i bookmark/mark
Move the cursor to the i bookmark/mark and from
the Function menu, select [Delete] → [Delete
one] → [Yes]. To delete several i bookmarks/
marks, from the Function menu, select [Delete]
→ [Select&delete] and select i bookmarks/marks.
Press (Complete) and select [Yes]. To delete
all i bookmarks/marks, from the Function menu,
select [Delete] → [Delete all], enter the Security
code, and select [Yes].
3 Select an i bookmark and press (Disp).
The page set with the i bookmark appears.
Clipping a Still Image
You can clip a part of the currently displayed
PDF data and save it as a JPEG image.
ˎ You may not be able to clip an image of some PDF
data.
1 Press (Func) in the PDF data display.
The Function menu appears.
2 Select [Capture screen] → [Yes] and
press .
3 Select a folder and press .
The image clip is saved in My picture of the Data
Box.

331
What is Music&Video Channel? ............................................................................... 338
Setting a Program ..................................................................................................... 338
Playing Back a Program ........................................................................................... 340
Playing Back a Program from the Data Box ............................................................. 342
■ Listening to Music
What is MUSIC Player? ............................................................................................ 342
Transferring Music Data ............................................................................................ 343
Downloading Chaku-Uta Full® .................................................................................. 344
Playing Back Music Data .......................................................................................... 345
Managing the Playlist ............................................................................................... 348
Changing the MUSIC Player Settings ....................................................................... 349
Music&Video Channel/
Music Playback
Handling the music data
ˎ Chaku-Uta Full® and WMA (Windows Media Audio) files which are played back on the MUSIC Player are
stated as “music data” in this manual.
ˎ The FOMA terminal can play back WMA files and Chaku-Uta Full® which are protected by the copyright
protection technology.
ˎ When you download music data from a website over the Internet, make sure to check the usage
conditions (licensing, prohibited acts, etc.) before you use it.
ˎ The WMA files protected by the copyright protection technology are played back by the FOMA terminal
using its own information. When the FOMA terminal’s own information is changed due to malfunction,
repair, or change, the existing WMA files may not be played back again.
ˎ Under no condition will DoCoMo be held liable for handling CCCD (copy controlled CD) or when music
data cannot be converted to a WMA file or other file format.
ˎ Music data saved in the FOMA terminal and microSD memory card is used only for your personal use.
Please take care that you never violate other party’s intellectual property right and other rights such
as copyright when you use it. Also, do not copy or move music data saved in the FOMA terminal and
microSD memory card to a PC or other devices.
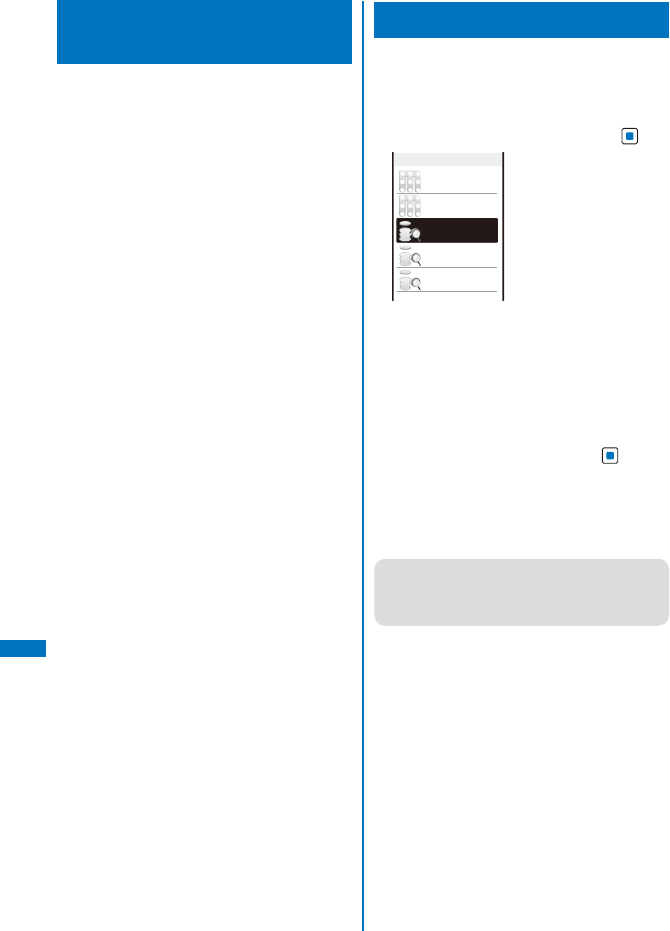
332
Music&Video Channel/Music Playback
What is Music&Video
Channel?
Music&Video Channel is a service that a music
program of up to one hour is automatically
distributed during the night only by setting
your favorite channel in advance. You can also
enjoy high-quality movie programs up to 30
minutes. Programs are updated regularly and
you can enjoy the distributed program anytime
such as during commuting time to work or
school.
■ Before using the Music&Video Channel
service
ˎ Music&Video Channel is a paid service that requires
a subscription. (To apply for the Music&Video
Channel service, the subscriptions to i-mode and
Pake-Houdai/Pake-Houdai Full service are required.)
ˎ The packet communication charge may be
required depending on a program in addition to the
Music&Video Channel service charge.
ˎ For details on the Music&Video Channel service,
see the “Mobile Phone User’s Guide
【i-mode】
FOMA version”.
ˎ After you subscribe to the Music&Video Channel
service, inserting the UIM into the FOMA terminal
which is incompatible with the Music&Video Channel
service does not allow you to use the service. Even
in this case, note that the service charge is required
unless you unsubscribe from the service.
ˎ You cannot set or download programs during
international roaming.※ Stop the distribution service
before you go abroad. Restart the distribution
service after you come back.
※ Note that the packet communication charge for
connecting to i-mode is required when you try to
set or download programs during international
roaming.
Setting a Program
When you set a desired program in advance,
the program data is automatically distributed at
night.
1 From the Menu, select [Music] →
[Music&Video Channel] and press .
Music&Video Channel
No program
No program
Set program
Program list
About
this service
The Music&Video Channel menu appears.
[Set program]:
Connect to a site to set/cancel a program.
[Program list]:
Connect to a site that contains a program list.
[About this service]:
Connect to a site that explains about
Music&Video Channel.
2 Select [Set program] and press .
3 Operate as instructed on the display to
set a program.
For more details, see the “Mobile Phone User’s
Guide
【i-mode】
FOMA version”.
● To set a program, you need to add a site which
provides the Music&Video Channel service to My
Menu (P.190).
● You can set two programs at a time.
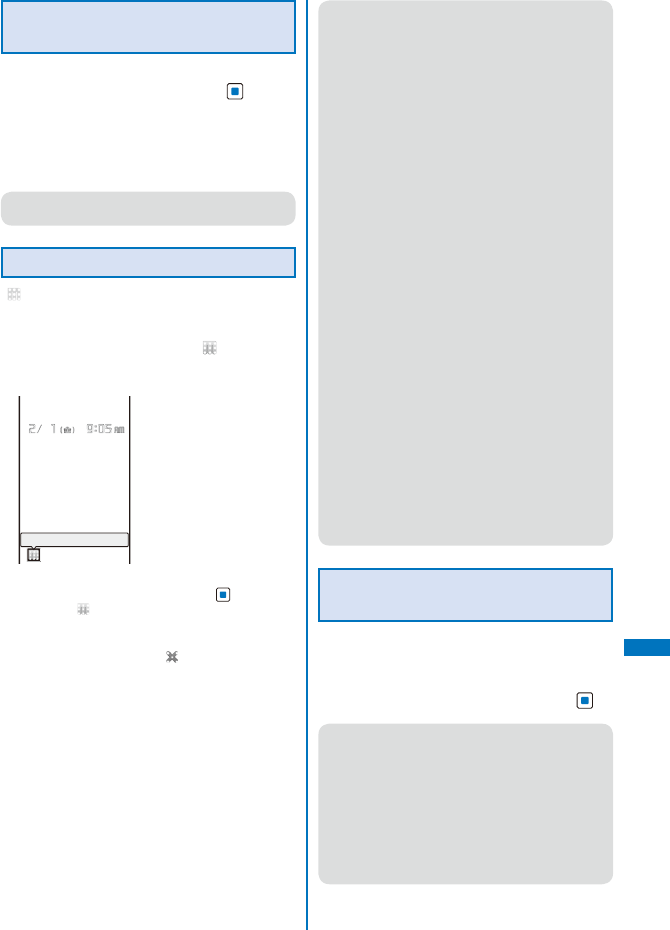
333
Music&Video Channel/Music Playback
Checking/Canceling a Set
Program
1 From the Music&Video Channel menu,
select [Set program] and press .
2 Operate as instructed on the display.
You can check or cancel a set program. For more
details, see the “Mobile Phone User’s Guide
【i-mode】
FOMA version”.
● Even if you cancel a set program, the site is not
deleted from My Menu.
After Setting a Program
“” appears in the stand-by display 12 hours
before the downloading starts.
A program is automatically downloaded at
night and the notification icon “ ” (Download
completed) appears in the stand-by display
right after downloading successfully.
Download completed
To play back a program immediately
In the stand-by display, press (Link) and
select “ ”. The Music&Video Channel menu
appears.
When failed to download a program
The notification icon “ ” (Download failed)
appears.
● If the communication is interrupted due to
weak radio wave, etc. while downloading a
program, the FOMA terminal attempts to resume
the downloading up to five times at 3-minute
intervals. If the program cannot be downloaded
completely after the reacquisition, the FOMA
terminal attempts to download the program at
nighttime of the next day.
● If downloading fails because of the following
reasons: outside of the service area, the terminal
is powered off, the battery level is low, etc., the
FOMA terminal will download the program at the
next night.
● Downloading a program may take time so make
sure that the FOMA terminal is fully charged and
used in an area where the radio wave condition
is good.
● The downloaded program cannot be copied.
● Programs cannot be downloaded automatically
in the following cases. Set a program again from
the Music&Video Channel menu.
- When inserting the UIM which is not the one
used for setting a program
- When inserting the UIM into another
Music&Video Channel compatible FOMA
terminal after setting a program.
- When performing the Rset all data&set.
● Only one program data can be saved in
per channel. When new program data is
downloaded, the previously downloaded
program data is deleted and cannot be played
back.
● When you unsubscribe from the Music&Video
channel or i-mode service, the program data in
the [Distrib. program] folder may be deleted.
Downloading a Program
Manually
When failed to download a program
automatically, you can download it manually.
1 From the Music&Video Channel menu,
select a program → [Yes] and press .
● During certain hours of a day, you may not be
able to download a program manually.
● When downloading is interrupted, the partly
downloaded program until the interruption can
be saved. You can operate the FOMA terminal to
resume the downloading for the remaining data
except during certain hours.
● You cannot re-download a program whose
playback restriction has expired. You cannot also
update until the next distribution date.
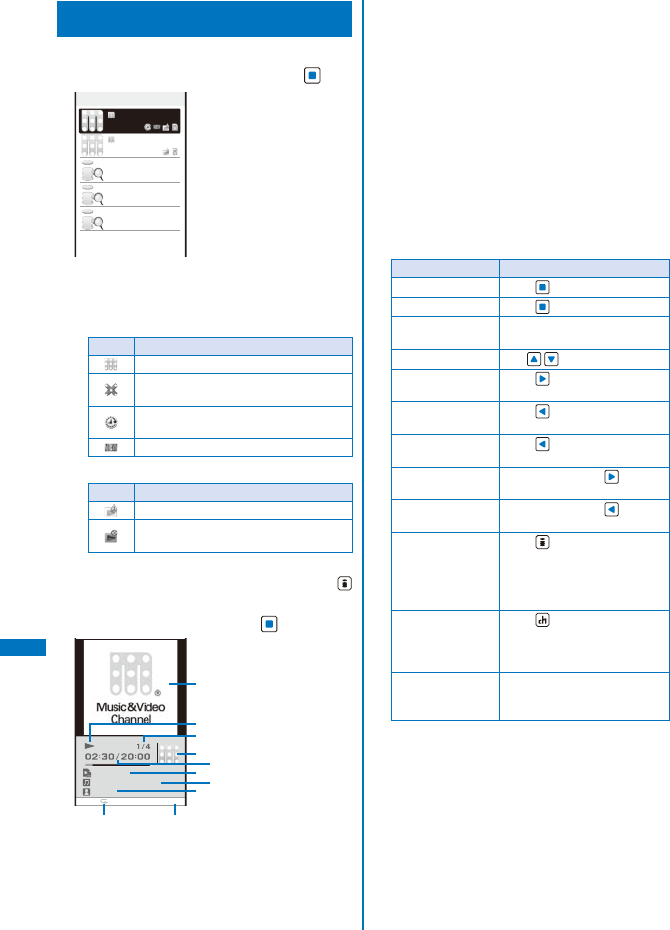
334
Music&Video Channel/Music Playback
Playing Back a Program
1 From the Menu, select [Music] →
[Music&Video Channel] and press .
Music&Video Channel
○○ライブ
20:00
△△特集
15:00
Set program
Program list
About
this service
Next distribution
2008/02/20
The Music&Video Channel menu appears.
ˎ The following icons show the program type,
status, and playback restrictions.
Type/status
Icon Type/status
Program downloaded successfully
Program failed to download/Program
partly downloaded successfully
Program for which the starting time of
playback is set
Program not yet played back
Playback restrictions
Icon Playback restrictions
Program with playback restrictions
Program whose time limit on playback
has expired
To display the detailed information on a program
Move the cursor to a program and press
(Detail).
2 Select a program and press .
○○ライブ
イントロダクション
△△△
VOL 16
ͦ
ͧ
ͨ
ͩͪ
ͫͬ
ͭ
ͮ ͯ
ʓ Image/movie of chapter
ͧ Current status (Playing back/Stopping/Pausing/
Forwarding/Reversing)
ͨ The number of the chapter being played back/
The total number of chapters of the program
ͩ Images in the program
ͪ The elapsed playback time/The total playback
time of the program
ͫ Program title
ͬ Chapter title/Original title
ͭ Name of artist/Name of composer
ͮ Repeat playback (ON/OFF)
ͯ Volume
The program is played back.
Operating method
Operation Key operation
Play Press (Play).
Pause Press (Pause).
Stop Fro m the Function menu,
select [Stop].
Volume adjustment Use .
Beginning of the
next chapter※
Press .
Beginning of the
current chapter※
Press .
Beginning of the
previous chapter※
Press repeatedly.
Fast-forward Keep pressing during
playback.
Fast-reverse Keep pressing during
playback.
Full screen※Press (Full scrn).
ˎ You cannot switch the
display to be full-sized
when a program is a Chaku-
Uta Full® file.
Use Web To Press (Web to).
If a program contains URL
information, you can connect
to a site.
Repeat playback Fro m the Function menu,
select [Settings] → [Repeat]
→ [ON]/[OFF].
※ You cannot operate it while stopping.
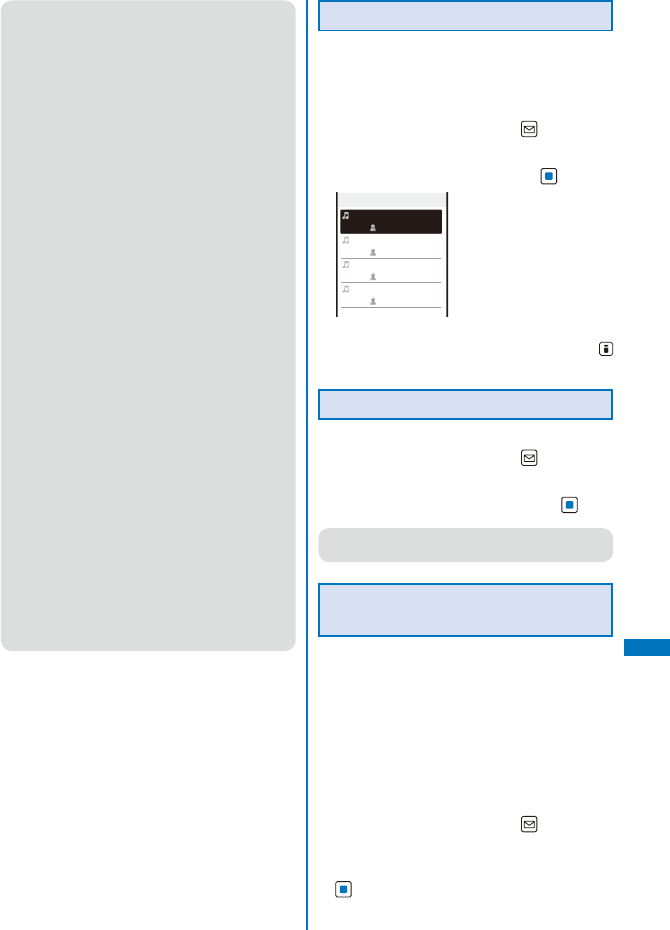
335
Music&Video Channel/Music Playback
● If a program with some restrictions such as the
number of playback times, period of playback,
and term limitation for playback, you cannot play
it back once exceeding the restrictions.
● When you select a program that failed to be
downloaded, the screen for confirming whether
to download the program again appears. If you
select [Yes], the downloading starts. Even if the
update is failed but the original program is able
to be played back, the program is played back
when you select [Play prev. prog].
● When you select a program partly downloaded,
the screen for confirming whether to download
the remaining of the program appears. If you
select [Yes], the downloading starts. If you select
[Play halfway], the downloaded part is played
back. However, if the program has the playback
starting time, you cannot play it back unless it is
fully downloaded.
● When the program has the playback starting
time, the time is set to play back so that you
cannot play it back out of the time. The playback
starts at the time on the clock set by the Auto
time adjust.
● When you select a program for which the
playback starting time is set before the time
when it is set to start, the message “This program
is unable to play at this hour” appears and shows
the next playback starting time. The message “It
is coming soon. Please wait for a while.” appears
about 60 seconds before the program starts and
soon you can play it back.
● Some programs may have some limitations on
pausing, skipping chapters, fast-forwarding, and
fast-reversing.
● When you try to play back a program while the
battery level is low, the screen for confirming
whether to play it back appears. Also, when the
battery level becomes low during playback, the
playback is paused and the screen for confirming
whether to continue to play back appears. Fully
charge the battery before playback.
Checking the Program Chapter
By displaying the program chapter list, you can
check a title of each chapter, name of artist,
and playback time.
1 From the Music&Video Channel menu,
select a program and press (Func).
The Function menu appears.
2 Select [Chapter list] and press .
○○ライブ
1/4
イントロダクション
04:00
△△△
トラック
1
05:20
△△△
トラック
2
06:15
△△△
トラック
3
04:25
△△△
To display the detailed information of a chapter
Move the cursor to a chapter and press
(Detail).
Deleting a Program
1 From the Music&Video Channel menu,
select a program and press (Func).
The Function menu appears.
2 Select [Delete] → [Yes] and press .
● Even if you delete a program, the Set program is
not canceled.
Moving a Program to a Different
Folder
Downloaded programs are saved in the
[Distrib. program] folder in Music&Video
Channel of the Data Box. Every time the
program is updated, the program saved in the
folder is overwritten and you cannot play back
the older one. You can move the program to
a different folder before the update. You can
save up to 10 programs.
1 From the Music&Video Channel menu,
select a program and press (Func).
The Function menu appears.
2 Select [Move program] → [Yes] and press
.
Continued
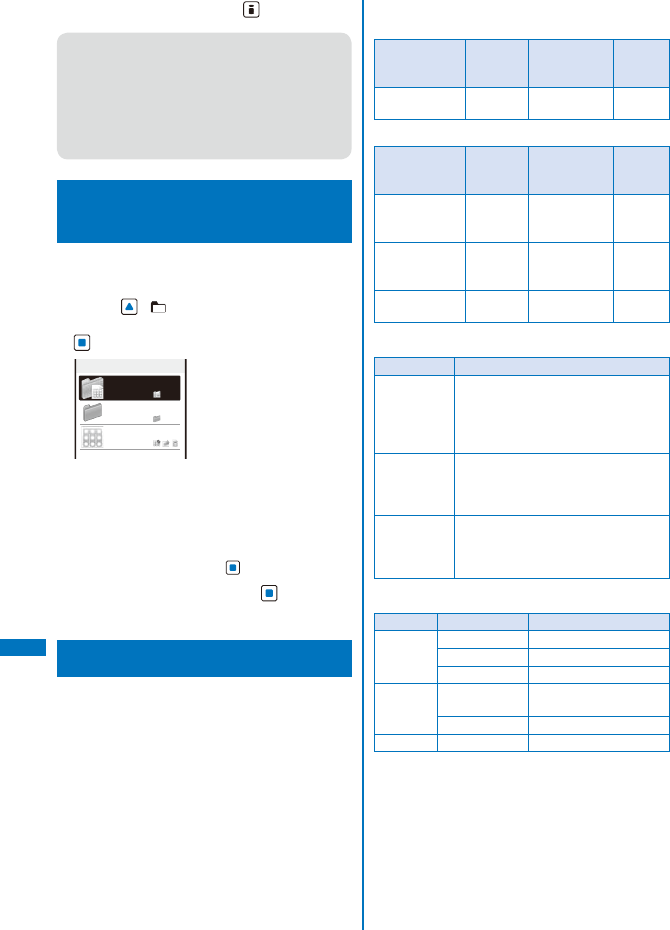
336
Music&Video Channel/Music Playback
3 Select a folder and press (Complete).
● You cannot move a downloaded program to the
microSD memory card.
● The following programs cannot be moved.
- Program which is partly downloaded
- Program for which the playback starting time
is set
- Program whose time limit on playback has
expired
Playing Back a Program
from the Data Box
You can play back a program saved in
Music&Video Channel of the Data Box.
1 Press ( ) in the stand-by display,
select [Music&Video Channel], and press
.
Music&Video
Channel
Distrib. program
Folder1
musicch1
The list of the Music&Video Channel folders and
files appears.
ˎ For information on operations while displaying
the list of folders/files, see “Managing Data Box”
(P.317).
To play back a program within a folder
Select a folder and press .
2 Select a program and press .
The selected program is played back.
What is MUSIC Player?
You can use the MUSIC Player to play back
Chaku-Uta Full® downloaded from an i-mode
site. You can also play back music data that
was saved from a PC in the microSD memory
card inserted in the FOMA terminal.
ˎ You can play back music data in the background
while operating other functions such as displaying
a site or sending/receiving mail (Background
playback).
■ Music data that can be played back
Data Box
Place to save to
Files that
can be
played back
Format
Extension
MUSIC Chaku-Uta
Full®
AAC-LC/
HE-AAC
.3gp
microSD memory card
Place to save to
Files that
can be
played back
Format
Extension
[Distrib.
contents] folder
of MUSIC
WMA/
3GPP
WMA/AAC-LC/
HE-AAC
.wma/
.3gp
[Movable
contents] folder
of MUSIC
Chaku-Uta
Full®
AAC-LC/
HE-AAC
.SB2
[WMA] folder of
MUSIC
WMA WMA .wma
■ Format supported for playback
Format Description
WMA A sound compression technology
developed by Microsoft Corporation,
which is employed as the Windows
standard sound compression
technology.
AAC-LC A sound compression technology used
in MPEG2 and MPEG4, enabling a
high compression rate while keeping
the sound quality.
HE-AAC A sound compression technology
used in MPEG4, which is an extended
version of AAC and also employed in
the Chaku-Uta Full®.
■ Bit rate supported for playback
File Format Bit rate (kbps)
Chaku-Uta
Full®
AAC-LC 8−128
HE-AAC(v1) 8−128
HE-AAC(v2) 8−48
3GPP AAC-LC 80, 96, 128, 160, 192,
256, 320
HE-AAC(v1) 40, 48, 64, 80, 96
WMA WMA 20−320
ˎ Typically, the higher the bit rate is, the better the
sound quality, however, also the larger the data size
is, resulting in the smaller number of tracks that can
be saved.
337
Music&Video Channel/Music Playback
■ Maximum number of tracks that can be
stored for operation on the MUSIC Player
Place to save to Maximum number
of tracks
Data Box 200
microSD memory card: 2G bytes 1,500
● Copy-righted music data in the “WMA” format
saved in the microSD memory card can only be
played back on your SO906i.
● Some music data saved in the microSD memory
card may not be played back on other FOMA
terminals.
Transferring Music Data
You can transfer music data from a PC to the
microSD memory card inserted in the FOMA
terminal using Windows Media Player or
Napster® appli.
Transferring a WMA File to a PC
Using Windows Media Player
You can use Windows Media Player 10/11
to import music data from a music CD to a
PC and save it in the microSD memory card
inserted in the FOMA terminal.
1 Install Windows Media Player 10/11 on
your PC.
ˎ When installing Windows Media Player 10/11
on a PC running Windows XP, use Windows XP
Service Pack 2 or later version.
ˎ When installing Windows Media Player on a PC
running Windows Vista, use Windows Media
Player 11.
2 Save a WMA file in the PC.
For the operations on Windows Media Player 10/11,
see the Help of Windows Media Player 10/11.
3 Change the USB mode setting of the
FOMA terminal to [MTP mode].
ˎ Follow the same steps as in “Using the FOMA
Terminal with a PC” (P.314, step 1 to 3).
ˎ Make sure to insert the microSD memory card
before changing to the MTP mode.
4 Connect the FOMA terminal and PC
using the FOMA USB Cable with Charge
Function 01/02 (optional).
5 Transfer music data from Windows Media
Player 10/11.
ˎ When you transfer a playlist, the playlist can be
used as a WMA playlist on the FOMA terminal.
6 Remove the FOMA USB Cable with
Charge Function 01/02 (optional) from the
FOMA terminal and PC.
● A WMA file which is transferred to the microSD
memory card by other FOMA terminal may not
be displayed or played back on your SO906i.
● When you use the microSD memory card in
which a WMA file is transferred by other FOMA
terminal even if the USB mode setting is set
to [MTP mode] and the FOMA terminal is
connected to a PC, the PC may not recognize it.
In this case, either perform the Delete all WMA
(P.320) or format the microSD memory card
(P.313). If you format the microSD memory card,
please note that not only music data but also all
other data are deleted.
About Napster® appli
You can also transfer music data using
Napster® appli.
ˎ You can download Napster® appli from the website
below.
http://www.napster.jp/ (as of December 2007)
ˎ For more information, see the website for Napster®
appli below.
http://www.napster.jp/support/ (as of December
2007)
Continued
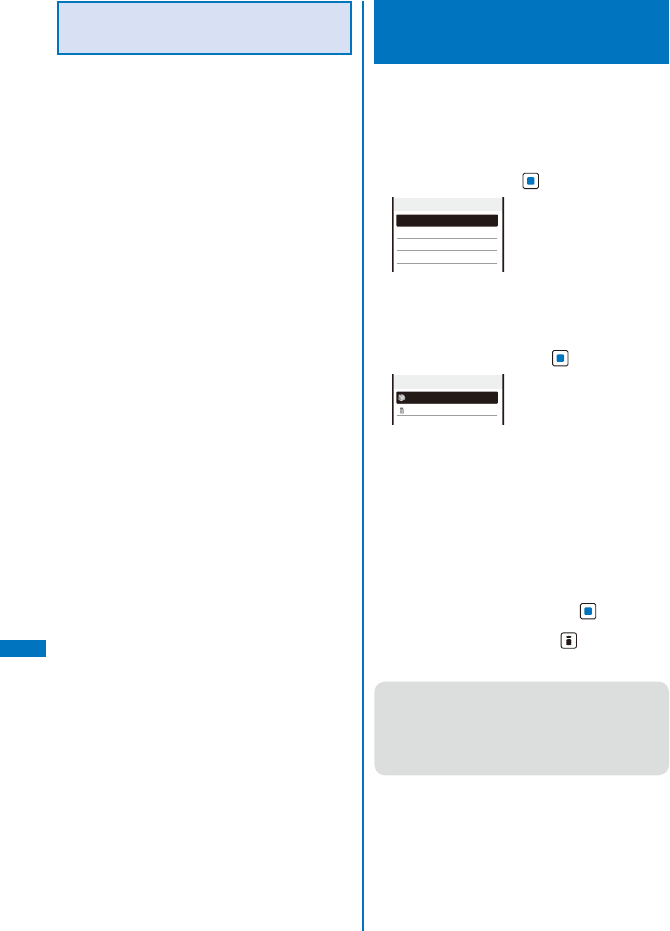
338
Music&Video Channel/Music Playback
Directly Copying Music Data to
the FOMA Terminal on a PC
The microSD memory card can be used as an
external drive of a PC by connecting the FOMA
terminal to the PC, allowing you to read/write
data from/to the microSD memory card.
With an AAC file (.3gp), you can play it back
on the MUSIC Player also by saving it directly
in the microSD memory card without using
Windows Media Player.
ˎ Music data that is saved in the microSD memory
card without using Windows Media Player may not
be played back properly on SO906i.
ˎ Do not delete music data that is saved in the
microSD memory card using Windows Media Player
by performing the direct operation of the microSD
memory card.
ˎ For details on the folder setup of the microSD
memory card, see P.309.
1 Change the USB mode setting of the
FOMA terminal to [microSD mode].
ˎ Follow the same steps as in “Using the FOMA
Terminal with a PC” (P.314, step 1 to 3).
2 Connect the FOMA terminal and PC
using the FOMA USB Cable with Charge
Function 01/02 (optional).
3 Double-click [リムーバブル ディスク] of マ
イ コンピュータ.
4 Create folders named “PRIVATE”,
“DOCOMO”, “MMFILE”, and “MUSIC” in
this order.
ˎ You do not need to create the folders if they
already exist.
5 Save the music data in the “MUSIC” folder
created.
6 Remove the FOMA USB Cable with
Charge Function 01/02 (optional) from the
FOMA terminal and PC.
Downloading Chaku-Uta
Full®
You can download a Chaku-Uta Full® file of
up to 5M bytes and save it in the Data Box or
microSD memory card.
Example: Saving Chaku-Uta Full® in the Data Box
1 While displaying a site, select a Chaku-
Uta Full® and press .
Music
Play
Save
File property
Back
The Chaku-Uta Full® is downloaded to the FOMA
terminal. For Uta-hodai, the information of time
limit on playback is obtained and then the FOMA
terminal starts to download an Uta-hodai.
2 Select [Save] and press .
Save to
Data Box
microSD
[Data Box]:
Save data in MUSIC of the Data Box.
[microSD]:
Save data in [Movable contents] of MUSIC in
the microSD memory card. (Insert the microSD
memory card.)
To play back Chaku-Uta Full®
Select [Play].
To display detailed information
Select [File property].
3 Select [Data Box] and press .
4 Select a folder and press (Save).
The downloaded Chaku-Uta Full® is saved.
● If you have deleted preinstalled Chaku-Uta Full®,
you can download it from “PlayNow by SO”.
[i Menu] → [メニュー/検索] (Menu/Search)
→ [ケータイ電話メーカー] (Mobile Phone
Manufacturers) → [PlayNow by SO] (Japanese
only)
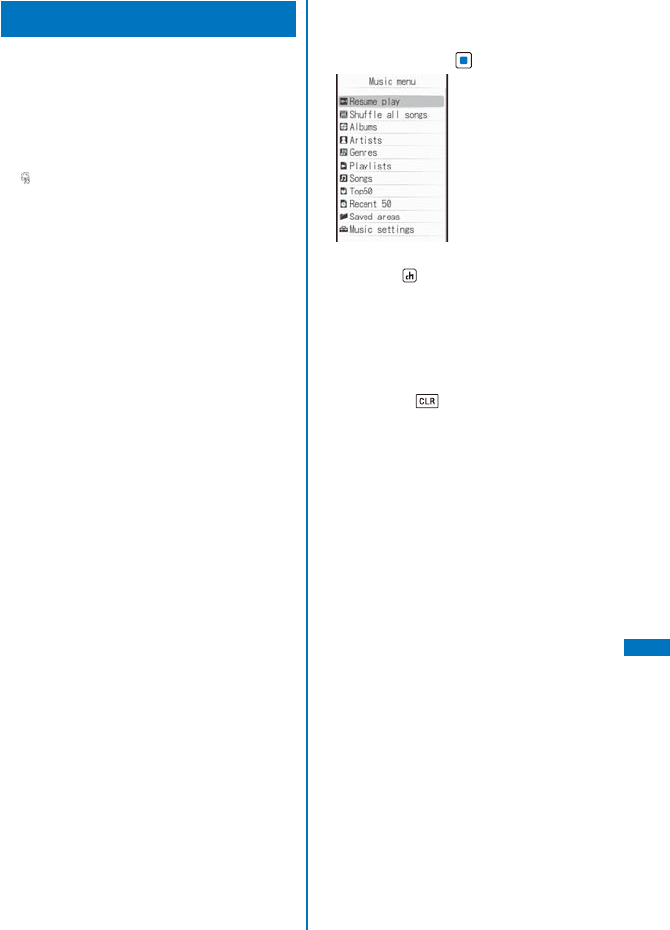
339
Music&Video Channel/Music Playback
Playing Back Music Data
You can use the MUSIC Player to play back
music data saved in MUSIC of the Data Box
and microSD memory card.
You can also search a song you want to listen
to easily by specifying an artist, album, genre,
etc. in the Music menu.
ˎ While music data in the MUSIC Player is updated,
“” appears. If another function is activated,
updating the data may take time. The MUSIC Player
operation may be slower while the data is being
updated. While the data is updated, all tracks may
not be displayed. After the update is completed, re-
display the Music menu.
ˎ It may take time to start playback of some music
data.
ˎ Jacket images may not be displayed depending on
music data.
ˎ Sound skip or noise may occur depending on the
format and bit rate of music data.
ˎ When the battery level is low, you may not be
able to operate the MUSIC Player. If the battery
level becomes low during playback, the player is
stopped. Fully charge the battery before using this
function.
ˎ Do not insert/remove the microSD memory card into/
from the FOMA terminal while you are playing back
music data on the MUSIC Player. The playback is
interrupted.
ˎ If you receive a voice, videophone, or PushTalk call
or mail, or the Alarm/Schedule alarm is activated
while you are playing back music data on the
MUSIC Player, the playback is interrupted and
one of the above operations is performed. After
the operation is completed, when you return to the
MUSIC Player, the playback resumes automatically,
however, with some exceptions.
ˎ If you save a Chaku-Uta Full® or display the music
folder while you are playing back music data on the
MUSIC Player, the MUSIC Player is terminated.
ˎ It may take time to display a music data list
depending on music data.
Example: Playing back music data by selecting the
artist
1 From the Menu, select [Music] → [MUSIC
Player] and press .
ˎ You can also activate the MUSIC Player by
pressing for over a second in the stand-by
display.
[Resume play]:
When there is music data that was played back
last time, the current track is played back from
the last stopped position. If you delete the music
data, however, you cannot select [Resume play].
ˎ When the Music menu is displayed by
pressing during playback, [To playback
disp] appears. Select this option to return to
the playback display.
[Shuffle all songs]:
Perform random playback of all music data.
[Albums]:
Display the list of albums. Select an album →
music data.
[Artists]:
Display the list of artists. Select an artist → an
album → music data.
[Genres]:
Display the list of genres. Select a genre → artist
→ an album → music data.
[Playlists]:
Display the playlist. Select [Original playlist]/
[WMA playlist]/[Imported playlist] → a playlist →
music data.
[Songs]:
Display the list of all music data. Select the music
data.
Continued
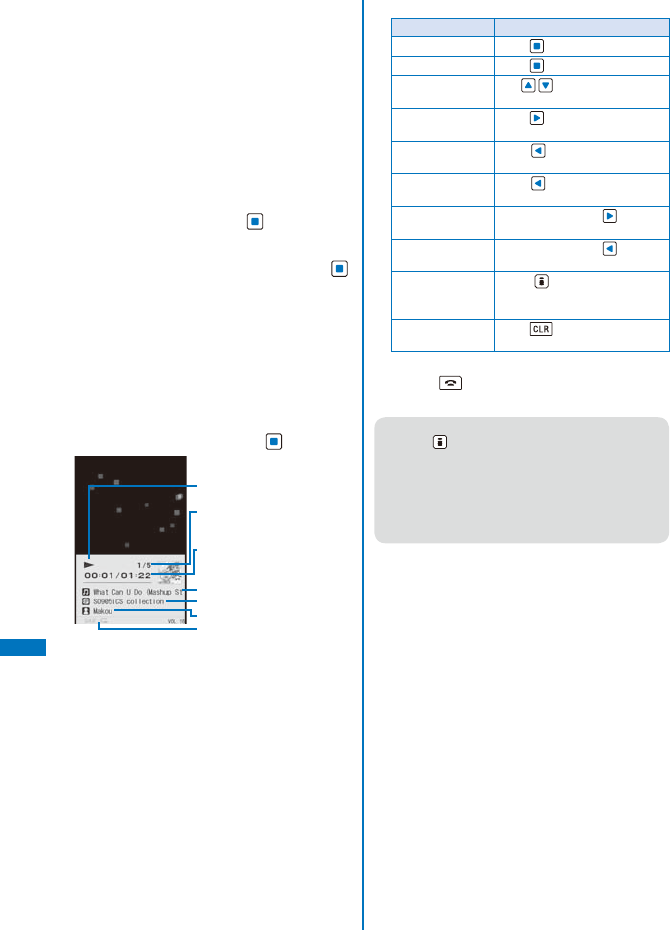
340
Music&Video Channel/Music Playback
[Top50]:
Display up to 50 tracks in the order of the
number of the playback times, from the highest
to the lowest. Select the music data.
[Recent 50]:
Display up to 50 tracks in the order of the
playback date/time, from the most recent to the
oldest. Select the music data.
[Saved areas]:
Select a place to save to and select the music
data.
[Music settings]:
Display the menu of the Music settings.
2 Select [Artists] and press .
The artist list appears.
3 Select an artist → an album and press .
To display detailed information
Move the cursor to the music data and from the
Function menu, select [Detail info].
To check the jacket
Move the cursor to the music data and from the
Function menu, select [Display img].
To check the lyrics
Move the cursor to the music data and from the
Function menu, select [Display lyrics].
4 Select music data and press (Play).
Current status (During playback/
Stopped)
The number in the list of the
current track/The total number of
tracks in the current playback list
The elapsed playback time/
The total playback time of the
current track
Track title
Album title
Name of artist
Status of the MUSIC Player setting
The selected music data is played back.
Operating method
Operation Key operation
Play Press (Play).
Stop Press (Stop).
Volume
adjustment
Use .
Beginning of the
next track
Press .
Beginning of the
current track
Press after more than three
seconds since the music starts.
Beginning of the
previous track
Press within less than three
seconds since the music starts.
Fast-forward Keep pressing during
playback.
Fast-reverse Keep pressing during
playback.
Switch display Press . The player screen
switches between the visualizer
display and jacket display.
Move to the
previous display
Press .
To end the Music Player
Press to end the Music Player and go back
to the stand-by display.
● Some jacket or lyric may be saved. To save it,
press (Save) while displaying it and select
[Yes] → a folder.
● If you select [File mng. Mode] from the Function
menu in the Music menu, you can stop the
MUSIC Player to display the music data saved in
the MUSIC folder that is to be prepared in each
place to save.
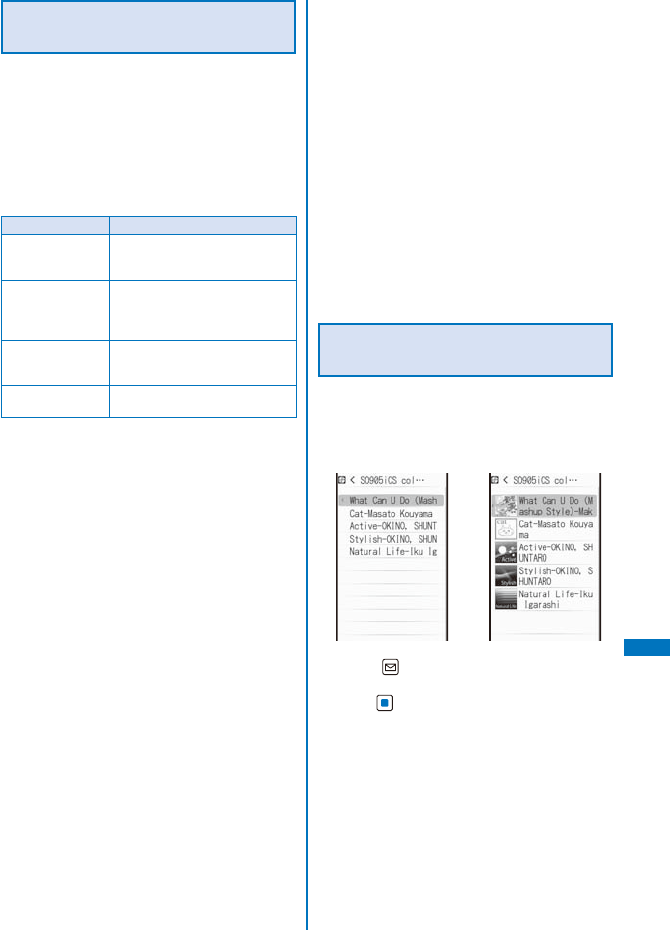
341
Music&Video Channel/Music Playback
Playback Restrictions of Music
Data
Some music data is set the playback
restrictions. When you play back music
data with playback restrictions, the different
confirmation screen may appear depending on
a type of music data.
■ Chaku-Uta Full®
When you play back music data with playback
restrictions, the followings are displayed.
Playback restriction
Display
Playback time left “This data can be replayed XX
times. Replay?” appears. Select
[Yes] to play back the music data.
Playback time over “This data can no longer be
replayed. Delete?” appears.
Select [Yes] to delete the music
data.
Time limit on
playback over
“Replay period has expired.
Delete?” appears. Select [Yes] to
delete the music data.
Before playback
period
“Replay period has not yet
started” appears.
■ Uta-hodai
ˎ When you play back an Uta-hodai whose time
limit on playback has expired, “Some data need
to update replay period. Send phone/terminal and
UIM ID, and connect to site?” or “Need to update
replay period. Send phone/terminal and UIM ID, and
connect to site?” appears. Select [Yes] to update
the time limit on playback. If you select [No], you
cannot play back music data.
ˎ The packet communication charge is required when
updating the time limit on playback.
ˎ When you use the FOMA terminal in other countries,
the time limit on playback may expire before or after
the displayed time limit.
ˎ Pake-Houdai or Pake-Houdai Full does not cover the
packet communication charge for updating the time
limit on playback during international roaming.
ˎ The playback restrictions for some Uta-hodai may be
set the renewal period for a few days after the time
limit on playback has expired. During the period,
you can play back music data without updating the
time limit on playback. After the renewal period on
playback has passed, the file cannot be played
back. Also, when you download music data while
updating the time limit is not proceeded, playback
cannot be performed before saving it.
ˎ When the maximum number of music services
(members only) which can be saved has been
exceeded, the screen for confirming whether to
overwrite a service appears. If you select [Yes], the
new service overwrites the service which has the
oldest time limit on playback. Also, you cannot play
back music downloaded from the service which is
overwritten.
ˎ The date and time of the time limit information in the
display which notifies the time limit on playback is
displayed in Japan time.
Setting How to Display the
Music Data List
You can select how to display the music data
list from two types.
ˎ When no jacket information is available in the music
data, the jacket is not displayed.
List display Jacket display
1 Press (Func) in the music data list
display, select [Change jackets], and
press .
The list display is changed to the jacket display or
vice versa.
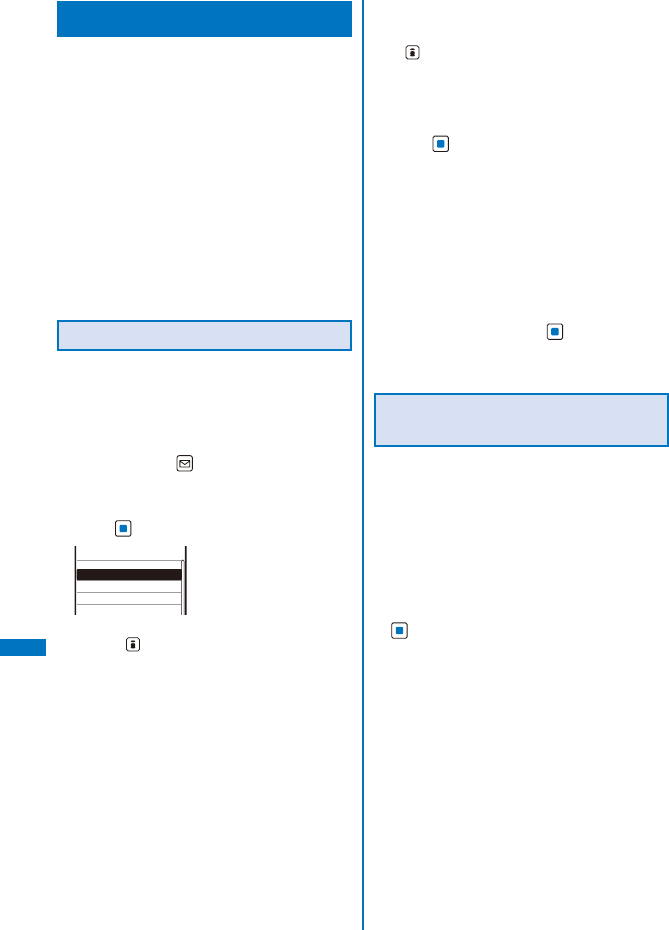
342
Music&Video Channel/Music Playback
Managing the Playlist
There are three types of playlists that can be
played back using the FOMA terminal.
Original playlist
The playlist is created on the FOMA terminal. You can
create or edit up to 20 playlists and save up to 50
tracks of music data per file.
WMA playlist/Imported playlist
The playlist is created on an external device such as a
PC. You can display up to 100 playlists. A WMA playlist
or imported playlist can display up to 500 tracks or 200
tracks of music data per file, respectively. You cannot
create/edit these playlists on the FOMA terminal.
You can create a WMA playlist using Windows
Media Player 10/11. You use an imported playlist by
transferring a playlist file in the M3U format created by
a PC, etc. to the microSD memory card.
Creating a Playlist
You can save your favorite music data in an
original playlist.
Example: Adding and saving one track of music data
in an original playlist
1 From the music data list, select music
data and press (Func).
The Function menu appears.
2 Select [Add to playlist] → [Save one] and
press .
XXX Best Hits 1
XXX Best Hits 2
XXX Live
Select add to
To create a new original playlist
Press (Create) and enter a name for the
playlist. Enter the name within nine full-width and
19 half-width characters.
To save several music data
From the Function menu, select [Add to playlist]
→ [Select&save] → music data and press
(Complete).
To save all music data
From the Function menu, select [Add to playlist]
→ [Save all].
3 Select an original playlist to be saved and
press .
The screen for selecting the saving method
appears.
[Add]:
Newly add selected music data to the music
data saved in a playlist.
[Overwrite]:
The screen for confirming whether to overwrite
all music data saved in a playlist with selected
music data appears. Note that all data existing in
the playlist is deleted when you select [Yes].
4 Select [Add] and press .
The selected music data is saved in the original
playlist.
Deleting/Reordering Music Data
of the Playlist
You can delete music data from a playlist or
reorder it within a playlist. Even if you delete
music data from a playlist, the files of the music
data are not deleted.
ˎ You cannot delete music data from a WMA playlist/
imported playlist or reorder it.
Example: Deleting one track
1 From the Music menu, select [Playlists] →
[Original playlist] → a playlist and press
.
The music data list of the Original playlist appears.
To delete all music data
From the Function menu, select [Delete from list]
→ [Delete all] → [Yes].
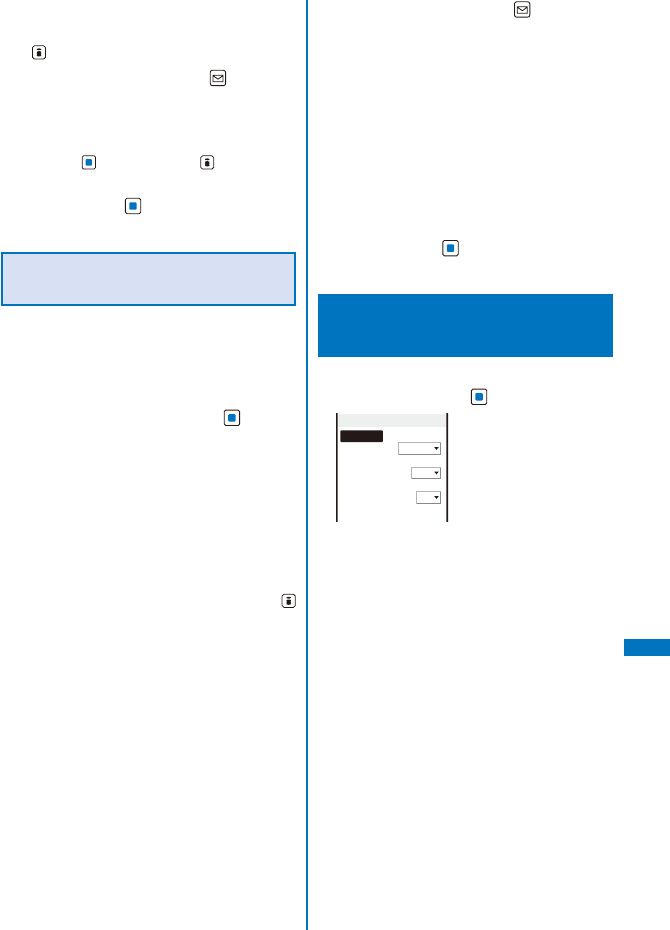
343
Music&Video Channel/Music Playback
To delete several music data
From the Function menu, select [Delete from
list] → [Select&delete] → music data. Press
(Complete) and select [Yes].
2 Select music data and press (Func).
The Function menu appears.
To reorder music data
From the Function menu, select [Reorder] →
music data. Move the cursor to the place to move
to, press (Move), and press (Complete).
3 Select [Delete from list] → [Delete one] →
[Yes] and press .
The selected music data is deleted from the playlist.
Copying/Deleting/Editing the
Name of the Playlist
You can delete a playlist or edit its name.
ˎ You cannot copy/edit a WMA playlist or imported
playlist.
Example: Deleting one playlist
1 From the Music menu, select [Playlists]
→ [Original playlist] and press .
A list of all playlists appears.
To delete a WMA playlist
Select [WMA playlist].
To delete an imported playlist
Select [Imported playlist].
To delete all playlists
From the Function menu, select [Delete playlist]
→ [Delete all] → [Yes].
To delete several playlists
From the Function menu, select [Delete playlist]
→ [Select&delete] → playlists. Press
(Complete) and select [Yes].
2 Select a playlist and press (Func).
The Function menu appears.
To edit the name of a playlist
Move the cursor to the playlist and from the
Function menu, select [Edit name]. Enter a
new name within nine full-width or 19 half-width
characters.
To copy a playlist
Move the cursor to the playlist and from the
Function menu, select [Copy Playlists] → [Yes].
To display the detailed information of a playlist
Move the cursor to a playlist and from the
Function menu, select [Detail info].
3 Select [Delete playlist] → [Delete one] →
[Yes] and press .
The selected playlist is deleted.
Changing the MUSIC
Player Settings
1 From the Music menu, select [Music
settings], and press .
Music settings
Play mode
Normal
Repeat
OFF
AVLS
OFF
Reset settings
2 Select a playback mode for music data at
[Play mode].
[Normal]:
Play back the selected music data list in the
order of appearance.
[Shuffle]:
Perform random playback of the selected music
data list.
Continued

344
Music&Video Channel/Music Playback
3 Select the repeat type at [Repeat].
[All tracks]:
Repeat playback of all tracks in the selected
music data list.
[1 track]:
Repeat playback of the selected track.
[OFF]:
Play back only once.
4 Select whether to restrict the playback
volume at [AVLS].
[ON]:
Restrict the playback volume. You cannot turn up
the volume to level 16 or higher.
[OFF]:
Do not restrict the playback volume.
To reset the music settings to the default status
From the Music settings display, select [Reset
settings] → [Yes] and enter the Security code.

345
Other Convenient
Functions
Multiaccess Feature ............................................................................ <Multiaccess> 352
Multitask Feature ..................................................................................... <Multitask> 353
Displaying the Edit Display by Sliding the FOMA Terminal .............<Edit slide setting> 354
Using the Lifetime Calendar ........................................................ <Lifetime Calendar> 355
Posting on a Blog...................................................................................................... 358
Starting the Alarm at a Specified Time ........................................................ <Alarm> 360
Saving Schedules ................................................................................... <Schedule> 363
Performing Frequently Used Functions Quickly ..................................<My Selection> 368
Setting a Function to Be Activated in the TV Style ................... <Display rotated appli> 368
Recording Recipient’s or Your Own Voice ........................................... <Voice memo> 369
Checking the Call Duration and Charge ...................................... <Call duration/cost> 369
Setting the Limit for Alert on the Total Call Charge ........................ <Cost limit notice> 371
Using the Calculator .............................................................................. <Calculator> 372
Using a Memo ...................................................................................... <Text Memo> 372
Displaying the Settings of Various Functions ........................................ <Application> 373
Using the Earphone/Microphone with Switch ....... <Earphone/microphone with switch> 374
Receiving a Call Automatically with Earphone ......................... <Auto answer setting> 375
Setting Which Mic to Use......................................................... <Headset microphone> 376
Resetting to the Default Settings ......................................................<Reset settings> 376
Deleting All Saved Data .............................................................. <Reset all data&set> 377
List of Reset Items ................................................................................................... 378
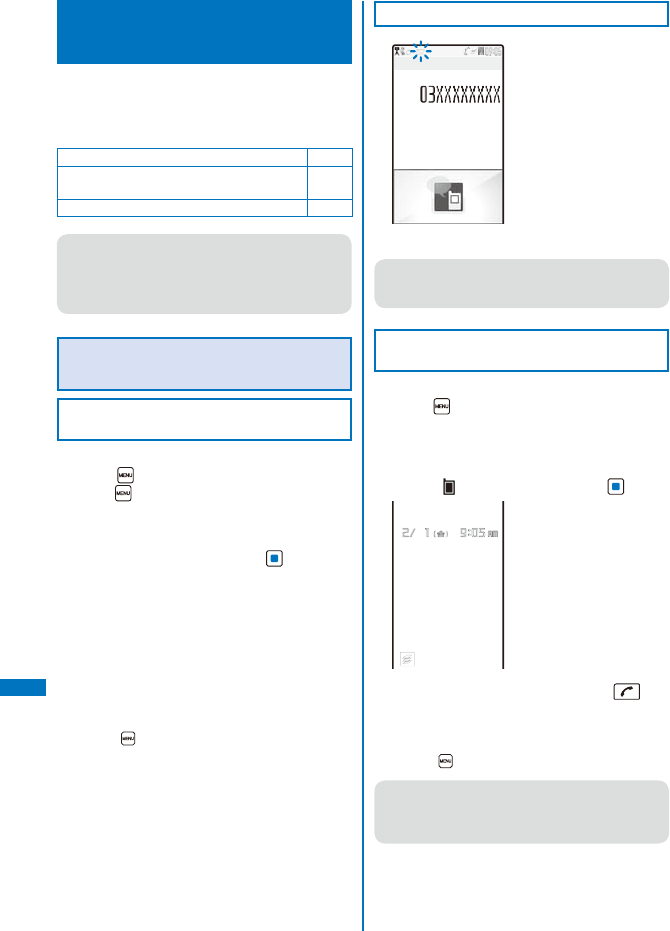
346
Other Convenient Functions
Multiaccess Feature
<Multiaccess>
Multiaccess is a function that enables you to
use a voice call, packet communication, and
SMS functions at the same time.
ˎ For multiaccess combinations, see P.435.
Voice call 1 line
i-mode, i-αppli, i-mode mail, and packet
communication by connecting a PC
1 line
SMS 1 line
● Charge is required for the use of each
communication line during multiaccess.
● You cannot use multiaccess during a videophone
call or 64K data communication, but you can
receive SMS.
Main Functions That Can Be
Performed Using Multiaccess
Starting Other Communication during a
Voice Call
Example: Connecting to i-mode during a voice call
1 Press (MENU) during a voice call and
press (New TASK).
The menu display appears.
2 Select [i-mode] → [i Menu] → [メニュー/検
索] (Menu/Search) and press .
You can access i-mode while the call is being
connected.
To send mail
Select [Mail] → [Compose message] and
compose mail and send it.
To perform packet communication using a connected
PC
Establish connection for packet communication
using PC operation.
To switch the display
Press (MENU) and select a task icon.
Receiving Mail during a Voice Call
Talking
Call duration
12:34
You receive mail while the call is being connected.
● If you receive i-mode mail, SMS, or Message R/F
while you are talking on the phone, the ring tone,
incoming indicator, and vibrator do not operate.
Placing a Voice Call during i-mode/Packet
Communication
Example: Placing a voice call during i-mode
1 Press (MENU) during i-mode or packet
communication.
The menu display appears and the cursor moves to
the TASK MENU.
2 Select “ ” (Stand-by) and press .
3 Enter a phone number and press .
Place a voice call while you continue to use i-mode
or packet communication.
To switch the display during a call
Press (MENU) and select a task icon.
● When you place a videophone call while
i-mode is being used, the i-mode connection
is disconnected and your videophone call is
placed.
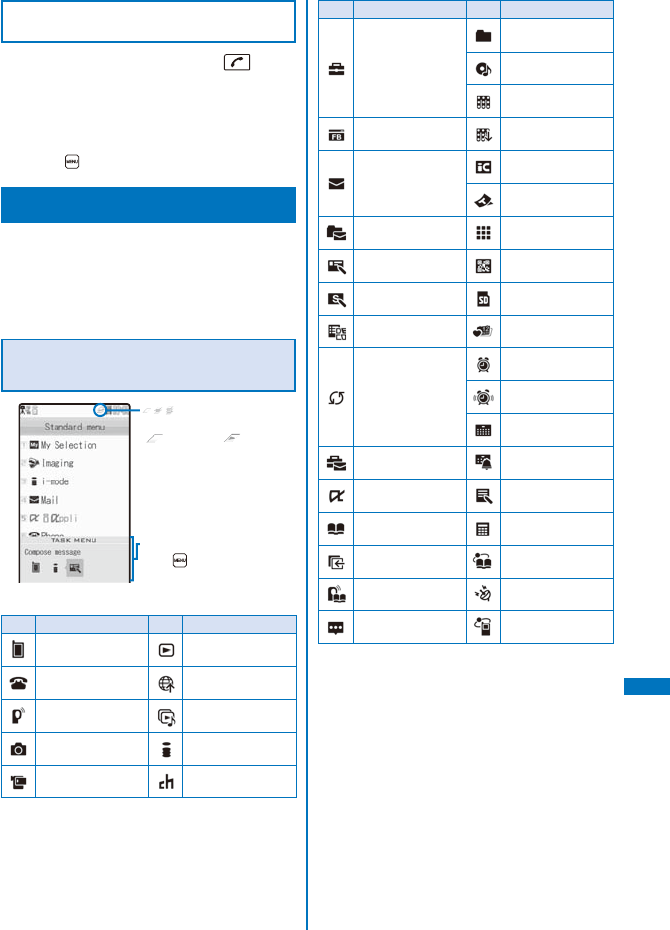
347
Other Convenient Functions
Continued
Receiving a Voice Call during i-mode/
Packet Communication
1 When you receive a call, press .
When you receive a voice call, the receive call
display appears.
You can answer a voice call while you continue to
use i-mode or packet communication.
To switch the display during a call
Press (MENU) and select a task icon.
Multitask Feature <Multitask>
Multitask is a function that enables you to
perform several functions at the same time,
each of which you can access by switching the
displays.
ˎ For multitask combinations, see P.437.
Using the Display during the
Multitask Operation
/ / : One/two/three or more
tasks are being executed.
( changes to while
playback is in progress on the
MUSIC Player)
TASK MENU
Press (MENU) to display
the TASK MENU.
■ Task icons
Icon Function name Icon Function name
Stand-by Viewer
Phone
Phone number entry easy BlogUp
PushTalk
Dial PushTalk Music slide show
Camera i-mode
Movie i-Channel
Icon Function name Icon Function name
Mail/i-mode common setting
i-mode setting
Settings
Storage information
USB mode setting
Input method setting
Data Box
MUSIC Player
Music&Video
Channel
Full Browser Music&Video
Channel Download
Mail
Display mail
Message
IC card
ToruCa
Mail box Own number
Compose message Bar code reader
Compose SMS microSD
Templates
Lifetime Calendar
Receive mail
Check new messages
Receive SMS
Check new SMS
Data transmission
Alarm setting
Alarm
Schedule
Mail setting Schedule alarm
iαppli Text Memo
Phonebook Calculator
Call record Data Security
Service
PushTalk
phonebook GPS
Record message NW Services
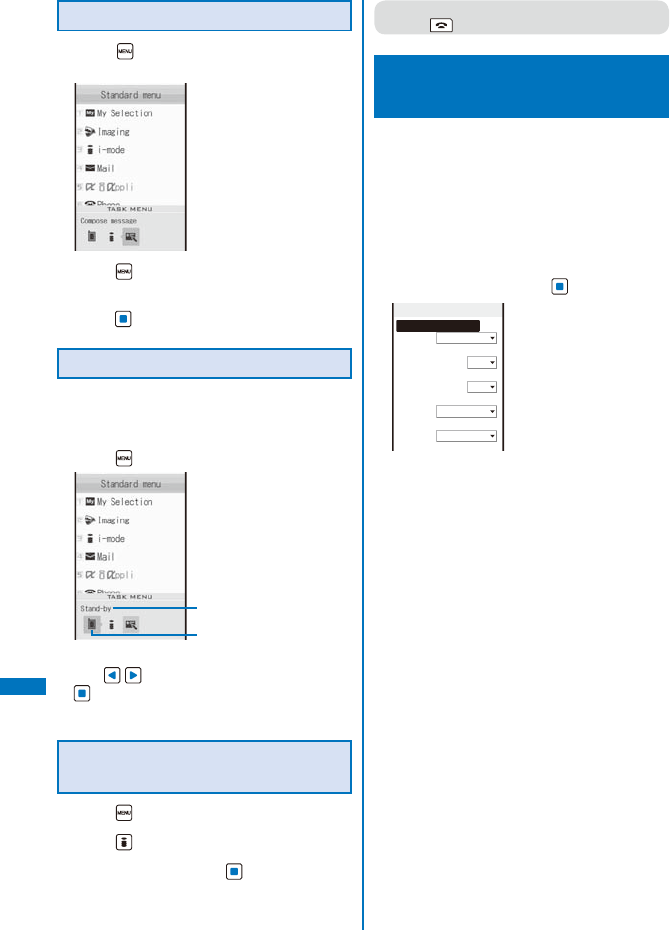
348
Other Convenient Functions
Activating a New Function
1 Press (MENU) during the activation of
a function.
2 Press (New TASK).
3 From the Menu, select a new function and
press .
Switching Functions
While running multiple functions, you can
switch to the display that provides access to
the function you want to use.
1 Press (MENU).
Function name
The cursor moves to a task
icon on the TASK MENU.
2 Use to select a task icon and press
.
The selected function display appears.
Stopping All Functions
Currently Activated
1 Press (MENU).
2 Press (Quit all).
3 Select [Yes] and press .
All functions currently activated are stopped.
● When you execute multiple functions, you can
press to quit the current function.
Displaying the Edit Display by Sliding
the FOMA Terminal
<Edit slide setting>
You can set to display the Edit mail display,
Edit schedule display, and Edit Text Memo
display just by sliding the FOMA terminal to
open.
Example: Displaying the Edit mail display for replying
from Inbox
1 From the Menu, select [Settings] →
[Management] → [Slide setting] → [Edit
slide setting] and press .
Edit slide setting
Inbox(List/Detail)
Quote reply
Outbox(List/Detail)
Edit
Draft(List)
Edit
Schedule
Create/Edit
Memo(List/Detail)
Create/Edit
[Inbox(List/Detail)]:
Set whether to display the Edit mail display for
replying when you open the FOMA terminal in
the received mail list or Inbox display.
[Outbox(List/Detail)]:
Set whether to display the Edit display of sent
mail when you open the FOMA terminal in the
sent mail list or Outbox display.
[Draft(List)]:
Set whether to display the Edit display of saved
mail when you open the FOMA terminal in the
saved mail list or Draft display.
[Schedule]:
Set whether to display the Edit schedule
display when you open the FOMA terminal in
the Calendar of the Schedule, schedule list, or
Schedule detail display.
[Memo(List/Detail)]:
Set whether to display the Edit Text Memo
display when you open the FOMA terminal in the
text memo list or Text Memo display.
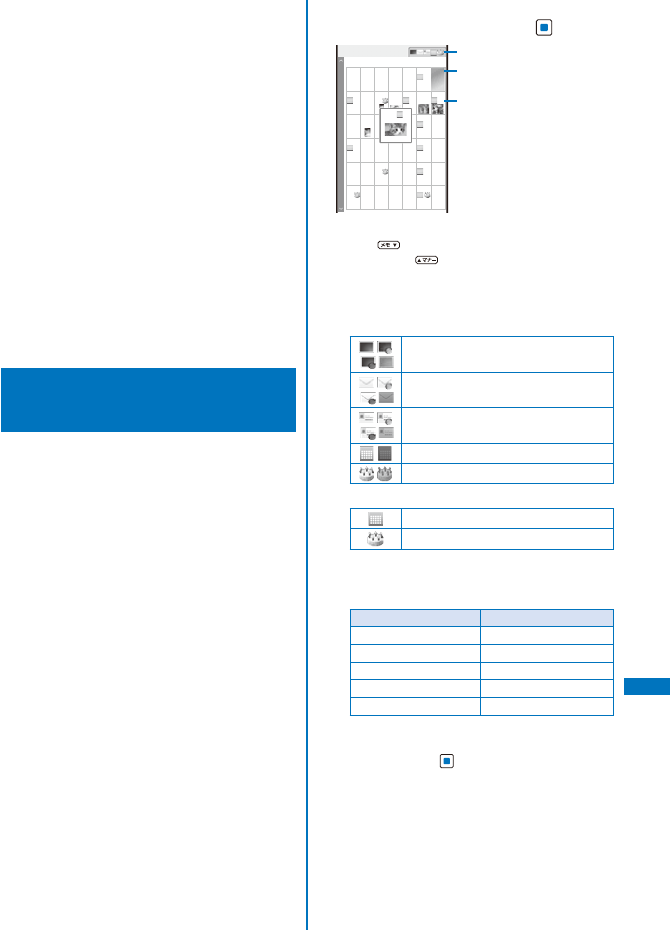
349
Other Convenient Functions
2 Select [Quote reply]/[Reply] at [Inbox(List/
Detail)].
[Quote reply]:
Quote the main body.
[Reply]:
Do not quote the main body.
[OFF]:
Do not display the Edit mail display.
ˎ Even if you select [Quote reply], the Reply
is applied when the Quote reply cannot be
performed. Also, even if you select [Reply],
the Quote reply is applied when the Reply
cannot be performed.
To edit a send mail
Select [Edit]/[OFF] at [Outbox(List/Detail)].
To edit a saved mail
Select [Edit]/[OFF] at [Draft(List)].
To edit a schedule
Select [Create/Edit]/[OFF] at [Schedule].
To edit a text memo
Select [Create/Edit]/[OFF] at [Memo(List/Detail)].
Using the Lifetime Calendar
<Lifetime Calendar>
The Lifetime Calendar displays an image, mail,
Schedule, and birthday data stored in the
FOMA terminal in the Calendar format. This
function helps you more effectively to keep
track of items to remember.
You can also automatically display the items
to remember, and display mail, Schedule, etc.
from the Lifetime Calendar.
1 From the Menu, select [LifeKit] →
[Lifetime Calendar] and press .
2008/02/13
12
3456789
10 11
2
12 13 14 15 16
17 18 19 20 21 22 23
24 25 26 27 28 29 1
2345678
28 29 30 3127
TueMon ThrWed FriSun Sat
13
Display status
Number of mail display
Recorded contents
The Lifetime Calendar appears.
ˎ Use to display the calendar of the next
month and to display the calendar of the
previous month.
ˎ The following icons show the displayed or saved
items.
Display status
/
/ /
Still image (All)/(Selected)/(Selected
off)/(OFF)
/
/ /
Received mail (All)/(Selected)/
(Selected off)/(OFF)
/
/ /
Sent mail (All)/(Selected)/(Selected
off)/(OFF)
/Schedule (All)/(OFF)
/Birthday (All)/(OFF)
Recorded contents
The saved schedule data
The saved birthday data
ˎ When there are mail, the color defines the
number of mail.
Number of mail display
Background color Number of mail
Cream 1 to 4
Beige 5 to 9
Orange 10 to 19
Silver 20 to 99
Gold More than 100
When the Lifetime Calendar is set as the stand-by
display
When you press (Link) in the stand-by display
and select the Lifetime Calendar, the Lifetime
Calendar is activated.
Continued
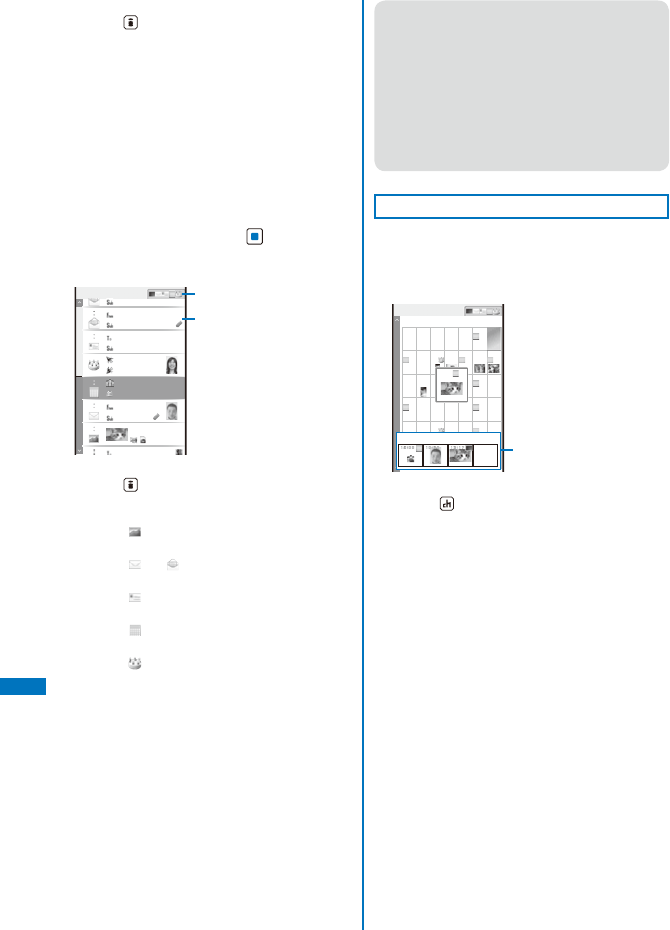
350
Other Convenient Functions
To display the index
Press (Index). When you select a year and
month, the Lifetime Calendar for the selected
year and month appears.
To create a new schedule
From the Function menu, select [Create new]
and save the schedule.
To display the Lifetime Calendar by specifying a
date
From the Function menu, select [Select date] and
enter the date. Enter the date within the range
from 2000/01/01 to 2050/12/31.
To update the displayed data
From the Function menu, select [Data update].
2 Select the date and press .
The Lifetime Calendar appears displaying one year
including the selected day (Detail view).
2008/02/13 Wed
携帯なつ子
New melody
13
12
11
15 25
docomo.taro.△△@
It’s a long tim
10 24
携帯はる子
Discuss busines
ON
12 00
ドコモ二郎
Snapshot
10 30
Sasha of the
13 17
S
c
h
e
d
u
l
e
f
or
t
o
携帯はる子
13 18
Display status
Recorded contents
To display the index
Press (Index). When you select a date, the
Lifetime Calendar (Detail view) appears.
To display a still image
Select [ ] (P.290).
To display received mail
Select [ ] or [ ] (P.219).
To display sent mail
Select [ ] (P.219).
To display the schedule
Select [ ] (P.366).
To display a birthday
Select [ ]. The Phonebook display (P.101) or the
Own number display (P.45) appears.
● The Phonebook, Own number, and Schedule
saved as Secret are not displayed in the Lifetime
Calendar. Set the Secret display to [ON] to
display the data.
● When you have more still images, mail, and
schedule data saved in the FOMA terminal, you
can build a more interesting Lifetime Calendar.
We recommend saving data in the FOMA
terminal using infrared communication and the
microSD memory card if you are going to use this
function immediately after you purchase SO906i.
When Items to Remember Are Displayed
If no operation is performed for a specific
period, still images, mail, and Schedule data
saved in the FOMA terminal are displayed
randomly as past memories.
2008/02/13
12
3456789
10 11
2
12 13141516
17 18 19 20 2122 23
24 25 26 272829 1
2345678
28 29 30 3127
TueMon ThrWed FriSun Sat
13
2008/02/13
Items to remember
To display details of the item to remember
Press (Memory). When you select an item to
remember, the Lifetime Calendar (Detail view)
appears.
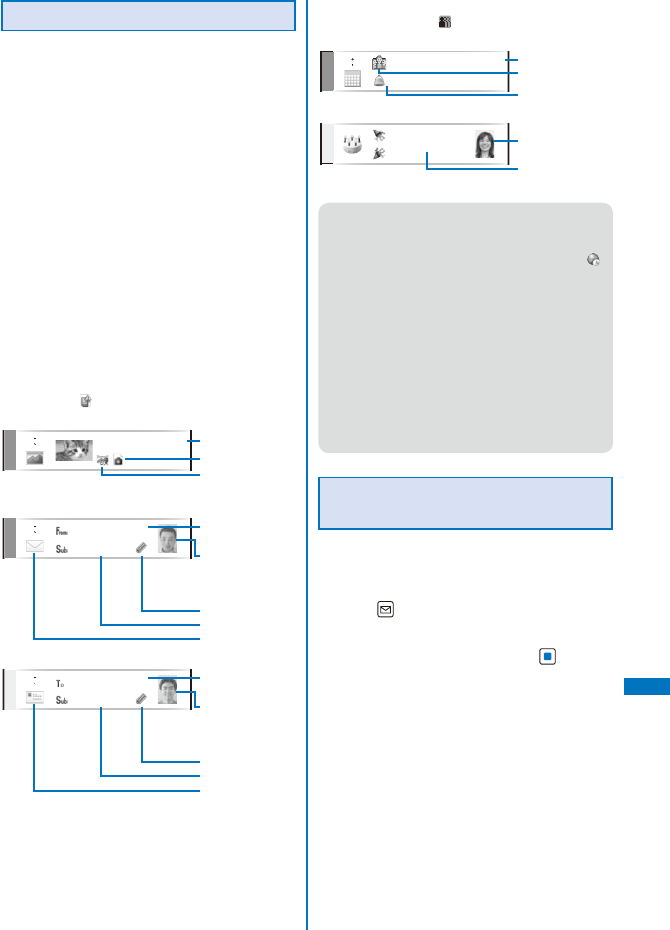
351
Other Convenient Functions
Data Displayed in the Lifetime Calendar
The following data is displayed in the Lifetime
Calendar.
- JPEG and GIF images saved in My picture of the
Data Box
- Received and sent mail saved in the FOMA terminal,
or images attached to SMS and received/sent mail
※1
- Schedule saved in the FOMA terminal
- Name, Des call display, and birthday saved in the
FOMA terminal phonebook※2
- Name, image, and birthday saved in the Own
number
※1 When 2in1 is set to the A mode, data for Address
A is displayed. When the B mode is set, data for
Address B is displayed.
※2 When 2in1 is set to the A mode, data set as
[Common] and [A] at the Phonebook 2in1 setting
is displayed. When the B mode is set, data set as
[Common] and [B] is displayed.
■ Typical display examples
ˎ When the image attached to mail cannot be
displayed, “ ” appears.
Still image
Sasha of the
13 17
Management title
Source (P.319)
Type/size of an
image (P.290)
Received mail
13
ドコモ二郎
Snapshot
10 30
Sender (name saved
in the Phonebook)
Image attached
to mail or Des call
display saved in
the Phonebook
With a file attachment
Subject
Mail status (P.220)
Sent mail
12
ドコモ三郎
It’s a l
10 24
Recipient (name saved
in the Phonebook)
Image attached
to mail or Des call
display saved in
the Phonebook
With a file attachment
Subject
Mail status (P.220)
ˎ When you send mail to several recipients using
address type “To”, “ ” appears next to the address.
Schedule
Discuss busines
ON
12 00
Event outline
Category icon
Alarm
Birthday
12
携帯はる子
Des call display saved
in the Phonebook
Name saved in the
Phonebook
● Data saved in the microSD memory card cannot
be displayed in the Lifetime Calendar.
● When the date and time of mail are corrected to
the local time during international roaming, “ ”
appears next to the time (P.44).
● Images in the [Preinstall] and [Stamp&Frame]
folders cannot be displayed in the Lifetime
Calendar.
● While displaying the Lifetime Calendar, when
receiving new mail or deleting/changing saved
data such as images, Phonebook, or Schedule
using Multitask, the displayed contents of the
Lifetime Calendar may differ from the actual data.
In this case, from the Function menu, select [Data
update] to update the displayed contents of the
Lifetime Calendar.
Setting the Display of Lifetime
Calendar
You can set the data to be displayed in
the Lifetime Calendar and set whether to
automatically display the items to remember.
1 Press (Func) in the Lifetime Calendar.
The Function menu appears.
2 Select [LTC setting] and press .
The LTC setting display appears.
[Display setting]:
Set the data to be displayed in the Lifetime
Calendar.
Continued
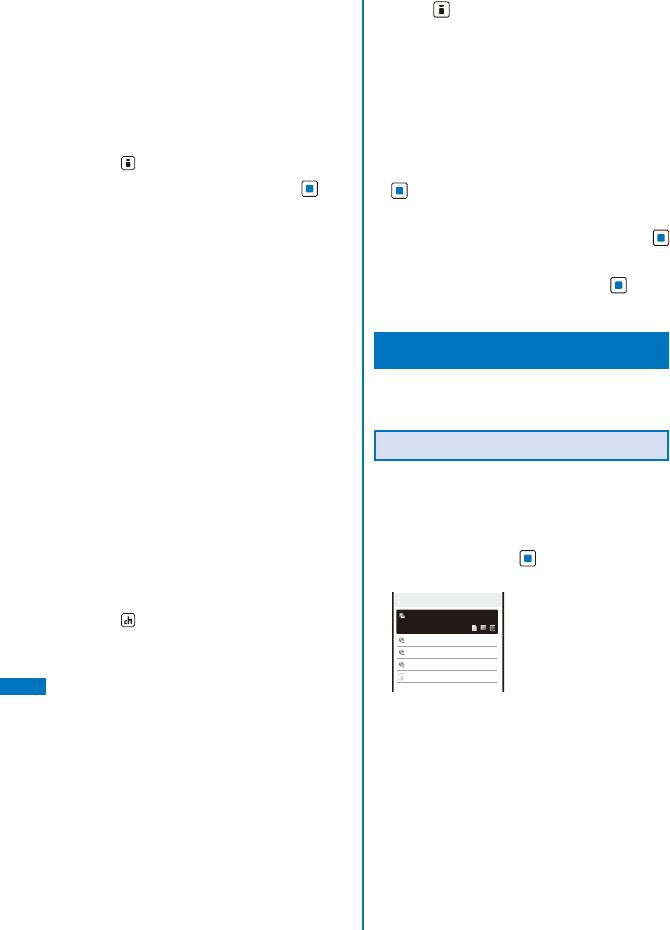
352
Other Convenient Functions
[Memory auto display]:
Set the time before the item to remember is
automatically displayed when a key is not
operated for a specific period.
[Security data display]:
Set whether to display a folder which is set the
Mail security or Data security. If you set [Display],
you need to enter the Security code when you
display the Lifetime Calendar.
To display the Help of the LTC setting
Press (Help).
3 Select [Display setting] and press .
The Display setting display appears.
[Photo]:
Set the display of the still image to [All]/
[Selected]/[Selected off]/[OFF]. To or not to
display still images saved in a specific folder
only, select [Selected]/[Selected off] → [Select
folder] → a folder.
ˎ You cannot select the [Preinstall] or
[Stamp&Frame] folder.
[Received mail]:
Set the display of the received mail to [All]/
[Selected]/[Selected off]/[OFF]. To or not to
display mail received from a specific address
only, select [Selected]/[Selected off] → [Select
mail address] and set a mail address.
[Sent mail]:
Set the display of the sent mail to [All]/[Selected]/
[Selected off]/[OFF]. To or not to display mail
sent to a specific address only, select [Selected]/
[Selected off] → [Select mail address] and set a
mail address.
[Schedule]:
Set the display of the schedule to [All]/[OFF].
[Birthday]:
Set the display of the birthday to [All]/[OFF].
To restore the default settings
Press (Reset).
4 Select the display for each item.
5 Press (Complete).
The LTC setting display appears.
6 Set the time before the item to remember
is automatically displayed at [Memory
auto display].
Select from [Fast], [Normal], [Slow], and [OFF].
To disable automatic display of the item to remember
Select [OFF].
7 Select [Security data display] and press
.
The Security code screen appears.
8 Enter the Security code and press
(OK).
9 Select [Display]/[OFF] and press .
The LTC setting is set.
Posting on a Blog
If you save a blog service, you can post on a
blog using i-mode mail easily.
Saving a Blog Service
You can save a blog service to which you post
a blog. Up to 22 blog services can be saved.
Example: Saving a blog service manually
1 From the Menu, select [Imaging] → [easy
BlogUp] and press .
The blog service list appears.
easy BlogUp
1/4
○○○
Photo diary
△△△
□□□
×××
Search by i−mode
To use an easy BlogUp service information file
Connect to the blog service site you want to
use by i-mode and download an easy BlogUp
service information file (P.195).
ˎ An easy BlogUp service information file can
be downloaded when you connect to a site
by i-mode. You cannot download it by Full
Browser.
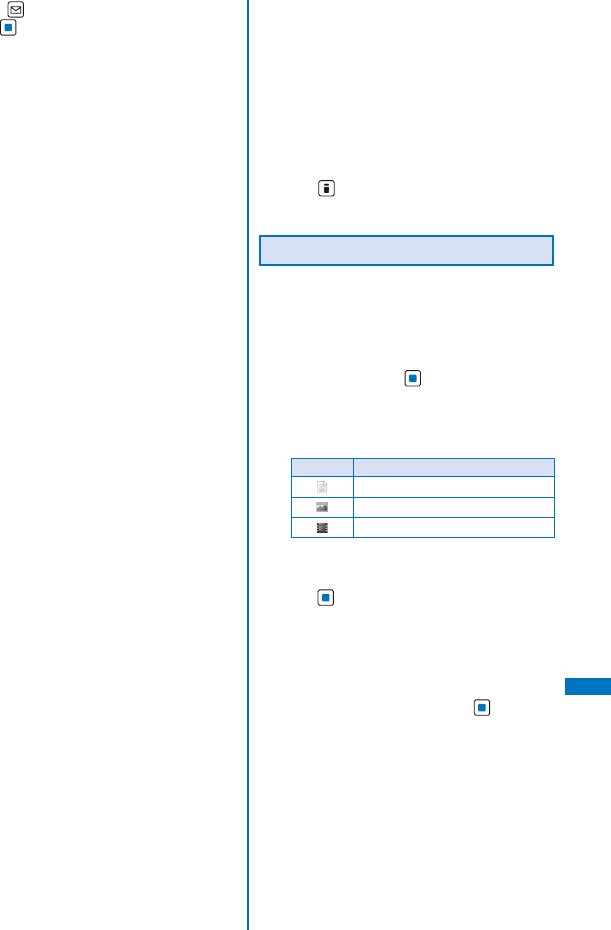
353
Other Convenient Functions
2 Press (Func), select [Added], and
press .
The service setting display appears.
To edit a blog service
Move the cursor to a blog service and from the
Function menu, select [Edit].
ˎ When you set an easy BlogUp service
information file, you can edit the service name
and service details.
To delete a blog service
Move the cursor to a blog service and from the
Function menu, select [Delete one] → [Yes].
To check the information of a blog service
Move the cursor to a blog service and from the
Function menu, select [Property].
ˎ When you set an easy BlogUp service
information file, you can check the version and
user’s ID of the service.
3 Enter a service name at [Service].
Enter a service name within 25 full-width or 50 half-
width characters.
4 Enter service details at [Service details].
Enter service details within 25 full-width or 50 half-
width characters.
5 Enter a URL for i-mode connection at
[i-mode URL].
Enter a URL including “http://” within 512 half-width
alphanumeric characters and symbols.
ˎ If you have entered a URL before, the last
entered URL is displayed.
ˎ “http://” at the beginning of a URL is entered on
the field automatically.
6 Enter a URL for Full Browser connection
at [Full Browser URL].
Enter a URL including “http://” within 512 half-width
alphanumeric characters and symbols.
ˎ If you have entered a URL before, the last
entered URL is displayed.
ˎ “http://” at the beginning of a URL is entered on
the field automatically.
7 Enter a mail address for posting at [Mail
address].
Enter a mail address within 50 half-width
alphanumeric characters and symbols.
8 Select whether to post a still image/movie
on a blog at [Attach picture]/[Attach
movie].
ˎ Select whether to post a still image/movie
depending on a type of contents which is
supported by a blog service.
[Yes]:
Post a still image/movie.
[No]:
Do not post a still image/movie.
9 Press (Complete).
The blog service is set.
Posting on a Blog
You can post a still image (JPEG) or movie
(3GP) other than a text on a blog.
Example: Posting a still image in the Data Box and
texts
1 From the Menu, select [Imaging] → [esay
BlogUp] and press .
The blog service list appears.
ˎ A type of contents which is supported by a blog
service can be checked by the following icons or
the combinations of them.
Icon Type
Text supported
Still image supported
Movie supported
2 Select a blog service which supports
both posting a still image and text, and
press (BlogUp).
The screen for confirming whether to attach a file
appears.
When you select a blog service which supports
posting only texts
The Edit mail display appears. Go to step 5.
3 Select [File attach] and press .
To post texts only
Select [Input text]. Go to step 5.
Continued
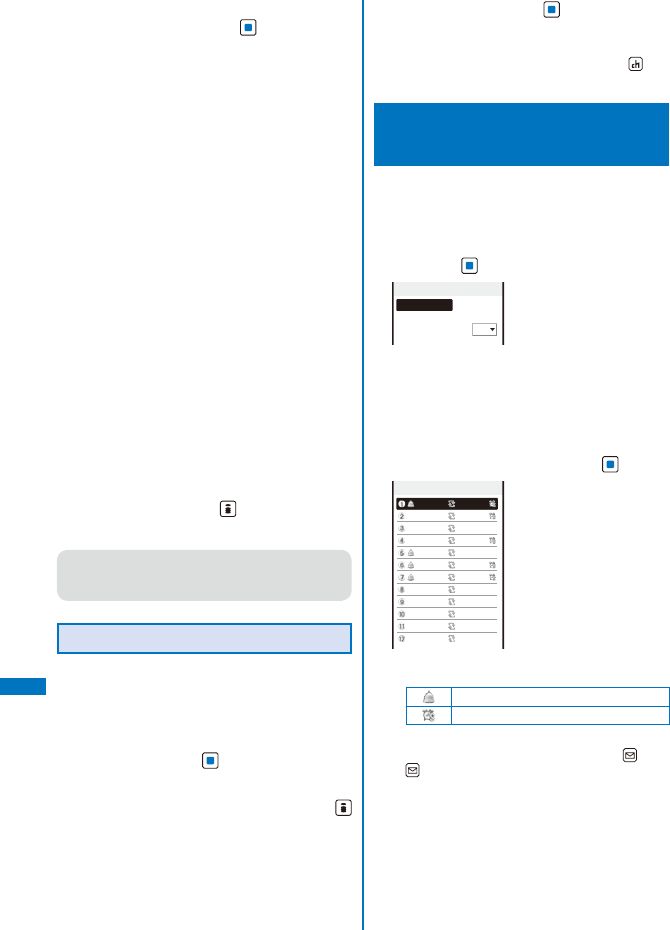
354
Other Convenient Functions
4 From the Data Box, select a category → a
folder → a file and press .
The Edit mail display appears.
For a still image recorded when the Auto orientation
is set to [ON]
The screen for confirming whether to rotate the
still image to align the display direction of the
FOMA terminal appears. To post a rotated image,
select [Matching&BlogUp]. When the image size
exceeds [VGA(640×480)], the size of the image
is automatically reduced to [VGA(H640×W480)]
or [VGA(W640×H480)] depending on which
orientation the original image is, landscape or
portrait.
To post an image as is, select [Keeping&BlogUp].
For a still image exceeding [VGA(640×480)]
The screen for confirming whether to reduce the
image size to [VGA(640×480)] appears. To post
a reduced image, select [Reduces&BlogUp].
To post an image as is, select [Keeping&BlogUp].
ˎ When you select a still image exceeding 2M
bytes, the still image is not attached because
of the size restriction of the mail attachment
file.
For a movie exceeding 2M bytes
A movie is automatically clipped to be less than
2M bytes from the beginning.
To select a still image or movie in the microSD
memory card
From the microSD category list, select a category
→ a file.
5 Enter texts and press (Send).
Mail is sent and it is posted on a blog.
● When 2in1 is set to the B mode, you cannot
compose any i-mode mail.
● You cannot send i-mode mail using Address B.
Browsing a Blog
Example: Browsing a blog using i-mode
ˎ When a blog service has neither the i-mode URL nor
the Full Browser URL specified, you cannot select
the blog service.
1 From the Menu, select [Imaging] → [easy
BlogUp] and press .
The blog service list appears.
2 Select a blog service and press
(i-mode).
The screen for confirming whether to connect to
i-mode appears.
3 Select [Yes] and press .
The selected blog is displayed.
To browse a blog using Full Browser
Move the cursor to a blog service, press (Full
Brs), and select [Yes].
Starting the Alarm at a
Specified Time <Alarm>
The alarm is activated for about one minute at
a specified time. You can set up to 12 alarms
to be activated.
1 From the Menu, select [LifeKit] → [Alarm]
and press .
Alarm
Select alarm
Auto power on
OFF
To set the operation of the alarm during power off
Select [Auto power on] → [ON]/[OFF].
ˎ If you select [ON], when the alarm time
comes during power off, the FOMA terminal
is automatically powered on and the alarm
works.
2 Select [Select alarm] and press .
Select alarm
10:00
Eyd
11:30
Eyd
12:00
Eyd
13:30
Eyd
14:00
OFF
16:00
Day
18:30
Day
00:00
OFF
00:00
OFF
00:00
OFF
00:00
OFF
00:00
OFF
ˎ The following icons show the setting status of the
Alarm.
The Alarm is set
The Snooze is set
To switch between setting/canceling the Alarm
Move the cursor to the Alarm and press (Set)/
(Rel.).
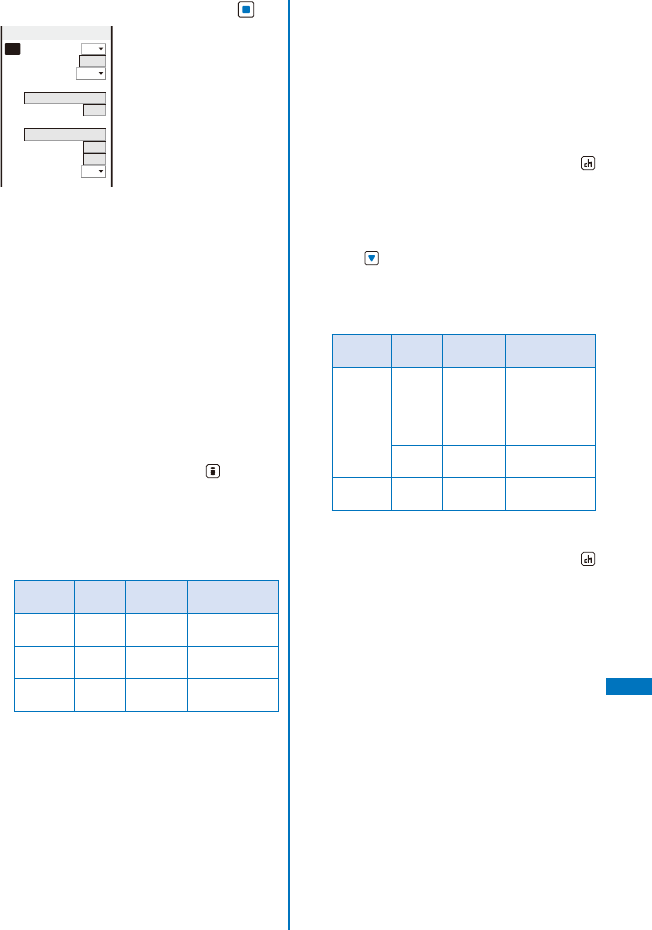
355
Other Convenient Functions
3 Select an alarm to be set and press .
Alarm1
Set
OFF
Time
00:00
Repeat
OFF
Alarm tone
Alarm(std)
Alarm volume
4
Alarm image
めざまし
アラーム
鳴動
Vibrator
OFF
Color
C5
Snooze
OFF
4 Select [ON]/[OFF] at [Set].
[ON]:
Activate the alarm.
[OFF]:
Do not activate the alarm.
5 Enter a time to start the alarm at [Time].
Enter a time in 24-hour format.
6 Select the repeat type at [Repeat].
[OFF]:
Do not repeat the alarm.
[Eyd]:
Repeat the alarm every day.
[Day]:
Repeat the alarm on the same day of the week.
Select a day of the week and press (OK).
7 Select an alarm tone from MUSIC/
i-motion/Melody of the Data Box at [Alarm
tone].
ˎ You can set the following files. You can select a
Chaku-Uta® from [i-motion].
Category File
format File size Image size
MUSIC※
AAC-LC/
HE-AAC
Max. 5M
bytes −
i-motion
※MP4 Max. 10M
bytes
Max. [VGA(640
×480)]
Melody SMF/
MFi
Max. 350K
bytes −
※ Some files may not be set.
When you select a Chaku-Uta Full® that has a
choice of specified playback ranges from [MUSIC]
The screen for selecting a type of setting
appears. If you select [Full song], the entire track
of Chaku-Uta Full® is set for the alarm tone. If you
select [Point], the specified playback range of
Chaku-Uta Full® is set for the alarm tone.
To mute the alarm tone
Select [Silent].
To check the alarm tone
Move the cursor to the alarm tone and press
(Play).
8 Set the volume at [Alarm volume].
Select from [OFF] and [1 to 6].
To set the volume to [OFF]
Press at level 1.
9 Select an alarm image from My picture/
i-motion of the Data Box at [Alarm image].
ˎ You can set the following files.
Category File
format File size Image size
My picture
GIF/
JPEG
Max. 250K
bytes
Max. [Stand-by
(480×864)],
Max. W480×
H288 for GIF
animation
SWF Max. 100K
bytes
−
i-motion
※MP4 Max. 10M
bytes
Max. [VGA(640
×480)]
※ Some i-motion may not be set.
To check an alarm image
Move the cursor to an alarm image and press
(Play).
10
Select a vibration type at [Vibrator].
[Pattern1]:
Set short intermittent vibration.
[Pattern2]:
Set long intermittent vibration.
[Link melody]:
Vibrates in accordance with the alarm tone. If you
have set the alarm tone to [Silent] or to a melody
that cannot be synchronized with the vibrator
operation, the vibrator vibrates using [Pattern1].
Continued
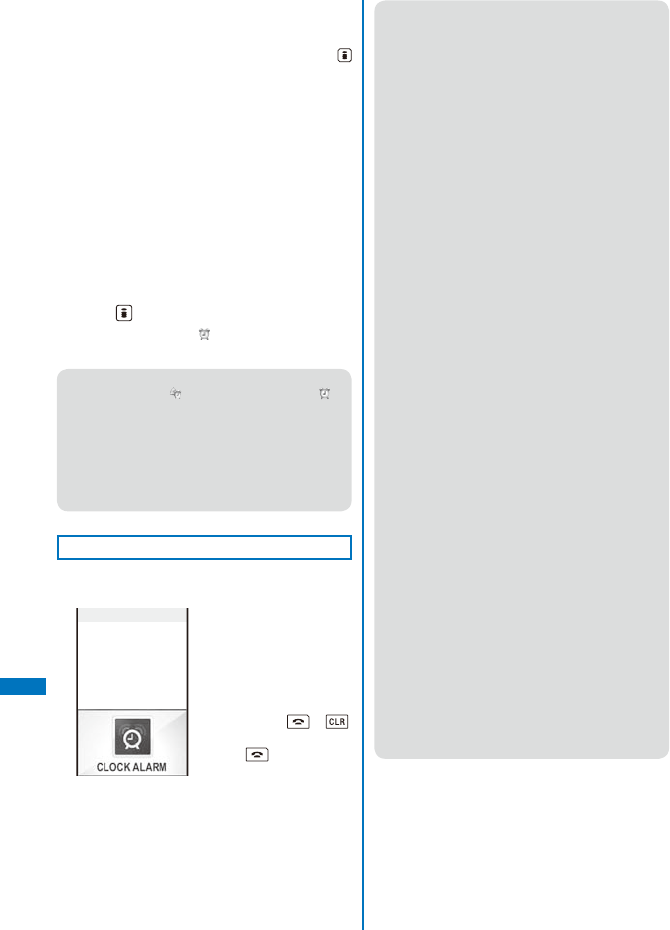
356
Other Convenient Functions
[OFF]:
Do not set the vibrator.
To check the vibration
Move the cursor to the pattern and press
(Confirm).
11
Select an indicator color at [Color].
Select from 12 indicator colors or [C13:ALL]
(indicator flashes in 12 colors in sequence).
When you move the cursor, the indicator flashes
accordingly.
12
Select [ON]/[OFF] at [Snooze].
[ON]:
The alarm operates for about one minute and
repeats operation up to six times every five
minutes.
[OFF]:
Do not repeat the alarm operation.
13
Press (Complete).
The Alarm is set and “ ” appears in the stand-by
display.
● When the Alarm and Schedule alarm are set
simultaneously, “ ” is displayed instead of “ ”.
● When the Alarm and Schedule alarm are set to
start at the same time, the Schedule alarm has
priority.
● When you set an i-motion or Chaku-Uta Full® for
the alarm tone or set an i-motion for the alarm
image, the settings may be changed in some
cases.
At the Alarm Time
The alarm tone sounds for about one minute
with the indicator flashing.
Alarm
06:30
To stop the alarm tone
Press any key.
When you do not stop the
alarm tone
The display informing
the release of the alarm
appears. To turn off the
display, press or .
To stop the Snooze
Press .
● If you set an i-motion with video and sound
tracks to the alarm tone, a movie in the i-motion
is displayed.
● If the alarm time comes during a voice call or
PushTalk communication, the default alarm tone
sounds and the default alarm image is displayed.
The vibrator does not operate.
● The Alarm does not operate in the following
cases.
- While the Lock all is set
- While the Personal data lock is set
- While the Omakase Lock is set
- While updating the software
● If the alarm time comes in the following cases,
the Alarm may operate when the status changes
to during a call or stand-by.
- While placing/receiving a voice/videophone
call or originating/receiving a PushTalk call
- During packet communication
- During the infrared communication/while the
infrared remote control is being used
- During the iC communication
- During data communication or while reading/
writing data from/into a microSD memory card
on a PC with the FOMA terminal connected
using the USB cable
- While recording a still image/movie
- While the Schedule alarm is sounding
- Beep while receiving Area Mail, while
sounding Area Mail ring tone, or displaying
Area Mail
● If another function is executed during the Alarm
or Snooze operation, the alarm is stopped. The
Snooze keeps operating within five times.
● When the PIN1 code setting and the Auto power
on for the Alarm are set to [ON], the FOMA
terminal is automatically powered on at the alarm
time and the PIN1 code input screen appears
after the Alarm operation. If you set any data for
which the UIM operation restriction function is set
to the alarm tone, the default melody sounds.
● If you leave the FOMA terminal with the battery
pack removed or fully expended for a long
period of time, the date and time is reset, and the
Alarm may not operate correctly.
● If you remove the battery pack and turn off the
FOMA terminal, the FOMA terminal is not turned
on automatically even if the Auto power on is set
to [ON].
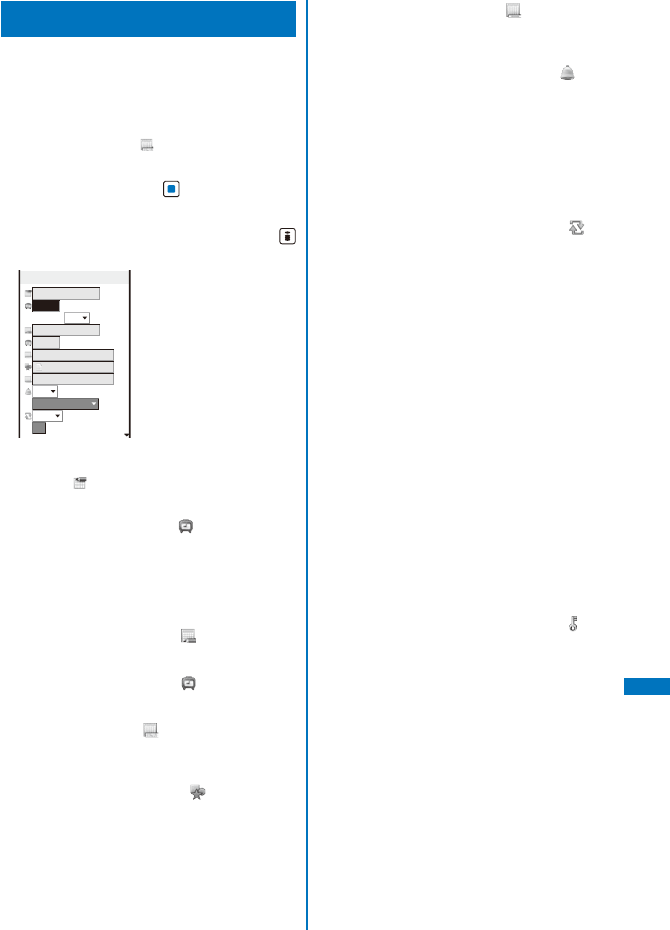
357
Other Convenient Functions
Saving Schedules <Schedule>
Up to 300 schedules, such as date and events/
appointments can be saved for management.
When a Schedule alarm is set, the FOMA
terminal activates the alarm at the scheduled
time.
ˎ An entry is required at [ ] (Event).
1 From the Menu, select [LifeKit] →
[Schedule] and press .
The calendar is displayed.
2 Select a starting date and press
(Create).
Edit schedule
2008/02/01 Fri
00:00
All day
OFF
2008/02/01 Fri
00:00
Schedule
None
OFF
00min.before
OFF
01
Count
The selected date is automatically entered.
To change the starting date
Select [ ] and change the date. Enter the date
within the range from 2000/01/01 to 2050/12/31.
3 Enter a starting time at [ ].
Enter a time in 24-hour format.
To set the schedule period to all day
Select [ON] at [All day]. When it is set to [ON],
you cannot set the starting time, ending date,
ending time, and alarm.
4 Enter an ending date at [ ].
Enter from the starting date to 2050/12/31.
5 Enter an ending time at [ ].
Enter a time in 24-hour format.
6 Enter the event at [ ].
Enter the event within 128 full-width or 256 half-
width characters.
7 Select a category icon at [ ].
8 Enter an event outline at [ ].
Enter an outline within 20 full-width or 40 half-width
characters.
9 Select [ON]/[OFF] of the alarm at [ ].
[ON]:
Sound the alarm tone. Select how many minutes
before the starting time of schedule the alarm
should sound. Select [00min.before] if you want
to sound the alarm at the same time as the
starting time.
[OFF]:
Do not sound the alarm tone.
10
Select the schedule repeat type at [ ].
[OFF]:
Do not repeat the schedule. Go to step 12.
[Eyd]:
Repeat the schedule every day.
[Week]:
Repeat the schedule on the same day of the
week.
[Month]:
Repeat the schedule every month on the same
day.
[Year]:
Repeat the schedule every year on the same day
of the same month.
When the schedule repeat type is set to other than
[OFF]
Enter the repeat count within 01 to 99 times.
11
Select [ON]/[OFF] of a holiday at [Holiday].
[ON]:
The schedule repeats even on a holiday.
[OFF]:
The schedule does not repeat on a holiday, but it
is included in the repeat count.
12
Select [ON]/[OFF] of the Secret at [ ].
[ON]:
Save the schedule as Secret. Details of the
schedule are masked with “
*
” except for the
time at the schedule alarm time.
[OFF]:
Do not save the schedule as Secret.
To display the data saved as Secret
Set the Secret display to [ON].
Continued
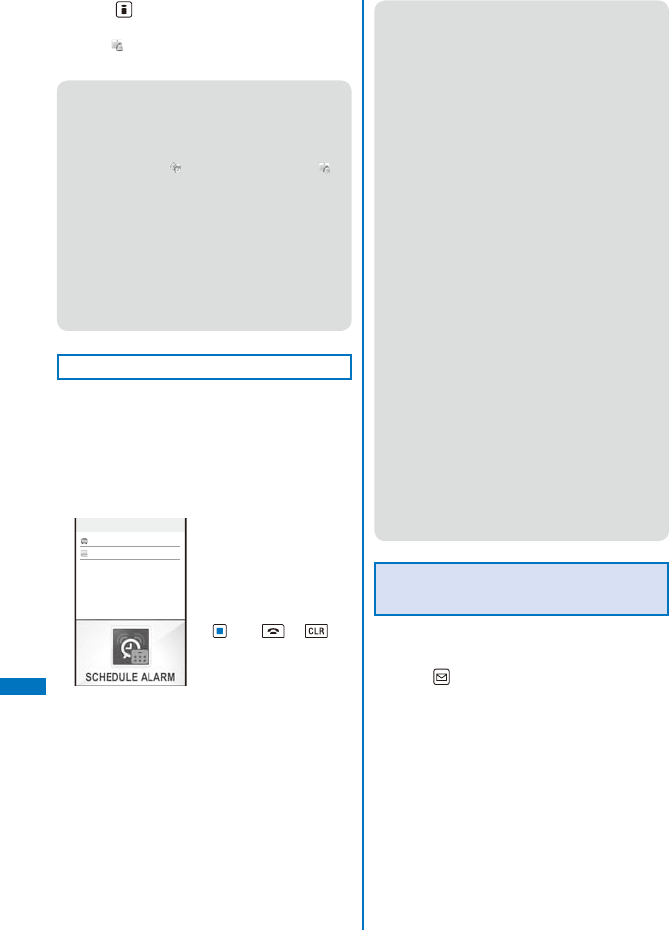
358
Other Convenient Functions
13
Press (Complete).
The schedule is saved. When the Alarm is set to
[ON], “ ” appears in the stand-by display.
The schedule dates are highlighted on the calendar.
● When you set [Create/Edit] at [Schedule] of the
Edit slide setting, just opening the FOMA terminal
in the calendar or schedule list allows you to
save the schedule (P.354).
● When the Schedule alarm and Alarm are set
simultaneously, “ ” is displayed instead of “ ”.
● If the repeat type of the schedule set for the 31st
is set to [Month], the schedule is set for the last
day of the month for months with less than 31
days. It is also applied when the repeat type of
the schedule set for the 29th of February in a
leap year is set to [Year].
● When you set an i-motion or Chaku-Uta Full® for
the alarm tone or set an i-motion for the alarm
image, the settings may be changed in some
cases.
At the Schedule Alarm Time
The alarm sounds for about 30 seconds with
the indicator flashing and the schedule data is
displayed.
If there are several overlapping schedules with
the same start time of the alarm, the number
of schedules you have in addition is shown as
“XXX” on the upper right of the display.
Schedule
12:00
Lunch meeting
To stop the alarm tone
Press any key.
When you do not stop the
alarm tone
The Schedule display
appears. To turn off the
Schedule display, press
(OK), , or .
● If you set an i-motion with video and sound
tracks to the alarm tone, a movie in the i-motion
is displayed.
● If the alarm time comes during a voice call or
PushTalk communication, the default alarm tone
sounds and default alarm image is displayed.
The vibrator does not operate.
● The Schedule alarm does not operate in the
following cases.
- When the FOMA terminal is powered off
- While the Lock all is set
- While the Personal data lock is set
- While the Omakase Lock is set
- While updating the software
● If the alarm time comes in the following cases,
the Schedule alarm may operate when the status
changes to during a call or stand-by.
- While placing/receiving a voice/videophone
call or originating/receiving a PushTalk call
- During packet communication
- During the infrared communication/while the
infrared remote control is being used
- During the iC communication
- During data communication or while reading/
writing data from/into a microSD memory card
on a PC with the FOMA terminal connected
using the USB cable
- While recording a still image/movie
- Beep while receiving Area Mail, while
sounding Area Mail ring tone, or displaying
Area Mail
● If you leave the FOMA terminal with the battery
pack removed or fully expended for a long
period of time, the date and time is reset, and the
Schedule alarm may not operate correctly.
Setting the Schedule Alarm
Operations
You can set the details of the operations of the
Schedule alarm.
1 Press (Func) in the calendar.
The Function menu appears.
359
Other Convenient Functions
2 Select [Schedule setting] → [Schedule
alarm] and press .
Alarm setting
Alarm tone
Alarm(std)
Alarm volume
4
Alarm image
スケシ゛ュールアラーム
鳴動中
Vibrator
OFF
Color
C5
3 Select an alarm tone from MUSIC/
i-motion/Melody of the Data Box at [Alarm
tone].
ˎ You can set the following files. You can select a
Chaku-Uta® from [i-motion].
Category File
format File size Image size
MUSIC※
AAC-LC/
HE-AAC
Max. 5M
bytes −
i-motion
※MP4 Max. 10M
bytes
Max. [VGA(640
×480)]
Melody SMF/
MFi
Max. 350K
bytes −
※ Some files may not be set.
When you select a Chaku-Uta Full® that has a
choice of specified playback ranges from [MUSIC]
The screen for selecting a type of setting
appears. If you select [Full song], the entire track
of Chaku-Uta Full® is set for the alarm tone. If you
select [Point], the specified playback range of
Chaku-Uta Full® is set for the alarm tone.
To mute the alarm tone
Select [Silent].
To check the alarm tone
Move the cursor to the alarm tone and press
(Play).
4 Set the volume at [Alarm volume].
Select from [OFF] and [1 to 6].
To set the volume to [OFF]
Press at level 1.
5 Select an alarm image from My picture/
i-motion of the Data Box at [Alarm image].
ˎ You can set the following files.
Category File
format File size Image size
My picture
GIF/
JPEG
Max. 250K
bytes
Max. [Stand-by
(480×864)],
Max. W480×
H288 for GIF
animation
SWF Max. 100K
bytes −
i-motion
※MP4 Max. 10M
bytes
Max. [VGA(640
×480)]
※ Some i-motion may not be set.
To check an alarm image
Move the cursor to an alarm image and press
(Play).
6 Select a vibration type at [Vibrator].
[Pattern1]:
Set short intermittent vibration.
[Pattern2]:
Set long intermittent vibration.
[Link melody]:
Vibrates in accordance with the alarm tone. If you
have set the alarm tone to [Silent] or to a melody
that cannot be synchronized with the vibrator
operation, the vibrator vibrates using [Pattern1].
[OFF]:
Do not set the vibrator.
To check the vibration
Move the cursor to the pattern and press
(Confirm).
7 Select an indicator color at [Color].
Select from 12 indicator colors or [C13:ALL]
(indicator flashes in 12 colors in sequence).
When you move the cursor, the indicator flashes
accordingly.
8 Press (Complete).
The Schedule alarm operations are set.
Continued
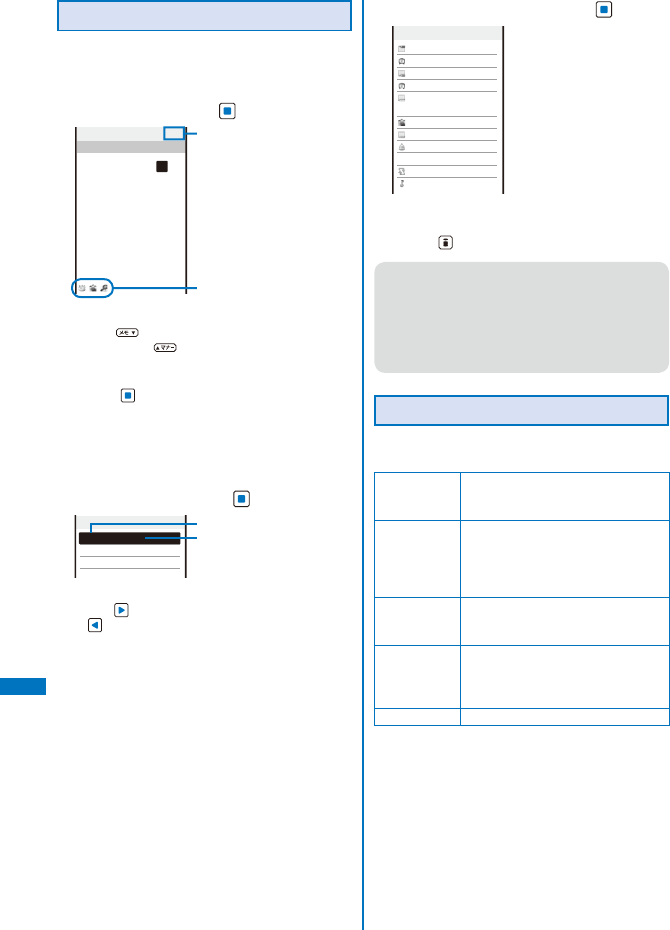
360
Other Convenient Functions
Displaying the Schedule
The saved schedule can be checked using the
calendar.
1 From the Menu, select [LifeKit] →
[Schedule] and press .
3029 31 12
3456789
10 11 12 13 14 15 16
17 18 19 20 21 22 23
24 25 26 27 28 29 1
2827
324657
8
2008/02
2/1
TueMon ThuWed FriSun Sat
Today
Schedule icons
The calendar is displayed.
ˎ Use to display the calendar of the next
month and to display the calendar of the
previous month.
When the calendar is set for the stand-by display
Press (Link) in the stand-by display and select
the calendar to start the schedule.
To display the calendar for a specified date
From the Function menu, select [Select date] and
enter the date. Enter the date within the range
from 2000/01/01 to 2050/12/31.
2 Select a date and press .
2008/02/01 Fri
−−:−− Birthday
12:00 Lunch meeting
18:00 Baseball
Starting time
Event outline (Contents of the
saved schedule, when you did
not save the event outline)
The schedule list is displayed.
ˎ Use to display the next day’s schedule and
to display the previous day’s schedule.
3 Select the schedule and press .
Schedule detail
2008/02/01 Fri
12:00
2008/02/01 Fri
12:50
Discuss business pla
n over lunch
Conference
Lunch meeting
ON
60min.before
No
OFF
The details of the schedule appear.
To edit the saved schedule
Press (Edit).
● When you set [Create/Edit] at [Schedule] of the
Edit slide setting, just opening the FOMA terminal
in the schedule list or Schedule detail display
allows you to edit the schedule (P.354).
● If you set a repeat count beyond 2050/12/31, [To
2050/12/31] is displayed as the last day of the
repeat when you display the schedule.
Deleting a Schedule
You can delete schedules using the following
five methods.
Delete one Delete a schedule. If you delete a
schedule set to repeat, all its repeats
are also deleted.
Select&delete Delete the selected schedules.
You can select up to 30 schedules
over days at a time. If you delete a
schedule set to repeat, all its repeats
are also deleted.
Delete a day Delete all schedules for the selected
date. Schedules set to repeat cannot
be deleted.
Del up to ysd Delete all schedules before the
selected date. Schedules set to
repeat on and after the selected date
cannot be deleted.
Delete all Delete all schedules.
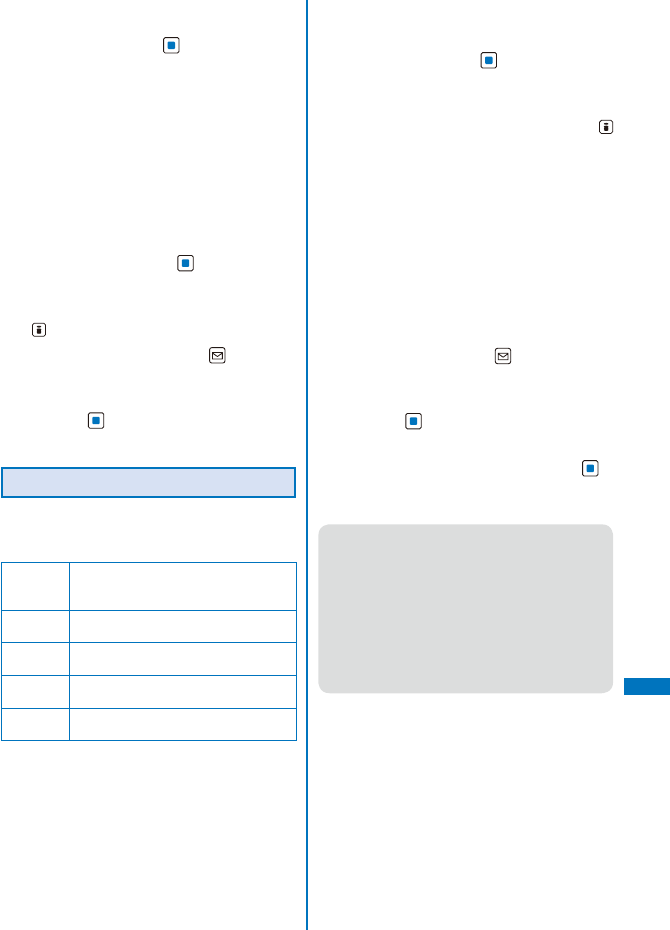
361
Other Convenient Functions
Example: Deleting a schedule
1 From the Menu, select [LifeKit] →
[Schedule] and press .
To delete all schedules
From the Function menu, select [Delete] →
[Delete all], enter the Security code, and select
[Yes].
To delete all schedules before the selected date
Move the cursor to the date and from the
Function menu, select [Delete] → [Del up to
ysd]. Enter the Security code and select [Yes].
To delete all schedules for the selected date
Move the cursor to the date and from the
Function menu, select [Delete] → [Delete a day]
→ [Yes].
2 Select a date and press .
To delete several schedules
From the Function menu, select [Delete] →
[Select&delete] and select schedules. Press
(Complete) and select [Yes].
3 Select a schedule and press (Func).
The Function menu appears.
4 Select [Delete] → [Delete one] → [Yes]
and press .
The selected schedule is deleted.
Setting Holiday
You can set a day or a day of the week as a
holiday and cancel the holiday settings. A day
set as a holiday is displayed in red.
For today Set a specific day as a holiday or cancel
a holiday. Up to 1,000 days can be set or
canceled.
Day of the
week
Set a specific day of the week as a
holiday or cancel a holiday of the week.
Rel up to
yesterday
Cancel all holidays set by the For today
before the selected date.
Release all Cancel all holidays set by the For today
and Day of the week.
Reset Reset the holiday settings to the default
settings.
Example: Setting a specific day as a holiday or
canceling the holiday setting of a day
1 From the Menu, select [LifeKit] →
[Schedule] and press .
To set/cancel holidays by a day of the week
From the Function menu, select [Schedule
setting] → [Set holidays] → [Day of the week].
Select the day of the week and press
(Complete).
To cancel all holidays before the selected date
Move the cursor to the date and from the
Function menu, select [Schedule setting] → [Set
holidays] → [Rel up to yesterday] → [Yes].
To cancel all holidays
From the Function menu, select [Schedule
setting] → [Set holidays] → [Release all], enter
the Security code, and select [Yes].
To reset to the default settings
From the Function menu, select [Schedule
setting] → [Set holidays] → [Reset], enter the
Security code, and select [Yes].
2 Select a date and press (Func).
The Function menu appears.
3 Select [Schedule setting] → [Set holidays]
and press .
The Set holidays display appears.
4 Select [For today] → [Yes] and press .
The selected day is set as a holiday or the holiday
setting of the day is canceled.
● The public holidays are based on the “Law
Partially Revising the National Holidays Law and
the Old-Age Welfare Law” (Law No.59, 2001) and
(Law No.43, 2005). Note that the Vernal Equinox
Day and Autumn Equinox Day may fall on the
dates other than those set on the FOMA terminal
because they depend on the announcement
by the official gazette on February 1st of the
previous year (as of December 2007).
Perform the required setting when a holiday is
changed or newly added.
Continued
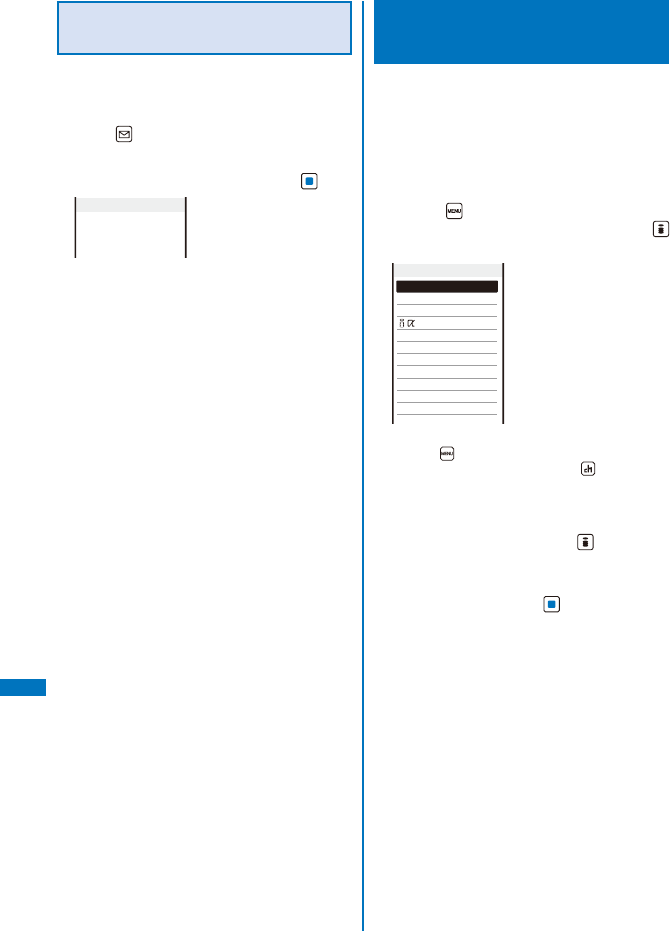
362
Other Convenient Functions
Checking the Number of
Schedules Saved
The number of schedules saved can be
checked as well as the number of schedules
still available to be saved or saved as Secret.
1 Press (Func) in the calendar.
The Function menu appears.
2 Select [Memory status] and press .
Memory status
Remained
279
Used
21
Secret
5
[Remained]:
Display the number of schedules still available to
be saved.
[Used]:
Display the number of schedules saved
(including schedules as Secret).
[Secret]:
Display the number of schedules saved as
Secret (this data is displayed only when the
Secret display is set to [ON]).
Performing Frequently Used
Functions Quickly
<My Selection>
You can save frequently used functions in My
Selection and select a saved function directly.
Up to 12 functions can be added to My
Selection.
ˎ When the Menu displays the Kisekae menu or
Standard menu, you need to set the Start menu
setting to [My Selection] (P.123).
1 Press (MENU) in the stand-by
display, select a function, and press
(Exchange).
Replacement
Imaging
i−mode
Mail
ppli
Phone
Data Box
Music
Osaifu−Keitai
Own number
LifeKit
Settings
To delete the saved function
Press (MENU) in the stand-by display, move
the cursor to the function, press (Delete), and
select [Yes].
To reset My Selection to the default setting
Reset the settings (P.376).
2 Select a function and press (Save).
The screen for confirming whether to replace My
Selection appears.
3 Select [Yes] and press .
The selected function replaces My Selection.
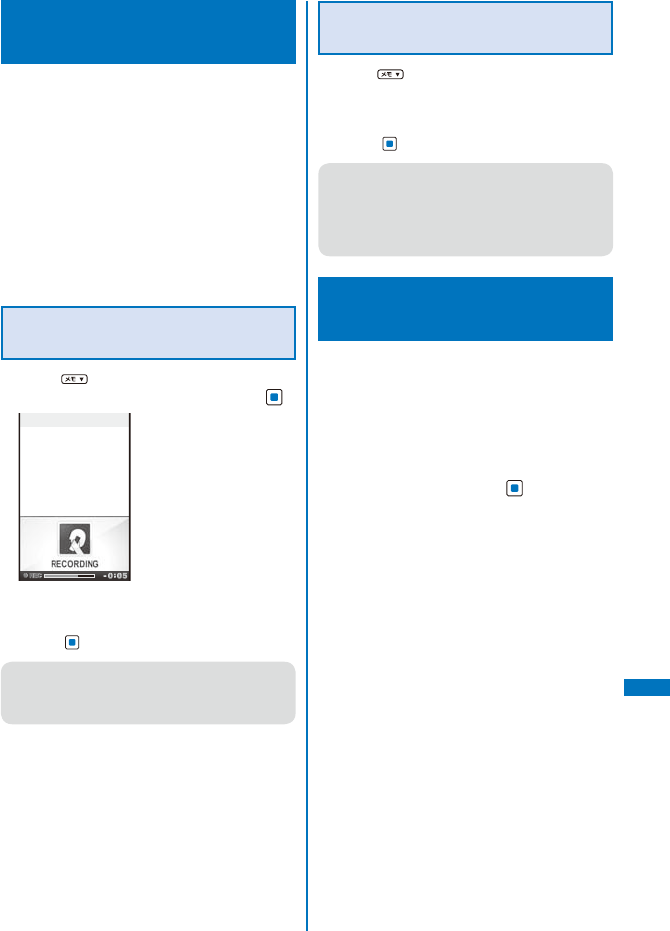
363
Other Convenient Functions
Recording Recipient’s or
Your Own Voice <Voice memo>
Your own voice during stand-by and the
recipient’s voice during a voice call can be
recorded.
Up to three voice memos of up to about 15
seconds each can be recorded.
ˎ When you record a voice memo during a call in
addition to the already recorded three voice memos,
the oldest memo is automatically overwritten by the
new one. When you record a voice memo during
stand-by, the screen for confirming whether to
overwrite the oldest voice memo appears.
ˎ For information on playing back and deleting the
voice memo, see P.74.
Recording Your Own Voice
during Stand-by
1 Press in the stand-by display, select
[Rec voice memo] → [Yes] and press .
2/10 21:08
Rec voice memo
The recording starts. When the recording ends, a
beep sounds.
To stop the recording on the way
Press (Stop).
● If there is an incoming call/mail or the Alarm/
Schedule alarm time comes while recording a
voice memo during stand-by, the recording stops
and the voice memo recorded until then is saved.
Recording Recipient’s Voice
during a Call
1 Press during a call.
The recording starts. When the recording ends, a
beep sounds.
To stop the recording on the way
Press (Stop).
● When the FOMA terminal is closed while
recording a voice memo during a call, the
recording is stopped and the recorded voice
memo is saved if the Setting when folded is set
to [Holding] or [Disconnect] and the recording is
continued if set to [Mute].
Checking the Call Duration
and Charge <Call duration/cost>
You can check the call duration and charge for
the last and total voice and videophone calls.
ˎ The call duration and charge displayed are
estimated and may not be real values. The call
charge does not include consumption tax.
1 From the Menu, select [Settings] →
[Management] → [NW Services] → [Call
Cost/Duration] and press .
The Call Cost/Duration display appears.
[Last call cost]:
Display the call charge for the last voice call at
[Voice call] and the last videophone call/64K
data communication at [Digital]. The call charge
is counted only when you place a call.
[Last call duration]:
Display the call duration for the last voice call
at [Voice call] and the last videophone call/64K
data communication at [Digital]. The call duration
is counted when you receive a call as well as
place a call.
[Total calls cost]:
Display the total call charge from the last reset to
the present time.
[Total calls duration]:
Display the total call duration from the last reset
to the present time.
Continued
364
Other Convenient Functions
2 Select the item and press .
● When you place a call to a toll-free number such
as NTT Free Dial or Directory Assistance (104),
“0YEN” or “
******
YEN” indicated for the call
charge.
● The accumulated call charges are stored in
the UIM. Therefore, if you switch the UIM, the
accumulated total call charge (starting from
December 2004) is displayed.
※ FOMA terminals manufactured earlier than the
901i series are not capable of displaying the
accumulated call charges stored in the UIM.
(The charges, however, are stored in the UIM
used by the older terminals.)
● The duration and charge for PushTalk, i-mode,
and packet communication are not counted. For
details on how to check charges for i-mode, etc.,
see the “Mobile Phone User’s Guide
【i-mode】
FOMA version” that you receive when you
subscribe to i-mode.
● When the call duration for the last voice call or
digital communication exceeds 99 hours, 59
minutes, and 59 seconds or the total call duration
for voice calls or digital communication exceeds
9,999 hours, 59 minutes, and 59 seconds, “Over”
is displayed.
● The ring time for incoming and outgoing calls are
not counted.
● The transmission charge for Chaku-moji is not
counted.
● When you use WORLD CALL, the international
call charge is counted. When you use other
international call services other than WORLD
CALL, the call charge is not counted.
● When you switch between voice and videophone
calls during a call, the call duration and call
charge are counted separately for each call
type and incremented at [Voice call] or [Digital]
alternately every time you switch the call.
● When 2in1 is used, the total call duration and
charge of both Number A and Number B are
summed up and displayed.
Resetting the Total Call Duration
and Charge
The display of the total call duration and
charge can be reset. The count starts from 0
after the reset.
Example: Resetting the total call duration
1 From the Menu, select [Settings] →
[Management] → [NW Services] → [Call
Cost/Duration] → [Reset] and press .
Select reset
item
Total duration
Total cost
2 Select [Total duration] and press .
The Security code screen appears.
To reset the total call charge
Select [Total cost], enter the PIN2 code, and
select [Yes].
3 Enter the Security code and press
(OK).
The screen for confirming whether to reset appears.
4 Select [Yes] and press .
The total call duration is reset and the reset date/
time are updated.
Automatically Resetting the
Total Call Charge
You can set to automatically reset the total call
charge at 00:00 a.m. on the first day of every
month.
1 From the Menu, select [Settings] →
[Management] → [NW Services] → [Call
Cost/Duration] → [Auto reset] and press
.
The PIN2 code input screen appears.
2 Enter the PIN2 code and press (OK).
The Auto reset display appears.
3 Select [ON]/[OFF] and press .
The Auto reset is set.
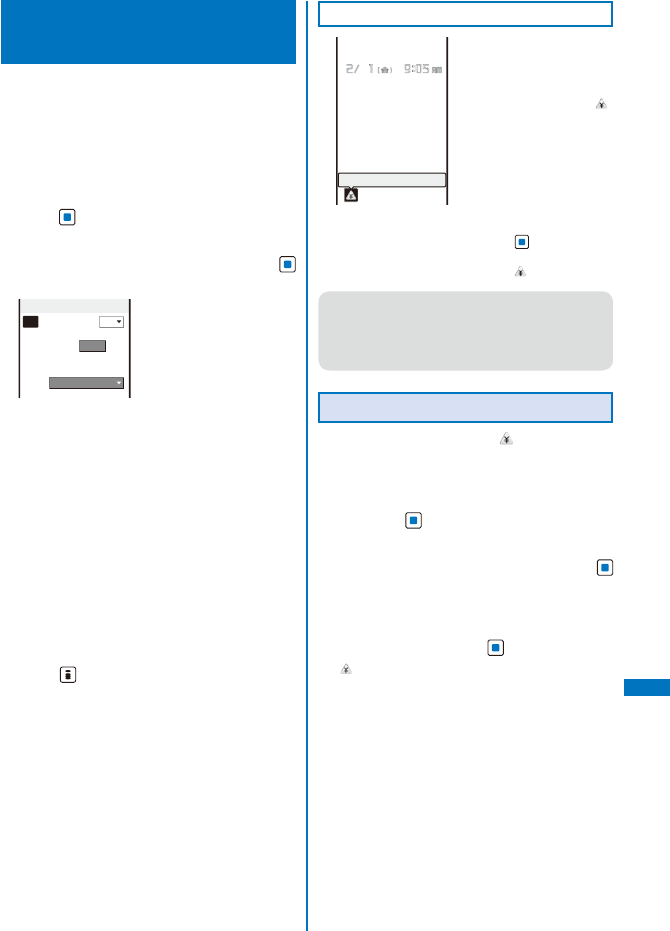
365
Other Convenient Functions
Setting the Limit for Alert on the
Total Call Charge
<Cost limit notice>
You can set an upper limit amount of call
charges to alert yourself with an icon or alarm
tone when the total call charge exceeds this
limit value.
1 From the Menu, select [Settings] →
[Management] → [NW Services] → [Call
Cost/Duration] → [Cost limit notice] and
press .
The Security code screen appears.
2 Enter the Security code and press
(OK).
Call cost limit
Set
OFF
Limit
0YEN
(10−100000)
Notification
Alarm+Stand−by
3 Select [ON]/[OFF] for the Call limit notice
at [Set].
4 Enter a value at [Limit].
Enter from ¥10 to ¥100,000 (in increments of ¥10).
5 Select a notification method at
[Notification].
[Alarm+Stand-by]:
Display the icon in the stand-by display and
sound an alarm tone to alert you at the same
time.
[Stand-by]:
Display the icon in the stand-by display to alert
you.
6 Press (Complete).
The Call cost limit is set.
When the Call Charge Exceeds the Limit
Exceed cost limit
When the upper limit value
of the call charge you have
set is exceeded during a
call or data communication,
the notification icon “ ”
(Exceed cost limit) appears
in the stand-by display.
When you set the notification
method to [Alarm+Stand-by],
an alarm tone sounds
when the stand-by display
reappears.
To check the call charge
Press (Link) in the
stand-by display and
select “ ”.
● The alarm for the Call cost limit is heard at the
same volume level as set for the incoming call
ring volume. It is heard at the volume level 2
when you set the volume of the ring tone to [3] or
higher level, [STEP DOWN], or [STEP UP].
Canceling the Icon for Limit Alert
Turn off the notification icon “ ”.
1 From the Menu, select [Settings] →
[Management] → [NW Services] → [Call
Cost/Duration] → [Delete max cost icon]
and press .
The Security code screen appears.
2 Enter the Security code and press
(OK).
The screen for confirming whether to delete the
maximum cost icon appears.
3 Select [Yes] and press .
“” disappears.
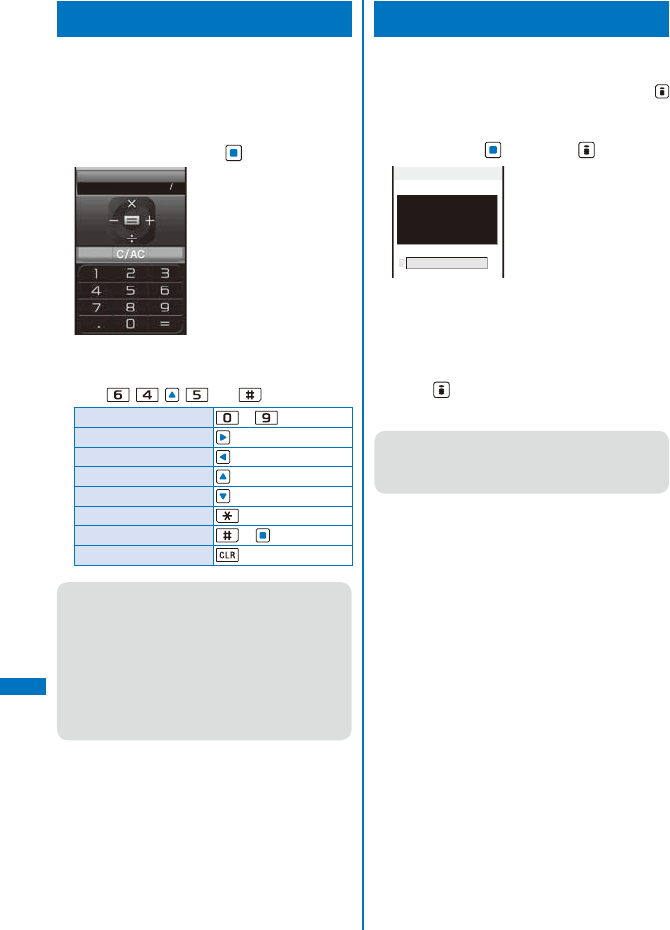
366
Other Convenient Functions
Using the Calculator
<Calculator>
You can use the FOMA terminal to perform the
four basic operations of arithmetic (+,−,×,
÷) for up to nine digits.
Example: Calculating 64×5
1 From the Menu, select [LifeKit] →
[Calculator] and press .
0
2 Enter numbers and operators to display
the result.
Press , , , , and in this order.
0 to 9 to
Add (+)
Subtract (−)
Multiply (×)
Divide (÷)
Decimal (.)
Calculate (=) or
Clear (C)/Clear All (AC)
● If the number is indivisible or the result of the
calculation contains a decimal point and proves
to be 10 digits or more, 10th digit and any more
digits than this are discarded for display from the
rightmost digit.
● If the result of the calculation is 10 digits or
more, or if you attempt an illegal calculation (e.g.
division by 0), the error code “0E” appears.
● Minus numbers can be calculated only when you
enter a minus number first.
Using a Memo <Text Memo>
Necessary information can be saved in the Text
Memo. Up to 10 text memos can be saved.
ˎ When you enter [Contents] of a memo,
(Complete) appears and you can save the memo.
1 From the Menu, select [LifeKit] → [Text
Memo], press , and press (Create).
Edit Text Memo
Contents
Category
None
2 Enter a memo at [Contents].
Enter a memo within 256 full-width or 512 half-width
characters.
3 Select a category icon at [Category].
4 Press (Complete).
The memo is saved.
● When you set [Create/Edit] at [Memo(List/Detail)]
of the Edit slide setting, just opening the FOMA
terminal in the Text Memo list allows you to enter
a text memo (P.354).

367
Other Convenient Functions
Displaying a Memo
The contents of a saved memo can be
checked.
1 From the Menu, select [LifeKit] → [Text
Memo] and press .
Text Memo list
1/5
Feb 23 at Karuizawa
Book airline ticket
Milk and sugar
090XXXXXXXX
12345
To copy [Contents] of a memo
Move the cursor to a memo and from the
Function menu, select [Copy Text Memo] →
[Yes].
To delete memos
Move the cursor to a memo and from the Function
menu, select [Delete] → [Delete one] → [Yes]. To
delete several memos, from the Function menu,
select [Delete] → [Select&delete], and select
memos. Press (Complete) and select [Yes]. To
delete all memos, from the Function menu, select
[Delete] → [Delete all], enter the Security code,
and select [Yes].
2 Select a memo and press .
Text Memo
2/5
Book airline ticket to
Okinawa.
Category
Travel
Create date
2008/02/10 09:15
Last update on
2008/02/10 09:15
Contents
Category
Create date
Last update on
The memo appears.
To edit the memo
Press (Edit).
● When you set [Create/Edit] at [Memo(List/Detail)]
of the Edit slide setting, just opening the FOMA
terminal while displaying the text memo list
allows you to edit the text memo (P.354).
Displaying the Settings of
Various Functions <Application>
You can directly display the settings of
each function and set each item. For more
information about settings, see the relevant
pages.
Display Setting data
Lifetime Cal. Set the data to be displayed in
the Lifetime Cal., set whether to
automatically display the items to
remember, or etc. (P.357).
Mail Set the functions used for i-mode mail,
SMS, and Area Mail (P.225, 233, 236,
etc.).
i-mode Set the functions used for i-mode
(P.112, 197, etc.).
iαppli Set automatic activation of software
and software description display
during a download (P.112, 239, 246).
Phonebook Set the display style and font size of
the Phonebook (P.102).
Call record Set the Redial/Received record display
ON/OFF (P.141).
PushTalk Set the operation for originating/
receiving a PushTalk call (P.89).
Record msg Set ON/OFF and the answer time of the
Record message and the answering/
recording image of the Videophone
message (P.73).
ToruCa Set the operation to be performed
when a ToruCa card is obtained
(P.259).
IC act. notice Set the operation for notifying you that
the FOMA terminal comes within the
FeliCa communication range (P.261).
Schedule Set the operation of holidays and the
Schedule alarm (P.365, 367).
Input method Set the function for character input
(P.384, 386, etc.).
Continued
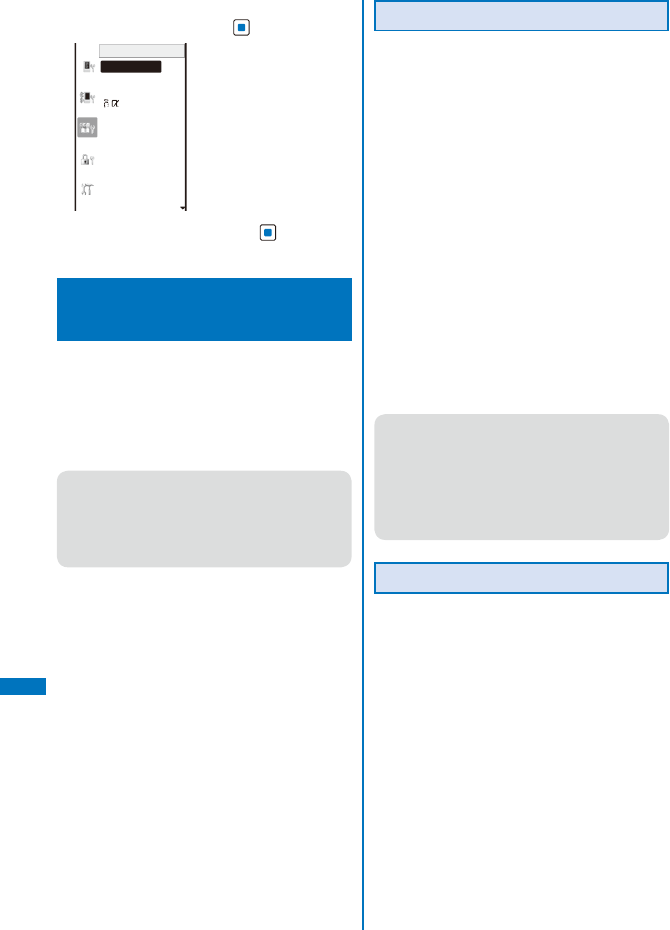
368
Other Convenient Functions
1 From the Menu, select [Settings] →
[Application] and press .
Application
Lifetime Cal.
Mail
i−mode
ppli
Phonebook
Call record
PushTalk
Record msg
ToruCa
IC act. notice
Schedule
Input method
2 Select a function and press .
The setting display of each function appears.
Using the Earphone/Microphone
with Switch
<Earphone/microphone with switch>
When you connect the Flat-plug Earphone/
Microphone with Switch (optional), etc. to the
Earphone/Microphone Jack, you can answer
a voice, videophone, or PushTalk call, place
a voice call by simply pressing its switch. You
can also set Earphone/Microphone operation.
● Do not wind the cord of the Earphone/
Microphone around the FOMA terminal. Doing
so may cause the radio wave condition to be
degraded.
● Placing the cord of the Earphone/Microphone
close to the antenna may cause noise.
Using the Switch to Place a Call
You can place a voice call to the first phone
number saved as the Memory number (P.375)
of the Phonebook using the switch on the
Earphone/Microphone.
ˎ When the Personal data lock is set, the call cannot
be placed.
1 Connect the Earphone/Microphone to the
FOMA terminal.
ˎ Open the cover of the Earphone/Microphone
Jack and insert the plug of the Earphone/
Microphone into the jack.
2 Press the switch on the Earphone/
Microphone for over a second in the
stand-by display.
The beep sounds and the call is connected to the
recipient. Talk when the recipient answers the call.
3 Press the switch on the Earphone/
Microphone for over a second to hang up.
The beep sounds and the call is disconnected.
● If a Phonebook memory number that is saved
as Secret is set for the Memory number, set the
Secret display to [ON] if you want to use the
switch on the Earphone/Microphone to place a
call.
● When you use the MUSIC Player while the FOMA
terminal is closed, you cannot use the switch to
place a call.
Using the Switch to Receive a Call
1 When receiving a call, press the switch
on the Earphone/Microphone for over a
second.
The beep sounds and the call is connected.
2 Press the switch on the Earphone/
Microphone for over a second to hang up.
The beep sounds and the call is disconnected.
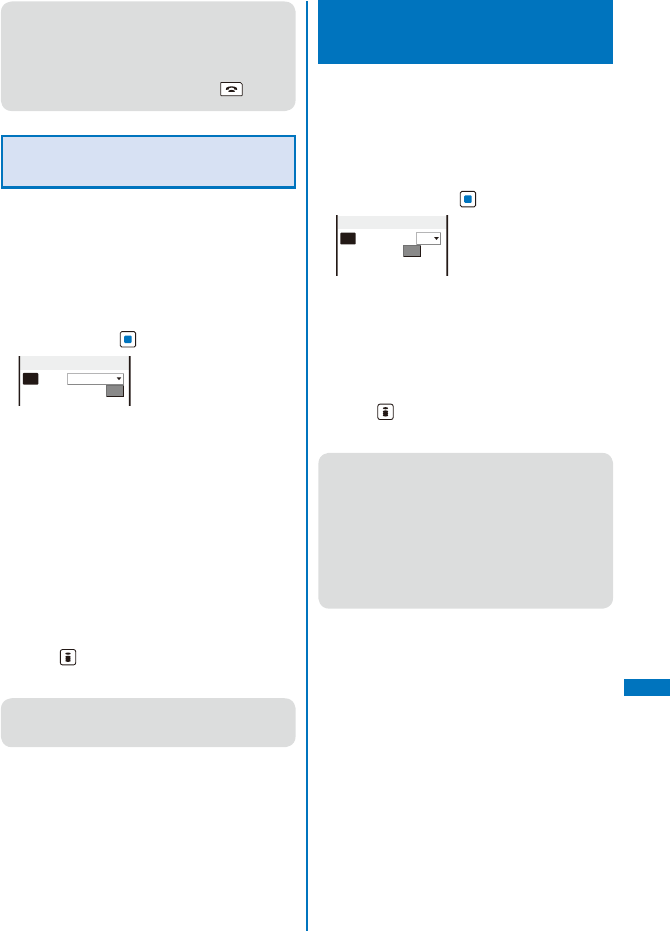
369
Other Convenient Functions
● When you answer a videophone call using the
switch on the Earphone/Microphone, a substitute
image is sent to the caller.
● You cannot end communication using the
switch on the Earphone/Microphone during
PushTalk communication. Press to end
communication.
Setting the Operation of the
Earphone/Microphone with Switch
You can set whether to permit the switch on
the Earphone/Microphone to place a voice call.
You can also set a Phonebook memory number
to be used for placing a voice call by pressing
the switch on the Earphone/Microphone.
1 From the Menu, select [Settings] → [Call]
→ [Headset setting] → [Headset sw. to
call] and press .
Headset sw. to call
Set
OFF
Memory number
999
2 Select [Voice call]/[OFF] of the switch on
the Earphone/Microphone at [Set].
[Voice call]:
Use the switch on the Earphone/Microphone to
place a voice call.
[OFF]:
Do not use the switch on the Earphone/
Microphone.
3 Enter a memory number from the
Phonebook used for placing a voice call
at [Memory number].
Enter from 000 to 999.
4 Press (Complete).
The Headset sw. to call is set.
● If you delete phonebook data of the phone
number that is set for the Memory number, the
default Memory number setting 999 is restored.
Receiving a Call Automatically
with Earphone
<Auto answer setting>
You can set to automatically answer a voice or
videophone call when the Flat-plug Earphone/
Microphone with Switch (optional), etc. is
connected.
1 From the Menu, select [Settings] → [Call]
→ [Headset setting] → [Auto answer
setting] and press .
Auto answer setting
Set
OFF
To answer
005
sec
(000−120)
2 Select [ON]/[OFF] of the Auto answer
setting at [Set].
3 Enter the time before receiving a call
automatically at [To answer].
Enter from 000 to 120 seconds.
4 Press (Complete).
The Auto answer setting is set.
● When you receive a videophone call, a substitute
image is sent to the caller.
● When the Record message, Voice Mail Service,
Call Forwarding Service, and Auto answer
setting are set simultaneously, and if you want to
give priority to the Auto answer setting, set the
time before starting the answering message for
the Auto answer setting shorter than that for the
Record message and the ring time for the Voice
Mail and Call Forwarding Services.
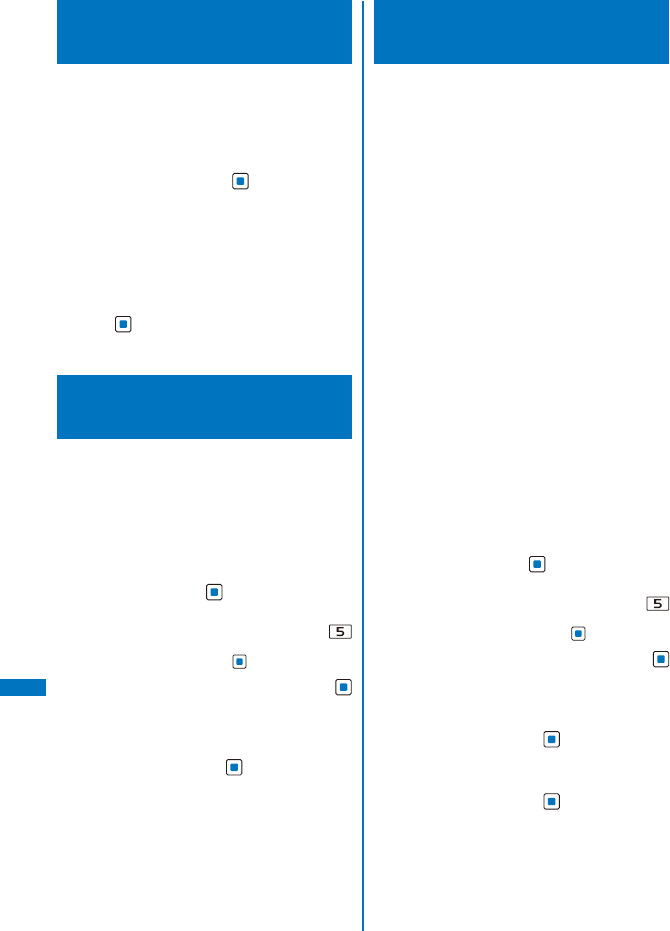
370
Other Convenient Functions
Setting Which Mic to Use
<Headset microphone>
You can set to use a microphone during a call
when the Flat-plug Earphone/Microphone with
Switch (optional), etc. is connected.
1 From the Menu, select [Settings] →
[Call] → [Headset setting] → [Headset
microphone] and press .
[Valid main]:
Use the earpiece (microphone) of the FOMA
terminal.
[Valid Headset]:
Use the Flat-plug Earphone/Microphone with
Switch (optional).
2 Select a microphone to be used and
press .
The Headset microphone is set.
Resetting to the Default
Settings <Reset settings>
You can reset the settings of each function to
the default settings. For the functions that are
reset by the Reset settings and the default
settings of these functions, see the list of reset
items (P.378) and the list of menus (P.420).
1 From the Menu, select [Settings] →
[Management] → [Reset] → [Reset
settings] and press .
The Security code screen appears.
ˎ The Reset display also appears by pressing
for over a second in the stand-by display. Select
[Reset settings] and press .
2 Enter the Security code and press
(OK).
The screen for confirming whether to reset all
settings appears.
3 Select [Yes] and press .
The settings are reset.
Deleting All Saved Data
<Reset all data&set>
You can delete saved data and reset the
settings of each function to the default settings.
For the functions to be reset by the Reset all
data&set, see the list of reset items (P.378) and
the list of menus (P.420).
ˎ The following data is not deleted.
- Preinstalled data in My picture, MUSIC, i-motion,
Melody, My document, some Kisekae tools, and
Chara-den of the Data Box
(The [スーパーモンキーボール] in My picture is
deleted by folder.)
- Preinstalled Deco-mail templates
- Osaifu-Keitai-compatible i-αppli
ˎ The preinstalled i-αppli software “デコ絵つくーる”,
“スーパーモンキーボールモバイル for SO”, “地図ア
プリ”, “Gガイド番組表リモコン”, “iアプリバンキ
ング”, and “楽オク出品アプリ2” are deleted.
ˎ Even if you delete a preinstalled Deco mail pict.,
MUSIC, My document, and Chara-den data files,
they are restored if you execute the Reset all
data&set.
ˎ The preset folders are not deleted. The folder names
at the time of purchase are restored, however.
ˎ If you execute the Reset all data&set when 2in1 is
used, the 2in1 is set to OFF.
ˎ When 2in1 is set to ON, all data are deleted
regardless of the 2in1 modes.
1 From the Menu, select [Settings] →
[Management] → [Reset] → [Reset all
data&set] and press .
The Security code screen appears.
ˎ The Reset display also appears by pressing
for over a second in the stand-by display. Select
[Reset all data&set] and press .
2 Enter the Security code and press
(OK).
The screen for confirming whether to reset all data
and settings appears.
3 Select [Yes] and press .
The screen for confirming whether to execute
restart operation appears.
4 Select [Yes] and press .
The FOMA terminal is initialized and restarts.
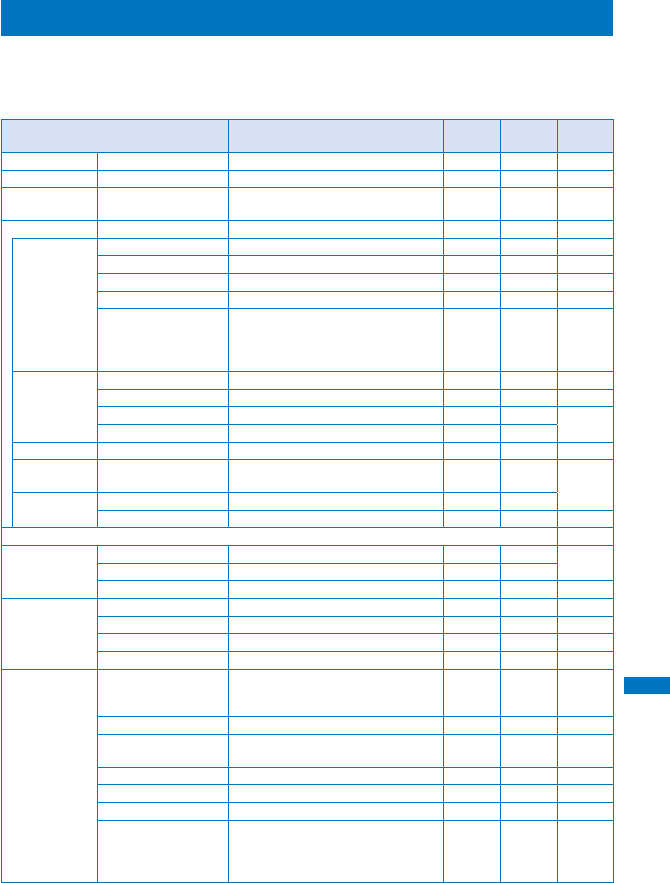
Other Convenient Functions
371
List of Reset Items
The items in which settings, that are made through the associated Function menus, etc., are reset
by executing the Reset settings or Reset all data&set are as follows. For functions that can be
accessed through the menu display, see the list of menus (P.420).
○: Items restored to their default settings ●: Items deleted
Menu Default setting Reset
settings
Reset all
data&set Page
Standard menu Menu guide display OFF ○○
P. 3 3
Phonebook Group setting −○
P. 1 0 0
PushTalk
phonebook
Group setting −○
P. 8 5
Data Box Sort Date (new → old) ○P. 3 2 1
My picture Data security −○
P. 1 4 2
Mini-Photo creator Not replicate ○○
P. 3 1 9
Change display 6 images ○○
P. 3 2 2
Display quality Normal ○○
P. 2 9 0
Music slide show Repeat: OFF, Effect: Sweet, BGM:
What Can U Do(Mashup Style)※,
Change image quality: Normal, Volume
adjustment: 25
○○
P. 2 9 1
i-motion Data security −○
P. 1 4 2
Change display 6 images ○○
P. 3 2 2
Display quality Normal ○○
P. 2 9 6
Volume adjustment 25 ○○
Melody Volume adjustment 4 ○○
P. 3 0 5
Music&Video
Channel
Change display 6 images ○○
P. 3 2 2
Kisekae Tool Change display 6 images ○○
Display quality Normal ○○
P. 2 9 0
microSD (Same as described for the Data Box) −
Music&Video
Channel
Volume adjustment 16 ○○
P. 3 4 0
Repeat OFF ○○
Reservation information
−●
P. 3 3 8
MUSIC Player Change display Jacket display ○○
P. 3 4 7
Volume adjustment 16 ○○
P. 3 4 6
Music settings Play mode: Normal, Repeat/AVLS: OFF ○○
P. 3 4 9
Usage history −●
P. 3 4 5
Camera Select size Still image (Out-camera): Stby(480×
864), Still image (In-camera): VGA(640
×480), Movie: QCIF(176×144)
○○
P. 1 5 9
Face detection ON ○○
P. 1 6 2
Set attach loc. info Auto attach loc. info: OFF, Attach loc.
info meth.: From act. camera ○○
P. 1 7 1
Auto Focus Macro OFF P.173
Multi focus Multi AF ○○
P. 1 7 2
Flash OFF ○○
P. 1 7 4
Select save to Still image: [Camera] folder in My
picture of the Data Box, Movie:
[Camera] folder in i-motion of the Data
Box
○○
P. 1 7 7
※ When you delete [What Can U Do(Mashup Style)] preinstalled at the time of purchase, [Silent] is used as the
default setting if you perform the Reset settings or Reset all data&set.
Continued
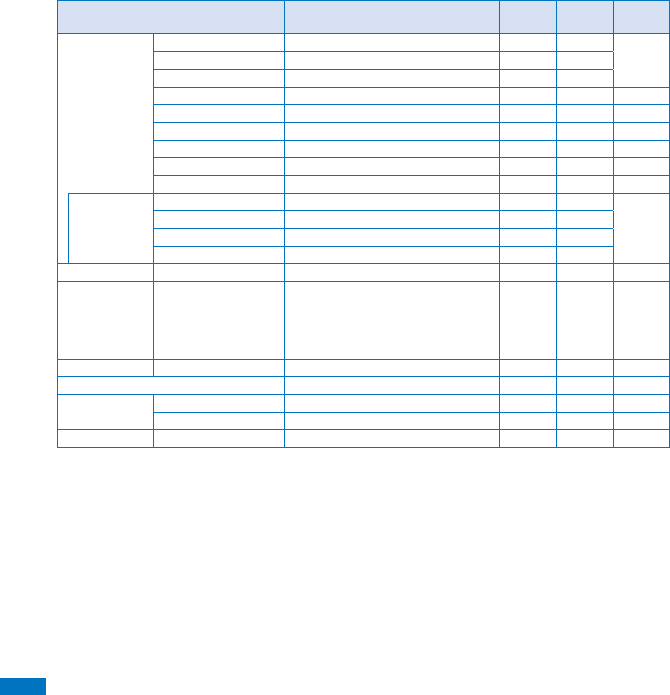
Other Convenient Functions
372
Menu Default setting Reset
settings
Reset all
data&set Page
Camera Auto save OFF ○○
P. 1 7 8
Mini-Photo creator Not replic. ○○
Image quality Standard ○○
Digital Zooming OFF ○○
P. 1 7 9
Image stabilize AUTO ○○
P. 1 8 0
Auto orientation ON ○○
P. 1 7 9
Shutter sound Sound1 ○○
P. 1 8 0
File size Attach(L) ○○
P. 1 8 1
Shoot mode Image+Sound ○○
P. 1 8 2
Deco-Snap Select size QVGA(240×320) P.164
Flash OFF
Deco-Snap beep Smile (Eng.) ○ ○
Whitening mode OFF ○ ○
Mail Mail security −○
P. 1 4 2
Alarm Alarm Set: OFF, Time: 00:00, Repeat: OFF,
Alarm tone: Alarm (std), Alarm volume:
4, Alarm image: めざましアラーム鳴
動中, Vibrator: OFF, Color: C5:Color 5,
Snooze: OFF
○○
P. 3 6 0
SW Update Scheduled update time −●
P. 4 6 0
Public mode (Drive mode) OFF ○○
P. 6 9
Input text Learning data −●
P. 3 8 9
Clipboard −●
P. 3 8 7
iαppli Change display Icon(L) ○○
P. 2 4 9
373
Character Entry
About Entering Text ................................................................................................. 382
Entering Text ............................................................................................................ 383
Entering Common Phrases ..................................................................................... 385
Entering Pictographs/Symbols ................................................................................ 386
Editing/Saving Common Phrases .......................................... <Edit common phrases> 386
Quoting Data from the Phonebook, etc. .................................................................. 387
Cutting/Copying/Pasting Text ................................................................................... 387
Entering Text Using Kuten Codes .........................................................<Input kuten> 388
Saving the Frequently Used Kanji Words ................................ <Save prediction/user> 388
Restoring the Default Settings .............................................................. <Reset data> 389
Using the Downloaded Dictionary ........................................... <Download dictionary> 389
For kuten codes, see the “Kuten Code List” (PDF format) included in the supplied CD-
ROM. You need Adobe® Reader® to read the “Kuten Code List” in the PDF format. If Adobe®
Reader® is not installed on your PC, install it from the supplied CD-ROM, which also contains
the Adobe® Reader® software.
For details on using Adobe® Reader®, see “Adobe Reader Help” that is installed with the
software.
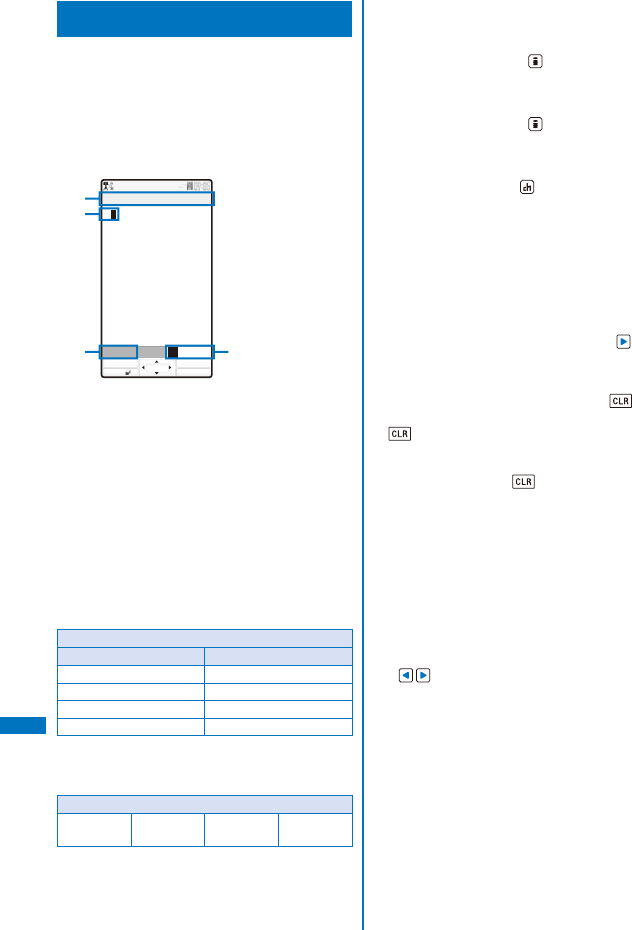
374
Character Entry
About Entering Text
The overview of the text entry is described
here.
ˎ Characters including JIS level 1 and level 2, 6,355
kanji are available.
ˎ Some complicated kanji characters are abridged or
simplified in part.
■ Text input display
※ The screen shown
is an image for
explanatory
purpose.
あ
R.510
漢
カナAa12
Input Text Memo
OK Pict/Sym
ModeFunc
MENU
ͦ
ͧ
ͨͩ
ͦ The name of a function for which characters are
input
ͧ Entered characters
ͨ Number of bytes of characters that can be entered
A half-width character is counted as one byte and
a full-width character as two bytes. The number
of characters is displayed for the SMS main body.
While composing mail, it appears with a “−” (minus
sign) when the number of entered characters
exceeds the limit. The word “ap” (approximately)
may appear.
ͩ Character mode or pictograph/symbol mode
ˎ The character mode or pictograph/symbol mode
available varies depending on the contents to be
edited.
Character mode
Half-width Full-width
[漢]
: Kanji/Hiragana ※ [漢]
: Kanji/Hiragana
[カナ]
: Half-width katakana [カ]
: Full-width katakana
[
Aa
]
: Half-width alphabet [A]
: Full-width alphabet
[
12
]:
Half-width numeric
[1]
: Full-width numeric
※ Characters are always entered in full-width in the
kanji/hiragana mode even if the character mode is
set to half-width.
Pictograph/Symbol mode
Ranking Pictograph Deco mail
pict.※
Symbols
※ Deco mail pict. is a Deco-mail pictograph that can
be entered in the Edit mail, Edit template display,
and Edit signature displays.
■ Changing the character mode or pictograph/
symbol mode
Character mode for half-width
Every time you press (Mode), the character
mode changes in the order of [漢]→ [カナ]→ [
Aa
]
→ [
12
].
Character mode for full-width
Every time you press (Mode), the character
mode changes in the order of [漢]→ [カ]→ [A]
→ [1].
Pictograph/symbol mode
Every time you press (Pict/Sym), the character
mode changes in the order of [Ranking] → [Pict.]
→ [Pict-D] → [Symbol].
■ Changing the character mode between full-
width and half-width
From the Function menu, select [Full/Half size].
■ Entering a character assigned to the same
key twice or more in succession
After entering the first character, either press or wait
for a while, and the cursor moves automatically.
■ Deleting a character
Move the cursor to the character and press .
ˎ The character at the cursor is deleted by pressing
for less than a second. The last character is
deleted when the cursor is at the end of the text.
ˎ All characters at and after the cursor position are
deleted by pressing for over a second. All
characters are deleted when the cursor is at the end
of the text.
■ Inserting a character
Move the cursor to the position to insert a character
and enter the character. The characters after the
cursor position are shifted to the right of the inserted
character.
■ If the matching kanji word does not appear
If you cannot get the desired conversion, change the
block of characters to be converted. Moving the cursor
with changes the matching words list/conversion
target words displayed according to the cursor
position.
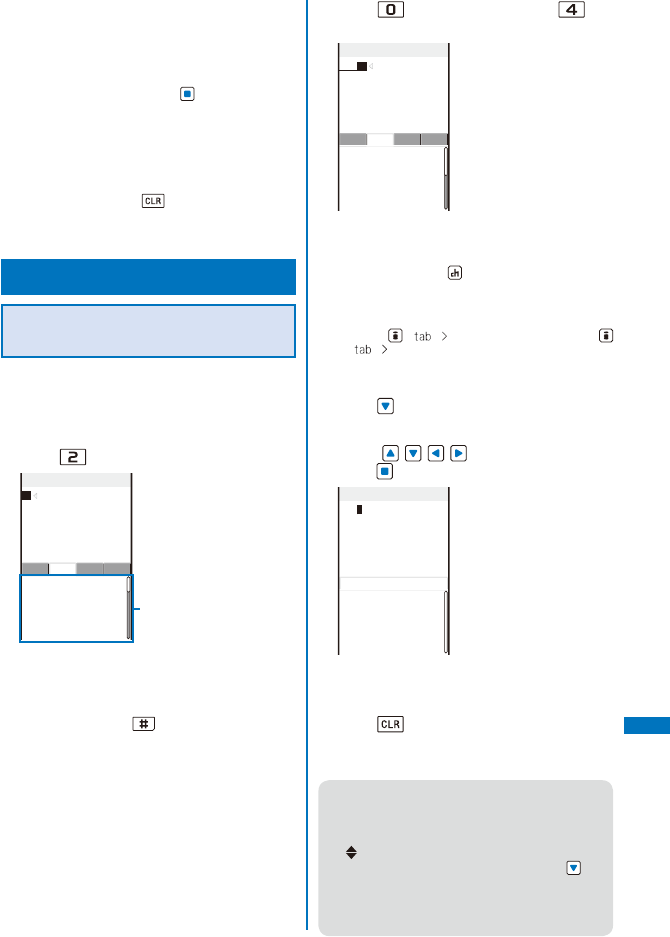
375
Character Entry
Continued
■ Undoing text
If you have performed an incorrect operation, you can
select, from the Function menu, [Undo] to cancel the
last operation and restore the previous status.
ˎ [Undo] is available for the following actions:
- Confirming character entry ( )
- [Undo]
- Entering common phrases
- Entering pictographs/symbols
- Entering kuten codes (P.388)
- Cutting or pasting (P.387)
- Deleting characters ( )
- Quoting data from Phonebook, My data, etc.
(P.387)
Entering Text
Entering Text in the Prediction
Conversion Mode
Example: Entering “健闘” (けんとう)
1 Check the character mode in the text
input display.
Check that the kanji/hiragana mode is selected.
2 Press four times.
Input Text Memo
Direct Aa12カナ ImgSym Pre.
け
けど
携帯
掲載
掲示板
結果
結構
研究
検索
けどね
件
けれど
決定
KO
県
結婚
健康
系
計画
形式
結局
化粧
Matching words list
The first character “け” is entered and the matching
words list is displayed.
To return to the previous character
When passing the target character by pressing
extra keys, press . Every time you press it,
the character returns to the previous one.
3 Press three times and press five
times.
Input Text Memo
Direct Aa12カナ ImgSym Pre.
けんと
検討
健闘
剣道
見当
県道
限度
言動
原動
原動力
ケント
検討中
件と
県と
券と
権と
兼と
健と
圏と
The characters “んと” are entered and the matching
words list is displayed.
To set the User conversion mode temporarily
When you press (Convert), the conversion
target words for the User conversion mode
appear.
To change the matching words lists
Press ( ). Every time you press
(), the matching words list changes in the
order of “Aa12カナ”→ “ImgSym” → “Direct” →
“Pre.”.
4 Press .
The cursor moves to the matching words list.
5 Press to select [健闘] and
press .
Input Text Memo
健闘
Phrase Item
の
は
を
に
で
と
です
も
ね
し
た
て
から
する
した
だ
か
が
まで
へ
かも
ない
とき
る
こと
?
!
。
、
“健闘” is entered. A selection of words that are
expected to succeed the word “健闘” appears in
the matching words list.
6 Press .
The matching words list closes and “健闘” is
finalized.
● The selected words from the matching words list
are displayed with priority over other words next
time.
● When you enter too many words at once,
“Convert” is displayed instead of displaying
the matching words list. When you press , the
conversion target words for the User conversion
mode appear. When you select a word, the word
is displayed in the matching words list from the
next time.
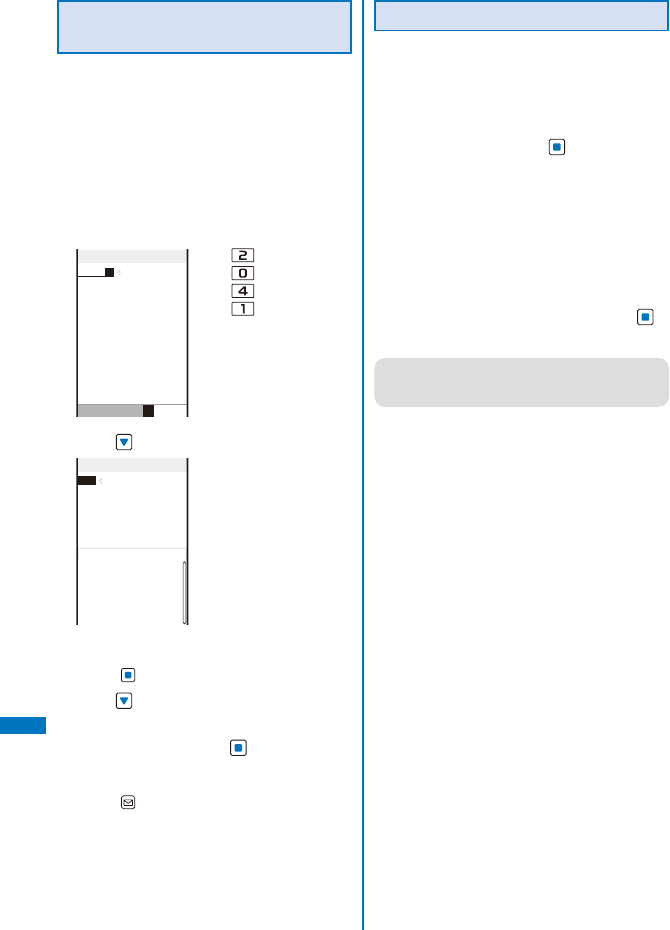
376
Character Entry
Entering Text in the User
Conversion Mode
Example: Entering “健闘” (けんとう)
1 Change the conversion mode to [User
conversion].
ˎ Follow the same steps as in “Changing the
Conversion Mode” (P.384).
2 Check the character mode in the text
input display.
Check that the kanji/hiragana mode is selected.
3 Enter a text.
けんとう
Input Text Memo
R.512
漢
カナAa12
Press four times: け
Press three times: ん
Press five times: と
Press three times: う
4 Press .
Input Text Memo
検討
健闘
見当
健投
拳闘
献灯
賢答
けんとう
ケントウ
ケントウ
User Conversion Item
The matching words list for “けんとう” is displayed.
To finalize this word
Press (Select).
5 Press .
The cursor is moved to the matching words list.
6 Select [健闘] and press .
“健闘” is finalized.
To cancel the conversion
Press (Cancel).
Changing the Conversion Mode
Select the conversion mode from Prediction
conversion or User conversion when the
character mode is the kanji/hiragana mode.
1 From the Menu, select [Settings] →
[Application] → [Input method] → [Select
conversion] and press .
[Prediction]:
When entering characters, a selection of words
predicted by the characters appears in the
matching words list. This is a conversion mode
that a look-ahead strategy is applied to by the
FOMA terminal.
[User conversion]:
Enter the entire reading of the word before
conversion.
2 Select a conversion mode and press .
The selected conversion mode is set.
● To change the conversion mode in the text input
display, from the Function menu, select [Input
method] → [Select conversion].
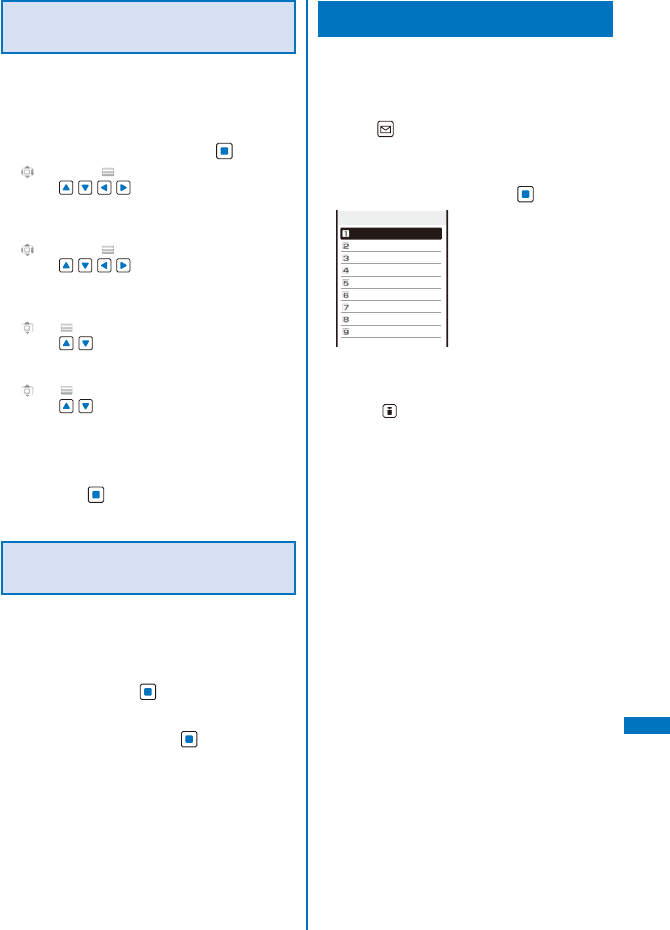
377
Character Entry
Setting the Movement Method for the
Cursor in the Matching Words List
You can select a movement method for the
cursor in the matching words list.
1 From the Menu, select [Settings] →
[Application] → [Input method] →
[Operation in item] and press .
[ 4 directions/ hor.]:
Use to move the cursor upward,
downward, to the right, and to the left. When you
scroll the JOG upward and downward, the cursor
moves to the left and right.
[ 4 directions/ vert.]:
Use to move the cursor upward,
downward, to the right, and to the left. When you
scroll the JOG upward and downward, the cursor
moves upward and downward.
[ hor./ hor.]:
Use to move the cursor to the left and
right. When you scroll the JOG upward and
downward, the cursor moves to the left and right.
[ hor./ vert.]:
Use to move the cursor to the left and
right. When you scroll the JOG upward and
downward, the cursor moves upward and
downward.
2 Select a movement method for the cursor
and press .
The Operation in item is set.
Setting the Cursor to Move
Automatically
You can set the time before moving the cursor
automatically after entering words.
1 From the Menu, select [Settings] →
[Application] → [Input method] → [Auto
cursor] and press .
2 Select a time before moving the cursor
automatically and press .
Select from [1 to 5].
To set the cursor not to move automatically
Select [OFF].
Entering Common Phrases
For common phrases, see P.434.
ˎ Common phrases that are available vary depending
on the contents to be edited. Unavailable categories
are disabled for selection.
1 Press (Func) in the text input display.
The Function menu appears.
2 Select [Input phrases] → a category → a
common phrase and press .
Category
Internet
Emoticon1
Emoticon2
Emoticon3
Greetings
Business
Private
Reply
Original
The selected common phrase is entered.
To check a common phrase
Move the cursor to the common phrase and
press (Confirm).
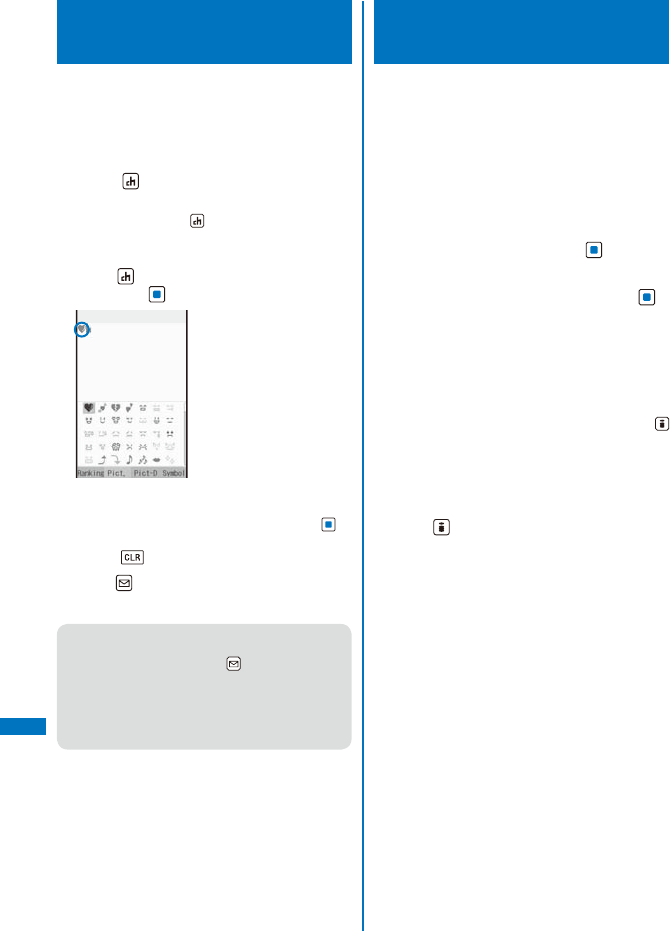
378
Character Entry
Entering Pictographs/
Symbols
Pictographs and symbols, which displayed in
the order of number of entering in the Pict/Sym
ranking, you entered can be selected when
you enter characters.
For pictographs and symbols, see P.431, 432.
1 Press (Pict/Sym) in the text input
display.
Every time you press (Pict/Sym), the pictograph/
symbol mode changes in the order of [Ranking] →
[Pict.] → [Pict-D] → [Symbol].
2 Press (Pict/Sym), select a pictograph,
and press .
Input
The selected pictograph is displayed on the top of
the text input display. To select the next pictograph,
move the cursor to the desired one and press .
To cancel the all selected pictographs
Press for over a second.
3 Press (Close).
The selected pictographs are entered all at once.
● In the Edit mail, Edit template, and Edit signature
displays, every time you select a pictograph, it
is entered at a time. Press (Close) to end the
pictograph/symbol mode.
● Deco mail pict. can be entered in the Edit mail,
Edit template, and Edit signature displays. You
can enter a Deco mail pict. to compose Deco-
mail (P.208).
Editing/Saving Common
Phrases <Edit common phrases>
The preinstalled common phrases can be
edited according to the intended use. Your
own common phrases can also be added as
new entries. For the list of common phrases,
see P.434.
Example: Editing “.co.jp” saved in the “Internet”
category
1 From the Menu, select [Settings] →
[Application] → [Input method] → [Edit
common phrases] and press .
The Common phrases display appears.
2 Select [Internet] → [.co.jp] and press .
To reset the common phrase to the default setting
Move the cursor to the common phrase and from
the Function menu, select [Reset] → [Reset one]
→ [Yes]. To restore the default set of common
phrases in a category, from the Function menu,
select [Reset] → [Reset all], enter the Security
code, and select [Yes]. To restore the default set
of common phrases in all categories, press
(Rset all) in the Common phrases display, enter
the Security code, and select [Yes].
To delete a common phrase
Move the cursor to the common phrase and from
the Function menu, select [Delete one] → [Yes].
3 Press (Edit) and edit the contents.
Enter a common phrase within 64 full-width or 128
half-width characters.
Editing is completed.
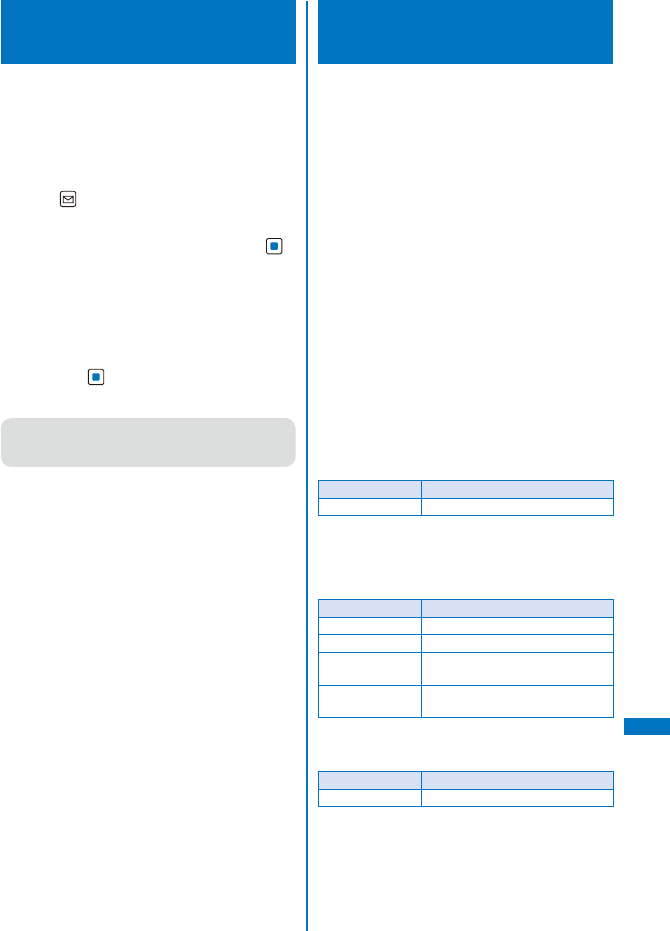
379
Character Entry
Quoting Data from the
Phonebook, etc.
You can quote data saved in the Phonebook or
Own number (My data) or characters scanned
by the bar code reader to enter in the main
body of mail or in the text input display while
displaying a site.
Example: Quoting from the Phonebook
1 Press (Func) in the text input display.
The Function menu appears.
2 Select [Quote phonebook] and press .
The Phonebook appears.
To quote the Own number
Select [Quote my data].
To quote texts using the bar code reader
Select [Bar code reader].
3 Select a name → an item to be quoted
and press .
The selected item appears in the text input display.
● When the selected item contains more characters
than the maximum number of characters that can
be entered, the extra characters are deleted.
Cutting/Copying/Pasting
Text
The entered characters can be pasted to the
other input display by cutting or copying.
The characters cut or copied are saved in the
clipboard and pasted when the Paste function
is selected. The contents of the clipboard can
be pasted as many times as needed.
ˎ The clipboard is a special memory area where cut
or copied characters are temporarily saved. The
clipboard can hold only one item and it is replaced
with new data when copying or cutting next data to
it.
ˎ The characters in the clipboard are deleted when
the FOMA terminal is powered off.
ˎ A character that cannot be entered to the destination
display is replaced with a half-width space when
pasted. Any extra characters that exceed the
maximum allowable number of characters are
deleted.
ˎ You cannot cut/copy and paste Deco mail pict. or
images inserted in the Deco-mail main body.
■ Cutting
Cut the selected characters and save them in the
clipboard (the selected characters are deleted from
the source display).
Function menu Setting option
Cut Cut the selected text.
■ Copying
Copy the selected characters and save them in the
clipboard (the selected characters are not deleted
from the source display).
Function menu Setting option
Copy Copy the selected text.
Attach No. Copy a phone number.
Item copy Copy a phone number, mail
address, etc. item by item.
Copy Text Memo Copy the contents of the text
memo.
■ Pasting
Paste the characters in the clipboard.
Function menu Setting option
Paste Paste the copied or cut data.
Continued
380
Character Entry
Copying/Cutting Text
1 Press (Func) in the text input display.
The Function menu appears.
2 Select [Copy] and press .
To cut
Select [Cut].
3 Select the Start point and press .
The first character to be copied is set.
To select all characters
Press (Sel. all).
4 Select the End point and press .
The range of characters to be copied is set and
saved in the clipboard.
Pasting Text
1 Select the position to paste in the text
input display and press (Func).
The Function menu appears.
2 Select [Paste] and press .
The copied/cut text is pasted.
Entering Text Using Kuten
Codes <Input kuten>
You can enter characters, numbers and
symbols using corresponding 4-digit kuten
codes as listed in the Kuten code list.
ˎ For kuten codes, see the “Kuten Code List” (PDF
format) included in the supplied CD-ROM.
1 Press (Func) in the text input display.
The Function menu appears.
2 Select [Input kuten] and press .
Input kuten
3 Enter a kuten code.
The character corresponding to the entered kuten
code is entered.
Saving the Frequently Used
Kanji Words
<Save prediction/user>
Frequently used Kanji words can be saved
in the Prediction or User dictionary. Saved
words are displayed in the matching words list/
conversion target words by priority when you
convert characters.
Prediction
dictionary
Save words that you want to display in the
matching words list by priority when you
use the Prediction conversion. Up to 300
words can be saved.
User
dictionary
Save words that you want to display in the
conversion target words by priority when
you use the User conversion. Up to 200
words can be saved.
ˎ The words saved in the User dictionary are
automatically saved in the Prediction dictionary, but
not vice versa.
ˎ When you delete a saved word, delete it from the
dictionary to which it is saved.
Example: Saving a word in the Prediction dictionary
1 From the Menu, select [Settings] →
[Application] → [Input method] → [Edit
prediction] and press .
The Prediction dictionary display appears.
To add a word to the User dictionary
Select [Settings] → [Application] → [Input
method] → [Edit user dict].
To delete a word
Move the cursor to the word and from the
Function menu, select [Delete one] → [Yes]. To
delete several words, from the Function menu,
select [Select&delete] and select words, press
(Complete), and select [Yes]. To delete all
words, from the Function menu, select [Delete
all], enter the Security code, and select [Yes].
To edit a word
Move the cursor to the word and press .
2 Press (Create).
Edit prediction
Reading(Keyword)
Word(Prediction)
Reading field
Word field
381
Character Entry
3 Enter the reading in the reading field.
Enter a reading within 16 hiragana characters.
4 Enter the word in the word field.
Enter a word within 16 full-width or 32 half-width
characters.
5 Press (Complete).
The entered word is saved in the Prediction
dictionary.
Restoring the Default
Settings <Reset data>
The FOMA terminal’s dictionary has a data
learning feature. The data leaning feature
memorizes the frequency in which individual
words are used and give priority to the
frequently used words when displaying them
in the matching words list/conversion target
words.
If you reset the learning data, the order of
priority is reset to the default setting.
1 From the Menu, select [Settings] →
[Application] → [Input method] → [Reset
data] and press .
The Security code screen appears.
2 Enter the Security code and press
(OK).
The screen for confirming whether to reset the
learning data appears.
3 Select [Yes] and press .
The learning data is reset.
Using the Downloaded
Dictionary <Download dictionary>
Up to 20 dictionaries can be downloaded using
i-mode for use with the FOMA terminal. When
enabling a downloaded dictionary, words
saved in it appear in the matching words list.
1 From the Menu, select [Settings] →
[Application] → [Input method] →
[Dictionaries] and press .
Dictionary folder
流行語辞書
エリア辞書
大阪弁辞書
To display the detailed information
Move the cursor to the dictionary and from the
Function menu, select [Information].
To change the name
Move the cursor to the dictionary and from the
Function menu, select [Edit name]. Enter a name
within eight full-width or 17 half-width characters.
To delete a dictionary
Move the cursor to the dictionary and from the
Function menu, select [Delete] → [Delete one]
→ [Yes]. To delete several dictionaries, from the
Function menu, select [Delete] → [Select&delete]
and select dictionaries, press (Complete),
and select [Yes]. To delete all dictionaries, from
the Function menu, select [Delete] → [Delete all],
enter the Security code, and select [Yes].
2 Select a dictionary and press (Set).
The Valid/Invalid display appears.
3 Select [Valid]/[Invalid] and press .
When it is set to [Valid], the dictionary is enabled
and “ ” (gray) changes to “ ” (green).
● If many dictionaries are enabled simultaneously,
some words may not be displayed in the
matching words list.
● The dictionary can be downloaded from
“PlayNow by SO”.
[i Menu] → [メニュー/検索] (Menu/Search)
→ [ケータイ電話メーカー] (Mobile Phone
Manufacturers) → [PlayNow by SO] (Japanese
only)
Continued
382
Character Entry
Sorting the Downloaded
Dictionaries
When you download several dictionaries, you
can change the order of the dictionaries in
the list to display words of a frequently used
dictionary by priority.
1 Press (Func) in the Dictionary folder
display.
The Function menu appears.
2 Select [Reorder] and press .
3 Select a dictionary and press .
The Reorder display appears.
4 Select a position to move to and press
(Move).
5 Press (Complete).
The searching priority is set.
383
Network Services
Using the Voice Mail Service ................................................................................... 392
Using the Call Waiting Service ................................................................................ 393
Using the Call Forwarding Service .......................................................................... 393
Using the Nuisance Call Blocking Service ............................................................... 394
Using the Caller ID Display Request Service .......................................................... 395
Using the Dual Network Service .............................................................................. 395
Using the English Guidance Service ....................................................................... 395
Using the Service Numbers ..................................................................................... 396
Selecting an Operation for an Incoming Call during a Call ..............<Arrival Call Act> 396
Setting Remote Control ................................................................. <Remote Control> 397
Using the Multi Number Service .............................................................................. 397
Using 2in1 ................................................................................................................. 398
Using OFFICEED .................................................................................<OFFICEED> 402
Saving a New Service to Use It .......................<Additional service (USSD) registration> 402
Available Network Services
You can use the following DoCoMo network services on the FOMA terminal.
For details on the outline and how to use each service, see the relevant pages indicated in
the table below.
Service name
Application
Monthly
charge
Page Service name
Application
Monthly
charge
Page
The Voice Mail Service Required Paid
P. 3 9 2
The English Guidance Service
Not required
Free
P. 3 9 5
The Call Waiting Service Required Paid
P. 3 9 3
The Multi Number Service Required Paid
P. 3 9 7
The Call Forwarding Service
Required Free
P. 3 9 3
2in1 Required Paid
P. 3 9 8
The Nuisance Call Blocking Service Not required
Free
P. 3 9 4
OFFICEED Required Paid
P. 4 0 2
Notify Caller ID
Not required
Free P.45 Public mode (Drive mode)
Not required
Free P.69
The Caller ID Display Request Service
Not required
Free
P. 3 9 5
Public mode (Power off)
Not required
Free P.70
The Dual Network Service Required Paid
P. 3 9 5
Melody Call Required Paid
P. 1 1 5
ˎ You cannot use the network services when you are outside of the service area or in a location without the
radio wave.
ˎ For details, see the “Mobile Phone User’s Guide
【Network services】
”.
ˎ For subscription and inquiry, call the “General Contact” on the backcover of this manual.
ˎ “Deactivating the service” of the Voice Mail or Call Forwarding Service, etc. does not cancel your
subscription to the service itself.
ˎ “OFFICEED” is a paid service that requires a subscription. For more information, see the DoCoMo’s
website for business customers (http://www.docomo.biz/d/212/).
384
Network Services
Using the Voice Mail Service
The Voice Mail Service takes messages for
you, as long as it answers a call with the
answering message, if there is an incoming
voice or videophone call when you are in a
location without the radio wave, while the
FOMA terminal is powered off, or when you are
in a situation where you cannot answer a call.
ˎ When the Voice Mail Service and Record Message
(P.72) are set simultaneously, and if you want to give
priority to the Voice Mail Service, set the ring time for
the Voice Mail Service shorter than the time before
starting the answering message for the Record
Message.
ˎ When the Voice Mail Service is set to “Activate”
and if you do not answer an incoming voice or
videophone call, the call is saved in the Received
record as a “Missed call” and the notification icon
“” (Missed call) appears in the stand-by display.
ˎ When the Call Forwarding Service is set to “Activate”,
the Voice Mail Service is automatically deactivated.
■ Basic flow of the Voice Mail Service
Step 1 Activate the service.
Step 2 The caller leaves a message.
Step 3 Play back the Voice Mail message.
1 From the Menu, select [Settings] →
[Management] → [NW Services] → [Voice
Mail] and press .
2 Set each item.
Menu item Operation
Activate※Select [Activate] → [Activate]/
[Ring+Activate] (→ Enter the ring
time) → [Yes].
ˎ When you select [Ring+Activate],
you can set the ring time (000 to
120 seconds) and activate the
Voice Mail Service.
ˎ When you select [Ring+Activate],
the Voice Mail Service is
activated by Number A.
ˎ When 2in1 is set to the B mode,
you cannot select the method of
activating the Voice Mail Service.
Set ring time Select [Set ring time] → Enter the
ring time (000 to 120 seconds) →
(Complete).
Menu item Operation
Deactivate※Select [Deactivate] → [Yes].
Check setting Select [Check setting].
ˎ When 2in1 is set to either the
B or Dual mode, the screen for
selecting either Number A or
Number B appears.
Play messages
※Select [Play messages] → [Yes]
→ Operate as instructed by the
guidance.
ˎ The displayed number is the
number that the guidance
announces when playing back
new Voice Mail messages.
Already saved Voice Mail
messages are not included.
ˎ You can also play back the
record message by pressing
(Link) in the stand-by display and
selecting “ ”.
Voice Mail
setting※
Select [Voice Mail setting] → [Yes]
→ Operate as instructed by the
guidance.
Check
messages
Select [Check messages].
ˎ When a new message is stored
at the Voice Mail Service Center,
the notification icon “ ” (Voice
Mail message) appears in the
stand-by display.
Tone/Vibrate
notice
(Default: ON)
Set whether to alert you of a new
message with the mail tone when it
is received at the Voice Mail Service
Center.
Select [Tone/Vibrate notice] →
[ON]/[OFF].
Delete VM icon Select [Delete VM icon] → [Yes].
Missed
Call
notice
Activate Notify you of a new message by
SMS when it is received while the
FOMA terminal is powered off or
outside of the service area.
Select [Missed Call notice] →
[Activate] → [All calls]/[With Caller
ID] → [Yes].
ˎ Even if the caller is saved in the
Phonebook, the caller ID of the
caller is notified and the name
saved in the Phonebook is not
displayed.
Deactivate
Select [Missed Call notice] →
[Deactivate] → [Yes].
Check
setting
Select [Missed Call notice] →
[Check setting].
※ When 2in1 is set to the Dual mode, the screen for
selecting either Number A or Number B appears.
385
Network Services
Continued
Notes on the service for the videophone
● When the Voice Mail Service takes a videophone
message for you, it is notified to you by SMS.
● To change the settings of the Voice Mail Service
for videophone support, press
in the stand-by display and operate as
instructed by the guidance.
● A videophone of AV32K type is disabled for
connection to the Voice Mail Service Center.
● When you connect to the Voice Mail Service
Center using Chara-den, the DTMF operation
is not available. From the function menu, select
[DTMF send mode] (P.75).
Using the Call Waiting
Service
When there is another incoming call while you
are on a call, the in-call ring tone notifies you
of the second call. You can answer the second
call by putting the first call on hold. You can
also put your current call on hold and place a
call to another party.
ˎ When you receive a videophone call during a
voice call, you can answer the videophone call
by disconnecting the voice call. You cannot
answer a voice/videophone call that arrives during
a videophone call. However, it is saved in the
Received record.
ˎ To use the Call Waiting Service, set the Arrival Call
Act (P.396) to [Answer]. If it is set to other operation,
you cannot answer a second voice call received
while you are on a voice call even if the Call Waiting
Service is activated.
1 From the Menu, select [Settings] →
[Management] → [NW Services] → [Call
Waiting] and press .
2 Set each item.
Menu item Operation
Activate Select [Activate] → [Yes].
Deactivate Select [Deactivate] → [Yes].
Check setting Select [Check setting].
● To put the current call on hold and answer an
incoming call, press (Call). When you put a
call on hold, the message “Connecting” appears.
Every time you press (Switch), you can switch
between the calls. To disconnect the put on hold
call, from the Function menu, select [Release
Hold Call].
● To disconnect the current call and answer an
incoming call, press and .
Using the Call Forwarding
Service
The Call Forwarding Service forwards a voice
or videophone call to a preset forwarding
number when you are in a location without the
radio wave, the FOMA terminal is powered off,
or you do not answer the call within the preset
ring time.
ˎ When the Call Forwarding Service and Record
Message (P.72) are set simultaneously, and if you
want to give priority to the Call Forwarding Service,
set the ring time for the Call Forwarding Service
shorter than the time before starting the answering
message for the Record Message.
ˎ When the Call Forwarding Service is set to “Activate”
and if you do not answer an incoming voice or
videophone call, the call is saved in the Received
record as a “Missed call” and the notification icon
“” (Missed call) appears in the stand-by display.
ˎ When you receive a videophone call, the call is
disconnected if the forwarding number does not
support a videophone feature compliant with
3G-324M.
■ Basic flow of the Call Forwarding Service
Step 1 Save the forwarding number.
Step 2 Activate the Call Forwarding Service.
Step 3 Receive a call on your FOMA terminal.
Step 4 If you do not answer the call, it is
automatically forwarded to the specified
forwarding number.
1 From the Menu, select [Settings] →
[Management] → [NW Services] → [Call
Forwarding] and press .
386
Network Services
2 Set each item.
Menu item Operation
Activate※Select [Activate] → [Activate]/
[Set+Activate](→ Enter the
forwarding number and ring time) →
[Yes].
ˎ When you select [Set+Activate],
you can set the forwarding
number (within 26 digits) and
ring time (000 to 120 seconds)
and activate the Call Forwarding
Service.
ˎ When 2in1 is set to the B mode,
you cannot select the method of
activating the Call Forwarding
Service.
Deactivate※Select [Deactivate] → [Yes].
Change FWD
number
Select [Change FWD number]
→ Enter the forwarding number
(within 26 digits) → Select [Set]/
[Set+Activate].
ˎ When 2in1 is set to the B mode,
select [Change FWD number]
→ enter the forwarding number
(within 26 digits) → select [Yes].
If FWD number
busy
Set whether to connect to the
Voice Mail Service Center when the
forwarding number is busy.
Select [If FWD number busy] → [Not
connect]/[Connect].
Check setting Select [Check setting].
ˎ When 2in1 is set to either the
B or Dual mode, the screen for
selecting either Number A or
Number B appears.
※ When 2in1 is set to the Dual mode, the screen for
selecting either Number A or Number B appears.
● To set on/off of the Call Forwarding guidance,
press in the stand-by
display and operate as instructed by the
guidance.
Using the Nuisance Call
Blocking Service
The Nuisance Call Blocking Service prevents
receiving a “nuisance call” such as prank
phone calls. When you set the Bar Nuisance
Calls, further calls from registered nuisance
call numbers are automatically rejected and
the call rejection guidance is played back on
the caller’s phone.
ˎ The ring tone does not sound when there is an
incoming call from the saved phone number. The
call is not saved in the Received record, either.
ˎ When you receive a videophone call from a caller
who is saved as a nuisance caller, it is disconnected
after playing back the call rejection video guidance
on the caller’s phone.
1 From the Menu, select [Settings] →
[Management] → [NW Services] → [Bar
Nuisance Calls] and press .
2 Set each item.
Menu item Operation
Register Caller Save the phone number of the last
received call.
Select [Register Caller] → [Yes].
Reg. selected
No.
Select [Reg. selected No.] → Enter
the phone number (within 22 digits)
→ Select [Yes].
Delete all entries Select [Delete all entries] → [Yes].
Delete last entry Delete the last saved phone
number. You can delete another
phone number from the last
saved one by repeating the same
operation.
Select [Delete last entry] → [Yes].
Check No. of
entry
Select [Check No. of entry].
387
Network Services
Using the Caller ID Display
Request Service
When you receive a voice or videophone
call without a caller ID, the Caller ID Display
Request Service answers the call with a
guidance requesting the caller to send the
caller ID and then automatically disconnects
the call.
ˎ When there is an incoming call from the caller
who does not notify the phone number, the ring
tone does not sound. The call is not saved in the
Received record either.
ˎ When you receive a videophone call without a caller
ID, it is disconnected after playing back the caller
ID display request video guidance on the caller’s
phone.
ˎ When you receive a PushTalk call without a caller
ID, the caller ID display request guidance is not
played back on the caller’s phone and the call is
disconnected.
1 From the Menu, select [Settings] →
[Management] → [NW Services] → [Caller
ID Request] and press .
2 Set each item.
Menu item Operation
Activate Select [Activate] → [Yes].
Deactivate Select [Deactivate] → [Yes].
Check setting Select [Check setting].
Using the Dual Network
Service
The Dual Network Service enables you to use a
Mova terminal using the phone number of the
FOMA terminal you use at present. This service
enables you to select and use both the FOMA
and Mova service areas as required.
ˎ You cannot use the FOMA and Mova terminals at
the same time.
ˎ Make sure to perform the operation for switching the
Dual Network Service from the FOMA terminal not
using the service.
1 From the Menu, select [Settings] →
[Management] → [NW Services] → [Dual
Network] and press .
2 Set each item.
Menu item Operation
Switch Dual
Network
Switch the Dual Network Service to
enable using the FOMA terminal for
this service.
Select [Switch Dual Network] →
Enter the network security code →
Select [Yes].
Check setting Select [Check setting].
Using the English
Guidance Service
You can set English voice guidance to be
played during various network service settings
such as the Voice Mail Service and when you
are outside of the service area.
If a caller is also using this service, the settings
of a call from this caller have priority over the
settings on the recipient’s phone.
1 From the Menu, select [Settings] →
[Management] → [NW Services] →
[English Guidance] → [Guidance setting]
and press .
2 Select a target for the English Guidance
Service and press .
[Call+Income]:
Set both the guidance that you hear when you
place a call and that a recipient hears upon
receiving your call.
[Call]:
Set the guidance that you hear when you place a
call.
[Income]:
Set the guidance that a recipient hears upon
receiving your call.
3 Select a language for the guidance to be
played during outgoing calls and press
.
Continued
388
Network Services
4 Select a language for the guidance played
during incoming calls and press .
[Japanese]:
Set the guidance to Japanese.
[Japanese+English]:
Set the guidance in the order of Japanese →
English.
[English+Japanese]:
Set the guidance in the order of English →
Japanese.
To check the settings
From the Menu, select [Settings] →
[Management] → [NW Services] → [English
Guidance] → [Check setting].
Using the Service Numbers
You can call DoCoMo General Inquiries,
Contact for Repairs, etc.
ˎ Depending on the UIM being used, the items to be
displayed may be different or some items may not
be displayed.
1 From the Menu, select [Settings] →
[Management] → [NW Services] →
[Service Numbers] and press .
The Service Numbers display appears.
[ドコモ故障問合せ] (Contact for Repairs):
Call the DoCoMo representative of Contact for
Repairs.
[ドコモ総合案内・受 付 ] (General Inquiries):
Call the DoCoMo information desk of General
Inquiries (DoCoMo Information Center).
2 Select a contact number → [Yes] and
press .
The call is connected to the contact number.
● When 2in1 is set to the Dual mode, the screen for
selecting either Number A or Number B appears.
Selecting an Operation for an Incoming
Call during a Call
<Arrival Call Act>
If you are subscribing to the Voice Mail, Call
Forwarding, or Call Waiting Service, you can
set the operation you want to perform when
you receive the second voice or videophone
call during a call.
ˎ If you do not subscribed to the Voice Mail, Call
Forwarding, or Call Waiting Service, you cannot
answer a second incoming call received while you
are on a current call.
ˎ To use the Arrival Call Act function, set the In-call
arrival act to “Activate”.
1 From the Menu, select [Settings] →
[Management] → [NW Services] →
[Arrival Call Act] and press .
[Answer]:
You can answer a call or forward it manually to
the Voice Mail Service Center or a forwarding
number.
[Voice Mail]:
An incoming call is connected to the Voice Mail
Service Center.
[Call Forwarding]:
An incoming call is forwarded to a saved
forwarding number.
[Call Rejection]:
An incoming call is rejected.
2 Select an operation for an incoming call
and press .
The operation for an incoming call during a call is
set.
Starting/Stopping the In-call
Arrival Act
You can start or stop the operation you have
selected for the Arrival Call Act.
1 From the Menu, select [Settings] →
[Management] → [NW Services] → [In-call
arrival act] and press .
2 Set each item.
Menu item Operation
Activate Select [Activate] → [Yes].
Deactivate Select [Deactivate] → [Yes].
Check setting Select [Check setting].
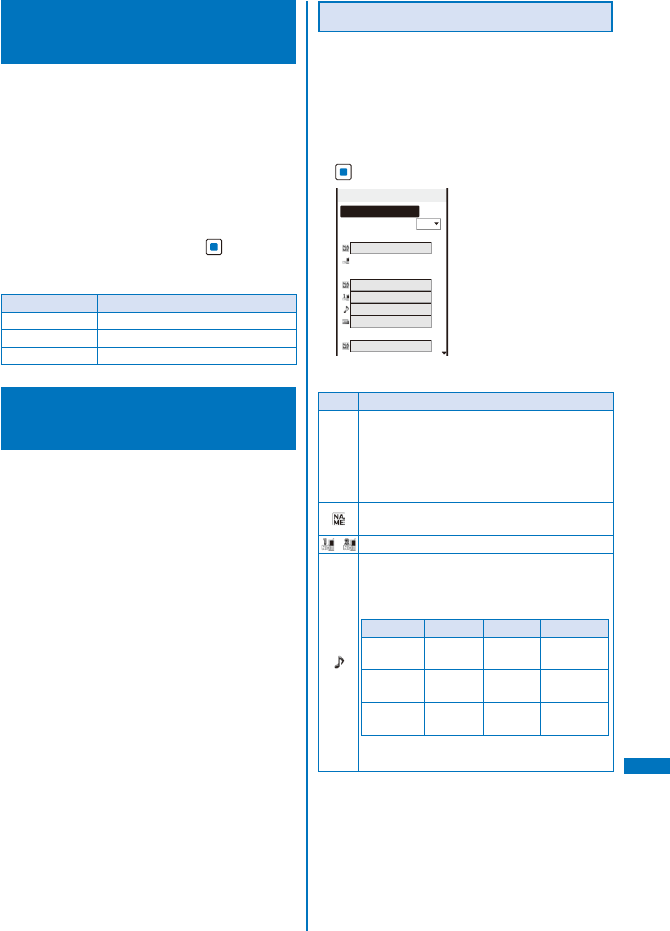
389
Network Services
Setting Remote Control
<Remote Control>
You can set to be able to operate the Voice
Mail or Call Forwarding Service, etc. from a
general push-button telephone, public phone,
DoCoMo mobile phones, etc.
ˎ To use the Voice Mail or Call Forwarding Service
overseas, the Remote Control function must be set
in advance.
1 From the Menu, select [Settings] →
[Management] → [NW Services] →
[Remote Control] and press .
2 Set each item.
Menu item Operation
Activate Select [Activate] → [Yes].
Deactivate Select [Deactivate] → [Yes].
Check setting Select [Check setting].
Using the Multi Number
Service
The Multi Number Service enables you to
add up to two numbers, Additional No.1
and Additional No.2 in addition to the Basic
Number, as your FOMA terminal phone
numbers.
ˎ You cannot use the Multi Number Service and 2in1
simultaneously.
Setting Phone Number Details
ˎ You cannot change the phone number displayed
under “Basic Number”. However, you can set the
ring tone/incoming image using the Incoming set,
etc.
1 From the Menu, select [Settings] →
[Management] → [NW Services] → [Multi
Number] → [Number Setting] and press
.
Number Setting
Multi Number call
OFF
<Basic Number>
基本契約番号
090XXXXXXXX
<Additional No.1>
付加番号
1
着信音
1
付加番号
1
着信画像
<Additional No.2>
付加番号
2
2 Set each item.
Item Description
Multi
Number
call
Select [ON]/[OFF] of the Multi Number call.
[ON] : Enable to select a phone number to
be used for placing a call from the
Option call display.
[OFF] : You cannot select a phone number
when you place a call.
Enter a name within 10 full-width or 20 half-
width characters.
/
Enter a phone number within 26 digits.
Select a ring tone from MUSIC/i-motion/Melody
of the Data Box.
ˎ You can set the following files. You can
select a Chaku-Uta® from [i-motion].
Category
File format
File size Image size
MUSIC※
AAC-LC/
HE-AAC
Max. 5M
bytes −
i-motion※MP4
Max. 10M
bytes
Max. [VGA
(640×480)]
Melody SMF/
MFi
Max. 350K
bytes
−
※ Some files may not be set.
ˎ To mute the ring tone, select [Silent].
Continued
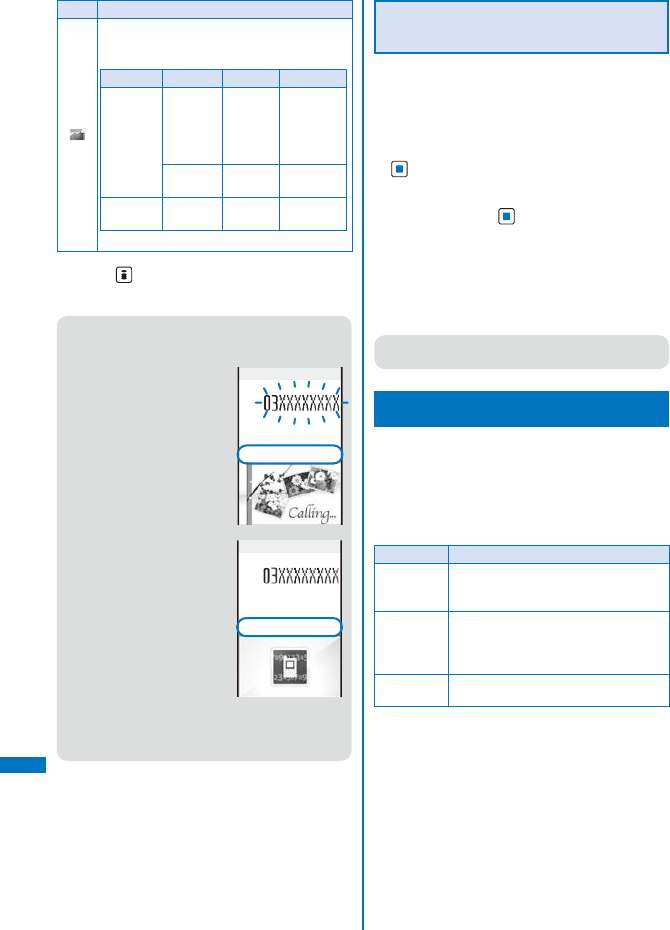
390
Network Services
Item Description
Select an incoming image from My picture/
i-motion of the Data Box.
ˎ You can set the following files.
Category
File format
File size Image size
My picture GIF/
JPEG
Max. 250K
bytes
Max. [Stby
(480×864)],
Max. W480×
H288 for GIF
animation
SWF
Max. 100K
bytes
−
i-motion※MP4
Max. 10M
bytes
Max. [VGA
(640×480)]
※ Some i-motion may not be set.
3 Press (Complete).
The details of a phone number are set.
● If you do not yet subscribe to the Multi Number
Service, use the FOMA terminal with the Multi
Number call set to [OFF].
Additional No.1
090XXXXXXXX
Calling
● If the Multi Number call
is set to [ON], a phone
number and name
associated with the Multi
Number (Basic Number/
Additional No.1/Additional
No.2) selected in the
Option call display are
displayed while placing a
call.
Incoming call
Additional No.2
090XXXXXXXX
● When you receive a call,
a phone number and
name associated with the
used Multi Number (Basic
Number/Additional No.1/
Additional No.2) being
used are displayed.
● When you place a call from the Redial or
Received record, the Multi Number previously
used for placing/receiving a call is displayed and
the call is placed using this number.
Setting an Originating Phone
Number
You can select a phone number to be used
when you place a call.
1 From the Menu, select [Settings] →
[Management] → [NW Services] → [Multi
Number] → [Set Multi Number] and press
.
2 Select an originating phone number →
[Yes] and press .
The phone number you use for placing a call is set.
To check the phone number you use for placing a
call
From the Menu, select [Settings] →
[Management] → [NW Services] → [Multi
Number] → [Check Multi Number].
● You can select a phone number manually in the
Option call display when you place a call (P.60).
Using 2in1
You can separately use two phone numbers,
two mail addresses, and exclusive modes for
each on your FOMA terminal as if you have two
terminals.
For the default settings, see the List of menus
(P.420).
Mode Description
A mode You can dial with your phone number
(Number A), send i-mode mail with
Address A, and browse related data.
B mode You can dial with 2in1 phone number
(Number B), access to sites where WEB
mail is available with Address B, and
browse related data.
Dual mode The mode that supports both functions
of A and B modes.
ˎ Sending/receiving mail for Address B is performed
on the specified WEB mail site.
ˎ Packet communication in B mode is available while
subscribing to the i-mode service.
ˎ For details on 2in1, see the “Mobile Phone User’s
Guide
【2in1】
”.
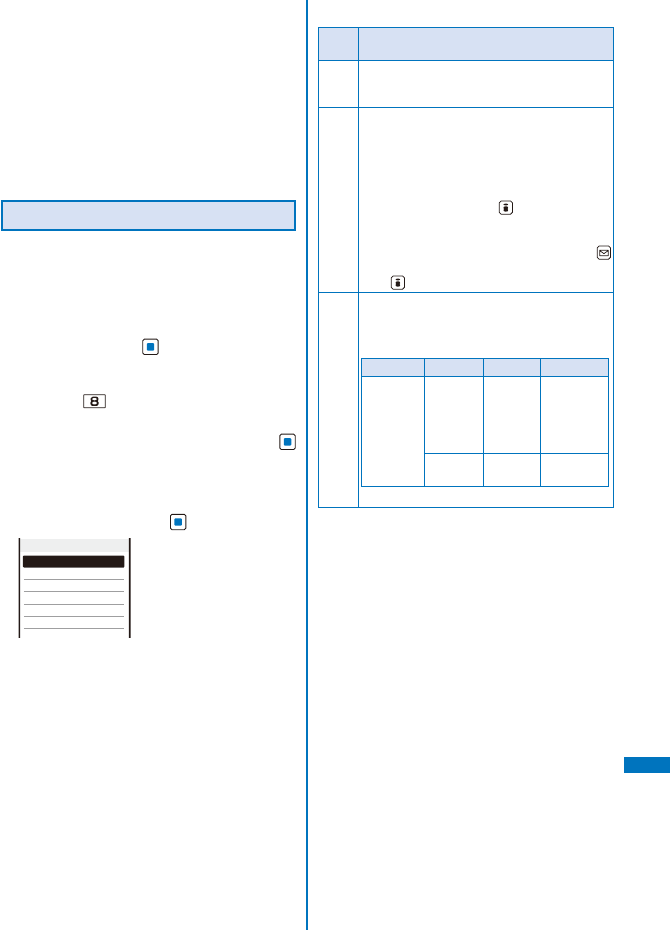
391
Network Services
ˎ When you replace the UIM (From 2in1 subscriber
to 2in1 subscriber) while 2in1 is used, to obtain a
correct Number B, you need to perform the 2in1
function OFF (P.400) first, and then set the 2in1 to
ON again.
When you replace the UIM (From 2in1 subscriber to
2in1 non-subscriber), perform the 2in1 function OFF.
ˎ When placing a voice/videophone call or originating
64K data communication from an external device,
if 2in1 is set to either the A mode or Dual mode, it
is done by Number A. When the B mode is set, it is
done by Number B.
Setting 2in1
You can set the operations such as the Stand-by
display and Receive avoid. setting by setting
the ON for 2in1.
1 From the Menu, select [Settings] →
[Management] → [NW Services] → [2in1
setting] and press .
The Security code screen appears.
ˎ The 2in1 setting display also appears by
pressing for over a second in the stand-by
display.
2 Enter the Security code and press
(OK).
When 2in1 is already set to ON
The 2in1 setting display appears.
3 Select [Yes] and press .
2in1 setting
Mode switching
Phonebook 2in1 setting
Stand−by display
Set call/receive No.
2in1 function OFF
Receive avoid. setting
2in1 is set to ON and the 2in1 setting display
appears.
4 Set each item.
Menu
item Operation
Mode
switching
Switch the 2in1 modes.
Select [Mode switching] → [A mode]/[B mode]/
[Dual mode].
Phonebook
2in1
setting
Change the 2in1 settings saved for the Phonebook.
ˎ When an entry is saved in the Phonebook,
the Phonebook 2in1 setting compatible with
the 2in1 mode is automatically saved.
● Set each entry
Select [Phonebook 2in1 setting] →
phonebook data → (Set) → Select
[A]/[B]/[Common].
● Set for a group
Select [Phonebook 2in1 setting] →
(Func) → Select [Set all groups] → a group
→ (Set) → Select [A]/[B]/[Common].
Stand-by
display
Set the stand-by display for the B and Dual modes.
Select [Stand-by display] → [B mode]/[Dual mode]
→ an image from My picture of the Data Box.
ˎ You can set the following files.
Category
File format
File size Image size
My picture GIF/
JPEG
Max. 250K
bytes
Max. [Stby
(480×864)],
Max. W480×
H288 for GIF
animation
SWF
Max. 100K
bytes
−
ˎ To specify no image, select [None].
Continued

392
Network Services
Menu
item Operation
Set call/
receive
No.
To identify the call placed or received using
Number B, set the font color and ring tone of
the incoming/receiving call display.
● Set the font color
Select [Set call/receive No.] → [Disp. call/rcv.
No.] → [dark]/[light].
● Set the ring tone
Select [Set call/receive No.] → [Ringtone
for Number B] → [Incoming call]/[Incoming
V.phone] → a ring tone from MUSIC/
i-motion/Melody of the Data Box.
ˎ You can set the following files.
Category
File format
File size Image size
MUSIC※
AAC-LC/
HE-AAC
Max. 5M
bytes −
i-motion※MP4
Max. 10M
bytes
Max. [VGA
(640×480)]
Melody SMF/
MFi
Max. 350K
bytes
−
※ Some files may not be set.
ˎ If you select [ON] at [Link incoming call],
the ring tone for the Incoming V.phone
follows the setting for the Incoming call.
ˎ When you receive a call without the caller
ID, the ring tone follows the setting of
[Ringtone for Number B].
2in1
function
OFF
Quit using the 2in1 functions.
Select [2in1 function OFF] → [Yes].
Receive
avoid.
setting
Set the restriction for incoming call of Number
A and Number B.
● Set the restriction for incoming call for
Number A and Number B individually
Select [Receive avoid. setting] → [Change
receive avoid.] → [Rcv. avoid. (Number
A)]/[Rcv. avoid. (Number B)] → [Receive]/
[Avoid]/[Unchange] → (Complete).
● Check the current setting
Select [Receive avoid. setting] → [Check
receive avoid.] → [Yes].
● Activate/deactivate the Mode link
When the A mode is used, allow to receive
a call only for Number A. When the B mode
is used, allow to receive a call only for
Number B. When the Dual mode is used,
allow to receive a call for both Number A
and Number B.
Select [Receive avoid. setting] → [Mode link
setting] → [Yes].
ˎ When the Mode link setting is set to
“Activate”, you cannot change the mode
while the FOMA is outside of the service
area.
● Set the Receive avoid. setting from
overseas
Select [Receive avoid. setting] → [Rcv.
avoid. set(Int.)] → Operate as instructed by
the guidance.
Selecting a Phone Number
When Placing a Call
When the Dual mode is set, you can select a
phone number to place a call.
1 Enter a phone number in the stand-by
display and press .
To place a videophone call
Press (V.phone).
ドコモ次郎
Select number
to call
Number A
Number B
Cancel
2 Select [Number A]/[Number B] and press
.
Place a call from the selected phone number.
● When you place a call using the Redial/Received
record, the phone number which was used to
receive/place a call previously is displayed and
the call is placed using this phone number.
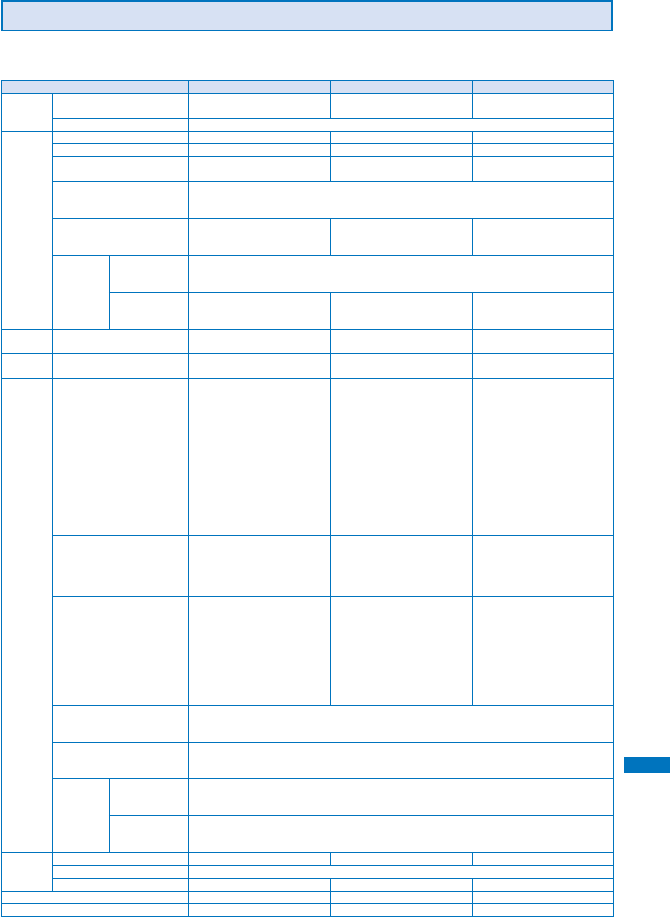
Network Services
393
Functions Available for Each Mode
The funcions which only differ from each mode are listed (the functions which are common with
the A mode are excluded).
Service A mode B mode Dual mode
Voice/
videophone
call
Call Number A Number B Selectable when placing a call
※1
Receive All
Phonebook
Display A/Common B/Common All
Change name※2 A/Common B/Common All
Phonebook 2in1 setting
when saving new data
ABA
Receive all from Infrared/iC
communication/microSD
memory card※3
Copy the Phonebook 2in1 setting of the sender※4
Receive one from Infared/iC
communication/microSD
memory card※3
ABA
UIM
phonebook
Copy from
FOMA terminal
to UIM
Common
Copy from
UIM to FOMA
terminal
ABA
Redial
record
Display Call from Number A Call from Number B All
Received
record
Display Call for Number A Call for Number B All
Mail/SMS Display ˎ Mail sent for/from Address A
ˎ SMS sent for/from Number A
FOMA terminal
ˎ Received mail sent for
Address B saved in the
FOMA terminal (at the WEB
mail site, mail set to [端末
に保存] (save to the FOMA
terminal)), newly arrived
notification mail, or alarm
notification mail
ˎ
SMS sent for Number B
WEB mail site
ˎ Mail sent for/from Address
B
FOMA terminal
ˎ Mail sent for/from Address
A, received mail sent for
Address B saved in the
FOMA terminal, newly
arrived notification mail, or
alarm notification mail
ˎ SMS sent for/from Address
A
ˎ
SMS sent for Number B
WEB mail site
ˎ Mail sent for/from Address
B
Send ˎ Mail from Address A
ˎ SMS from Number A
FOMA terminal
ˎ Cannot send mail/SMS
WEB mail site
ˎ Mail from Address B
FOMA terminal
ˎ
Mail from Address A※5
ˎ SMS from Number A
WEB mail site
ˎ Mail from Address B
Receive ˎ Mail for Address A/SMS for
Number A (with sound)
ˎ Received mail sent for
Address B saved in the
FOMA terminal, newly
arrived notification mail, or
alarm notification mail/SMS
sent for Number B (without
sound)
ˎ Mail for Address A/SMS for
Number A (without sound)
ˎ Received mail sent for
Address B saved in the
FOMA terminal, newly
arrived notification mail, or
alarm notification mail/SMS
sent for Number B (with
sound)
ˎ Mail for Address A/SMS for
Number A (with sound)
ˎ Received mail sent for
Address B saved in the
FOMA terminal, newly
arrived notification mail, or
alarm notification mail/SMS
sent for Number B (with
sound)
Receive all from Infrared/iC
communication/microSD
memory card※3
Copy mail/SMS following the sender status※4
Receive one from Infared/iC
communication/microSD
memory card※3
A
SMS in
UIM
Copy from
FOMA terminal
to UIM
A
Copy from
UIM to FOMA
terminal
A
PushTalk
Originate Number A Not available Number A
Receive Number A
PushTalk phonebook Display Cannot display Display
i-αppli Available all Available※6 Available※7
Own number Number A/Address A Number B/Address B
Number A/B/Address A/B
Continued

394
Network Services
※1 To place a call, Number A is the default setting
for the Phonebook of the A/Common setting, and
Number B is the one for the Phonebook of the B
setting.
※2 When the phone number of placing/receiving
a call or sending/receiving SMS and mail
address of receiving/sending mail are saved
in the Phonebook, after comparing them with
the phonebook data, the name saved in the
Phonebook of each phone number and mail
address is displayed.
※3 When you save the phonebook entries or mail from
the microSD memory card to the FOMA terminal,
you can save them based on each file in the
microSD memory card.
※4 When the sender’s mobile phone is not compatible
with the 2in1 functions, Number A is applied.
※5 When you compose new mail in the Dual mode,
you can select a mail address from the Phonebook
of the B mode setting but note that mail is sent
from Address A.
※6 Except i-αppli with mail, i-αppli using mail, and
i-αppli stand-by display.
※7 Except i-αppli stand-by display.
Using OFFICEED <OFFICEED>
“OFFICEED” is a fixed-rate service within
a group provided by IMCS (Indoor Mobile
Communication System). You may need to
apply separately to use this service.
ˎ For more information (provided only in Japanese),
see the DoCoMo’s website for business customers
(http://www.docomo.biz/d/212/).
Saving a New Service to
Use It <Additional service (USSD) registration>
When DoCoMo adds a new network service,
you can save the service in the Menu and use
it.
1 From the Menu, select [Settings] →
[Management] → [NW Services] →
[Additional service] and press .
2 Set each item.
Menu item Operation
Register USSD [Register USSD] → [Unregistered]
→ (Edit) → Enter a name of the
service at [Service] (within 10 full-
width or 20 half-width characters) →
Enter a USSD command at [USSD]
(within 20 digits) → (Complete).
●To use a service
Select [Register USSD] → a
service.
●To delete a service
[Register USSD] → Move the
cursor to a service and press
(Func) → Select [Delete one] (to
delete all services, select [Delete
all] → enter the Security code) →
Select [Yes].
Register ans
word
[Register ans word] →
[Unregistered] → (Edit) → Enter
an answering message at [Answer
wording] (within 10 full-width or 20
half-width characters) → Enter a
USSD command at [USSD] (within
20 digits) → (Complete).
●To delete an answering message
[Register ans word] → Move
the cursor to an answering
message and press (Func)
→ Select [Delete one] (to delete
all answering messages, select
[Delete all] → enter the Security
code) → Select [Yes].
395
PC Connection
About Data Communication ..................................................................................... 404
Before Using Data Communication .......................................................................... 406
Preparations and Flow of Data Transfer (OBEX™ Communication) ........................ 407
Preparations and Flow of Data Communication ...................................................... 407
AT Commands ......................................................................................................... 408
About the Supplied CD-ROM .................................................................................. 408
Introduction of DoCoMo keitai datalink .................................................................... 408
For detailed information on Data Communication, see the “Manual for PC connection setting”
(PDF format) included in the supplied CD-ROM or available on the DoCoMo’s website. You
need Adobe® Reader® to read the “Manual for PC connection setting” in the PDF format. If
Adobe® Reader® is not installed on your PC, install it from the supplied CD-ROM, which also
contains the Adobe® Reader® software.
For details on using Adobe® Reader®, see “Adobe Reader Help” that is installed with the
software.
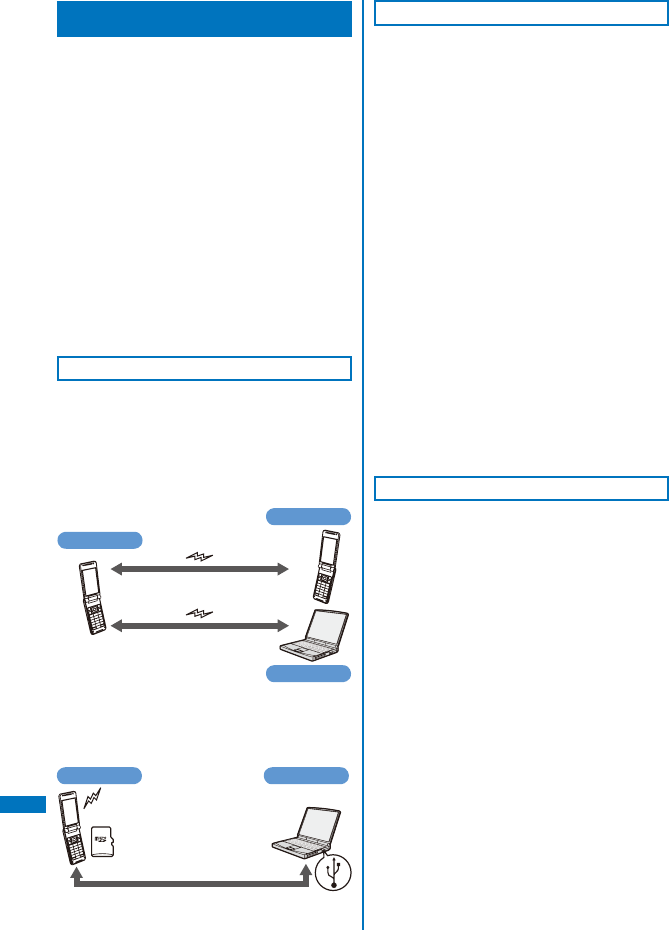
396
PC Connection
About Data Communication
You can use the FOMA terminal for three types
of data communication, packet communication,
64K data communication, and data transfer
(OBEX™ communication).
ˎ The FOMA terminal does not support Remote
Wakeup.
ˎ The FOMA terminal does not support FAX
communication.
ˎ If you are going to connect the FOMA terminal to
DoCoMo’s “sigmarionⅡ”/“sigmarionⅢ”/“musea”
PDA to perform data communication, you should
update “sigmarionⅡ”/“musea”. For details about
updating, see the DoCoMo’s website.
ˎ 64K data communication to be performed by
connecting to a PC is not available overseas. When
you originate the packet communication, use the IP
connection to communicate (the PPP connection
cannot originate the packet communication).
Data Transfer (OBEX™ Communication)
Data such as an image, music, Phonebook,
or mail can be sent and received between the
FOMA terminal and other FOMA terminal or
device such as a PC.
■ Infrared communication (P.329, 330)/iC
communication (P.332, 333)
FOMA terminal
FOMA terminal
PC, etc.
■ FOMA USB Cable with Charge Function
01/02 (optional) (P.314, 344)/microSD
memory card (P.306)/DoCoMo keitai datalink
(P.408)
PC, etc.FOMA terminal
Packet Communication
A charge applies to this type of communication
based on the volume of exchanged data
(maximum reception speed 3.6Mbps,
maximum transmission speed 384kbps).
You can perform packet communication by
connecting the FOMA terminal to a PC using
the FOMA USB Cable with Charge Function
01/02 (optional) and making the necessary
settings. Use a FOMA packet communication-
compliant access point such as DoCoMo’s
Internet connection service “mopera U”/
“mopera”. You can also exchange data by
accessing an in-house LAN connected to the
FOMA network.
ˎ Note that packet communication could be expensive
if you exchange large volumes of data such as
viewing sites or Internet home pages that contain
images or downloading files.
ˎ The maximum transmission/reception speed is
384kbps outside of the FOMA HIGH-SPEED Area.
ˎ When you use DoCoMo’s “sigmarionⅢ”/“sigmarion
Ⅱ”/“musea” PDA to perform packet communication,
the maximum transmission/reception speed is
384kbps. It does not support the high-speed
communication compatible with HIGH-SPEED Area.
64K Data Communication
A charge applies to this type of communication
based on the duration of a communication.
You can perform 64K data communication
by connecting the FOMA terminal to a PC
using the FOMA USB Cable with Charge
Function 01/02 (optional) and making the
necessary settings. Use a FOMA 64K data
communication-compliant access point such
as DoCoMo’s Internet connection service
“mopera U”/“mopera” or ISDN synchronous
64K access points.
ˎ Note that 64K data communication could be
expensive if it is performed for a long period of time.
397
PC Connection
Precautions on Use
Usage Fee of Internet Service Provider
When you use the Internet, a usage fee is
required for your Internet service provider. This
usage fee, which is separate from the FOMA
service charges, must be paid directly to the
Internet service provider. For details about
usage fees, contact your Internet service
provider.
You can use DoCoMo’s Internet connection
service “mopera U”/“mopera”.
To use “mopera U”, you need to subscribe to
this service (paid service). No monthly charge
is required to use “mopera” and you do not
need to subscribe to it.
Setting a Host (Such as an Internet
Service Provider)
The host for packet communication is different
from the host for 64K data communication.
To use packet communication, use a packet
communication-compliant host; to use 64K
data communication, use a FOMA 64K data
communication-compliant host or ISDN
synchronous 64K-compliant host.
ˎ You cannot connect to a DoPa access point.
User Authentication for Network Access
User authentication (ID and password) may
be required when connecting to some hosts.
If user authentication is required, enter your ID
and password on the communication software
(dial-up network) for connecting to the host.
The Internet service provider or network
administrator of the host assigns an ID and
password. For details, contact your Internet
service provider or network administrator of the
host.
Access Authentication for the Use of a
Browser
When a FirstPass-compatible site that you
access through the Internet browser on your
PC requires the FirstPass (user certificate) as
an access authentication, install the FirstPass
PC software from the supplied CD-ROM
and perform necessary settings. For details,
see “FirstPassManual” (PDF format) in the
[FirstPassPCSoft] folder on the CD-ROM. You
need Adobe® Reader® (Version 6.0 or later is
recommended) to read “FirstPassManual” (PDF
format). If Adobe® Reader® is not installed
on your PC, install it from the same CD-ROM,
which also contains the Adobe® Reader®
software.
For details on using Adobe® Reader®, see
“Adobe Reader Help” that is installed with the
software.
Conditions of Packet and 64K Data
Communication
The following conditions are necessary to
perform communication using the FOMA
terminal (for using in Japan).
- The FOMA USB Cable with Charge Function 01/02
(optional) can be used on your PC.
- Your PDA must have FOMA packet and 64K data
communication support.
- You must be inside of the FOMA’s service area.
- The host for packet communication must have
FOMA packet communication support.
- The host for 64K data communication must
have FOMA 64K or ISDN synchronous 64K data
communication support.
Note, however, that even if you comply with
the above conditions, you may not be able to
perform communication if the base station is
congested or radio wave condition is poor.
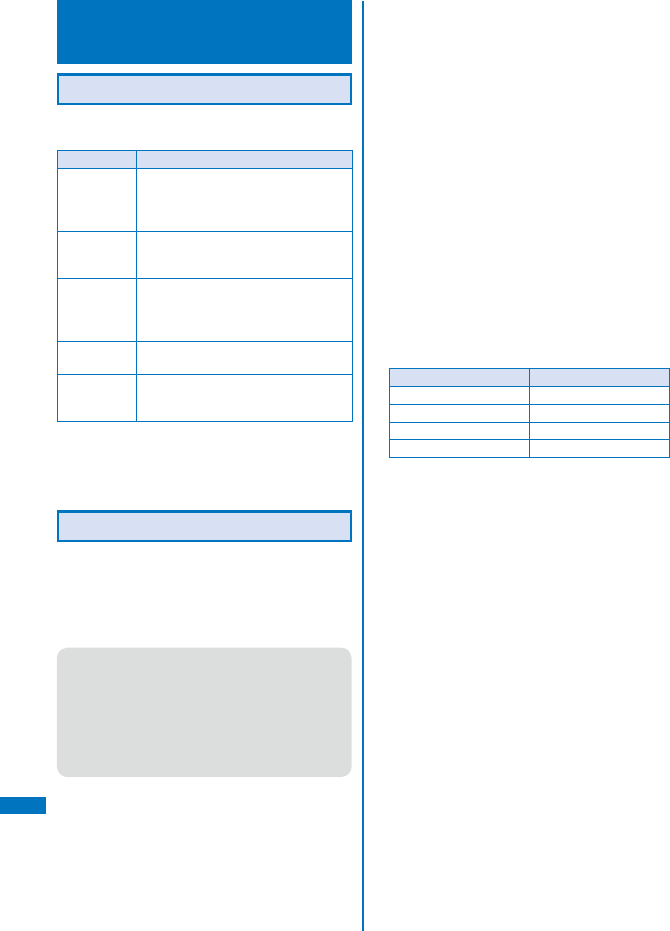
398
PC Connection
Before Using Data
Communication
About the Operating Environment
Operating environment of a PC to be used for
data communication is as follows.
Item Required environment
PC main unit ˎ PC/AT compatible machine with a
built-in or removable CD-ROM drive
ˎ USB port (Universal Serial Bus
Specification 1.1 compliant)
OS※1 Windows 2000 Professional,
Windows XP,
Windows Vista (Japanese version)
Required
memory※2
Windows 2000 Professional: 64MB or
more
Windows XP: 128MB or more
Windows Vista: 512MB or more
Hard drive
capacity※2
5MB or more free space
Display High color (65,536 colors) and high
resolution (800×600 dots) or over
(recommended)
※1 Operation on a PC running upgraded OS is not
guaranteed.
※2 The required memory and hard drive capacity may
vary depending on the PC system configuration.
Other Necessary Items
Other than the FOMA terminal and a PC, the
following hardware and software are necessary.
ˎ FOMA USB Cable with Charge Function 01/02
(optional) or FOMA USB Cable (optional)
ˎ Supplied CD-ROM “FOMA SO906i CD-ROM”
● This manual assumes that you use the FOMA
USB Cable with Charge Function 01/02 (optional).
● Use the exclusive “FOMA USB Cable with
Charge Function 01/02” or “FOMA USB Cable”.
A generic USB cable for a PC connection cannot
be used because it has a different connector
shape.
● If you use USB HUB, it may not work properly.
■ Definition of terms
● Administrator
An administrator is authorized access to all
Windows XP, Windows 2000 Professional, and
Windows Vista systems. At least one user with
Administrator privilege is set for each PC. Normally,
a user without Administrator privilege cannot install
the FOMA communication configuration files. For
more information on Administrator privilege, contact
the manufacturer of your PC or a representative of
Microsoft Corporation.
● APN (Access Point Name)
A character string used for identifying the Internet
service provider host or in-house LAN for packet
communication. For example, the APN of “mopera U”
is “mopera.net”.
● cid (Context Identifier)
A registration number available when you save a
packet communication host (APN) in the FOMA
terminal. You can save up to 10 numbers from one
to 10 for the FOMA terminal.
Default cid of the FOMA terminal
Registration number (cid) Host (APN)
1 mopera.ne.jp (mopera)
2 Undefined
3 mopera.net (mopera U)
4-10 Undefined
● DNS (Domain Name System)
DNS is a system that converts a domain name
(example: nttdocomo.co.jp) into an IP address,
which is used by a PC.
● QoS (Quality of Service)
Service quality technology that enables the
user to use a communication line in accordance
with requirements. If you are using the FOMA
terminal, you can set the communication speed for
connection.
●通信設定最適化 (Optimizing the communication
settings)
“通信設定最適化” is a “TCP parameter setting”
tool that makes optimal use of TCP/IP transmission
capabilities for packet communication on the FOMA
network. To make the most of the communication
performance of the FOMA terminal, you need to
configure the communication settings using this
software.

399
PC Connection
Preparations and Flow of Data
Transfer (OBEX™ Communication)
To use the FOMA USB Cable with Charge
Function 01/02 (optional), install the FOMA
communication configuration files.
Data transfer
Install the FOMA communication configuration files
(USB drivers).
ˎ Install from the supplied CD-ROM
or
ˎ Download from the DoCoMo’s website and install
Preparations and Flow of
Data Communication
The preparations required for performing
packet and 64K data communication by
connecting the FOMA terminal to a PC are
given below.
When you use the
FOMA PC setup
software
Install the FOMA communication configuration files (USB drivers).
Connect the FOMA terminal to a PC.
Check the installed FOMA communication configuration files.
Set a host.
Packet
communication
ˎ “mopera U” or
“mopera”
ˎ Other provider
Perform communication.
Start up communication software that is
compatible with AT commands.
Set a host.
Set ON/OFF for the Notify caller ID.
Set up the dial-up network.
Perform dial-up connection.
When you do not
use the FOMA PC
setup software
Install the FOMA PC setup software.
64K data
communication
ˎ “mopera U” or
“mopera”
ˎ Other provider
ˎ Install from the supplied CD-ROM
or
ˎ Download from the DoCoMo’s website and install

400
PC Connection
AT Commands
AT commands are the commands (instructions)
that are executed on a PC for setting and
changing the functions of the FOMA terminal.
For more information on the AT commands, see
the “Manual for PC connection setting” (PDF
format) included in the supplied CD-ROM.
About the Supplied CD-ROM
The supplied CD-ROM contains the software
required for data communication using
the FOMA terminal and the “Manual for
PC connection setting”/“Kuten Code List”
operation instructions (PDF format). For details,
see the supplied CD-ROM.
<Software/PDF>
◆ FOMA communication configuration files
◆ FOMA PC setup software
◆ FOMA byte counter
◆ General information about DoCoMo keitai datalink
◆ FirstPass PC software
◆ General information about mopera U (mopera U start
up tool/mopera U connection & setting tool/mopera
U requesting original data/FOMA byte counter)
◆ General information about Napster®
◆ “Manual for PC connection setting” in PDF format
◆ “Kuten Code List” in PDF format
◆ Adobe® Reader®
◆ Picture Motion Browser Ver.2.2.01
◆ Declaration of Conformity (DoC)
● When you set the supplied CD-ROM in the PC,
a warning window as shown below may appear.
This warning appears because of the security
setting on the Internet Explorer, however, causing
no problem for use.
Click [はい].
※ The window example assumes that Windows
XP is used as an operating system. The actual
window that appears may differ depending on
your PC environment.
Introduction of DoCoMo
keitai datalink
“DoCoMo keitai datalink” software is used to
make backup files of the Phonebook and mail,
etc. to a PC from your FOMA terminal and edit
the data on the PC. This software is provided
on the DoCoMo’s website. For more information
about this software and how to download this
software, see the following website. You can
also access the following website from the
supplied CD-ROM. (Japanese only)
http://datalink.nttdocomo.co.jp/
For more details about the downloading method, data
that can be transferred, supporting OS, operating
environment, installation method, operation method,
and restrictions, see the above website.
For the operation procedure after installing the
software, see the Help of the software.
A FOMA USB Cable (optional) is required to use the
DoCoMo keitai datalink software.

401
Overseas Use
Overview of International Roaming (WORLD WING) .............................................. 410
Services Available Overseas ................................................................................... 410
Before Using the FOMA Terminal Overseas ............................................................ 411
Placing a Call from Your Overseas Location ............................................................ 414
Receiving a Call ....................................................................................................... 414
Setting the Network to be Used ...................................................... <3G/GSM setting> 415
Setting the Carrier Search Method ........................................<Network search mode> 415
Setting the Higher-priority Carrier for Connection .............................<PLMN setting> 416
Setting the Display for International Roaming ......................<Operator name display> 416
Checking the Communication Status .........................................<Check service area> 417
Starting the Roaming Guidance Service ...................................<Roaming Guidance> 417
Rejecting an Incoming Call during Roaming ............................... <Bar Incoming call> 417
Using the Network Services during Roaming ................................<Oversea service> 418

402
Overseas Use
Overview of International
Roaming (WORLD WING)
The international roaming (WORLD WING) is
a service that enables you to use the same
phone number and mail address as used
in Japan to have phone conversations or
communicate using the networks of overseas
carriers even if you are abroad.
For more information on available
communication services while the international
roaming service is used, see the “Mobile
Phone User’s Guide
【International services】
”.
Also, at the DoCoMo’s “International service
website”, you can check the latest information
of international services as well as download
the latest “Mobile Phone User’s Guide
【International services】
”.
http://www.nttdocomo.co.jp/service/world/
ˎ The FOMA terminal works in a 3G Roaming Area
and GSM/GPRS service area.
ˎ The FOMA terminal is set to automatically change a
network at the time of purchase (P.415).
Subscribing to WORLD WING
ˎ If you subscribed to the FOMA services after
September 1, 2005, you already have “WORLD
WING” and no application is required. If you
declined to use “WORLD WING” when you
subscribed to the FOMA services or canceled the
“WORLD WING” service halfway, you need to make
a separate application.
ˎ If you subscribed to the FOMA services before
August 31, 2005 and have not yet made an
application to “WORLD WING”, you need to make
an application.
ˎ This service is not available in some service charge
plans.
■ Country codes for major countries
When you use an international call or set to the Int’l
dial assist, use the following country codes (as of
December 2007).
Area Country
code Area Country
code
Australia 61 Malaysia 60
Austria 43 Maldives 960
Belgium 32 Netherlands 31
Brazil 55 New Caledonia 687
Canada 1 New Zealand 64
China 86 Norway 47
Czech Republic 420 Peru 51
Egypt 20 Philippines 63
Fiji 679 Russia 7
Finland 358 Singapore 65
France 33 Spain 34
Germany 49 Sweden 46
Greece 30 Switzerland 41
Hong Kong 852 Tahiti (French
Polynesia)
689
Hungary 36
India 91 Taiwan 886
Indonesia 62 Thailand 66
Italy 39 Turkey 90
Japan 81 United Kingdom 44
Korea 82 USA 1
Macau 853 Vietnam 84
● For other country codes and details, see the
DoCoMo’s “International service website”.
Services Available Overseas
Communication services that you can use
overseas are described in the following table.
ˎ Some of the communication services may not be
available depending on the carrier or network to
which you connect. For the communication services
that can be used during international roaming, see
DoCoMo’s “International service website”.
403
Overseas Use
Continued
Communication service 3G GSM
GPRS
Voice call※1
You can use the same mobile
phone number as used in Japan
even from an overseas location to
place international calls to Japan
and other countries as well as
ordinary calls in your country of
stay.
○○○
Videophone call※1
You can place international
videophone calls to specific 3G
carrier users overseas and to
FOMA users.
○××
i-mode
You can use i-mode even from an
overseas location.
○×○
i-mode mail
You can use the same mail
address as used in Japan even
overseas and send/receive i-mode
mail.
○×○
SMS※2
You can use the same mobile
phone number as used in Japan
even from an overseas location to
send/receive SMS messages.
○○○
i-Channel※3○○○
Data communication
(Packet communication)※4○×○
※1 When 2in1 is used, you cannot place a call from
Number B.
※2 You can send and receive SMS to/from a user who
uses the FOMA terminal in Japan and overseas
and a user who is using an overseas carrier, even
if you are using the international roaming service.
ˎ When you send SMS to the recipient who uses
an overseas carrier, enter “+” and the recipient’s
country code before entering the phone number
of the recipient as his address. Make sure to
omit the first “0” when you enter the phone
number, if it starts with “0”.
ˎ If you include characters in your SMS message
that are not supported by the recipient’s
terminal, those characters may not be displayed
correctly when you send this SMS message to
a recipient who is using an overseas carrier.
For details, see the “Mobile Phone User’s Guide
【International services】
” and “Mobile Phone
User’s Guide
【Network services】
”.
※3 Auto update is automatically and temporarily
canceled when you connect to an overseas carrier.
To restart the Auto update of i-Channel overseas,
you need to perform the i-Channel setting again.
Note that there is a communication charge every
time you receive i-Channel while you are overseas
(domestic free-of-charge communication is not
applicable overseas).
※4 64K data communication to be performed by
connecting to a PC is not available overseas.
When you originate the packet communication,
use the IP connection to communicate (the
PPP connection cannot originate the packet
communication).
● The GPS function is not available overseas. Also,
if you access to the site for performing settings
to use the GPS service, the display informing an
error appears but packet communication charge
is required.
Before Using the FOMA
Terminal Overseas
You must check the following items before
departure, during your stay overseas, and after
returning to Japan.
ˎ The overseas communication charge is included in
your monthly charge. In some cases, however, the
overseas communication charge is included in the
charge of the following month depending on the
system used by the carriers in the country of your
stay. Also note that in some cases the charge is not
included in the relevant month even if you use the
FOMA terminal overseas during the same billing
target period.
Checks before Departure
To use the FOMA terminal overseas, please
check the following items in Japan.
ˎ When you use the network services from an
overseas location, set the Remote Control to
“Activate” before leaving Japan (P.397).
■ About charging the battery
About charging the battery, see the followings.
ˎ Precautions on handling the AC adapter (P.20)
ˎ How to charge with the AC adapter (P.40, 41)
■ About i-mode
To view sites using i-mode overseas, perform
“海外利用設定” (the settings for using i-mode
overseas) accessible from i Menu.
ˎ For details, see the “Mobile Phone User’s Guide
【i-mode】
FOMA version”.
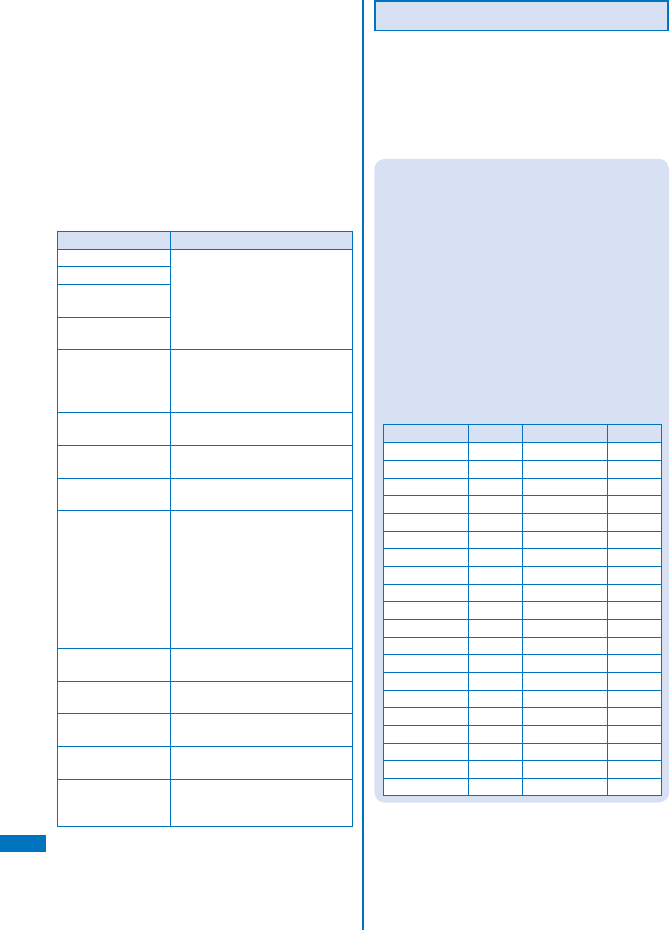
404
Overseas Use
■ About setting the network services
When you are subscribing to the network
services, you can perform the network service
setting/cancellation from overseas, except for
some functions.
ˎ You may not be able even to use the network
services that you are supposed to be able to set/
cancel, depending on the overseas carrier you
use. Also, some of the network services can be
performed only in Japan.
To use the network services overseas, see
the “Mobile Phone User’s Guide
【International
services】
” and “Mobile Phone User’s Guide
【Network services】
” before departure.
Menu name Description
Voice Mail (P.392) You may not be able to set the
services in some service areas.
Call Waiting (P.393)
Call Forwarding
(P.393)
Bar Nuisance Calls
(P.394)
Notify Caller ID
(P.45)
You may not be able to set the
service in some service areas.
Also, a caller ID may not be
notified correctly in some cases.
Caller ID Request
(P.395)
You may not be able to set the
service in some service areas.
Dual Network
(P.395)
You cannot set this service.
English Guidance
(P.395)
You may not be able to set the
service in some service areas.
Multi Number
(P.397)
You may not be able to set the
service in some service areas.
Note also that you cannot place
a call from your additional
number. You can receive an
incoming call to your additional
number, but you may not be able
to identify the number being
used for receiving the call.
2in1 (P.398) You cannot place a call from
Number B.
Chaku-moji (P.58) You can set the service, but you
cannot use it.
Roaming Guidance
(P.417)
You may not be able to set the
service in some service areas.
Bar Incoming call
(P.417)
You may not be able to set the
service in some service areas.
Public mode
(Drive mode) (P.69)
You can set the service, but you
cannot use it. Cancel the setting
overseas.
Checks in the Location of Stay
The FOMA terminal works in a 3G Roaming
Area and GSM/GPRS service area.
The FOMA terminal is set by default to
automatically search the network and connect
to the local carrier when you power it on in an
overseas location.
About inquiries
For inquiries about loss, theft, the charge
settlement, and repairs overseas, see “For Loss,
Theft, and Charge Settlement for Overseas” or
“About Troubles and Repairs for Services Overseas”
on the backcover of this manual. Note that you are
still liable for the call and communication charge
incurred after the loss or theft occurred.
ˎ For the latest information on the international
access number and international prefix number
for the universal number, see the DoCoMo’s
“International service website”.
■ International access number for major countries
(Table1)
The international access number for major countries
is as follows (as of August 2007).
Area Number Area Number
Australia 0011 Malaysia 00
Belgium 00 Monaco 00
Brazil
0041/0014
Netherlands 00
Canada 011 New Zealand 00
China 00 Norway 00
Czech Republic
00 Philippines 00
Denmark 00 Poland 00
Finland 00 Portugal 00
France 00 Russia 810
Germany 00 Singapore 001
Greece 00 Spain 00
Hong Kong 001 Sweden 00
Hungary 00 Switzerland 00
India 00 Taiwan 002
Indonesia 001 Thailand 001
Ireland 00 Turkey 00
Italy 00
United Arab Emirates
00
Korea 001
United Kingdom
00
Luxembourg 00 USA 011
Macau 00 Vietnam 00
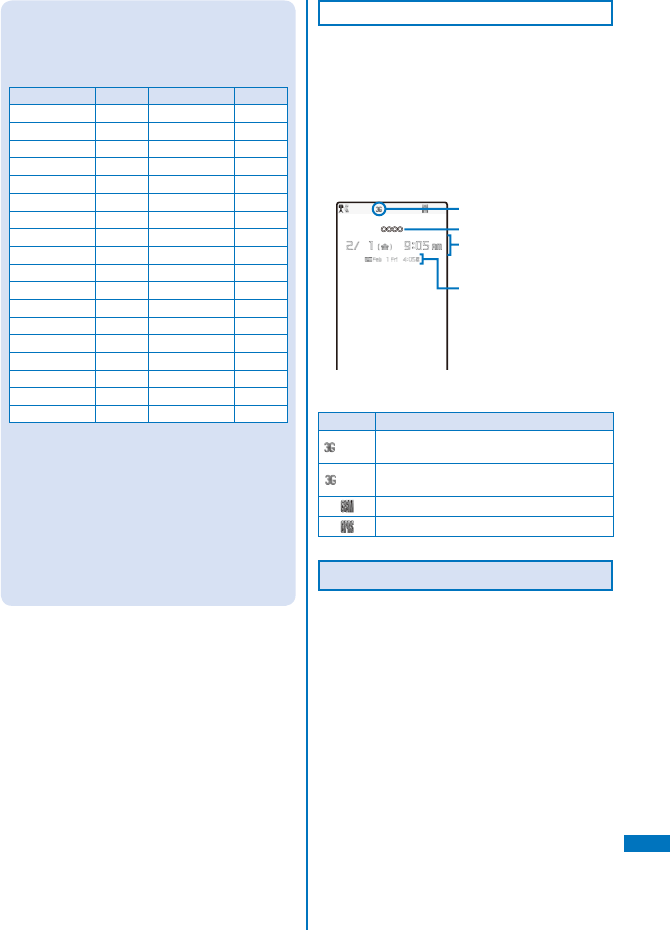
405
Overseas Use
■ International prefix number for the universal
number (Table2)
The international prefix number for the universal
number of each country is as follows (as of August
2007).
Area Number Area Number
Argentina 00 Korea 001
Australia 0011 Luxembourg 00
Austria 00 Malaysia 00
Belgium 00 Netherlands 00
Brazil 0021 New Zealand 00
Bulgaria 00 Norway 00
Canada 011 Peru 00
China 00 Philippines 00
Colombia 009 Portugal 00
Denmark 00 Singapore 001
Finland 990 South Africa 09
France 00 Spain 00
Germany 00 Sweden 00
Hong Kong 001 Switzerland 00
Hungary 00 Taiwan 00
Ireland 00 Thailand 001
Israel 014
United Kingdom
00
Italy 00 USA 011
ˎ Some of them may not be used.
ˎ The universal number is available only for
countries listed on the table above.
ˎ When you place a call from a hotel, the hotel may
charge the phone call (it is liable for you to pay).
Before placing a call, make sure to check with
the hotel.
ˎ Please note that, in many cases, the universal
number may not be available when you place a
call from a mobile phone, public phone, hotel, or
other places.
Display to Be Shown Overseas
While you use the FOMA terminal overseas,
the name of the connected network carrier
appears in the stand-by display.
ˎ You can also set the FOMA terminal not to display
the name of the carrier (P.416).
ˎ To display the current date/time of the location of
stay on the main clock and additionally to display
the sub-clock, set the Auto time adjust to [ON] (P.44).
However, the time may not be corrected in some
networks overseas.
○○○○ ○○○○
Connected network
Carrier name
Main clock
ˎ Display the current date/
time of the location of stay.
Sub-clock
ˎ Display the current date/
time of Japan.
ˎ The following icons show the current network
connection.
Icon Network you can use
(Blue) 3G network (supported packet
communication)
(Red) 3G network (not supported packet
communication)
GSM network
GPRS network
Checks after Returning to Japan
When you power on the FOMA terminal after
returning to Japan, it is set by default to
automatically search the network and connect
to the FOMA network (NTT DoCoMo, Inc).
ˎ If the Network search mode is set to [Manual],
manually switch to the FOMA network (NTT
DoCoMo, Inc) or change the setting to [Auto].
ˎ You need to set to [Auto] or [3G] at the 3G/GSM
setting.
406
Overseas Use
Placing a Call from Your
Overseas Location
You can use the international roaming service
and place a call from an overseas location.
Placing a Call to Another Country (Including
Japan) from Your Overseas Location
You can place a call to Japan or another
country from your country of stay.
ˎ You can easily place an international call if you save
the country codes of frequently dialed countries
using the Country code of the Int’l dial assist setting
(P.62).
1 Press “+” (press for over a second)
in the stand-by display. Enter a country
code, area code, and a recipient’s phone
number, in that order.
ˎ If an area code begins with “0”, omit the “0”
when dialing (excepting when calling ordinary
phones, etc. in Italy).
ˎ To place an international call to Japan, enter the
country code “81”.
To place a call to a country saved using the Country
code
Enter a phone number in the stand-by display,
press (Option), select [Call method] →
[Voice call]/[Videophone] → [Country code] → a
country code, and press (Call).
To place a call to a recipient saved in the Phonebook
Select a recipient form the Phonebook and
press . To place a videophone call, select a
recipient, press , and press (V.phone). The
first digit of the phone number “0” is converted
into a country code automatically added by the
Int’l dial assist before the call is dialed.
To place a call from the Redial/Received record
Select a recipient from the Redial/Received
record and press or (V.phone).
2 Press .
The international call is dialed.
To place a videophone call
Press (V.phone).
Placing a Local Call in Your
Overseas Location
You can place calls in your country of stay in
the same way you do in Japan.
1 Enter a phone number in the stand-by
display.
Make sure to include the area code, even for a local
call.
If a recipient uses “WORLD WING”, place a call to
the recipient as an international call to Japan.
2 Press .
The call is dialed.
To place a videophone call
Press (V.phone).
● If both you and the recipient of your videophone
call are using a carrier that supports FOMA
videophone calls, you can perform an
international videophone call by first using the
international call dialing method and then placing
a videophone call.
※ For information about countries and
carriers you can connect to, see DoCoMo’s
“International service website”.
※ The videophone image displayed on the
FOMA terminal may be distorted or the
videophone call may not be connected
depending on the terminal being used by the
other party for the international videophone
call.
Placing a Call to a WORLD WING
Overseas User
If the recipient is a “WORLD WING” overseas
user, enter the country code “81” and place the
call as an international call to Japan regardless
of the current location at home and abroad.
Receiving a Call
You can receive a call using the international
roaming service when you are overseas.
1 When receiving a call, press .
You can talk to a caller.
When you receive a videophone call
Press or (V.phone). To answer a call with
a substitute image, press (Sub).
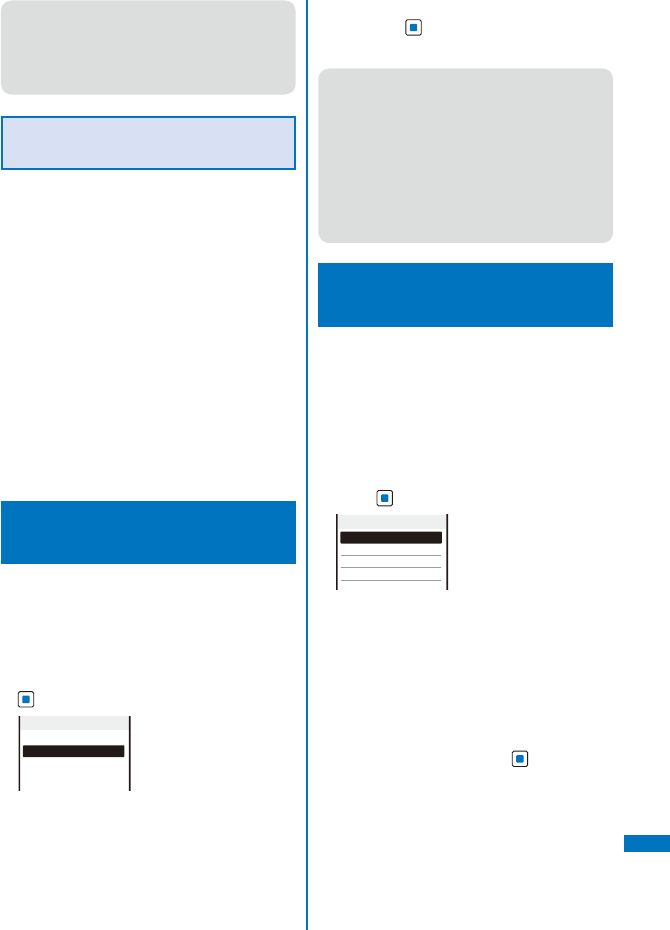
407
Overseas Use
● If you receive a call during international roaming,
the call is forwarded to the country of your
stay from Japan. There is a communication
charge to the caller for the call to Japan and
an international call forwarding charge to the
recipient.
Procedure for a Caller Who
Wants to Call You
■ When the caller places a call from Japan
Ask the caller to dial only your phone number
in the same manner as it is done in Japan.
090–XXXX–XXXX
or
080–XXXX–XXXX
■ When the caller places a call from countries
other than Japan
Ask the caller to dial the international access
number and country code of Japan “81” and
then your phone number without the first “0”
and place the call as an international call to
Japan regardless of your country of stay.
International access number–81–90–XXXX–XXXX
or
International access number–81–80–XXXX–XXXX
Setting the Network to be
Used <3G/GSM setting>
You can set a communication method to be
supported in an area or by a carrier you use.
ˎ The default setting is set to [Auto].
1 From the Menu, select [Settings] →
[Management] → [NW Services] → [Int’l
roaming] → [3G/GSM setting] and press
.
3G/GSM setting
Auto
3G
GSM/GPRS
[Auto]:
Search all networks that can be connected to.
[3G]:
Search only 3G-compatible networks.
[GSM/GPRS]:
Search only GSM- or GPRS-compatible networks.
2 Select [Auto]/[3G]/[GSM/GPRS] → [Yes]
and press .
The network communication method is set.
● When the 3G/GSM setting is set to [Auto] and
the Network search mode is set to [Auto], if
you search a carrier that supports both the
3G and GSM/GPRS networks, the terminal is
automatically connected to the 3G network.
● In Japan or 3G network compatible areas, it is
recommended to set the 3G/GSM setting to [3G]
to suppress the consumption of the battery.
● Even if you are in the GSM network, you cannot
perform the packet communication if the network
does not support GPRS.
Setting the Carrier Search
Method <Network search mode>
You can set whether to search the network
automatically and connect to another carrier
when the network currently used falls outside
of the service area.
Example: Changing a carrier for manual connection
1 From the Menu, select [Settings] →
[Management] → [NW Services] → [Int’l
roaming] → [Network search mode] and
press .
Network search mode
Auto
Manual
Network re−search
PLMN setting
[Auto]:
Automatically connect to another carrier.
[Manual]:
Manually select a carrier.
[Network re-search]:
Search the carrier to be connected again.
[PLMN setting]:
Set a carrier with the higher-priority for
connection (P.416).
2 Select [Manual] and press .
The menu for selecting a network appears.
Continued
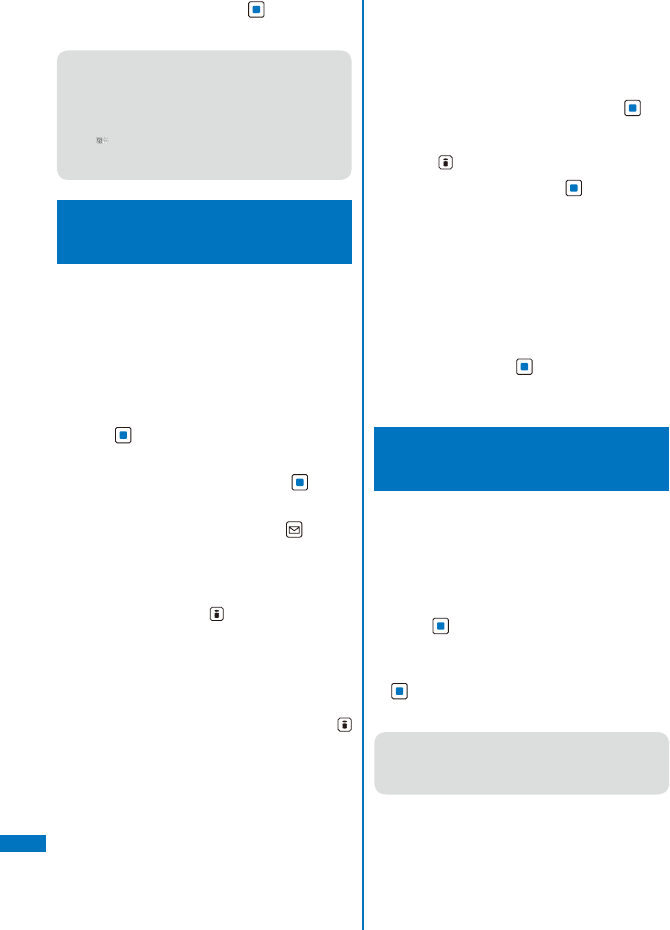
408
Overseas Use
3 Select a carrier and press .
The carrier to be connected is changed.
● You may not be able to set this function
depending on the radio wave condition or
network restrictions.
● As of December 2007, you cannot select a
carrier other than NTT DoCoMo in Japan.
● If “ ” appears in the display after you return to
Japan, check if the Network search mode is set
to [Auto].
Setting the Higher-priority Carrier
for Connection
<PLMN setting>
You can set a priority for the carriers to be
automatically connected when the Network
search mode is set to [Auto]. You can save a
priority setting for up to 20 carriers.
Example: Saving a carrier from the carrier list
1 From the Menu, select [Settings] →
[Management] → [NW Services] → [Int’l
roaming] → [Network search mode] and
press .
The Network search mode display appears.
2 Select [PLMN setting] and press .
The PLMN setting display appears.
3 Select [Unregistered] and press (Func).
The Function menu appears.
Entering a carrier manually
From the Function menu, select [PLMN manual
sel.], enter a country code (MCC) and network
number (MNC), press (Complete), and select
a network communication method → [Yes].
To save the carrier being connected
From the Function menu, select [VPLMN to
PLMN] → [Yes].
To change the priority
From the Function menu, select [Change priority]
→ a carrier → a desired position, press
(Complete), and select [Yes].
To display detailed information
Move the cursor to the carrier and from the
Function menu, select [Detail info].
To delete a carrier
Move the cursor to the carrier and from the
Function menu, select [Delete] → [Delete one]
→ [Yes]. To delete all carriers, from the Function
menu, select [Delete] → [Delete all], enter the
Security code, and select [Yes].
4 Select [Select from List] and press .
The PLMN slct from List display appears.
To search for a carrier by country name
Press (Search) and select a country name.
5 Select a carrier and press .
The screen for selecting 3G/GSM appears.
[3G/GSM/GPRS]:
Set as the 3G and GSM/GPRS compatible
carrier.
[3G]:
Set as the 3G compatible carrier.
[GSM/GPRS]:
Set as the GSM/GPRS compatible carrier.
6 Select a network communication method
→ [Yes] and press .
A carrier with the higher-priority for connection is
set.
Setting the Display for International
Roaming
<Operator name display>
You can set whether to display the name of the
connected carrier in the stand-by display while
you are using the international roaming service.
1 From the Menu, select [Settings] →
[Management] → [NW Services] → [Int’l
roaming] → [Operator name display] and
press .
The display of the Operator name display appears.
2 Select [Display on]/[Display off] and press
.
The carrier name display is set.
● Even if you set the Operator name display to
[Display on], the carrier name is not displayed
when you are using the “DoCoMo” network or
you are outside of the service area.
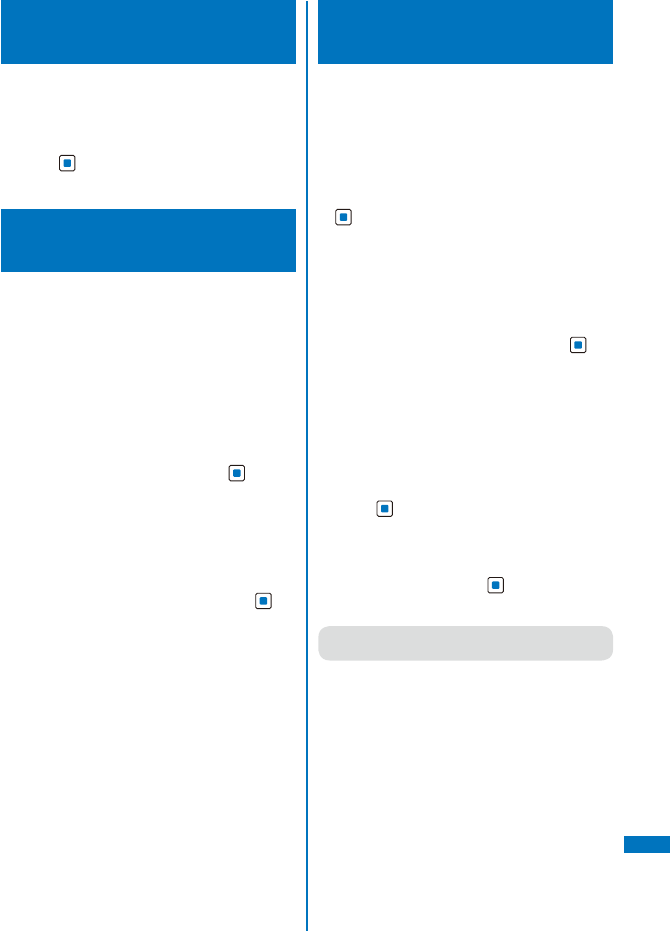
409
Overseas Use
Checking the Communication
Status
<Check service area>
You can check the available network services
in your overseas location.
1 From the Menu, select [Settings] →
[Management] → [Check serv. area] and
press .
The available network services appear.
Starting the Roaming Guidance
Service
<Roaming Guidance>
If you receive a call during international
roaming, you can inform a caller that you are
using the international roaming service by
playing back the guidance.
ˎ The guidance may be played back in a foreign
language depending on the conditions of the
overseas carrier.
ˎ You need to set the service in Japan.
1 From the Menu, select [Settings] →
[Management] → [NW Services] →
[Roaming Guidance] and press .
The Roaming Guidance display appears.
To cancel the roaming guidance
Select [Deactivate] → [Yes]. A caller hears the
ring tone set by the overseas carrier.
To check the setting
Select [Request Status] → [Yes].
2 Select [Activate] → [Yes] and press .
The roaming guidance service is activated.
Rejecting an Incoming Call
during Roaming
<Bar Incoming call>
You can set whether to reject incoming calls
during roaming. You can select whether to
reject either all incoming calls or only incoming
videophone calls.
1 From the Menu, select [Settings] →
[Management] → [NW Services] → [Int’l
roaming] → [Bar Incoming call] and press
.
The Bar Incoming call display appears.
To cancel the Bar Incoming call service
Select [Deactivate barring], enter the network
security code, and select [Yes].
To check the setting
Select [Request Status].
2 Select [Activate barring] and press .
The Activate barring display appears.
[Bar all incm call]:
Reject all incoming calls.
[Bar. V.phone/64K]※:
Reject incoming videophone calls.
※ 64K data communication cannot be used
overseas.
3 Select the type of call to be rejected and
press .
The network security code screen appears.
4 Enter a network security code.
5 Select [Yes] and press .
The Bar Incoming call is activated.
● You may not be able to set it depending on the
overseas carrier you use.
410
Overseas Use
Using the Network Services
during Roaming
<Oversea service>
You can use network services such as the
Voice Mail and Call Forwarding Services from
an overseas location.
ˎ To use the network services overseas, set the
Remote Control to “Activate” (P.397).
ˎ An international call charge applies in the country
where you use the service when you operate the
FOMA terminal overseas.
Operating the Voice Mail Service
from Your Overseas Location
1 From the Menu, select [Settings] →
[Management] → [NW Services] → [Int’l
roaming] → [Voice Mail(Int.)] and press
.
2 Set each item.
Menu item Operation
Activate Select [Activate] → [Yes] →
Operate as instructed by the
guidance.
Deactivate Select [Deactivate] → [Yes] →
Operate as instructed by the
guidance.
Play messages Select [Play messages] → [Yes]
→ Operate as instructed by the
guidance.
Voice Mail setting Select [Voice Mail setting] → [Yes]
→ Operate as instructed by the
guidance.
Set ring time Select [Set ring time] → [Yes]
→ Operate as instructed by the
guidance.
Operating the Call Forwarding
Service from Your Overseas Location
1 From the Menu, select [Settings] →
[Management] → [NW Services] → [Int’l
roaming] → [Call FWD(Int.)] and press .
2 Set each item.
Menu item Operation
Activate Select [Activate] → [Yes] →
Operate as instructed by the
guidance.
Deactivate Select [Deactivate] → [Yes] →
Operate as instructed by the
guidance.
Call FWD settings Select [Call FWD settings] → [Yes]
→Operate as instructed by the
guidance.
Operating the Roaming Guidance
Service from Your Overseas Location
1 From the Menu, select [Settings] →
[Management] → [NW Services] → [Int’l
roaming] → [Roaming guide(Int.)] → [Yes]
and press .
Perform the setting as instructed by the guidance
after this process.
Setting the Remote Control from
Your Overseas Location
1 From the Menu, select [Settings] →
[Management] → [NW Services] → [Int’l
roaming] → [Remote access(Int.)] → [Yes]
and press .
Perform the setting as instructed by the guidance
after this process.
Operating the Caller ID Display Request
Service from Your Overseas Location
1 From the Menu, select [Settings] →
[Management] → [NW Services] → [Int’l
roaming] → [Caller ID req(Int.)] → [Yes]
and press .
Perform the setting as instructed by the guidance
after this process.

411
Appendix/External
Devices/Troubleshooting
List of Menus ........................................................................................................... 420
Characters Assigned to Keys .................................................................................. 430
Special Symbols ...................................................................................................... 431
Pictographs .............................................................................................................. 432
Emoticons ................................................................................................................ 433
Common Phrases .................................................................................................... 434
Multiaccess Combinations ....................................................................................... 435
Multitask Combinations ........................................................................................... 437
Services Available on the FOMA Terminal .............................................................. 438
Optional and Related Devices ................................................................................. 439
■ External Device Interface
Introduction of Movie Player Software ..................................................................... 440
Enjoying with Picture Motion Browser ...................................................................... 440
■ Troubleshooting
Troubleshooting ....................................................................................................... 444
Error Messages ....................................................................................................... 446
Warranty and After Sales Services .......................................................................... 454
iモード故障診断 (i-mode Trouble Diagnosis) Site ................................................. 456
Updating the Software ...................................................................<Software update> 456
Protecting Your Mobile Phone from Harmful Data ............................ <Scan function> 462
Specifications ........................................................................................................... 465
Number of Saved and Protected Data Items ............................................................ 466
About the Specific Absorption Rate (SAR) of Mobile Phones, etc............................ 467
Export Controls and Regulations .............................................................................. 475
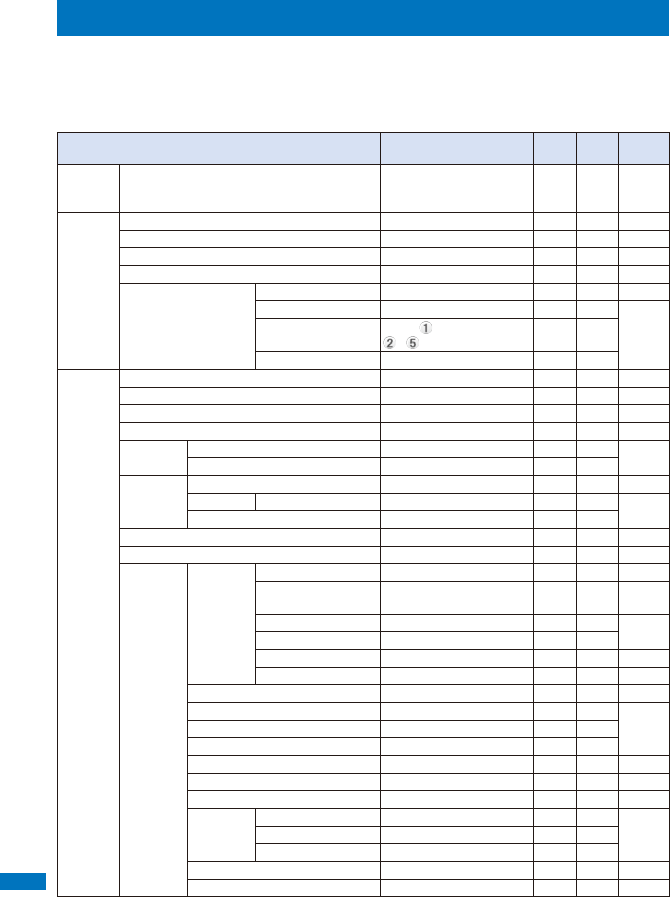
Appendix/External Devices/Troubleshooting
412
List of Menus
ˎ You can press a key on the keypad of the number or symbol next to some menu names listed
below in the menu display to execute the associated function.
■ Standard menu
○: The default setting/s is/are restored. ●: Items deleted
Menu Default Setting
Reset
settings
Reset all
data&set
Page
My
Selection
[1]
Receive Ir data, Bar code reader, Select alarm,
Full Browser, Jog setting, Stand-by display,
Incoming set
−○○
P. 3 6 8
Imaging
[2]
Camera [21] −P. 1 5 5
Movie [22] −P. 1 7 0
easy BlogUp [23] −●
P. 3 5 8
Music slide show [24] −P. 2 9 1
Stand-by pictures [25] Frame Bulletin Board(↑)○○
P. 1 1 9
Screen update Every 1hours ○○
P. 1 2 0
Select folder Folder : Camera, Folder
- : OFF ○○
Update image −
i mode
[3]
i Menu [31] −P. 1 8 6
Bookmark [32] −●
P. 1 9 1
Screen Memo [33] −●
P. 1 9 3
Last accessed URL [34] −●
P. 1 8 7
Go to
location
[35]
Enter URL −●
P. 1 9 1
URL history −●
i-Channel
[36]
Channel list −●
P. 2 0 2
Ticker Stand-by Std ○○
P. 2 0 3
Reset i-Channel −
Message [37] −●
P. 2 3 1
Check new message [38] −
P.216, 231
i-mode
setting
[39]
Common
setting
Melody auto play ON ○○
P. 2 2 8
i-mode inquiry set Mail/MessageR/MessageF:
Valid ○○
P. 2 2 7
Connection timeout 60sec ○○
P. 1 9 7
Host selection i-mode (UIM) ○○※
1
Dur multi task disp Prefer alarm ○○
P. 2 2 9
Auto-display Prefer msgR ○○
P. 2 3 0
Font size(Brs Com.) M ○○
P. 1 2 7
Display img ON ○○
P. 1 9 8
Auto detect ON ○○
Use phone info Yes ○○
i-motion auto replay ON ○○
P. 2 0 1
Sound effect 4 ○○
P. 1 1 2
i-mode arrival act Prefer PushTalk ○○
P. 9 0
SSL list CA cert. Valid ○○
P. 1 9 8
DoCoMo cert.1 Valid ○○
DoCoMo cert.2 −
User certificate −P. 1 9 9
Select host ドコモ ○ ○※1 P.200
※1 Hosts you added are deleted.

Appendix/External Devices/Troubleshooting
413
Continued
Menu Default Setting
Reset
settings
Reset all
data&set
Page
i mode
[3]
Full
Browser
[30]
Home −P. 2 8 0
Bookmark −●
P. 2 8 6
Go to
location
Enter URL −●
P. 2 8 0
URL history −●
P. 2 8 3
Last accessed URL −●
P. 2 8 0
Full Browser
setting
Home URL http://www.google.co.jp ○○
P. 2 8 6
Cookie setting Valid ○○※
2
Script setting Valid(Confirm) ○○
P. 2 8 7
Display mode setting PC mode ○○
Display img ON ○○
Display magnification 100% ○○
PagePilot setting Invalid ○○
Pointer speed setting 4 ○○
Window Open Guard Invalid ○○
P. 2 8 8
Referer setting Send ○○
Access setting No ○○
Check settings −
Reset settings −
Mail
[4]
Inbox [41] −●
P. 2 1 9
Outbox [42] −●
Draft [43] −●
Compose message [44] −P. 2 0 7
WEB mail [45] −P. 2 0 6
Compose SMS [46] −P. 2 3 4
Templates [47] −●※
3 P.211
Check new message [48] −
P.216, 231
Check new SMS [49] −P. 2 3 6
Receive option [40] −P. 2 1 5
Mail
setting
[4 ]
Common setting (See [i mode] → [i-mode setting] → [Common setting]) −
Mail list setting 2lines+body ○○
P. 2 2 5
Edit signature −●
P. 2 2 7
Signature Auto ○○
Mail list List: List 0-9, Member list:
None ●P. 2 2 8
Font size M ○○
P. 1 2 7
Sort inbox Sorting criteria/Select folder
to: None ●P. 2 2 6
Sort outbox Sorting criteria/Select folder
to: None ●
SMS
setting
Language JPN P.236
SMS report Invalid
Validity 3days
SMSC DoCoMo
Type of Number International
Address 81903101652
※2 The Cookie files you add are deleted.
※3 Preinstalled data is not deleted.
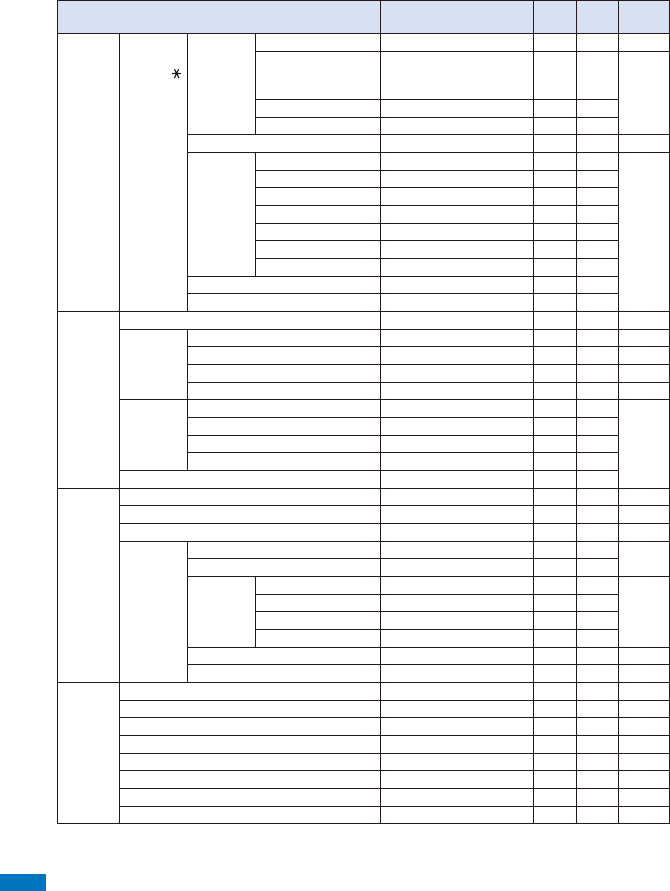
Appendix/External Devices/Troubleshooting
414
Menu Default Setting
Reset
settings
Reset all
data&set
Page
Mail
[4]
Mail
setting
[4 ]
Area Mail
setting
Receive setting OFF ○○
P. 2 3 3
Receive entry A r e a Mail name:
Emergency information,
Message ID:A000∼A3FF
○※4
P. 2 3 4
Beep setting Permission ○○
Beep time 10sec ○○
Recv option setting OFF ○○
P. 2 2 7
Attached
file pref.
Image Valid ○○
P. 2 2 9
Melody Valid ○○
i-motion Valid ○○
ToruCa Valid ○○
PDF Valid ○○
Tool data Valid ○○
Others Valid ○○
Clear Recv ranking −●
Clear Send ranking −●
i appli
[5]
iαppli list −●※
5 P.239
iαppli
setting
Auto-start Yes ○○
P. 2 4 6
SW description No ○○
P. 2 3 9
Volume setting 4 ○○
P. 1 1 2
Pref. i αppli sound unpreference ○○
P. 1 1 3
iαppli
history
Stand-by err hist −●
P. 2 5 0
Security err. Hist. −●
Trace result −●
Auto-start err hist −●
iαppli(microSD) −
Phone
[6]
Phonebook [61] −●
P. 1 0 1
Call record [62] −●
P. 5 5
PushTalk phonebook [63] −●
P. 8 5
Record
message
[64]
Play rec msg −●
P. 7 4
Play Vphone msg −●
Set rec
msg
Set OFF ○○
P. 7 3
To answer 13sec ○○
Answer img(V.phone) テレビ電話動作中 ○ ○
Record img(V.phone) テレビ電話動作中 ○ ○
Rec voice memo −P. 3 6 9
Play voice memo −●
P. 7 4
Data Box
[7]
My picture −●※
3 P.290
MUSIC −●※
3 P.303
Music&Video Channel −●
P. 3 4 2
i-motion −●※
3 P.295
Melody −●※
3 P.304
My document −●※
3 P.333
Kisekae Tool −●※
6 P.305
Chara-den −●※
3 P.302
※3 Preinstalled data is not deleted.
※4 Receive entries you added are deleted.
※5 Osaifu-Keitai-compatible i-αppli is not deleted.
※6 [Manual Custom] preinstalled at the time of purchase is not deleted.
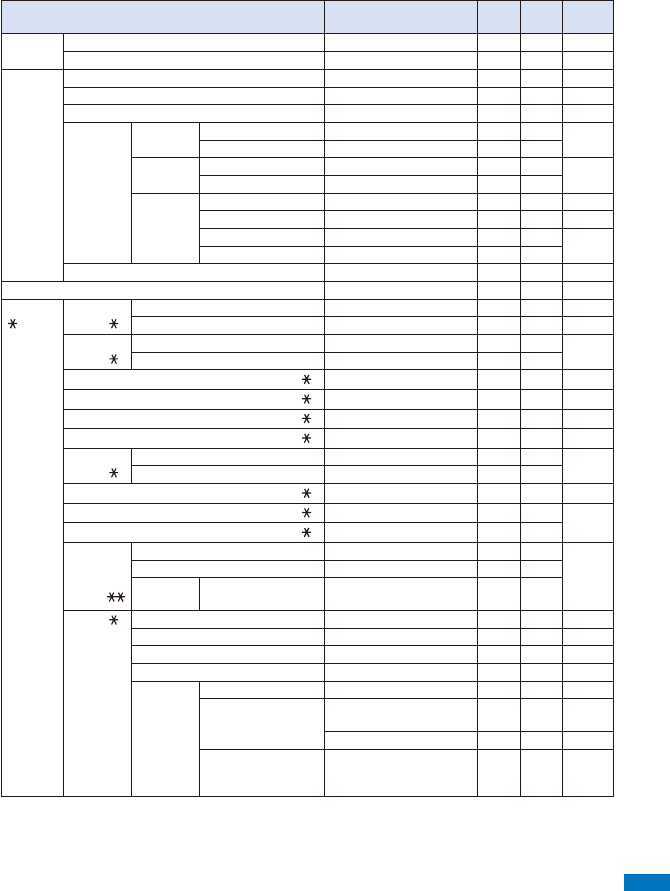
Appendix/External Devices/Troubleshooting
415
Menu Default Setting
Reset
settings
Reset all
data&set
Page
Music
[8]
MUSIC Player [81] −P. 3 4 2
Music&Video Channel [82] −P. 3 3 8
Osaifu-
Keitai
[9]
IC card content [91] −P. 2 5 5
DCMX [92] −P. 2 4 5
ToruCa [93] −●
P. 2 5 7
Settings
[94]
IC card
lock
IC card lock OFF ○○
P. 2 6 2
IC lock(power-off) Last status ○○
IC act.
notice
By vibrator ON ○○
P. 2 6 1
By LED ON ○○
ToruCa
setting
ToruCa receive Yes ○○
P. 2 5 9
Sort folder −●
P. 2 6 0
Auto recognition ON ○○
P. 2 6 1
Duplication check ON ○○
Search by i-mode [95] −P. 2 5 5
Own number [0] −○
P. 4 5
LifeKit
[]
Bar code
reader [ 1]
Scan code −P. 1 8 3
Send data −●
P. 1 8 4
Receive Ir
data [ 2]
Receive −P. 3 2 9
Receive all −
microSD [ 3] −P. 3 0 6
Camera [ 4] −P. 1 5 5
Movie [ 5] −P. 1 7 0
Lifetime Calendar [ 6] −P. 3 5 5
Alarm
[
7]
Select alarm OFF ○○
P. 3 6 0
Auto power on OFF ○○
Schedule [ 8] −●P. 3 6 3
Text Memo [ 9] −●P. 3 7 2
Calculator [ 0] −
Data
Security
Service
[
]
Connect to Center −P. 1 0 5
Exchanging history −●
Service
setting
Send phonebook img Unsend ○○
GPS [ #] Position location −P. 2 6 4
Location notice −P. 2 7 4
i appli −P. 2 6 5
Location history −●
P. 2 7 6
GPS
settings
GPS button setting Read a Map ○○
P. 2 7 8
Reg. service client Loc. serv. client/Service
client ID/Phone number: −●P. 2 7 5
Auto Notice setting: Confirm
○○
P. 2 7 6
Loc. request menu Location request: OFF,
Host setting: Initial host,
Service settings: −
○○※
1
P. 2 7 1
※1 Hosts you added are deleted.
Continued

Appendix/External Devices/Troubleshooting
416
Menu Default Setting
Reset
settings
Reset all
data&set
Page
LifeKit
[ ]
GPS [ #] GPS
settings
Sound/Color setting Position location:
Volume: OFF, Vibrator:
OFF, Color: ON
Location notice:
Volume: 4, Vibrator: OFF,
Color: ON
Loc. provide/accept/Loc.
provide/check:
Volume: 4, Vibrator: OFF
○○
P. 1 1 3
Positioning mode Position location/Location
notice/Location provision:
Standard mode
○○
P. 2 7 8
Settings
[#]
Display Stand-by
display
Stand-by Image: Kisekae tool※7
Stand-by pictures:
Frame: Bulletin Board(↑),
Screen update: Every
1hours
Select folder:
Folder : Camera,
Folder - : OFF
○○
P. 1 1 7
Image quality Sharp ○○
Calendar/Clock Calendar: OFF, Cal. font
color: Blk, Clock: Digital
clock5, Clock style: 12h
○○
Soft key OFF ○○
Camera in key locking Not activate ○○
Backlight Auto setting ON ○○
P. 1 2 1
Adjust light 3 ○○
Keypad light ON ○○
Backlight always on Charging/Internet: OFF,
Videophone/Pict. shoot/
Movie shoot/Movie play:
ON
○○
Power saver 1min ○○
P. 1 2 2
Menu
setting
Start menu setting Kisekae menu ○○
P. 1 2 3
Icon setting My selection/Imaging/
i-mode/Mail/i αppli/Phone/
Data Box/MUSIC/Osaifu-
Keitai/Own number/LifeKit/
Settings: None specified
○○
Kisekae
setting
Kisekae Tool Kisekae tool※8○○
P. 1 2 4
Color theme setting Main body color “SILVER”:
Black, Main body color
“WHITE”: White & Gold,
Main body color “PINK”:
Pink
○○
※7 The setting varies depending on the main body color of the FOMA terminal. When you perform the Reset
settings or Reset all data&set, the image of [Cyber-shot Logo] preinstalled at the time of purchase is used as
the default setting.
※8 The setting varies depending on the main body color of the FOMA terminal. When you perform the Reset
settings or Reset all data&set, the setting of [Manual Custom] is used as the default setting.
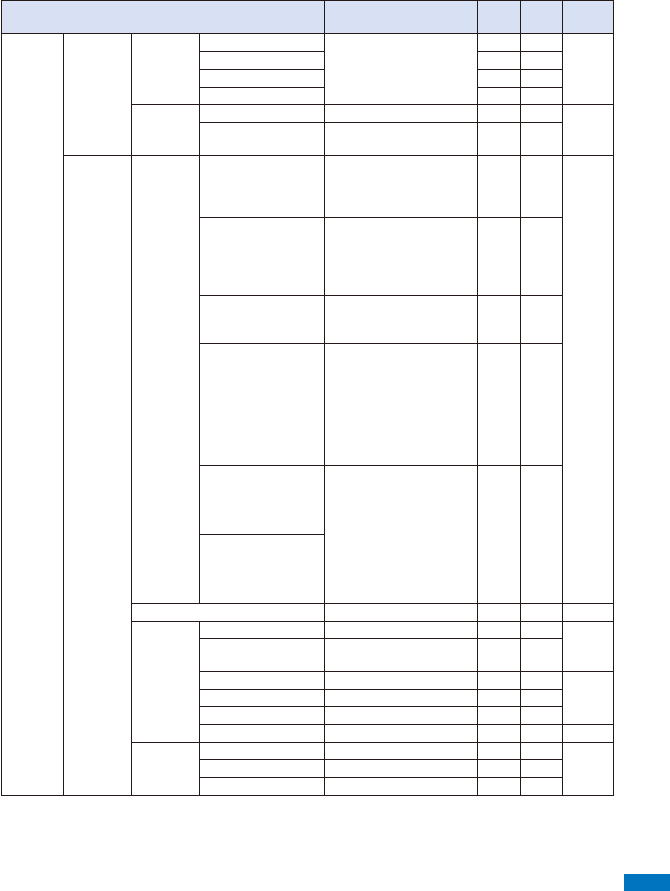
Appendix/External Devices/Troubleshooting
417
Menu Default Setting
Reset
settings
Reset all
data&set
Page
Settings
[#]
Display Animation Calling Kisekae tool※9○○
P. 1 2 0
V.phone calling img ○○
Mail sending img ○○
Check new message ○○
Font size All font size setting Standard disp. P.127
Individual font size Phonebook/Call record/
Mail/Internet/Input text: M ○○
Call Incoming
set
Incoming call Ring tone: 着信音1, Ring
volume: 4, Incoming image:
Kisekae tool※9, Vibrator:
OFF, Color: C9:Color9
○○
P. 1 0 8
Incoming V.phone Link incoming call: OFF,
Ring tone: 着信音1, Ring
volume: 4, Incoming image:
Kisekae tool※9, Vibrator:
OFF, Color: C9:Color9
○○
PushTalk Ring tone: 着信音1, Ring
volume: 4, Vibrator: OFF,
Color: C9:Color9
○○
Mail Receiving img: Kisekae
tool※9, Received image:
Kisekae tool※9, Ring tone:
着信音1, Ring volume: 4,
Vibrator: OFF, Color: C9:
Color9
Ring time setting:
Set: ON, Ring time: 4sec
○○
MessageR Link receive mail: ON,
Receiving img: Kisekae
tool※9, Received image:
Kisekae tool※9, Ring tone:
着信音1, Ring volume: 4,
Vibrator: OFF, Color: C9:
Color9
Ring time setting:
Set: ON, Ring time: 4sec
○○
MessageF
Missed call ON ○○
P. 1 2 6
Videophone
setting
Display setting Main-Other side ○○
P. 7 6
Set outgoing image Camera image: ON,
Substitute image: アイアイ ○○
Visual preference Normal ○○
P. 7 7
Auto redial(voice) OFF ○○
Hands-free ON ○○
V.ph while packet Prefer V.phone ○○
P. 7 8
Call display Phonebook image ON ○○
P. 1 2 1
Name ON ○○
Disp. call/receive No. None specified ○○
※9 The setting varies depending on the main body color of the FOMA terminal. When you perform the Reset
settings or Reset all data&set, one of the images from the [Preinstall] folder in My picture of the Data Box is
used as the default setting.
Continued
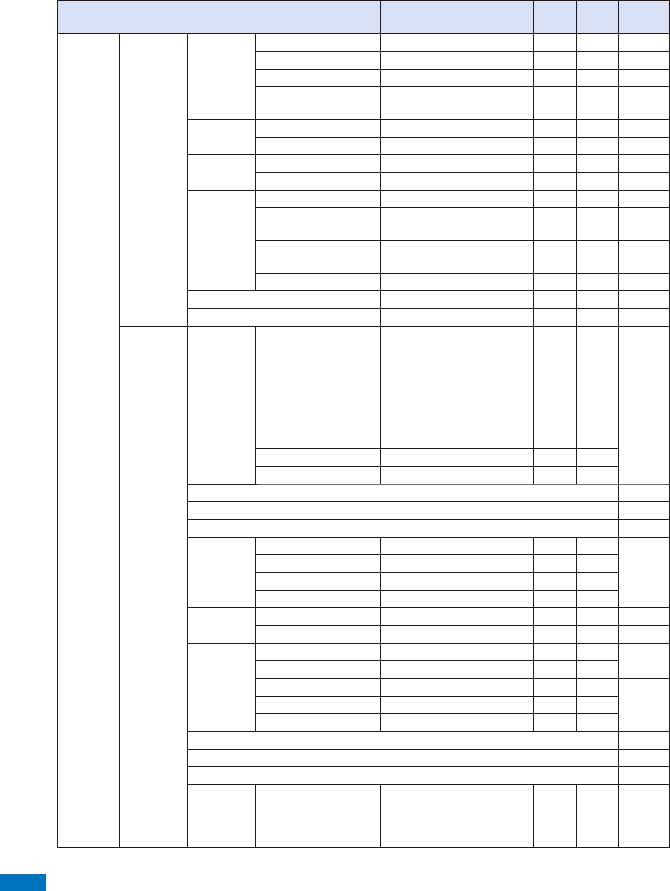
Appendix/External Devices/Troubleshooting
418
Menu Default Setting
Reset
settings
Reset all
data&set
Page
Settings
[#]
Call Call assist Sub-address ON ○○
P. 6 3
Prefix setting −○
P. 6 1
Any key ans ON ○○
P. 6 7
Set ring start time Set: OFF, Start time: 4sec,
Missed call display: OFF ○○
P. 1 4 5
Call setting Volume 4 ○○
P. 1 1 2
Recnct ALM OFF ○○
P. 6 4
Call quality Quality alarm OFF ○○
P. 1 1 4
Reduce noise ON ○○
P. 6 4
Headset
setting
Auto answer setting Set: OFF, To answer: 5sec ○○
P. 3 7 5
Headset usage
setting
Headset+speaker ○○
P. 1 1 4
Headset sw. to call Set: OFF, Memory number:
999 ○○
P. 3 7 5
Headset microphone Valid Headset ○○
P. 3 7 6
Self mode OFF ○○
P. 1 3 7
Melody Call −P. 1 1 5
Application Lifetime
Cal.
Display setting Photo:
Disp: All, Select folder:
i-mode
Received mail/Sent mail:
Disp: All, Select mail
address: None
Schedule/Birthday:
Disp: All
○○
P. 3 5 8
Memory auto display Normal ○○
Security data display OFF ○○
Mail (See [Mail] → [Mail setting]) −
i-mode (See [i mode] → [i-mode setting]) −
iαppli (See [i appli] → [i αppli setting]) −
Phonebook Which PB to use Phonebook ○○
P. 1 0 2
Font size M ○○
Set image display ON ○○
Save/attach image Valid ○○
Call record Record display ON ○○
P. 1 4 1
Font size M ○○
P. 1 2 7
PushTalk Auto answer setting OFF ○○
P. 8 9
Set ring time 30sec ○○
i-mode arrival act Prefer PushTalk ○○
P. 9 0
P-Talk arrival act Answer ○○
Hands-free ON ○○
Record msg (See [Phone] → [Record message] → [Set rec msg]) −
ToruCa (See [Osaifu-Keitai] → [Settings] → [ToruCa setting]) −
IC act. notice (See [Osaifu-Keitai] → [Settings] → [IC act. notice]) −
Schedule Set holidays
For today: Annual holidays
established by the
Japanese National Holidays
Law, Day of the week: Sun
○○
P. 3 6 7
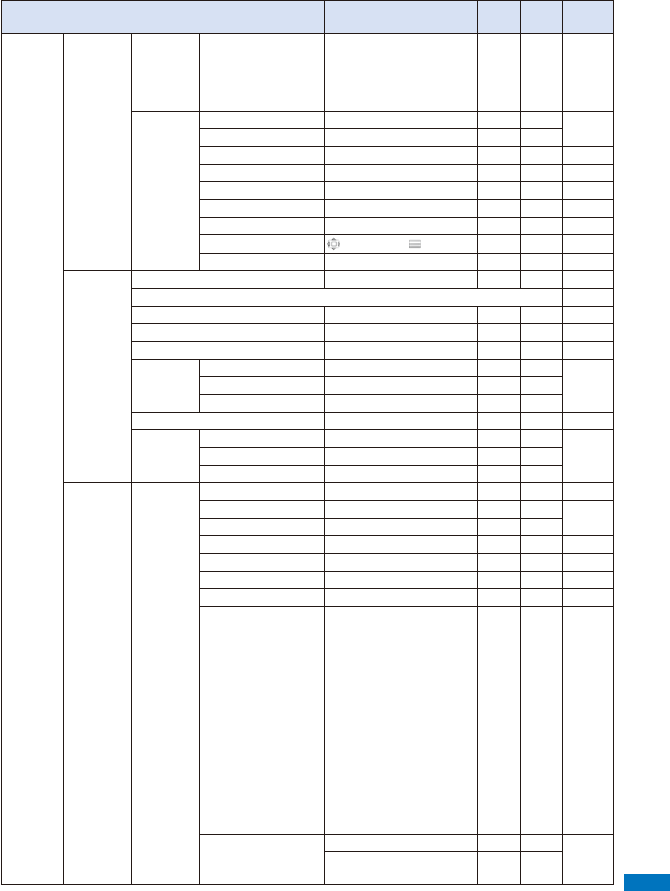
Appendix/External Devices/Troubleshooting
419
Menu Default Setting
Reset
settings
Reset all
data&set
Page
Settings
[#]
Application Schedule Schedule alarm Alarm tone: Alarm(std),
Alarm volume: 4, Alarm
image: スケジュールア
ラーム鳴動中, Vibrator:
OFF, Color: C5:Color5
○○
P. 3 6 5
Input
method
Edit user dict −●
P. 3 8 8
Edit prediction −●
Dictionaries −●
P. 3 8 9
Select conversion Prediction ○○
P. 3 8 4
Edit common phrases
See Common Phrases (P.434)
○○
P. 3 8 6
Auto cursor 1(Slow) ○○
P. 3 8 5
Font size M ○○
P. 1 2 7
Operation in item 4 directions/ hor. ○○
P. 3 8 5
Reset data −P. 3 8 9
Lock/
Security
Lock all OFF P.135
IC card lock (See [Osaifu-Keitai] → [Settings] → [IC card lock]) −
Pers. data lock OFF P.137
Secret display OFF ○○
P. 1 4 1
Key dial lock OFF ○○
P. 1 3 9
Acpt/Rjct
call
Set OFF ○○
P. 1 4 3
Phone No. −●
Group list −●
Reject unknown OFF ○○
P. 1 4 6
Denied no
ID
User Unset OFF ○○
P. 1 4 4
PublicPhone OFF ○○
Not supported OFF ○○
Management
NW
Services
Voice Mail Tone/Vibrate notice: ON ○○
P. 3 9 2
Call Waiting −P. 3 9 3
Call Forwarding −
Bar Nuisance Calls −P. 3 9 4
Notify Caller ID −P. 4 5
Caller ID Request −P. 3 9 5
Call Cost/Duration −P. 3 6 9
2in1 setting Mode switching: Dual
mode, Stand-by display:
B mode: Bモード待受画面
Dual mode: デュアル
モード待受画面
Set call/receive No.:
Disp. call/receive No.: dark
Ringtone for Number B:
Incoming call: Ring
tone: 着信音2
Incoming V.phone: Link
incoming call: OFF,
Ring tone: 着信音2
Receive avoid. Setting:
Mode link setting: OFF
○○
P. 3 9 9
Chaku-moji Create message: −●
P. 5 8
Set Message display: Only
calls w/ID ○○
Continued
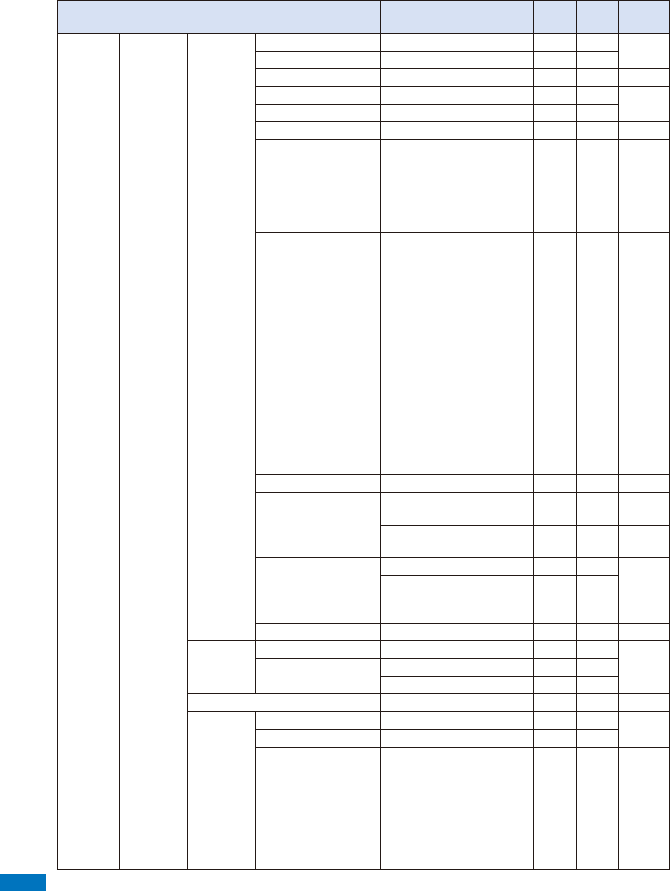
Appendix/External Devices/Troubleshooting
420
Menu Default Setting
Reset
settings
Reset all
data&set
Page
Settings
[#]
Management
NW
Services
In-call arrival act −P. 3 9 6
Arrival Call Act Answer ○○
Remote Control −P. 3 9 7
Dual Network −P. 3 9 5
English Guidance −
Service Numbers −P. 3 9 6
Additional service Register USSD:
Service: Unregistered
USSD: −
Register ans word:
Answer word: Unregistered
USSD: −
○
P. 4 0 2
Multi Number Number Setting:
Multi Number call: OFF
Basic Number:
Name: 基本契約番号
Additional No.1:
Name: 付加番号1,
Phone number: −,
Ring tone: 着信音1,
Incoming image: 付加
番号1着信画像
Additional No.2:
Name: 付加番号2,
Phone number: −,
Ring tone: 着信音1,
Incoming image: 付加
番号2着信画像
○※
10
○
P. 3 9 7
Roaming Guidance −P. 4 1 7
Int'l roaming Network search mode:
Auto, 3G/GSM setting: Auto
P. 4 1 5
Operator name display:
Display on ○○
P. 4 1 6
Int’l dial assist Auto conversion: ON ○○
P. 6 2
Int’l prefix: ͦWorld Call
009130010, Country code:
See P.410.
○
V.ph switch notice −P. 7 8
Date/time Auto time adjust ON ○○
P. 4 4
Manual clock set Date: ----/--/-- ---, Time: --:-- ○
Time zone: GMT+9 ○
Select language Japanese P.128
Manner
mode
Set OFF ○○
P. 1 1 6
Mode Manner ○○
Original manner V i b rator: OFF, Phone
volume: SD (STEP DOWN),
Mail volume/Alarm volume:
4, Keypad sound: 1,
Keyguard release tone/
Charge sound/Battery
ALM: ON, Whisper mode:
OFF
○○
P. 1 1 7
※10 Only the settings of the Multi Number call, ring tones/incoming images of the Additional No.1 and Additional
No.2 are reset.
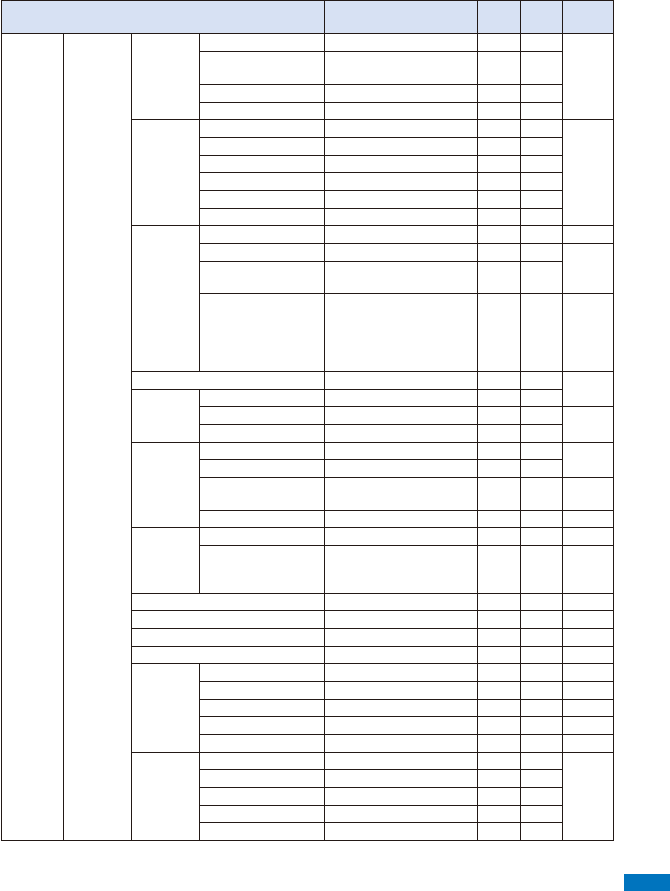
Appendix/External Devices/Troubleshooting
421
Menu Default Setting
Reset
settings
Reset all
data&set
Page
Settings
[#]
Management
Set basic
tone
Keypad sound 1 ○○
P. 1 1 1
Keyguard release
tone
ON ○○
Stereo&3D ON ○○
Charge sound ON ○○
Jog setting Rotate set ON ○○
P.376
Mail view Medium ○○
i-mode
Medium ○○
Full Browser Medium ○○
Upward rotation Data Box ○○
Downward rotation Phonebook ○○
Slide
setting
Auto key lock/rel ON ○○
P. 1 4 1
Slide open setting Answer ○○
P. 6 7
Setting when folded V o i c e c a ll/V.phone/
PushTalk: Continuous call ○○
Edit slide setting Inbox(List/Detail): Quote
reply, Outbox(List/Detail)/
Draft(List): Edit, Schedule/
Memo(List/Detail): Create/
Edit
○○
P. 3 5 4
Change code 0000 ○P. 1 3 2
UIM setting PIN1 code setting OFF
Change PIN1 code −P. 1 3 3
Change PIN2 code −
Scan
function
Update −P. 4 6 3
Set auto-update −
Set scan Scan function/Message
scan: Valid ○○
P. 4 6 2
Version −P. 4 6 4
SW Update Update −P. 4 5 9
Set auto-update Set: Auto-update, Day:
None specified, Time:
03:00
○○
P. 4 5 8
Check serv. area −P. 4 1 7
Battery level −P. 4 2
Storage info −P. 3 2 6
USB mode setting Communication mode ○○
P. 3 1 4
Reset Reset menu log −●
P. 1 2 6
Reset menu screen −P. 1 2 4
Reset display/sound −P. 1 2 5
Reset settings −P. 3 7 6
Reset all data&set −P. 3 7 7
Initial
setting
Date/time −P. 4 3
Change code Yet (0000) ○
Keypad sound 1 ○○
Location request Yet (OFF) ○○
All font size setting Yet (Standard disp.) ○○
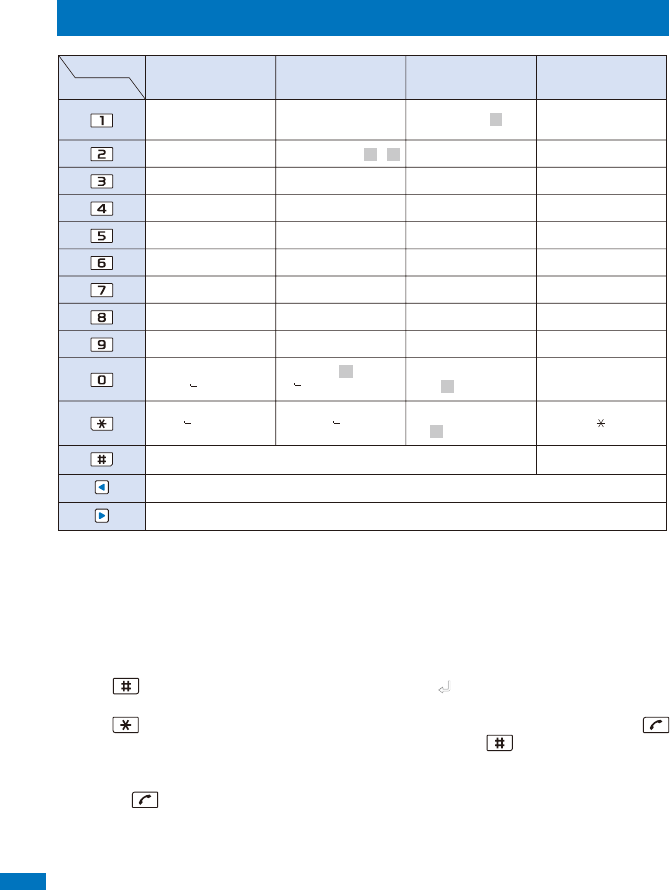
Appendix/External Devices/Troubleshooting
422
Characters Assigned to Keys
Move cursor left
#
1
2
3
4
5
6
7
8
9
0
※※※
、 。 ・ ゛ ゜! ? ゛ ゜、 。 ・ ! ?「 」
あ い う え お
ぁ ぃ ぅ ぇ ぉ
A B C a b c 2
D E F d e f 3
G H I g h i 4
J K L j k l 5
M N O m n o 6
P Q R S p q r s 7
T U V t u v 8
W X Y Z w x y z 9
! ? – , ,;( )”
_ ∼ ~ & ¥
. @ / : − ∼ ~ 1
か き く け こ
さ し す せ そ
た ち つ て と っ
な に ぬ ね の
は ひ ふ へ ほ
ま み む め も
や ゆ よ ゃ ゅ ょ
ら り る れ ろ
サ シ ス セ ソ
カ キ ク ケ コ ヵ ヶ
ア イ ウ エ オ
ァ ィ ゥ ェ ォ
タ チ ツ テ ト ッ
ナ ニ ヌ ネ ノ
ハ ヒ フ ヘ ホ
マ ミ ム メ モ
ヤ ユ ヨ ャ ュ ョ
ラ リ ル レ ロ
ワ ヲ ン ヮ □ 、。
・ ! ?「 」
わ を ん ゎ □ 、
。 ・ ! ?
□! ? – , ,;( )
”_ ∼ ~ & ¥ 0
Kanji/Hiragana mode Alphabetic mode
Keys
Katakana mode Numeric mode
Character
mode
Display character assignments in the reverse order (before acceptance
of characters)/Line feed (after acceptance of characters)
Move cursor right/Insert half-width space (blank) (only when there is no character after the
cursor)
※ If you press a key for over a second, the assigned characters are switched one after another.
ˎ□ indicates a space (blank). A space (blank) is provided in two sizes: a full-width and half-
width sizes and counted as one full-width or half-width character.
ˎ Characters marked with ■ appear in the full-width character mode only.
ˎ Blue colored characters appear in the half-width character mode only.
ˎ Every time you press a key, the character changes to the next one that is assigned to that key.
If you press and hold the key, the characters change continuously.
ˎ Press after finalizing a character to start a new line. “ ” appears to indicate it. A new line
is counted as a full-width character.
ˎ Press before finalizing a character to insert a voice or semivoice sound symbol. Press
to change its case from upper to lower case or vice versa. Press to change the character
assigned to a key in the reverse order.
ˎ In the Alphabetic mode, the case attribute of the character entered last or converted by
pressing is inherited to the next character.
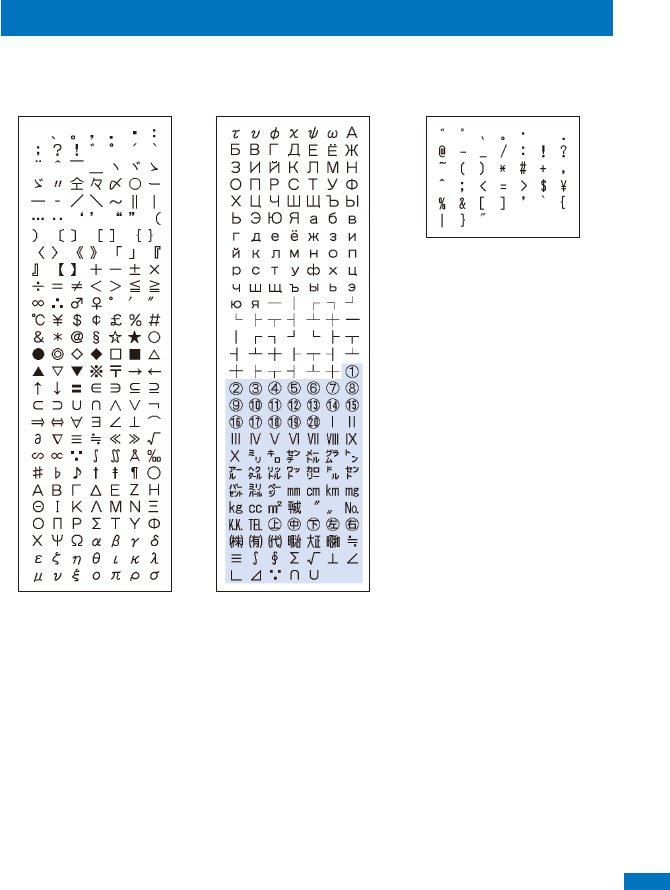
Appendix/External Devices/Troubleshooting
423
Special Symbols
ˎ Symbols marked with ■ may not be displayed correctly when sending to i-mode non-
compatible mobile phones or PCs.
■ Full-width symbols ■ Half-width symbols
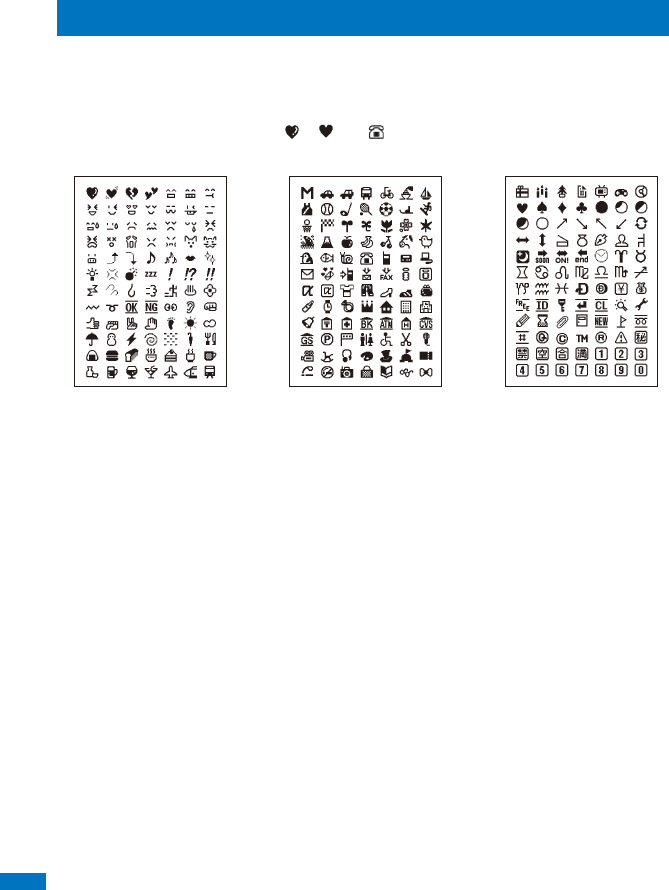
Appendix/External Devices/Troubleshooting
424
Pictographs
ˎ Pictographs may not be displayed correctly when sending to i-mode non-compatible mobile
phones or PCs.
ˎ Some pictographs may not be displayed correctly depending on the type of recipient’s i-mode
compatible mobile phone.
ˎ For SMS, pictographs other than “ ”, “ ”, or “ ” are replaced with a half-width space (blank).
■ Pictographs
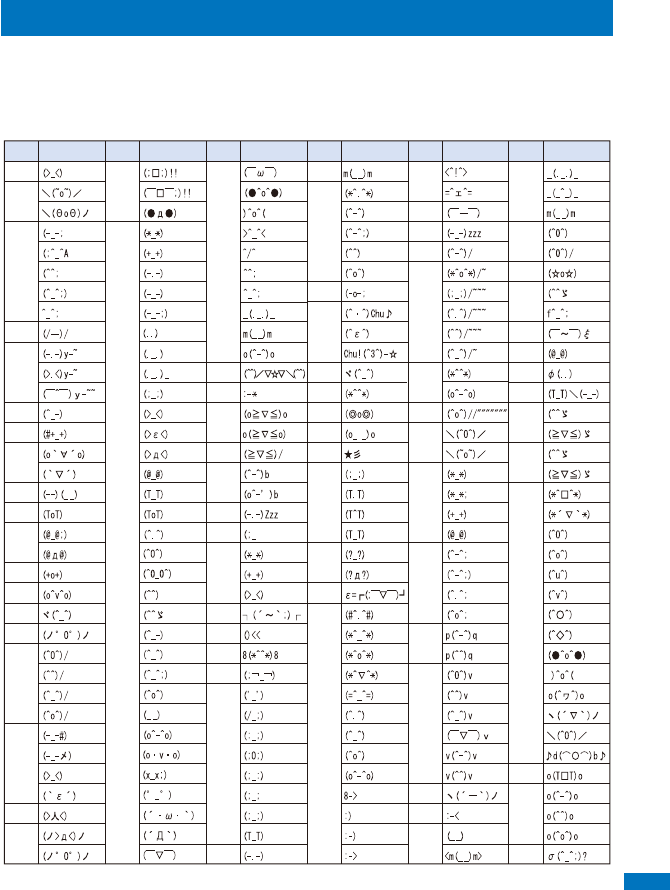
Appendix/External Devices/Troubleshooting
425
Emoticons
When you enter the following words in the kanji/hiragana mode, emoticons are
entered.
ˎ Some of the following emoticons may be different from those actually displayed.
ˎ Emoticons may be displayed in the ImgSym tab rather than in the Pre. tab.
がーん
かお
かお
かんぱい
きす
きゃー
きゃはは
ぐー
ぐーぐー
くすん
くたばる
さあ
さかな
さざえ
じーっ
しくしく
じと
あいたっ
あくび
あせ
あら
いっぷく
うぃん く
うーん
うひょひょ
うん
えーん
えっ
えと
えへへ
おいおい
おお
おーい
おこる
おねがい
おりゃ
にこにこ
にやり
ねてる
はーい
ばいばい
はずかしい
ぱちぱち
ばんざい
びくっ
ひやあせ
ふぁいと
ぶい
ふっ
ぷんぷん
ぺこり
ぺこり
ほーい
ほし
ぽりぽり
むにゃむにゃ
めがね
めもめも
よしよし
らじゃ
りょうか い
わーい
わーん
わくわく
わたしかな
すみません
たのしい
たら
ちゅっ
つっこみ
てれ
どきっ
どてっ
ながれぼし
なく
なぜ
にげろー
にこにこ
Word Emoticon Word Emoticons Word Emoticon Word Emoticon Word Emoticon Word Emoticon
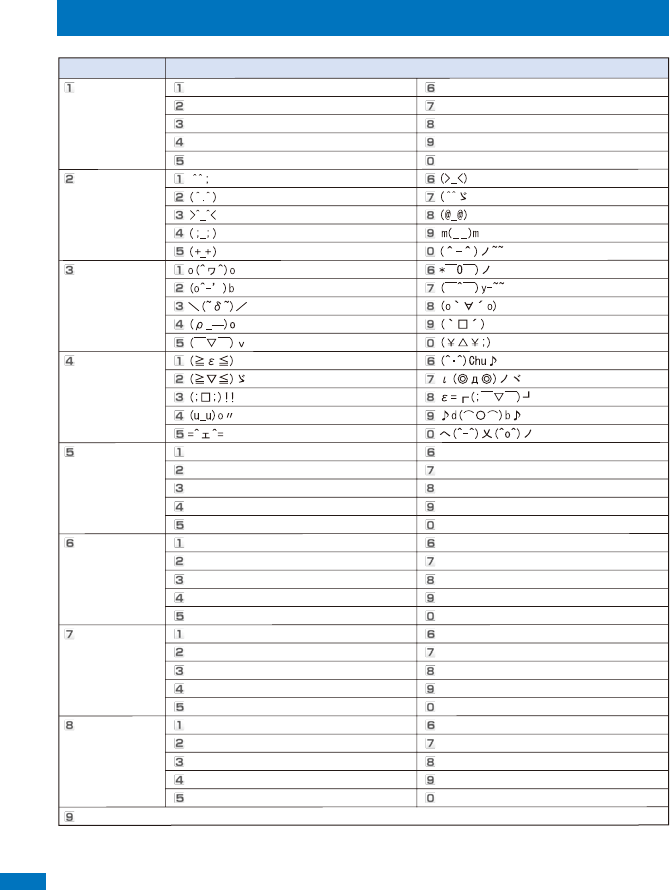
Appendix/External Devices/Troubleshooting
426
Common Phrases
.co.jp .go.jp
.ne.jp @docomo.ne.jp
.com http://
.or.jp https://
.ac.jp www.
おはようございます お疲れさまでした
おやすみなさい お世話になっております
昨日は、どうも ありがとうござ い ました こんにちは
行ってきます こんばんは
いってらっしゃい よろしくお願い致します
直行します 本日の会議は中止となりました
直帰します 出欠をご連絡ください
休暇をとります 次の指示を待ってください
半休します 携帯の電源を切ります
電車遅延のため、遅れます メールで連絡してください
遊びに行こう 先に行きます
飲みにいきませんか? 先に帰ります
遅れます 時間です
変更します 何してるの?
中止です どこにいるの?
OKです 今忙しい
NGです 後で連絡を入れます
ありがとう 保留です
ごめんなさい キャンセルです
待ってて!時間がありません
Category Common phrase
Internet
Emoticon1
Emoticon2
Emoticon3
Greetings
Business
Private
Reply
Original
Appendix/External Devices/Troubleshooting
427
Multiaccess Combinations
The table below indicates whether another event or task is available for each task in
progress.
ˎ The FOMA terminal may not operate as indicated in the table below depending on its condition.
○: Available ×: Unavailable △: Available depending on the conditions
Current
status
Another event or task
Voice
call
V.phone
call
PushTalk i-mode
Full
Browser
i-mode
mail SMS
64K data
comm.
Packet comm.
(Data comm.)
Software
update
Comm.
for
scanning
Data Security
Service
Music&Video
Channel
Download
Call Rcv Call Rcv
Orig
Rcv
Send
Rcv
Send
Rcv Call Rcv Call Rcv
Now
Rsv
Send
Rcv
During a
voice call
△
※1
△
※2
××××
※4
○ ○ ○○○○××
※4
○○×○×○○○
During a
videophone
call
××
※4
××
※4, 5
×× × × ×××○××
※4
××××××××
During
PushTalk
communication
×○
※6
××
※4
×
※7
×
※4
× × ×××○××
※4
××××××××
During
i-mode
connection
○○○
※3
○
※8
○
※3
○
※9
×△
※13 ○○○○×
※10
×
※4
×
※10
××××○○×
Full
Browser ○○○
※3
○
※8
○
※3
○
※9
××
○
※3
○○○××
※4
×××× × ○
※3
○×
During
sending/
receiving
i-mode
mail
○○○
※3
○
※8
○
※3
○
※9
○○
※14 ×○
※11
○
※11
○
※11
××
※4
×××××○○×
During
sending/
receiving
SMS
○○○○○○ ○ ○ ○
※11
○
※11
○
※11
○
※11
○○○○×××××○
During 64K
data
communication
××
※4
××
※4
×× × × ×××○××
※4
××××××××
During
packet
comm.
(Data
comm.)
○
※15
○××
※4
×× × × ××○○××
※4
××××××××
Updating
software ×○××
※4
×× × × ××
※12
××××
※4
××××××××
Communication
for scanning
×○
※3
××
※4
×× × × ××
※12
×○××
※4
××××××××
During Data
Security
Service
communication
○○○
※3
○
※8
○
※3
○
※9
○○
※14 ××××××
※4
××××××××
During
downloading
Music&Video
Channel
○○○○
※8
○○
※9
○ × ○○○○××
※4
××××××○×
Continued

Appendix/External Devices/Troubleshooting
428
※1 If you subscribe to the Call Waiting Service, you can place a call to another recipient while
you already have a call in progress.
※2 If you subscribe to the Call Waiting Service, you can receive another call while you already
have a call in progress. If you do not yet subscribe to the Call Waiting Service, you can
receive another call after you disconnect the first call.
※3 You can place a voice or videophone call or originate a PushTalk call after disconnecting
the current communication.
※4 The FOMA terminal does not perform the receiving operation and a received call is saved
in the Received record as a missed call.
※5 If you do not yet subscribe to the Voice Mail Service, Call Waiting Service, or Call
Forwarding Service, a received call is not saved in the Received record.
※6 In either of the following cases, the FOMA terminal notifies you of an incoming voice call
and you can select either to “answer a voice call” or to “continue with PushTalk call”. (The
one that was not selected is terminated.)
ˎ When the P-Talk arrival act is set to [Answer]
ˎ When the P-Talk arrival act is set to [Voice Mail] or [Call Forwarding] and you do not
subscribe to these services
※7 If you originate a PushTalk call, you can place another call to add a member.
※8 The FOMA terminal performs the operation set by the V.ph while packet.
ˎ When the V.ph while packet is set to [Prefer packet] or when the V.ph while packet is set
to [V.ph voicemail] or [Call forwarding] and you do not subscribe to these services, the
packet communication is continued.
ˎ When the V.ph while packet is set to [Prefer V.phone], packet communication is
disconnected and you can receive a videophone call.
※9 The FOMA terminal performs the operation set by the i-mode arrival act.
ˎ When set to [Prefer i-mode], i-mode communication is continued.
ˎ When set to [Prefer PushTalk], i-mode communication is disconnected and you can
receive a PushTalk call.
※10 While you are performing i-mode communication using i-αppli, you can send data after
disconnecting the i-mode communication in progress.
※11 A combination of the same communication direction, either sending or receiving, is not
available.
※12 When you set the Host selection to [i-mode(UIM)], “ ” appears.
※13 After the current communication is terminated, the Full Browser communication is started.
※14 When switching from i-mode to Full Browser, after the i-mode communication is terminated,
the Full Browser communication is started.
※15 You can only place a call by entering a phone number directly in the stand-by display.
Appendix/External Devices/Troubleshooting
429
Multitask Combinations
The table below indicates whether another function is available for each function from
the menu display.
ˎ The FOMA terminal may not operate as indicated in the table below depending on the status of
each function.
ˎ Some functions may pause temporarily when they are not displayed in the display even if
already activated.
○: Available ×: Unavailable −: Unavailable from the menu display
Function to be
activated
Currently
activated function
Voice call
PushTalk
Videophone call/64K data
comm./Packet comm.
Call record/
Phonebook
ToruCa/Alarm/Schedule/
Text Memo/Calculator
Mail/SMS
i-mode/Full Browser
i-αppli
Data Box/Lifetime
Calendar
Camera/Movie
MUSIC Player
GPS
Settings/NW Services/
Receive Ir data
During a voice call −−−○○○○××××○×
During PushTalk
comm. −−−○○○○××××○×
During a videophone call/
during 64K data comm./
during packet comm.
−−−××××××××××
Call record/
Phonebook −−−○○○○○○○○○×
ToruCa/Alarm/
Schedule/Text Memo/
Calculator
−−−○○○○○○○○○×
Mail/SMS −−−○○○○○○○○○×
i-mode/Full Browser −−−○○○○×○○○○×
i-αppli −−−○○○××○○○○×
Data Box/Lifetime
Calendar −−−○○○○○○○○○×
Camera/Movie −−−○○○○○○○×○×
MUSIC Player −−−○○○○○○○×○×
GPS −−−○○○○○○○○××
Settings/NW Services/
Receive Ir data −−−××××××××××
Appendix/External Devices/Troubleshooting
430
Services Available on the FOMA Terminal
Service Phone number
Number guide service (paid: service charge + call charge)
(Phone numbers of customers who declined to disclose
their number information cannot be guided.)
(no area code) 104
Telegram service (paid: telegram fee) (no area code) 115
Time (paid) (no area code) 117
Weather (paid) Area code of the area you want to
hear the weather forecast for + 177
Emergency call to Police (no area code) 110
Emergency call to Fire/Ambulance (no area code) 119
Emergency call to Maritime rescue (no area code) 118
Disaster Message Board Service (paid) (no area code) 171
Collect Call (paid: service charge + call charge) (no area code) 106
● When placing a Collect Call through 106, the recipient pays for the call charge and a
handling fee of 90 yen (94.5 yen including tax) per call (as of December 2007).
● When calling the Directory Assistance at 104, you are required to pay a service charge of
100 yen (105 yen including tax) besides the call charge (as of December 2007). Note that
Operator Services are free to the people with impairment in the vision or upper limbs. For
more details, contact 116 (NTT Sales Office) from an ordinary phone.
● If you have an ordinary phone with subscription to the Call Forwarding Service and you
designate your mobile phone number to forward your calls to, the caller may hear a ringing
sound even if the mobile phone is busy, outside of the service area, in the Self mode, or
powered off, etc. depending on the settings of the ordinary phone/mobile phone.
● Note that 116 (NTT Sales Office), Dial Q2, Message Dial, Credit calls cannot be called from
the FOMA terminal (note that Automatic Credit Calls may be used when calling from ordinary
phones to the FOMA terminal).
● This FOMA terminal supports “Emergency call location information”.
If you use the FOMA terminal to place a call to emergency numbers such as 110, 119,
or 118, the information of a location where you are calling from (location information) is
automatically notified to the Emergency call acceptance organization such as the Police
Station. The Emergency call acceptance organization may not be able to figure out your
exact location depending on the location where you place a call or radio wave condition.
If you notify your current location information, the name of the notified Emergency call
acceptance organization appears in the stand-by display.
If you place a call without the caller ID, such as by entering a phone number with “184” for
each call, the location information and phone number are not notified. However, the Emergency
call acceptance organization may decide to obtain the location information and phone number
regardless of your settings when they consider it is necessary for lifesaving, etc.
Note that the areas/time for which the “Emergency call location information” is ready to be used
vary depending on the preparatory state of each Emergency call acceptance organization.
●
When you call the Police (110), Fire/Ambulance (119), or Maritime rescue (118) from the
FOMA terminal, clearly indicate that you are calling from a mobile phone, then give your
present location and mobile phone number, since the Police or Fire/Ambulance may have to
get in contact with you. Also, make a point to call in a stationary position to prevent the call
from being dropped. Do not power off the FOMA terminal for at least 10 minutes after the
emergency call just in case the Police or Fire/Ambulance may have to get in contact with you.
● Note that you may not connect to the local Fire Department or Police Station depending on
where you are calling from. In this case, try to call from a public phone or an ordinary phone
in the neighborhood.

431
Appendix/External Devices/Troubleshooting
Optional and Related Devices
A variety of commercially available optional devices allows you to expand the FOMA
terminal’s capabilities by supporting a wide range of applications, including personal
and business uses. Some accessories are only available in some areas. For details,
please contact our service counter (DoCoMo shop, etc.). For details on optional
devices, see the user’s manual of each device.
● Battery Pack SO02
● Back Cover SO09
● FOMA AC Adapter 01/02 ※1
● FOMA DC Adapter 01/02
● FOMA Portable Charging Adapter 01
● FOMA AC Adapter 01 for Global use ※2
● FOMA Dry Battery Adapter 01
● Desktop Holder SO10
● In-Car Holder 01
● Carry Case L 01
● In-Car Hands-Free Kit 01 ※3
● FOMA In-Car Hands-Free Cable 01
● FOMA USB Cable with Charge Function 01/02 ※4
● FOMA USB Cable ※4
● FOMA Indoor Booster Antenna ※5
● FOMA Indoor Booster Antenna (Stand Type) ※5
● Flat-plug Earphone/Microphone with Switch P01/02
● Flat-plug Stereo Earphone Set P01
● Earphone/Microphone with Switch P001/002 ※6
● Stereo Earphone Set P001 ※6
● Earphone Terminal P001 ※6
● Earphone Plug Adapter P001
● Bone conduction microphone/receiver
※1 For information on charging the AC adapter, see P.40 and P.41.
※2 For use overseas, a plug adapter that fits the electrical outlets in the country you stay is
needed.
※3 FOMA In-Car Hands-Free Cable 01 is required to connect to FOMA SO906i using USB or
charge FOMA SO906i.
※4 If you use USB HUB, it may not work properly.
※5 Use it only in Japan.
※6 The Earphone Plug Adapter is required.

432
Appendix/External Devices/Troubleshooting
Introduction of Movie Player Software
To play back a movie (MP4 format file) on a PC, you need QuickTime Player (free) ver.
6.4 or later (or ver. 6.3+3GPP) from Apple Computer, Inc.
You can download QuickTime from the following website.
http://www.apple.com/jp/quicktime/download/
ˎ To download this software, you need a PC connected to the Internet. A separate communication
charge is also required for downloading.
ˎ Check the above website for details about the operating environment, downloading method,
operation method, and other information.
433
Appendix/External Devices/Troubleshooting
Continued
Troubleshooting
First, check if the software update is necessary for the FOMA terminal. If necessary,
perform the software update (P.456).
Trouble Cause and Remedy
Cannot power on the FOMA terminal.
(The FOMA terminal cannot be used.)
ˎ Check if the battery pack is attached properly (P.39).
ˎ Check if the battery pack is not run out (P.42).
The FOMA terminal cannot be
used
ˎ Check if the Lock key is set (P.140).
The warning tone sounds and
does not stop even when you
press the Power key, and the
FOMA terminal is powered off.
ˎ The battery is running out. Charge the battery (P.41).
The busy tone sounds and the
call is not connected, even if
you dial up.
ˎ Check if “ ” appears (P.30).
ˎ Check if you enter the area code (P.51).
ˎ Check if you dial up in a hurry without hearing the ringing tone
(P.51).
“” is displayed and the busy
tone sounds.
ˎ Check if you are outside of the service area or in a location
with weak radio wave condition (P.30).
Cannot place a call even if you
press the keypad.
ˎ Check if the Self mode is set (P.137).
ˎ Check if the Key dial lock is set (P.139).
ˎ Check if the Lock key is set (P.140).
The dark display appears and
cannot operate anything.
ˎ Check if the FOMA terminal is powered on (P.43).
ˎ Check if the Lock key is set (P.140).
is displayed and cannot
operate anything.
ˎ The Lock key is set. Cancel the Lock key and retry the
operation (P.140).
The set stand-by display
does not appear and the dark
display appears.
ˎ Check if the Power saver mode is set (P.122).
Text is displayed in Japanese. ˎ Check if the Select language is set to [Japanese] (P.128).
Cannot receive a call or the
ring tone does not sound.
ˎ Check if the Public mode (Drive mode) is set (P.69).
ˎ Check if the Ring volume is set to [OFF] (P.109).
ˎ Check if the Manner mode is set (P.116).
ˎ Check if the Self mode is set (P.137).
ˎ Check if the Accept/Reject call is set (P.143).
ˎ Check if the Denied no ID is set (P.144).
ˎ Check if the Set ring start time is set (P.145).
ˎ Check if the Reject unknown is set (P.146).
ˎ Check if the ring time of the Voice Mail/Call Forwarding Service
is set to 0 seconds (P.392, 393).
ˎ Check if the Caller ID Request is set (P.395).
ˎ Check if the Mova terminal is enabled for the Dual Network
Service (P.395).
The mail and alarm tones
sound but the ring tone for an
incoming call does not sound.
ˎ Check if the Ring volume is set to [OFF] (P.109).
ˎ Check if a longer interval (such as 99 sec) is set at [Start time]
of the Set ring start time. Set it to a shorter interval (P.145).
The mail tone sounds but there
is no incoming mail.
ˎ Check if the Tone/Vibrate notice of the Voice Mail Service is
set to [ON]. If it is ON, you are notified of the increase in the
number of record messages by the mail tone (P.392).
434
Appendix/External Devices/Troubleshooting
Trouble Cause and Remedy
An image other than that
you set is displayed for an
incoming call.
ˎ If multiple images are set for the incoming image for voice/
videophone call, the image is displayed in the following order
of priority (P.96, 100, 108).
1. Des call display set in the Phonebook
2. Des call display set in the Group setting
3. Incoming image set in the Incoming set
When an i-motion or Chaku-Uta Full® is set for the ring tone or
an i-motion is set for the incoming image, however, the order
of priority may vary.
A ring tone other than that you
set sounds for an incoming
call.
ˎ If multiple ring tones are set for voice/videophone call, the ring
tone sounds in the following order of priority (P.97, 100, 109,
397, 400).
1. Ring tone set in the Number Setting (when a call is placed
to an Additional No. for the Multi Number)
2. Des phone tone set in the Phonebook
3. Des phone tone set in the Group setting
4. Ring tone of the Ringtone for Number B of 2in1
5. Ring tone set in the Incoming set
When an i-motion or Chaku-Uta Full® is set for the ring tone or
an i-motion is set for the incoming image, however, the order
of priority may vary.
A ring tone other than that you
set sounds for an incoming
mail.
ˎ If multiple ring tones are set for mail, the ring tone sounds in
the following order of priority (P.97, 100, 109).
1. Des mail tone set in the Phonebook
2. Des mail tone set in the Group setting
3. Ring tone set in the Incoming set
When an i-motion or Chaku-Uta Full® is set for the ring tone,
however, the order of priority may vary.
The incoming indicator in the
color other than that you set
lights for an incoming call or
mail.
ˎ If multiple incoming indicators are set for voice call/
videophone call/mail, the incoming indicator flashes in the
following order of priority (P.97, 100, 110).
1. Select phone/mail Illum. set in the Phonebook
2. Select phone/mail Illum. set in the Group setting
3. Indicator color set in the Incoming set
The incoming indicator flashes
in certain cycle.
ˎ Check if the Missed call is set to [ON] (P.126).
The charge indicator stays lit. ˎ
Check if [Charging] of the Backlight always on is set to [ON] (P.122).
In this setting, it may take time to complete charging, but this
is not a malfunction.
ˎ Check if you use a function such as the videophone, data
communication, and i-αppli while charging the battery.
In this case, it may take time to complete charging, but this is
not a malfunction.
The keypad sound is not
heard.
ˎ Check if the Keypad sound volume is set to [OFF] (P.111).
ˎ Check if the Manner mode is set (P.116).
The display is slow to react on
pressing a key.
ˎ This may occur when a large amount of data is stored in the
FOMA terminal.
The Total calls cost does not
increment.
ˎ It does not increment if the counter reaches the upper limit
value (about ¥16,770,000) of total calls cost of UIM. Reset the
counter to ¥0 (P.370).
Data communication does not
start.
ˎ Check if you use USB HUB. If you use USB HUB, it may not
work properly.
435
Appendix/External Devices/Troubleshooting
Error Messages
ˎ In some cases, a 3-digit number may be displayed together with a message. This is a DoCoMo
own code that DoCoMo displays on the FOMA terminal.
A
A mail address is unregistered
ˎ No mail address for posting
is saved for the selected blog
service. Save a mail address
(P.358).
Accessing IC card. Cannot
delete
ˎ Failed to delete the software
because data in the Osaifu-
Keitai-compatible i-αppli IC
card is being accessed.
Address is not valid (451)
ˎ Failed to send the mail
because of unknown mail
address. Enter the correct mail
address and send it again.
Another function is active.
Cannot activate this at the
same time
ˎ Another function that cannot
be run simultaneously by
multitask-ing is active. Quit the
function, if it is not being used,
and then retry the operation
(P.353).
Authentication failed
ˎ Failed in verifying the
authentication password.
Set the password so that it
matches the one of the other
device and then retry the
operation (P.329, 330, 332,
333).
ˎ The authentication type (one/
all) does not match the one set
for the other device. Set the
same authentication type (one/
all) on both party to exchange
data using the infrared or iC
communication (P.329, 330,
332, 333).
Authentication type is not
supported (401)
ˎ Failed to connect to the site or
website, etc. because of the
unsupported authentication
type.
C
Camera function error. Quit
the application
ˎ The Camera mode is
terminated because of an error
occurrence. To continue to use
the camera, restart the Camera
mode.
Camera function error.
Save the data and quit the
application
ˎ The Camera mode is
terminated after the image
is saved because of an error
occurrence. To continue to use
the camera, restart the Camera
mode.
Camera function error. Switch
to Substitute image
ˎ The videophone image is
switched to the substitute
image because of an error
occurrence. Switch it again to
the camera image (P.51).
Cannot execute because of
memory shortage
ˎ Failed to execute the function
because of insufficient
memory.
Cannot move. Not enough
memory
ˎ The remaining memory
in the microSD memory
card is insufficient. Delete
unnecessary data (P.103, 193,
194, 223, 258, 321, 366, 373).
Cannot read. You need to
format
ˎ The microSD memory card is
not formatted correctly. Format
it using the FOMA terminal
(P.313).
Cannot support content
ˎ Data that is not supported
by the FOMA terminal is
contained in the contents.
Cannot switch mode
ˎ Failed to set to the microSD
or MTP mode because of
a communication using the
FOMA USB Cable with Charge
Function 01/02 (optional) in
progress.
Certificate is rejected
(tampered)
ˎ There are some problems with
the certificate.
Check address
ˎ The SMS address exceeds 21
digits or 186/184 is entered at
the beginning of the address.
Enter the correct address and
send it again (P.234).
Check SMS Center setting
ˎ The incorrect host is set at the
SMSC. Restore the host to
“DoCoMo”, the default setting
at the time of purchase (P.236).
Connection failed
ˎ The host number set for the
Host selection is incorrect.
Restore the host number to
“iモード”, the default setting at
the time of purchase (P.197).
ˎ Failed to connect because of
weak radio wave condition.
Retry to connect from a
place with better radio wave
condition.
ˎ Failed to connect to a line due
to a network problem. Retry to
connect after a while.
ˎ Failed to connect to a line for
some reason when placing a
videophone call.
Connection failed (403)
ˎ Failed to connect to i-mode for
some reason. Retry to connect
(P.186).
Connection failed (503)
ˎ Failed to connect to a line due
to a network problem. Retry to
connect after a while.
Continued
436
Appendix/External Devices/Troubleshooting
Connection failed (562)
ˎ Failed to connect to the i-mode
center. Move to a location with
better radio wave condition
and then retry the operation.
Connection interrupted
ˎ The communication is
interrupted because of an
error occurrence during data
communication.
Content length exceeds
maximum size for i-motion
ˎ Failed to retrieve the data
because its volume has
exceeded the maximum size.
Content length exceeds
replayable size for i-motion
ˎ Failed to retrieve the data
because its volume has
exceeded the maximum size.
Continue using ppli and
transmit data?
ˎ This message appears
when the number of times of
communication performed
while an i-αppli software
is used has increased
significantly for a certain
period of time. To continue
using the i-αppli software,
select [Yes]. To continue using
the i-αppli software after the
communication is terminated,
select [No]. To quit the i-αppli
software, select [Terminate].
Could not move
ˎ Failed to move data because
of an error occurrence.
Could not save
ˎ Failed to save the image,
music data, or i-αppli
software.
ˎ Failed to save to the microSD
memory card.
ˎ Failed to receive data during
the infrared/iC communication
or data communication with a
PC.
ˎ Failed to save the image or
melody scanned by the bar
code reader.
ˎ Failed to save the i-motion
because the size exceeded
10M bytes. You can set a
Chaku-Uta Full® with up to 10M
bytes of i-motion for the ring
tone/Alarm using [Point].
D
Data in IC card is full. Unable
to download. Delete service?
ˎ Failed to download the data
because the Osaifu-Keitai-
compatible i-αppli IC card is
full of data. When you select
[Yes], the names of the Osaifu-
Keitai services on the card
appear. Select a service name
and delete its Osaifu-Keitai-
compatible i-αppli software
and data from the IC card.
Data transmission is frequent.
Continue transmission?
ˎ This message appears
when the number of times of
communication performed
while an i-αppli software
is used has increased
significantly for a certain
period of time. To continue
using the i-αppli software,
select [Yes]. To continue using
the i-αppli software after the
communication is terminated,
select [No]. To quit the i-αppli
software, select [Terminate].
Deleted invalid text
ˎ Characters other than digits
cannot be accepted for
the postal code. They are
discarded.
Download failed
ˎ Failed to download because of
an error occurrence.
Draft is full. Cannot create
ˎ The number of saved mail
has reached 50 or there is
not enough memory. Delete
unnecessary saved mail
(P.223).
E
Error in IC card data. Unable
to delete software
ˎ Failed to delete the software
because data in the Osaifu-
Keitai-compatible i-αppli IC
card contains an error.
Error in image. Does not work
correctly
ˎ The Flash movie cannot be
played back correctly due to
some errors in the Flash movie.
Error in the dictionary
ˎ There are some words or
phrases that have failed to
be saved because of an error
in part of the dictionary data
(words or phrases that have
been saved successfully can
be used as dictionary data).
Exceeds max number of
simultaneous call
ˎ This message appears when
you originate a PushTalk call
to more than four members.
Reduce the number of
members you select to four
or less and originate the call
again.
F
Final number exists. Cannot shoot
ˎ The microSD memory card
contains a file with the
maximum number (999-9999),
so no more files can be saved
in it. Delete the image files from
the largest file numbers (P.321).
I
ppli stand-by display
terminated due to security
error
ˎ The i-αppli stand-by display
was canceled since it has
attempted an unauthorized
operation. Check the security
error history (P.250).
ppli To function is not set
ˎ The i-αppli To is set to [No].
Set the i-αppli To to [Yes] and
then retry the operation (P.241).
IC card is locked
ˎ The IC card lock is set. Cancel
the IC card lock and then retry
the operation (P.262).
437
Appendix/External Devices/Troubleshooting
Continued
Image display setting OFF.
Cannot download
ˎ Failed to download the image
because the Display img is
set to [OFF]. Set the Display
img to [ON] and then retry the
operation.
i-mode mail service is busy.
Please try again later (553)
ˎ The line is extremely
congested. Wait for a while
and then retry the operation.
Input error (205)
ˎ Incorrect input data. Check the
input contents.
Insert UIM
ˎ The UIM is not inserted. Insert
the UIM and then retry the
operation (P.36).
Invalid data (XXX)
ˎ You tried to connect to the site
or website, etc. not supporting
i-mode.
ˎ The URL you entered may be
invalid.
ˎ Failed to display because of
an error in the received data.
Invalid data. Connection
cannot be established (400)
ˎ The host number you set for
the Host selection is incorrect.
Restore the host number to
“iモード”, the default setting at
the time of purchase (P.197).
ˎ Failed to connect to i-mode for
some reason. Retry to connect
(P.186).
Invalid data. Data size is not
supported (XXX)
ˎ You tried to connect to the site,
etc. not supporting i-mode.
ˎ The URL you entered may be
invalid.
ˎ Failed to display because of
an error in the received data.
Invalid UIM, requested
software failed to start
ˎ Failed to start the i-αppli
software due to the function
for restricting UIM operation.
Insert the UIM that was used
when you retrieved the data or
file and then retry the operation
(P.36).
Invalid UIM. Delete not possible
ˎ Unable to delete software
because the information on
a UIM inserted in the FOMA
terminal and its corresponding
information on the IC card are
different. Use the UIM that was
inserted in the FOMA terminal
when you downloaded and
activated the Osaifu-Keitai-
compatible i-αppli for the first
time.
Invalid UIM. Download failed
ˎ Unable to download software
because the information on
a UIM inserted in the FOMA
terminal and its corresponding
information on the IC card are
different. Use the UIM that was
inserted in the FOMA terminal
when you downloaded and
activated the Osaifu-Keitai-
compatible i-αppli for the first
time.
Invalid UIM. Requested
service not available
ˎ Failed to perform the operation
due to the function for restricting
UIM operation. Insert the
UIM that was used when you
retrieved the data or file and
then retry the operation (P.36).
Invalid UIM. Start failed
ˎ Unable to start software
because the information on
a UIM inserted in the FOMA
terminal and its corresponding
information on the IC card are
different. Use the UIM that was
inserted in the FOMA terminal
when you downloaded and
activated the Osaifu-Keitai-
compatible i-αppli for the first
time.
Invalid URL
ˎ When you entered a URL,
you did not enter “http://”
or “https://”, or entered it
incorrectly. Enter the correct
URL and then retry the
operation (P.191).
ˎ Failed to display a link
because the URL contains an
error.
K
Key dial locked
ˎ The Key dial lock is set. Cancel
the Key dial lock and then retry
the operation (P.139).
L
Lock all
ˎ The Lock all is set. Cancel
the Lock all and then retry the
operation (P.135).
Low battery. Cannot update
data information
ˎ When the battery level is
very low, you cannot add
an i bookmark/mark in the
PDF data saved in [Movable
contents] of My document in
the microSD memory card.
M
Mail security is set
ˎ The Mail security is set. Cancel
the Mail security and then retry
the operation (P.142).
以下の宛先にはメール送信で
きませんでした(561) Mails
could not be sent to following
address
○○
@
△△△
.ne.jp
※ Mail addresses vary
depending on each recipient.
ˎ Failed to send mails to some
mail addresses. Move to a
location with better radio wave
condition and then send them
again.
Main memory shortage
ˎ The remaining memory on the
FOMA terminal is insufficient.
Change the image quality
or image size, or delete
unnecessary images (P.159,
178, 321).
Main memory shortage. May
not save
ˎ An image you edit may not be
saved because of insufficient
memory on the FOMA terminal.
Delete unnecessary images
or move some images to the
microSD memory card (P.312,
321).
438
Appendix/External Devices/Troubleshooting
MainMenu cannot be activated
now
ˎ Failed to display the menu
because a function that does
not support menu display is
executed.
Manner mode is set
ˎ Failed to adjust the volume
because the Manner mode is
set. Cancel the Manner mode
and then retry the operation
(P.116).
Memory shortage
ˎ The operation is interrupted
because of insufficient
memory. If the message is
frequently displayed, power off
the FOMA terminal once and
then power it on again.
Memory shortage. Cancel
operation
ˎ The operation is discontinued
because of insufficient
memory.
Message rejected and cannot
be received
ˎ Failed to send SMS because
the recipient rejects receiving
SMS.
Message rejected and cannot
be sent
ˎ Failed to send SMS because
sending SMS is rejected.
microSD error
ˎ Failed to access the microSD
memory card (loading error,
etc.). Remove the microSD
memory card once and
insert it again (P.307). If this
message appears again, the
microSD memory card may be
damaged.
N
No content is available (204)
ˎ The site or website you
specified contains no display
data.
No files
ˎ For the Music slide show,
only JPEG images can be
displayed. Either save a JPEG
image or specify other folder
where JPEG images are
saved.
ˎ The UIM operation restriction
is set to the image. Insert the
UIM that was inserted when
the image was obtained, and
retry the operation (P.36).
No memory space
ˎ The number of entries saved
in the Phonebook has reached
1,000. Delete unnecessary
entries in the Phonebook
(P.103).
ˎ The number of saved
schedules has reached 300.
Delete unnecessary schedules
(P.366).
ˎ Failed to save the data. This
message appears if there is
not enough memory when
you attempt to exchange
data using the infrared or iC
communication.
ˎ There is not enough memory
to save new data. Delete
unnecessary data (P.326).
No more file number. Please reset
ˎ The file number which is
attached to an image saved
in the microSD memory card
and incremented with the
number of saved images has
reached the maximum number
(999-9999). Perform the Reset
file No. (P.181).
No requested software
ˎ The i-αppli software to be
started from the site or mail, or
by the infrared communication
is not stored in the FOMA
terminal.
No response
ˎ Failed to identify a recipient
of iC communication. Check
if both FeliCa marks “ ”
are opposed correctly with
each other or the other device
operates properly (P.331).
ˎ Failed to recognize the
other device for the infrared
communication. Check if the
infrared data ports are pointed
at each other correctly or if the
other device operates properly
(P.327).
No response (408)
ˎ The communication is
interrupted because there is
no response from the site or
website. Retry the operation
after a while.
No space in main memory
ˎ Another image recorded by
the camera cannot be saved
because of no memory to
save it on the FOMA terminal.
Change the image quality
or image size, or delete
unnecessary images (P.159,
178, 321).
ˎ The remaining memory on the
FOMA terminal is insufficient.
Delete unnecessary data
(P.103, 193, 194, 223, 258,
321, 366, 373).
No space to attach signature
ˎ Failed to attach the signature
because the total number of
characters in the mail main
body and signature exceeds
5,000 full-width or 10,000 half-
width characters. Decrease
the number of characters in
the mail main body or send
mail with no signature attached
(P.207, 227).
Not enough space in microSD
ˎ Another image recorded by
the camera cannot be saved
because of no vacant space to
save it in the microSD memory
card. Change the image
quality or image size, or delete
unnecessary images (P.159,
178, 321).
439
Appendix/External Devices/Troubleshooting
Continued
Not supported by this Reader/
Writer
ˎ The recipient’s terminal
does not support the iC
communication.
O
Omakase Lock activated
ˎ The Omakase Lock is set.
While the Omakase Lock is set,
all key operations are disabled
except for answering an
incoming voice or videophone
call and powering on/off
(P.136).
Out of service area
ˎ The i-mode services are not
available since you are outside
of the service area or in a
location without the radio wave.
Move to a location where “ ”
disappears (P.30).
P
Page is not found (404)
ˎ The site, website, etc. cannot
be located. Check if the URL
you entered is correct.
Personal data locked
ˎ The Personal data lock is set.
Cancel the Personal data lock
and then retry the operation
(P.137).
Please wait for a while
ˎ Voice line/packet
communication system failure
or very high congestion
in voice line/packet
communication network. Retry
after a while. However, you can
still place a call to 110, 119,
or 118, with some exceptions
depending on the situation.
Please wait for a while (packet)
ˎ Packet communication system
failure or very high congestion
in packet communication
network. Retry the operation
after a while.
Positioning failed
ˎ Failed to position the current
location. Move to a location
with better radio wave
condition and then try it again.
Public mode (Drive mode)
ˎ The Public mode is set. Cancel
the Public mode and then retry
the operation (P.69).
PUK blocked
ˎ The PUK code is locked.
Contact the nearest DoCoMo
shop (P.131).
R
Receiving data exceeds
maximum size for i-motion
ˎ Failed to retrieve the data
because its volume has
exceeded the maximum size.
ˎ Failed to retrieve the data
because its file size has
exceeded 10M bytes while
playing back a streaming type
i-motion.
Receiving data exceeds
replayable size for i-motion
ˎ Failed to retrieve the data
because its volume has
exceeded the maximum size.
ˎ Failed to retrieve the data
because its file size has
exceeded 500K bytes while
playing back a standard type
i-motion.
Registration is in progress
(554)
ˎ User registration of i-mode is in
progress. Retry the operation
after a while.
Remotely Controllable
services denied
ˎ You currently do not yet
subscribe to services such
as the Voice Mail or Call
Forwarding Service that can
be operated by remote control.
To use the remote control,
subscribe to services.
Replay period has expired
ˎ This file is provided with an
expiry date or time limit on
playback. It cannot be played
back because the term
permitted for playback has
expired. Check the expiry
date in the Detail info display
(P.322).
Replay period has not yet
started
ˎ This file is provided with a time
limit on playback. It cannot be
played back because the term
permitted for playback has not
yet started. Check the starting
date of the term in the Detail
info display (P.322).
Requested software
unavailable
ˎ Failed to start the i-αppli
software stored in the FOMA
terminal from a site or mail, or
by infrared communication.
Retention period has expired
(492)
ˎ The time for storage of the
pull-type file attachment has
expired. It cannot be obtained.
Root certificate has expired.
Connect?
ˎ The certificate of the FOMA
terminal is not yet valid or
has expired. Select [Yes] to
connect or [No] to cancel to
connect. This message may
also appear when the current
date and time are set wrong.
Set them correctly (P.44).
Root certificate is not valid
ˎ The SSL list is set to [Invalid].
Set the SSL list to [Valid]
(P.198).
Run software and delete
data on IC card. Then delete
software
ˎ Failed to delete the Osaifu-
Keitai-compatible i-αppli
software because of some
data being contained in the IC
card. Delete the saved data
after starting the software and
then retry the operation (P.255).
S
Same ToruCa exists. Unable to
receive ToruCa
ˎ You cannot obtain a ToruCa
card that already exists when
the Duplication check is set
(P.261).
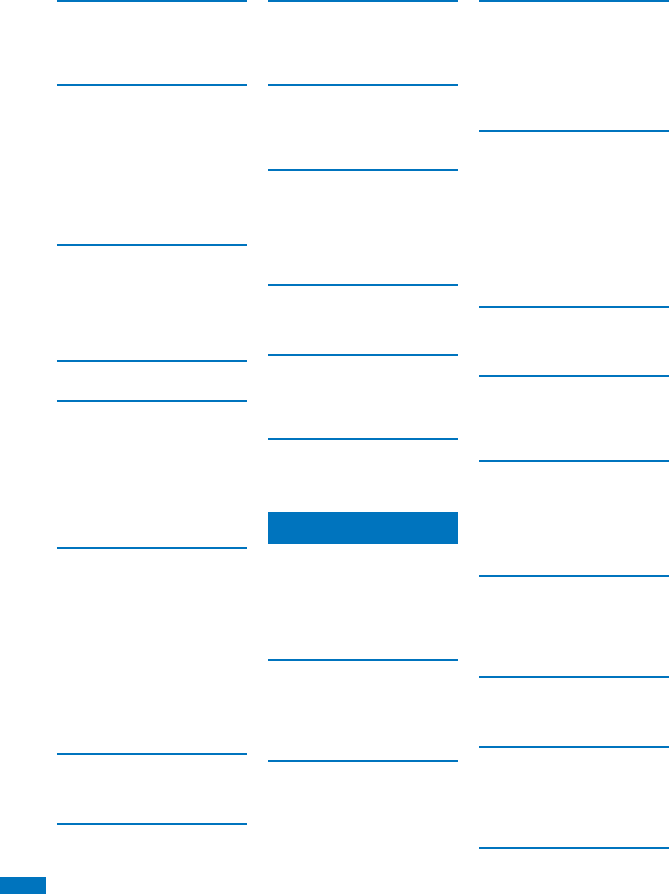
440
Appendix/External Devices/Troubleshooting
Server is busy
ˎ The software update is not
available because the server is
busy. Wait for a while and then
retry the operation (P.459).
Server is full (551)
ˎ When the number of mail held
for the recipient at the i-mode
center reaches the maximum
number, no more mail sent to
the recipient is accepted by
the i-mode center. Try to send
mail after the recipient makes
space for new mail at the
i-mode center (P.213).
Service is used by the
previous software. Unable to
download. Delete a service?
ˎ Downloading/upgrading is
unavailable because software
using the same service has
been already downloaded.
Service not provided
ˎ SMS is not provided.
Service not registered
ˎ You do not have a subscription
for the i-mode service. To use
i-mode, subscribe to i-mode.
ˎ If you signed up for i-mode
after starting to use the FOMA
terminal, power off the FOMA
terminal once and then power
it on again.
Services are full. MUSIC of
overwritten service is unable
to play. Overwrite?
ˎ The maximum number of
music services (members only)
which can be saved has been
exceeded. If you select [Yes],
the new service overwrites the
service which has the oldest
time limit on playback. Also,
you cannot play back music
downloaded from the service
which is overwritten.
Setting keyguard
ˎ The Lock key is set. Cancel
the Lock key and then retry the
operation (P.140).
Setting self mode
ˎ The Self mode is set. Cancel
the Self mode and then retry
the operation (P.137).
Setting unknown reject
ˎ The Reject unknown is set.
Cancel the Reject unknown
and then retry the operation
(P.146).
Software already updated
ˎ No update is available for the
i-αppli software because it
has been already updated to
the latest.
Software terminated due to
security error
ˎ The i-αppli software was
terminated since it has
attempted an unauthorized
operation. Check the security
error history (P.250).
SSL session failed
ˎ Failed to connect to the
server because of a server
authentication error.
SSL session was terminated
ˎ The SSL communication is
disconnected because there is
a problem with the certificate
of the site.
Syntax error (XXX)
ˎ Failed to display because of
an error in the received data.
T
Text volume exceeds. Cannot
send
ˎ The number of characters
in the mail main body has
exceeded the limit and mail
cannot be sent. Reduce the
number of characters.
There is no corresponding
service
ˎ No blog service that supports
a service you want to use is
saved. Save an appropriate
blog service (P.358).
This certificate has expired.
Connect?
ˎ The certificate of the site is not
yet valid or has expired. Select
[Yes] to connect or [No] to
cancel to connect.
This certificate is not valid for
this URL. Connect?
ˎ The CN-Name (server name)
of the certificate of the site
does not match the actual
server name. Select [Yes] to
connect or [No] to cancel to
connect.
This data can no longer be
replayed
ˎ This file is provided with a
limitation on the number of
times of playback. It cannot
be played back because the
number of times permitted for
playback has been exceeded.
Check the permitted number of
times in the Detail info display
(P.322).
This data may not be replayed
ˎ You may not be able to
play back this i-motion data
because it is invalid.
This function is unavailable
ˎ The function you selected
cannot be used concurrently
with the function that is
currently executed (P.353).
This site is not certified.
Connect?
ˎ The certificate of the site is
not supported by the FOMA
terminal. Select [Yes] to
connect or [No] to cancel to
connect.
This software contains an
error
ˎ Failed to download or upgrade
because information required
for it is not set on the i-αppli
software.
This software contains an
error. Unable to download
ˎ Failed to download because of
an error in the software data.
This software is currently
unavailable for use
ˎ IP (information service
providers) stopped the use of
the i-αppli software. Contact
IP.
This software is not supported
by this phone
ˎ The software you want to
download or upgrade does not
support the FOMA terminal.
441
Appendix/External Devices/Troubleshooting
This UIM cannot be recognized
ˎ Make sure that the correct UIM
is inserted (P.36).
ˎ The UIM contains an error.
Contact our service counter
(DoCoMo shop, etc.).
Time out
ˎ Failed to connect within the
time set for the Connection
timeout. Change the setting or
retry to connect after a while
(P.197).
Too many active functions.
Cannot activate
ˎ You cannot execute the
selected function because
of too many functions being
executed by multitasking. Quit
a currently executed function
and then retry the operation
(P.353).
Too many active functions.
Cannot execute. Quit other
function and retry
ˎ You cannot execute a selected
function because of insufficient
memory. Quit a currently
executed function and then
retry the operation (P.353).
Too much data was entered
ˎ Failed to send because of too
many characters. Reduce the
number of characters and try
to send again.
Transmission failed
ˎ An error occured while sending
mail. Make sure that “ ” is not
displayed and send it again. If
the message appears again,
retry to send after a while
(P.213).
ˎ The address of SMS is
incorrect. Enter the correct
address (phone number) and
send again (P.234).
Transmission failed (552)
ˎ Failed to connect to a line due
to a problem at the i-mode or
SMS center. Retry to connect
after a while.
U
UIM is full
ˎ The number of SMS saved
in the UIM has reached the
maximum number. Delete
unnecessary SMS (P.223).
UIM is not inserted. Content is
unavailable
ˎ Failed to operate because the
UIM is not inserted. Insert the
UIM that was used when you
retrieved the data or file and
then retry the operation (P.36).
Unable to display this program
guide
ˎ When 2in1 is set to the B
mode, you cannot run the
program guide i-αppli with
mail or using mail.
Unable to obtain data due to
replay restriction data error
ˎ Failed to obtain the file
because of an error in the
playback restriction data.
Unable to retrieve the
requested URL (504)
ˎ Failed to connect to the site or
website for some reason. Retry
to connect.
Unable to run this software
ˎ When 2in1 is set to the B
mode, you cannot run i-αppli
with mail or i-αppli using mail.
Unable to update pattern
definitions
ˎ Failed to update pattern
definitions because of error
occurrence.
Unable to use in My Data B
ˎ You cannot originate a
PushTalk call from the Own
number display of the B mode.
Unsupported microSD
ˎ A non-compatible microSD
memory card is installed in the
FOMA terminal. Install a FOMA
terminal-compatible microSD
memory card (P.307).
URL is too long to register
ˎ Failed to save the site as
a bookmark because the
URL exceeds 256 half-width
characters (P.191).
Usage is currently restricted.
Try again later
ˎ Users of the flat-rate i-mode
packet service may not be
able to connect during certain
hours because of sharp
increase in communication
traffic. In this case, wait for a
while until you can use i-mode.
Use ToruCa automatic reading
func through the reader/writer?
ˎ Auto recognition is set to [OFF]
(P.260).
Y
Your HTTP version is not
supported (505)
ˎ You tried to connect to the site,
etc. not supporting i-mode.
Symbol
error
ˎ An error occurred while
running the i-αppli software.
Start to run again or check the
error history (P.250).
“
○
△
□
.ne.jp”宛のメールが混み
合っているため、送信すること
ができません(555) (Failed
to send mail to “
○
△
□
.ne.jp”
because the line is congested)
※ Domain names vary
depending on each recipient.
ˎ The line is extremely
congested. Wait for a while
and then retry the operation.

442
Appendix/External Devices/Troubleshooting
Warranty and After Sales Services
Warranty
● Make sure that the warranty is received with the FOMA terminal upon purchase.
Check to be sure that the name of the retailer, date of purchase, and other items have been
filled out on the warranty before storing it in a safe place. If any necessary information is not
provided, immediately contact the retailer and request to complete the warranty. The FOMA
terminal comes with a year’s free warranty starting from the date of purchase.
● Specifications of this product and its accessories are subject to change for improvement
without prior notice.
● Data saved in the Phonebook or other memory locations may be changed/lost due to the
trouble/repairs or handling of the FOMA terminal. Note down the data in the Phonebook or
other memory locations on a separate memo and keep it safely to prevent such problems.
When the FOMA terminal is replaced due to trouble, the information downloaded using i-mode
and i-αppli are not transferred to the repaired FOMA terminal because of copyright laws, with
some exceptions.
※ This FOMA terminal allows you to save data, such as the Phonebook, in the microSD
memory card.
※ This FOMA terminal allows you to save i-motion files and data that is used by i-αppli
software in the microSD memory card.
※ This FOMA terminal allows you to use the Data Security Service (a paid service that requires
a subscription) to store data, such as the Phonebook, at the Data Security Service Center.
※
If you have a PC, you can use the DoCoMo keitai datalink (P.408) and the FOMA USB Cable
with Charge Function 01/02 (optional) or FOMA USB Cable (optional) to transfer data saved in
the Phonebook and other memory from the FOMA terminal to the PC and save data in the PC.
After Sales Services
◎ If you have problems with the FOMA terminal
Before requesting for repairs, refer to “Troubleshooting” of this manual to see if the problem can
be remedied (P.444).
If the FOMA terminal still malfunctions, call the “Contact for Repairs” on the backcover of this
manual.
◎ If repair is required resultingly
Bring the FOMA terminal to the DoCoMo repair handling service counter. However, it must be
taken during business hours of the DoCoMo repair handling service counter. Make sure to
bring a warranty card with the product when you visit the shop.
◎ Within the warranty period
ˎ We repair the FOMA terminal free of charge based on the terms documented in the warranty.
ˎ When requesting a repair, make sure to bring the warranty card with the FOMA terminal.
Repair requests that are not accompanied by the warranty or that involve malfunction and
damage due to incorrect handling by the owner will only be repaired at the owner’s expense,
even if the warranty period is still effective.
ˎ
Malfunction due to use of devices and consumable parts other than those specified by DoCoMo
will only be repaired at the owner’s expense, even if the warranty period is still effective.
ˎ Damages on the liquid-crystal screen, connecter, or other parts occurred after the purchase
will be repaired at the owner’s expense.
◎ Note that repair may be refused in the following cases.
We may not repair the FOMA terminal if the water leak seal is reacted or if the FOMA terminal
has corrosion due to water leakage, condensation, perspiration, etc. or if the internal circuit
board is damaged or deformed. Even if repair is possible, it will be done at the owner’s
expense, as this type of corrosion or damage is not covered by the warranty.

443
Appendix/External Devices/Troubleshooting
◎ If the warranty period expires
We will repair the FOMA terminal at the owner’s expense.
◎ Parts stock period
The functional parts necessary to repair the FOMA terminal will be basically available for
a minimum of six years after the manufacture is discontinued. However, depending on the
defective portion, repair may not be possible because of a shortage of repair parts.
Note that repair may still be possible depending on the defective portion even if the stock
period has expired. Call the “Contact for Repairs” on the backcover of this manual.
◎ Precautions
● Never modify the FOMA terminal or accessories.
ˎ Doing so may result in fire, injuries or malfunctions.
ˎ The modified FOMA terminal may be repaired only if the owner agrees on that all the
modified parts are restored to the original conditions. However, repairs may be refused
depending on the modifications.
The following cases may be considered as modifications.
- Put a seal on portions such as of the liquid-crystal screen or keypad.
- Glued decorations on the FOMA terminal using adhesion bond, etc.
- Change the parts such as exterior to other than DoCoMo Standard Parts.
ˎ Malfunction and damage due to modifications will be repaired at the owner’s expense,
even if the warranty period is still effective.
● The model plate must not be removed from the FOMA terminal.
The model plate certifies that the FOMA terminal satisfies technical standards. It should be
noted that if the plate is removed or is replaced with a different plate, and the original model
plate cannot be verified, it may disqualify the unit from repairs due to not being able to
determine the technical standards of that particular phone.
● Note that the settings, total call duration, and other information may be reset (cleared) as a
result of malfunction, repair or other handling. In this case, make the settings again.
● A material that generates a magnetic field is used in the following parts of the FOMA
terminal. Do not hold an object that is easily affected by magnetism, such as a cash card,
close to the FOMA terminal. You may not be able to use the card any more.
Where it is used: Earpiece, speaker, upper side of the back of the lens cover, both sides of
the JOG
● If the FOMA terminal has gotten wet or moist, immediately power off the terminal and remove
the battery pack from it, and then bring it to the DoCoMo repair handling service counter as
soon as possible. However, note that we may not repair the FOMA terminal depending on
the extent of the damage.
Precautions on Memory Dial (Phonebook Function) and Downloaded Data
● It is strictly recommended to back up all the data you have saved in the FOMA terminal or other
recording media. DoCoMo shall have no liability for any change or loss of the data.
● Note that data you created or data you retrieved or downloaded from sources other than your
FOMA terminal may be changed or lost when you change the model or have repairs done to
the FOMA terminal. DoCoMo shall have no liability for any change or loss of any kind. Under
some circumstances, DoCoMo may replace your FOMA terminal with its equivalent instead of
repairing it.
Only when the FOMA terminal is replaced, the images/melodies for incoming calls that you
downloaded to your FOMA terminal and user-defined data are transferred to a new terminal.
(However, depending on the data and seriousness of the trouble, data cannot be transferred to
a new terminal.)
※ Depending on the volume of data saved in the FOMA terminal, it may take time or it may not
be possible to transfer data to a new terminal.
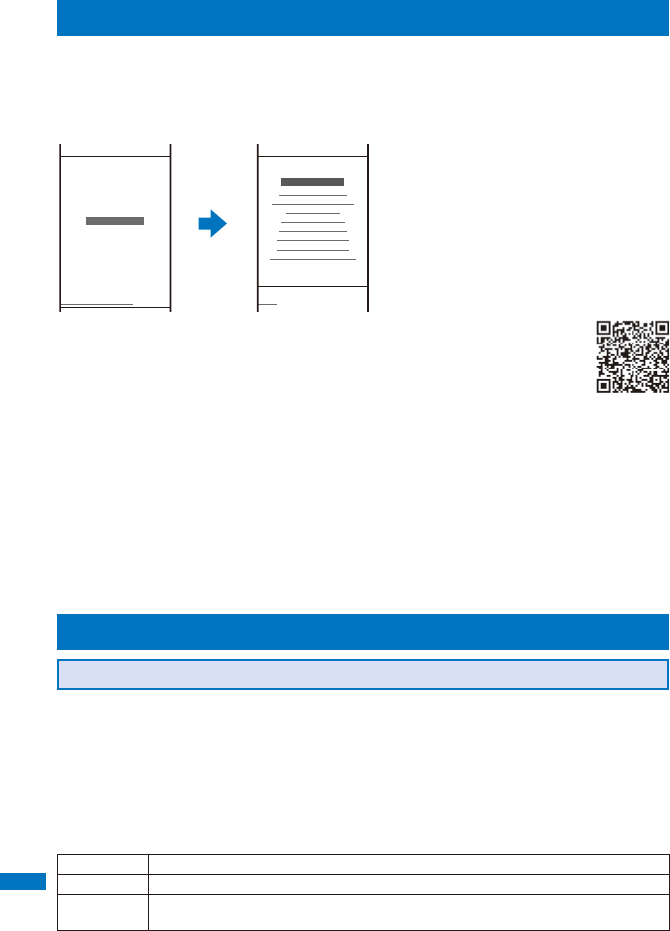
444
Appendix/External Devices/Troubleshooting
iモード故障診断 (i-mode Trouble Diagnosis) Site
This website allows you to check by yourself whether some operations, such as
sending/receiving mail and downloading images and melodies, are performed
normally on your FOMA terminal.
Top page List of test menus page
(Only in Japanese) (Only in Japanese)
画像・
メロテ゛ィ
・
メール
などが正
常に動作しているか確認す
る事ができます。
テストメニュー
一覧へ
「
iモート゛
故障診断」につい
てのお問い合せ
※お問い合わせ先及び受付
時間は地域によって異なり
ます。
お問い合わせ先へ
この
ヘ゜ーシ゛
を
Bookmark
登録
される事をお勧めします
↓ ↓ ↓
ハ゜ケット
通信料無料
!
iモート゛
故障診断
テストメニュー
一覧
GIF
画像表示
テスト
JPEG
画像表示
テスト
アニメーション
画像表示
テスト
メール
送受信
テスト
画像
メール
表示
テスト
メロテ゛ィメール
受信
テスト
着信
メロテ゛ィ
再生
テスト
iアフ゜リタ゛ウンロート゛テスト
i−motionタ゛ウンロート゛テスト
戻る
iモート゛
故障診断
● Access to the “iモード故障診断” (i-mode trouble diagnosis) site
i-mode site : [i Menu] → [お知らせ] (Information) → [サービス・機能] (Service/
Function) → [iモード] (i-mode) → [iモード故障診断] (i-mode
trouble diagnosis)
ˎ No packet communication charge is required for the i-mode trouble diagnosis site.
※ Packet communication charge is required from abroad.
ˎ
Available test items vary depending on the model of the FOMA terminal and may be subject to change.
ˎ When you check your mobile phone for normal operation on each test item, carefully read the
precautions described in the website before starting the diagnosis.
ˎ When you access the i-mode trouble diagnosis site and perform a mail sending test, your
FOMA terminal-specific information (such as model name and mail address) is automatically
sent to the server (server for the i-mode trouble diagnosis). DoCoMo will not use the information
sent from your FOMA terminal for any purposes other than for the i-mode trouble diagnosis.
ˎ If your mobile phone is diagnosed as having some troubles, call the “Contact for Repairs” on
the backcover of this manual for remedial action.
Updating the Software <Software update>
About Updating the Software
This function allows you to check if the software update is necessary by connecting to
the network for the FOMA terminal and if necessary, download a part of the software
using packet communication to update the software.
※ No packet communication charge is required for updating software.
If the software update is necessary, we inform of it on DoCoMo’s home page and in “お
知らせ” (Information) accessible from i Menu.
You can use one of the three update types: “Auto-update”, “Now update”, “Reserve”
to update the software.
Auto-update Download new software automatically and rewrite at the previously set time.
Now update Update the software immediately at any time you want.
Reserve Reserve a date/time you want to update the software. The software update starts
automatically at the reserved date and time.
445
Appendix/External Devices/Troubleshooting
Continued
● Do not remove the battery pack while updating the software. The software update may fail if
you do so.
● The software update can be made with data, such as Phonebook entries, images recorded
by the camera and downloaded data, remaining in the FOMA terminal. However, note
that the safety of the data may not be assured depending on the conditions of your FOMA
terminal (e.g. malfunction, damage and exposure to water). It is recommended to take a
backup copy of important data (some data such as downloaded data may be protected
from backup copy).
Before Using the Function
ˎ You can update the software even if the Host selection is set to other than [i-mode(UIM)].
ˎ Before updating the software, be sure to fully charge the battery pack of the FOMA terminal.
ˎ You cannot update the software in the following cases:
- When the date and time of the FOMA terminal are not set - During a call
- When “ ” is displayed - While the Self mode is set
- While the Omakase Lock is set
- When the Lock key is set (Auto-update and Reserve are available)
- When the battery level is low - When the UIM is not inserted
- When another function is being used
- When the FOMA terminal is connected to an external device such as a PC
ˎ It may take time to update (download and rewrite) the software in some cases.
ˎ The Alarm and Schedule alarm do not operate while updating the software.
ˎ You cannot place or receive a call, and use various communication functions and other functions
while updating the software. (You can receive a voice call while downloading the software.)
ˎ The FOMA terminal uses SSL communication with the DoCoMo server to update the software.
Before starting update, set the SSL list to [Valid] (Default: [Valid]) (P.198).
ˎ It is recommended to update the software under strong radio wave condition with 3-antenna
marks displayed and not to move the FOMA terminal while updating the software.
※ When the weakening of the radio wave occurs while downloading the software or the
download is interrupted for any reason, perform the software update again in a location of
good radio wave condition.
ˎ If no new update is available, the message “No update is needed. Please continue to use as
before” appears when you check the necessity of the update.
ˎ After updating the software, icons that notify you about mail/messages stored at the i-mode
center disappears. When the Recv option setting is [ON], the screen notifying you of new mail
may not be displayed after completion of the update if there is new mail while updating the
software.
ˎ When you update the software, your FOMA terminal-specific information (such as model
and manufacturer’s serial number) is automatically sent to the server (server for updating the
software under DoCoMo’s supervision). DoCoMo will not use the information sent from your
mobile phone for any purposes other than to update the software.
ˎ When the software update fails, the message “Rewrite failed” appears and no further operation
is possible. In this case, please bring the FOMA terminal to the nearest DoCoMo repair
handling service counter.
ˎ You cannot use the software update overseas.
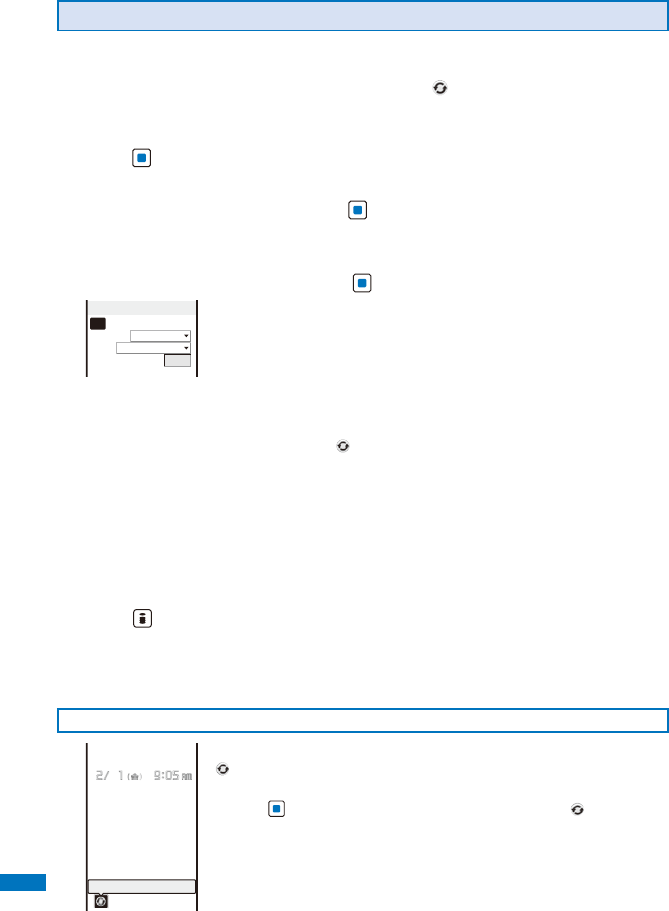
446
Appendix/External Devices/Troubleshooting
Updating the Software Automatically (Auto-update)
Download new software automatically and rewrite old one with it at the previously set
time.
When the status is changed to be ready to rewrite, “ ” appears. After you check the
time of rewriting, you can change the time or select whether to rewrite right away.
1
From the Menu, select [Settings] → [Management] → [SW Update] and
press .
The Security code screen appears.
2
Enter the Security code and press (OK).
ˎ The Security code is masked by “
****
”.
ˎ The Security code is set to “0000” at the time of purchase.
3
Select [Set auto-update] and press .
Set auto−update
Set
Auto−update
Day
None specified
Time
09:05
4
Set whether to update the software automatically at [Set].
[Auto-update] : Update the software automatically.
[Only notice] : The notification icon “ ” (Update notification) appears in the stand-by
display when the software update is necessary.
[Disable] : Do not update the software automatically.
5
Set a day of the week to perform the software update at [Day].
Select from [Mon to Sun] and [None specified].
6
Set a time to start the software update at [Time].
Enter a time in 24-hour format.
7
Press (Complete).
The Set auto-update is set.
When the Set auto-update is set to [Disable]
Select [Yes].
After Receiving the Software Update Information
Update schedule
When the Set auto-update is set to [Auto-update], the notification icon
“” (Update schedule) appears in the stand-by display.
To check the date and time of the software update
Press (Link) in the stand-by display and select “ ”. To change
the date and time of the update, select [Change]. To start the update,
select [Now rewrite].
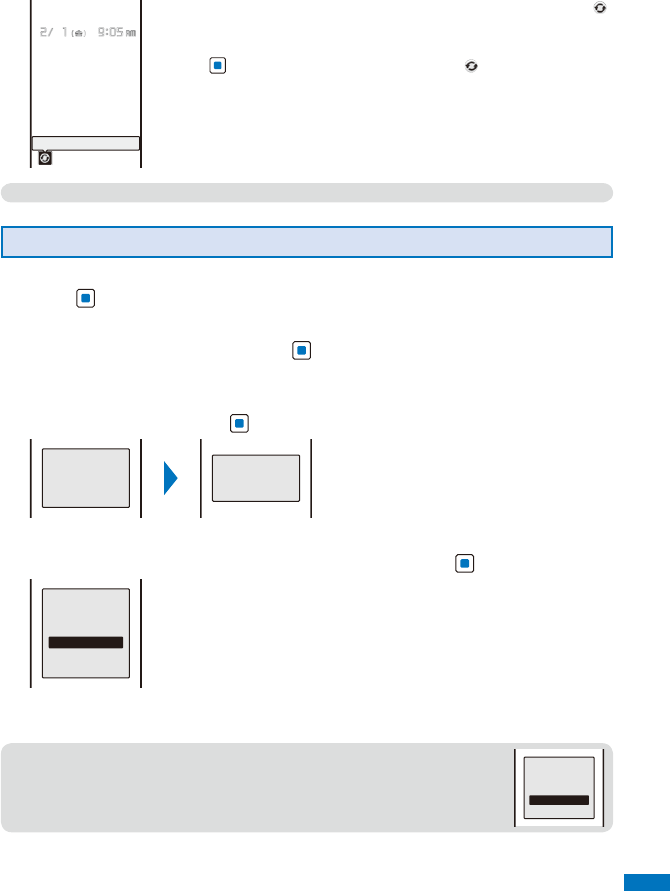
447
Appendix/External Devices/Troubleshooting
Continued
Update notification
When the Set auto-update is set to [Only notice], the notification icon “ ”
(Update notification) appears in the stand-by display.
To activate the software update
Press (Link) in the stand-by display, select “ ”, and select [Yes].
● The notification icon of the SW Update appears only when DoCoMo notifies software update.
Activating the Software Update
1
From the Menu, select [Settings] → [Management] → [SW Update] and
press .
The Security code screen appears.
2
Enter the Security code and press (OK).
ˎ The Security code is masked by “
****
”.
ˎ The Security code is set to “0000” at the time of purchase.
3
Select [Update] and press .
Establishing
SSL session
(Authenti−
cating)
Checking
The FOMA terminal starts SSL communication to check if the software update is necessary.
4
If necessary, select the timing to start update and press .
Update is needed
Now update
Reserve
Cancel
[Now update] : Start updating the software. The software update may not
be completed successfully if the server is busy.
[Reserve] : Reserve a date/time to start the software update.
[Cancel] : Do not start updating the software.
When the message informing there is no need to update the software
appears
You do not need to update the software. Continue to use the FOMA
terminal without updating.
● When the server is busy, the screen to the right appears. To reserve, select
[Reserve] and set a date/time for the update.
Server is busy
Reserve
Cancel

448
Appendix/External Devices/Troubleshooting
Updating the Software Immediately (Now update)
1
From the screen for selecting the update type, select [Now update] and press .
Ready to
download?
Notice:
No functions are
available except
receive calls
Connecting
SW Update
Downloading
After a while, the software download starts.
ˎ When downloading starts, step 2 is performed automatically (no need to operate).
To cancel the download
Press (Cancel) while downloading.
ˎ
If you stop the download before it is completed, the data downloaded up until this point is deleted.
2
After the download is completed, press (OK).
Ready to
rewrite?
書換え中
Rewriting
書換え完了しました
再起動します
Rewriting is complete.
Ready to reload?
The software rewriting starts and the incoming indicator lights. After rewriting is completed,
the FOMA terminal is restarted automatically.
ˎ While the software is being rewritten, all key operations are disabled. You even cannot stop
the update operation.
●
When the FOMA terminal is restarted, “ ” (Update complete) appears in the stand-by display.
If there is any information that you must confirm, “ ” (Check for update) appears. The icon
and message disappear after you check the notification information by selecting the icon.
Reserving a Date/Time for the Software Update (Reserve)
If downloading takes too long or the server is congested, you can connect to the
server and preset a date/time to start the software update.
Example: Reserving the software update on February 13 (Wed) 1:05 a.m.
1
From the screen for selecting the update type, select [Reserve] and press .
List of choice
2/13 Wed 1:05
2/13 Wed 3:44
2/13 Wed 4:18
2/13 Wed 4:44
2/13 Wed 5:28
2/13 Wed 5:55
2/13 Wed 6:23
2/13 Wed 6:57
2/13 Wed 7:15
2/13 Wed 7:50
2/13 Wed 8:27
2/13 Wed 8:58
The FOMA terminal connects to the server and displays a list of
reservation choices.
ˎ When reserving the software update, the time set on the server is
displayed.
To select another date/time
Press (Others) and select the preferred date, time slot, and time.
You can confirm vacant time slot available for reservation in the
Preferred- time slot display as follows:
“○: Available”, “△: Almost full”, or “×: Full”.
To cancel the reservation operation
Press (Cancel).
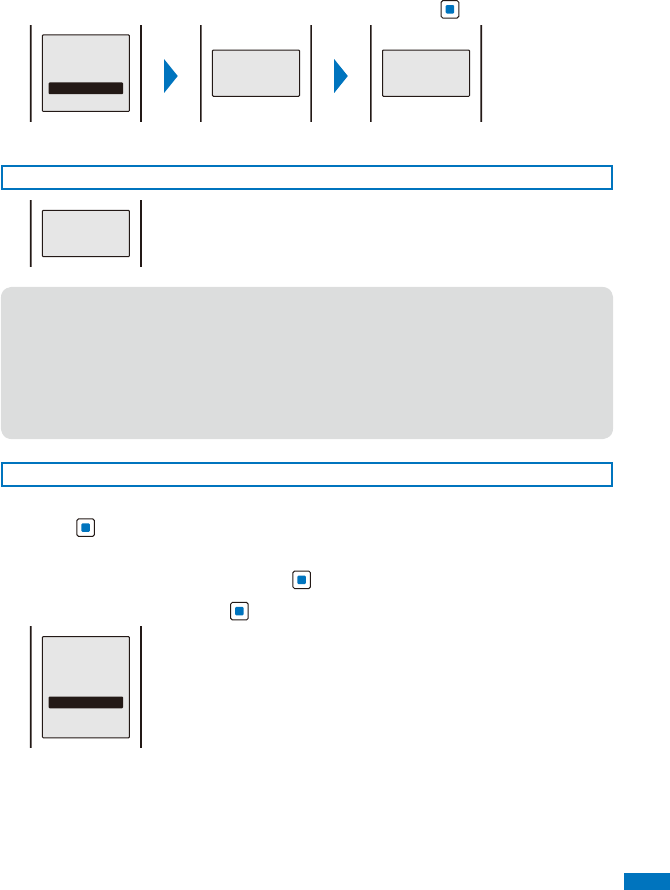
449
Appendix/External Devices/Troubleshooting
2
Select the date/time to be reserved → [Yes] and press .
Reserve for
2008/02/13 Wed
1:05?
Yes
No
Connecting
Reserved for
2008/02/13 Wed
1:05
The FOMA terminal connects to the server and completes the reservation.
When the Reserved Time Comes
Ready to update
software?
The screen to the left appears. After about five seconds, the software
update starts automatically and the incoming indicator flashes.
ˎ Before the reserved time comes, turn the FOMA terminal to the stand-by
display and place it in a location of good radio wave condition.
● The software update may not start if another function is being used when the reserved time
comes.
● When the Alarm/Schedule alarm is set to start at the same time as the reserved time, the
software update has priority and the alarm may not sound.
● If you execute the Reset all data&set or leave the FOMA terminal without a battery pack
or with a fully expended battery pack for a long period of time after you complete the
reservation, the date and time is reset, and the software update does not start even if the
reserved time comes. Perform the reservation again.
Confirming the Reservation
1
From the Menu, select [Settings] → [Management] → [SW Update] and
press .
The Security code screen appears.
2
Enter the Security code and press (OK).
3
Select [Update] and press .
Already reserved
for
2008/02/13 Wed
1:05
OK
Change
Cancel
If the software update is already reserved, the reserved information
appears.
To change the reservation
Select [Change]. The FOMA terminal connects to the server and you
can select another date/time.
To cancel the reservation
Select [Cancel] → [Yes]. The FOMA terminal connects to the server
and cancels the reservation.
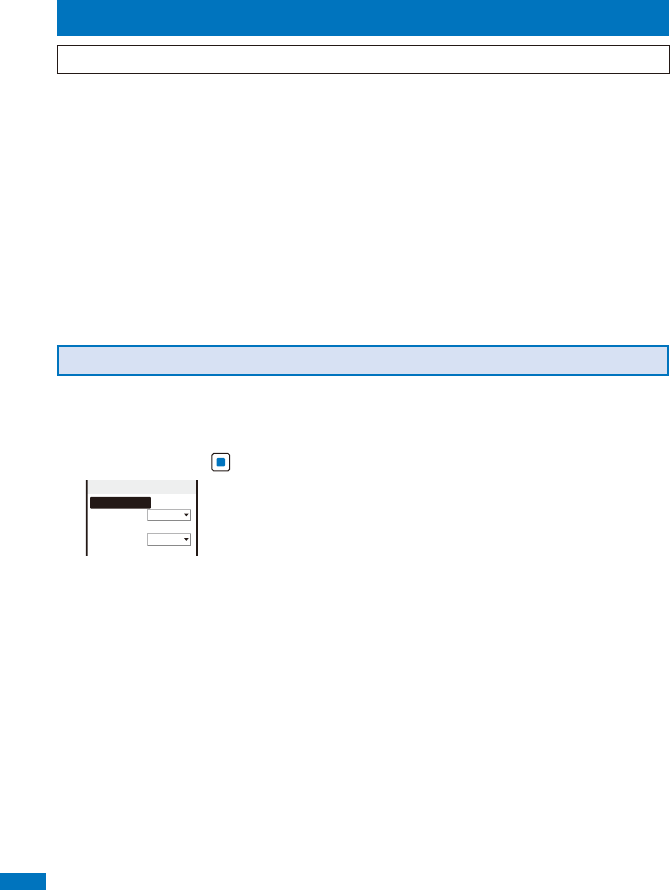
450
Appendix/External Devices/Troubleshooting
Protecting Your Mobile Phone from Harmful Data
<Scan function>
At first, update the pattern definitions to get the latest definitions.
You can detect information related to the data and programs obtained into the FOMA
terminal from an external source, such as data downloaded from a site or i-mode
mail, and delete data or end the start-up of application that can cause a trouble.
ˎ Use the pattern definitions for checking. Since the pattern definitions are upgraded every time
a new problem is discovered, be sure to update the definitions (P.463).
ˎ The scanning function provides explicit protection against intrusive data that causes mobile
phone trouble while you are viewing a website or receiving mail. Note that if the pattern
definitions corresponding to each trouble are not downloaded to the mobile phone, or if there
are no pattern definitions corresponding to each trouble, this function cannot prevent the
trouble occurrences.
ˎ The contents of the pattern definitions vary depending on the model of your mobile phone.
Note that the distribution of pattern definitions for models released more than three years ago
may be discontinued at our company’s discretion.
Setting the Scanning Function
You can set whether to automatically check data and programs when they are
executed.
1
From the Menu, select [Settings] → [Management] → [Scan function] → [Set
scan] and press .
Set scan
Scan function
Valid
Message scan
Valid
[Scan function] : Set whether to enable the scanning function.
[Message scan] : Set whether to enable the scanning function for SMS
when the Scan function is set to [Valid].
2
Select [Valid] at [Scan function].
[Valid] : Execute the scanning function. If data that can cause a trouble is detected, a
warning is displayed in five levels.
[Invalid] : Do not execute the scanning function.
When you change the setting
Select [Yes].
3
Select [Valid] at [Message scan].
[Valid] : Execute the scanning function for the SMS. If a phone number or URL is included
in the mail main body, the message appears.
[Invalid] : Do not execute the scanning function for the SMS.
When you change the setting
Select [Yes].
451
Appendix/External Devices/Troubleshooting
Updating the Pattern Definitions
1
From the Menu, select [Settings] → [Management] → [Scan function] →
[Update] and press .
Update pattern
definitions?
Yes
No
2
Select [Yes] → [Yes] and press .
Ready to
send your
terminal ID?
Yes
No
Update
Downloading
When the pattern definitions are the latest available
There is no need to update the pattern definitions. Use them as is.
● When you update the pattern definitions, your FOMA terminal-specific information (such as
model and manufacturer’s serial number) is automatically sent to the server (server for the
scanning function under DoCoMo’s supervision). DoCoMo will not use the information sent
from your mobile phone for any purposes other than the scanning function.
● You cannot update the pattern definitions in the following cases:
- When the date/time is not set - When “ ” is displayed
- During a call - While the Self mode is set
- While the Lock all is set - While the Omakase Lock is set
- While the Lock key is set - When the UIM is not inserted
- When another function is being used
- When the FOMA terminal is connected to an external device such as a PC
- When the international roaming service is used
● If you cancel the downloading operation before it is completed, the data downloaded until
this point is deleted.
Setting Whether Pattern Definitions Are Automatically Updated
You can set whether to update the pattern definitions automatically.
1
From the Menu, select [Settings] → [Management] → [Scan function] → [Set
auto-update] and press .
Set auto−update
of pattern
definitions
Valid
Invalid
[Valid] : Update the pattern definitions automatically.
[Invalid] : Do not update the pattern definitions automatically.
2
Select [Valid] → [Yes] → [Yes] and press .
The Set auto-update is set.
Continued
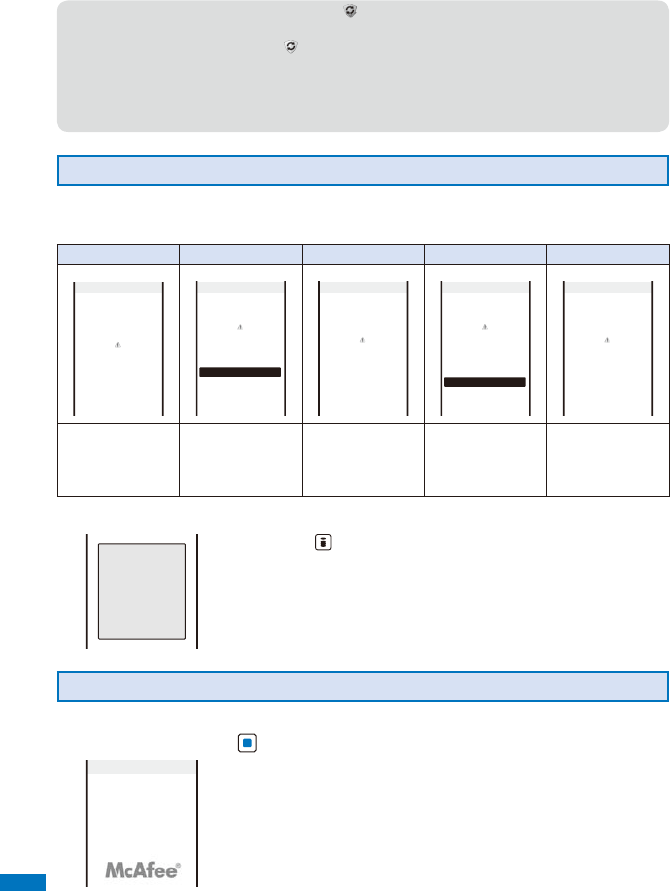
452
Appendix/External Devices/Troubleshooting
● If the Set auto-update is set to [Valid], “ ” (Update completed) appears in the stand-by
display when the pattern definitions auto-update is completed. If the pattern definitions were
not auto-updated successfully, “ ” (Update definitions) appears. Confirm the information by
selecting the icon to clear the notification.
● If you leave the FOMA terminal without a battery pack or with a fully expended battery pack
for a long period of time, the date and time is reset, and the Auto-update may not operate
correctly.
About the Scanning Result Indication
If data that can cause a trouble is detected, the warning display appears.
■ Scanning result indication
Warning level 0 Warning level 1 Warning level 2 Warning level 3 Warning level 4
Operation may
not run properly
Problem factor
Operation may
not run properly.
Cancel operation?
Yes
No
Problem factor
Operation may
not run properly.
Canceling operation
Problem factor
Operation may
not run properly.
Delete data?
Yes
No
Problem factor
Operation may not
run properly.
Deleting data
Problem factor
The operation is
continued.
Confirms whether
you want to stop
the operation.
Stops the operation.
Confirms whether
you want to stop the
operation and delete
the target data.
Stops the operation
and deletes the
target data.
■ Display of detected problem factors
PadHtml026.H
PadHtml027.H
PadHtml025.H
PadHtml028.H
PadHtml030.H
Detected
above data
When you press (Detail) in the warning display, the title of the problem
factor appears.
ˎ If six or more problem factors are detected, the titles of the sixth and
later problem factors are omitted.
Displaying the Pattern Definition Version
1
From the Menu, select [Settings] → [Management] → [Scan function] →
[Version] and press .
Pattern Definitions
Version
1.1
Version
453
Appendix/External Devices/Troubleshooting
Specifications
■ FOMA terminal
Product name FOMA SO906i
Dimensions 103.5×49×18 mm (H×W×D) (when folded)
Weight About 130 g (with battery pack attached)
Continuous
stand-by
time
Network 3G/GSM setting
FOMA/
3G
3G Moving state: About 380 hours
Auto Moving state: About 360 hours
Stationary state: About 520 hours
GSM Auto Stationary state: About 290 hours
Continuous
call time
Network 3G/GSM setting
FOMA/
3G
3G Voice call: About 220 minutes
Videophone call: About 120 minutes
Auto
GSM Auto Voice call: About 230 minutes
Charging time AC adapter: About 140 minutes
DC adapter: About 140 minutes
LCD Type Display: TFT 16,770,000 colors
Size Display: About 3.0 inches
Number of pixels Display: 414,720 pixels (864 dots×480 dots)
Image
pickup
device
Type In-camera: CMOS
Out-camera: CMOS
Size In-camera: 1/10 inches
Out-camera: 1/4 inches
Valid pixels In-camera: About 330,000 pixels
Out-camera: About 3,200,000 pixels
Camera Film valid pixels In-camera: About 310,000 pixels
Out-camera: About 3,150,000 pixels
Zoom (Digital) In-camera: Zoom is unavailable.
Out-camera: Maximum magnification about ×16.0
Storage Recordable number of still
images
About 1,500 (on the Data Box)※1
Recordable number of
continuous still images
4
File format of still images JPEG
Recordable time of movies On the Data Box: About 434 seconds※2
On the microSD memory card (64MB): About 60
minutes※3
File format of movies MP4
Music
playback
Continuous playback time i-motion: About 420 minutes
Chaku-Uta Full®: About 780 minutes※4
WMA: About 840 minutes※4
Music&Video Channel: About
1,140
minutes (sound)※4,
about 330 minutes (movie)
Memory
capacity
Chaku-Uta®/
Chaku-Uta Full®
About 300.6MB
※1 Image size: [QCIF(176×144 dots)] Image quality: [Standard] File size: 19K bytes
※2 It is the maximum recording time per one movie under the following conditions:
Image size: [sQCIF(128×96 dots)] Shoot mode: [Image+Sound]
Image quality: [Standard] File size restriction: Attach(L)
Continued
454
Appendix/External Devices/Troubleshooting
※3 It is the maximum recording time per one movie under the following conditions:
Image size: [sQCIF(128×96 dots)] Shoot mode: [Image+Sound]
Image quality: [Standard] File size: No limit
※4 Playing back music in the background is supported.
■ Battery pack
Product name Battery Pack SO02
Type of battery Lithium Ion Battery
Nominal voltage DC 3.7V
Nominal amount 870mAh
Number of Saved and Protected Data Items
Type Number of saved data items
Number of protected
data items
Phonebook※1 Up to 1,000 −
Schedule Up to 300 −
Text memo Up to 10 −
Mail
(Total number
of i-mode mail
and SMS)
Received mail※2 Up to 1,000 Up to 500
Sent mail※2 Up to 500 Up to 250
Saved draft mail※2 Up to 50 −
Area Mail※2 Up to 30 −
Template※3 Up to 50 −
Message Message R Up to 20 Up to 20
Message F Up to 20 Up to 20
Bookmark i-mode Up to 200 −
Full Browser Up to 200 −
Screen memo※4 Up to 100 Up to 50
i-αppli※2※3 Up to 100 (including up to 5 i-αppli
with mail software)
−
Image※2※5 Up to 1,500 −
Music&Video Channel
(Delivered program)※2
Up to 2 −
Music&Video Channel
(Re-saved program)※2
Up to 10 −
Movie/i-motion※2※6 Up to 150 −
Melody※2※6 Up to 200 −
Chara-den※2※6 Up to 50 −
PDF data※2※3 Up to 50 −
Kisekae Tool※2※6 Up to 50 −
ToruCa card Up to 100 −
easy BlogUp service information file Up to 22 −
※1 You can save up to 50 entries in the UIM.
※2
The actual number of data items that can be saved may decrease depending on the data to be saved.
※3 Includes the preinstalled data.
※4
The actual number of data items that can be saved or protected may decrease depending on the data.
※5 Includes the preinstalled Deco-mail pictographs and the images saved in the [スーパーモン
キーボール] folder at the time of purchase.
※6 Does not include the preinstalled data.

455
Appendix/External Devices/Troubleshooting
About the Specific Absorption Rate (SAR) of Mobile Phones, etc.
★ Mobile Phone GSM/GPRS 900/1800/1900&UMTS JP/EU/US
SAR Certification Information
This model phone FOMA SO906i meets the MIC’s* technical regulation for exposure
to radio waves.
The technical regulation established permitted levels of radio frequency energy, based on
standards that were developed by independent scientific organizations through periodic and
thorough evaluation of scientific studies. The regulation employs a unit of measurement known as
the Specific Absorption Rate, or SAR. The SAR limit is 2 watts/kilogram (W/kg)** averaged over
ten grams of tissue. The limit includes a substantial safety margin designed to assure the safety
of all persons, regardless of age and health. The value of the limit is equal to the international
guidelines recommended by ICNIRP***.
All phone models should be confirmed to comply with the regulation, before they are available
for sale to the public. The highest SAR value for this model phone is 0.346 W/kg. It was taken by
the Telecom Engineering Center (TELEC), a Registered Certification Agency on the Radio Law.
The test for SAR was conducted in accordance with the MIC testing procedure using standard
operating positions with the phone transmitting at its highest permitted power level in all tested
frequency bands. While there may be differences between the SAR levels of various phones and
at various positions, they all meet the MIC’s technical regulation. Although the SAR is determined
at the highest certified power level, the actual SAR of the phone during operation can be well
below the maximum value.
For more information about SAR, please see the following websites:
World Health Organization (WHO):
http://www.who.int/peh-emf/
ICNIRP: http://www.icnirp.de/
MIC: http://www.tele.soumu.go.jp/e/ele/body/index.htm
TELEC: http://www.telec.or.jp/ENG/index_e.htm
NTT DoCoMo: http://www.nttdocomo.co.jp/english/product/
Sony Ericsson Mobile Communications Japan, Inc.:
http://www.SonyEricsson.co.jp/product/SAR/ (Japanese only)
* Ministry of Internal Affairs and Communications
** The technical regulation is provided in Article 14-2 of the Ministry Ordinance Regulating Radio
Equipment.
*** International Commission on Non-Ionizing Radiation Protection
Radio Wave Exposure and Specific Absorption Rate (SAR) Information
United States & Canada
THIS PHONE MODEL HAS BEEN CERTIFIED IN COMPLIANCE WITH THE GOVERNMENT’S
REQUIREMENTS FOR EXPOSURE TO RADIO WAVES.
The SO906i mobile phones have been designed to comply with applicable safety requirements for
exposure to radio waves. Your wireless phone is a radio transmitter and receiver. It is designed to
not exceed the limits* of exposure to radio frequency (RF) energy set by governmental authorities.
These limits establish permitted levels of RF energy for the general population. The guidelines are
based on standards that were developed by international scientific organizations through periodic
and thorough evaluation of scientific studies. The standards include a safety margin designed to
assure the safety of all individuals, regardless of age and health.
Continued

456
Appendix/External Devices/Troubleshooting
The radio wave exposure guidelines employ a unit of measurement known as the Specific
Absorption Rate (SAR). Tests for SAR are conducted using standardized methods with the phone
transmitting at its highest certified power level in all used frequency bands. While there may be
differences between the SAR levels of various phone models, they are all designed to meet the
relevant guidelines for exposure to radio waves. For more information on SAR, please refer to the
safe and efficient use chapter in the User Guide.
The highest SAR value as reported to the authorities for this phone model when tested for use by
the ear is 0.44 W/kg*, and when worn on the body is 0.50 W/kg* for speech and 0.49 W/kg* for
data calls. Body worn measurements are made while the phone is in use and worn on the body
with a Sony Ericsson accessory supplied with or designated for use with this phone. It is therefore
recommended that only Ericsson and Sony Ericsson original accessories be used in conjunction
with Sony Ericsson phones.
**Before a phone model is available for sale to the public in the US, it must be tested and certified
by the Federal Communications Commission (FCC) that it does not exceed the limit established
by the government-adopted requirement for safe exposure*. The tests are performed in positions
and locations (i.e., by the ear and worn on the body) as required by the FCC for each model. The
FCC has granted an Equipment Authorization for this phone model with all reported SAR levels
evaluated as in compliance with the FCC RF exposure guidelines. While there may be differences
between the SAR levels of various phones, all mobile phones granted an FCC equipment
authorization meet the government requirement for safe exposure. SAR information on this phone
model is on file at the FCC and can be found under the Display Grant section of http://www.fcc.
gov/oet/fccid after searching on FCC ID PY7A3724011. Additional information on SAR can be
found on the Cellular Telecommunications & Internet Association (CTIA) website at
http://www.phonefacts.net.
* In the United States and Canada, the SAR limit for mobile phones used by the public is 1.6
watts/kilogram (W/kg) averaged over one gram of tissue. The standard incorporates a margin
of safety to give additional protection for the public and to account for any variations in
measurements.
** This paragraph is only applicable to authorities and customers in the United States.
Europe
This mobile phone model SO906i has been designed to comply with applicable safety
requirements for exposure to radio waves. These requirements are based on scientific guidelines
that include safety margins designed to assure the safety of all persons, regardless of age and
health.
The radio wave exposure guidelines employ a unit of measurement known as the Specific
Absorption Rate, or SAR. Tests for SAR are conducted using standardized methods with the
phone transmitting at its highest certified power level in all used frequency bands.
While there may be differences between the SAR levels of various phone models, they are all
designed to meet the relevant guidelines for exposure to radio waves.
457
Appendix/External Devices/Troubleshooting
For more information on SAR, please refer to the safety chapter in the User’s Guide.
SAR data information for residents in countries that have adopted the SAR limit recommended
by the International Commission of Non-lonizing Radiation Protection (ICNIRP), which is 2 W/kg
averaged over ten (10) gram of tissue (for example European Union, Japan, Brazil and New
Zealand):
The highest SAR value for this model phone tested by Sony Ericsson for use at the ear is 0.27 W/kg
(10g).
Radio Frequency (RF) Exposure and SAR
Your mobile phone is a low-power radio transmitter and receiver.
When it is turned on, it emits low levels of radio frequency energy (also known as radio waves or
radio frequency fields).
Governments around the world have adopted comprehensive international safety guidelines,
developed by scientific organizations, e.g. ICNIRP (International Commission on Non-Ionizing
Radiation Protection) and IEEE (The Institute of Electrical and Electronics Engineers Inc.), through
periodic and thorough evaluation of scientific studies. These guidelines establish permitted levels
of radio wave exposure for the general population. The levels include a safety margin designed to
assure the safety of all persons, regardless of age and health, and to account for any variations in
measurements.
Specific Absorption Rate (SAR) is the unit of measurement for the amount of radio frequency
energy absorbed by the body when using a mobile phone. The SAR value is determined at the
highest certified power level in laboratory conditions, but the actual SAR level of the mobile phone
while operating can be well below this value. This is because the mobile phone is designed to use
the minimum power required to reach the network.
Variations in SAR below the radio frequency exposure guidelines do not mean that there are
variations in safety. While there may be differences in SAR levels among mobile phones, all Sony
Ericsson mobile phone models are designed to meet radio frequency exposure guidelines.
Before a phone model is available for sale to the public, it must be tested and certified to the
FCC that it does not exceed the limit established by the government-adopted requirement for
safe exposure. The tests are performed in positions and locations (that is, at the ear and worn
on the body) as required by the FCC for each model. For body worn operation, this phone has
been tested and meets FCC RF exposure guidelines when the handset is positioned a minimum
of 15 mm from the body without any metal parts in the vicinity of the phone or when used with the
original Sony Ericsson body worn accessory intended for this phone. Use of other accessories
may not ensure compliance with FCC RF exposure guidelines.
SAR information for this mobile phone model is included with the material that comes with this
mobile phone. This information can also be found, together with more information on radio
frequency exposure and SAR, on:
www.sonyericsson.com
Continued
458
Appendix/External Devices/Troubleshooting
Guidelines for Safe and Efficient Use
Please read this information before using your mobile phone.
These instructions are intended for your safety. Please follow these guidelines. If the product has
been subject to any of the conditions listed below or you have any doubt as to its proper function
make sure you have the product checked by a certified service partner before charging or using
it. Failure to do so might entail a risk of product malfunction or even a potential hazard to your
health.
Recommendations for safe use of product (mobile phone, battery, charger and other accessories)
□ Always treat your product with care and keep it in a clean and dust-free place.
□Warning! May explode if disposed of in fire.
□ Do not expose your product to liquid or moisture or humidity.
□ Do not expose your product to extremely high or low temperatures. Do not expose the battery
to temperatures above +35°C (+95°F).
□ Do not expose your product to open flames or lit tobacco products.
□ Do not drop, throw or try to bend your product.
□ Do not paint your product.
□ Do not attempt to disassemble or modify your product.
□ Do not close your product with an object inserted between keypad and display if you have a
clamshell phone; this may damage your product.
□ Do not use your product near medical equipment without requesting permission from your
treating physician or authorized medical staff.
□ Do not use your product when in, or around aircraft, or areas showing the sign “turn off two-way
radio”.
□ Do not use your product in an area where a potentially explosive atmosphere exists.
□ Do not place your product or install wireless equipment in the area above an air bag in your
car.
□Caution: Cracked or broken displays may create sharp edges or splinters that could be harmful
upon contact.
CHILDREN
KEEP OUT OF CHILDRENS REACH. DO NOT ALLOW CHILDREN TO PLAY WITH YOUR MOBILE
PHONE OR ITS ACCESSORIES. THEY COULD HURT THEMSELVES OR OTHERS, OR COULD
ACCIDENTALLY DAMAGE THE MOBILE PHONE OR ACCESSORY. YOUR MOBILE PHONE
OR ITS ACCESSORY MAY CONTAIN SMALL PARTS THAT COULD BECOME DETACHED AND
CREATE A CHOKING HAZARD.

459
Appendix/External Devices/Troubleshooting
Power supply (Charger)
Connect the AC power adapter only to designated power sources as marked on the product.
Make sure the cord is positioned so that it will not be subjected to damage or stress. To reduce
risk of electric shock, unplug the unit from any power source before attempting to clean it. The AC
power adapter must not be used outdoors or in damp areas. Never alter the cord or plug.
Battery
We recommend that you fully charge the battery before you use your mobile phone for the first
time. A new battery or one that has not been used for a long time could have reduced capacity
the first few times it is used. The battery should only be charged in temperatures between +5°C
(+41°F) and +35°C (+95°F).
Use only original batteries intended for use with your mobile phone. Using other batteries and
chargers could be dangerous.
Talk and standby times depend on several different conditions such as signal strength, operating
temperature, application usage patterns, features selected and voice or data transmissions when
the mobile phone is being used.
Turn off your mobile phone before removing the battery. Do not put the battery into your mouth.
Battery electrolytes may be toxic if swallowed. Do not let the metal contacts on the battery touch
another metal object. Doing this could short-circuit and damage the battery. Use the battery for
the intended purpose only.
Personal medical devices
Mobile phones may affect the operation of pacemakers and other implanted equipment. Please
avoid placing the mobile phone over the pacemaker, e.g. in your breast pocket. When using the
mobile phone, use it at the ear on the opposite side of the body to the pacemaker. If a minimum
distance of 22 cm (8.7 inches) is kept between the mobile phone and the pacemaker, the risk
of interference is limited. If you have any reason to suspect that interference is taking place,
immediately turn off your mobile phone. Contact your medical doctor for more information.
For other medical devices, please consult your physician and the manufacturer of the device.
Driving
Please check if local laws and regulations restrict the use of mobile phones while driving or
require drivers to use handsfree solutions.
For the use of mobile phones in the vehicle, please follow instructions from vehicle manufacturers.
Always pay full attention to driving and pull off the road and park before making or answering a
call if driving conditions so require.
Continued
460
Appendix/External Devices/Troubleshooting
Emergency calls
Mobile phones operate using radio signals, which cannot guarantee connection in all conditions.
You should therefore never rely solely upon any mobile phone for essential communications (e.g.
medical emergencies).
Emergency calls may not be possible in all areas, on all cellular networks, or when certain network
services and/or mobile phone features are in use. Check with your local service provider.
Efficient use
Hold your mobile phone as you would any other phone. Do not cover the hinge area when the
phone is in use, as this affects call quality and may cause the phone to operate at a higher power
level than needed, thus shortening talk and standby times.
Disposal of old electrical and electronic equipment
This symbol indicates that all electrical and electronic equipment included shall not be treated
as household waste. Instead it shall be left at the appropriate collection point for recycling of
electrical and electronic equipment. By ensuring this product is disposed of correctly, you will
help prevent potential negative consequences for the environment and human health, which
could otherwise be caused by inappropriate waste handling of this product. The recycling of
materials will help to conserve natural resources. For more detailed information about recycling
this product, please contact your local city office, your household waste disposal service or the
shop where you purchased the product.
Disposing of the battery
Please check local regulations for disposal of batteries or call your local Sony Ericsson Call
Center for information.
The battery should never be placed in municipal waste. Use a battery disposal facility if available.
Memory Card
If your product comes complete with a removable memory card, it is generally compatible with
the handset purchased but may not be compatible with other devices or the capabilities of their
memory cards. Check other devices for compatibility before purchase or use. If your product is
equipped with a memory card reader, check memory card compatibility before purchase or use.
Memory cards are generally formatted prior to shipping. To reformat the memory card, use a
compatible device. Do not use the standard operating system format when formatting the memory
card on a PC. For details, refer to the operating instructions of the device or contact customer
support.

461
Appendix/External Devices/Troubleshooting
WARNING:
If your device requires an adapter for insertion into the handset or another device, do not insert
the card directly without the required adapter.
Precautions on Memory Card Use
□ Do not expose the memory card to moisture.
□ Do not touch terminal connections with your hand or any metal object.
□ Do not strike, bend, or drop the memory card.
□ Do not attempt to disassemble or modify the memory card.
□ Do not use or store the memory card in humid or corrosive locations or in excessive heat such
as a closed car in summer, in direct sunlight or near a heater, etc.
□ Do not press or bend the end of the memory card adapter with excessive force.
□ Do not let dirt, dust, or foreign objects get into the insert port of any memory card adapter.
□ Check you have inserted the memory card correctly.
□ Insert the memory card as far as it will go into any memory card adapter needed. The memory
card may not operate properly unless fully inserted.
□ We recommend that you make a backup copy of important data. We are not responsible for
any loss or damage to content you store on the memory card.
□ Recorded data may be damaged or lost when you remove the memory card or memory card
adapter, turn off the power while formatting, reading or writing data, or use the memory card in
locations subject to static electricity or high electrical field emissions.
Protection of personal information
To safeguard your privacy and prevent information being accessible to a third party, you should
erase all personal data before selling or disposing of the product. To delete personal data, perform
a master reset, remove the memory card or format the media memory. DELETION OF MATERIAL
FROM THE PHONE AND MEDIA MEMORIES DOES NOT ENSURE THAT SAID INFORMATION
CANNOT BE RECOVERED BY A SUBSEQUENT USER. DoCoMo/SONY ERICSSON DOES NOT
WARRANT AGAINST A SUBSEQUENT USER OF THE DEVICE ACCESSING YOUR INFORMATION
AND DOES NOT ASSUME ANY RESPONSIBILITY FOR SUBSEQUENT DISCLOSURE OF SAID
INFORMATION EVEN IF A MASTER RESET AND A MEDIA MEMORY FORMAT HAS BEEN
PERFORMED. If you are concerned about such potential disclosure retain your device or secure
its permanent destruction.
Accessories
DoCoMo recommends use of DoCoMo’s original accessories for safe and efficient use of its
products. Use of third-party accessories may decrease performance or pose a risk to your health
or safety.
LOUDNESS WARNING:
Please adjust the audio volume cautiously when using third-party audio accessories to avoid
volume levels that may be harmful to your hearing. DoCoMo does not test use of third-party audio
accessories with this mobile phone. DoCoMo recommends using only DoCoMo’s original audio
accessories.
Continued
462
Appendix/External Devices/Troubleshooting
FCC Statement for the US:
This device complies with Part 15 of the FCC rules. Operation is subject to the
following two conditions :
(1) This device may not cause harmful interference, and
(2) This device must accept any interference received, including interference
that may cause undesired operation.
Any change or modification not expressly approved by Sony Ericsson may void the user’s
authority to operate the equipment.
This equipment has been tested and found to comply with the limits for a Class B digital device,
pursuant to Part 15 of the FCC Rules. These limits are designed to provide reasonable protection
against harmful interference in a residential installation. This equipment generates, uses and can
radiate radio frequency energy and, if not installed and used in accordance with the instructions,
may cause harmful interference to radio communications. However, there is no guarantee that
interference will not occur in a particular installation.
If this equipment does cause harmful interference to radio or television reception, which can
be determined by turning the equipment off and on, the user is encouraged to try to correct the
interference by one or more of the following measures:
-- Reorient or relocate the receiving antenna.
-- Increase the separation between the equipment and receiver.
-- Connect the equipment into an outlet on a circuit different from that to which the receiver is
connected.
-- Consult the dealer or an experienced radio/TV technician for help.
Industry Canada Statement:
This Class B digital apparatus complies with Canadian ICES-003.
Cet appareil numérique de la classe B est conforme à la norme NMB-003 du Canada.
This device complies with RSS-210 of Industry Canada.
Operation is subject to the following two conditions: (1) this device may not cause interference,
and (2) this device must accept any interference, including interference that may cause undesired
operation of the device.
463
Appendix/External Devices/Troubleshooting
Declaration of Conformity for SO906i
We, Sony Ericsson Mobile Communications AB of Nya Vattentornet SE-221 88 Lund, Sweden
declare under our sole responsibility that our product
Sony Ericsson type AAD-3724011-BV
and in combination with FOMA global AC charger 01(MODEL:MAS-BH0008-A 002), to which this
declaration relates is in conformity with the appropriate standards EN 301 511:V9.0.2, EN 301
908-1:V2.2.1, EN 301 908-2:V2.2.1, EN 301 489-24:V1.3.1, EN 301 489-7:V1.3.1, EN 301 489-3:
V1.4.1, EN 302 291-2:V1.1.1, and EN 60950-1:2006, following the provisions of, Radio Equipment
and Telecommunication Terminal Equipment Directive 1999/5/EC
Lund, March 2008
0682
Signature
Yukio Kubota, Head of Product Business Unit JAPAN
われわれはR&TTE指令の要求事項を満たしています(1999/5/EC)
We fulfill the requirements of the R&TTE Directive (1999/5/EC)
Export Controls and Regulations
This product and its accessories may be covered and controlled by Japan’s export
control regulations (“Foreign Exchange and Foreign Trade Law” and related laws
and regulations). If you wish to export this product and/or its accessories, you must
complete the necessary procedures at your own responsibility and cost. Detailed
information on the procedure, contact the Ministry of Economy, Trade and Industry.


465
Index/Quick Manual
Index ........................................................................................................................ 478
Quick Manual ........................................................................................................... 490
466
Index/Quick Manual
A
AC adapter ......................... 41
Accept/Reject call ............. 143
Acquire image ................... 194
Additional service ............. 402
Adjust light ........................ 121
Adjust volume
GPS .............................. 113
i-motion ........................ 296
i-αppli.......................... 112
Keypad sound .............. 111
Melody ......................... 305
MUSIC .................. 304, 346
Music&Video Channel
... 340
Ring volume ................. 109
Sound effect ................. 112
Volume ......................... 112
After sales services .......... 454
Alarm
Alarm (clock) ................ 360
Cost limit notice ............ 371
Schedule alarm ............ 365
Alarm (clock) ..................... 360
All font size setting ............ 127
Animation.......................... 120
Antenna .............................. 27
Any key ans ........................ 67
Application ........................ 373
Area Mail ......................... 233
Receive ........................ 233
Area Mail setting ....... 233, 234
Beep setting ................. 234
Beep time ..................... 234
Receive entry ............... 234
Receive setting ............ 233
Arrival Call Act .................. 396
Auto answer setting .......... 375
Auto key lock/rel ............... 141
Auto reset ......................... 370
Auto setting ....................... 121
AV Phone To function ....... 196
Available services ............. 438
B
Backlight ........................... 121
Backlight always on .......... 121
Bar code reader ................ 183
Add bookmark ............. 184
Add to phonebook ....... 184
Saved data ................... 184
Battery level ........................ 42
Battery pack........................ 39
Bookmark ................. 191, 285
Add bookmark ............. 191
Attach to mail ............... 212
Bookmark ..................... 192
Delete ........................... 193
Display ......................... 192
Edit ............................... 286
Edit folder ..................... 192
iC transmission ............. 332
Move ............................ 192
Send Ir data ................. 329
C
Cache ............................... 188
Calculator ......................... 372
Calendar ................... 118, 366
Calendar/Clock ................. 118
Call condition ..................... 60
Call display ....................... 121
Call Forwarding Service ... 393
Index
How to Look up in the Index
The index can be used as an “alphabetical table of contents”. Under each headword, terms
relevant to it are listed. Not only terms representing function names actually displayed on the
FOMA terminal, but also those that are a brief summary about the functions described in this
manual.
Example: Adjusting the volume of i-αppli software
Adjust volume
i-motion ........................ 296
i-αppli.......................... 112
Keypad sound .............. 111
Melody ......................... 305
MUSIC .................. 304, 346
Ring volume ................. 109
Sound effect ................. 112
i-αppli .............................. 238
Auto-start...................... 246
Certificates ................... 240
SW description ............. 239
SW init. Setting ............. 238
Upgrade ....................... 248
Use icons ..................... 241
Volume setting .............. 112

467
Index/Quick Manual
Call method ........................ 60
Call Rejection ..................... 65
Call Waiting Service .......... 393
Call with ID/Call without ID
....................................... 60
Caller ID Display Request
Service ......................... 395
Camera ............................. 150
Adjust EV ...................... 162
Adjust zoom ................. 161
Attach to mail ....... 156, 170
Auto Focus ................... 173
Auto orientation ............ 179
Auto save ..................... 178
Auto timer ..................... 173
Backlight always on ..... 121
Bar code reader ........... 183
BestPic™...................... 167
Common replay mode
... 175
Continuous mode ......... 168
Deco-Snap ................... 164
Digital Zooming ............ 179
Direct key ..................... 158
easy BlogUp ................ 358
Estimated number of
recordable images ... 151
Estimated recording time
of movie ........... 152, 153
Face detection ............. 162
File size ........................ 181
Flash............................. 174
Graphical menu ........... 157
Grid Line ...................... 174
High sensitivity ............. 166
Icons ............................ 154
Image quality ............... 178
Image stabilize ............. 180
Mini-Photo creator ........ 178
Movie shoot .................. 170
Multi focus .................... 172
Panorama ..................... 165
Photo light .................... 174
Photometry ................... 176
Picture effect ................ 176
Picture Motion Browser
... 440
Reset all ....................... 177
Reset file No. ................ 181
Select save to ............... 177
Select scene ................ 160
Select size .................... 159
Set attach loc. info ....... 171
Shoot by photo ............. 155
Shoot mode .......... 163, 182
Shoot with frame .......... 169
Shutter sound ............... 180
Smile shutter ................ 163
Switch camera ............. 159
Viewer .......................... 353
White balance .............. 175
Camera in key locking ...... 117
Certificates
..... 187, 198, 199, 240, 284
Chaku-moji ......................... 58
Create message ............. 58
Place a call ..................... 59
Set Message display ...... 58
Chaku-Uta Full® ................ 344
Change code .................... 132
Characters Assigned to Keys
..................................... 430
Chara-den ......................... 302
Action input mode .......... 75
Action list ................ 75, 302
Call Chara-den ....... 75, 303
Change action ........ 75, 303
Delete ........................... 321
Detail ............................ 322
DTMF send mode .......... 75
Set Chara-den .............. 303
Set sub image .............. 303
Sort ............................... 321
Charge ................................ 40
Backlight always on ..... 121
Charge sound .............. 111
Charging time ................ 40
Check new message
............................. 216, 231
Animation ..................... 120
i-mode inquiry set ........ 227
Check new SMS ............... 236
Animation ..................... 120
Check service area ........... 417
Chg. to videophone ............. 54
Chg. to voice call ................ 54
Chg.MENU ......................... 35
Color theme setting .......... 124
Common phrases ............. 385
Edit ............................... 386
List of common phrases
... 434
Communication mode ....... 314
Compose message ........... 207
Cost limit notice ................ 370
Country code ...................... 60
Cursor ................................. 28
D
Data Box ........................... 317
Chara-den .................... 302
i-motion ........................ 295
Kisekae Tool ................. 305
Melody ......................... 304
MUSIC .......................... 303
Music&Video Channel
... 342
My document ............... 333
My picture .................... 290
Property ........................ 322
Data communication ......... 404
Data security..................... 142
Data Security Service
............................. 105, 147
Connect to Center ........ 105
Exchanging history ...... 105
Save mail ...................... 221
Save phonebook .......... 105
Save photo ................... 294
Service setting ............. 105
Date/time ............................ 44
DC adapter ......................... 41
Deco mail pict. .................. 386
Deco-mail ......................... 208
Continued

468
Index/Quick Manual
Compose and send
message .................. 208
Deco. slcted txt ............ 205
Decorate mail ............... 211
Quick deco. Mail .......... 210
Templates ..................... 211
Delete max cost icon ........ 371
Denied no ID ..................... 144
Desktop holder ................... 41
Dial frequency record ......... 55
Dictionary
Delete ........................... 389
Dictionary folder ........... 389
Download ..................... 195
Edit name ..................... 389
Information ................... 389
Reorder ........................ 390
Save ............................. 388
Differences in UIM functions
....................................... 38
Disp. call/rcv. No. ............... 121
Display ................................ 30
Backlight ...................... 121
Guide display ......... 33, 117
Icon ........................ 30, 154
Display sites ..................... 187
DoCoMo keitai datalink ..... 408
Download
Chaku-Uta Full® ........... 344
Chara-den .................... 195
Dictionary ..................... 195
easy BlogUp service
inforamtion file ......... 195
Graphics ...................... 194
i-motion ........................ 201
i-αppli.......................... 238
Kisekae Tool ................. 195
Melody ......................... 195
Music&Video Channel
... 338
PDF data ...................... 195
Template ....................... 195
ToruCa .......................... 195
Dual Network Service ....... 395
E
Earphone/Microphone ...... 374
Earphone/Microphone with
Switch........................... 374
easy BlogUp ..................... 358
BlogUp ......................... 359
Browse ......................... 360
Save ............................. 358
Edit movie ......................... 298
Clip movie .................... 299
Clip picture ................... 299
Select size .................... 300
Edit photo ......................... 292
Frame ........................... 292
Image effect ................. 294
Image stamp ................ 292
Rotate ........................... 294
Select size .................... 294
Text stamp .................... 293
Zoom&trim.................... 293
Edit slide setting ............... 354
Emoticons ......................... 433
English Guidance Service
..................................... 395
Error messages ................ 446
Export Controls and
Regulations .................. 475
F
FeliCa ............................... 254
IC card lock .................. 262
Osaifu-Keitai................. 254
Osaifu-Keitai-compatible
i-αppli ..................... 255
FirstPass ........................... 199
Flash ................................. 189
Sound effect ................. 112
FOMA card ......................... 36
FOMA card phonebook ...... 94
FOMA terminal phonebook
....................................... 94
Font size ........................... 127
Full Browser ...................... 280
Access setting ............. 288
Bookmark ..................... 286
Check settings ............. 288
Cookie setting .............. 286
Display img .................. 287
Display magnification ... 287
Display mode setting ... 287
Drag ............................. 284
Enter URL ..................... 280
Frame Page .................. 283
Full scrn/normal ........... 284
Function menu while
viewing..................... 281
Go to location ............... 280
Home URL .................... 286
Key Operations while
viewing..................... 280
PagePilot ...................... 284
PagePilot setting .......... 287
Pointer speed setting ... 287
Referer setting .............. 288
Reset settings .............. 288
Script setting ................ 287
Search .......................... 285
SSL/TLS page .............. 284
Text copy ...................... 284
To Full Browser ............. 189
Upload ......................... 285
URL history................... 283
Window ........................ 283
Window Open Guard ... 288
Full Browser setting
..................... 286, 287, 288
Function for restricting UIM
operation ........................ 37
Function menu .................... 35
G
Go to location ................... 191
Font size ....................... 127
GPS .................................. 264
Add location information
... 277

469
Index/Quick Manual
GPS button setting ....... 278
Host setting .................. 274
i appli ........................... 265
Location history ............ 276
Location notice ............. 274
Location provision ........ 270
Location request .......... 271
Position location ........... 265
Positioning mode ......... 278
Rcv loc. info ................. 277
Reg. service client ....... 275
Service settings ............ 274
Sound/Color setting ..... 113
Use loc. info ................. 277
GPS settings
..... 113, 271, 274, 275, 278
Guide display .............. 33, 117
H
Handling precautions .......... 19
Hands-free .................... 53, 64
Headset microphone ........ 376
Headset setting ......... 114, 375
Headset sw. to call ............ 375
Headset usage setting ...... 114
Hold
Holding........................... 68
Multiple connections .... 393
On hold .......................... 68
Holding ............................... 68
I
i Menu ............................... 187
iαppli setting ... 112, 239, 246
iαppli(microSD) .............. 250
IC act. notice ..................... 261
IC card .............................. 254
Osaifu-Keitai-compatible
i-αppli ..................... 255
IC card content ................. 255
IC card lock ....................... 262
iC communication ............. 331
Reception ..................... 332
Transmission ................ 332
iC transfer service ............. 252
i-Channel .......................... 202
Channel list .................. 202
Display ......................... 202
Reset i-Channel ............ 203
Ticker ........................... 203
Icon ............................. 30, 154
Icon setting ....................... 123
Image quality .................... 118
i-mode............................... 186
Acquire image .............. 194
Add to phonebook ....... 217
Auto detect. .................. 198
Auto-display ................. 230
Backlight always on ..... 121
Bookmark ..................... 191
Cache........................... 188
Change i-mode password
... 190
Compose message ...... 189
Connection timeout ...... 197
Display img .................. 198
Display sites ................. 187
Download ..................... 195
Enter URL ..................... 191
Font size ....................... 127
Go to location ............... 191
Host selection .............. 197
i-mode arrival act ........... 90
i-mode menu ................ 186
Last accessed URL ...... 187
My Menu ...................... 190
Reload .......................... 188
Save backgnd img ....... 194
Screen memo ............... 193
Select host ................... 200
Sound effect ................. 112
SSL list ......................... 198
SSL page ..................... 187
Terminate i-mode ......... 190
To Full Browser ............. 189
URL .............................. 189
URL history................... 191
Use phone info ............. 198
Use sites ...................... 188
User certificate ............. 199
Word translate .............. 189
i-mode mail ....................... 206
Add receiver ................ 208
Add to phonebook ....... 217
Animation ..................... 120
Attached file pref. ......... 229
Auto receive ................. 214
Check new message ... 216
Clear Recv ranking ...... 229
Clear Send ranking ...... 229
Compose and send ..... 207
Confirm title .................. 218
Deco-mail ..................... 208
Delete ........................... 213
Display ......................... 219
Dur multi task disp ....... 229
Edit folder ..................... 222
File attachment ..... 212, 218
Font size ....................... 127
Forward ........................ 216
iC transmission ............. 332
i-mode inquiry set ........ 227
i-mode mail form .......... 224
Incoming set ................ 108
Mail list ................. 208, 228
Mail list setting ............. 225
Mail security ................. 142
Melody auto play .......... 228
Memory status.............. 224
Move ............................ 222
Protect ON/OFF ............ 223
Receive option ............. 215
Recv option setting ...... 227
Reply ............................ 216
Save ............................. 213
Save address ............... 217
Secret code .................... 96
Send Ir data ................. 329
Signature ...................... 227
Sort ............................... 225
Sort inbox ..................... 226
Continued

470
Index/Quick Manual
Sort outbox ................... 226
Store in Center ............. 221
Templates ..................... 211
i-mode menu ..................... 186
i-mode password .............. 131
Change ........................ 190
i-mode setting ........... 112, 197
i-mode Trouble Diagnosis Site
..................................... 456
i-motion ..................... 200, 295
Attach to mail ............... 212
Backlight always on ..... 121
Change display ............ 322
Change scr. Set............ 296
Chapter list ................... 297
Continuous play ........... 296
Data security ................ 142
Delete ........................... 321
Detail ............................ 322
Display quality .............. 296
Display setting ............. 296
Download ..................... 201
Edit folder ..................... 319
Edit movie .................... 298
Folder info .................... 322
iC transmission ............. 332
i-motion auto replay ..... 201
Move ............................ 320
Play .............................. 295
Playlists ........................ 297
Save ............................. 312
Send Ir data ................. 329
Sort ............................... 321
i-motion auto replay .......... 201
In-call arrival act ............... 396
Incoming set ..................... 108
Individual font size ............ 127
Information on using the manual and
how to look up in the manual
... 1
Infrared communication .... 327
Infrared remote control
... 331
Receive ........................ 329
Send ............................. 329
Send IrSS™ .................. 330
Initial setting ........................ 43
Input method
..... 384, 385, 386, 388, 389
Insufficient memory .......... 326
Intellectual Property Right
....................................... 22
International call ................. 61
International roaming ........ 410
Int’l dial assist ..................... 62
Int’l prefix ............................ 60
Int’l roaming
............. 415, 416, 417, 418
i-αppli .............................. 238
Auto-start...................... 246
Certificates ................... 240
Change display ............ 249
Cng. ring tone/img. ...... 242
Delete ........................... 249
Download ..................... 238
Edit folder ..................... 248
iαppli history .............. 250
iαppli To ..................... 241
Individual set ................ 241
Move ............................ 248
NW setting .................... 241
Phonebook/Records .... 242
Preinstalled software .... 242
Run ............................... 239
Stand-by display .......... 247
Stand-by NW setting .... 241
SW description ............. 239
SW init. Setting ............. 238
Upgrade ....................... 248
Use icons ..................... 241
Use location info .......... 242
Volume setting .............. 112
i-αppli stand-by ................ 247
i-αppli To function ............ 196
i-αppli with mail ............... 238
i-mode mail form .......... 224
J
JAN code .......................... 183
Jog setting ........................ 376
K
Key dial lock ...................... 139
Keypad light ...................... 121
Keypad sound ................... 111
Kisekae menu ................... 125
Kisekae setting ................. 123
Kisekae Tool ............. 124, 305
Change display ............ 322
Delete ........................... 321
Detail ............................ 322
Edit folder ..................... 319
Folder info .................... 322
Move ............................ 320
Sort ............................... 321
Kuten codes ...................... 388
L
Last accessed URL .......... 187
Last call cost ..................... 369
Last call duration .............. 369
Lifetime Cal. ...................... 373
Lifetime Calendar ............. 355
Display ......................... 356
Display setting ............. 358
LTC setting ................... 357
Memory auto display.... 358
Security data display ... 358
List of default settings
............................. 378, 420
List of menus .................... 420
List of reset items ..... 378, 420
Lock all ............................. 139
Lock key ............................ 144
Keyguard release tone
... 111
M
Mail menu ......................... 206
Mail security...................... 142
Mail setting ...................... 225

471
Index/Quick Manual
Mail To function ................. 196
Manner mode ................... 115
Original manner ........... 117
Silent ............................ 115
Melody .............................. 304
Attach to mail ............... 212
Delete ........................... 321
Detail ............................ 322
Edit folder ..................... 319
Folder info .................... 322
iC transmission ............. 332
Move ............................ 320
Play .............................. 304
Play portion .................. 305
Save ............................. 312
Send Ir data ................. 329
Sort ............................... 321
Melody Call ....................... 115
Menu ................................... 33
Menu setting ..................... 123
Message
Auto-display ................. 230
Check new message ... 231
Delete ........................... 232
Display ......................... 231
Dur multi task disp ....... 229
i-mode inquiry set ........ 227
Incoming set ................ 108
Melody auto play .......... 228
Protect ON/OFF ............ 232
Receive ........................ 230
Save attached .............. 218
Message F ........................ 231
Message R ....................... 231
microSD memory card ...... 306
Delete ........................... 321
Display ......................... 308
Folder setup ................. 309
Format .......................... 313
Insert/Remove .............. 307
microSD info ................. 314
Reset file No. ................ 181
Save ............................. 312
Update mng. info ......... 314
microSD mode .................. 315
Missed call ........................ 126
Movie player software ....... 440
MTP mode ........................ 315
Multi Number Service ....... 397
Multiaccess ....................... 352
Combinations ............... 435
Multitask ........................... 353
Combinations ............... 437
MUSIC ...................... 303, 342
Delete ........................... 321
Detail ............................ 322
Edit folder ..................... 319
Folder info .................... 322
Move ............................ 320
Play .............................. 303
MUSIC Player ................... 342
Change jackets ............ 347
Music settings .............. 349
Play .............................. 345
Playable music data ..... 342
Playback restriction ...... 304
Playlist .......................... 348
Reset settings .............. 350
Transfer ........................ 343
Music slide show .............. 291
Music&Video Channel ...... 338
Change display ............ 322
Chapter list ................... 341
Delete ................... 321, 341
Detail ............................ 322
Downloading a program
... 339
Edit folder ..................... 319
Folder info .................... 322
Move program .............. 341
Play ...................... 340, 342
Set program ................. 339
Sort ............................... 321
My data ............................... 45
My document .................... 333
Attach to mail ............... 212
Bookmark ..................... 336
Capture screen ............ 336
Delete ........................... 321
Detail ............................ 322
Detail info disp ............. 334
Display ......................... 333
Edit folder ..................... 319
Folder info .................... 322
iC transmission ............. 332
i-mode bookmark ......... 336
Mark ............................. 335
Move ............................ 320
Save ..................... 312, 334
Search .......................... 335
Send Ir data ................. 329
Sort ............................... 321
My Menu ........................... 190
My picture ......................... 290
Attach to mail ............... 212
Change display ............ 322
Data security ................ 142
Delete ........................... 321
Detail ............................ 322
Display quality .............. 290
Edit folder ..................... 319
Edit photo ..................... 292
Folder info .................... 322
iC transmission ............. 332
Move ............................ 320
Save ............................. 312
Send Ir data ................. 329
Send IrSS™ .................. 330
Sort ............................... 321
Store in Center ............. 295
My Selection ..................... 368
N
Name ................................ 121
Network search mode ....... 415
Network security code ...... 130
Network service ................ 391
Notification display .............. 32
Notify caller ID .................... 45
Nuisance Call Blocking
Service ......................... 394
Continued

472
Index/Quick Manual
Number of protected data
items............................. 466
Number of saved data items
..................................... 466
NW Services ..................... 392
O
OBEX™ communication ... 404
OFFICEED ....................... 402
Omakase Lock .................. 136
On hold ............................... 68
Operator name display ..... 416
Optional and related devices
..................................... 439
Osaifu-Keitai ..................... 254
IC card lock .................. 262
Use ............................... 255
Osaifu-Keitai-compatible
i-αppli .......................... 255
Start .............................. 255
Oversea service................ 418
Overseas Use
Int’l roaming
......... 415, 416, 417, 418
Place a call ................... 414
Receive a call ............... 414
Own number ....................... 45
Attach to mail ............... 212
iC transmission ............. 332
Quote my data ............. 387
Secret display .............. 141
Send Ir data ................. 329
P
Part names and functions ... 26
Pause (P) ............................ 53
PB setting ......................... 102
PDF data .......................... 333
Personal data lock ............ 137
Phone To function ............. 196
Phonebook ......................... 94
2-touch dial .................. 104
Attach to mail ............... 212
Copy to Main ................ 317
Copy to UIM ................. 316
Delete ........................... 103
Display ......................... 101
Edit ............................... 103
Font size ....................... 127
Group setting ............... 100
iC transmission ............. 332
Memory status.............. 104
Originate a PushTalk call
... 101
Phonebook image ........ 121
Place a call ................... 101
Quote ........................... 387
Save ......................... 95, 98
Save/attach image ....... 102
Search .......................... 102
Secret display .............. 141
Send Ir Data ................. 329
Send mail ..................... 101
Set image display ........ 102
Which PB to use ........... 102
Phonebook image ............. 121
Pictographs ....................... 386
List of pictographs ....... 432
Picture Motion Browser .... 440
PIN1 Code and PIN2 Code
..................................... 131
Cancel PIN lock ........... 133
Change PIN1 code ...... 133
Change PIN2 code ...... 133
PIN1 code setting ........ 132
Place a call ......................... 51
Play music ................ 303, 345
Playlist ...................... 297, 348
PLMN setting .................... 416
Plus JOG ............................ 28
Power .................................. 43
Power saver ...................... 122
Pref. i αppli sound ........... 113
Prefix ................................. 60
Prefix setting ....................... 61
Priority .............. 111, 126, 362
Public mode (Drive mode)
....................................... 69
Public mode (Power off)...... 70
PushTalk ............................. 80
Add member .................. 83
Any key ans .................... 67
Auto answer setting ....... 89
Hands-free ............... 81, 90
i-mode arrival act ........... 90
Incoming set ................ 108
Missed call ..................... 71
Originate ........................ 82
Originate from the
phonebook......... 87, 101
P-Talk arrival act ............. 90
Receive .......................... 84
Set ring time ................... 89
Setting when folded ....... 67
Slide open setting .......... 67
PushTalk phonebook .......... 85
Delete ............................. 88
Group setting ................. 86
NW connection ............... 89
Originate ........................ 87
Save ............................... 85
PushTalk setting ................. 89
PushTalkPlus ...................... 89
Q
QR code ........................... 179
Quality alarm .................... 114
Quick Manual .................... 490
Quick record message ........ 74
R
Receive a call ..................... 65
Receive option .......... 225, 227
Received mail ................... 219
Received record ................. 55
Add to phonebook ......... 99
Delete ............................. 57
Detail info ....................... 57

473
Index/Quick Manual
Font size ....................... 127
Recnct ALM ........................ 64
Record display .................. 141
Record message ................ 72
Delete ............................. 75
Play ................................ 74
Quick record message... 74
Redial record ...................... 55
Add to phonebook ......... 99
Delete ............................. 57
Detail info ....................... 57
Font size ....................... 127
Reduce noise ...................... 64
Reject unknown ................ 146
Remote Control ................ 397
Reset all data&set ............ 377
List of reset items
... 378, 420
Reset data ........................ 389
Reset display/sound ......... 125
Reset menu log ................ 126
Reset menu screen .......... 124
Reset settings ................... 376
List of reset items
... 378, 420
Reset total ........................ 370
Ring time .......................... 110
S
Safety precautions .............. 12
SAR .................................. 467
Saved mail ........................ 219
Scan code ......................... 183
Scan function .................... 462
Set auto-update ........... 463
Set scan ....................... 462
Update ......................... 463
Version ......................... 464
Schedule
Attach to mail ............... 212
Delete ........................... 366
Display ......................... 366
iC transmission ............. 332
Memory status.............. 368
Save ..................... 312, 363
Schedule alarm ............ 365
Secret display .............. 141
Select date ................... 366
Send Ir data ................. 329
Set holidays .................. 367
Schedule setting ....... 365, 367
Screen memo
Delete ........................... 194
Display ......................... 193
Protect ON/OFF ............ 194
Save ............................. 193
URL .............................. 193
Secret
Own number .................. 46
Phonebook ..................... 96
Schedule ...................... 363
Secret code ........................ 96
Secret display ................... 141
Security code .................... 130
Change ........................ 132
Security scanning function
(Scan function) ............. 462
Select host ........................ 200
Select language ................ 128
Self mode ......................... 137
Send IrSS™ ...................... 330
Sent mail ........................... 219
Service numbers .............. 396
Set basic tone ................... 111
Set call record ................... 141
Set rec msg ........................ 73
Set ring start time ............. 145
Setting when folded ............ 67
Slide open setting ............... 67
Slide setting
................. 67, 91, 141, 354
SMS .................................. 206
Animation ..................... 120
Compose and send ..... 234
Copy to Main ................ 317
Copy to UIM ................. 316
Receive ........................ 235
Save ............................. 235
SMS setting ...................... 236
Soft key ............................. 117
Software update ............... 456
Now update .................. 460
Reserve ........................ 460
Set auto-update ........... 458
Update ......................... 459
Sound effect ..................... 112
Specifications ................... 465
SSL list ............................. 198
SSL site ............................ 187
Standard menu ................. 420
Stand-by books ................. 118
Stand-by display ............... 117
Stand-by pictures .............. 119
Start menu setting ............ 123
Stereo&3D ........................ 111
Storage info ...................... 326
Sub-address ....................... 63
Supplied and optional
accessories .................... 24
Symbols ............................ 386
List of special symbols
... 431
T
Template ........................... 211
Delete ........................... 211
Text input .......................... 382
Bar code reader ........... 387
Character mode ........... 382
Characters assigned to
keys ......................... 430
Common phrases
... 385, 434
Copy............................. 388
Cut................................ 387
Delete ........................... 382
Dictionaries .................. 389
Edit common phrases
... 386
Edit prediction .............. 388
Edit user dict ................ 388
Full/Half size ................. 382
Insert ............................ 382
Kuten codes ................. 388
Operation in item .......... 385
Continued

474
Index/Quick Manual
Paste ............................ 387
Pictograph/symbol mode
... 382
Pictographs .......... 386, 432
Prediction ..................... 383
Quote my data ............. 387
Quote phonebook ........ 387
Reset data .................... 389
Select conversion ......... 384
Symbols ............... 386, 431
Undo ............................ 383
User conversion ........... 384
Text Memo ........................ 372
Copy Text Memo .......... 373
Delete ........................... 373
Display ......................... 373
iC transmission ............. 332
Save ..................... 312, 372
Send Ir data ................. 329
Ticker ................................ 203
Timer (T) ............................. 54
ToruCa .............................. 256
Attach to mail ............... 212
Auto recognition ........... 261
Delete ........................... 258
Display ......................... 257
Duplication check ........ 261
Edit folder ..................... 258
IC act. notice ................ 261
IC card lock .................. 262
iC transmission ............. 332
Move ............................ 258
Obtain .......................... 256
Save ............................. 312
Search .......................... 259
Send Ir data ................. 329
Sort ............................... 259
Sort folder..................... 260
ToruCa receive ............. 259
ToruCa setting .................. 259
Total calls cost .................. 369
Total calls duration ............ 369
Touch-tones ........................ 53
Troubleshooting ................ 444
U
UIM ..................................... 36
Copy to Main ................ 317
Copy to UIM ................. 316
Insert/Remove ................ 36
PIN1/PIN2 code ........... 133
UIM phonebook .................. 94
Save ............................... 98
UIM setting ....................... 132
URL
Display ......................... 189
History .................. 191, 273
Last accessed URL ...... 187
USB mode setting ............. 314
User certificate ................. 199
V
V.ph switch notice ............... 78
Vibrator ............................. 110
Videophone ........................ 50
Animation ..................... 120
Auto redial(voice) ........... 77
Backlight always on ..... 121
Call Rejection ................. 65
Chara-den ...................... 75
Chg. to voice call ........... 54
Display setting ............... 76
Hands-free ............... 53, 77
Holding........................... 68
Incoming set ................ 108
Missed call ..................... 71
On hold .......................... 68
Quick record message... 74
Select sub image ........... 51
Set call display ............. 121
Set outgoing image ........ 76
Setting when folded ....... 67
Slide open setting .......... 67
V.ph while packet ........... 78
Visual preference ........... 77
Videophone setting ............. 76
Voice call
Animation ..................... 120
Any key ans .................... 67
Call Rejection ................. 65
Chg. to videophone ....... 54
Hands-free ..................... 53
Holding........................... 68
Incoming set ................ 108
Missed call ..................... 71
On hold .......................... 68
Quick record message... 74
Set call display ............. 121
Setting when folded ....... 67
Slide open setting .......... 67
Whisper mode ................ 68
Voice Mail Service ............ 392
Bar Incoming call ......... 417
Roaming Guidance ...... 417
Voice memo ................ 74, 369
Volume .............................. 112
Volume setting .................. 112
W
Warranty and after sales
services ........................ 454
Web To function ................ 196
Whisper mode .................... 68
WORLD CALL .................... 61
WORLD WING .................... 38
Symbols and Numbers
+ ........................................ 54
186/184............................... 60
2in1 ................................... 398
2in1 setting ....................... 399
2-touch dial ....................... 104
3G/GSM setting ................ 415

MEMO

MEMO

MEMO
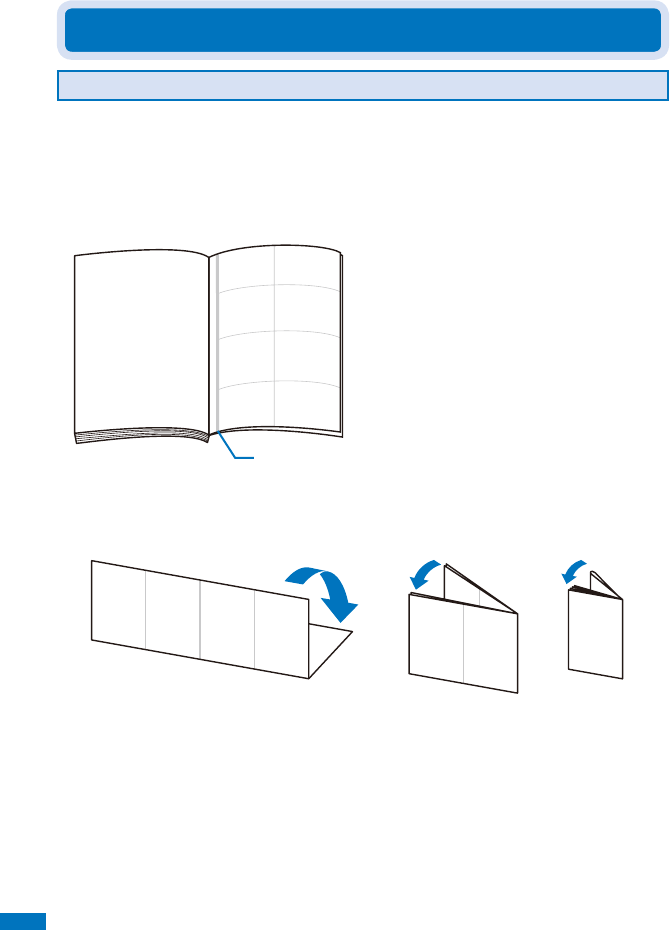
Index/Quick Manual
478
Quick Manual
Using the Quick Manual
To bring the Quick Manual provided with this manual, separate it at the tear-off line
and fold as shown below.
You can conveniently bring the Quick Manual “Overseas Use” with you when you are
overseas and using the international roaming service (WORLD WING).
■ Cutting the pages
Separate the pages of the Quick Manual at the tear-off line.
Tear-off line
■ Folding the cut pages
Fold the Quick Manual at the folding line so that the frontcover of the document comes on top.
1 2 3
Frontcover
sheet
Frontcover
sheet
Frontcover
sheet
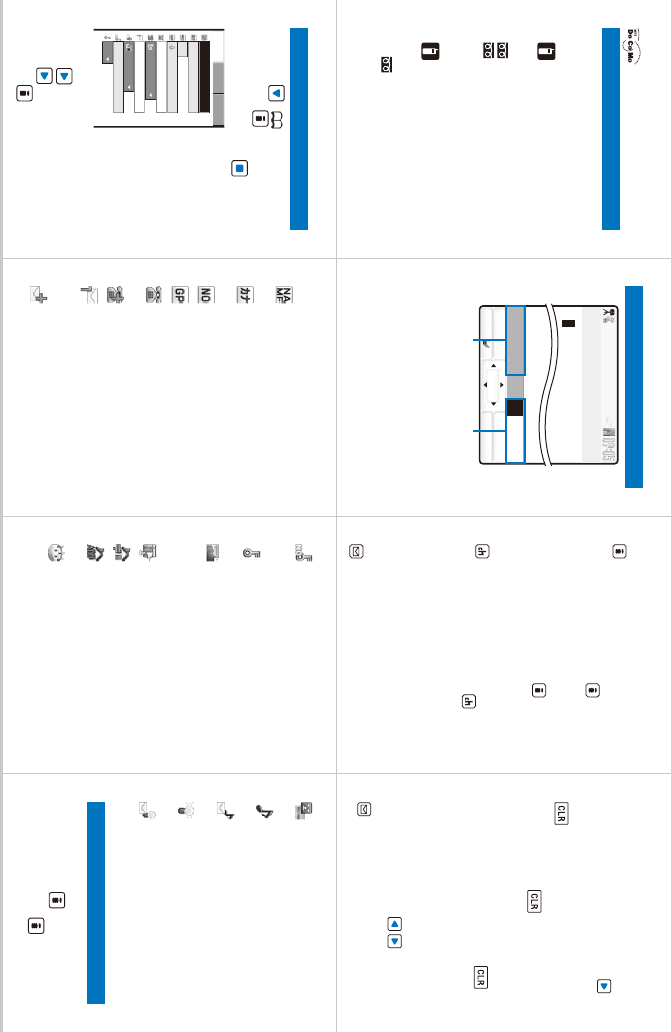
Tear-off line
123
7654
FOMA SO906i
Quick Manual
■ General Contact
<DoCoMo Information Center>
From DoCoMo mobile phones (in Japanese only)
(No prefix) 151 (toll free)
※
Not available from ordinary phones.
From ordinary phones
0120-800-000
(toll free) (in Japanese)
0120-005-250
(toll free) (in English)
※
Also available from mobile phones and PHSs.
■
Contact for Repair (in Japanese only)
From DoCoMo mobile phones
(No prefix) 113 (toll free)
※
Not available from ordinary phones.
From ordinary phones
0120-800-000 (toll free)
※
Also available from mobile phones and PHSs.
●
Check the number you call and dial it correctly.
Entering Text (P.382)
MENU
OK Pict/Sym
ModeFunc
R.510
漢
カナAa12
あ
Input Text Memo
ͧͦ
※ The screen is an image.
ͦ
Number of bytes that can be entered
ˎ A half-width character is
counted as one byte and a full-
width character as two bytes.
ͧ Character mode or pictograph/
symbol mode
■ Changing the character mode
(Mode)
ˎ Character mode for half-width:
Every time you press (Mode),
the character mode changes in the
order of [漢]→ [カナ]→ [
Aa
]→ [
12
].
ˎ Character mode for full-width:
Every time you press (Mode),
the character mode changes in the
order of [漢]→ [カ]→ [A]→ [1].
■
Changing the pictograph/symbol mode
(Pict/Sym)
ˎ Every time you press (Pict/
Sym), the character mode
changes in the order of [Ranking]
→ [Pict.] → [Pict-D] → [Symbol].
[Pict-D] can be selected only in the
Edit mail and Edit signature displays.
■
Changing the character mode
between full-width and half-width
(Func) → [Full/Halfsize]
■
Entering a character assigned to the
same key twice or more in succession
After entering the first character, either press or
wait for a while, and the cursor moves automatically.
■ Deleting a character
ˎ
The character at the cursor is deleted
by pressing for less than a
second. The last character is deleted
when the cursor is at the end of the text.
ˎ
All characters at and after the cursor
position are deleted by pressing for
over a second. All characters are deleted
when the cursor is at the end of the text.
■ Inserting a character
Move the cursor to the position to insert a character.
■
Changing the block of characters
Move the cursor with .
■ Undoing text
(Func) → [Undo]
Saving an Entry in the FOMA Terminal Phonebook
(P.95)
1 Press ( ) in the stand-by
display → (Create).
2 [Main memory] →.
000
No Group
Public
Mobile1
OFF
Detail
Basic Setting
To save data in the
UIM phonebook
Select [UIM].
3
Save other items at the Basic display.
4
Press and save each item at the Detail display.
5
Press and save each item at the Setting display.
6 Press (Complete).
■ Items you can save
: Name (Required)
Enter a name within 16 full-
width/32 half-width characters.
: Reading
Enter the reading within 32 half-
width characters.
: Memory no.
Enter from 000 to 999.
: Group
Select from 20 different groups.
: Phone number
Up to three numbers per entry are available.
Enter each number within 26 digits.
: Phone number type
Select from nine different icons.
: E-mail address
Up to three mail addresses per entry are
available. Enter each address within 50 half-
width alphanumeric characters and symbols.
: E-mail address type
Select from five different icons.
: Secret code
Enter the Secret code which is saved
in the recipient’s mail address (phone
number@docomo.ne.jp) in four digits.
: Secret
Select whether to display the
Phonebook data.
: Des call display
Select or shoot a call image to be displayed
when placing/receiving a voice/videophone
call, right after receiving mail, and when
displaying the individual Phonebook entry.
: Location information
Add the location information.
: Postal code
Enter a code within seven half-width digits.
: Address
Enter an address within 64 full-
width/128 half-width characters.
: Birthday
Enter a date within the range
from 1900/01/01 to 2050/12/31.
: Chara-den
Select a Chara-den character to
be sent during a videophone call.
: Des phone tone
Select a ring tone that sounds for
an incoming voice/videophone call.
: Des mail tone
Select a ring tone that sounds
immediately after receiving mail.
: Select phone Illum.
Select an indicator color that flashes
for an incoming voice/videophone call.
: Select mail Illum.
Select an indicator color that flashes
immediately after receiving mail.
Editing an Entry (P.103)
1 From the Phonebook, select
an entry → (Edit).
2
Edit each item → (Complete).
Tear-off line
91011
15141312
8
Camera (P.155, 170)
■ Recording still images
1 Slide the lens cover to open it
in the stand-by display.
The Camera mode is activated.
2 Point the camera at the object
→ (halfway).
The white focus frame/frames
are used to adjust the focus, the
confirmation is heard and the
focus frame/frames turn green.
3 Press .
A still image is recorded with the shutter
sound and the screen for confirming
whether to save the image appears.
4 Press (Save).
The still image is saved.
■ Recording a movie
1 Press (Func) → [ ]
(Shoot mode) → [ ] (Movie
shoot) →.
The display switches to the Movie
shoot display.
2 Point the camera at the object
→.
The recording star tone is heard
and the movie is recorded.
3 Press to end recording.
The recording end tone is heard,
the recording is stopped, and the
screen for confirming whether to
save the movie appears.
4 Press (Save).
The movie is saved.
Music (P.345)
Example: Playing back music data by
selecting an artist
1 From the Menu, select [Music]
→ [MUSIC Player] →.
2 Select [Artists] →.
3 Select an artist → an album
→.
4
Select music data → (Play).
Videophone (P.51, 65)
■ Placing a videophone call
1 Enter a phone number in
the stand-by display →
(V.phone).
2 Press to hang up.
■ Receiving a videophone call
1 When you receive a call,
press or (V.phone).
2 Press to hang up.
■
Operations during a videophone call
Key operation Operation
(MySide/
Sub)
Switch between camera
image/substitute image
(In/Out) Switch between In-/
Out-camera
( ) Hands-free ON/OFF
/
Out-camera zoom-in/-out
Composing and Sending i-mode Mail (P.207)
1
Press (Mail) in the stand-by
display → [Compose message].
0
Edit mail
Address
Subject
Main body
Number of
entered bytes
2 Enter an address at [ ].
Enter it within 50 half-width
alphanumeric characters and symbols.
To add an address
From the Function menu, select [Add
receiver] → address type (To/Cc/Bcc).
To delete an address
Move the cursor to an address and
from the Function menu, select
[Delete receiver] → [Yes].
3 Enter a subject at [ ].
Enter it within 100 full-/200 half-
width characters.
4 Enter the main body at [ ].
Enter it within 5,000 full-/10,000
half-width characters.
5 Press (Send).
File Attachment (P.212)
1 Press (Func) in the Edit
mail display → [Add attach
file] →.
Select from [Image], [i-motion],
[Melody], [ToruCa], [PDF],
[Phonebook], [My data],
[Schedule], [Bookmark], [Others],
and [Activate camera].
2 Select a file type → a folder
→ a file →.
“”, “ ”, “ ” (green), “ ” (orange),
“ ”, “ ”, “ ”, or “ ” appears.
3 Compose mail → (Send).
Checking New i-mode Mail (P.216)
1 Press (Mail) in the stand-by
display (for over a second).
An inquiry result is displayed.
Auto Receiving i-mode Mail (P.214)
1 When receiving mail
“” flashes.
2 When receiving is completed
The number of received mail is displayed.
The display before receiving
reappears after about 15 seconds.
Manner Mode (P.69, 70, 116)
■
Setting/canceling the Public mode (Drive mode)
Press ( ) in the stand-by
display (for over a second).
■ Public mode (Power off)
Set +
Cancel +
Confirm contents
+
■
Setting/canceling the Manner mode
Press in the stand-by
display (for over a second).
Tear-off line
17 18 19
23222120
16
List of Menus (P.33, 420)
■ Selecting the menu
1 (MENU)
■ Changing the menu
Every time you press (Chg.
MENU), the display changes in the
order of Kisekae menu → Standard
menu → My Selection.
■ List of Standard menus
My Selection
Imaging
Camera
Movie
easy BlogUp
Music slide show
Stand-by pictures
i mode
i Menu
Bookmark
Screen Memo
Last accessed URL
Go to location
i-Channel
Message
Check new message
i-mode setting
Full Browser
Mail
Inbox
Outbox
Draft
Compose message
WEB mail
Compose SMS
Templates
Check new message
Check new SMS
Receive option
Mail setting
i appli
iαppli list
iαppli setting
iαppli history
iαppli(microSD)
Phone
Phonebook
Call record
PushTalk phonebook
Record message
Data Box
My picture
MUSIC
Music&Video Channel
i-motion
Melody
My document
Kisekae Tool
Chara-den
Music
MUSIC Player
Music&Video Channel
Osaifu-Keitai
IC card content
DCMX
ToruCa
Settings
Search by i-mode
Own number
LifeKit
Bar code reader
Receive Ir data
microSD
Camera
Movie
Lifetime Calendar
Alarm
Schedule
Text Memo
Calculator
Data Security Service
GPS
Settings
Display
Stand-by display
Backlight
Power saver
Menu setting
Kisekae setting
Animation
Font size
Call
Incoming set
Missed call
Videophone setting
Call display
Call assist
Call setting
Call quality
Headset setting
Self mode
Melody Call
Application
Lifetime Cal.
Mail
i-mode
iαppli
Phonebook
Call record
PushTalk
Record msg
ToruCa
IC act. notice
Schedule
Input method
Lock/
Security
Lock all
IC card lock
Pers. data lock
Secret display
Key dial lock
Acpt/Rjct call
Reject unknown
Denied no ID
Management
NW Services
Date/time
Select language
Manner mode
Set basic tone
Jog setting
Slide setting
Change code
UIM setting
Scan function
SW Update
Check serv. area
Battery level
Storage info
USB mode setting
Reset
Initial setting
The Voice Mail Service (P.392)
■ Starting the service※
From the Menu, select [Settings] →
[Management] → [NW Services] →
[Voice Mail] → [Activate] → [Activate]
→ [Yes] →.
■ Stopping the service※
From the Menu, select [Settings] →
[Management] → [NW Services] → [Voice
Mail] → [Deactivate] → [Yes] →.
■
Playing back a new message
※
From the Menu, select [Settings] →
[Management] → [NW Services] → [Voice
Mail] → [Play messages] → [Yes] →.
※ When 2in1 is set to the Dual mode,
the screen for selecting either
Number A or Number B appears.
Tear-off line
25 26 27
31302928
24
The Call Waiting Service (P.393)
■ Starting the service
From the Menu, select [Settings] →
[Management] → [NW Services] → [Call
Waiting] → [Activate] → [Yes] →.
■ Stopping the service
From the Menu, select [Settings] →
[Management] → [NW Services] → [Call
Waiting] → [Deactivate] → [Yes] →.
The Call Forwarding Service (P.393)
■ Starting the service※
From the Menu, select [Settings] →
[Management] → [NW Services] →
[Call forwarding] → [Activate] →
[Activate] → [Yes] →.
■ Stopping the service※
From the Menu, select [Settings] → [Management]
→ [NW Services] → [Call forwarding] →
[Deactivate] → [Yes] →.
■
Changing the forwarding number
From the Menu, select [Settings] → [Management] →
[NW Services] → [Call forwarding] → [Change FWD
number] → Enter the phone number → [Set] →.
※
When 2in1 is set to the Dual mode, the screen for
selecting either Number A or Number B appears.
The Caller ID Display Request Service (P.395)
■ Starting the service
From the Menu, select [Settings] →
[Management] → [NW Services] → [Caller
ID Request] → [Activate] → [Yes] →.
■ Stopping the service
From the Menu, select [Settings] →
[Management] → [NW Services] → [Caller ID
Request] → [Deactivate] → [Yes] →.
List of Key Operation (P.26, 27, 28)
:
Press in the stand-by display to display the Data Box.
:
Press in the stand-by display to display the Phonebook.
:
Press in the stand-by display to display the Received record.
:
Press in the stand-by display to display the Redial record.
:
Press in the stand-by display to display the Mail
menu. Press for over a second in the stand-by
display to perform the Check new message.
:
Press in the stand-by display to display the i-mode menu.
Press for over a second in the stand-by display
to display the i-αppli folder list display.
: Press to display the menu.
: Press in the stand-by display to
display the Channel list display.
Press for over a second in the stand-by
display to activate the MUSIC Player.
:
Press for over a second in the stand-by
display to lock/cancel the IC card function.
:
Press for over a second in the stand-by display
to set/cancel the Public mode (Drive mode).
:
Press in the stand-by display to
display the Manner mode display.
Press for over a second in the stand-by
display to set/cancel the Manner mode.
:
Press in the stand-by display to
display the Record msg display.
Press for over a second in the stand-by
display to set/cancel the Record message.
:
Press for over a second to display/
play back a still image/movie.
:
Press to record an image by the camera.
Services Available on the FOMA Terminal (P.438)
Service
Phone number
Number guide service (paid:
service charge + call charge)
※
(no area code) 104
Telegram service (paid: telegram fee)
(no area code) 115
Time (paid)
(no area code) 117
Weather (paid)
Area code + 177
Emergency call to Police
(no area code) 110
Emergency call to Fire/Ambulance
(no area code) 119
Emergency call to Maritime rescue
(no area code) 118
Disaster Message Board Service (paid)
(no area code) 171
Collect Call (paid: service
charge + call charge)
(no area code) 106
※
Phone numbers of customers who declined to disclose
their number information cannot be guided.
Using the Display (P.30)
͵Ͷͷͺͻͼͽ;
ͦ
∼
ͨͫ
ͪ
ͩͬ
ͭͲ
ͱ ͳ
ͮ
∼
Ͱ ʹ
ͦ/// :
Radio wave condition
ͧ : During i-mode
: During Full Browser
ͨ : Outside of the service area
: Self mode is set
:
While using the infrared/iC communication function
:
While the infrared remote control is being used
ͩ :
While performing an SSL-related
function such as displaying an SSL site
ͪ/ / :
Unread i-mode mail/Unread SMS/
Unread i-mode mail and unread SMS
: Mail at the i-mode center
: Unread Area Mail
ͫ/ : Unread Message R/F
ͬ/ :
While providing location information
by GPS/During GPS positioning
(Blue)/ (Red) :
While connecting to
the 3G network (Packet communication:
able)/(Packet communication: disable)
/ :
While connecting to the GSM network/
While connecting to the GPRS network
ͭ/ :
While running i-αppli (i-αppli
stand-by display)/i-αppli DX
ͮ :
USB mode setting is Communication mode
:
USB mode setting is microSD mode
:
USB mode setting is MTP mode connecting
ͯ : Secret display is [ON]
Ͱ :
The microSD memory card is inserted
(Flashes during preparation for access
after insertion of the microSD memory card)
ͱ/ / :
During a voice call/During a videophone
call/During PushTalk communication
Ͳ// :
1/2/3 or more tasks are executed
( changes to while playback is in progress on the MUSIC Player)
ͳ/ / / : Battery level
ʹ :
Current time (Displayed in 24-hour format
in other than the stand-by display)
͵ :
The vibrator is set for incoming calls
:
The vibrator is set for incoming mail
:
The vibrator is set for incoming calls and mail
Ͷ :
Incoming call ring volume OFF
:
Incoming mail ring volume OFF
:
Incoming call and mail ring volume OFF
ͷ :
Manner mode is set ( is pink)
:
Public mode (Drive mode) is set
: Personal data lock is set
: Key dial lock is set
:
Personal data lock and Key dial lock are set
ͺ : IC card lock is set
ͻ :
During Music&Video Channel reservation
ͼ : Alarm is set
: Schedule alarm is set
:
Alarm and Schedule alarm are set
ͽ :
Record message is set (there are
non-played back record messages)
( is white, is light blue)
; :
Videophone message is set (there are
non-played back videophone messages)
( is green, is light blue)
: Lock key is set
Contact for Emergency Such As Lost Terminal
■ Omakase Lock
※
Omakase Lock is a paid service. However,
when you subscribe to this service together
with your request to suspend the FOMA
terminal or while the FOMA terminal is
suspended, the service charge is not required.
Setting/canceling the Omakase Lock
0120-524-360 (24-hour service)
■ Other contact numbers
Contact number:
Contact number:
Contact number:
●
Check the number you call and dial it correctly.
Tear-off line
123
7654
FOMA SO906i
Quick Manual for “Overseas Use”
■
For Loss, Theft, and Charge Settlement for Overseas
<DoCoMo Information Center> (24-hour service)
From DoCoMo mobile phones
International access number
of your country of stay (Table1)
-81-3-5366-3114
*
(toll-free)
*
The call charges to Japan apply when
you place a call from ordinary phones.
※
Dial +81-3-5366-3114 to get connected when
you place a call from SO906i. (Press and hold
the “0” key for at least one second to enter “+”.)
From ordinary phones
Universal number
International prefix number for
the universal number (Table2)
-800-0120-0151
*
* The call charges to your country of
stay may apply.
●
For the international access number of
major countries (Table1) and international
prefix number for the universal number
(Table2), see P.13 or P.14 respectively.
■
About Troubles and Repairs for Services Overseas
<Network Technical Support and Operation Center> (24-hour service)
From DoCoMo mobile phones
International access number
of your country of stay (Table1)
-81-3-6718-1414
*
(toll-free)
*
The call charges to Japan apply when
you place a call from ordinary phones.
※
Dial +81-3-6718-1414 to get connected when
you place a call from SO906i. (Press and hold
the “0” key for at least one second to enter “+”.)
From ordinary phones
Universal number
International prefix number for
the universal number (Table2)
-800-5931-8600
*
*The call charges to your country of
stay may apply.
●
For the international access number of
major countries (Table1) and international
prefix number for the universal number
(Table2), see P.13 or P.14 respectively.
Before Using the FOMA Terminal Overseas
■ Setting the i-mode
【In Japan】
1
Press in the stand-by display →
[i Menu] → [料金&お申込・設定]→ [オプ
ション設定]→ [海外利用設定]→ [iモー
ド利用設定]→ [利用する]→ Enter an
i-mode password → [決定]→.
【Overseas】
1 Press in the stand-by display →
[i Menu] → [海外利用設定]→ [iモー
ド利用設定]→ [利用する]→ Enter an
i-mode password → [決定]→.
■ Setting the Remote Control
【In Japan】
1
From the Menu, select [Settings] →
[Management] → [NW Services] → [Remote
Control] → [Activate] → [Yes] →.
【Overseas】
1 From the Menu, select [Settings]
→ [Management] → [NW Services]
→ [Int’l roaming] → [Remote
access(Int.)] → [Yes]→.
■ Setting the clock
1 From the Menu, select [Settings] →
[Management] → [Date/time] → [Auto
time adjust] → [ON] →.
Available Network
3G roaming Available
GSM network Available
GPRS network Available
Services Available Overseas
(P.410)
Communication service 3G
GSM GPRS
Voice call
You can use the same mobile phone
number as used in Japan even from an
overseas location to place international
calls to Japan and other countries as well
as ordinary calls in your country of stay.
○○○
Videophone call
You can place international
videophone calls to specific 3G carrier
users overseas and to FOMA users.
○××
i-mode
You can use i-mode even from an overseas location.
○×○
i-mode mail
You can use the same mail address
as used in Japan even overseas
and send/receive i-mode mail.
○×○
SMS
You can use the same mobile phone number
as used in Japan even from an overseas
location to send/receive SMS messages.
○○○
i-Channel ○○○
Data communication
(Packet communication) ○×○
Network Search Mode (P.415)
Example:
Changing a carrier to be connected for manual connection
1
From the Menu, select [Settings] →
[Management] → [NW Services] → [Int’l
roaming] → [Network search mode] →.
[Auto]:
Automatically connect to another carrier.
[Manual]:
Manually select a carrier.
[Network re-search]:
Search the carrier to be connected again.
[PLMN setting]:
Set a carrier with the higher-priority for connection.
2 Select [Manual] → a carrier →.
PLMN Setting (P.416)
Example: Saving a carrier from the carrier list
1 From the Menu, select [Settings] →
[Management] → [NW Services] →
[Int’l roaming] → [Network search
mode] → [PLMN setting] →.
2 Select [Unregistered] and press
(Func).
3 Select [Select from List] → a carrier
→.
4 Select a network communication
method → [Yes] →.
Setting After Returning to Japan (P.413)
The default setting is to search a network
after the FOMA terminal powered on in
Japan and connect to the FOMA network
(NTT DoCoMo, Inc) automatically.
■
Changing the network to the FOMA
network (NTT DoCoMo, Inc) manually
1 From the Menu, select [Settings] →
[Management] → [NW Services] →
[Int’l roaming] → [Network search
mode] →.
2 Select [Manual] → [NTT DoCoMo, Inc]
→.
Display to Be Shown Overseas (P.413)
While you use the FOMA terminal overseas, the name of
the connected carrier appears in the stand-by display.
○○○○ ○○○○
Connected network
Carrier name
Main clock
ˎ
Display the current
date/time of the
location of stay.
Sub-clock
ˎ
Display the current
date/time of Japan.
ˎ The following icons show the current
network connection.
Icon Network you can use
(Blue)
3G network (supported packet communication)
(Red)
3G network (not supported packet communication)
GSM network
GPRS network
Tear-off line
91011
15141312
8
Placing a Call from Your Overseas Location (P.414)
■
Placing a call to another country (including
Japan) from your overseas location
1
Press “+” (press for over a second) in the
stand-by display and enter a country code, area
code, and a recipient’s phone number, in that order.
ˎ If an area code begins with “0”, omit
the “0” when dialing (excepting when
calling ordinary phones, etc. in Italy).
ˎ To place an international call to Japan,
enter the country code “81”.
To place a call to a country saved using the Country code
Enter a phone number in the stand-by display,
press (Option), select [Call method] →
[Voice call]/[Videophone] → [Country code] →
a country code, and press (Call).
To place a call to a recipient saved in the Phonebook
Select a recipient form the Phonebook
and press . To place a videophone
call, select a recipient, press , and
press (V.phone). The first digit of the
phone number “0” is converted into a
country code automatically added by the
Int’l dial assist before the call is dialed.
To place a call from the Redial/Received record
Select a recipient from the Redial/Received
record and press or (V.phone).
2 Press .
To place a videophone call
Press (V.phone).
■
Placing a local call in your overseas location
1
Enter a phone number in the stand-by display.
ˎ Make sure to include the area code,
even for a local call.
ˎ
If you place a call to a “WORLD WING”
overseas user, enter the country code “81”
and make the call an international call to
Japan even if the recipient is currently in
the same country in which you stay.
2 Press .
To place a videophone call
Press (V.phone).
Receiving a Call (P.414)
1 When receiving a call, press .
When you receive a videophone call
Press or (V.phone). To answer a call
with a substitute image, press (Sub).
■
When the caller places a call from Japan
Ask the caller to dial your phone number.
■ When the caller places a call from
countries other than Japan
Ask the caller to dial the international access number
−81−your phone number without the first “0”.
Network Services
To use the network services overseas, set
the Remote Control beforehand.
■ Roaming Guidance (P.417)
ˎ You need to set it in Japan.
1 From the Menu, select [Settings] →
[Management] → [NW Services] →
[Roaming Guidance] →.
■ Bar Incoming call (P.417)
ˎ You may not be able to set it depending
on the overseas carrier you use.
1
From the Menu, select [Settings] →
[Management] → [NW Services] → [Int’l
roaming] → [Bar Incoming call] →.
■ Voice Mail(Int.) (P.418)
1 From the Menu, select [Settings] →
[Management] → [NW Services] →
[Int’l roaming] → [Voice Mail(Int.)] →
.
■ Call FWD(Int.) (P.418)
1 From the Menu, select [Settings] →
[Management] → [NW Services] →
[Int’l roaming] → [Call FWD(Int.)] →
.
■ Roaming guide(Int.) (P.418)
1 From the Menu, select [Settings] →
[Management] → [NW Services] →
[Int’l roaming] → [Roaming guide(Int.)]
→ [Yes] →.
Country Codes for Major Countries
When you use an international call or set to
the Int’l dial assist, use the following country
codes (as of December 2007).
Area
Country code
Area
Country code
Australia 61 Japan 81
Austria 43 Korea 82
Belgium 32 Macau 853
Brazil 55 Malaysia 60
Canada 1 Maldives 960
China 86 Netherlands 31
Czech Republic
420
New Caledonia
687
Egypt 20
New Zealand
64
Fiji 679 Norway 47
Finland 358 Peru 51
France 33 Philippines 63
Germany 49 Russia 7
Greece 30 Singapore 65
Hong Kong 852 Spain 34
Hungary 36 Sweden 46
India 91 Switzerland 41
Indonesia 62
Tahiti (French
Polynesia)
689
Italy 39
Area
Country code
Area
Country code
Taiwan 886
United Kingdom
44
Thailand 66 USA 1
Turkey 90 Vietnam 84
ˎ
For other country codes and details, see the
DoCoMo’s “International service website”.
International Access Number for
Major Countries (Table1)
The international access number for major
countries is as follows (as of August 2007).
Area
Number
Area
Number
Australia 0011 Hong Kong 001
Belgium 00 Hungary 00
Brazil
0041/0014
India 00
Canada 011 Indonesia 001
China 00 Ireland 00
Czech Republic
00 Italy 00
Denmark 00 Korea 001
Finland 00 Luxembourg 00
France 00 Macau 00
Germany 00 Malaysia 00
Greece 00 Monaco 00
Area
Number
Area
Number
Netherlands 00 Sweden 00
New Zealand
00 Switzerland 00
Norway 00 Taiwan 002
Philippines 00 Thailand 001
Poland 00 Turkey 00
Portugal 00
United Arab Emirates
00
Russia 810
United Kingdom
00
Singapore 001 USA 011
Spain 00 Vietnam 00
International Prefix Number for
the Universal Number (Table2)
The international prefix number for the
universal number of each country is as
follows (as of August 2007).
Area
Number
Area
Number
Argentina 00 Canada 011
Australia 0011 China 00
Austria 00 Colombia 009
Belgium 00 Denmark 00
Brazil 0021 Finland 990
Bulgaria 00 France 00
Area
Number
Area
Number
Germany 00 Peru 00
Hong Kong 001 Philippines 00
Hungary 00 Portugal 00
Ireland 00 Singapore 001
Israel 014 South Africa 09
Italy 00 Spain 00
Korea 001 Sweden 00
Luxembourg 00 Switzerland 00
Malaysia 00 Taiwan 00
Netherlands 00 Thailand 001
New Zealand
00
United Kingdom
00
Norway 00 USA 011
About Inquiries
For inquiries about loss, theft, the charge
settlement, and repairs, see “For Loss, Theft,
and Charge Settlement for Overseas” on the
frontcover or “About Troubles and Repairs
for Services Overseas” on P.1 of this manual.
ˎ
When you place a call to a contact number for inquiries,
call the “International access number of your country
of stay (Table1)” or “International prefix number for the
universal number (Table2)” assigned to the location where
you stay, and then enter the contact phone numbers.
“ドコモeサイト” allows you to go through procedures for various registration changes, including
changes of the address and charge plan, and request for relevant documents.
Using i-mode i Menu➡料金&お申込・設定➡各種手続き (ドコモeサイト)Free packet communication charge
From a PC My DoCoMo (http://www.mydocomo.com/) ➡ 各種手続き (ドコモeサイト)
※ For access using i-mode, the “network security code” is required.
※ For access using i-mode, no packet communication charge is required, except for from abroad.
※ For access from a PC, the “DoCoMo ID/Password” are required.
※ If you have not yet obtained the “network security code” or “DoCoMo ID/Password”, or you forget them, call the “General
Contact” on the backcover of this manual.
※ Access to the services may not be available depending on the subscription detail.
※ DoCoMo e-site may be inaccessible because of the system maintenance.
Don’t forget your FOMA terminal or your manners!
When you use the FOMA terminal, be careful not to disturb others around you.
Power off the FOMA terminal in the following cases
● When you are in a place where the use is prohibited
In airplanes and hospitals, power off the FOMA terminal.
※ Power off the FOMA terminal not only inside hospital wards but also in the lobby or
waiting rooms since electronic medical equipment may be used nearby.
● When there is a possibility that the implantable cardiac pacemaker or implantable
cardioverter defibrillator is used nearby such as on rush-hour trains
The FOMA terminal may affect the operation of implantable cardiac pacemaker or
implantable cardioverter defibrillator.
Set the Public mode in the following cases
● When you are driving
Holding the mobile phone with a hand while driving applies the penal regulations.
※ When you are compelled to receive a call, tell “Call you back” to the caller using the
Hands-free function and park the vehicle in a safe place to place a call.
● When you are in a public place such as in a theater, movie theater or museum
Power off the FOMA terminal in a quiet public place since it may disturb others around you.
Be careful of where you use the FOMA terminal and the volume of your voice and ring tone
● Be careful of the volume of your voice when you use the FOMA terminal in a quiet place
such as in a restaurant or hotel lobby.
● Use the FOMA terminal in a place where you do not disturb passengers on the streets.
Be sensitive regarding privacy
Please be considerate of the privacy of individuals around you when taking and sending
photos using camera-equipped mobile phones.
Features to support public manners
The FOMA terminal is equipped with helpful features, such as muting sounds, not
answering incoming calls, etc.
● Public mode (Drive Mode/Power off) (P.66, 67)
● Manner mode (P.103)/Original manner mode (P.104)
● Vibrator (P.99) ● Record message (P.69)
This manual was printed and produced in such a way to allow easy recycling. Please dispose it
for recycling when it is no longer needed.
This manual is printed using an ink
based on soy bean oil.
Li-ion
Return all spent battery packs
to NTT DoCoMo or a dealer,
or a recycling shop
to protect the environment.
General Contact Contact for Repair (in Japanese only)
■
From DoCoMo mobile phones (in Japanese only)
(No prefix) 151 (toll-free)
※Not available from ordinary phones.
■ From ordinary phones
0120-800-000
(toll-free) (in Japanese)
0120-005-250
(toll-free) (in English)
※Also available from mobile phones and PHSs.
● Check the number you call and dial it correctly.
● For information on applications and procedures, repairs, and after sales services, either call the inquiries above or
contact your local DoCoMo shop, etc via the DoCoMo’s website or i-mode site.
DoCoMo’s website http://www.nttdocomo.co.jp/ i-mode site i Menu お知らせ ドコモショップ
■From DoCoMo mobile phones
(No prefix) 113 (toll-free)
※Not available from ordinary phones.
■ From ordinary phones
0120-800-000 (toll-free)
※Also available from mobile phones and PHSs.
About Troubles and Repairs for Services Overseas
<Network Technical Support and Operation Center> (24-hour service)
For Loss, Theft, and Charge Settlement for Overseas
<DoCoMo Information Center> (24-hour service)
From DoCoMo mobile phones
International access number of
-81-3-5366-3114
*
your country of stay (Table1)
(toll-free)
* The call charges to Japan apply when you place a
call from ordinary phones.
※ Dial +81-3-5366-3114 to get connected when you place
a call from SO906i. (Press and hold the “0” key for at
least one second to enter “+”.)
From ordinary phones
<Universal number>
International prefix number for
the universal number (Table2)
-800-0120-0151
*
* The call charges to your country of stay may apply.
※
For the international access number of major countries
(Table1) and international prefix number for the universal
number (Table2), see P.404, 405 of this manual.
From DoCoMo mobile phones
International access number of
-81-3-6718-1414
*
your country of stay (Table1)
(toll-free)
* The call charges to Japan apply when you place a
call from ordinary phones.
※ Dial +81-3-6718-1414 to get connected when you place
a call from SO906i. (Press and hold the “0” key for at
least one second to enter “+”.)
From ordinary phones
<Universal number>
International prefix number for
the universal number (Table2)
-800-5931-8600
*
* The call charges to your country of stay may apply.
※
For the international access number of major countries
(Table1) and international prefix number for the universal
number (Table2), see P.404, 405 of this manual.
●
If you should lose your mobile phone or have it stolen abroad, please report it to DoCoMo and take steps to cancel the use of it as soon as possible.
●
When the FOMA terminal you purchased is damaged, bring it to the DoCoMo repair handling service counter after returning to Japan.
When using your mobile phone in a public place, don’t forget to show common courtesy
and consideration for others around you.
Don’t forget your mobile phone … or your manners!
Manufacturer: Sony Ericsson Mobile Communications Japan, Inc.
’08.5 (Ver.1)
3-296-221-11(1)
Sales: NTT DoCoMo Group
NTT DoCoMo Hokkaido, Inc.
NTT DoCoMo Tokai, Inc.
NTT DoCoMo Chugoku, Inc.
NTT DoCoMo Tohoku, Inc.
NTT DoCoMo Hokuriku, Inc.
NTT DoCoMo Shikoku, Inc.
NTT DoCoMo, Inc.
NTT DoCoMo Kansai, Inc.
NTT DoCoMo Kyushu, Inc.
This manual is printed
on recycled paper.