Sony A3880136 Mobile phone with Bluetooth, WLAN 802.11bgn, GPS/A-GPS, ANT+ and FM Rx User Manual 08 user guide part 2
Sony Mobile Communications Inc Mobile phone with Bluetooth, WLAN 802.11bgn, GPS/A-GPS, ANT+ and FM Rx 08 user guide part 2
Sony >
Contents
- 1. 08 user guide part 1
- 2. 08 user guide part 2
08 user guide part 2
’11.8
INSTRUCTION MANUAL

Introduction
Thank you for your purchase of "SO-02D".
For proper use of the SO-02D, read this manual carefully before and while you use the SO-02D.
Before using the FOMA terminal

1

2
In addition to this manual, the operations of
SO-02D are described in "Quick Start Guide"
(in Japanese only) and "SO-02D e

3
In this manual, each key operations are
described with p, x, y, t,
m. And selection operations of the
icons or function items on the touch panel are
described as follows.
❖Information

4
Contents/Precautions
Accessories . . . . . . . . . . . . . . . . . . . . . . . . . . . . . . . . . . . . . . . . . . . . . . . . . . . . . . . . . . .1
About manuals of SO-02D . . . . . . . . . . . . . . . . . . . . . . . . . . . . . . . . . . . . . . . . . . . . . . . . 2
Safety Precautions (Always follow these directions) . . . . . . . . . . . . . . . . . . . . . . . . . . . . 9
Handling precautions . . . . . . . . . . . . . . . . . . . . . . . . . . . . . . . . . . . . . . . . . . . . . . . . . . . 17
Contents
Before Using the Handset

5
Contents/Precautions
Settings

6
Contents/Precautions
Applications

7
Contents/Precautions
Notes on usage

8
Contents/Precautions

9
Contents/Precautions
10
Contents/Precautions
1. Handling the FOMA terminal,
Battery Pack, AC Adapter cable,
and UIM (general)
DANGER
Do not use, store, or leave the FOMA
terminal, battery pack, AC adapter cable, or
UIM in a place subject to high temperature
such as close to fire, under direct sunlight, or
in a car on an extremely hot day.
Doing so may cause fire, burns or injury.
Do not place the FOMA terminal, battery
pack, AC adapter cable, or UIM inside
cooking appliance such as a microwave oven
or high-pressure containers.
Doing so may cause fire, burns, injury or
electric shock.
Do not disassemble or modify the FOMA
terminal, battery pack, AC adapter cable, or
UIM.
Doing so may cause fire, burns, injury or
electric shock.
Do not let the FOMA terminal, battery pack,
AC adapter cable, or UIM get wet with water,
drinking water, urine of pet animals, etc.
Doing so may cause fire, burns, injury or
electric shock.
Use the battery pack and AC adapter cable
for the FOMA terminal specified by
DOCOMO.
Failure to do so may cause fire, burns, injury
or electric shock.
WARNING
Do not subject the FOMA terminal, battery
pack, AC adapter cable, or UIM to excessive
force or throw it.
Doing so may cause fire, burns, injury or
electric shock.
Do not allow the microUSB connection jack
or headset connection jack to come in
contact with conducting foreign substances
(a piece of metal, pencil lead, etc.). Never
allow these objects to get into the connection
jack.
Doing so may cause fire, burns, injury or
electric shock.
Do not cover or wrap the FOMA terminal,
battery pack, AC adapter cable, or UIM with
a cloth or bedding in use or while charging.
Doing so may cause fire or burns.
Power off the FOMA terminal before you step
into a place where flammable gas can leak,
such as gas stations. Do not charge the
battery.
Gas may catch fire.
If you notice anything unusual about the
FOMA terminal, battery pack, AC adapter
cable, or UIM such as an unusual odor,
overheating, discoloration or deformation
during operation, charging or storage,
immediately perform the following measures.
11
Contents/Precautions
CAUTION
Do not place on an unstable or inclined
platform.
Doing so may cause the device to fall and
cause injury.
Do not keep in a place that is very humid,
dusty, or subject to high temperature.
Doing so may cause fire, burns or electric
shock.
If children use the FOMA terminal, parents or
guardians should give them the proper
instructions for use. Make sure that they use
the FOMA terminal as instructed.
Failure to do so may cause injury.
Keep the FOMA terminal, battery pack, AC
adapter cable, or UIM out of the reach of
babies and infants.
Failure to do so may cause accidental
swallowing or injury.
Be careful especially when you use the
FOMA terminal while it has been
continuously connected to the AC adapter
cable for a long period of time.
If you play a game, etc. for a long time while
charging, the temperature of the FOMA
terminal, battery pack and AC adapter cable
may rise.
If you are directly in contact with hot parts
for a long period of time, it may cause your
skin to become red, itchy, or develop a rash
depending on your physical condition and
also it may cause low-temperature burn.
2. Handling the FOMA terminal
WARNING
Do not turn on the photo light with the
lighting luminescence part close to the eyes.
Especially to shoot infants or young children,
step away from them more than 1 m.
Doing so may cause blurred vision. Or injury
by dazzling eyes or surprising may occur.
Do not allow a foreign substance such as
water and other liquids, metal parts, or
flammables to get in the UIM or microSD
card insertion slot on the FOMA terminal.
Doing so may cause fire, burns, injury or
electric shock.
Do not turn on the light toward a driver of a
car etc.
Doing so may disturb driving and cause an
accident.
Don’t
Don’t
Do
Do
Do
Don’t
Don’t
Don’t
12
Contents/Precautions
WARNING
Power off the FOMA terminal in a place
where the use is prohibited such as in
airplane or hospital.
Failure to do so may affect electronic
equipment and electronic medical
equipment. If you set the automatic power-
on function, cancel it before powering off the
FOMA terminal.
Follow the instructions of each medical
facility for the use of mobile phones on their
premises.
Prohibited acts such as mobile phone usage
on board an airplane may be punished by
law. If usage of mobile phones in an aircraft
is admitted by setting airplane mode, etc.,
use the terminal under the direction of the
airline.
If the microUSB cable is connected into the
microUSB connection jack for charging etc.,
the FOMA terminal is automatically powered
on. Be careful not to connect the microUSB
cable in a place where the use is prohibited
such as in airplane or hospital.
Always keep the FOMA terminal away from
your ear when you talk setting the hands-free
function.
Also, when you play game, play back music,
etc. connecting the Earphone/Microphone,
etc. to the FOMA terminal, adjust the volume
adequately.
If the volume is too loud, it may cause
difficulty in hearing. Moreover, if you barely
hear the surrounding sounds, it may cause
an accident.
If you have a weak heart, set the vibrator or
ringtone volume carefully.
Failure to do so may affect your heart.
WARNING
If you are wearing any electronic medical
equipment, check with the relevant medical
electronic equipment manufacturer or vendor
whether the operation may be affected by
radio waves.
The radio waves from the FOMA terminal
may affect electronic medical equipment.
Power off the FOMA terminal near electronic
devices or equipment operating on high
precision control or weak signals.
Failure to do so may interfere with the
operation of electronic devices or
equipment.
* The followings are some electronic devices
or equipment that you should be careful of:
Hearing aids, implantable cardiac
pacemaker, implantable cardioverter
defibrillator, other electronic medical
equipment, fire detector, automatic door,
and other automatically controlled devices
or equipment.
If you use an implantable cardiac
pacemaker, implantable cardioverter
defibrillator, or other electronic medical
equipment, check with the relevant
medical electronic equipment
manufacturer or vendor whether the
operation can be affected by radio waves.
Be careful about broken glasses or exposed
internal from the FOMA terminal if the
display or the camera lens is broken.
Shatterproof film-applied hardened glass is
used on the display surface and the acrylic
resin is applied on camera lens so as not to
be shattered when broken. But they may
cause injury if you touch a cut surface or
exposed portion mistakenly.
Do
Do
Do
Do
Do
Do
13
Contents/Precautions
CAUTION
Do not swing the FOMA terminal around by
holding the strap, etc.
The FOMA terminal may hit you or others
and cause accident such as injury.
Do not use damaged FOMA terminal.
Doing so may cause fire, burns, injury or
electric shock.
If the display is mistakenly damaged and
when the liquid crystal runs out, do not get it
on your skin such as face, hands, etc.
Doing so may cause blindness or injury on
your skin.
If the liquid crystal gets in your eye or
mouth, rinse with clean running water, and
get medical treatment immediately.
Also, if it gets on your skin or clothes, use
something such as alcohol to wipe off and
wash it with soap in clear water.
To use the FOMA terminal in car, check with
automobile manufacturer or dealer to
determine how the device is affected by radio
waves before using.
In rare cases, using the phone in some
vehicle models can cause the vehicle's
electronic equipment to malfunction. In that
case, stop using the FOMA terminal
immediately.
The use of the FOMA terminal may cause
itching, rashes, eczema, or other symptoms
depending on the user's physical condition.
Immediately stop using and get medical
treatment in such a case.
For material of each part,
14
Contents/Precautions
DANGER
If the battery fluid gets into your eyes, do not
rub, rinse with clean running water, and get
medical treatment immediately.
Failure to do so may cause blindness.
WARNING
If the battery pack seems to have
abnormalities such as deformation or
scratches due to falling, never use it.
Doing so may cause battery pack to ignite,
explode, overheat or leak.
If the battery pack leaks or hears an unusual
odor, immediately stop using and move it
away from fire.
The leaking liquid may ignite fire, catch fire,
or explode.
Be careful about your pet not to bite the
battery pack.
Failure to do so may cause battery pack to
ignite, explode, overheat or leak.
CAUTION
Do not discard the battery pack together with
other garbage.
The battery pack may become the source of
fire or environmental destruction. Take the
used battery pack to our service counter
(docomo Shop, etc.) after insulating it by
affixing an adhesive tape on the terminal of it
or follow the instructions of the local
authorities in charge of collecting used
battery packs.
CAUTION
Do not use or charge the wet battery pack.
Doing so may cause battery pack to ignite,
explode, overheat or leak.
If fluid etc. leaks out from battery pack, do
not make the fluid contact with your skin of
face or hands.
Doing so may cause blindness or injury on
your skin.
If the fluid etc. put into your eyes or mouth,
or contacts skin or clothes, immediately
flush the contacted area with clean running
water.
If the fluid put into the eyes or mouth,
immediately see a doctor after flushing.
4. Handling the AC Adapter cable
WARNING
Do not use the microUSB cable if it is
damaged.
Doing so may cause fire, burns or electric
shock.
Do not use the AC adapter cable in a very
humid or steamy place such as bathroom.
Doing so may cause fire, burns or electric
shock.
Do not touch the AC adapter cable if you
hear thunder.
Doing so may cause electric shock.
Do
Don’t
Do
Do
Don’t
Don’t
Do
Don’t
Don’t
Don’t
15
Contents/Precautions
WARNING
Do not short-circuit the microUSB plug while
it is connected to the power outlet. Do not
touch the microUSB plug with your hands,
fingers, or any part of your body.
Doing so may cause fire, burns or electric
shock.
Do not place any heavy objects on the
microUSB cable.
Doing so may cause fire, burns or electric
shock.
When you insert and remove AC adapter
from power outlet, do not contact a metal
strap or other metal objects with the jack.
Doing so may cause fire, burns or electric
shock.
Do not touch the cord of the AC adapter
cable or the power outlet with wet hands.
Doing so may cause fire, burns or electric
shock.
Use the adapter only on the specified power
supply and voltage.
Use the AC adapter cable available overseas
when you charge the battery overseas.
Failure to do so may cause fire, burns or
electric shock.
AC adapter cable: AC 100 V to 240 V (Make
sure to connect the adapter to a household
AC power outlet.)
Clean dust from the power plug.
Failure to do so may cause fire, burns or
electric shock.
WARNING
When you connect the AC adapter to the
power outlet, insert it firmly.
Failure to do so may cause fire, burns or
electric shock.
Hold the AC adapter, not the microUSB
cable, when you remove the power plug from
the power outlet.
Failure to do so may cause fire, burns or
electric shock.
Remove the power plug from the power
outlet when not used for a long period of
time.
Failure to do so may cause fire, burns or
electric shock.
If liquid such as water gets into the adapter,
immediately remove it from the power outlet.
Failure to do so may cause fire, burns or
electric shock.
Before cleaning, remove the power plug from
the power outlet.
Failure to do so may cause fire, burns or
electric shock.
5. Handling the UIM
CAUTION
Please be careful not to touch a cut surface
when you remove the UIM.
Failure to do so may cause injury.
Don’t
Don’t
Don’t
No wet hands
Do
Do
Do
Do
Unplug
Unplug
Unplug
Do

16
Contents/Precautions
6. Handling the FOMA terminal
near electronic medical
equipment

17
Contents/Precautions
7. Material list

18
Contents/Precautions

19
Contents/Precautions

20
Contents/Precautions

21
Contents/Precautions

22
Contents/Precautions

23
Contents/Precautions

24
Before Using the Handset
aIn camera lens
bEar speaker
cProximity sensor: Turn on or off the touch screen
to prevent misoperation during a call.
dLight sensor: Use for auto controlling of the
screen brightness.
eTouch screen
fBack key
gHome key
hMenu key
iNotification LED
jPower key/Screen lock key
kHeadset connector
lCamera lens
mPhoto light
nGPS/Wi-Fi/Bluetooth antenna section*
oSecond microphone: Reduce noise to make easy
to listen or use as a stereo microphone when
recording a moving picture.
pBack cover*
qMicrophone
rSpeaker
sStrap hole
tFOMA antenna section*
uVolume key/Zoom key
vConnector for microUSB cable
* The antenna is built into the main body. Covering
around the antenna with your hand may affect the
quality.
❖Note

25
Before Using the Handset
The UIM is an IC card recorded user
information such as your phone number etc.
When the UIM is not inserted to the FOMA
terminal, you cannot use some functions
(phone function, etc.) of the FOMA terminal.

26
Before Using the Handset
1Remove the back cover and
battery pack, press the UIM with
your fingertip and remove it sliding
forward.
❖Information

27
Before Using the Handset
2Remove the battery pack, make
sure the inserting direction and
insert straight the microSD card all
the way into the holder.

28
Before Using the Handset
The following time varies by the battery
condition or operating environment. For
details, see (P.208).

29
Before Using the Handset
Do not charge the battery pack for
a long time (several days)

30
Before Using the Handset
1Remove the back cover, put your
tip of thumb (nail) into the groove
of the FOMA terminal, hold the
battery pack up in the direction of
the arrow ( ) to remove.
1Insert the supplied microUSB
cable horizontally with the
microUSB plug engraved side
facing up into the connector for
USB cable of the FOMA terminal.
2Insert the microUSB cable
horizontally with the USB plug
engraved side facing up into the
connector for USB of the AC
Adapter, and insert the AC Adapter
plug to the power outlet.
3When the charging is completed,
remove the microUSB plug of the
microUSB cable from the FOMA
terminal.
4Remove the AC Adapter from the
power outlet.
❖Note

31
Before Using the Handset
3When the charging is completed,
remove the microUSB plug of the
microUSB cable from the FOMA
terminal.
4Remove the USB plug of the
microUSB cable from the USB port
of the PC.
❖Note

32
Before Using the Handset
1Press p for over a second.

33
Before Using the Handset
A key unlocking screen appears when
turning the power on or the backlight on by
pressing p/y.
1Touch and drag to until
it laps over.
❖Information

34
Before Using the Handset
7Tap .
35
Before Using the Handset
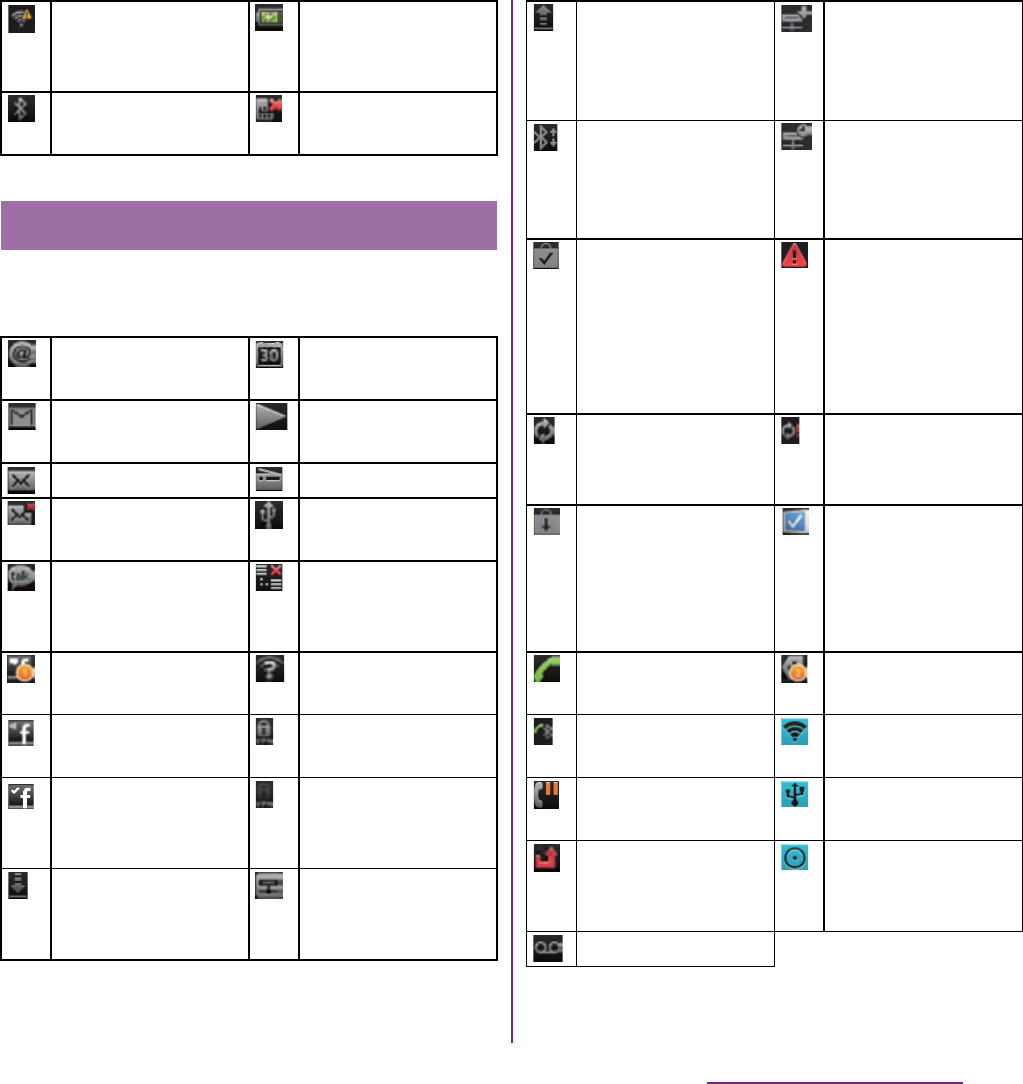
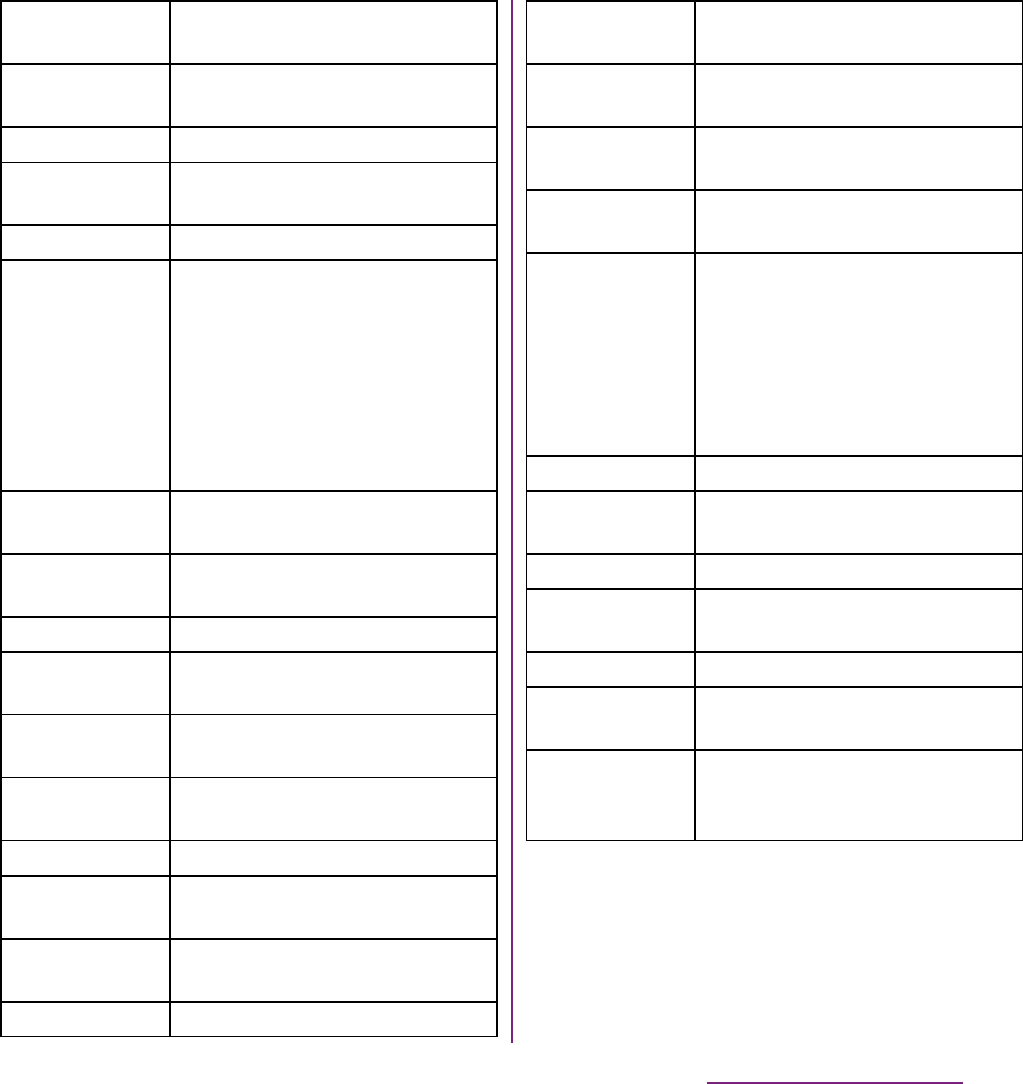
The notification icons displayed on the
screen are as follows.
Connecting to Wi-Fi
using AutoIP
function
The battery is
charging.
The Bluetooth
function is ON.
UIM is locked or not
inserted.
Notification icons
New email
message
Upcoming calendar
event
New Gmail
message
Playing a track
New SMS message FM radio in use
Problem with SMS
message delivery
USB connected
New instant
message
Data
communication
invalid
New Facebook
message
Wi-Fi open network
available
Uploading data to
Facebook
Connecting to a
VPN
Uploading data to
Facebook
completed
Not connected to a
VPN
Receiving/
Downloading data
Media server
activated in
Connected devices
Sending/Uploading
data
Media server
connection request
notification in
Connected devices
Bluetooth
connection request
notification
Client device
connected to Media
server in
Connected devices
Installation is
completed (when
installing
applications from
Android Market,
etc).
Red: Error
messages
Yellow: Warning
messages
Software update
notification or
updating software
Problem with sync
Update notification
(when update of the
installed market
application is
notified)
Setup guide
unchecked
Outgoing,
receiving, or calling
More (undisplayed)
notifications
Calling with
Bluetooth device
Setting Wi-Fi
tethering
Call on hold Setting USB
tethering
Missed call Setting Wi-Fi
tethering/USB
tethering
New voice mail

36
Before Using the Handset
Notification icons are displayed in the
Notification panel. You can open notifications,
such as messages, remainders, or event
notifications directly from the Notification
panel.
1Drag the status bar downwards.

37
Before Using the Handset
* In this manual, each key operation is described with
x, y, t.
Precautions on using touch screen

38
Before Using the Handset
Operations on the touch screen

39
Before Using the Handset
Some lists have Japanese syllabary and
alphabetic index on the right side of the
screen.
40
Before Using the Handset
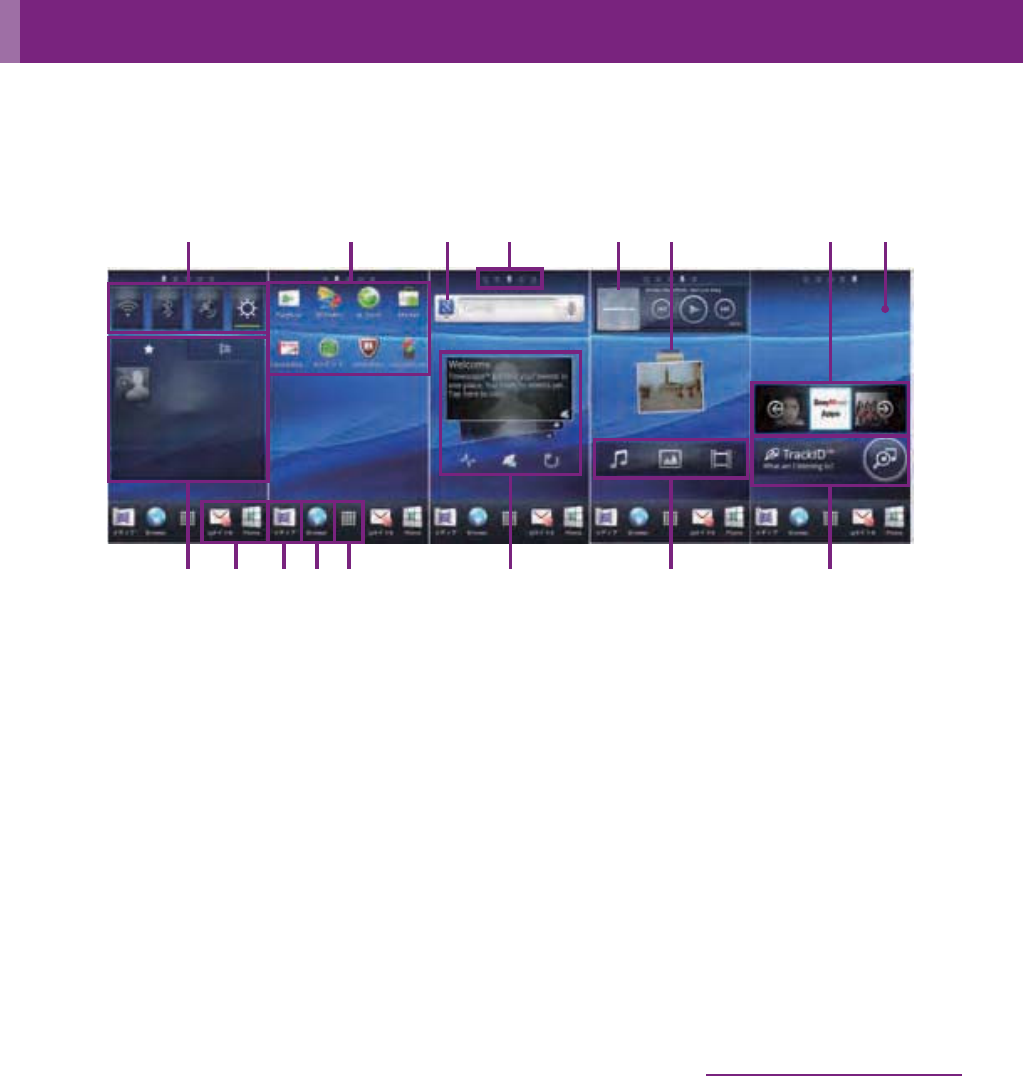
The Home screen consists of 5 screens: the center screen and 2 auxiliary screens on right
and left. The center screen is the starting point of the FOMA terminal operation. You can
personalize the Home screen by adding or moving, for example, application shortcuts and
widgets, or changing the wallpaper.
aWidget: Status switch
bShortcuts (applications)
cWidget: Google search (P.45)
dHome screen position
eWidget: Music player
fWidget: Photos and videos
gWidget: Sony Music Apps
hWallpaper
iWidget: Favorites and call log
jMedia folder (Gallery, Music, FM radio, Camera)
kApplication button
lWidget: TimescapeTM
mWidget: Media shortcuts
nWidget: TrackIDTM
Home screen
d e f
m
ca b g
n
h
lbi b kj

41
Before Using the Handset
1Flick the Home screen to left or
right.
42
Before Using the Handset
2Select an item.
Favorites and
call log
Display contacts registered to
Favorites and related call log.
Friends' music
& videos
Display lists of videos or music
tracks shared on Facebook.
Google Search Display the Quick search box.
Home screen
tips
Display tips of the Home screen
operation.
Latitude View locations of members.
LiveWareTM
manager
Set to automatically activate
selected application when you
connect Stereo Headset with
Microphone (sample) or
commercially available stereo
earphone set, or connect to
charge with microUSB cable and
AC adapter.
Market Display recommended
applications of Android Market.
Media
shortcuts
Display Music player and Gallery
(photos, videos).
Music player Display Music player.
News &
Weather
Display news and weather.
On/Off:
Backlight
Turn on/off the backlight.
On/Off:
Bluetooth
Switch on/off Bluetooth function
On/Off:GPS Switch on/off GPS function
On/Off:
Roaming
Display setting buttons for mobile
network setting.
On/Off: Sound Switch between speaker on and
vibrate.
On/Off: Wi-Fi Switch on/off Wi-Fi function
Photos and
videos
Display photos and videos stored
on the microSD card.
Picture frame Crop the shot photo to display on
the Home screen.
Rate Places Display information of nearby
stores or post word of mouth.
Sony Music
Apps
Display the website produced by
Sony Music.
Status switch Display the battery level (%),
setting buttons for turning on
Airplane mode, Bluetooth
function, GPS function, Wi-Fi
function, and for switching
speakerphone On, vibrate, and
Mobile network settings.
Timer Display Timer.
TimescapeTM
Widget
Display the latest Timescape tile.
TrackIDTM Display TrackID.
Twitter (large) View comments of members with
entry screen.
Twitter (small) View comments of members.
Weather widget View weather in the specified
area.
YouTube Display the list of frequently
played movies and
recommended.
Continued on next page

43
Before Using the Handset
❖Information

44
Before Using the Handset
Changing wallpaper
1In "Add to home screen" menu, tap
[Wallpapers].
2Tap [Gallery]/[Live wallpapers]/
[Sony Ericsson wallpapers].

45
Before Using the Handset
Enter a word in the search box to browse the
information in the FOMA terminal or on the
Internet.
1Tap the search box (P.40 c) on the
Home screen.

46
Before Using the Handset
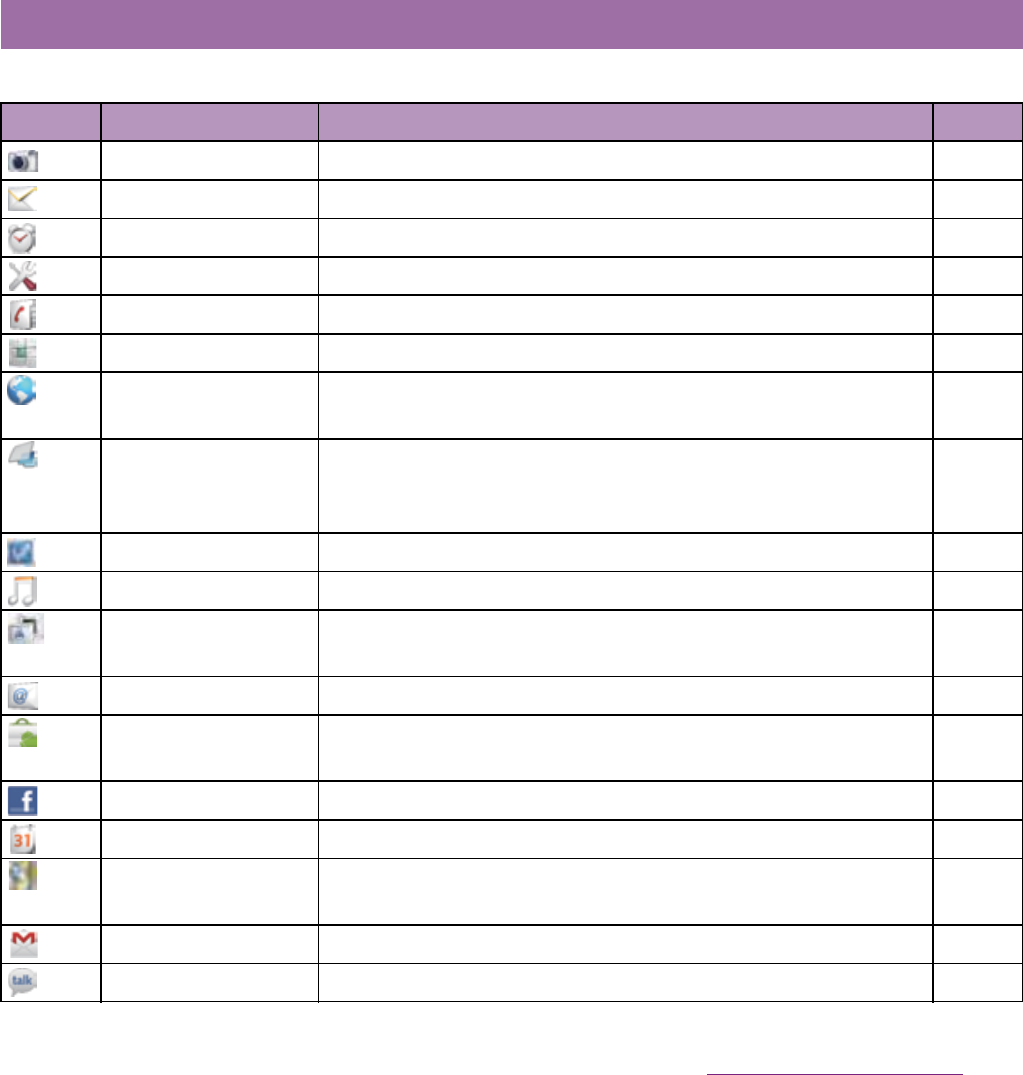
You can access the applications installed in
the FOMA terminal using the Applications
screen.
1From the Home screen, tap .
47
Before Using the Handset
The applications displayed on the Applications screen by default are as follows.
Applications
Icon Application Description Page
Camera Take photos and record video clips. P.146
Messaging Send and receive messages (SMS). P.120
Alarms Set an alarm. P.184
Settings Make the FOMA terminal settings. P.91
Contacts Keep contacts of your friends and colleagues. P.74
Phone Make and receive calls, and switch between calls. P.69
Browser Browse Web and WAP sites (except for WML) and download
files.
P. 1 3 1
TimescapeTM View Social Network Service (SNS), missed calls, message
(SMS) history. You can make a call, send a message, etc. from
the history.
P. 1 7 1
Setup guide Display Setup guide. P.33
Music Playback music data stored on a microSD card. P.165
Gallery View photos and videos you took, and images posted on Picasa
or Facebook.
P. 1 6 0
Email Send and receive emails (multiple accounts are also available). P.122
Market Access to the Android Market, download and buy new
applications.
P. 1 6 9
Facebook Activate Facebook client application. P.113
Calendar Display a calendar and manage schedule. P.182
Maps Use Google map services, such as viewing current location,
finding another location and calculating routes.
P. 1 7 7
Gmail Send and receive mails from/to a Google account. P.129
Talk Chat with friends using Google Talk instant messaging. P.129
Continued on next page

48
Before Using the Handset
Navigation Display Google map navigation to receive detailed guides for
your destination.
P. 1 7 9
Places Use various information registered on Google map, such as
shops around the current location.
P. 1 7 8
Latitude Check and share the location information of specified friends. P.180
Calculator Perform basic calculations such as addition, subtraction,
multiplication, and division.
-
TrackIDTM
Use a service to check information on the currently played music.
P. 1 6 8
YouTube Playback videos around the world or upload recorded videos. P.164
Area Mail Receive earthquake early warning, etc. delivered by the
Meteorological Agency.
Area Mail is a free service and subscription is not required.
P. 1 3 0

49
Before Using the Handset
Google Search Search information in the FOMA terminal and web pages from
keywords.
P. 4 5
Voice Search Use Google search by voice input. P.45
Connected devices Set up and manage Media server in Connected devices. P.145
Instruction Manual Display the FOMA terminal instruction manual. You can start a
function you want to use from the explanation.
P. 2
Update center Acquire latest software and applications from the website of
Sony Ericsson.
P. 2 0 4
FM radio Use FM radio. P.180
mora touch Access to mora touch, the music download site. P.187
Clock Display clock and set an alarm, etc. P.183
LiveWareTM manager Set to automatically activate selected application when you
connect Stereo Headset with Microphone (sample) or
commercially available stereo earphone set, or connect to
charge with microUSB cable and AC adapter.
-
docomo market Access to the docomo market in which you can search
applications and videos.
P. 1 7 0
APPNAVI Introduce applications for Android terminals. You can search
applications from categories, rankings, etc.
-
BOOK

50
Before Using the Handset
Phonebook backup A service with which you can back up contacts to the
Phonebook backup center automatically on a regular basis and
restore the contacts in case of losing the FOMA terminal or
erasing the contacts accidentally.
* For details on Phonebook backup, refer to "

51
Before Using the Handset
Koe no Takuhaibin Koe no Takuhaibin is a service which records a message by
voice call and notify to the party of recording message by an
SMS.
Using this application, voice message can be easily recorded
and played.
-
life.episodeTM View the latest information such as news and music. P.187

52
Before Using the Handset
❖Information

53
Before Using the Handset
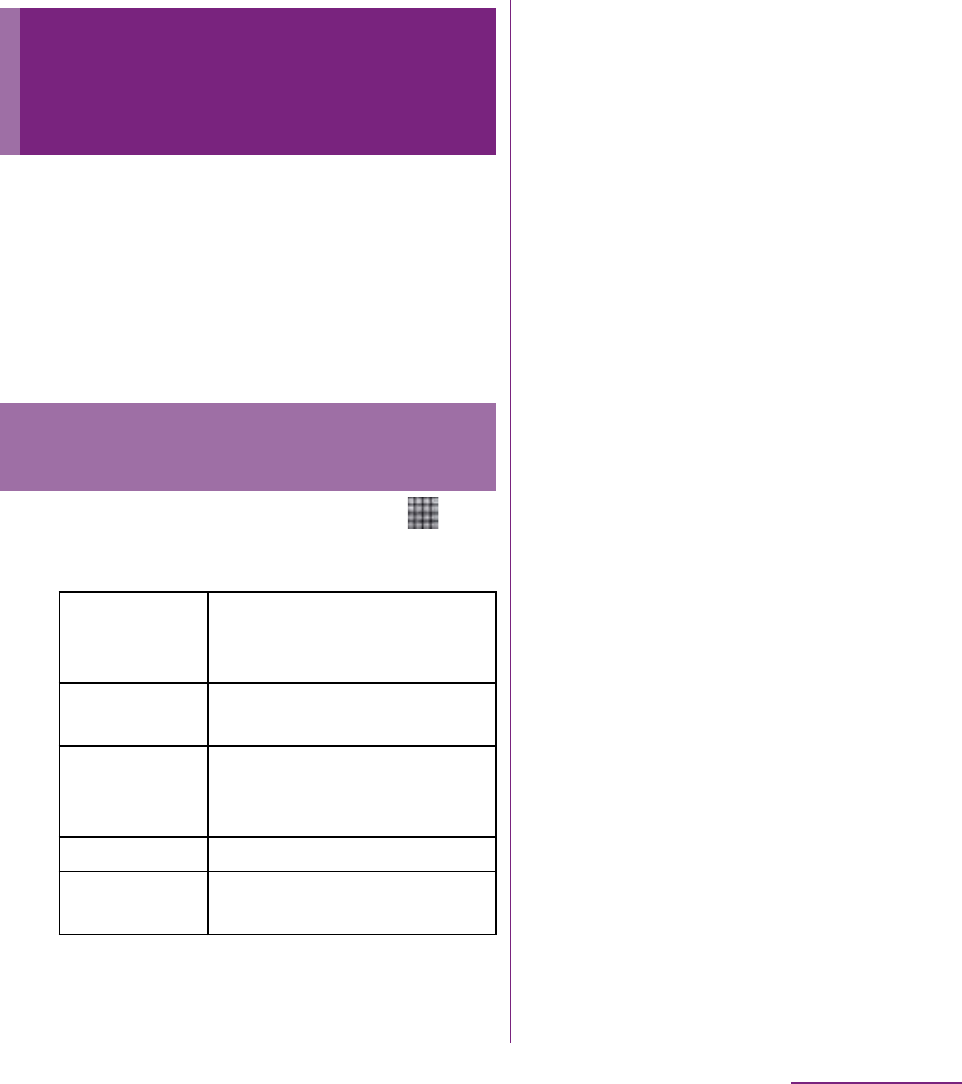
You can sort the applications displayed on
the Applications screen from the "Sorting"
menu.
1On the Applications screen, tap
.

54
Before Using the Handset

55
Before Using the Handset
For Japanese keyboard, there are 3 types of
software keyboards: 12 key, QWERTY and
Japanese syllabary.
❖Information

56
Before Using the Handset
1On the character entry screen,
touch and hold the character mode
icon .
2Tap ////.

57
Before Using the Handset
*1 When any characters are entered, just tap the desired
position on the entered character string to move the
cursor.
*2 On some screens such as the search box or mail
account registration screen, "

58
Before Using the Handset

59
Before Using the Handset
Use the QWERTY keyboard to enter
Japanese characters in "Romaji input" mode.
The main functions of the touch-
keys

60
Before Using the Handset
*1 When any characters are entered, just tap the desired
position on the entered character string to move the
cursor.
*2 On some screens such as the search box or mail
account registration screen, "

61
Before Using the Handset
3Tap [On-screen keyboard settings]

62
Before Using the Handset

63
Before Using the Handset
*1 When any characters are entered, just tap the desired
position on the entered character string to move the
cursor.
*2 In some screens such as the search box or mail
account registration screen, "

64
Before Using the Handset
2Tap [International keyboard]/
[Japanese keyboard]/[Chinese
keyboard].

65
Before Using the Handset
The Word suggestion function shows
predicted conversion candidates when you
enter Japanese/English characters. Mark the
checkbox of Word suggestion checkbox to
set options "Error correction" and "Auto
space" These options help you entering
characters with ease.
Setting Word suggestions
1From the Home screen, tap t,
then tap [Settings]

66
Before Using the Handset
Registering words in user
dictionaries
There are 2 types of user dictionaries: "My
words Japanese" (Kana/Kanji) and "My words
English" (one-byte alphabet).
1From the Home screen, tap t,
then tap [Settings]

67
Before Using the Handset
❖Information

68
Before Using the Handset
Adding a category of phrases
Add a new category and register a phrase.
1From the Home screen, tap ,
then tap [

69
Calling/Network Services
1From the Home screen, tap
[Phone].
2Enter the number of the recipient
and tap [Call].

70
Calling/Network Services
❖Note

71
Calling/Network Services
For details on WORLD CALL, refer to
DOCOMO International Services website.
1From the Home screen, tap
[Phone].
2Touch and hold [0] key until "+"
sign appears.

72
Calling/Network Services

73
Calling/Network Services

74
Calling/Network Services
1From the Home screen, tap
[Phone]

75
Calling/Network Services
On the contacts list screen, you can view
details of your contacts. You can add a
contact picture, and display updating status
information of Social Networking Service
(SNS).
aContact search field
bPicture saved to contact
cIcon for adding a new contact
dMyself (your own phone number)
eA contact saved in Contacts
fJapanese syllabary or alphabetical index for
browsing contacts
gOnline status* of Google Talk (Chat) (P.129)
hUpdating status information for the Social
Networking Service (SNS)
iScreen tabs (Phone/Call log/Contacts/Favorites)
* Depending on the usage, it may be different from online
display of Google Talk.
Adding a contact
1On the contacts list screen (P.75),
tap at the top right.
2Tap [docomo]/[Phone contact].

76
Calling/Network Services
Using shortcuts of Contacts
When you tap the photo (image) part on
contacts list screen, shortcuts for phone
number, mail, etc. appear. Tap the shortcut to
make a call, or create and send a mail.
* You can also use the registered Google Talk account,
addresses, etc.
❖Information

77
Calling/Network Services

78
Calling/Network Services
3Enter the new information or make
the changes you want.

79
Calling/Network Services
4Tap [Gallery]/[Take new photo].

80
Calling/Network Services
2Tap an item you want to display.

81
Calling/Network Services
Exporting all contacts on microSD
card
1On the contacts list screen (P.75),
tap t, then tap [Back up
contacts]

82
Calling/Network Services
Importing contacts from UIM
1On the contacts list screen (P.75),
tap t, then tap [Import
contacts]

83
Calling/Network Services
Copying contacts registered in
Google account to docomo
account
1On the "docomo

84
Calling/Network Services
❖Information

85
Calling/Network Services
Setting Voice Mail Service
1From the Home screen, tap t
and tap [Settings].
2Tap [Call settings]

86
Calling/Network Services
Playing the voice message
1When the SMS notification "NTT
DoCoMo VM:XX" appears, tap
[New message] from the
Notification panel (P.36).

87
Calling/Network Services
2Switch to the first call.

88
Calling/Network Services
The Call Forwarding Service forwards a voice
call to a preset forwarding number when you
are in a location without the radio wave, the
FOMA terminal is powered off, or you do not
answer the call within the preset ring time.

89
Calling/Network Services
3Tap [Call Forwarding].

90
Calling/Network Services
2Tap [Call settings]

91
Settings
1From the Home screen, tap t.
2Tap [Settings].

92
Settings
❖Information

93
Settings
mopera U is ISP of NTT DOCOMO's Internet
connection. If you have subscribed to
mopera U, you can use Internet after making
the simple settings. mopera U is a service
requiring subscription.
Setting mopera U
1From the Settings screen (P.91),
tap [Wireless & networks]

94
Settings
Using the Wi-Fi function, you can connect to
an access point for your home, company
network or public wireless LAN services to
use mail and Internet.

95
Settings
1From the Settings screen (P.91),
tap [Wireless & networks]

96
Settings
Setting the Wi-Fi network
notification to ON
1Confirm that Wi-Fi is turned on,
and then on the Settings screen
(P.91), tap [Wireless & networks]

97
Settings
Viewing detailed information on a
connected Wi-Fi network
1From the Settings screen (P.91),
tap [Wireless & networks]

98
Settings
Tethering stands for using mobile devices
such as smartphone as modem to allow USB
compatible devices or wireless LAN devices
to access the Internet via mobile phone line.
❖Information

99
Settings

100
Settings
Virtual Private Network (VPN) is a technology
to connect to the information in a protected
local network from another network.
Generally, VPNs are provided to companies,
schools and other facilities. A user can
access to the information in the local network
from outside of the premises.
To set up a VPN access from the FOMA
terminal, you need to retrieve the information
related to security from your network
administrator. For details, refer to
http://www.sonyericsson.co.jp/support/
(Japanese site)
❖Information

101
Settings
Disconnecting a VPN
1Open the Notification panel, tap
the VPN connecting notification.

102
Settings
❖Information

103
Settings
❖Information

104
Settings
You can set the screen orientation to change
automatically between landscape and
portrait view when you turn the FOMA
terminal sideways/paleways.
❖Information

105
Settings
*1 Set the password to the credential storage in advance.
*2 Save certificates and credential information in the
credential storage.
Some functions provided for convenient use
of the FOMA terminal require the security
code to use them. Besides the security code
for locking the FOMA terminal, the network
security code necessary for the network
services etc. are available. Make use of the
FOMA terminal using an appropriate security
code according to the purpose.

106
Settings
You can change your network security code to
the new one using the PC if you have the
"docomoID"/"Password" for the "My docomo"*
General support site for PC (in Japanese only).
* For information on "My docomo", see the
previons page of the last page of this
manual.
You can set a security code called PIN code
to the UIM. The code is set to "0000" at the
time of subscription. It can be changed by
yourself.
PIN code is a 4- to 8-digit number (code) that
must be entered for user confirmation to
prevent unauthorized use by a third party
every time you insert the UIM into the FOMA
terminal or when the FOMA terminal is
powered on. Entering the PIN code enables
making/receiving calls and terminal
operation.

107
Settings
❖Information

108
Settings

109
Settings

110
Settings
2Tap t, tap [More]

111
Settings
3Tap [Clear data].
4Tap [OK].
Deleting an installed application

112
Settings
You can add or delete an online service
account.
Setting Google account
You can create a Google account on your
FOMA terminal and use Google services
such as Gmail, Google Talk, Google
Calendar, Android Market, etc.
You can set multiple Google accounts on the
FOMA terminal.
1From the Settings screen (P.91),
tap [Accounts & sync]

113
Settings
Setting Facebook account
When you register or sign in Facebook, you
can synchronize (register/update) profile
information published by "Friend" online to
Contacts.
You can display image posted on Facebook
by "Friends" onto the Gallery or Photo filter in
Contacts, display information stored in "

114
Settings
Setting other account

115
Settings
6Tap to mark an item for automatic
synchronization.

116
Settings
❖Note

117
Settings
Increasing the free volume of the
FOMA terminal and a microSD card
If the FOMA terminal has a small memory,
you can do the following to increase the
available memory:

118
Settings
You can set call end operation and user
support service which sounds or vibrates
according to user's operation.
❖Information

119
Settings
1From the Settings screen (P.91),
tap [Date & time]

120
Mail/Internet
You can send/receive mails using i-mode
mail address (@docomo.ne.jp).
You can use pictogram and Deco-mail. Mails
can be received automatically. For details on
sp-mode mail, refer to "

121
Mail/Internet

122
Mail/Internet
1From the Home screen, tap ,
then tap [Messaging].
2Tap a thread to select.
3Touch and hold a message you
want to delete.
4Tap [Delete message]

123
Mail/Internet
4Enter account name and a name
you want to display on outgoing
mails.

124
Mail/Internet

125
Mail/Internet
2Tap t, then tap [Preview pane].

126
Mail/Internet
1From the Home screen, tap ,
then tap [Email].

127
Mail/Internet
1From the Home screen, tap ,
then tap [Email].

128
Mail/Internet
mopera U users (for the setting, see "Setting
mopera U" (P.93)) can use mopera U Mail.
In mopera U Mail, POP mail and IMAP mail
are available. The mail box supports 50 MB.
Also, the Web mail system is available.

129
Mail/Internet
10
On the option setting screen, set
frequency of checking Emails etc.
and tap [More].
11
On the mail account registration
screen, enter a name you want to
display on outgoing messages,
then tap [Done].

130
Mail/Internet
❖Information

131
Mail/Internet
1From the Home screen, tap ,
then tap [Area Mail].
2Tap t, then tap [Settings].
1From the Home screen, tap
[Browser].
❖Information

132
Mail/Internet
1Press y.

133
Mail/Internet
2Enter the search item.

134
Mail/Internet
Operating links in web pages
1Open the web page you want to
operate the links.
2To open the web page, tap the link.

135
Mail/Internet

136
File management
Files in the FOMA terminal should be
operated on the file handling application. For
example, to delete files saved in the microSD
card, use the deletion function of the
applications such as Music player or Gallery.
With "Share" function of each application, you
can exchange the files via Bluetooth or by
email file attachment sending to/receiving
from the other compatible devices.
In addition, with the FOMA terminal
connected to a PC, you can move or delete
files in the microSD card mounted on the PC.
With PC Companion and Media Go, you can
manage files between a PC and the FOMA
terminal mutually.
With "Sync Zone" of PC Companion, you can
synchronize contacts in the FOMA terminal
and calendar with Outlook of a PC.
You can transfer and move images, music
data and some other data. Sharing some
data may not be permitted due to copyright.
By connecting the FOMA terminal and a PC
with the supplied microSD cable, you can
exchange data between the microSD card of
the FOMA terminal and the PC.
Using a microUSB cable to
connect the FOMA terminal to a PC
1Connect the FOMA terminal to a
PC using a microUSB cable (P.31).

137
File management
2Tap [Skip].

138
File management
Disconnecting the microUSB cable
safely

139
File management
If the FOMA terminal and a PC*1 are
connected in a pair on a Wi-Fi network,
automatic connection/disconnection of
microSD card and a PC is enabled when
FOMA terminal user comes in and out of the
Wi-Fi area, You can easily access to a
microSD card inserted in the FOMA terminal
from a connected PC.
*1 Use Microsoft Windows 7 to make a pair
setting. Pair setting cannot be made under
Microsoft Windows XP, Microsoft Windows
Vista or other OS.
1Connect a PC you want to set in a
pair to a Wi-Fi network.
2Set USB connection mode of the
FOMA terminal to "Media transfer
mode (MTP)".
3Connect the FOMA terminal to a
Wi-Fi network (P.95).
4Connect the FOMA terminal to a
PC using a microUSB cable.

140
File management
❖Information

141
File management
Transferring data using Media Go
1Connect the FOMA terminal to a
PC using a microUSB cable.
2Drag the status bar down to check
the USB connection mode.

142
File management

143
File management
Once you have made pair setting for your
phone and a Bluetooth device, the setting is
saved. When making pair setting for the
FOMA terminal and a Bluetooth device, you
may need to enter a pass code (PIN). Your
phone will automatically try the generic pass
code 0000. If this does not work, see the
documentation of your Bluetooth device for
the pass code used by your Bluetooth
device. You do not need to re-enter the pass
code the next time you connect to a paired
Bluetooth device already set.
You cannot make pair setting for the FOMA
terminal and two Bluetooth headsets.
However, you can set it with two or more
Bluetooth devices if the same profile is not in
use. The FOMA terminal supports the
following Bluetooth profiles: A2DP, AVRCP,
H F P, H S P, O P P, P B A P a n d S P P.
1From the Home screen, tap t.
2Tap [Settings]

144
File management
3Touch and hold a Bluetooth device
name that you are going to
connect.
145
File management
With Media server, you can share media files
with other client (DLNA: Digital Living
Network Alliance) devices using Wi-Fi
function.
Set Wi-Fi connection (P.94) with another client
device.
1From the Home screen, tap ,
then tap [Connected devices].
Sharing files with DLNA
devices via Connected
devices (Media server)
Setting Connected devices
(Media server)
2Media server Set to connect from a client
device to the FOMA terminal
via Wi-Fi.
Change
server name
Rename the FOMA terminal
(server) on a client device.
Client device
list
Manage client device
registered to the FOMA
terminal.
Wi-Fi settings P. 9 4
About Display explanation of icons
in the status bar.

146
Applications
You can take a photo or record a video by
tapping the screen. You can hold the camera
horizontally or vertically to shoot still images.
For recording movies, screen display
supports landscape only. Photos and videos
are saved automatically in the microSD card.

147
Applications

148
Applications
❖Information

149
Applications
Setting face detection
1From the Home screen, tap

150
Applications
❖Information

151
Applications
Still camera settings
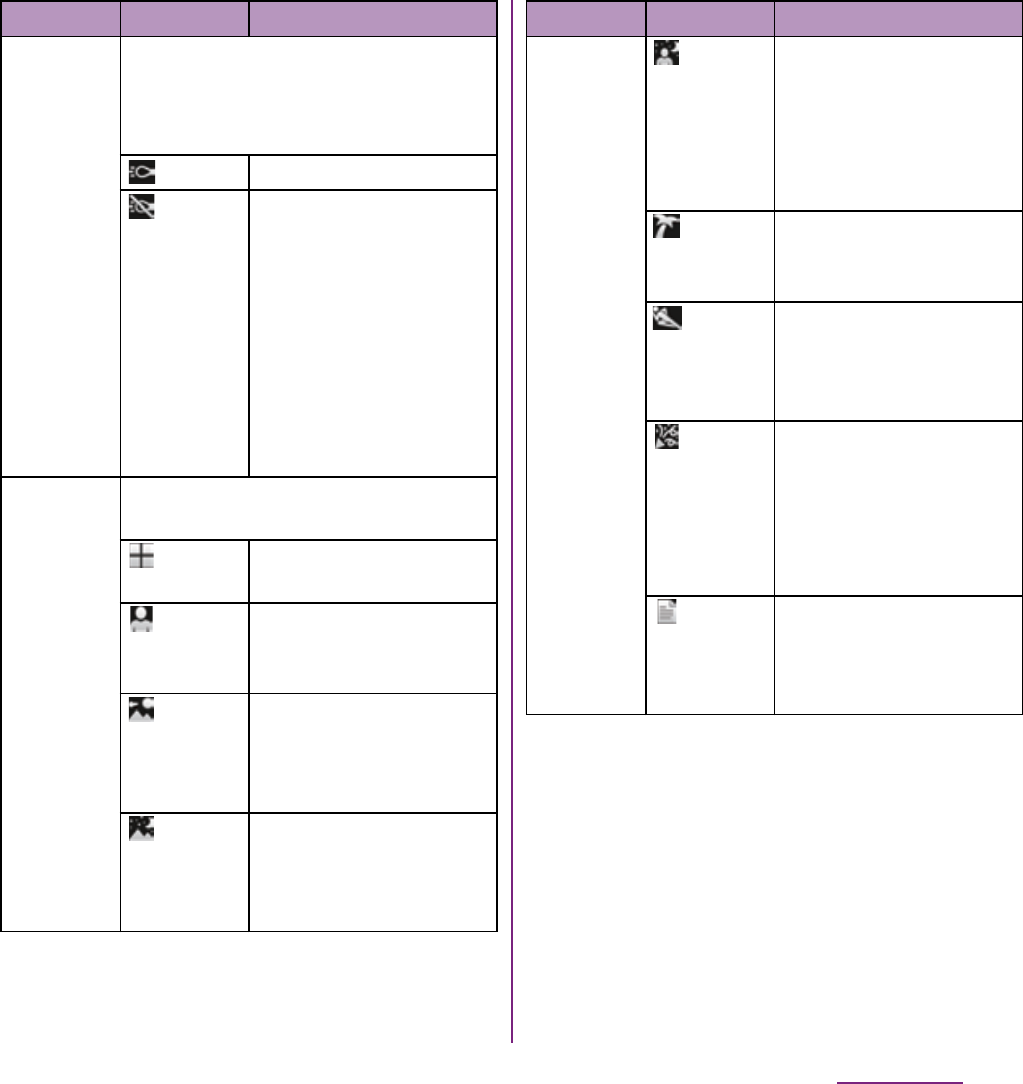
Item Icon Description
Capturing
mode
Select the shooting method.
Normal A standard shooting
mode
Scene
recognition
The camera determines
most suitable scene
effect. A corresponding
scene icon appears
when the scene is
recognized.
Smile
detection
P. 1 4 9
Resolution Select image sizes and aspect ratios
before shooting. An image with a
higher resolution requires more
memory.
8MP 4:3 8 megapixel image size
with 4:3 aspect ratio.
Suitable for viewing on
normal size screen or
printing in high
resolution.
6MP
16:9
6 megapixel image size
with 16:9 aspect ratio. A
high resolution wide-
screen format. A higher
resolution than full HD.
Suitable for viewing on
on wide-screen.
Resolution 2MP 4:3 2 megapixel image size
with 4:3 aspect ratio.
Suitable for viewing on
normal size screen.
2MP
16:9
2 megapixel image size
with 16:9 aspect ratio.
Suitable for viewing on
wide-screen.
Switch
camera
P. 1 4 8
Self-timer Use it to take self-portraits, or group
photos where everyone can be in the
photo. You can also use the self-timer
to avoid camera shake.
On
(10 sec.)
The shooting starts in
10 seconds you tap the
screen.
On
(2 sec.)
The shooting starts in
2 seconds you tap the
screen.
Off The shooting starts as
soon as you tap the
screen.
Item Icon Description
Continued on next page
152
Applications
Photo
light
Set whether to turn on the photo
camera when shooting when lighting
conditions are poor or when there is a
backlight.
On The photo light turns on.
Off The photo light does not
turn on. Sometimes the
image quality can be
better without a photo
light, even if lighting
conditions are poor.
Taking a good photo
without using the photo
light requires a steady
hand.
Scenes Use Scenes to quickly set up the
camera for various scene conditions.
Off Adjust color shade or
brightness automatically.
Portrait Settings are optimized to
give brighter and warmer
skin tones.
Landscape
Shoot landscape
depicting trees with vivid
color and focusing on
distant objects.
Night
scene
Shoot a crisp and clear
night scene. Due to long
exposure time, be careful
not to shake camera.
Item Icon Description
Scenes Night
portrait
Suitable for shooting
persons against the
nightscape background.
Due to long exposure
time, be careful not to
shake camera.
Beach
and snow
Reconstruct beach and
snowy scene brightly
and vividly.
Sports To shoot fast-moving
object, shorten exposure
time to minimize motion
blurring.
Party Shoot an indoor picture
creating good
atmosphere of indoor
lighting. Due to long
exposure time, be careful
not to shake camera.
Document
Use for shooting text or
graphics. It allows to
capture a clear, bright,
and easy to read text.
Item Icon Description
Continued on next page
153
Applications
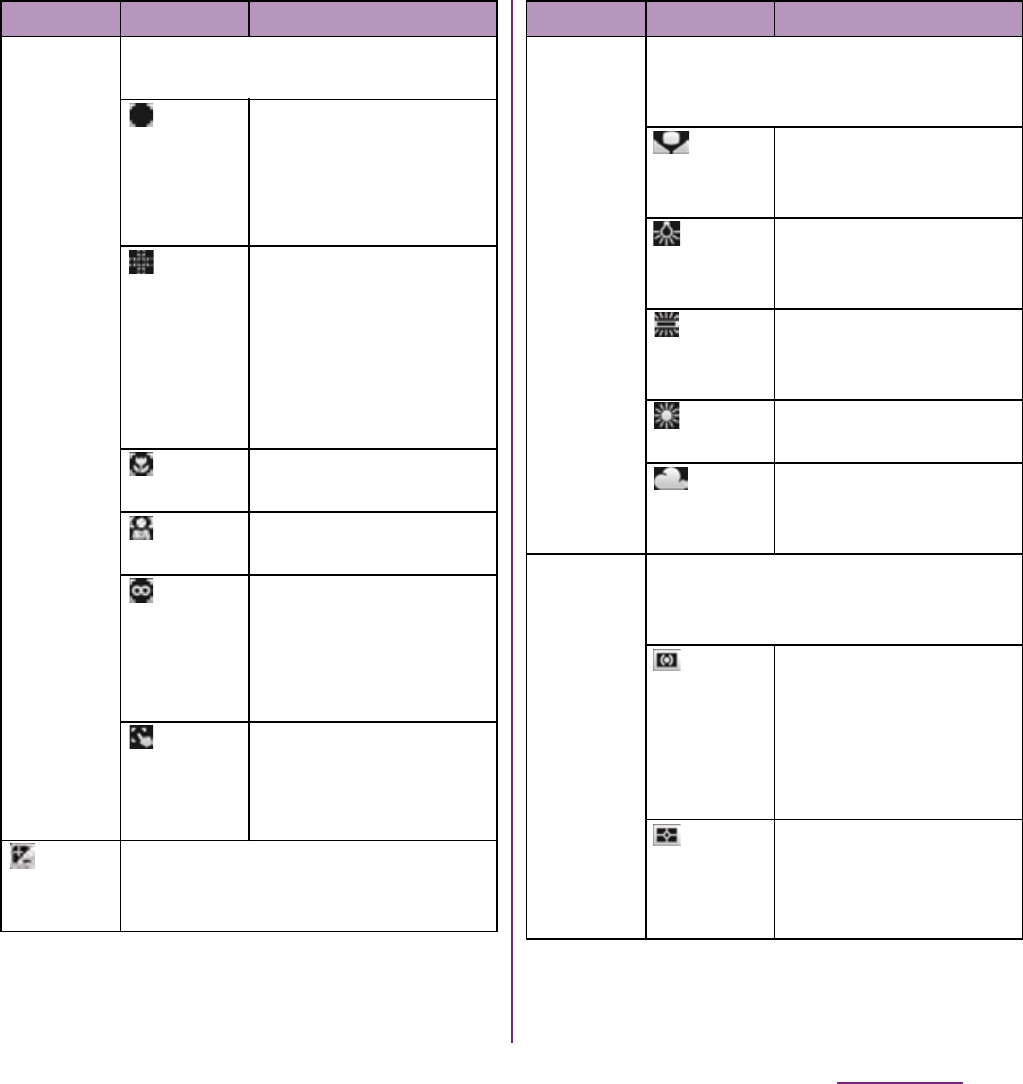
Focus
mode
Set focus controls. Use when
"Capturing mode" is set to "Normal".
Single
autofocus
The camera
automatically focuses on
a selected subject. The
focus frame turns to
green when focus is on.
Multi
autofocus
The camera
automatically focuses on
several points on the
shooting screen. The
white focus frames turn
to green when focus is
set.
Macro Auto focus for close-up
photos
Face
detection
P. 1 4 8
Infinity Use when shooting at a
distance. Focus on
subjects far away.
Subjects close to the
camera may be blurred.
Touch
focus
Tap an object on the
shooting screen. The
focus frame moves onto
the tapped place.
Exposure
value
P. 1 4 8
Item Icon Description
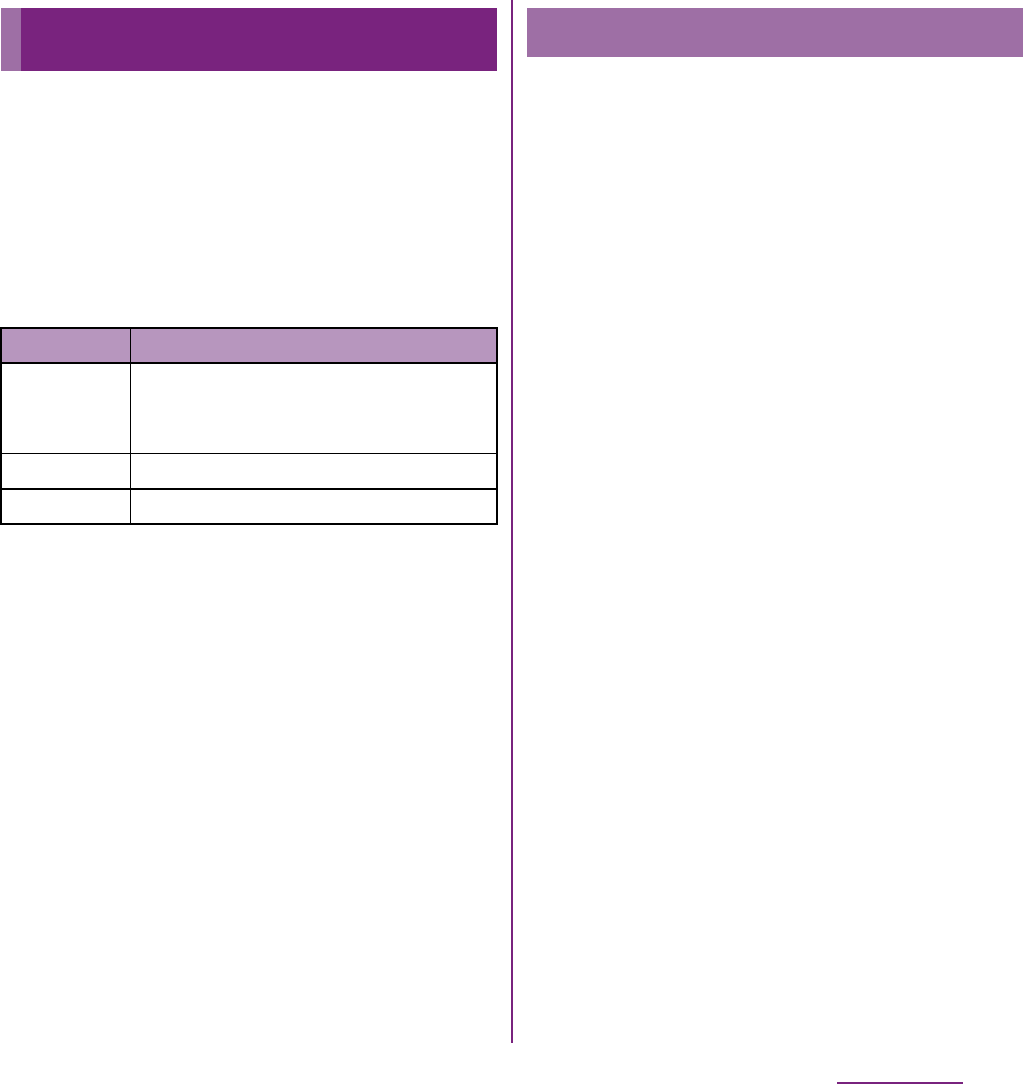
White
balance
The white balance setting adjusts the
color balance according to the light
source.
Auto Adjust the color balance
automatically to the light
source.
Incandescent
Adjust the color balance
for lighting like
incandescent bulb.
Fluorescent
Adjust the color balance
for lighting like
fluorescent.
Daylight Adjust the color balance
for a sunny place.
Cloudy Adjust the color balance
for a cloudy sky or
shaded area.
Metering Measure the brightness on the
shooting screen to determine a well-
balanced exposure automatically.
Center Put emphasis at the
center of the shooting
screen and measure
photometry at whole view
finder to adjust the
exposure.
Average Adjust the exposure
based on the brightness
of the whole shooting
screen.
Item Icon Description
Continued on next page

154
Applications
❖Note

155
Applications
Recording videos using in-camera
1On the shooting screen, tap
(Switch camera).
2Tap the screen to start recording.
3Tap the screen to stop the
recording.

156
Applications
1From the Home screen, tap

157
Applications
Video size HD 720p HD format with 16:9
aspect ratio. 1280

158
Applications
❖Note
159
Applications
You can play music files on "Music" and view
photos and video files on "Gallery".
You can play photos and videos shot by the
FOMA terminal, transfer files to a microSD
card by connecting to a PC, and play
multimedia content of the following file
formats downloaded from the Internet.
For details on operations for copying files by
connecting to a PC, see "Transferring and
moving data" (P.136).
Avoid copyright infringements when you
handle photos taken with the FOMA terminal,
e.g. copy/edit. In addition, avoid rights
infringements of portraits by using these
photos without consent, altering them or by
other means. Note that capturing or
recording a stage performance,
entertainment or exhibition may be prohibited
even if for personal use.
Please be considerate of the privacy of
individuals around you when taking and
sending photos using camera-equipped
mobile phones.
Playing multimedia content
Type File format
Sound MP3, 3GPP, MP4, AMR, AMRWB,
SMF, XMF, WAV, iMelody, RTTTL/RTX,
OTA, Ogg vorbis
Still image JPEG, GIF, PNG, BMP
Video 3GPP, MP4
Copyright protected content

160
Applications
1Connect the plug of Stereo
Headset with Microphone
(Sample) to headset connector of
the FOMA terminal.

161
Applications
1From the Home screen, tap

162
Applications
2Tap t and tap the displayed
menu.

163
Applications

164
Applications
bProgress bar: Display the playback position in the
playback duration.
cMarker: Playback position. Drag to change the
playback position.
d[Play/Pause] key
e[Fast forward] key: Fast-forward the playing
position.
Adjusting the volume of a video
1On the video playback screen,
press m up or down.
Fast forwarding and rewinding a
video
1Drag the progress bar marker right
or left.

165
Applications
1While playing a video, double-tap
the screen to switch to the
landscape screen.
2Tap the screen to display the play
control keys, then tap [HQ].
❖Information

166
Applications

167
Applications
3Touch and hold a track you want to
share.

168
Applications
4Tap [Name] entry box and enter a
playlist name, and tap [OK].
Playing Playlists
1On the Music player screen, tap
.
2Tap [Playlists].

169
Applications
When a track has been recognized by
TrackID, you can recommend it, search for
related content for the track on YouTube, or
do some others. The track information
appears when a track is recognized after a
search, but also in a history list.
To use TrackID results

170
Applications
❖Information

171
Applications

172
Applications
173
Applications
Refreshing the start screen in
Timescape
When you refresh the start screen, the FOMA
terminal connects to the Internet to update
information from your Twitter, Facebook and
mixi account set in Timescape.
1In the Timescape screen, tap t
and tap [Refresh].
Posting to Facebook, Twitter, mixi
from Timescape
1In the Timescape screen, tap t
and tap [Update status].
2Mark the service you want to post
and tap [Continue].
3Enter the text and tap [Post].
The following icons on a tile indicate a type of
event.
Viewing a tile information
1On the Timescape screen, tap a
tile.
Calling back from Timescape when
you have a missed call
1On the Timescape screen, tap
tile.
2Tap the tile again.
3Tap [Return call].
Replying to an SMS message in
Timescape
1On the Timescape screen, tap
tile.
2Tap the tile again.
3Enter a message text.
4Tap [Send].
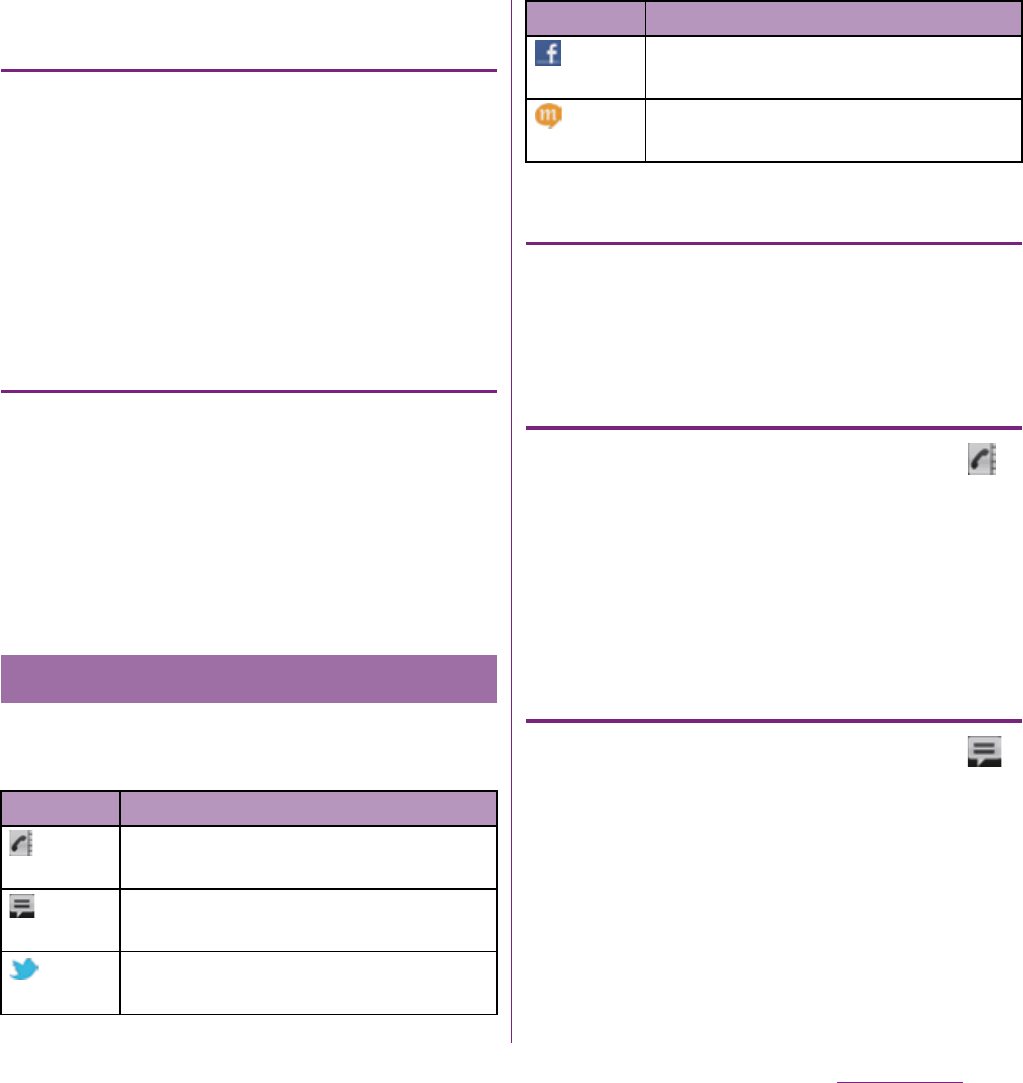
Tile icons
Icon Event
A missed call: Tap the tile to call the
caller.
An SMS message: Tap the tile to
display the message.
A Twitter update: Tap the tile to display
the update.
A Facebook update: Tap the tile to
display the update.
A mixi update: Tap the tile to display
the update.
Icon Event

174
Applications
When you tap a tile, (infinite button) may
appear in the upper right corner. By tapping
, you can view the communication log by
registered information in the contacts or tile
filter event.
Viewing the registered information
of contacts in Timescape
1On the Timescape screen, tap a
tile.
2Tap .

175
Applications
The FOMA terminal has a GPS receiver that
uses satellite signals to calculate your
location. Some GPS features use the Internet.
Data rates and charges may apply.
When you use functions that require the GPS
receiver to find your location, make sure you
have a clear view of the sky. If the GPS
receiver does not find your location after a
few minutes, you should move to another
location. To help the search, stand still and do
not cover the GPS/Wi-Fi/Bluetooth antenna
section (P.24). The first time you use the GPS
it may take up to 10 minutes before your
location is found.

176
Applications

177
Applications
The Google Maps application lets you view
your current location, find other locations and
calculate routes. When you start the Google
Maps application, your approximate location
is shown using information from nearby
mobile towers. Your location is updated with a
more precise position when the GPS receiver
finds your location.
❖Information

178
Applications
2Fill out the search box.

179
Applications
Receiving guides
Google Map helps you receive detailed
guides for your destination.
1On the map screen, tap t, then
tap [Directions].
2Enter a departure point in the
upper text box, and a destination in
the lower text box.

180
Applications
Google Latitude enables you to check where
a friend is on the map, and to share status
messages. Latitude also enables you to send
messages (SMS) and emails, to make phone
calls, and to find the route to where a friend
is.
Location information cannot be automatically
shared. You need to join Latitude and invite a
friend who gives his or her location
information, or to receive an invitation from
him or her.
Joining Latitude
1While a map is displayed, tap
t, and tap [Join Latitude].

181
Applications
2From the Home screen, tap

182
Applications
The FOMA terminal has a built-in calendar for
the schedule. If you have a Google account,
you can synchronize the FOMA terminal's
calendar and web calendar. See "Accounts &
sync" (P.111).

183
Applications
Displaying a calendar schedule
1From the Home screen, tap ,
then tap [Calendar].
2Tap a schedule you want to
display.

184
Applications
1From the Home screen, tap .
2Tap [Clock].
The Clock screen appears.
aAlarm display

185
Applications
Turning the alarm ON/OFF
1On the alarms list screen, tap .

186
Applications
The following applications are preinstalled in
the FOMA terminal to use the various
services on the Web.
Use Media Discovery to display lists of
videos or music tracks shared on Facebook.
You can also view a list of videos and tracks
shared by Friends on Facebook. In addition,
you can select a video or track to post or to
view comments and "

187
Applications
mora touch is an application which allows
you to access music downloading service for
Android terminal.
To use the application, from the Home
screen, tap and then tap [mora touch] to
connect the dedicated site. You can operate
after creating a new account or using your
existing account.
life.episode application is a new
entertainment which allows you to discover
the latest information for wide ranged
categories such as news, music, animation,
photos, gourmet, shopping, etc.
corresponding specified age and gender.
Use "Pocket" function, you can clip favorite
information easily and take it out any time.
To use life.episode, from the Home screen,
tap and then tap [life.episode] to
download the application. Set age and
gender to complete installation.
ToruCa is an electronic card that can be
obtained to mobile terminals. It can be
obtained from the site as store information,
coupon ticket, etc. Obtained ToruCa is saved
to the "ToruCa" application. Use the "ToruCa"
application to display, search or update.
For details on ToruCa, refer to "

188
Applications

189
International roming
With the international roaming (WORLD
WING), you can use the FOMA terminal
without changing phone number or mail
address in the service area of the overseas
network operator affiliated with DOCOMO.
You do not need to change the settings of call
and SMS.

190
International roming
To use the FOMA terminal overseas, check
the following in Japan.

191
International roming
Connectivity
When you have set search mode of "Available
networks" to "Select automatically" in
"Network operators" settings, optimized
network is automatically selected.
When you connect to the network operator
conducted in flat-rate service manually, you
can use the service with flat-rate packet
communication charges overseas up to the
specified upper limit per day. To use this
service, subscription of packet flat-rate
service is required. For details, refer to
"Mobile Phone User's Guide [International
Services]" or DOCOMO International
Services Website.
Display
In the status bar, the type of your operator's
network are displayed.
: During International roaming
/ : Connecting/Using GPRS
/ : Connecting/Using 3G (packet)

192
International roming
After returning to Japan
When you return to Japan, the FOMA terminal
is connected to FOMA network automatically.
If connection is failed, perform the following
operations.

193
International roming
Changing network mode
You can change network mode settings
according to the network mode
(communication method) adopted by the
overseas network operator.
1From the Home screen, tap t
and tap [Settings].
2Tap [Wireless & networks]

194
International roming
2Dial + (press and hold [0])

195
International roming

196
Appendix/Index
A variety of commercially available optional
devices allows you to expand the FOMA
terminal's capabilities by supporting a wide
range of purpose, including personal and
business uses.
Some accessories are only available in some
areas.
For details, please contact a sales outlet such
as docomo Shop.
For details on optional devices, see the user's
manual of each device.

197
Appendix/Index

198
Appendix/Index

199
Appendix/Index

200
Appendix/Index

201
Appendix/Index

202
Appendix/Index

203
Appendix/Index

204
Appendix/Index

205
Appendix/Index
1From the Home screen, tap ,
then tap [Update center].
2Tap t, then tap [Refresh].

206
Appendix/Index
3Follow the onscreen instructions
on the PC to install.

207
Appendix/Index
*1 It is confirmed that the FOMA terminal and all Bluetooth
devices are compliant with Bluetooth standards
designated by Bluetooth SIG, and they are
authenticated. However, procedures may differ or data
transfer may not be possible depending on the
device's characteristics or specifications.
*2 May vary by the signal status and/or whether there is
an interference between communications devices.
*3 Bluetooth standards for Bluetooth device connection
procedure according to the product's applications.
Image
pickup
device
Type Camera: CMOS sensor
In-camera: CMOS sensor
Size Camera: 1/3.2 inches
In-camera: 1/13 inch
Camera pixels Camera: Effective
pixels: Approx. 8.1 mill.
pixels
(Recorded pixels:
Approx 8.0 mill. pixels)
In-camera: Effective
pixels: Approx. 320,000
pixels (Recorded pixels:
Approx 310,000 pixels)
Digital zoom Camera: Max. 16x
(41 levels)
In-camera:

208
Appendix/Index
209
Appendix/Index
Mobile Phone GSM/GPRS/EGPRS 850/900/
1800/1900&UMTS JP/EU/US
This model FOMA SO-02D mobile phone
complies with Japanese technical regulations
and international guidelines regarding
exposure to radio waves.
This mobile phone was designed in
observance of Japanese technical
regulations regarding exposure to radio
waves *1 and limits to exposure to radio
waves recommended by a set of equivalent
international guidelines. This set of
international guidelines was set out by the
International Commission on Non-Ionizing
Radiation Protection (ICNIRP), which is in
collaboration with the World Health
Organization (WHO), and the permissible
limits include a substantial safety margin
designed to assure the safety of all persons,
regardless of age and health condition.
The technical regulations and international
guidelines set out limits for radio waves as
the Specific Absorption Rate, or SAR, which
is the value of absorbed energy in any 10
grams of tissue over a 6-minute period. The
SAR limit for mobile phones is 2.0 W/kg. The
highest SAR value for this mobile phone
when tested for use at the ear is 1.33 W/kg.
There may be slight differences between the
SAR levels for each product, but they all
satisfy the limit.
The actual SAR of this mobile phone while
operating can be well below that indicated
above. This is due to automatic changes to
the power level of the device to ensure it only
uses the minimum required to reach the
network. Therefore in general, the closer you
are to a base station, the lower the power
output of the device.
This mobile phone can be used in positions
other than against your ear. This mobile
phone satisfies the international guidelines
when used with a carrying case or a
wearable accessory approved by NTT
DOCOMO or the manufacturer *2. In case you
are not using the approved accessory,
please use a product that does not contain
any metals, and one that positions the mobile
phone at least 1.5 cm away from your body.
Specific Absorption Rate
of Mobile Phone, etc.
Specific Absorption Rate (SAR)
of Mobile Phones
Continued on next page

210
Appendix/Index
The World Health Organization has stated
that present scientific information does not
indicate that there are harmful effects
attributed to the use of mobile devices. They
recommend that if you are worried about your
exposure then you can limit your usage or
simply use a hands-free kit to keep the
mobile device away from the head and body.
Please refer to the WHO website if you would
like more detailed information.
http://www.who.int/docstore/peh-emf/
publications/facts_press/fact_english.htm
Please refer to the websites listed below if
you would like more detailed information
regarding SAR.
Ministry of Internal Affairs and
Communications Website:
http://www.tele.soumu.go.jp/e/sys/ele/
index.htm
Association of Radio Industries and
Businesses Website:
http://www.arib-emf.org/index02.html (in
Japanese only)
NTT DOCOMO, INC. Website:
http://www.nttdocomo.co.jp/english/product/
sar/
Sony Ericsson Mobile Communications
Japan, Inc. Website:
http://www.sonyericsson.co.jp/product/SAR/
*1 Technical regulations are defined by the
Ministerial Ordinance Related to Radio
Law (Article 14-2 of Radio Equipment
Regulations).
*2 Regarding the method of measuring SAR
when using mobile phones in positions
other than against the ear, international
standards (IEC62209-2) were set in March
2010. On the other hand, technical
regulation is currently being deliberated on
by national council. (As of August, 2011)
United States & Canada
THIS PHONE MODEL HAS BEEN CERTIFIED
IN COMPLIANCE WITH THE
GOVERNMENT'S REQUIREMENTS FOR
EXPOSURE TO RADIO WAVES.
The SO-02D mobile phones have been
designed to comply with applicable safety
requirements for exposure to radio waves.
Your wireless phone is a radio transmitter and
receiver. It is designed to not exceed the
limits* of exposure to radio frequency (RF)
energy set by governmental authorities.
These limits establish permitted levels of RF
energy for the general population. The
Radio Wave Exposure and
Specific Absorption Rate (SAR)
Information
Continued on next page

211
Appendix/Index
guidelines are based on standards that were
developed by international scientific
organizations through periodic and thorough
evaluation of scientific studies. The standards
include a safety margin designed to assure
the safety of all individuals, regardless of age
and health.
The radio wave exposure guidelines employ
a unit of measurement known as the Specific
Absorption Rate (SAR). Tests for SAR are
conducted using standardized methods with
the phone transmitting at its highest certified
power level in all used frequency bands.
While there may be differences between the
SAR levels of various phone models, they are
all designed to meet the relevant guidelines
for exposure to radio waves. For more
information on SAR, please refer to the safe
and efficient use chapter in the User Guide.
The highest SAR value as reported to the
authorities for this phone model when tested
for use by the ear is 0.87 W/kg*, and when
worn on the body is 0.69 W/kg* for speech
and 1.10 W/kg* for data calls. For body-worn
operation, the phone has been tested when
positioned a minimum of 15 mm from the
body without any metal parts in the vicinity of
the phone or when properly used with an
appropriate Sony Ericsson accessory and
worn on the body.
For devices which include "WiFi hotspot"
functionality, body-worn SAR measurements
for operation of the device operating in WiFi
hotspot mode were taken using a separation
distance of 10mm.
Use of third-party accessories may result in
different SAR levels than those reported.
** Before a phone model is available for sale
to the public in the US, it must be tested and
certified by the Federal Communications
Commission (FCC) that it does not exceed
the limit established by the government-
adopted requirement for safe exposure*. The
tests are performed in positions and locations
(i.e., by the ear and worn on the body) as
required by the FCC for each model. The
FCC has granted an Equipment Authorization
for this phone model with all reported SAR
levels evaluated as in compliance with the
FCC RF exposure guidelines. While there
may be differences between the SAR levels
of various phones, all mobile phones granted
an FCC equipment authorization meet the
government requirement for safe exposure.
SAR information on this phone model is on
file at the FCC and can be found under the
Display Grant section of http://www.fcc.gov/
oet/ea/fccid/ after searching on FCC ID
PY7A3880136. Additional information on SAR
can be found on the Cellular
Telecommunications & Internet Association
(CTIA) website at http://www.ctia.org/.
Continued on next page

212
Appendix/Index
* In the United States and Canada, the SAR
limit for mobile phones used by the public
is 1.6 watts/kilogram (W/kg) averaged over
one gram of tissue. The standard
incorporates a margin of safety to give
additional protection for the public and to
account for any variations in
measurements.
** This paragraph is only applicable to
authorities and customers in the United
States.
Europe
This mobile phone model SO-02D has been
designed to comply with applicable safety
requirements for exposure to radio waves.
These requirements are based on scientific
guidelines that include safety margins
designed to assure the safety of all persons,
regardless of age and health.
The radio wave exposure guidelines employ
a unit of measurement known as the Specific
Absorption Rate, or SAR. Tests for SAR are
conducted using standardized methods with
the phone transmitting at its highest certified
power level in all used frequency bands.
While there may be differences between the
SAR levels of various phone models, they are
all designed to meet the relevant guidelines
for exposure to radio waves.
For more information on SAR, please refer to
the safety chapter in the User's Guide.
SAR data information for residents in
countries that have adopted the SAR limit
recommended by the International
Commission of Non-lonizing Radiation
Protection (ICNIRP), which is 2 W/kg
averaged over ten (10) gram of tissue (for
example European Union, Japan, Brazil and
New Zealand):
The highest SAR value for this model phone
tested by Sony Ericsson for use at the ear is
1.33 W/kg (10g).
Your mobile phone is a low-power radio
transmitter and receiver.
When it is turned on, it emits low levels of
radio frequency energy (also known as radio
waves or radio frequency fields).
Governments around the world have adopted
comprehensive international safety
guidelines, developed by scientific
organizations, e.g. ICNIRP (International
Commission on Non-Ionizing Radiation
Protection) and IEEE (The Institute of
Electrical and Electronics Engineers Inc.),
through periodic and thorough evaluation of
scientific studies. These guidelines establish
Radio Frequency (RF)
Exposure and SAR
Continued on next page

213
Appendix/Index
permitted levels of radio wave exposure for
the general population. The levels include a
safety margin designed to assure the safety
of all persons, regardless of age and health,
and to account for any variations in
measurements.
Specific Absorption Rate (SAR) is the unit of
measurement for the amount of radio
frequency energy absorbed by the body
when using a mobile phone. The SAR value is
determined at the highest certified power
level in laboratory conditions, but the actual
SAR level of the mobile phone while
operating can be well below this value.
This is because the mobile phone is
designed to use the minimum power required
to reach the network.
Variations in SAR below the radio frequency
exposure guidelines do not mean that there
are variations in safety. While there may be
differences in SAR levels among mobile
phones, all Sony Ericsson mobile phone
models are designed to meet radio frequency
exposure guidelines.
Before a phone model is available for sale to
the public, it must be tested and certified to
the FCC that it does not exceed the limit
established by the government-adopted
requirement for safe exposure. The tests are
performed in positions and locations (that is,
at the ear and worn on the body) as required
by the FCC for each model. For body worn
operation, this phone has been tested and
meets FCC RF exposure guidelines when the
handset is positioned a minimum of 15 mm
from the body without any metal parts in the
vicinity of the phone or when used with the
original Sony Ericsson body worn accessory
intended for this phone. Use of other
accessories may not ensure compliance with
FCC RF exposure guidelines.
SAR information for this mobile phone model
is included with the material that comes with
this mobile phone. This information can also
be found, together with more information on
radio frequency exposure and SAR, on:
http://www.sonyericsson.co.jp/product/SAR/
(Japanese only)
Please follow these guidelines. Failure
to do so might entail a potential health
risk or product malfunction. If in doubt
as to its proper function, have the product
checked by a certified service partner before
charging or using it.
Guidelines for Safe and
Efficient Use

214
Appendix/Index

215
Appendix/Index

216
Appendix/Index

217
Appendix/Index

218
Appendix/Index

219
Appendix/Index

220
Appendix/Index

221
Appendix/Index
If this equipment does cause harmful
interference to radio or television reception,
which can be determined by turning the
equipment off and on, the user is encouraged
to try to correct the interference by one or
more of the following measures:
222
Appendix/Index
We fulfill the requirements of the R&TTE
Directive (1999/5/EC).
Software delivered with this device and its
media is owned by Sony Ericsson Mobile
Communications AB, and/or its affiliated
companies and its suppliers and licensors.
Sony Ericsson grants you a non-exclusive
limited licence to use the Software solely in
conjunction with the Device on which it is
installed or delivered. Ownership of the
Software is not sold, transferred or otherwise
conveyed.
Do not use any means to discover the source
code or any component of the Software,
reproduce and distribute the Software, or
modify the Software. You are entitled to
transfer rights and obligations to the Software
to a third party, solely together with the
Device with which you received the Software,
provided the third party agrees in writing to
be bound by the terms of this Licence.
This licence exists throughout the useful life
of this Device. It can be terminated by
transferring your rights to the Device to a third
party in writing.
Failure to comply with any of these terms and
conditions will terminate the licence
immediately.
Sony Ericsson and its third party suppliers
and licensors retain all rights, title and interest
in and to the Software. To the extent that the
Software contains material or code of a third
party, such third parties shall be beneficiaries
of these terms.
This licence is governed by the laws of
Sweden. When applicable, the foregoing
applies to statutory consumer rights.
In the event Software accompanying or
provided in conjunction with your device is
provided with additional terms and
conditions, such provisions shall also govern
your possession and usage of the Software.
End User Licence
Agreement
End User Licence Agreement
223
Appendix/Index
This product includes certain open source or
other software originating from third parties
that is subject to the GNU General Public
License (GPL), GNU Library/Lesser General
Public License (LGPL) and different and/or
additional copyright licenses, disclaimers
and notices. The exact terms of GPL, LGPL
and some other licenses, disclaimers and
notices are reproduced in the about box in
this product and are also available at http://
opensource.sonyericsson.com.
Sony Ericsson offers to provide source code
of software licensed under the GPL or LGPL
or some other open source licenses allowing
source code distribution to you on a CD-ROM
for a charge covering the cost of performing
such distribution, such as the cost of media,
shipping and handling, upon written request
to Sony Ericsson Mobile Communications AB,
Open Source Software Management, Nya
Vattentornet, SE-221 88 Lund, Sweden. This
offer is valid for a period of three (3) years
from the date of the distribution of this
product by Sony Ericsson.
This product and its accessories may be
covered and controlled by Japan's export
control regulations ("Foreign Exchange and
Foreign Trade Law" and related laws and
regulations). If you wish to export this product
and/or its accessories, you must complete
the necessary procedures at your own
responsibility and cost. For details about the
procedure, contact the Ministry of Economy,
Trade and Industry.
About the Copyright and Portrait
rights
Copyrighted contents you recorded or
obtained from sites or Internet home pages
using this product by downloading or other
means, such as documents, images, music
data, software, are prohibited from
reproduction, transformation and
transmission over public lines without
consent of the copyright holders, unless
intended for personal use or any other
purpose permitted by law.
About Open Source
Software
About Open Source Software
Export Controls and
Regulations
Intellectual Property Right
Continued on next page

224
Appendix/Index
Note that some performances, shows, and
exhibitions may not allow photography, movie
shooting, or sound recording even for
personal use.
You should also refrain from taking a picture
of other people and disclosing it by such
means as posting it on a site on the Internet
without their consent because of possible
infringement of their right of portrait.
Trademarks
The company names and product names
appearing in this manual are trademarks or
registered trademarks of their respective
holders.

225
Appendix/Index

226
Appendix/Index

227
Appendix/Index
A
About phone .................................................. 119
Access point
Initialize ........................................................ 92
Settings ........................................................ 91
Accessibility ................................................... 118
Account settings
Facebook ................................................... 113
Google ....................................................... 112
Accounts & sync ............................................ 111
Auto-sync ........................................... 111, 114
Airplane mode.................................................. 93
Alarm.............................................................. 183
Set an alarm ............................................... 184
Android Market .............................................. 169
Uninstall ............................................... 53, 111
Application button............................................ 46
Applications ............................................. 46, 109
Icon .............................................................. 47
Manage ...................................................... 110
Sort............................................................... 53
APPNAVI .......................................................... 49
Area mail ........................................................ 130
Auto-rotate ..................................................... 104
B
Backlight
Turn off ....................................................... 104
Turn on ................................................. 33, 111
Battery pack..................................................... 29
BeeTV ...............................................................49
Bluetooth.........................................................141
Device name...............................................142
Pair setting..................................................142
BOOK Store 2Dfacto ........................................49
Bookmark........................................................134
Bookmark a web page ...............................134
Edit..............................................................135
Open...........................................................135
Books, comics E

228
Appendix/Index
Display a schedule .................................... 183
Call ................................................................... 69
Decline ................................................... 71, 72
End............................................................... 70
Make ...................................................... 69, 72
Mute ............................................................. 73
On hold ........................................................ 73
Receive .................................................. 71, 72
Speaker........................................................ 73
Call Forwarding Service................................... 88
Call log ............................................................. 73
Add to contacts............................................ 74
Delete........................................................... 74
Make a call................................................... 73
Call settings ................................................... 101
Call Waiting ...................................................... 86
Caller ID Notification ........................................ 89
Camera .......................................................... 146
Face detection ........................................... 148
In-camera........................................... 148, 155
Record videos............................................ 154
Settings (Still camera) ................................ 151
Settings (Video recording) ......................... 156
Smile detection .......................................... 149
Take photos................................................ 147
Campaign Navi ................................................ 51
Character entry
Character mode ............................... 56, 59, 62
Input method.................................... 56, 59, 62
Settings ........................................................ 63
Charge ............................................................. 27
Use AC Adapter........................................... 30
Use PC ......................................................... 30
Chat................................................................ 129
Checkbox......................................................... 39
Clock...............................................................183
Connected devices (Media server) ................145
Contact Picker 2.3 ......................................56, 67
Contacts
Add a contact ...............................................75
Delete ...........................................................77
Edit................................................................76
Export .....................................................81, 82
Favorites .......................................................78
Import .....................................................81, 82
Information filter ............................................80
Link contacts ................................................77
Make a call ...................................................77
Myself ...........................................................77
Search...........................................................76
Send a contact .............................................78
Set a photo ...................................................78
D
Data synchronization ......................................114
Auto-sync....................................................114
Date & time .....................................................118
Display............................................................103
docomo market...............................................170
E
Ear speaker volume..........................................72
Early warning "Area mail"................................130
eco mode..........................................................50
Email ...............................................................122
Delete .........................................................126
Forward.......................................................125
Initial settings ..............................................122
Receive.......................................................124
229
Appendix/Index
Reply .......................................................... 125
Save attachment file................................... 125
Send........................................................... 123
Email account
Add ............................................................ 127
Change ...................................................... 126
Remove ...................................................... 127
Emergency call ................................................ 69
Evernote ........................................................... 50
F
Facebook ....................................................... 113
Delete......................................................... 114
Fixed phrase .............................................. 56, 67
FM radio ......................................................... 180
G
Gallery............................................................ 160
Play (video) ................................................ 163
Slideshow (Photo) ...................................... 163
View (Photo) ............................................... 162
Gmail.............................................................. 129
Google Map ................................................... 177
Current location.......................................... 177
Directions ................................................... 179
Google Latitude ......................................... 180
Layer .......................................................... 178
Street view.................................................. 177
Google Talk .................................................... 129
GPS Function ................................................. 175
Enable GPS function .................................. 176
Enable Wireless networks to find position
................................................................... 176
H
Home screen ....................................................40
I
i-Channel ..........................................................50
Index letter........................................................39
Ines Secret........................................................50
Initial settings....................................................33
International call ...............................................71
International roaming........................................51
International roaming service .........................189
J
Japanese keyboard..........................................54
Japanese syllabary keyboard ..........................62
K
Key....................................................................37
Key lock ............................................................33
Koe no Takuhaibin ............................................51
L
Landscape view .............................................104
Language & keyboard....................................117
life.episode .....................................................187
Light sensor ......................................................24
Link .................................................................134
LiveWareTM manager ........................................49
Location ..........................................................174
Location & security .........................................104
230
Appendix/Index
M
Map Application............................................... 51
McDonald’s ...................................................... 51
Media Discovery ............................................ 186
Media Go ....................................................... 140
Install.......................................................... 140
Playlist ........................................................ 167
Transfer data .............................................. 141
Media Remote................................................ 186
melodycall........................................................ 51
Message (SMS).............................................. 120
Add new contact........................................ 121
Delete message ......................................... 122
Delete thread ............................................. 122
Delete threads............................................ 122
Receive ...................................................... 121
Send........................................................... 120
Settings ...................................................... 121
microSD card ................................................... 26
Format ........................................................ 116
microUSB cable ............................................. 136
Missed calls ..................................................... 73
mixi......................................................... 113, 171
Mobage............................................................ 51
mopera U ......................................................... 93
mopera U Mail................................................ 128
mora touch ..................................................... 187
Move data ...................................................... 136
Music player................................................... 165
Play ............................................................ 165
Playlist ........................................................ 167
Share.......................................................... 166
Myself............................................................... 77
N
Network connection settings ............................91
Network Mode ................................................193
News & Weather ...............................................48
Notification icon ................................................35
Notification LED ................................................36
Notification panel..............................................36
Notification sound...........................................103
O
OfficeSuite ......................................................185
Own number .........................................7, 77, 119
P
PC Companion ...............................................137
Phone language .............................................117
Phonebook........................................................74
PhoneBookCopy...............................................82
PIN code.........................................................106
PlayNow..........................................................186
Privacy ............................................................115
Program list.......................................................50
Proximity sensor ...............................................24
PUK (PIN Unblocking Key).............................106
Q
QWERTY keyboard ...........................................59
R
Radio button .....................................................39
Rakuten auction................................................51
Record videos ................................................154
Remaining battery level ............................28, 119

231
Appendix/Index
Reset .............................................................. 115
Ringtone settings ........................................... 102
Ringtone volume ...................................... 72, 102
S
Schedule
Create ........................................................ 182
Display ....................................................... 183
Screen brightness.......................................... 103
Screen lock .................................................... 107
Change ...................................................... 108
Settings ...................................................... 107
SE Store ......................................................... 186
Search.............................................................. 45
Security code
Network security code ............................... 105
PIN code .................................................... 106
Setting menu .................................................... 91
Setup guide...................................................... 33
Shortcut............................................................ 41
Silent mode .................................................... 101
Software keyboard ........................................... 55
Software update............................................. 204
Sound............................................................. 101
Specific Absorption Rate (SAR)..................... 209
Specifications................................................. 206
sp-mode........................................................... 92
sp-mode mail ................................................. 120
Status bar......................................................... 34
Status icon ....................................................... 34
Stereo Headset with Microphone..... 71, 160, 180
Storage........................................................... 116
T
Take photos ....................................................147
Theme...............................................................44
Timescape ......................................................171
Filter ............................................................172
Reply to an SMS message .........................173
Settings...............................................171, 174
Tiles ............................................................172
View a tile....................................................173
ToruCa ............................................................187
Touch screen ....................................................37
Drag..............................................................38
Flick ..............................................................38
Pinch.............................................................38
Tap ................................................................38
Touch ............................................................38
Touch tone ......................................................103
TrackID............................................................168
Transfer data...................................................136
Troubleshooting ..............................................196
Turn power on/off ..............................................32
Twitter................................................51, 113, 171
Twonky Special .................................................52
U
UIM .............................................................20, 25
PIN ..............................................................106
Update center.................................................204
USB connection........................................30, 136
Mount..........................................................137
USB tethering ...................................................98
User dictionary .................................................65
Back up and restore .....................................67
My words English..........................................66
232
Appendix/Index
My words Japanese..................................... 66
V
Vibrate............................ 101, 102, 122, 183, 184
VirusScan (docomo security scan) .................. 51
Voice input & output....................................... 117
Voice Mail Service............................................ 84
Volume adjust................................................. 102
VPN ................................................................ 100
W
Wallpaper......................................................... 44
Widget.............................................................. 41
Wi-Fi ................................................................. 94
Wi-Fi tethering .................................................. 99
Wireless & networks......................................... 91
Word suggestion .............................................. 65
Words by learning ............................................ 66
WORLD CALL .................................................. 71
WORLD WING................................................ 189
Y
YouTube ......................................................... 164
Numerics
12 key keyboard .............................................. 56

Don't forget your mobile phone ... or your manners!
Remember to be courteous to others when you use your FOMA terminal.
Turn the power off when you are:

General Inquiries
<docomo Information Center>
0120-005-250 (toll free)
*Service available in: English, Portuguese, Chinese, Spanish, Korean.
*Unavailable from part of IP phones.
(Business hours: 9:00 a.m. to 8:00 p.m.)