Sony A5880001 Licensed transmitter User Manual
Sony Mobile Communications Inc Licensed transmitter
Sony >
Contents
- 1. 08 user guide part 1
- 2. 08 user guide part 2
08 user guide part 2
39
Text input
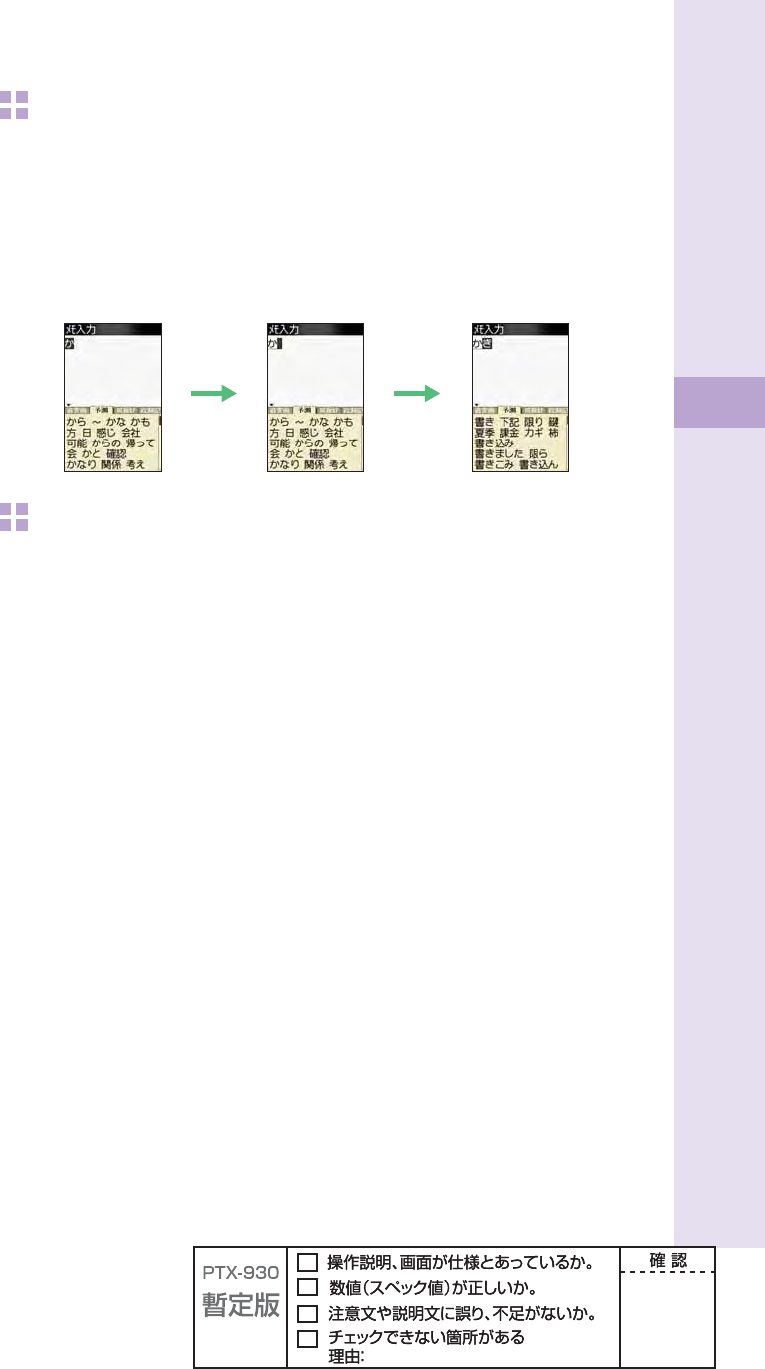
To consecutively input characters assigned to the same key
Input the fi rst character, press r and press the next character key.
After inputting the fi rst character, no operation for about four seconds automatically moves
entering position.
Example: To input "ab"
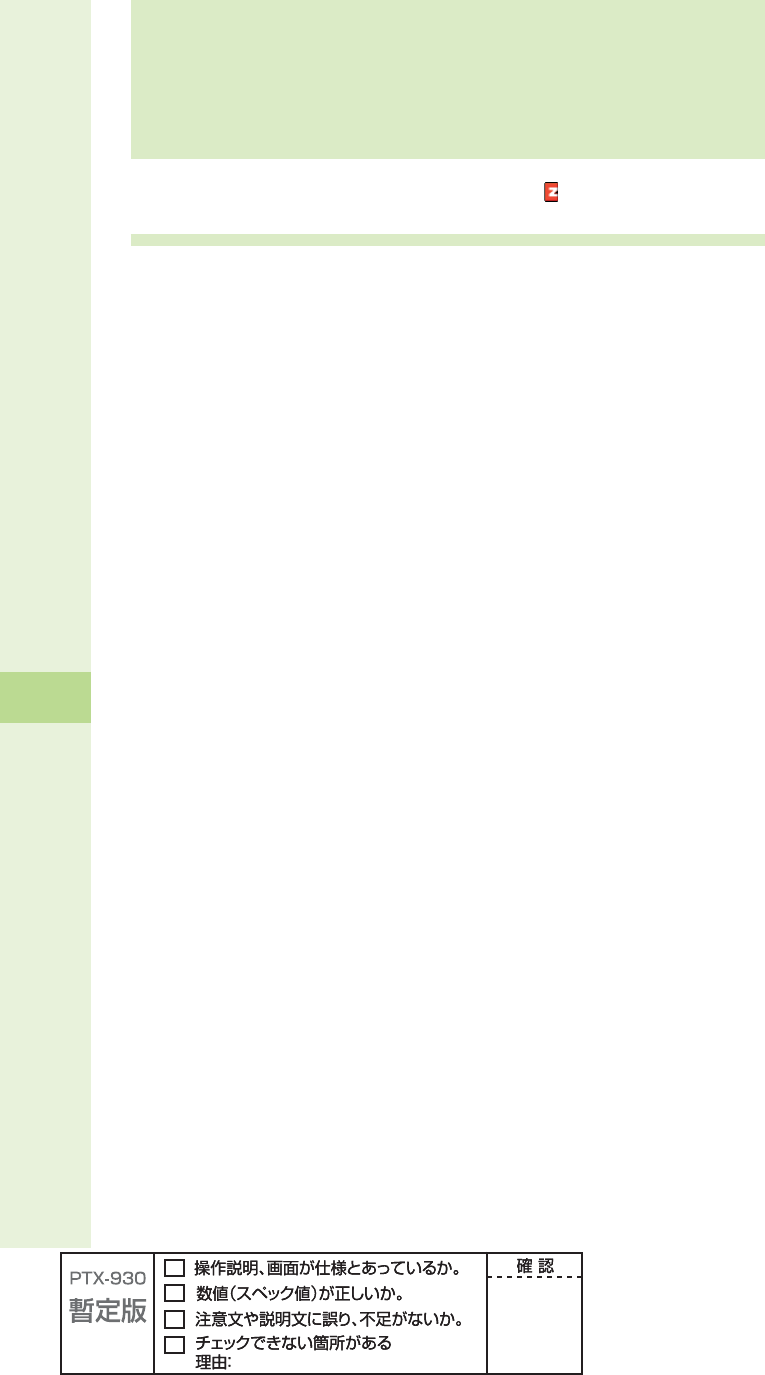
Press 2 once. Press r . Press 2 twice.
To input uppercase characters
2**
40
Text input
To input pictorial characters, symbols and emoticons
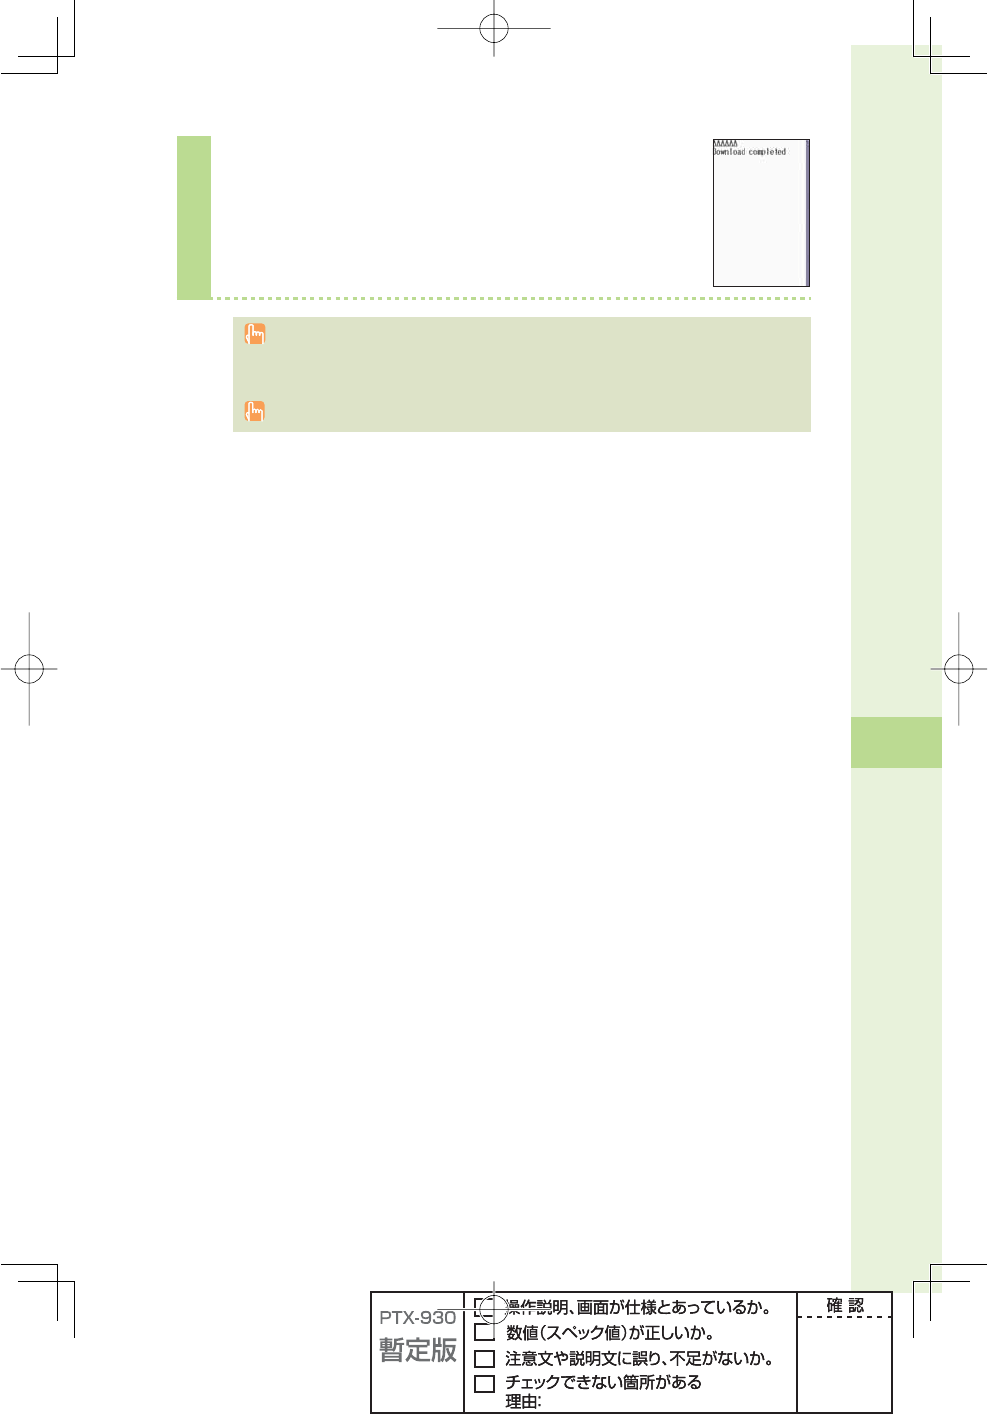
1
Press e ( /smb) in the text input screen.
Each time you press
e
( /smb), the character group changes
in following order: Pictorial characters
41
Text input
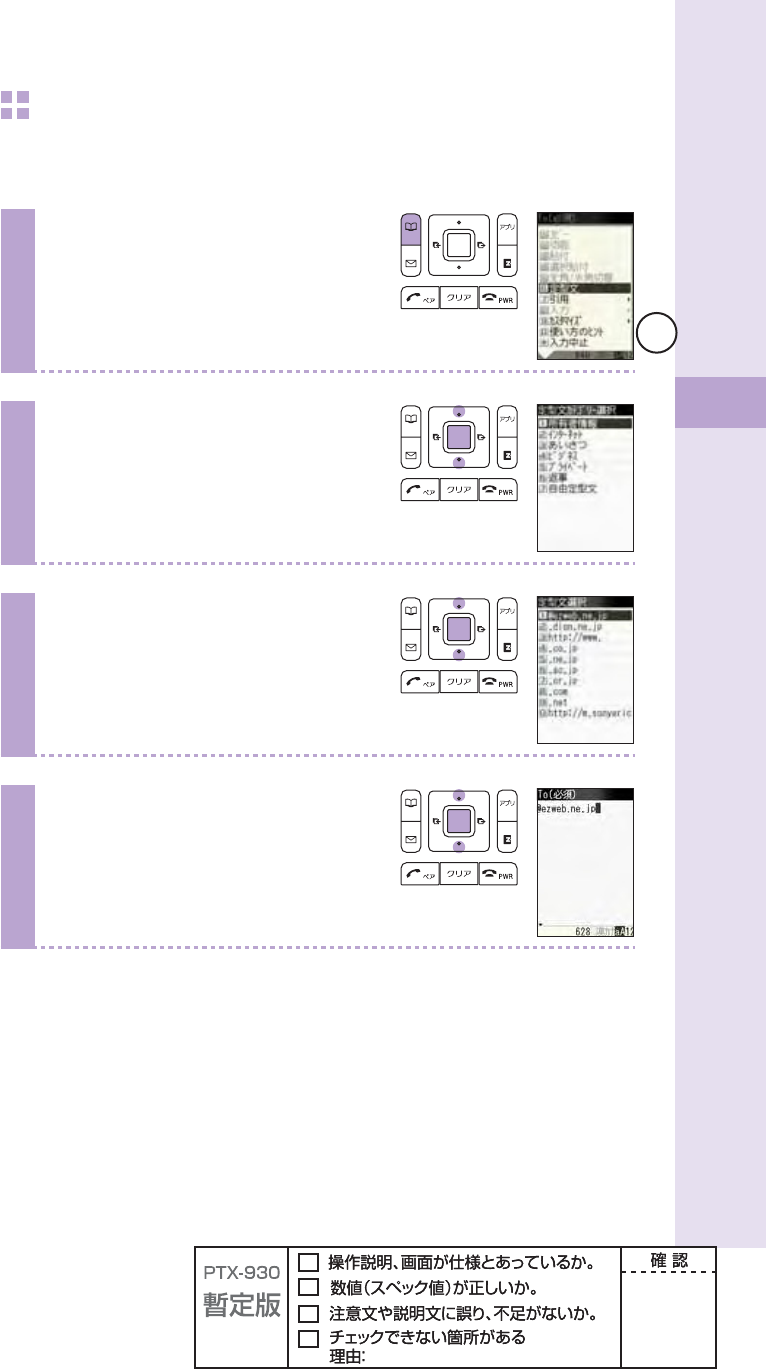
To input useful sentences
You can enter your frequently used sentences using our useful sentence list.
Example: To input "@ezweb.ne.jp" in the mail address
1
Press B (option) in the text input
screen.
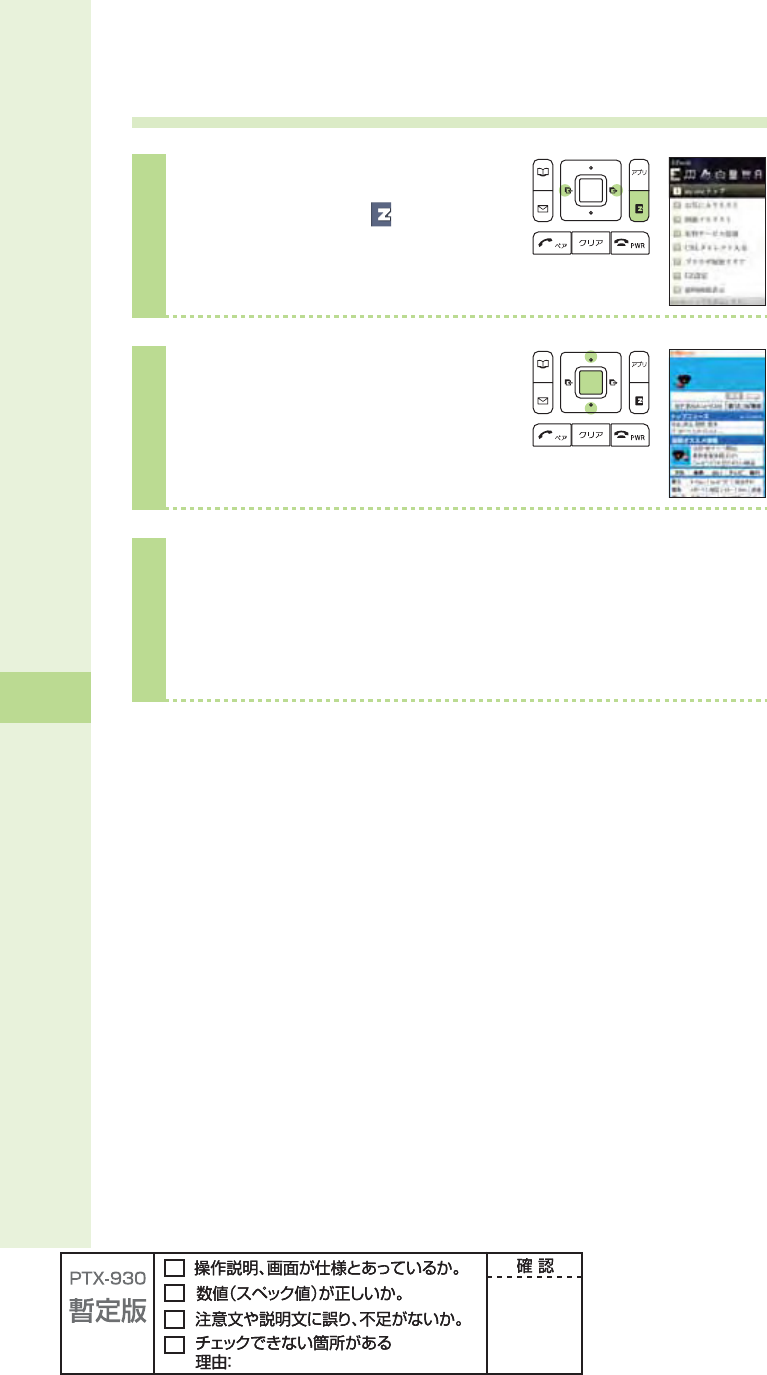
2
Press j to select "useful
sentence," and press p (select).
3
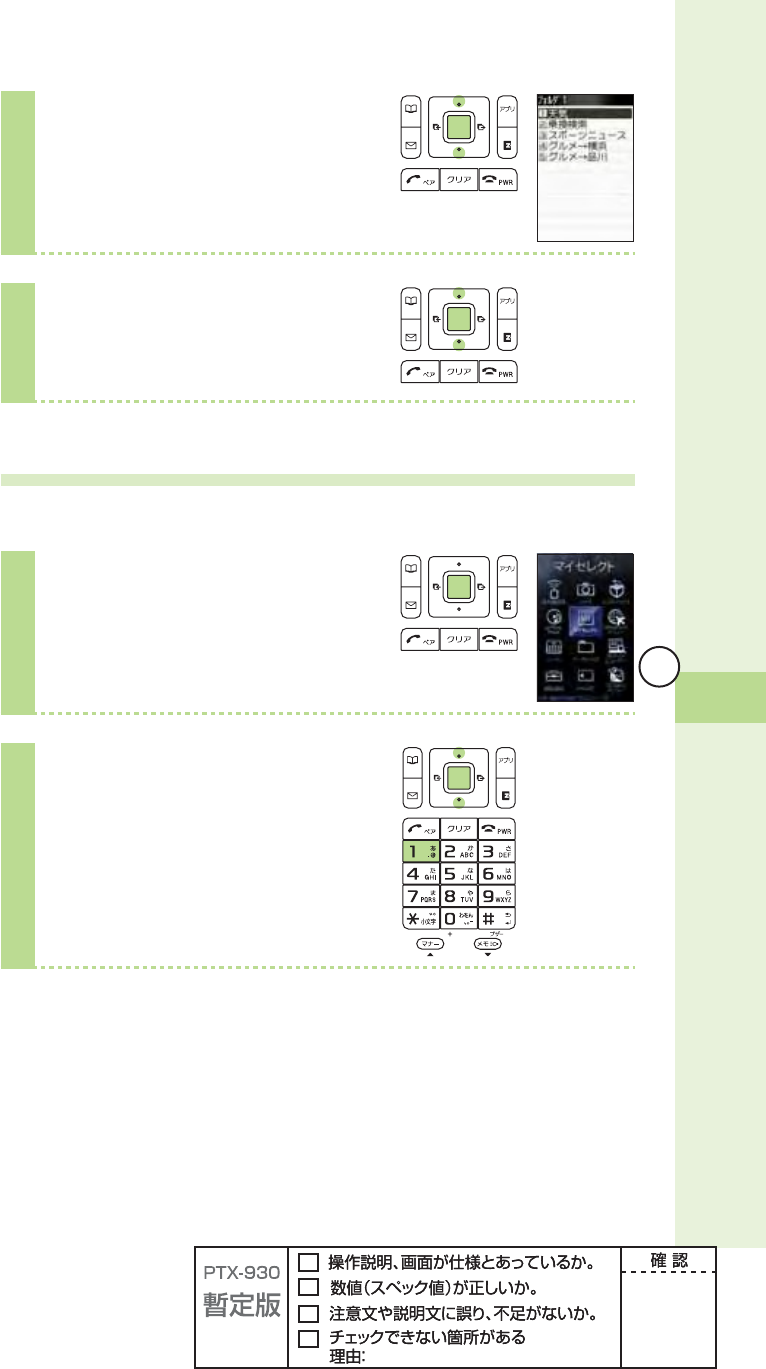
Press j to select "Internet,"
and press p (select).
4
Press j to select "@ezweb.
ne.jp," and press p (select).
42
Phone book
You can save up to 1,000 phone numbers or e-mail addresses.
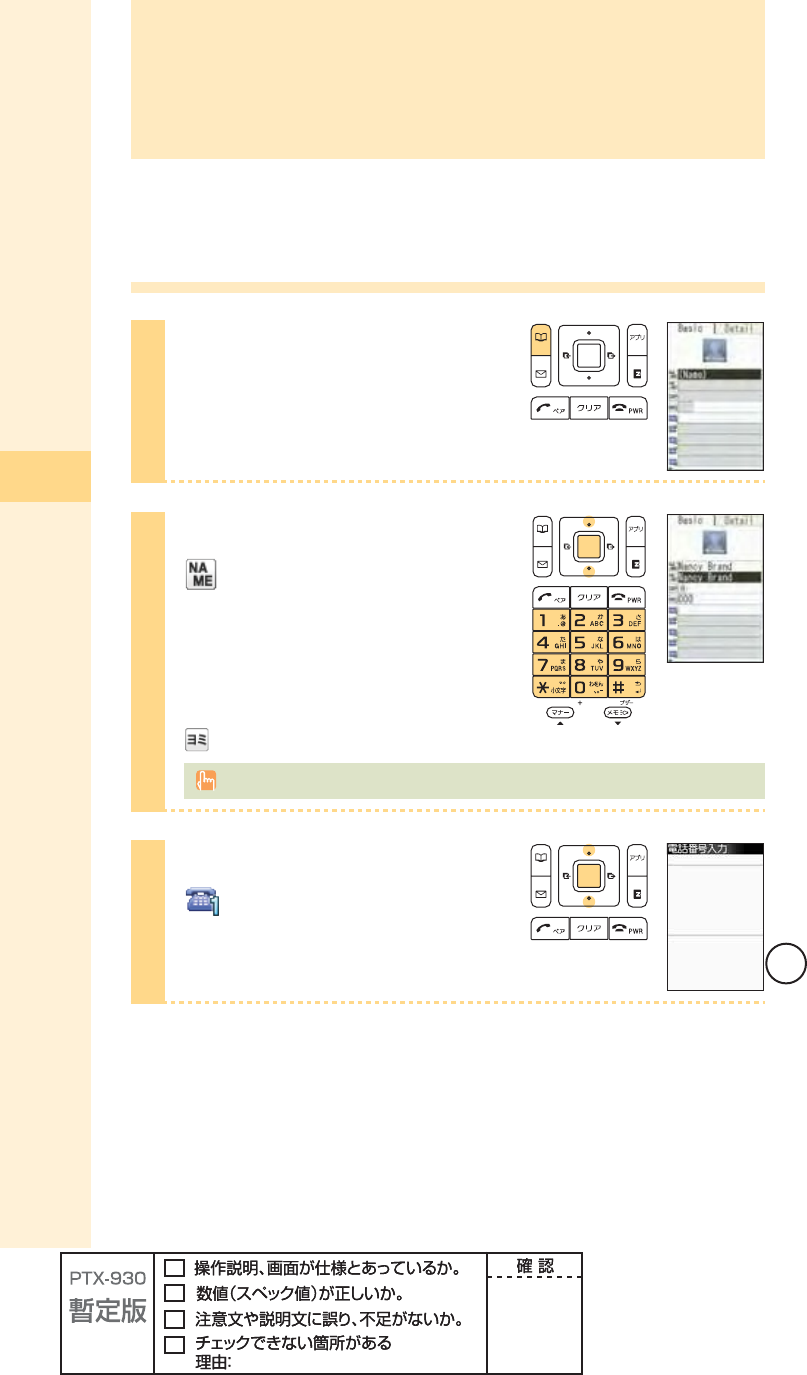
Saving to the phone book
1
Hold down B (phone book) for
at least one second in the idle
screen.
2
Press j to select
(Name), and press
p (select).
Enter the name, and press
p (ok).
(JP reading) is automatically entered.
For details on how to enter text, see page 36.
3
Press j to select
(Phone no.1), and press
p (select).
Phone book
43
Phone book
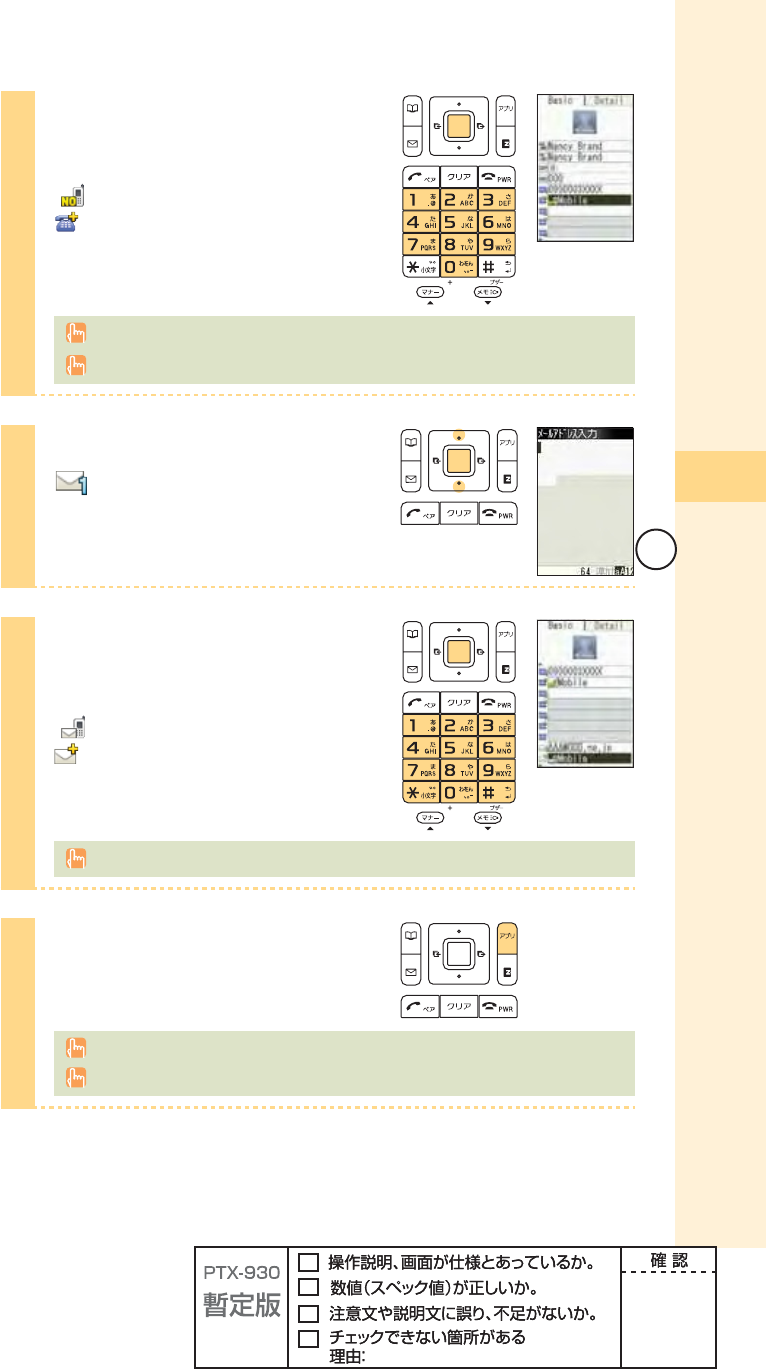
4
Enter the phone number, and
press p (ok).
" Mobile" is automatically entered to
(phone type).
When saving a regular phone number, start with the area code.
To end saving to the phone book, jump to step 7.
5
Press j to select
(Mail address1), and press
p (select).
6
Enter the e-mail address, and
press p (ok).
" Mobile" is automatically entered to
(e-mail address type).
For details on how to enter e-mail addresses, see page 37.
7
Press A (cmplt).
The entry is automatically saved to the smallest available memory number from 000 to 999.
You can also save other items such as groups, ringtones, postal addresses and birthdays.
44
Phone book
Editing the phone book
Example: To edit phone numbers
1
Press B (phone book) in the idle
screen.
To switch from the "
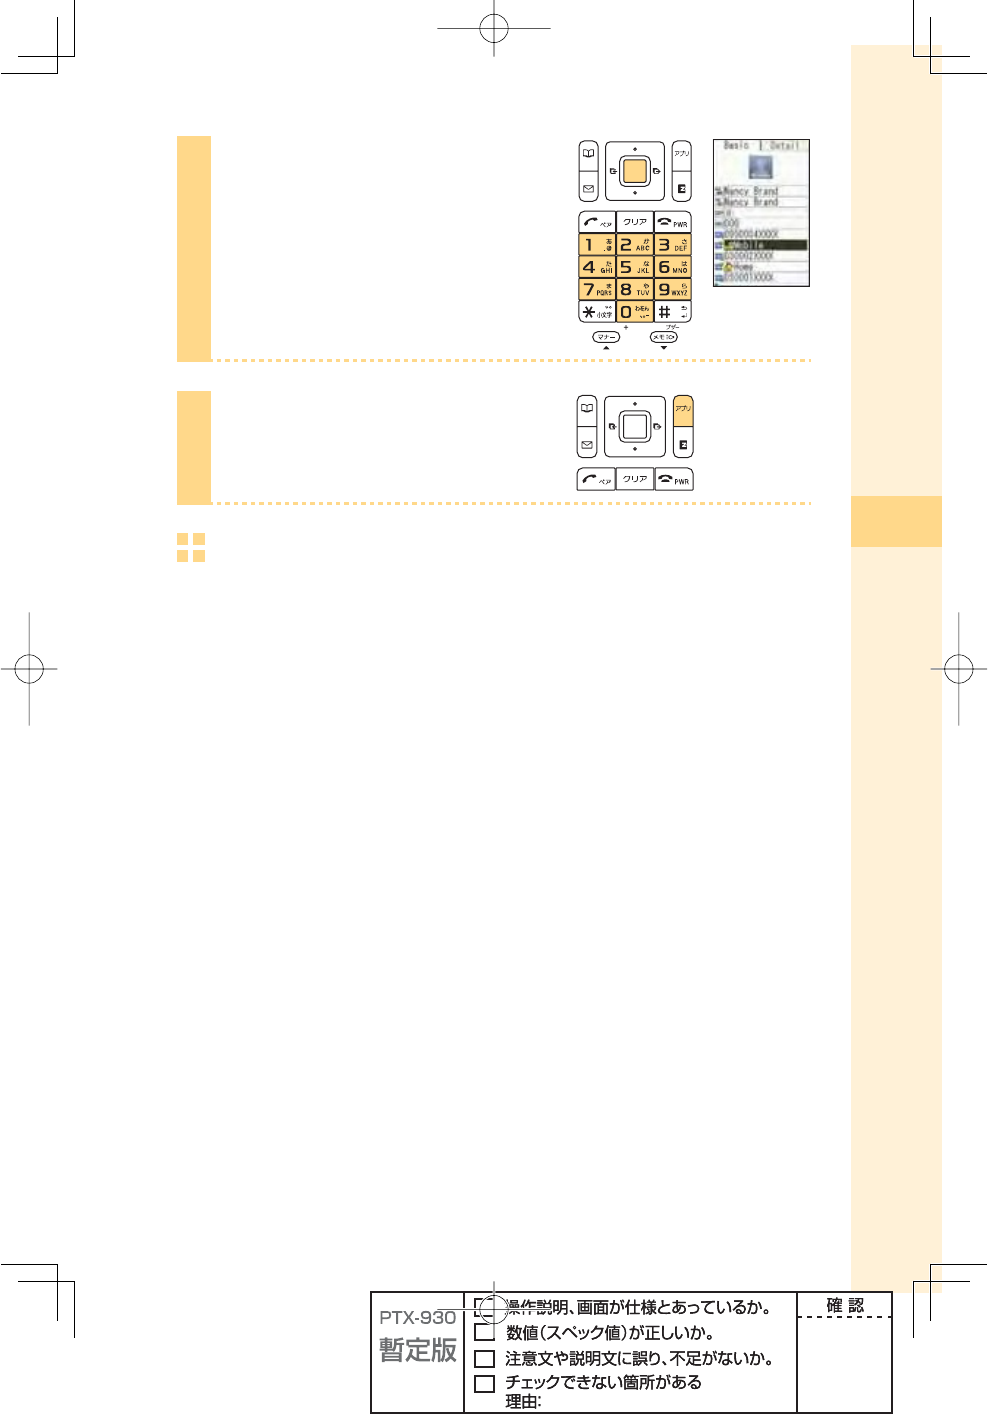
45
Phone book
5
Edit the information, and press
p (ok).
6
Press A (cmplt).
Deleting the phone book
Example: To delete one entry
ʌPress B (phone book) in the idle screen. Press o to select the entry to
delete, and press p(select).
ʍPress B (option). Press j to select "delete," and press p (select).
ʎPress j to select "Yes," and press p (select).

46
Phone book
Making a call from the phone book
1
Press B (phone book) in the idle
screen.
To switch from the "
47
Phone book
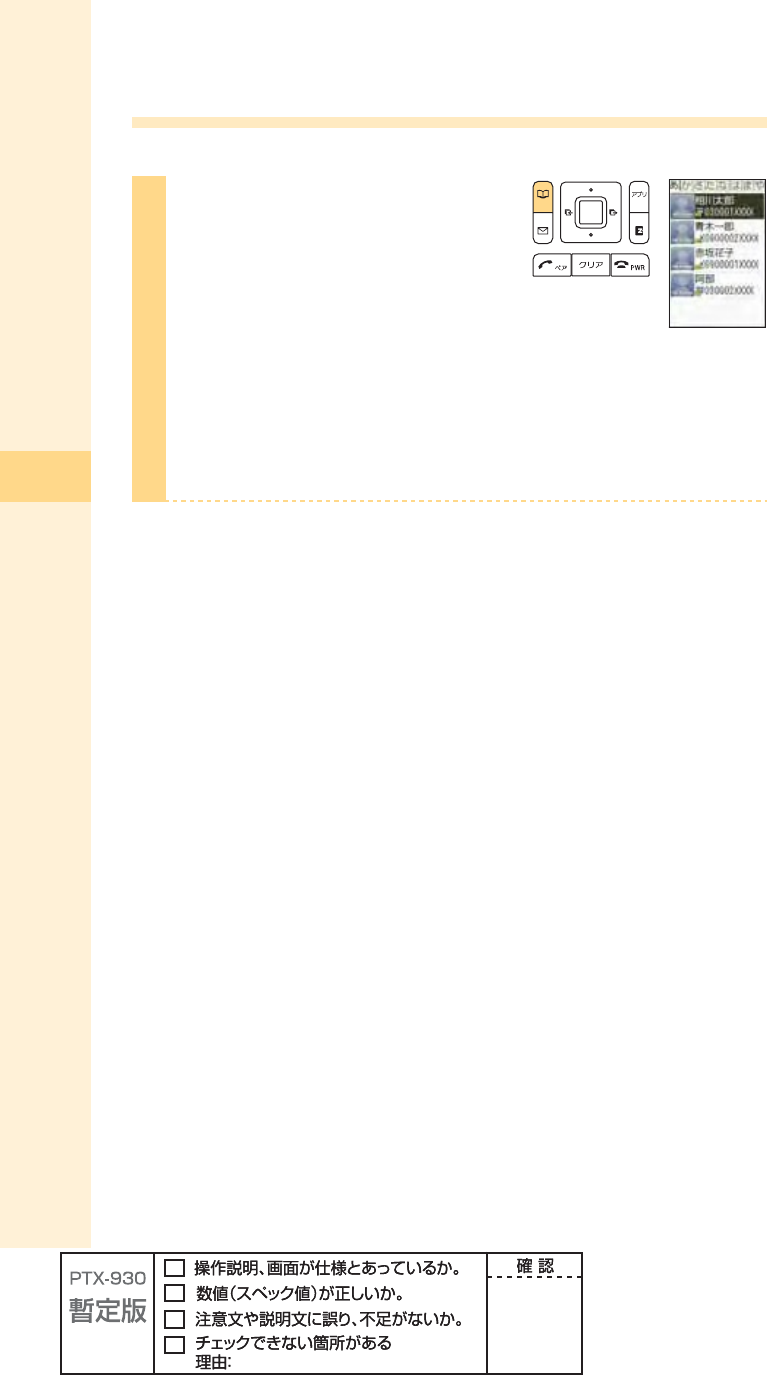
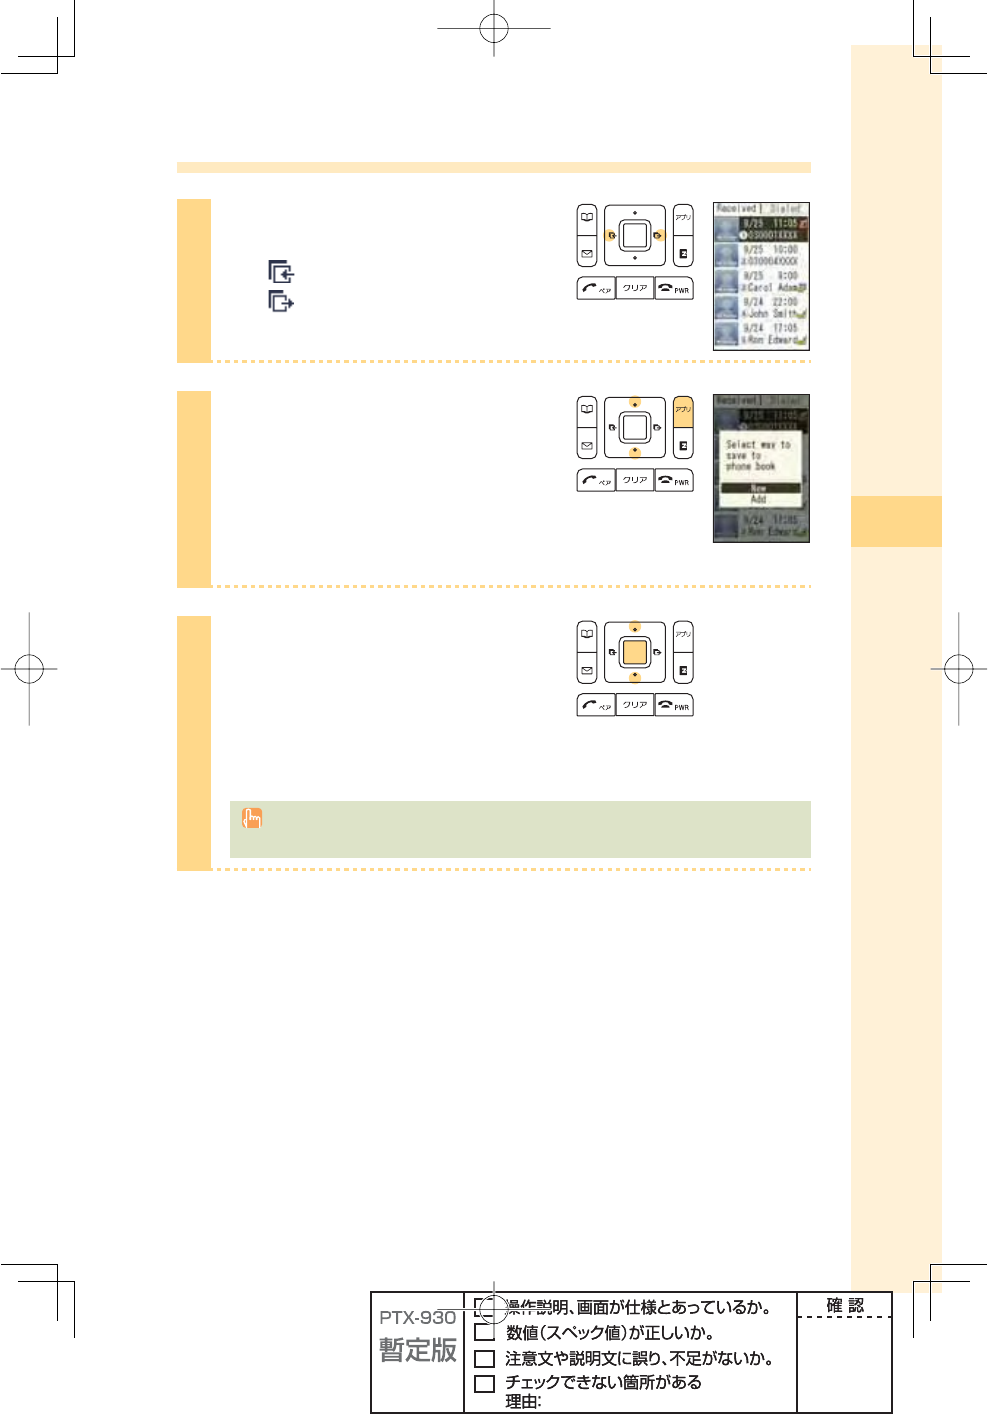
Saving from Dialed/Received calls
1
Press s in the idle screen.
l():Display Received calls.
r():Display Dialed calls.
2
Press j to select the phone
number to save in the phone book,
and press A (save).
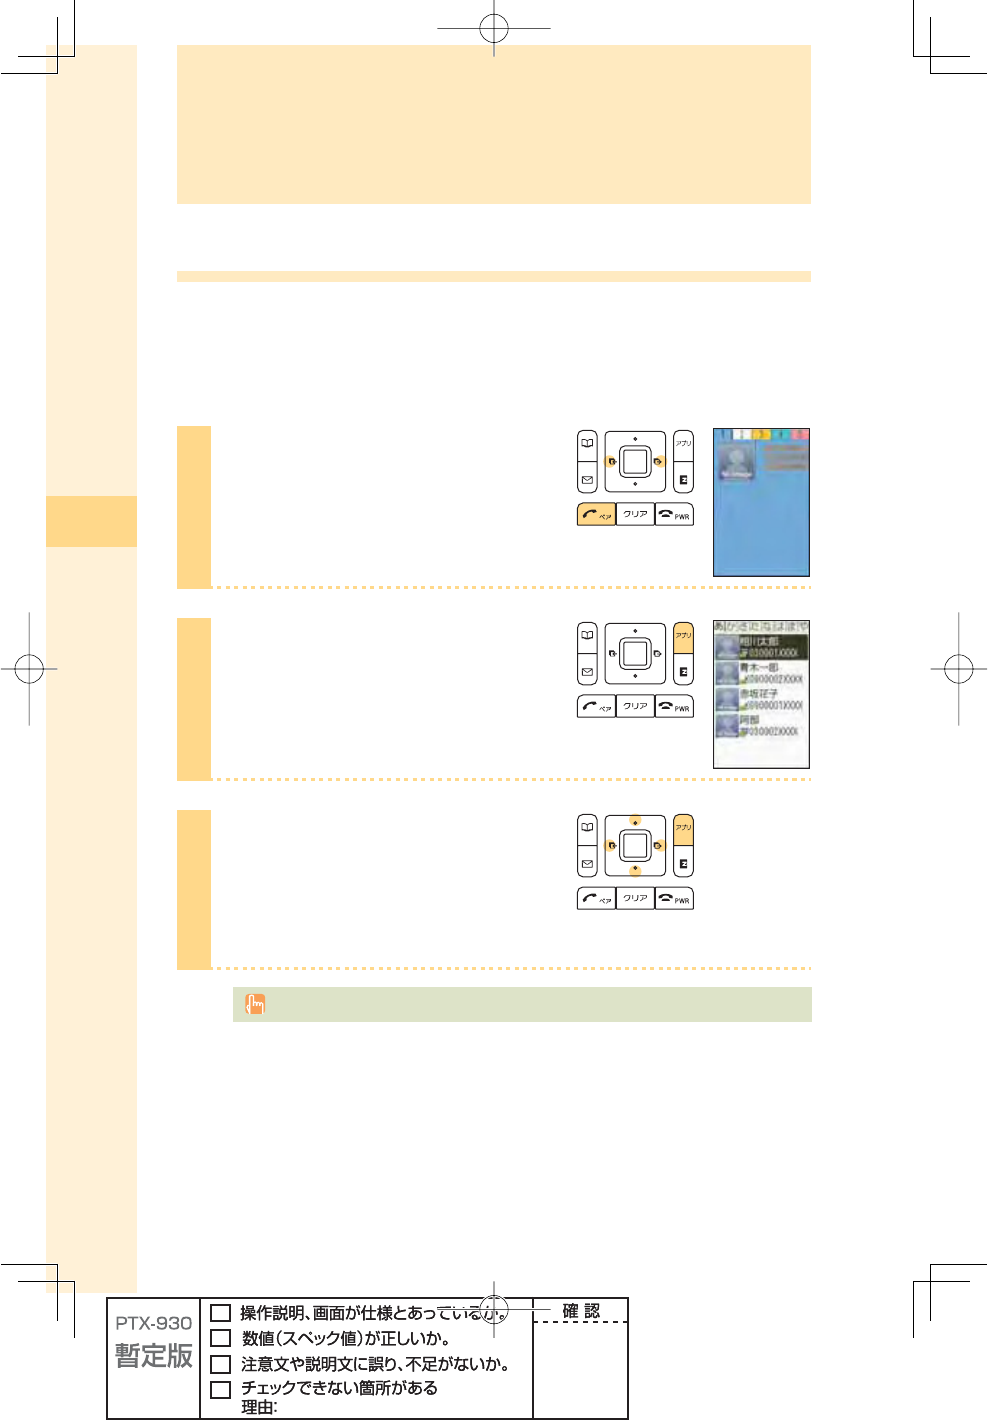
"New":Create and save a new address.
"Add" :Add and save newly added information.
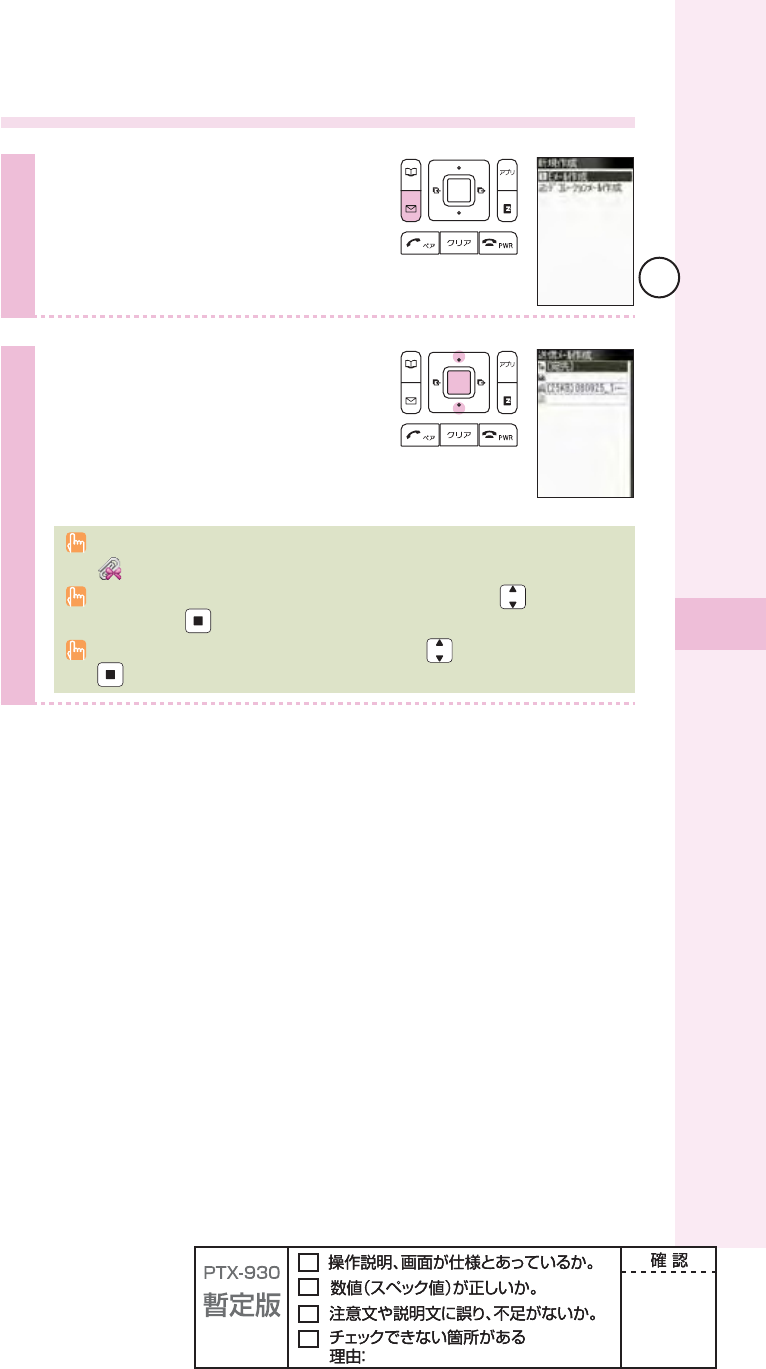
3
Press j to select "New," and
press p (select).
The phone book edit screen appears.
The phone number you selected is
automatically entered.
For details on how to save information in the phone book, see steps 2 to 7 on pages 42
and 43.
48
Pair Function
Pair Function
Saving to the Pair Function
You can save up to fi ve phone numbers (like frequently used ones) from the phone book,
and make calls or send mails with a simple operation.
You need to save Pair Partners to the phone book beforehand. For details on how to save
numbers in the phone book, see pages 42 and 43.
1
Press T in the idle screen,
press s to display the tab you
want to save a partner to.
2
Press A (set).
3
Press o to select the person to
save, and press A (save).
Name, Phone no., Mail address and image
of the person you selected are saved.
Deleting Pair Partner's data from the phone book also cancel the Pair Function for those data.
49
Pair Function
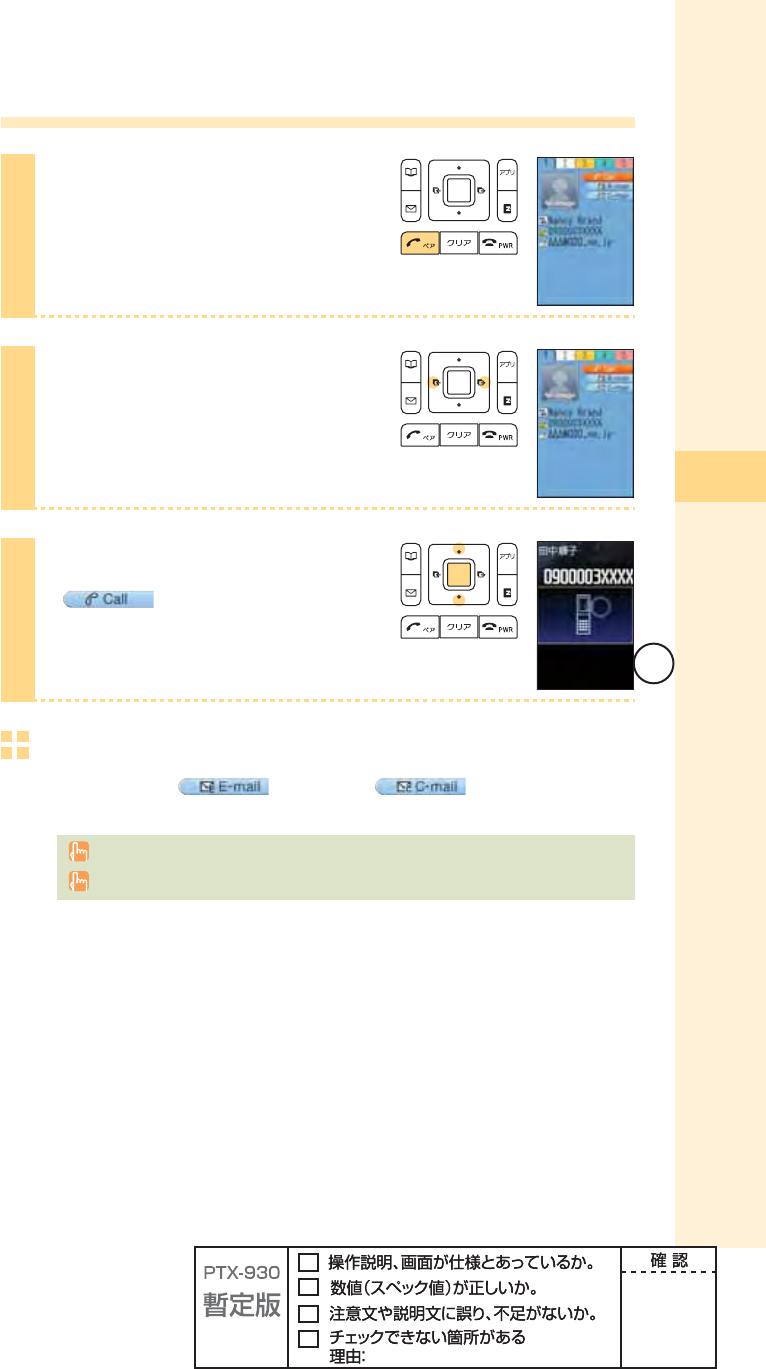
Making a call by using Pair Function
1
Press T in the idle screen.
2
Press s to select the person to
call.
3
Press j to select
(Call), and press
p (select).
To send mail
Press j to select (E-mail) or (C-mail), and press
p (select) in step 3.
For details on how to create or send e-mail, see steps 7 to 11 on pages 52 and 53.
For details on how to create or send C-mail, see steps 3 to 4 on page 61.
50
Mail
Using e-mail
EZweb subscription required
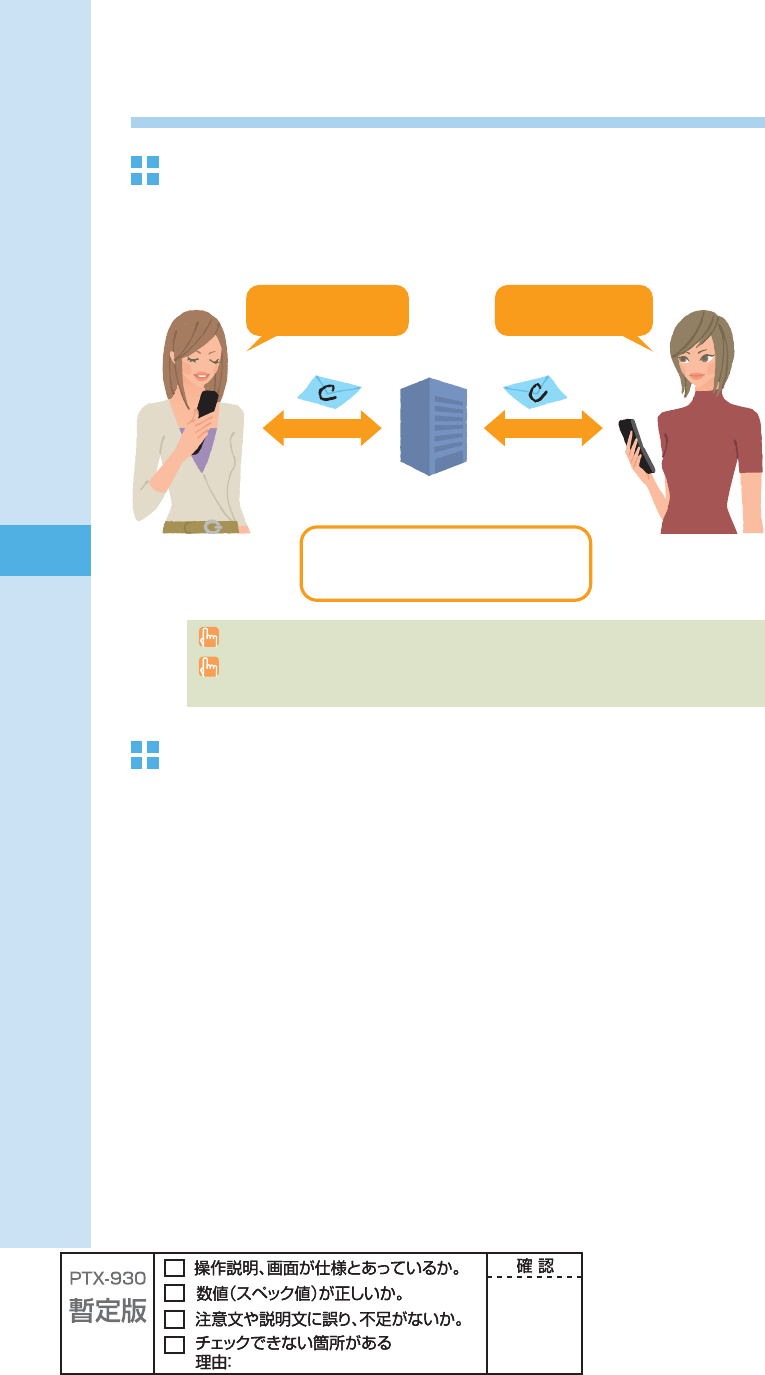
About e-mail
E-mail allows you to exchange mail with PCs or cellphones that supports e-mail. You can
send mail comprising up to 5,000 double/10,000 single byte characters, also photos and
movies.
Before using e-mail
51
Mail
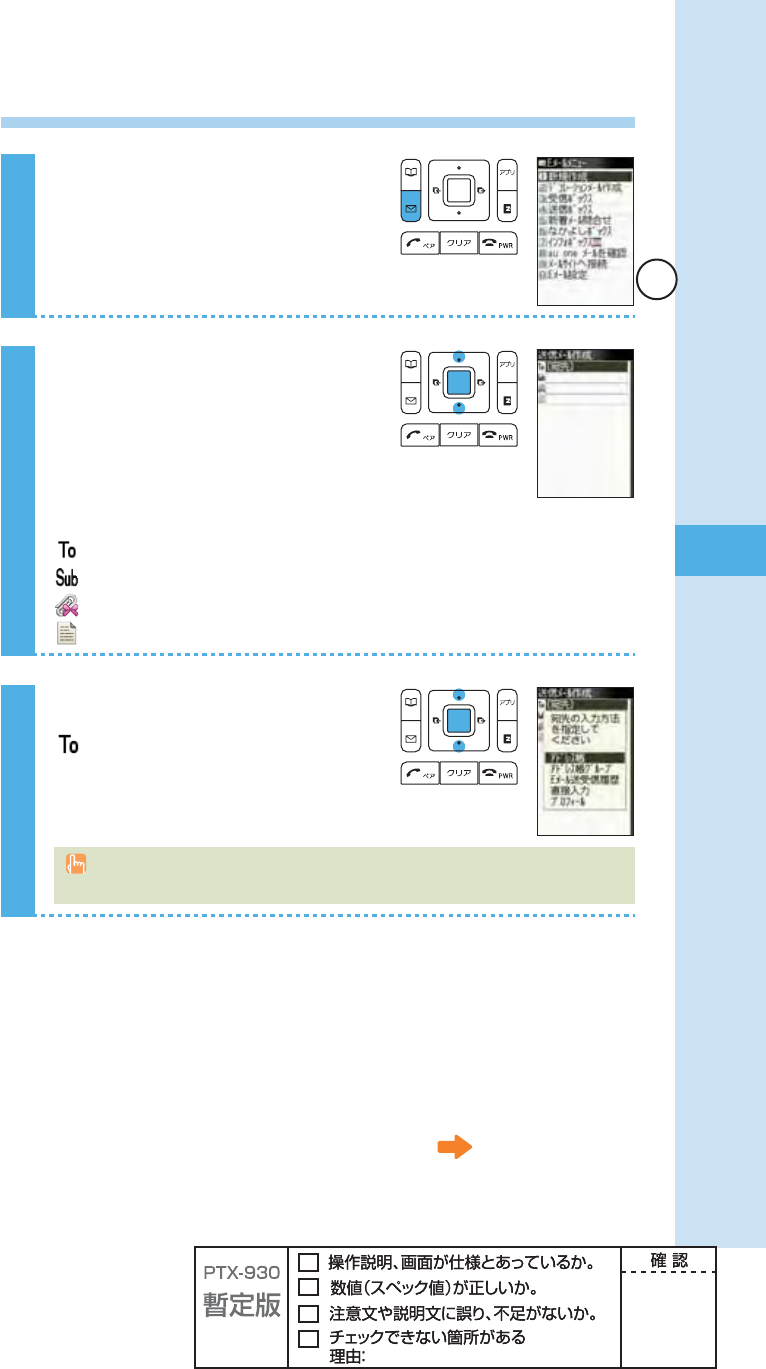
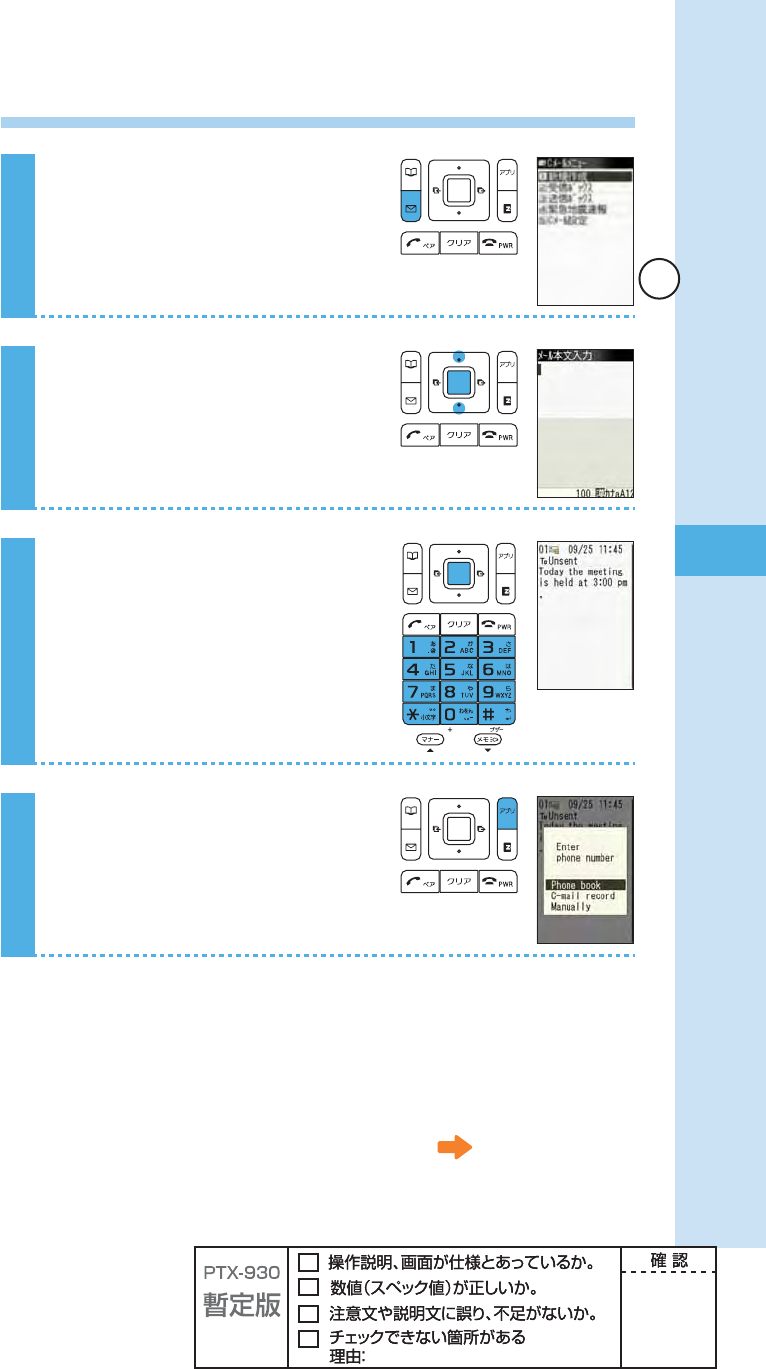
Creating and sending e-mail
1
Press q (mail) in the idle screen.
2
Press j to select "Create new,"
and press p (select).
Icons
(E-mail address): The e-mail address of the recipient
(Subject) : The subject of the e-mail
(Attached data) : The data attached to e-mail
(Text) : The main text of the e-mail
3
Press j to select
(E-mail address), and press
p (select).
There are three types of destinations: To, Cc and Bcc. You can send e-mail to several
destinations at a time.
Continued on the next page

52
Mail
4
Press j to select "Phone book,"
and press p (select).
You can also select an address from sent/received record or enter an address manually.
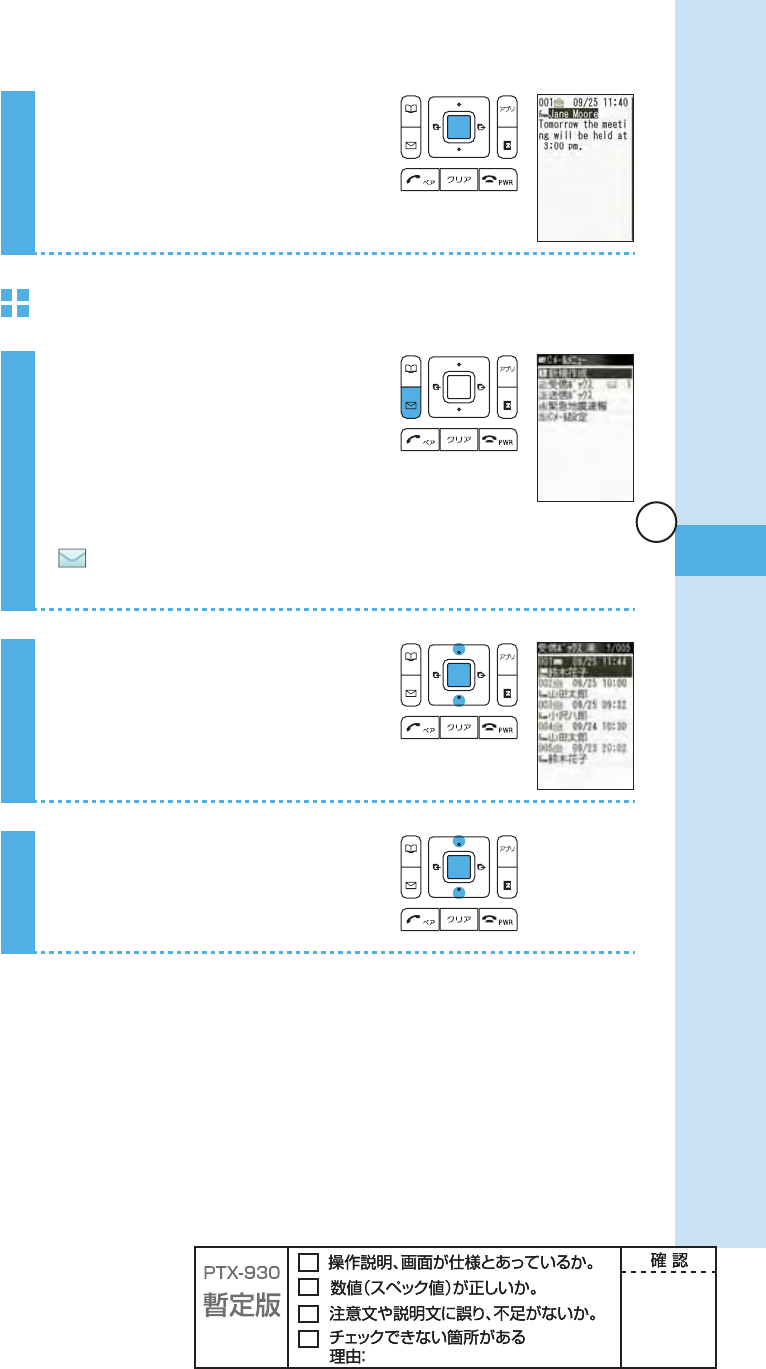
5
Press o to select a person you
want to send an e-mail to, and
press p (select).
6
Press j to select an e-mail
address, and press p (select).
7
Press j to select (Subject),
and press p (select).
8
Enter the subject, and press
p (ok).
53
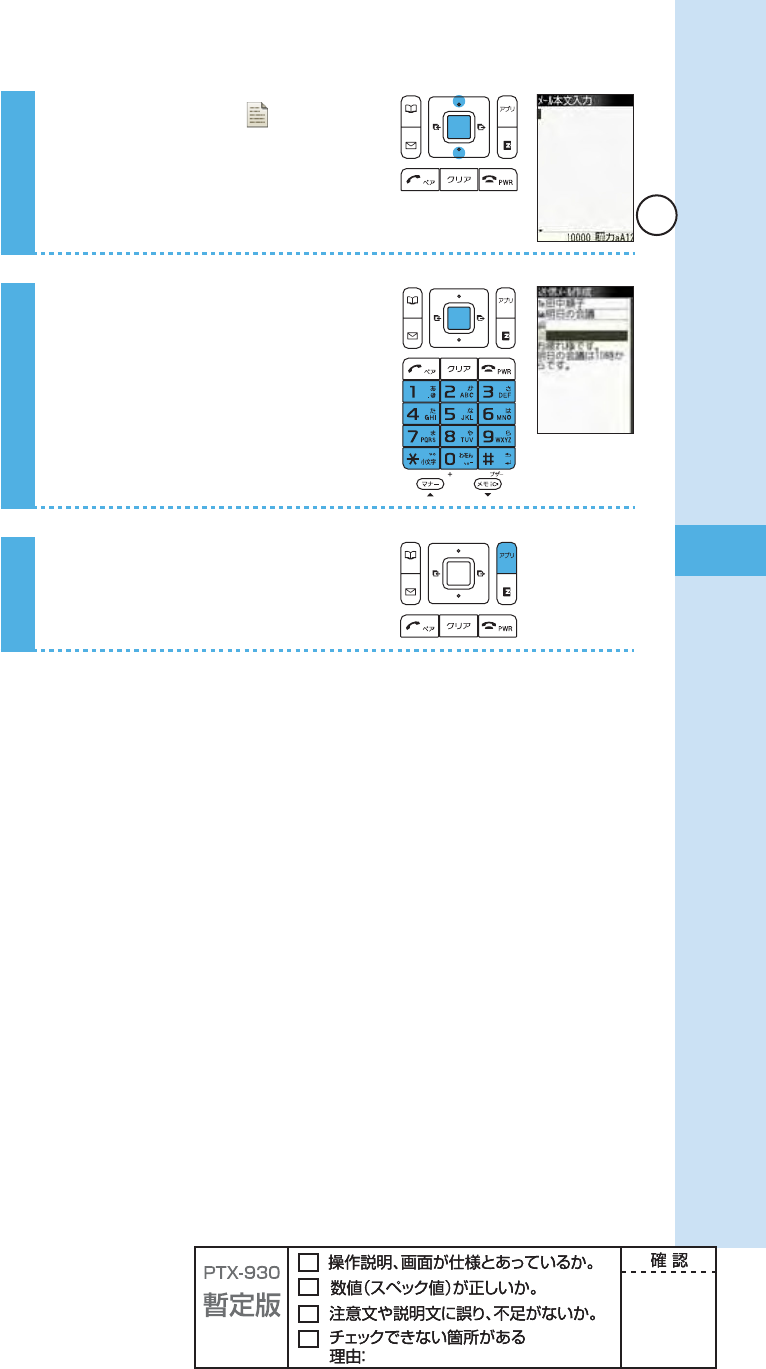
Mail
9
Press j to select (Text), and
press p (select).
10
Enter the main text, and press
p (ok).
11
Press A (send).
The e-mail is sent.
54
Mail
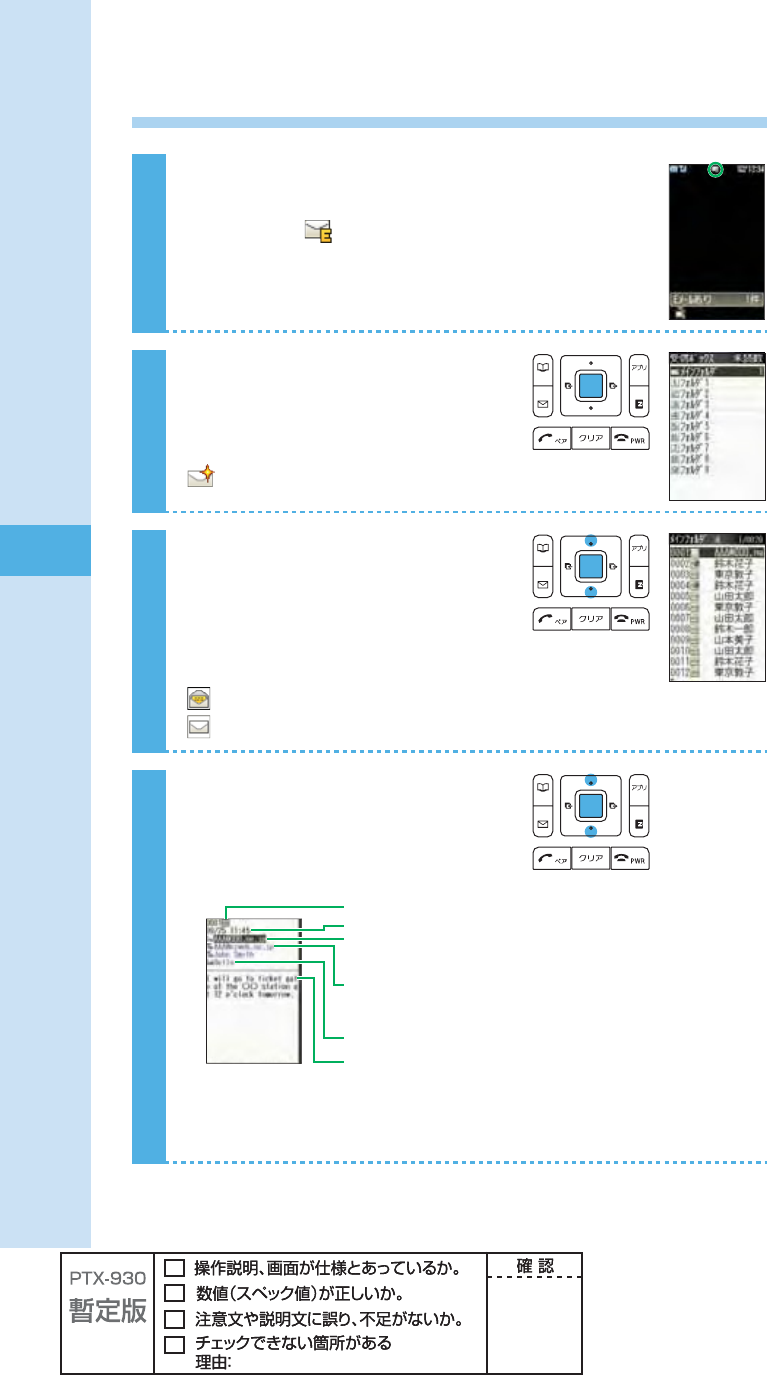
Opening a received e-mail
When you receive an e-mail
A message and appear in the idle screen.
1
Press p (select).
Icon
:The folder containing new mail
2
Press j to select the folder
containing new mail, and press
p (select).
Icons
:The "read mail" that has already been read
:The "unread mail" that has not yet been read
3
Press j to select the new mail,
and press p (viewer).
How to view received mail
55
Mail
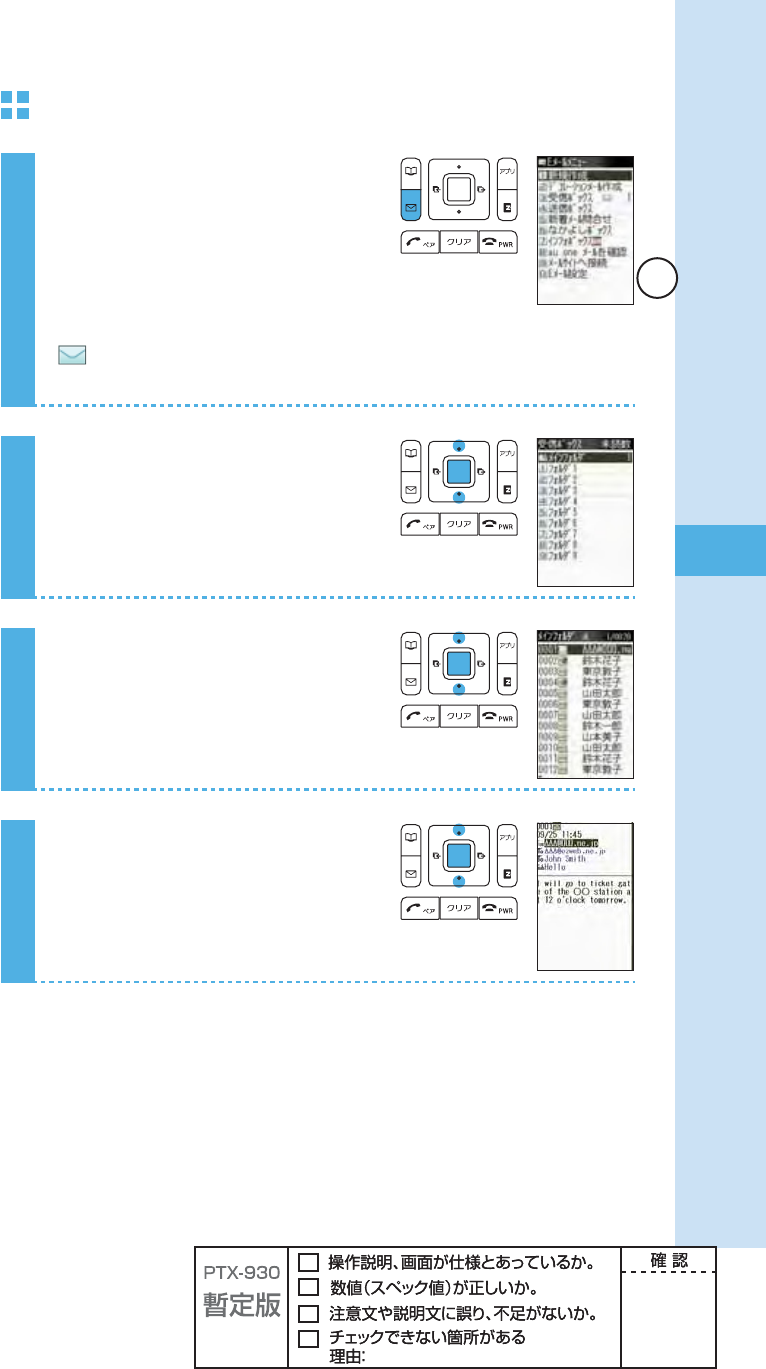
To open an e-mail in the Inbox
1
Press q (mail) in the idle screen.
Icon
: The "unread mail" that has not yet been read
The number on the right side is the number of unread mails.
2
Press j to select "Inbox," and
press p (select).
3
Press j to select the folder
containing the mail you want to
read, and press p (select).
4
Press j to select the mail you
want to read, and press
p (viewer).
56
Mail
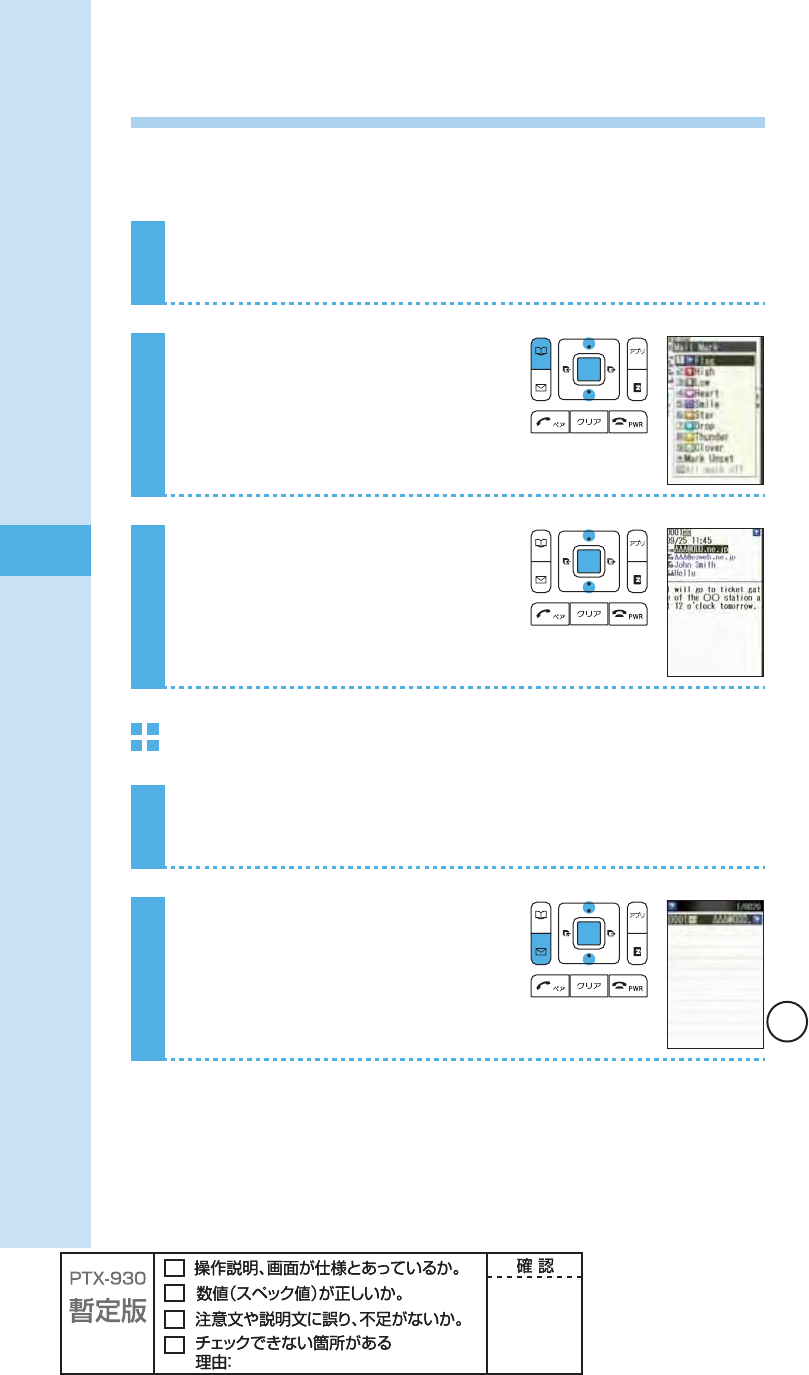
Searching e-mail
By sorting beforehand using mail marks, you can search e-mails by using the mail search
function.
1
See steps 1 to 4 in "To open an e-mail in the Inbox" (page 55)
to display the e-mail to sort.
2
Press B (option), use j to
select "mark on/off," and press
p (select).
3
Press j to select the mail mark,
and press p (select).
To use mail search function
1
See steps 1 to 2 in "To open an e-mail in the Inbox" (page 55)
to display the Inbox.
2
Press q (search), use j to
select the mail mark to search,
and press p (select).
57
Mail
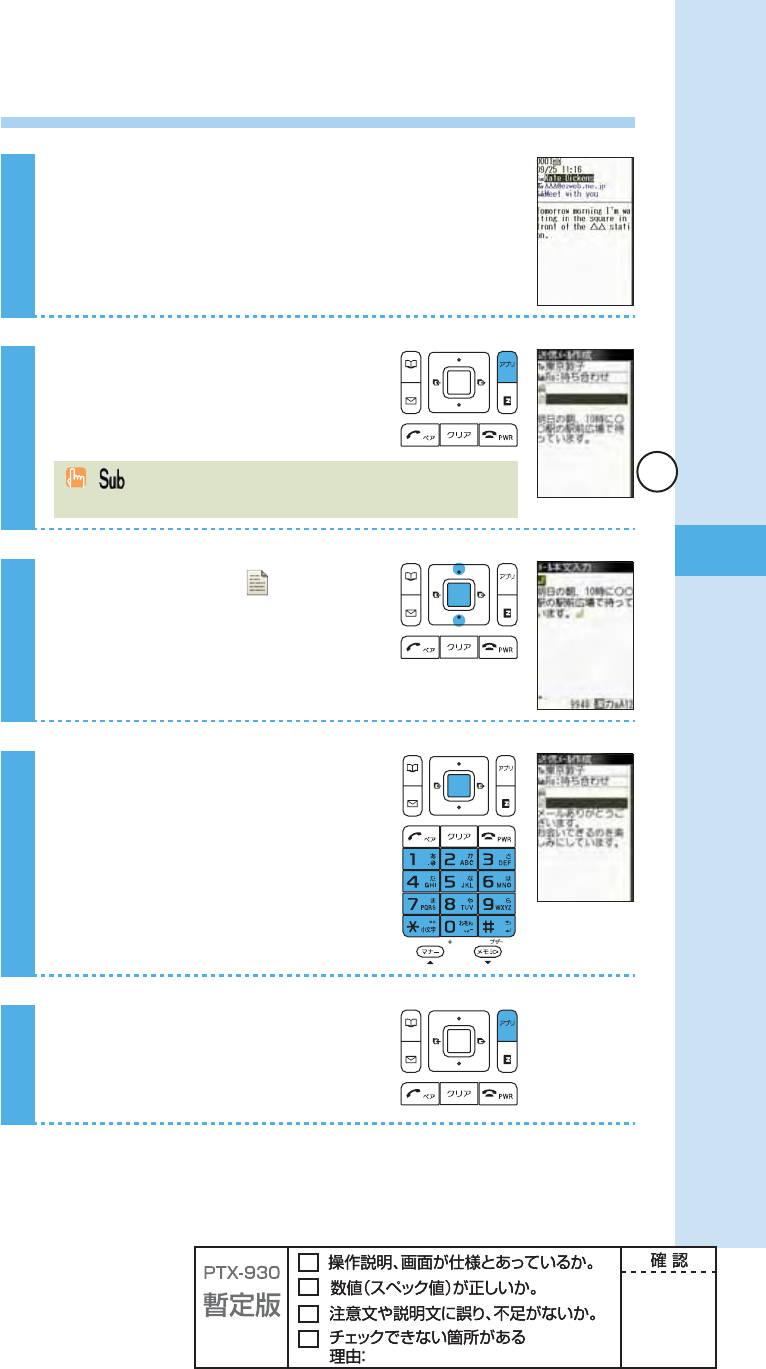
Replying to a received e-mail
1
See steps 1 to 4 in "To open an e-mail in the
Inbox" (page 55) to display the e-mail to reply.
2
Press A (reply).
(Subject) is prefi xed with "Re:," and the main text of the e-mail is
quoted.
3
Press j to select , and press
p (select).
4
Input the main text, and press
p (ok).
5
Press A (send).
The e-mail is sent.
58
Mail
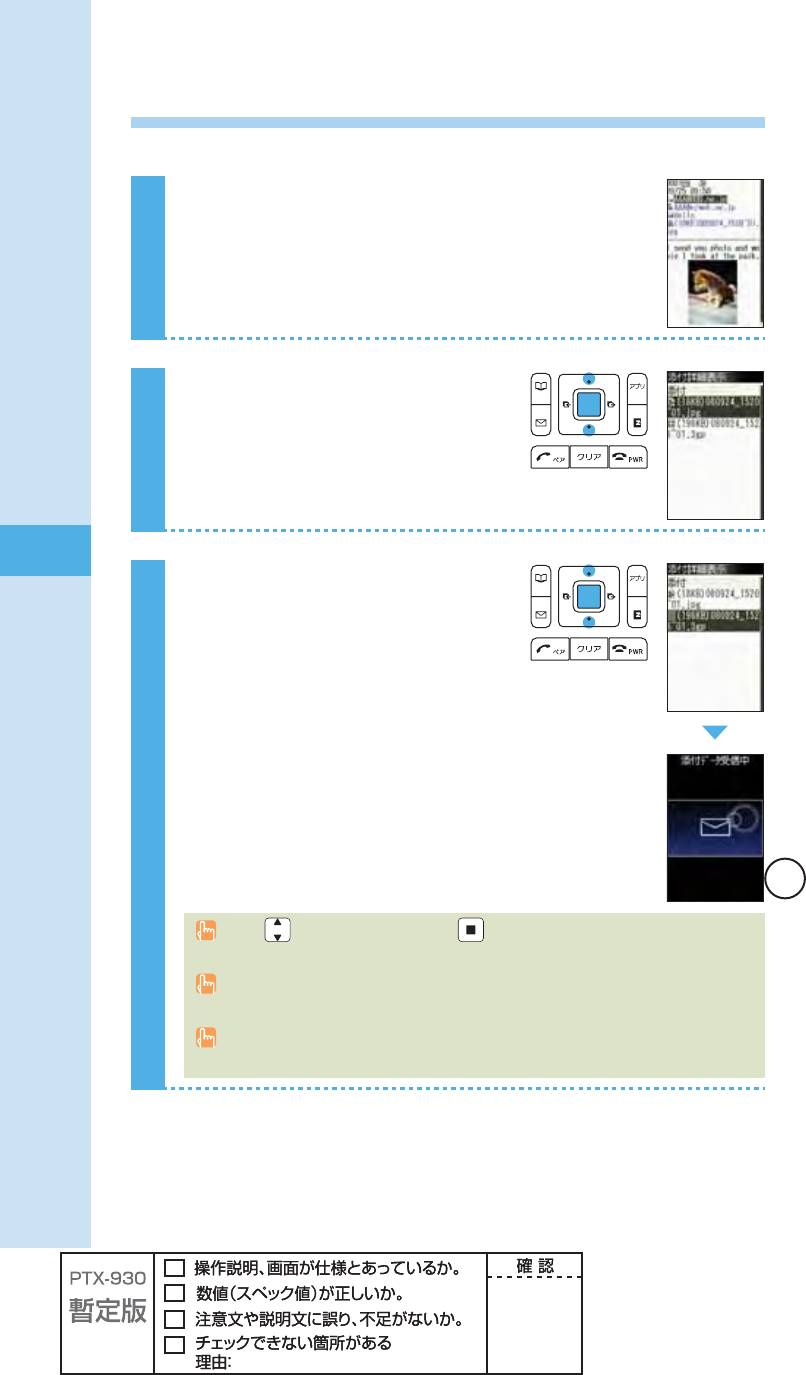
Reading e-mails with photo or movie attached
Example: To read an e-mail with photo and movie attached
1
See steps 1 to 3 in "Opening a received e-mail"
(page 54) to view a mail.
The photo is displayed.
2
Press j to select Attached data
fi eld, and press p (select).
The Attachment list screen appears.
3
Press j to select a fi le name,
and press p (recv).
The movie is received. Press p (play) to
view the movie.
Press to select a photo, and press (view) to display the entire photo on the
screen.
Some attached data do not appear automatically depending on their size. If they do not
appear, go to step 3.
It may take a short while to send/receive mails depending on the data attached to them or
the reception strength of the place you are in.
59
Mail
Filtering spam
We recommend that you set our mail fi lter function to block spam.
Using Supportive setting, you can set mail fi lter function with simple operations answering
onscreen questions.
Setting the mail fi lter
Example: To access the Supportive setting
ʌ Press q (mail) in the idle screen. Press j to select
"Settings"
60
Mail
Using C-mail
About C-mail
C-mail allows you to exchange mail among other au cellphones that supports C-mail using
cellphone numbers. You can send C-mail comprising up to 50 double/100 single byte
characters.
C-mail transmission fee is charged when sending C-mail.
In overseas, EZ non-subscriber (including who once subscribed but cancelled EZ service)
can not send C-mail.
C-mail Safety Block
C-mail Safety Block allows you to reject C-mails that include URL (http://
61
Mail
Creating and sending C-mail
1
Hold down q (mail) for at least
one second in the idle screen.
2
Press j to select "Create new,"
and press p (select).
3
Enter the main text, and press
p (ok).
4
Press A (send).
Continued on the next page

62
Mail
5
Press j to select "Phone book,"
and press p (select).
You can also select a phone number from sent/received messages or enter a phone
number manually.
6
Press o to select a person you
want to send a C-mail to, and
press p (select).
7
Press j to select a phone
number, and press p (select).
8
Press p (select).
The C-mail is sent.
Opening a received C-mail
When you receive a C-mail
A message and appear in the idle screen.
63
Mail
1
Press p (select).
To open a C-mail in the Inbox
1
Hold down q (mail) for at least
one second in the idle screen.
Icon
: The "unread mail" that has not yet been read
The number on the right side is the number of unread mails.
2
Press j to select "Inbox," and
press p (select).
3
Press j to select the C-mail you
want to read, and press
p (viewer).
64
Camera
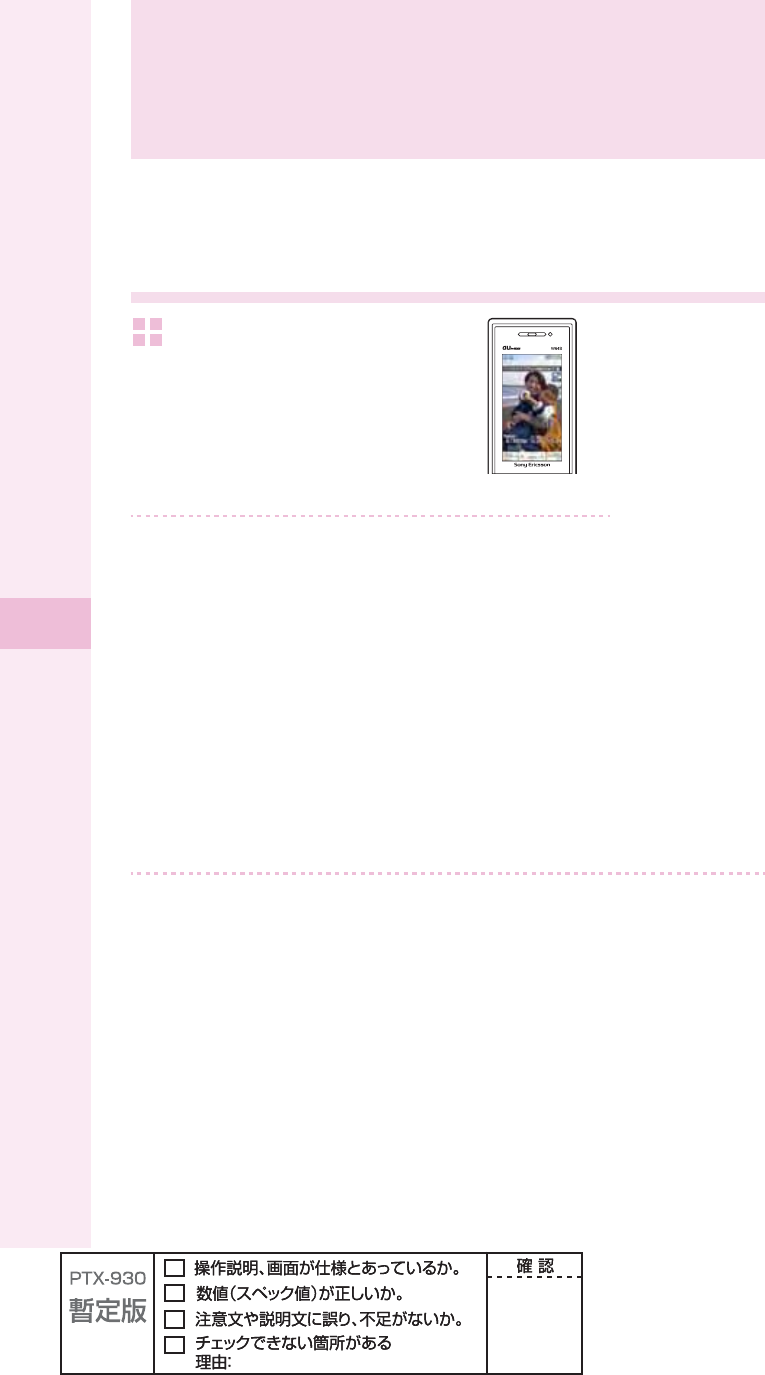
The W64S has a 3.2 Megapixel camera and allows you to take photos and record movies.
What you can do with the camera
You can use images on the
W64S.
You can set photos you took as the image
for the idle screen, set them to display when
you have an incoming call, or save photos or
movies to the phone book.
65
Camera
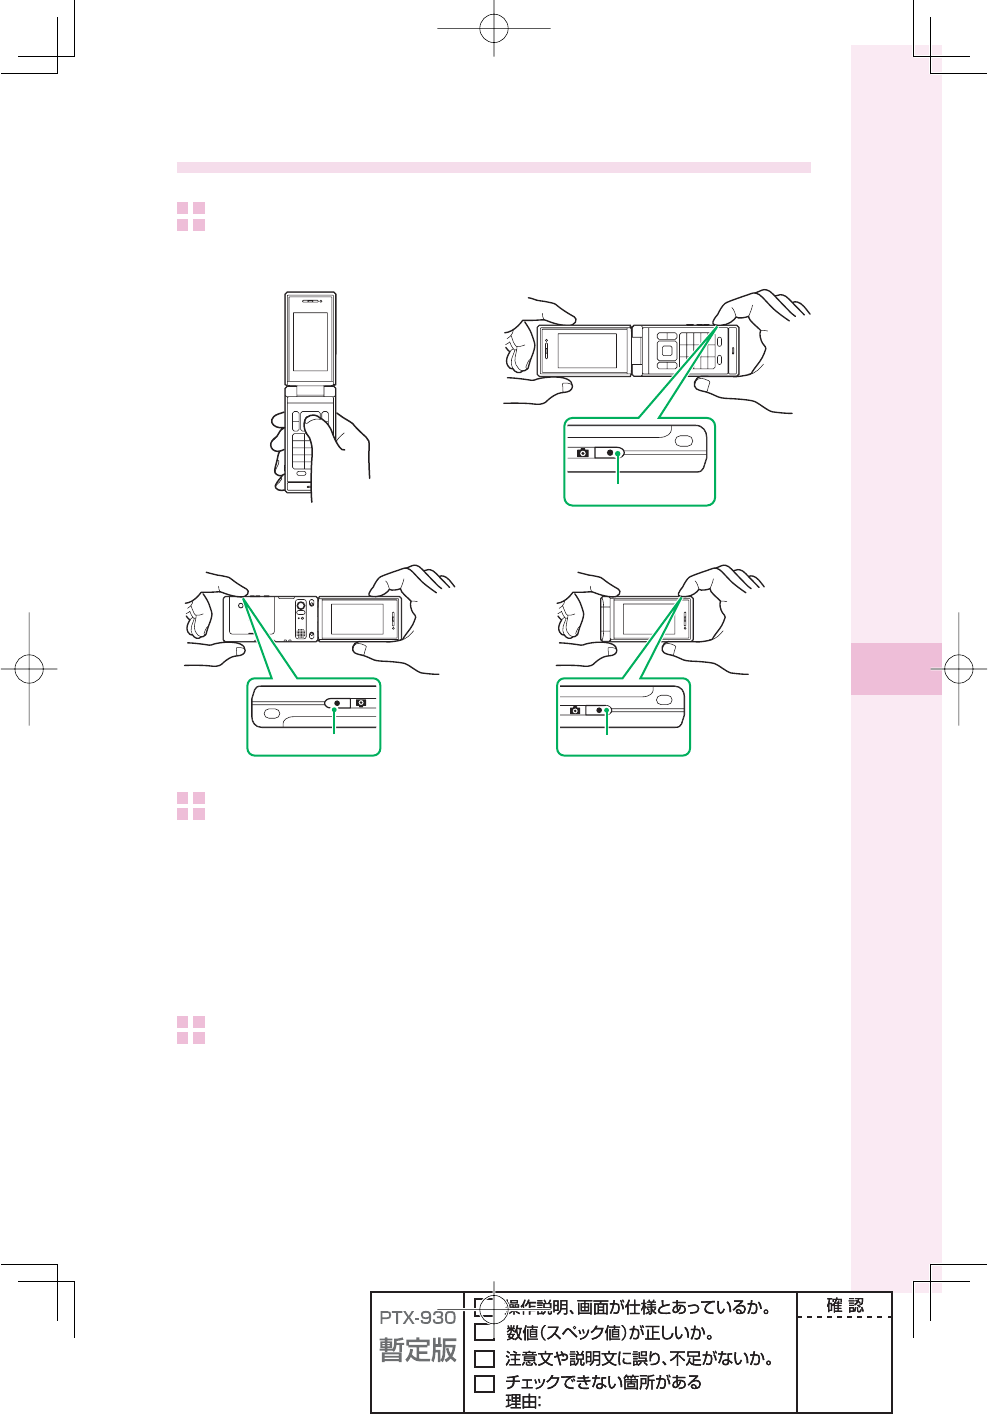
Successful taking of photos
How to hold the W64S
To take "Photo (Wallpaper)" photos To take "Photo (Digital Camera)" photos
To take in Recording oneself style To take in TV style
How to set the W64S
ʌ Hold your bent arm tight against your body.
ʍ Hold the main unit not to shake it.
If your armpits are open or your arms are stretched, the main unit may move and it may
cause a blur.
ʎ Be sure not to cover the lens with your fi ngers.
Smeared lens (with fi ngerprint, etc.) can blur your images.
To stabilize the shot
ʌ Do not move the main unit.
Do not move the main unit after you press the shutter until the shutter sound stops.
Be careful especially when you shoot in the dark.
ʍ Use self-timer.
You can prevent a blur caused by pressing the shutter.
66
Camera
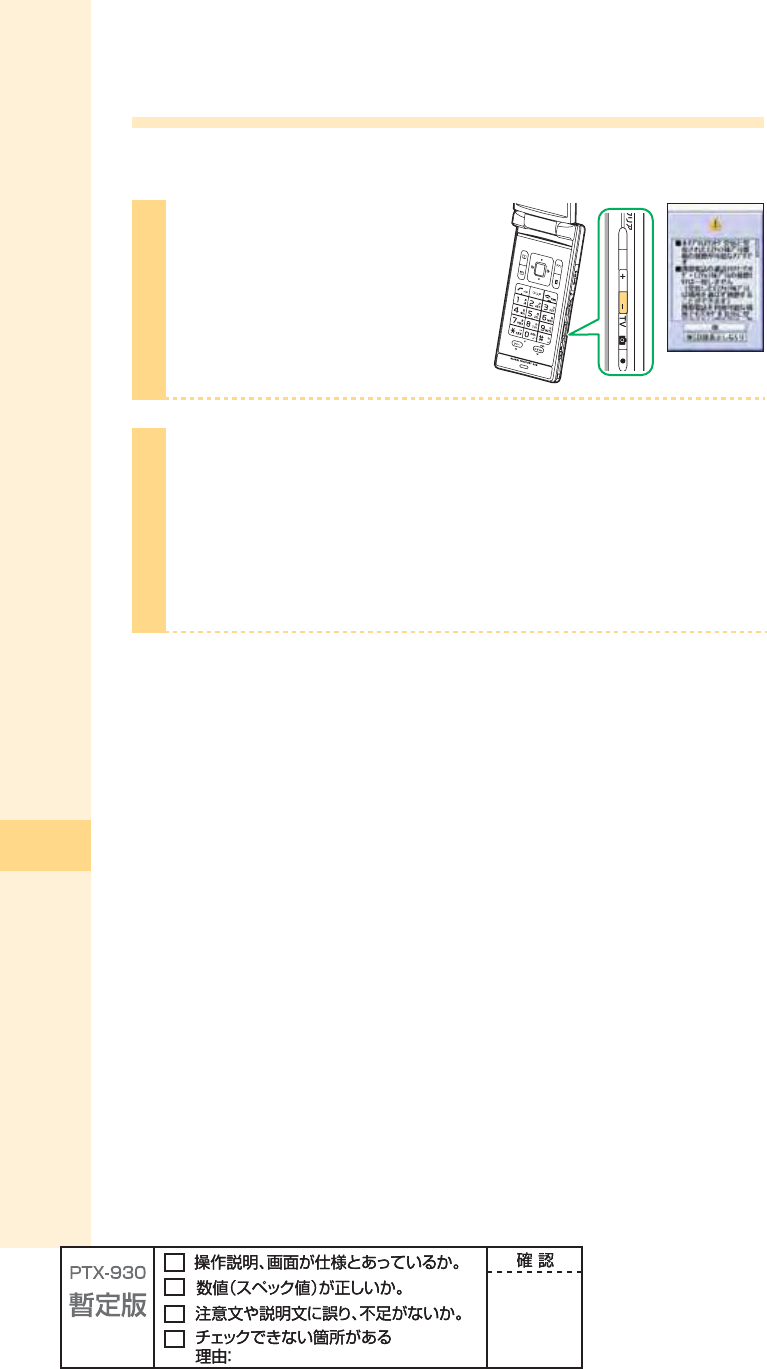
Taking photos
1
Hold down Q (Side setting
key) on the side of your cellphone
for at least one second in the idle
screen.
The photo monitor screen appears.
The photo monitor screen appears in the previous selected size. "3M" is set by default.
2
Hold the W64S horizontally with both hands. View the
subject you want to take on the photo monitor screen.
3
Half-press Q (Side setting key) on the side of your
cellphone.
W64S camera
automatically focuses
on the subject. The
frame's color turns into
green from white with a
short sound.
You can also automatically focus on the subject by pressing (AFlock).
67
Camera
4
Full press Q (Side setting key) on the side of your
cellphone.
You hear the shutter
sound, and the photo
you have taken is
displayed (preview
screen).
5
Press Q (Side setting key) on
the side of your cellphone.
"Saved in data folder" appears, and the
display returns to the monitor screen.
You can also save photos by pressing (save).
Photos are saved in the "Photo folder" in the data folder if the microSD™ Memory Card is
not inserted.
Seven photo shooting modes (shown below) are available.
About the microSDTM Memory Card
If you take photos with "0.3M," "1M," "2M," "2M(Wide)," or "3M" with inserting the microSDTM
Memory Card in the W64S, the images are saved in the "DigiCame folder" in the microSDTM
Memory Card.
68
Camera
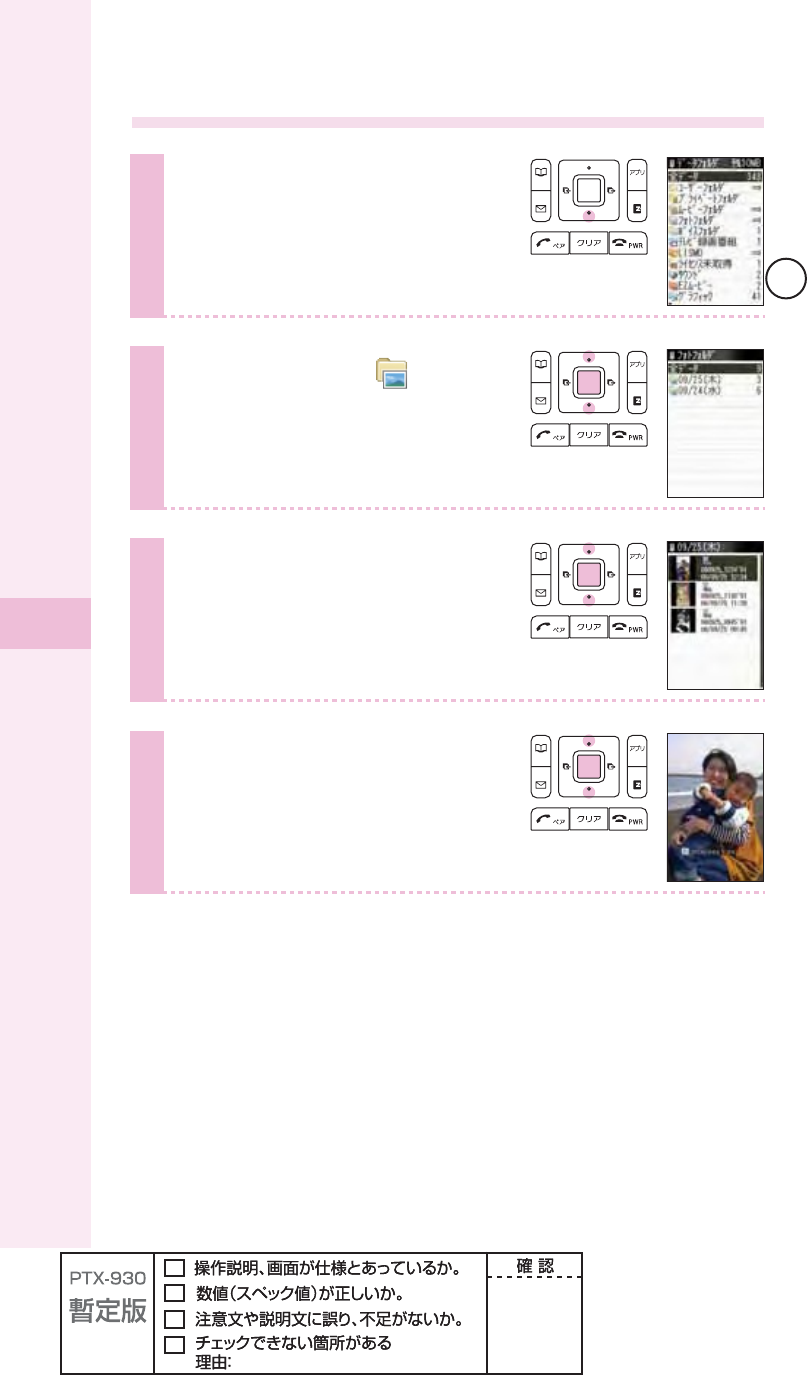
Viewing photos you have taken
1
Hold down d for at least one
second in the idle screen.
2
Press
j
to select " Photo
folder," and press
p
(select).
3
Press j to select the date folder
containing the photo you want to
view, and press p (select).
4
Press j to select the photo
you want to view, and press
p (view).
69
Camera
Attaching a photo to e-mail
1
Press q (E-mail) in the preview
screen immediately after you have
taken the image.
2
Press j to select
"
Create
E-mail,
"
and press p (select).
The create screen appears.
For details on how to create and send e-mail,
see steps 3 to 11 on page 51 to 53.
The photo or the movie you have taken is automatically attached to an e-mail
(Attached data).
"Other phone cannot play size over case happen" may appear. Press to select "Attach
on," and press (select).
"Cannot attach over 500KB Resize?" may appear. Press to select "Yes," and press
(select) to select the size.
70
EZweb
EZweb
EZweb subscription required
About EZweb
EZweb is an information service that allows you to enjoy the Internet on your cellphone.
With EZweb, you can obtain Chaku-Uta-Full®(full songs), the latest news, and other contents
from information sites.
71
EZweb
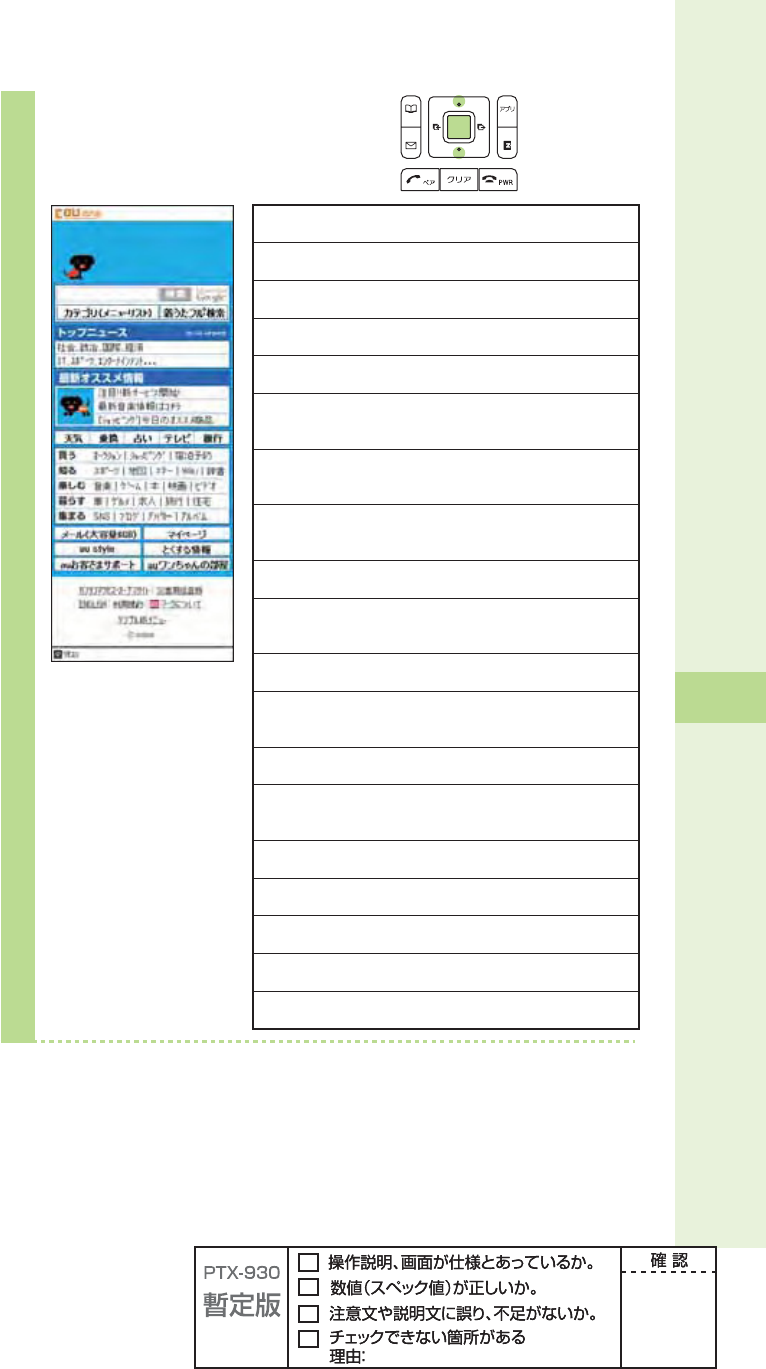
2
Press j to select
"au one Top," and press
p (select).
72
EZweb
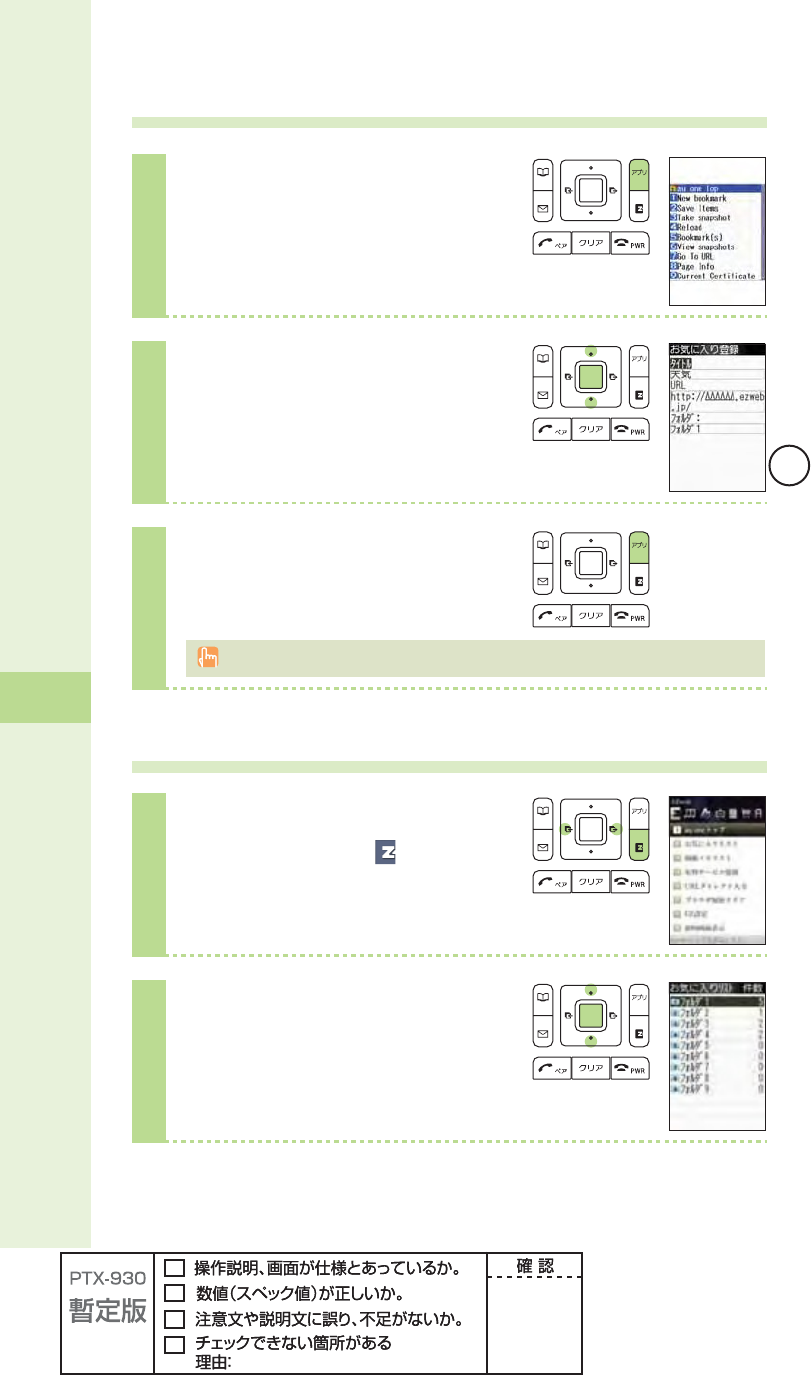
Saving your favorite sites
1
Display the site you want to save,
and press A (Browser Menu).
2
Press j to select "New
bookmark," and press
p (Select).
3
Press A (cmplt).
You can save up to 100 sites in the Bookmark. However, some sites may not be saved.
Viewing a site saved to the Bookmark
1
Press e (EZ) in the idle screen.
Press s to select (EZweb).
2
Press j to select "Bookmark(s),"
and press p (select).
73
EZweb
3
Press j to select a folder, and
press p (select).
4
Press j to select the site you
want to view, and press
p (select).
Confi rming your call costs
You can confi rm call and communication charges.
1
Press p (menu) in the idle
screen.
2
Press 11.
Press j to select "Yes," and
press p (select).
Select the item you want to confi rm.
74
EZweb
Downloading Chaku-Uta®(ringtones)/ Chaku-Uta-Full®(full songs)
1
Press e (EZ) in the idle screen.
Press s to select (EZweb).
2
Press j to select "au one Top,"
and press p (select).
3
Press j to select
"
75
EZweb
6
Select and download a melody.
Download the melody by following the on-screen instructions.
To use paid information site, you must enter the EZ Password or the Premium EZ
Password. EZ Password or Premium EZ Password is any 4-digit number that you wrote in
the application form.
The screen layout and contents are just examples. These are subject to change.
EZ News Flash
76
EZweb subscription required
What you can do with EZ News Flash
EZ News Flash is a service distributing updated news, weather, and fortune telling
information to the idle screen for no charge.
Updated news is always displayed on the idle screen as a scrolling ticker, and you can
browse detailed information by selecting it. You can use EZ News Flash easily with simple
settings just after making initial settings for EZweb (page 23). All information is distributed
for no charge.

EZ News Flash
77
Setting EZ News Flash service
You can use EZ News Flash with simple settings for no charge.
Make settings for EZ News Flash after making initial settings for EZweb (page 23).
1
Press u in the idle screen to
select the ticker, and press
p (select).
2
Press j to select "
78
EZ Navi
EZ Navi
79
EZ Navi
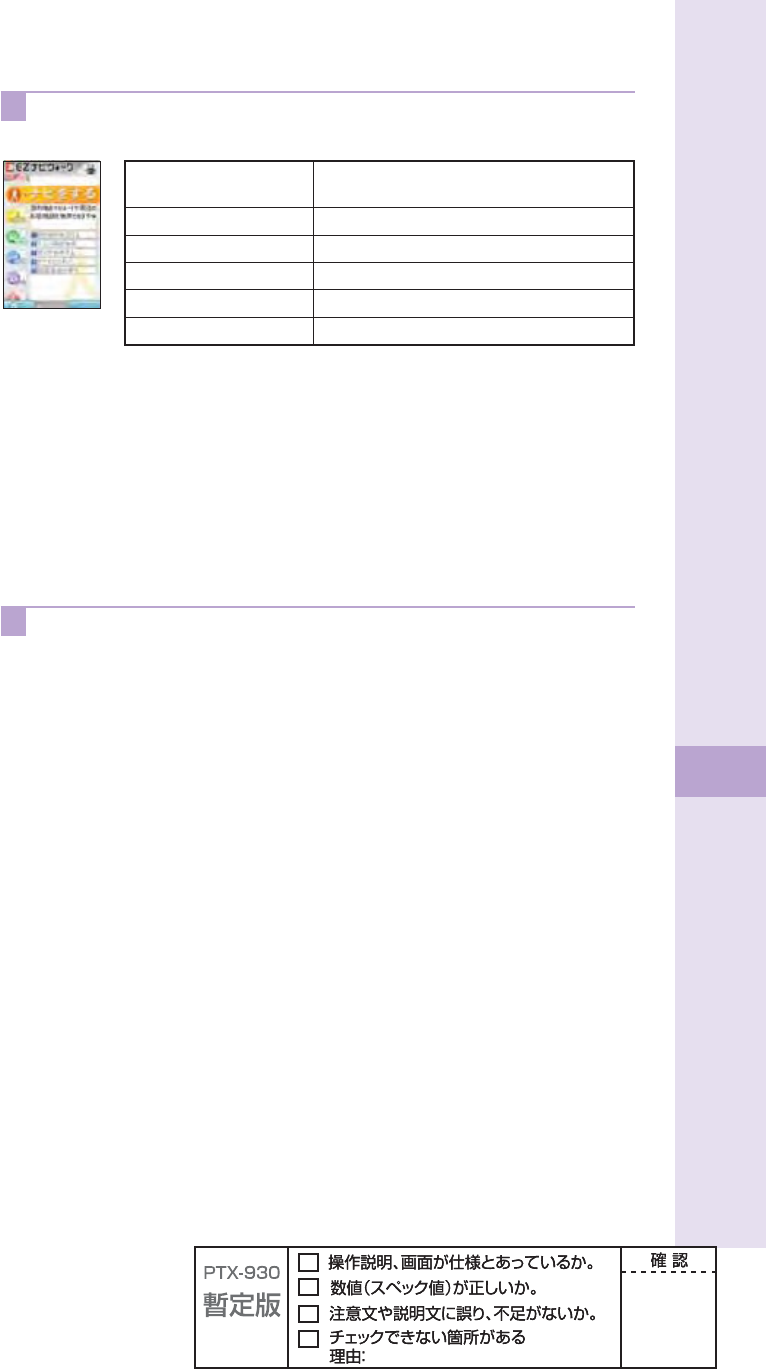
C When you go out: "EZ Navi Walk"
You can display various menus convenient for going out.
80
au Media Tuner
EZweb subscription required
You can view Television (1Seg), EZ Channel-Plus and EZ Channel.
What you can do with au Media Tuner
Television (1Seg)
You can view the "1Seg" television service, which has begun broadcasting digital terrestrial
television in Japan for cellphones and portable devices.
For details on the "1Seg" television service, see the following websites.
The Association for Promotion of Digital Broadcasting
From your PC: http:www.dpa.or.jp/
From your cellphone: http:www.dpa.or.jp/1seg/k/
EZ Channel-Plus
You can enjoy registered programs with EZ Channel-Plus or EZ Channel.
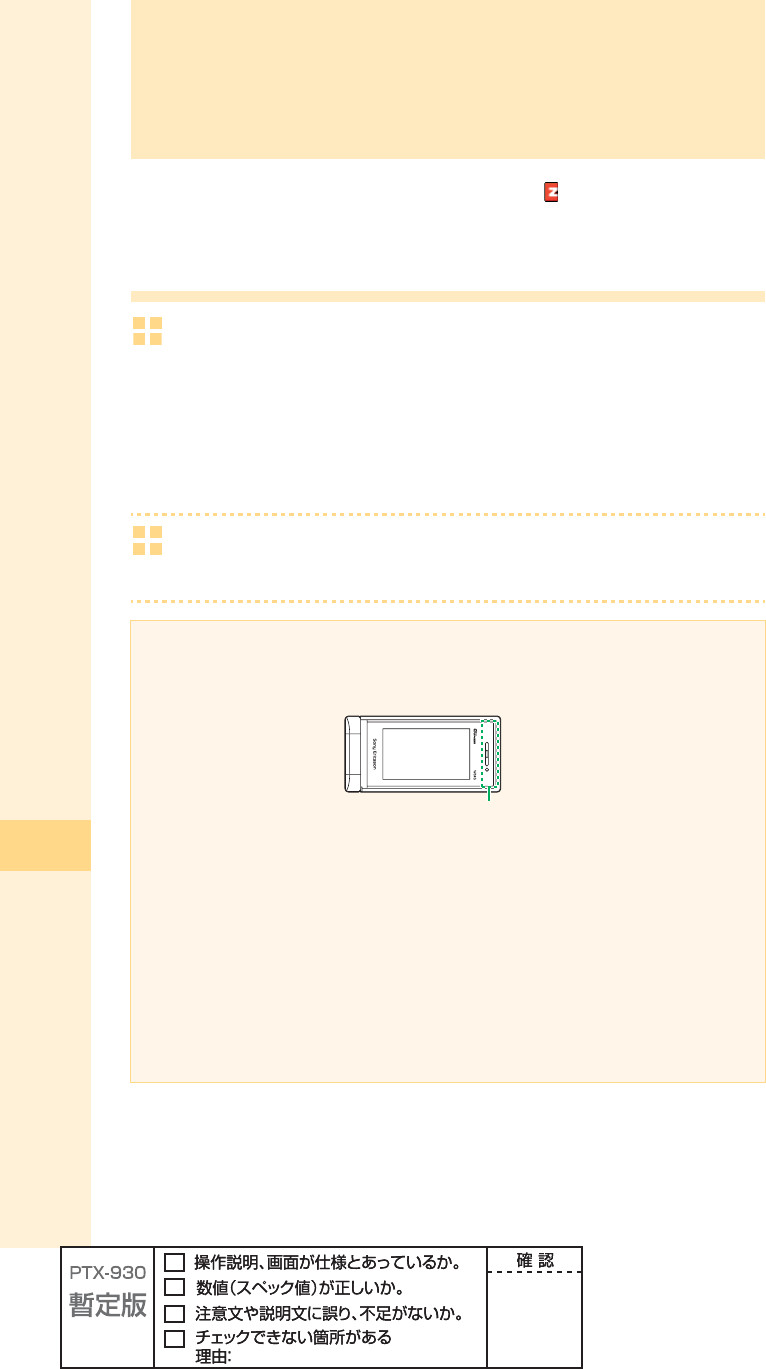
Built-in TV antenna
The antenna for Television (1Seg) is built in the main unit. When viewing Television (1Seg),
do not cover the built-in TV antenna with your hands.
81
au Media Tuner
You need to make initial settings before using au Media Tuner. If you have not made initial
settings yet, see page 23.
No call or data communication fees are charged for using au Media Tuner to view
Television (1Seg). No data communication fees are charged for viewing data broadcasting
programs. However, data communication fees are charged when using services such as
program guide acquisition, song title search function, and accessing information sites on
EZweb or acquiring additional information from information provided by data broadcasting
programs.
When remaining battery level shows , you can not start au Media Tuner.
The approximate continuous viewing time is shown below. The time will differ depending
on the operation of data broadcasting programs.
Television
(1Seg)
Reception
time
Using
earphone
Time with DBEX On : XXXX
Time with DBEX Off : XXXX
Using
speaker
Time with DBEX On : XXXX
Time with DBEX Off : XXXX
Recording time XXXX
The screen layout and contents are just examples. These are subject to change.
82
au Media Tuner
Initial settings for au Media Tuner
To view Television (1Seg) by using au Media Tuner, you need to make initial settings for both
au Media Tuner and Television (1Seg).
1
Hold down - for at least
one second in the idle screen.
Precautions appear.
2
Confi rm the precautions, use
j to select "OK" and press
p (
83
au Media Tuner
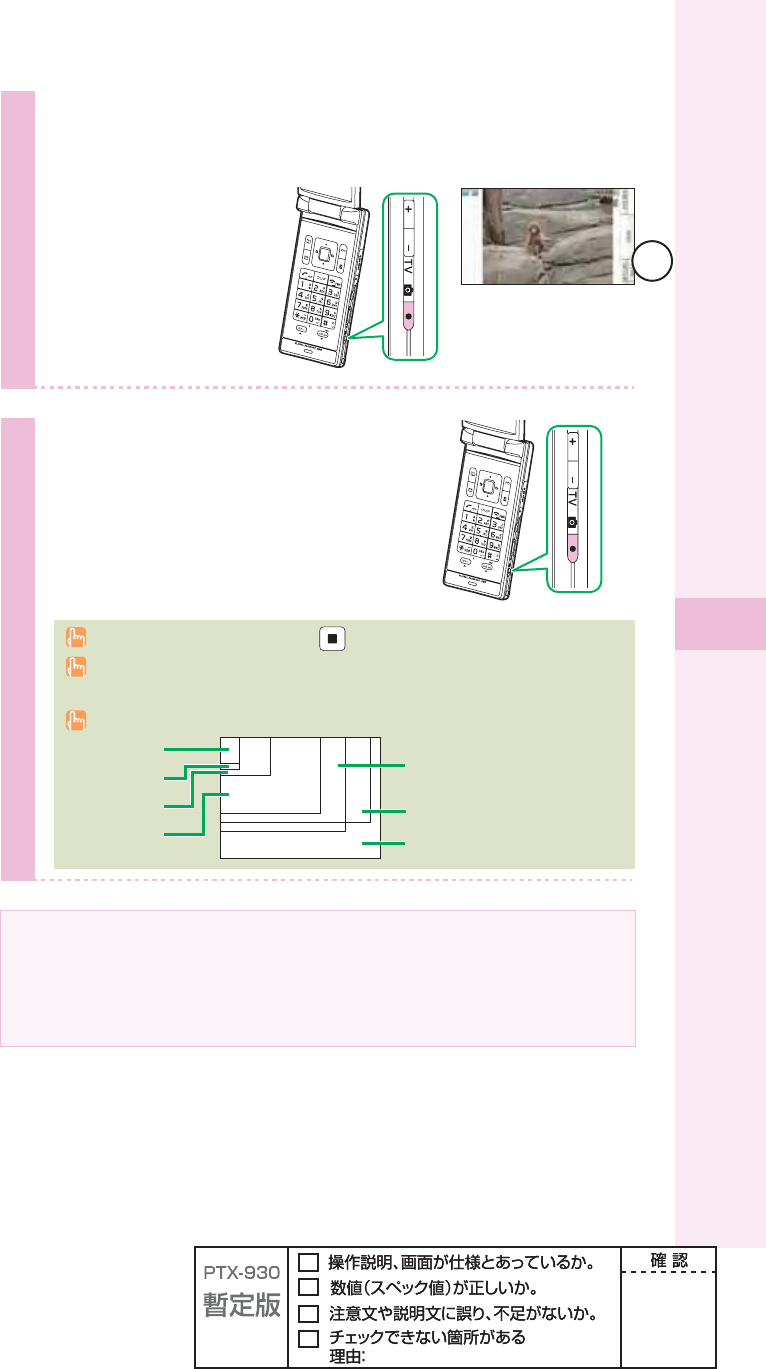
Viewing Television (1Seg)
1
Hold down - for at least
one second in the idle screen.
Television (1Seg) starts in the mode
you used the last time, and the
channel selected when you used
the last time is displayed (television
operation screen).
After receiving data broadcasting, the screen automatically
switches to data operation screen. If you want to switch to
television operation screen, press B
84
au Media Tuner
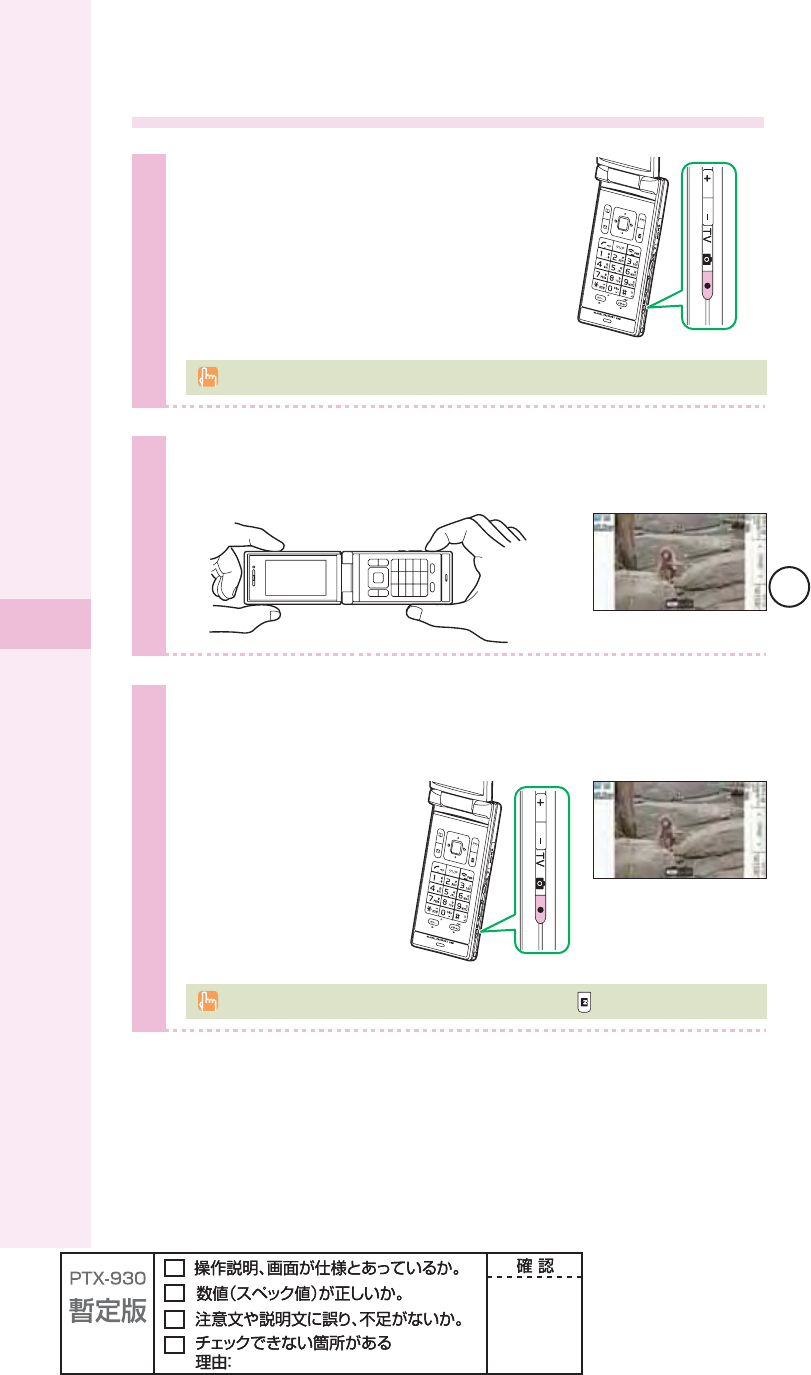
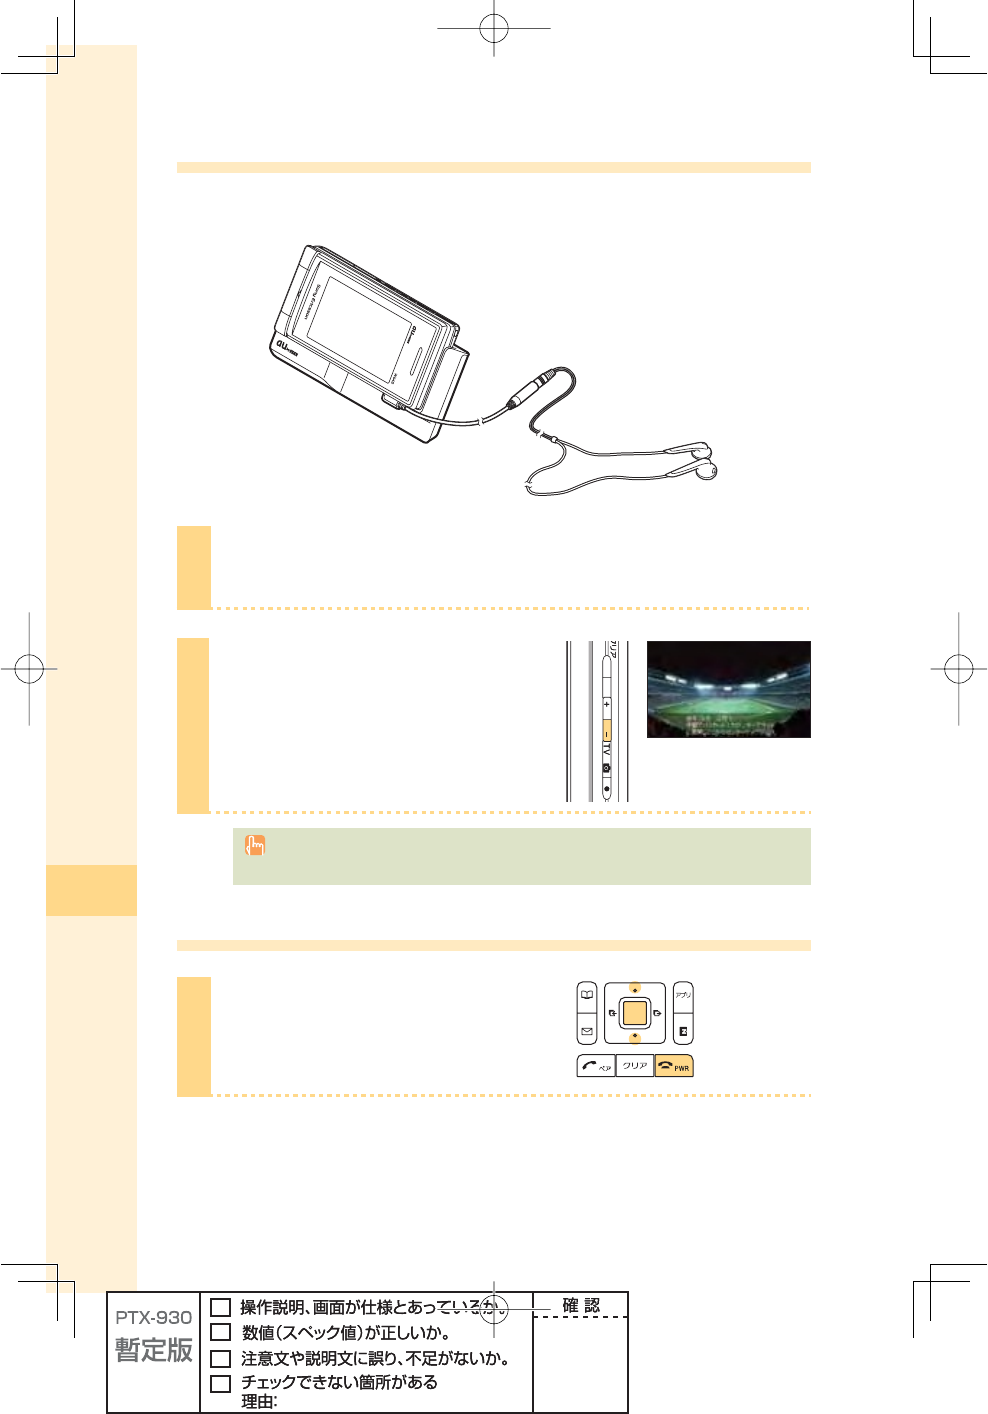
Viewing Television (1Seg) in TV style
After making initial settings for au Media Tuner, you can view Television (1Seg) in TV style.
You can also view Television (1Seg) while charging the battery using the desktop holder.
1
Set W64S to TV style.
2
Hold down - for at least
one second in the idle screen.
Press +- to adjust the volume.
Press Q to switch the channel.
When "Launch Set" is set to "TV (1Seg)," Television (1Seg) will start just by setting W64S
to TV style while the idle screen is displayed.
Ending au Media Tuner
1
Press t, use j to select
"Quit," and press p (select).
85
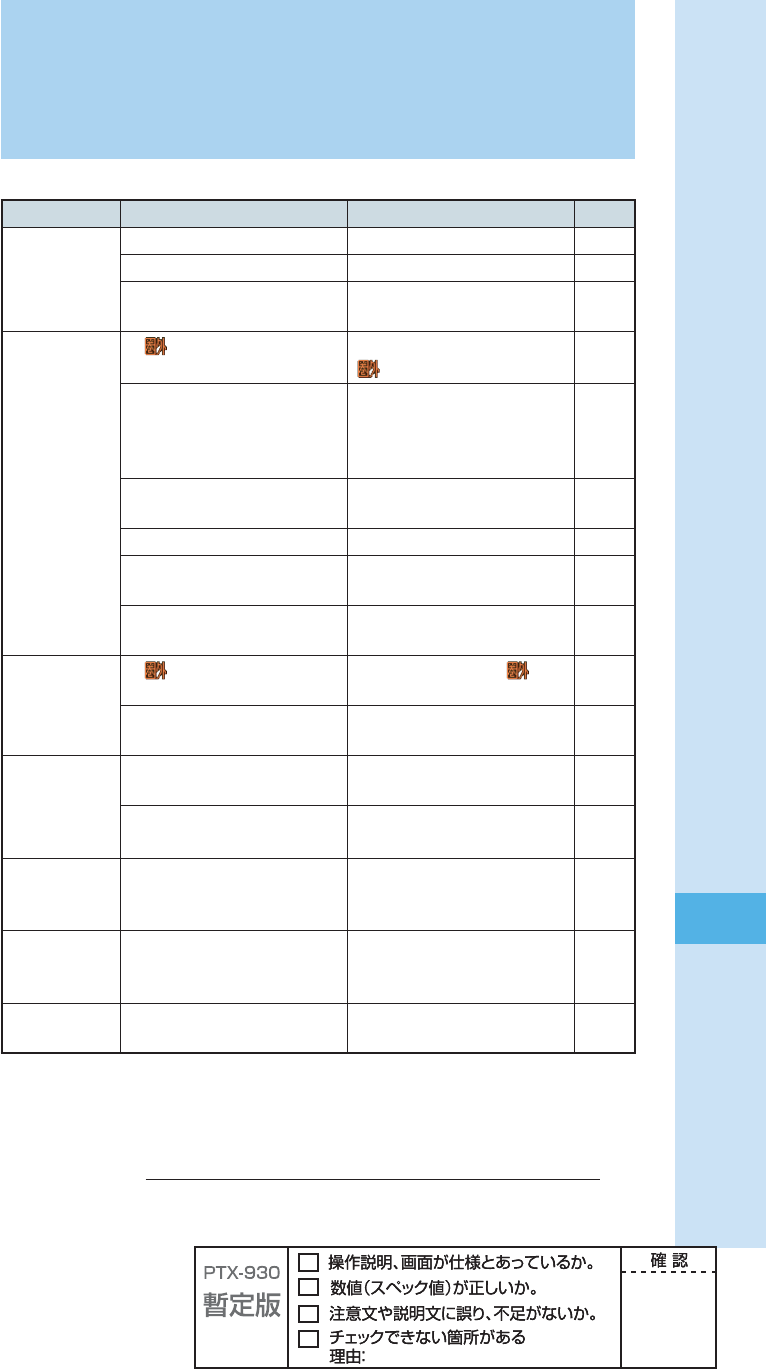
Troubleshooting
Symptom Items to check Solution Page
Unable to turn
the power on.
Is the battery pack properly installed? Properly install the battery pack. —
Is the battery pack charged? Charge the battery pack. 12
Did you hold down t for at least
one second?
Hold down t for at least one
second. 16
Unable to make
calls.
Is " " displayed on the screen? Make a call from a location where
"" is not displayed. 16
Did you enter the area code when
entering the phone number?
When making a call to a phone other
than a cellphone, fi rst enter the area
code even when both parties are
inside the same city.
27
Is the power turned on? Hold down t for at least one
second. 16
Did you press T ? Press T.27
Is W64S set to Recording oneself
style or TV style?
Set W64S to Normal style. 22
Is the Area Setting properly set? For making a call in Japan, set
"Japan" in Area Setting. 26
Unable to receive
calls.
Is " " displayed on the screen? Move to a location where " " is not
displayed. 16
Is the power turned on? Hold down t for at least one
second. 16
No reaction when
a key is pressed.
Is the power turned on? Hold down t for at least one
second. 16
Is the side keylock set? Hold down p for at least one
second to cancel side keylock.
15
Warning tone
sounds, and
power turns off.
There is not enough power remaining
in the battery pack.
Charge the battery pack.
12
Incoming calls
are automatically
answered.
Is the record message set? Hold down M for at least one
second to cancel the record
message.
34
Unable to hear
the other party.
Is the volume during a call set too
low?
Press u while you are talking. The
volume during a call will increase. 30
Please visit the au web site for more information.
86
Remote Ctrl Lock
In case you have lost your W64S
Using Remote Ctrl Lock, you can lock your W64S (Auto lock, FeliCa lock and Phone book
lock) remotely against unauthorized use.
To set up the working environment of Remote Ctrl Lock
Auto lock, FeliCa lock and Phone book lock are enabled by calling to your W64S specifi c
times from the phone number specifi ed beforehand.
1 Press p (menu) in the idle screen
87
Remote Ctrl Lock
To set Auto lock, FeliCa lock and Phone book lock on
W64S by Remote Ctrl Lock
Make a call to W64S under the working condition (Duration, Frequency, Caller)
set by Remote Ctrl Lock.
Remote Ctrl Lock is set, and announcement is played notifying that Remote Ctrl
Lock is set.
Remote Ctrl Lock cannot be set if W64S is turned off or in the area where reception
strength is not good.
"Not erase" (for "Data erase") and "OFF" (for "Local unlock") are set by default.
To lock Remote Ctrl Lock on W64S by Security Lock
Service
With no Remote Ctrl Lock setting has been made, call au Customer Service Center or visit
our web site from your PC to set Auto lock, FeliCa lock and Phone book lock. You can use
Security Lock Service with no charge.
au Customer Service Center
From au cellphones: 113 area code not required (toll free)
From other operators'/regular phones:
88
Other features
Safety Buzzer
To show that you are in emergencies, you can use the Safety Buzzer function in extreme
volume sound. To use this function, set the Safety Buzzer to "ON" beforehand.
To set the Safety Buzzer "ON"
ʌ Press
p (menu) in the idle screen
89
Other features
Other Functions
GlobalAssort Menu
You can use tools such as Twin Planet Clock and Global Calculator which is
useful both in Japan and Overseas.
EZ keitai-arrange
You can set/change ringtones or designs of the idle screen, icons, etc.
collectively. Also, you can use downloaded data for those settings.
au one My Page
You can save data such as a phone book, e-mail, or the data in the data
folder to au one My Page.
Various ways to get audio fi les
You can enjoy your favorite songs by EZ "Chaku-Uta-Full®" (full songs),
the full length music download service, and also enjoy other audio fi les
transferred from your music CDs via au Music Port.
EZ apps (BREW®)
You can download game software from EZweb sites and play games.
Infrared data exchange feature
You can exchange data such as a phone book, profi le, or the data in the
data folder between au cellphones that support infrared data exchange.
PC Site Viewer
You can view WEB sites intended for PC on W64S with smooth high-speed
data communication.
Fake Incoming Call
Holding down T for at least one second makes ringtone sound as if you
have an incoming call.
90
Other features
Radio Wave Exposure and
Specifi c Absorption Rate (SAR) Information
91
Other features
* In the United States and Canada, the SAR limit for mobile phones used by the public is 1.6 watts/kilogram
(W/kg) averaged over one gram of tissue. The standard incorporates a margin of safety to give additional
protection for the public and to account for any variations in measurements.
** This paragraph is only applicable to authorities and customers in the United States.
Europe
This mobile phone model W64S has been designed to comply with applicable safety
requirements for exposure to radio waves. These requirements are based on scientifi c
guidelines that include safety margins designed to assure the safety of all persons,
regardless of age and health.
The radio wave exposure guidelines employ a unit of measurement known as the Specifi c
Absorption Rate, or SAR. Tests for SAR are conducted using standardized methods with the
phone transmitting at its highest certifi ed power level in all used frequency bands.
While there may be differences between the SAR levels of various phone models, they are
all designed to meet the relevant guidelines for exposure to radio waves.
For more information on SAR, please refer to the safety chapter in the User's Guide.
SAR data information for residents in countries that have adopted the SAR limit
recommended by the International Commission of Non-lonizing Radiation Protection
(ICNIRP), which is 2 W/kg averaged over ten (10) gram of tissue (for example European
Union, Japan, Brazil and New Zealand):
The highest SAR value for this model phone tested by Sony Ericsson for use at the ear is
0.36 W/kg (10g).

92
Other features
Radio Frequency (RF) exposure and Specifi c Absorption Rate (SAR)
When the phone or Bluetooth handsfree is turned on, it emits low levels of radio frequency
energy. International safety guidelines have been developed through periodic and thorough
evaluation of scientifi c studies. These guidelines establish permitted levels of radio wave
exposure. The guidelines include a safety margin designed to assure the safety of all
persons and to account for any variations in measurements.
Specifi c Absorption Rate (SAR) is used to measure radio frequency energy absorbed by
the body when using a mobile phone. The SAR value is determined at the highest certifi ed
power level in laboratory conditions, but because the phone is designed to use the minimum
power necessary to access the chosen network, the actual SAR level can be well below this
value. There is no proof of difference in safety based on difference in SAR value.
Products with radio transmitters sold in the US must be certifi ed by the Federal
Communications Commission (FCC). When required, tests are performed when the phone is
placed at the ear and when worn on the body. For body-worn operation, the phone has been
tested when positioned a minimum of 15 mm from the body without any metal parts in the
vicinity of the phone or when properly used with an appropriate Sony Ericsson accessory
and worn on the body.
For more information about SAR and radio frequency exposure go to:
www.sonyericsson.com/health.
93
Other features
Guidelines for Safe and Effi cient Use
Please follow these guidelines. Failure to do so might entail a potential health risk or product
malfunction. If in doubt as to its proper function, have the product checked by a certifi ed
service partner before charging or using it.
Recommendations for care and safe use of our products
94
Other features
Battery
New or idle batteries can have short-term reduced capacity. Fully charge the battery before
initial use. Use for the intended purpose only. Charge the battery in temperatures between
+5° C (+41° F) and +35° C (+95° F). Do not put the battery into your mouth. Do not let the
battery contacts touch another metal object. Turn off the product before removing the battery.
Performance depends on temperatures, signal strength, usage patterns, features selected
and voice or data transmissions. Use of an unqualifi ed battery may present a risk of fi re,
explosion, leakage or other hazard.
Personal medical devices
Mobile phones may affect implanted medical equipment. Reduce risk of interference by
keeping a minimum distance of 22cm (8.7 inches) between the phone and the device.
Use the phone at your right ear. Do not carry the phone in your breast pocket. Turn off the
phone if you suspect interference. For all medical devices, consult a physician and the
manufacturer.
Driving
Some vehicle manufactures forbid the use of phones in their vehicles unless a handsfree kit
with an external antenna supports the installation. Check with the vehicle manufacturer's
representative to be sure that the mobile phone or Bluetooth handsfree will not affect the
electronic systems in the vehicle. Full attention should be given to driving at all times and
local laws and regulations restricting the use of wireless devices while driving must be
observed.
GPS/Location based functions
Some products provide GPS/Location based functions. Location determining functionality is
provided "As is" and "With all faults". KDDI/Sony Ericsson does not make any representation
or warranty as to the accuracy of such location information.
Use of location-based information by the device may not be uninterrupted or error free and
may additionally be dependent on network service availability. Please note that functionality
may be reduced or prevented in certain environments such as building interiors or areas
adjacent to buildings.
Caution: Do not use GPS functionality in a manner which causes distraction from driving.
Emergency calls
Calls cannot be guaranteed under all conditions. Never rely solely upon mobile phones for
essential communication. Calls may not be possible in all areas, on all networks, or when
certain network services and/or phone features are used.
95
Other features
Malware
Malware (short for malicious software) is software that can harm the mobile phone or other
computers. Malware or harmful applications can include viruses, worms, spyware, and other
unwanted programs. While the device does employ security measures to resist such efforts,
KDDI/Sony Ericsson does not warrant or represent that the device will be impervious to
introduction of malware. You can however reduce the risk of malware attacks by using care
when downloading content or accepting applications, refraining from opening or responding
to messages from unknown sources, using trustworthy services to access the Internet, and
only downloading content to the mobile phone from known, reliable sources.
Accessories
Use only KDDI original accessories. KDDI/Sony Ericsson does not test third-party
accessories. Accessories may infl uence RF exposure, radio performance, loudness, electric
safety and other areas. Third-party accessories and parts may pose a risk to your health or
safety or decrease performance.
Disposal of old electrical and electronic equipment
Electronic equipment and batteries should not be included as household waste but should
be left at an appropriate collection point for recycling. This helps prevent potential negative
consequences for the environment and human health. Check local regulations by contacting
your local city offi ce, your household waste disposal service, the shop where you purchased
the product.
Disposing of the battery
Check local regulations or call a Sony Ericsson call centre for information. Never use
municipal waste.
96
Other features
Memory Card
If the product comes complete with a removable memory card, it is generally compatible
with the handset purchased but may not be compatible with other devices or the capabilities
of their memory cards. Check other devices for compatibility before purchase or use. If the
product is equipped with a memory card reader, check memory card compatibility before
purchase or use.
Memory cards are generally formatted prior to shipping. To reformat the memory card, use
a compatible device. Do not use the standard operating system format when formatting the
memory card on a PC. For details, refer to the operating instructions of the device or contact
customer support.
Warning!
If the device requires an adapter for insertion into the handset or another device, do not
insert the card directly without the required adapter.
Precautions on memory card use

97
Other features
FCC Statement for the USA
This device complies with Part 15 of the FCC rules. Operation is subject to the
following two conditions
98
Other features
Declaration of Conformity for W64S
We, Sony Ericsson Mobile Communications AB of Nya Vattentornet SE-221 88 Lund,
Sweden declare under our sole responsibility that our product
Sony Ericsson type AAH-5880001-BV
and in combination with KDDI AC-charger 02 (0203PQA), KDDI Desktop stand (64SOPUA)
and Sony Earphone (MDR-E0921LP), to which this declaration relates is in conformity with
the appropriate standards EN 301 511:V9.0.2, EN 301 489-7:V1.3.1, EN 300 440-2:V1.1.2,
EN 300 440-1:V1.7.1, EN 301 489-3:V1.4.1 and EN 60950-1:2006, following the provisions
of Radio Equipment and Telecommunication Terminal Equipment Directive 1999/5/EC
Lund, September 2008
0682
Signature
Yo s h iro Kido, Head of Product Business Group Japan
We fulfi ll the requirements of the R&TTE Directive (1999/5/EC)
100
Index
Index
A
accessories ......................................... 10
au IC-Card ........................................... 11
au Media Tuner .................................... 80
initial settings .................................... 82
au one Top ........................................... 70
B
battery pack ........................................ 10
battery power, remaining ..................... 4
before use ........................................... 10
Bookmark
saving ............................................... 72
viewing ............................................. 72
C
C-mail ................................................... 60
C-mail Safety Block .......................... 60
creating and sending ........................ 61
icon ................................................... 63
opening ...................................... 62, 63
receiving ........................................... 62
camera ................................................. 64
photo ................................................ 66
successful taking .............................. 65
cellphone etiquette ............................... 1
charge indicator .................................. 12
charging the battery pack .................. 12
confi rming your call costs ................. 73
confi rming your cellphone number
......................................................... 23
cross controllerTM ............................... 15
D
desktop holder .................................... 12
Dialed calls .......................................... 30
Disaster Message Board Service
(demonstration) ................................ 7
display ................................................. 17
domain ................................................. 24
downloading Chaku-Uta-Full®
(full songs) ...................................... 74
downloading Chaku-Uta®
(ringtones) ...................................... 74
drive mode ............................................ 5
E
e-mail ................................................... 50
attaching photo ................................. 69
creating and sending ........................ 51
icons ..................................... 51, 54, 55
initial settings .................................... 23
opening ...................................... 54, 55
receiving ........................................... 54
replying ............................................. 57
searching .......................................... 56
viewing attached photo/movie .......... 58
e-mail address
changing ........................................... 24
confi rming ........................................ 23
English display ................................... 17
EZ Navi ................................................ 78
EZ News Flash .................................... 76
EZ Service menu ................................. 20
EZweb .................................................. 70
Bookmark ......................................... 72
confi rming your call costs ................. 73
initial settings .................................... 23
I
icons .............................................. 17, 18
idle screen ........................................... 16
ID Unsent ............................................. 29
incoming indicator ............................. 11
initial settings ..................................... 23
international call ................................. 27
Internet (See "EZweb")
M
mail
C-mail ............................................... 60
e-mail ............................................... 50
mail fi lter .............................................. 59
Main menu ........................................... 19
101
manner mode .................................. 4, 31
Media Launcher .................................. 21
N
names of parts .................................... 11
Normal style ........................................ 22
O
one-ring call .......................................... 6
overseas use ....................................... 26
P
Pair Function ....................................... 48
making a call .................................... 49
saving ............................................... 48
phone book ......................................... 42
deleting ............................................. 45
editing ............................................... 44
making a call .................................... 46
saving ............................................... 42
saving from dialed/received calls ..... 47
Phone call ............................................ 27
if you are unable to answer .............. 29
making .............................................. 27
making an international call ............. 27
notify/not notify the other party ......... 27
receiving ........................................... 29
photo
attaching to e-mail ............................ 69
saving ............................................... 67
taking ................................................ 66
viewing ............................................. 68
power ..................................................... 4
R
Received calls ..................................... 30
reception strength ................................ 4
record message .............................. 4, 34
playing back ..................................... 35
Recording oneself style ..................... 22
redialing ............................................... 30
Remote Ctrl Lock ................................ 86
ringtone ............................................... 32
S
Safety Buzzer ...................................... 88
Security Lock Service ........................ 87
soft key ................................................ 16
spam ................................................ 6, 59
stereo earphone .................................. 13
T
television (1Seg) ................................. 83
text input ............................................. 36
alphanumerics .................................. 37
Back Space function ........................ 37
changing input mode ........................ 36
character key assignment table ........ 37
characters assigned to the same key
..................................................... 39
deleting characters ........................... 39
emoticons ......................................... 40
pictorial characters ........................... 40
sentences ......................................... 41
symbols ............................................ 40
uppercase characters ....................... 39
troubleshooting .................................. 85
TV style ................................................ 22
V
volume during a call ........................... 30