Sony A5880013 Mobile phone with Bluetooth, WLAN 802.11bgn, GPS/A-GPS, FM receiver and RFID User Manual 08 user guide
Sony Mobile Communications Inc Mobile phone with Bluetooth, WLAN 802.11bgn, GPS/A-GPS, FM receiver and RFID 08 user guide
Sony >
Contents
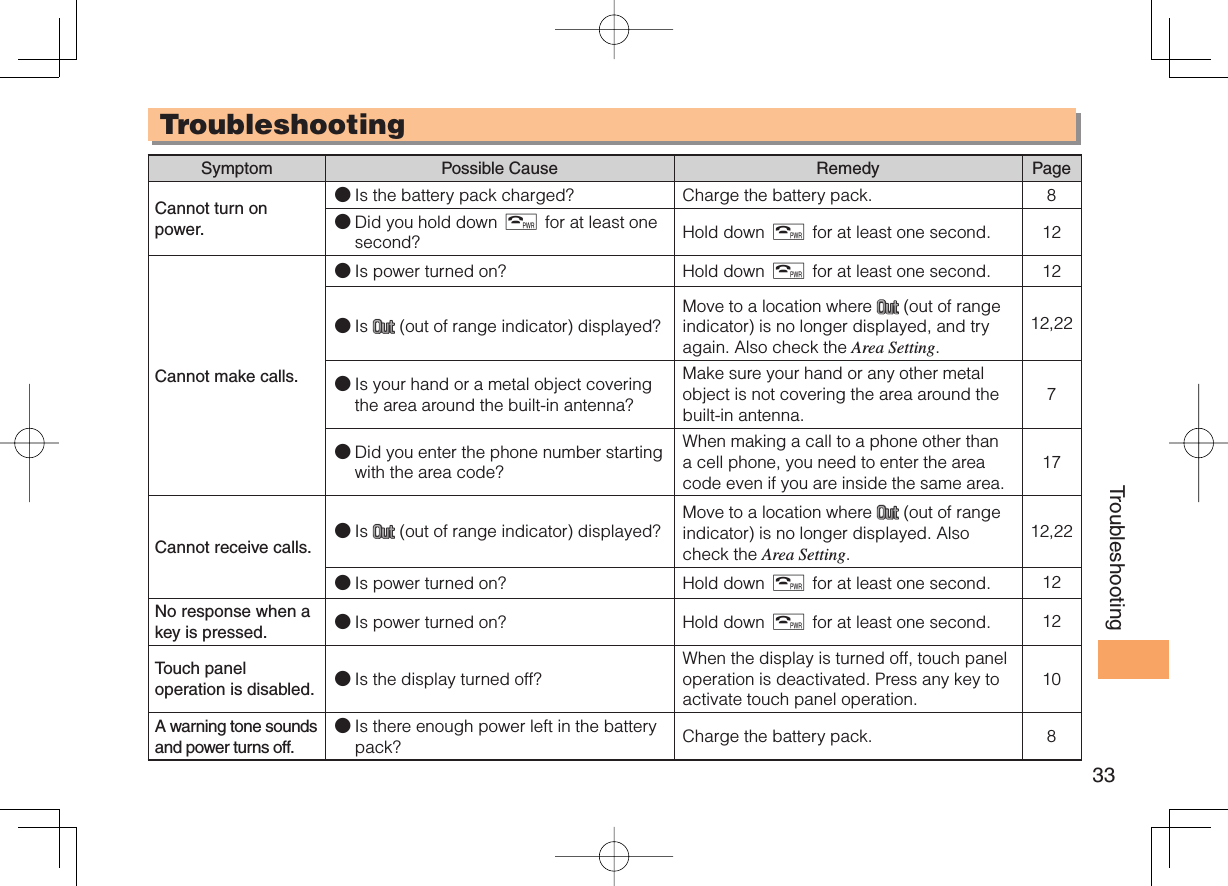
- 1. 08 user guide
- 2. 08 user manual
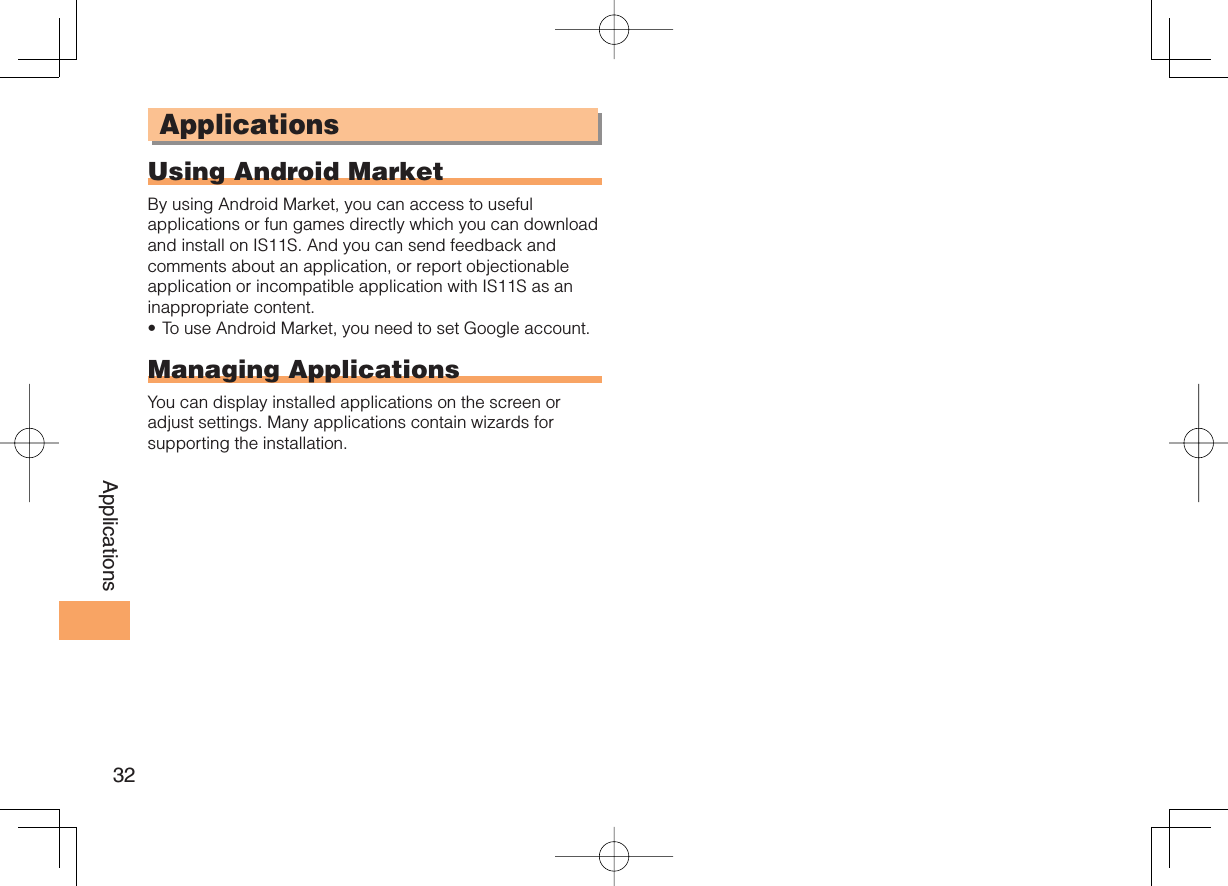
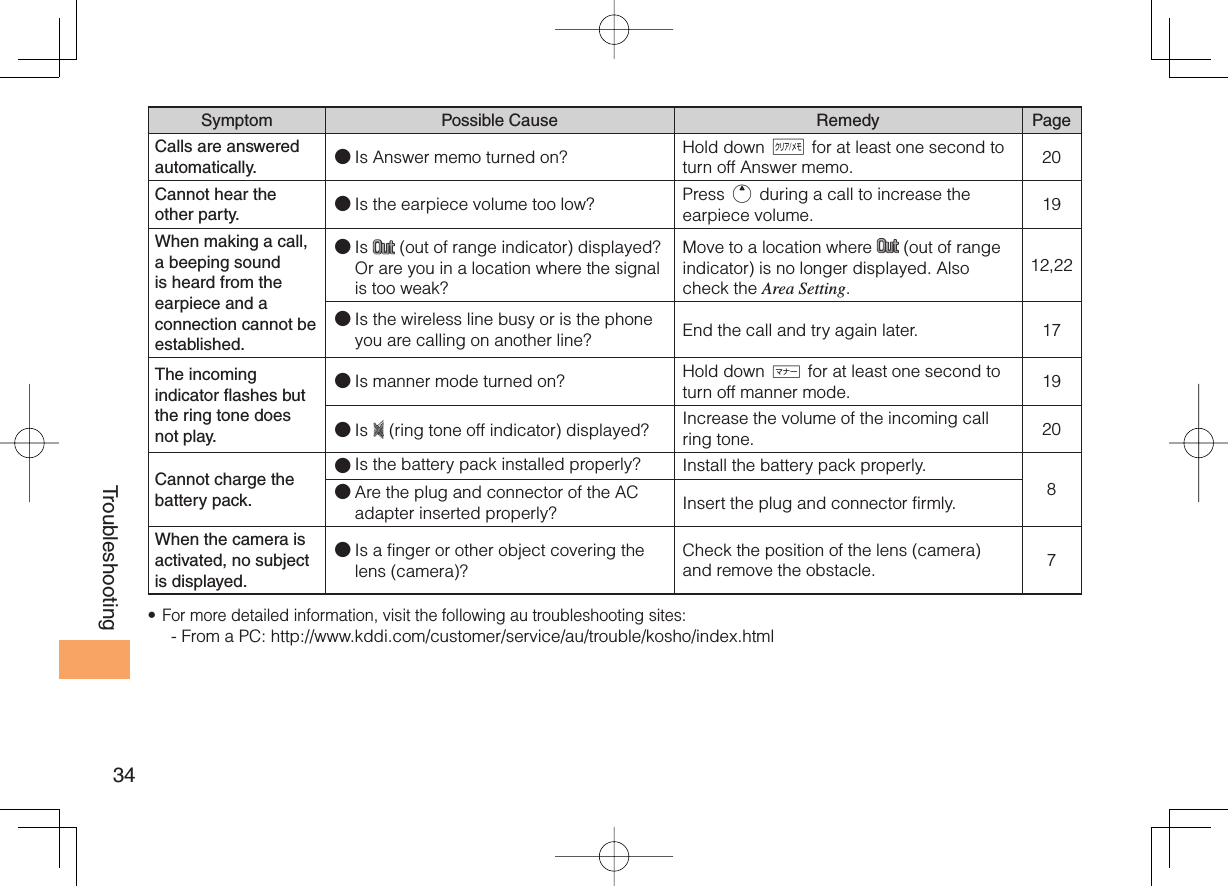
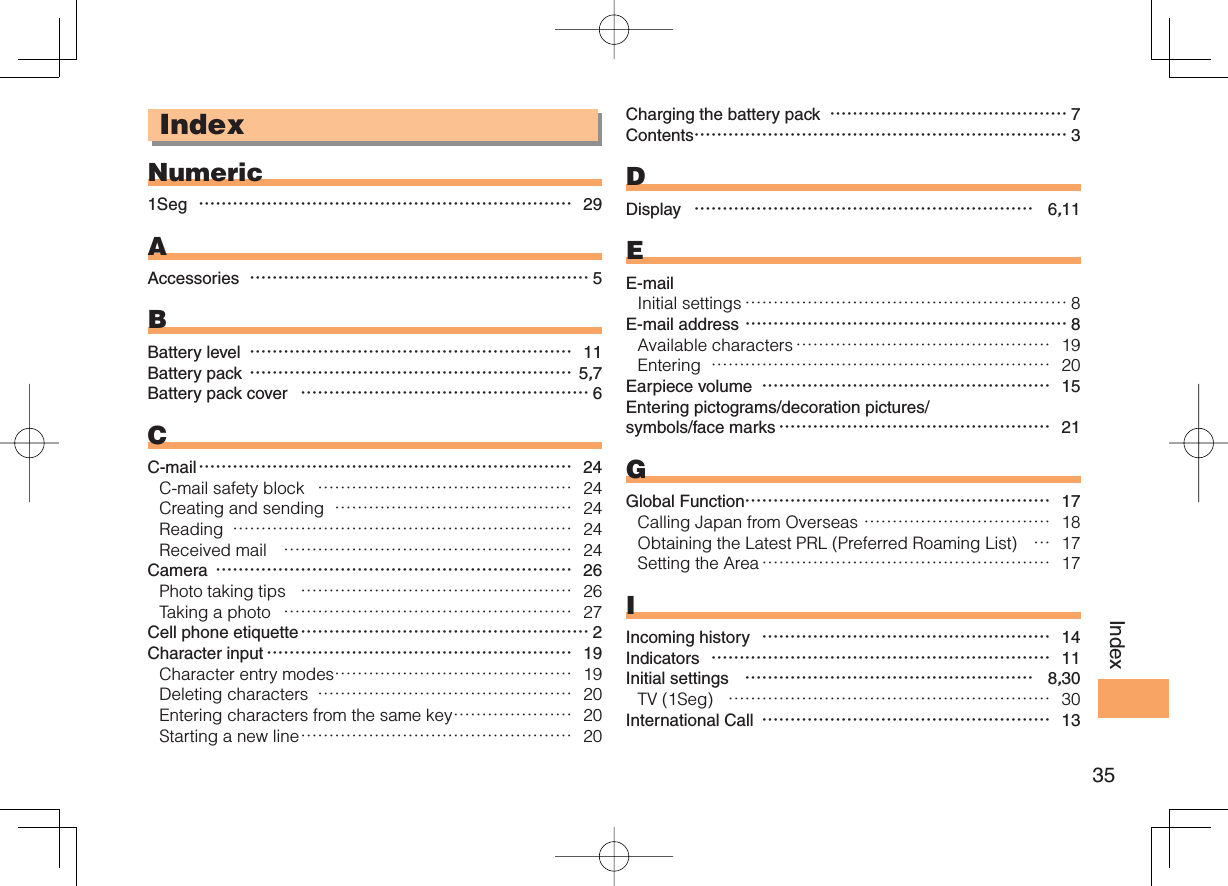
08 user guide
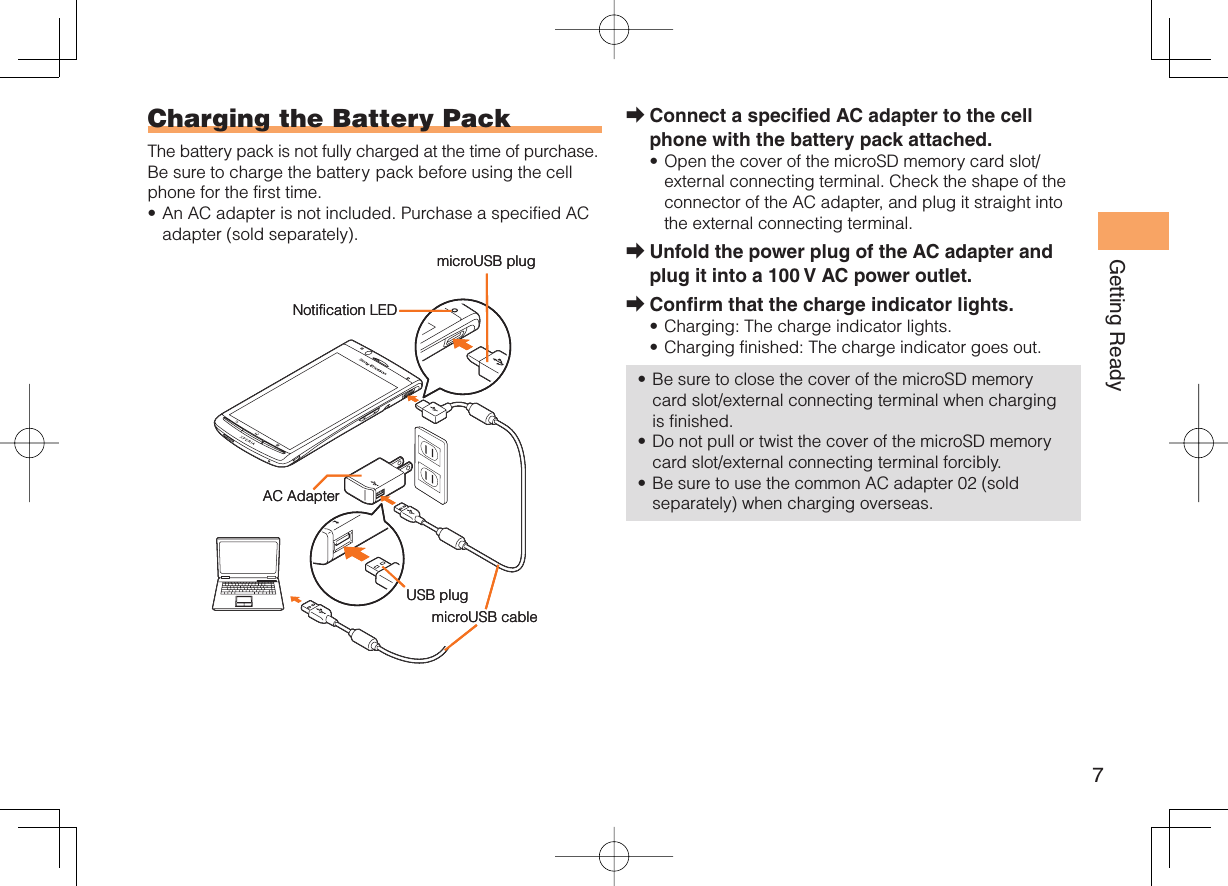
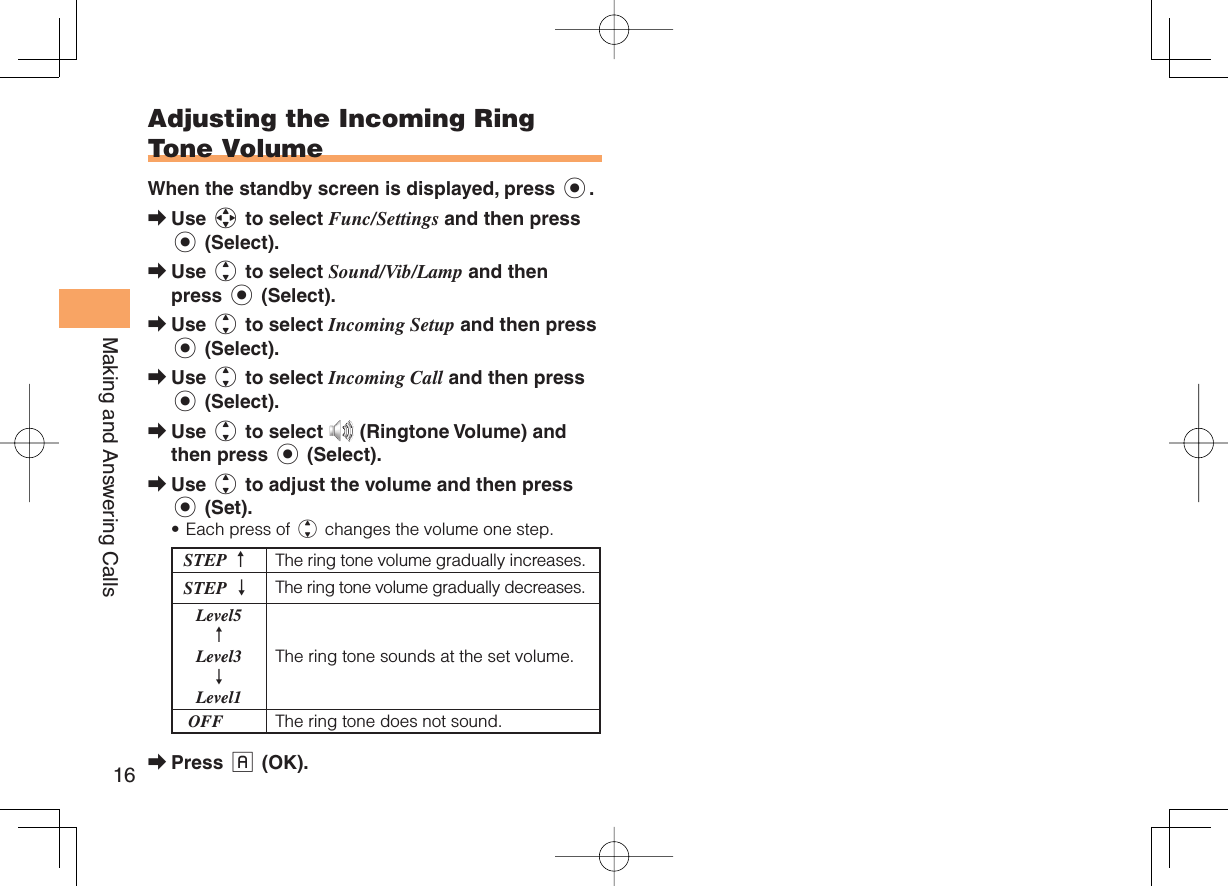
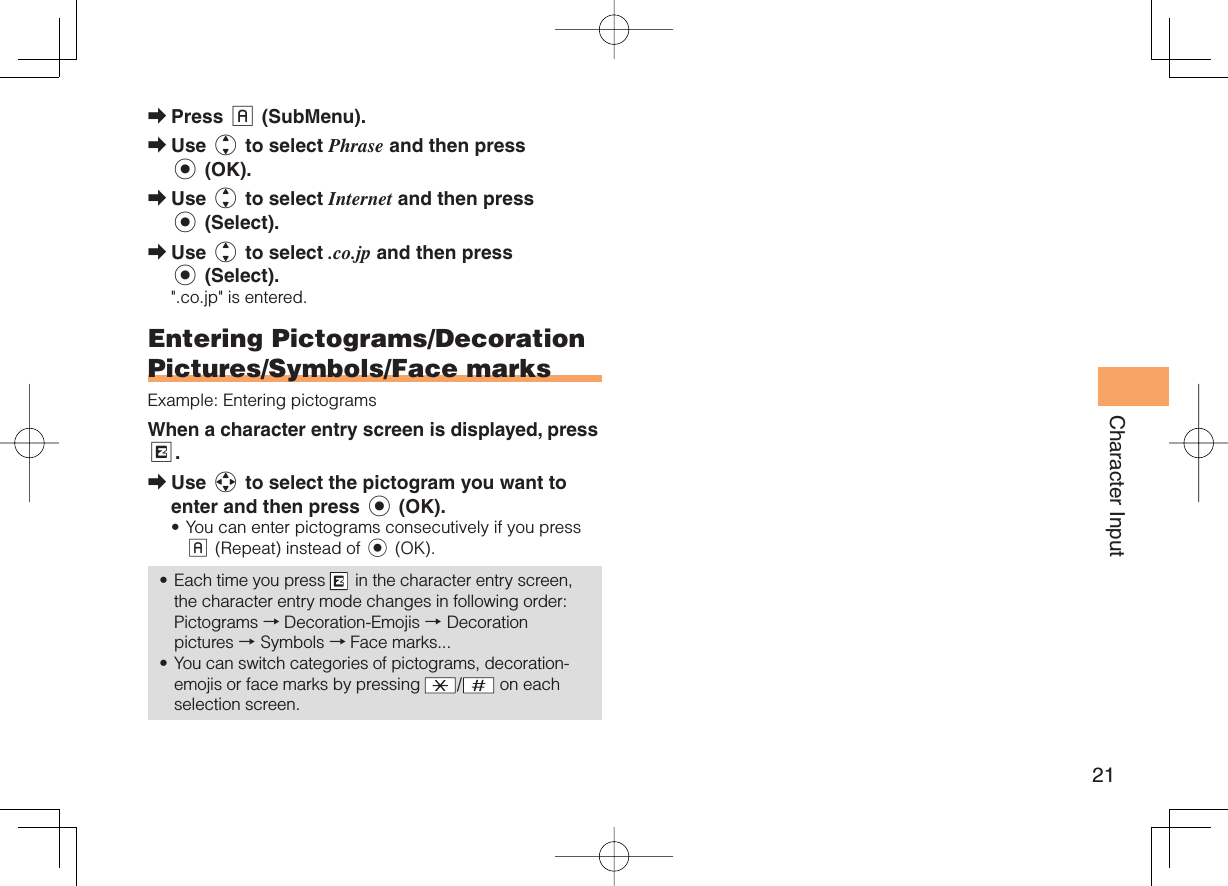
![8Getting Ready Turning On PowerHold down F for at least one second.You cannot receive or make calls if (out of range indicator) is displayed.Turning Off PowerWhen the standby screen is displayed, hold down F for at least one second.Switching the Display Language to EnglishYou can switch the display language for function names and other items to English.When the standby screen is displayed, press c.Use a to select 機能/設定 (Func/Settings) and then press c (選択 [Select]).Use j to select 画面表示 (Screen Display) and then press c (選択 [Select]).Use j to select Set Language and then press c (選択 [Select]).Use j to select English and then press c (Set).•■➡➡➡➡ Initial SetupBefore use, you need to configure initial settings. Your e-mail address is assigned automatically in the initial setup.When the standby screen is displayed, press L.Press c (OK).After a short while, your e-mail address is displayed.Press c (OK).The initial settings are complete.You can also configure initial settings by pressing or . Checking Your Phone NumberWhen the standby screen is displayed, press c and then 0.➡➡•](https://usermanual.wiki/Sony/A5880013.08-user-guide/User-Guide-1463890-Page-10.png)
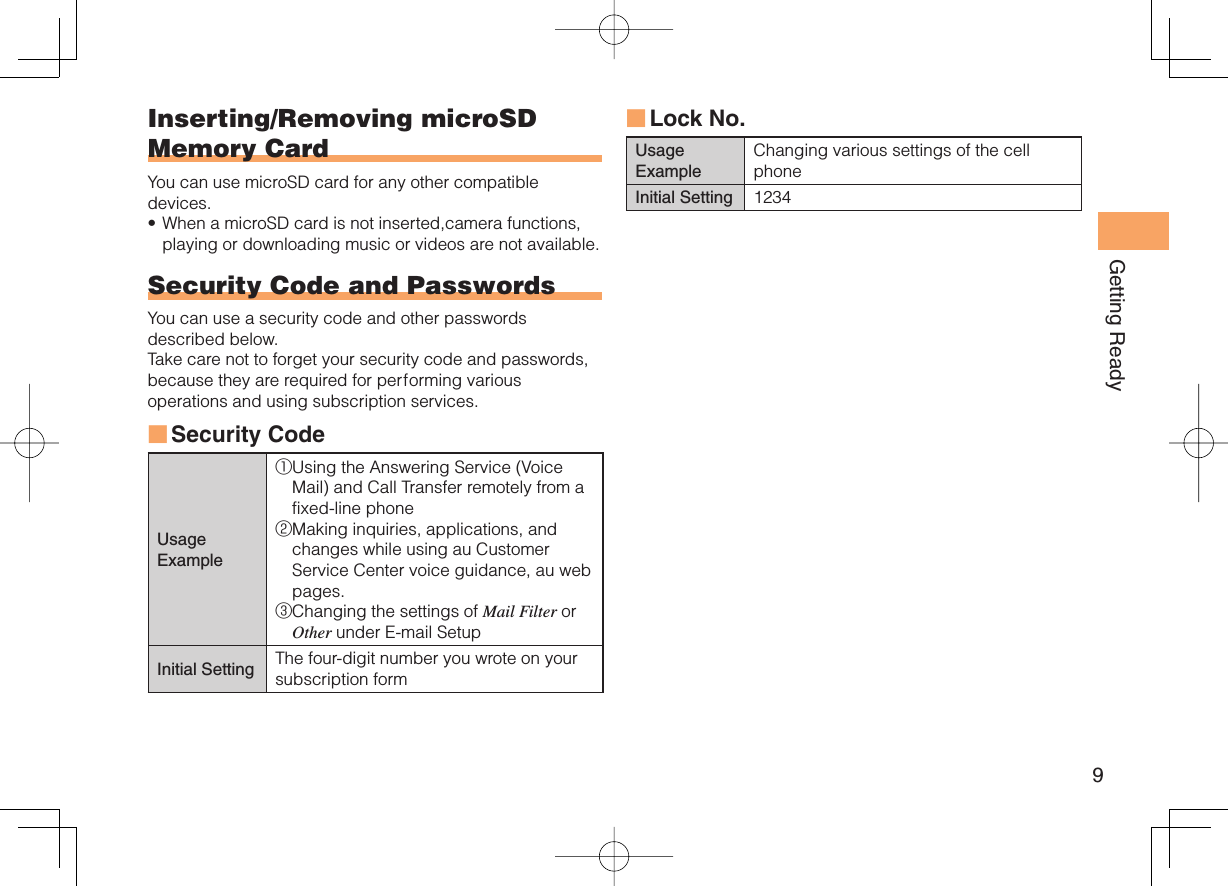
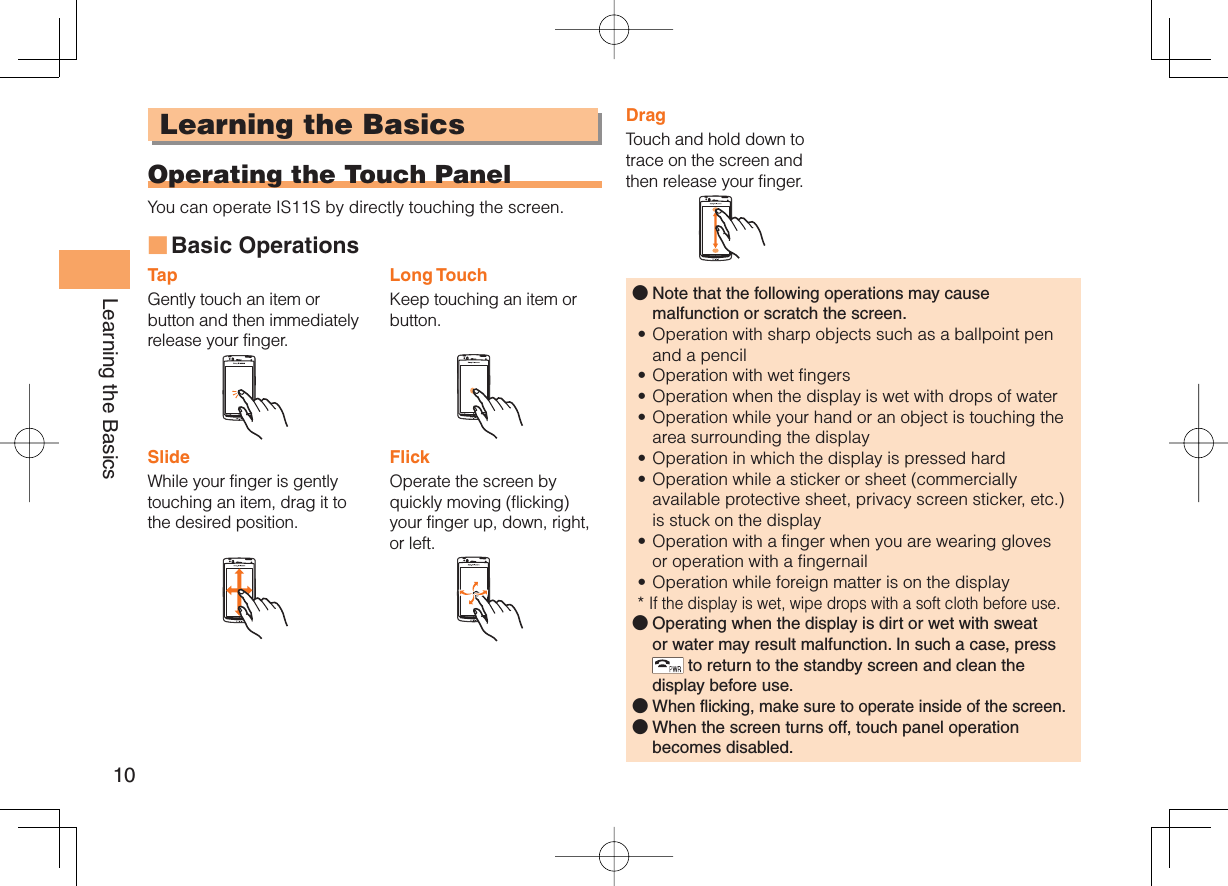
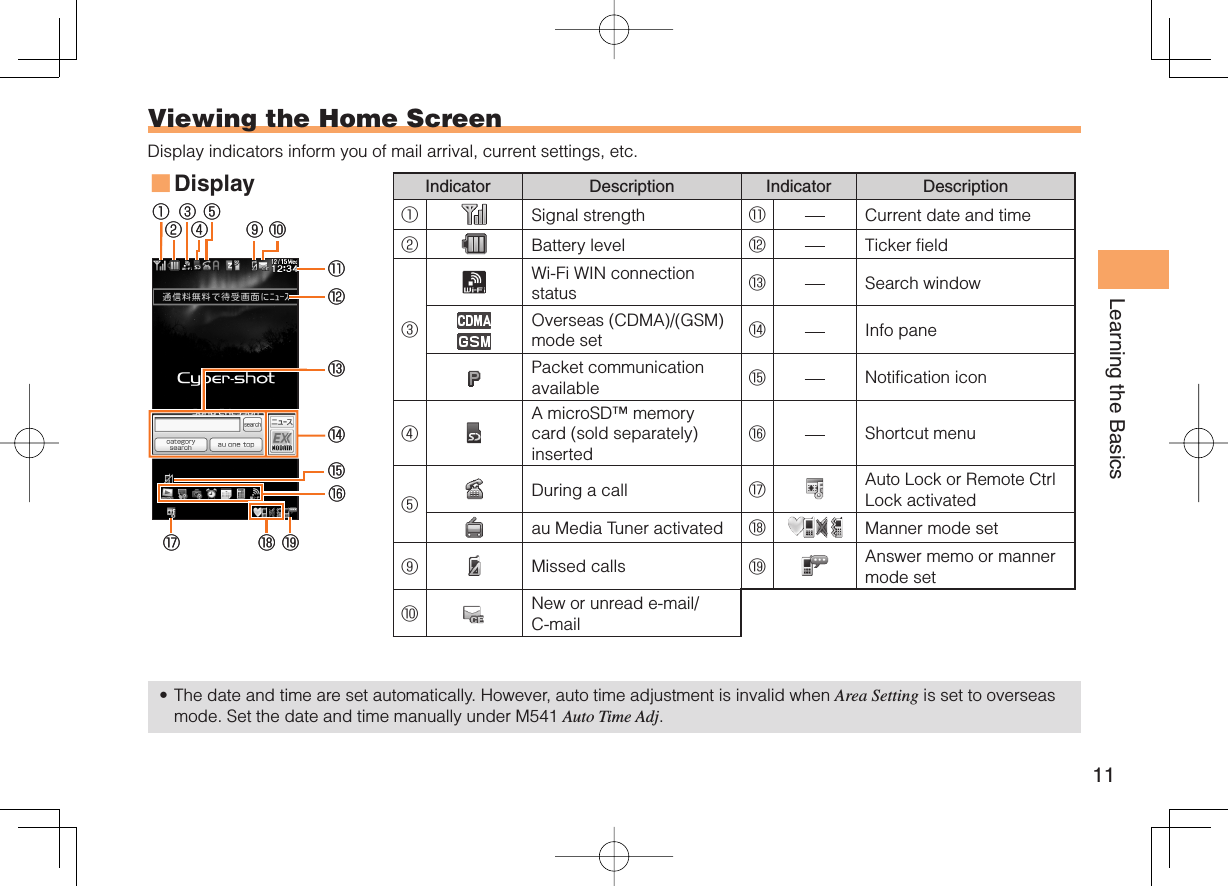
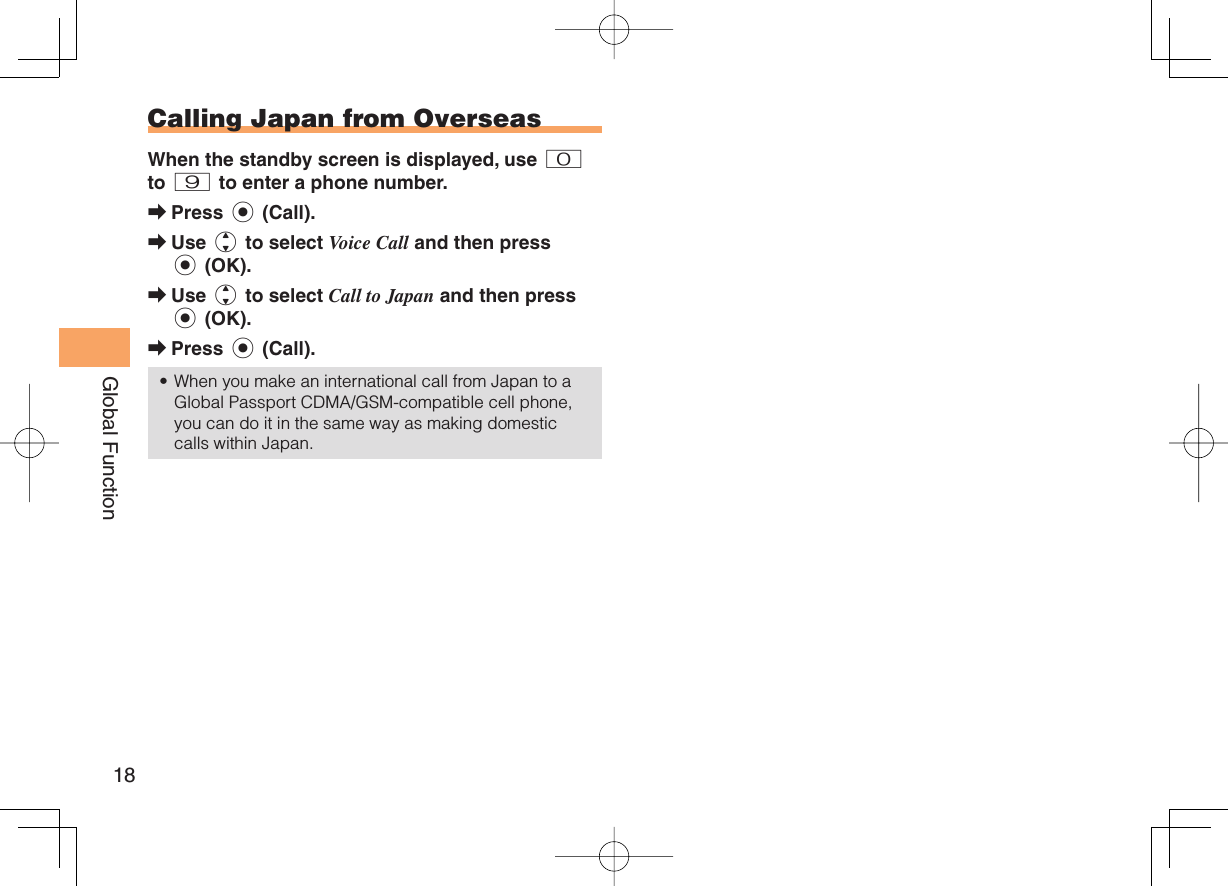
![17Global Function Global FunctionThe IS11S supports Global Passport CDMA/GSM services. You can use your IS11S overseas without any additional application. Setting the AreaExample: Setting to Overseas (Auto) modeWhen the standby screen is displayed, press c.Use a to select Global Function and then press c (Select).Precautions are displayed.Check the precautions and then press c (OK).Use j to select Area Setting and then press c (Select).Use j to select Overseas (Auto) and then press c (Select).Use j to select YES and then press c (OK).Some functions are not available when Area Setting is not set to Japan.➡➡➡➡➡• Obtaining the Latest PRL (Preferred Roaming List)Manually update and set the PRL (preferred roaming list) before traveling abroad.When the standby screen is displayed, press c.Use a to select Global Function and then press c (Select).Precautions are displayed.Check the precautions and then press c (OK).Use j to select PRL Setting and then press c (Select).Use j to select PRL Manual Update and then press c (Select).The cell phone connects to the server.Use j to select PRLダウンロード (Download PRL) and then press c (ダウンロード [Download]).Use j to select 最新ファイルはこちら (The Latest PRL) and then press c (Select).Press c (OK).The latest PRL is downloaded.The PRL (preferred roaming list) is the area information of overseas carriers offering international roaming service in partnership with KDDI (au).➡➡➡➡➡➡➡•](https://usermanual.wiki/Sony/A5880013.08-user-guide/User-Guide-1463890-Page-19.png)
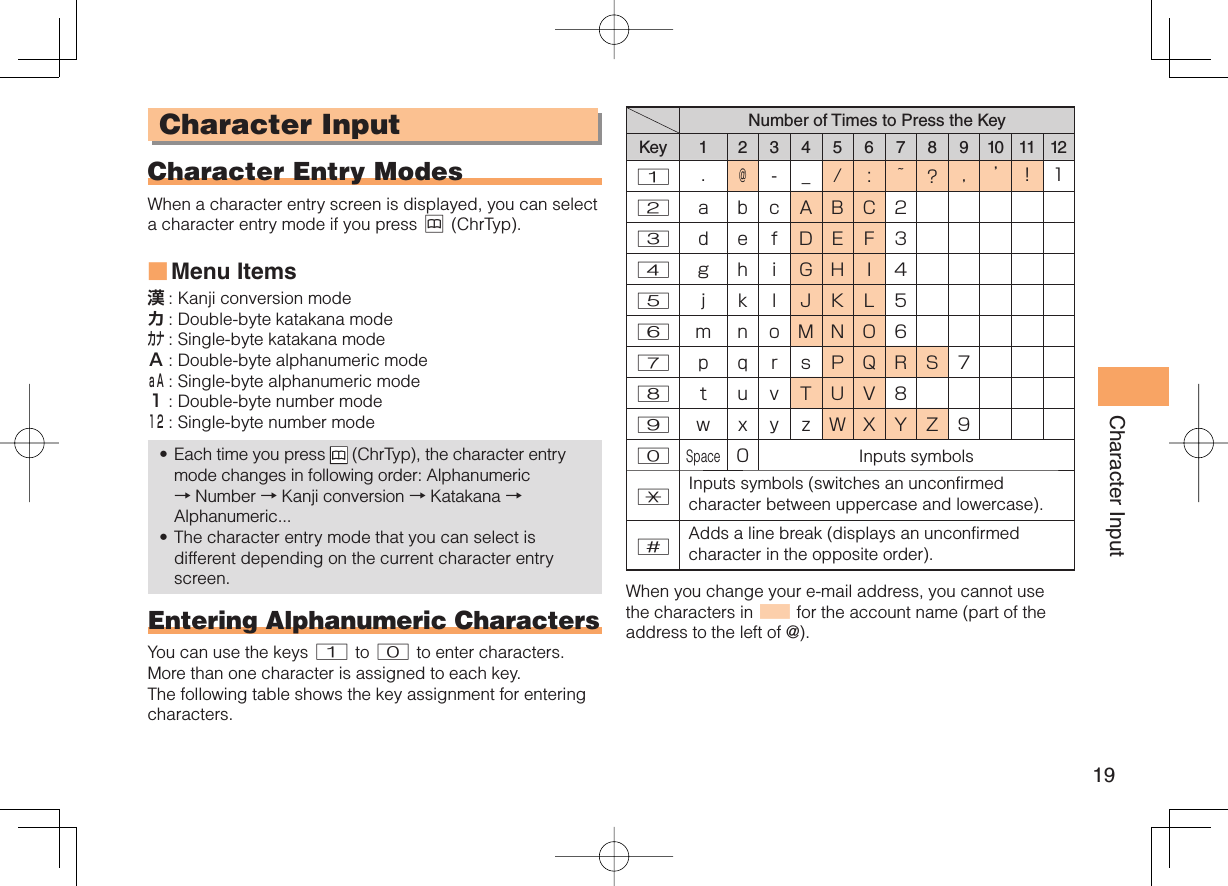
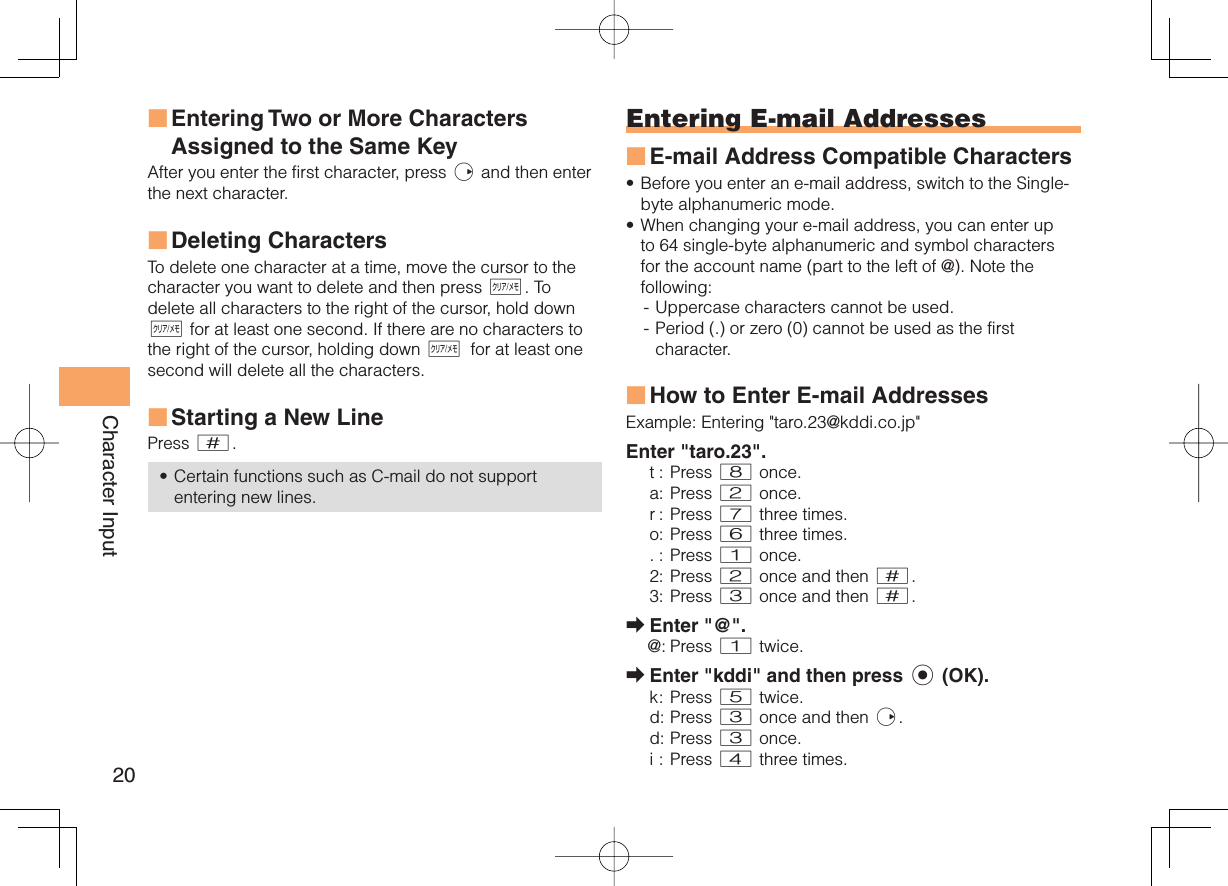
![22Phone Book Phone Book Saving a Phone Book EntryWhen the standby screen is displayed, hold down & for at least one second.Use j to select [Name] and then press c (Select).Enter a name and then press c (OK).The [Reading] for the name is entered automatically.Use j to select [Phone No.1] and then press c (Select).Enter a phone number and then press c (OK).If the phone number is for a fixed-line phone, enter the phone number starting with the area code.Use j to select a phone number type and then press c (Select).Follow the next step to enter an e-mail address. If you do not want to enter an e-mail address, press % (Reg).Use j to select [E-mail Address1] and then press c (Select).Enter an e-mail address and then press c (OK).Use j to select an e-mail address type and then press c (Select).Press % (Reg).➡➡➡➡•➡•➡➡➡➡The phone book can store up to 1,000 entries. The cell phone automatically saves an entry to the lowest available memory number from 000 to 999.You can save five phone numbers and five e-mail addresses for each phone book entry.You can also assign a group No., and enter birthday, address, and other information. Dialing from the Phone BookWhen the standby screen is displayed, press &.Use a to select the entry containing the phone number you want to dial and then press c (Detail).Use j to select the phone number and then press c (Select).Use j to select Voice Call and then press c (OK). Editing Phone Book EntriesWhen the standby screen is displayed, press &.Select an entry and press c (Detail).Press & (Edit).Edit the contents and then press % (Reg).Use j to select Overwrite and then press c (OK).••••➡➡➡➡➡➡➡](https://usermanual.wiki/Sony/A5880013.08-user-guide/User-Guide-1463890-Page-24.png)
![24Mail MailUsing C-mailC-mail is a service that uses phone numbers as addresses to exchange messages between au cell phones that support C-mail. A C-mail message can contain up to 50 double-byte (or 100 single-byte) characters.The C-mail send charge applies when sending C-mail. C-mail Safety BlockC-mail safety block is a function that allows you to reject C-mails that include URLs (http://△△△, https://△△△) or phone numbers in the C-mail message text.C-mail safety block is valid by default. Cancel the setting if you want to receive C-mails that include URLs and phone numbers in the message text. Creating and Sending C-mail MessagesWhen the standby screen is displayed, hold down L for at least one second.Use j to select Create New and then press c (Select).Enter text and then press c (OK).Use j to select [Address] and then press c (Edit).•■➡➡➡Use j to select Quote Adrs Book and then press c (OK).Use a to select a phone book entry and then press c (Detail).Use j to select a phone number and then press c (Select).Press & (Send). Reading Received C-mail MessagesWhen you receive a C-mail message, C-mail appears on the standby screen.Use d to select C-mail and then press c (Select).Press c (Select).: Indicates a read message.: Indicates an unread message.Use j to select the new message and then press c (View).Reading a C-mail Message from the C-mail MenuWhen the standby screen is displayed, hold down L for at least one second to display the C-mail menu, use j to select Inbox and then press c (Select). For subsequent operations, see "Reading Received C-mail Messages" above.➡➡➡➡➡➡••➡■](https://usermanual.wiki/Sony/A5880013.08-user-guide/User-Guide-1463890-Page-26.png)
![25MailUsing PC-mailYou can create an Email account provided by au one mail or general service provider, and use Email.Registering another PC-mail accountIf you enter your account settings in the Email setup wizard, you can view your emails up to 11 accounts by Timescape.Sending PC-mail MessagesFrom the Home screen, tap the applications bar, then tap [Email].Press menu, then tap [Compose].Enter the email address of the recipient.Enter a subject.Enter a message text.To attach a file, press menu, then tap [Add attachment] and select a file.Tap [Send].Receiving PC-mail MessagesFrom the Home screen, tap the applications bar, then tap [Email].To update the inbox with new messages, press menu, then tap [Refresh].■■➡➡➡➡➡➡➡■➡➡Tap the email.Using GmailIf you have a Google account, you can send/receive emails by using Gmail on your IS11S.Gmail messages are not displayed in Timescape.From the Home screen, tap the applications bar, then tap [Gmail].On the inbox, press menu and tap [Refresh].➡•➡➡](https://usermanual.wiki/Sony/A5880013.08-user-guide/User-Guide-1463890-Page-27.png)
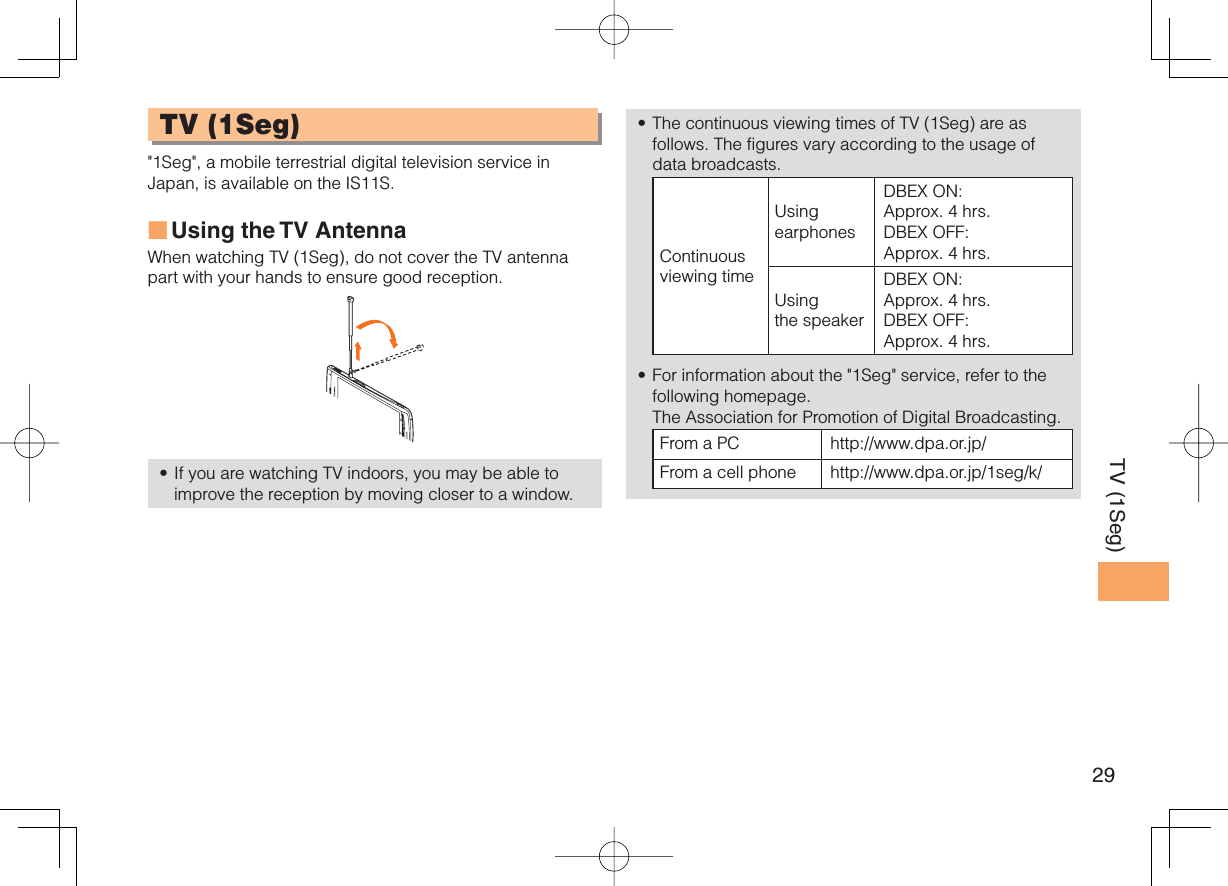
![30TV (1Seg) Initial Setup of the TVTo watch TV (1Seg) using the au Media Tuner, you need to configure initial settings. When the standby screen is displayed, hold down g for at least one second.Disclaimer notes are displayed.Use j to check the disclaimer notes, use j to select OK, and then press c (選択 [Select]). The initial setting screen for using the au Media Tuner is displayed. Follow the on-screen instructions to configure each setting. Then, the screen for setting TV (1Seg) channels appears. Use j to select オート設定(放送波) (Auto (Broadcasting wave)) and then press c (選択 [Select]).Automatic channel scanning begins. When receivable channels are found, the channel setup is completed.Select マニュアル設定 (Manual) to set the channel manually. ➡•➡•Watching TV (1Seg)When the standby screen is displayed, hold down g for at least one second.To Change Channels Use s to change channels.You can select TV (1Seg). Before using this feature, you must configure au Media Tuner initial settings (see the procedure on the left).Channels cannot be changed with when the data operation screen is displayed.■••1ch 2ch …12chTV (1Seg)Change channels one by one. 1ch 2ch …12chTV (1Seg)Change channels one by one.](https://usermanual.wiki/Sony/A5880013.08-user-guide/User-Guide-1463890-Page-32.png)
![31TV (1Seg) Basic OperationsLaunch TV (1Seg) to start receiving data broadcasts. The data operation screen appears when a data broadcast is received. Press & (Vol/Ch) on the data operation screen to switch to the TV operation screen. On the TV operation screen, pressing N switches the display.On the TV operation screen, use to adjust the volume. Exiting the TVPress F, use j to select はい (YES) and then press c (OK).•TV operation screenData operation screen& (Vol/Ch)& (戻る[Return])TV operation screenData operation screen& (Vol/Ch)& (戻る[Return])](https://usermanual.wiki/Sony/A5880013.08-user-guide/User-Guide-1463890-Page-33.png)
