Sony F1022013 Licensed transmitter User Manual Elena SHUG
Sony Mobile Communications Inc Licensed transmitter Elena SHUG
UserManual.wiki
>
Sony
>
F1022013 User Manual
08 user manual
Navigation menu
Upload a User Manual
Namespaces
Wiki Guide
HTML
PDF
Info
Views
User Manual
Discussion / Help
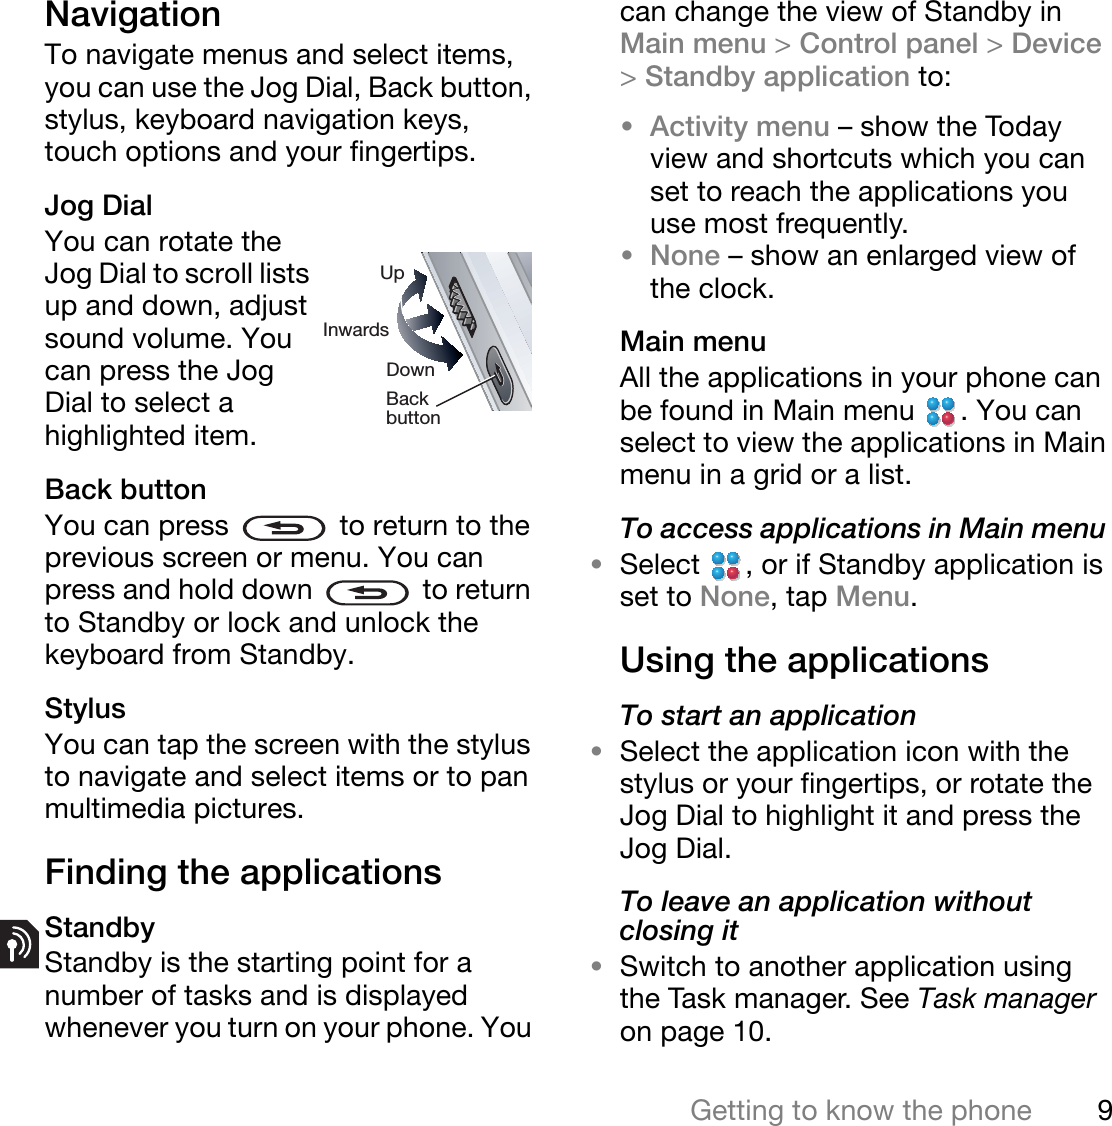
Navigation


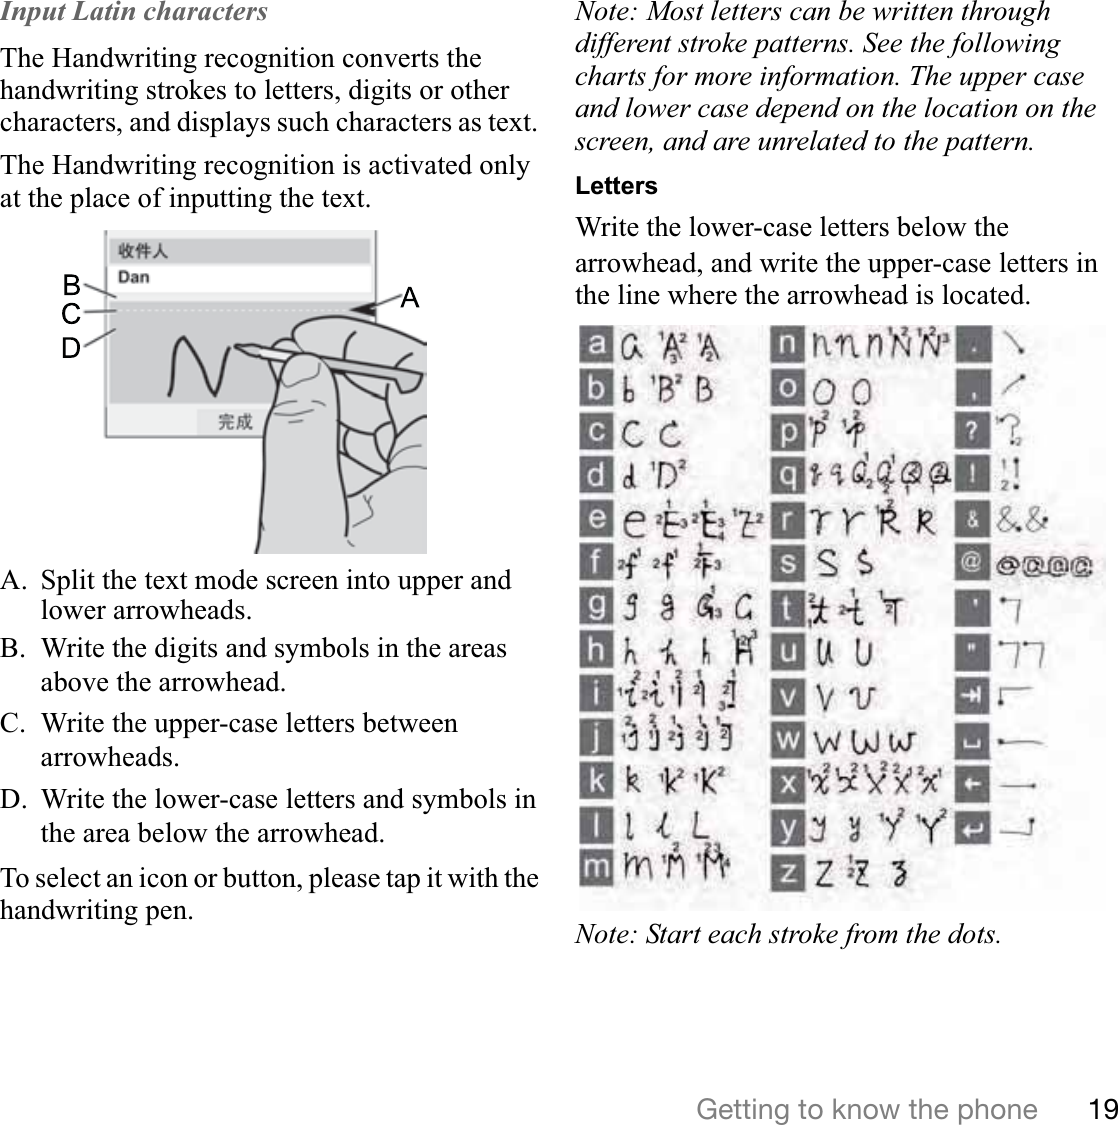
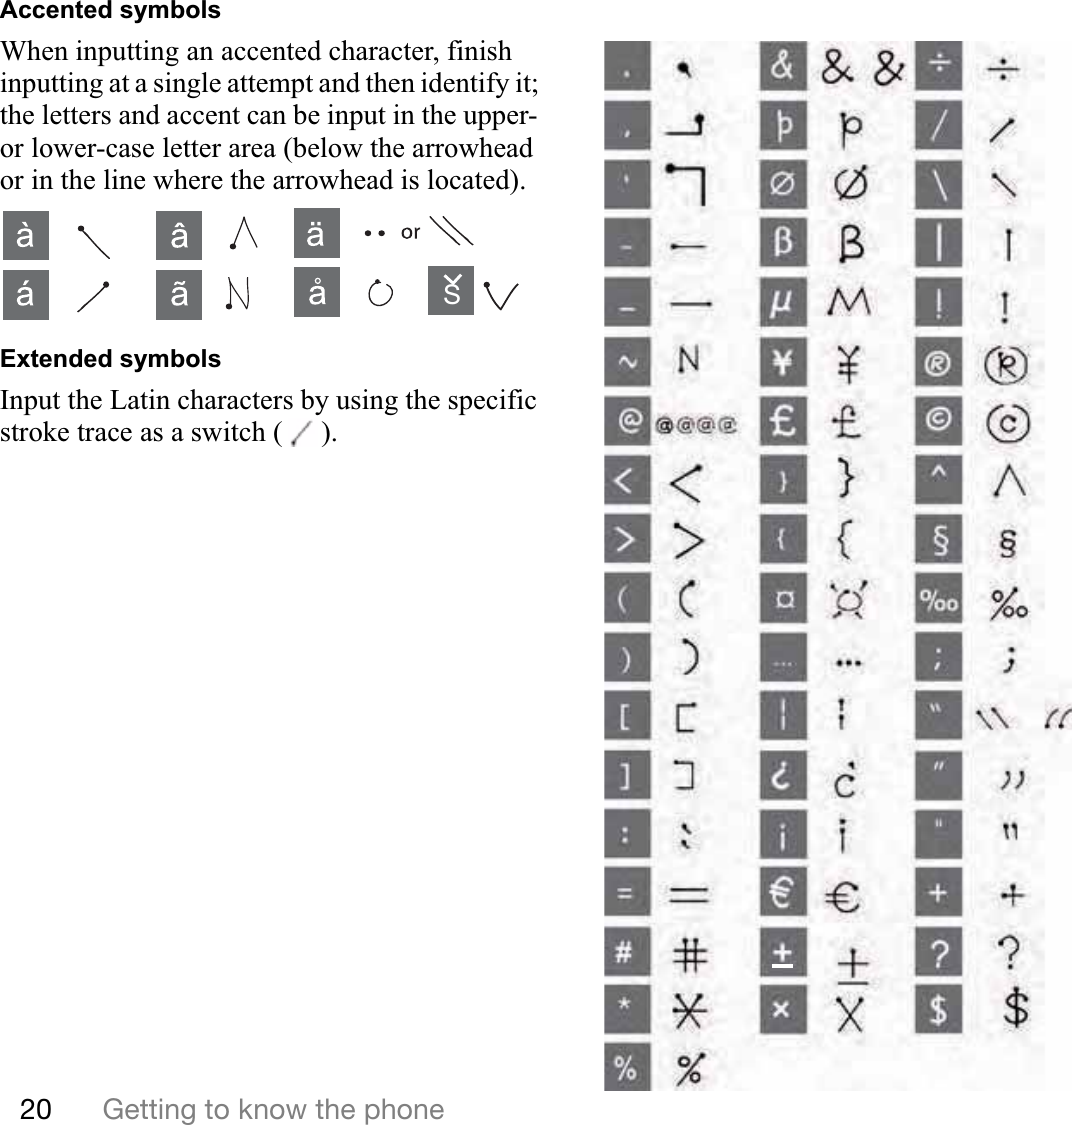
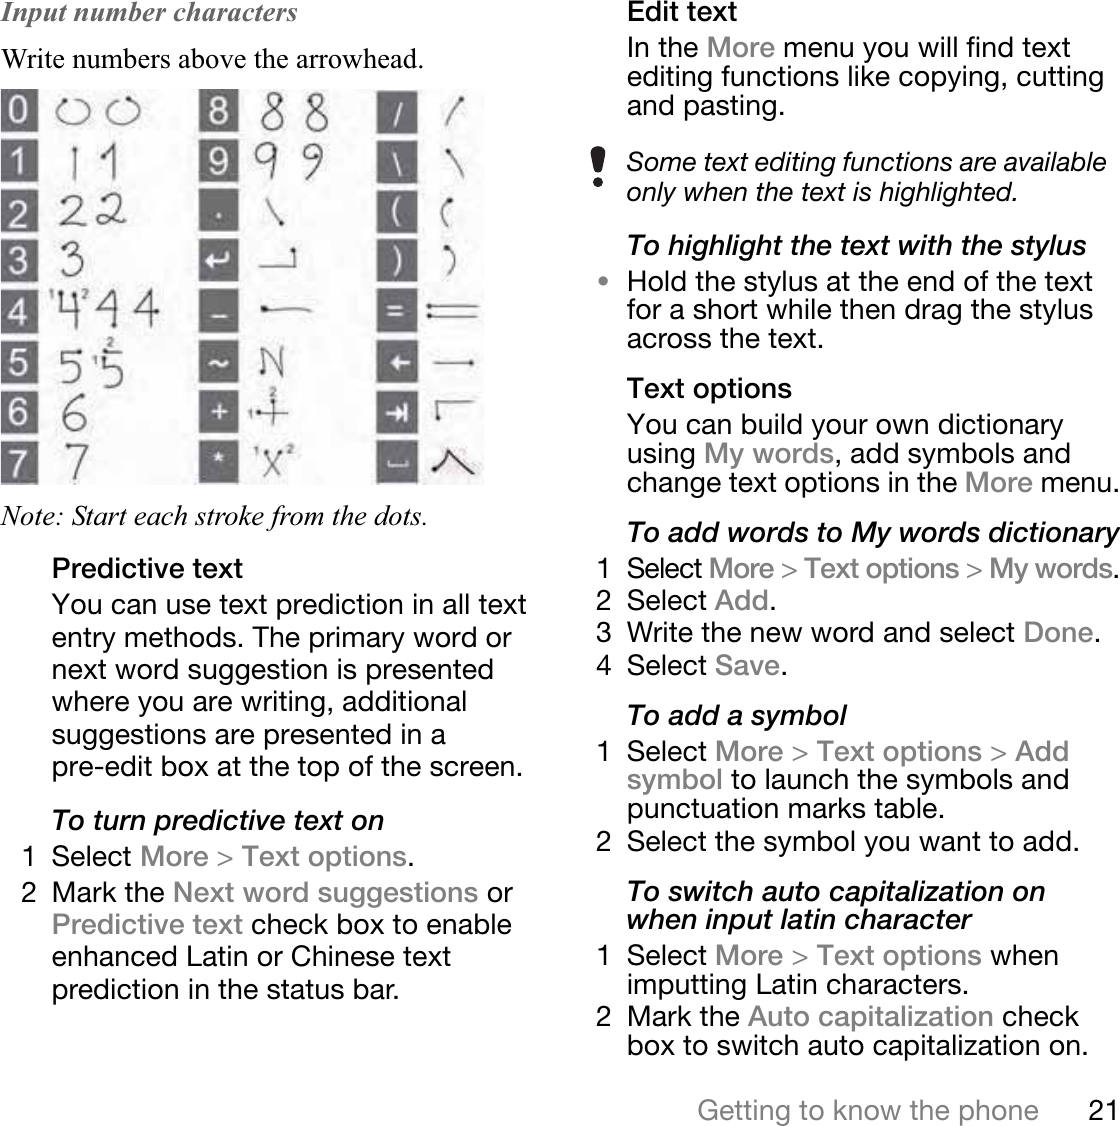


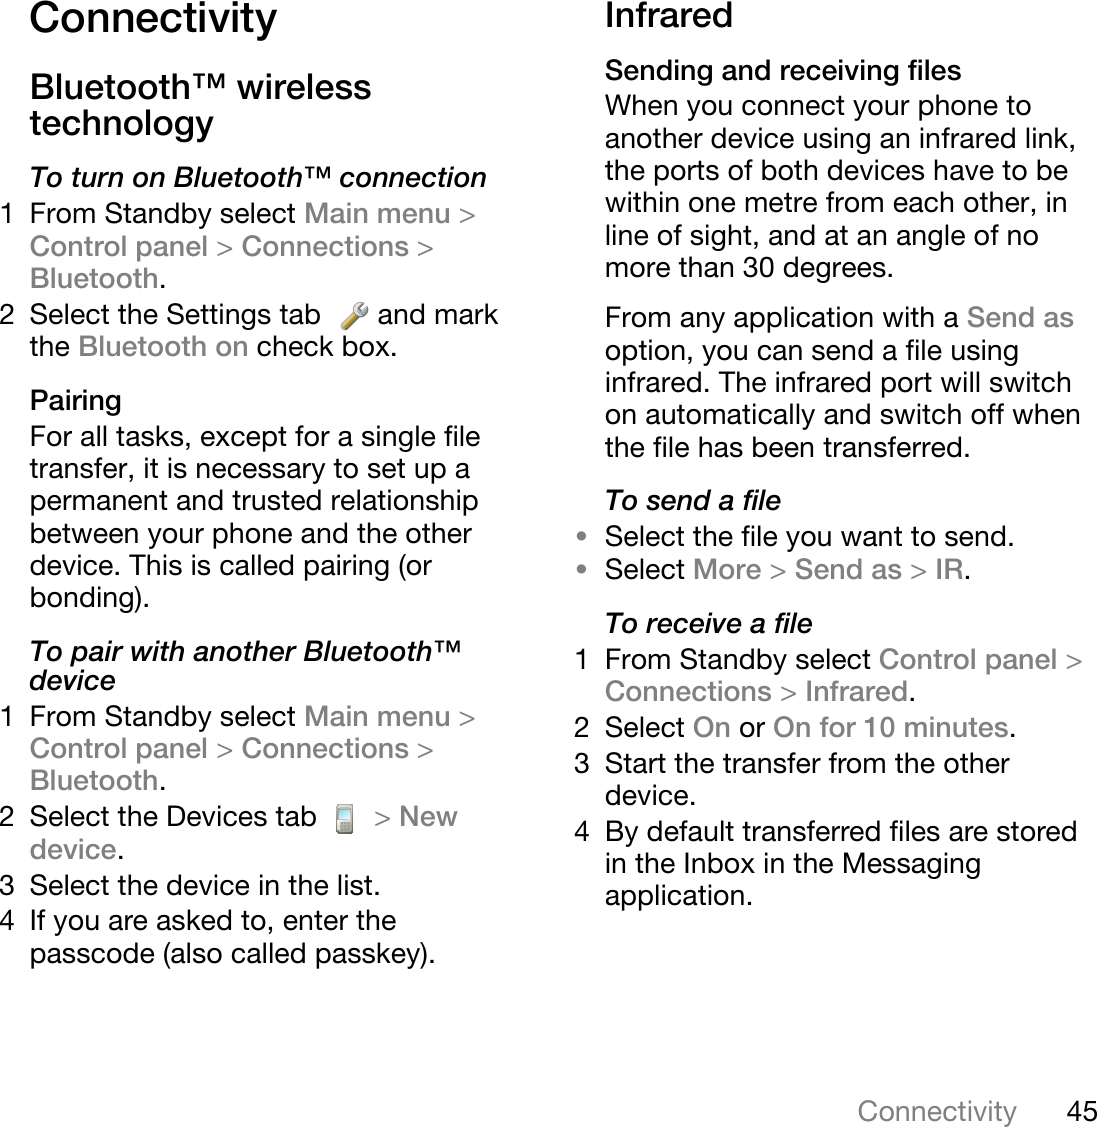
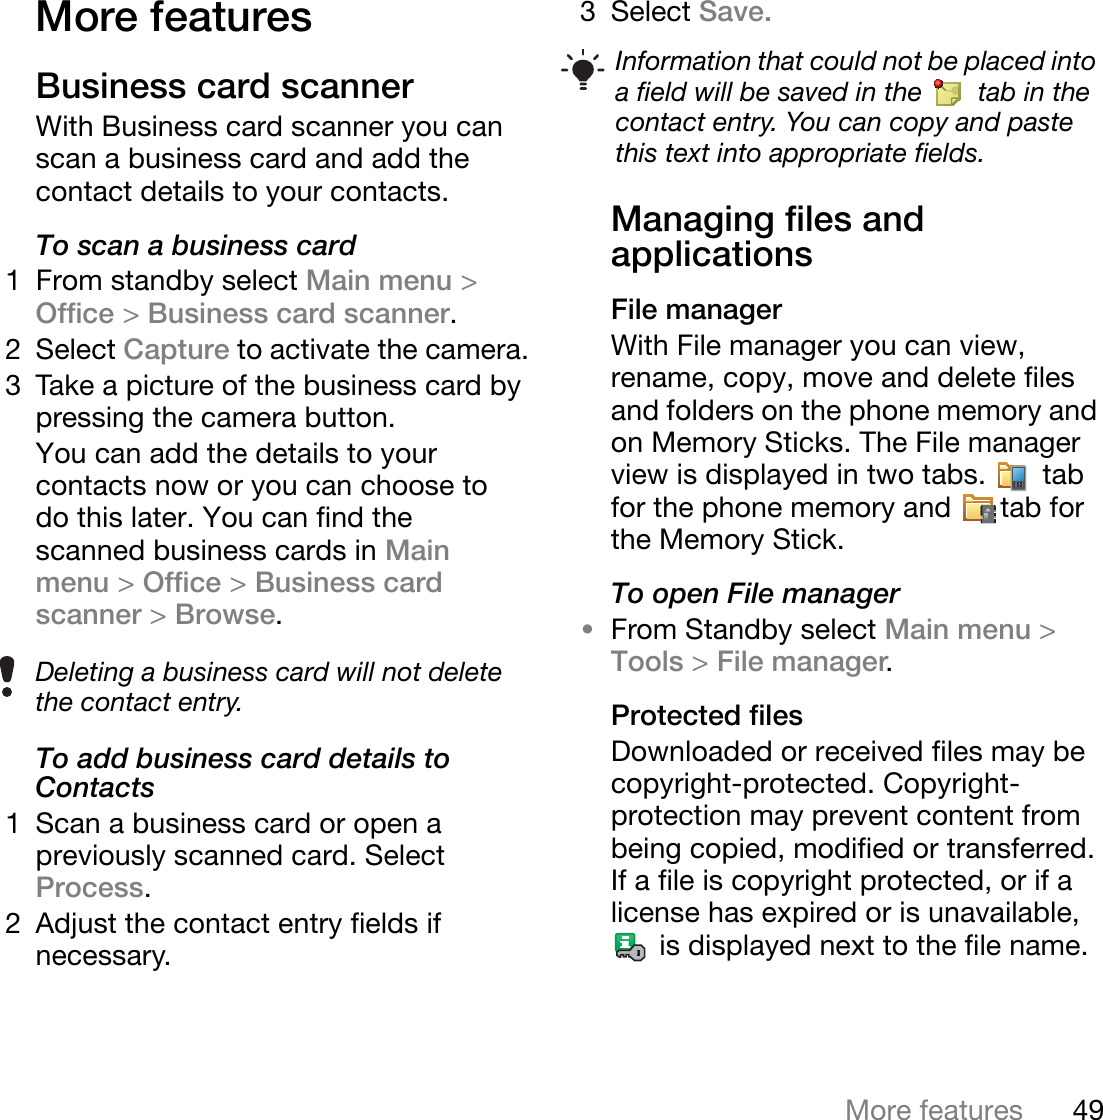
![57Important informationThis is the Internet version of the user's guide. © Print only for private use.Disposal of old electrical and electronic equipmentThis symbol indicates that all electrical and electronic equipment included shall not be treated as household waste. Instead it shall be left at the appropriate collection point for recycling of electrical and electronic equipment. By ensuring this product is disposed of correctly, you will help prevent potential negative consequences for the environment and human health, which could otherwise be caused by inappropriate waste handling of this product. The recycling of materials will help to conserve natural resources. For more detailed information about recycling this product, please contact your local city office, your household waste disposal service or the shop where you purchased the product.Disposing of the batteryPlease check local regulations for disposal of batteries or call your local Sony Ericsson Call Center for information.The battery should never be placed in municipal waste. Use a battery disposal facility if available.Declaration of substances When this product is operated under the conditions in the product manual, the environmental protection period (EPUP) is 20 years.7R[LFRUKD]DUGRXVVXEVWDQFHV3DUW1DPH 0HUFXU\+J&DGPLXP&G+H[DYDOHQWFKURPLXP&U3RO\EURPLQDWHGELSKHQ\OV3%%3RO\EURPLQDWHGGLSKHQ\OHWKHUV3%'(3KRQH ; 2 2 2 2 2%DWWHU\ ; 2 2 2 2 2$FFHVVRULHVDQGFKDUJHU ; 2 2 2 2 22,QGLFDWHVWKDWWKLVWR[LFRUKD]DUGRXVVXEVWDQFHFRQWDLQHGLQDOORIWKHKRPRJHQHRXVPDWHULDOVIRUWKLVSDUWLVEHORZWKHOLPLWUHTXLUHPHQWLQ6-7;,QGLFDWHVWKDWWKLVWR[LFRUKD]DUGRXVVXEVWDQFHFRQWDLQHGLQDWOHDVWRQHRIWKHKRPRJHQHRXVPDWHULDOVXVHGIRUWKLVSDUWLVDERYHWKHOLPLWUHTXLUHPHQWLQ6-7&XUUHQWO\WKHUHDUHQRDOWHUQDWLYHWHFKQRORJLHVDYDLODEOH)](https://usermanual.wiki/Sony/F1022013/User-Guide-799126-Page-59.png)