Spirent Communications NOMADHD-01 Table Top HW device for Voice Quality and Call Performance User Manual Part 1
Spirent Communications Inc Table Top HW device for Voice Quality and Call Performance Users Manual Part 1
Contents
- 1. Users Manual Part 1
- 2. Operators Manual
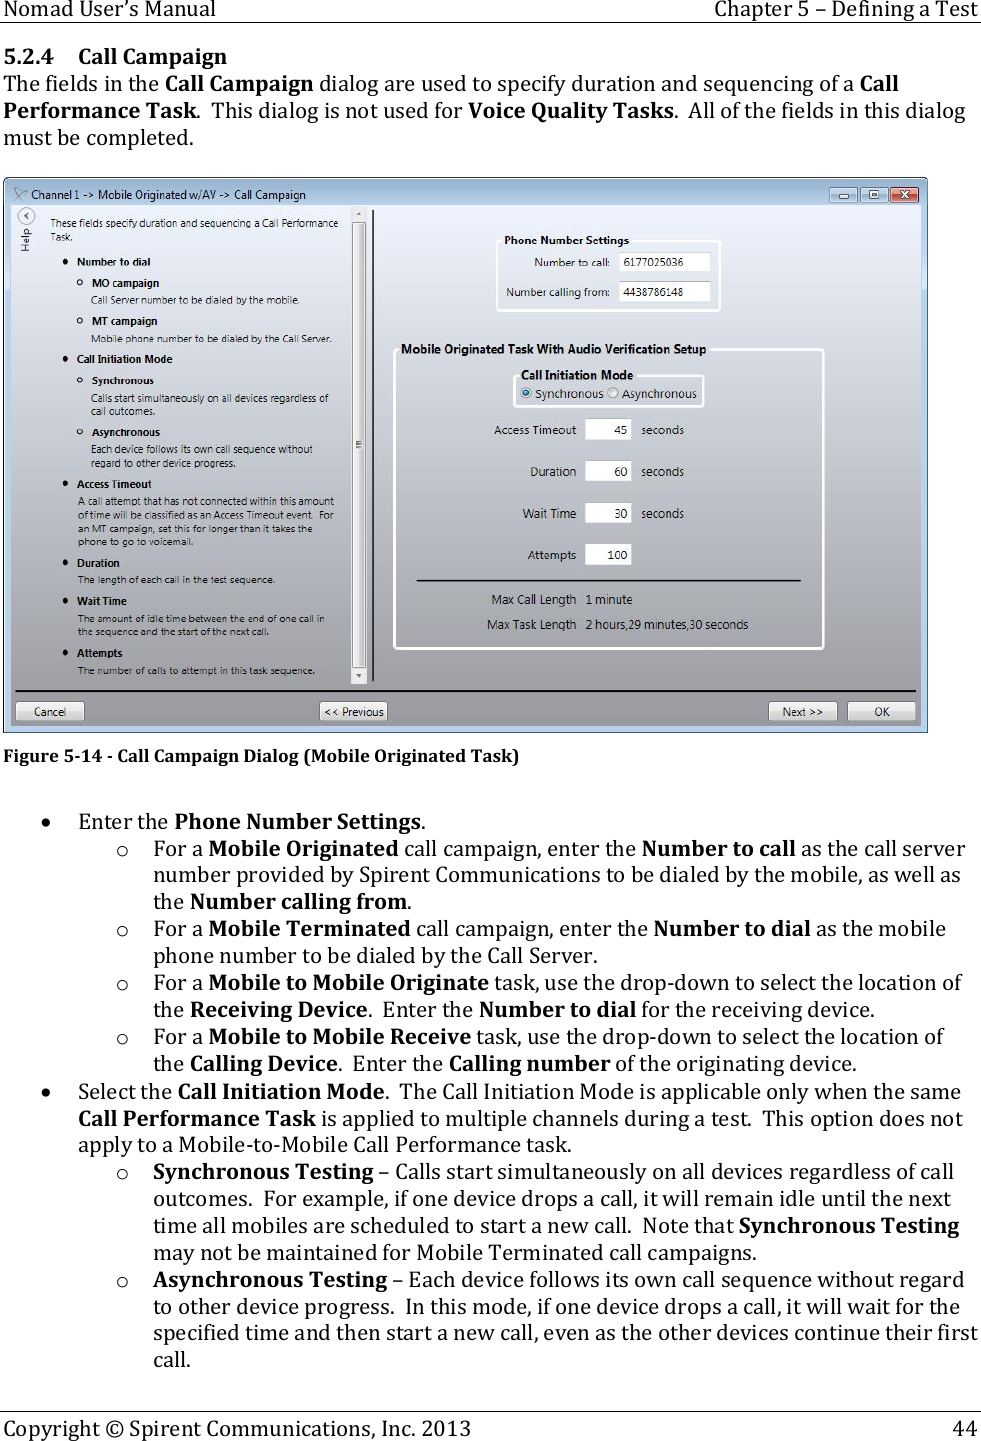
- 3. User Manual Part 2
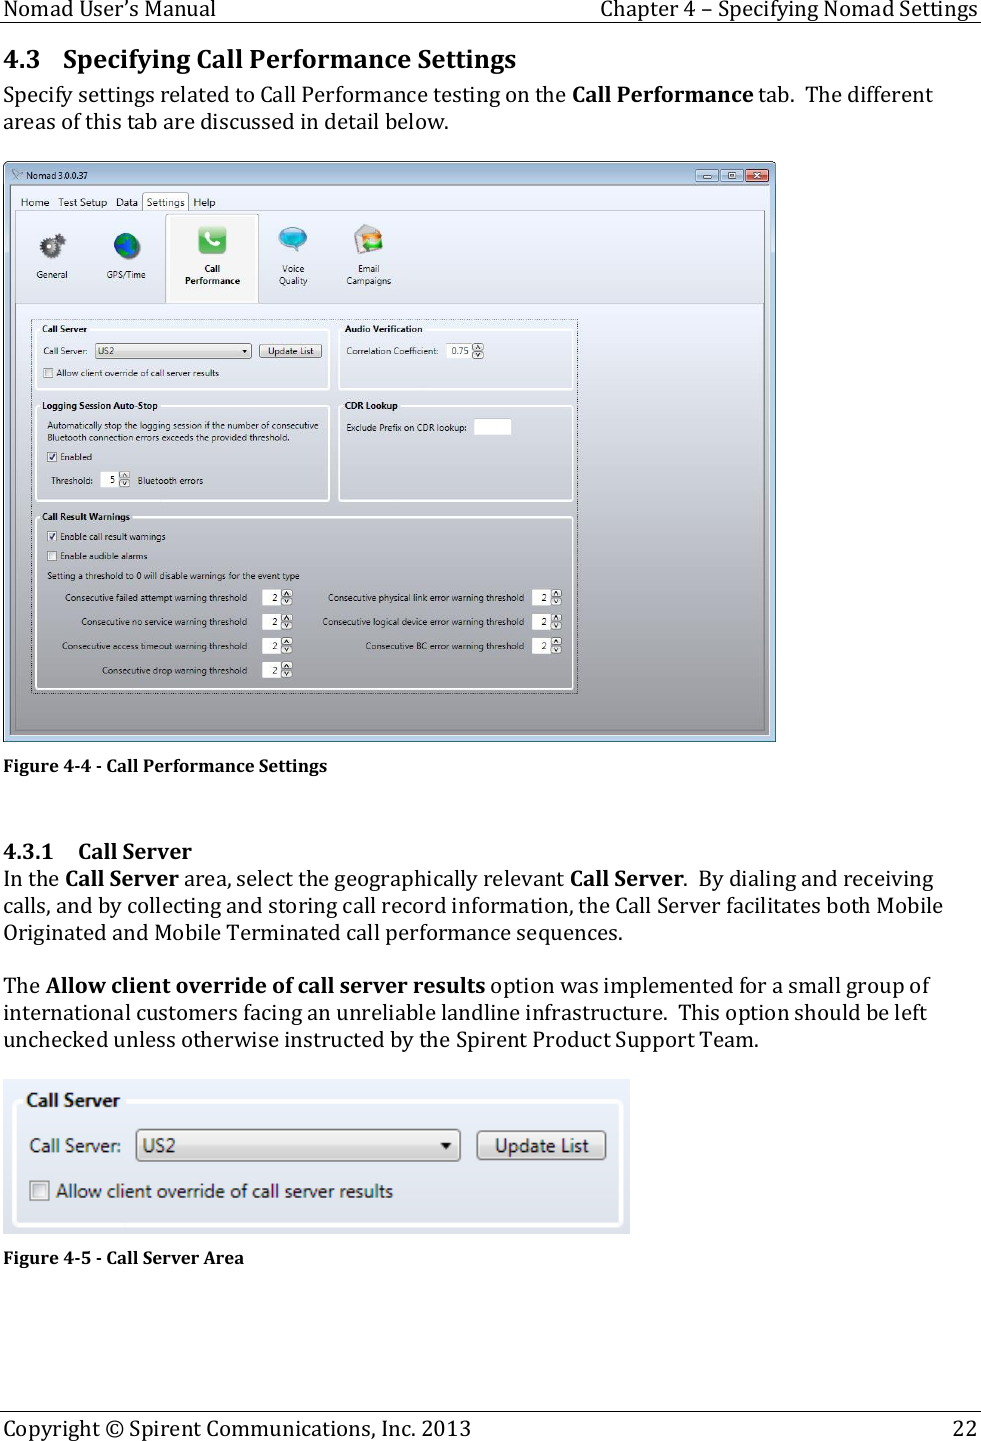
Users Manual Part 1