Steinberg HALion 6 – Operation Manual 6.0 OM En
User Manual: Steinberg HALion - 6.0 - Operation Manual Free User Guide for Steinberg HALion Software, Manual
Open the PDF directly: View PDF ![]() .
.
Page Count: 550 [warning: Documents this large are best viewed by clicking the View PDF Link!]
- Table of Contents
- Installation and Setup
- HALion Control Panel
- Common Editing Methods
- Global Functions and Settings
- Plug-in Functions Section
- Plug-in Name and Steinberg Logo
- Toolbar
- Keyboard Editor
- Quick Controls
- Value Tooltips
- Assigning Quick Controls
- Unassigning Quick Controls
- Single Assignment vs. Multi Assignment
- Quick Control Assignments Editor
- Managing Quick Controls
- Setting the Scope for Quick Control Assignments
- Receiving Quick Controls
- Adjusting the Curvature
- Setting the Mode for the Quick Control Assignment
- Neutral Setting
- Bypassing Quick Controls
- Assigning Quick Controls in the Modulation Matrix
- Options Editor
- AI Knob Support
- Automation
- Managing Your Sounds
- About Programs, Layers, Multis, Macro Pages, and Presets
- Registering VST Sounds
- Loading Programs and Layers
- Load Dialog
- Slot Rack
- Managing and Loading Files
- Managing Multis
- Managing Files via the MediaBay
- Loading Files Using the Browser
- Working with General MIDI Files
- Mapping Zones
- Editing Programs and Layers
- Editing Zones
- Adding Zones
- Zone Types
- Adding Samples to Empty Zones
- Absolute and Relative Editing
- Editing Selected Zones or All Zones
- Global Zone Settings
- Voice Control Section
- Voice Control Section for Organ Zones
- Pitch Section
- Oscillator Section
- Sample Oscillator Section
- Organ Oscillator Section
- Wavetable Section
- AudioWarp Section
- Filter Section
- Amplifier Section
- Envelope Section
- LFO Section
- Step Modulator
- Modulation Matrix
- Editing Samples in the Sample Editor
- Wavetable Synthesis
- Granular Synthesis
- MIDI Editing and Controllers
- Mixing, Routing, and Effect Handling
- Loading and Managing Programs via the Program Table
- Program Tree
- Program Tree Elements
- Program Tree Columns and Controls
- Editing Programs, Zones and Layers
- Importing Samples
- Replacing Samples
- Exporting Samples
- Exporting Programs and Layers with Samples
- Exporting Programs and Layers as HALion Sonic SE Layer Presets
- Importing Sliced Loops
- Selections in the Program Tree
- Navigating in the Program Tree
- Sorting the Program Tree Elements
- Setting Up the Program in the Program Tree
- Renaming Elements
- Sample Recorder
- Included Instruments
- Parameter List
- Macro Pages
- Macro Pages, Templates, Controls, Resources, and Libraries
- Getting Started
- Macro Page Designer
- Editing and Assembling Elements
- Libraries
- Connecting Macro Page Controls to HALion Parameters
- Collaborating on Macro Pages
- Cleaning Up and Consolidating Your Macro Pages
- Saving Macro Pages
- Library Creator
- Library Manager
- Effects Reference
- MIDI Modules Reference
- Key Commands Reference
- Note Expression
- Using the Standalone Version of the Plug-In
- Index

Operation Manual
Matthias Klag, Michael Ruf
Cristina Bachmann, Heiko Bischoff, Christina Kaboth, Insa Mingers, Matthias Obrecht, Sabine Pfeifer,
Benjamin Schütte, Marita Sladek
This PDF provides improved access for vision-impaired users. Please note that due to the complexity and
number of images in this document, it is not possible to include text descriptions of images.
The information in this document is subject to change without notice and does not represent a commitment
on the part of Steinberg Media Technologies GmbH. The software described by this document is subject to
a License Agreement and may not be copied to other media except as specifically allowed in the License
Agreement. No part of this publication may be copied, reproduced, or otherwise transmitted or recorded, for
any purpose, without prior written permission by Steinberg Media Technologies GmbH. Registered licensees
of the product described herein may print one copy of this document for their personal use.
All product and company names are ™ or ® trademarks of their respective owners. For more information,
please visit www.steinberg.net/trademarks.
© Steinberg Media Technologies GmbH, 2017.
All rights reserved.

Table of Contents
3
6Installation and Setup
6Conventions
7System Requirements
8Downloading Program Files
8Installing the Program
8Activating Your License
9Registering Your Software
9How You Can Reach Us
9About the Documentation
10 Setting Up
11 HALion Control Panel
11 Configuring the Control Panel
12 View and Tab Operations
13 Window Handling
15 Setting the Focus
15 Available Editors
18 Common Editing Methods
18 Dials and Sliders
18 Multi Selection and Parameter Controls
19 Buttons
19 Value Fields
20 Using Key Commands
20 Presets
23 Global Functions and Settings
23 Plug-in Functions Section
24 Plug-in Name and Steinberg Logo
24 Toolbar
26 Keyboard Editor
27 Quick Controls
35 Options Editor
41 AI Knob Support
42 Automation
42 Automation Parameters
43 Automation Editor
44 Setting Up Automation
46 Managing Your Sounds
46 About Programs, Layers, Multis, Macro
Pages, and Presets
47 Registering VST Sounds
48 Loading Programs and Layers
50 Load Dialog
50 Slot Rack
53 Managing and Loading Files
69 Working with General MIDI Files
70 Mapping Zones
70 Mapping Editor
74 Mapping Editor Context Menu
78 Sample Zones and their Root Keys
78 Moving Zones
79 Creating Fades and Crossfades
79 Setting Key Range and Velocity Range
79 Zooming
80 Selecting Zones
80 Importing Single Samples Using Drag And
Drop
81 Importing Multiple Samples Using Drag And
Drop
82 Editing Programs and Layers
82 Main Section
83 Trigger Section
85 Voice Management Section
90 Variation Groups Section
91 Quick Control Assignments Section
91 Note Expression Section
92 Editing Zones
92 Adding Zones
92 Zone Types
93 Adding Samples to Empty Zones
93 Absolute and Relative Editing
94 Editing Selected Zones or All Zones
94 Global Zone Settings
95 Voice Control Section
99 Voice Control Section for Organ Zones
101 Pitch Section
102 Oscillator Section
106 Sample Oscillator Section
109 Organ Oscillator Section
109 Wavetable Section
116 AudioWarp Section
119 Filter Section
123 Amplifier Section
125 Envelope Section
132 LFO Section
135 Step Modulator
137 Modulation Matrix
150 Editing Samples in the Sample Editor
150 Loading and Previewing Samples
150 Toolbar

Table of Contents
4
153 Info Line
155 Overview Line
155 Waveform Display
157 Parameter Section
163 Sample Editor Context Menu
166 Markers
167 Zooming
167 Editing Samples in an External Editor
168 Creating Loops
170 Creating Slices Automatically
171 Replacing Samples
173 Wavetable Synthesis
174 Wavetable Editor
186 Creating a Wavetable
186 Pitch Detection
187 Markers
188 Replacing Samples
188 Importing Wavetables
189 Managing Wavetables
190 Granular Synthesis
190 Grain Oscillator
197 Modulating the Grain Oscillator
198 MIDI Editing and Controllers
198 MIDI Editor
200 MIDI Controllers
204 Mixing, Routing, and Effect Handling
204 Mixer Window
206 Audio Bus Architecture
210 Insert Effects
213 Loading and Managing Programs via the
Program Table
213 Program Table
214 Configuring the Program Table
215 Program Table Context Menu
217 Program Tree
217 Program Tree Elements
218 Program Tree Columns and Controls
227 Editing Programs, Zones and Layers
228 Importing Samples
233 Replacing Samples
234 Exporting Samples
238 Exporting Programs and Layers with
Samples
244 Exporting Programs and Layers as HALion
Sonic SE Layer Presets
244 Importing Sliced Loops
248 Selections in the Program Tree
249 Navigating in the Program Tree
249 Sorting the Program Tree Elements
250 Setting Up the Program in the Program Tree
251 Renaming Elements
254 Sample Recorder
260 Recording From an Audio Track With Multiple
Drum Sounds
261 Recording the Output of Another Plug-In
262 Recording Samples in the Standalone
Version
263 Included Instruments
263 Auron
271 Trium
279 Voltage
285 Model C
291 HALiotron
294 B-Box
300 World Instruments
304 World Percussion
308 Anima
326 Skylab
340 Raven
341 Eagle
343 Hot Brass
354 Studio Strings
365 Parameter List
367 Macro Pages
367 Macro Pages, Templates, Controls,
Resources, and Libraries
368 Getting Started
370 Macro Page Designer
385 Editing and Assembling Elements
401 Libraries
402 Connecting Macro Page Controls to HALion
Parameters
403 Collaborating on Macro Pages
403 Cleaning Up and Consolidating Your Macro
Pages
404 Saving Macro Pages
405 Library Creator
405 Libraries
409 Library Creator Editor
418 Unassigned VST Sound Containers
420 Consistency Check
421 Library Manager
421 Library Manager Editor
424 Effects Reference
424 Introduction
424 Reverb Effects
428 Delay Effects
429 EQ Effects
431 Filter Effects
439 Distortion Effects
443 Pitch Shift Effects
444 Modulation Effects
455 Dynamics Effects
465 Spatial and Panner Effects
466 Surround Effects
467 Tools Effects
468 Legacy Effects

Table of Contents
5
480 MIDI Modules Reference
480 Common Functions
483 FlexPhraser
494 Trigger Pads
497 MIDI Player
502 Drum Player
508 Mono Envelope
510 Mono LFO
512 Mono Step Modulator
514 True Pedaling
516 MegaTrig
522 Layer Alternate
524 Key Switch Alternate
526 Key Switch Remote
527 MIDI Randomizer
529 CC Mapper
530 Velocity Curve
531 Tuning Scale
533 Lua Script
537 Key Commands Reference
540 Note Expression
540 Note Expression Editor
542 Using the Standalone Version of the Plug-In
542 Making Preferences Settings
542 Preferences Dialog
544 Selecting the MIDI Input and the Audio
Output
544 Scratch Pad
546 Loading a MIDI File
547 Saving a MIDI File
547 Master Volume
548 Index

Installation and Setup
6
Conventions
In our documentation, we use typographical and markup elements to structure information.
Typographical Elements
The following typographical elements mark the following purposes.
PREREQUISITE
Requires you to complete an action or to fulfill a condition before starting a
procedure.
PROCEDURE
Lists the steps that you must take to achieve a specific result.
IMPORTANT
Informs you about issues that might affect the system, the connected hardware,
or that might bring a risk of data loss.
NOTE
Informs you about issues that you should consider.
EXAMPLE
Provides you with an example.
RESULT
Shows the result of the procedure.
AFTER COMPLETING THIS TASK
Informs you about actions or tasks that you can undertake after completing the
procedure.
RELATED LINKS
Lists related topics that you can find in this documentation.

Installation and Setup
System Requirements
7
Markup
Bold text indicates the name of a menu, option, function, dialog, window, etc.
EXAMPLE
In the header of the plug-in panel, click the Preset Management button next to the preset
name field and select Load Preset.
If bold text is separated by a greater-than symbol, this indicates a sequence of different
menus to open.
EXAMPLE
To save a specific layer, right-click it and select Load/Save> Save Layer As.
Key Commands
Many of the default key commands, also known as keyboard shortcuts, use modifier keys,
some of which are different depending on the operating system.
For example, the default key command for Undo is Ctrl-Z on Windows and Cmd-Z on Mac OS.
When key commands with modifier keys are described in this manual, they are shown with
the Windows modifier key first, in the following way:
•Windows modifier key/Mac OS modifier key-key
EXAMPLE
Ctrl/Cmd-Z means: press Ctrl on Windows or Cmd on Mac OS, then press Z.
System Requirements
Your computer must meet the following minimum requirements:
Mac
•Mac OS X Version 10.11/macOS 10.12
•VST 3, AAX, or AU compatible host application for using HALion as a plug-in
•64-bit Intel or AMD mutli-core processor (Intel i5 or faster recommended)
•4 GB RAM (8 GB recommended)
•40 GB of free hard-disk space
•Display resolution of 1366 x 768 pixels (1920 x 1080 recommended)
•OS-compatible audio hardware*
•Internet connection required for activation, account setup, and personal/
product registration
•Downloads are required for the installation
*ASIO-compatible audio hardware recommended for low-latency performance
Installation and Setup
Downloading Program Files
8
Windows
•64-bit Windows 7*/8.x/10
•VST 2, VST 3, or AAX compatible host application for using HALion as a
plug-in
•64-bit Intel or AMD mutli-core processor (Intel i5 or faster recommended)
•4 GB RAM (8 GB recommended)
•40 GB of free hard-disk space
•Display resolution of 1366 x 768 pixels (1920 x 1080 recommended)
•OS-compatible audio hardware**
•Internet connection required for activation, account setup, and personal/
product registration
•Downloads are required for the installation
*Windows 7 Service Pack 1, Microsoft.NET Framework 4.0 and Platform Update
for Windows
**ASIO-compatible audio hardware recommended for low-latency performance
Downloading Program Files
The Steinberg Download Assistant helps you download the required files to your computer.
1. Start the Steinberg Download Assistant.
2. On the left, select the program that you want to install.
3. On the right, select which version you want to install.
You can install a new program, update an existing program, etc.
4. Click Download to download the files.
Installing the Program
After downloading the required files, you can install HALion on your computer.
•On Windows systems, double-click the product installer and follow the instructions
on screen.
•On a Mac, double-click the file HALion 6.pkg and follow the instructions on screen.
Activating Your License
HALion uses a software-based copy protection scheme. This Soft-eLicenser is installed
automatically with HALion. It can be accessed via the eLicenser Control Center application
that is installed automatically with the product.
After installation, you must activate your product.
If you purchased HALion in a shop, the product package contains a “Download Access Code”
that allows you to download both the software and the license of the product.
If you purchased the download version of HALion, you receive an e-mail with the activation
code and a description of the activation process.
Installation and Setup
Registering Your Software
9
IMPORTANT
The process for license activation is described in detail on the Steinberg web site.
Registering Your Software
Register your product at the MySteinberg online customer portal. As a registered user,
you are entitled to technical support, you gain access to exclusive offers such as software
updates and upgrades, and more.
PROCEDURE
1. Start your software.
2. Select Help> Register now.
An online registration form opens in your web browser.
3. Follow the instructions on screen to register at MySteinberg.
How You Can Reach Us
Click the Steinberg logo in the top right corner of the control panel to open a pop-up menu
containing items for getting additional information and help.
•This menu contains links to various Steinberg web pages. Select a link to open
the corresponding page. On the web pages, you can find support and compatibility
information, answers to frequently asked questions, links for downloading new drivers,
etc.
•You also find a menu item for the registration of your product.
As a registered user, you are entitled to technical support, you gain access to exclusive
offers such as software updates and upgrades, and more.
About the Documentation
The documentation is available online and most of it can be downloaded in PDF format from
steinberg.help.
•To visit steinberg.help, enter steinberg.help in the address bar of your web
browser or open HALion, click the Steinberg logo in the top right corner and select
Help> HALion Help.
•You can find the documentation for the HALion scripting features, as well as additional
parameter descriptions regarding the Macro Page Designer and the Library Creator
under http://developer.steinberg.help.
Here, you can find tutorials and parameter references, download example files, and
much more.

Installation and Setup
Setting Up
10
Setting Up
The following sections describe how to use HALion as a plug-in in different host applications.
NOTE
HALion can also be used as a standalone application.
Selecting Outputs
HALion loads with a stereo output configuration by default. However, you can use up to 32
stereo outputs plus one 5.1 output in the Steinberg DAW. This allows you to route all 64
program slots to a dedicated channel in the MixConsole.
PROCEDURE
1. To make the outputs available in the VST instrument, open the VST Instruments
window.
2. Click the Activate Outputs button for the instrument.
3. Activate the outputs that you want to use.
RESULT
The Steinberg DAW automatically adds an output channel for each additional output to
the MixConsole. You can now route programs or layers to these outputs for further signal
processing within the DAW.
Using the Instrument in an AU-Compatible Application
The AU version of HALion is installed in your AU plug-ins folder and lets HALion work in an
AU environment without any performance loss or incompatibilities.
For example, to load HALion as an AU instrument for Logic Pro, proceed as follows:
PROCEDURE
1. Open the Track Mixer and select the instrument channel that you want to use.
2. Click in the I/O field and select AU Instruments> Steinberg> HALion.
3. Select one of the available channel configurations.
Using the Instrument as Standalone Application
HALion can be used as a standalone application, independently of any host application. In
this case, you can connect the instrument directly to your audio hardware.
RELATED LINKS
Using the Standalone Version of the Plug-In on page 542
HALion Control Panel
11
HALion provides flexible and highly customizable window management. You can arrange
the available editors in the window, structure the window sections using tabs, and configure
several separate windows for your work. The size of each window, and window section, is
freely adjustable. This allows you to make the most of the available screen space.
Configuring the Control Panel
You can set up the control panel by determining the number of different views, that is,
window sections, and by further configuring these sections, for example, by adding tabs. For
the views and tabs, you can specify the editor that is displayed.
Setup Options
You can configure the control panel using the setup options.
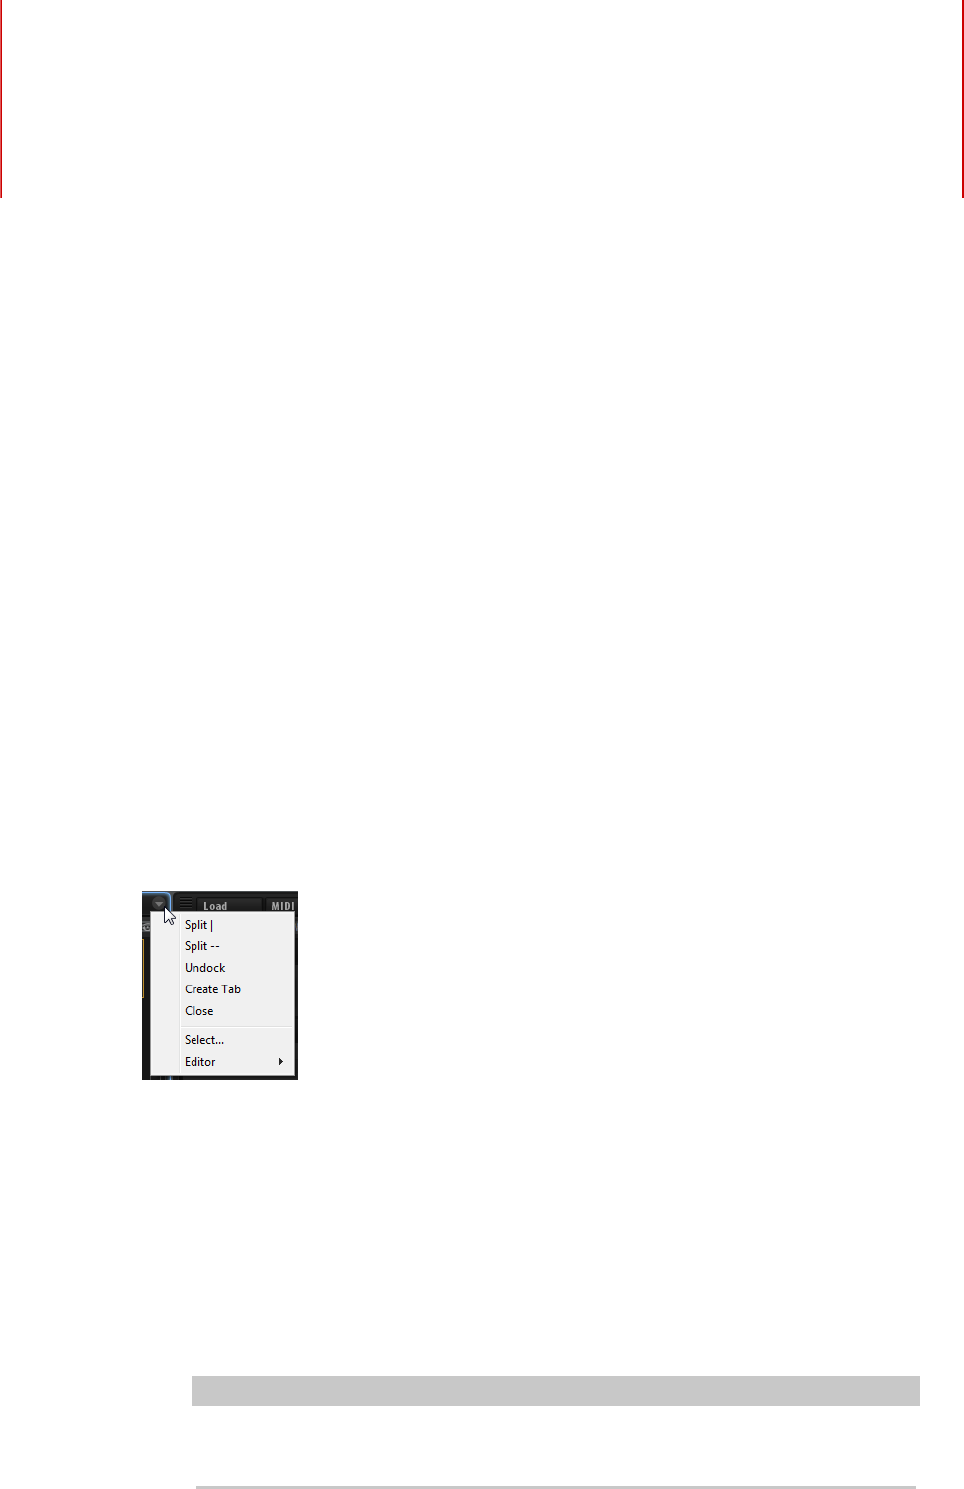
For views, click the Setup Options icon in the header to open the menu that contains the
setup options.
For tabs, right-click the name of the tab to open the context menu contains the setup
options.
Split | and Split --
You can add a view or tab to the window by splitting an existing view or tab.
• To perform a vertical split, select Split |. This adds a new editor to the right
of the current editor.
• To perform a horizontal split, select Split --. This adds an editor below the
current editor.
NOTE
To create a copy of an existing view or tab, click its upper left corner and drag it to
another position in the window. A colored frame indicates the insert position.

HALion Control Panel
View and Tab Operations
12
Undock
Creates a duplicate of the view or tab in a new window.
Create Tab
Creates a tab. You can also create tabs within tabs.
Rename
Allows you to rename tabs.
Close
Removes the view or tab.
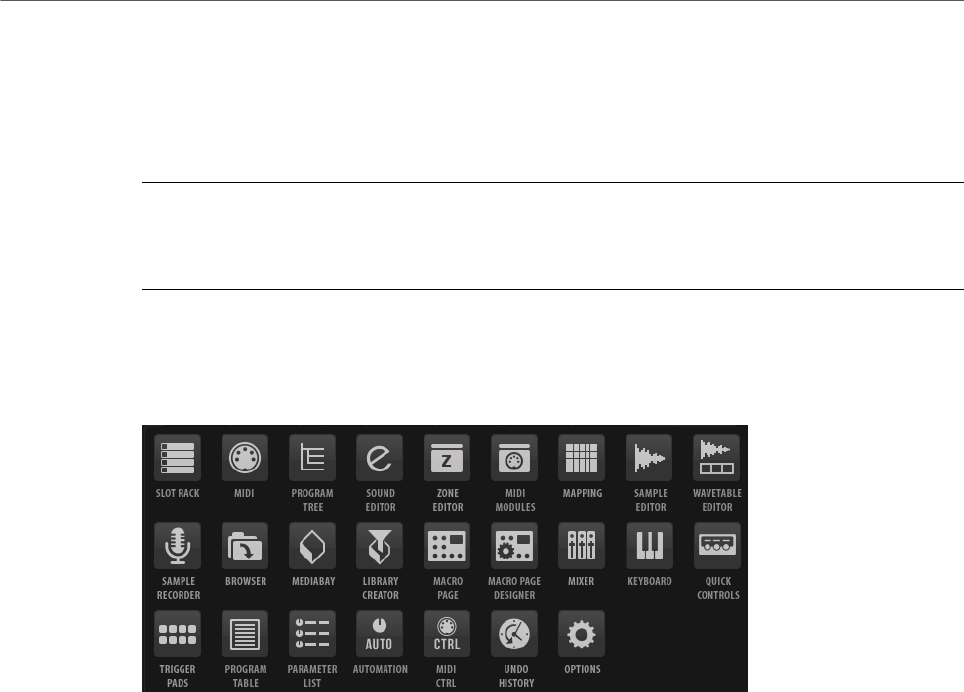
Select
Opens a pane that shows icons for the available editors. To select an editor, click
its icon.
Editor
Allows you to select the editor to be displayed from the list of available editors.
View and Tab Operations
You can add, move, and resize tabs and views to configure the control panel.
Creating Tabs
You can create tabs in the following ways:
• Select Create Tab from the setup options.
• Click in the upper left corner of an existing view or tab and drag it onto another one.
• Click the + icon to the right of the rightmost tab and click the icon for the editor that
you want to display.
NOTE
• You can also create tabs within tabs.
• If a view contains more tabs than can be displayed, arrow buttons are displayed to
navigate between the tabs.
Moving Views and Tabs
• To move a view or tab, hold down Shift, click in its upper left corner, and drag it to
another position.
Depending on the drop position, it is added as a tab or as part of a split view.
Expanding and Resizing Editor Sections
Some editors, such as the Options Editor, contain expandable sections. These sections can
be resized or collapsed so that they only show their title bar. This helps you to save space and
focus on the edited parameters.

HALion Control Panel
Window Handling
13
• To expand or collapse a section, click the + or - icon on the left of the title bar, or click
the title bar.
• To expand or collapse all sections at the same time, hold down Shift and click the + or
the - icon or the title bar.
• To resize a section, click the dotted line in the middle of its lower border and drag up
or down.
Adjusting the Size of a Split View
• To adjust the size of two split views, point the mouse at the divider between these two,
click, and drag.
If a view is split into three or more parts, these parts are resized proportionally. To
resize an individual part, hold down Ctrl/Cmd and drag.
Window Handling
Creating Additional Windows
You can create new windows from existing views in the following ways:
• Click in the upper left corner of an existing view or tab and drag it out of the current
window.
• Use the Undock command on the tab context menu or the View pop-up menu.
Using Window Presets
HALion comes with several preconfigured window presets.
• To open a window preset, click the Open New Window button in the top bar and select
it from the pop-up menu.
• To create your own window presets, use the corresponding commands on the pop-up
menu.
Locking Windows
If you open an additional window, HALion shows the settings of the focused program, layer,
zone, etc. This way, all editors and separate windows relate to the same material. However,
in some cases it might be necessary to show different objects in different windows, for
example, to compare the parameter sets of two zones or layers. This can be achieved by
locking a window.
• To lock a window, click the Lock button in the upper right corner. If this button is
activated, the window no longer follows selection and focus changes in the main plug-
in window. Instead, it displays the settings of the program that was selected when you
clicked the Lock button.
Screen Sets
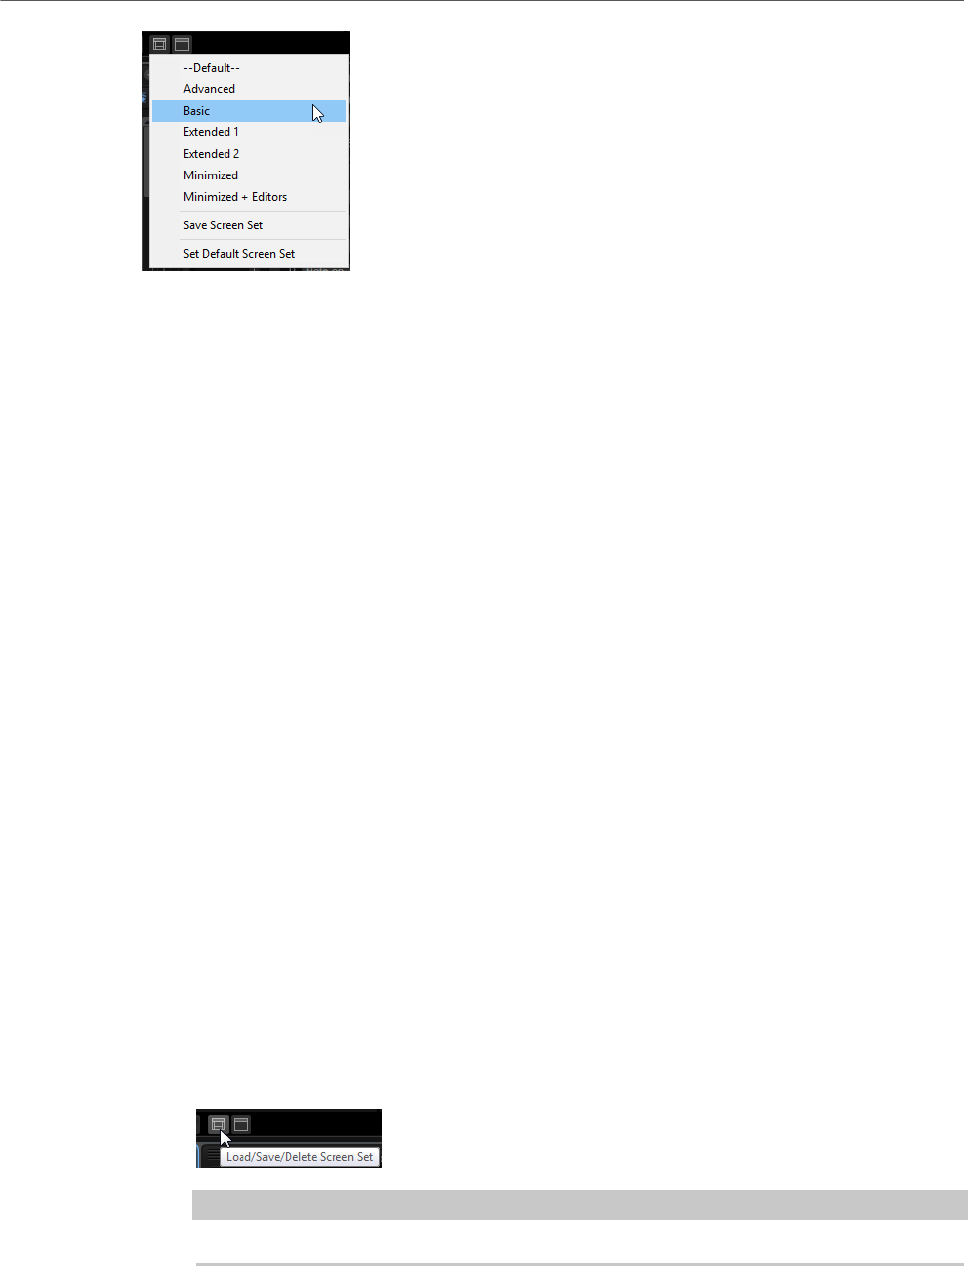
You can save the configuration of the control panel as a screen set. This way, you can
preconfigure HALion for different workflows and editing situations. By default, the following
screen sets are available:
HALion Control Panel
Window Handling
14
Default
This screen set is optimized for wide-screen monitors and contains the most
important editors. It is suitable for a display resolution of 1440 x 900.
Advanced
This is the full editor screen set. It is suitable for a resolution of 1440 x 900.
Basic
This is a minimized single slot player view. It is suitable for a display resolution of
1024 x 768.
Extended 1
This screen set is optimized for use on laptops with a display resolution of
1280x800.
Extended 2
This screen set is also optimized for laptops, but it is slightly larger than
Extended 1. It is suitable for a display resolution of 1440 x 900.
Minimized
This screen set shows the smallest configuration.
Minimized + Editors
This screen set provides the minimized plug-in window plus an additional floating
window that contains all editors. This configuration is intended for use in host
applications where you cannot resize the main plug-in window.
• To load, save, and delete screen sets, click the Load/Save/Delete Screen Set button
on the toolbar in the plug-in functions section and select the corresponding command
from the pop-up menu.
NOTE
Factory presets cannot be deleted.
HALion Control Panel
Setting the Focus
15
Setting the Focus
It is important to know which view, window, or tab has the focus. The focused section of the
window is the area to which your actions, such as key commands, are applied. The view that
has the focus is indicated by a blue frame.
PROCEDURE
•To set the focus on a specific view, use one of its controls, edit a parameter, or click on
the frame or in an empty background of a view.
Available Editors
The editors give you access to the parameters of HALion and its programs and modules.
Slot Rack
Allows you to load and manage the loaded programs.
MIDI
Allows you to configure the ranges and MIDI parameters of the slots.
Program Tree
Allows you to create programs by combining samples, layers, busses, and MIDI
and audio effects.
Sound Editor
Gives you access to the parameters of the various program components. It can
display the parameters of programs, layers, zones, MIDI modules, busses, and
effects. Which parameters are displayed depends on the object that is selected in
the Program Tree.
Zone Editor
Allows you to edit the parameters of all zones of the focused layer
simultaneously, including any sublayers. If zones are selected in the Program
Tree or the Mapping Editor, only these zones can be modified.
MIDI Modules
Allows you to edit MIDI modules, such as FlexPhrasers or MegaTrig modules.

HALion Control Panel
Available Editors
16
Mapping
Allows you to specify and visualize how samples are distributed over the keyboard
and velocity range.
Sample Editor
Allows you to define the sample and loop parameters.
Wavetable Editor
Allows you to make settings for the wavetable synthesizer that is used by
wavetable zones.
Sample Recorder
The Sample Recorder allows you to record samples in HALion.
Browser
Allows you to browse and import files, including external sampler formats.
MediaBay
Allows you to load programs and layers.
Library Creator
Allows you to create your own VST Sound content in HALion.
Macro Page
VST Sound Instrument Sets provide macro pages. These pages are preconfigured
to show the most important parameters for the specific programs. Whether it is
possible to edit a program only via its macro page or whether you have access to
all underlying zone and layer parameters depends on the instrument set.
If a program comes with a macro page, this page is displayed when you open
the Macro Editor. If you load a program that contains one or multiple layers with
macro pages, all macro pages are shown together in the Macro Editor. For each
macro page, HALion inserts a navigation button on the toolbar that allows you to
switch between the pages.
Macro Page Designer
Allows you to create your own macro pages.
Mixer
Allows you to mix the program slots, access the output and AUX busses, and
manage effects.
Keyboard
Combines a keyboard, two wheels, and the sphere control. You can use these
controls to simulate external hardware.
Quick Controls
Allows you to remote-control any parameter inside the program.

HALion Control Panel
Available Editors
17
Trigger Pads
Allow you to assign and trigger notes and chords. Furthermore, it is possible to
use the trigger pads to switch the states of FlexPhraser modules.
Program Table
Shows all loaded programs. This includes the programs that are used in the Slot
Rack as well as those that are loaded via MIDI program change.
Parameter List
Gives you a detailed overview of the parameters of the selected item in the
Program Tree. For example, if you select an effect in the Program Tree, only the
parameters of that effect are shown.
Automation
Lists all assigned automation parameters. With the tabs at the top, you can
specify whether you want to show the automation parameters for the slot, the
global parameters, or all automation parameters.
MIDI Ctrl
Lists all assigned MIDI controllers.
Undo History
Lists all of your actions and allows you to undo changes.
Options
Contains global plug-in settings regarding the overall performance, global edit
functions, and MIDI controllers.
RELATED LINKS
Slot Rack on page 50
MIDI Editor on page 198
Program Tree on page 217
Editing Programs and Layers on page 82
Editing Zones on page 92
MIDI Modules Reference on page 480
Mapping Editor on page 70
Editing Samples in the Sample Editor on page 150
Wavetable Editor on page 174
Sample Recorder on page 254
Macro Page Designer on page 370
Mixer Window on page 204
Keyboard Editor on page 26
Quick Controls on page 27
Trigger Pads on page 494
Loading and Managing Programs via the Program Table on page 213
Parameter List on page 365
Automation Editor on page 43
MIDI Controllers on page 200

Common Editing Methods
18
Dials and Sliders
Dials and sliders can be unidirectional or bidirectional. Unidirectional values, for example
level values, start at a minimum value and go up to the maximum. Bidirectional controls
start from the middle position and go to the left for negative and to the right for positive
values.
Most of the editing methods are the same for dials and sliders.
• To adjust a value, click a dial or a fader and drag up and down, or use the mouse
wheel.
If you press Alt when clicking a dial, a small fader appears, allowing you to set the
parameter.
• To make fine adjustments, press Shift and move the dial or use the mouse wheel.
• To restore the default value for a parameter, press Ctrl/Cmd and click on the control.
Multi Selection and Parameter Controls
If several zones are selected and they are not set to the exact same values, most of the
controls indicate this by turning red. This is true for encoders, switches, combo boxes, value
fields, and text faders.
For example, if you have selected 3 zones with cutoff frequency values of 1200, 1400, and
2500 Hz, the corona of the frequency encoders shows a range from 1200 to 2500. The
corresponding field shows the value of the focused zone in red.
NOTE
More complex controls, such as the envelope editors, only show the values of the focused
zone.
Adjusting Value Ranges
You can adjust the value range of a parameter using the corona of the encoder. The values
for the zones are distributed within the new range, keeping their relative distances.
• To compress or expand the value range, drag the corona.
• To adjust the upper limit of the range, hold down Ctrl/Cmd and drag the corona.
• To adjust the lower limit of the range, hold down Alt and drag the corona.

Common Editing Methods
Buttons
19
Buttons
On/Off Buttons
These buttons have two states: on and off. If you move the mouse over an On/Off button, it
changes its appearance to show that you can click it.
Push Buttons
Push buttons trigger an action and then go back to their inactive state. These buttons open
menus or file dialogs.
Value Fields
To set a value, you have the following possibilities:
• Double-click in a value field, enter a new value, and press Enter.
If the entered value exceeds the parameter range, it is automatically set to the
maximum or the minimum value, respectively.
• Click in the value field and drag up or down.
• Position the mouse over a value field and use the mouse wheel.
• Click the up/down triangles next to the field.
• To set the parameter to its default value, Ctrl/Cmd-click the value field.
• To use a fader to adjust the value, Alt-click a value field.
• To enter musical values, such as key ranges or the root key, with your MIDI keyboard,
double-click the value field, press a key on your MIDI keyboard, and press Return.
• To navigate to the next parameter, press Tab. To jump backwards to the previous
parameter, press Shift-Tab.
If no parameter is selected inside the focused view, pressing Tab always jumps to the
first parameter.
Common Editing Methods
Using Key Commands
20
Using Key Commands
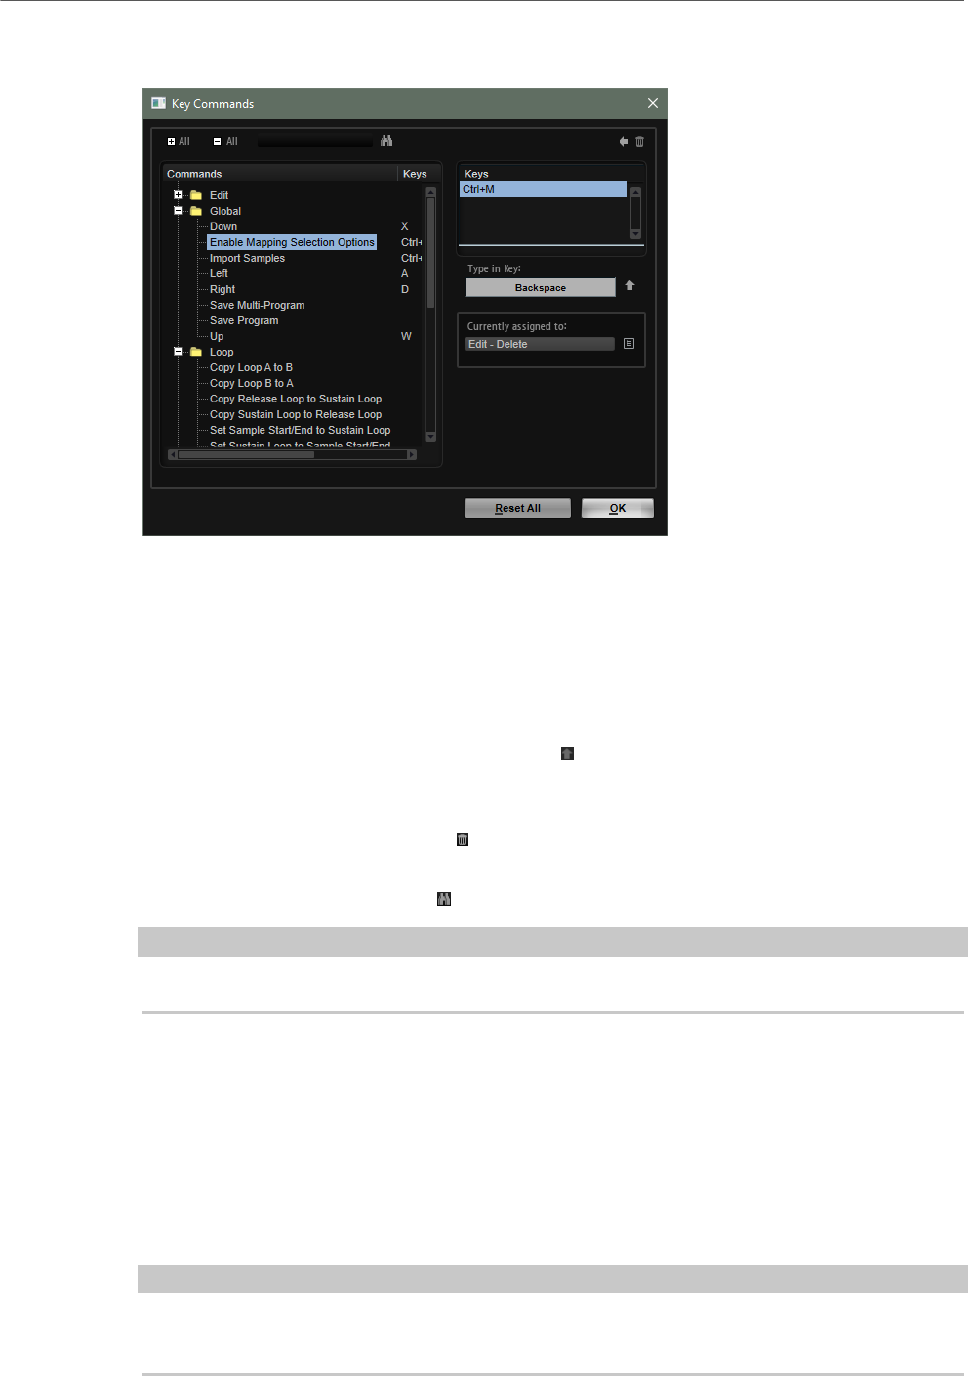
• To open the Key Commands dialog, open the Options Editor and click the Key
Commands button in the Edit section.
The commands are arranged in a hierarchical folder structure on the left. When you open
a category folder, the items and functions are displayed with any currently assigned key
commands.
• To set up a key command, select the function in the list, enter the key command in
the Type in Key field and click the Assign button to the right of the field. If this key
command is already used for another function, this is displayed in the field below.
• To delete a key command, select the function in the list, select the key command in the
Keys list and click the Delete button.
• To search for a specific function, enter its name in the search field at the top of the
dialog and click the search button.
NOTE
You can set up several key commands for the same function.
Presets
HALion offers two types of presets: section/module presets and VST presets. Section and
module presets store and recall the setup of a specific component on the HALion panel. VST
presets contain all information necessary to restore the complete state of the plug-in.
During setup, the factory presets are installed in a dedicated folder and a user folder is
created for your own presets. The handling of presets is the same throughout the program.
NOTE
Factory presets are write-protected, but may be overwritten when a software update is
executed. Presets in your user folder are never changed by the software update.
Common Editing Methods
Presets
21
For more information on VST presets, see the Operation Manual of your Steinberg DAW.
Handling Section and Module Presets
The preset controls can be found throughout the program. The handling is always the same.
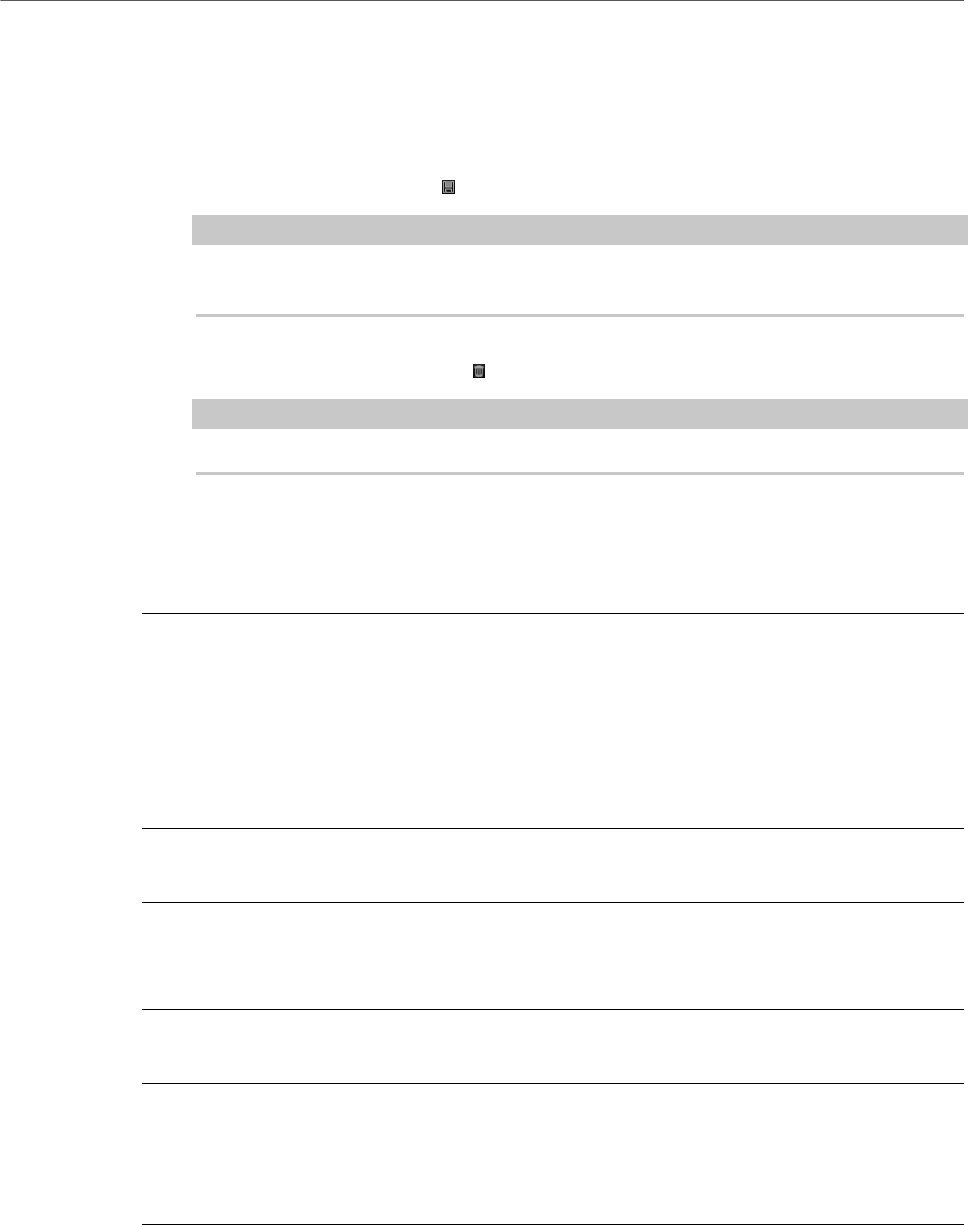
• To save a preset, click Save .
NOTE
You cannot overwrite factory presets. If you want to save changes made to a factory
preset, save the preset under a new name or in a new location.
• To load a preset, click the arrow icon and select a preset from the list.
• To delete a preset, click Delete .
NOTE
Factory presets cannot be deleted.
Handling VST Presets
Loading VST Presets
PROCEDURE
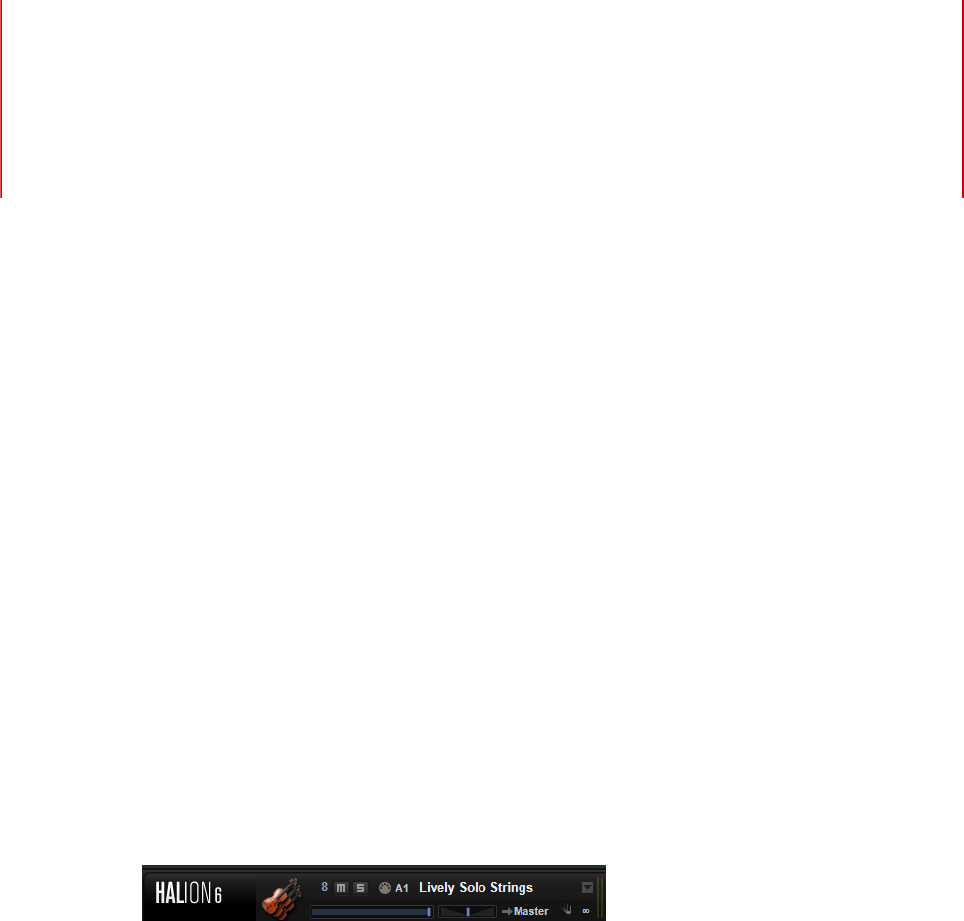
1. In the header of the plug-in panel, click the Preset Management button next to the
preset name field and select Load Preset.
2. Do one of the following:
•Select a preset to load it.
•Double-click a preset to load it and close the preset loader.
Saving VST Presets
PROCEDURE
•In the header of the plug-in panel, click the Preset Management button next to the
preset name field and select Save Preset.
Inserting VST Presets as Layers
PROCEDURE
1. Right-click the program or layer for which you want to insert the VST preset and select
Load/Save> Load to new Layer.
2. Select a VST preset and click OK.
RESULT
The program is inserted as an additional layer.
• Alternatively, drag the VST preset from the MediaBay or the file browser into the
Program Tree, and drop it on a layer.

Common Editing Methods
Presets
22
Replacing Programs and Layers with VST Presets
PROCEDURE
1. Right-click the program or layer that you want to replace.
2. Open the Load/Save submenu and select Replace Program or Replace Layer.
3. Select a VST preset and click OK.
RESULT
The program or layer is replaced.
• Alternatively, drag the VST preset from the MediaBay or the file browser onto the
Program Tree, and drop it on a program or layer.
Global Functions and Settings
23
Plug-in Functions Section
The plug-in functions section at the top of the window gives you access to global functions
that affect both the currently loaded programs, and the general working of the plug-in.
The plug-in functions section contains the multi slot section, the program slot section, the
master section, and the performance displays.
The toolbar below the plug-in functions section contains controls for loading multi-programs
on the left. To the right of these, you can find two buttons for managing screen sets. And to
the right of these, you can find various buttons with useful global functions.
Program Slot Section
This section contains a copy of the slot that is selected in the Slot Rack, as well as the main
parameters of the program.
The slot parameters are the same as in the Slot Rack. In addition, the following parameters
are available:
Slot Number
The number of the active slot. You can switch to another slot by clicking the slot
number and selecting an entry from the list.
RELATED LINKS
Slot Controls on page 51
Master Section
The master section can be used to set volume and tuning of the plug-in.
Master Volume
Adjusts the overall volume of the plug-in.
Master Tune
You can set the Master Tune slider from 415.3 Hz to 466.2 Hz, which equals -100
cents to +100 cents.

Global Functions and Settings
Plug-in Name and Steinberg Logo
24
Performance Displays
The meters and text displays indicate the system load of the plug-in.
CPU
This meter shows the processor load during playback. The more voices you play,
the higher the processor load. If the overload indicator lights up, reduce the Max
Voices setting on the Options page.
Disk
This meter shows the hard disk transfer load during the streaming of samples
or when loading presets. If the overload indicator lights up, the hard disk is not
supplying data fast enough. In such a case, open the Options page and adjust the
Disk vs. RAM slider towards RAM or decrease the Max Voices setting.
Polyphony
This display indicates the number of samples that are currently played back, to
help you trace performance problems. For example, if you have to reduce the Max
Voices setting on the Options page, you can verify your settings by monitoring the
number of samples that are currently playing.
Memory
This display indicates the overall amount of RAM that is currently used by the
plug-in and the loaded programs. The number refers to the streaming buffer and
the preloaded samples. The MEM display helps you trace performance problems.
For example, if you need to free up memory for other applications, you can adjust
the Disk vs. RAM slider on the Options page toward Disk. You can verify your
settings by monitoring the MEM display.
Plug-in Name and Steinberg Logo
To get information regarding the version and build number of the plug-in, click the plug-
in logo. This opens the About box. To close the About box, click it or press Esc on your
computer keyboard.
If you click the Steinberg logo in the top right corner of the plug-in interface, a pop-up menu
opens. Select one of the options to navigate to Steinberg web pages containing information
on software updates, troubleshooting, etc.
Toolbar
Missing Busses
Opens the Pending Busses dialog, allowing you to resolve any bus connections
that could not be established.
Find Missing Samples
Opens the Find Missing Samples dialog, allowing you to resolve any missing
samples for the loaded program.

Global Functions and Settings
Toolbar
25
Global insert, AUX, and FlexPhraser buttons
Use these buttons to switch off all insert effects, AUX effects, and FlexPhrasers
for the whole plug-in at once. You can use this to compare sounds with and
without effects or to use a preset without the FlexPhrasers, for example.
RAM Save
The RAM Save function scans the playback of your project and unloads unused
samples.
1. Click the RAM Save button and in the dialog, click Yes to start collecting the
necessary samples.
The RAM Save button starts blinking.
2. Play back the project in your host application from the beginning to the end
or to the point where no new notes are played.
3. Click the RAM Save button again. In the dialog, click Yes to unload the
unused samples.
To deactivate RAM Save and reload the unused samples, click the RAM Save
button again.
RAM Save mode always keeps samples that are within the range of the highest
and lowest note of the played programs. This also applies for unused expression
layers that can be controlled via key switches. This allows you to switch between
expressions within the valid note range after applying RAM Save mode.
IMPORTANT
If a program randomly triggers notes, for example, different guitar slide noises,
it is possible that these notes are not triggered during the RAM Save analysis
process, and that the samples are therefore removed. To prevent this, trigger the
highest required note manually during the analysis.
Enable MIDI Mapping Selection Options
If this button is activated, played MIDI notes can be used to select zones. This
also influences the zone parameters that are displayed in the editors.
This parameter is linked to the corresponding option in the Mapping Editor,
allowing you to remote-control the option even if the Mapping Editor is not
visible.
MIDI Reset
Click this button to stop playback and reset all MIDI controllers to their default
values.
Undo/Redo
To undo or redo a single operation, click the Undo or Redo buttons. To undo or
redo multiple operations, click the arrow next to the button to open the history
and select the step to which you want to return.
Global Functions and Settings
Keyboard Editor
26
NOTE
How many undo/redo operations are available depends on the Number of Undo
Steps setting on the Options page.
Keyboard Editor
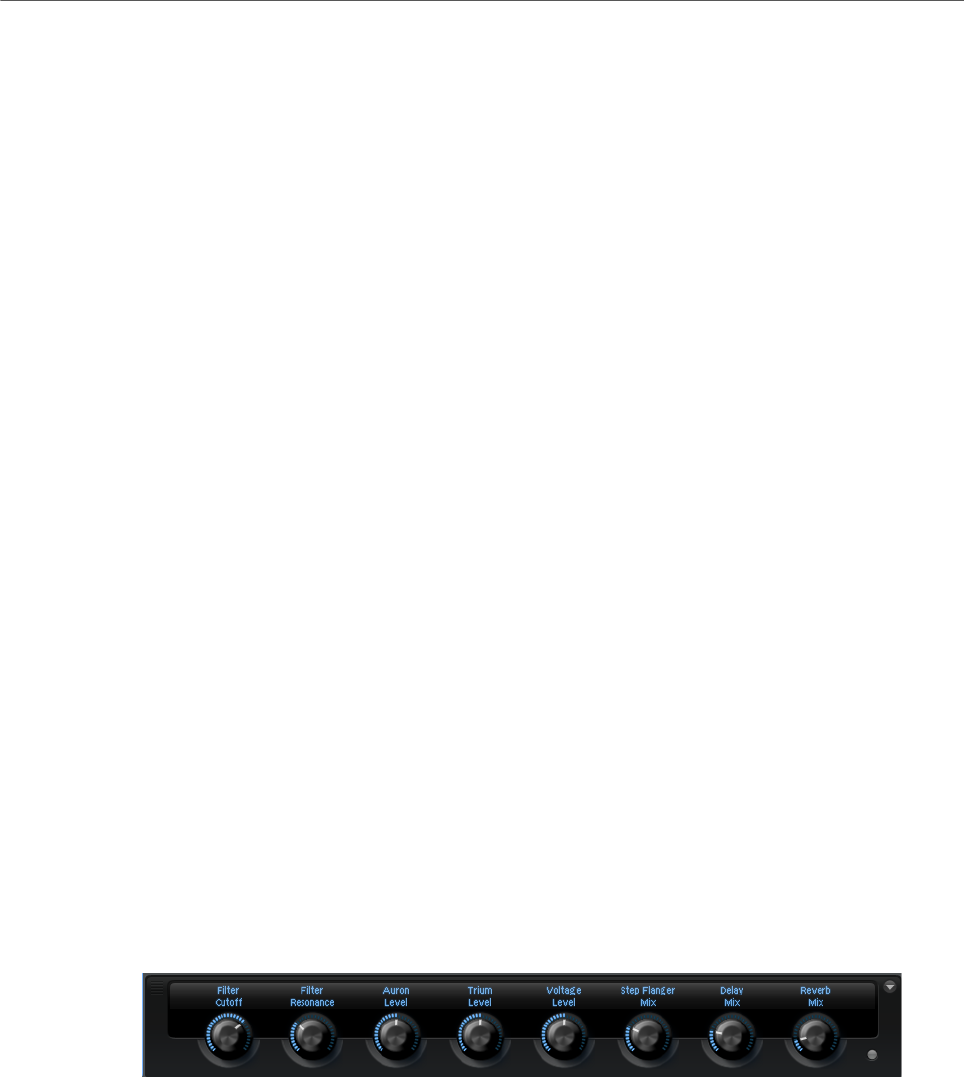
The Keyboard Editor contains the wheel controls, the sphere control and the internal
keyboard.
Wheel Controls
To the left of the internal keyboard, the pitchbend wheel and the modulation wheel are
located.
The modulation wheel is hardwired to MIDI controller #1, which is normally used as a source
in the modulation matrix, but can be used as a quick control as well.
Typically, you assign the modulation wheel to a parameter of an insert effect, such as the
speed of the Rotary effect.
Internal Keyboard
The internal keyboard in HALion spans the entire MIDI note range from C-2 to G8. You can
use it to trigger notes by playing them, but you can also drop samples onto it to import and
map samples, for example.
You can resize the internal keyboard horizontally and vertically. A vertical resize changes the
size of the individual keys and a horizontal resize defines how many octaves are visible. If the
horizontal size is not sufficient to display all octaves, you can use the left/right arrow buttons
on both sides of the keys to shift the visible range by octaves.
For each key, the keyboard indicates whether a sample is mapped to it.
The following color scheme is used for the keys:
• Keys to which a key switch is assigned are shown in yellow.
• Keys to which a remapped key switch is assigned are shown in beige.
• Keys to which an expression in the Layer Alternate MIDI module is assigned are shown
in red.
• Keys that are assigned to a trigger pad are shown in blue.
• Keys to which a loop trigger note is assigned are shown in green.
Previewing Notes Using the Keyboard
• To preview a note, click the corresponding key on the keyboard.
The vertical position where you click a key defines the velocity that is used to trigger
the note. Click the lower part of a key to use the highest velocity, and the upper part to
use the lowest velocity.
Global Functions and Settings
Quick Controls
27
• To play a key and all following keys at the same velocity, for as long as you keep the
mouse button pressed, hold down Ctrl/Cmd and click the key on the keyboard.
• To play each note 10 times at increasing velocities between 1 and 127, hold down Ctrl/
Cmd-Alt and click a key.
Keyboard Context Menu
Right-click a key to open a context menu that contains information about the key.
• The Assigned Zones submenu displays the names of all zones that are mapped to this
key, allowing you to select a zone.
• The Info submenu shows pitch and velocity information.
• Select Clear key to remove all assignments.
Sphere Control
The sphere is a two-dimensional control. It allows you to adjust two parameters
simultaneously, by dragging the mouse horizontally (Sphere H) and vertically (Sphere V).
Typically, two parameters that belong together are assigned to the sphere, such as cutoff and
resonance.
If parameters are assigned to Sphere H and Sphere V, triangles for indicating the horizontal
and vertical axis are available.
You can reset the sphere to the center position using the corresponding options on the
context menu.
• If Center Horizontal and/or Center Vertical are activated, the sphere returns to the
corresponding center position as soon as you release the mouse button.
Quick Controls
Quick controls allow you to remote-control any parameter inside the program.
Quick controls can be set up for programs and for layers. If a layer has no quick controls,
the quick controls of the program are used. If a layer has quick controls, the layer and all its
zones use these quick controls.
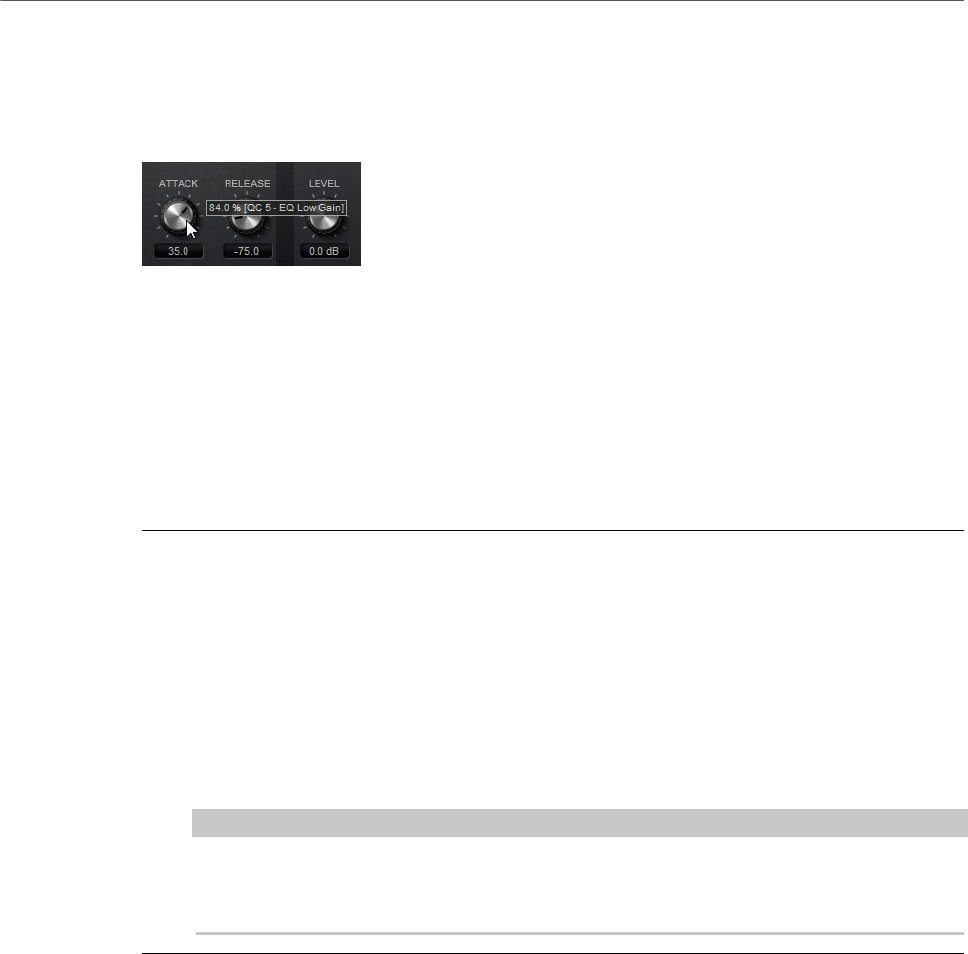
For each program and layer, eight quick controls are available. Furthermore, Sphere H,
Sphere V, and the modulation wheel can also serve as quick controls.
The quick controls can be accessed via the Quick Controls Editor for a program or layer.
Value Tooltips
If you use quick controls, the following situations can happen:
•The actual value of a parameter and the value that is displayed in its value field differ.
•A button on the user interface is deactivated but the corresponding parameter is
active.
Global Functions and Settings
Quick Controls
28
For example, this can happen if the quick control introduces an offset or if a button is
controlled by a quick control.
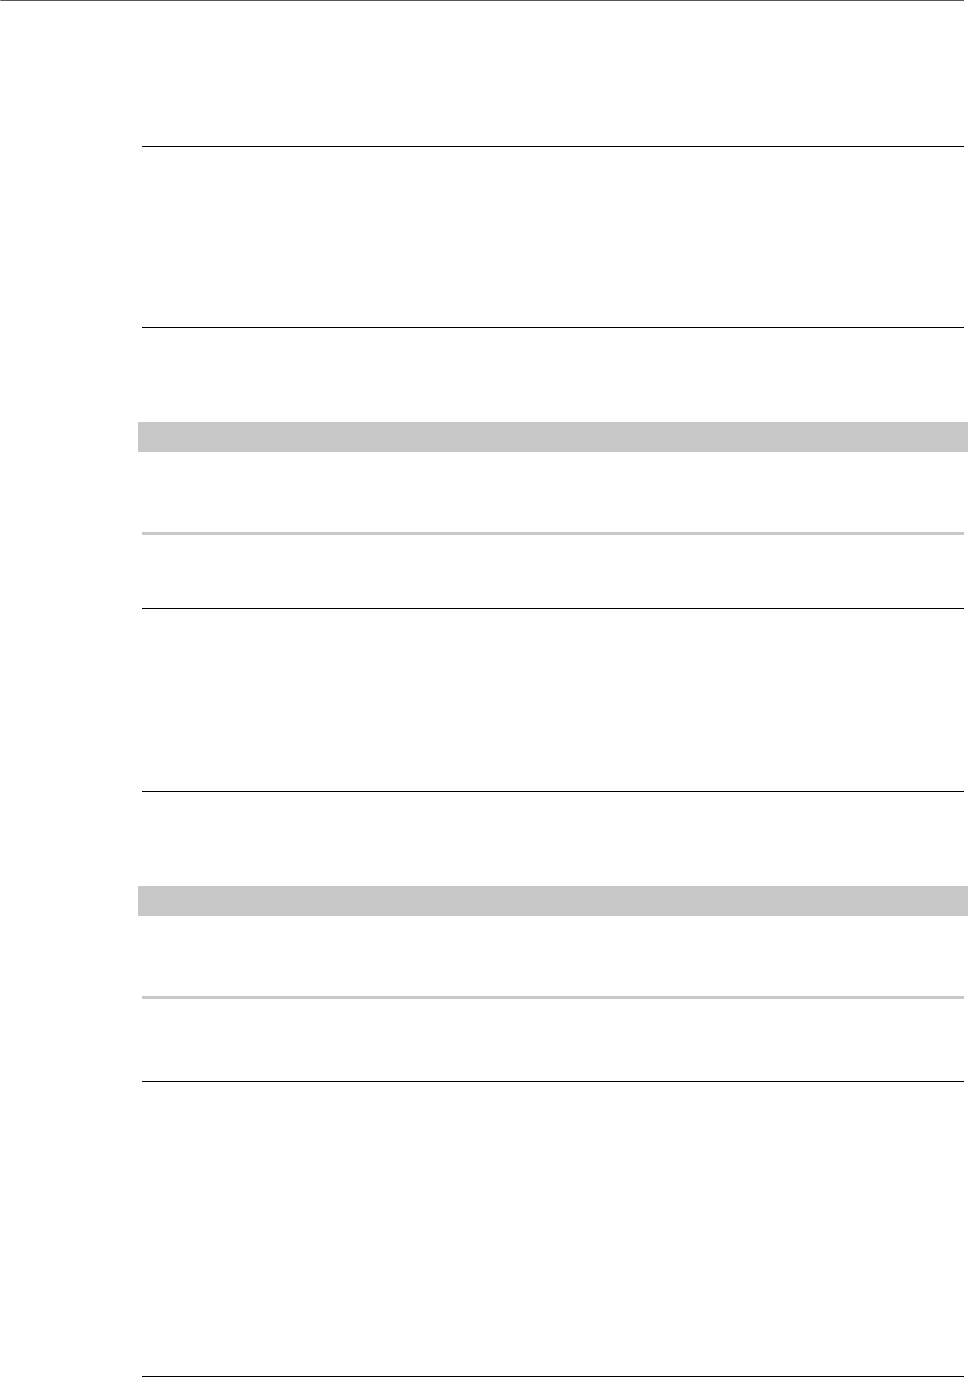
Therefore, parameters that are assigned to a quick control show a value tooltip. This value
tooltip indicates the resulting parameter value and the name of the assigned quick control.
Value tooltips can be activated or deactivated in the Options Editor.
RELATED LINKS
Edit Section on page 38
Assigning Quick Controls
You can assign quick controls to a parameter of the program or one of its layers, to zones
inside a program or layer, or to parameters of a MIDI module or an effect.
PROCEDURE
1. In the Program Tree, select the element that you want to remote-control via a quick
control.
2. Open the Sound Editor.
3. Right-click the control to which you want to assign a quick control and on the Assign
Quick Control submenu, select a quick control.
You can assign the same quick control to different parameters. This allows you to
make complex sound settings with a single control. However, you cannot assign
different quick controls to the same parameter.
NOTE
You can also assign a quick control as modulation source or modulation modifier in the
modulation matrix. This allows you to combine the quick control with other modulation
sources.
RELATED LINKS
Modulation Matrix Parameters on page 140
Setting the Minimum/Maximum Range
You can set the minimum and maximum range for each assignment separately. This gives
you better control over the parameter change.
•Right-click a control and define the range using the Set Minimum and Set Maximum
commands.
•In the Quick Control Assignments editor, enter the values in the Minimum Value and
Maximum Value fields or click and drag the handles in the curve display.
Global Functions and Settings
Quick Controls
29
Trimming the Range
The Trim Range function allows you to automatically set the best quick control range,
depending on the current parameter value.
PROCEDURE
•In the Quick Control Assignments editor, right-click the assignment in the list on the
right.
•To trim the range of a single assignment, select Trim Range.
•To trim the range of all quick controls, select Trim Range of All Quick Controls.
RESULT
The minimum and maximum values are set automatically.
NOTE
If you change the original parameter, you have to apply the Trim Range function again to
guarantee the best control range.
Setting the Default Range
PROCEDURE
•In the Quick Control Assignments editor, right-click the assignment on the right.
•To set the default range of a single assignment, select Set Default Range.
•To set the default range of all quick controls, select Set Default Range of All
Quick Controls.
RESULT
The quick controls are set to their maximum possible range.
NOTE
If you change the original parameter, you must apply the Set Default Range function again to
guarantee the best control range.
Unassigning Quick Controls
PROCEDURE
•Do one of the following:
•To remove a quick control assignment, right-click the parameter in the Quick
Control Assignments editor and select Remove Assignment.
•To remove all assignments of the selected quick control, open the context menu
and select Remove All Assignments.
•To remove all quick control assignments of all quick controls that belong to the
selected layer in the Program Tree, open the context menu and select Remove
All Assignments of All Quick Controls.
Global Functions and Settings
Quick Controls
30
Single Assignment vs. Multi Assignment
You can assign a quick control to a single parameter of a zone or module. This is called a
single assignment. And you can assign a quick control to the same parameter of all zones
inside a layer. This is called a multi assignment.
•Single assignments override multi assignments.
For example, if a quick control remote-controls the cutoff of all zones inside a layer
and you assign the cutoff of one of these zones to another quick control, the multi
assignment is overridden by this single assignment.
•If you remove a single assignment from a parameter of a zone that is part of a layer
that has a multi assignment on the same parameter of all other zones, the zone
becomes part of the multi assignment again.
•If you add another zone to a layer that has a multi assignment, the added zone gets the
same quick control assignments as the other zones of that layer.
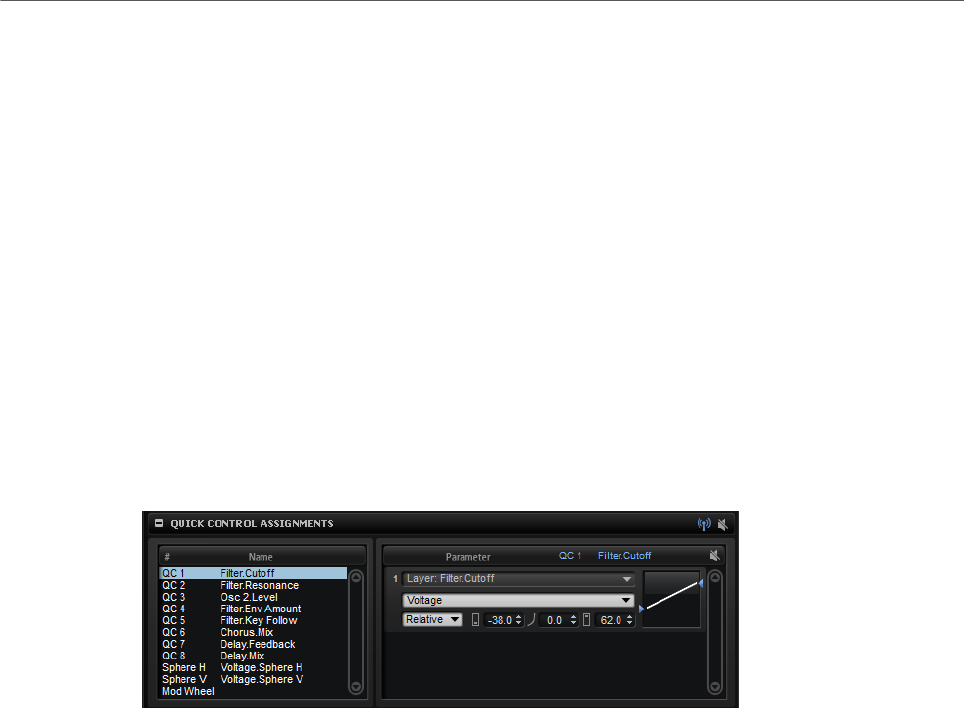
Quick Control Assignments Editor
• The Quick Control Assignments editor can be found in the Sound Editor for programs
or layers.
Receive Quick Controls
If Receive Quick Controls is deactivated for a layer, its quick controls are not
routed any further, that is, any layers, zones, etc., that come after this layer are
not affected by the quick controls.
You can use this as a filter for quick controls. For example, if you have a guitar
sound, and you assign quick controls to the amplifier envelope, you want them
to affect the entire instrument, except for the fret noises. In this case, deactivate
Receive Quick Controls for the layer that contains the fret noises, so that these
are unaffected by the amp envelope.
Bypass All Quick Control Assignments
Allows you to hear a sound without quick control assignments.
Quick Controls List
The eight quick controls are listed on the left. The assignments of the selected
quick control are listed on the right. You can edit the parameters for each
assignment separately.
Quick Control Parameter
Displays the parameter assignment for the selected quick control.

Global Functions and Settings
Quick Controls
31
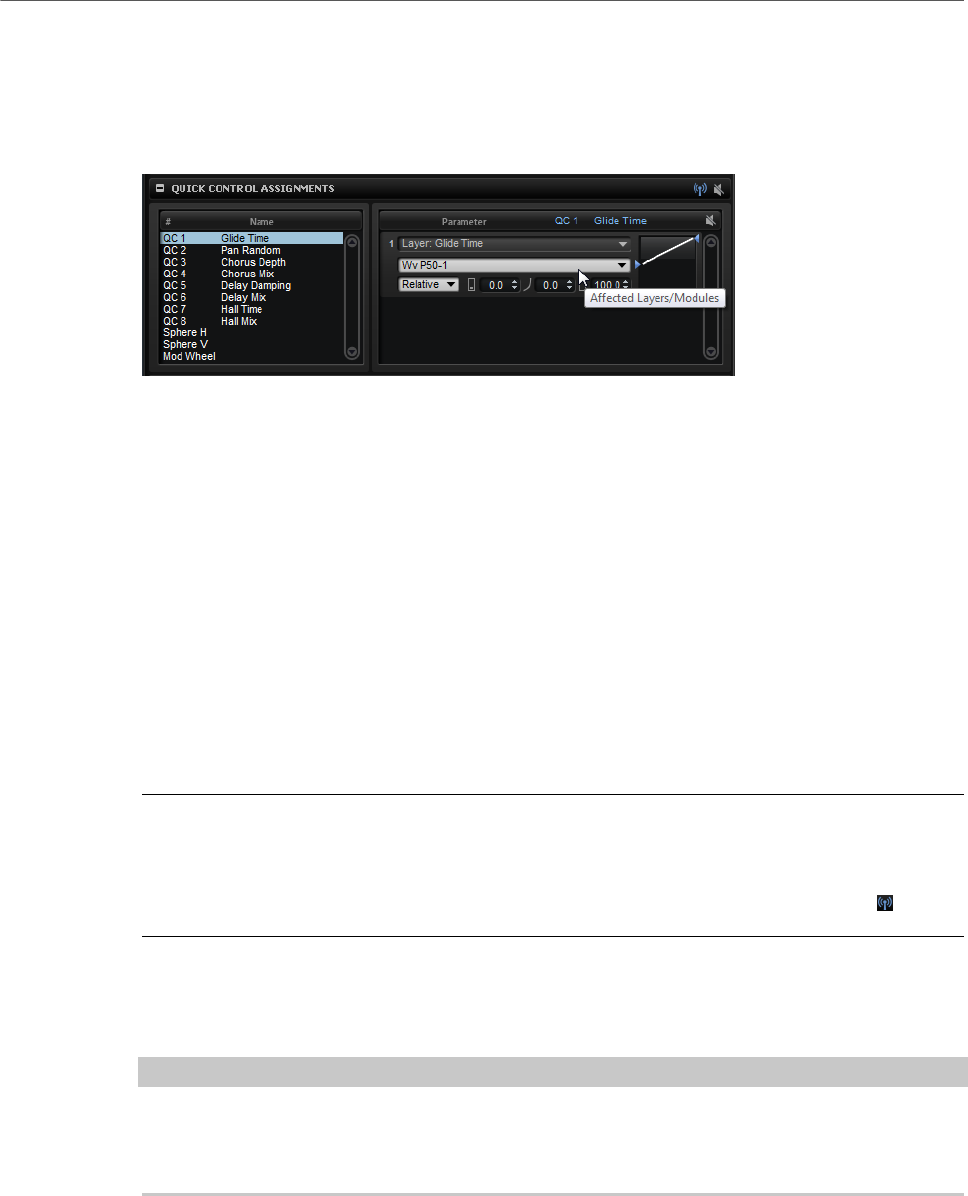
Affected Layers/Modules
Displays which program, layer, or module is affected by the quick control.
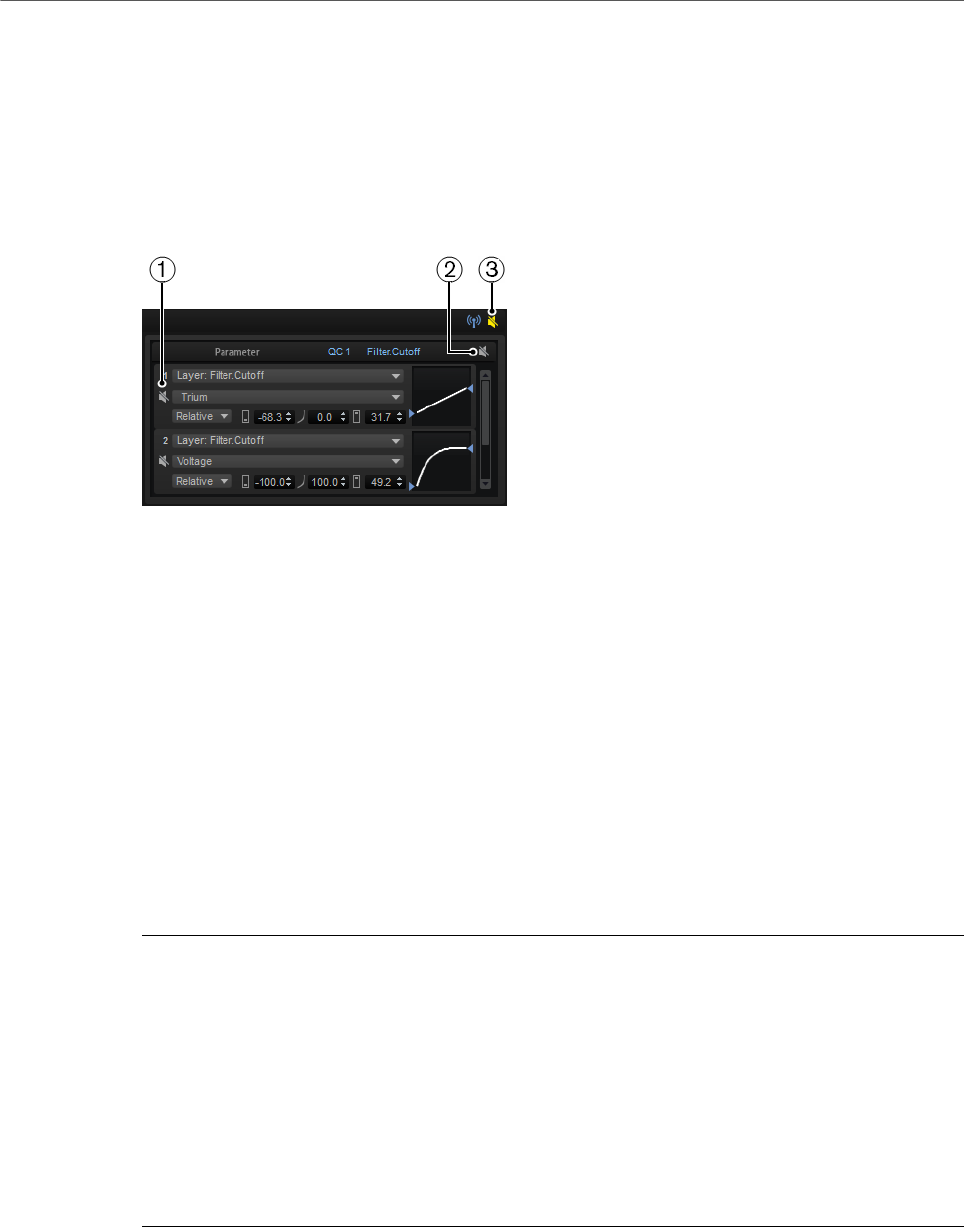
Bypass Single Quick Control Assignment
Bypasses the corresponding quick control assignment.
For example, if a quick control is assigned to several layers, this option allows
you to bypass the quick control assignment for one of the layers only.
Mode
Determines the mode that is used for changing the parameter values.
Minimum Value
Sets the minimum value for the quick control assignment.
Curvature
Sets the curvature. You can also set the curvature by clicking and dragging in the
curve display.
Maximum Value
Sets the maximum value for the quick control assignment.
Bypass All Quick Control Assignments
Bypasses all assignments for the selected quick control.
RELATED LINKS
Setting the Mode for the Quick Control Assignment on page 33
Adjusting the Curvature on page 33
Bypassing Quick Controls on page 34
Receiving Quick Controls on page 32
Managing Quick Controls
The Quick Control Assignments editor allows you to manage and edit assigned quick
controls.
•To rename a quick control, click in the Name column and enter a new name.
•To duplicate a quick control assignment, open the context menu for the quick control
and select Duplicate Assignment.
•To change the order of quick control assignments, drag an assignment between two
other quick controls. When a line is shown, release the mouse button to insert the
quick control assignment.
•To replace a quick control assignment, drag it onto another quick control. When a
rectangle is shown, release the mouse button to replace the quick control assignment.
•To assign a quick control to another parameter, click the parameter name and select a
new parameter from the menu.
You can only select parameters within the same layer, zone, or module.
•To transfer all quick control assignments of a layer to the program, select the layer in
the Program Tree, open the context menu of the Quick Control Assignments section,
and select Forward All Assignments to Program.
Global Functions and Settings
Quick Controls
32
Setting the Scope for Quick Control Assignments
If quick controls are assigned to a layer, all zones inside this layer respond to the quick
controls as well. In the Quick Control Assignments editor, you can change the scope of each
quick control, that is, you can specify which layers or modules it affects.
The pop-up menu in the middle of each assignment row displays which part of the program
is affected by this quick control assignment. If the name of a zone or module is displayed
here, only that zone or module is affected by the quick control assignment. If the name of
the program or one of its layers is displayed, all zones inside the program or the layer are
affected. You can change which part of the program is affected by selecting an option from
the pop-up menu.
If a quick control is assigned to a parameter of the program or one of its layers, the scope of
that assignment is that program or layer only. Any layers from deeper hierarchy levels are
not affected by the quick control.
Receiving Quick Controls
You can specify whether all zones or only selected zones within a layer are affected by the
quick controls.
PROCEDURE
1. In the Program Tree, select the program or layer that you want to respond to the quick
controls.
2. In the Quick Control Assignments editor, activate the Receive Quick Controls button.
RESULT
Now, zones inside layers respond to quick controls. This includes any single and multi
assignment to zones.
NOTE
Quick control assignments that belong to the layer itself are not affected. This is useful if you
have assigned quick controls to the entire program and you want to exclude parts of it, such
as the layer containing the instrument noises, for example.

Global Functions and Settings
Quick Controls
33
Adjusting the Curvature
You can adjust the curvature of each assignment in the Quick Controls Assignment editor
separately.
PROCEDURE
•To adjust the curvature, do one of the following:
•Select the quick control that you want to edit and specify a value in the Curvature
value field.
Positive values change the curvature towards logarithmic behavior and negative
values towards exponential behavior.
•Click and drag the curvature in the display on the right.
Setting the Mode for the Quick Control Assignment
A quick control behaves either as continuous control or as a switch. In addition, it remote-
controls a parameter either in relative or absolute mode. You can specify a mode for each
assignment.
You can set the behavior in the context menu for the control itself or via the pop-up menu in
the Quick Control Assignments editor.
Absolute
Remote-controls the parameter values continuously. Absolute mode changes the
assigned parameters by overwriting them with the current quick control value,
that is, parameter changes are overwritten.
Relative
Remote-controls the parameter values continuously. Relative mode changes the
values of the assigned parameters without losing their relative settings, that is,
parameter changes can still be heard.
Switch Absolute
Switches between the minimum and maximum value. Parameter changes are
overwritten.
Switch Relative
Switches between the minimum and maximum value. Parameter changes can
still be heard.
Neutral Setting
If you adjust the range of a quick control assignment, it can become necessary to change its
neutral setting, to prevent the resulting sound from changing.
If you adjust the range of a quick control that has a single assignment that uses Absolute
or Relative mode, HALion adjusts the setting of the quick control automatically so that the
sound does not change. Likewise, if you assign multiple parameters to the same quick
control, HALion sets the range of this quick control assignment automatically.
Global Functions and Settings
Quick Controls
34
However, if a quick control has multiple assignments and you change the range of one or
more assignments, the neutral setting cannot be set automatically. In this case, you can
specify the neutral setting manually using the Set Quick Control to Neutral Setting command
on the context menu for the quick control.
Bypassing Quick Controls
Bypassing quick controls allows you to hear a sound without quick control assignments.
1. To bypass a single assignment for one quick control, click Bypass Single Quick Control
Assignment in the Quick Control Assignments editor.
2. To bypass all assignments for one quick control, select the quick control in the Quick
Control Assignments editor, and click Bypass All Quick Control Assignments in the
upper right of the parameter section.
3. To bypass all quick control assignments of a program or layer, select the program or
layer in the Program Tree and click Bypass All Quick Controls Assignments in the title
bar of the Quick Control Assignments editor.
Assigning Quick Controls in the Modulation Matrix
In addition to assigning the quick controls directly to parameter controls, you can also assign
them as source or modifier in the modulation matrix. This way, you can combine the quick
control with other modulation sources.
PROCEDURE
1. In the Program Tree, select the zones that you want to edit.
Make sure that the zones are part of the program or layer containing the quick controls
that you want to use.
2. In the Sound Editor, open the Modulation Matrix section.
3. On the pop-up menu in the Source/Modifier column, open the Assign Quick Control
submenu and select the quick control.
The submenu lists only the quick controls that belong to the same layer or that are on
a higher hierarchy level.
Global Functions and Settings
Options Editor
35
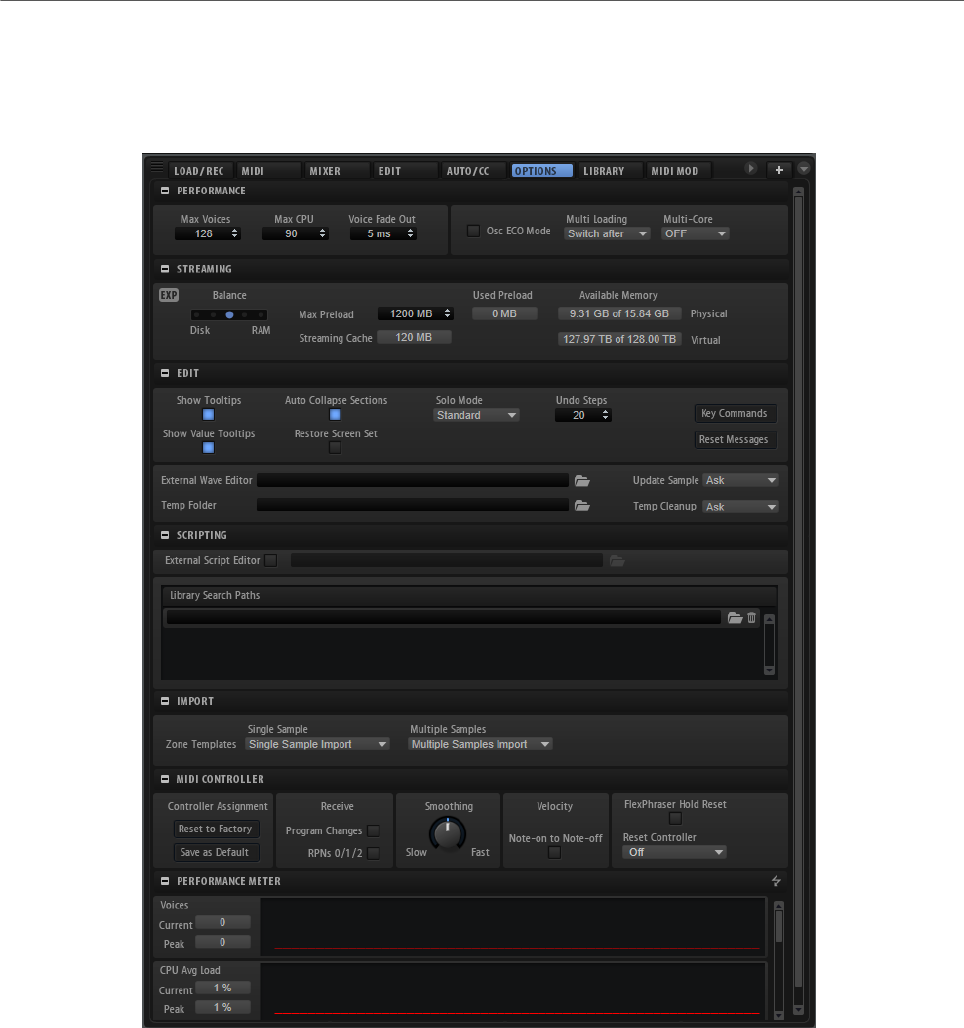
Options Editor
The Options Editor contains global settings regarding performance optimization, global
functions, and MIDI controllers.
Performance Section
The Performance section contains settings to optimize the overall CPU performance of the
plug-in.
Max Voices
Determines the total number of voices that a plug-in instance can play back. As
soon as this limit is reached, HALion starts stealing voices.

Global Functions and Settings
Options Editor
36
Max CPU
To avoid clicks from CPU overloads, you can specify a maximum limit for the CPU
load of the plug-in instance. HALion steals voices automatically when this limit is
exceeded.
At a setting of 100 %, no voices are stolen and the available CPU is used to its
limit. This can lead to audio drop-outs.
NOTE
Because of the reaction time of the plug-in, it is possible that you get CPU peaks
that exceed the set limit. This can lead to artifacts, such as audio drop-outs.
Therefore, it is good practice to set the Max CPU setting at a value a bit lower
than actually needed.
Voice Fade Out
Sets the time to fade out voices that need to be stolen because the Max Voices
setting or the Max CPU setting have been reached.
Osc ECO Mode
Activate this option to run the oscillators of synth layers in ECO mode. In ECO
mode, the oscillators use less CPU at the cost of producing more aliasing at
higher pitches. If this option is activated, you can play more voices with synth
layers.
Multi Loading
Normally, when loading multi-programs, the previous multi is kept in the RAM
until the new multi has been completely loaded. Therefore, replacing a large
multi by another can lead to RAM overload on 32-bit systems.
• To clear a multi before loading a new one, select Clear before on the pop-
up menu.
Multi-Core
On this pop-up menu, you can specify how many of the available CPU cores of
your system can be used by the plug-in. This allows HALion to compute each
program on a different core, for example. The best setting here depends on
multiple factors, and varies from system to system, and project to project. A good
starting point is to set this value to one core less than the available number of
cores.
NOTE
If problems occur, reduce the number of cores, or set the pop-up menu to Off
and load multiple instances of HALion instead. This way, the host application
distributes the work load across the available cores.
Streaming Section
Some of the programs come with several gigabytes of samples. That is a large amount of
data and your computer cannot load all samples completely into the RAM, especially if you
are using all slots. Therefore, HALion loads only the initial milliseconds of each sample into
Global Functions and Settings
Options Editor
37
RAM. You can specify how much RAM should be used and how much HALion should rely on
accessing the hard-disk.
Balancing Disk vs. RAM
Use the Balance slider to balance the hard disk versus the RAM usage.
• If you need more RAM for other applications, drag the slider to the left
towards the Disk setting.
• If your hard disk is not supplying data fast enough, drag the slider to the
right towards the RAM setting.
NOTE
The Disk vs. RAM setting always applies to all plug-in instances. It is not saved
with the project. You set it up only once for your computer system.
Used Preload and Available Memory
These displays provide information of the memory load in MB according to the
current balance slider setting.
Max Preload
Determines the maximum amount of RAM that HALion uses for preloading
samples. In most cases, the default values are sufficient. However, it may
become necessary to reduce this value, for example, when working with other
applications or plug-ins that require a lot of memory.
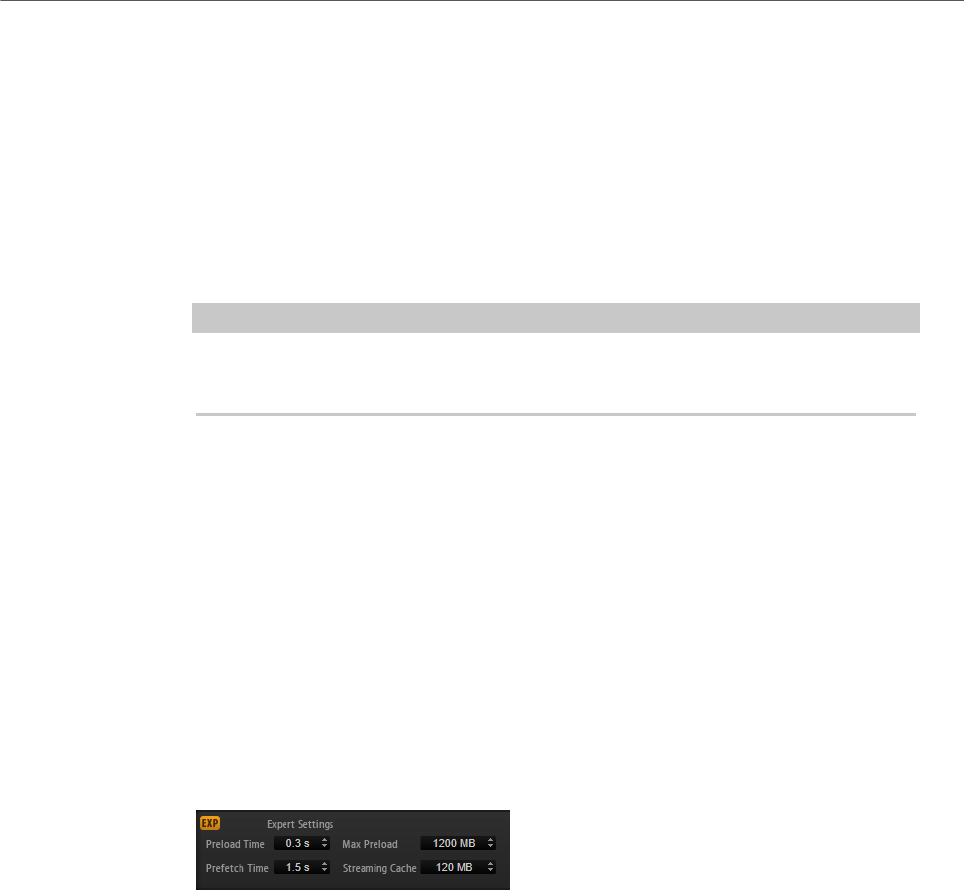
Expert Mode
Activate Expert Mode if you want to adjust the Disk Streaming settings in greater
detail.
•Preload Time defines how much of the start of the samples is preloaded
into the RAM. Larger values allow for more samples to be triggered in a
short time.
•Prefetch Time determines the read-ahead capacity into the RAM while
streaming samples for a voice that is playing. Larger values allow for
better transfer rates from disk, and usually for more voices. However, this
requires larger streaming cache in RAM. If you increase the Prefetch Time,
it is recommended to also increase the Streaming Cache.
•Streaming Cache determines the amount of RAM that is reserved for
prefetching. The actually needed size depends on the prefetch time, the
number of simultaneously streaming voices and the audio format of the
samples. For example, higher sample and bit rates need more RAM.

Global Functions and Settings
Options Editor
38
Edit Section
Here, you find common settings of HALion and you can specify an external wave editor that
you want to use for editing your samples.
NOTE
The settings in this section are not saved with a project, but affect the plug-in as a whole.
Show Tooltips
If this option is activated, a tooltip is shown when you move the mouse over a
control.
Show Value Tooltips
If this option is activated, parameters without a value field display their value in a
tooltip when you use the corresponding control.
Auto Collapse Sections
If this option is activated and you expand a section, all other sections are
automatically collapsed.
Restore Screen Set
Restores the corresponding screen set when you load a multi.
NOTE
In a VST 2 or AU environment, screen sets and windows are always restored when
loading a multi.
Solo Mode
• In Standard mode, you can solo multiple programs or layers to hear them
combined.
• In Exclusive mode, only one program or layer can be soloed at a time.
Number of Undo Steps
Specifies the number of available undo steps.
Key Commands
Opens the Key Commands dialog, where you can view and assign key commands.
Reset Messages
If you click this button, all message dialogs that have been suppressed with the
Don't Show Again option are displayed again.
External Wave Editor
HALion allows you to specify an external sample editor application that can be
used to perform destructive offline editing on a sample, for example applying
EQs, filtering, or denoising.
Here, you specify which application to use. You can enter the path manually or
click the Browse button to navigate to the corresponding application folder.
Global Functions and Settings
Options Editor
39
Update Sample
Specifies what happens if a sample is saved in the external wave editor.
• If Ask is selected and you switch back to HALion from the external editor,
you are asked whether you want to replace the current sample with the
modified sample.
• If Always is selected, HALion accepts the modified sample.
• If With Backup is selected, HALion accepts the modified sample and
automatically creates a backup of the old sample file.
• If Never is selected, modified samples are never accepted automatically.
You must import modified samples manually from the temp folder.
Temp Folder
Allows you to specify a temp folder for exchanging samples between HALion and
the external editor.
Temp Cleanup
After a specific period of time, HALion deletes temporary sample files from the
temp folder. The Temp Cleanup option allows you to specify how HALion handles
these samples.
• If Ask is selected, you are prompted to confirm the cleanup of the temp
folder.
• If Always is selected, temporary files are deleted without further notice. If a
file cannot be deleted, an error message is shown.
• If Ignore Error is selected, temporary files are always removed without
further notice. If a file cannot be deleted, no error message is shown.
• If Never is selected, temporary files are never deleted automatically. You
must delete them manually.
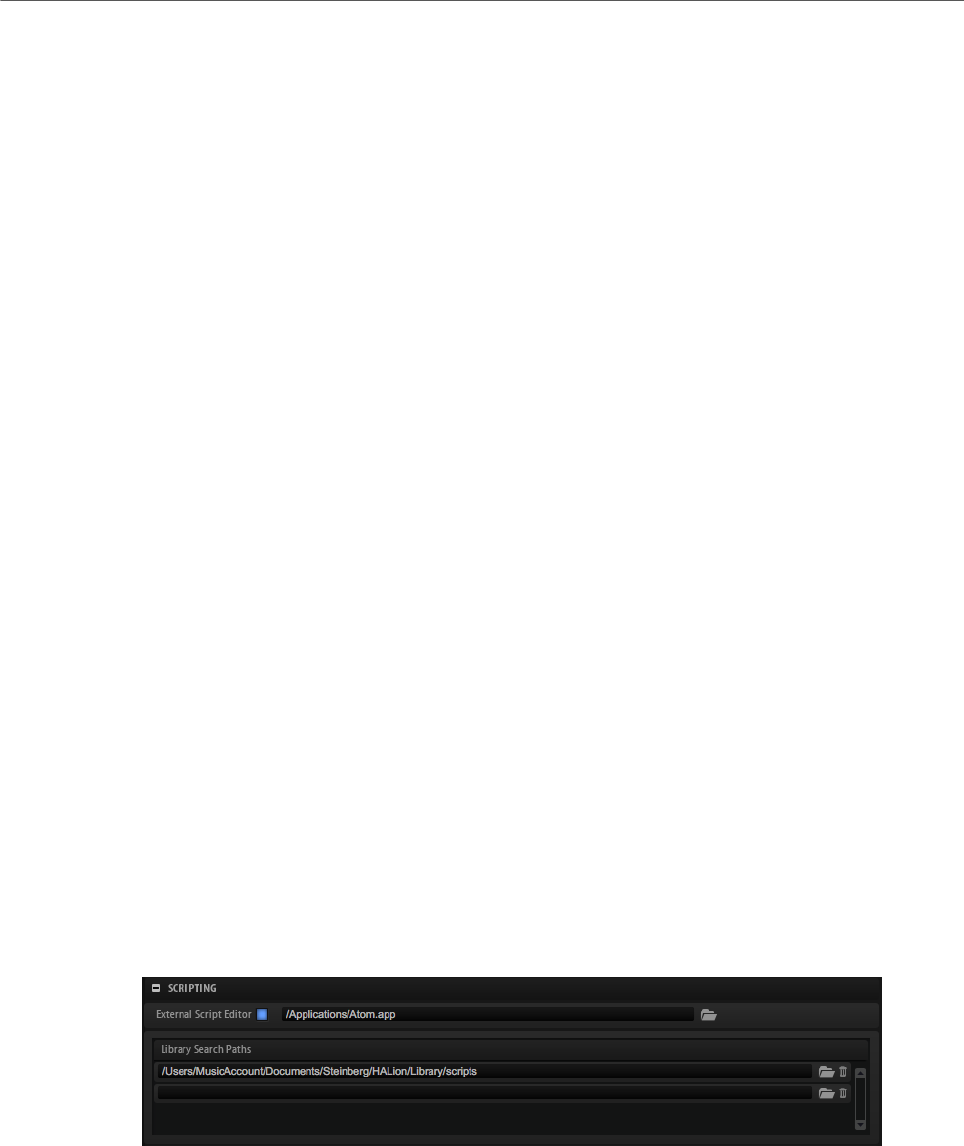
Scripting Section
In this section, you can set up and activate an external script editor and specify where
HALion searches for script libraries.
Use External Script Editor
Activates/Deactivates the use of the external editor.
Library Search Paths
These paths are used to search for libraries by all script modules.
RELATED LINKS
Setting Up an External Editor on page 536

Global Functions and Settings
Options Editor
40
Import Section
In this section, you can specify which zone templates to use when importing samples. For
example, by specifying different headroom settings for single and multiple samples, you
can import single drum loop samples without headroom and multiple instrument samples
including their headroom settings, because they are required for polyphonic playback.
MIDI Controller Section
Controller Assignment
With the two buttons in this section, you can save your customized MIDI
controller assignments as default or restore the factory MIDI controller
assignments.
NOTE
Save as Default does not include any of the MIDI controller assignments of the
AUX FX.
The current MIDI controller mapping is also saved with each project. This way,
you can transfer your settings to other systems. The project includes the MIDI
controller assignments of the AUX FX as well.
Receive Program Changes
If this option is activated, HALion responds to program change messages. These
are used by General MIDI (GM) files, for example.
Receive RPNs 0/1/2
GM files can contain information about pitchbend range, coarse tuning, and
fine tuning. This information is transmitted as RPNs (Registered Parameter
Numbers). Activate this option if you want HALion to respond to RPNs.
MIDI Controller Smoothing
MIDI controllers have a maximum resolution of 128 steps. Therefore, if you
use a MIDI controller as a modulation source in the modulation matrix or to
remote-control a quick control, the parameter change may occur in audible
steps, causing an effect often referred to as “zipper noise”. To avoid this, HALion
provides MIDI controller smoothing, so that parameter changes occur more
gradually.
• If MIDI controller changes cause audible artifacts, turn the control
towards slower settings. This way, MIDI controller changes do not occur
immediately, but are spaced over a period of time (in milliseconds).
• If you want more immediate MIDI controller changes, turn the control
towards faster settings. Note, however, that this may introduce audible
artifacts.
Velocity Note-On to Note-Off
Some keyboards do not transmit note-off velocity messages. If this option is
activated, the played note-on velocity value is also used as note-off velocity for
the notes.

Global Functions and Settings
AI Knob Support
41
FlexPhraser
Hold Reset sends a global hold reset message to all FlexPhraser modules that
are used.
The Reset Controller pop-up menu allows you to assign a dedicated MIDI
controller to the Hold Reset button for remote-controlling it.
Performance Meter Section
This section provides performance-relevant information. Each meter displays the current
value, the peak value, and a curve showing the changes over time. To reset all peaks, click
the Reset button in the title bar of the section. The following values are displayed:
Voices
The number of played voices.
CPU Avg Load
The average CPU load.
CPU Peak Load
The CPU peak load.
Streamed MB/s
The quantity of sample data that is streamed from the hard disk.
Dropout/s
The number of dropouts per second. This can be an indicator for hard disks that
are too slow.
Preload Memory
The quantity of samples loaded into the RAM of your computer.
AI Knob Support
HALion can be controlled with the AI knob of Steinberg’s CC121, CI 2, and CI2+ controller
units.
•To change a parameter value, move the mouse pointer over the control that you want
to change and turn the AI knob to set the value.
NOTE
•Some parameters cannot be controlled by the AI knob, due to internal differences in
parameter resolution. For example, sample marker positions cannot be changed with
the ai-knob because their ranges vary too much.
•The AI knob only works on parameters that are automatable. This means that you
cannot use the AI knob to change the parameters in the Options Editor, for example.

Automation
42
You can automate most of the HALion parameters from within your host application, whether
these are parameters of a program or global parameters such as AUX effects.
HALion provides 512 automation parameters that can be addressed from within the host
application. You can assign HALion parameters to one of these automation parameters,
and even assign multiple parameters to the same automation parameter, to control these
parameters at the same time.
NOTE
• To automate parameters of multiple zones relatively, use quick controls and automate
these instead.
• Not all parameters can be automated.
Automation Parameters
Each slot offers the following pre-assigned automation parameters:
Mute
Automates the Mute button of the corresponding slot.
Solo
Automates the Solo button of the corresponding slot.
Level
Automates the level of the corresponding slot.
Pan
Automates the panorama position of the corresponding slot.
Quick Controls 1-8
Automates the quick controls 1 to 8 of the program that is loaded into the slot.
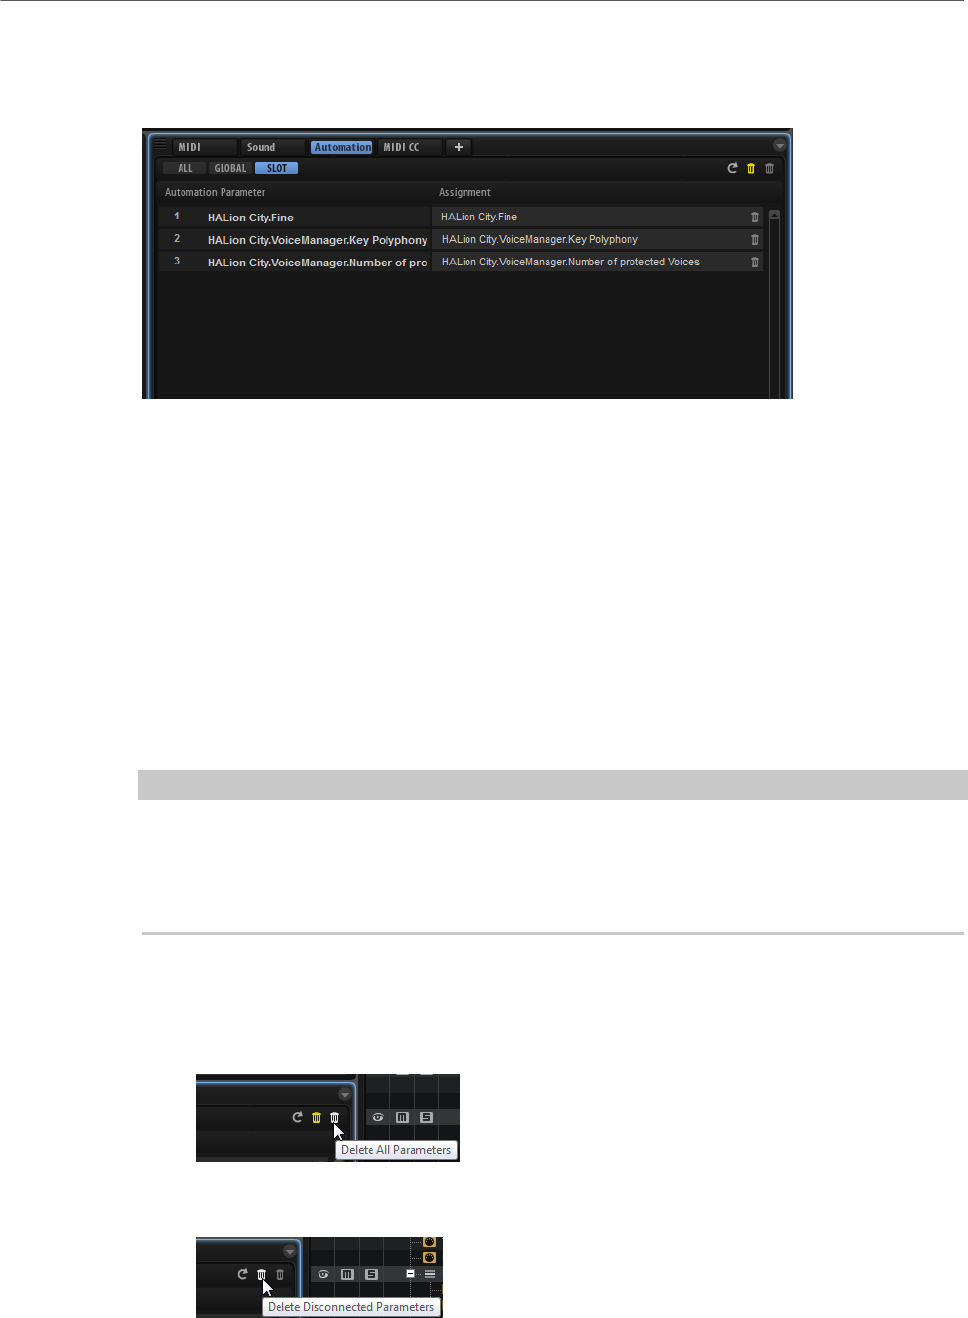
Automation
Automation Editor
43
Automation Editor
All assigned automation parameters are shown in the Automation editor.
With the tabs at the top, you can specify whether you want to show the automation
parameters for the slot, the global parameters, or all automation parameters.
On the left, the name of the automation parameter is shown, and on the right, the name
of the assigned HALion parameter. If multiple HALion parameters are assigned to one
automation parameter, these are listed below each other on the right.
If you assign an automation parameter for multiple zones, for example, the parameter is
displayed in the list in the following way:
• If all zones within a layer are selected, the automation list shows one automation
parameter for all these zones.
• If several zones within a layer are selected, the automation list adds sub-entries for
each zone to each automation parameter in the list.
NOTE
You can assign a HALion parameter to an automation parameter only once. If you try to add a
parameter a second time, for example, a zone parameter as part of a selection of zones, the
new automation parameter is only applied to those zones in the selection that were not yet
assigned to an automation parameter.
• To remove an automation parameter, click the trash icon to the right of the parameter
name.
• To remove all automation parameters, click Delete All Parameters at the top of the
page.
• To remove all disconnected automation parameters, click Delete Disconnected
Parameters on the toolbar.

Automation
Setting Up Automation
44
Disconnected automation assignments could not be connected properly. This can
occur if you make automation settings for a program and then load another program
with a different structure into a slot, for example.
• To rename an automation parameter, double-click the parameter name and enter the
new name. This name is then used in your host application.
• To replace the names for all automation parameters with the original parameter
names of the program, click Refresh All Parameter Names on the toolbar
Setting Up Automation
By default, some of the slot parameters are already assigned to automation parameters,
for example Mute, Solo, Volume, Pan, and Program Change. When you load a program, it
automatically adds its automation parameters for the eight Quick Controls and the Sphere
control.
Creating Automation Parameters
• To assign a parameter to an automation parameter, right-click the parameter control
and select Assign to New Automation. The automation parameter is created on the
first free automation parameter.
• To add a parameter to an existing automation parameter, right-click the control, select
Add to Automation and select the automation parameter.
• To remove a parameter from the automation, right-click an automated control and
select Forget Automation.
• To assign a parameter to an automation parameter automatically while working in
your host application, activate Automation Read/Write, start playback, and use the
controls on the HALion interface.
NOTE
To create automation parameters only for selected zones, select these zones, or the
layer that contains these zones, first.
Assigning Parameters to Automation Parameters
The selection in the Program Tree determines the scope of the automation parameter, that
is, which element it affects. For example, select a zone to automate this zone, and select a
layer to automate all zones within this layer, etc.
EXAMPLE
If you assign an automation parameter to a group of zones within a layer, the incoming
automation data affects all zones in the same way and individual settings of zones are
overwritten. For example, if the zones of a layer have different cutoff values and you start
automating the cutoff parameter, the zones are all set to the same cutoff value.
NOTE
If you have assigned automation parameters for a program and then load another program
into this slot, it can become necessary to verify the automation settings.

Automation
Setting Up Automation
45
If the new program has the same structure as the previous program, for example if you
exchange a Voltage preset with another Voltage preset, HALion reconnects the automation
parameters correctly and no manual modifications are necessary. However, if you load a
preset with a different structure, for example a Model C preset, the automation parameters
cannot be reconnected. In this case, the disconnected automation parameters are still
displayed in the automation list.

Managing Your Sounds
46
About Programs, Layers, Multis, Macro Pages, and Presets
Programs
A program is a complex instrument or sound that can consist of up to 4 layers. Often, a
program contains a single layer that comes with all necessary components, such as the
synthesis part or insert effects. Programs add the possibility of combining different layers to
build up more complex sounds or to create combinations of sounds that you want to load as a
unit. A typical example is a bass/piano split sound or a piano/string layer sound.
Because of the various layer types that come with HALion, these combinations can do a lot
more. For example, think of combining a pulsating synthesizer sequence with a sliced loop
completed by a bass on the lower keys, and so on. Finally, add some effects to individual
layers or to the whole program and you get a unique sound experience.
Layers
Programs are combinations of up to 4 layers. HALion offers 5 different layer types. You can
choose between synth, sample, instrument, drum, and sliced loop layers. Each layer type is
based on an individual sound architecture and has a dedicated editor.
Synth and Sample Layers
For synth and sample layers, you get access to a synthesizer editor with
components such as a highly flexible filter section, powerful multi-stage
envelopes, LFOs, a step modulator, and a modulation matrix. These layer types
differ in their basic sound source. While a synth layer provides an oscillator
section with three main oscillators, a sub oscillator, a noise generator, and a ring
modulation stage, the sample layer loads a specific multi-sample instead.
Drum Layers
The drum layers load a multi-sampled drum set, for which you can individually
adjust the most important parameters of each drum instrument. Each drum
instrument can be set to a specific pan position or an individual output, or it can
be filtered, reversed, and so on.
Loop Layers
Loop layers load a sliced loop, that is, a combination of a loop-specific MIDI
phrase and the individual slices mapped across the keyboard. You can either play
the original loop or a transposed version of it, or trigger single slices manually.
Each slice can be modified with the same parameters as the drum instruments.

Managing Your Sounds
Registering VST Sounds
47
Instrument Layers
Instrument layers contain several multi-samples of an instrument that can be
parts of single sounds or different articulations. These sublayers are called
expressions. You can modify expression parameters. By switching off an
expression, you can shorten the load time of a sound.
Multis
HALion is a multitimbral plug-in that can load up to 16 sounds (or programs) and combine
them. This combination is called a multi-program, or multi for short. You can use multis to
layer several programs or to create split sounds by setting several programs to the same
MIDI input channel, for example. However, the most common usage is to create sound sets
with different instruments set to individual MIDI channels.
VST Sound Instrument Sets and Macro Pages
VST Sound Instrument Sets from Steinberg provide additional content for VST instruments
based on the HALion technology. They come with their own edit pages, called macro pages,
that feature a customized look and a collection of controls that match the functions of
the VST Sound Instrument Set. When you edit a program or layer of a certain VST Sound
Instrument Set, the accompanying macro page opens. For details on the functions and
controls of a particular macro page, refer to the documentation that comes with the
corresponding VST Sound Instrument Set.
Furthermore, you can create your own macro pages with HALion’s Macro Page Designer.
Presets
You can save and load all types of sounds as presets, that is, you can create presets for
single programs, for layers, and for multis.
Content Files and Folder Structure
HALion comes with a large amount of ready-to-use sound content, made up of hundreds of
multis, programs, and layers. This content is write-protected. You can edit files while they
are loaded, but you cannot overwrite the factory content files.
To save edits to the factory content, save the files under a new name. These files get the file
name extension .vstpreset and are referred to as user content. They can be searched and
categorized in the same way as factory content.
User content is saved in a predefined folder structure on your hard disk. You can create
subfolders within this structure to facilitate moving or exchanging content.
Registering VST Sounds
To be able to use the content from VST Sound containers, these containers must be
registered in the MediaBay.
Any content that comes with HALion is registered during installation, but if you have created
your own VST Sound container and want other users to be able to use it, they must register it
first.

Managing Your Sounds
Loading Programs and Layers
48
NOTE
Before registering a VST Sound container, move it to the folder on your system where you
want to store it. If you have registered a VST Sound container from the wrong location,
for example from your Download folder, you can move it at a later point in time, using the
Library Manager.
•Double-click the VST Sound container in the File Explorer/Mac OS Finder.
This way, the VST Sound container as well as any other VST Sound containers located
in the same folder are registered.
•Drag one or multiple VST Sound containers from File Explorer/Mac OS Finder onto the
MediaBay.
The registered files remain in their current location and links to them are created under
program data/steinberg/content/VSTsound for Windows and under Library/
Application Support/Steinberg/Content/VSTsound for Mac.
If a VST Sound container has already been registered, it will not be registered a second time.
RELATED LINKS
Library Manager on page 421
Loading Programs and Layers
There are several ways to load programs:
•Via drag and drop from the MediaBay, the Program Table, the Program Tree, or the
File Explorer/Mac OS Finder onto the Slot Rack.
To load the program into an empty slot, drag it onto this slot, or, if empty slots are not
shown, drag it onto the empty space below the slots in the Slot Rack.
To replace the current program, drag the program onto a used slot in the Slot Rack.
•Via the slot context menu.
•Samples and third-party programs can be loaded into the Slot Rack from a file
browser or the Results List using drag and drop.
NOTE
Programs containing lots of sample data may take some time to load.
Inserting Programs in between Slots
To add a program or layer in a new slot between two existing slots, drag it between these
slots. A red line indicates the insert position.
NOTE
The slot number is taken from the first available slot and does not necessarily reflect the
order in which the slots are listed.
Loading Layers into Slots
If you load a layer into a slot, HALion creates a new program.

Managing Your Sounds
Loading Programs and Layers
49
Finding Missing Samples
There might be situations where loaded programs cannot find the samples they use. This
can happen if the referenced samples are located on a different drive and the drive name has
changed, or because the program was created on a different computer system.
When this happens, the Find Missing Sample dialog opens, showing a list of all samples that
are missing, with additional information about the format, size, and creation date. The list
groups all samples that are located in the same subfolder.
Entering a Search Path
In the Find Missing Sample dialog, below the list of missing samples, you can enter the
search path to find the missing samples.
NOTE
All subdirectories are searched before the results are displayed, therefore the search takes
longer if you specify entire drives.
Starting the Search
Once you have specified the search path, click the Start Search button to start the search
process.
If the search only finds a single result for each missing sample, the sample path is
automatically corrected in the program and the sample disappears from the Missing Files
list. If all samples are found, the dialog is closed.
Multiple Results
If sample files with the same name are found in more than one location, an additional Found
File list appears below the Missing File list. This shows the available samples and their file
locations.
• To select a sample or a complete folder that is to be used to resolve the missing
samples, double-click it in the Found Files list.
Each sample or folder that is resolved this way disappears from the Missing File list.
Once all samples are resolved the dialog closes.
Favorite Paths
If a path might be helpful for future searches, you can add it to the search path list. The next
time the dialog opens, it allows you to select one or multiple predefined paths to specify
which places to include in the search.
• To add a path, click the + sign.
Search Options
By default, HALion searches for samples that do not only have the same file name, but
also correspond in terms of time, size, and format information. A sample is considered
“found” only if all of the information is identical. However, you can exclude this information
by activating the Ignore File Time and Size and Ignore Audio Format and Length options.
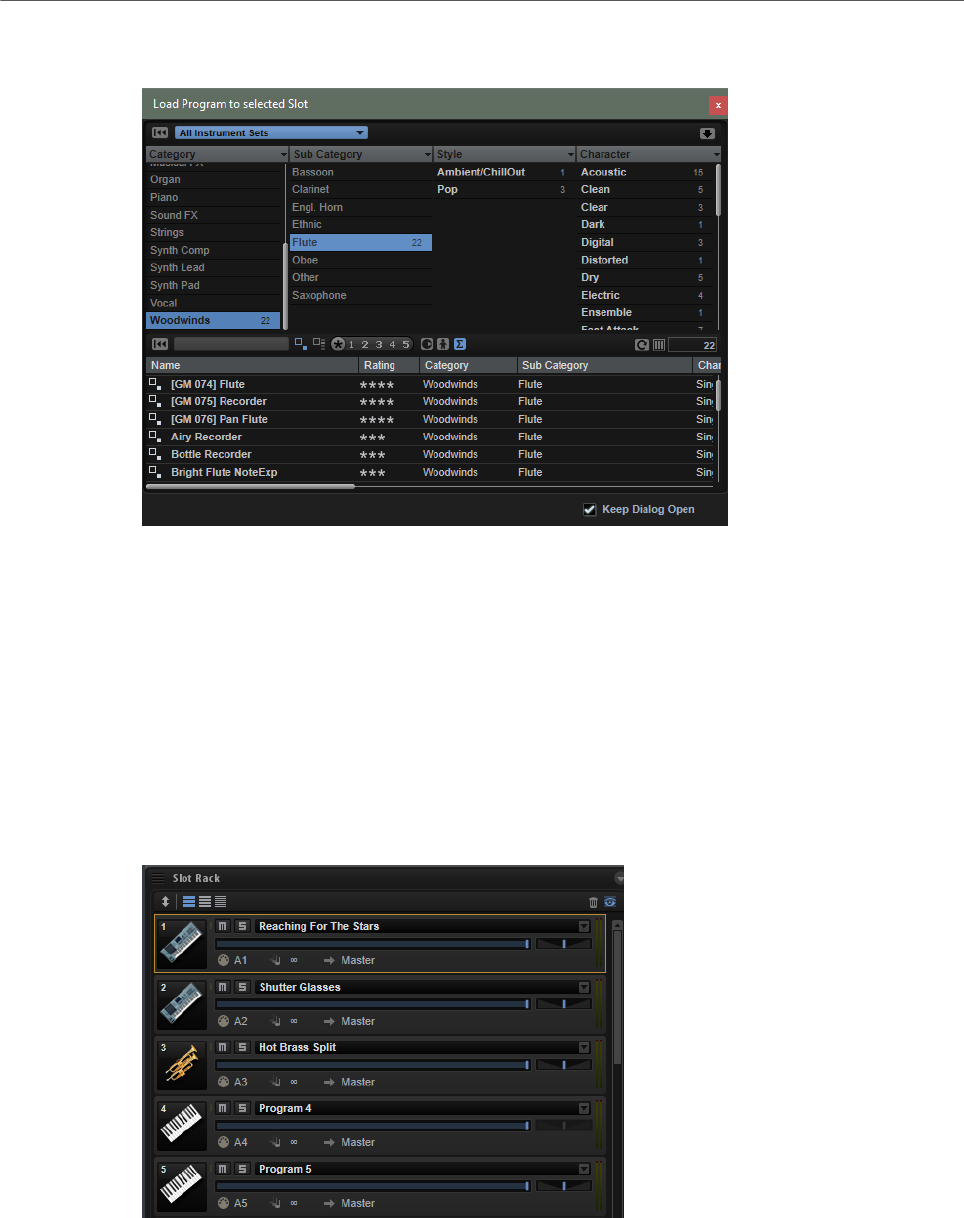
Managing Your Sounds
Load Dialog
50
Load Dialog
The Load dialog contains many of the MediaBay functions, allowing for very sophisticated
search criteria.
RELATED LINKS
Applying Filters on page 56
Managing Files via the MediaBay on page 55
Results List on page 57
Slot Rack
The Slot Rack has 64 slots. Each slot can hold a program, that is, you can work with 64
programs at the same time.
Once a program is loaded in the Slot Rack, it can be played and edited.
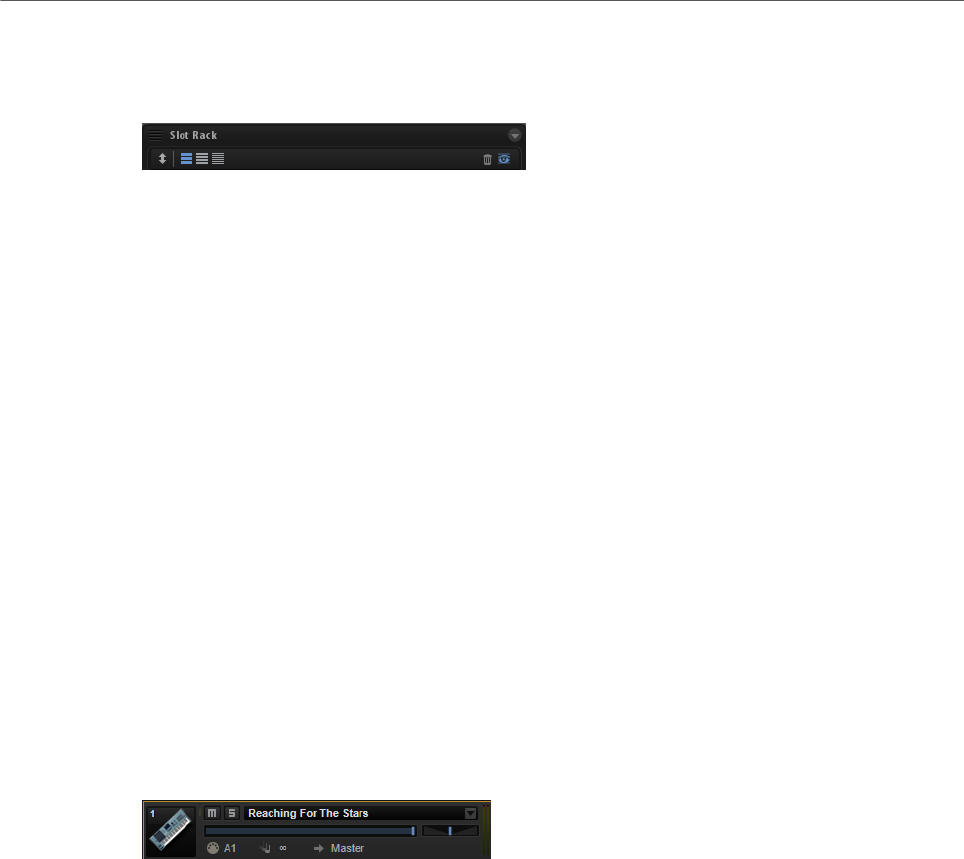
Managing Your Sounds
Slot Rack
51
Slot Rack Controls
The top section of the Slot Rack contains the controls.
Sort Slots
Allows you to select the sorting mode.
•Custom Sorting – Allows you to define the order by dragging the slots up or
down.
•Sort Slots by MIDI Port and Channel – The slots are sorted according to
their MIDI port and MIDI channel.
•Sort Slots by Index – Sorts the slots according to their slot index.
Slot Size Buttons
Allow you to show large, medium, or small slots. The larger the slot, the more
controls are displayed.
Remove All Programs
Removes all programs that are loaded in the Slot Rack.
Show Empty Slots
By default, the Slot Rack only shows slots that contain programs. Activate Show
Empty Slots to show all 64 slots.
Slot Controls
For the slots in the Slot Rack, the following controls are available:
Program Icon
The program icon on the left shows to which sound category a program belongs if
a category is set.
Mute
Deactivates playback of the program.
Solo
Activate the Solo button of a slot to hear only the corresponding program. Several
slots can be soloed at the same time.
Level
The level fader controls the output level of a program. The parameter has an
influence on all outputs that are used by layers and zones inside the program.

Managing Your Sounds
Slot Rack
52
Pan
Controls the stereo position of a program. The parameter has an influence on all
outputs that are used by layers and zones inside the program. If the slot bus has
a surround configuration, this control is not available.
MIDI Port and Channel
Determines on which MIDI port and channel the slot receives MIDI messages.
MIDI Activity Indicator
This green bar next to the slot number and symbol indicates incoming MIDI data.
Polyphony
Determines how many notes can be triggered simultaneously.
NOTE
If a note triggers several zones at the same time, the number of resulting voices
can be much higher.
Output
Determines to which output bus the slot sends its signal.
NOTE
This setting does not affect any output routing that has been set up for individual
layers or zones inside the program.
Level Meter
The level meter on the right indicates the signal level of the slot’s output bus.
NOTE
If a program contains layers and zones that are routed to individual outputs,
these are not reflected in the level meter.
Slot Context Menu
The context menu provides a number of functions for managing programs.
Load Program
Opens the program loader. Double-click a program or layer to load it into this
slot.
Save Program
Saves the program. If you try to overwrite write-protected factory content, a
dialog opens that allows you to save the edited program under a new name.
Save Program As
Allows you to save the program under a new name.

Managing Your Sounds
Managing and Loading Files
53
Save All Programs
Allows you to save all programs as a VST preset.
Remove Program
Removes the program from the slot.
Init Program
Loads the Init program. This contains a neutral synth layer.
Revert to Last Saved Program
Discards any changes that you made to the program since the last time it was
saved.
Cut Program
Copies the program and removes it from the slot.
Copy Program
Copies the program.
Paste Program
Pastes the copied program into the slot. If the slot already contains a program, it
is replaced.
Rename Program
Allows you to rename the program.
Reset Slot
Resets the slot to the default values.
Reset All Slots
Resets all slots to the default values.
NOTE
You can also cut, copy, and paste programs from one plug-in instance to another.
Managing and Loading Files
You can use the MediaBay and the Browser to manage, navigate to, load, and preview
different file types.
Managing Multis
Multis can load multiple sounds or programs and combine them.
You can use multis to layer several programs or to create split sounds by setting several
programs to the same MIDI input channel, for example. However, the most common usage is
to create sound sets with different instruments set to individual MIDI channels.
Managing Your Sounds
Managing and Loading Files
54
A multi-program contains all plug-in parameters. If you use HALion as a plug-in in a
Steinberg DAW, these multis are listed in the Preset Management pop-up menu of the host
application. You can drag multis and programs from the MediaBay to a slot in HALion.
If you use HALion as a plug-in in a different host application, you can use the preset
functionality from the host application or the multi management features provided by
HALion.
Loading Multis
You can load multis in the following ways:
• Open the MediaBay and double-click a multi or drag a multi onto the multi slot.
• Click the Load Multi-Program button in the multi slot to open the Load Multi-Program
dialog, select a multi, and click OK.
Renaming Multis
PROCEDURE
•To rename a multi, click in the name field, enter a new name, and press Return.
Removing Multis
• To remove all programs of the current multi, click the Remove All Programs button on
the toolbar of the Slot Rack.
This also resets all slot parameters and removes effects from the slot busses.
However, AUX and Master effects are not removed.
NOTE
Removing the programs from the slots does not remove them from the Program Table.
Clearing the Plug-In Instance
• To reset the entire plug-in instance to an empty state, right-click the multi loader and
select Clear Plug-in Instance from the context menu.
Saving Multis
PROCEDURE
1. Click the Save Multi-Program button.
2. Enter the name of the multi.
3. Assign any attributes that you want to use and click OK.
If the entered name already exists, the Make Unique Name option adds a number
suffix to the name of the new multi.
Saving a Multi as Default
• To specify a default multi to be loaded with HALion, use the Save as Default command
on the context menu for the multi loader.
Managing Your Sounds
Managing and Loading Files
55
Creating Subfolders for User-Defined Multis
You can create subfolders inside the user preset folder to organize presets.
• To create a new folder, click the Create New Folder icon at the top left of the Save
Multi-Program dialog.
Navigating Through the Folder Hierarchy
You can move through the folder hierarchy using the three navigation buttons at the top left
of the dialog.
These buttons allow you to navigate to the previous or next browse location, or browse the
containing folder.
Editing Attributes
You can edit the attribute values that are assigned to the preset.
PROCEDURE
1. Open the Save Multi-Program dialog and navigate to the New Preset Tags section.
2. To edit an attribute, click on a value field and enter the new name or value.
3. Click OK to save the preset.
Exporting Multis as VST3 Presets with Samples
You can export multi-programs with samples to transfer a complete multi to another
computer. Programs that use samples from VST Sound containers cannot be exported.
PROCEDURE
1. Click the Export Multi-Program as VST3 Preset with Samples button next to the multi
slot.
2. Enter the name of the multi and click OK.
The multi is written to the specified location. Additionally, a folder named after the
preset that contains all samples is created.
Managing Files via the MediaBay
The MediaBay gives access to presets, such as multis, programs, and layers.
In the top section of the MediaBay, you specify which sounds to look for. The lower section
presents the corresponding results.
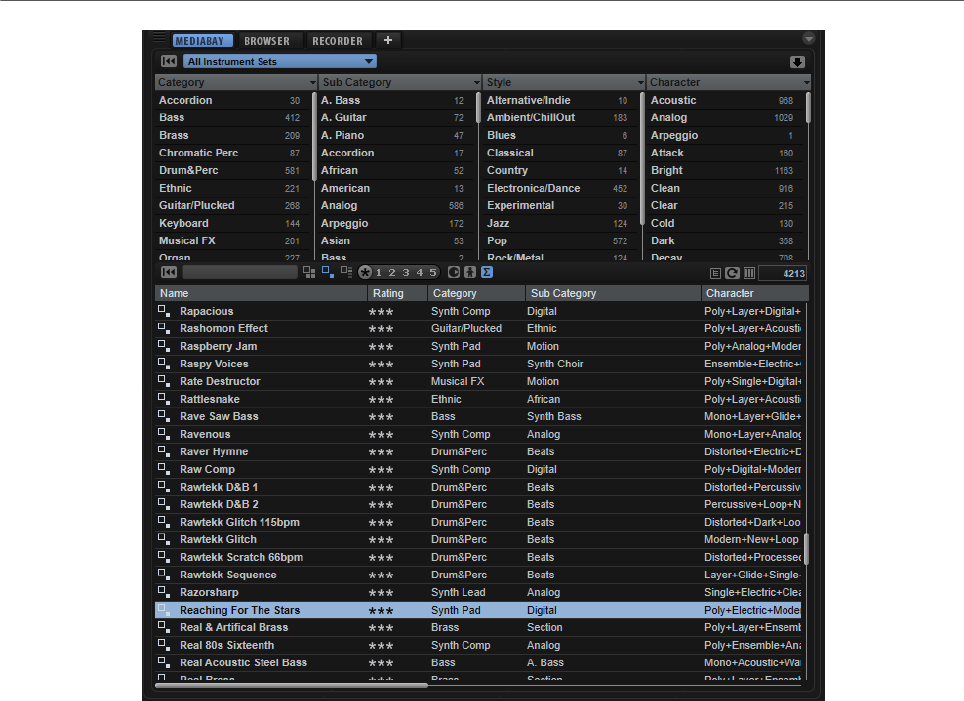
Managing Your Sounds
Managing and Loading Files
56
•To adjust the size of the two sections, drag the divider at the top of the results list.
Applying Filters
Category Filter
You can filter the results list based on up to 4 filter criteria using the configurable attribute
columns. The standard attributes are Category, Sub Category, Style, and Character.
Only the files that match the filter are displayed in the results list.
• To define the filter, click on specific values in the columns.
• To refine the filter, select more values from other columns.
• To select different filter criteria, click the column header and select a different
attribute from the submenu.
Content Set Filter
Use the Select Content Set pop-up menu to search a specific content set. By default, the
search is performed in all installed content sets.
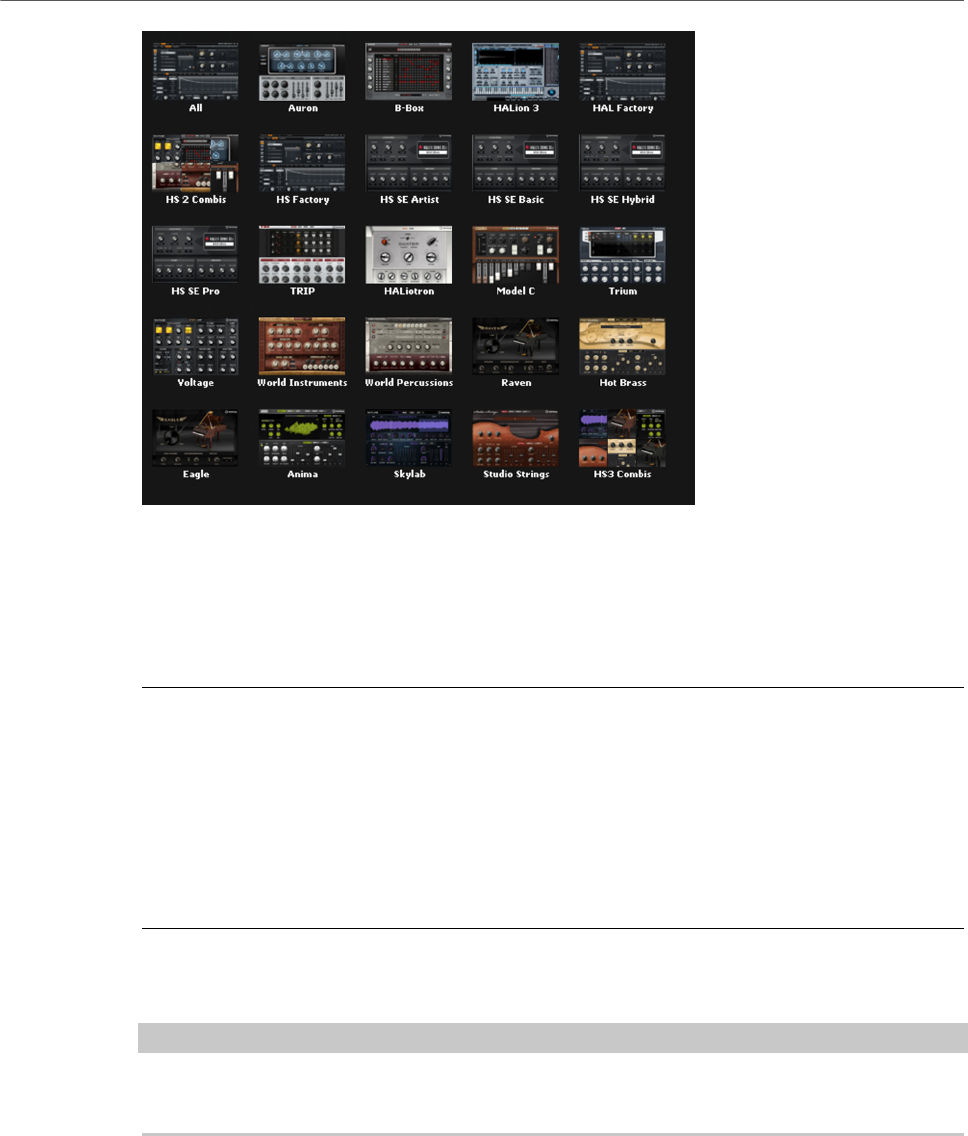
Managing Your Sounds
Managing and Loading Files
57
Using User Icons for Content Libraries
The Select Content Set pop-up menu allows you to filter presets according to their library
name. To be able to filter out your user presets, you can set up a custom library name for
your user presets in the MediaBay. By default, the pop-up menu displays user libraries with
a generic library icon, but you can also set up your own icons for your libraries.
PROCEDURE
1. Open the Select Content Set pop-up menu.
2. Right-click the icon for your custom library and select Select Custom Library Icon.
3. Navigate to the file that you want to use, and select it.
You can only use .jpeg or .bitmap files.
4. To remove a user icon from a library, right-click it and select Remove Custom Library
Icon.
RESULT
The new icon is shown in the MediaBay and on the Select Content Set pop-up menu.
NOTE
The standard size for library icons is 60x90 pixels. Images with a different height or width are
resized.
Results List
The results list shows all files that have been found according to the category filter.
Text Search
In the text search field on the results list toolbar, you can enter text contained in
the name or any of the attributes of a preset that you are looking for. The results
list is updated immediately and the category search section above shows all
categories that contain presets matching the text search.
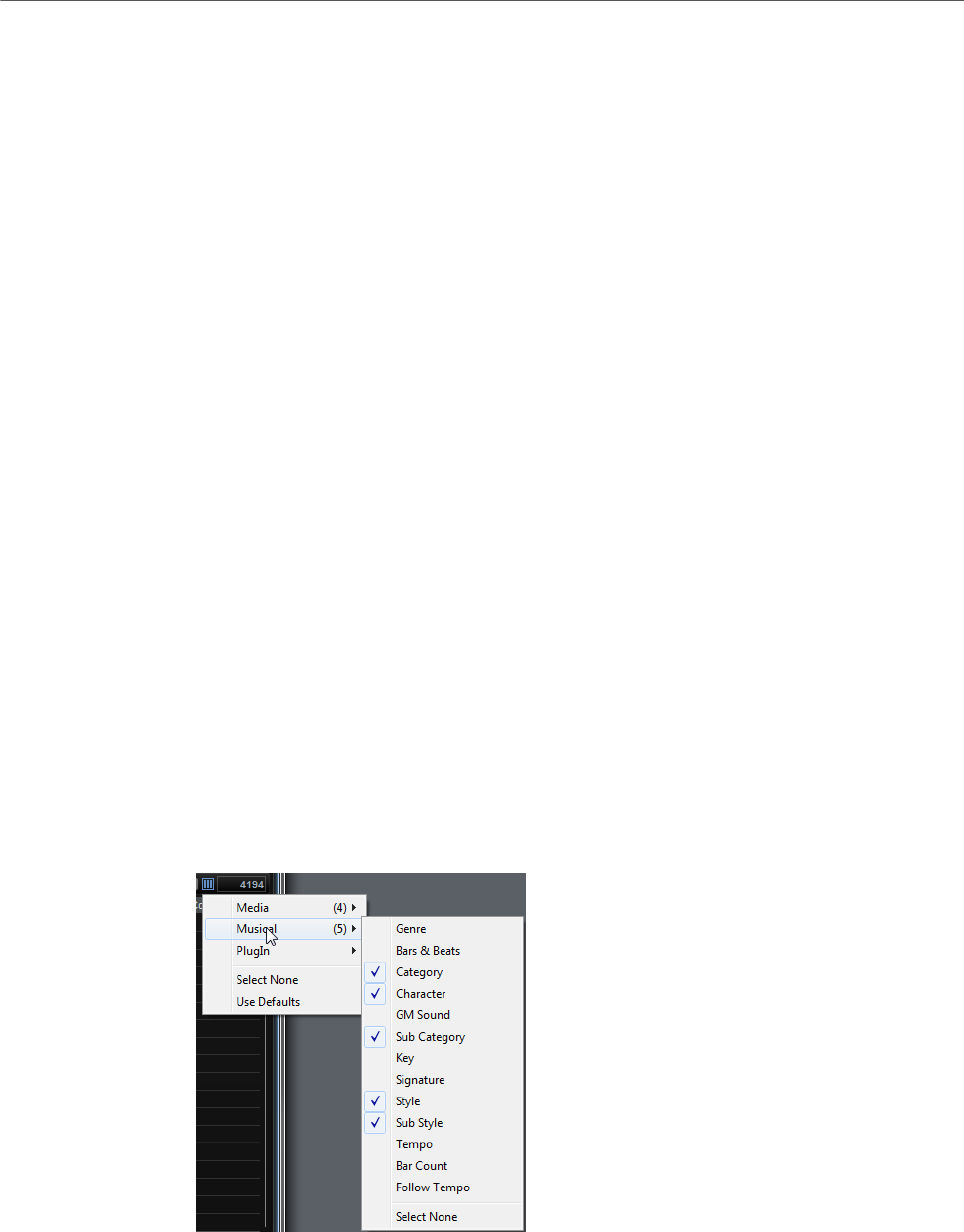
Managing Your Sounds
Managing and Loading Files
58
To reset the text-based result filter, click Clear Search Text next to the search
field.
View Filters
The toolbar has three filter buttons that allow you to define which preset types to
display: multis, programs, or layers. In the results list, the corresponding icon is
shown to the left of the preset name.
Rating Filter
You can limit the results list according to the rating of the presets. Use the rating
slider to define the minimum rating.
Content Filters
The content filter buttons allow you to define whether to show all presets, only
the factory presets, or only your user presets.
Columns
The columns show all the attribute values for the presets that match the filters
that you set up in the top section.
Set Up Result Columns
Allows you to select which attribute columns to display on the toolbar.
Results Counter
The number of presets that match the filter criteria is displayed at the right of the
toolbar.
Configuring the Results List
•To configure which attributes are shown in the results list, click Set up Result Columns
in the upper right corner of the results list and activate the corresponding entries. New
attributes are added at the right of the list.
•To reorder the columns in the results list, drag the column headers to another
position.
•To change the sorting of the list entries, click the column header. The triangle in the
column header shows the sorting direction.

Managing Your Sounds
Managing and Loading Files
59
Results List Context Menu
The context menu of the results list offers additional options for managing the selected
presets. Different options are available for factory presets and for user presets.
NOTE
Programs from the factory content are write-protected and cannot be deleted or renamed.
Factory Presets
Load Program into selected Slot/Load Multi-Program
Loads the highlighted preset.
Select All
Selects all presets in the results list.
Select None
Cancels any selection in the results list.
User Presets
Copy
Copies the selected presets to the clipboard.
Rename
Opens a dialog for renaming the preset.
Delete
Moves the selected presets to the trash of your operating system.
Show in Explorer/Reveal in Finder
Shows the preset in the file browser of your operating system.
Set/Remove Write Protection
Sets/Removes write protection for the selected presets.
Assigning General MIDI Program Change Numbers to Sounds
PROCEDURE
1. In the MediaBay, click Set up Result Columns on the title bar of the lower section.
2. Select Musical> GM Sound.
3. Select the sound to which you want to apply the GM program change number.
4. In the GM Sound column for the sound, select the General MIDI program change
number that you want to use.
You can assign the same GM Sound program number several times. If a program
number is used more than once, the Rating attribute can be used to decide which
program to load.
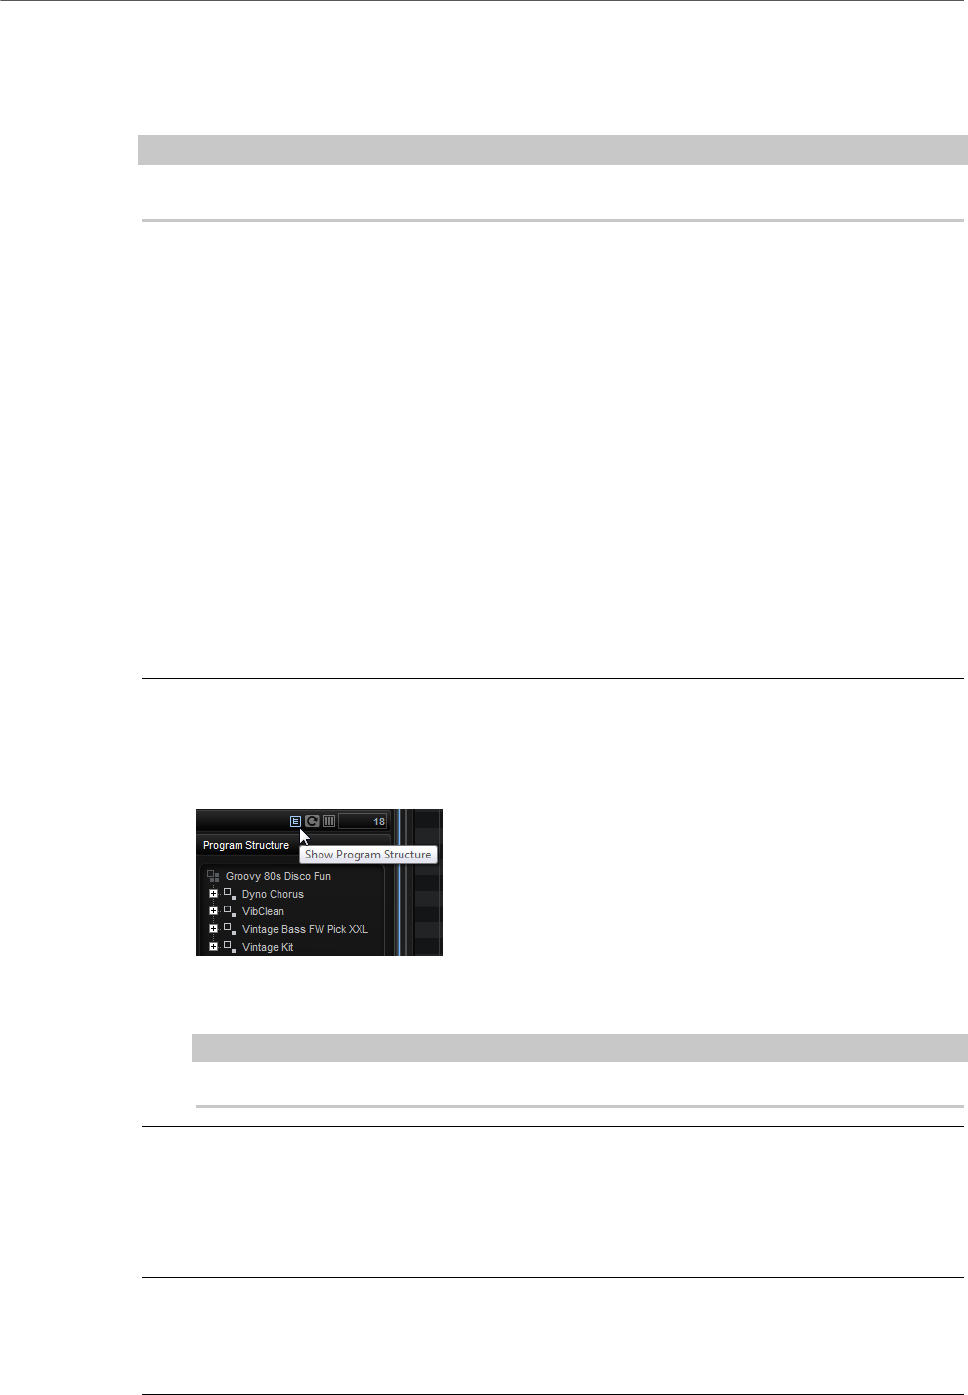
Managing Your Sounds
Managing and Loading Files
60
RESULT
Now, you can use MIDI program change messages to load the assigned sounds into the slot
of the corresponding MIDI channel.
NOTE
Slot 10 ignores any program change messages and keeps the loaded drum set.
Loading Programs into Slots
To load a program into one of the slots of the Slot Rack, you have the following possibilities:
• Select the slot into which you want to load the program, and double-click the program
in the results list.
• Drag a program from the results list to an empty space in the Slot Rack to create a
new slot.
If you drag it to an existing slot, the current program is replaced.
• Right-click the program and select Load Program into selected Slot from the context
menu.
Showing the Program Structure
You can look inside multis, programs, and layers. This allows you to load only specific
components, for example.
PROCEDURE
1. Activate Show Program Structure on the toolbar of the results list.
An additional window section is displayed. It shows the contents of the selected multi,
program, or layer.
2. Navigate through the tree structure and select the items that you want to use, for
example, a program within a multi, a single layer of a program, or a single zone.
NOTE
You cannot open protected layers. These are shown with a lock icon.
Importing Presets
You can import program presets from any file location using the File Explorer/Mac OS
Finder.
PROCEDURE
1. Select the preset in the File Explorer/Mac OS Finder.
2. Drag it to the MediaBay.
Managing Your Sounds
Managing and Loading Files
61
RESULT
The imported presets are copied to your user folder.
Editing Preset Attributes
Presets can be described by using a predefined set of attributes.
PROCEDURE
1. In the New Preset Attributes section of the Save dialog, click in the field of the
attribute value that you want to set.
Depending on the attribute, a menu or a dialog opens.
2. Select a value.
Attribute values are written into the corresponding preset files.
NOTE
If you change the attributes for write-protected factory presets, these changes are only
saved in the MediaBay database, not in the preset file.
Deleting User Presets
• To delete a user preset, right-click it and select Delete from the context menu.
NOTE
Factory presets cannot be deleted.
Loading HALion 3 Programs
You can load HALion 3 presets from HSB container files, VST Sound files, or FXP/FXB files.
To be able to load presets from HALion3 HSB files or programs that are contained in VST
Sound files, the HSB or VST Sound files must be registered in the MediaBay.
NOTE
The factory content is located in a directory that is automatically scanned when HALion
is loaded. However, if you added additional VST Sound files in another directory, you must
register these files.
Registering HSB/VST Sound Files
PROCEDURE
1. Click Import on the right of the category filter toolbar and select Register HSB/VST
Sound Files.
2. Navigate to the files, select them, and click OK.
Alternatively, HSB/VST Sound files can be registered by dragging them from the File
Explorer/Mac OS Finder into the MediaBay.
RESULT
The MediaBay has access to the presets.
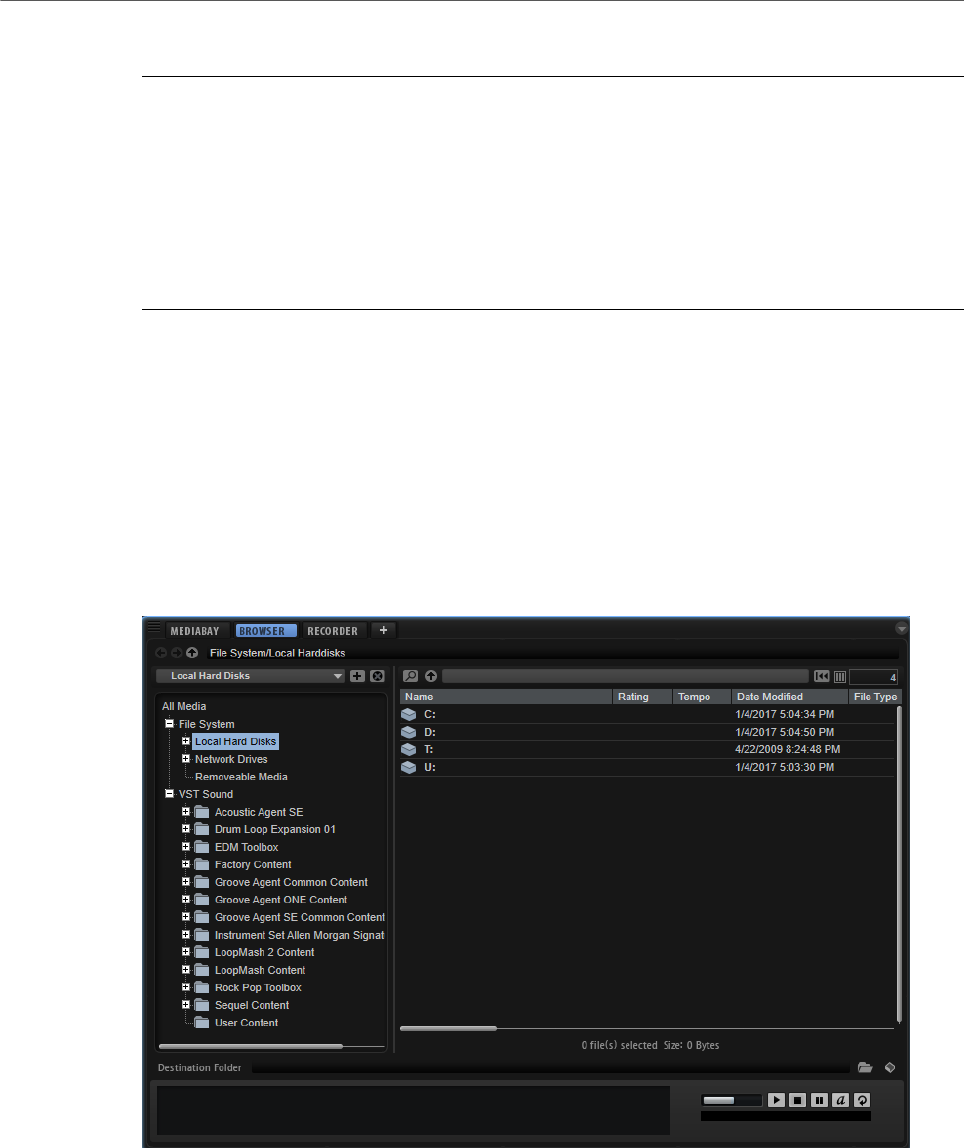
Managing Your Sounds
Managing and Loading Files
62
Importing FXP/FXB Files
PROCEDURE
1. Click Import on the right of the category filter and select Import HALion FXP/FXB
Files.
2. Navigate to the folder that contains the FXP/FXB file.
3. Select the file that you want to import and click OK.
Alternatively, import multiple FXP/FXB files by dragging them from the File Explorer/
Mac OS Finder into the MediaBay.
Loading FXP/FXB Files
To load FXP/FXB files, do one of the following:
• Drag and drop the FXP/FXB files from the File Explorer/Mac OS Finder onto the Slot
Rack.
• Drag and drop the FXP/FXB files to the Slot Rack or the multi slot.
HALion converts the FXP/FXB files into programs or multi-programs.
Loading Files Using the Browser
In the Browser, you can search and load the following files:
•Samples and zones from the file system or from within loaded programs.
This also includes program formats from other software and hardware samplers.
•Programs, layers, and sublayers.
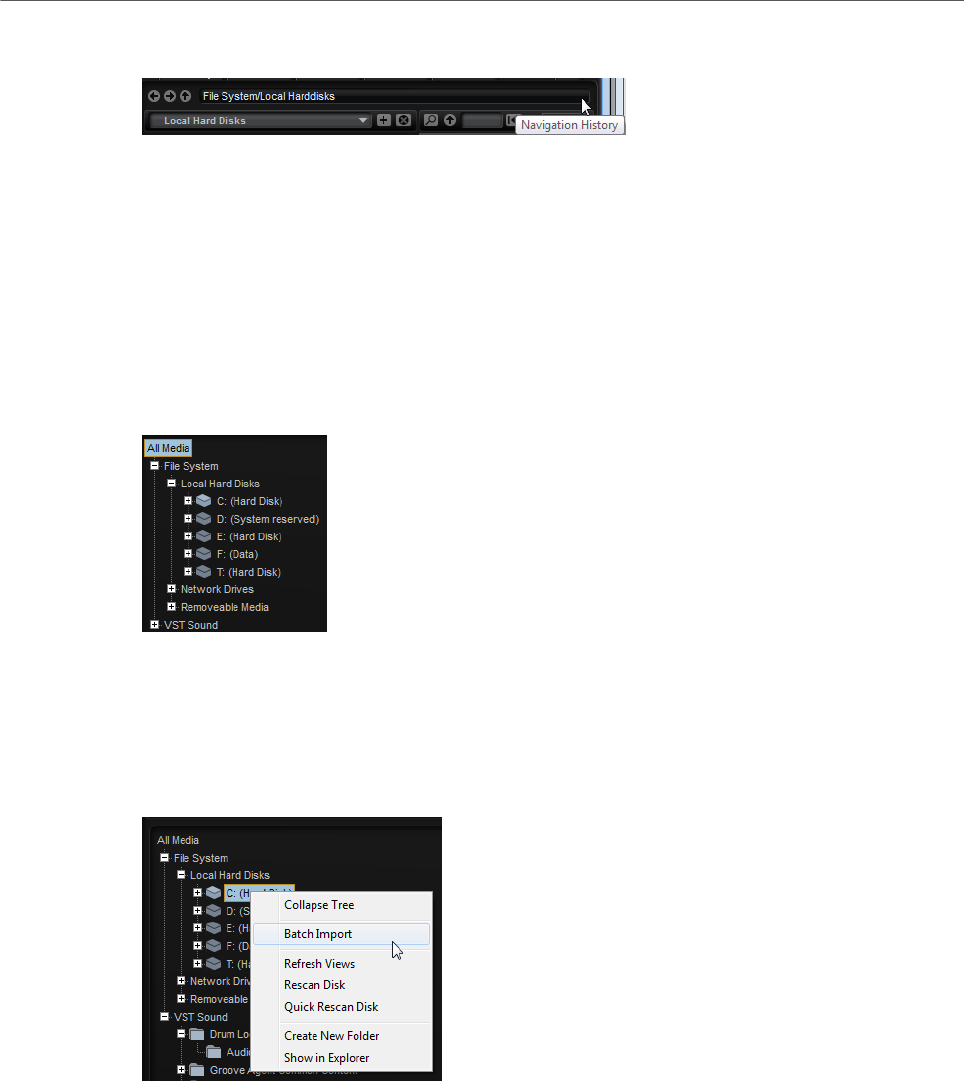
Managing Your Sounds
Managing and Loading Files
63
Path Section
• To step through the recent locations, click the Previous Browse Location/Next Browse
Location buttons.
• To navigate to the folder one level up in the location tree, click the Browse Containing
Folder button.
• The path field shows the current location. To specify a new location, enter or copy a
new path.
• To open the navigation history, click at the very right of the path field.
Location Tree
The location tree on the left in the Browser allows you to navigate through the programs,
layers, or zones in any folder. You can even access files contained in VST Sound containers,
HSB files, and ISO files. If you select an entry in the tree, the results list on the right shows
the corresponding content.
Location Tree Context Menu
Batch Import
Select this command to import the content of entire folders or ISO image files.
Refresh Views
Updates the tree. This is useful if you added a new disk to your setup or created a
new folder on the hard disk.
Rescan Disk
Rescans the selected element in the tree. The corresponding files are opened,
the information is extracted, and the database file is updated accordingly.
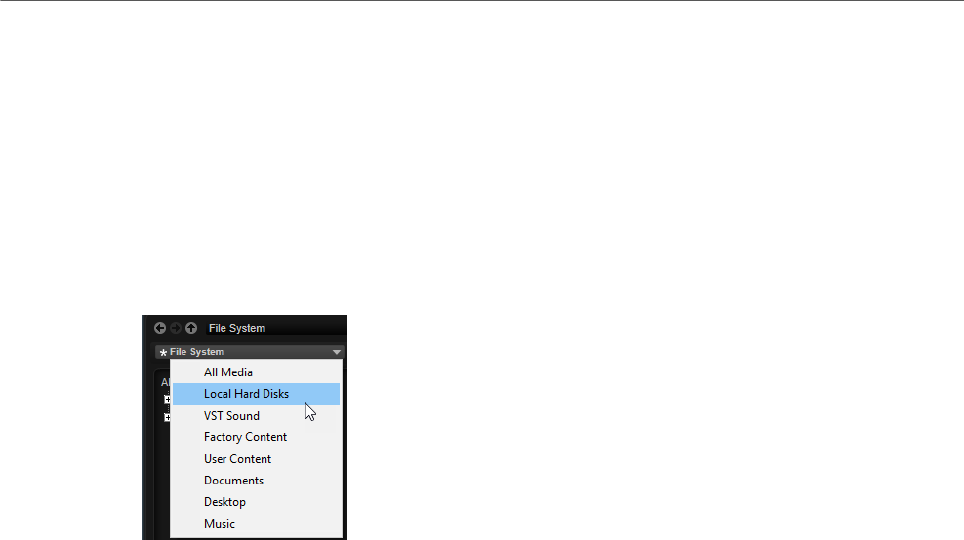
Managing Your Sounds
Managing and Loading Files
64
Quick Rescan Disk
Rescans only the folders that have changed since the last scan.
Show in Explorer (Win)/Reveal in Finder (Mac)
Shows the location of the selected file on your system.
Locations
Locations are folders or directories on your system that contain media files. By setting up
locations, you can organize the files that are available in the results list according to context.
The text field above the tree shows the name of the selected folder. If the name is preceded
by an asterisk, the folder has not been saved as a location yet.
Managing Locations
• To open the list of favorite locations, click in the text field.
• To add the current folder to the favorite locations, click Add Selected Media Node as
Favorite Location.
You can keep the folder name or specify a new name for the location.
• To delete the current location from the list, click Remove Favorite Location.
Results List
The results list shows the files found in the selected folder. It displays all files that HALion
can read, such as VST presets, samples, or third-party sampler programs. In addition to
information like file name and path, the columns in the results list can be configured to show
different attributes.
The results list also shows any subfolders of the selected folder, but does not include the
files contained in the subfolders themselves. To see the content inside subfolders, select the
corresponding subfolder.
Navigating in the Results List
• To open a folder or location, double-click it in the results list.
If you double-click a preset, its contents are shown.
• To move up one level in the folder hierarchy, click Browse Containing Folder.
Performing a Text Search
You can limit the number of results in the results list using the text search function. This way,
you can search for files with specific names, for example. For presets, the search also takes
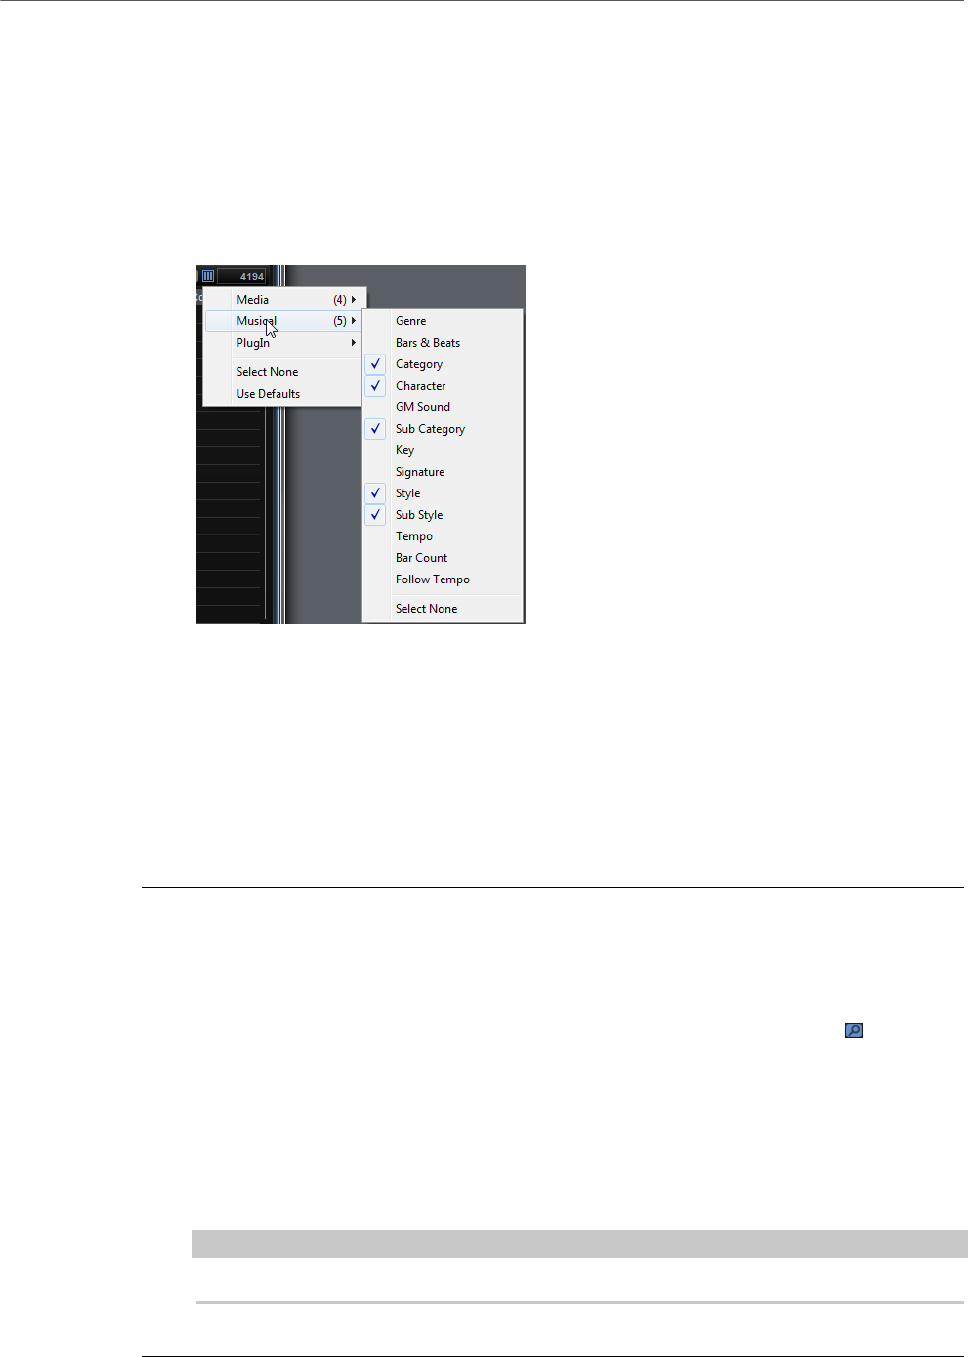
Managing Your Sounds
Managing and Loading Files
65
any attributes into account. The value field in the top right corner indicates the number of
files that match the search text.
• To clear the search text, click Clear Filter Text.
Configuring the Results List
•To configure which attributes are shown in the results list, click Set up Result Columns
in the upper right corner of the results list and activate the corresponding entries. New
attributes are added at the right of the list.
•To reorder the columns in the results list, drag the column headers to another
position.
•To change the sorting of the list entries, click the column header. The triangle in the
column header shows the sorting direction.
Searching for Files on Your System
Instead of searching the current results list, you can also use the text search to look for files
on your hard disks or in VST Sound containers.
PROCEDURE
1. Select the location that you want to use as the starting point for the search.
The higher up in the hierarchy the location, the longer the search takes. Therefore, it is
not recommended to search entire hard drives.
2. In the top left corner of the results list, click the Search Location Content button and
enter the search text in the text field.
3. Optional: Click the button to the right of the search field to specify whether you want to
search for samples, MIDI files layers, programs, multis, or all types.
4. To start the search, press Return or click Search/Stop Search to the right of the search
text.
The files that match the search criteria are listed in the results list.
NOTE
The maximum of files that can be displayed in the list is 10,000.
5. Double-click a result to show it in the location tree.

Managing Your Sounds
Managing and Loading Files
66
Preview and File Info Sections
The Preview and File Info sections below the results list allow you to play back the focused
sample and shows information about the file.
File Info Section
This section shows information on the focused sample or MIDI file.
• For samples, length, channels, bit depth, and sample rate are shown. If available, root
key, key, and velocity range are also shown.
• For MIDI files, original tempo, signature, and length are shown, as they are saved in
the file.
Preview Section
You can listen to the focused sample or MIDI file using the controls in the Preview section.
Level
Adjusts the playback level.
Play
Plays back the focused sample or MIDI file.
Stop
Stops playback. The play locator jumps back to the start of the file.
Pause
Pauses playback. Click again to continue.
Auto Play
Automatically starts playback of the focused sample or MIDI file.
Loop Playback
If this button is activated, the focused sample or MIDI file is played back
repeatedly.
Play Position
Displays the playback position within the focused sample or MIDI file. To select
another position for playback, click on the slider or drag the handle to the new
position.
Destination Folder
When programs are imported, HALion creates a folder for each program. The name of the
folder corresponds to the name of the imported program. Inside this folder, a subfolder is
created, in which the corresponding samples are saved, if necessary.
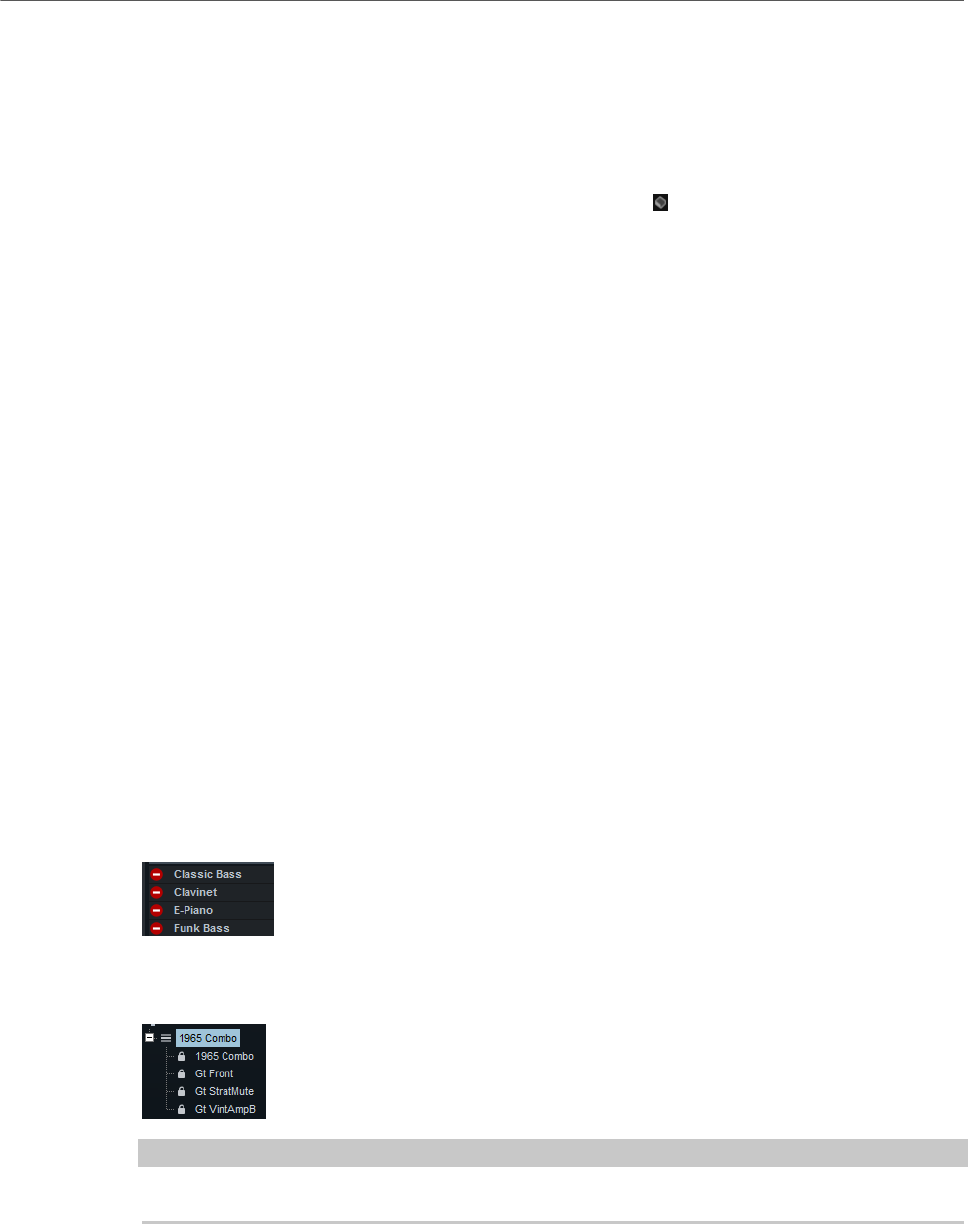
Managing Your Sounds
Managing and Loading Files
67
The folder specified in the Destination Folder field is used to save samples from bank or
container files, such as GigaSampler files (.gig). You can enter the path manually or click
the button to the right to navigate to a specific directory.
Adding Files to the MediaBay on Import
To automatically create VST presets for each imported program in the user presets folder,
activate Automatically Add Preset to MediaBay on Import to the right of the destination
folder field. This way, the imported programs are available in the MediaBay and can be used
in other projects. Otherwise, imported programs are only available in the current instance of
HALion.
Missing Samples
If you browse the samples of a program and you cannot load them or listen to them, they
may have been moved or deleted. In this case, the sample info displays “Sample not found”.
To remedy this, load the program again and make sure that no samples are missing.
Afterwards, be sure to save the program with the restored sample paths.
RELATED LINKS
Finding Missing Samples on page 49
Loading Files
You can load selected programs, layers, zones, or samples by dragging them from the
results list to the Slot Rack, the Program Table, or the Program Tree. Programs, layers, and
zones can also be dragged directly from the Browser tree. In all cases, the Import Folder
dialog opens, where you can specify how to import the contained subfolders and samples.
•To load the file that is focused in the results list into the active slot in the Slot Rack,
use the key commands Return or L.
Some file types are not supported. In this case, an icon is displayed to indicate that the file
format cannot be loaded.
Protected programs and layers are shown with a lock icon to indicate that you cannot extract
single zones or samples. However, you can load the programs as a whole.
NOTE
These icons only appear after selecting the programs.
RELATED LINKS
Importing Samples on page 228

Managing Your Sounds
Managing and Loading Files
68
Loading Files from HALion3
You can load FXB and FXP files from HALion3. These files can be located in a directory on
the file system or inside an HSB container file. HSB container files must be registered in the
MediaBay before they can be used. When loading FXB files, the multi-program is replaced.
If FXB or FXP files are referring to HSB container files, the sample paths always work. For
samples that are located on the file system, you might have to reestablish the sample paths.
•To register an HSB file, right-click it in the location tree and select Register HSB.
•To import FXP and FXB files, right-click the file in the location tree and select Import
HALion FXP/FXB-File.
Single FXP files from within HSB files cannot be imported. In this case, you must
register the HSB file.
RELATED LINKS
Finding Missing Samples on page 49
Loading Third-Party Sampler Programs
The supported third-party sampler programs appear as nodes in the location tree. You can
load entire programs, or selected layers or samples.
Multis and banks in third-party sampler formats can be dropped on the multi-program slot,
the Slot Rack, or the Program Table.
•If you drop a multi or bank on the multi-program slot, the current multi is replaced.
•If you drop a multi or bank on the Slot Rack, new slots are created and the
corresponding programs are added to the Program Table.
If the multi or bank contains more programs than slots are available, the remaining
programs are added to the Program Table only. The current multi is not replaced.
•If you drop a multi or bank on the Program Table, the additional programs are added to
the Program Table. The current multi is not replaced.
NOTE
If the ISO image or bank has partitions or folders, you can drag only that partition or folder
to the Slot Rack or the Program Table. Any contained programs are then loaded. This
is different to dragging a folder from the file system to HALion. In that case, the Import
Samples dialog opens and only the contained samples are imported and mapped.
The following formats can be imported:
•Emagic EXS24
•NI Kontakt 1.x to 4.1 (except for encrypted files, scripted content, and containers)
•Akai* S1000, S2000, S3000, S5000/6000
•EMU* 3, 3X, ESI, 4, 4K, E64, E6400, ESynth, Ultra
•Roland S770*
•Kurzweil (KRZ, K25, K26)
•SoundFonts 2.x
•Giga 1, 2, limited Giga 3 support (except for encrypted content, time stretching, and
pitch shifting)

Managing Your Sounds
Working with General MIDI Files
69
* ISO images on HDD only.
Working with General MIDI Files
HALion can play back files in the General MIDI format. For this, the following preparations
must be made:
PROCEDURE
1. Load a GM multi from the MediaBay.
The first 16 slots are prepared with send effects for chorus and reverb.
2. Open the Options Editor, navigate to the MIDI Controller section, and activate Receive
Program Changes and Receive RPNs 0/1/2.
3. Load the GM file that you want to use.
RESULT
HALion loads the necessary programs and adjusts the chorus and reverb levels.

Mapping Zones
70
You can edit the sample mapping manually in the Mapping Editor. The mapping functions are
based on information like key range, root key, and velocity range.
Mapping Editor
The Mapping Editor allows you to view and edit the distribution of the zones within a
program.
All zones are mapped to the key range on the horizontal axis and the velocity range on the
vertical axis. In the upper area, you have access to mapping ranges and sample parameters
for the selected zone. If several zones are selected, the parameters of the focused zone are
displayed.
NOTE
Layers and zones that are hidden in the Program Tree are not displayed in the Mapping
Editor.
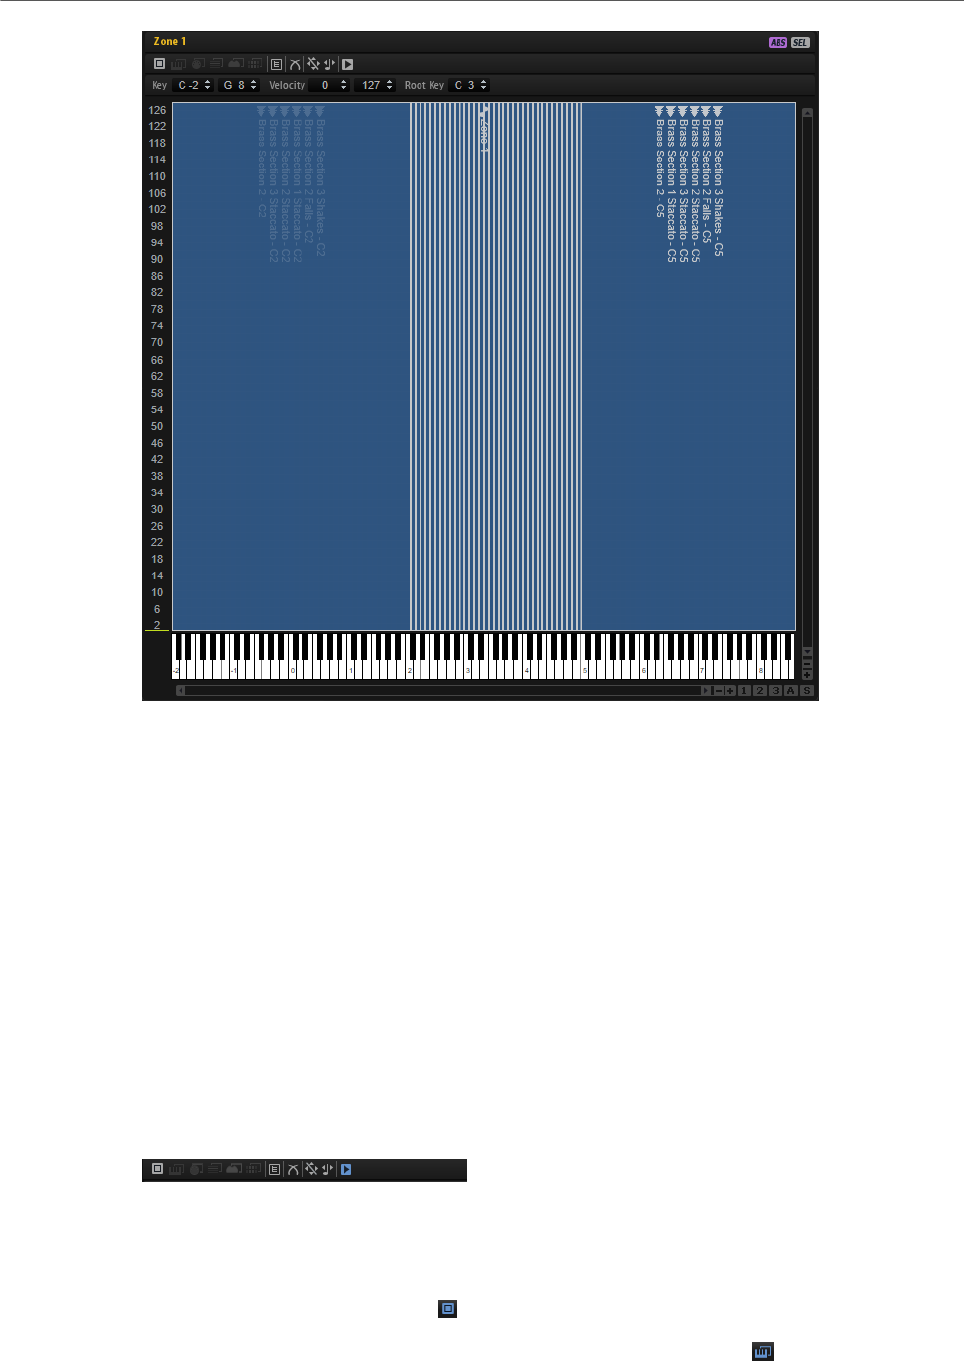
Mapping Zones
Mapping Editor
71
Zones are displayed as boxes. Overlaying zones are semi transparent, so that overlapping
areas can easily be recognized. Selected zones have a red border, and the focused zone has
an orange border. To set the focus on a zone, click on it or select it on the Focused Zone pop-
up menu above the toolbar.
When you play notes on your MIDI keyboard, these notes are highlighted on the Mapping
Editor keyboard. The velocity of the played note is shown on the velocity scale on the left.
To test the sample mapping, you have the following possibilities:
•Ctrl/Cmd-click a key on the keyboard and keep the mouse button pressed. HALion
plays this key and all following keys at the same velocity, for as long as you press the
mouse button.
• Hold down Ctrl/Cmd-Alt and click a key to play this key and the following keys ten
times each, at increasing velocities from 1 to 127.
Toolbar
MIDI Mapping Selection Options
You can select zones using the Mapping Editor keyboard or an external MIDI
keyboard. The mapping selection buttons are available if the Enable MIDI
Mapping Selection Options button is activated.
•Activate Select Zones with the Mapping Editor Keyboard to select zones
by clicking on the Mapping Editor keyboard.
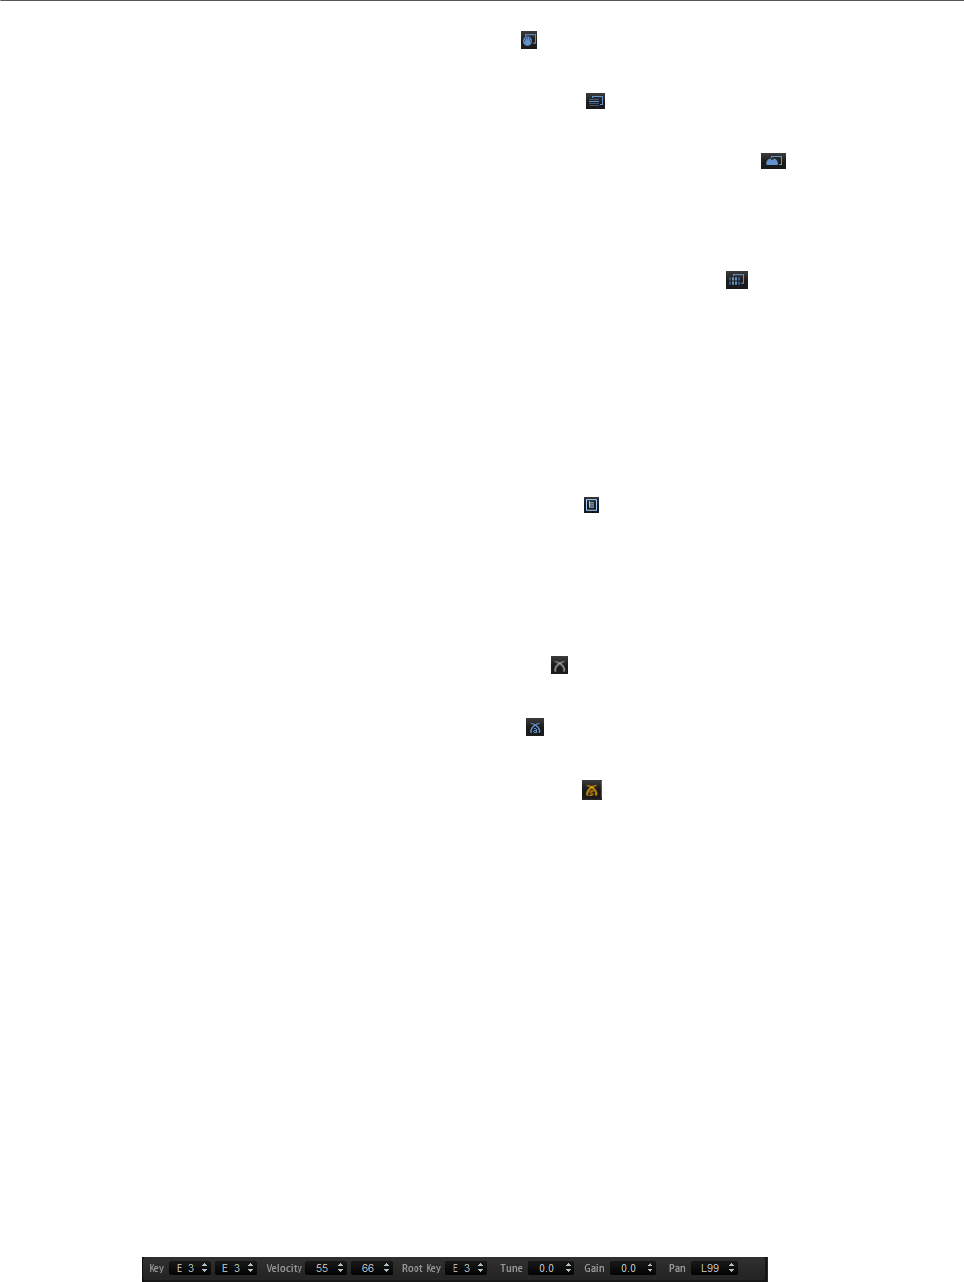
Mapping Zones
Mapping Editor
72
•Activate Select Zones via MIDI to select zones by playing on an external
MIDI keyboard.
•If Select Zones depending on Velocity is activated, only zones that match
the incoming velocity are selected.
•If Select Zones using a MIDI Controller to set the Velocity is activated,
the velocity from the keyboard is replaced by the controller values that are
sent by the selected controller.
Right-click the icon to select another controller or use the Learn function.
•If Select all Zones between the last two played Notes is activated, any
zones that are located between the last 2 triggered zones are selected.
To extend the selection, play and hold a note. Any additional notes that you
play add the corresponding zones to the selection.
If you play a chord, any zones between the lowest and the highest key are
selected.
Scroll Position follows Tree Selection
If the Scroll Position follows Tree Selection button is activated and you select
a zone in the Program Tree, the Mapping Editor automatically scrolls the view to
keep the selection in the center. This works on both the keyboard and the velocity
axes.
Crossfade
•If this is set to Crossfade: Manual , you can set up and edit each
crossfade manually.
•If this is set to Crossfade: Auto , the crossfade range is automatically
adjusted if you move overlapping zones.
•If this is set to Crossfade: Symmetric , you can create symmetric
crossfades for zones that have an identical key range and an adjacent
velocity range.
Move Lock
Allows you to lock zones, to prevent you from accidentally moving or resizing
them.
Move Root Key with Zones
If this button is activated, the root key is automatically adapted when you move a
sample zone. This way, you can make sure that moved samples play back at the
correct pitch.
Trigger Zones
If this button is activated, you can trigger zones in the Mapping Editor.
Zone Range Section
Below the toolbar, you can make settings for the zone range. The Tune and Gain parameters
are only available for sample zones.
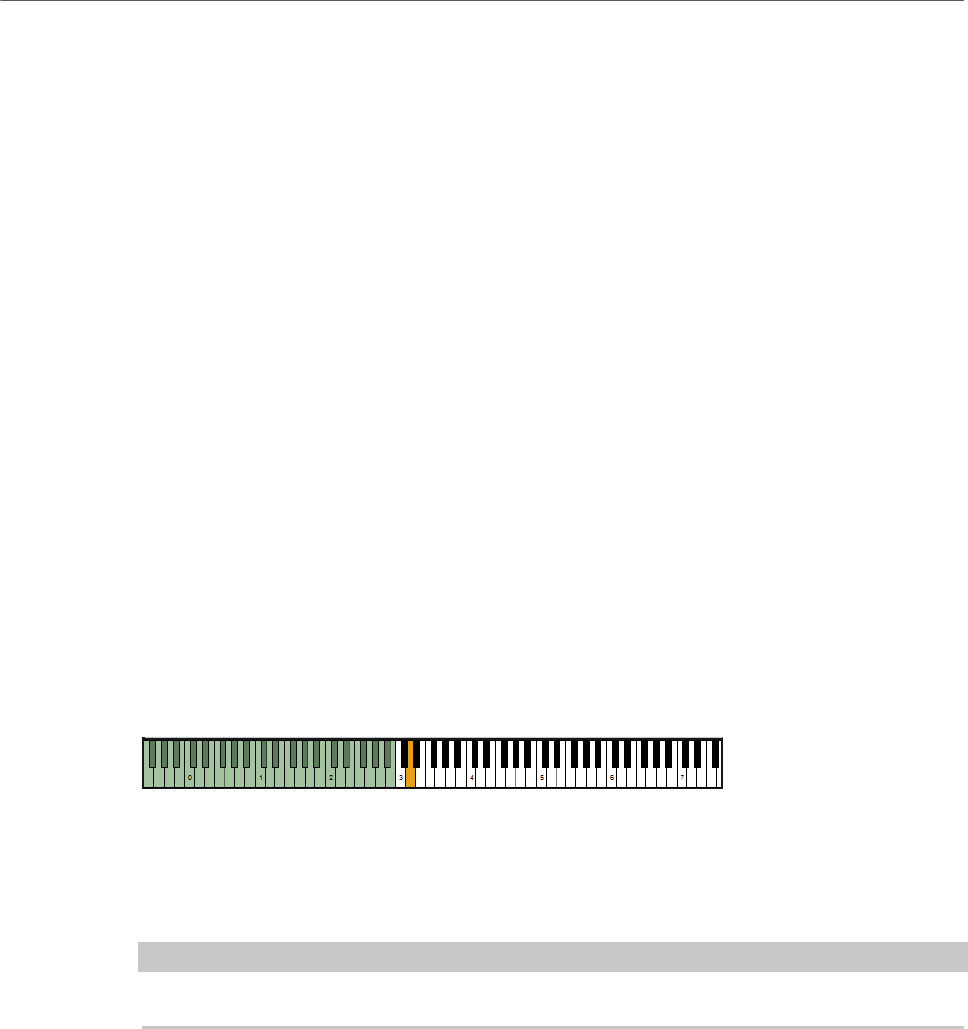
Mapping Zones
Mapping Editor
73
Key Range
With the Low Key and High Key value fields, you can set up the key range for the
selected zone.
Velocity Range
With the Low Velocity and High Velocity value fields, you can set the velocity
range for the selected zone.
Root Key
The root key determines the original pitch of a zone, that is, the key on which the
zone is played without being transposed.
Tune
Sets the tune offset of the zone.
This value can be written into the sample file on export and is read on import.
Gain
Sets the gain offset of the zone.
This value can be written into the sample file on export and is read on import.
Pan
Allows you to specify a pan offset for the sample.
Keyboard
The keyboard indicates with which keys a zone can be triggered. It can also be used to trigger
notes. The vertical position at which you click a key determines the velocity.
The context menu for a key contains submenus that show information on pitch and velocity,
as well as the zones that are mapped to a key.
NOTE
Keys to which no zones are assigned are grayed out.
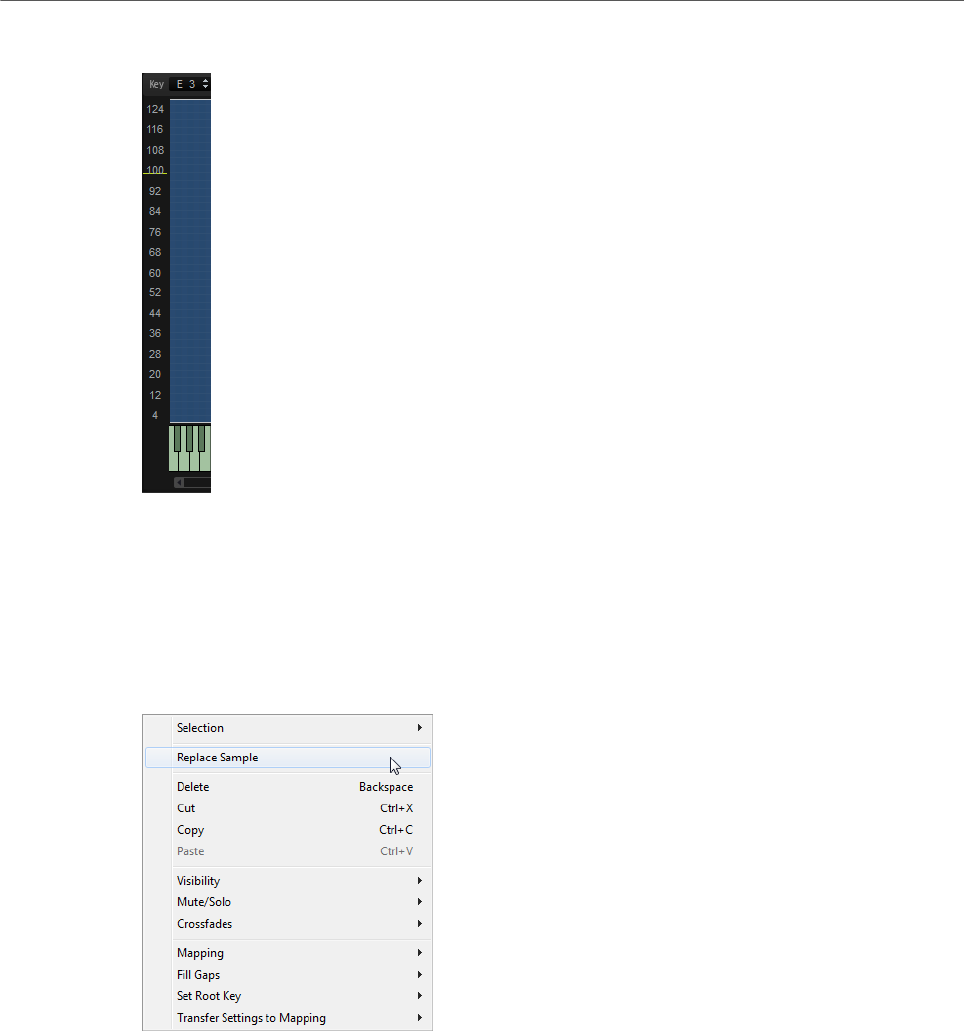
Mapping Zones
Mapping Editor Context Menu
74
Velocity Scale
The velocity scale on the left provides an orientation when you adjust the velocity range of
a zone. In the background of the scale, a meter indicates the incoming velocity value. After
each note, the meter automatically falls back to zero and leaves a marker on the last velocity
value.
Mapping Editor Context Menu
Selection
Opens a submenu where you can select all zones or invert the current selection.
• To select all zones, select Select All.
• To select all zones that were previously not selected and to deselect all
zones that were previously selected, select Invert Selection.
Replace Sample
Allows you to exchange one or multiple samples that are used to play back one or
multiple zones. Any zone-specific settings like Pitch, Filter, or Amplifier are not
modified by this.

Mapping Zones
Mapping Editor Context Menu
75
Delete
Deletes the selected zones.
Cut
Removes the selected zones and saves them to the clipboard.
Copy
Copies the selected zones to the clipboard.
Paste
Pastes the zones from the clipboard to the selected program or layer.
Visibility
The Visibility submenu allows you to control the visibility of zones inside the
Mapping Editor.
•Hide Selected hides the selected zones.
•Hide Non-Selected hides all zones that are not selected.
•Show Selected shows all selected zones.
•Hide All hides all zones.
•Show All shows all zones.
• If Auto Visibility is activated, the selected zones and any of their direct
siblings that are part of the same layer are automatically shown. Other
zones are hidden.
Mute/Solo
•Mute All Zones mutes all zones.
•Solo All Zones solos all zones.
•Mute Selected Zones mutes the selected zones.
•Solo Selected Zones solos the selected zones.
•Make All Zones Audible resets all mute and solo states for all zones.
•Solo Follows Selection automatically solos the zones that you select.
Crossfades
Zones can partially or entirely overlap. You can create fades in the horizontal (key)
and the vertical (velocity) direction. This allows you to successively add certain
sound components over the key or the velocity range.
• On the submenu, select whether you want to create crossfades on the
keyboard axis or the velocity axis, or both.
Mapping
Allows you to set up the mapping for the selected sample.
Fill Gaps
•Pitch Only fills any gaps between the selected zones on the keyboard axis.
•Velocity Only fills any gaps between the selected zones on the velocity axis.

Mapping Zones
Mapping Editor Context Menu
76
•Pitch and Velocity first fills the gaps on the keyboard axis. Then, the
remaining gaps on the velocity axis are filled.
•Velocity and Pitch first fills the gaps on the velocity axis. Then, the
remaining gaps on the keyboard axis are filled.
Set Root Key
Allows you to adjust the root keys of the selected zones without changing their
key or velocity ranges.
•Center of Zone sets the root key to the center of the zone. If the zone has
no center because it has an even number of keys, the root key is set to the
key in the center that is closest to the previous root key.
•High Key of Zone sets the root key to the High Key of the zone.
•Low Key of Zone sets the root key to the Low Key of the zone.
•Key Text in Sample Name sets the root key to the key that is extracted from
the sample file name. The function searches for the name of the key in text
form.
•Key Number in Sample Name sets the root key to the MIDI note number
that is extracted from the sample file name. The function searches for a
number.
•Root Key in Sample File sets the root key to the key that is stored in the
header chunk of the sample file.
Transfer Settings to Mapping
Zones often have varying Fine Tune and Level settings, while sharing various
other settings. To avoid varying Fine Tune and Level settings, transfer these
settings to the Tune and Gain parameter in the Mapping Editor.
•All transfers the Fine Tune and Level settings at the same time.
•Fine Tune and Level allow you to transfer the parameters separately.
Afterwards, the zone settings are reset to their default values.
Mapping Options
Root Key Only
Each sample is mapped to its root key only.
Root Key Fill Centered
The samples are mapped to their root key. The zones expand to the left and right
from the root key to fill empty spaces.
Root Key Fill Up
The samples are mapped to their root key. The zones expand to the right to fill
empty spaces.
Root Key Fill Down
The samples are mapped to their root key. The zones expand to the left to fill
empty spaces.

Mapping Zones
Mapping Editor Context Menu
77
Layered on Root Key
The zones are layered on the root key, equally spaced from the lowest to the
highest velocity.
Layered on Key Range
Zones that have exactly the same key range are layered equally spaced from the
lowest to the highest velocity.
Chromatic from Last Key
Starting with the highlighted key of the Mapping Editor keyboard, the zones are
mapped chromatically to the white and black keys in ascending order. The root
keys are set to the corresponding key.
White Keys from Last Key
Starting with the highlighted key of the Mapping Editor keyboard, the zones
are mapped to the white keys in ascending order. The root keys are set to the
corresponding key.
Black Keys from Last Key
Starting with the highlighted key of the Mapping Editor keyboard, the zones
are mapped to the black keys in ascending order. The root keys are set to the
corresponding key.
Layered on Last Key
On the highlighted key of the Mapping Editor keyboard, the zones are layered
equally spaced from lowest to highest velocity. The root keys are set to the
highlighted key.
Stacked on Last Key
At the highlighted key of the Mapping Editor keyboard, the zones are stacked on
top of each other. The root keys are set to the highlighted key.
Key Text in Sample Name
The zones are mapped to the key that is extracted from the sample file name.
The function searches for the name of the key in text form, for example, C#3. The
mapping and root key are set to that key.
Key Number in Sample Name
The zones are mapped to the MIDI note number that is extracted from the sample
file name. The function searches for a number. The mapping and root key are set
to that key.
Velocity in Layer Name
The zones are mapped to the velocity range that is extracted from the layer
name.
Velocity in Sample Name
The zones are mapped to the velocity range that is extracted from the sample file
name.
Mapping Zones
Sample Zones and their Root Keys
78
Velocity in Sample Folder
The zones are mapped to the velocity range that is extracted from the name of
the sample folder.
Ranges in Sample File
The zones are mapped to the key and velocity ranges that are stored in the
sample file header.
NOTE
If the header does not contain this information, the samples cannot be mapped.
Tuning from Sample File
The zones are mapped according to the tuning settings that are stored in the
sample file header.
NOTE
If the header does not contain this information, the samples cannot be mapped.
Gain from Sample File
The zones are mapped according to the gain settings that are stored in the
sample file header.
NOTE
If the header does not contain this information, the samples cannot be mapped.
Sample Zones and their Root Keys
The root key determines the original pitch of a zone, that is, the key on which the zone is
played without being transposed.
Samples can contain root key information embedded in the sample file. When they are
loaded, they are automatically mapped to the corresponding keys.
The sample collections included with HALion contain both multi-sampled instrument
programs and single-shot sample programs. The multi-sampled programs contain samples
of a specific instrument, usually containing only one sample zone per key on the keyboard.
The single-shot programs contain different sample zones that are mapped across the
keyboard, without relationship between key and pitch. For these programs, you might want to
move sample zones. After moving the zones, adjust the root key to make the zones play back
at the correct pitch.
•To set the root key, enter the value in the Root Key value field, or hold down Alt and
click the corresponding key on the keyboard.
Moving Zones
To move a zone, select it, click in the middle of it and drag it to another position.
To move several selected zones, click in the middle of one of the zones and drag.
Mapping Zones
Creating Fades and Crossfades
79
To restrict the movement to the horizontal direction, start dragging the zone and press Ctrl/
Cmd, and to restrict movement to vertical, start dragging and press Alt. When you move
sample zones horizontally, they are transposed, therefore, it might be necessary to adjust the
root key.
Creating Fades and Crossfades
PREREQUISITE
On the Crossfades submenu of the context menu, Enable Crossfades on Keyboard Axis or
Enable Crossfade on Velocity Axis, or both, are activated.
PROCEDURE
•Drag the fade handles to create a fade. For keyboard axis fades, drag left or right and
for velocity axis fades, drag up or down.
By default, the fade curve is exponential, but you can change the curvature by dragging
the curve up and down. The maximum curve setting represents an equal power curve.
This is useful for velocity crossfades.
If you want to create symmetric crossfades, activate the corresponding button on the
toolbar.
RELATED LINKS
Crossfade on page 72
Setting Key Range and Velocity Range
• To set the key range, move the mouse to one of the borders of a zone and drag to the
left or the right, or enter the values manually in the Low Key and High Key value fields.
• To set the velocity range, move the mouse to one of the borders of a zone and drag
up or down, or enter the values manually in the Low Velocity and High Velocity value
fields.
NOTE
If several zones are selected, the key range or the velocity range is modified for all the zones
simultaneously. However, only the values of the focused zone are displayed in the edit fields.
Zooming
The Mapping Editor can zoom and scroll in two dimensions: the keyboard and the velocity
scale.
•To zoom in or out, click the + or - buttons on the scrollbars.
Once you have zoomed in, you can use the scrollbar to move to a specific velocity or
keyboard area.
•To zoom in/out on the locator position, press G and H.

Mapping Zones
Selecting Zones
80
•To zoom in on a specific zone, double-click it. To zoom out, double-click again.
•To zoom in on an area where two or more zones are overlapping, double-click the area.
To zoom out, double-click again.
•To zoom to the selection, activate the S button next to the scrollbar.
•To zoom out completely or return to the last zoom state, click the A button next to the
scrollbar.
Zoom Snapshots
Zoom snapshots save the zoom factor and scroll position of the editor. These are restored
when you load the snapshot.
To the right of the scrollbar, you can find three numbered buttons that allow you to save and
load zoom snapshots.
• To save the current state of the editor as snapshot, Shift-click one of the numbered
buttons to the right of the scrollbar.
• To load a zoom snapshot, click the corresponding button. The button color changes if a
snapshot is active.
NOTE
If you perform any manual zooming or scrolling, the zoom snapshot is deactivated.
Selecting Zones
• Click a zone to select it.
•Ctrl/Cmd-click to select several zones.
• Hold down Ctrl/Cmd and draw a selection rectangle covering the zones that you want
to select.
• Press Ctrl/Cmd-A to select all zones.
• Click on the velocity scale to select all zones that belong to this velocity.
Importing Single Samples Using Drag And Drop
PROCEDURE
1. Drag a sample into the mapping section or onto the keyboard and keep the mouse
button pressed.
An outline representing the sample appears.
2. Move the mouse pointer up and down.
The horizontal position of the mouse pointer determines the lowest key of the key
range, and the vertical position of the mouse pointer determines the key zone range.
3. Drop the sample to insert it.
Mapping Zones
Importing Multiple Samples Using Drag And Drop
81
Importing Multiple Samples Using Drag And Drop
PROCEDURE
1. Select the samples that you want to import.
2. Drag the samples to the key on the Mapping Editor keyboard where you want the first
selected sample to be placed.
If you drag samples from a separate browser window, the selection order determines
how the samples are mapped, with the first selected sample being mapped to the first
key.
3. Move the mouse up and down.
The samples are mapped chromatically. Moving the mouse up or down resizes the key
range for each zone.
•If you move the mouse pointer to the bottom of the Mapping Editor, the samples
are distributed to different velocities rather than key ranges.The first selected
sample gets the highest velocity and the last selected the lowest velocity
•If you press Ctrl/Cmd and move the mouse pointer to the bottom of the mapping
view, the samples are layered on the keys that you drop them on.
•If you press Ctrl/Cmd and point at a white key, the samples are mapped to the
consecutive white keys only, and the key range cannot be extended. Pointing to a
black key maps the samples to black keys instead.
4. Release the mouse button to insert the samples.
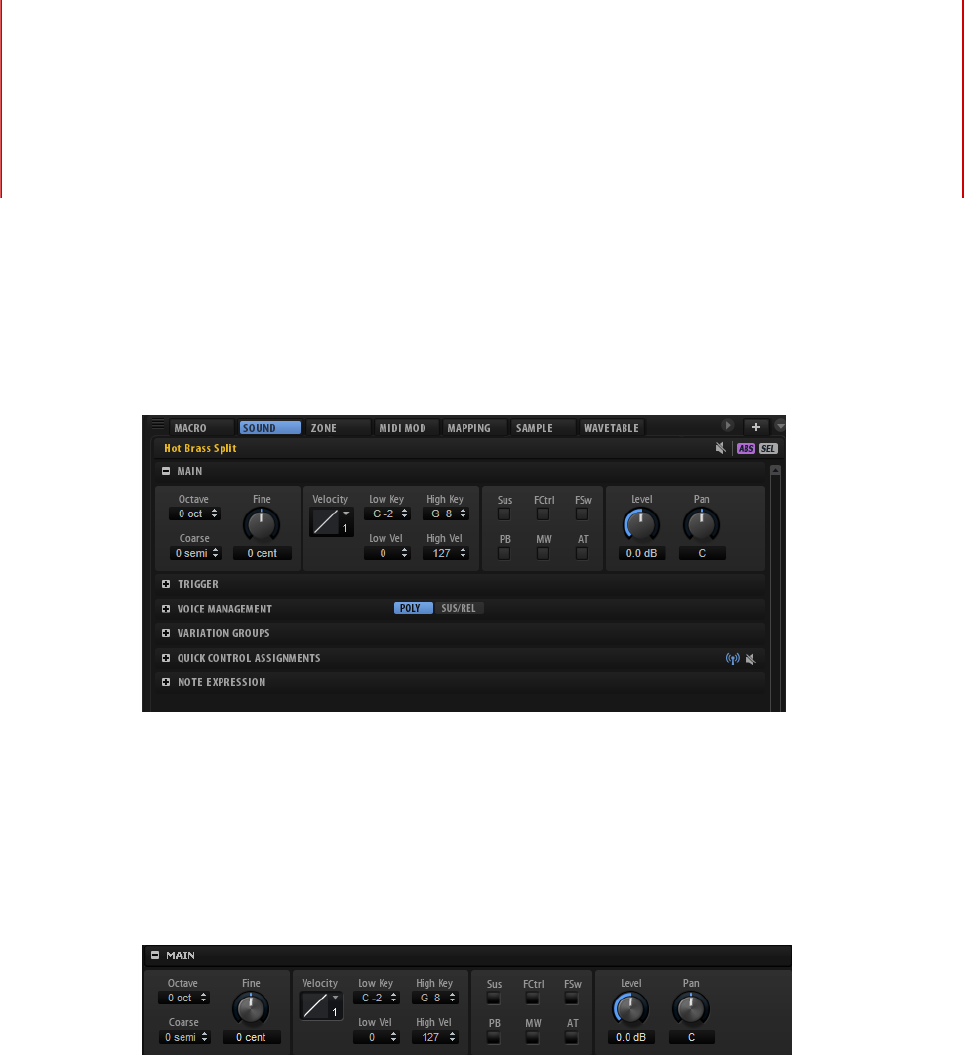
Editing Programs and Layers
82
In the Sound Editor for programs and layers, you can find the parameters that are set
globally for an entire program or layer. For example, you can transpose the pitch, adjust level
and pan, and limit the playback to a specific area on the keyboard.
Programs and layers share the same set of parameters.
Main Section
The Main section contains basic settings.
Octave
Transposes the pitch in octave steps.
Coarse
Transposes the pitch in semitone steps.
Fine
Detunes the pitch in cents steps (1/100 of a semitone).
Level Velocity Curve
Defines how incoming MIDI velocity values are re-mapped before they are sent to
the program or layer. By default, the incoming and outgoing values are identical.
The characteristic of each curve is displayed by a small icon.
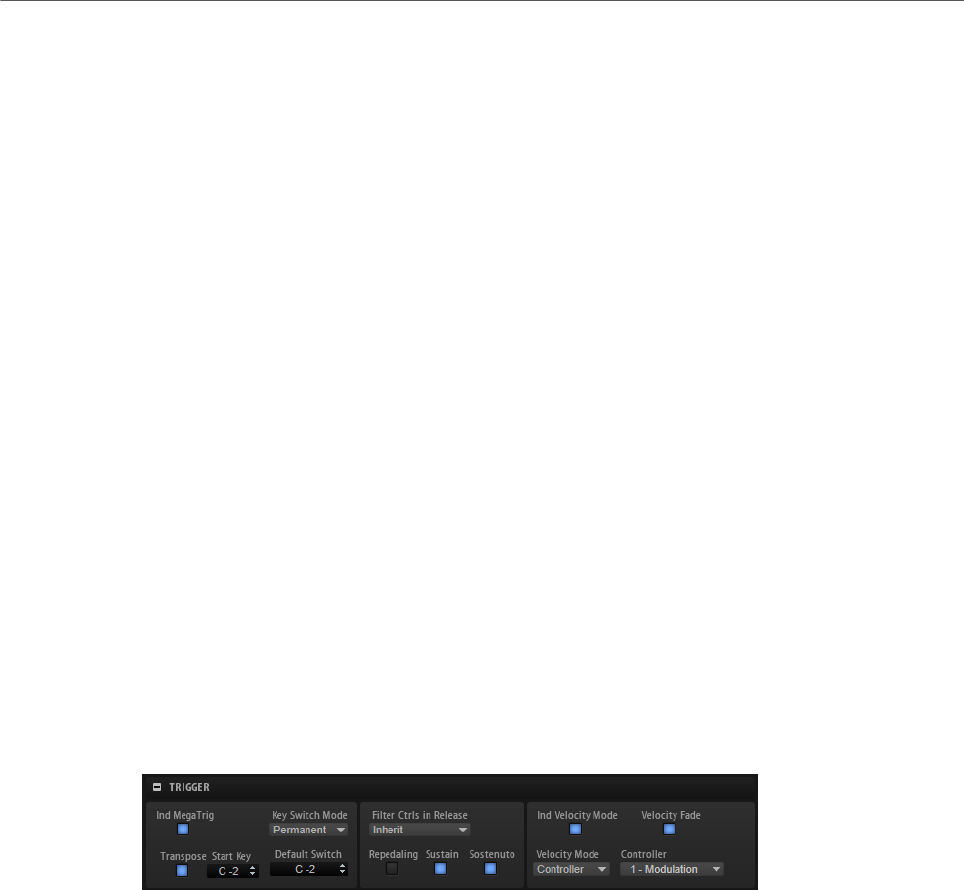
Editing Programs and Layers
Trigger Section
83
Low Key
Defines the lowest key on which the program or layer is triggered.
High Key
Defines the highest key on which the program or layer is triggered.
Low Vel
Defines the lowest velocity on which the program or layer is triggered.
High Vel
Defines the highest velocity on which the program or layer is triggered.
Sus, FCtrl, FSw, PB, MW, and AT
The Filter options allow you to filter incoming MIDI controllers.
Level
Adjusts the level of the layer. This parameter works as an offset to the zone
settings.
Pan
Defines the position of the layer in the stereo panorama. This parameter works
as an offset to the zone settings.
Trigger Section
The Trigger section allows you to control the trigger and release behavior.
Individual MegaTrig Management
This button is only available for layers. If you want the key switch assignments
across different layers to work individually, activate Ind MegaTrig for these
layers. This can be necessary if two layers with different key switches are used
together in one program.
Transpose
Transposes the key switches that you set up for the MegaTrig module.
Start Key
Defines the key that is used as the lowest key switch.
Key Switch Mode
Defines how long a key switch is active.
• If this parameter is set to Permanent, the key switch stays active until
another key switch is used.

Editing Programs and Layers
Trigger Section
84
• If this parameter is set to Temporary, the key switch is only active for as
long as the corresponding key is pressed.
Default Switch
Specifies the default key switch that is active when you load a program, that
means, before you used the first key switch. The default key switch is also used in
Temporary mode when no key switch is pressed.
NOTE
If you set the Default Switch parameter to a note value that is not assigned as a
key switch, the lowest key switch is used as the default key switch.
Filter Ctrls in Release
Filters out MIDI controllers in the release phase. Modulation destinations that are
using controllers keep their value after the note-off message.
• If this parameter is set to Off, MIDI controllers are processed in the release
phase.
• If this parameter is set to On, MIDI controllers are filtered out.
• If this parameter is set to Inherit, the zones of this layer follow the behavior
that is specified for the parent layer.
Repedaling
On an acoustic piano, you can repedal the sustain after releasing the sustain
pedal for as long as the strings vibrate. The effect is that the strings play on. You
can achieve a similar effect with the Repedaling option. If you release and press
the pedal within the release of the amplitude envelope, the envelope jumps to the
decay segment, resuming at the current level of the release.
Sustain
Enables sustain for the program or layer. When you use the sustain pedal, notes
keep playing until you release the pedal.
Sostenuto
Enables sostenuto for the program or layer. Notes that are held while pressing
the sostenuto pedal sustain. Successive notes do not sustain.
Ind Velocity Mode
Sample-based instruments often use crossfade techniques to optimize the
switching between samples with different velocities.
Activate this option to apply the Velocity Mode settings to the selected layer and
its children.
NOTE
Crossfades are set up in the Mapping Editor.
Velocity Mode
The switching or crossfading between zones can be controlled via velocity or MIDI
controller.
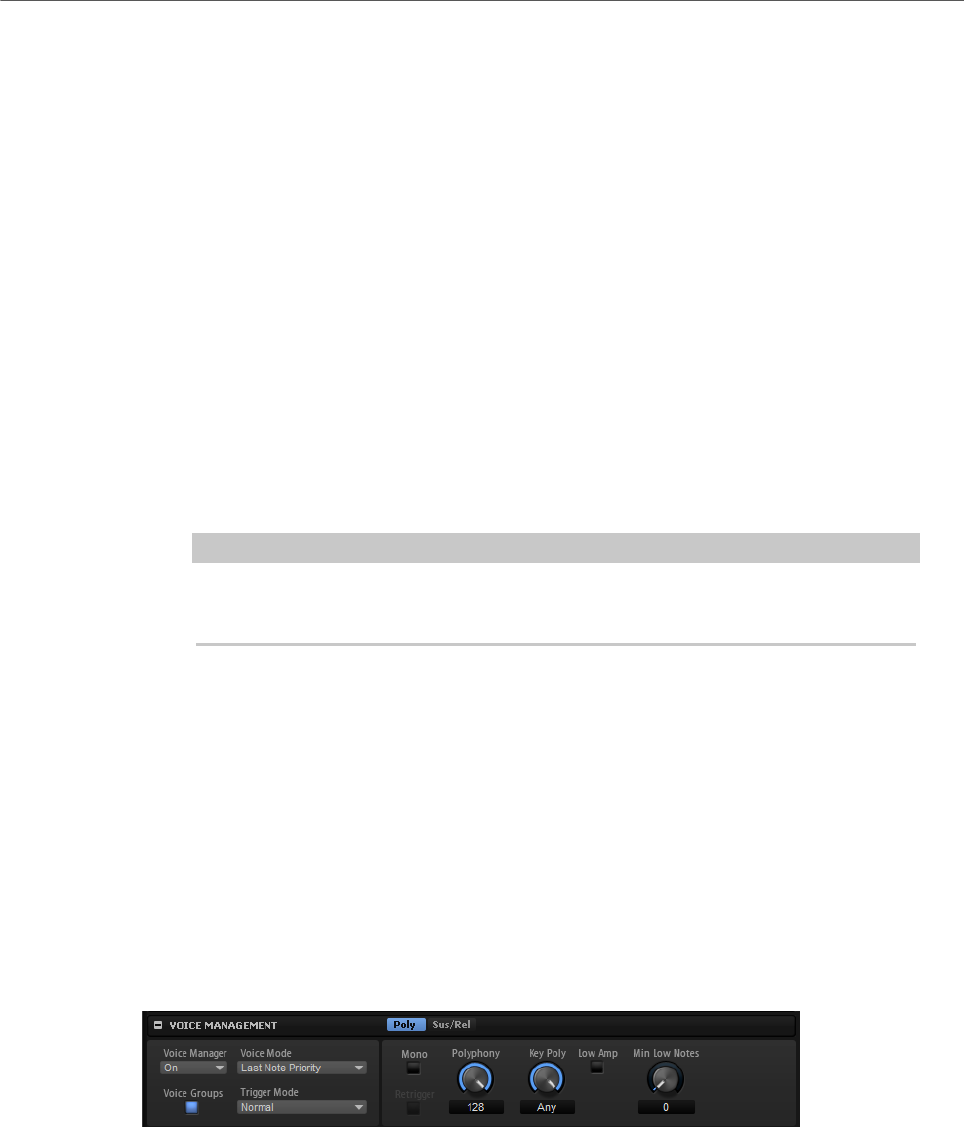
Editing Programs and Layers
Voice Management Section
85
• If Note-on is selected, the velocity is used to trigger the zones.
• If Controller is selected, a MIDI controller is used to replace the velocity,
that is, the controller value is used to select the zones.
The note-on message triggers the zones selected by the controller. Only
zones that belong to the corresponding velocity are played back.
• If Continuous is selected, a MIDI controller is used to replace the velocity.
Depending on the Velocity Fade setting, the controller uses fades when
switching between zones. Therefore, all zones belonging to a key are
played back.
Controller
Determines which controller is used if Velocity Mode is set to Controller or
Continuous.
• For the most realistic playback of instruments that use crossfade
techniques, activate Velocity Fade and set Velocity Mode to Continuous.
• To save voices during playback of instruments that use crossfade
techniques, deactivate Velocity Fade and set Velocity Mode to Note-on.
NOTE
For a good compromise between performance optimization and realistic
playback, try setting Velocity Mode to Controller and activating Velocity Fade.
Velocity Fade
Activate this option to use the velocity crossfades that are specified in the
Mapping Editor. If this option is deactivated or if no crossfades are set up, zones
switch directly between the different velocities.
RELATED LINKS
MegaTrig on page 516
Voice Management Section
The Voice Management section allows you to control the maximum number of notes that you
can play and to set conditions for note stealing and triggering.
Voice Manager
Determines which Voice Management settings are applied to the selected layer.
• If this parameter is set to Off, the layer uses the Voice Management
settings of the layer one level up in the hierarchy. If no layer with active
Voice Management settings exists at this level, the settings of the program
are used.
• If this parameter is set to On, you can make individual Voice Management
settings for the selected layer.

Editing Programs and Layers
Voice Management Section
86
• If this parameter is set to Program, the settings of the program are used,
regardless of any Voice Management settings made for layers higher up in
the hierarchy.
Voice Mode
Determines which notes are stolen during playback and whether new notes are
triggered when the Polyphony setting is exceeded.
•Last Note Priority – New notes have playback priority over the notes that
were played before them.
If you exceed the maximum number of notes, the notes that were played
first are stolen in chronological order (First in/First Out) and the new notes
are triggered.
•First Note Priority – Older notes have playback priority over newer notes.
If you exceed the maximum number of notes while older notes are still
being held, no notes are stolen. New notes are only triggered if a free voice
is available.
•Low Note Priority – Low notes have playback priority over higher notes.
If you exceed the maximum number of notes by playing a lower note than
the ones that are held, the highest note is stolen and the new note is
triggered.
If you exceed the maximum number of notes by playing a higher note than
the ones that are held, no note is stolen and no new note is triggered.
•High Note Priority – High notes have playback priority over lower notes.
If you exceed the maximum number of notes by playing a higher note
than the ones that are held, the lowest note is stolen and the new note is
triggered.
If you exceed the maximum number of notes by playing a lower note than
the ones that are held, no note is stolen and no new note is triggered.
•Steal Lowest Amplitude – New notes have playback priority over notes with
a low amplitude.
If you exceed the maximum number of notes, the note with the lowest
amplitude is stolen and the newest note is triggered.
•Steal Released Notes – New notes have priority over notes that enter the
release phase.
If you exceed the maximum number of notes, the oldest note that is in its
release phase is stolen and the new note is triggered.
If no note is playing in release and you exceed the maximum number of
notes, the first played notes are stolen in chronological order and the new
notes are triggered.
Trigger Mode
Defines the trigger behavior for new notes.
•Normal triggers a new note when the previous note gets stolen. The
sample and the envelope of the new note are triggered from the start.
To minimize discontinuities, use the Fade Out parameter of the zone.
•Resume does not always trigger a new note.
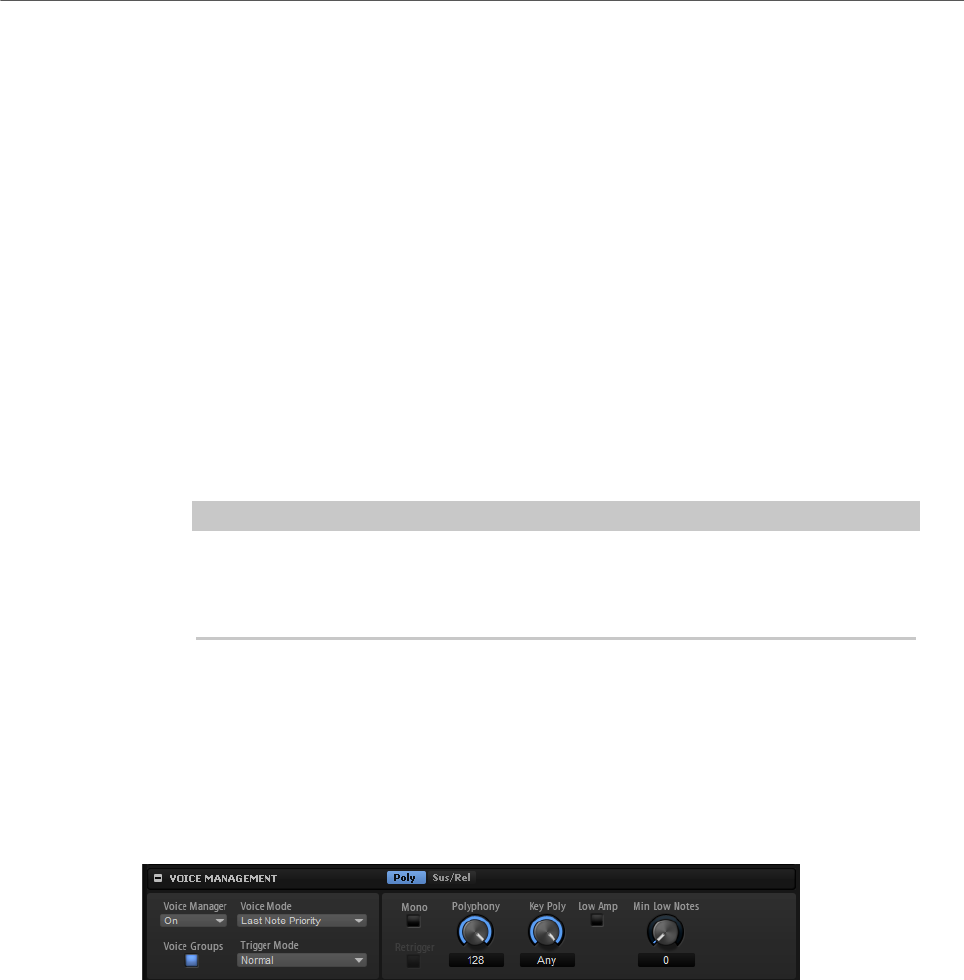
Editing Programs and Layers
Voice Management Section
87
If the new note stays within the same zone, the envelope is retriggered, but
resumes at the level of the stolen note. The pitch of the zone is set to the
new note.
If the new note plays in a different zone, the sample and the envelope of the
new note are triggered from the start.
•Legato does not always trigger a new note.
If the new note stays within the same zone, the envelope keeps running.
The pitch of the zone is set to the new note.
If the new note plays in a different zone, the sample and the envelope of the
new note are triggered from the start.
•Resume Keeps Zone does not trigger a new note upon note stealing. The
envelope resumes at the level of the stolen note and the pitch of the zone is
set to the new note, even if the new note plays in a different zone.
•Legato Keeps Zone does not trigger a new note upon note stealing. The
envelope keeps running and the pitch of the zone is set to the new note,
even if the new note plays in a different zone.
NOTE
If Resume or Legato are selected, you might hear an unnatural attack, depending
on the sample. To avoid this, activate Use Start Range on the Glide tab in the
Voice Control section for the zone.
Voice Groups
Allows you to create and use voice groups, that is, groups of zones that can be
edited together.
Poly Tab
The Poly tab contains the polyphony settings for programs and layers.
Mono
Activates monophonic playback. For solo instruments, this usually results in a
more naturally sounding performance.
Mono can also be used for programs that use dedicated note-off layers. When the
played note is released, the note-off layer is triggered.
Retrigger
This option is only available in Mono mode. If Retrigger is activated, a note that
was stolen by another note is retriggered if you still hold the stolen note when
you release the new one.
This way, you can play trills by holding one note and quickly and repeatedly
pressing and releasing another note, for example.

Editing Programs and Layers
Voice Management Section
88
Polyphony
When you play a note, one or multiple zones can be triggered. Each triggered
zone equals a voice. The number of voices that you trigger with each note is
displayed in the Voices field of the program. Use this parameter to set an upper
limit for the number of notes that can be played simultaneously in polyphonic
mode.
If a program has a lower Polyphony value than its layers, the maximum number
of notes that you can play is limited by the Polyphony value of the program.
Key Poly
With this parameter, you can specify an upper limit for the number of notes that
can be played for a key. The notes that were played last have priority. For this
parameter to have an effect, the Mono button must be deactivated.
NOTE
Key Poly is limited by the Polyphony setting.
Low Amp
By default, the oldest note is removed first when notes are stolen due to a Key
Poly limitation. If you want the note with the lowest amplitude to be removed
instead, activate Low Amp.
Min Low Notes
Defines the number of low notes that cannot be stolen, regardless of the Voice
Mode setting.
Make sure that the polyphony of the program is high enough for your specific Min
Low Notes setting and allows to play additional higher notes.
Sus/Rel Tab
The Sus/Rel tab contains the sustain and release settings for programs and layers.
Ind Sustain
Activate this parameter to use individual sustain settings for the selected
programs or layers.
Sustain Mode
While you hold the sustain pedal, HALion plays back the notes that you play
repeatedly until the Key Polyphony value is reached. When you release the
sustain pedal, the notes of the keys that are no longer held enter the release
phase. Depending on the selected Sustain Mode, the notes of the keys that are
still held either keep playing or also enter the release phase.
• If Hold Loudest is selected, the loudest note keeps playing.
• If Hold Last is selected, the last note that you played keeps playing.
• If Hold First is selected, the first note that you played keeps playing.
• If Hold All is selected, all notes keep playing.
• If Release All is selected, all notes enter the release phase.

Editing Programs and Layers
Voice Management Section
89
Play Release
By default, the release phase of stolen notes is not played back and the notes
fade out in the time specified by the Fade Out parameter of the zone. Activate this
option to fade out the notes with their normal release phase instead.
RELATED LINKS
Fade Out on page 96
Voice Groups
By assigning zones to a voice group, you can set their polyphony individually. You can manage
the polyphony across zones that are not part of the same layer. Furthermore, zones can steal
notes from each other, regardless of whether they are in the same layer.
The maximum number of notes that you can play in a voice group is limited by the Polyphony
setting of the corresponding program or layer.
The parameters of the voice groups are edited using the columns in the table below the Voice
Management section.
No
Shows the number of the voice group.
Poly
Allows you to set the polyphony for each voice group.
Excl
If voice groups belong to the same exclusive group, they cannot be played back
simultaneously. The voice group that was triggered last has priority over the voice
groups that were playing before. Any voice groups of the same exclusive group
that were playing are cut off. A typical example for assigning voice groups to an
exclusive group is a drum set where the closed hi-hat cuts off the open hi-hat.
•To assign a voice group to an exclusive group, select a number from the
pop-up menu.
Voice Mode
Allows you to set the Voice Mode parameter separately for each voice group.
RELATED LINKS
Voice Management Section on page 85
Assigning Zones to Voice Groups
PROCEDURE
1. In the Program Tree, select the zones that you want to add to a voice group.
2. Open the Sound Editor for the zones.
3. In the Voice Control section, on the Trigger tab, select a voice group from the Voice
Group pop-up menu.
Usually, the voice group numbers relate to the voice groups of the program. If the zone
is part of a layer with active voice groups, the numbers relate to the voice groups of the
layer instead.
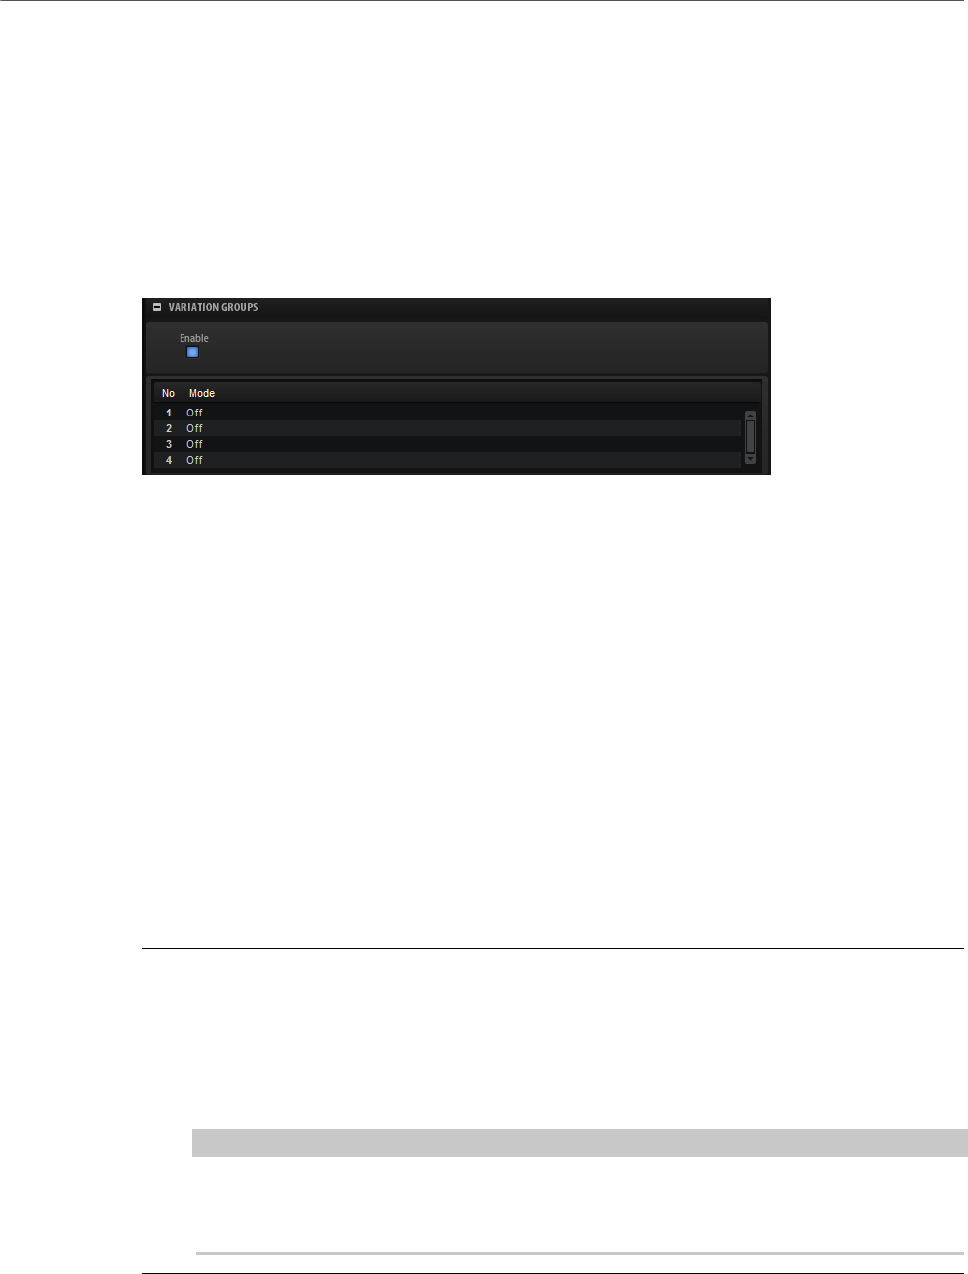
Editing Programs and Layers
Variation Groups Section
90
Variation Groups Section
To avoid the so-called machine gun effect that occurs when the same sample is triggered
repeatedly, you can create programs that use several samples for the same key and velocity
range. These samples can then be triggered alternately as variations. To define which
samples are triggered as variations, you can assign them to variation groups.
If no variation groups are activated, all zones play simultaneously. To avoid this, activate the
variation groups for the program or layer containing the zones and assign the zones to the
different variation groups.
Enable
Activates the variation group feature.
Mode
Click the Mode column to open a pop-up menu with the following options:
• If this parameter is set to Off, all variations are triggered simultaneously.
• If this parameter is set to Round Robin, all variations are triggered
alternately in a fixed order.
• If this parameter is set to Random, all variations are triggered randomly.
Individual variations can be triggered repeatedly.
• If this parameter is set to Random Exclusive, all variations are triggered
randomly. No variation is directly repeated.
Assigning Zones to Variation Groups
PROCEDURE
1. In the Program Tree, select the zones that you want to add to the variation group.
2. Open the Sound Editor for the zones.
3. In the Voice Control section, select the Trigger tab.
4. On the Variation Group pop-up menu, select a variation group.
NOTE
Usually, the variation group numbers relate to the variation groups of the program.
If the zone is part of a layer with active variation groups, the numbers relate to the
variation groups of the layer instead.
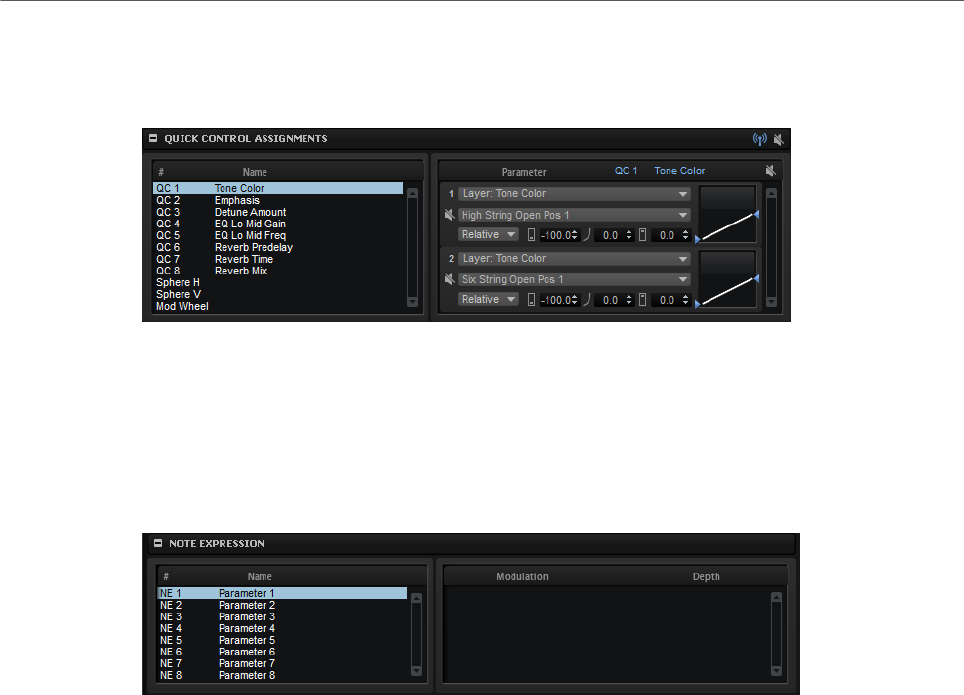
Editing Programs and Layers
Quick Control Assignments Section
91
Quick Control Assignments Section
This section allows you to manage and edit the assigned quick controls.
How to work with the quick controls is described in a separate section.
RELATED LINKS
Quick Controls on page 27
Note Expression Section
How to work with the Note Expression parameters is described in a separate section.
RELATED LINKS
Note Expression on page 540
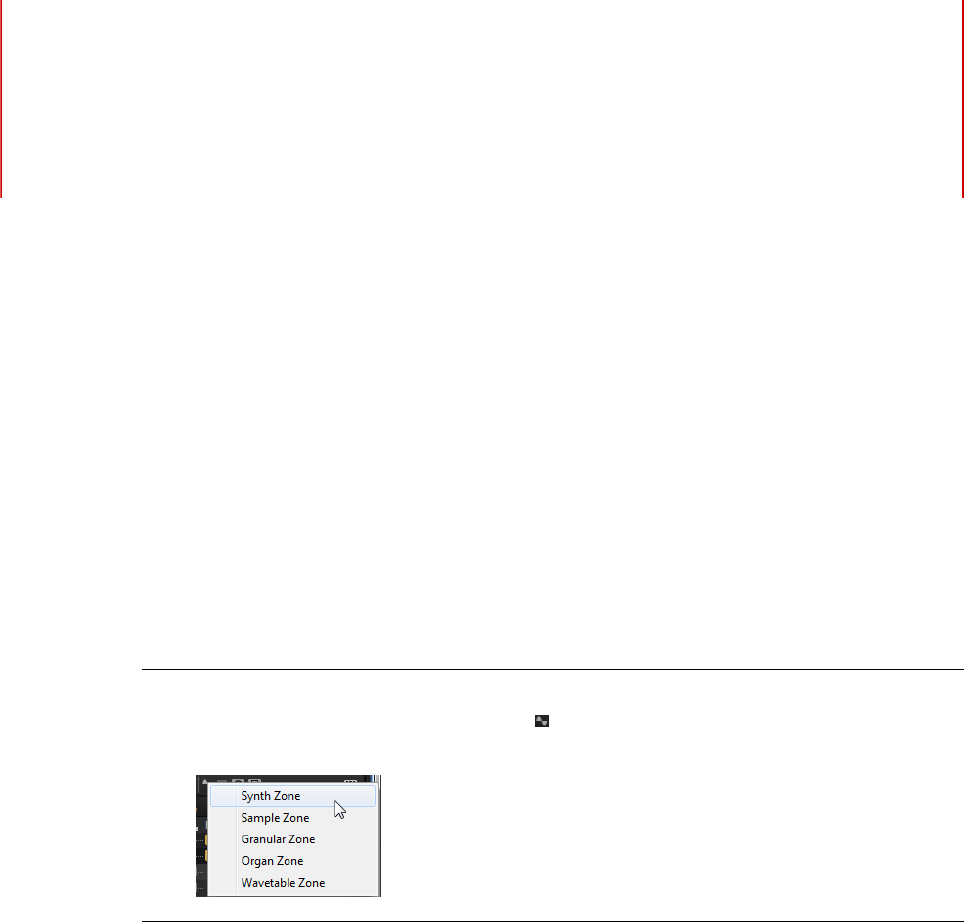
Editing Zones
92
You can edit zones in the Zone Editor or in the Sound Editor. These editors allow you to
modify the settings for a single zone, for multiple selected zones, or for all zones at the same
time.
Adding Zones
You can add zones in the Program Tree. Which zone type to add depends on the type of sound
that you want to create or work with.
PROCEDURE
1. On the toolbar, click Create New Zone .
2. From the pop-up menu, select the zone type that you want to add.
Zone Types
Synth Zone
Uses a combination of oscillators, a ring modulator, and a noise generator
as sound source. The synth zone oscillators offer much more than classic
subtractive synthesis.
Sample Zone
Uses a sample as sound source. With the AudioWarp features, sample zones
allow for pitch shifting and time stretching, and the Vintage setting emulates the
sound quality of the first samplers. In the Sample Editor for a sample zone, you
can slice the sample and create a step modulation for each slice, for example.
Granular Zone
Granular zones use a sophisticated granular synthesis as sound source. This
allows you to create complex sounds that can drastically evolve over time from
any sample.

Editing Zones
Adding Samples to Empty Zones
93
Organ Zone
Organ zones produce the sound of classic drawbar organs with up to nine
drawbars.
Wavetable Zone
Wavetable zones use wavetable synthesis as sound source. Its high-quality
analysis combined with the wavetable envelope allows for resynthesis of a
sample, that is, only a few waves are necessary to reproduce the original
character of any sample.
If not explicitly stated, the functions described in this chapter apply to all zone types.
RELATED LINKS
Editing Samples in the Sample Editor on page 150
Granular Synthesis on page 190
Wavetable Synthesis on page 173
Adding Samples to Empty Zones
Depending on the zone type, it can be necessary to fill the created zone with sample
material. This applies to sample zones, granular zones, and wavetable zones.
•To add a sample to an empty sample zone, drag it from the File Explorer/Mac OS
Finder or the Browser to the sample display in the Sample Osc section of the Zone
Editor or onto the waveform area in the Sample Editor or click Load/Replace Sample
in the header of the Sample Editor and select a sample.
•To add a sample to an empty granular zone, drag it to the sample display in the Grain
Osc section of the Zone Editor or onto the waveform area in the Sample Editor.
•To add a sample to an empty wavetable zone, drag it to the waveform area in the
Wavetable Editor or use the Insert From Sample button on the toolbar of the
wavetable overview section.
Absolute and Relative Editing
When editing multiple zones, you can either change values absolutely for all the zones (ABS)
or make relative changes (REL), depending on the setting of the corresponding button on the
toolbar.
•If you use absolute editing and you change a parameter from 50 % to 60 % for one
zone, all other zones are also set to 60 %.
•If you use relative editing and you change a parameter from 50 % to 60 % in one zone,
another selected zone that was set to 70 % is set to 80 %.
NOTE
Relative changes can be made for all parameters that can be adjusted continuously. Changes
of parameters that select one of multiple modes or switch between two states are always
absolute.
RELATED LINKS
Multi Selection and Parameter Controls on page 18
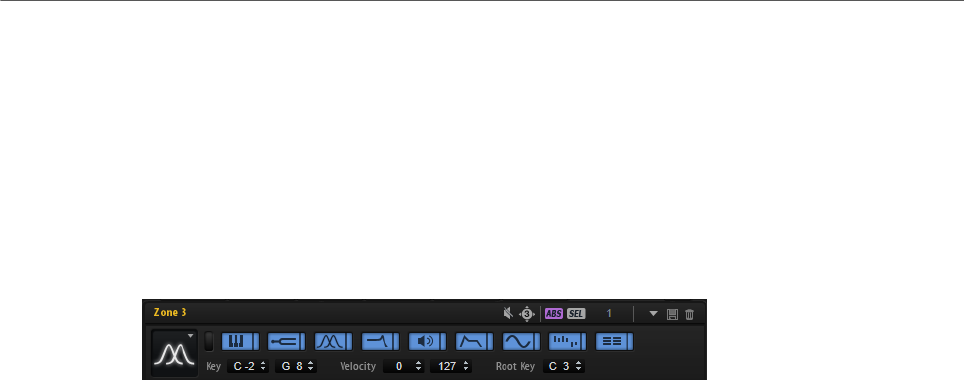
Editing Zones
Editing Selected Zones or All Zones
94
Editing Selected Zones or All Zones
When working in the Zone Editor or Sound Editor, you can apply your editing either to the
selected zones (SEL) or to all zones (ALL), depending on the setting of the corresponding
button on the toolbar.
Global Zone Settings
The global section at the top of the Zone Editor allows you to set up basic zone parameters.
Mute Zone
Mutes the zone.
HALion 3 Compatibility
This button lights up if you load an FXP file from HALion 3, to indicate that HALion
is in compatibility mode. This way, FXP files sound like they did in HALion 3.
If you deactivate the compatibility button, some modulations will sound different.
ABS/REL
Allows you to switch between absolute and relative editing.
SEL/ALL
Allows you to select whether the editing is applied to all zones or to the selected
zones.
Zone Type
Allows you to select a zone type.
You can change the zone type of existing zones. For example, this allows you to
create and set up a sample zone, and then switch the zone type to Granular or
Wavetable and use your sample as a basis for further editing in this editor. If you
switch between zones, the zone settings are adapted as far as this is possible.
A sample oscillator is replaced by a synth oscillator, for example. However,
changing the zone type has some limits. When switching from a wavetable to a
sample zone, for example, the sample zone will initially be empty. Because there
are two oscillators in the wavetable zone that can even refer to multiple samples
or work without samples at all, sample data cannot be transferred. The same is
true for synth and organ zones that are switched to sample zones.
Show All Sections/Show First Section
Allows you to switch the display between showing all sections and showing only
the first activated section.
Section buttons
The section buttons allow you to customize the section display and to facilitate
navigating between sections. For each section, one button is available.
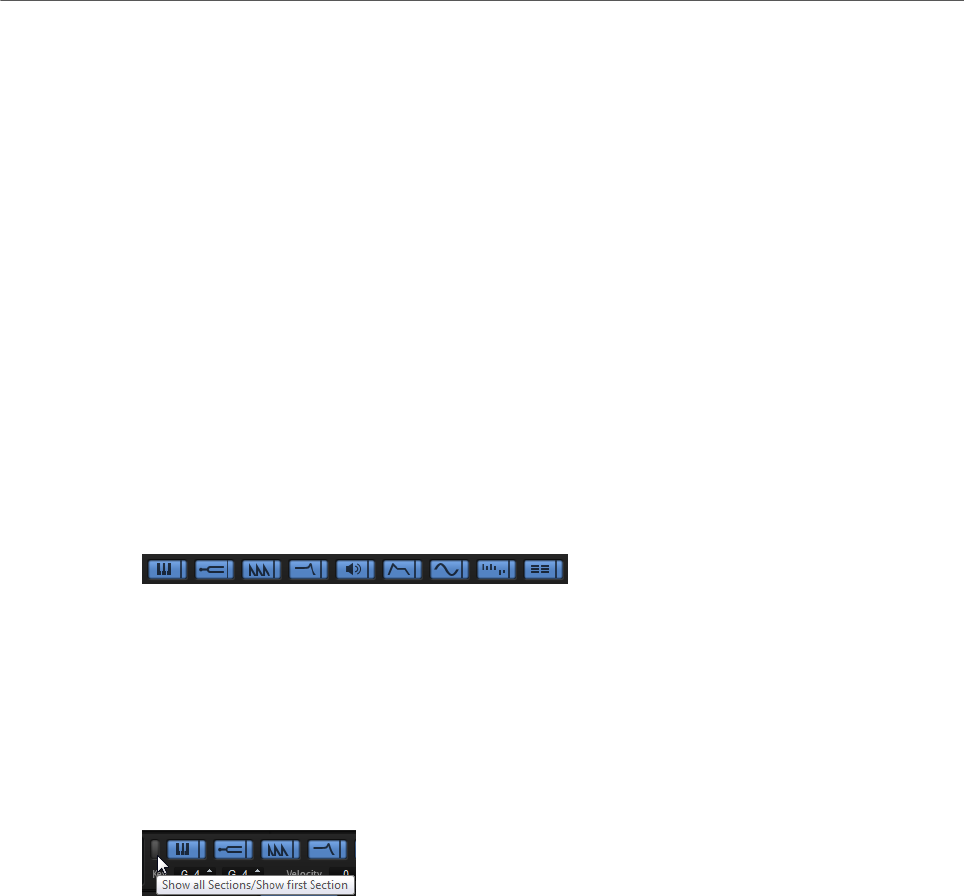
Editing Zones
Voice Control Section
95
The buttons can be activated, deactivated, or locked.
Low Key/High Key
These parameters determine the lowest key and the highest key on which the
zone is triggered.
Low Velocity/High Velocity
These parameters determine the lowest velocity and the highest velocity on
which the zone is triggered.
Root Key
The root key determines the pitch of the zone. Samples can contain root key
information embedded in the file, which means that when loaded, they are
automatically mapped to the corresponding keys.
RELATED LINKS
Absolute and Relative Editing on page 93
Managing Sections
If you activate a section button, the corresponding section is shown. As soon as you click
another button, the section is automatically hidden and the new section is shown.
If you lock a section by clicking the button directly to the right of the section button, the
section button cannot be deactivated and the corresponding section is always visible in the
editor. Clicking another button shows the new section, scrolling the view, if necessary.
Click the button to the left of the section buttons to toggle between showing and locking all
sections, and showing only the first section.
•If only one button is active, but not locked, you can click another button to switch
exclusively between the sections.
•Having one section locked while showing others dynamically can speed up your work
considerably.
For example, you can lock the Filter section, and then switch between the different
modifying sections, such as Envelope, LFO, Step Modulator, and Modulation Matrix.
•You can also use these buttons to set up views for different contexts, showing exactly
those sections you need for a given workflow, and save them in a screen set.
RELATED LINKS
Screen Sets on page 13
Voice Control Section
The Voice Control Section contains the same controls for sample, synth, grain, and
wavetable zones and a separate set of controls for organ zones.
For sample, synth, grain, and wavetable zones, the following parameters are available:

Editing Zones
Voice Control Section
96
Trigger Tab
On the Trigger tab, you can specify the triggering of a zone.
Voice Group
You can set the polyphony of a zone individually, by assigning it to one of 128 voice
groups. The settings of voice groups can be edited in the Voice Management
section of the program or layer.
Variation Group
Specifies the alternation mode for the different variation groups.
Priority
Each zone that you trigger corresponds to a voice. If the number of played zones
exceeds the Maximum Voices setting specified in the Options Editor, zones are
cut off and replaced by other zones. This is called “voice stealing”. Use this
parameter to specify a priority for this behavior. Zones with higher priority can
steal zones with lower priority, but not vice versa. If there are no zones with lower
priority, zones of the same priority are stolen. Zones with the priority Hold steal
only from lower priorities, but not from zones with the same priority.
Fade Out
Whenever a voice is stolen because a polyphony limit is reached, it is faded out.
You can specify this fade out time for each zone, which allows you to adapt it to
different signal types. For example, you might want to cut a stolen crash cymbal
zone less abruptly than a stolen hi-hat zone.
Key On Delay
With this parameter, you can delay the playback of the zone by a specified time or
a note value.
If Sync is deactivated, the delay is specified in milliseconds. If Sync is activated,
the delay is specified in fractions of beats.
To synchronize the delay time to the host tempo, activate the Sync button and
select a note value from the pop-up menu. To change the selected note value to a
triplet, activate the T button.
Release Delay
With this parameter, you can delay the release event of the zone by a specified
time or a note value.
If Sync is deactivated, the delay is specified in milliseconds. If Sync is activated,
the delay is specified in fractions of beats.
To synchronize the delay time to the host tempo, activate the Sync button and
select a note value from the pop-up menu. To change the selected note value to a
triplet, activate the T button.
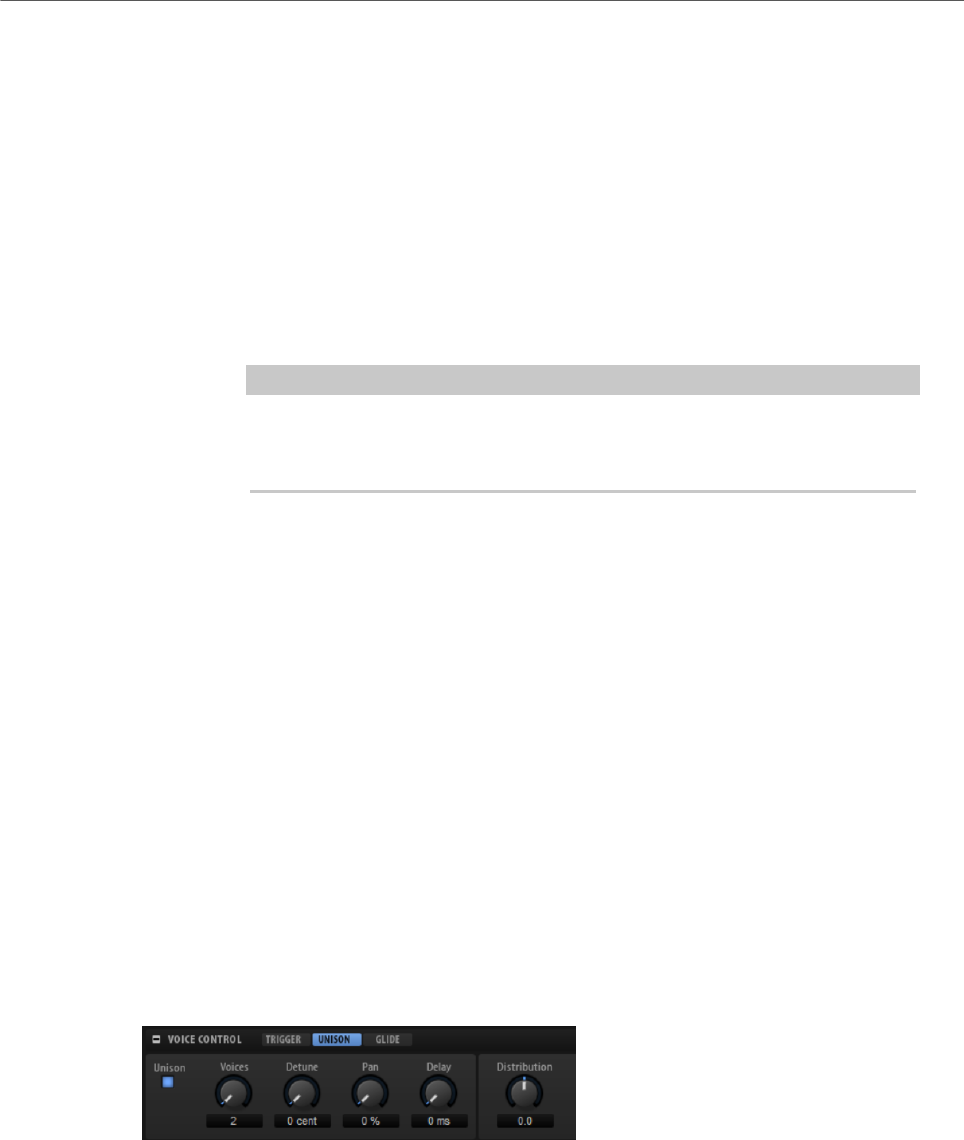
Editing Zones
Voice Control Section
97
Release Mode and Amount
These parameters determine how loud the release samples are played back.
Release samples play back the sound of an instrument when the note ends. For
example, this can be the noise of the damper touching down on the piano string,
or the reverb tail of an instrument that was recorded in a concert hall.
•Off deactivates the Release Mode. The level of the note-off sample is
controlled only by the amplifier section of the zone.
• If Note-on Env is selected, the level of the note-off sample is controlled
by the amplitude envelope of the associated note-on sample: The note-off
sample is played back with the level that the amplitude envelope has at the
moment when the note-off sample is triggered.
NOTE
In order to find the associated note-on sample, the mappings of the note-
on and note-off samples must overlap. HALion takes the last running note-
on sample as the associated sample.
• If Note-off Env is selected, the level of the note-off sample is controlled
by the amplitude envelope of the note-off sample: The note-off sample is
played back with the level that its amplitude envelope has at the moment
when the note-off sample is triggered.
• If Note-on Vel is selected, the level of the note-off sample is controlled by
the incoming MIDI note-on velocity.
• If Note-off Vel is selected, the level of the note-off sample is controlled by
the incoming MIDI note-off velocity.
• If Current Amplitude is selected, the level of the note-off sample is
controlled by the current amplitude of the associated note-on sample.
• If Random is selected, the level of the release sample is controlled by a
random value.
The Amount parameter adjusts how much the selected option affects the level of
the note-off samples.
Unison Tab
Unison allows you to trigger multiple voices simultaneously with each note that you play.
Unison On/Off
Activates/Deactivates unison.
Voices
Determines the number of voices that are triggered simultaneously. The
maximum is eight.
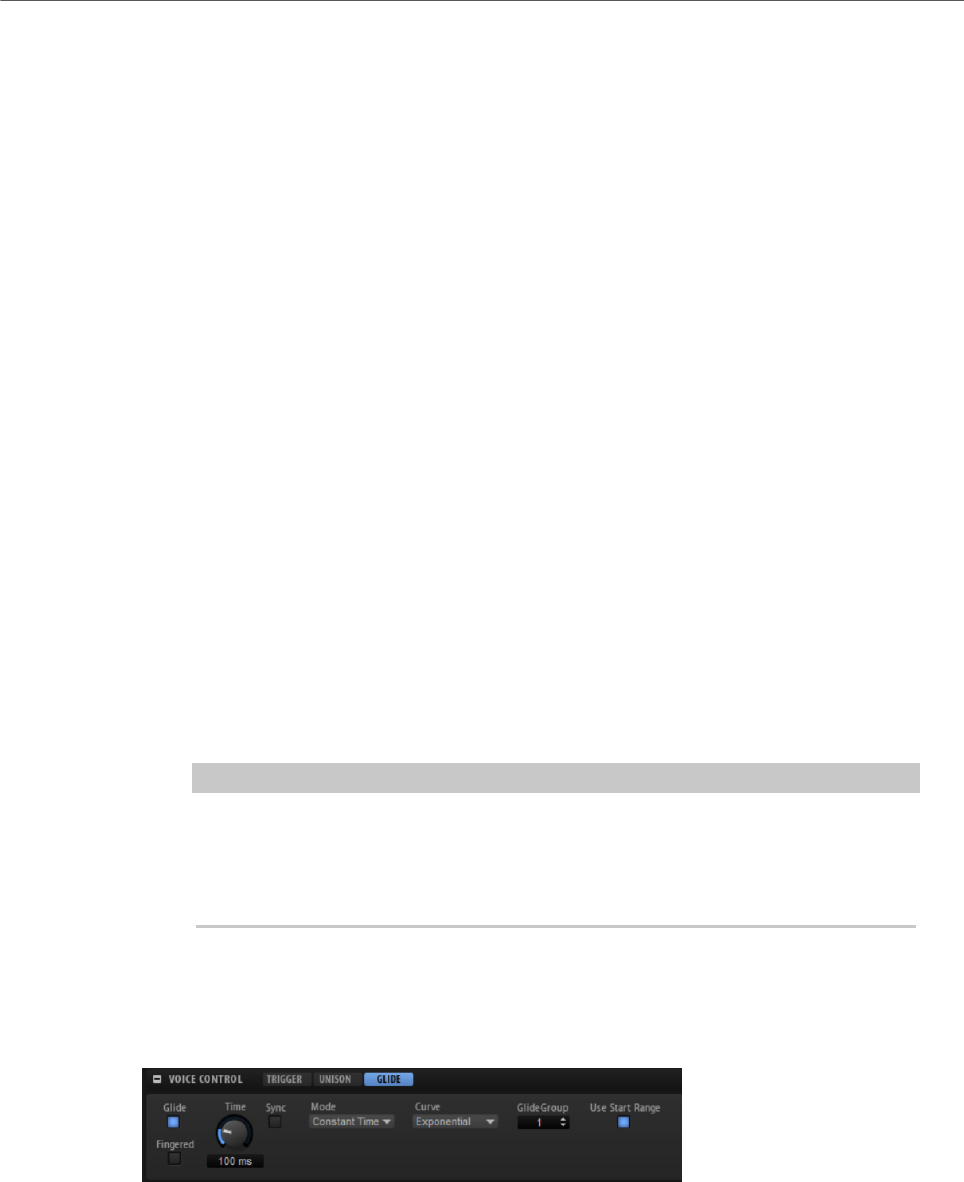
Editing Zones
Voice Control Section
98
Detune
Detunes the pitch of each unison voice in cents. This produces a fatter sound.
Pan
Spreads the unison voices across the stereo panorama. The higher the value, the
broader the stereo image.
Delay
Allows you to introduce a small random delay for each unison voice.
With a value of 0 ms, all unison voices are triggered at the same time. Values
from 1 ms to 100 ms add a random delay to each unison voice. The higher the
value, the more random the delay. This is especially useful to avoid comb filter
effects with two or more slightly detuned samples.
Distribution
Allows you to specify how unison voices are spread in pitch. Changing the unison
voice distribution will create different modulations between the unison voices.
• If this is set to 0, the distribution is linear, that is, all voices have an equal
distance in their pitch offset.
• Raising the value stretches the distribution using an exponential curve, so
that the first unison voices have a smaller pitch offset than the second and
third.
• Decreasing the value stretches the distribution using a negative
exponential curve,so that the first unison voices have a larger pitch offset
than the second and third voices.
NOTE
This parameter is always visible, even if Unison is deactivated. This is because
it does not only affect the voice distribution of the zone unison, but also the
voice distribution of the wavetable and synth oscillators that have their own
independent multi-oscillator settings.
Glide Tab
Glide allows you to bend the pitch between notes that follow each other. You achieve the best
results in Mono mode.
Glide On/Off
Activates/Deactivates Glide.
Fingered
Activate this parameter to glide the pitch only between notes that are played
legato.
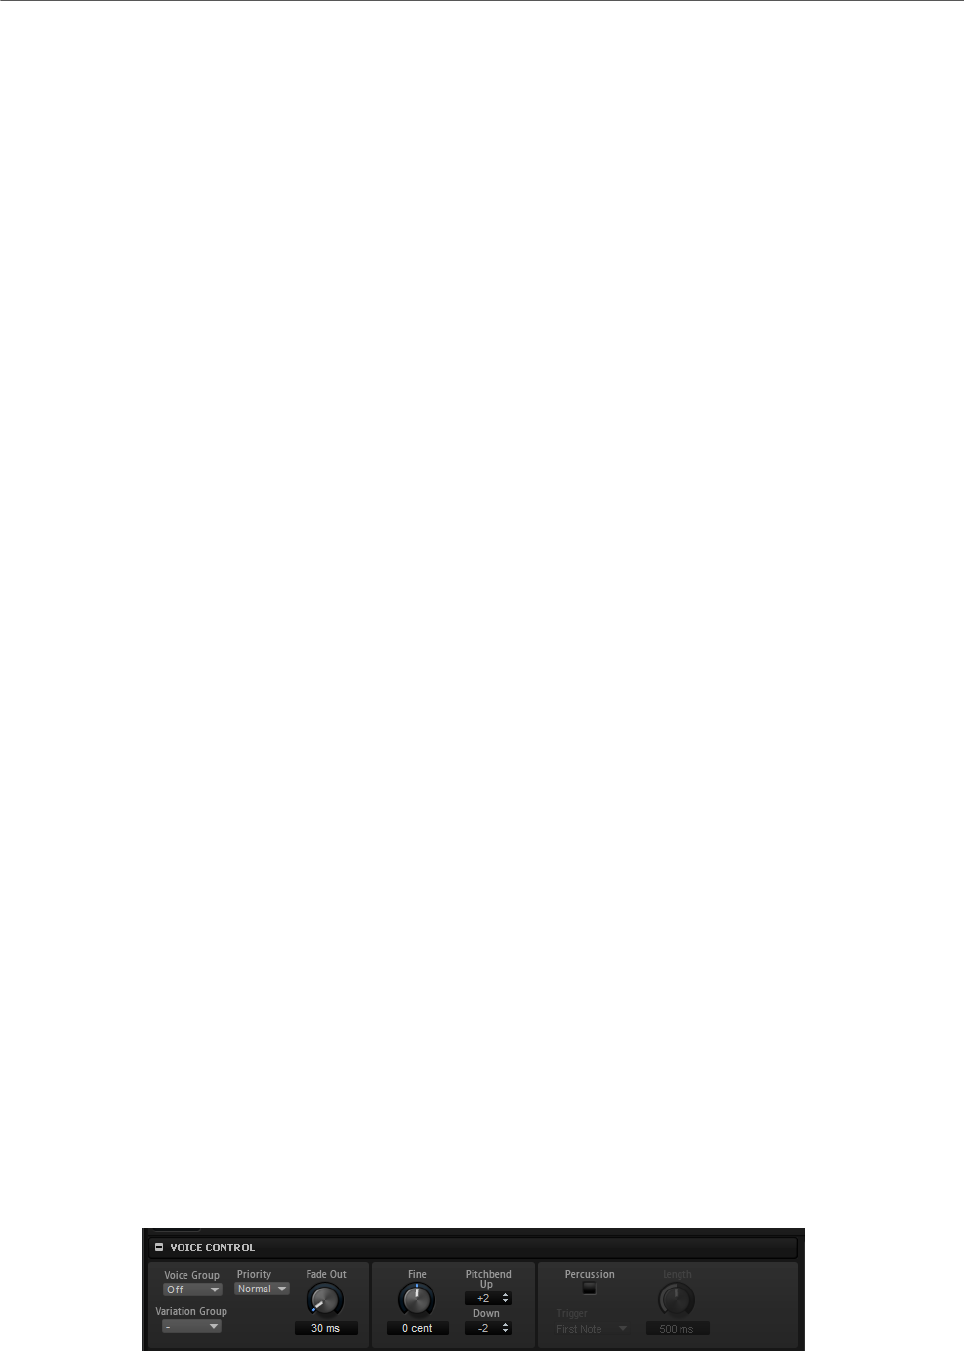
Editing Zones
Voice Control Section for Organ Zones
99
Glide Time
Sets the glide time, that is, the time it takes to bend the pitch from one note to
the next.
Sync
Activate Sync to synchronize the delay time to the host tempo. Select a note value
from the pop-up menu. To change the selected note value to a triplet, activate the
T button.
Mode
• Set this parameter to Constant Time to keep the glide time constant and
independent from the note interval.
• Set this parameter to Constant Speed to change the glide time with the
note interval. Larger intervals result in longer glide times.
Curve
Allows you to select one of three curve types to define the glide behavior.
• With the Linear curve, the pitch glides at continuous speed from the start
to the end pitch.
• With the Exponential curve, the pitch starts gliding at higher speed and
decelerates towards the end pitch. This behavior is similar to the natural
pitch glide produced by a singer.
• With the Quantized curve, the pitch glides in semitones from the start to
the end pitch.
Glide Group
If you assign zones to glide groups, you can set the glide effect independently
for the zones. This allows you to set up zones with overlapping key ranges and
different settings of Glide Time, for example.
Use Start Range
If a new note plays in a different zone with a different sample assigned, the new
sample is used to glide to the new pitch. Depending on the sample, this can
produce an unnatural attack. To avoid this, activate Use Start Range. If this is
activated, the sample does not start from the beginning, but from the position you
set with the Sample Start Range parameter.
RELATED LINKS
Voice Groups on page 89
Sample Oscillator Section on page 106
Voice Control Section for Organ Zones

Editing Zones
Voice Control Section for Organ Zones
100
Voice Group
You can set the polyphony of a zone individually, by assigning it to one of 128 voice
groups. The settings of voice groups can be edited in the Voice Management
section of the program or layer.
Priority
Each zone that you trigger corresponds to a voice. If the number of played zones
exceeds the Maximum Voices setting specified in the Options Editor, zones are
cut off and replaced by other zones. This is called “voice stealing”. Use this
parameter to specify a priority for this behavior. Zones with higher priority can
steal zones with lower priority, but not vice versa. If there are no zones with lower
priority, zones of the same priority are stolen. Zones with the priority Hold steal
only from lower priorities, but not from zones with the same priority.
Variation Group
Specifies the alternation mode for the different variation groups.
Fade Out
Whenever a voice is stolen because a polyphony limit is reached, it is faded out.
You can specify this fade out time for each zone, which allows you to adapt it to
different signal types. For example, you might want to cut a stolen crash cymbal
zone less abruptly than a stolen hi-hat zone.
Fine
Allows you to fine-tune the pitch in cent steps.
Pitchbend Up/Pitchbend Down
Determines the range for the modulation that is applied when you move the
pitchbend wheel.
Percussion
Adds a dedicated percussion envelope to emulate the percussion of vintage
organs. The percussion envelope works in addition to the amplifier envelope.
• The Percussion button activates/deactivates the percussion envelope.
• The Length parameter controls the decay of the percussion.
For example, set this to 500 ms for short percussion and to 1000 ms for
long percussion.
• On the Trigger pop-up menu, select First Note if you want to use
monophonic triggering or Each Note if you want to use polyphonic
triggering.
NOTE
For the typical percussion sound of an organ, use only the drawbars 4' or 2 2/3'.
RELATED LINKS
Voice Management Section on page 85

Editing Zones
Pitch Section
101
Pitch Section
On the Pitch section for synth, sample, grain, and wavetable zones, you can make settings for
tuning and pitch modulation.
Pitchbend Up/Pitchbend Down
Determines the range for the modulation that is applied when you move the
pitchbend wheel.
Octave
Adjusts the pitch in octave steps.
Coarse
Adjusts the pitch in semitone steps.
Fine
Allows you to fine-tune the pitch in cent steps.
Pitch Envelope Amount
Determines how much the pitch is affected by the pitch envelope.
Random Pitch
Allows you to randomly offset the pitch with each played note. Higher values
cause stronger variations. At a setting of 100 %, the random offsets can vary from
-6 to +6 semitones.
Pitch Key Follow
Allows you to adjust the pitch modulation by MIDI note number. Set this
parameter to positive values in order to raise the pitch the higher you play. Use
negative values to lower the pitch the higher you play. At a setting of +100 %, the
pitch follows the played note exactly.
Center Key
Specifies the MIDI note that is used as the central position for the Key Follow
function.
Bypass Pitch Envelope
This button in the header of the Pitch section allows you to bypass the Pitch
envelope.
RELATED LINKS
Envelope Section on page 125
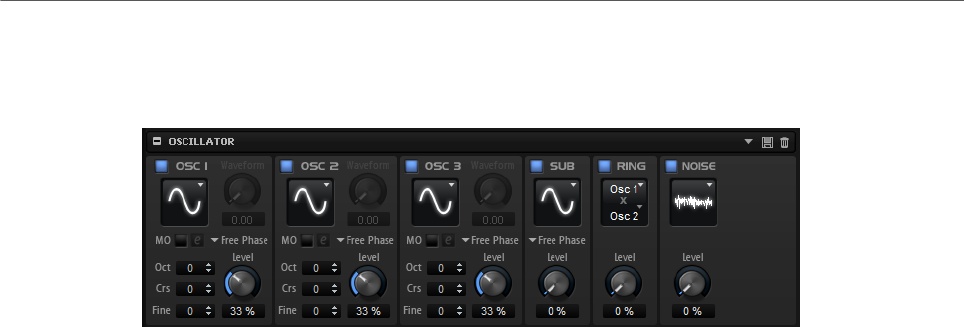
Editing Zones
Oscillator Section
102
Oscillator Section
The Oscillator section is available for synth zones.
The Oscillator section offers six sound sources: three main oscillators, the sub oscillator,
the ring modulation, and the noise generator. To create interesting electronic spectra, you
can mix any of these sound sources. The resulting signal is sent to the Filter and Amplifier
sections for further sound shaping.
The three main oscillators (OSC 1, OSC 2, and OSC 3) offer different wave shapes and
algorithms.
• To activate an oscillator, click its On/Off button.
OSC 1/2/3 Type
The oscillator type defines the basic sound character of the oscillator. This pop-
up menu lists the waveforms (sine, triangle, saw, or square), followed by the
algorithm (PWM, Sync, CM, or XOR). The combination of waveform and algorithm
controls the sound of the oscillator.
The following algorithms are available:
•PWM (pulse width modulation) is only supported by the square waveform.
The Waveform parameter sets the ratio between the high and low value
of the square wave. A setting of 50 % produces a pure square wave. With
settings below or above 50 %, the oscillator produces rectangular waves.
•Sync provides different hard-sync oscillators, where each is a combination
of a master and slave oscillator. The wave shape of the slave oscillator
(sine, triangle, saw, or square) is reset with each full wave cycle of the
master oscillator. This means that a single oscillator can produce a
rich sync-sound without using other oscillators as slave or master. The
Waveform parameter adjusts the pitch of the slave oscillator, producing the
typical sync sound.
•CM (cross modulation) provides a combination of two oscillators where
a master oscillator is modulating the pitch of a slave oscillator (sine,
triangle, saw, or square) at the rate of the audio sample. The Waveform
parameter adjusts the pitch ratio between slave and master oscillator,
resulting in a sound close to frequency modulation.
•XOR (exclusive OR) compares two square waveforms with an XOR
operation. Depending on the outcome of the XOR operation, the waveform
shape of a third oscillator (sine, triangle, saw, or square) is reset. The
Waveform parameter adjusts the pitch ratio of the square oscillators
resulting in a sound close to ring modulation of the third oscillator.

Editing Zones
Oscillator Section
103
Osc 1/2/3 Waveform
Modifies the sound of the oscillator algorithm. Its effect depends on the selected
oscillator type.
NOTE
• Except for PWM, all algorithms support the sine, triangle, saw, and square
wave shapes. PWM supports only the square wave shape.
• The Waveform parameter for the three main oscillators can be assigned as
modulation destinations in the modulation matrix.
OSC 1/2/3 Octave
Adjusts the pitch in octave steps.
OSC 1/2/3 Coarse
Adjusts the pitch in semitone steps.
OSC 1/2/3 Fine
Adjusts the pitch in cent steps. This allows you to fine-tune the oscillator sound.
OSC 1/2/3 Level
Adjusts the output level of the oscillator.
NOTE
Waveform, pitch, and level of oscillator 1, 2, and 3 can be modulated separately in
the modulation matrix.
Multi-Oscillator Mode
For the three main oscillators, you can activate Multi-Oscillator mode. This allows you to
create a richer sound by producing up to eight oscillators simultaneously.
The effect is similar to the Unison mode for the zone, but it requires less performance.
• To activate Multi-Oscillator mode, activate the MO button.
If Multi-Oscillator mode is activated, you can click the edit button to show the
corresponding parameters.
NOTE
If Multi-Oscillator mode is active for an oscillator, you can modulate the corresponding
parameters in the modulation matrix.
Multi Oscillator Number, Detune, and Pan
Each of the main oscillators offers these multi-oscillator functions. They allow
you to create a richer sound by producing up to eight oscillators simultaneously.
•Number determines the number of oscillators that play back
simultaneously. You can also set fractions of numbers. For example, with
a setting of 2.5, you hear two oscillators at full level and a third one at half
level.
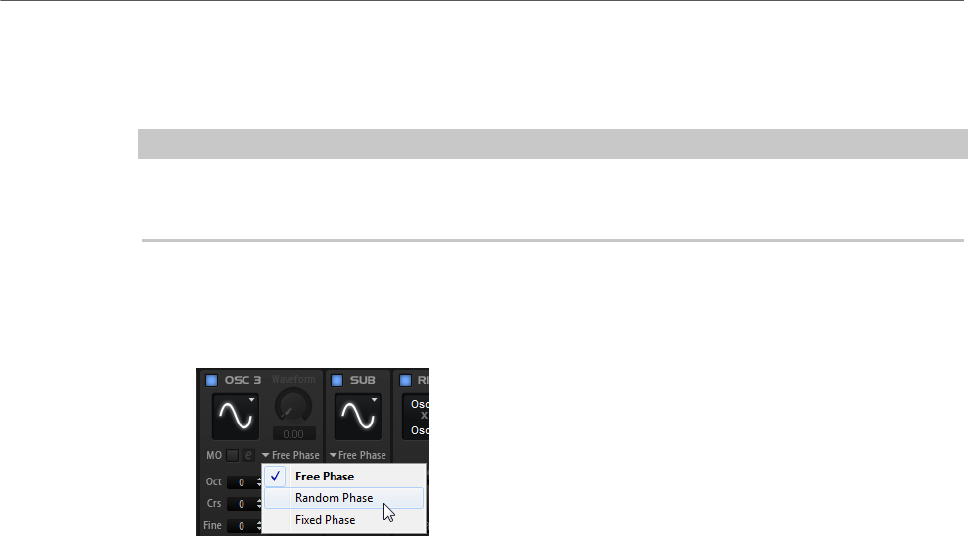
Editing Zones
Oscillator Section
104
•Detune detunes the oscillators.
•Pan narrows or widens the stereo panorama. With a setting of 0 %, you
create a mono signal, and with 100 %, you create a stereo signal.
NOTE
The pitch distribution of the oscillators is determined by the Distribution control in the Voice
Control section.
Retrigger Mode
Allows you to decide whether the oscillator runs freely, with a random phase
each time a note is triggered, or with a fixed start phase.
• If Free Phase is selected, the behavior of analog synthesizers is emulated.
The oscillator is running freely and continuously.
• If Random Phase is selected, the start phase is randomly set to a different
value each time that you trigger a note. In contrast to Free Phase, there is
no continuity in the phase of the waveform.
• If Fixed Phase is selected, the oscillator runs with a fixed start phase that
can be specified between 0 and 360 degrees.
Sub Oscillator
The pitch of the sub oscillator is always one octave lower than the overall pitch. The overall
pitch is determined by the Octave setting.
On/Off
Activates/Deactivates the sub oscillator.
Type
The wave shape of the sub oscillator. You can choose between Sine, Triangle,
Saw, Square, Pulse Wide, and Pulse Narrow.
Level
Adjusts the output level of the sub oscillator.
Retrigger Mode
Allows you to decide whether the oscillator runs freely, with a random phase
each time a note is triggered, or with a fixed start phase.
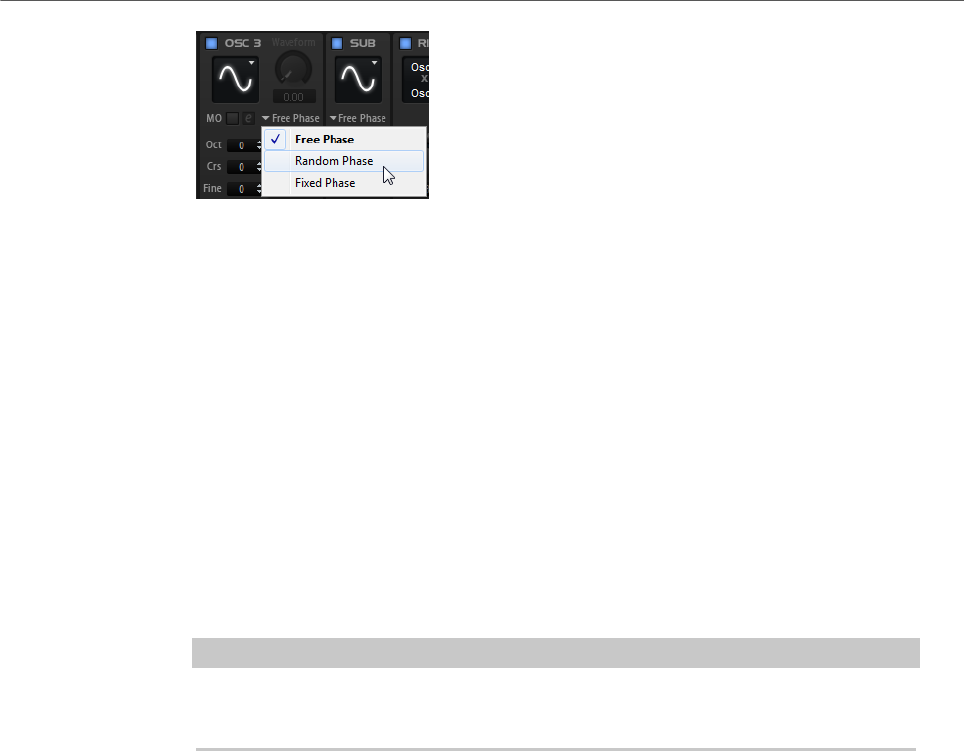
Editing Zones
Oscillator Section
105
• If Free Phase is selected, the behavior of analog synthesizers is emulated.
The oscillator is running freely and continuously.
• If Random Phase is selected, the start phase is randomly set to a different
value each time that you trigger a note. In contrast to Free Phase, there is
no continuity in the phase of the waveform.
• If Fixed Phase is selected, the oscillator runs with a fixed start phase that
can be specified between 0 and 360 degrees.
Ring Modulator
Ring modulation produces sums and differences between the frequencies of two signals.
Ring Modulation Source 1/Ring Modulation Source 2
Determines the sources to be ring modulated. You can select OSC 1 or Sub as
Source 1, and OSC 2 or OSC 3 as Source 2.
NOTE
Make sure that the corresponding oscillators are activated when you select them.
Otherwise, no sound is heard.
Ring Modulation Level
Adjusts the output level of the ring modulation.
Noise Generator
The Noise parameter is used for non-pitched sounds. In addition to standard white and pink
noise, there are also band-pass filtered versions of white and pink noise.
Noise Type
The sound color of the noise. You can choose between standard and band-pass
filtered (BPF) versions of white and pink noise.
Noise Level
Adjusts the output level of the noise generator.
RELATED LINKS
Modulation Matrix on page 137
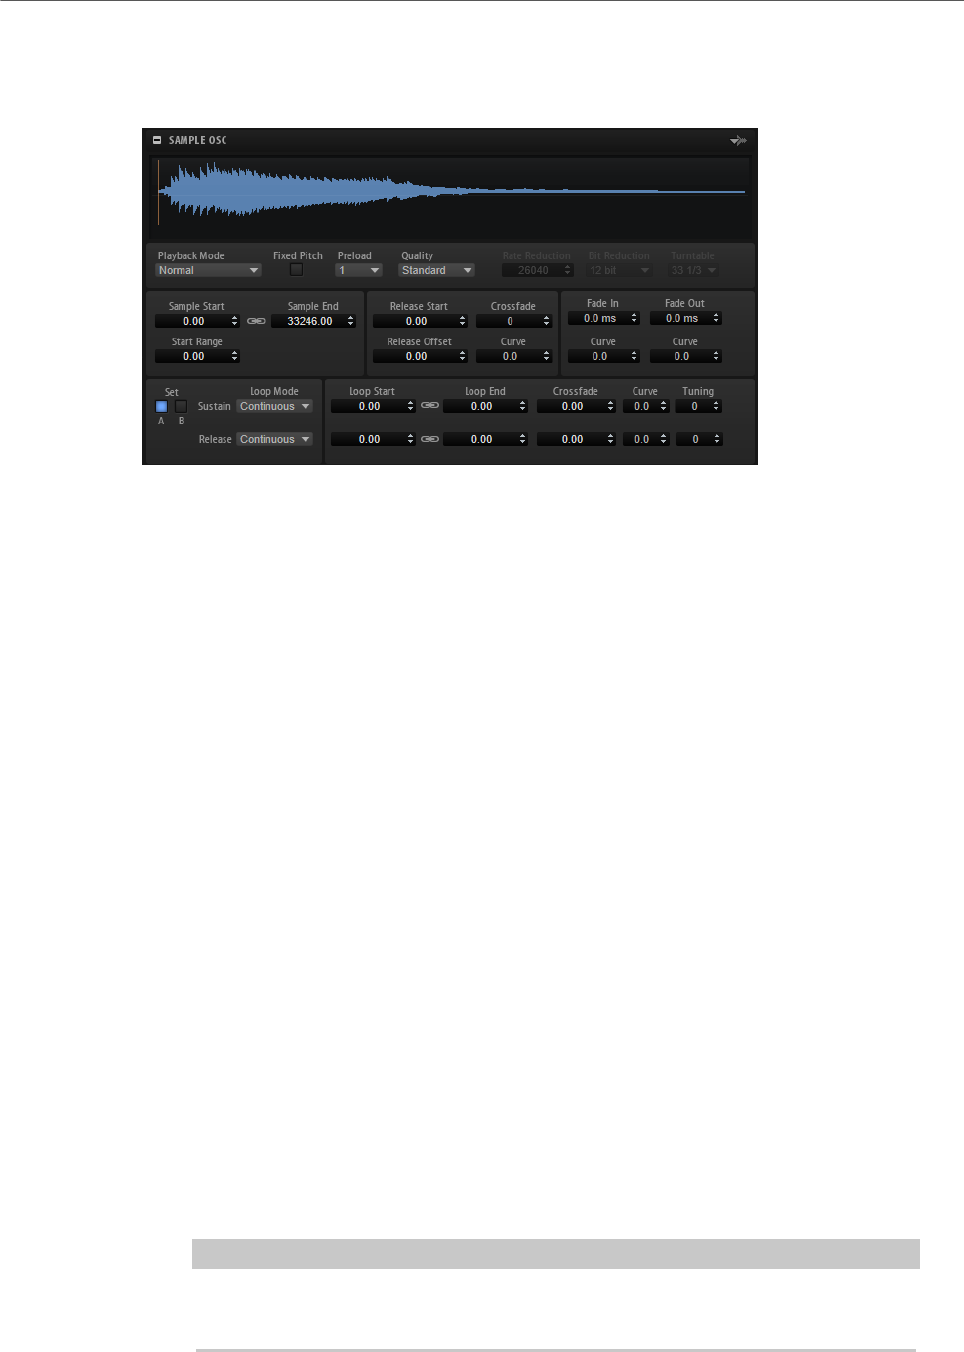
Editing Zones
Sample Oscillator Section
106
Sample Oscillator Section
This section is available for sample zones. It contains various playback and loop parameters.
Load/Replace Sample
This button on the right side of the section header allows you to load an initial
sample or to replace the current sample. In the dialog, you can listen to the
samples, to select the best match for your working situation.
Playback Mode
•Normal – The sample is played back from beginning to end. If loops are
defined, they are played back according to their loop settings.
•Reverse – The sample is played from end to beginning, ignoring any loop
settings.
•One-Shot – The sample is played back from beginning to end, regardless of
any loop settings.
•Reverse One-Shot – The sample is played back from end to beginning,
regardless of any loop settings.
In One-Shot and Reverse One-Shot mode, the zones ignore any MIDI note-off
messages. All envelopes and LFOs play until their sustain is reached and then
remain on this level for as long as the sample plays back. Any release segments
of the envelopes and LFOs are not played. However, if you activate One-Shot
mode in the Envelope section, the release nodes of the envelopes are included in
the playback.
Fixed Pitch
If a sample zone is triggered by a MIDI note other than the one defined by the
Root Key setting, the sample is normally pitched accordingly. If Fixed Pitch is
activated, the relation between played note and root key is disregarded and all
keys play the sample just as it was recorded.
NOTE
You can still apply the usual pitch modulations in the Pitch section and set the
sample to follow the keyboard according to the Pitch Key Follow setting.

Editing Zones
Sample Oscillator Section
107
Preload
A sample can either be loaded completely into RAM or it can be streamed from
the hard disk. If samples are streamed, HALion needs to preload a portion of
these samples to be able to play a voice without having to search for the sample
data first. The size of this preload buffer can be set in the Options Editor. The
Preload setting allows you to adapt this buffer size for individual sample zones
by setting a multiplier from 1 to 16. Increasing the buffer size can be useful if
a sample can be transposed in a wide range and HALion needs to read out the
sample data faster, for example.
If you set Preload to its maximum, the entire sample is preloaded. This is useful
for smaller samples.
Quality
If samples are not played with their original pitch or tempo, HALion calculates
the transposed versions in real time using algorithms that require different CPU
performance depending on the Quality setting.
Changing the quality setting is particularly noticeable in the high frequencies.
The higher the setting, the better the suppression of artifacts. For samples with
little high-frequency content, you can use the Standard option. For programs
that use different samples for every key, you can use the Standard option to save
computing power.
If Quality is set to Vintage, you can make the following settings:
•Rate Reduction allows you to specify a sample frequency, to simulate the
lower sample rates of early samplers.
•Bit Reduction allows you to select the bit depth that was used by early
samplers.
•Turntable emulates the memory-optimized workflow of the past, where
turntables were sampled at a speed of 45 RPM to record shorter samples,
and then tuned down again to correct for the change in pitch.
If you set this parameter to 78 RPM, you can increase the vintage artifacts
that are produced.
Sample Start
The start marker of the sample.
Start Range
Determines the range for sample start offset modulation. If Sample Start
is selected as a modulation destination in the modulation matrix, the Start
Range parameter controls the sample portion that is affected by the start offset
modulation. If this parameter is set to zero, no sample start modulation is
performed.
For example, if Note-on Velocity is used to modulate the Sample Start
parameter, a high key velocity starts playback later in the sample, and the range
of this modulation is determined by the Start Range parameter.
Link Loop Start and End
Links the loop start and end positions. If you edit one of the values, the other is
automatically modified.

Editing Zones
Sample Oscillator Section
108
Sample End
The end marker of the sample.
Release Start
Determines the position to which the cursor jumps when you release a key.
For example, if you are playing back a sample in a loop, but you want it to play its
original release phase, set the Release Start parameter to this position.
Release Offset
Allows you to fine-tune the release start for each sample.
This allows you to offset the release start for several zones at the same time
without losing the original release settings, for example.
Crossfade/Fade In/Fade Out
Allow you to set the curve and the length of the fade in, the fade out, and the
crossfade.
Loop Sets A and B
Allow you to set up two different sets of loops for the same sample. This is useful
to compare different versions of the same loop, for example.
Loop Mode
Allows you to select a mode for the sustain loop and the release loop.
• If this is set to No Loop, the sample is played without loop.
• If this is set to Continuous, the loop is played continuously until the end of
the amplitude envelope.
• If this is set to Alternate, the loop alternates forward and backward even if
you release the key.
• If this is set to Once, the loop is repeated once.
• If this is set to Until Release (sustain loop only), the loop is repeated until
you release the key on the keyboard.
• If this is set to Alternate Until Release (sustain loop only), the loop
alternates forward and backward for as long as the key is held and then
continues to the end of the sample.
NOTE
If Loop Mode is set to Alternate or Alternate Until Release, the loop crossfade
is applied to the loop start and the loop end. All other modes on the Loop Mode
pop-up menu apply the loop crossfade only to the loop end.
Loop Start
The loop start for the sustain loop and for the release loop.
Loop End
The loop end for the sustain loop and for the release loop.
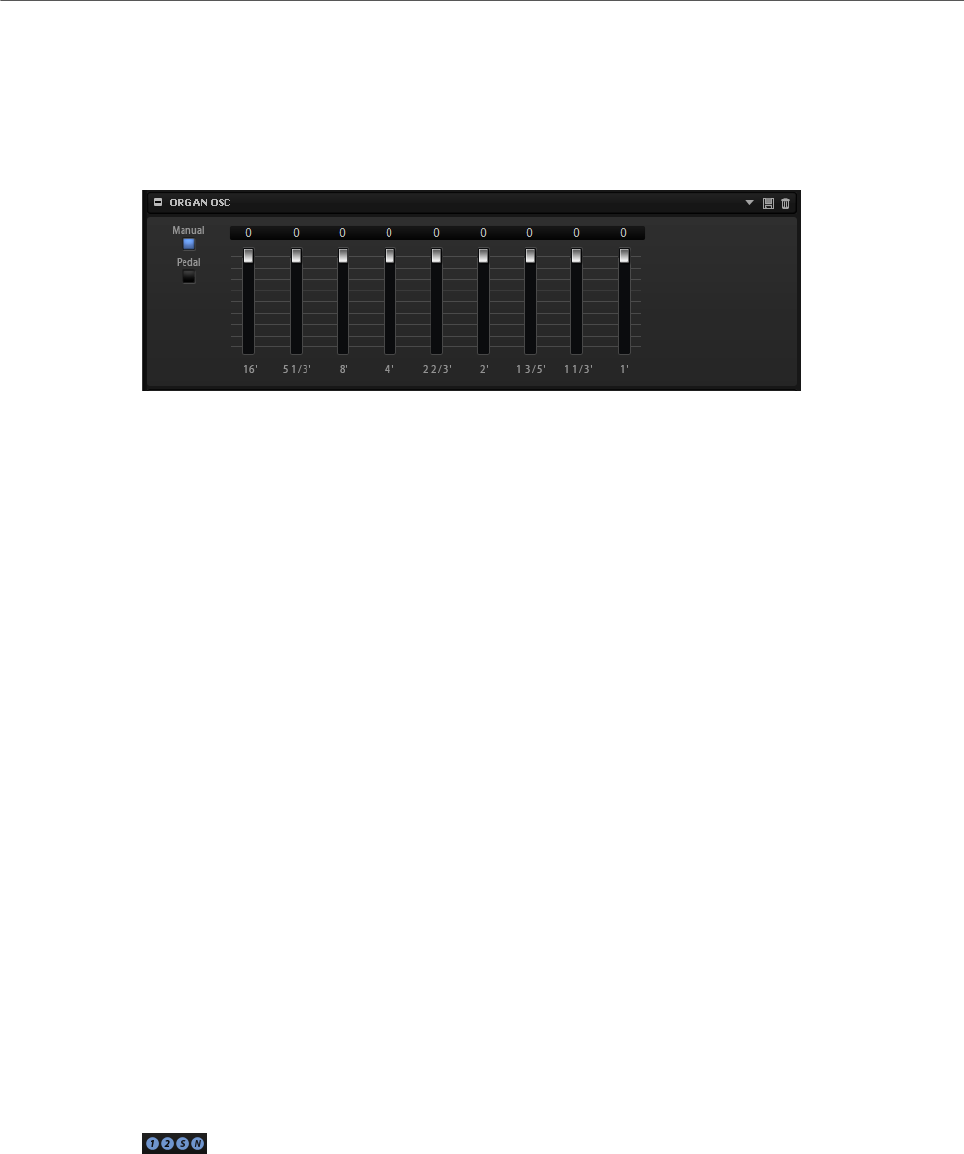
Editing Zones
Organ Oscillator Section
109
Tuning
Sets the tuning of the loop. This is useful to adjust the frequency of the loop.
Organ Oscillator Section
Organ zones produce the sound of classic drawbar organs with up to nine drawbars. Each
drawbar controls the level of a harmonic. The drawbars are named after the length of church
organ pipes, ranging from 16' to 1'. 16' is the lowest and 1' the highest harmonic. You can mix
the harmonics using the drawbars to create different classic organ timbres.
Manual
Activates the nine drawbars for the manual.
Pedal
Activates the two drawbars for the bass pedals.
Drawbars 16' to 1'
The faders control the level of the corresponding drawbar.
Wavetable Section
The Wavetable section in the Zone Editor gives access to the oscillator parameters of
wavetable zones. The oscillator is a combination of two wavetable oscillators, one sub
oscillator, and one noise oscillator that can be mixed with individual settings, such as level,
pan, tuning, etc.
The Osc 1 and Osc 2 tabs allow you to choose from a set of preconfigured wavetables and
to define how to play these. The Sub tab contains the settings for the sub oscillator and the
noise oscillator.
On the right in the title bar, you can find On/Off buttons for the four oscillators. This allows
you to activate/deactivate an oscillator without having to open the corresponding tabs.
Osc Tabs
The wavetable oscillators 1 and 2 have the same parameters. For each oscillator, a separate
tab is available.
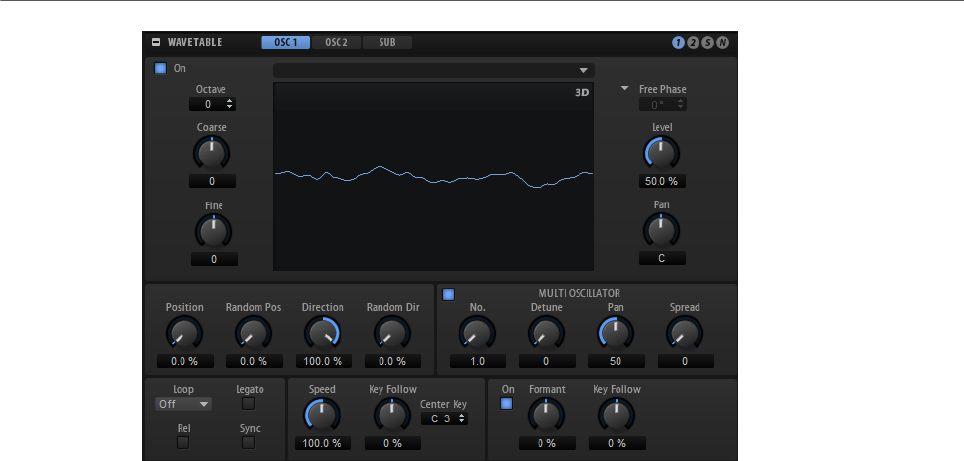
Editing Zones
Wavetable Section
110
Oscillator On/Off
Activates/Deactivates the oscillator.
Select Wavetable
This pop-up menu allows you to select a wavetable for the wavetable oscillator.
You can choose between the included wavetables and the wavetables that you
created in the Wavetable Editor.
Show 3D Wavetable Map/2D Wave
Toggles between displaying a single cycle of the current waveform and a
topographic map of the entire wavetable.
Octave
Adjusts the pitch in octave steps.
Coarse
Adjusts the pitch in semitone steps.
Fine
Adjusts the pitch in cent steps. This allows you to fine-tune the oscillator sound.
Retrigger Mode
Determines the initial phase of the oscillator when you play a note.
• If Free Phase is selected, the behavior of analog synthesizers is emulated.
The oscillator is running freely and continuously.
• If Random Phase is selected, the start phase is randomly set to a different
value each time that you trigger a note. In contrast to Free Phase, there is
no continuity in the phase of the waveform.
• If Fixed Phase is selected, the oscillator runs with a fixed start phase that
can be specified between 0 and 360 degrees.

Editing Zones
Wavetable Section
111
Level
Adjusts the output level of the oscillator.
Pan
Adjusts the position of the oscillator in the stereo panorama. At a setting of -100
%, the sound is panned hard left, and at +100 %, it is panned hard right.
NOTE
The Position, Pitch, Level, and Pan parameters of wavetable oscillators 1 and 2 can be
modulated separately in the modulation matrix.
Position
Determines where the envelope starts.
Random Position
Adds a random value to the current position when you play a note.
For example, if you want the position to vary between 25.0 % and 75.0 %, set
Position to 25.0 % and Random Position to 50.0 %.
Playback Direction
Allows you to set the playback speed in smaller increments. Furthermore, this
parameter determines the playback direction.
• If you enter negative values, you reverse playback, that is, the playback
position moves backward through the wavetable.
Random Direction
Adds a negative or positive random value to the current direction when you play a
note.
For example, if you want the direction to vary between -100 % and +100 %, set
Direction to 0.0 % and Random Direction to 100.0 %. If you want the direction to
vary within the full positive range, set Direction to 50 % and Random Direction to
50 %, for example.
Loop Mode
•Off: If Playback Direction is set to a positive value, the wavetable plays from
the position cursor to the end.
If Playback Direction is set to a negative value, the wavetable plays from
the position cursor to the start.
•On: Depending on the Playback Direction setting, the wavetable plays
forward or backward in a loop.
•Alt: The wavetable plays in an alternate loop, that is, the loop is alternately
played forward and backward. The first direction depends on the Playback
Direction setting.
Loop Until Release
If this button is activated, the loop is repeated until you release the key on the
keyboard.
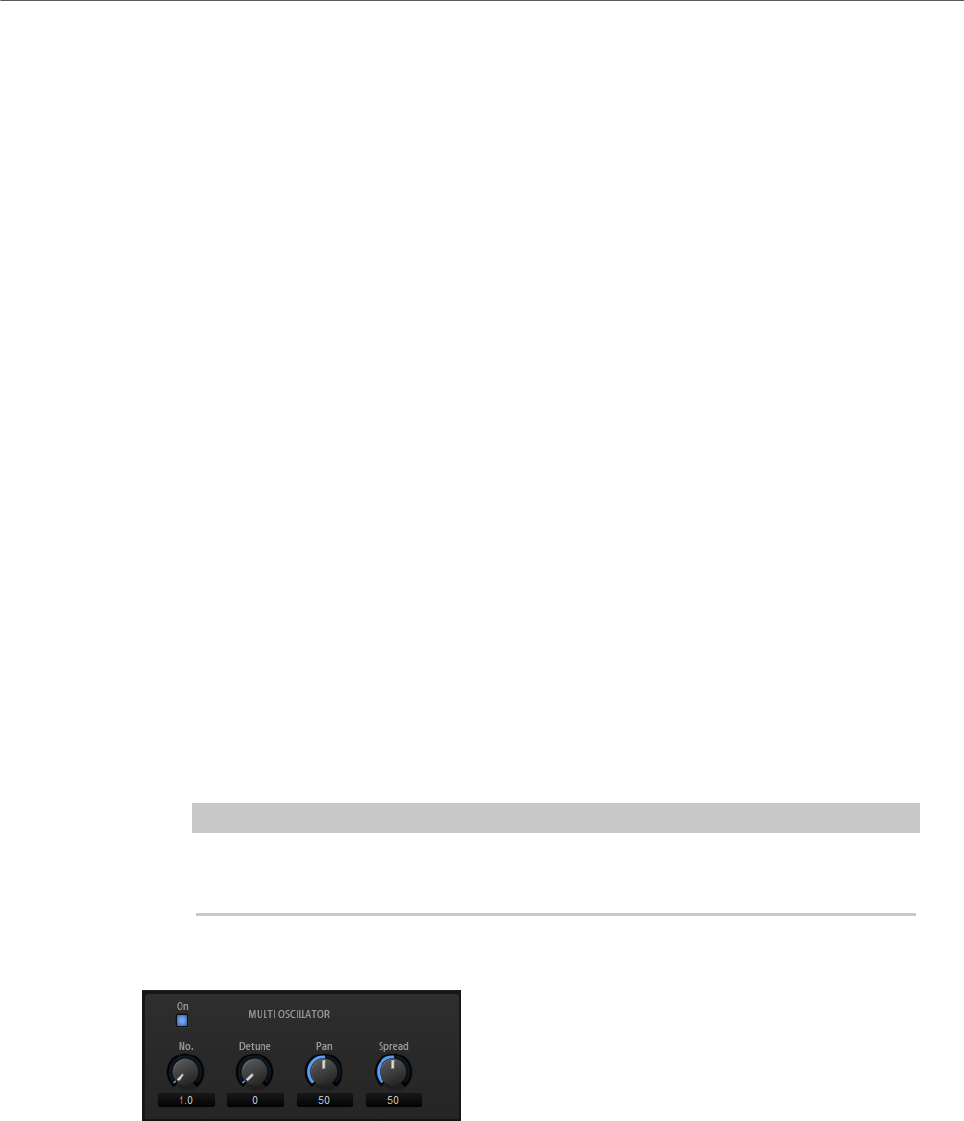
Editing Zones
Wavetable Section
112
If this button is deactivated, waves outside the loop are not played when you
release the key.
Legato
If Legato is deactivated, each note starts playback from the position cursor.
If Legato is activated, the first note starts playback from the position cursor, and
any following notes start from the current playback position for as long as the
first note is held.
Sync to Host
Allows you to sync the wavetable to the beats and measures of your host
application.
Speed
Determines the rate at which the envelope plays through the wavetables. At +100
%, the envelope plays back at its original speed. A value of +50 % corresponds to
half the original speed, and +200 % to twice the original speed, for example.
This parameter is unipolar.
Key Follow
Adjusts how the speed of the wavetable envelope is affected by the note that you
play. Values higher that 0 increase the speed of notes above the center key and
decrease the speed of notes below the center key.
For example, at a setting of 100 %, the playback is twice as fast for the octave
above the center key and is half the speed for the octave below the center key.
A setting of 200 % results in an envelope that is four times as fast for the octave
above the center key and is a quarter of the current speed for the octave below.
NOTE
Negative values invert the order, that is, the speed gets lower above the center
key, and higher below the center key.
Multi-Oscillator
For Osc 1 and Osc 2, you can activate Multi-Oscillator mode. This allows you to create a
richer sound by producing up to eight oscillators simultaneously.
• To activate Multi-Oscillator mode, activate the On/Off button in the Multi-Oscillator
section.
Multi-Oscillator Number, Detune, Pan, and Spread
•Number determines the number of oscillators that play back
simultaneously. You can also set fractions of numbers. For example, with
Editing Zones
Wavetable Section
113
a setting of 2.5, you hear two oscillators at full level and a third one at half
level.
•Detune detunes the oscillators.
•Pan narrows or widens the stereo panorama. With a setting of 0 %, you
create a mono signal and with 100 %, you create a stereo signal.
•Spread distributes the oscillators so that each oscillator plays from a
different position in the wavetable.
NOTE
• The multi-oscillator settings can be modulated separately in the
modulation matrix.
• The pitch distribution of the unison voices is determined by the Distribution
control in the Voice Control section.
Formant Settings
Formants are harmonics within the spectrum of a note which are pronounced and help
to define the character of an instrument. The positions of the formants in the spectrum
mainly depend on the construction of an instrument, such as the body of a guitar, the form
of the vocal tract in a human body, the filter settings for electronic instruments, etc. These
conditions lead to specific frequency ranges that are emphasized regardless of the pitch
of the note. Playing back samples or wavetables with a different pitch than the original is
usually done by increasing or decreasing the playback speed. This leads to the well known
monster or Mickey Mouse effect, because all harmonics are also affected, that is, the
characteristic formants are shifted. To avoid this, you can activate the Formant option.
In addition, you can route any available modulation source to the Formant Shift modulation
destination in the modulation matrix. This allows you to move the formants through the
spectrum with an envelope, creating filter sweep effects, for example.
On
Activates/Deactivates the formant settings.
Formant
Allows you to shift the formants of the entire wavetable by a fixed value.
Key Follow
Allows you to shift the formants depending on the played note.
• A value of 100 % means that the formant frequency moves with the played
note.
• A value of 0 % means that the formants kept the same for all notes.
The root key for the key follow function is determined by the pitch of the original
sample portion that was used to extract a wave in the wavetable. For waves with
no sample origin, such as synthetic sine, saw, or square waves, or waves of freely
edited spectrums, the root is set to C3.
You can invert the behavior of the formant shift by setting Key Follow to negative
values.
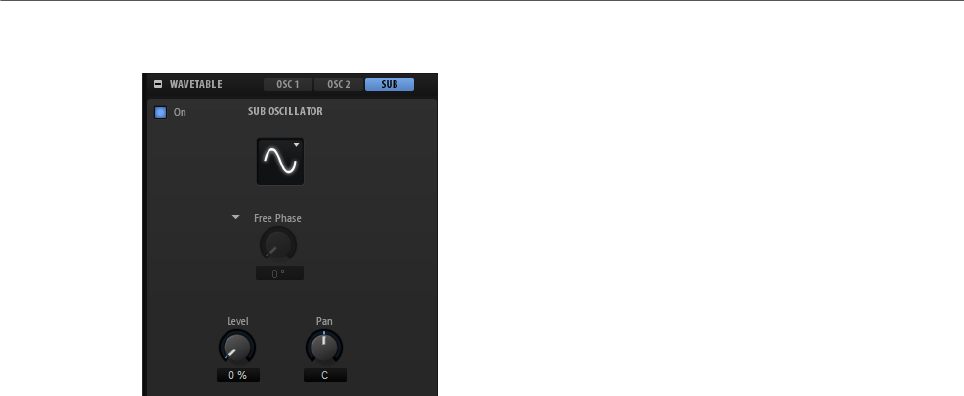
Editing Zones
Wavetable Section
114
Sub Oscillator
The pitch of the sub oscillator is always one octave below the overall pitch of the wavetable
zone. If you modulate the pitch of the wavetable zone, the pitch of the sub oscillator follows.
On/Off
Activates/Deactivates the sub oscillator.
Type
The wave shape of the sub oscillator. You can choose between Sine, Triangle,
Saw, Square, Pulse Wide, and Pulse Narrow.
Retrigger Mode
Allows you to decide whether the sub oscillator runs freely, with a random phase
each time a note is triggered, or with an adjustable start phase.
• If Free Phase is selected, the behavior of analog synthesizers is emulated.
The oscillator is running freely and continuously.
• If Random Phase is selected, the start phase is randomly set to a different
value each time that you trigger a note. In contrast to Free Phase, there is
no continuity in the phase of the waveform.
• If Fixed Phase is selected, the oscillator runs with a fixed start phase that
can be specified between 0 and 360 degrees.
Level
Adjusts the output level of the sub oscillator.
Pan
Adjusts the position of the oscillator in the stereo panorama. At a setting of -100
%, the sound is panned hard left, and at +100 %, it is panned hard right.
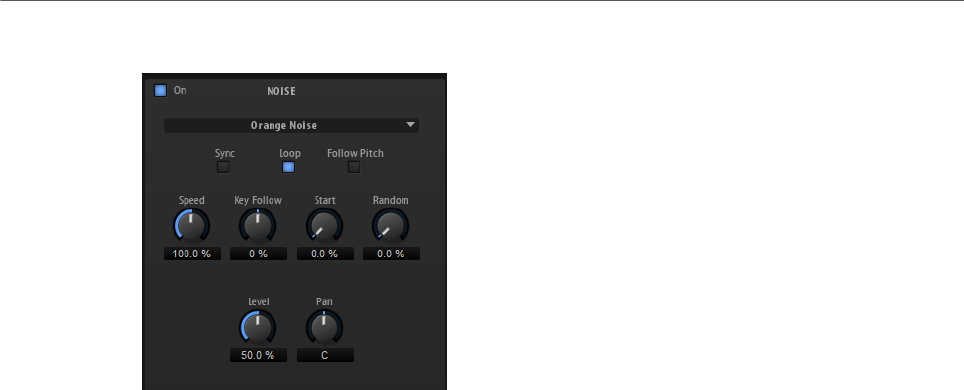
Editing Zones
Wavetable Section
115
Noise
The Noise section offers you a large amount of different noise types that can be used to add
inharmonic frequencies to the overall spectrum, either for the entire sound, with looped
noises or with one-shot noise samples. This allows you to add characteristic transients to
percussive instruments based on samples, for example.
Noise On/Off
Activates/Deactivates the Noise section.
Noise Type
This pop-up menu offers you a choice of classic noises, attack transients,
soundscapes, and ambience noise samples.
Sync
Activate Sync to synchronize the speed of the noise oscillator to the host tempo.
This is particularly useful for rhythmic noises that are based on a tempo of 120
BPM.
Loop
Activate this button to play the noise sample in a loop.
If this button is not activated, the sample is played once.
Follow Pitch
If Follow Pitch is activated, zone pitch settings like Octave, Coarse, and Fine, as
well as modulations like Glide, Pitchbend, or other pitch modulations, affect the
duration length. A higher sample pitch leads to a shorter duration.
If Follow Pitch is deactivated, the duration is independent of the zone pitch and
determined by the Duration settings.
Speed
Adjusts the playback speed of the noise sample. A setting of 800.0 % equals an
increase of three octaves in pitch.
Speed Key Follow
Allows you to adjust the speed modulation by MIDI note number. At a setting of
+100 %, the speed doubles per octave.
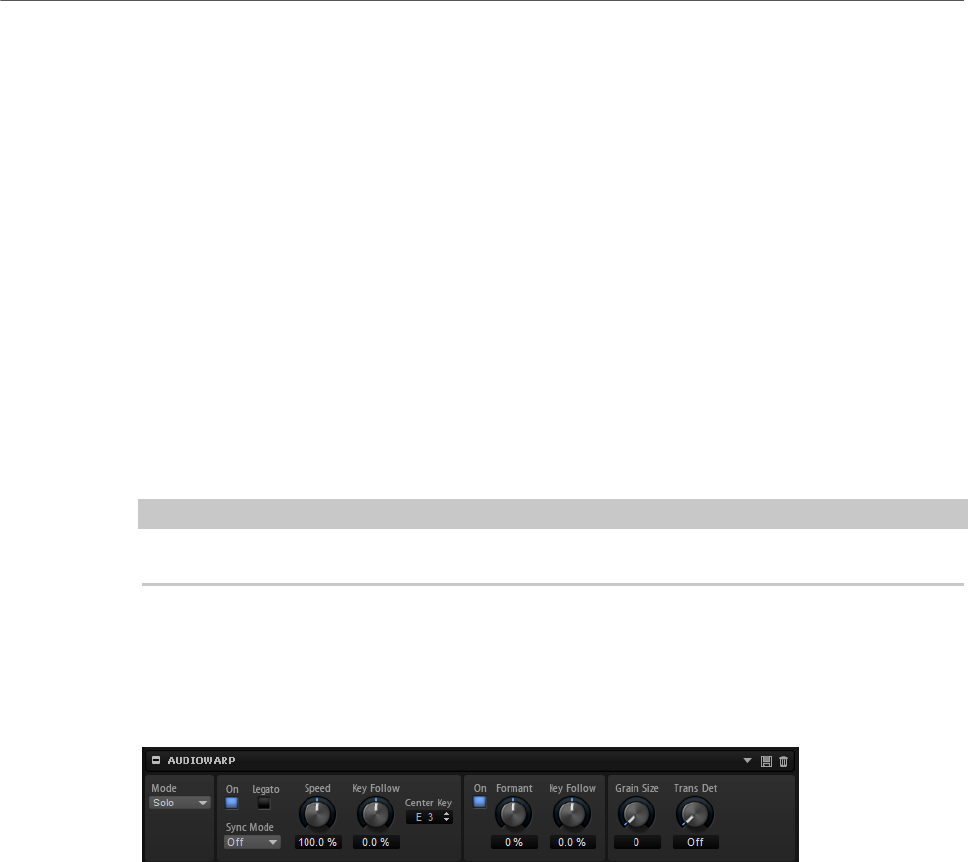
Editing Zones
AudioWarp Section
116
Start
Adjusts the start of the noise sample. With a value of 50 %, playback starts in the
middle of the sample.
Random Start
Selects a random playback start within a specific range around the current
position.
At a setting of 100 %, the playback position jumps to a random position between
the specified Start value and the end of the noise sample.
Level
Adjusts the output level of the Noise section.
Pan
Determines the position of the noise in the stereo panorama. At a setting of -100
%, the sound is panned hard left, and at +100 %, it is panned hard right.
NOTE
Speed, Level, and Pan can be modulated in the modulation matrix.
AudioWarp Section
In this section, you can apply time stretching and formant shifting to the audio in your sample
zones.
Mode
On the Mode pop-up menu, you select the mode that is used for the AudioWarp
functions.
•Off deactivates the AudioWarp section.
•Solo offers parameters for time stretching and formant shifting. This
mode is suitable for solo instruments and vocals. It is highly efficient and
supports polyphonic playback.
•Music offers parameters for time stretching. This mode is suitable
for complex material like drum loops and samples with mixed music.
It uses considerably more CPU time than Solo mode. Therefore, it
is recommended for monophonic playback. The more the sample is
stretched, the higher the CPU load.
Music mode can only be used with mono and stereo samples. If you
process multi-channel samples, only the left and right channels are
stretched. The remaining channels are turned off.

Editing Zones
AudioWarp Section
117
Time Stretching On/Off
If this button is activated, you can play back a sample at a different pitch than the
root key without changing its tempo and length.
In Music mode, transposition is limited to the range between -24 and +24
semitones around the root key of the sample. If you play notes outside this limit,
the highest, or lowest, note is used, respectively. The same applies for pitch
modulation. Settings outside the -24 to +24 semitones limit lead to clipping in the
modulation.
Legato
You can use this function to turn a vocal sample into a choir, for example. If the
Legato button is activated, you can add more voices while the sample is playing.
These voices are inserted at the current playback position. All voices play in sync.
If you play legato, the sample continues playing and you can change the chord
without restarting the sample.
Sometimes, the added voices can have audible clicks in the attack, for example, if
playback starts somewhere in the middle of the sample. You can compensate for
this by increasing the attack time of the amplifier envelope.
NOTE
Legato only works within a single sample zone, not across separate sample
zones.
Sync Mode
The Sync modes are used to match the playback speed of the sample to the
tempo of the host application.
• If Off is selected, the playback speed is specified manually, in percent.
• If Tempo is selected, the playback speed is calculated using the ratio
between the original tempo of the sample and the tempo of the host.
• If Beats is selected, the playback speed is calculated using the note length
of the beats, the number of beats, and the tempo of the host.
For the Sync modes to work properly, the loop of the sample has to be set up
correctly. In Tempo mode, the original tempo must be set as exact as possible.
If you load a sample that contains tempo information in the file header, HALion
uses this information to set up the parameters Original Tempo, Note Length, and
Number of Beats. If a sample does not contain any tempo information, HALion
estimates these values.
NOTE
You can always modify the parameter values manually.
Speed
Adjusts the playback speed of the sample. You can speed up the tempo by up to
800 % of the original.
In Music mode, the lower limit of the playback speed adjustment is 12.5 %.
Values below this limit have no effect.
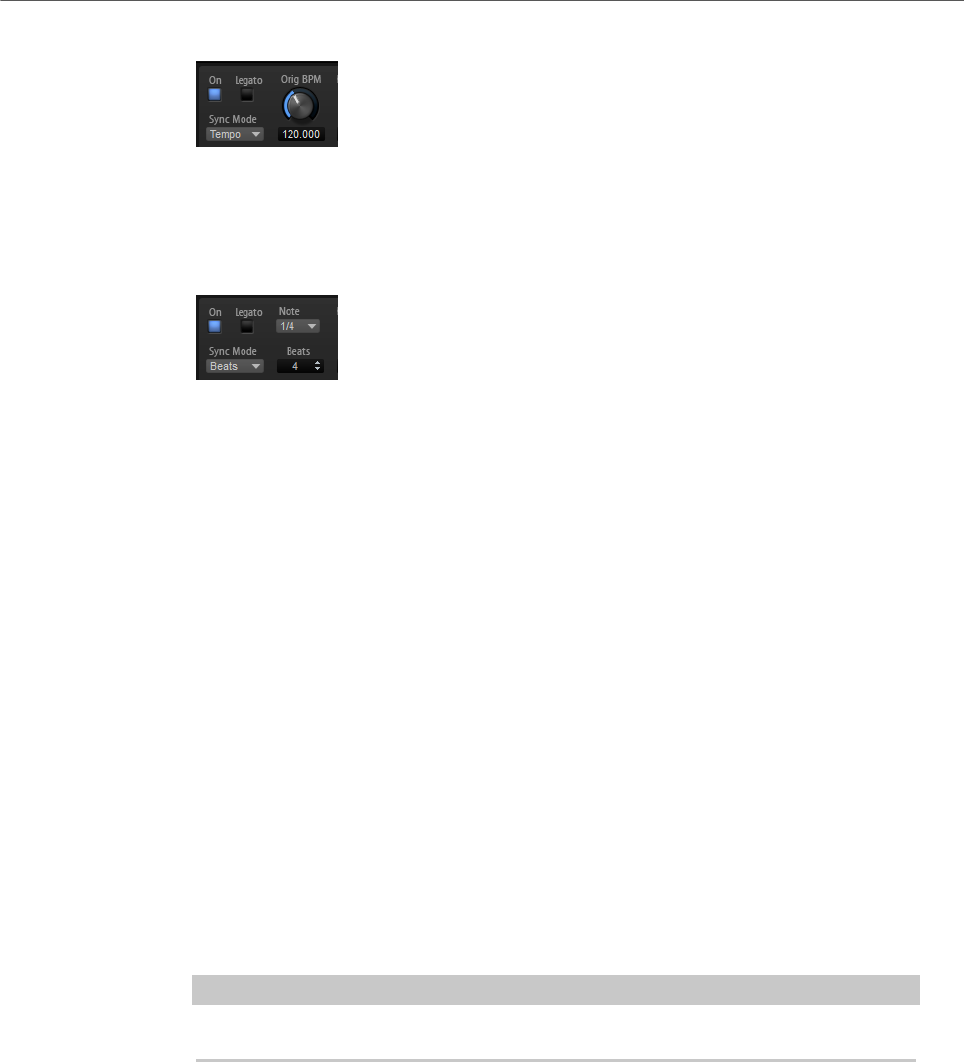
Editing Zones
AudioWarp Section
118
Original BPM
If Sync Mode is set to Tempo, you can enter the original tempo of the sample in
beats per minute. The playback speed of the sample is adjusted to match the
tempo of the host application.
Note Length and Number of Beats
If Sync Mode is set to Beats, HALion calculates the tempo of the sample, based
on the note length and number of beats that you enter.
For example, if the sample is a drum loop with four quarter notes, set Note to 1/4
and Beats to 4. The playback speed of the sample is adjusted to match the tempo
of the host.
AudioWarp Key Follow
Adjusts the time stretch modulation using MIDI note numbers.
Positive values increase the playback speed of the sample the higher the notes
you play. Negative values decrease the playback speed the higher the notes you
play.
Center Key
Specifies the MIDI note that is used as the center position for AudioWarp Key
Follow.
Formant Shift On/Off
Formant shifting allows you to avoid so-called Mickey Mouse effects when pitch
shifting a sample. This is especially useful with samples of human voices or
acoustic instruments.
NOTE
The Formant Shift options are only available in Solo mode.
Formant Shift
Specifies the amount of formant shifting.
Formant Shift Key Follow
Determines how much the formants follow the pitch. Use positive values to
minimize the Mickey Mouse effect caused by pitch shifting.
Minimum Grain Size
If you use complex material, a larger grain size can sound better. The higher
this setting, the less accurate the pitch detection, which helps to avoid
misinterpretations of pitch.
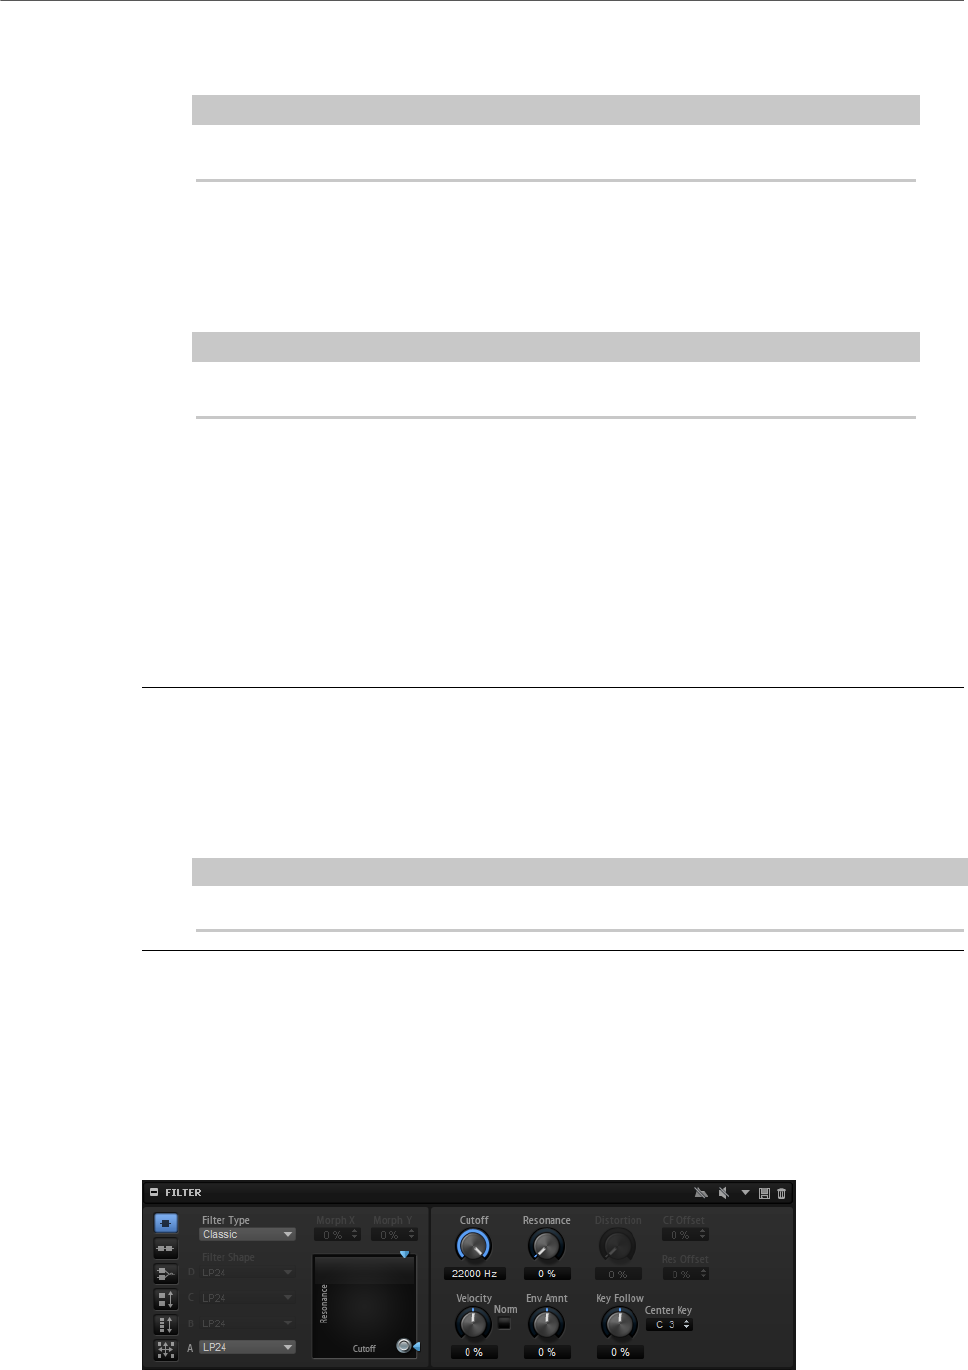
Editing Zones
Filter Section
119
In addition, you can use this parameter to experiment and create interesting
effects.
NOTE
This parameter is only available in Solo mode.
Transient Detection
Sets a threshold for the transient detection. The higher the value, the more
transients are detected. Transients can sound more defined if you adjust this
parameter.
NOTE
This parameter is only available in Solo mode.
Modulating AudioWarp Parameters in the Modulation Matrix
You can modulate the playback speed and formant shift of the sample in the modulation
matrix.
PREREQUISITE
Make sure that the AudioWarp parameters are activated for the samples that you want to
edit.
PROCEDURE
1. In the modulation matrix, select a destination.
On the Sample submenu of the modulation destinations, the options Speed Factor and
Formant Shift are available.
2. Assign a modulation source and set up the modulation depth.
NOTE
The destination Formant Shift can only be used in Solo mode.
RELATED LINKS
Modulation Matrix on page 137
Filter Section
The Filter section for synth, sample, grain, and wavetable zones allows you to adjust the tone
color of the sound.

Editing Zones
Filter Section
120
Filter Mode
The buttons on the left determine the overall filter structure.
•Single Filter uses one filter with one selectable filter shape.
•Dual Filter Serial uses two separate filters connected in series.
You can select the filter shapes for each filter independently. The
parameters Cutoff and Resonance control both filters simultaneously.
However, you can offset these parameters for the second filter with the
parameters CF Offset and Res Offset.
•Dual Filter Parallel uses two separate filters connected in parallel.
You can select the filter shapes for each filter independently. The
parameters Cutoff and Resonance control both filters simultaneously.
However, you can offset these parameters for the second filter with the
parameters CF Offset and Res Offset.
•Morph 2 morphs between filter shape A and B.
Adjust the morphing with the Morph Y parameter.
•Morph 4 morphs sequentially from filter shape A to D.
Adjust the morphing with the Morph Y parameter.
•Morph XY morphs freely between the filter shapes A, B, C, and D.
Adjust the morphing with the Morph X and Morph Y parameters.
NOTE
The filter types HALion 3 and Waldorf always use Single filter mode.
Filter Type
Specifies the basic sound character of the filter.
•Off deactivates the filter section.
•Classic offers 24 filter shapes with resonance.
•Tube Drive adds warm, tube-like distortion. You can set the amount of tube
drive with the Distortion parameter.
•Hard Clip adds bright, transistor-like distortion. You can set the amount of
hard clipping with the Distortion parameter.
•Bit Red (Bit Reduction) adds digital distortion by means of quantization
noise. You can adjust the bit reduction with the Distortion parameter.
•Rate Red adds digital distortion by means of aliasing. You can adjust the
rate reduction with the Distortion parameter.
•Rate Red KF adds digital distortion by means of aliasing. In addition, Key
Follow is used. The rate reduction follows the keyboard, so the higher you
play, the higher the sample rate.
•HALion 3 offers the five legacy filter shapes from HALion3.
•Waldorf offers 13 filter shapes, including two comb filters.
•Eco is a performance-optimized low-pass filter without Resonance or
Distortion parameters. It allows you to adapt the brilliance of samples for
different velocity layers of the same key, for example.

Editing Zones
Filter Section
121
NOTE
Filters without distortion use less processing power.
Filter Shape
• LP24, 18, 12, and 6 are low-pass filters with 24, 18, 12, and 6 dB/oct.
Frequencies above the cutoff are attenuated.
• BP12 and BP24 are band-pass filters with 12 and 24 dB/oct. Frequencies
below and above the cutoff are attenuated.
• HP6+LP18 and HP6+LP12 are combinations of a high-pass filter with 6 dB/
oct and a low-pass filter with 18 and 12 dB/oct, respectively (asymmetric
band-pass filter). Frequencies below and above the cutoff are attenuated.
Attenuation is more pronounced for the frequencies above the cutoff.
• HP12+LP6 and HP18+LP6 are combinations of a high-pass filter with 12
and 18 dB/oct and a low-pass filter with 6 dB/oct (asymmetric band-pass
filter). Frequencies below and above the cutoff are attenuated. Attenuation
is more pronounced for the frequencies below the cutoff.
• HP24, 18, 12, and 6 are high-pass filters with 24, 18, 12, and 6 dB/oct.
Frequencies below the cutoff are attenuated.
• BR12 and BR24 are band-reject filters with 12 and 24 dB/oct. Frequencies
around the cutoff are attenuated.
• BR12+LP6 and BR12+LP12 are combinations of a band-reject filter with 12
dB/oct and a low-pass filter with 6 and 12 dB/oct, respectively. Frequencies
around and above the cutoff are attenuated.
• BP12+BR12 is a band-pass filter with 12 dB/oct plus a band-reject filter
with 12 dB/oct. Frequencies below, above, and around the cutoff are
attenuated.
• HP6+BR12 and HP12+BR12 are combinations of a high-pass filter with 6
and 12 dB/oct and a band-reject filter with 12 dB/oct. Frequencies below
and around the cutoff are attenuated.
• AP is an all-pass filter with 18 dB/oct. Frequencies around the cutoff are
attenuated.
• AP+LP6 is an all-pass filter with 18 dB/oct plus a low-pass filter with 6 dB/
oct. Frequencies around and above the cutoff are attenuated.
• HP6+AP is a high-pass filter with 6 dB/oct plus an all-pass filter with 18
dB/oct. Frequencies around and below the cutoff are attenuated.
Cutoff
Controls the cutoff frequency of the filter.
X/Y Control
Allows you to adjust two parameters simultaneously.
• For the filter types Single, Dual Serial, and Dual Parallel, the X/Y control
adjusts the cutoff frequency on the horizontal axis and the resonance on
the vertical axis.

Editing Zones
Filter Section
122
• For the filter types Morph 2 and Morph 4, the X/Y control adjusts the
morphing between the filter shapes on the vertical axis. The horizontal axis
adjusts the cutoff frequency.
• For Morph XY, the X/Y control adjusts the morphing between the filter
shapes AD and BC on the horizontal axis, and AB and DC on the vertical
axis.
Resonance
Emphasizes the frequencies around the cutoff. At higher settings, the filter self-
oscillates, which results in a ringing tone.
Distortion
Adds distortion to the signal. The effect depends largely on the selected filter
type. At higher settings, it creates a very intense distortion effect.
NOTE
This parameter is only available for the filter types Tube Drive, Hard Clip, Bit Red,
Rate Red, and Rate Red KF.
CF Offset
For the dual filters, this parameter allows you to offset the cutoff frequency of the
second filter, that is, of filter shape B.
Res Offset
For the dual filters, this parameter allows you to offset the resonance of the
second filter, that is, of filter shape B.
Cutoff Velocity
Controls the cutoff modulation from velocity.
Norm
Allows you to normalize the velocity values that are used to modulate the filter.
This means, that the velocity range for the zone is remapped to a full velocity
range.
For example, if a zone ranges from 40 to 80 on the mapping velocity scale, an
incoming velocity of 40 results in a velocity value of 0 being sent to the cutoff, an
incoming velocity of 80 results in 127. This way, you can adapt velocity-layered
zones in such a way that each zone starts with a damped filter setting and opens
completely towards the zone above.
Fatness
For the Waldorf and HALion 3 filter types, this his parameter adds a warm, tube-
like filter distortion to the signal.
Envelope Amount
Controls the cutoff modulation from the filter envelope.
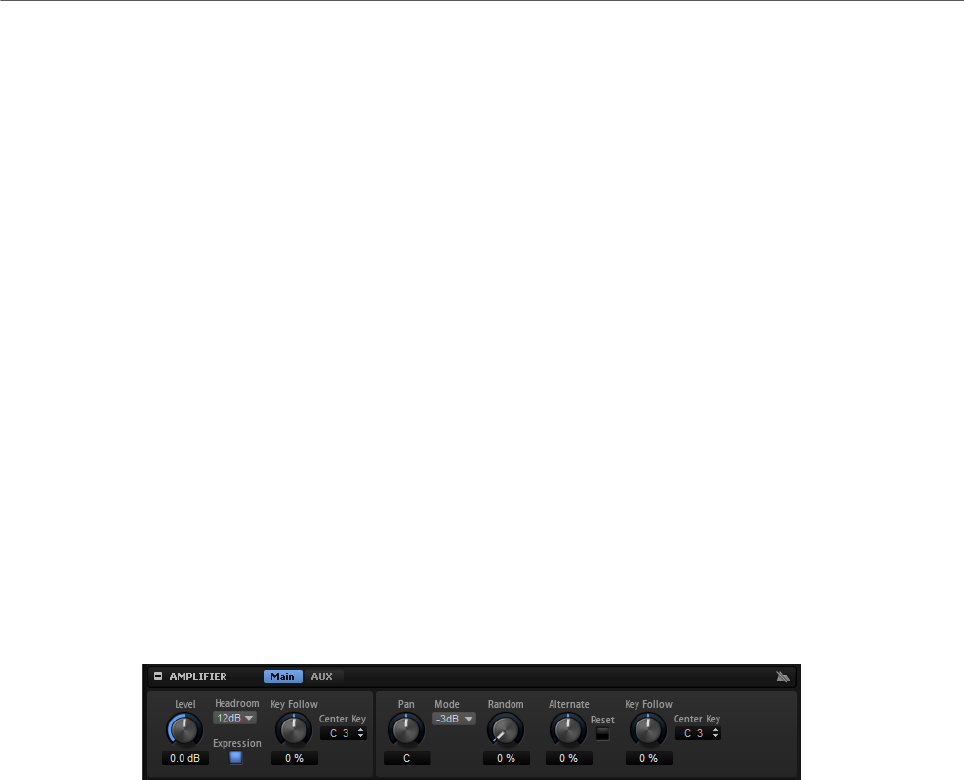
Editing Zones
Amplifier Section
123
Cutoff Key Follow
Adjusts the cutoff modulation using the note number. Increase this parameter
to raise the cutoff with higher notes. At 100 %, the cutoff follows the played pitch
exactly.
Center Key
Specifies the MIDI note that is used as the central position for the Key Follow
function.
Bypass Filter Envelope
Allows you to listen to the zone without modulation of the filter envelope.
Bypass Filter
Allows you to listen to the zone without any filtering.
Amplifier Section
The Amplifier section has two tabs: Main and AUX. The Main tab gives you access to the level
and pan settings of the zone. The AUX tab allows you to send the zone to the four global AUX
busses and to route the zone to one of the plug-in output busses.
Main Tab
Level
Specifies the loudness of the zone.
Headroom
Specifies the headroom for polyphonic playback. By default, HALion uses a
headroom of 12 dB. For monophonic programs, such as drum loops, set the
headroom to 0 dB. If you work with low polyphony values, a headroom of 6 dB is
sufficient.
Expression
If this button is activated, incoming MIDI expression controller and controller #7
data is used to calculate the voice amplitude. This ensures a correct behavior
when working with General MIDI files, for example.
Level Key Follow
Allows you to control the volume depending on the note pitch. Positive values
mean that the volume is higher the higher the notes you play. With negative
values, the volume decreases the higher the notes you play.
Center Key
Specifies the MIDI note that is used as the center position for Level Key Follow.

Editing Zones
Amplifier Section
124
Pan
Determines the position of the sound in the stereo panorama. At a setting of -100
%, the sound is panned hard left, and at +100 %, it is panned hard right.
Mode
With this option you can specify how the loudness changes across the stereo
panorama.
• If this parameter is set to 0 dB, it works like a balance control.
Setting the pan control towards the left fades out the right channel and vice
versa. At the center position, the loudness is not cut.
• If this parameter is set to -3 dB, the option uses the cosine/sine pan law.
The loudness is cut by -3 dB at the center position, but the energy is
preserved when moving the source signal across the stereo panorama.
The -3 dB option sounds more natural. The transition from hard left to hard
right sounds much smoother than with the 0 dB or the -6 dB setting.
• If this parameter is set to -6 dB, this option uses the linear pan law.
The loudness is cut by -6 dB at the center position, and the energy is not
preserved when moving the source signal across the stereo panorama. The
-6 dB option sounds more synthetic. The transition from hard left to hard
right sounds more abrupt than with the -3 dB setting.
• If this parameter is set to Off, no panning is applied.
Random Pan
Allows you to offset the pan position randomly with each played note. Higher
values cause stronger variations. At a setting of 100 %, the random offsets can
vary from fully left to fully right.
Alternate Pan
Allows you to alternate the pan position each time that you play a note. To start
panning on the left, use negative values. Use positive values to begin on the right.
At a setting of +100 %, the first note plays hard right, the second note hard left,
and so on.
Reset
The initial pan position is set once when HALion is loaded. After that, each note
that you play is counted to determine the next pan position. To reset this counter,
click the Reset button.
Pan Key Follow
Allows you to adjust the pan modulation via the MIDI note number. Set this
parameter to positive values to offset the pan position towards the right for notes
above, and towards the left for notes below the center key. Use negative values to
offset the pan position towards the left for notes above, and towards the right for
notes below the center key.
At the maximum setting of +200 %, the pan position moves from hard left to hard
right within two octaves: Fully left is reached one octave below and fully right is
reached one octave above the center key.
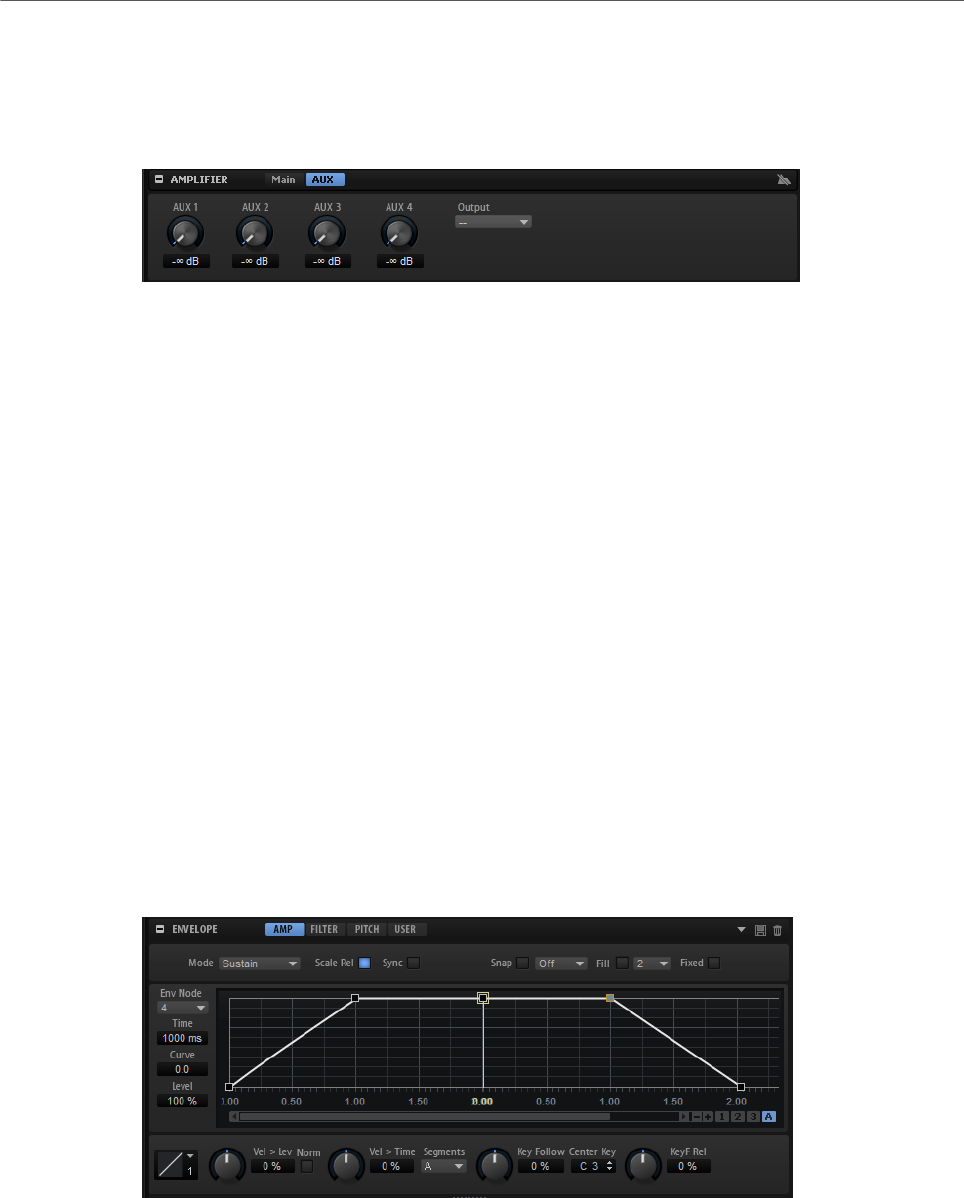
Editing Zones
Envelope Section
125
Center Key
Specifies the MIDI note that is used as the center position for Pan Key Follow.
AUX Tab
AUX 1-4
If you send the zone signal to one of the local AUX busses, you can control the
signal level that is sent to the busses with the controls AUX 1-4.
Output
Zones can be routed to the following destinations:
• Busses that are higher up in the hierarchy of the program.
This includes the plug-in outputs, but not the bus that is set for the
program slot or global AUX busses.
• Busses that are part of the same layer and that have been inserted after
this zone or bus.
If you route a zone directly to one of the output busses, it does not pass through
the layer, program, and slot busses.
Envelope Section
The Envelope section gives you access to the envelopes of the zone. For synth, sample, grain,
and wavetable zones, the Amp, Filter, Pitch, and User envelopes are available. For organ
zones, the Amp envelope is available. Each envelope is a multi-segment envelope with up to
128 nodes.
The Amp, Filter, and Pitch envelopes are pre-assigned to the amplitude, the filter cutoff
frequency, and the pitch of the zone. The User envelope is freely assignable.
All envelopes can be used as sources in the modulation matrix.
• Click Amp to display the parameters of the amplifier envelope.
The amplifier envelope shapes the volume over time.

Editing Zones
Envelope Section
126
• Click Filter to display the parameters of the filter envelope.
The filter envelope controls the cutoff frequency to shape the harmonic content over
time.
• Click Pitch to display the parameters of the pitch envelope.
The pitch envelope modulates the pitch over time. The pitch envelope is bipolar, which
means it allows for negative and positive values to bend the pitch.
• Click User to display the parameters of the freely assignable user envelope.
The user envelope is bipolar, which means it allows for negative and positive values,
for example, to modulate the pan from left to right.
Mode
Determines how the envelope is played back when it is triggered.
• Select Sustain to play the envelope from the first node to the sustain node.
The sustain level is held for as long as you play the note. When you release
the note, the envelope continues with the stages following the sustain. This
mode is ideal for looped samples.
• Select Loop to play back the envelope from the first node to the loop nodes.
Then, the loop is repeated for as long as the key is held. When you release
the note, the envelope continues playing the stages that follow the sustain.
This mode is ideal for adding motion to the sustain of the envelope.
• Select One Shot to play the envelope from the first to the last node, even if
you release the key. The envelope has no sustain stage. This mode is ideal
for drum samples.
• Select Sample Loop to preserve the natural attack of the sample. The
decay of the envelope does not start until the sample has reached the
sample loop start.
If you set the second node to the maximum level and use the following
nodes to shape the decay during the loop phase of the sample, the
envelope only affects the loop phase. The attack of the envelope is still
executed.
NOTE
Sample Loop mode is only available for sample zones.
Scale Rel (Scale Levels of Release Nodes with Level at Note-Off)
Allows you to scale the level of the release node with the level at note-off. This
avoids abrupt changes in level as the envelope passes from one phase to the
next, for example from sustain to release.
NOTE
The level of the sustain node is automatically scaled this way.
Sync
Allows you to synchronize the envelopes to the tempo of your host application.

Editing Zones
Envelope Section
127
Snap
You can select a second envelope to be displayed in the background of the edited
envelope. If Snap is activated and you change the position of nodes, they snap to
the nodes of the envelope that is shown in the background.
• To specify the envelope for the background, open the pop-up menu to the
right of the Snap button and select an envelope from the list.
Fill
Allows you to add multiple envelope nodes after the selected nodes.
Fixed
• If Fixed is activated and you move selected nodes on the time axis, only the
selected nodes are moved.
• If Fixed is deactivated, all nodes that follow the edited nodes are also
moved.
Env Node
Displays the focused envelope node.
Time
Specifies the period of time between two nodes. Depending on the Sync mode,
the Time parameter is displayed in milliseconds and seconds, or in fractions of
beats.
Curve
Allows you to adjust the curvature of the envelope curve between two nodes from
linear to logarithmic or exponential behavior.
Level
Specifies the amplitude of the envelope at the position set by the Time
parameter.
Level Velocity Curve
You can select the curve type to specify how the incoming velocity translates to
the level of the envelope. The characteristic of each curve is displayed by a small
icon.
Level Velocity (Vel>Lev)
Determines how the velocity affects the level of the envelope.
The level of the envelope depends on two factors: the setting of this parameter
and how hard you hit a key. Positive values increase the level of the envelope
the harder you hit a key. Negative values decrease the level of the envelope the
harder you hit a key.
Time Velocity (Vel>Time)
Adjusts the influence of velocity on the phases of the envelope. Positive values
decrease the length of the phases for higher velocity values. Negative values
increase the length of the phases for higher velocity values.

Editing Zones
Envelope Section
128
Segments
Here, you can select which phases of the envelope are affected by the Time
Velocity parameter.
•Attack – The velocity affects the attack only.
•Attack + Decay – The velocity affects all phases until the sustain.
•Decay – The velocity affects all phases until the sustain but without the
attack.
•Attack + Release – The velocity affects the attack and the release phases.
•All – The velocity affects all phases.
Time Key Follow, Center Key, and KeyF Rel (Key Follow Release)
With the Time Key Follow and KeyF Rel parameters, you can scale the envelope
phases across the keyboard.
•Time Key Follow scales all times before the sustain node.
•KeyF Rel scales all times after the sustain node, that is, the release phase
of the envelope.
The value that you specify for Center Key is used as the central position for the
Time Key Follow and KeyF Rel functions.
The envelope phases depend on the keyboard range in which the note is played
and on the corresponding Time Key Follow setting:
• Positive values decrease the phase lengths for notes above and increase
the phase lengths for notes below the set Center Key, that is, the envelope
becomes faster the higher the note you play.
• Negative values increase the phase lengths for notes above and decrease
the phase lengths for notes below the Center Key, that is, the envelope
becomes slower the higher the note you play.
RELATED LINKS
Scaling the Level of the Release Node with the Level at Note-Off on page 131
Zooming
The vertical axis of the graphical envelope editor displays the level. The horizontal axis
displays the time.
• To zoom in or out, click the + or - buttons to the right of the scrollbar below the
graphical editor.
• To zoom in or out at the current position, click in the timeline and drag up or down.
• To toggle between full zoom and the previous zoom setting, click the A button to the
right of the horizontal zoom slider.
• To zoom to a specific region, hold Alt, click and drag the mouse over the region.
Zoom Snapshots
Zoom snapshots save the zoom factor and scroll position of the editor. These are restored
when you load the snapshot.

Editing Zones
Envelope Section
129
To the right of the scrollbar, you can find three numbered buttons that allow you to save and
load zoom snapshots.
• To save the current state of the editor as snapshot, Shift-click one of the numbered
buttons to the right of the scrollbar.
• To load a zoom snapshot, click the corresponding button. The button color changes if a
snapshot is active.
NOTE
If you perform any manual zooming or scrolling, the zoom snapshot is deactivated.
Selecting Nodes
• To select a node, click on it in the graphical editor.
The focused node is indicated by a frame. The value fields to the left of the graphical
envelope editor display the parameters of the focused node.
• If multiple nodes are selected, you can use the Env Node pop-up menu to set the focus
to a different node without losing the current selection.
• To add a node to a selection, Shift-click the node. Selected nodes are edited together.
• You can select multiple nodes by drawing a rectangle around the nodes with the
mouse.
• To select all envelope nodes, press Ctrl/Cmd-A
• If the graphical editor has the focus, you can select the next or the previous node with
the left and right arrow keys.
Adjusting the Time Parameter
The Time parameter specifies the period of time between two nodes. Depending on the Sync
mode, the Time parameter is displayed in milliseconds and seconds, or in fractions of beats.
• To set the Time parameter, select the nodes that you want to adjust and enter a value
in the Time field.
• You can also adjust the Time parameter in the graphical envelope editor, by dragging
the nodes left or right, to decrease or to increase the time span.
For a higher resolution, hold Shift while moving the nodes.
To limit the movement to the time axis, that is, to change only the horizontal position of
a node, hold down Ctrl/Cmd while dragging.
Adjusting the Level Parameter
The Level parameter specifies the amplitude of the envelope at the position set by the Time
parameter.
The Amp and Filter envelopes are unipolar. Therefore, the value range for the level is 0 %
to +100 % (positive values only). The Pitch and User envelopes are bipolar. Therefore, the
value range for the level is from -100 % to +100 % (negative and positive values) for these
envelopes. You can change the polarity of the envelopes in the modulation matrix, to map
the range of the amplifier envelope (unipolar) to the Pan parameter (bipolar), for example.
However, the envelopes always display their values with their default polarity.

Editing Zones
Envelope Section
130
• To set the Level parameter, select the nodes that you want to adjust and enter a value
in the Level field.
• You can also adjust the Level parameter in the graphical envelope editor by dragging
the selected nodes up or down, to decrease or increase the levels.
For a higher resolution, hold Shift while moving the nodes.
To limit the movement to the level axis, that is, to change only the vertical position of a
node, hold down Alt while dragging.
Adjusting the Curve Parameter
The Curve parameter allows you to adjust the curvature of the envelope curve between two
nodes from linear to logarithmic or exponential behavior.
• To set the Curve parameter, select the nodes that you want to adjust and enter a value
in the Curve field. Positive curve values change the curvature towards logarithmic and
negative values towards exponential behavior.
• You can also adjust the Curve parameter in the graphical envelope editor by dragging
the curve between two nodes.
Ctrl/Cmd-click a curve to reset it to linear.
Adding and Removing Nodes
• To add a node, double-click at the position where you want to add the node.
• To remove a node, double-click it.
• To delete several selected nodes, press Delete.
NOTE
• You cannot remove the first, the last, or the sustain node.
• All nodes added after the sustain node always affect the release phase of the envelope.
Adding Nodes Using the Fill Function
The Fill function allows you to add multiple envelope nodes after the selected nodes.
PROCEDURE
1. On the pop-up menu to the right of the Fill button, select the number of nodes that you
want to add.
2. In the graphical envelope editor, select the node after which you want to add nodes.
If several nodes are selected, the new nodes are inserted after the last selected node.
If Fixed is deactivated, the added nodes are placed with the interval specified by the
Time parameter of the selected node. If multiple nodes are selected, the interval is
specified by the focused node.
By activating Sync, you can specify the interval with the Sync note value. For example,
if 1/4 is selected, new nodes are added at exact quarter note intervals.
If Fixed is activated, the added nodes fill the space between the last selected node and
the following one.
3. Click the Fill button.
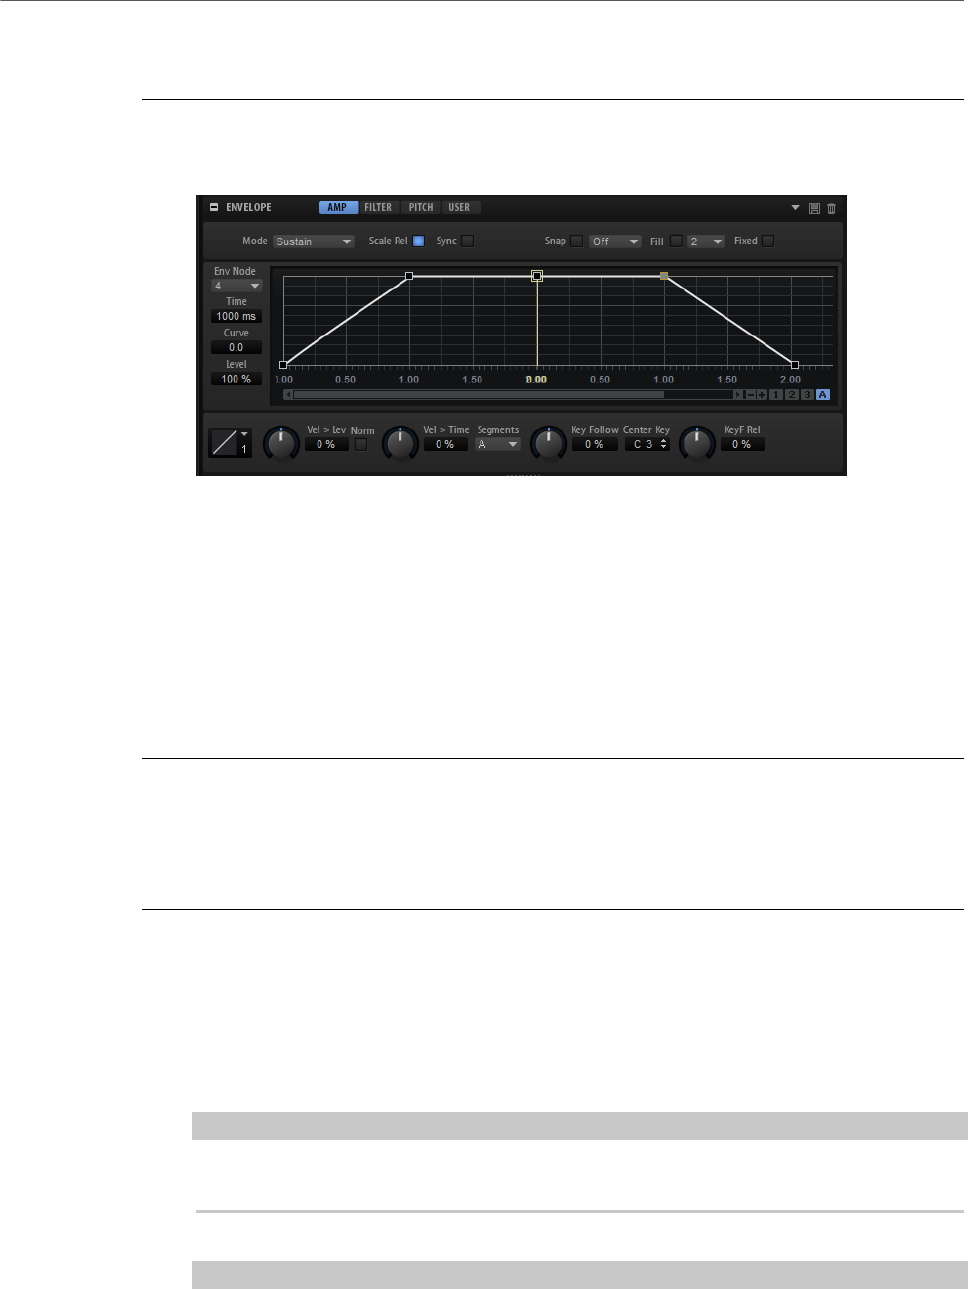
Editing Zones
Envelope Section
131
Scaling the Level of the Release Node with the Level at Note-Off
PROCEDURE
1. Set up an amplifier envelope with five nodes, spaced at intervals of 1000 ms. The
second, third, and fourth nodes have a level of 100 %. All curve segments are linear.
2. Deactivate Scale Rel and play and release a note in the middle of the attack, halfway
between node 1 and 2.
The level of node 4 is not altered. However, the sustain level is scaled down and
therefore increases when going from the sustain node to node 4.
3. Now, activate Scale Rel and play and release a note in the middle of the attack, halfway
between node 1 and 2.
The level of node 4 is scaled down by the level at note-off. In this example, the sustain
level and the level of node 4 are exactly the same. They have been scaled by the same
amount and the level will not change when going from the sustain node to node 4.
Using Sync
You can synchronize the envelopes to the tempo of your host application. This allows you to
set envelope times that relate to musical time intervals, regardless of any tempo changes.
PROCEDURE
1. Click Sync to activate sync mode for the envelope.
Sync mode is active if the button is highlighted. A grid spaced in fractions of beats is
displayed in the graphical envelope editor.
2. On the pop-up menu located to the right of the Sync button, select a note value.
This sets the resolution of the grid.
NOTE
The Time field of a node displays times in fractions of beats. The fraction is always
reduced to the smallest possible value. 2/16 is displayed as 1/8, for example.
3. To use triplet note values, activate the T button.
NOTE
•Envelope nodes that do not exactly match a note value display the closest note
value.
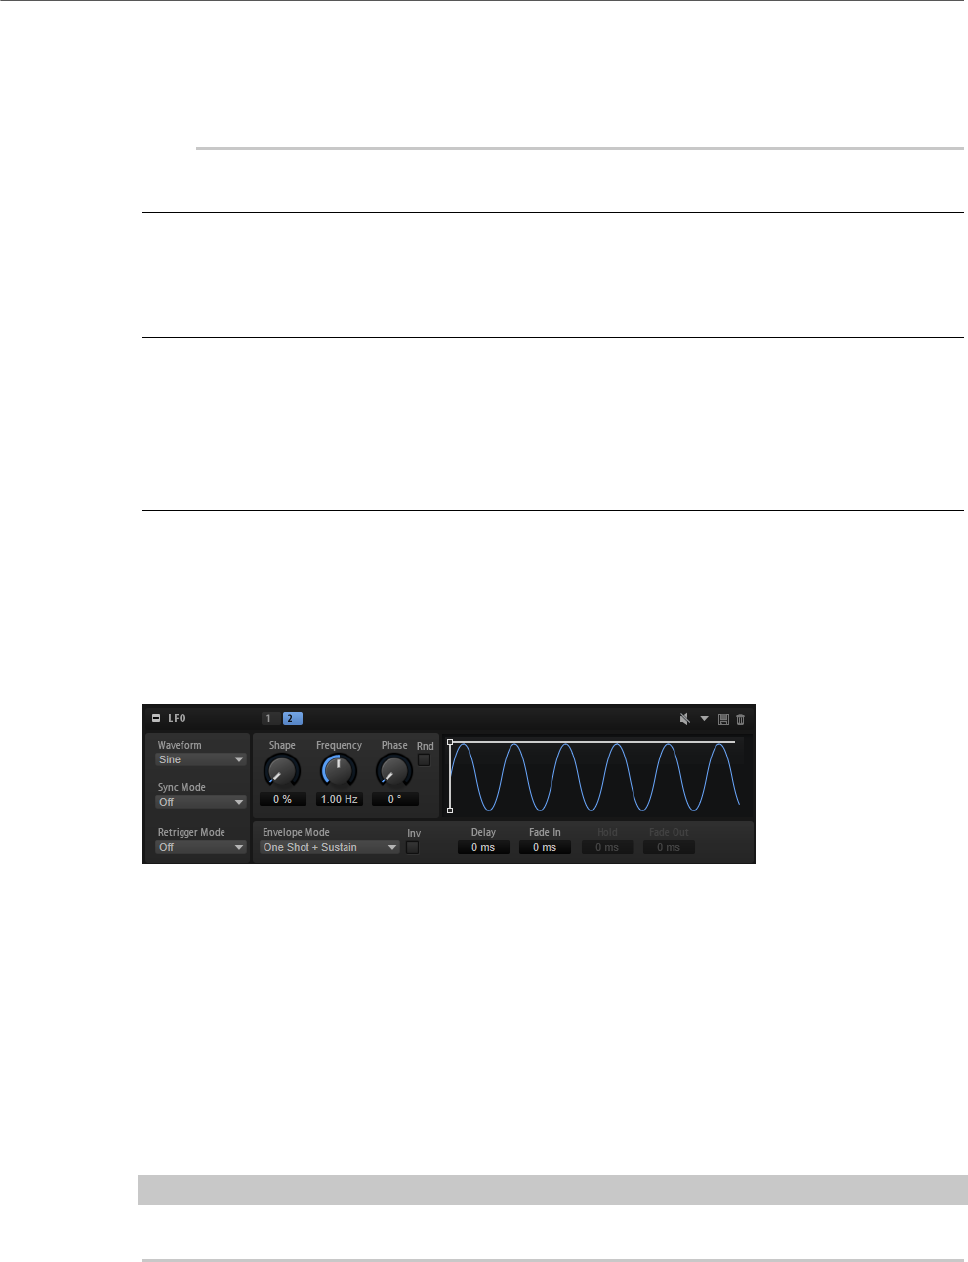
Editing Zones
LFO Section
132
•Nodes that exactly match a note value are indicated by a red dot inside the
handle of the node. This is useful if you switch the grid between triplets and
normal note values, for example. The triplet nodes still indicate that they match
a note value, even if the grid shows normal note values.
You can also enter note values and triplets manually in the value field.
Setting Up the Loop
You can set up the envelope to repeat its playback between the selected nodes.
PROCEDURE
1. Set the envelope mode to Loop.
2. The loop is indicated by the green region in the graphical envelope editor. Specify the
loop start and end by dragging the borders of the region.
The loop region can only be set up in the decay phase of the envelope.
LFO Section
Synth, sample, grain, and wavetable zones offer two polyphonic LFOs.
LFO 1 and LFO 2
Polyphonic means the LFOs are calculated per voice allowing for independent modulations
with each triggered note. You can use this to create a richer sound, for example, with an
independent pitch modulation per note. The LFOs can be assigned freely in the modulation
matrix and they have an additional envelope that allows you to shape the modulation
intensity over time.
You can also configure monophonic LFOs using the Mono LFO MIDI Module.
To access the LFOs, click the corresponding button at the top of the LFO section.
You can adjust the times of the envelope in the graphical editor by dragging nodes left or
right.
NOTE
Which nodes are available in the graphical editor depends on the Envelope Mode setting.
• The first node adjusts the Delay time.
• The second node adjusts the Fade In time.
• The third node adjusts the Hold time.

Editing Zones
LFO Section
133
• The fourth node adjusts the Fade Out time.
LFO Waveform and Shape
•Sine produces smooth modulation, suitable for vibrato or tremolo. Shape
adds additional harmonics to the waveform.
•Triangle is similar to Sine. Shape continuously changes the triangle
waveform to a trapezoid.
•Saw produces a ramp cycle. Shape continuously changes the waveform
from ramp down to triangle to ramp up.
•Pulse produces stepped modulation, where the modulation switches
abruptly between two values. Shape continuously changes the ratio
between the high and low state of the waveform. If Shape is set to 50 %, a
square wave is produced.
•Ramp is similar to the Saw waveform. Shape increasingly puts silence
before the sawtooth ramp up begins.
•Log produces a logarithmic modulation. Shape continuously changes the
logarithmic curvature from negative to positive.
•S & H 1 produces randomly stepped modulation, where each step is
different. Shape puts ramps between the steps and changes the S & H into
a smooth random signal when fully turned right.
•S & H 2 is similar to S & H 1. The steps alternate between random high and
low values. Shape puts ramps between the steps and changes the S & H
into a smooth random signal when fully turned right.
Sync Mode
The Sync Mode is used to match the LFO to the tempo of the host application.
• Select Off to adjust the speed of the modulation in Hertz.
• Select Tempo + Retrig to adjust the speed of the modulation in fractions of
beats. You can also set dotted and triplet note values. The restart behavior
of the LFO depends on the Retrigger Mode.
• Select Tempo + Beat to adjust the speed of the modulation in fractions of
beats. You can also set dotted and triplet note values. The LFO restarts
with the transport of the host and lines up to the beats of the song. The
Retrigger Mode setting is not taken into account.
NOTE
The behavior of the Frequency parameter changes with the selected option.
Retrigger Mode
Determines whether the LFO is restarted when a note is triggered. The waveform
restarts at the position set with the Phase parameter.
The polyphonic LFOs can switch between On and Off.
• If this parameter is set to Off, the LFO runs freely.
• If this parameter is set to On, the LFO starts with each triggered note.

Editing Zones
LFO Section
134
Frequency
Controls the frequency of the modulation, that is, the speed of the LFO.
Phase
Sets the initial phase of the waveform when the LFO is retriggered.
Rnd (Random Phase)
If this button is activated, each note starts with a randomized start phase.
NOTE
The Phase control cannot be used if Rnd is activated.
Delay
Determines the delay time between the moment you play a note and the moment
the LFO comes into effect.
Fade In
Determines how long the LFO takes to fade in after the note was triggered and
the Delay time has elapsed.
Hold
Determines the amount of time the LFO is running before the fade out begins.
NOTE
Hold is only available for the envelope modes One Shot and Hold + Fade Out.
Fade Out
Determines how long the LFO takes to fade out after the hold time has elapsed or
a note has been released.
NOTE
To deactivate the fade out, use the envelope modes One Shot + Sustain or
Sustain. This ensures that the modulation does not change when a note is
released.
Inv (Invert Envelope)
If this parameter is activated, the behavior of the LFO envelope is inverted, that
is, the LFO modulation starts at its maximum level and decreases to zero in the
time specified by the Fade In parameter. After the Hold time has elapsed, or
when the key is released, the modulation increases to its maximum level in the
time specified by the Fade Out parameter.
Envelope Mode
Allows you to specify how the LFO envelope reacts to your playing on the
keyboard. The One Shot modes do not react to note-off events.
• Select One Shot to play the envelope from start to end in the time specified
by the Delay, Fade In, Hold, and Fade Out parameters.
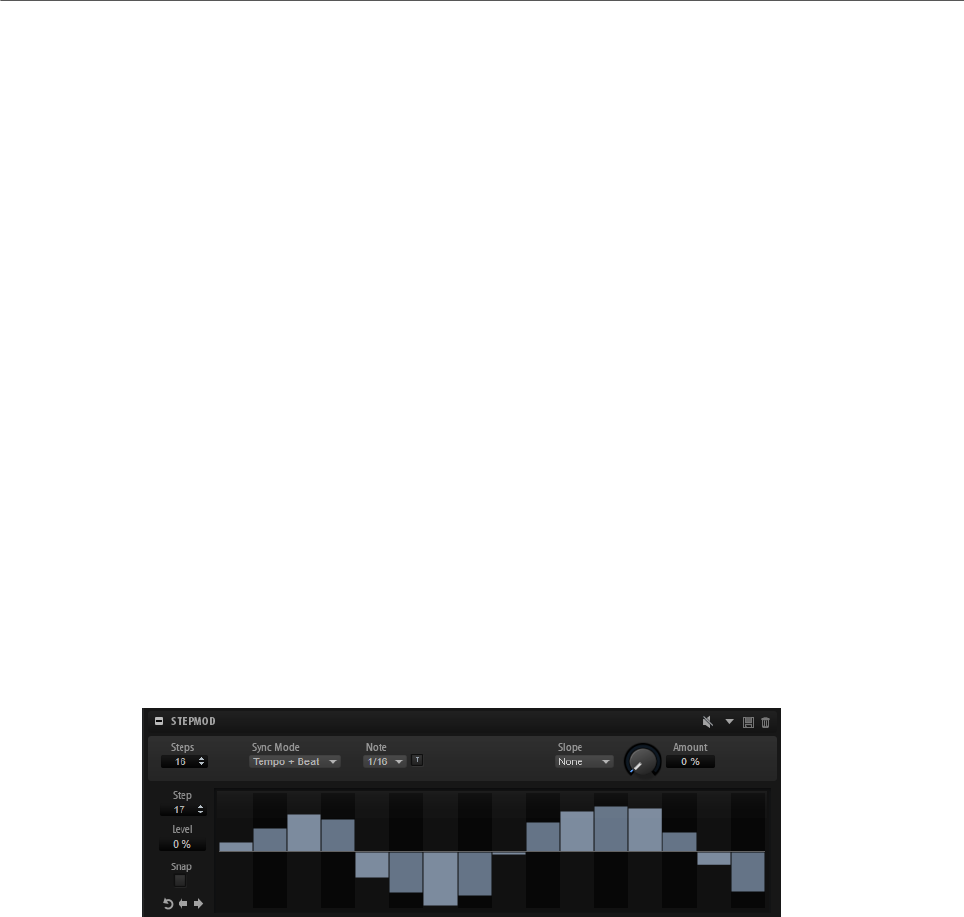
Editing Zones
Step Modulator
135
•One Shot + Sustain is similar to One Shot. The Delay and Fade In
parameters are always applied when you play a note. The Hold and Fade
Out parameters are not available.
• If Hold + Fade Out is selected and you play a note, the Delay and Fade In
parameters are applied. The envelope fades out after the time specified by
the Hold parameter or when a key is released. Releasing a key during the
fade in starts the fade out from the current level.
• If Sustain + Fade Out is selected and you play a note, the Delay and Fade In
parameters are applied. The Hold parameter is not available. The fade out
is applied when releasing the key. Releasing a key during the fade in starts
the fade out from the current level.
• If Sustain is selected and you play a note, the Delay and Fade In
parameters are applied. The Hold and Fade Out parameters are not
available. Releasing a key during the fade in sustains the current level. This
prevents a change in modulation when a key is released.
RELATED LINKS
Mono LFO on page 510
Step Modulator
Synth, sample, grain, and wavetable zones feature a polyphonic step modulator for creating
rhythmic control sequences.
The step modulator can be freely assigned in the modulation matrix.
Steps
Sets the number of steps in the sequence. The maximum number of steps is 32.
Sync Mode
• If Off is selected, you can adjust the speed at which the sequence repeats.
Whether the sequence restarts when you play a note depends on the
Retrigger mode.
• If Tempo + Retrig is selected, you can adjust the length of the steps in
fractions of beats. The speed of the modulation depends on the number of
steps, the note value, and the tempo you set in your host application. To use
triplet note values, activate Triplet.
Whether the sequence restarts when you play a note depends on the
selected Retrigger Mode.
• If Tempo + Beat is selected, you can adjust the length of the steps in
fractions of beats. The speed of the modulation depends on the number of

Editing Zones
Step Modulator
136
steps, the note value, and the tempo you set in your host application. To use
triplet note values, activate Triplet.
The sequence restarts with the transport of the host application and lines
up to the beats of the project. The Retrigger Mode is not taken into account.
Frequency
If Sync Mode is set to Off, this controls the speed at which the sequence is
repeated.
Note
If Sync Mode is set to one of the Tempo settings, this adjusts the length of the
steps in fractions of beats. You can also select triplet values.
Triplet
Activate this button to use triplet note values.
Retrigger Mode
Determines whether the sequence restarts when you play a note. This parameter
is only available if Sync Mode is set to Off or Tempo + Retrig.
• If this parameter is set to Off, the sequence is not restarted. Instead, it
resumes playback at the position at which you released the key.
• If this parameter is set to First Note, the sequence restarts when a note is
triggered and no other notes are held.
• If this parameter is set to Each Note, the sequence restarts each time a
note is triggered.
Slope
Determines whether the step modulator jumps from step to step or creates
ramps between the steps.
•No Slope produces hard steps.
•Slope on Rising Edges creates ramps only for rising edges.
•Slope on Falling Edges creates ramps only for falling edges.
•Slope on All Edges creates ramps for all edges.
Amount
If Slope is set to Rising, Falling, or All, this parameter determines the time of the
ramp between two steps. The higher the setting, the smoother the transitions
between steps.
Step
Allows you to select a specific step.
Level
Shows the level of the selected step.
Snap
If Snap is activated, the level of each step can only be adjusted in steps of 1/12th.

Editing Zones
Modulation Matrix
137
Shift Phrase Right/Shift Phrase Left
These commands shift all the steps to the right/left. If you shift the rhythm of the
phrase to the left, the first step is moved to the end. If you shift the phrase to the
right, the last step is moved to the beginning.
Reverse Phrase
Reverses the phrase, that is, inverts the order of all steps.
Editing Steps
•To set the level of a step, click at the corresponding position in the graphical editor.
•To change the value of a step, drag the step up or down or enter a new value in the
Level value field.
•To reset the level of a step to 0 %, Ctrl/Cmd-click the step.
•To reset all steps, hold Shift-Ctrl/Cmd and click in the graphical editor.
•To adjust all steps at the same time, Shift-click and drag a step.
•To draw a ramp with steps, hold down Alt and draw a line.
•To draw symmetric ramps at the beginning and the end of the sequence, hold down
Shift-Alt and draw a line.
•To gradually raise or lower the value of the selected step, use the up and down arrow
keys.
By default, the value changes in increments of 1 %. Hold Shift to use increments of 0.1
% instead.
•If the graphical editor has the keyboard focus, you can use the left and right arrow keys
to select the previous or next step.
Producing Modulations in Steps of Semitones
PROCEDURE
1. Activate Snap.
2. In the modulation matrix, assign the Step Modulator to Pitch.
3. Set the Modulation Depth to +12.
Now, the levels of the steps represent semitone intervals.
4. In the Step Modulator, adjust each step to the interval that you want to use.
Modulation Matrix
The concept of controlling one parameter by another is called modulation. HALion offers
many fixed assigned modulations, such as the amplitude and filter envelopes, or pitch key
follow. In the modulation matrix, you can assign additional modulations.
Assigning modulations means interconnecting modulation sources, like LFOs and envelopes,
with modulation destinations, like pitch, cutoff, amplitude, etc.
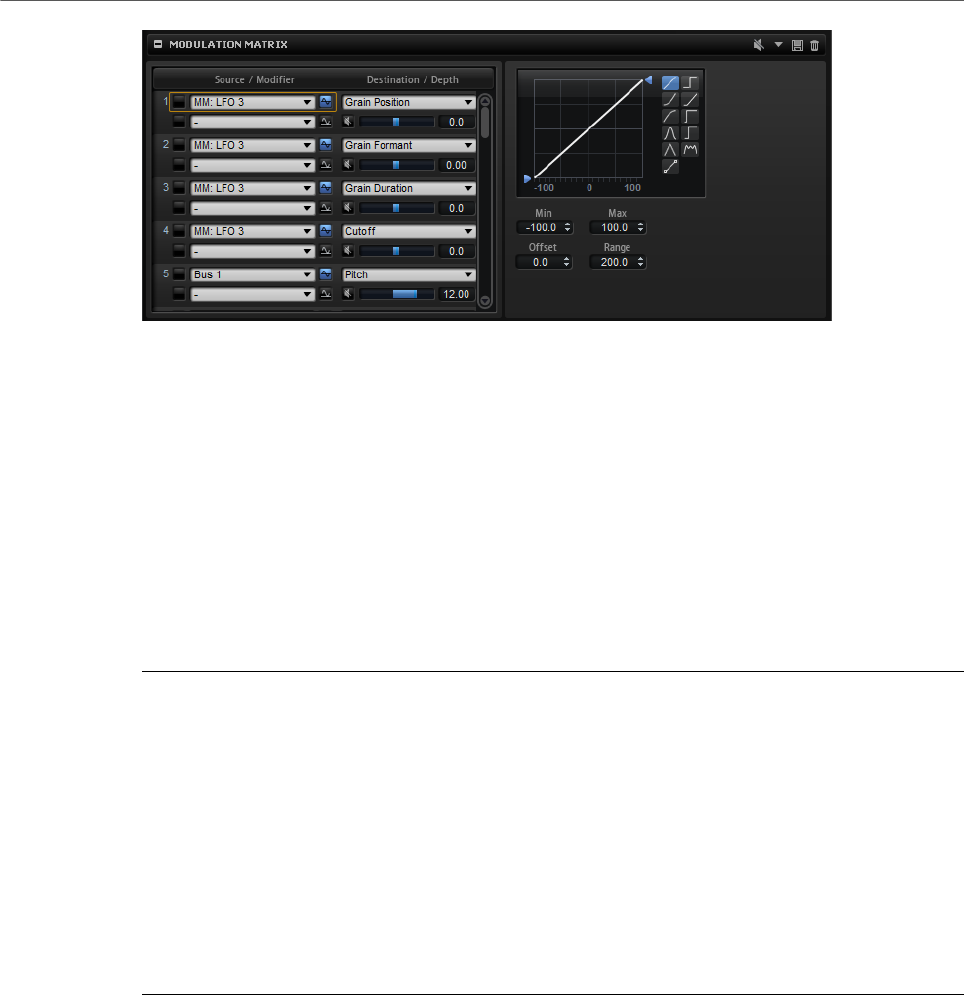
Editing Zones
Modulation Matrix
138
The modulation matrix offers you up to 32 freely assignable modulations, each with a source,
an offset parameter, a modifier, and a destination with adjustable depth. All modulation
sources and destinations can be assigned several times. The polarity of each source can be
switched between unipolar and bipolar. An additional modifier and user-definable curves and
ranges give you further control over the modulation.
The modulation matrix is divided into two sections. On the left, you can assign modulation
sources to destinations and adjust the modulation depth. The section on the right contains
settings for the curve and range editor, where you can make further settings for the selected
modulation source.
Creating Modulations
PROCEDURE
1. Select the zone that you want to adjust.
2. Select a modulation source and a modulation destination, for example, LFO1 as source
and Pitch as destination.
3. Use the horizontal fader below the destination to adjust the modulation depth.
4. Optional: Click the Source 2 field and select a modifier or change the polarity of the
source.
For example, select Pitch Bend as modifier and set it to unipolar.
5. Optional: Use the curve and range settings on the right to limit the modulation range
or to adjust the characteristics of the modulation.
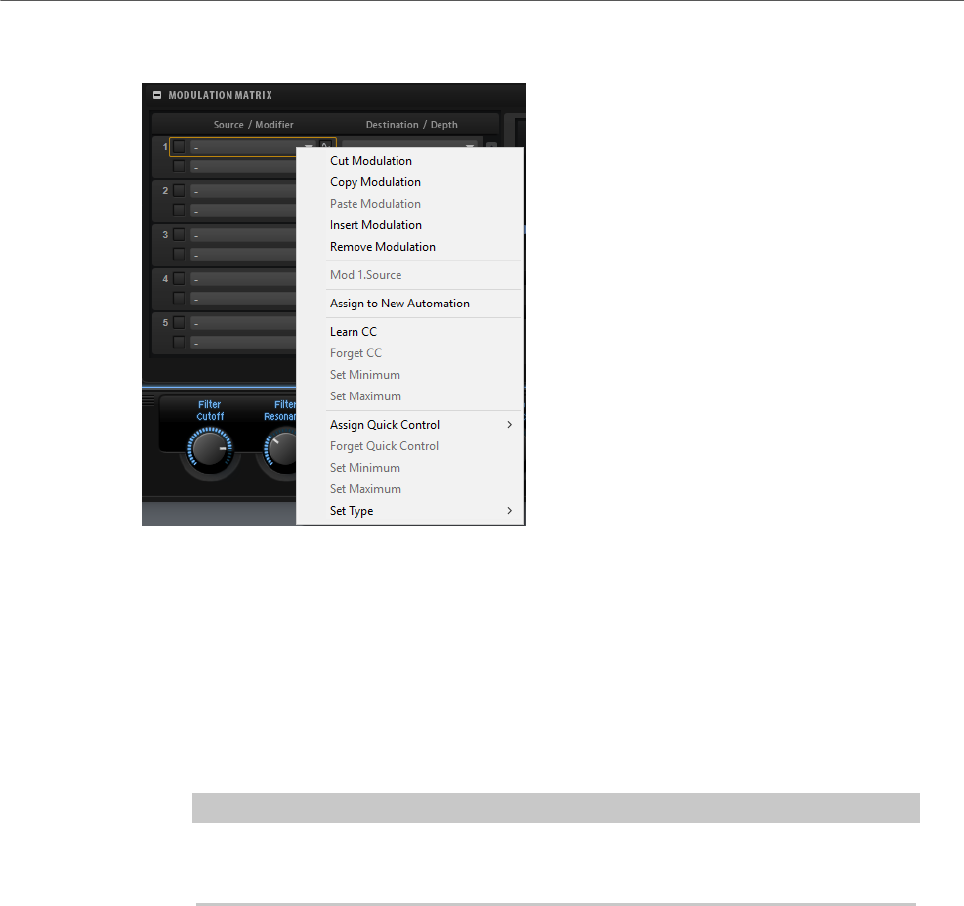
Editing Zones
Modulation Matrix
139
Modulation Matrix Context Menu
Cut Modulation
Cuts the modulation data from the current slot.
Copy Modulation
Copies the modulation data from the current slot to the clipboard.
Paste Modulation
Pastes the modulation data from the clipboard to the current modulation slot.
NOTE
You can copy modulation rows between different programs and between different
plug-in instances.
Insert Modulation
Inserts an empty modulation slot.
Remove Modulation
Removes the modulation slot.
Name of the Assigned Source/Modulator/Destination
Depending on where you click, the assigned modulation source, the modulator, or
the modulation destination is shown on the context menu.
Assign to New Automation
Assigns this modulation source as automation parameter.
Learn CC
Allows you to assign a MIDI controller to the modulation slot.

Editing Zones
Modulation Matrix
140
Forget CC
Removes the MIDI controller assignment for the current slot.
Set Minimum
Allows you to set the minimum value for the MIDI controller that is assigned to
the modulation slot.
Set Maximum
Allows you to set the maximum value for the MIDI controller that is assigned to
the modulation slot.
Assign Quick Control
Allows you to assign a quick control to the modulation slot.
Forget Quick Control
Removes the quick control assignment of the modulation slot.
Set Minimum
Allows you to set the minimum value for the quick control that is assigned to the
modulation slot.
Set Maximum
Allows you to set the maximum value for the quick control that is assigned to the
modulation slot.
Set Type
•Absolute remote-controls the parameter values continuously.
Absolute mode changes the assigned parameters by overwriting them with
the current quick control value, that is, parameter changes are overwritten.
•Relative remote-controls the parameter values continuously.
Relative mode changes the values of the assigned parameters without
losing their relative settings, that is, parameter changes can still be heard.
•Switch Absolute switches between the minimum and maximum value.
Parameter changes are overwritten.
•Switch Relative switches between the minimum and maximum value.
Parameter changes can still be heard.
RELATED LINKS
Setting Up Automation on page 44
Modulation Matrix Parameters
Modulation Sources
LFO 1/2
The LFOs 1 and 2 produce cyclic modulation signals.
These LFOs are polyphonic, that is, a new LFO signal is created with each new
note.

Editing Zones
Modulation Matrix
141
Amp Envelope
The amplifier envelope. This modulation source is unipolar. The shape of the
envelope determines the modulation signal.
Filter Envelope
The filter envelope. This modulation source is unipolar. The shape of the envelope
determines the modulation signal.
Pitch Envelope
The pitch envelope. This modulation source is bipolar. The shape of the envelope
determines the modulation signal.
User Envelope
The user envelope. This modulation source is bipolar. The shape of the envelope
determines the modulation signal.
Step Modulator
The step modulator of the zone. This modulation source is bipolar. It produces
cyclic, rhythmically stepped modulation signals.
Glide
The glide signal of the source. This modulation source is unipolar.
Key Follow
This produces an exponential modulation signal derived from the MIDI note
number. Exponential means this source works with destinations such as Pitch or
Cutoff. This modulation source is bipolar.
Note-on Velocity
Note-on velocity can be used as modulation signal. This modulation source is
unipolar.
Note-on Vel Squared
The squared version of Note-on Velocity. The harder you press the key, the higher
the modulation values.
Note-on Vel Normalized
The note-on velocity is normalized according to the velocity range of the
corresponding sample zone. At the lowest velocity of the zone, the modulation is
0, at the highest velocity, the modulation is 1.
Note-off Velocity
Note-off velocity can be used as modulation signal. This modulation source is
unipolar. Most MIDI keyboards cannot send note-off velocity messages. However,
most sequencer software is able to produce such messages.
Pitchbend
The position of the pitchbend wheel can be used as modulation signal. This
modulation source is bipolar.

Editing Zones
Modulation Matrix
142
Modulation Wheel
The position of the modulation wheel can be used as modulation signal. This
modulation source is unipolar.
Aftertouch
Aftertouch can be used as modulation signal. This modulation source is unipolar.
Some MIDI keyboards cannot send aftertouch messages. However, most
sequencer software is able to produce such messages.
MIDI Controller
Any of the 127 available MIDI controllers can be used as modulation signal. You
can select the MIDI controller from the corresponding submenu.
In addition, you can select the eight global MIDI controllers Contr. A-Contr. H
that can be used as placeholders in the modulation matrix. These controllers
allow you to remap specific MIDI controllers to the placeholder controllers, for
example, using the CC Mapper. This way, you can use the global controllers in
several places, and set up the assignment only once.
Quick Control
The quick controls of the program or layer to which the zone belongs can be used
as modulation signal. You can select the quick control from the corresponding
submenu.
Note Expression
This submenu lists the eight Note Expression parameters that can be used as
modulation signals.
MIDI Modules
This submenu lists the available MIDI modules that can be used as modulation
signals. A zone can use the MIDI modules that are higher up in the Program Tree
hierarchy than the zone. Which parameters are available depends on the selected
module.
Noise
Produces a random modulation signal. This modulation source is bipolar.
Output
The audio output of the zone can be used as modulation signal. This modulation
source is unipolar.
Bus 1–16
Modulations that are sent to one of the 16 busses can be reused as sources. This
way, you can combine several modulations to produce more complex signals.
Modulation Modifiers
All modulation sources can also be used as modifiers. A modifier is used to scale the output
of the modulation source. A typical example is an LFO as a source and the modulation wheel
as the modifier. This allows you to control the intensity of the LFO modulation using the
wheel.

Editing Zones
Modulation Matrix
143
The Sample & Hold modifier is only available on the Source 2 pop-up menu. It takes a
sample of the modulation source whenever it receives a trigger signal. It holds the sampled
value until it receives a new trigger. This way, you can quantize a continuous modulation
signal.
The following Sample & Hold options are available:
Trigger on Note-on
Triggers the Sample & Hold modifier manually each time that you hit a key.
Trigger on LFO 1
Triggers the Sample & Hold modifier each time that the waveform of LFO 1
crosses the zero line from below.
Trigger on LFO 2
Triggers the Sample & Hold modifier each time that the waveform of LFO 2
crosses the zero line from below.
Trigger on Modulation Wheel
Triggers the Sample & Hold modifier each time that the modulation wheel
passes the center position.
Trigger on Sustain
Triggers the Sample & Hold modifier each time that you press the sustain pedal.
Sample until Release
Triggers the Sample & Hold modifier each time that you release a key.
Unipolar vs. Bipolar Sources
The polarity of a modulation source specifies the value range that it produces. Unipolar
sources modulate between 0 and +1. Bipolar sources modulate between -1 and +1.
• To change the polarity of a modulation source, click its Polarity button.
Modulation Depth
The horizontal fader below the destination adjusts the modulation depth.
Bypass Modulation
Click the Bypass button in front of the depth fader to bypass the modulation.
Modulation Destinations
Depending on the selected type of zone, the available modulation destinations vary.
Pitch
Modulates the pitch. For example, assign one of the LFOs to create a vibrato
effect. If Pitch is selected, the modulation depth is set in semitones (-60 to +60).
Cutoff
Modulates the filter cutoff.

Editing Zones
Modulation Matrix
144
For example, to create rhythmic patterns in the spectral timbre, assign the Step
Modulator.
Resonance
Modulates the filter resonance. Resonance changes the character of the filter.
For example, to accent the filter the harder you hit a key, assign Velocity to
Resonance.
Distortion
Modulates the filter distortion.
This has no effect on the Classic, HALion 3, and Waldorf filters.
Morph X
Modulates the x-axis of the filter in Morph XY mode. Use this to morph between
the filter shapes AD and BC.
Morph Y
Modulates the y-axis of the filter in Morph 2, Morph 4, or Morph XY mode. Use
this to morph between the filter shapes AB and DC, for example.
Cutoff Offset
Modulates the cutoff offset of the second filter in Dual Filter Serial or Dual Filter
Parallel mode. For example, to lower or raise the cutoff of the second filter while
you play, assign the modulation wheel.
Resonance Offset
Modulates the resonance offset of the second filter in Dual Filter Serial or Dual
Filter Parallel mode. For example, to lower or raise the resonance of the second
filter while you play, assign the modulation wheel.
Level
This modulation adds to the level setting. It can be used to create level offsets
using the mod wheel, for example.
Volume 1
Modulates the gain. The volume modulation multiplies with the level.
This modulation is ideal for crossfades between zones.
Volume 2
As Volume 1. Volume 1 is multiplied with Volume 2. This way, you can build more
complex modulations.
Pan
Modulates the position of the zone in the panorama.
Sample Start
Modulates the start position of the sample playback. For example, assign Note-
on Velocity to play back more of the attack of a sample the harder you hit a key.

Editing Zones
Modulation Matrix
145
This modulation destination cannot be modulated continuously. The parameter is
updated only when you hit a key.
Speed Factor
Modulates the speed factor of the sample.
Formant Shift
Modulates the formant shifting.
Grain Position
Modulates the playback position. The modulation is not continuous, but it is
updated at the start of each grain.
Grain Direction
Modulates the Direction parameter. For the effect to be heard, the Speed
parameter must be set to a value above 0 %.
Grain Duration
Modulates the grain duration, that is, the frequency at which the grains repeat.
The maximum modulation range at a modulation depth of 100 % is -5 to +5
octaves.
Grain Length
Modulates the grain length.
Grain Pitch
Modulates the pitch of a grain. The modulation is not continuous, but it is updated
at the start of a new grain. For continuous pitch modulation, use Pitch instead of
Grain Pitch as destination and make sure that Follow Zone Pitch is activated in
the grain oscillator.
Grain Formant
Grain Level
Modulates the grain level. The modulation is not continuous, but it is updated at
the start of each new grain. For continuous level modulation, use the destinations
Volume 1, Volume 2, or Level.
Osc 1/2/3 Pitch
Modulates the pitch of the corresponding oscillator.
For example, to detune an oscillator cyclically, assign one of the LFOs.
Osc 1/2/3 Level
Modulates the level of the corresponding oscillator.
For example, to fade an oscillator in and out while you play, assign the
modulation wheel.
Osc 1/2/3 Waveform
Modulates the shape and character of the corresponding oscillator.

Editing Zones
Modulation Matrix
146
For example, to change the character of an oscillator over time, assign one of the
envelopes.
Osc 1/2/3 Multi Detune
Modulates the Detune parameter of the individual oscillator voices that are
produced by multi-oscillator mode.
Osc 1/2/3 Multi Pan
Modulates the pan position of the individual oscillator voices that are produced by
multi-oscillator mode.
Osc 1/2/3 Multi Voices
Modulates the number of oscillator voices that are produced by multi-oscillator
mode.
Sub Osc Level
Modulates the level of the sub oscillator. For example, to fade in the oscillator
while you play, assign the modulation wheel.
Ring Mod Level
Modulates the level of the ring modulation effect. For example, to fade in the ring
modulation while you play, assign the modulation wheel.
Noise Level
Modulates the level of the noise generator. For example, to fade in the noise
generator while you play, assign the modulation wheel.
LFO 1/2 Frequency
Modulates the speed of the corresponding LFO.
For example, to control the speed of a vibrato effect while you play, assign
Aftertouch.
LFO 1/2 Shape
Modulates the waveform of the corresponding LFO.
For example, to vary the waveform with the playing position on the keyboard,
assign Key Follow.
Step Mod Frequency
Modulates the speed of the step modulator. For example, assign an LFO to
increase or decrease the speed cyclically.
Step Mod Slope
Modulates the shape of the edges of the step modulator if the Slope parameter is
active. For example, assign the modulation wheel to blend from hard to smooth
edges.
Amp Env Attack Time
Modulates the attack time of the amplitude envelope. This modulation
destination cannot be modulated continuously. The time is updated only when the
segment starts.

Editing Zones
Modulation Matrix
147
Amp Env Decay Time
Modulates the decay time of the amplitude envelope. This modulation destination
cannot be modulated continuously. The time is updated only when the segment
starts.
Amp Env Sustain Level
Modulates the sustain level of the amplitude envelope. This modulation
destination cannot be modulated continuously. The level is updated only when the
segment starts.
Amp Env Release Time
Modulates the release time of the amplitude envelope. This modulation
destination cannot be modulated continuously. The time is updated only when the
segment starts.
Filter Env Attack Time
Modulates the attack time of the filter envelope. This modulation destination
cannot be modulated continuously. The time is updated only when the segment
starts.
Filter Env Decay Time
Modulates the decay time of the filter envelope. This modulation destination
cannot be modulated continuously. The time is updated only when the segment
starts.
Filter Env Sustain Level
Modulates the sustain level of the filter envelope. This modulation destination
cannot be modulated continuously. The level is updated only when the segment
starts.
Filter Env Release Time
Modulates the release time of the filter envelope. This modulation destination
cannot be modulated continuously. The time is updated only when the segment
starts.
Pitch Env Start Level
Modulates the level of the first pitch envelope node. This modulation destination
cannot be modulated continuously. The level is updated only when the segment
starts.
Pitch Env Attack Time
Modulates the attack time of the pitch envelope. This modulation destination
cannot be modulated continuously. The time is updated only when the segment
starts.
Pitch Env Attack Level
Modulates the level of the second pitch envelope node. This modulation
destination cannot be modulated continuously. The level is updated only when the
segment starts.

Editing Zones
Modulation Matrix
148
Pitch Env Decay Time
Modulates the decay time of the pitch envelope. This modulation destination
cannot be modulated continuously. The time is updated only when the segment
starts.
Pitch Env Sustain Level
Modulates the sustain level of the pitch envelope. This modulation destination
cannot be modulated continuously. The level is updated only when the segment
starts.
Pitch Env Release Time
Modulates the release time of the pitch envelope. This modulation destination
cannot be modulated continuously. The time is updated only when the segment
starts.
Pitch Env Release Level
Modulates the level of the last pitch envelope node. This modulation destination
cannot be modulated continuously. The level is updated only when the segment
starts.
User Env Start Level
Modulates the level of the first user envelope node. This modulation destination
cannot be modulated continuously. The level is updated only when the segment
starts.
User Env Attack Time
Modulates the attack time of the user envelope. This modulation destination
cannot be modulated continuously. The time is updated only when the segment
starts.
User Env Attack Level
Modulates the level of the second user envelope node. This modulation
destination cannot be modulated continuously. The level is updated only when the
segment starts.
User Env Decay Time
Modulates the decay time of the user envelope. This modulation destination
cannot be modulated continuously. The time is updated only when the segment
starts.
User Env Sustain Level
Modulates the sustain level of the user envelope. This modulation destination
cannot be modulated continuously. The level is updated only when the segment
starts.
User Env Release Time
Modulates the release time of the user envelope. This modulation destination
cannot be modulated continuously. The time is updated only when the segment
starts.

Editing Zones
Modulation Matrix
149
User Env Release Level
Modulates the level of the last user envelope node. This modulation destination
cannot be modulated continuously. The level is updated only when the segment
starts.
Bus 1-16
You can send any modulation to one of the 16 busses, for example, to produce
more complex modulation signals. Select the bus that you want to send the
signals to as a destination. To use the modulation that was sent to a bus, assign
the corresponding bus as a modulation source.
Curve and Range Editor
You can set up a curve and range for each modulation source.
• The curve editor allows you to change the characteristics of a modulation. The
displayed curve is superimposed on the modulation source.
This way, you can change the modulation from linear to exponential or logarithmic, for
example.
• By setting the minimum and maximum values, you limit the modulation to a specific
range only. In addition, you can specify an offset and a range for the modulation.
For example, with an offset and range of +50 %, only the second half of the displayed
curve is superimposed on the modulation.
• If a MIDI or Note Expression controller is selected as modulation source, the
Smoothing parameter is available. This allows for parameter changes to occur more
gradually. Set this to Default to use the global Smoothing parameter set up in the
Options Editor or enter a value in the value field.
The curve editor offers different presets that you can select by clicking the corresponding
button on the right of the curve editor. To set up your own curve, click CustomCurve.
You can edit the custom curve in the following way:
• Double-click in the editor to insert a new node.
• Double-click on a node to delete it.
• Drag the nodes to new positions to adjust the basic shape of the curve.
• Drag the lines between the nodes up or down to change the curvature.
Editing Samples in the Sample
Editor
150
The Sample Editor allows you to view and edit samples. In HALion, samples are associated
with sample zones. If a sample zone is selected, the Sample Editor shows the corresponding
sample.
Loading and Previewing Samples
The controls in the Sample Editor header allow you to load a sample and make preview
settings.
Load/Replace Sample
Allows you to load a new sample or replace the current sample.
Preview Volume/Output for Preview
You can specify the playback volume and output for the Sample Editor with the
Preview Volume and Output for Preview controls in the upper right corner of the
editor.
Toolbar
The toolbar contains tools for editing sample markers, loop markers, and slices, for
example.
Play Sample
Activate this button to play back the raw sample.
Play Selection Looped
Activate this button to play back the selection in a loop.
Auto-Scroll
If this button is activated, the waveform display is scrolled during playback,
keeping the playback cursor visible.
Follow Sample Playback
Activate this button to see a play locator when triggering a sample via MIDI.

Editing Samples in the Sample Editor
Toolbar
151
Range Selection Tool
Click and drag with this tool to create a selection.
Zoom Tool
If this tool is selected, you can click in the waveform to zoom in on the position
where you click.
Play Tool
If this tool is selected, you can click in the waveform to start playback. The
sample is played back from this position until you release the mouse button.
Scrub Tool
If this tool is selected, you can click in the waveform and drag sideways to play
back the audio. The playback direction and speed depend on how far you move
the mouse left or right from the position where you clicked.
Snap
If this button is activated, the selection start and end points and markers snap to
other markers.
Snap to Zero Crossing
If this button is activated, markers and selection start and end points are only
placed at zero crossings, that is, at positions in the audio where the amplitude is
zero. This helps you avoid pops and clicks that are caused by sudden amplitude
changes.
Trim Sample
Trims the sample, either to the selection, or to the range that is set with the
sample start/end markers.
Revert to Full Sample
Undoes the trimming, so that the entire sample is restored.
NOTE
After undoing the trimming, make sure to set the start/end markers to their
original positions, otherwise these parts are not played back.
Normalize Sample
Normalizes the sample by detecting the highest peak level in the sample and
adjusting the gain to reach a predefined level.
Normalize Level
Sets the level for the Normalize Sample function.
Sustain/Release Loop
Switches between the display of the sustain loop and the release loop in the
waveform display.
Editing Samples in the Sample Editor
Toolbar
152
Edit Loop
If this button is activated, the editor shows the looped region instead of the
original sample data. This provides a better overview over the transition between
loop end and loop start and allows you to set the loop markers to the best
positions.
NOTE
If Loop Mode is deactivated when you activate Edit Loop, it is automatically set to
Continuous and the loop markers are placed at the start and end of the sample.
Show Resulting Loop Crossfade
Activate this button to see the effect of your crossfade settings in the waveform
display. If this button is activated, the resulting waveform is displayed in red.
NOTE
This button only has an effect if Edit Loop is activated.
Find Previous Loop Start/Find Next Loop Start
Automatically detects a suitable loop start, either before (previous) or after (next)
the current loop start.
Find Previous Loop End/Find Next Loop End
Automatically detects a suitable loop end, either before (previous) or after (next)
the current loop end.
Loop Transition
Set this to t (transition) to search for short loops or to T (timbre) to search for
longer loops.
It can be useful to search for longer loops if the sample contains longer sound
progressions or beats that need to be included. That way you can prevent the
resulting loop from becoming static.
If this is set to T, HALion also suggests loop marker positions that might not be
optimal regarding the local transition, but best reflect the tonal progression of
the sound. In this case, you can use the Crossfade function to smooth out the
loop.
Threshold
HALion detects a large number of possible loop marker positions for the loop.
These positions are evaluated internally and attributed a score, according to
quality. The Threshold parameter allows you to specify the score value that a
marker must have before it can be used. With the highest setting, only a few
suitable positions are suggested.
Loop Score
Each detected loop marker is evaluated and attributed a score that provides
additional information about how well loop start and end match.
Editing Samples in the Sample Editor
Info Line
153
NOTE
This value is only updated when you search for loop positions using the Find
Previous/Next Loop Start/End buttons.
Pitch Detection Sensitivity
Allows you to adjust the pitch detection curve. For example, if the pitch detection
curve changes too fast or if it contains wrong pitches, lower the Pitch Detection
Sensitivity.
Detected Pitch
The detected pitch at the current marker position.
If the Slice tab is selected, the following additional tools are available on the toolbar:
Play Slice Tool
If this tool is selected, you can play slices by clicking on them.
Lock Slices
Activate this button to prevent slice markers from being accidentally moved.
Locked slices are shown with red markers.
Auto Zoom Slices
If this button is activated and you step through slice zones in the Program Tree,
the slices are zoomed automatically so that they are centered in the waveform
display.
Zoom to Previous Slice/Zoom to Next Slice
Click these buttons to zoom in on the previous/next slice.
Info Line
File Length
Shows the length of the sample file.
Sample Rate
Shows the sample rate of the sample file.
File Tempo
Shows the tempo of the sample file, in BPM.
Playback Position
Shows the playback position.
To change the playback position, use the arrow buttons or enter a new position in
the value field.

Editing Samples in the Sample Editor
Info Line
154
Selection Start
Sets the start of the selection.
Selection End
Sets the end of the selection.
Selection Length
Sets the length of the selection.
Show Selection/Sample Parameters
Switches the info line between displaying the parameters for the selection or for
the entire sample.
Root Key
The root key determines the original pitch of a zone, that is, the key on which the
zone is played without being transposed.
Tune
Sets the tune offset of the zone.
This value can be written into the sample file on export and is read on import.
Gain
Sets the gain offset of the zone.
This value can be written into the sample file on export and is read on import.
Pan
Allows you to specify a pan offset for the sample.
If the Slice tab is selected, the info line contains the following slice-specific settings:
Sample Length
Shows the length of the sample.
Tempo
Shows the tempo of the sample, in BPM.
Bars/Beats
Shows the length of the sample found by the automatic tempo detection, in bars
and beats.
NOTE
You can adjust these values manually. This has an effect on the grid and the
tempo.
Grid
Allows you to display a grid in the waveform display.
Grid Resolution
Sets the grid resolution, in note values.
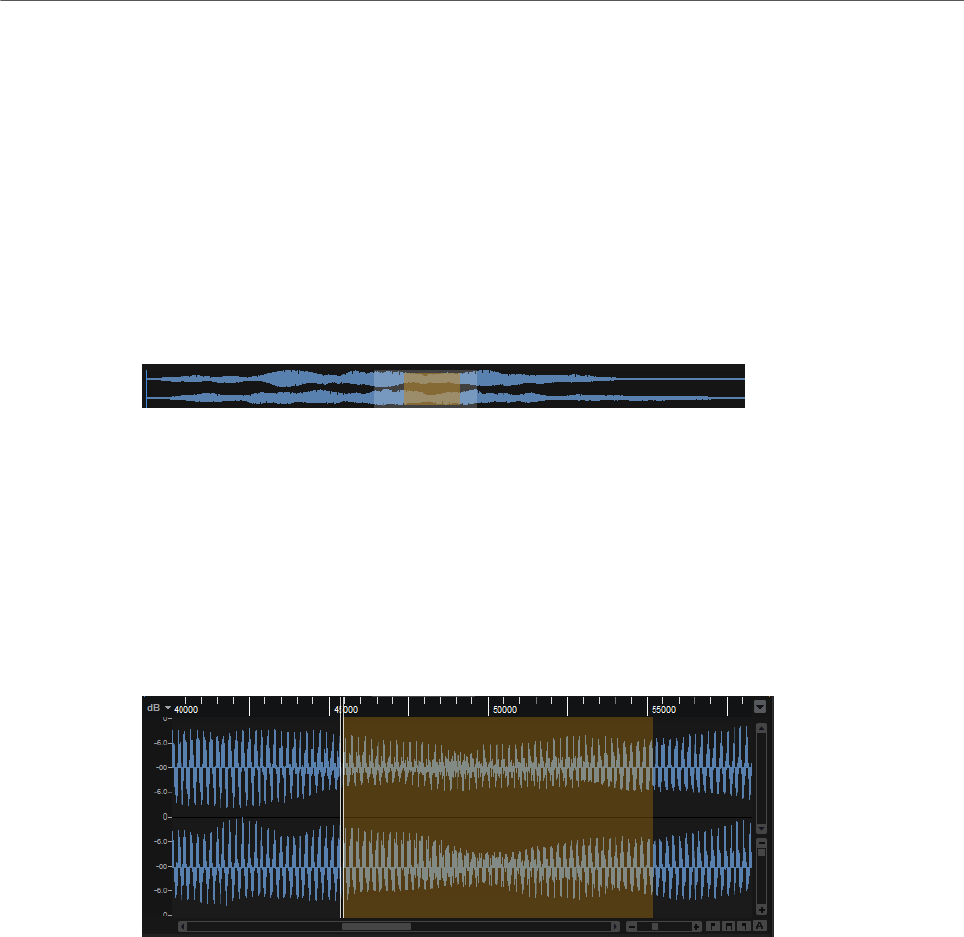
Editing Samples in the Sample Editor
Overview Line
155
Signature
Allows you to specify the time signature of the loop.
Offset
Offsets the grid by the specified value.
Overview Line
The overview line shows the entire sample. The section that is visible in the waveform display
is indicated by a rectangle. The current selection range in the waveform display is shown in
brown.
• To view a different section of the sample, click in the lower half of the rectangle and
drag to the left or right.
• To show a larger or a smaller range of the sample in the main waveform display, resize
the rectangle by dragging its borders.
• To specify a new sample range for the main waveform display, click in the upper half of
the overview and drag.
Waveform Display
The waveform display shows the waveform image of the sample. To the left of the waveform
display, a level scale is shown, indicating the amplitude of the audio.
• To select whether the level is shown as a percentage or in dB, click the level scale
label (dB or %), and select an option from the pop-up menu.
• To display the half level axis, right-click in the waveform display and select the
corresponding option on the context menu.
Ruler
The ruler shows the timeline in the specified display format.
• To select the format, click the arrow button to the right of the ruler and select an
option from the pop-up menu.
You can choose to display bars and beats, seconds, or samples.
Editing Samples in the Sample Editor
Waveform Display
156
View Options
Channel View Options
You can display either all channels, a specific channel, or the sum of all channels
by activating the corresponding button to the left of the waveform display. If no
selection is made here, all channels are displayed.
NOTE
Which channel selector buttons are available depends on the sample file.
Show Fades in Wave
If this button is activated, your fade settings are displayed directly in the
waveform.
Show Gain in Wave
• If this button is activated, the waveform display shows the influence of the
Gain parameter on the sample. The gain can either be set manually or by
using the Normalize function.
• If this button is deactivated, the original raw sample data is shown.
Show Pitch Detection Curve
If this button is activated, the pitch detection curve is displayed on the waveform.
This curve shows you where in a sample the pitch can be detected properly.
Show Pitch Envelope/Show Level Envelope
You can edit the pitch and the level of a sample using the integrated pitch and
level envelopes. This allows you to modify the pitch of the attack portion of a
sample or to correct the pitch or the level of a loop end so that it matches the
loop start, for example. Both envelopes are applied when you play a sample using
your MIDI keyboard.
To edit an envelope, click Show Pitch Envelope or Show Level Envelope.
• To offset the pitch or level of an entire sample, add a single node and move
it up or down from the center position.
• To add further to the envelope, double-click the curve.
• To remove a node, double-click it.
• To reset a node to its neutral position, Ctrl/Cmd-click it.
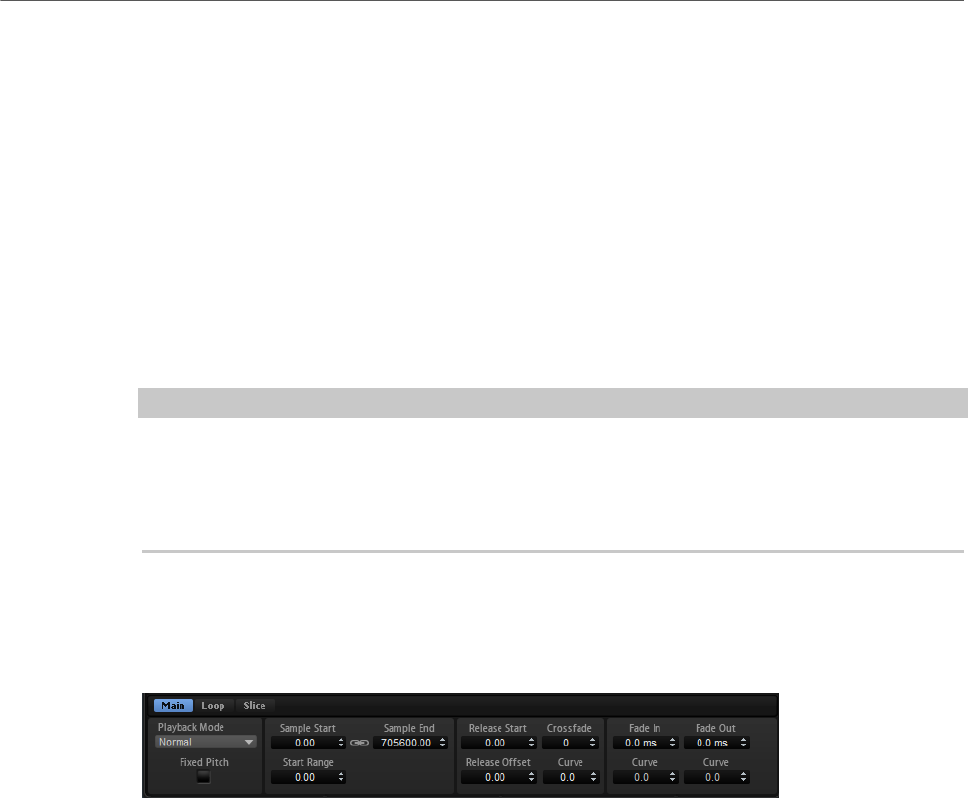
Editing Samples in the Sample Editor
Parameter Section
157
Zoom Envelope
Zooms in on the pitch and level envelopes. This allows you to edit the envelopes
in more detail.
Bypass Gain, Tuning, Fades, and Envelopes in Editor Playback
Bypasses any level and pitch corrections that are performed by changing the gain
of the sample, using fade curves, the pitch envelope, and the level envelope.
Parameter Section
The parameter section below the waveform display contains sample and sample zone
parameters.
NOTE
The Sample Oscillator parameters on the Main and Loop tabs can be edited for multiple
samples at the same time. This can be useful to add a fade to a multi-selection or to set
loop markers for several samples that contain different microphone signals of the same
instrument, for example.
Main Tab
The Main tab contains the zone parameters, the marker settings, and the fade settings for
the sample.
Playback Mode
•Normal – The sample is played back from beginning to end. If loops are
defined, they are played back according to their loop settings.
•Reverse – The sample is played from end to beginning, ignoring any loop
settings.
•One-Shot – The sample is played back from beginning to end, regardless of
any loop settings.
•Reverse One-Shot – The sample is played back from end to beginning,
regardless of any loop settings.
In One-Shot and Reverse One-Shot mode, the zones ignore any MIDI note-off
messages. All envelopes and LFOs play until their sustain is reached and then
remain on this level for as long as the sample plays back. Any release segments
of the envelopes and LFOs are not played. However, if you activate One-Shot
mode in the Envelope section, the release nodes of the envelopes are included in
the playback.
Fixed Pitch
If a sample zone is triggered by a MIDI note other than the one defined by the
Root Key setting, the sample is normally pitched accordingly. If Fixed Pitch is
Editing Samples in the Sample Editor
Parameter Section
158
activated, the relation between played note and root key is disregarded and all
keys play the sample just as it was recorded.
NOTE
You can still apply the usual pitch modulations in the Pitch section and set the
sample to follow the keyboard according to the Pitch Key Follow setting.
Sample Start
The start marker of the sample.
Sample End
The end marker of the sample.
Link Sample Start and End
Links the sample start and end positions. If you edit one of the values, the other
is automatically modified.
NOTE
You cannot change the sample start or end positions beyond the limits of the
sample file. For example, if the end of the sample is reached and you raise the
Sample Start value, the Sample End value is not modified.
Start Range
Determines the range for sample start offset modulation. If Sample Start
is selected as a modulation destination in the modulation matrix, the Start
Range parameter controls the sample portion that is affected by the start offset
modulation. If this parameter is set to zero, no sample start modulation is
performed.
For example, if Note-on Velocity is used to modulate the Sample Start
parameter, a high key velocity starts playback later in the sample, and the range
of this modulation is determined by the Start Range parameter.
Release Start
Determines the position to which the cursor jumps when you release a key.
For example, if you are playing back a sample in a loop, but you want it to play its
original release phase, set the Release Start parameter to this position.
Release Offset
Allows you to fine-tune the release start for each sample.
This allows you to offset the release start for several zones at the same time
without losing the original release settings, for example.
Crossfade/Fade In/Fade Out
Allow you to set the curve and the length of the fade in, the fade out, and the
crossfade.
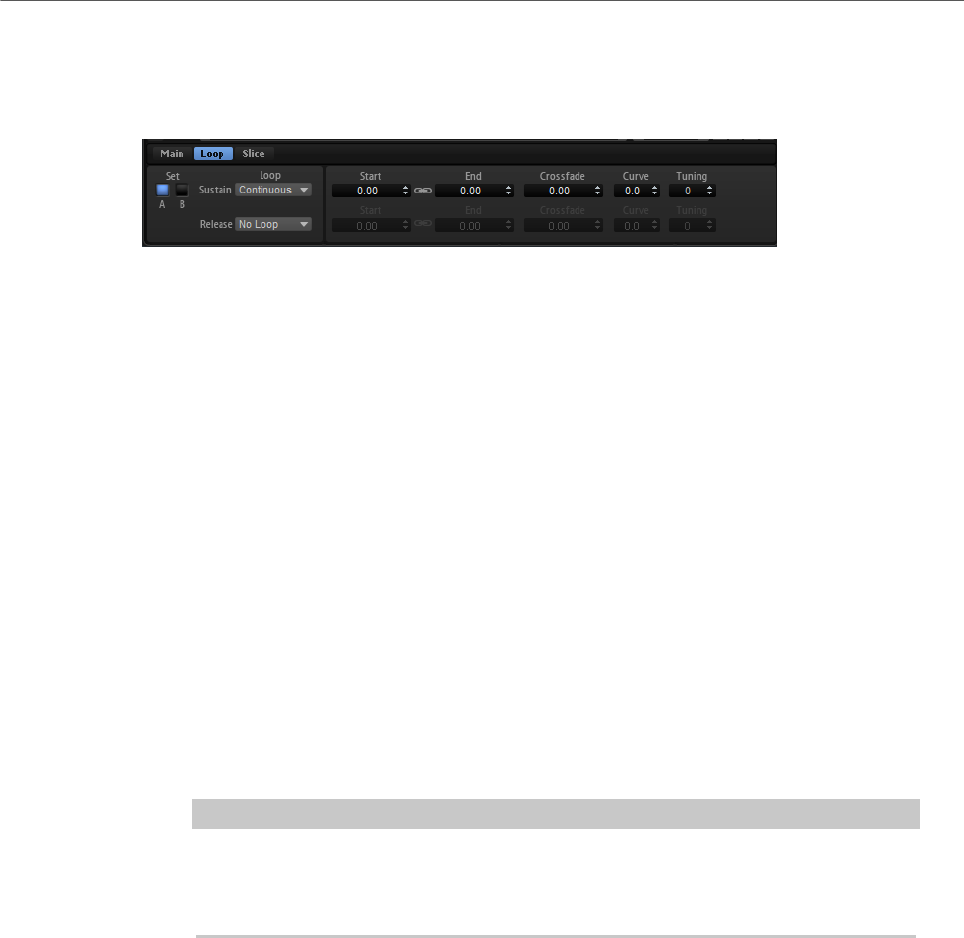
Editing Samples in the Sample Editor
Parameter Section
159
Loop Tab
This tab contains settings for the sustain loop and the release loop and lets you set up two
different loop sets.
Loop Sets A and B
Allow you to set up two different sets of loops for the same sample. This is useful
to compare different versions of the same loop, for example.
Loop Mode
Allows you to select a mode for the sustain loop and the release loop.
• If this is set to No Loop, the sample is played without loop.
• If this is set to Continuous, the loop is played continuously until the end of
the amplitude envelope.
• If this is set to Alternate, the loop alternates forward and backward even if
you release the key.
• If this is set to Once, the loop is repeated once.
• If this is set to Until Release (sustain loop only), the loop is repeated until
you release the key on the keyboard.
• If this is set to Alternate Until Release (sustain loop only), the loop
alternates forward and backward for as long as the key is held and then
continues to the end of the sample.
NOTE
If Loop Mode is set to Alternate or Alternate Until Release, the loop crossfade
is applied to the loop start and the loop end. All other modes on the Loop Mode
pop-up menu apply the loop crossfade only to the loop end.
Loop Start
The loop start for the sustain loop and for the release loop.
Loop End
The loop end for the sustain loop and for the release loop.
Link Loop Start and End
Links the loop start and end positions. If you edit one of the values, the other is
automatically modified.
Crossfade
Allows you to introduce a crossfade between loop end and loop start. Crossfades
allow for smoother transitions.
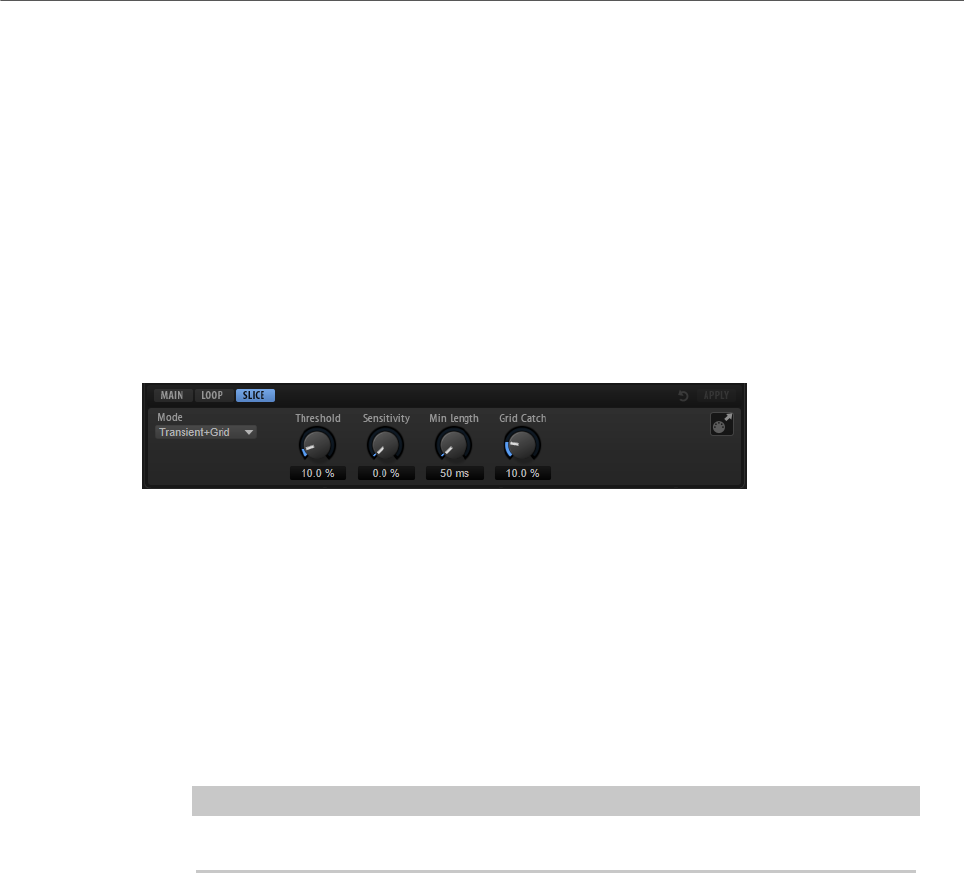
Editing Samples in the Sample Editor
Parameter Section
160
Curve
Allows you to create a linear curve, an equal power curve, or anything in between
for the crossfade.
Tuning
Sets the tuning of the loop. This is useful to adjust the frequency of the loop.
Slice Tab
The parameter section contains different parameters, depending on whether slices have
been created or not.
If no slices have been created, the following parameters are available:
Slice Detection Mode
The slice detection automatically sets slice markers in the waveform.
•Transient mode allows you to set the minimum peak level that a transient
needs to become a slice marker.
•Grid mode sets the slice markers according to a beat grid.
•Transient + Grid detects slices that match both conditions.
•Manual mode deactivates automatic slice detection. In this mode, you can
only set slice markers manually.
NOTE
You can always add slice markers manually by Alt-clicking in the waveform.
Threshold
Determines the minimum level that a transient must have to be detected as start
of a new slice.
Sensitivity
The transient detection evaluates all transients and classifies them according to
their quality. The Sensitivity control allows you to define the quality that must be
matched before a slice marker can be set.
Min Length
Determines the minimum length of a slice. Use this parameter to avoid creating
slices that are too short.
Grid Catch
In Transient+Grid mode, you can use this control to specify how close to the grid
a transient marker must be.
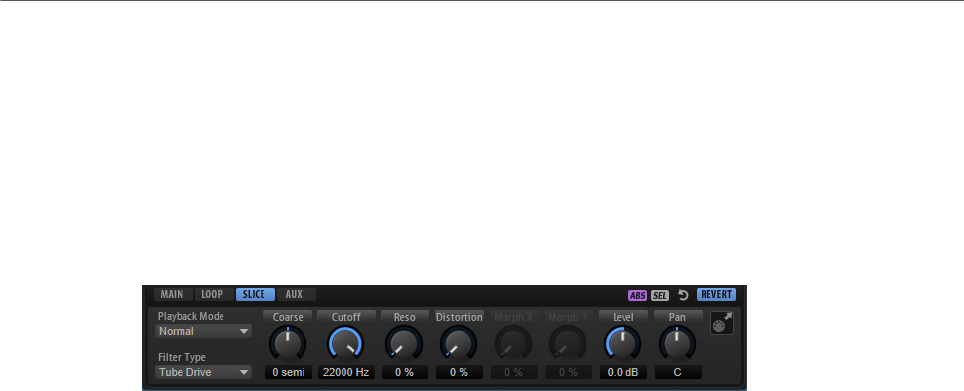
Editing Samples in the Sample Editor
Parameter Section
161
Reset Slice Marker Edits
Removes all slice markers that you have edited manually and repositions any
moved markers.
Apply
Click this button to create slices. After clicking Apply, the button reads Revert
and allows you to undo the slicing.
If slices have been created, the following parameters are available:
Playback Mode
•Normal – The sample is played back from beginning to end. If loops are
defined, they are played back according to their loop settings.
•Reverse – The sample is played from end to beginning, ignoring any loop
settings.
•One-Shot – The sample is played back from beginning to end, regardless of
any loop settings.
•Reverse One-Shot – The sample is played back from end to beginning,
regardless of any loop settings.
In One-Shot and Reverse One-Shot mode, the zones ignore any MIDI note-off
messages. All envelopes and LFOs play until their sustain is reached and then
remain on this level for as long as the sample plays back. Any release segments
of the envelopes and LFOs are not played. However, if you activate One-Shot
mode in the Envelope section, the release nodes of the envelopes are included in
the playback.
Filter Type
Specifies the basic sound character of the filter.
•Off deactivates the filter section.
•Classic offers 24 filter shapes with resonance.
•Tube Drive adds warm, tube-like distortion. You can set the amount of tube
drive with the Distortion parameter.
•Hard Clip adds bright, transistor-like distortion. You can set the amount of
hard clipping with the Distortion parameter.
•Bit Red (Bit Reduction) adds digital distortion by means of quantization
noise. You can adjust the bit reduction with the Distortion parameter.
•Rate Red adds digital distortion by means of aliasing. You can adjust the
rate reduction with the Distortion parameter.
•Rate Red KF adds digital distortion by means of aliasing. In addition, Key
Follow is used. The rate reduction follows the keyboard, so the higher you
play, the higher the sample rate.
•HALion 3 offers the five legacy filter shapes from HALion3.
•Waldorf offers 13 filter shapes, including two comb filters.

Editing Samples in the Sample Editor
Parameter Section
162
•Eco is a performance-optimized low-pass filter without Resonance or
Distortion parameters. It allows you to adapt the brilliance of samples for
different velocity layers of the same key, for example.
NOTE
Filters without distortion use less processing power.
Coarse Tuning
Adjusts the tuning in semitone steps.
Cutoff
Controls the cutoff frequency of the filter.
Resonance
Emphasizes the frequencies around the cutoff. At higher settings, the filter self-
oscillates, which results in a ringing tone.
Distortion
Adds distortion to the signal. The effect depends largely on the selected filter
type. At higher settings, it creates a very intense distortion effect.
NOTE
This parameter is only available for the filter types Tube Drive, Hard Clip, Bit Red,
Rate Red, and Rate Red KF.
Morph X/Y
These controls are available if the filter types Morph 2, Morph 4, or Morph XY are
used in the Filter section in the Zone Editor for the sample zone. With Morph X/Y,
you can adjust two parameters simultaneously.
• For the filter types Morph 2 and Morph 4, the Y control adjusts the
morphing between the filter shapes.
• For Morph XY, the Morph X control adjusts the morphing between the filter
shapes AD and BC and the Morph Y control adjusts the morphing between
the filter shapes AB and DC.
Level
Sets the level of the selected slice.
Pan
Sets the panorama position for the selected slice.
Drag MIDI Phrase to Host Sequencer
To export your slice markers as MIDI phrase, drag the MIDI export field to your
host sequencer or another destination that can handle MIDI files. This MIDI file is
used to play the sliced loop.
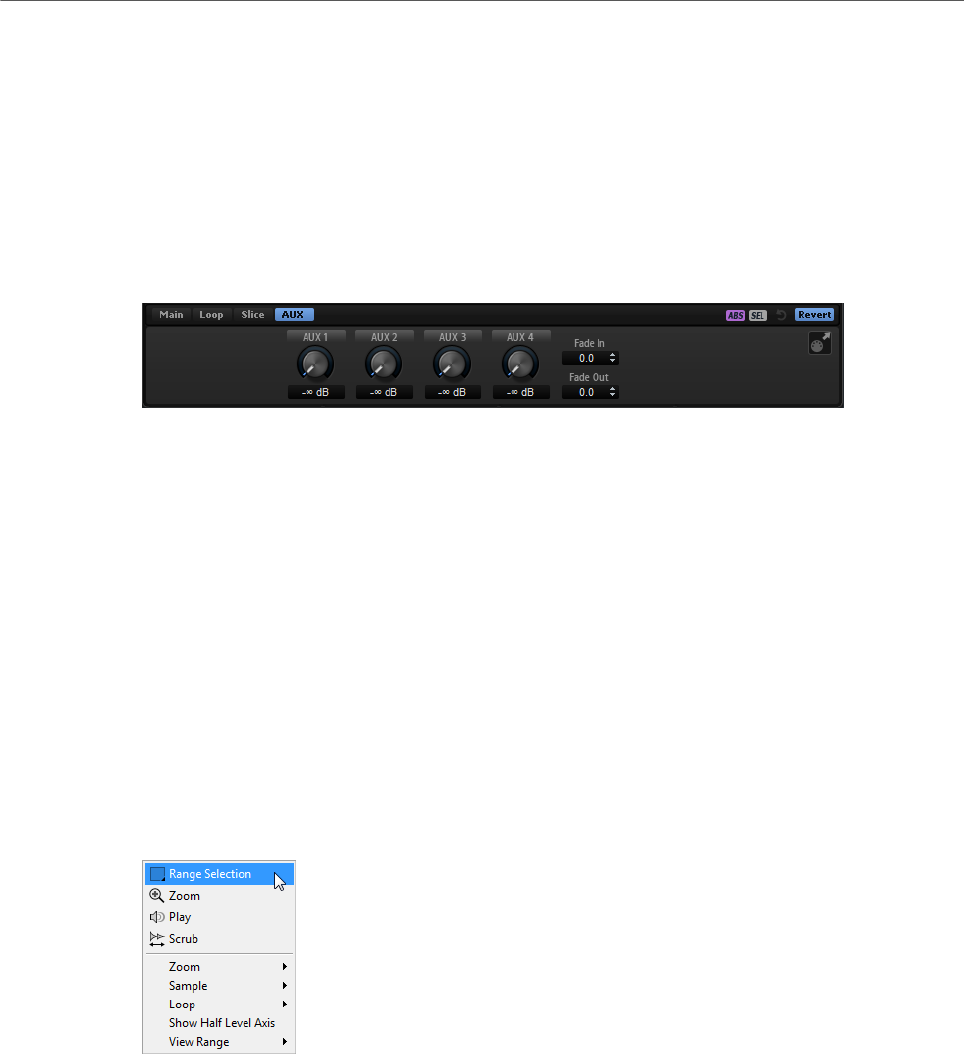
Editing Samples in the Sample Editor
Sample Editor Context Menu
163
Reset Slice Marker Edits
Removes all slice markers that you have edited manually and repositions any
moved markers.
Revert
Click this button to remove any modifications to the slice markers, to undo the
slicing, and to remove the layer with the sliced zones from the Program Tree.
AUX Tab
If you have created slices, the AUX tab becomes available.
AUX 1-4
You can send the signal of the selected slice to the global, or, if available, the
local AUX busses. Use the controls to specify the level that is sent to each AUX
bus.
Fade In/Fade Out
Defines a fade in or a fade out for the selected slices. This can be used to remove
unwanted clicks if the audio is difficult to slice.
RELATED LINKS
Filter Section on page 119
Sample Editor Context Menu
Range Selection Tool
Click and drag with this tool to create a selection.
Zoom Tool
If this tool is selected, you can click in the waveform to zoom in on the position
where you click.
Play Tool
If this tool is selected, you can click in the waveform to start playback. The
sample is played back from this position until you release the mouse button.

Editing Samples in the Sample Editor
Sample Editor Context Menu
164
Scrub Tool
If this tool is selected, you can click in the waveform and drag sideways to play
back the audio. The playback direction and speed depend on how far you move
the mouse left or right from the position where you clicked.
Zoom
•Zoom In zooms in one step.
•Zoom Out zooms out one step.
•Zoom Full displays the entire sample in the waveform display.
•Toggle Zoom Full/Last switches between the last zoom setting and the
display of the entire sample.
•Undo/Redo Zoom allow you to undo/redo the last zoom setting.
•Zoom to Selection zooms in on the current selection.
•Zoom to Sample Start/End zooms in on the sample start or end marker,
depending on which is nearer to the position of the cursor.
•Zoom to Sample Start zooms in on the start marker of the sample.
•Zoom to Sample Start Range zooms in on the start range.
•Zoom to Sample End zooms in on the end marker of the sample.
•Zoom to Sustain Loop zooms in on the entire sustain loop.
•Zoom to Sustain Loop Start zooms in on the start of the sustain loop.
•Zoom to Sustain Loop End zooms in on the end of the sustain loop.
•Zoom to Release Start zooms in on the release start.
•Zoom to Start zooms in on the start of the sample file.
•Zoom to End zooms in on the end of the sample file.
•Zoom to Range zooms in on the selection range.
Sample
•Read Root Key and Tuning From File allows you to set the root key and
tuning to the values that are saved in the sample file. The current zone
settings are overwritten by the sample file settings.
NOTE
This option is only available if the corresponding information is available in
the sample file.
•Show in Explorer/Finder navigates to the file in the File Explorer/Mac OS
Finder.
•Read Loop from File allows you to set loop markers to the values that are
saved in the sample file. The current zone settings are overwritten by the
sample file settings.
NOTE
This option is only available if the corresponding information is available in
the sample file.
•Open in External Editor allows you to open and edit the sample in an
external editor.

Editing Samples in the Sample Editor
Sample Editor Context Menu
165
NOTE
This menu entry is only available if an external editor is specified in the Edit
section of the Options Editor.
•Trim Sample to Start/End trims the sample according to the start and end
markers.
•Trim Sample to Selection trims the sample according to the current
selection range.
•Normalize Sample allows you to normalize the sample.
Loop
•Copy Sustain Loop to Release Loop copies the start/end marker positions
of the sustain loop to the release loop.
•Copy Release Loop to Sustain Loop copies the start/end marker positions
of the release loop to the sustain loop.
•Copy Loop A to B copies the settings of loop A to loop B.
•Copy Loop B to A copies the settings of loop B to loop A.
•Set Sustain Loop to Sample Start/End sets the sustain loop start and end
marker positions to those of the sample start and end markers. This is
useful for drum loops, for example.
•Set Sample Start/End to Sustain Loop sets the sample start and end
marker positions to those of the sustain loop start and end markers. This
can be used to create sliced loops from longer sample files.
Selection
•Set Sample Start/End to Selection moves the start and end points of the
sample to the start and end points of the selection range.
•Set Sustain Loop to Selection moves the sustain loop markers so that they
encompass the selection range.
•Set Release Loop to Selection moves the release loop markers so that they
encompass the selection range.
•Create Zone from Selection creates a new sample zone from the selection
range.
Show Half Level Axis
Activate this option to show the half level axes in the waveform display.
View Range
•Auto uses the view range of the previous sample.
•Last restores the view range that is saved with the sample.
•Full shows the entire sample.
•Sample shows the range between sample start and sample end markers.
•Sample Start shows the sample start marker with the current zoom factor.
•Sample Start Range shows the sample start range marker with the current
zoom factor.
•Sample End shows the sample end marker with the current zoom factor.
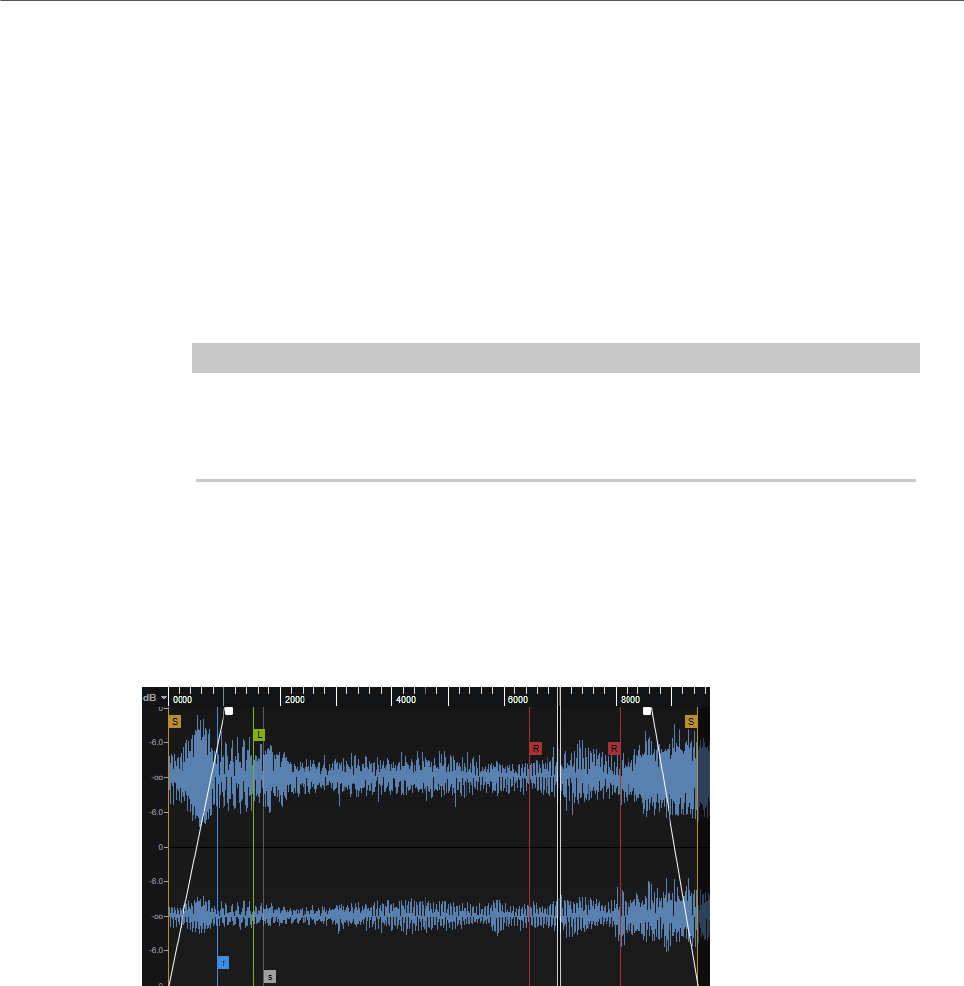
Editing Samples in the Sample Editor
Markers
166
•Sustain Loop shows the entire sustain loop.
•Sustain Loop Start shows the start marker of the sustain loop with the
current zoom factor.
•Sustain Loop End shows the end marker of the sustain loop with the
current zoom factor.
•Release Loop shows the entire release loop.
•Release Loop Start shows the start marker of the release loop with the
current zoom factor.
•Release Loop End shows the end marker of the release loop with the
current zoom factor.
NOTE
If the view range cannot be set to the specified loop marker or range because the
sample does not contain the required loop, it is set to the last stored settings for
that zone. If no such settings are found, the entire sample is displayed.
RELATED LINKS
Options Editor on page 35
Markers
Markers specify important positions or sections in a sample.
You can move markers by dragging them in the graphical display. Which markers are shown
in the display depend on which tab is selected.
Sample Start
Defines where the sample starts to play when a zone is triggered. Audio before
this marker is skipped.
Sample End
Defines where the sample stops playing. Audio after this marker is ignored.
Sustain Loop Start
Defines where the sustain loop starts.

Editing Samples in the Sample Editor
Zooming
167
Sustain Loop End
Defines where the sustain loop ends. When this marker is reached, playback
jumps back to the sustain loop start.
Release Loop Start
Defines where the release loop starts.
Release Loop End
Defines where the release loop ends. When this marker is reached, playback
jumps back to the release loop start.
Release Start
This marker defines the position at which playback starts when a note-off
message is received. This allows for a realistic release note-off behavior without
the necessity of using extra release samples. To avoid unwanted clicks when
jumping to the release marker, you can set a crossfade time and curvature on the
Loop tab in the parameter section.
Sample Start Range
Defines the attack phase of a sample, which can be used for the modulation of
the sample start.
RELATED LINKS
Sample Oscillator Section on page 106
Zooming
•To zoom in/out on the time and level axis, use the horizontal and vertical zoom sliders.
•The three buttons to the right of the horizontal zoom slider allow you to zoom to the
start, the end, and to the full range.
Depending on the situation, these options refer to the sample, the selection, or a loop.
Click several times to increase the zoom level.
•To toggle between full zoom and the previous zoom setting, click the A button to the
right of the horizontal zoom slider.
•To zoom in/out on the locator position, press G and H.
•You can click and drag the ruler to zoom in/out on the position you have clicked.
•Resize the rectangle in the overview line to zoom to this range.
•Use the options on the Zoom submenu of the context menu.
Editing Samples in an External Editor
HALion allows you to use an external sample editor to perform destructive offline editing on
a sample.
Editing Samples in the Sample Editor
Creating Loops
168
NOTE
Not all sample editors provide the same functionality, that is, certain features, like
transferring sample loop markers, are not always possible. To get the best results, use
Steinberg’s WaveLab.
•To load the current sample in an external editor, right-click in the waveform of the
sample, and select Sample> Open in External Editor.
The external sample editor is launched and the sample is transferred.
NOTE
This menu entry is only available if an external editor is specified in the Edit section in
the Options Editor.
HALion creates a copy of the sample and writes it to a temporary folder. This folder is
specified in the Options Editor. If no folder is specified, the temporary folder of the operating
system is used. Changes in the external editor are made to the copy of the sample.
When you save the sample in the external editor, HALion recognizes that the temporary file
has changed and lets you update the corresponding sample.
NOTE
Sample start/end and release markers cannot be transferred to an external editor.
If a sample is referenced by several zones, changes to the sample are reflected in all these
zones.
RELATED LINKS
Edit Section on page 38
Creating Loops
You can specify two independent loops, one for the sustain phase, and one for the release
phase.
To set up the sustain and the release loop, you can set the start and end positions manually
and/or use the functions to automatically detect suitable loop positions. For a smooth loop,
you must find positions at which the loop end can be continued naturally at the loop start.
The loop settings can be edited using the toolbar options and the handles in the waveform
display, but they are also available on the Loop tab in the parameters section.
Setting Up a Loop
PROCEDURE
1. On the Loop tab, select a loop mode for the sustain loop and the release loop.
The corresponding markers are shown in the waveform display.
2. Activate Edit Loop on the toolbar.
3. Do one of the following:

Editing Samples in the Sample Editor
Creating Loops
169
•Set the start and end markers for the loop by dragging the marker handles or
press Shift and drag the audio before or after the loop end marker to adjust the
end or start position.
•To automatically detect suitable loop start and end positions, click the Find
Previous Loop Start/End or Find Next Loop Start/End buttons.
The loop markers are set accordingly.
NOTE
The Loop Transition, Threshold, and Loop Score settings influence the marker
detection features.
Edit Loop
If Edit Loop is activated, the editor shows the looped region instead of the original sample
data. This is useful to fine-tune and adjust a loop. The waveform is updated to reflect the
result of your loop settings.
To better see how loop start and end are correlating, a part of the waveform is displayed
in blue on top of the loop. This part is taken from an area around the loop start (+/- the
loop length) and then shifted to the loop end. The better both waveforms correspond, the
smoother the sound of the loop.
Setting Up Loop Crossfades
Loop crossfades allow for smoother loops.
PROCEDURE
1. Activate Edit Loop on the toolbar.
Crossfade handles are displayed in the waveform display.
2. Click Sustain/Release Loop on the toolbar to select whether you want to edit the
sustain loop or the release loop.
3. Drag the crossfade handles or enter the crossfade range numerically in the parameter
section.
4. To see the effect of the crossfade, activate Show Resulting Loop Crossfade on the
toolbar.
The resulting waveform is displayed in red.
5. Adjust the crossfade curve by dragging the middle of the fade curve up or down.
Creating a Loop from the Selection
You can use a selection range as the basis for a loop.
PROCEDURE
1. Activate Play Selection Looped on the toolbar.
2. Click the Play Sample button on the toolbar.
3. Adjust the selection until you are satisfied with the loop.
Editing Samples in the Sample Editor
Creating Slices Automatically
170
4. Right-click in the waveform display, open the Selection submenu, and select Set
Sustain Loop to Selection or Set Release Loop to Selection.
Creating Slices Automatically
You can slice samples in the Sample Editor. This allows you to play them back in sync with
the host application, for example.
PROCEDURE
1. In the Program Tree, select the sample zone that you want to slice.
2. In the Sample Editor, select the Slice tab.
3. Adjust the Threshold, Sensitivity, Min Length and Grid Catch parameters to set the
slice markers automatically.
4. If necessary, move, add, or delete slice markers manually.
You can add and delete slice markers by Alt-clicking in the editor.
5. To create slices, click Apply in the upper right corner of the parameter section.
RESULT
HALion creates zones from the slices. These zones are added to the Program Tree, together
with a slice player that contains the MIDI sequence to play back the sliced loop.
AFTER COMPLETING THIS TASK
NOTE
• After slicing the sample, you can still edit the slice markers manually, but you cannot
use the automatic slice detection.
• If you change slice markers after creating slices, the sample start and end markers
of the affected zones in the Program Tree are modified. If you add slice markers, new
zones are added. If you remove slice markers, the corresponding zones are removed.
Modifying Start and End of Slices
You can shorten a slice without changing the position of the adjacent slice markers.
PROCEDURE
•Select the Main tab and drag the corresponding marker.
If you modify the end marker, the following slice start marker turns blue. If you modify
the sample start marker of a slice, this marker turns blue.
NOTE
Changing the start or end markers does not influence the timing of the note events of
the MIDI phrase that triggers the loop.
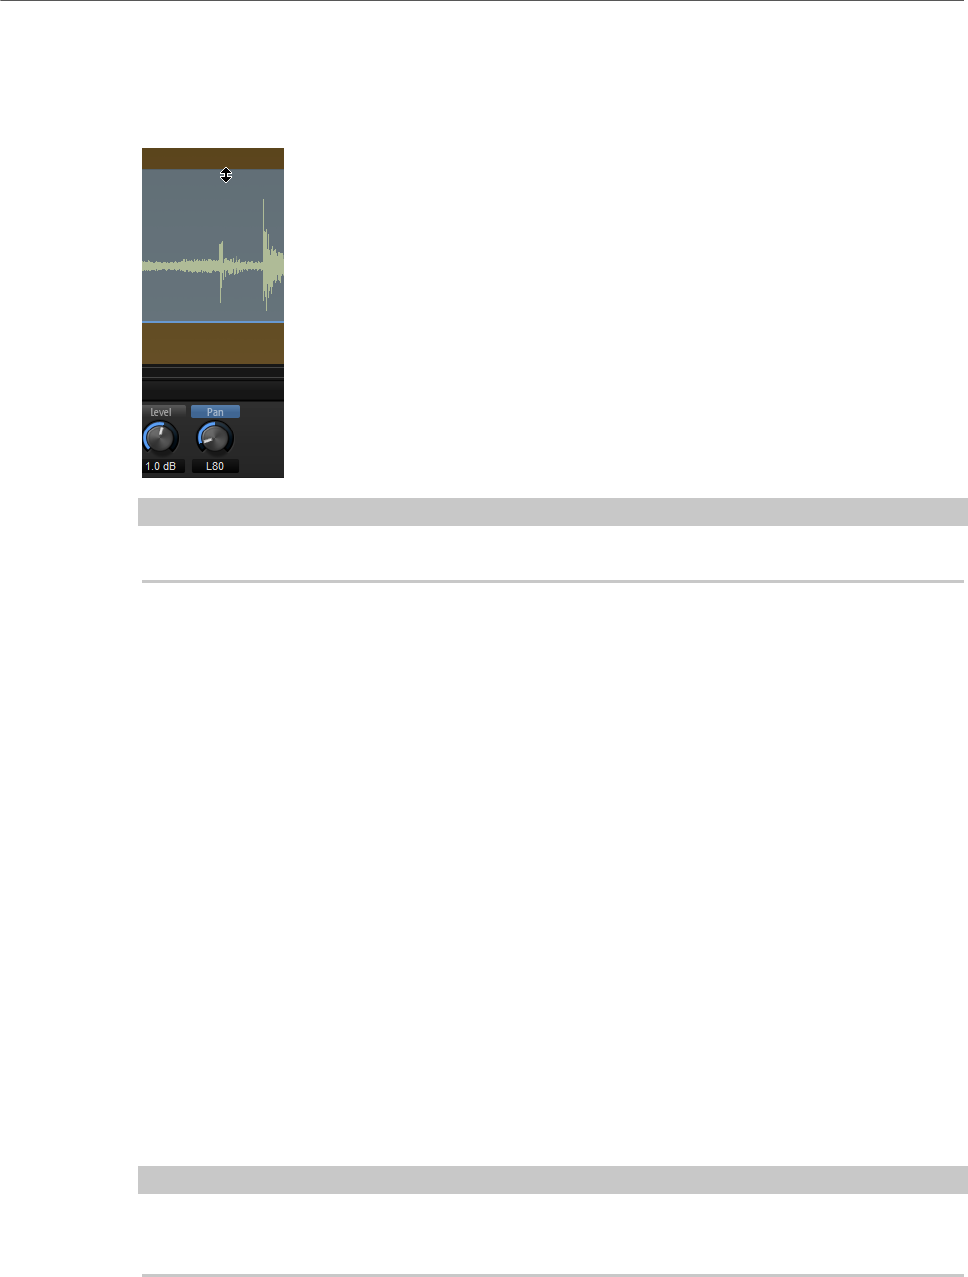
Editing Samples in the Sample Editor
Replacing Samples
171
Editing Parameter Curves
If you click the parameter name above a control, you can view and edit the corresponding
parameter in the waveform display.
NOTE
Only one parameter can be shown at a time.
•To change the value of a single step, drag it up/down.
•To adjust all steps at once, Shift-drag a step.
•To reset a step to a level of 0 dB, Ctrl/Cmd-click the step.
•To reset all steps, hold down Shift and Ctrl/Cmd and click in the graphical editor.
•To draw a ramp with steps, Alt-click and draw a line.
Replacing Samples
You can replace samples using the Load/Replace Sample button in the header of the Sample
Editor.
Furthermore, the Program Tree allows you to exchange samples, for example, to replace the
snare drum in a drum loop. This can be done by replacing the sample or the sample zone. If
you replace the sample, zone parameters like filter settings, etc. remain unaffected. If you
replace the entire zone, the sample and all zone parameters are replaced.
•In the Program Tree, drag the new sample or sample zone onto the sample or zone
that you want to replace.
•Drag the new sample or zone from the Program Tree onto the slice in the slice editor
that you want to replace.
NOTE
If the replacement sample is longer than the original, change the playback mode of the zone
to One-Shot, to make sure that the sample is played until the end.
If you replace slices in the Sample Editor, the following applies:
•In the Sample Editor, samples that were replaced are shown in a different color.

Editing Samples in the Sample Editor
Replacing Samples
172
•The Sample Editor does not show the waveform of the replaced sample, only the
original sample waveform.
NOTE
If you revert the slicing of a loop, all created zones are deleted and any replacement samples
are also discarded.

Wavetable Synthesis
173
HALion’s wavetable synthesis offers you a wide range of possibilities, from the re-synthesis
of samples to the creation of entirely new sounds.
In classic subtractive synthesis, static harmonic oscillator waveforms are sent through filters
and amplifiers where the sound is shaped. In wavetable synthesis, you can extract specific
portions of samples and align these to make up a wavetable. The waves in the wavetable are
played back one after the other to create the sound progression. You can shape the sound as
in the subtractive synthesis by using filters, amplifiers, etc.
The Wavetable Editor is where you create wavetables, that is, where you load samples, insert
wave extraction markers to add the waves, work on the spectrum of the waves, create the
wavetable envelope, and specify the order of the waves in the wavetable.
HALion allows you to create your own wavetables by extracting single-cycle waves from
samples. Single-cycle means that a wave is exactly one period long. The sophisticated
sample analysis functions in the Wavetable Editor help you to find good positions for wave
extraction.
When HALion extracts a wave from a sample, a wavetable envelope is created. You can edit
the envelope on the Envelope tab. This envelope is part of the wavetable, which means
that you can always use the wavetable as it is, without having to assign and set up a new
envelope.
The order of the waves in the wavetable determines how the sound evolves when you
modulate the position. A wavetable can contain up to 256 waves that can be extracted from
different samples. A series of consecutive waves from the same sample is called a sequence.
A wavetable can contain multiple sequences from different samples.
In the Zone Editor for a wavetable zone, in the Wavetable section, you can find the play
parameters for wavetables. This is where you specify which oscillators you want to use and
where you make settings for them.
You can modulate the wavetable position automatically with the Speed parameter or
manually in the modulation matrix.
RELATED LINKS
Editing Zones on page 92
Wavetable Section on page 109
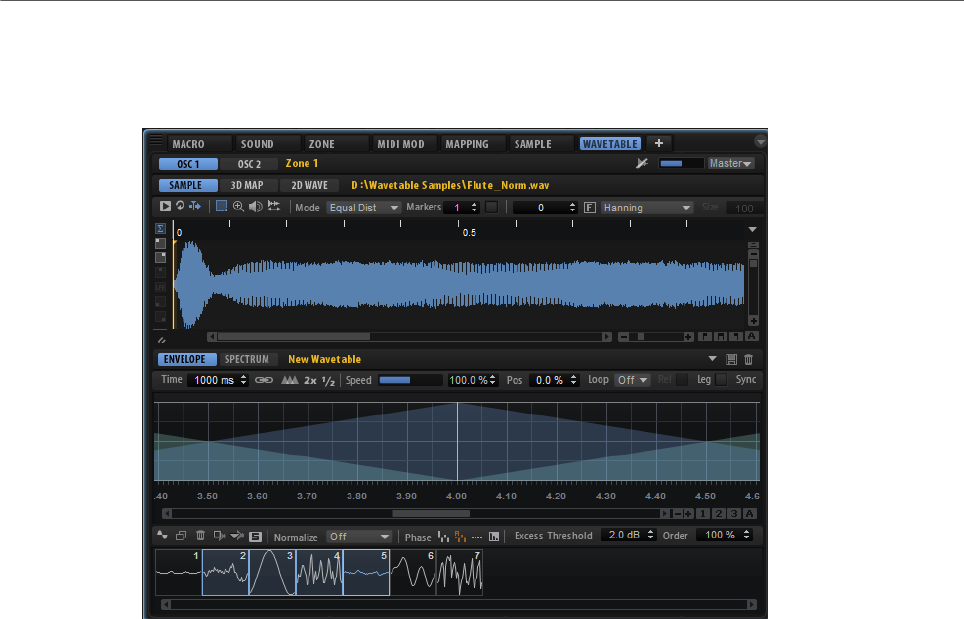
Wavetable Synthesis
Wavetable Editor
174
Wavetable Editor
The Wavetable Editor allows you to create wavetables by extracting waves from samples.
The Osc 1 and Osc 2 tabs in the top section of the Wavetable Editor allow you to switch
between the settings for the two oscillators.
The Wavetable Editor contains a sample display, a Spectrum tab, and an Envelope tab. At
the bottom of the window, an overview of the wavetable that contains the extracted waves is
displayed.
The file path and name of the sample are displayed above the sample display. If more than
one sample is loaded, the file path serves as a menu to select the sample to edit and display.
If you select a sample, the waves that belong to it are selected in the wavetable.
The order of the waves in the wavetable determines how the sound evolves when you
modulate the position, either automatically with the Speed parameter or manually in the
modulation matrix.
3D Map and 2D Wave Tabs
Show 2D Wave
Displays a single cycle of the current waveform. The shape of the waveform
changes as the sound evolves, reflecting the waveform at the current position
in the wavetable. If Multi-Oscillator is activated in the Wavetable section of the
Zone Editor, the view displays the waveform of the individual oscillators.
Show 3D Wavetable Map
Displays a topographic map of the entire wavetable. The current position in the
wavetable is indicated by a line. If Multi-Oscillator is activated in the Wavetable
section of the Zone Editor, the view indicates the position of the individual
oscillators.
• To change the viewing angle, drag the 3D map.

Wavetable Synthesis
Wavetable Editor
175
• To zoom in and out, use the scroll wheel of your mouse.
Toolbar
Play Sample
Plays back the original sample.
You can specify the playback volume and output with the Preview Volume and
Output for Preview controls in the upper right corner of the editor.
Play Selection Looped
Activate this button to play back the selection in a loop.
Auto-Scroll
If this button is activated, the waveform display is scrolled during playback,
keeping the playback cursor visible.
Range Selection Tool
Click and drag with this tool to create a selection.
Zoom Tool
If this tool is selected, you can click in the waveform to zoom in on the position
where you click.
Play Tool
If this tool is selected, you can click in the waveform to start playback. The
sample is played back from this position until you release the mouse button.
Scrub Tool
If this tool is selected, you can click in the waveform and drag sideways to play
back the audio. The playback direction and speed depend on how far you move
the mouse left or right from the position where you clicked.
Marker Creation Mode
• If this parameter is set to Equal Distance, the markers are equally
distributed over the sample.
• If this parameter is set to Exponential, the distances between the markers
increase over the length of the sample.
• If this parameter is set to Spectral, the entire sample is analyzed and
markers are only inserted if the change in the spectrum exceeds the set
threshold.
• If this parameter is set to Spectral Voiced, the entire sample is analyzed
and markers are only inserted if the change in the spectrum exceeds the
set threshold and if a pitch is detected at this position.
NOTE
Markers are created automatically each time that you change the Marker
Creation Mode, the Number of Markers, or the Threshold.
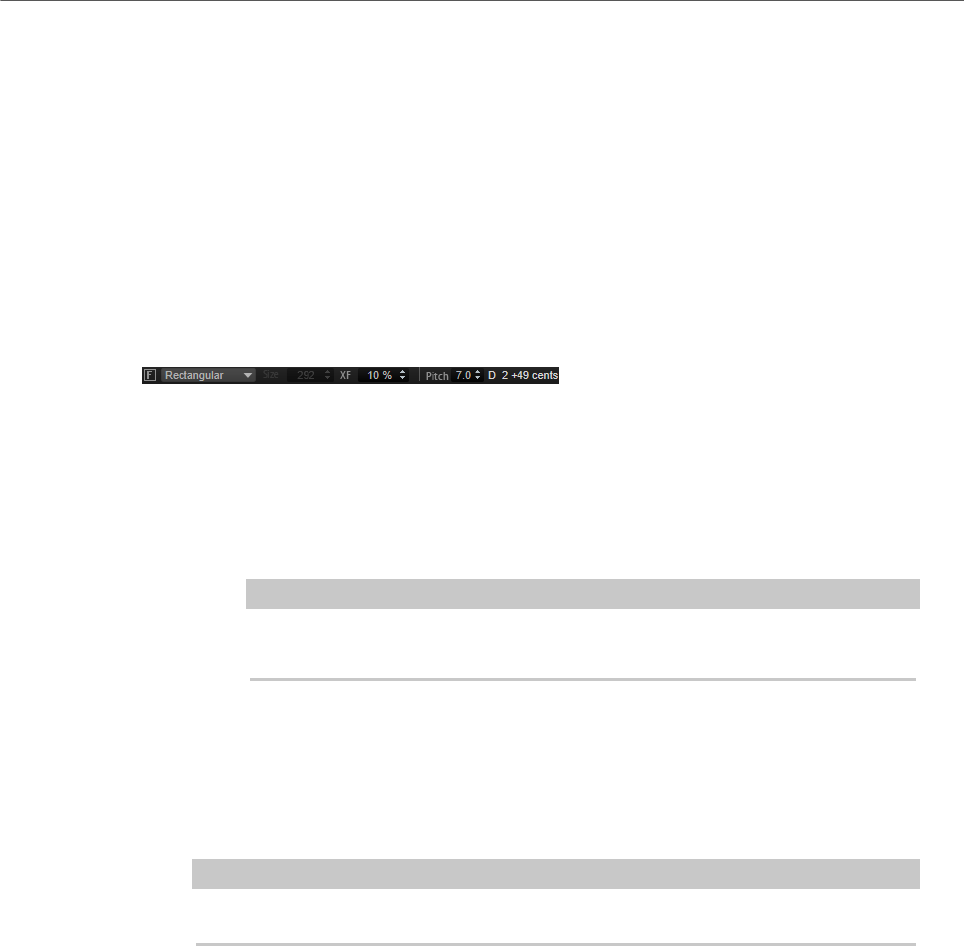
Wavetable Synthesis
Wavetable Editor
176
Number of Markers
The number of markers in the sample display.
You can enter the number of markers that you want to use directly in the value
field.
Set Markers
Analyzes the sample and inserts markers, depending on the Marker Creation
Mode setting.
Sample Position
The position of the selected marker in the sample.
Fixed Size
Sets the FFT window to a fixed size. This is useful if you want to extract a specific
portion of a sample.
• If this button is activated, you can enter the size in number of samples in
the Window Size value field.
NOTE
If the window size does not match the fundamental frequency of the
sample, the extracted wave has digital artifacts.
Detected Pitch
The detected pitch at the current marker position.
Window Crossfade
Sets window crossfade.
NOTE
This option is only available for the Rectangular window type.
Window Size
Sets the size of the window.
Window Type
Allows you to select the window type.
Pitch Detection Sensitivity
Allows you to adjust the pitch detection curve. For example, if the pitch detection
curve changes too fast or if it contains wrong pitches, lower the Pitch Detection
Sensitivity.
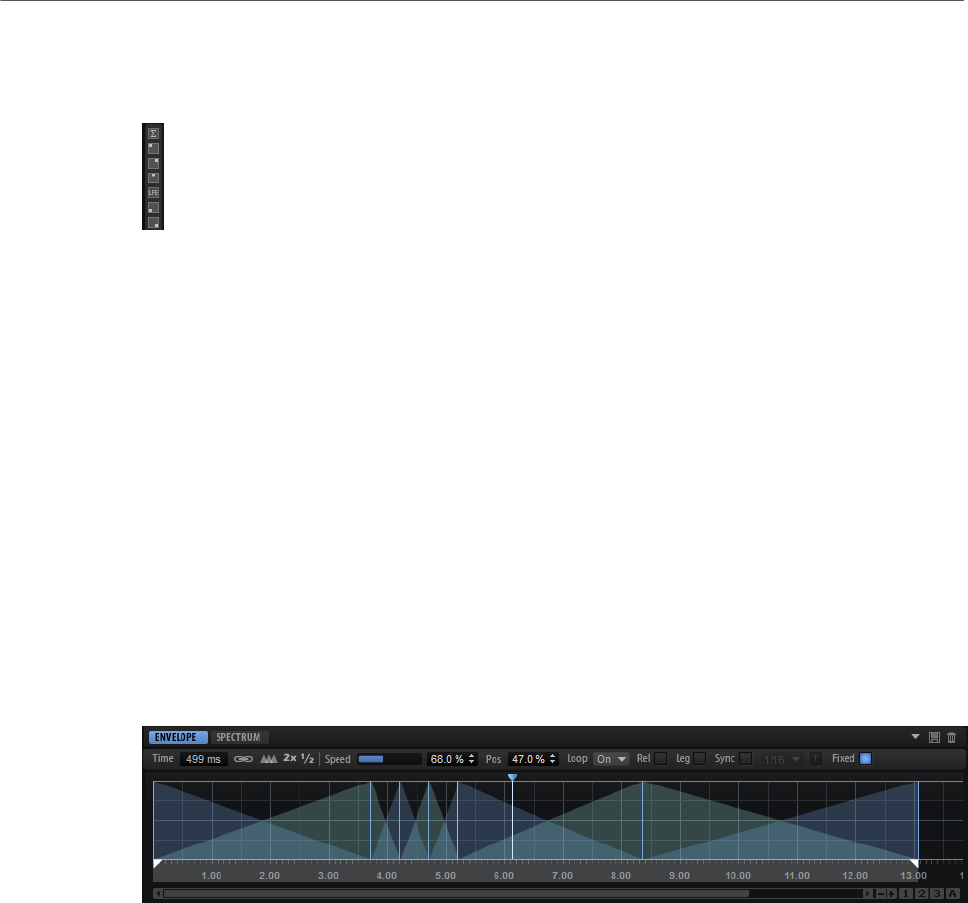
Wavetable Synthesis
Wavetable Editor
177
Channel View Options
On the left of the waveform display, you can find the view options for the waveform.
If you use multi-channel samples, the buttons on the left of the sample display let you decide
which channel is displayed and used for wave extraction. The channel setting is remembered
for each extracted wave. This way, you can extract one wave from the left and another from
the right channel, for example. By default, the wave is extracted from the sum of the audio
channels.
Wavetable Envelope
On the Envelope tab, you can set up the wavetable envelope. This envelope determines how
the waves in a wavetable play back.
An envelope can consist of a number of segments that can be based on different waves.
The order of the segments in the wavetable envelope matches the order of the waves in the
wavetable. Between these segments, crossfades are inserted to create smooth transitions.
The form of the crossfades is shown in the display. The fade-in and fade-out of the selected
segment are highlighted. The vertical line in the display marks the position where the wave
can be heard alone, that is, without crossfade from adjacent waves. When you play a note,
the envelope starts from the position cursor.
Time of Segment
If you want to adjust an envelope segment to a specific time, enter the value in
this field.
You can adjust the Time of several selected segments at the same time.
Link Envelope Times to Marker Positions
If this button is activated, the chronological order of the envelope segments
corresponds to the chronological order of the markers in the sample. New
markers are added to the wavetable envelope according to their position in the
sample. If you change the position of a marker in the sample, the position and
time of the corresponding envelope segment also change.
If this button is deactivated, you can extract a different spectrum from a different
position in the sample without changing the envelope.
Wavetable Synthesis
Wavetable Editor
178
NOTE
• If you adjust the envelope or change the order of the waves while
Link Envelope Times to Marker Positions is activated, this option is
automatically deactivated, because the markers and the envelope are not
in sync anymore.
• If the wavetable consists of multiple sequences, this option is remembered
separately for each sequence.
Set Equal Times
The duration of the selected envelope segments is adjusted to equal times, that
is, to the arithmetic mean of the durations of the segments.
NOTE
This function can only be used if three or more consecutive segments are
selected.
Double Envelope Times
For the selected envelope segments, the times are doubled.
Halve Envelope Times
For the selected envelope segments, the times are halved.
Speed
Determines the rate at which the envelope plays through the wavetables. At +100
%, the envelope plays back at its original speed. A value of +50 % corresponds to
half the original speed, and +200 % to twice the original speed, for example.
This parameter is unipolar.
Position
The position of the cursor.
Loop Mode
•Off: If Playback Direction is set to a positive value, the wavetable plays from
the position cursor to the end.
If Playback Direction is set to a negative value, the wavetable plays from
the position cursor to the start.
•On: Depending on the Playback Direction setting, the wavetable plays
forward or backward in a loop.
•Alt: The wavetable plays in an alternate loop, that is, the loop is alternately
played forward and backward. The first direction depends on the Playback
Direction setting.
Loop Until Release
If this button is activated, the loop is repeated until you release the key on the
keyboard.
If this button is deactivated, waves outside the loop are not played when you
release the key.

Wavetable Synthesis
Wavetable Editor
179
Legato
If Legato is deactivated, each note starts playback from the position cursor.
If Legato is activated, the first note starts playback from the position cursor, and
any following notes start from the current playback position for as long as the
first note is held.
Sync To Host Tempo
You can synchronize the envelope to the tempo of your host application. This
allows you to set envelope times that relate to musical time intervals.
If Sync is activated, a grid appears in the graphical envelope editor. On the Grid
pop-up menu to the right of the Sync button, you can select a note value. This
sets the resolution of the grid.
For example, if you specify a 1/4 note value, the envelope segments snap to 1/4
note steps. If the T button is activated, triplet note values are used.
You can also enter note values and triplets manually in the value field. The Time
field of a segment displays times in fractions of beats. The fraction is always
reduced to the smallest possible value. For example, 2/16 is displayed as 1/8.
Envelope segments that do not exactly match a note value show the closest note
value.
Fixed
• If Fixed is activated and you move selected segments on the time axis, only
these segments are moved.
• If Fixed is deactivated, all segments that follow the edited segments are
also moved.
NOTE
Position, Speed, and Direction of wavetable oscillator 1 and 2 can be modulated in the
modulation matrix.
Editing the Envelope
•To move the cursor, drag the blue handle above the envelope.
•To change the length of a segment, drag its right border.
•To adjust the shape of the crossfade between two waves, drag the crossfade lines of
the segment. This way, you can change the character of the crossfade from linear to
exponential/logarithmic behavior.
•To reset the crossfade to linear, Ctrl/Cmd-click it.
Editing Selections
You can change the position and distribution of envelope markers within a multi selection of
markers.
• To stretch or expand all markers, hold down Ctrl/Cmd and move the first or the last
marker of the selection.
To modify the distribution of the markers inside the selection, hold down Ctrl/Cmd and
move one of the middle markers.
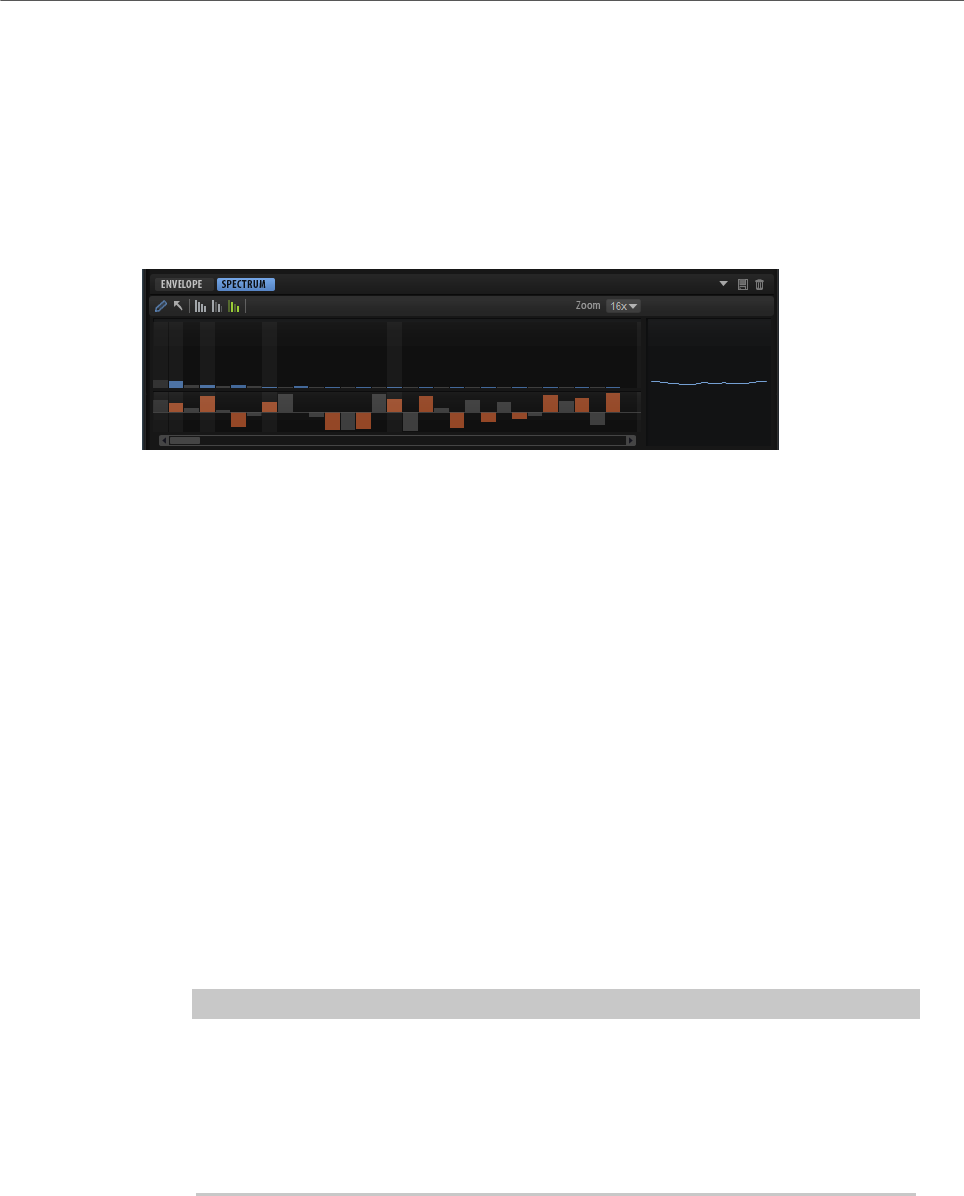
Wavetable Synthesis
Wavetable Editor
180
Moving the marker towards the first or last marker stretches the density of markers
at one side and expands it on the other side. Dragging the middle marker within the
selection to the left or right has the same effect.
Spectrum Tab
The Spectrum tab shows the amplitude and phase spectrum of the extracted wave, that is,
the amplitude and phase for each harmonic.
The lowest harmonic is displayed on the left, the highest harmonic on the right.
The overtones in the spectrum are represented through blue and orange bars. The blue bars
represent the amplitude of the overtones, that is, the magnitude spectrum. The orange bars
represent the phase of the overtones, that is, the phase spectrum. If the magnitude of an
overtone is zero, the corresponding phase is grayed out. To get information on a particular
overtone, move the mouse over its bar.
Draw Tool
If the Draw tool is selected, you can change the spectrum by drawing with the
mouse. The resulting wave is displayed on the right.
• To draw in the magnitude or the phase spectrum, click in the display and
drag.
• To draw a line, hold down Alt and drag.
• To adjust a single overtone, click it, hold down Shift and drag up/down.
• To set the magnitude or the phase of an overtone to zero, Ctrl-click it.
To set the magnitude or phase of all overtones to zero, hold down Shift-Ctrl
and click.
NOTE
• If Keep Original Phases is activated, only the focused wave is affected.
• If Align Phases is activated and you adjust the phase of the focused wave,
the following waves are also affected.
• If Reset Phases to Zero is activated, the phase spectrum cannot be
adjusted with the Draw tool.
Selection Tool
The Selection tool lets you create range selections in the magnitude spectrum.
• Drag the tool to make a selection.
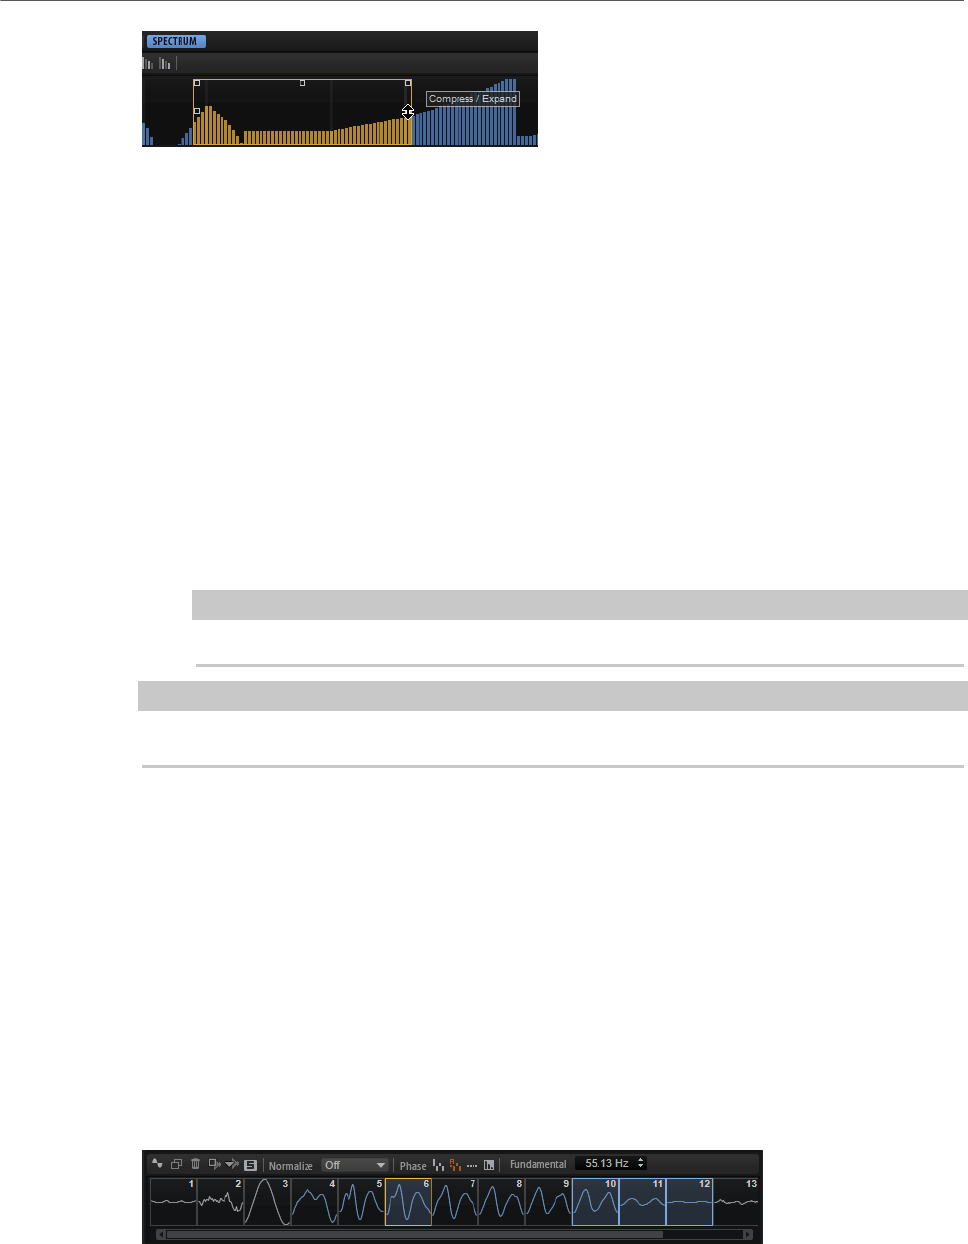
Wavetable Synthesis
Wavetable Editor
181
If a selection is made, you can use the handles of the rectangle to execute the following
functions:
• To tilt the overtones from left to right, use the handle in the top left corner.
Press Ctrl to tilt the overtones using a shelving filter curve instead of the linear curve.
• To tilt the overtones from right to left, use the handle in the top right corner.
Press Ctrl to tilt the overtones using a shelving filter curve instead of the linear curve.
• To scale the overtones, use the handle in the center of the top border.
Press Ctrl to scale the overtones with a bell curve.
Press Shift to offset the overtones.
• To scale the overtones around their relative center, use the handle in the middle or the
left and right borders.
• To select all overtones of the same pitch in all octaves that are higher than the current
octave, double-click an overtone.
NOTE
This automatically switches to All Harmonics mode.
NOTE
Only non-zero values can be edited with the Selection tool.
Harmonics buttons
You can edit all harmonics, or you can choose to apply your editing only to even or
to odd harmonics.
• Select All Harmonics to edit all overtones.
• Select Odd Harmonics to edit only the odd-numbered overtones.
• Select Even Harmonics to edit only the even-numbered overtones.
Zoom
Allows you to choose between six predefined zoom factors.
Wavetable Overview
At the bottom of the Wavetable Editor, you find the wavetable overview. The selected waves
are marked in blue. The focused wave is marked in orange.

Wavetable Synthesis
Wavetable Editor
182
NOTE
A wavetable can consist of up to 256 waves.
• To select a wave, click on it.
• To select multiple waves, Shift-click on them.
The corresponding segments in the wavetable envelope are highlighted.
NOTE
You can only add consecutive waves to a multi-selection.
• To select all waves from a sequence, double-click a wave, double-click the marker for
a wave, or open the context menu and select Select Sequence.
• To copy the selected waves, hold down Alt and drag them to a new position in the
wavetable.
• To change the order of the waves, drag them to a new position in the wavetable.
The insert position is indicated in red.
• To replace a wave with another wave, drag the new wave onto the wave that you want
to replace.
NOTE
This operation only works with single waves.
Create New Wave
Allows you to create a new wave of the selected type and insert it to the right of
the selected wave in the wavetable.
Duplicate
Duplicates the selected waves.
Delete
Deletes the selected waves.
NOTE
If you delete all waves from the wavetable, the last sample that was visible in the
waveform display is kept, allowing you to restart from scratch.
Insert from Sample
Opens a file dialog where you can load a new sample. This also adds a new wave
to the wavetable.
Replace Sample
Allows you to replace all waves of the visible markers in the sample.
NOTE
If other waves of the same sample are used in other wave sequences, these
waves are not replaced.

Wavetable Synthesis
Wavetable Editor
183
Solo
Solos the focused wave. This bypasses the position and speed settings and you
hear only the selected wave.
Normalize Mode
When samples are loaded, they are automatically normalized to 0 dB. This way,
the levels of the extracted waves match more easily.
If you extract waves from loud and from quiet parts of the sample, the levels of
these extracted waves differ. In this case, you can normalize the waves to match
their levels.
•Off plays back the waves at their original levels.
•Wave normalizes each wave of the wavetable separately.
•Sequence normalizes the loudest wave in a sequence. The levels of the
other waves in this sequence are adjusted accordingly. If the wavetable
contains multiple sequences, each sequence is normalized separately.
NOTE
The orignial level of the waves in the wavetable is not affected. Only the playback
is normalized.
Phase Buttons
The wavetable envelope uses crossfades between consecutive waves. Depending
on the phase of the waves, different amounts of phase cancellation occur during
the crossfade. To minimize the effects of phase cancellation, the phases of the
waves can be altered during playback.
• If Keep Original Phases is activated, the waves play with their original
phase.
Phase cancellation during the crossfades can occur.
• If Align Phases is activated, the phases of the waves are aligned.
The effect of phase cancellation is minimized.
• If Reset Phases to Zero is activated, the phase of all overtones is set to 0
degrees.
There is no phase cancellation, because all overtones of the waves are in
phase. However, the sound quality is less natural compared to the other
modes.
Interpolate Phases
If this button is activated, the wavetable envelope creates crossfades for both
the levels and the phases of the waves. This can minimize the effects of phase
cancellation even more.
NOTE
• This option is only available for Keep Original Phases and Align Phases.
• This option can introduce pitch modulation.
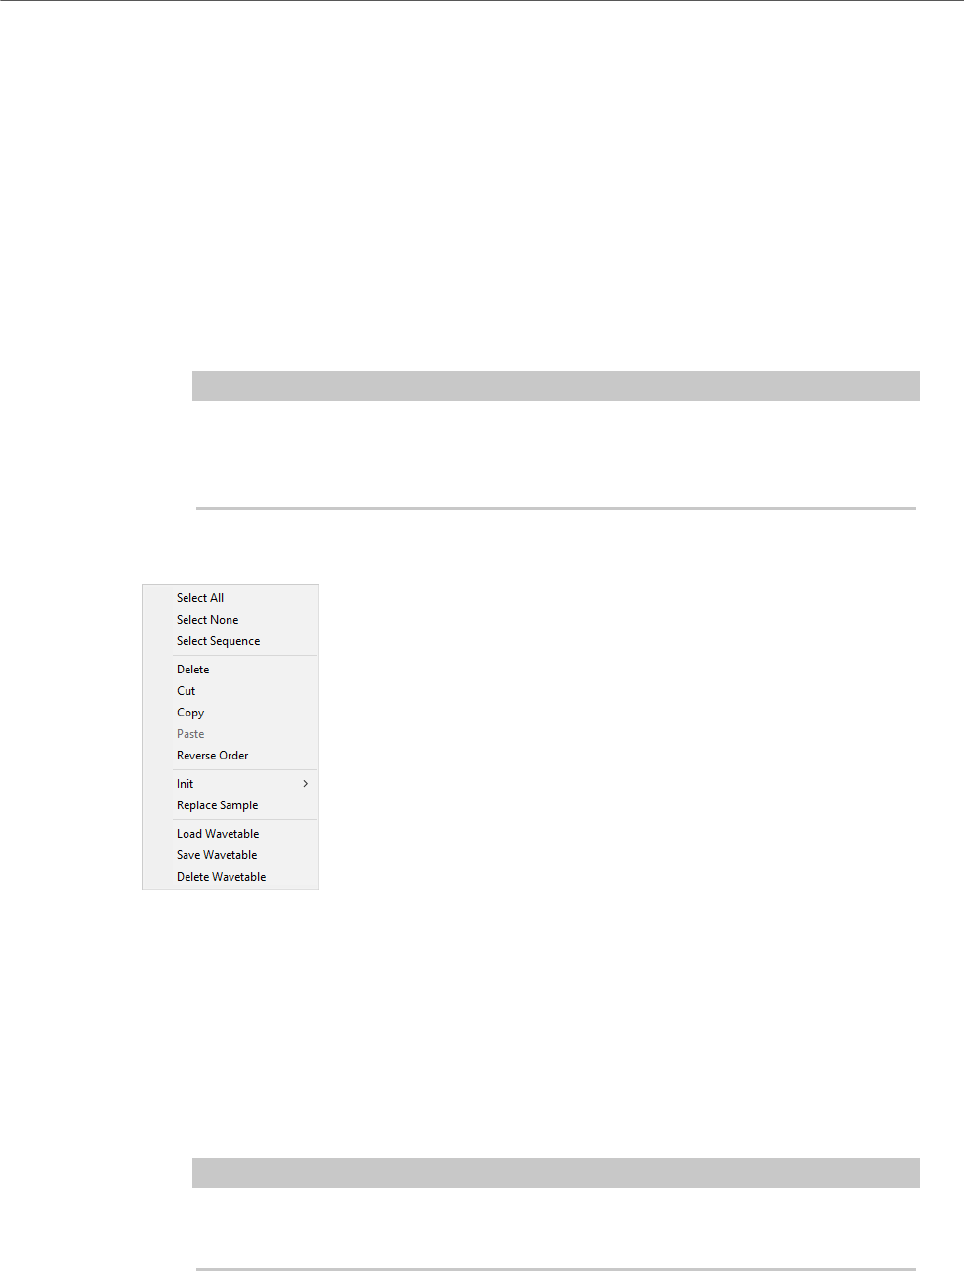
Wavetable Synthesis
Wavetable Editor
184
Fundamental
Displays the frequency of the fundamental of a wave in Hz. This value is set
automatically when a wave is extracted from a sample and represents the
original pitch.
If you have created the spectrum manually, either by drawing or by inserting one
of the basic waves from the Create New Wave menu, the value is set to 20 Hz.
If no extracted pitch information is available, the fundamental allows you to
determine which harmonic represents which frequency. For the default value
of 20 Hz, the 1st harmonic is at 20 Hz, the second at 40 Hz, the third at 60,
and so on. HALion provides 1024 harmonics, which means that you can create
frequencies up to 20.480 Hz.
NOTE
This parameter is only required by the Formant Shift function. If the Formant
section is deactivated in the Wavetable section in the Sound Editor or the Zone
Editor, the Fundamental parameter has no effect.
Context Menu
Select All
Selects all waves in the wavetable.
Select None
Deselects all waves in the wavetable.
Select Sequence
Selects all waves from the current sequence.
NOTE
In this context, a sequence is defined as a series of consecutive waves from the
same sample.
Delete
Deletes the selected waves.
Wavetable Synthesis
Wavetable Editor
185
NOTE
If you delete all waves from a wavetable, the last sample that was visible in the
sample display is kept. This allows you to start over if the wavetable was not to
your liking.
Cut
Cuts the selected waves to the clipboard.
Copy
Copies the selected waves to the clipboard.
Paste
Pastes the waves from the clipboard at the current position.
Reverse Order
Reverses the order of the selected waves, including their envelope times. This
command is only available if multiple waves are selected. If several waves are
selected, but if they have unselected waves in between, only the selected waves
change their order, all others remain unaffected.
Init
Allows you to replace a wavetable with a precalculated, mathematically perfect,
waveform. You can choose between Sine, Triangle, Saw, Square, Pulse 1, Pulse
2, White Noise, and Pink Noise. White Noise and Pink Noise use the spectrum
of white and pink noise to fill the wave with random numbers. You get different
waves each time that you select White Noise or Pink Noise.
Replace Sample
Allows you to change the sample that is used by the selected wave.
Load Wavetable
Allows you to load a wavetable.
Save Wavetable
Allows you to save the current wavetable.
Delete Wavetable
Allows you to delete a wavetable.
Zooming in the Wavetable Editor
•To zoom in/out on the time and level axis, use the horizontal and vertical zoom sliders.
•To zoom in or out, click the + or - buttons on the scrollbars.
•To toggle between full zoom and the previous zoom setting, click the A button to the
right of the horizontal zoom slider.

Wavetable Synthesis
Creating a Wavetable
186
•To zoom in or out on the current position, click in the timeline and drag up or down.
•To zoom to a specific region, hold down Alt, and click and drag over this region.
•The three buttons to the right of the horizontal zoom slider allow you to zoom to the
start, to the full range or the selection, and to the end.
Click several times to increase the zoom level.
Creating a Wavetable
PROCEDURE
1. Open the Wavetable Editor for a wavetable zone and load a sample using one of the
following methods:
•Drag and drop a sample to the sample display.
•Drag a sample to the wavetable and drop it where you want to insert a new wave
or replace an existing one.
The insert location is indicated by a red line. The replace location is indicated by
a red frame.
2. Enter wave extraction markers in the sample using one of the following methods:
•Alt-click the sample at the position where you want to insert a marker.
•Enter the number of markers that you want to use in the Markers value field.
This adds the corresponding waves to the wavetable.
3. Optional: On the Envelope and Spectrum tabs, adjust the wavetable envelope or edit
the spectrum of the wave.
4. Optional: Change the order of the waves in the wavetable.
5. Optional: Click Insert from Sample in the toolbar above the wavetable to add more
waves from other samples.
Pitch Detection
HALion’s Wavetable Editor automatically detects the pitch of samples that are added.
Positions in a sample where the pitch is properly detected usually contain a harmonic
spectrum that is suitable for wave extraction. In some cases, however, the pitch cannot
be detected correctly. This can be the case if a vocal sample contains breath noises, for
example.
Normally, you would not want to use these positions in samples for wave extraction.
Therefore, for visual feedback and orientation, you can display and edit the pitch detection
curve in the Wavetable Editor.
NOTE
The pitch detection is executed only on the selected channel.
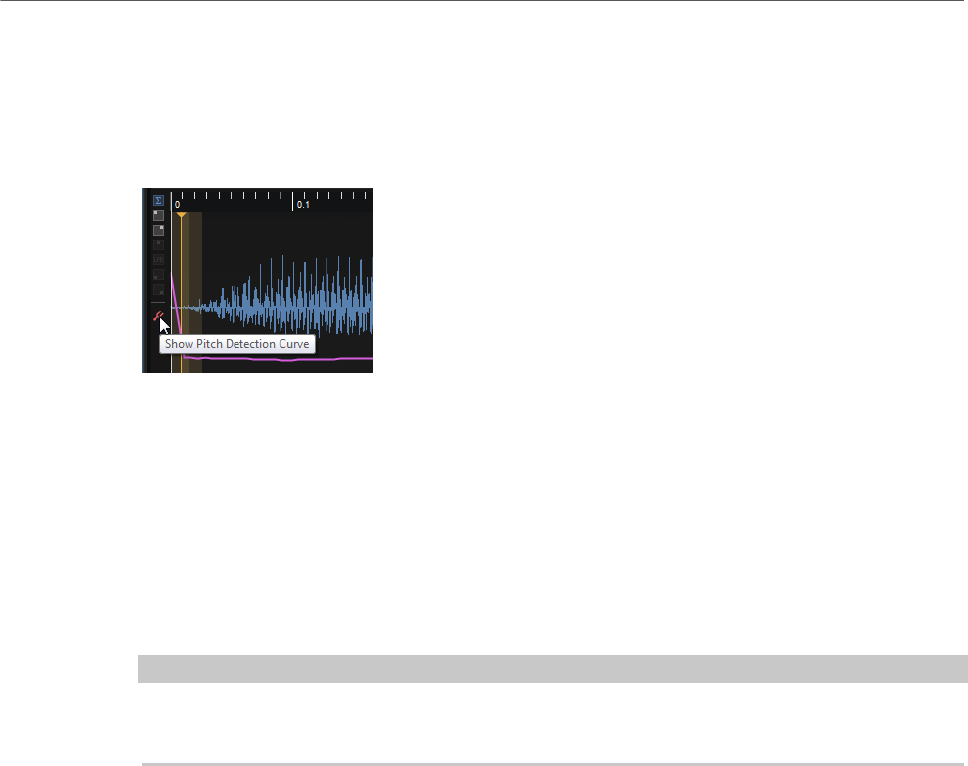
Wavetable Synthesis
Markers
187
Pitch Detection Curve
The pitch detection curve shows you where in a sample the pitch can be detected properly.
To show the pitch detection curve, click the corresponding button to the left of the Sample
display.
For example, if you use a sample that has a constant pitch but that shows peaks and troughs
at some positions in the pitch detection curve, this means that the detection is incorrect at
these positions. This is not unusual if you work with complex audio samples. However, if
waves are extracted at these positions, the result of the wave extraction will most probably
not have the expected result. You can prevent HALion from using incorrectly detected pitches
as extraction positions, either by correcting the pitch detection curve or by setting the
extraction markers manually.
•To correct the curve, use the Sensitivity control on the toolbar. Set it to a value where
fewer or no peaks occur in the curve.
NOTE
If the pitch detection fails, that is, if the pitch curve has gaps, a neighboring detected pitch is
used. If this is not what you want, you can use a fixed window size.
Markers
Markers in the sample display determine at which position in a sample a wave is extracted.
You can enter markers manually or create them automatically.
Creating Wave Markers Automatically
1. Select the portion of the sample you want to analyze.
If no selection is made, the entire sample is analyzed.
2. Select a Marker Creation Mode.
3. Use the Number of Markers or the Threshold parameters to create the markers.
Creating and Removing Wave Markers Manually
• To add a marker, Alt-click at the position where you want to insert the marker.
For each marker, a wave is added to the wavetable and an envelope segment is added
to the wavetable envelope.
• To remove a marker, Alt-click it.

Wavetable Synthesis
Replacing Samples
188
NOTE
You can move markers by dragging them in the display.
Moving Selected Wave Markers
You can change the position and distribution of wave markers within a multi selection of
markers.
• To stretch or expand all markers, hold down Ctrl/Cmd and move the first or the last
marker of the selection.
• To modify the distribution of the markers inside the selection, hold down Ctrl/Cmd and
move one of the middle markers.
Moving the marker towards the first or last marker stretches the density of markers
at one side and expands it on the other side. Dragging the middle marker within the
selection to the left or right has the same effect.
Replacing Samples
To replace a sample, you can do one of the following:
• Drag a sample from the browser onto the sample display.
This replaces all waves for which markers are visible in the sample display. If other
waves of the same sample are used in other wave sequences, these waves are not
replaced.
• Drag a sample from the browser onto a selection of multiple waves in the wavetable.
This replaces the selected waves.
• Drag a sample from the browser onto a single wave that is not part of a multi-selection
of waves.
This replaces only the wave on which you drop the sample.
• Click Replace Sample on the wavetable toolbar.
This replaces all waves for which markers are visible in the sample display. If other
waves of the same sample are used in other wave sequences, these waves are not
replaced.
NOTE
When you replace a sample, HALion tries to keep the marker positions. However, if the new
sample is shorter, the positions of some wave markers can be beyond the sample end. In this
case, these markers are set to the sample end.
Importing Wavetables
HALion can import wavetables that were saved as .wav files.
If the file header of the wave file contains information about the size of the single-cycle
waves of the wavetable, HALion will import the wavetable automatically when the wave file is
loaded. The waves of the wavetable and the corresponding wavetable envelope will be set up
to fit a duration of 2 seconds.

Wavetable Synthesis
Managing Wavetables
189
If the file header does not contain this information, it can be specified manually. This is done
differently for waves that contain one single-cycle wave and waves that contain multiple
single-cycle waves.
Importing Wave Files That Contain One Single-Cycle Wave
1. Load the wave file.
2. On the toolbar, activate Fixed Size.
3. Set Window Size to the number of samples of the single-cycle wave and Window
Crossfade to 0 %.
Importing Wave Files That Contain a Sequence of Single-Cycle Waves
1. Load the wave file.
2. Activate Fixed Size.
3. Set Window Size to the number of samples of the single-cycle wave and Window
Crossfade to 0 %.
4. Set Marker Creation Mode to Equal Distance.
5. Set Number of Markers to the number of waves.
Usually, a readme file or a technical specification that is provided with the wavetable
will give you information about the size of the single-cycle waves. To determine the
number of waves, divide the length of the sample by the size of the single-cycle waves.
RELATED LINKS
Managing Wavetables on page 189
Managing Wavetables
The Wavetable Editor allows you to load, save, and delete wavetables.
The wavetable is always stored with the VST preset. However, you can also save the
wavetable to the wavetable library. This allows you to load the wavetable in other presets, for
example.
NOTE
Wavetables do not contain any samples. Instead, each wave contains information on the
spectrum and the envelope.
•To load, save, and delete wavetables, use the corresponding buttons to the right of the
Envelope and Spectrum tabs.

Granular Synthesis
190
You can use granular synthesis to extract interesting spectra from all kinds of samples, to
create sound effects by completely scrambling a sample, or to perform low-fidelity time
stretching, for example.
In granular synthesis, it is not an entire sample that is played back, but only short portions
of the sample, the so-called grains. These grains can be played back in any order. Each
time a grain ends, a new one starts. To avoid discontinuities in the playback and to minimize
artifacts, envelopes are applied to the grains. Very short grains produce sounds with an
individual pitch. This means that you can also extract pitched spectra from samples without
a distinct pitch, such as drum loops or sound effects. Sounds with longer grains usually play
back with the pitch of the original sample.
If you repeatedly play back the same portion of a sample, the sound may become too static.
To compensate for this and bring more liveliness into the sound, you can use the Random,
Spread, and Offset parameters. By adding more grain streams, you can increase the grain
and sound density to produce a richer sound.
Grain Oscillator
To show the settings for the granular synthesis, select a granular zone in the Program Tree
and open the Zone Editor or the Sound Editor for the zone. For granular zones, the same
sections as for sample zones are available, except for the AudioWarp section.
The Load/Replace Sample button in the header of the grain oscillator allows you to load
another sample.
RELATED LINKS
Editing Zones on page 92
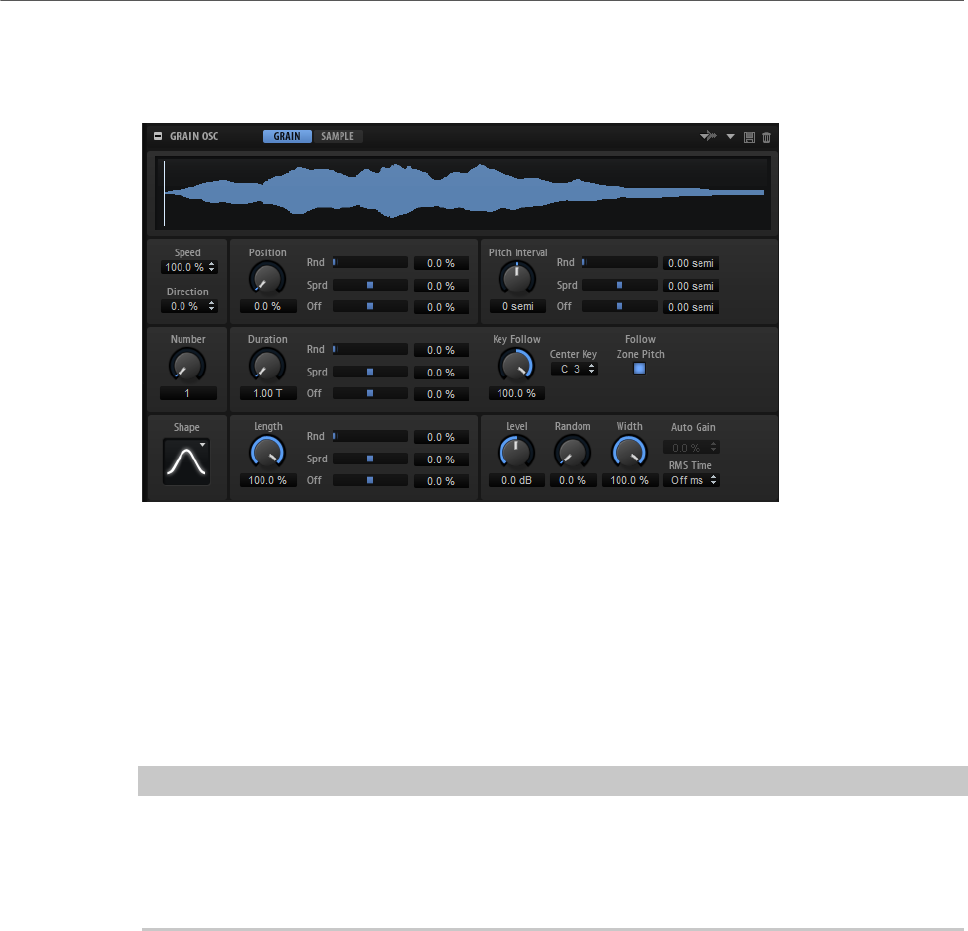
Granular Synthesis
Grain Oscillator
191
Grain Tab
The Grain tab of the grain oscillator contains the parameters for the granular synthesis.
Sample Display
The sample display provides an overview of the sample and shows a playback locator for
each grain stream. It shows the resulting effects of the grain oscillator parameters and helps
you find the sample portions that you want to use as grain sources.
The sample start and end markers of the sample are indicated by orange lines. They
determine the range that can be used to create grains. If the sample has a defined sustain
loop, the grains use the sample range between sample start and loop end.
NOTE
Release loop settings and release markers are not taken into account. The sustain and the
release loop are shown as green and red shades in the sample display. The release marker
is shown as a blue line. However, these are only indicators. You can edit the corresponding
parameters on the Sample tab.
Speed and Direction
The Speed and Direction parameters determine how the playback position moves through
the sample when you play a note.
Speed
Determines how fast the playback position progresses through the sample. If this
is set to 0 %, the playback position stays fixed. At a setting of 100 %, the playback
position moves through the sample at its original speed. At the maximum setting,
the playback speed is eight times faster than the original speed.
Direction
Allows you to set the playback speed in smaller increments. Furthermore, this
determines the playback direction. If you enter negative values, the playback
position moves backwards through the sample.

Granular Synthesis
Grain Oscillator
192
Position Settings
Position
You can set the playback position of the grains manually. For example, at a
setting of 50 %, the playback position is in the middle of the sample. The playback
position is updated with every new grain.
Position Random
Determines the range from which a random playback position is chosen. At a
setting of 100 %, the playback position jumps to a random position between the
start and the end of the sample. The random playback position is calculated
separately for each channel of the sample, at the start of a new grain. This can be
used to widen the panorama of the sound.
Position Spread
If Number of Grains is set to a value higher than 1, this parameter spreads the
playback positions of the grains, making each grain play back a different portion
of the sample.
Position Offset
Offsets the playback position for each channel of the sample. Positive values
modify the playback position of the right channel and negative values modify
the playback position of the left channel. In either case, the other channel is not
affected. This can be used to widen the panorama of the sound.
If you are working with surround files, the center channel and the LFE channel
remain unchanged. The left and right surround channels get the maximum
offset, and the left and right channels are offset to a value halfway between the
center and LFE channels and the surround channels. For example, an offset of
100 % has the following results:
• Center channel: 0 %
• LFE channel: 0 %
• Left surround channel: 100 %
• Right surround channel: 100 %
• Left channel: 50 %
• Right channel: 50 %
Pitch Settings
In granular synthesis, either the pitch of the original sample or the grain oscillator define the
pitch of a sound.
• To use the pitch of the original sample, raise the Duration value until you can clearly
hear the pitch of the sample.
If you change the pitch, the spectrum of the sound changes. You can use the standard
pitch settings of the zone, for example, Glide, Pitchbend, Octave, etc.
• To define the pitch using the grain oscillator, set the Duration parameter to very low
values, preferably 1 or 2.

Granular Synthesis
Grain Oscillator
193
To set the pitch of the grain oscillator, adjust the Duration, Center Key, and Key Follow
parameters. If you want the pitch of the grain oscillator to follow the pitch of the zone,
activate Follow Zone Pitch.
Pitch Interval
Here, you can specify an interval between -12 and +12 semitones. The grains
are played randomly at their original pitch, or they are transposed according to
the pitch interval. This interval is calculated separately for each channel of the
sample, at the start of a new grain.
Pitch Random
Sets the random pitch range in semitones and cents. At a setting of +12, the
random pitch values lie between -12 and +12 semitones. The random pitch is
calculated separately for each channel of the sample, at the start of a new grain.
This can be used to widen the panorama of the sound.
Pitch Spread
This parameter is available if Number of Grains is set to a value higher than 1.
It detunes the pitch of the grains in semitones and cents. The first grain keeps
its pitch, and the other grains are detuned evenly to values within the specified
range. The last grain is detuned to the maximum value.
NOTE
For shorter grains, this is perceived as a change in the spectrum and for longer
grains as a detuning of the sample.
Pitch Offset
Offsets the pitch across the channels of the sample, in semitones and cents.
Positive values increase the pitch of the right channel and decrease the pitch
of the left channel. Negative values increase the pitch of the left channel and
decrease the pitch of the right channel. This can be used to widen the panorama
of the sound.
NOTE
For shorter grains, this is perceived as a change in the spectrum and for longer
grains as a detuning of the sample.
If you are working with surround files, the center channel and the LFE channel
remain unchanged. The left channel and the left surround channel get the same
value. The right channel and the right surround channel get the same value. Left
and right are distributed symmetrically. For example, an offset of +12 semitones
gives the following results:
• LFE channel: 0 semitones
• Center channel: 0 semitones
• Left channel: -12 semitones
• Left surround channel: -12 semitones
• Right channel: +12 semitones
• Right surround channel: +12 semitones

Granular Synthesis
Grain Oscillator
194
Grain Settings
Number of Grains
You can specify the number of grains for each channel of the sample. At a
setting of 2, the two grains are offset by 180°. Due to this phase offset, the
root of the spectrum is canceled out, and the pitch increases by one octave. To
compensate for this, adjust the Position Spread, Position Offset, or Duration
Spread parameters.
Duration
Increases the grain period by a factor ranging from 1 to 1000.
• For very short grains, the sound gets the pitch of the frequency at which
the grains repeat.
For example, the grain duration at the center key C3 is 3.82 ms. If you set
the grain duration to 2, the grain period is 7.64 ms, and the pitch of the
sound is one octave lower.
• When longer grains (above 30 ms) are used, the sound gets the pitch of the
sample.
Duration Random
The random grain duration is calculated separately for each channel, at the start
of a new grain. This can be used to widen the panorama of the sound. At a setting
of 100 %, the grain duration varies between half and twice the grain period.
Duration Spread
If Number of Grains is set to a value higher than 1, this parameter modifies the
grain durations by the factor that you set. This way, each grain is played with a
different duration. At a setting of +100 %, the first grain is half as long and the
last is twice as long. If you use negative settings, the first grain becomes longer
and the last grain becomes shorter.
Duration Offset
Offsets the grain duration across the sample channels. Positive settings result in
shorter grain durations for the right channel and longer grain durations for the
left channel. This can be used to widen the panorama of the sound. At a setting of
100 %, the minimum and maximum duration lie between half and twice the grain
period.
If you are working with surround files, the center channel and the LFE channel
remain unchanged. The left and right channels and the left and right surround
channels are modified symmetrically. For example, a setting of +100 % results in
the following grain duration factors:
• Center channel: 1.0
• LFE channel: 1.0
• Left channel: 1.41421
• Right channel: 0.707
• Left surround channel: 2
• Right surround channel: 0.5

Granular Synthesis
Grain Oscillator
195
Key Follow
Determines how the grain duration changes with the notes that you play. At a
setting of +100 % and a duration of 1.00, the grain duration corresponds to the
pitch of the played note.
Center Key
In general, the grains repeat at the frequency of the center key. The grain
duration corresponds to the wave length of that frequency. If you play C3 with the
center key set to C3, the grains repeat at a frequency of 261.626 Hz, that is, at a
grain period of 3.82 ms. You can set the center key between A-2 (122.31 ms) and
G8 (0.0797 ms).
Follow Zone Pitch
If Follow Zone Pitch is activated, zone pitch settings like Octave, Coarse, and
Fine, as well as modulations like Glide, Pitchbend, or other pitch modulations,
affect the duration length. A higher sample pitch leads to a shorter duration.
If Follow Zone Pitch is deactivated, the duration is independent from the zone
pitch and determined by the grain duration settings.
Shape and Length Settings
Shape
Determines the shape of the grain. The shape strongly influences the spectrum
of the sound.
• Click the display to open the pop-up menu that contains the available
shapes.
Length
Shortens the length of the grain without changing the grain duration. At a setting
of 100 %, the grain length corresponds to the grain duration. By decreasing the
grain length, a shorter portion of the sample is played back, which results in a
change in the spectrum. The pitch of the sound does not change, because the
grain duration stays the same.
Length Random
Here, you can set a random grain length. At a setting of 100 %, the grain length
varies between 0 % and 100 % of the grain duration. The random grain length is
calculated for each channel of the sample separately at the start of a new grain.
This can be used to widen the panorama of the sound.
Length Spread
This parameter is available if Number of Grains is set to a value higher than 1.
It modifies the length of the grains. With positive values, the first grain has the
shortest length and the last grain the longest. With negative values, the first
grain has the longest length and the last grain the shortest.
Length Offset
Offsets the grain length across the sample channels. Positive settings shorten
the grain length for the right channel, and the left channel remains unchanged.
Negative values shorten the grain length for the left channel, and the right

Granular Synthesis
Grain Oscillator
196
channel remains unchanged. This parameter can be used to widen the panorama
of the sound.
If you are working with surround files, the center channel and the LFE channel
remain unchanged. The left and right channels and the left and right surround
channels are modified symmetrically.
Level Settings
Grain Level
Adjusts the overall level of the grain oscillator. When you increase the number of
grains, it might become necessary to lower the oscillator level. If you play back a
portion of a sample that is very quiet, you can use this control to raise the level.
Random Level
Sets a random level for each new grain. At a setting of 100 %, the level varies
between a factor of 0 and 2 of the original level. The random level is calculated
separately for each channel of the sample, at the start of a new grain. This can be
used to widen the panorama of the sound.
Stereo Width
Narrows the stereo width of the grain oscillator. It is applied after the grain
oscillator and does not affect the stereo width of the actual sample. At a setting
of 0 %, the output of the grain oscillator is monophonic. If you are working with
surround files, the center channel and the LFE channel remain unchanged. The
left and right channels and the left and right surround channels are modified
symmetrically.
Auto Gain and RMS Time
• With Auto Gain, you can automatically adjusts the level of grains using
quieter sample parts.
NOTE
•Auto Gain can only be applied to RMS times of at least 6 ms.
• By raising the gain, you can lose the dynamics of the sample.
•RMS Time defines the time over which the audio levels are averaged. Low
values will let the auto gain compensation follow faster, whereas higher
values produce a smoother gain compensation.
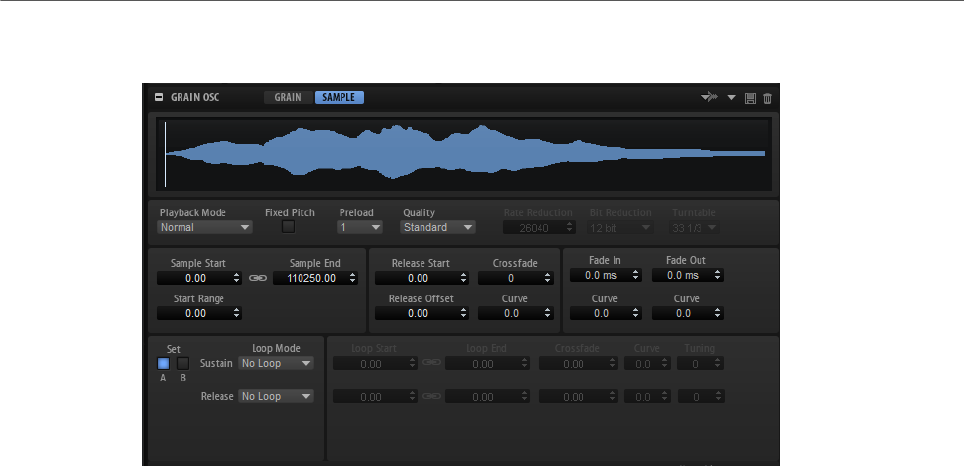
Granular Synthesis
Modulating the Grain Oscillator
197
Sample Tab
The parameters on the grain oscillator Sample tab are the same as in the Sample Oscillator
section for sample zones.
RELATED LINKS
Sample Oscillator Section on page 106
Modulating the Grain Oscillator
You can use the following grain oscillator parameters as modulation destinations in the
modulation matrix: Grain Position, Grain Direction, Grain Duration, Grain Length, Grain
Pitch, and Grain Level.
RELATED LINKS
Modulation Matrix on page 137
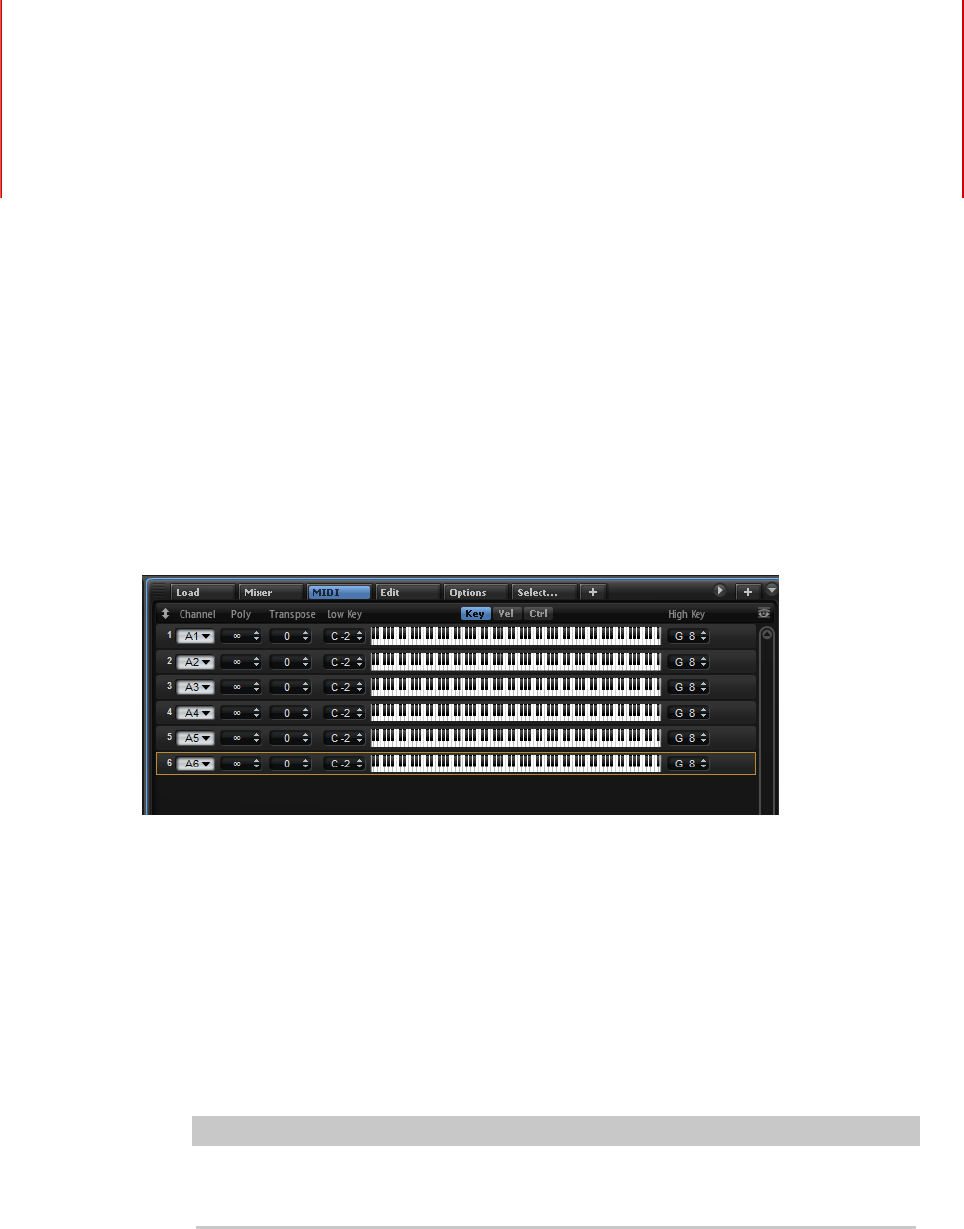
MIDI Editing and Controllers
198
MIDI Editor
The MIDI Editor provides access to the MIDI slot parameters. Furthermore, you can specify
MIDI controllers to be filtered.
MIDI Editor Parameters
Channel
The slot receives MIDI signals on the MIDI port and channel that are specified
here. You can set multiple slots to the same MIDI channel and trigger them
simultaneously with the same note events.
Polyphony
Specifies how many notes can be played at the same time.
NOTE
Programs can contain various layers, therefore, the resulting number of voices
can be much higher than the value that is specified here.
Transpose
Allows you to shift the incoming MIDI notes by ±64 semitones before they are sent
to the loaded program.
Key Range (Low Key, High Key)
Allows you to limit the key range for a slot.
Velocity Range (Low Vel, High Vel)
Allows you to limit the velocity range for a slot.
MIDI Editing and Controllers
MIDI Editor
199
Controller Filter
Allows you to filter out the most commonly used MIDI controllers.
Show Empty Slots
• If this button is activated, the MIDI Editor shows all program slots.
• If this button is deactivated, the MIDI Editor shows only the slots that
contain programs.
Editing the Key Range
Each slot can be limited to a specific key range.
To show the key range, activate the Key button above the range controls.
You can set the key range in the following ways:
• Set the range with the Low Key and High Key value fields or by dragging the ends of
the keyboard range control.
• To move the key range, click in the middle of the range control and drag.
• To set the range via MIDI input, double-click in a value field and play the note.
Editing the Velocity Range
Each slot can be limited to a specific velocity range.
To show the velocity range, activate the Vel button above the range controls.
• Set the velocity range with the Low Vel and High Vel value fields or by dragging the
ends of the velocity range control.
To move the velocity range, click in the middle of the range control and drag.
Filtering Controllers
You can filter out the most commonly used MIDI controllers for each slot separately.
For example, if you set up a keyboard split with bass and piano playing on the same MIDI
channel, both sounds receive the same MIDI controllers. However, you usually do not want
the bass to receive the sustain pedal. To avoid that all sounds on the same MIDI channel
receive the same MIDI controllers, use the controller filter.
Filtering out control change messages can also be used to avoid unwanted program changes
on MIDI channel 10 (drums), for example.
PROCEDURE
1. Activate the Ctrl button above the range controls.
2. For each slot, activate the MIDI controllers that you want to filter out.
You can filter out the following MIDI controllers: Sustain Pedal #64, Foot Controller
#4, Foot Switches #65-69, Pitchbend, Modulation Wheel #1, Aftertouch, and Program
Change.

MIDI Editing and Controllers
MIDI Controllers
200
MIDI Controllers
HALion allows you to assign almost any parameter to a MIDI controller. However, you can
only assign one parameter of a single zone, layer, effect control, etc. at a time. If you want
to use the same MIDI controller for several zones, layers, etc., you have to assign it several
times.
A more convenient way to control a zone parameter, such as the cutoff frequency for all
zones, for example, is to assign a quick control to that parameter and then assign the MIDI
controller to that quick control. This allows you to control all zones simultaneously and this
way, you can also preserve different cutoff settings per zone and simply control the offset
that is added by the quick control.
By default, the most common parameters like slot volume and pan, and the quick controls of
each slot are already assigned. The AUX FX send modules 1-4 for the slots are also assigned
and are controllable as soon as you load one of the AUX FX send modules for an insert effect.
To provide more control, you can set the minimum and maximum range for each assignment
separately.
Assigning MIDI Controllers
To assign a MIDI controller to a parameter, proceed as follows:
PROCEDURE
1. Right-click the control that you want to control remotely and select Learn CC.
2. On your MIDI keyboard or controller, use the potentiometer, fader, or button.
The next time you right-click the control, the menu shows the assigned MIDI
controller.
NOTE
You can assign the same MIDI controller several times to different parameters.
However, you cannot assign different MIDI controllers to the same parameter.
RELATED LINKS
MIDI Controller Section on page 40
Unassigning MIDI Controllers
PROCEDURE
•To remove a MIDI controller assignment, right-click the control and select Forget CC.
Restoring the Factory MIDI Controller Assignment
To restore the factory MIDI controller assignments, open the Options Editor and click Reset
to Factory in the MIDI Controller section.
MIDI Editing and Controllers
MIDI Controllers
201
Setting the Parameter Range
You can set the minimum and maximum values for the parameter for each assignment
separately. This gives you more control over the parameter, for example, when you are
performing live on stage.
PROCEDURE
1. Set the parameter to the minimum value.
2. Right-click the control and select Set Minimum from the context menu.
3. Set the parameter to the maximum value.
4. Right-click the control and select Set Maximum.
MIDI Controllers and AUX FX
You can assign the parameters of the AUX FX to MIDI controllers.
Unlike the slots, the AUX FX do not have a MIDI port and channel of their own. Instead, they
listen to any incoming MIDI controller message, regardless of the MIDI channel. Therefore, if
you assign a parameter to a MIDI controller, you should use a controller number that is not
already in use by any of the assignments that you made for the slots.
NOTE
If you unload or replace the effect, the MIDI controller assignment of this effect is lost.
Saving a MIDI Controller Mapping as Default
After customizing the factory MIDI controller assignments, you can save them as default.
PROCEDURE
•Open the Options Editor and, in the MIDI Controller section, click Save as Default.
RESULT
Now, each time that you load a new instance of the plug-in, your customized MIDI controller
mapping is available as default.
NOTE
• Saving the controller mapping as default does not include the MIDI controller
assignments of the AUX FX.
• The MIDI controller mapping is saved with each project. This way, you can transfer your
settings to other systems. The project also includes the MIDI controller assignments of
the AUX FX.
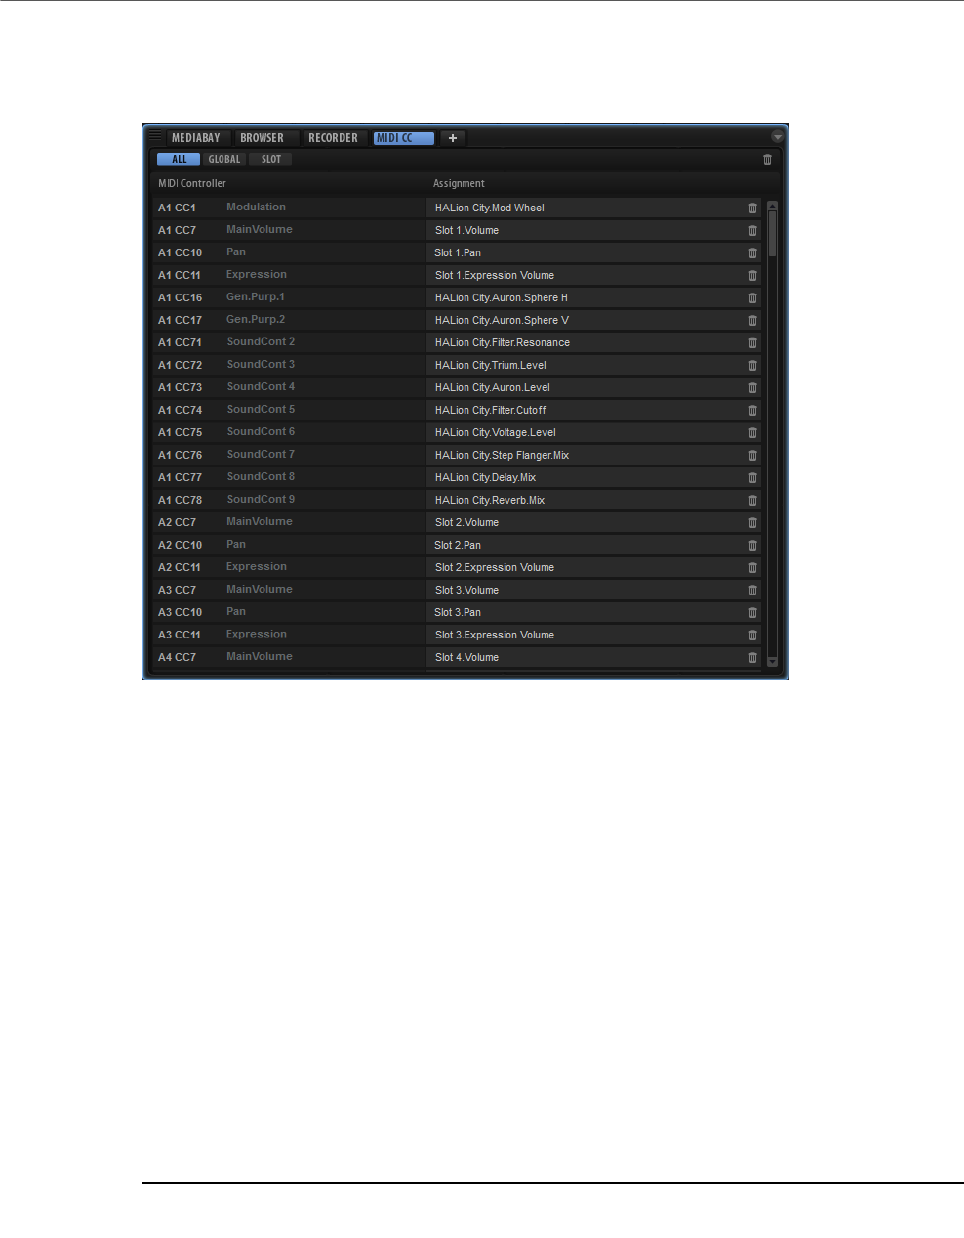
MIDI Editing and Controllers
MIDI Controllers
202
MIDI Ctrl Editor
In the MIDI Ctrl Editor, all assigned MIDI controllers are shown.
With the buttons at the top, you can specify whether you want to show the MIDI controllers
that are assigned to the slot, to global parameters, or whether you want to show them all.
On the left, the name of the MIDI controller is shown, and on the right, the name of the
assigned HALion parameter. If several HALion parameters are assigned to the same MIDI
controller, they are listed below each other on the right.
• To remove a single MIDI controller assignment, click the trash icon to the right of the
parameter name.
• To remove all MIDI controller assignments, click the trash icon on the toolbar.
Automation and Factory MIDI Controller Assignment
Several parameters on the plug-in interface are available for automation from your host
software and can be assigned to an external MIDI controller.
The table shows the controller numbers and names of the default factory MIDI controller
assignment. The assigned MIDI controller numbers are the same for all slots. However, the
MIDI controllers listen only to the MIDI channels of the corresponding slot.
Parameter Controller Number Name
Volume #7 Volume
Pan #10 Pan
Send FX 1 #91 Effect 1 Depth

MIDI Editing and Controllers
MIDI Controllers
203
Parameter Controller Number Name
Send FX 2 #92 Effect 2 Depth
Send FX 3 #93 Effect 3 Depth
Send FX 4 #94 Effect 4 Depth
Program QC 1 #74 Brightness
Program QC 2 #71 Harmonic Content
Program QC 3 #73 Attack Time
Program QC 4 #72 Release Time
Program QC 5 #75 Sound Controller #6
Program QC 6 #76 Sound Controller #7
Program QC 7 #77 Sound Controller #8
Program QC 8 #78 Sound Controller #9
NOTE
•Send FX 1-4 are only available if the corresponding AUX send effects are loaded.
•You can remotely control any other parameter by assigning the parameter first to a
quick control and then to a MIDI controller.
•You can use MIDI controllers inside the modulation matrix of a synth or sample layer to
control the cutoff, for example.
Mixing, Routing, and Effect
Handling
204
You perform your mixing operations in the Mixer.
The Mixer manages all busses that are available in a HALion instance, that is, the 32 stereo
output busses plus one surround bus, the 64 slot busses, the 4 AUX busses, and a dynamic
number of program and layer busses depending on the current program architecture.
Each bus can be controlled using a dedicated mixer channel, featuring functions like level,
pan, mute, solo, and up to eight insert/send effects. You can specify which type of bus you
want to see at a given time by using the controls on the toolbar.
Mixer Window
Toolbar
Show Slot Bus Channels
Shows all slot channels.
Show AUX Bus Channels
Shows the AUX channels.
Show Output Bus Channels
Shows all output channels.
Show Child Bus Channels
Shows all the busses that can be found inside the selected program or layer
hierarchy.
Show Depending Bus Channels
Shows all busses that are in use for the selected program or layer, including AUX
busses.
Hide Inactive Outputs
If the Show Output Bus Channels button is activated, the Mixer shows all output
busses. Deactivated outputs are grayed out. To gain a better overview about
which channels are used, activate the Hide Inactive Outputs button.

Mixing, Routing, and Effect Handling
Mixer Window
205
Show Empty Slots
If the Show Slot Bus Channels button is activated, the Mixer only shows channels
that are in use by programs loaded into the corresponding slots. To show the
empty slot channels as well, activate the Show Empty Slots button.
Collapse All Mixer Channels/Expand All Mixer Channels
• To expand all mixer channels, click the Expand All Mixer Channels button.
Expanded mixer channels provide direct access to the insert/send effects.
• To collapse all mixer channels, click the Collapse All Mixer Channels
button.
Collapsed mixer channels only show the most important controls, that is,
level, pan, solo, mute, and a level meter.
Channel Strip Controls
Mute
Mutes the bus.
Solo
Mutes all other busses and lets you hear the solo bus only. You can put several
channels into solo mode to hear all of them.
Level
The level fader allows you to adjust the volume of the bus. All busses allow an
amplification of +12 dB.
Pan
All stereo mixer channels provide a stereo panner that allows you to define the
position of the sound in the stereo field. When working with surround busses, you
can insert a surround panner effect to one of the insert slots of a bus and use it
to pan the stereo signals in the surround field.
The mixer channel shows a small version of the Surround Panner, which can be
used to remote-control the inserted surround panner. For more detailed editing,
use the Sound Editor of the Surround Panner.
Meter
The meters of a mixer channel show the output level of the bus. The number of
meters depends on the number of audio channels of the bus. Stereo busses have
two channel meters, surround channels have six.
Peak Level
The peak level meter indicates the highest level on the bus in dB. To reset, click
the peak level.
Output
Each channel can be routed to various busses. Click the output pop-up menu and
select an output.

Mixing, Routing, and Effect Handling
Audio Bus Architecture
206
The output busses represent the audio interface to the host application or the
audio hardware. Therefore, these channels cannot be routed freely and do not
have an output pop-up menu.
NOTE
You can route the bus of a surround slot to one of the stereo output busses. In
this case, only the first 2 channels are connected. You can decide whether to add
a downmix effect to the output bus, to reroute the slot to the surround output
bus, or to leave it as it is.
Audio Bus Architecture
The audio signals of zones, layers, programs, and slots are managed via audio busses. You
can load insert effects on any of the audio busses, for example, to process the audio of a
single layer or an entire program.
Slots have one dedicated bus.
Programs can have one or more audio busses that mix the audio signals from the layers and
zones that they contain.
Layers do not have to have an audio bus. However, you can create audio busses for layers, for
example, to create a submix of the zones that they contain.
AUX busses allow you to use send effects with zones, layers, programs, and slots. Send
effects can be shared between zones, layers, programs, and slots, but you can also add local
AUX busses to use send effects for individual zones or layers.
Zones do not have an audio bus of their own. Instead, their outputs are routed automatically
to the next available audio bus. Any zone, audio bus, and AUX bus can be assigned freely
to one of the stereo outputs or to the surround output of the plug-in. For example, a zone
output can be routed to an output bus, omitting any audio busses and their effects in
between.
Audio Signal Flow
Typically, programs are loaded into slots. Each slot is connected to an output bus. The audio
busses from the program send their signals to the audio bus of the slot.
A program can contain a single or multiple zones, or one or more layers. Layers can contain
other layers, which in turn can contain zones. The output of the zones is mixed to the audio
busses of the layers of the next higher level or directly to the program.
NOTE
If a layer does not have an audio bus, its zones are automatically routed to the next higher
audio bus.
Audio Busses
Audio busses can be compared to channels in a mixer, but with much more flexibility when it
comes to mixing and routing possibilities.
Each slot has at least one audio bus that mixes the audio signals from its layers and zones.

Mixing, Routing, and Effect Handling
Audio Bus Architecture
207
Apart from the routing and mixing possibilities, audio busses allow you to load insert effects
for processing audio on that bus. Depending on how you set up the audio busses, you can
load insert effects on single layers, the whole program, or the slot. For example, you can
process only the strings of a piano and strings layer sound with a chorus effect, and keep the
piano unprocessed. You load insert effects into the effect slots of the channels in the Mixer.
In addition, audio busses allow you to route audio via sends to an AUX bus. This way, you
can set up send effects which can be shared among the layers, programs, and slots. You
assign sends directly in the zones or with the effect slots of the channels in the Mixer. You
can adjust the level for the sends, which allows you to control the amount of the effect that is
loaded on the AUX bus.
AUX Busses
You need an AUX bus to route individual audio signals from zones or audio busses
to AUX effects. HALion provides 4 global AUX busses and 4 local AUX busses that
you can add for individual layers. By default, the output of an AUX bus is routed to
the master output bus, but you can reassign its output to other output busses.
•To set up an AUX effect, load an insert effect into one of the effect slots of
the AUX bus.
•To hear the effect, raise the send level of a zone, route the output of a zone
or your audio bus to the AUX bus, or set up a send in the effect rack of your
audio bus.
The send levels control the amount of the effect that is loaded into the AUX bus.
You can set up sends for each zone and audio bus separately.
Master Effect Bus
The master bus works similar to the AUX busses. The only difference is that the
master bus has no bus output selector, because it is hard-wired to the main plug-
in output (1/2).
Multi-Channel Effects
HALion comes with a large number of effects that are mainly intended for use on
stereo busses. However, most of them can also be used on surround busses. In
this case, the effect is processed on all channels. If a bus changes from stereo to
surround, the effect follows. For effects with level meters, the number of meters
is adapted accordingly.
Zones
The outputs of zones are routed to the first audio bus of the next higher layer or
the program. You can reassign the outputs of the zones to any master output.
Layers
To save processing power, audio busses for layers are optional. You can create
them at any time in the Program Tree. By default, audio busses of layers are
routed to the first audio bus of the next higher layer or the program. You can
reassign the outputs of the audio busses of the layers to any master output.
Programs
By default, audio busses of programs are routed to the audio bus of the slot into
which the program is loaded. You can create additional audio busses. You can
reassign the outputs of the audio busses of the program to any master output.

Mixing, Routing, and Effect Handling
Audio Bus Architecture
208
Slots
A slot outputs its audio busses to the master outputs of the plug-in. Each slot has
one audio bus. You can reassign the outputs of the audio busses of the slots to
any plug-in output bus.
Creating Audio Busses
PROCEDURE
1. In the Program Tree, select the program or layer to which you want to add a bus.
2. Click the Create New Bus icon on the toolbar.
RESULT
The audio bus and a corresponding Mixer channel strip are created.
Changing the Output Assignment of an Audio Bus
PROCEDURE
1. In the Mixer, activate the Show Depending Bus Channels button.
2. In the Program Tree, select a layer or a program with one or more audio busses.
All corresponding channels are shown in the Mixer. Additional audio busses are
displayed to the right of the first audio bus.
3. In the Mixer, click on the output of the audio bus that you want to edit and select an
output from the pop-up menu.
The output busses of the plug-in can be activated in the host sequencer or the
Preferences dialog of the standalone version.
Changing the Output Assignment of an AUX bus
PROCEDURE
1. In the Mixer, activate the Show AUX Bus Channels button on the toolbar.
2. Click on the output selector of the AUX bus that you want to edit and select an output
bus from the pop-up menu.
Changing the Output Assignments of Zones
PROCEDURE
1. Select a zone in the Program Tree.
2. Open the Sound Editor, show the Amplifier section and open the AUX tab.
3. From the Output pop-up menu, select a plug-in output or an AUX bus.
4. Optional: Use the send level controls of the zone to route individual audio signals to
insert effects on AUX busses.

Mixing, Routing, and Effect Handling
Audio Bus Architecture
209
Automatic Bus Width Adaptation
HALion is constantly monitoring the width of all busses in the signal path and adapts to the
required width automatically.
For example, changing the bus width is required when you add a surround sample zone to a
layer that only contains stereo samples. In this case, the layer bus and all following busses
are set to surround, to allow for a correct routing. Stereo samples are still routed correctly to
channels 1 and 2.
Another way to change the bus width in the middle of the signal path is to add a surround
panner to one of the insert effect slots of a stereo bus. In this case, the output of the bus
changes from stereo to surround and forces all following busses to do the same.
NOTE
AUX busses change their bus width, too, if they receive signals from surround sources.
Output busses cannot change their bus width automatically, because they are usually
connected to a hardware device. Therefore, the routing to the plug-in output busses has to be
changed manually. Make sure that surround slots are routed to the surround output and that
stereo busses are routed to one of the stereo outputs.
If your routing is not set up correctly, the affected channels show a red warning icon to
indicate that 2 or more busses have the wrong width and that you risk losing signals from
audio channels that cannot be processed.
In this case, you could connect surround busses to stereo outputs, for example, or add the
Downmix effect to one of the inserts, thereby reducing the bus width to stereo, for example.
Local AUX Busses
In addition to the 4 global AUX busses, you can also create local AUX busses for layers. This
allows you to integrate typical AUX effects like reverb or delay into a program, for example.
If you add a local AUX bus for a layer, the signal routing for the layer automatically changes
from the global AUX bus to the new local bus.
AUX busses can be distinguished in the Program Tree by their green bus icon. A small
number inside the icon indicates the specific AUX bus. AUX send effects that were added to a
normal bus show a red effects icon with the same small numbers. This way, you can identify
which AUX busses and sends are used, even if their names have been modified.
Adding and Removing Local AUX Busses
• To add a local AUX bus, select the layer for which you want to add the bus in the
Program Tree, click the Add Bus button on the toolbar and select one of the four AUX
busses from the menu.
• To remove a local AUX bus, select it in the Program Tree and press Delete or
Backspace or use the Delete command on the context menu.
When you remove a local AUX bus, all sends that were routed to it are sent to the
global AUX busses.

Mixing, Routing, and Effect Handling
Insert Effects
210
Automatic Output Connection
If connections to busses cannot be established in HALion, the signals are automatically
routed to the master bus.
HALion allows you to select outputs in many places. You can find output selectors in zones,
layer busses, AUX busses, and slots. Each output can be freely named and the output
selectors reflect these names.
Different programs on different slots may contain output configurations that are not
available, for example, because busses with the required names are not present in a multi.
•If connections cannot be established, a dialog opens showing all pending busses. For
each missing bus, you can select another bus to be used instead.
Pending busses can also occur when loading layers into programs. If a layer does not
find the required busses, the same dialog opens.
•If an assigned output bus is deactivated in the host, HALion shows a red warning icon
on the output channel and the Mixer channels that are connected to it.
You will still be able to hear the signal, because all signals are routed to the master
bus in the background. However, all output selectors remain as they are, allowing you
to reestablish the connections later, by activating the outputs in your host, etc.
Output Configurations in Different Hosts
Apple Logic 9
HALion provides 32 stereo outputs and one surround output connecting with
the host application or a standalone hardware device. In most applications,
all these outputs are available. However, Logic 9 only allows for 16 outputs
for a single plug-in. When you open HALion, you can choose one of 4 output
configurations: Stereo, 5.1-Surround, Multi-Output (1x5.1, 15xStereo), and Multi-
Output (16xStereo).
Ableton
Ableton Live 8 does not support surround busses.
Sonar 9
Sonar 9 allows you to activate all outputs either in mono or in stereo. For mono,
you get 64 channels for the 32 HALion stereo channels plus six channels for the
surround bus. If the stereo outputs are activated, Sonar uses 32 stereo channels
plus three stereo channels for the surround bus.
Insert Effects
Each channel can load up to 8 insert effects. To display the inserts, you must expand the
channel strips.
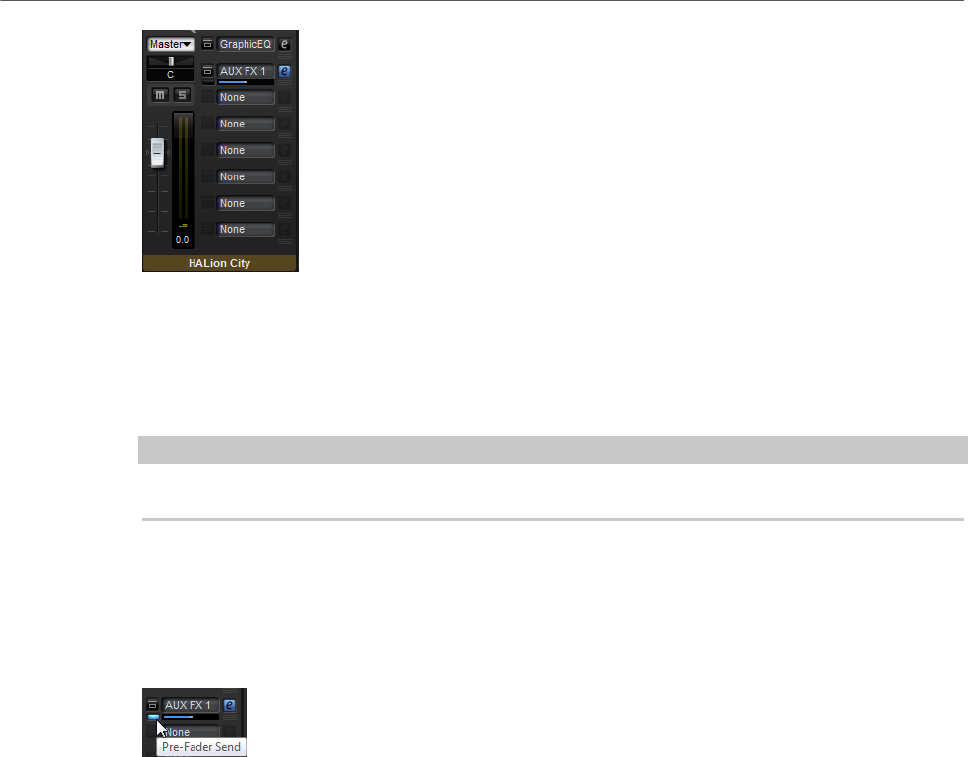
Mixing, Routing, and Effect Handling
Insert Effects
211
Each insert can either be a classical insert effect like a chorus or a delay, or it can load
one of the 4 AUX send effects that allow you to send the signal to the AUX busses. All slot,
program, and layer busses, as well as zones, can send signal portions to these busses. If an
AUX send effect is loaded, a level fader is available for the insert slot. Use this fader to set
the level that is sent to the AUX bus.
NOTE
You cannot use send effects on AUX and output busses.
Pre-Fader Send Effects
By default, send levels are influenced by the level of the bus. If you want to adjust the send
level independently from the bus level, you can set the send to pre-fader by activating the
corresponding button to the left of the level fader.
Using the Insert Effect Slots
In the Mixer, you can set up insert effects for AUX busses.
•To assign an insert effect, click the effect slot and select the effect from the menu.
•To remove an insert effect including its current settings, click the effect slot and select
None from the menu.
•To bypass an effect, activate the Bypass button of the slot. Bypass is active when the
button lights up.
•To edit an insert effect, click the e button of the corresponding slot. You can edit only
one effect at a time. The parameters of the insert effect are displayed in the bottom
section.
•To change the output assignment of an AUX bus, select a different output from the
pop-up menu.
•To modify the level, move the fader of the bus or double-click in the value field below
the fader and enter a value manually.
•To move an effect to another slot, click its drag icon and drag it to another slot. This
replaces any effect loaded in this slot.
•To change the order of the effects, drag them by their drag icon to a new position
between two slots.
Mixing, Routing, and Effect Handling
Insert Effects
212
•To copy an effect into another slot, Alt-click the drag icon and drag it onto the new slot.
This replaces any effect loaded in this slot.
NOTE
You can also copy effects between the different mixers. First drag an effect to the
corresponding mixer tab. Then drag it to the position where you want to insert it.
•To copy an effect and insert it between two effect slots, Alt-click its drag icon and drag
it between two slots.
NOTE
You can also copy effects between the different mixers. First drag an effect to the
corresponding mixer tab. Then drag it to the position where you want to insert it.
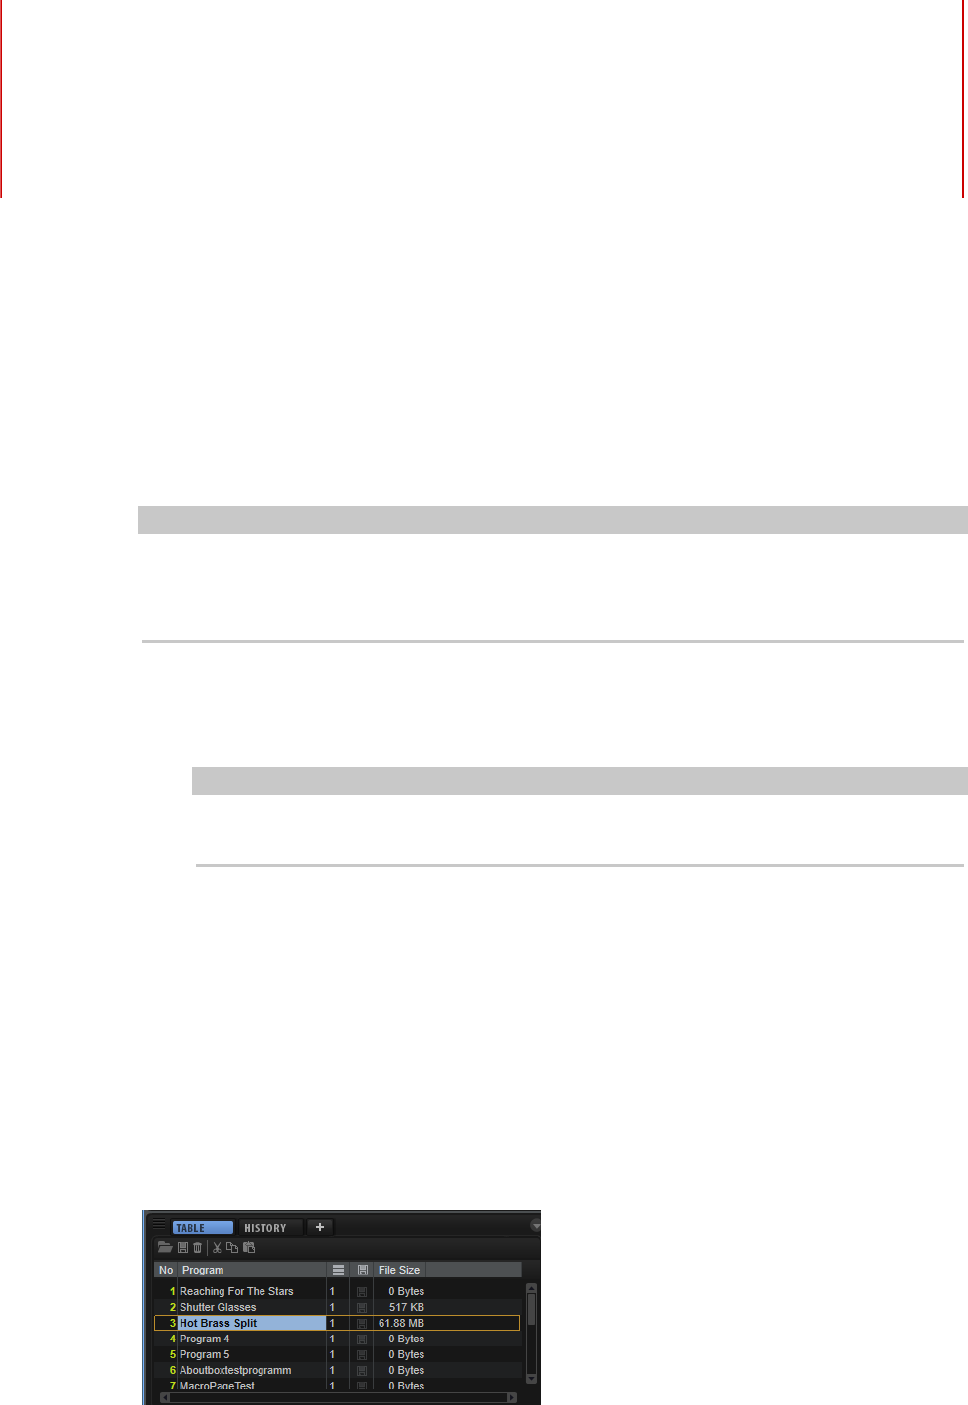
Loading and Managing
Programs via the Program
Table
213
HALion allows you to load a virtually unlimited number of programs into the Program Table.
This is useful, because it allows for quick access to these programs and for preloading the
program samples for faster changes between programs.
NOTE
Programs can only be played if they are loaded into the Slot Rack. However, you can perform
editing like verifying the settings or copying zones for the focused program in the Program
Table.
You can load a program into the Program Table without automatically loading it into the Slot
Rack. This allows you to configure the Program Table.
•Drag the program from the MediaBay to a slot in the Program Table.
NOTE
If you drag multiple programs on a slot, the programs are loaded into the target slot
and the following slots. If the slots already contain programs, these are replaced.
•Click Load Program on the Program Table toolbar, select a program, and click OK.
You can load a program in the active slot in the Slot Rack and in a slot in the Program Table
at the same time.
•In the MediaBay, right-click a program and select Load Program into selected Slot.
RELATED LINKS
Loading Third-Party Sampler Programs on page 68
Program Table
The Program Table lists all programs that are loaded in HALion.
The Program Table contains the following columns:

Loading and Managing Programs via the Program Table
Configuring the Program Table
214
Program Number
Displays the program number.
The first 128 entries of the Program Table correspond to the 128 MIDI program
change numbers. You can load these programs into the Slot Rack by sending
MIDI program change messages on the slot’s MIDI channel.
Programs that are loaded into the Slot Rack are shown with a yellow number.
To assign a program to another MIDI program change number, you can drag it to
the corresponding list position. If another program already occupies this position,
the two programs change places.
Program Name
Shows the program name. You can edit the name here.
Used
Displays in how many slots in the Slot Rack the program is loaded.
Preload
Shows if the samples of a program are preloaded. This allows for faster MIDI
program change.
• To activate the preload for a program, click the corresponding icon in the
Preload column so that it lights up, or right-click in the Preload field and
activate Always Preload Program.
File Size
Displays the size of the program, with all its samples, as it is stored on the hard
disk.
Configuring the Program Table
You can configure the Program Table by showing/hiding and rearranging the columns.
You can reorder columns using drag and drop and change the width of a column by dragging
its borders.
You can show/hide the File Size, Preload, and Used columns.
•To hide a column, right-click the column header and use the corresponding Remove
command.
•To insert a column, select its name on the column header context menu.
NOTE
All modifications to the columns are saved with the project.
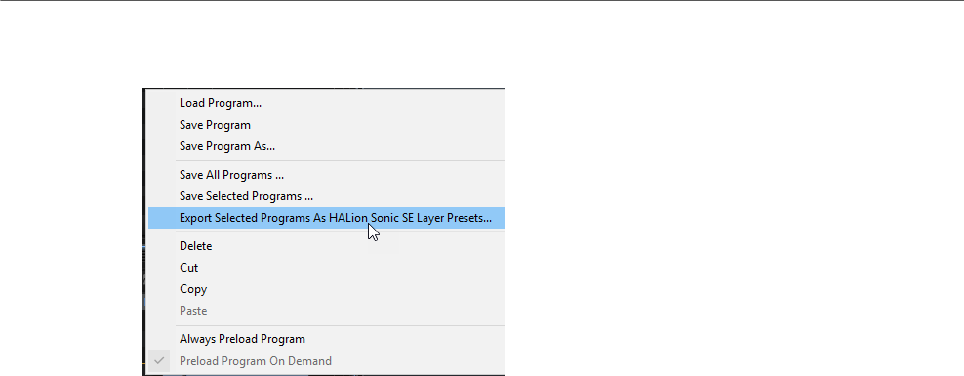
Loading and Managing Programs via the Program Table
Program Table Context Menu
215
Program Table Context Menu
Load Program
Allows you to load a program.
Save Program
Saves the current program.
Save Program As
Allows you to save a program under a new name and in a different subfolder in
the content folder.
Save All Programs
Saves all programs in the Program Table.
Save Selected Programs
Saves the selected programs.
Export Selected Programs As HALion Sonic SE Layer Presets
Allows you to export the selected programs as HALion Sonic SE Layer Presets.
Delete
Deletes the program from the slot.
Cut/Copy
Cuts/Copies the program from the current slot.
Paste
Pastes the cut or copied program to the current slot.
Always Preload Program
If a program is loaded into the Program Table but is not used in one of the
slots, its samples are not preloaded. With this option, you can preload individual
unassigned programs, to allow for a faster MIDI program change.
Preload Program On Demand
Activate this option if you want to preload the program samples only when it is
loaded into a slot.
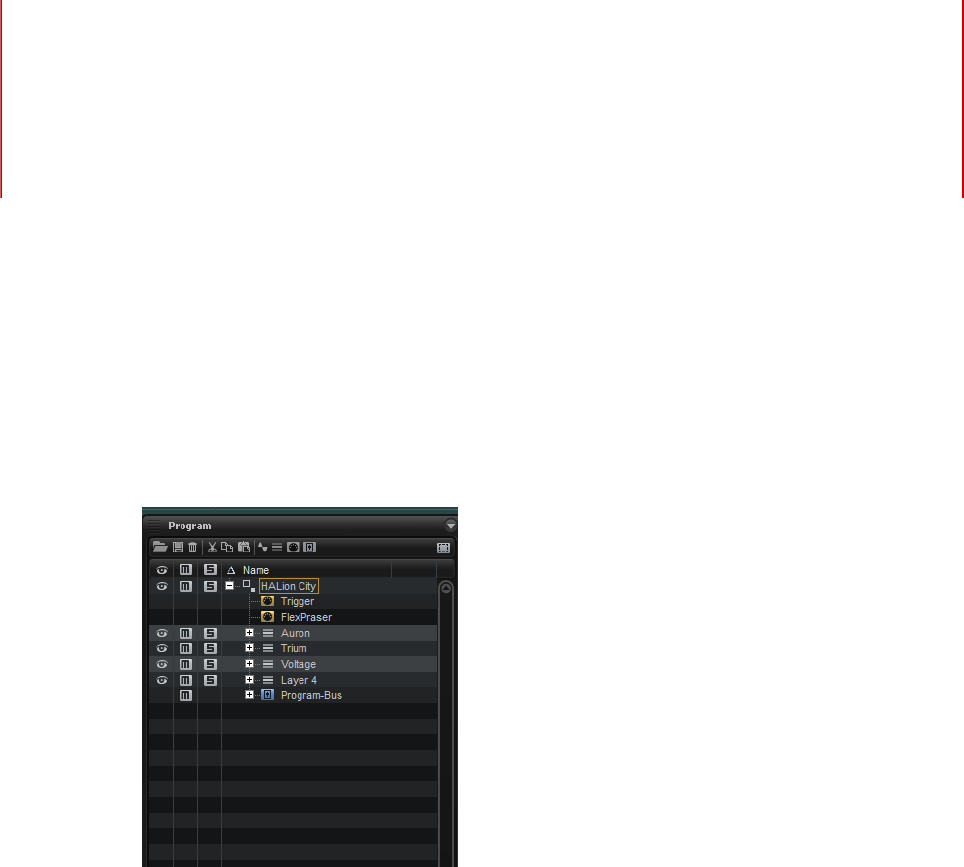
Program Tree
217
The Program Tree is the main area for navigating and making selections. It shows the active
program with all its layers, zones, and modules and allows you to add, load, import, or delete
elements.
The Program Tree represents the signal flow inside the program. The MIDI comes in at
the top and passes through the layers and MIDI modules. The processing order of the MIDI
modules inside a program or layer is also from top to bottom.
The audio is output via busses that can have any number of FX modules. The processing
order of the FX modules inside the busses is also from top to bottom.
Program Tree Elements
The Program Tree shows all elements that make up the program that is selected in the Slot
Rack.
Programs and Layers
Programs are the top-level elements in the Program Tree. Only one program is displayed at
a time.
Programs are complex instruments or sounds that combine layers, zones, busses, MIDI
modules, and FX modules. Often, a program contains a single layer that already comes
with all necessary components such as the synthesis part or insert effects. This is because
a layer already is a complete sound structure on its own. Layers can be used to structure
programs, for example, by grouping a number of zones. This is useful if you want to apply
the same settings to a number of zones in one go. Programs add the possibility of combining
different layers to build up more complex sounds or to create combinations of sounds that
Program Tree
Program Tree Columns and Controls
218
you want to load as a unit. A typical example is a bass/piano split sound or a piano/string
layer sound.
Zones
Zones are the elements that create the sounds in HALion. In the Program Tree, the zone is
the element on the lowest level.
Different types of zones are available: synth, sample, granular, organ, and wavetable. The
zone types differ in their basic sound source.
• Synth zones provide an oscillator section with three main oscillators, a sub oscillator, a
noise generator, and a ring modulation stage.
• Sample zones load a specific sample.
• Granular zones offer a sophisticated grain oscillator section that contains a page for
the grain-specific parameters and another page for the sample-related parameters.
• Organ zones produce the sound of classic drawbar organs with up to nine drawbars.
• Wavetable zones allow you to create your own wavetables by extracting single-cycle
waves from samples.
Below the Program Tree, there are 3 numbers that indicate how many zones are selected,
how many zones are contained in the focused layer, and how many zones are contained in the
program.
These numbers are useful when editing or deleting zones. For example, if you have a piano
that was recorded with several velocity layers per note, each velocity layer has 88 sample
zones. If you now want to edit or delete an entire velocity layer, you can use these 3 numbers
to verify whether you selected the right amount of zones before you edit or delete them.
Busses
Busses allow you to set up the audio routing in HALion and add audio effects.
MIDI Modules
MIDI modules process the stream of MIDI events inside a program. They can produce
monophonic modulation signals, which can be used as sources in the modulation matrix.
MIDI modules can be assigned to an entire program or to a single layer.
Audio Effects
Audio effects can be added for busses.
Program Tree Columns and Controls
The first three columns in the Program Tree give you access to the Visibility, Mute, and Solo
functions. In the section on the right, the selected program and its elements are displayed.
They are organized in a hierarchical structure, with the program at the topmost level.
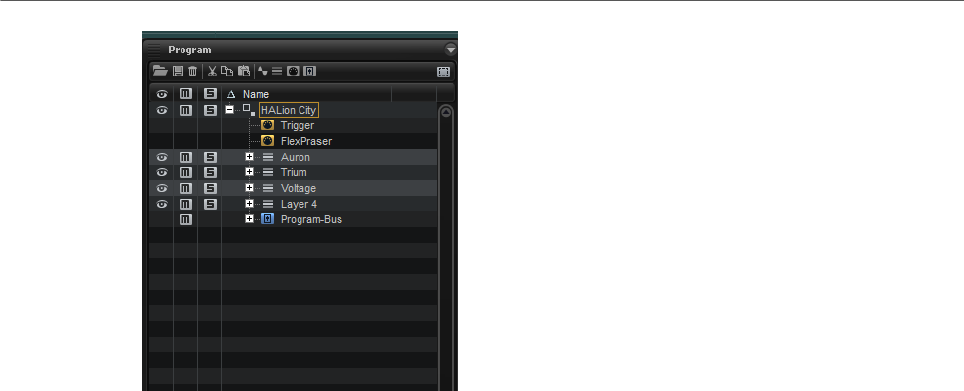
Program Tree
Program Tree Columns and Controls
219
Columns
By default, the Program Tree shows the Visibility, Mute, Solo, and Name columns. You can
add further columns that show more information.
Key Range
Shows the key range of the zones, programs, and layers.
Velocity Range
Shows the velocity range of the zones, programs, and layers.
Root Key
Shows the root key of the zones.
Tune
Shows the tune offset of sample zones.
The Tune parameter is set in the Mapping Editor.
Gain
This shows the gain offset of sample zones.
The Gain parameter is set in the Mapping Editor.
File Size
Shows the size of the samples, as they are saved on the hard disk. Programs and
layers show the sum of the samples that they contain.
Preload
Shows the amount of preload per sample.
Mute
Contains the Mute buttons for the elements of the Program Tree.
Solo
Contains the Solo buttons for the elements of the Program Tree.
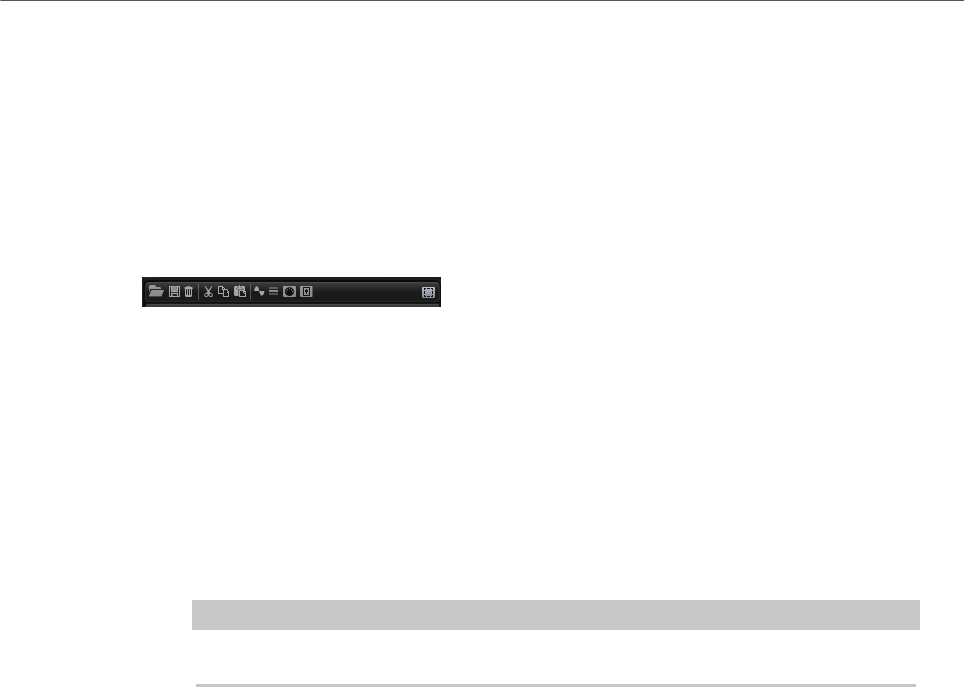
Program Tree
Program Tree Columns and Controls
220
Visibility
Contains the Visibility icon for the elements of the Program Tree. You can click
the icon to change the visibility setting for each element.
Learn Zone Parameter
To display a zone parameter in a column, use this option.
Toolbar
Load Program/Layer
Allows you to navigate to and load a program or layer.
Save Program
Saves the program. If you try to overwrite write-protected factory content, a
dialog opens that allows you to save the edited program under a new name.
Delete Selected Items
Deletes the selected items from the Program Tree.
NOTE
The files themselves are not deleted from the hard disk.
Cut
Removes the selected elements from the list and saves them to the clipboard.
Copy
Copies the selected elements to the clipboard.
Paste
Pastes the elements from the clipboard at the selected position.
Create New Zone
Allows you to create a new synth, sample, granular, organ, or wavetable zone at
the selected position.
Create New Layer
Creates a new layer at the selected position.
Create New MIDI Module
Opens a selector where you can choose a MIDI Module that you want to add to the
program.
Create New Audio Effect
Opens a selector where you can choose an audio effect that you want to add to
the selected bus.
Program Tree
Program Tree Columns and Controls
221
Create New Bus
Opens a menu from which you can add busses to the program. You can also add
up to four AUX busses via the menu.
Selection Filter
Lets you select a group of elements by double-clicking on a program, layer, or
zone. By default, a double-click selects all elements in the Program Tree.
The selection filter can be set to select only zones, layers, effects, MIDI modules,
or busses.
Visibility
You can hide zones and layers in the Program Tree by clicking the corresponding eye icon
in the Visibility column. The eye icon indicates the visibility status for zones, layers, and
programs.
Icon Description
The element and all its contents are visible.
The element and all its contents are hidden.
The element is visible, but parts of it are hidden.
You can use the following key commands for the visibility functions:
• To show a single layer or zone and hide all other layers or zones, Alt-click its eye icon.
• To show all selected layers or zones, press Ctrl/Cmd-U.
• To show all layers and zones, press Shift-Ctrl/Cmd-U.
Mute and Solo
• To mute/unmute an element and all of its sub-elements, click the button in the Mute
column. For example, if you mute a program or layer that contains zones, these zones
are muted as well.
Layers and zones that are muted are not played when you hit a key.
• To reset all mute settings, click the Mute icon in the column header.
• To solo an element and mute all elements that reside on the same hierarchy level,
click the button in the Solo column.
• To reset all solo settings, click the Solo icon in the column header.
• To mute the selected zones, open the context menu of the Program Tree and select
Mute/Solo> Mute Selected Zones.
• To mute all zones, open the context menu of the Program Tree, and select Mute/Solo>
Mute All Zones.
The program itself and any of its layers are not affected by this.
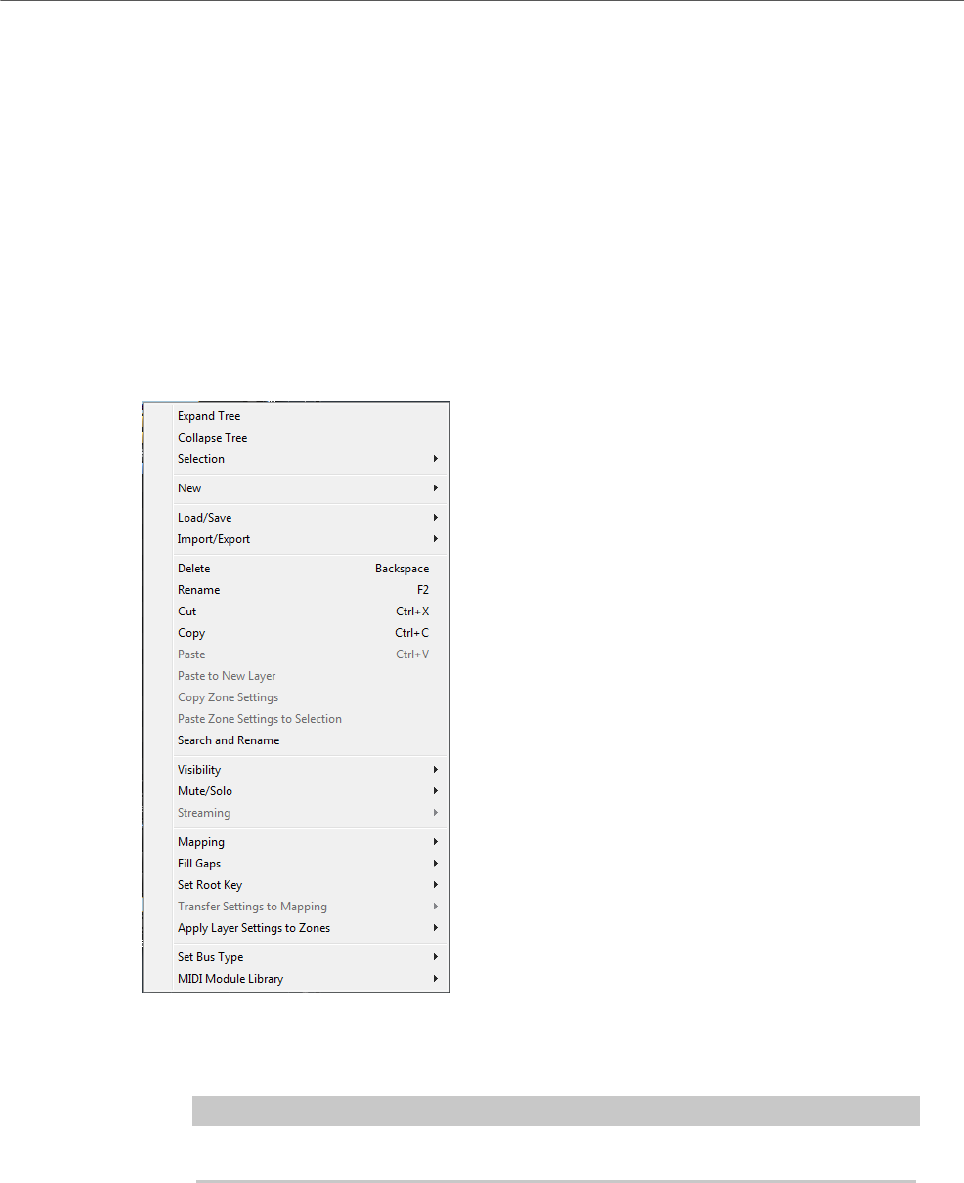
Program Tree
Program Tree Columns and Controls
222
Configuring the Columns
• To add a column, right-click the column header and select the element you want to
show.
• To remove a column, right-click the column header and deselect the element.
• To add a particular zone parameter as a column, right-click the column header, select
Learn Zone Parameter, open the editor for the zone, and click the parameter that you
want to add as a column.
Program Tree Context Menu
The available options and commands depend on the element for which you open the menu.
For example, Copy Zone Settings is only available for zones.
Expand All/Collapse All
Expands/Collapses all elements of the Program Tree.
NOTE
These options are only available if no element is selected.
Expand Tree/Collapse Tree
Expands/Collapses the selected element.
Selection
• To select the entire content of a program, select Select All.

Program Tree
Program Tree Columns and Controls
223
• To select all elements that were previously not selected and to deselect all
elements that were previously selected, select Invert Selection.
NOTE
This function applies to elements of the same type that belong to the same
hierarchy. For example, layers that are all sub-elements of a program, or
busses that are part of the same layer.
• To select all sub-entries of an element, select Select Tree.
New
This submenu allows you to add a new layer, zone, bus, MIDI module, or audio
effect.
NOTE
Some elements can only be added at specific positions. For example, audio
effects can only be added to busses.
Load/Save
Allows you to load/save Program Tree elements. Which options are available
depends on the selected element.
•Replace Program/Layer allows you to replace the current program/layer.
•Load to New Layer allows you to select a new program/layer and add it to
the current program at the current hierarchy position.
•Save Program saves the current program.
NOTE
The factory content cannot be overwritten. If you try to save a factory
program, the Save Program As dialog opens, allowing you to save the
program to your user content folder.
•Save Program/Layer As allows you to save the current program or layer to
your user content folder.
•Save Layer As Program allows you to save the selected layer in the
Program Tree as program to your user content folder.
•Revert to Last Saved Program discards all the changes that you made
since you last saved the program.
Import/Export
•Import VST 3 Preset opens a dialog where you can select and load a VST 3
preset.
•Export Program/Layer as VST 3 Preset allows you to export the selected
program or layer as a VST 3 preset.
•Export Program/Layer as HALion Sonic SE Layer Preset allows you to
export the selected program or layer as HALion Sonic SE layer presets.
These presets can then be loaded by HALion Sonic or HALion Sonic SE as
layers or as programs.
•Export Program/Layer as VST 3 Preset with Samples allows you to export
the selected program or layer including all its samples as a VST 3 preset.

Program Tree
Program Tree Columns and Controls
224
•Export Program/Layer as Protected VST 3 Preset allows you to export the
selected program or layer as a protected VST 3 preset.
•Export Program/Layer as VST 3 Preset with Files allows you to export the
selected program or layer including all its files as a VST 3 preset.
•Import Folder allows you to import a folder containing samples or
subfolders with samples.
•Import Samples allows you to import samples.
•Export Samples allows you to export samples.
•Replace Samples allows you to exchange one or multiple samples that are
used to play back one or multiple zones. Any zone-specific settings like
Pitch, Filter, or Amplifier are not modified by this.
•Change Sample Folder allows you to relocate samples. This is useful if
you processed some samples and saved them in a new location without
changing their names.
•Find Missing Samples opens a dialog that allows you to search for missing
samples.
Delete
Deletes the selected element in the Program Tree.
If a sample is selected, it is only deleted from the tree, not from the hard disk.
Rename
Allows you to rename the selected element.
Cut
Removes the selected element from the list and saves it to the clipboard.
Copy
Copies the selected element to the clipboard.
Paste
Pastes the element from the clipboard to the selected program or layer.
Paste to New Layer
Allows you to paste one or several copied elements to a new layer within a zone,
to a layer, or to the program, depending on where you click to open the context
menu.
Copy Zone Settings
Copies the settings of the selected zone to the clipboard.
Paste Zone Settings to Selection
Pastes the zone settings from the clipboard to the selected element in the
Program Tree.
Search and Rename
Allows you to perform a search and rename operation on the selected element or
on all elements in the Program Tree.

Program Tree
Program Tree Columns and Controls
225
Visibility
•Hide Selected hides the selected elements.
•Hide Non-Selected hides all elements that are not selected.
•Show Selected shows all selected elements.
•Hide All hides all elements.
•Show All shows all elements.
• If Auto Visibility is activated, the selected zones and any of their direct
siblings that are part of the same layer are automatically shown. Other
zones are hidden.
If this option is activated, you can still toggle the visibility of zones inside
the layers.
Mute/Solo
•Mute All Zones mutes all zones.
The program itself and any of its layers are not muted.
•Solo All Zones solos all zones.
The program itself and any of its layers are not soloed.
•Mute Selected Zones mutes the selected zones.
•Solo Selected Zones solos the selected zones.
•Make All Zones Audible resets all mute and solo states for all zones.
•Solo Follows Selection automatically solos the layers and zones that you
select. The other elements of the program are muted.
This is useful if you want to switch between layers and zones and only play
back the current selection.
Streaming
Allows you to choose between two streaming settings for the selected sample:
•Play from RAM
•Remove Completely from RAM
Mapping
Allows you to set up the mapping for the selected sample.
Fill Gaps
•Pitch Only fills any gaps between the selected zones on the keyboard axis.
•Velocity Only fills any gaps between the selected zones on the velocity axis.
•Pitch and Velocity first fills the gaps on the keyboard axis. Then, the
remaining gaps on the velocity axis are filled.
•Velocity and Pitch first fills the gaps on the velocity axis. Then, the
remaining gaps on the keyboard axis are filled.
Set Root Key
Allows you to adjust the root keys of the selected zones without changing their
key or velocity ranges.

Program Tree
Program Tree Columns and Controls
226
•Center of Zone sets the root key to the center of the zone. If the zone has
no center because it has an even number of keys, the root key is set to the
key in the center that is closest to the previous root key.
•High Key of Zone sets the root key to the High Key of the zone.
•Low Key of Zone sets the root key to the Low Key of the zone.
•Key Text in Sample Name sets the root key to the key that is extracted from
the sample file name. The function searches for the name of the key in text
form.
•Key Number in Sample Name sets the root key to the MIDI note number
that is extracted from the sample file name. The function searches for a
number.
•Root Key in Sample File sets the root key to the key that is stored in the
header chunk of the sample file.
Transfer Settings to Mapping
Zones often have varying Fine Tune and Level settings, while sharing various
other settings. To avoid varying Fine Tune and Level settings, transfer these
settings to the Tune and Gain parameter in the Mapping Editor.
•Select All transfers the Fine Tune and Level settings at the same time.
•Fine Tune and Level allow you to transfer the parameters separately.
Afterwards, the zone settings are reset to their default values.
Apply Layer Settings to Zones
It can be helpful to apply the layer settings to the zones they contain.
For example, if a program contains layers that are limited to a specific key range,
but that contain zones that use the full key range, all these zones fill the whole
key range in the Mapping Editor and it is impossible to see their real limitations.
To solve this, select Apply Layer Settings to Zones> Key Range to make the
zones inherit the limits of the layers. You can either apply all settings at once
or apply the settings for Key Range, Velocity Range, Fine Tune, Level, and Pan
separately.
Set Bus Type
Allows you to change the bus type. You can convert a regular audio bus into an
AUX bus and vice versa. This is particularly useful if you have added effects for a
bus and want to change the bus type while keeping the effects.
MIDI Module Library
Allows you to save your script modules as MIDI modules. These modules are then
treated just as the other MIDI modules in HALion, that is, they appear on the MIDI
modules list on the toolbar, they can be opened in the MIDI Modules Editor, etc.
RELATED LINKS
Mapping Editor on page 70
Search and Rename Dialog on page 251
Program Tree
Editing Programs, Zones and Layers
227
Color Scheme
The color of the icons for program, layers, and zones offer additional information.
• Light gray – Light gray is the standard color for zones. For sample zones, this color
means all samples were found and loaded without problems.
• Red – If an icon is red, samples could not be found, for example, because a removable
hard drive is not connected.
• Yellow – If an element is incomplete, for example, if a sample zone is not linked to a
sample, this is indicated by a yellow icon.
• Light blue – To reduce hard-disk load, HALion can play back samples from RAM only.
To indicate this, the icons of the corresponding sample zones turn light blue.
• Magenta – To free memory on your computer, you can remove the samples completely
from RAM. The samples are played back from the hard disk only. To indicate this, the
icons of the corresponding sample zones turn magenta.
Editing Programs, Zones and Layers
Creating Zones
To create a new zone, you have the following options:
•Drag and drop samples from the MediaBay or the File Explorer/Mac OS Finder to a
program or layer.
•Right-click a layer in the Program Tree, select New> Zone and select the type of zone
that you want to create.
•Click the Create New Zone icon on the toolbar of the Program Tree and select the
type of zone that you want to create.
NOTE
•When creating new zones, HALion uses the default zone preset to set the zone
parameters to their default values. This preset contains all zone parameters, but no
sample-related parameters like sample start/end, loop start/end, etc.
•To use specific zone settings, modify the default preset, and save it as default in your
user presets directory.
Creating Layers
To create new layers you have the following options:
•Click the Create New Layer icon on the toolbar.
If a layer is selected, the new layer is added within this layer. If a zone is selected, the
new layer is added on the same hierarchy level as the zone.
•To add several layers on the same level, Shift-click the Create New Layer icon on the
toolbar for as many times as you want to add layers.
•Right-click a layer, and select New> Layer.
This creates a new layer within the selected layer.
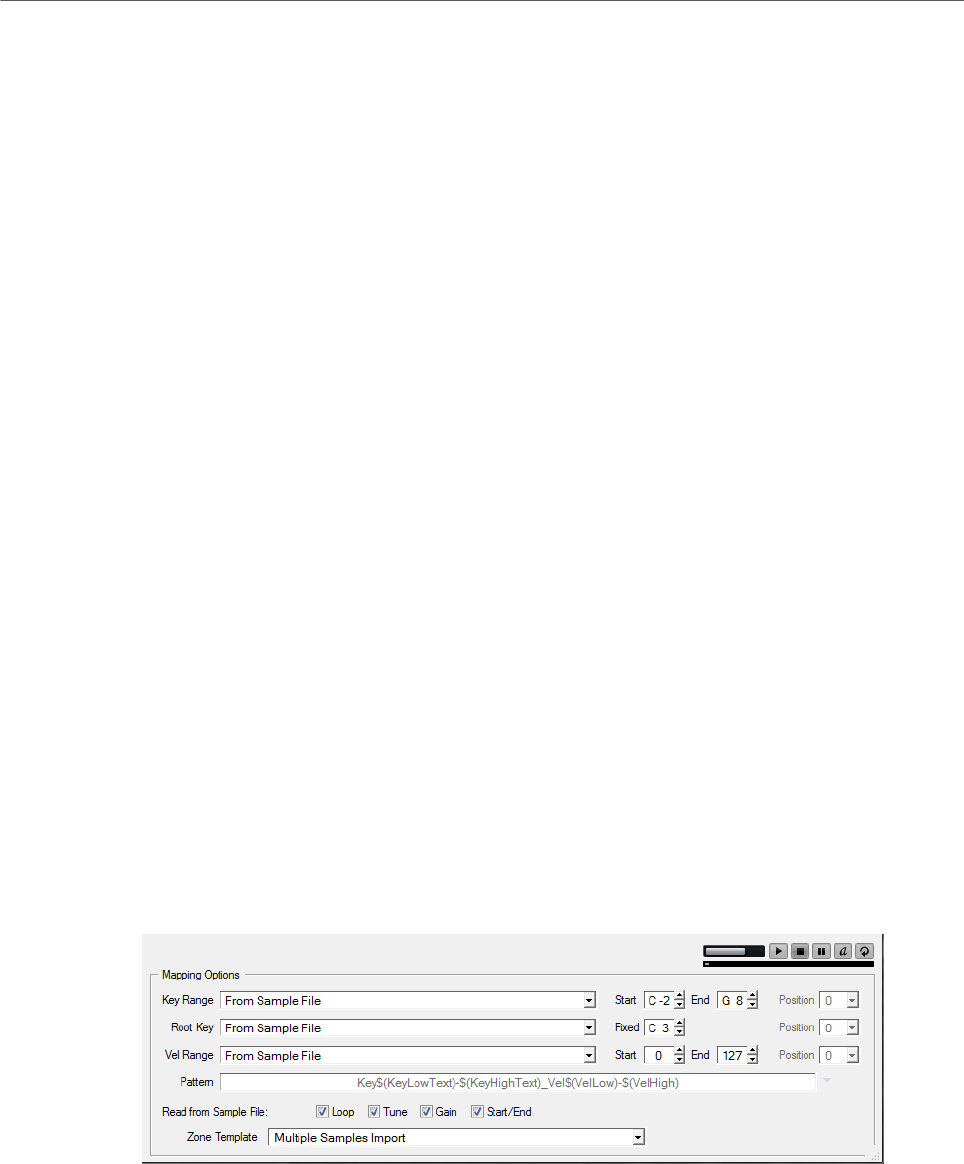
Program Tree
Importing Samples
228
Saving Programs and Layers as VST Presets
• To save a program as VST preset, click the Save button on the toolbar, or use the Save
Program command on the Load/Save submenu of the context menu. In the dialog,
specify a name and click OK.
• To save a specific layer, right-click it and select Load/Save> Save Layer As. In the
dialog, specify a name and click OK.
Importing Samples
You can manually select samples to import or you can import complete folders containing
samples.
•To import samples, right-click the program or one of its layers, and select Import/
Export> Import Samples.
•To import a folder containing samples or subfolders with samples, right-click the
program or one of its layers, and select Import/Export> Import Folder.
Usually, sample collections are organized in folder structures, where each velocity
layer or each key group is saved in a separate folder. You can create layers that
correspond to the hierarchy of the subfolders on disk, by activating Create Layers from
Subfolders.
When importing samples, HALion uses a default zone preset. This sets all zone parameters
to the default values, but excludes the sample-specific parameters. You can modify this
preset in the Sound Editor for a zone and save it as Default to your user preset directory.
HALion then uses this preset when importing samples.
RELATED LINKS
Import Samples Dialog on page 228
Import Samples Dialog
• To open the Import Samples dialog, right-click a program or layer in the Program Tree
and select Import/Export> Import Samples
In the Mapping Options section in the Import Samples dialog, you can specify which samples
to import, how to map the samples, and you can also extract mapping information from
sample file and folder names.
• To listen to the samples before importing them, use the transport controls in the upper
right of the Mapping Options section.

Program Tree
Importing Samples
229
Level
Adjusts the playback level.
Play
Plays back the focused sample or MIDI file.
Stop
Stops playback. The play locator jumps back to the start of the file.
Pause
Pauses playback. Click again to continue.
Auto Play
Automatically starts playback of the focused sample or MIDI file.
Loop Playback
If this button is activated, the focused sample or MIDI file is played back
repeatedly.
Play Position
Displays the playback position within the focused sample or MIDI file. To select
another position for playback, click on the slider or drag the handle to the new
position.
Key Range
From Sample File
The samples are mapped to the key range that is saved in the file header of the
sample. If the header does not contain any key range information, the Start and
End values are used.
Text from Sample Name
The samples are mapped to the key range that is extracted from the name of the
sample. This function searches for a key range that is defined in text form, for
example Sample_Name_B2-C#3.
Number from Sample Name
The samples are mapped to the key range that is extracted from the name
of the sample. This function searches for MIDI note numbers, for example
Sample_Name_59-61.
NOTE
Only values between 0 and 127 can be extracted as MIDI note numbers.
From Sample Name Pattern
The samples are mapped to the key range that is extracted from the name of the
sample, according to the specified name pattern.

Program Tree
Importing Samples
230
Root Key Only
Each sample is mapped to its root key only.
Root Key Fill Centered
The samples are mapped to their root key. The zones expand to the left and right
from the root key to fill empty spaces.
Root Key Fill Up
The samples are mapped to their root key. The zones expand to the right to fill
empty spaces.
Root Key Fill Down
The samples are mapped to their root key. The zones expand to the left to fill
empty spaces.
Chromatic
The samples are mapped chromatically to the white and black keys in ascending
order, starting at the key specified with the Start value.
White Keys
The samples are mapped to white keys in ascending order, starting at the key you
set with the Start value.
Black Keys
The samples are mapped to black keys in ascending order, starting at the key you
set with the Start value.
Fixed
The samples are mapped to the key range that you specify with the Start and End
values.
NOTE
The Chromatic, White Keys and Black Keys options alter the root key. All other options map
the root key according to the Root Key settings.
Root Key
Allows you to specify how the root key for the samples is obtained.
From Sample File
The root key is read from the file header.
Text from Sample Name
The root key is extracted from the file name. This function searches for root key
information in text form, for example Sample_Name_C#3.
Number from Sample Name
The root key is extracted from the file name. This function searches for MIDI note
numbers, for example Sample_Name_61.
Program Tree
Importing Samples
231
NOTE
Only values between 0 and 127 can be extracted as MIDI note numbers.
From Sample Name Pattern
The root key is extracted from the sample file name, according to the specified
name pattern.
Fixed
The root key is set to a fixed key, specified in the field to the right.
NOTE
If no root key information is found, the fixed root key is used.
Velocity Range
If no information on the velocity range is found, the samples are mapped to the range that
you specify with the Start and End values.
From Sample File
The samples are mapped to the velocity range saved in the file header.
From Sample Name
The samples are mapped to the velocity range that is extracted from the file
name.
From Sample Name Pattern
The samples are mapped to the velocity range that is extracted from the file
name, according to the specified name pattern.
From Folder Name
The samples are mapped to the velocity range that is extracted from the name of
the folder in which the samples reside.
Layered
The samples are layered, that is, they are distributed evenly over the velocity
range.
Fixed
The samples are mapped to the velocity range that you specify with the Start and
End values.
Position
The Position setting for the key range, the velocity range, and the root key determines the
position in the file name at which the program searches for the information.
• If this is set to 0, the entire file name is searched.
• To start the search after a specific number of characters, select the number from the
pop-up menu.

Program Tree
Importing Samples
232
NOTE
Every character is taken into account, including spaces.
Name Patterns
Depending on the mapping settings, the information for root key, key range, and velocity
range is retrieved differently for file and folder names.
Usually, names of sample files follow a certain naming scheme, for example,
Sample_C3_Key_59-61_Vel_80-100. You can extract all this information from the
sample file name by selecting From Sample Name Pattern on the Key Range, Root Key, or
Vel Range pop-up menus and defining a pattern in the lower part of the Mapping Options
section. You can use the Pattern field to manually edit your pattern and select variables from
the pop-up menu on the right.
Key Low Number $(KeyLow)
The MIDI note number is extracted and is used as the lower limit of the key
range.
Key High Number $(KeyHigh)
The MIDI note number is extracted and is used as the upper limit of the key
range.
Key Low Text $(KeyLowText)
The note name is extracted and is used as the lower limit of the key range.
Key High Text $(KeyHighText)
The note name is extracted and is used as the upper limit of the key range.
Velocity Low $(VelLow)
The number for the velocity value is extracted and is used as the lower limit of
the velocity range.
Velocity High $(VelHigh)
The number for the velocity value is extracted and is used as the upper limit of
the velocity range.
Root Key Number $(RootKey)
The MIDI note number is extracted and is used as the root key.
Root Key Text $(RootKeyText)
The note name is extracted and is used as the root key.
NOTE
Samples can only be mapped correctly on import if all samples follow the same name
pattern. If no matching pattern is found, the samples use the settings for the Root Key, and
the Start and End values for the key range and the velocity range instead.

Program Tree
Replacing Samples
233
Read From Sample File
The file header of a sample can contain information on the tuning, the gain, the loop, and
start and end of the sample. On import, this information is retrieved as well.
To deactivate the reading of this information during import, deactivate the corresponding
options in the Read from Sample File section.
Zone Template
In this section, you can specify which zone template to use. For example, this allows you to
import multiple instrument samples including their headroom settings, because they are
required for polyphonic playback.
Replacing Samples
PROCEDURE
1. Select the zones for which you want to replace the samples.
2. Open the context menu for one of the zones, and select Import/Export> Replace
Samples.
3. Select a method for replacing samples.
•Replace Identical Names replaces the samples by new samples if their names
are identical.
This is useful if you processed samples and saved them under the same name in
a different location.
•Replace by Root Key replaces the samples by new samples that have the same
root key, regardless of the file name.
•Replace by Search Pattern performs a search for the samples to replace the
current samples.
This method can be used if parts of the sample name have changed, for
example, due to processing or saving.
Enter the part of the name that has changed in the text field. Samples are
replaced if the remaining parts of the sample name are identical. For example, if
the name Sample_Mix_1_C3.wav has changed to Sample_Mix_2_C3.aiff,
enter *Mix_2*.aiff in the text field.
4. Locate the new samples.
The info text in the lower right section shows you how many samples are replaced in
how many zones. If no samples are found, you must select another method for finding
matching samples.
5. Optional: To listen to the samples before using them to replace the existing samples,
activate Prelisten Samples and use your MIDI keyboard.
To listen to the samples with the correct pitch, select how to detect the root key of the
new sample.
•Root Key from Sample File uses the root key that is saved in the file header of
the sample file.
•Root Key Text from Sample Name extracts the root key from the sample file
name. This function searches for the root key in text form.

Program Tree
Exporting Samples
234
•Root Key Number from Sample Name extracts the root key from the sample file
name. This function searches for the root key as a MIDI note number.
•Keep Zone Root Key uses the root key of the zone. This option is only available
when replacing a single sample.
6. Click OK.
Exporting Samples
NOTE
Samples that are loaded from HSB files or protected VST sound files cannot be exported.
PROCEDURE
1. To export individual samples, select them and select Export Samples on the context
menu.
2. In the Export Samples dialog, specify the location for the exported samples in the
Sample Path field.
You can open the pop-up menu and use variables or click the button to the right of the
field and navigate to the folder where you want to save the exported samples.
3. Specify the names for the samples in the Sample Name field. You can enter a name
manually or use one or more variables from the pop-up menu.
In the Example Name and Status Message fields below, the results of your settings are
shown. If some samples cannot be exported or if problems occur, a warning message
is shown.
4. Specify the file format for the samples in the File Format section.
5. Optional: In the Header Options section, specify the zone settings that you want to
include when saving the samples.
6. Optional: Make settings in the Audio Options and Export Options sections.
7. Click OK.
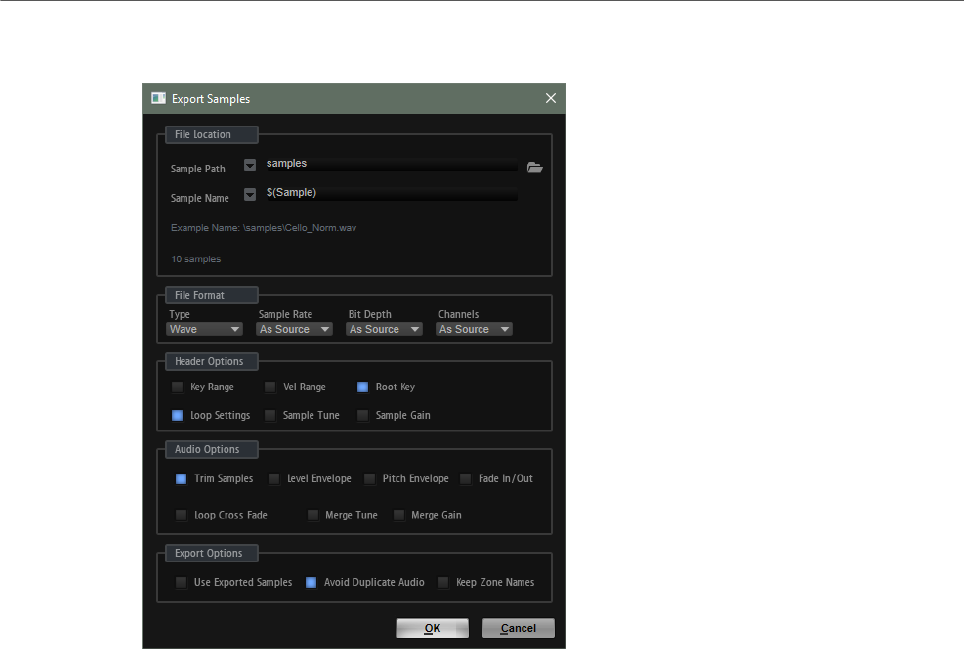
Program Tree
Exporting Samples
235
Export Samples Dialog
File Location
Sample Path
Allows you to use variables to define the path where the samples are saved.
•$(SampleFolder) creates a folder that has the same name as the folder in
which the original samples were saved.
•$(LayerStructure) creates folders following the structure of the selected
program or layer.
•$(Layer) creates a folder with the name of the layer.
•$(Program) creates a folder with the name of the program.
•$(SampleRate) creates folders that are named according to the sample
rate of the samples.
•$(BitDepth) creates folders that are named according to the bit depth of the
samples.
•$(Date) creates a folder with the name of the current system date in the
format yymmdd.
•$(Time) creates a folder with the name of the current system time in the
format hhmm.
Sample Name
Allows you to use variables to define how the exported samples are named.
•$(Sample) uses the original file name of the sample.
•$(SampleFolder) uses the name of the folder of the original samples.

Program Tree
Exporting Samples
236
•$(Zone) uses the name of the zone.
•$(Layer) uses the name of the layer.
•$(Program) uses the name of the program.
•$(KeyLow) uses the MIDI note number of the lower limit of the key range.
•$(KeyHigh) uses the MIDI note number of the upper limit of the key range.
•$(KeyLowText) uses the name of the note of the lower limit of the key
range.
•$(KeyHighText) uses the name of the note of the upper limit of the key
range.
•$(VelLow) uses the number of the lower limit of the velocity range.
•$(VelHigh) uses the number of the upper limit of the velocity range.
•$(RootKey) uses the MIDI note number of the root key.
•$(RootKeyText) uses the name of the root key.
For example, “$(Sample)_$(RootKeyText)” appends the name of the root
key to each sample file name.
•$(SampleRate) uses the sample rate of the samples.
•$(BitDepth) uses the bit depth of the samples.
•$(Date) uses the system date in the format yymmdd.
•$(Time) uses the system time in the format hhmm.
Example name field
Shows the sample path and name resulting from your settings.
Status message field
The status message field informs you how many samples are saved and whether
duplicate names are created.
For example, if two zones in the Program Tree have the same name, and you
use the variable $(Zone), this results in duplicate file names. In this case, the
duplicate file names are automatically numbered.
NOTE
• Samples loaded from HSB files or protected VST Sound files cannot be
exported. The status message informs you if such protected files exist.
• Files that are in use cannot be overwritten. In this case, you must select a
different location for the samples.
NOTE
Some systems have problems with file names longer than 32 characters. Therefore, it is best
to use file names that do not exceed this number.
File Format
Type
You can export the samples as Wave or AIFF files.

Program Tree
Exporting Samples
237
Sample Rate
Allows you to specify the sample rate of the samples.
NOTE
Do not change the sample rate of looped samples, because this can cause
audible artifacts.
Bit Depth
Allows you to specify the bit depth of the samples.
Channels
Allows you to specify the channels for the sample.
Header Options
You can include zone settings when saving the samples. When you import these samples
back into HALion, they automatically get these settings.
•Key Range saves the Key Low and Key High settings of each zone with the samples.
•Vel Range saves the Velocity Low and Velocity High settings of each zone with the
samples.
•Root Key saves the Root Key setting of each zone with the samples.
•Loop Settings saves the Loop settings of each zone with the samples.
•Sample Tune saves the Tune setting of each zone with the samples.
•Sample Gain saves the Gain setting of each zone with the samples.
Audio Options
Trim Samples
Trims the samples to their actual length, specified with the Sample Start and
Sample End parameters of the zone.
Level Envelope
If this option is activated, the level envelope specified in the Sample Editor is
applied to the samples during export.
Pitch Envelope
If this option is activated, the pitch envelope specified in the Sample Editor is
applied to the samples during export.
Fade In/Out
If this option is activated, the fade curves specified in the Sample Editor are
applied to the samples during export.
Loop Crossfade
If this option is activated, the loop crossfade is merged into the new sample.
For the new sample, the crossfade time is reset to 0. This allows you to slightly
reduce the playback performance, because the crossfade does not need to be
calculated in real time.

Program Tree
Exporting Programs and Layers with Samples
238
NOTE
• Merging the loop crossfade is best suited for Continuous and Alternate
Loop mode, where the sample portion after the loop end is not played.
Otherwise, the exported sample might not continue seamlessly after the
merge.
If you want to merge the loop crossfades for samples that have with Until
Release or Alternate Until Release mode, you must use release markers
and set the up so that the loop end is not crossed.
• In Alternate Loop mode, the loop length in the exported sample is doubled,
because it also contains the backward portion. Loop Mode is set to
Continuous.
Merge Tune
Activate this option to merge the Tune value into the new sample. For the new
sample, the Tune value is reset to 0.
Merge Gain
Activate the option to merge Gain value into the new sample. For the new sample,
the Gain value is reset to 0.
Export Options
Use Exported Samples
Updates the sample references of the zones to use the exported samples.
Avoid Duplicate Audio
Prevents samples that are used by several zones from being exported as
duplicate audio files.
NOTE
If a sample has several zones and these zones have different loop settings,
HALion creates duplicates of the file.
Keep Zone Names
If this option is deactivated, zone names are replaced by the sample names. This
is useful if you rename the samples during export.
If this option is activated, the exported zones keep their names.
Exporting Programs and Layers with Samples
You can export a program or layer together with the corresponding samples as a VST preset.
PROCEDURE
1. Select the program or layer and select Import/Export> Export Samples.
2. In the Export Preset with Samples dialog, specify a preset name in the Preset File field
or click the button to the right of the field to open a dialog that allows you to navigate
to the folder where you want to save the preset and to specify a name for it.

Program Tree
Exporting Programs and Layers with Samples
239
3. Specify the path in the Preset Path field.
User presets are always saved in the user presets folder. In this field, you can specify
or create a subfolder in which to save the preset.
4. Specify the location for the exported samples in the Sample Path field.
You can open the pop-up menu and use variables or click the button to the right of the
field and navigate to the folder where you want to save the exported samples.
You can automatically create folders using variables for the sample path. Where
necessary, complete the file path by typing in a backslash (Win) or a slash (Mac). You
can combine several variables, separating them with hyphens, spaces, etc.
5. Specify the names for the samples in the Sample Name field. You can enter a name
manually or use one or more variables from the pop-up menu.
In the Example Name and Status Message fields below, the results of your settings are
shown. If some samples cannot be exported or if problems occur, a warning message
is shown.
6. Specify the file format for the samples in the File Format section.
7. Optional: Set up the Header Options, Audio Options, and Export Options sections.
8. Click OK.
NOTE
Samples that are loaded from HSB files or protected VST sound files cannot be
exported.
RESULT
The VST preset is created at the specified location.
NOTE
The VST preset also includes all resources, such as the macro page, bitmaps, fonts, scripts
etc. This data is written into a folder that is saved in the same folder as the preset file.
This way, you can move a preset to another system without losing any of the necessary
components. If several presets are exported to the same location and if they share a macro
page, the necessary resources are exported only once.
RELATED LINKS
Export Samples Dialog on page 235
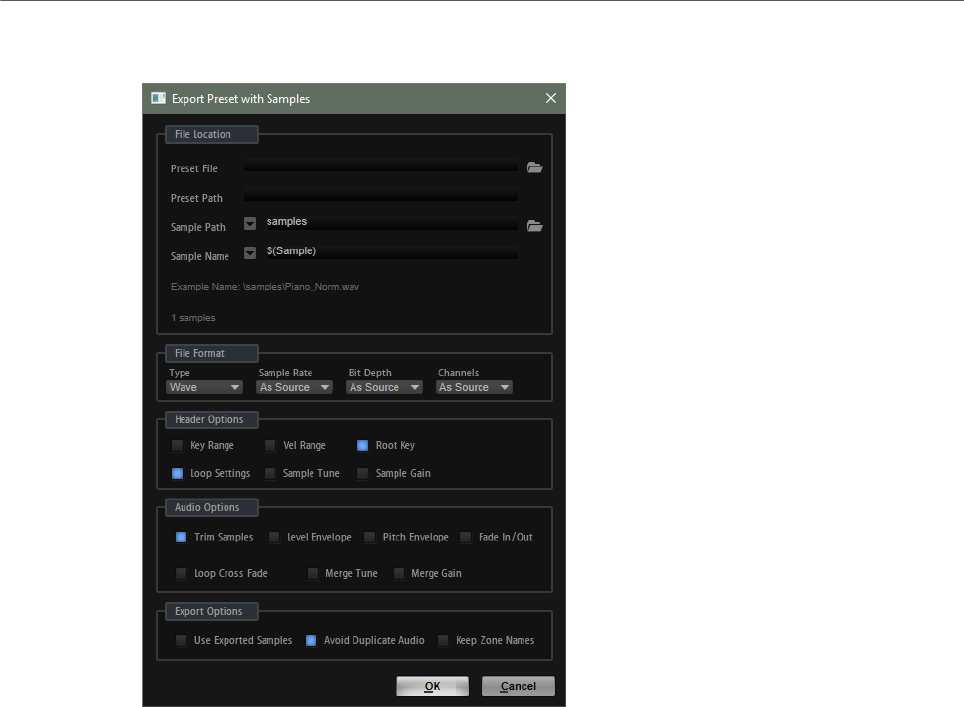
Program Tree
Exporting Programs and Layers with Samples
240
Export Preset with Samples Dialog
File Location
Preset File
The file name of the preset.
Preset Path
The path where the preset is saved.
Sample Path
Allows you to use variables to define the path where the samples are saved.
•$(SampleFolder) creates a folder that has the same name as the folder in
which the original samples were saved.
•$(LayerStructure) creates folders following the structure of the selected
program or layer.
•$(Layer) creates a folder with the name of the layer.
•$(Program) creates a folder with the name of the program.
•$(SampleRate) creates folders that are named according to the sample
rate of the samples.
•$(BitDepth) creates folders that are named according to the bit depth of the
samples.
•$(Date) creates a folder with the name of the current system date in the
format yymmdd.

Program Tree
Exporting Programs and Layers with Samples
241
•$(Time) creates a folder with the name of the current system time in the
format hhmm.
Sample Name
Allows you to use variables to define how the exported samples are named.
•$(Sample) uses the original file name of the sample.
•$(SampleFolder) uses the name of the folder of the original samples.
•$(Zone) uses the name of the zone.
•$(Layer) uses the name of the layer.
•$(Program) uses the name of the program.
•$(KeyLow) uses the MIDI note number of the lower limit of the key range.
•$(KeyHigh) uses the MIDI note number of the upper limit of the key range.
•$(KeyLowText) uses the name of the note of the lower limit of the key
range.
•$(KeyHighText) uses the name of the note of the upper limit of the key
range.
•$(VelLow) uses the number of the lower limit of the velocity range.
•$(VelHigh) uses the number of the upper limit of the velocity range.
•$(RootKey) uses the MIDI note number of the root key.
•$(RootKeyText) uses the name of the root key.
For example, “$(Sample)_$(RootKeyText)” appends the name of the root
key to each sample file name.
•$(SampleRate) uses the sample rate of the samples.
•$(BitDepth) uses the bit depth of the samples.
•$(Date) uses the system date in the format yymmdd.
•$(Time) uses the system time in the format hhmm.
Example name field
Shows the sample path and name resulting from your settings.
Status message field
The status message field informs you how many samples are saved and whether
duplicate names are created.
For example, if two zones in the Program Tree have the same name, and you
use the variable $(Zone), this results in duplicate file names. In this case, the
duplicate file names are automatically numbered.
NOTE
• Samples loaded from HSB files or protected VST Sound files cannot be
exported. The status message informs you if such protected files exist.
• Files that are in use cannot be overwritten. In this case, you must select a
different location for the samples.
Program Tree
Exporting Programs and Layers with Samples
242
NOTE
Some systems have problems with file names longer than 32 characters. Therefore, it is best
to use file names that do not exceed this number.
File Format
Type
You can export the samples as Wave or AIFF files.
Sample Rate
Allows you to specify the sample rate of the samples.
NOTE
Do not change the sample rate of looped samples, because this can cause
audible artifacts.
Bit Depth
Allows you to specify the bit depth of the samples.
Channels
Allows you to specify the channels for the sample.
Header Options
You can include zone settings when saving the samples. When you import these samples
back into HALion, they automatically get these settings.
•Key Range saves the Key Low and Key High settings of each zone with the samples.
•Vel Range saves the Velocity Low and Velocity High settings of each zone with the
samples.
•Root Key saves the Root Key setting of each zone with the samples.
•Loop Settings saves the Loop settings of each zone with the samples.
•Sample Tune saves the Tune setting of each zone with the samples.
•Sample Gain saves the Gain setting of each zone with the samples.
Audio Options
Trim Samples
Trims the samples to their actual length, specified with the Sample Start and
Sample End parameters of the zone.
Level Envelope
If this option is activated, the level envelope specified in the Sample Editor is
applied to the samples during export.
Pitch Envelope
If this option is activated, the pitch envelope specified in the Sample Editor is
applied to the samples during export.

Program Tree
Exporting Programs and Layers with Samples
243
Fade In/Out
If this option is activated, the fade curves specified in the Sample Editor are
applied to the samples during export.
Loop Crossfade
If this option is activated, the loop crossfade is merged into the new sample.
For the new sample, the crossfade time is reset to 0. This allows you to slightly
reduce the playback performance, because the crossfade does not need to be
calculated in real time.
NOTE
• Merging the loop crossfade is best suited for Continuous and Alternate
Loop mode, where the sample portion after the loop end is not played.
Otherwise, the exported sample might not continue seamlessly after the
merge.
If you want to merge the loop crossfades for samples that have with Until
Release or Alternate Until Release mode, you must use release markers
and set the up so that the loop end is not crossed.
• In Alternate Loop mode, the loop length in the exported sample is doubled,
because it also contains the backward portion. Loop Mode is set to
Continuous.
Merge Tune
Activate this option to merge the Tune value into the new sample. For the new
sample, the Tune value is reset to 0.
Merge Gain
Activate the option to merge Gain value into the new sample. For the new sample,
the Gain value is reset to 0.
Export Options
Use Exported Samples
Updates the sample references of the zones to use the exported samples.
Avoid Duplicate Audio
Prevents samples that are used by several zones from being exported as
duplicate audio files.
NOTE
If a sample has several zones and these zones have different loop settings,
HALion creates duplicates of the file.
Keep Zone Names
If this option is deactivated, zone names are replaced by the sample names. This
is useful if you rename the samples during export.
If this option is activated, the exported zones keep their names.

Program Tree
Exporting Programs and Layers as HALion Sonic SE Layer Presets
244
RELATED LINKS
Export Samples Dialog on page 235
Exporting Programs and Layers as HALion Sonic SE Layer
Presets
By exporting programs or layers as HALion Sonic SE Layer presets, you can make sure that
they can be loaded correctly by HALion Sonic or HALion Sonic SE. This is particularly useful
if you create content that will be part of a VST Sound container, because it lets you verify
whether the preset contains all necessary resources.
PREREQUISITE
HALion Sonic layers require a macro page to be controllable from within HALion Sonic.
Without macro page, the program can be loaded and played, but not edited.
The macro page must be attached to the exported layer. Macro pages that are attached to
sub layers cannot be accessed in HALion Sonic or HALion Sonic SE.
PROCEDURE
•Right-click the program or layer and select Import/Export> Export Program as
HALion Sonic SE Layer Preset/Export Layer as HALion Sonic SE Layer Preset.
RESULT
The preset is written into the layer presets folder and can be accessed via the MediaBay.
Importing Sliced Loops
You can import sliced loops in the REX1 and REX2 formats or drag and drop sliced events
directly from Cubase.
NOTE
Before importing a loop, make sure that the very last event ends with the loop end and not
before. Otherwise, the generated loop is too short and will not play in a perfect cycle.
Importing REX Loops
The import process for REX files includes several steps. First, the slice information is used to
create a sample zone for each slice. These sample zones are then mapped to the keyboard.
The range starts with C3 and uses as many zones as slices are defined in the loop. The slice
information is also used to create a MIDI phrase that is loaded into a Slice Player module.
To import REX files, you have the following options:
• Drag a REX file from the File Explorer/Mac OS Finder to the Program Tree and drop it
on a program or layer.
• Open the context menu for a program or layer, select Import/Export> Import
Samples, and select the file that you want to import.
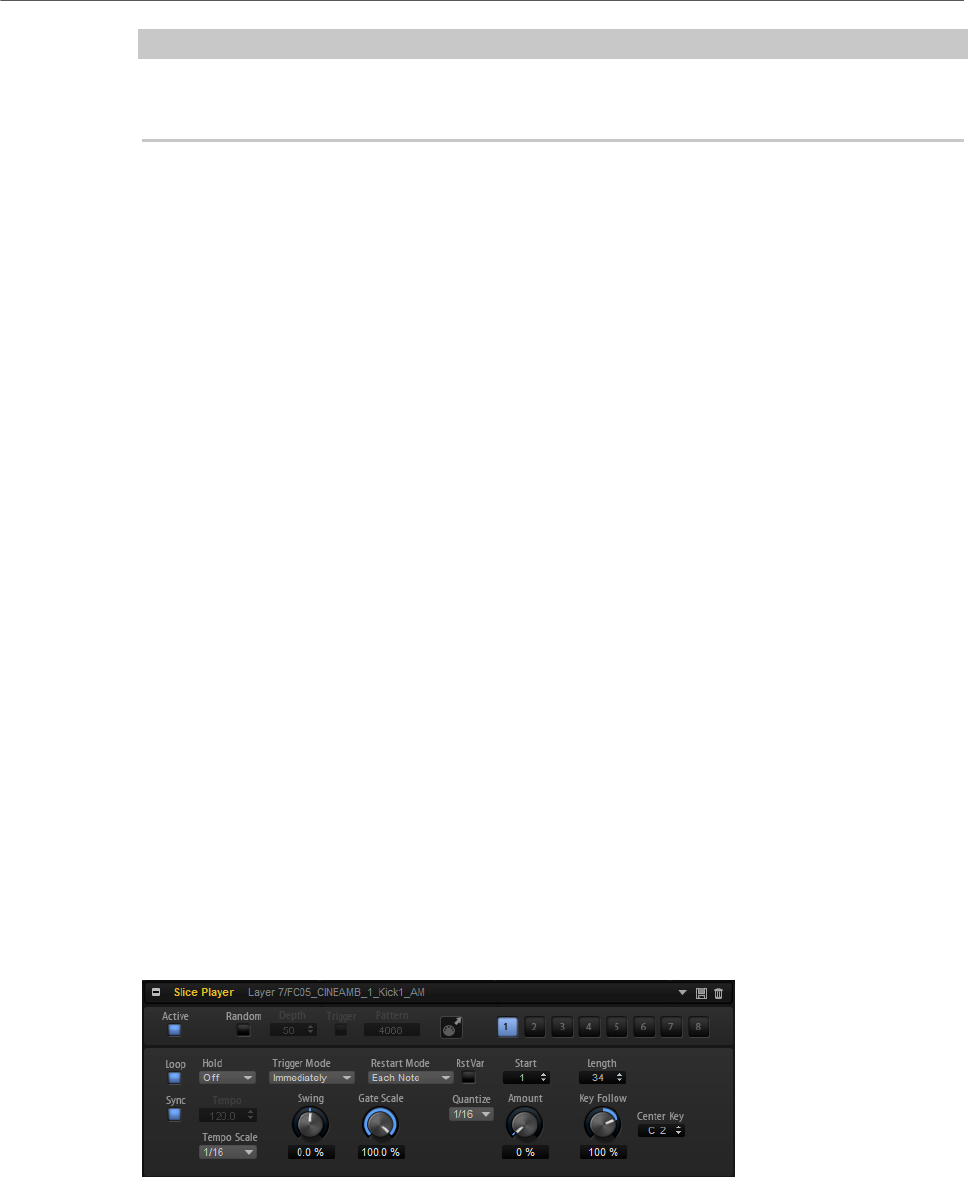
Program Tree
Importing Sliced Loops
245
NOTE
HALion can directly play back REX1 audio files. For REX2 files, HALion first extracts a WAV
file and saves it in the same folder as the REX file.
Importing Sliced Audio Events from Cubase
You can import sliced audio events from Cubase using drag and drop.
When you drop a sliced audio event in the Program Tree, HALion recognizes that the event
contains positional information for the different slices. In the Import Samples dialog, the
button Create Sliced Loop becomes available. If you click this button, HALion creates
a sample zone for each slice and adds a slice player that contains the required MIDI
information. Any further mapping options are ignored.
You can also drag selected audio events from a Cubase project to the Program Tree to create
a sliced loop.
Playing Back Sliced Loops
You can play back the loop at its original key or in a transposed version.
By default, the original loop is played using C2 (#48), but you can specify another key using
the Key Follow and Center Key parameters. Pressing a key below C3 plays transposed
versions of the original loop. The keyboard range above C3 provides the slice sample zones
that are triggered by the slice player, but can also be triggered manually while the loop is
playing.
If the REX file or audio event contains more than 128 slices, HALion automatically creates
additional layers with MegaTrig modules that are preconfigured to use key switches. This
way, you can create up to 1024 zones distributed over up to 32 layers.
Slice Player
If you have created or imported sliced loops, the Slice Player becomes available in the
Program Tree.
You can make settings for the Slice Player in the MIDI Modules Editor.
Active
Activates the slice player.
Random
If this button is activated, the slices are played back in random order. The timing
is not affected by this.

Program Tree
Importing Sliced Loops
246
•Depth adjusts how much the playing order of the slices is shuffled.
Lower this value to keep the playing order of slices on the main beats.
Raise this value to vary the playing order of slices on the offbeats as well.
• Click the Trigger button to trigger a new shuffle. Note that this changes the
pattern number.
• The Pattern parameter allows you to use a specific random pattern, by
entering its pattern number in the value field.
MIDI Drag Icon
Drag this icon into the Project window of your Steinberg DAW to export the loop
sequence as a MIDI part.
Variation Buttons
With the parameters Random, Tempo, Tempo Scale, Swing, Gate Scale, Quantize,
Amount, Start, and Length, you can set up 8 different variations of phrases and
switch between them with the variation buttons.
You can remote-control the variation buttons using the trigger pads, which gives
you the possibility to switch between variations by playing the trigger keys that
are assigned to the trigger pads.
NOTE
To avoid that the variation switches in the middle of a beat or measure, use the
trigger modes Next Beat or Next Measure.
Loop
If this option is activated, the phrase plays in a loop.
Sync
Synchronizes the phrase to the tempo of your host application.
NOTE
In addition, you can set Restart Mode to Sync to Host. This aligns the phrase with
the beats and measures of your host application.
Hold
Allows you to prevent the phrase from stopping or changing when the keys are
released.
• If Off is selected, the phrase changes as soon as you release a key. The
phrase stops immediately when you release all keys.
• If On is selected, the phrase plays to the end, even if the keys are released.
If Loop is activated, the phrase repeats continuously.
• If Gated is selected, the phrase starts to play when the first key is played. It
plays silently in the background, even if the keys are released, and resumes
playback at the current position when you press any of the keys again. This
way, you can gate the playback of the phrase.

Program Tree
Importing Sliced Loops
247
Trigger Mode
Determines at which moment the arpeggiator scans for new notes that you play
on the keyboard.
• If Immediately is selected, the arpeggiator scans for new notes all the
time. The phrase changes immediately in reaction to your playing.
• If Next Beat is selected, the arpeggiator scans for new notes at every new
beat. The phrase changes in reaction to your playing on each new beat.
• If Next Measure is selected, the arpeggiator scans for new notes at the
start of new measures. The phrase changes in reaction to your playing on
each new measure.
Restart Mode
•Off plays the loop continuously and does not restart upon note changes.
•First Note restarts the loop when a note is triggered and no other notes are
already held.
•Each Note restarts the loop each time that a note is triggered.
•Sync to Host aligns the loop with the beats and measures of your host
application each time that you start the transport.
RstVar (Restart on Variation Change)
If this button is activated, changing a variation restarts the slice player, even if no
new notes were triggered.
NOTE
If Sync is activated, this option is not available.
Start
Allows you to shift the start of the loop in steps of 1/4 notes. The length of the
loop is shortened accordingly.
Length
Allows you to shorten the length of the loop in steps of 1/4 notes.
NOTE
The control range of the parameters Start and Length varies, depending on the
original length of the loop.
Tempo
If Sync is deactivated, you can use the Tempo control to set the internal playback
speed of the slice player. The playback speed of the phrase is specified in BPM.
Tempo Scale
Defines the rate at which notes are triggered, that is, the speed at which the
phrase is running. In addition to the Tempo parameter, this gives you further
control over the playback speed. You can specify a value in fractions of beats. You
can also set dotted and triplet note values.

Program Tree
Selections in the Program Tree
248
Swing
Shifts the timing of notes on even-numbered beats. This way, the phrase gets
a swing feeling. Negative values shift the timing backward, and the notes are
played earlier. Positive values shift the timing forward, and the notes are played
later.
Gate Scale
Allows you to shorten or lengthen the notes of the phrase. At a value of 100 %,
the notes play with their original gate length.
NOTE
Gate Scale has no effect on samples that are played in One Shot mode. They
always sound until the end.
Quantize
Allows you to set up a quantization grid, in fractions of beats. You can also specify
dotted and triplet values. This way, you can force the timing of the slices to play
back only at the selected note value.
Amount
Defines how much of the quantization grid is applied. A value of 100 % means the
slices play back only at the specified Quantize note value. Lower values move the
notes only partially towards the next Quantize note value. With a value of 0 %, no
quantization is applied.
Key Follow
Allows you to adjust the pitch modulation by note number. Set this parameter to
positive values to raise the pitch with notes above the center key. Use negative
values to lower the pitch with notes above the center key. At +100 %, the pitch
follows the played note exactly.
NOTE
This parameter is limited to the keys that trigger the entire loop. It does not affect
the keys that play the single slices.
Center Key
This parameter determines the MIDI note that is used as the central position for
the Key Follow function.
Selections in the Program Tree
The selection in the Program Tree defines which part of the program can be edited in
HALion.
All editors in HALion reflect the selection in the Program Tree and display the available
parameters. The name of the selected entry is marked in blue. If several elements are
selected, the one with the focus is available for editing. It is indicated by an orange frame
around its name.
•To select an element, click on it.
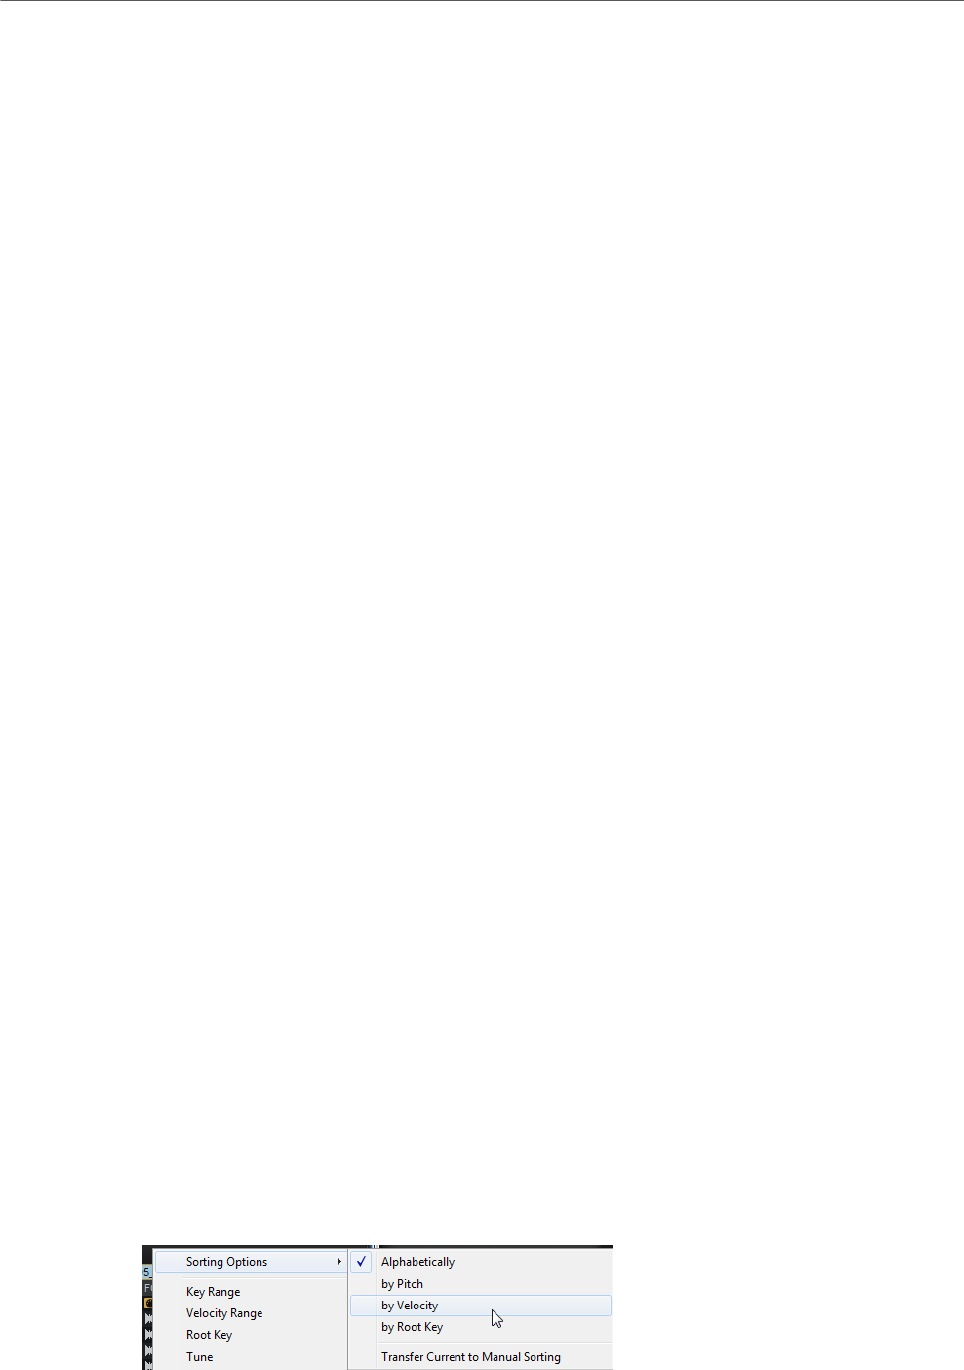
Program Tree
Navigating in the Program Tree
249
•To select a range of elements, use Shift or Ctrl/Cmd.
•To select all zones within a layer, double-click one of the zones.
•To select all elements of a layer, double-click the layer.
Navigating in the Program Tree
If the Program Tree has the window focus, you can use the arrow keys for navigating
between the elements.
• If a single entry is selected, use the up and down arrow keys to select the previous or
next entry.
• To open or close a selected layer, use the right or left arrow key.
• To expand the selection, use the up/down arrow keys while holding Shift.
• If multiple entries are selected, use the up and down arrow keys to set the focus to the
previous or next selected entry.
• If the Program Tree does not have the window focus, you can use the keys W, A, D, and
X to navigate in it: To select the previous or next element, press W or X, and to open or
close the focused layer, press D or A, respectively.
• If you are working with several separate windows that contain a Program Tree, the key
commands are applied to the window that has the focus, provided that its lock icon is
activated.
RELATED LINKS
Locking Windows on page 13
Sorting the Program Tree Elements
You can change the sorting order of layers and zones using the Sorting Options submenu on
the column context menu or manually via drag and drop.
Sorting the Columns
The layers and zones in the Program Tree can be sorted according to columns. The triangle
in the header of a column indicates that the sorting via this column is active.
• To activate the sorting for a column, click its header.
• To change the sorting between ascending and descending order, click the header
again.
• To deactivate the sorting via the column, click a third time.
Sorting the Name Column
By default, the Name column is sorted in alphabetical order. However, you can change the
sorting according to pitch, velocity, or root key.

Program Tree
Setting Up the Program in the Program Tree
250
• To change the sorting, open the context menu, select Sorting Options and select an
option.
Changing the Sorting Order Manually
If the column sorting is not activated for a column, you can change the order of elements, for
example, of imported samples, manually using drag and drop.
Transferring the Current Sorting to the Manual Sorting
If sorting by column is activated, you can transfer this sorting order to the manual sorting
order of the zones. This can be useful if zones are not displayed in the order that you want to
work with, for example, after importing samples.
By transferring the current sorting to the manual sorting, you can apply your manual sorting
permanently for the zone:
1. Select the program or the layer that contains the zones that you want to sort
differently. To change the sorting order of all zones, select the program.
2. Click the header of the column according to which you want to sort. Click again to
switch between ascending and descending order.
3. On the context menu of the column header, open the Sorting Options submenu and
select Transfer Current to Manual Sorting.
4. To return to the manual sorting order, deactivate the sorting via column.
NOTE
Transfer Current to Manual Sorting can only be used to change the sorting of the zones
inside the selected program or layer.
Setting Up the Program in the Program Tree
You can set up a program by adding elements such as modules, layers, or zones, and by
structuring them in the Program Tree.
•To add elements to the program, use the buttons on the toolbar, or open the context
menu and select the element that you want to add from the New submenu.
•To rearrange the program structure, drag the elements to a new position in the tree.
To drag an element to another hierarchical level in the program, drag it onto the
topmost element of this level.
NOTE
The order of MIDI modules and insert effects determines the order of the processing.
The topmost element is processed first, the lowest last.
•To move or copy elements, open the context menu and use the Cut, Copy, and Paste
commands.
You can also copy or move the selection from one program to another.
NOTE
You can move a complete program into another one. In this case the moved program
becomes a layer inside the target program.
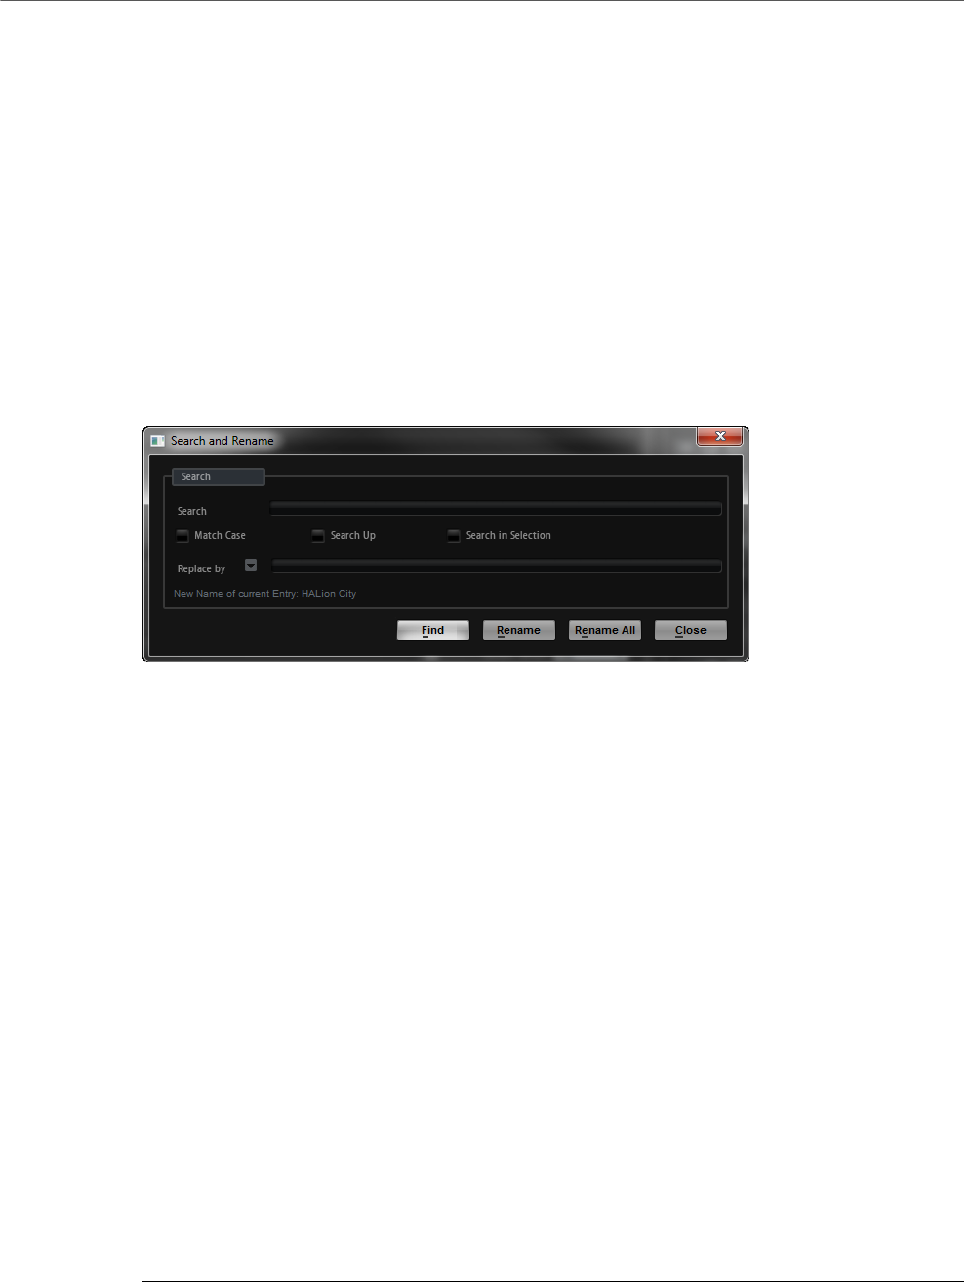
Program Tree
Renaming Elements
251
Renaming Elements
If you create a new element in the Program Tree, it gets a generic name. You can change this
name in the following ways:
•Select an element, click it a second time, and enter a new name.
•Select an element, press F2 (Win) or Return (Mac), and enter a new name.
Search and Rename Dialog
You can perform a search and rename operation on selected or all elements in the Program
Tree.
• To open the Search and Rename dialog, right-click anywhere in the Program Tree and
select Search and Rename.
Search Text Field
Here, you enter the word or phrase that you want to search for.
Match Case
Activate this option to perform a case-sensitive text search.
Search Up
If this option is activated, the search is performed on the elements that are
higher-up in the Program Tree hierarchy.
Search in Selection
If this option is activated, the search is performed only on the elements that are
selected in the Program Tree.
Replace by
Here, you enter the word or phrase that you want to replace the searched text
with.
Renaming Multiple Elements
You can search for words and phrases in the Program Tree and rename them.
PROCEDURE
1. In the Program Tree, select the element that you want to rename. If nothing is
selected, the search is performed on the entire program.
2. Open the context menu and select Search and Rename.
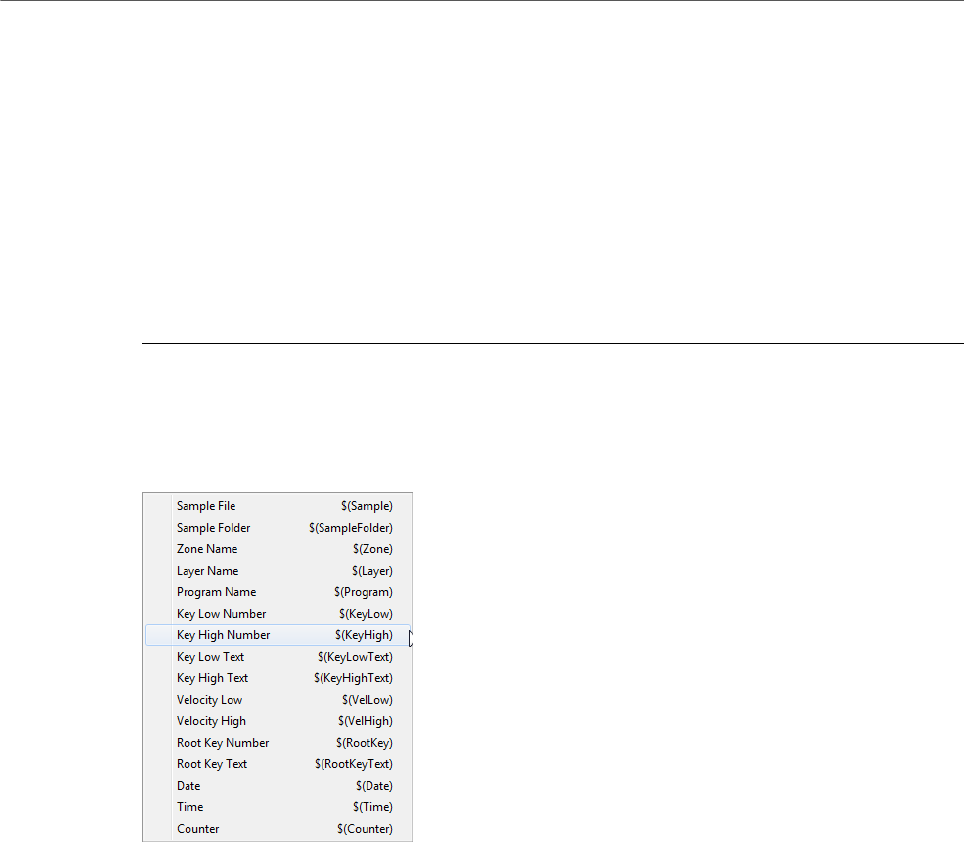
Program Tree
Renaming Elements
252
3. Enter the word or phrase that you want to search for.
You can enter the entire word or phrase you are searching for, or you can use
wildcards.
4. Set up the search options to refine your search.
You can specify the search direction or only search the selected elements, for example.
5. Enter the text to replace the found words or phrases.
You can also use text variables.
6. Click the Find button to go to the next matching element in the Program Tree. Click
the Rename button to rename the current element and to jump to the next match.
Click Rename All to automatically rename all matching elements.
Variables That Can Be Used for Renaming
Instead of entering the text to replace manually, you can also use the variables on the
Replace by pop-up menu.
Sample File $(Sample)
The file name of the original sample.
Sample Folder $(SampleFolder)
The name of the folder where the sample is located.
Zone Name $(Zone)
The name of the zone.
Layer Name $(Layer)
The name of the layer.
Program Name $(Program)
The name of the program.
Key Low Number $(KeyLow)
The MIDI note number of the lower limit of the key range.

Program Tree
Renaming Elements
253
Key High Number $(KeyHigh)
The MIDI note number of the upper limit of the key range.
Key Low Text $(KeyLowText)
The note name of the lower limit of the key range.
Key High Text $(KeyHighText)
The note name of the upper limit of the key range.
Velocity Low $(VelLow)
The number of the lower limit of the velocity range.
Velocity High $(VelHigh)
The number of the upper limit of the velocity range.
Root Key Number $(RootKey)
The MIDI note number of the root key.
Root Key Text $(RootKeyText)
The name of the root key.
Date $(Date)
The system date (in the format yymmdd).
Time $(Time)
The system time (in the format hhmm).
Counter $(Counter)
A counter starting at 1, counting up for each replacement.
You can also use counter variables with up to 5 digits, where the counter starts
with 01, 001, etc. These are not available on the menu. To use them, enter
$(Counter2), $(Counter3), etc.
IMPORTANT
The variables $(Sample), $(SampleFolder), $(Zone), $(KeyLow), $(KeyHigh), $(KeyLowText),
$(KeyHighText), $(VelLow), $(VelHigh), $(RootKey), and $(RootKeyText) work only for zones.
If you try to use any of these variables for replacing text in a layer name, the matching text is
deleted. The variables $(Program), $(Layer), $(Date), $(Time) and $(Counter) always work.
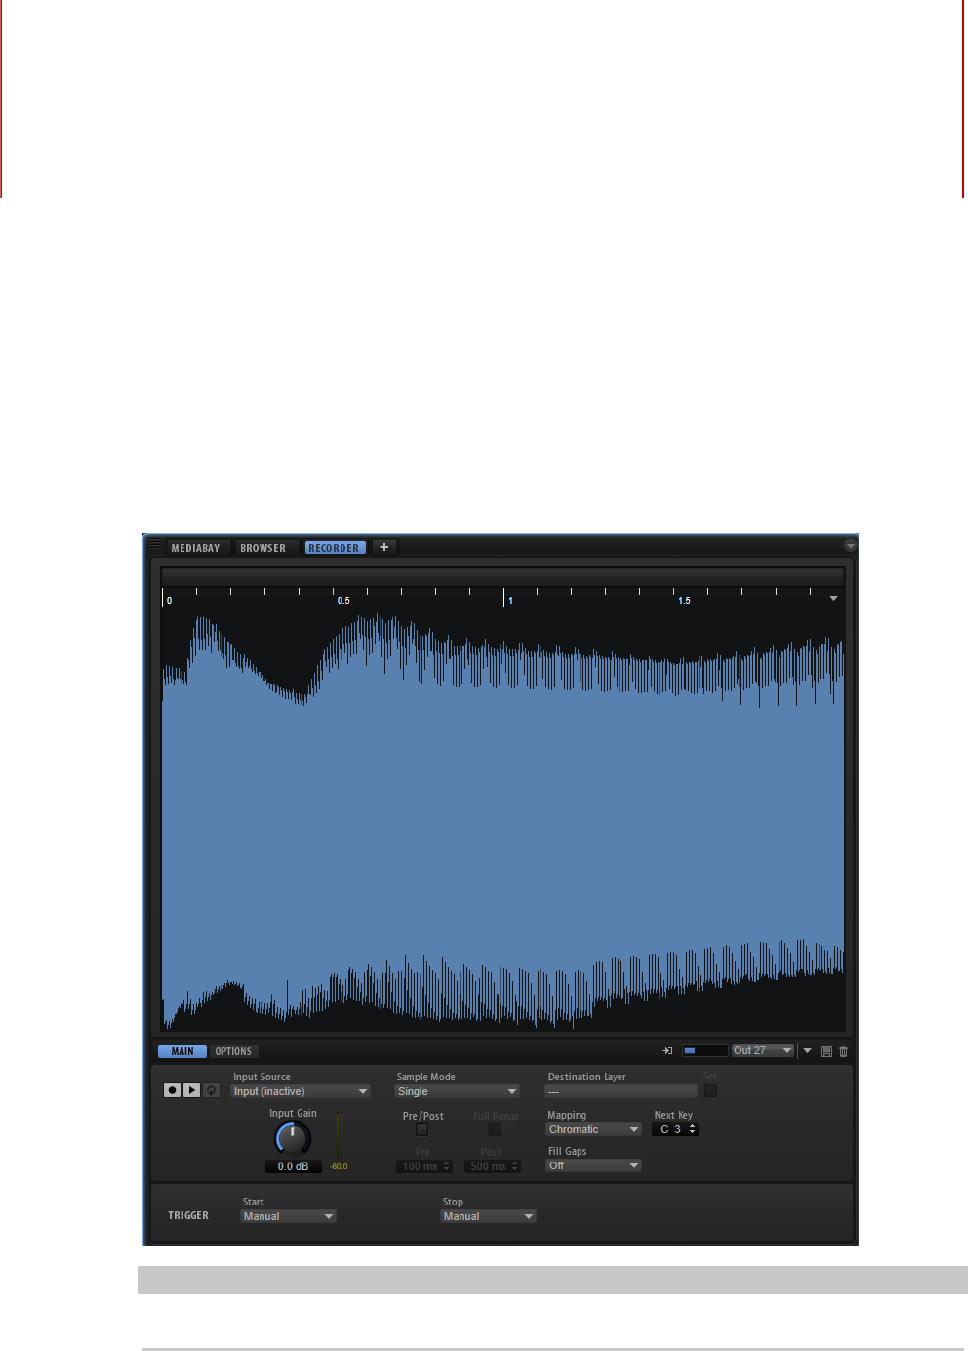
Sample Recorder
254
The Sample Recorder allows for live sampling in HALion. You can sample the sounds of
another plug-in and map them to the keyboard, reduce CPU load by creating one sample
from an audio event that contains fades, processing, etc., or quickly create sounds from
events in your sequencer projects and edit them further in HALion, for example.
NOTE
The Sample Recorder is available once for a HALion instance.
Waveform Display
During recording, the sample display shows the waveform. When recording is stopped, it
shows the sample zone that was created. If nothing has been recorded yet, the waveform
display shows the waveform of the sample zone that is selected in the Program Tree.

Sample Recorder
255
The ruler above the display can be switched between Beats, Seconds, and Samples.
Input Monitoring
The Sample Recorder can play back the input signal. The input monitoring controls are
located on the right below the waveform display. Activate Enable Input Monitoring to hear
the signal at the input of the Sample Recorder and specify the routing and the level for
monitoring.
This is useful if you have routed an audio track from the DAW to HALion’s side-chain input. In
this case, the signal of the track is no longer sent to the master bus of your sequencer and
cannot be heard.
NOTE
When you are routing a send from a track in the DAW to HALion’s side-chain input, the
original track remains audible and you can deactivate Monitor Input.
Main Tab
Record/Record Enable
The behavior of this button depends on the Start setting in the Trigger section.
• In Manual mode, this button starts/stops recording.
• In the Audio Threshold, MIDI Note-On, and MIDI Note-Off modes, this
button record-enables the Sample Recorder. This means that recording
starts as soon as the audio signal exceeds the threshold or a MIDI note-on
or note-off event is received.
NOTE
The Sample Recorder always records the sample for the selected program or
layer. Every recording creates a new sample zone.
Play/Stop
The behavior of this button depends on the Start setting in the Trigger section.
• In Manual mode, the Play/Stop button starts/stops playback of the
recorded sample.
• In the Audio Threshold, MIDI Note-On, and MIDI Note-Off modes, the Play/
Stop button starts/stops recording.
Reset Recording
Removes any recorded audio, allowing you to start over.
Input Source
Allows you to select the source from which to record. You can use HALion’s side-
chain input, the output of one of the slots in HALion or one of the plug-in outputs.
NOTE
Only the available options are shown on the menu, that is, outputs for empty slots
or plug-in outputs that have not been activated are not shown.

Sample Recorder
256
Input Gain
Adjusts the input level for the recording.
Sample Mode
Determines whether you can make a single recording or record multiple
samples.
• In Single mode, you can only record one sample.
• In Auto-Next mode, you can record multiple samples in a row. This is
particularly useful when working with the Audio Threshold, MIDI Note-
On, and MIDI Note-Off modes. Every time that a sample is recorded, the
Sample Recorder reverts to its record-enabled state and starts recording
again as soon as the condition that triggers recording is met.
Destination Layer
This field displays the name of the layer into which the sample zone is recorded.
Set
Allows you to switch the layer, even if Record Enable is active.
To switch to another layer, select it in the Program Tree and click Set.
Mapping
When you record multiple samples, you can specify how they are mapped to the
keyboard.
•As played can be used when the recording start is triggered by MIDI notes.
The played notes determine the root key of the sample.
•Fixed maps all samples to the key that is specified in the Key text field.
•Chromatic maps the samples chromatically to the keys on the keyboard,
starting with the key that is specified in the Key text field.
•White Keys maps the samples to the white keys on the keyboard, starting
with the key that is specified in the Key text field.
•Black Keys maps the samples to the black keys on the keyboard, starting
with the key that is specified in the Key text field.
Key
Specifies the initial key or the fixed key for the sample mapping, depending on the
selection you made on the Mapping pop-up menu.
Fill Gaps
Allows you to automatically map samples so that they are distributed over the
keyboard. The available key range is from C-2 to G8.
• If Off is selected, the sample zone is mapped only to the root key of the
sample.
• If Fill Centered is selected, the mapping of the sample zones is extended
upwards and downwards halfway towards the adjacent sample zone. The
mapping spans the entire keyboard range.
• If Fill Up is selected, the mapping of the sample zones is extended upwards
until the next sample zone is reached.

Sample Recorder
257
• If Fill Down is selected, the mapping of the sample zones is extended
downwards until the next sample zone is reached.
Pre/Post Record
Allows you to start the recording slightly ahead or let it continue for a bit after the
recording stop trigger is received. This way, you can capture transients or reverb
tails that are slightly lower than the set threshold, or perform fine-adjustments
of the start and end regions of the sample at a later stage, for example.
•Full Range – If this option is activated, the pre- and post-record portions of
the recording span the entire sample range.
•Pre sets the time that is recorded before the recording is triggered. The
sample start marker of the zone is set to the exact trigger moment. The
pre-record time can then be used to adjust the start of the sample.
•Post sets the time that is recorded after the trigger event has stopped the
recording. The sample end marker of the zone is set to the exact trigger
moment. The post-record time can then be used to adjust the end of the
sample.
NOTE
When you record multiple samples, Post-Record is automatically stopped
50 ms after a new sample recording has started, to avoid overlapping
recordings.
Trigger – Start
Determines what starts the recording.
• If Manual is selected, recording starts when you click the Record/Record
Enable button.
• If Audio Threshold is selected, recording starts as soon as the audio signal
exceeds the specified threshold.
• If MIDI Note-On is selected, recording starts when a MIDI note-on event is
received on the specified channel and port.
• If MIDI Note-Off is selected, recording starts when a MIDI note-off event is
received on the specified channel and port.
Trigger – Stop
Determines what stops the recording.
• If Manual is selected, recording stops when you click the Record/Record
Enable button.
• If Audio Threshold is selected, recording stops as soon as the audio signal
falls below the specified threshold.
• If MIDI Note-Off is selected, the following applies:
If Trigger – Start is set to MIDI Note-On, recording stops when the
corresponding MIDI note-off is received on the specified channel and port.
NOTE
Only this specific note-off event stops the recording. Any other MIDI notes
can be played and the resulting audio will be recorded.
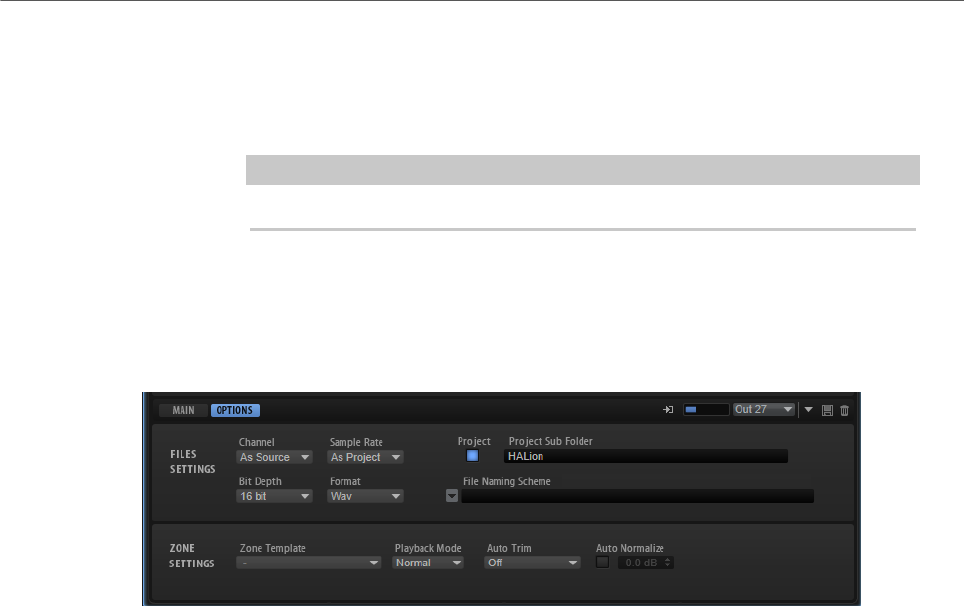
Sample Recorder
258
If Trigger – Start is not set to MIDI Note-On, recording stops when a MIDI
note-off event is received on the specified port.
• If MIDI Note-On is selected, recording stops when a MIDI note-on event is
received on the specified channel and port.
NOTE
Any note that is sent on the specified channel and port stops the recording.
•Fixed Duration allows you to specify the duration for the recording, either
as absolute recording time or as recording time in beats, in sync to the
project tempo.
Options Tab
On the Options tab, you can specify the sample format and the location for the recorded
samples. Furthermore, you can define a naming scheme and make playback settings for the
created sample zones.
File Settings
Channel
•As Source adapts the number of channels automatically to the number of
channels of the source.
•Mono records mono samples.
Sample Rate
Specifies the sample rate for recorded samples. You can choose between a
selection of predefined sample rates or use the sample rate that is used in the
project of your host application.
Bit Depth
Specifies the bit depth for the recorded samples.
Format
Specifies the file format for the recorded samples.
Project
Activate this button to record the sample files into the current project folder of
the Steinberg DAW.

Sample Recorder
259
Record Folder
Allows you to specify the destination folder for the recorded sample files. If the
Project button is activated, you can define a subfolder or path inside the project
folder.
Naming Scheme
Allows you to set up a naming scheme for the recorded samples. The file name
can be a combination of a text and a selection of predefined elements.
• You can enter the text for the file name in the text field.
• To add one of the predefined elements to the naming scheme, click the
triangle to the left and select it from the pop-up menu.
• You can modify the naming scheme by cutting, copying, and pasting in the
text field.
The resulting name is displayed as an example above the text field.
NOTE
To avoid duplicate file names, a continuous counter is automatically added to the
file name.
Zone Settings
Zone Template
Allows you to select a zone template that is used to create new sample zones.
Playback Mode
Specifies how the zone is played back.
• In Normal mode, the sample starts playing when a key is triggered and
stops when the key is released.
• In One Shot mode, the sample is played back in its entirety, any note-off
events are ignored.
• In Loop mode, the sample is played back in a loop. The loop is set up so
that loop start and end correspond to the start and end of the sample.
Auto Trim
Zero Crossing moves the sample start and end markers automatically to the
nearest zero crossing before the start and after the end of the recording.
Silence automatically removes any silence before the audio starts and after it
ends. The sample start and end markers are set accordingly.
EXAMPLE
Manual Recording
If you set Auto Trim to Off, manually start recording, and play a note on your instrument, the
recording contains silence before and after the recorded audio. This means that you must
adjust the sample start and end markers manually.
Sample Recorder
Recording From an Audio Track With Multiple Drum Sounds
260
If you activate Auto Trim, the sample start and end markers are automatically set to
positions directly before the start and after the end of the audio.
EXAMPLE
Recording With an Audio Threshold and Pre/Post Record
Set Auto Trim to Off, specify an audio threshold for both the start and the stop trigger for the
recording, and activate and set up Pre/Post Record. Now, click the Record/Record Enable
button to enable recording and play a note on your instrument.
As soon as the signal exceeds the Start threshold, recording starts and when the audio level
falls below the Stop threshold, it ends.
The resulting recording contains silence before and after the audio recording. This means
that you must adjust the sample start and end markers manually.
If you activate Auto Trim, and repeat the same procedure, the sample start and end markers
are automatically moved into the pre and post record range to match the effective start and
end of the audio when the recording is finished.
Auto Trim only affects the sample start and end markers and leaves the audio file as it is,
including the pre and post-record time.
Auto Normalize
Allows you to normalize the audio of the recorded sample to the specified level.
NOTE
This operation is non-destructive and only affects the Gain parameter of the
sample.
Recording From an Audio Track With Multiple Drum Sounds
Recording audio from a track in the Steinberg DAW allows you to save any processing, fades,
etc. directly in the audio event.
PROCEDURE
1. In HALion, select the program for which you want to record the samples.
2. Open the Sample Recorder.
3. In the plug-in header of HALion, activate the Activate Side-Chain button.
4. On the Input Source pop-up menu, select Input.
5. In the DAW, route the output of the audio track to the side-chain input of HALion.
Alternatively, you can also add a send on the mixer channel of the audio track and
route it to the side-chain input of HALion.
6. In the Trigger section of the Sample Recorder, set Start and Stop to Audio Threshold
and specify the threshold levels.
7. Set the Sample Mode to Auto Next to create multiple sample recordings.
8. Set Mapping to Chromatic to map the zones automatically to the keys on the keyboard.
9. Click the Record/Record Enable button to enable recording.

Sample Recorder
Recording the Output of Another Plug-In
261
10. In the Steinberg DAW, play back the audio track.
As soon as the audio signal exceeds the Start threshold, the first sample recording
starts. When the audio level falls below the Stop threshold, recording ends and the
sample zone is created. The Sample Recorder automatically reverts to its record-
enabled state and starts recording again as soon as the signal exceeds the threshold.
RESULT
HALion creates a sample zone for each audio event on the track.
Recording the Output of Another Plug-In
Recording the output of another plug-in allows you to save the sounds that you created with
other plug-ins, software or hardware, exactly the way that you set them up. This can be
particularly useful if a plug-in does not allow you to create presets, for example.
PREREQUISITE
You have added two tracks in the Steinberg DAW, one for the plug-in from which you want to
record, and one for HALion.
PROCEDURE
1. In HALion, select the program for which you want to record the samples.
2. Open the Sample Recorder.
3. In the plug-in header of HALion, activate the Activate Side-Chain button.
4. Set the Input Source pop-up menu to Input.
5. Route the output of the instrument track to the side-chain input of HALion.
Alternatively, you can also add a send on the mixer channel of the instrument track
and route it to the side-chain input of HALion.
6. In HALion, in the Trigger section, set Start to MIDI Note-On and use the Port pop-up
menu to specify a MIDI port and channel for the recording.
7. In the Trigger section, set Stop to MIDI Note-Off.
8. Set Sample Mode to Auto Next to create multiple sample recordings.
9. Set Mapping to As Played to map the zones automatically to the keys that correspond
to the notes on the instrument track.
10. Copy the note events of the plug-in track to the HALion track, so that they both receive
the same MIDI notes.
11. Click the Record/Record Enable button to enable recording.
12. Start playback in the DAW.
As soon as the first note-on message is received, recording starts. When the note is
released, recording stops. The Sample Recorder automatically reverts to its record-
enabled state and starts recording again as soon as the next note is received.
NOTE
You can also record samples by playing the notes manually. In this case, proceed as
described above, activate the Record-Enable and Monitor buttons for the plug-in track

Sample Recorder
Recording Samples in the Standalone Version
262
and the HALion track, so that you can trigger both tracks at the same time and then
play the notes on your keyboard.
RESULT
HALion creates a sample zone for each MIDI note that is played.
Recording Samples in the Standalone Version
In the standalone version of HALion, you can create samples by recording the audio input of
the plug-in.
PROCEDURE
1. Open the Preferences dialog, select the Input Routing tab and select the audio inputs
of your hardware for Input 1 and Input 2 and click OK to close the dialog.
2. In the Slot Rack, select the program for which you want to record the samples.
3. Open the Sample Recorder, and make the following settings:
•Set the Input Source pop-up menu to Input.
•In the Trigger section, set Start and Stop to Audio Threshold and specify the
threshold levels.
•Set Sample Mode to Auto Next to create multiple sample recordings.
•Set Mapping to Chromatic to map the zones automatically to the keys on the
keyboard.
4. Click the Record/Record Enable button to enable recording.
5. Now play your guitar, or record various drum sounds, for example.
6. When you are done, click the Record/Record Enable button again to deactivate record-
enable.
RESULT
As soon as the signal exceeds the Start threshold, recording starts and when the audio level
falls below the Stop threshold, it ends.
NOTE
You can also record from an external MIDI keyboard and make use of the MIDI Note-On, MIDI
Note-Off, Recording Start Trigger and Recording Stop Trigger functions. In this case, make
sure that the MIDI notes that you play on the keyboard are also received by HALion.
RELATED LINKS
Preferences Dialog on page 542
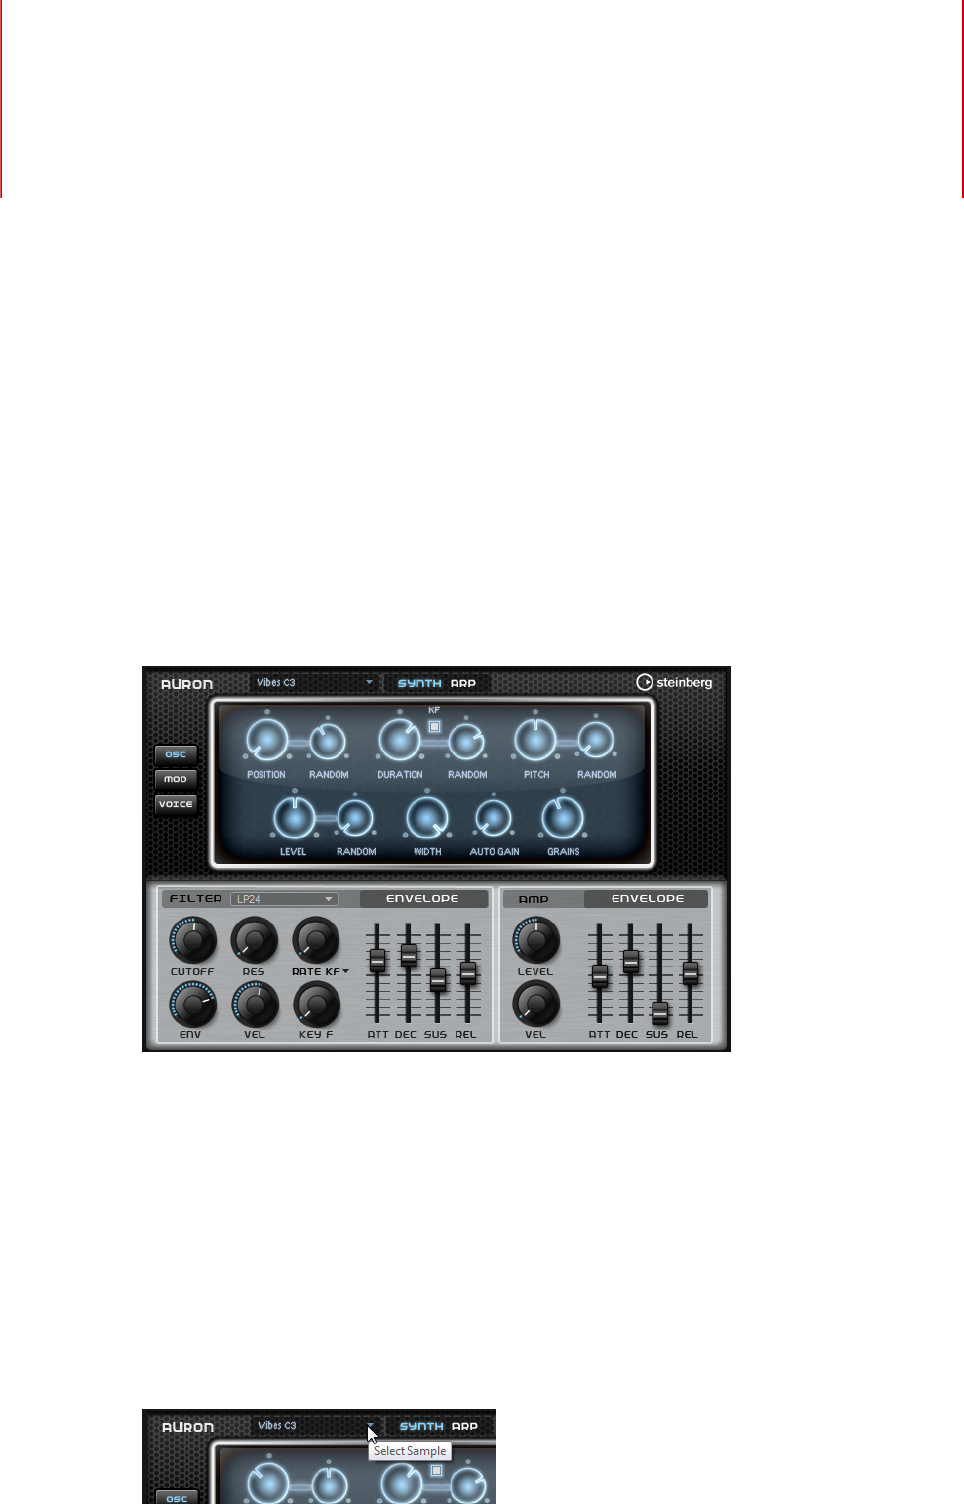
Included Instruments
263
HALion comes with a factory library containing powerful instruments. For each instrument,
an intuitive macro page is available, offering a rich palette of presets.
Auron
The Auron synth uses granular synthesis with up to 8 grain streams to produce oscillator
waveforms. With the integrated arpeggiator and step sequencer, you can create anything
from sequencer lines to stepped chords.
The granular oscillator is followed by a multi-mode filter that offers a large number of
different filter shapes. The filter can be modulated by modulation sources like the keyboard,
velocity, and LFO, but also by the controller lanes of the step sequencer, for example.
Auron includes 2 LFOs for pitch, grain position, formant, and duration as well as filter
modulations. The first LFO can be synchronized to the tempo of the host application and
allows for modulations of grain position, formant and duration, as well as filter cutoff. The
second LFO is controlled by the modulation wheel and is used to create a vibrato.
For the grain synthesizer, three pages are available: Osc, Mod, and Voice. To open a page,
click the corresponding button in the upper left of the Auron panel.
Selecting Samples

Included Instruments
Auron
264
You can select samples on the sample selector that is opened by clicking the little triangle in
the upper left of the page.
Osc Page
On this page, you can make settings for the grain oscillator.
Position
You can set the playback position of the grains manually. For example, at a
setting of 50 %, the playback position is in the middle of the sample. The playback
position is updated with every new grain.
Random Position
Selects a random playback position within a specific range around the current
position. At a setting of 100 %, the playback position jumps to a random position
between the start and the end of the sample.
Duration
Increases the grain period by a factor ranging from 1 to 1000.
For very short grains, the sound gets the pitch of the frequency at which the
grains repeat. For grains longer than 30 ms, the sound gets the pitch of the
original sample.
Random Duration
Sets the random grain duration. This duration is calculated at the start of a new
grain.
Duration Key Follow
Determines how the grain duration changes with the notes you play. It is mostly
used with short durations. Longer durations sound with the original pitch of the
sample and therefore do not need to follow the keyboard.
Pitch
Allows you to specify an interval between -12 and +12 semitones. The grains are
played randomly at their original pitch, or are transposed according to the pitch
interval. This parameter is suited for longer grain durations.
Random Pitch
Sets the random pitch range in semitones and cents. At a setting of +12, the
random pitch values lie between -12 and +12 semitones. This parameter can be
used to enrich the sound.
Level
Adjusts the overall level of the grain oscillator. When you increase the number
of grains, it might become necessary to lower the oscillator level. When you play
back a very quiet portion of a sample, you can use this control to raise the level.
Random Level
Sets a random level for each new grain. At a setting of 100 %, the level varies
between a factor of 0 and 2 of the original level.
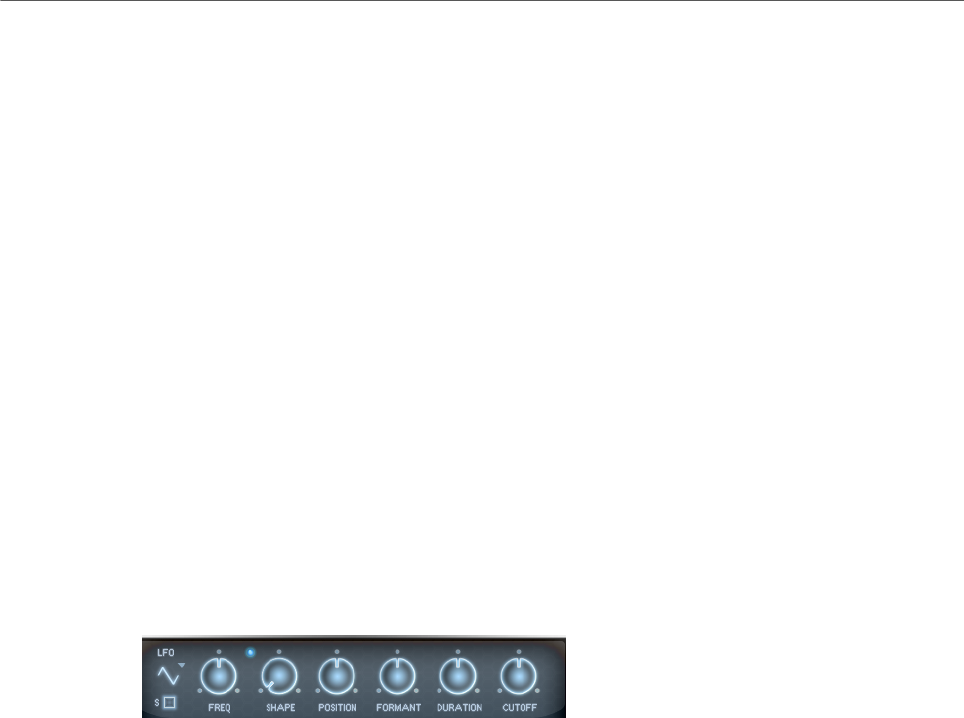
Included Instruments
Auron
265
Width
Narrows the stereo width of the grain oscillator. It is applied after the grain
oscillator and does not affect the stereo width of the actual sample. At a setting
of 0 %, the output of the grain oscillator is monophonic.
Auto Gain
Allows you to automatically adjust the level of grains using quieter sample parts.
This way, you get a more homogeneous signal and you can use a quiet part of a
sample as source.
Grains
Allows you to specify the number of grains, from 1 to 8. For example, with a
setting of 4, you get 4 grains per period of the grain duration.
To hear the effect of this setting, you have to play a new note.
Mod Page
The Mod page contains the LFO settings in the upper section and the mod wheel, or vibrato,
settings in the lower section.
LFO Settings
LFO Waveform and Shape
•Sine produces smooth modulation, suitable for vibrato or tremolo. Shape
adds additional harmonics to the waveform.
•Triangle is similar to Sine. Shape continuously changes the triangle
waveform to a trapezoid.
•Saw produces a ramp cycle. Shape continuously changes the waveform
from ramp down to triangle to ramp up.
•Pulse produces stepped modulation, where the modulation switches
abruptly between two values. Shape continuously changes the ratio
between the high and low state of the waveform. If Shape is set to 50 %, a
square wave is produced.
•Ramp is similar to the Saw waveform. Shape increasingly puts silence
before the sawtooth ramp up begins.
•Log produces a logarithmic modulation. Shape continuously changes the
logarithmic curvature from negative to positive.
•S & H 1 produces randomly stepped modulation, where each step is
different. Shape puts ramps between the steps and changes the S & H into
a smooth random signal when fully turned right.
•S & H 2 is similar to S & H 1. The steps alternate between random high and
low values. Shape puts ramps between the steps and changes the S & H
into a smooth random signal when fully turned right.
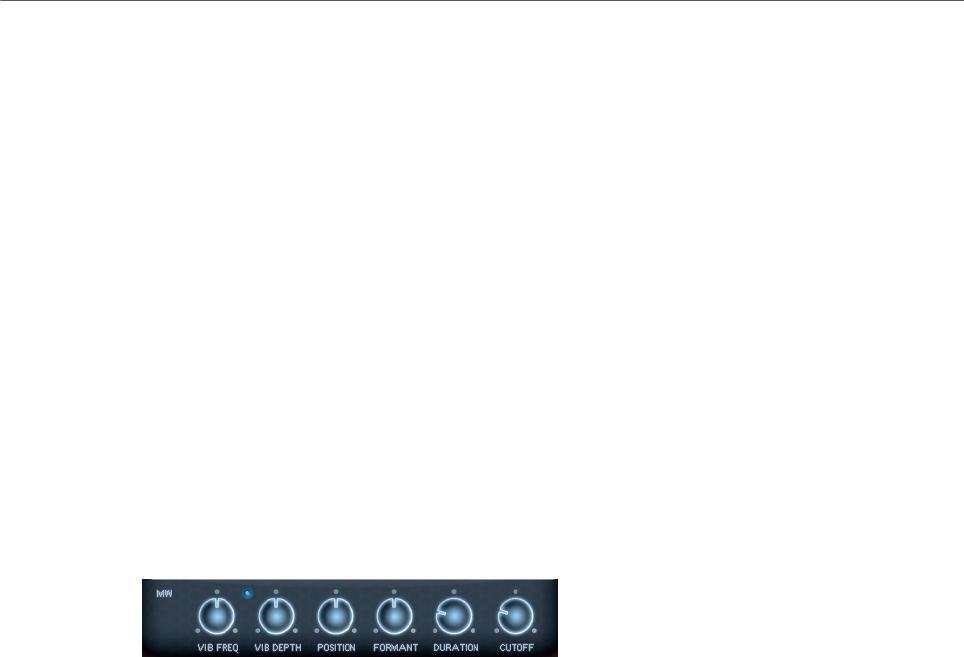
Included Instruments
Auron
266
Freq
Controls the frequency of the modulation, that is, the speed of the LFO.
Sync
If Sync is activated, the frequency is set in fractions of beats.
Position
Controls the modulation depth of the grain position modulation.
Formant
Controls the modulation depth of the grain formant modulation.
Duration
Controls the modulation depth of the grain duration modulation.
Cutoff
Controls the modulation depth of the filter cutoff modulation.
Mod Wheel Settings
Vib Freq
Controls the frequency of the second LFO that is used for pitch modulation
(vibrato).
Vib Depth
Controls the depth of the pitch modulation (vibrato).
Position
Controls the influence of the mod wheel on the grain position.
Formant
Controls the influence of the mod wheel on the grain formant.
Duration
Controls the influence of the mod wheel on the grain duration.
Cutoff
Controls the influence of the mod wheel on the filter cutoff.

Included Instruments
Auron
267
Voice Page
Polyphony
If Mono mode is deactivated, you can use this parameter to specify how many
notes can be played simultaneously.
Octave
Adjusts the pitch in octave steps.
Coarse
Adjusts the pitch in semitone steps.
Fine
Allows you to fine-tune the pitch in cent steps.
Fixed Pitch
Activate this option if you do not want the sample to be transposed over the
keyboard. If you work with short grain durations and Duration Key Follow is
activated on the Osc page, the pitch of the played key still follows the keyboard,
and only the frequency response changes.
Pitchbend Up/Pitchbend Down
Determines the range for the modulation that is applied when you move the
pitchbend wheel.
Glide
Allows you to bend the pitch between notes that follow each other. You achieve
the best results in Mono mode.
Glide Time
Sets the glide time, that is, the time it takes to bend the pitch from one note to
the next.
Fingered
Activate this parameter to glide the pitch only between notes that are played
legato.
Mono
Activates monophonic playback.
Retrigger
If this option is activated, a note that was stolen is retriggered if you still hold the
stolen note when releasing the newer note. This lets you play trills by holding

Included Instruments
Auron
268
one note and quickly and repeatedly pressing and releasing another note, for
example.
Trigger Mode
Defines the trigger behavior for new notes.
•Normal triggers a new note when the previous note gets stolen. The
sample and the envelope of the new note are triggered from the start.
To minimize discontinuities, use the Fade Out parameter of the zone.
•Resume does not always trigger a new note.
If the new note stays within the same zone, the envelope is retriggered, but
resumes at the level of the stolen note. The pitch of the zone is set to the
new note.
If the new note plays in a different zone, the sample and the envelope of the
new note are triggered from the start.
•Legato does not always trigger a new note.
If the new note stays within the same zone, the envelope keeps running.
The pitch of the zone is set to the new note.
If the new note plays in a different zone, the sample and the envelope of the
new note are triggered from the start.
•Resume Keeps Zone does not trigger a new note upon note stealing. The
envelope resumes at the level of the stolen note and the pitch of the zone is
set to the new note, even if the new note plays in a different zone.
•Legato Keeps Zone does not trigger a new note upon note stealing. The
envelope keeps running and the pitch of the zone is set to the new note,
even if the new note plays in a different zone.
NOTE
If Resume or Legato are selected, you might hear an unnatural attack, depending
on the sample. To avoid this, activate Use Start Range on the Glide tab in the
Voice Control section for the zone.
Filter Section
Filter Shape
• LP24, 18, 12, and 6 are low-pass filters with 24, 18, 12, and 6 dB/oct.
Frequencies above the cutoff are attenuated.
• BP12 and BP24 are band-pass filters with 12 and 24 dB/oct. Frequencies
below and above the cutoff are attenuated.
• HP6+LP18 and HP6+LP12 are combinations of a high-pass filter with 6 dB/
oct and a low-pass filter with 18 and 12 dB/oct, respectively (asymmetric
band-pass filter). Frequencies below and above the cutoff are attenuated.
Attenuation is more pronounced for the frequencies above the cutoff.
• HP12+LP6 and HP18+LP6 are combinations of a high-pass filter with 12
and 18 dB/oct and a low-pass filter with 6 dB/oct (asymmetric band-pass
filter). Frequencies below and above the cutoff are attenuated. Attenuation
is more pronounced for the frequencies below the cutoff.

Included Instruments
Auron
269
• HP24, 18, 12, and 6 are high-pass filters with 24, 18, 12, and 6 dB/oct.
Frequencies below the cutoff are attenuated.
• BR12 and BR24 are band-reject filters with 12 and 24 dB/oct. Frequencies
around the cutoff are attenuated.
• BR12+LP6 and BR12+LP12 are combinations of a band-reject filter with 12
dB/oct and a low-pass filter with 6 and 12 dB/oct, respectively. Frequencies
around and above the cutoff are attenuated.
• BP12+BR12 is a band-pass filter with 12 dB/oct plus a band-reject filter
with 12 dB/oct. Frequencies below, above, and around the cutoff are
attenuated.
• HP6+BR12 and HP12+BR12 are combinations of a high-pass filter with 6
and 12 dB/oct and a band-reject filter with 12 dB/oct. Frequencies below
and around the cutoff are attenuated.
• AP is an all-pass filter with 18 dB/oct. Frequencies around the cutoff are
attenuated.
• AP+LP6 is an all-pass filter with 18 dB/oct plus a low-pass filter with 6 dB/
oct. Frequencies around and above the cutoff are attenuated.
• HP6+AP is a high-pass filter with 6 dB/oct plus an all-pass filter with 18
dB/oct. Frequencies around and below the cutoff are attenuated.
Cutoff
Controls the cutoff frequency of the filter.
Resonance
Emphasizes the frequencies around the cutoff. At higher settings, the filter self-
oscillates, which results in a ringing tone.
Distortion
Adds distortion to the signal. The following distortion types are available:
•Tube adds warm, tube-like distortion.
•Hard Clip adds bright, transistor-like distortion.
•Bit Reduction adds digital distortion by means of quantization noise.
•Rate Reduction adds digital distortion by means of aliasing.
•Rate Reduction Key Follow adds digital distortion by means of aliasing, but
with Key Follow. The rate reduction follows the keyboard, so the higher you
play, the higher the sample rate.
Envelope Amount
Controls the cutoff modulation from the filter envelope.
Cutoff Velocity
Controls the cutoff modulation from velocity.
Cutoff Key Follow
Adjusts the cutoff modulation using the note number. Increase this parameter
to raise the cutoff with higher notes. At 100 %, the cutoff follows the played pitch
exactly.

Included Instruments
Auron
270
Filter Envelope Section
Attack
Controls the attack time of the filter envelope.
Decay
Controls the decay time of the filter envelope.
Sustain
Controls the sustain level of the filter envelope.
Release
Controls the release time of the filter envelope.
Amplifier Section
Level
Controls the overall volume of the sound.
Velocity
Controls the level modulation from velocity. At 0, all notes are played with the
same level.
Amplifier Envelope Section
Attack
Controls the attack time of the amplifier envelope.
Decay
Controls the decay time of the amplifier envelope.
Sustain
Controls the sustain level of the amplifier envelope.
Release
Controls the release time of the amplifier envelope.
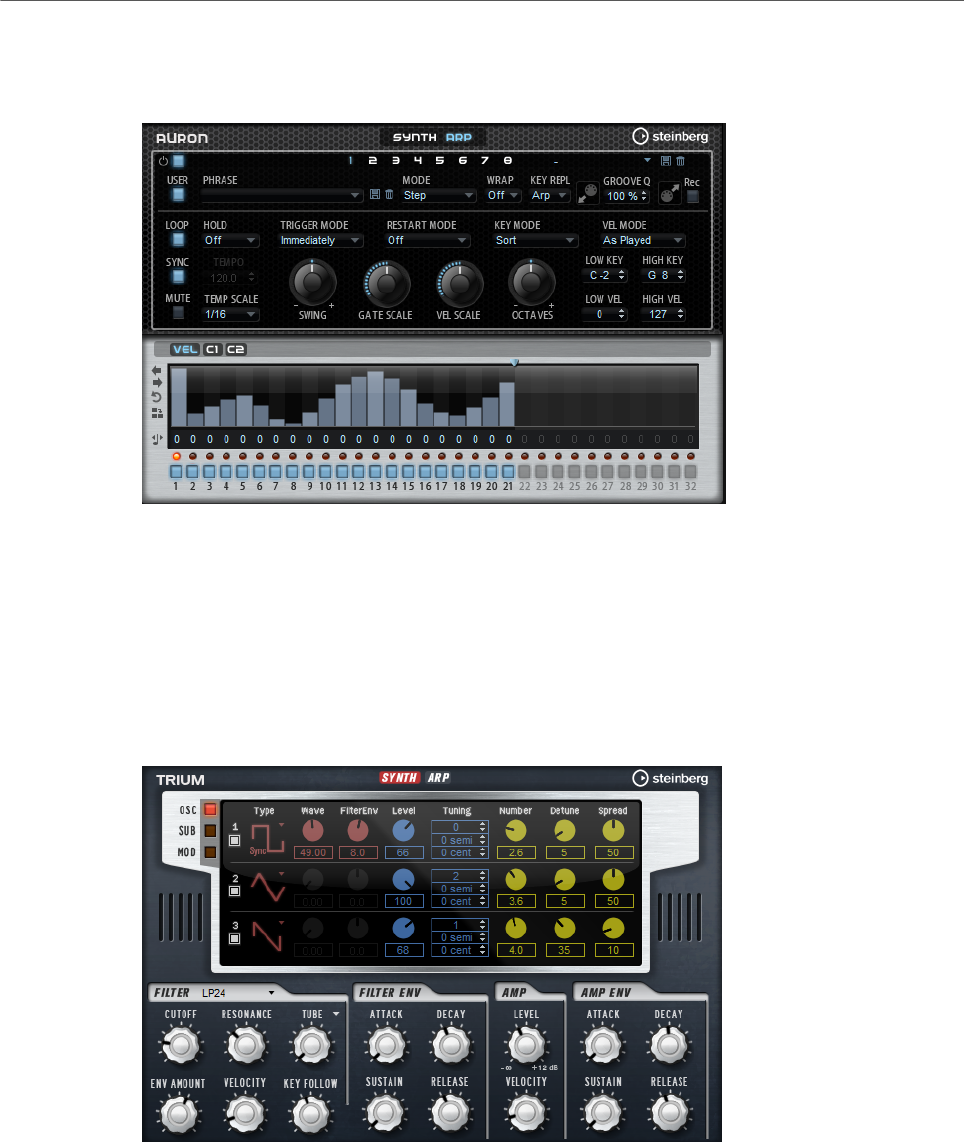
Included Instruments
Trium
271
Arp Page
This page contains the same parameters as the FlexPhraser.
RELATED LINKS
FlexPhraser on page 483
Trium
Trium was designed to create modern and rich sounds. It comes with 3 oscillators, a sub
oscillator, a ring modulator, and a noise generator. With the integrated arpeggiator and step
sequencer, you can create anything from sequencer lines to stepped chords.
The oscillators are followed by a multi-mode filter that offers a large number of different
filter shapes. The filter can be modulated using modulation sources like the keyboard,
velocity, and LFO, but also by the controller lanes of the step sequencer, for example.
Trium includes two LFOs for pitch, PWM, and filter modulations. The first LFO can be
synchronized to the tempo of the host application and allows for filter cutoff, pitch, and
waveform modulation of the three main oscillators. The second LFO is controlled by the
modulation wheel and is used to create a vibrato.

Included Instruments
Trium
272
Osc Page
The Osc page contains the parameters for the three main oscillators.
• To activate an oscillator, click its On/Off button.
OSC 1/2/3 Type
The oscillator type defines the basic sound character of the oscillator. This pop-
up menu lists the waveforms (sine, triangle, saw, or square), followed by the
algorithm (PWM, Sync, CM, or XOR). The combination of waveform and algorithm
controls the sound of the oscillator.
The following algorithms are available:
•PWM (pulse width modulation) is only supported by the square waveform.
The Waveform parameter sets the ratio between the high and low value
of the square wave. A setting of 50 % produces a pure square wave. With
settings below or above 50 %, the oscillator produces rectangular waves.
•Sync provides different hard-sync oscillators, where each is a combination
of a master and slave oscillator. The wave shape of the slave oscillator
(sine, triangle, saw, or square) is reset with each full wave cycle of the
master oscillator. This means that a single oscillator can produce a
rich sync-sound without using other oscillators as slave or master. The
Waveform parameter adjusts the pitch of the slave oscillator, producing the
typical sync sound.
•CM (cross modulation) provides a combination of two oscillators where
a master oscillator is modulating the pitch of a slave oscillator (sine,
triangle, saw, or square) at the rate of the audio sample. The Waveform
parameter adjusts the pitch ratio between slave and master oscillator,
resulting in a sound close to frequency modulation.
•XOR (exclusive OR) compares two square waveforms with an XOR
operation. Depending on the outcome of the XOR operation, the waveform
shape of a third oscillator (sine, triangle, saw, or square) is reset. The
Waveform parameter adjusts the pitch ratio of the square oscillators
resulting in a sound close to ring modulation of the third oscillator.
Level
Adjusts the output level of the oscillator.
Waveform
Modifies the sound of the oscillator algorithm. Its effect depends on the selected
oscillator type.
NOTE
This parameter is only available for oscillator types that allow waveform
modulation.
Filter Envelope
Determines how much the modulation of the filter envelope influences the
oscillator waveform.
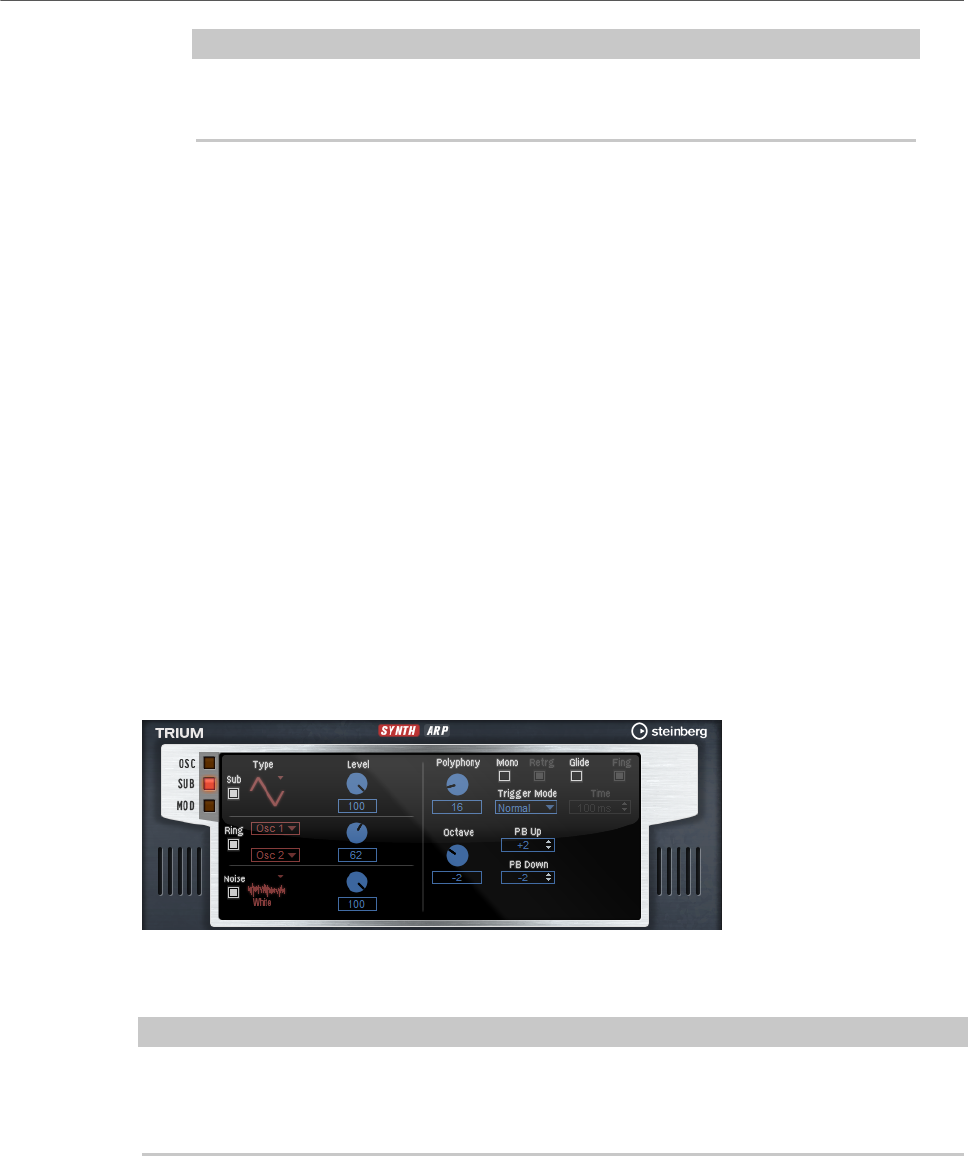
Included Instruments
Trium
273
NOTE
This parameter is only available for oscillator types that allow waveform
modulation.
Tuning
These parameters allow you to adjust the pitch in octave, semitone, and cent
steps.
Multi Oscillator Number, Detune, and Spread
Each of the main oscillators offers these multi-oscillator functions. They allow
you to create a richer sound by producing up to eight oscillators simultaneously.
•Number determines the number of oscillators that play back
simultaneously. You can also set fractions of numbers. For example, with
a setting of 2.5, you hear two oscillators at full level and a third one at half
level.
•Detune detunes the oscillators.
•Spread narrows or widens the stereo panorama. With a setting of 0 %, you
create a mono signal, and with 100 %, you create a stereo signal.
Sub Page
The Sub page contains the parameters for the sub oscillator, the ring modulator, and the
noise generator.
Activate the sub oscillator, the ring modulator, and the noise generator by clicking their On/
Off buttons.
NOTE
Deactivate the sub oscillator, the ring modulator, and the noise generator if they are not
needed, because they use CPU cycles even if they are not heard, such as in a situation where
the level is set to 0 %.
Sub Oscillator
The pitch of the sub oscillator is always one octave lower than the overall pitch. The overall
pitch is determined by the Octave setting.
On/Off
Activates/Deactivates the sub oscillator.

Included Instruments
Trium
274
Type
The wave shape of the sub oscillator. You can choose between Sine, Triangle,
Saw, Square, Pulse Wide, and Pulse Narrow.
Level
Adjusts the output level of the sub oscillator.
Ring Modulator
Ring modulation produces sums and differences between the frequencies of two signals.
Ring Modulation Source 1/Ring Modulation Source 2
Determines the sources to be ring modulated. You can select OSC 1 or Sub as
Source 1, and OSC 2 or OSC 3 as Source 2.
NOTE
Make sure that the corresponding oscillators are activated when you select them.
Otherwise, no sound is heard.
Ring Modulation Level
Adjusts the output level of the ring modulation.
Noise Generator
The Noise parameter is used for non-pitched sounds. In addition to standard white and pink
noise, there are also band-pass filtered versions of white and pink noise.
Noise Type
The sound color of the noise. You can choose between standard and band-pass
filtered (BPF) versions of white and pink noise.
Noise Level
Adjusts the output level of the noise generator.
Voice Parameters
On the right, the voice parameters are available.
Polyphony
If Mono mode is deactivated, you can use this parameter to specify how many
notes can be played simultaneously.
Octave
Adjusts the pitch in octave steps.
Pitchbend Up/Pitchbend Down
Determines the range for the modulation that is applied when you move the
pitchbend wheel.

Included Instruments
Trium
275
Glide
Allows you to bend the pitch between notes that follow each other. You achieve
the best results in Mono mode.
Glide Time
Sets the glide time, that is, the time it takes to bend the pitch from one note to
the next.
Fingered
Activate this parameter to glide the pitch only between notes that are played
legato.
Mono
Activates monophonic playback.
Retrigger
If this option is activated, a note that was stolen is retriggered if you still hold the
stolen note when releasing the newer note. This lets you play trills by holding
one note and quickly and repeatedly pressing and releasing another note, for
example.
Trigger Mode
Defines the trigger behavior for new notes.
•Normal triggers a new note when the previous note gets stolen. The
sample and the envelope of the new note are triggered from the start.
To minimize discontinuities, use the Fade Out parameter of the zone.
•Resume does not always trigger a new note.
If the new note stays within the same zone, the envelope is retriggered, but
resumes at the level of the stolen note. The pitch of the zone is set to the
new note.
If the new note plays in a different zone, the sample and the envelope of the
new note are triggered from the start.
•Legato does not always trigger a new note.
If the new note stays within the same zone, the envelope keeps running.
The pitch of the zone is set to the new note.
If the new note plays in a different zone, the sample and the envelope of the
new note are triggered from the start.
•Resume Keeps Zone does not trigger a new note upon note stealing. The
envelope resumes at the level of the stolen note and the pitch of the zone is
set to the new note, even if the new note plays in a different zone.
•Legato Keeps Zone does not trigger a new note upon note stealing. The
envelope keeps running and the pitch of the zone is set to the new note,
even if the new note plays in a different zone.
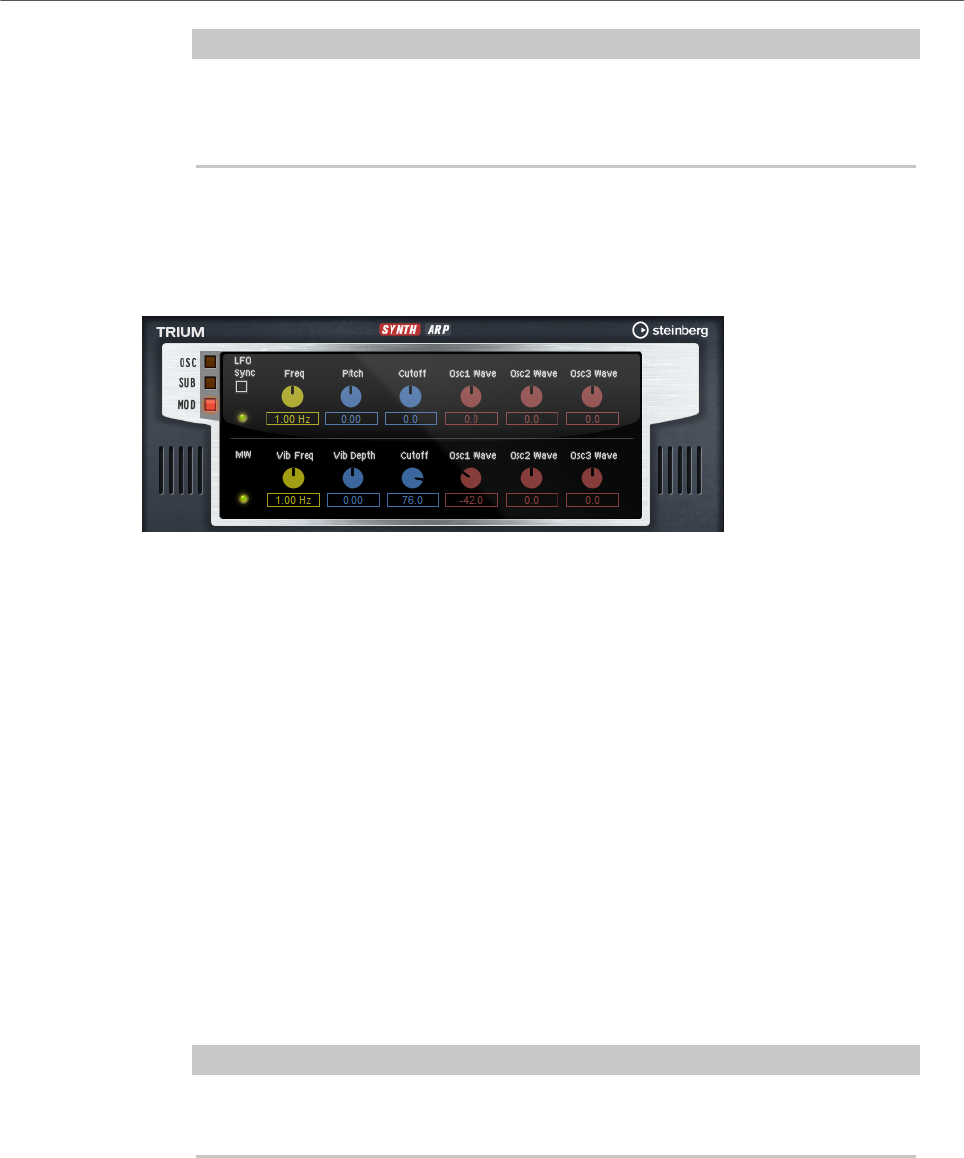
Included Instruments
Trium
276
NOTE
If Resume or Legato are selected, you might hear an unnatural attack, depending
on the sample. To avoid this, activate Use Start Range on the Glide tab in the
Voice Control section for the zone.
Mod Page
The Mod page contains the LFO settings in the upper section and the mod wheel, or vibrato,
settings in the lower section.
LFO Settings
Sync
If Sync is activated, the frequency is set in fractions of beats.
Freq
Controls the frequency of the modulation, that is, the speed of the LFO.
Pitch
Controls the modulation depth of the pitch modulation.
Cutoff
Controls the modulation depth of the filter cutoff modulation.
Osc1/2/3 Wave
These parameters control the modulation depth of the waveform modulation of
the three main oscillators.
NOTE
These controls are only available if the selected oscillator type supports
waveform modulation.
Mod Wheel Settings
Vib Freq
Controls the frequency of the second LFO that is used for pitch modulation
(vibrato).
Vib Depth
Controls the depth of the pitch modulation (vibrato).

Included Instruments
Trium
277
Cutoff
Controls the influence of the mod wheel on the filter cutoff.
Osc1/2/3 Wave
These parameters control the influence of the mod wheel on the waveform of the
three main oscillators.
NOTE
These controls are only available if the selected oscillator type supports
waveform modulation.
Filter Section
Filter Shape
• LP24, 18, 12, and 6 are low-pass filters with 24, 18, 12, and 6 dB/oct.
Frequencies above the cutoff are attenuated.
• BP12 and BP24 are band-pass filters with 12 and 24 dB/oct. Frequencies
below and above the cutoff are attenuated.
• HP6+LP18 and HP6+LP12 are combinations of a high-pass filter with 6 dB/
oct and a low-pass filter with 18 and 12 dB/oct, respectively (asymmetric
band-pass filter). Frequencies below and above the cutoff are attenuated.
Attenuation is more pronounced for the frequencies above the cutoff.
• HP12+LP6 and HP18+LP6 are combinations of a high-pass filter with 12
and 18 dB/oct and a low-pass filter with 6 dB/oct (asymmetric band-pass
filter). Frequencies below and above the cutoff are attenuated. Attenuation
is more pronounced for the frequencies below the cutoff.
• HP24, 18, 12, and 6 are high-pass filters with 24, 18, 12, and 6 dB/oct.
Frequencies below the cutoff are attenuated.
• BR12 and BR24 are band-reject filters with 12 and 24 dB/oct. Frequencies
around the cutoff are attenuated.
• BR12+LP6 and BR12+LP12 are combinations of a band-reject filter with 12
dB/oct and a low-pass filter with 6 and 12 dB/oct, respectively. Frequencies
around and above the cutoff are attenuated.
• BP12+BR12 is a band-pass filter with 12 dB/oct plus a band-reject filter
with 12 dB/oct. Frequencies below, above, and around the cutoff are
attenuated.
• HP6+BR12 and HP12+BR12 are combinations of a high-pass filter with 6
and 12 dB/oct and a band-reject filter with 12 dB/oct. Frequencies below
and around the cutoff are attenuated.
• AP is an all-pass filter with 18 dB/oct. Frequencies around the cutoff are
attenuated.
• AP+LP6 is an all-pass filter with 18 dB/oct plus a low-pass filter with 6 dB/
oct. Frequencies around and above the cutoff are attenuated.
• HP6+AP is a high-pass filter with 6 dB/oct plus an all-pass filter with 18
dB/oct. Frequencies around and below the cutoff are attenuated.

Included Instruments
Trium
278
Cutoff
Controls the cutoff frequency of the filter.
Resonance
Sets the filter resonance.
Distortion
Adds distortion to the signal. The following distortion types are available:
•Tube adds warm, tube-like distortion.
•Hard Clip adds bright, transistor-like distortion.
•Bit Reduction adds digital distortion by means of quantization noise.
•Rate Reduction adds digital distortion by means of aliasing.
•Rate Reduction Key Follow adds digital distortion by means of aliasing, but
with Key Follow. The rate reduction follows the keyboard, so the higher you
play, the higher the sample rate.
Envelope Amount
Controls the cutoff modulation from the filter envelope.
Cutoff Velocity
Controls the cutoff modulation from velocity.
Cutoff Key Follow
Adjusts the cutoff modulation using the note number. Increase this parameter
to raise the cutoff with higher notes. At 100 %, the cutoff follows the played pitch
exactly.
Filter Envelope Section
Attack
Controls the attack time of the filter envelope.
Decay
Controls the decay time of the filter envelope.
Sustain
Controls the sustain level of the filter envelope.
Release
Controls the release time of the filter envelope.
Amplifier Section
Level
Controls the overall volume of the sound.
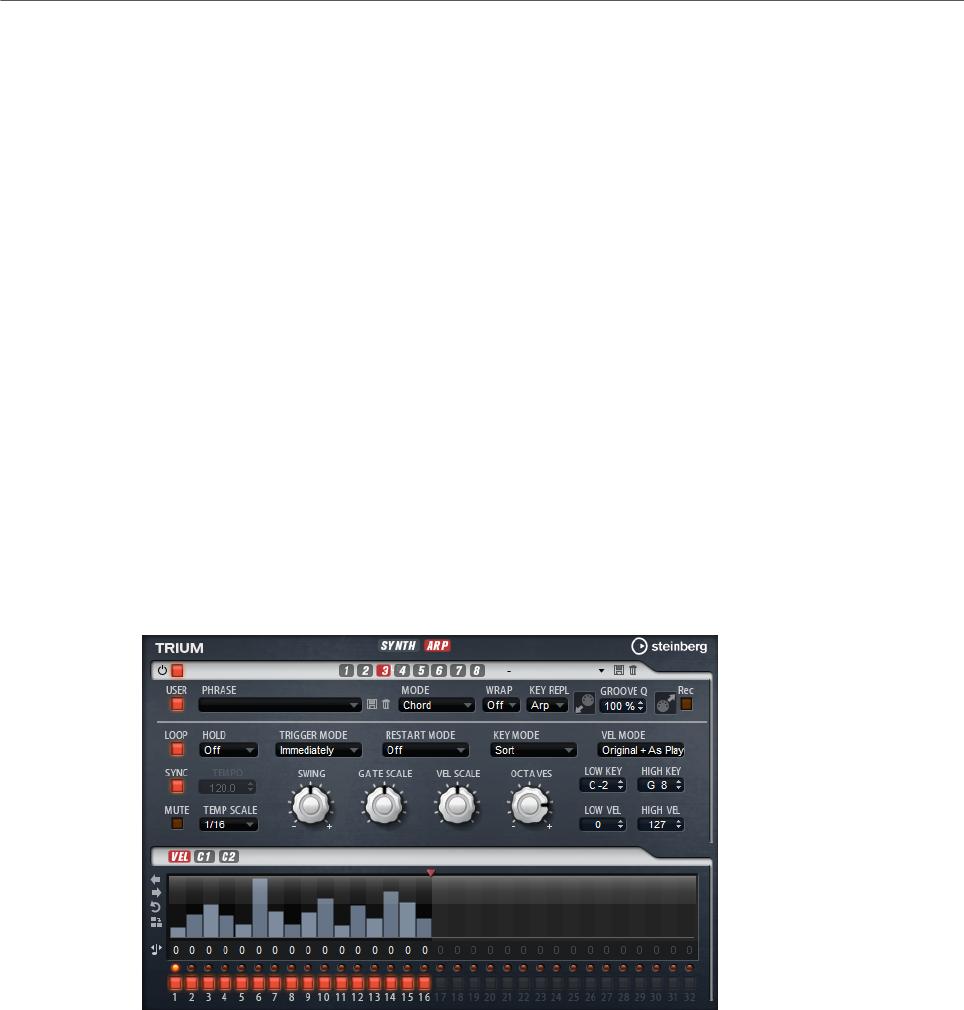
Included Instruments
Voltage
279
Velocity
Controls the level modulation from velocity. At 0, all notes are played with the
same level.
Amplifier Envelope Section
Attack
Controls the attack time of the amplifier envelope.
Decay
Controls the decay time of the amplifier envelope.
Sustain
Controls the sustain level of the amplifier envelope.
Release
Controls the release time of the amplifier envelope.
Arp Page
This page contains the same parameters as the FlexPhraser.
RELATED LINKS
FlexPhraser on page 483
Voltage
Voltage is a two-oscillator and noise synthesizer that can be used for synth basses, but it
also allows you to create any kind of classic monophonic and polyphonic synth sound. With
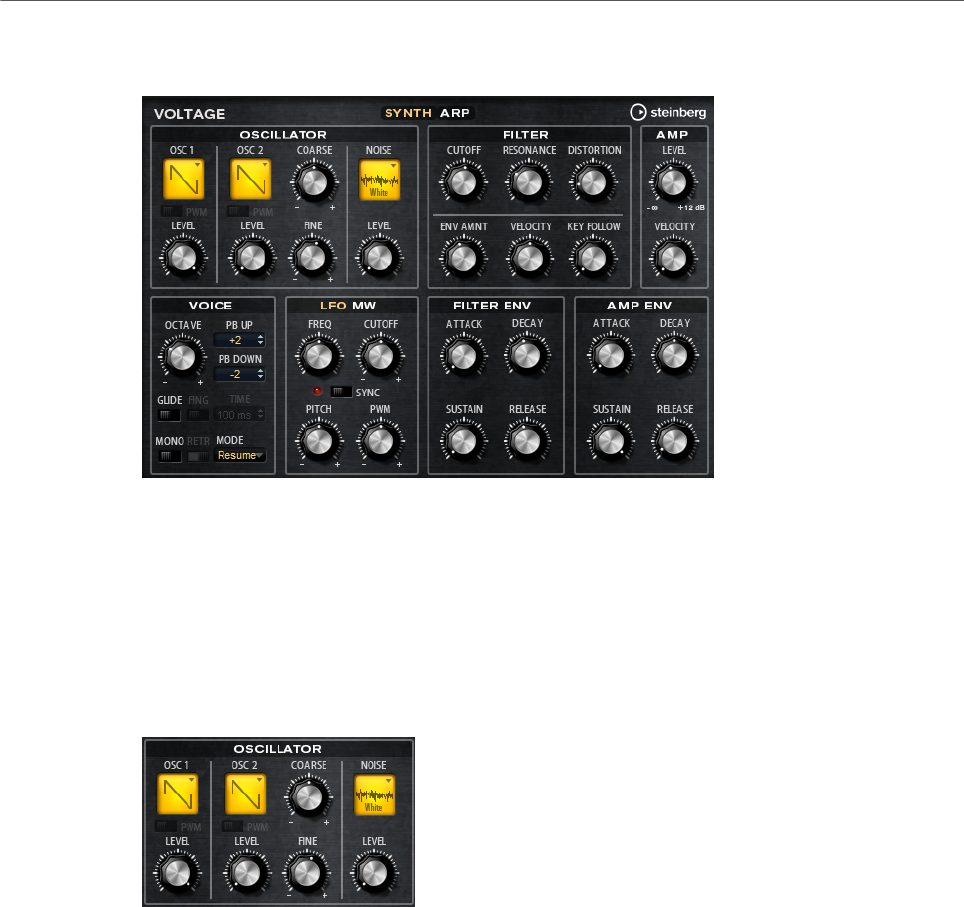
Included Instruments
Voltage
280
the integrated arpeggiator and step sequencer, you can create anything from sequencer lines
to stepped chords.
The two oscillators and the noise generator are followed by a 24 dB low-pass filter. The filter
can be modulated using modulation sources like the keyboard, velocity, and LFO, but also by
the controller lanes of the step sequencer, for example. Voltage includes 2 LFOs for pitch,
PWM, and filter modulations. The first LFO can be synchronized to the tempo of the host
application and allows for filter and pitch modulation. The second LFO is controlled by the
modulation wheel and is used to create a vibrato.
Oscillator Section
Oscillator 1/2 Waveform
Sets the waveform for the oscillator. You can choose between saw, triangle, and
square.
Oscillator 1/2 Level
Controls the level of the oscillators.
PWM
PWM (pulse width modulation) is only available for the square waveform. Activate
this option if you want to be able to let the LFO modulate the width of the wave.
Osc 2 Coarse
Detunes the second oscillator by +/-12 semitones.
Osc 2 Fine
Detunes the second oscillator by +/- 100 cents.
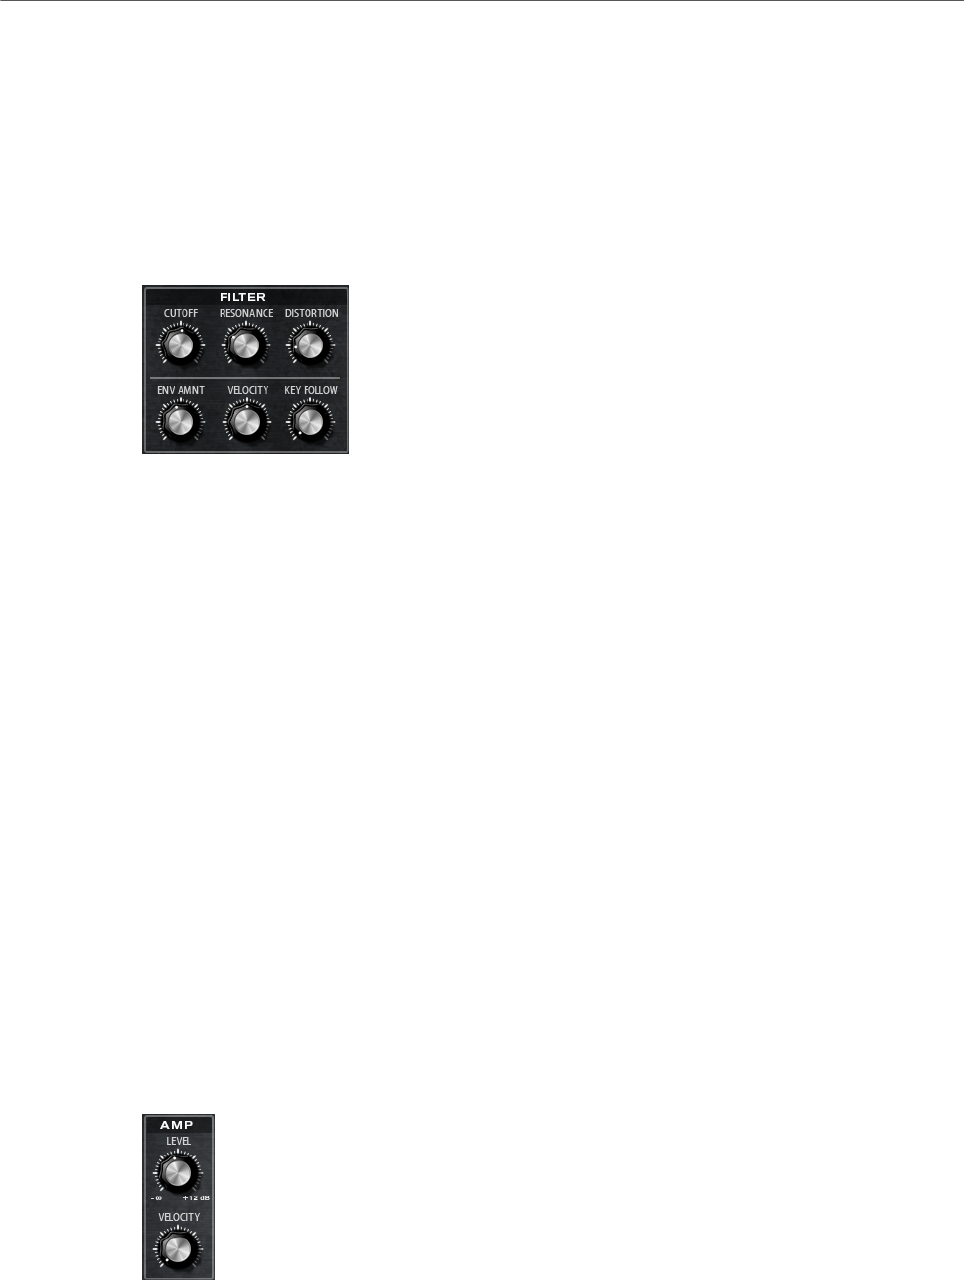
Included Instruments
Voltage
281
Noise Type
The sound color of the noise. You can choose between standard and band-pass
filtered (BPF) versions of white and pink noise.
Level
Controls the level of the noise generator.
Filter Section
Cutoff
Controls the cutoff frequency of the filter.
Resonance
Emphasizes the frequencies around the cutoff. At higher settings, the filter self-
oscillates, which results in a ringing tone.
Distortion
Adds tube-like distortion to the signal.
Envelope Amount
Controls the cutoff modulation from the filter envelope.
Cutoff Velocity
Controls the cutoff modulation from velocity.
Cutoff Key Follow
Adjusts the cutoff modulation using the note number. Increase this parameter
to raise the cutoff with higher notes. At 100 %, the cutoff follows the played pitch
exactly.
Amplifier Section
Level
Controls the overall volume of the sound.
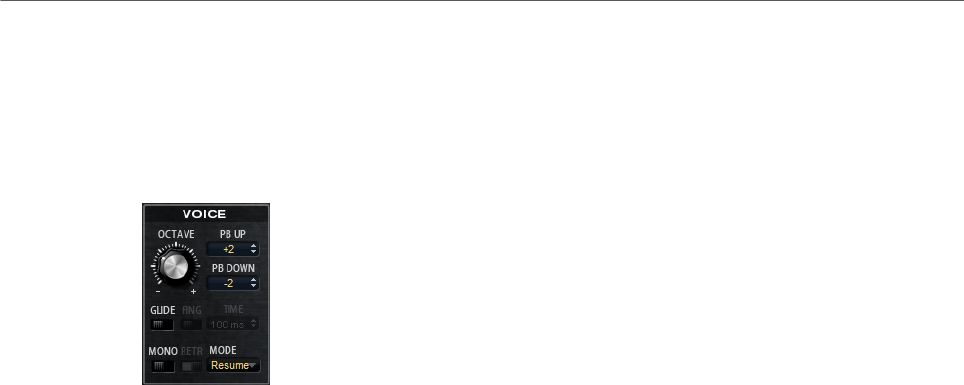
Included Instruments
Voltage
282
Velocity
Controls the level modulation from velocity. At 0, all notes are played with the
same level.
Voice Section
Octave
Adjusts the pitch in octave steps.
Pitchbend Up/Pitchbend Down
Determines the range for the modulation that is applied when you move the
pitchbend wheel.
Glide
Allows you to bend the pitch between notes that follow each other. You achieve
the best results in Mono mode.
Fingered
Activate this parameter to glide the pitch only between notes that are played
legato.
Mono
Activates monophonic playback.
Retrigger
This option is only available in Mono mode. If Retrigger is activated, a note that
was stolen by another note is retriggered if you still hold the stolen note when
you release the new one.
This way, you can play trills by holding one note and quickly and repeatedly
pressing and releasing another note, for example.
Trigger Mode
Defines the trigger behavior for new notes.
•Normal triggers a new note when the previous note gets stolen. The
sample and the envelope of the new note are triggered from the start.
To minimize discontinuities, use the Fade Out parameter of the zone.
•Resume does not always trigger a new note.
If the new note stays within the same zone, the envelope is retriggered, but
resumes at the level of the stolen note. The pitch of the zone is set to the
new note.
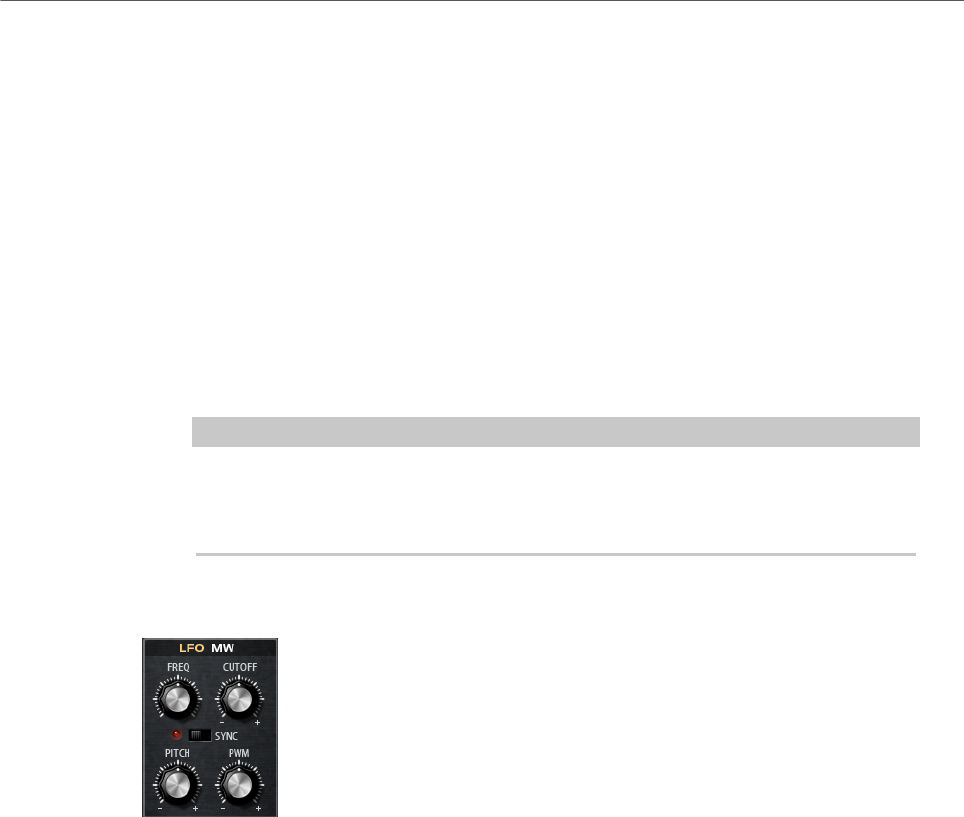
Included Instruments
Voltage
283
If the new note plays in a different zone, the sample and the envelope of the
new note are triggered from the start.
•Legato does not always trigger a new note.
If the new note stays within the same zone, the envelope keeps running.
The pitch of the zone is set to the new note.
If the new note plays in a different zone, the sample and the envelope of the
new note are triggered from the start.
•Resume Keeps Zone does not trigger a new note upon note stealing. The
envelope resumes at the level of the stolen note and the pitch of the zone is
set to the new note, even if the new note plays in a different zone.
•Legato Keeps Zone does not trigger a new note upon note stealing. The
envelope keeps running and the pitch of the zone is set to the new note,
even if the new note plays in a different zone.
NOTE
If Resume or Legato are selected, you might hear an unnatural attack, depending
on the sample. To avoid this, activate Use Start Range on the Glide tab in the
Voice Control section for the zone.
LFO Section
Freq
Controls the frequency of the modulation, that is, the speed of the LFO.
Sync
If Sync is activated, the frequency is set in fractions of beats.
Cutoff
Controls the modulation depth of the filter cutoff modulation.
Pitch
Controls the modulation depth of the pitch modulation.
PWM
Controls the modulation depth of the pulse width modulation of the square
oscillators.
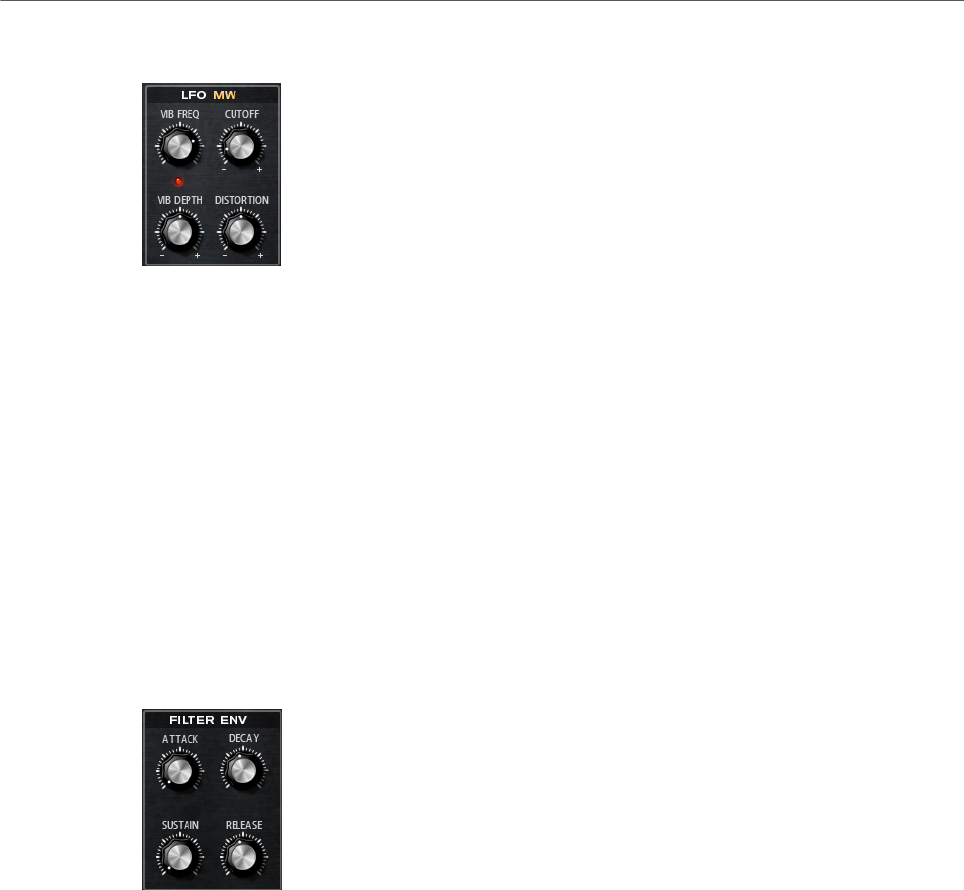
Included Instruments
Voltage
284
Mod Wheel Section
Vib Freq
Controls the frequency of the second LFO that is used for pitch modulation
(vibrato).
Cutoff
Controls the influence of the mod wheel on the filter cutoff.
Vib Depth
Controls the depth of the pitch modulation (vibrato).
Distortion
Controls the influence of the mod wheel on the filter distortion.
Filter Envelope Section
Attack
Controls the attack time of the filter envelope.
Decay
Controls the decay time of the filter envelope.
Sustain
Controls the sustain level of the filter envelope.
Release
Controls the release time of the filter envelope.
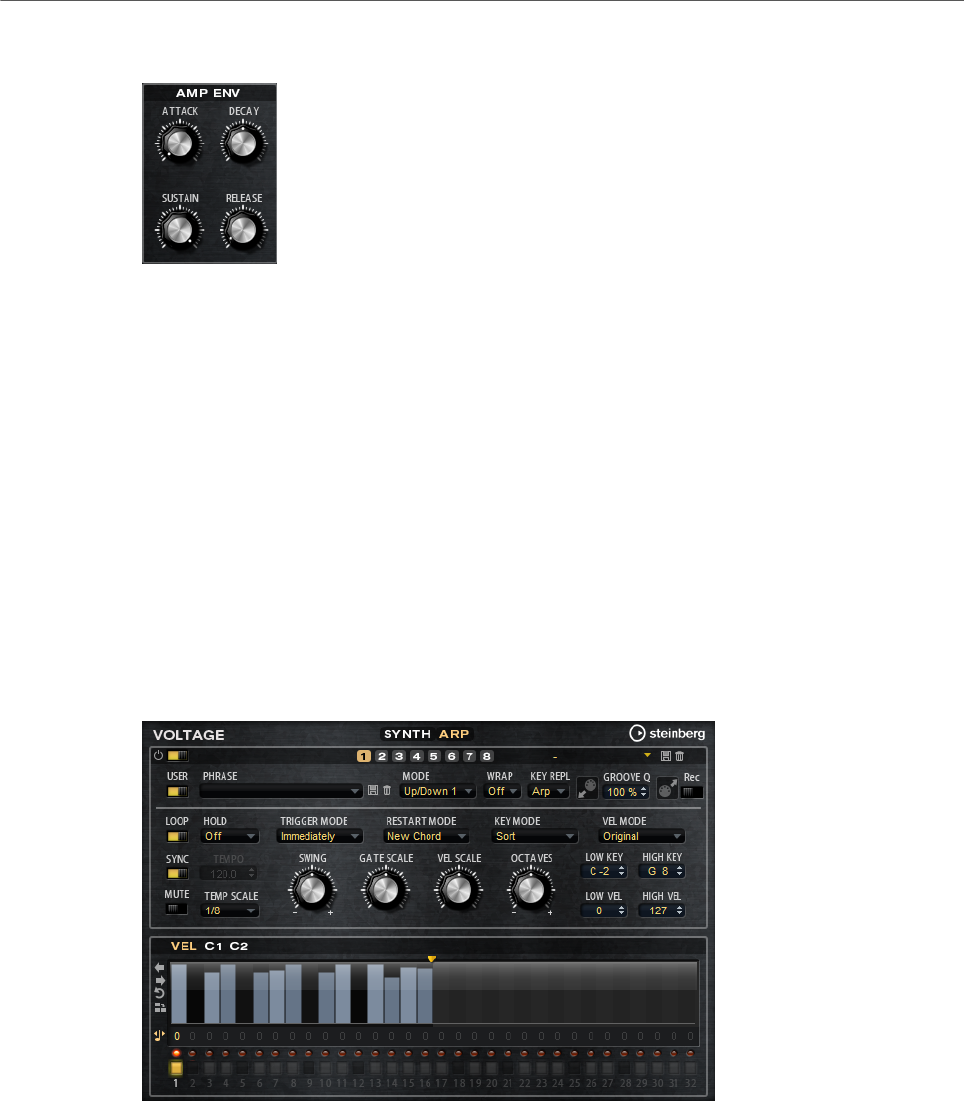
Included Instruments
Model C
285
Amp Envelope Section
Attack
Controls the attack time of the amplifier envelope.
Decay
Controls the decay time of the amplifier envelope.
Sustain
Controls the sustain level of the amplifier envelope.
Release
Controls the release time of the amplifier envelope.
Arp Page
This page contains the same parameters as the FlexPhraser.
RELATED LINKS
FlexPhraser on page 483
Model C
Model C is a classic tonewheel organ emulation with 9 drawbars and 3 additional drawbars
for the percussion.
Model C comes with an integrated and highly configurable rotary effect, as well as an
amplifier emulation using VST Amp technology. The effect section provides additional effects,
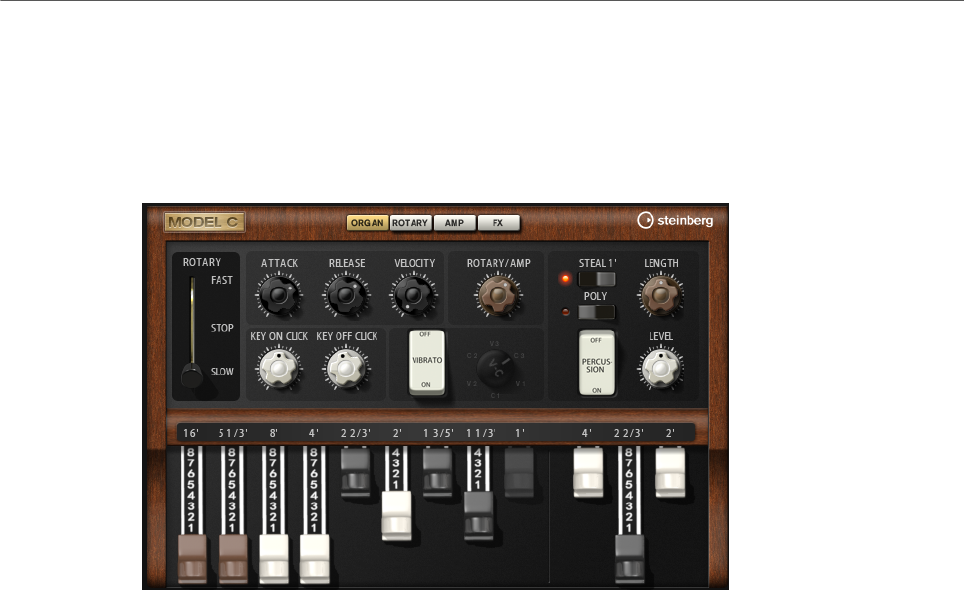
Included Instruments
Model C
286
such as phaser, delay, and reverb, and also offers a ring modulator which allows to add non-
harmonic tones. Model C contains four pages: Organ, Rotary, Amp, and FX.
•To open a page, click the corresponding button in the top section of the window.
Organ Page
Drawbars
The main drawbars on the left adjust the levels of the individual tonewheels. The
three drawbars on the right adjust the levels of the tonewheels that are used for
percussion.
Rotary
Allows you to switch from fast to slow speaker rotation. In the middle position,
rotation is stopped. On the Rotary page, you can make detailed settings for the
effect.
Attack
Adjusts the attack time of the organ sound. Typically, the attack is very short, but
you can set longer times to create pad-like sounds.
Release
Adjusts the release time of the organ sound. Typically, the release time is very
short, but you can set longer times to achieve a slow fade out of the sound when
a key is released.
Velocity
Determines the influence of the velocity on the level of the organ sound.
Key On Click/Key Off Click
Electromechanical organs produce short noise signals when a note is triggered
and when it is released. The level of these clicks is set here.
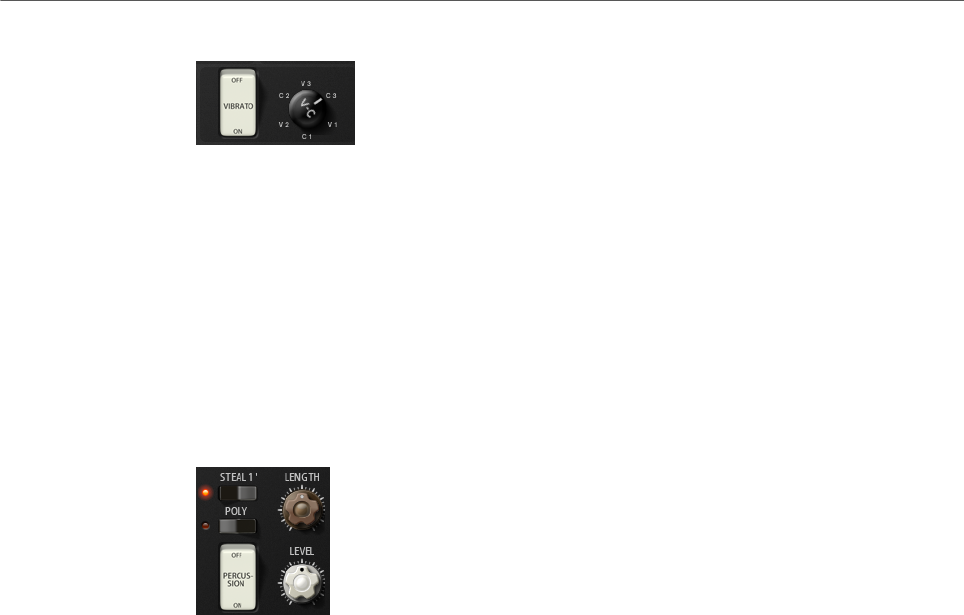
Included Instruments
Model C
287
Vibrato
Click the pedal button to activate the integrated vibrato effect. If it is activated,
you can select a type using the control on the right.
Rotary/Amp
The organ signal is sent in parallel to the rotary speaker and to the internal amp.
This control allows you to specify how the signal is distributed between these two
destinations.
• If you turn the control all the way to the left, the signal is sent only to the
rotary speaker. All the way to the right, it is sent only to the amp.
Percussion
Click the pedal button to activate the percussion signal. The following percussion
parameters are available:
•Steal 1' – Typically, on an electromechanical organ, the 1' drawbar is not
available when percussion is activated. To prevent this, deactivate the Steal
1' option.
•Poly – Typically, percussion in drawbar organs is monophonic, that is, when
you play a key, the percussion envelope is triggered for this note. As long as
the key is held, no new percussion can be retriggered. If you play a legato
section, for example, percussion is only applied to the very first note or
chord. Percussion can only be retriggered after all notes are released.
To trigger the percussion with every new note, activate Poly.
•Level adjusts the loudness of the percussion signal.
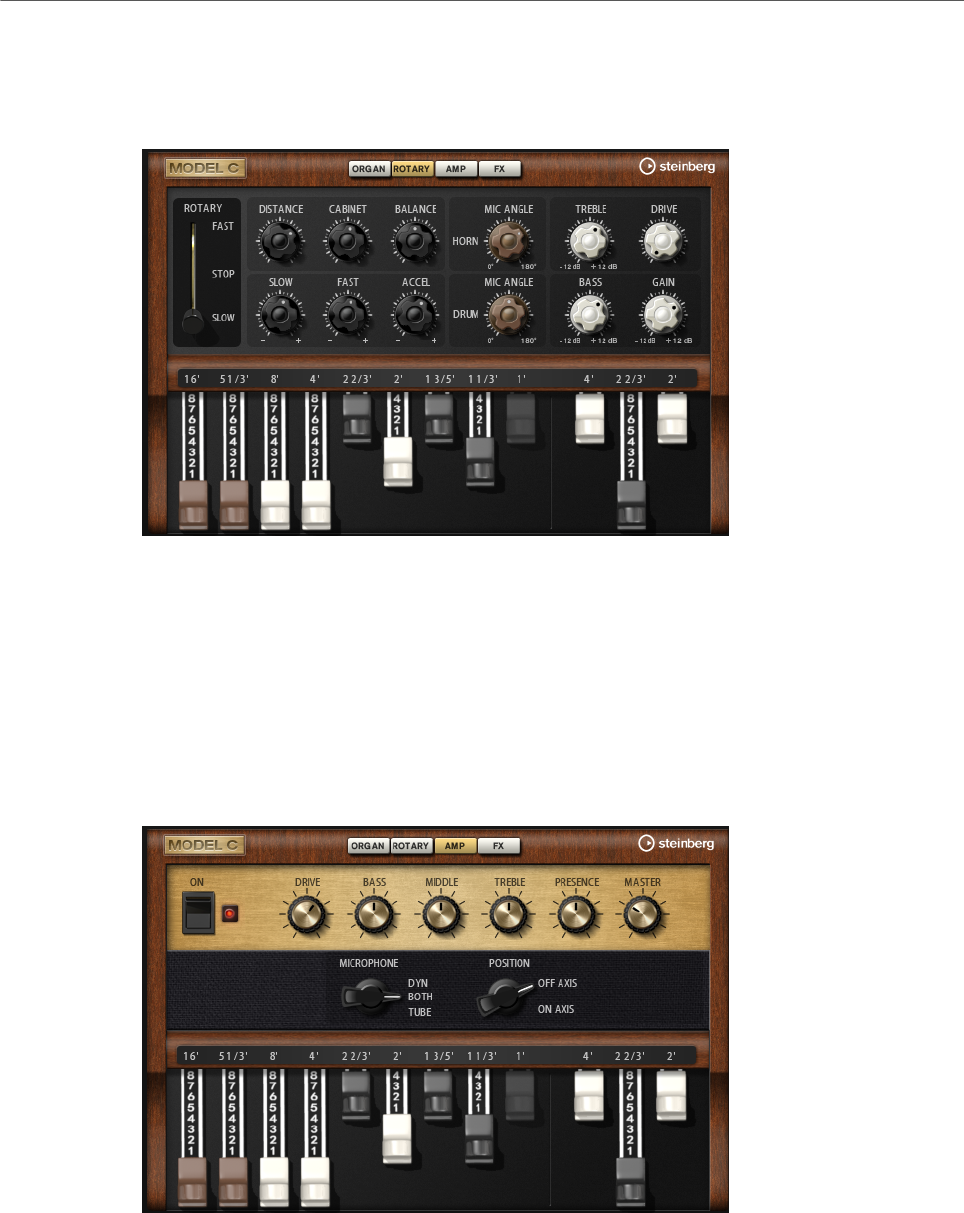
Included Instruments
Model C
288
Rotary Page
The settings on this page only have an effect on the sound when signals are sent to the rotary
effect using the Rotary/Amp dial on the Organ page.
The Rotary effect on this page has the same parameters as the included Rotary effect, except
for Input and Color.
RELATED LINKS
Rotary on page 452
Amp Page
The settings on this page only have an effect on the sound if signals are sent to the amp
using the Rotary/Amp dial on the Organ page.
The parameters correspond to those of the VST Amp effect, with reduced microphone and
microphone position options.
RELATED LINKS
VST Amp on page 441
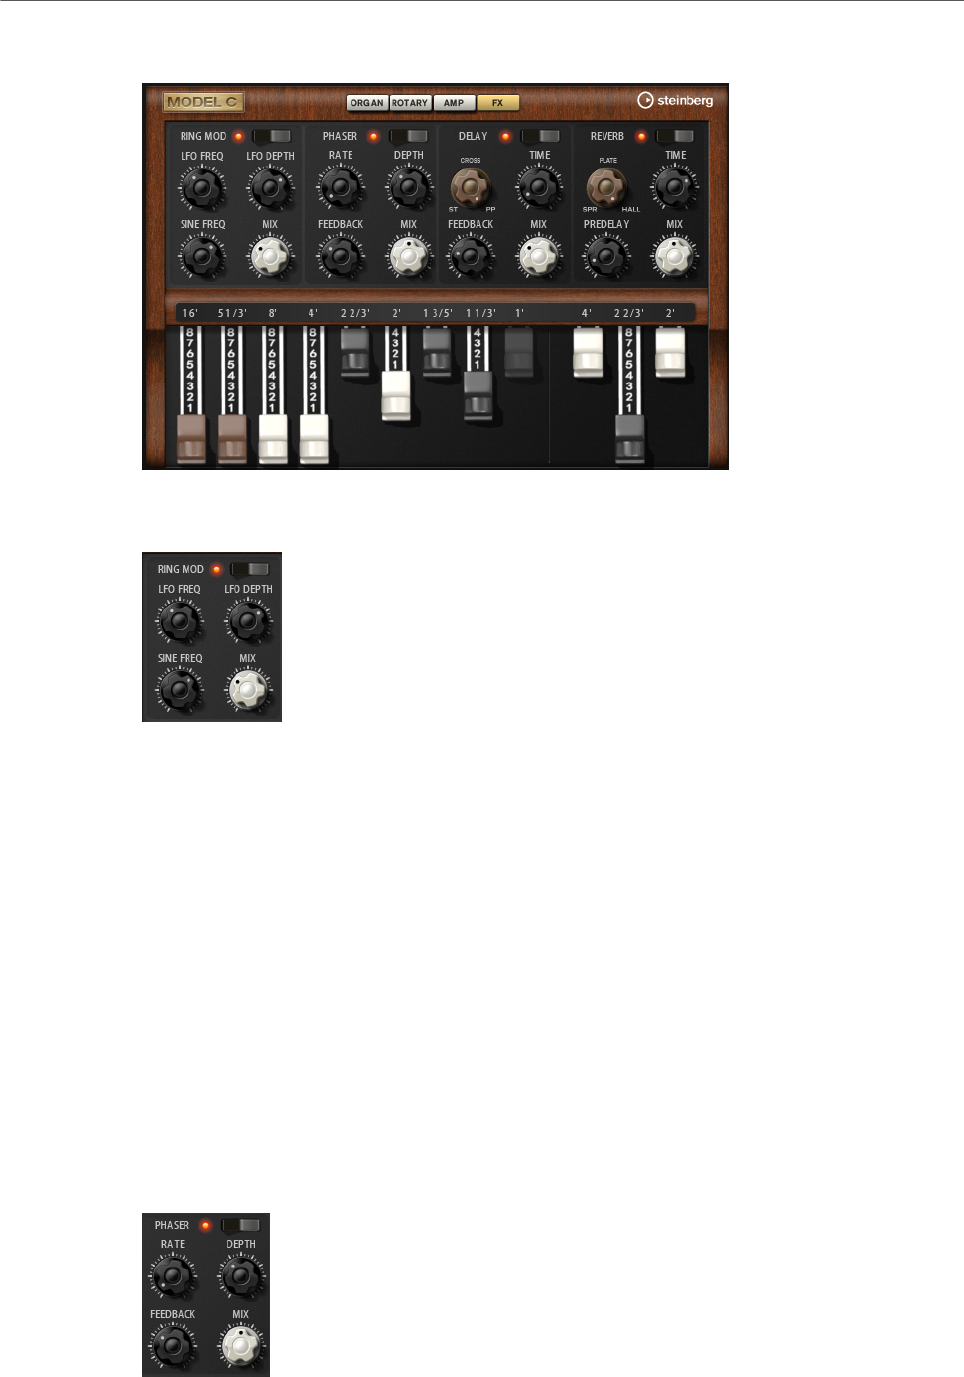
Included Instruments
Model C
289
FX Page
Ring Modulator
On/Off
Activates/Deactivates the ring modulator effect.
LFO Freq
Sets the frequency of the LFO for modulating the frequency of the sine oscillator.
LFO Depth
Sets the intensity of the LFO modulation of the sine oscillator frequency.
Sine Freq
Sets the frequency of the sine oscillator.
Mix
Sets the ratio between the dry and the wet signal.
Phaser
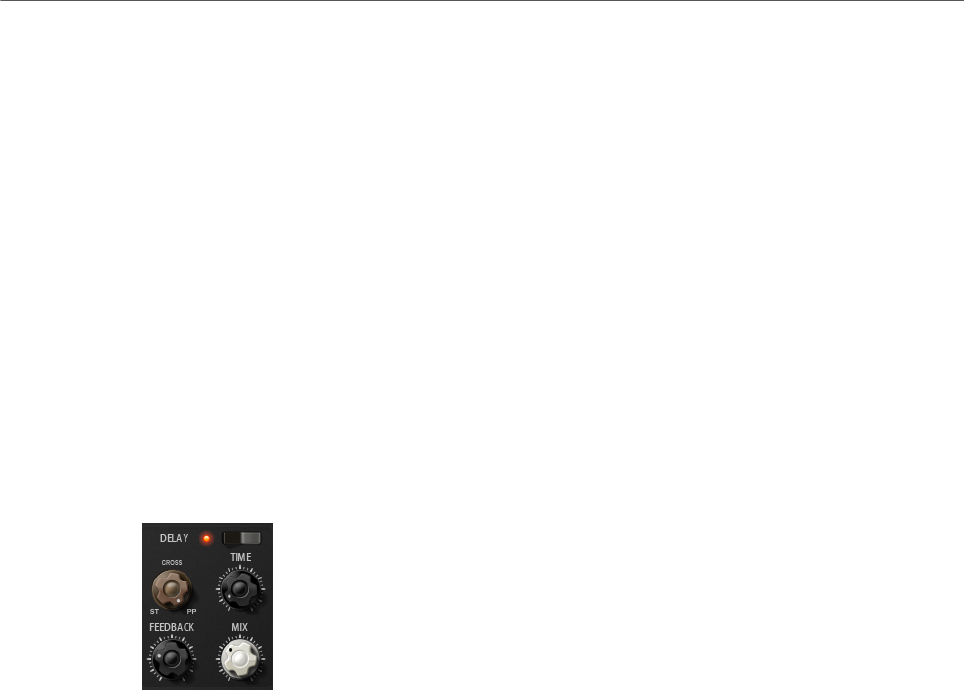
Included Instruments
Model C
290
On/Off
Activates/Deactivates the Phaser effect.
Rate
Sets the frequency of the phase modulation in Hertz.
Depth
Sets the intensity of the phase modulation.
Feedback
Adds resonances to the effect. Higher settings produce a more pronounced
effect.
Mix
Sets the ratio between the dry and the wet signal.
Delay
On/Off
Activates/Deactivates the Delay effect.
Delay Mode
With this dial, you can switch between the three available delay modes:
•St (Stereo) – This mode has two delays in parallel, one for the left and one
for the right audio channel, each with a feedback path of its own.
•Cross – This mode has two delays with cross feedback. Cross feedback
means that the delay of the left channel is fed back into the right delay and
vice versa.
•PP (Ping-Pong) – This mode mixes the left and right input and sends it to
hard-panned left and right delays. This way, the echoes bounce like a ping-
pong ball between left and right in the stereo panorama.
Delay Time
Sets the overall time for the left and right delay in milliseconds.
Feedback
Sets the overall amount of feedback for the left and right delay. Feedback means
the output of the delay is fed back to its input. At a setting of 0 %, you hear only
one echo. At a setting of 100 %, the echoes repeat endlessly.
Mix
Sets the ratio between the dry and the wet signal.

Included Instruments
HALiotron
291
Reverb
On/Off
Activates/Deactivates the Reverb effect.
Reverb Type
Use this dial to switch between the available reverb types: Spring, Plate, and Hall.
Time
Allows you to set the reverb time in seconds.
Predelay
Controls how much time passes before the reverb is applied. This allows you to
simulate larger spaces by increasing the time it takes for first reflections to reach
the listener.
Mix
Sets the ratio between the dry and the wet signal.
HALiotron
HALiotron emulates the sound generation of the pre-digital sampling era.
Before the introduction of digital samplers, original instrument sounds were created by
playing a pre-recorded tape for every key. HALiotron comes with seven different tapes
from these days, which can be blended to create sound mixtures. In addition to its classic
archetype, HALiotron offers a set of the most important synthesis parameters, allowing you
to vary the shape of the sound. Furthermore, you can play sounds dynamically by controlling
filter and amp via velocity.
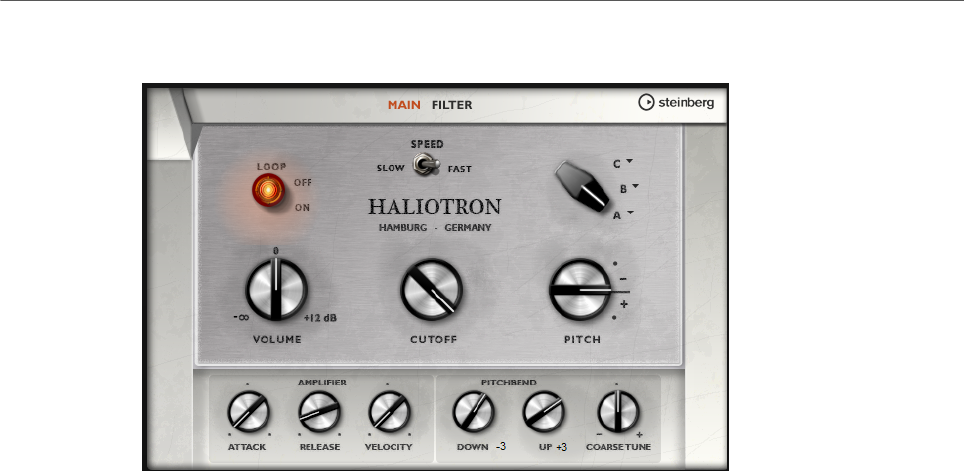
Included Instruments
HALiotron
292
Main Page
Loop On/Off
Set this to On if you want the notes to be played using looped versions of the
underlying samples and to Off if you want the notes to stop when the tape
reaches its end.
Volume
Adjusts the main volume of the sound.
Speed
Adjusts the speed of the tape playback. If this is set to Slow, the samples are
played back an octave lower.
Cutoff
Adjusts the cutoff frequency of the built-in low-pass filter.
Pitch
Adjusts the tuning of the sound. When you combine several HALiotron presets,
this can be used to make the sound richer.
A, B, C
Click here to select one of the included tapes for each dial position. Use the dial
to blend seamlessly between the tapes.
Attack
Adjusts the attack time of the sound.
Release
Adjusts the release time of the sound.
Velocity
Controls the influence of the velocity on the level of the sound.
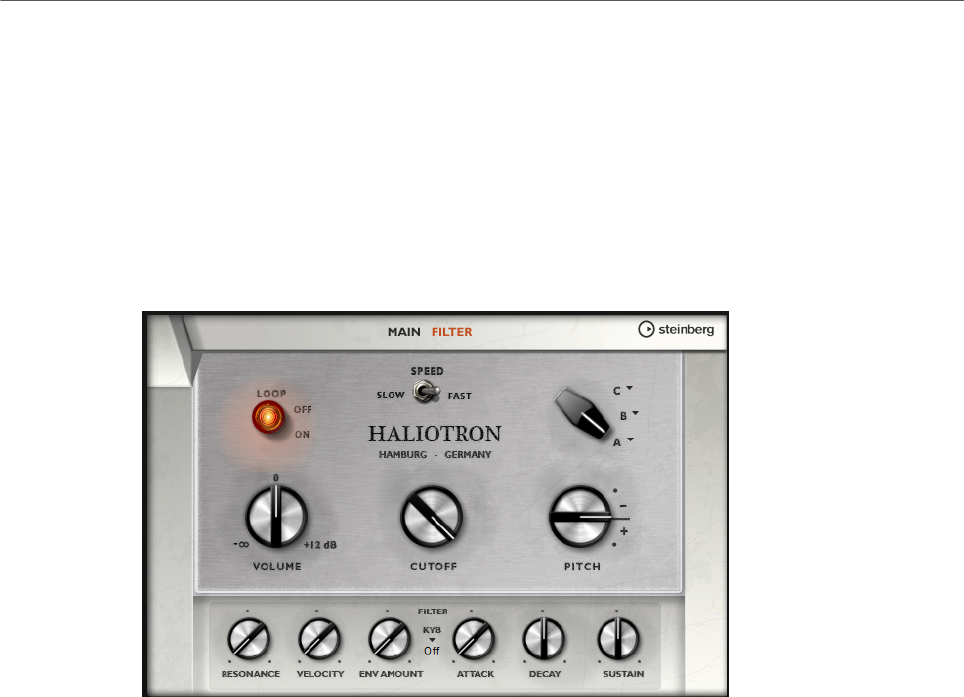
Included Instruments
HALiotron
293
Pitchbend Up/Pitchbend Down
Determines the range for the modulation that is applied when you move the
pitchbend wheel.
Coarse Tune
Adjusts the sound in semitone steps. This allows you to play intervals with
multiple layered HALiotron sounds.
Filter Page
Resonance
Adjusts the resonance of the low-pass filter.
Velocity
Sets the influence of the velocity on the level of the sound.
Env Amount
Adjusts the influence of the filter envelope on the cutoff frequency.
KYB
Adjusts the cutoff modulation from the keyboard, that is, cutoff key follow.
Attack
Controls the attack time of the filter envelope.
Decay
Controls the decay time of the filter envelope.
Sustain
Controls the sustain level of the filter envelope.
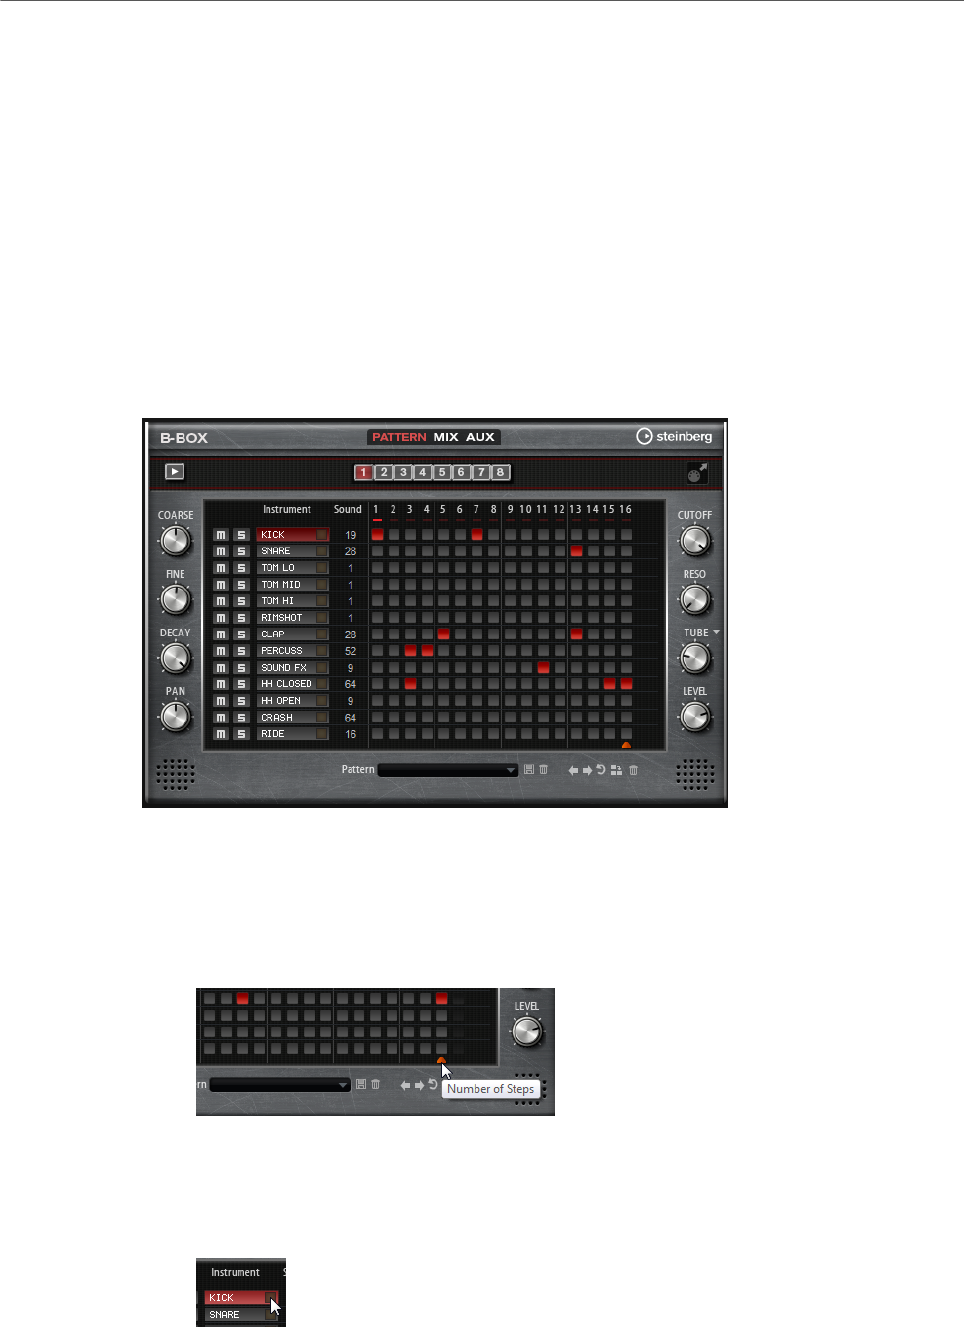
Included Instruments
B-Box
294
B-Box
B-Box provides you with a veritable drum computer inside HALion. It comes with 13
instrument lanes that can make use of up to 128 different sounds. You can set up your drum
patterns, create variations, and modify each drum sound using a low-pass filter and several
distortion modes.
B-Box contains three pages: Pattern, Mix, and Aux.
•To open a page, click the corresponding button in the top section of the window.
Pattern Page
The Pattern page is where you create and edit the drum patterns. It gives you access to the
pattern editor as well as to some of the most important sound parameters.
The pattern editor section in the center of the window allows you to create and edit drum
patterns.
• To specify the number of steps for a pattern, drag the small triangle in the lower part
of the pattern display.
The maximum length is 16 steps.
• To change the drum sound for a lane, set a new value in the Sound column.
You can choose between up to 128 drum sounds, depending on the selected drum
instrument.
• To preview a drum sound, click the trigger button to the right of the instrument name.
• To add drum steps to the pattern, click on the step fields in the pattern editor.
To add drum steps for all fields on a lane in one go, hold down Shift and click on a field.
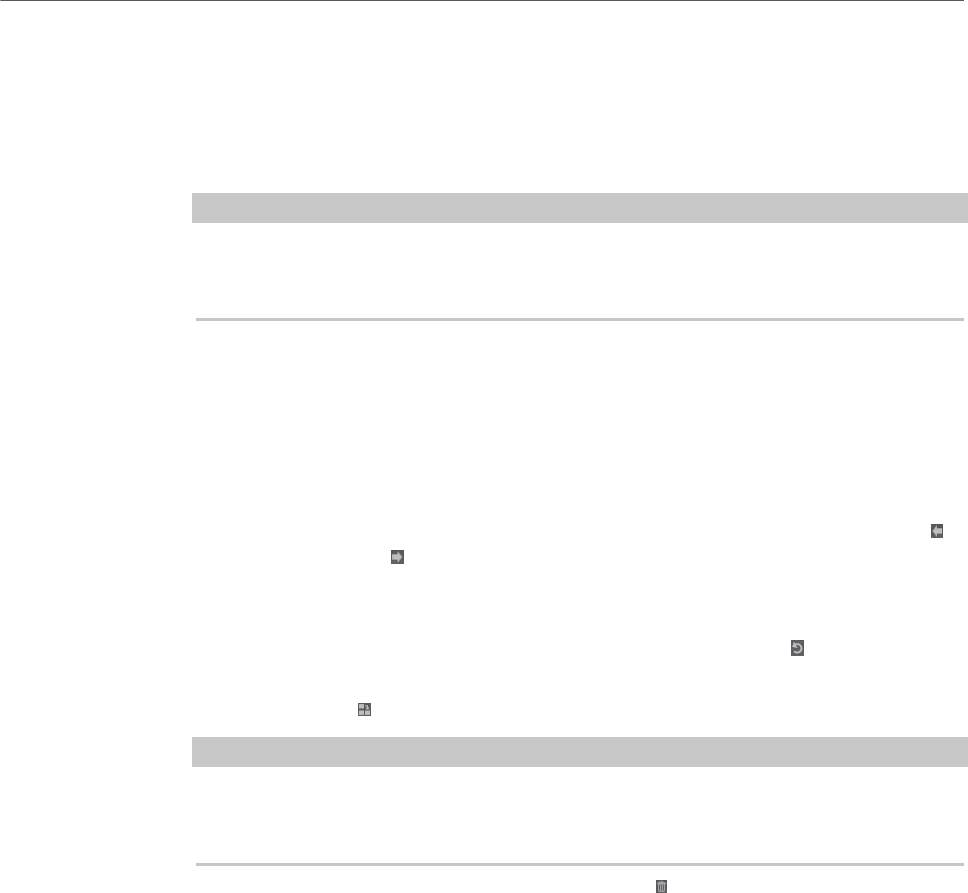
Included Instruments
B-Box
295
• To mute or solo individual lanes, click the corresponding Mute and Solo buttons.
• To set up the velocity for a step, click it and drag up or down or use the mouse wheel.
A step can be set to low, medium, or high velocity.
To change the velocity of all steps in a lane at the same time, hold down Shift and use
the mouse.
NOTE
This function inserts drum steps for every step field on the lane and sets it to the same
velocity. If you want to use only several steps of this lane, you must modify the velocity
separately for each step.
• To remove a step, click it.
To remove all steps, hold down Shift-Ctrl/Cmd and click a step.
Editing the Entire Pattern
• To load a pattern, click in the field below the editor and select it from the pop-up
menu.
• To move all steps of the pattern one step to the left or right, click Shift Pattern Left
or Shift Pattern Right .
This is useful if you have created a pattern that sounds the way you want but does not
start on the first beat, for example.
•To mirror the pattern around its middle step, click Reverse Pattern .
• To copy all steps in the current pattern and insert them behind the current steps, click
Duplicate Pattern .
NOTE
The maximum number of steps in a pattern is 16. If you select Duplicate Pattern and
the resulting pattern would be longer than 16 steps, new steps are inserted until the
maximum length is reached.
• To remove all steps in a pattern, click Clear Pattern .
Setting Up the Drum Sounds
With the controls to the left and right of the pattern editor, you can make settings for the
selected drum instrument.
Coarse
Adjusts the tuning of the instrument in semitone steps.
Fine
Fine-tunes the instrument in cent steps.
Pan
Adjusts the panorama position.
Cutoff
Adjusts the cutoff frequency for the instrument.
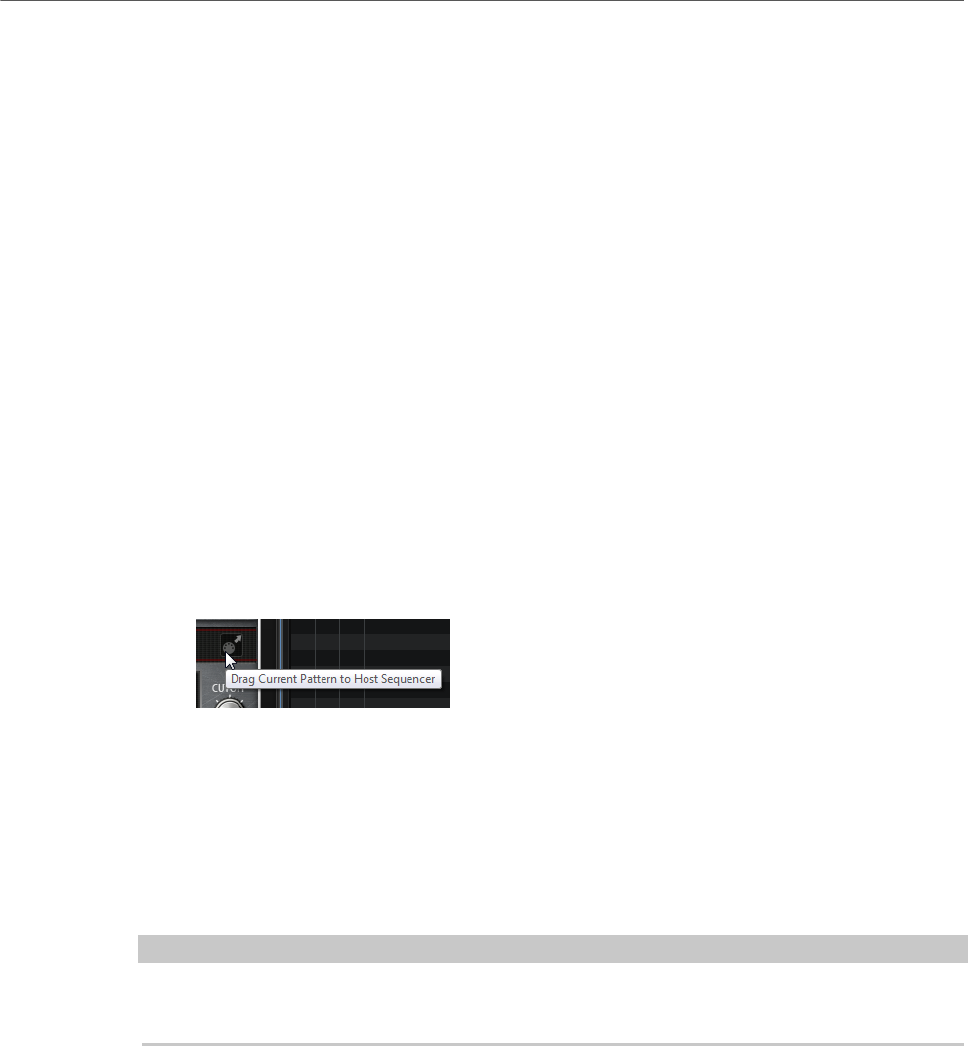
Included Instruments
B-Box
296
Resonance
Adjusts the filter resonance for the instrument.
Distortion Type
Sets the distortion type. You can choose between Tube, Hard Clip, Bit Reduction,
and Rate Reduction.
Distortion
Sets the amount of distortion for the instrument.
Level
Sets the level of the instrument.
Playing Back the Pattern
• To play back the pattern, use the play button at the top of the window.
An indicator below the step number shows which step is playing.
Exporting Patterns
• To export a pattern as a MIDI file, drag the MIDI export field into your host application.
Variations
B-Box offers up to 8 variations that can be used to create different rhythm patterns, such as
intros, fills, and endings, for example.
•To switch between variations, click the variation buttons above the pattern editor.
•You can copy and paste variations using the commands on the context menu.
NOTE
The parameters Loop, Sync, Hold, Trigger Mode, Restart Mode, and Input Mode are not part
of the variations.
Variations can be assigned to the trigger pads, allowing you to switch variations on the fly.
RELATED LINKS
Trigger Pads on page 494
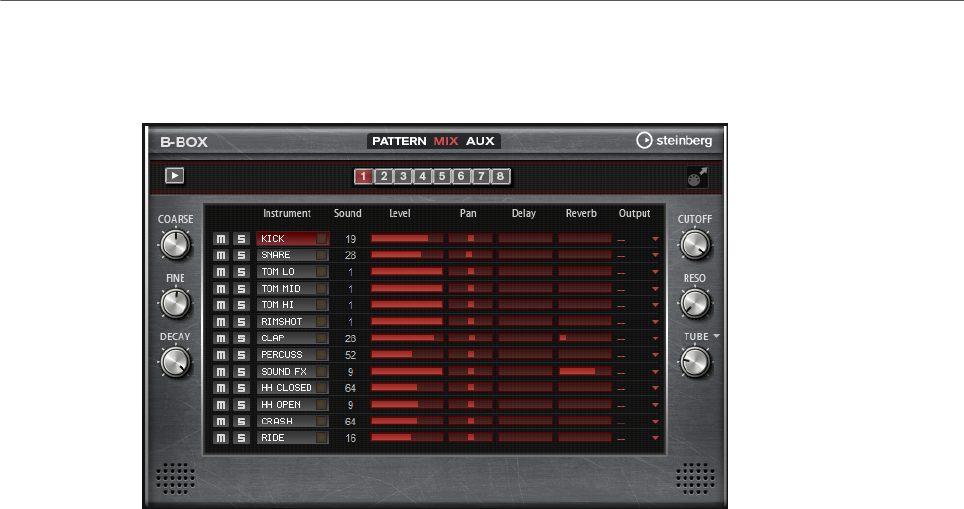
Included Instruments
B-Box
297
Mix Page
On the Mix page, you can add effects to the patterns.
Level
Adjusts the level of the instrument.
Pan
Adjusts the panorama position of the instrument.
Delay
Determines how much of the signal is sent to the delay effect.
Reverb
Determines how much of the signal is sent to the reverb effect.
Output
Here, you can select one of the available plug-in outputs.
AUX Page
On the Aux page, you can make global settings for B-Box and the included effects.
The page is divided into two sections. The left section gives you access to the global
performance settings, and the right section allows you to edit the integrated delay and reverb
effects.
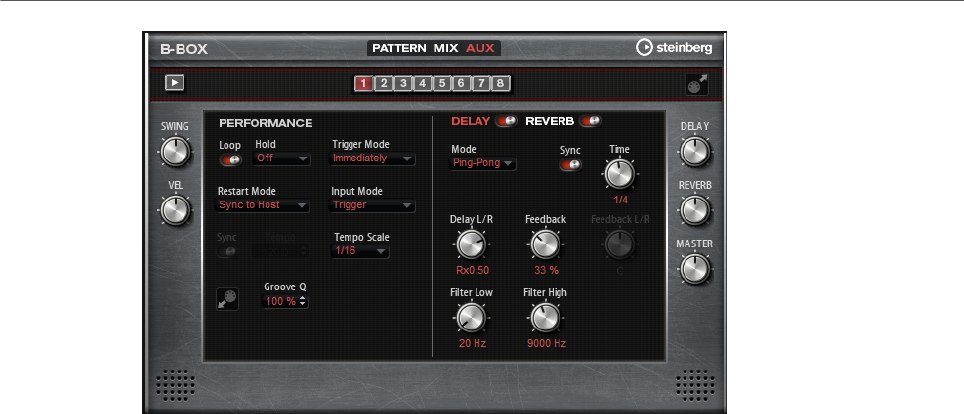
Included Instruments
B-Box
298
Performance Section
Loop
If this option is activated, the pattern plays back in a loop.
Hold
• If this parameter is set to Off, the pattern changes immediately when a key
is released. The pattern stops immediately when all keys are released.
• If the parameter is set to On, the pattern plays to the end even when
the keys are released. If the Loop option is activated, the pattern plays
continuously in a cycle.
• If the parameter is set to Gated, the pattern starts playback with the first
key being played. It plays silently in the background even if the keys are
released, and resumes playback at the current position when you press any
of the keys again. This way, you can gate the playback of the pattern.
Trigger Mode
The trigger mode determines at which moment B-Box changes the pattern when
you select another variation.
• If the parameter is set to Immediately, the pattern changes as soon as you
switch to another variation.
• If the parameter is set to Next Beat, the pattern changes on the first new
beat after switching to another variation.
• If the parameter is set to Next Measure, the pattern changes at the first
new measure after switching to another variation.
Restart Mode
Determines whether the pattern playback is restarted when a note is triggered.
•Off – Playback is not restarted if it is already running.
•First Note – Restarts playback when a note is triggered and no other notes
are playing.
•Each Note – Restarts playback every time a note is triggered.

Included Instruments
B-Box
299
•Sync to Host – Aligns playback with the beats and measures of your host
application. Playback is synchronized every time you start the transport.
•Follow Transport – Playback starts and stops automatically together with
the transport controls in your host application.
Input Mode
Keys that trigger the pattern are shown in green on the HALion keyboard. Keys
that are assigned to an instrument sound are shown as regular black and white
keys.
Depending on the Input Mode, the black and white keys either trigger or mute the
assigned instrument.
•Off triggers the pattern with any key that you play.
•Trigger plays back the sound of the assigned instrument.
•Mute mutes the track for as long as you press the key.
Sync
To synchronize the pattern to the tempo of your host application, activate Sync.
For the modes Sync to Host and Follow Transport, synchronization to the host
application is established automatically. In these modes, the Sync parameter
cannot be edited.
Tempo
If Sync is deactivated, you can use the Tempo parameter to set the internal
playback speed.
Tempo Scale
Defines the speed at which the pattern is running. You can specify a value in
fractions of beats. You can also set dotted and triplet note values. For example, if
the Tempo parameter is set to 1/16 and you set this value to 1/8, the speed is cut
in half.
Groove Quantizing Patterns
To adapt the timing of a pattern to an external MIDI file, you can drop this MIDI
file on the Groove Quantize drop field. You can quantize the playback of the
pattern to the timing of a sliced loop by dragging its MIDI file from the MIDI
export drag field to the Groove Quantize drop field.
The Groove Quantize Depth parameter to the right of the drop field determines
how accurately the pattern follows the timing of the MIDI file.
Swing
Shifts the timing of notes on even-numbered beats. This way, the pattern gets a
swing feeling. Negative values let the notes play earlier, positive values let the
notes play later.
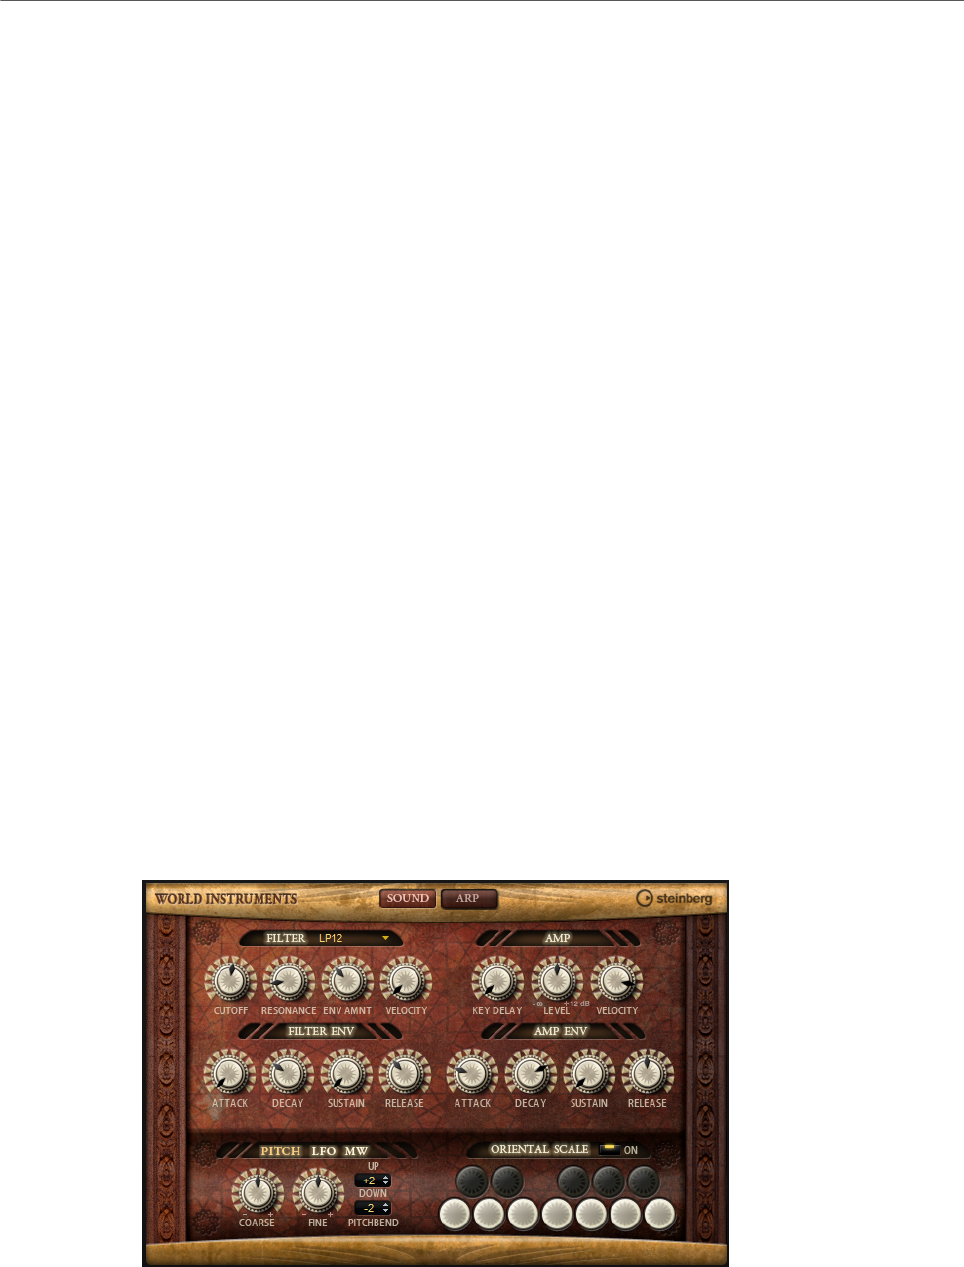
Included Instruments
World Instruments
300
Velocity Scale
Allows you to raise or lower the note-on velocities of the pattern. At a value of 100
%, the notes play with their original velocity.
Delay and Reverb Section
The delay and reverb effect have the same parameters as the Multi Delay and Reverb effects.
Delay
Adjusts the general amount of delay.
Reverb
Adjusts the general amount of reverb.
Master
Adjusts the overall volume of B-Box.
RELATED LINKS
Multi Delay on page 428
Reverb on page 425
World Instruments
World Instruments delivers a great variety of ethnic instruments that can either be played
manually or use the integrated arpeggiator.
On the Sound page, the instruments can be fine-tuned with filter and amp settings. In
addition, you can use the built-in micro-tuning functionality to decrease the pitch of each key
by a quarter note, to realize typical oriental scales.
Sound Page

Included Instruments
World Instruments
301
Filter Section
Filter Shape
• LP24, 18, 12, and 6 are low-pass filters with 24, 18, 12, and 6 dB/oct.
Frequencies above the cutoff are attenuated.
• BP12 and BP24 are band-pass filters with 12 and 24 dB/oct. Frequencies
below and above the cutoff are attenuated.
• HP6+LP18 and HP6+LP12 are combinations of a high-pass filter with 6 dB/
oct and a low-pass filter with 18 and 12 dB/oct, respectively (asymmetric
band-pass filter). Frequencies below and above the cutoff are attenuated.
Attenuation is more pronounced for the frequencies above the cutoff.
• HP12+LP6 and HP18+LP6 are combinations of a high-pass filter with 12
and 18 dB/oct and a low-pass filter with 6 dB/oct (asymmetric band-pass
filter). Frequencies below and above the cutoff are attenuated. Attenuation
is more pronounced for the frequencies below the cutoff.
• HP24, 18, 12, and 6 are high-pass filters with 24, 18, 12, and 6 dB/oct.
Frequencies below the cutoff are attenuated.
• BR12 and BR24 are band-reject filters with 12 and 24 dB/oct. Frequencies
around the cutoff are attenuated.
• BR12+LP6 and BR12+LP12 are combinations of a band-reject filter with 12
dB/oct and a low-pass filter with 6 and 12 dB/oct, respectively. Frequencies
around and above the cutoff are attenuated.
• BP12+BR12 is a band-pass filter with 12 dB/oct plus a band-reject filter
with 12 dB/oct. Frequencies below, above, and around the cutoff are
attenuated.
• HP6+BR12 and HP12+BR12 are combinations of a high-pass filter with 6
and 12 dB/oct and a band-reject filter with 12 dB/oct. Frequencies below
and around the cutoff are attenuated.
• AP is an all-pass filter with 18 dB/oct. Frequencies around the cutoff are
attenuated.
• AP+LP6 is an all-pass filter with 18 dB/oct plus a low-pass filter with 6 dB/
oct. Frequencies around and above the cutoff are attenuated.
• HP6+AP is a high-pass filter with 6 dB/oct plus an all-pass filter with 18
dB/oct. Frequencies around and below the cutoff are attenuated.
Cutoff
Controls the cutoff frequency of the filter.
Resonance
Emphasizes the frequencies around the cutoff. At higher settings, the filter self-
oscillates, which results in a ringing tone.
Envelope Amount
Controls the cutoff modulation from the filter envelope.
Cutoff Velocity
Controls the cutoff modulation from velocity.

Included Instruments
World Instruments
302
Filter Envelope
Attack
Controls the attack time of the filter envelope.
Decay
Controls the decay time of the filter envelope.
Sustain
Controls the sustain level of the filter envelope.
Release
Controls the release time of the filter envelope.
Amp Section
Key Delay
Delays playback of the notes. This parameter can be used when working with
multiple programs or layers. Setting up different key delay values for the different
layers allows you to spread the notes, so that they do not all begin at the same
time.
Level
Controls the overall volume of the sound.
Velocity
Controls the level modulation from velocity. At 0, all notes are played with the
same level.
Amp Envelope
Attack
Controls the attack time of the amplifier envelope.
Decay
Controls the decay time of the amplifier envelope.
Sustain
Controls the sustain level of the amplifier envelope.
Release
Controls the release time of the amplifier envelope.
Pitch Section
Coarse
Adjusts the tuning in semitones.
Fine
Adjusts the tuning in cents.

Included Instruments
World Instruments
303
Pitchbend Up/Pitchbend Down
Determines the range for the modulation that is applied when you move the
pitchbend wheel.
LFO Section
Freq
Controls the frequency of the modulation, that is, the speed of the LFO.
Sync
If Sync is activated, the frequency is set in fractions of beats.
Pitch
Controls the modulation depth of the pitch modulation.
Cutoff
Controls the modulation depth of the filter cutoff modulation.
MW Section
Vib Freq
Controls the frequency of the second LFO that is used for pitch modulation
(vibrato).
Vib Depth
Controls the depth of the pitch modulation (vibrato).
Cutoff
Controls the influence of the mod wheel on the filter cutoff.
Oriental Scale Section
Scale On/Off
Activates/Deactivates the influence of the scale settings on the played notes.
Note Switches
Activate a switch to decrease the tuning of the corresponding note by a quarter
note.
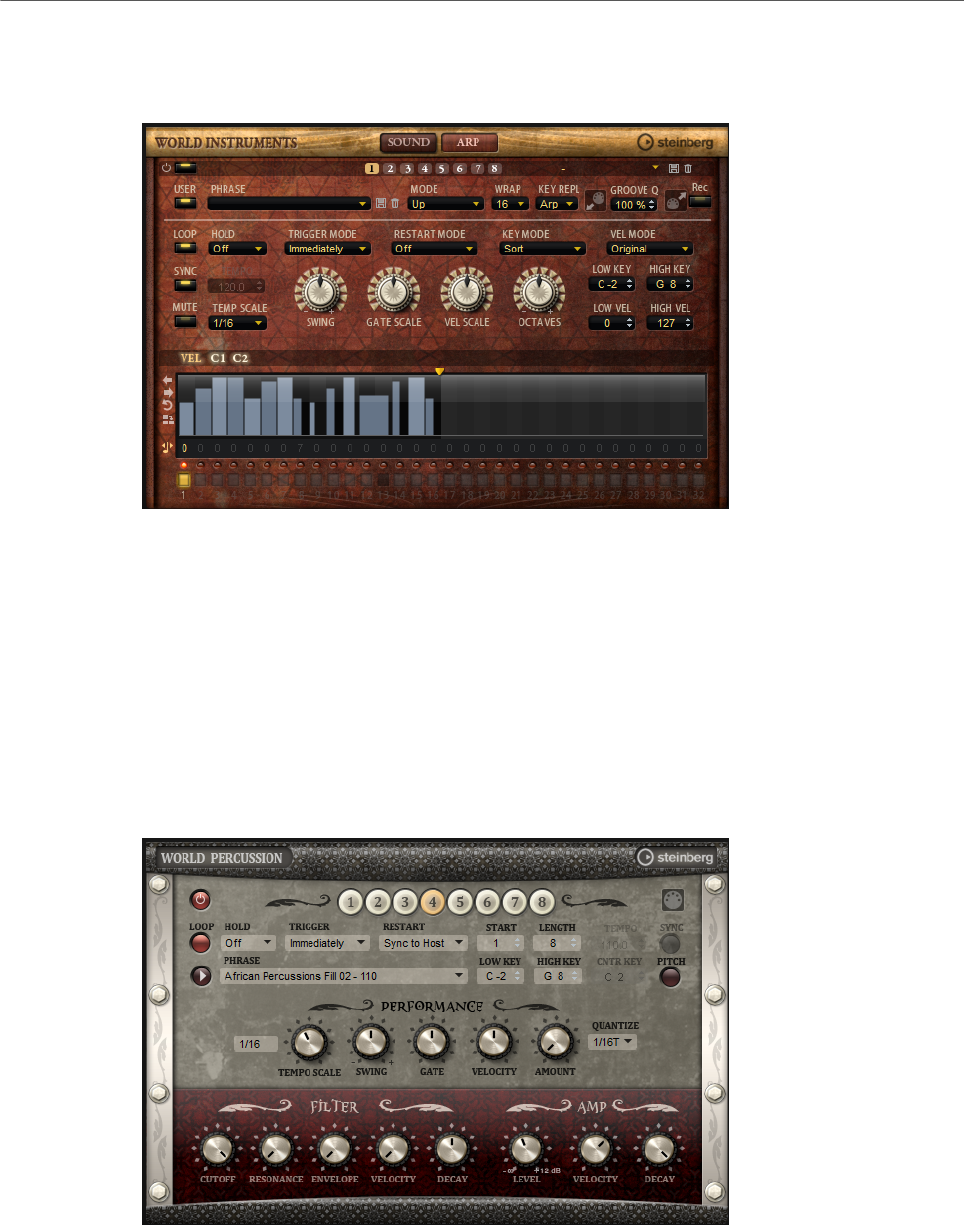
Included Instruments
World Percussion
304
Arp Page
This page contains the same parameters as the FlexPhraser.
RELATED LINKS
FlexPhraser on page 483
World Percussion
World Percussion delivers a great variety of ethnic percussion instruments and associated
MIDI phrases.
The instruments can be globally fine-tuned with filter and amp settings which in turn can
make use of envelope settings. The built-in MIDI player allows you to use the included MIDI
phrases or to import your own MIDI phrases.
MIDI Player Parameters
In the top section of the macro page, the MIDI player parameters are available.

Included Instruments
World Percussion
305
On/Off button
Activates/Deactivates the MIDI player part of World Percussion.
Variation buttons
You can configure up to eight different variations of your sounds and switch
between them with the variation buttons.
NOTE
To avoid switching variations in the middle of a beat or measure, use the trigger
modes Next Beat or Next Measure.
Loading Phrases
To load a phrase, click in the Phrase field and select a phrase from the selector.
Exporting MIDI Phrases
You can export your MIDI phrase as a MIDI file using drag and drop.
Loop
If this button is activated, the phrase plays back in a loop. If this button is
deactivated, the phrase is played once.
Hold
Allows you to prevent the phrase from stopping or changing when the keys are
released.
• If Off is selected, the phrase changes as soon as you release a key. The
phrase stops immediately when you release all keys.
• If On is selected, the phrase plays to the end, even if the keys are released.
If Loop is activated, the phrase repeats continuously.
• If Gated is selected, the phrase starts to play when the first key is played. It
plays silently in the background, even if the keys are released, and resumes
playback at the current position when you press any of the keys again. This
way, you can gate the playback of the phrase.
Trigger Mode
Determines at which moment the player changes the phrase when you select
another variation.
•Immediately – The phrase changes as soon as you switch to another
variation.
•Next Beat – The phrase changes on the first new beat after switching to
another variation.
•Next Measure – The phrase changes on the first new measure after
switching to another variation.
Restart
Depending on the selected Restart mode and your playing, you can restart
playback from the beginning of the loop.
•Off – The loop runs continuously and will not restart upon note changes.

Included Instruments
World Percussion
306
•First Note – The loop restarts when a note is triggered and no other notes
are already held.
•Each Note – The loop restarts each time a note is triggered.
•Sync to Host – Select this to align the loop with the beats and measures of
your host application. The loop aligns to the beats and measures each time
you start the transport.
•Follow Transport – Playback starts and stops automatically together with
the transport controls in your host application.
Start
Shifts the start of the loop in steps of 1/4 notes. The length of the loop is
shortened accordingly.
Length
Allows you to shorten the length of the loop in steps of 1/4 notes.
NOTE
The control range of Start and Length varies with the original length of the loop.
Tempo
• If Sync is deactivated, the Tempo control sets the internal playback speed
of the loop, in BPM. In addition, Tempo Scale gives you further control over
the playback speed.
• If Sync is activated, the Tempo control is inactive.
Sync
To synchronize the loop to the tempo of your host application, activate Sync.
NOTE
In the Restart modes Sync to Host and Follow Transport, synchronization to
the host application is established automatically. In these modes, the Sync
parameter cannot be edited.
Play/Stop
Starts/Stops playback of the phrase.
Low Key
Defines the lowest key on which the phrase is triggered.
High Key
Defines the highest key on which the phrase is triggered.
Center Key
Determines the MIDI note that is used as the central position for the Key Follow
function.

Included Instruments
World Percussion
307
Pitch
Activate this option to set the pitch of the drum sounds according to the center
key.
Performance Section
Tempo Scale
Defines the rate at which notes are triggered, that is, the speed at which the
phrase is running. In addition to the Tempo parameter, this gives you further
control over the playback speed. You can specify a value in fractions of beats. You
can also set dotted and triplet note values.
For example, if you change the Tempo Scale setting from 1/16 to 1/8, the speed
is cut in half. If you set it to 1/32, the speed is doubled. Other values increase or
decrease the speed accordingly.
Swing
Shifts the timing of notes on even-numbered beats. This way, the phrase gets
a swing feeling. Negative values shift the timing backward, and the notes are
played earlier. Positive values shift the timing forward, and the notes are played
later.
Gate Scale
Allows you to shorten or lengthen the notes of the phrase. At a value of 100 %,
the notes play with their original gate length.
Velocity Scale
Raises or lowers the note-on velocities of the phrase. At a value of 100 %, the
notes are played with their original velocity.
Quantize Note Value
This pop-up menu allows you to set up a quantization grid, in fractions of beats.
You can also specify dotted and triplet values. This way, you can force the timing
of the MIDI note events to play back only at the selected note value.
Quantize Amount
Defines how much of the quantization grid is applied. A value of 100 % means
that the MIDI note events play back only at the specified Quantize note value.
Smaller values move the notes only partially towards the next Quantize note
value. At a value of 0 %, no quantization is applied.
Filter Section
Cutoff
Controls the cutoff frequency of the filter.
Resonance
Emphasizes the frequencies around the cutoff. At higher settings, the filter self-
oscillates, which results in a ringing tone.
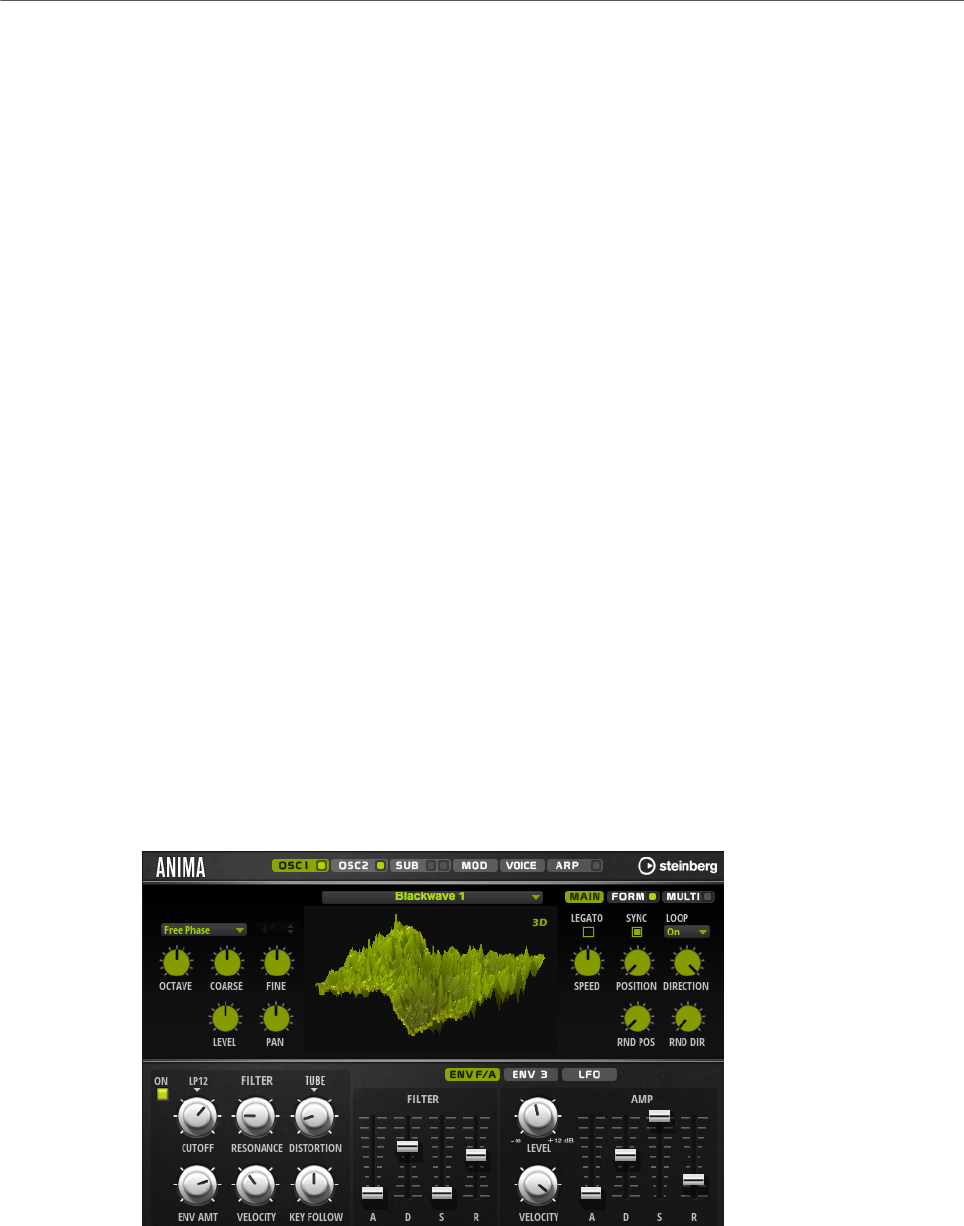
Included Instruments
Anima
308
Envelope Amount
Controls the cutoff modulation from the filter envelope.
Cutoff Velocity
Controls the cutoff modulation from velocity.
Decay
Controls the decay time of the filter envelope.
Amp Section
Level
Controls the overall volume of the sound.
Velocity
Controls the level modulation from velocity. At 0, all notes are played with the
same level.
Decay
Controls the decay time of the amplifier envelope.
Anima
The Anima synth is a wavetable instrument using HALion’s wavteable synthesis which
crossfades the waves smoothly in real time based on an integrated wavetable envelope. This
envelope makes it very easy to control the playback of the wavetable, because no further
modulation settings are required. All you have to do is set up the Speed parameter. The
modulation matrix allows you to control the playback position of the oscillator using one of
the integrated LFOs, the velocity, or the modulation wheel, for example.
Anima provides two wavetable oscillators that can be used in parallel. Each oscillator
features a multi-oscillator that allows you to create up to eight additional voices for each
oscillator and then separately detune them and distribute them in the stereo panorama.
The sub-oscillator comes with classic oscillator waves like sine, triangle, saw, square and
two different pulses, and also features a noise generator. The noise generator delivers a
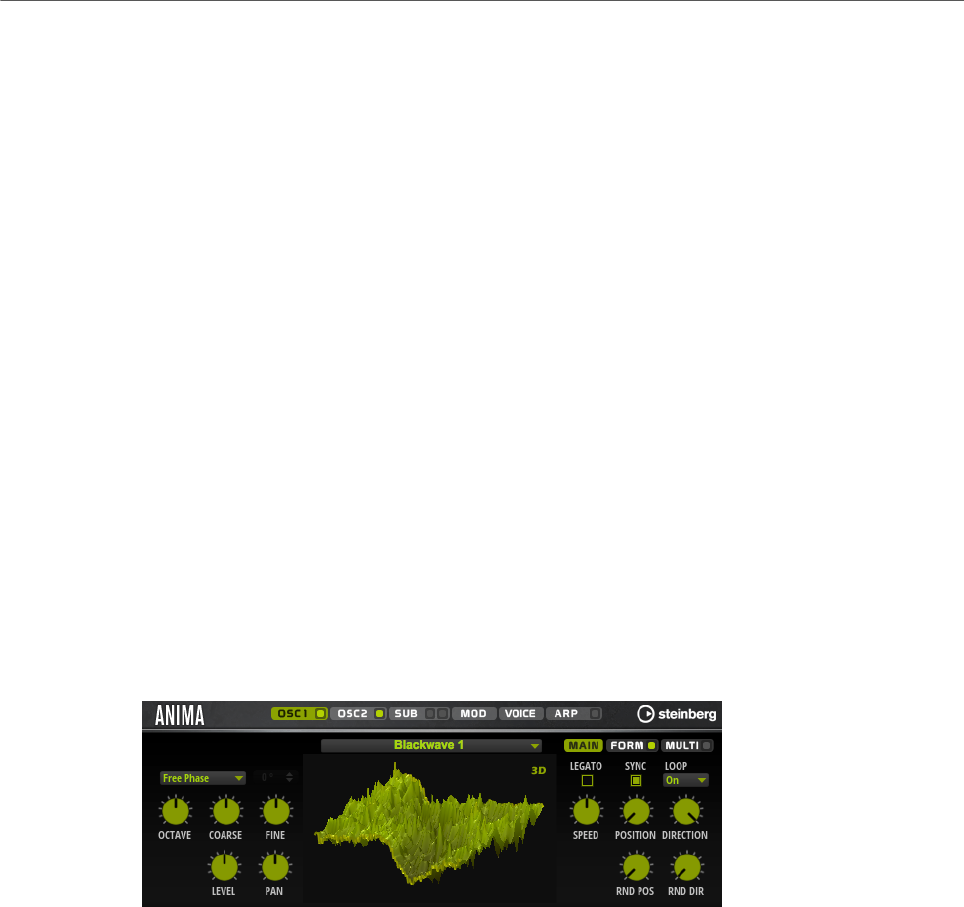
Included Instruments
Anima
309
large number of different noise types. These range from classic noises like white and pink
noise over drum attacks and rhythmical noises to specifically filtered colored noises and
unique circuit noises, recorded from various electronic devices. This powerful collection
of noises can be used to add inharmonic frequencies to create atmospheric sound or add
transients for rich and percussive attacks, for example. The integrated arpeggiator and step
sequencer allows you to play rhythmic patterns and/or add modulations to the synthesis
parameters using the three available controller lanes.
The oscillator is followed by a multi-mode filter that offers a large number of different filter
shapes. The filter can be modulated by modulation sources like the keyboard, velocity, and
LFO, but also by the controller lanes of the step sequencer, for example.
Anima includes two monophonic LFOs that can be synchronized to the host tempo and allow
you to modulate a large number of modulation destinations using the modulation matrix.
In addition, a user-defined envelope can be assigned to destinations like Pitch, Pan, or
Wavetable parameters in the modulation matrix.
Anima contains six pages: Osc1, Osc2, Sub, Mod, Voice, and Arp. To show the settings for a
page, click the corresponding page button.
If a page button itself contains an On/Off button, which is the case for the Arp page button,
for example, you can use this to activate/deactivate the corresponding element without
having to open the page first.
Oscillator Pages
The Osc 1 and Osc 2 pages contain the settings for the two main oscillators.
• To show the settings for oscillator 1 or oscillator 2, click the corresponding button.
• To activate/deactivate an oscillator, click the On/Off button on the right of the
corresponding page button.
Select Wavetable
This pop-up menu allows you to select one of the included wavetables for the
wavetable oscillator.
Show 3D Wavetable Map/2D Wave
Toggles between displaying a single cycle of the current waveform and a
topographic map of the entire wavetable.
Retrigger Mode
• If Free Phase is selected, the behavior of analog synthesizers is emulated.
The oscillator is running freely and continuously.
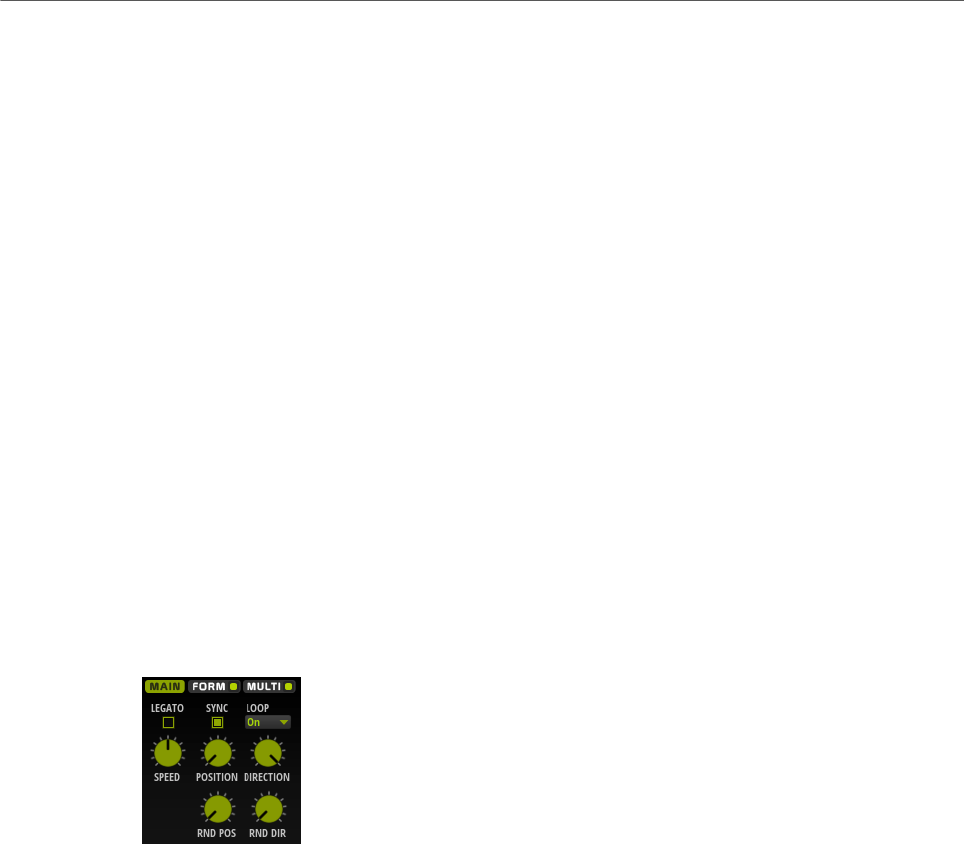
Included Instruments
Anima
310
• If Random Phase is selected, the start phase is randomly set to a different
value each time that you trigger a note. In contrast to Free Phase, there is
no continuity in the phase of the waveform.
• If Fixed Phase is selected, the oscillator runs with a fixed start phase that
can be specified between 0 and 360 degrees.
Octave
Adjusts the pitch in octave steps.
Coarse
Adjusts the pitch in semitone steps.
Fine
Adjusts the pitch in cent steps. This allows you to fine-tune the oscillator sound.
Level
Adjusts the output level of the oscillator.
Pan
Adjusts the position of the oscillator in the stereo panorama. At a setting of -100
%, the sound is panned hard left, and at +100 %, it is panned hard right.
Main Tab
Legato
If Legato is deactivated, each note starts playback from the position cursor.
If Legato is activated, the first note starts playback from the position cursor, and
any following notes start from the current playback position for as long as the
first note is held.
Sync to Host
Allows you to sync the wavetable to the beats and measures of your host
application.
Loop Mode
•Off: If Playback Direction is set to a positive value, the wavetable plays from
the position cursor to the end.
If Playback Direction is set to a negative value, the wavetable plays from
the position cursor to the start.
•On: Depending on the Playback Direction setting, the wavetable plays
forward or backward in a loop.
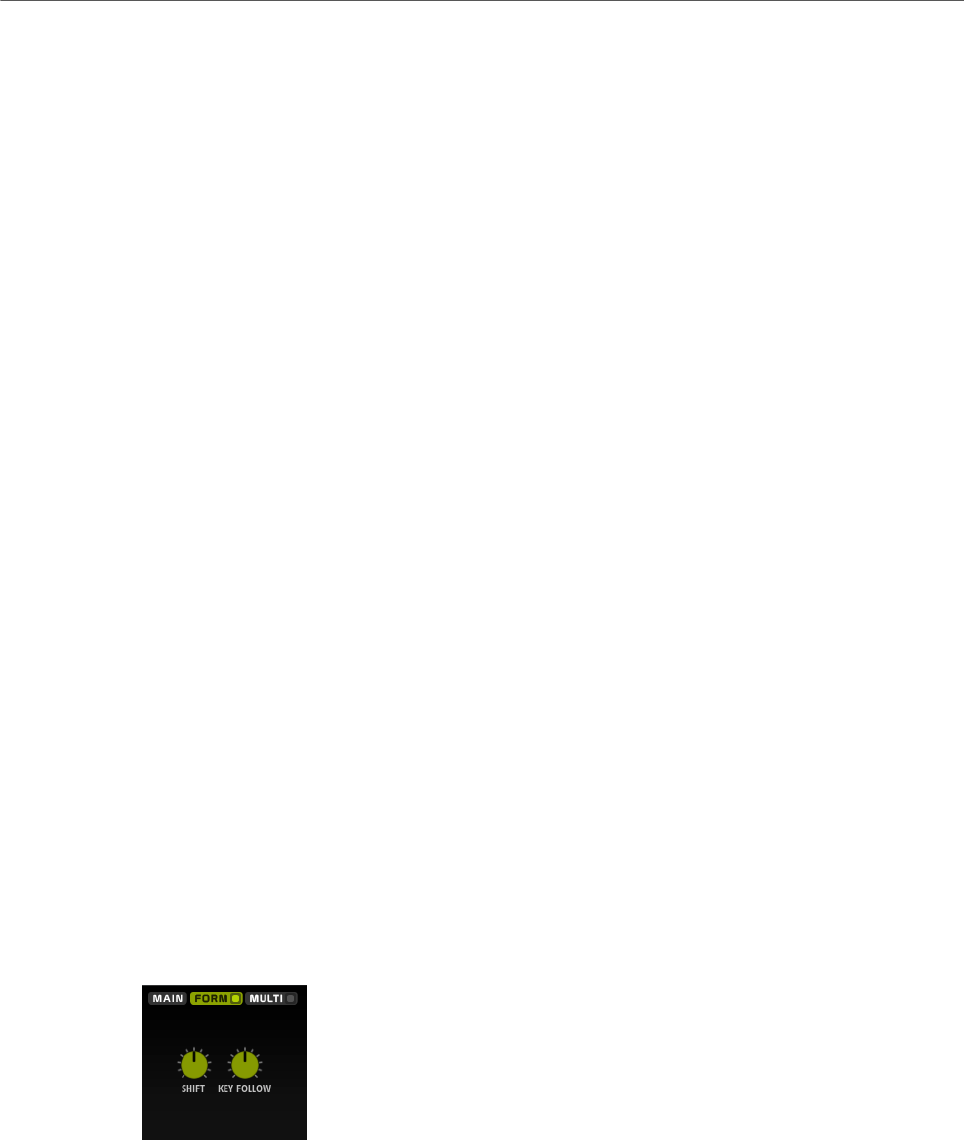
Included Instruments
Anima
311
•Alt: The wavetable plays in an alternate loop, that is, the loop is alternately
played forward and backward. The first direction depends on the Playback
Direction setting.
Speed
Determines the rate at which the envelope plays through the wavetables. At +100
%, the envelope plays back at its original speed. A value of +50 % corresponds to
half the original speed, and +200 % to twice the original speed, for example.
This parameter is unipolar.
Position
Determines where the envelope starts.
Playback Direction
Allows you to set the playback speed in smaller increments. Furthermore, this
parameter determines the playback direction.
• If you enter negative values, you reverse playback, that is, the playback
position moves backward through the wavetable.
Random Position
Adds a random value to the current position when you play a note.
For example, if you want the position to vary between 25.0 % and 75.0 %, set
Position to 25.0 % and Random Position to 50.0 %.
Random Direction
Adds a negative or positive random value to the current direction when you play a
note.
For example, if you want the direction to vary between -100 % and +100 %, set
Direction to 0.0 % and Random Direction to 100.0 %. If you want the direction to
vary within the full positive range, set Direction to 50 % and Random Direction to
50 %, for example.
Form Tab
Formants are harmonics within the spectrum of a note which are pronounced and help
to define the character of an instrument. The positions of the formants in the spectrum
mainly depend on the construction of an instrument, such as the body of a guitar, the form
of the vocal tract in a human body, the filter settings for electronic instruments, etc. These
conditions lead to specific frequency ranges that are emphasized regardless of the pitch
of the note. Playing back samples or wavetables with a different pitch than the original is
usually done by increasing or decreasing the playback speed. This leads to the well known
monster or Mickey Mouse effect, because all harmonics are also affected, that is, the
characteristic formants are shifted. To avoid this, you can activate the Formant option.
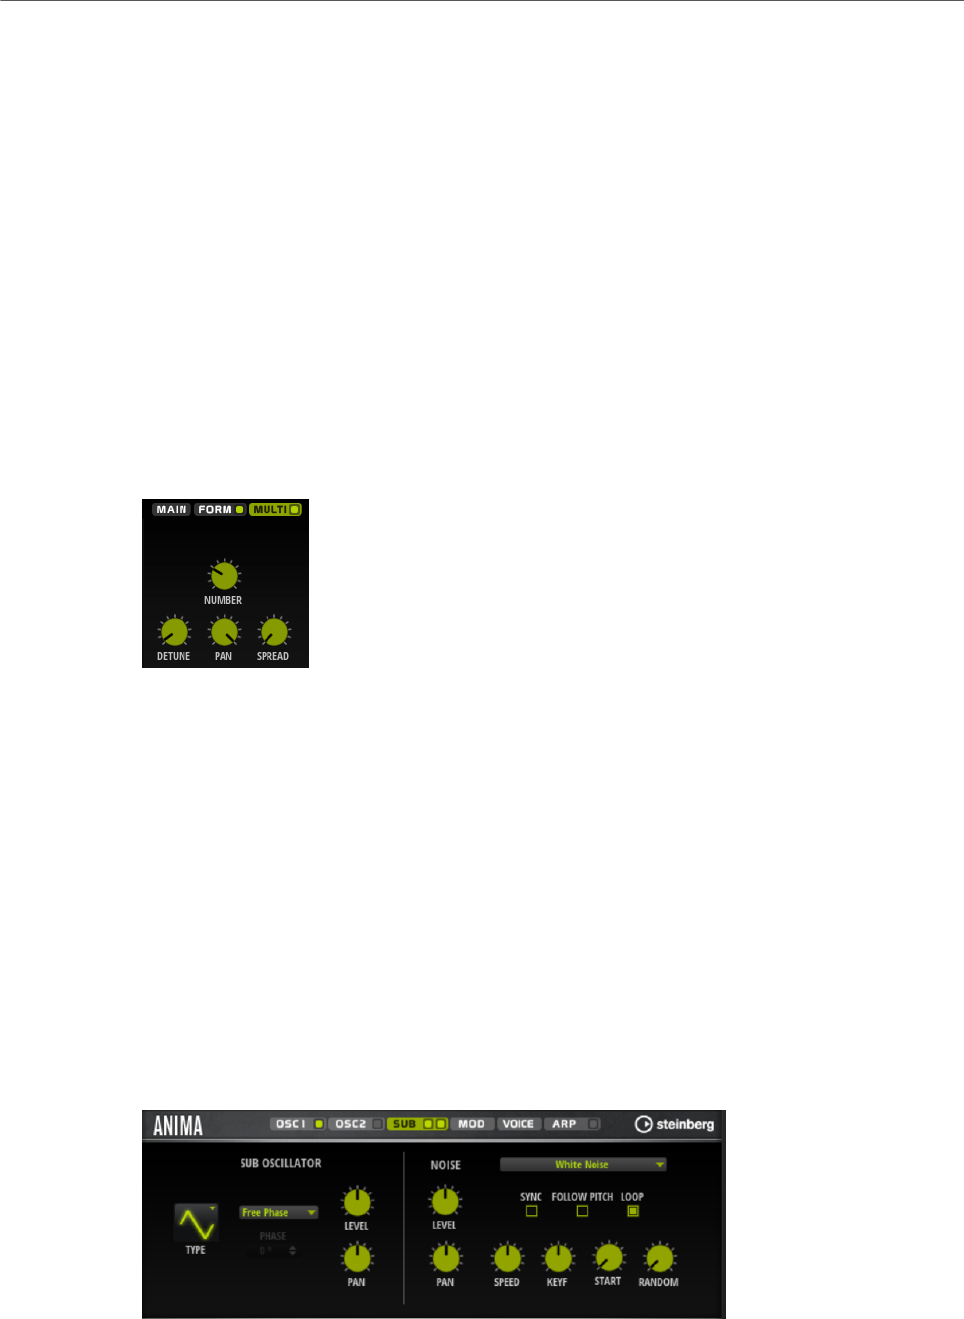
Included Instruments
Anima
312
On/Off
Activates/Deactivates the formant settings.
Formant
Allows you to shift the formants of the entire wavetable by a fixed value.
Key Follow
Allows you to shift the formants depending on the played note.
• A value of 100 % means that the formant frequency moves with the played
note.
• A value of 0 % means that the formants kept the same for all notes.
You can invert the behavior of the formant shift by setting Key Follow to negative
values.
Multi Tab
The multi-oscillator function allows you to trigger multiple voices simultaneously with each
note that you play. If you activate Multi, the following parameters become available:
•Number determines the number of oscillators that play back simultaneously. You
can also set fractions of numbers. For example, with a setting of 2.5, you hear two
oscillators at full level and a third one at half level.
•Detune detunes the oscillators.
•Pan narrows or widens the stereo panorama. With a setting of 0 %, you create a mono
signal and with 100 %, you create a stereo signal.
•Spread distributes the oscillators so that each oscillator plays from a different position
in the wavetable.
Sub Page
The Sub page contains the settings for the sub oscillator and the noise oscillator.

Included Instruments
Anima
313
Sub Oscillator Section
Type
The wave shape of the sub oscillator. You can choose between Sine, Triangle,
Saw, Square, Pulse Wide, and Pulse Narrow.
Retrigger Mode
• If Free Phase is selected, the behavior of analog synthesizers is emulated.
The oscillator is running freely and continuously.
• If Random Phase is selected, the start phase is randomly set to a different
value each time that you trigger a note. In contrast to Free Phase, there is
no continuity in the phase of the waveform.
• If Fixed Phase is selected, the oscillator runs with a fixed start phase that
can be specified between 0 and 360 degrees.
Level
Adjusts the output level of the sub oscillator.
Pan
Adjusts the position of the oscillator in the stereo panorama. At a setting of -100
%, the sound is panned hard left, and at +100 %, it is panned hard right.
Noise Oscillator Section
The noise oscillator offers you a large amount of different noise types that can be used to
add inharmonic frequencies to the overall spectrum, either for the entire sound, with looped
noises or with one-shot noise samples. This allows you to add characteristic transients to
percussive instruments based on samples, for example.
Noise Type
This pop-up menu offers you a choice of classic noises, attack transients,
soundscapes, and ambience noise samples.
Level
Adjusts the output level of the Noise section.
Sync
Activate Sync to synchronize the speed of the noise oscillator to the host tempo.
This is particularly useful for rhythmic noises that are based on a tempo of 120
BPM.
Pan
Determines the position of the noise in the stereo panorama. At a setting of -100
%, the sound is panned hard left, and at +100 %, it is panned hard right.
Follow Pitch
If Follow Pitch is activated, zone pitch settings like Octave, Coarse, and Fine, as
well as modulations like Glide, Pitchbend, or other pitch modulations, affect the
duration length. A higher sample pitch leads to a shorter duration.
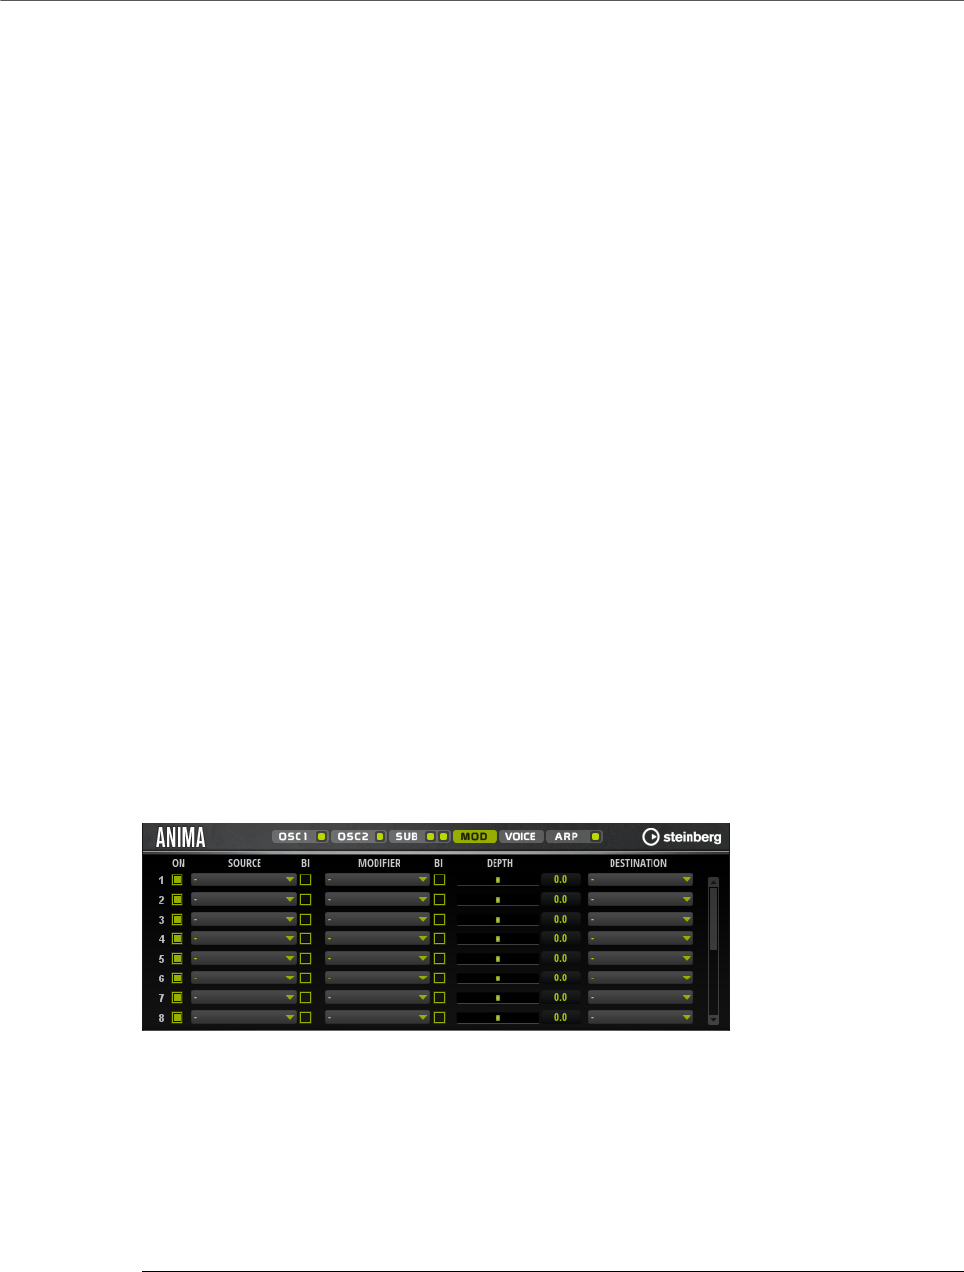
Included Instruments
Anima
314
If Follow Pitch is deactivated, the duration is independent of the zone pitch and
determined by the Duration settings.
Loop
Activate this button to play the noise sample in a loop.
If this button is not activated, the sample is played once.
Speed
Adjusts the playback speed of the noise sample. A setting of 800.0 % equals an
increase of three octaves in pitch.
Speed Key Follow
Allows you to adjust the speed modulation by MIDI note number. At a setting of
+100 %, the speed doubles per octave.
Start
Adjusts the start of the noise sample. With a value of 50 %, playback starts in the
middle of the sample.
Random Start
Selects a random playback start within a specific range around the current
position.
At a setting of 100 %, the playback position jumps to a random position between
the specified Start value and the end of the noise sample.
Mod Page
The Mod page contains the modulation matrix.
The modulation matrix offers you up to 16 freely assignable modulations, each with a source,
a modifier, and a destination with adjustable depth. The polarity of each source and each
modifier can be switched between unipolar and bipolar.
Creating Modulations
You create modulations by selecting a source, a modifier, and a destination from the pop-up
menus in the modulation matrix.
PROCEDURE
1. Click the modulation Source field and select the modulation source.
2. Optional: Click in the modulation Modifier field and select the parameter that you want
to use to modify the modulation.

Included Instruments
Anima
315
This modifier is used to scale the output of the modulation source.
3. Optional: Specify whether you want the Source and Modifier parameters to be unipolar
or bipolar.
4. Set the modulation intensity with the Depth parameter.
5. Click in the modulation Destination field and select the parameter that you want to
modulate.
Modulation Matrix Parameters
Modulation Sources and Modulation Modifiers
The following options are available as modulation sources and as modulation modifiers.
LFO A/B
The LFOs A and B produce cyclic modulation signals.
Amp Envelope
The amplifier envelope. The shape of the envelope determines the modulation
signal.
Filter Envelope
The filter envelope. The shape of the envelope determines the modulation signal.
Env 3
A freely assignable envelope. It is suited for pan or pitch modulation, for example.
Key Follow
This produces an exponential modulation signal derived from the MIDI note
number. Exponential means this source works with destinations such as Pitch or
Cutoff.
Note-on Velocity
Note-on velocity can be used as modulation signal.
Note-on Vel Squared
The squared version of Note-on Velocity. The harder you press the key, the higher
the modulation values.
Pitchbend
The position of the pitchbend wheel can be used as modulation signal.
Modulation Wheel
The position of the modulation wheel can be used as modulation signal.
Aftertouch
Aftertouch can be used as modulation signal. Some MIDI keyboards cannot send
aftertouch messages. However, most sequencer software is able to produce such
messages.

Included Instruments
Anima
316
Arp Controller 1–3
The 3 controllers available on this submenu correspond to the three controller
lanes on the Arp page.
Bus 1–8
Modulations that are sent to one of the eight busses can be reused as sources.
This way, you can combine several modulations to produce more complex
signals.
Quick Control 1–8
The quick controls can be used as modulation signal.
Unipolar vs. Bipolar Sources
The polarity of a modulation source specifies the value range that it produces. Unipolar
sources modulate between 0 and +1. Bipolar sources modulate between -1 and +1.
• To change the polarity of a modulation source or modifier from unipolar to bipolar,
activate its Bipolar button.
Modulation Destinations
Pitch
Modulates the pitch. For example, assign one of the LFOs to create a vibrato
effect. If Pitch is selected, the modulation depth is set in semitones.
Cutoff
Modulates the filter cutoff.
Resonance
Modulates the filter resonance. Resonance changes the character of the filter.
For example, to accent the filter the harder you hit a key, assign Velocity to
Resonance.
Distortion
Modulates the filter distortion.
Level
This modulation adds to the level setting. It can be used to create level offsets
using the mod wheel, for example.
Volume
Modulates the gain. The volume modulation multiplies with the level.
Pan
Modulates the position of the sound in the panorama.
WT 1/2 Pitch
Modulates the Pitch parameter of the corresponding wavetable oscillator.

Included Instruments
Anima
317
WT 1/2 Level
Modulates the Level parameter of the corresponding wavetable oscillator.
WT 1/2 Pan
Modulates the Pan parameter of the corresponding wavetable oscillator.
WT 1/2 Multi Detune
Modulates the multi-oscillator Detune parameter of the corresponding wavetable
oscillator.
WT 1/2 Multi Pan
Modulates the multi-oscillator Pan parameter of the corresponding wavetable
oscillator.
WT 1/2 Multi Spread
Modulates the multi-oscillator Spread parameter of the corresponding wavetable
oscillator.
WT 1/2 Multi Voices
Modulates the multi-oscillator Voices parameter of the corresponding oscillator.
WT 1/2 Position
Modulates the Position parameter of the corresponding wavetable oscillator.
WT 1/2 Direction
Modulates the Direction parameter of the corresponding wavetable oscillator.
WT 1/2 Speed
Modulates the Speed parameter of the corresponding wavetable oscillator.
WT Sub Pitch
Modulates the Pitch parameter of the wavetable sub-oscillator.
WT Sub Level
Modulates the Level parameter of the wavetable sub-oscillator.
WT Sub Pan
Modulates the Pan parameter of the wavetable sub-oscillator.
WT Noise Speed
Modulates the Speed parameter of the wavetable noise oscillator.
WT Noise Level
Modulates the Level parameter of the wavetable noise oscillator.
WT Noise Pan
Modulates the Pan parameter of the wavetable noise oscillator.

Included Instruments
Anima
318
Amp Env Attack
Modulates the attack time of the amplitude envelope. This modulation
destination cannot be modulated continuously. The time is updated only when the
segment starts.
Amp Env Decay
Modulates the decay time of the amplitude envelope. This modulation destination
cannot be modulated continuously. The time is updated only when the segment
starts.
Amp Env Sustain
Modulates the sustain level of the amplitude envelope. This modulation
destination cannot be modulated continuously. The level is updated only when the
segment starts.
Amp Env Release
Modulates the release time of the amplitude envelope. This modulation
destination cannot be modulated continuously. The time is updated only when the
segment starts.
Filter Env Attack
Modulates the attack time of the filter envelope. This modulation destination
cannot be modulated continuously. The time is updated only when the segment
starts.
Filter Env Decay
Modulates the decay time of the filter envelope. This modulation destination
cannot be modulated continuously. The time is updated only when the segment
starts.
Filter Env Sustain
Modulates the sustain level of the filter envelope. This modulation destination
cannot be modulated continuously. The level is updated only when the segment
starts.
Filter Env Release
Modulates the release time of the filter envelope. This modulation destination
cannot be modulated continuously. The time is updated only when the segment
starts.
Env 3 Start Level
Modulates the start level of the user-definable envelope 3, that is, the level
of the first envelope node. This modulation destination cannot be modulated
continuously. The level is updated only when the segment starts.
Env 3 Attack
Modulates the attack time of the user-definable envelope 3. This modulation
destination cannot be modulated continuously. The time is updated only when the
segment starts.
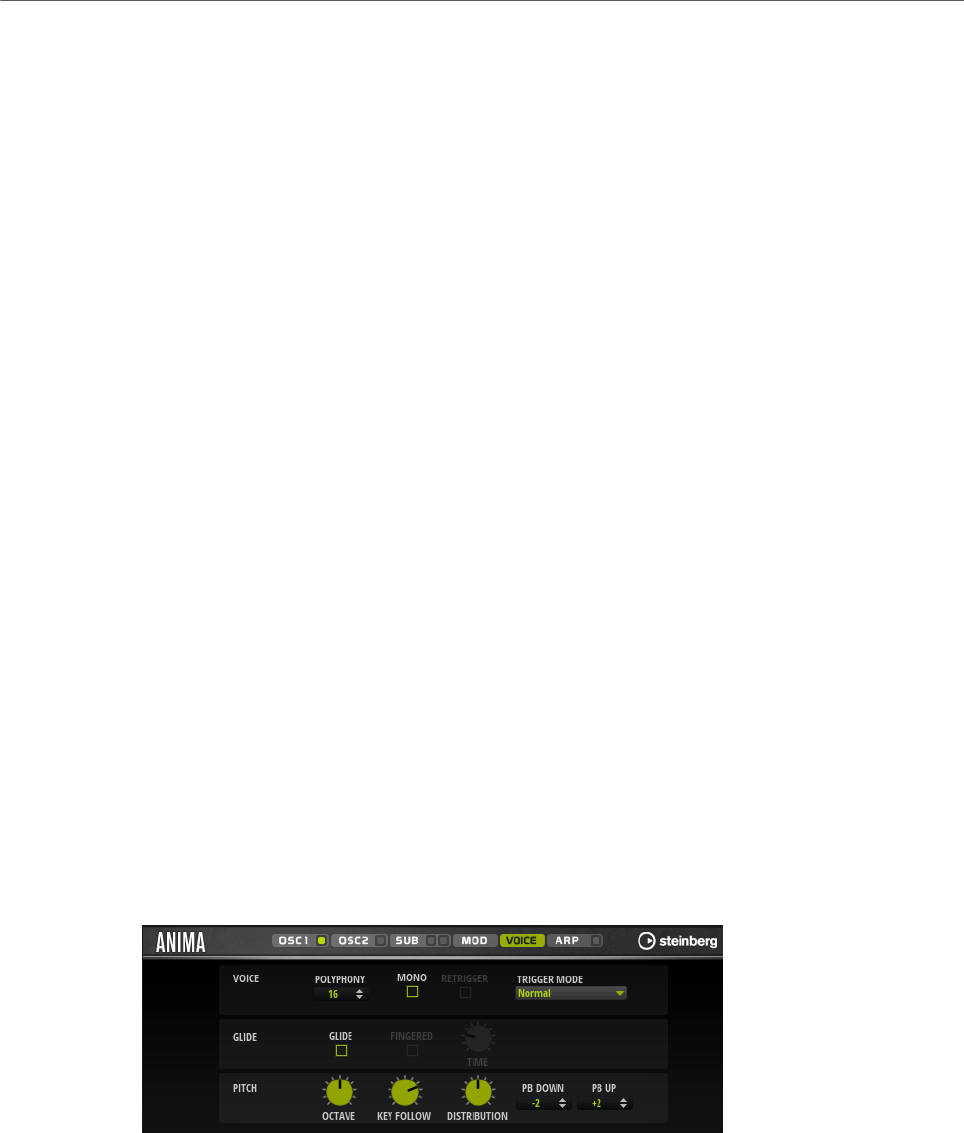
Included Instruments
Anima
319
Env 3 Attack Level
Modulates the attack level of the user-definable envelope 3, that is, the level of
the second envelope node. This modulation destination cannot be modulated
continuously. The level is updated only when the segment starts.
Env 3 Decay
Modulates the decay time of the user-definable envelope 3. This modulation
destination cannot be modulated continuously. The time is updated only when the
segment starts.
Env 3 Sustain
Modulates the sustain level of the user-definable envelope 3. This modulation
destination cannot be modulated continuously. The level is updated only when the
segment starts.
Env 3 Release
Modulates the release time of the user-definable envelope 3. This modulation
destination cannot be modulated continuously. The time is updated only when the
segment starts.
Env 3 Release Level
Modulates the release level of the user-definable envelope 3, that is, the
last user envelope node. This modulation destination cannot be modulated
continuously. The level is updated only when the segment starts.
Bus 1-8
You can send any modulation to one of the 8 busses, for example, to produce
more complex modulation signals. Select the bus that you want to send the
signals to as a destination. To use the modulation that was sent to a bus, assign
the corresponding bus as a modulation source.
Voice Page
Polyphony
If Mono mode is deactivated, you can use this parameter to specify how many
notes can be played simultaneously.
Mono
Activates monophonic playback.

Included Instruments
Anima
320
Retrigger
This option is only available in Mono mode. If Retrigger is activated, a note that
was stolen by another note is retriggered if you still hold the stolen note when
you release the new one.
This way, you can play trills by holding one note and quickly and repeatedly
pressing and releasing another note, for example.
Trigger Mode
Defines the trigger behavior for new notes.
•Normal triggers a new note when the previous note gets stolen. The
sample and the envelope of the new note are triggered from the start.
To minimize discontinuities, use the Fade Out parameter of the zone.
•Resume does not always trigger a new note.
If the new note stays within the same zone, the envelope is retriggered, but
resumes at the level of the stolen note. The pitch of the zone is set to the
new note.
If the new note plays in a different zone, the sample and the envelope of the
new note are triggered from the start.
•Legato does not always trigger a new note.
If the new note stays within the same zone, the envelope keeps running.
The pitch of the zone is set to the new note.
If the new note plays in a different zone, the sample and the envelope of the
new note are triggered from the start.
•Resume Keeps Zone does not trigger a new note upon note stealing. The
envelope resumes at the level of the stolen note and the pitch of the zone is
set to the new note, even if the new note plays in a different zone.
•Legato Keeps Zone does not trigger a new note upon note stealing. The
envelope keeps running and the pitch of the zone is set to the new note,
even if the new note plays in a different zone.
Glide
Allows you to bend the pitch between notes that follow each other. You achieve
the best results in Mono mode.
Fingered
Activate this parameter to glide the pitch only between notes that are played
legato.
Glide Time
Sets the glide time, that is, the time it takes to bend the pitch from one note to
the next.
Octave
Adjusts the pitch in octave steps.
Pitch Key Follow
Allows you to adjust the pitch modulation by MIDI note number. Set this
parameter to positive values in order to raise the pitch the higher you play. Use
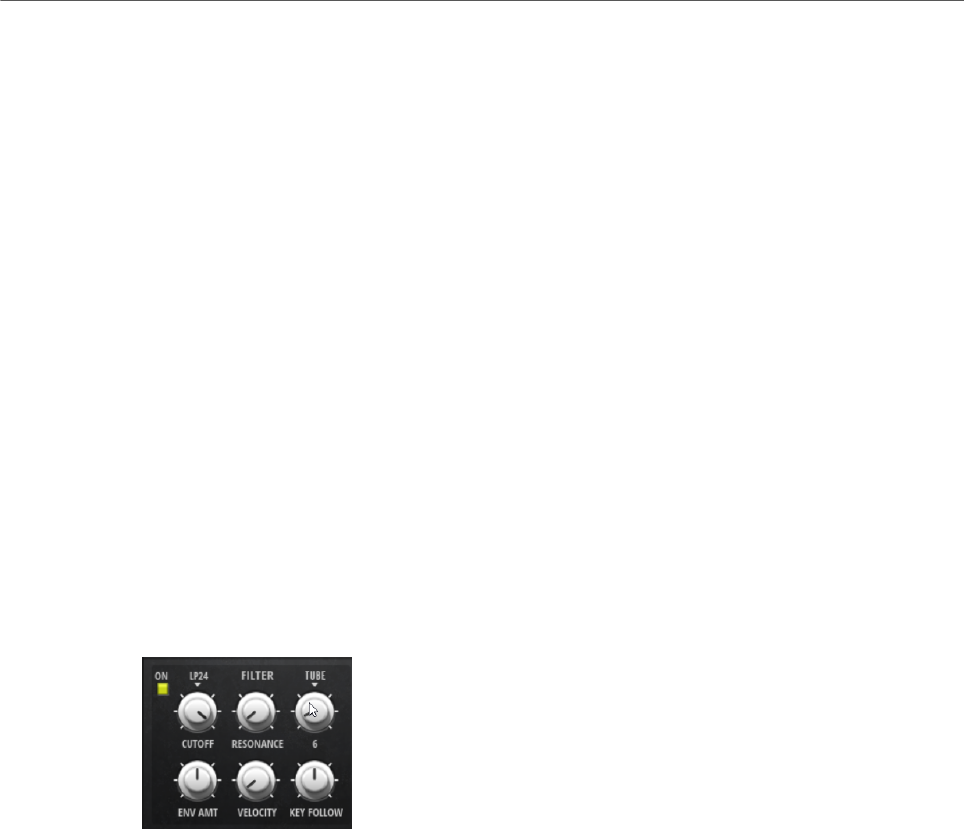
Included Instruments
Anima
321
negative values to lower the pitch the higher you play. At a setting of +100 %, the
pitch follows the played note exactly.
Distribution
Allows you to specify how unison voices are spread in pitch. Changing the unison
voice distribution will create different modulations between the unison voices.
• If this is set to 0, the distribution is linear, that is, all voices have an equal
distance in their pitch offset.
• Raising the value stretches the distribution using an exponential curve, so
that the first unison voices have a smaller pitch offset than the second and
third.
• Decreasing the value stretches the distribution using a negative
exponential curve,so that the first unison voices have a larger pitch offset
than the second and third voices.
Pitchbend Up/Pitchbend Down
Determines the range for the modulation that is applied when you move the
pitchbend wheel.
Filter Section
In the filter section in the lower left, you can activate and set up the filter.
Filter On/Off
Activates/Deactivates the filter.
Filter Shape
• LP24, 18, 12, and 6 are low-pass filters with 24, 18, 12, and 6 dB/oct.
Frequencies above the cutoff are attenuated.
• BP12 and BP24 are band-pass filters with 12 and 24 dB/oct. Frequencies
below and above the cutoff are attenuated.
• HP6+LP18 and HP6+LP12 are combinations of a high-pass filter with 6 dB/
oct and a low-pass filter with 18 and 12 dB/oct, respectively (asymmetric
band-pass filter). Frequencies below and above the cutoff are attenuated.
Attenuation is more pronounced for the frequencies above the cutoff.
• HP12+LP6 and HP18+LP6 are combinations of a high-pass filter with 12
and 18 dB/oct and a low-pass filter with 6 dB/oct (asymmetric band-pass
filter). Frequencies below and above the cutoff are attenuated. Attenuation
is more pronounced for the frequencies below the cutoff.
• HP24, 18, 12, and 6 are high-pass filters with 24, 18, 12, and 6 dB/oct.
Frequencies below the cutoff are attenuated.

Included Instruments
Anima
322
• BR12 and BR24 are band-reject filters with 12 and 24 dB/oct. Frequencies
around the cutoff are attenuated.
• BR12+LP6 and BR12+LP12 are combinations of a band-reject filter with 12
dB/oct and a low-pass filter with 6 and 12 dB/oct, respectively. Frequencies
around and above the cutoff are attenuated.
• BP12+BR12 is a band-pass filter with 12 dB/oct plus a band-reject filter
with 12 dB/oct. Frequencies below, above, and around the cutoff are
attenuated.
• HP6+BR12 and HP12+BR12 are combinations of a high-pass filter with 6
and 12 dB/oct and a band-reject filter with 12 dB/oct. Frequencies below
and around the cutoff are attenuated.
• AP is an all-pass filter with 18 dB/oct. Frequencies around the cutoff are
attenuated.
• AP+LP6 is an all-pass filter with 18 dB/oct plus a low-pass filter with 6 dB/
oct. Frequencies around and above the cutoff are attenuated.
• HP6+AP is a high-pass filter with 6 dB/oct plus an all-pass filter with 18
dB/oct. Frequencies around and below the cutoff are attenuated.
Cutoff
Controls the cutoff frequency of the filter.
Resonance
Emphasizes the frequencies around the cutoff. At higher settings, the filter self-
oscillates, which results in a ringing tone.
Distortion
Adds distortion to the signal. The following distortion types are available:
•Tube adds warm, tube-like distortion.
•Hard Clip adds bright, transistor-like distortion.
•Bit Reduction adds digital distortion by means of quantization noise.
•Rate Reduction adds digital distortion by means of aliasing.
•Rate Reduction Key Follow adds digital distortion by means of aliasing, but
with Key Follow. The rate reduction follows the keyboard, so the higher you
play, the higher the sample rate.
Envelope Amount
Controls the cutoff modulation from the filter envelope.
Cutoff Velocity
Controls the cutoff modulation from velocity.
Cutoff Key Follow
Adjusts the cutoff modulation using the note number. Increase this parameter
to raise the cutoff with higher notes. At 100 %, the cutoff follows the played pitch
exactly.
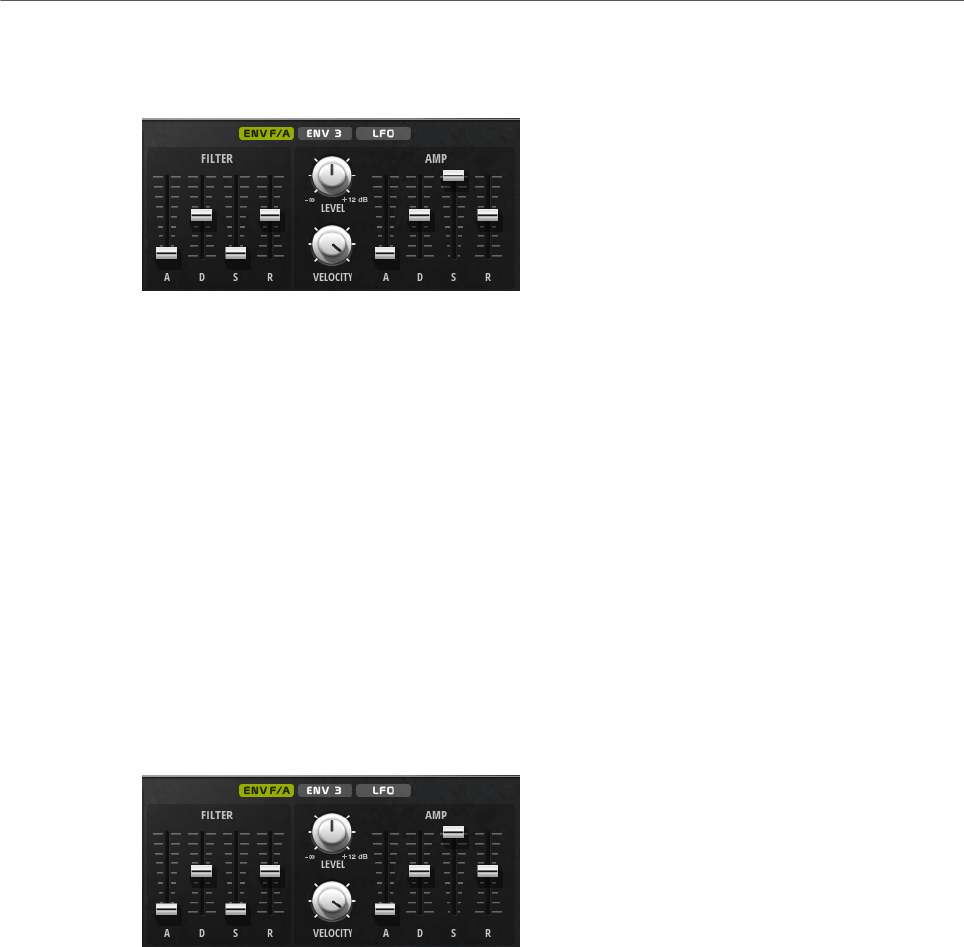
Included Instruments
Anima
323
Filter Envelope
On the left on the Env F/A tab, you can set up the filter envelope.
Attack
Controls the attack time of the filter envelope.
Decay
Controls the decay time of the filter envelope.
Sustain
Controls the sustain level of the filter envelope.
Release
Controls the release time of the filter envelope.
Amplifier and Amplifier Envelope
On the right of the Env F/A tab, you can make settings for the amplifier and the amplifier
envelope.
Amplifier Parameters
Level
Controls the overall volume of the sound.
Velocity
Controls the level modulation from velocity. At 0, all notes are played with the
same level.
Amplifier Envelope Parameters
Attack
Controls the attack time of the amplifier envelope.
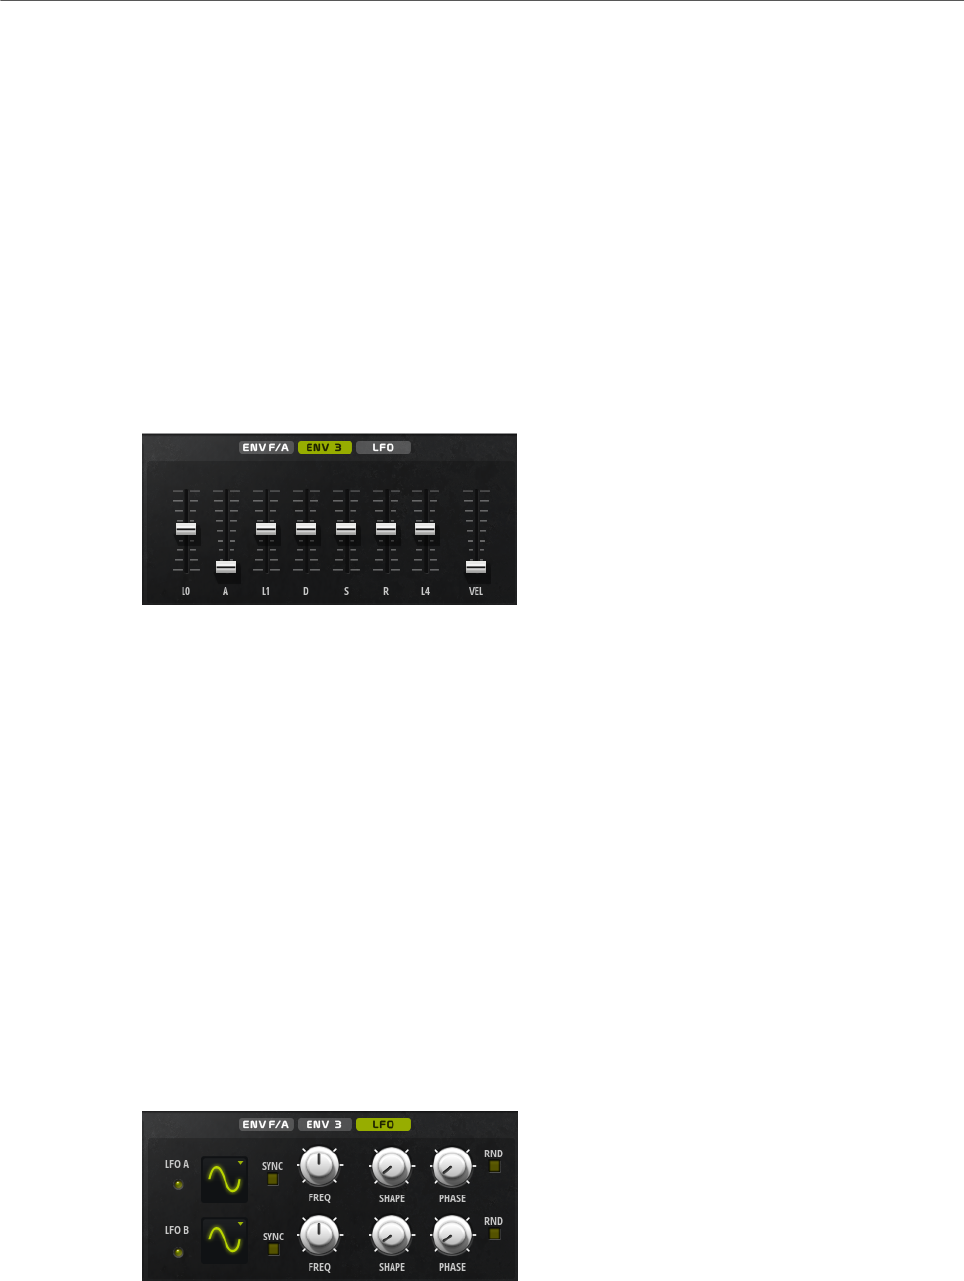
Included Instruments
Anima
324
Decay
Controls the decay time of the amplifier envelope.
Sustain
Controls the sustain level of the amplifier envelope.
Release
Controls the release time of the amplifier envelope.
Env3 Section
The Env3 section provides an additional envelope that can be routed freely in the modulation
matrix. This envelope is bipolar, therefore, it is particularly suited to modulate destinations
like pan or pitch, for example.
The faders below the envelope display set the following parameters:
•L0 sets the start level.
•A sets the attack time.
•L1 sets the attack level.
•D sets the decay time.
•S sets the sustain level.
•R sets the release time.
•L4 sets the end level.
•Vel determines how much the envelope intensity depends on the velocity.
If this fader is set to 0, the envelope is fully applied. Higher values reduce the intensity
for lower velocities.
LFO Section
In the LFO section, you can make settings for the two included LFOs.
LFO Waveform and Shape
•Sine produces smooth modulation, suitable for vibrato or tremolo. Shape
adds additional harmonics to the waveform.

Included Instruments
Anima
325
•Triangle is similar to Sine. Shape continuously changes the triangle
waveform to a trapezoid.
•Saw produces a ramp cycle. Shape continuously changes the waveform
from ramp down to triangle to ramp up.
•Pulse produces stepped modulation, where the modulation switches
abruptly between two values. Shape continuously changes the ratio
between the high and low state of the waveform. If Shape is set to 50 %, a
square wave is produced.
•Ramp is similar to the Saw waveform. Shape increasingly puts silence
before the sawtooth ramp up begins.
•Log produces a logarithmic modulation. Shape continuously changes the
logarithmic curvature from negative to positive.
•S & H 1 produces randomly stepped modulation, where each step is
different. Shape puts ramps between the steps and changes the S & H into
a smooth random signal when fully turned right.
•S & H 2 is similar to S & H 1. The steps alternate between random high and
low values. Shape puts ramps between the steps and changes the S & H
into a smooth random signal when fully turned right.
Sync
If Sync is activated, the frequency is set in fractions of beats.
Freq
Controls the frequency of the modulation, that is, the speed of the LFO.
Phase
Sets the initial phase of the waveform when the LFO is retriggered.
Sync
If Sync is activated, the frequency is set in fractions of beats.
Freq
Controls the frequency of the modulation, that is, the speed of the LFO.
Phase
Sets the initial phase of the waveform when the LFO is retriggered.
Rnd (Random Phase)
If this button is activated, each note starts with a randomized start phase.
NOTE
The Phase control cannot be used if Rnd is activated.
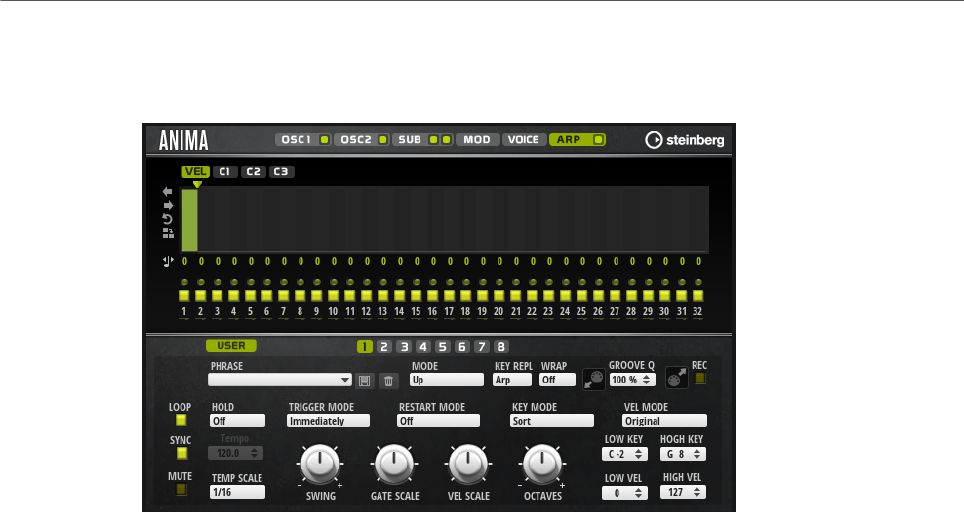
Included Instruments
Skylab
326
Arp Page
This page contains the same parameters as the FlexPhraser.
RELATED LINKS
FlexPhraser on page 483
Skylab
The Skylab synth is an instrument that produces a wide range of sounds that are perfectly
suited to create cinematic or ambient soundtracks. It comes with a large number of multi-
samples that provide a variety of evolving pads and soundscapes as well as typical orchestral
sounds like strings, brass, and choirs, allowing you to create huge and epic sounds.
Furthermore, percussive sample sets of orchestral percussion and taikos are available that
can be used with the integrated arpeggiator to create rhythmic patterns, for example.
Skylab’s oscillator section can be switched between Sample Mode and Grain Mode.
Grain Mode uses granular synthesis with up to eight grain streams, which allows you to
produce even more variations of the source samples. The oscillator is followed by a multi-
mode filter that offers a large number of different filter shapes. The filter can be modulated
by modulation sources like the keyboard, velocity, and LFO, but also by the controller lanes
of the step sequencer, for example. Skylab includes two monophonic LFOs that can be
synchronized to the host tempo and allow you to modulate a large number of modulation
destinations using the modulation matrix. In addition, a third envelope is included that can be
assigned to destinations like Pitch, Pan, or Wavetable parameters in the modulation matrix.
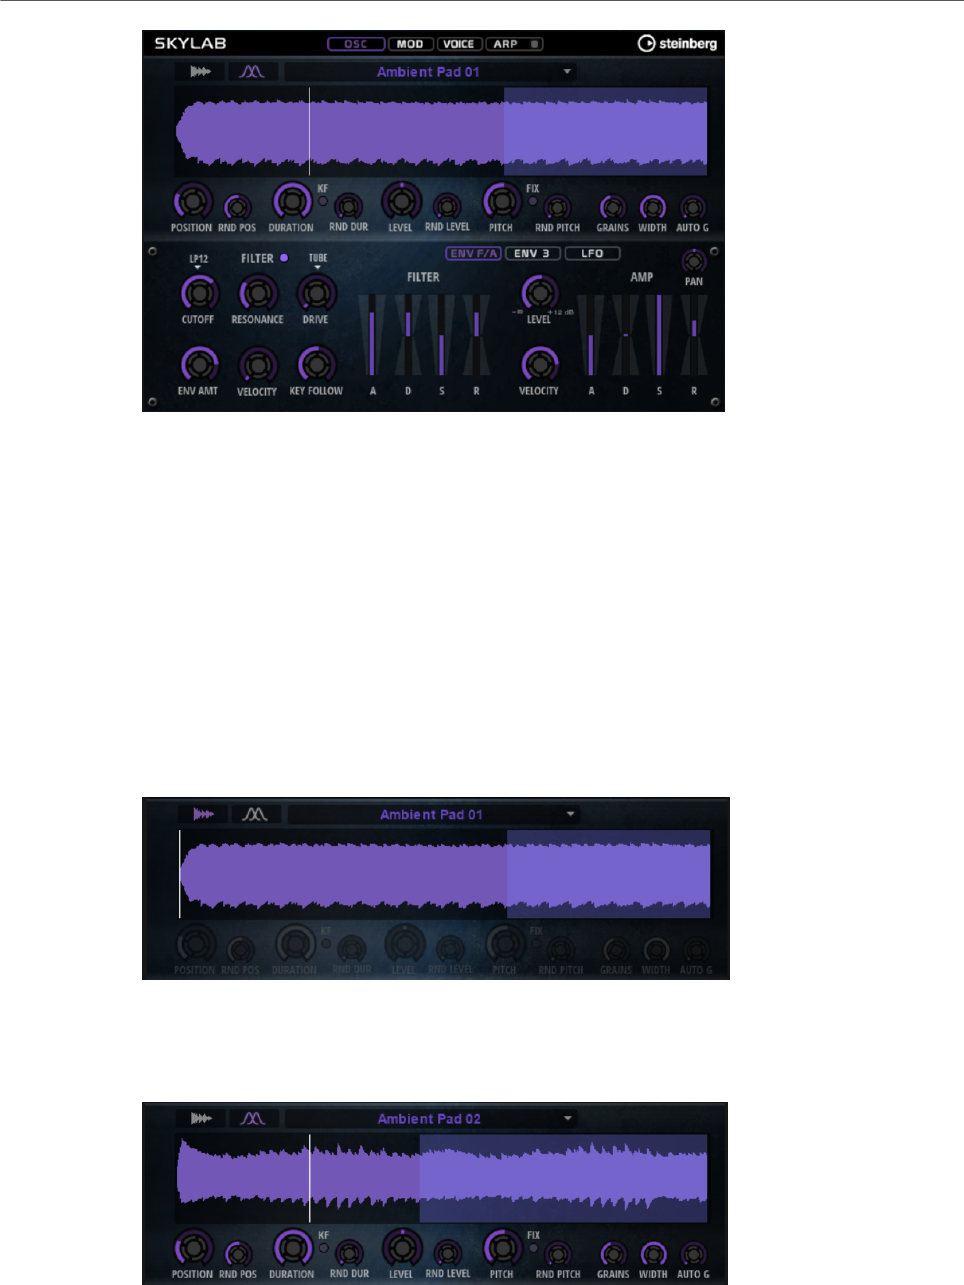
Included Instruments
Skylab
327
Skylab contains four pages: Osc, Mod, Voice, and Arp. To show the settings for a page, click
the corresponding page button.
The button for the Arp page also contains an On/Off button for the arpeggiator.
Osc Page
On this page, you can specify whether you want to use a sample or a grain oscillator and
make settings for the oscillator.
Sample Mode
In Sample Mode, you can load different multi-samples. These samples are played back
normally.
Grain Mode
In Grain Mode, Skylab uses a grain oscillator for playback.

Included Instruments
Skylab
328
Position
You can set the playback position of the grains manually. For example, at a
setting of 50 %, the playback position is in the middle of the sample. The playback
position is updated with every new grain.
Random Position
Selects a random playback position within a specific range around the current
position. At a setting of 100 %, the playback position jumps to a random position
between the start and the end of the sample.
Duration
Increases the grain period by a factor ranging from 1 to 1000.
For very short grains, the sound gets the pitch of the frequency at which the
grains repeat. For grains longer than 30 ms, the sound gets the pitch of the
original sample.
Random Duration
Sets the random grain duration. This duration is calculated at the start of a new
grain.
Duration Key Follow
Determines how the grain duration changes with the notes you play. It is mostly
used with short durations. Longer durations sound with the original pitch of the
sample and therefore do not need to follow the keyboard.
Pitch
Allows you to specify an interval between -12 and +12 semitones. The grains are
played randomly at their original pitch, or are transposed according to the pitch
interval. This parameter is suited for longer grain durations.
Random Pitch
Sets the random pitch range in semitones and cents. At a setting of +12, the
random pitch values lie between -12 and +12 semitones. This parameter can be
used to enrich the sound.
Level
Adjusts the overall level of the grain oscillator. When you increase the number
of grains, it might become necessary to lower the oscillator level. When you play
back a very quiet portion of a sample, you can use this control to raise the level.
Random Level
Sets a random level for each new grain. At a setting of 100 %, the level varies
between a factor of 0 and 2 of the original level.
Width
Narrows the stereo width of the grain oscillator. It is applied after the grain
oscillator and does not affect the stereo width of the actual sample. At a setting
of 0 %, the output of the grain oscillator is monophonic.
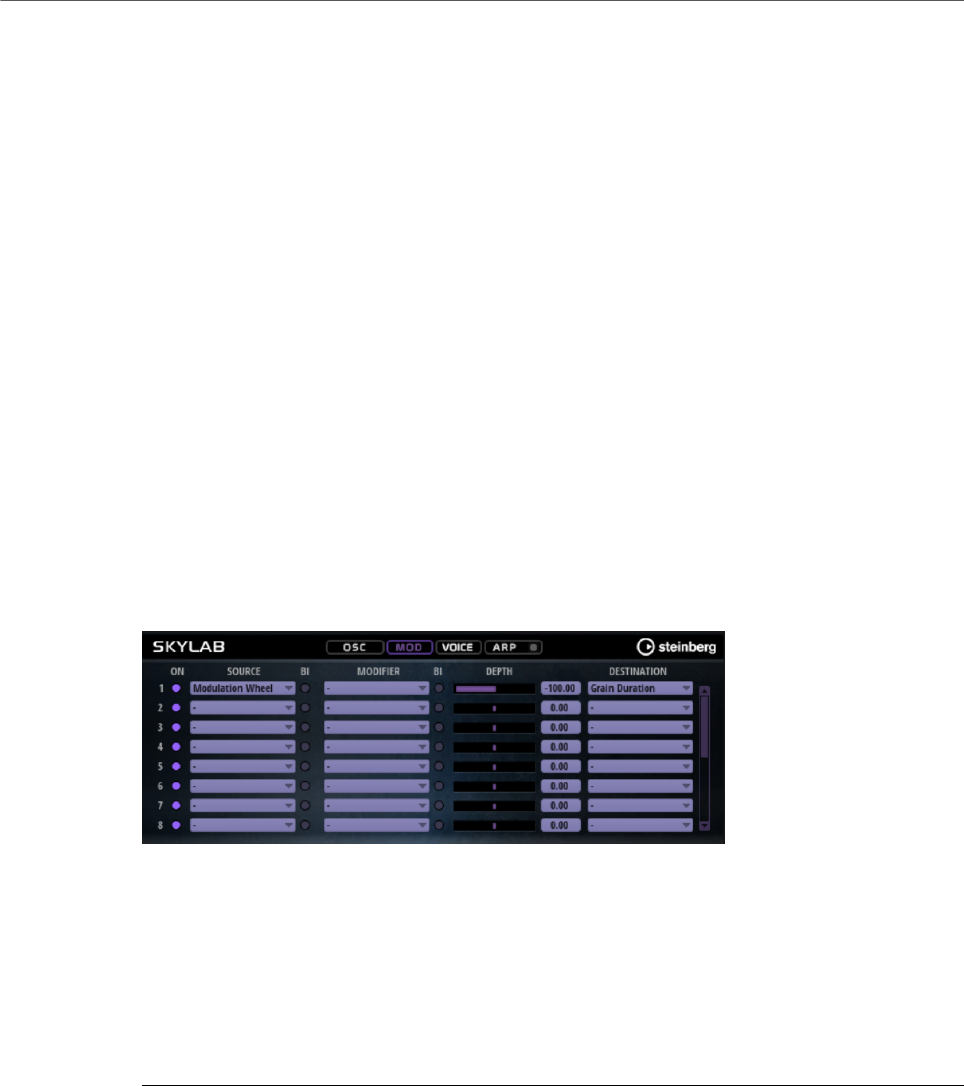
Included Instruments
Skylab
329
Auto Gain
Allows you to automatically adjust the level of grains using quieter sample parts.
This way, you get a more homogeneous signal and you can use a quiet part of a
sample as source.
Grains
Allows you to specify the number of grains, from 1 to 8. For example, with a
setting of 4, you get 4 grains per period of the grain duration.
To hear the effect of this setting, you have to play a new note.
Fixed Pitch
Plays the sample at a fixed pitch.
• If this button is activated, the sample follows the pitch of the keyboard.
The root key is C3.
• If this button is deactivated, the sample plays at its original pitch, and any
pitch modulations for the zone have no effect.
Mod Page
The Mod page contains the modulation matrix.
The modulation matrix offers you up to 16 freely assignable modulations, each with a source,
a modifier, and a destination with adjustable depth. The polarity of each source and each
modifier can be switched between unipolar and bipolar.
Creating Modulations
You create modulations by selecting a source, a modifier, and a destination from the pop-up
menus in the modulation matrix.
PROCEDURE
1. Click the modulation Source field and select the modulation source.
2. Optional: Click in the modulation Modifier field and select the parameter that you want
to use to modify the modulation.
This modifier is used to scale the output of the modulation source.
3. Optional: Specify whether you want the Source and Modifier parameters to be unipolar
or bipolar.
4. Set the modulation intensity with the Depth parameter.

Included Instruments
Skylab
330
5. Click in the modulation Destination field and select the parameter that you want to
modulate.
Modulation Matrix Parameters
Modulation Sources and Modulation Modifiers
The following options are available as modulation sources and as modulation modifiers.
LFO A/B
The LFOs A and B produce cyclic modulation signals.
Amp Envelope
The amplifier envelope. The shape of the envelope determines the modulation
signal.
Filter Envelope
The filter envelope. The shape of the envelope determines the modulation signal.
Env 3
A freely assignable envelope. It is suited for pan or pitch modulation, for example.
Key Follow
This produces an exponential modulation signal derived from the MIDI note
number. Exponential means this source works with destinations such as Pitch or
Cutoff.
Note-on Velocity
Note-on velocity can be used as modulation signal.
Note-on Vel Squared
The squared version of Note-on Velocity. The harder you press the key, the higher
the modulation values.
Pitchbend
The position of the pitchbend wheel can be used as modulation signal.
Modulation Wheel
The position of the modulation wheel can be used as modulation signal.
Aftertouch
Aftertouch can be used as modulation signal. Some MIDI keyboards cannot send
aftertouch messages. However, most sequencer software is able to produce such
messages.
Arp Controller 1–3
The 3 controllers available on this submenu correspond to the three controller
lanes on the Arp page.

Included Instruments
Skylab
331
Bus 1–8
Modulations that are sent to one of the eight busses can be reused as sources.
This way, you can combine several modulations to produce more complex
signals.
Quick Control 1–8
The quick controls can be used as modulation signal.
Unipolar vs. Bipolar Sources
The polarity of a modulation source specifies the value range that it produces. Unipolar
sources modulate between 0 and +1. Bipolar sources modulate between -1 and +1.
• To change the polarity of a modulation source or modifier from unipolar to bipolar,
activate its Bipolar button.
Modulation Destinations
Pitch
Modulates the pitch. For example, assign one of the LFOs to create a vibrato
effect. If Pitch is selected, the modulation depth is set in semitones.
Cutoff
Modulates the filter cutoff.
Resonance
Modulates the filter resonance. Resonance changes the character of the filter.
For example, to accent the filter the harder you hit a key, assign Velocity to
Resonance.
Distortion
Modulates the filter distortion.
Level
This modulation adds to the level setting. It can be used to create level offsets
using the mod wheel, for example.
Volume
Modulates the gain. The volume modulation multiplies with the level.
Pan
Modulates the position of the sound in the panorama.
Grain Position
Modulates the playback position. The modulation is not continuous, but it is
updated at the start of each grain.

Included Instruments
Skylab
332
Grain Duration
Modulates the grain duration, that is, the frequency at which the grains repeat.
The maximum modulation range at a modulation depth of 100 % is -5 to +5
octaves.
Grain Pitch
Modulates the pitch of a grain. The modulation is not continuous, but it is updated
at the start of a new grain. For continuous pitch modulation, use Pitch instead of
Grain Pitch as destination and make sure that Follow Zone Pitch is activated in
the grain oscillator.
Grain Formant
Modulates the pitch of the source sample independently from the grain duration.
This results in formant shifting for short durations.
Grain Level
Modulates the grain level. The modulation is not continuous, but it is updated at
the start of each new grain.
Amp Env Attack
Modulates the attack time of the amplitude envelope. This modulation
destination cannot be modulated continuously. The time is updated only when the
segment starts.
Amp Env Decay
Modulates the decay time of the amplitude envelope. This modulation destination
cannot be modulated continuously. The time is updated only when the segment
starts.
Amp Env Sustain
Modulates the sustain level of the amplitude envelope. This modulation
destination cannot be modulated continuously. The level is updated only when the
segment starts.
Amp Env Release
Modulates the release time of the amplitude envelope. This modulation
destination cannot be modulated continuously. The time is updated only when the
segment starts.
Filter Env Attack
Modulates the attack time of the filter envelope. This modulation destination
cannot be modulated continuously. The time is updated only when the segment
starts.
Filter Env Decay
Modulates the decay time of the filter envelope. This modulation destination
cannot be modulated continuously. The time is updated only when the segment
starts.

Included Instruments
Skylab
333
Filter Env Sustain
Modulates the sustain level of the filter envelope. This modulation destination
cannot be modulated continuously. The level is updated only when the segment
starts.
Filter Env Release
Modulates the release time of the filter envelope. This modulation destination
cannot be modulated continuously. The time is updated only when the segment
starts.
Env 3 Start Level
Modulates the start level of the user-definable envelope 3, that is, the level
of the first envelope node. This modulation destination cannot be modulated
continuously. The level is updated only when the segment starts.
Env 3 Attack
Modulates the attack time of the user-definable envelope 3. This modulation
destination cannot be modulated continuously. The time is updated only when the
segment starts.
Env 3 Attack Level
Modulates the attack level of the user-definable envelope 3, that is, the level of
the second envelope node. This modulation destination cannot be modulated
continuously. The level is updated only when the segment starts.
Env 3 Decay
Modulates the decay time of the user-definable envelope 3. This modulation
destination cannot be modulated continuously. The time is updated only when the
segment starts.
Env 3 Sustain
Modulates the sustain level of the user-definable envelope 3. This modulation
destination cannot be modulated continuously. The level is updated only when the
segment starts.
Env 3 Release
Modulates the release time of the user-definable envelope 3. This modulation
destination cannot be modulated continuously. The time is updated only when the
segment starts.
Env 3 Release Level
Modulates the release level of the user-definable envelope 3, that is, the
last user envelope node. This modulation destination cannot be modulated
continuously. The level is updated only when the segment starts.
Bus 1-8
You can send any modulation to one of the 8 busses, for example, to produce
more complex modulation signals. Select the bus that you want to send the
signals to as a destination. To use the modulation that was sent to a bus, assign
the corresponding bus as a modulation source.

Included Instruments
Skylab
334
Voice Page
Voice Section
Polyphony
If Mono mode is deactivated, you can use this parameter to specify how many
notes can be played simultaneously.
Mono
Activates monophonic playback.
Retrigger
This option is only available in Mono mode. If Retrigger is activated, a note that
was stolen by another note is retriggered if you still hold the stolen note when
you release the new one.
This way, you can play trills by holding one note and quickly and repeatedly
pressing and releasing another note, for example.
Trigger Mode
Defines the trigger behavior for new notes.
•Normal triggers a new note when the previous note gets stolen. The
sample and the envelope of the new note are triggered from the start.
To minimize discontinuities, use the Fade Out parameter of the zone.
•Resume does not always trigger a new note.
If the new note stays within the same zone, the envelope is retriggered, but
resumes at the level of the stolen note. The pitch of the zone is set to the
new note.
If the new note plays in a different zone, the sample and the envelope of the
new note are triggered from the start.
•Legato does not always trigger a new note.
If the new note stays within the same zone, the envelope keeps running.
The pitch of the zone is set to the new note.
If the new note plays in a different zone, the sample and the envelope of the
new note are triggered from the start.
•Resume Keeps Zone does not trigger a new note upon note stealing. The
envelope resumes at the level of the stolen note and the pitch of the zone is
set to the new note, even if the new note plays in a different zone.
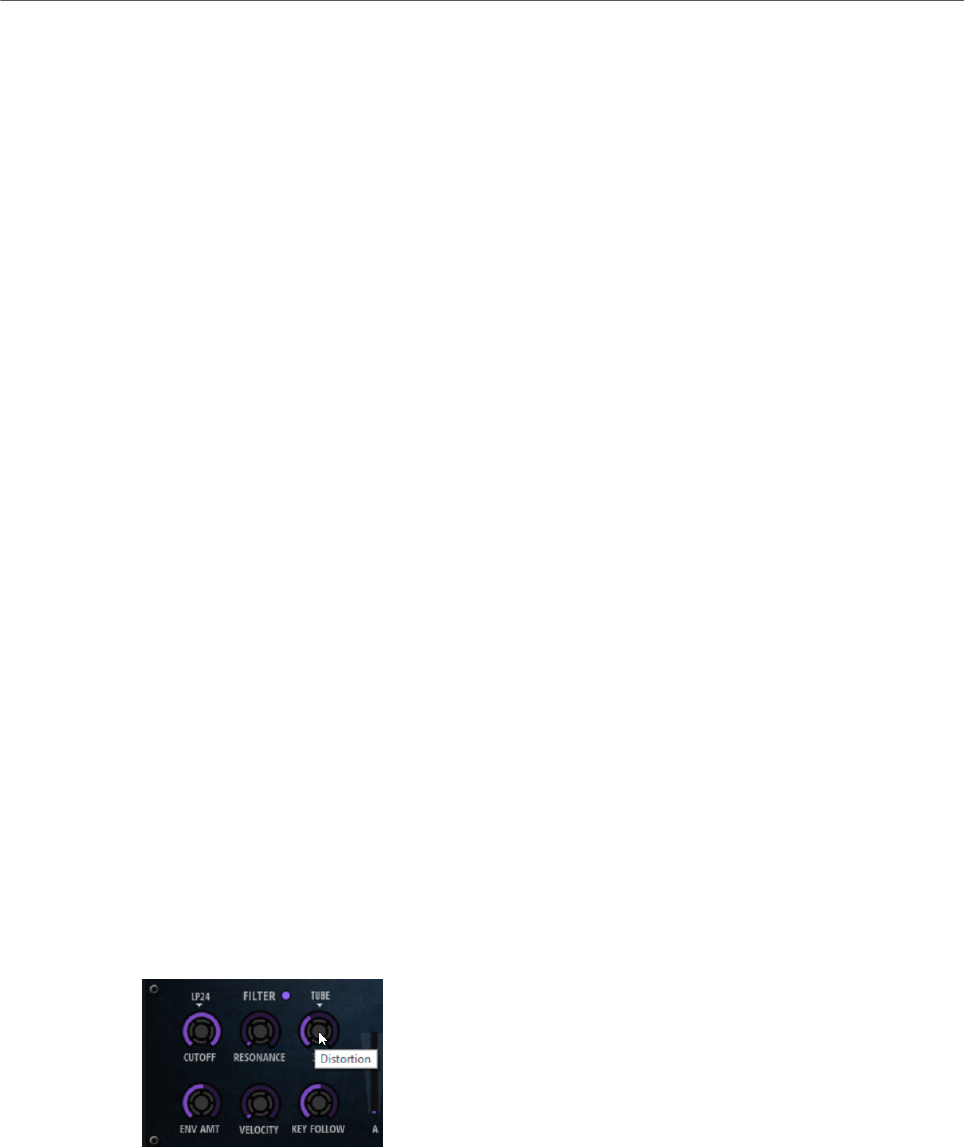
Included Instruments
Skylab
335
•Legato Keeps Zone does not trigger a new note upon note stealing. The
envelope keeps running and the pitch of the zone is set to the new note,
even if the new note plays in a different zone.
Glide Section
Glide
Allows you to bend the pitch between notes that follow each other. You achieve
the best results in Mono mode.
Fingered
Activate this parameter to glide the pitch only between notes that are played
legato.
Glide Time
Sets the glide time, that is, the time it takes to bend the pitch from one note to
the next.
Pitch Section
Octave
Adjusts the pitch in octave steps.
Coarse
Adjusts the pitch in semitone steps.
Fine
Adjusts the pitch in cent steps. This allows you to fine-tune the oscillator sound.
Pitchbend Up/Pitchbend Down
Determines the range for the modulation that is applied when you move the
pitchbend wheel.
Filter Section
Filter On/Off
Activates/Deactivates the filter.
Filter Shape
• LP24, 18, 12, and 6 are low-pass filters with 24, 18, 12, and 6 dB/oct.
Frequencies above the cutoff are attenuated.
• BP12 and BP24 are band-pass filters with 12 and 24 dB/oct. Frequencies
below and above the cutoff are attenuated.

Included Instruments
Skylab
336
• HP6+LP18 and HP6+LP12 are combinations of a high-pass filter with 6 dB/
oct and a low-pass filter with 18 and 12 dB/oct, respectively (asymmetric
band-pass filter). Frequencies below and above the cutoff are attenuated.
Attenuation is more pronounced for the frequencies above the cutoff.
• HP12+LP6 and HP18+LP6 are combinations of a high-pass filter with 12
and 18 dB/oct and a low-pass filter with 6 dB/oct (asymmetric band-pass
filter). Frequencies below and above the cutoff are attenuated. Attenuation
is more pronounced for the frequencies below the cutoff.
• HP24, 18, 12, and 6 are high-pass filters with 24, 18, 12, and 6 dB/oct.
Frequencies below the cutoff are attenuated.
• BR12 and BR24 are band-reject filters with 12 and 24 dB/oct. Frequencies
around the cutoff are attenuated.
• BR12+LP6 and BR12+LP12 are combinations of a band-reject filter with 12
dB/oct and a low-pass filter with 6 and 12 dB/oct, respectively. Frequencies
around and above the cutoff are attenuated.
• BP12+BR12 is a band-pass filter with 12 dB/oct plus a band-reject filter
with 12 dB/oct. Frequencies below, above, and around the cutoff are
attenuated.
• HP6+BR12 and HP12+BR12 are combinations of a high-pass filter with 6
and 12 dB/oct and a band-reject filter with 12 dB/oct. Frequencies below
and around the cutoff are attenuated.
• AP is an all-pass filter with 18 dB/oct. Frequencies around the cutoff are
attenuated.
• AP+LP6 is an all-pass filter with 18 dB/oct plus a low-pass filter with 6 dB/
oct. Frequencies around and above the cutoff are attenuated.
• HP6+AP is a high-pass filter with 6 dB/oct plus an all-pass filter with 18
dB/oct. Frequencies around and below the cutoff are attenuated.
Cutoff
Controls the cutoff frequency of the filter.
Resonance
Emphasizes the frequencies around the cutoff. At higher settings, the filter self-
oscillates, which results in a ringing tone.
Distortion
Adds distortion to the signal. The following distortion types are available:
•Tube adds warm, tube-like distortion.
•Hard Clip adds bright, transistor-like distortion.
•Bit Reduction adds digital distortion by means of quantization noise.
•Rate Reduction adds digital distortion by means of aliasing.
•Rate Reduction Key Follow adds digital distortion by means of aliasing, but
with Key Follow. The rate reduction follows the keyboard, so the higher you
play, the higher the sample rate.
Envelope Amount
Controls the cutoff modulation from the filter envelope.
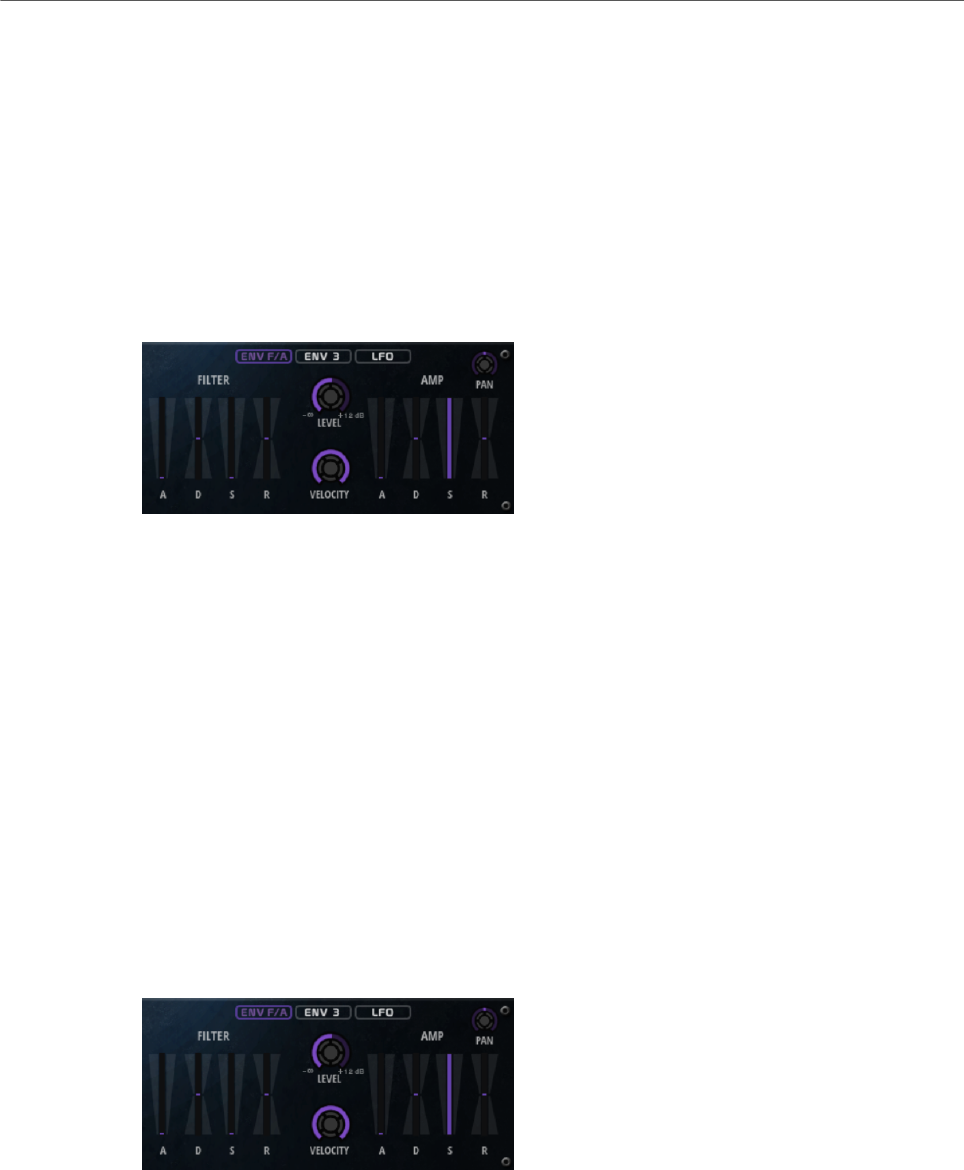
Included Instruments
Skylab
337
Cutoff Velocity
Controls the cutoff modulation from velocity.
Cutoff Key Follow
Adjusts the cutoff modulation using the note number. Increase this parameter
to raise the cutoff with higher notes. At 100 %, the cutoff follows the played pitch
exactly.
Filter Envelope
On the left on the Env F/A tab, you can set up the filter envelope.
Attack
Controls the attack time of the filter envelope.
Decay
Controls the decay time of the filter envelope.
Sustain
Controls the sustain level of the filter envelope.
Release
Controls the release time of the filter envelope.
Amplifier and Amplifier Envelope
On the right of the Env F/A tab, you can make settings for the amplifier and the amplifier
envelope.
Amplifier Parameters
Level
Controls the overall volume of the sound.
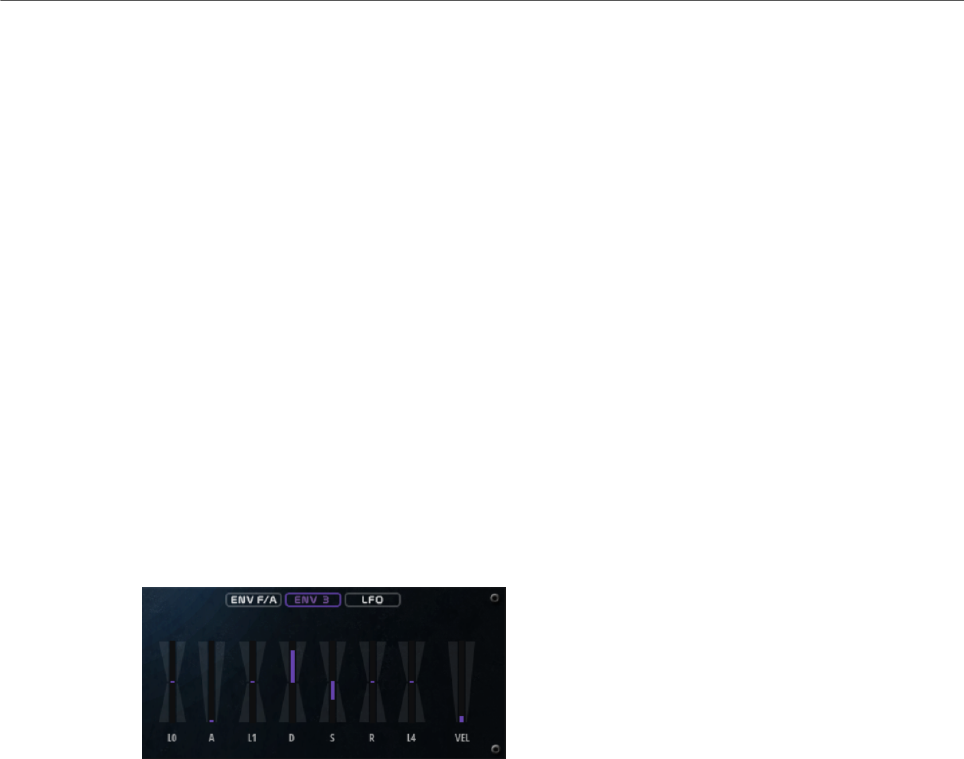
Included Instruments
Skylab
338
Velocity
Controls the level modulation from velocity. At 0, all notes are played with the
same level.
Amplifier Envelope Parameters
Attack
Controls the attack time of the amplifier envelope.
Decay
Controls the decay time of the amplifier envelope.
Sustain
Controls the sustain level of the amplifier envelope.
Release
Controls the release time of the amplifier envelope.
Env3 Section
The faders below the envelope display set the following parameters:
•L0 sets the start level.
•A sets the attack time.
•L1 sets the attack level.
•D sets the decay time.
•S sets the sustain level.
•R sets the release time.
•L4 sets the end level.
•Vel determines how much the envelope intensity depends on the velocity.
If this fader is set to 0, the envelope is fully applied. Higher values reduce the intensity
for lower velocities.
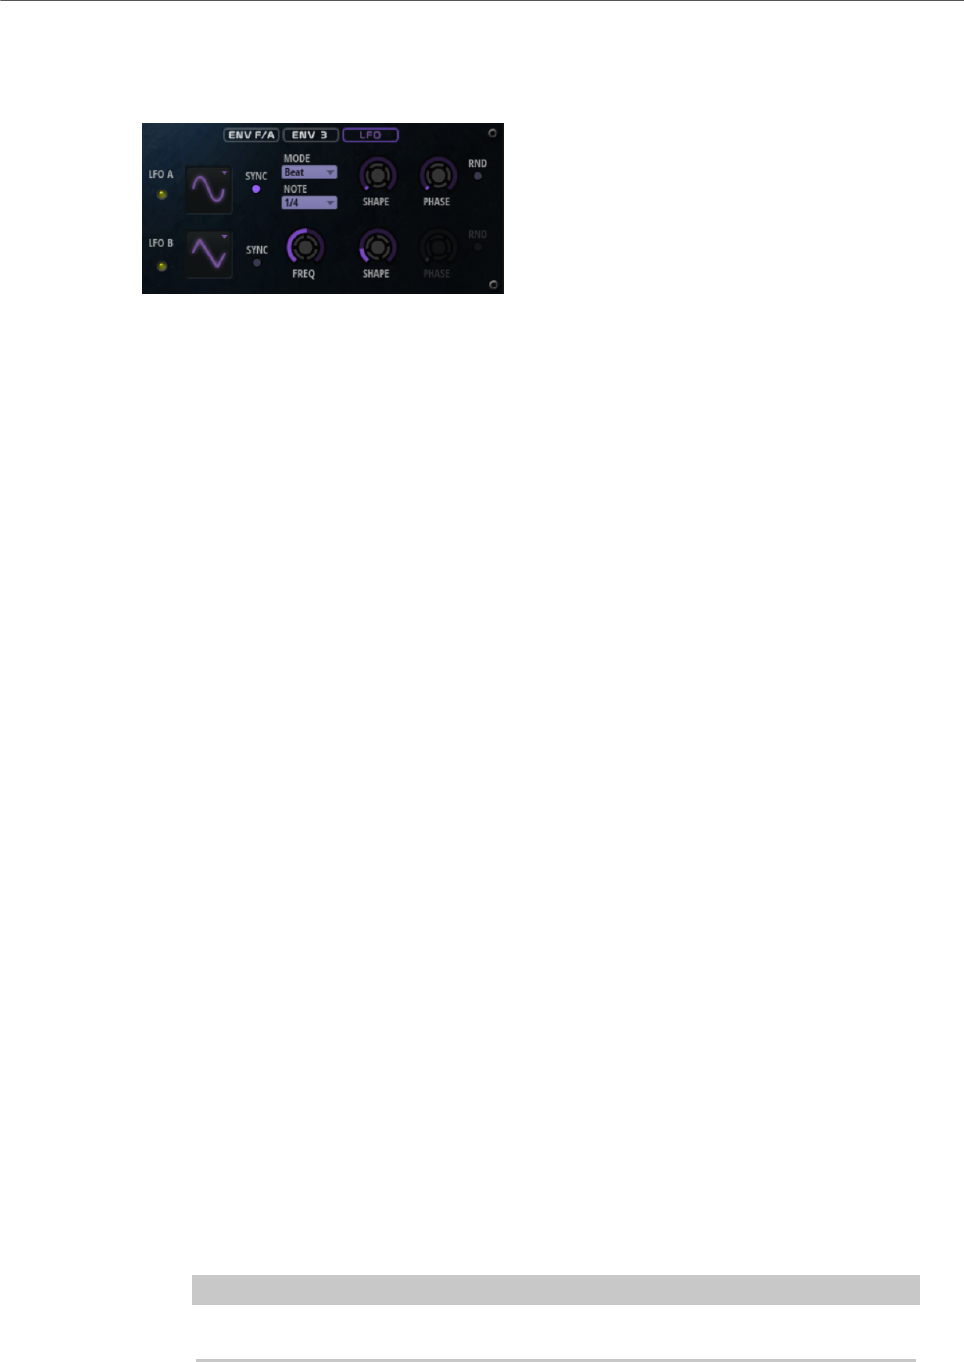
Included Instruments
Skylab
339
LFO Section
In the LFO section, you can make settings for LFO A and LFO B.
LFO Waveform and Shape
•Sine produces smooth modulation, suitable for vibrato or tremolo. Shape
adds additional harmonics to the waveform.
•Triangle is similar to Sine. Shape continuously changes the triangle
waveform to a trapezoid.
•Saw produces a ramp cycle. Shape continuously changes the waveform
from ramp down to triangle to ramp up.
•Pulse produces stepped modulation, where the modulation switches
abruptly between two values. Shape continuously changes the ratio
between the high and low state of the waveform. If Shape is set to 50 %, a
square wave is produced.
•Ramp is similar to the Saw waveform. Shape increasingly puts silence
before the sawtooth ramp up begins.
•Log produces a logarithmic modulation. Shape continuously changes the
logarithmic curvature from negative to positive.
•S & H 1 produces randomly stepped modulation, where each step is
different. Shape puts ramps between the steps and changes the S & H into
a smooth random signal when fully turned right.
•S & H 2 is similar to S & H 1. The steps alternate between random high and
low values. Shape puts ramps between the steps and changes the S & H
into a smooth random signal when fully turned right.
Sync
If Sync is activated, the frequency is set in fractions of beats.
Freq
Controls the frequency of the modulation, that is, the speed of the LFO.
Phase
Sets the initial phase of the waveform when the LFO is retriggered.
Rnd (Random Phase)
If this button is activated, each note starts with a randomized start phase.
NOTE
The Phase control cannot be used if Rnd is activated.
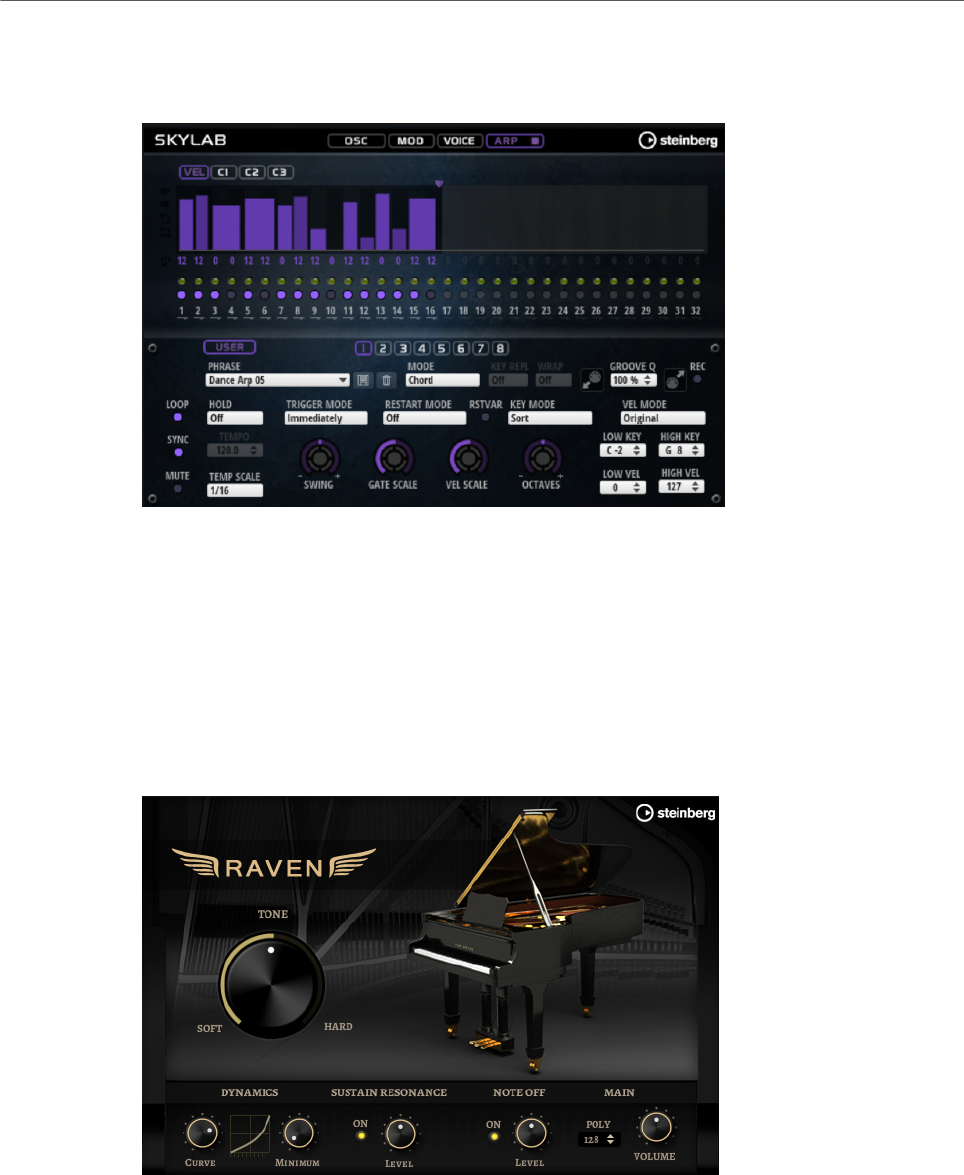
Included Instruments
Raven
340
Arp Page
This page contains the same parameters as the FlexPhraser.
RELATED LINKS
FlexPhraser on page 483
Raven
Raven provides the sound of a classical Italian concert grand with six velocity layers and
adjustable sustain resonances. Its Tone control allows you to adapt the tonal range from very
soft romantic to more intense colors. In addition, you can modify the character of the note-off
behavior by adding a dedicated note-off layer.
Tone
Raven comes with 6 different velocity layers. The Tone control allows you to
specify how these layers are used.
• If the Tone control is in middle position, different input velocities trigger all
6 layers.

Included Instruments
Eagle
341
• If you turn the knob to the left, the number of hard velocity layers that are
used in the sound is reduced, that is, the sound becomes softer.
• If you turn the knob to the right, the number of soft velocity layers that are
used is reduced, that is, the sound becomes harder.
NOTE
The Tone control is independent from the influence that the velocity has on the
level of the piano. That means that you can always play the entire level range,
even with the softest or the hardest layer.
Dynamics – Curve
Allows you to specify how the input velocity is affecting the level of the piano.
The curve that is used by this control goes from linear to exponential/negative
exponential. The curve display on the right reflects the current setting.
Dynamics – Minimum Level
Specifies the minimum level for the note that is playing the lowest MIDI velocity.
This allows you to simulate the behavior of real pianos where you cannot play a
note without a minimum amount of pressure. If you set this control to the lowest
setting, you get a behavior that is more common with electronic instruments.
Sustain Resonance
Allows you to decide whether or not to use the additional sustain resonance layer
of the piano.
If this option is activated, the sustain resonance layers are played when the
sustain pedal is held and notes are played. You can adjust the level of the
resonance layer with the dial on the right.
NOTE
The piano also allows for repedaling, which means that the sustain resonances
will also be blended in when the sustain pedal is pressed again shortly after
notes have been played.
If you do not want to use the sustain resonance layers, deactivate this option to
save CPU power.
Note Off
Allows you to decide whether or not to use an additional note-off layer.
If this option is deactivated, the sound of the piano stops faster when a key is
released. If this option is activated, the release is slightly longer and smoother.
Polyphony
Determines the number of notes that can be played before notes are stolen.
Eagle
Eagle provides the sound of a classical German concert grand with 12 velocity layers and
adjustable sustain resonances. Its Tone control allows you to adapt the tonal range from very
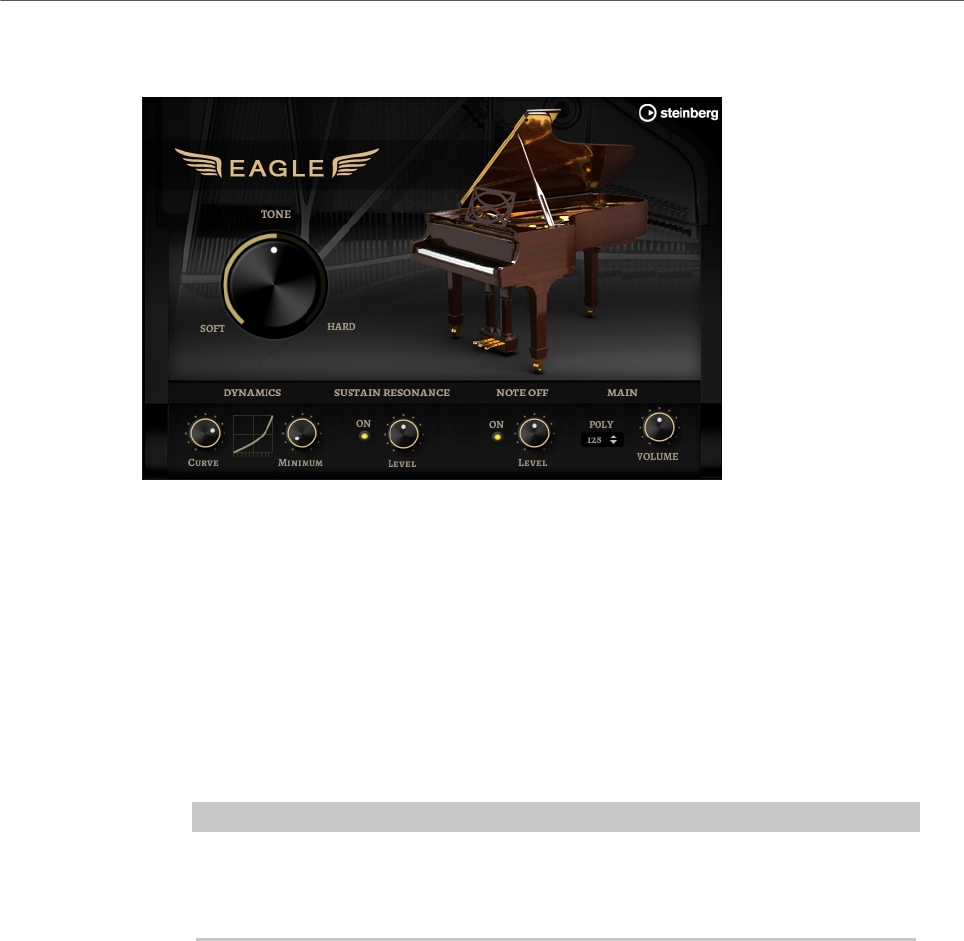
Included Instruments
Eagle
342
soft romantic to more intense colors. In addition, you can modify the character of the note-off
behavior by adding a dedicated note-off layer.
Tone
Eagle comes with 12 different velocity layers. The Tone control allows you to
specify how these layers are used.
• If the Tone control is in middle position, different input velocities trigger all
12 layers.
• If you turn the knob to the left, the number of hard velocity layers that are
used in the sound is reduced, that is, the sound becomes softer.
• If you turn the knob to the right, the number of soft velocity layers that are
used is reduced, that is, the sound becomes harder.
NOTE
The Tone control is independent from the influence that the velocity has on the
level of the piano. That means that you can always play the entire level range,
even with the softest or the hardest layer.
Dynamics – Curve
Allows you to specify how the input velocity is affecting the level of the piano.
The curve that is used by this control goes from linear to exponential/negative
exponential. The curve display on the right reflects the current setting.
Dynamics – Minimum Level
Specifies the minimum level for the note that is playing the lowest MIDI velocity.
This allows you to simulate the behavior of real pianos where you cannot play a
note without a minimum amount of pressure. If you set this control to the lowest
setting, you get a behavior that is more common with electronic instruments.
Sustain Resonance
Allows you to decide whether or not to use the additional sustain resonance layer
of the piano.
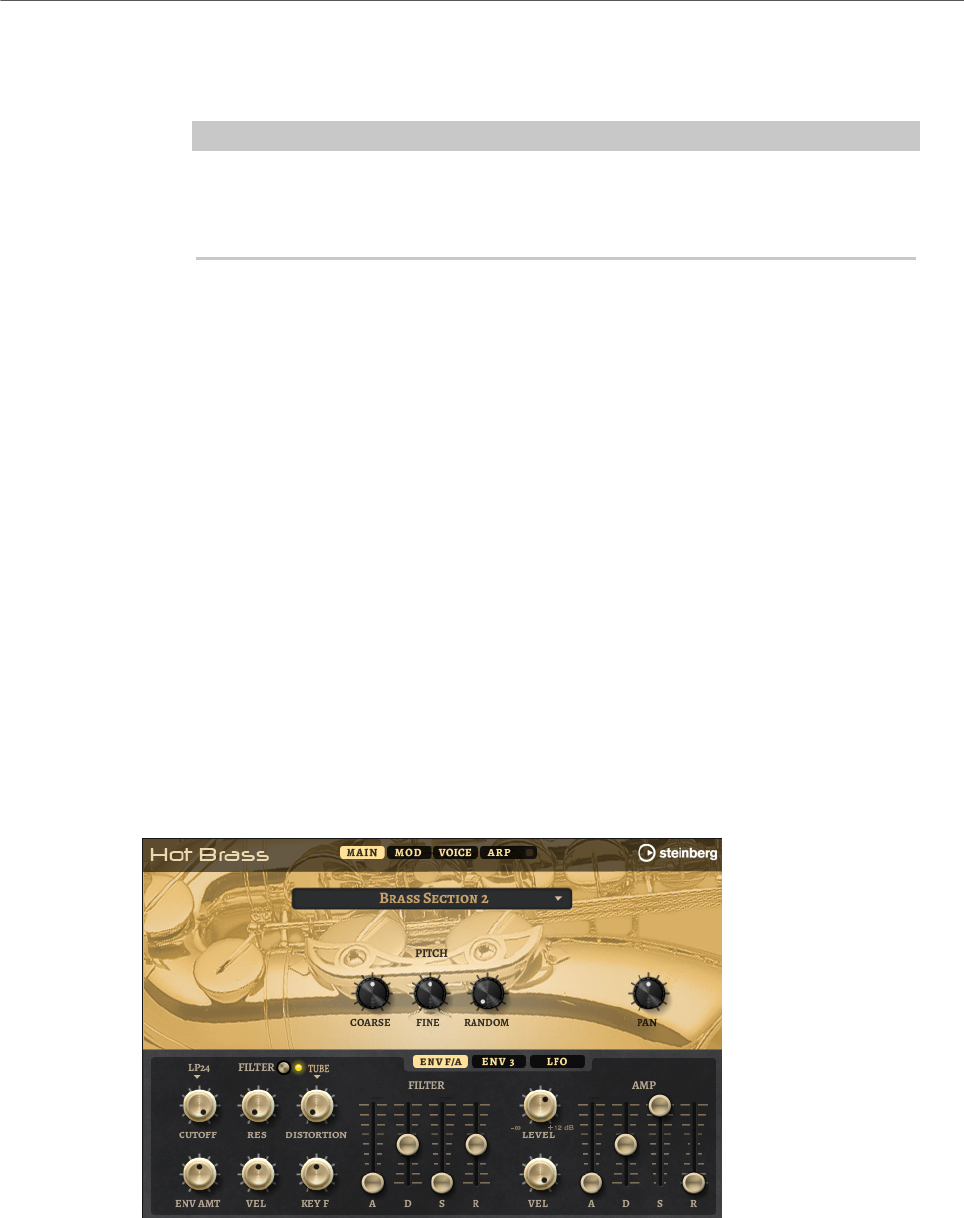
Included Instruments
Hot Brass
343
If this option is activated, the sustain resonance layers are played when the
sustain pedal is held and notes are played. You can adjust the level of the
resonance layer with the dial on the right.
NOTE
The piano also allows for repedaling, which means that the sustain resonances
will also be blended in when the sustain pedal is pressed again shortly after
notes have been played.
If you do not want to use the sustain resonance layers, deactivate this option to
save CPU power.
Note Off
Allows you to decide whether or not to use an additional note-off layer.
If this option is deactivated, the sound of the piano stops faster when a key is
released. If this option is activated, the release is slightly longer and smoother.
Polyphony
Determines the number of notes that can be played before notes are stolen.
Hot Brass
Hot Brass delivers a broad range of brass sounds and articulations suited for rock, soul,
funk, and other music styles that need sharp and accentuated brass tone colors. This
instrument is particularly suited to play concise licks and riffs.
The instrument’s sample oscillators are followed by a synthesis section with a flexible filter
where you can modify the sounds further. With the FlexPhraser functionality on the Arp
page, you can play typical brass phrases and licks with a single note on your keyboard.
Hot Brass contains four pages: Main, Mod, Voice, and Arp. To show the settings for a page,
click the corresponding page button.
The button for the Arp page also contains an On/Off button for the arpeggiator.
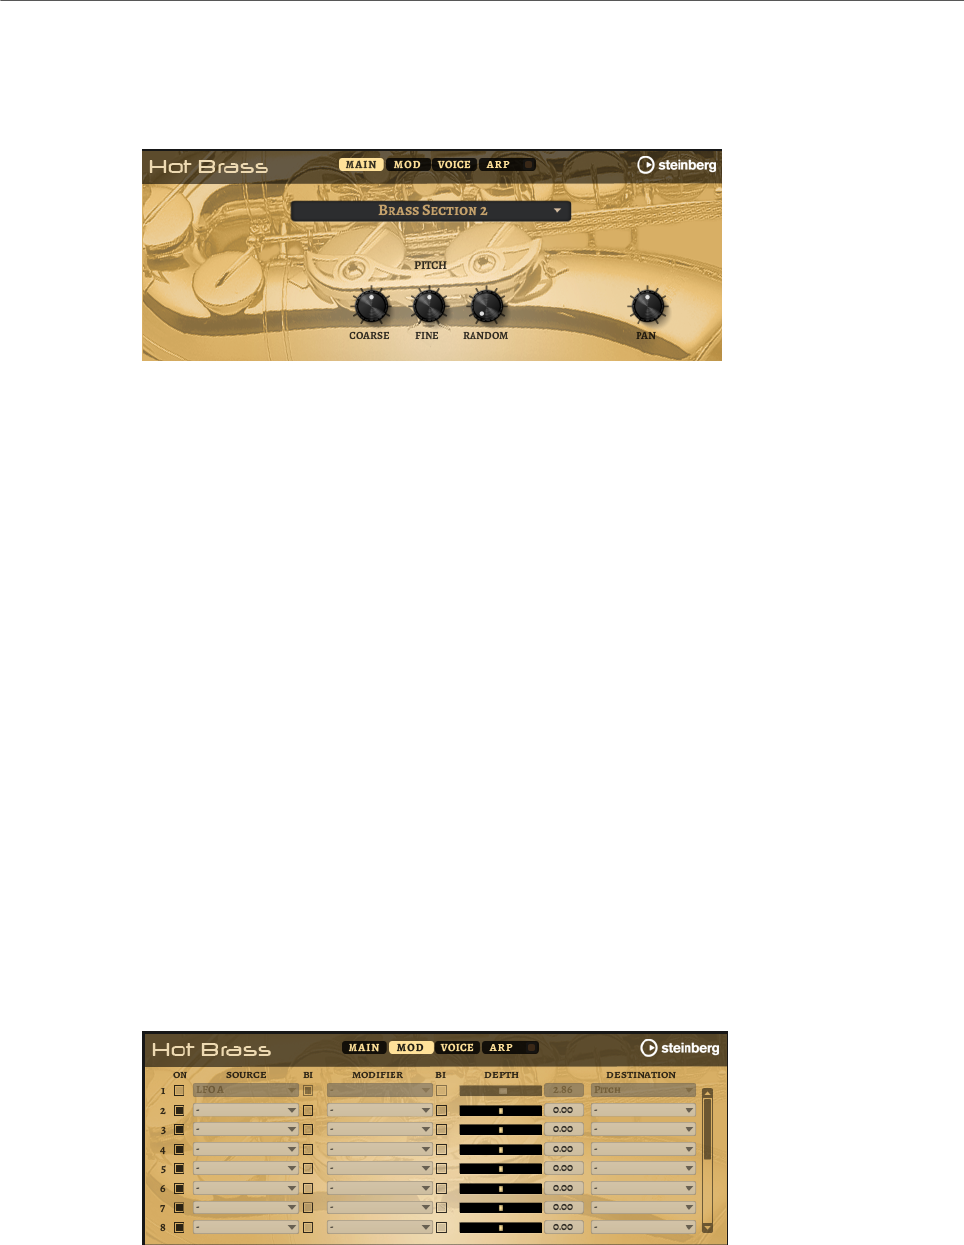
Included Instruments
Hot Brass
344
Main Page
The Main page allows you to select the sample for Hot Brass and to make basic pitch
settings.
Select Samples
Allows you to choose from a range of included samples. Hot Brass provides three
differently mixed sections and a pure saxophone section. You can add additional
authenticity to your play using the included falls, growls, doits, shakes, and
staccato articulations.
Coarse
Adjusts the pitch in semitone steps.
Fine
Allows you to fine-tune the pitch in cent steps.
Random Pitch
Allows you to randomly offset the pitch with each played note. Higher values
cause stronger variations. At the maximum setting, the random offsets can vary
from -60 cents to +60 cents.
Pan
Defines the position of the instrument in the stereo panorama
Mod Page
The Mod page contains the modulation matrix.
The modulation matrix offers you up to 16 freely assignable modulations, each with a source,
a modifier, and a destination with adjustable depth. The polarity of each source and each
modifier can be switched between unipolar and bipolar.

Included Instruments
Hot Brass
345
Creating Modulations
You create modulations by selecting a source, a modifier, and a destination from the pop-up
menus in the modulation matrix.
PROCEDURE
1. Click the modulation Source field and select the modulation source.
2. Optional: Click in the modulation Modifier field and select the parameter that you want
to use to modify the modulation.
This modifier is used to scale the output of the modulation source.
3. Optional: Specify whether you want the Source and Modifier parameters to be unipolar
or bipolar.
4. Set the modulation intensity with the Depth parameter.
5. Click in the modulation Destination field and select the parameter that you want to
modulate.
Modulation Matrix Parameters
Modulation Sources and Modulation Modifiers
The following options are available as modulation sources and as modulation modifiers.
LFO A/B
The LFOs A and B produce cyclic modulation signals.
Amp Envelope
The amplifier envelope. The shape of the envelope determines the modulation
signal.
Filter Envelope
The filter envelope. The shape of the envelope determines the modulation signal.
Env 3
A freely assignable envelope. It is suited for pan or pitch modulation, for example.
Key Follow
This produces an exponential modulation signal derived from the MIDI note
number. Exponential means this source works with destinations such as Pitch or
Cutoff.
Note-on Velocity
Note-on velocity can be used as modulation signal.
Note-on Vel Squared
The squared version of Note-on Velocity. The harder you press the key, the higher
the modulation values.
Pitchbend
The position of the pitchbend wheel can be used as modulation signal.

Included Instruments
Hot Brass
346
Modulation Wheel
The position of the modulation wheel can be used as modulation signal.
Aftertouch
Aftertouch can be used as modulation signal. Some MIDI keyboards cannot send
aftertouch messages. However, most sequencer software is able to produce such
messages.
Arp Controller 1–3
The 3 controllers available on this submenu correspond to the three controller
lanes on the Arp page.
Bus 1–8
Modulations that are sent to one of the eight busses can be reused as sources.
This way, you can combine several modulations to produce more complex
signals.
Quick Control 1–8
The quick controls can be used as modulation signal.
Unipolar vs. Bipolar Sources
The polarity of a modulation source specifies the value range that it produces. Unipolar
sources modulate between 0 and +1. Bipolar sources modulate between -1 and +1.
• To change the polarity of a modulation source or modifier from unipolar to bipolar,
activate its Bipolar button.
Modulation Destinations
Pitch
Modulates the pitch. For example, assign one of the LFOs to create a vibrato
effect. If Pitch is selected, the modulation depth is set in semitones.
Cutoff
Modulates the filter cutoff.
Resonance
Modulates the filter resonance. Resonance changes the character of the filter.
For example, to accent the filter the harder you hit a key, assign Velocity to
Resonance.
Distortion
Modulates the filter distortion.
Level
This modulation adds to the level setting. It can be used to create level offsets
using the mod wheel, for example.

Included Instruments
Hot Brass
347
Volume
Modulates the gain. The volume modulation multiplies with the level.
Pan
Modulates the position of the sound in the panorama.
Amp Env Attack
Modulates the attack time of the amplitude envelope. This modulation
destination cannot be modulated continuously. The time is updated only when the
segment starts.
Amp Env Decay
Modulates the decay time of the amplitude envelope. This modulation destination
cannot be modulated continuously. The time is updated only when the segment
starts.
Amp Env Sustain
Modulates the sustain level of the amplitude envelope. This modulation
destination cannot be modulated continuously. The level is updated only when the
segment starts.
Amp Env Release
Modulates the release time of the amplitude envelope. This modulation
destination cannot be modulated continuously. The time is updated only when the
segment starts.
Filter Env Attack
Modulates the attack time of the filter envelope. This modulation destination
cannot be modulated continuously. The time is updated only when the segment
starts.
Filter Env Decay
Modulates the decay time of the filter envelope. This modulation destination
cannot be modulated continuously. The time is updated only when the segment
starts.
Filter Env Sustain
Modulates the sustain level of the filter envelope. This modulation destination
cannot be modulated continuously. The level is updated only when the segment
starts.
Filter Env Release
Modulates the release time of the filter envelope. This modulation destination
cannot be modulated continuously. The time is updated only when the segment
starts.
Env 3 Start Level
Modulates the start level of the user-definable envelope 3, that is, the level
of the first envelope node. This modulation destination cannot be modulated
continuously. The level is updated only when the segment starts.
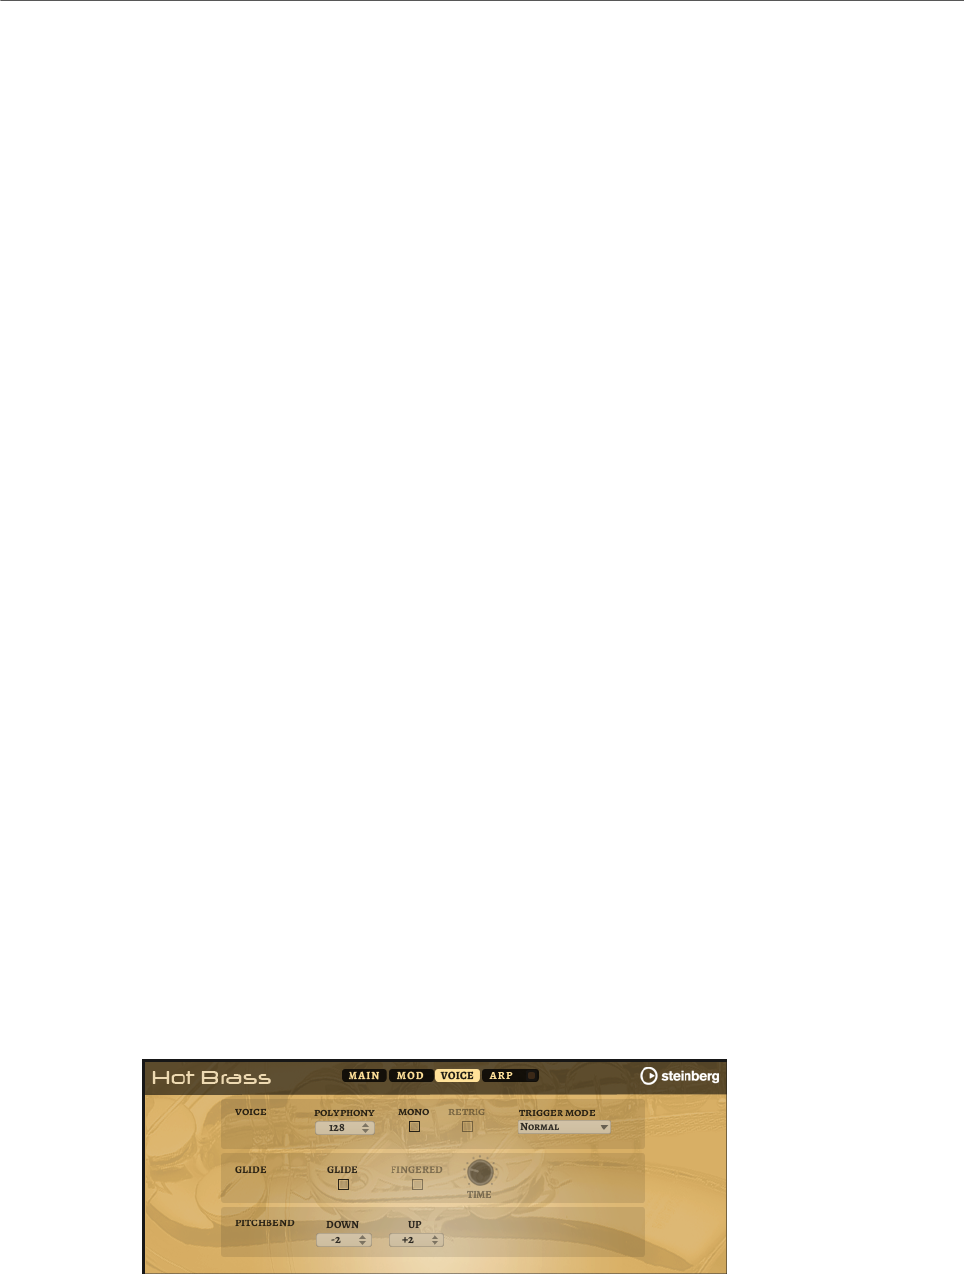
Included Instruments
Hot Brass
348
Env 3 Attack
Modulates the attack time of the user-definable envelope 3. This modulation
destination cannot be modulated continuously. The time is updated only when the
segment starts.
Env 3 Attack Level
Modulates the attack level of the user-definable envelope 3, that is, the level of
the second envelope node. This modulation destination cannot be modulated
continuously. The level is updated only when the segment starts.
Env 3 Decay
Modulates the decay time of the user-definable envelope 3. This modulation
destination cannot be modulated continuously. The time is updated only when the
segment starts.
Env 3 Sustain
Modulates the sustain level of the user-definable envelope 3. This modulation
destination cannot be modulated continuously. The level is updated only when the
segment starts.
Env 3 Release
Modulates the release time of the user-definable envelope 3. This modulation
destination cannot be modulated continuously. The time is updated only when the
segment starts.
Env 3 Release Level
Modulates the release level of the user-definable envelope 3, that is, the
last user envelope node. This modulation destination cannot be modulated
continuously. The level is updated only when the segment starts.
Bus 1-8
You can send any modulation to one of the 8 busses, for example, to produce
more complex modulation signals. Select the bus that you want to send the
signals to as a destination. To use the modulation that was sent to a bus, assign
the corresponding bus as a modulation source.
Voice Page
Polyphony
If Mono mode is deactivated, you can use this parameter to specify how many
notes can be played simultaneously.

Included Instruments
Hot Brass
349
Mono
Activates monophonic playback.
Retrigger
This option is only available in Mono mode. If Retrigger is activated, a note that
was stolen by another note is retriggered if you still hold the stolen note when
you release the new one.
This way, you can play trills by holding one note and quickly and repeatedly
pressing and releasing another note, for example.
Trigger Mode
Defines the trigger behavior for new notes.
•Normal triggers a new note when the previous note gets stolen. The
sample and the envelope of the new note are triggered from the start.
To minimize discontinuities, use the Fade Out parameter of the zone.
•Resume does not always trigger a new note.
If the new note stays within the same zone, the envelope is retriggered, but
resumes at the level of the stolen note. The pitch of the zone is set to the
new note.
If the new note plays in a different zone, the sample and the envelope of the
new note are triggered from the start.
•Legato does not always trigger a new note.
If the new note stays within the same zone, the envelope keeps running.
The pitch of the zone is set to the new note.
If the new note plays in a different zone, the sample and the envelope of the
new note are triggered from the start.
•Resume Keeps Zone does not trigger a new note upon note stealing. The
envelope resumes at the level of the stolen note and the pitch of the zone is
set to the new note, even if the new note plays in a different zone.
•Legato Keeps Zone does not trigger a new note upon note stealing. The
envelope keeps running and the pitch of the zone is set to the new note,
even if the new note plays in a different zone.
Glide
Allows you to bend the pitch between notes that follow each other. You achieve
the best results in Mono mode.
Fingered
Activate this parameter to glide the pitch only between notes that are played
legato.
Glide Time
Sets the glide time, that is, the time it takes to bend the pitch from one note to
the next.
Pitchbend Up/Pitchbend Down
Determines the range for the modulation that is applied when you move the
pitchbend wheel.

Included Instruments
Hot Brass
350
Filter Section
Filter On/Off
Activates/Deactivates the filter.
Filter Shape
• LP24, 18, 12, and 6 are low-pass filters with 24, 18, 12, and 6 dB/oct.
Frequencies above the cutoff are attenuated.
• BP12 and BP24 are band-pass filters with 12 and 24 dB/oct. Frequencies
below and above the cutoff are attenuated.
• HP6+LP18 and HP6+LP12 are combinations of a high-pass filter with 6 dB/
oct and a low-pass filter with 18 and 12 dB/oct, respectively (asymmetric
band-pass filter). Frequencies below and above the cutoff are attenuated.
Attenuation is more pronounced for the frequencies above the cutoff.
• HP12+LP6 and HP18+LP6 are combinations of a high-pass filter with 12
and 18 dB/oct and a low-pass filter with 6 dB/oct (asymmetric band-pass
filter). Frequencies below and above the cutoff are attenuated. Attenuation
is more pronounced for the frequencies below the cutoff.
• HP24, 18, 12, and 6 are high-pass filters with 24, 18, 12, and 6 dB/oct.
Frequencies below the cutoff are attenuated.
• BR12 and BR24 are band-reject filters with 12 and 24 dB/oct. Frequencies
around the cutoff are attenuated.
• BR12+LP6 and BR12+LP12 are combinations of a band-reject filter with 12
dB/oct and a low-pass filter with 6 and 12 dB/oct, respectively. Frequencies
around and above the cutoff are attenuated.
• BP12+BR12 is a band-pass filter with 12 dB/oct plus a band-reject filter
with 12 dB/oct. Frequencies below, above, and around the cutoff are
attenuated.
• HP6+BR12 and HP12+BR12 are combinations of a high-pass filter with 6
and 12 dB/oct and a band-reject filter with 12 dB/oct. Frequencies below
and around the cutoff are attenuated.
• AP is an all-pass filter with 18 dB/oct. Frequencies around the cutoff are
attenuated.
• AP+LP6 is an all-pass filter with 18 dB/oct plus a low-pass filter with 6 dB/
oct. Frequencies around and above the cutoff are attenuated.
• HP6+AP is a high-pass filter with 6 dB/oct plus an all-pass filter with 18
dB/oct. Frequencies around and below the cutoff are attenuated.
Cutoff
Controls the cutoff frequency of the filter.
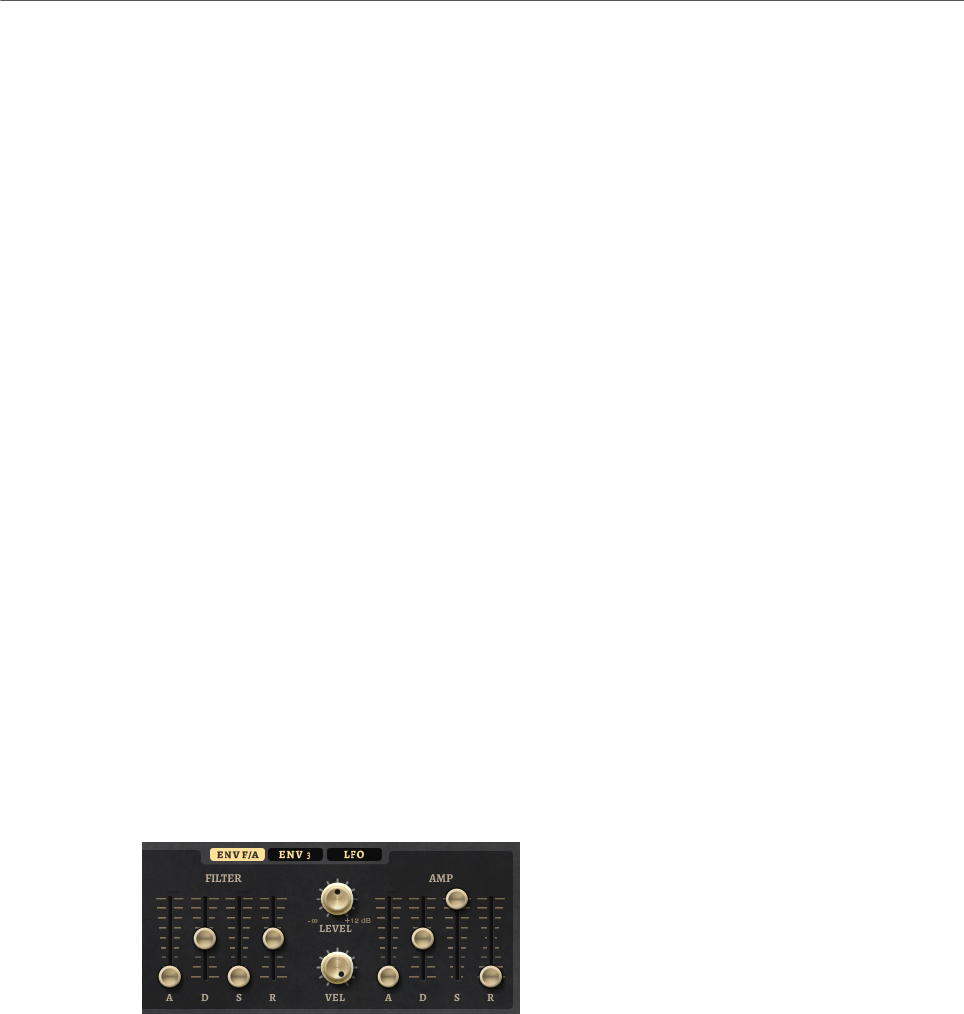
Included Instruments
Hot Brass
351
Resonance
Emphasizes the frequencies around the cutoff. At higher settings, the filter self-
oscillates, which results in a ringing tone.
Distortion
Adds distortion to the signal. The following distortion types are available:
•Tube adds warm, tube-like distortion.
•Hard Clip adds bright, transistor-like distortion.
•Bit Reduction adds digital distortion by means of quantization noise.
•Rate Reduction adds digital distortion by means of aliasing.
•Rate Reduction Key Follow adds digital distortion by means of aliasing, but
with Key Follow. The rate reduction follows the keyboard, so the higher you
play, the higher the sample rate.
Envelope Amount
Controls the cutoff modulation from the filter envelope.
Cutoff Velocity
Controls the cutoff modulation from velocity.
Cutoff Key Follow
Adjusts the cutoff modulation using the note number. Increase this parameter
to raise the cutoff with higher notes. At 100 %, the cutoff follows the played pitch
exactly.
Filter Envelope
On the left on the Env F/A tab, you can set up the filter envelope.
Attack
Controls the attack time of the filter envelope.
Decay
Controls the decay time of the filter envelope.
Sustain
Controls the sustain level of the filter envelope.
Release
Controls the release time of the filter envelope.
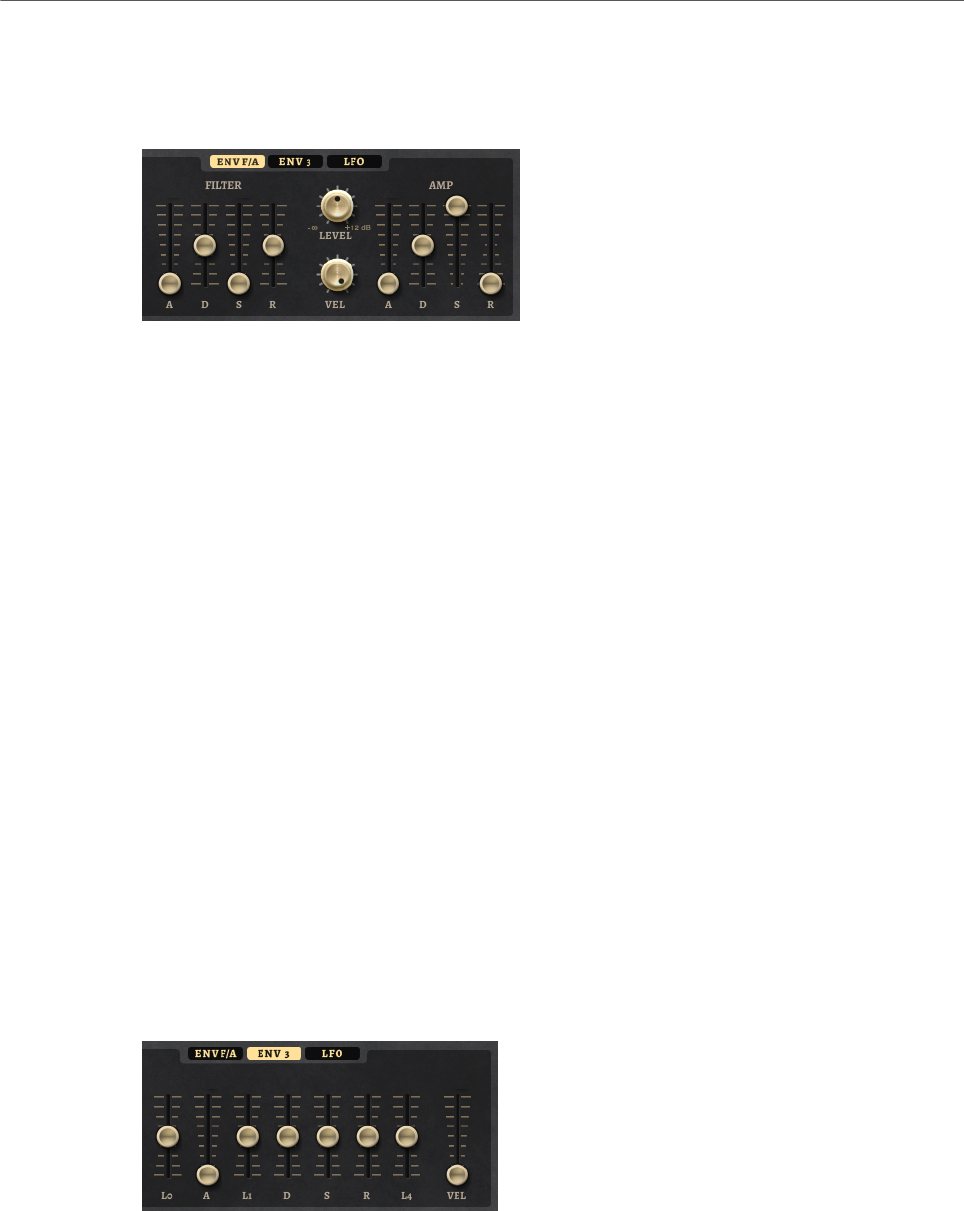
Included Instruments
Hot Brass
352
Amplifier and Amplifier Envelope
On the right of the Env F/A tab, you can make settings for the amplifier and the amplifier
envelope.
Amplifier Parameters
Level
Controls the overall volume of the sound.
Velocity
Controls the level modulation from velocity. At 0, all notes are played with the
same level.
Amplifier Envelope Parameters
Attack
Controls the attack time of the amplifier envelope.
Decay
Controls the decay time of the amplifier envelope.
Sustain
Controls the sustain level of the amplifier envelope.
Release
Controls the release time of the amplifier envelope.
Env3 Section
The faders below the envelope display set the following parameters:
•L0 sets the start level.
•A sets the attack time.
•L1 sets the attack level.
•D sets the decay time.
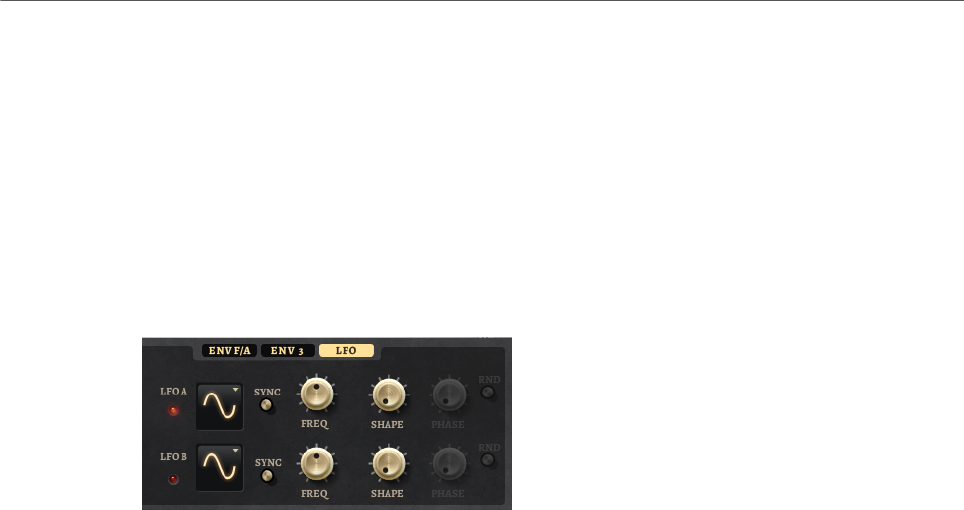
Included Instruments
Hot Brass
353
•S sets the sustain level.
•R sets the release time.
•L4 sets the end level.
•Vel determines how much the envelope intensity depends on the velocity.
If this fader is set to 0, the envelope is fully applied. Higher values reduce the intensity
for lower velocities.
LFO Section
In the LFO section, you can make settings for LFO A and LFO B.
LFO Waveform and Shape
•Sine produces smooth modulation, suitable for vibrato or tremolo. Shape
adds additional harmonics to the waveform.
•Triangle is similar to Sine. Shape continuously changes the triangle
waveform to a trapezoid.
•Saw produces a ramp cycle. Shape continuously changes the waveform
from ramp down to triangle to ramp up.
•Pulse produces stepped modulation, where the modulation switches
abruptly between two values. Shape continuously changes the ratio
between the high and low state of the waveform. If Shape is set to 50 %, a
square wave is produced.
•Ramp is similar to the Saw waveform. Shape increasingly puts silence
before the sawtooth ramp up begins.
•Log produces a logarithmic modulation. Shape continuously changes the
logarithmic curvature from negative to positive.
•S & H 1 produces randomly stepped modulation, where each step is
different. Shape puts ramps between the steps and changes the S & H into
a smooth random signal when fully turned right.
•S & H 2 is similar to S & H 1. The steps alternate between random high and
low values. Shape puts ramps between the steps and changes the S & H
into a smooth random signal when fully turned right.
Sync
If Sync is activated, the frequency is set in fractions of beats.
Freq
Controls the frequency of the modulation, that is, the speed of the LFO.
Phase
Sets the initial phase of the waveform when the LFO is retriggered.
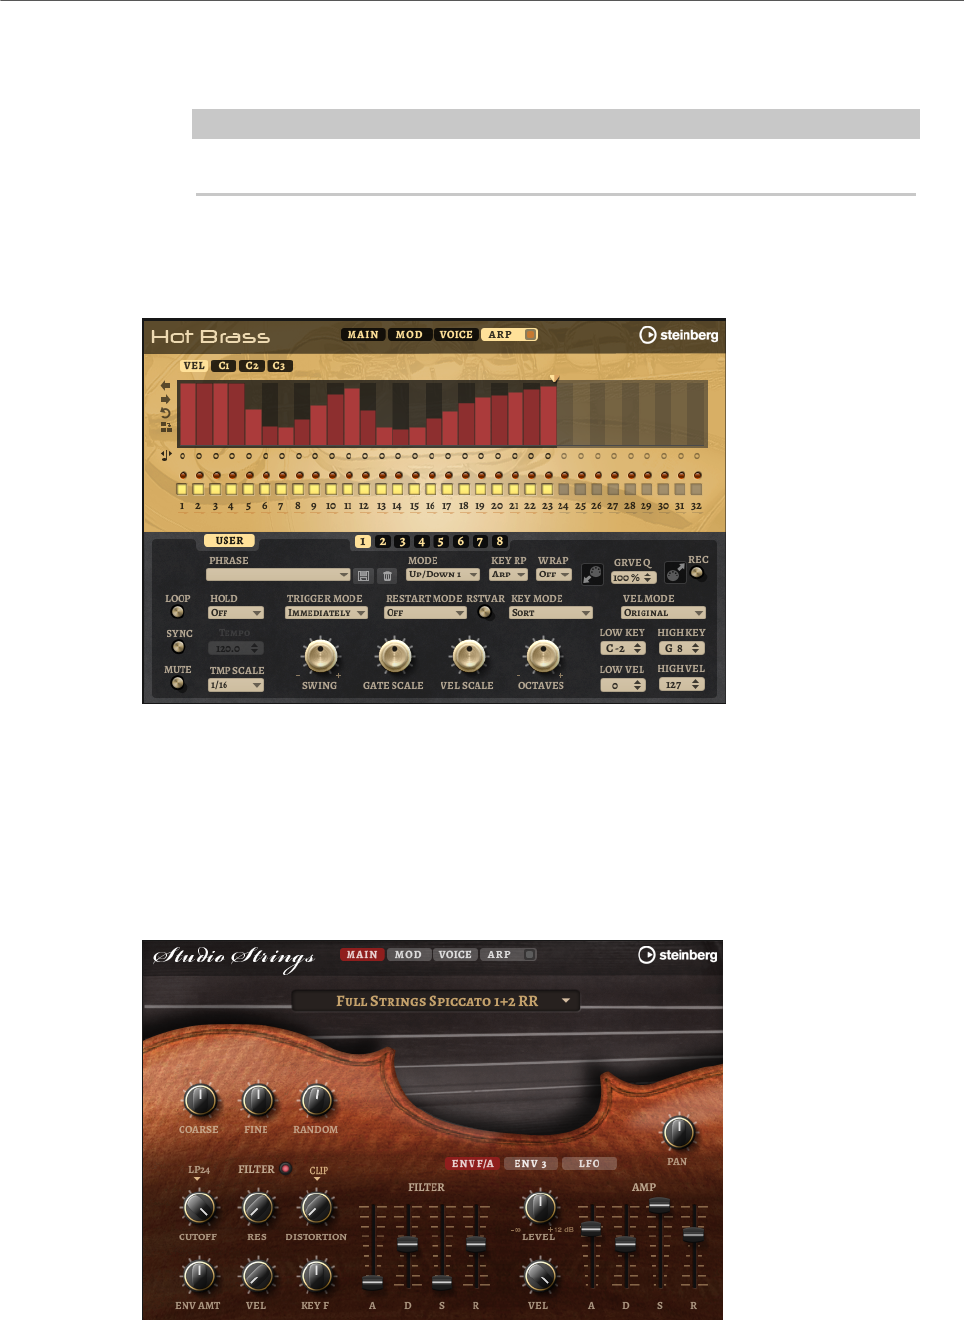
Included Instruments
Studio Strings
354
Rnd (Random Phase)
If this button is activated, each note starts with a randomized start phase.
NOTE
The Phase control cannot be used if Rnd is activated.
Arp Page
This page contains the same parameters as the FlexPhraser.
RELATED LINKS
FlexPhraser on page 483
Studio Strings
Studio Strings delivers a broad range of string sounds and articulations comprising solo
strings, small chamber, and full orchestra sections.
The instrument’s sample oscillators are followed by a synthesis section with a flexible
filter where you can modify the sounds further. With the FlexPhraser functionality on the
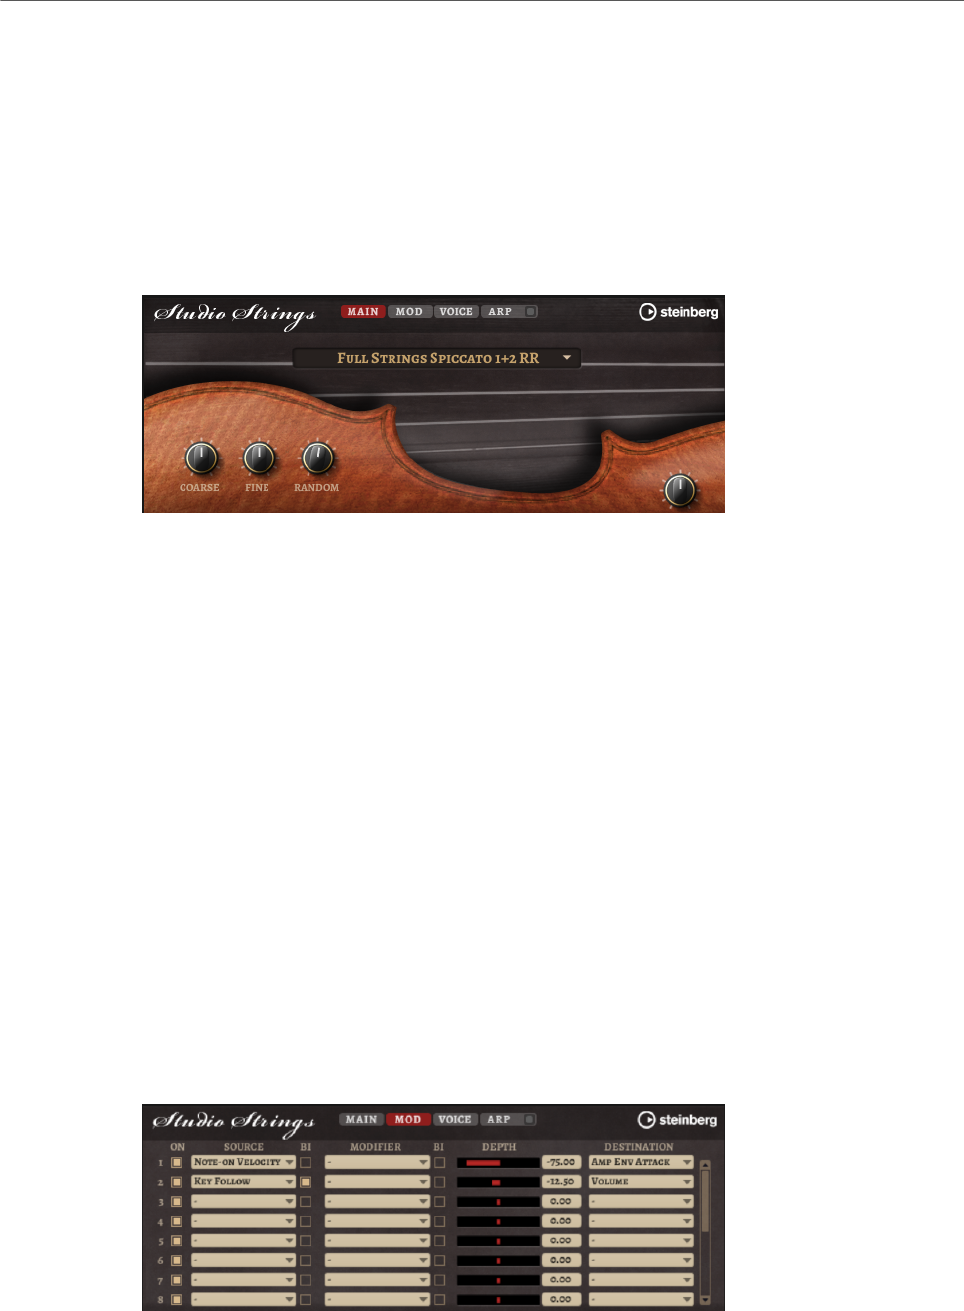
Included Instruments
Studio Strings
355
Arp page, you can play typical phrases with a single note on your keyboard. Studio Strings
contains four pages: Main, Mod, Voice, and Arp. To show the settings for a page, click the
corresponding page button.
The button for the Arp page also contains an On/Off button for the arpeggiator.
Main Page
The Main page allows you to select the sample for Studio Strings and to make basic pitch
settings.
Select Samples
Allows you to choose from a range of included samples.
Coarse
Adjusts the pitch in semitone steps.
Fine
Allows you to fine-tune the pitch in cent steps.
Random Pitch
Allows you to randomly offset the pitch with each played note. Higher values
cause stronger variations. At the maximum setting, the random offsets can vary
from -60 cents to +60 cents.
Pan
Defines the position of the instrument in the stereo panorama.
Mod Page
The Mod page contains the modulation matrix.

Included Instruments
Studio Strings
356
The modulation matrix offers you up to 16 freely assignable modulations, each with a source,
a modifier, and a destination with adjustable depth. The polarity of each source and each
modifier can be switched between unipolar and bipolar.
Creating Modulations
You create modulations by selecting a source, a modifier, and a destination from the pop-up
menus in the modulation matrix.
PROCEDURE
1. Click the modulation Source field and select the modulation source.
2. Optional: Click in the modulation Modifier field and select the parameter that you want
to use to modify the modulation.
This modifier is used to scale the output of the modulation source.
3. Optional: Specify whether you want the Source and Modifier parameters to be unipolar
or bipolar.
4. Set the modulation intensity with the Depth parameter.
5. Click in the modulation Destination field and select the parameter that you want to
modulate.
Modulation Matrix Parameters
Modulation Sources and Modulation Modifiers
The following options are available as modulation sources and as modulation modifiers.
LFO A/B
The LFOs A and B produce cyclic modulation signals.
Amp Envelope
The amplifier envelope. The shape of the envelope determines the modulation
signal.
Filter Envelope
The filter envelope. The shape of the envelope determines the modulation signal.
Env 3
A freely assignable envelope. It is suited for pan or pitch modulation, for example.
Key Follow
This produces an exponential modulation signal derived from the MIDI note
number. Exponential means this source works with destinations such as Pitch or
Cutoff.
Note-on Velocity
Note-on velocity can be used as modulation signal.
Note-on Vel Squared
The squared version of Note-on Velocity. The harder you press the key, the higher
the modulation values.

Included Instruments
Studio Strings
357
Pitchbend
The position of the pitchbend wheel can be used as modulation signal.
Modulation Wheel
The position of the modulation wheel can be used as modulation signal.
Aftertouch
Aftertouch can be used as modulation signal. Some MIDI keyboards cannot send
aftertouch messages. However, most sequencer software is able to produce such
messages.
Arp Controller 1–3
The 3 controllers available on this submenu correspond to the three controller
lanes on the Arp page.
Bus 1–8
Modulations that are sent to one of the eight busses can be reused as sources.
This way, you can combine several modulations to produce more complex
signals.
Quick Control 1–8
The quick controls can be used as modulation signal.
Unipolar vs. Bipolar Sources
The polarity of a modulation source specifies the value range that it produces. Unipolar
sources modulate between 0 and +1. Bipolar sources modulate between -1 and +1.
• To change the polarity of a modulation source or modifier from unipolar to bipolar,
activate its Bipolar button.
Modulation Destinations
Pitch
Modulates the pitch. For example, assign one of the LFOs to create a vibrato
effect. If Pitch is selected, the modulation depth is set in semitones.
Cutoff
Modulates the filter cutoff.
Resonance
Modulates the filter resonance. Resonance changes the character of the filter.
For example, to accent the filter the harder you hit a key, assign Velocity to
Resonance.
Distortion
Modulates the filter distortion.

Included Instruments
Studio Strings
358
Level
This modulation adds to the level setting. It can be used to create level offsets
using the mod wheel, for example.
Volume
Modulates the gain. The volume modulation multiplies with the level.
Pan
Modulates the position of the sound in the panorama.
Amp Env Attack
Modulates the attack time of the amplitude envelope. This modulation
destination cannot be modulated continuously. The time is updated only when the
segment starts.
Amp Env Decay
Modulates the decay time of the amplitude envelope. This modulation destination
cannot be modulated continuously. The time is updated only when the segment
starts.
Amp Env Sustain
Modulates the sustain level of the amplitude envelope. This modulation
destination cannot be modulated continuously. The level is updated only when the
segment starts.
Amp Env Release
Modulates the release time of the amplitude envelope. This modulation
destination cannot be modulated continuously. The time is updated only when the
segment starts.
Filter Env Attack
Modulates the attack time of the filter envelope. This modulation destination
cannot be modulated continuously. The time is updated only when the segment
starts.
Filter Env Decay
Modulates the decay time of the filter envelope. This modulation destination
cannot be modulated continuously. The time is updated only when the segment
starts.
Filter Env Sustain
Modulates the sustain level of the filter envelope. This modulation destination
cannot be modulated continuously. The level is updated only when the segment
starts.
Filter Env Release
Modulates the release time of the filter envelope. This modulation destination
cannot be modulated continuously. The time is updated only when the segment
starts.

Included Instruments
Studio Strings
359
Env 3 Start Level
Modulates the start level of the user-definable envelope 3, that is, the level
of the first envelope node. This modulation destination cannot be modulated
continuously. The level is updated only when the segment starts.
Env 3 Attack
Modulates the attack time of the user-definable envelope 3. This modulation
destination cannot be modulated continuously. The time is updated only when the
segment starts.
Env 3 Attack Level
Modulates the attack level of the user-definable envelope 3, that is, the level of
the second envelope node. This modulation destination cannot be modulated
continuously. The level is updated only when the segment starts.
Env 3 Decay
Modulates the decay time of the user-definable envelope 3. This modulation
destination cannot be modulated continuously. The time is updated only when the
segment starts.
Env 3 Sustain
Modulates the sustain level of the user-definable envelope 3. This modulation
destination cannot be modulated continuously. The level is updated only when the
segment starts.
Env 3 Release
Modulates the release time of the user-definable envelope 3. This modulation
destination cannot be modulated continuously. The time is updated only when the
segment starts.
Env 3 Release Level
Modulates the release level of the user-definable envelope 3, that is, the
last user envelope node. This modulation destination cannot be modulated
continuously. The level is updated only when the segment starts.
Bus 1-8
You can send any modulation to one of the 8 busses, for example, to produce
more complex modulation signals. Select the bus that you want to send the
signals to as a destination. To use the modulation that was sent to a bus, assign
the corresponding bus as a modulation source.

Included Instruments
Studio Strings
360
Voice Page
Polyphony
If Mono mode is deactivated, you can use this parameter to specify how many
notes can be played simultaneously.
Mono
Activates monophonic playback.
Retrigger
This option is only available in Mono mode. If Retrigger is activated, a note that
was stolen by another note is retriggered if you still hold the stolen note when
you release the new one.
This way, you can play trills by holding one note and quickly and repeatedly
pressing and releasing another note, for example.
Trigger Mode
Defines the trigger behavior for new notes.
•Normal triggers a new note when the previous note gets stolen. The
sample and the envelope of the new note are triggered from the start.
To minimize discontinuities, use the Fade Out parameter of the zone.
•Resume does not always trigger a new note.
If the new note stays within the same zone, the envelope is retriggered, but
resumes at the level of the stolen note. The pitch of the zone is set to the
new note.
If the new note plays in a different zone, the sample and the envelope of the
new note are triggered from the start.
•Legato does not always trigger a new note.
If the new note stays within the same zone, the envelope keeps running.
The pitch of the zone is set to the new note.
If the new note plays in a different zone, the sample and the envelope of the
new note are triggered from the start.
•Resume Keeps Zone does not trigger a new note upon note stealing. The
envelope resumes at the level of the stolen note and the pitch of the zone is
set to the new note, even if the new note plays in a different zone.
•Legato Keeps Zone does not trigger a new note upon note stealing. The
envelope keeps running and the pitch of the zone is set to the new note,
even if the new note plays in a different zone.
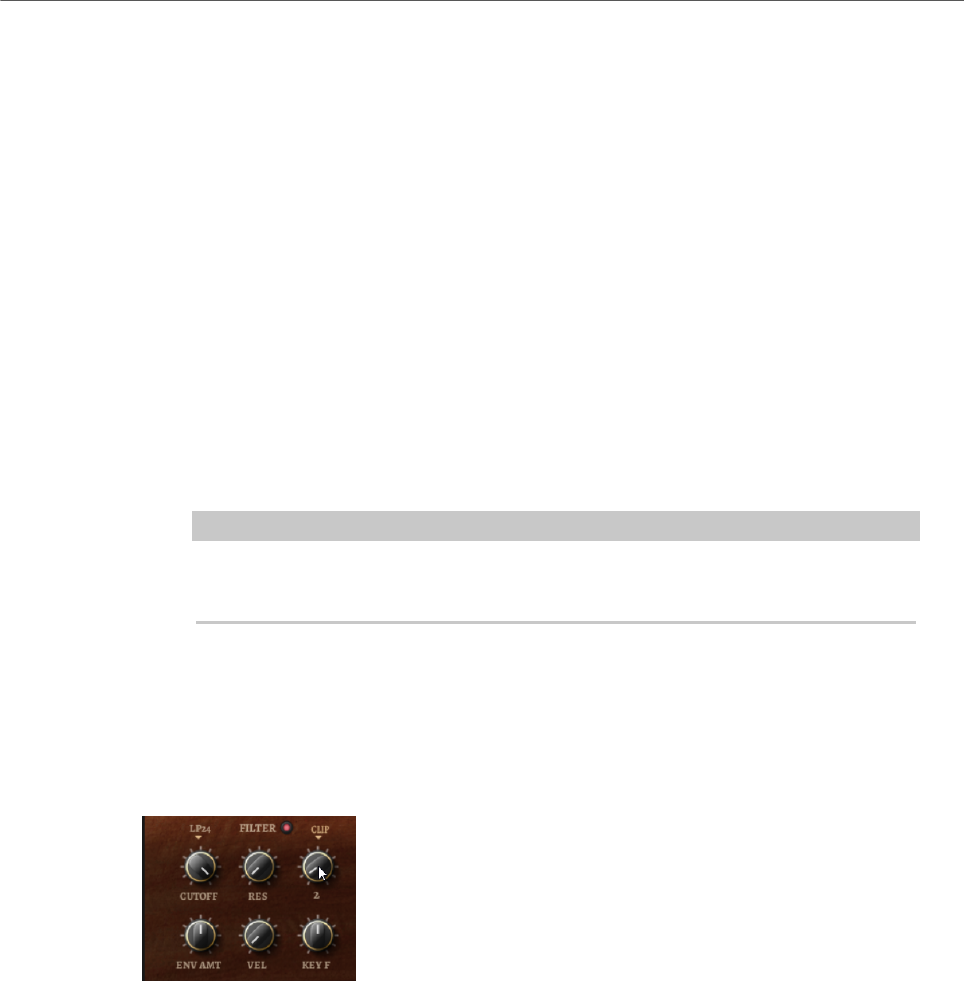
Included Instruments
Studio Strings
361
Glide
Allows you to bend the pitch between notes that follow each other. You achieve
the best results in Mono mode.
Fingered
Activate this parameter to glide the pitch only between notes that are played
legato.
Glide Time
Sets the glide time, that is, the time it takes to bend the pitch from one note to
the next.
Start Range
Activate Start Range to use a shorter sample attack for notes that are played
legato in Mono mode. This allows for a more realistic transition between notes,
especially in combination with the Glide parameter. Use the Attack Time of the
amplifier envelope to shape the effective attack of a note.
NOTE
The Start Range affects only sustained articulations. For staccato, pizzicato, and
crescendo articulations, it has no effect.
Pitchbend Up/Pitchbend Down
Determines the range for the modulation that is applied when you move the
pitchbend wheel.
Filter Section
Filter On/Off
Activates/Deactivates the filter.
Filter Shape
• LP24, 18, 12, and 6 are low-pass filters with 24, 18, 12, and 6 dB/oct.
Frequencies above the cutoff are attenuated.
• BP12 and BP24 are band-pass filters with 12 and 24 dB/oct. Frequencies
below and above the cutoff are attenuated.
• HP6+LP18 and HP6+LP12 are combinations of a high-pass filter with 6 dB/
oct and a low-pass filter with 18 and 12 dB/oct, respectively (asymmetric
band-pass filter). Frequencies below and above the cutoff are attenuated.
Attenuation is more pronounced for the frequencies above the cutoff.

Included Instruments
Studio Strings
362
• HP12+LP6 and HP18+LP6 are combinations of a high-pass filter with 12
and 18 dB/oct and a low-pass filter with 6 dB/oct (asymmetric band-pass
filter). Frequencies below and above the cutoff are attenuated. Attenuation
is more pronounced for the frequencies below the cutoff.
• HP24, 18, 12, and 6 are high-pass filters with 24, 18, 12, and 6 dB/oct.
Frequencies below the cutoff are attenuated.
• BR12 and BR24 are band-reject filters with 12 and 24 dB/oct. Frequencies
around the cutoff are attenuated.
• BR12+LP6 and BR12+LP12 are combinations of a band-reject filter with 12
dB/oct and a low-pass filter with 6 and 12 dB/oct, respectively. Frequencies
around and above the cutoff are attenuated.
• BP12+BR12 is a band-pass filter with 12 dB/oct plus a band-reject filter
with 12 dB/oct. Frequencies below, above, and around the cutoff are
attenuated.
• HP6+BR12 and HP12+BR12 are combinations of a high-pass filter with 6
and 12 dB/oct and a band-reject filter with 12 dB/oct. Frequencies below
and around the cutoff are attenuated.
• AP is an all-pass filter with 18 dB/oct. Frequencies around the cutoff are
attenuated.
• AP+LP6 is an all-pass filter with 18 dB/oct plus a low-pass filter with 6 dB/
oct. Frequencies around and above the cutoff are attenuated.
• HP6+AP is a high-pass filter with 6 dB/oct plus an all-pass filter with 18
dB/oct. Frequencies around and below the cutoff are attenuated.
Cutoff
Controls the cutoff frequency of the filter.
Resonance
Emphasizes the frequencies around the cutoff. At higher settings, the filter self-
oscillates, which results in a ringing tone.
Distortion
Adds distortion to the signal. The following distortion types are available:
•Tube adds warm, tube-like distortion.
•Hard Clip adds bright, transistor-like distortion.
•Bit Reduction adds digital distortion by means of quantization noise.
•Rate Reduction adds digital distortion by means of aliasing.
•Rate Reduction Key Follow adds digital distortion by means of aliasing, but
with Key Follow. The rate reduction follows the keyboard, so the higher you
play, the higher the sample rate.
Envelope Amount
Controls the cutoff modulation from the filter envelope.
Cutoff Velocity
Controls the cutoff modulation from velocity.
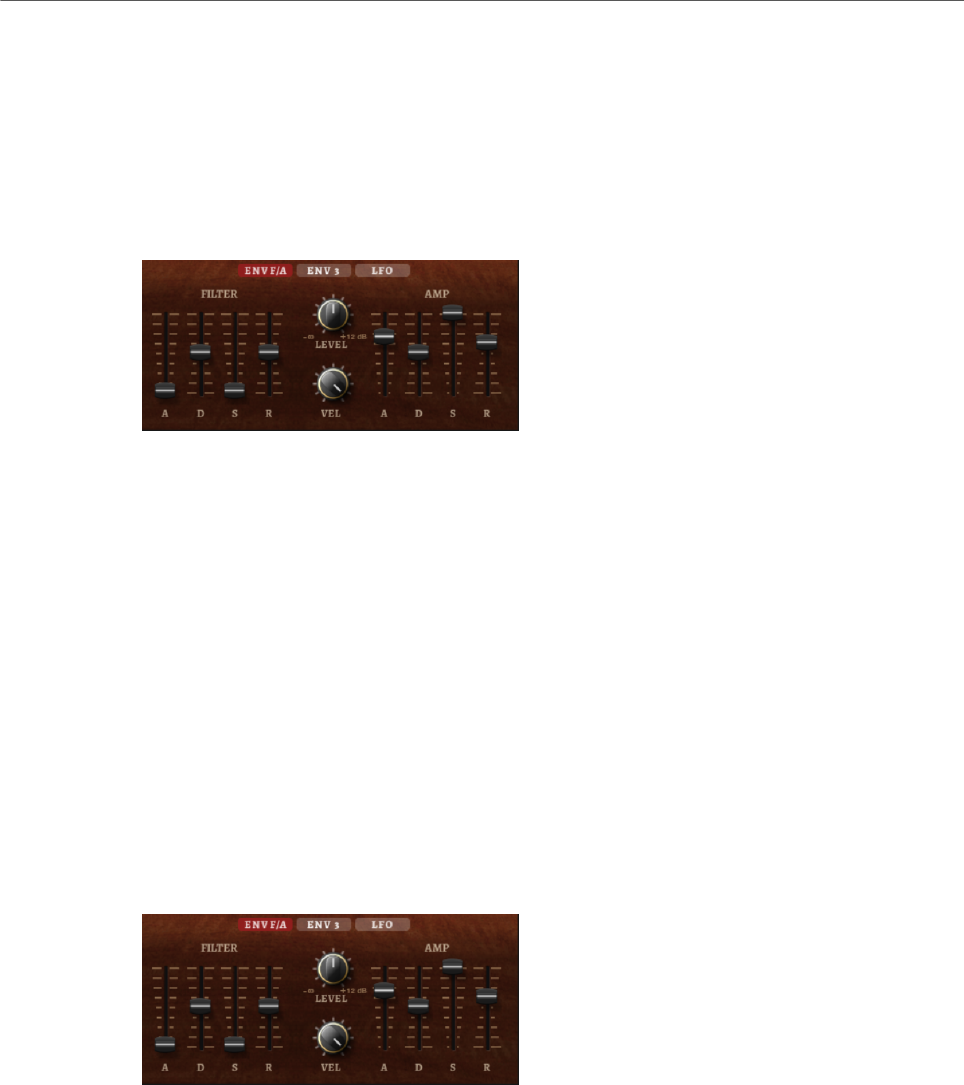
Included Instruments
Studio Strings
363
Cutoff Key Follow
Adjusts the cutoff modulation using the note number. Increase this parameter
to raise the cutoff with higher notes. At 100 %, the cutoff follows the played pitch
exactly.
Filter Envelope
On the left on the Env F/A tab, you can set up the filter envelope.
Attack
Controls the attack time of the filter envelope.
Decay
Controls the decay time of the filter envelope.
Sustain
Controls the sustain level of the filter envelope.
Release
Controls the release time of the filter envelope.
Amplifier and Amplifier Envelope
On the right of the Env F/A tab, you can make settings for the amplifier and the amplifier
envelope.
Amplifier Parameters
Level
Controls the overall volume of the sound.
Velocity
Controls the level modulation from velocity. At 0, all notes are played with the
same level.
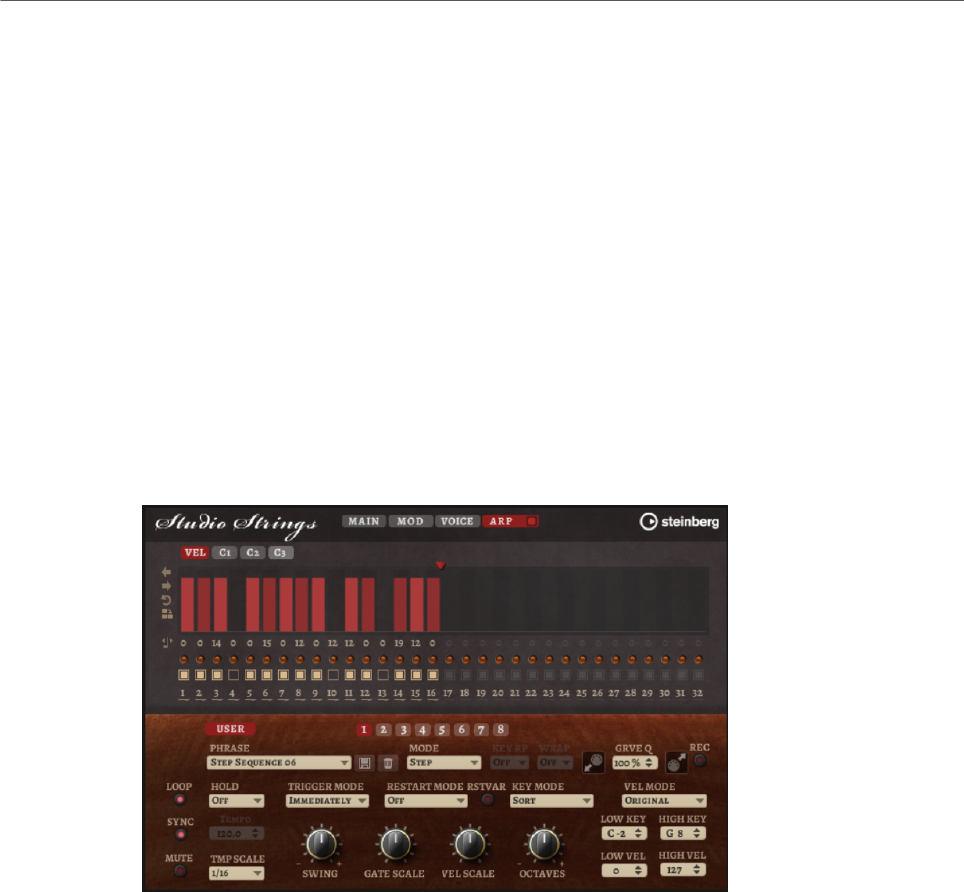
Included Instruments
Studio Strings
364
Amplifier Envelope Parameters
Attack
Controls the attack time of the amplifier envelope.
Decay
Controls the decay time of the amplifier envelope.
Sustain
Controls the sustain level of the amplifier envelope.
Release
Controls the release time of the amplifier envelope.
Arp Page
This page contains the same parameters as the FlexPhraser.
RELATED LINKS
FlexPhraser on page 483
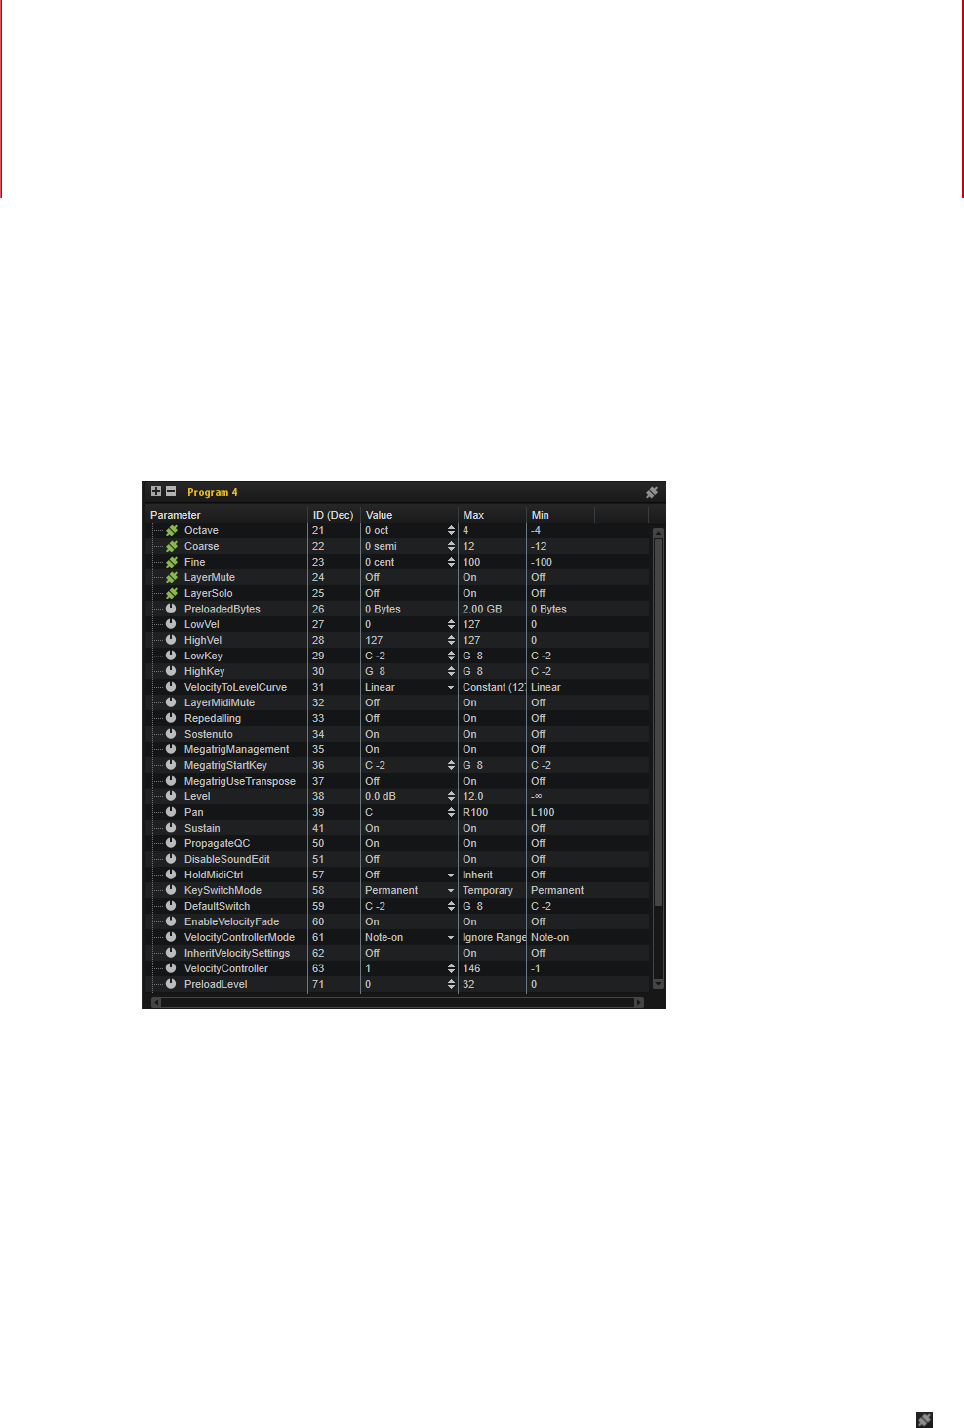
Parameter List
365
The Parameter List gives you a detailed overview of the parameters of the element that is
selected in the Program Tree.
For example, if you select an effect in the Program Tree, only the parameters of that effect
are shown.
The Parameter List is also useful to get additional information about parameters, which is
needed if you want to address parameters from a script, for example.
•By default, the Parameter List shows the Parameter and Value columns. To add
additional columns to the Parameter List, right-click a column header and select an
item from the list.
•To expand a folder and view its content, click the plus sign or double-click the folder.
To collapse a folder, click the minus sign or double-click the folder. To expand or
collapse all folders in the list, use the plus/minus buttons in the top left corner of the
Parameter List.
If a parameter is connected to a macro page, the icon to the left of the parameter
name changes. Additional information is shown at the bottom of the editor. To display
only connected parameters in the list, activate Show Only Connected Parameters in
the top right corner of the Parameter List.
The following columns are available:

Parameter List
366
Parameter
Displays the names of the parameters. Parameters that belong to a specific
section are grouped in folders, for example, the LFOs or the envelopes of a zone.
Value
Displays the values of the parameters.
ID (Dec)
Shows the parameter ID as decimal value.
ID (Hex)
Shows the parameter ID as hexadecimal value.
Type
Shows the value type, that is, Integer, Float, String, Bool, or Data.
Unit
Shows the unit of the parameter, that is, %, Hz, dB, deg, cent, spl (sample), ms,
BPM, etc.
Min
Shows the minimum value for the parameter.
Max
Shows the maximum value for the parameter.
Default
Shows the default value for the parameter.
Long Name
Shows the long name for the parameter.

Macro Pages
367
HALion allows you to build your own sample and synthesizer instruments and to customize
them using the integrated LUA script engine. In the Macro Page Designer, you can create
your own user interface for these instruments.
The Macro Page Designer allows you to create everything from small user interfaces for
custom script modules to complete instrument editors with several pages and a wide range
of controls, such as knobs, buttons, sliders, text, labels, menus, etc. In addition to the basic
controls, complex graphical editors for multi-stage envelopes, the FlexPhraser, the Step
Modulator, and displays for samples and wavetables are available. The controls themselves
are highly customizable in how they behave and look.
NOTE
Macro pages can be created for programs, layers, and LUA script MIDI modules. They are not
available for smaller HALion elements, such as zones or effects, for example.
Macro Pages, Templates, Controls, Resources, and Libraries
The general concept behind macro pages distinguishes between templates, controls,
resources, and libraries.
Macro Pages
A macro page is a user interface document that describes which controls and templates
are used, how they are graphically arranged, and how the controls are connected to engine
or script parameters. The document is saved as an XML file and can be compared to an
HTML page describing a web page. A macro page can be created independently from any
HALion program and then be combined with it at a later stage. Macro pages contain a list of
resources (bitmaps, fonts) and a list of templates that are referenced on it.
Templates
A template is a group of control elements. A template can be used multiple times on a macro
page, each time with different property values. Templates are organized in the Templates
Tree. You can create your own templates, either from scratch in the Templates Tree or by
combining controls that are used on a macro page.
Controls
A control is a basic element, like a text field, menu, switch, knob, etc., that can be added to a
macro page. Controls have properties for their behavior and their appearance. Depending on
the type of control, they can be directly connected to engine and script parameters or have a
display functionality and use resources like bitmaps and fonts.

Macro Pages
Getting Started
368
Resources
Most controls require resources like bitmaps or fonts to display something on the screen.
These resources are organized in the Resources Tree.
Libraries
Libraries are identical to macro pages, except that they do not include a functional user
interface. Instead, libraries contain a collection of templates and their resources. Using the
Resource/Library Browser, you can drag templates from a library onto a macro page. This
adds an instance of the template, as well as all necessary components, to your macro page.
Libraries can be edited in the same way as macro pages. You can export them to exchange
them with other users or customers.
Getting Started
To learn how to build your own macro pages, it is best to try it out step by step and get
familiar with the system.
Once you get the general idea of how macro pages are created, take a look at the
instruments that come with HALion, such as Anima, Skylab, etc. All the new instruments
are built using the feature set and editors of the Macro Page Designer and you can see every
single element on the GUI and check out how it is structured and connected to the engine or
scripts.
Preparing a Basic Macro Page
PROCEDURE
1. Create a program with a single synth zone.
2. Click Open New Window and select Macro Page Designer Extended.
This window combines the Macro Page Designer with the Program Tree, the
Parameter List, the Sound Editor, and the Macro Page. Those editors can be used in
combination to set up and test a macro page.
3. Select the program in the Program Tree.
This way, the macro page will be associated with this program.
4. On the toolbar of the Macro Page Designer, click Create New Macro Page and select
Create HALion Sonic Macro Page to create a page that corresponds to the size
standard used in HALion Sonic and HALion Sonic SE.
RESULT
An empty macro page with a size of 595 x 390 pixels is created. Size Lock is automatically
activated to prevent you from accidentally changing the size of the macro page. The Macro
Page Designer shows all the editors that are necessary to build a macro page.
Adding a Background Image to a Macro Page
PREREQUISITE
• You have prepared a basic macro page in the Macro Page Designer.
• You have created or selected a bitmap file that you want to use as background.
Macro Pages
Getting Started
369
PROCEDURE
1. In the File Explorer/Mac OS Finder or the Resource/Library Browser, navigate to the
.bmp or .png bitmap file that you want to use and drag it onto the canvas in the Macro
Page Editor.
A new image control is added to the GUI Tree and the bitmap resource is added to the
Resources Tree. This resource is used by the image control on your page.
2. Optional: Adjust the position or size of the image, either in the Properties section or
directly on the canvas.
RELATED LINKS
Editing the Elements on the Canvas on page 390
Scaling Elements on page 393
Loading a Template and Connecting It to the Parameters of Your
Program
Once you have created a macro page, you can connect the parameters of your program to the
macro page controls.
PROCEDURE
1. In the Resource/Library Browser, select the Basic Controls library.
2. Select the Knobs folder.
3. Make sure that the GUI Tree has the focus and drag the Knob H6 template from the
browser onto the macro page.
The knob is added to the macro page. The template already contains several control
elements like the knob itself, a text field, and a label.
4. To move the template, drag it to another position. To scale the template, drag its
edges.
In this example, the template adapts the size of the text field and label accordingly and
keeps the knob centered.
5. In the Program Tree, select the zone that you want to use.
6. In the Parameter List, scroll to the Amp folder, expand it, and drag the Level
parameter name onto the Value field in the Properties section for the knob template or
onto the knob on the canvas.
The level of the zone is now connected to the value field.
7. Enter the name for the knob in the Label field, for example, Level.
8. Set the unit to dB to show a value in decibel.
9. For the tooltip, enter Oscillator Level.
10. Now that the connection is established, activate Test Macro Page and use the knob.
In the Parameter List and/or the Amp section of the Zone Editor, you can see that the
parameter values change as you use the control.
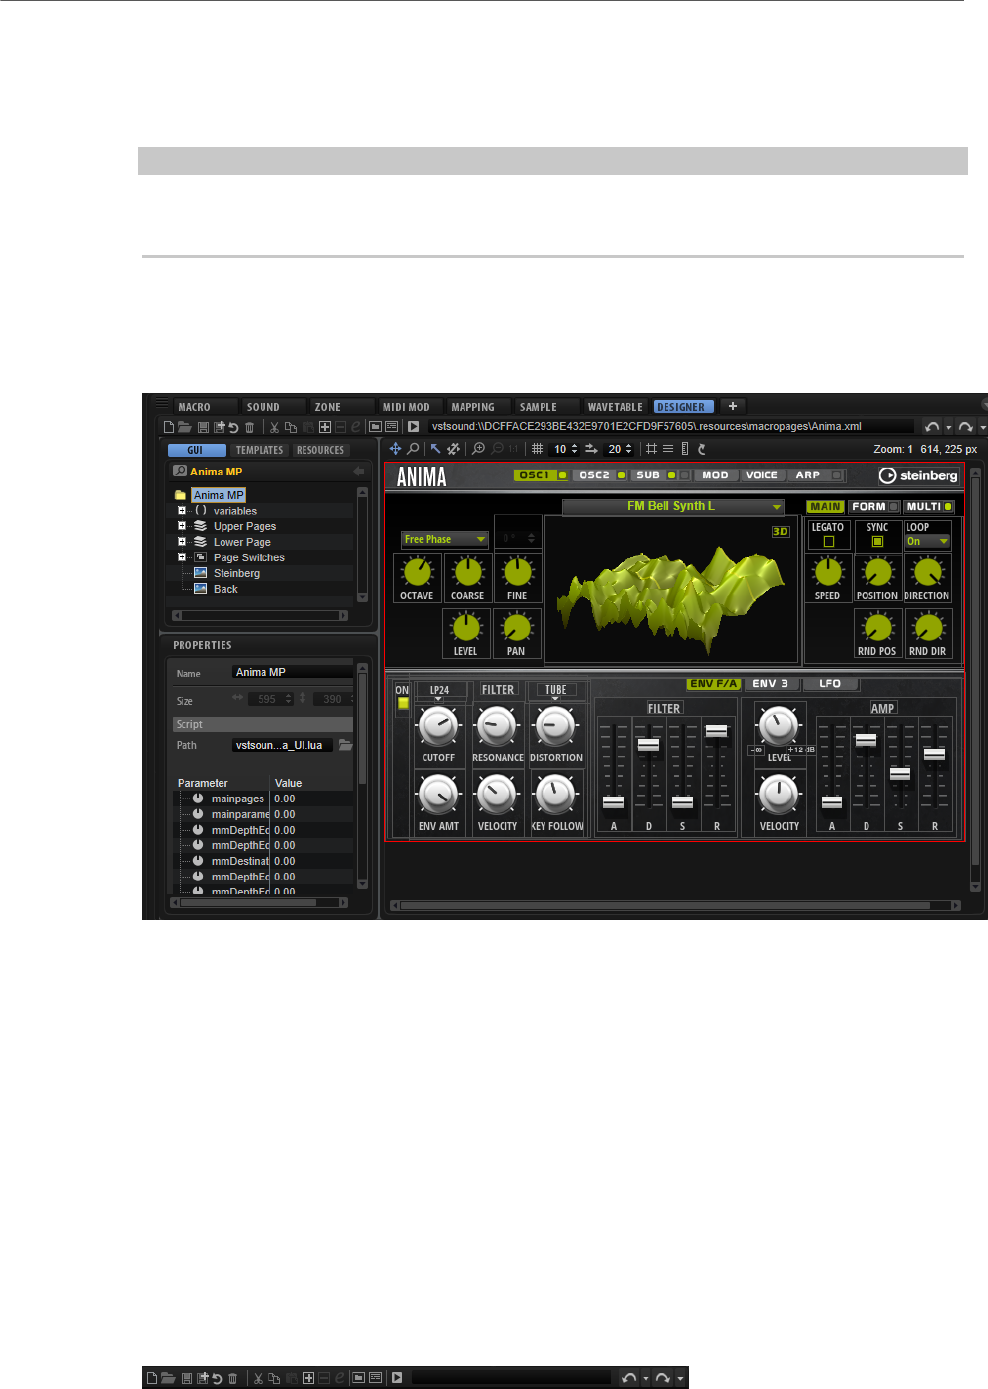
Macro Pages
Macro Page Designer
370
Saving the Macro Page
To save your macro page, click Save Macro Page/Library, specify a name and a location, and
click Save.
NOTE
Macro pages can be created for programs, layers, and LUA script MIDI modules. They are not
available for smaller HALion elements, such as effects or zones, for example.
Macro Page Designer
The Macro Page Designer is where you create and edit macro pages.
In the middle of the editor, you find the canvas, that is, the area where you arrange the
controls on your interface.
The section on the left can show either the GUI Tree, the Templates Tree, or the Resources
Tree. These give you access to the macro page and its components.
The Properties section in the lower left shows the properties of the selected control,
template, or resource.
Below the canvas, you can display the Resource/Library Browser that can be used to browse
for control templates in libraries or in existing macro pages or for bitmap resources on your
system.
Toolbar
The toolbar provides tools and commands necessary for designing and managing your macro
pages.

Macro Pages
Macro Page Designer
371
Create New Macro Page/Library
What happens when you click this button depends on which element is selected
in the Program Tree.
If a program or layer is selected, you can choose between Create Macro Page and
Create HALion Sonic Macro Page.
•Create Macro Page allows you to create a macro page that does not have
any limitation in size.
NOTE
With this option, it is possible to create macro pages that cannot be
displayed in their entirety in HALion Sonic or in the default screen setup of
HALion, for example.
•Create HALion Sonic Macro Page creates a macro page that corresponds
to the size standard used in HALion Sonic and HALion Sonic SE, that
is, 595x390 pixels. If you select this option, Size Lock is automatically
activated so that you cannot accidentally modify the size of the macro page
during the design process of the page.
If a LUA script MIDI Module is selected, a macro page is created that corresponds
to the size standard used in HALion’s MIDI modules. Size Lock is automatically
activated so that you cannot accidentally modify the size of the macro page
during the design process of the page.
Load Macro Page
Allows you to navigate to a macro page and load it.
Save Macro Page/Library
Saves the current state of your macro page.
Export Macro Page/Library
Allows you to export the macro page, complete with all the required resources,
such as bitmaps, fonts, and scripts. You can use Export Macro Page/Library to
consolidate and relocate all resources for a macro page and to save them under
the names defined in the macro page.
NOTE
• The program, layer, or LUA script MIDI module from which you exported
the macro page still uses the original version of the macro page. If you
want to use the exported macro page instead, you must load it using the
Load Macro Page button on the toolbar.
Revert to Last Saved Macro Page/Library
Reloads the macro page as it was saved the last time. Any changes made
afterwards are discarded.
Cut
Cuts the selected element.
Macro Pages
Macro Page Designer
372
Copy
Copies the selected element to the clipboard.
Paste
Pastes the element from the clipboard at the current position.
NOTE
You can copy and paste elements between macro pages. All related resources are
automatically copied as well.
Create New Element
Click this button to add a new element.
Which elements can be added depends on whether you are in the GUI Tree, the
Templates Tree, or the Resources Tree.
Delete Element
Click this button to delete the selected element.
Edit Element
Click this button to edit the selected element.
Show/Hide Resource/Library Browser
Shows/Hides the Library Browser below the canvas.
Show/Hide Debug Messages
Shows/Hides the Debug Messages section below the Resource/Library Browser.
Test Macro Page
Activates test mode. This allows you to use the macro page controls as you would
on the final macro page.
Undo Last Command/Redo Last Command
Allow you to undo/redo your actions.
The undo history of the Macro Page Designer is independent from HALion’s
global undo history. This way, parameter changes, or modifications of the
program structure, such as adding or removing modules, etc., do not interfere
with the changes that you made on the macro page.
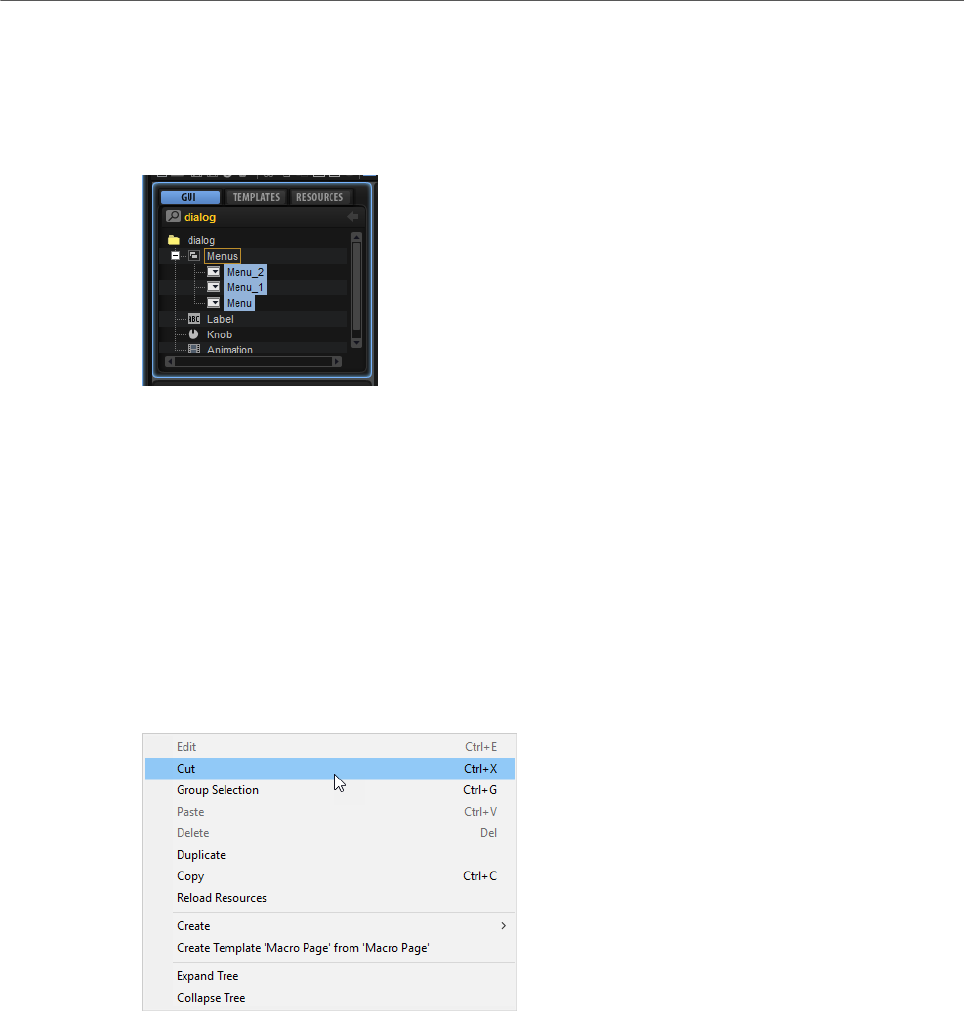
Macro Pages
Macro Page Designer
373
GUI Tree
The GUI Tree shows the hierarchical structure of a macro page with all its controls and
templates. You can set up and structure the macro page by adding and removing elements,
grouping them, etc.
If you select an element in the GUI Tree, the element is highlighted on the canvas and you
can make adjustments for it in the Properties section.
For a better overview, the different element types use different icons.
Switch Back to Macro Page/Parent Template
This button in the header of the GUI Tree allows you to go back to the last macro
page, template, etc. For example, if you have been editing a template within a
template, clicking Switch Back to Macro Page/Parent Template switches back to
the parent template.
Context Menu
Edit
Allows you to edit the selected element.
Cut
Cuts the selected element.
Group Selection
Allows you to group multiple selected elements.
Paste
Pastes the element from the clipboard at the current position.
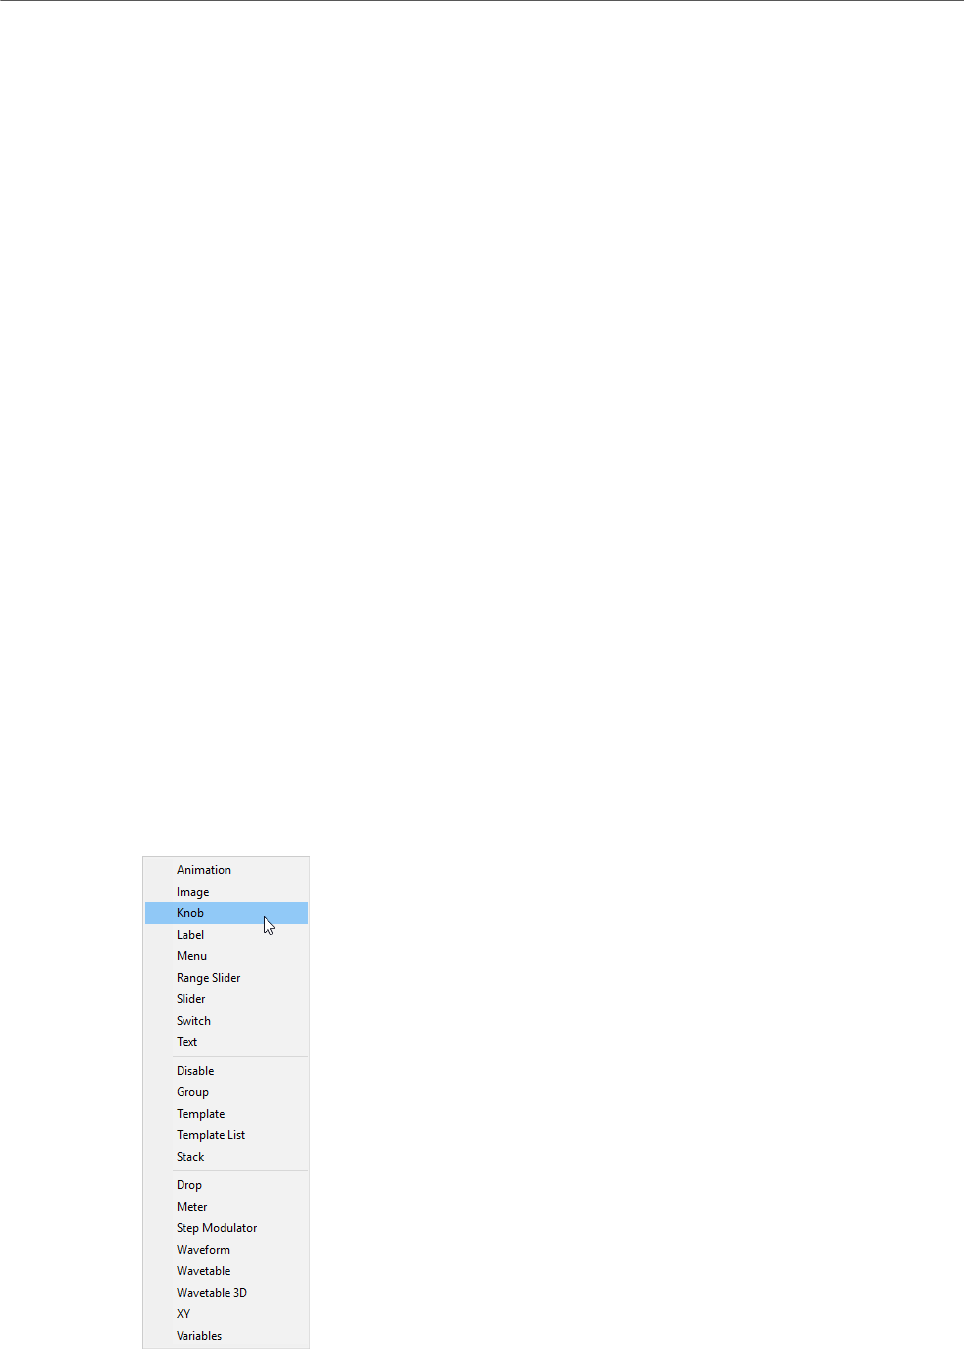
Macro Pages
Macro Page Designer
374
Delete
Deletes the selected element.
Duplicate
Duplicates the selected element.
Copy
Copies the selected element to the clipboard.
Reload All Resources
Allows you to reload all resources. This can be necessary if you changed a bitmap
resource in an external image application, for example, and you want to see
the updated image on the macro page. Without reloading the resources, your
changes are only visible when you load the program the next time.
Create
Opens a submenu containing the elements that can be added. Select a menu
entry to add the element to the GUI Tree.
Create Template <template name> from <name of group/selection>
Allows you to create a template from the current group or selection.
Expand Tree/Collapse Tree
These commands expand/collapse the entire tree or one of its substructures,
depending on where you click to open the context menu.
GUI Tree Elements
You can add the components that are used on the macro page via the Create New Element
button on the toolbar.

Macro Pages
Macro Page Designer
375
Animation
Allows you to display animations or graphical option menus.
Image
Allows you to add bitmaps in the formats .png and .bmp.
Knob
Allows you to create potentiometers by using a bitmap or a section with frames.
These frames will be played as an animation when turning the knob.
Label
Allows you to display text for knobs, text fields, or sections. This text is defined
once and cannot be edited on the macro page. To insert editable text, use the Text
element instead.
You can either use one of the available system fonts or use your own fonts for
more decorative text styles.
Menu
Allows you to create switches that open a menu. This menu is filled with the
values that are delivered by the connected parameter. The menu also provides an
option to open a tree menu, which is helpful when the element contains a large
number of values.
Range Slider
Allows you to add a range slider. This is similar to the Slider element, but it
is used to work on a specific range that is defined by minimum and maximum
values.
Slider
Allows you to create a variety of different slider types. You can choose between
horizontal and vertical sliders, let the slider jump or move to the click position,
etc. Sliders can use a background bitmap that can also be an animation.
Switch
Allows you to create different types of switches. By specifying a Mode, you can
configure the switch as an on/off switch with two states, as a multi-state switch
with an arbitrary number of states, you can create exclusive switches that can act
as a radio group, etc. The switch requires several bitmaps, depending on the set
Mode and can be set to Scalable, which allows you to resize the switch. In this
case, the bitmaps are resized according to the set Scale Mode.
Text
Allows you to add editable text to your macro page.
Disable
Allows you to add a special group that can disable all its child controls.
Group
Allows you to add a group that serves as a container for controls and templates.

Macro Pages
Macro Page Designer
376
Template
Allows you to add an instance of a template to the GUI Tree.
Template List
Allows you to add a list that can contain multiple instances of a referenced
template.
Stack
A stack allows you to create pages or sections on a macro page between which
you can switch. Each child of a stack is shown exclusively, depending on the
value of the stack. For example, you can control stacks using radio switches, by
providing one switch per stack view.
Drop
Allows you to add a control that accepts dropped objects and returns information
such as the file name and path of a sample file, for example.
Meter
Allows you to add meters that can display the value of a parameter.
NOTE
For audio metering, use the “Bus Meter” template instead.
Step Modulator
Allows you to add a control with up to 32 editable bars.
Waveform
Allows you to add a waveform display to show sample waveforms.
Wavetable
Allows you to add a display showing the waveform output of a wavetable
oscillator.
Wavetable 3D
Allows you to add a display that shows a wavetable as a three-dimensional
image.
XY
Allows you to add a two-dimensional control, where the position of a point in a
field controls two parameters.
Variables
Allows you to add a folder in which you can add variables.
If a Variables folder was added, you can select the available variables from the
Variables submenu.
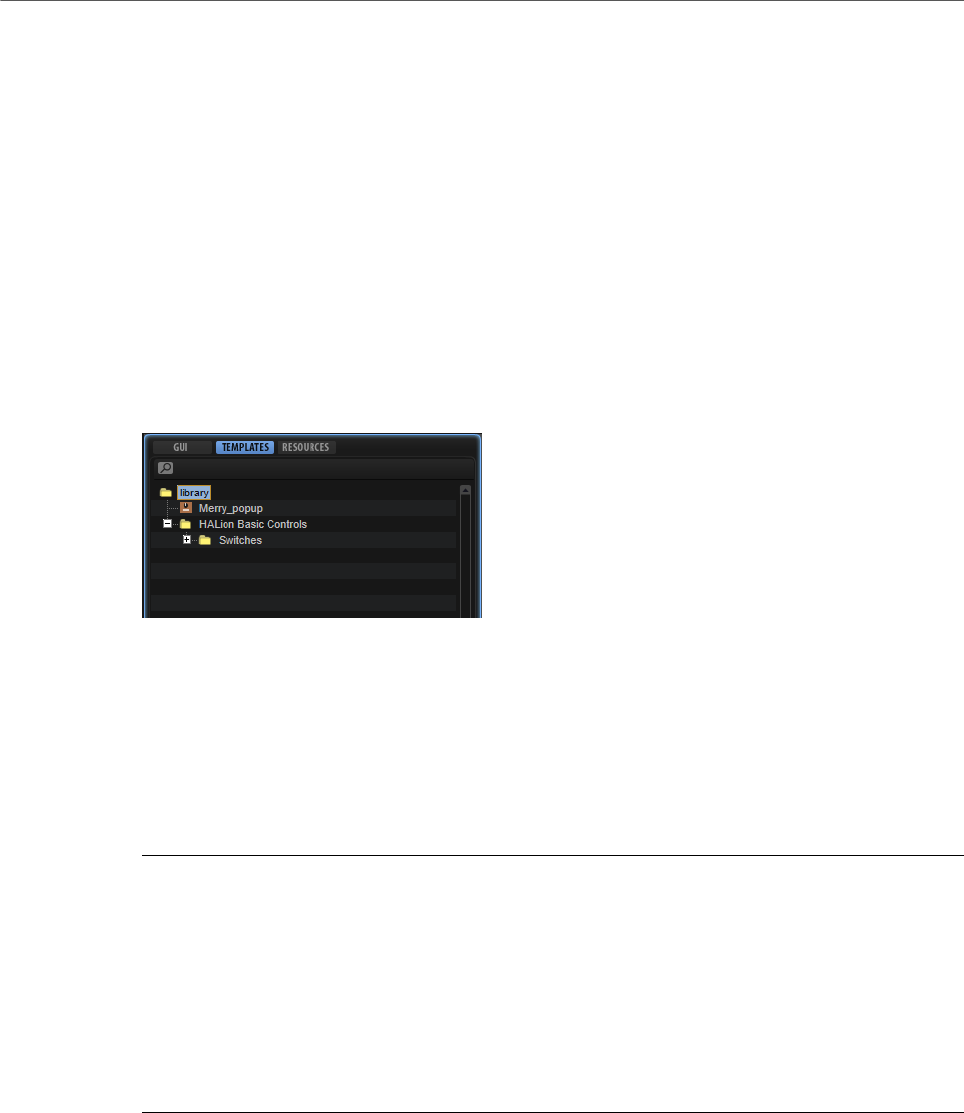
Macro Pages
Macro Page Designer
377
Managing the GUI Tree Elements
The structure of the GUI Tree has an influence on the order in which overlapping elements
are layered on the canvas. Elements that are children of another element are drawn on top of
their parent. Elements that are on the same hierarchy level are drawn bottom to top, that is,
the highest element in the tree is drawn topmost on the canvas.
•To move an element, drag it to another position.
If you drag an element on a group, it is added as a child to this group.
•To group several selected elements, open the context menu and select Group Selected
Elements.
Templates Tree
The Templates Tree allows you to organize your templates.
If a template is selected in the Templates Tree, the Preview section displays the contents of
the template.
You can add Template or Template Folder elements to the Templates Tree using the Create
New Element button on the toolbar. This allows you to structure the template content of your
macro page.
Editing Templates
PROCEDURE
1. In the Templates Tree, select the template and click Edit Element on the toolbar.
The GUI Tree opens and shows the template structure, and the canvas displays the
content of the template.
2. You can enter values manually in the Properties section, drag elements from the
Resource/Library Browser, arrange them on the canvas, etc.
3. When you are done, click Switch Back to Macro Page/Parent Template on the toolbar
to return to the macro page.
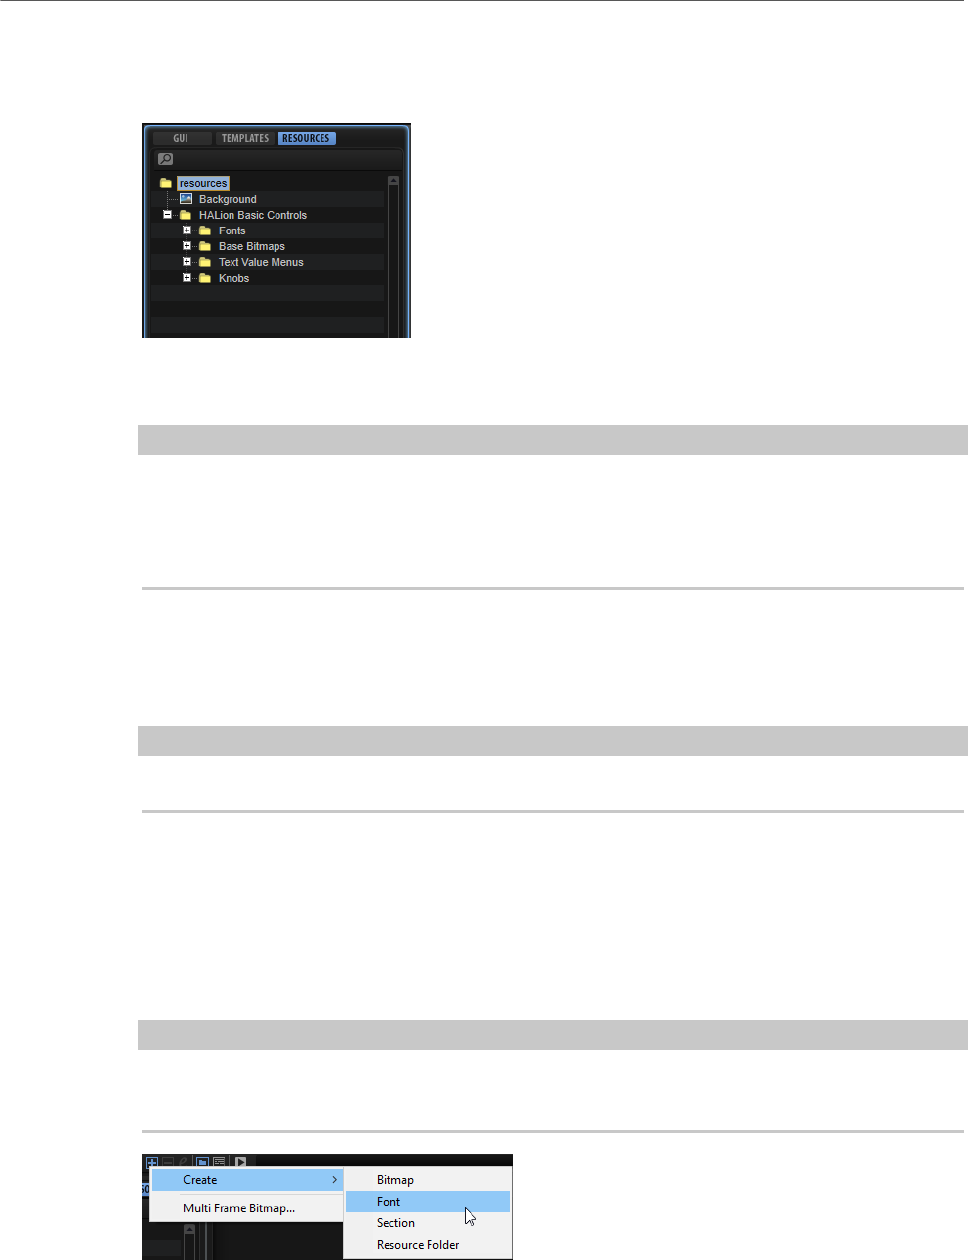
Macro Pages
Macro Page Designer
378
Resources Tree
The Resources Tree shows the resources that are available within a macro page.
You can add or remove resources in the tree and organize them into folders. This allows you
to structure your macro page, in order to keep an overview over your files.
NOTE
The Resources Tree shows all resources that were added to the macro page. The number of
resources in the tree can differ greatly from the number of resources that are actually used.
Therefore, it is good practice to remove any unused resources before finalizing your macro
page.
Resources can be added to the tree via the toolbar, the context menu, or by dragging them
onto the canvas. For a better overview, the different element types use different icons. If a
resource is selected, the canvas switches to the resource editor, displaying the referenced
bitmap, section, font, etc.
NOTE
Only files of the supported file formats can be imported as resources.
RELATED LINKS
Removing Unused Files on page 403
Resources Tree Elements
In the Resources Tree, you can add and edit the resources for your macro pages, that is,
bitmaps, sections, and fonts.
NOTE
For names, do not use the following characters: \/@:.|={}. If you import a bitmap whose file
name contains one of these characters, it is automatically replaced by an underscore.
Bitmap
HALion supports 24-bit .bmp files and 24-bit .png files with alpha channel. A
bitmap can either be a single image or consist of a series of subframes. The
Properties for a bitmap resource include the path information to the original

Macro Pages
Macro Page Designer
379
bitmap file and the number of frames that the bitmap consists of. For single
images, the frame count is 1. If the bitmap contains a knob animation, for
example, the number of frames must be set.
When you add a bitmap, HALion evaluates it to find out if the image is in fact an
animation and of how many frames it is composed. The number of frames is then
set automatically. However, this analysis cannot always deliver the perfect frame
count, and it may be that you must set this value manually.
Bitmap resources also provide an alpha channel that allows you to specify the
degree of overall transparency of the bitmap. A fully opaque bitmap is set to 255.
A value of 128 results in a semi-transparent background, for example.
Font
Allows you to create a font for use in your macro page elements. You can make
settings for it in the Properties section.
NOTE
Make sure that you only use free fonts or fonts that you are allowed to use
because you purchased the license.
Section
A section is a rectangular region within a bitmap. In the Properties section, you
can specify the reference bitmap and the coordinates of the section rectangle.
This allows you to create multiple images in a single bitmap and then define the
necessary sections all referring to that same bitmap. It is recommended to work
with sections wherever it is possible, to minimize the number of individual bitmap
files that have to be managed by the operating system.
A section can also contain multiple frames of an animation and therefore
provides the same frame property as a bitmap resource.
Resource Folder
You can add folders to the Resources Tree to help you structure your macro page
and keep an overview over the resources.
Importing a Multi-Frame Bitmap
When you use animated controls like knobs or switches, the original creation tool is often
a 3-D program that generates video files or a series of single frames of the final control
animation. However, HALion requires single-frame bitmaps. Once you have generated all the
required frames, they must be combined into a single image, where all frames are pasted
vertically from top to bottom.
PROCEDURE
1. In the Resources Tree, open the context menu and select Multi-Frame Bitmap.
2. Navigate to the folder where the animation frame bitmaps are located.
3. Select all the required bitmap files and click Open.
4. Navigate to the folder where you want to save the bitmap and click Save.
A .png file that contains all the selected frames is created and the frame count is set
to the corresponding value.
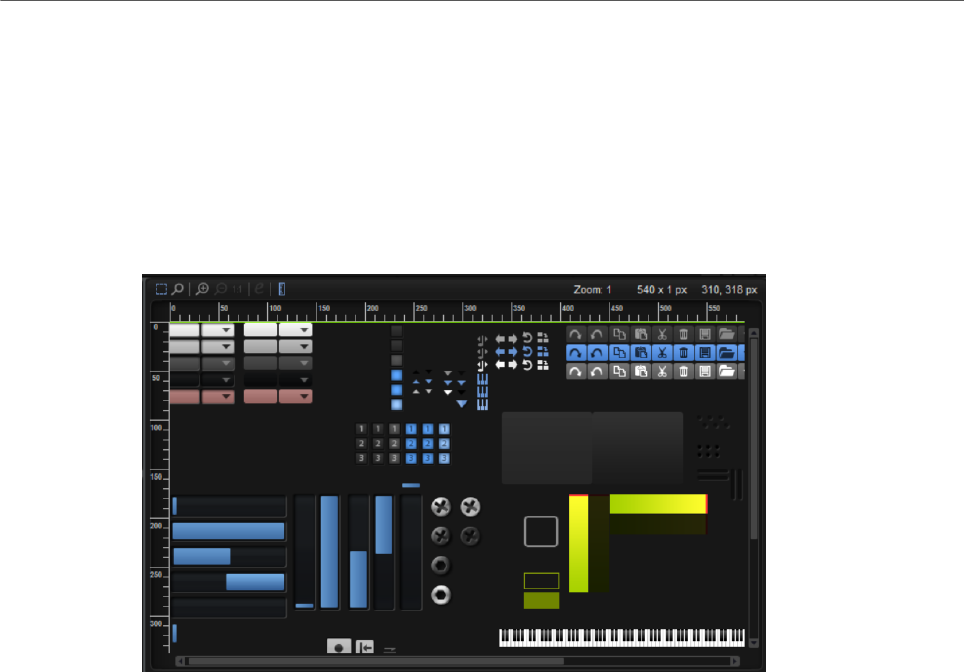
Macro Pages
Macro Page Designer
380
RESULT
You can now use the new bitmap file just as any other bitmap resource.
Resource Editor
If the Resources Tree is selected, the canvas shows the Resource Editor.
The Resource Editor shows the selected bitmap, section, or a preview of the selected font. It
allows you to create new sections from bitmaps or to modify existing sections.
Toolbar
Select Tool
Activate this tool if you want to define sections from a bitmap.
Zoom Tool
This tool allows you to define sections more precisely.
If Zoom mode is activated, you can zoom in on a specific area by clicking it. Each
click zooms in deeper. Shift-click to zoom out.
Zoom In
Zooms in one step.
Zoom Out
Zooms out one step.
Zoom to Actual Pixels
Displays the bitmap in its original size.
Edit Section
This button is only available for sections. Click it to switch between showing the
section and showing the underlying bitmap that contains the selection rectangle
defining the section.

Macro Pages
Macro Page Designer
381
If this button is activated, you can modify the section rectangle. To update the
section, deactivate the button again.
Show Ruler
Shows/Hides the horizontal and vertical rulers.
Zoom Factor
Indicates the current zoom factor.
Selection Size
Indicates the size of the current selection.
Mouse Position
Indicates the current mouse position.
Sections
You can combine your bitmaps into a single larger bitmap and then create sections within
this bitmap for all the images that you want to use. This helps you keep a better overview
over the macro page bitmap resources, for example.
Creating a Section from a Bitmap
1. Add a bitmap resource that contains all the regions that you want to address.
2. In the Resources Tree, open the context menu and select Create> Section.
3. Enter the name for the new section.
4. In the Properties section, click Select File next to the Bitmap field and select the
bitmap.
5. Use the Position and Size controls to specify the borders of the new section within the
bitmap.
Creating a Section From a Selection
1. Zoom in on the area where you want to create the section.
2. With the Select Tool, draw a rectangle around the region that represents the section.
3. If necessary, adjust the selection edges by dragging the borders.
4. Right-click to open the context menu and select Create Section from Selection.
The section is added to the tree and the editor automatically switches to the new
section resource. You can now use the new section in any control that requires a
bitmap resource.
Creating Sections From Existing Sections
Using existing sections to create new sections is particularly useful if you want to create
several sections of the same size.
1. Select the section in the tree.
2. Activate Edit Section to display the source bitmap that contains the section rectangle.
3. Right-click the canvas and select Create Section from Selection.
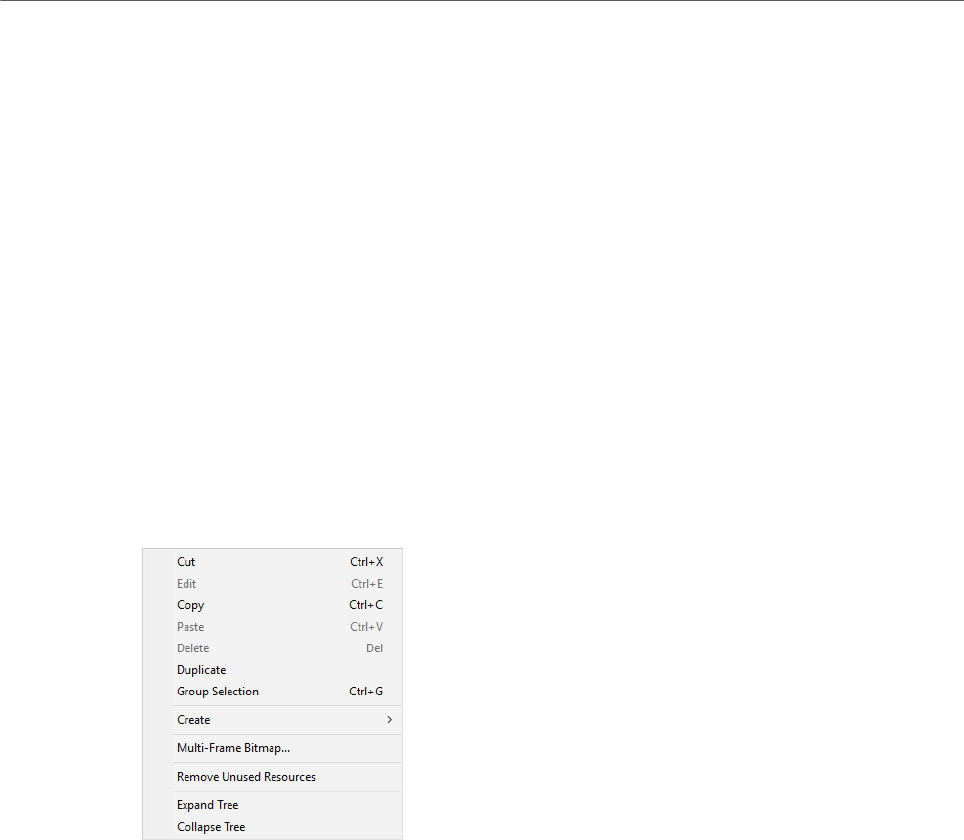
Macro Pages
Macro Page Designer
382
The section is added to the tree and the editor automatically switches to the new
section resource.
4. Move the rectangle so that it encompasses the region that you want to use in the new
section.
5. Repeat the last two steps to create all the necessary sections.
6. Deactivate Edit Section.
Modifying an Existing Section
If a section is not quite accurate or does not contain the content that you wanted it to show,
you can modify it.
1. Select the section in the tree.
2. Activate Edit Section to display the source bitmap that contains the section rectangle.
3. Adjust the section rectangle by dragging its edges.
4. Deactivate Edit Section.
Resources Tree Context Menu
Cut
Cuts the selected element.
Edit
Allows you to edit the selected element.
Copy
Copies the selected element to the clipboard.
Paste
Pastes the element from the clipboard at the current position.
Delete
Deletes the selected element.
Duplicate
Duplicates the selected element.
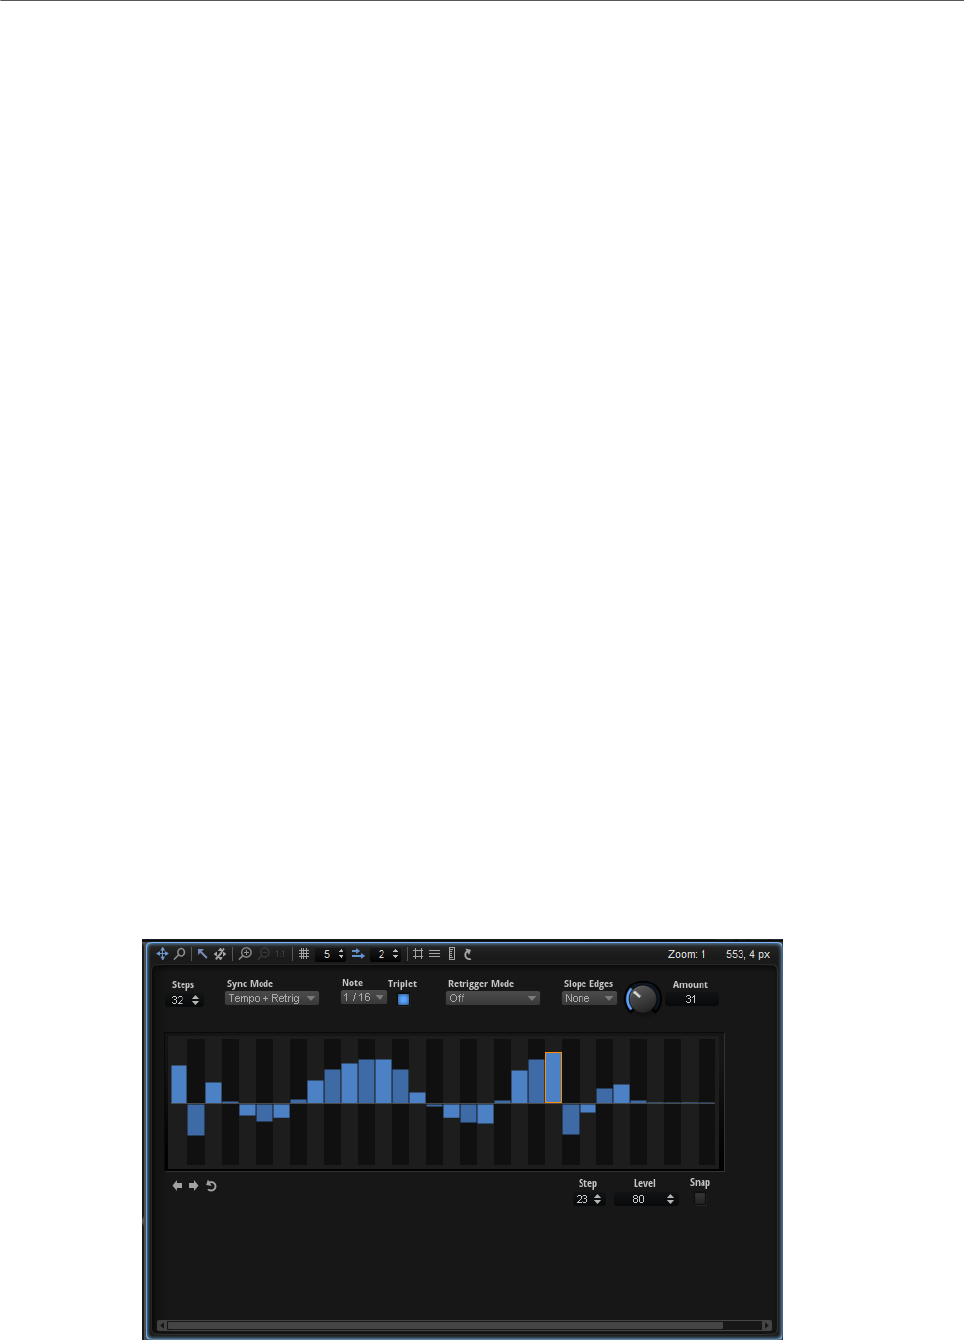
Macro Pages
Macro Page Designer
383
Group Selection
Allows you to group multiple selected elements.
Create
Opens a submenu containing the elements that can be added. Select a menu
entry to add the element to the Resources Tree.
Multi-Frame Bitmap
Allows you to create a multi-frame bitmap.
Remove Unused Resources
Removes the unused resources from the Resources Tree. This is useful to clean
up your macro page.
Expand Tree/Collapse Tree
These commands expand/collapse the entire tree or one of its substructures,
depending on where you click to open the context menu.
Properties Section
The Properties section below the GUI, Templates, and Resources trees allows you to edit the
properties of the selected element.
For example, if you select a resource in the Resources Tree, the Properties section allows
you to make settings for this specific resource.
Which parameters are available in this section depends on the selected element.
Canvas
The canvas allows you to edit your macro page graphically by adding and arranging
elements, etc., and to create and edit the used templates and resources. Depending on
which tree and element is selected, the canvas shows the macro page as it will appear in the
Macro Editor, the content of the selected template, or the resource editor.

Macro Pages
Macro Page Designer
384
You can drop controls, templates, and resources directly onto the canvas to add them to your
macro page.
Toolbar
The canvas toolbar is available for the GUI Tree and the Templates Tree. The Resource
Editor has its own toolbar.
Move Tool
If this tool is selected, you can move and resize controls on the canvas.
Zoom Tool
If this tool is selected, you can zoom in on a specific area by clicking in the center
of it. Click multiple times to increase the zoom level.
Focus Mode
Allows you to select elements on the canvas by clicking them. If Focus Mode is
deactivated, you can only set the focus on the canvas by selecting an element in
the GUI Tree.
If an element is selected, you can move and scale it on the canvas.
Disable Attachments
Allows you to deactivate the attachment properties of all objects on the canvas.
For example, if Disable Attachments is activated, changing the position of a
group edge changes the size of the group only, any attached child objects are not
resized nor repositioned.
Zoom In
Zooms in on the macro page.
NOTE
If the macro page is zoomed in, you cannot use test mode. To test the
functionality of your macro page, you must zoom back to the original resolution.
Zoom Out
Click this button to zoom out.
Zoom to Actual Pixels
Displays the macro page in its original size.
Enable Grid
Activating the grid allows you to place controls and other elements on a fixed
grid.
NOTE
If you move an element using a key command, the grid is not used and the
element can be placed freely.

Macro Pages
Editing and Assembling Elements
385
Grid Width
Sets the width of the grid, in pixels.
Enable Coarse Step
If Enable Coarse Step is activated, you can position elements on the canvas grid
using a larger step width.
Coarse Step Width
Sets the coarse step width, in pixels.
Show Pixel Grid
Shows a grid that represents the actual pixels. This grid is only displayed for high
zoom levels, starting with 600 %.
Show Guide Lines
Activate this option to show/hide guide lines on the canvas. If Show Guide Lines is
activated, objects snap to these lines when approaching them.
Show Ruler
Shows/Hides the horizontal and vertical rulers. The rulers show coordinates in
pixels.
Reload All Resources
Allows you to reload all resources. This can be necessary if you changed a bitmap
resource in an external image application, for example, and you want to see
the updated image on the macro page. Without reloading the resources, your
changes are only visible when you load the program the next time.
Zoom Factor
Indicates the current zoom factor.
Mouse Position
Indicates the current mouse position.
Editing and Assembling Elements
For your macro pages, you will use many elements that need to be placed on the canvas in
a specific order, have a specific color and size, etc. You have many possibilities for adding,
editing, scaling, and arranging the available elements on the canvas.
Using Templates
You can create and arrange controls directly on the canvas and then connect them to HALion
parameters. This is a very straightforward way of creating a macro page. However, with
this workflow, once the page is set up, it becomes very difficult to change the look of some
controls globally, because you have to edit every single instance of these controls on the
page. Therefore, it is often better practice to work with templates.
Templates allow you to combine several controls with a specific look and feel in a single
unit that can be used several times on a macro page and that can be connected to different
parameters.

Macro Pages
Editing and Assembling Elements
386
If you use templates and a modification is necessary, you only have to change the template to
apply the changes to all controls that use the template.
Furthermore, templates can be saved in libraries, which means that you can build your own
control template library and use controls from there in your projects.
Using templates is a very powerful way to create sophisticated interfaces that still allow for
quick changes of the overall look, simply by modifying a few templates.
There is no hard and fast rule when it comes to deciding when to create a template and
when to use the controls directly on the macro page, but for big projects or projects that are
similar in style and/or share a lot of their content, creating templates can save a lot of time
and keep a lot of flexibility until a very late stage in your work.
Creating Templates
You can create a template from scratch by adding a new empty template to the Templates
Tree and then assembling and configuring its elements. In addition, you must specify which
control values you want to export to the template. Exported properties become template
parameters and can then be connected to HALion engine parameters.
PREREQUISITE
You have created or loaded a macro page in the Macro Page Designer.
PROCEDURE
1. Right-click the Templates Tree and select Create> Template.
This creates a new empty template.
2. Enter a name for the template and click Edit Element on the toolbar.
3. Specify the size for the template by dragging the borders of the rectangle on the
canvas.
4. Right-click the GUI Tree and select Create> Knob.
5. In the Properties section for the knob element, assign a bitmap to it by dragging it
from the Resource/Library Browser onto the Bitmap field.
6. Right-click the GUI Tree and select Create> Text.
7. Right-click the Resources Tree and select Create> Font.
8. Set up the font in the Properties section.
9. In the Properties section for the Text element, select the font that you have set up.
10. Arrange the knob and the text controls on the canvas.
11. Select the knob control and activate the Export Property button for the Value
parameter.
12. Do the same for the text control.
13. In the Properties section for the template, enter the same name for the two created
template parameters, for example Value. This way, they appear as a single template
parameter when you use the template on the macro page.
14. When you are done setting up your template, click Switch Back to Macro Page/Parent
Template in the top right corner of the GUI Tree.
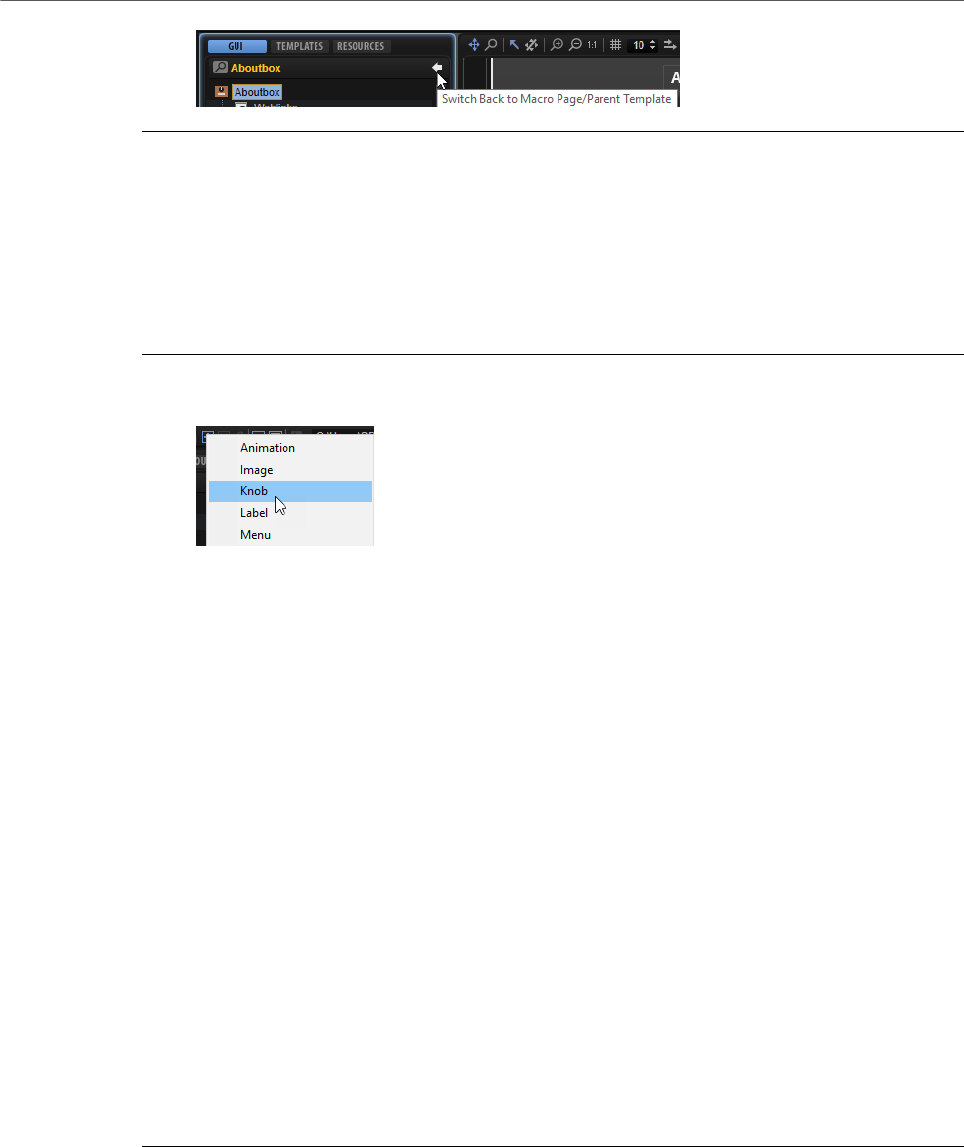
Macro Pages
Editing and Assembling Elements
387
RESULT
You can now use your template on the macro page.
Creating Templates From Groups or Selections
In the GUI Tree, you can create templates from a group or a selection. This is useful if you
want to use this specific combination of elements as one entity on your macro pages.
PROCEDURE
1. In the GUI Tree toolbar, click Create New Element and add a Text and a Knob element.
2. Select the knob element, and specify its bitmap in the Bitmap field in the Properties
section.
3. In the Resources Tree, create a Font element and make settings for the font in the
Properties section.
4. In the GUI Tree, select the text element, and select the created font in the Font field in
the Properties section.
5. Arrange the text and knob elements graphically on the canvas.
6. In the GUI Tree, select the text and knob elements, open the context menu, and select
Create Template <template name> from Selection.
7. As template name, enter Knob_with_Text.
8. Select the knob element and activate the Export Property button for the Value
parameter.
9. Do the same for the text element.
10. Select the template Knob_with_Text in the GUI Tree.
The Properties section now contains a Template Parameter section where the two
Value parameters are listed.
11. Enter the same name for both Value parameters.
12. When you are done setting up your template, click Switch Back to Macro Page/Parent
Template in the top right corner of the GUI Tree.
RESULT
When you use the template, it will show both controls in a single connection. They appear as
a combined template parameter on the parent. You can now connect the template and both
the Text and Knob values will react to parameter changes in HALion.

Macro Pages
Editing and Assembling Elements
388
NOTE
You can add default values for exported parameters by typing in a string or a value, even
though the Export Property button is activated. As long as this string or value is not
overwritten in the template instance, it remains active.
For an example, look at the exported label parameters of the library controls. You will see
that they are all set to Label. This means that when you add such a template to your macro
page, the control will show this default label. Setting the Label parameter of the template
will overwrite the default value and show the new name instead.
AFTER COMPLETING THIS TASK
You can now name the template and finalize it by exporting the required parameters, adding
additional components, or setting up attachments, for example.
Creating Nested Templates
You can create templates that contain other templates. Combining templates this way allows
you to specify separately for each child template whether you want to use its parameter
values in the parent template or whether you want to use fixed parameter values.
A good example for nested templates is the definition of a group of four knobs as ADSR
envelope controls.
PROCEDURE
1. Create a new template named ADSR Knobs and click Edit Element on the toolbar.
2. To this template, add four knob templates that each contain a label and a text field.
3. In the Properties section for the knob parameters, you will find the template
parameters Value, Unit, and Label.
4. Click the Export Property buttons for the Value parameters of the four knobs and
name them ValA, ValD, ValS, and ValR, for example.
This creates independent parameters in the template.
5. For the Label parameters, enter A, D, S, and R.
RESULT
When you use the ADSR Knobs template, the labels will always be A, D, S, and R, but the
knobs can be freely connected to any envelope.
Using Templates From Libraries or Macro Pages
You can use the Resource/Library Browser to browse the content of existing macro pages
and use them in the current macro page.
The Resource/Library Browser shows the templates that are available in the macro pages
and allows you to drag and drop them from there. All the necessary resources are also
copied from the source macro page to the current macro page.
PROCEDURE
1. Navigate to the library or the macro page that contains the template that you want to
use.
If the file contains sub-libraries, navigate to the sub-library.
Macro Pages
Editing and Assembling Elements
389
2. Drag the template from the Resource/Library Browser to the canvas or to a group on
the canvas.
The destination lights up to indicate where the control will be placed.
Editing Templates
To edit a template, click Edit Element on the toolbar or select Edit on the context menu. This
opens the GUI Tree for the template, that is, only the template content is shown.
You can edit templates in the same way as other macro page elements. When you have
finished editing, click Switch Back to Macro Page/Parent Template to leave template editing
and return to the editing of the macro page. The modifications are now visible in every
occurrence of the template on the macro page.
Browsing for Files
When creating a macro page, you need a variety of different files. You can work with control
libraries, use elements or groups of elements from other macro pages, and even create your
own graphical elements in a graphics program and use these in HALion. To browse for all
these kinds of files, you use the Resource/Library Browser.
The Resource/Library Browser gives you access to factory and user libraries that contain
templates. It allows you to search for files that you can use in macro pages and allows you
to save your favorite browse locations. Furthermore, you can also browse the contents of
existing macro pages, which means that you can reuse templates from other macro pages,
for example.
To open the Resource/Library Browser, click Show/Hide Resource/Library Browser on the
toolbar.
To specify the folder that you want to browse for files, click the Select Folder icon on the
toolbar and navigate to the folder on your system, or select one of the locations from the
Select Location pop-up menu.
You navigate through the folders by clicking the folder icons. If you are not on the topmost
level of the hierarchy, the leftmost folder lets you move up a level. To browse the content of
macro pages and control libraries, click their icons.
Browse Locations
By specifying browse locations, you can save shortcuts to the folders that contain control
libraries, bitmaps, etc. If you have folders on your hard disks that you often need, save them
as browse locations.
• To define a folder as browse location, open it in the Resource/Library Browser, click
Save Location on the toolbar, and save the folder as HALion subpreset.

Macro Pages
Editing and Assembling Elements
390
Once a location is defined, you can select it from the Select Locations pop-up menu.
• To delete a browse location, click Delete Location on the toolbar, select the location
that you want to delete, and click Yes.
Adding Elements
You can either add elements directly to the canvas, or you can add them to the GUI Tree, the
Templates Tree, or the Resources Tree first.
If you drag an element onto the canvas, a corresponding entry is automatically added to the
GUI Tree, the Resources Tree, and/or the Templates Tree.
Grouping Elements
Grouping elements allows you to structure your macro page content.
You can group selected elements in the GUI Tree, the Templates Tree, and the Resources
Tree using the context menu command Group Selection.
Editing the Elements on the Canvas
You can edit the elements on the canvas either with the mouse, using key commands, or by
editing their values in the Properties section.
Positioning Elements
You can position elements in the following ways:
• Drag the element to another position on the canvas.
To restrict movement to the horizontal/vertical axis, hold down Ctrl/Cmd while
dragging in one direction.
This restricts movement to the direction in which you move the mouse most, that is,
you can switch from horizontal to vertical by moving the mouse in this direction.
• Select the element and use the arrow keys.
To move an element in the coarse steps set on the toolbar, hold down Shift and use the
arrow keys.
• Select the element and change the Position values in the Properties section.
NOTE
If Enable Coarse Step is activated, all move actions use the coarse step width.
Resizing Elements
You can resize elements in the following ways:
• Select the element and change the Size values in the Properties section.
• To move the upper border of an element, use Ctrl/Cmd-Shift-Down Arrow/Up Arrow.
• To move the lower border of an element, use Ctrl/Cmd-Down Arrow/Up Arrow.
• To move the left border of an element, use Ctrl/Cmd-Shift-Left Arrow/Right Arrow.
• To move the right border of an element, use Ctrl/Cmd-Left Arrow/Right Arrow.
Macro Pages
Editing and Assembling Elements
391
• To adjust the height or width of an element, drag its borders.
To adjust the width in finer increments, hold down Shift while dragging.
To scale height and width with a fixed ratio, point at the border of an element so
that the cursor becomes a double arrow, click and hold the mouse, hold down Ctrl/
Cmd-Shift and drag.
Copying Elements
You can copy elements in the following ways:
• Hold down Alt and drag it to another position.
• Hold down Alt and use an arrow button.
The copy is added with a distance of one pixel. To add a copy at a Coarse Step distance,
press Alt-Shift and use an arrow key.
Attaching Objects to Parent Objects
You can attach one or multiple edges of a child object to its parent. This way, changing
the size of the parent will also influence the position or size of the child. This is useful for
creating your own templates.
If a child object is selected in the GUI Tree, the Attach options are available in the Properties
section.
Attach Left
Activate this button to attach the child to the left side of the parent object.
Resizing the parent object to the left will also move the child to the left, to keep
its relative position to the left edge of the parent.
Attach Right
Activate this button to attach the child to the right side of the parent object.
Resizing the parent object to the right will also move the child to the right, to
keep its relative position to the right edge of the parent.
NOTE
Attaching the left and right sides resizes the child object horizontally. If the child object
provides a Scale option, such as images and sections do, for example, the content is scaled.
Attach Top
Activate this button to attach the child to the top border of the parent object.
Resizing the parent object by adjusting its top border will also move the top
border of the child, to keep its relative position to the top border of the parent.
Attach Bottom
Activate this button to attach the child to the bottom border of the parent object.
Resizing the parent object by adjusting its bottom border will also move the
bottom border of the child, to keep its relative position to the bottom border of the
parent.
Macro Pages
Editing and Assembling Elements
392
NOTE
Attaching the top and bottom borders resizes the child object vertically. If the child object
provides a Scale option, such as images and sections do, for example, the shown content is
scaled.
Setting the Attach Ratio
Each Attach option features an additional Ratio parameter that defines the effective change
of the corresponding edge in relation to the edge of the template in which the child is used.
If this parameter is set to 1/1, the border of the edge follows the template edge exactly. With
a value of 1/2, for example, the edge only follows with half the speed, which means that if the
template edge is moved by 10 pixels, the attached edge is only moved 5 pixels.
To keep a child unchanged in size but horizontally centered in the template, set the values for
left and right to 1/2.
To keep a child unchanged in size but vertically centered in the template, set the values for
top and bottom to 1/2.
EXAMPLE
Creating a Template With a Centered Element That Fills The Available Space
Let’s say you want to create a template containing a text field and a knob, where you want the
text field to be resized horizontally when the size of the template is changed and where you
want the knob to remain centered and unscaled.
For the text field, set Attach Ratio Left to 0/1 and Attach Ratio Right to 1/1. This way, the left
edge always sticks to the left side of the template and the right edge follows the right edge of
the template exactly. Changing the width of the template equally changes the size of the text
field.
For the knob, set Attach Ratio Left and Attach Ratio Right to 1/2. This way, resizing the
template by 20 pixels will move the left and right borders of the knob by 10 pixels each,
keeping the size of the knob unchanged and its position centered.
EXAMPLE
Creating a Template Containing Several Adjacent Elements That Are Equally Distributed
You can also create more complex constructions, where several child objects are arranged
horizontally side by side, and where all children are resized relatively to the template size.
Let’s say you have four text fields in a row and want them to be resized with the same
horizontal ratio when the template is resized in width.
1. Attach the left edge of the first text field with a ratio of 0/1.
2. Attach the right edge with a ratio of 1/4.
3. Attach the left edge of the second text field with a ratio of 1/4.
4. Attach the right edge with a ratio of 2/4.
5. Attach the left edge of the third text field with a ratio of 2/4.
6. Attach the right edge with a ratio of 3/4.

Macro Pages
Editing and Assembling Elements
393
7. Attach the left edge of the fourth text field with a ratio of 3/4.
8. Attach the right edge with a ratio of 4/4.
Scaling Elements
You can scale bitmap resources to make them fit on your macro page.
PROCEDURE
1. In the Resources Tree, select the resource.
2. In the Properties section, select a Scale Mode for the image.
•Select Stretch to stretch or compress the image to fill the new space.
•Select Tile to repeat the image, that is, to insert several instances of the image
next to each other, as often as necessary to fill the new space.
•Select Tileborder to fill the area outside the margin lines with the bitmap
content, the center area of the bitmap remains empty. This allows you to create a
resizable border for an element on the macro page, for example.
3. In the GUI Tree, select the element that uses the bitmap property, activate the Scalable
button in the Properties section and adjust the Size values for the bitmap.
Aligning Elements on the Canvas
Guide lines help you align controls and other elements on the canvas.
PREREQUISITE
Show Guide Lines is activated on the toolbar.
PROCEDURE
1. Right-click the canvas at the position where you want to add the guide line and select
Add Horizontal Guide Line or Add Vertical Guide Line or click in the ruler and drag the
mouse into the canvas.
2. Move the guide line to the exact position.
The pixel position is indicated while moving a guideline.
Creating Pages on the Macro Page
PROCEDURE
1. In the GUI Tree, click Add Element and select Stack.
2. Select the stack element on the canvas and drag its borders so that the stack size
matches the size of the macro page.
3. Right-click the stack element in the GUI Tree and select Create> Group.
4. Drag the borders of the group element so that it matches the stack size.
5. Repeat the last two steps, so that you get a stack with two child groups.
Those child groups are the pages of your macro page.
6. Add and edit the elements on both pages.
Macro Pages
Editing and Assembling Elements
394
AFTER COMPLETING THIS TASK
You can now create variables that allow you to switch between the pages.
RELATED LINKS
Switching Between Two Pages Using a Single Switch on page 396
Bitmaps Used In Controls
Most of the controls use bitmap resources for their graphical representation. The number
of required bitmap resources depends on the control and its configuration. For example, a
switch requires up to six different bitmap resources, to display its off, on, and hover states
and their equivalents when clicked with the mouse.
To assign a bitmap resource to a control, do one of the following:
•In the Properties section, click the Select File button to the right of the Bitmap field
and select one of the available bitmaps.
•In the Resource/Library Browser or the File Explorer/Mac OS Finder, navigate to and
select the bitmap file that you want to use and drag it onto the Bitmap field in the
Properties section for the control.
Searching for Elements
The GUI Tree, the Templates Tree, and the Resources Tree all feature a search and replace
function. This is useful to find content when you work with a lot of content files, for example.
To open the search options, click the Search button at the top left of the tree. You can search
for elements by entering a portion of the name or property value that you are looking for in
the Find text field. With the arrow buttons, you can step through the found elements.
Only Visible
If this button is activated, the search is limited to the elements that are located in
expanded tree branches. Collapsed parts of the tree are not searched.
Case Sensitive
If this button is activated, the search is case sensitive.
Search in All Attributes
If this button is activated, the search is extended to all property fields. By default,
only the name property is included in the search.
You can also replace strings that were found with another string. Replace Current Selection
only replaces the selected string. Replace All replaces all found strings in the tree with the
replacement text.

Macro Pages
Editing and Assembling Elements
395
UI Parameters and Variables
Not all macro page controls need to be connected to engine or script module parameters.
Sometimes, you need so-called UI parameters to perform functions on your macro page, for
example, to switch between pages or to activate specific editing features.
To be able to connect macro page controls with UI parameters, you must first add variables
and then define them in the Properties section.
Variables can either be created for templates or for the macro page itself if you want to use
them globally.
UI Variable Types
Which of the available variable types to use depends on the parameter that you want to
connect. For example, the Index parameter of a node in an envelope requires an Integer
variable, and the Level parameter of the node requires a Float parameter.
You can find out the type of a parameter in the Type column in the Parameter List.
NOTE
If the Type column is not shown, right click a column header and activate Type.
Float
Uses numbers with a decimal point. The properties are Name, Value, Minimum,
Maximum, and Precision. Precision defines the number of digits after the
decimal point.
Integer
Uses positive and negative natural numbers. The properties are Name, Value,
Minimum, Maximum.
Popup List
Uses a list of template name strings. You can open a template that is referenced
in the list, that is, show it on top of the other elements in the macro page, by
setting the variable to the value that corresponds to the index of the template in
the list. The properties are Name and the list entries. You can enter the names of
the templates that you want to use in the text fields.
Rational
Uses a fraction. The nominator and denominator can be set individually. The
properties are Name and Value. An example of this variable is the Time Beat
text control template within the Envelope template that comes with the “Basic
Controls” library.
String List
Uses a list of strings. These strings are used to fill a menu control. This can be
used for Sync Note function in the envelope, for example. The properties are
Name and the list entries. You can enter the string that you want to add in the
text field.
String
Uses text. The properties are Name and Value.
Macro Pages
Editing and Assembling Elements
396
Adding UI Variables
Before you can use variables, you must add them to your macro page.
PROCEDURE
1. In the GUI Tree, either select the macro page or the template, depending on where you
want to use the variable.
2. Right-click and select Create> Variables.
This creates the folder in which all variables are saved.
NOTE
If you use a large number of variables, it might be necessary to organize them by
creating further subfolders. To do so, right click the Variables folder and select
Create> Variables.
3. Right-click the Variables folder and select the type of variable that you want to add
from the Create submenu.
AFTER COMPLETING THIS TASK
Now you can name the variable and make settings for it in the Properties section.
RELATED LINKS
UI Variable Types on page 395
Switching Between Two Pages Using a Single Switch
You can use variables to switch between the pages of your macro page.
PREREQUISITE
• You have created a Stack element that contains two groups, one for each page.
• You have added a Variables folder to your macro page.
PROCEDURE
1. In the GUI Tree, right-click the Variables folder and select Create> Integer.
2. In the Properties section, name it pages.
3. Set Minimum to 0 and Maximum to 1.
4. Add an on/off switch to the macro page.
5. Set the Value property of the switch and the Value property of the stack to @pages.
This will connect the two properties.
RESULT
You can now switch between the two pages using the on/off switch.

Macro Pages
Editing and Assembling Elements
397
Switching Between Multiple Pages Using Radio Buttons
If you have more than two pages on your macro page, you can use radio buttons to switch
between the pages, rather than an on/off switch.
PREREQUISITE
You have created a Stack element that contains four groups, one for each page.
You have added a Variables folder to the macro page.
PROCEDURE
1. In the GUI Tree, right-click the Variables folder and select Create> Integer.
2. Name the variable pages.
3. In the Properties section, set Minimum to 0 and Maximum to 3.
4. On the macro page level, add a radio switch for each page.
5. Set the Value properties of all the radio buttons to @pages.
6. Set the Onvalue parameters to 0, 1, 2, and 3, respectively, so that they match the four
pages.
7. Set the Value property of the stack to @pages.
8. Activate Test Macro Page and use the radio buttons to open the different pages.
RESULT
You can now click one of the radio buttons to display the corresponding page of the stack.
Opening an About Box from the Macro Page
If you want to present background or related information for the program that is connected
to your macro page, you can create an about box, that is, a separate information page, and
make it accessible as a pop-up panel.
PREREQUISITE
• You have created a macro page for your program.
• You have added a Variables folder to the macro page.
• You have created a bitmap that contains the information that you want to show in the
about box.
PROCEDURE
1. In the Templates Tree, add a template and name it About.
2. On the toolbar, click Edit Element and set the size of the template to the size of the
macro page.
3. Add the about box bitmap by dragging it from the Resource/Library Browser onto the
canvas.
4. Position the bitmap where you want the about box to appear.
5. Optional: If necessary, activate Scalable in the Properties section and specify the
correct size for the about box.
6. Click Switch Back to Macro Page/Parent Template.
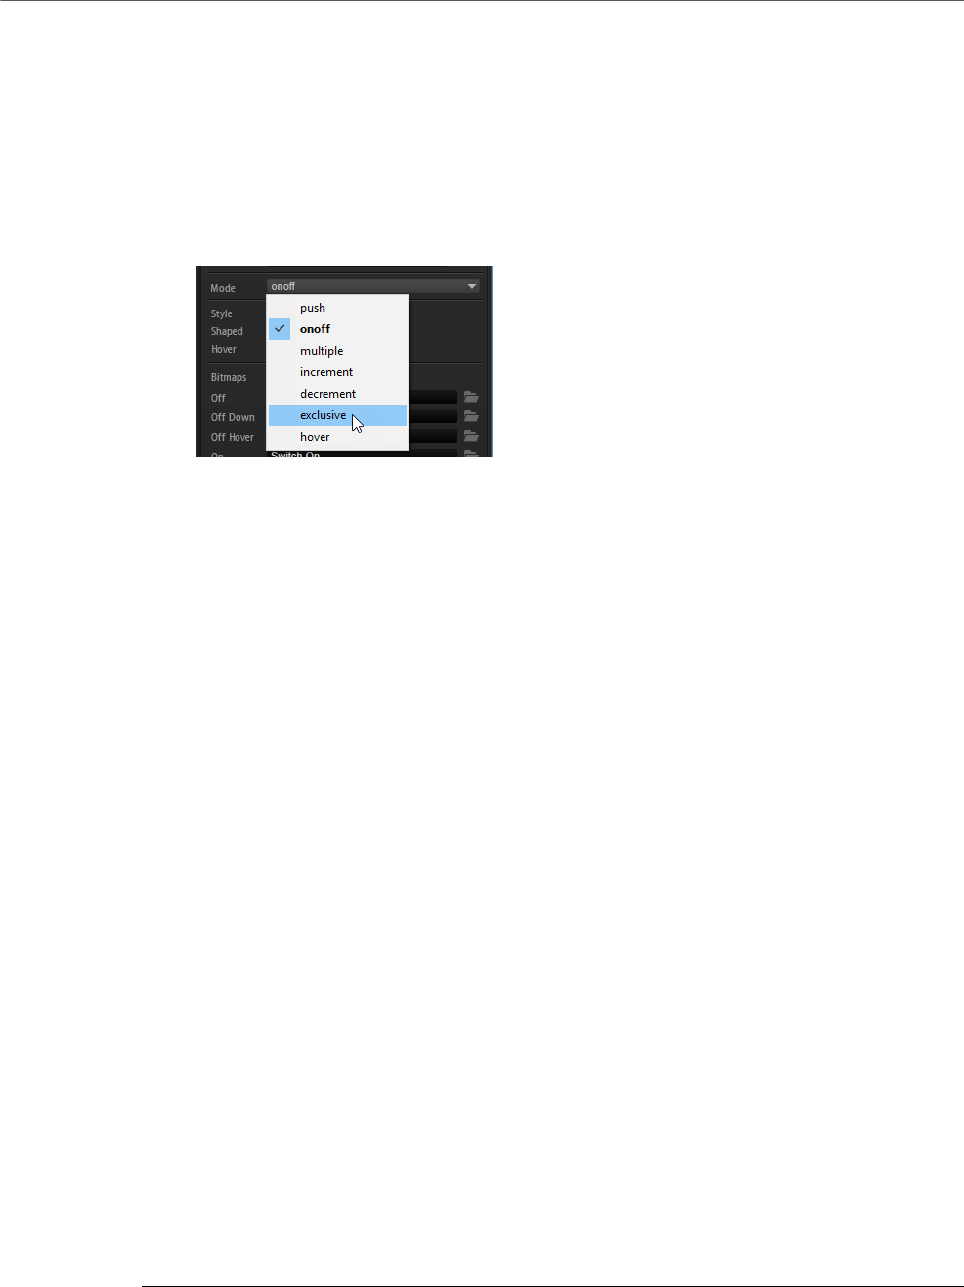
Macro Pages
Editing and Assembling Elements
398
7. In the GUI Tree, create a Popup List variable for the macro page and name it
aboutbox.
8. In the Properties section for the variable, enter About in the first line.
This connects the variable to the About template.
9. Add a switch to the macro page by dragging it from the Resource/Library Browser to
the GUI Tree.
10. Click Edit Element on the toolbar, select the switch element, and set the Mode to
exclusive.
This way, the switch performs one exclusive switching operation. In this case, we want
it to open the about box.
11. Set the Onvalue for the switch to 1.
12. Set the Value parameter to @aboutbox to connect it to the Popup List variable.
If you now click the switch, it sends a value of 1 to the Popup List variable. This will
open the About template that is located at the first line in the variable.
13. Click Switch Back to Macro Page/Parent Template.
14. Activate Test Macro Page on the toolbar and click the switch.
This opens the about box at the specified position on the canvas. Now, you need a way
to close the about box again.
15. Deactivate Test Macro Page, open the Templates Tree, select the About template and
click Edit Element on the toolbar.
16. Click Create New Element and select a switch to the About template.
We want to switch back to the macro page by clicking anywhere on the page, therefore,
we need a simple switch in the size of the macro page, which does not contain a label.
17. Select the switch and click Edit Element.
18. Adjust the size of the switch so that it spans the entire macro page.
19. Set the Mode to exclusive.
20. Set the Value to @aboutbox to connect the switch with the Popup List variable.
21. Set Onvalue to 0.
This way, the About template is removed from the macro page when the switch is
pressed.
22. Go back to the GUI Tree for the macro page by clicking Switch Back to Macro Page/
Parent Template and activate Test Macro Page.
23. Click the switch on the macro page to open the about box and click anywhere on the
page to close the about box again.

Macro Pages
Editing and Assembling Elements
399
Edit Scope
The edit scope allows you to specify for a group or template on the macro page which
module, effect, layer, etc., will be affected by it.
The scope is defined with the path to this object.
You can either enter the path to the object manually in the Scope value field in the Properties
section, or you can drag one of the parameters of the object from the Parameter List onto
the Scope value field.
NOTE
Dragging a parameter onto the Scope value field is a quick and easy way of setting the scope
for an element on your macro page. However, note that when you drag a parameter onto
the Scope value field, the entire path is inserted, including the parameter ID. Be sure to
delete this part from the value field. Otherwise, only this parameter will get the scope, not
the entire object.
Path Syntax
A path always starts with an @, followed by the object, that is, the module, layer, bus, etc.
To specify an object, you can either address it by object and counter or by counter and name.
Object:Counter
•@bus:n defines the n-th bus
•@layer:n defines the n-th layer
•@zone:n defines the n-th zone
•@matrix defines the modulation matrix within a zone
•@row:n defines the n-th row within the modulation matrix
Counter:Name
@n:Name defines the n-th object with this specific name
If the object that you want to address is located deeper in the program hierarchy, add a / and
continue with the next object.
EXAMPLE
•@layer:1/@0:Bus2/@0:Chorus1/ defines the first object that is called “Chorus1”
in the first object “Bus2” in the second layer.
•@0:LayerA/@0:ZoneB/ defines the first object that is called “ZoneB” in the first
object that is called “LayerA”.
Addressing Multiple Objects at the Same Time With A Single Control
You can specify both the path and the type of an object on which a control should work. For
example, this allows you to control the Pitch parameter of all zones in a layer with a single
knob. In this case, the last part of the path must be @type:Zone.
Type:Object
The following object types can be set:
Macro Pages
Editing and Assembling Elements
400
•Zone for zones
•Bus for busses
•Layer for layers
•<name of the effect > for all effects with this name
•<name of the MIDI module> for all MIDI modules of this type, that is,
all FlexPhrasers, MIDI Player modules, etc.
EXAMPLE
•@layer:1/@0:Bus2/@type:Chorus/ defines all chorus effects in the first object
that is called “Bus2” in the second layer
•@0:LayerA/@type:Zone/ defines all zones in the first object that is called LayerA
•@type:Layer/ defines all layers in the program
NOTE
For programs, no additional path information is required. Every path starts relatively to the
program.
Using a Single Set of Controls To Control Parameters for Different Layers
An edit scope allows you to add a single set of controls and apply it to different objects. For
example, if you have a program that contains several layers that all have the parameters
Octave, Coarse, Fine, etc., you can create one set of controls for these parameters, and then
switch the edit scope between the layers.
PROCEDURE
1. Create a program with two layers and name them LayerA and LayerB.
2. Create a macro page for the program.
3. In the GUI Tree, add a group to your macro page.
4. Add a knob control to the group.
5. To connect the engine parameter to the knob, open the Parameter List and drag the
Coarse parameter for layer A onto the Value property field of the knob.
The field now displays LayerA.Coarse.
6. Click the Value property field of the knob.
Now, the entire path to the engine parameter is displayed. In this example
@0:LayerA/@id16.
7. Cut the first part of the path information, that is, @0:LayerA/, and paste it to the
Scope property of the group.
The dynamic Scope only requires the parameter ID, in this case, “@id16”. The first part
of the path, that is, @0:LayerA/ is required as Scope information for the group.
8. Copy the path information into the Scope value field for the group.
9. Add a Variables folder to the macro page.
10. Create a String List variable and name it LayerSelect.
11. Copy the path information from the Scope property of the group to the first entry line of
the string list variable.

Macro Pages
Libraries
401
12. Copy the same path information to the second entry line and change LayerA to
LayerB.
The variable switches between two path strings. Now, you need a control that switches
between these two strings.
13. Add a menu control to the macro page.
You can also use other controls like knobs or radio switches to change the scope.
14. In the Value property of the menu, enter @LayerSelect.
15. In the Scope property of the group, enter @LayerSelect as well, so that the menu
and the group are both using the same variable.
16. You can now use the menu to switch between the two scopes of the group, that is, you
can select the layer that is affected.
NOTE
Note: If you want the controls to work in a dynamic scope, first add the path
information to the Scope property of the group and then connect the engine
parameters to the controls. This way, HALion directly detects that there is an edit
scope and only adds the subpath, or in the simplest case the parameter name, to the
Value property when you drop the engine parameter.
Before dragging a parameter from the Parameter List, make sure that the object from
which you want to drag the parameter is selected in the Program Tree. Otherwise,
HALion cannot retrieve the correct parameter name and will only show the parameter
ID instead.
Libraries
Libraries are identical to macro pages, except that they do not include a functional user
interface. Libraries can contain templates and their resources, as well as any further useful
content for macro pages.
You can open and edit libraries in the Resource/Library Browser. Libraries are visualized
with a light bluish background to distinguish them from bitmap resources, for example.
When you click a library, its contents are shown. If a library contains folders, these are
displayed in a blue color to distinguish them from the folders provided by the operating
system.
You can edit libraries in the same way as macro pages. For example, you can create new
templates, insert templates by dragging them from another macro page or library into the
new library, create new folders inside a library file, drag templates from libraries to a macro
page, etc.
Perform the editing that you want to apply, for example, delete or rename libraries, create
new ones, add existing templates from macro pages or other libraries, or copy templates
between libraries or macro pages by dragging them from one list to the other.
To edit a library, right-click it in the Resource/Library Browser and select Edit Library.
NOTE
To make editing operations such as copying easier, open two Macro Page Designer windows,
so that you can drag elements from one window to the other.

Macro Pages
Connecting Macro Page Controls to HALion Parameters
402
Icons for Libraries and Macro Pages
For macro pages, the Resource/Library Browser shows a preview picture of the macro page.
If you want to get such a preview picture for your library files, you can define a small and
basic macro page inside the library by adding some of the most representative elements to
the canvas and then saving the library.
Connecting Macro Page Controls to HALion Parameters
To be able to use a macro page control, you must connect it to a parameter in HALion.
You can establish the connection between control and parameter by using the context menu
or via drag and drop.
Connecting Parameters Via the Parameter List
You can connect parameters from the Parameter List or from another HALion editor.
1. In the Parameter List, navigate to the parameter that you want to connect, right-click
it and select Connect to Macro Page.
2. In the GUI Tree, navigate to the control that you want to connect to the parameter,
right-click the value property in the Properties section, and select Connect to
Parameter <HALion parameter name>.
If you now click the value field, it shows the parameter ID of the connected HALion
parameter.
Connecting Parameters Via an Editor in HALion
1. Right-click a control in the Sound Editor, Zone Editor, etc. and select Connect to
Macro Page.
2. In the GUI Tree, navigate to the control that you want to connect to the parameter,
right-click the value property in the Properties section, and select Connect to
Parameter <HALion parameter name>.
If you now click the value field, it shows the parameter ID of the connected HALion
parameter.
Connecting Parameters Via Drag and Drop
1. In the GUI Tree, navigate to the macro page control to display its properties in the
Properties section.
2. In the Parameter List, navigate to the parameter that you want to connect.
3. Do one of the following:
• Drag the parameter name and drop it on the value field of the control in the
Properties section.
• Drop the parameter name onto the control on the macro page canvas.
The value field in the Properties section then shows the parameter ID of the connected
HALion parameter.
RELATED LINKS
Removing a Connection on page 403

Macro Pages
Collaborating on Macro Pages
403
Removing a Connection
If you connected a control to the wrong parameter or if you modified the macro page and
want to set up a different connection for a control, you can delete the connection of a control.
PROCEDURE
1. Open the GUI Tree.
2. Do one of the following:
•In the Properties section, navigate to the macro control and delete its value
entry.
•Right-click a control and select Disconnect from Parameter <HALion parameter
name>.
Collaborating on Macro Pages
If you want to work on macro pages together with other users, you must make sure that you
exchange all the added and required content.
For this, HALion allows you to export the macro page together with its resources.
RELATED LINKS
Exporting Macro Pages with their Resources on page 404
Cleaning Up and Consolidating Your Macro Pages
Before finalizing your macro pages, you may want to remove any unused files, or consolidate
names and locations of the resource files used in the macro page. HALion offers you several
tools for cleaning up the macro page content.
Removing Unused Files
When you create your macro pages, you will most probably try out different templates
from various libraries. You will add various bitmaps that you want to try out as background
images, etc. Every time that you add an element or a template to the macro page, the
templates and resources are automatically added to the Templates Tree and the Resources
Tree. All these will remain in your macro page file, even if they are not used on the macro
page. Therefore, the Macro Page Designer allows you to automatically remove any unused
template or resource files from the macro page.
•To remove unused templates, open the Templates Tree context menu and select
Remove Unused Templates.
The Macro Page Designer verifies whether the existing templates are referenced by
elements on the macro page or by templates that are used on the macro page. The
templates that are not used are moved to the Trash folder in the Templates Tree,
where you can delete them.
•To remove unused resources, open the Resources Tree context menu and select
Remove Unused Resources.
The Macro Page Designer verifies whether the existing resources are referenced by
any controls on the macro page or by a template. The resources that are not used are
moved to the Trash folder in the Resources Tree, where you can delete them.

Macro Pages
Saving Macro Pages
404
NOTE
To perform both these cleanup operations at the same time, use the Templates Tree context
menu command Remove All Unused Templates And Resources.
IMPORTANT
These cleanup functions can be performed without any risk if all templates and resources
are directly linked to the macro page. However, there are certain limits. For example, when
you are using a template that references a string variable that itself is controlled by another
parameter, it is not possible for the cleanup function to determine that this template is used
and it will be moved to the Trash folder. To prevent this, activate the Protected button in the
Properties section for the template. This excludes the template from cleanup.
Exporting Macro Pages with their Resources
When you assemble a macro page, you will most probably try out and use resources from
different folders and libraries, with different naming conventions and different folder
structures. HALion imports and references all these files without problems. However, there
may be situations where you want to clean up the macro page structure, for example, if you
want to share your work or make the setup more understandable to other users. In this case,
you can export the macro page with its resources.
PROCEDURE
•In the Macro Page Designer toolbar, click Export Macro Page/Library.
RESULT
A macropage.xml file is created, together with a ui_scripts folder (if used) and a
resources folder. The structure of the resources folder reflects the tree structure of the
contained resources and templates. All resources are renamed according to their names on
the macro page and all references are adapted.
RELATED LINKS
Removing Unused Files on page 403
Saving Macro Pages
To save your macro page, click Save Macro Page/Library, specify a name and a location, and
click Save.
As soon as a macro page is saved, the program references this new macro page file. It can be
loaded into the Macro Page Designer and connected to a program, layer, or MIDI module.
NOTE
If you save the program in HALion, the corresponding macro page file on your hard disk
is automatically saved, too. However, note that the macro page is not saved automatically
when you save the project in your host application. If you try to open a project that contains a
macro page file that is older than the one that is saved on your system, you will get a warning
message.

Library Creator
405
HALion’s Library Creator allows you to create your own instrument libraries. These libraries
are built as VST Sound container files that contain all the necessary components, such as
presets, samples, macro pages, MIDI modules, scripts, and sub presets.
A library can be created as a single VST Sound container or as a combination of containers
and can easily be distributed between computers using Steinberg’s Library Manager. VST
Sound is a Steinberg container format that can be compared to ZIP or ISO files, for example.
It contains a file structure with folders and files. Once it is registered in the MediaBay, the
container is mounted, and all the Steinberg products that contain a MediaBay can access the
folders and files within the container.
Libraries
When working with HALion, all presets are managed by the MediaBay. The MediaBay is
the central place where all information about presets is stored. This information is added
by tagging the presets with a variety of attributes that describe the preset character, the
instrument category it belongs to, the author of the preset, etc. One of those tags is the
Library Name.
If you set all presets that you want to belong to a particular library to the same Library
Name, they become part of this library and the MediaBay allows you to filter your search for
content belonging to this library only. This means that if you save a new preset, you can add a
specific Library Name to it to assign it to an existing library.
There are no restrictions regarding the type of preset that you can assign to a library.
However, if you are creating libraries for use in HALion Sonic SE, it is better practice to
be more restrictive, that is, to treat a library like an individual instrument with dedicated
presets.
Often, presets refer to other files, such as samples, macro pages, and Lua scripts.
Combining presets with all the referenced files into a library makes it easy to distribute them
and to protect them against modification and deletion.
Target Users and Creation Process for Libraries
Before you create a library, you must decide who your target users or customers are. You
could build a library that only HALion users can use, which gives you the freedom to build a
macro page that is larger than the size that HALion Sonic supports, for example. However,
this limits the number of potential users.
Most often, you will probably want to build your library so that it works with HALion Sonic
SE, which means that it can be used by everybody. HALion Sonic SE is freely available for
download on the Steinberg website.

Library Creator
Libraries
406
If you want to create a library for all users, you must export your program as a HALion Sonic
SE layer preset. You can find the corresponding command on the Program Tree context
menu.
Prerequisites
Here is an exemplary list of main steps that you would usually perform to finalize the content
before creating a library.
1. You have sampled all the required sounds and noises.
2. You have cut and processed all the samples.
3. You have mapped the samples to the keyboard.
4. You have structured the samples into layers, for example, for different articulations.
5. You have set up the program so that you can switch between articulations, either using
MegaTrig or your own Lua script.
6. You have added the MIDI modules that are to be used by the instrument, for example, a
MIDI player.
7. You have added custom script code to realize some special playing features.
8. You have added busses and effects to control the audio routing and deliver the
integrated effects that you want to be part of the instrument.
9. You have configured the quick controls to add more control over the sound.
10. You have built a macro page with all the knobs, sliders, and other elements that you
need to control the sound of your instrument.
11. You have assigned the macro page to the program.
This means, you need a program that can be played and that can be adjusted using the quick
controls and the macro page.
NOTE
For a later use as HALion Sonic SE library, the Program Tree, in the most simple case,
should contain a program and a layer. The program will be exported as HALion Sonic SE
layer and contains the macro page and the quick control assignments. The layer contains all
samples, synth zones, sublayers, MIDI modules, internal busses, and effects.
Creating a Simple Library
Let us assume that you have inherited a precious and unique acoustic guitar, for example,
and you think it is worth building a virtual version of it so that you can play it with your
keyboard. You have sampled the guitar sounds and noises, and now you are going to build the
library Precious Guitar.
PREREQUISITE
• You have exported your program under the name Precious Guitar Layer using
the Export Program as HALion Sonic SE Layer preset command on the Import/Export
submenu of the Program Tree context menu.
• If you want to distribute HALion Sonic SE Program presets that combine several layers,
you have loaded the preset Precious Guitar Layer.vstpreset into a slot in
HALion Sonic.

Library Creator
Libraries
407
• You have saved the preset under the name Init Precious Guitar and you have
set up all the necessary tags, such as Category, Sub Category, Author, Character, etc.
NOTE
Do not specify the Library Name and Manufacturer attributes at this point, because
when building the VST Sound container, these tags are overwritten by the attributes
that are defined for the library.
• You have created all the required presets for the library.
This is best and quickest achieved by creating variations from the first preset.
PROCEDURE
1. In the Properties section of the Library Creator, assign icons for the MediaBay and the
library selector.
2. Set the Name to Precious Guitar.
3. Set the Long Name to Precious Guitar, too.
4. Set the Family to HALion Sonic SE.
5. Add the name of your company under Manufacturer.
6. Optional: Add a URL to your website.
7. In the Output Path field, specify the location where you want the VST Sound containers
to be created.
8. In the VST Sound Containers list, set the file name of the VST Sound container to
<name of your company>_001_Precious Guitar.
9. Set the name of the library to Precious Guitar Samples and Presets.
10. Set the Version Number to 1.
11. Optional: Select a compression method and add a comment.
You have now defined the basic settings for your library and can start to add presets
and other files.
12. Select the VST Sound container in the Structure section and drag all presets into the
Content section.
A VST 3 Presets folder is added and all presets are placed inside.
The Unassigned Samples list now lists all samples that are used in the presets.
13. Select all samples in the list and drag them onto the Content section.
A Private Audio Files folder is added to the VST Sound section and all samples
are placed inside it. If you do not want to deliver any sub presets for effects or MIDI
modules, everything is now in place to build the container.
14. Click the Build Library button on the toolbar.
If the preset consistency check discovers any issues, a red warning triangle is shown,
allowing you to fix issues, such as missing tags, etc.
15. Click Save Library to save the library to a location on your disk.
RESULT
You have now built the container and the library is ready to be used.

Library Creator
Libraries
408
NOTE
You can always modify presets and the macro page and build the container afterwards again.
The Library Creator always takes the files as they are in the moment of the build process.
Verifying Your Libraries
After creating a library, the next step is to check whether it is functional.
A quick and easy way to check the library is to temporarily mount the container for testing.
This method has the advantage that you can rebuild the container if something needs to be
fixed, and HALion will instantly see this modified container.
PROCEDURE
1. On the toolbar, click Mount VST Sound containers temporarily to HALion MediaBay.
This way, the container is temporarily registered and mounted.
2. You can now access the presets using the Load page.
Mounting the container only temporarily allows you to rebuild it over and over again
while keeping HALion’s MediaBay up-to-date. The only thing you have to ensure when
rebuilding the library is that you have to unload all presets and especially samples
from this library. Otherwise, you may get a message that the library cannot be written.
3. When you are done, unload HALion to release the container file from being used.
As soon as you unload HALion or close the project, the container is unmounted. If
you reload the project at a later time, you have to mount the library again. VST Sound
containers are added to a location that is also surveyed by HALion Sonic and HALion
Sonic SE, which means that you can check the library there.
NOTE
If you rebuild the container, you must unload HALion Sonic SE, that is, you must quit
the host application and open it again before you can see the updated container.
4. Copy the new container to the location of the final library.
5. Reload HALion.
RESULT
You have checked that the library is functional and you are now ready to distribute it to
friends and/or customers.
You can also verify the functioning of a library using Steinberg’s Library Manager.
RELATED LINKS
Library Manager on page 421
Macro Page Resources
When building a library, it is necessary to also add the macro pages and scripts that are
used by the presets. This includes all bitmap and font resources as well as all scripts and UI
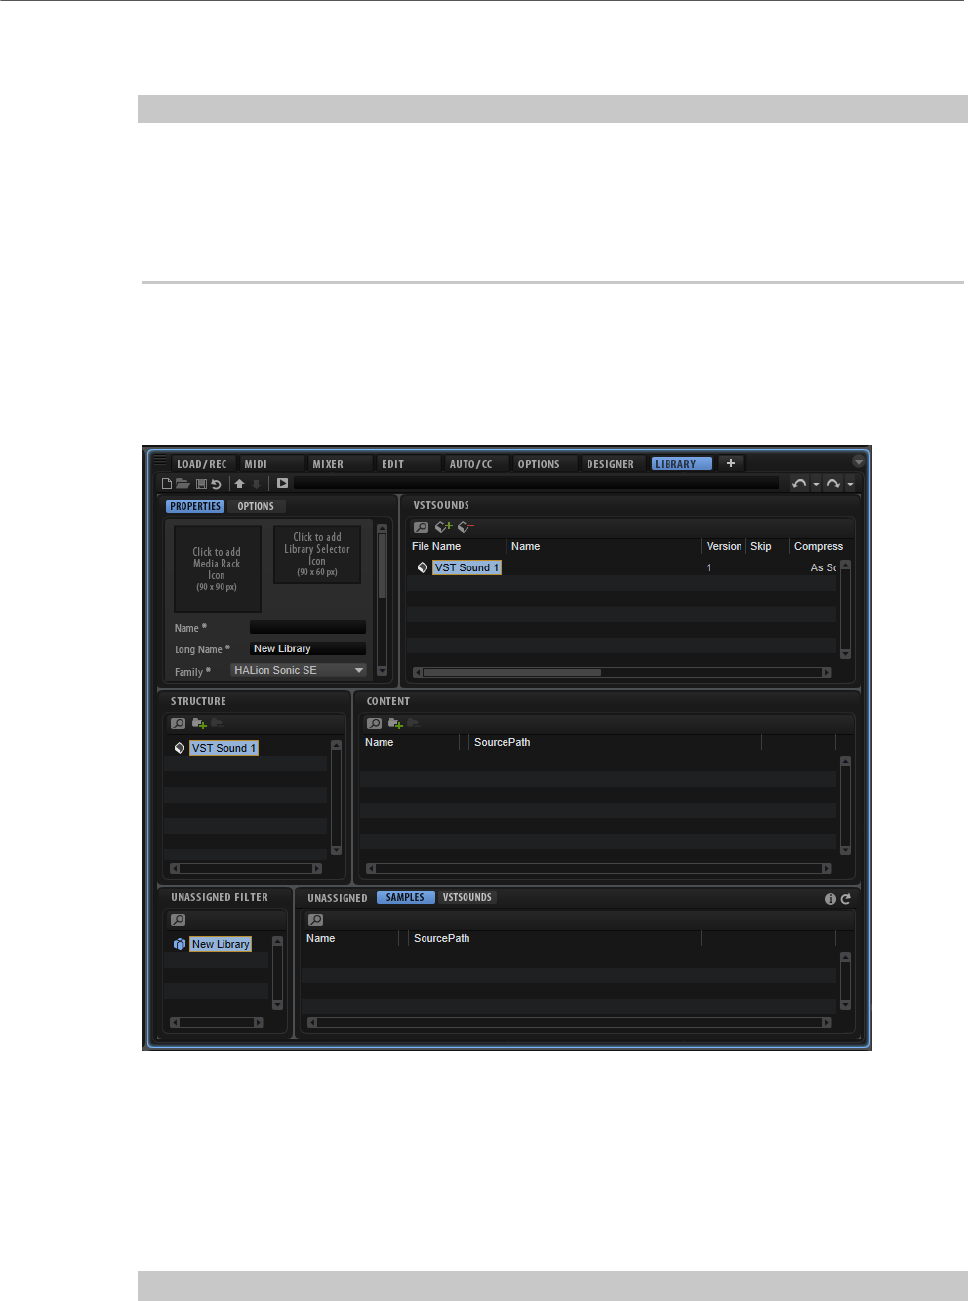
Library Creator
Library Creator Editor
409
scripts. All these files are included in the VST Sound container that contains the preset files.
However, the files are not shown in the Structure section.
NOTE
Usually, a library only contains one VST Sound container with presets. If you distribute
presets over several preset VST Sound containers, the macro page and script resources are
automatically added to each container. This means that if you want to update your macro
page or scripts, you must rebuild all preset containers and provide them to the user, to
guarantee that all presets use the updated macro page.
Library Creator Editor
The Library Creator is available as a HALion editor and it is part of the Advanced screen set,
for example.
The editor is divided into three rows, each consisting of two panes. In the topmost row, you
can set global properties for the library and define which VST Sound containers are part of it.
The second row shows the structure of the selected VST Sound container as a tree view in
the Structure section on the left and as a file list in the Content section on the right.
The third row shows the list of unassigned samples and VST Sound containers on the right.
The Unassigned Filter section on the left allows you to filter the list.
NOTE
Although the Library Creator is part of the HALion interface, it has no direct relation to the
currently loaded multi and its programs and works on its own library document.
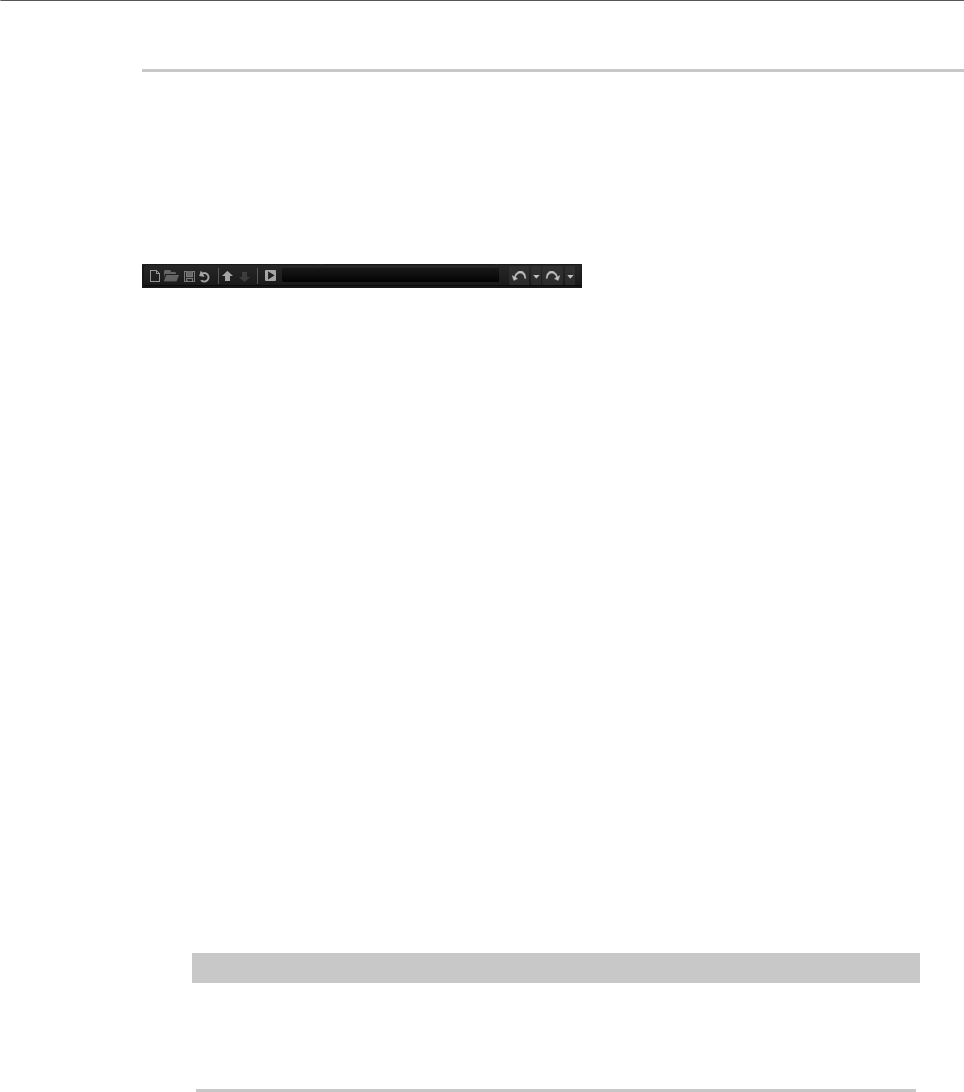
Library Creator
Library Creator Editor
410
You can only edit one library per HALion instance.
RELATED LINKS
Window Handling on page 13
Toolbar
The main toolbar provides the most important functions.
Create Library
Allows you to create a new library.
Load Library
Allows you to load a library.
Save Library
Saves the current library.
Revert to Last Saved Library
Reloads the last version that was saved. This will discard all changes that have
been made.
Mount VST Sound containers temporarily to HALion MediaBay
Allows you to mount the VST Sound containers that you created for this library
temporarily to the MediaBay. This way, you can check the build result without
having to register the library. At this state, you can still make changes to the files
and rebuild the container, and the MediaBay is automatically updated. If a library
is registered and mounted in HALion, HALion Sonic, or HALion Sonic SE and a
Steinberg DAW, it cannot be updated on-the-fly. In this case, you must close all
applications and plug-ins that have access to the VST Sound container before you
can see the changes. VST Sound containers are unmounted automatically when
HALion is unloaded.
NOTE
When you build libraries for HALion Sonic or HALion Sonic SE, these also appear
in the MediaBay. However, if you have to rebuild the container, you must unload
and reload the plug-ins to reflect the changes.
Unmount temporarily mounted VST Sound containers from HALion MediaBay
Allows you to unmount the VST Sound containers that were temporarily mounted.
Build Library
Starts the build process for the library. During the process, a progress bar is
shown.
Library Path
Displays the location and the name of your library. Changing the name here
allows you to save the library as a new version.
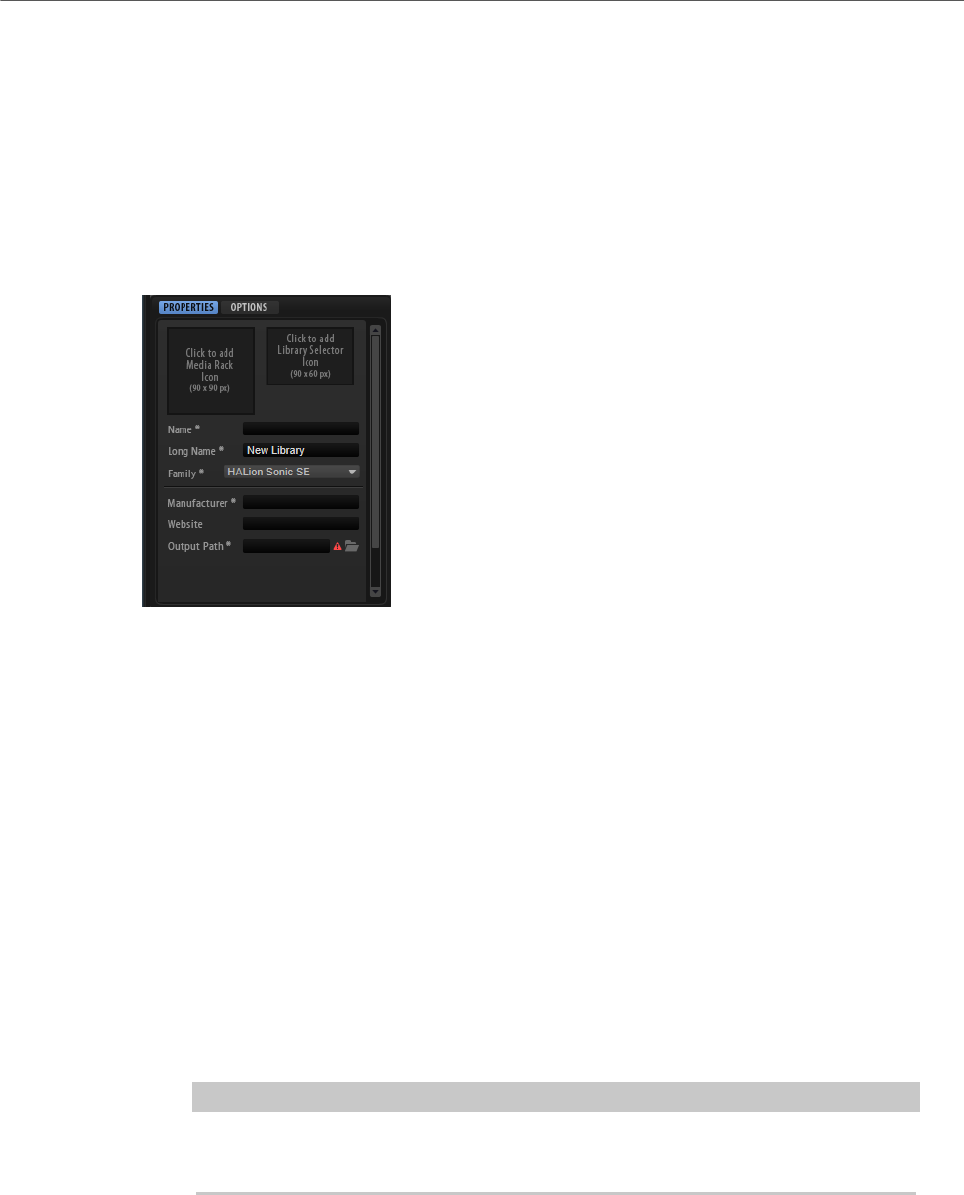
Library Creator
Library Creator Editor
411
Undo/Redo
The Library Creator provides an independent undo/redo stack with a history.
Only the changes in the library file can be undone/redone, other HALion editing
actions are not affected.
Properties
In this section, you can name the library, add icons and further information. All text fields
with an * are mandatory.
MediaBay Icon
Click this field to select the icon that you want to be shown in the MediaBay of the
Steinberg DAW. The image must be a .png file and must be 90 x 90 pixels in size.
Library Selector Icon
Click this field to select the icon that you want to be shown in the library selector.
The image must be a .png file and must be 90 x 60 pixels in size. Below the
icon, you can see a preview of the library name as it will be shown in the library
selector. This indicates whether the library name is too long to be displayed in its
entirety.
Name
Here, you must specify the name of the library. If you change the name after
having created VST Sound containers, you will be asked whether you want to
rename the library or create a new one. If you create a new library, all VST Sound
containers get new unique identifiers.
IMPORTANT
It is important not to reuse VST Sound containers with the same identifiers for
different libraries.
Long Name
Here, you must specify a longer version of your library name. This will be used in
the MediaBay of the Steinberg DAW if it is not too long. Otherwise, the standard
name is shown.
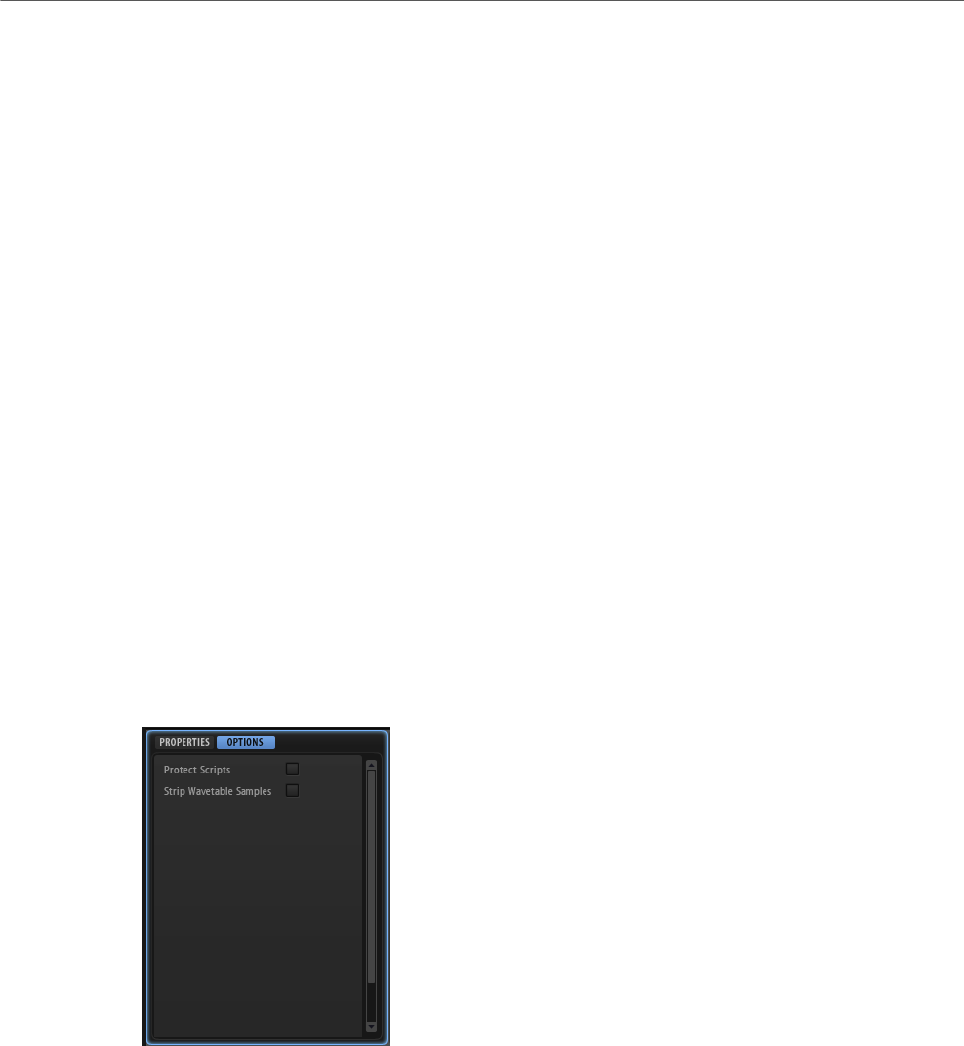
Library Creator
Library Creator Editor
412
Family
Allows you to specify for which plug-in you want to build your library.
•HALion: These presets cannot be loaded in HALion Sonic and HALion Sonic
SE.
•HALion Sonic: These presets can be loaded in HALion Sonic and HALion,
but not in HALion Sonic SE.
•HALion Sonic SE: These presets can be loaded in HALion, HALion Sonic,
and HALion Sonic SE.
Most often, you will probably want to build your library so that it works with HALion Sonic
SE, which means that it can be used by everybody. HALion Sonic SE is freely available for
download on the Steinberg website.
Manufacturer
Here, you must add your name or the name of your company.
Website
Allows you to add a URL to your website.
Output Path
Here, you must specify the folder on your system into which the VST Sound files
are written. Each container is saved in a separate subfolder.
Options
Protect Scripts
Activate this option if you want to encrypt all script files that are part of the
library. This means that users will not be able to see or edit the script code.
Strip Wavetable Samples
When creating wavetables that are based on samples, the reference paths to
the used samples are stored with the presets. This allows you to come back to a
wavetable and modify some of the wave markers. As soon as you want to deliver
these presets to others, you have the choice to either add all the source samples
that you have used to the VST Sound container, so that the user can perform
these modifications too, or you can decide to only deliver the presets with the
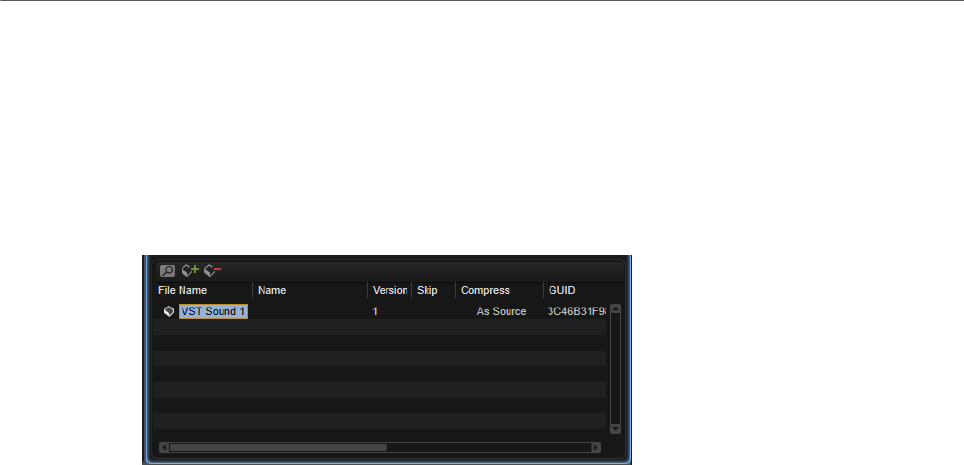
Library Creator
Library Creator Editor
413
final wavetables. In this case, you can remove the information about the used
samples in the wavetable editor by activating this option.
VST Sound Containers
This list contains all the VST Sound containers that are part of the library, either because you
are building the containers or because they are required as an external dependency by the
presets that you are delivering with the library.
Search
Allows you to search for a specific container, preset, or sample, or to replace
strings.
•Find: Allows you to enter the text string that you are searching.
•Replace: Allows you to specify the text string that you want to use instead.
•Find Previous/Next: Allows you to move from one result to the next.
•Replace Current Selection: Replaces the text for the current search result.
•Replace All: Replaces the text for all search results.
•Search for Content in all VST Sound containers: By default, the search is
performed only on the list of VST Sound Containers. Activate this option
if you want to extend the search to the entire library and the lists of
unassigned samples and VST Sounds.
•Case Sensitive: Activate this option to make the search case sensitive.
•Search in all Attributes: Activate this option if you want to search for text in
all attribute columns. Otherwise, only the name column is searched.
Add VST Sound Container
Allows you to add a new container to your library.
Remove VST Sound Container
Allows you to remove the selected containers from your library.
Attribute Columns
The additional attribute columns allow you to specify for each VST Sound
container how it should be built.
File Name
Allows you to specify the name of the VST Sound container. The file name
extension is .vstsound.

Library Creator
Library Creator Editor
414
NOTE
To avoid that two VST Sound container files with the same name built by
two different people get into conflict, each container has an internal unique
identifier, which is created automatically by the Library Creator. However, it is
recommended to use a naming scheme for VST Sound containers that makes
them easy to identify. This can be a combination of numbers, abbreviations for
your company, and the library name, for example.
Name
Allows you to add an additional name that will be shown in the Library Manager,
in the Details view for the library.
Version
Allows you to specify a version number for the VST Sound container. Every time
that you update the container and distribute it to the public, be sure to increase
the version number.
Comment
Allows you to add a comment.
Skip
In some cases, it can be helpful to skip the creation of some containers
while building others, for example, if you have created a library with multiple
containers, one for the presets and several others for samples, and you only want
to update the preset container to fix some issues. In this case, activate Skip for
the sample containers.
NOTE
• If presets in your library are referring to other VST Sound containers,
these must be added to the library as external dependencies. For those
containers, Skip is automatically activated, so that these containers are not
rebuilt.
• You can only rebuild VST Sound containers that you have created yourself.
Compress
Allows you to compress or convert the samples in the VST Sound container.
•As Source: No changes are made to the samples.
•Compress: All Samples are compressed.
•Truncate 16 Bit: All samples are converted to 16 bit.
•Compress 16 Bit: All samples are converted to 16 bit and are compressed.
Audio Size
This column shows the total size of all uncompressed samples in the container.
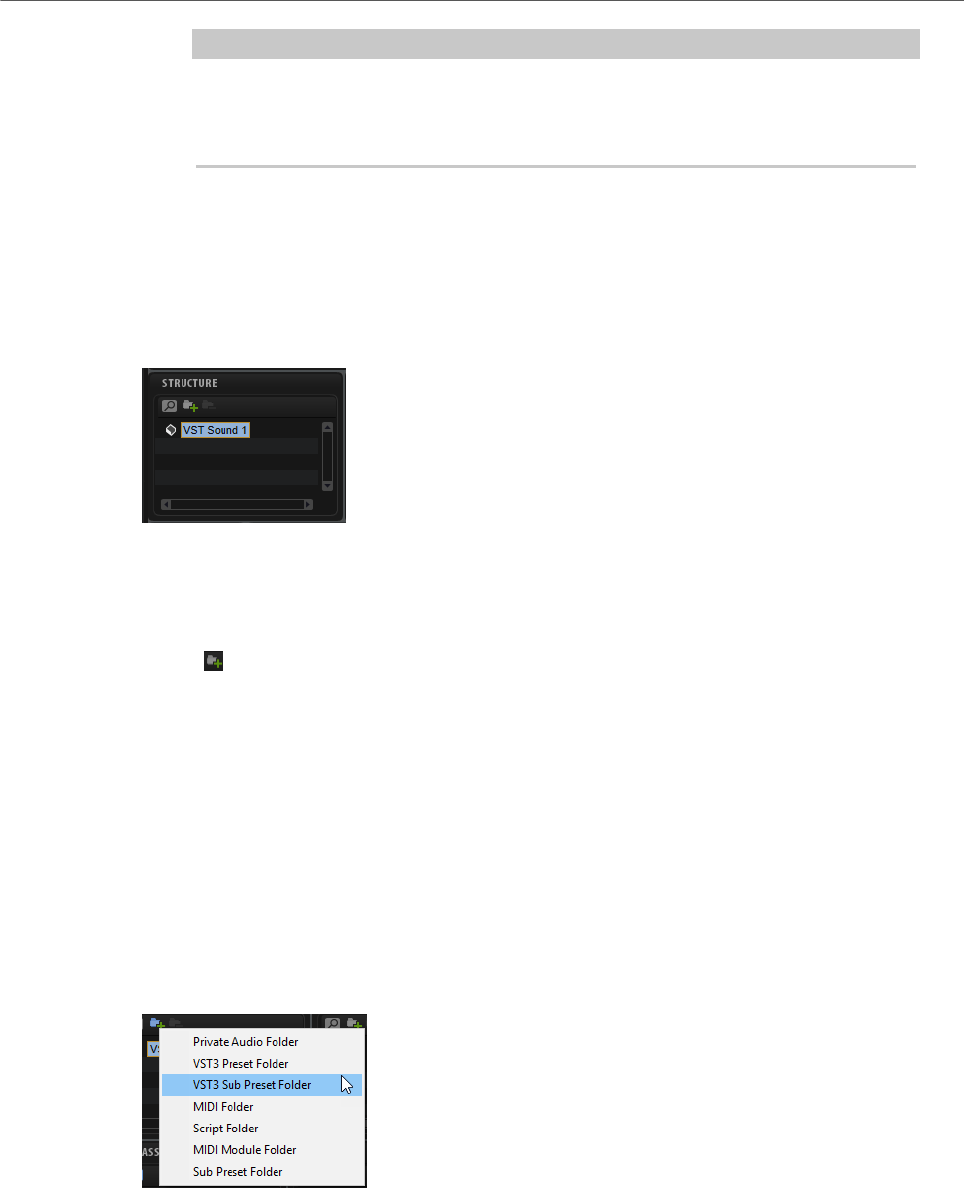
Library Creator
Library Creator Editor
415
NOTE
If compression is used, the final size can differ from this value, depending on the
sample content. The final size of the container is also influenced by the amount of
additional files, such as presets, sub presets, page resources, etc.
Structure
This section displays the internal file structure of the selected VST Sound container. You
can add and remove various folders to organize the elements that you want to be part of the
container. Some folders are created automatically, to guarantee that they can be found by
HALion, HALion Sonic, or HALion Sonic SE and the MediaBay.
The main step when building VST Sound containers is to add VST presets. This can be done
using drag and drop, either from the MediaBay or the OS file explorer onto the Content
section or the Structure section. When adding presets, a VST 3 Preset Folder is added and
all presets are added to it. You can also create a folder for the presets by clicking the Add
button and then dropping presets onto the folder. Additionally, you can create multiple
VST 3 Preset folders and subfolders and drop presets to the different folders. However, a
sophisticated subfolder structure is not required, because all presets are later managed via
the MediaBay.
When adding presets that make use of samples, all samples are added to the Unassigned
Samples list. From here, you can add them, or a selection of them, to a VST Sound container
by dragging them onto the Structure or the Content section.
If you add samples, the Private Audio Folder is created and the samples are added to it.
HALion, HALion Sonic and HALion Sonic SE can then use these samples, but they are not
accessible via the MediaBay. You can create further subfolders to structure your samples.
Additional Folder Types
Sub Preset Folder
If your library uses effects, MIDI modules, or Lua modules for which you have
created subpresets, you can add a Sub Preset Folder for those presets.

Library Creator
Library Creator Editor
416
NOTE
The folder structure must correspond to the settings that you made for the
subpreset selector on your macro page. Otherwise, the subpresets cannot be
found.
MIDI Module Folder
If you have created Lua script modules and saved them as MIDI modules to make
them available in the MIDI Module selector, you can add them to your library, too.
Add a MIDI Module Folder and place the modules in there. Once the library is
built and the container is registered to the MediaBay, they will appear in the MIDI
module selector. You can also add subfolders to define in which folder of the MIDI
Module selector you want your module to appear. You can add your modules to
existing folders, such as the Player or Modulation category, for example, or you
can define new categories for your library or company.
MIDI Folder
If your library makes use of HALion’s MIDI Player module or if you have written a
Lua script that can play back MIDI files, add a MIDI Folder.
• To add the folder automatically, select the topmost VST Sound node in the
Structure section and drag your MIDI files from your OS file explorer onto
the Content or Structure section.
This adds the MIDI Folder and your MIDI files are placed inside it.
If you want to make these MIDI files globally available in the standard HALion
MIDI Player module, the MIDI Folder must contain the same subfolder structure
that is used in HALion, that is, MIDI Folder/HALion/Sub Presets/MIDI
Files/.
It is recommended to add a folder that can be associated with the library as a
first level subfolder, so that the user can navigate through the MIDI file selector
more easily. If you have configured the MIDI file loader on your macro page to
load MIDI files from a library-specific folder, you must create the same subfolder
structure.
NOTE
If your MIDI files are located in HALion’s MIDI Files folder in your documents
folder (User/Documents/Steinberg/HALion/Sub Presets/MIDI
Files), you can drag them from here and the correct structure is automatically
added by the Library Creator.
Script Folder
You can add a Script Folder for your Lua scripts. Normally, it is not necessary
to add scripts manually to a VST Sound container, because they are added
automatically if they are part of a preset.
However, you can create Lua scripts that can be defined as “required” inside
other script files. For this case, you can add scripts manually to a VST Sound
container. Scripts that require these additional scripts will find them and make
use of their functions.
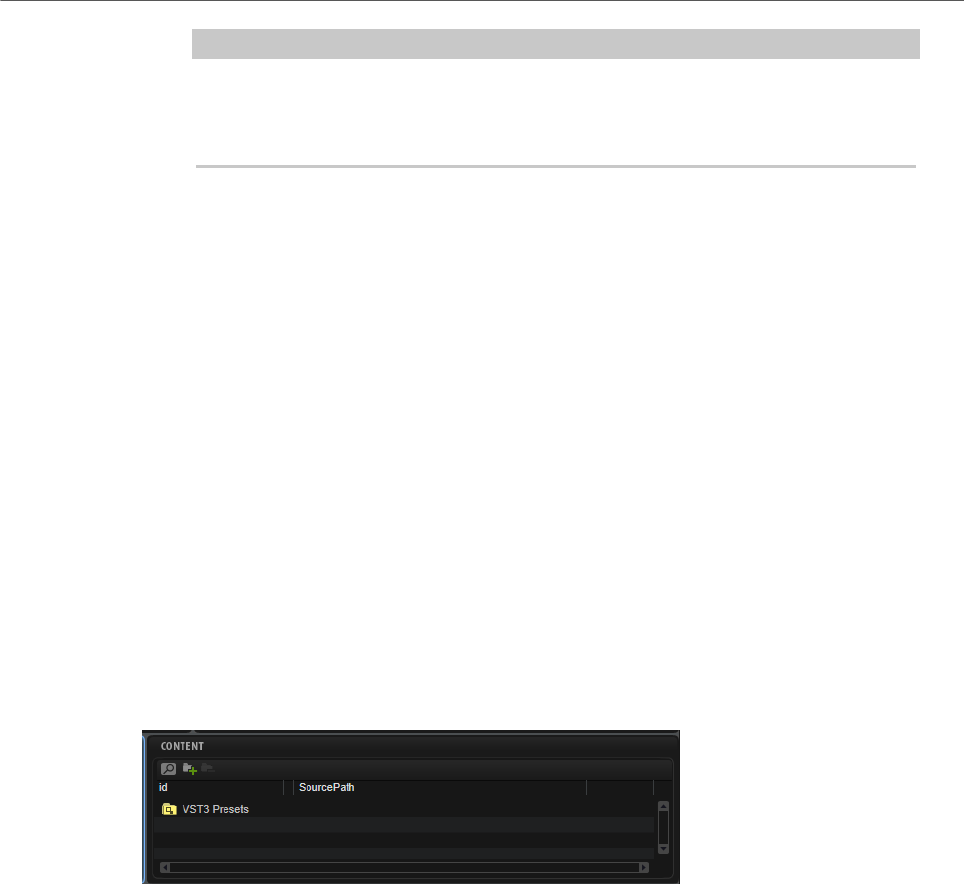
Library Creator
Library Creator Editor
417
NOTE
You can also use Automatically Add Required Files in the editor for the Lua Script
MIDI module. However, this only works if VST presets and scripts are put into the
same VST Sound container.
Scripts can also be added to a completely different VST Sound container, for
example, if you want to create a dedicated library for your scripts.
In this case, you must specify the search path for the Lua “require” function:
package.path = vstsound://<GUID of the required VST Sound
container>/resources/scripts/.lua;.
For more information, please refer to the HALion Scripting documentation under
http://developer.steinberg.help.
VST 3 Sub Preset Folder
You can add a special folder for VST 3 presets and add presets that are used as a
sub library for layers. These presets do not appear in the MediaBay and are only
used as source layers that can be loaded via script into a program. This method
is used for the Hot Brass and Studio Strings libraries, for example. For more
information, check the “Custom Params” script that is used in these libraries.
Content
This section shows the content of the folder that is selected in the Structure section. You can
add files here using drag and drop.
Search
Allows you to search for a specific container, preset, or sample, or to replace
strings.
•Find: Allows you to enter the text string that you are searching.
•Replace: Allows you to specify the text string that you want to use instead.
•Find Previous/Next: Allows you to move from one result to the next.
•Replace Current Selection: Replaces the text for the current search result.
•Replace All: Replaces the text for all search results.
•Case Sensitive: Activate this option to make the search case sensitive.
•Search in all Attributes: Activate this option if you want to search for text in
all attribute columns. Otherwise, only the name column is searched.
Add
Allows you to add a folder.
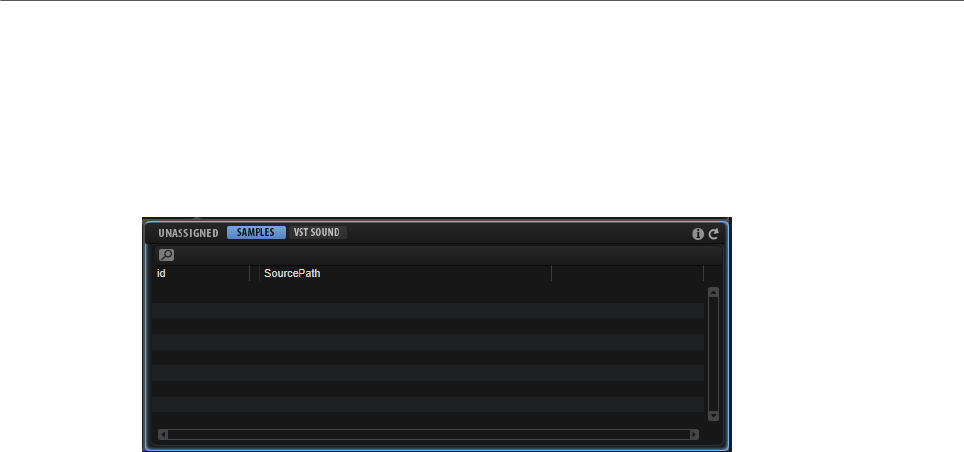
Library Creator
Unassigned VST Sound Containers
418
Remove
Removes the selected folders or files.
Unassigned Section
This section is divided into two tabs: Samples and VST Sound.
When dropping preset files into a VST Sound container, the Samples list is filled with all
samples that are required. Then, you can decide which VST Sound container you want them
to be part of. In the most simple case, your library only consists of a single VST Sound
container. In this case, you can drag all samples into the container in the Content section.
This adds a Private Audio Folder and the samples are placed inside.
A more advanced setup is to add several subfolders to the Private Audio Folder and to
distribute the samples into these folders, for example, all brass samples to a brass folder,
all string samples to a string folder. This allows for a better overview over the contents of
the container. To select only some samples, use the Unassigned Filter section to limit the
selection of samples to the selected presets.
This filter possibility becomes even more powerful if you want to distribute samples over
multiple VST Sound containers. This could be necessary if you want for example to keep the
VST Sound containers smaller than 4 GB, so that they can be stored on a FAT32 hard drive or
USB stick. In this case, you can drag a part of the samples on one VST Sound container and
the rest on another. This will create a Private Audio Folder in each VST Sound container and
add the samples.
As soon as samples are added to a VST Sound container, the sample path references inside
the presets are remapped to the new VST Sound container location.
Unassigned VST Sound Containers
When adding presets to your library that use samples referring to other VST Sound
containers, these containers are added as required VST Sound containers to the Unassigned
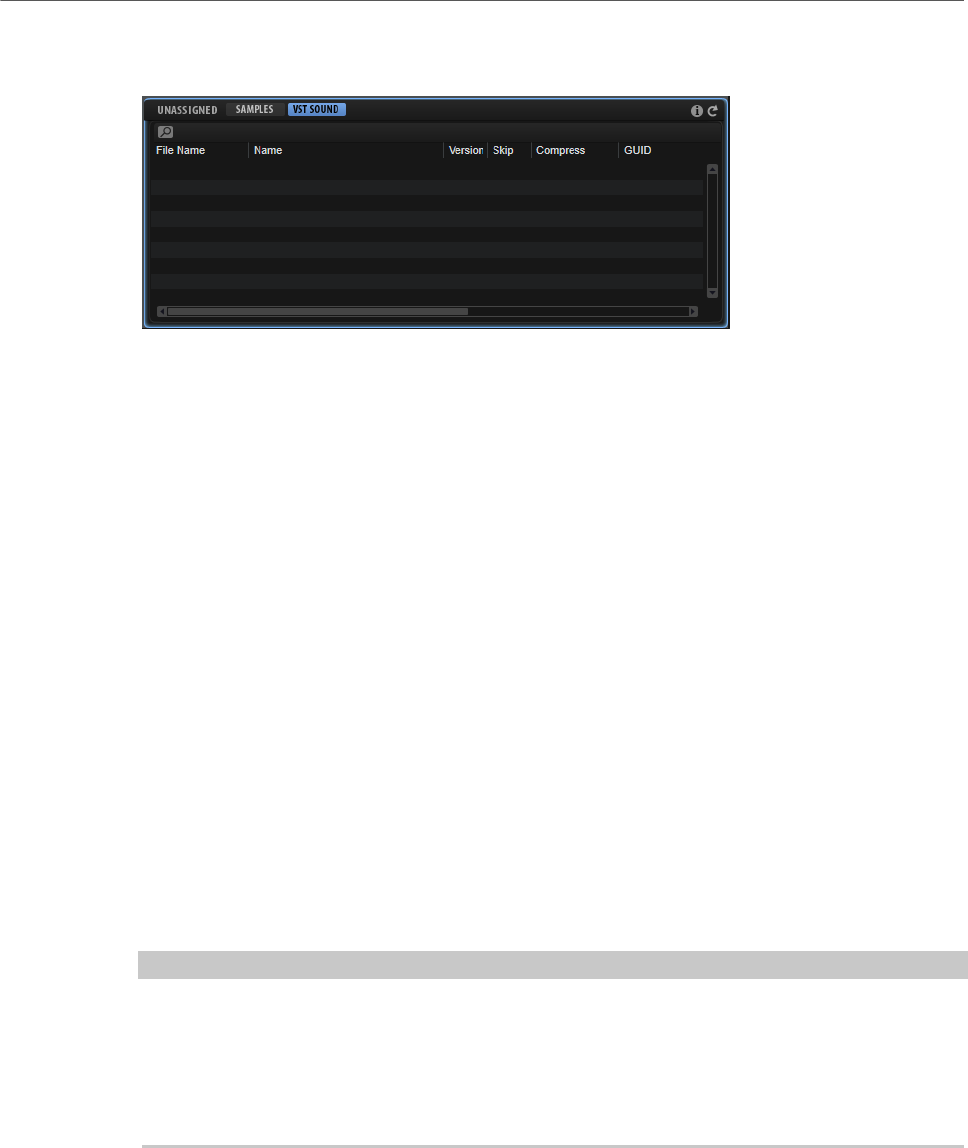
Library Creator
Unassigned VST Sound Containers
419
VST Sound list. This allows you to change the structure of your library if you do not want to
reference external content.
The following scenarios can help make the decision easier.
If your presets contain layers or samples
•using HALion/HALion Sonic content, like for example Auron, HALiotron or Voltage, this
means that you reduce the number of potential customers to HALion and HALion Sonic
users.
•using HALion Sonic SE libraries like Basic, Artist or Trip, this means that you reduce
the number of potential customers to Cubase Artist or Cubase Pro users.
•from other libraries, such as Steinberg’s Triebwerk, Dark Planet, or Hypnotic Dance,
this means that you reduce the number of potential customers to users of these
libraries.
•from another library that you have released earlier, this means that you reduce the
number of potential customers to users of your existing library.
Since most of the time, you probably want to maximize the number of people that can use
your library, for example, with Steinberg’s free HALion Sonic SE, it is not recommended to
create dependencies.
In any case, if you accept presets with dependencies, be sure to inform potential customers/
users of your library about these requirements, especially if the library is not for free.
If you want to remove these dependencies, you can either modify or remove the
corresponding presets.
NOTE
•HSB containers are not supported as external dependencies.
•If you build a library for HALion Sonic, for example, external dependencies to HALion
Sonic factory VST Sound containers are resolved automatically and are not mentioned
in the Unassigned VST Sound list, because these containers are also installed on the
computer of the end users.
Search
Allows you to search for a specific container, preset, or sample, or to replace
strings.
•Find: Allows you to enter the text string that you are searching.
•Replace: Allows you to specify the text string that you want to use instead.
•Find Previous/Next: Allows you to move from one result to the next.
•Replace Current Selection: Replaces the text for the current search result.

Library Creator
Consistency Check
420
•Replace All: Replaces the text for all search results.
•Case Sensitive: Activate this option to make the search case sensitive.
•Search in all Attributes: Activate this option if you want to search for text in
all attribute columns. Otherwise, only the name column is searched.
Show Issues
Click here to open a list of issues that have been detected in the added presets
during a consistency check.
Click the button to redo the consistency check. This can be useful if the check has
detected missing MediaBay tags, for example.
Refresh
Refreshes the list. Use this if you have added tags to the presets in the MediaBay.
Consistency Check
To avoid incomplete or nonfunctional libraries, the Library Creator performs several
automatic checks when building libraries. As a first step, all presets are checked when they
are added to a VST Sound container. If any issues are found, a red warning sign is shown in
the Issue column of the corresponding preset and a global warning sign is shown in the list
of unassigned samples/VST Sound containers. Existing issues will not prevent the Library
Creator from building the VST Sound container, however. They should be understood as an
information about what Steinberg would consider an issue to be fixed before releasing the
library.
Checks are performed for the following:
•HALion Sonic and HALion Sonic SE presets for which no macro page is assigned
•HALion Sonic and HALion Sonic SE presets for which no quick controls are assigned
•the used audio formats (file type, sample rate, bit depth, channels)
•Sample markers that exist beyond the sample file end
•Sample markers that exist beyond the sample end in a zone
•Sample end markers that are placed before the start marker
•Empty sample, grain, and wavetable zones
•Samples that are not referenced by any presets
•Missing information for Author, Category, and Sub-Category
•Character tags that are not set
•Only one of the parameters Signature and Tempo is set
•Presets with the same name (case sensitive)
•An incorrect size for the macro page if it is to be used in HALion Sonic and HALion
Sonic SE
When starting the library build process, the Library Creator may encounter additional issues
which can stop the build process. If that happens, a report window opens that informs you
why the process could not be executed. The reasons could be that you did not fill out one of
the mandatory fields in the library properties, or that required samples, presets, or macro
page resources could not be found, because they were removed from your file system after
the library file was created, for example.
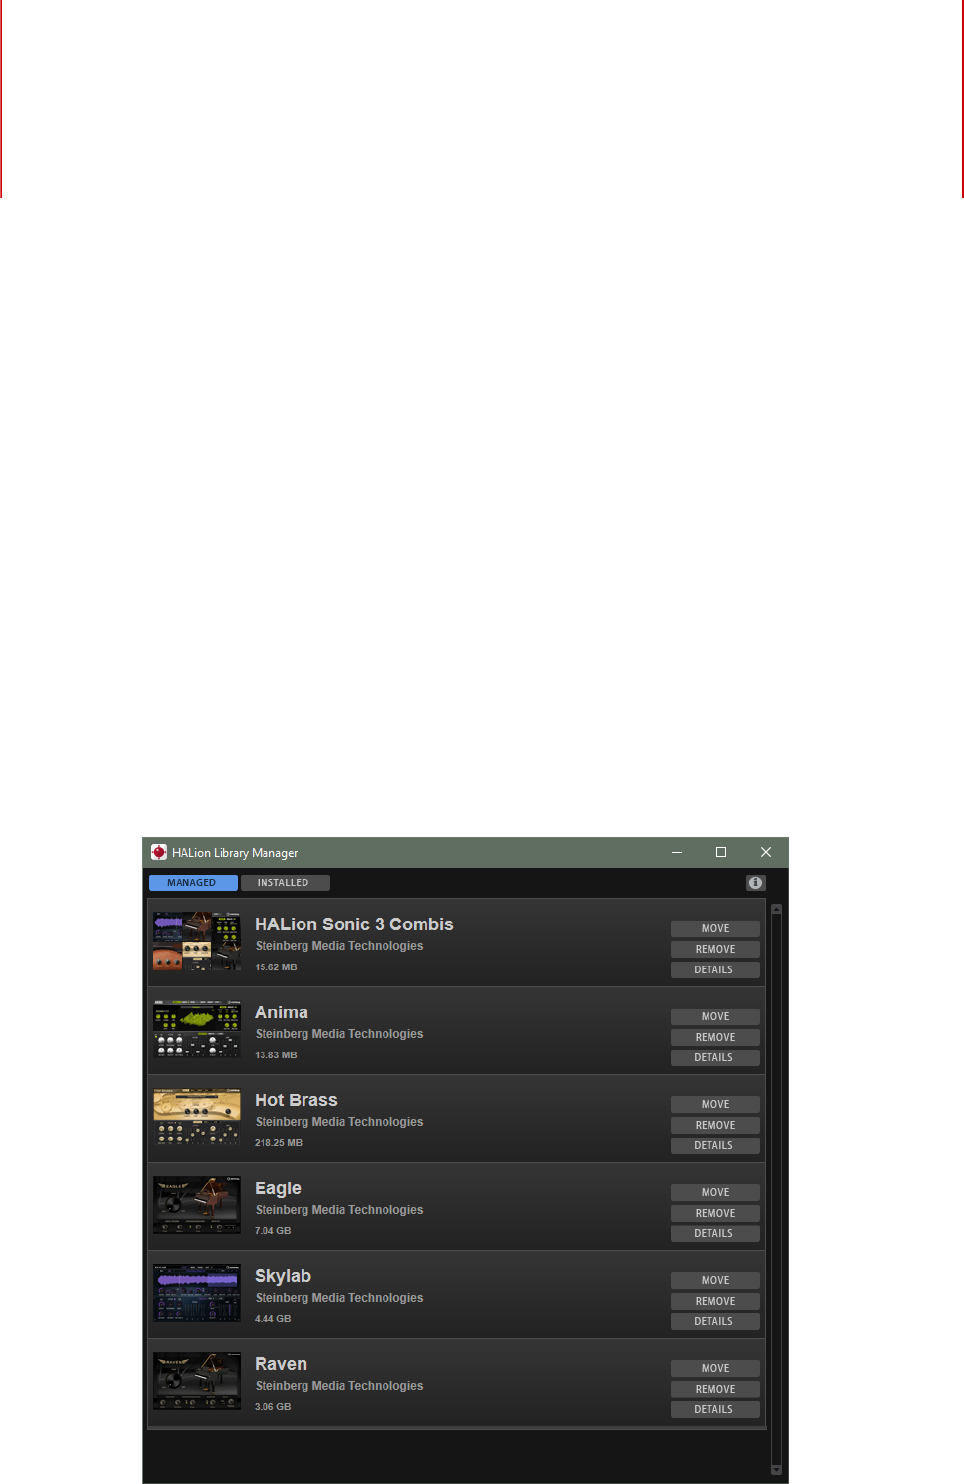
Library Manager
421
HALion’s Library Manager allows you to register and to manage libraries that have been
created with HALion 6 and newer. It also displays all libraries that were created earlier and
therefore were installed with a classic installer.
The Library Manager is installed on your computer as a standalone application and can be
run independently from HALion, HALion Sonic, and HALion Sonic SE.
For actions such as registering, moving, or deleting libraries, the Library Manager requires
full access to all VST Sound libraries. Therefore, you must close HALion, HALion Sonic,
HALion Sonic SE, and your Steinberg DAW first, so that they release these files.
Library Manager Editor
All libraries are displayed in the Library Manager, either on the Managed or the Installed
tab. For each library, an icon, the name, the manufacturer, as well as its total file size are
shown.

Library Manager
Library Manager Editor
422
• The libraries in the Managed list were created with HALion 6 and newer and can be
moved between hard disks or deleted.
• The libraries on the Installed list were installed using an installer. These libraries
cannot be moved or deleted, to avoid interference with the original installers.
For both library types, a Details button is available, which will extend the list entry and show
which VST Sound containers are part of the library and where on your hard disks they are
located.
Installing VST Sound Libraries
To install a new library, you must register the corresponding VST Sound container files.
PREREQUISITE
You have moved the VST Sound container files to a hard disk and folder where you want to
store them and from where you want to register them.
NOTE
If you have downloaded a library, for example, you most probably do not want to keep it in
the Downloads folder. To keep your system clean and uncluttered, you might want to create
a dedicated folder for all your libraries and then create subfolders for each new library. You
can also create multiple Library folders on different hard disks.
PROCEDURE
•Navigate to the folder where the new VST Sound container files are located and
double-click one of them.
The Library Manager opens and registers all VST Sound containers from that folder.
This process does not change the location of the library files, but registers them to the
MediaBay of HALion, HALion Sonic, and HALion Sonic SE, as well as your Steinberg
DAW.
NOTE
•If the folder contains VST Sound containers that have already been registered,
they are ignored.
•You can also register user VST Sound containers that were created with versions
4 and 5 of HALion. HSB files from HALion 3 are not supported.
RESULT
All VST Sound containers in that folder are now registered and can be used the next time that
you open HALion.
Moving Libraries
You can move the file location of a library, for example, to a faster SSD hard disk or because
you have accidentally registered it from the wrong folder and you do not want it to remain in
this location.
PROCEDURE
1. Navigate to the library in the list and click Move.
Library Manager
Library Manager Editor
423
2. In the dialog, navigate to the new location and click OK.
Removing Libraries
You can remove a library if it is no longer needed.
PROCEDURE
1. Navigate to the library in the list and click Remove.
2. Do one of the following:
•To delete the library from your hard disk, select Move to Trash.
•To unregister the library while keeping the corresponding VST Sound container,
select Unregister.
NOTE
•Libraries can have dependencies to other libraries. For example, if a preset
library is based on samples that were delivered exclusively with another library.
If you try to delete this second library, the Library Manager will warn you that
this library is required by another library.
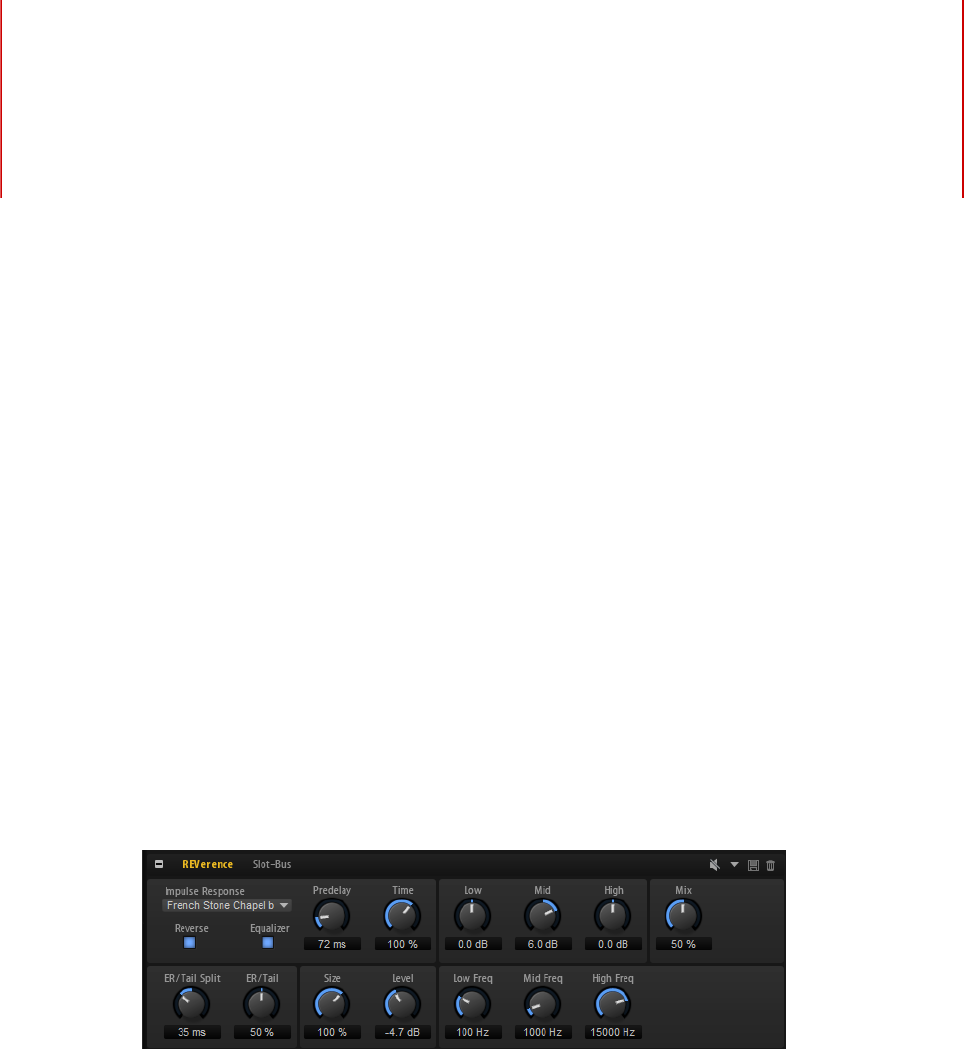
Effects Reference
424
Introduction
HALion comes with a collection of high-quality studio effects.
Many of the insert effects can also be used in surround configurations, that means, they
process all channels. However, the legacy HALion 3 effects, Stereo Pan, Chorus, Flanger,
Rotary, Vibrato, and Multi Delay only process the front left and right channels.
Reverb Effects
REVerence
REVerence is a convolution tool that allows you to apply room characteristics (reverb) to the
audio.
By recording an impulse in a room, you capture the characteristics of this room. Convolution
superimposes these characteristics to the sound. The result is a very natural sounding
reverb. Included with this effect is a collection of high-quality reverb impulse responses.
Impulse Response
Allows you to select an impulse response. This determines the basic sound
character of the reverb.
Reverse
Reverses the impulse response.
Predelay
Determines the amount of time between the dry signal and the onset of the
reverb. With higher predelay values, you can simulate larger rooms.
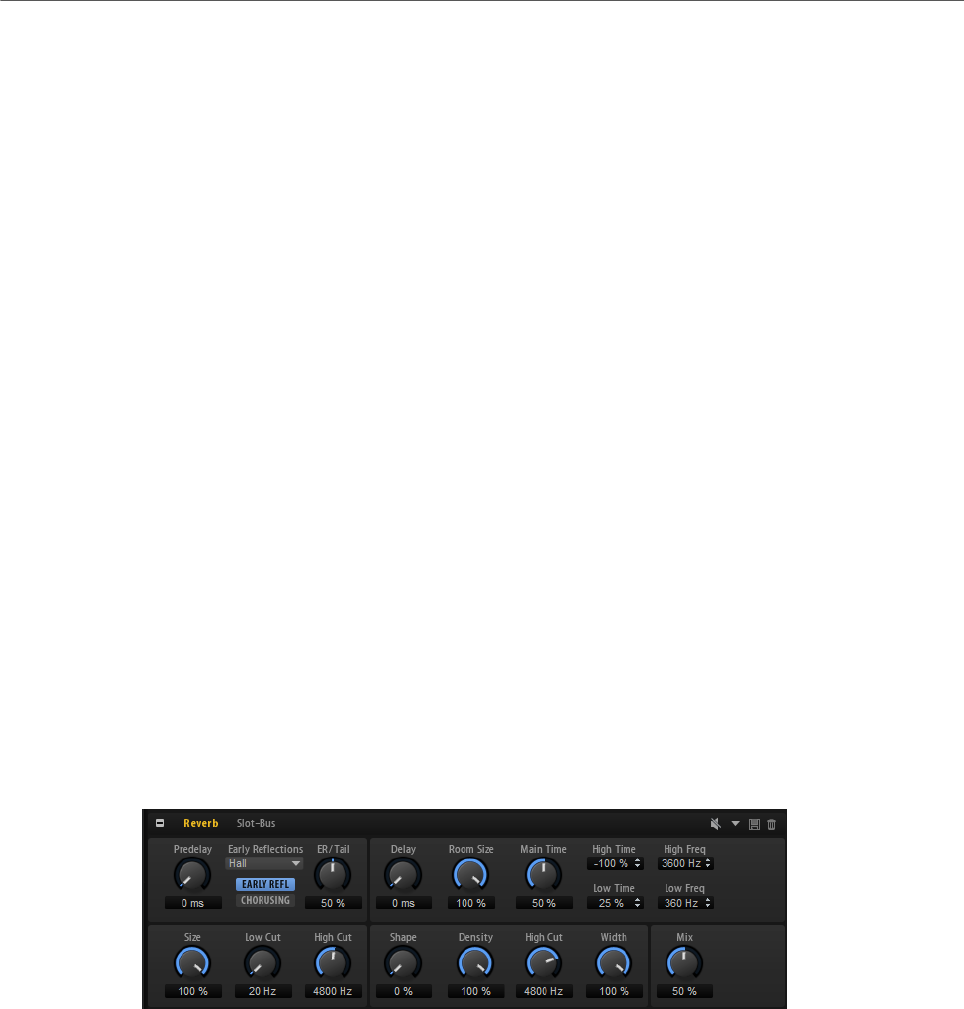
Effects Reference
Reverb Effects
425
Time
Controls the reverb time. At a setting of 100 %, the impulse response is applied
with its original length.
Size
Scales the size of the simulated room. At a setting of 100 %, the impulse
response is applied as recorded in the original room.
Level
Adjusts the level of the impulse response.
Equalizer
Activates the built-in three-band equalizer.
ER/Tail Split
Sets the split point between the early reflections and the reverb tail.
ER/Tail Mix
Sets the balance between the early reflections and the reverb tail. At a setting of
50 % the early reflections and the tail have the same volume level. Settings below
50 % raise the early reflections and lower the tail, as a result the sound source
moves towards the front of the room. Settings above 50 % raise the tail and lower
the early reflections, as a result the sound source moves towards the back of the
room.
Reverb
This effect produces a high-quality algorithmic reverb with early reflections and reverb tail.
The early reflections are responsible for the spatial impression in the first milliseconds of
the reverb. For emulating different rooms, you can choose between different early reflection
patterns and adjust their size. The reverb tail, or late reverberation, offers parameters for
controlling the room size and the reverb time. You can adjust the reverb time individually in
three frequency bands.
Predelay
Determines how much time passes before the reverb is applied. This allows you
to simulate larger rooms by increasing the time it takes for the first reflections to
reach the listener.

Effects Reference
Reverb Effects
426
Early Reflections
Here, you select an early reflections pattern. The early reflections pattern
contains the most important delays that deliver the key information for the
spatial impression of the room.
Show Early Reflections Page/Show Chorusing Page
With these two buttons below the Early Reflections pop-up menu, you can choose
whether to display the early reflections settings or the chorusing settings in the
lower left part of the effect panel.
ER/Tail
Sets the level balance between the early reflections and the reverb tail. At a
setting of 50 %, early reflections and tail have the same volume. Settings below
50 % raise the early reflections and lower the tail, as a result the sound source
moves towards the front of the room. Settings above 50 % raise the tail and lower
the early reflections, as a result the sound source moves toward the back of the
room.
Delay
Delays the onset of the reverb tail.
Room Size
Controls the dimensions of the simulated room. At a setting of 100 %, the
dimensions correspond to a cathedral or a large concert hall. At a setting of 50 %,
the dimensions correspond to a medium-sized room or studio. Settings below 50
% simulate the dimensions of small rooms or a booth.
Main Time
Controls the overall reverb time of the tail. The higher this value, the longer the
reverb tail will decay. At a setting of 100 %, the reverb time is infinitely long. The
Main Time parameter also represents the mid band of the reverb tail.
High Time
Controls the reverb time for the high frequencies of the reverb tail. With positive
values, the decay time of the high frequencies is longer. With negative values, it is
shorter. Frequencies are affected depending on the High Freq parameter.
Low Time
Controls the reverb time for the low frequencies of the reverb tail. With positive
values, low frequencies decay longer and vice versa. Frequencies will be affected
depending on the Low Freq parameter.
High Freq
Sets the cross-over frequency between the mid and the high band of the reverb
tail. You can offset the reverb time for frequencies above this value from the main
reverb time with the High Time parameter.
Low Freq
Sets the cross-over frequency between the low and the mid band of the reverb
tail. The reverb time for frequencies below this value can be offset from the main
reverb time with the Low Time parameter.
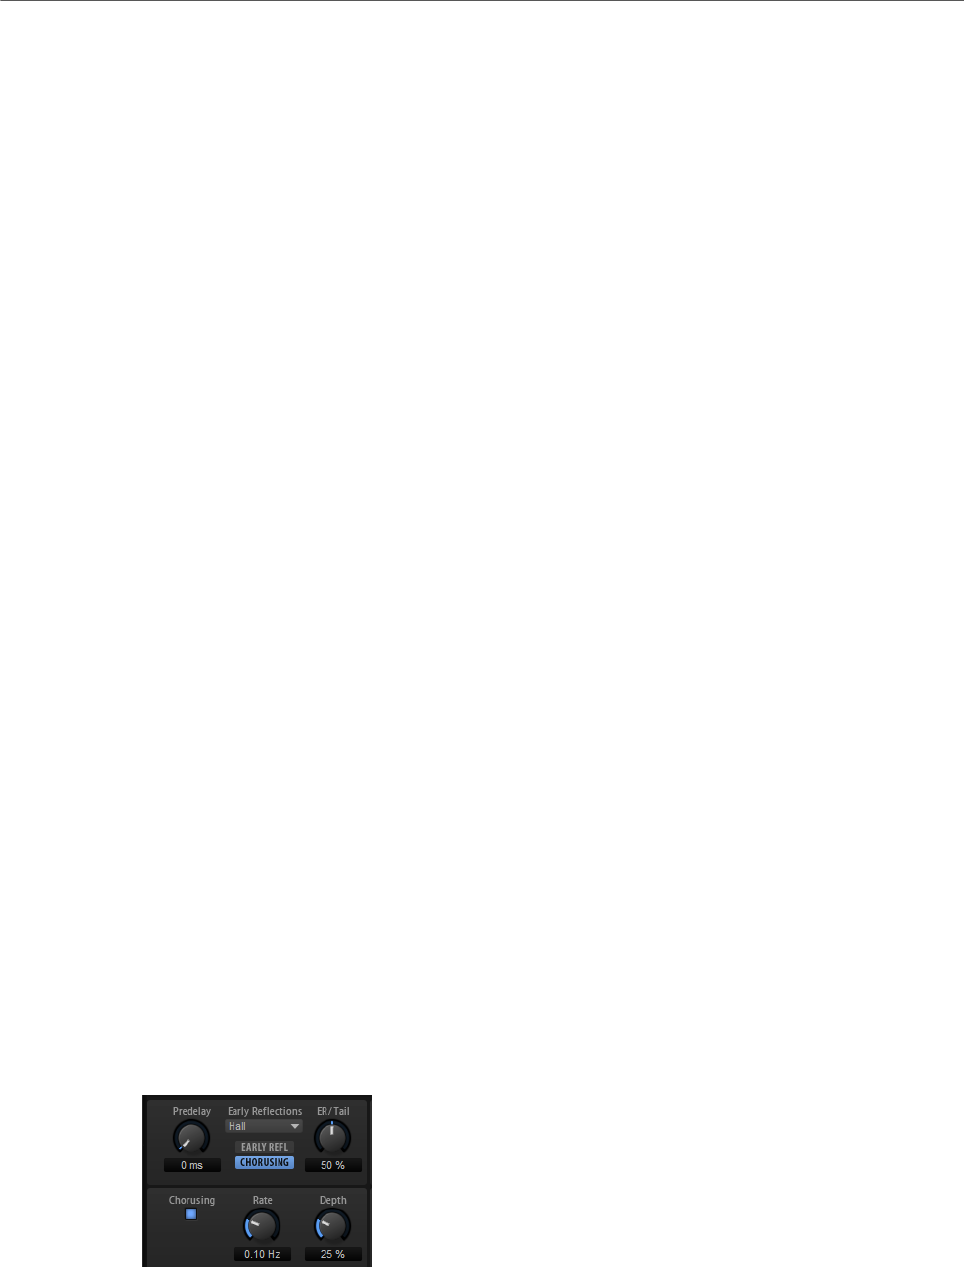
Effects Reference
Reverb Effects
427
Size
Adjusts the length of the early reflections pattern. At a setting of 100 %, the
pattern is applied with its original length and the room sounds the most natural.
At settings below 100 %, the early reflections pattern is compressed and the
room is perceived smaller.
ER Low Cut
Attenuates the low frequencies of the early reflections. The higher this value, the
fewer low frequencies are present in the early reflections.
ER High Cut
Attenuates the high frequencies of the early reflections. The lower this value, the
fewer high frequencies the early reflections will have.
Shape
Controls the attack of the reverb tail. At a setting of 0 %, the attack is more
immediate, which is a good setting for drums. The higher this value, the less
immediate the attack.
Density
Adjusts the echo density of the reverb tail. At a setting of 100 %, single reflections
from walls cannot be heard. The lower this value, the more single reflections can
be heard.
Tail High Cut
Attenuates the high frequencies of the reverb tail. The lower this value, the fewer
high frequencies the reverb tail will have.
Width
Adjusts the output of the reverb signal between mono and stereo. At a setting of 0
%, the output of the reverb is mono, at 100 % it is stereo.
Mix
Sets the ratio between the dry and the wet signal.
Chorusing
Chorusing allows you to enrich the reverb tail through subtle pitch modulations. To access
the chorusing parameters, click the Show Chorusing Page button.
Chorusing On/Off
Activates/Deactivates the chorusing effect.
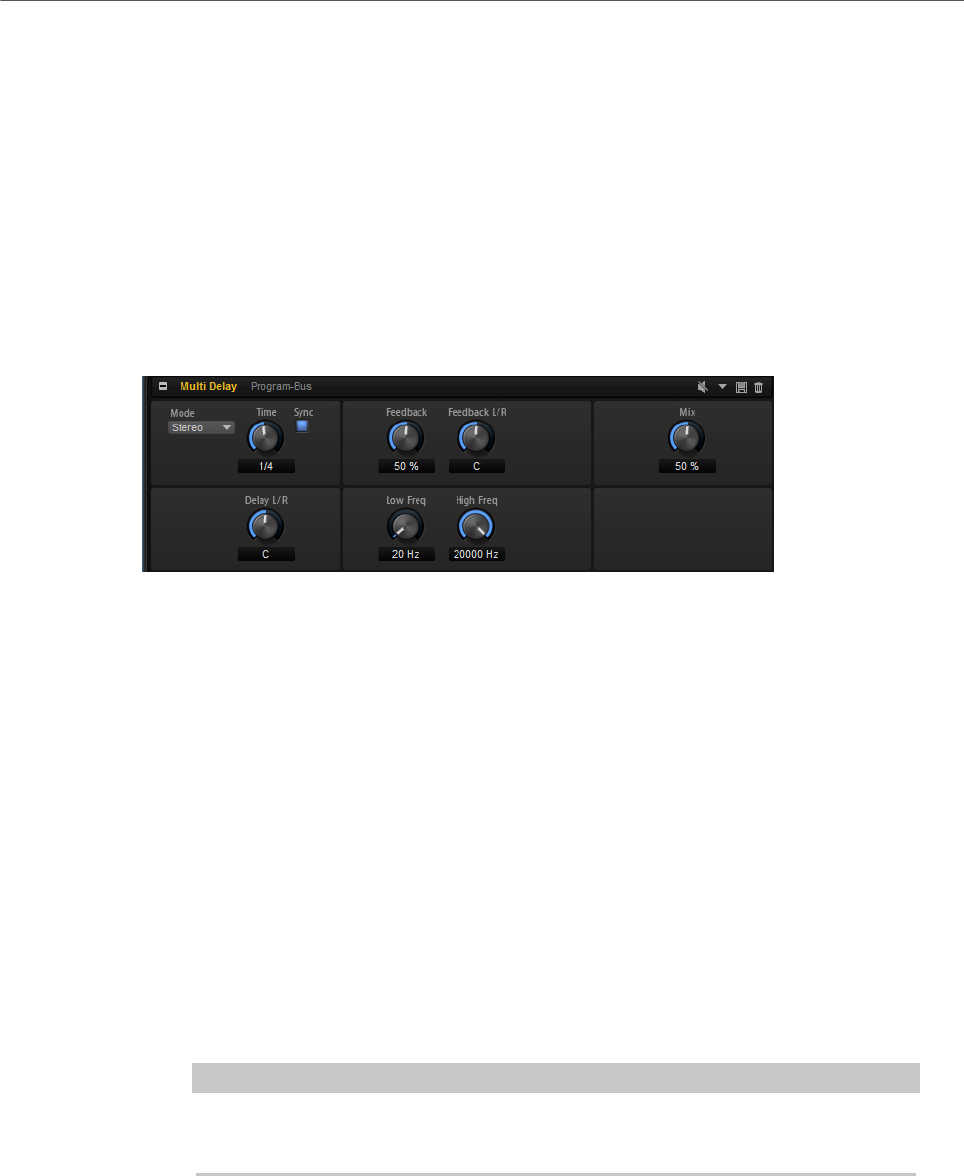
Effects Reference
Delay Effects
428
Chorusing Rate
Specifies the frequency of the pitch modulation.
Chorusing Depth
Sets the intensity of the pitch modulation.
Delay Effects
Multi Delay
This effect produces delays, with adjustable time, feedback, and filters.
Mode
•Stereo has two independent delay lines, one for the left and one for the
right audio channel, each with a feedback path of its own.
•Cross has two delay lines with cross feedback, where the delay of the left
channel is fed back into the delay of the right channel, and vice versa.
•Ping-Pong mixes the left and right input channels and sends the mixed
signal to hard-panned left and right delays. This way, the echoes bounce
like a ping-pong ball between left and right in the stereo panorama.
Time
Sets the overall time for the left and right delay. Use the Delay L/R parameter to
shorten the time for the left or right delay.
Sync
Activate Sync to synchronize the delay time to the host tempo. If Sync is activated,
the time is set as a note value.
NOTE
The maximum delay time is 5000 ms. If the note length exceeds this value, it is
automatically shortened.
Delay L/R
Offsets the time of the left or right delay from the overall delay time. At a factor of
1, the right or left delay time has the same length as the overall delay time. At a
factor of 0.5, the time is half as long as the overall delay time.
• To offset the left delay time, turn the control to the left.
• To offset the right delay time, turn the control to the right.
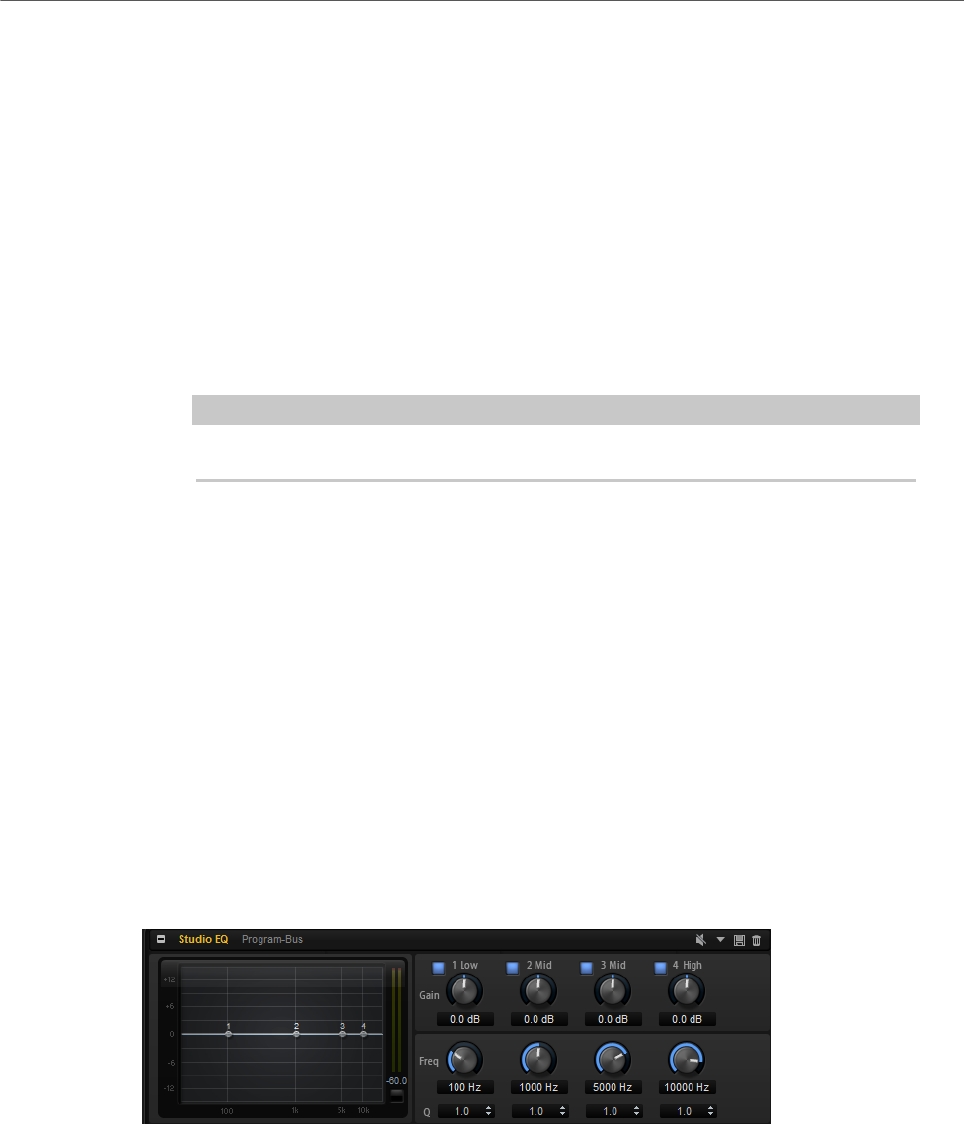
Effects Reference
EQ Effects
429
Feedback
Sets the overall amount of feedback for the left and right delay. Feedback means
that the output of the delay is fed back to its input. At a setting of 0 %, you hear
one echo. At a setting of 100 %, the echoes repeat endlessly.
Feedback L/R
Offsets the amount of feedback of the left or right delay from the overall
feedback. A factor of 1 means that the amount of feedback corresponds to
the overall feedback. A factor of 0.5 means that the amount is half the overall
feedback.
• To offset the left feedback, turn the control to the left.
• To offset the right feedback, turn the control to the right.
NOTE
This parameter is only available in Stereo mode.
High Freq
Attenuates the high frequencies of the delays.
Low Freq
Attenuates the low frequencies of the delays.
Mix
Sets the ratio between the dry and the wet signal.
EQ Effects
Studio EQ
Studio EQ is a high-quality 4-band parametric equalizer.
With the four frequency bands, you can shape the tone color, to create a brighter or darker
sound, for example. The two mid-range bands act as peak filters and the low and high bands
act as shelving filters. All bands are fully parametric with adjustable gain, frequency, and Q
factor. Each frequency band offers the following controls:
On/Off
Activates/Deactivates the frequency band.
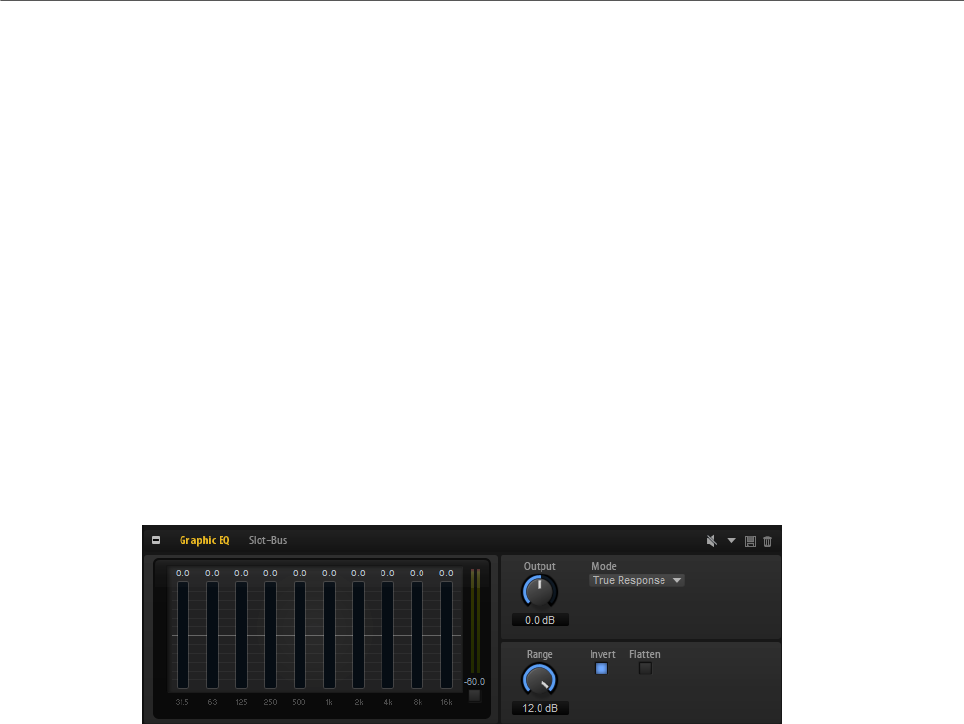
Effects Reference
EQ Effects
430
Gain
Sets the amount of cut or boost for the corresponding band.
Freq
Sets the frequency that is cut or boosted with the Gain parameter.
Q (Quality)
Adjusts the bandwidth of the mid-range peak filters from wide to narrow. By
increasing the Q value on the low and high shelving filters, you can add a dip to
their shape.
• To adjust the parameters Gain and Freq simultaneously, drag the points in the EQ
curve display.
Graphic EQ
Graphic EQ is an equalizer with ten frequency bands that can be cut or boosted by up to 12
dB. In addition, you can specify the overall range and output of the equalizer.
Output
Controls the overall output level of the equalizer.
Mode
Allows you to add color or character to the equalized output. The following
options are available:
•True Response mode uses serial filters with accurate frequency response.
•Classic mode uses parallel filters where the resonance depends on the
amount of gain.
•Constant Q mode uses parallel filters where the resonance is raised when
boosting the gain.
Range
Adjusts the maximum cut or boost for all frequency bands together.
Invert
Activate this to invert the EQ curve.
Flatten
Resets all frequency bands to 0 dB.
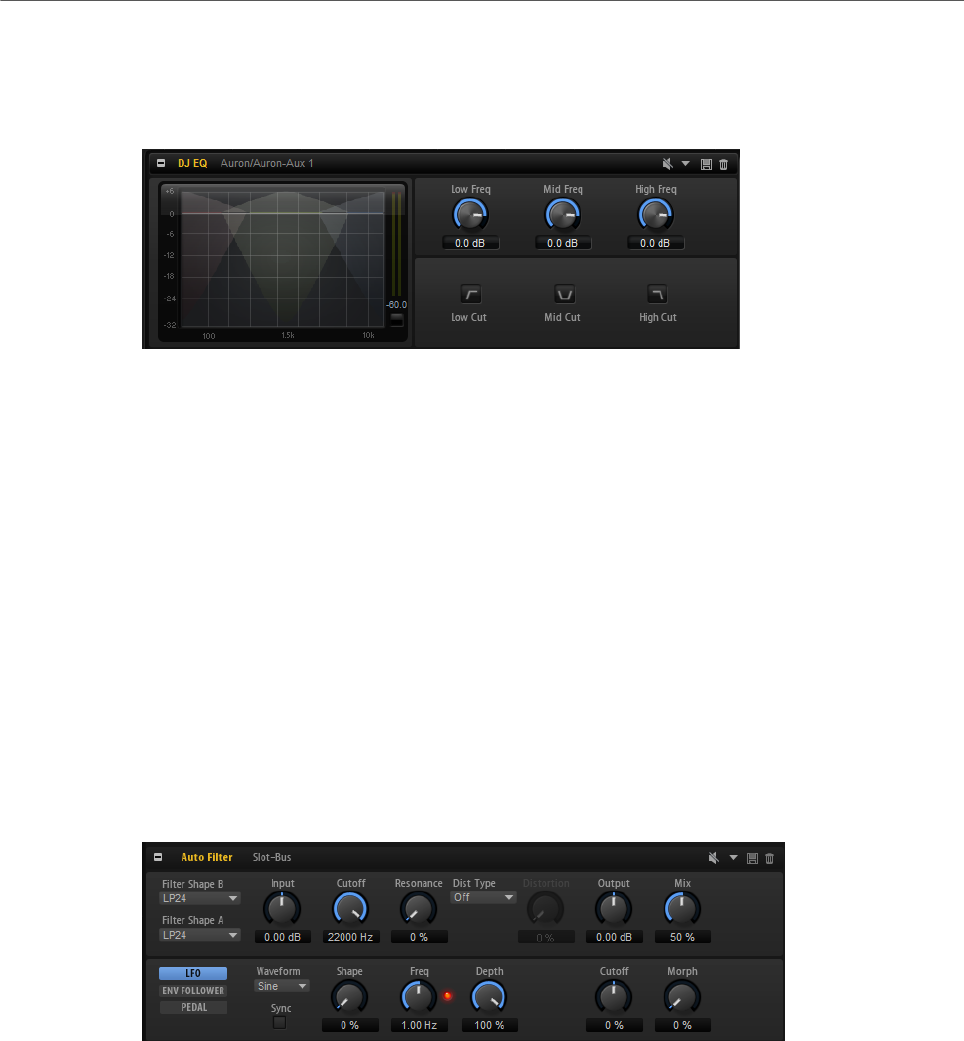
Effects Reference
Filter Effects
431
DJ-EQ
This plug-in is an easy-to-use 3-band parametric equalizer that resembles the EQs found on
typical DJ mixers. This plug-in is designed for quick sound fixes.
Low Freq/Mid Freq/High Freq
Set the amount of boost or attenuation for the low, mid, and high bands.
You can also click and drag in the display to change these values.
Low Cut/Mid Cut/ High Cut
Cut the low, mid, and high bands.
Reset Output Peak Level
Resets the peak level that is displayed in the output meter.
Filter Effects
Auto Filter
Auto Filter provides two morphable filter shapes with distortion.
The morphing between the two shapes, as well as the cutoff, can be controlled with a manual
pedal control, an LFO, or an envelope shaper.
Filter Parameters
Filter Shape
• LP24, 18, 12, and 6 are low-pass filters with 24, 18, 12, and 6 dB/oct.
Frequencies above the cutoff are attenuated.
• BP12 and BP24 are band-pass filters with 12 and 24 dB/oct. Frequencies
below and above the cutoff are attenuated.
• HP6+LP18 and HP6+LP12 are combinations of a high-pass filter with 6 dB/
oct and a low-pass filter with 18 and 12 dB/oct, respectively (asymmetric

Effects Reference
Filter Effects
432
band-pass filter). Frequencies below and above the cutoff are attenuated.
Attenuation is more pronounced for the frequencies above the cutoff.
• HP12+LP6 and HP18+LP6 are combinations of a high-pass filter with 12
and 18 dB/oct and a low-pass filter with 6 dB/oct (asymmetric band-pass
filter). Frequencies below and above the cutoff are attenuated. Attenuation
is more pronounced for the frequencies below the cutoff.
• HP24, 18, 12, and 6 are high-pass filters with 24, 18, 12, and 6 dB/oct.
Frequencies below the cutoff are attenuated.
• BR12 and BR24 are band-reject filters with 12 and 24 dB/oct. Frequencies
around the cutoff are attenuated.
• BR12+LP6 and BR12+LP12 are combinations of a band-reject filter with 12
dB/oct and a low-pass filter with 6 and 12 dB/oct, respectively. Frequencies
around and above the cutoff are attenuated.
• BP12+BR12 is a band-pass filter with 12 dB/oct plus a band-reject filter
with 12 dB/oct. Frequencies below, above, and around the cutoff are
attenuated.
• HP6+BR12 and HP12+BR12 are combinations of a high-pass filter with 6
and 12 dB/oct and a band-reject filter with 12 dB/oct. Frequencies below
and around the cutoff are attenuated.
• AP is an all-pass filter with 18 dB/oct. Frequencies around the cutoff are
attenuated.
• AP+LP6 is an all-pass filter with 18 dB/oct plus a low-pass filter with 6 dB/
oct. Frequencies around and above the cutoff are attenuated.
• HP6+AP is a high-pass filter with 6 dB/oct plus an all-pass filter with 18
dB/oct. Frequencies around and below the cutoff are attenuated.
Input
Adjusts the gain before the filter and distortion. This parameter only affects the
wet signal.
Cutoff
Specifies the cutoff frequency of the filter.
Resonance
Emphasizes the frequencies around the cutoff. At higher resonance settings, the
filter self-oscillates, which results in a ringing tone.
Distortion Type
The following options are available:
• When this parameter is set to Off, the filter offers no distortion.
•Tube Drive offers a lot of character by adding warm, tube-like distortion.
•Hard Clip adds bright, transistor-like distortion.
•Bit Red adds digital distortion by means of quantization noise.
•Rate Red adds digital distortion by means of aliasing.

Effects Reference
Filter Effects
433
Distortion
Adds distortion to the signal. The effect depends on the selected distortion type.
At higher settings, it creates a very intense distortion effect.
NOTE
This parameter is not available if Distortion Type is set to Off.
Output
Adjusts the gain after the filter and distortion. This parameter only affects the wet
signal.
Mix
Sets the ratio between the dry and the wet signal.
LFO Section
LFO Waveform and Shape
Waveform selects the basic type of waveform. Shape changes the characteristic
of the waveform.
•Sine produces smooth modulation. Shape adds additional harmonics to the
waveform.
•Triangle is similar in character to Sine. The waveform periodically ramps
up and down. Shape continuously changes the triangle waveform to a
trapezoid.
•Saw produces a ramp cycle. Shape continuously changes the waveform
from ramp down to triangle to ramp up.
•Pulse produces stepped modulation, where the modulation switches
abruptly between two values. Shape continuously changes the ratio
between the high and low state of the waveform. At 50 %, it produces a
square wave.
•Ramp is similar to the Saw waveform. Shape increasingly puts silence
before the sawtooth ramps up.
•Log is a logarithmic curvature. Shape continuously changes the curvature
from negative to positive.
•S & H 1 produces random stepped modulation, where each step is
different. Shape puts ramps between the steps and produces a smooth
random signal when fully turned right.
•S & H 2 is similar to S & H 1. The steps alternate between random high and
low values. Shape puts ramps between the steps and produces a smooth
random signal when fully turned right.
Freq
Determines the frequency of the cutoff modulation.
Sync
Activate this to set the Freq parameter in fractions of beats.
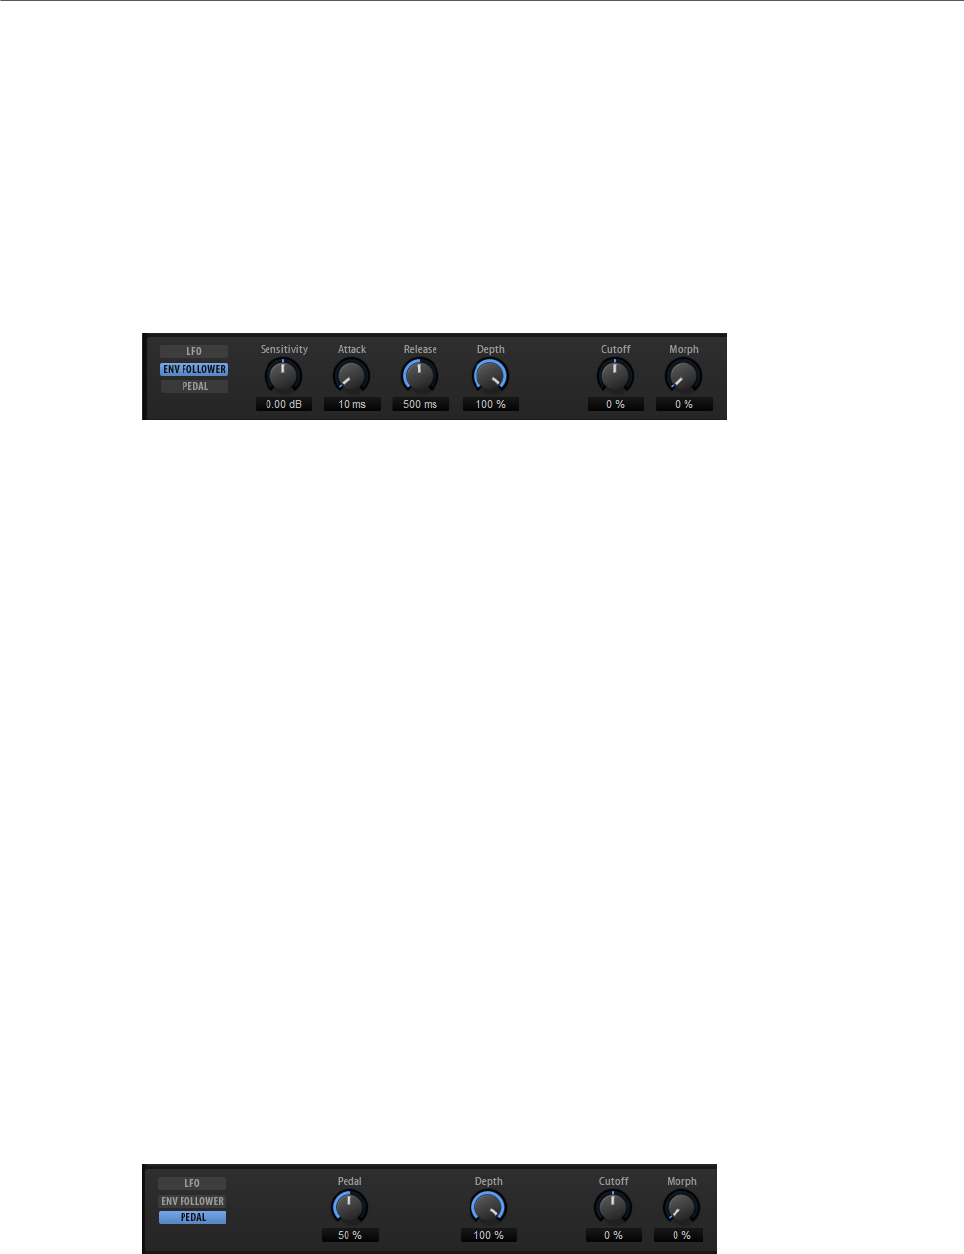
Effects Reference
Filter Effects
434
Depth
Determines the output level of the LFO modulation signal.
Cutoff
Determines the modulation intensity of the LFO on the filter cutoff.
Morph
Determines the modulation intensity of the LFO on the filter morph.
Envelope Follower Section
The Envelope Follower traces the input signal with an adjustable attack and release time and
delivers a modulation signal representing the level envelope of the signal.
Sensitivity
All input signals are mixed down to mono before they are sent to the Envelope
Follower. This parameter sets the optimum input level for the Envelope Follower.
Attack
Adjusts the attack time, that is, the time the Envelope Follower needs to
approach increasing input levels.
Release
Adjusts the release time, that is, the time the Envelope Follower needs to
approach decreasing input levels.
Depth
Determines the output level of the modulation signal of the Envelope Follower.
Cutoff
Determines the modulation intensity of the Envelope Follower on the filter cutoff.
Morph
Determines the modulation intensity of the Envelope Follower on the filter
morph.
Pedal Section
Pedal
Sets the position of the pedal.
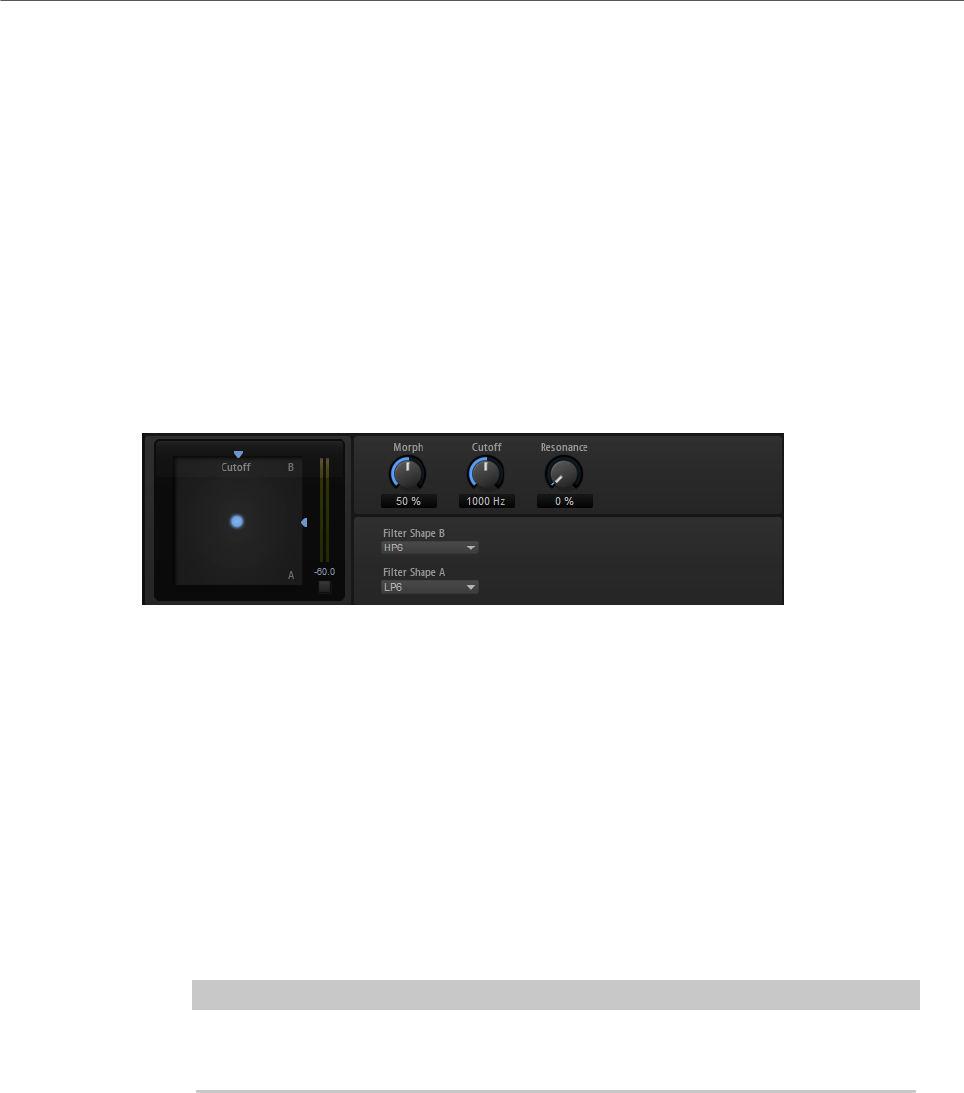
Effects Reference
Filter Effects
435
Depth
Determines the output level of the pedal modulation signal.
Cutoff
Determines the modulation intensity of the pedal on the filter cutoff.
Morph
Determines the modulation intensity of the pedal on the filter morph.
Morph Filter
Morph Filter allows you to mix low-pass and high-pass filter effects, allowing for creative
morphings between two filters. You can specify the filter shapes independently for filter
shape A and B.
Filter Shape B
Here, you can choose between several high-pass and band-rejection filter
shapes.
Filter Shape A
Here, you can select a low-pass or a band-pass filter shape.
Morph
Allows you to mix the output between the two selected filters.
Cutoff
Adjusts the cutoff frequency of the filters.
NOTE
You can also set the Cutoff and Morph parameters simultaneously by clicking in
the display and dragging.
Resonance
Emphasizes the frequencies around the cutoff frequency. For an electronic
sound, increase the resonance. At higher resonance settings, the filter self-
oscillates, which results in a ringing tone.
Resonator
The sound of the human voice or of acoustic instruments can be characterized by their
distinctive formant regions, that is, by resonances in the frequency spectrum that are typical
for a particular sound.

Effects Reference
Filter Effects
436
For example, the vowel “ah” (as in father) sung by a male singer has three characteristic
formants: F1 = 570 Hz, F2 = 840 Hz, and F3 = 2410 Hz. The Resonator effect allows you to
induce such formant regions to a sound by using three filters that are connected in parallel.
You can specify the positions and levels of the formant regions by adjusting the Cutoff,
Resonance, and Gain parameters of the filters.
The Resonator effect comes with 14 predefined filter shapes that determine the basic sound
character. In addition, three LFOs can be used to modulate each filter separately, which
allows for adding extra motion to the sound.
Resonator Shape
Defines the basic sound character of the effect. Each shape is a unique
combination of different filter types for the low, mid, and high frequency bands.
Option Filter Low/Mid/High
Low-Pass 1 LP6/LP6/LP6
Low-Pass 2 LP12/LP12/LP12
Band-Pass 1 BP12/(-1)BP12/BP12*
Band-Pass 2 BP12/BP12/BP12
High-Pass 1 HP6/HP6/HP6
High-Pass 2 HP12/HP12/HP12
Peak 1 LP6/(-1)BP12/HP6*
Peak 2 LP6/BP12/HP6
Bat 1 HP12/BP12/LP12
Bat 2 HP6/BP12/LP6
Wings 1 LP6/BR12/HP6
Wings 2 HP12/BR12/LP12
Wings 3 LP6/(-1)BR12/HP6*
Wings 4 HP12/(-1)BR12/LP12*
*(-1) means that the phase is inverted
Mix
Sets the ratio between the dry and the wet signal.
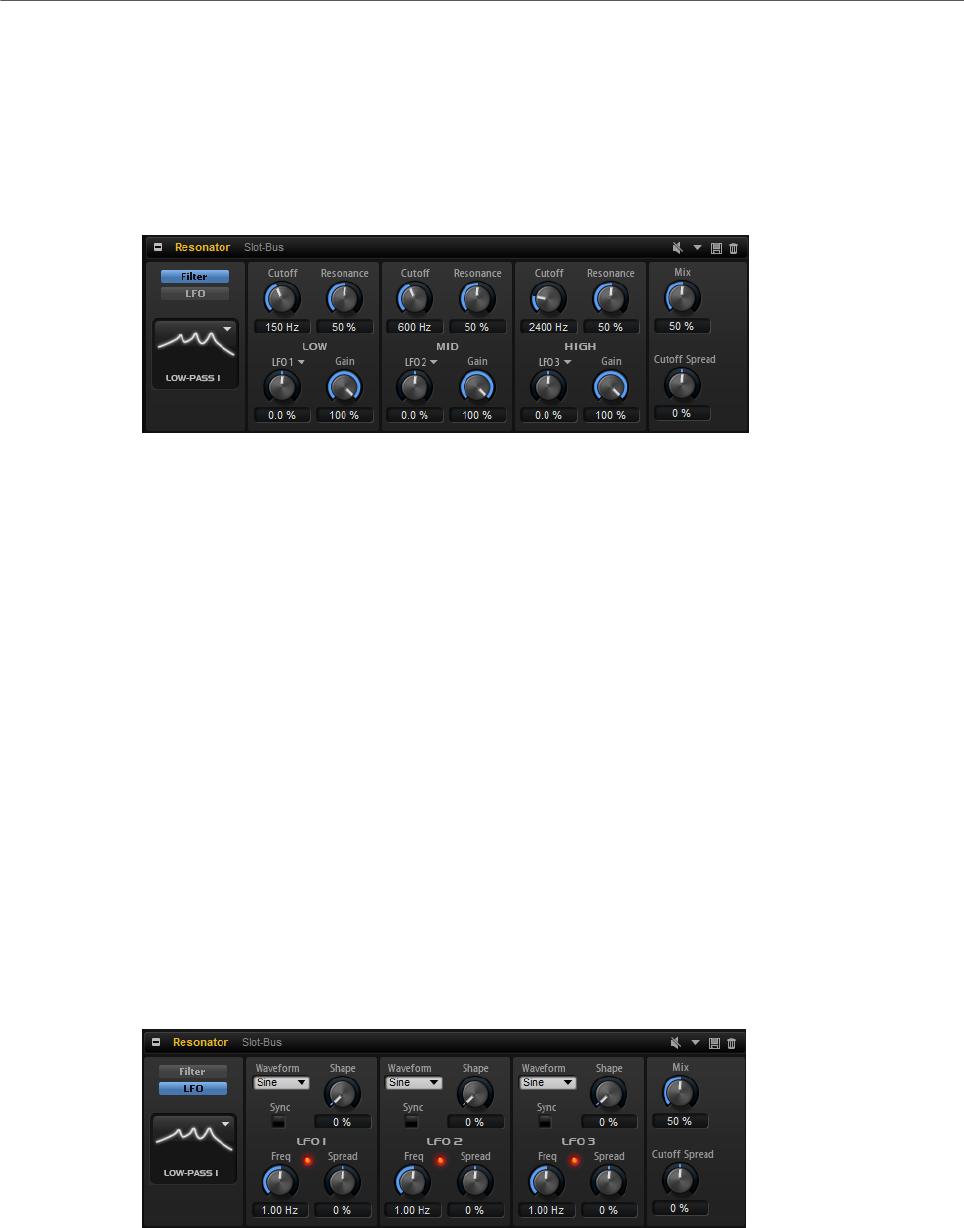
Effects Reference
Filter Effects
437
Cutoff Spread
Spreads the cutoff frequencies between the channels of the effect.
For example, if the effect is used in stereo, positive Cutoff Spread values shift the
cutoff down on the left channel and up on the right channel.
Filter Tab
Cutoff
Adjusts the cutoff frequency of the filter, that is, the center frequency of the
formant region.
Resonance
Adjusts the resonance of the filter. The resonance determines how much the
formant region is emphasized. At higher settings, the filter self-oscillates, which
results in a ringing tone.
Gain
Adjusts the input gain of the filter. The gain determines the level of the formant
region.
LFO Modulation Source
Allows you to select the LFO that modulates the cutoff.
LFO Modulation Depth
Adjusts the cutoff modulation from the LFO.
LFO Tab
LFO Waveform and Shape
•Sine produces smooth modulation, suitable for vibrato or tremolo. Shape
adds additional harmonics to the waveform.
•Triangle is similar to Sine. Shape continuously changes the triangle
waveform to a trapezoid.
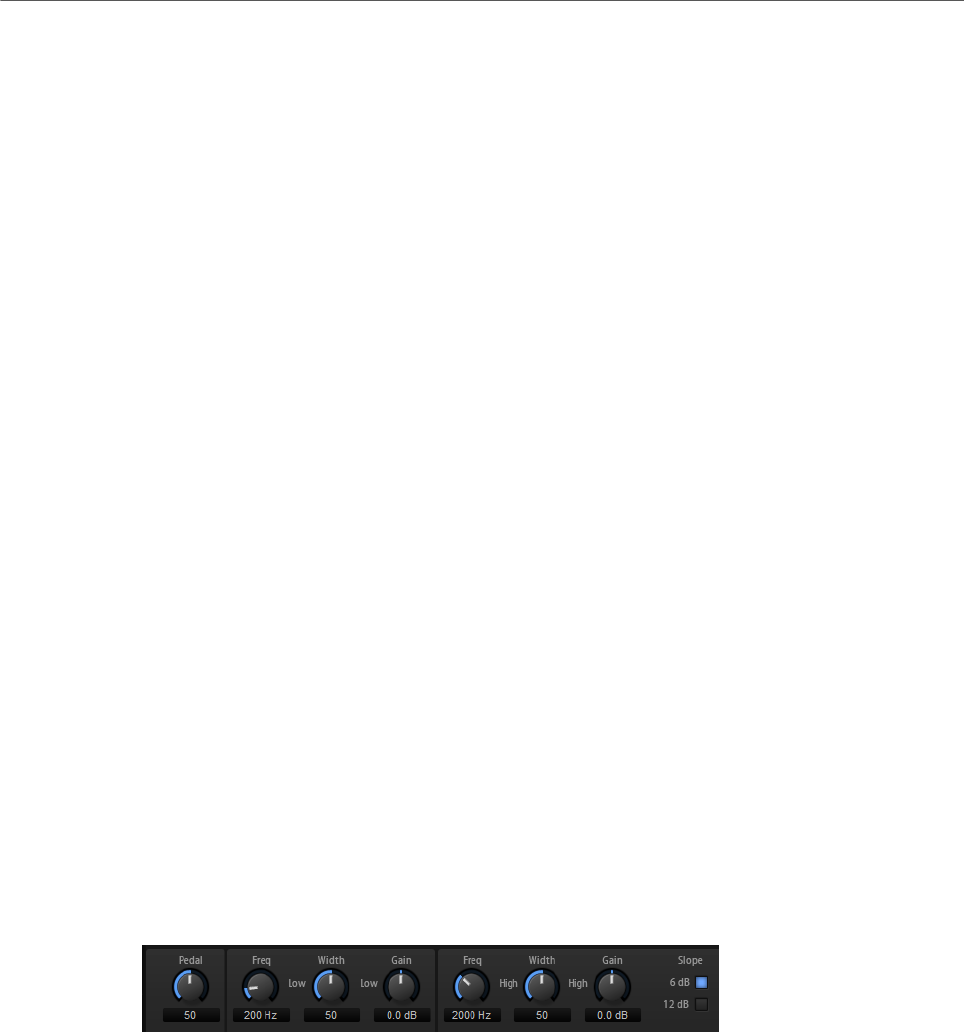
Effects Reference
Filter Effects
438
•Saw produces a ramp cycle. Shape continuously changes the waveform
from ramp down to triangle to ramp up.
•Pulse produces stepped modulation, where the modulation switches
abruptly between two values. Shape continuously changes the ratio
between the high and low state of the waveform. If Shape is set to 50 %, a
square wave is produced.
•Ramp is similar to the Saw waveform. Shape increasingly puts silence
before the sawtooth ramp up begins.
•Log produces a logarithmic modulation. Shape continuously changes the
logarithmic curvature from negative to positive.
•S & H 1 produces randomly stepped modulation, where each step is
different. Shape puts ramps between the steps and changes the S & H into
a smooth random signal when fully turned right.
•S & H 2 is similar to S & H 1. The steps alternate between random high and
low values. Shape puts ramps between the steps and changes the S & H
into a smooth random signal when fully turned right.
Spread
For each channel of the effect, there is a separate LFO signal. This parameter
spreads the phase of the LFO signals across the different channels.
For example, if the effect is used in stereo, positive values shift the LFO phase
forward on the left channel and backward on the right channel.
Sync
Activate this to set the Freq parameter in fractions of beats.
Freq
Determines the frequency of the cutoff modulation.
WahWah
WahWah is a variable slope band-pass filter modeling the well-known analog pedal effect.
You can independently specify the frequency, width, and the gain for the low and high pedal
positions. The crossover point between the low and high pedal positions lies at 50.
Pedal
Controls the filter frequency sweep.
Freq Low/Freq High
These parameters determine the frequency of the filter for the low and high
pedal positions.
Width Low/Width High
These parameters determine the width (resonance) of the filter for the low and
high pedal positions.
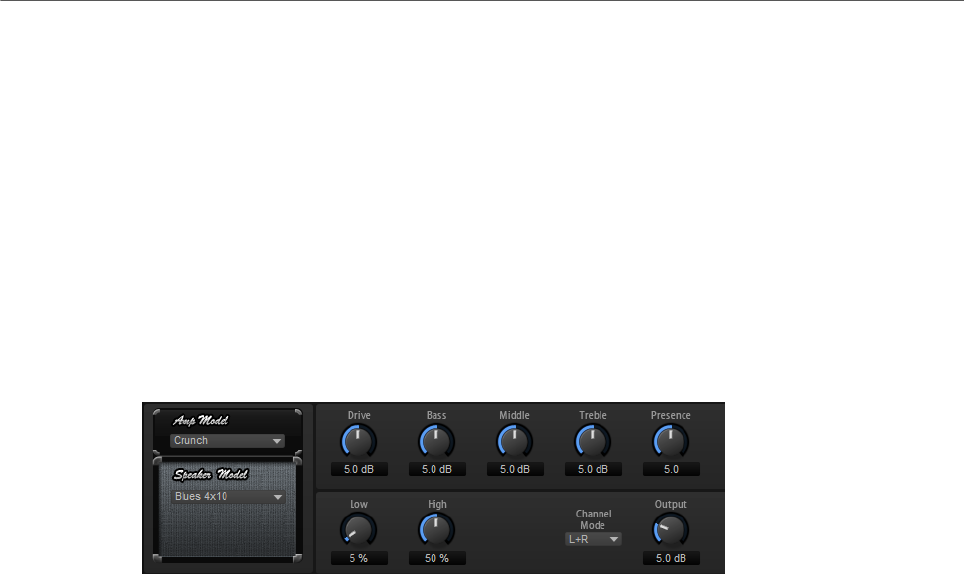
Effects Reference
Distortion Effects
439
Gain Low/Gain High
These parameters determine the gain of the filter for the low and high pedal
positions.
Slope
Here, you can choose between two filter slope values: 6 dB or 12 dB.
Distortion Effects
Amplifier
This effect emulates the sound of an amplifier with speakers.
There are different amplifiers and speaker models you can combine.
Amp Model
Determines the type of amplifier. The sound character of the overdrive changes
with the amplifier. To bypass the amplifier, select No Amp.
Speaker Model
Determines the speaker model type. Each model colors the sound uniquely. To
bypass the model, select No Speaker.
Drive
Adjusts the amount of overdrive.
Bass
Adjusts the tone color of the low frequencies.
Middle
Adjusts the tone color of the mid frequencies.
Treble
Adjusts the tone color of the high frequencies.
Presence
Adds brightness to the sound.
Low Damp
Attenuates the low frequencies of the speakers.

Effects Reference
Distortion Effects
440
High Damp
Attenuates the high frequencies of the speakers.
Channel Mode
Defines which output channels of the amplifier deliver a distorted signal. You can
set it to L (Left), R (Right) or L/R (Both). When set to L or R, the other channel
provides a clean signal.
Output
Controls the output level of the amplifier.
Distortion
This effect offers the whole range of distortion, from low fidelity, digital distortion to high
fidelity, analog sounding distortion. The available distortion types (Rate Red, Tube Drive,
Hard Clip, and Bit Red) can be freely combined.
In Gain
Adjusts the input level of the sound.
Rate Red (Rate Reduction)
Rate reduction distorts the sound by means of aliasing. Enable the Rate Red
option to activate the control that adjusts the amount of aliasing. The lower the
setting, the more aliasing is added.
Tube Drive
Adds warm, tube-like distortion to the sound. Enable the Tube Drive option to
activate the control that adjusts the amount of distortion. The higher the setting,
the more distortion is added.
Hard Clip
Adds bright, transistor-like distortion to the sound. Enable the Hard Clip option to
activate the control that adjusts the amount of distortion. The higher the setting,
the more distortion is added.
Bit Red (Bit Reduction)
Bit reduction distorts the sound by means of quantization noise. Enable the Bit
Red option to activate the control that adjusts the amount of quantization noise.
The lower the setting, the more quantization noise is added.
Out Gain
Adjusts the output level of the sound.
Mix
Sets the ratio between the dry and the wet signal.

Effects Reference
Distortion Effects
441
VST Amp
This effect emulates the sound of an amplifier with speakers. There are different amplifiers
and speaker models you can combine.
Amp Model
Specifies the amplifier type. The sound character of the overdrive changes with
the amplifier. To bypass the amp modeling, select No Amplifier.
Speaker Model
Specifies the speaker model type. Each model colors the sound uniquely. To
bypass the speaker modeling, select No Cabinet.
Drive
Adjusts the amount of overdrive.
Bass
Adjusts the tone color of the low frequencies.
Middle
Adjusts the tone color of the mid frequencies.
Treble
Adjusts the tone color of the high frequencies.
Presence
Adjusts the brightness of the sound.
Mic Type
You can choose between two microphone types. If this control is set to 0 %, a
large-diaphragm condenser microphone is used. At 100 %, you get a dynamic
microphone. Settings in between allow you to fade between the characteristics of
these two microphones.
Microphone Position
Here, you can choose between seven positions to place the microphone. These
positions result from two different angles (center and edge) and three different
distances from the speaker, as well as an additional center position at an even
greater distance from the speaker.
Channel Mode
Determines in which way the two input channels are distorted.
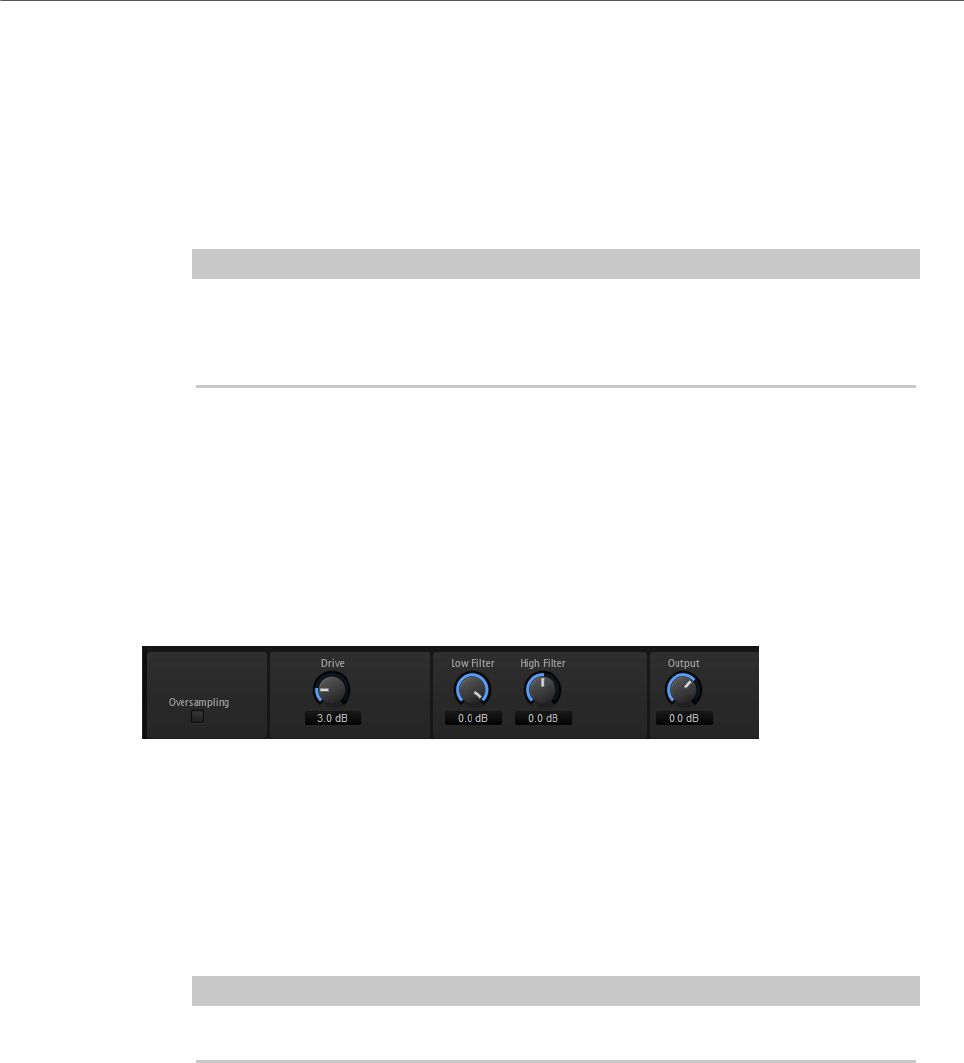
Effects Reference
Distortion Effects
442
•L (Left) only distorts the left input channel. The right channel remains
clean and unprocessed.
•R (Right) only distorts the right input channel. The left channel remains
clean and unprocessed.
•L+R (Left + Right) sums the two input channels into a mono signal which is
then distorted.
•Stereo distorts the two input channels independently.
NOTE
The L and R modes allow you to cascade two VST Amp effects, that is, to use the
first one to processes the left channel and the second one to process the right
channel at different settings.
Output
Controls the output level of the amplifier.
Tape Saturator
Tape Saturator simulates the behavior of classic tape recorders. These machines produced a
specific saturation when recording higher input levels, which led to a compressed signal with
light distortion.
Mode
Here, you can choose between the effect of a single (One Stage) or two cascaded
tape machines (Two Stage). Two Stage mode leads to higher saturation and
compression.
Oversampling
Activate this parameter to increase the accuracy of the effect by oversampling.
NOTE
If this parameter is activated, the effect requires more processing power.
Drive
Determines the level of the input signal and thus the amount of saturation.
Auto Gain
Activate this option for an automatic level compensation.
Low Filter
Here, you can adjust the low frequency range below 1000 Hz by +/- 3 dB.
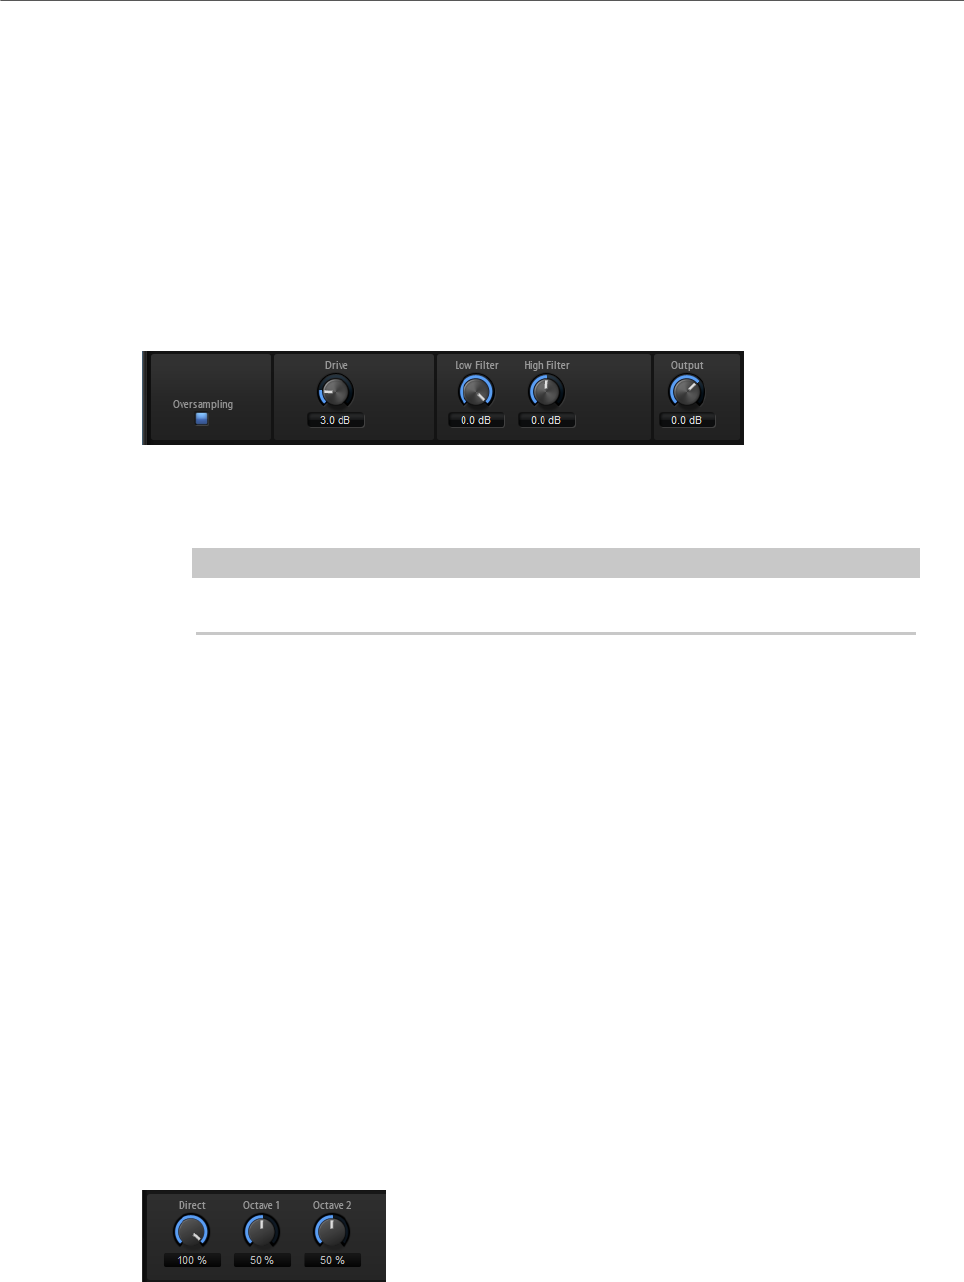
Effects Reference
Pitch Shift Effects
443
High Filter
Here, you can attenuate the high frequency range. This high-cut filter works with
a slope of 24 dB/octave.
Output
Determines the level of the output signal.
Tube Saturator
This effect enriches the sound by adding the characteristic harmonics of a saturated tube to
the audio signal.
Oversampling
Increases the accuracy of the effect by oversampling.
NOTE
If this parameter is activated, the effect requires more processing power.
Drive
Determines the level of the input signal and thus the amount of saturation.
Low Filter
Allows you to reduce the low frequency range by up to 6 dB before saturation.
High Filter
Allows you to adjust the high frequency range by -/+ 6 dB before saturation.
Output
Determines the level of the output signal.
Pitch Shift Effects
Octaver
Octaver allows you to create two additional voices that follow the original voice an octave
below and above. This effect is best suited for monophonic signals.
Direct
Determines the level of the input signal.
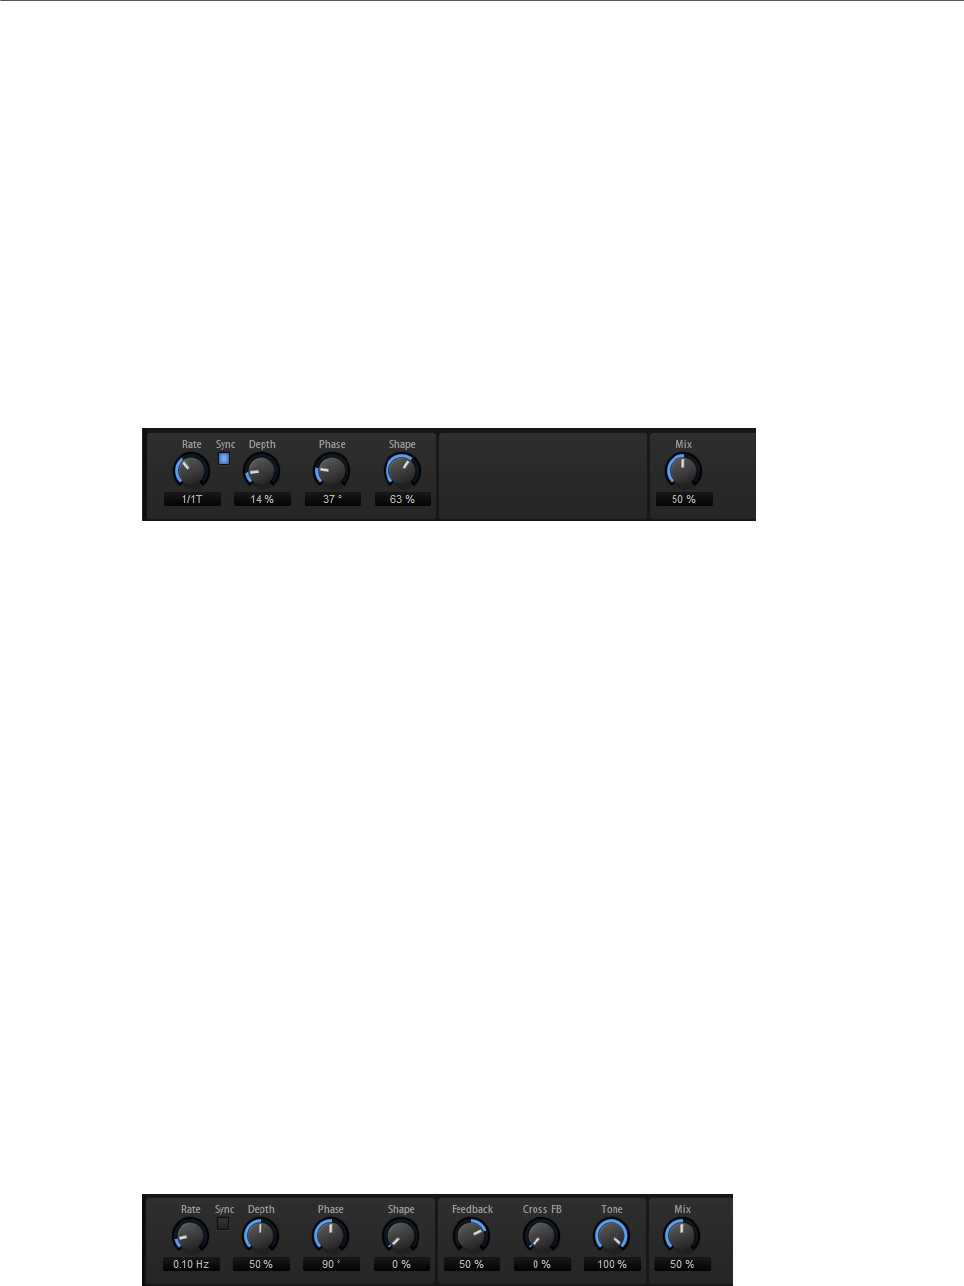
Effects Reference
Modulation Effects
444
Octave 1
Determines the level of the signal that is produced an octave below the original
voice.
Octave 2
Determines the level of the signal that is produced an octave above the original
voice.
Modulation Effects
Chorus
Chorus thickens and broadens the sound by means of pitch modulation.
Rate
Determines the frequency of the pitch modulation, in Hertz.
Sync
Activate this to set the Rate value in fractions of beats.
Depth
Sets the intensity of the pitch modulation.
Phase
Widens the sound image of the effect from mono to stereo.
Shape
Adjusts the characteristics of the modulation. At a setting of 0 %, the pitch
changes continuously, producing a steady modulation. At a setting of 100 %, the
pitch does not change all the time, producing a less steady modulation.
Mix
Sets the ratio between the dry and the wet signal.
Flanger
This effect thickens and broadens the sound by means of pitch modulation.
Rate
Allows you to specify the frequency of the pitch modulation in Hertz.
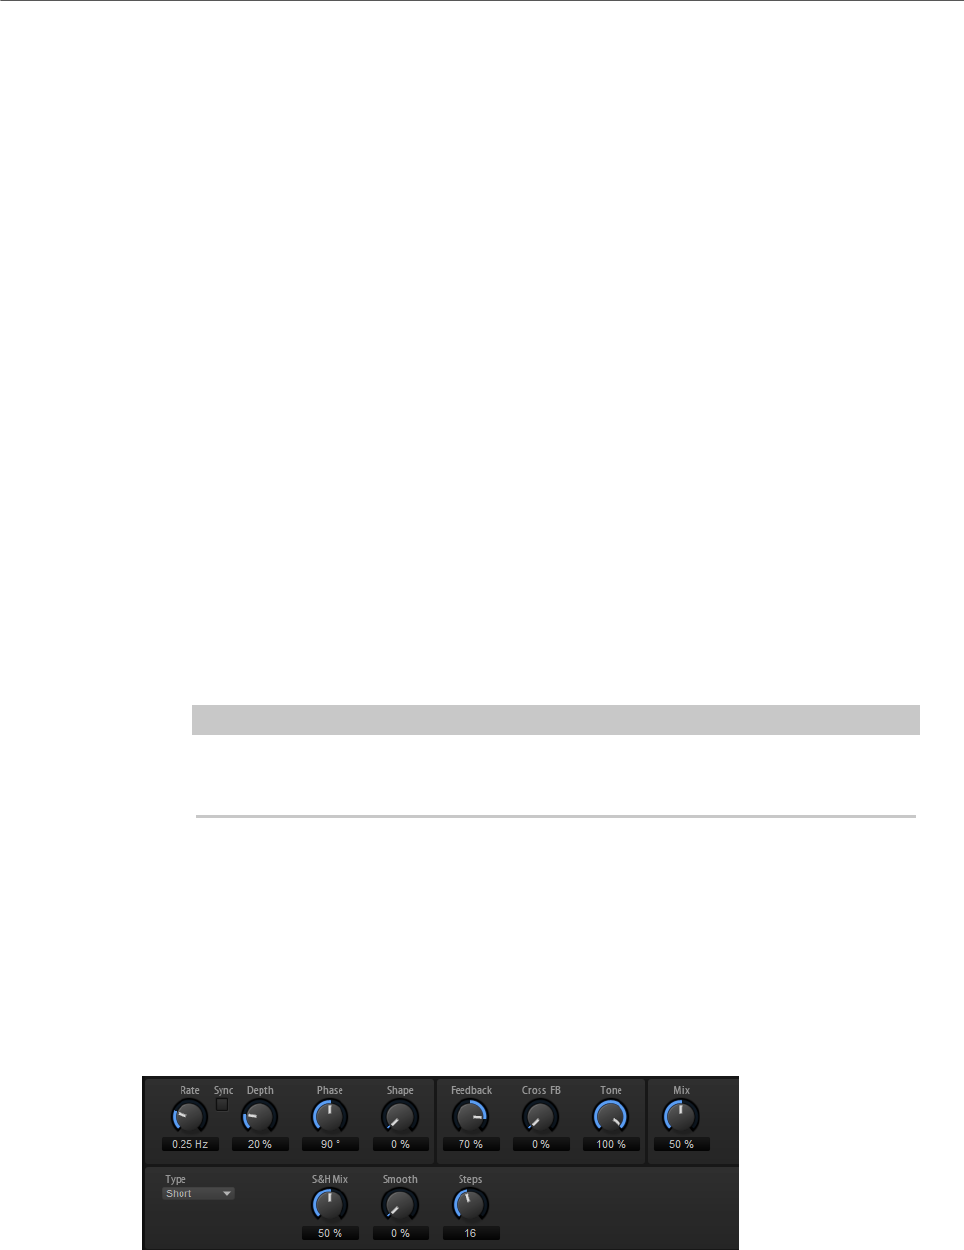
Effects Reference
Modulation Effects
445
Sync
Activate this to set the Rate value in fractions of beats.
Depth
Sets the intensity of the pitch modulation.
Phase
Widens the sound image of the effect from mono to stereo. This parameter also
changes the characteristic of the Cross FB parameter.
Shape
Adjusts the characteristics of the modulation. You hear this best when Feedback
is activated. At a setting of 0 %, the sound sweeps linearly up and down. At a
setting of 100 %, the sound sweeps exponentially up and down.
Mix
Sets the ratio between the dry and the wet signal.
Feedback
Adds resonances to the effect. This allows for jet-like sweeps of the sound.
Cross FB
Mixes the feedback of the left channel with the right channel, and vice versa. The
effect of this parameter is influenced by the Phase parameter.
NOTE
This parameter only takes effect if the Feedback parameter is set to a value
above 0 %.
Tone
Adjusts the tone color of the feedback. At lower values, the feedback is less
bright.
Step Flanger
The Step Flanger expands the Flanger with a Sample and Hold section that divides the
modulation signal into a definable number of steps.
Rate
Allows you to specify the frequency of the pitch modulation in Hertz.

Effects Reference
Modulation Effects
446
Sync
Activate this to set the Rate value in fractions of beats.
Depth
Sets the intensity of the pitch modulation.
Phase
Widens the sound image of the effect from mono to stereo. This parameter also
changes the characteristic of the Cross FB parameter.
Shape
Adjusts the characteristics of the modulation. You hear this best when Feedback
is activated. At a setting of 0 %, the sound sweeps linearly up and down. At a
setting of 100 %, the sound sweeps exponentially up and down.
Mix
Sets the ratio between the dry and the wet signal.
Feedback
Adds resonances to the effect. This allows for jet-like sweeps of the sound.
Cross FB
Mixes the feedback of the left channel with the right channel, and vice versa. The
effect of this parameter is influenced by the Phase parameter.
NOTE
This parameter only takes effect if the Feedback parameter is set to a value
above 0 %.
Tone
Adjusts the tone color of the feedback. At lower values, the feedback is less
bright.
Type
Defines the length of the delay line that is modulated. Short produces a sharper
and Long a less defined, more blurred flanger sound.
S&H Mix
Use this parameter to blend the normal modulation signal with the stepped
modulation signal. At 100 %, only the stepped modulation is used.
Smooth
Use this parameter to create ramps between the steps. This way, the stepped
modulation signal sounds smoother.
Steps
Determines into how many steps the modulation signal is divided. You can use up
to 32 steps.
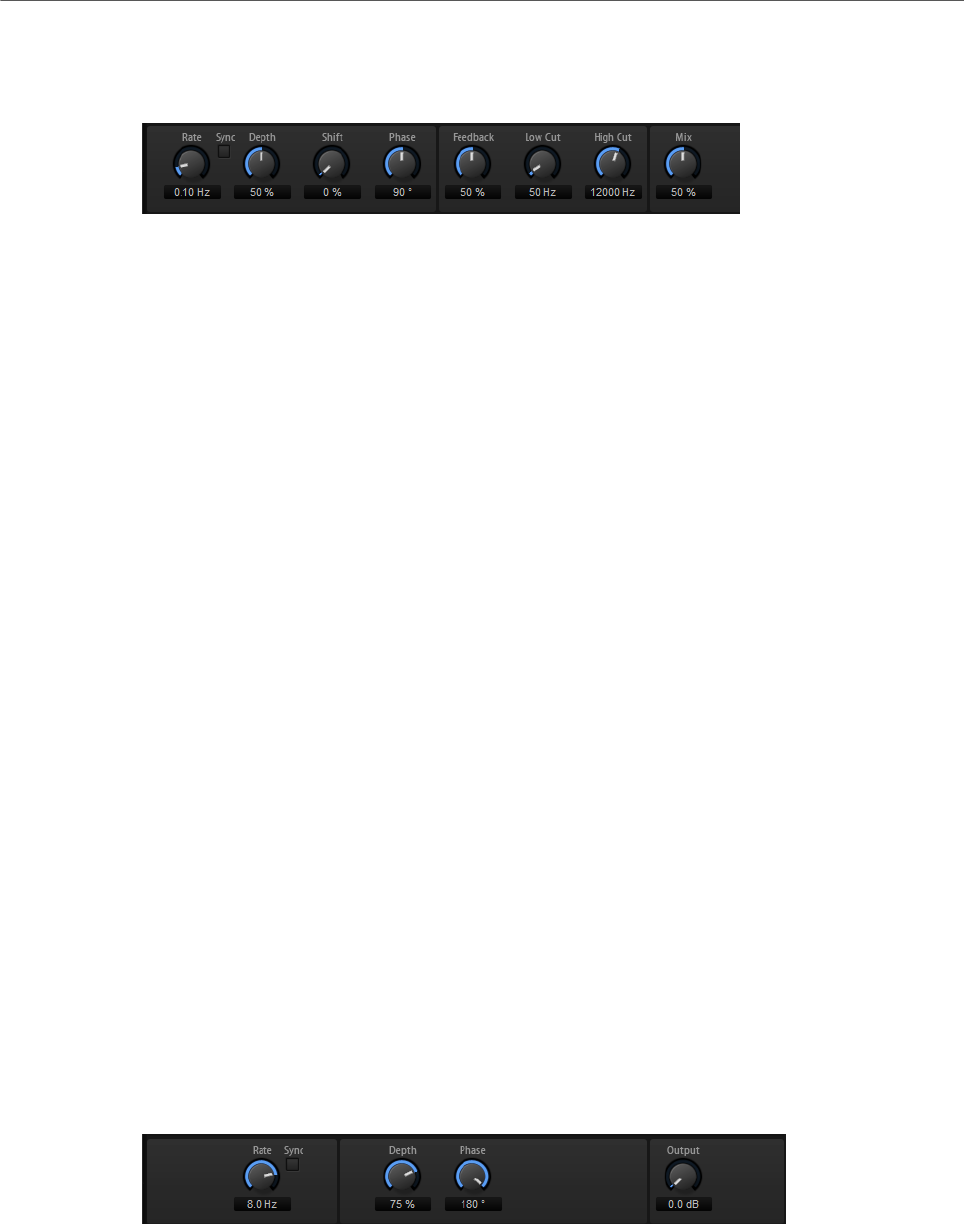
Effects Reference
Modulation Effects
447
Phaser
The Phaser effect thickens and broadens the sound by means of phase modulation.
Rate
Specifies the frequency of the phase modulation.
Sync
Activate this to set the Rate value in fractions of beats.
Depth
Sets the intensity of the phase modulation.
Shift
Shifts the phase modulation upwards to higher frequencies of the spectrum.
Phase
Widens the sound image of the effect from mono to stereo.
Feedback
Adds resonances to the effect. Higher settings produce a more pronounced
effect.
Low Cut
Attenuates the low frequencies.
High Cut
Attenuates the high frequencies.
Mix
Sets the ratio between the dry and the wet signal.
Tremolo
This effect produces amplitude modulation, that is, cyclic modulation of the level of the
sound.
Rate
Determines the frequency of the amplitude modulation.
Sync
Activate this to set the Rate value in fractions of beats.
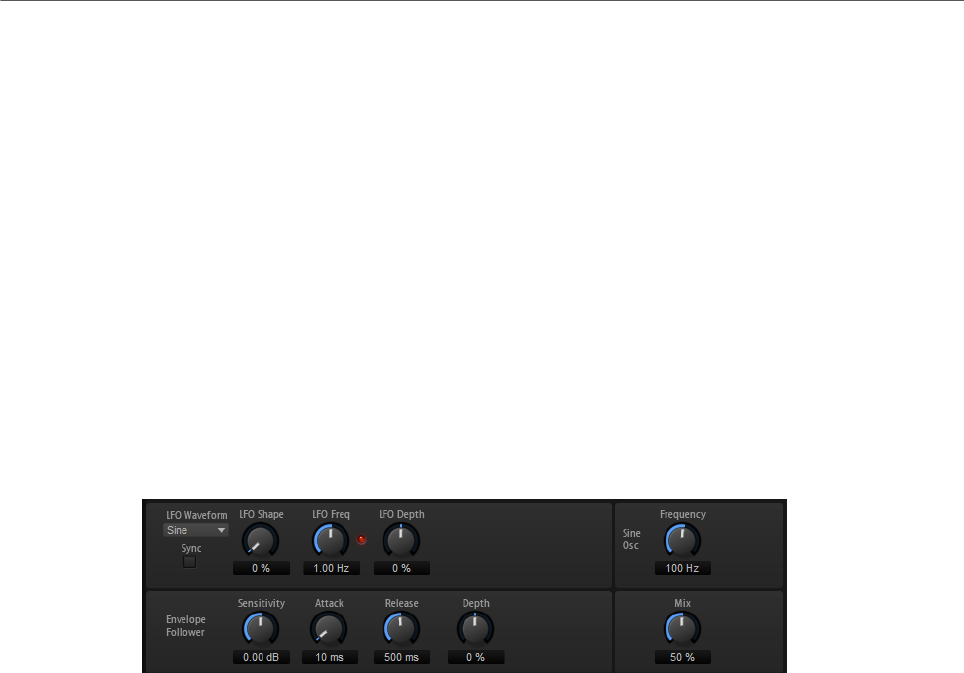
Effects Reference
Modulation Effects
448
Depth
Sets the intensity of the amplitude modulation.
Phase
Widens the sound image of the effect from mono to stereo.
Output
Sets the output level of the effect.
Ring Modulator
The Ring Modulator provides a sine oscillator that is multiplied with the input signal. This
creates metallic, or bell-like, frequencies.
The integrated LFO modulates the frequency of the sine oscillator to vary the created
frequencies over time. In addition, an envelope follower is available, which can be used to
modulate the frequency of the sine oscillator depending on the level of the input signal.
LFO Waveform and Shape
Waveform selects the basic type of waveform. Shape changes the characteristic
of the waveform.
•Sine produces smooth modulation. Shape adds additional harmonics to the
waveform.
•Triangle is similar in character to Sine. The waveform periodically ramps
up and down. Shape continuously changes the triangle waveform to a
trapezoid.
•Saw produces a ramp cycle. Shape continuously changes the waveform
from ramp down to triangle to ramp up.
•Pulse produces stepped modulation, where the modulation switches
abruptly between two values. Shape continuously changes the ratio
between the high and low state of the waveform. At 50 %, it produces a
square wave.
•Ramp is similar to the Saw waveform. Shape increasingly puts silence
before the sawtooth ramps up.
•Log is a logarithmic curvature. Shape continuously changes the curvature
from negative to positive.
•S & H 1 produces random stepped modulation, where each step is
different. Shape puts ramps between the steps and produces a smooth
random signal when fully turned right.
•S & H 2 is similar to S & H 1. The steps alternate between random high and
low values. Shape puts ramps between the steps and produces a smooth
random signal when fully turned right.
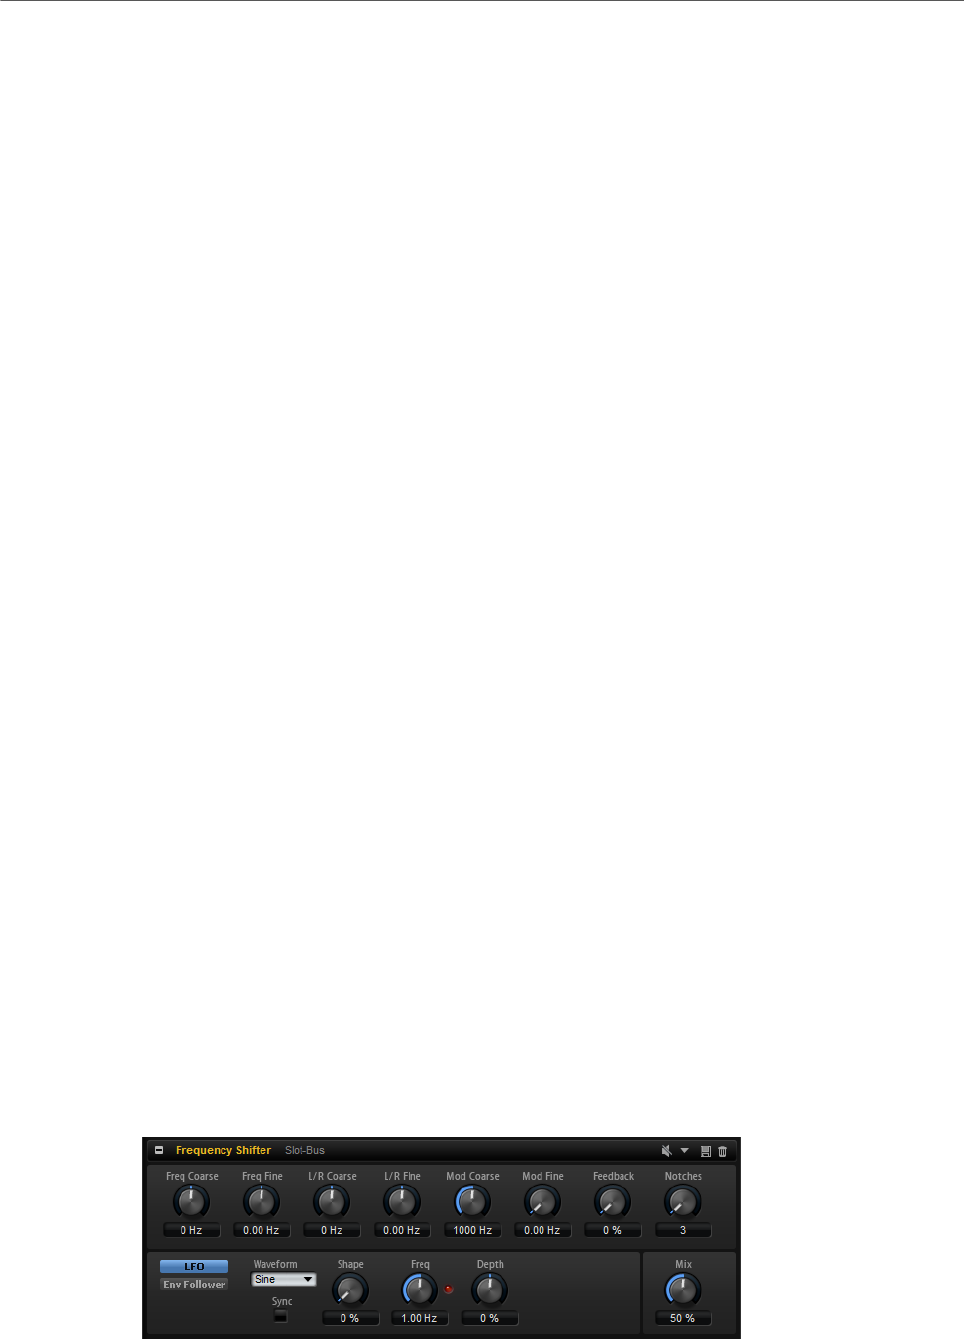
Effects Reference
Modulation Effects
449
LFO Freq
Use this to specify the frequency of the LFO for modulating the frequency of the
sine oscillator.
Sync
Activate this to set the LFO Freq value in fractions of beats.
LFO Depth
Sets the intensity of the LFO modulation of the sine oscillator frequency.
Frequency
Determines the frequency of the sine oscillator.
Mix
Sets the ratio between the dry and the wet signal.
Envelope Follower
The Envelope Follower traces the input signal with an adjustable attack and
release time and delivers a modulation signal representing the level envelope of
the signal.
Sensitivity
All input signals are mixed down to mono before they are sent to the Envelope
Follower. The Sensitivity parameter sets the optimum input level for the
Envelope Follower.
Attack
This adjusts the attack time, that is, the time the Envelope Follower needs to
approach increasing input levels.
Release
This adjusts the release time, that is, the time the Envelope Follower needs to
approach decreasing input levels.
Depth
Determines the output level of the modulation signal of the Envelope Follower.
Frequency Shifter
A frequency shifter shifts each frequency of the input signal by a fixed amount.

Effects Reference
Modulation Effects
450
Unlike pitch shifters, where the frequencies are shifted by a factor, and where the harmonic
relations are kept, a frequency shifter alters the harmonic relations. Therefore, a larger
frequency shift usually results in a disharmonic sound.
Furthermore, a frequency shifter alters the frequencies by adding an offset, while a pitch
shifter multiplies the frequencies by a factor. The frequency shifter alters lower frequencies
more than higher frequencies.
For example, if the input signal has the frequencies 100 Hz, 1000 Hz, and 10000 Hz, and you
shift the frequency by +100 Hz, the resulting frequencies are 200 Hz, 1100 Hz, and 10100 Hz.
Freq Coarse
Here you set the amount of frequency shift.
Freq Fine
Here you can fine adjust the amount of frequency shift.
L/R Offset Coarse
Sets an offset for the left and right channels. Positive values shift the right
channel upwards and the left channel downwards, and vice versa.
L/R Offset Fine
Allows for fine-adjustments of the offset between the left and right channels.
Positive values shift the right channel upwards and the left channel downwards,
and vice versa.
Mod Coarse
Sets the maximum amount of frequency shift via modulation from LFO and
Envelope Follower.
Mod Fine
Allows for fine-adjustments to the amount of frequency shift via modulation from
LFO and Envelope Follower.
Feedback
Sets the amount of feedback, that is, the amount of signal that is sent from the
output of the effect back to its input. The sound is similar to that of a phaser.
You can control the direction and speed of this effect with the Frequency Fine
parameter.
Notches
Here you set the number of notches the phaser effect produces when you use
larger amounts of Feedback.
LFO Section
LFO Waveform and Shape
Waveform selects the basic type of waveform. Shape changes the characteristic
of the waveform.
•Sine produces smooth modulation. Shape adds additional harmonics to the
waveform.

Effects Reference
Modulation Effects
451
•Triangle is similar in character to Sine. The waveform periodically ramps
up and down. Shape continuously changes the triangle waveform to a
trapezoid.
•Saw produces a ramp cycle. Shape continuously changes the waveform
from ramp down to triangle to ramp up.
•Pulse produces stepped modulation, where the modulation switches
abruptly between two values. Shape continuously changes the ratio
between the high and low state of the waveform. At 50 %, it produces a
square wave.
•Ramp is similar to the Saw waveform. Shape increasingly puts silence
before the sawtooth ramps up.
•Log is a logarithmic curvature. Shape continuously changes the curvature
from negative to positive.
•S & H 1 produces random stepped modulation, where each step is
different. Shape puts ramps between the steps and produces a smooth
random signal when fully turned right.
•S & H 2 is similar to S & H 1. The steps alternate between random high and
low values. Shape puts ramps between the steps and produces a smooth
random signal when fully turned right.
Freq
Specifies the frequency of the LFO in Hertz.
Sync
Activate this to set the Freq parameter in fractions of beats.
Depth
Determines the direction and amount of frequency shift from the LFO modulation
signal.
Envelope Follower
The Envelope Follower traces the input signal with an adjustable attack and release time and
delivers a modulation signal representing the level envelope of the signal.
Sensitivity
All input signals are mixed down to mono before they are sent to the Envelope
Follower. This parameter sets the optimum input level for the Envelope Follower.
Attack
Adjusts the attack time, that is, the time the Envelope Follower needs to
approach increasing input levels.
Release
Adjusts the release time, that is, the time the Envelope Follower needs to
approach decreasing input levels.
Depth
Determines the direction and amount of frequency shift from the envelope
follower modulation signal.
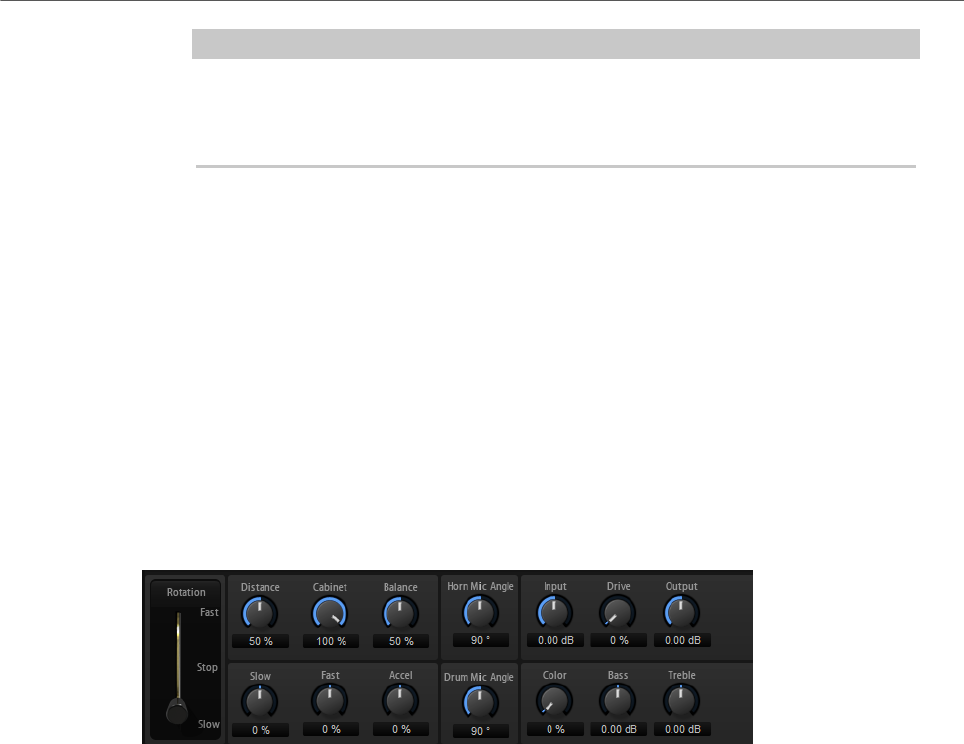
Effects Reference
Modulation Effects
452
NOTE
The maximum frequency shift via modulation from LFO or the Envelope Follower
is determined by the parameters Modulation Range Coarse and Modulation
Range Fine.
Mix
Sets the ratio between the dry and the wet signal.
Rotary
The Rotary effect emulates the sound of a vintage rotary speaker including amplifier, horn,
drum, and cabinet.
By emitting the sound via a rotating horn and drum, the rotary speaker produces a Doppler
effect that thickens the sound. The horn and drum rotate at variable speed producing
different amounts of Doppler effect. The amplifier of the rotary speaker adds a warm
sounding distortion, and the horn, drum, and cabinet color the sound uniquely. The horn and
drum are recorded via (virtual) microphones that can be set to different angles to broaden
the sound image. Typically, rotary speakers are used with electric organs.
Rotation
This parameter changes the rotation speed of the horn and drum. When set to
Fast, the Doppler effect is stronger. When set to Stop, there is no Doppler effect
because the drum and horn do not rotate. Because the horn and drum accelerate
and decelerate at different speeds, the transition from Slow to Fast and vice
versa sounds the most interesting.
Distance
Sets the distance between the microphones and the horn and drum. The
amplitude modulation of the sound decreases with the distance of the
microphones. Set this to higher values for less amplitude modulation.
Cabinet
The horn and drum sound different when recorded through the louvers of the
cabinet. Use this to color the horn and drum with the sound of the cabinet. At a
setting of 100 %, you get the full sound of the cabinet.
Balance
Here you adjust the balance between the horn and drum microphones. At a
setting of 0 %, you hear only the drum. At a setting of 100 %, you hear only the
horn.
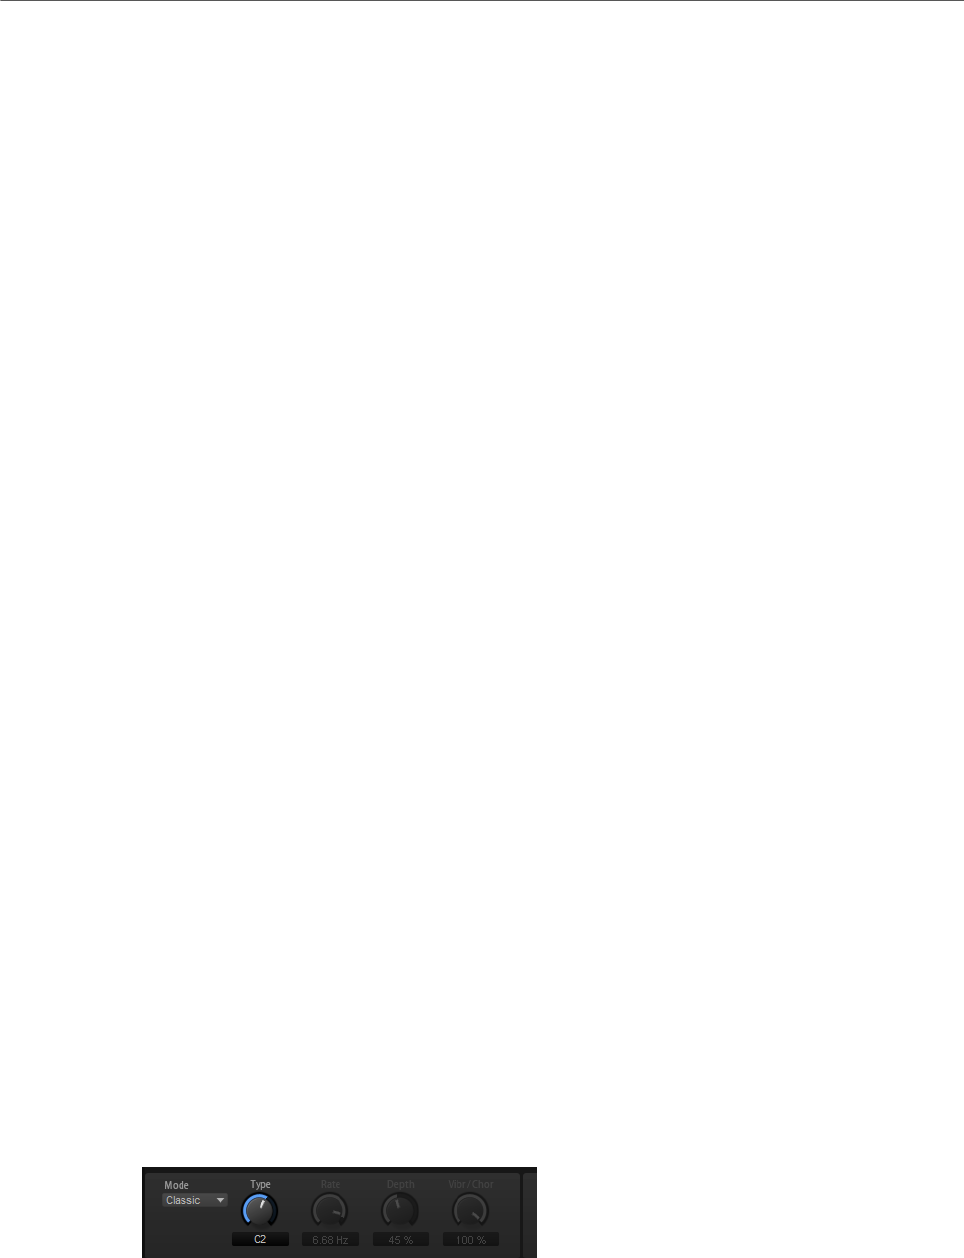
Effects Reference
Modulation Effects
453
Slow
Adjusts the slow speed of the horn and drum together.
Fast
Adjusts the fast speed of the horn and drum together.
Accel
Adjusts the acceleration time for raising and lowering the rotation speed of the
horn and drum.
Horn Mic Angle
This adjusts the stereo spread of the horn microphones. At a setting of 0°, the
sound image is monophonic. At a setting of 180°, the sound image is fully stereo.
Drum Mic Angle
This adjusts the stereo spread of the drum microphones. At a setting of 0°, the
sound image is monophonic. At a setting of 180°, the sound image is fully stereo.
Input
Adjusts the gain before the rotary and drive.
Drive
Adjusts the distortion of the amplifier.
Output
Adjusts the gain after the rotary and drive.
Color
Alters the sound of the Rotary effect by changing the timbre, which leads to the
rotation of the horn and the drum being perceived with greater depth.
Bass
Adjusts the tone color of the low frequencies.
Treble
Adjusts the tone color of the high frequencies.
Vibrato
The Vibrato effect emulates the chorus and vibrato effects of vintage organs. It thickens the
sound by means of pitch modulation.
The effect provides direct access to the classic chorus and vibrato settings (C1, C2 and C3
and V1, V2 and V3). In addition, there is a custom mode that allows you to adjust the amount
of chorus or vibrato freely.
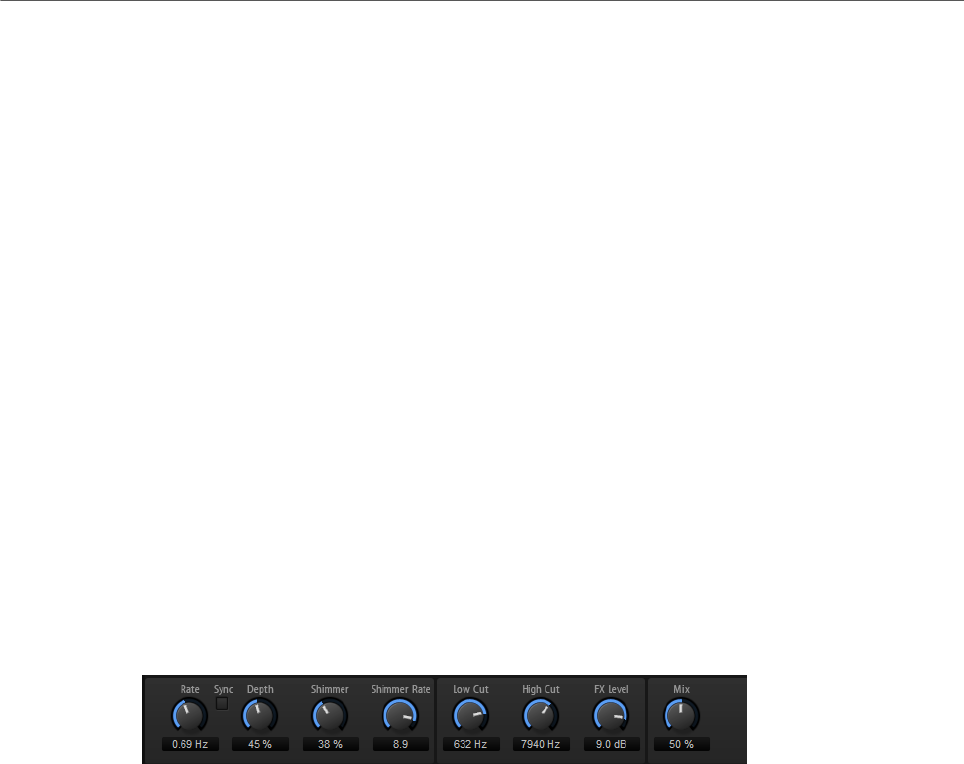
Effects Reference
Modulation Effects
454
Type
Here, you can select the classic chorus and vibrato settings. This control is only
available if the effect is set to Classic mode.
Custom Mode
Activate this to adjust the chorus and vibrato settings freely with the Rate, Depth,
and Vibr/Chor controls.
Rate
Sets the frequency of the pitch modulation.
Depth
Sets the intensity of the pitch modulation.
Vibr/Chor
Controls the mix between the vibrato and the chorus signal. At 100 %, you only
hear the chorus effect.
Vintage Ensemble
This effect emulates the sound of classic ensemble modulation effects. It is based on a
delay with LFO-modulated delay times. A secondary LFO with higher frequencies is used to
produce the so-called shimmer.
Rate
Sets the frequency of the LFO.
Sync
If Sync is activated, you can set the Rate value in fractions of beats.
Depth
Sets the intensity of the delay time modulation by the LFO.
Shimmer
Sets the intensity of a secondary faster delay time modulation.
Shimmer Rate
Determines the relation between the speed of the primary and the secondary
delay modulation. For example, with a value of 10, the secondary modulation is
10 times faster.
Low Cut
Applies a low-cut filter to the signal. Only frequencies above the set frequency
are sent to the effect.
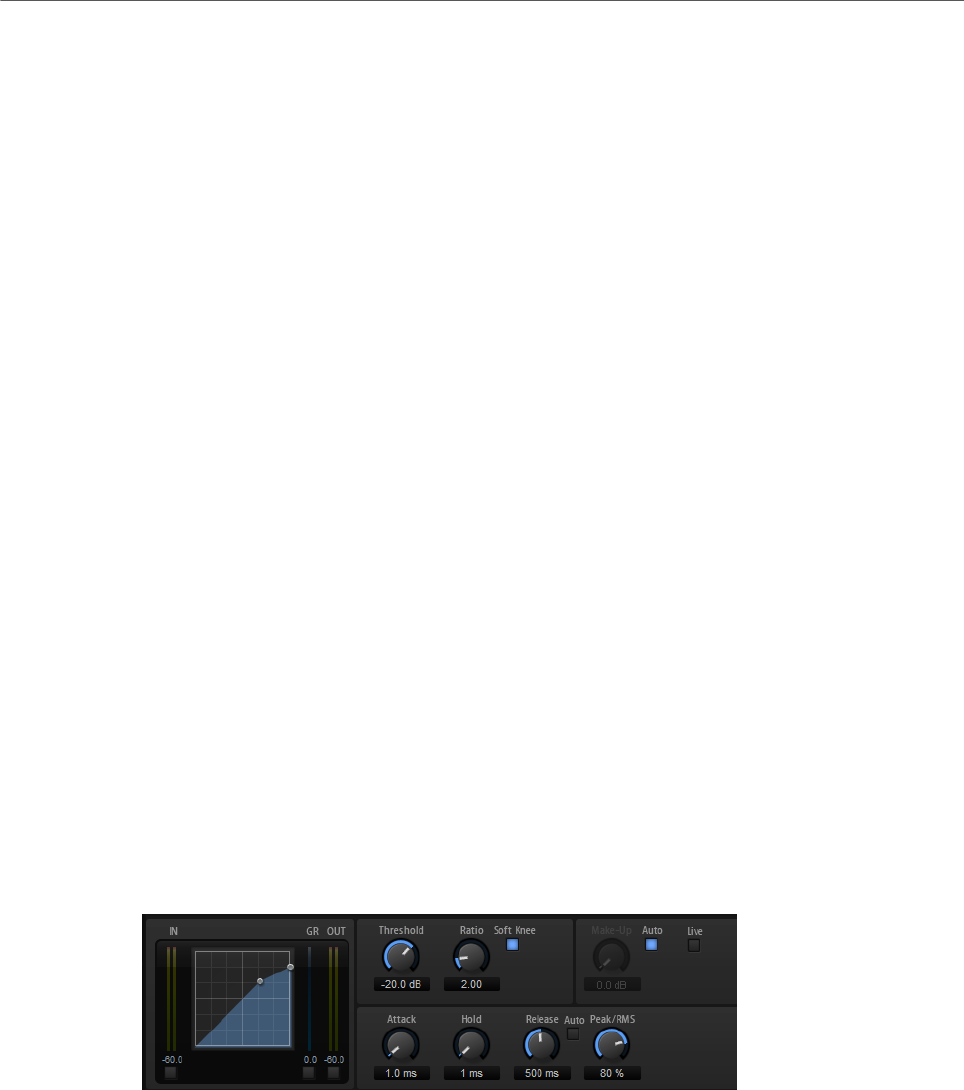
Effects Reference
Dynamics Effects
455
High Cut
Applies a high-cut filter to the signal. Only frequencies below the set frequency
are sent to the effect.
FX Level
Allows you to adapt the effect signal level to compensate for level reductions
caused by the low-cut and high-cut filters.
Mix
Sets the ratio between the dry and the wet signal.
Dynamics Effects
The effects Compressor, Limiter, Brickwall Limiter, Expander, Gate, and Maximizer work with
an internal look-ahead function to guarantee the best possible audio quality.
However, this look-ahead function introduces a small amount of latency. Usually, this is not
noticeable, but in some cases, it might introduce unwanted side effects. For example, if you
work with parallel compression where signals are sent to an AUX bus and being returned to
the rest of the mix, this might lead to unwanted flanging effects.
If you run into latency issues, you have the following possibilities:
•For the effects Compressor, Expander, and Gate, activate the Live button to use the
effects without look-ahead functionality.
•For the effects Limiter, Brickwall Limiter, and Maximizer, send the signals to one of the
plug-in outputs and add the corresponding effect directly in the DAW, to make use of
the host’s delay compensation.
Compressor
The Compressor reduces the dynamic range of a sound. This way, the sound gains
headroom. You can use this extra headroom to make the overall sound louder again.
The graphical control to the left indicates the compression curve. You can edit the Threshold
and Ratio values with the handles of this control. The input and output VU meters indicate
the level before and after the compression. The Gain Reduction meter indicates the current
attenuation of the level.
Threshold
Sets the threshold. Sounds that are louder than the threshold are reduced in
gain. Sounds below the threshold stay untreated.

Effects Reference
Dynamics Effects
456
Ratio
Sets the amount of gain reduction for sounds that are louder than the threshold.
The higher the ratio, the more the output is lowered. For example, if the ratio is
set to 2:1 and the amplitude of the sound is 4 dB above the threshold, the output
is lowered by 2 dB. If the amplitude is 8 dB above the threshold, the output is
lowered by 4 dB.
Soft Knee
If this button is deactivated, signals above the threshold are compressed instantly
according to the set ratio. If Soft Knee is activated, the onset of the compression
is more gradual, producing a less drastic result.
Make-Up
Raises the overall sound. This can become necessary if too much gain reduction
is introduced by the Threshold and Ratio parameters. You can see the amount of
gain reduction in the Gain Reduction meter.
NOTE
This parameter is not available if the Auto button is activated.
Auto Make-Up Gain
Sets the Make-Up value automatically, depending on the current Threshold and
Ratio settings.
Attack
Determines how fast the Compressor reacts to sounds that exceed the threshold.
The longer the attack time, the longer the time it takes to reduce the gain. With
longer attack times, the onset of sounds exceeding the threshold pass through
unprocessed.
Hold
Sets the time period during which the compression is applied after the sound
exceeds the set threshold.
Release
Determines how fast the Compressor effect reacts to sounds that fall below the
set threshold. The longer the release time, the longer it takes to return to the
original level.
NOTE
This parameter is not available if the Auto Release button is activated.
Auto Release
Activate this to set the release time automatically. The Compressor analyzes the
input sound continuously to find the optimal setting.
Peak/RMS
Determines whether the input signal is analyzed according to peak or RMS values
or a mixture of both. At a setting of 0 %, the Compressor uses Peak sensing
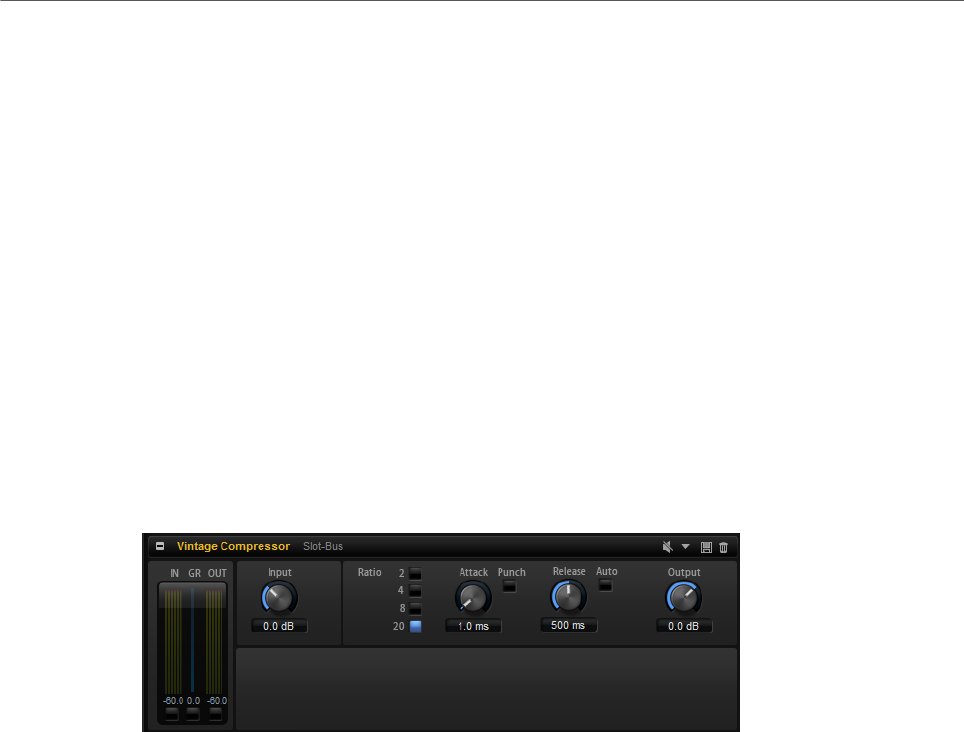
Effects Reference
Dynamics Effects
457
only and at 100 %, RMS sensing only. Peak means that the Compressor directly
senses the peak level of the sound. RMS means that the Compressor senses the
average power of the sound. Peak sensing responds faster than RMS sensing.
Typically, Peak sensing is used for transient and RMS sensing for sustained
sounds.
Live
If this button is activated, the look-ahead feature of the effect is disengaged.
Look-ahead produces more accurate processing, but adds a certain amount
of latency as a trade-off. If Live mode is activated, there is no latency, which is
better for live processing.
Vintage Compressor
Vintage Compressor is modeled after vintage type compressors.
This compressor features separate controls for Input and Output gain, Attack, and Release.
In addition, there is a Punch mode which preserves the attack phase of the signal and a
program-dependent Auto feature for the Release parameter.
In/Out Meters
Show the highest peaks of all available input and output channels.
GR Meter
Shows the amount of gain reduction.
Input
Determines the compression amount. The higher the input gain, the more
compression is applied.
Ratio
Sets the amount of gain reduction for sounds that are louder than the threshold.
The higher the ratio, the more the output is lowered.
Attack (0.1 to 100 ms)
Determines how fast the compressor responds. If the attack time is long, more of
the initial part of the signal passes through unprocessed.
Punch
If this is activated, the early attack phase of the signal is preserved, retaining the
original punch in the audio material, even with short Attack settings.
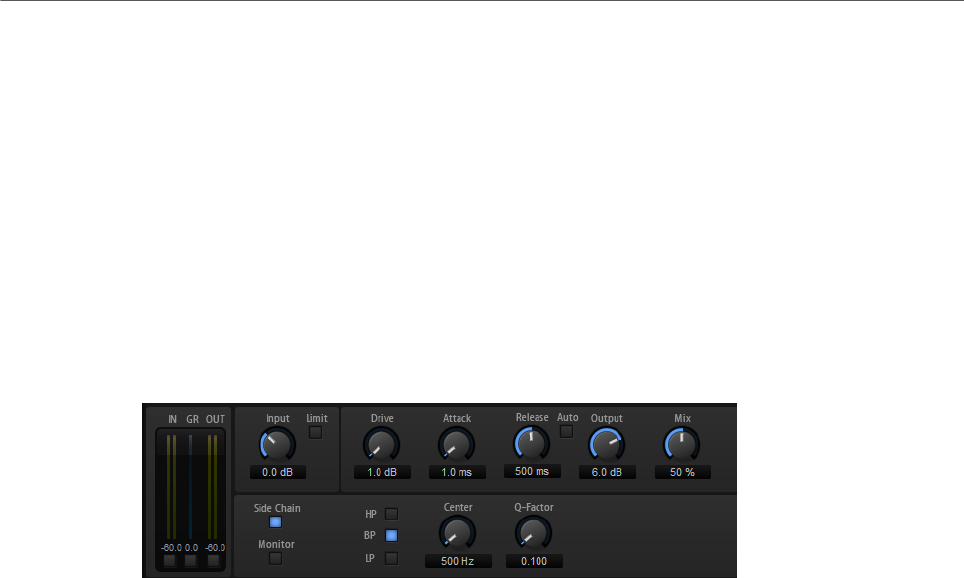
Effects Reference
Dynamics Effects
458
Release (10 to 1000 ms or Auto mode)
Sets the time after which the gain returns to its original level. If the Auto button
is activated, the plug-in automatically finds the best release setting for the audio
material.
Output (-48 to 24 dB)
Sets the output gain.
Tube Compressor
This versatile compressor with integrated tube-simulation allows you to achieve smooth
and warm compression effects. The GR meter shows the amount of gain reduction. Tube
Compressor features an internal side-chain section that lets you filter the trigger signal.
In/Out Meters
Show the highest peaks of all available input and output channels.
GR Meter
Shows the amount of gain reduction.
Input
Determines the compression amount. The higher the input gain, the more
compression is applied.
Limit
Increases the ratio of the compressor for a limiting effect.
Drive (1.0 to 6.0)
Controls the amount of tube saturation.
Attack (0.1 to 100 ms)
Determines how fast the compressor responds. If the attack time is long, more of
the initial part of the signal passes through unprocessed.
Release (10 to 1000 ms or Auto mode)
Sets the time after which the gain returns to its original level. If the Auto button
is activated, the plug-in automatically finds the best release setting for the audio
material.
Output (-12 to 12 dB)
Sets the output gain.
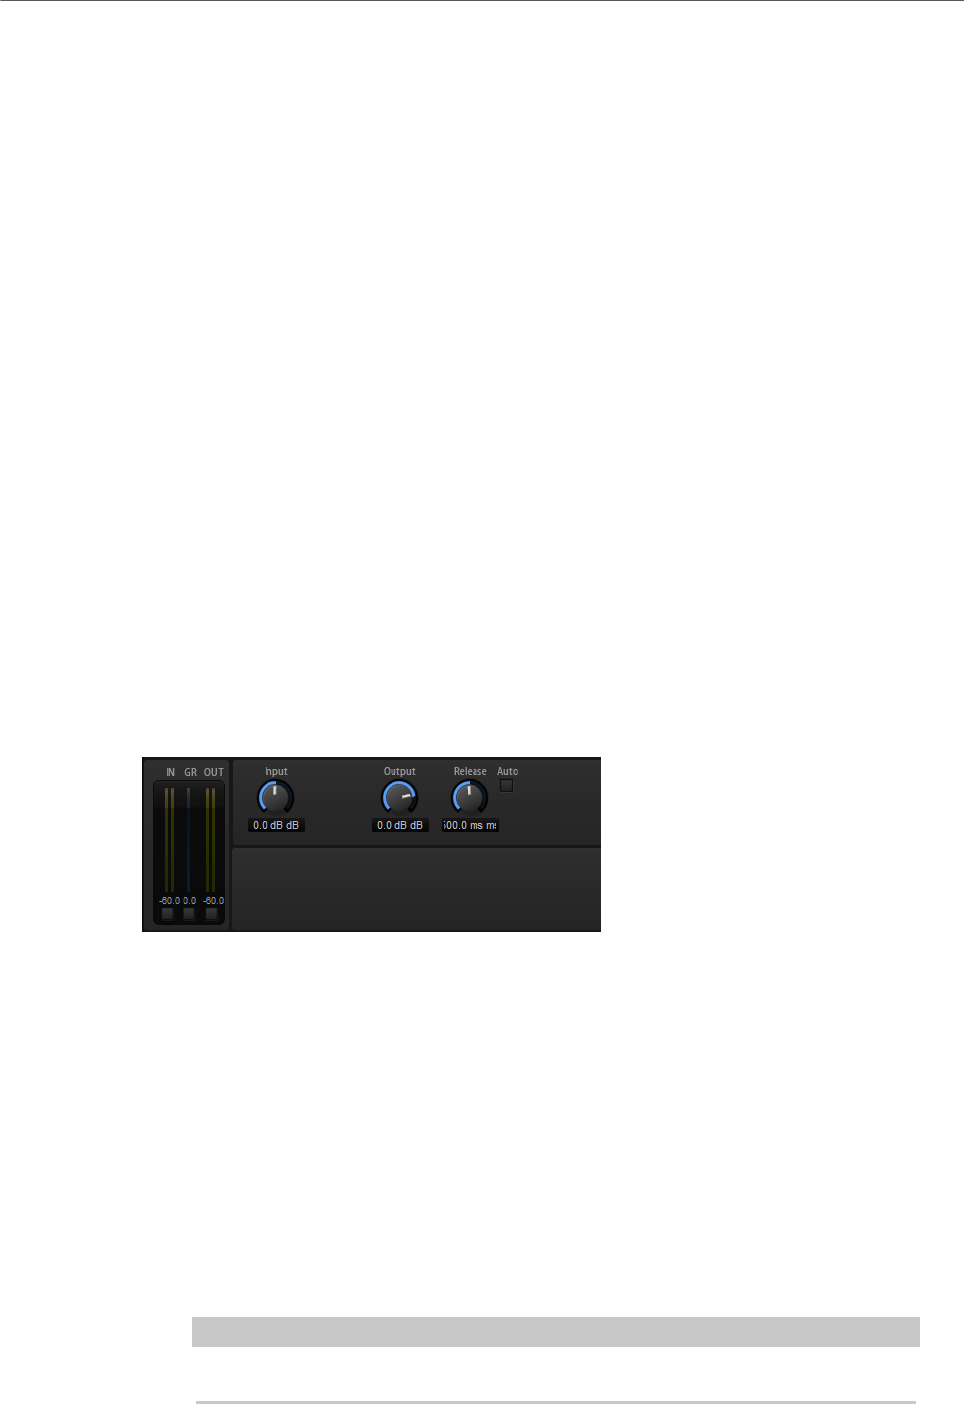
Effects Reference
Dynamics Effects
459
Mix
Adjusts the mix between dry signal and wet signal preserving the transients of
the input signal.
Side-Chain
Activates the internal side-chain filter. The input signal can then be shaped
according to the filter parameters. Internal side-chaining is useful for tailoring
how the gate operates.
Monitor
Allows you to monitor the filtered signal.
Filter buttons (LP, BP, and HP)
If the Side-Chain button is activated, you can use these buttons to set the filter
type to low-pass, band-pass, or high-pass.
Center (50 to 20000 Hz)
If the Side-Chain button is activated, this sets the center frequency of the filter.
Q-Factor
If the Side-Chain button is activated, this sets the resonance or width of the filter.
Limiter
The Limiter effect prevents the sound from exceeding the set output level. This can be used
to avoid clipping in following effects, for example.
The input and output meters indicate the level before and after the Limiter. The Gain
Reduction meter in the middle indicates the current attenuation of the level.
Input
Adjusts the input level of the sound. By increasing the input level, you can drive
the sound more and more into limiting.
Output
Sets the maximum output level of the sound.
Release
Sets the time that the gain needs to return to its original level. The longer the
release time, the longer it takes to return to the original level.
NOTE
This parameter is not available if the Auto button is activated.
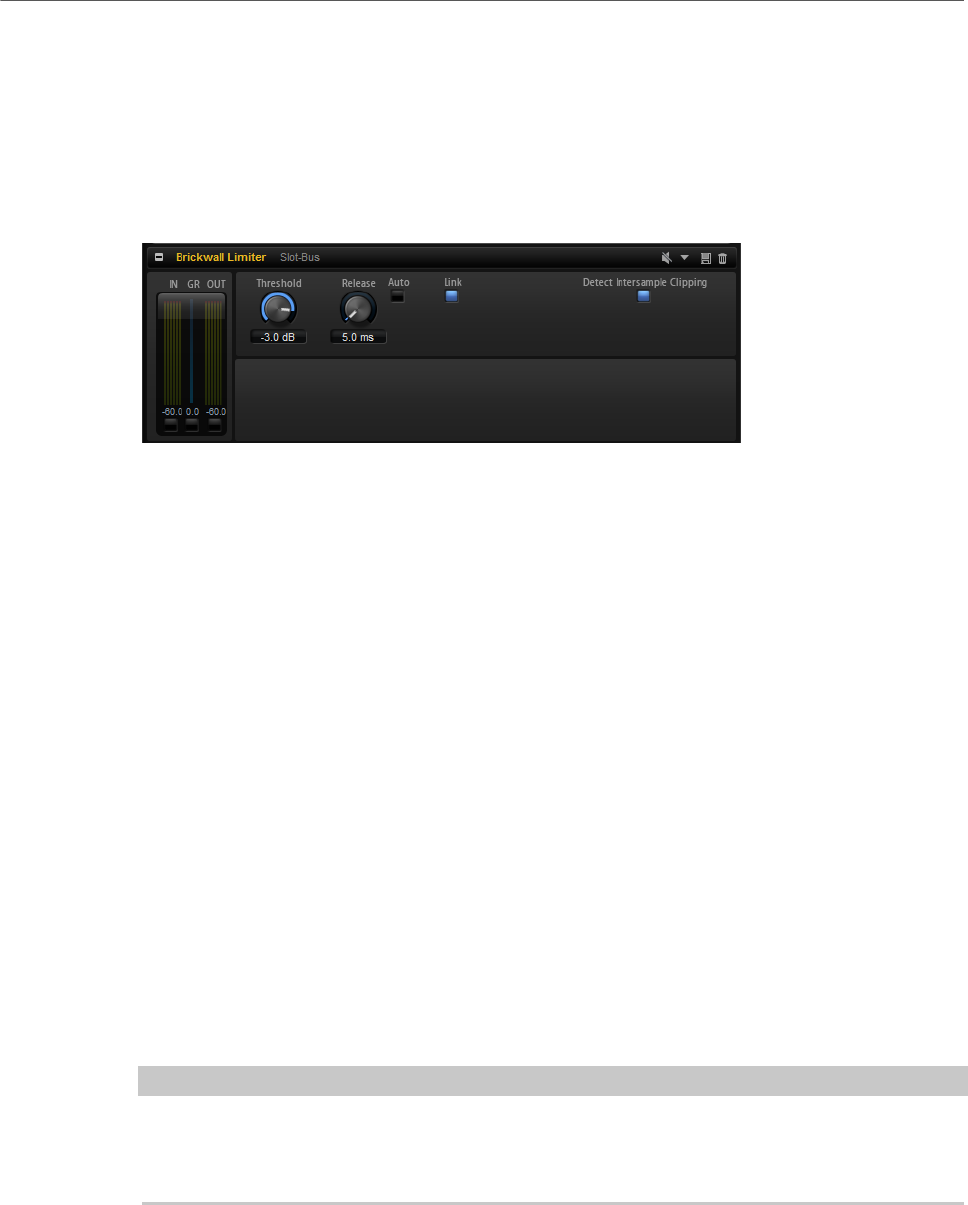
Effects Reference
Dynamics Effects
460
Auto
Activate this to set the release time automatically. The Limiter analyzes the input
sound continuously to find the optimal setting.
Brickwall Limiter
Brickwall Limiter ensures that the output level never exceeds a set limit.
Due to its fast attack time, Brickwall Limiter can reduce even short audio level peaks without
creating audible artifacts. However, this plug-in creates a latency of 1 ms. Brickwall Limiter
features separate meters for input, output, and the amount of limiting.
Threshold (-20 to 0 dB)
Determines the level where the limiter kicks in. Only signal levels above the set
threshold are processed.
Release (ms or Auto mode)
Sets the time after which the gain returns to the original level when the
signal drops below the threshold. If the Auto button is activated, the plug-in
automatically finds the best release setting for the audio material.
Link
If this button is activated, Brickwall Limiter uses the channel with the highest
level to analyze the input signal. If the button is deactivated, each channel is
analyzed separately.
Detect Intersample Clipping
If this option is activated, Brickwall Limiter uses oversampling to detect and limit
signal levels between two samples to prevent distortion when converting digital
signals into analog signals.
NOTE
Brickwall Limiter is designed for the reduction of occasional peaks in the signal. If the Gain
Reduction meter indicates constant limiting, try raising the threshold or lowering the overall
level of the input signal.
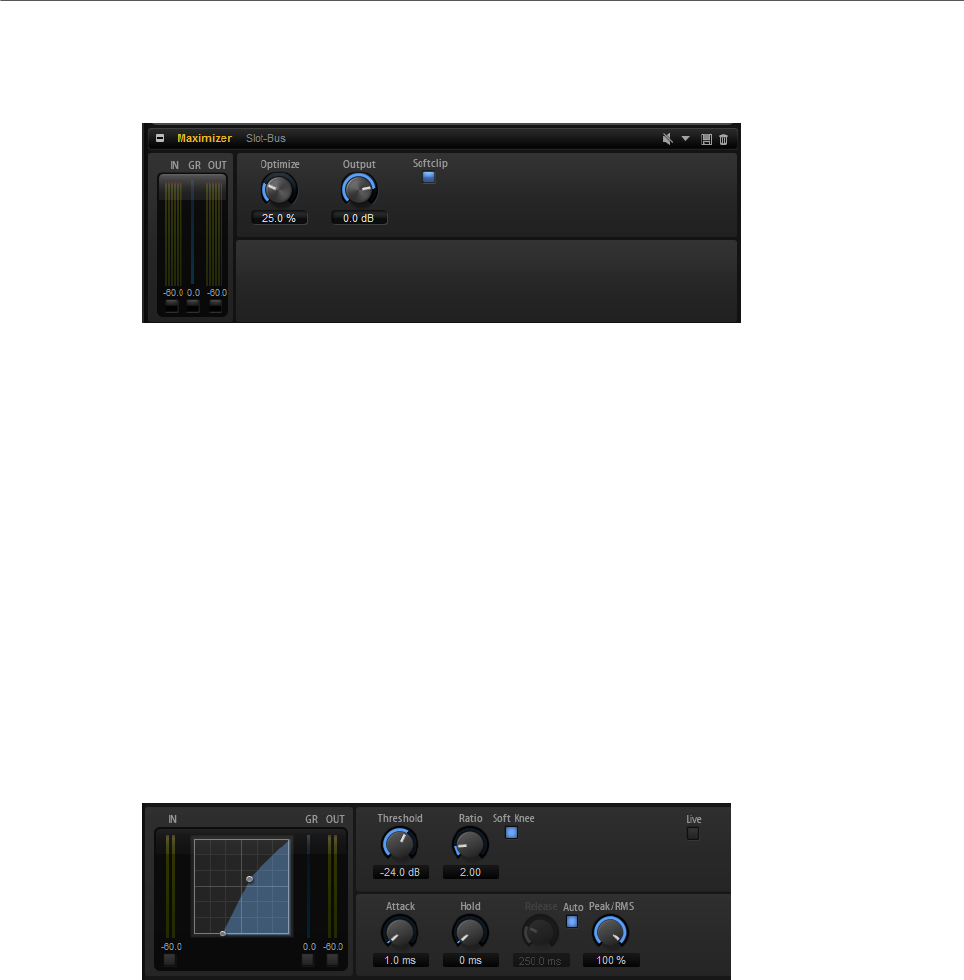
Effects Reference
Dynamics Effects
461
Maximizer
This plug-in raises the loudness of audio material without the risk of clipping.
Optimize
Determines the loudness of the signal.
Output
Sets the maximum output level.
Soft Clip
If this button is activated, Maximizer starts limiting or clipping the signal softly. At
the same time, harmonics are generated, adding a warm, tube-like characteristic
to the audio material.
Expander
The Expander reduces the output level in relation to the input level for signals below the
set threshold. This is useful to enhance the dynamic range or reduce the noise in quiet
passages.
The graphical control to the left shows the expansion curve. You can edit the Threshold and
Ratio values with the handles of this control. The input and output meters indicate the level
before and after the expansion. The Gain Reduction meter indicates the current attenuation
of the level.
Threshold
Sets the threshold. Sounds that are softer than the threshold are reduced in gain.
Sounds above the threshold stay untreated.
Ratio
Sets the amount of gain reduction for sounds that are softer than the threshold.
The higher the ratio, the more the output is lowered. For example, if the ratio is
set to 2:1 and the amplitude of the sound is 4 dB below the threshold, the output
is lowered by 2 dB. If the amplitude is 8 dB below the threshold, the output is
lowered by 4 dB.

Effects Reference
Dynamics Effects
462
Soft Knee
If this button is deactivated, signals above the threshold are compressed instantly
according to the set ratio. When Soft Knee is activated, the onset of the expansion
is more gradual, producing a less drastic result.
Attack
Determines how fast the Expander reduces the gain when the sound falls below
the set threshold. The longer the attack time, the longer it takes to reduce the
gain.
Hold
Sets the time period during which the expansion is applied after the sound falls
below the set threshold.
Release
Determines how fast the Expander effect raises the gain after the sound exceeds
the set threshold. The longer the release time, the longer it takes to raise the
gain.
NOTE
This parameter is not available when the Auto Release button is activated.
Auto
Activate this to set the release time automatically. The Expander analyzes the
input sound continuously to find the optimal setting.
Peak/RMS
Determines whether the input signal is analyzed according to peak or RMS values
or a mixture of both. At a setting of 0 %, the Expander uses Peak sensing only and
at 100 %, RMS sensing only. Peak means that the Expander directly senses the
peak level of the sound. RMS means that the Expander senses the average power
of the sound. Peak sensing responds faster than RMS sensing. Typically, Peak
sensing is used for transient and RMS sensing for sustained sounds.
Live
If this button is activated, the look-ahead feature of the effect is disengaged.
Look-ahead produces more accurate processing, but adds a certain amount
of latency as a trade-off. If Live mode is activated, there is no latency, which is
better for live processing.
Gate
The Gate effect passes sound only to its output if the input sound exceeds the set threshold.
Sounds below the threshold are silenced.
An internal side-chain filter allows you to analyze a filtered version of the input sound
instead. This way, the gate detects only certain frequencies of the input sound.
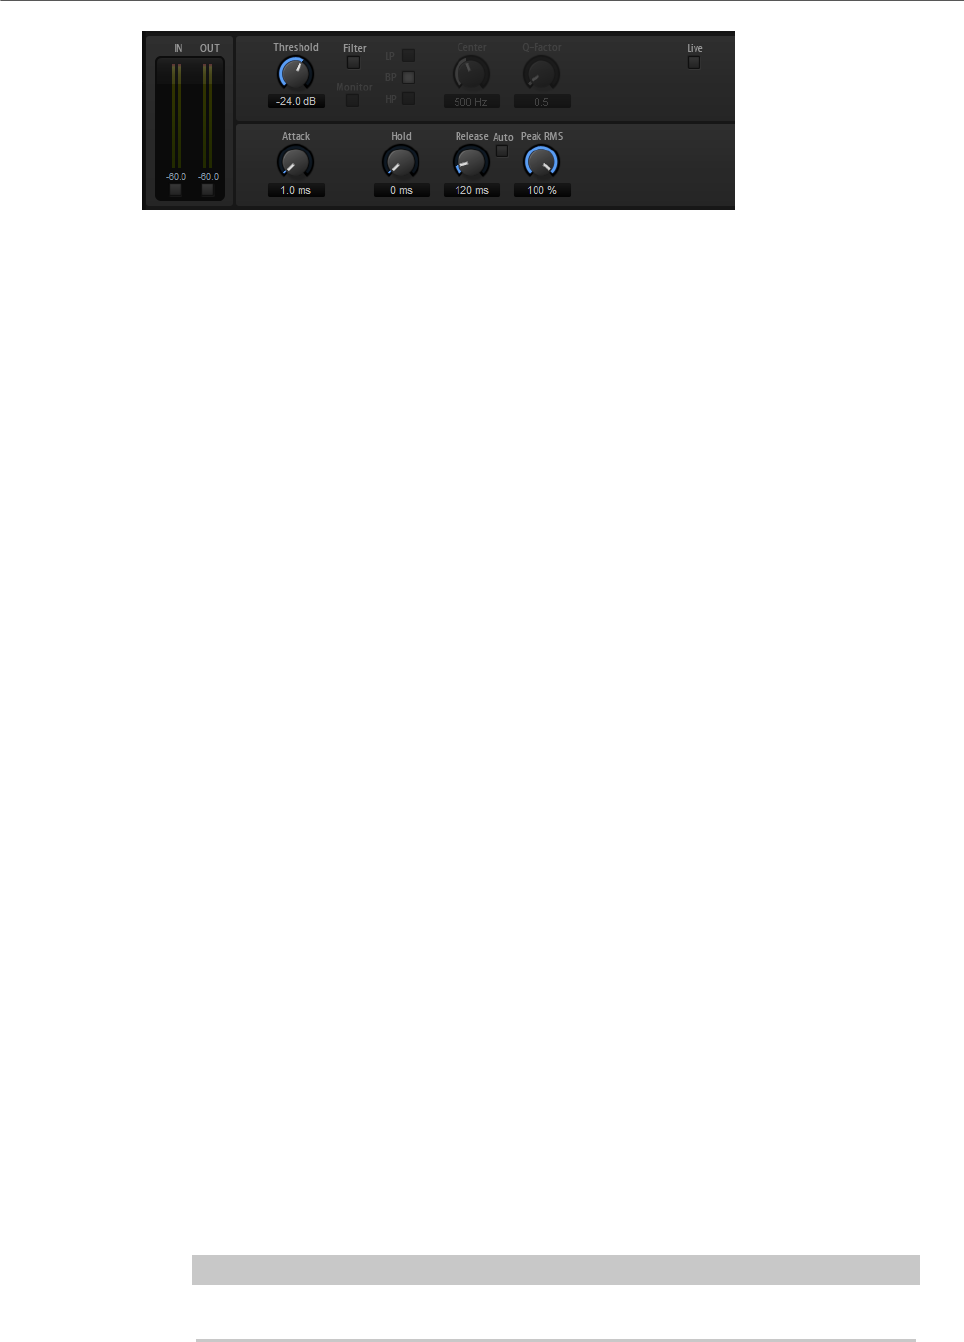
Effects Reference
Dynamics Effects
463
Threshold
Determines the level that activates the gate. Signal levels above the set threshold
trigger the gate to open, and signal levels below the set threshold close the gate.
Filter
Activates the internal side-chain filter. If this button is activated, the input sound
is filtered before it is analyzed. The gate opens only if the filtered sound exceeds
the set threshold. When the Filter button is deactivated, the filter controls are not
available.
Filter Type
Sets the filter type for the side-chain filter. Select high-pass (HP) to detect high
frequencies, band-pass (BP) to detect mid frequencies, and low-pass (LP) to
detect low frequencies only.
Monitor
Activate this button to listen to the sound of the side-chain filter. The gate is
inactive when the Monitor button is activated.
Center
Sets the center frequency of the side-chain filter.
Q-Factor
Adjusts the bandwidth of the filter from wide to narrow.
Attack
Determines how fast the gate opens when the sound exceeds the set threshold.
The longer the attack time, the longer it takes for the sound to fade in.
Hold
Sets the time period during which the gate is applied after the sound falls below
the set threshold.
Release
Determines how fast the gate closes after the sound falls below the set
threshold. The longer the release time, the longer it takes for the sound to fade
out.
NOTE
This parameter is not available when the Auto button is activated.
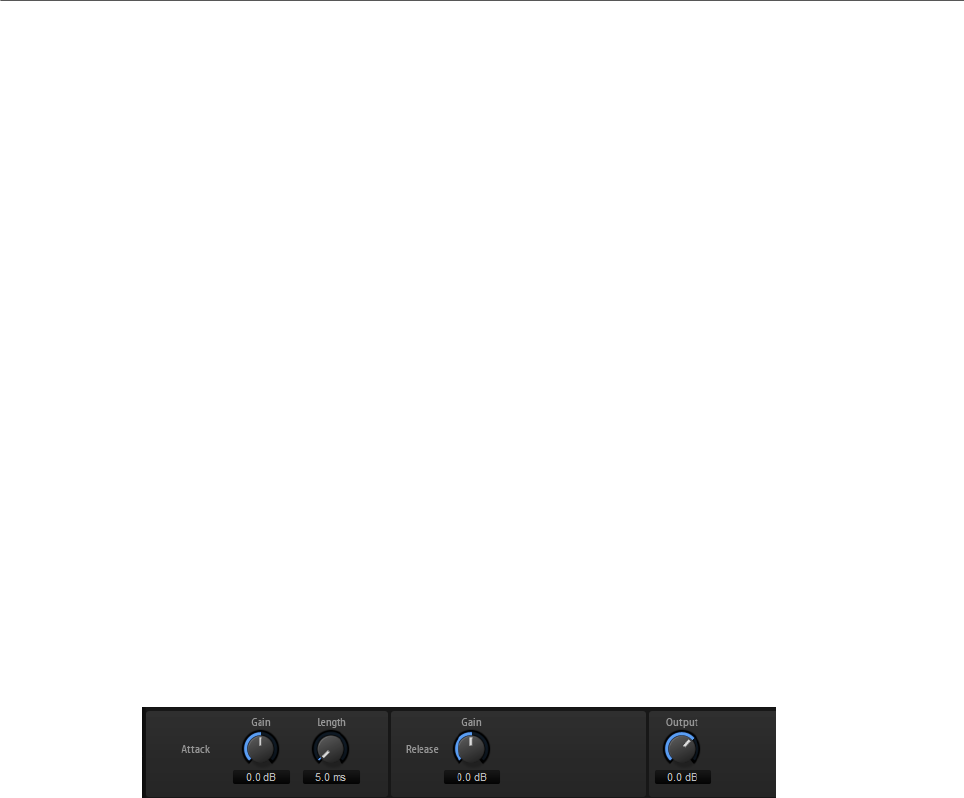
Effects Reference
Dynamics Effects
464
Auto
Activate this to set the Release time automatically. The Gate analyzes the input
sound continuously to find the optimal setting.
Peak/RMS
Determines whether the input signal is analyzed according to peak or RMS values
(or a mixture of both). At a setting of 0 %, the Gate uses Peak sensing only and
at 100 %, RMS sensing only. Peak means that the Gate directly senses the peak
level of the sound. RMS means that the Gate senses the average power of the
sound. Peak sensing responds faster than RMS sensing. Typically, Peak sensing
is used for transient and RMS sensing for sustained sounds.
Live
If this button is activated, the look-ahead feature of the effect is disengaged.
Look-ahead produces more accurate processing, but adds a certain amount
of latency as a trade-off. If Live mode is activated, there is no latency, which is
better for live processing.
Envelope Shaper
This effect can be used to attenuate or boost the gain of the attack and release phase of
audio material.
Be careful with levels when boosting the gain and, if needed, reduce the output level to avoid
clipping.
Attack – Gain
Changes the gain of the attack phase of the signal.
Attack - Length
Determines the length of the attack phase of the signal.
Release - Gain
Changes the gain of the release phase of the signal.
Output
Sets the output level.
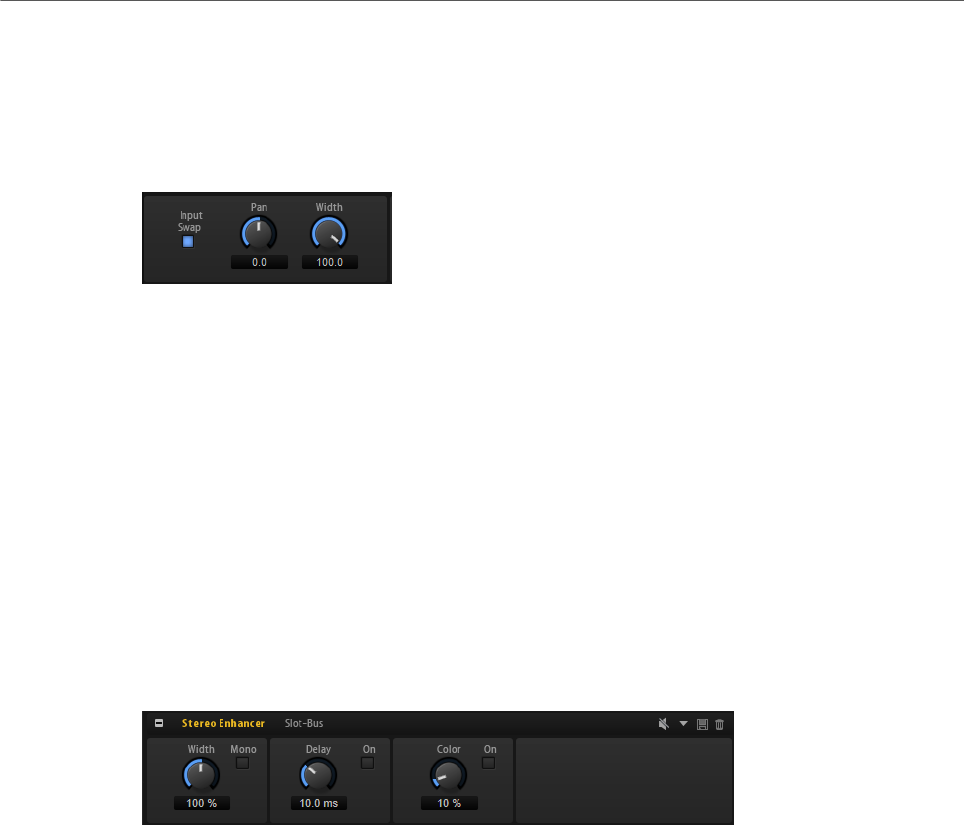
Effects Reference
Spatial and Panner Effects
465
Spatial and Panner Effects
Stereo Pan
This effect allows you to set the stereo position and width of the signal.
Input Swap
Swaps the stereo channels.
Pan
Sets the pan position of the signal. The panning is available for mono and stereo
input signals.
Width
Adjusts the stereo width of the signal from stereo to mono.
Stereo Enhancer
This plug-in expands the stereo width of (stereo) audio material. It cannot be used with mono
files.
Width
Controls the width or depth of the stereo enhancement. Turn clockwise to
increase the enhancement.
Delay
Increases the amount of differences between the left and right channels to
further increase the stereo effect.
Color
Generates additional differences between the channels to increase the stereo
enhancement.
Mono
Switches the output to mono, to check for possible unwanted coloring of the
sound which sometimes can occur when enhancing the stereo image.
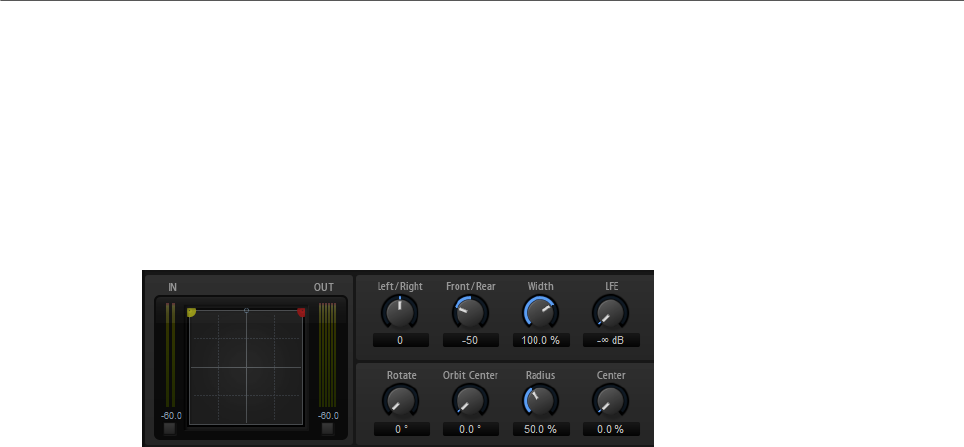
Effects Reference
Surround Effects
466
Surround Effects
Surround Panner
The Surround Panner allows you to position a signal in a two-dimensional surround
field. You can either pan the left/right and the front/rear position independently using the
corresponding knobs or use the positioning handle in the pan area to control both positions
at the same time.
To move a sound source, click anywhere in the pan area and drag. To position the handle at a
specific position, click at this position.
You can limit movement to a specific direction using modifier keys. This way, you can scale
down your movements, or have the surround source move along a particular axis.
• Press Shift to allow for very fine mouse movements. This is useful when panning in the
miniature display in the mixer channel, for example.
• To restrict movement to horizontal, press Ctrl/Cmd.
• To restrict movement to vertical, press Ctrl/Cmd-Shift.
• To restrict movement to diagonal (bottom left to top right), press Alt.
• To restrict movement to diagonal (bottom right to top left), press Alt-Shift.
• If the positioning handle is located outside the pan area, you can move the mouse
pointer to the handle by pressing Shift-Ctrl/Cmd-Alt.
Controls
Left/Right
Adjusts the horizontal (X) position of the audio signal.
Front/Rear
Adjusts the depth (Y) position of the audio signal.
Width
Controls the width of the stereo input signal from 0 % (mono) over 100 % (stereo)
to 141.4 % (expanded stereo).
LFE
Controls the level of the low frequency effects channel.
Rotate
Rotates the source channels around the positioning handle. All input channels
circle around the handle – without moving beyond the borders of the surround
field.
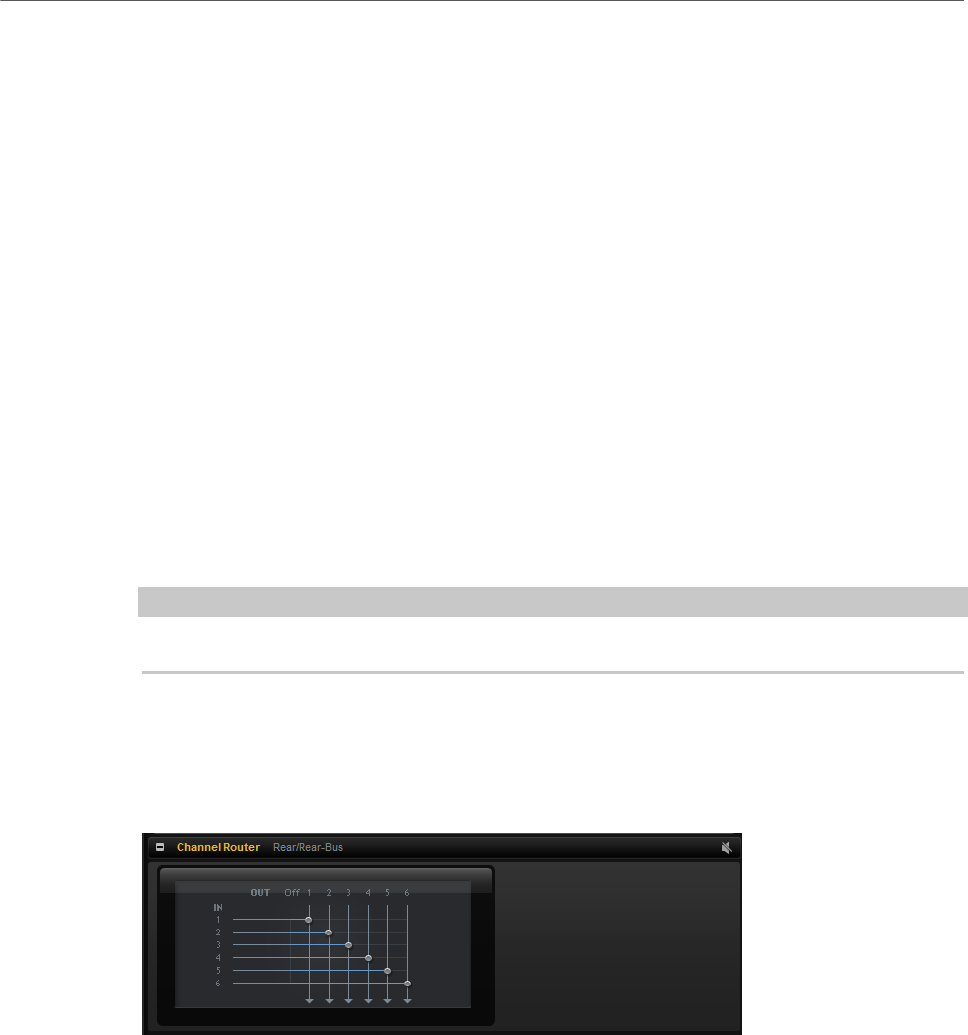
Effects Reference
Tools Effects
467
Orbit Center
Rotates the complete signal around the center of the surround field.
Radius
Changes the distance of the signal from the orbit center. By default, the radius is
set to 100 %, but you can lower it to get closer to the center or increase it to orbit
on a larger circle.
Center
Distributes part or all of the signal to the left and right front speakers. This
can be used to widen the center signal. At 100 %, the center source is provided
entirely by the phantom image created by the left and right speakers. This can
be useful if you want to rotate the surround signal without using the center
speaker at all, for example. A blue line at the top of the surround field indicates
the distance up to which a phantom signal is added. If you position the source
signal inside this range, the signal is sent to all three channels.
Downmix
This effect allows you to downmix a surround signal to a stereo signal.
NOTE
For this effect, no controls are available, because the downmix is performed automatically.
Tools Effects
Channel Router
This effect allows you to change the channel routing of a bus, to adapt the channel format to
different multi-channel samples. Each of the six input channels can be routed to a specific
output channel.

Effects Reference
Legacy Effects
468
Legacy Effects
HALion 3 Legacy Effects
In addition to the standard effects, a number of effects from HALion 3 is also provided. These
effects can be selected from the Legacy submenu of the effects menu.
Hall Reverb
A simple reverb with adjustable pre-delay and damping.
PreDelay
Delays the wet signal to simulate larger acoustic spaces or to create a slap-back
effect.
Time
Length of reverb tail.
Damp
Progressive damping of high frequencies.
Low EQ
Low-cut EQ.
High EQ
High-cut EQ.
Mix
Wet/dry mix.
Non-Linear Reverb
A gated reverb with a sharp cutoff.
Time
Length of reverb tail. It also allows you to change the sound from dense early
reflections to a trashy, grainy 1980’s-type reverb.
Low EQ
Low-cut EQ.
High EQ
High-cut EQ.
Mix
Wet/dry mix.
Early Reflections
A short, dense reverb for simulating small acoustic spaces and to thicken or blur sounds.

Effects Reference
Legacy Effects
469
Time
Length of reverb tail. It also allows you to change the sound from dense early
reflections to a trashy, grainy 80’s-type reverb.
Low EQ
Low-cut EQ.
High EQ
High-cut EQ.
Mix
Wet/dry mix.
Delay
A simple mono-in/stereo-out delay.
Time
Delay time.
Sync
If Sync is activated, you can set the delay time in fractions of beats.
Feedback
Controls the number of delay repeats.
Balance
Ratio of left delay time to right delay time.
Damp
High-cut filter to soften delay repeats.
Stereo Delay
A stereo-in/stereo-out delay.
Time
Delay time.
Feedback
Controls the number of delay repeats. For minimum feedback, set the slider to
the mid position. By moving the slider to the left or right, cross delay is applied,
where left output feeds back into right input or vice versa.
Sync
If Sync is activated, you can set the delay time in fractions of beats.
Balance
Ratio of left delay time to right delay time.

Effects Reference
Legacy Effects
470
Damp
High-cut filter to soften delay repeats.
Long Delay
This effect provides the same parameter set as the Delay effect, except that longer delays of
up to four seconds can be set.
Tape Delay
Simulation of a vintage 4-head analog tape delay.
Time
Delay time.
Sync
If Sync is activated, you can set the delay time in fractions of beats.
Feedback
Controls the number of delay repeats.
Vintage
Amount of vintage color and tape flutter.
Mix
Wet/dry mix.
Head 1
Delay level 1 (the output is panned left).
Head 2
Delay level 2 (the output is panned right).
Head 3
Delay level 3.
Head 4
Delay level 4.
Pan 3+4
Varies the panning of delays 3 and 4 from center to hard left/right.
Vol 3+4
Varies the volume of delay outputs 3 and 4.
Chorus
A straightforward chorus effect that can be used to widen sounds.
Rate
The modulation rate.

Effects Reference
Legacy Effects
471
Depth
The amount of pitch modulation.
PreDelay
The initial delay, to vary the tightness of the chorused voices in relation to the dry
signal.
Mix
Wet/dry mix.
Ensemble
Chorus with a more complex modulation waveform for a lively thickening effect.
Rate
The modulation rate.
Depth
The amount of pitch modulation.
Shimmer
Creates a more complex modulation effect.
Width
Stereo width adjustment.
Mix
Wet/dry mix.
Flanger
A classic flanger effect.
Rate
Sweep rate.
Depth
Sweep depth.
Feedback
Feedback amount. Increase for a more intense flanging effect.
PreDelay
Initial delay. Adjusts the minimum delay time/maximum flange frequency.
Mix
Wet/dry mix.
Phaser
A four pole phaser for subtle phasing effects.

Effects Reference
Legacy Effects
472
Rate
Sweep rate.
Depth
Sweep depth.
Feedback
Feedback amount. Increase for a more pronounced effect.
Stereo
Offset between left and right modulation.
Center
Sets the center frequency around which the modulation occurs.
Mix
Wet/dry mix.
Pan & Tremolo
Autopan and Tremolo effect as used in vintage electric pianos.
Rate
Sweep rate.
Phase
Relative phase of left and right channel amplitude modulation, to vary from
tremolo to autopan.
Shape
Shape of modulation waveform from thin pulse, through sine, to fat pulse.
Mix
Wet/dry mix.
Stereo Width
A stereo width enhancer with 4 modes.
Mode
•Adjust mode adjusts the existing width of the stereo signal.
•Swap mode adjusts the existing width of the stereo signal and additionally
swaps the left and right channels.
•Comb mode applies a stereo comb filter effect.
•Haas mode synthesizes the stereo width by delaying one channel.
Delay
Delay time (not used in Adjust and Swap modes).

Effects Reference
Legacy Effects
473
Width
Overall width adjustment.
Low/Mid/High
Width adjustment for the low, mid, and high frequencies.
Output
Output level trim.
Rotary Speaker
Simulation of a rotary speaker cabinet with high and low rotors.
Rate
Master speed control: Stop, Slow, Fast.
Dirt
Amount of overdrive.
LoHi
Crossover frequency between low and high rotors.
Width
Stereo width.
Tone
Adjusts the tone of the overdriven signal.
Low/High Speed
Speed of the high and low rotors.
Low/High Acceleration
Acceleration of the high and low rotors.
Mix
Wet/dry mix.
Wah Pedal
An auto-wah effect.
Rate
Modulation rate.
Depth
Modulation depth.
Pedal
Adjusts the filter frequency.

Effects Reference
Legacy Effects
474
Mode
•Auto Wah: Envelope controlled wah effect.
•Pedal Wah: No modulation. The Pedal parameter sets the frequency.
•Mod Wah: LFO modulation. The Rate parameter controls the modulation
rate.
Resonance
Sets the amount of filter resonance.
Tracking
Adjusts the envelope tracking speed in Auto mode, and the envelope rate
modulation in Mod mode.
Mix
Wet/dry mix.
TalkBox
Modulated vowel formant filter.
Rate
LFO modulation rate.
Depth
LFO modulation depth.
Vowel
In center setting, vowels are produced when there is no modulation.
Env Mod
Amount of vowel modulation by input signal level.
Env Att
Rate of response to a rising input signal level.
Env Rel
Rate of response to a falling input signal level.
Mix
Wet/dry mix.
Shelf EQ
Simple tone control.
Output
Output level trim.
Bass
Low frequency cut/boost.

Effects Reference
Legacy Effects
475
Treble
High frequency cut/boost.
Parametric EQ
Two-band parametric equalizer.
Gain 1/2
Cut/boost amount for the two bands.
Freq 1/2
Sets the center frequency for the two bands.
Width 1/2
Sets the bandwidth for the two bands (Q).
Output
Output level trim.
Enhancer
Psycho acoustic spectrum shaping.
High Depth
High frequency boost, combined with mid cut.
High Tune
High/mid tune.
Low Depth
Low frequency boost.
Low Tune
Low frequency tune.
Limiter
Hard level limiting.
Drive
Input signal drive.
Attack
Attack time.
Release
Release time.
Output
Output level trim.

Effects Reference
Legacy Effects
476
Compressor
A simple compressor effect.
Threshold
Compression threshold.
Ratio
Compression amount.
Attack
Attack time.
Release
Release time.
Output
Output level trim.
Multiband
Three-band compressor.
Drive
Input signal drive (increase for more density).
Lo/Hi
Balance of low and high frequency bands.
Mid
Level of mid frequency band.
Attack
Attack time.
Release
Release time.
Output
Output level trim.
Gate
Simple gate effect.
Threshold
Gate threshold.
Range
Level reduction when gate closed.

Effects Reference
Legacy Effects
477
Attack
Attack time.
Release
Release time.
Output
Output level trim.
Distortion
Hard clipping distortion.
Drive
Distortion amount.
Bias
Adjusts the balance between even and odd harmonics, that is, the character of
the distortion.
Tone
Distortion tone.
Out
Output level trim.
Mix
Wet/dry mix.
Overdrive
Softer distortion with a gradual onset.
Drive
Overdrive amount.
Bias
Overdrive character. Adjusts the balance between even and odd harmonics.
Out
Output level trim.
Mix
Wet/dry mix.
Bit Reduction
Digital, lo-fi, quality degradation.

Effects Reference
Legacy Effects
478
Mode
Determines whether the bit depth is fixed (Linear) or depends on the signal level
(Companding).
Rate
Simulated sample rate.
Depth
Sample bit depth.
Slew Rate
Maximum rate of change of output waveform, for a soft, wooly distortion.
Mix
Wet/dry mix.
Amp Simulator
Amplifier modeling effect.
Model
The type of amplifier model. This changes the tone character.
Mode
Mono/Stereo operation. Mono saves CPU, and in some cases sounds more solid.
Drive
Overdrive amount.
Feedback
Feedback amount. The result depends on the input signal.
Treble
Treble boost. Optionally in or out of phase for different tones.
Mix
Wet/dry mix.
Modulate L/R
This effect features three modes of signal distortion, where one side of a stereo signal is
used to modulate the other.
Mode
•Ring Mod: Ring modulation.
•Env Mod: The signal level of the right channel is modulated by the level of
the left channel.
•Duck: The signal level of the right channel is reduced when the level of the
left channel increases.

Effects Reference
Legacy Effects
479
Thru
Defines which input signals are used as the dry signal for the Mix.
Smooth
Smoothing of modulation.
Drive
Level trim.
Mix
Wet/dry mix.
MIDI Modules Reference
480
The MIDI modules in HALion range from standard arpeggiator modules to more dedicated
modules that trigger specific events or deliver specific modulation signals.
MIDI modules can be used to control articulations of sampled instruments, for example.
They process the stream of MIDI events within a program. In addition, they can produce
monophonic modulation signals, which can be used as sources in the modulation matrix.
MIDI modules can be assigned to an entire program or to specific layers. This way, you can
process the MIDI stream of an entire program, or parts of it.
To perform more complex tasks, multiple MIDI modules can be assigned in series.
•To add a module, click Create New MIDI Module on the toolbar of the Program Tree
and select a MIDI module.
Common Functions
Some functions and settings are available in several MIDI modules. These are described in
the following sections.
Inserting MIDI Modules
PROCEDURE
1. In the Program Tree, select the program or layer for which you want to insert the MIDI
module.
2. Right-click the program or layer and select New> MIDI Module.
3. Select the MIDI module that you want to insert.
You can also insert multiple MIDI modules and use them in series.
Bypassing MIDI Modules
Bypassing a MIDI module can be used to play a layer without the FlexPhrasers or the
conditions that are set with the MegaTrig module, for example.
PROCEDURE
•To bypass a MIDI module, activate Bypass in the top right of the section of the MIDI
Modules Editor.
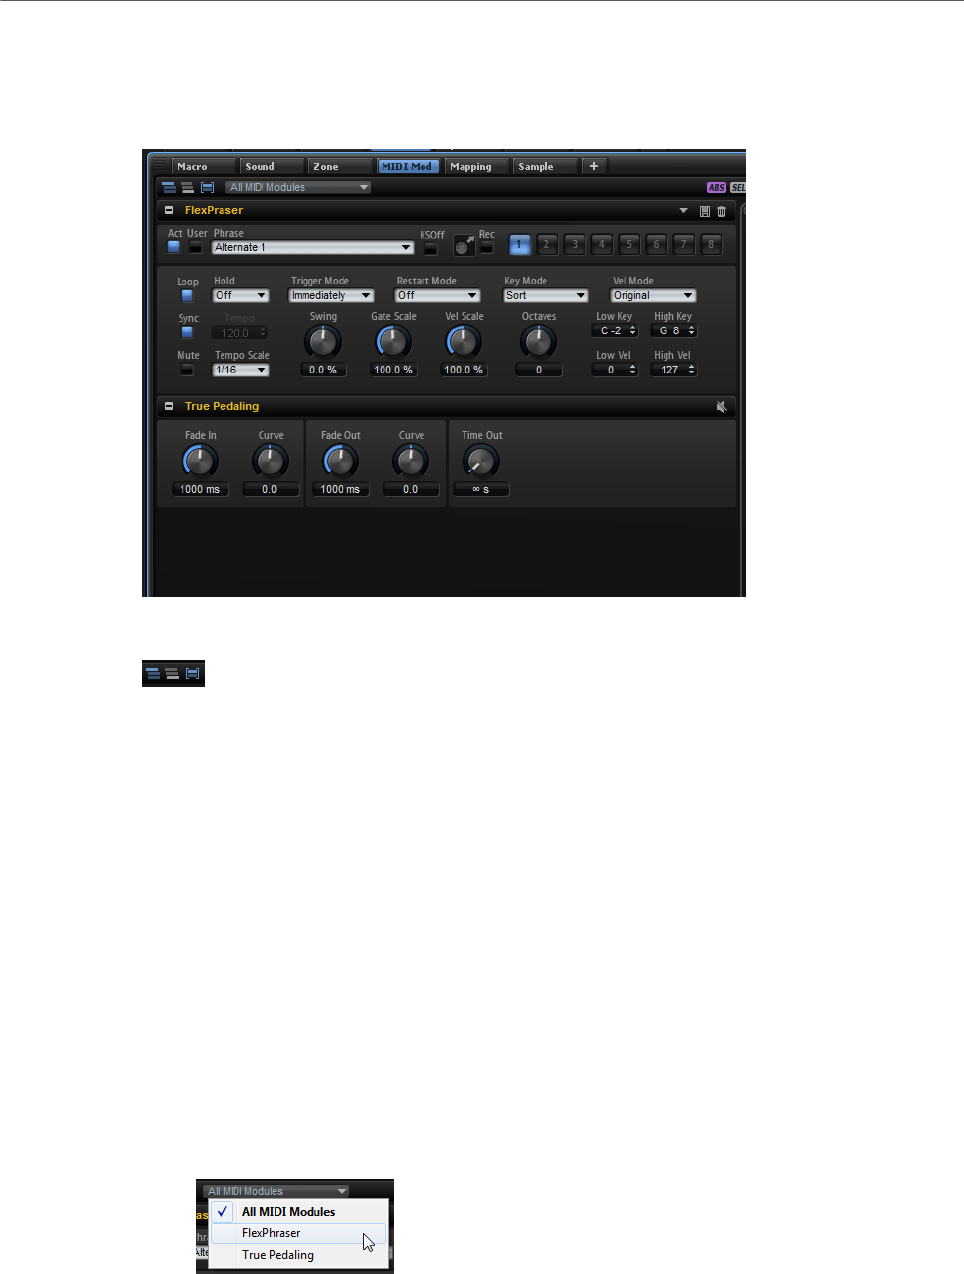
MIDI Modules Reference
Common Functions
481
MIDI Modules Editor
In the MIDI Modules Editor, you can edit the parameters of the MIDI modules. The editor
shows the MIDI modules that are selected in the Program Tree.
Which modules are affected is specified with the buttons at the top of the editor.
Show MIDI Modules Contained in the Corresponding Layer
If this button is activated, the MIDI modules that are used in the current layer are
displayed.
Show MIDI Modules Higher up in the Signal Flow
If this button is activated, the MIDI modules that are used in the current layer and
those used higher up in the signal flow are displayed.
Show MIDI Modules Combined
If this button is activated, MIDI modules of the same type are combined, allowing
you to modify the selected MIDI modules simultaneously. The number of module
instances that are edited together is displayed behind the module name on the
title bar. Parameter settings that differ between the MIDI modules are shown in
red.
On the Show Only Selected Module Type pop-up menu, you can specify which
combined MIDI Module type is shown in the editor.
ABS/REL button
Allows you to select whether you want to make absolute or relative changes to
the parameters.

MIDI Modules Reference
Common Functions
482
SEL/ALL button
Allows you to select whether the editing is applied to all or to the selected MIDI
modules.
RELATED LINKS
Absolute and Relative Editing on page 93
Changing the Order of the MIDI Modules
MIDI modules are processed in the order in which they are displayed in the Program Tree,
from top to bottom.
PROCEDURE
•To change the order of the MIDI modules, drag them to new positions in the Program
Tree.
The routing between the MIDI modules changes accordingly.
Assigning MIDI Modules in the Modulation Matrix
Some MIDI modules, like the FlexPhraser, directly process the MIDI events. Other MIDI
modules, like True Pedaling, produce modulation signals that must be assigned as source or
modifier in the modulation matrix before they can be used.
PROCEDURE
1. In the Program Tree, select the zones that you want to edit.
Make sure that the zones are part of a program or layer with a MIDI module that
produces modulation signals.
2. Open the Sound Editor and show the Modulation Matrix section.
3. On the pop-up menu of the Source/Modifier column, open the Modulation Module
submenu and select a MIDI module.
The submenu lists only MIDI modules that belong to the same layer or that are higher
up in the hierarchy.
Adding and Deleting your own MIDI Modules
You can program your own MIDI modules with the script engine of HALion and make them
available on the Create New MIDI Module menu.
•To add a module to the MIDI module library, right-click it in the Program Tree, select
MIDI Module Library> Save Module, enter a name for the module and click Save.
NOTE
You can also create subfolders within the library folder to organize your own MIDI
modules. These subfolders appear as submenus on the Create New MIDI Module
menu.
•To delete a module from the library, right-click it in the Program Tree, select MIDI
Module Library> Delete Module, select the module and click Open, then Yes.

MIDI Modules Reference
FlexPhraser
483
NOTE
Deleted modules cannot be retrieved. They are erased from disk.
RELATED LINKS
Lua Script on page 533
FlexPhraser
The FlexPhraser is an arpeggio and phrase player.
You can select from a great variety of phrases that suit a wide range of musical instruments
and styles. Depending on the selected phrase, the FlexPhraser uses your live playing to
modify the phrase in real-time. This allows you to re-harmonize phrases by playing different
chords, for example.
Presets
FlexPhraser presets contain the selected phrase, as well as the performance settings of the
FlexPhraser, such as Tempo, Tempo Scale, Loop, Swing, etc.
NOTE
Presets can only be saved and loaded for phrases, not for sliced loops.
RELATED LINKS
Handling Section and Module Presets on page 21
Loading Phrases
Phrases are sorted into subfolders, according to the type of instrument. Each instrument
subfolder contains phrases of different musical styles.
NOTE
Some FlexPhrases make extensive use of key switches to switch between multiple playing
styles of an instrument while playing. These phrases can be found on the Construction Sets
submenu. They work best with the corresponding instrument layers.
PROCEDURE
1. At the top of the FlexPhraser, click in the Phrase field.
2. On the pop-up menu, open the submenu for the instrument, and select the phrase that
you want to load.
In general, you can apply any phrase to any type of instrument. However, a phrase for
guitar might not be suitable for use with a piano, for example.
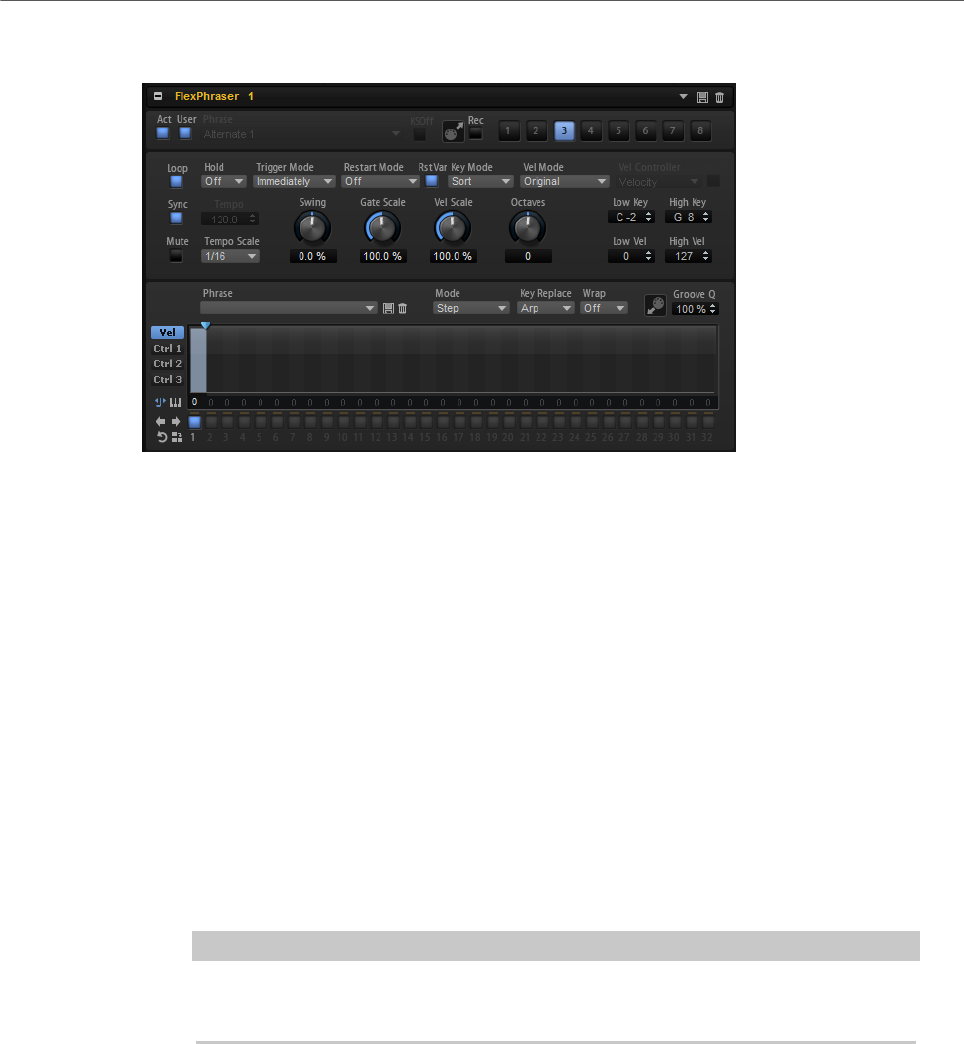
MIDI Modules Reference
FlexPhraser
484
FlexPhraser Parameters
Act
Activates the FlexPhraser.
User
Activates the user phrase and the user phrase editor.
Phrase
Allows you to select a phrase.
KSOff (Key Switches Off)
Construction set phrases that make use of key switches and noises, such as fret
noises for guitar phrases, for example, usually work only with programs for the
same type of instrument. Programs without key switches and noises interpret
these events as regular notes and includes them during playback, which yields
unexpected results. To avoid the playback of key switches and noises, activate
KSOff.
NOTE
KSOff filters out any note events that do not transpose with your playing.
Therefore, it is not recommended for the use with drum phrases.
MIDI Record
Allows you to record the MIDI output of the FlexPhraser.
Variation buttons
Allow you to create up to eight variations of your phrase.
Loop
If this option is activated, the phrase plays in a loop.
Sync
Synchronizes the phrase to the tempo of your host application.

MIDI Modules Reference
FlexPhraser
485
NOTE
In addition, you can set Restart Mode to Sync to Host. This aligns the phrase with
the beats and measures of your host application.
Mute
Mutes the FlexPhraser. The phrase still plays in the background. If you deactivate
Mute, playback resumes immediately.
Hold
Allows you to prevent the phrase from stopping or changing when the keys are
released.
• If Off is selected, the phrase changes as soon as you release a key. The
phrase stops immediately when you release all keys.
• If On is selected, the phrase plays to the end, even if the keys are released.
If Loop is activated, the phrase repeats continuously.
• If Gated is selected, the phrase starts to play when the first key is played. It
plays silently in the background, even if the keys are released, and resumes
playback at the current position when you press any of the keys again. This
way, you can gate the playback of the phrase.
Trigger Mode
Determines at which moment the FlexPhraser scans for new notes that you play
on the keyboard.
• If this is set to Immediately, the FlexPhraser scans for new notes all the
time. The phrase changes immediately in reaction to your playing.
• If this is set to Next Beat, the FlexPhraser scans for new notes at every
new beat. The phrase changes in reaction to your playing on each new beat.
• If this is set to Next Measure, the FlexPhraser scans for new notes at the
start of new measures. The phrase changes in reaction to your playing on
each new measure.
Restart Mode
• If this is set to Off, the phrase runs continuously and does not restart at
chord or note changes.
•New Chord restarts the phrase on new chords.
NOTE
The phrase does not restart upon notes that are played legato.
•New Note restarts the phrase with each new note that you play.
•Sync to Host aligns the phrase with the beats and measures of your host
application each time that you start the transport.
RstVar (Restart on Variation Change)
This option is available for new chords and new notes. If this button is activated,
changing a variation restarts the FlexPhraser, even if no new notes or chords
were triggered.
MIDI Modules Reference
FlexPhraser
486
Key Mode
Defines whether the order in which the notes are played on the keyboard affects
the playback of the phrase.
• If Sort is selected, the notes are played in the order of the selected pattern.
The chronological order does not have any influence.
• If As Played is selected, the notes are played in the order in which you play
them on the keyboard.
• If Direct is selected, the phrase creates controller events instead of notes.
You hear the notes that you play plus any controller events of the phrase,
such as pitch bend, volume, pan, etc.
NOTE
Not all phrases contain controller data.
Vel Mode
• If Original is selected, the notes of the phrase play with the velocity that is
saved in the phrase.
• If Vel Controller is selected, you can choose a velocity controller that is
used to generate or modulate the velocities of the notes.
• If Original + Vel Controller is selected, the phrase velocity is determined by
the combination of the velocity saved in the phrase and the velocity derived
from the velocity controller.
Vel Controller
If the Vel Mode pop-up menu is set to Vel Controller or Original + Vel Ctrl., the
Vel Controller pop-up menu is available. It allows you to generate or modulate
the velocities of the notes using the incoming controller values.
• If Velocity is selected, the triggered notes get the velocity of the note that
you play.
• Select Controller to open a submenu where you can select a MIDI
controller.
The value of this MIDI controller is used as velocity for the triggered notes.
• If Aftertouch is selected, the triggered notes get their velocity from the
aftertouch controller.
• If Poly Pressure is selected, the triggered notes get their velocity from the
poly pressure controller. This allows you to control the velocity per key.
Fetch
If the Vel Controller pop-up menu is set to Aftertouch, Poly Pressure, or a MIDI
controller, the Fetch option can be used to change the way that the notes are
generated.
• If Fetch is activated, the first note that you play defines the initial velocity.
As soon as the controller value exceeds this velocity, new notes get their
velocity from the controller.
• If Fetch is deactivated, the generated notes get their velocity from the
current controller value.

MIDI Modules Reference
FlexPhraser
487
NOTE
Fetch is not available if the Vel Controller pop-up menu is set to Velocity.
Tempo
If Sync is deactivated, you can use the Tempo control to set the internal playback
speed of the FlexPhraser. The playback speed of the phrase is specified in BPM.
If Sync is activated, the Tempo parameter is not available.
Tempo Scale
Defines the rate at which notes are triggered, that is, the speed at which the
phrase is running. In addition to the Tempo parameter, this gives you further
control over the playback speed. You can specify a value in fractions of beats. You
can also set dotted and triplet note values.
For example, if you change the Tempo Scale setting from 1/16 to 1/8, the speed
is cut in half. If you set it to 1/32, the speed is doubled. Other values increase or
decrease the speed accordingly.
Swing
Shifts the timing of notes on even-numbered beats. This way, the phrase gets
a swing feeling. Negative values shift the timing backward, and the notes are
played earlier. Positive values shift the timing forward, and the notes are played
later.
Gate Scale
Allows you to shorten or lengthen the notes of the phrase. At a value of 100 %,
the notes play with their original gate length.
Vel Scale
Allows you to raise or lower the note-on velocities of the phrase. At a value of 100
%, the notes are played with their original velocity.
Octaves
Extends the phrase playback to include higher or lower octaves. Positive
settings extend the playback to higher and negative settings to lower octaves.
For example, a value of +1 first plays the phrase in the octave range that you
originally played. Then, it repeats the phrase one octave higher.
Key Range
The Low Key and High Key parameters determine the key range that is used to
trigger phrase playback.
Velocity Range
The Low Vel and High Vel parameters determine the velocity range that is used to
trigger phrase playback.
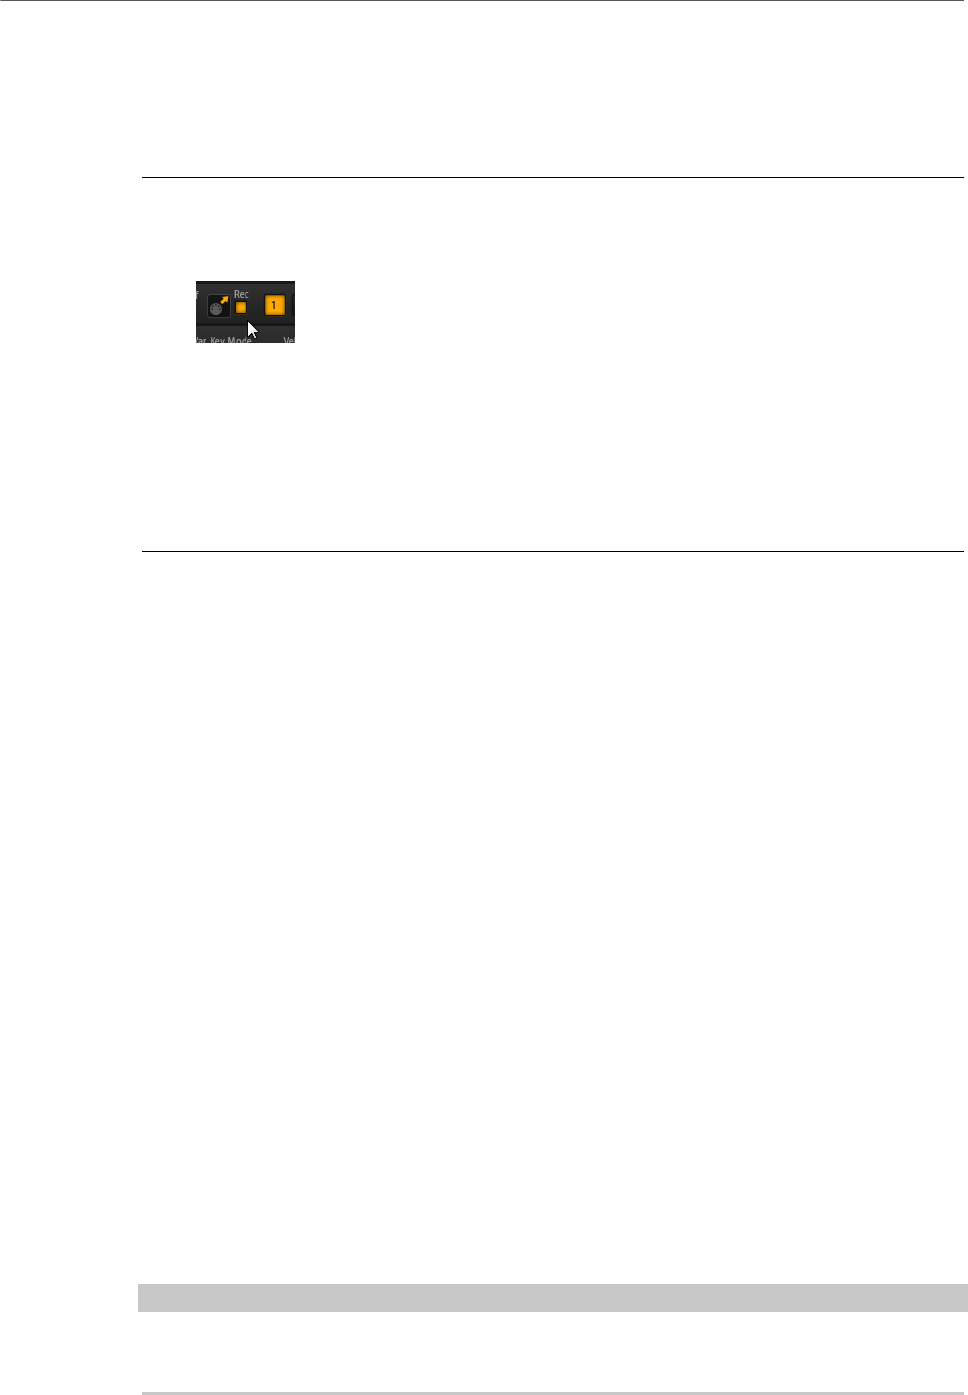
MIDI Modules Reference
FlexPhraser
488
Recording the MIDI Output of the FlexPhraser
The phrases played by the FlexPhraser depend on the notes that are played and can
therefore not be exported directly. However, it is possible to generate exportable phrases by
recording the MIDI output of the FlexPhraser.
PROCEDURE
1. Click Record FlexPhraser MIDI Output.
The arrow in the Drag MIDI field starts blinking to indicate record mode.
2. Play some notes.
3. When you are done, click Record FlexPhraser MIDI Output again.
Recording stops. In the Drag MIDI field, the arrow remains lit to indicate that a MIDI
phrase can be exported.
4. Click the Drag MIDI field and drag the phrase on a MIDI track in your host sequencer
application.
Phrase Playback Types
HALion features a huge amount of phrase types, organized in submenus and categorized
according to functional descriptions or musical styles, such as Classic Arp, Synth Seq, Chord
Seq, Bass, etc.
The Construction Sets submenu contains phrases made for instrument layers. These
phrases use key switches to switch between different playing styles, to increase the realism
of your performance. The phrases that can be found in the various other categories use a
number of different playback types to allow phrase-specific user interaction while playing.
For example, with drum patterns, pressing any note triggers the same rhythm pattern. Other
phrases are played back using only the played note and its octave notes. And if you play back
a programmed sequence according to the played chord, the following applies:
• If you press a single key, the phrase is played back using the programmed sequence,
which means that notes other than the ones you play are triggered.
• If you are adding notes to those already held, the sequence changes accordingly, for
example, the phrase plays back according to the chord you play.
Variations
For each module, you can set up eight different variations of phrases. You can switch
between them with the variation buttons at the top right.
You can remote-control the variation buttons using the trigger pads, which gives you the
possibility to switch between variations by playing the trigger keys that are assigned to the
trigger pads.
NOTE
To avoid that the variation switches in the middle of a beat or measure, use the trigger
modes Next Beat or Next Measure.

MIDI Modules Reference
FlexPhraser
489
Creating FlexPhraser Variations
PROCEDURE
1. Click one of the variation buttons at the top right of the FlexPhraser.
2. You can either start from scratch or base the new variation on an existing variation.
•To start from scratch, assign a phrase and edit the FlexPhraser settings.
•To use an existing variation as base, use the context menu commands Copy
FlexPhraser Variation and Paste FlexPhraser Variation.
RESULT
The variation can now be recalled by clicking the corresponding variation button.
NOTE
The parameters Loop, Sync, Hold, Trigger Mode, Restart Mode, Key Mode, Vel Mode, Low/
High Key, and Low/High Vel are not part of the variations. You set them up only once for each
inserted FlexPhraser module.
RELATED LINKS
Switching between Variations on page 496
User Phrases
The user pattern of the FlexPhraser has up to 32 steps. Each step has an adjustable velocity,
gate length, and transpose value. By setting the steps, adjusting their length, or leaving
pauses, you define the rhythm of the user pattern. Consecutive steps can be combined to
create longer notes. By selecting a mode, you define how the notes play back. In addition,
there are three MIDI control sequences, that is, each step can send three modulation signals.
To create your own phrases, activate the User button.
For user phrases, the regular FlexPhraser parameters are available, except for the KSOff
button.
User Phrase Editor
In the user phrase editor, you can set up your user phrases.
You can display the velocity curve or three MIDI controller sequences for the phrase.
Phrase
To load a phrase, select it from the Phrase pop-up menu.
NOTE
Saved phrases include the Mode, Key Replace, and Wrap parameters, as well
as the steps with their Level, Length, and Legato settings. The selected MIDI
controllers or any settings on the main FlexPhraser page are not saved.
Mode
Determines how the notes are played back.

MIDI Modules Reference
FlexPhraser
490
• If Step is selected, the last note that is received triggers a monophonic
sequence.
• If Chord is selected, the notes are triggered as chords.
• If Up is selected, the notes are arpeggiated in ascending order.
• If Down is selected, the notes are arpeggiated in descending order.
• If Up/Down 1 is selected, the notes are arpeggiated first in ascending, then
in descending order.
• If Up/Down 2 is selected, the notes are arpeggiated first in ascending, then
in descending order. This mode depends on the set Key Mode.
If Key Mode is set to Sort, the highest and the lowest note are repeated.
If Key Mode is set to As Played, the first and the last note are repeated.
• If Down/Up 1 is selected, the notes are arpeggiated first in descending,
then in ascending order.
• If Down/Up 2 is selected, the notes are arpeggiated first in descending,
then in ascending order. This mode depends on the set Key Mode.
If Key Mode is set to Sort, the highest and the lowest note are repeated.
If Key Mode is set to As Played, the first and the last note are repeated.
• If Random is selected, the notes are arpeggiated in random order.
Groove Q
To adapt the timing of a phrase to an external MIDI file, you can drop this MIDI
file on the Groove Quantize drop field. You can quantize the playback of the user
phrase to the timing of a sliced loop by dragging its MIDI file from the MIDI export
drag field to the Groove Quantize drop field.
The Groove Quantize Depth parameter to the right of the drop field determines
how accurately the phrase follows the timing of the MIDI file.
Key Select
The FlexPhraser scans the keyboard and writes the keys that are pressed into a note buffer.
Depending on the selected Key Mode, this note buffer is sorted either by pitch or in the order
in which you play the keys.
Key Select allows you to play back a defined key from the note buffer. You can set up Key
Select for each step separately, which allows you to create very elaborate phrases.
NOTE
Key Select cannot be used in Step or Chord mode.
• To access the Key Select values of the steps, click Show Key Values to the left of the
editor.
• To switch between the available Key Select values for a step, click the value and drag
up/down or use the scroll wheel.
The following options are available:
•P (Phrase) plays the note of the user phrase, according to the selected mode, for
example, Up, Down, Up/Down 1, etc.
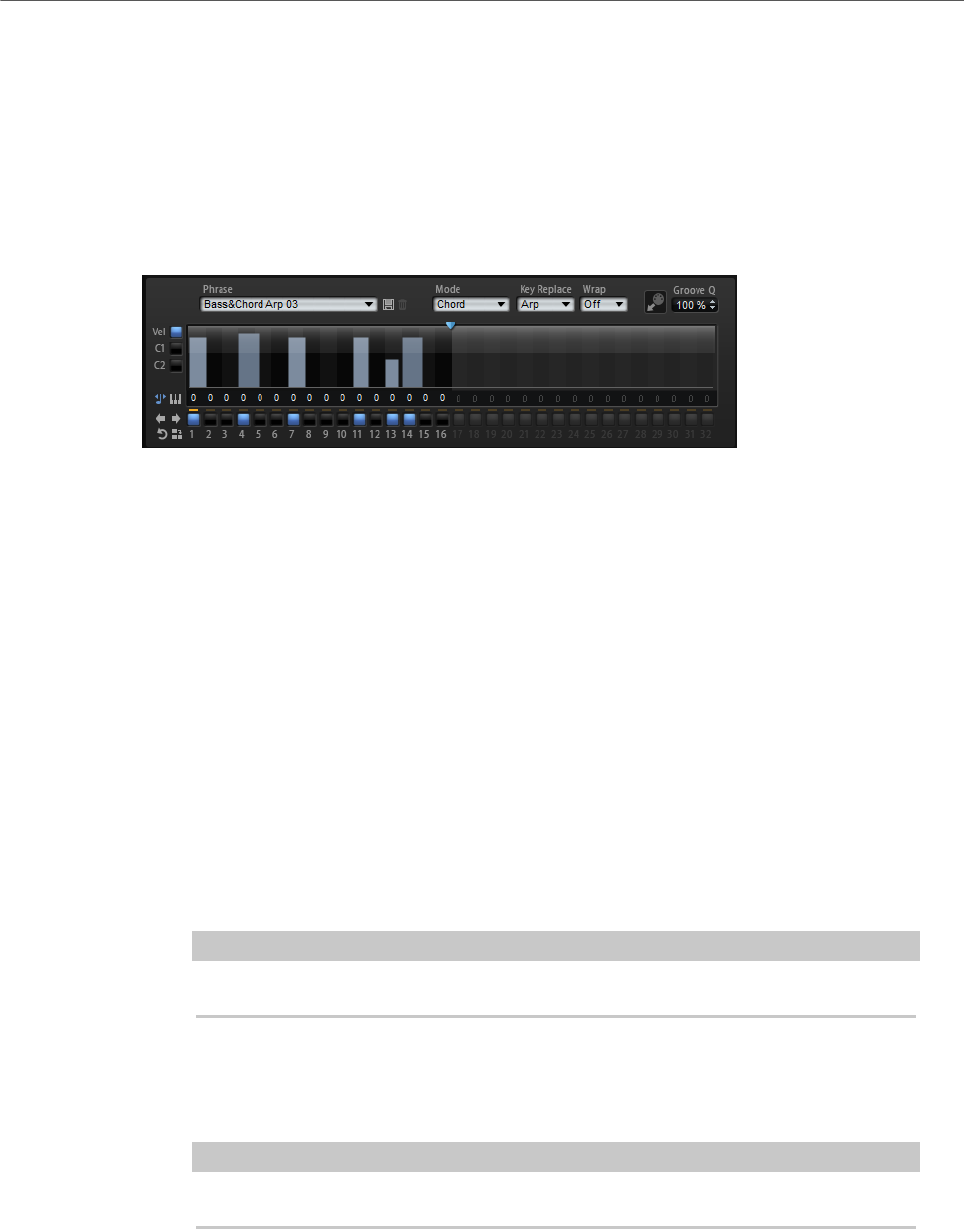
MIDI Modules Reference
FlexPhraser
491
• The settings 1 - 8 play the corresponding keys from the note list. Which key is
played depends on the Key Mode setting. For example, if Key Mode is set to Sort,
the setting 1 plays the lowest key.
•L (Last) always plays the last key from the note buffer. Depending on the Key
Mode, this is the highest note or the last note in the note buffer.
•A (All) plays all keys from the note buffer as a chord.
Velocity Curve
Key Replace
With this parameter, you can deactivate the Key Select function or specify how
missing keys are replaced.
For example, if Key Select is set to 1 - 2 - 3 - 4 and you play a chord with 3 notes,
key 4 is considered missing.
•Off deactivates Key Replace and Key Select. The selected arpeggio plays
back normally.
•Arp replaces the missing keys with the note that the arpeggio would
normally play.
•Rest does not replace any missing keys. The arpeggio plays a rest instead.
•1st replaces the missing keys by the first note in the note buffer.
•Last replaces the missing keys with the last note in the note buffer.
•All replaces the missing keys with all notes in the note buffer. The notes
are played as a chord.
NOTE
Key Replace can be set separately for each variation.
Wrap
For all modes except Step and Chord, you can use this parameter to restart the
arpeggio after a specified number of steps.
NOTE
Deactivated steps are taken into account.
In Step and Chord mode, this parameter only affects the Octaves setting.
If the Octaves parameter is active, the arpeggio traverses the octaves and
restarts from the original octave after the specified number of steps.
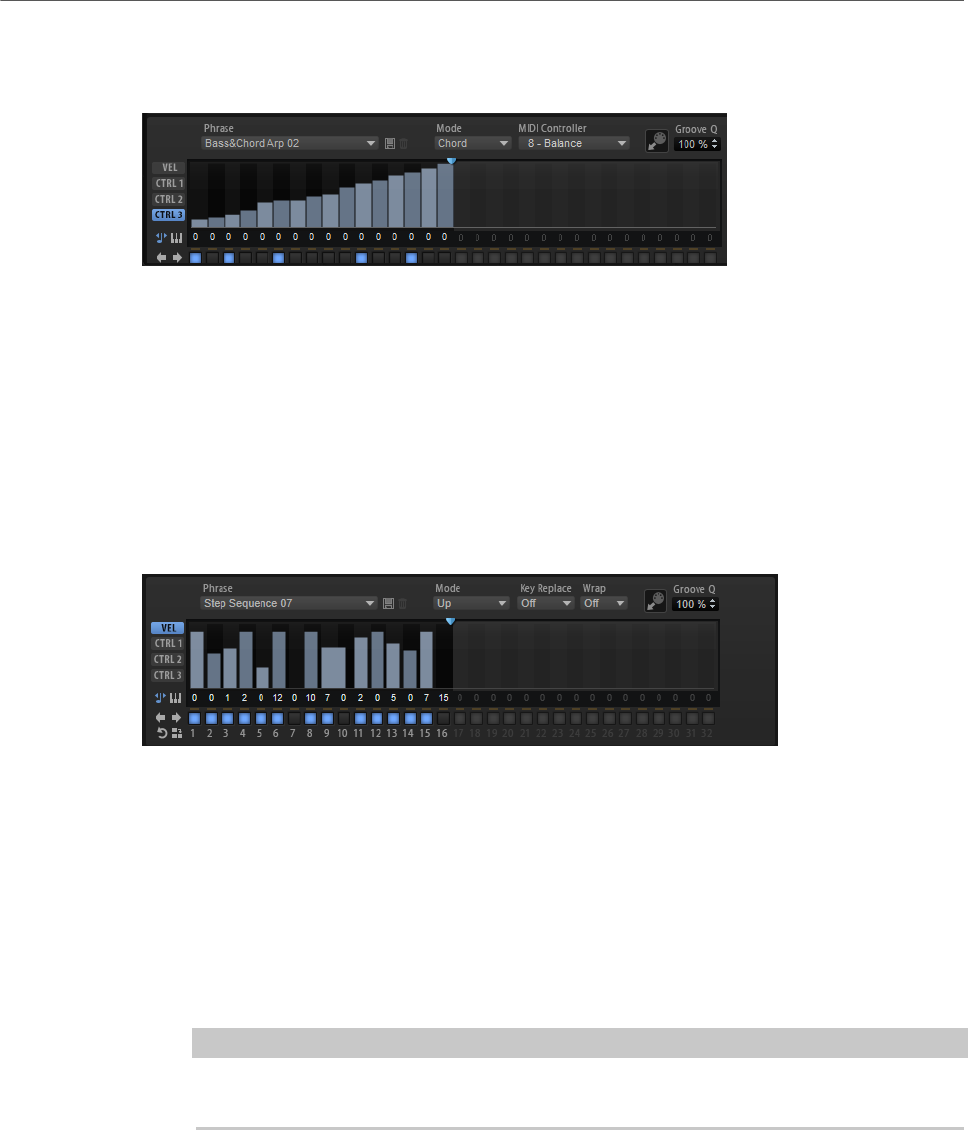
MIDI Modules Reference
FlexPhraser
492
Controller Curve
To show a controller curve, click one of the controller buttons on the left.
MIDI Controller
Allows you to select the MIDI controller that you want to use.
Editing User Phrases
You can make detailed settings for the user phrase in the editor for the user phrases.
To set up the phrase, activate the Vel button to the left of the step display.
To set up a controller curve for the phrase, activate one of the controller buttons to the left of
the step display.
•To specify the number of steps for the pattern, drag the pattern length handle to the
right or left.
Activating Steps
A phrase can contain up to 32 steps. Only the steps that are activated are played.
• To activate a step, click its On/Off button below the display.
This can be necessary if you change the gate length of one step so that it overlaps the
following step, thereby deactivating it.
NOTE
If you activate a step that was inactive because of an overlapping previous step, the
previous step is shortened.
• To activate all steps, right-click in the step display and select Enable All Steps from
the context menu.
Editing Steps
The height of a step represents its value. You can edit the steps in the following way:
• To activate all steps, select Enable All Steps from the context menu.
• To adjust a value, click a step and drag up or down.
• To adjust multiple steps, click and draw a curve.
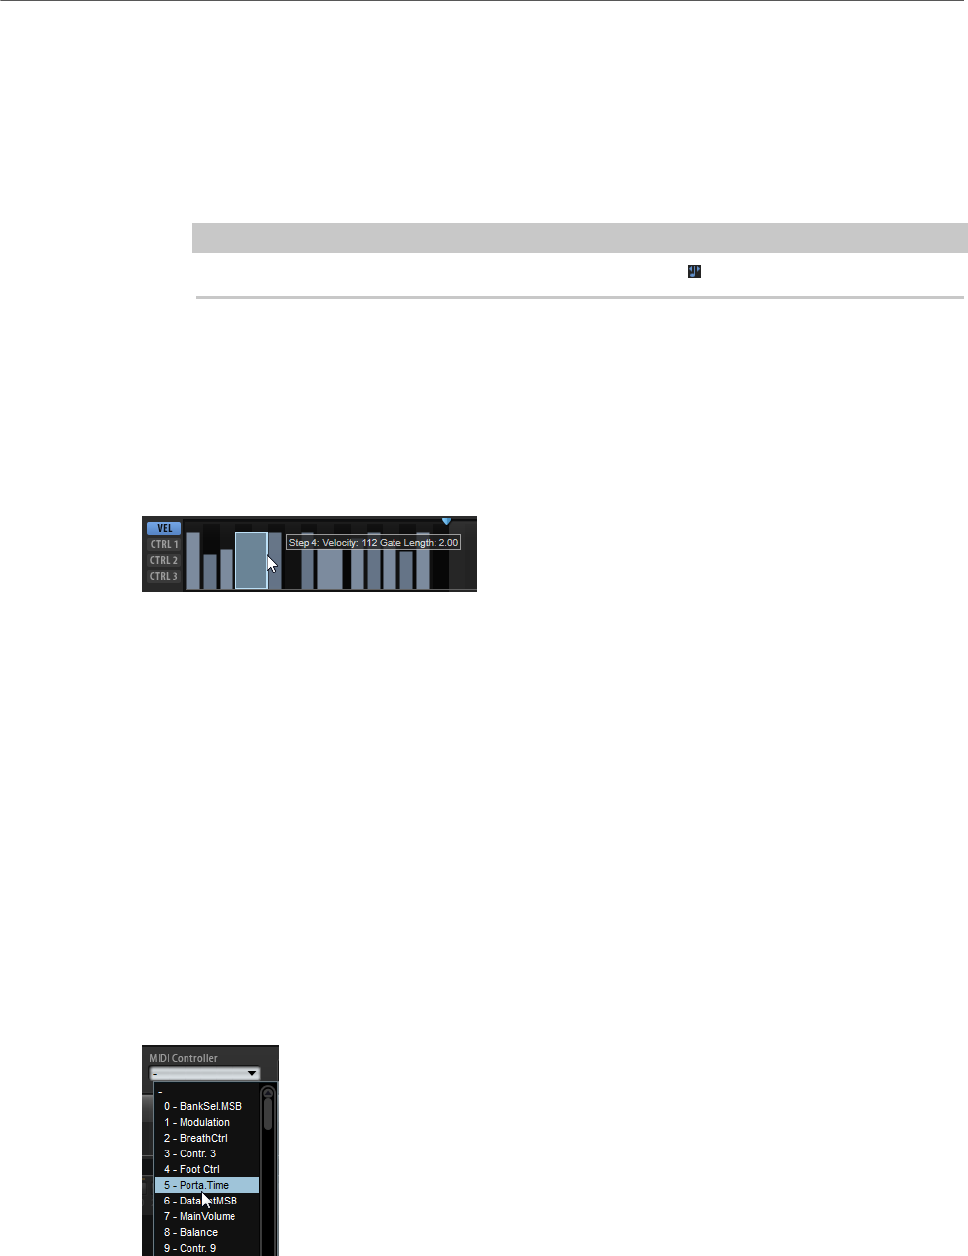
MIDI Modules Reference
FlexPhraser
493
• To adjust the velocity of all steps relatively, Shift-click and drag.
• To draw a ramp with steps, hold down Alt and draw a line.
• To draw symmetric ramps at the beginning and the end of the sequence, hold down
Shift-Alt and draw a line.
• To transpose a step, click in the field below it and enter the number of semitones for
the transposition.
NOTE
You can only transpose steps if Show Transpose Values is activated.
• To reset the velocity of a step to 127, Ctrl/Cmd-click the step.
• To reset the velocity of all steps to 127, hold Shift-Ctrl/Cmd and click a step.
• To introduce a legato between 2 steps, click the number below the first of these steps,
so that a small arrow is shown.
If Legato is activated, the Gate Scale parameter is not taken into account.
For velocity steps, the width of a step represents its gate length.
• To adjust the gate length of a step, drag its right border.
• To adjust the gate length of all steps, hold down Shift and drag the right border of a
step.
You can only adjust the length this way until a step reaches the next step. If you
increase the gate length of a step so that it overlaps the following step, this following
step is deactivated.
• To reset the length of a step to 1, Ctrl/Cmd-click its highlighted right border.
• To reset the length of all steps, hold down Shift-Ctrl/Cmd and click on a highlighted
right border.
• To fill the gaps between consecutive steps, select Fill Gap or Fill All Gaps from the
context menu.
Each MIDI controller lane can send a MIDI controller. By selecting the same MIDI controller
as source in the Modulation Matrix, you can modulate any of the destinations with the MIDI
controller sequence.
• To assign a controller, open the MIDI Controller pop-up menu and select the controller
or use the corresponding control on your hardware.
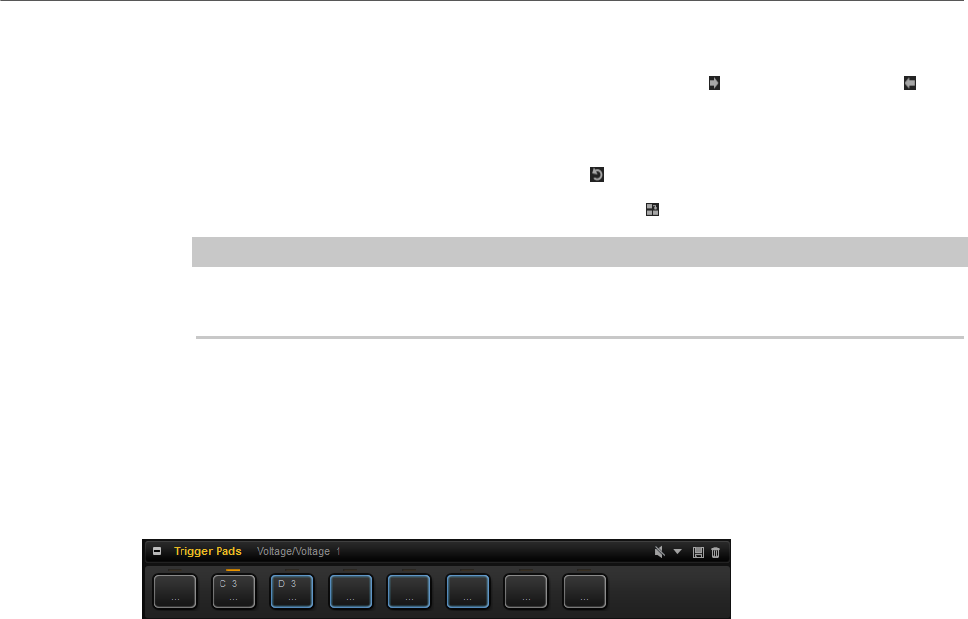
MIDI Modules Reference
Trigger Pads
494
Adjusting the Phrase
• To shift the rhythm of the phrase, click Shift Phrase Right or Shift Phrase Left .
If you shift the rhythm of the phrase to the left, the first step is moved to the end. If you
shift the phrase to the right, the last step is moved to the beginning.
• To reverse the phrase, click Reverse Phrase .
• To duplicate short phrases, click Duplicate Phrase .
NOTE
The maximum number of steps is 32. Therefore, phrases that contain more than 16
steps cannot be duplicated entirely.
Trigger Pads
You can use the trigger pads to trigger single notes or whole chords and to switch between
FlexPhraser variations.
Many of the programs that come with HALion make use of the trigger pads.
If a note or a chord is assigned to a pad, this pad turns blue. If a pad switches between
FlexPhraser variations, the line above the pad turns orange.
•To trigger a pad, click on it.
Presets
Pad presets save trigger notes and chord snapshots, but not FlexPhraser
snapshots. This means that you can exchange trigger notes and chords by
loading presets without loosing your FlexPhraser snapshots.
Bypass
Bypassing the Trigger Pads module deactivates any functionality assigned to the
trigger pads.
RELATED LINKS
Handling Section and Module Presets on page 21
Assigning Trigger Notes to Pads
You can assign a MIDI note to a pad and trigger the pad by playing this note.
To define the trigger note, do one of the following:
•Right-click a pad, open the Assign Trigger Note submenu, and from the further
submenus, select the octave and note that you want to assign.
•Open the context menu for a pad, select Learn Trigger Note, and play the note on your
MIDI keyboard or click a key on the internal keyboard.
The name of the assigned trigger note is displayed in the top left corner of the pad.

MIDI Modules Reference
Trigger Pads
495
On the internal keyboard, keys that serve as trigger notes are shown in blue. These keys do
not play sounds, but trigger the corresponding pads instead.
•To remove a trigger note from a pad, right-click the pad and select Forget Trigger
Note.
Assigning Chords or Notes to Trigger Pads
PROCEDURE
1. Right-click a pad and select Snapshot Chord.
The pad starts blinking.
2. Do one of the following:
•Play a chord or a single note and then click the pad that is blinking to assign the
chord or note to the pad.
•Drag a chord event from the chord track of your Steinberg DAW onto a trigger
pad. This transfers the corresponding MIDI notes to the pad.
If you drag a chord event onto the internal keyboard first, the corresponding
chord is played back. This is useful to verify whether you selected the correct
chord.
If you define a chord that contains a key switch, you can trigger the chord with a
specific instrument expression.
If you add keys to a chord that also work as trigger notes, they trigger the underlying
MIDI note instead of the trigger note.
RESULT
Triggering the pad now plays the chord or note.
Default Trigger Note Settings
Assigned trigger notes are saved with each program to allow for maximum flexibility.
However, you can save a fixed set of default trigger notes to reflect an existing hardware
setup, for example.
•To specify a default set of trigger notes, set up the trigger notes for all pads, right-click
a pad, and select Save Trigger Notes as Default.
•To activate the default trigger note settings, right-click a pad and select Use Default
Trigger Notes.
Now, changing programs or multi-programs does not change the trigger notes
anymore.
If you deactivate Use Default Trigger Notes, the last set of trigger notes remains active. To
return to the trigger notes that were saved with the program, reload the program.
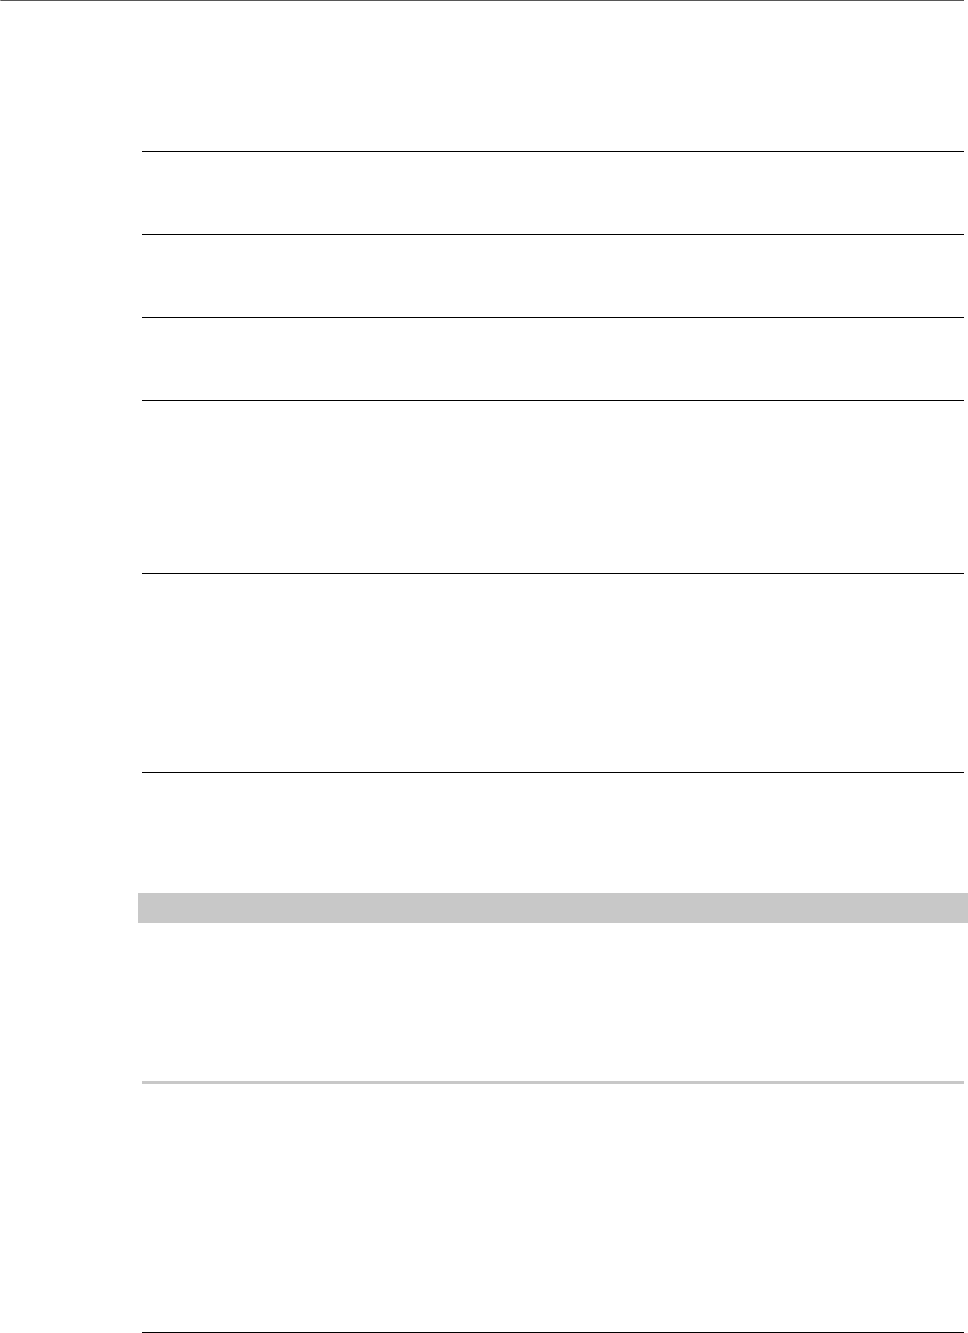
MIDI Modules Reference
Trigger Pads
496
Assigning Key Switches to Trigger Pads
To use the pads for switching between expressions, assign them to the corresponding key
switches.
PROCEDURE
•Right-click a pad, select Snapshot Chord, and play the key switch.
Removing Chords or Notes from Trigger Pads
PROCEDURE
•Right-click the trigger pad and select Clear Chord.
Switching between Variations
You can switch between variations using the trigger pads.
Variations are available for the FlexPhraser and the B-Box, for example.
PROCEDURE
1. Right-click the trigger pad that you want to use for switching to the selected
FlexPhraser variations.
2. On the menu, select Snapshot Variation.
The line above the pad turns orange to indicate that a FlexPhraser snapshot is
assigned.
RESULT
If you trigger the pad, it switches to the variation that was selected when you made the
snapshot.
NOTE
Instead of saving the variation settings themselves, the trigger pad saves only the variations
that were selected when you made the snapshot. This allows you to modify variations after
creating the snapshot. However, if you replace or add layers, you must first remove the
assignment using the Clear FlexPhrasers command on the context menu and then take the
FlexPhraser snapshot again.
RELATED LINKS
Creating FlexPhraser Variations on page 489
B-Box on page 294
Naming Pads
Entering names for pads allows you to get a better overview of their functionality, for
example.
PROCEDURE
1. Right-click the pad to open the context menu and select Rename Pad.
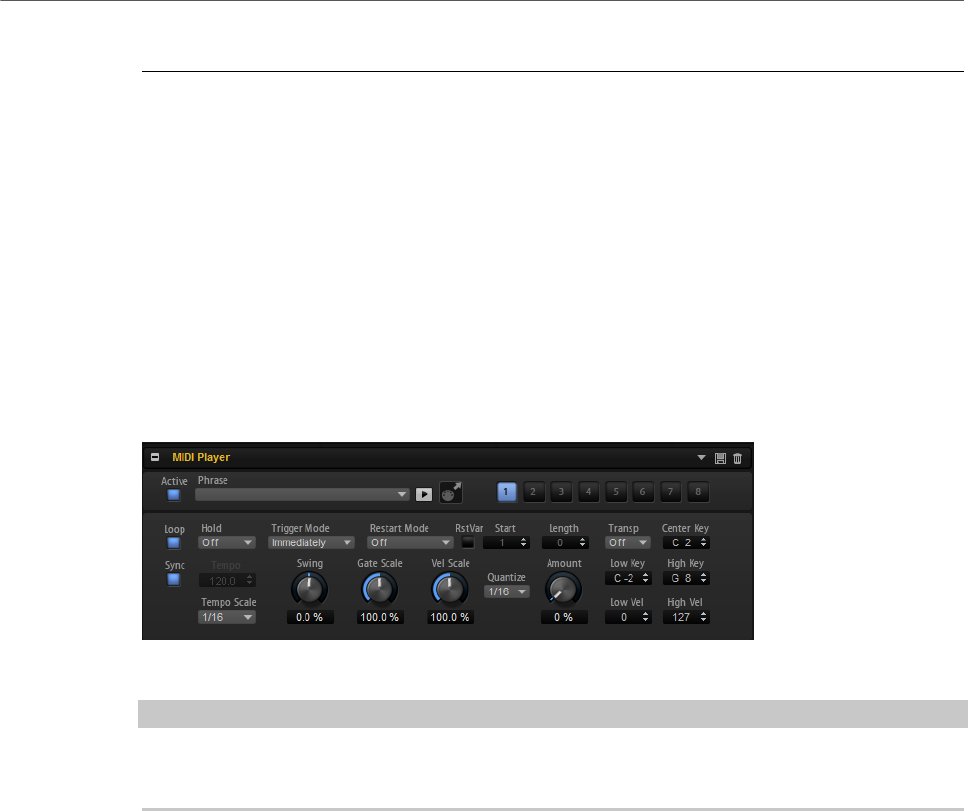
MIDI Modules Reference
MIDI Player
497
2. Enter the new name and press Enter.
Combining Multiple Trigger Pads Modules
You can use multiple Trigger Pads modules inside a layer, in a serial connection. This allows
you to memorize and trigger more than eight chords, for example. However, it is not possible
to memorize more than eight FlexPhraser snapshots. Only the last Trigger Pads module can
be used to switch between FlexPhraser snapshots.
MIDI Player
The MIDI Player allows you to load up to eight different MIDI files. For example, you can
load different variations of a MIDI file and modify these variations by using the performance
parameters.
You can use the Trigger Pads to switch between variations.
NOTE
The MIDI Player was developed for use with single track phrases, not multi-track MIDI files.
If you use multi-track MIDI files, all tracks are played back.
Presets
MIDI Player presets contain the selected MIDI phrases, as well as the
performance settings of the MIDI Player, such as Tempo, Tempo Scale, Loop,
Swing, etc.
RELATED LINKS
Handling Section and Module Presets on page 21
Loading MIDI Phrases
To load a MIDI phrase, do one of the following:
• Click in the Phrase field and select a phrase from the pop-up menu.
The phrases are sorted into subfolders, according to their musical uses.
• Drag a phrase on the Phrase field.
• Drag one or more phrases on a variation button.
If the MIDI files contain controller data, this is sent to the modulation matrix, where the
controllers can be used as modulation sources.
If you drag multiple files, they are automatically distributed to different variation
buttons.

MIDI Modules Reference
MIDI Player
498
Playing Back MIDI Phrases
•Click the play button next to the Phrase field to play back the MIDI phrase.
Click again to stop playback.
MIDI Player Parameters
Active
Activates the MIDI Player.
Phrase
Allows you to select a phrase.
Play/Stop
Allows you to play back the phrase.
MIDI Export Field
Allows you to export the phrase using drag and drop.
Variation buttons
Allow you to load up to eight MIDI files.
Loop
If this is activated, the MIDI file plays back in a loop.
Sync
Synchronizes the MIDI file to the tempo of your host application.
NOTE
In addition, you can set Restart Mode to Sync to Host. This aligns the phrase with
the beats and measures of your host application.
Hold
Allows you to prevent the phrase from stopping or changing when the keys are
released.
• If Off is selected, the phrase changes as soon as you release a key. The
phrase stops immediately when you release all keys.
• If On is selected, the phrase plays to the end, even if the keys are released.
If Loop is activated, the phrase repeats continuously.
• If Gated is selected, the phrase starts to play when the first key is played. It
plays silently in the background, even if the keys are released, and resumes
playback at the current position when you press any of the keys again. This
way, you can gate the playback of the phrase.
Trigger Mode
Determines how long it takes for phrases to change when you switch to another
variation.

MIDI Modules Reference
MIDI Player
499
• If this is set to Immediately, the phrase changes as soon as you switch to
another variation.
• If this is set to Next Beat, the phrase changes on the first new beat after
you switch to another variation.
• If this is set to Next Measure, the phrase changes on the first new measure
after you switch to another variation.
Restart Mode
Determines when the phrase is restarted.
• If this is set to Off, the phrase runs continuously and does not restart at
chord or note changes.
•New Note restarts the phrase on new notes.
NOTE
The phrase does not restart upon notes that are played legato.
•Each Note restarts the phrase with each new note that you play.
•Sync to Host aligns the phrase with the beats and measures of your host
application each time that you start the transport.
•Follow Transport follows the transport control of your host application.
Playback starts and stops automatically as soon as your host application
starts and stops playing.
RstVar (Restart on Variation Change)
This option is available for new chords and new notes. If this button is activated,
changing a variation restarts the MIDI Player, even if no new notes or chords
were triggered.
Start
Shifts the start of the loop in steps of 1/4 notes. The end of the loop is not shifted,
that is, the loop is shortened.
Length
Shortens the loop in steps of 1/4 notes.
Transpose
Allows you to transpose the original MIDI phrase, according to the key that you
play.
• If this is set to Off, the phrase is not transposed.
• If this is set to On, the MIDI phrase is transposed by the specified value.
• If this is set to Pitch, the MIDI notes themselves are not modified, but each
note is sent with a pitch transpose value instead.
For example, if the MIDI phrase is used to trigger a multi-sampled drum
kit, this does not change which instrument is triggered, but the pitch at
which it is played.

MIDI Modules Reference
MIDI Player
500
Center Key
Determines the MIDI note that is used as the central position for the Transpose
function.
Sync
Synchronizes the phrase to the tempo of your host application.
NOTE
In addition, you can set Restart Mode to Sync to Host. This aligns the phrase with
the beats and measures of your host application.
Tempo
If Sync is deactivated, you can use the Tempo control to set the internal playback
speed of the MIDI Player.
Tempo Scale
Defines the rate at which notes are triggered, that is, the speed at which the
phrase is running. In addition to the Tempo parameter, this gives you further
control over the playback speed. You can specify a value in fractions of beats. You
can also set dotted and triplet note values.
For example, if you change the Tempo Scale setting from 1/16 to 1/8, the speed
is cut in half. If you set it to 1/32, the speed is doubled. Other values increase or
decrease the speed accordingly.
Swing
Shifts the timing of notes on even-numbered beats. This way, the phrase gets
a swing feeling. Negative values shift the timing backward, and the notes are
played earlier. Positive values shift the timing forward, and the notes are played
later.
Gate Scale
Allows you to shorten or lengthen the notes of the phrase. At a value of 100 %,
the notes play with their original gate length.
Vel Scale
Allows you to raise or lower the note-on velocities of the phrase. At a value of 100
%, the notes are played with their original velocity.
Quantize
Allows you to set up a quantization grid in fractions of beats. You can also specify
dotted and triplet values.
Amount
Determines how much of the quantization grid is applied. For example, a value
of 100 % means that the MIDI note events play back only at the specified quantize
note values. Lower values move the notes only partially towards the next quantize
note value. With a value of 0 %, no quantization is applied.

MIDI Modules Reference
MIDI Player
501
Key Range
The Low Key and High Key parameters determine the key range that is used to
trigger phrase playback.
Velocity Range
The Low Vel and High Vel parameters determine the velocity range that is used to
trigger phrase playback.
Variations
For each module, you can set up eight different variations of phrases. You can switch
between them with the variation buttons at the top right.
You can remote-control the variation buttons using the trigger pads, which gives you the
possibility to switch between variations by playing the trigger keys that are assigned to the
trigger pads.
NOTE
To avoid that the variation switches in the middle of a beat or measure, use the trigger
modes Next Beat or Next Measure.
Creating Variations
PROCEDURE
1. Click one of the eight variation buttons at the top right of the MIDI Player.
2. You can either start from scratch or base the new variation on an existing variation.
•To start from scratch, assign a phrase and edit the settings.
•To use an existing variation as base, use the context menu commands Copy MIDI
Player Variation and Paste MIDI Player Variation.
RESULT
The variation can now be recalled by clicking the corresponding variation button.
NOTE
The parameters Loop, Sync, Hold, Trigger Mode, Restart Mode, Low/High Key, and Low/
High Vel are not part of the variations. You set them up only once for each inserted MIDI
Player module.
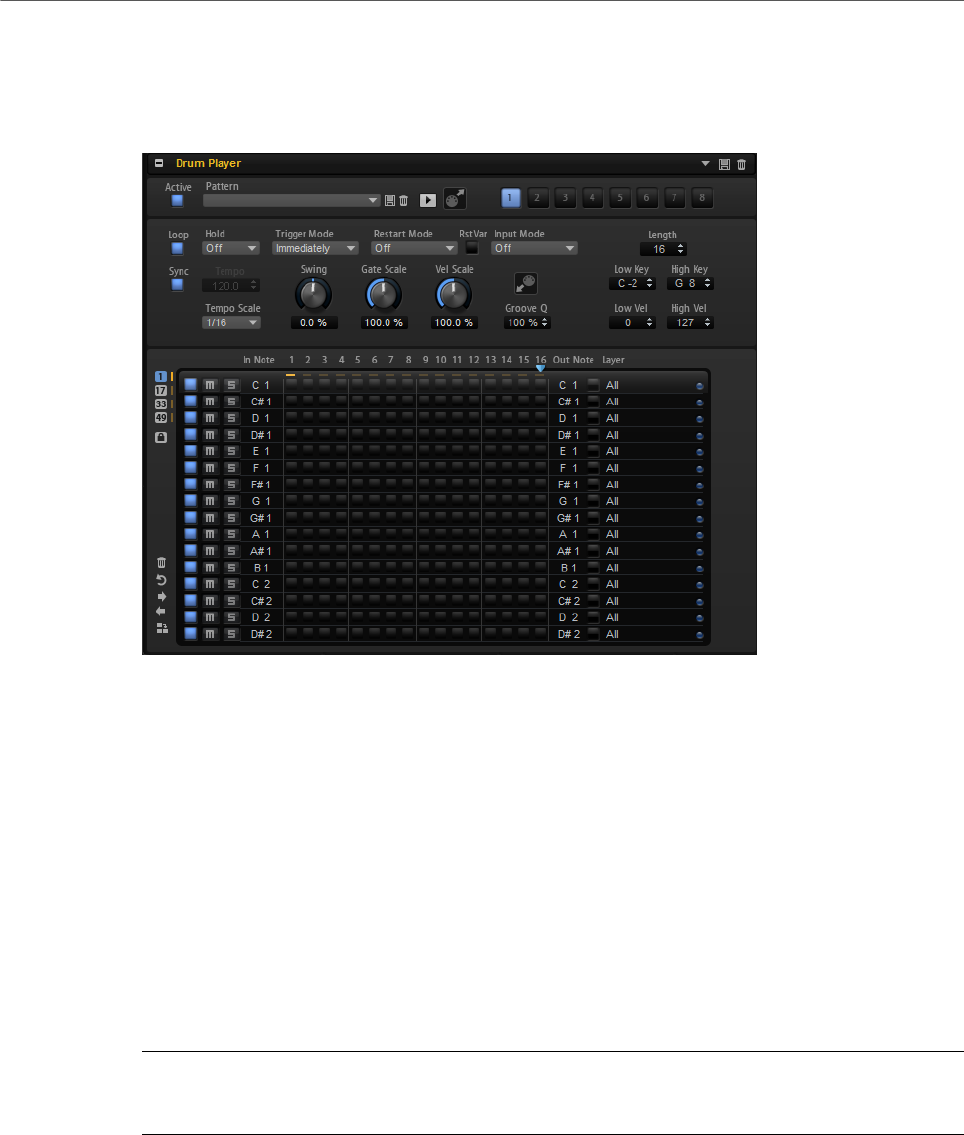
MIDI Modules Reference
Drum Player
502
Drum Player
The Drum Player module allows for classic drum beat programming with up to 64 steps
playing on up to 16 tracks. Each track can play a different sound.
You can set up eight different patterns using the variation buttons and use the Trigger Pads
to switch between variations.
Presets
Drum Player presets contain the selected MIDI phrases, as well as the
performance settings of the Drum Player, such as Tempo, Tempo Scale, Loop,
Swing, etc.
RELATED LINKS
Handling Section and Module Presets on page 21
Loading Patterns
Patterns are sorted into subfolders, according to their musical usage.
PROCEDURE
•To load a pattern, click in the Pattern field and select a pattern from the pop-up menu.
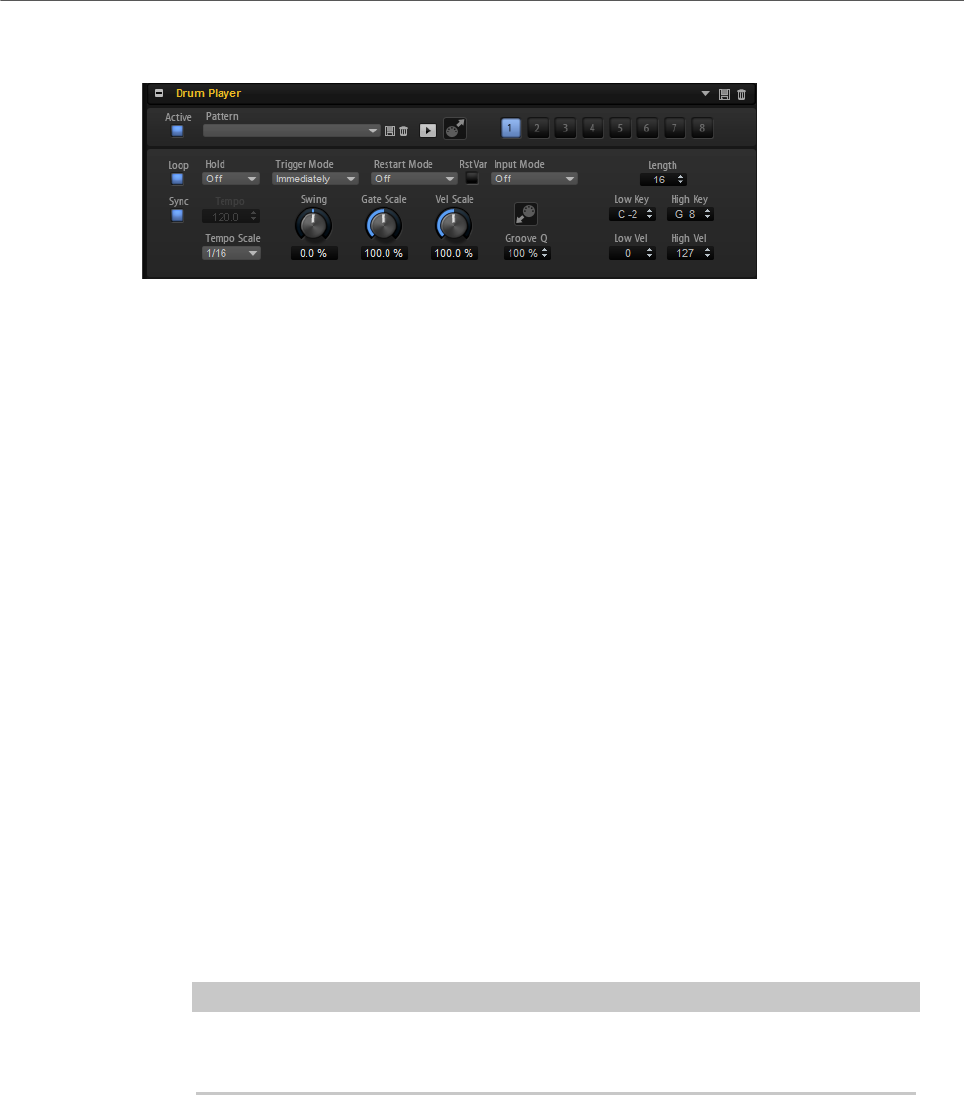
MIDI Modules Reference
Drum Player
503
Drum Player Parameters
Active
Activates the Drum Player.
Pattern
Allows you to select a pattern for the Drum Player.
Save and Delete
The Save and Delete buttons to the right of the Pattern field allow you to save and
delete patterns.
Play/Stop
Allows you to play back the pattern. Click again to stop playback.
MIDI Export
Allows you to export the phrase using drag and drop.
Variation buttons
Allow you to create eight variations of your phrase.
Loop
If this option is activated, the phrase plays in a loop.
Sync
Synchronizes the phrase to the tempo of your host application.
NOTE
In addition, you can set Restart Mode to Sync to Host. This aligns the phrase with
the beats and measures of your host application.
Tempo
If Sync is deactivated, you can use the Tempo control to set the internal playback
speed of the Drum Player. The playback speed of the phrase is specified in BPM.
If Sync is activated, the Tempo parameter is not available.
Tempo Scale
Defines the speed at which the pattern is running. You can specify a value in
fractions of beats. You can also set dotted and triplet note values.

MIDI Modules Reference
Drum Player
504
For example, if you change the Tempo Scale setting from 1/16 to 1/8, the speed
is cut in half. If you set it to 1/32, the speed is doubled. Other values increase or
decrease the speed accordingly.
Hold
Allows you to prevent the phrase from stopping or changing when the keys are
released.
• If Off is selected, the phrase changes as soon as you release a key. The
phrase stops immediately when you release all keys.
• If On is selected, the phrase plays to the end, even if the keys are released.
If Loop is activated, the phrase repeats continuously.
• If Gated is selected, the phrase starts to play when the first key is played. It
plays silently in the background, even if the keys are released, and resumes
playback at the current position when you press any of the keys again. This
way, you can gate the playback of the phrase.
Trigger Mode
Determines at which moment the Drum Player changes the pattern when you
switch to another variation.
• If this is set to Immediately, the pattern changes as soon as you switch to
another variation.
• If this is set to Next Beat, the pattern changes on the first new beat after
you switch to another variation.
• If this is set to Next Measure, the pattern changes at the first new measure
after switching to another variation.
Restart Mode
Determines whether the Drum Player is restarted when a note is triggered.
• If Off is selected, the player is not restarted if it is already running.
•First Note restarts the player if a note is triggered and no other notes are
playing.
•Each Note restarts playback every time a note is triggered.
•Sync to Host aligns the playback with the beats and measures of your host
application. Playback is synchronized every time you start the transport.
•Follow Transport follows the transport control of your host application.
Playback starts and stops automatically as soon as your host application
starts and stops playing.
RstVar (Restart on Variation Change)
This option is available for new chords and new notes. If this button is activated,
changing a variation restarts the Drum Player, even if no new notes or chords
were triggered.
Input Mode
Determines whether the black and white keys trigger or mute the assigned
instrument.
•Off triggers the pattern with any key.

MIDI Modules Reference
Drum Player
505
•Trigger triggers the note that is defined with the Out Note parameter.
Playback uses the sound of the track. Keys that are not assigned to any In
Note play back the pattern.
•Mute mutes the track for as long as the corresponding In Note key is held.
Release the key to unmute the track again. Keys that are not assigned to
any In Note play back the pattern.
Length
Determines the length of the pattern, that is, the number of steps. The maximum
number of steps is 64.
Swing
Shifts the timing of notes on even-numbered beats. This way, the pattern gets a
swing feeling. Negative values let the notes play earlier, positive values let the
notes play later.
Gate Scale
Allows you to shorten or lengthen the notes of the pattern. At a value of 100 %,
the notes play with their original gate length.
NOTE
If the triggered samples are in One-shot mode, this parameter has no effect.
Vel Scale
Allows you to raise or lower the note-on velocities of the pattern. At a value of 100
%, the notes play with their original velocity.
Groove Quantize value field
Allows you to adapt the timing of a pattern to an external MIDI file by dropping
this MIDI file on the Groove Quantize drop field. You can quantize the playback of
the pattern to the timing of a sliced loop by dragging its MIDI file from the MIDI
export drag field to the Groove Quantize drop field.
The Groove Quantize Depth parameter determines how accurately the pattern
follows the timing of the MIDI file.
Key Range
The Low Key and High Key parameters determine the key range that is used to
trigger pattern playback.
Velocity Range
The Low Vel and High Vel parameters determine the velocity range that is used to
trigger pattern playback.
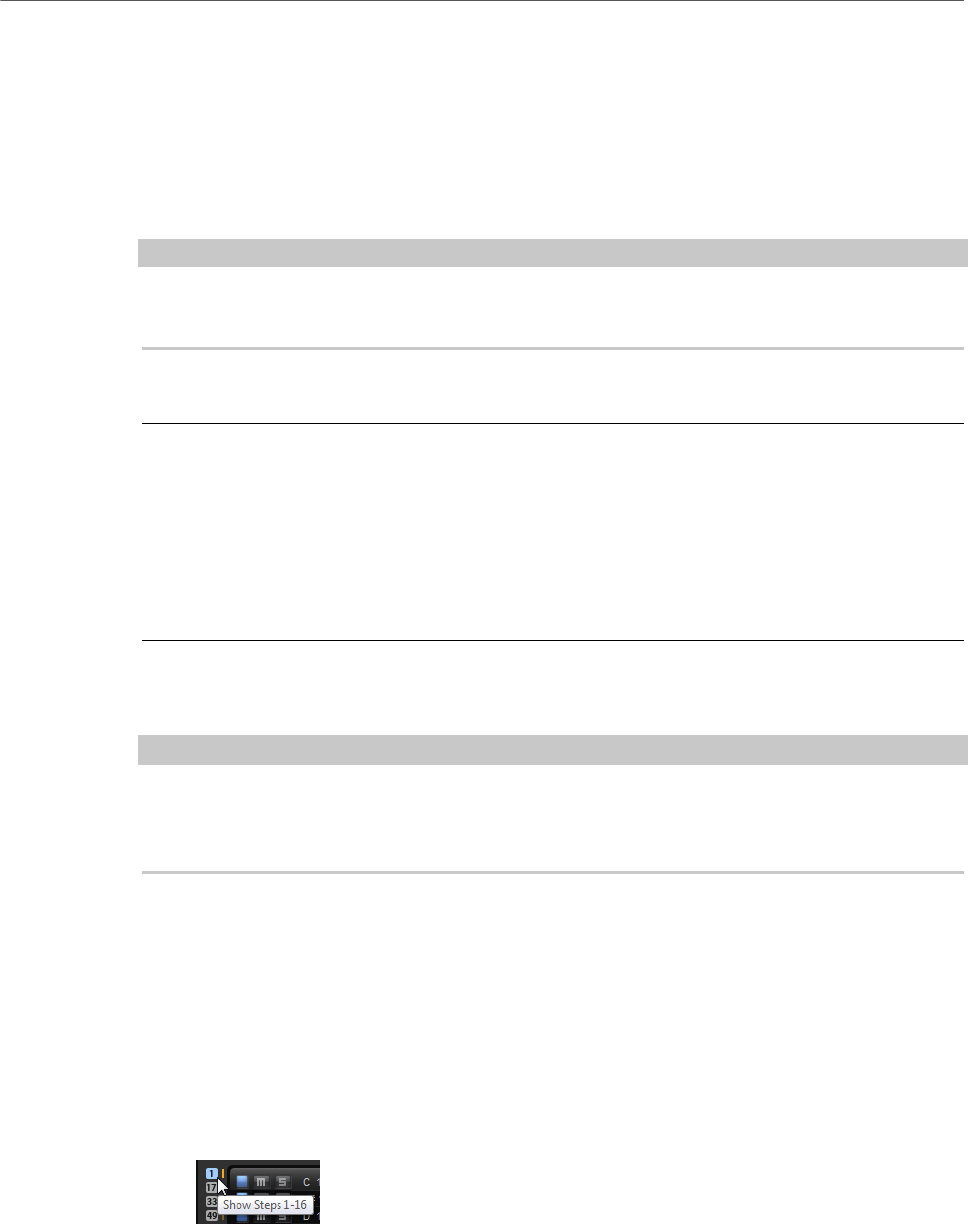
MIDI Modules Reference
Drum Player
506
Variations
For each module, you can set up eight different variations of phrases. You can switch
between them with the variation buttons at the top right.
You can remote-control the variation buttons using the trigger pads, which gives you the
possibility to switch between variations by playing the trigger keys that are assigned to the
trigger pads.
NOTE
To avoid that the variation switches in the middle of a beat or measure, use the trigger
modes Next Beat or Next Measure.
Creating Variations
PROCEDURE
1. Click one of the eight variation buttons at the top right of the Drum Player.
2. You can either start from scratch or base the new variation on an existing variation.
•To start from scratch, assign a phrase and edit the Drum Player settings.
•To use an existing variation as base, use the context menu commands Copy
Drum Player Variation and Paste Drum Player Variation.
RESULT
The variation can now be recalled by clicking the corresponding variation button.
NOTE
The parameters Loop, Sync, Hold, Trigger Mode, Restart Mode, Input Mode, Low/High Key,
and Low/High Vel are not part of the variations. You set them up only once for each inserted
module.
Drum Player Pattern Editor
You can create and edit the patterns in the pattern editor in the lower section.
Pattern Editor Parameters
Page buttons
A pattern can contain up to 64 steps. These are distributed over four pages that
you can access with the page buttons on the upper left of the editor.
During playback, the pages are switched automatically, so that the playback
position is always displayed in the editor. Additionally, an indicator above the step
display shows which step is being played.
MIDI Modules Reference
Drum Player
507
Lock button
• To deactivate automatic page switching, activate the Lock button below
the page buttons.
If the Lock button is activated, you can still use the playback indicator to
the right of the page buttons to see which page is currently playing.
Pattern functions buttons
The function buttons below the page buttons allow you to edit entire patterns.
• Click Clear Pattern to delete all pattern steps in the editor.
• Click Reverse Pattern to reverse the pattern.
This mirrors the pattern around its middle step.
• To shift the rhythm of the phrase, click Shift Pattern Left or Shift Pattern
Right .
If you shift the rhythm of the pattern to the left, the first step is moved to
the end. If you shift the pattern to the right, the last step is moved to the
beginning.
• Click Duplicate Pattern to copy all events between the pattern start and
end markers and paste them after the end marker.
If any events are located after the end marker, these are deleted.
On/Off button
To activate a lane, activate its On/Off button.
Mute
To mute a lane, activate its Mute button.
Solo
To solo a lane, activate its Solo button.
In Note
Determines which key is used to play the sound that is triggered by the track.
Out Note
Determines the note number that is used by the track to trigger notes.
Layer
Allows you to limit the track output to a specific layer. For this to work, the layer
must be on the same level as the Drum Player module.
Activity LED
The activity LED on the right lights up when an instrument is triggered, either by
the playing track, the trigger button, or an incoming MIDI note.
Creating and Editing Patterns
• To add a step, click on a step field in the editor.
• To add all steps for a lane, hold down Shift and click.
To remove all steps, hold down Shift and click again.
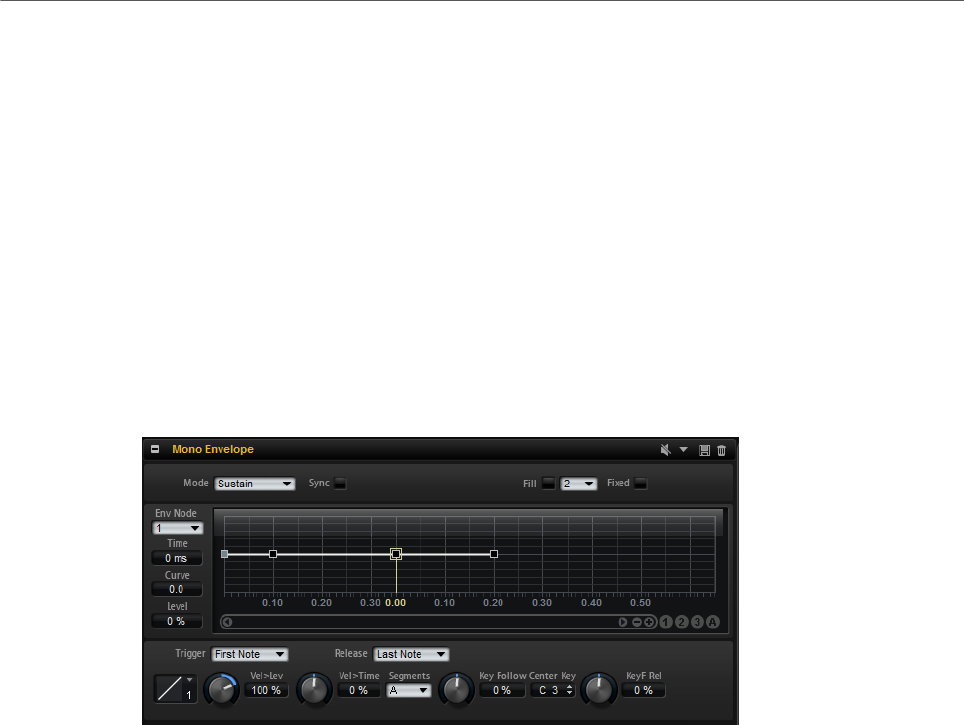
MIDI Modules Reference
Mono Envelope
508
• To set the velocity for a step, click the step and drag up or down, or use the mouse
wheel.
You can set each step to low, medium, or high velocity.
• To change the velocity of all steps in a lane, hold down Shift and use the mouse.
• To remove a step, click it.
• To remove all steps in a pattern, click Clear Pattern.
Mono Envelope
This MIDI module triggers a monophonic multi-segment envelope that you can use as a
modulation source in the modulation matrix of a zone.
In this context, monophonic means that the envelope is not played back per zone. Instead, it
is played back only once for the program or layer that it belongs to.
You can set up conditions for triggering and releasing the envelope. By default, this envelope
is bipolar.
RELATED LINKS
Unipolar vs. Bipolar Sources on page 143
Envelope Section on page 125
Handling Section and Module Presets on page 21
Mono Envelope Parameters
Mode
Determines how the envelope is played back when it is triggered.
• Select Sustain to play the envelope from the first node to the sustain node.
The sustain level is held for as long as you play the note. When you release
the note, the envelope continues with the stages following the sustain. This
mode is ideal for looped samples.
• Select Loop to play back the envelope from the first node to the loop nodes.
Then, the loop is repeated for as long as the key is held. When you release
the note, the envelope continues playing the stages that follow the sustain.
This mode is ideal for adding motion to the sustain of the envelope.
• Select One Shot to play the envelope from the first to the last node, even if
you release the key. The envelope has no sustain stage. This mode is ideal
for drum samples.

MIDI Modules Reference
Mono Envelope
509
Sync
Allows you to synchronize the envelopes to the tempo of your host application.
Fill
Allows you to add multiple envelope nodes after the selected nodes.
Fixed
• If Fixed is activated and you move selected nodes on the time axis, only the
selected nodes are moved.
• If Fixed is deactivated, all nodes that follow the edited nodes are also
moved.
Env Node
Displays the focused envelope node.
Time
Specifies the period of time between two nodes. Depending on the Sync mode,
the Time parameter is displayed in milliseconds and seconds, or in fractions of
beats.
Curve
Allows you to adjust the curvature of the envelope curve between two nodes from
linear to logarithmic or exponential behavior.
Level
Specifies the amplitude of the envelope at the position set by the Time
parameter.
Trigger Mode
Sets the condition for triggering the envelope.
• Select First Note to trigger the envelope with the first note that you play.
Any following notes that you play legato do not trigger the envelope.
• Select Each Note to trigger the envelope with each note that you play. The
envelope plays back from its attack each time you press a key.
Release Mode
Sets the condition for releasing the envelope.
• Select First Note to release the envelope with the first note that you
release.
• Select Last Note to release the envelope with the last note that you
release.
Level Velocity (Vel>Lev)
Determines how the velocity affects the level of the envelope.
The level of the envelope depends on two factors: the setting of this parameter
and how hard you hit a key. Positive values increase the level of the envelope
the harder you hit a key. Negative values decrease the level of the envelope the
harder you hit a key.

MIDI Modules Reference
Mono LFO
510
Level Velocity Curve
You can select a curve to specify how the incoming velocity translates to the level
of the envelope.
The characteristic of each curve is displayed by a small icon.
Time Velocity (Vel>Time)
Adjusts the influence of velocity on the phases of the envelope. Positive values
decrease the length of the phases for higher velocity values. Negative values
increase the length of the phases for higher velocity values.
Segments
Here, you can select which phases of the envelope are affected by the Time
Velocity parameter.
•Attack – The velocity affects the attack only.
•Attack + Decay – The velocity affects all phases until the sustain.
•Decay – The velocity affects all phases until the sustain but without the
attack.
•Attack + Release – The velocity affects the attack and the release phases.
•All – The velocity affects all phases.
Time Key Follow, Center Key, and KeyF Rel (Key Follow Release)
With the Time Key Follow and KeyF Rel parameters, you can scale the envelope
phases across the keyboard.
•Time Key Follow scales all times before the sustain node.
•KeyF Rel scales all times after the sustain node, that is, the release phase
of the envelope.
The value that you specify for Center Key is used as the central position for the
Time Key Follow and KeyF Rel functions.
The envelope phases depend on the keyboard range in which the note is played
and on the corresponding Time Key Follow setting:
• Positive values decrease the phase lengths for notes above and increase
the phase lengths for notes below the set Center Key, that is, the envelope
becomes faster the higher the note you play.
• Negative values increase the phase lengths for notes above and decrease
the phase lengths for notes below the Center Key, that is, the envelope
becomes slower the higher the note you play.
Mono LFO
You can add monophonic LFOs as MIDI modules to the program. An LFO module can be used
for an entire program, or for specific layers.
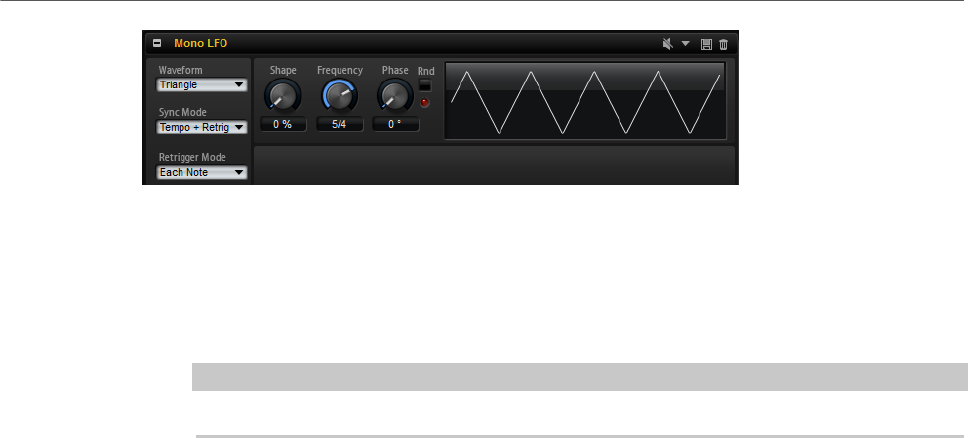
MIDI Modules Reference
Mono LFO
511
In this context, monophonic means that these LFOs are only calculated once and feed
multiple voices at the same time. A pitch modulation controlled by the modulation wheel is a
typical example where one LFO controls the vibrato for all voices. Monophonic LFOs appear
as sources in the modulation matrix of the zones contained in a layer or program.
•To bypass the LFO, click the Bypass button in the title bar.
NOTE
This deactivates all LFOs.
RELATED LINKS
Handling Section and Module Presets on page 21
Mono LFO Parameters
LFO Waveform and Shape
•Sine produces smooth modulation, suitable for vibrato or tremolo. Shape
adds additional harmonics to the waveform.
•Triangle is similar to Sine. Shape continuously changes the triangle
waveform to a trapezoid.
•Saw produces a ramp cycle. Shape continuously changes the waveform
from ramp down to triangle to ramp up.
•Pulse produces stepped modulation, where the modulation switches
abruptly between two values. Shape continuously changes the ratio
between the high and low state of the waveform. If Shape is set to 50 %, a
square wave is produced.
•Ramp is similar to the Saw waveform. Shape increasingly puts silence
before the sawtooth ramp up begins.
•Log produces a logarithmic modulation. Shape continuously changes the
logarithmic curvature from negative to positive.
•S & H 1 produces randomly stepped modulation, where each step is
different. Shape puts ramps between the steps and changes the S & H into
a smooth random signal when fully turned right.
•S & H 2 is similar to S & H 1. The steps alternate between random high and
low values. Shape puts ramps between the steps and changes the S & H
into a smooth random signal when fully turned right.
Sync Mode
You can sync the LFO either to the tempo of the host application or to the Step
Modulator. The behavior of the Frequency parameter depends on which option
you select:
• Select Off to adjust the speed of the modulation in Hertz.
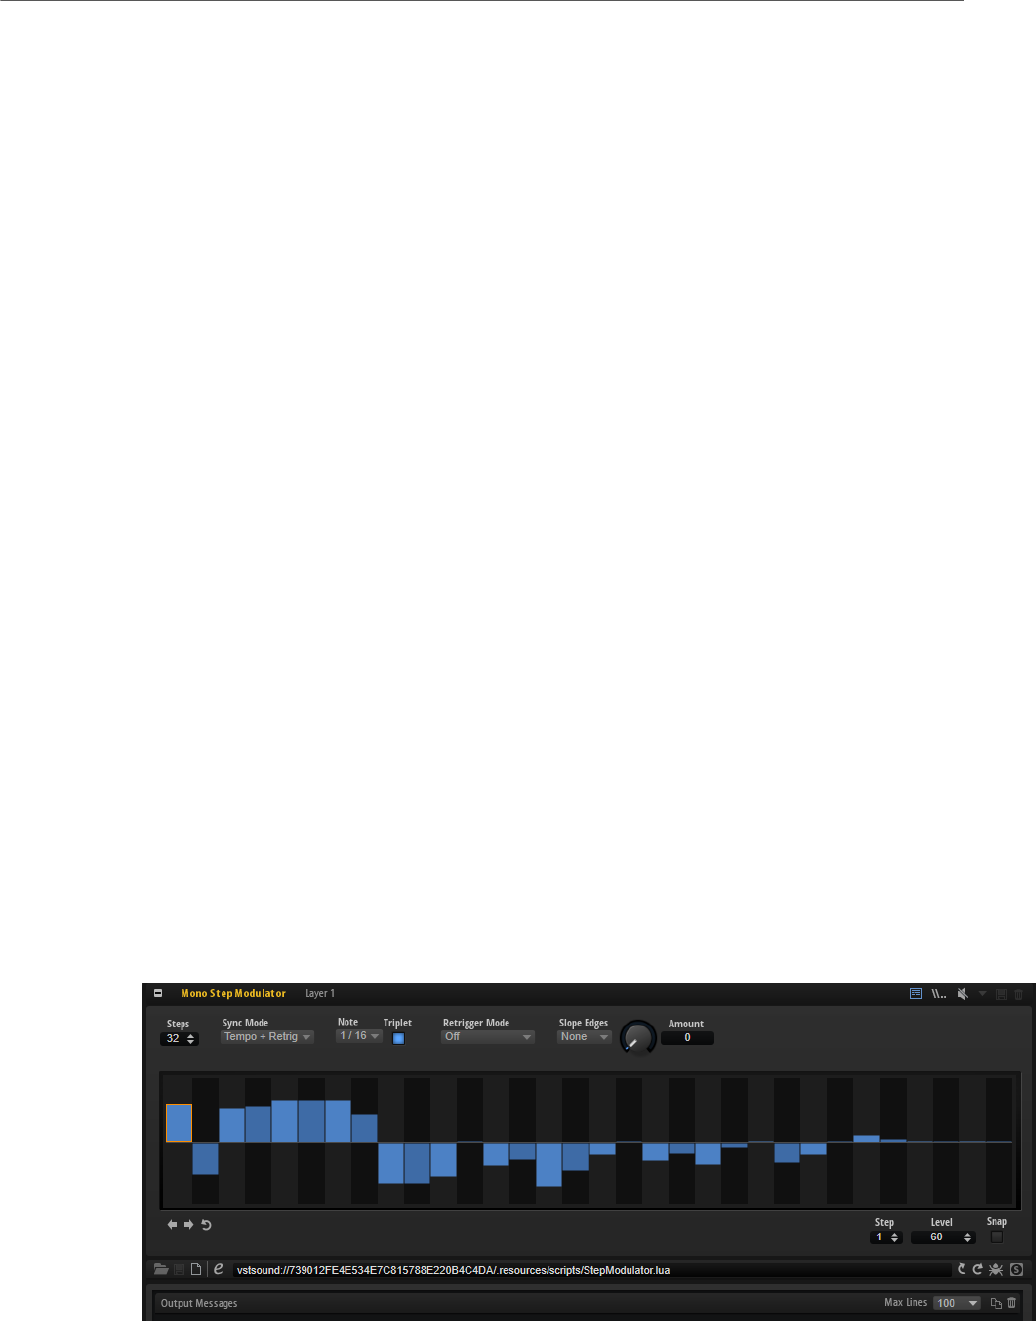
MIDI Modules Reference
Mono Step Modulator
512
• Select Tempo + Retrig to adjust the speed of the modulation in fractions of
beats. You can also set dotted and triplet note values.
The restart behavior of the LFO depends on the Retrigger setting.
• Select Tempo + Beat to adjust the speed of the modulation in fractions of
beats. You can also set dotted and triplet note values.
The LFO restarts with the transport of the host and aligns with the beats of
the project. The Retrigger setting is not taken into account.
Retrigger Mode
Determines whether the LFO is restarted when a note is triggered. If this is set
to First Note or Each Note, the waveform starts at the position specified by the
Phase parameter.
• If this is set to Off, the LFO runs freely.
• If this is set to First Note, the LFO restarts when a note is triggered and no
other notes are held.
• If this is set to Each Note, the LFO restarts each time a note is triggered.
Frequency
Controls the frequency of the modulation, that is, the speed of the LFO. If Sync
Mode is active, the frequency is set in fractions of beats, or number of steps of
the Step Modulator.
Phase
Sets the initial phase of the waveform that is used when the LFO is retriggered.
Random
If this button is activated, each note starts with a randomized start phase. The
Phase control is deactivated.
Mono Step Modulator
You can add the step modulator as MIDI module to the program and use it as a modulation
source in the modulation matrix of a zone.

MIDI Modules Reference
Mono Step Modulator
513
NOTE
The Mono Step Modulator was created using HALion’s scripting features. You can open this
script from the step modulator, as an example of how to realize such a module.
Mono Step Modulator Parameters
Steps
Sets the number of steps in the sequence. The maximum number of steps is 32.
Sync Mode
• If Off is selected, you can adjust the speed at which the sequence repeats.
Whether the sequence restarts when you play a note depends on the
Retrigger mode.
• If Tempo + Retrig is selected, you can adjust the length of the steps in
fractions of beats. The speed of the modulation depends on the number of
steps, the note value, and the tempo you set in your host application. To use
triplet note values, activate Triplet.
Whether the sequence restarts when you play a note depends on the
selected Retrigger Mode.
• If Tempo + Beat is selected, you can adjust the length of the steps in
fractions of beats. The speed of the modulation depends on the number of
steps, the note value, and the tempo you set in your host application. To use
triplet note values, activate Triplet.
The sequence restarts with the transport of the host application and lines
up to the beats of the project. The Retrigger Mode is not taken into account.
Frequency
If Sync Mode is set to Off, this controls the speed at which the sequence is
repeated.
Note
If Sync Mode is set to one of the Tempo settings, this adjusts the length of the
steps in fractions of beats. You can also select triplet values.
Triplet
Activate this button to use triplet note values.
Retrigger Mode
Determines whether the sequence restarts when you play a note. This parameter
is only available if Sync Mode is set to Off or Tempo + Retrig.
• If this parameter is set to Off, the sequence is not restarted. Instead, it
resumes playback at the position at which you released the key.
• If this parameter is set to First Note, the sequence restarts when a note is
triggered and no other notes are held.
• If this parameter is set to Each Note, the sequence restarts each time a
note is triggered.
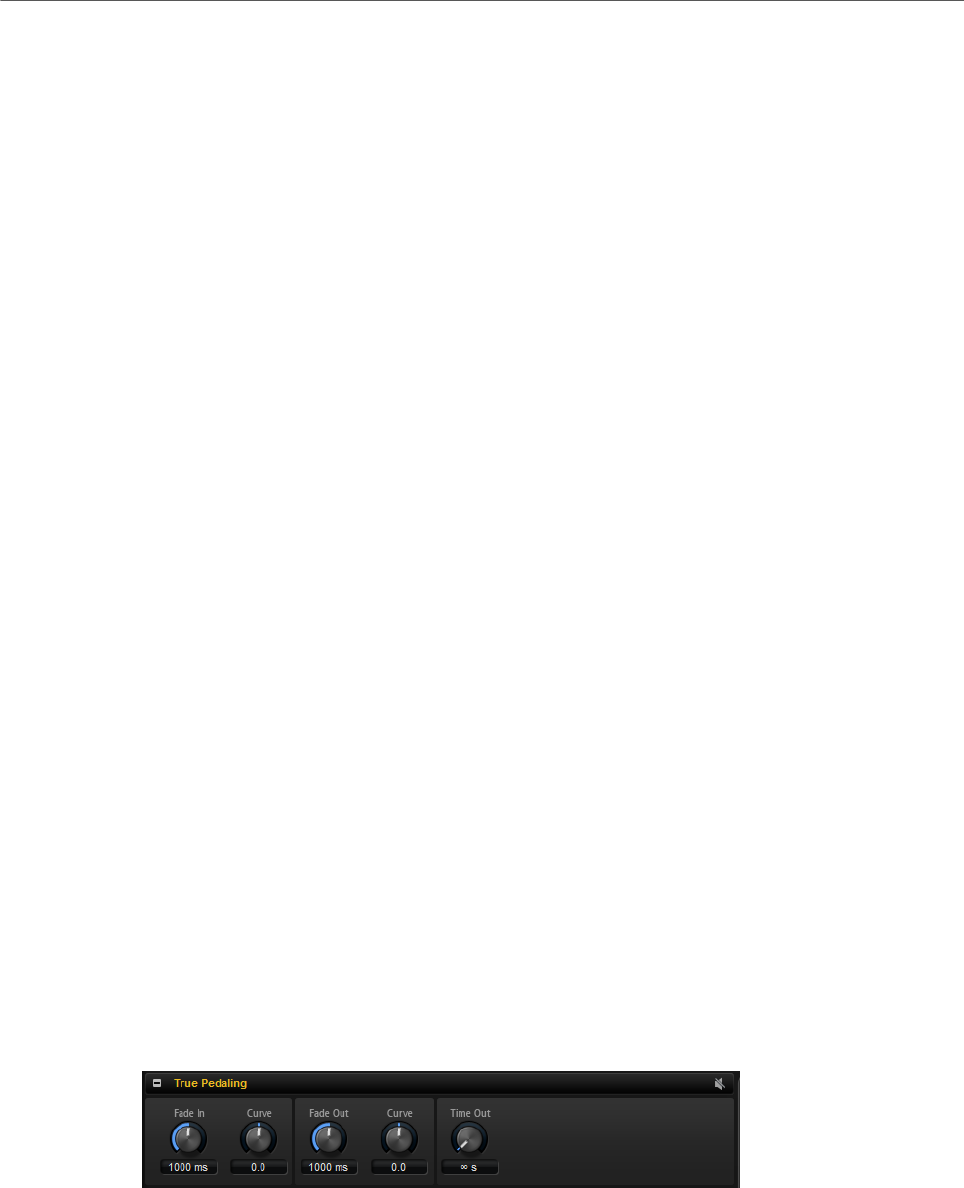
MIDI Modules Reference
True Pedaling
514
Slope
Determines whether the step modulator jumps from step to step or creates
ramps between the steps.
•No Slope produces hard steps.
•Slope on Rising Edges creates ramps only for rising edges.
•Slope on Falling Edges creates ramps only for falling edges.
•Slope on All Edges creates ramps for all edges.
Amount
If Slope is set to Rising, Falling, or All, this parameter determines the time of the
ramp between two steps. The higher the setting, the smoother the transitions
between steps.
Step
Allows you to select a specific step.
Level
Shows the level of the selected step.
Snap
If Snap is activated, the level of each step can only be adjusted in steps of 1/12th.
Shift Phrase Right/Shift Phrase Left
These commands shift all the steps to the right/left. If you shift the rhythm of the
phrase to the left, the first step is moved to the end. If you shift the phrase to the
right, the last step is moved to the beginning.
Reverse Phrase
Reverses the phrase, that is, inverts the order of all steps.
True Pedaling
This MIDI module produces a modulation signal from the sustain pedal that you can use
to simulate true pedaling of grand pianos. Instead of switching between two layers, this
module allows you to crossfade between layers when you press or lift the sustain pedal,
which produces a more realistic sound.
True Pedaling Parameters
Fade In Time
Specifies the fade in time of the modulation signal. The fade in time is applied
when you press the sustain pedal.

MIDI Modules Reference
True Pedaling
515
Fade In Curve
Sets the curvature of the fade in. Use negative values for an outward shaped
curve and positive values for an inward shaped curve.
Fade Out Time
Specifies the fade out time of the modulation signal, when you lift the sustain
pedal.
Fade Out Curve
Sets the curvature of the fade out. Use positive values for an outward shaped
curve and negative values for an inward shaped curve.
Time Out
On acoustic pianos, pressing the sustain pedal after a certain time has little to
no effect. You can achieve the same effect by using this parameter: Pressing
the sustain pedal after the time that you set here has no effect. Any resonance
samples that have been triggered, but were not faded in, are released.
Setting up a Crossfade between Two Layers
PROCEDURE
1. Set the Level parameter of the zones with the note-on samples to 0 dB.
2. Set the Level parameter of the zones with the sustain resonance samples to the
minimum setting.
3. In the modulation matrix, select the True Pedaling module as modulation source and
assign it to the Level modulation destination.
4. To bring the crossfade into effect, modulate the level of the note-on samples in
negative direction and the level of the sustain resonance samples in positive direction.
RESULT
The resonance samples are triggered with each note, but they are only heard if you press the
sustain pedal.
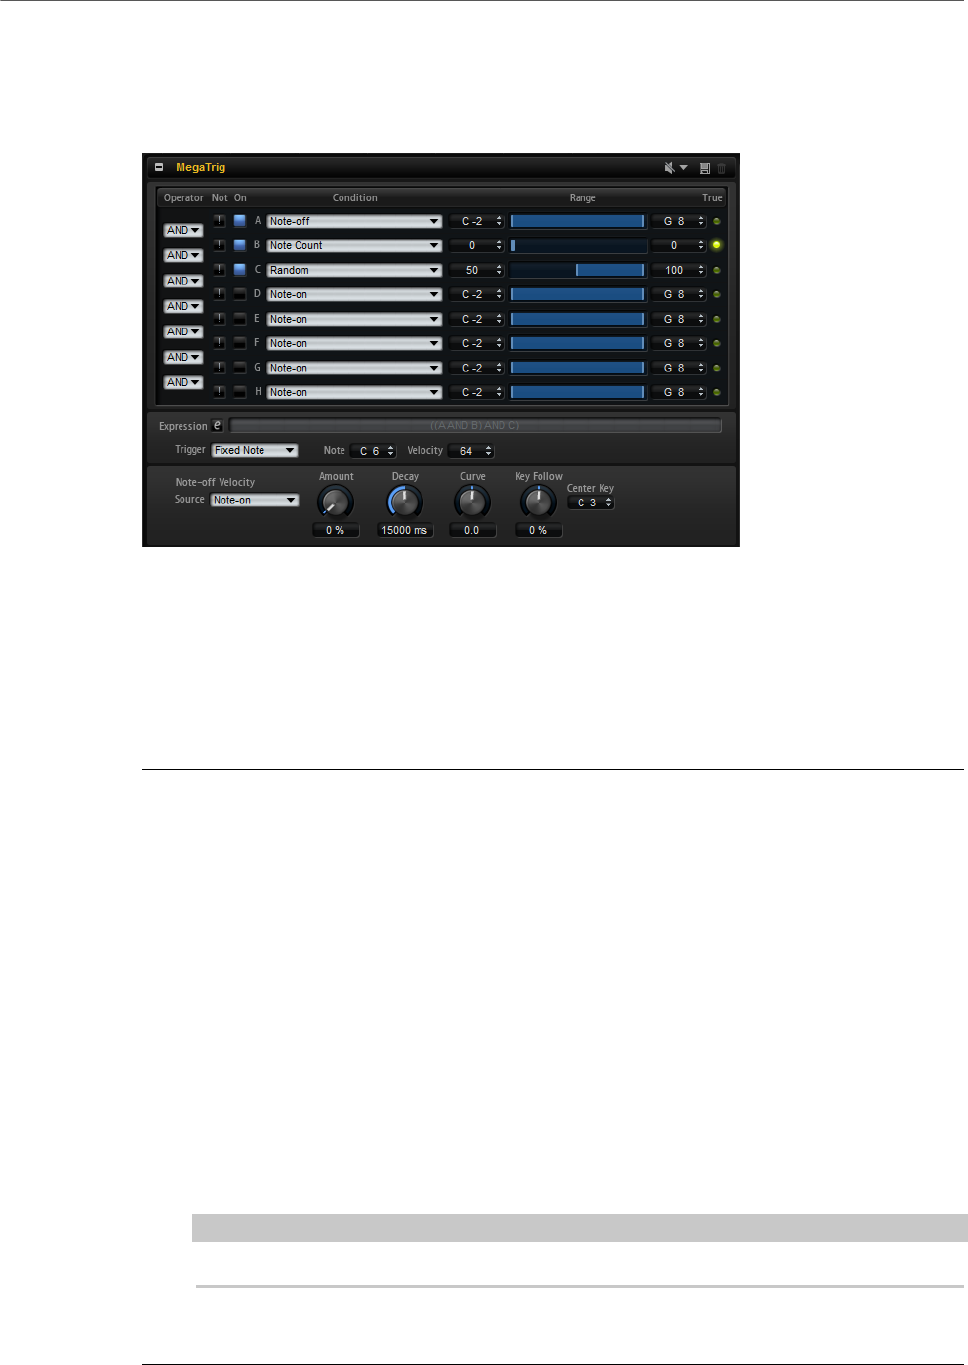
MIDI Modules Reference
MegaTrig
516
MegaTrig
The MegaTrig module allows you to control playing styles and articulations and to trigger
release samples and instrument noises.
By setting up conditions, you can determine which zone is triggered. For each condition, you
can specify an event and range.
RELATED LINKS
Handling Section and Module Presets on page 21
Setting Up Conditions
PROCEDURE
1. In the Program Tree, insert the MegaTrig module at the position where you want to
apply the playback rules.
This can be the program or one of its layers. Any zones within the program or layer are
affected, too.
2. Open the editor of the MegaTrig module.
3. On the pop-up menu for the first condition, select an event.
4. Activate the condition by clicking the On/Off button to the left of the menu.
5. Use the faders and value fields to the right to adjust the minimum and maximum value
of the range.
6. To set up more conditions, repeat these steps for additional rows.
7. Select the logical operations, AND or OR, from the menu to the left of the conditions.
To invert a condition, activate the NOT operation.
The Expression field displays the set conditions and logical operations.
NOTE
The operation AND is executed before the operation OR.
8. Set the Trigger option to determine which notes are triggered when the expression
becomes TRUE.
MIDI Modules Reference
MegaTrig
517
Setting Up the Expression Manually
Instead of using the AND/OR menus and NOT buttons, you can enter the expression
manually. This way, you can also influence the execution order of the expression.
PROCEDURE
1. Click the edit button next to the Expression field.
2. Enter the conditions and logical operations, for example A AND B OR C.
Instead of AND, OR, and NOT, you can also type &, |and !.
3. Put in parentheses to specify the execution order, for example A AND (B OR C).
NOTE
If you edit the expression manually, the AND/OR menus and the NOT and On buttons are
not available.
MegaTrig Parameters
You can combine up to eight conditions into an expression using logical operations.
For example, the expression “Note-on AND Sustain On” is true if you play notes while holding
down the sustain pedal. Any assigned zones only play back if the entire expression is true.
NOTE
It is possible to set up expressions that can never be true, such as “Note-on AND Note-off”,
“Note-on AND Key up”, or “Note-off AND Key up”, for example. The program will not show a
warning message. Therefore, be sure to check the expressions that you created.
Operator
Combines two conditions logically.
• If AND is selected, the condition is true if both conditions are true.
•OR combines two conditions logically. The expression is true if one of the
conditions is true.
NOT
Activate this to invert the condition. A condition that was previously true becomes
false, and vice versa.
On
Activates the corresponding condition.
Condition
Sets the event for the condition that you specify. The condition is true if the event
is of the correct type and within the specified range.
Min
The lowest value for a true condition. Use the arrow buttons, the value field, or
the range fader to adjust the minimum value of the range.

MIDI Modules Reference
MegaTrig
518
Range
Shows the range for the condition.
Max
The highest value for a true condition. Use the arrow buttons, the value field, or
the range fader to adjust the maximum value of the range.
Expression
Displays how the logical operators and conditions are executed. Click the edit
button to edit the expression manually. Put in parentheses to influence the
execution order.
Trigger Options
New Notes
If the expression is true, only new notes trigger the zones.
Held Notes
If the expression is true, the held notes and any new notes trigger the zones.
Fixed Note
If the expression is true, a single note is sent.
If Fixed Note is selected, the Note and Velocity parameters become available,
allowing you to determine which note to send. For example, to trigger the pedal
noise of a grand piano, select the condition Sustain On and set Trigger to Fixed
Note. Then, adjust the note and velocity of the fixed note that is triggered. The
Held Notes and New Notes options trigger the notes as you played them on the
keyboard.
Note-Off Velocity
Below the trigger options, the parameters to control the velocity of note-off samples
are located. This includes any sample selection through velocity mapping of the note-
off samples. The velocity may also have an effect on the level of the note-off samples, as
programmed in the zone.
Source
Determines whether the velocity that is sent to the release samples is taken from
the note-on or the note-off event.
Velocity Amount
Adjusts how much the selected option affects the velocity of the note-off sample.
This includes any sample selection through the velocity mapping of the release
samples.
NOTE
The velocity can also have an effect on the volume of the sample, as programmed
in the zone.

MIDI Modules Reference
MegaTrig
519
Decay Time
Depending on the time you set here, the velocity of the note-off sample is
reduced the longer you hold a key.
Decay Curve
Sets the curvature of the note-off velocity decay.
Use positive values for an outward shaped curve and negative values for an
inward shaped curve. Without changing the overall decay time, an outward
shaped curve reduces the note-off velocity faster and an inward shaped curve
reduces it slower.
Decay Key Follow
Scales the decay time across the keyboard.
You can set a center key that is used as the central position for the Key Follow
function. For example, set this parameter to positive values to decrease the decay
time for notes above and increase it for notes below the center key.
Decay Center Key
Specifies the note number that is used as a central position for the key follow
function of the decay time.
Conditions
Note-on
The condition is true if a key is pressed. You can specify a key range for this event.
Note-off
The condition is true if a note is released and a matching note-on event has been
received. This includes notes that are released by lifting the sustain pedal. You
can specify a key range for this event.
NOTE
This allows you to avoid triggering the wrong release samples after switching
between articulations of an instrument. For this to work, the layers of the note-
on and note-off samples must reside in the same layer of the corresponding
MegaTrig module for the key switch.
Forced Note-off
The condition is true if a note is released. Forced means that a matching note-
on event is not needed. In other words, the note-off event always passes through.
This includes notes that are released by lifting the sustain pedal. You can specify
a key range for the note-off events.
Key Up
The condition is true if a note is released, even if the sustain pedal is pressed.
This condition uses the full range of the keyboard.
Sustain On
The condition is true if the sustain pedal is pressed.

MIDI Modules Reference
MegaTrig
520
Sustain Off
The condition is true if the sustain pedal is released.
Key Switch
The condition is true if a key in the specified key range is pressed. Multiple
key switch assignments across different layers of the program work like radio
buttons, that is, only one key switch assignment can be active at a time. By
default, the key switch assignment with the lowest key is true.
NOTE
If you want the key switch assignments across different layers to work
individually, activate individual MegaTrig management for the corresponding
layers. This may be necessary if 2 programs with key switches are copied
together into one program, for example.
Key Range 1st
The condition is true as soon as the 1st note within the specified note range is
held.
Key Range 2nd
The condition is true as soon as the 2nd note within the specified note range is
held.
Key Toggle
This condition toggles between true and false each time that you hit a key within
the specified note range. By default, the condition is true. If you toggle the
condition starting from 0, the odd numbers are false and the even numbers are
true.
Velocity
The condition is true if the received velocity is within the specified velocity range.
Playing Speed
The condition is true if the time between successive notes is within the specified
range.
Legato
The condition is true if you play notes legato. You can specify a key range for the
legato played notes.
Retrigger
The condition is true if a note is retriggered. You can specify a key range for the
retriggered note.
NOTE
This condition must be combined with Note-on, and Mono and Retrigger must
be activated in the Voice Management section of the corresponding layer or
program.

MIDI Modules Reference
MegaTrig
521
Interval
The condition is true if the interval between successively played notes is within
the specified range.
Note Count
The condition is true if the number of played notes is within the specified range.
Lowest Note
The Range control specifies the order of the notes in a chord from low to high.
The condition is true if the played notes match the specified range.
For example, a range from 0 to 1 means that the first and second lowest notes
play and that all other notes are filtered out.
Highest Note
The Range control specifies the order of the notes in a chord from high to low.
The condition is true if the played notes match the specified range.
For example, a range from 0 to 1 means that the first and second highest notes
play and that all other notes are filtered out.
MIDI Controller
The condition is true if the position of the controller is within the specified range.
Quick Controls
The condition is true if the Quick Control is within the specified range.
Random
Produces a random value between 0 and 100 for each note that is played. The
condition is true if the random value is within the specified range.
NOTE
If you use several MegaTrig modules, you can use the same random value
across all modules by selecting Random for the same MegaTrig row. By setting
the ranges so that they do not overlap, you can switch randomly between the
corresponding layers.
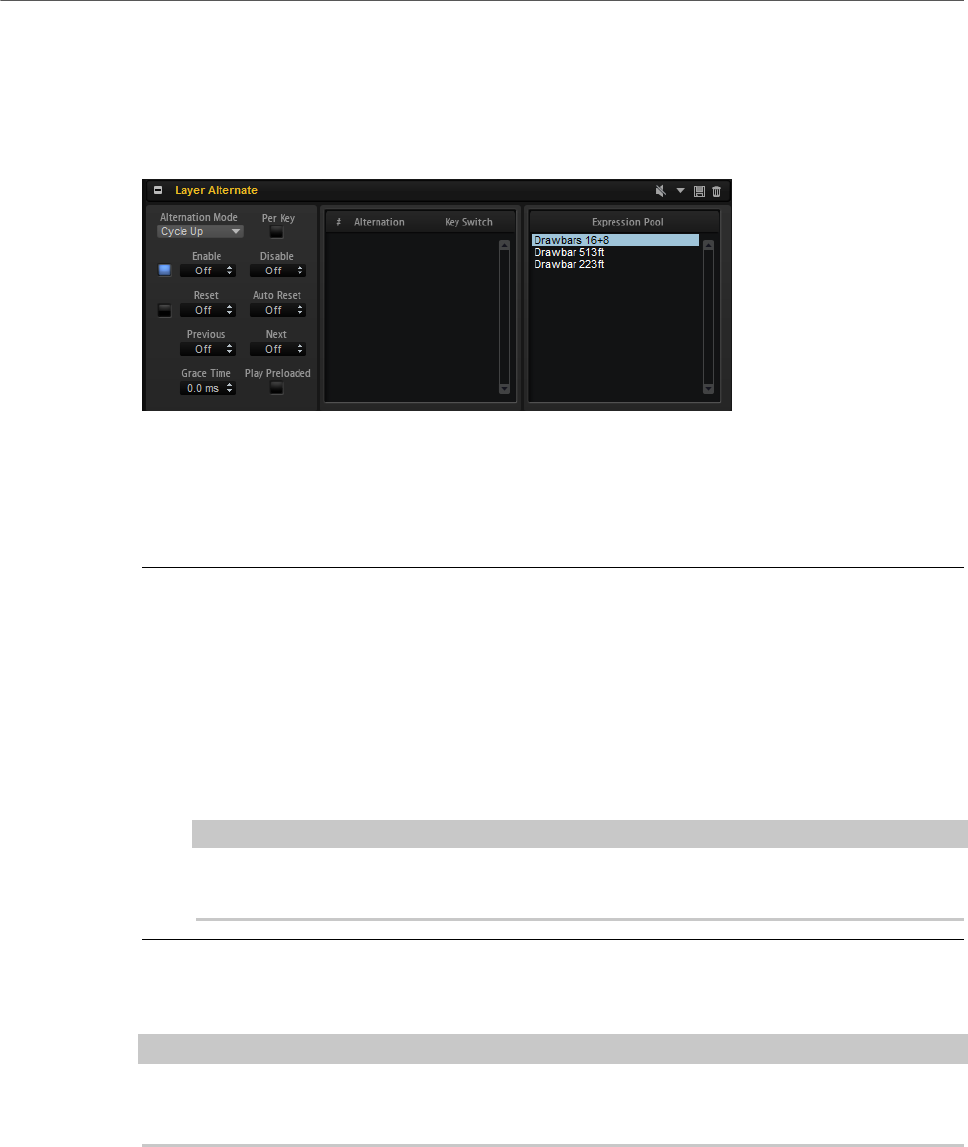
MIDI Modules Reference
Layer Alternate
522
Layer Alternate
You can use this module to switch between different layers automatically. This is useful for
alternating between the up and down bows of a string instrument or the left and right hand
of drum strokes, for example.
RELATED LINKS
Handling Section and Module Presets on page 21
Alternating between Layers
PROCEDURE
1. In the Program Tree, insert the Layer Alternate module above the layers between
which you want to switch.
2. Open the editor for the module and drag the layers from the Expression Pool into the
Alternation List in the order in which you want them to alternate.
You can rearrange the order of the list using drag and drop. To remove a layer from the
list, use the context menu.
3. Select the alternation mode, make sure that Enable is activated, and start playback.
NOTE
Depending on the selected Alternation Mode, the layers alternate in the order in which
they are listed or randomly.
RESULT
Playback alternates between the layers. The layer that is played back is highlighted.
NOTE
Layer Alternate can only be used to switch between layers. For switching between zones, use
variation groups.
RELATED LINKS
Variation Groups Section on page 90

MIDI Modules Reference
Layer Alternate
523
Using Key Switches
Key switches allow you to switch to a particular layer, regardless of the current position in
the alternation list.
You can specify a key switch for each layer in the alternation list. As soon as the
corresponding note is played, the alternation list jumps to the new layer. The alternation then
continues from that position.
To specify a key switch for a layer, enter the note, as text or as number, in the corresponding
key switch column of the alternation list.
Layer Alternate Parameters
Expression Pool
Shows the available layers.
Alternation List
Shows the layers that are used by Layer Alternate. The layer that is played back
is highlighted.
You can change the order of the layers by dragging them to a new position. To
remove a layer from the Alternation list, use the context menu for the selected
key switch.
Alternation Mode
• Select Cycle Up to cycle through the layers in descending order.
• Select Cycle Down to cycle through the layers in ascending order.
• Select Random to alternate the layers randomly with each note that you
play.
• Select Random Exclusive to alternate the layers randomly, but without
repetitions.
Per Key
Activate this option to apply the alternation for each MIDI key separately. If
this option is deactivated, the alternation is applied globally across the entire
keyboard, so that any key that you play advances the alternation sequence.
Enable/Disable
The two value fields allow you to specify the MIDI keys that enable/disable the
alternation sequence.
If no key is specified in the Disable field, the key in the Enable field is used to
enable and disable the alternation sequence.
NOTE
The keys that are specified for Enable and Disable are used exclusively for these
functions and cannot trigger any notes.
If this is set to Off, playback remains on the selected layer.
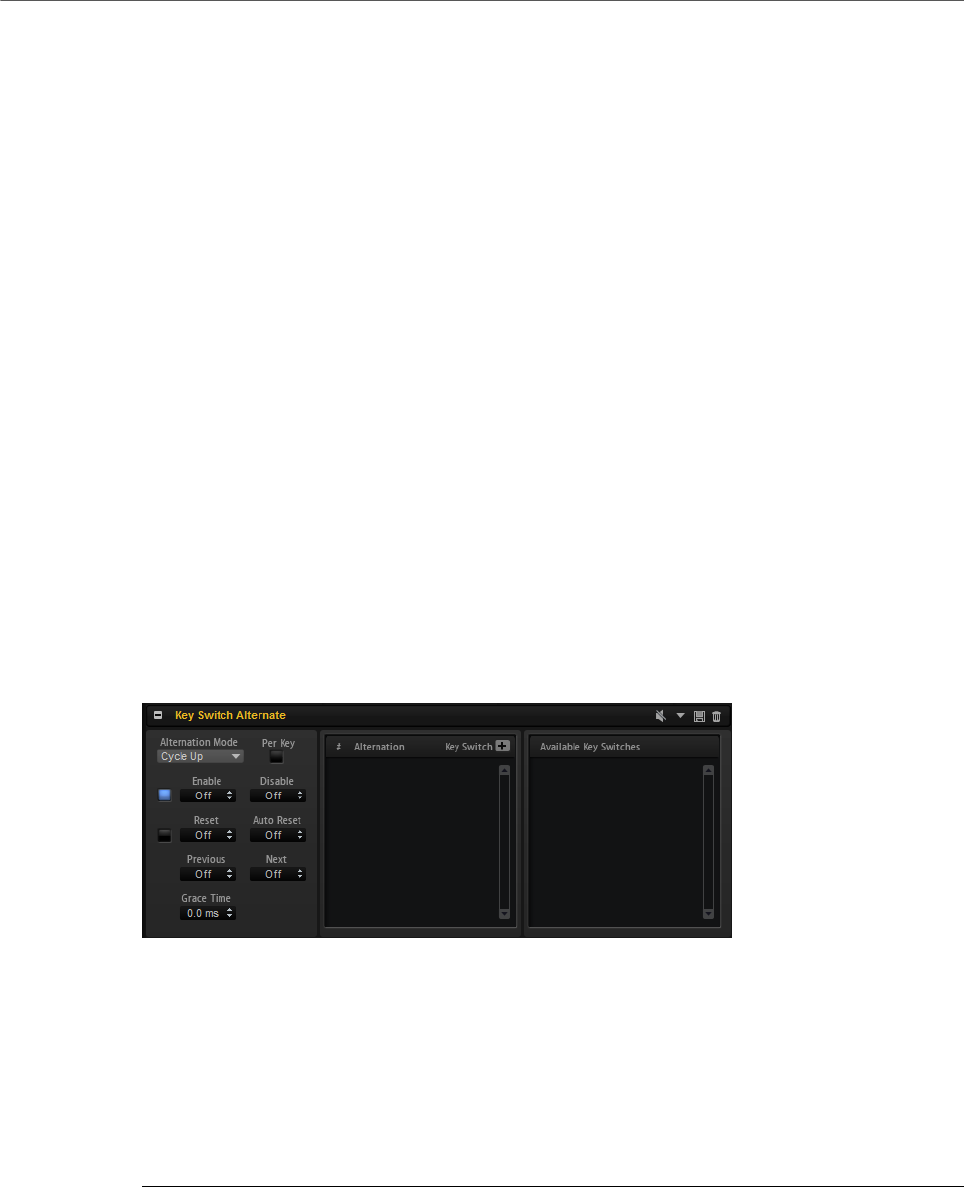
MIDI Modules Reference
Key Switch Alternate
524
You can also use the On/Off button to the left of the value fields to activate/
deactivate the alternation sequence.
Reset
Specifies the key that resets the alternation sequence.
Auto Reset
Allows you to reset the layer alternation automatically after a specific time.
Previous
Specifies the key that switches to the previous entry in the list.
Next
Specifies the key that switches to the next entry in the list.
Grace Time
Sets the minimum time between two steps. This allows you to play chords, for
example, because otherwise, each note of a chord would play with a different
layer.
Key Switch Alternate
This module allows you to switch automatically between different layers that are using
MegaTrig key switches.
Key Switch Alternate is provided for compatibility with HALion3 programs, because in
HALion 3, the alternation between layers was realized using key switches. With the current
program version, use the Layer Alternate module instead.
RELATED LINKS
Handling Section and Module Presets on page 21
Alternating Key Switches
PROCEDURE
1. In the Program Tree, insert the Key Switch Alternate module above the layers that
contain the MegaTrig modules with key switch settings.
2. Open the editor for the module and drag the key switches from the Available Key
Switches list to the Alternation List in the order in which you want them to alternate.
You can rearrange the order of the list using drag and drop. To remove a key switch
from the list, use the context menu.

MIDI Modules Reference
Key Switch Alternate
525
3. Select an alternation mode, make sure that Enable is activated, and start playback.
NOTE
Depending on the selected Alternation Mode, the triggered key switches alternate in
the order in which they are listed or randomly.
RESULT
Playback alternates between the different key switches. The key switch that is triggered is
highlighted.
Key Switch Alternate Parameters
Available Key Switches
Shows the available key switches.
Alternation List
Shows the key switches that are used to control an alternation.
You can change the order of the key switches by dragging them to a new position.
To remove a key switch from the alternation list, use the context menu for the
selected key switch.
Alternation Mode
• Select Cycle Up to cycle through the key switches in descending order.
• Select Cycle Down to cycle through the key switches in ascending order.
• Select Random to alternate the key switches randomly with each note that
you play.
• Select Random Exclusive to alternate the key switches randomly, but
without repetitions.
Per Key
Activate this option to apply the alternation for each MIDI key separately. If
this option is deactivated, the alternation is applied globally across the entire
keyboard, so that any key that you play advances the alternation sequence.
Enable/Disable
The two value fields allow you to specify the MIDI keys that enable/disable the
alternation sequence.
If no key is specified in the Disable field, the key in the Enable field is used to
enable and disable the alternation sequence.
NOTE
The keys that are specified for Enable and Disable are used exclusively for these
functions and cannot trigger any notes.
If this is set to Off, you can manually trigger a specific key switch by clicking it in
the alternation list.
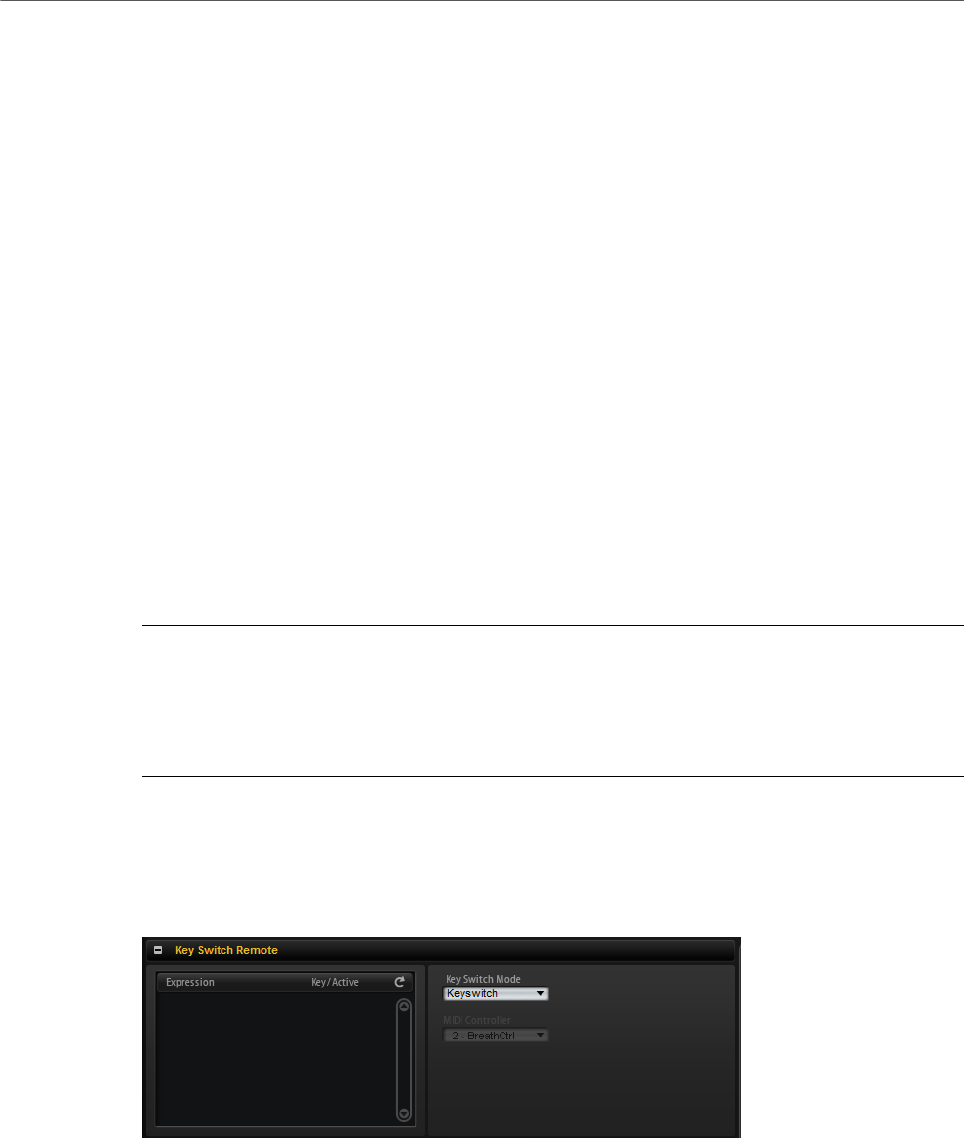
MIDI Modules Reference
Key Switch Remote
526
You can also use the On/Off button to the left of the value fields to activate/
deactivate the alternation sequence.
Reset
Specifies the key that resets the alternation sequence.
Auto Reset
Allows you to reset the key switch alternation automatically after a specific time.
Previous
Specifies the key that switches to the previous entry in the list.
Next
Specifies the key that switches to the next entry in the list.
Grace Time
Sets the minimum time between two steps. This allows you to play chords, for
example, because otherwise, each note of a chord would play with a different
layer.
Manually Adding Alternations
PROCEDURE
1. Click the + button above the alternation list.
2. Specify the name of the alternation.
3. Specify the key switch note to be sent.
Key Switch Remote
The Key Switch Remote module allows you to remote-control key switches that are used
within the parent layer.
Key Switch Remote Parameters
Expression list
The expression list shows all available layers. If a layer contains a MegaTrig
module that is set to Key Switch, the specified key is displayed in the Key/Active
column.
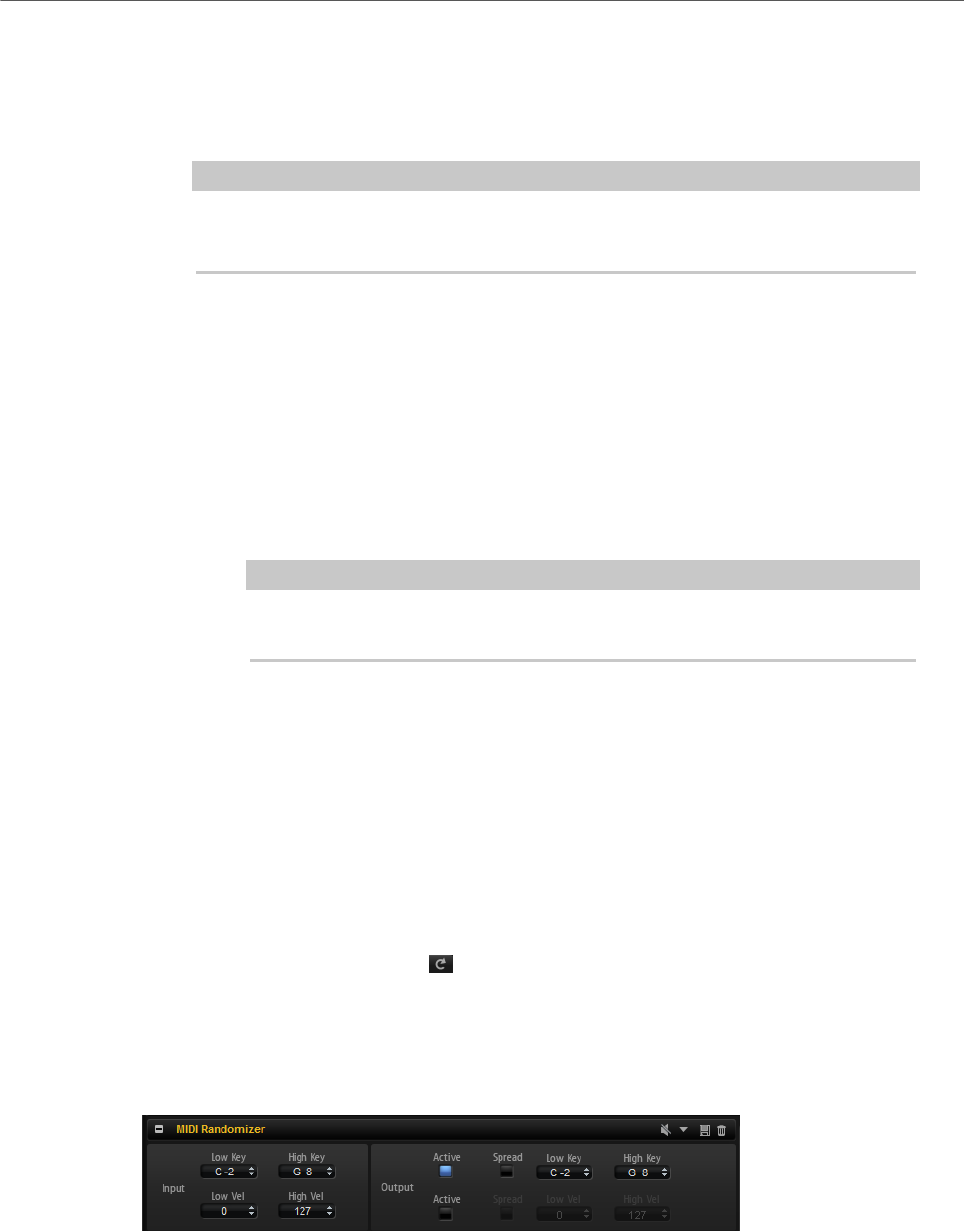
MIDI Modules Reference
MIDI Randomizer
527
Key Switch Mode
Allows you to determine whether the key switches are used as they were set up
in the MegaTrig modules, remapped to other keys, or whether you want to use a
MIDI controller instead.
NOTE
Regardless of the selected mode, the original key switch assignments still work.
The last key switch that is received always has priority.
• If Key Switch is selected, the original key switch assignments are used to
switch to an expression.
The keys are displayed in the list and cannot be edited.
• If Remapped is selected, you can transpose the original key switch
assignments to the playable range of your MIDI keyboard.
To do so, enter the MIDI note that you want the expression to be reassigned
to. You can also transpose multiple key switches at the same time by
pressing Shift and dragging one of the faders for the key switch that you
want to change.
NOTE
MIDI notes that are used for key switches can no longer be used to trigger
samples.
• If Controller is selected, you can select a MIDI controller that remote-
controls the original key switches from the pop-up menu.
The list does not show any MIDI note names, but checkboxes that allow
you to specify the expressions that you can switch to. Inactive expressions
cannot be addressed.
Refreshing the Expression List
If you add, move, or remove layers with key switches after adding the Key Switch Remote
module, it might be necessary to refresh the expression list.
To refresh the list, click Refresh .
MIDI Randomizer
The MIDI Randomizer module allows you to trigger notes randomly.
The notes that are used by the MIDI Randomizer can be created by modifying the original
notes and/or velocity values using an adjustable deviation amount, or within a completely
independent range that can be set for key and/or velocity. You can also limit the input range
for incoming MIDI notes to decide on which notes the module reacts.

MIDI Modules Reference
MIDI Randomizer
528
RELATED LINKS
Handling Section and Module Presets on page 21
MIDI Randomizer Parameters
Input Section
In the Input section on the left, you can make the following settings:
Low Key/High Key
These values define which incoming notes are used to create random notes.
Low Vel/High Vel
These values define the velocity range that is used to create random notes.
Output Section
In the Output section to the right, there are two rows of settings.
The upper row contains the key range parameters.
Active
If this option is activated, the MIDI Randomizer creates notes within the key range
that is specified with the Low Key and High Key parameters.
Spread
If this option is activated, the input values are varied randomly. Use the Amount
parameter to define how much the random notes are allowed to diverge from the
original keys.
The lower row contains the velocity range parameters.
Active
If this option is activated, the MIDI Randomizer creates notes within the velocity
range that is specified with the Low Vel and High Vel parameters.
Spread
If this option is activated, the input values are varied randomly. Use the Amount
parameter to define how much the random notes are allowed to diverge from the
original keys.
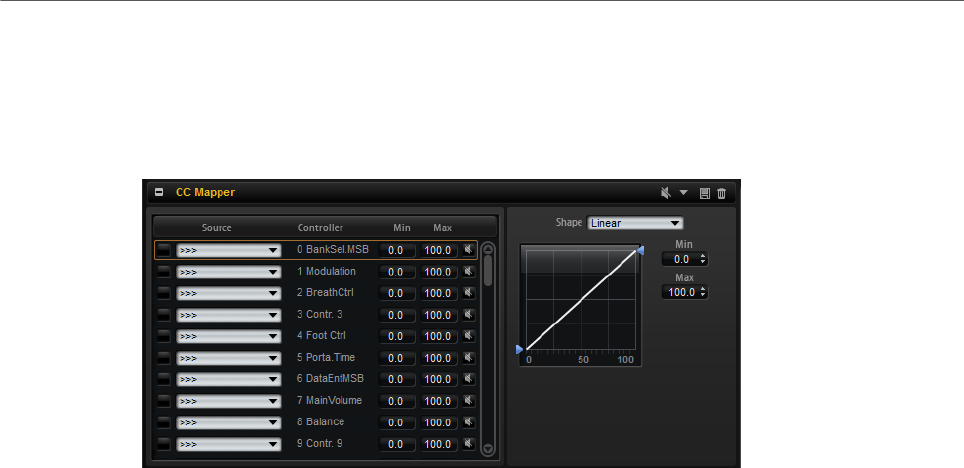
MIDI Modules Reference
CC Mapper
529
CC Mapper
This MIDI module allows you to map MIDI controllers to other MIDI controllers before they
are passed on to the following layers and zones. You can also use it to transform incoming
values using curves.
MIDI controllers, aftertouch, and pitchbend can be mapped freely to all MIDI controllers,
aftertouch, pitchbend, and the eight global controllers, that is, Contr. A to Contr. H.
The global controllers allow you to change the MIDI controller assignment via a single
setting in the CC Mapper, instead of changing the modulation matrix assignments of the
zones separately, for example. This can be achieved by assigning them in the modulation
matrix and mapping a MIDI controller or velocity to them using the CC Mapper.
RELATED LINKS
Handling Section and Module Presets on page 21
CC Mapper Parameters
Source
Determines the source controller that is to be remapped.
Controller
This column lists the available destination controllers.
Bypass
Allows you to deactivate the remapping for a controller.
Min
Determines the minimum value to be sent.
Max
Determines the maximum value to be sent.
Curve and Range Editor
You can set up a curve and a range for each remapped source. The curve and range editor
displays the settings of the selected source controller, displayed by an orange frame.
To select a different source, click the button to the left of it.
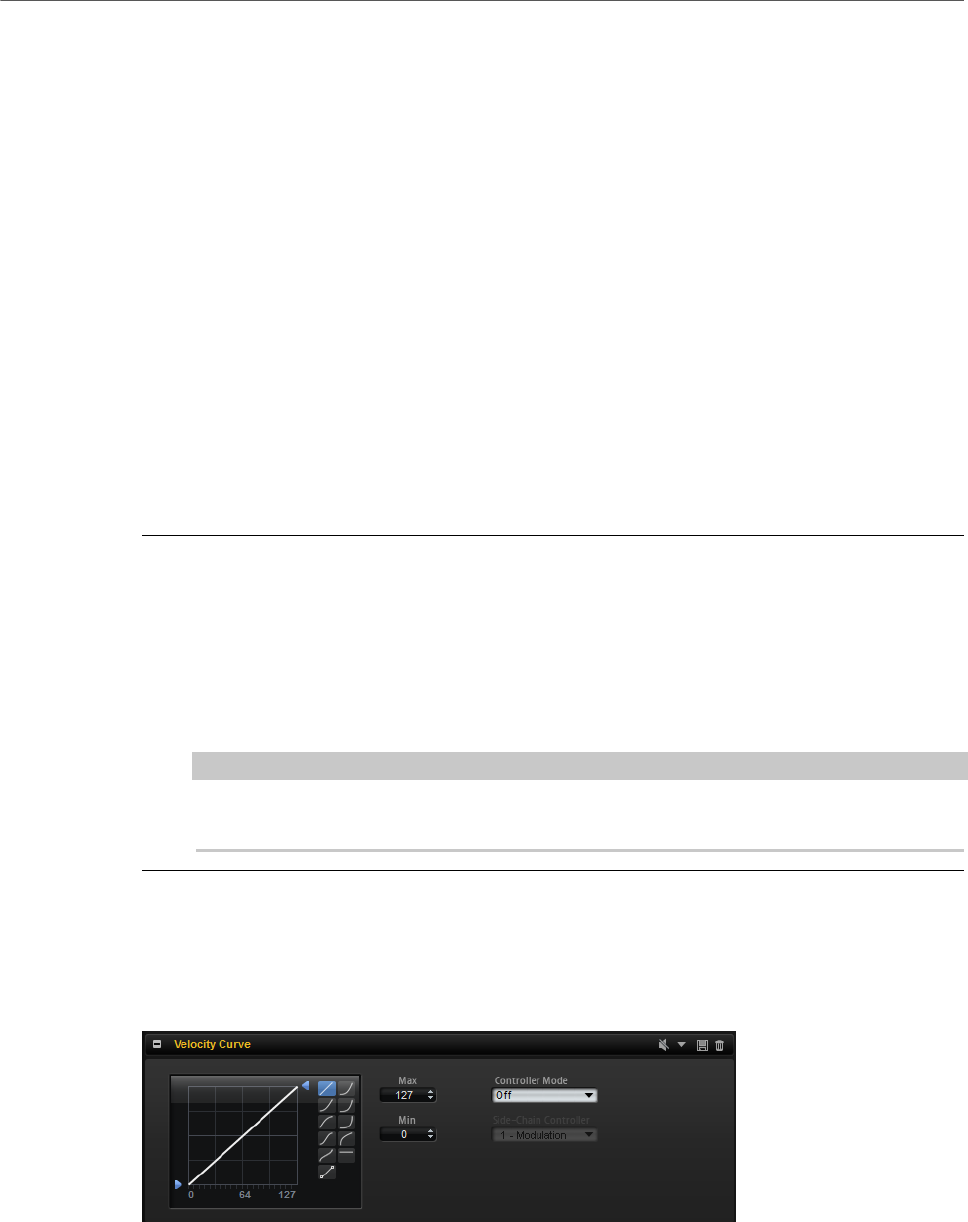
MIDI Modules Reference
Velocity Curve
530
Curve Types
You can use one of the available curve types, or create your own custom curves.
Custom curves
To set up your own curve, select the Custom preset.
• To insert a node, double-click in the editor.
• To delete a node, double-click it.
• To adjust the shape of the curve, drag the nodes.
• To change the curvature, drag the lines between the nodes up or down.
Min/Max
The minimum and maximum values define the range for the output of the
function. The values correspond to the Min and Max columns in the list on the
left.
Remapping Controllers
PROCEDURE
1. To map a MIDI controller to another MIDI controller, aftertouch, or pitchbend, click in
the Source column for the MIDI controller and select the controller that you want to
remap.
Velocity can only be used as source for the global controllers.
2. In the Controller column, select the destination, that is, the controller that you want
the controller to be remapped to.
NOTE
Velocity and the global controllers themselves can only be mapped to the global
controllers.
Velocity Curve
The Velocity Curve module allows you to map incoming velocity values to different output
values using an adjustable curve.
You can also use this module to limit the output velocity range, or use its side-chain
controller input to control the effect of the curve using a MIDI controller.
RELATED LINKS
Handling Section and Module Presets on page 21
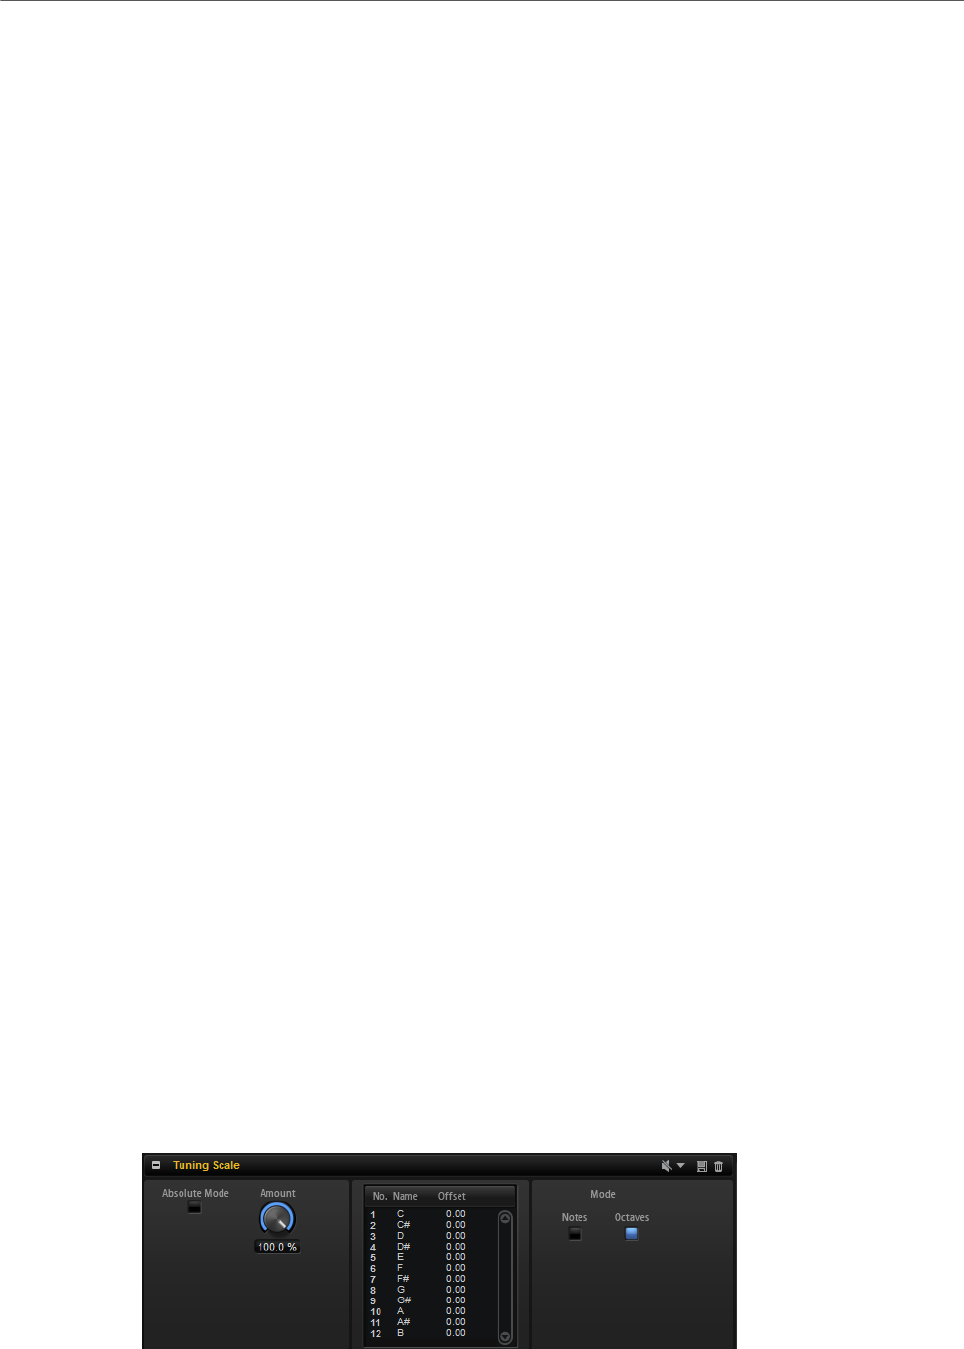
MIDI Modules Reference
Tuning Scale
531
Velocity Curve Parameters
Curve display
In the Curve display section to the left, you can use one of ten preconfigured
curve types, or create a custom curve. To select a curve type, click on one of the
buttons to the right of the curve display.
Custom curve
To set up your own curve, select the Custom preset.
• To insert a node, double-click in the editor.
• To delete a node, double-click it.
• To adjust the shape of the curve, drag the nodes.
• To change the curvature, drag the lines between the nodes up or down.
Min/Max
With the minimum and maximum values, you can specify the output velocity. The
curve is compressed accordingly.
Controller Mode
This parameter allows you to control the effect of the curve dynamically.
• If this is set to Off, the curve is applied at 100 %. The side-chain controller
cannot be used.
• In Switched mode, the velocity curve is only applied if the side-chain
controller sends a value higher than 64. This allows you to use a foot switch
to activate or deactivate the influence of the velocity curve, for example.
• In Continuous mode, the incoming side-chain controller value is used to
scale the influence of the velocity curve. If this is 0, the curve has no effect,
if this is set to 127, the curve is applied at 100 %.
• In Replace mode, you can use the side-chain controller as a source for the
input velocity. In this case, the originally played velocity is ignored.
Side-Chain Controller
Specifies which MIDI Controller is used to control the effect of the velocity curve.
Tuning Scale
This MIDI module allows you to create custom tuning scales, or apply one of the tuning scale
presets.

MIDI Modules Reference
Tuning Scale
532
Presets
The most commonly used scale in western music is the equal tempered scale,
where adjacent notes have an equal distance of 100 cents. Other well-known
traditional tuning scales are the well-tempered scale or the Kirnberger scale, for
example.
You can find examples of these scales in the presets that come with HALion.
Scala Files
You can import tuning scales in the popular Scala file format via the scale
preset pop-up menu.
This way, you can make use of the thousands of tuning scale presets that are
available on the Internet.
Absolute Mode
MIDI notes can contain micro-tuning information, that is, tune offsets per note.
If Absolute Mode is activated, this information is ignored and only the settings of
the tuning scale are applied.
If Absolute Mode is deactivated, the tuning scale settings are applied on top of
the incoming micro-tuning information.
Amount
Specifies how the tuning scale is applied. At a setting of 100 %, the tune offsets
are applied as specified in the tuning scale. Lower values reduce the tune offsets
relatively. At 0 %, the tuning scale is not applied.
Notes Mode/Octaves Mode
Determines whether your tuning changes are applied equally to all octaves on
the keyboard or only to specific notes.
RELATED LINKS
Handling Section and Module Presets on page 21
Editing Tuning Scales
You can create custom tuning scales by editing the notes per octave or by editing the 128
MIDI notes individually. Editing the scale per octave is particularly useful for creating
different temperaments. Editing the scale per note is useful for creating stretched tunings.
PROCEDURE
1. To the right of the scale editor, specify whether you want to edit the scale per notes or
per octaves.
•Select Octaves to apply the tune offsets equally to all octaves on the keyboard.
•Select Notes to apply the tune offsets only to specific notes.
2. In the scale editor, click the Offset field of the note that you want to adjust and set the
tune offset.
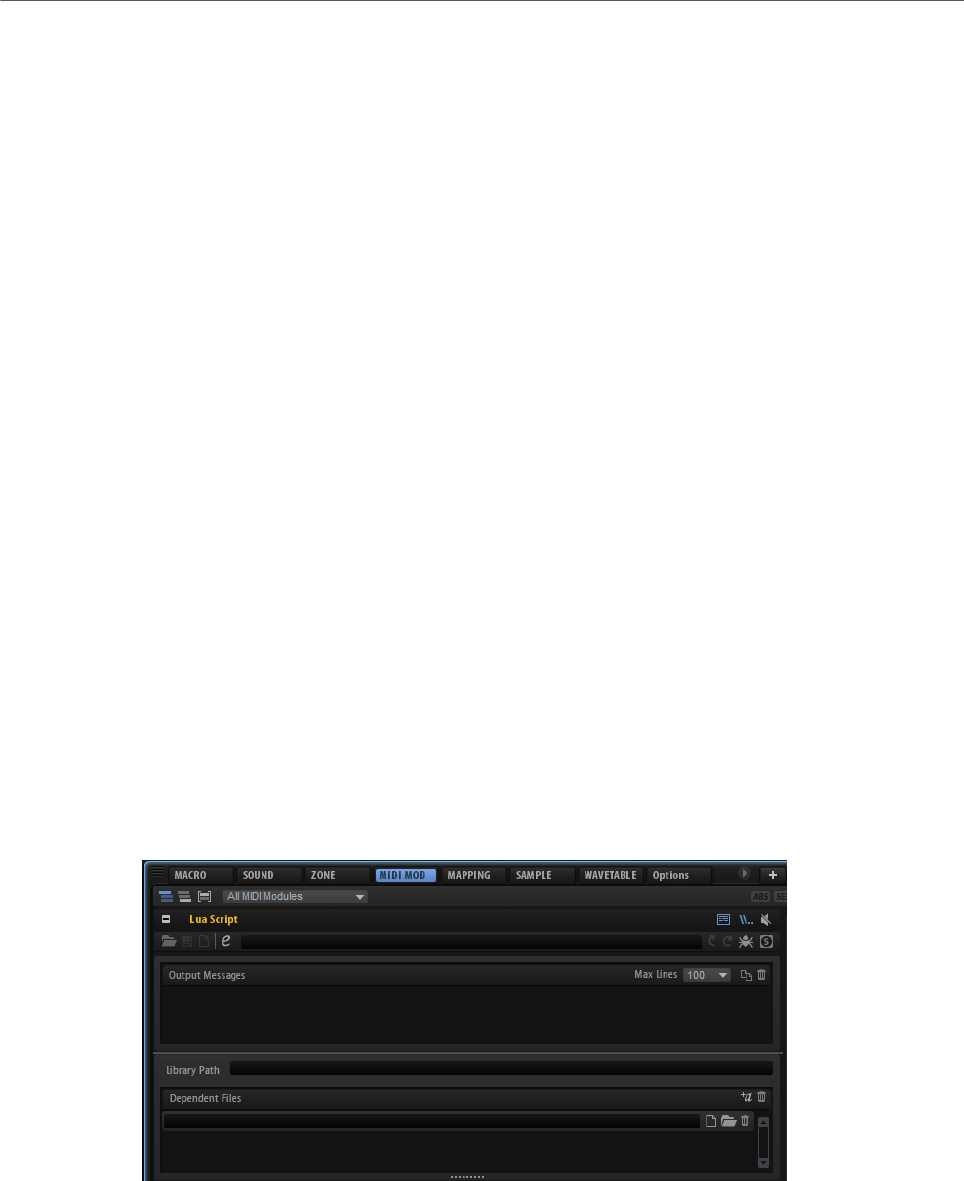
MIDI Modules Reference
Lua Script
533
Lua Script
The Lua Script module allows you to create and manage your own scripts.
In the following sections, the basic concepts and procedures are described. For more
detailed information on all parameters, editing possibilities, advanced features, etc., refer to
the online documentation that can be found under http://developer.steinberg.help.
Internal Editor vs. External Editor
The Lua Script MIDI module comes with an internal, plain text editor. This editor can be
used to write, load, and edit scripts. However, it does not offer code highlighting or advanced
editing features.
If you want to write complex scripts, it is recommended to use an external editor.
However, scripts that are written in an external editor are not part of the script module. Only
the file path for the script is saved in the VST Preset.
Scripts that are written in the internal editor have the following advantages and
disadvantages:
• You can easily use them on another computer, because they are part of the Lua Script
module.
• If an internal script is modified, this modification is not automatically applied to all
presets in which the script is used. It has to be added manually to each preset.
Scripts that are written in an external editor have the following advantages and
disadvantages:
• They can be easily modified throughout all presets that use them.
• If you want to use them on another computer, you must either make sure that the
corresponding script file is available on this computer, together with the script module,
or you have to manually copy the source code into the internal script editor.
Toolbar
Load Script
Allows you to load a script from disk.
The loaded file is referenced by the script module.

MIDI Modules Reference
Lua Script
534
Save Script
Scripts that are created with the internal editor can be saved to disk.
After saving the script to disk, it is referenced by the Lua Script module.
New Script
Clears the current script module. This command removes any internal or
referenced script.
Edit Script
Opens the script editor.
• If an external editor is specified in the Options Editor, this editor is used.
• If no external editor is specified, the internal editor is used.
Script Source File
Shows the file path to the script source file on your disk.
Reload from File/Script
Allows you to reload the script.
NOTE
• This function does not clear any output messages or remove any
parameters that are defined for the script module.
Reset from File/Script
Resets the current script.
NOTE
• This function removes any existing output messages, as well as
parameters that are defined for the script module.
Connect to Debugger
Connects the script module to an external debugger.
Syntax/Runtime Error
If a syntax or runtime error occurs when processing the script, this indicator
lights up. In this case, you must fix the error and reset the script.
Output Messages
In this section, any syntax and execution errors or the output of the print function are
displayed.
• To show/hide this section, click Show/Hide Output Messages in the top right corner of
the editor.
Max Lines
Sets the maximum number of visible lines.
MIDI Modules Reference
Lua Script
535
Copy Messages to Clipboard
Copies the output messages to the clipboard. This allows you to copy larger
output messages to an external editor that offers a text search, for example.
NOTE
This also includes any older messages that are not visible anymore.
Clear Message Display
Clears the output messages.
Library Path
Lua's require function allows you to load and run your own libraries. In the Library Path
field, you specify where require searches for libraries.
NOTE
The path that you specify here only applies to this script module. The global library path for
script modules is specified in the Options Editor.
Dependent Files
This section lists all files that are required by the script module. This list is used to add the
script files to a VST Sound archive, for example.
• To show/hide this section, click Show Dependent Files in the top right corner of the
editor.
Add Required Files Automatically
Activate this button to automatically add the files that you included using the
require function to the list of dependent files.
Clear Dependent Files
Removes all entries from the list of dependent files.
Select File
Allows you to change the current entry or to add a new file.
Select Folder
Allows you to add all files in the specified folder to the list of dependent files.
Delete Entry
Removes the selected entry from the list of dependent files.
Creating a Script With the Internal Editor
PREREQUISITE
You added a Lua Script midi module.
MIDI Modules Reference
Lua Script
536
PROCEDURE
1. In the editor for the Lua Script midi module, click Edit Script.
2. In the text editor, enter your script and click OK.
Setting Up an External Editor
HALion includes a basic text editor for scripts. If you want to use advanced features and code
highlighting, you can set up and use an external editor.
You set up the external script editor in the Scripting section of the Options Editor.
PROCEDURE
•On the Options page, in the Scripting section, click Browse for External Editor and
select the application that you want to use.
RESULT
If you now open a script by clicking Edit Script in the editor for the Lua Script module, it is
opened in the external editor.
NOTE
A Lua script must be saved to disk before it can be opened in an external editor.
Key Commands Reference
537
Below, the default key commands are listed according to category.
Edit Category
Option Key Command
AutoVisibility V
Copy Ctrl/Cmd-C
Cut Ctrl/Cmd-X
Delete Delete or Backspace
Edit Ctrl/Cmd-E
Group Selection Ctrl/Cmd-G
Hide Non-Selected Ctrl/Cmd-Shift-H
Hide Selected Ctrl/Cmd-H
Move Down Shift-Down Arrow
Move Hi Key Left Alt-Left Arrow
Move Hi Key Right Alt-Right Arrow
Move Hi Velocity Down Alt-Down Arrow
Move Hi Velocity Up Alt-Up Arrow
Move Left Shift-Left Arrow
Move Low Key Left Ctrl/Cmd-Left Arrow
Move Low Key Right Ctrl/Cmd-Right Arrow
Move Low Velocity Down Ctrl/Cmd-Down Arrow

Key Commands Reference
538
Option Key Command
Move Low Velocity Up Ctrl/Cmd-Up Arrow
Move Right Shift-Right Arrow
Move Up Shift-Up Arrow
Mute M
Paste Ctrl/Cmd-V
Redo Ctrl/Cmd-Shift-Z
Rename F2
Replace Samples Ctrl/Cmd-R
Select All Ctrl/Cmd-A
Select None Ctrl/Cmd-Shift-A
Select Tree Ctrl/Cmd-T
Show All Ctrl/Cmd-Shift-U
Show Selected Ctrl/Cmd-U
Solo S
Undo Ctrl/Cmd-Z
Global Category
Option Key Command
Down X
Enable Mapping Selection Options Ctrl/Cmd-M
Import Samples Ctrl/Cmd-I
Left A
Right D
Up W

Key Commands Reference
539
Media Category
Option Key Command
Open Return or L
Navigate Category
Option Key Command
Bottom End (Windows only)
Down Down Arrow
Left Left Arrow
Less Ctrl/Cmd-Num -
More Ctrl/Cmd-Num+
Right Right Arrow
Toggle Selection Ctrl/Cmd-Space
Top Home (Windows only)
Up Up Arrow
Zoom Category
Option Key Command
Zoom In H
Zoom Out G
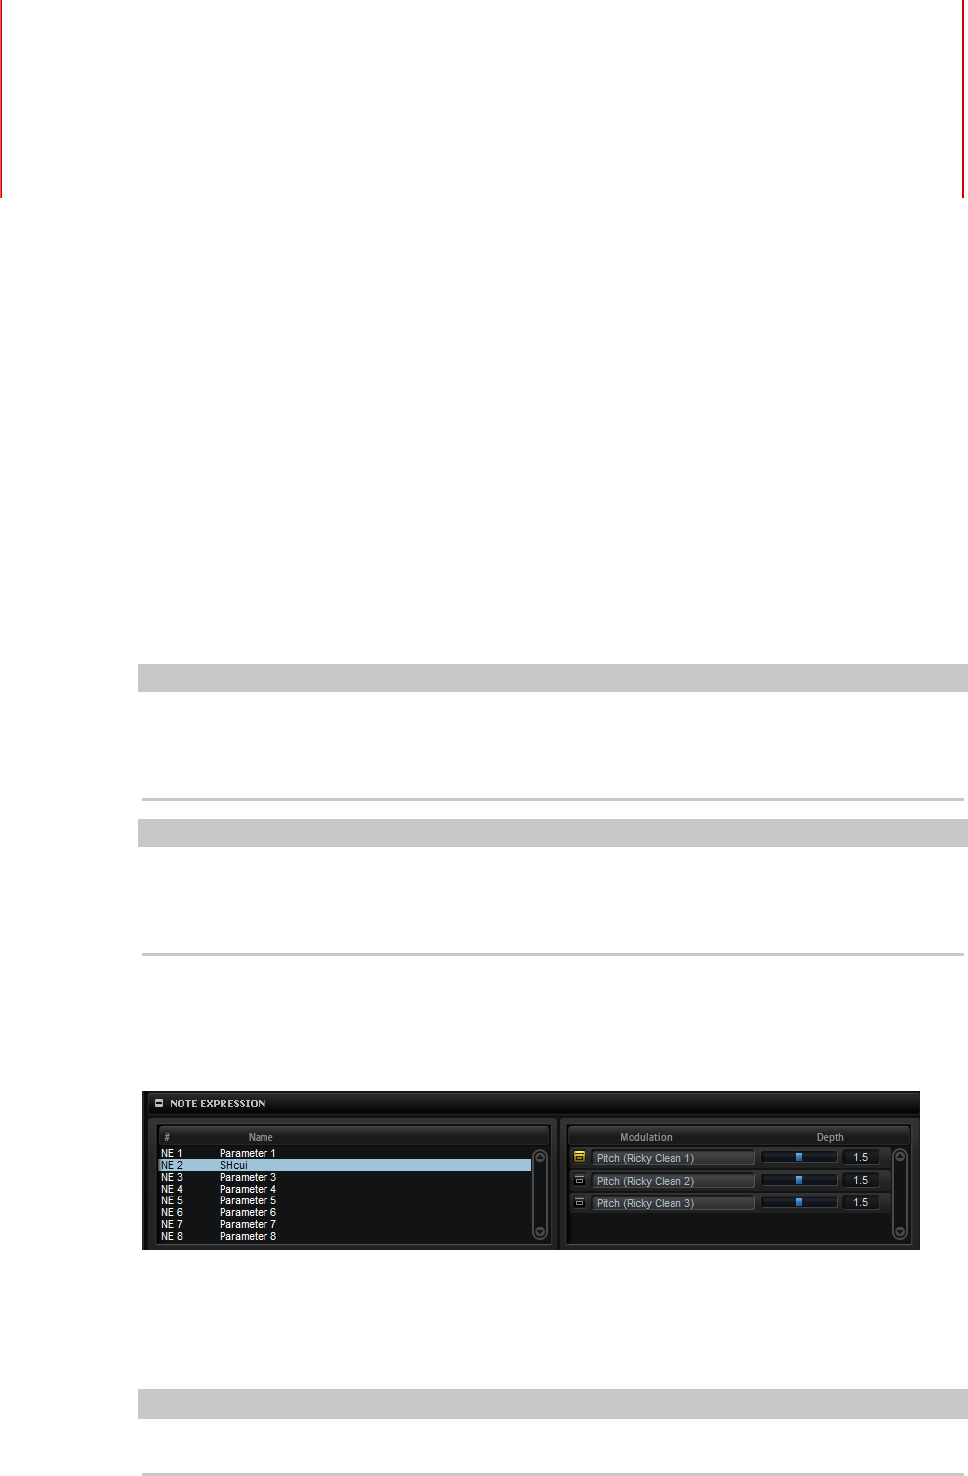
Note Expression
540
Steinberg’s Note Expression technology was developed for creating realistic instrument
performances. Note Expression allows you to create automated modulations for each note.
HALion supports Note Expression for volume, pan, and tuning. If you use a Steinberg DAW
that supports Note Expression, you can automate the Note Expression parameters for any
program in HALion per note.
Furthermore, in programs that give you access to the modulation matrix, you can assign up
to eight Note Expression controllers to the available modulation destinations. These work in
addition to the preassigned pitch, pan, and level modulations.
NOTE
The Note Expression controllers of a program are shared by all its zones. This means that
the controller data affects all zones simultaneously. Depending on how the Note Expression
controllers are set up, each zone can react differently.
NOTE
If you use HALion with host applications that do not support Note Expression, the Note
Expression editor page and the Note Expression controllers in the modulation matrix are
visible, but they do not have any influence on the program.
Note Expression Editor
• The Note Expression editor can be found on the Sound Editor for a program.
The editor shows the Note Expression controllers on the left and the assigned modulation
destinations on the right. This gives you a quick overview of how the Note Expression
controllers are routed in the modulation matrix and what their influence on the sound will
be.
NOTE
A Note Expression controller can be assigned to several destinations.

Note Expression
Note Expression Editor
541
Name
If you assign a Note Expression controller for the first time, it gets the name of
the modulation destination that it is assigned to. Any further assignments do not
change the name. You can specify a name manually by entering it in the Name
field.
Bypass Note Expression Controller
To deactivate the effect of the controller, click the Bypass Note Expression
Controller button. It is linked to the Bypass button of the corresponding
modulation destination in the modulation matrix.
Depth
This slider adjusts the intensity of the Note Expression modulation. It is linked to
the Depth slider of the corresponding modulation destination in the modulation
matrix.

Using the Standalone Version
of the Plug-In
542
If you use HALion as a standalone application, an additional section is available at the top
of the control panel. Here, you can define key commands, set up audio and MIDI interface
routings, adjust the master volume, and access the integrated MIDI scratch pad, which
allows you to record your musical ideas without having to start a MIDI sequencer application.
It can also be used to play multitrack arrangements that trigger the different programs.
Making Preferences Settings
You can configure the standalone version of HALion in the Plug-In Preferences dialog.
•To open the Plug-In Preferences dialog, click the Open Preferences button to the
right of the audio output field or right-click in the topmost section of the control panel
and select Plug-In Preferences on the context menu.
Preferences Dialog
The Plug-In Preferences dialog has several pages on which you can make settings.
MIDI Page
On the MIDI page, you can access the 64 input ports in groups of 16. For each of these
groups, you can make separate routing settings.
MIDI Input Ports
Use this pop-up menu to specify a MIDI input.
Channel Filter
Determines whether MIDI events are recorded on all MIDI channels, or only on
one specific channel.
Filter ‘All Notes Off’ Controller
Activate this parameter to avoid unwanted “All Notes Off” messages. Such
messages are sent by some keyboards when the last key is released. This causes
HALion to stop playback, even when the sustain pedal is still in use.
Inputs Page
Here, you can specify which inputs of the audio interface are connected to HALion’s stereo
input.
This is the input that can be selected in the Sample Recorder.

Using the Standalone Version of the Plug-In
Preferences Dialog
543
Outputs Page
You can use the Audio Output Ports pop-up menus to assign different audio outputs. HALion
supports 64 channels: two Master channels (left and right), 31 additional left and right stereo
channels, and one 5.1 surround channel. You can assign different audio outputs for each
channel.
• To map an output to a channel, select it from the pop-up menu.
• To set the front and rear channels to incrementing audio output ports, hold down Shift
and select an audio output.
• To assign the audio outputs in pairs to the front and rear channels, hold down Alt-Shift
and select an audio output.
Metronome Page
On the Metronome page, a number of settings can be made regarding the use of a
metronome.
Mode
Activates/Deactivates the metronome or sets it to Count In mode.
Accent
Accentuates the first beat of each bar.
Level
Adjusts the volume of the metronome.
Connections
Allows you to select a separate stereo output for the metronome.
General Page
• If you want the plug-in to close without prompting when you quit the program, activate
Don’t prompt for confirmation when quitting HALion.
ASIO Driver Page
On the ASIO Driver pop-up menu, you can select your audio hardware driver.
Release Driver when Application is in Background
Activate this option if you plan to use several audio applications simultaneously.
Input Latency/Output Latency
The input and output latency values for your audio hardware are displayed.
Latency is the amount of time it takes for your system to respond to any
messages that are sent to it. High latency results in a noticeable delay between
when you press a key and when you hear the sound.
You can change the latency with the Buffer Size parameter in the control panel
for your driver, opened by clicking the Control Panel button on the Advanced tab.
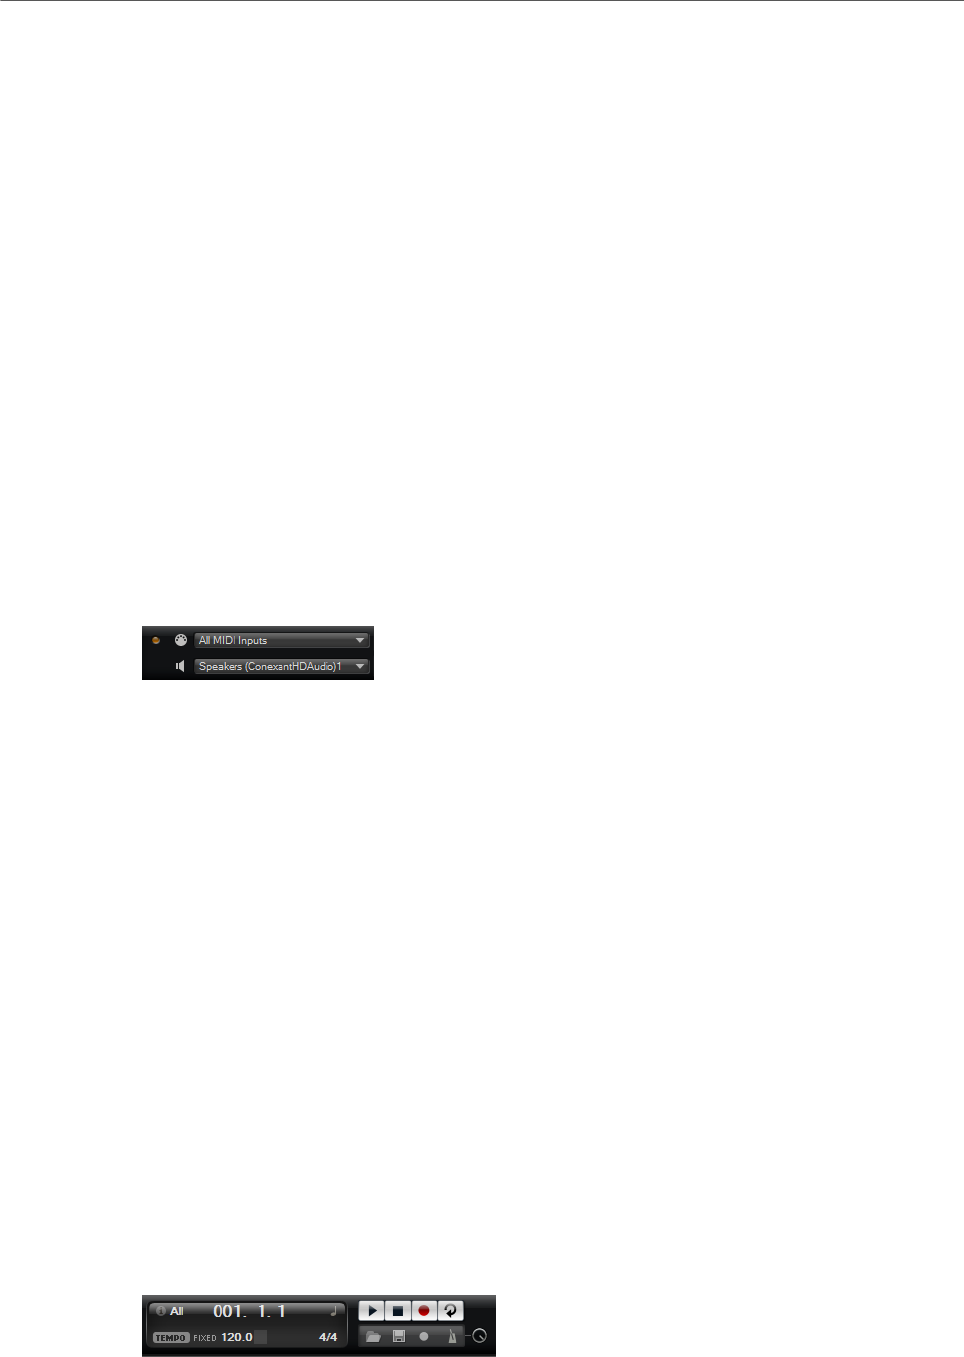
Using the Standalone Version of the Plug-In
Selecting the MIDI Input and the Audio Output
544
Sample Rate
Below the latency values, the sample rate for the connected audio hardware is
displayed.
Audio Priority
Determines which of the HALion processes gets priority when accessing
processor resources on your computer.
• In Normal mode, non-audio processes and audio playback get roughly
equal priorities.
• In Boost mode, audio precedes MIDI in priority. Try this mode if audio
playback problems occur when playing back MIDI and audio material.
Advanced Page
Once you have selected the driver, you can specify which inputs and outputs to use and
name these on the Advanced page. Click the Control Panel button to open the control panel
for the audio hardware and adjust the settings as recommended by the audio hardware
manufacturer.
Selecting the MIDI Input and the Audio Output
The MIDI input pop-up menu lists all MIDI devices that are installed on your system.
• Select the MIDI device that you want to use from the MIDI Input pop-up menu.
The MIDI activity LED in the top left corner of the control panel indicates incoming
MIDI messages via the selected MIDI input. The LED lights up on receiving note-on and
controller messages. This way, you can check if HALion and your MIDI keyboard are
connected to the same MIDI device input.
The Audio output pop-up menu lists all outputs of the selected ASIO device.
• To select an audio output for the main stereo channel of the plug-in, open the Audio
Output pop-up menu.
If you select an audio output, the front and rear channels are set to incrementing
audio output ports. To assign the audio outputs in pairs to the front and rear channels
instead, hold down Alt-Shift and select an output.
RELATED LINKS
ASIO Driver Page on page 543
Scratch Pad
The scratch pad allows you to record and play back MIDI files in Standard MIDI File format.
You can load existing MIDI files and you can record your own files and save them.

Using the Standalone Version of the Plug-In
Scratch Pad
545
The transport section provides buttons for play, stop, record, and loop. The display shows
the song position, the tempo, and the time signature of the MIDI file. In addition, there is a
metronome that you can use for recording and practicing.
The scratch pad can play back multi-track MIDI files sending notes on all 16 MIDI channels.
It also sends MIDI program change messages when a MIDI file is loaded.
Transport Controls
Play
Click Play to start playback of the MIDI file. Playback always starts at the song
position.
Stop
Click Stop to pause the MIDI file at the current position. Click the button twice to
reset the song position to the start.
Record
Click Record to start recording.
Loop
Activate Loop to play the entire MIDI file in a loop.
Info Icon
To check which MIDI file is loaded, point the mouse at the info icon in the top left corner of
the scratch pad. A tooltip appears, showing the name of the MIDI file.
Song Position Indicator
The song position indicator shows the position of the transport. Above the song position
indicator, the position is displayed numerically.
After loading a MIDI file, the display shows the full length of the file.
•To move the transport to a different song position, drag the song position indicator to
the new position.
•To switch the time format between Time and Bars, click Select Time Format in the top
right corner of the display.
Tempo and Time Signature
Below the song position display, the Tempo and Time Signature fields are located. These
fields provide HALion with tempo and time signature information. These settings are used by
the scratch pad and the metronome.
Fixed Tempo/Tempo Track
Set this parameter to Track to follow the original tempo of the MIDI file.
Set this parameter to Fixed to enter the tempo manually. You can either enter the
value directly in the value field or you can enter a tempo by repeatedly clicking
the Tap to set Tempo field next to the value field.

Using the Standalone Version of the Plug-In
Loading a MIDI File
546
Tempo Value
Determines the tempo of the MIDI file.
Adjust Tempo
If the Tempo Track option is selected, this parameter is available, allowing you to
scale the playback relatively to the original tempo of the MIDI file.
Time Signature
Determines the time signature. You can enter the new signature as fractions of
beats.
Recording Your Performance
PROCEDURE
1. Click the record symbol below the Record button to select a record mode.
•To start recording immediately when you click the record button, select Direct.
•To start recording with the first MIDI note, select MIDI.
•To start the recording after a count-in of one bar, select Count In 1.
•To start the recording after a count-in of 2 bars, select Count In 2.
2. Click the Record button to start recording.
To indicate that the recording is running, the song position indicator moves from left to
right.
3. When you are done recording, click the Stop button.
RELATED LINKS
Saving a MIDI File on page 547
Using the Metronome
PROCEDURE
•To select the playback mode of the metronome, click Metronome and select one of the
options from the pop-up menu:
•If On is selected, the metronome is activated and plays continuously.
•If Count In is selected, the metronome plays only during the count-in of a
recording.
•To deactivate the metronome, select Off.
Loading a MIDI File
You can load MIDI files in Standard MIDI File format (file name extension .mid).
PROCEDURE
1. Click the Load MIDI File button below the transport buttons.
2. In the file dialog, select the file that you want to use.
Using the Standalone Version of the Plug-In
Saving a MIDI File
547
3. Click Open to load the MIDI file.
MIDI Channel Filter
If a multitrack MIDI file is loaded, you can play back all MIDI events or only the events of a
specific MIDI channel.
• To specify which events to play back, click the MIDI Channel Filter field to the right of
the info icon and select an option from the pop-up menu.
Saving a MIDI File
PROCEDURE
1. Click the Save MIDI File button below the transport buttons.
2. In the file dialog, specify a location and a file name.
3. Click Save to save your recorded performance as a MIDI file.
Master Volume
Use the volume control on the right to set the master volume of the outputs of the
standalone version of HALion. This includes the volume of the main outputs, the rear
outputs, and the output of the metronome.

Index
548
A
ABS button 93
Absolute Editing 93
Anima
About 308
Audio Busses
About 206
Audio Output 544
Auron
About 263
B
B-Box
About 294
Browser
Loading Files 62
C
Control Panel 11
Configuring 11
Setup Options 11
D
Delay Effects 428
Distortion Effects 439
Dynamics Effects 455
E
Eagle
About 341
Editors
Available 15
Effect Slots 211
Effects 204
About 424
Amplifier 439
Auto Filter 431
Brickwall Limiter 460
Channel Router 467
Chorus 444
Compressor 455
Distortion 440
DJ-EQ 431
Downmix 467
Envelope Shaper 464
Expander 461
Flanger 444
Frequency Shifter 449
Gate 462
Graphic EQ 430
Limiter 459
Maximizer 461
MorphFilter 435
Multi Delay 428
Octaver 443
Phaser 447
Resonator 435
Reverb 425
REVerence 424
Ring Modulator 448
Rotary 452
Step Flanger 445
Stereo Pan 465
StereoEnhancer 465
Studio EQ 429
Surround Panner 466
Tape Saturator 442
Tremolo 447
Tube Compressor 458
Tube Saturator 443
Using 211
Vibrato 453
Vintage Compressor 457
Vintage Ensemble 454
VST Amp 441
WahWah 438
Effects Page 211
Envelopes
Selecting Nodes 129
Setting up the Loop 132
EQ Effects 429
F
Filter Effects 431
Finding Missing Samples 49
G
Grain Oscillator 190
Granular Synthesis 190
H
HALion 3 Effects 468

Index
549
HALiotron
About 291
Hot Brass
About 343
I
Insert Effects
About 210
K
Key Commands 537
L
Layers
Loading 48
Legacy Effects 468
M
Macro Page
About 367
Adding a background image 368
Connecting the program parameters 369
Controls 367
Creating a template 387
Libraries 367
Loading a template 369
Preparations 368
Resources 367
Saving 370
Templates 367
Macro Page Designer 370
Canvas 383
Macro Pages
About 46
Collaborating with Others 403
Creating 367
Exchanging Pages and Content 403
Mapping Editor
About 70
Master Section 23
MediaBay
About 55
Filters 56
Managing files 55
Results List 57
MIDI Controllers
About 200
Assigning 200
Factory Controller Assignment 202
Parameter Range 201
MIDI Editor
About 198
MIDI Input 544
MIDI Modules
About 480
Assigning in the Modulation Matrix 482
Bypassing 480
CC Mapper 529
Changing the Order 482
Drum Player 502
Editor 481
FlexPhraser 483
Inserting 480
Key Switch Alternate 524
Key Switch Remote 526
Layer Alternate 522
MegaTrig 516
MIDI Player 497
MIDI Randomizer 527
Mono Envelope 508
Mono LFO 510
Mono Step Modulator 512
Trigger Pads 494
True Pedaling 514
Tuning Scale 531
Velocity Curve 530
Missing Samples
Finding 49
Mixing 204
Model C
About 285
Modulation Effects 444
Modulation Matrix
About 137
Mono Step Modulator
About 512
Multi Selection 18
Multis
About 46
N
Note Expression
About 540
Editor 540
O
Options Editor 35
Organ Zones
Voice Control Section 99
P
Panner Effects 465
Pitch Detection
Wavetable Editor 186
Pitch Shift Effects 443
Preferences Dialog 542
Presets
About 46
Module Presets 20
VST Presets 20
Program Slot Section 23
Program Table
About 213
Parameters 213
Program Tree
About 217
Elements 217

Index
550
Programs
About 46
Loading 48
Q
Quick Control Assignments 30
Quick Controls 27
Bypassing 34
Managing 31
R
Raven
About 340
Recording
Samples 254
REL button 93
RelativeEditing 93
Reverb Effects 424
S
Sample Editor
About 150
Creating Loops 168
Creating Slices 170
Zoom 167
Sample Recorder
About 254
Samples
Editing in an external Editor 167
Exporting 234
Importing 228
Recording 254
Replacing 171, 233
Skylab
About 326
Slices
Creating 170
Sound Editor
About 82
Main Section 82
Note Expression Section 91
Quick Control Assignments Section 91
Trigger Section 83
Variation Groups Section 90
Voice Management Section 85
Spatial Effects 465
Standalone Plug-In Version
About 542
Loading MIDI Files 546
Preferences 542
Saving MIDI Files 547
Studio Strings
About 354
Surround Effects 466
T
Tools Effects 467
Trium
About 271
V
Value Ranges
Adjusting 18
Voltage
About 279
W
Wavetable
Creating 186
Wavetable Editor 173
2D Wave 174
3D Map 174
About 174
Replacing Samples 188
Wavetable Synthesis 173
Wavetable Zones
Editing in the Wavetable Editor 173
World Instruments
About 300
World Percussion
About 304
Z
Zone Editor
About 92
Amplifier Section 123
AudioWarp Section 116
Envelope Section 125
Filter Section 119
LFO Section 132
Organ Oscillator Section 109
Oscillator Section 102
Pitch Section 101
Sample Oscillator Section 106
Voice Control Section 95
Wavetable Section 109
Zones
Editing 92
Fades and Crossfades 79
Mapping 70
