Stormblue MP-500 MP3 Player User Manual Manual eng
Stormblue Co., Ltd. MP3 Player Manual eng
UserManual.wiki
>
Stormblue
>
MP 500 User Manual
Users Manual
Navigation menu
Upload a User Manual
Namespaces
Wiki Guide
HTML
PDF
Info
Views
User Manual
Discussion / Help
Navigation


![-Installing Software to PC - Insert the provided CD in the CD-ROM of PC and follow the below instructions. Below screen will be appear. If it does not run automatically, run “Setup.exe” file from the install CD * For Windows 98/SE In Windows 98/SE, USB MP3 Disk cannot be recognized in the PC without USB Drive installation. (How to Install) - Click Install/uninstall button from ‘Windows 98/SE USB Drive installation from the manager program. (Cannot be installed in Windows ME/2000/XP) [Manager program]](https://usermanual.wiki/Stormblue/MP-500/User-Guide-414159-Page-11.png)
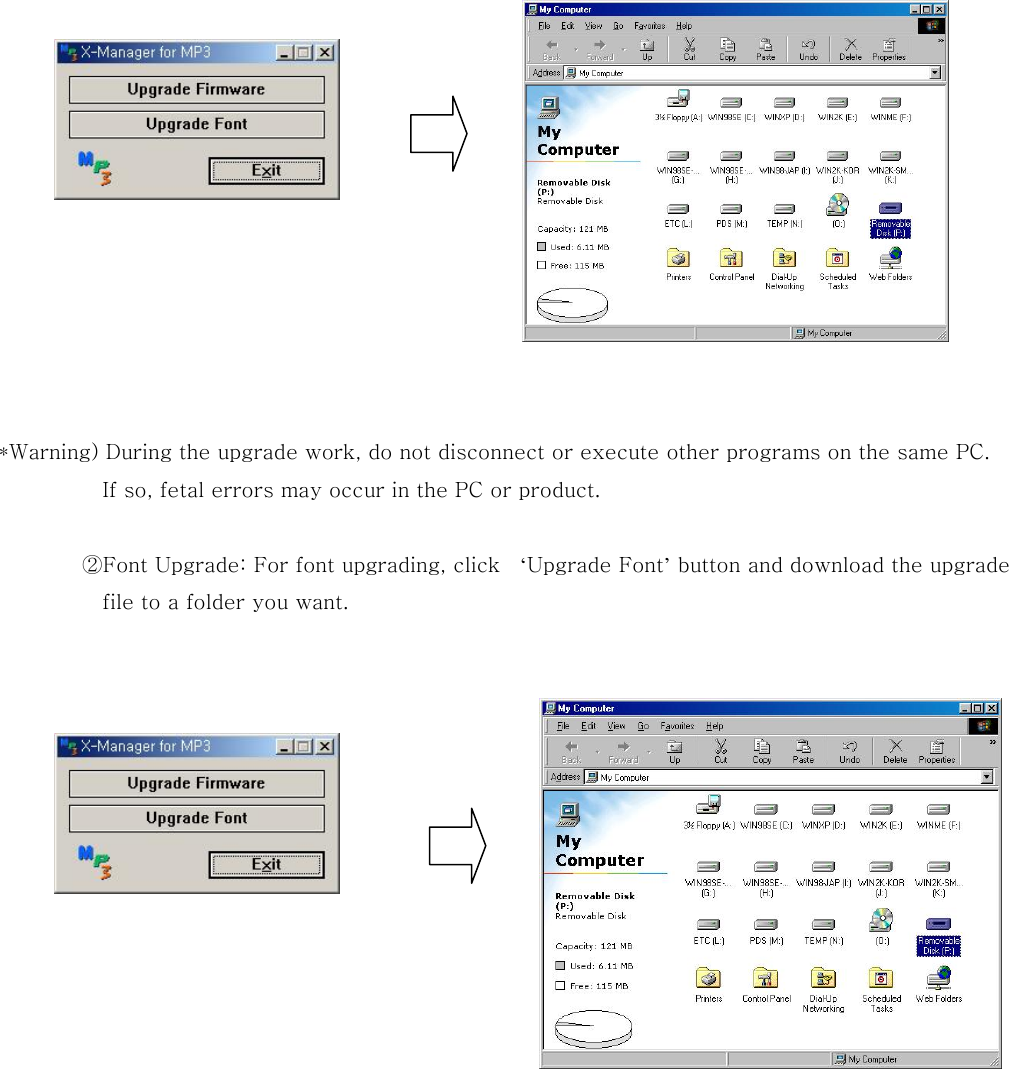
![ How to use Manager Program * X-Manager for MP3 - This is an exclusive program to upgrade the newest firmware and the font for MP3 Player. You may install this program with the sequence as follows. -Click Install/uninstall from ‘X-Manager for MP3’ from the manager program. (Upgrade Firmware) 1. When the installation is finished, ‘X-Manager for MP3’ icon is created in the Window and the following program appears. 2. The newest Firmware / Font Data download is available from the web-site ( www.stormblue.co.kr). 3. ① Firmware download : Click ‘Upgrade Firmware’ button and download the upgrade file to a folder you want. [Finish][Step2][Step1][ICON] [X-Manager Program] [Start]](https://usermanual.wiki/Stormblue/MP-500/User-Guide-414159-Page-12.png)
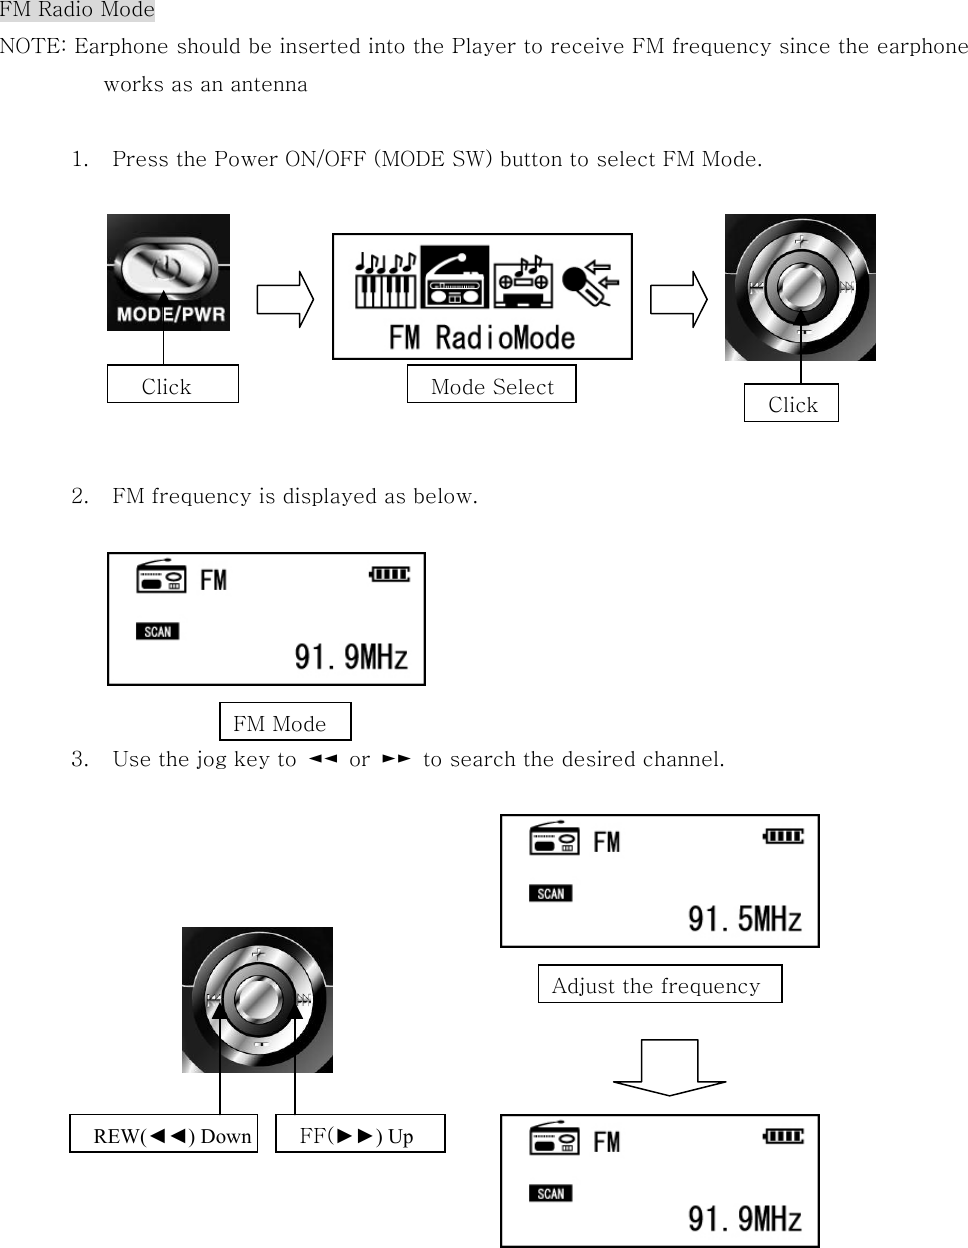
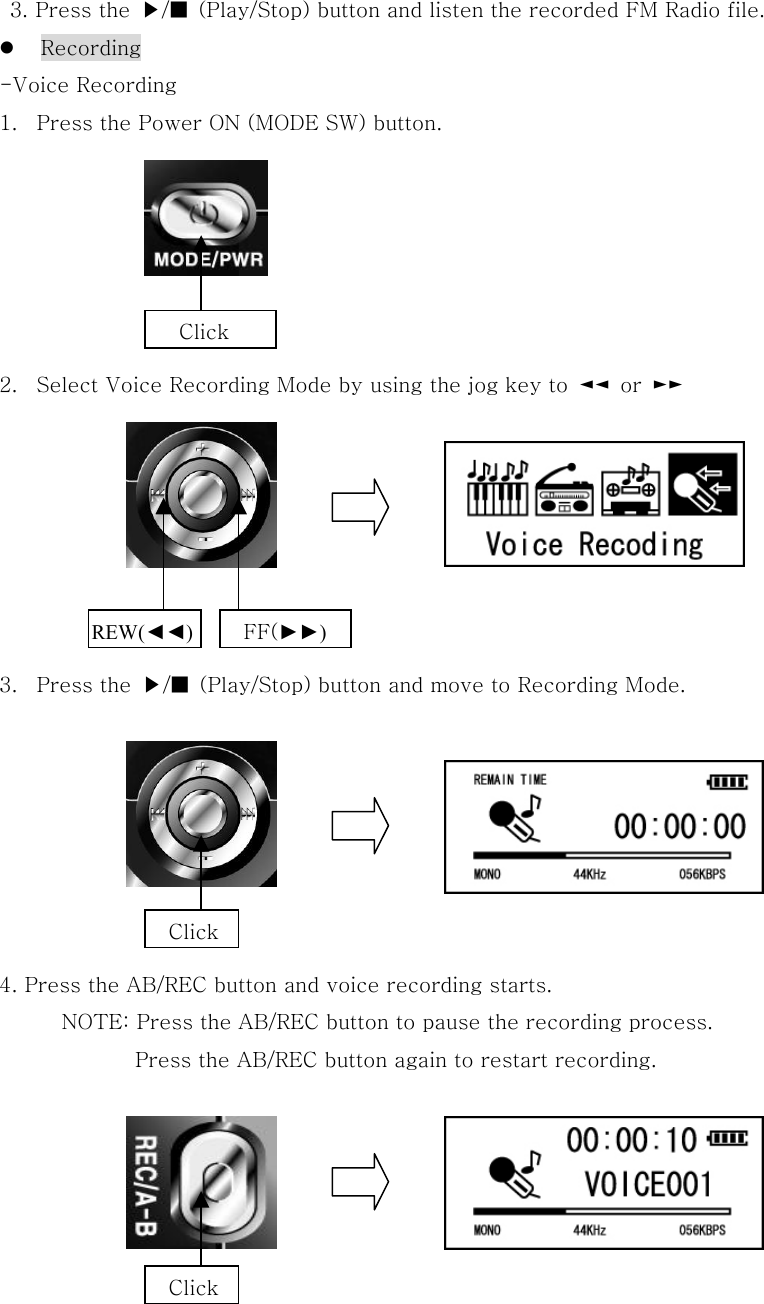
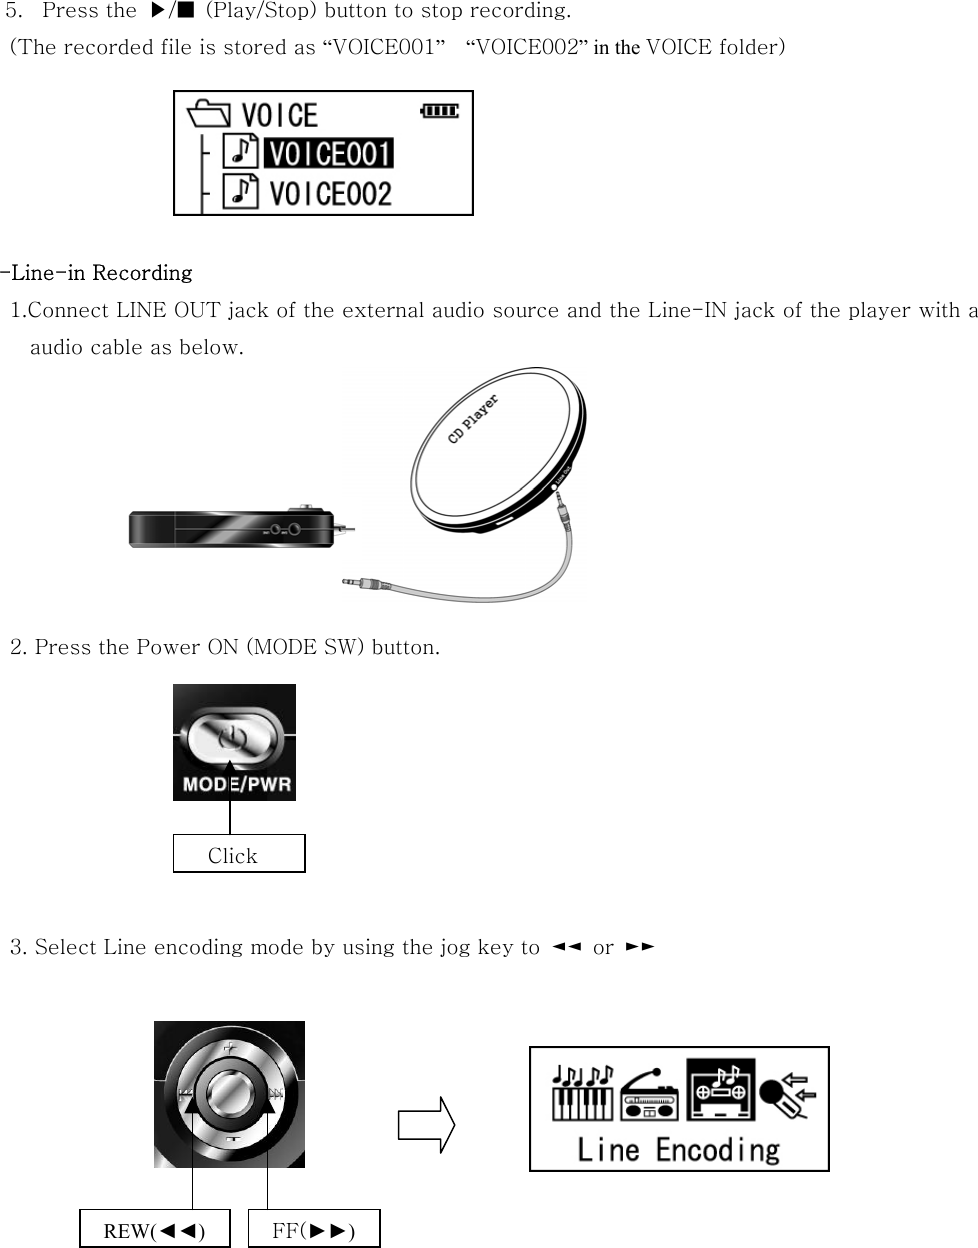
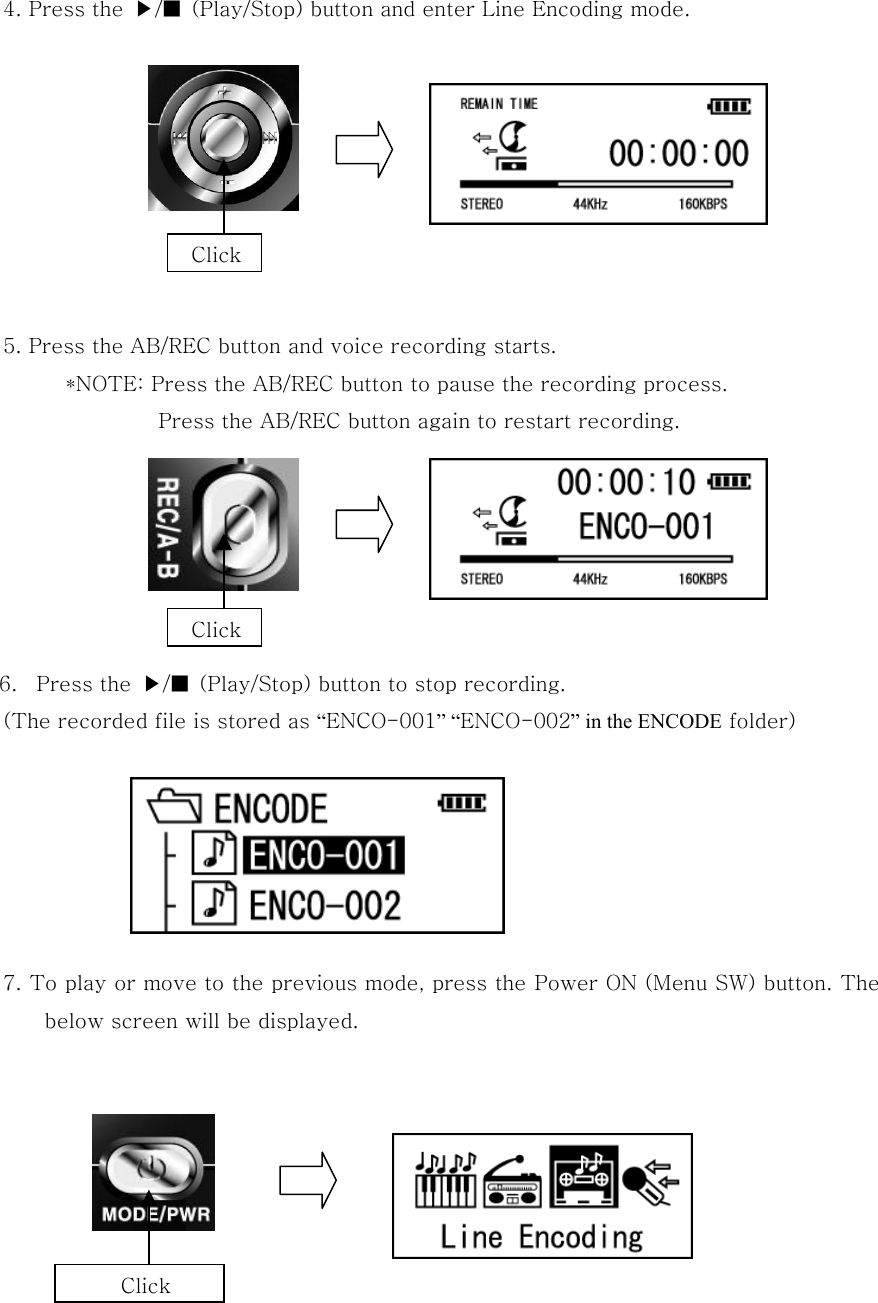
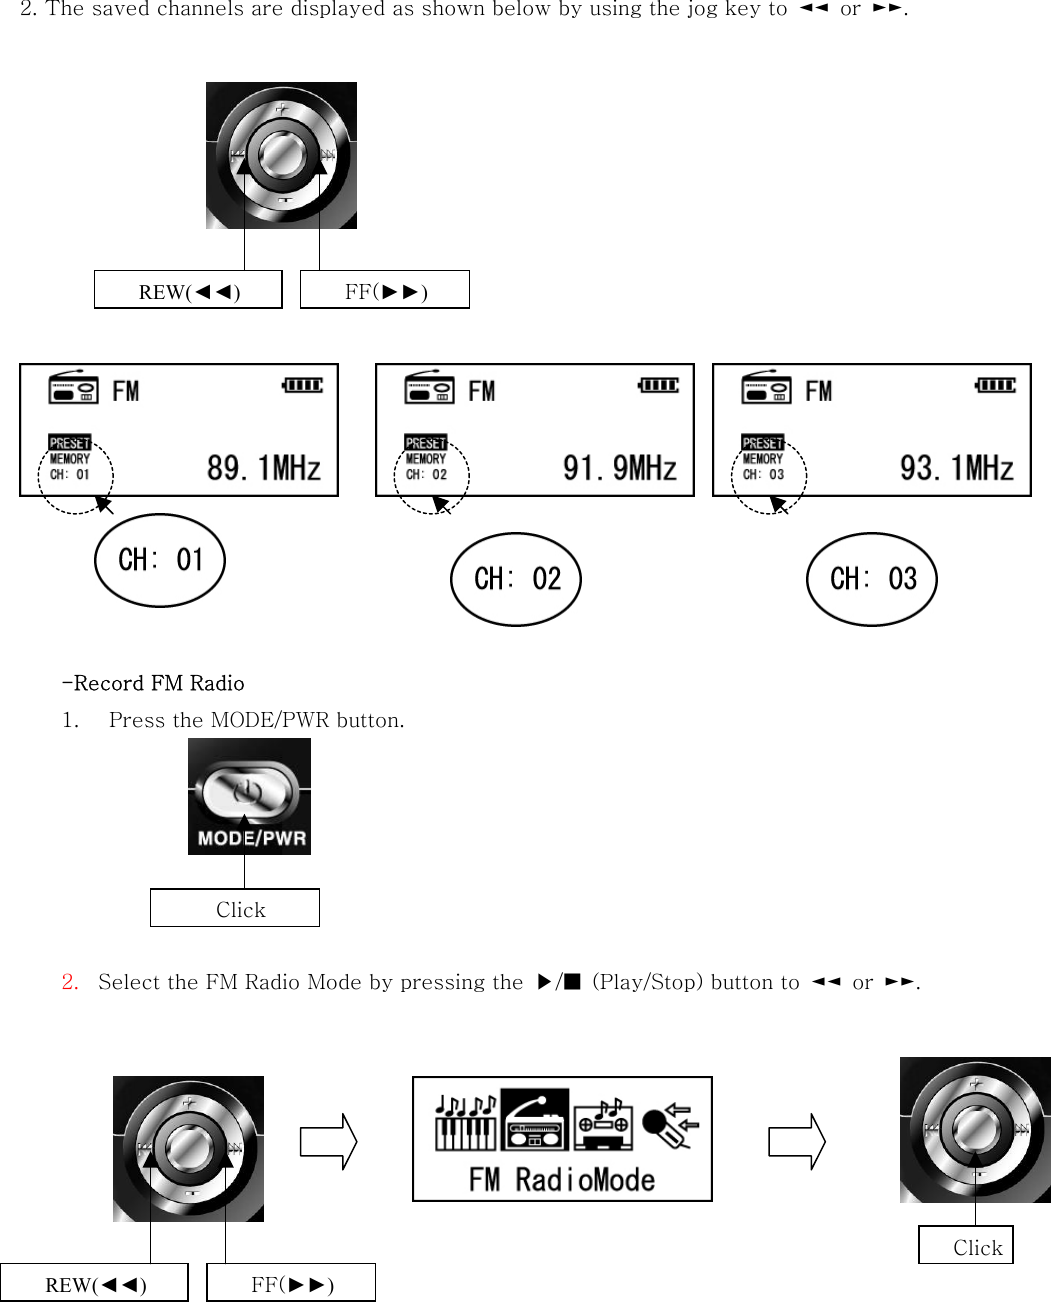
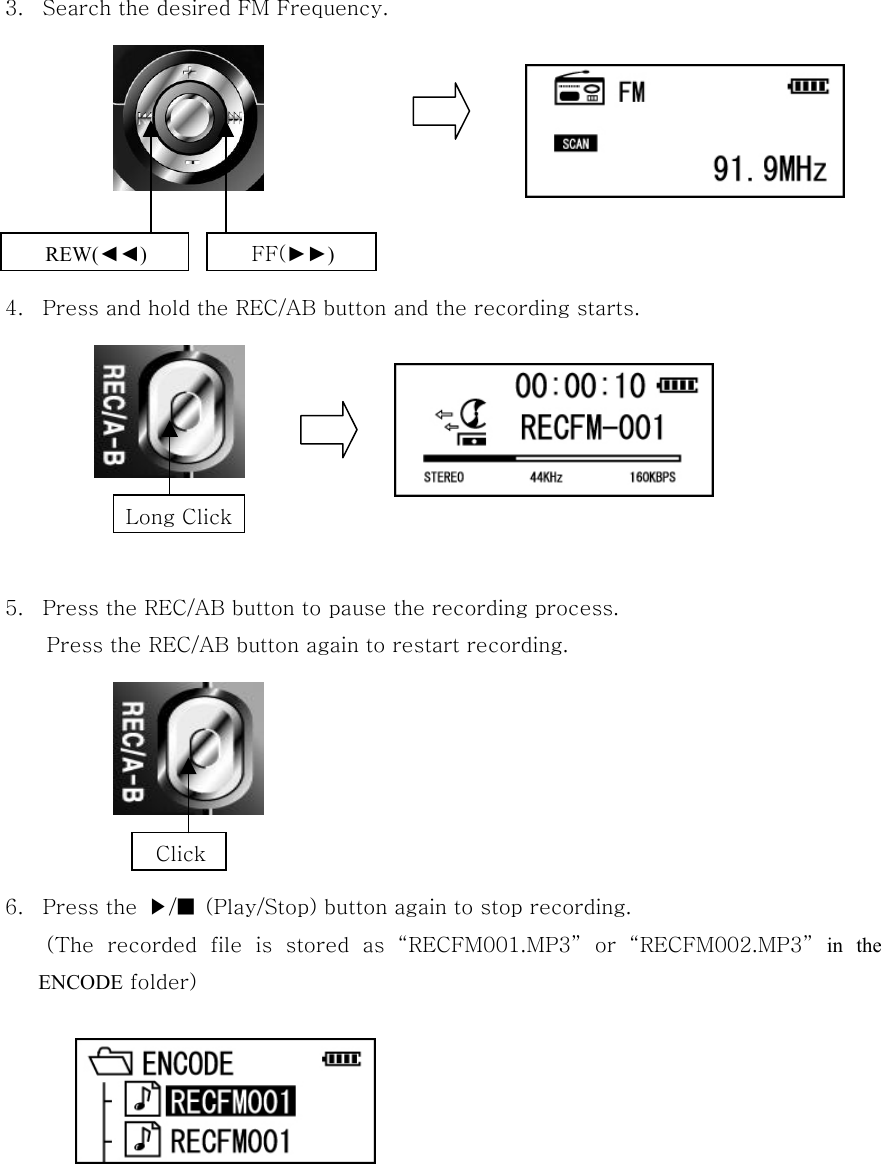
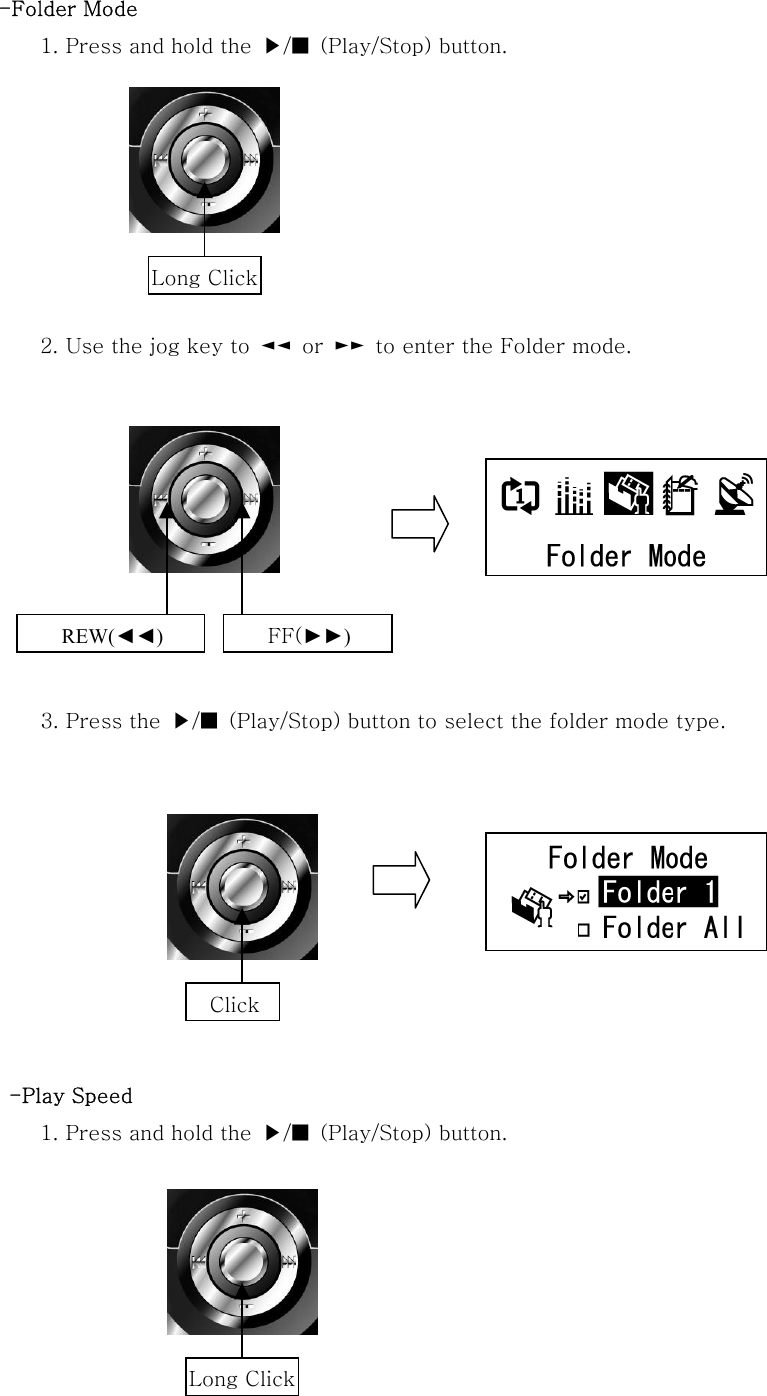
![ FM Radio Mode (Listening & Recording) 1. Press the MODE/PWR button. 2. Select the FM Radio Mode and press the ▶/■ (Play/Stop) button. Press the ▶/■ (Play/Stop) button once more and choose the scan or preset mode. 2. Use the jog key to ◄◄ or ►► to select the channel or frequency. NOTE: Earphone should be inserted into the Player to receive FM frequency since the earphone works as an antenna Click Click Click [PRESET Mode] [Scan Mode]](https://usermanual.wiki/Stormblue/MP-500/User-Guide-414159-Page-30.png)
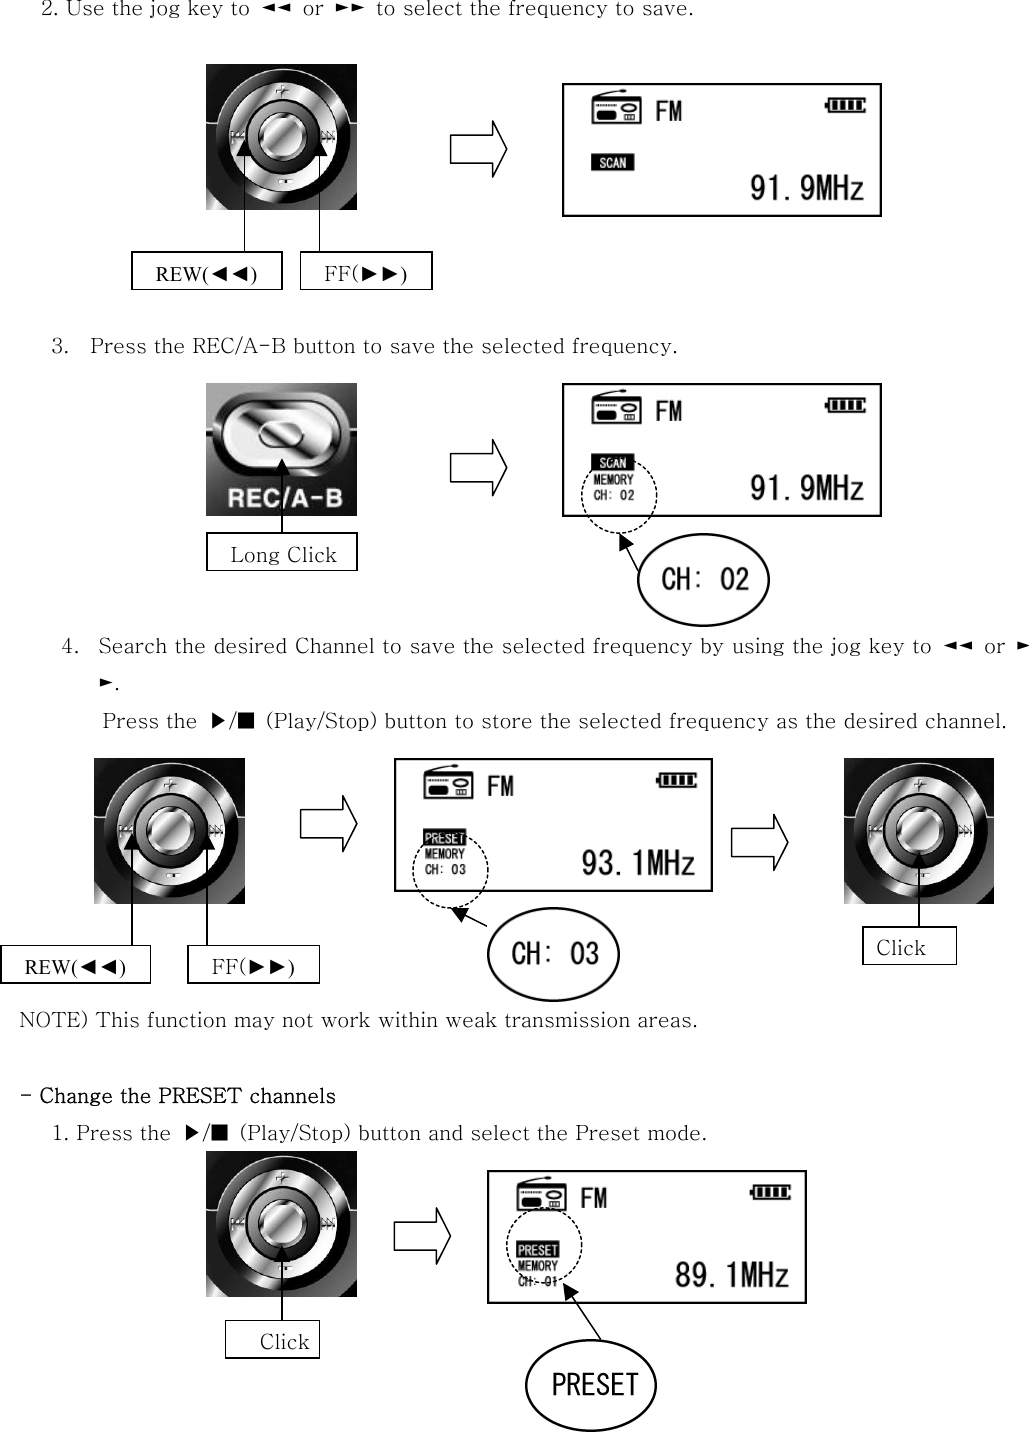
![-Turn to the desired frequency Use the jog key to search the desired frequency to listen. Auto Scan function: Press and hold the jog key to ◄◄ or ►►. The nearest channel is automatically sought. -Save FM Channels 1. Press the ▶/■ (Play/Stop) button and select the scan mode. (Saving FM channel is not available in the Preset Mode.) REW (◄◄) FF(►►) REW (◄◄) FF (►►) Click [Scan Mode]](https://usermanual.wiki/Stormblue/MP-500/User-Guide-414159-Page-31.png)


![Always On Backlight is always turned on Always Off Backlight is always turned off Set the transmission rate of the recorded voice files - 6Ks/TVF, 56K/MP3, 64K/MP3, 80K/MP3, 96K/MP3, 112K/MP3, 128K/MP3 Set the transmission rate of the recorded file from external audio sources. - 128KBps, 160KBps, 192KBps When the operation is paused or stopped, System turns off power automatically. 1 Min OFF Turns off power after 1min 2 Min OFF Turns off power after 2min 5 Min OFF Turns off power after 5min 10 Min OFF Turns off power after 10min Disable Does not apply to Auto Power saving Format the player. Fast All files in the track will be deleted Low level All memory will be deleted ( Including Font Delete) *After Low level format, the Font file should be installed Select the suitable language for OS Upgrade Firmware or Font file. * NOTE: Install the program on the PC before upgrading. Do not remove the Player during upgrading process. Ifso, fatal errors may occur with the Player. [Before connecting to USB Port] [After connecting to USB]](https://usermanual.wiki/Stormblue/MP-500/User-Guide-414159-Page-43.png)