Stratasys DUPCAB Assembly of RFID reader and antenna boards User Manual Stratasys P750k User Guide
Stratasys Ltd Assembly of RFID reader and antenna boards Stratasys P750k User Guide
UserManual.wiki
>
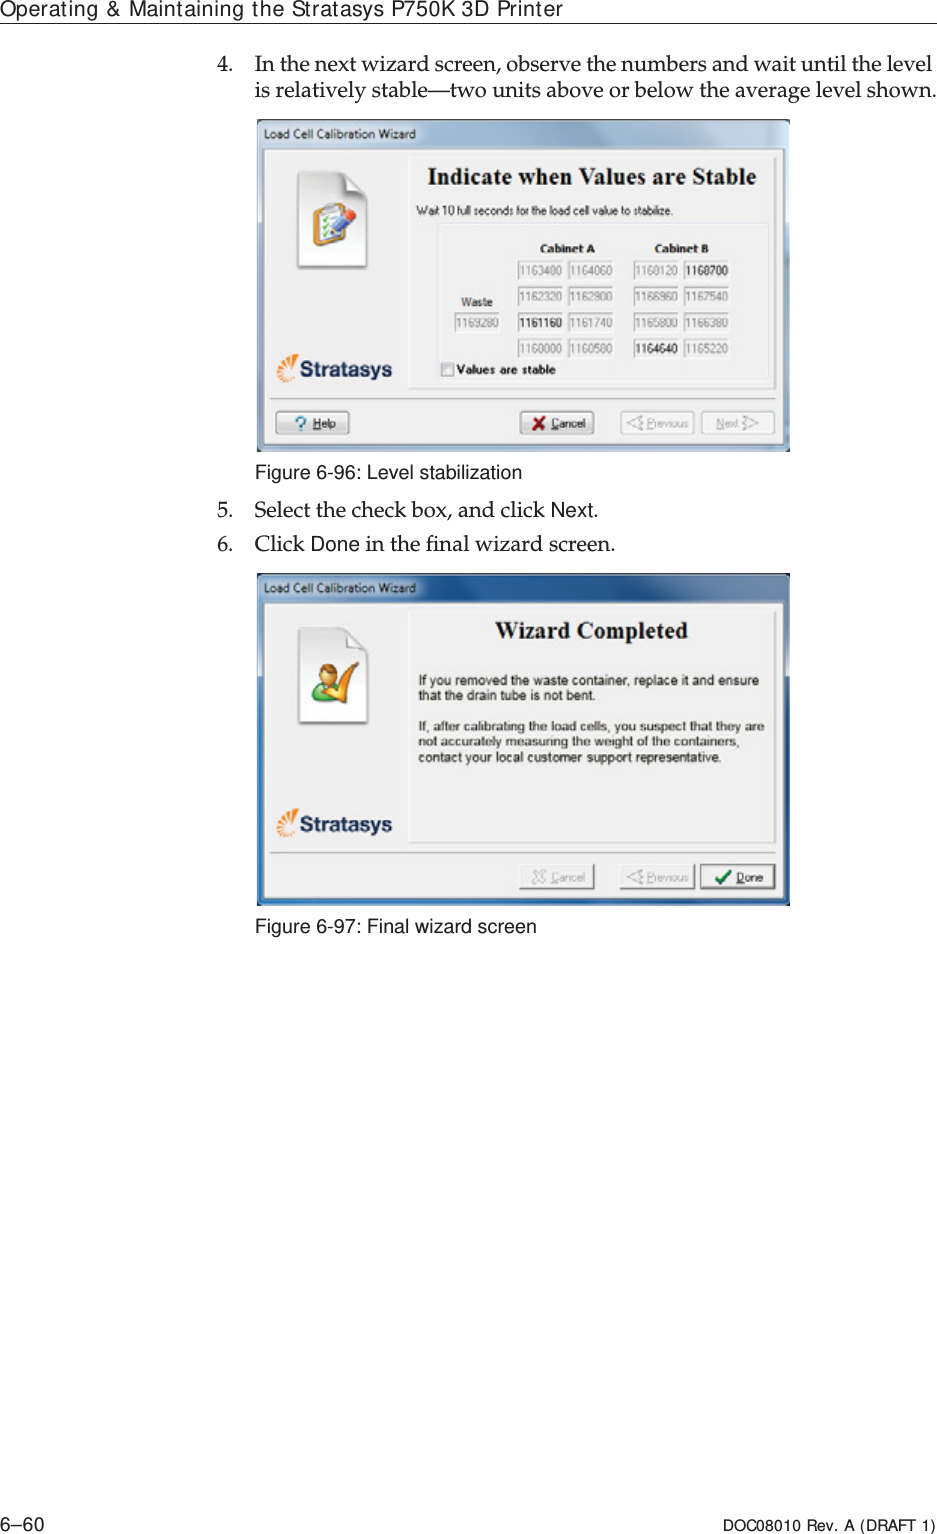
Stratasys
>
DUPCAB User Manual
User Manual
Navigation menu
Upload a User Manual
Namespaces
Wiki Guide
HTML
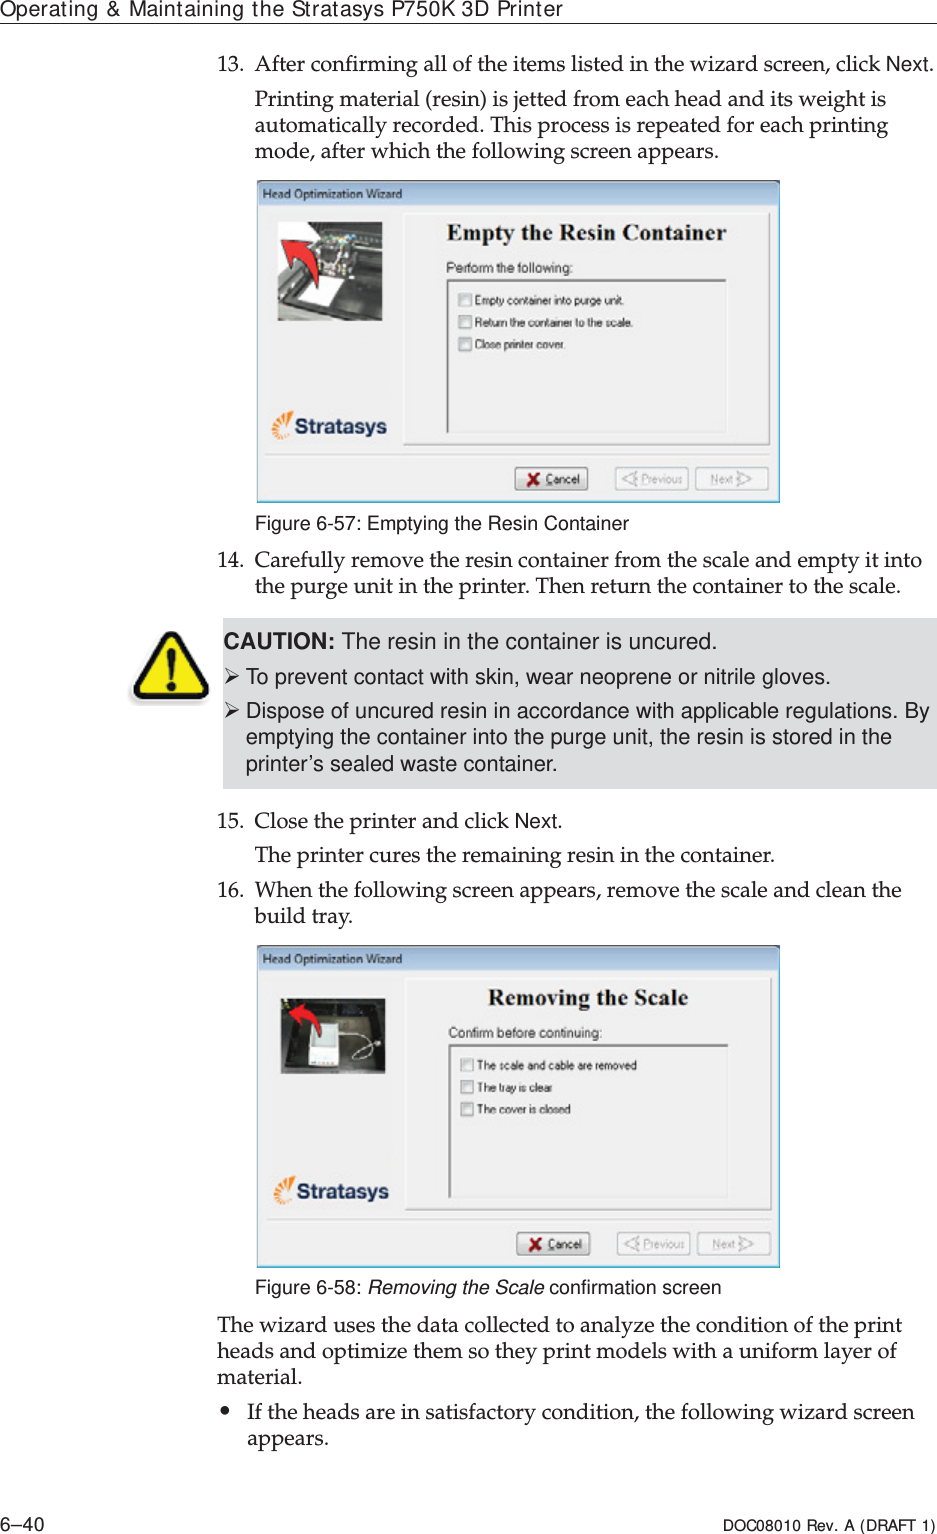
PDF
Info
Views
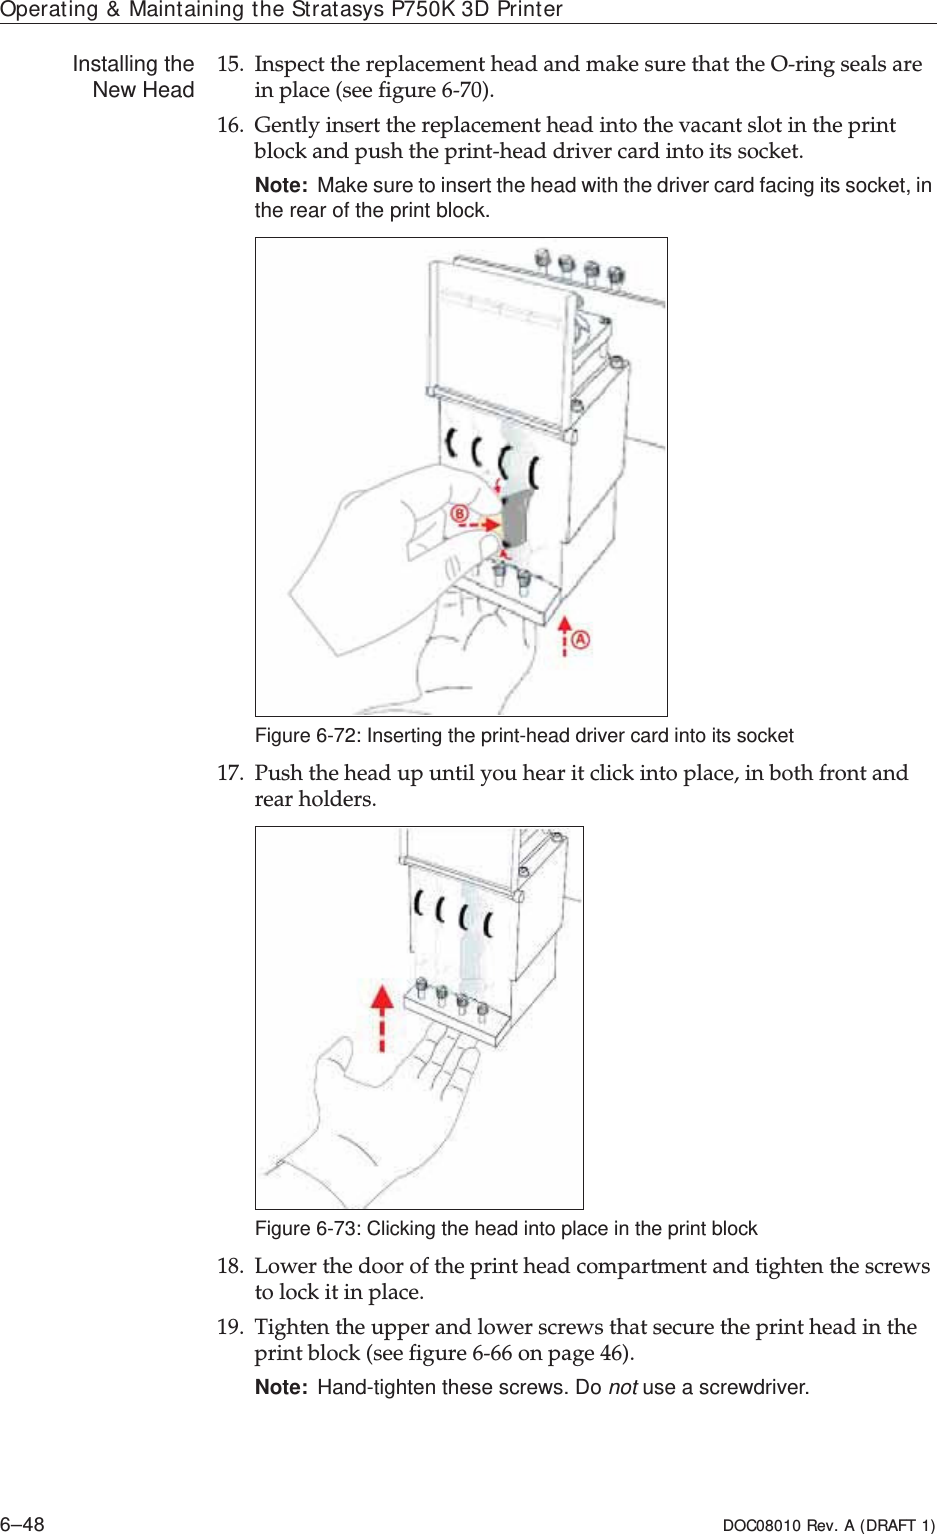
User Manual
Discussion / Help
Navigation


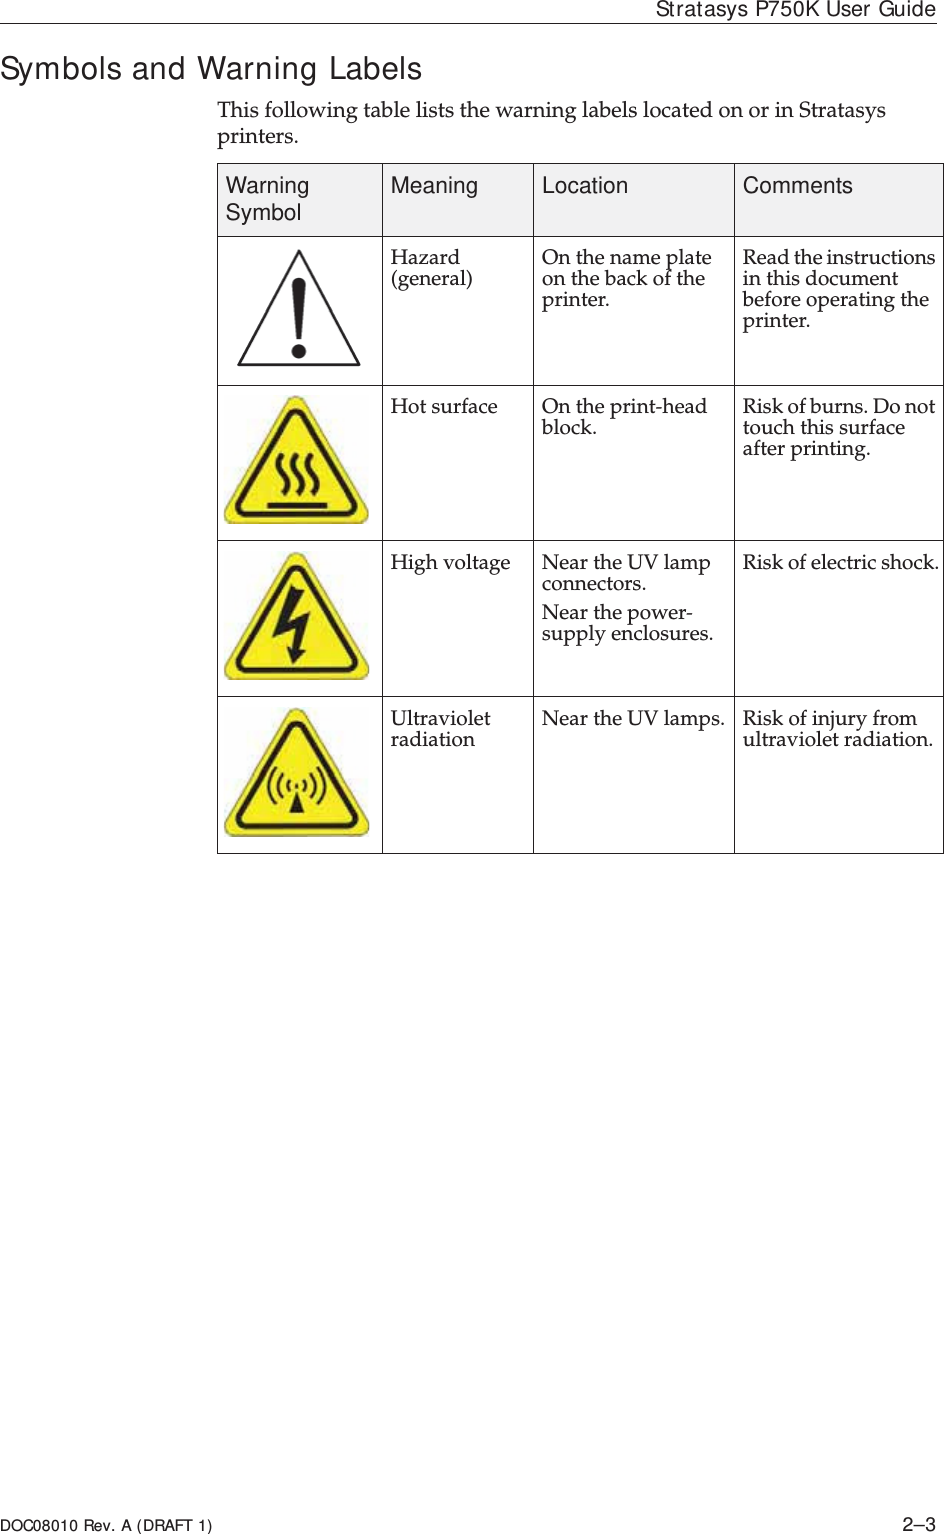


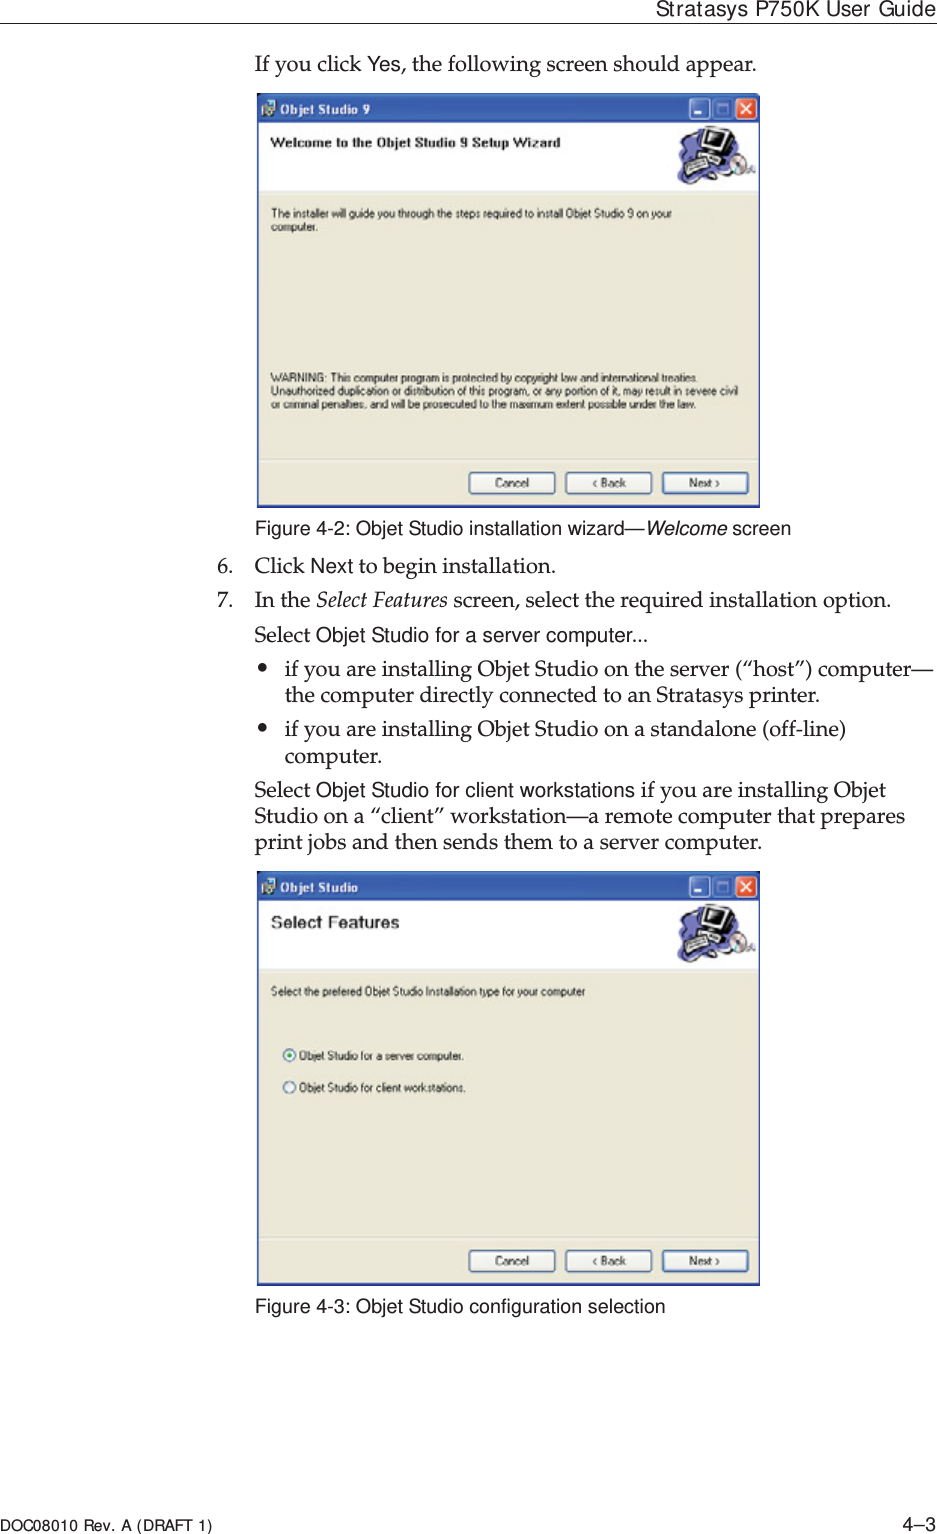


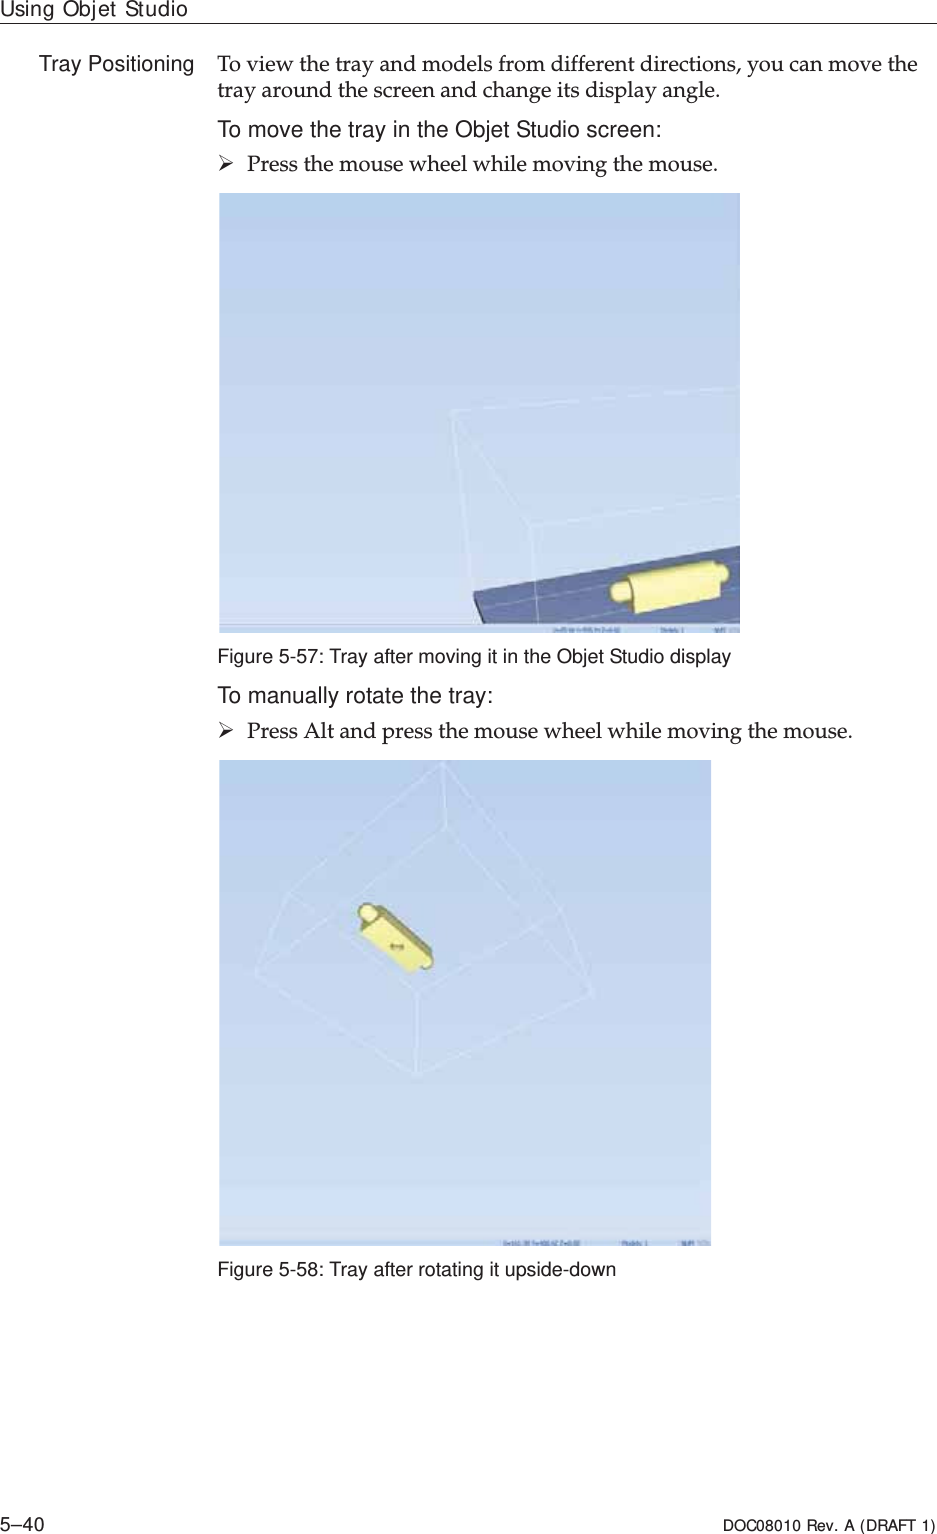
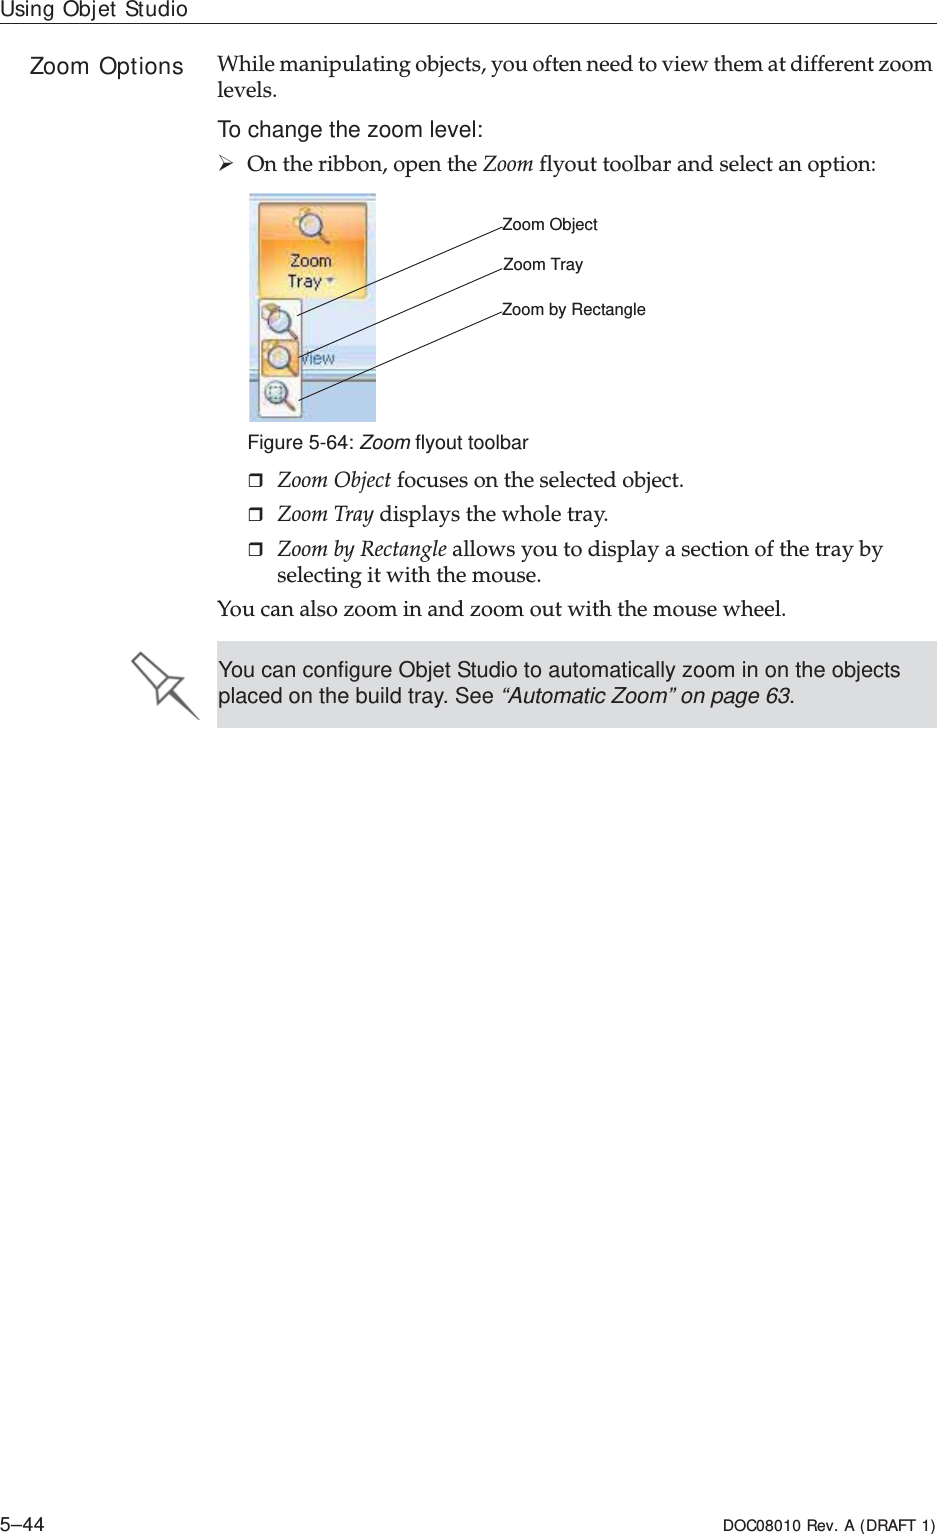
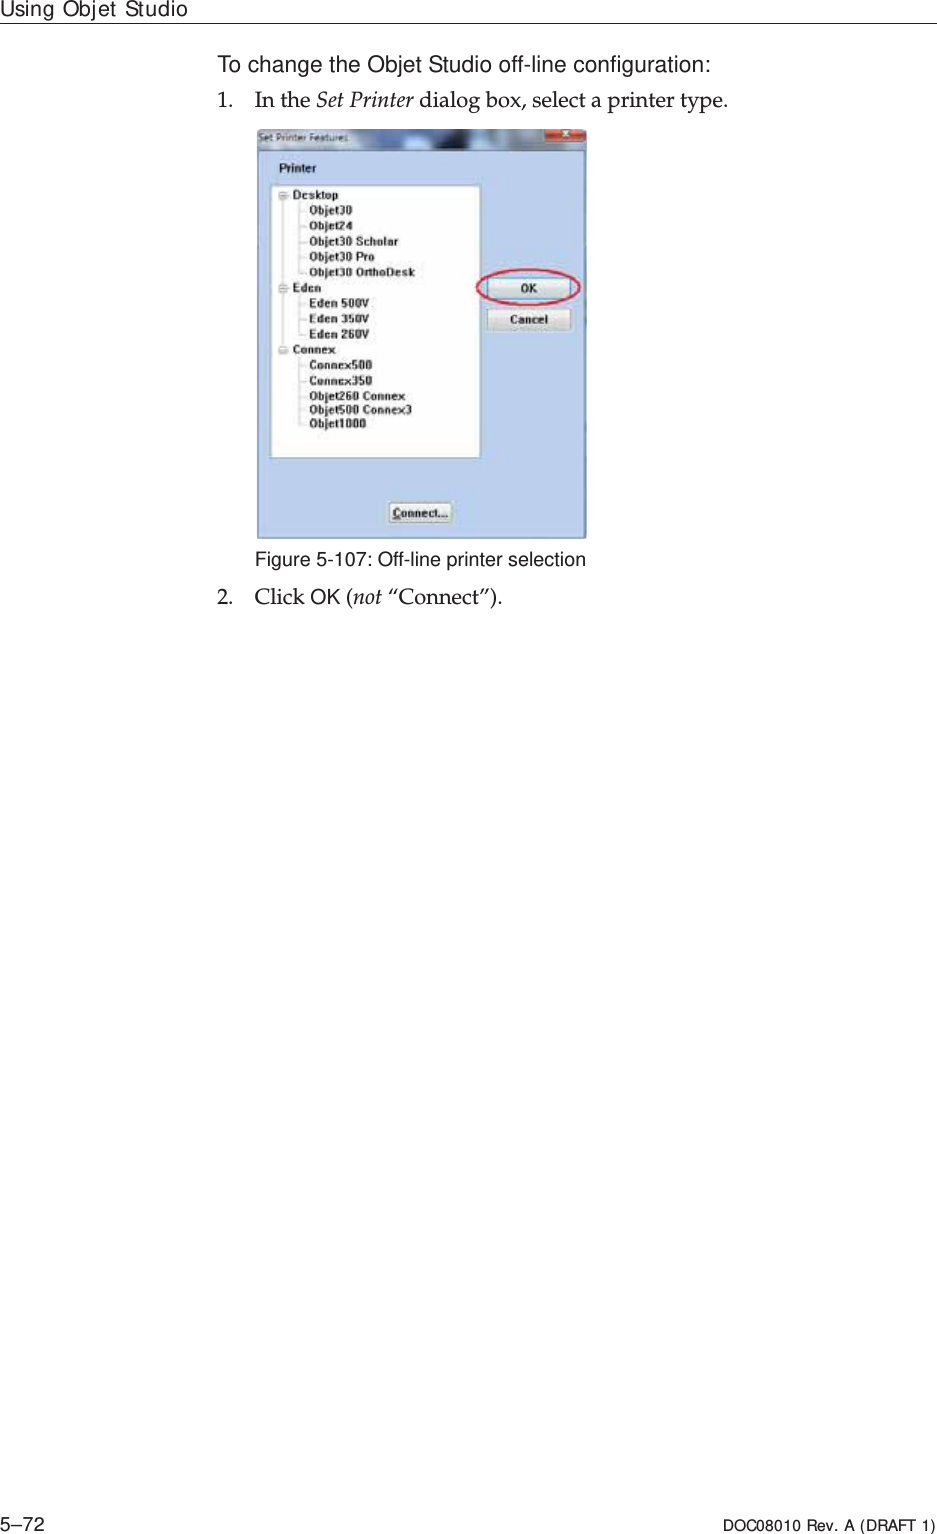
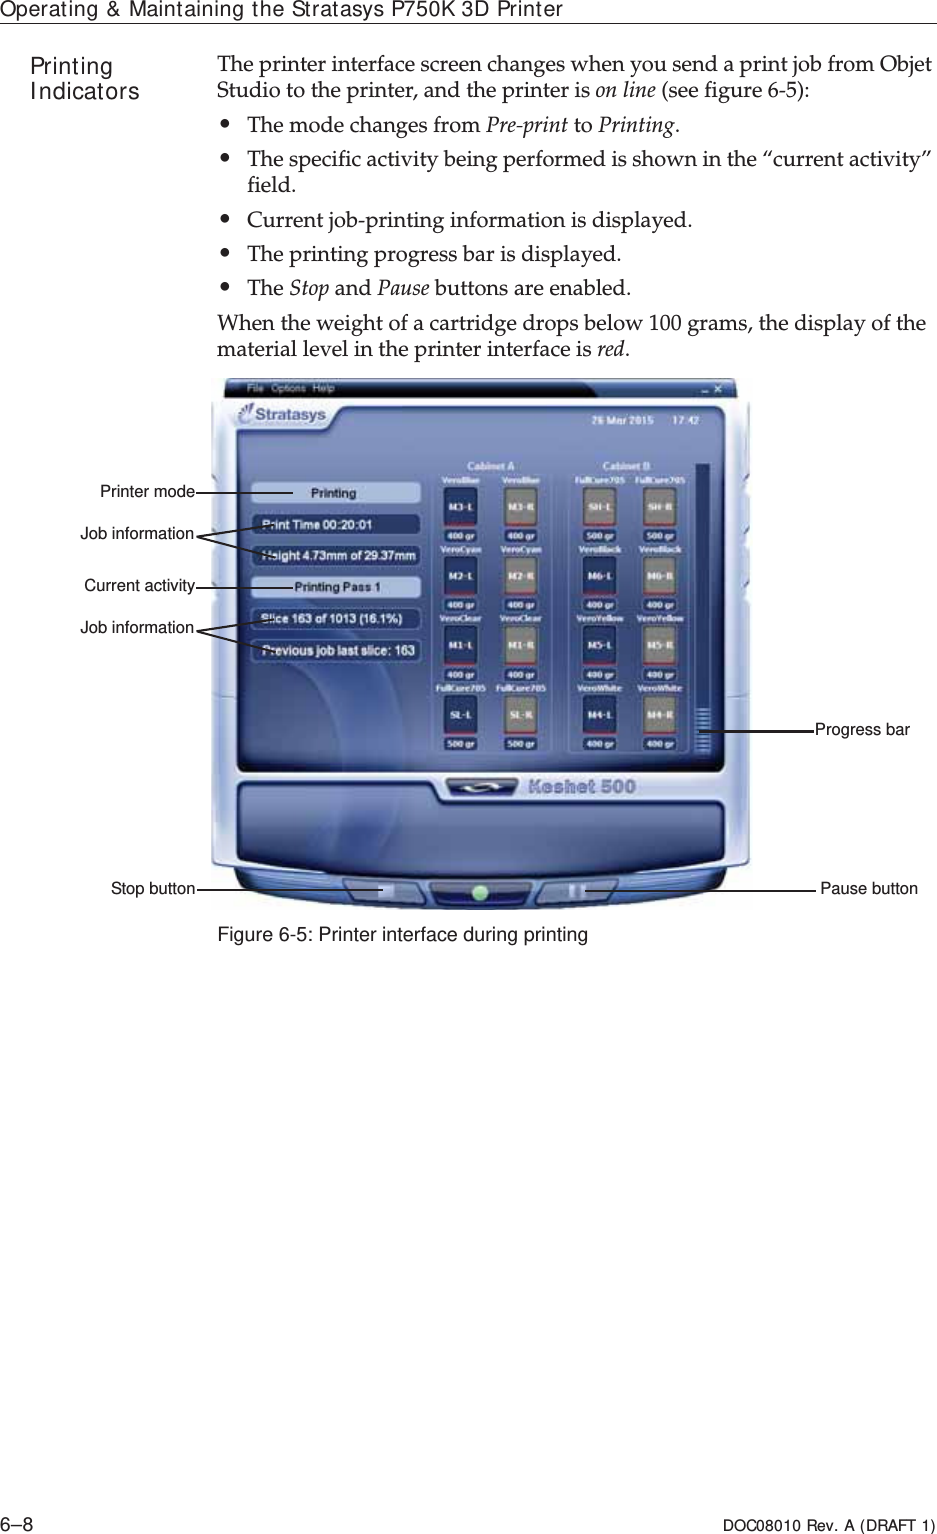
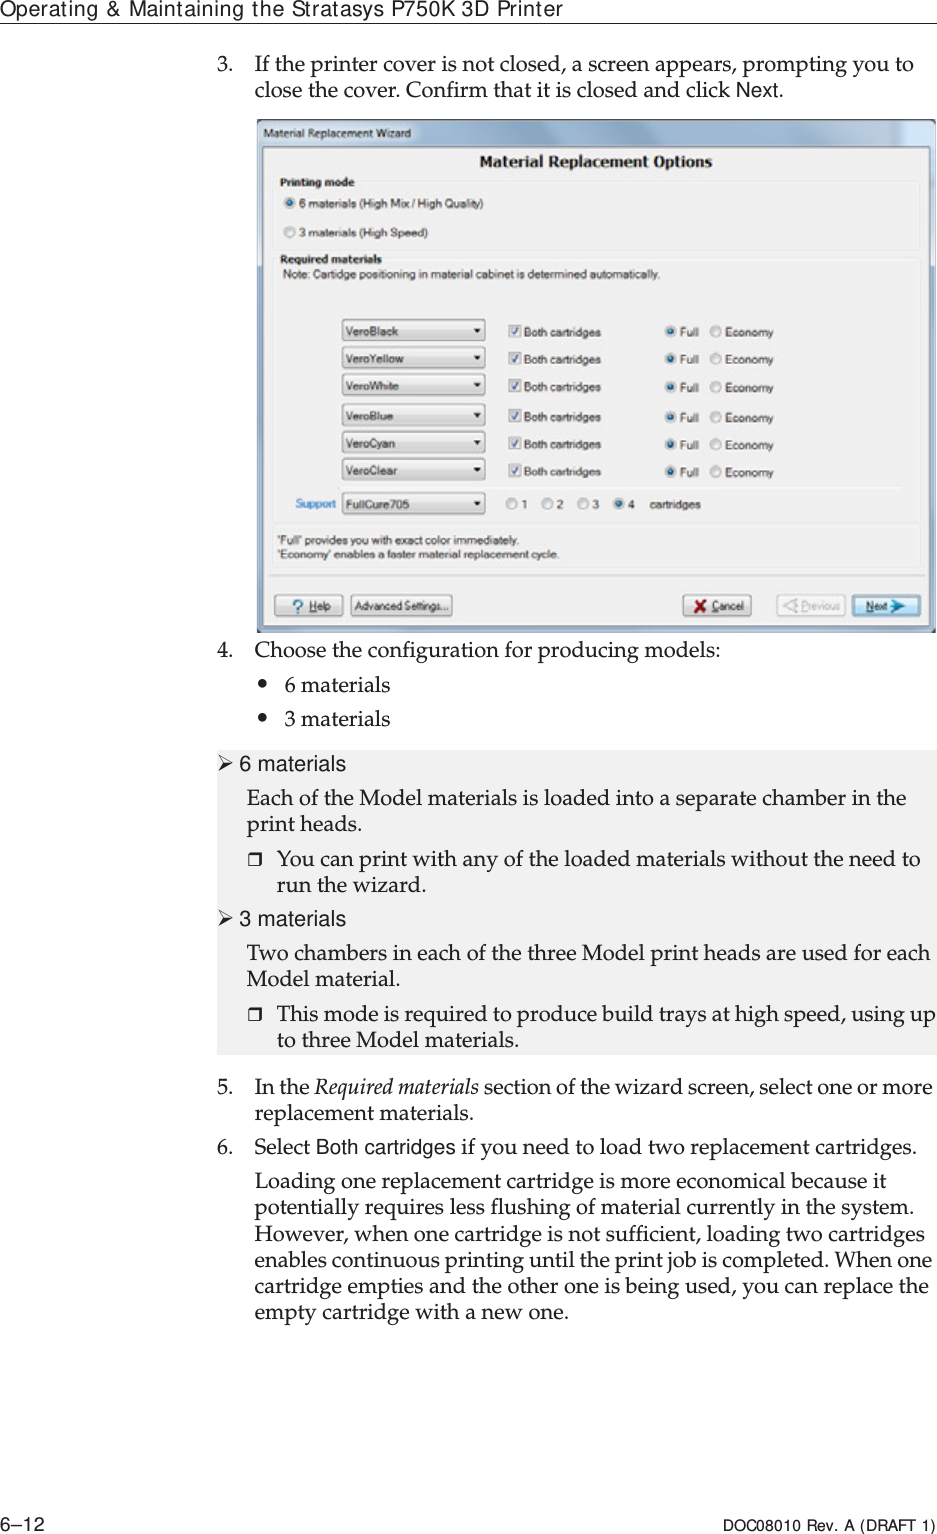
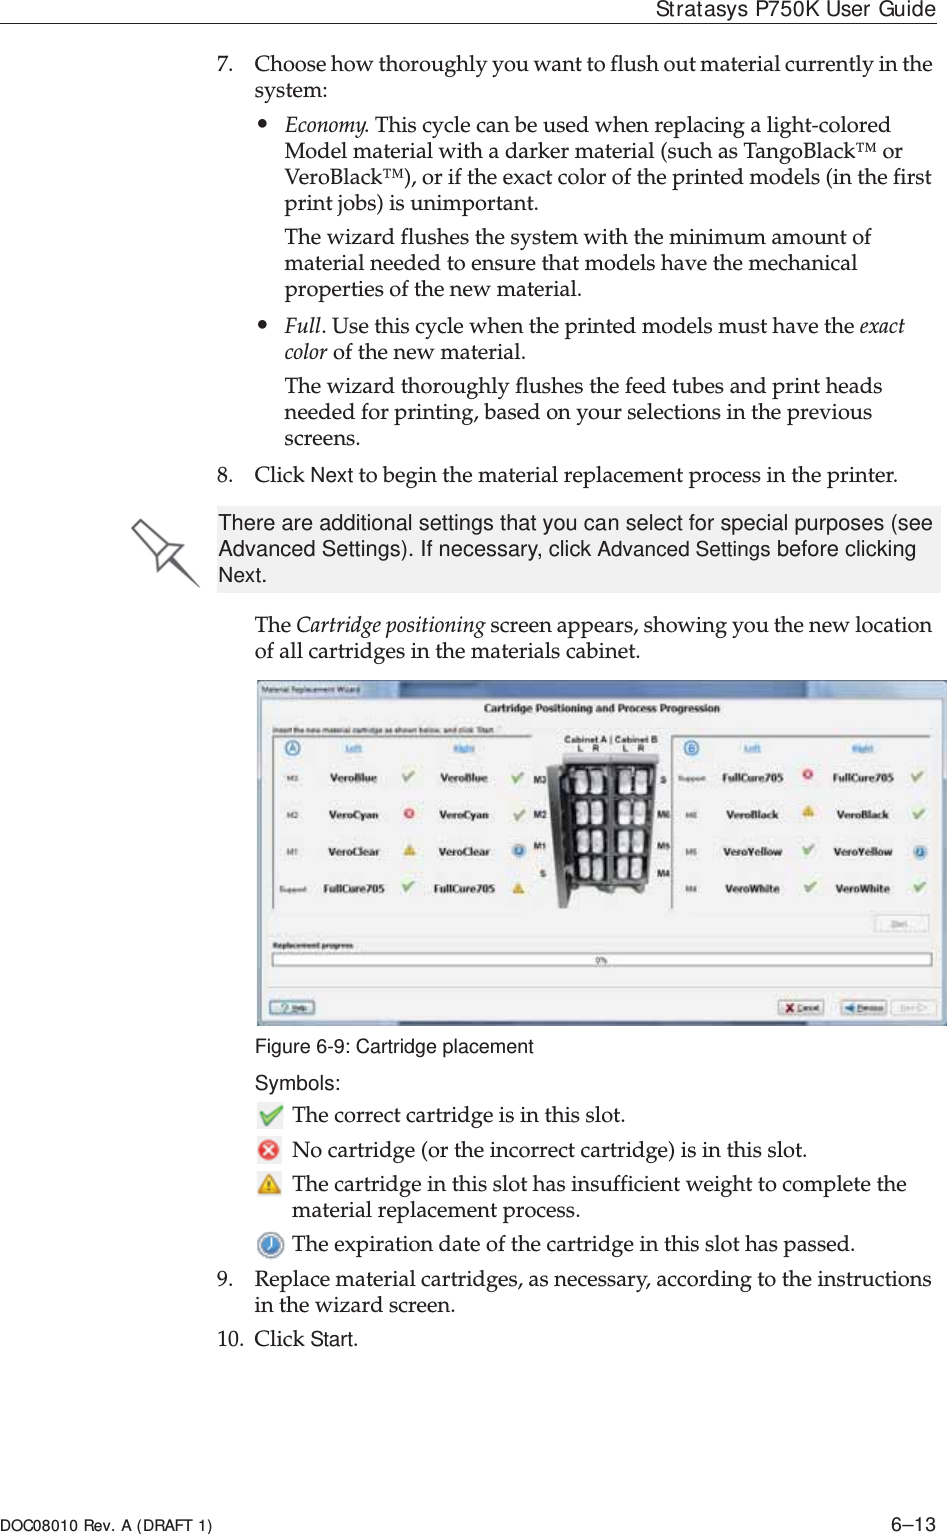


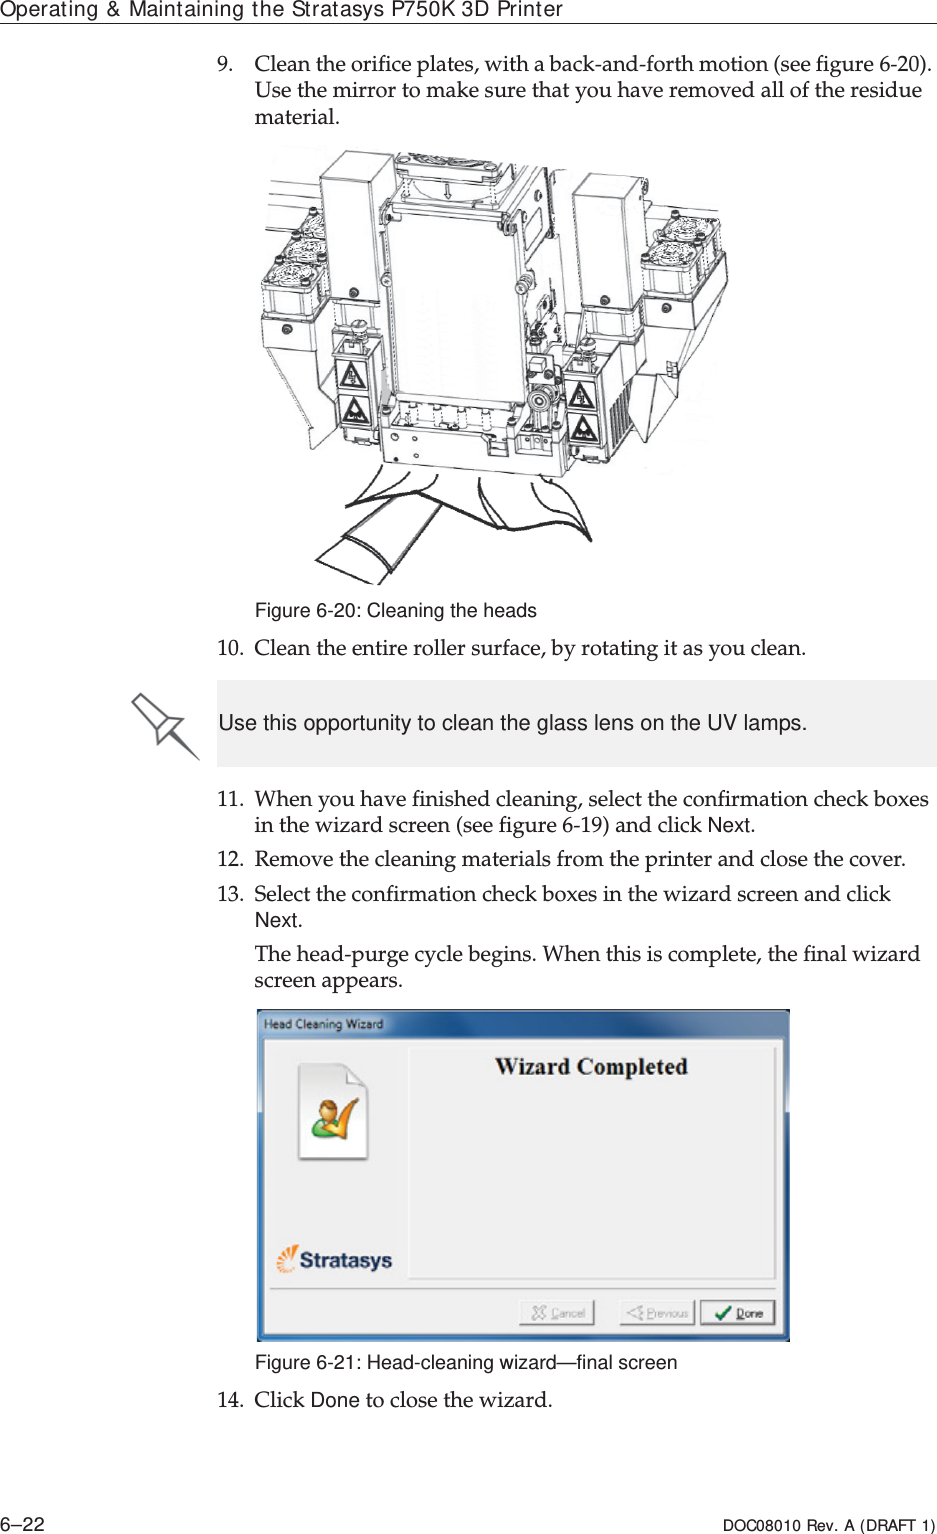

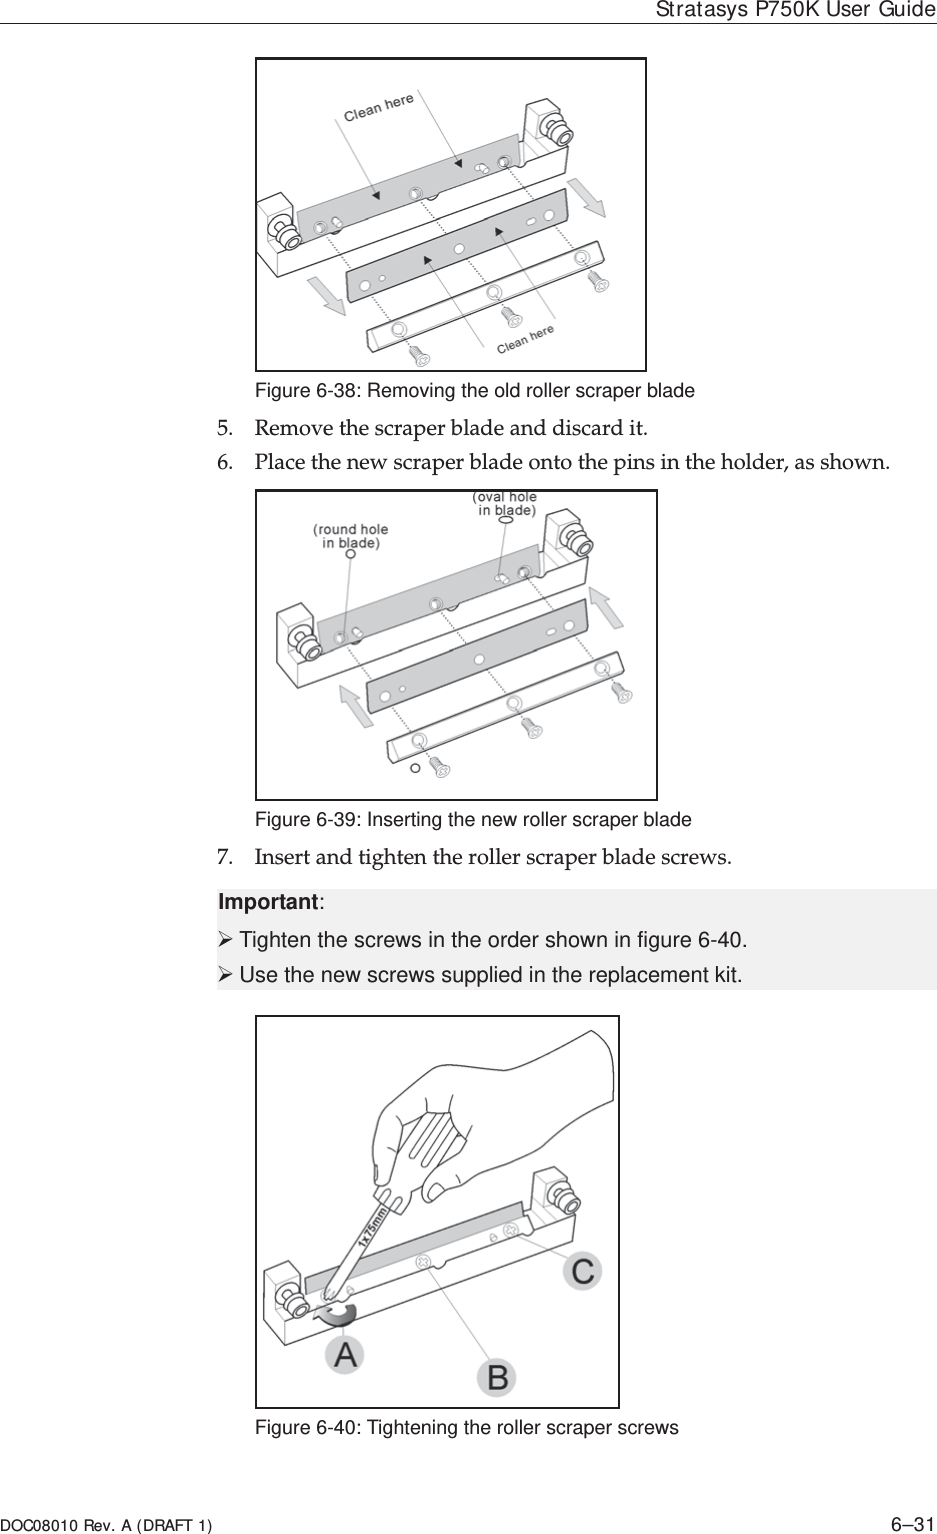

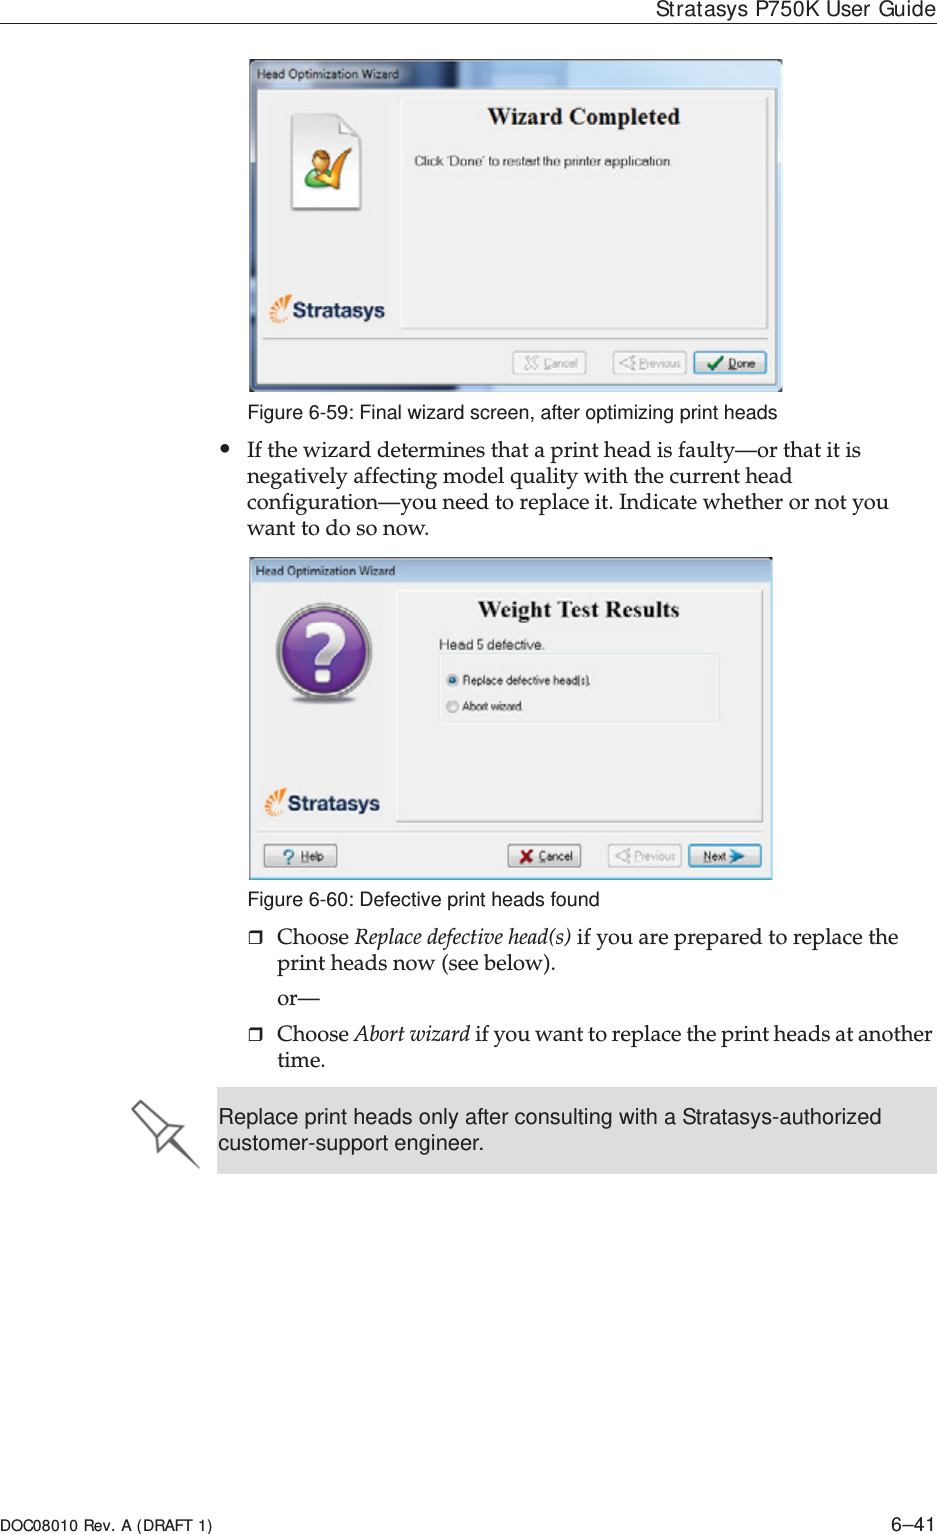
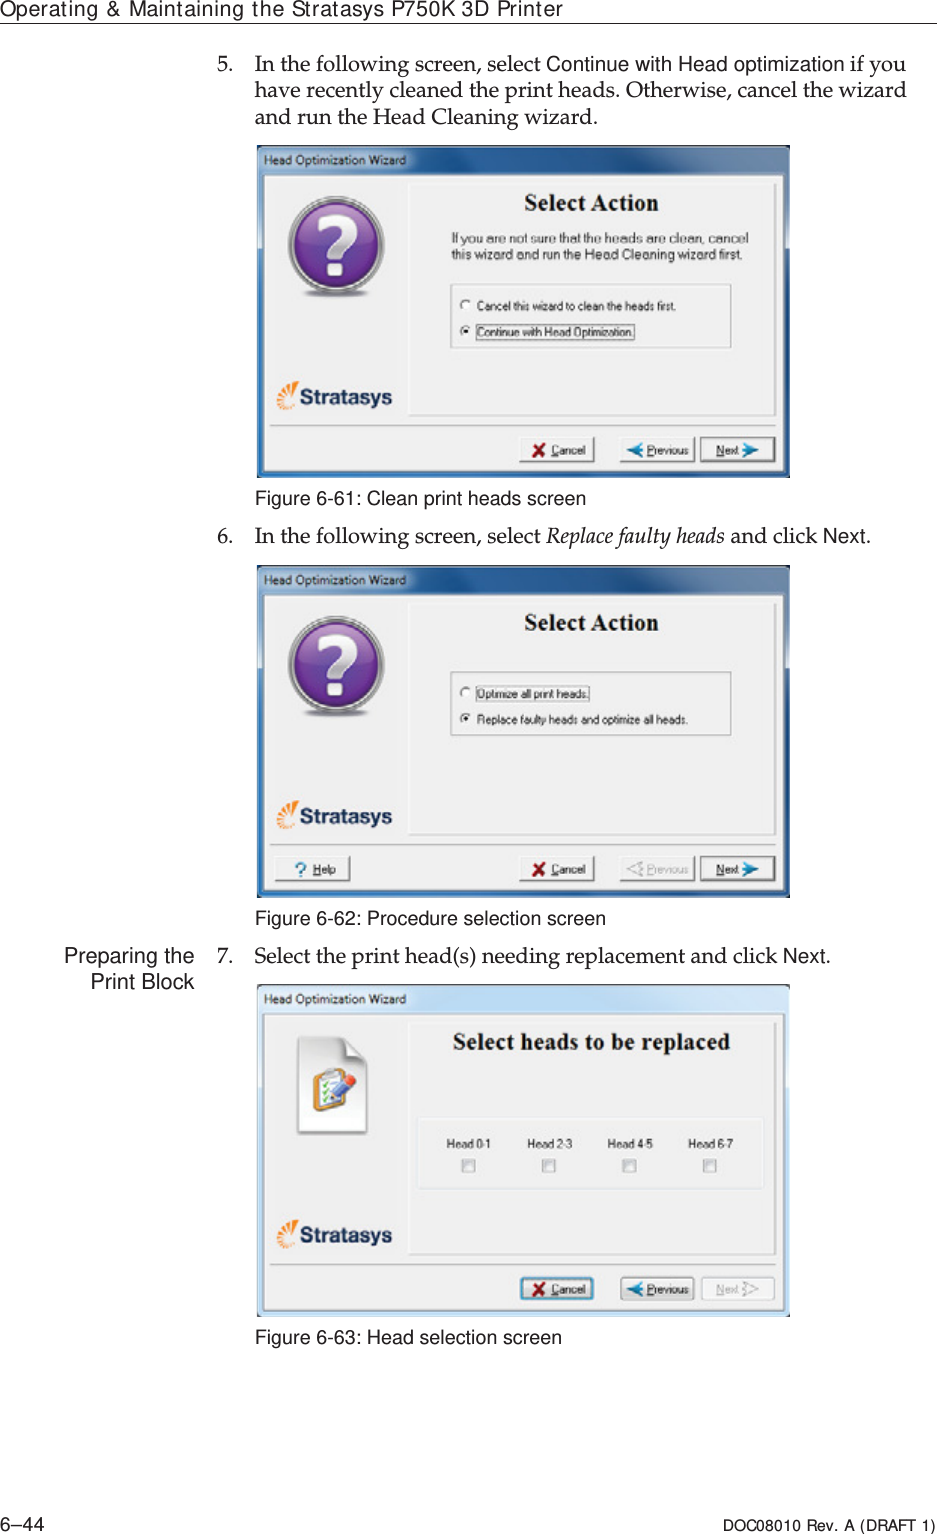
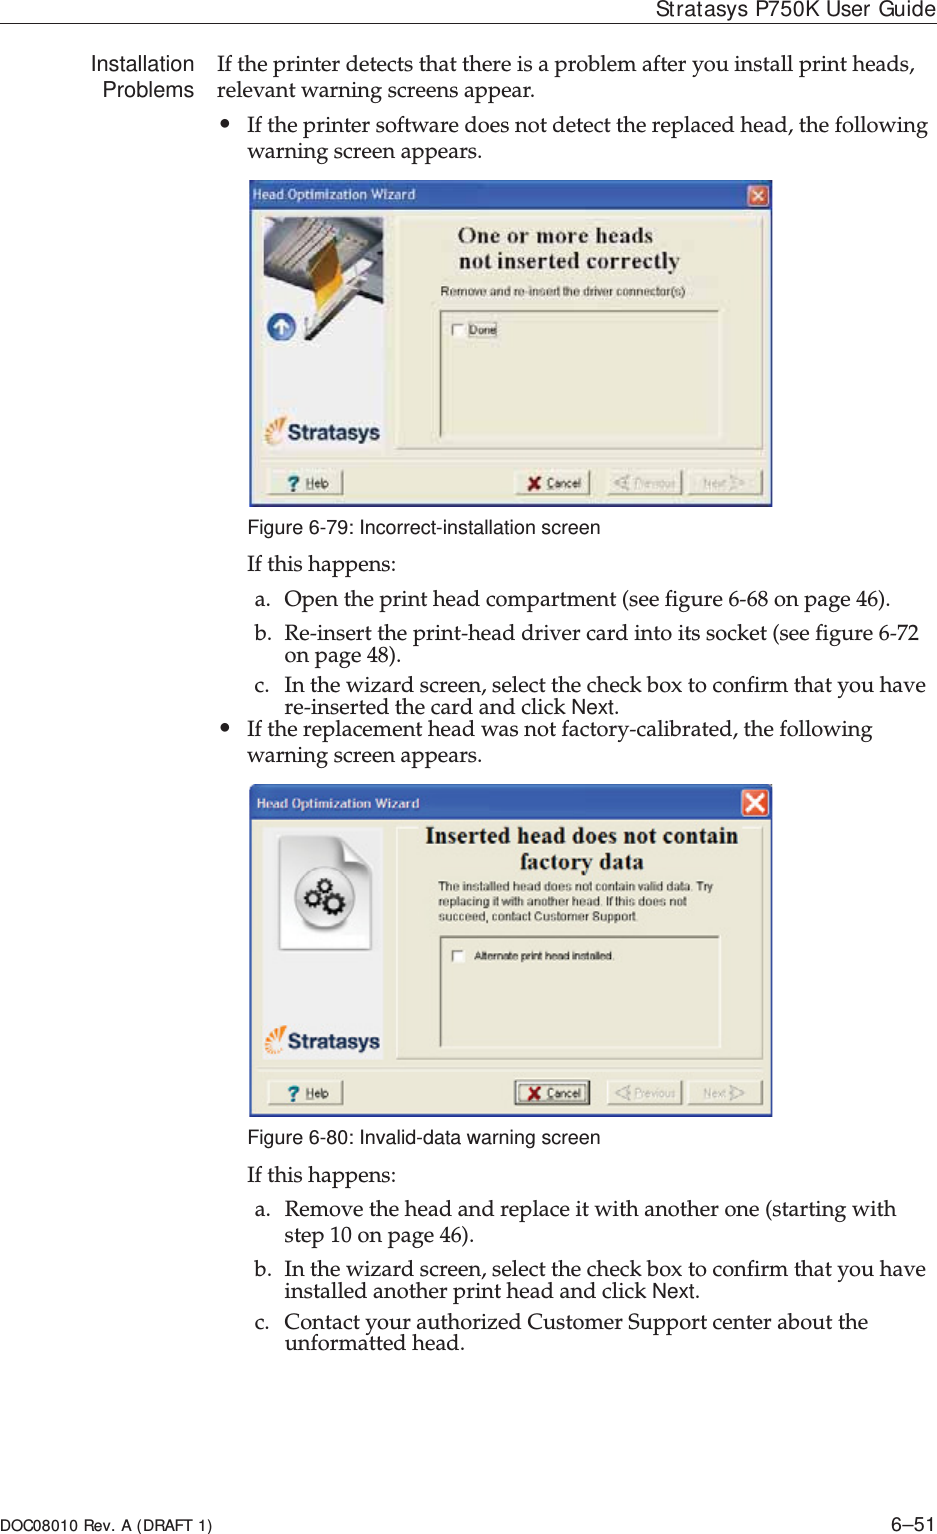
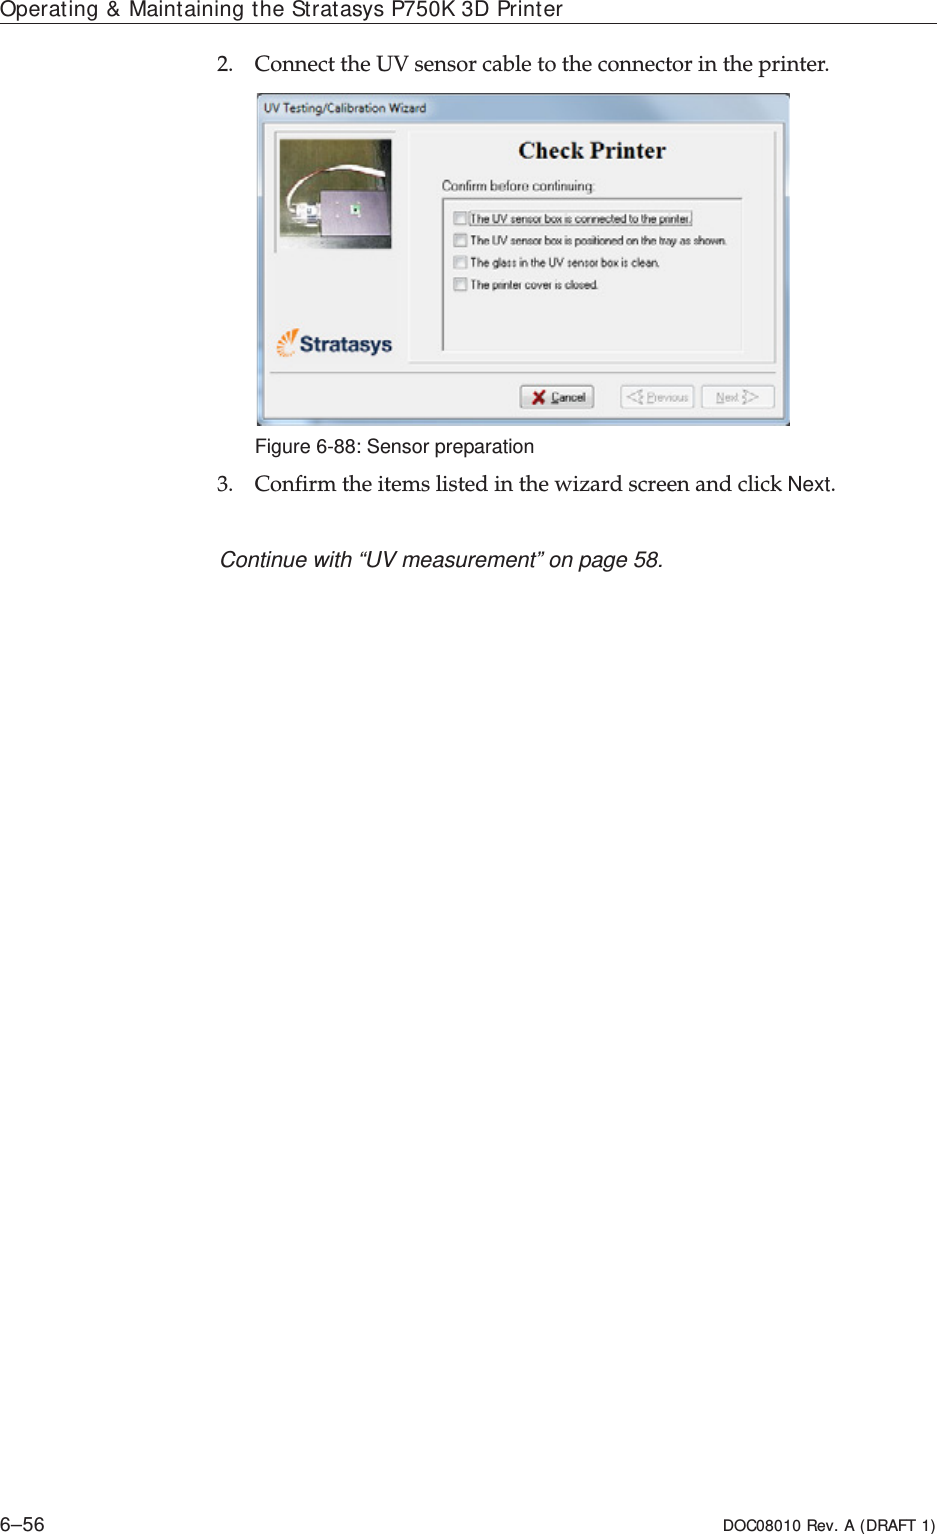
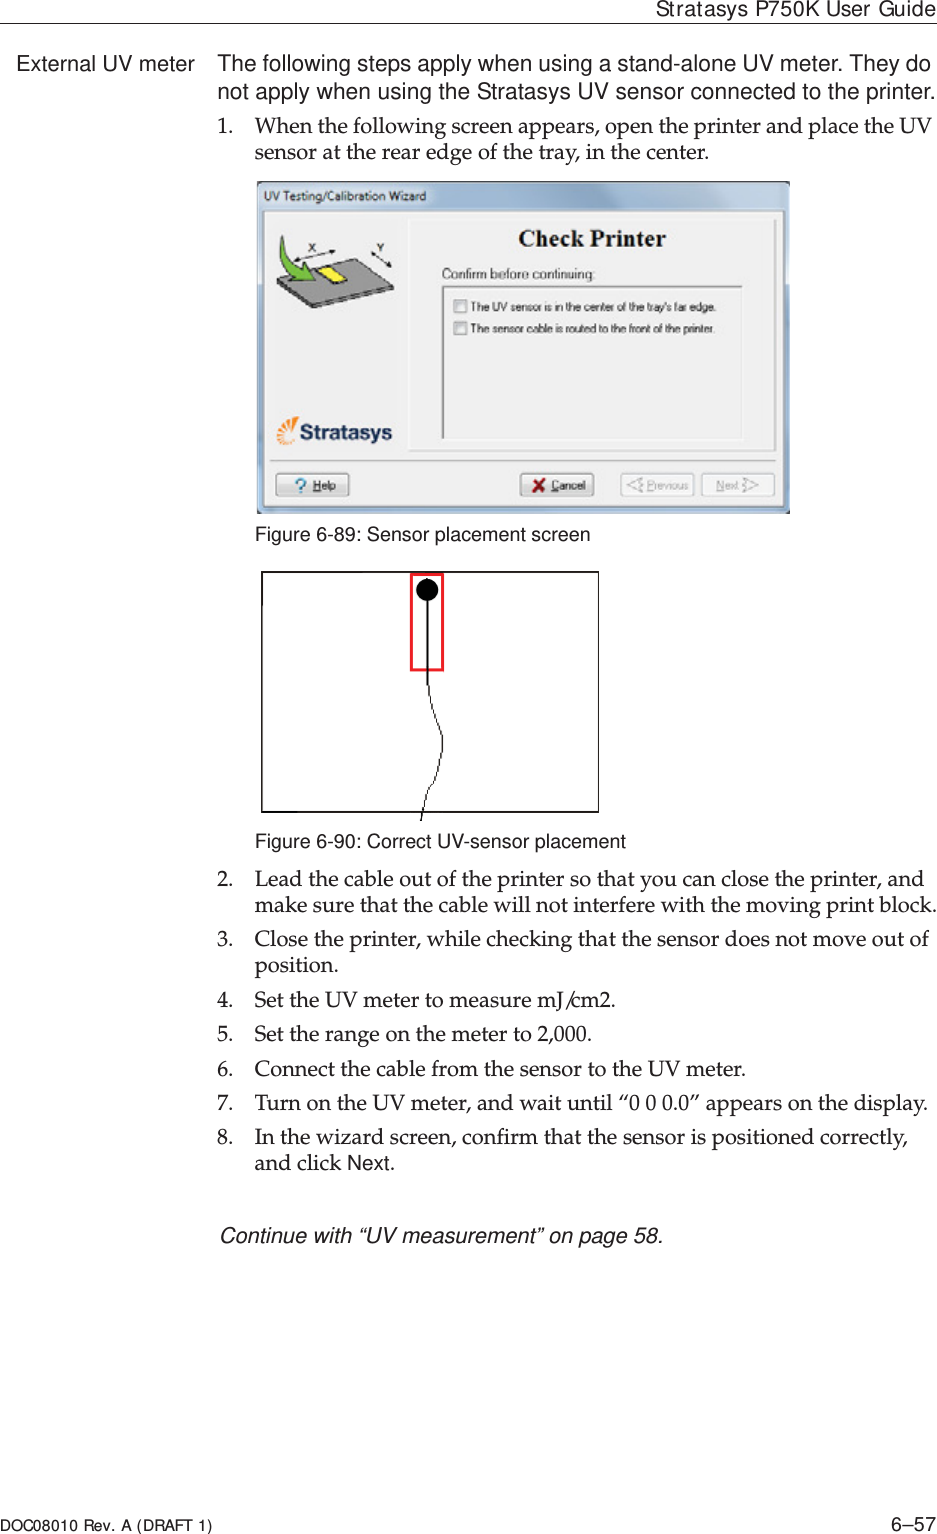
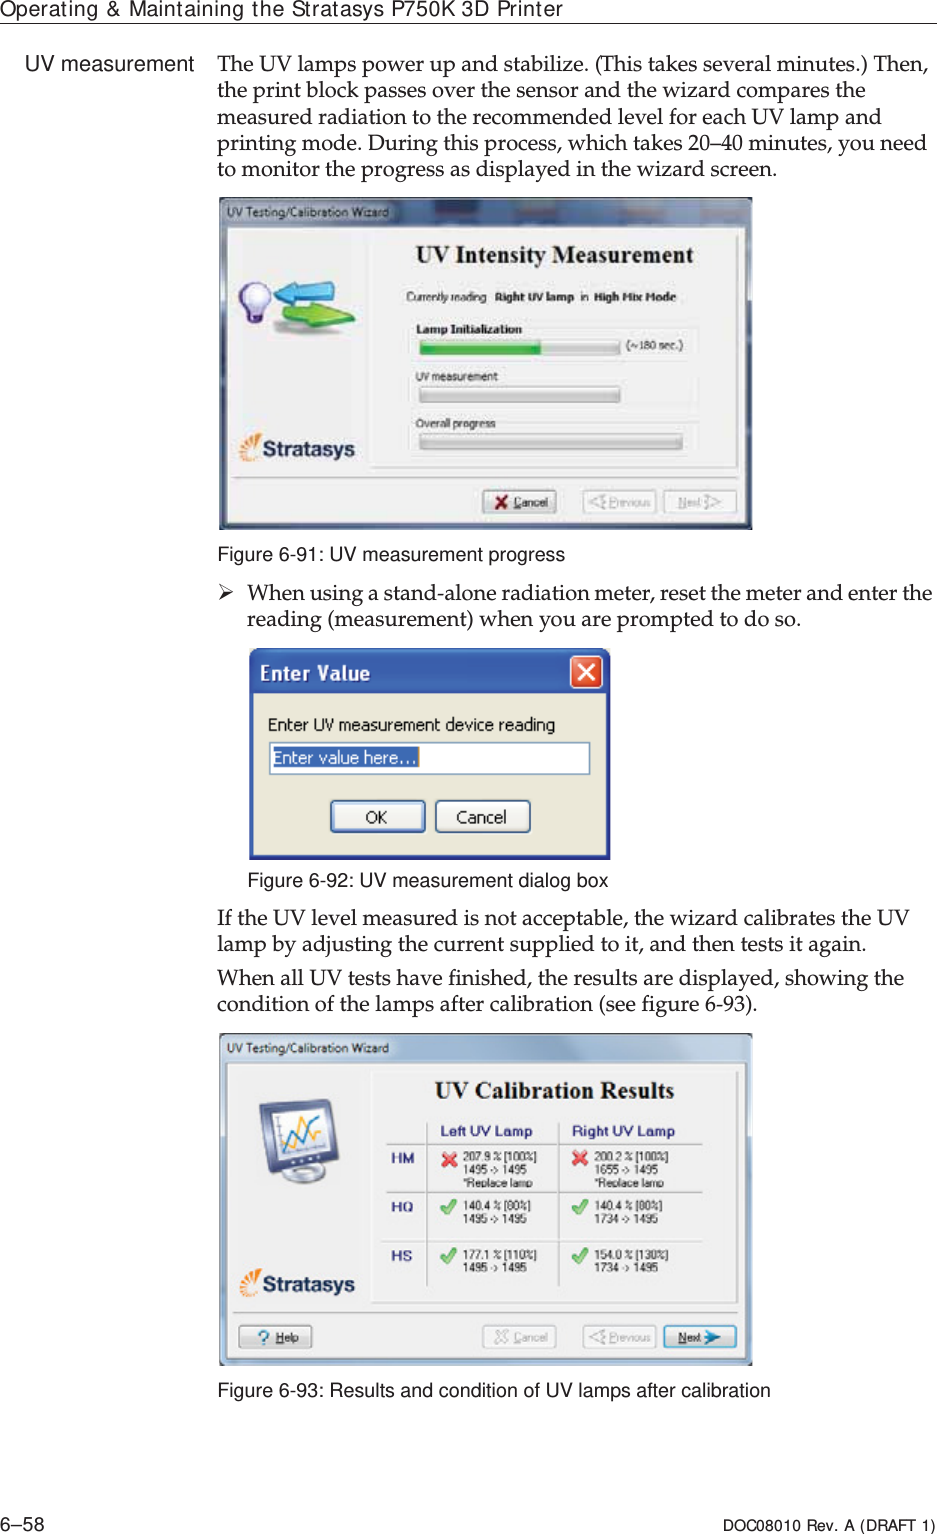
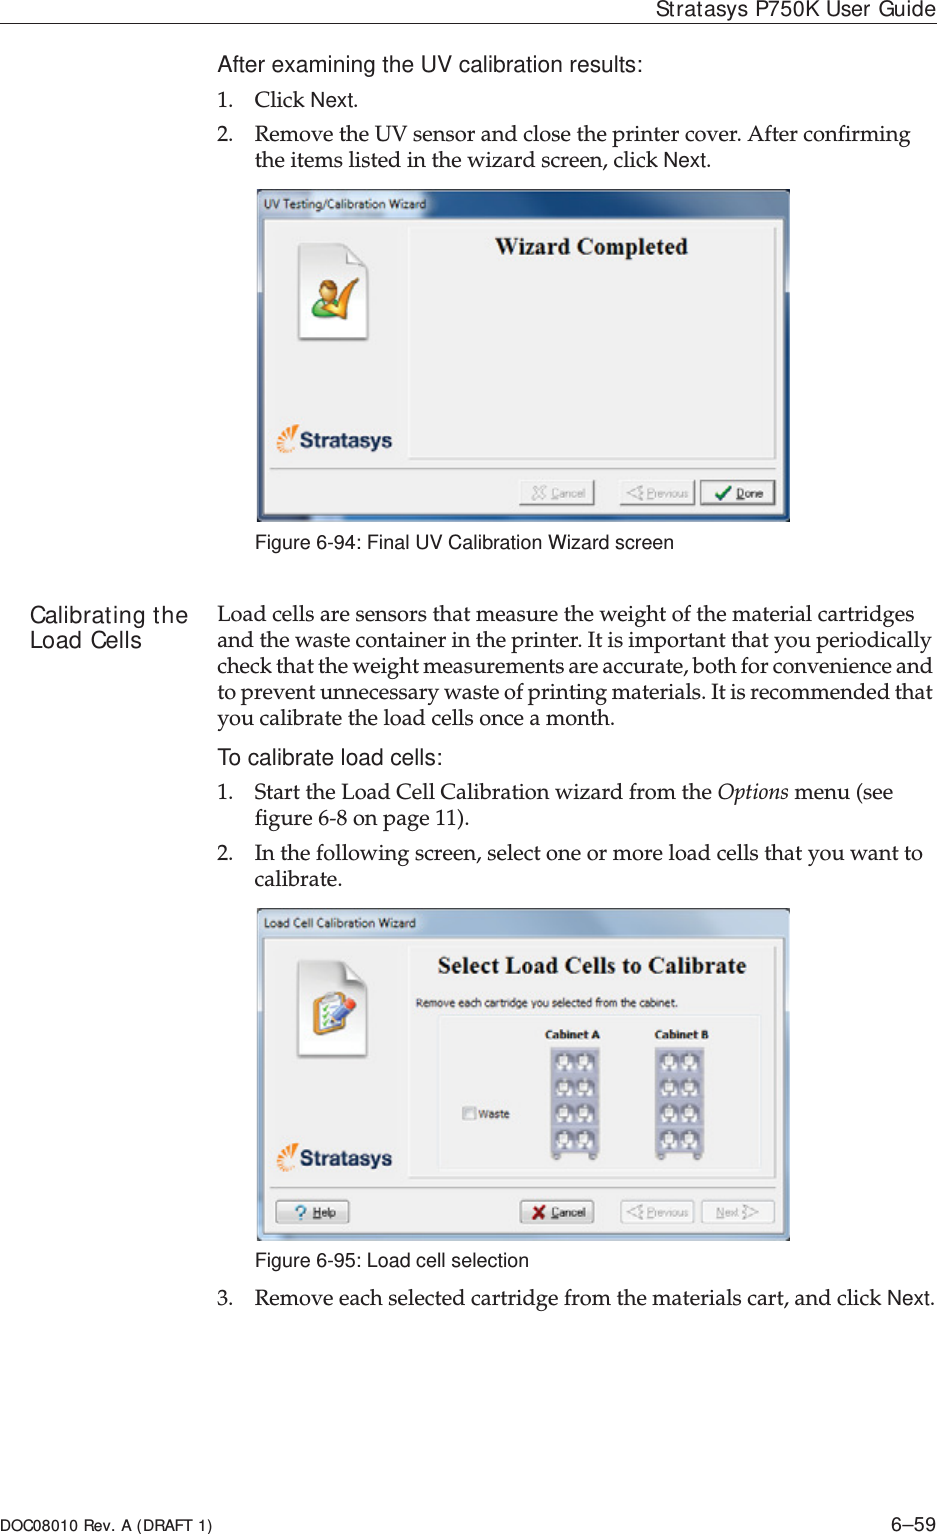
![DOC08010 Rev. A (DRAFT 1) 6–69Stratasys P750K User GuideCommand Buttons Youȱclickȱtheȱcommandȱbuttons,ȱonȱtheȱrightȱsideȱofȱtheȱscreen,ȱtoȱperformȱtheȱfollowingȱoperations:RunClickȱtoȱrunȱtheȱselectedȱtests.ResetClickȱtoȱclearȱpreviouslyȱrunȱtests.ȱThisȱreturnsȱtheȱstatusȱofȱeachȱtestȱtoȱUnknownȱ(?).SaveClickȱtoȱsaveȱaȱreportȱthatȱsummarizesȱtheȱtestsȱrun.ȱTheȱreportȱisȱsavedȱasȱanȱHTMLȱfile.ȱYouȱcanȱsaveȱanyȱnumberȱofȱreportsȱforȱtheȱtestsȱyouȱrun;ȱtheȱnameȱofȱtheȱfileȱsavedȱisȱBITReport [date][time].htm.ȱByȱdefault,ȱtheseȱfilesȱareȱsavedȱinȱtheȱStratasysȱinstallationȱfolder,ȱbutȱyouȱcanȱsaveȱitȱinȱanyȱotherȱfolder.ViewClickȱtoȱdisplayȱtheȱlatestȱtestȱreportȱthatȱyouȱsaved.ȱ(YouȱcanȱviewȱotherȱtestȱreportsȱbyȱopeningȱtheȱrelevantȱfilesȱinȱyourȱWebȱbrowser.ȱToȱdoȱso,ȱopenȱWindowsȱExplorer,ȱandȱdoubleȱclickȱtheȱBITReportȱfile.)CloseClickȱtoȱcloseȱtheȱBuiltȬinȱTestsȱscreen.Summary Onȱtheȱrightȱsideȱofȱtheȱscreen,ȱaȱsymbolȱrepresentsȱtheȱcombinedȱresultsȱofȱallȱtheȱtestsȱrun,ȱusingȱtheȱsymbolsȱfromȱtheȱStatusȱcolumn.Allȱtestsȱsuccessfullyȱcompleted.Atȱleastȱoneȱtestȱfailed.Notȱallȱtestsȱperformed.](https://usermanual.wiki/Stratasys/DUPCAB/User-Guide-2665715-Page-185.png)