Stratasys MATCAB Assembly of RFID reader and antenna boards User Manual user
Stratasys Ltd Assembly of RFID reader and antenna boards user
UserManual.wiki
>
Stratasys
>
MATCAB User Manual
user manual
Navigation menu
Upload a User Manual
Namespaces
Wiki Guide
HTML
PDF
Info
Views
User Manual
Discussion / Help
Navigation


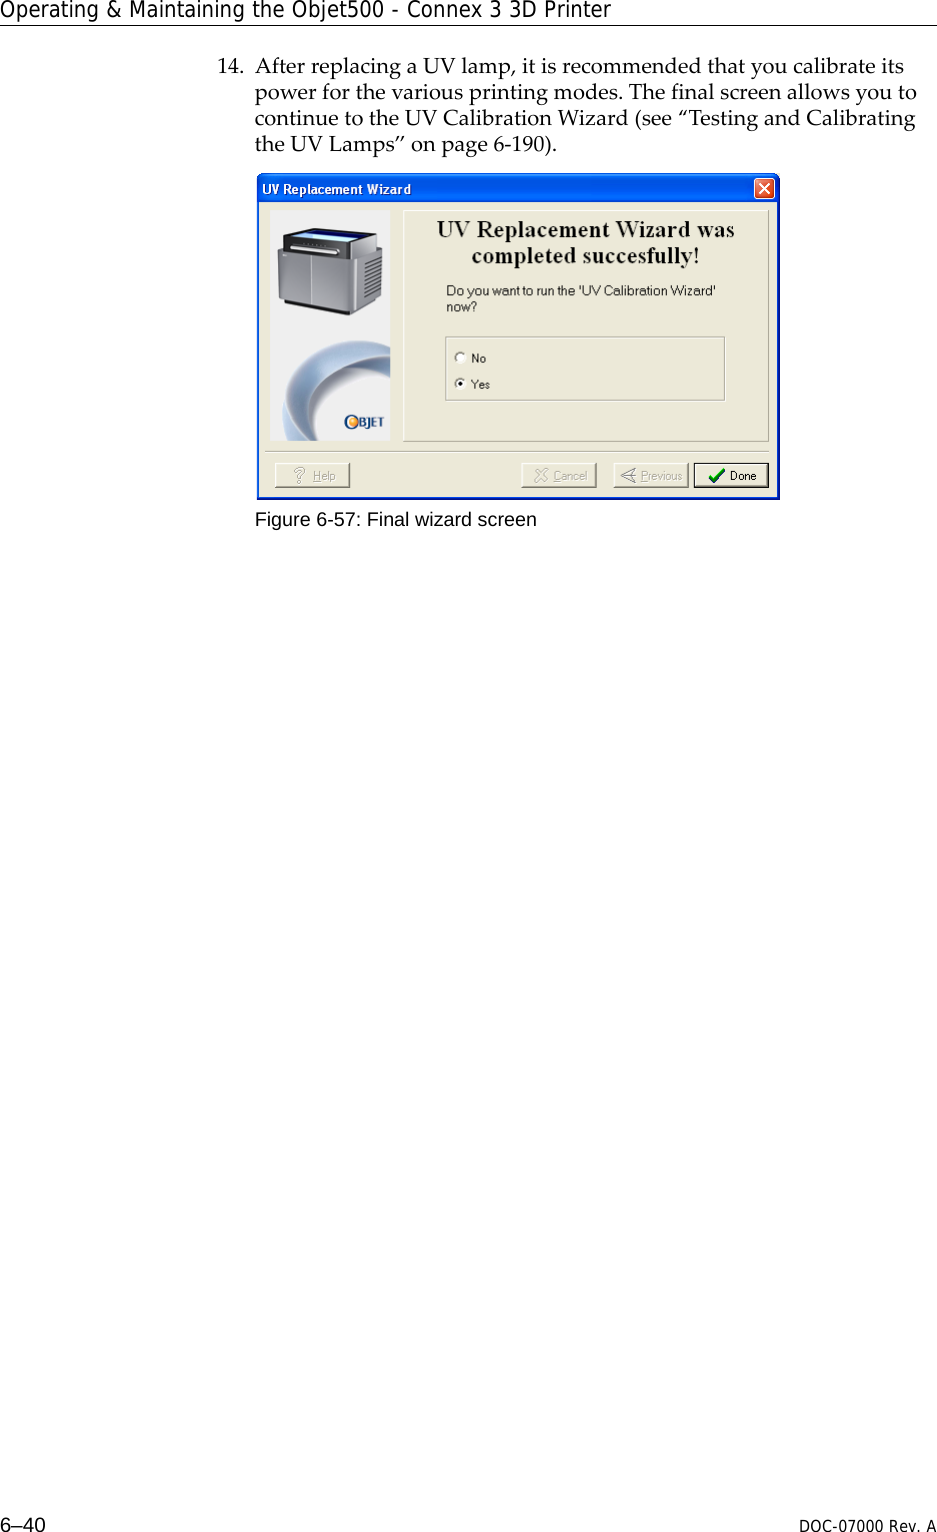
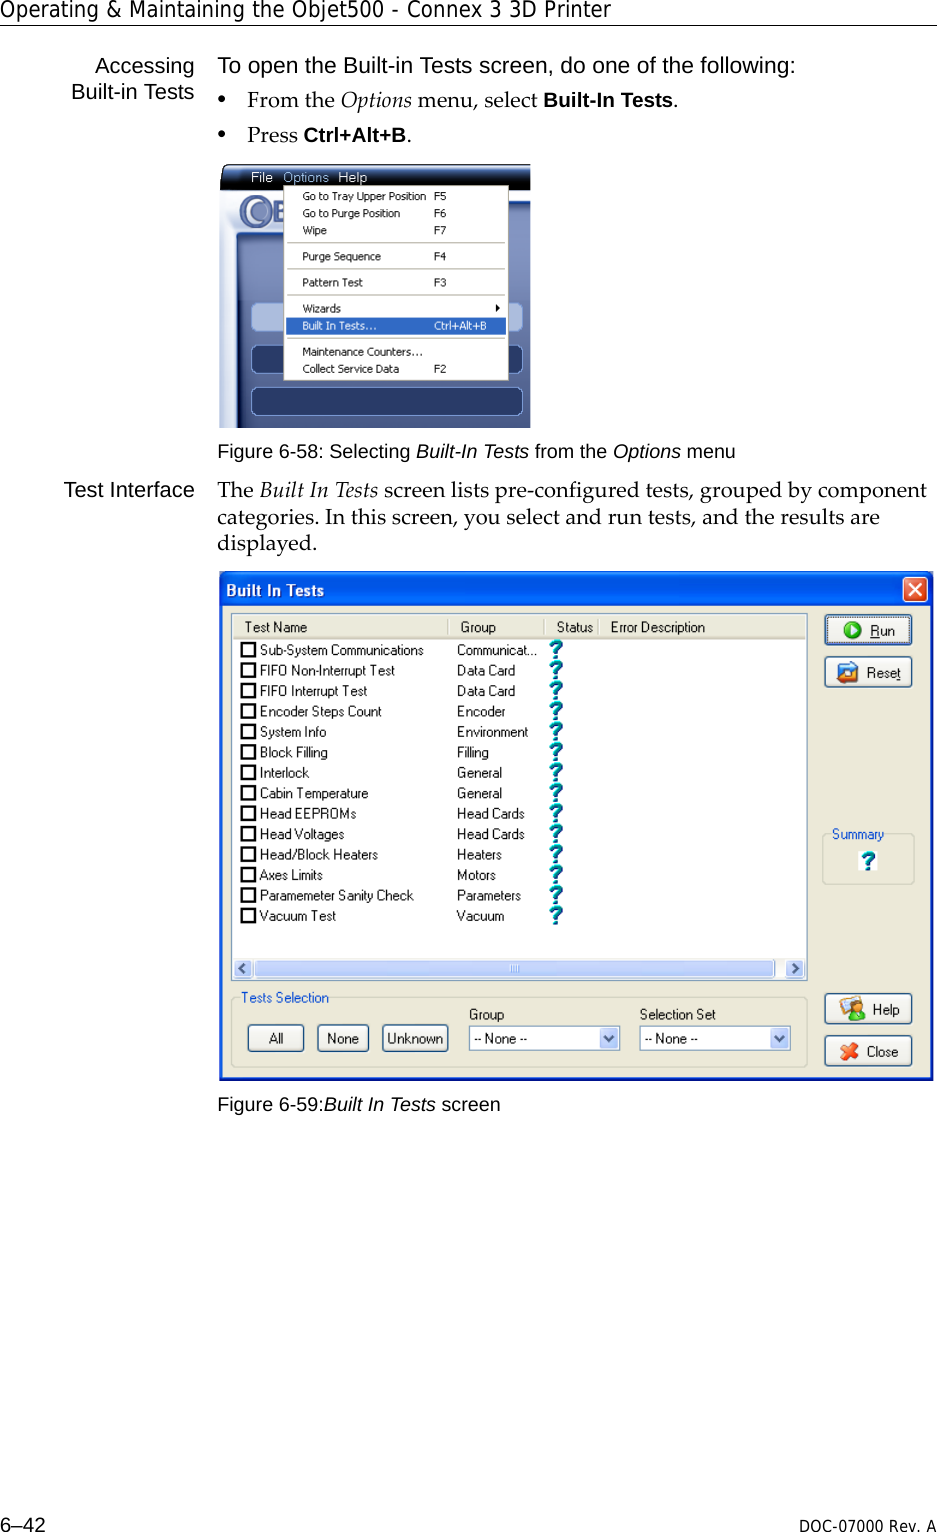
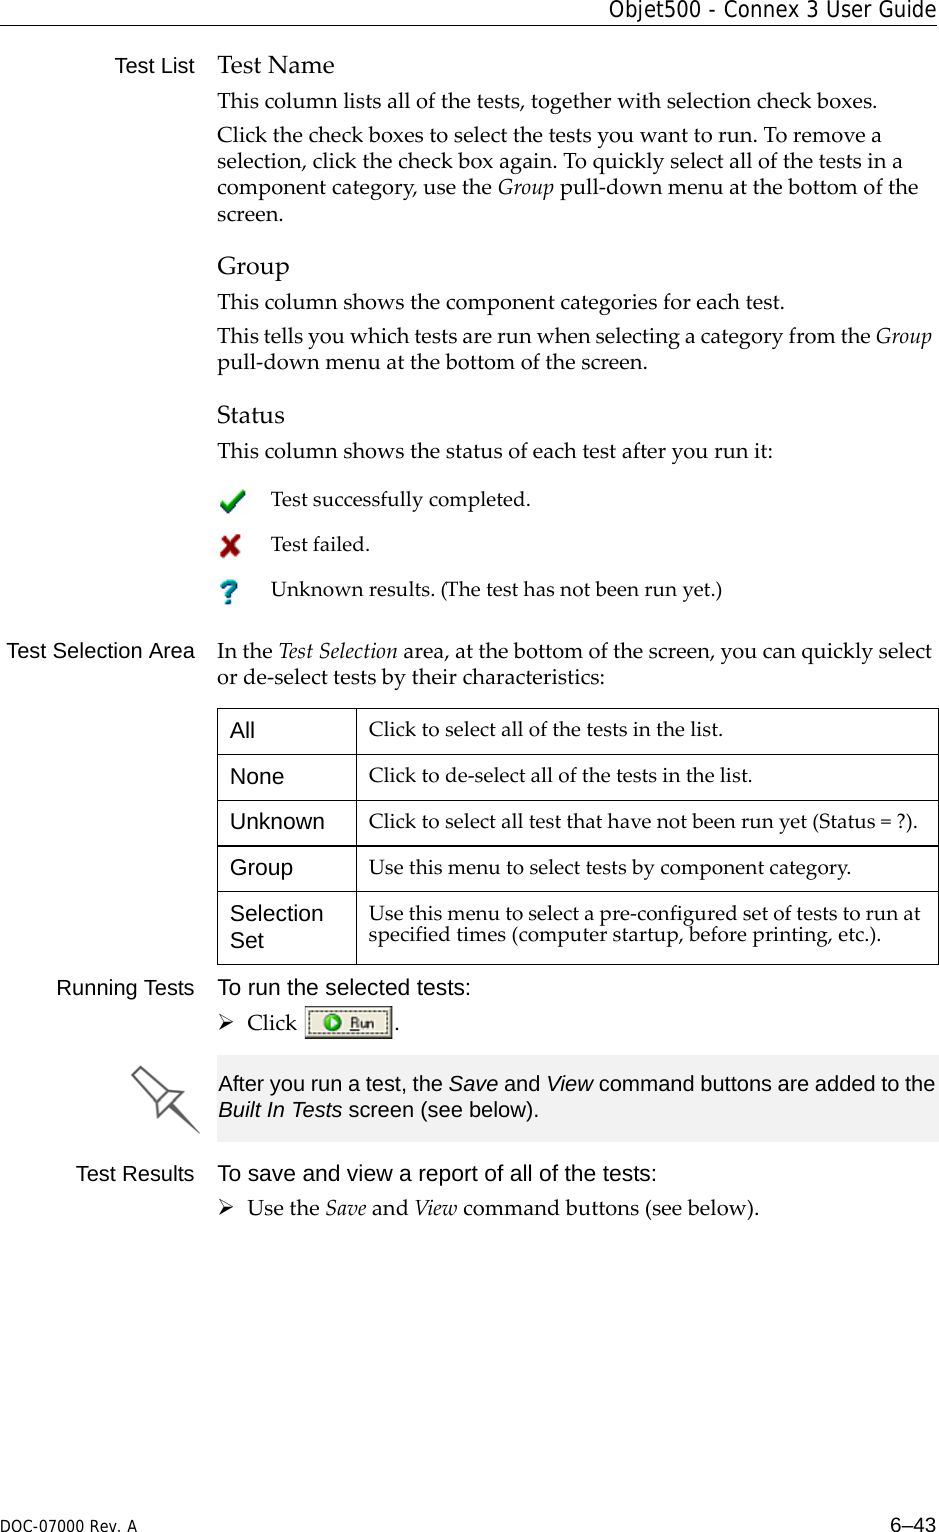
![Operating & Maintaining the Objet500 - Connex 3 3D Printer6–44 DOC-07000 Rev. ACommand Buttons Youclickthecommandbuttons,ontherightsideofthescreen,toperformthefollowingoperations:RunClicktoruntheselectedtests.ResetClicktoclearpreviouslyruntests.ThisreturnsthestatusofeachtesttoUnknown(?).SaveClicktosaveareportthatsummarizesthetestsrun.ThereportissavedasanHTMLfile.Youcansaveanynumberofreportsforthetestsyourun;thenameofthefilesavedisBITReport [date][time].htm.Bydefault,thesefilesaresavedintheObjetinstallationfolder,butyoucansaveitinanyotherfolder.ViewClicktodisplaythelatesttestreportthatyousaved.(YoucanviewothertestreportsbyopeningtherelevantfilesinyourWebbrowser.Todoso,openWindowsExplorer,anddoubleclicktheBITReportfile.)CloseClicktoclosetheBuilt‐inTestsscreen.Summary Ontherightsideofthescreen,asymbolrepresentsthecombinedresultsofallthetestsrun,usingthesymbolsfromtheStatuscolumn.Alltestssuccessfullycompleted.Atleastonetestfailed.Notalltestsperformed.](https://usermanual.wiki/Stratasys/MATCAB/User-Guide-1912586-Page-152.png)