Sun Communications WDCT45-A2 2.4GHz WDCT Color Display User Manual T1260 UserGuide R0 2005 03 31

SunCorp Communications Limited 2.4GHz WDCT Color Display T1260 UserGuide R0 2005 03 31

Contents

Users Manual 2 of 2

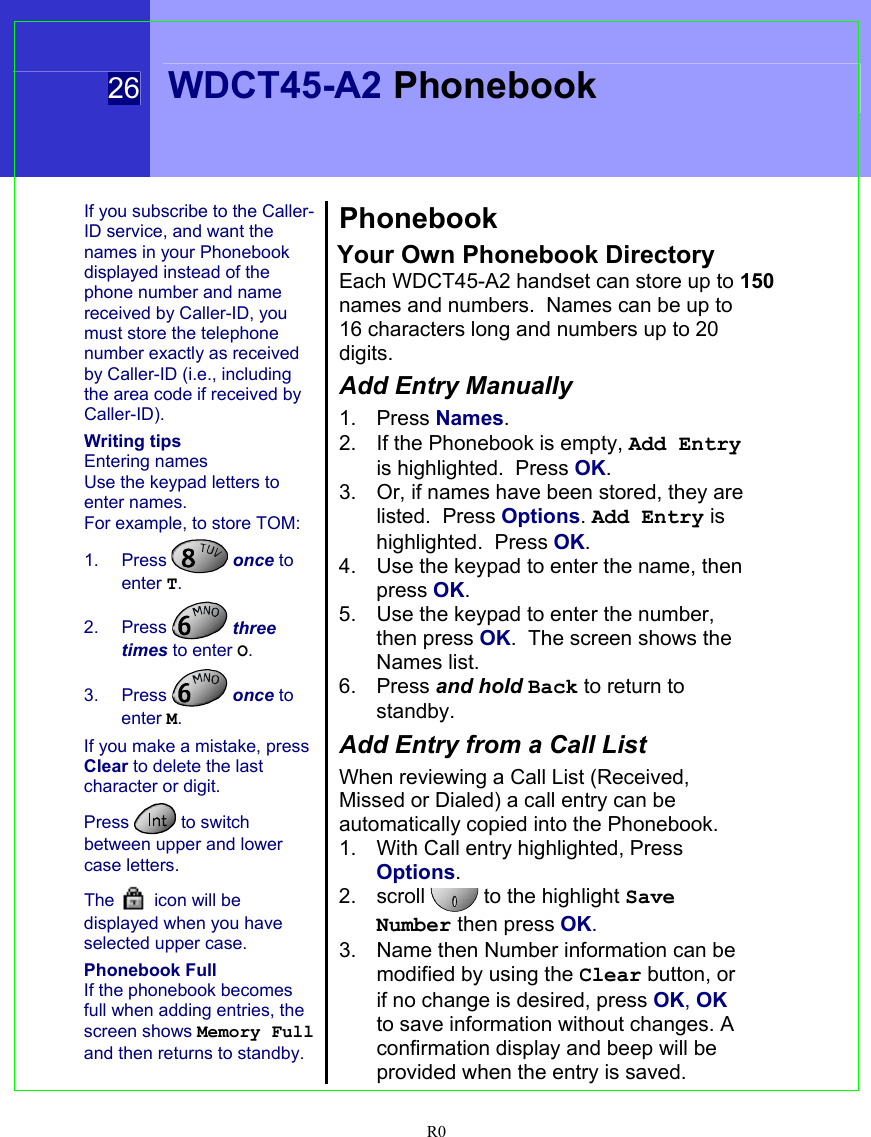
 26    WDCT45-A2 Phonebook R0  If you subscribe to the Caller-ID service, and want the names in your Phonebook displayed instead of the phone number and name received by Caller-ID, you must store the telephone number exactly as received by Caller-ID (i.e., including the area code if received by Caller-ID). Writing tips Entering names Use the keypad letters to enter names. For example, to store TOM: 1. Press   once to enter T. 2. Press   three times to enter O. 3. Press   once to enter M. If you make a mistake, press Clear to delete the last character or digit. Press   to switch between upper and lower case letters. The   icon will be displayed when you have selected upper case. Phonebook Full If the phonebook becomes full when adding entries, the screen shows Memory Full and then returns to standby. Phonebook Your Own Phonebook Directory Each WDCT45-A2 handset can store up to 150 names and numbers.  Names can be up to 16 characters long and numbers up to 20 digits. Add Entry Manually 1. Press Names. 2.  If the Phonebook is empty, Add Entry is highlighted.  Press OK. 3.  Or, if names have been stored, they are listed.  Press Options. Add Entry is highlighted.  Press OK. 4.  Use the keypad to enter the name, then press OK. 5.  Use the keypad to enter the number, then press OK.  The screen shows the Names list. 6. Press and hold Back to return to standby. Add Entry from a Call List When reviewing a Call List (Received, Missed or Dialed) a call entry can be automatically copied into the Phonebook.  1.  With Call entry highlighted, Press Options. 2. scroll   to the highlight Save Number then press OK. 3.  Name then Number information can be modified by using the Clear button, or if no change is desired, press OK, OK to save information without changes. A confirmation display and beep will be provided when the entry is saved.
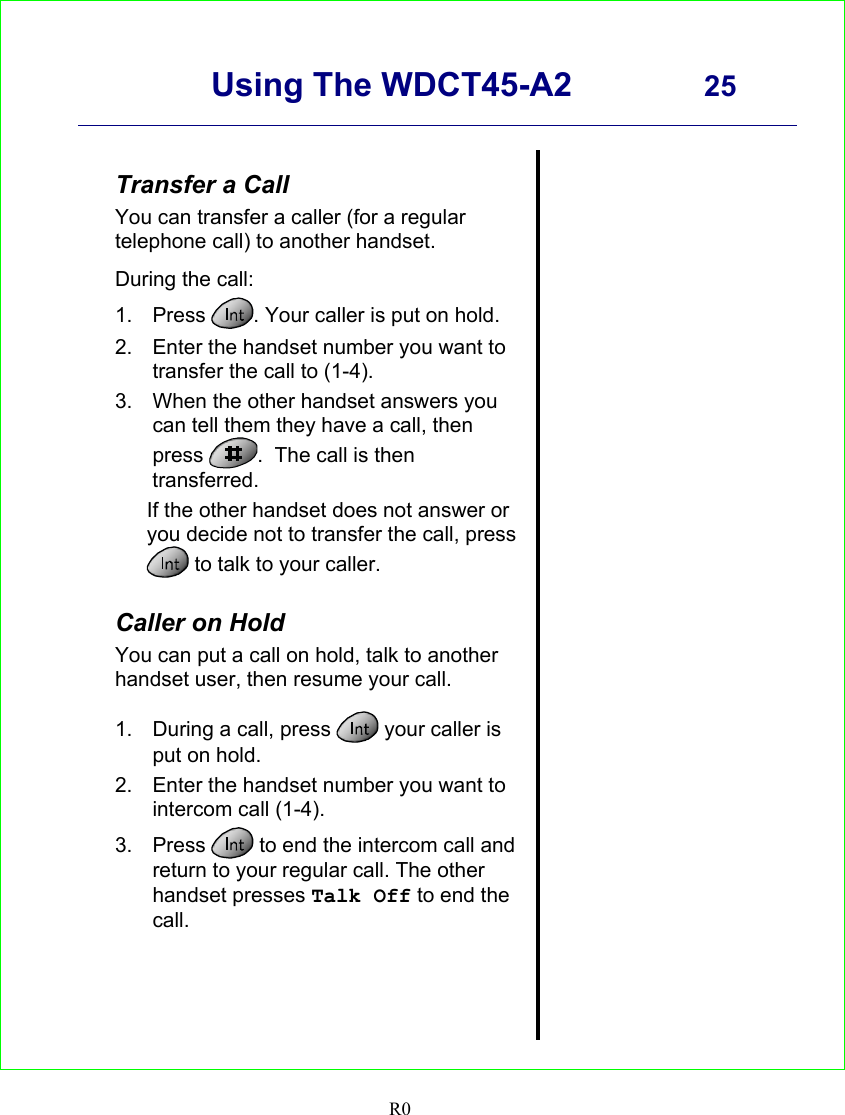
     Using The WDCT45-A2 25    R0   Transfer a Call You can transfer a caller (for a regular telephone call) to another handset.  During the call: 1. Press  . Your caller is put on hold. 2.  Enter the handset number you want to transfer the call to (1-4). 3.  When the other handset answers you can tell them they have a call, then press  .  The call is then transferred. If the other handset does not answer or you decide not to transfer the call, press  to talk to your caller.  Caller on Hold You can put a call on hold, talk to another handset user, then resume your call.  1.  During a call, press   your caller is put on hold. 2.  Enter the handset number you want to intercom call (1-4). 3. Press   to end the intercom call and return to your regular call. The other handset presses Talk Off to end the call.
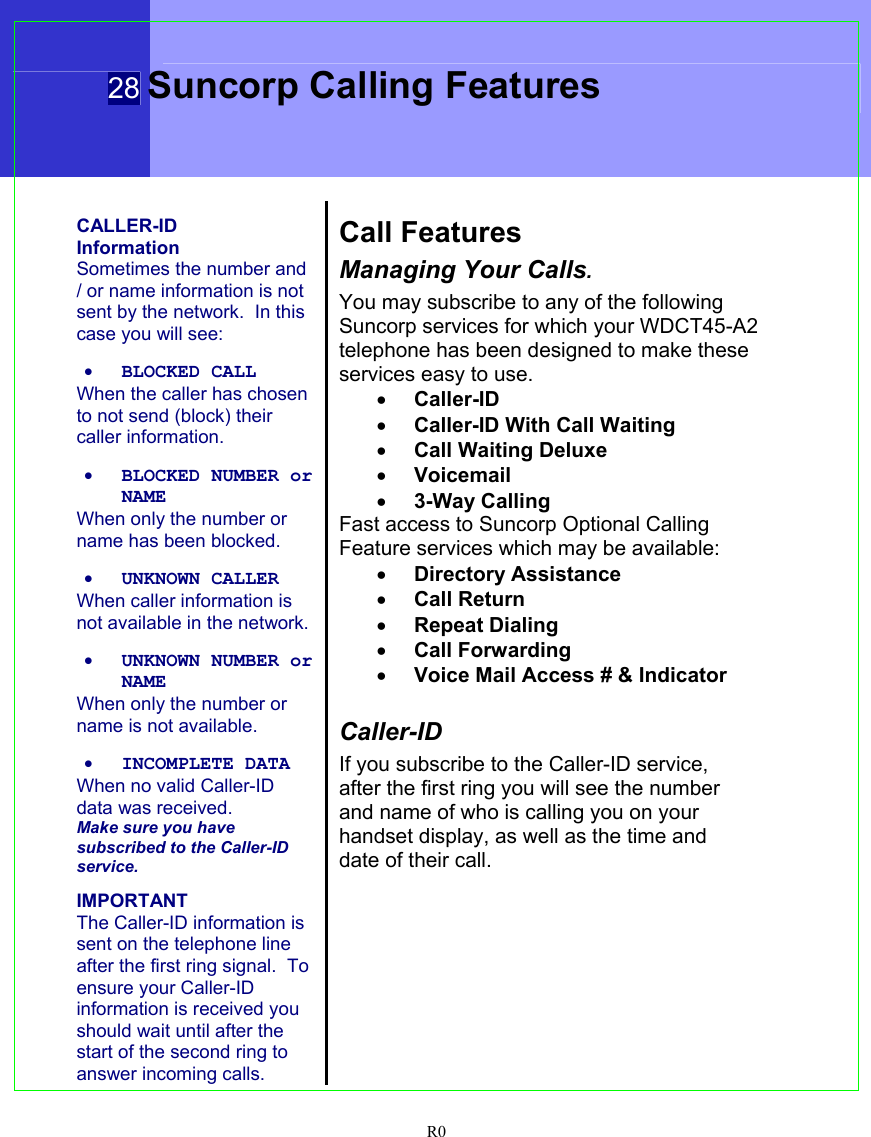
 28 Suncorp Calling Features  R0   CALLER-ID Information Sometimes the number and / or name information is not sent by the network.  In this case you will see:  • BLOCKED CALL When the caller has chosen to not send (block) their caller information.  • BLOCKED NUMBER or NAME When only the number or name has been blocked.  • UNKNOWN CALLER When caller information is not available in the network.  • UNKNOWN NUMBER or NAME When only the number or name is not available.  • INCOMPLETE DATA When no valid Caller-ID data was received. Make sure you have subscribed to the Caller-ID service.  IMPORTANT The Caller-ID information is sent on the telephone line after the first ring signal.  To ensure your Caller-ID information is received you should wait until after the start of the second ring to answer incoming calls.  Call Features Managing Your Calls. You may subscribe to any of the following Suncorp services for which your WDCT45-A2 telephone has been designed to make these services easy to use. • Caller-ID • Caller-ID With Call Waiting • Call Waiting Deluxe • Voicemail • 3-Way Calling Fast access to Suncorp Optional Calling Feature services which may be available: • Directory Assistance • Call Return • Repeat Dialing • Call Forwarding • Voice Mail Access # & Indicator  Caller-ID If you subscribe to the Caller-ID service, after the first ring you will see the number and name of who is calling you on your handset display, as well as the time and date of their call.
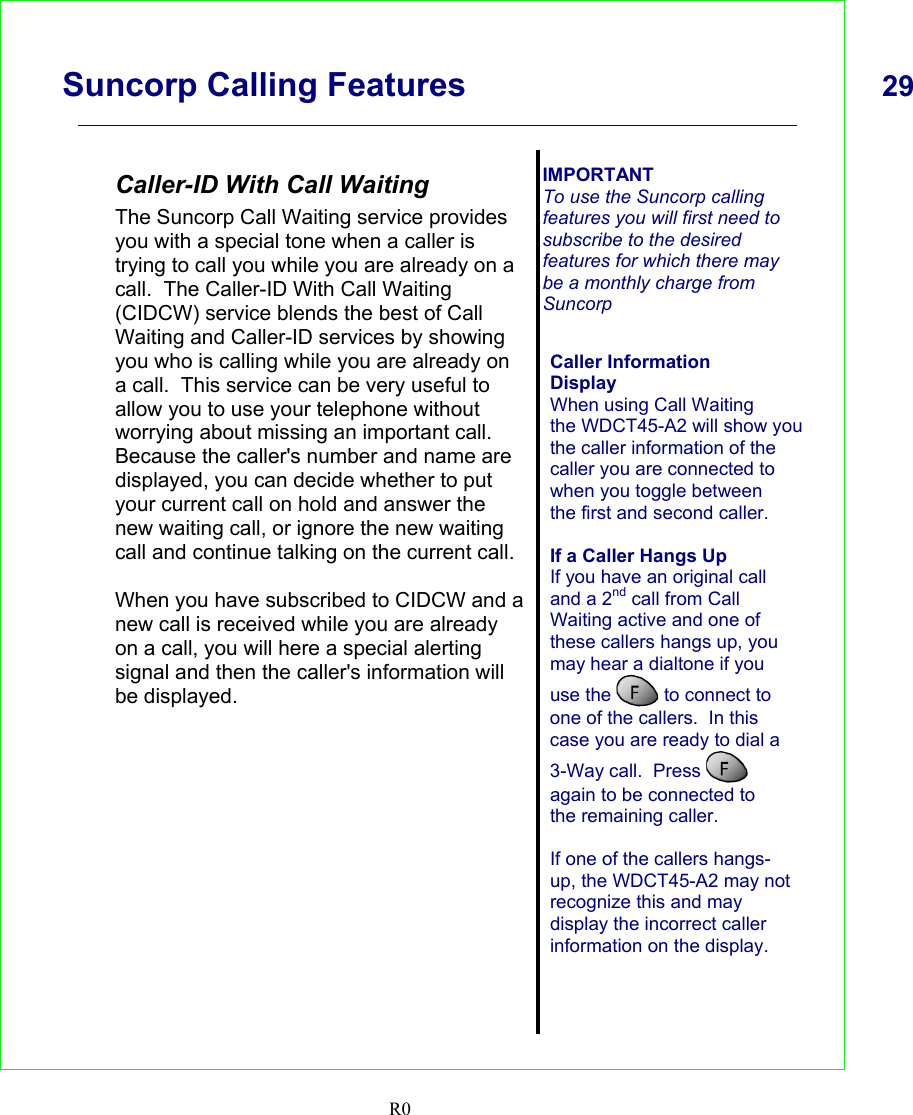
     Suncorp Calling Features  29    R0   Caller-ID With Call Waiting The Suncorp Call Waiting service provides you with a special tone when a caller is trying to call you while you are already on a call.  The Caller-ID With Call Waiting (CIDCW) service blends the best of Call Waiting and Caller-ID services by showing you who is calling while you are already on a call.  This service can be very useful to allow you to use your telephone without worrying about missing an important call.  Because the caller's number and name are displayed, you can decide whether to put your current call on hold and answer the new waiting call, or ignore the new waiting call and continue talking on the current call.  When you have subscribed to CIDCW and a new call is received while you are already on a call, you will here a special alerting signal and then the caller's information will be displayed.      IMPORTANT To use the Suncorp calling features you will first need to subscribe to the desired features for which there may be a monthly charge from Suncorp   Caller Information Display When using Call Waiting the WDCT45-A2 will show you the caller information of the caller you are connected to when you toggle between the first and second caller.    If a Caller Hangs Up If you have an original call and a 2nd call from Call Waiting active and one of these callers hangs up, you may hear a dialtone if you use the   to connect to one of the callers.  In this case you are ready to dial a 3-Way call.  Press    again to be connected to the remaining caller.  If one of the callers hangs-up, the WDCT45-A2 may not recognize this and may display the incorrect caller information on the display.
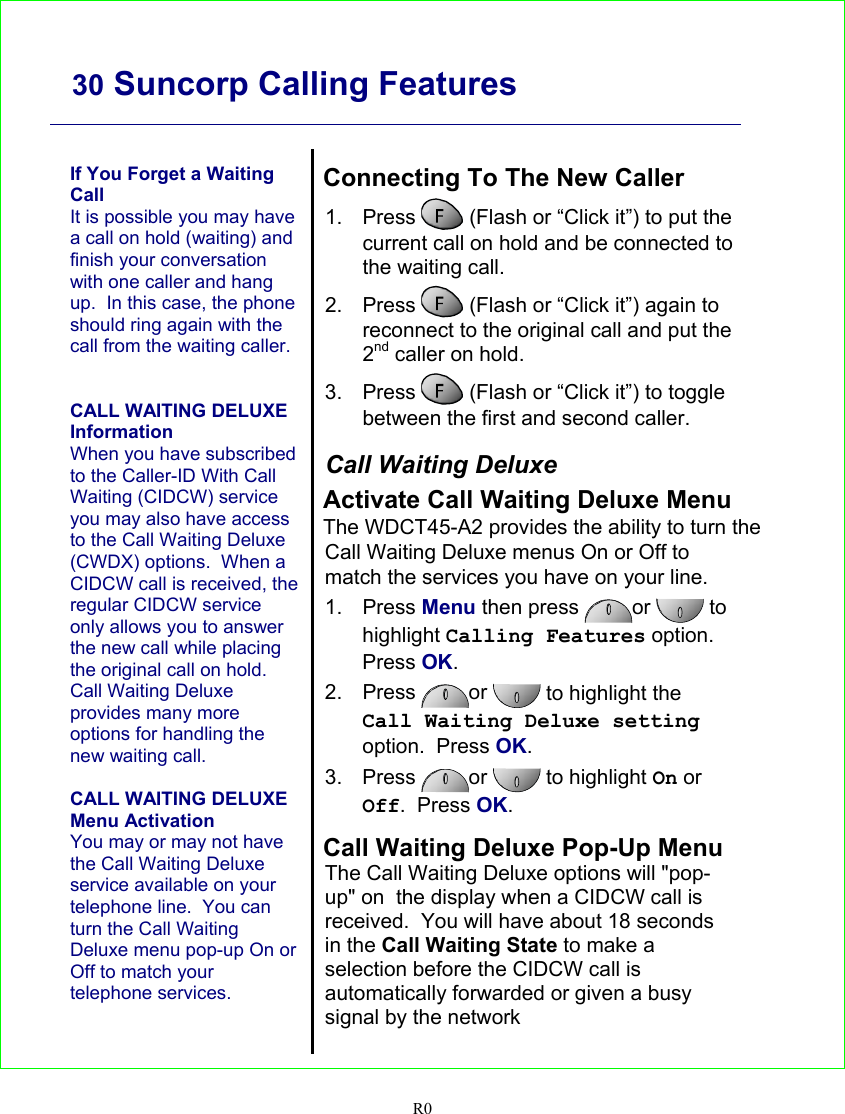
    30 Suncorp Calling Features   R0   If You Forget a Waiting Call It is possible you may have a call on hold (waiting) and finish your conversation with one caller and hang up.  In this case, the phone should ring again with the call from the waiting caller.   CALL WAITING DELUXE Information When you have subscribed to the Caller-ID With Call Waiting (CIDCW) service you may also have access to the Call Waiting Deluxe (CWDX) options.  When a CIDCW call is received, the regular CIDCW service only allows you to answer the new call while placing the original call on hold.  Call Waiting Deluxe provides many more options for handling the new waiting call.  CALL WAITING DELUXE Menu Activation You may or may not have the Call Waiting Deluxe service available on your telephone line.  You can turn the Call Waiting Deluxe menu pop-up On or Off to match your telephone services.   Connecting To The New Caller 1. Press   (Flash or “Click it”) to put the current call on hold and be connected to the waiting call. 2. Press   (Flash or “Click it”) again to reconnect to the original call and put the 2nd caller on hold. 3. Press   (Flash or “Click it”) to toggle between the first and second caller.  Call Waiting Deluxe Activate Call Waiting Deluxe Menu The WDCT45-A2 provides the ability to turn the Call Waiting Deluxe menus On or Off to match the services you have on your line. 1. Press Menu then press  or  to highlight Calling Features option.  Press OK. 2. Press  or  to highlight the Call Waiting Deluxe setting option.  Press OK. 3. Press  or   to highlight On or Off.  Press OK.  Call Waiting Deluxe Pop-Up Menu The Call Waiting Deluxe options will "pop-up" on  the display when a CIDCW call is received.  You will have about 18 seconds in the Call Waiting State to make a selection before the CIDCW call is automatically forwarded or given a busy signal by the network
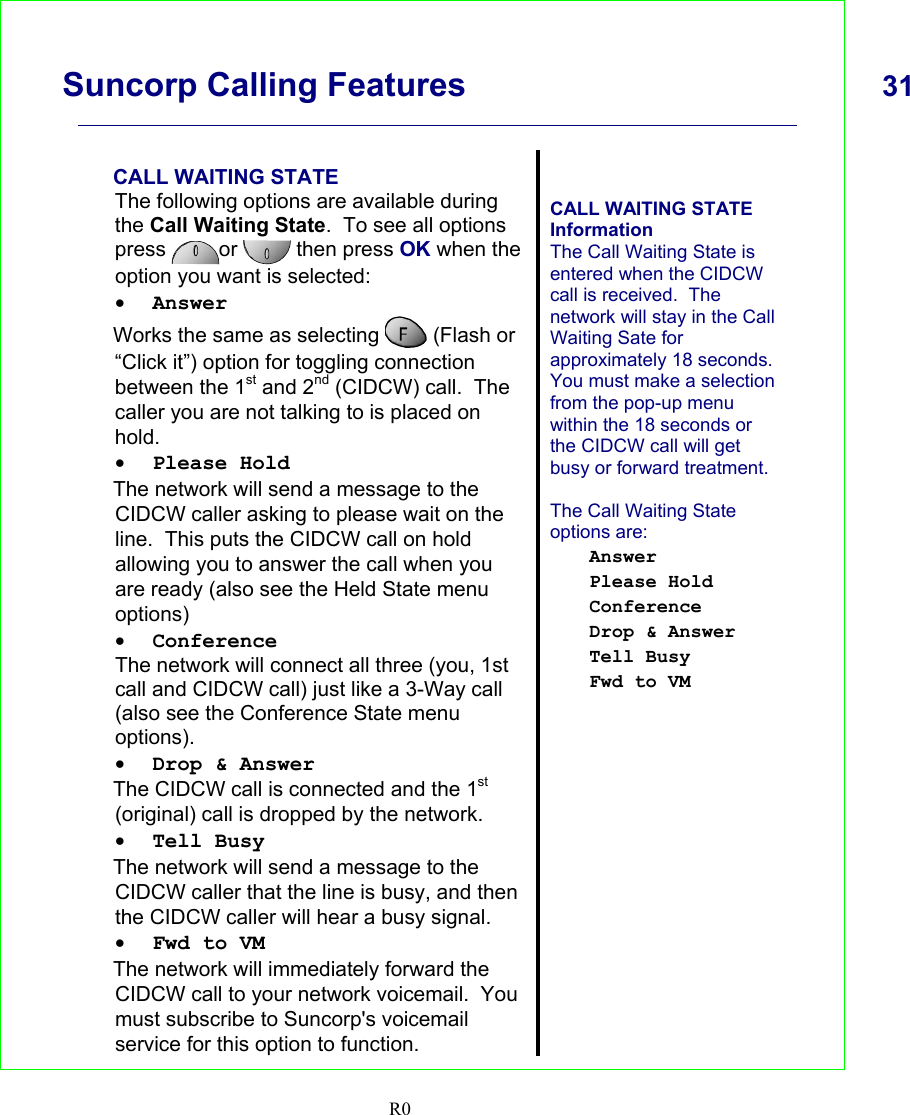
     Suncorp Calling Features  31    R0   CALL WAITING STATE The following options are available during the Call Waiting State.  To see all options press  or   then press OK when the option you want is selected:  • Answer Works the same as selecting   (Flash or “Click it”) option for toggling connection between the 1st and 2nd (CIDCW) call.  The caller you are not talking to is placed on hold. • Please Hold The network will send a message to the CIDCW caller asking to please wait on the line.  This puts the CIDCW call on hold allowing you to answer the call when you are ready (also see the Held State menu options) • Conference The network will connect all three (you, 1st call and CIDCW call) just like a 3-Way call (also see the Conference State menu options). • Drop & Answer The CIDCW call is connected and the 1st (original) call is dropped by the network. • Tell Busy The network will send a message to the CIDCW caller that the line is busy, and then the CIDCW caller will hear a busy signal. • Fwd to VM The network will immediately forward the CIDCW call to your network voicemail.  You must subscribe to Suncorp's voicemail service for this option to function.   CALL WAITING STATE Information The Call Waiting State is entered when the CIDCW call is received.  The network will stay in the Call Waiting Sate for approximately 18 seconds.  You must make a selection from the pop-up menu within the 18 seconds or the CIDCW call will get busy or forward treatment.  The Call Waiting State options are: Answer Please Hold Conference Drop & Answer Tell Busy Fwd to VM
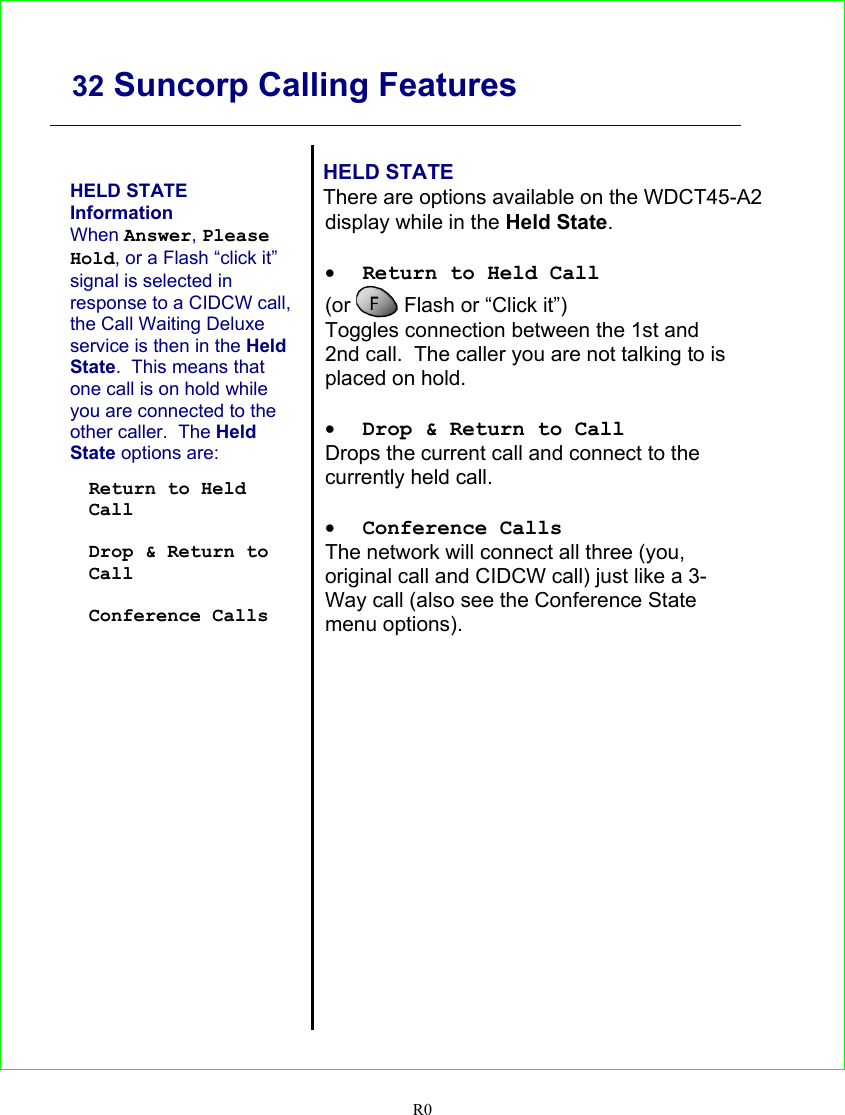
    32 Suncorp Calling Features   R0   HELD STATE Information When Answer, Please Hold, or a Flash “click it” signal is selected in response to a CIDCW call, the Call Waiting Deluxe service is then in the Held State.  This means that one call is on hold while you are connected to the other caller.  The Held State options are:  Return to Held Call  Drop & Return to Call  Conference Calls   HELD STATE There are options available on the WDCT45-A2 display while in the Held State.  • Return to Held Call  (or   Flash or “Click it”) Toggles connection between the 1st and 2nd call.  The caller you are not talking to is placed on hold.  • Drop & Return to Call Drops the current call and connect to the currently held call.  • Conference Calls The network will connect all three (you, original call and CIDCW call) just like a 3-Way call (also see the Conference State menu options).
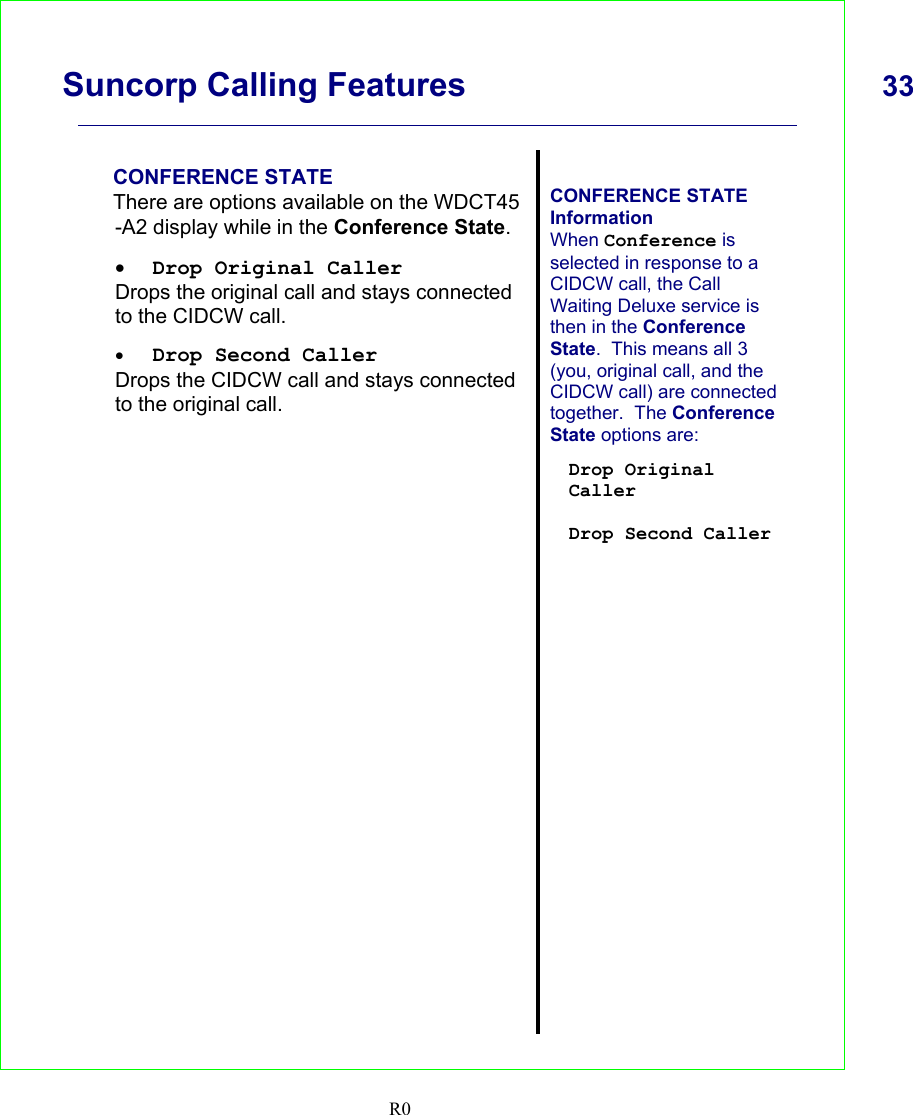
     Suncorp Calling Features  33    R0   CONFERENCE STATE There are options available on the WDCT45 -A2 display while in the Conference State.  • Drop Original Caller Drops the original call and stays connected to the CIDCW call.  • Drop Second Caller Drops the CIDCW call and stays connected to the original call.      CONFERENCE STATE Information When Conference is selected in response to a CIDCW call, the Call Waiting Deluxe service is then in the Conference State.  This means all 3 (you, original call, and the CIDCW call) are connected together.  The Conference State options are:  Drop Original Caller  Drop Second Caller
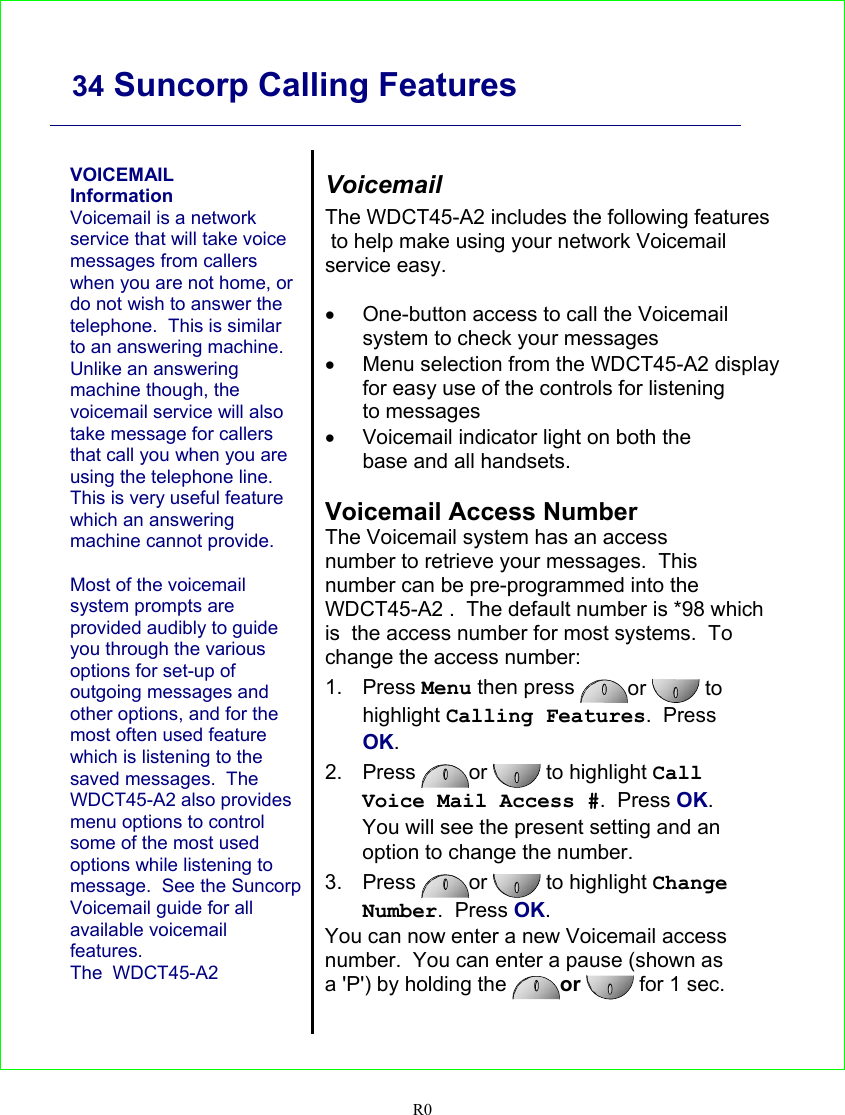
    34 Suncorp Calling Features   R0   VOICEMAIL Information Voicemail is a network service that will take voice messages from callers when you are not home, or do not wish to answer the telephone.  This is similar to an answering machine.  Unlike an answering machine though, the voicemail service will also take message for callers that call you when you are using the telephone line.  This is very useful feature which an answering machine cannot provide.    Most of the voicemail system prompts are provided audibly to guide you through the various options for set-up of outgoing messages and other options, and for the most often used feature which is listening to the saved messages.  The WDCT45-A2 also provides menu options to control some of the most used options while listening to  message.  See the SuncorpVoicemail guide for all available voicemail features. The  WDCT45-A2    Voicemail The WDCT45-A2 includes the following features to help make using your network Voicemail service easy.  •  One-button access to call the Voicemail system to check your messages •  Menu selection from the WDCT45-A2 display for easy use of the controls for listening to messages •  Voicemail indicator light on both the base and all handsets.  Voicemail Access Number The Voicemail system has an access number to retrieve your messages.  This number can be pre-programmed into the WDCT45-A2 .  The default number is *98 which is  the access number for most systems.  To change the access number: 1. Press Menu then press  or   to highlight Calling Features.  Press OK. 2. Press  or   to highlight Call Voice Mail Access #.  Press OK.  You will see the present setting and an option to change the number. 3. Press  or   to highlight Change Number.  Press OK.   You can now enter a new Voicemail access number.  You can enter a pause (shown as a 'P') by holding the  or  for 1 sec.
     Suncorp Calling Features  35    R0   Voicemail System Access Once the correct access number is programmed, simply press   to automatically call the voicemail system.    Voice Mail Guide After using the one-touch Voicemail access button, the WDCT45-A2 will display the Voice Mail Guide.    Press  or  to scroll to see all options.  These options can only be selected by pressing the corresponding button on the WDCT45-A2 handset keypad.  Voicemail Indicator If you have Voicemail waiting, the WDCT45-A2 will show alert you to the Voicemail by: 1.  A blinking light on the base 2.  Each handset display will flash the backlighting 3.  Each handset display will show: You have a Message Waiting   WDCT45-A2VOICE MAIL GUIDE Information The WDCT45-A2 provides a Voice Mail Guide for easy access to your Voicemail system's top level options.  This menu will stay on the display while you are using other Voicemail options.  Note the Voicemail top level options are only valid when the Voicemail system is in the top level state.  The Voice Mail Guide includes the following options.  Select an option by pressing the corresponding button on the WDCT45-A2 handset.  [1] Play messages [2] Send a message [3] Reminder service  [9] Mailbox Options   [*] Exit or Go back  [0] Help [#] End [6] Info by Voice [7] Access other mailboxes [8] Other messages
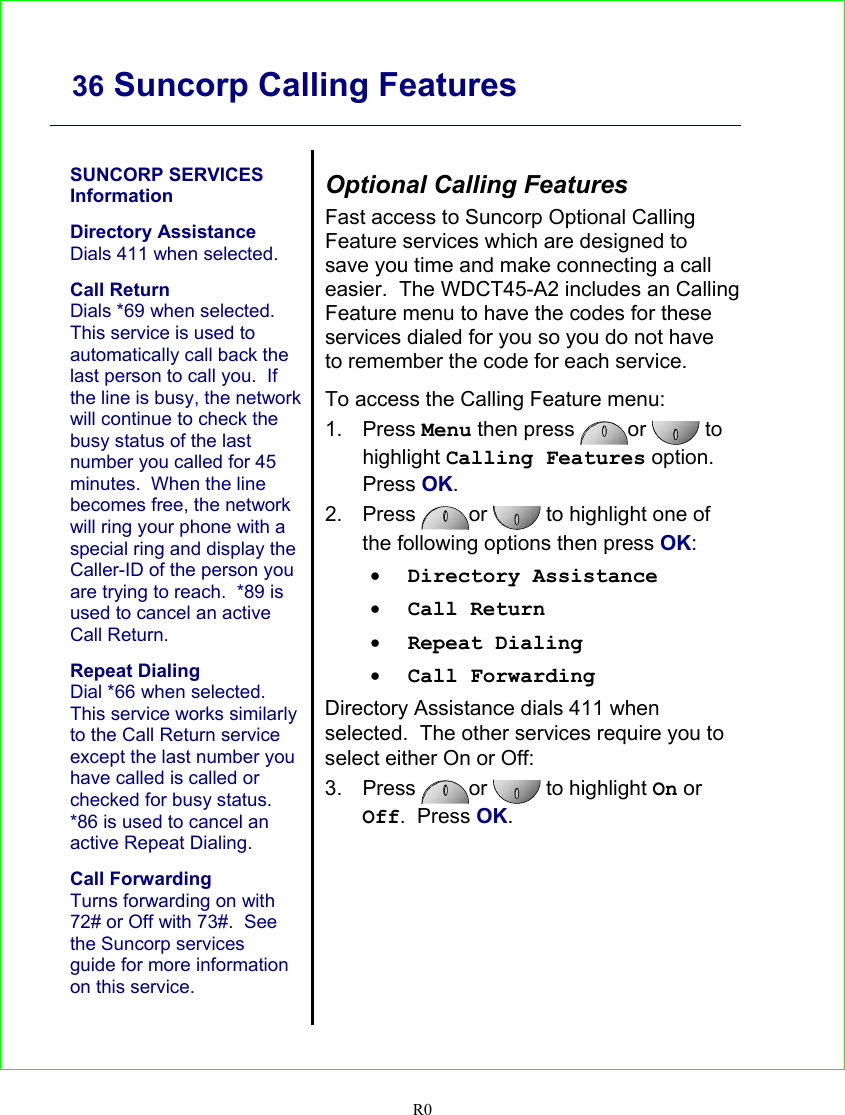
    36 Suncorp Calling Features   R0   SUNCORP SERVICES Information  Directory Assistance Dials 411 when selected.  Call Return Dials *69 when selected.  This service is used to automatically call back the last person to call you.  If the line is busy, the network will continue to check the busy status of the last number you called for 45 minutes.  When the line becomes free, the network will ring your phone with a special ring and display the Caller-ID of the person you are trying to reach.  *89 is used to cancel an active Call Return.  Repeat Dialing Dial *66 when selected.  This service works similarly to the Call Return service except the last number you have called is called or checked for busy status.  *86 is used to cancel an active Repeat Dialing.  Call Forwarding Turns forwarding on with 72# or Off with 73#.  See the Suncorp services guide for more information on this service.   Optional Calling Features Fast access to Suncorp Optional Calling Feature services which are designed to save you time and make connecting a call easier.  The WDCT45-A2 includes an Calling Feature menu to have the codes for these services dialed for you so you do not have to remember the code for each service.  To access the Calling Feature menu: 1. Press Menu then press  or   to highlight Calling Features option.  Press OK. 2. Press  or   to highlight one of the following options then press OK: • Directory Assistance • Call Return • Repeat Dialing • Call Forwarding Directory Assistance dials 411 when selected.  The other services require you to select either On or Off: 3. Press  or  to highlight On or Off.  Press OK.
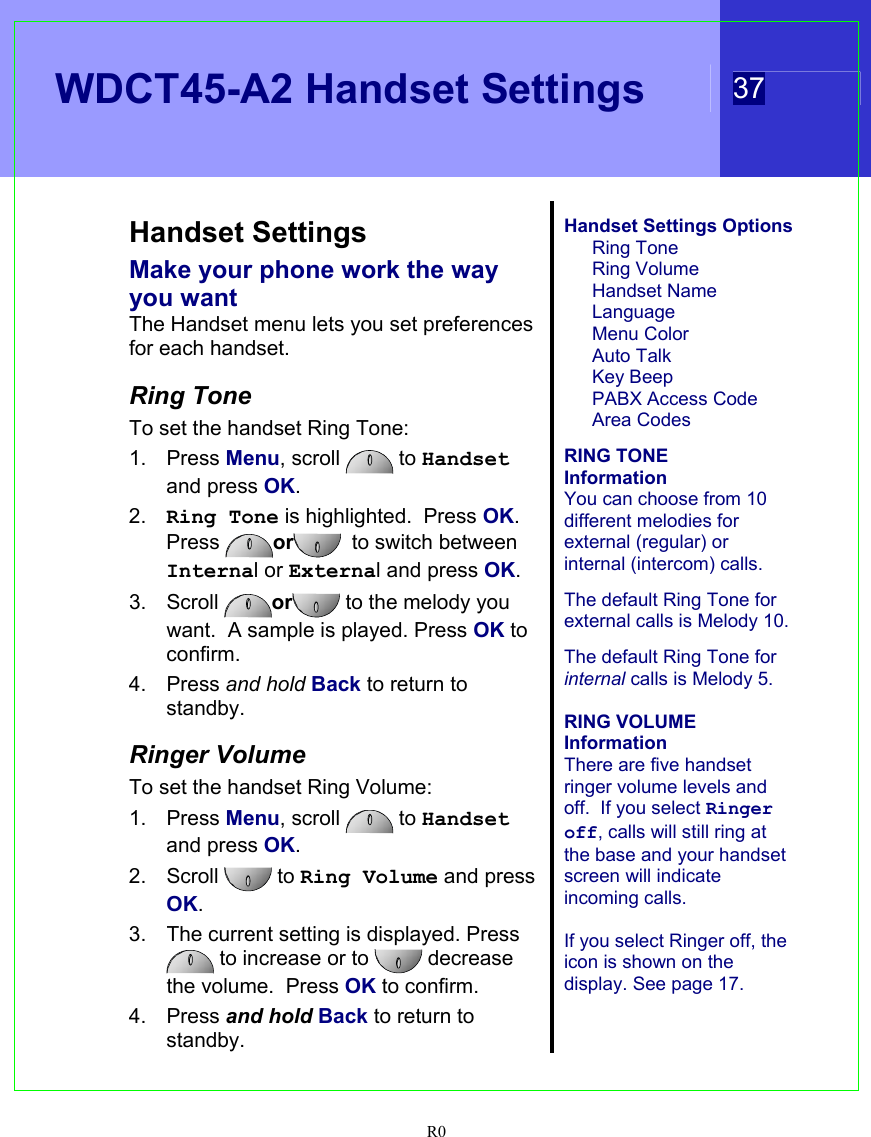
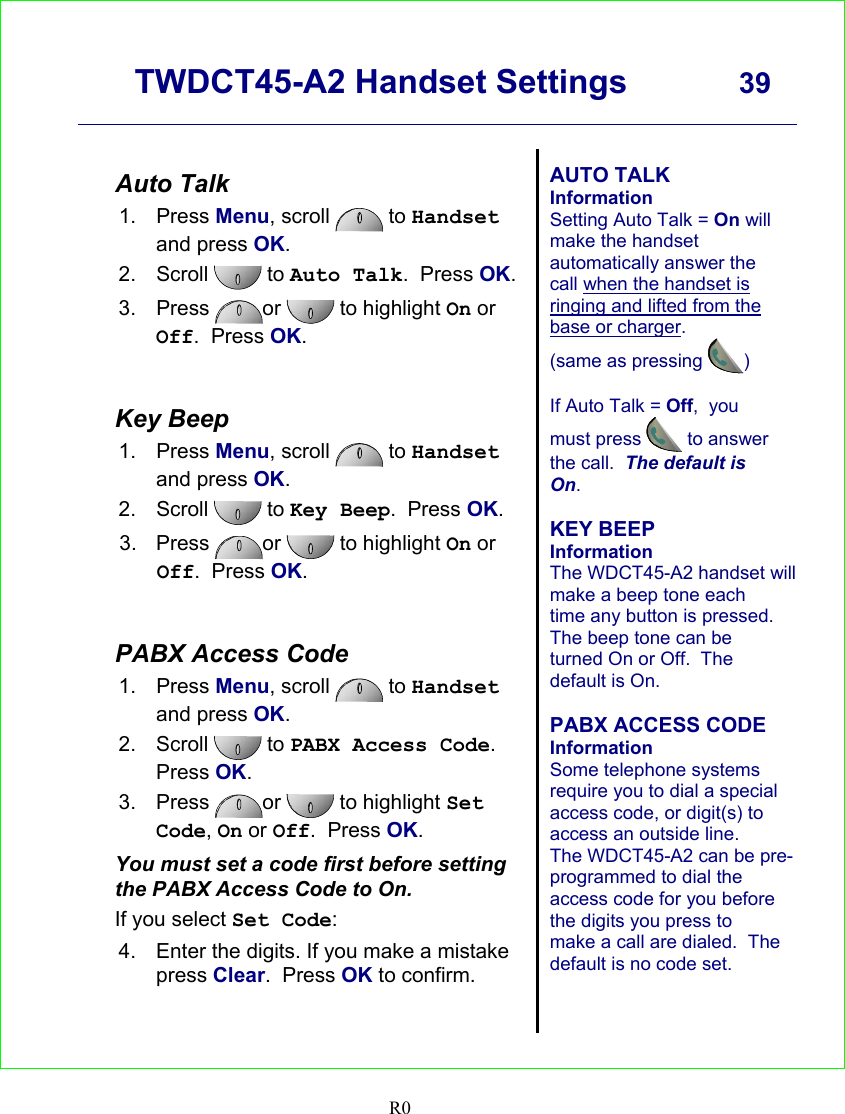
  WDCT45-A2 Handset Settings 37  R0   Handset Settings Make your phone work the way you want The Handset menu lets you set preferences for each handset.  Ring Tone To set the handset Ring Tone: 1. Press Menu, scroll   to Handset and press OK. 2.  Ring Tone is highlighted.  Press OK. Press  or   to switch between Internal or External and press OK. 3. Scroll  or  to the melody you want.  A sample is played. Press OK to confirm. 4. Press and hold Back to return to standby.  Ringer Volume To set the handset Ring Volume: 1. Press Menu, scroll   to Handset and press OK. 2. Scroll   to Ring Volume and press OK. 3.  The current setting is displayed. Press  to increase or to   decrease the volume.  Press OK to confirm. 4. Press and hold Back to return to standby.  Handset Settings Options Ring Tone Ring Volume Handset Name Language Menu Color Auto Talk Key Beep PABX Access Code Area Codes  RING TONE  Information You can choose from 10 different melodies for external (regular) or internal (intercom) calls.  The default Ring Tone for external calls is Melody 10.    The default Ring Tone for internal calls is Melody 5.  RING VOLUME  Information There are five handset ringer volume levels and off.  If you select Ringer off, calls will still ring at the base and your handset screen will indicate incoming calls.  If you select Ringer off, the icon is shown on the display. See page 17.
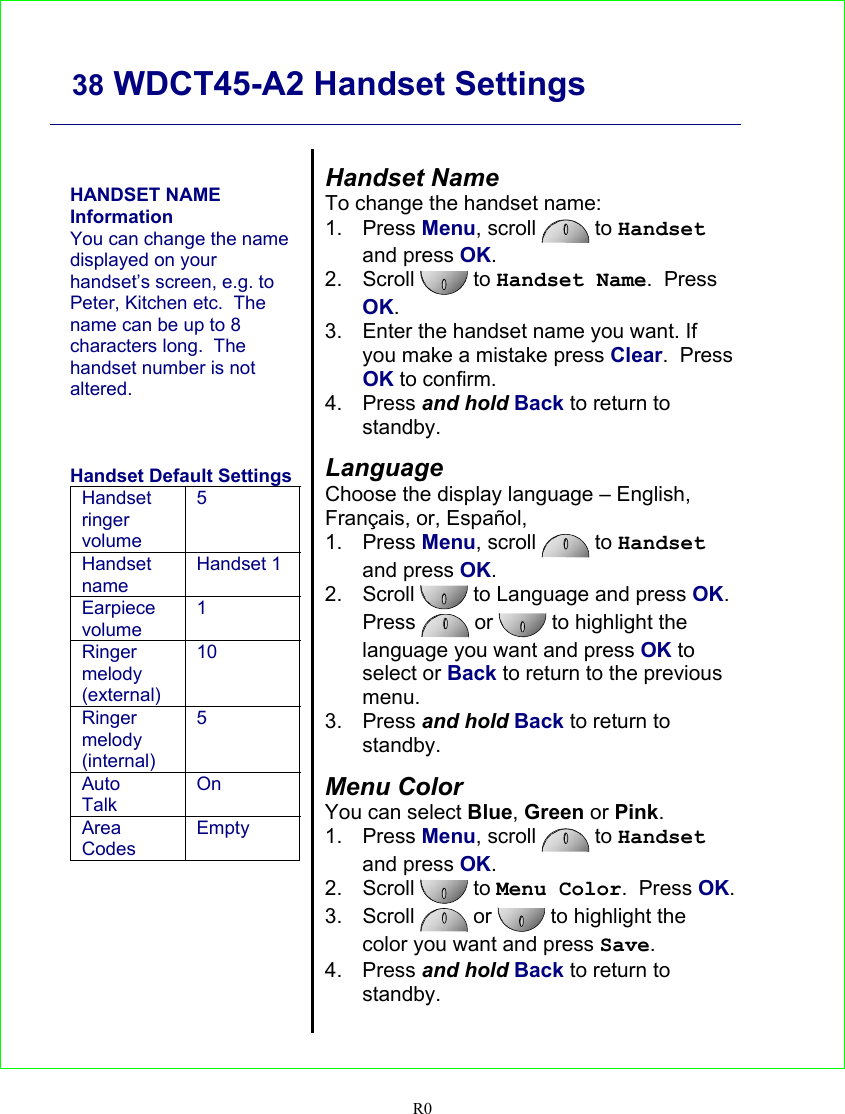
    38 WDCT45-A2 Handset Settings   R0    HANDSET NAME Information You can change the name displayed on your handset’s screen, e.g. to Peter, Kitchen etc.  The name can be up to 8 characters long.  The handset number is not altered.    Handset Default Settings Handset ringer volume 5 Handset name Handset 1 Earpiece volume 1 Ringer melody (external) 10 Ringer melody (internal) 5 Auto Talk On Area Codes Empty    Handset Name To change the handset name: 1. Press Menu, scroll   to Handset and press OK. 2. Scroll   to Handset Name.  Press OK. 3.  Enter the handset name you want. If you make a mistake press Clear.  Press OK to confirm. 4. Press and hold Back to return to standby.  Language Choose the display language – English, Français, or, Español,  1. Press Menu, scroll   to Handset and press OK. 2. Scroll   to Language and press OK.  Press   or  to highlight the language you want and press OK to select or Back to return to the previous menu. 3. Press and hold Back to return to standby.  Menu Color You can select Blue, Green or Pink. 1. Press Menu, scroll   to Handset and press OK. 2. Scroll   to Menu Color.  Press OK. 3. Scroll   or  to highlight the color you want and press Save. 4. Press and hold Back to return to standby.
     TWDCT45-A2 Handset Settings  39    R0   Auto Talk 1. Press Menu, scroll   to Handset and press OK. 2. Scroll  to Auto Talk.  Press OK.  3. Press  or   to highlight On or Off.  Press OK.   Key Beep 1. Press Menu, scroll   to Handset and press OK. 2. Scroll  to Key Beep.  Press OK. 3. Press  or   to highlight On or Off.  Press OK.   PABX Access Code 1. Press Menu, scroll   to Handset and press OK. 2. Scroll  to PABX Access Code.  Press OK. 3. Press  or  to highlight Set Code, On or Off.  Press OK. You must set a code first before setting the PABX Access Code to On. If you select Set Code: 4.  Enter the digits. If you make a mistake press Clear.  Press OK to confirm.   AUTO TALK Information Setting Auto Talk = On will make the handset automatically answer the call when the handset is ringing and lifted from the base or charger.  (same as pressing )   If Auto Talk = Off,  you must press  to answer the call.  The default is On.  KEY BEEP Information The WDCT45-A2 handset will make a beep tone each time any button is pressed.  The beep tone can be turned On or Off.  The default is On.  PABX ACCESS CODE Information Some telephone systems require you to dial a special access code, or digit(s) to access an outside line.  The WDCT45-A2 can be pre-programmed to dial the access code for you before the digits you press to make a call are dialed.  The default is no code set.
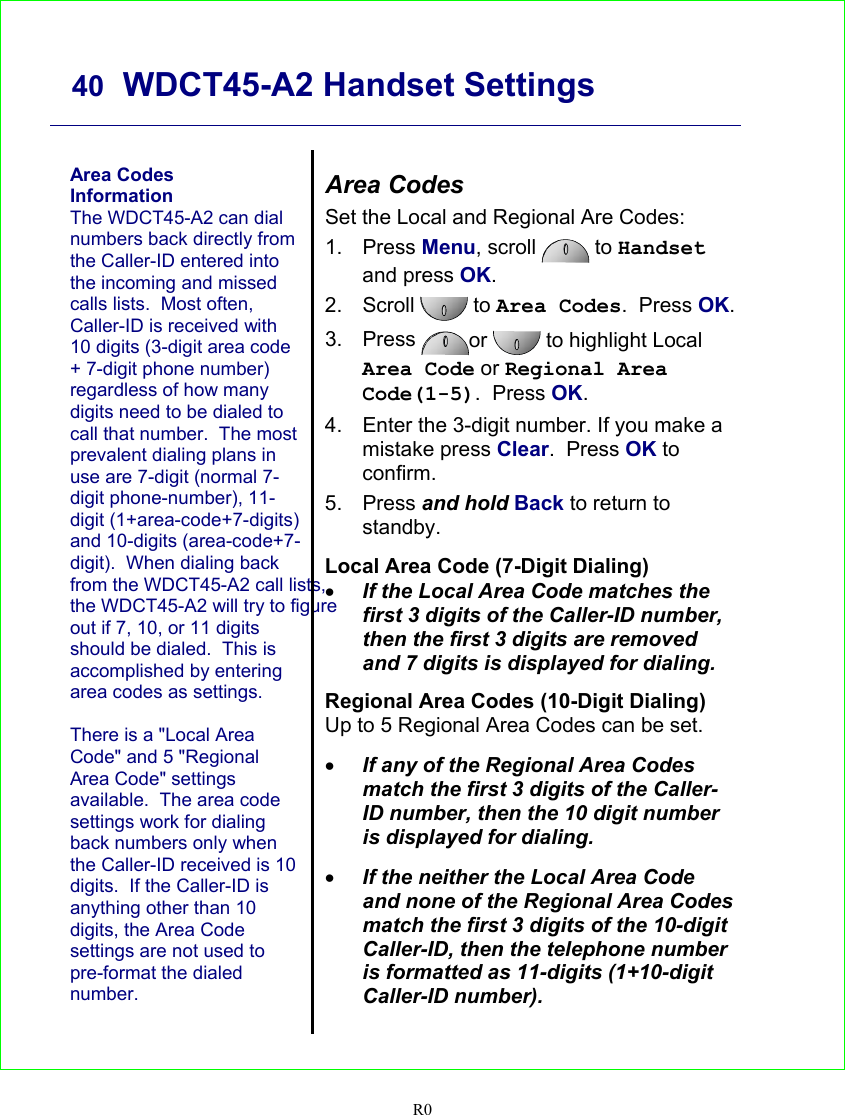
    40  WDCT45-A2 Handset Settings   R0   Area Codes Information The WDCT45-A2 can dial numbers back directly from the Caller-ID entered into the incoming and missed calls lists.  Most often, Caller-ID is received with 10 digits (3-digit area code + 7-digit phone number) regardless of how many digits need to be dialed to call that number.  The most prevalent dialing plans in use are 7-digit (normal 7-digit phone-number), 11-digit (1+area-code+7-digits) and 10-digits (area-code+7-digit).  When dialing back from the WDCT45-A2 call lists, the WDCT45-A2 will try to figure out if 7, 10, or 11 digits should be dialed.  This is accomplished by entering area codes as settings.    There is a "Local Area Code" and 5 "Regional Area Code" settings available.  The area code settings work for dialing back numbers only when the Caller-ID received is 10 digits.  If the Caller-ID is anything other than 10 digits, the Area Code settings are not used to pre-format the dialed number.   Area Codes Set the Local and Regional Are Codes: 1. Press Menu, scroll   to Handset and press OK. 2. Scroll   to Area Codes.  Press OK.   3. Press  or  to highlight Local Area Code or Regional Area Code(1-5).  Press OK. 4.  Enter the 3-digit number. If you make a mistake press Clear.  Press OK to confirm. 5. Press and hold Back to return to standby.  Local Area Code (7-Digit Dialing) • If the Local Area Code matches the first 3 digits of the Caller-ID number, then the first 3 digits are removed and 7 digits is displayed for dialing.  Regional Area Codes (10-Digit Dialing) Up to 5 Regional Area Codes can be set.   • If any of the Regional Area Codes match the first 3 digits of the Caller-ID number, then the 10 digit number is displayed for dialing.  • If the neither the Local Area Code and none of the Regional Area Codes match the first 3 digits of the 10-digit Caller-ID, then the telephone number is formatted as 11-digits (1+10-digit Caller-ID number).
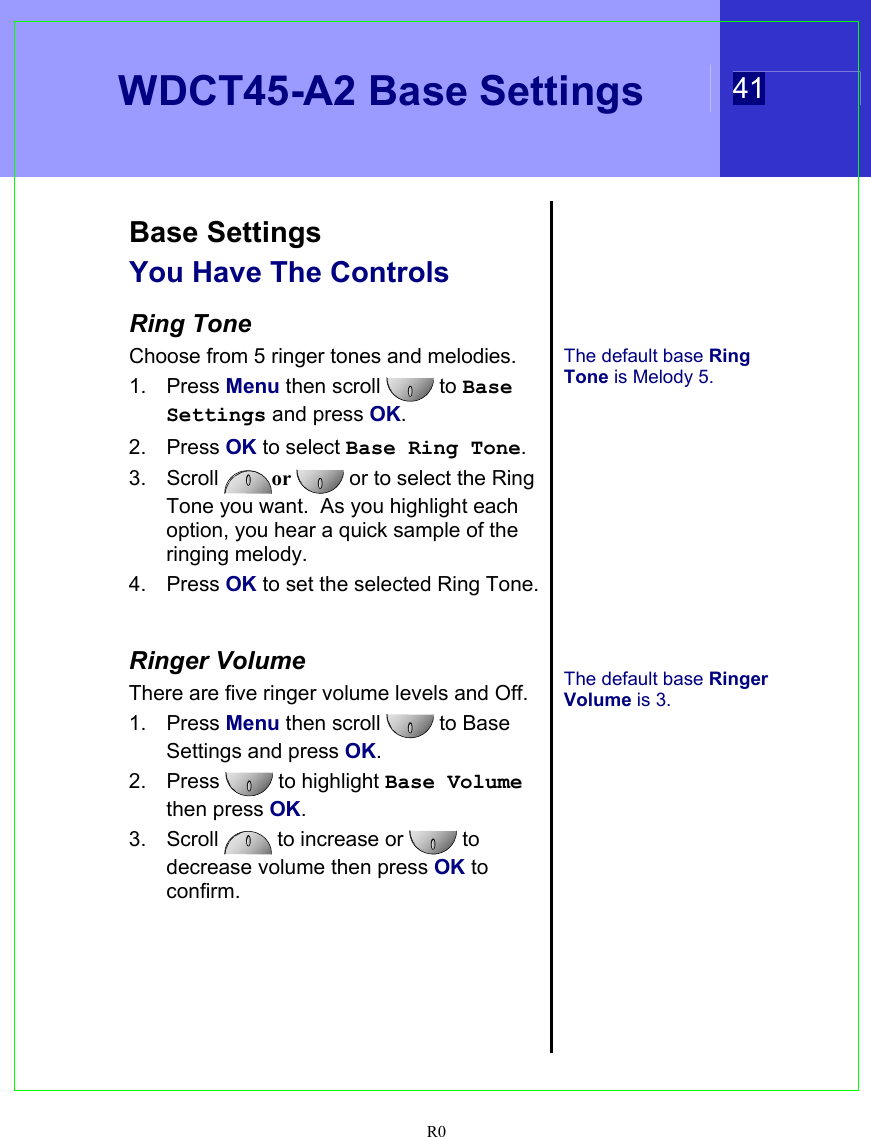
  WDCT45-A2 Base Settings 41  R0   Base Settings You Have The Controls  Ring Tone Choose from 5 ringer tones and melodies. 1. Press Menu then scroll  to Base Settings and press OK. 2. Press OK to select Base Ring Tone. 3. Scroll  or   or to select the Ring Tone you want.  As you highlight each option, you hear a quick sample of the ringing melody. 4. Press OK to set the selected Ring Tone.   Ringer Volume There are five ringer volume levels and Off. 1. Press Menu then scroll   to Base Settings and press OK. 2. Press   to highlight Base Volume then press OK. 3. Scroll   to increase or   to decrease volume then press OK to confirm.          The default base Ring Tone is Melody 5.              The default base Ringer Volume is 3.
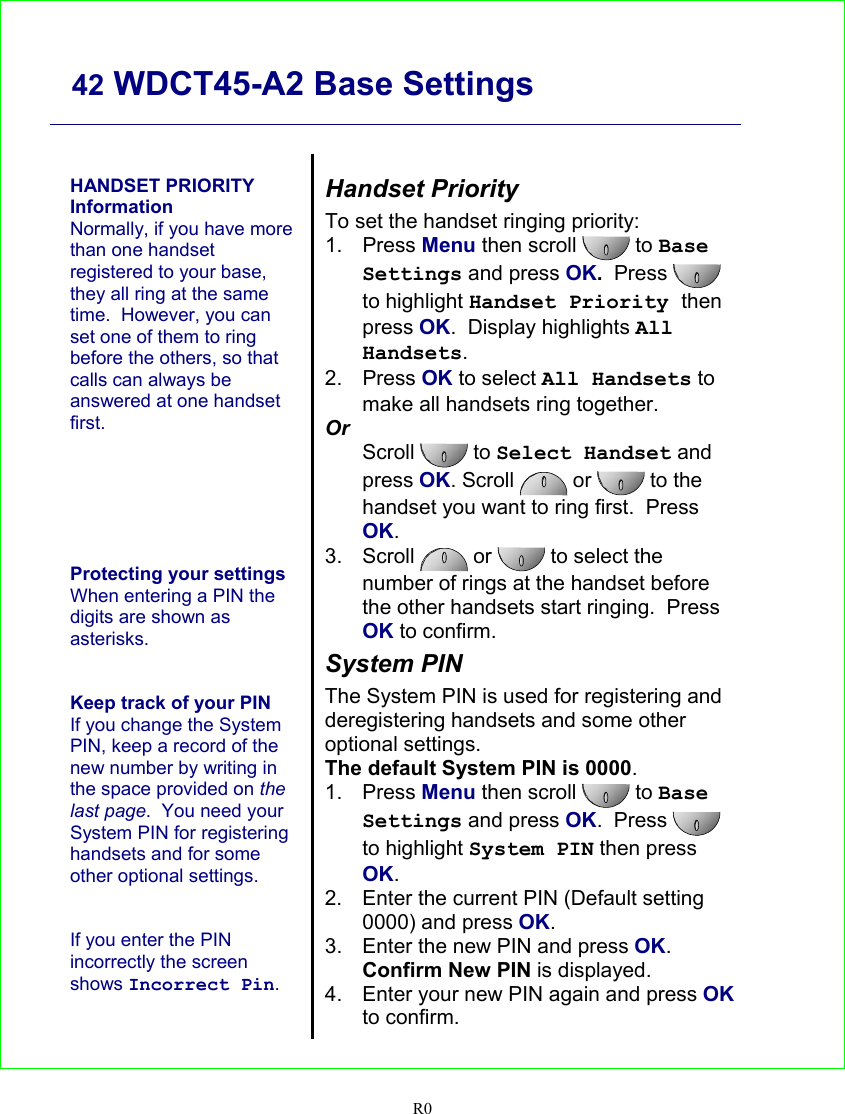
    42 WDCT45-A2 Base Settings   R0    HANDSET PRIORITY Information Normally, if you have more than one handset registered to your base, they all ring at the same time.  However, you can set one of them to ring before the others, so that calls can always be answered at one handset first.       Protecting your settings When entering a PIN the digits are shown as asterisks.   Keep track of your PIN If you change the System PIN, keep a record of the new number by writing in the space provided on the last page.  You need your System PIN for registering handsets and for some other optional settings.   If you enter the PIN incorrectly the screen shows Incorrect Pin.    Handset Priority To set the handset ringing priority: 1. Press Menu then scroll  to Base Settings and press OK.  Press   to highlight Handset Priority then press OK.  Display highlights All Handsets. 2. Press OK to select All Handsets to make all handsets ring together. Or Scroll  to Select Handset and press OK. Scroll   or   to the handset you want to ring first.  Press OK. 3. Scroll   or  to select the number of rings at the handset before the other handsets start ringing.  Press OK to confirm. System PIN The System PIN is used for registering and deregistering handsets and some other optional settings. The default System PIN is 0000. 1. Press Menu then scroll   to Base Settings and press OK.  Press   to highlight System PIN then press OK. 2.  Enter the current PIN (Default setting 0000) and press OK. 3.  Enter the new PIN and press OK. Confirm New PIN is displayed. 4.  Enter your new PIN again and press OK to confirm.
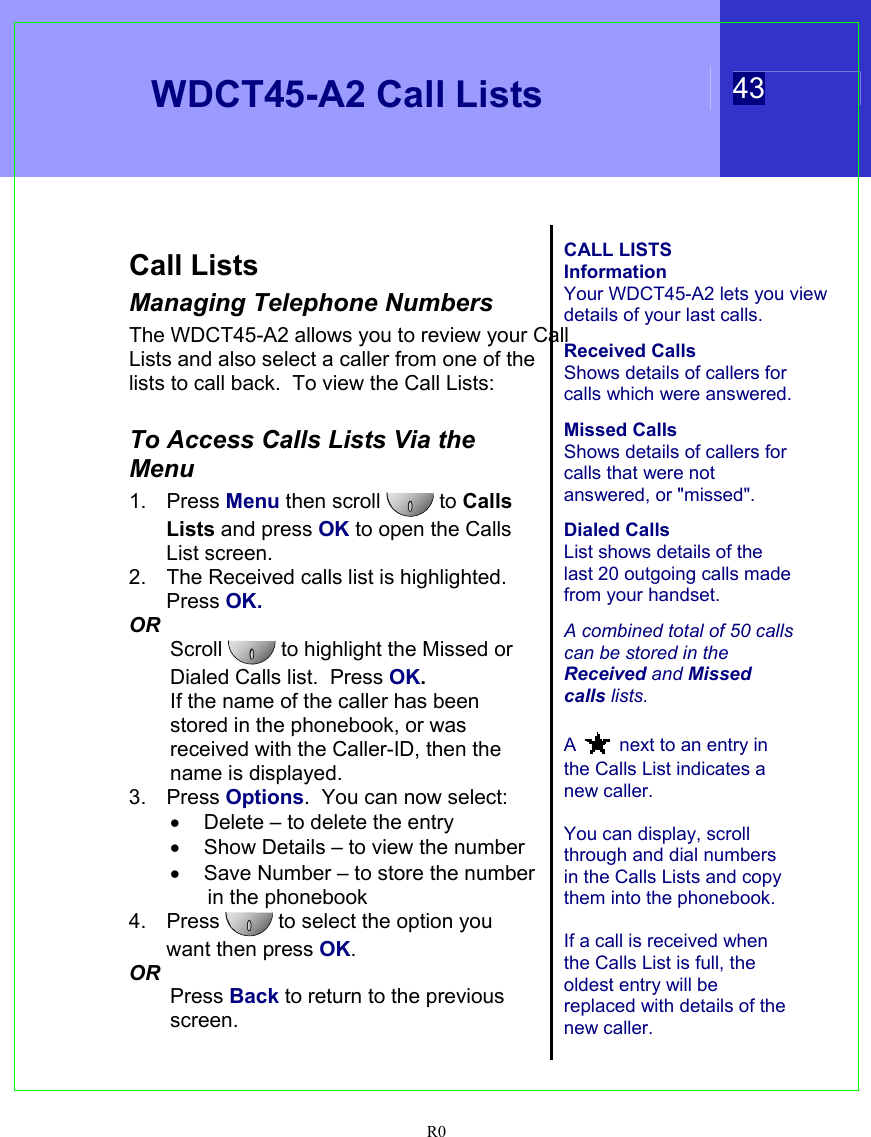
  WDCT45-A2 Call Lists  43  R0   Call Lists Managing Telephone Numbers The WDCT45-A2 allows you to review your Call Lists and also select a caller from one of the lists to call back.  To view the Call Lists:  To Access Calls Lists Via the Menu 1. Press Menu then scroll  to Calls Lists and press OK to open the Calls List screen. 2.  The Received calls list is highlighted.  Press OK. OR Scroll   to highlight the Missed or Dialed Calls list.  Press OK. If the name of the caller has been stored in the phonebook, or was received with the Caller-ID, then the name is displayed. 3. Press Options.  You can now select: •  Delete – to delete the entry •  Show Details – to view the number •  Save Number – to store the number in the phonebook 4. Press  to select the option you want then press OK. OR Press Back to return to the previous screen.   CALL LISTS Information Your WDCT45-A2 lets you view details of your last calls.  Received Calls Shows details of callers for calls which were answered.  Missed Calls Shows details of callers for calls that were not answered, or "missed".  Dialed Calls List shows details of the last 20 outgoing calls made from your handset.  A combined total of 50 calls can be stored in the Received and Missed calls lists.  A  next to an entry in the Calls List indicates a new caller.  You can display, scroll through and dial numbers in the Calls Lists and copy them into the phonebook.    If a call is received when the Calls List is full, the oldest entry will be replaced with details of the new caller.
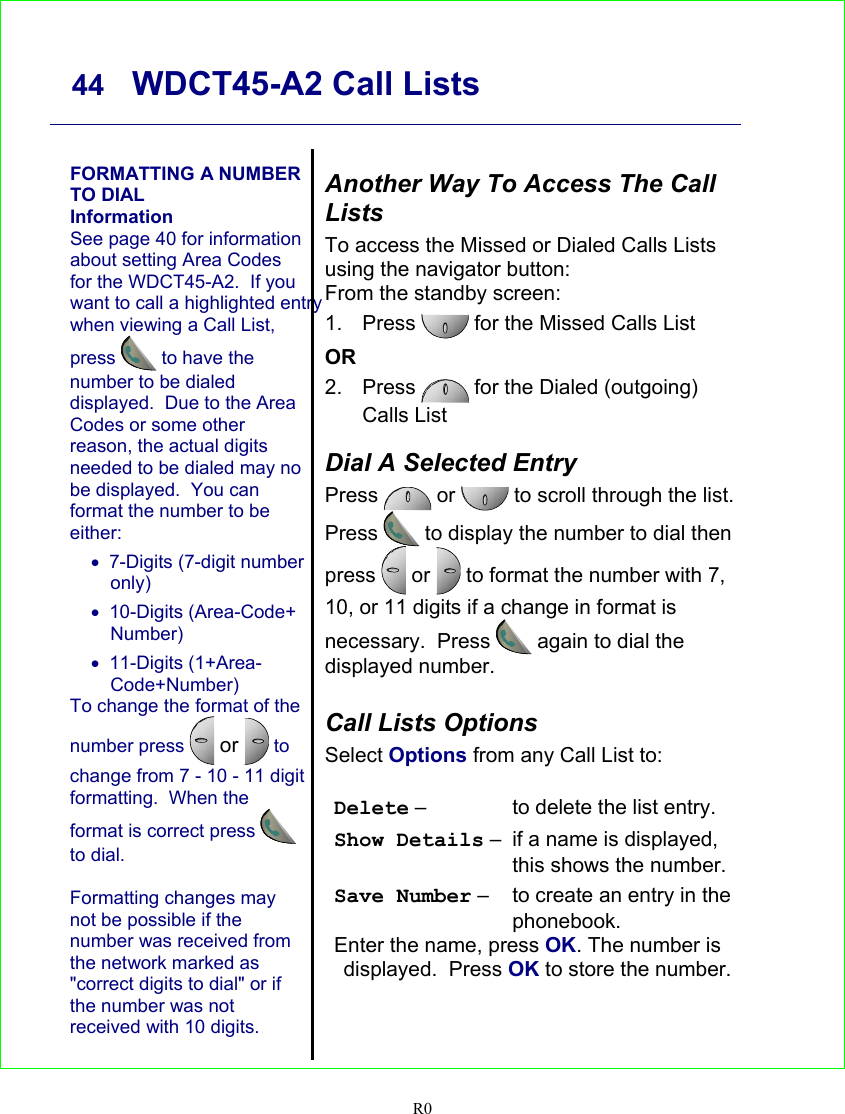
    44   WDCT45-A2 Call Lists   R0   FORMATTING A NUMBER TO DIAL Information See page 40 for information about setting Area Codes for the WDCT45-A2.  If youwant to call a highlighted entry when viewing a Call List, press  to have the number to be dialed displayed.  Due to the Area Codes or some other reason, the actual digits needed to be dialed may no be displayed.  You can format the number to be either: •  7-Digits (7-digit number only) • 10-Digits (Area-Code+ Number) • 11-Digits (1+Area-Code+Number) To change the format of the number press  or  to change from 7 - 10 - 11 digit formatting.  When the format is correct press  to dial.  Formatting changes may not be possible if the number was received from the network marked as "correct digits to dial" or if the number was not received with 10 digits.   Another Way To Access The Call Lists To access the Missed or Dialed Calls Lists using the navigator button: From the standby screen: 1. Press  for the Missed Calls List OR 2. Press   for the Dialed (outgoing) Calls List  Dial A Selected Entry Press   or  to scroll through the list. Press  to display the number to dial then press   or   to format the number with 7, 10, or 11 digits if a change in format is necessary.  Press  again to dial the displayed number.  Call Lists Options Select Options from any Call List to:  Delete –  to delete the list entry. Show Details –  if a name is displayed, this shows the number. Save Number –  to create an entry in the phonebook. Enter the name, press OK. The number is displayed.  Press OK to store the number.
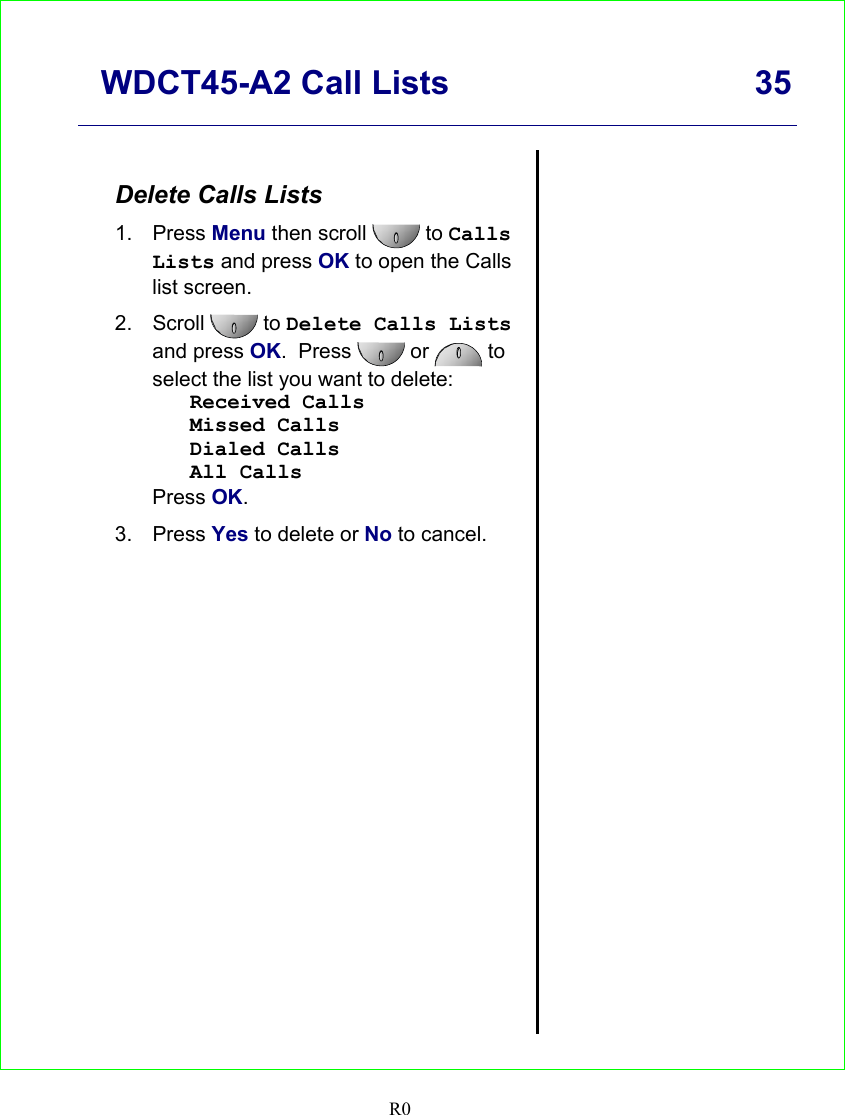
     WDCT45-A2 Call Lists                                 35   R0   Delete Calls Lists 1. Press Menu then scroll   to Calls Lists and press OK to open the Calls list screen. 2. Scroll   to Delete Calls Lists and press OK.  Press  or   to select the list you want to delete: Received Calls Missed Calls Dialed Calls All Calls Press OK. 3. Press Yes to delete or No to cancel.
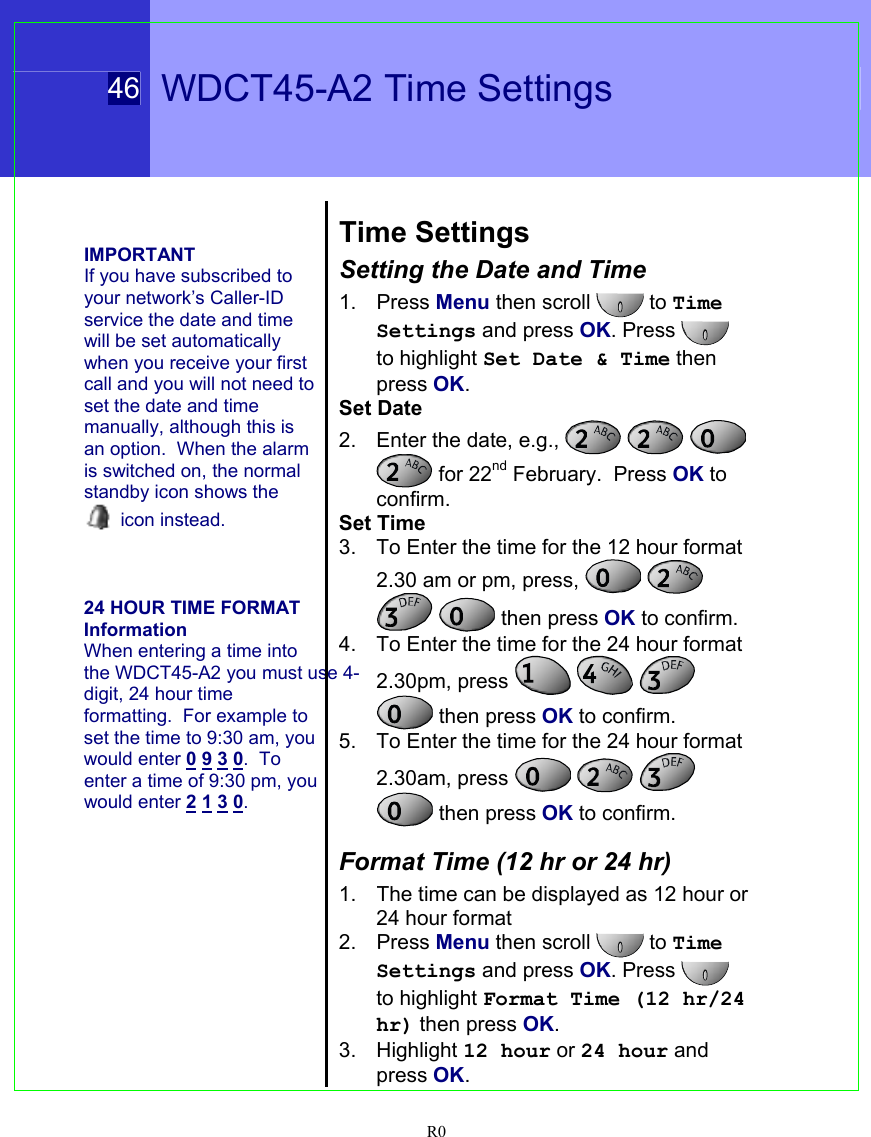
 46   WDCT45-A2 Time Settings  R0    IMPORTANT If you have subscribed to your network’s Caller-ID service the date and time will be set automatically when you receive your first call and you will not need to set the date and time manually, although this is an option.  When the alarm is switched on, the normal standby icon shows the  icon instead.    24 HOUR TIME FORMAT Information When entering a time into the WDCT45-A2 you must use 4-digit, 24 hour time formatting.  For example to set the time to 9:30 am, you would enter 0 9 3 0.  To enter a time of 9:30 pm, you would enter 2 1 3 0.    Time Settings Setting the Date and Time 1. Press Menu then scroll  to Time Settings and press OK. Press   to highlight Set Date & Time then press OK. Set Date 2.  Enter the date, e.g.,       for 22nd February.  Press OK to confirm. Set Time  3.  To Enter the time for the 12 hour format 2.30 am or pm, press,       then press OK to confirm. 4.  To Enter the time for the 24 hour format 2.30pm, press        then press OK to confirm. 5.  To Enter the time for the 24 hour format 2.30am, press        then press OK to confirm.  Format Time (12 hr or 24 hr) 1.  The time can be displayed as 12 hour or 24 hour format 2. Press Menu then scroll   to Time Settings and press OK. Press  to highlight Format Time (12 hr/24 hr) then press OK. 3. Highlight 12 hour or 24 hour and press OK.
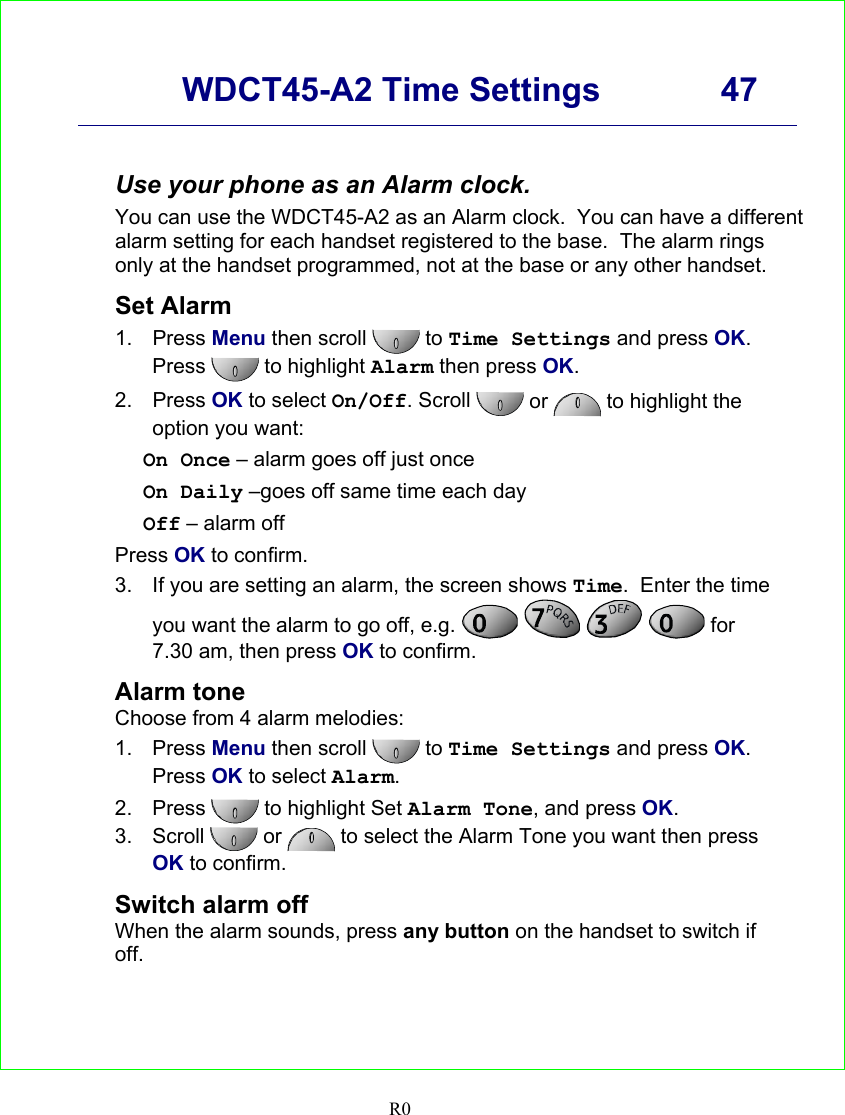
     WDCT45-A2 Time Settings             47    R0   Use your phone as an Alarm clock. You can use the WDCT45-A2 as an Alarm clock.  You can have a different alarm setting for each handset registered to the base.  The alarm rings only at the handset programmed, not at the base or any other handset.  Set Alarm 1. Press Menu then scroll  to Time Settings and press OK.  Press   to highlight Alarm then press OK. 2. Press OK to select On/Off. Scroll  or   to highlight the option you want: On Once – alarm goes off just once On Daily –goes off same time each day Off – alarm off Press OK to confirm. 3.  If you are setting an alarm, the screen shows Time.  Enter the time you want the alarm to go off, e.g.     for 7.30 am, then press OK to confirm.  Alarm tone Choose from 4 alarm melodies: 1. Press Menu then scroll  to Time Settings and press OK. Press OK to select Alarm. 2. Press  to highlight Set Alarm Tone, and press OK. 3. Scroll   or   to select the Alarm Tone you want then press OK to confirm.  Switch alarm off When the alarm sounds, press any button on the handset to switch if off.
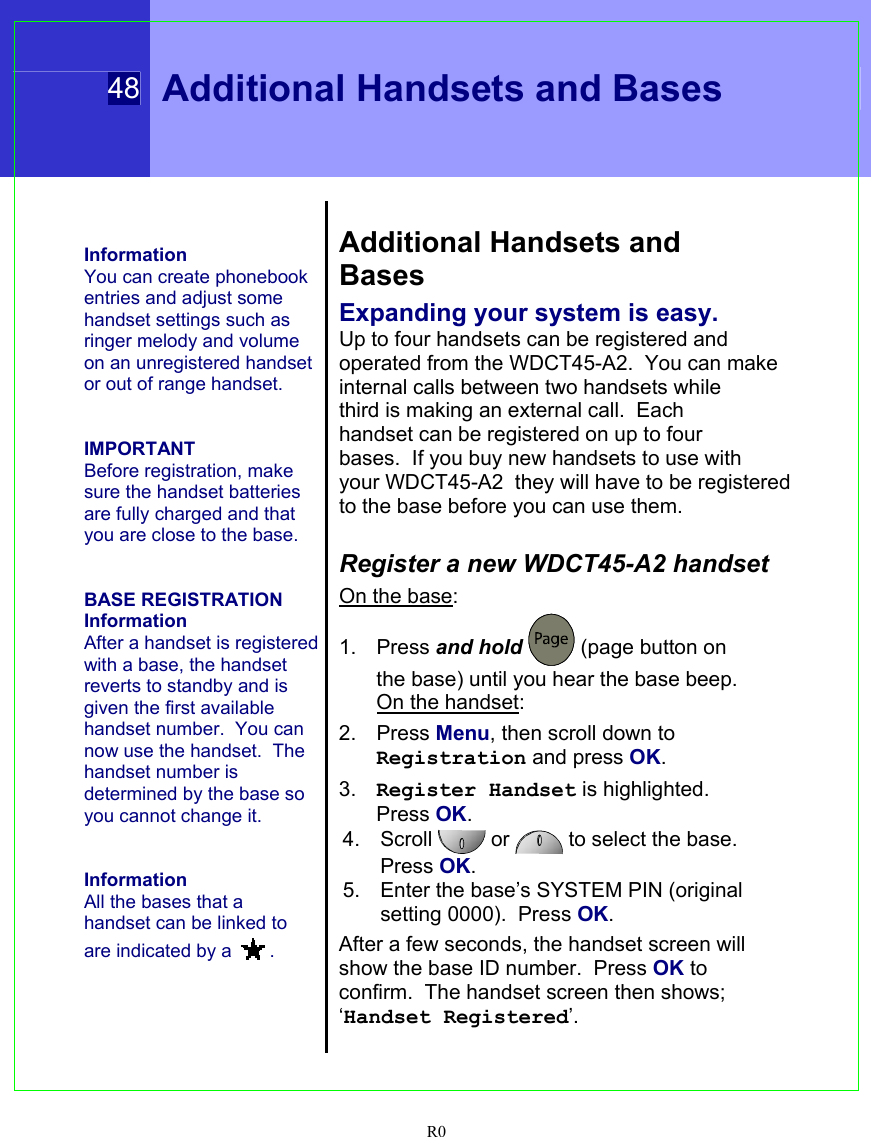
 48 Additional Handsets and Bases  R0    Information You can create phonebook entries and adjust some handset settings such as ringer melody and volume on an unregistered handset or out of range handset.   IMPORTANT Before registration, make sure the handset batteries are fully charged and that you are close to the base.   BASE REGISTRATION Information After a handset is registered with a base, the handset reverts to standby and is given the first available handset number.  You can now use the handset.  The handset number is determined by the base so you cannot change it.   Information All the bases that a handset can be linked to are indicated by a  .   Additional Handsets and Bases Expanding your system is easy. Up to four handsets can be registered and operated from the WDCT45-A2.  You can make internal calls between two handsets while third is making an external call.  Each handset can be registered on up to four bases.  If you buy new handsets to use with your WDCT45-A2  they will have to be registered to the base before you can use them.  Register a new WDCT45-A2 handset On the base: 1. Press and hold  (page button on the base) until you hear the base beep.  On the handset: 2. Press Menu, then scroll down to Registration and press OK. 3.  Register Handset is highlighted. Press OK. 4. Scroll   or   to select the base.  Press OK. 5.  Enter the base’s SYSTEM PIN (original setting 0000).  Press OK. After a few seconds, the handset screen will show the base ID number.  Press OK to confirm.  The handset screen then shows; ‘Handset Registered’.
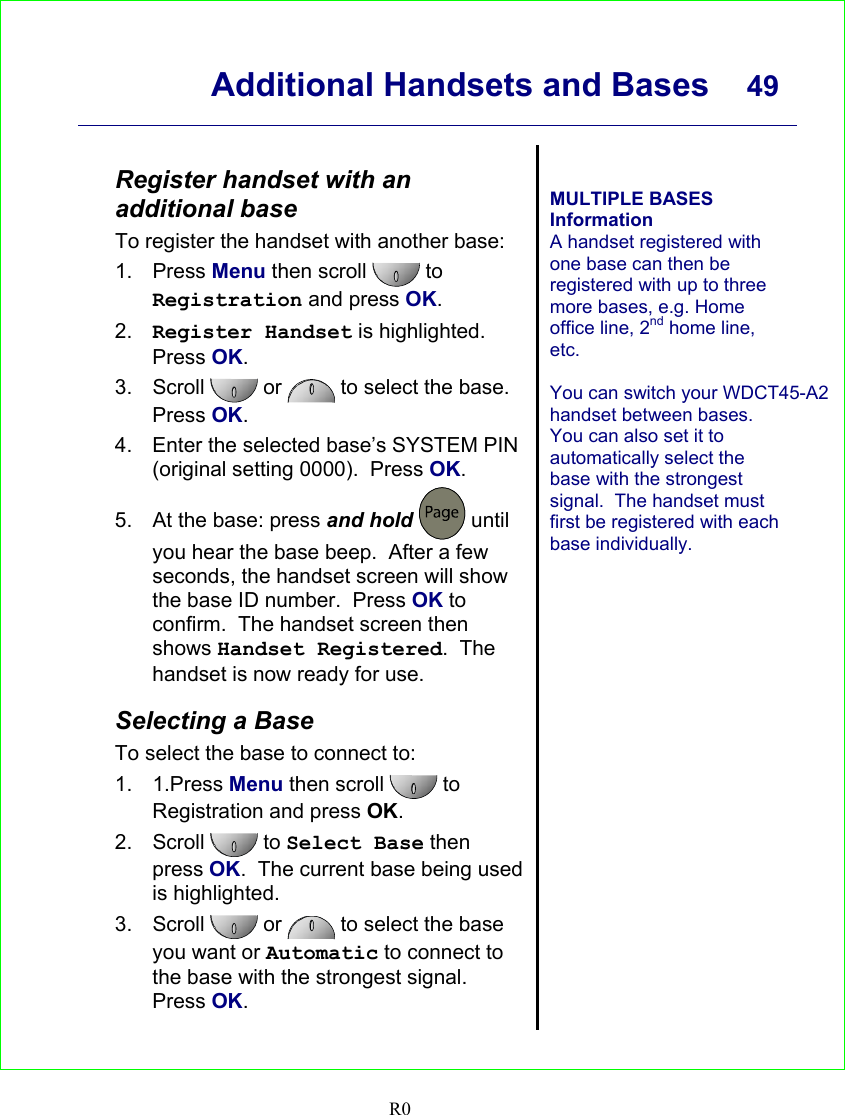
     Additional Handsets and Bases  49    R0  Register handset with an additional base To register the handset with another base: 1. Press Menu then scroll   to Registration and press OK. 2.  Register Handset is highlighted. Press OK. 3. Scroll  or   to select the base. Press OK. 4.  Enter the selected base’s SYSTEM PIN (original setting 0000).  Press OK. 5.  At the base: press and hold  until you hear the base beep.  After a few seconds, the handset screen will show the base ID number.  Press OK to confirm.  The handset screen then shows Handset Registered.  The handset is now ready for use.  Selecting a Base To select the base to connect to: 1. 1.Press Menu then scroll   to Registration and press OK. 2. Scroll   to Select Base then press OK.  The current base being used is highlighted. 3. Scroll   or   to select the base you want or Automatic to connect to the base with the strongest signal.  Press OK.   MULTIPLE BASES Information A handset registered with one base can then be registered with up to three more bases, e.g. Home office line, 2nd home line, etc.  You can switch your WDCT45-A2 handset between bases.  You can also set it to automatically select the base with the strongest signal.  The handset must first be registered with each base individually.
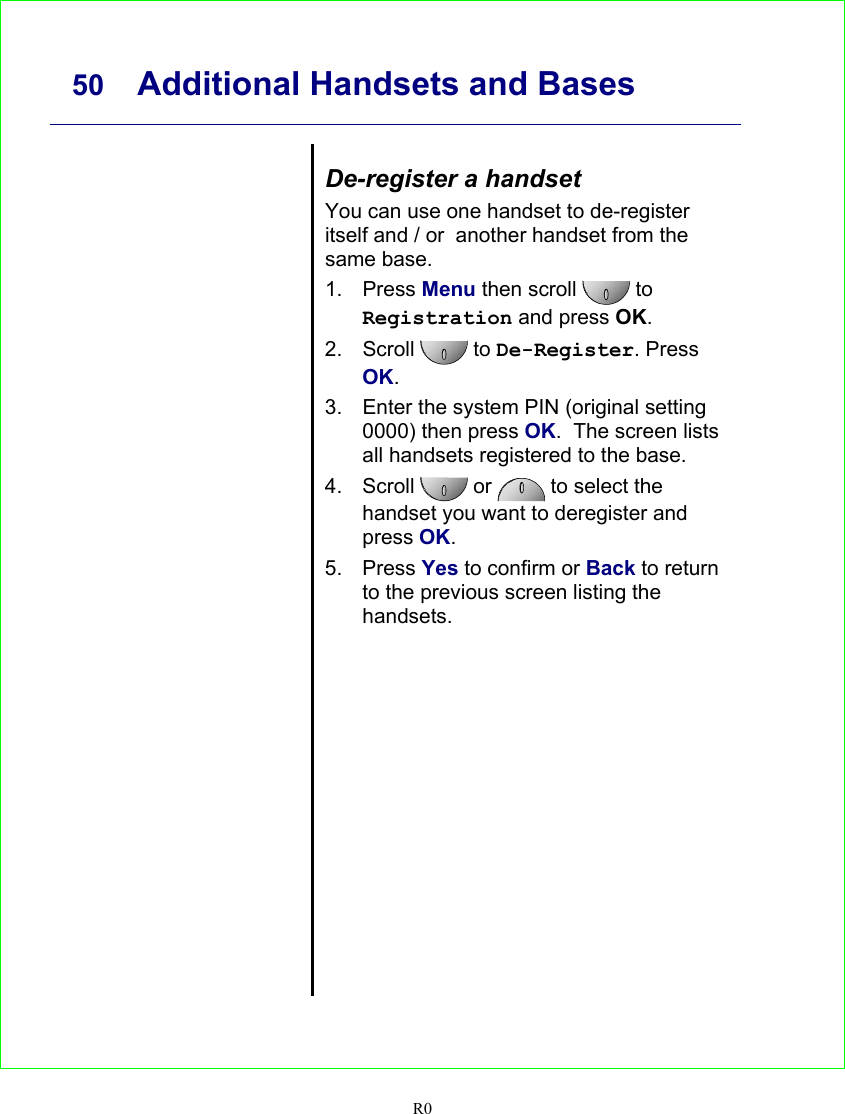
    50 Additional Handsets and Bases   R0    De-register a handset You can use one handset to de-register itself and / or  another handset from the same base. 1. Press Menu then scroll   to Registration and press OK. 2. Scroll  to De-Register. Press OK. 3.  Enter the system PIN (original setting 0000) then press OK.  The screen lists all handsets registered to the base. 4. Scroll  or   to select the handset you want to deregister and press OK. 5. Press Yes to confirm or Back to return to the previous screen listing the handsets.
  WDCT45-A2 Troubleshooting Tips  51  R0  Troubleshooting Tips Need Help? If you have any problems setting up or using your Suncorp WDCT Color Display WDCT45-A2 telephone, please contact the Help line at  86-755-2573-3333.  Caller ID Problem & Solution Caller ID “Incomplete Data” message •  The unit displays this message if it detects anything other than valid Caller ID information. •  Are you subscribed to Suncorp’s Caller ID service?   Hearing aid noise Please note that the WDCT45-A2 works by sending radio signals between the base and handset. These signals may interfere with some hearing aids, causing a humming noise.
    52 Troubleshooting Tips   R0  Telephone Problem & Solution Base Power LED is not on •  Make sure that the base is connected to a working non-switched electrical outlet. • Make sure the power cord is properly connected to the base in the correct jack, labeled   No Display on Handset and Base Power LED is on •  Are the batteries fully charged? Charge the batteries for 16 hours or replace the batteries. •  Make sure the batteries are properly installed. No Dial Tone but Handset Display works after full charge •  Ensure Telephone cord is connected at both ends. •  Does the handset indicate out of range?  If so move closer to the base. •  Does another phone work with the same cord and wall jack? Handset or Base does not ring •  Ensure Telephone cord is connected at both ends. •  Does the handset indicate out of range?  If so move closer to the base. •  Does another phone work with the same cord and wall jack? Poor Reception between Handset and Base •  Too close to metal appliances such as microwave, refrigerator, stove, etc. •  Baby monitor or Wireless LAN is using the same frequency (2.4 GHz). •  Handset battery is low, see battery indicator and place on charger. •  Out of range, excessive distance and/ or objects (walls) between handset and base (unit beeps). •  Computer Wireless Network (WIFI), do not install near WIFI transmitters.  Can Not Dial Out •  Keypad may be locked.  If the Padlock icon is on, press unlock in order to deactivate to enable the keypad.  (Page 23)
  R0   System Pin Number:

Navigation menu