Sunwin Technology SW-196F Turntable Player User Manual GPO Ambassador Manual High Res
Shenzhen Sunwin Technology Co., Ltd. Turntable Player GPO Ambassador Manual High Res
User Manual
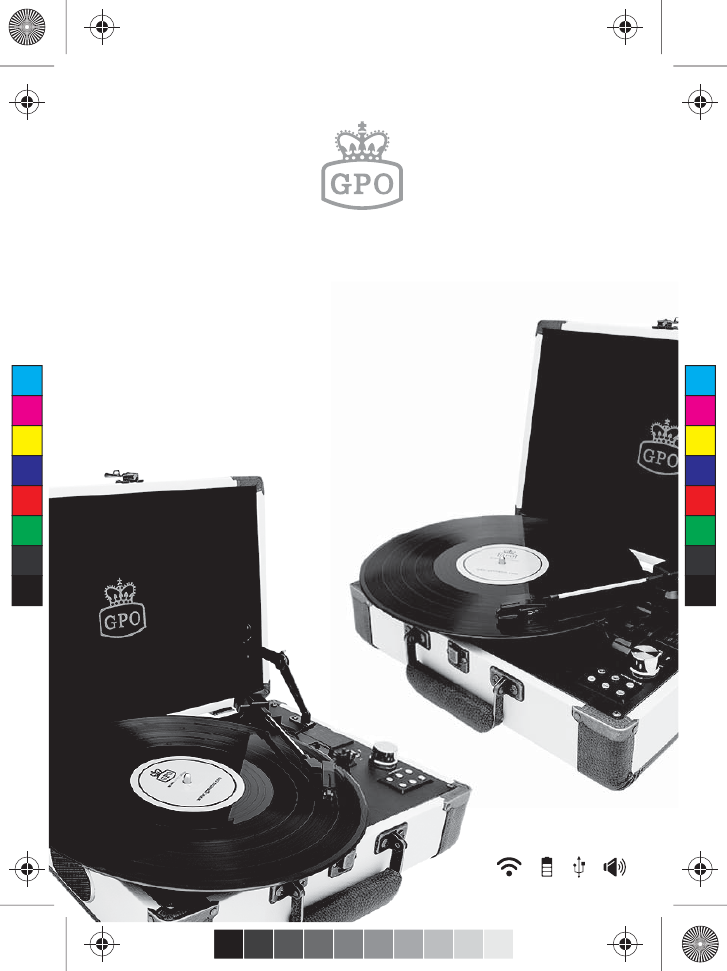
TURNTABLE
USER GUIDE
C
M
Y
CM
MY
CY
CMY
K
C
M
Y
CM
MY
CY
CMY
K
Content
Introduction ............................................................................... 1
Unpacking ................................................................................. 1
Features..................................................................................... 2
Location of Controls.................................................................. 3
Mode Selection ......................................................................... 4
Unit Operation ........................................................................... 4
Replacing the Stylus.................................................................. 8
Tips for Better Performance ...................................................... 9
Product Care ........................................................................... 10
Product Support...................................................................... 11
C
M
Y
CM
MY
CY
CMY
K
Introduction
Thanks for purchasing the turntable player from
GPO. This retro-themed unit adds a touch of classic style to
any room, while still providing amazing audio quality through
the built in speakers. To get the most from your new turntable
player, please read these instructions carefully before use, and
keep them in a safe place for future reference.
1
This package contains:
1x SW-196F Ambassador
1x Turntable Needle (fitted)
1x Turntable Slip Mat (placed on the turntable)
1x Blank USB Stick
1x DC Power Cable
1x Aux-in Cable
1x Manual
Carefully remove all of the contents from the packaging.
Make sure you retain and store this manual for future reference.
When choosing a location for the unit, avoid inclines, direct
sunlight or sources of heat and moisture.
Unpacking
C
M
Y
CM
MY
CY
CMY
K
Features
2
Your turntable unit has the following features:
1. 3-speed turntable (33, 45 or 78 RPM)
2. Belt drive and semi-automatic play tone arm
3. Ceramic stereo cartridge and jewel stylus
4. Built-in 45 RPM adapter
5. Aux-in and Aux-out functions
6. Built-in stereo speakers
7. Rechargeable battery
8. Bluetooth functionality
Keep all of the ventilation holes clear, and do not place any
equipment on top of the unit as this can lead to damage.
Only remove the stylus guard from the stylus assembly during
use. Leaving the guard in place during storage will protect
your stylus from damage.
C
M
Y
CM
MY
CY
CMY
K
1
2
3
4
5
6
7
11
13
14
15
16
9
812
10
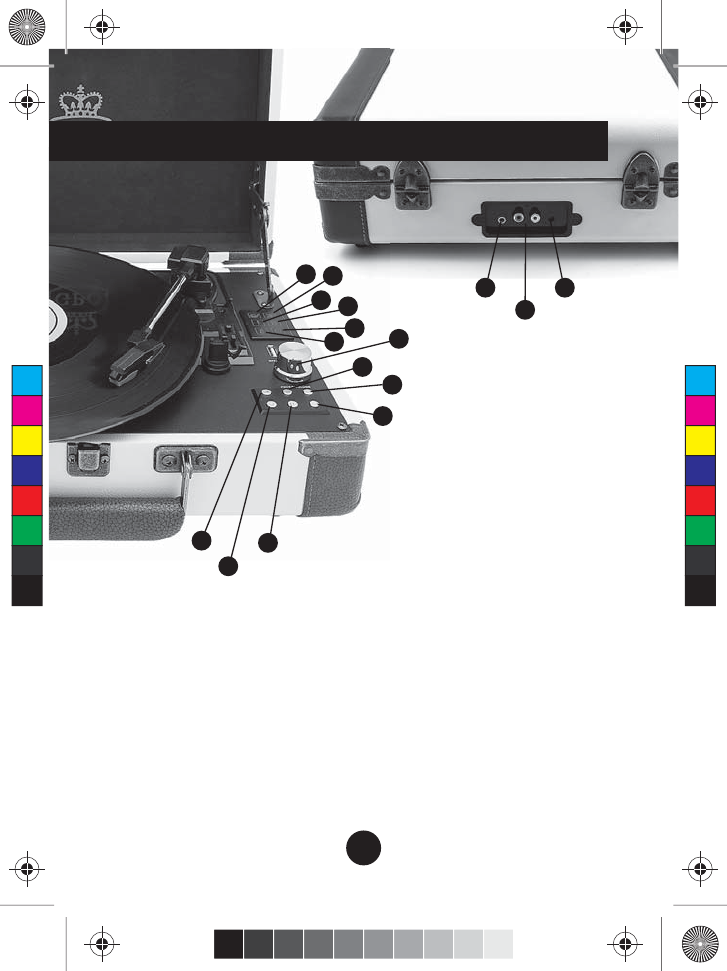
1. Turntable Indicator Light
2. Aux-in Indicator Light
3. USB Indicator Light
4. Bluetooth Indicator Light
5. Battery Power Indicator Light
6. Recording Indicator Light
7. Power On/Off and Volume
8. Mode Select
9. Stop
10. Record
11. Fast Forward
12. Rewind
13. Play/Pause
14. Aux-in Jack
15. Aux-out Jack
16. DC Power Jack
Location of Controls
3
C
M
Y
CM
MY
CY
CMY
K
4
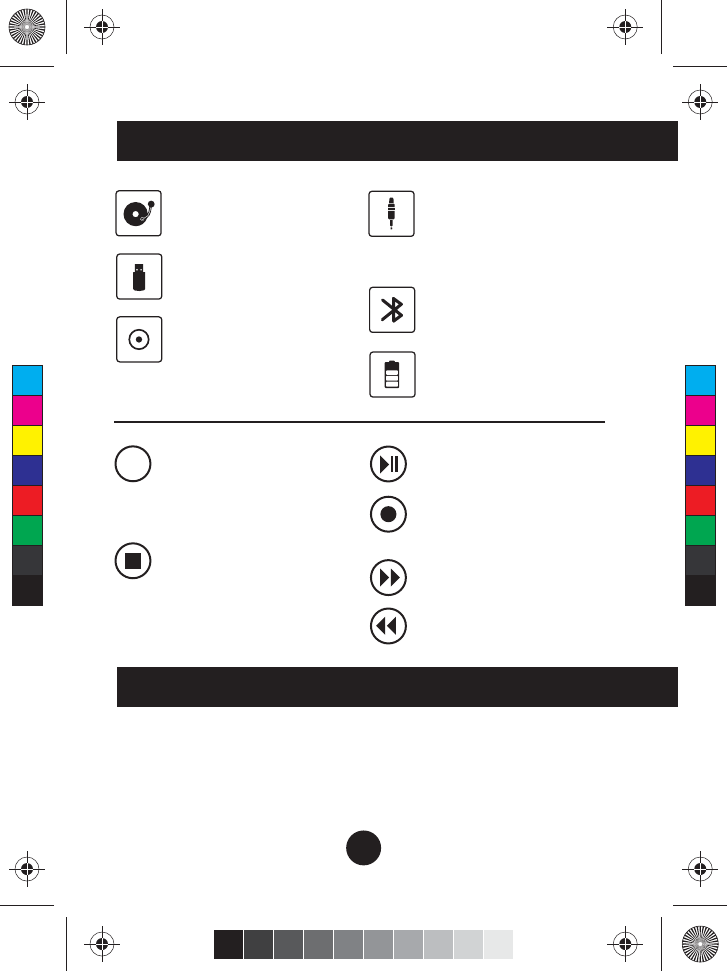
Mode Selection
Unit Operation
To select the Turntable, USB,
Aux-in or Bluetooth mode,
press the mode select button
until the relevant indicator
light is illuminated.
Press to STOP music playing
in USB mode.Press to STOP
vinyl recording in Record
mode.
PLAY or PAUSE the music
under USB mode.
Press to record your vinyl
records, more information in
record section.
Press to the NEXT song under
USB mode.
Press to the PREVIOUS song
under USB mode.
M
Turntable Mode
play a vinyl record through the
unit’s built-in speakers
USB Mode
play MP3 files stored on an
external USB drive
USB Record Mode
record your vinyl to MP3 files
on an external USB drive
Aux-in Mode
play music from your music
player, smartphone or other
device through the unit’s built
in speakers
Bluetooth Mode
connect the unit to external
Bluetooth-enabled speakers
Battery Level Indicator
Displays the current charge status
of the rechargeable battery
Your turntable player has a number of modes of
operation. Each one will allow you to play music from a different
source using the unit’s two in-built full range stereo speakers
C
M
Y
CM
MY
CY
CMY
K
Turntable Mode
1. Turn on the unit power
2. Select Turntable mode using the mode select button
3. Choose the correct speed setting, using the 45RPM adapter if
needed, and place the vinyl record onto the turntable
4. Place the tone arm into the correct position to begin playback
5. The turntable will stop automatically when the record has
finished, and the tone arm will return to the original position
6. Use the volume controls to set the desired sound levels
AUX-IN Play Mode
1. Turn on the unit power
2. Select Aux-in mode using the mode select button
3. Connect your chosen device to the unit’s aux-in jack using
the cable provided
4. Press the play/pause button to begin playback
5. Use the volume controls to set the desired sound levels
USB Mode
1. Turn on the unit power
2. Select USB mode using the mode select button
3. Connect your USB device to the unit using the USB slot
4. Press the play/pause button to begin playback
5. Use the volume controls to set the desired sound levels
6. To record from vinyl to your device, select USB record mode
7. Press record to begin recording
8. Press stop to cancel recording
5
C
M
Y
CM
MY
CY
CMY
K
Bluetooth Mode
The Bluetooth mode allows you to stream your vinyl
to any Bluetooth enabled speaker or headphones.
1. Turn on the unit power
2. Select Bluetooth mode by holding the mode button down for
three seconds while in turntable, USB or Aux-in mode
3. The Bluetooth indicator light will flash rapidly as the unit
searches for nearby Bluetooth-enabled devices.
4. When paired the blue light will flash shortly with a three
second interval
5. If the devices fail to sync, please repeat points 1-4.
6. Use the volume controls to set the desired sound levels
7. Hold down the stop button for three seconds to turn off
Bluetooth mode and move straight to turntable mode
Please note: When pairing the Ambassador to your Bluetooth
speaker or headphones, please ensure that the device you wish to
stream vinyl to is set to pairing mode. This will allow them to sync.
1. Press the mode button until the red LED light next to
Turntbale is illuminated.
2. Insert a blank USB stick into the slot
3. Place the desired vinyl onto the turntabled and begin playing.
4. Press the record button on the control panel, the red light
next to record will begin to flash. Press the record button
once to record the vinyl in one track, press the record button
twice to split the tracks.
Vinyl Record Mode
6
C
M
Y
CM
MY
CY
CMY
K
7
An RCA cable is included with you GPO Ambassador, you will
require this cable to connect to extra speakers.
RCA Audio Out
The battery level indicator displays the current charge status of
the unit’s rechargeable battery.
While operating on mains power via the DC cable and jack, the
unit will automatically begin to charge the inbuilt battery. The
battery indicator light will indicate how the charging is
progressing:
Red: The unit needs to be charged
Green: The unit is charging
Blue: The unit has fully charged
Line Out
To use your Ambassador turntable with external speakers,
connect your speakers to the unit’s Aux-out jack.
Headphones Out
Headphones can be connected using the Aux-out jack.
Charging the Battery
C
M
Y
CM
MY
CY
CMY
K
8
RCA Audio Out
Replace Stylus
di
O
O
O
O
O
O
O
O
t
t
t
t
t
t
RR
R
R
C
C
C
C
C
A
A
A
A
A
A
A
u
u
u
u
u
d
d
d
d
d
d
d
d
d
d
d
d
i
i
i
i
i
i
i
i
i
i
i
i
i
i
i
o
o
o
o
o
o
o
o
o
o
o
o
o
o
o
o
o
o
o
o
O
O
O
O
O
O
O
O
O
u
u
u
u
u
t
t
t
t
t
t
t
t
t
t
t
t
t
t
t
t
t
t
t
t
t
t
t
t
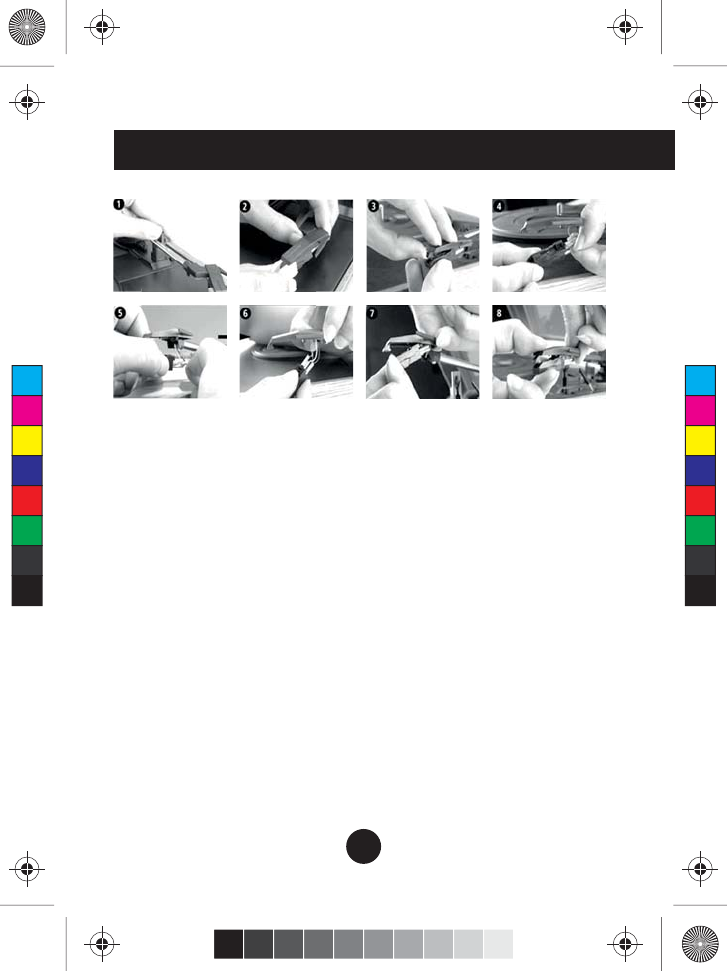
The unit’s stylus will need replacing regularly.
To replace the stylus:
1. Push the arm lock to release the tone arm
2. Remove the cap from the cartridge to expose the needle
3. Carefully remove the cartridge from the socket
4. Completely remove the stylus needle from the cartridge
5. Carefully place a new stylus needle into the cartridge
6. Place the cartridge back into the socket
7. Put the cartridge cap back in place
8. Re-engage the arm lock
The turntable's stylus needs to be replaced every 3-4 months
for best performance. To buy a replacement stylus, go to
www.gporetro.com or visit one of our stockists.
C
M
Y
CM
MY
CY
CMY
K

To get the best possible performance from your turntable,
please ensure that you:
the centre or both edges.
bumping it onto the turntable mat or the edge of a record.
back-to-front motion.
turntable system.
secured before moving.
Tips for Better Performance
9
C
M
Y
CM
MY
CY
CMY
K
Your SW-196F record player will provide you with
years of listening pleasure, as long as it is properly cared for. To
ensure that the unit remains in working condition, please take
care to:
sources of splashing or dripping, such as vases.
and bathrooms, and those with extreme temperatures of
35°C or higher.
unplug the unit and call our support team for advice.
and finish, and use only a dry dust cloth. The front panel can
be cleaned gently with a damp cloth and mild soap.
playback may be affected.
warmer location, please wait 30 minutes before operation.
10
Product Care
C
M
Y
CM
MY
CY
CMY
K

11
C
M
Y
CM
MY
CY
CMY
K
Product Support
For more advice or assistance, please visit www.gporetro.com,
or call our support team on 0845 521 4095.
Please note, for your personal safety you SHOULD NOT
attempt to open the unit’s casing. Opening the casing voids
your warranty, and no user serviceable parts are contained
inside
12
C
M
Y
CM
MY
CY
CMY
K
This device complies with Part 15 of the FCC Rules. Operation is subject to the following two conditions: (1) This device may not
cause harmful interference, and (2) this device must accept any interference received, including interference that may cause
undesired operation.
Caution: Changes or modifications not expressly approved by the party responsible for compliance could void the user's authority to
operate the equipment.
NOTE: This equipment has been tested and found to comply with the limits for a Class B digital device, pursuant to part 15 of the FCC
Rules. These limits are designed to provide reasonable protection against harmful interference in a residential installation. This
equipment generates uses and can radiate radio frequency energy and, if not installed and used in accordance with the instructions,
may cause harmful interference to radio communications. However, there is no guarantee that interference will not occur in a
particular installation. If this equipment does cause harmful interference to radio or television reception, which can be determined by
turning the equipment off and on, the user is encouraged to try to correct the interference by one or more of the following measures:
--Reorient or relocate the receiving antenna.
--Increase the separation between the equipment and receiver.
--Connect the equipment into an outlet on a circuit different from that to which the receiver is connected.
--Consult the dealer or an experienced radio/TV technician for help.
www.gporetro.com
C
M
Y
CM
MY
CY
CMY
K