Sweepscrub Kaercher Km 120 150 R Bp Rider Sweeper Quick Start Guide OBJ_DOKU 109522 001 User Manual
2017-11-01
User Manual: Sweepscrub Kaercher-Km-120-150-R-Bp-Rider-Sweeper-Quick-Start-Guide kaercher-km-120-150-r-bp-rider-sweeper-quick-start-guide 2390 file product_file sweepscrub
Open the PDF directly: View PDF ![]() .
.
Page Count: 5
QUICKSTART
5.964-011.0 07/11
Warning
These are only brief instructions! Please read and comply with these instructions prior to using or servicing your
appliance.
The non-compliance of the operating and safety instructions may lead to damages of the appliance and to dangers
for the operator and other persons.
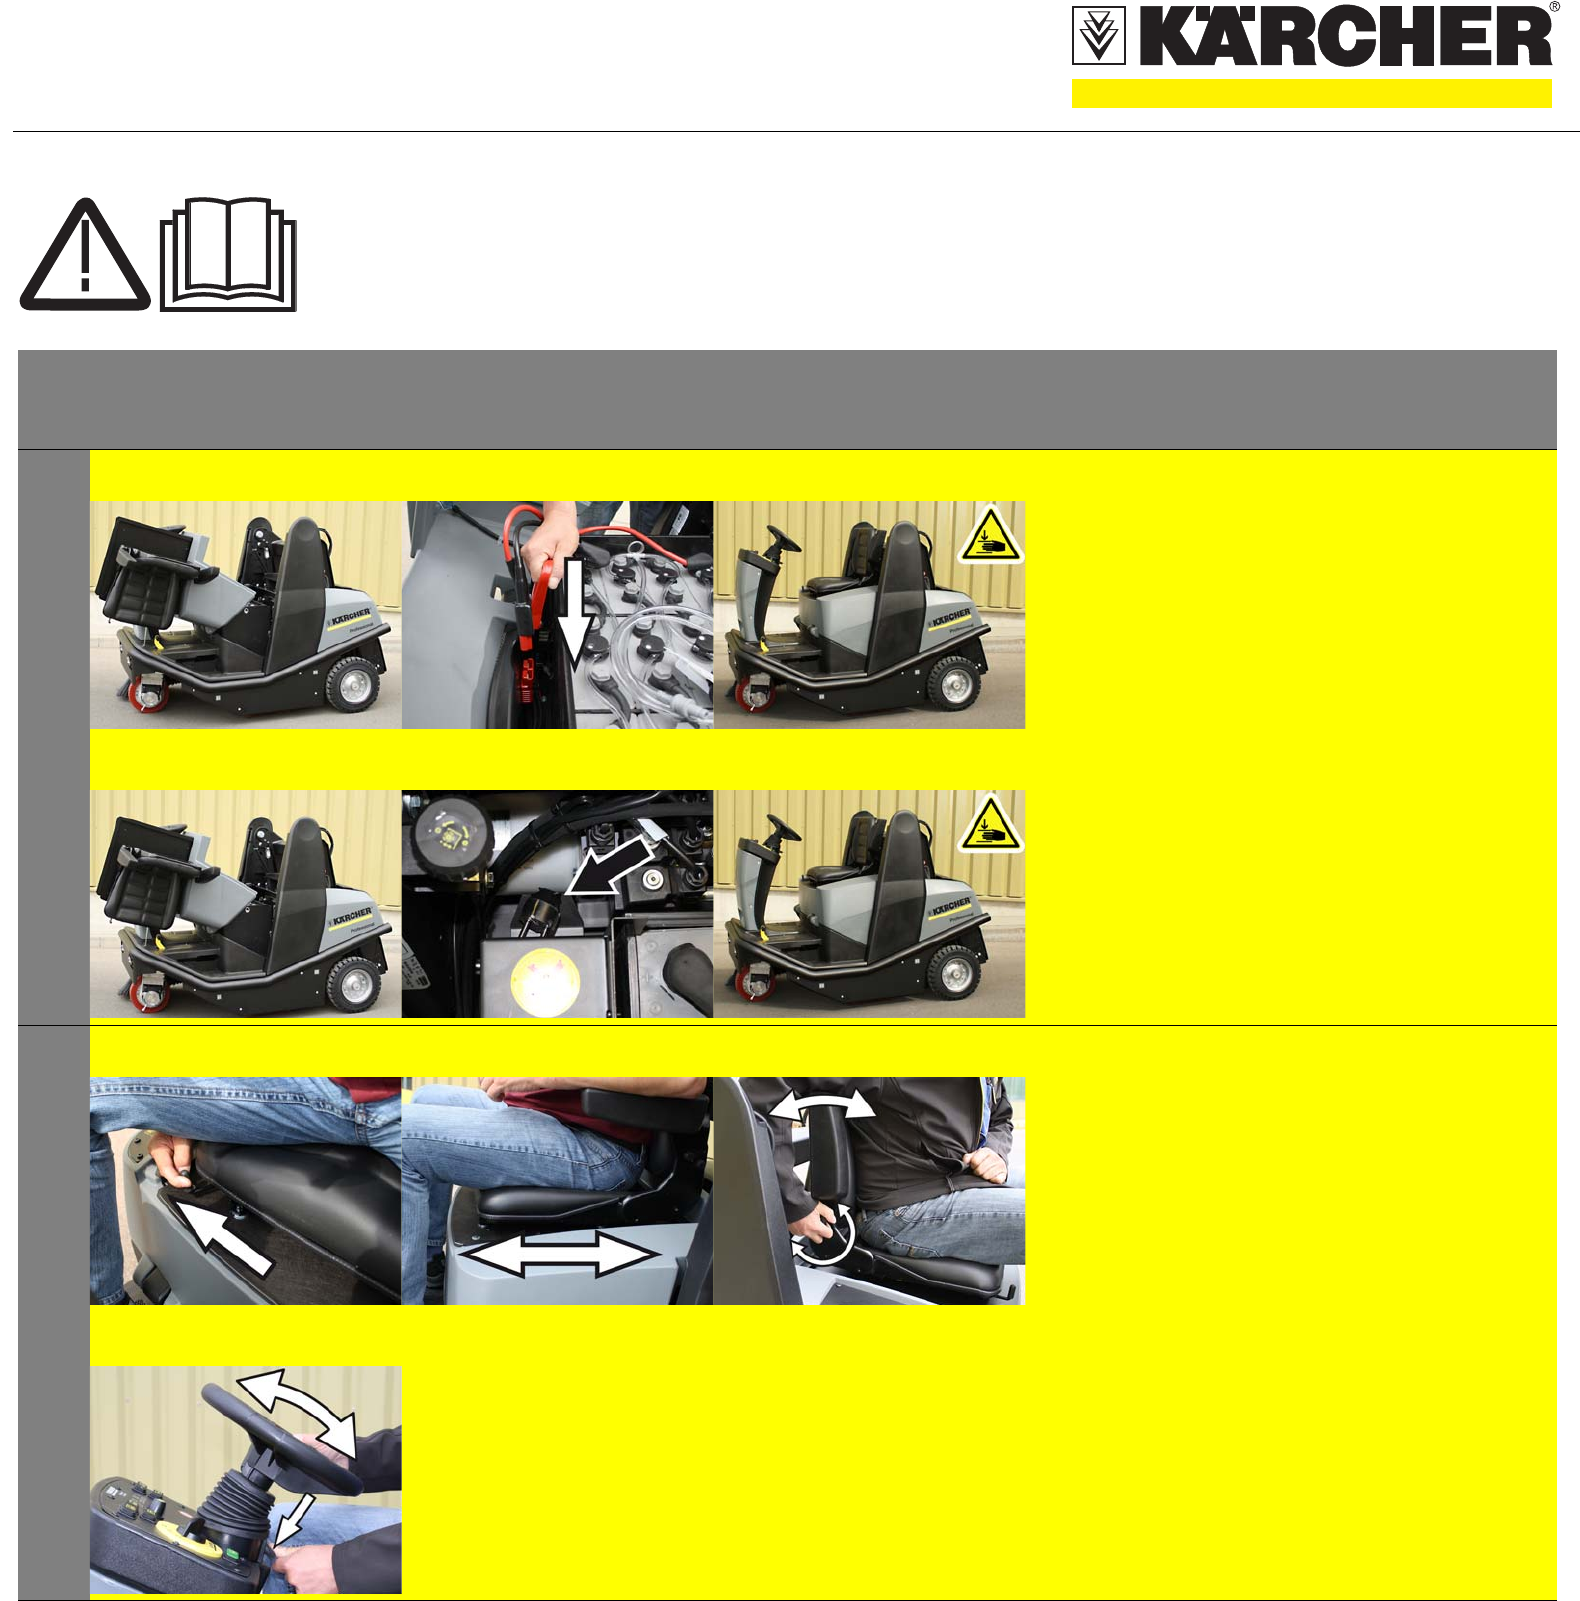
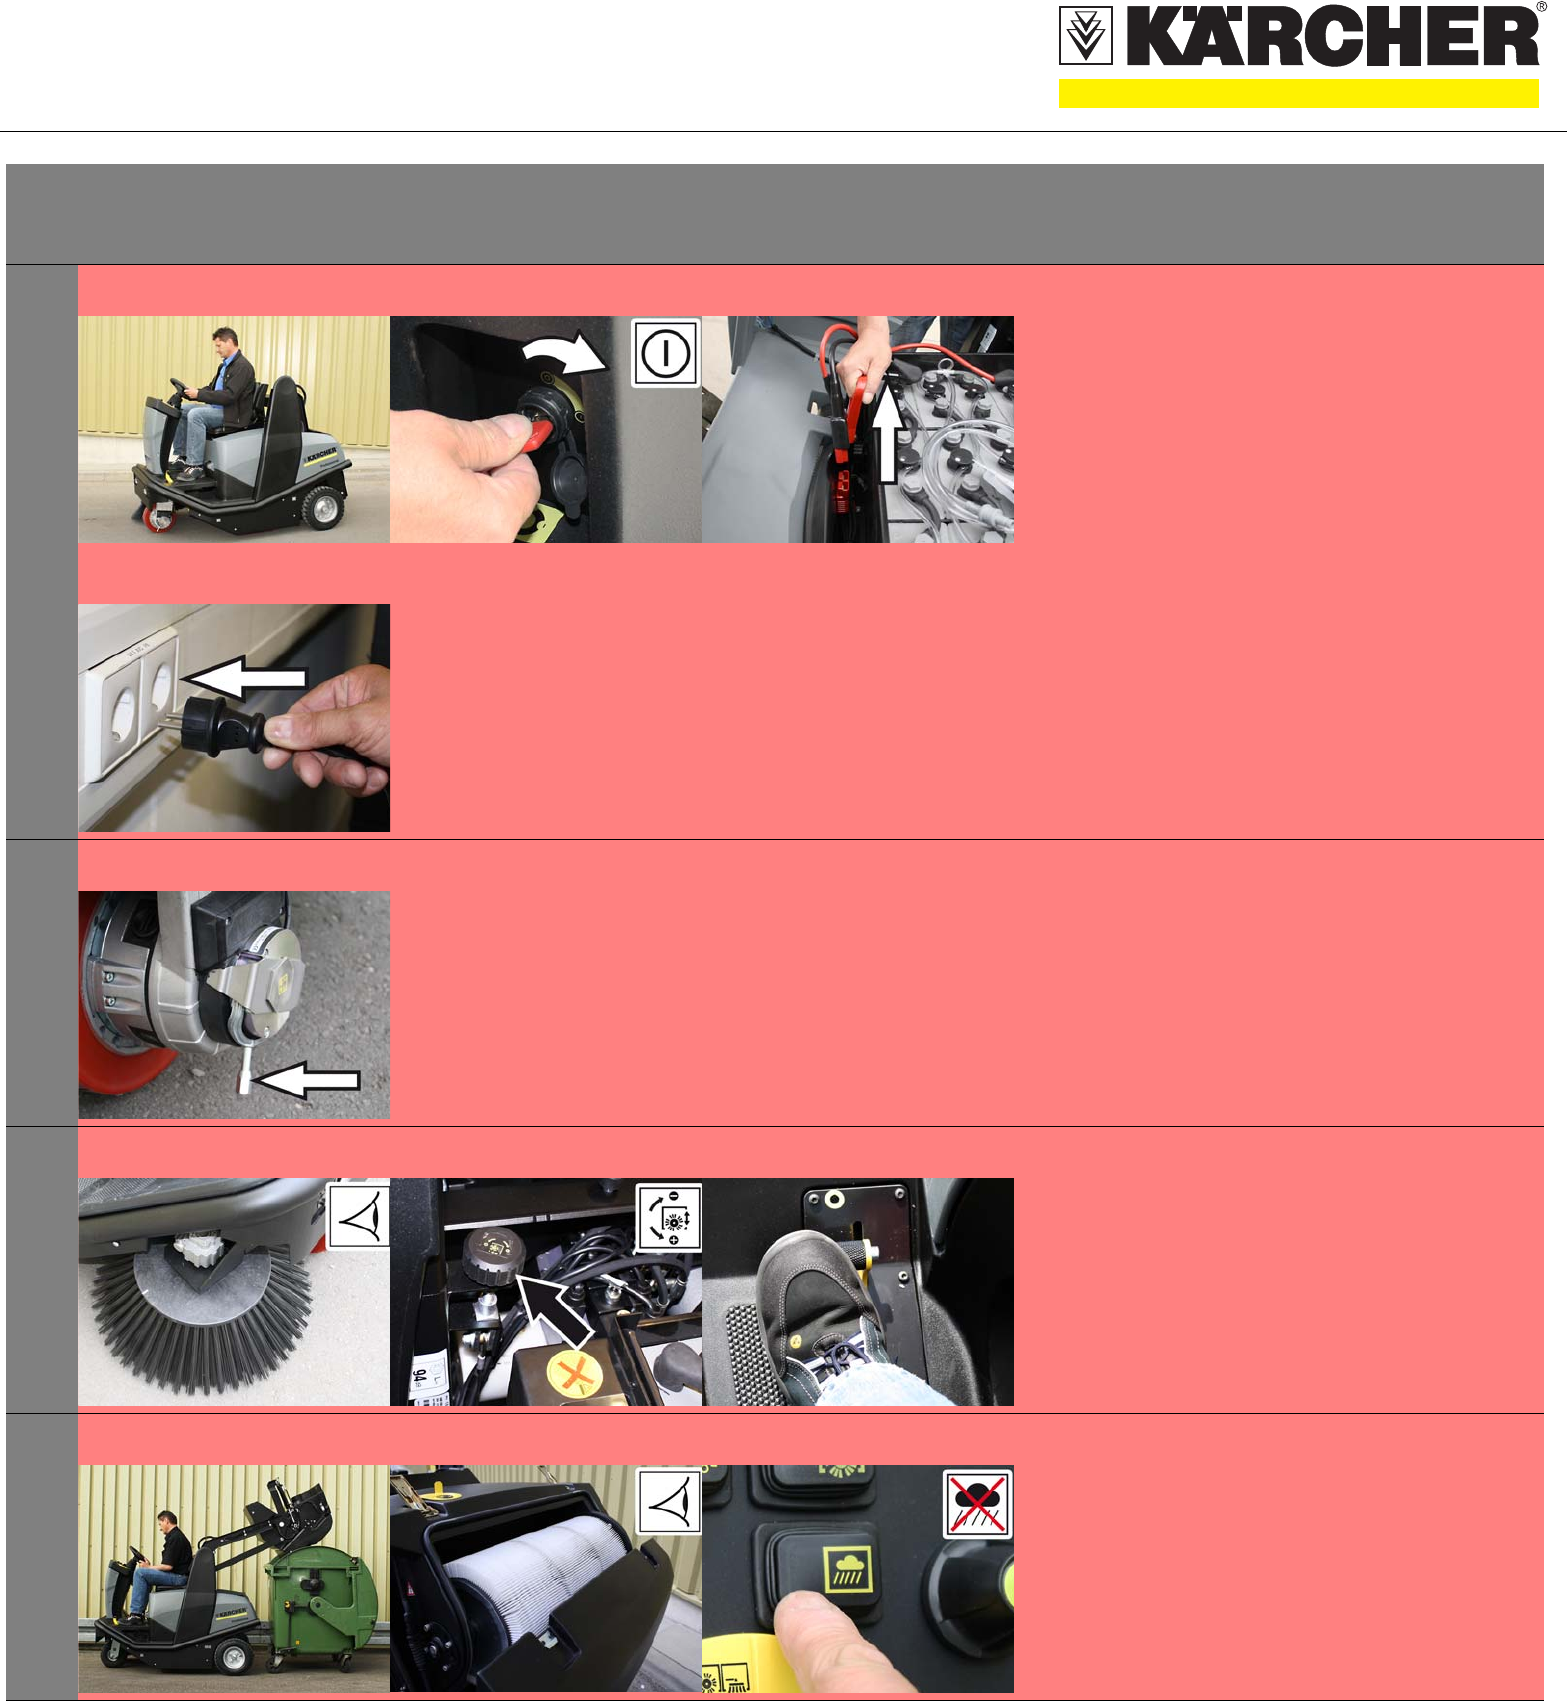
Start up
1A
A
B
B
C
C
Bp model
A Open the device hood.
B Switch off the charger and remove the plug
from the socket.
Pull the battery cable from the charger cable
and connect it to the appliance.
C Close cover.
Bp Pack model
A Open the device hood.
B Unplug the charger from the mains.
Place the mains cable into the storage com-
partment.
C Close cover.
2A
D
B C A Pull seat adjustment lever outwards.
B Move seat, release lever and
lock in place.
Check that the seat is properly locked in
position by attempting to move it backwards
and forwards.
C Adjust the seat back.
D Position the steering wheel.
KM 120/150 R Bp/Bp Pack
QUICKSTART
5.964-011.0 07/11
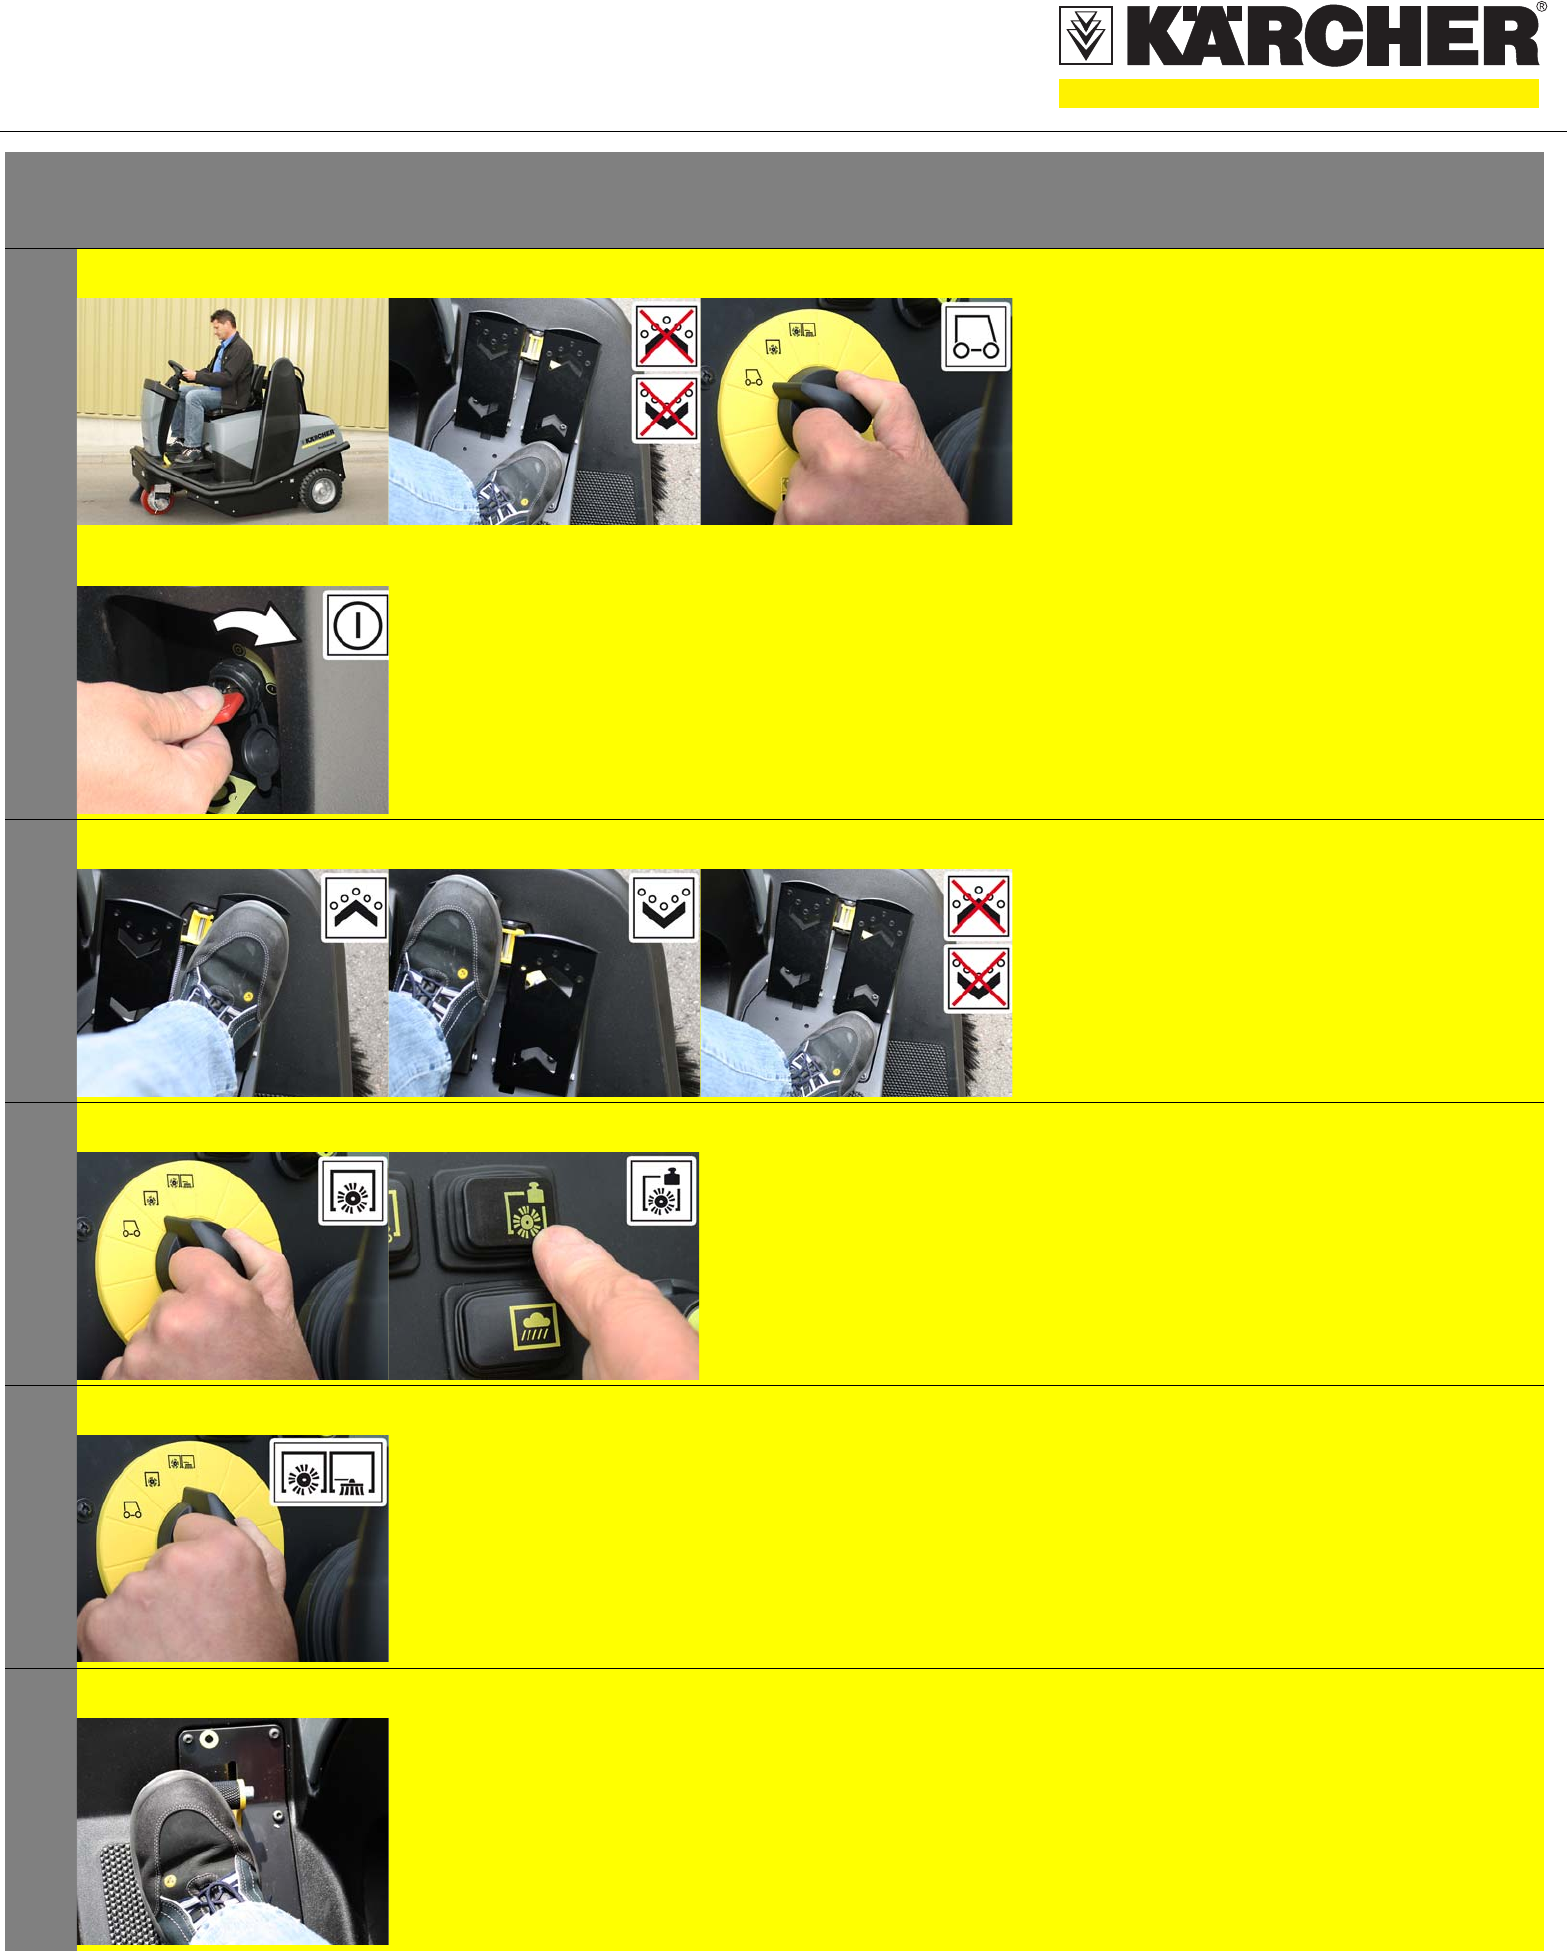
Operation
1A
D
B C Starting the machine
A Sit on the driver's seat.
B Do NOT press the accelerator pedal.
C Set programme switch to stage
1 (driving).
D Turn key switch to position "I".
2ABCDrive the machine
A Press slowly the accelerator pedal "forward".
B Press slowly the accelerator pedal "reverse".
C Release the accelerator pedal, the machine
brakes automatically and stops.
3A B Sweeping with sweep roller
A Set programme switch to stage 2.
Roller brush is lowered.
Increase roller brush pressure
B Press power button. Indicator lamp
is illuminated.
4ASweeping with side brushes
A Set programme switch to stage 3.
The side brushes and roller brush are
lowered.
5ASweeping with raised
coarse waste flap
A Push the coarse waste flap pedal
towards the front and hold it there briefly.
To lower it, take foot off pedal.
QUICKSTART
5.964-011.0 07/11
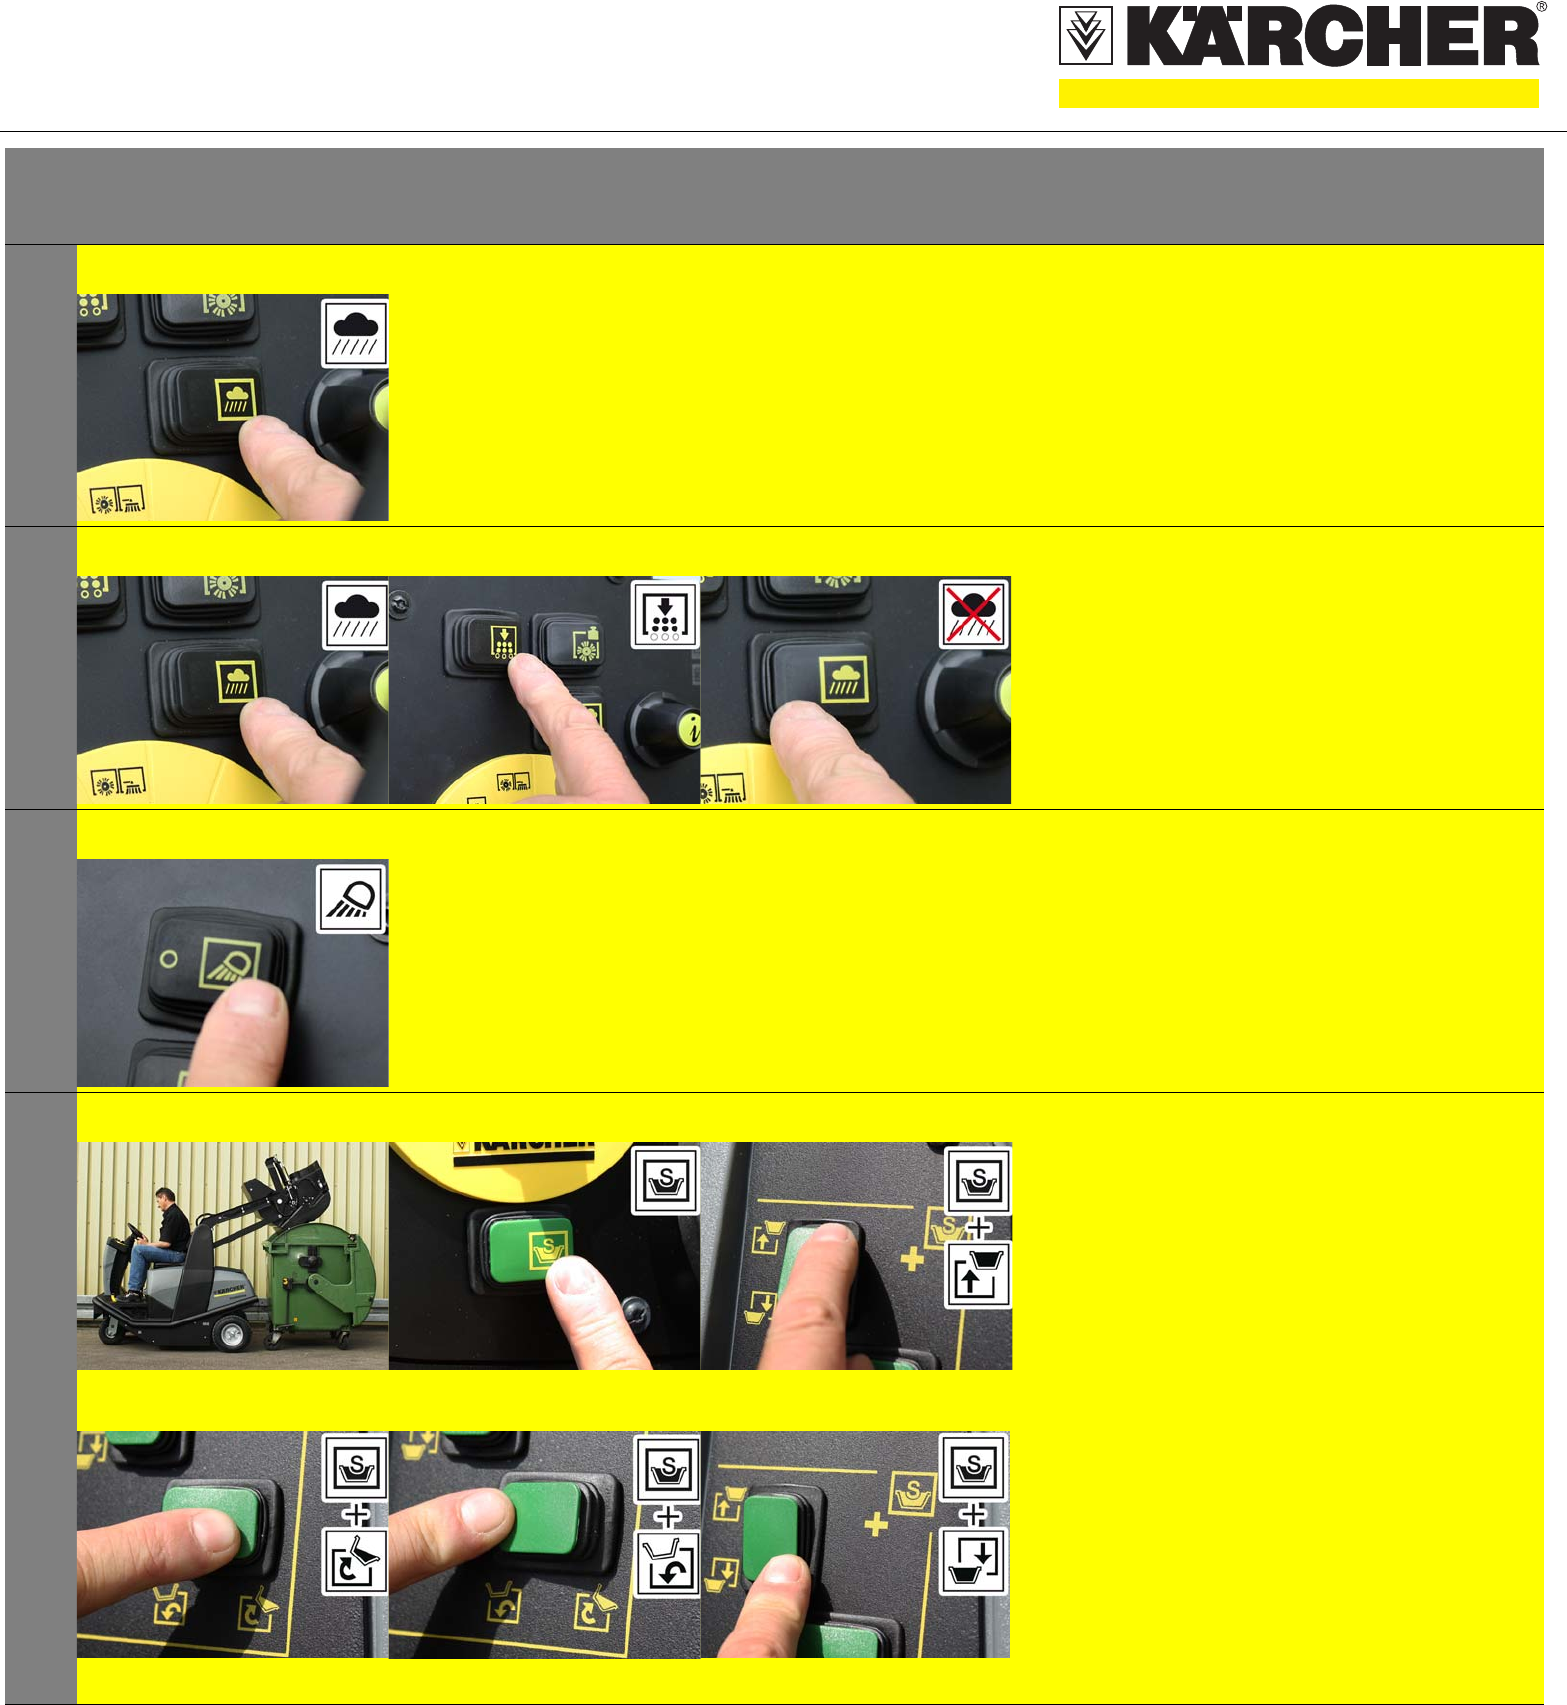
6ASweeping damp or wet floors
A Fan "Off".
7ABCCleaning the dust filter
A Fan "Off".
B Depending on the amount of the collected
dust, the dust filter must be cleaned during
operation.
C Fan "On".
8AOperation with working lights
A Switch on the working light.
9
C
A
D
B
E
Emptying waste container
Danger
Risk of injury! When emptying the waste
container, care should be taken to ensure that no
persons or animals are within its swivelling range.
Danger
Danger of crushing. Never reach into the rod
assembly for the drainage mechanism. Stay
away from the area under the raised container.
Danger
Danger of tipping! Place the appliance on an
even surface during the emptying
process.
A Keep the switch for the two-handed opera-
tions lift/tilt emptying mechanism pressed.
B Raise waste container.
C Tip waste container out.
D Tilt the waste container up to the end-position.
E Lower waste container.
Operation
QUICKSTART
5.964-011.0 07/11
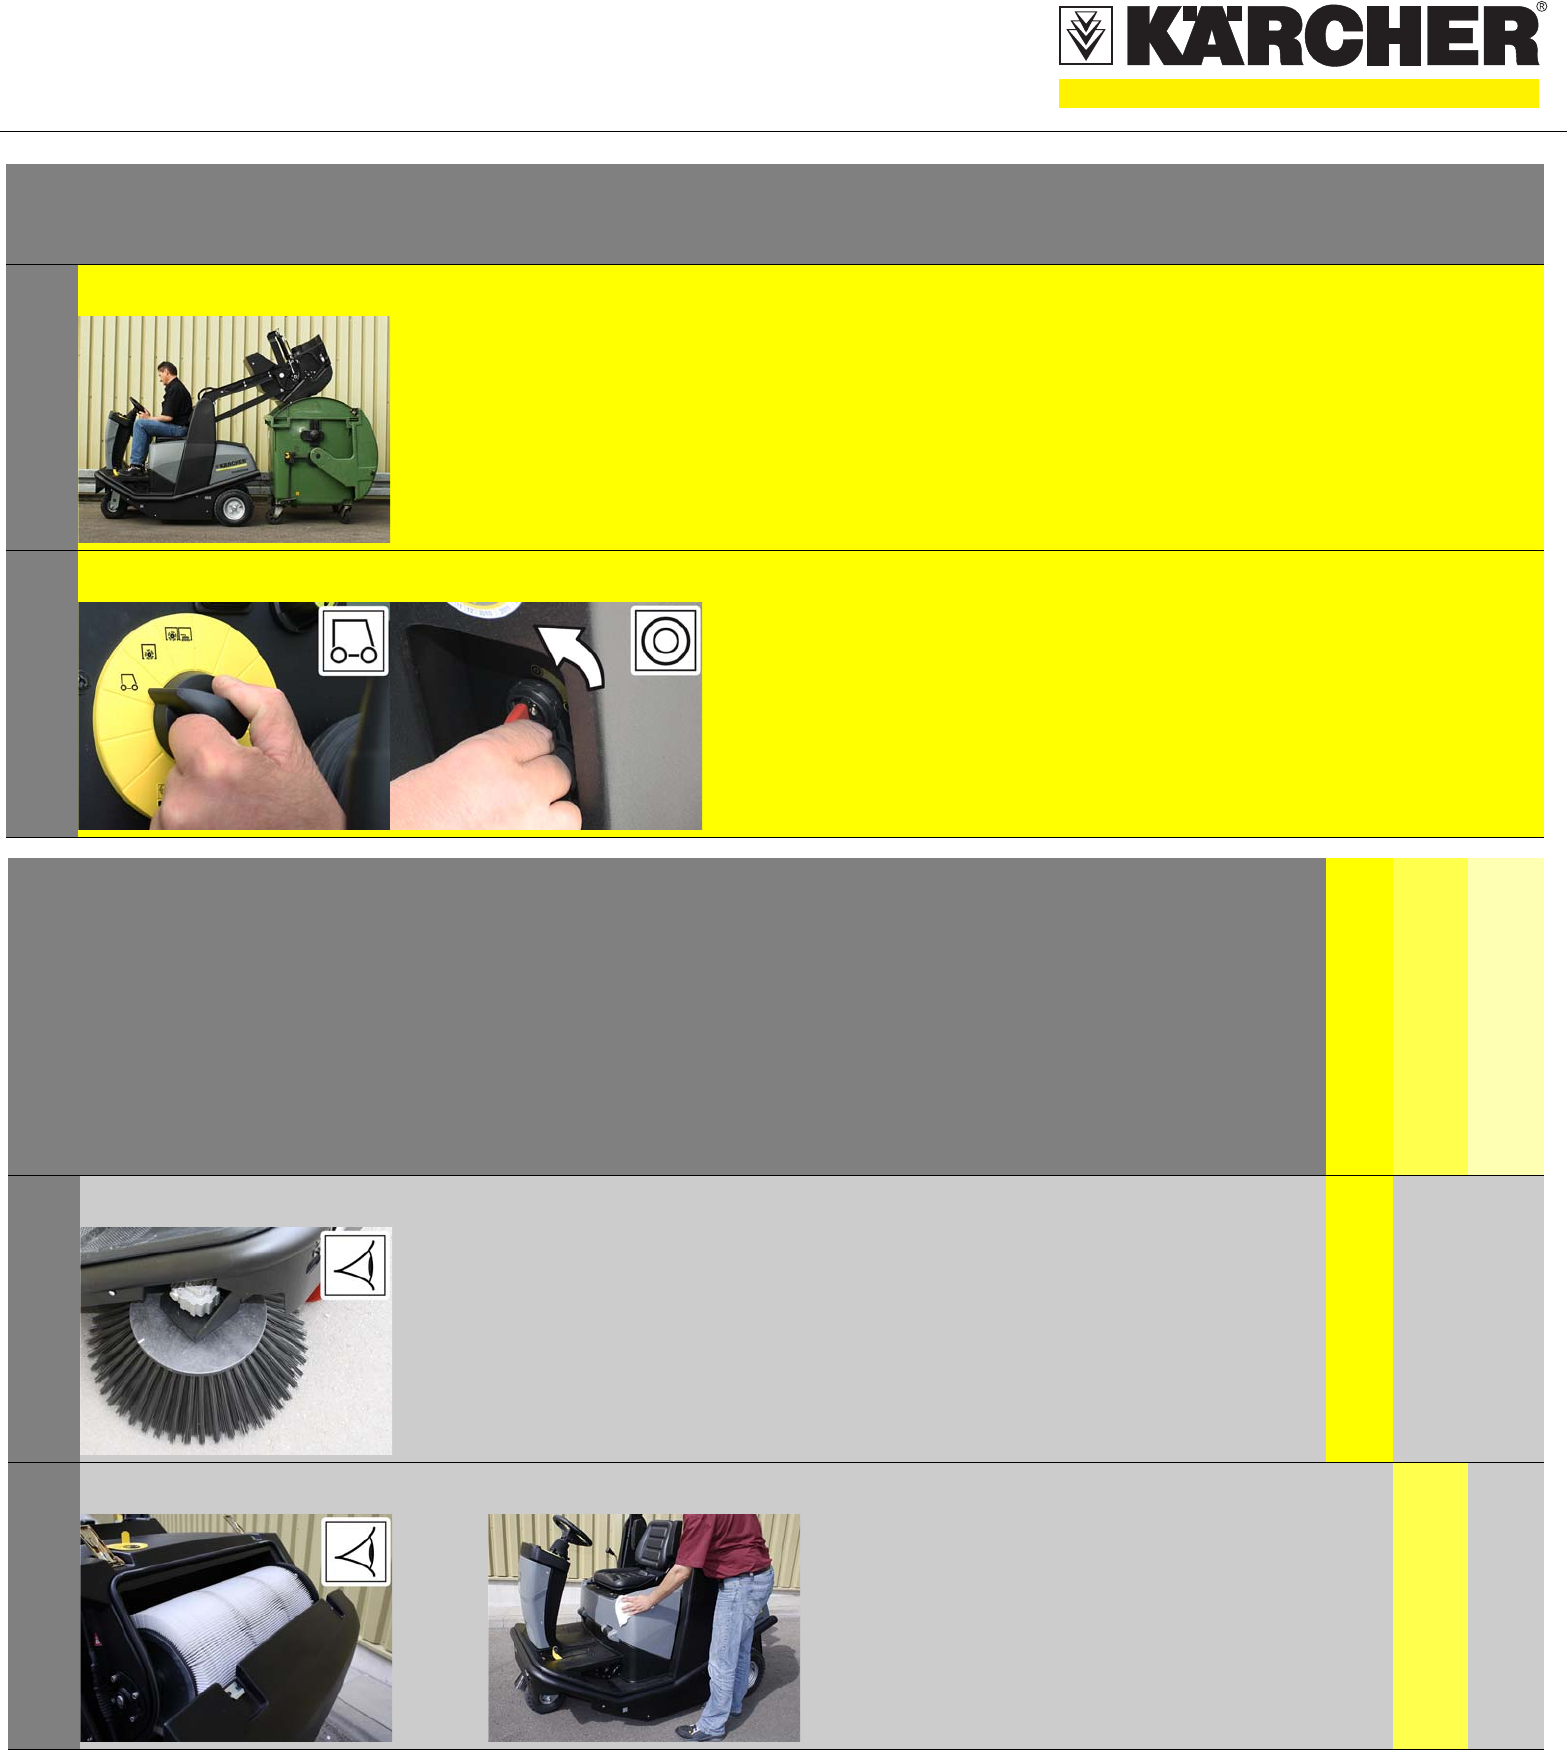
Finish operation
1Emptying waste container
See "Operation"
2A B Turn off the appliance
A Set programme switch to stage
1 (driving). The side brushes and roller brush
are raised.
B Turn ignition key to "0" and remove it.
Maintenance and care
daily
weekly
Kärcher Customer Service
1AA Check the sweeping roller and the
side brush for wear and wrapped
belts.
2A B A Check dust filter and clean filter
box, if required.
B Clean the machine with a damp
cloth which has been soaked in
mild detergent.
몇Warning
Risk of damage! Do not wash down the
appliance with water and do not use
aggressive detergents.
QUICKSTART
5.964-011.0 07/11
Troubleshooting
1A
D
B C Appliance cannot be started
A Sit on the driver seat, the
seat contact switch gets activated
B Turn key switch to position "I".
CBp model
Remove battery plug and join it to the
charging cable.
Switching on the charger
DBp Pack model
Remove the mains cable from the storage
bin.
Connect the charger to the mains and turn it
on.
2AEngine is running but machine is not moving
A Check setting of freewheel lever
3ABCMachine is not sweeping properly
A Check roller brush and side brushes for wear,
replace if necessary.
B Adjust sweeping track
C Check function of bulk waste flap
4ABCDust gathers in the machine
A Empty waste container
See "Operation"
B Check, clean or
replace dust filter
C Close wet/dry flap
Roller brush does not turn.
A Remove tapes or cords from the
roller brush
