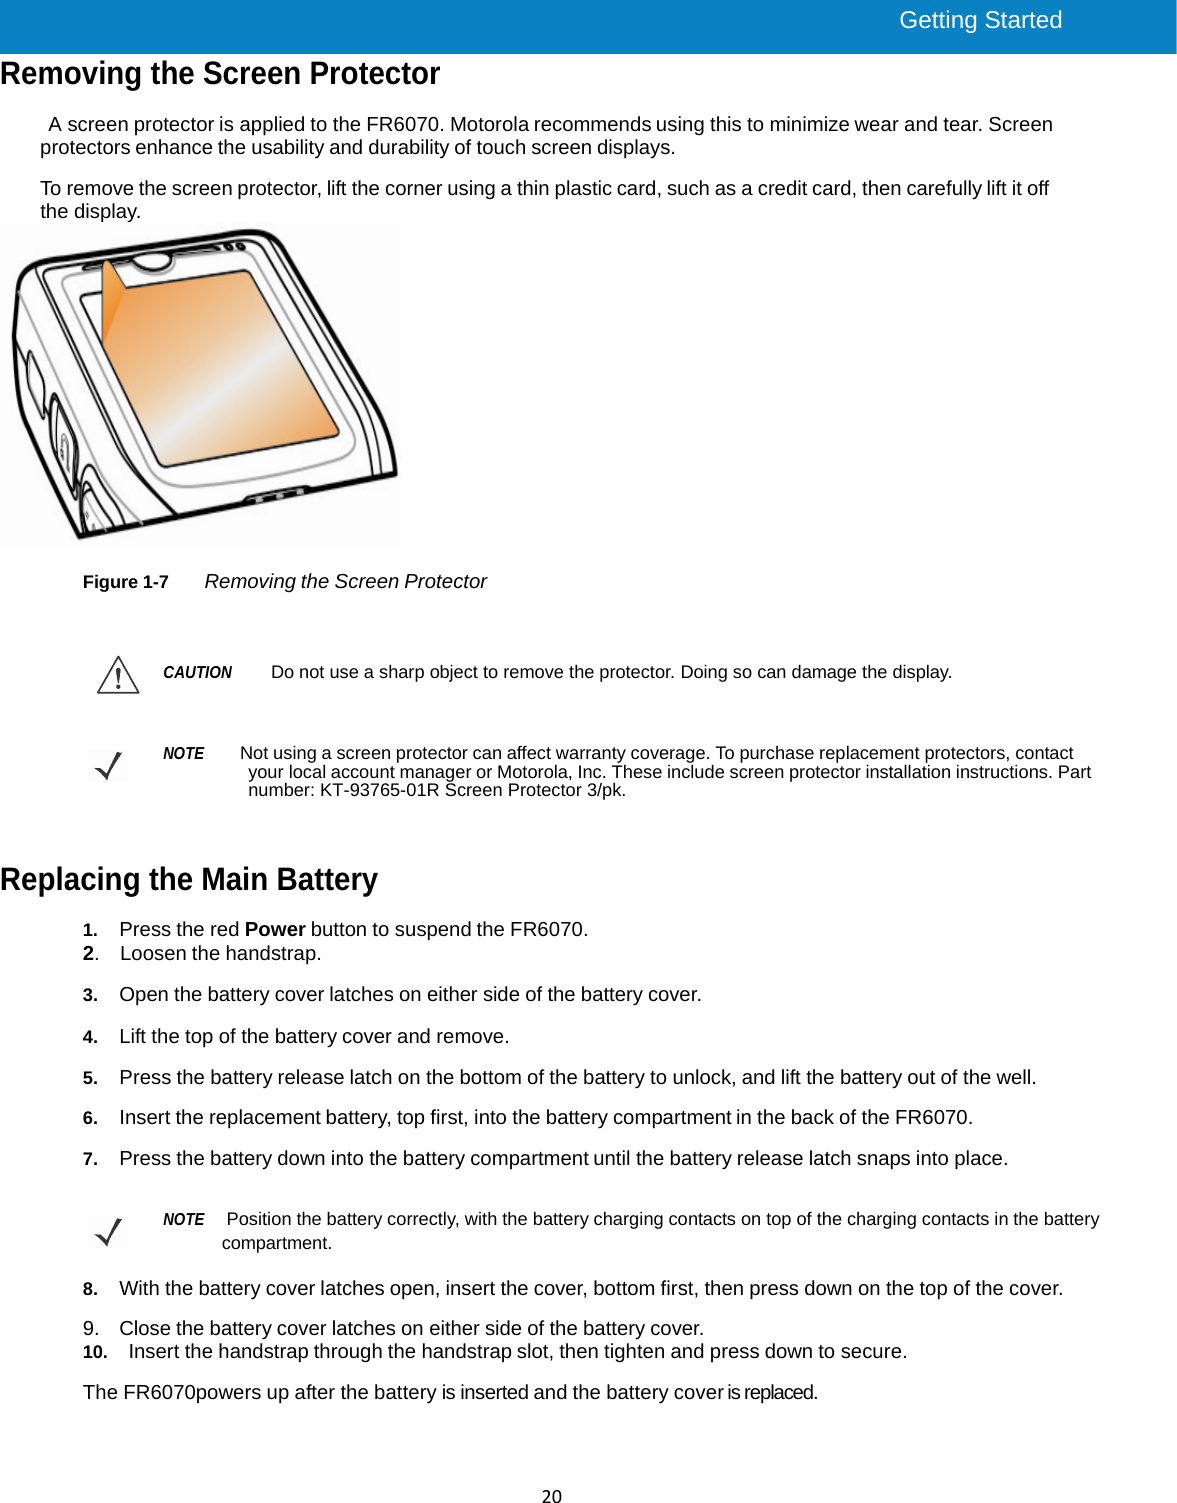
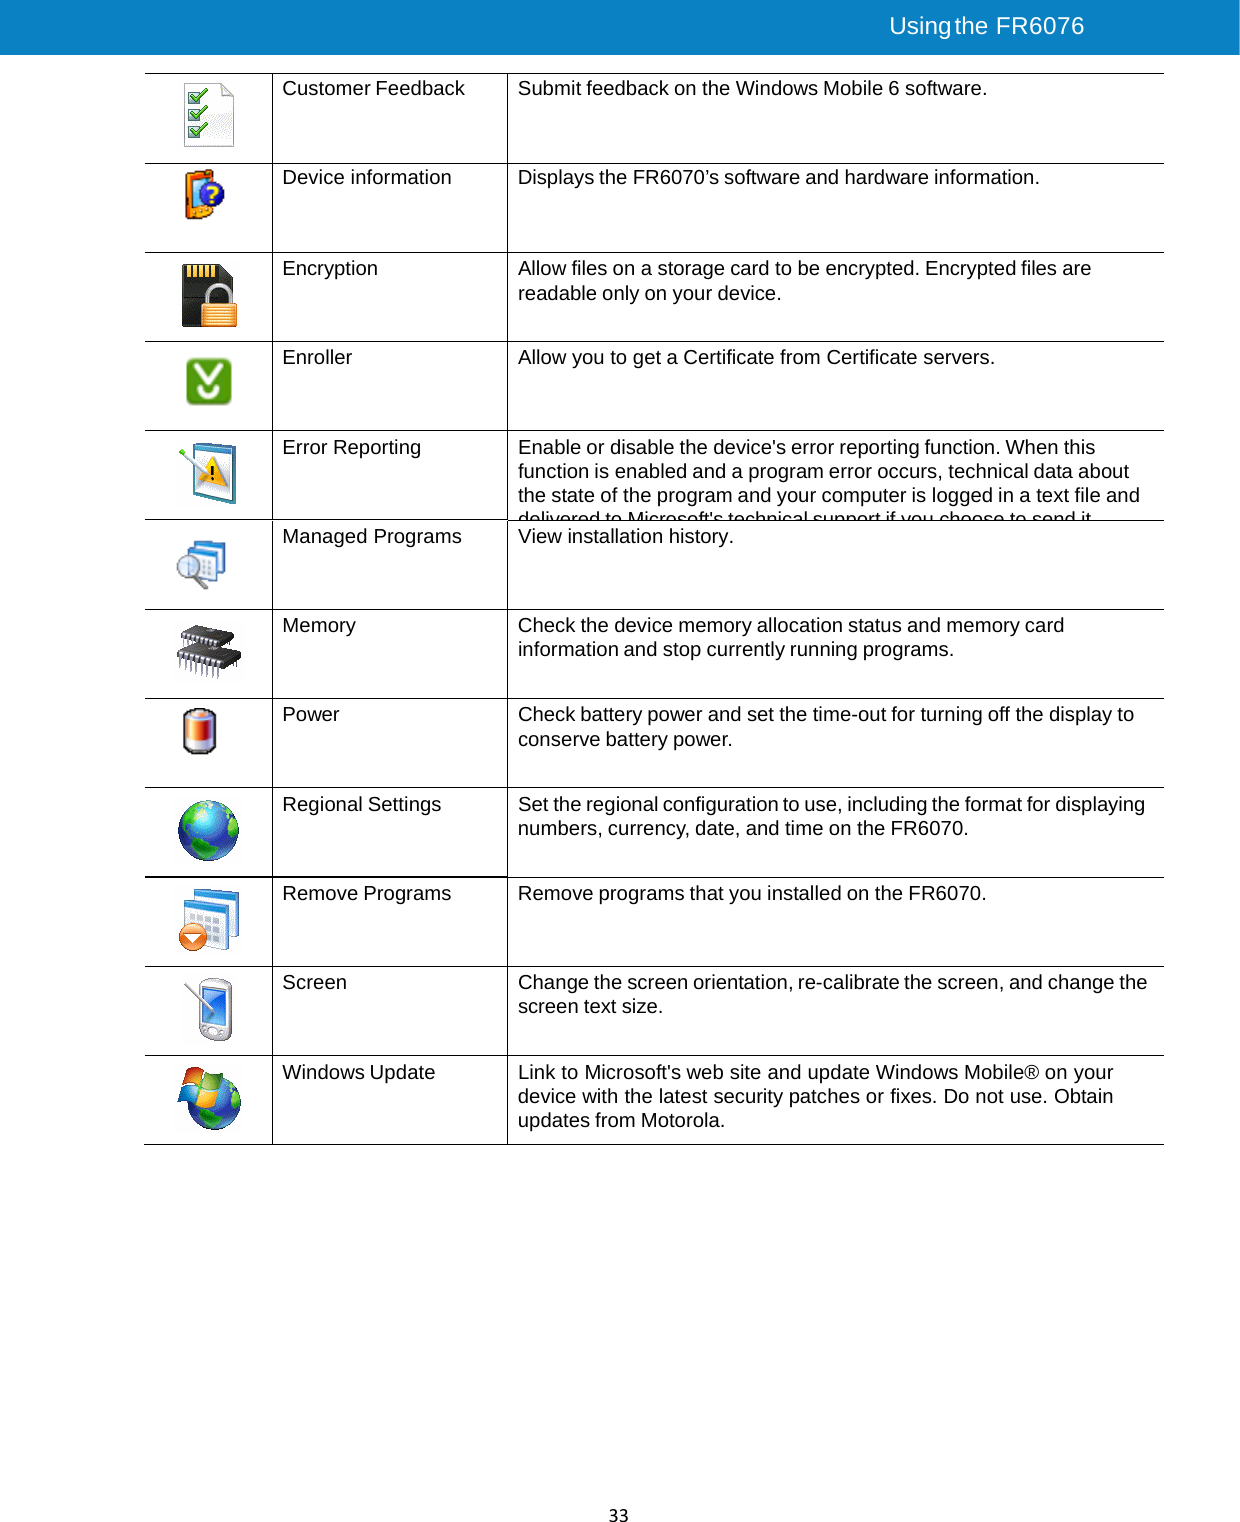
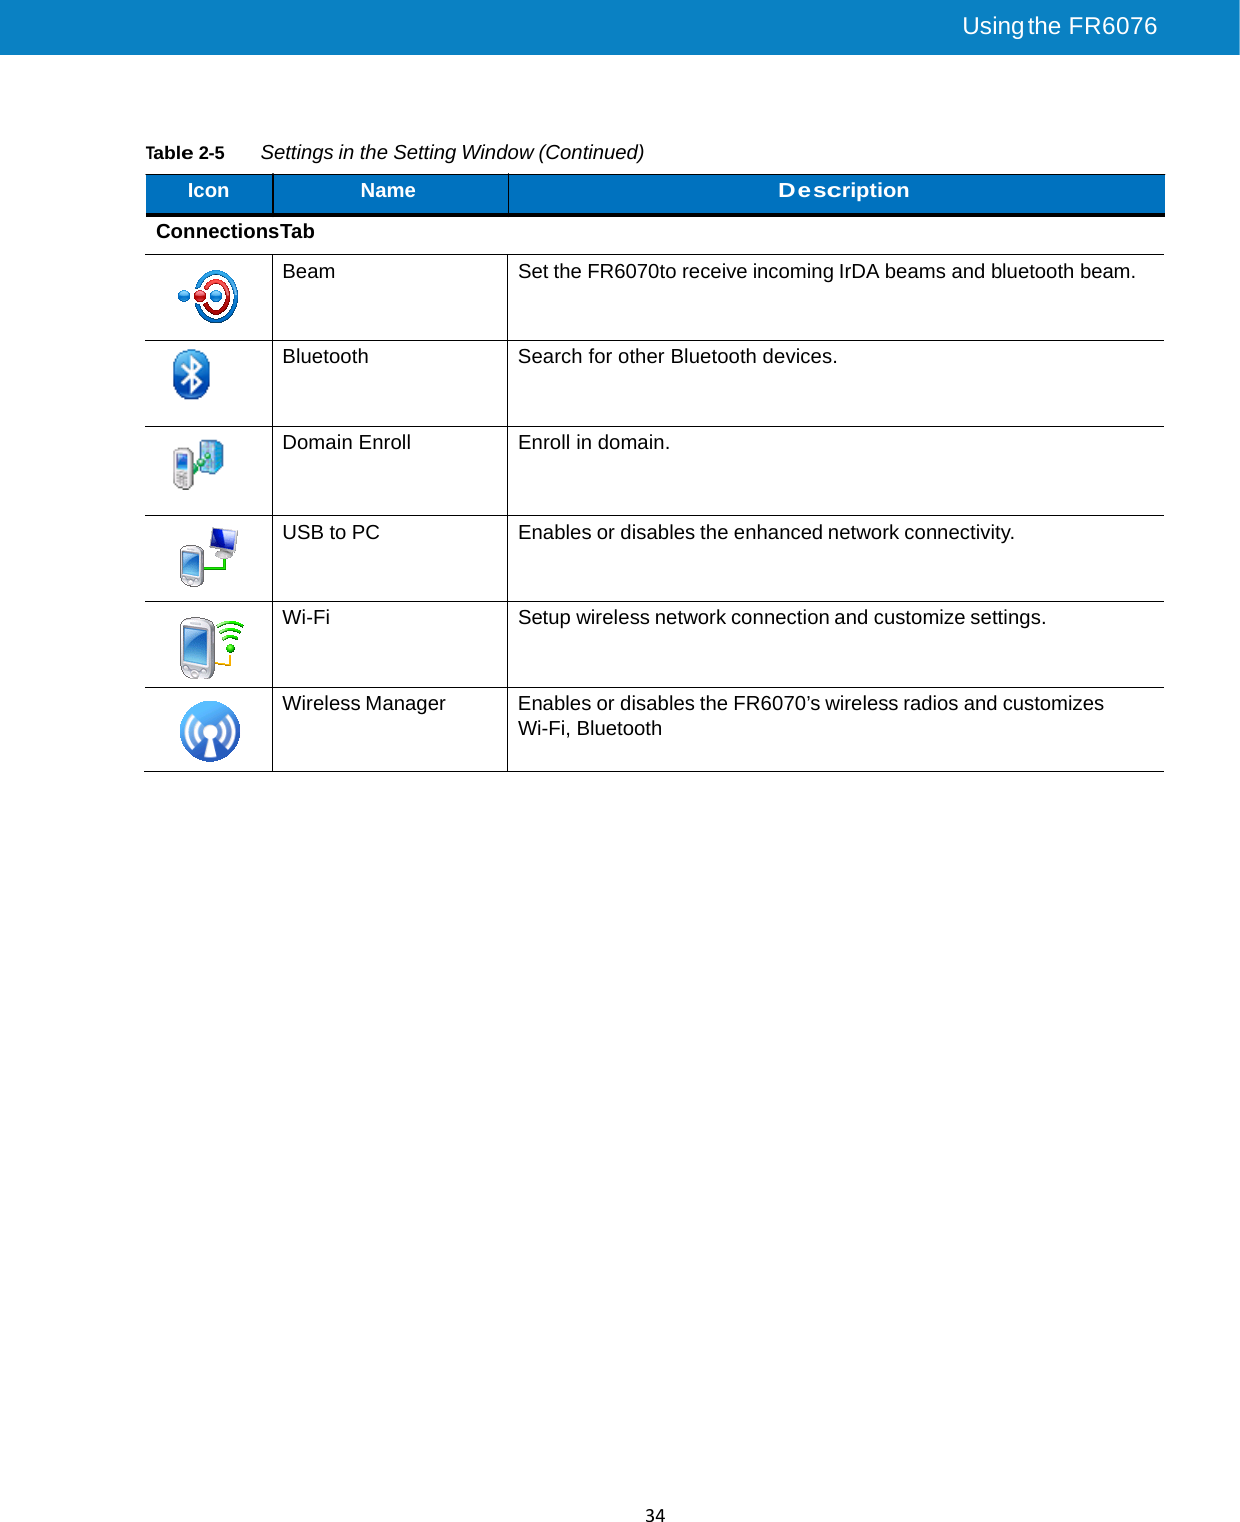
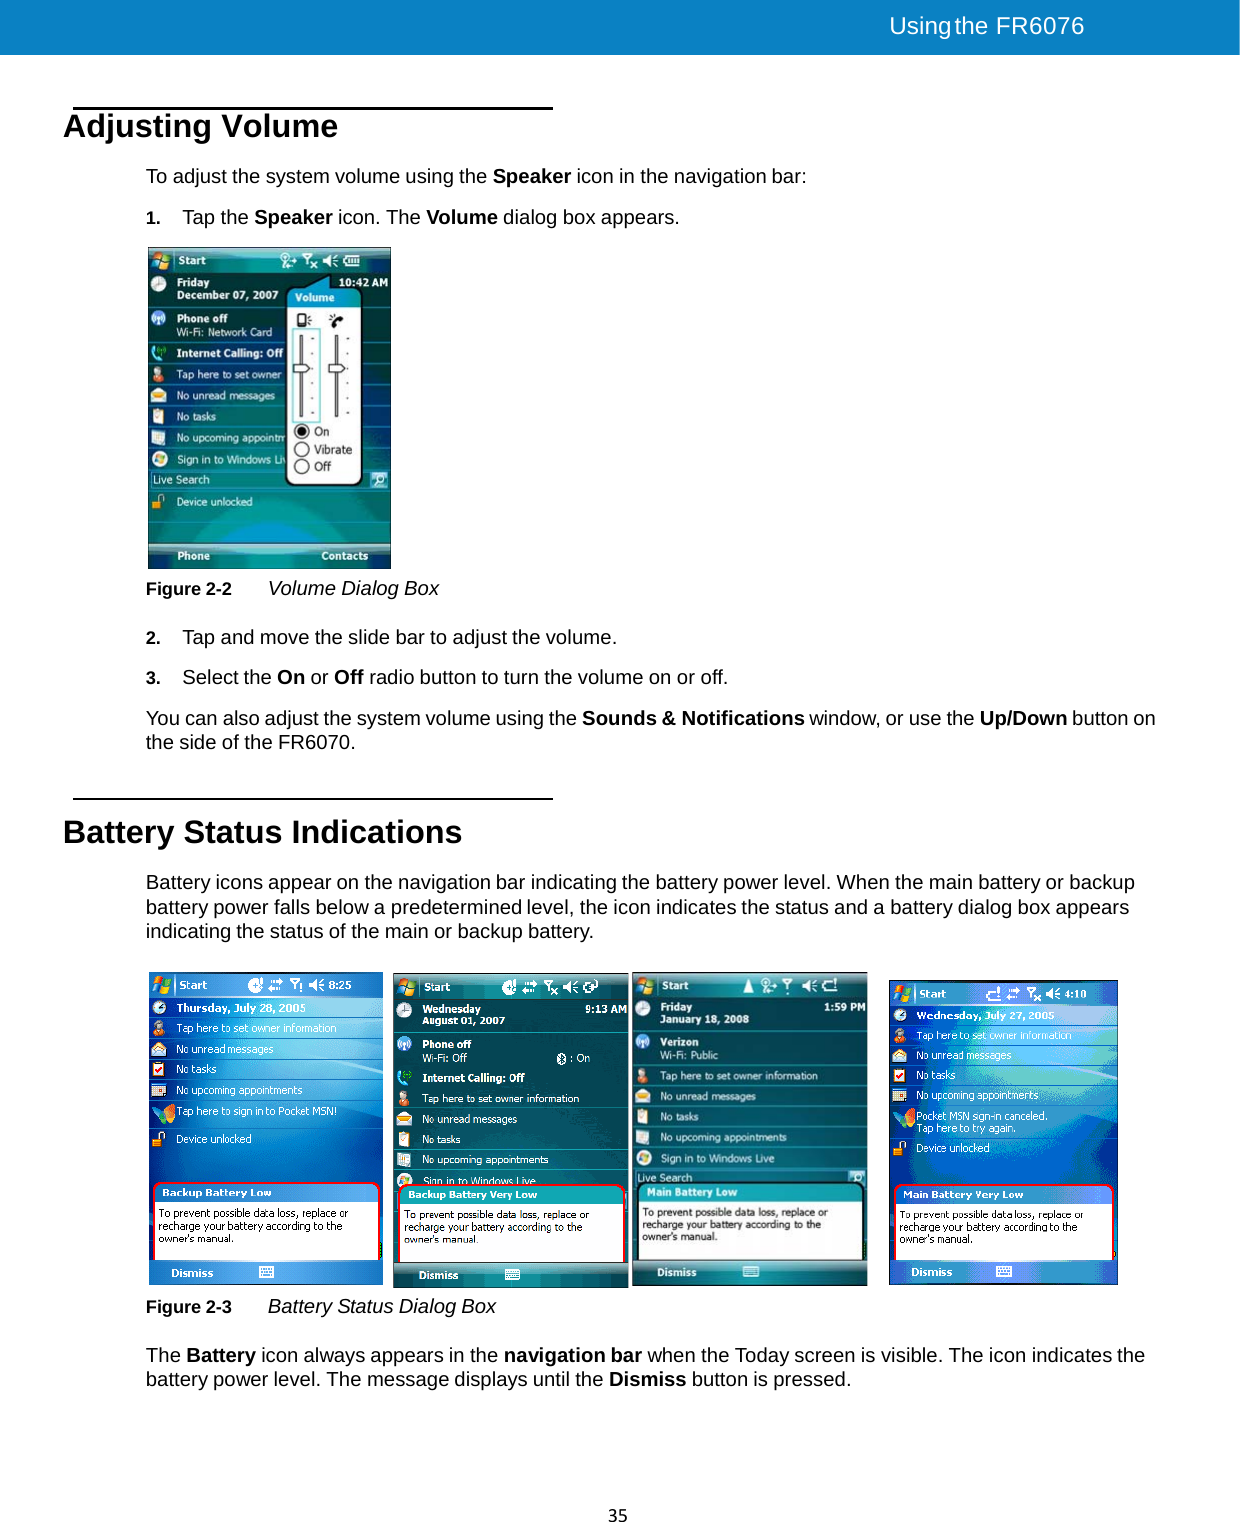
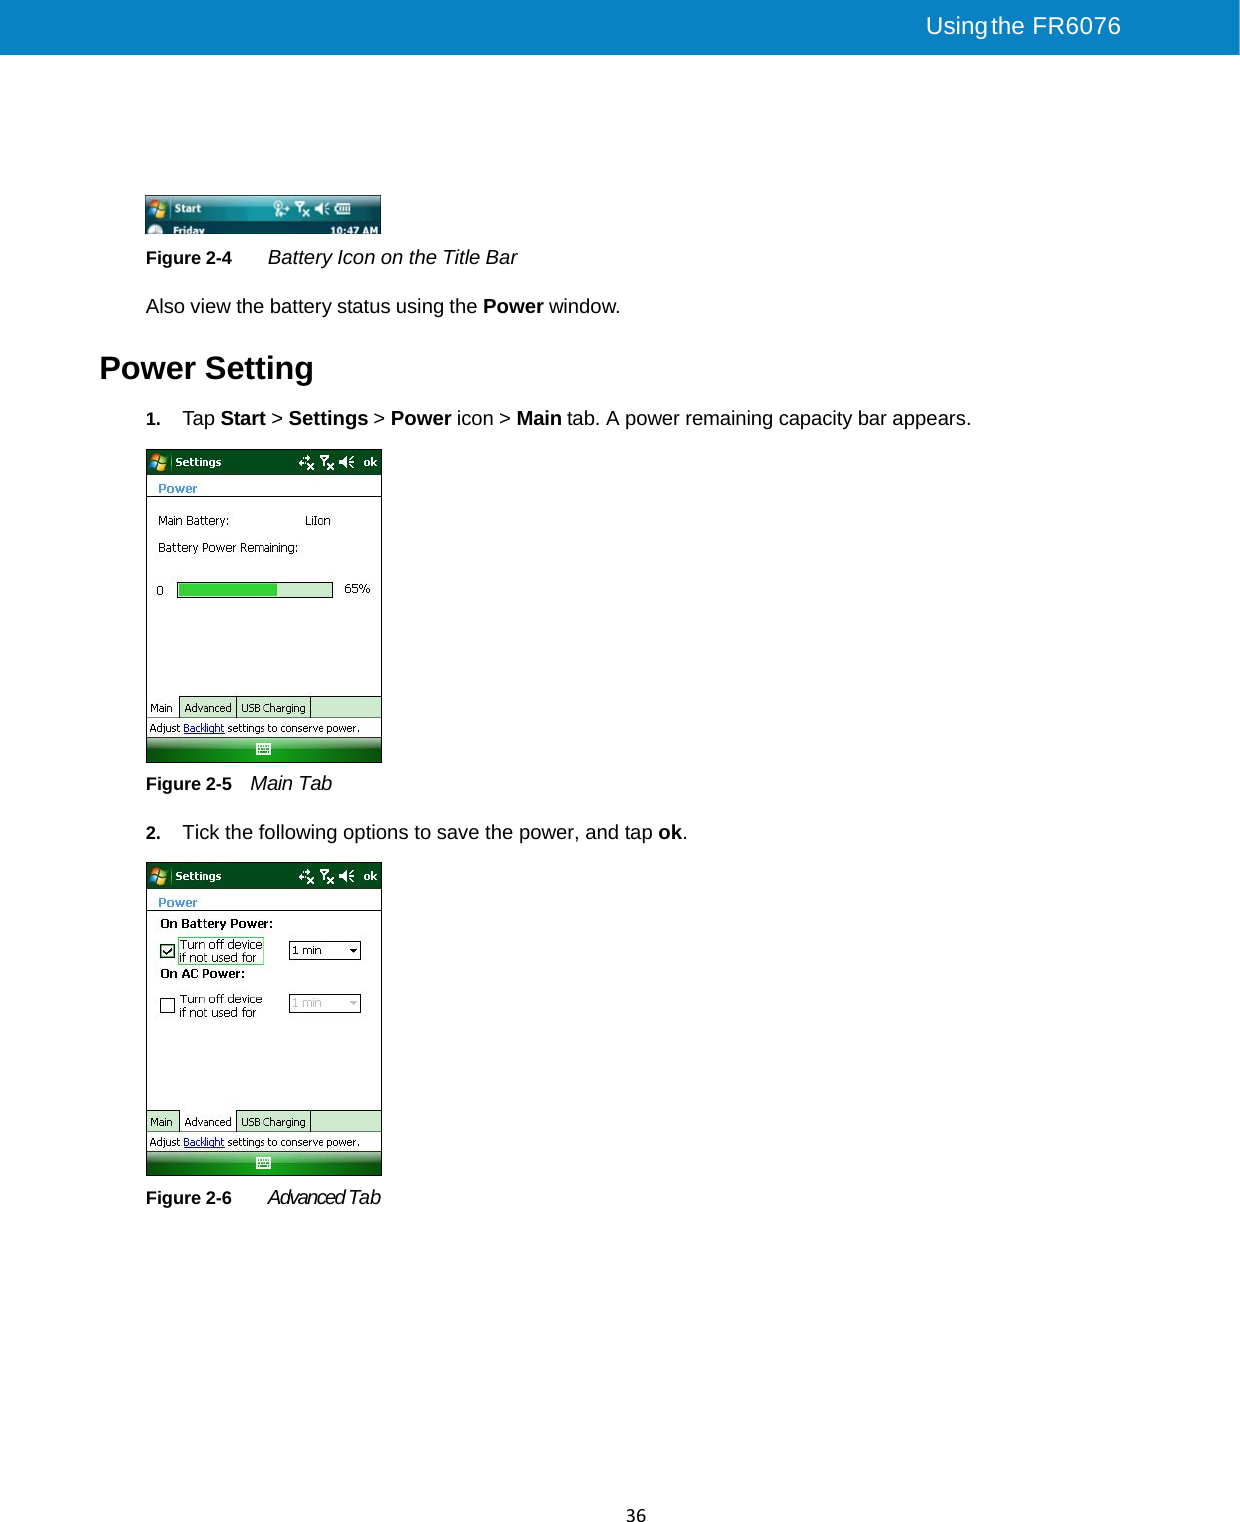
Symbol Technologies FR6070 MOBILE COMPUTER User Manual FR6070 User Guide 1
Symbol Technologies Inc MOBILE COMPUTER FR6070 User Guide 1
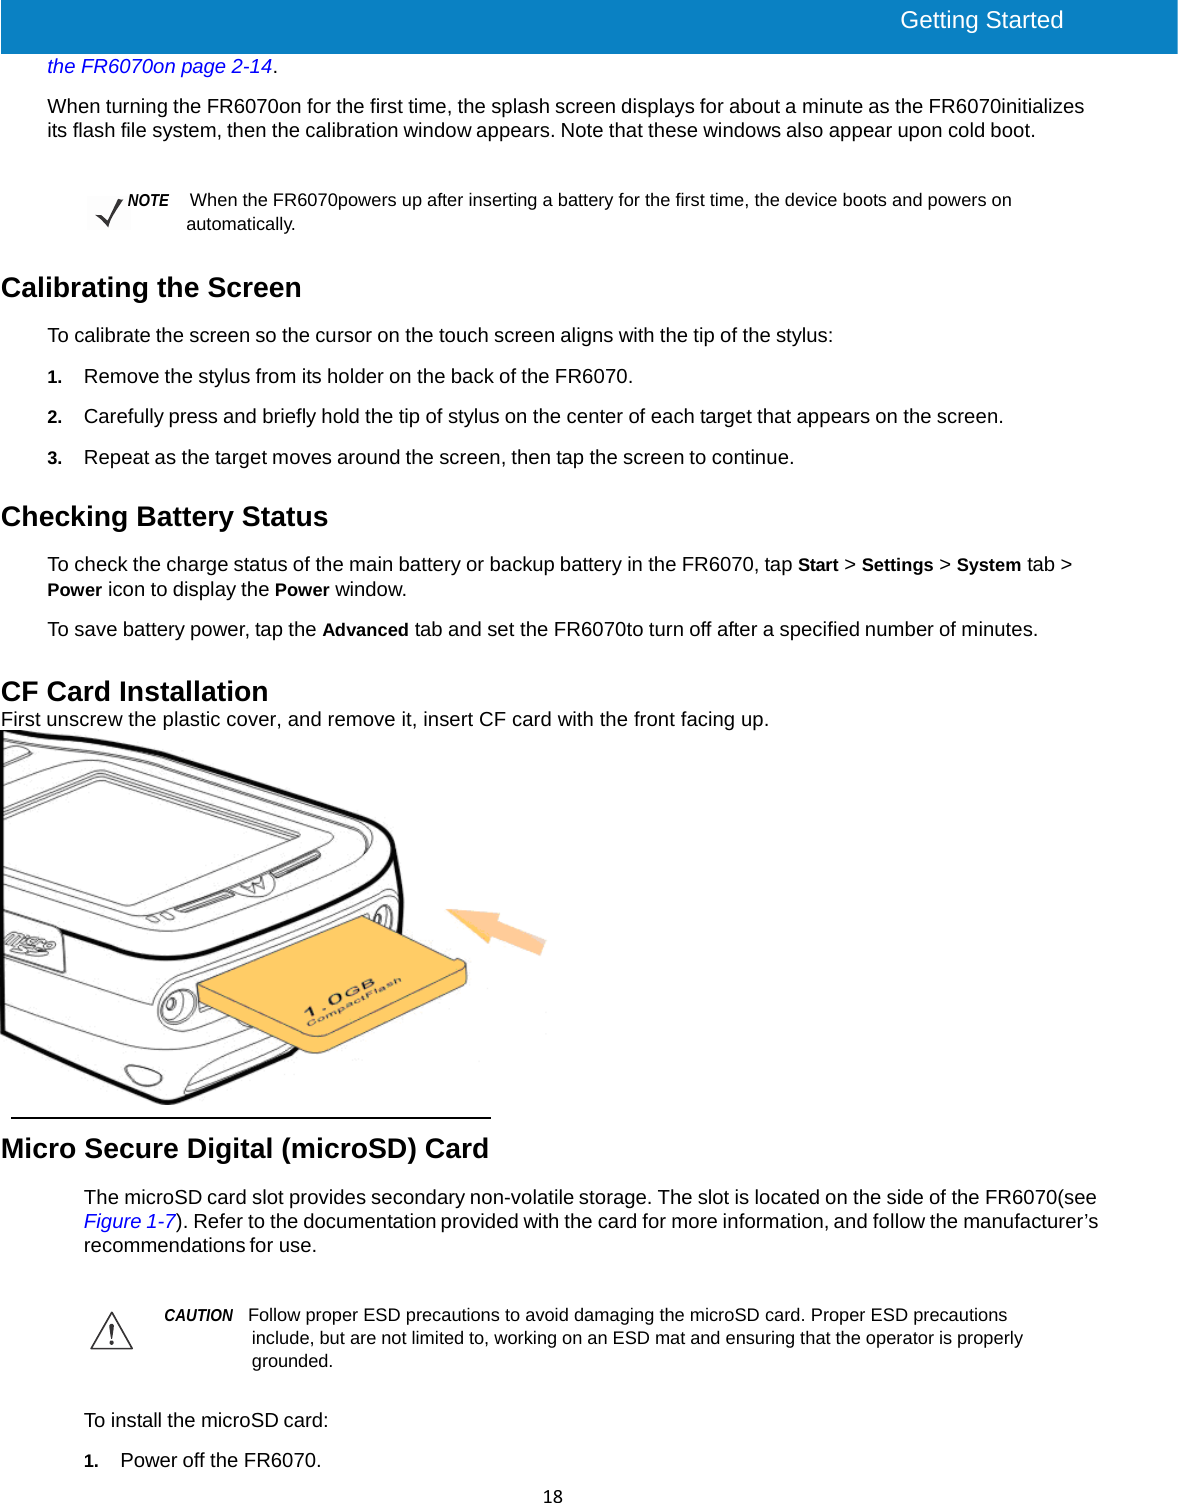
UserManual.wiki
>
Symbol Technologies
>
FR6070 User Manual
Users Manual
Navigation menu
Upload a User Manual
Namespaces
Wiki Guide
HTML
PDF
Info
Views
User Manual
Discussion / Help
Navigation
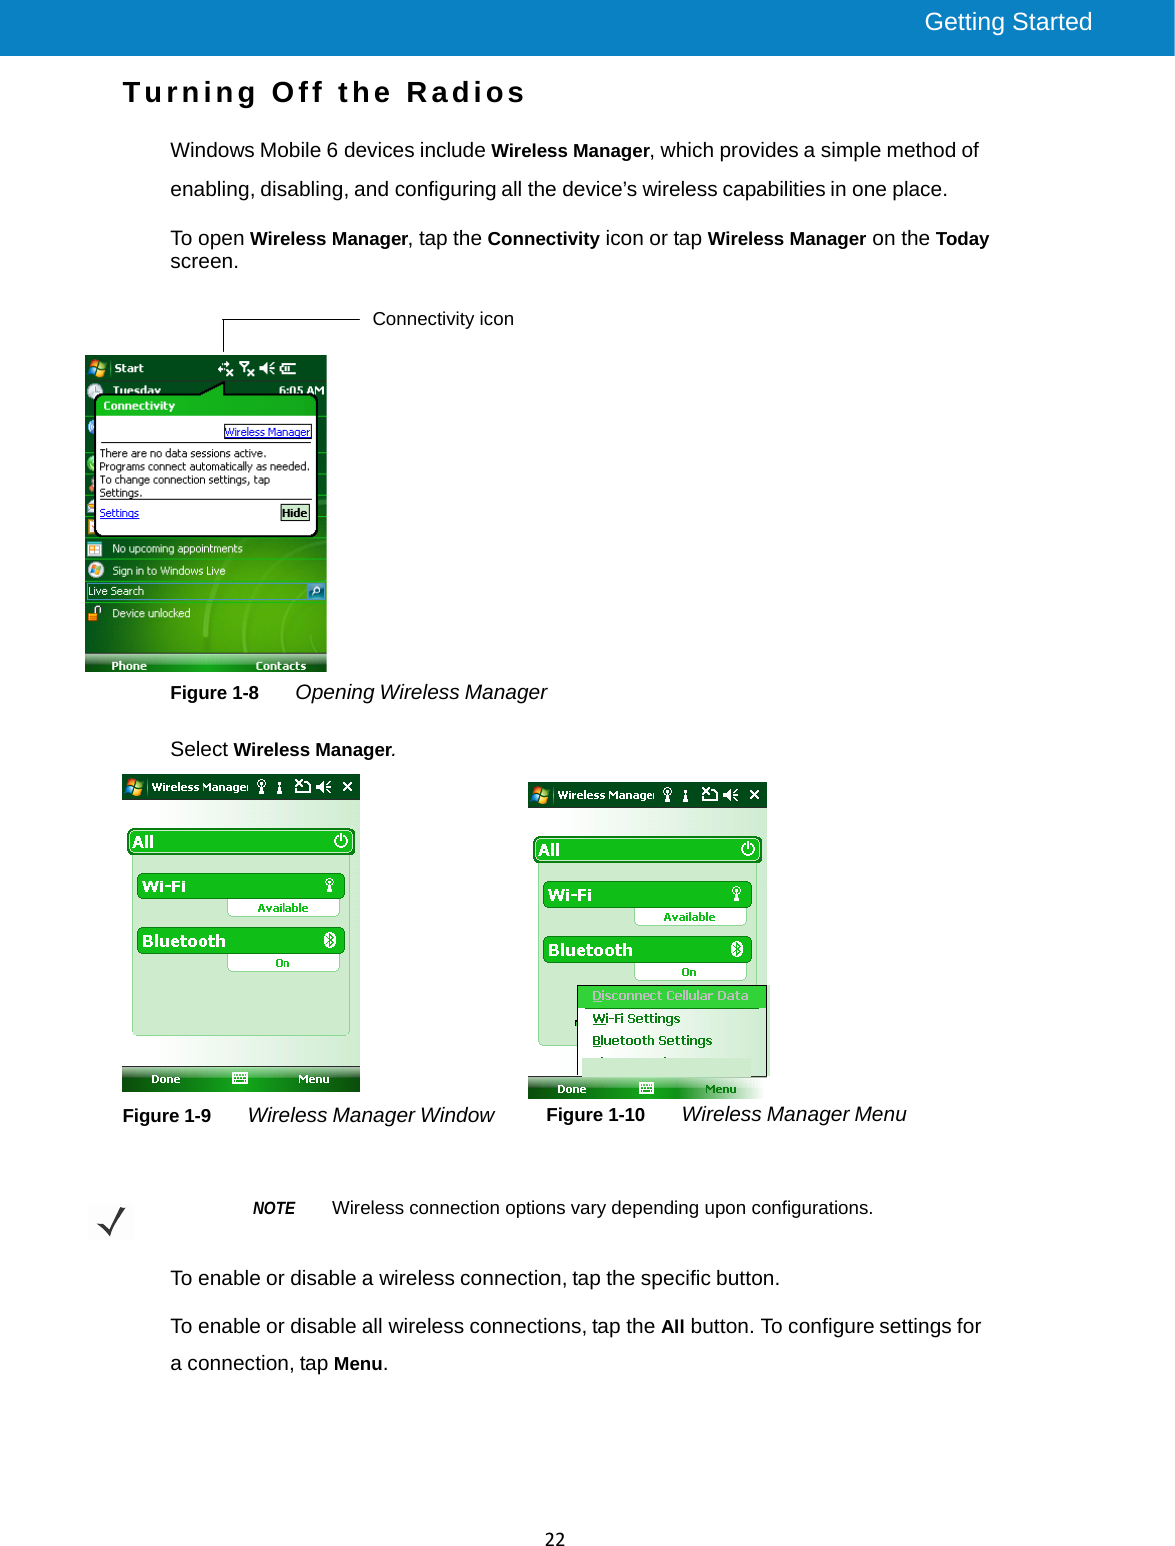
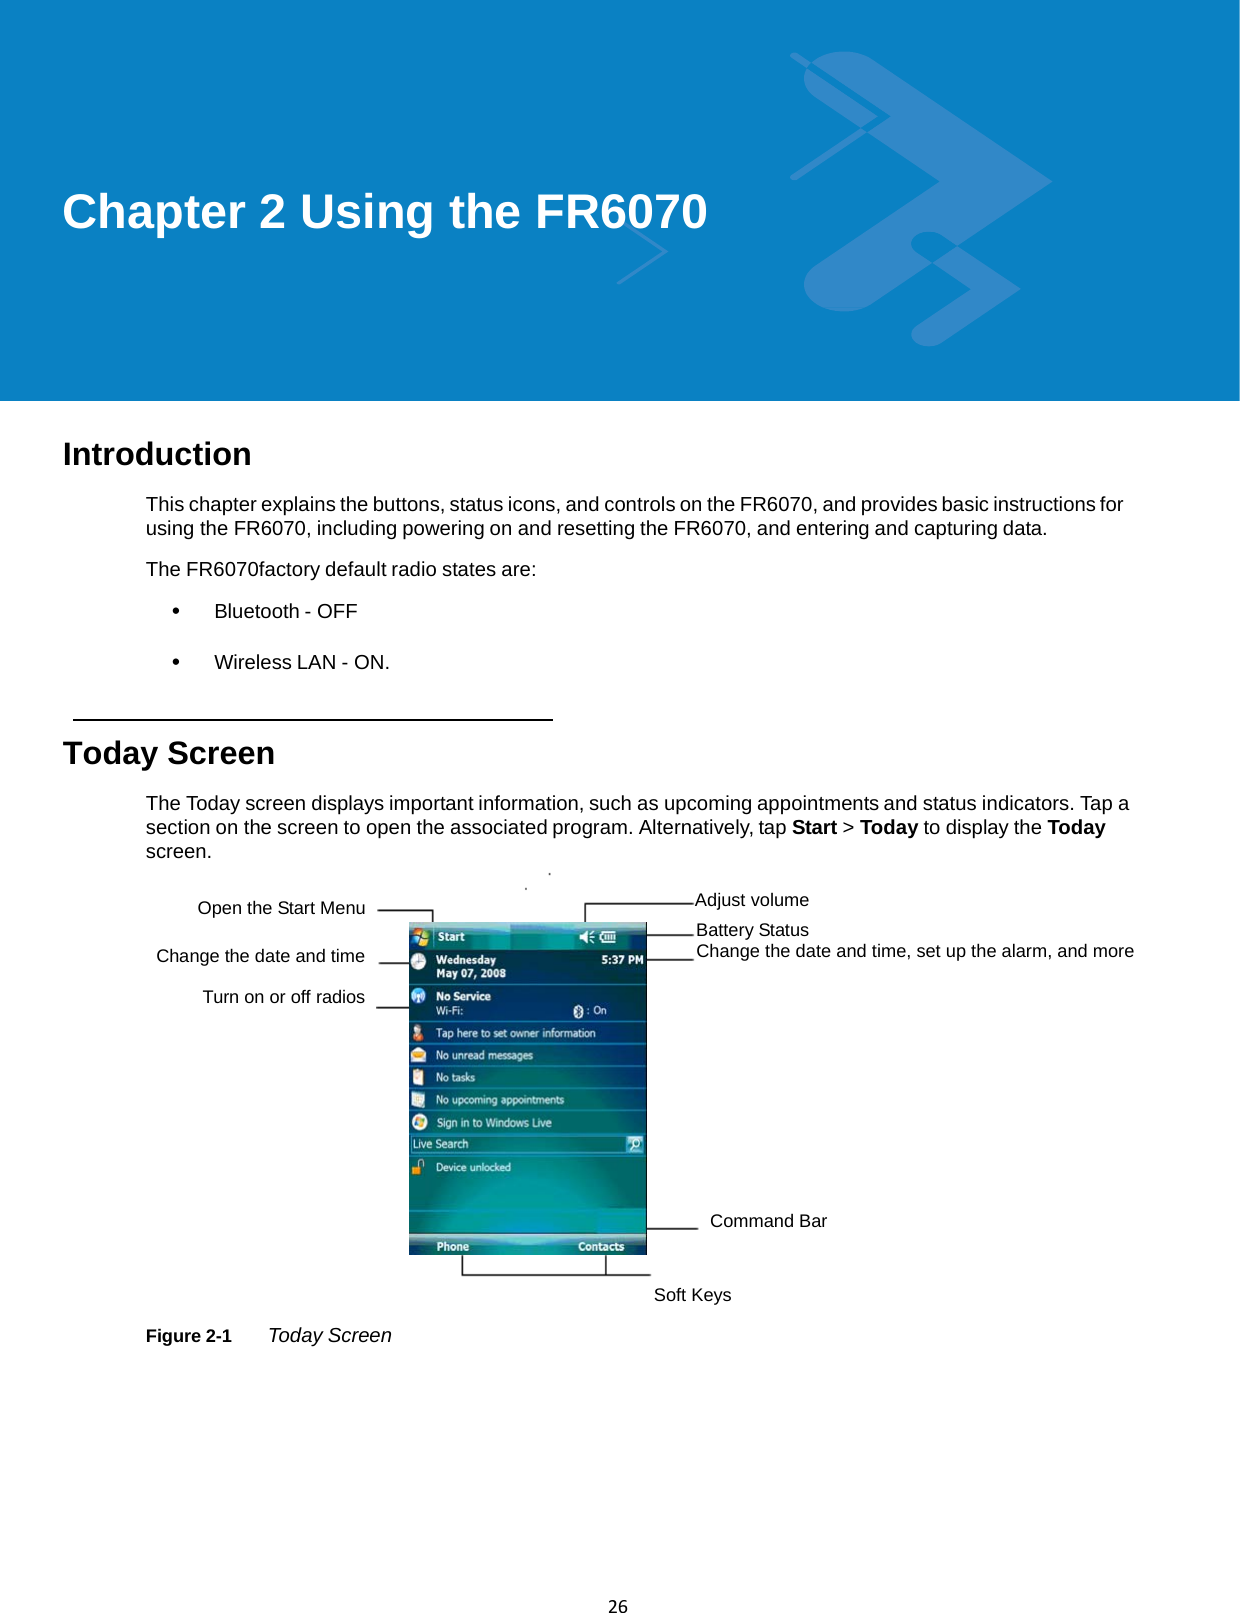
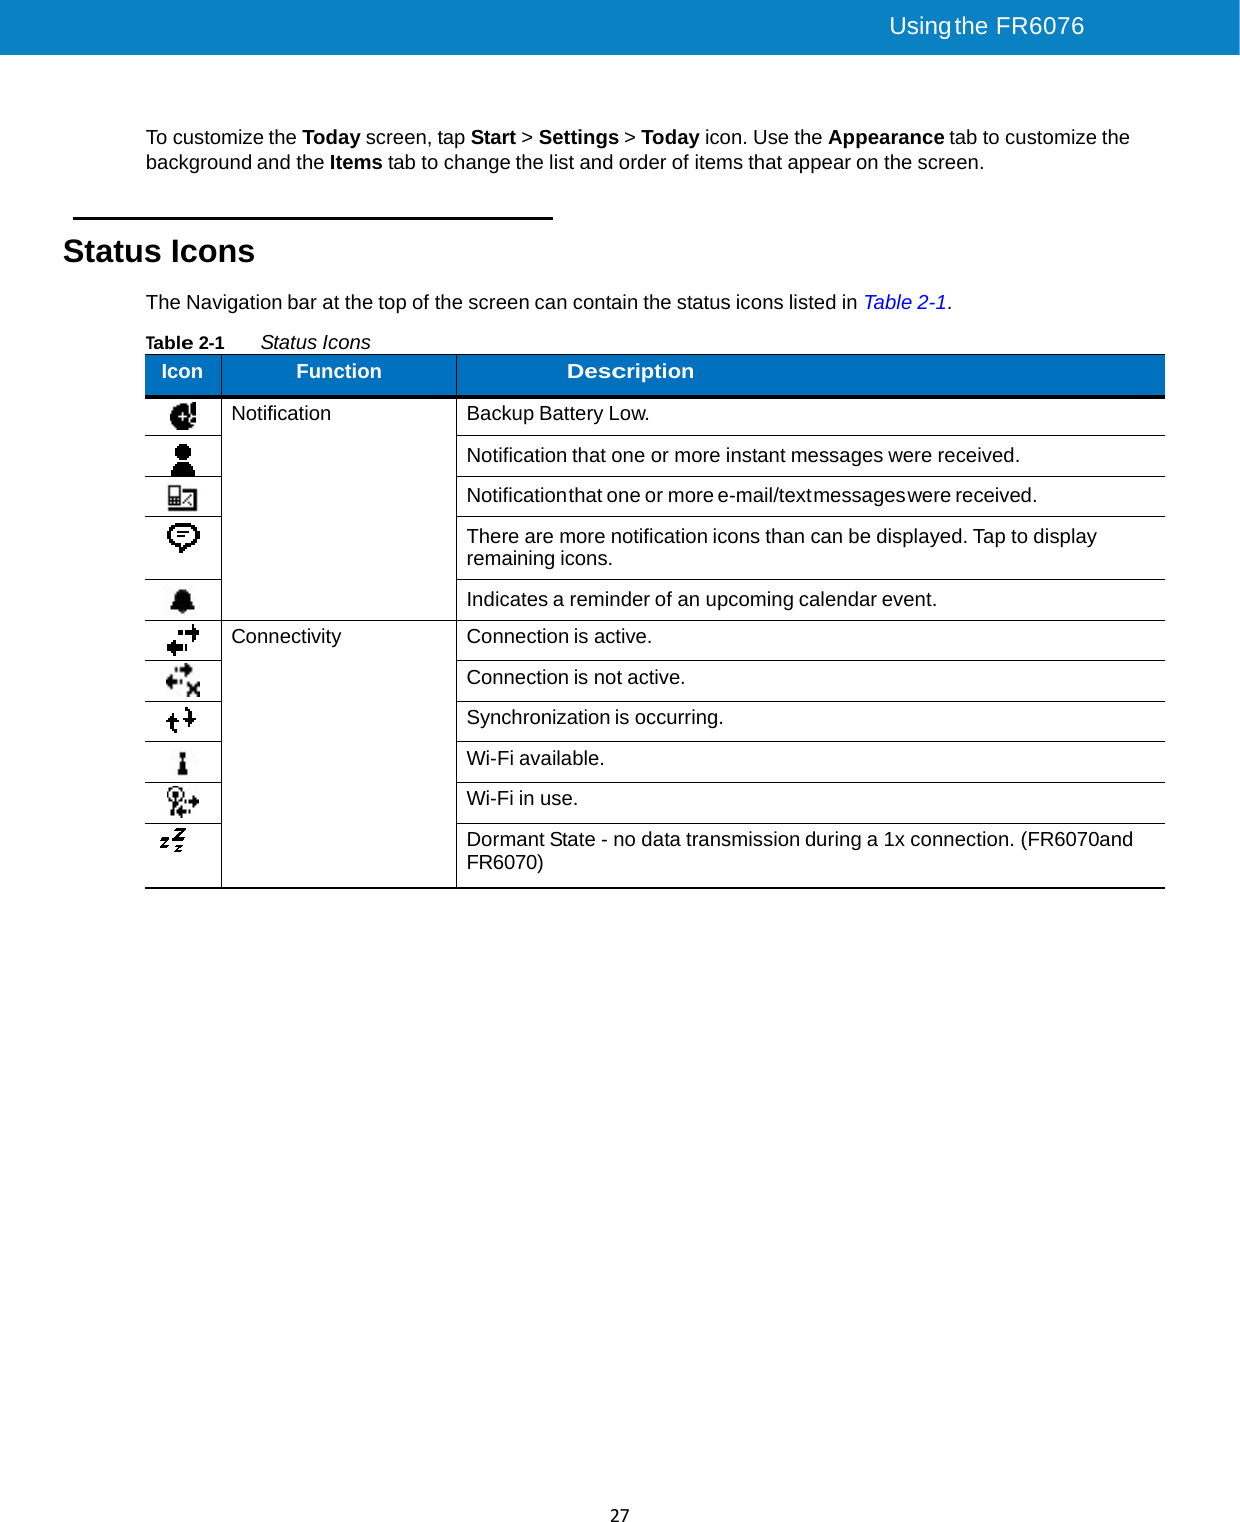


![Using theFR607649 Figure 2-19 Align FR6070with IrDA Device 3. Tap and hold the item, then tap Beam [type of item] on the pop-up menu. 4. Tap the device that you want to send the file to. Figure 2-20 Beam Contact Figure 2-21 Receive File To receive files via IrDA connection: 1. Align the IrDA port of the FR6070with that of the other IrDA device so that they are unobstructed and within a close range. 2. On the other device, send the file to the FR6070. 3. When the Receiving Data dialog displays, tap Yes.](https://usermanual.wiki/Symbol-Technologies/FR6070/User-Guide-1092546-Page-47.png)