Symbol Technologies MC5574A EDA (Enterprise Digital Assistant) User Manual MC55 front beta
Symbol Technologies Inc EDA (Enterprise Digital Assistant) MC55 front beta
Contents
user manual 2
MC75 Poster
BLACK
PANTONE 285
24hr*
6
11
5
8
1
2
3
7
4 (Note 1)
9
10
12
7
3
4
3
12
343
2
5
12
343
5
7
2
6
8
86
10
9
10
18
17
15
13
14
20
16
19
21
9
12
343
5
2
Create a Partnership
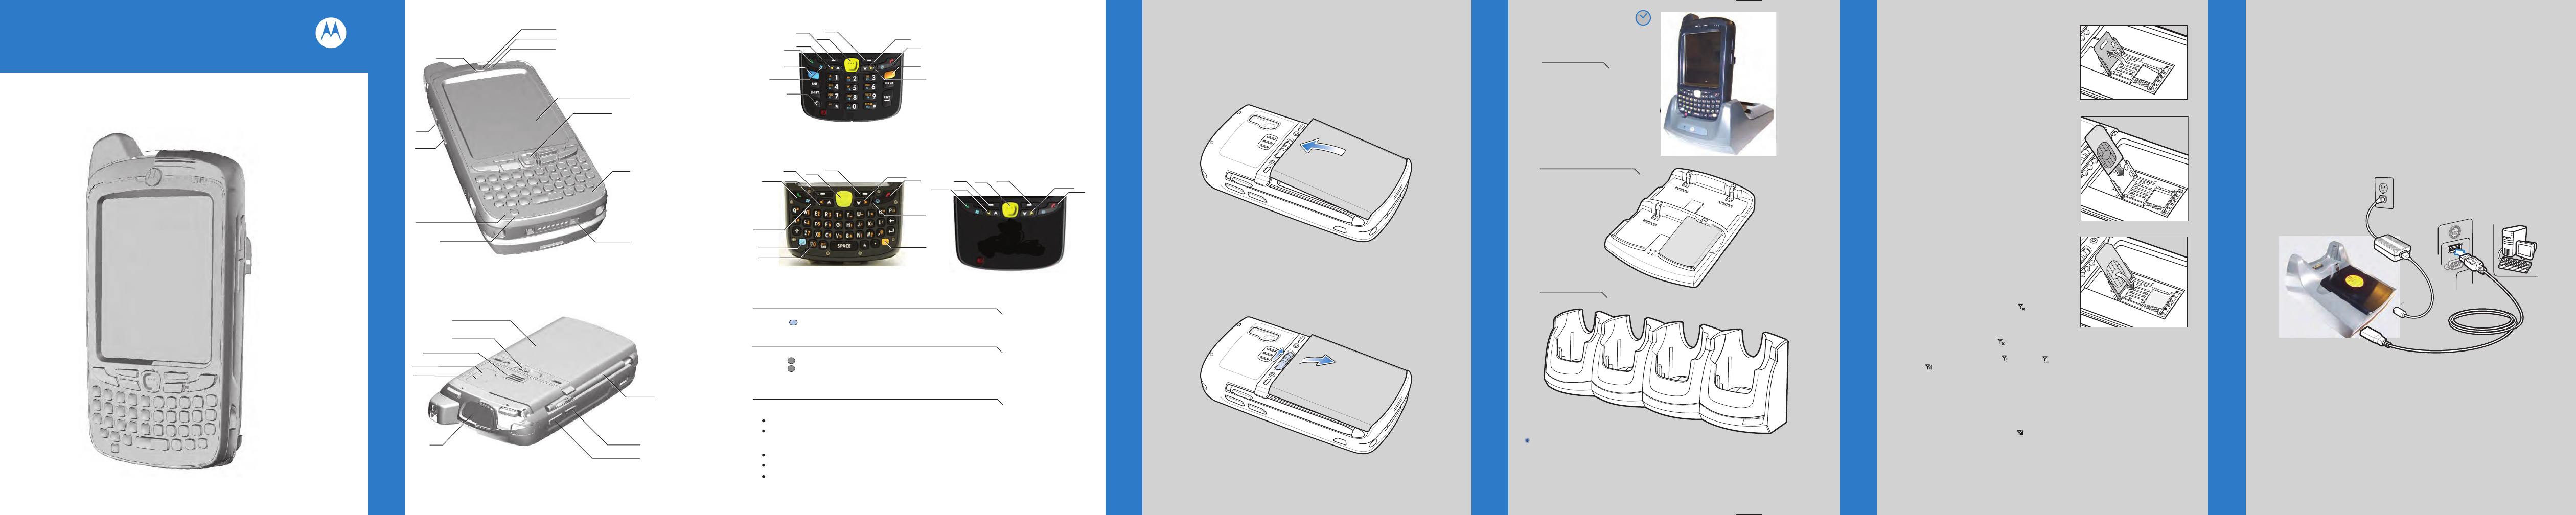
4-Slot Cradle
Insert the Battery
Charge the MC55 Install ActiveSync®
Communicate with Host
1-Slot Cradle
Slow Blinking Amber = Charging
Charging/Battery Status LED
Solid Amber = Fully Charged
*It is recommended that this product be charged for 24 hours before the first use
to ensure that the internal battery is fully charged.
Fast Blinking Amber = Charging Error
1 Scan/Action Button
2 Up/Down Button
3 Microphone
4 Power Button
5 I/O Connector
6 Keypad
7 Scan/Action Button
8 Touch Screen
(with screen protector)
9 Scan/Decode LED
10 Charging/Battery
Status LED
11 Radio Status LED
12 Phone Speaker
13 Battery Pack
14 Battery Latch
15 Speaker
16 Camera Flash
17 Camera
18 Exit Window
(see Data Capture Options)
19 Scan/Action Button
20 Action Button
21 Stylus
1 Talk
2 Navigation
3 Soft Key
4 Scan/Action Button
5 End
6 Orange Key
7 Backlight
8 Blue Key
9 OK
10 Start Menu
4-Slot Battery Charger
Blue Key
Use this key to launch applications and select items (shown on the keypad in blue).
> Press the key once to activate this mode followed by another key.
Orange Key
Use this key to access the secondary layer of characters and actions.
> Press the key once to lock the keypad in the Alpha state.
> Press the key a second time to return to the normal state.
Note 1: To reset the MC55, press and hold the Power button for five (5) seconds.
FEATURES
PHONE SETUP
COMMUNICATION
GETTING STARTED - BATTERY INSTALLATION
Notifications
Charging LED:
GSM Status/Notification LED:
Flashing orange: Battery charging
Solid orange: Charging complete
Fast flashing green: GSM activity
Solid green: Voice call in progress
Flashing red: System notification
Numeric Keypad
Alpha-Numeric Keypad PIM Keypad
CHARGING
SIM Card Installation
1. Remove battery pack.
2. Slide SIM card holder to the left.
3. Lift card holder.
4. Insert SIM card into SIM holder.
NOTE :
The proper position of the SIM card—the card
connector (i.e., gold area) should be facing outward
with the bevelled corner facing away.
5. Lower the SIM card holder down.
6. Slide SIM card holder to the right to lock into place.
7. Reinstall battery pack.
Enter Your PIN
After installing the SIM card activate your mobile
service connection. In most cases, SIM cards
are preset with a PIN (Personal Identity
Number), provided by your service provider.
1. Press the Power button to turn on the MC55.
2. Tap Start > Phone.
3. Enter the PIN from your service provider.
4. Tap Enter.
Turn On the Phone Function
1. Launch the Wireless Manager application.
•
On the Today screen, tap the Wireless Manager icon.
or
•
On the Today screen, tap the signal icon and
select Wireless Manager.
2. On the Wireless Manager screen, tap Phone to turn on
the phone function. The signal icon changes indicating
the MC55 is searching for a mobile connection. This may
take a few seconds. The signal icon changes to
and to once a mobile connection is established.
Turn Off the Phone Function
1. Launch the Wireless Manager application.
•
On the Today screen, tap the Wireless Manager icon.
or
•
On the Today screen, tap the signal icon and
select Wireless Manager.
2. On the Wireless Manager screen, tap Phone to turn
off phone function.
MC55
Quick Start Guide
Remove the Battery
1
Download ActiveSync
®
4.5 or higher from http://www.microsoft.com
and follow the instructions to install ActiveSync onto the host computer.
Follow the on-screen ActiveSync instructions to establish
a connection between the MC55 and the host computer.
PRELIMINARY