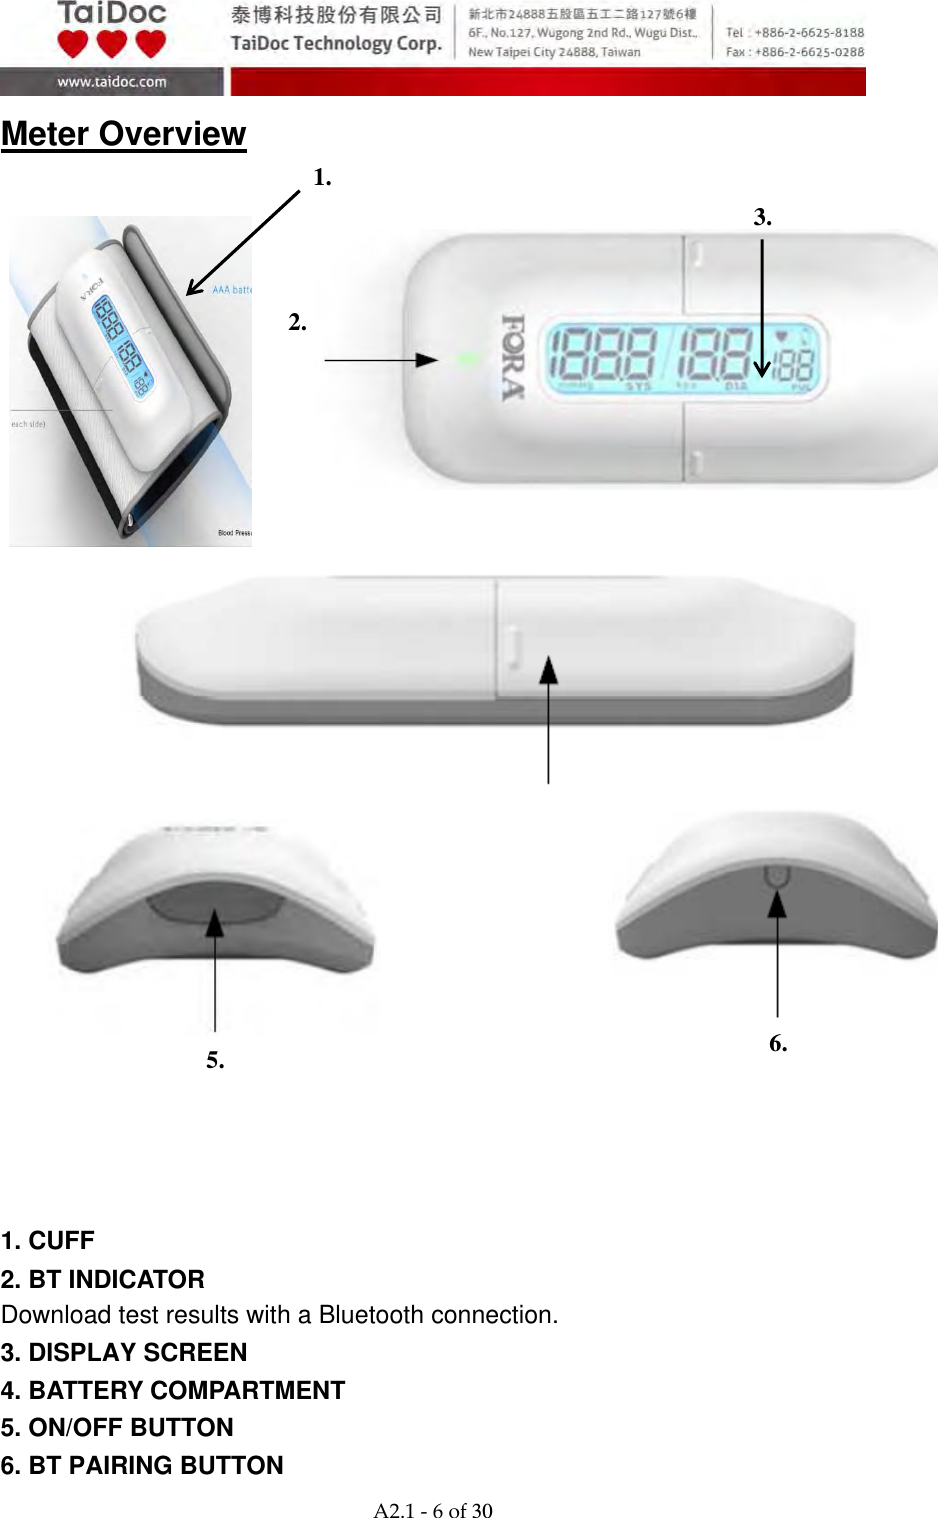
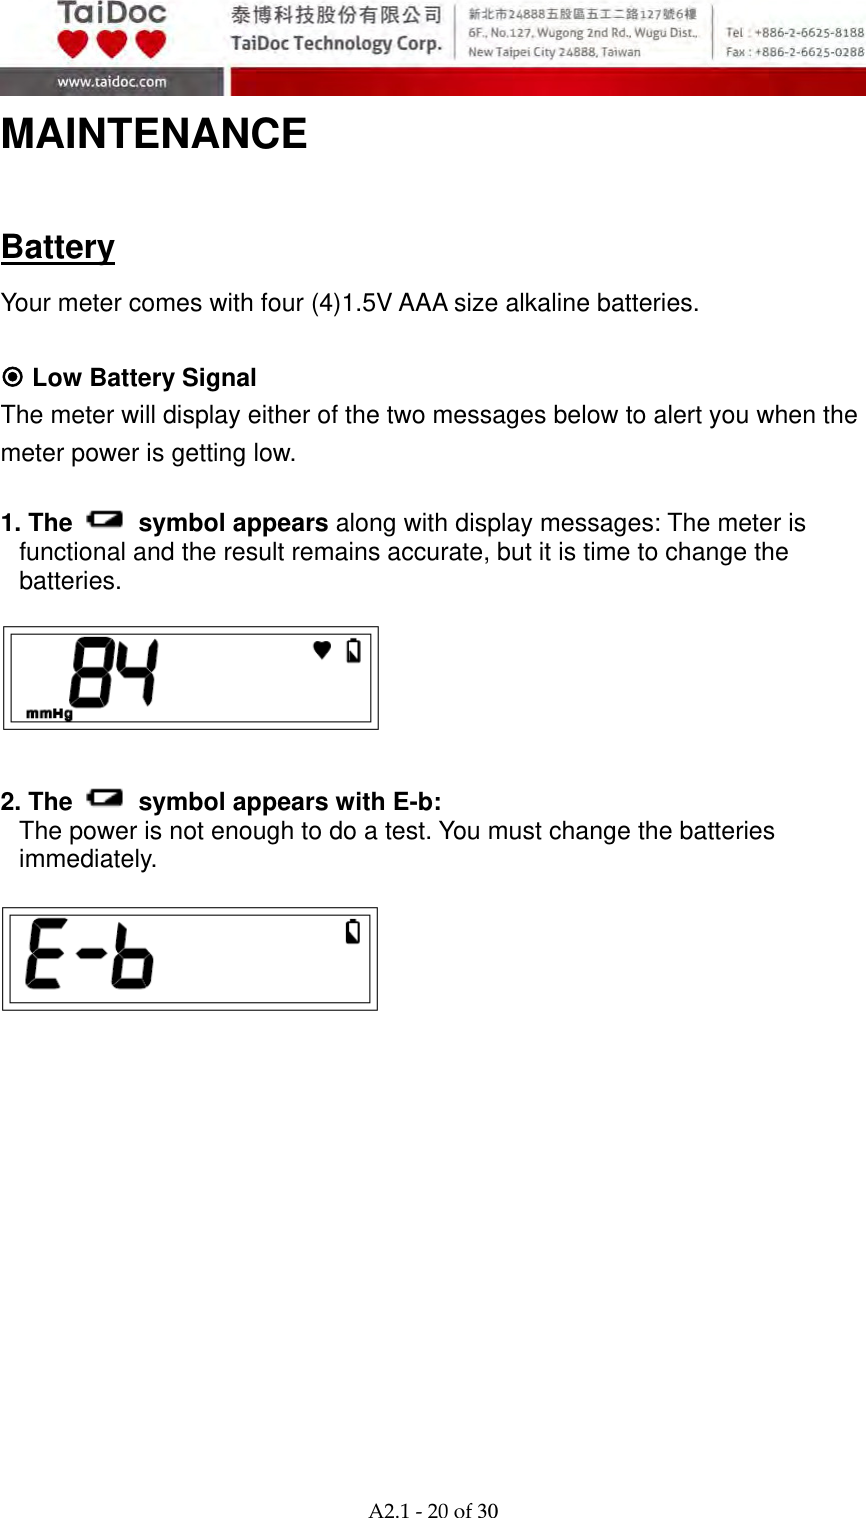
TAIDOC TECHNOLOGY 3140ABEM2 Blood Pressure Monitoring System User Manual P80 owner s manual
TAIDOC TECHNOLOGY CORP. Blood Pressure Monitoring System P80 owner s manual
UserManual.wiki
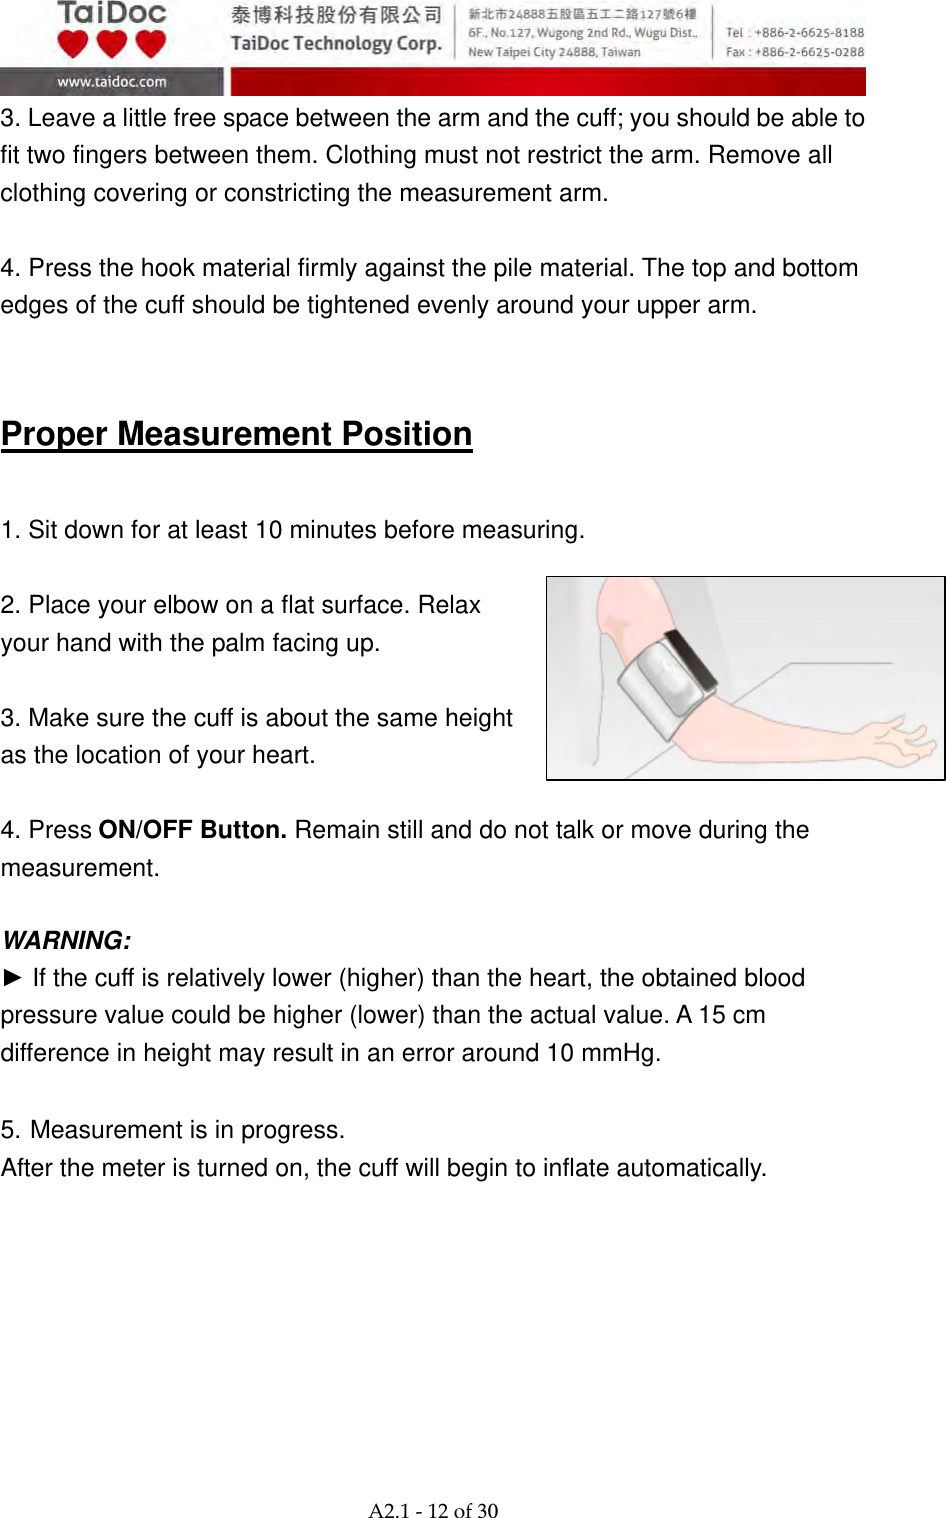
>
TAIDOC TECHNOLOGY
>
3140ABEM2 User Manual
owners manual_v1
Navigation menu
Upload a User Manual
Namespaces
Wiki Guide
HTML
PDF
Info
Views
User Manual
Discussion / Help
Navigation