TCL Communication B028 Car Wifi Hotspot User Manual
TCL Communication Ltd. Car Wifi Hotspot Users Manual
UserManual.wiki
>
TCL Communication
>
B028 User Manual
Users Manual
Navigation menu
Upload a User Manual
Namespaces
Wiki Guide
HTML
PDF
Info
Views
User Manual
Discussion / Help
Navigation
![[Ride-Fi] User Guide [UG template version 15b_mbb [draft version for review control] [Sprint_TCL_Y856UB_UG_EN_092515_D1]](https://usermanual.wiki/TCL-Communication/B028/User-Guide-2821705-Page-1.png)
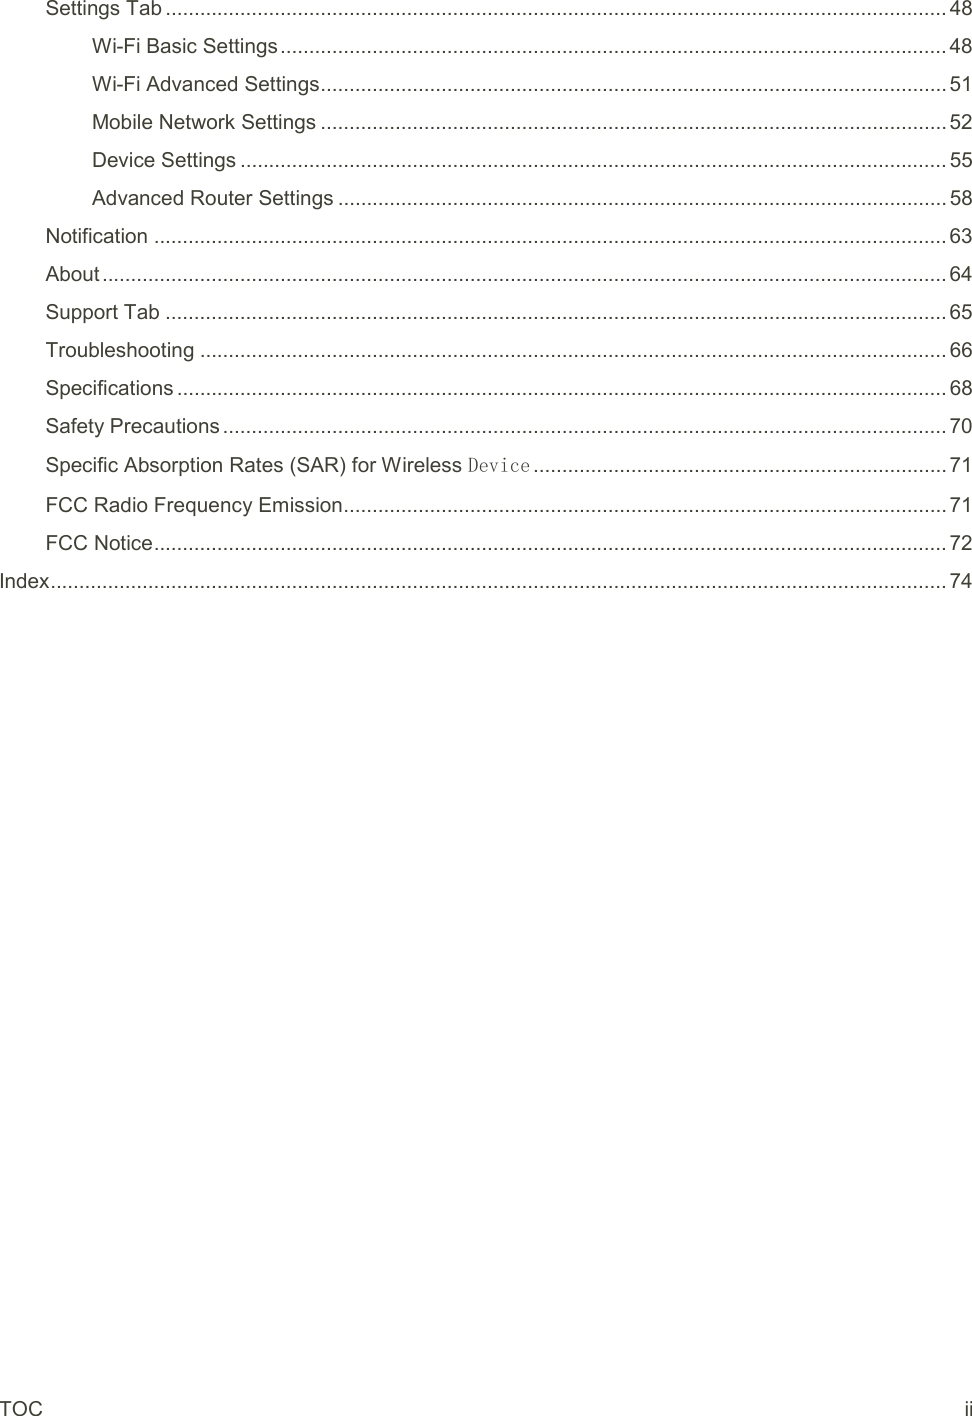
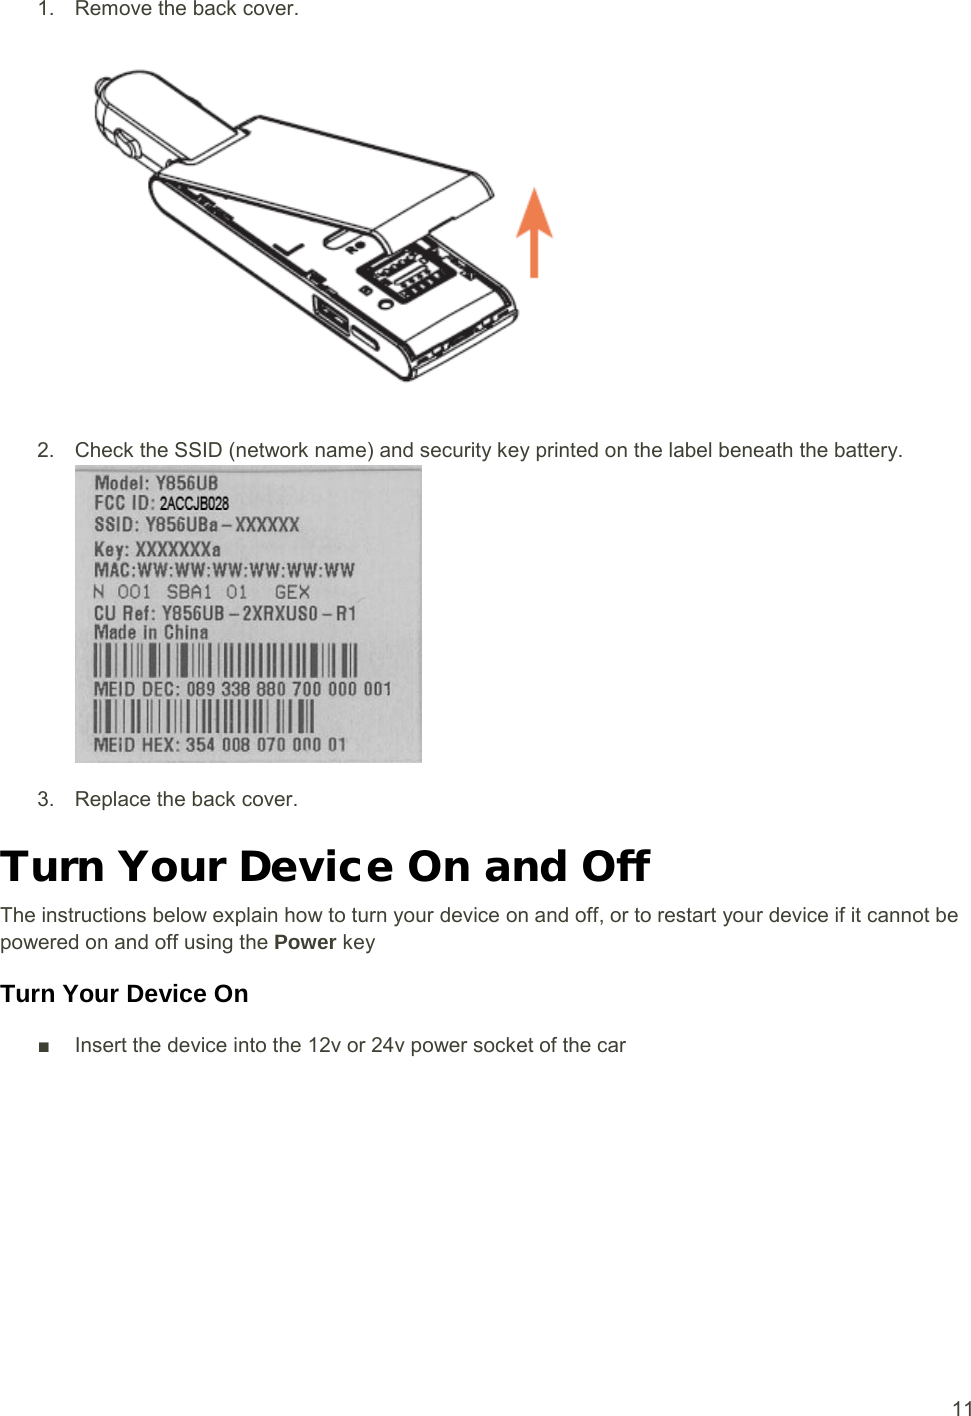
![3 ■ Open the back cover of the device, and you will see the MEID label. You will see the SSID (network name) and Key. Note: There are two SSIDs set for your Ride-Fi. By default, [SSID and Key] is set for [Main Wi-Fi]Additional Information . The following list describes additional information useful to know before you begin using your Ride-Fi. ● Your mobile broadband device accommodates software updates. Always use the latest software. ● Note that connection speeds may drop or connections may be disabled depending on line traffic or connection environments. ● When using WLAN overseas, change the settings according to the laws of those countries. ● To enhance security, it is recommended that you set apasscode for unlocking the screen.](https://usermanual.wiki/TCL-Communication/B028/User-Guide-2821705-Page-6.png)
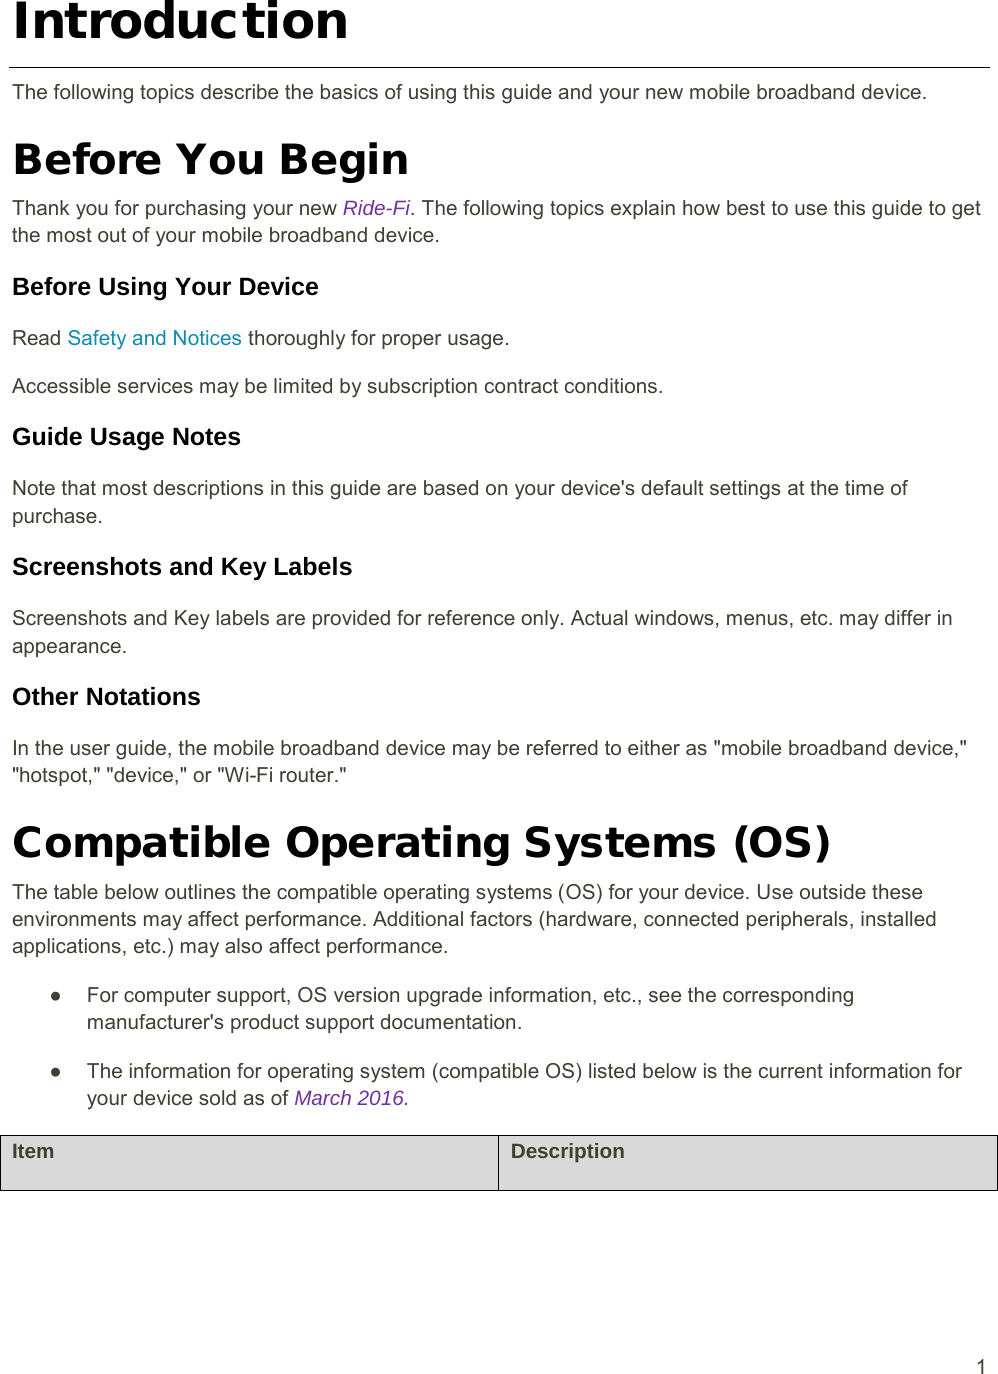
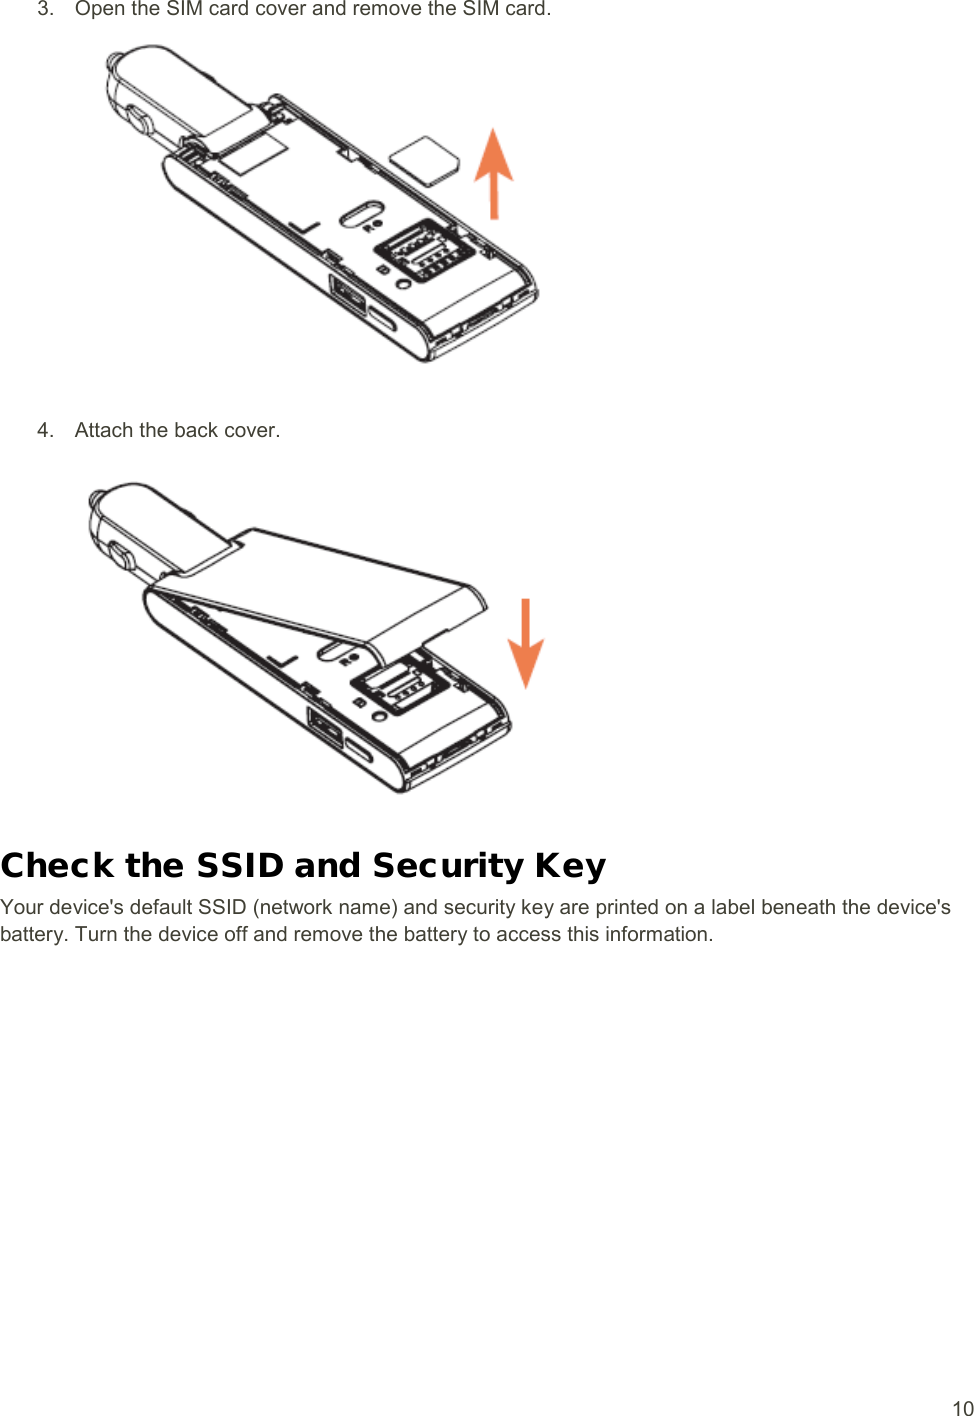
![8 ● Always power off the mobile broadband device before inserting or removing the SIM card. Insert a SIM Card Follow these instructions to insert a SIM card. Remember to power off your device before inserting a SIM card. Note1. Remove the back cover. : Your device's SIM card is preinstalled. These instructions are for reference only. 2. Open the SIM card holder and put in the SIM card [illustration] 3. Close the back cover](https://usermanual.wiki/TCL-Communication/B028/User-Guide-2821705-Page-11.png)

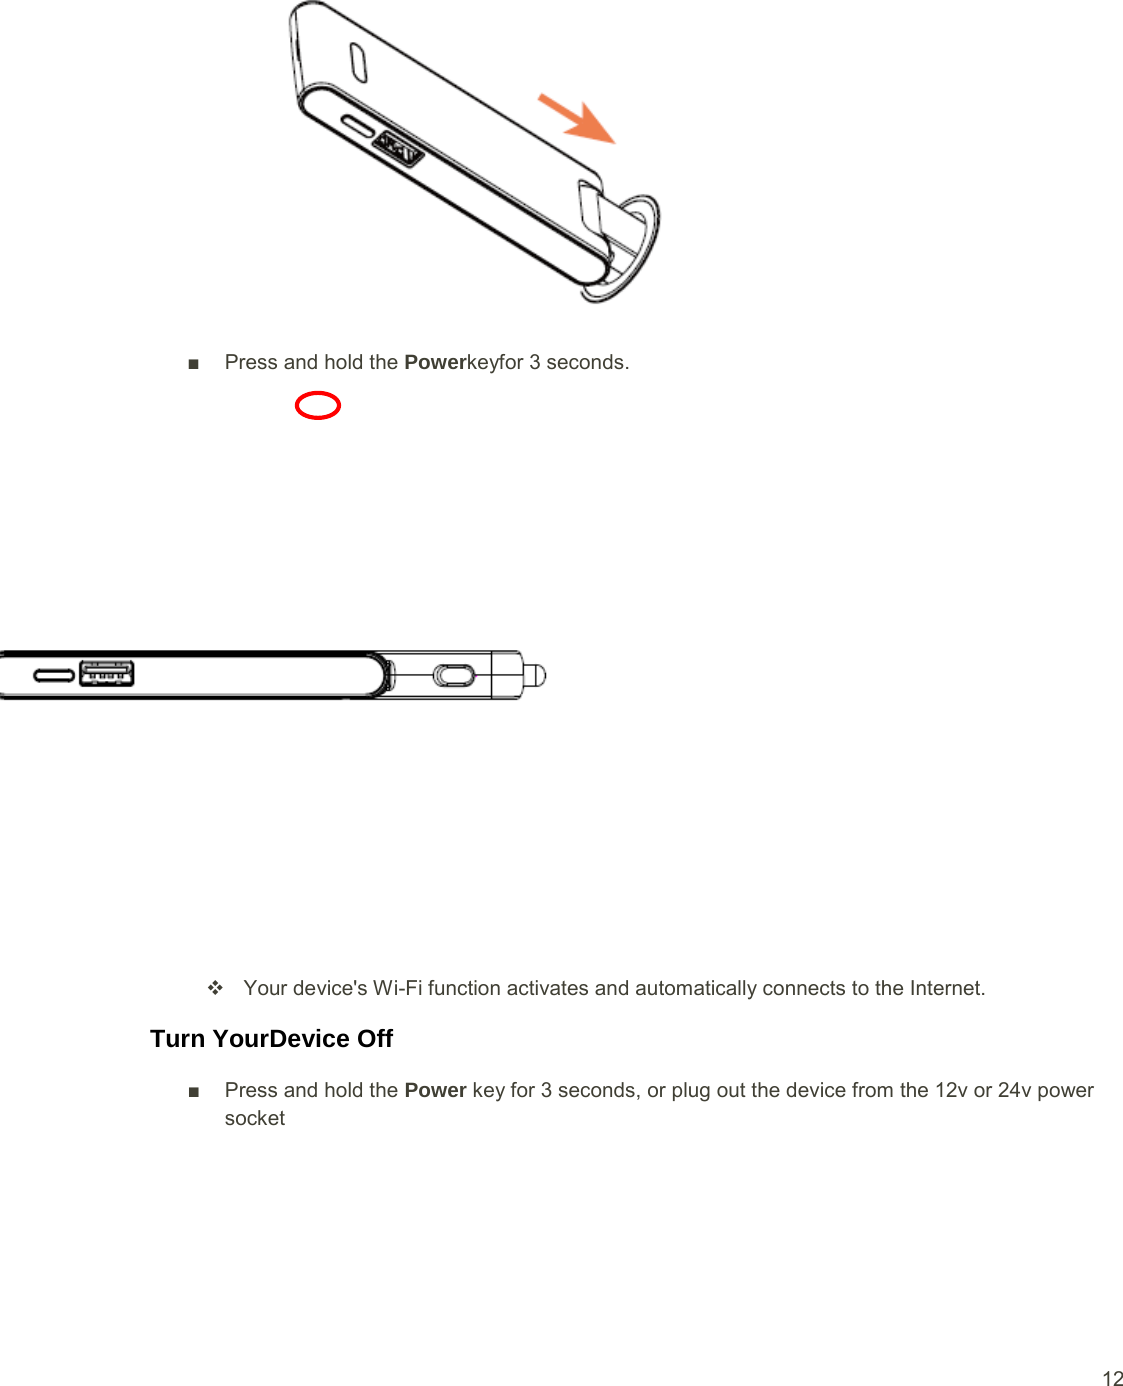
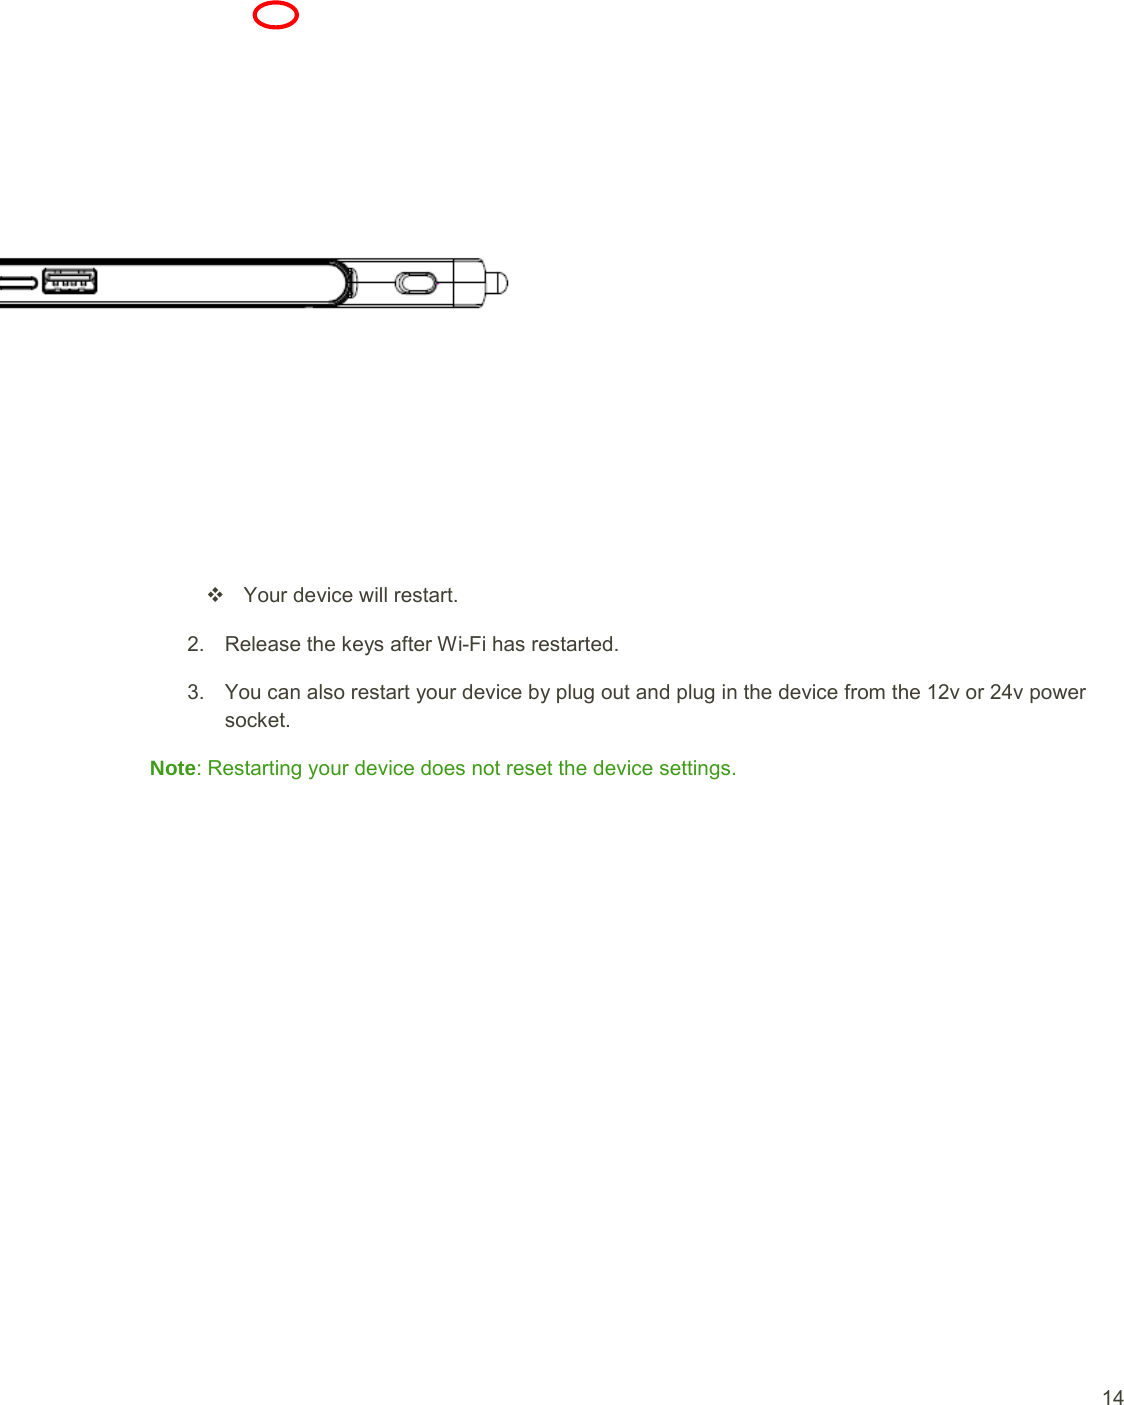
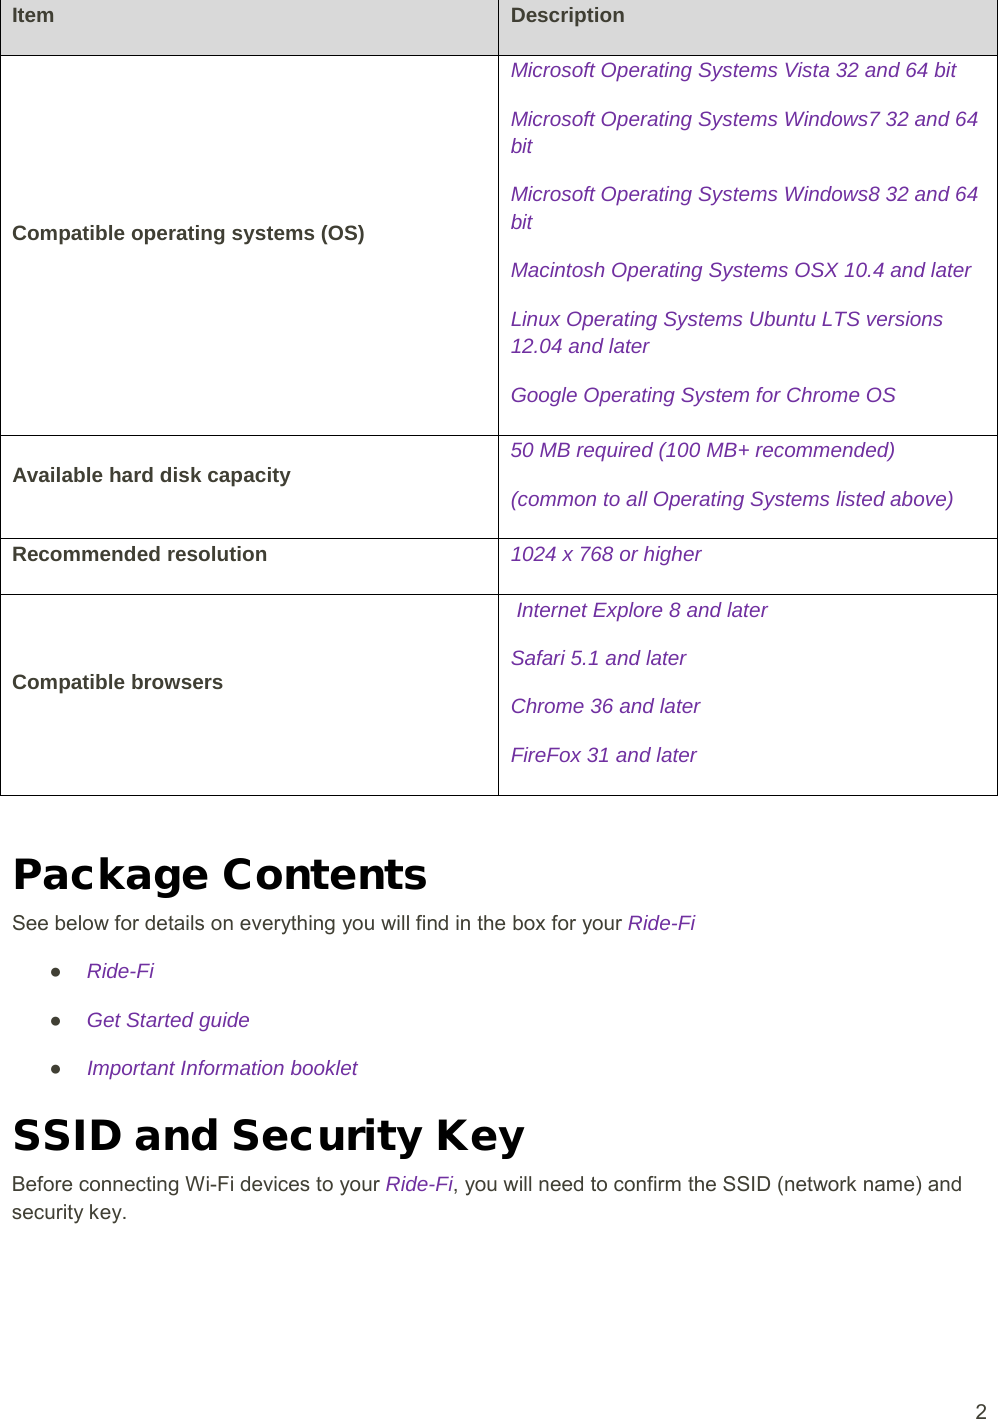
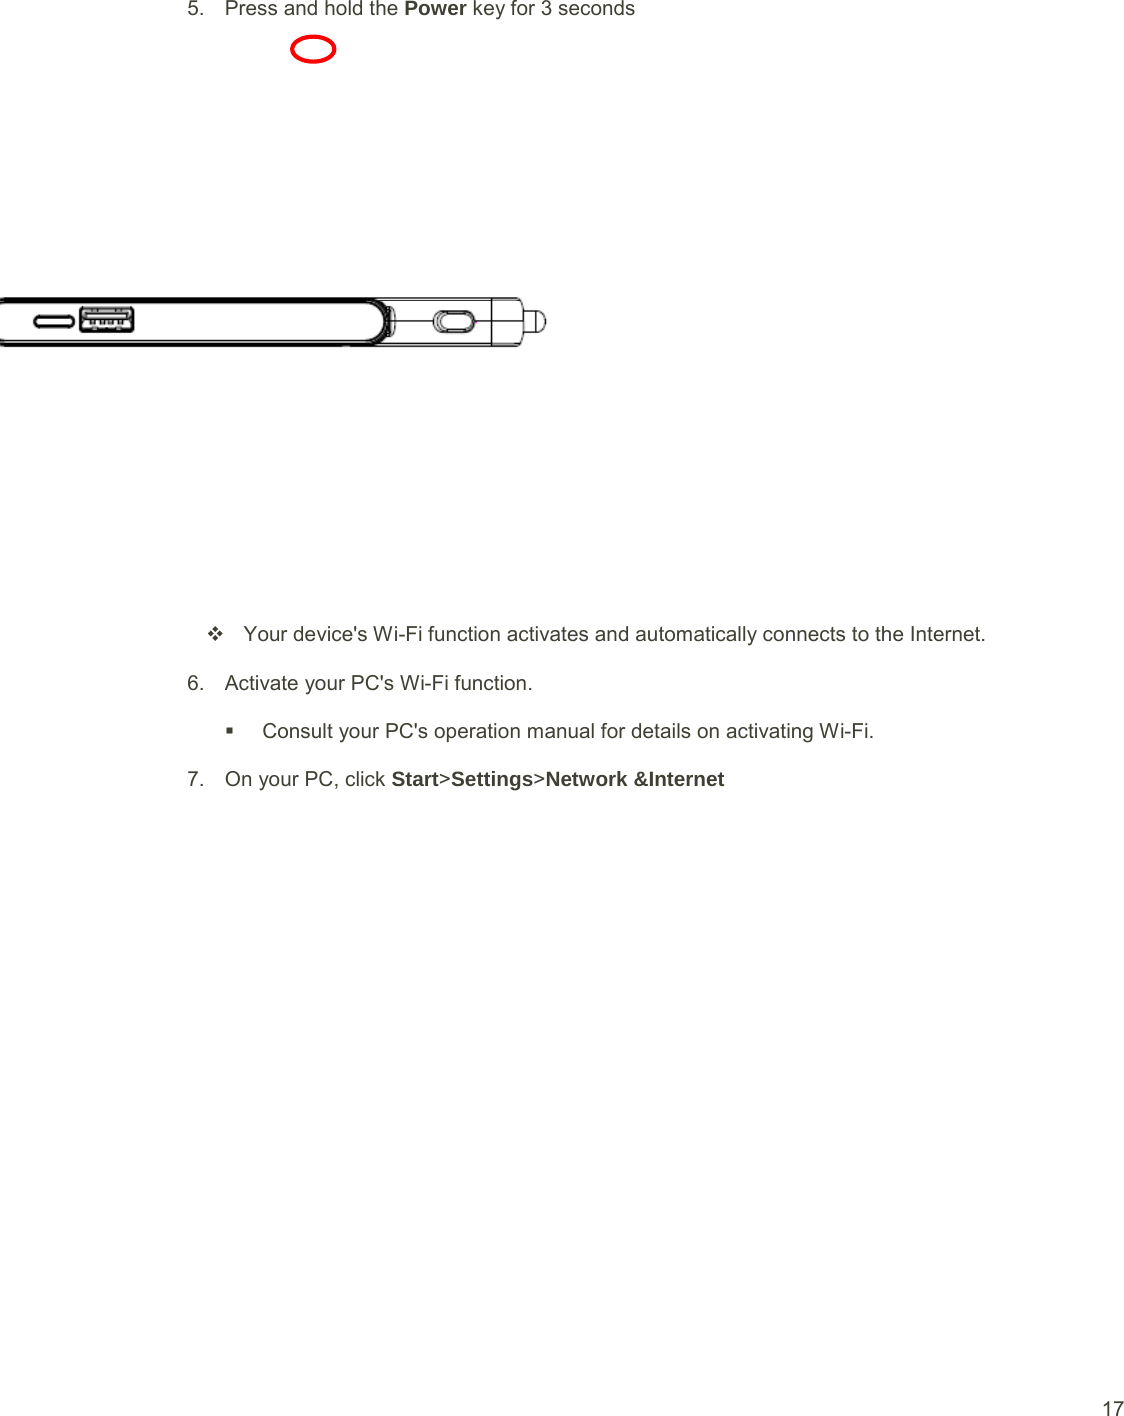
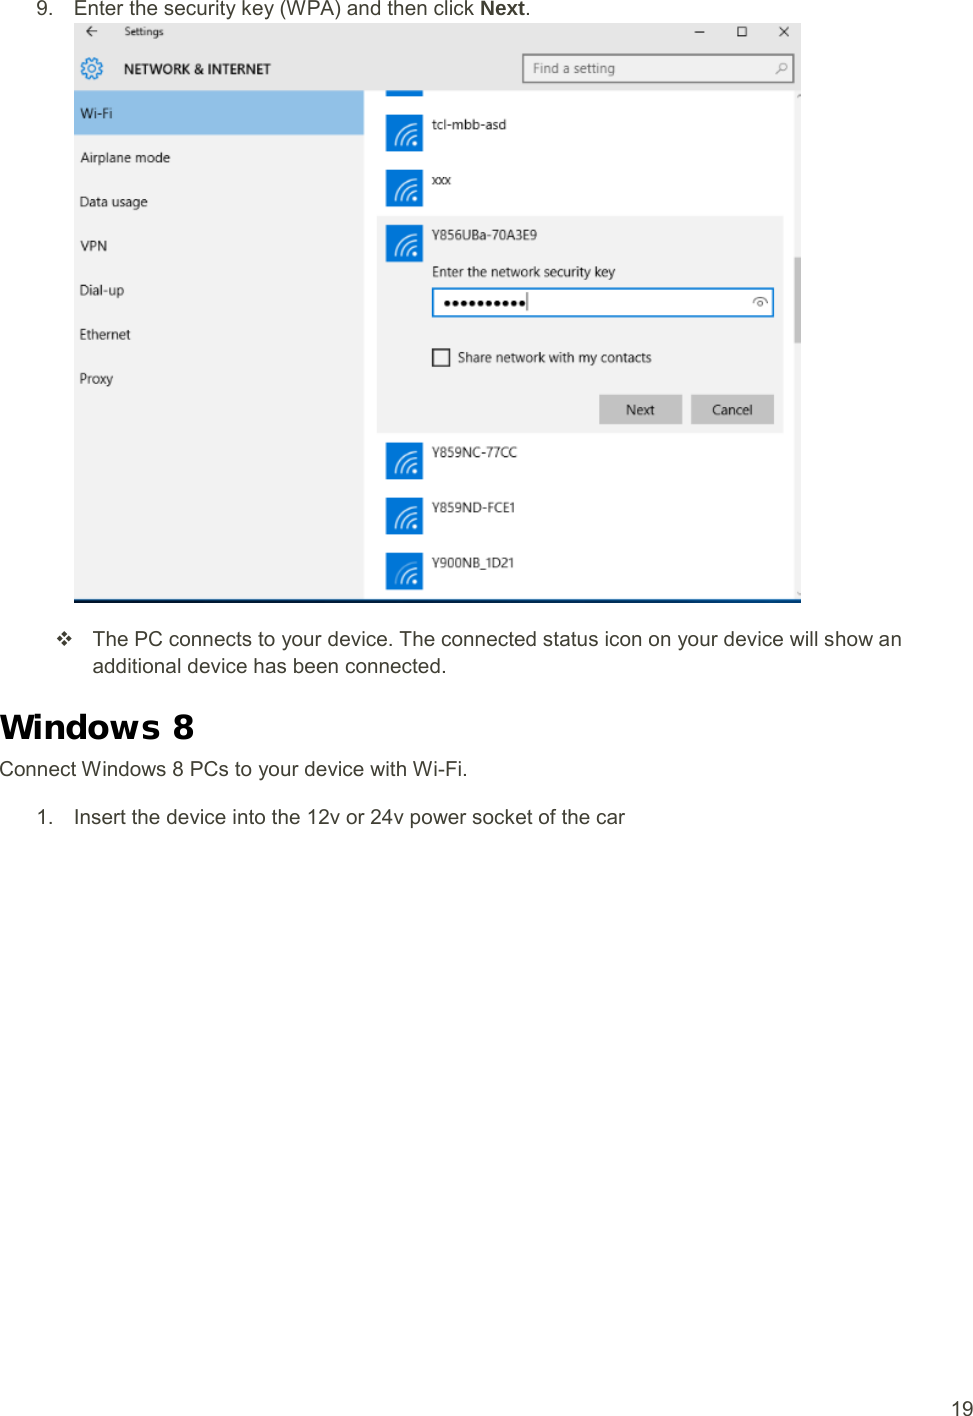
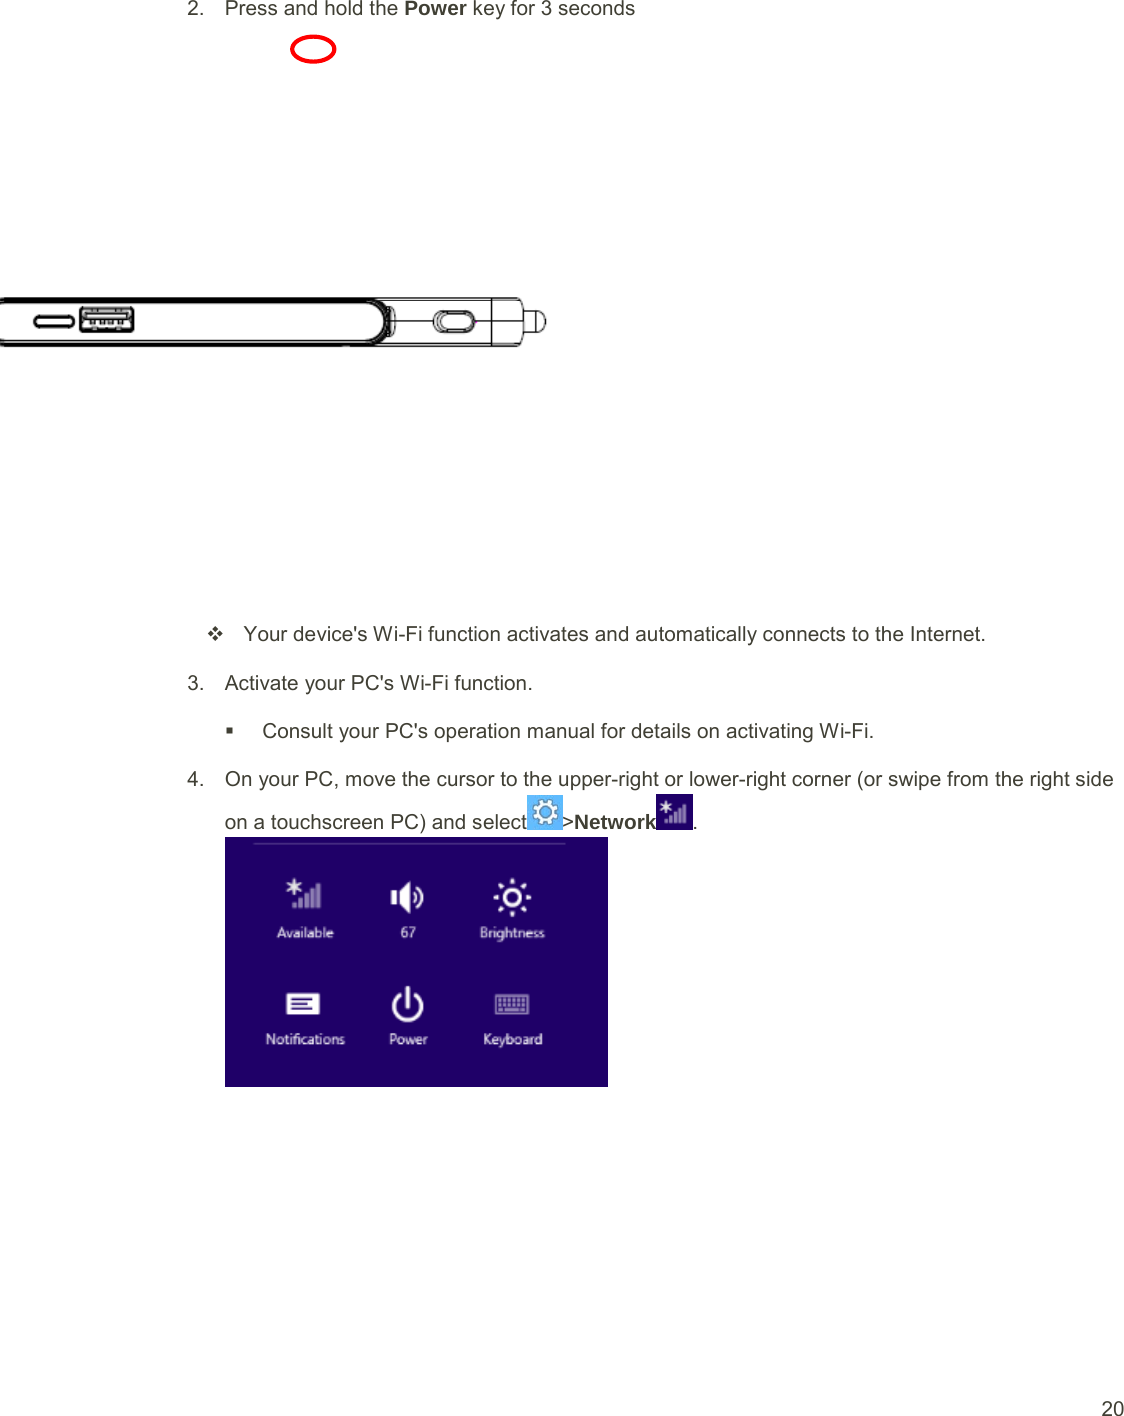
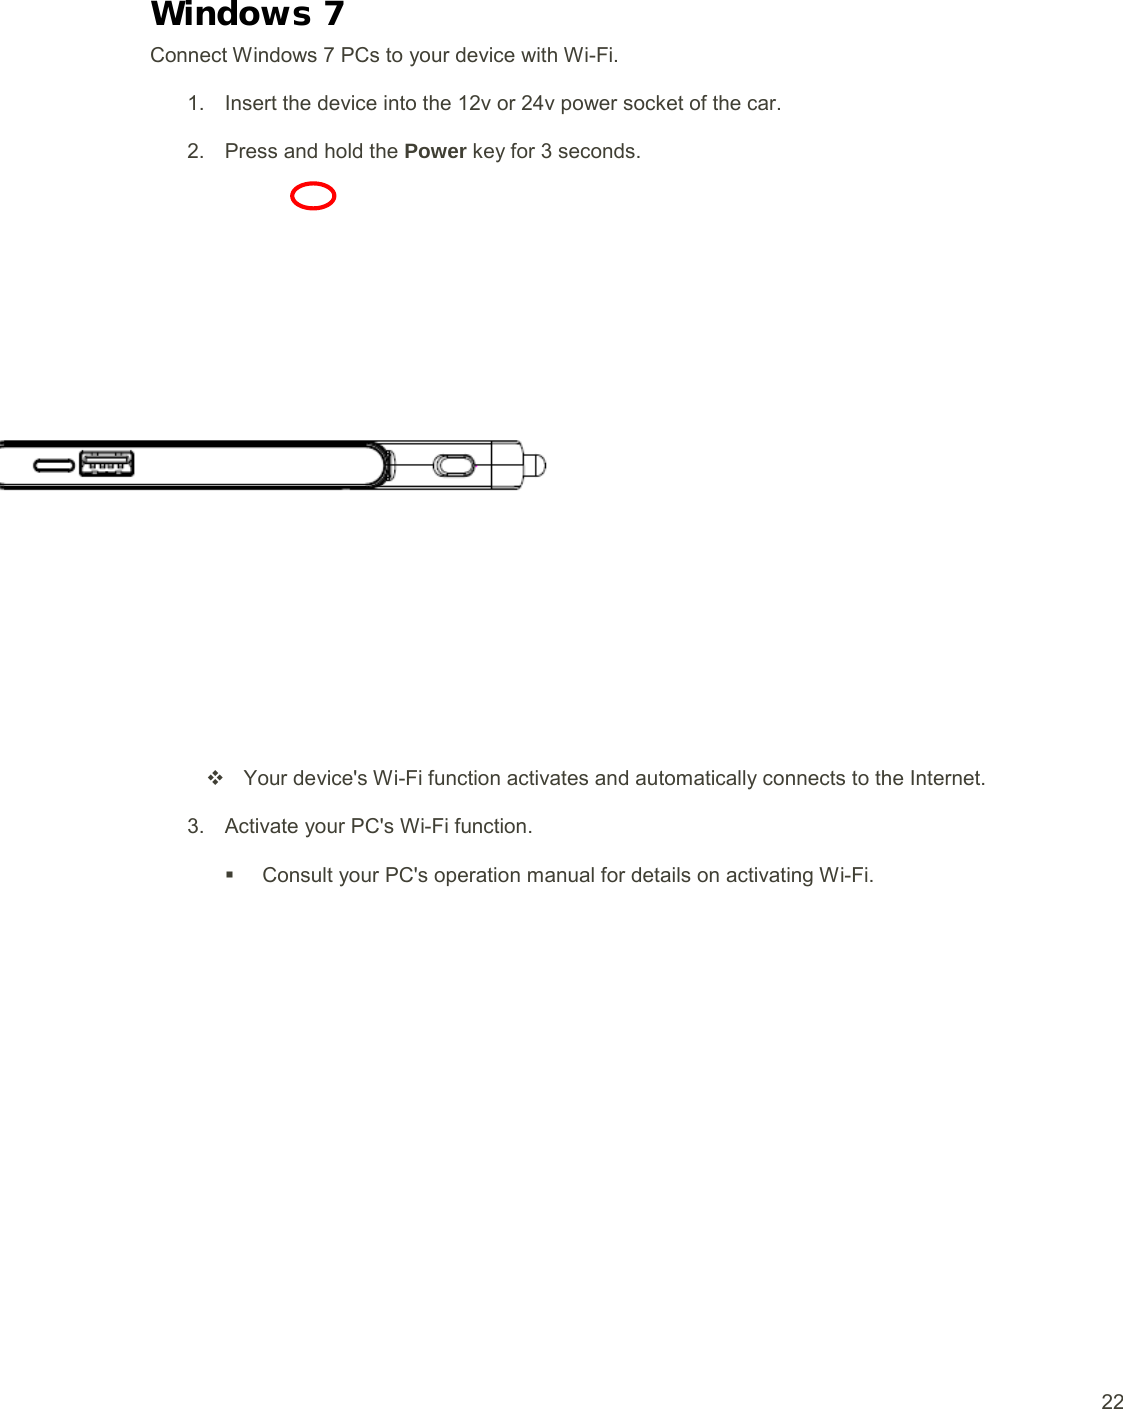
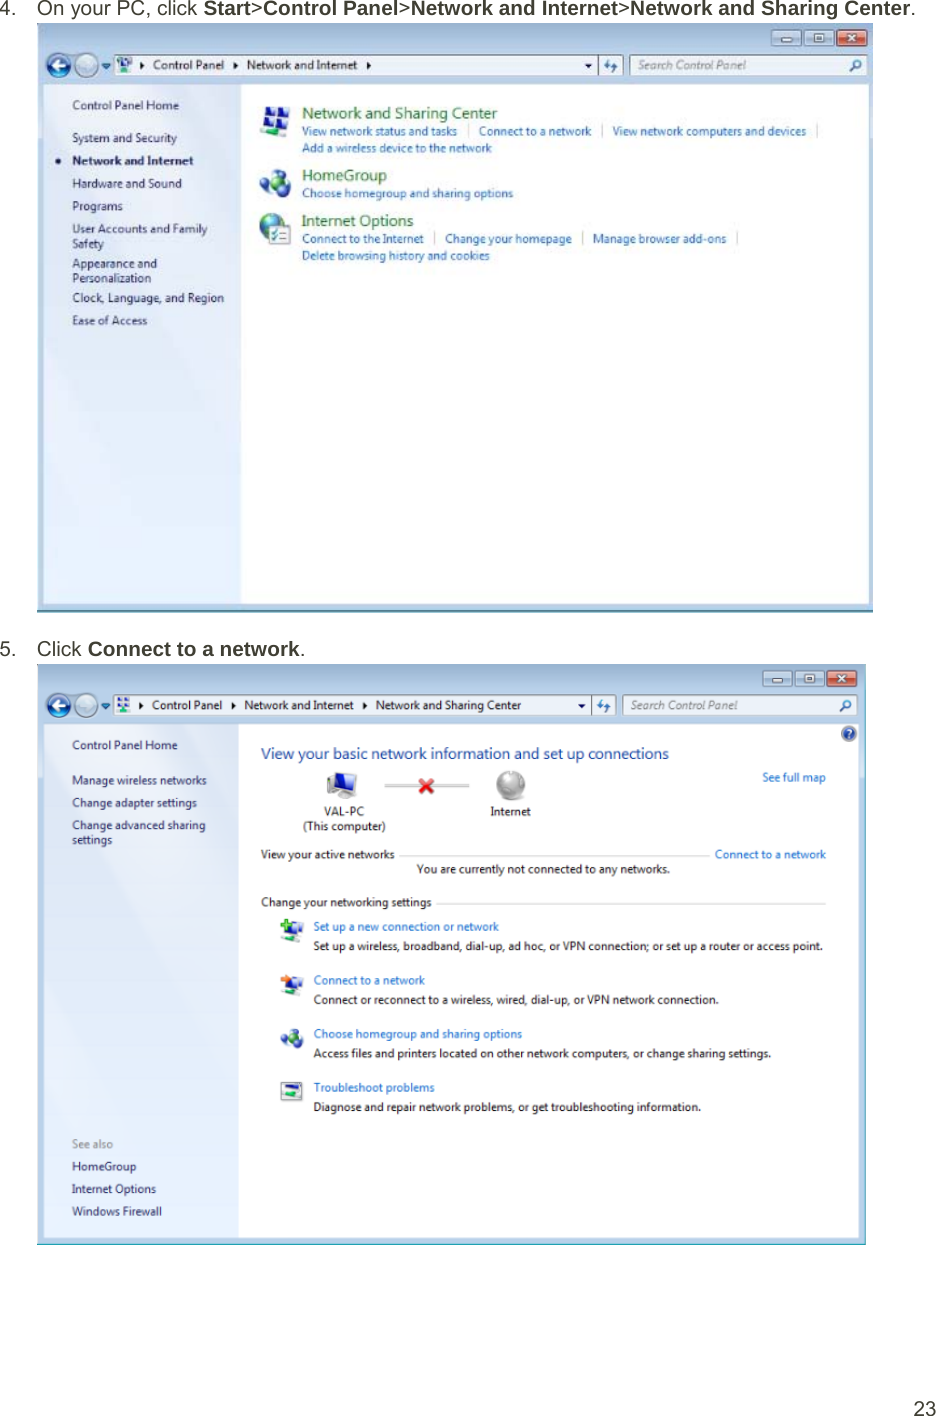
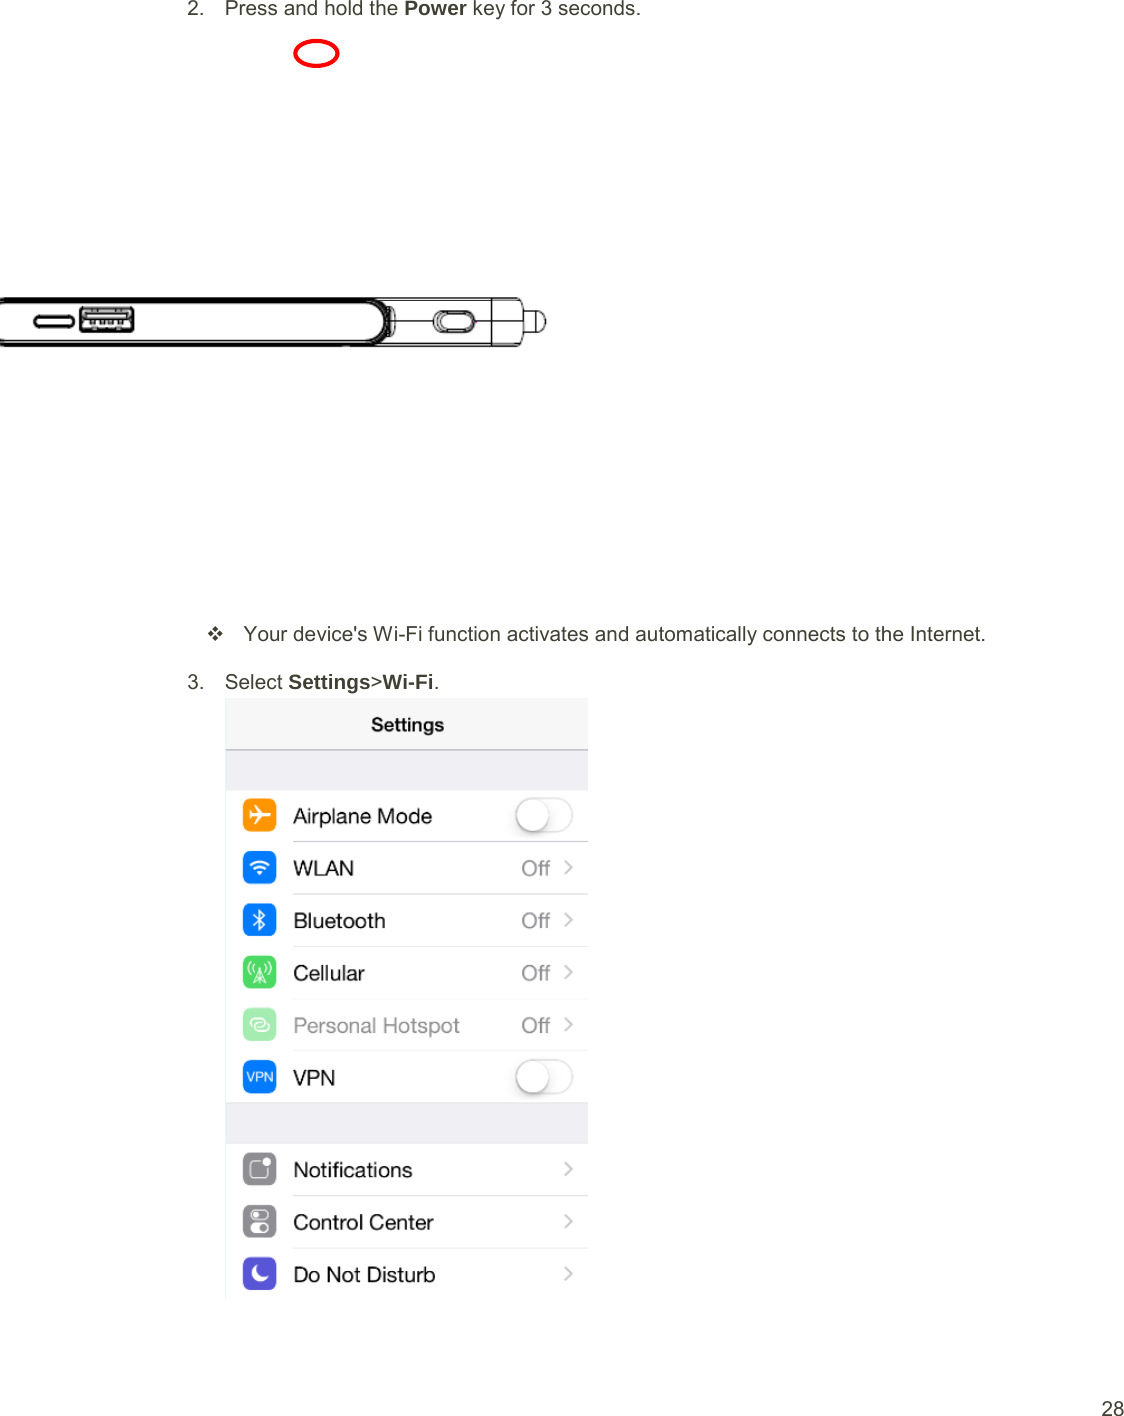
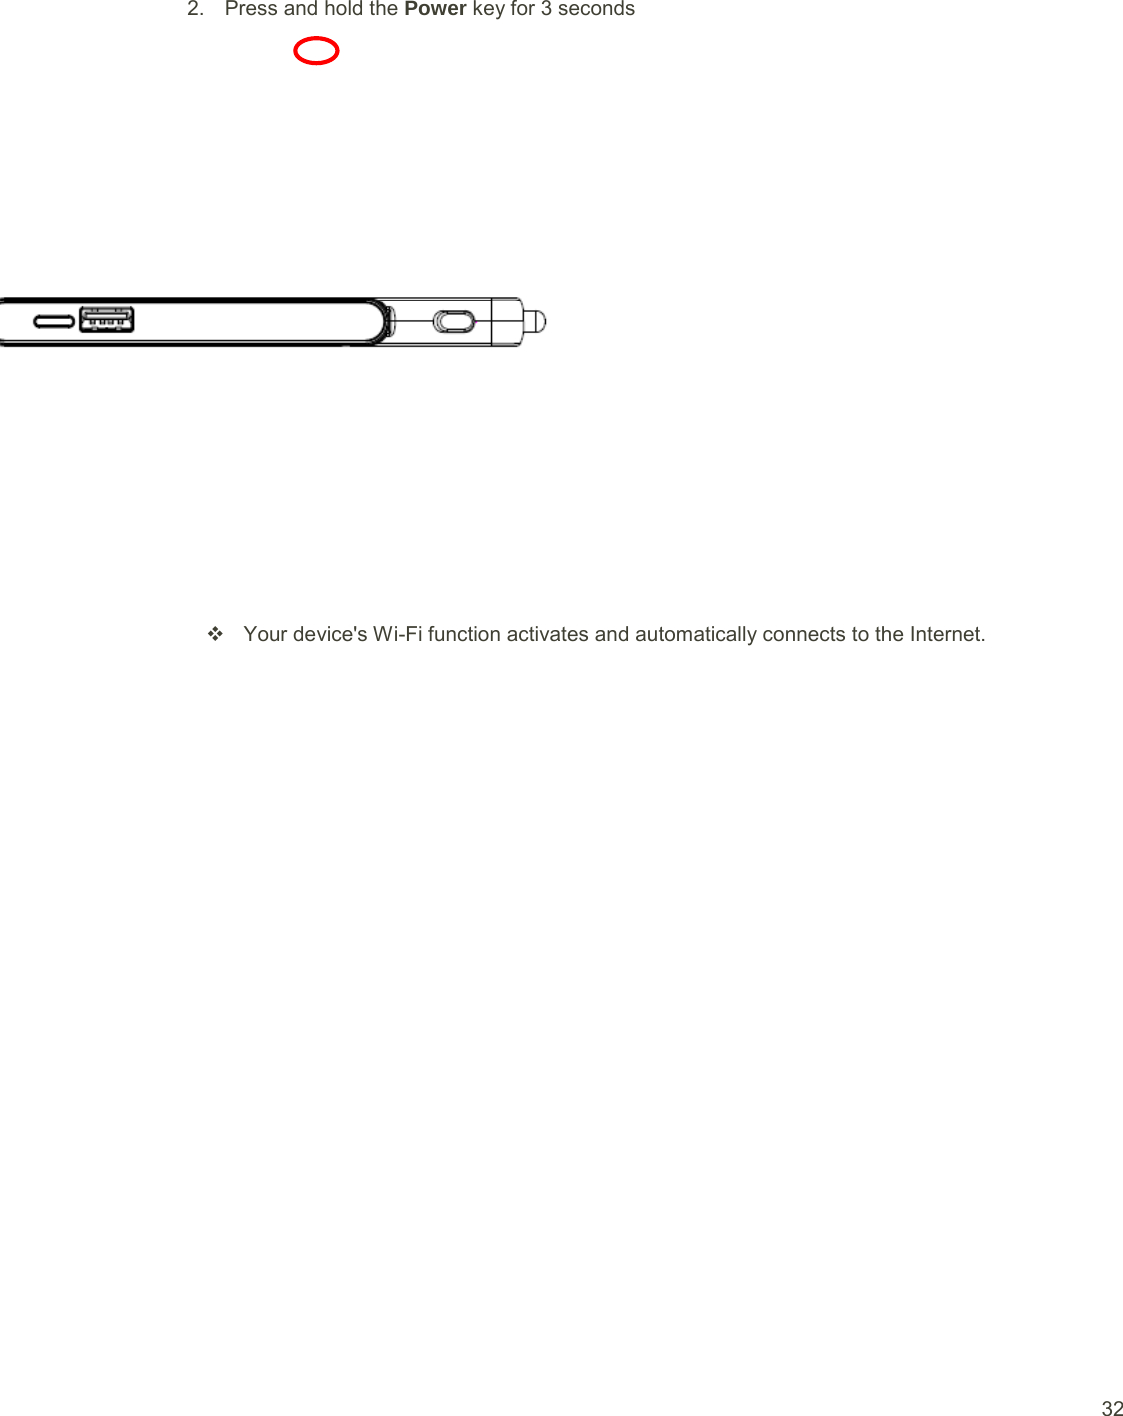
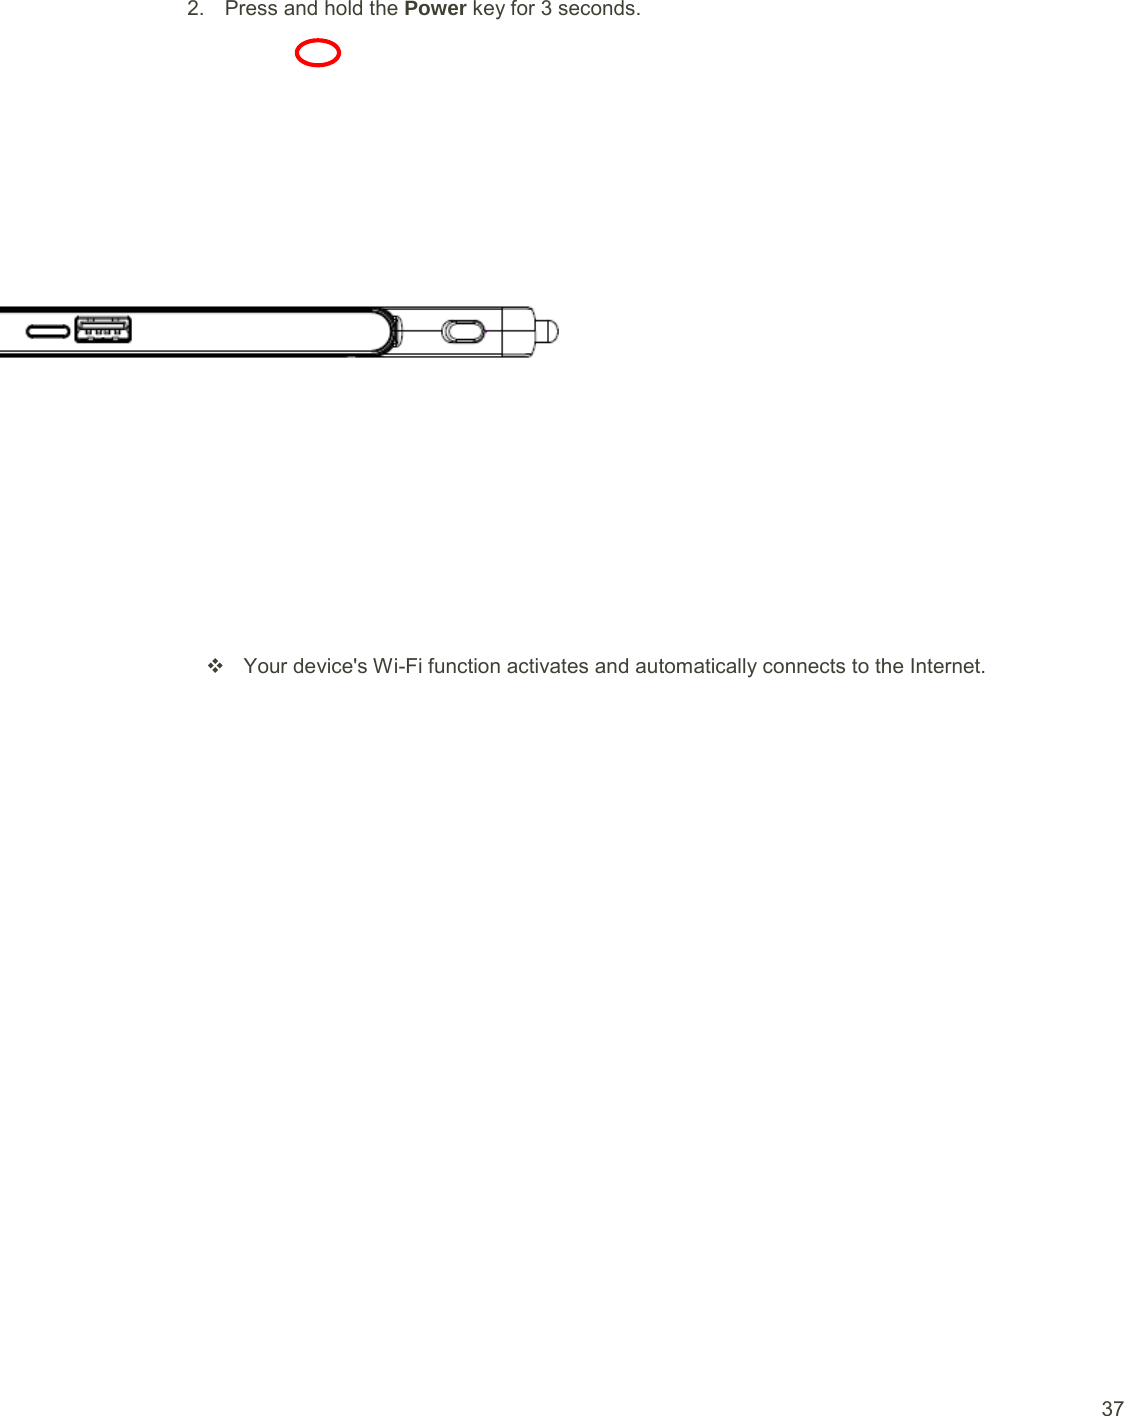
![16 ■ Press and hold the Power Your device's Wi-Fi function activates and automatically connects to the Internet. key for 3 seconds Connect Windows PCs with Wi-Fi The following topics describe how to connect your device with various versions of Windows PCs via Wi-Fi. [add OS instructions, such as for Windows 10, as necessary] Windows10 Connect Windows 10 PCs to your device with Wi-Fi. 4. Insert the device into the 12v or 24v power socket of the car](https://usermanual.wiki/TCL-Communication/B028/User-Guide-2821705-Page-19.png)
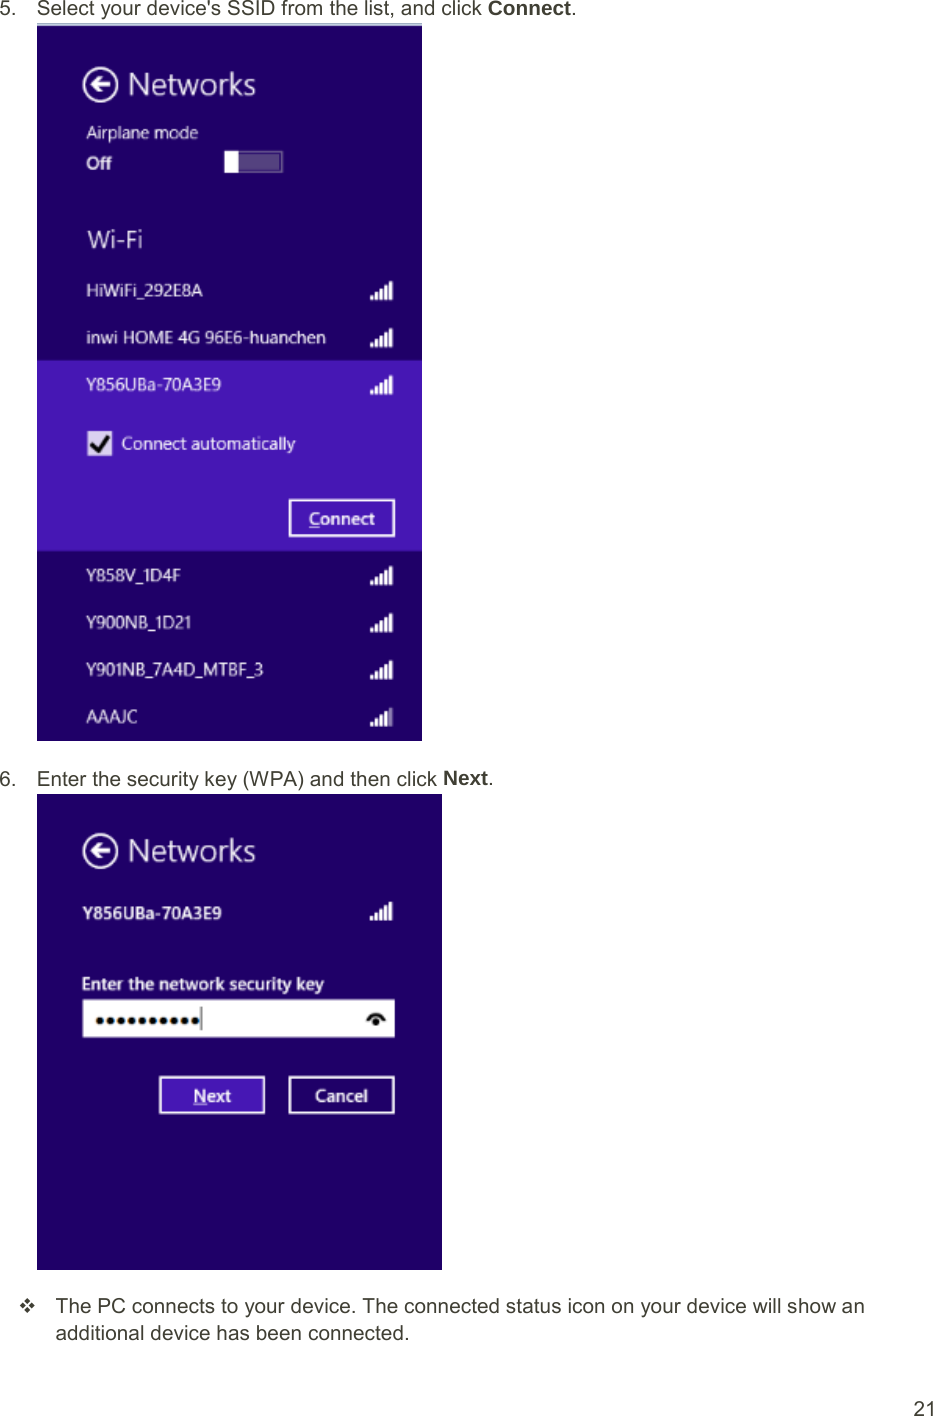
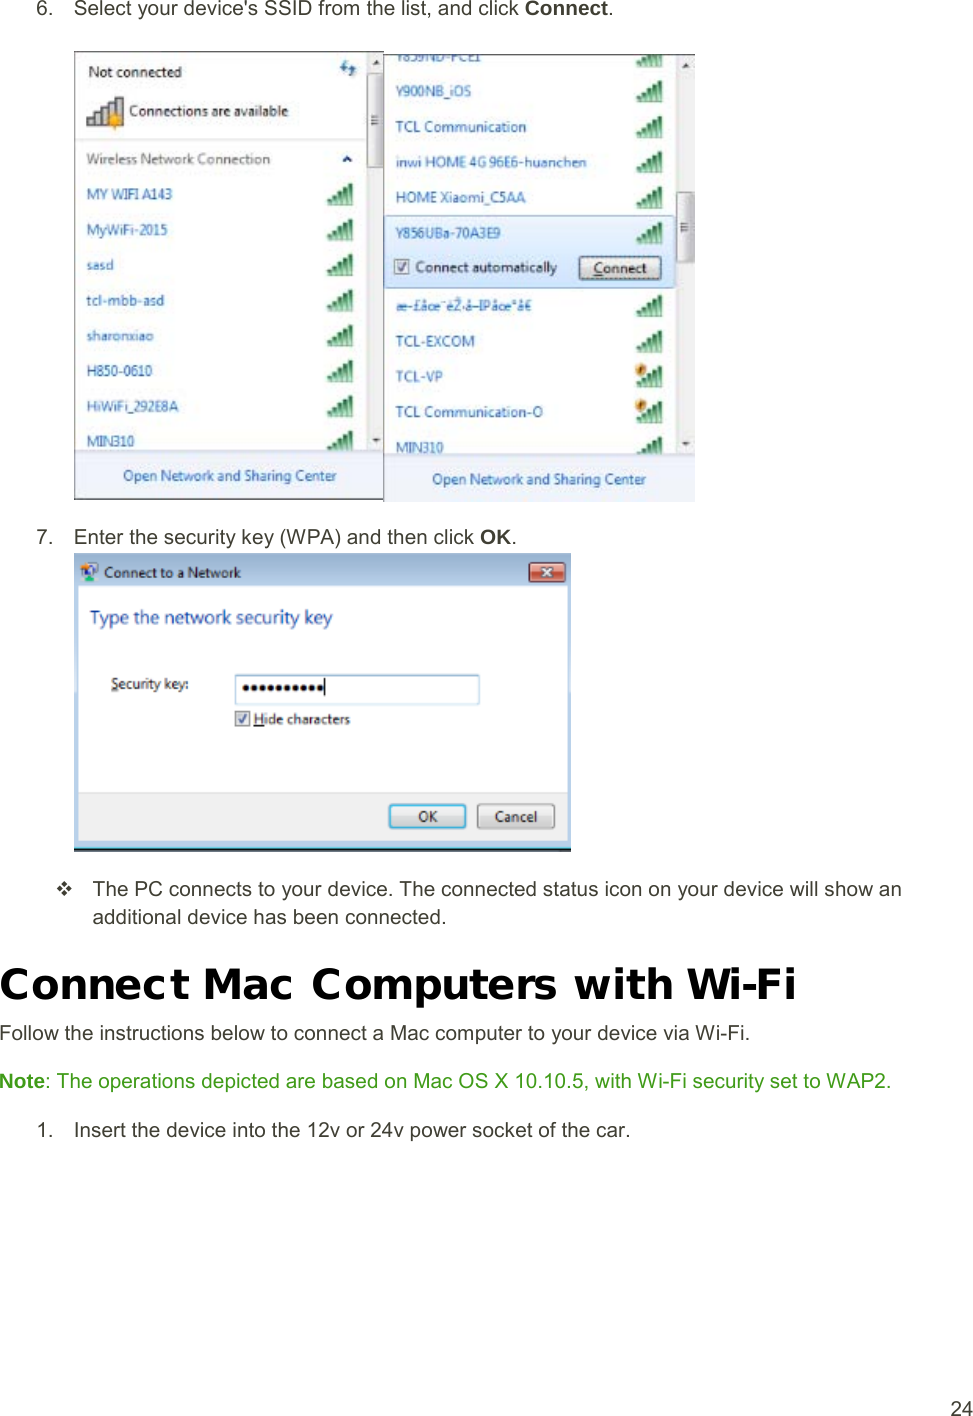
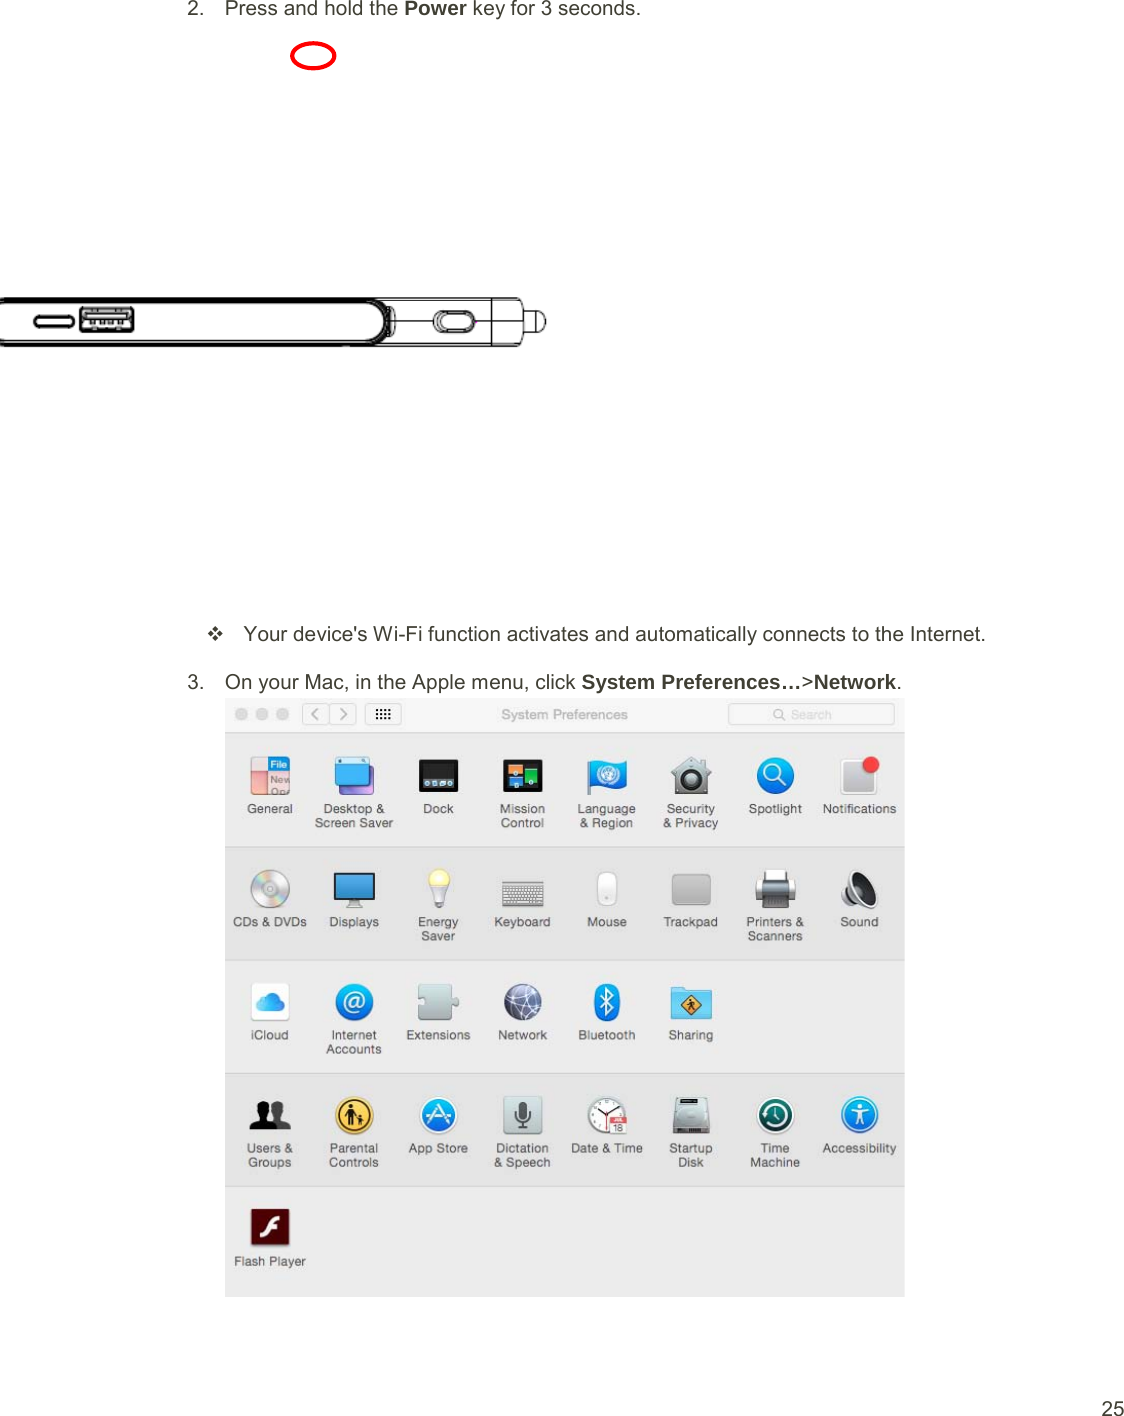
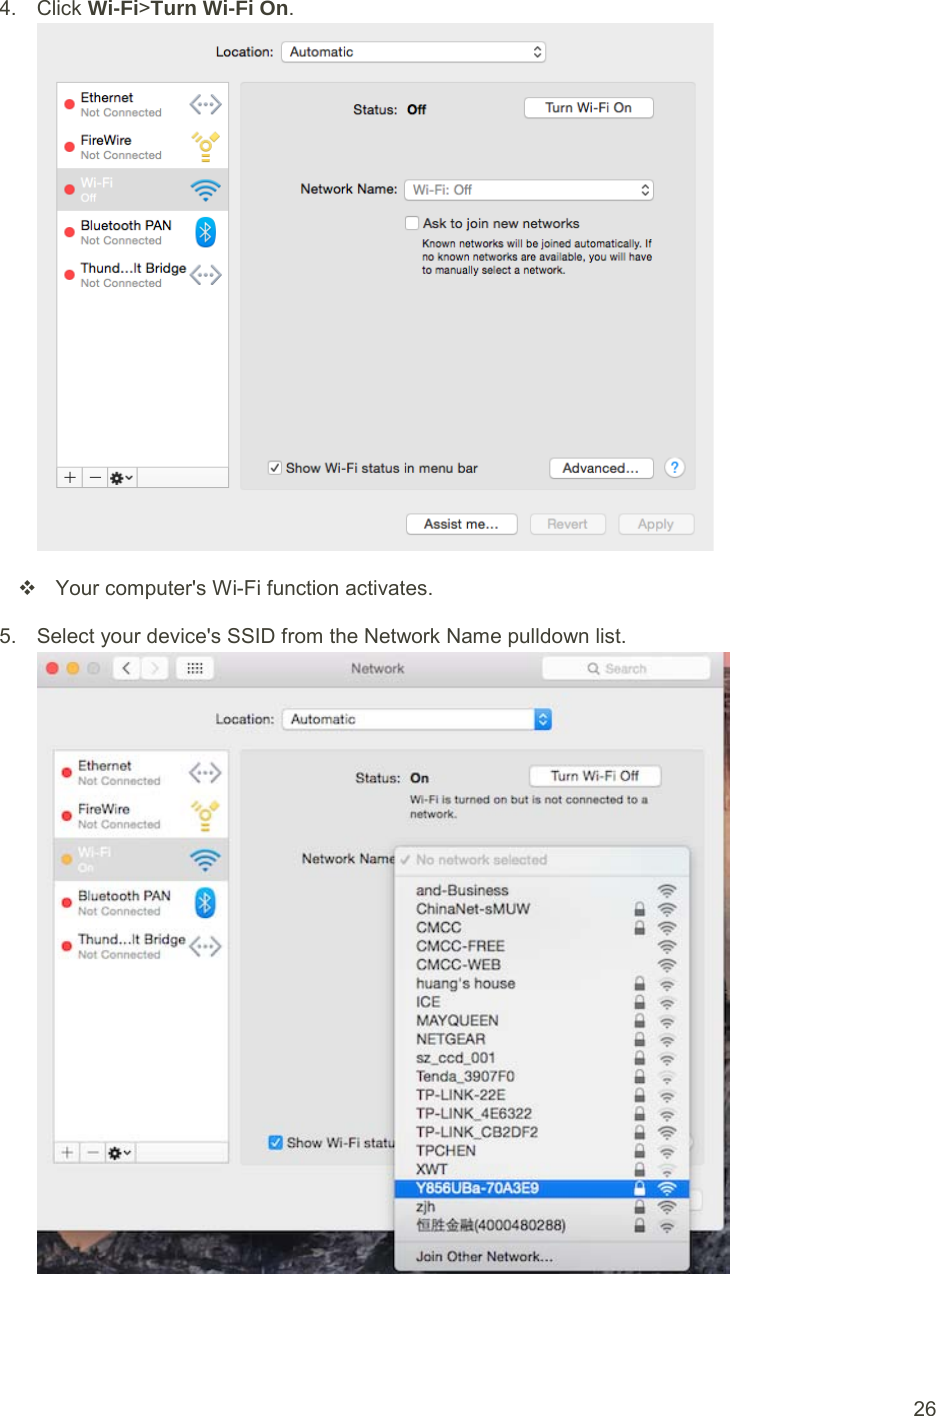
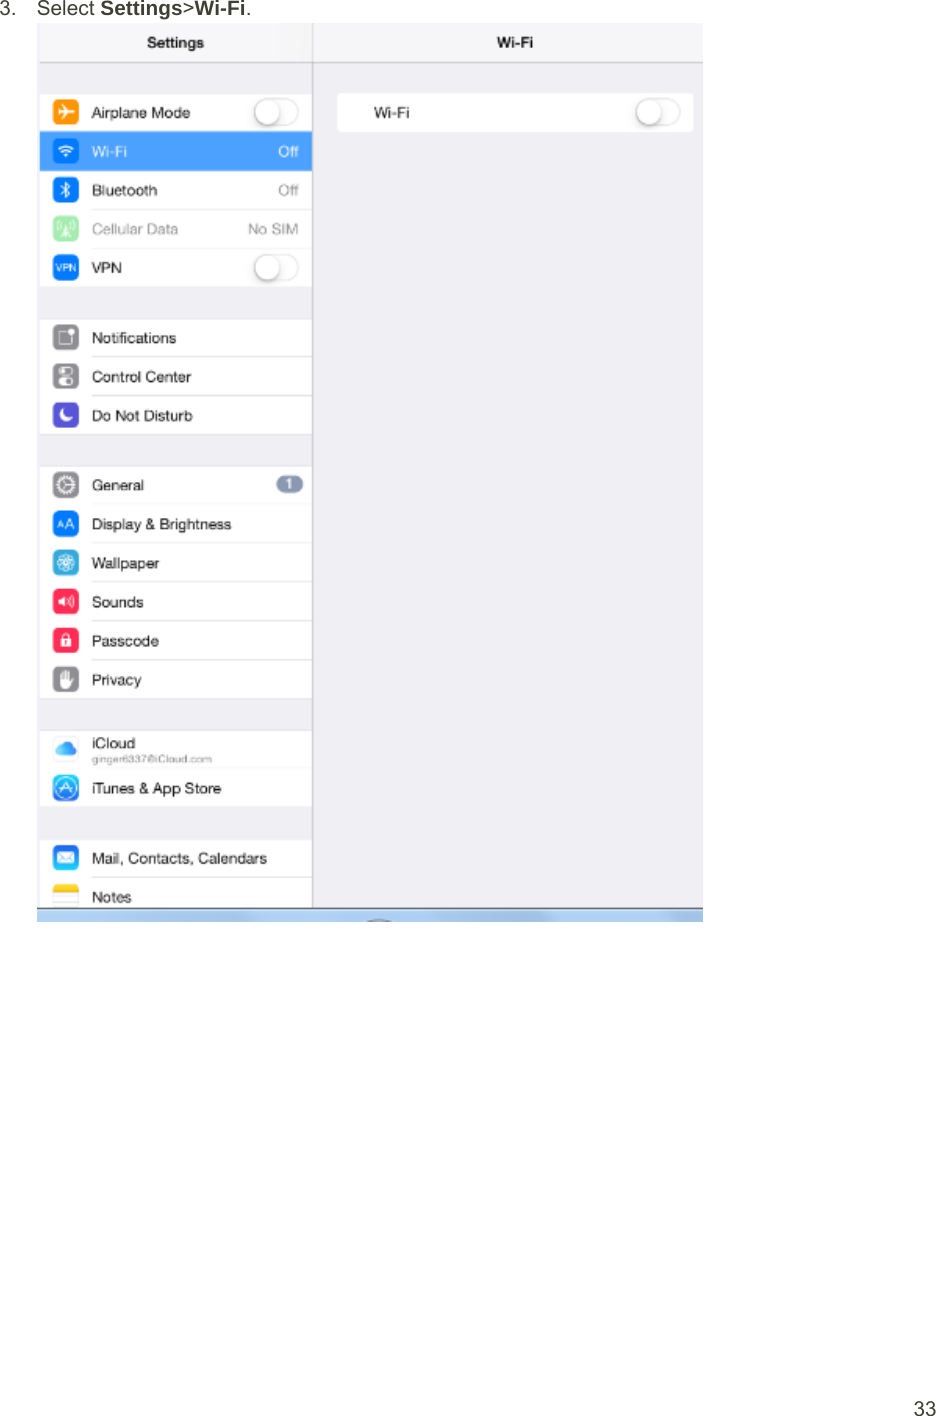
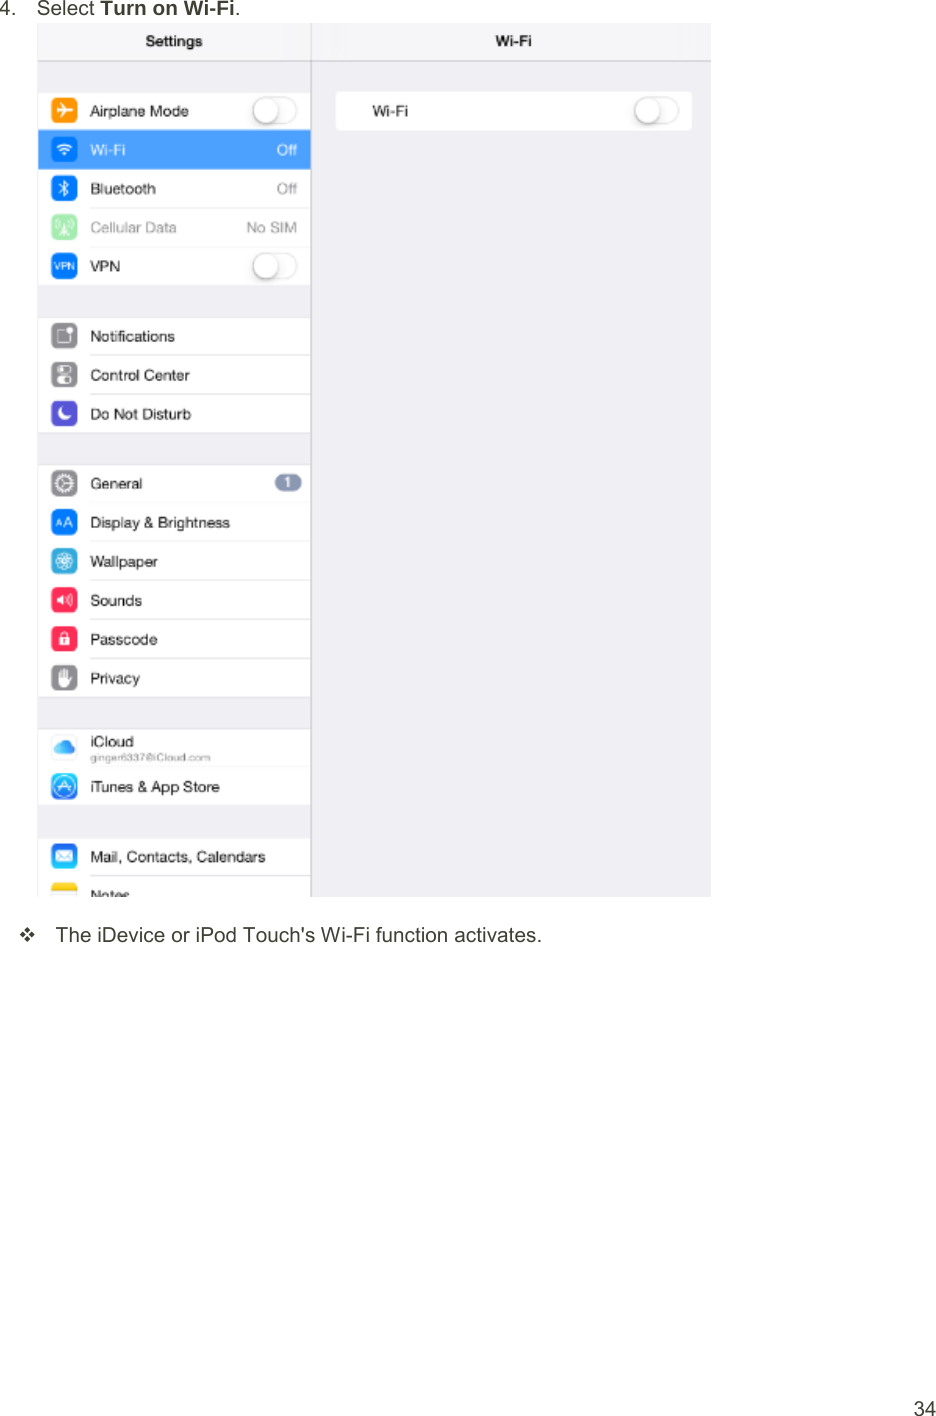
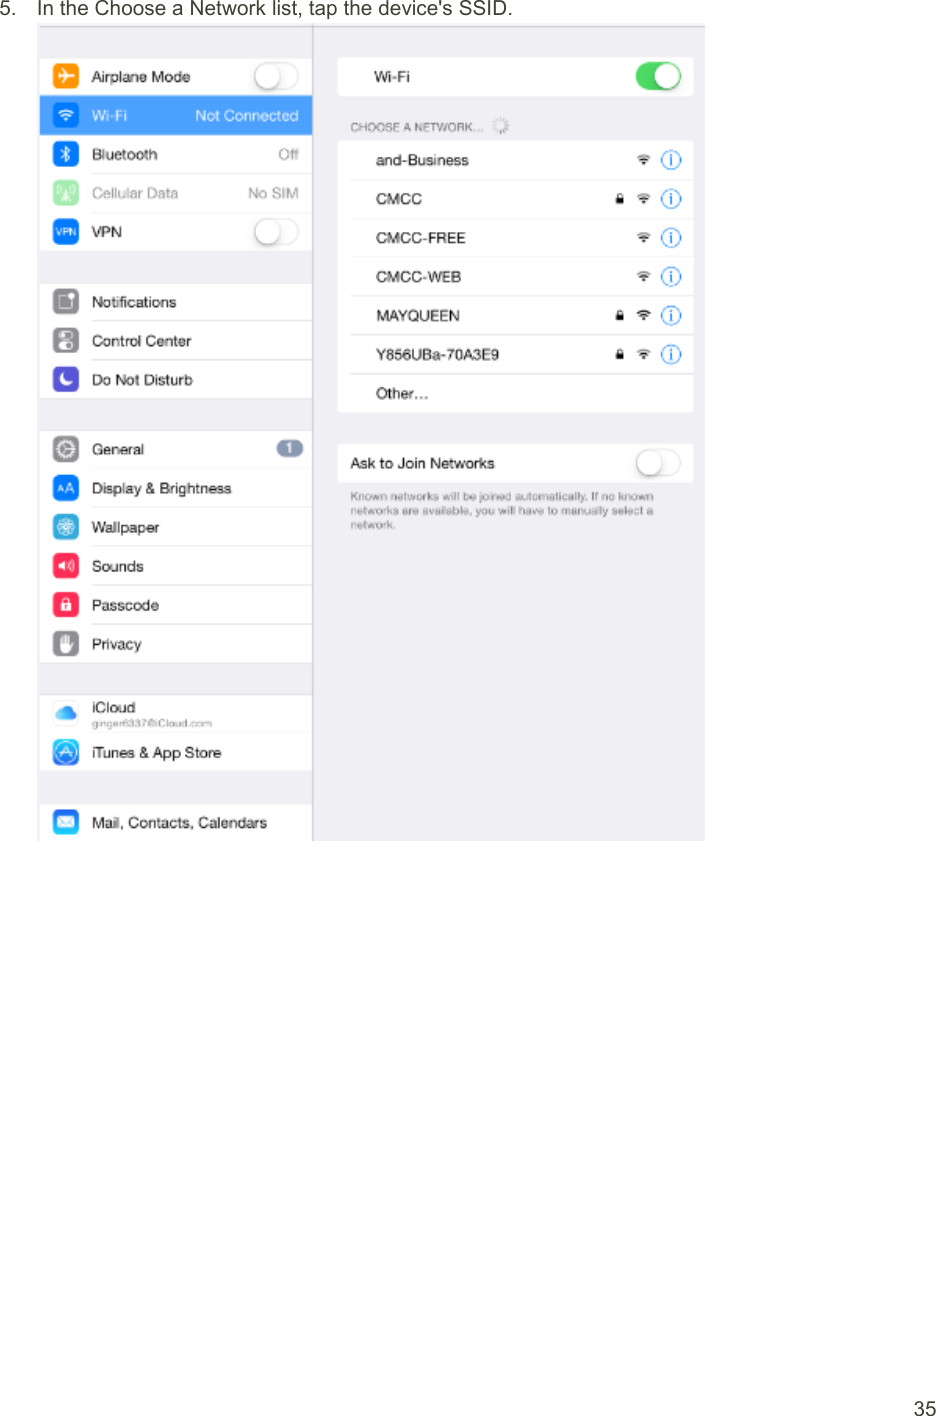
![27 6. Enter the security key (WPA) in the Password field, check Remember this network, and then click Join The computer connects to your device. The connected status icon on your device will show an additional device has been connected. . Connect iDevice/iPod Touch/iPad The following topics outline how to connect your iDevice, iPod Touch, or iPad to your device via Wi-Fi. Connect an iDevice or an iPod Touch Follow the instructions to connect your iDevice or iPod Touch to your device using Wi-Fi. Note: The operations below are based on your iDevice or iPod Touch Wi-Fi security set to [xxx]1. Insert the device into the 12v or 24v power socket of the car. .](https://usermanual.wiki/TCL-Communication/B028/User-Guide-2821705-Page-30.png)
![31 6. Enter the security key (WPA) and then tap Join The iDevice or iPod Touch connects to your device. The connected status icon on your device will show an additional device has been connected. . Connect an iPad Follow the instruction to connect your iPad to your device using Wi-Fi. Note: The operations below are based on your iPad Wi-Fi security set to [xxx]1. Insert the device into the 12v or 24v power socket of the car. .](https://usermanual.wiki/TCL-Communication/B028/User-Guide-2821705-Page-34.png)
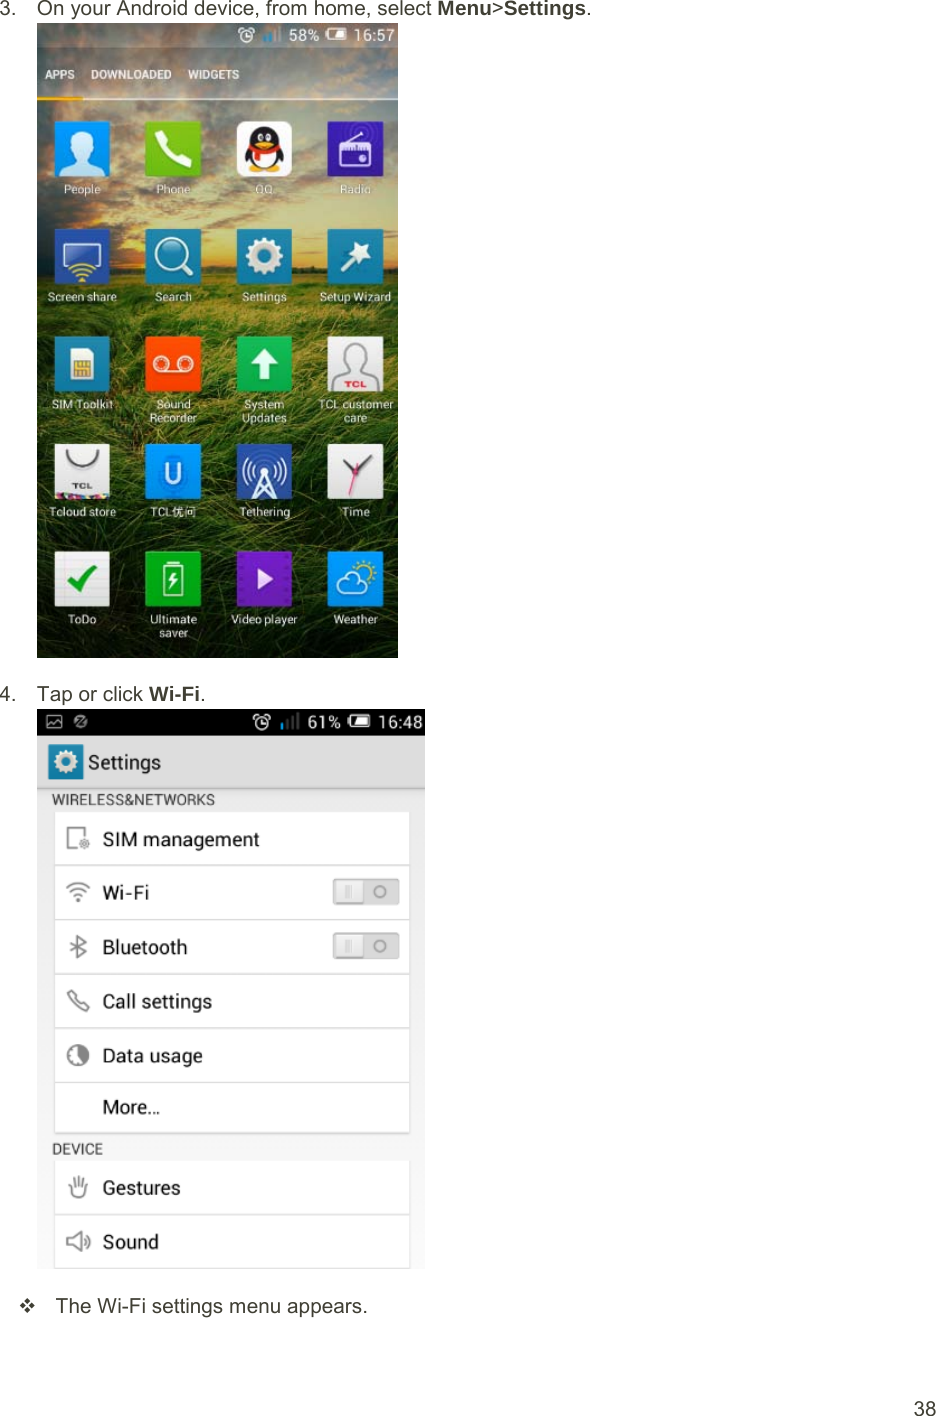
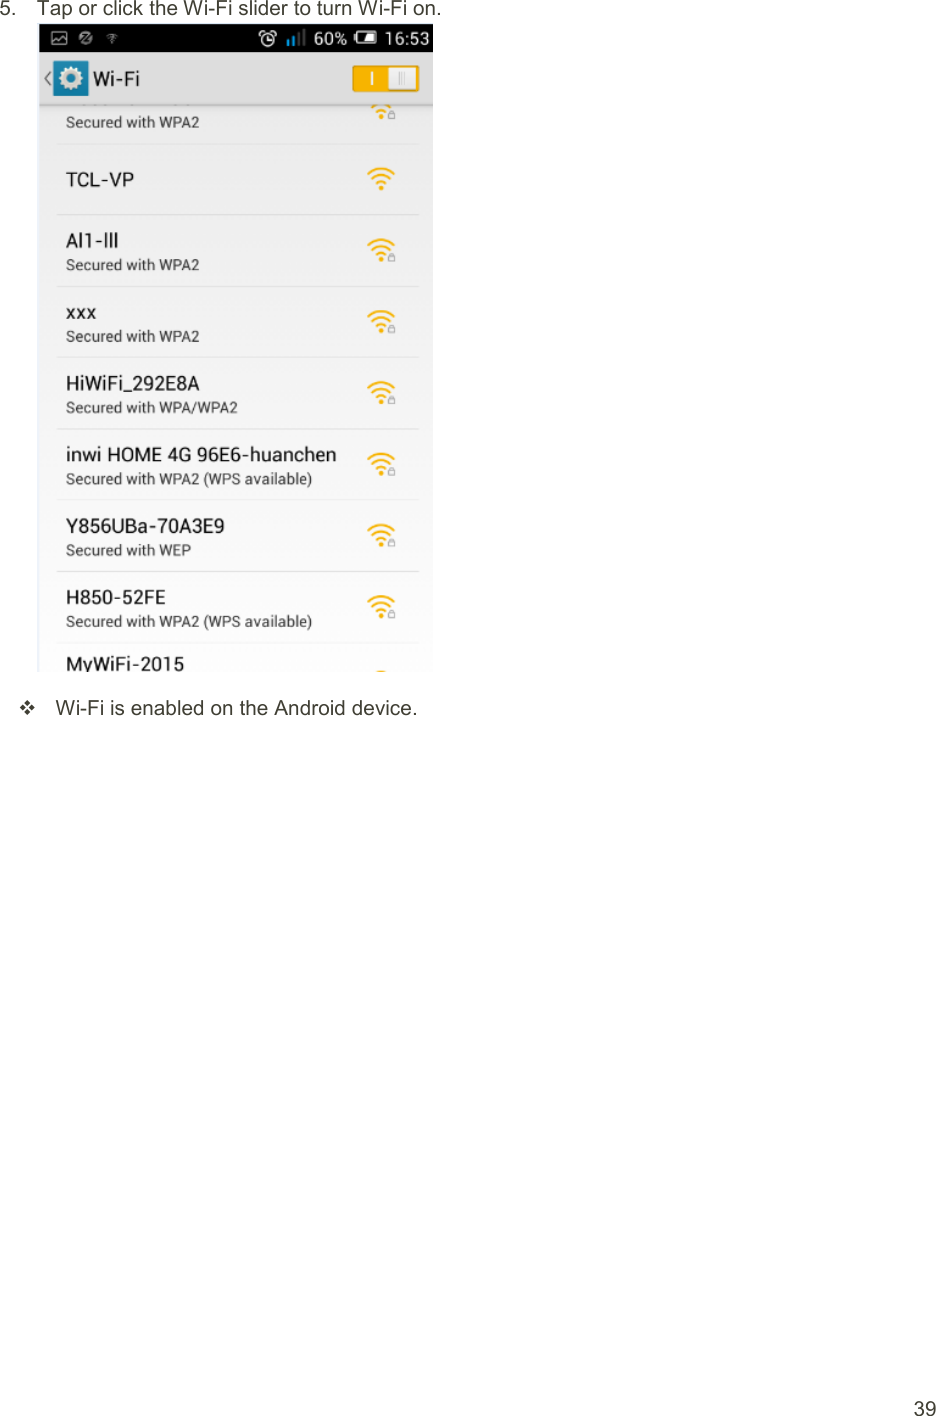
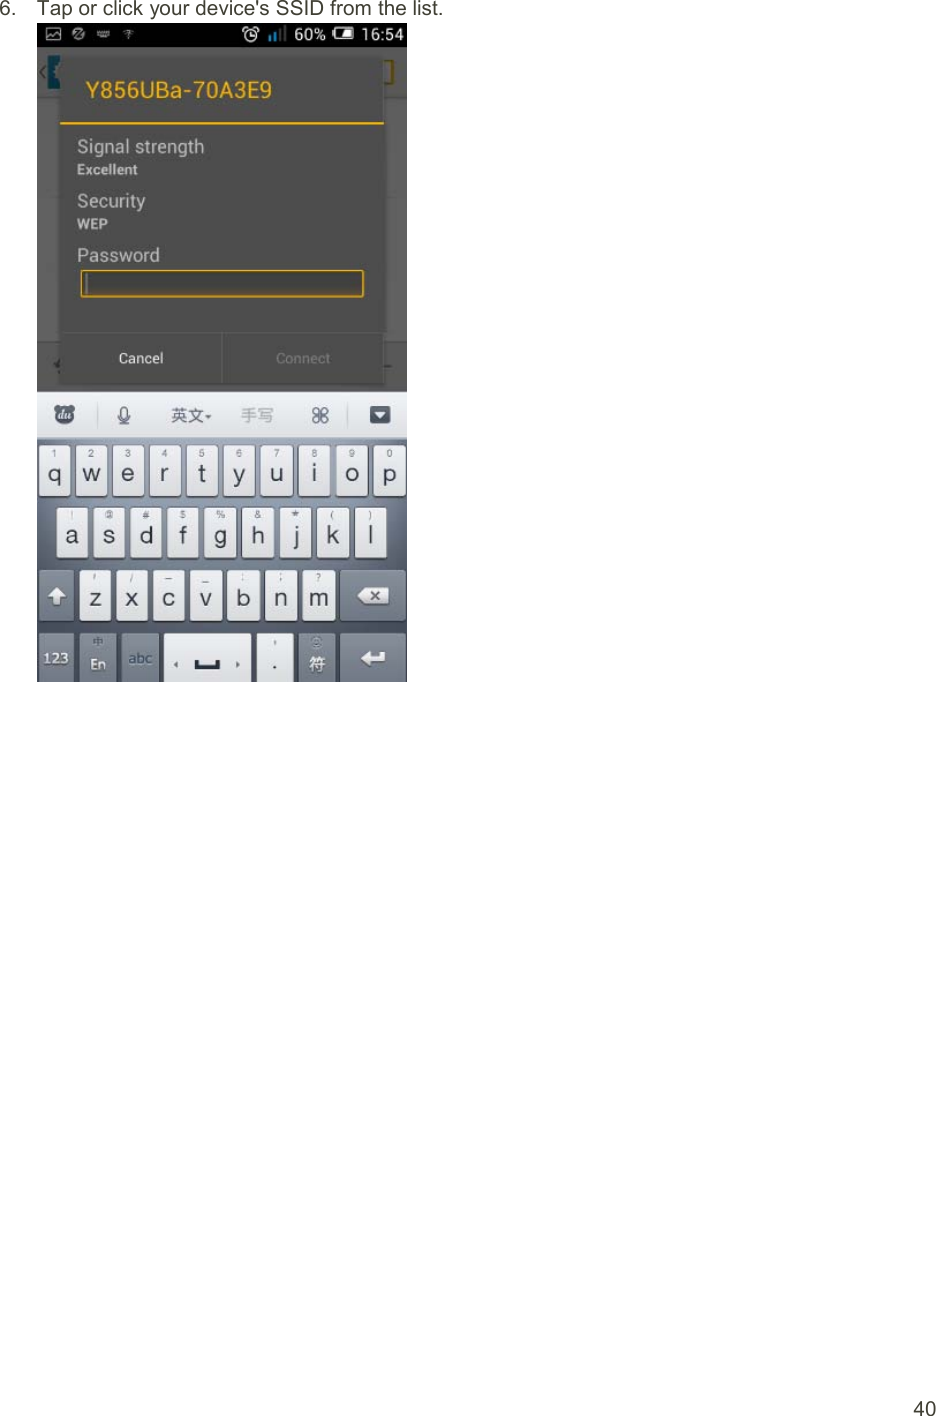
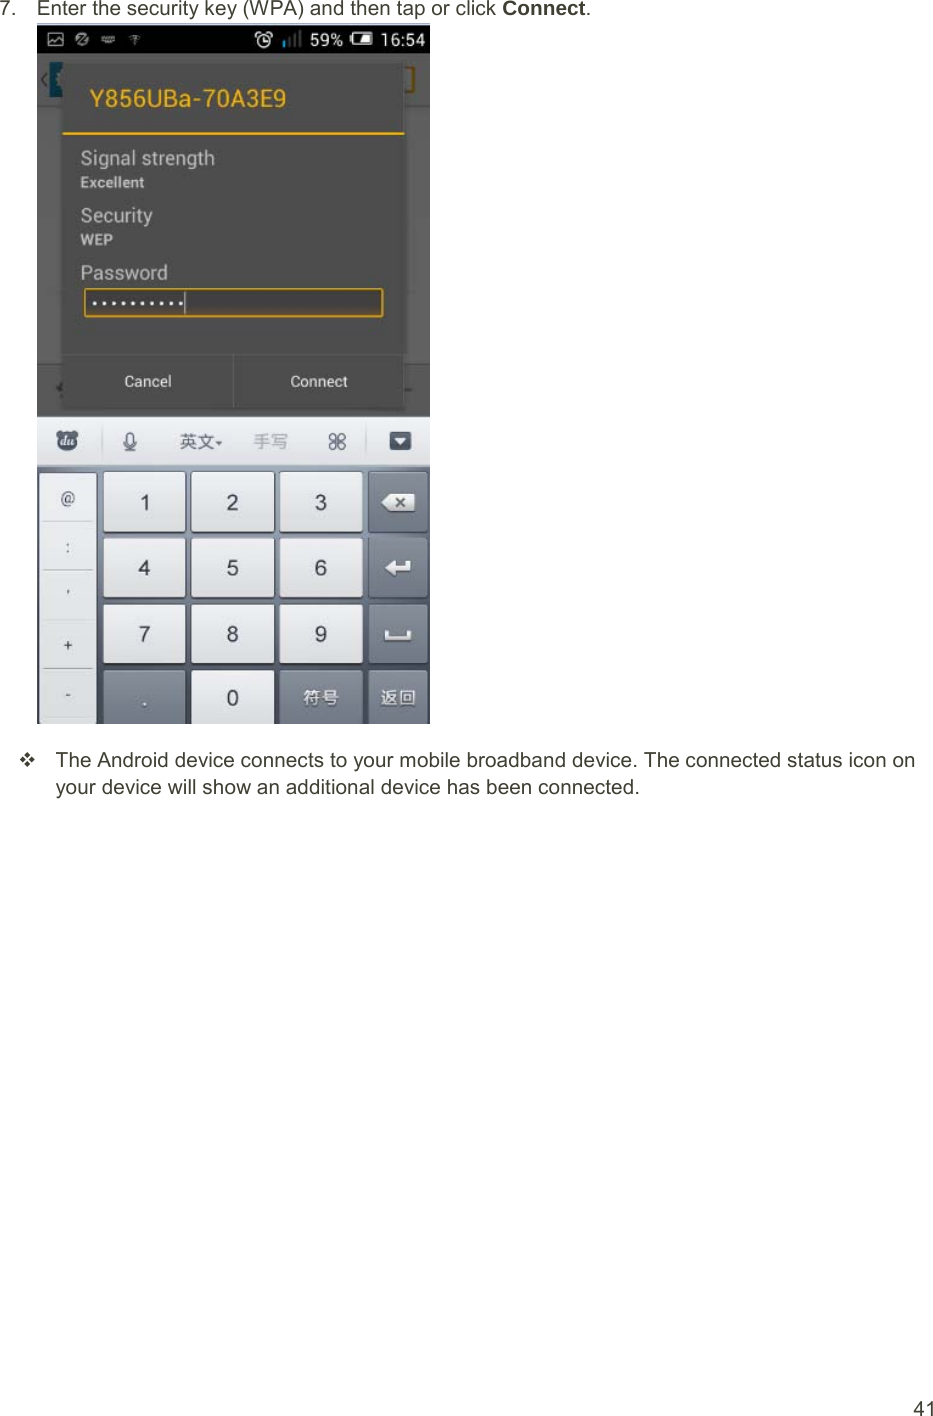
![36 6. Enter the security key (WPA) and then tap Join The iPad connects to your device. The connected status icon on your device will show an additional device has been connected. . Connect an Android™ Device You can share your device's connection with compatible Android devices, such as wireless devices, tablets, and Chromebook computers. Note: The operations below are based on generic Android devices with Wi-Fi security set to [xxx]1. Insert the device into the 12v or 24v power socket of the car. . Operation may vary depending on Android device type. See your Android device user guide for details.](https://usermanual.wiki/TCL-Communication/B028/User-Guide-2821705-Page-39.png)
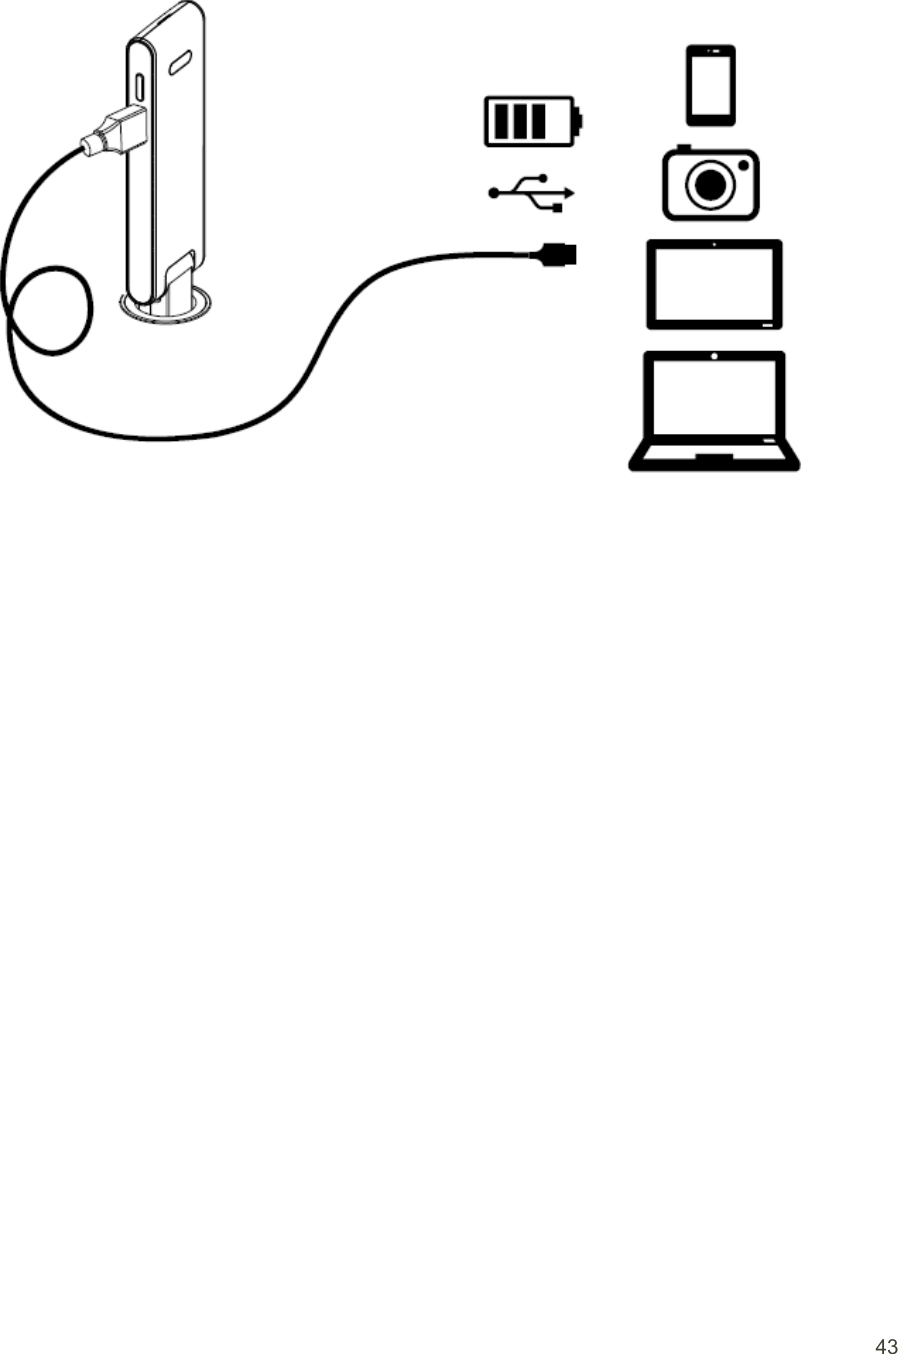
![42 Charging Your Personal Device The following topics describe how to charge your other personal devicesvia USB port of [Ride-Fi]. USB Port Layout Explore your device's USBportlayout. Output of theUSB port is 5V1A, you can charge your personal device such as device, tablet, camera, etc, once you plugged the device into the 12V or 24V socket of the car, as in below.](https://usermanual.wiki/TCL-Communication/B028/User-Guide-2821705-Page-45.png)