TEAC NT503 USB DAC / NETWORK PLAYER User Manual
TEAC Corporation USB DAC / NETWORK PLAYER
UserManual.wiki
>
TEAC
>
NT503 User Manual
User Manual
Navigation menu
Upload a User Manual
Namespaces
Wiki Guide
HTML
PDF
Info
Views
User Manual
Discussion / Help
Navigation
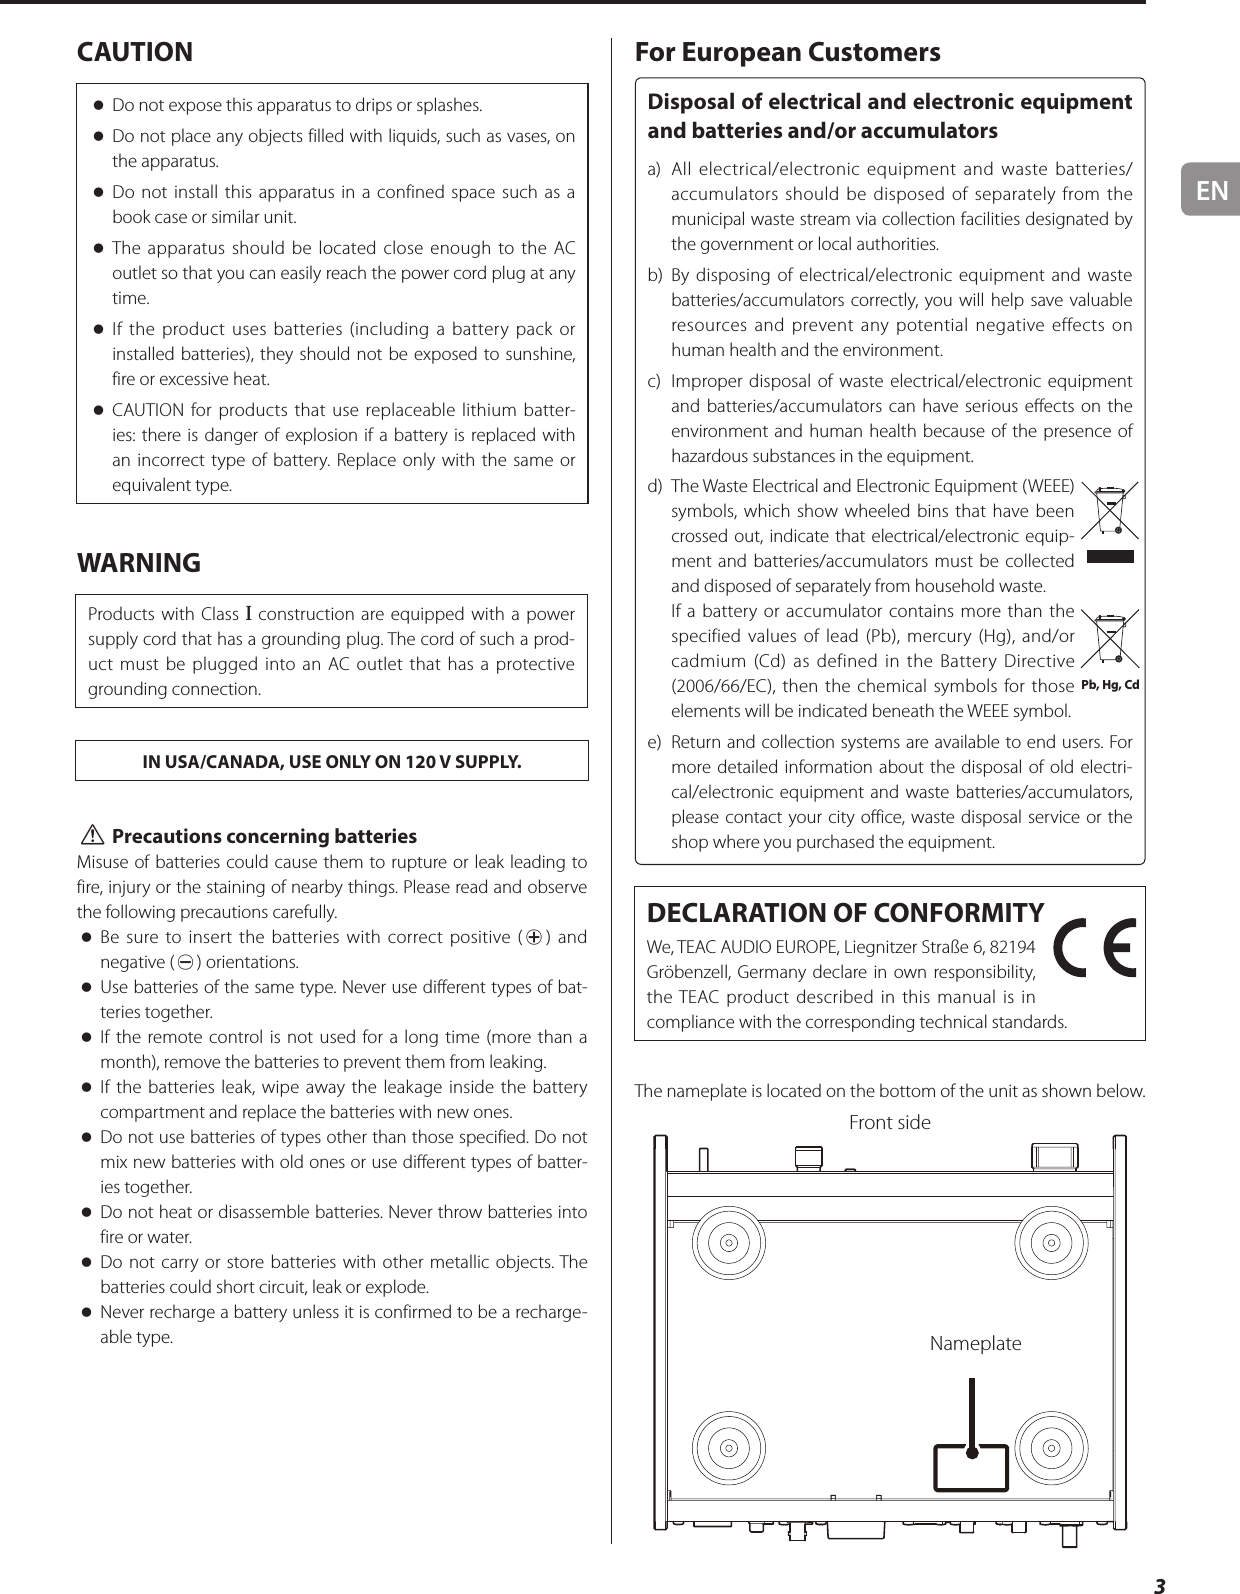


![EN13Connecting headphones VCAUTIONWhile wearing headphones, do not connect or disconnect them or turn the unit on or off.Doing so could result in a sudden loud noise that could harm your hearing.Always set the volume to minimum (−∞ dB) before putting head-phones on (page 17).UpconversionYou can use the upconversion function with digital input, includ-ing the OPT/COAX IN connector, and the USB (front) and USB (rear) ports. (page 23).The relationships between input sampling frequencies and sam-pling frequencies after upconversion are as follows.Input source Upconversion settingDigital audio input USB OFF 2Fs 4Fs 8Fs DSDInput sampling frequency Sampling frequency after upconversion[kHz] [kHz] [MHz]32 − 32 64 128 256 8.044.1 44.1 44.1 88.2 176.4 352.8 11.288.2 88.2 88.2 88.2 176.4 352.8 11.2176.4 176.4 176.4 176.4 176.4 352.8 11.2− 352.8 352.8 352.8 352.8 352.8 11.248 48 48 96 192 384 12.296 96 96 96 192 384 12.2192 192 192 192 192 384 12.2− 384 384 384 384 384 12.2 Values indicated by are unchanged.](https://usermanual.wiki/TEAC/NT503/User-Guide-2704783-Page-13.png)